Download as PDF, PPTX


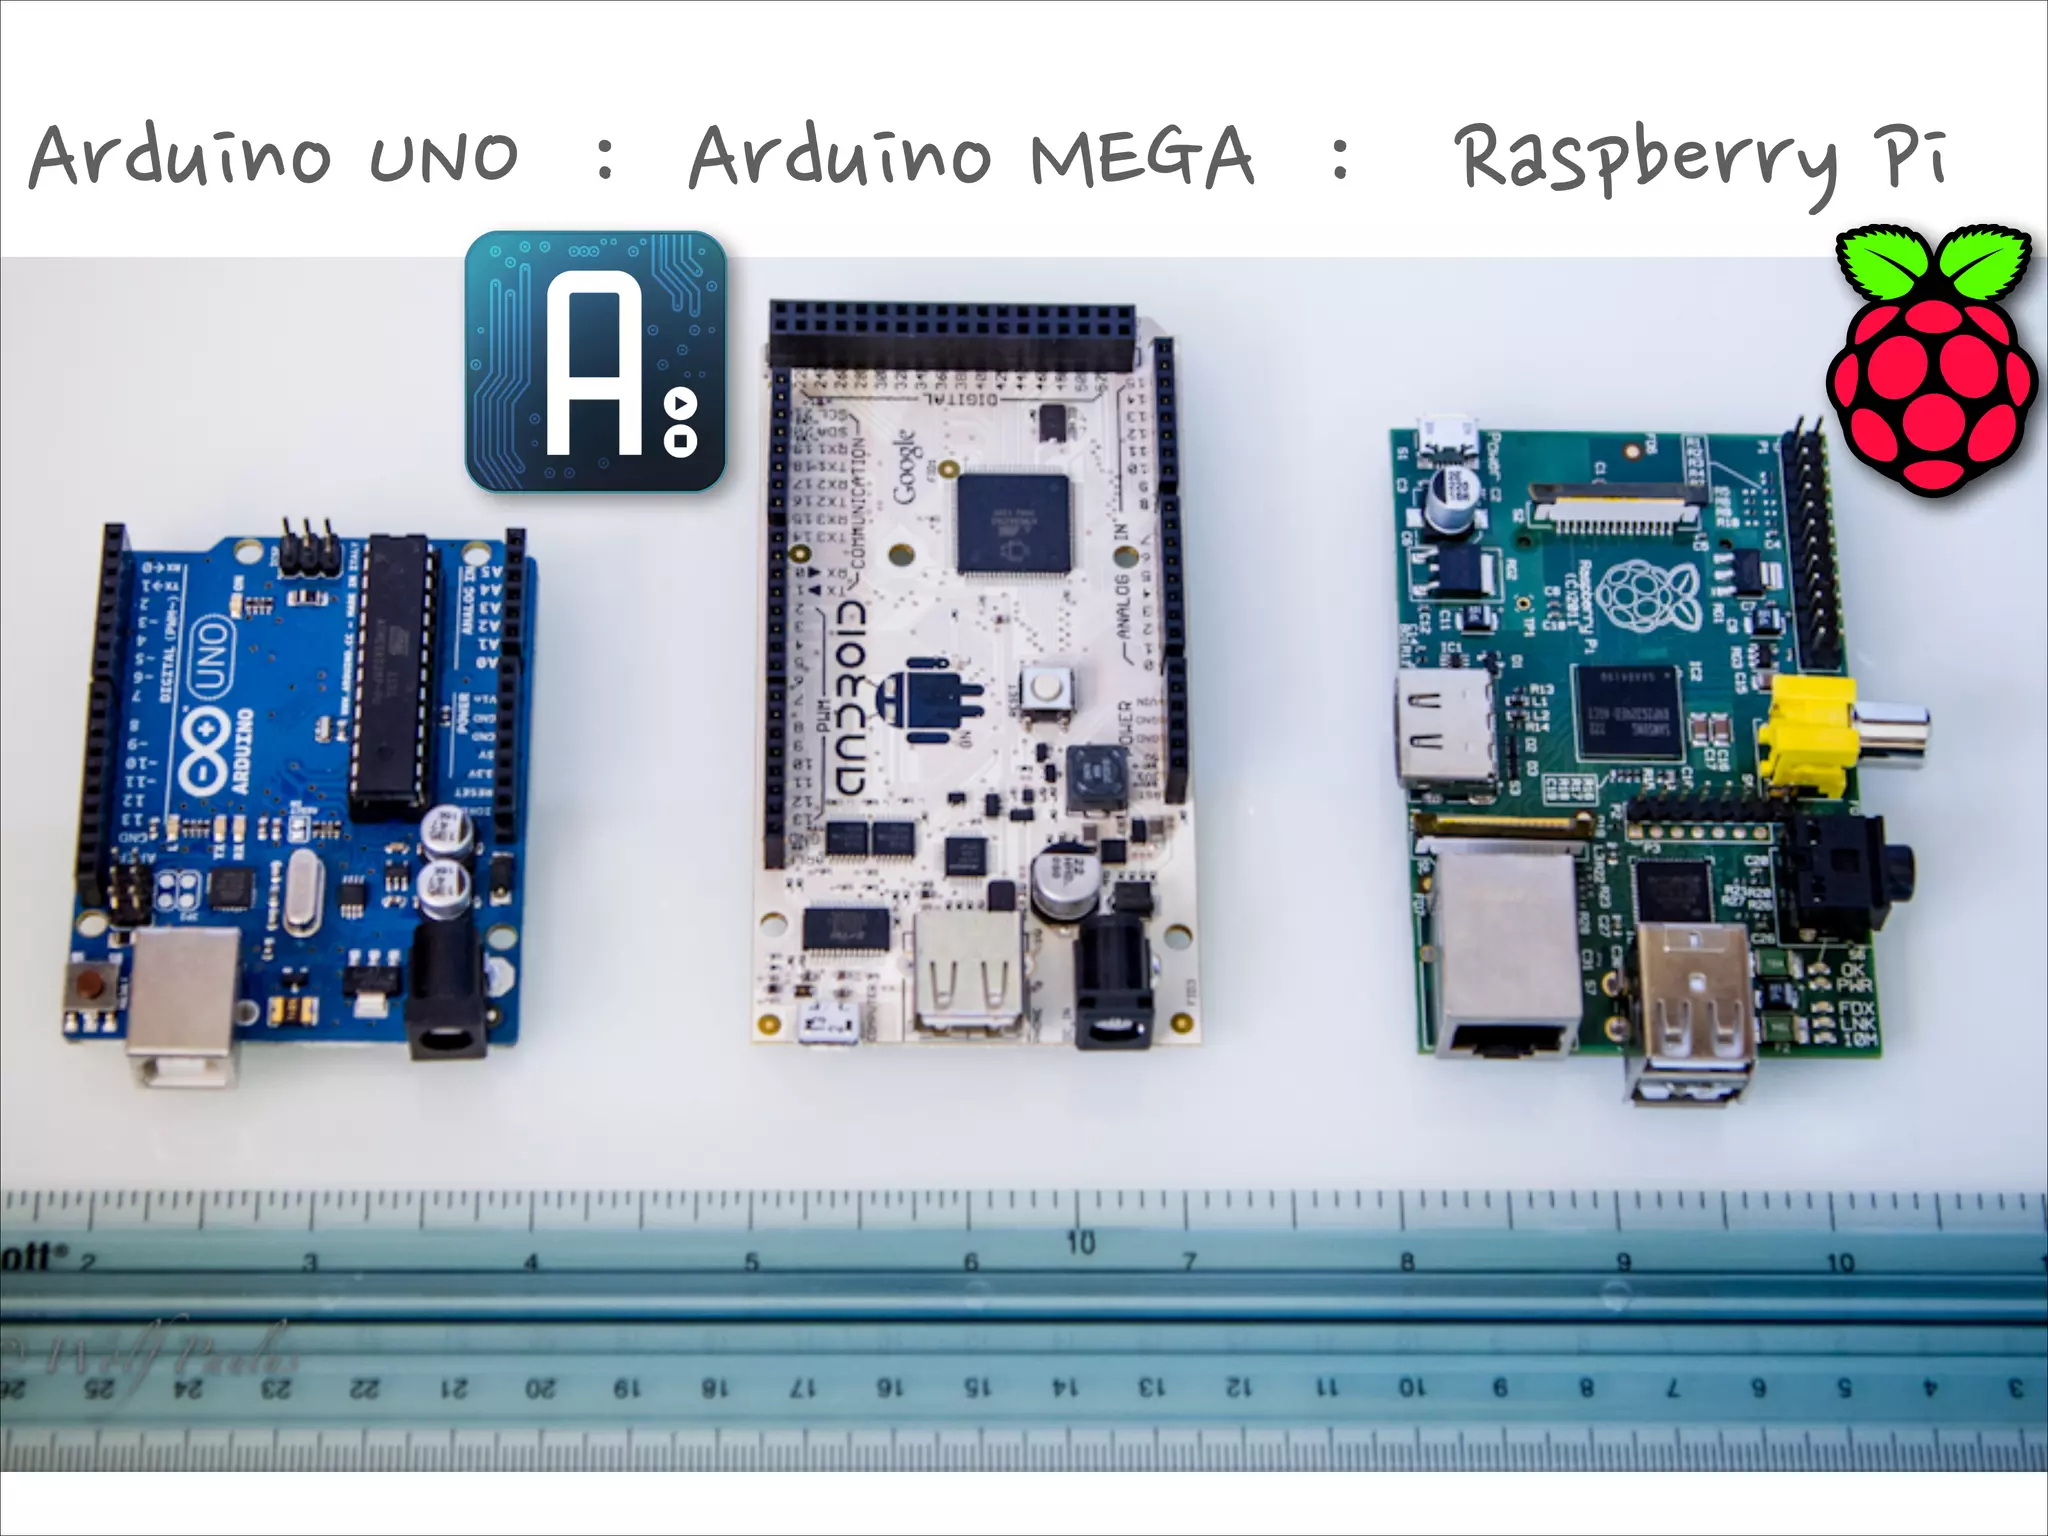
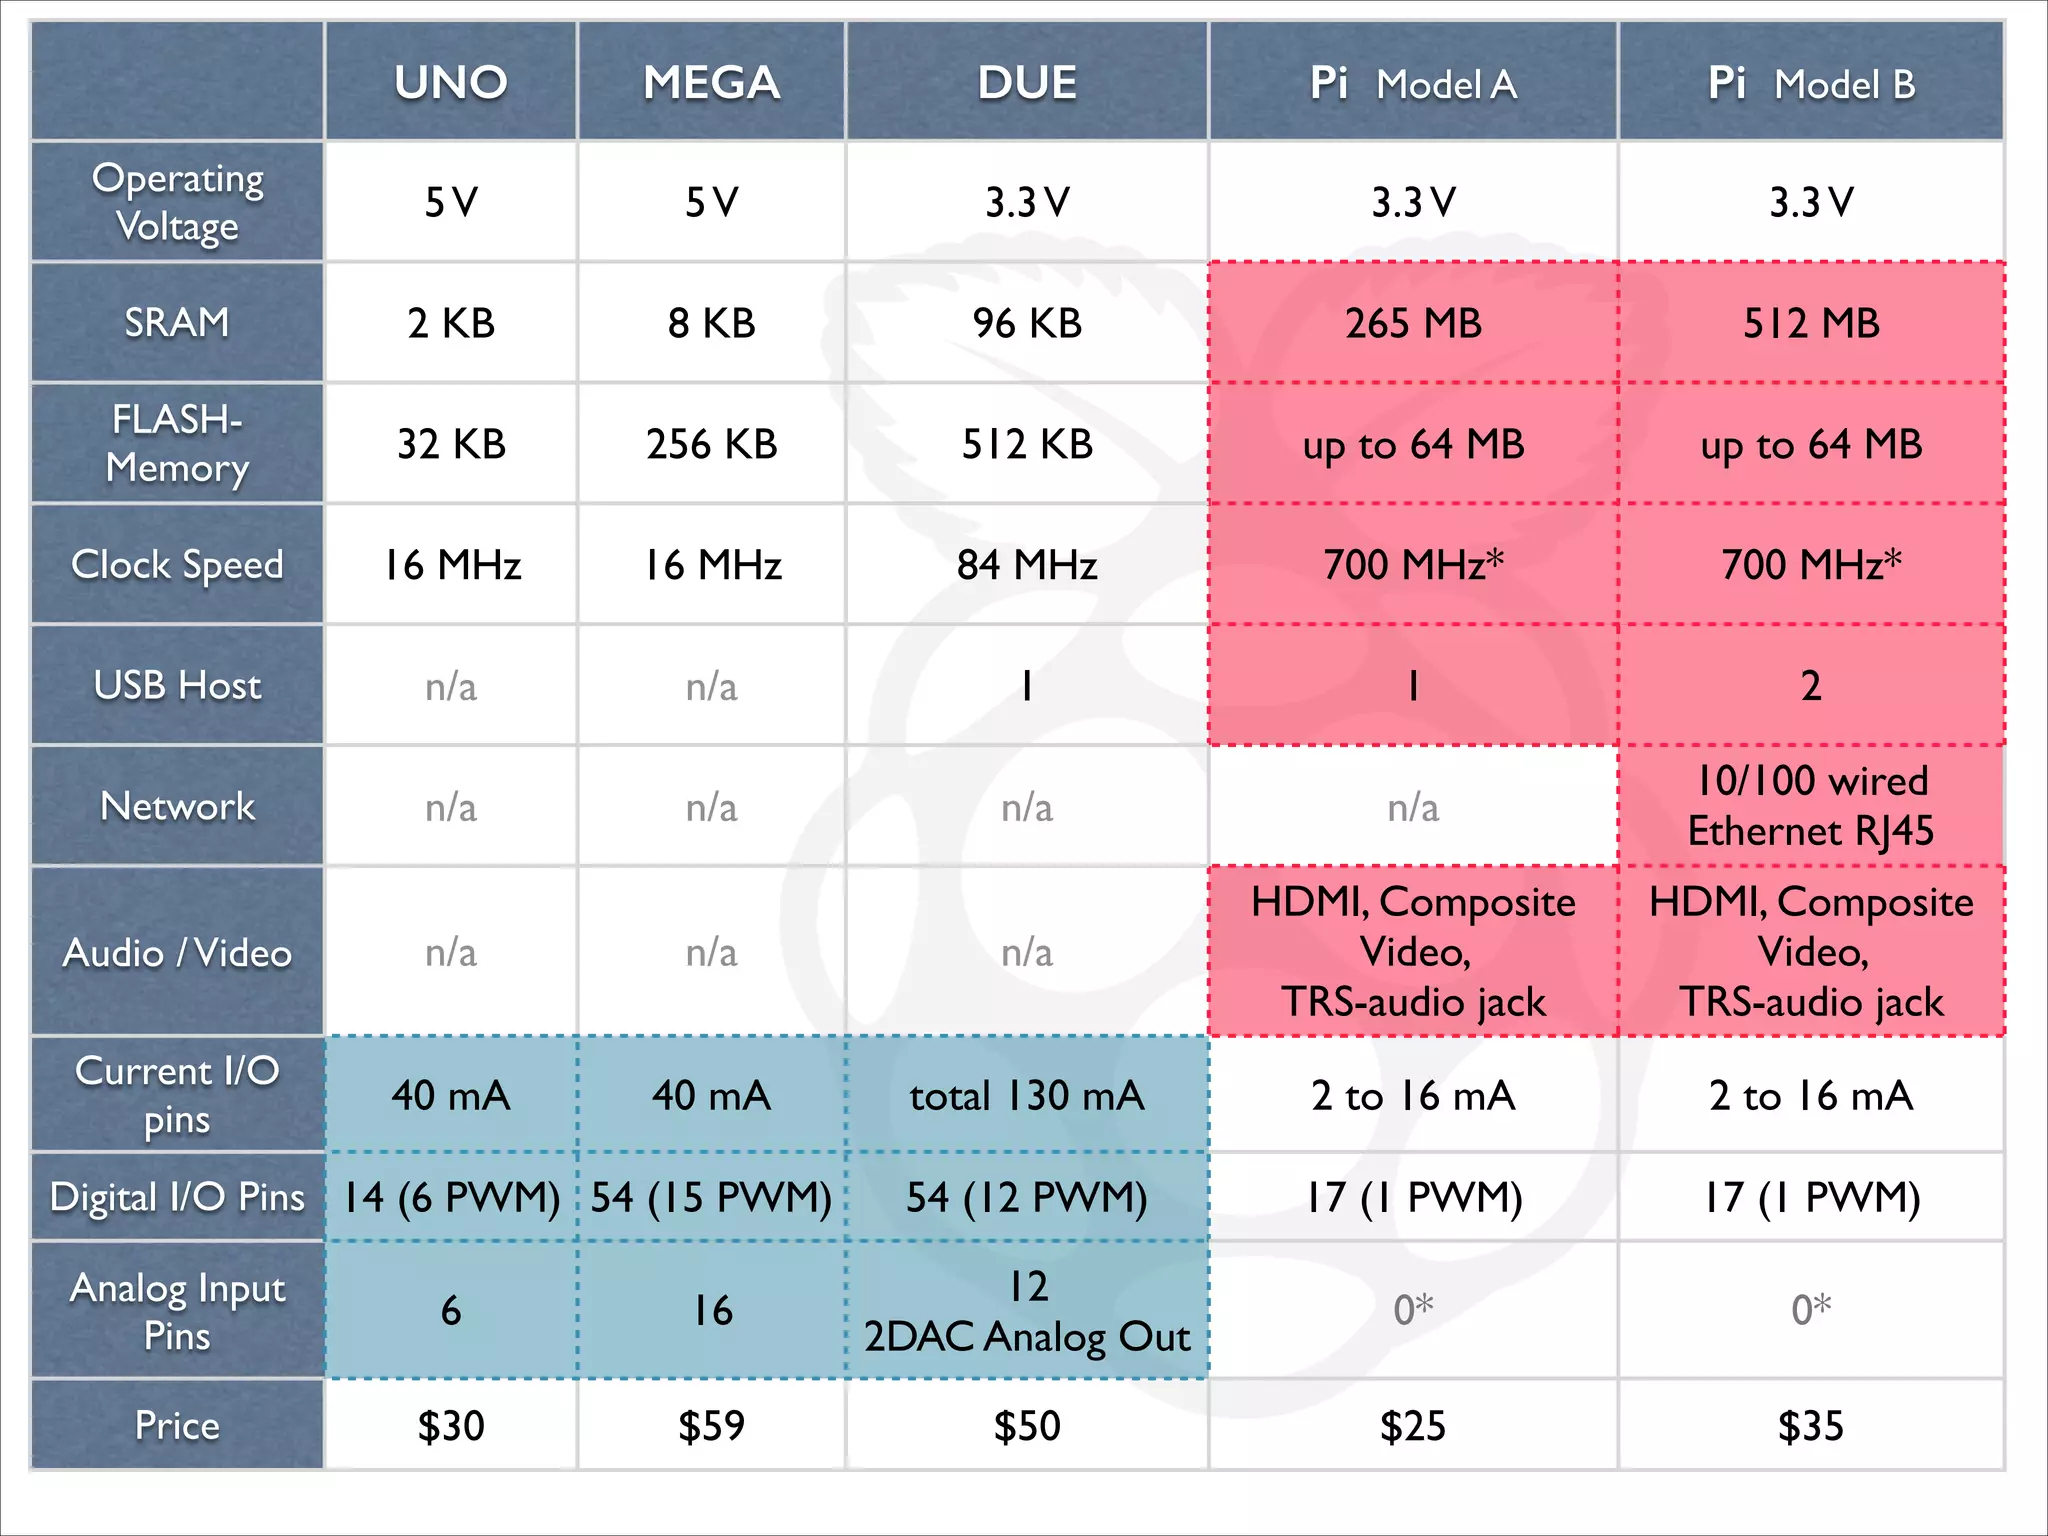

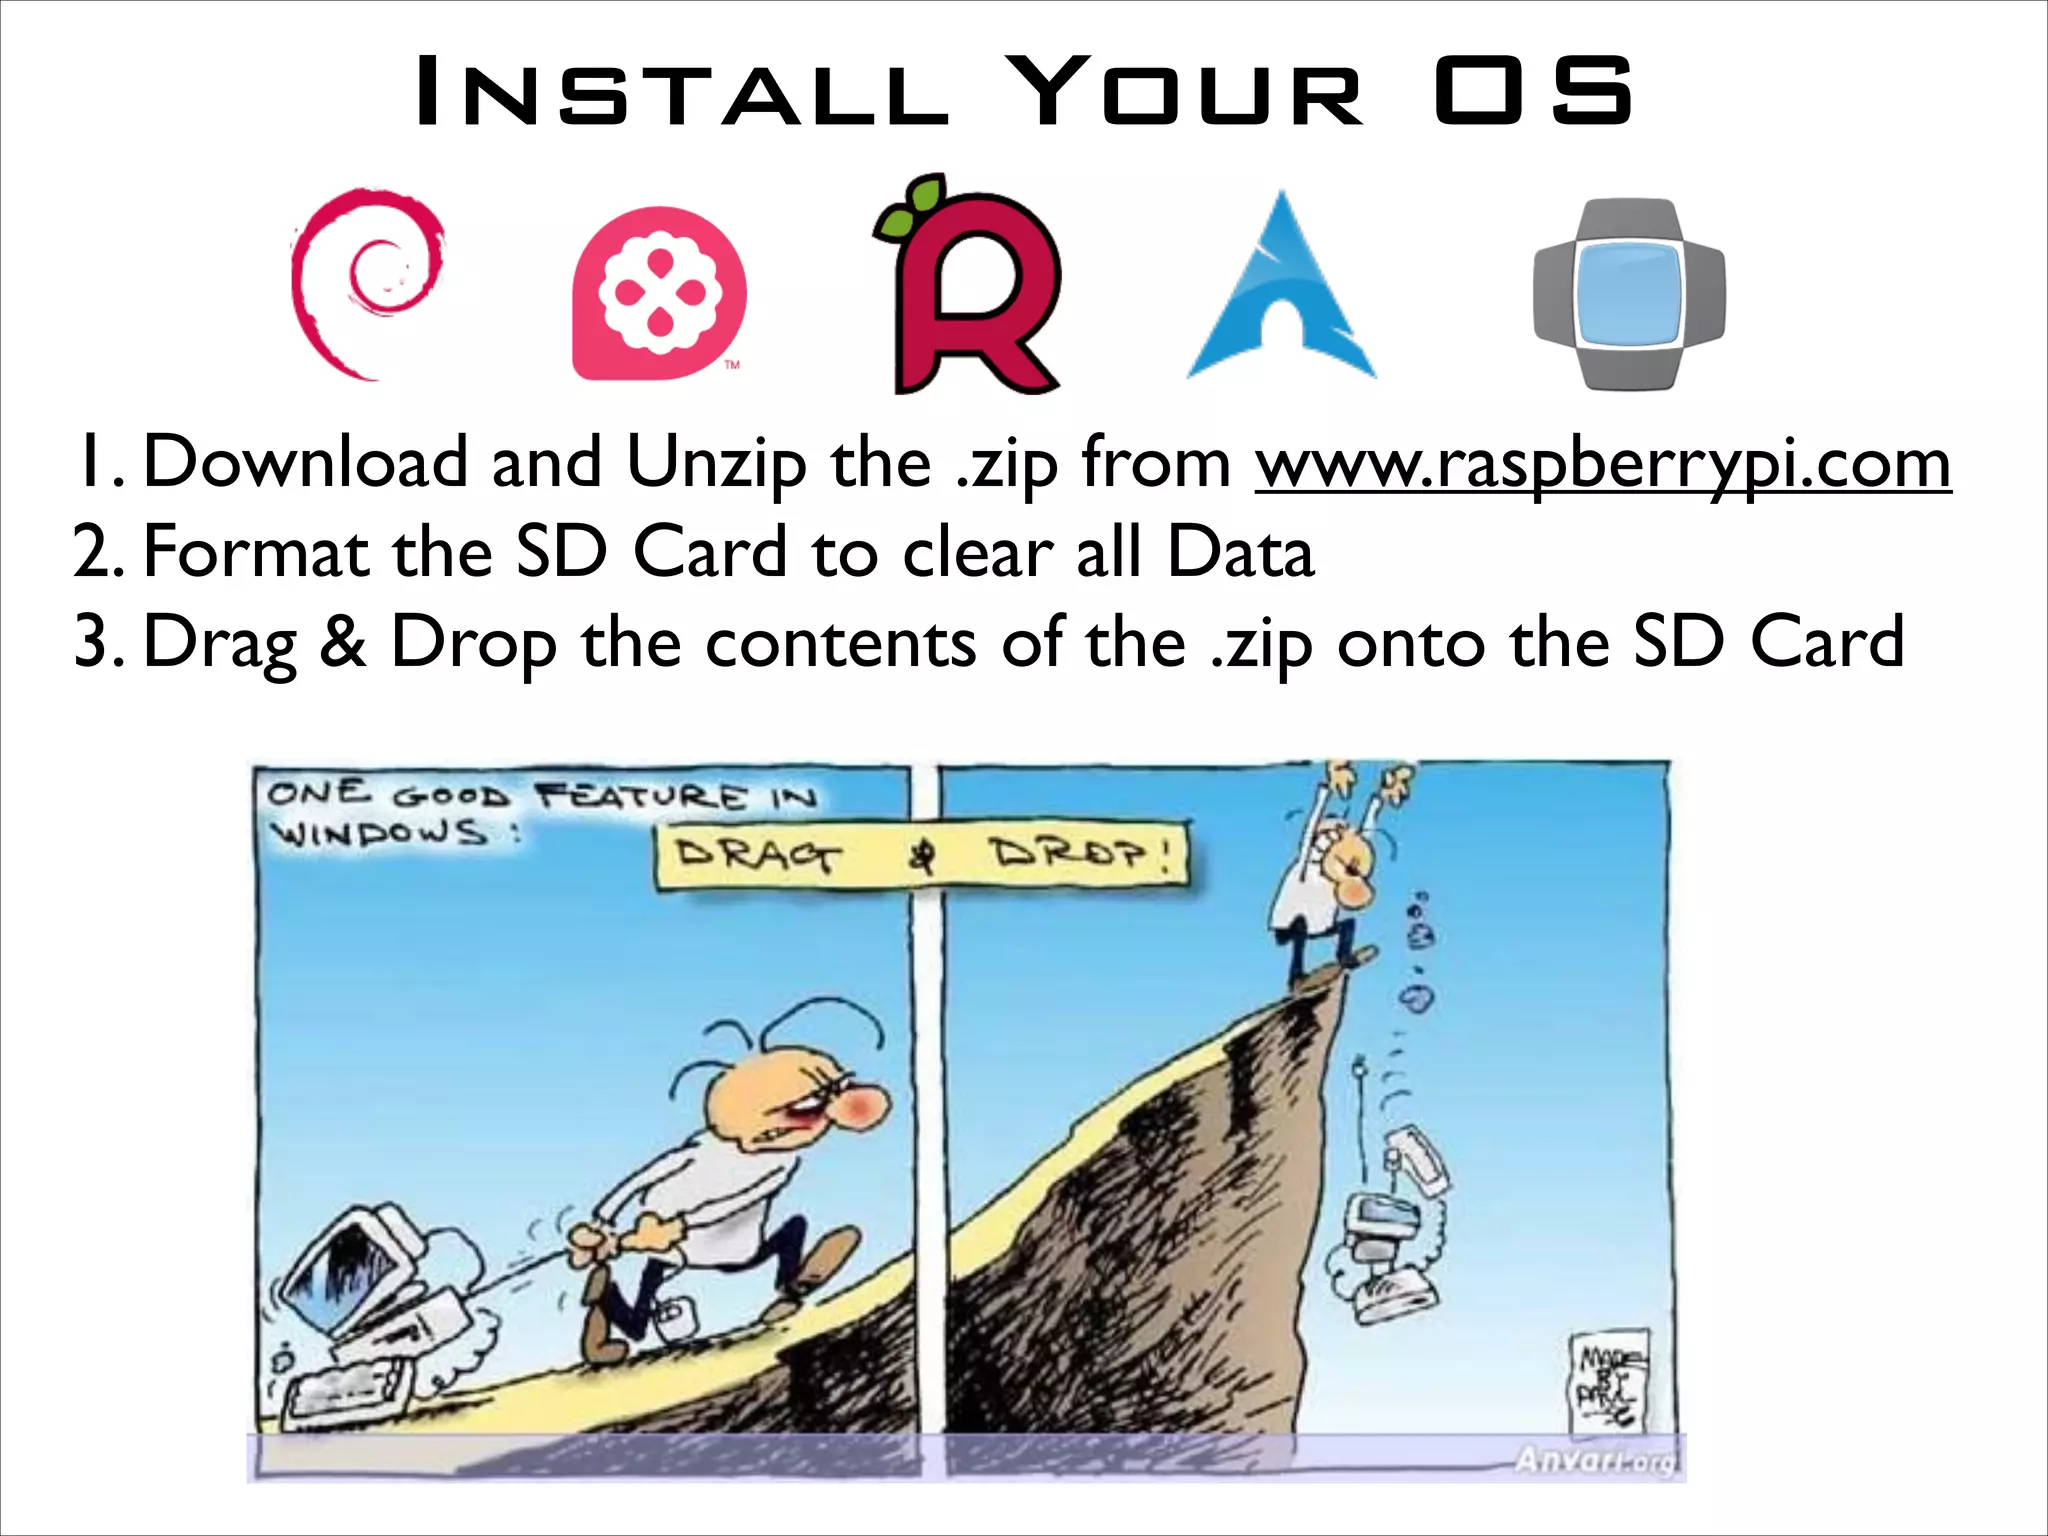


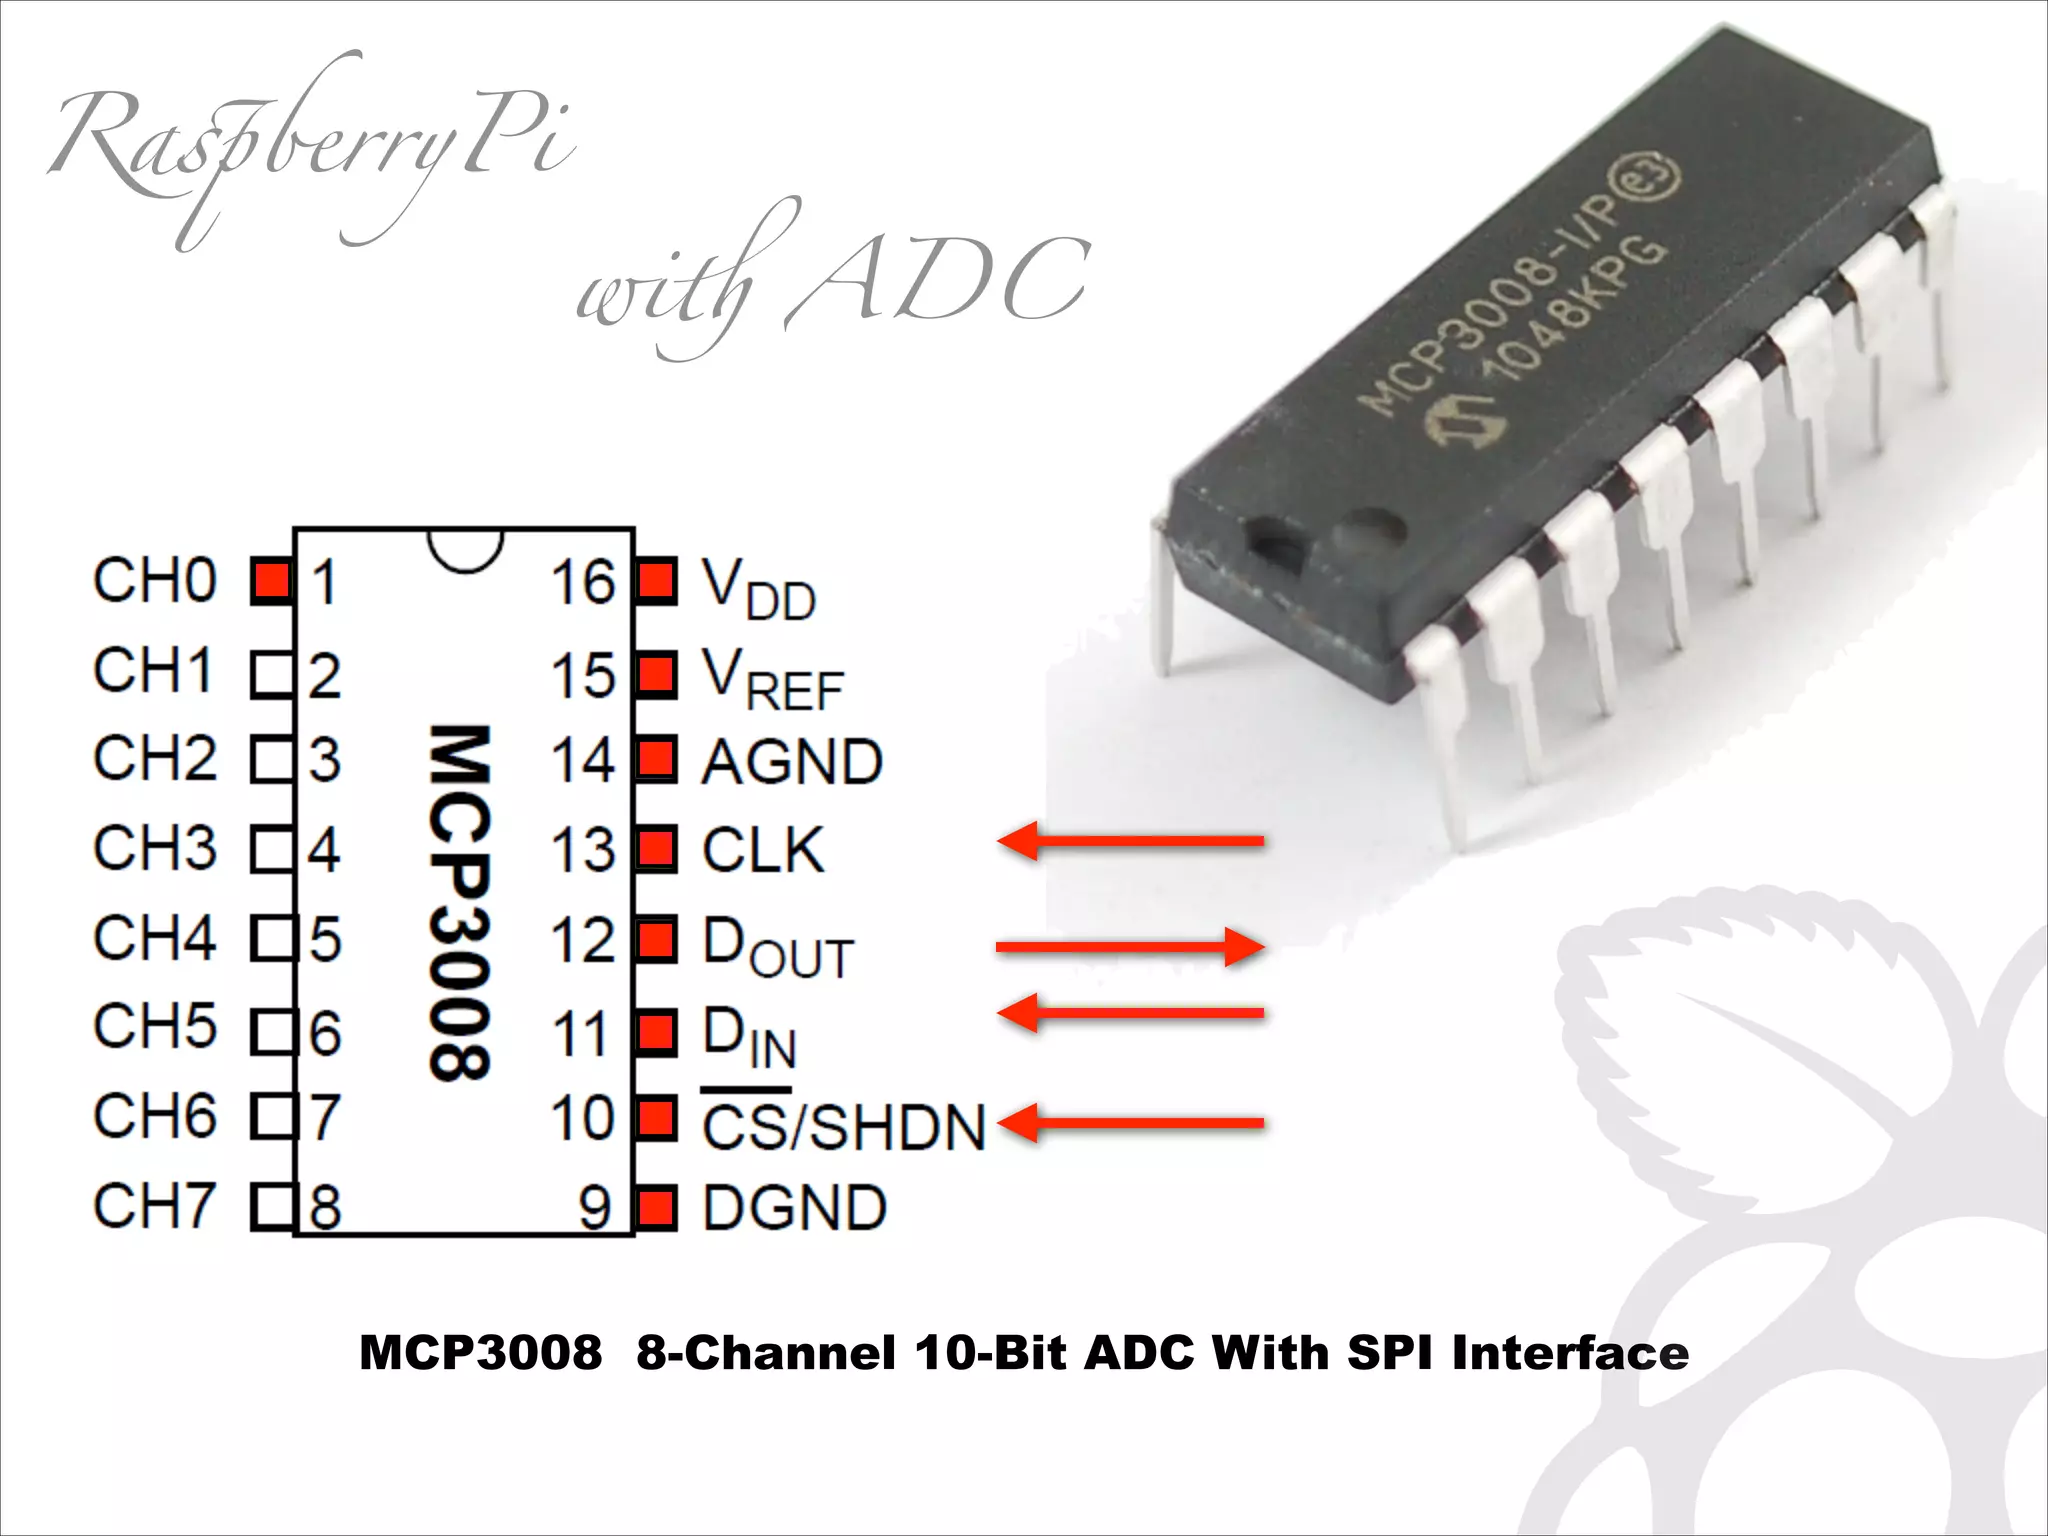
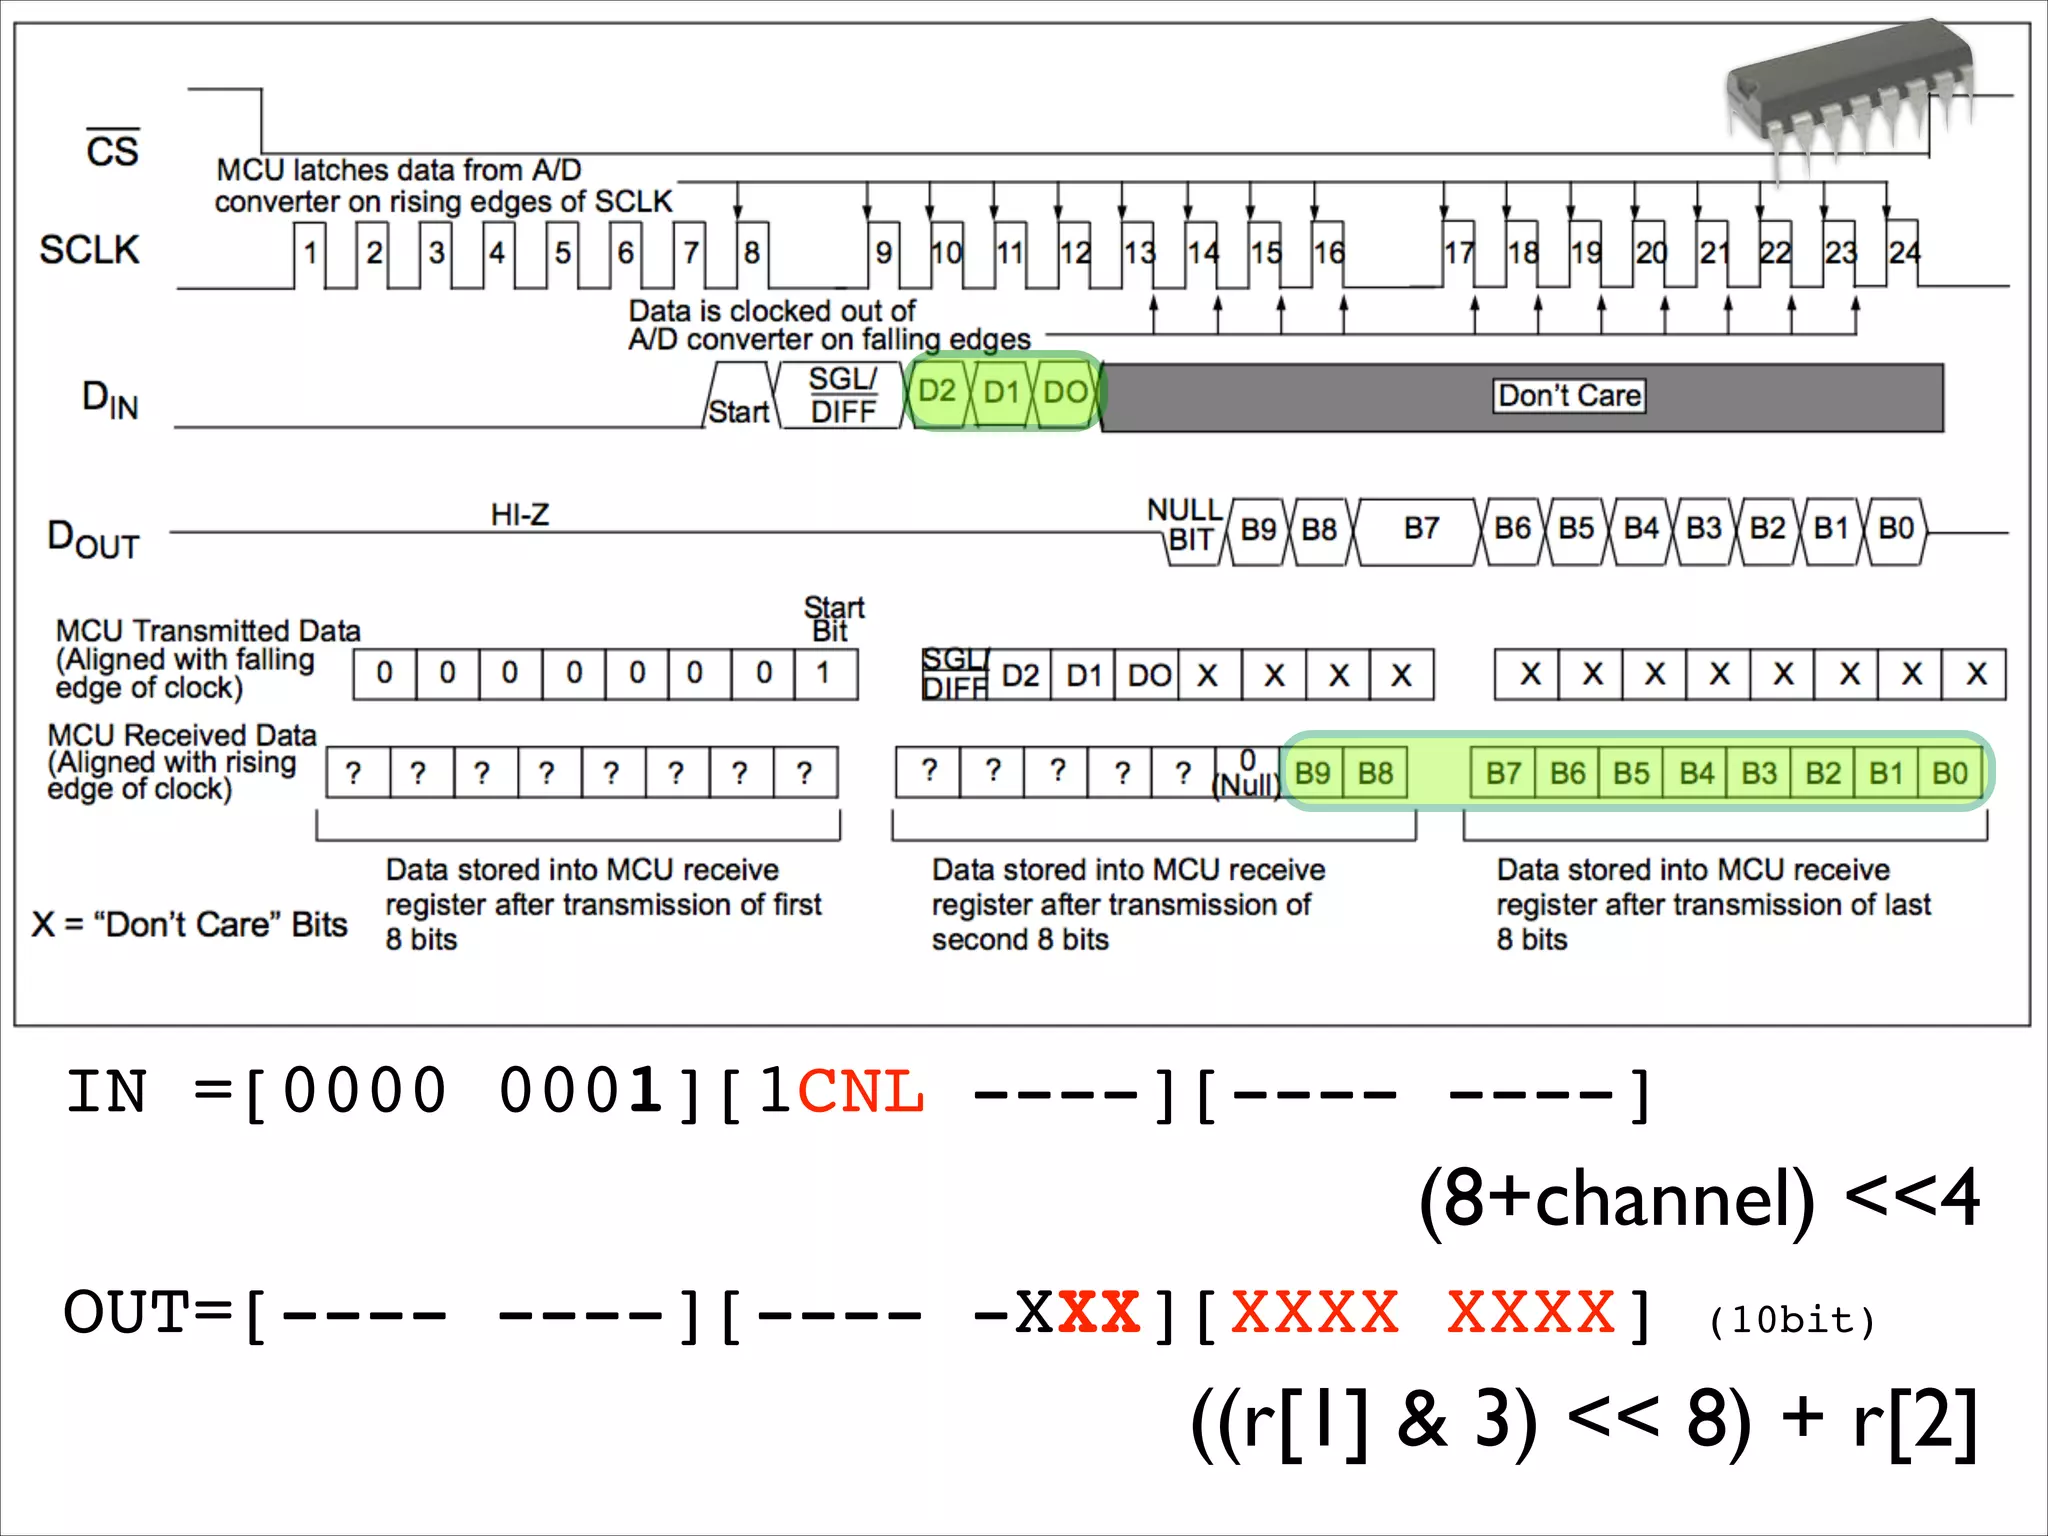


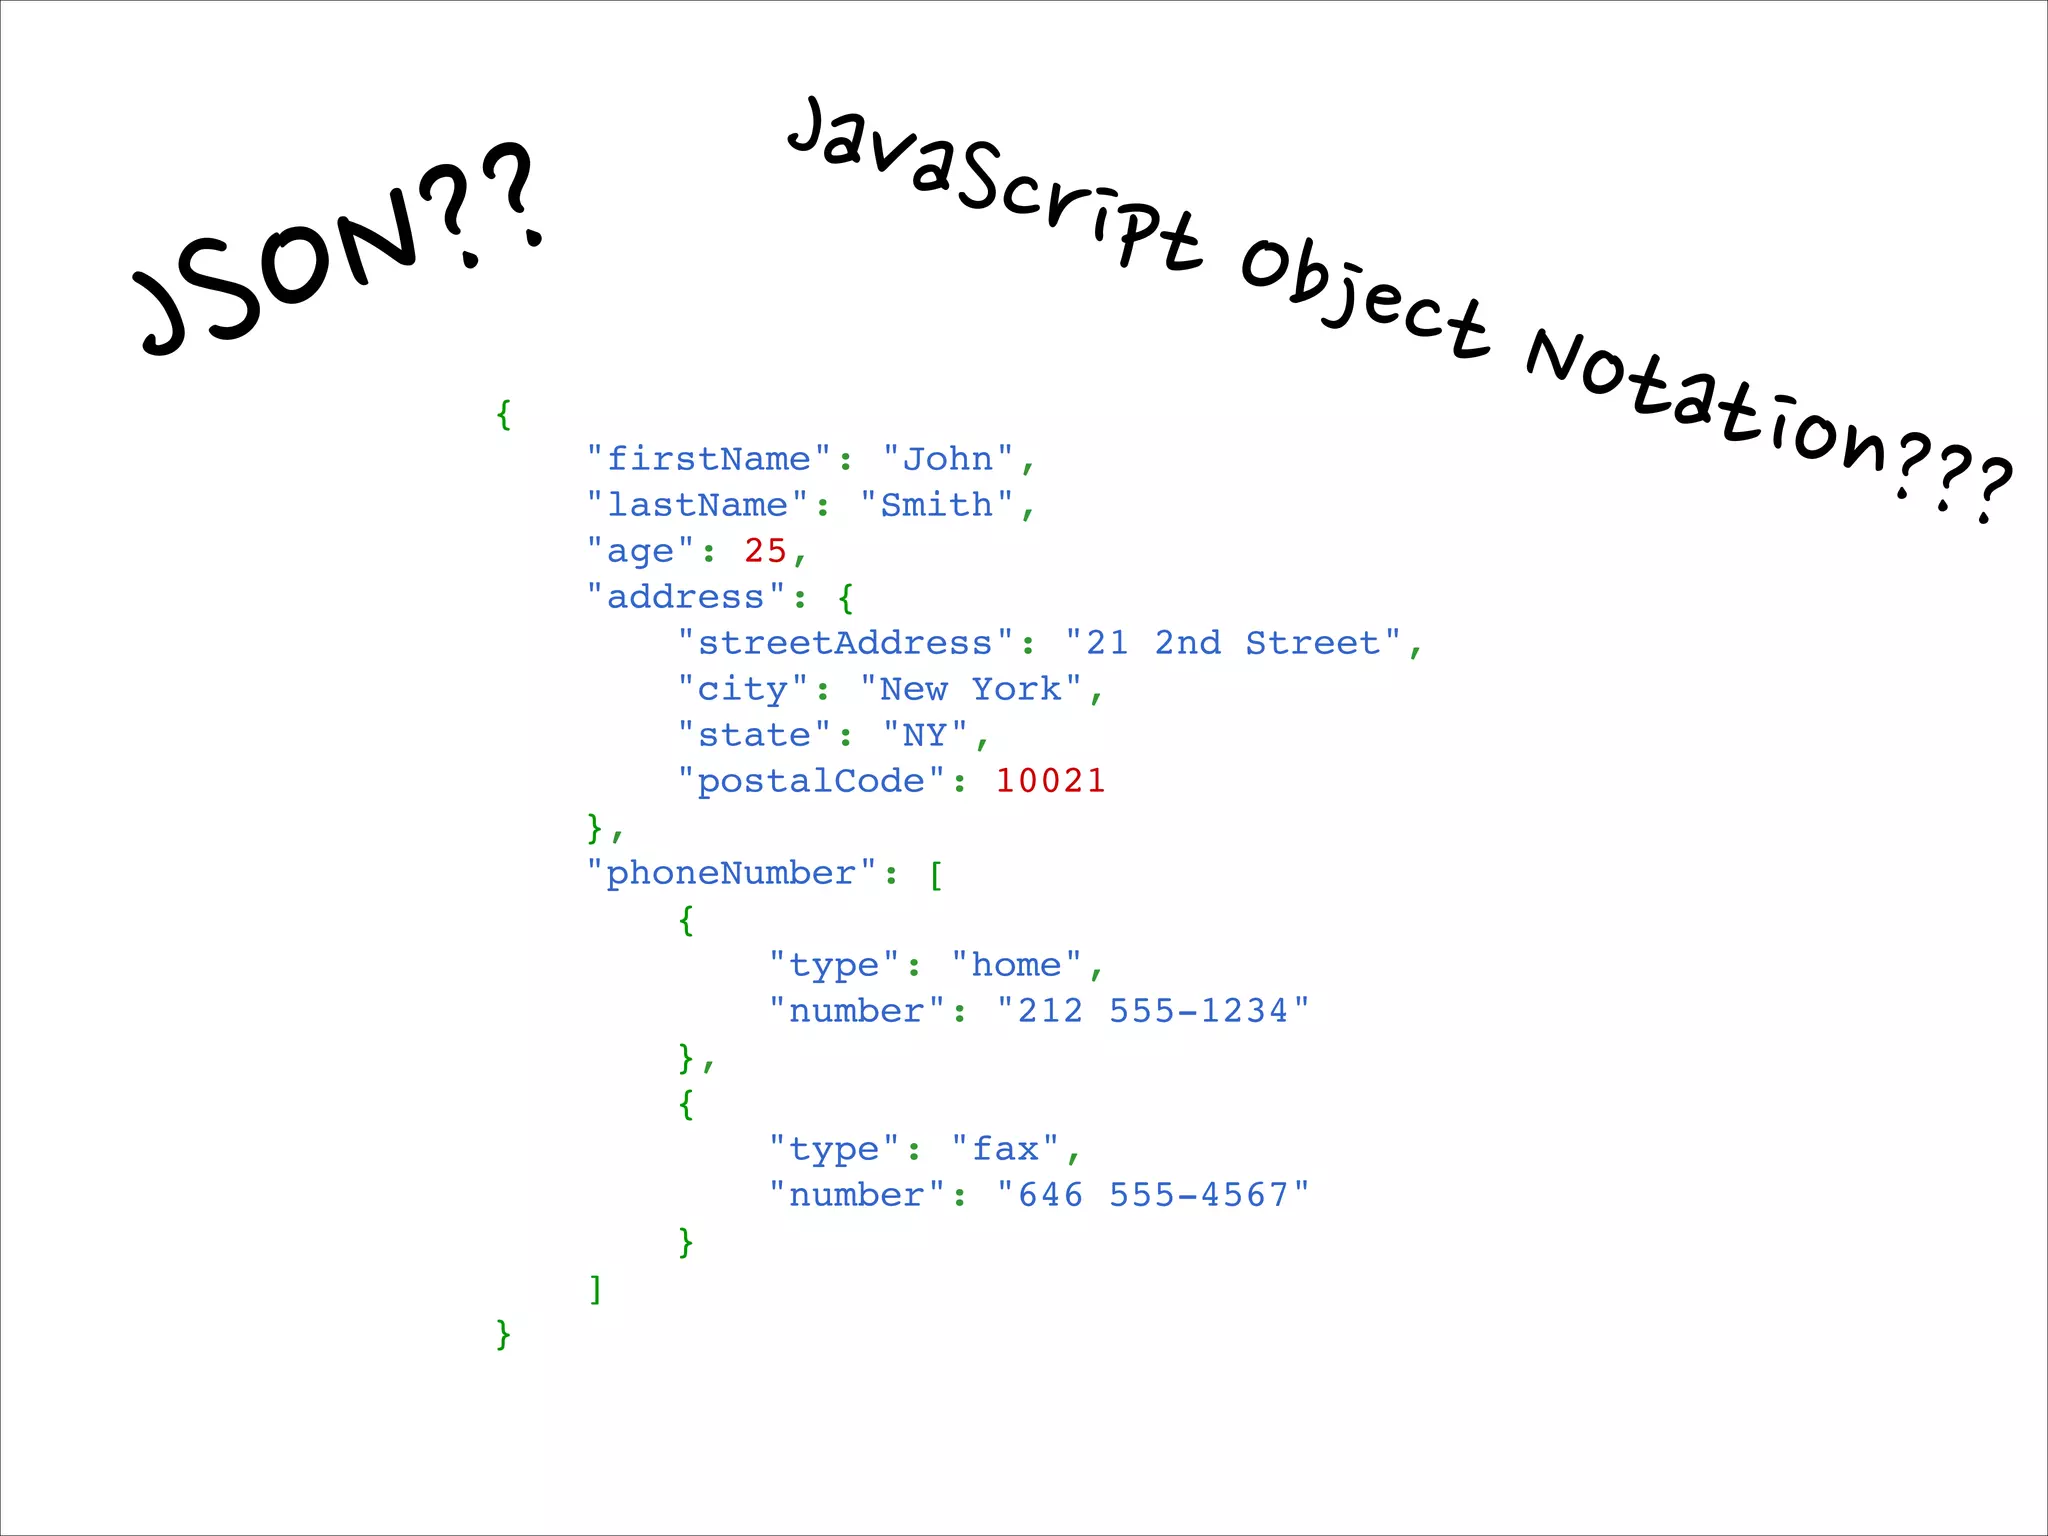

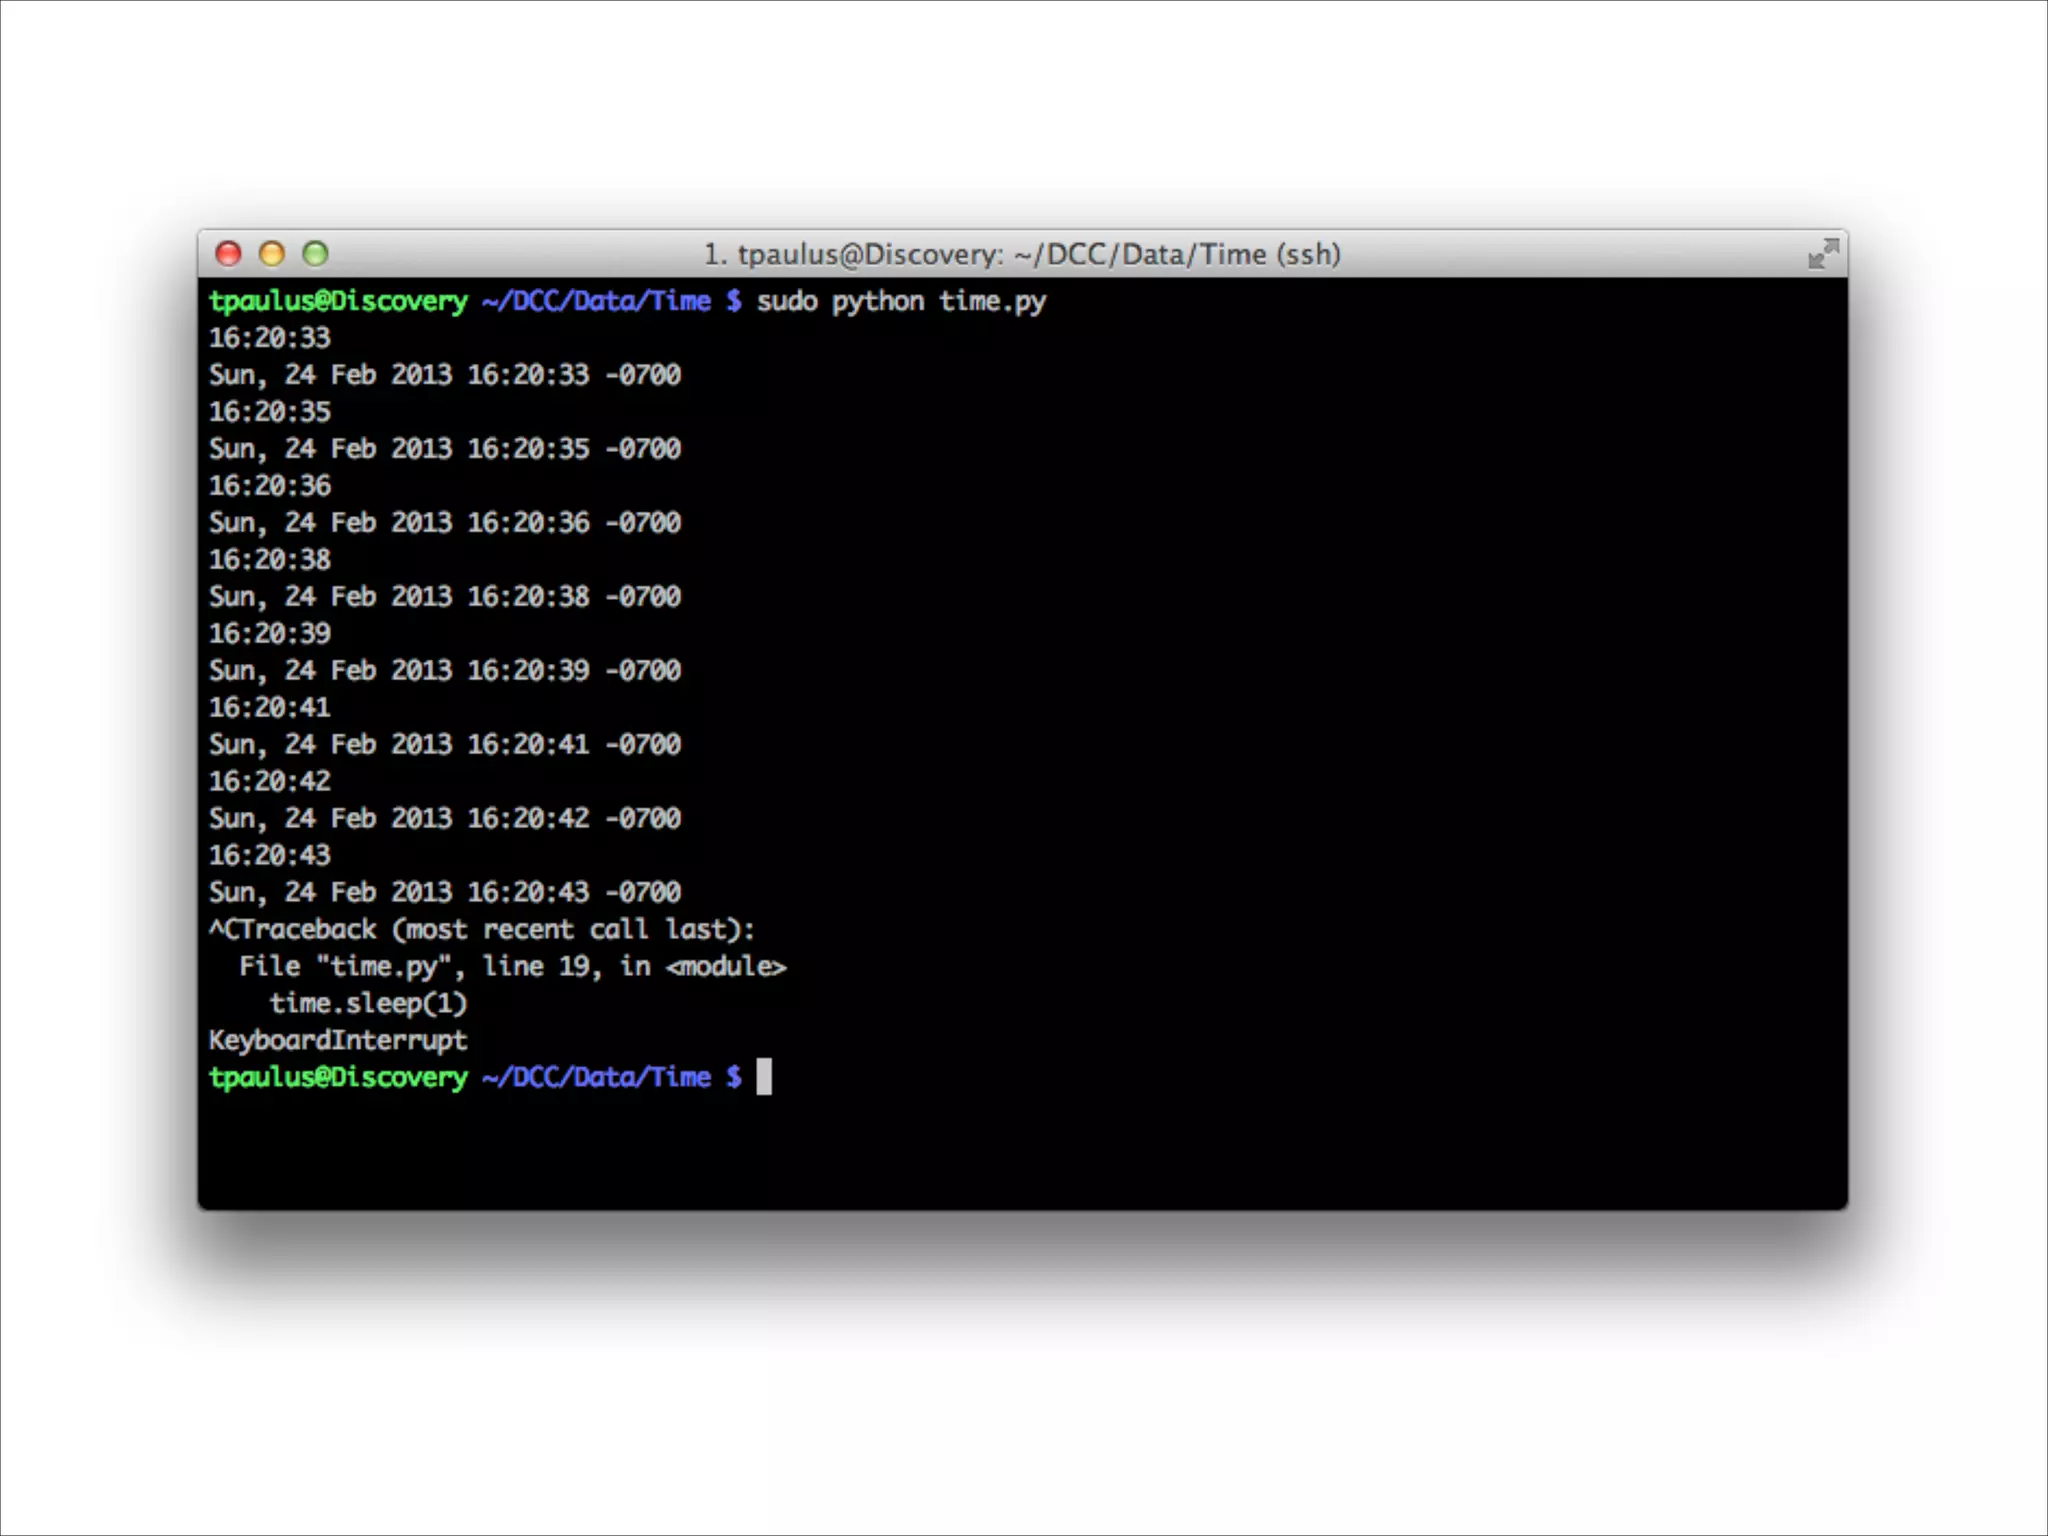


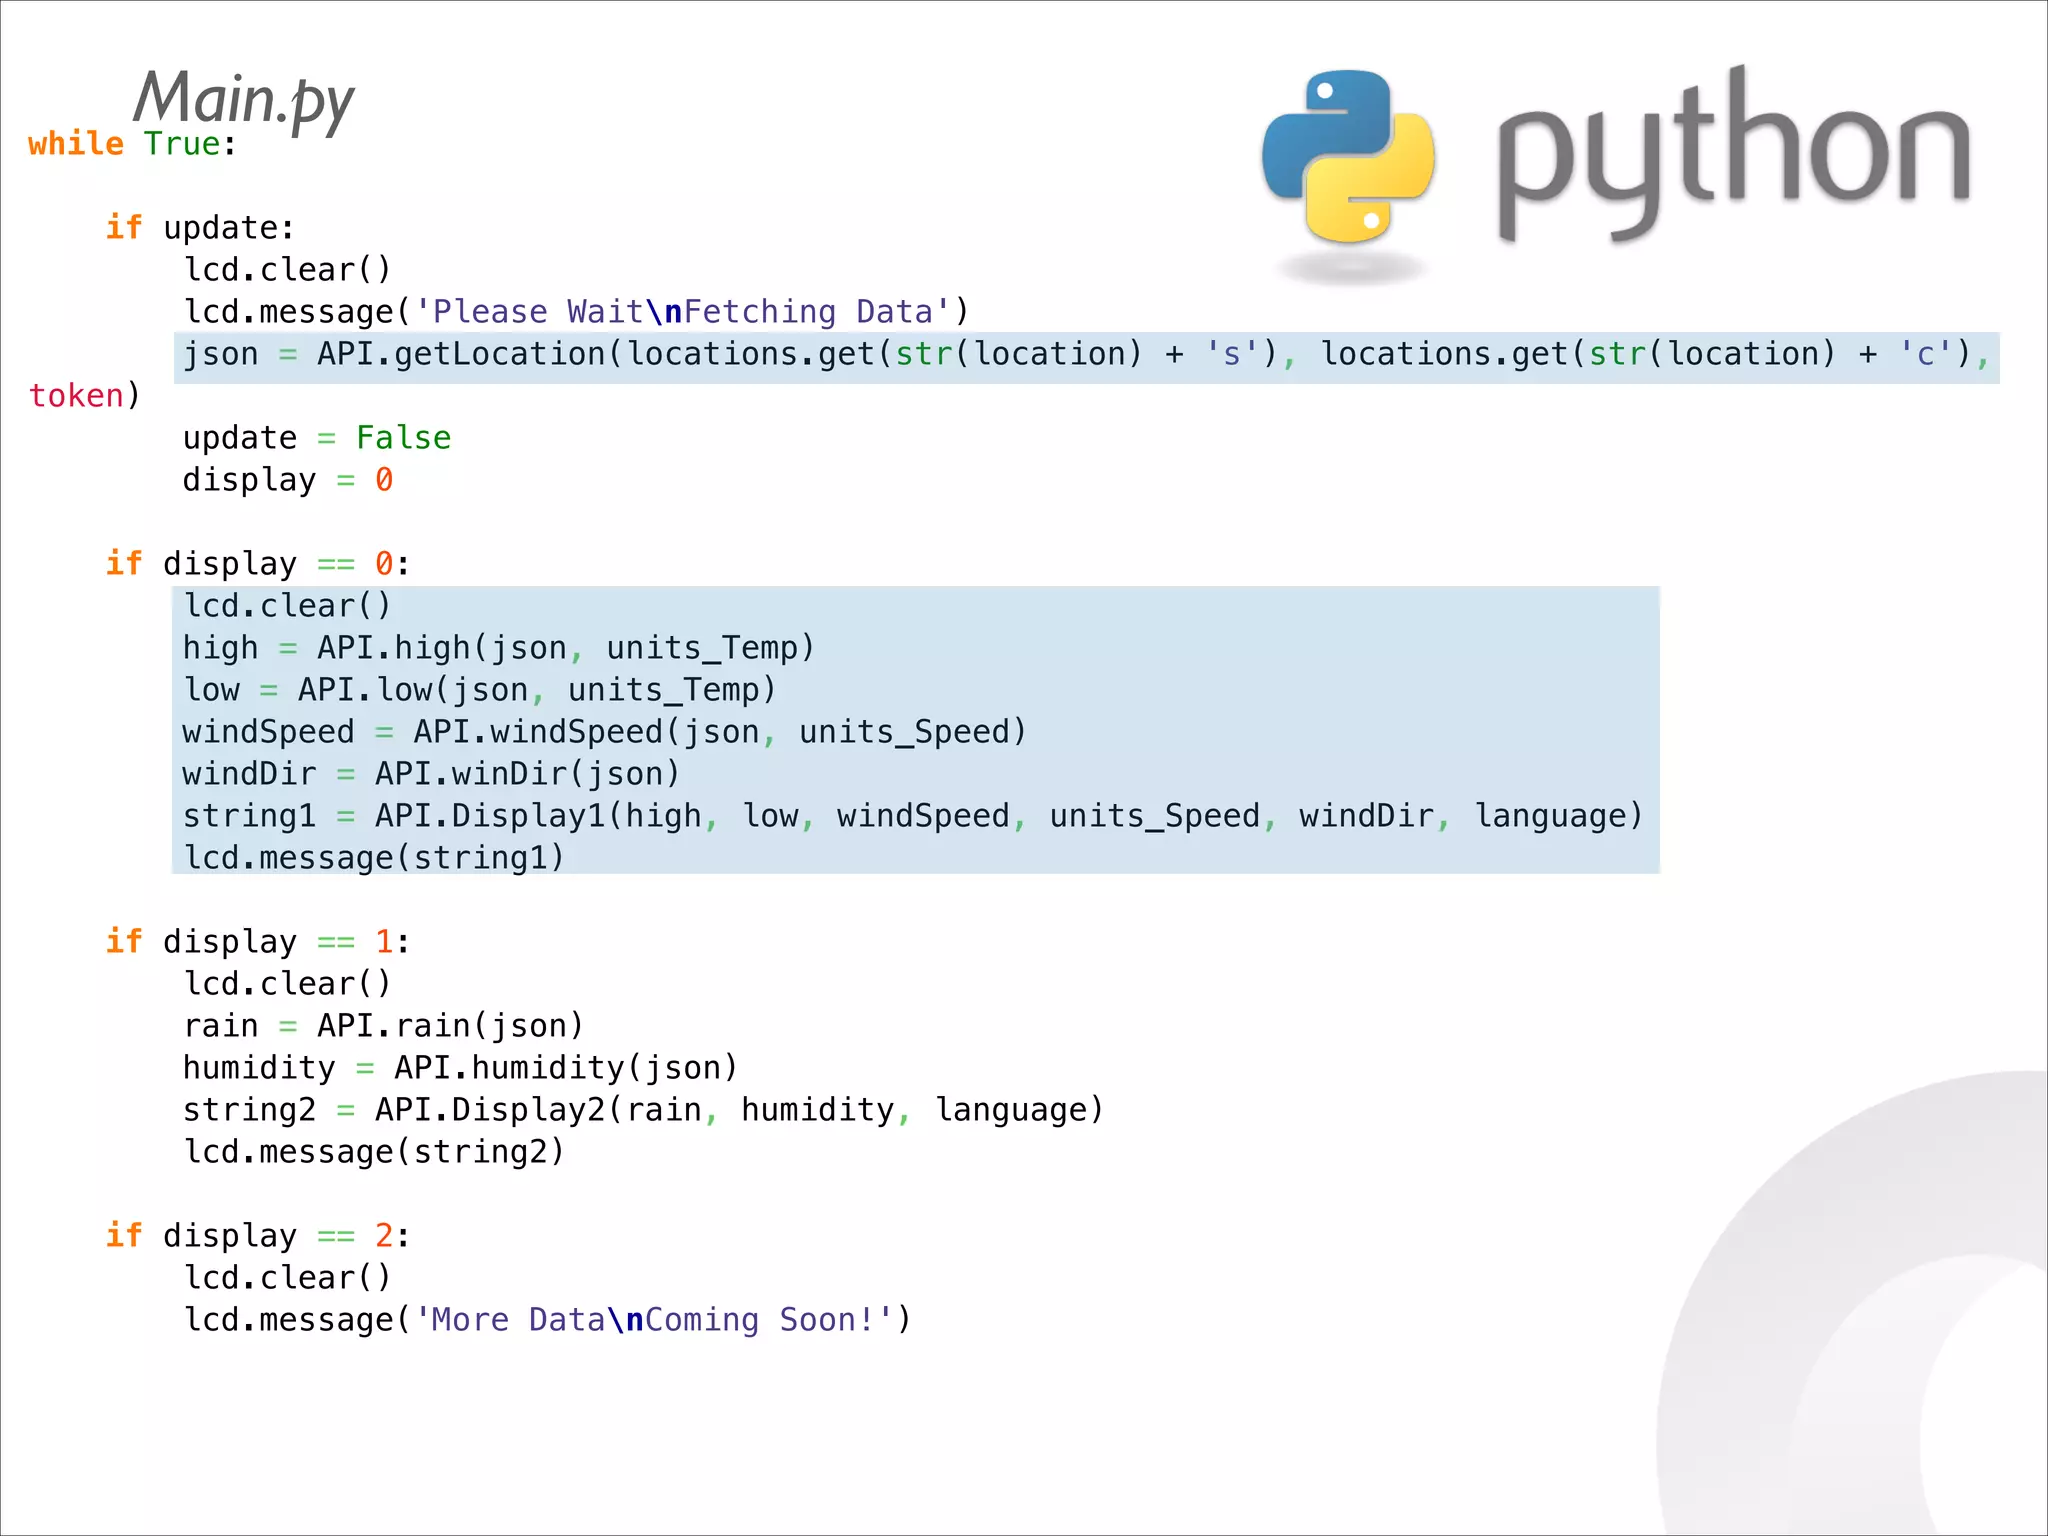

![IN =[0000 0001][1CNL ----][---- ----]! (8+channel) 4 OUT=[---- ----][---- -XXX][XXXX XXXX] (10bit) ! ((r[1] 3) 8) + r[2]](https://image.slidesharecdn.com/gettingstartedraspi-usc2013-131214191406-phpapp02/75/Getting-Started-with-Raspberry-Pi-USC-2013-63-2048.jpg)
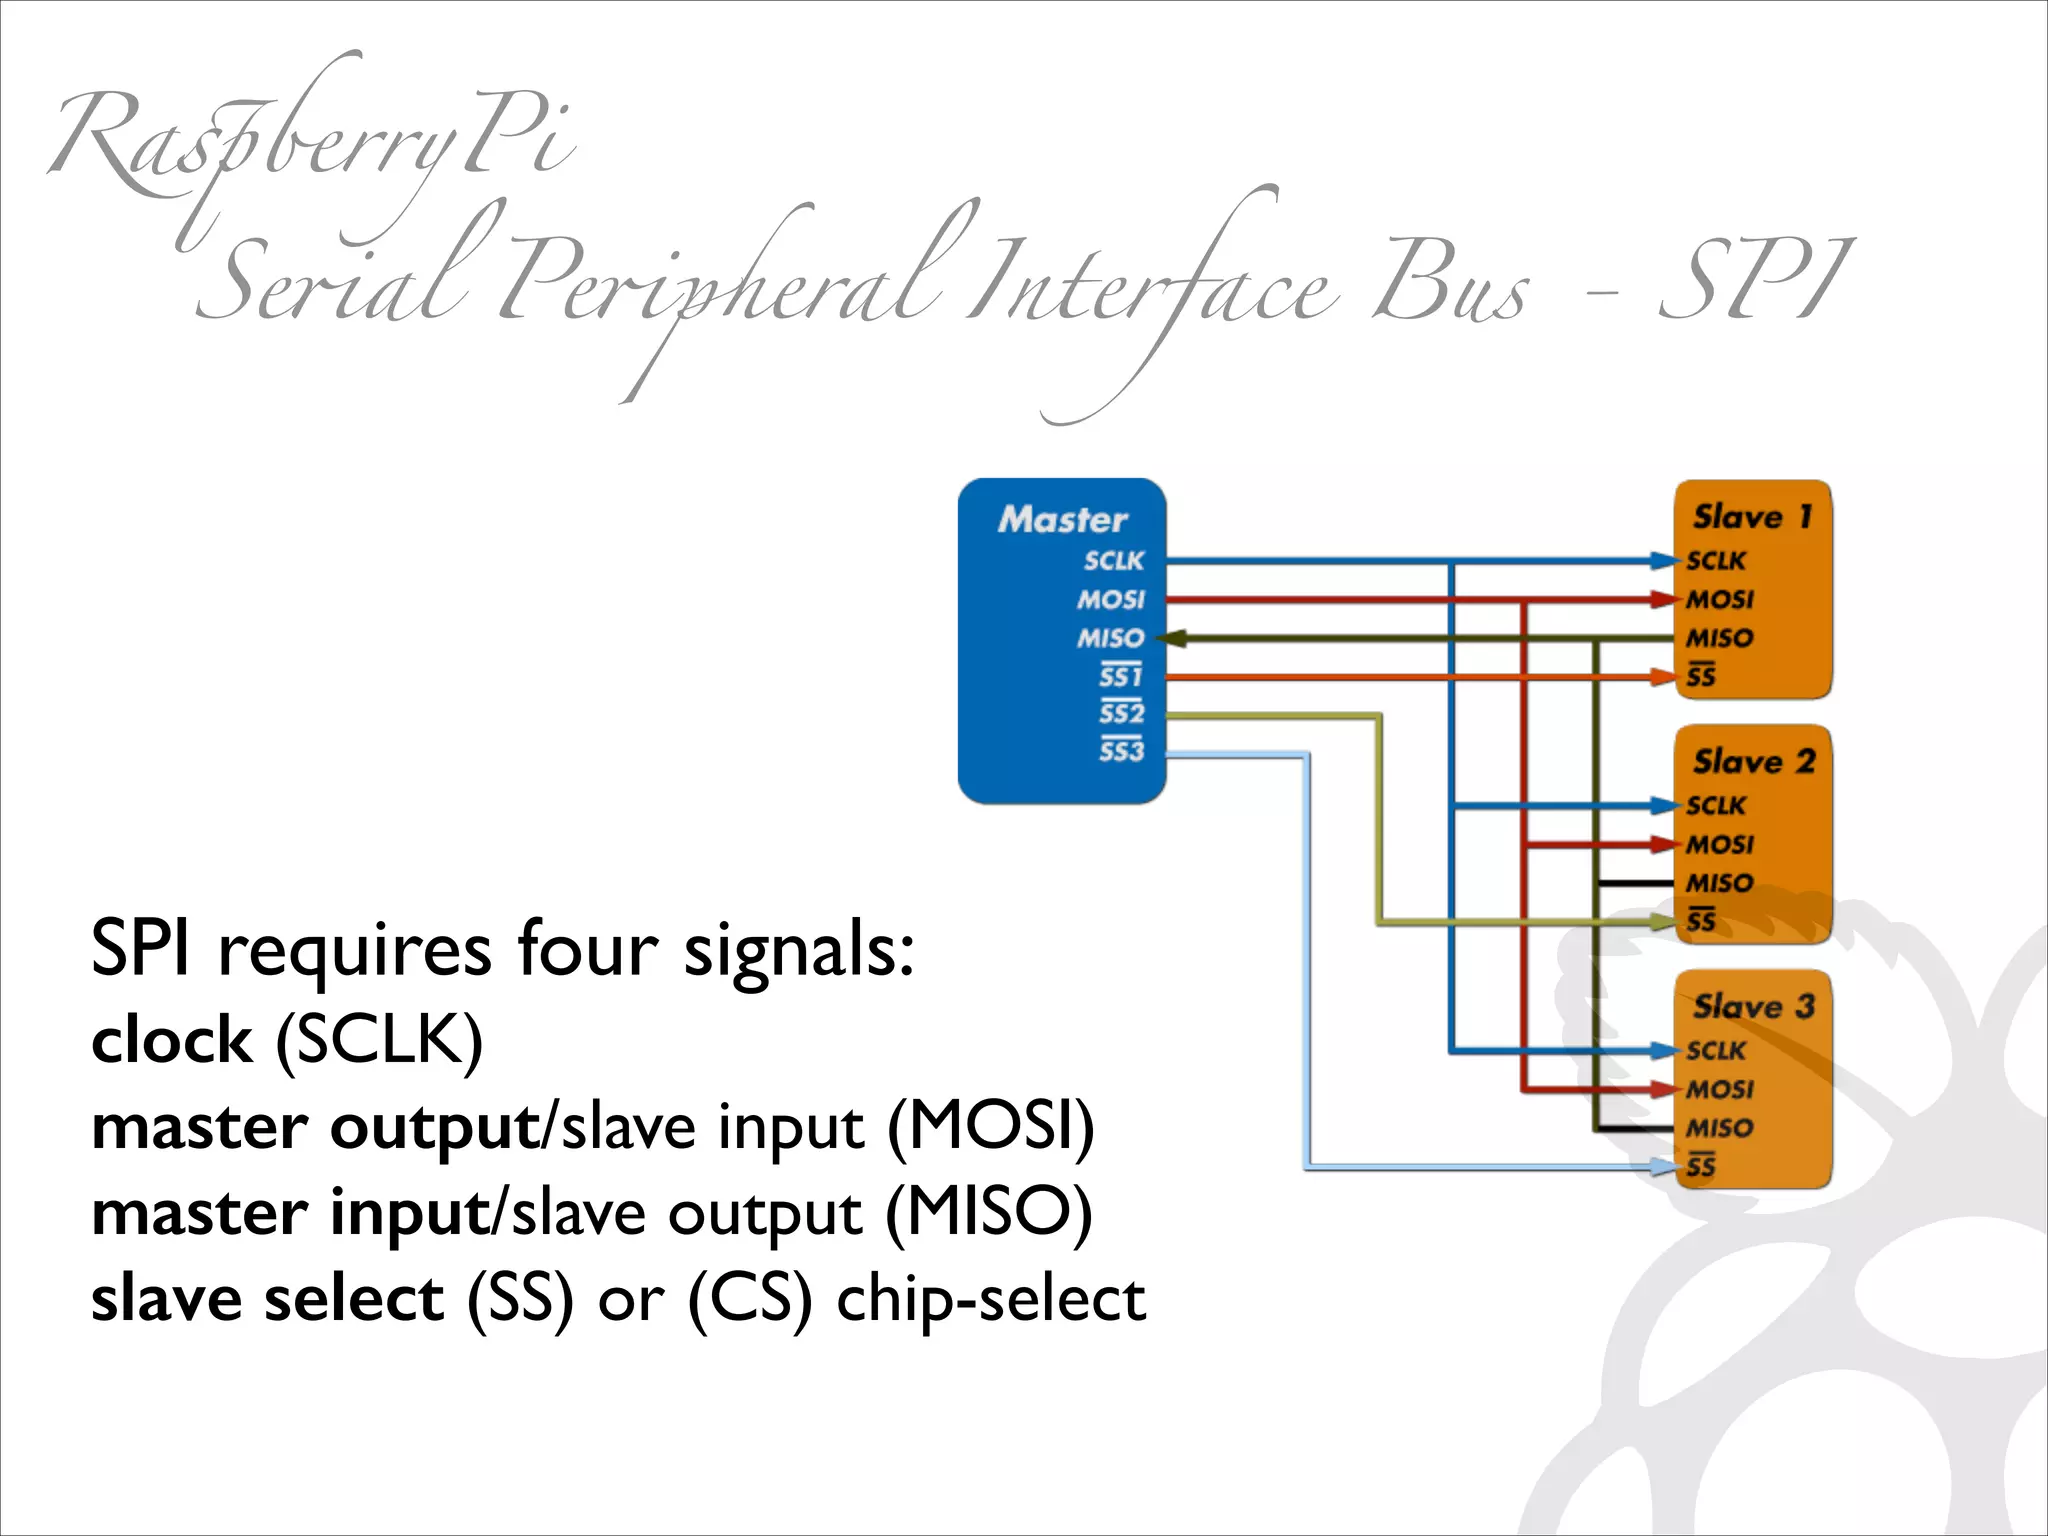
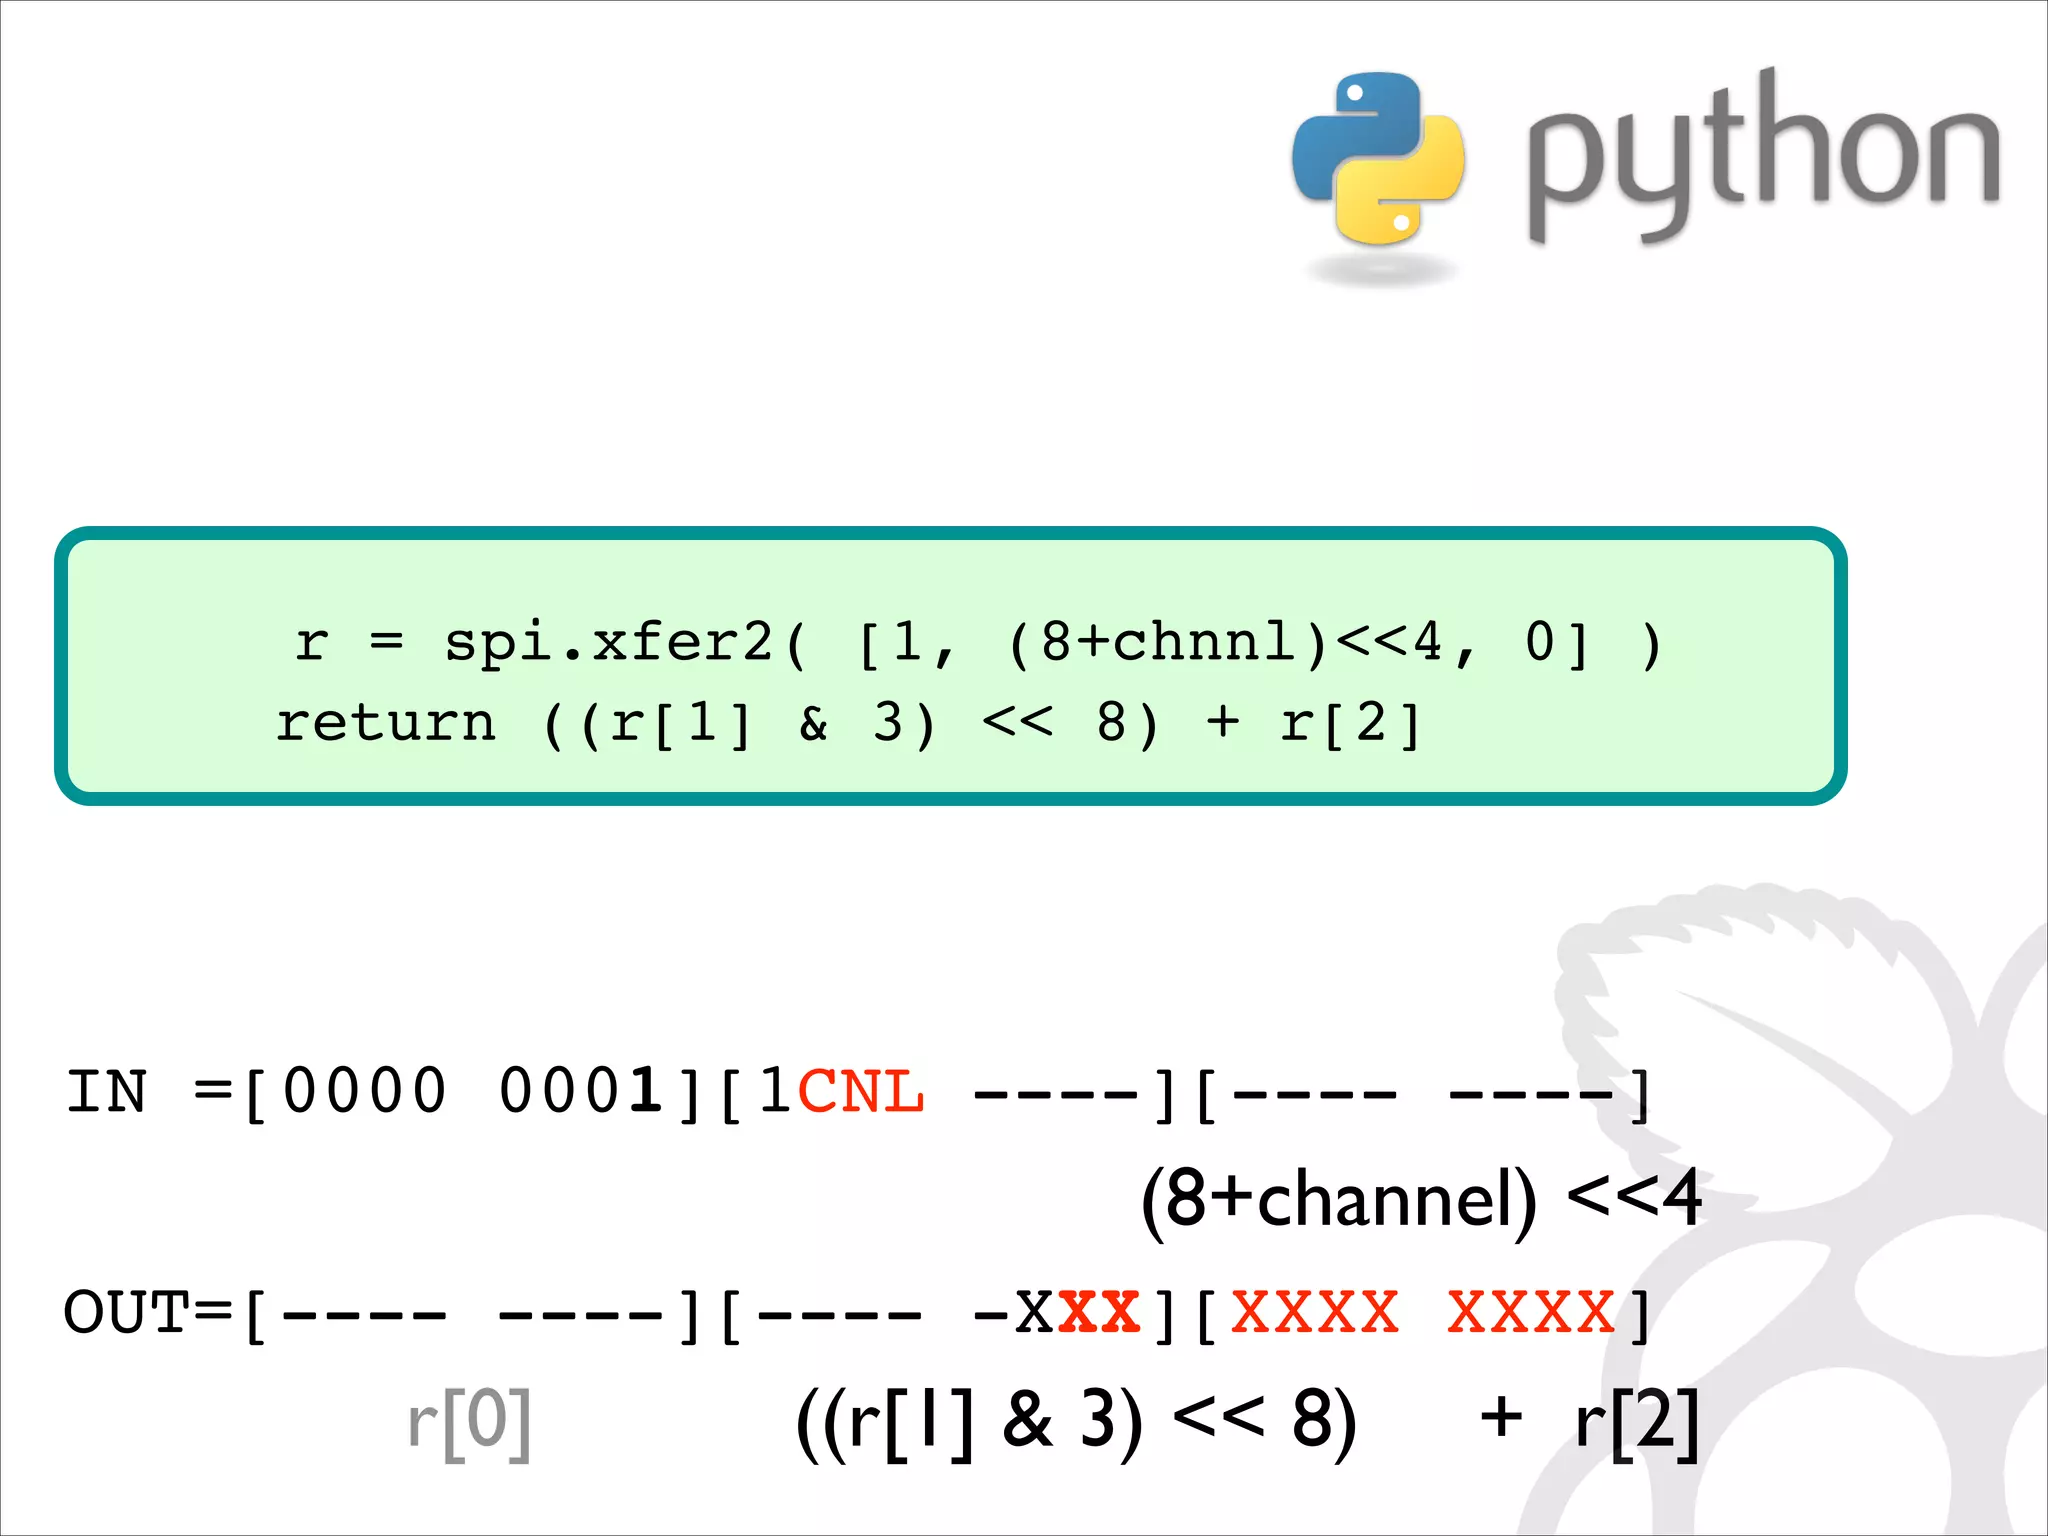
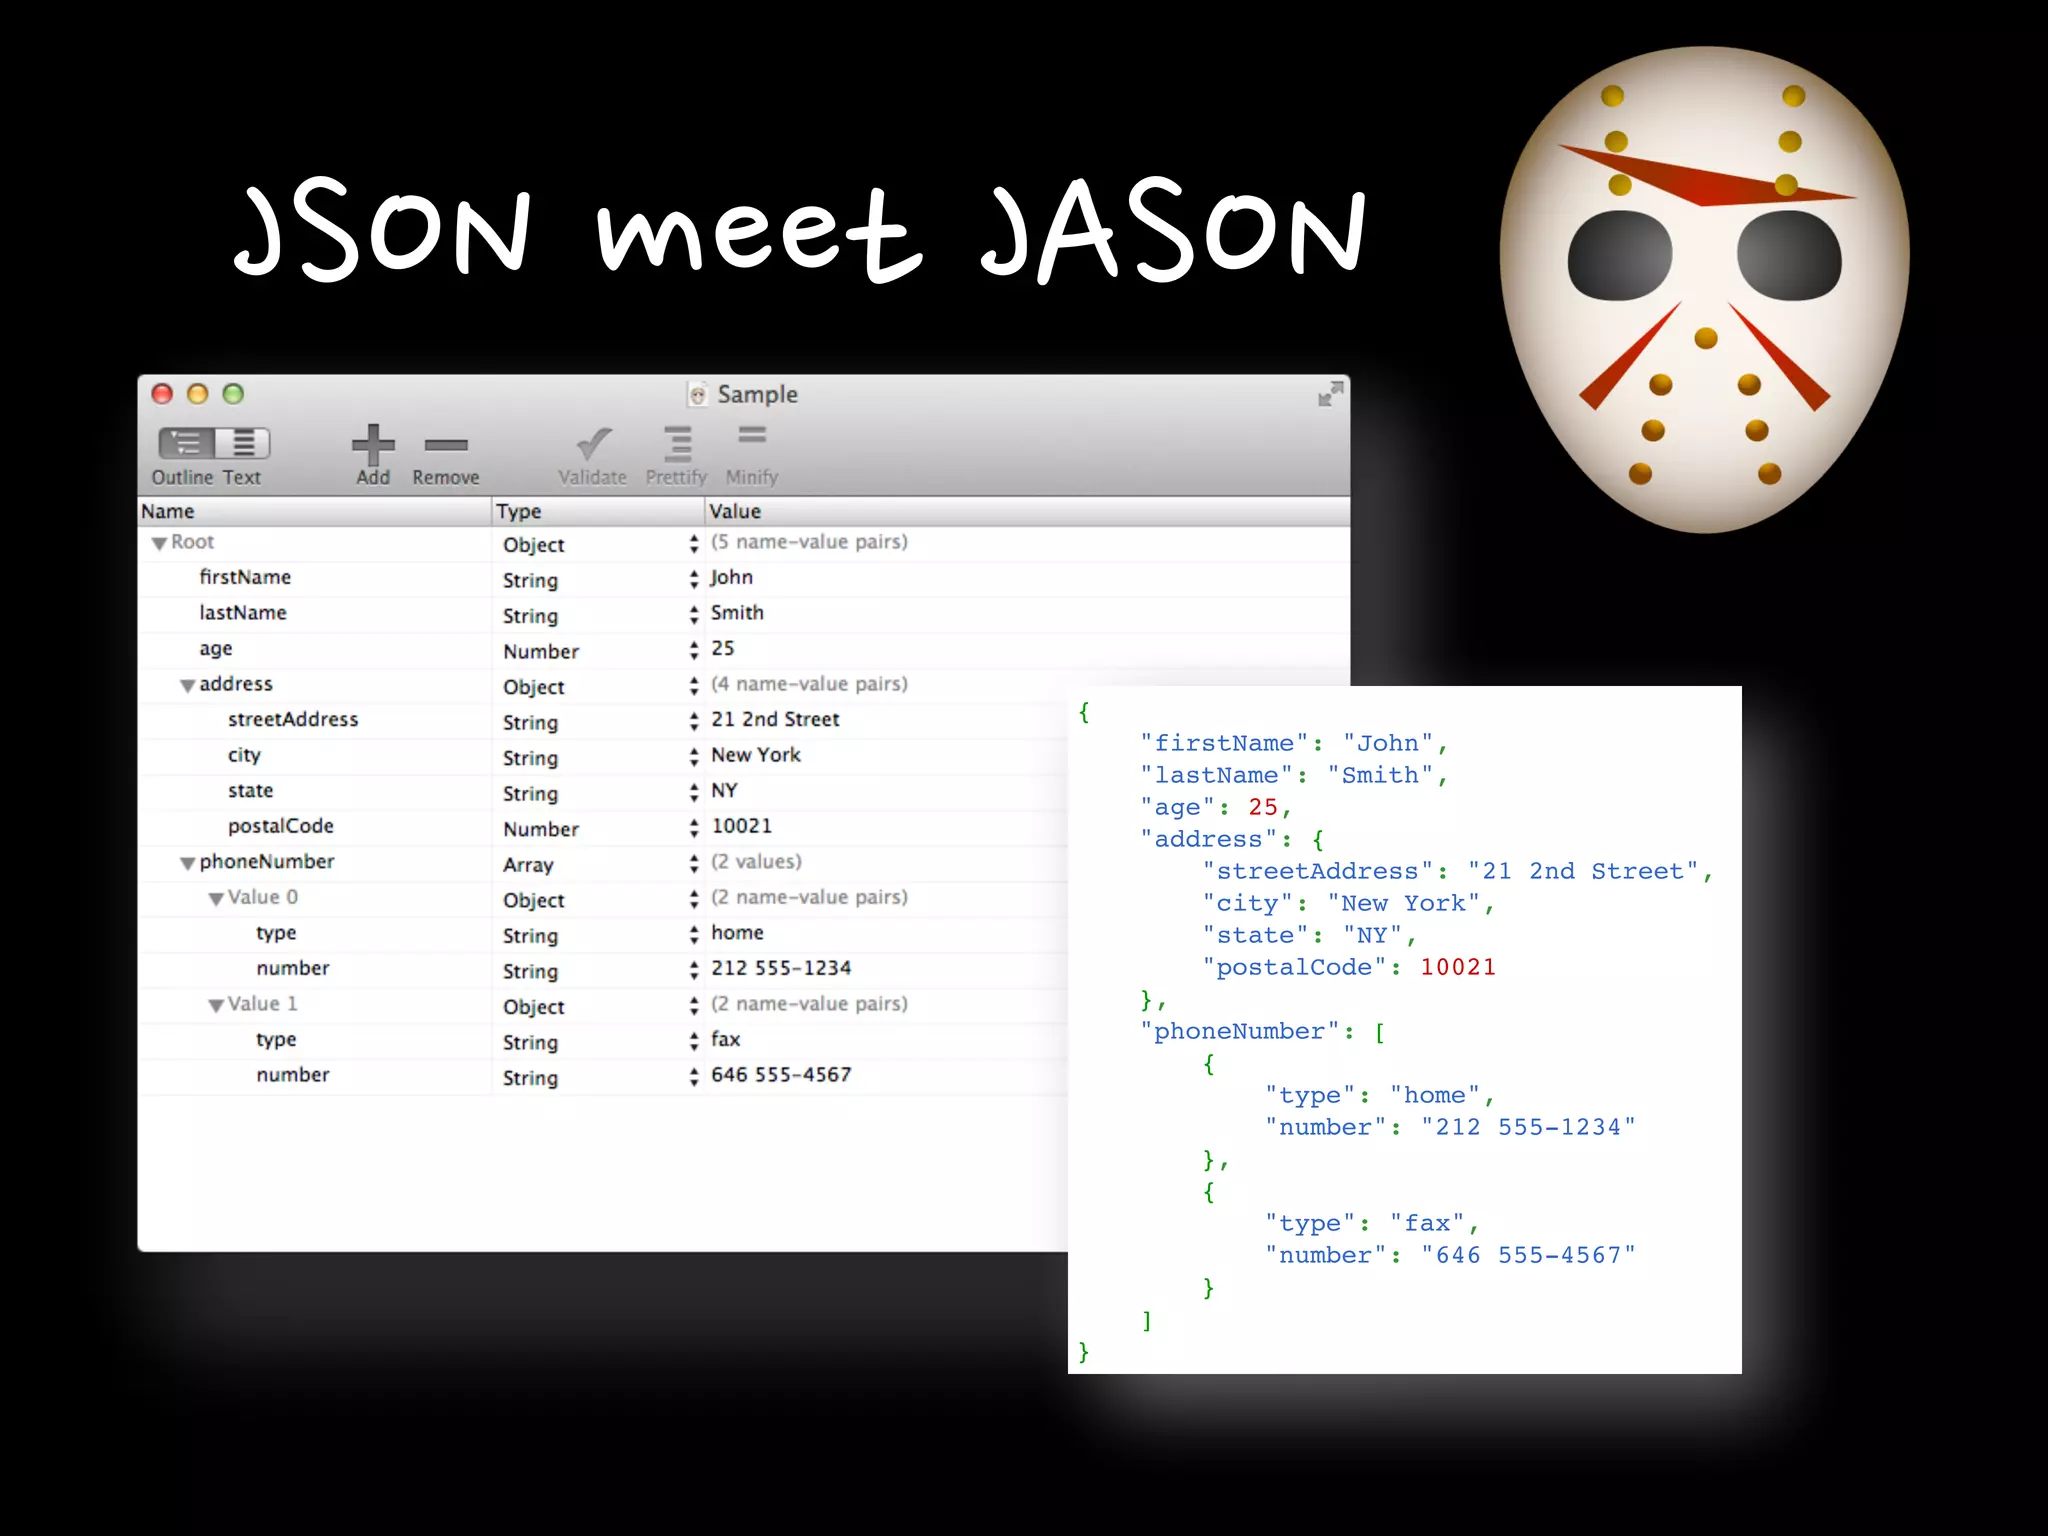
![r = spi.xfer2( [1, (8+chnnl)4, 0] )! return ((r[1] 3) 8) + r[2] IN =[0000 0001][1CNL ----][---- ----]! (8+channel) 4 OUT=[---- ----][---- -XXX][XXXX XXXX]! r[0] ((r[1] 3) 8) + r[2]](https://image.slidesharecdn.com/gettingstartedraspi-usc2013-131214191406-phpapp02/75/Getting-Started-with-Raspberry-Pi-USC-2013-64-2048.jpg)
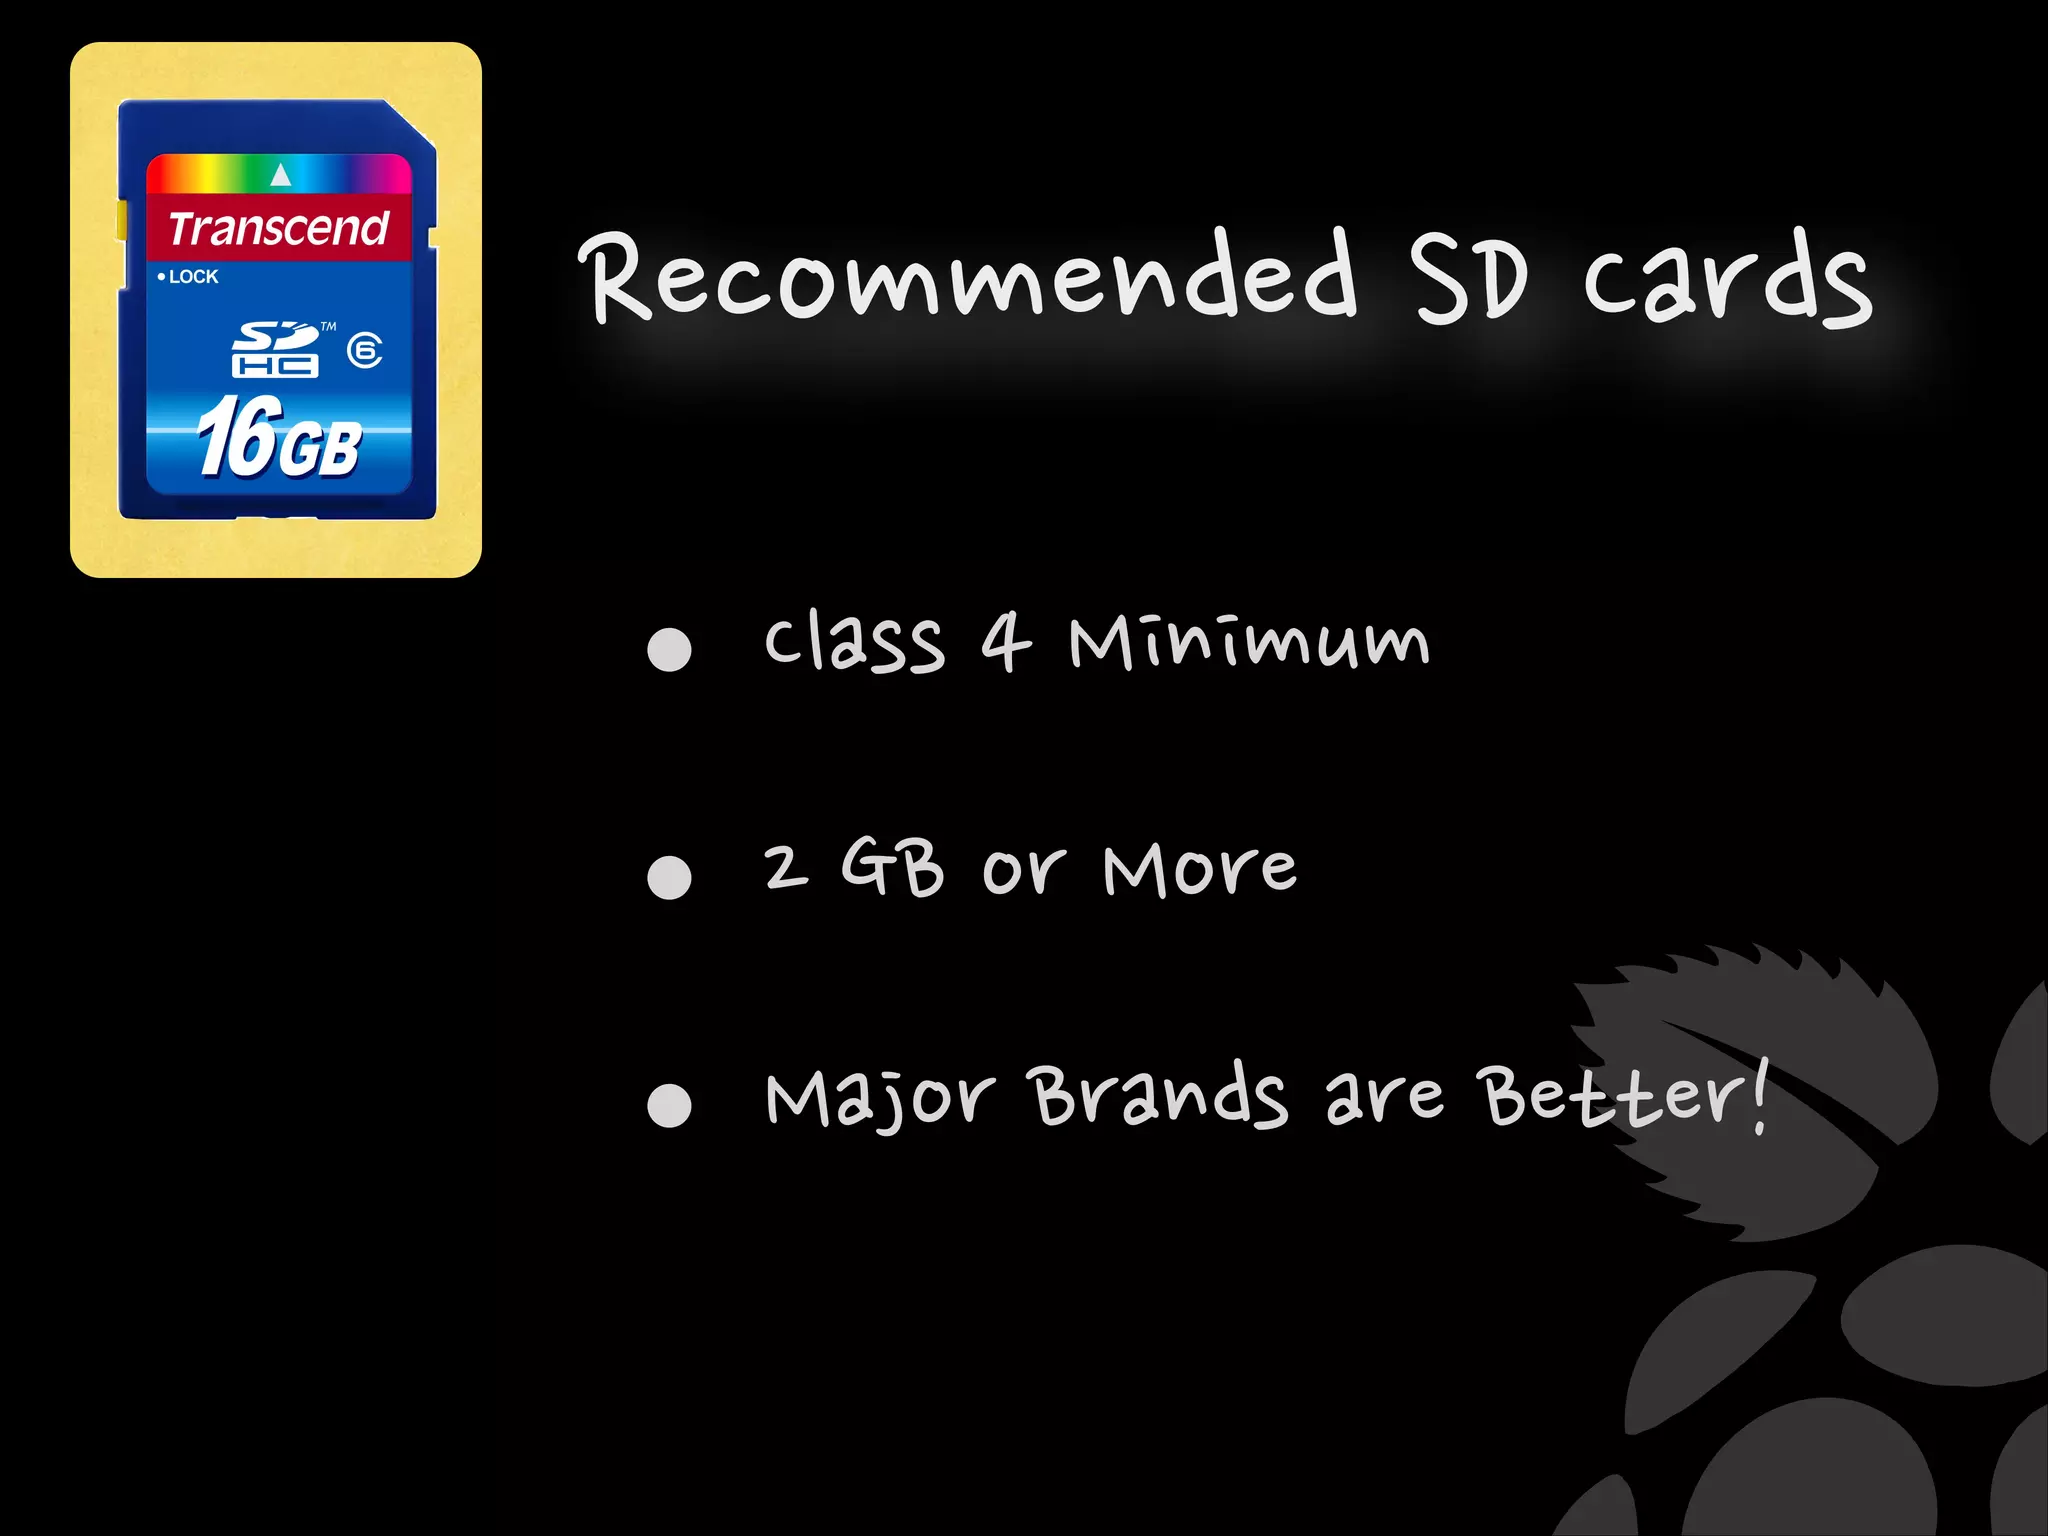
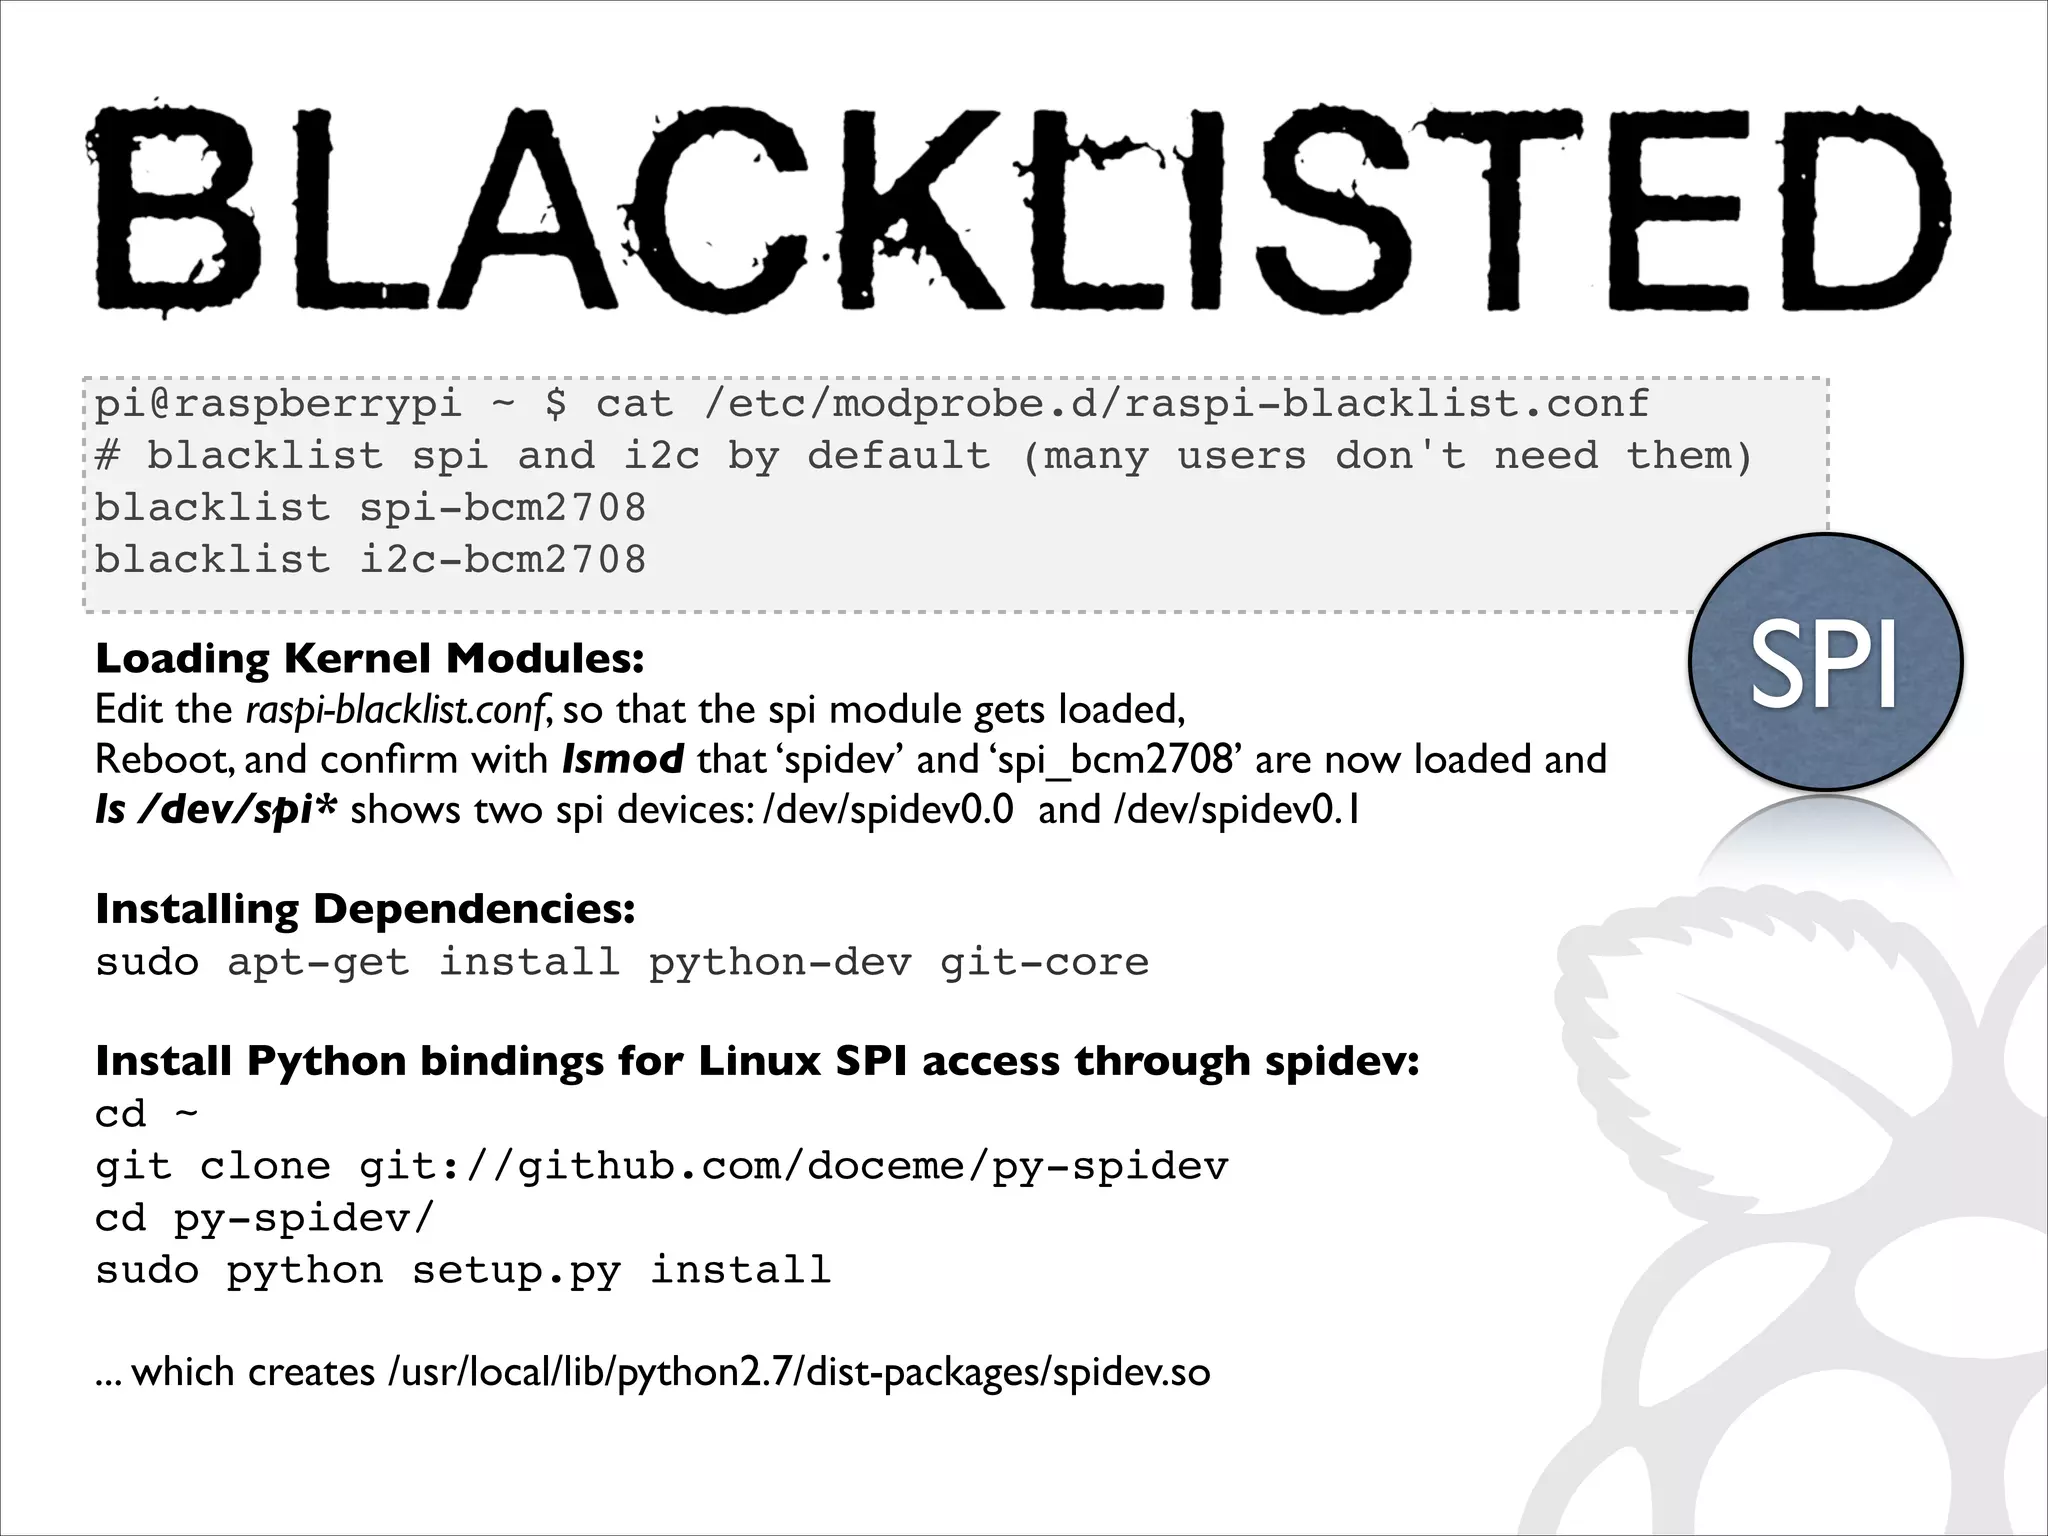
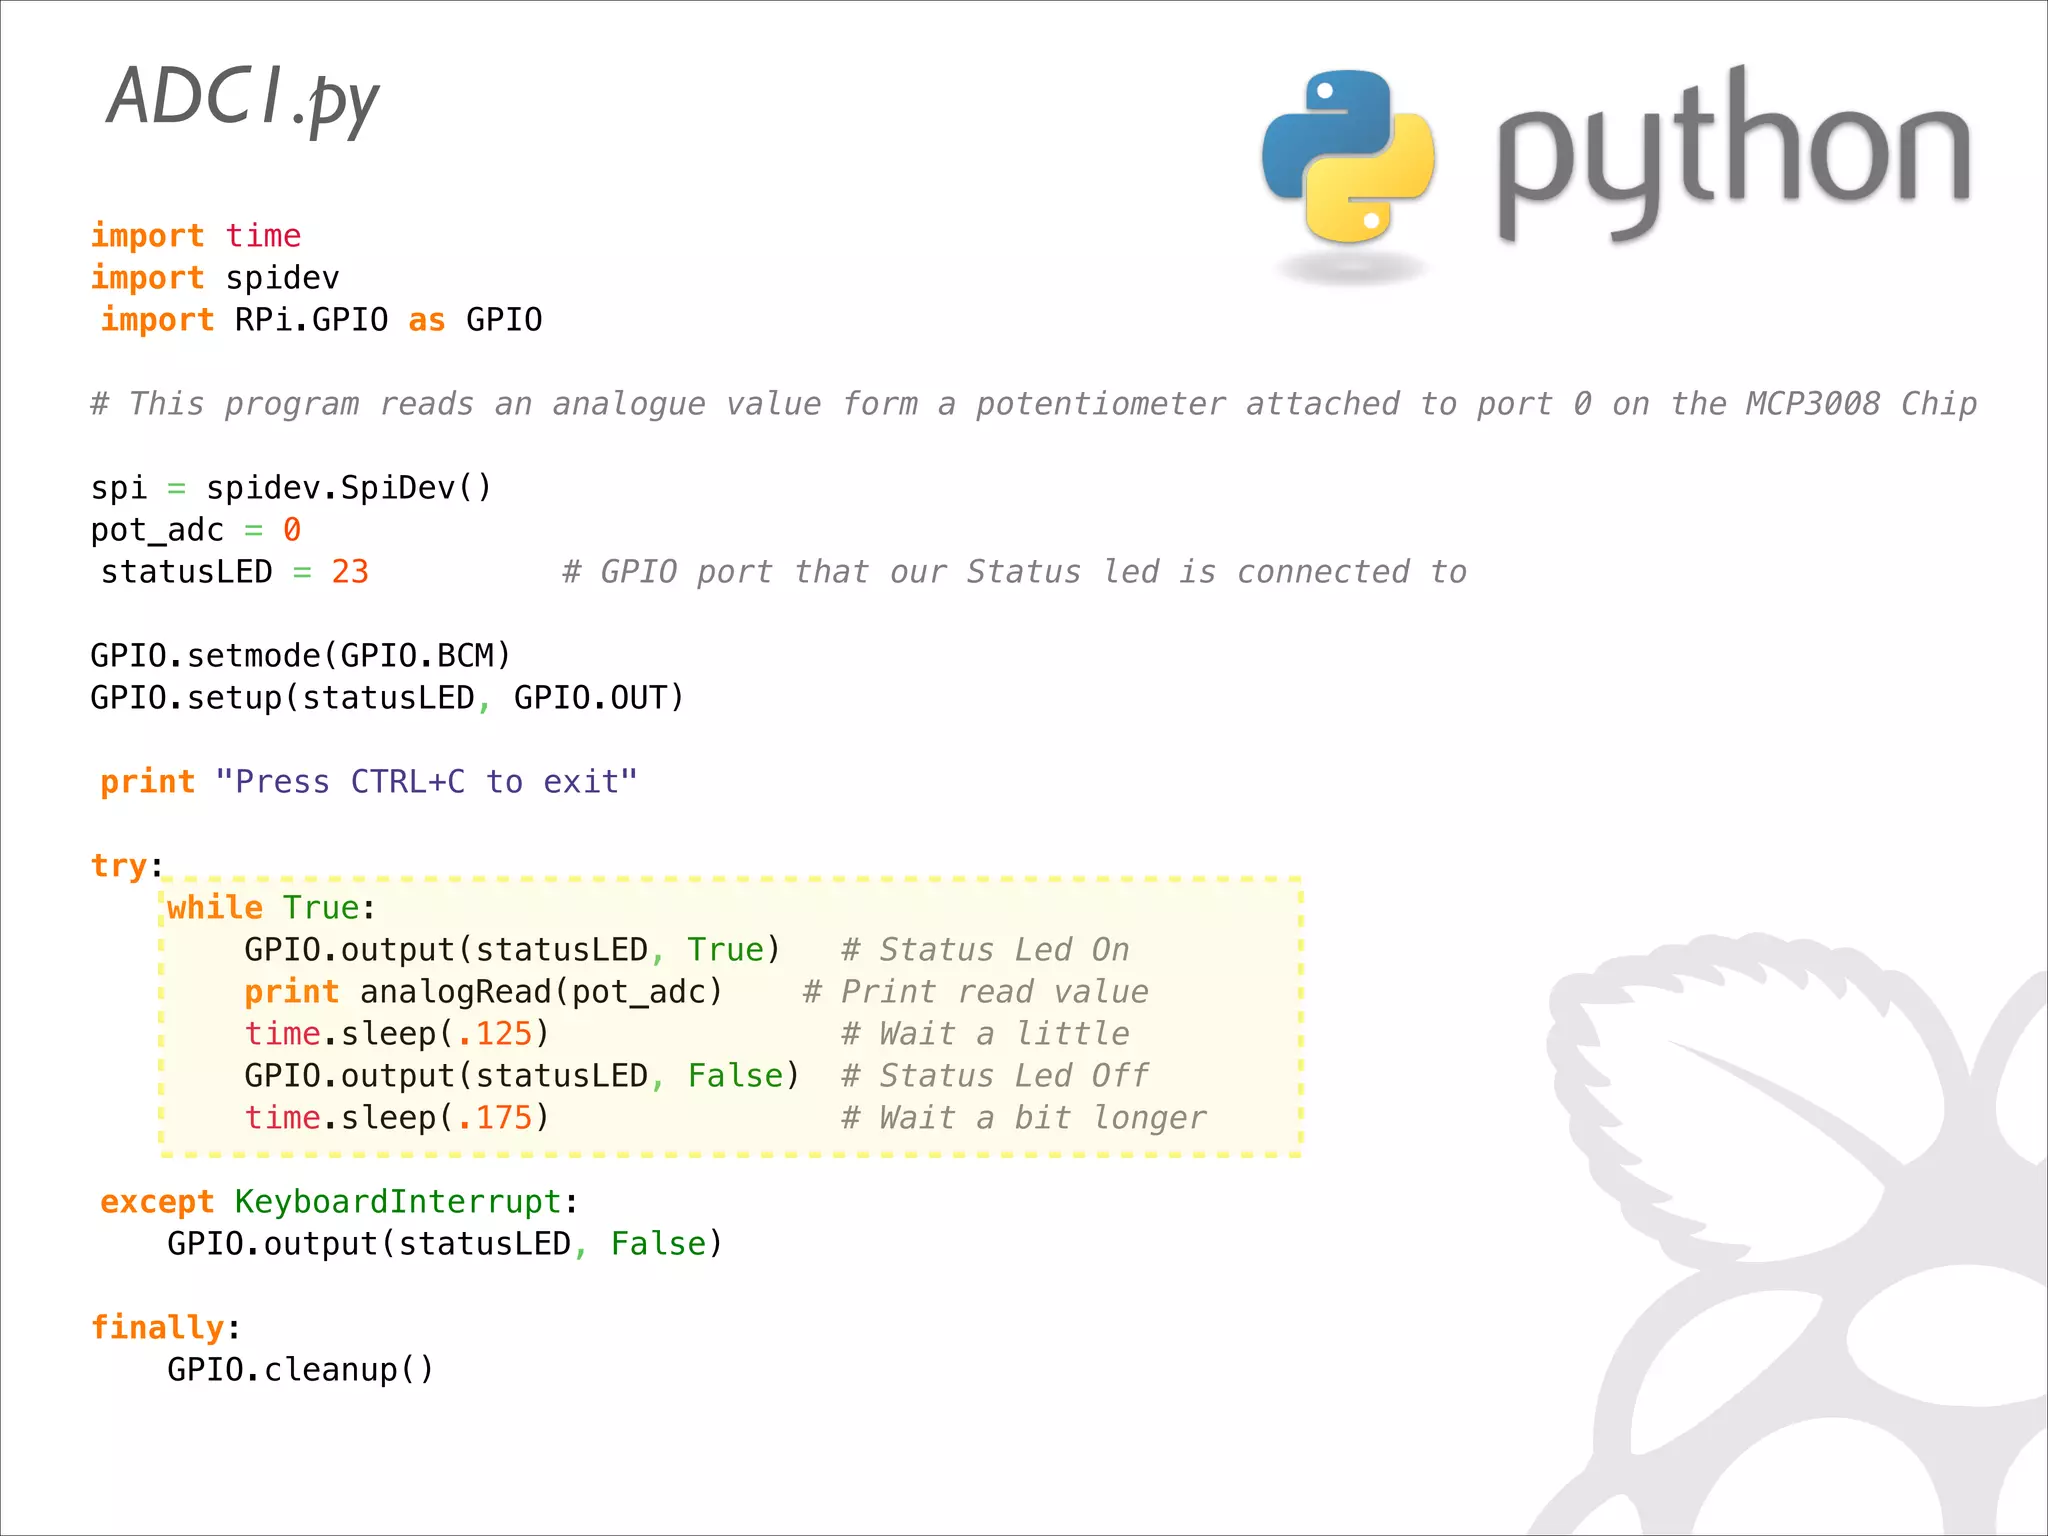
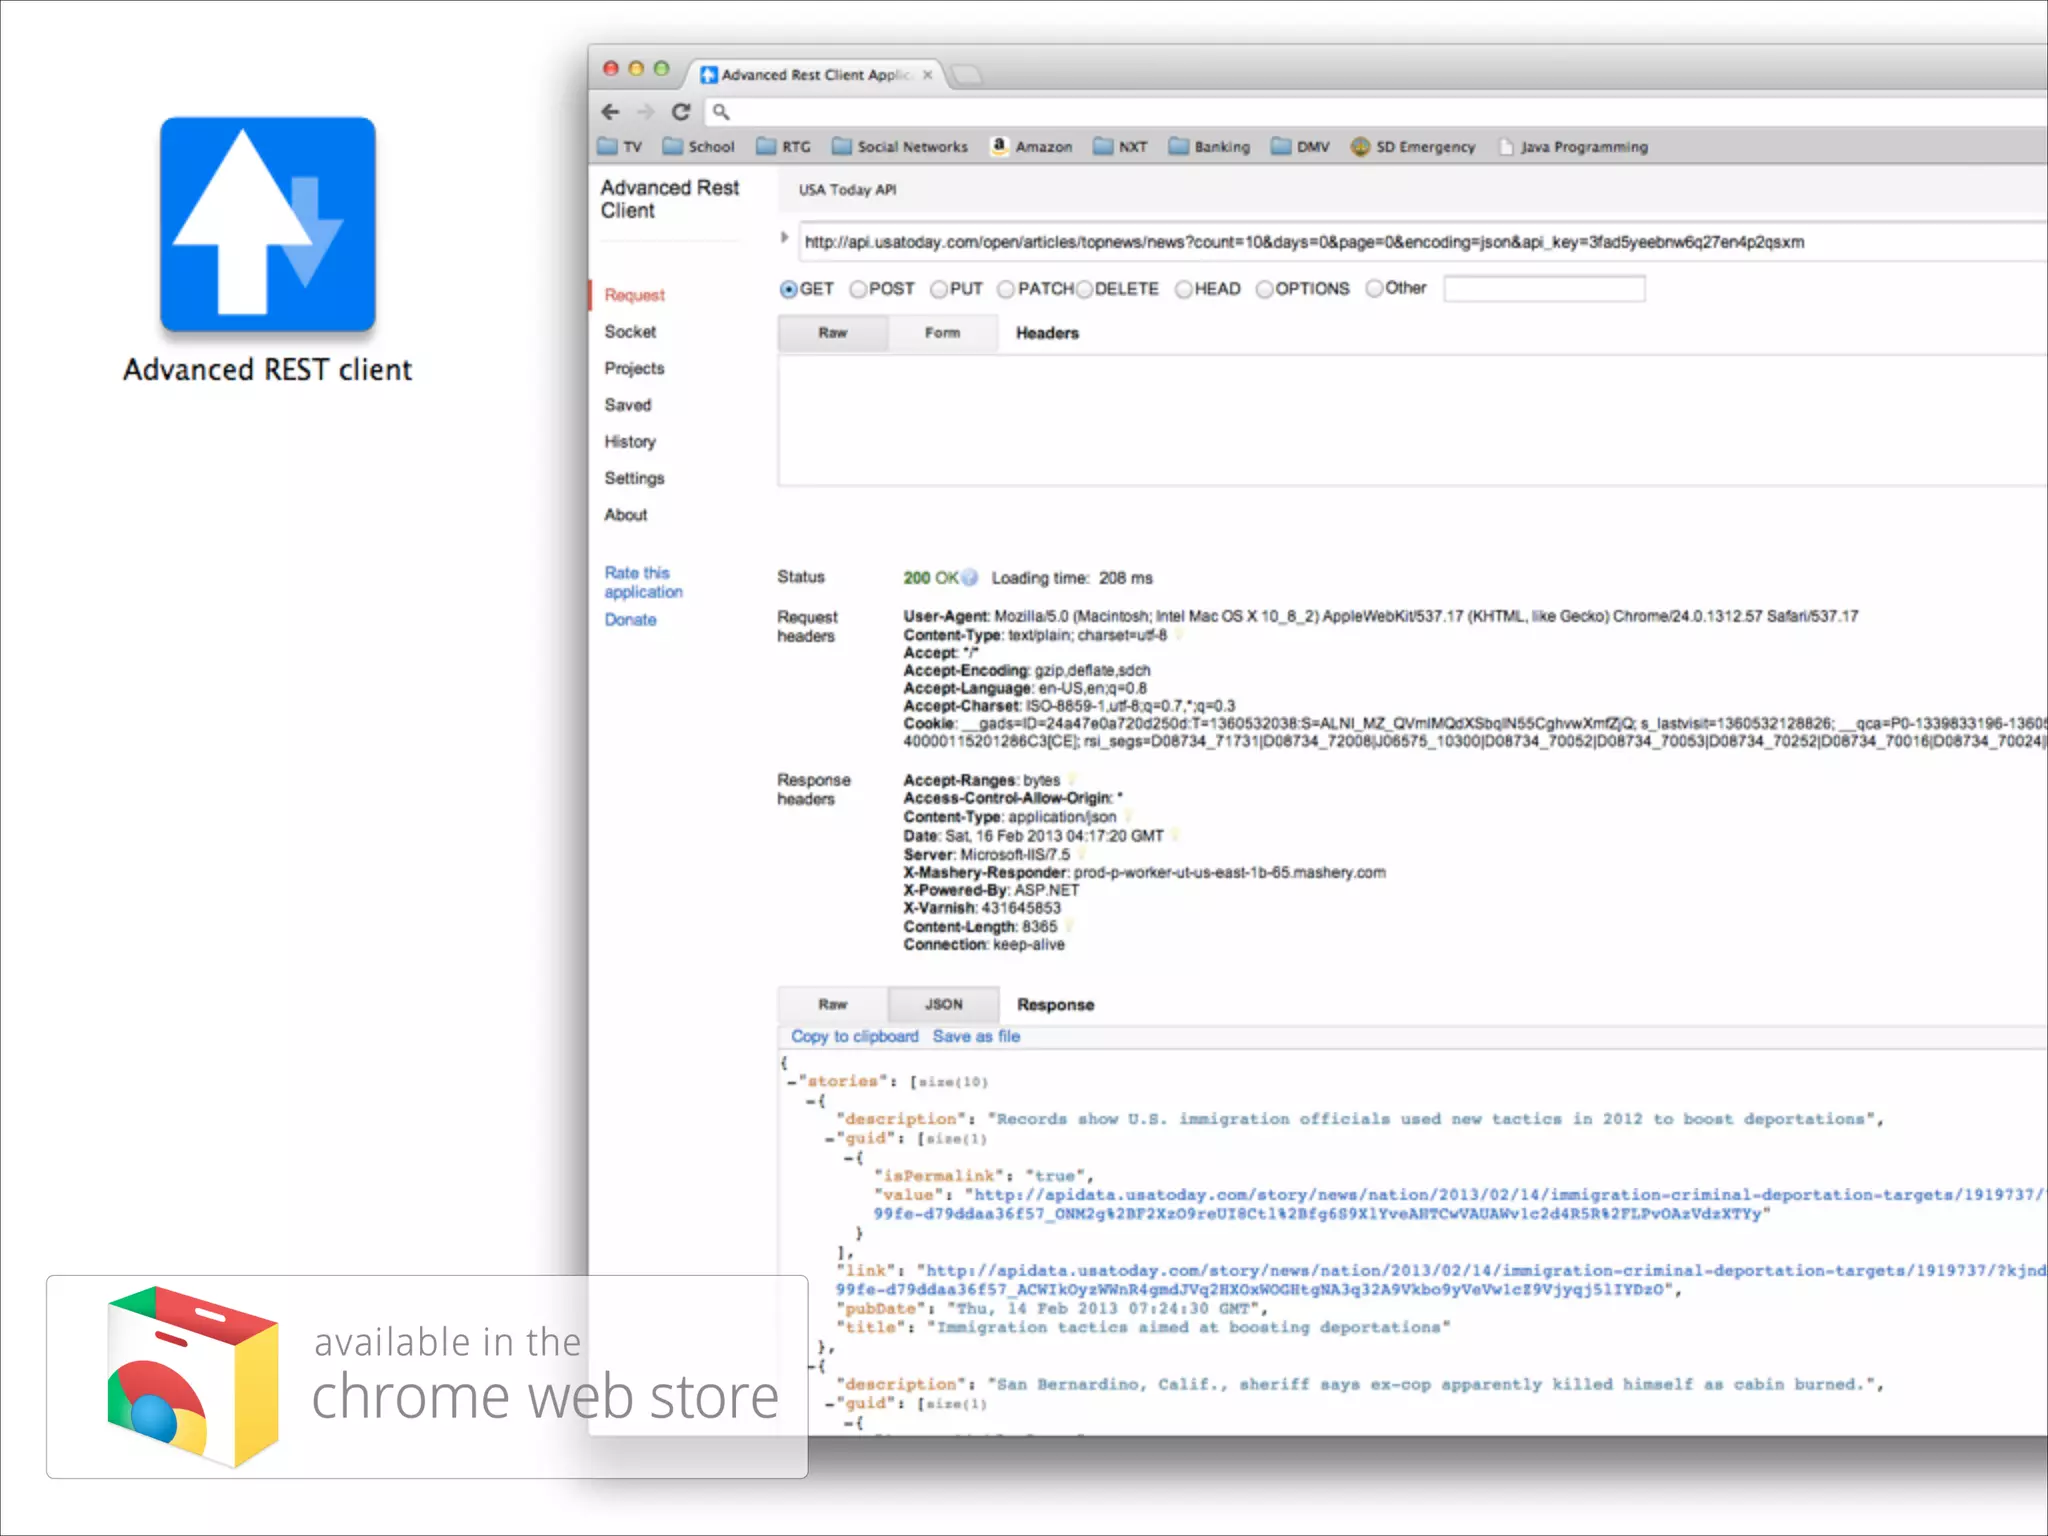
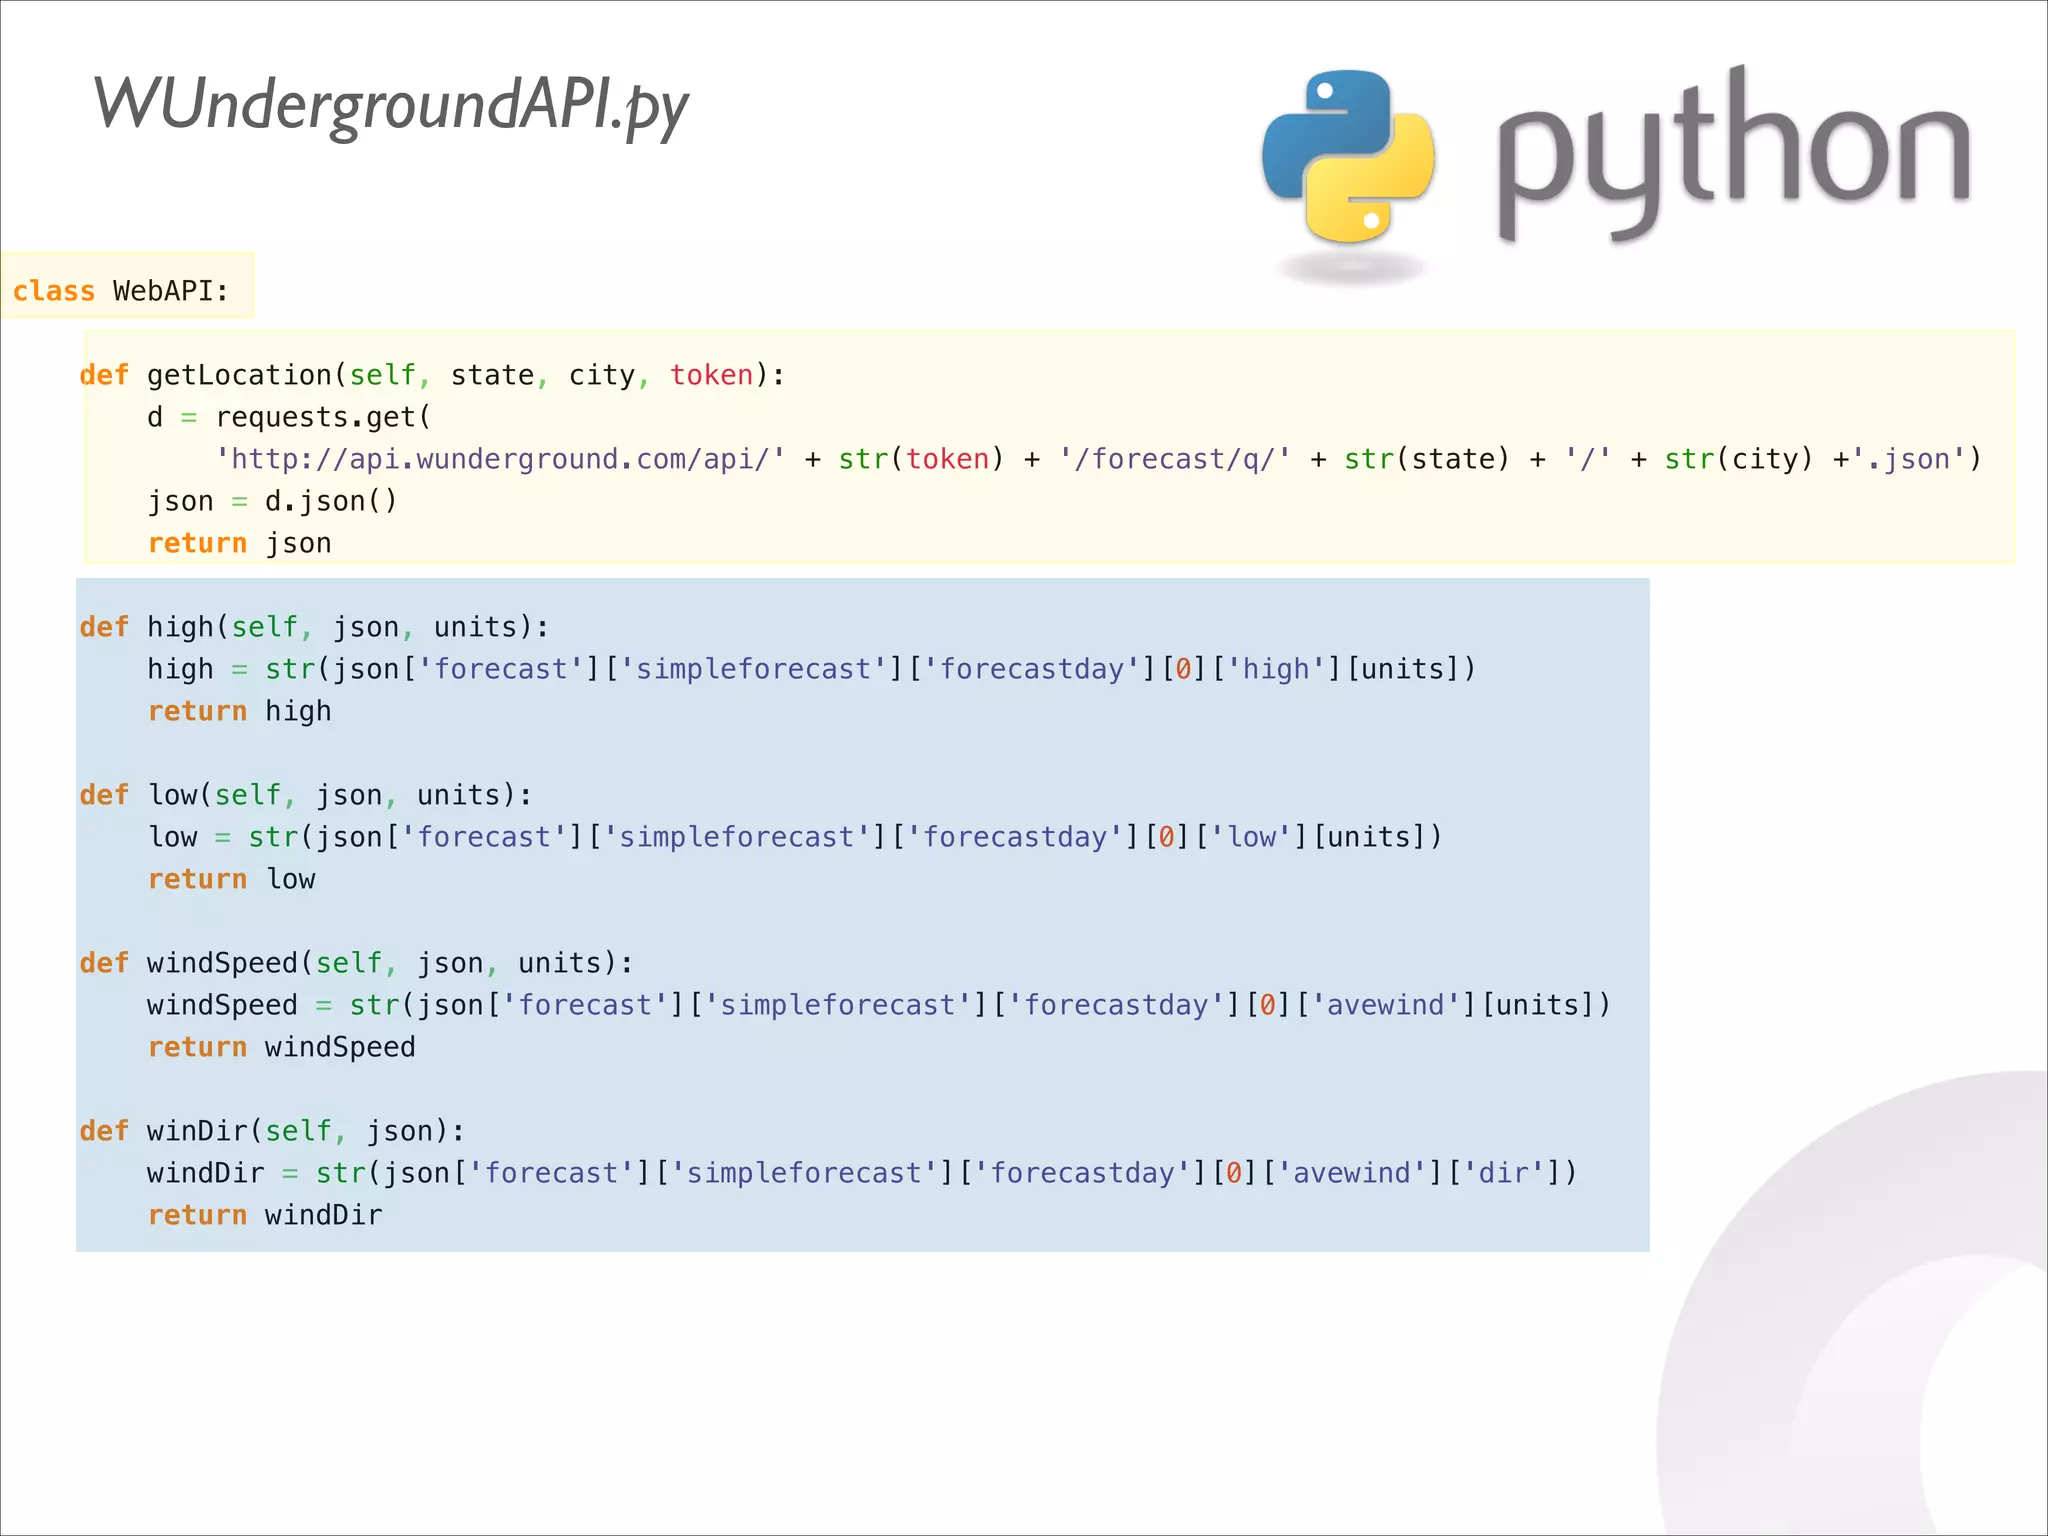
![def analogRead(port, bus=0, ce=0): Read the given ADC port and preform the necessary shifting of bits spi.open(bus, ce) # CE port that the MCP3008 is connected to if (port 7) or (port 0): print 'analogRead -- Port Error, Must use a port between 0 and 7' return -1 r = spi.xfer2([1, (8 + port) 4, 0]) value = ((r[1] 3) 8) + r[2] spi.close() return value](https://image.slidesharecdn.com/gettingstartedraspi-usc2013-131214191406-phpapp02/75/Getting-Started-with-Raspberry-Pi-USC-2013-65-2048.jpg)


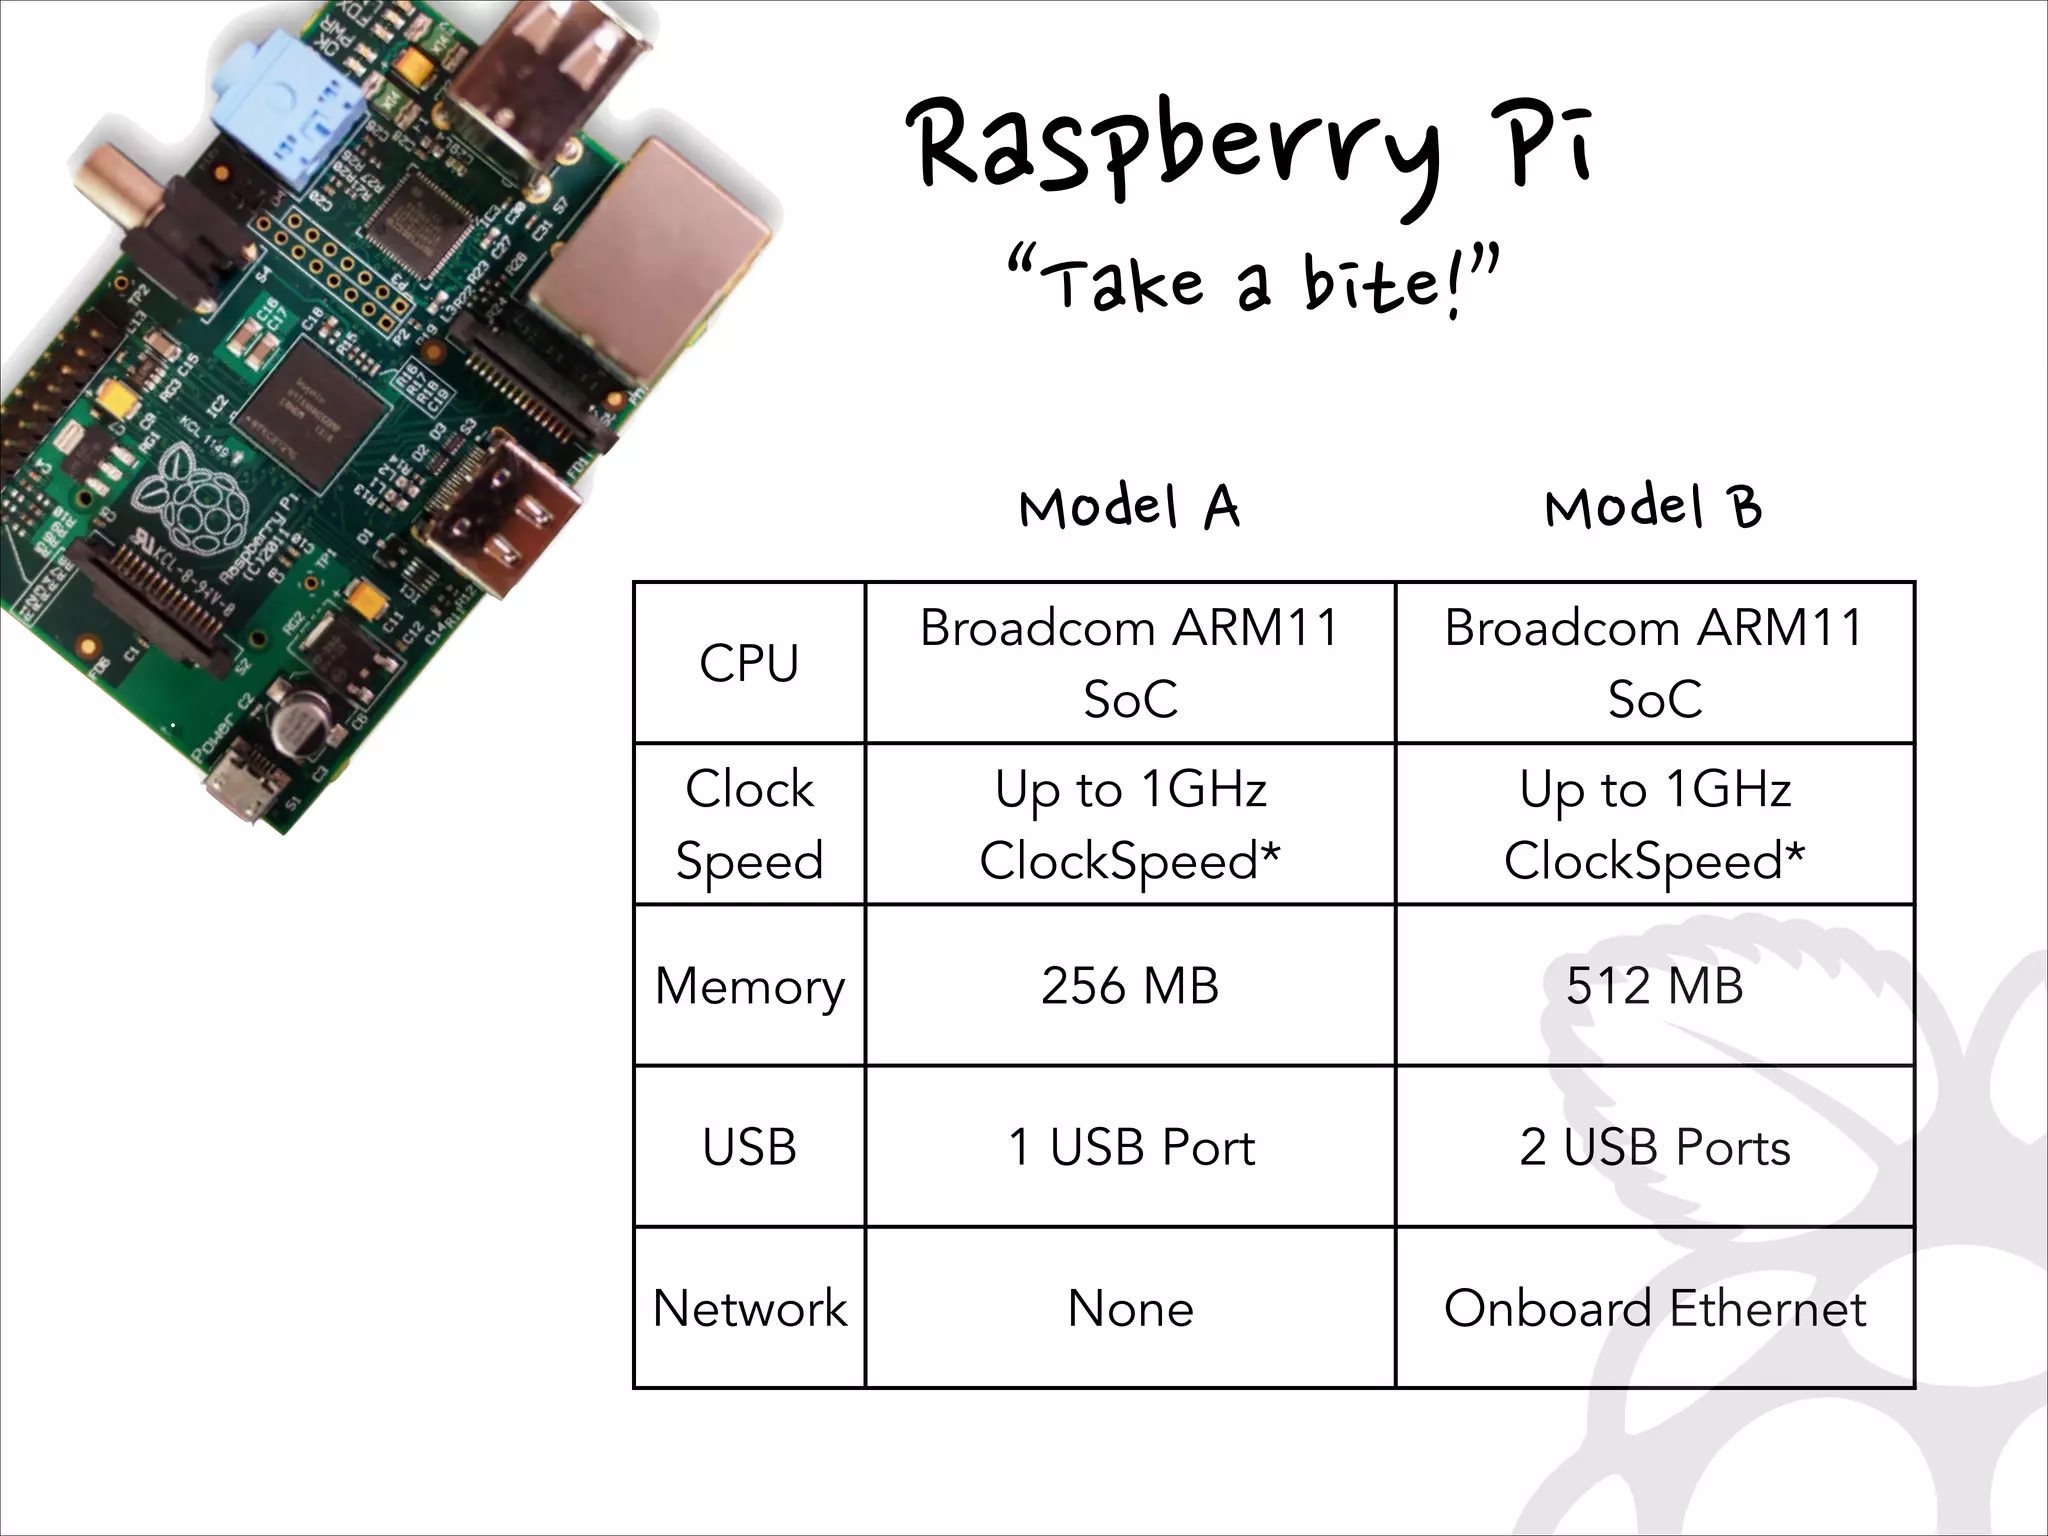
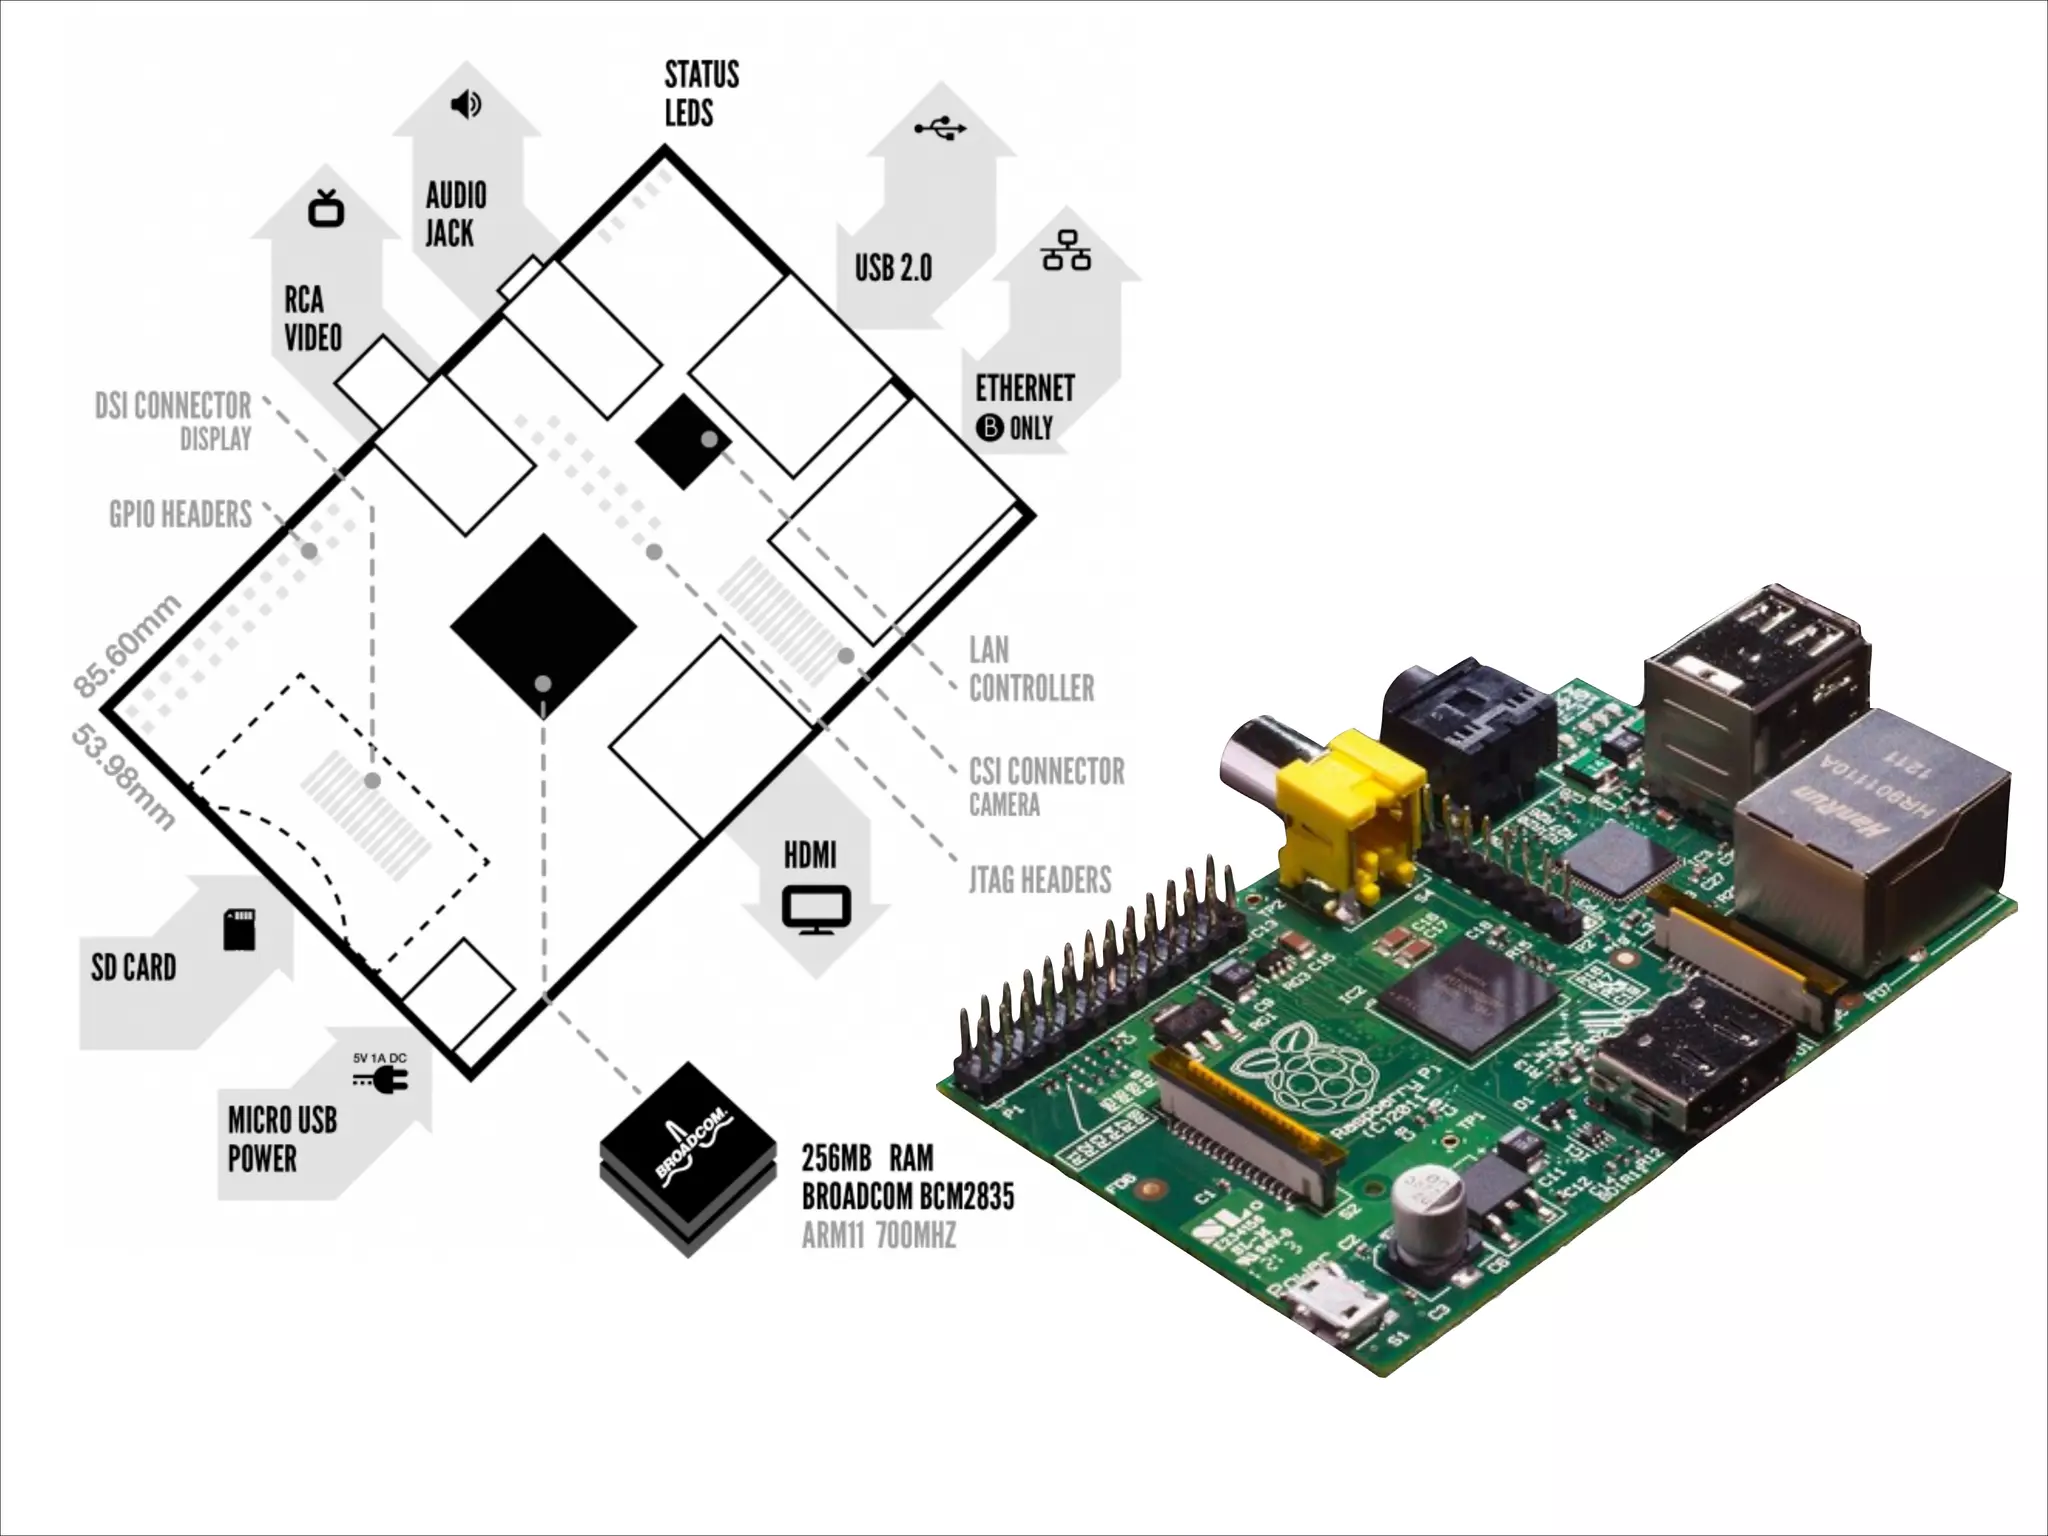
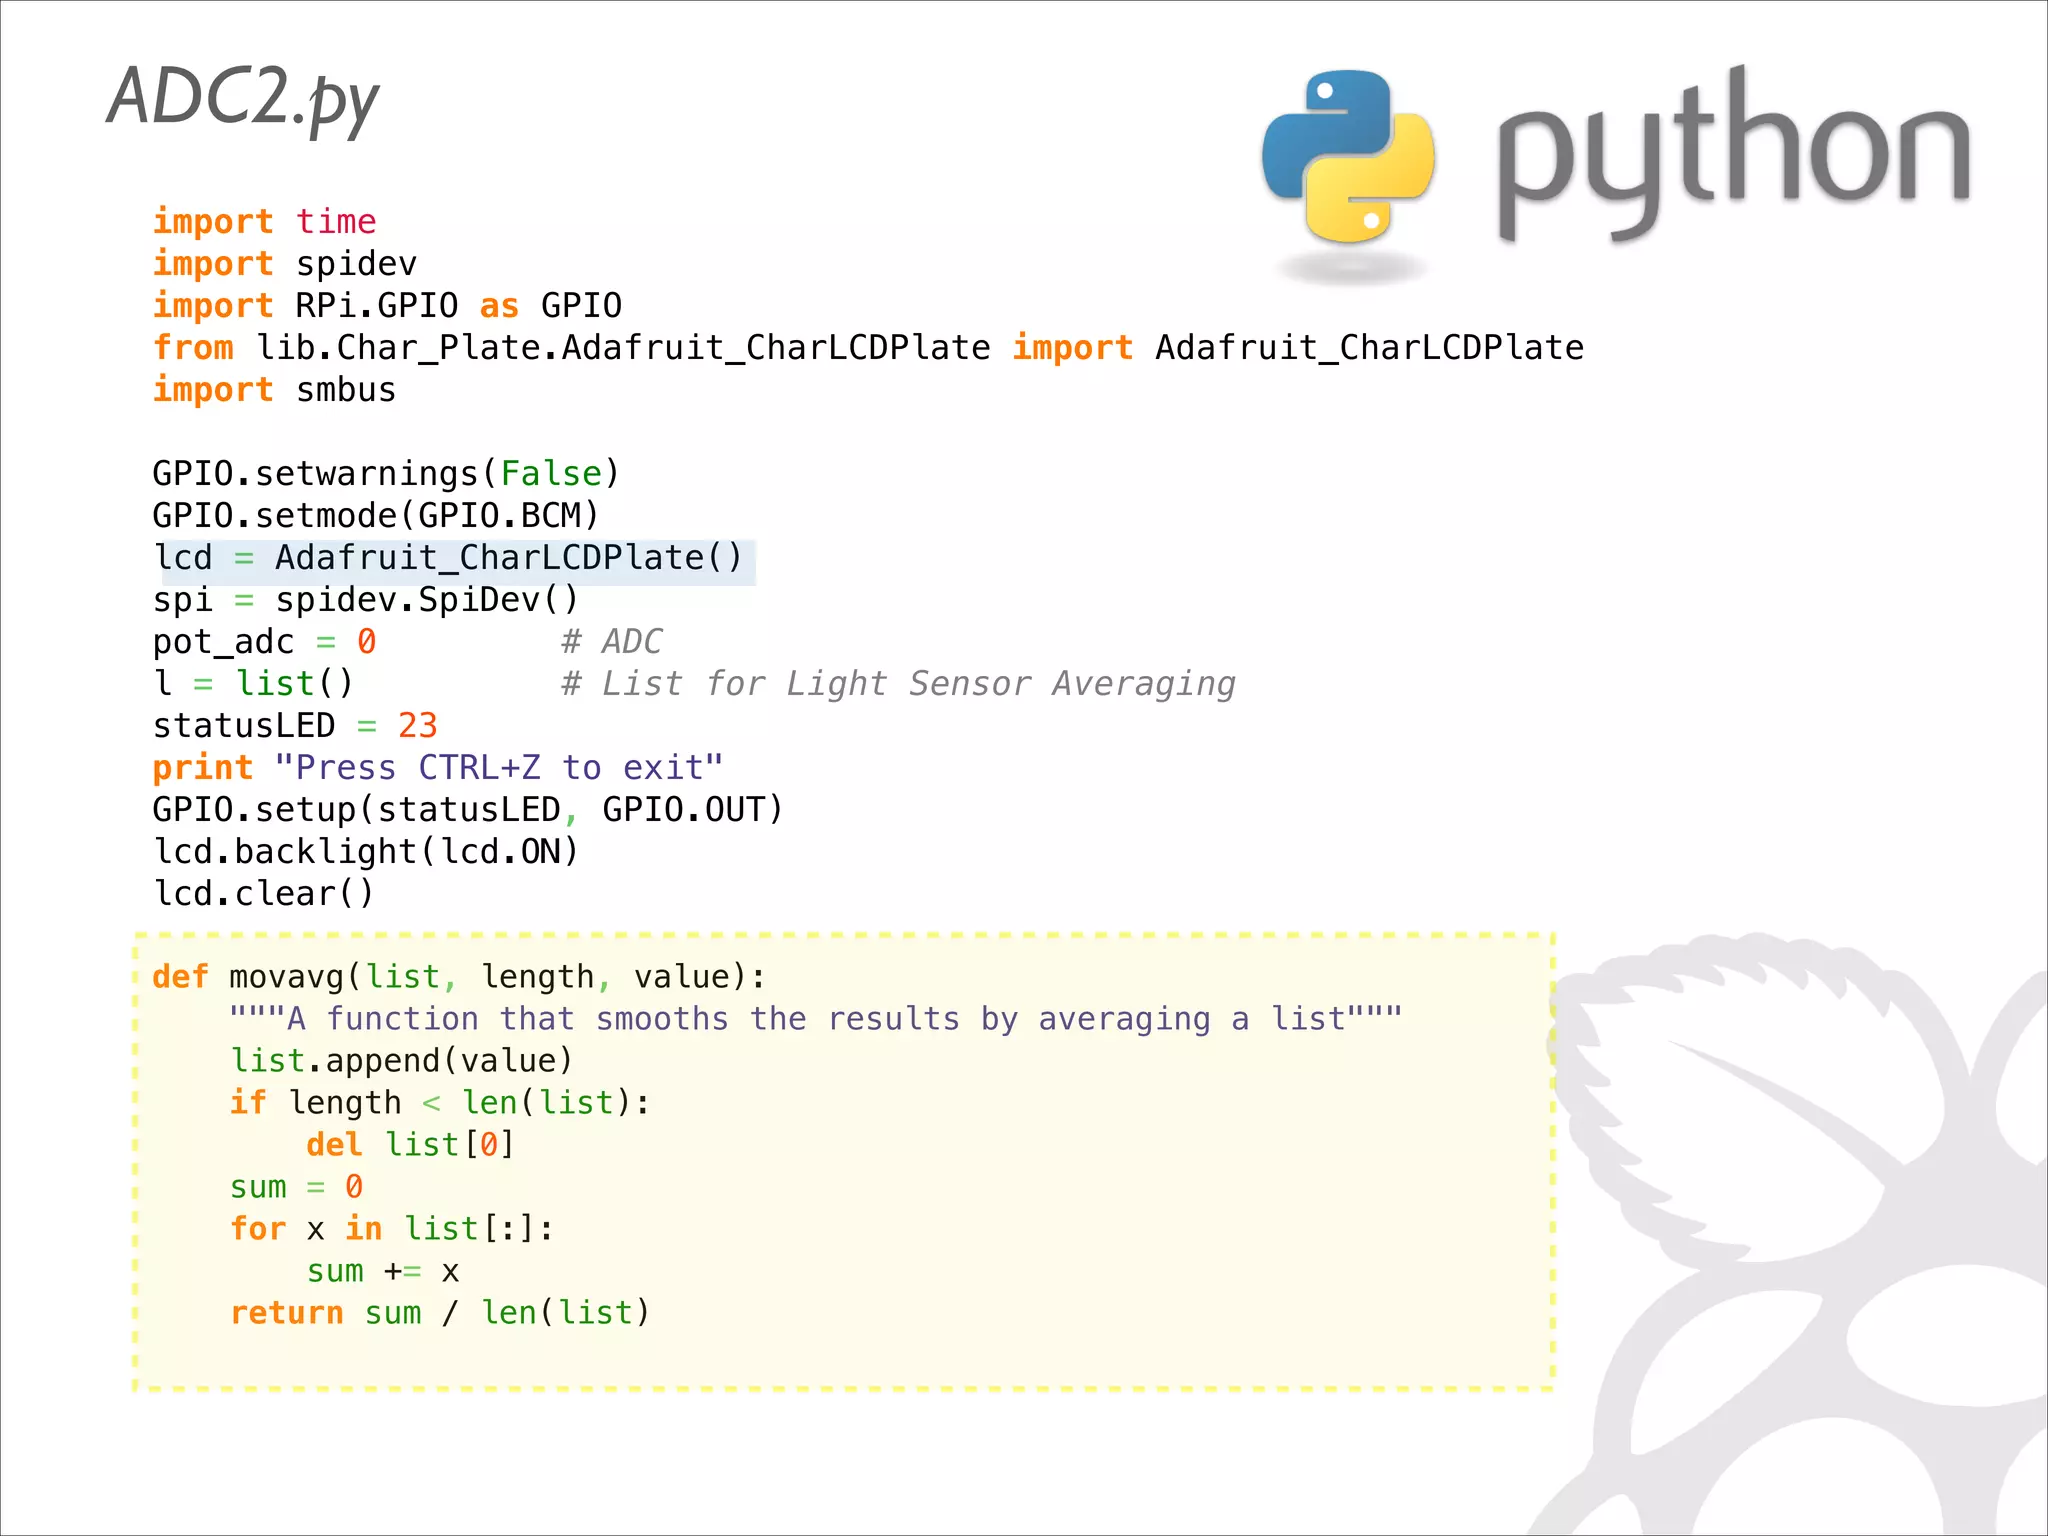
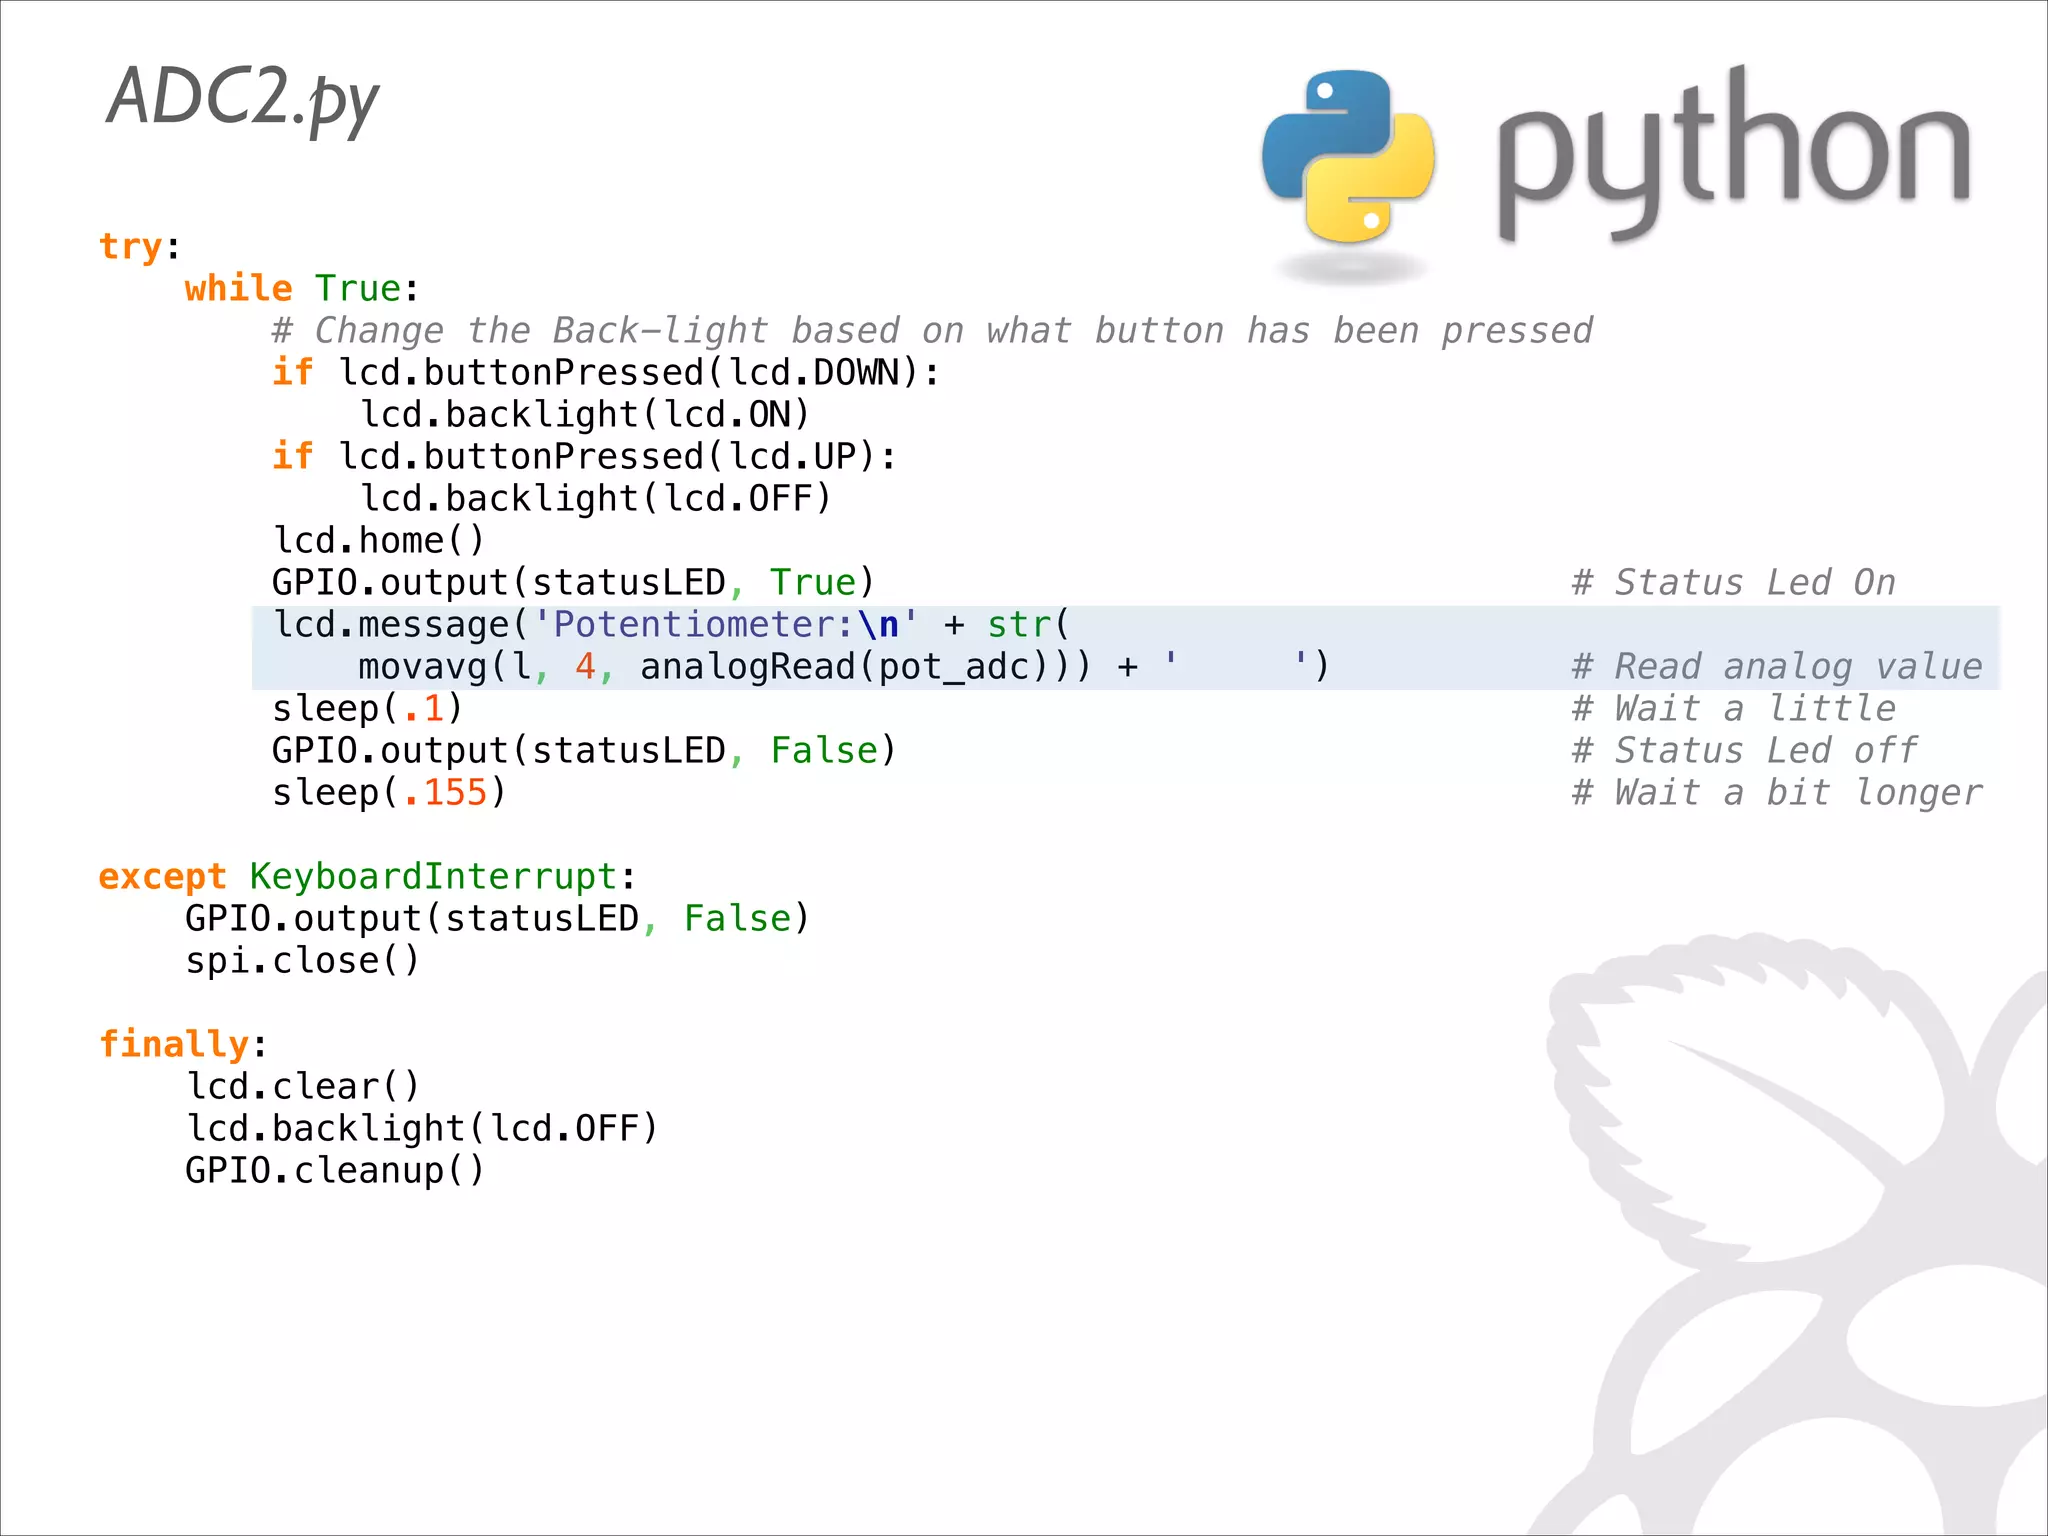
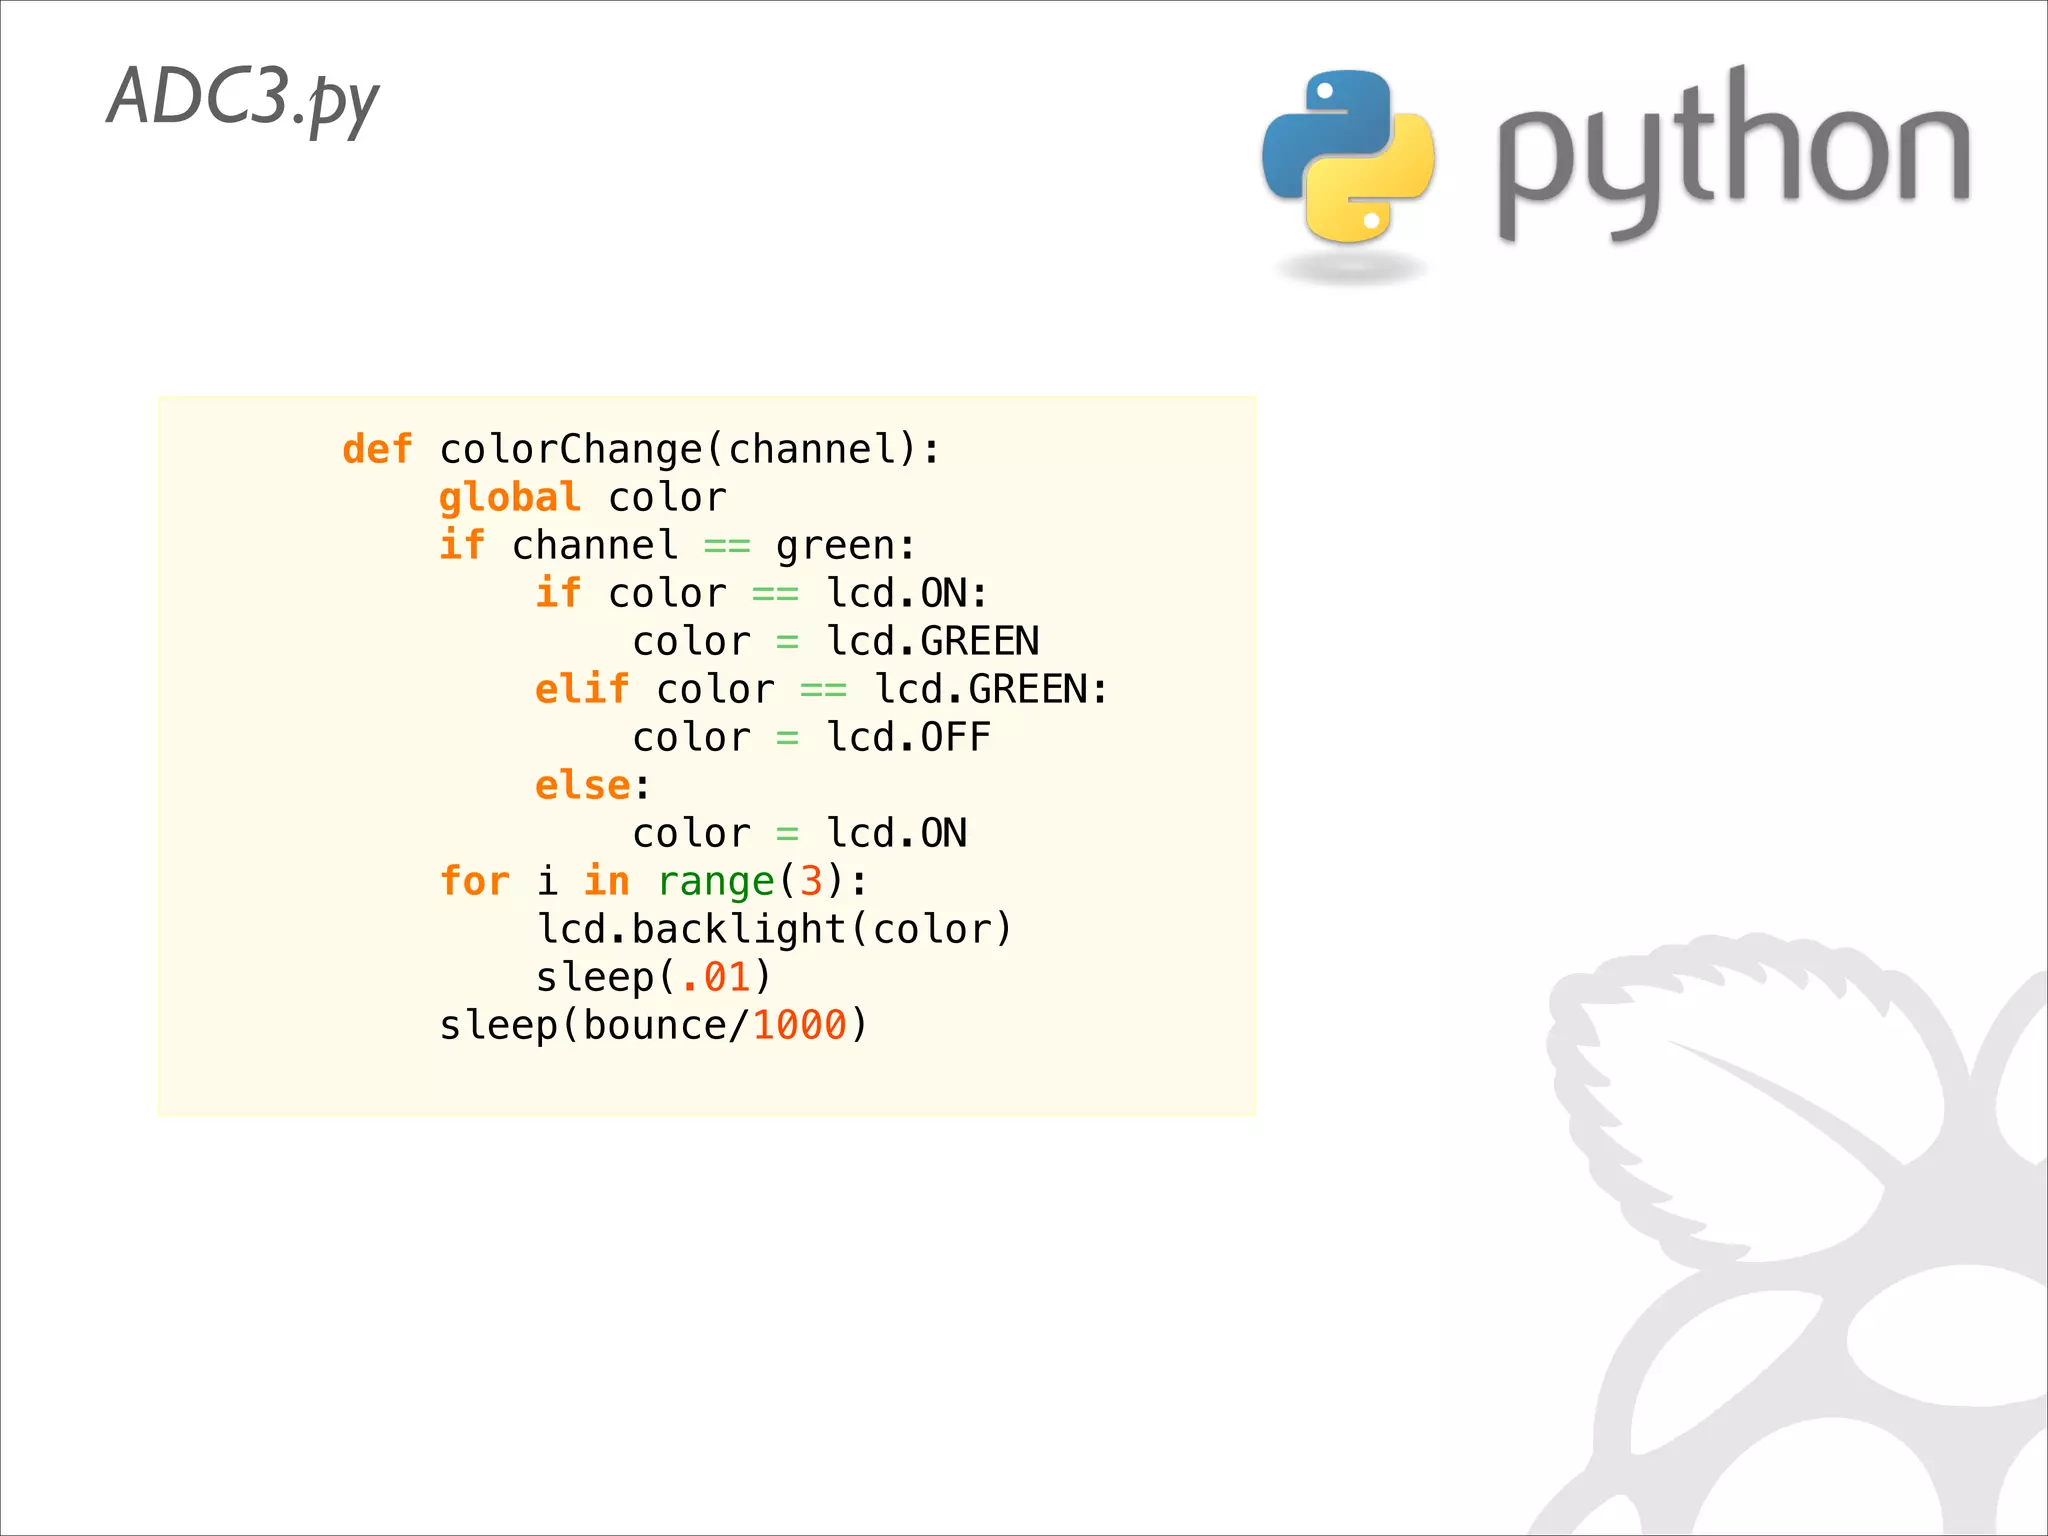
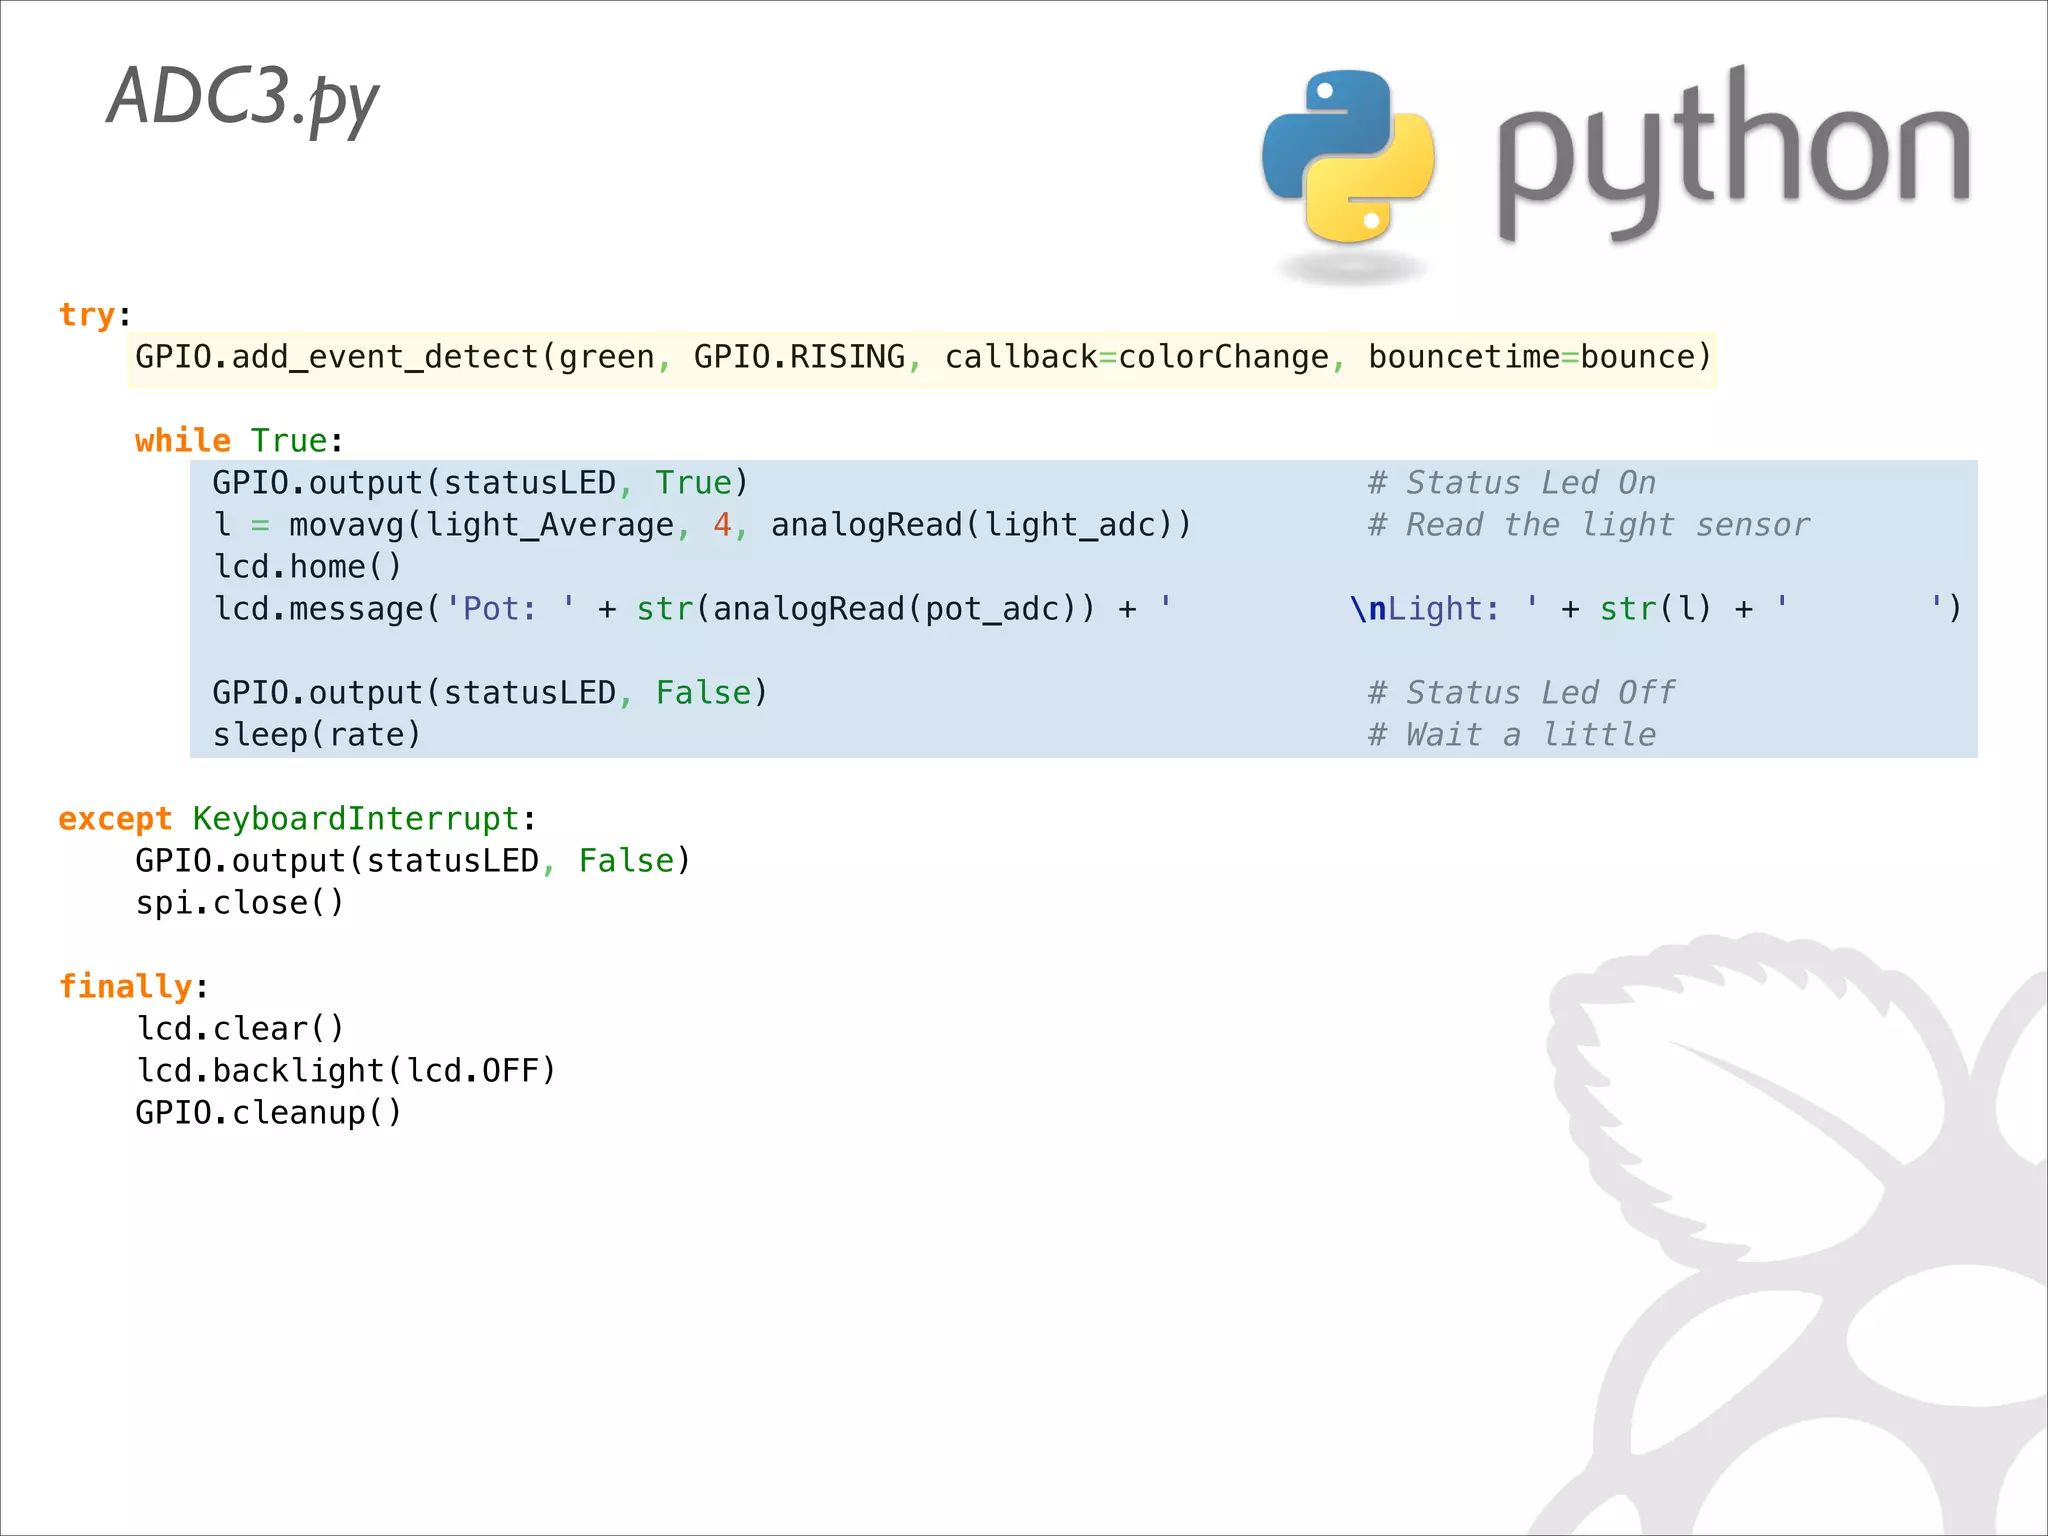
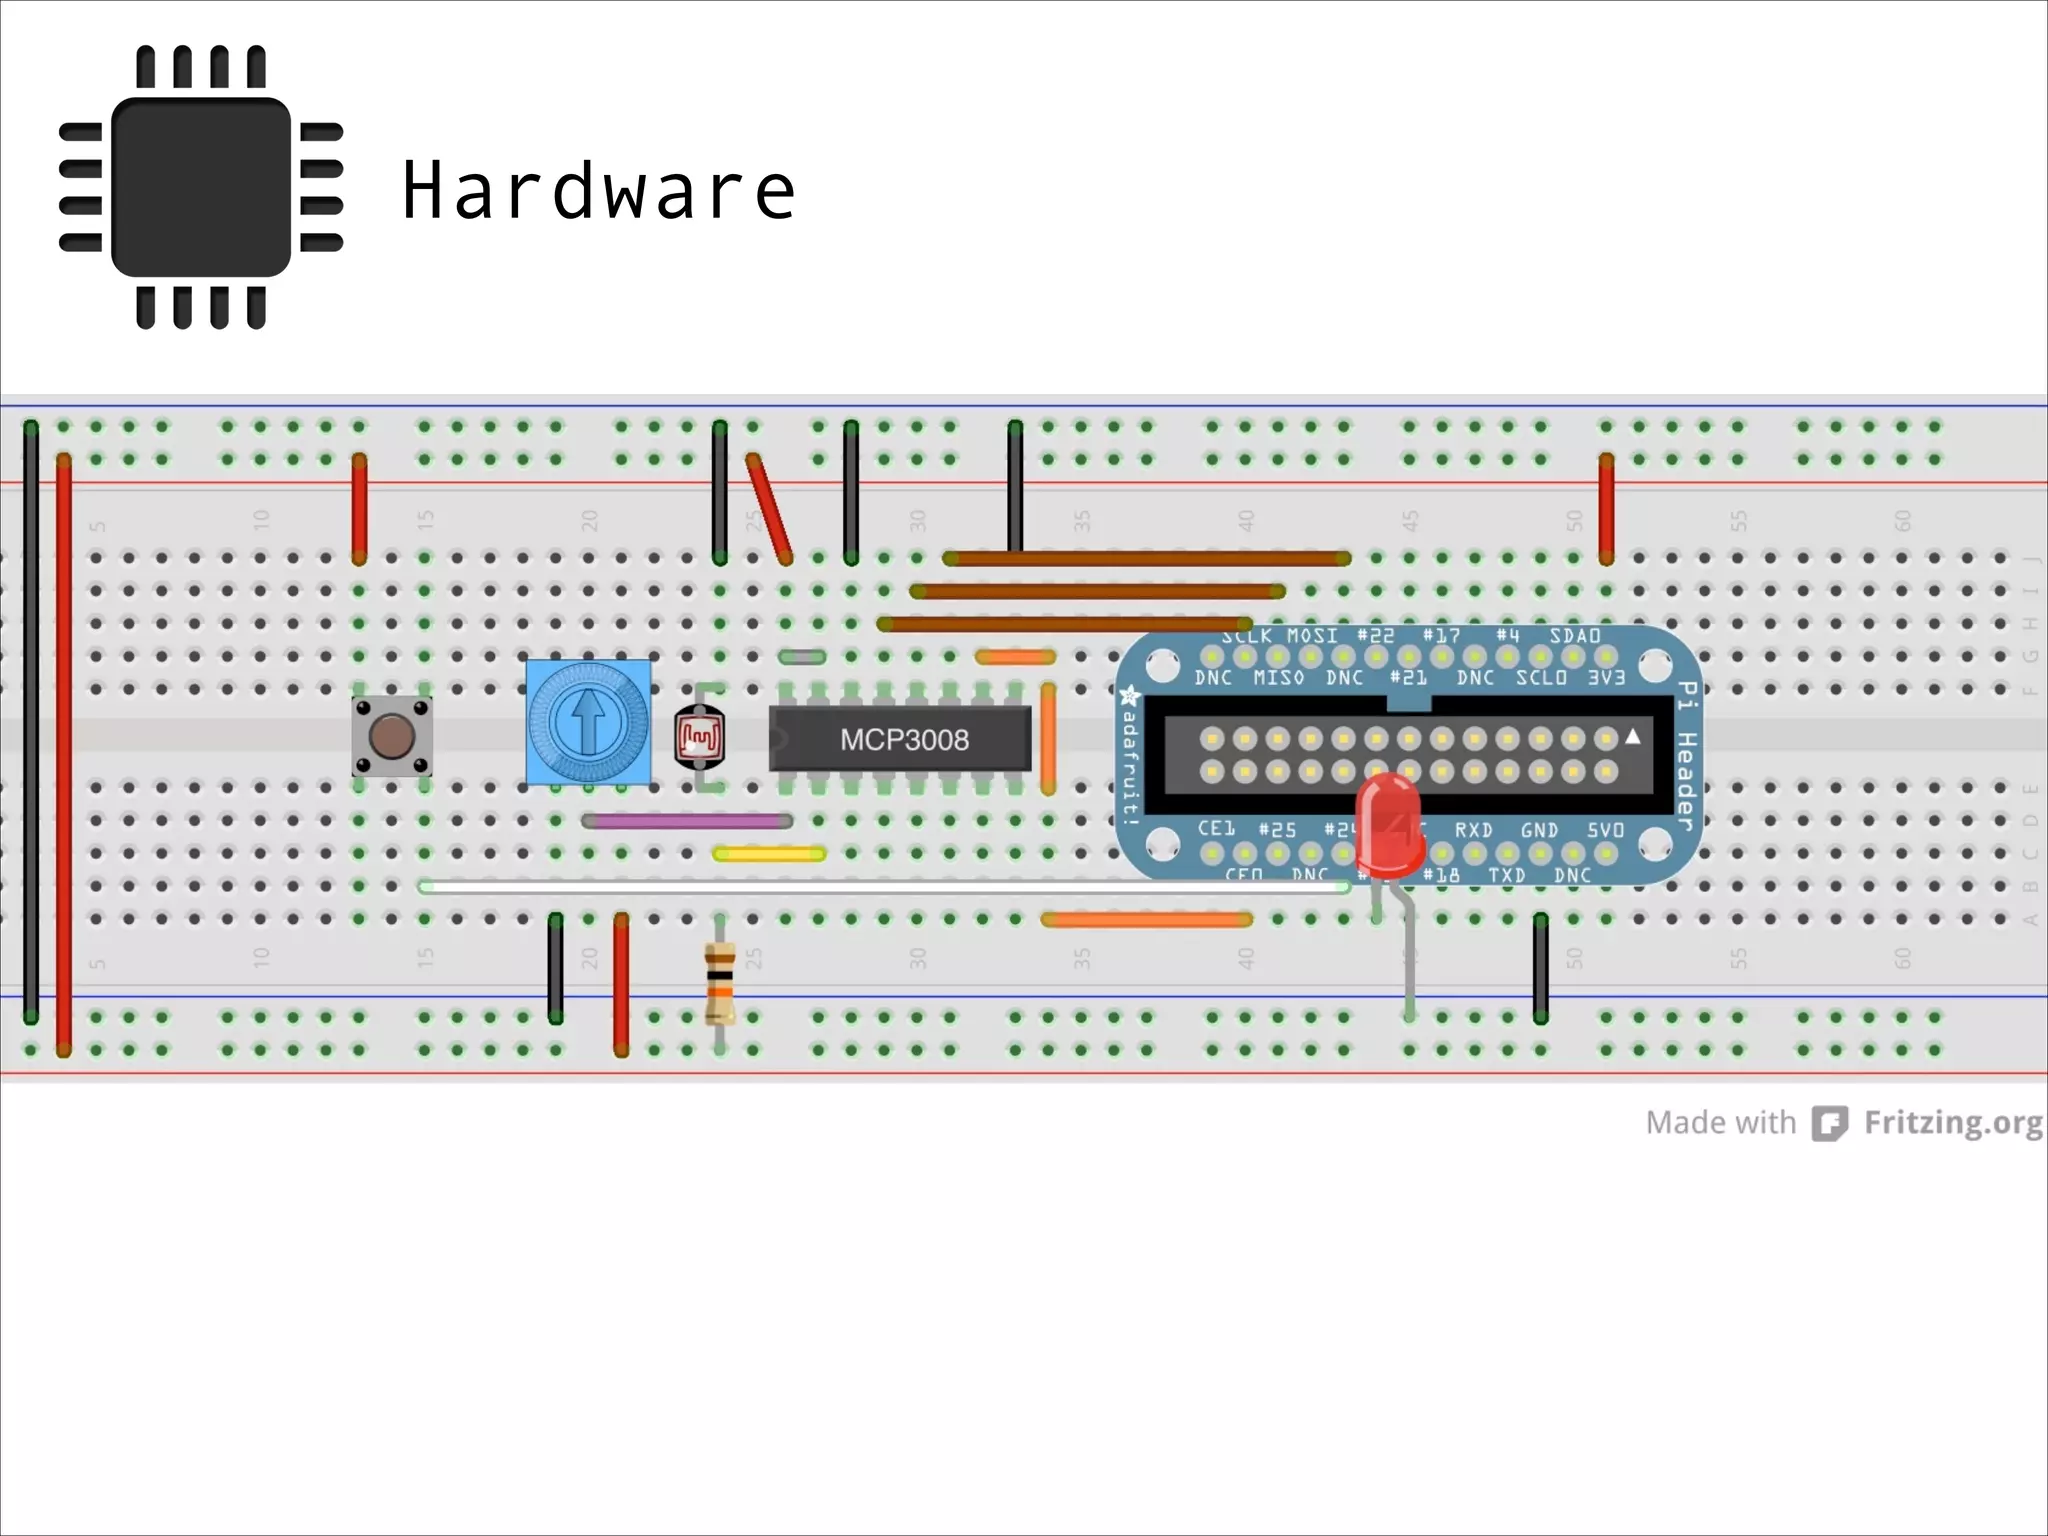
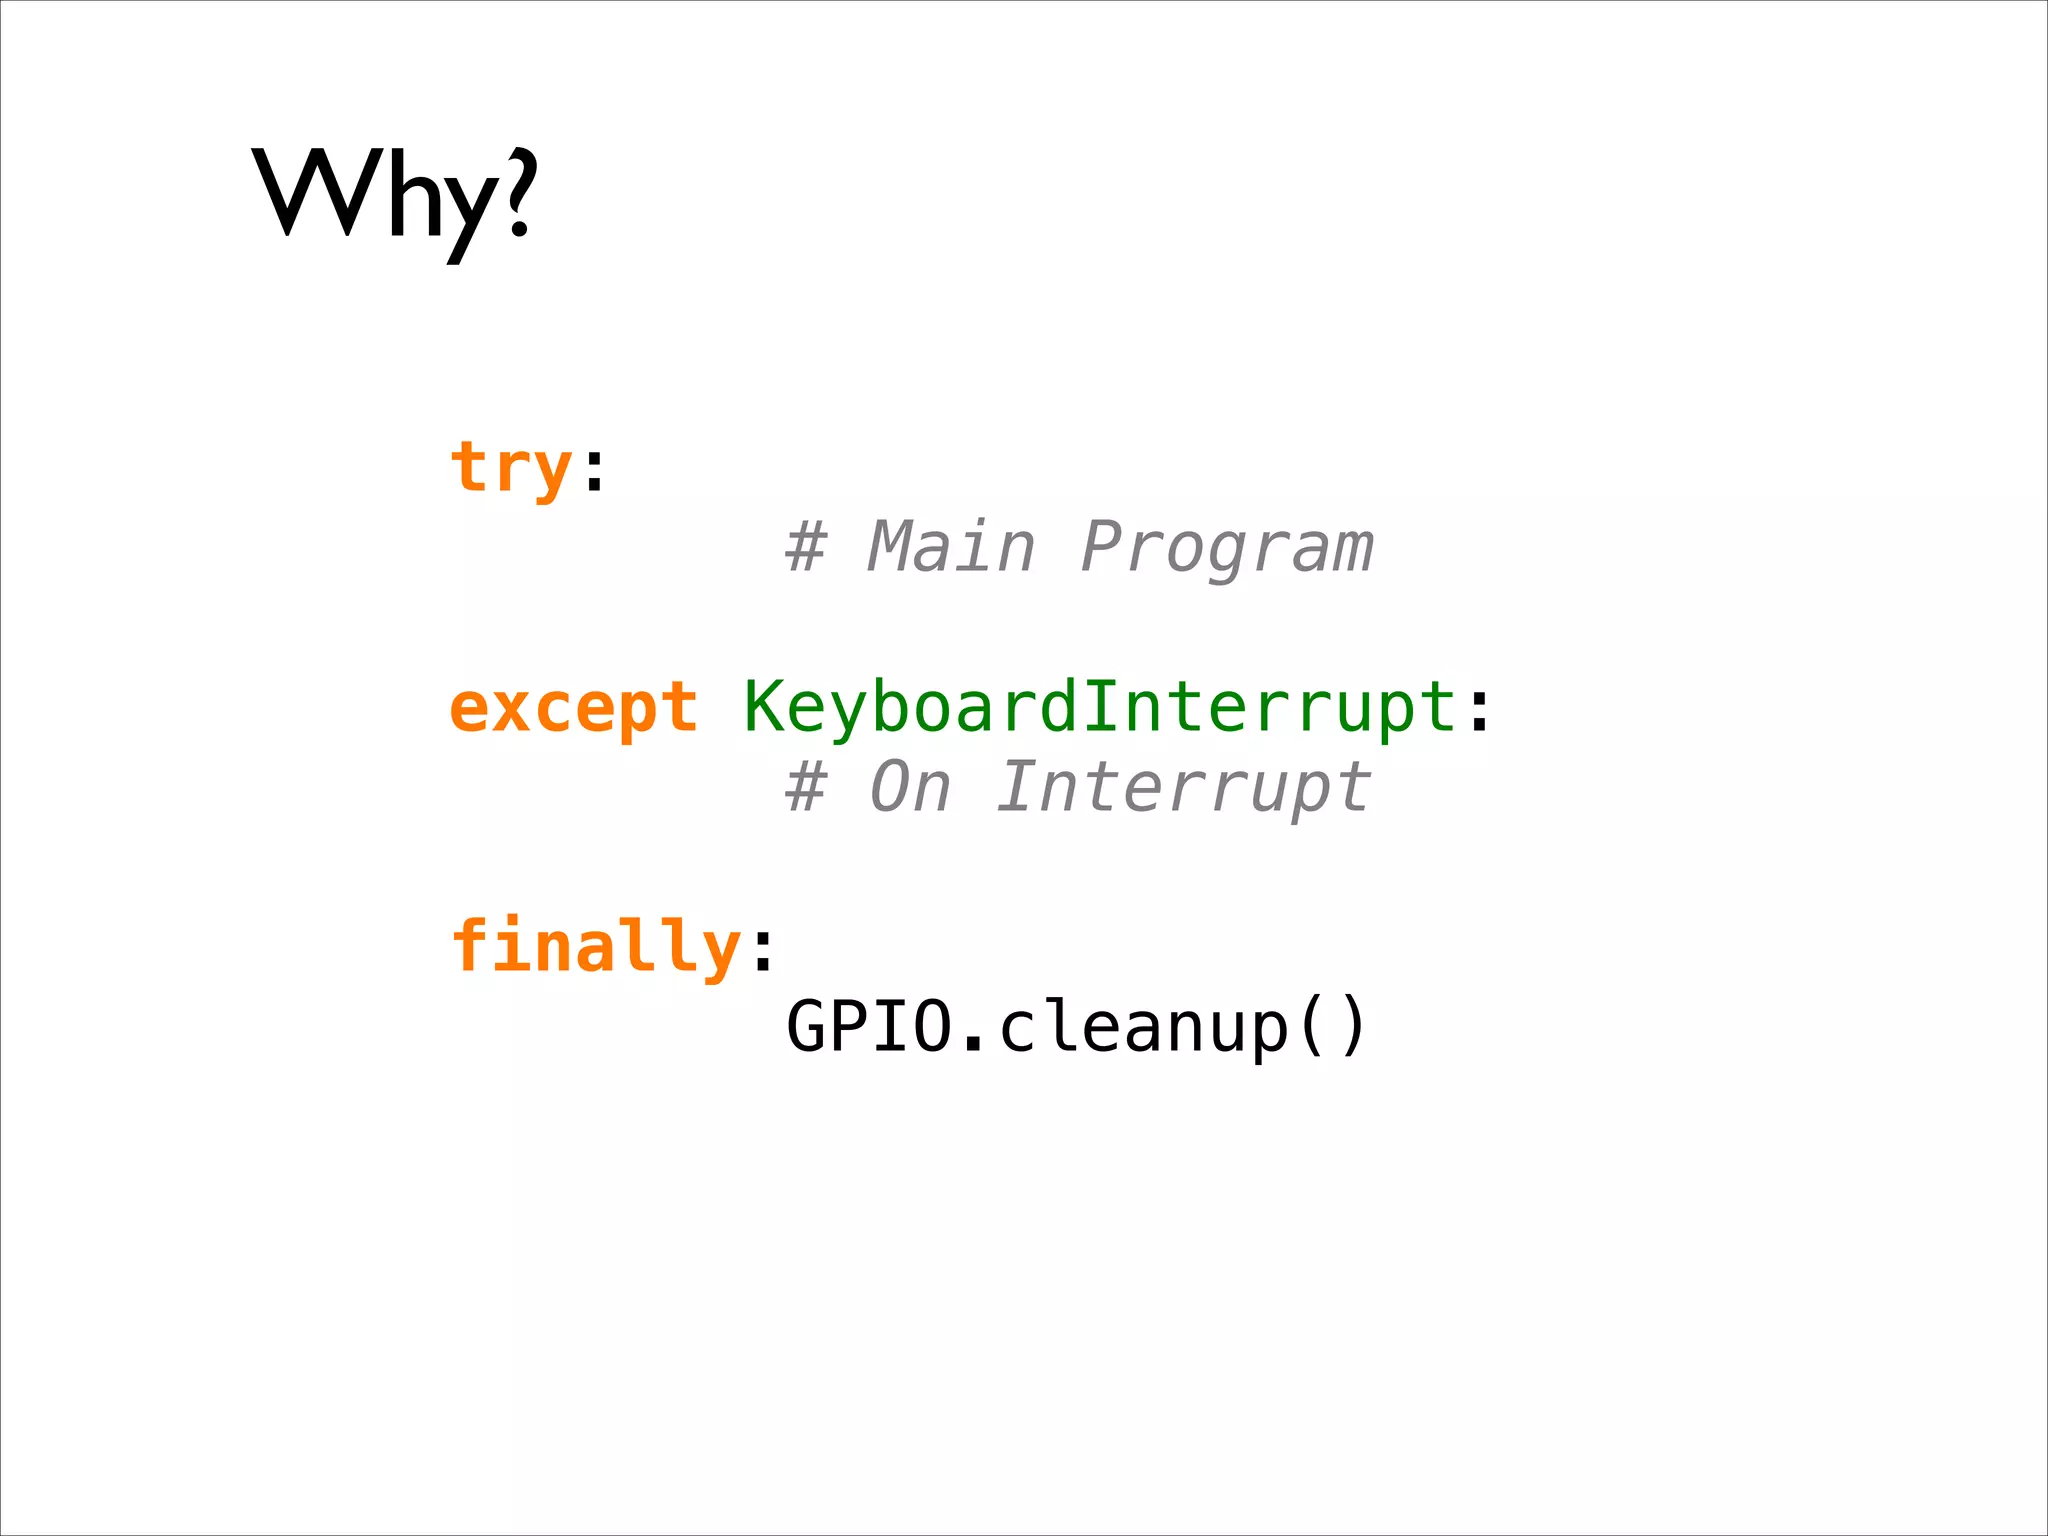
This document serves as a guide for getting started with Raspberry Pi, detailing various models, their specifications, and initial setup instructions. It includes software installation steps, GPIO programming examples, and hardware interfacing with peripherals like sensors and displays. Additionally, it provides code snippets for reading analog inputs and interfacing with I2C and SPI devices.