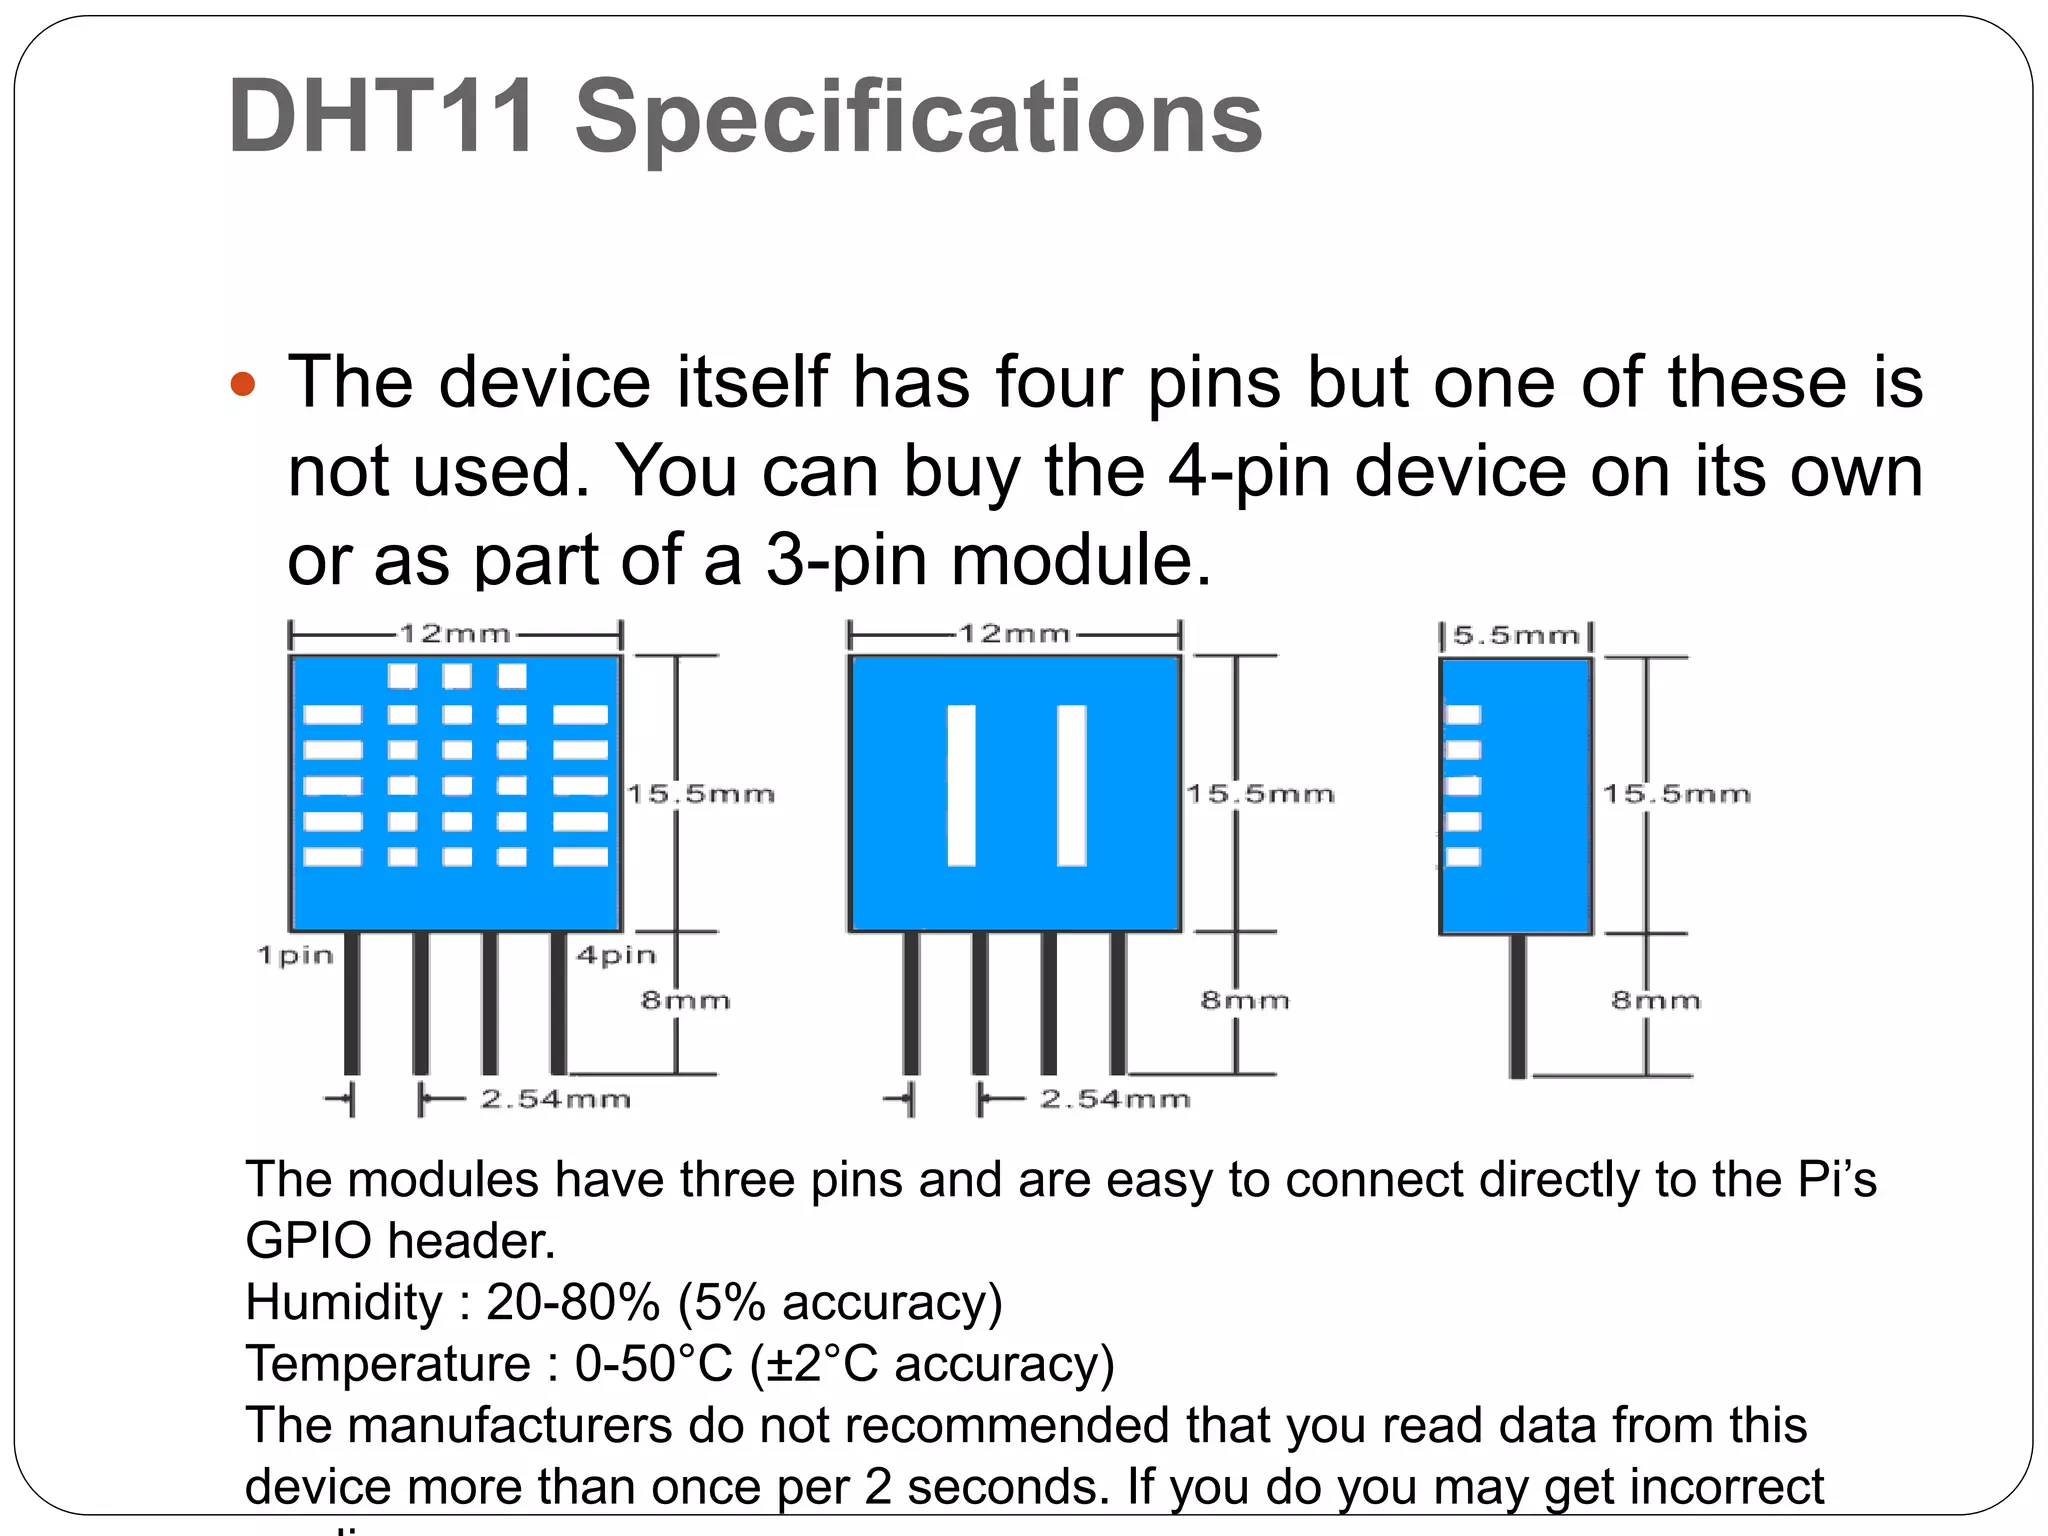
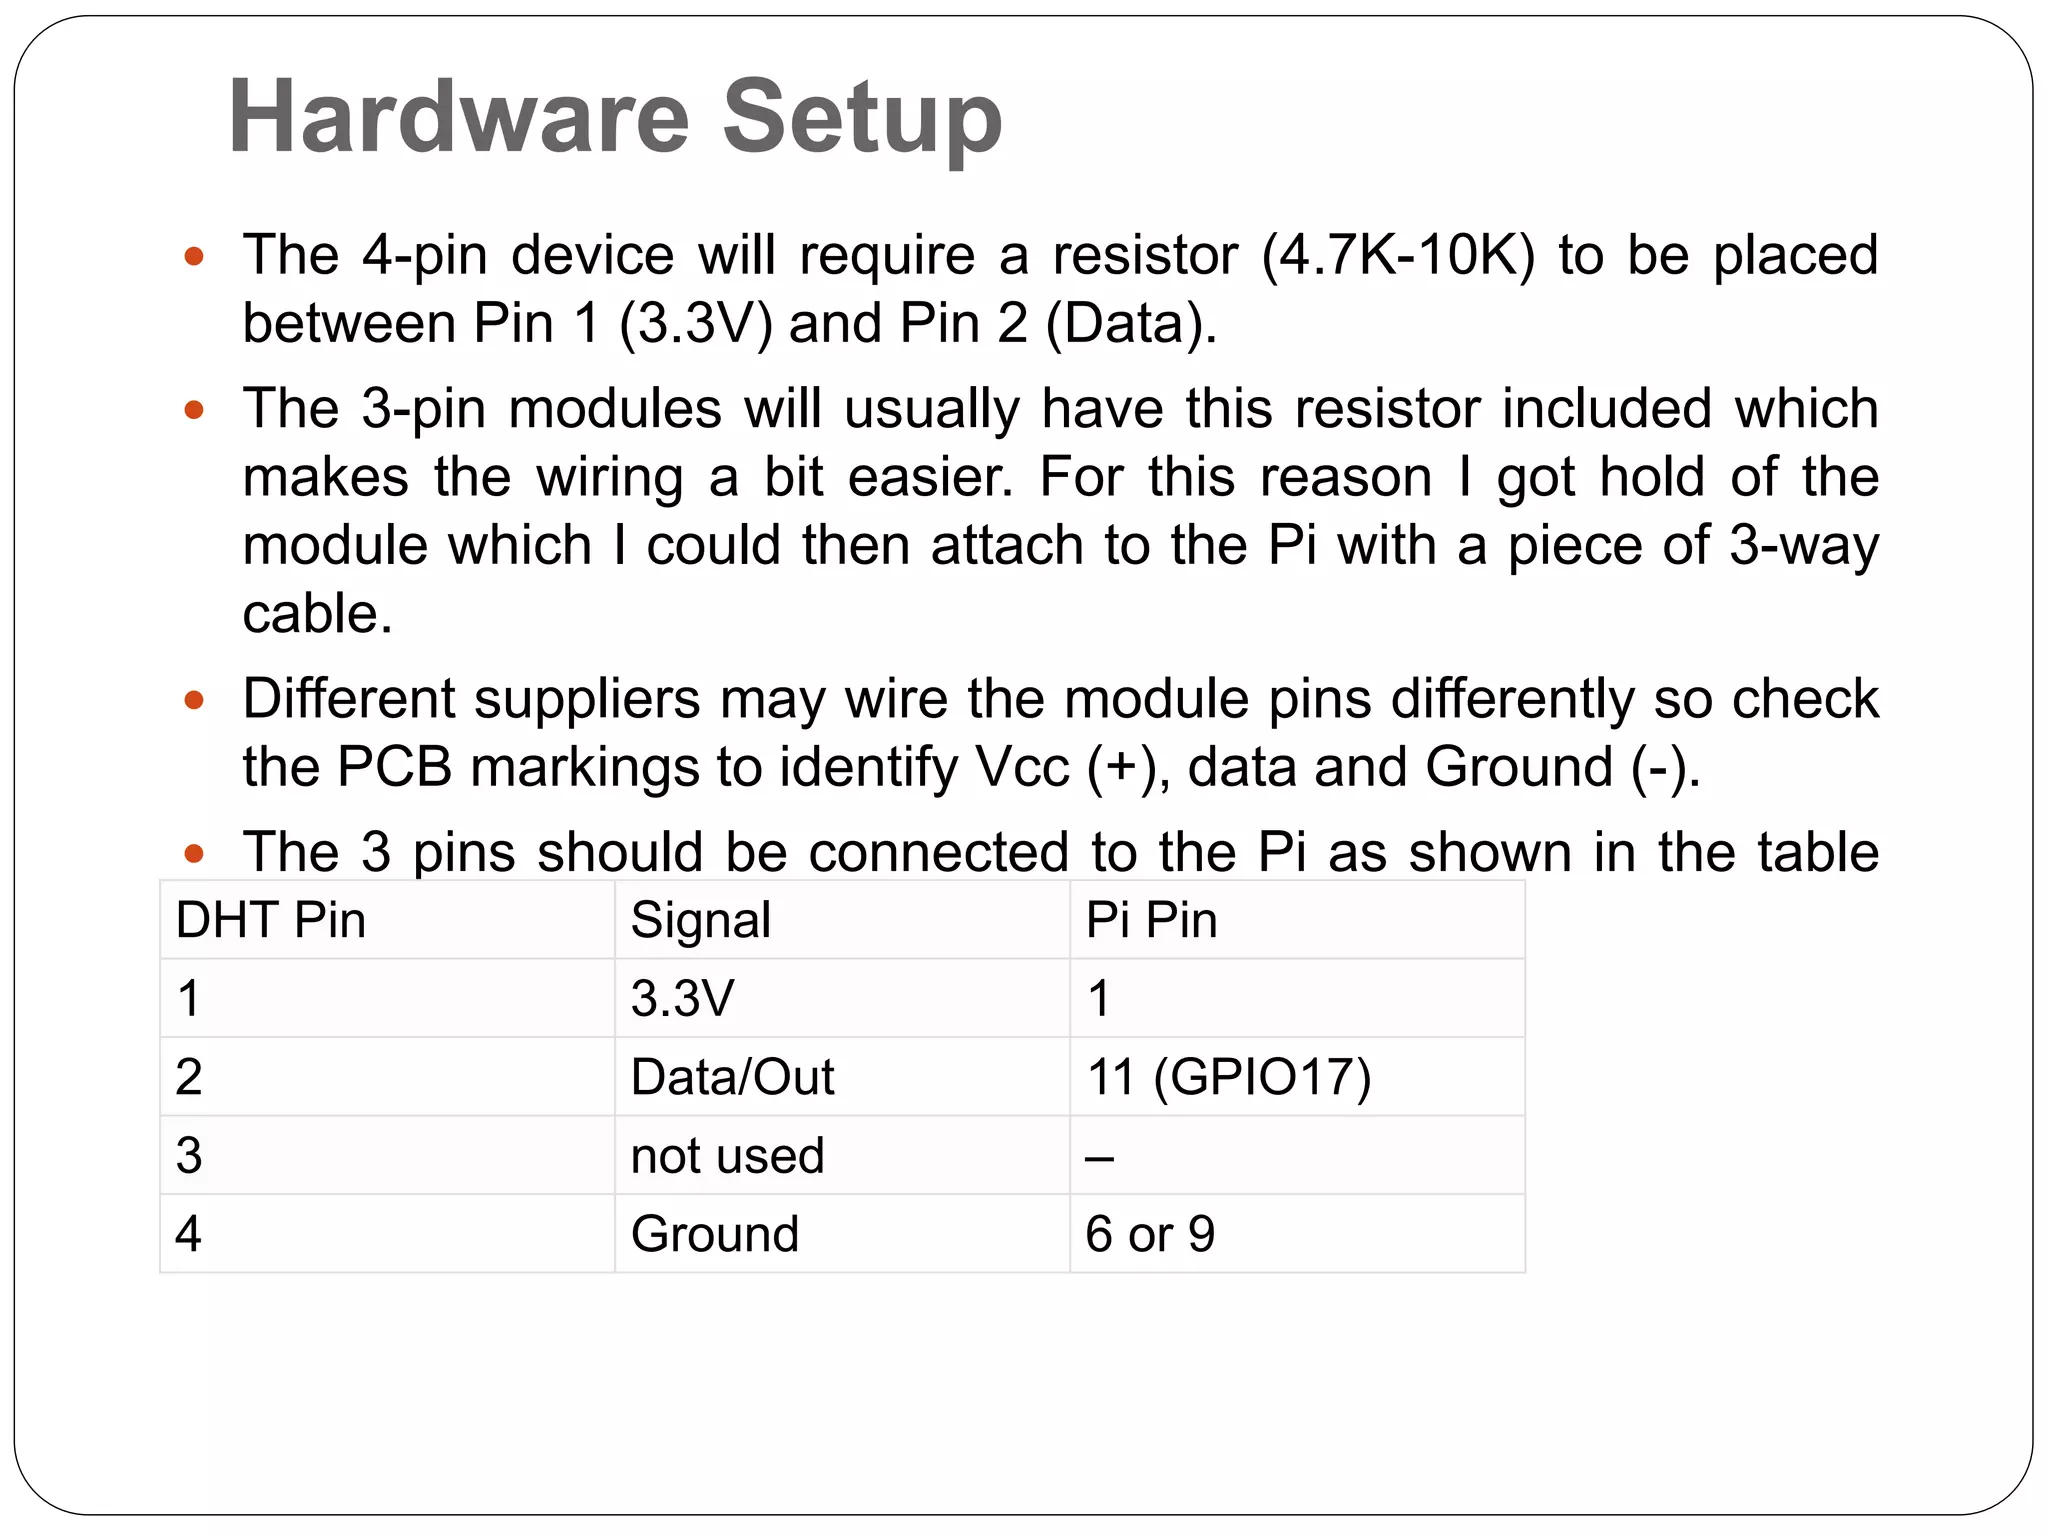
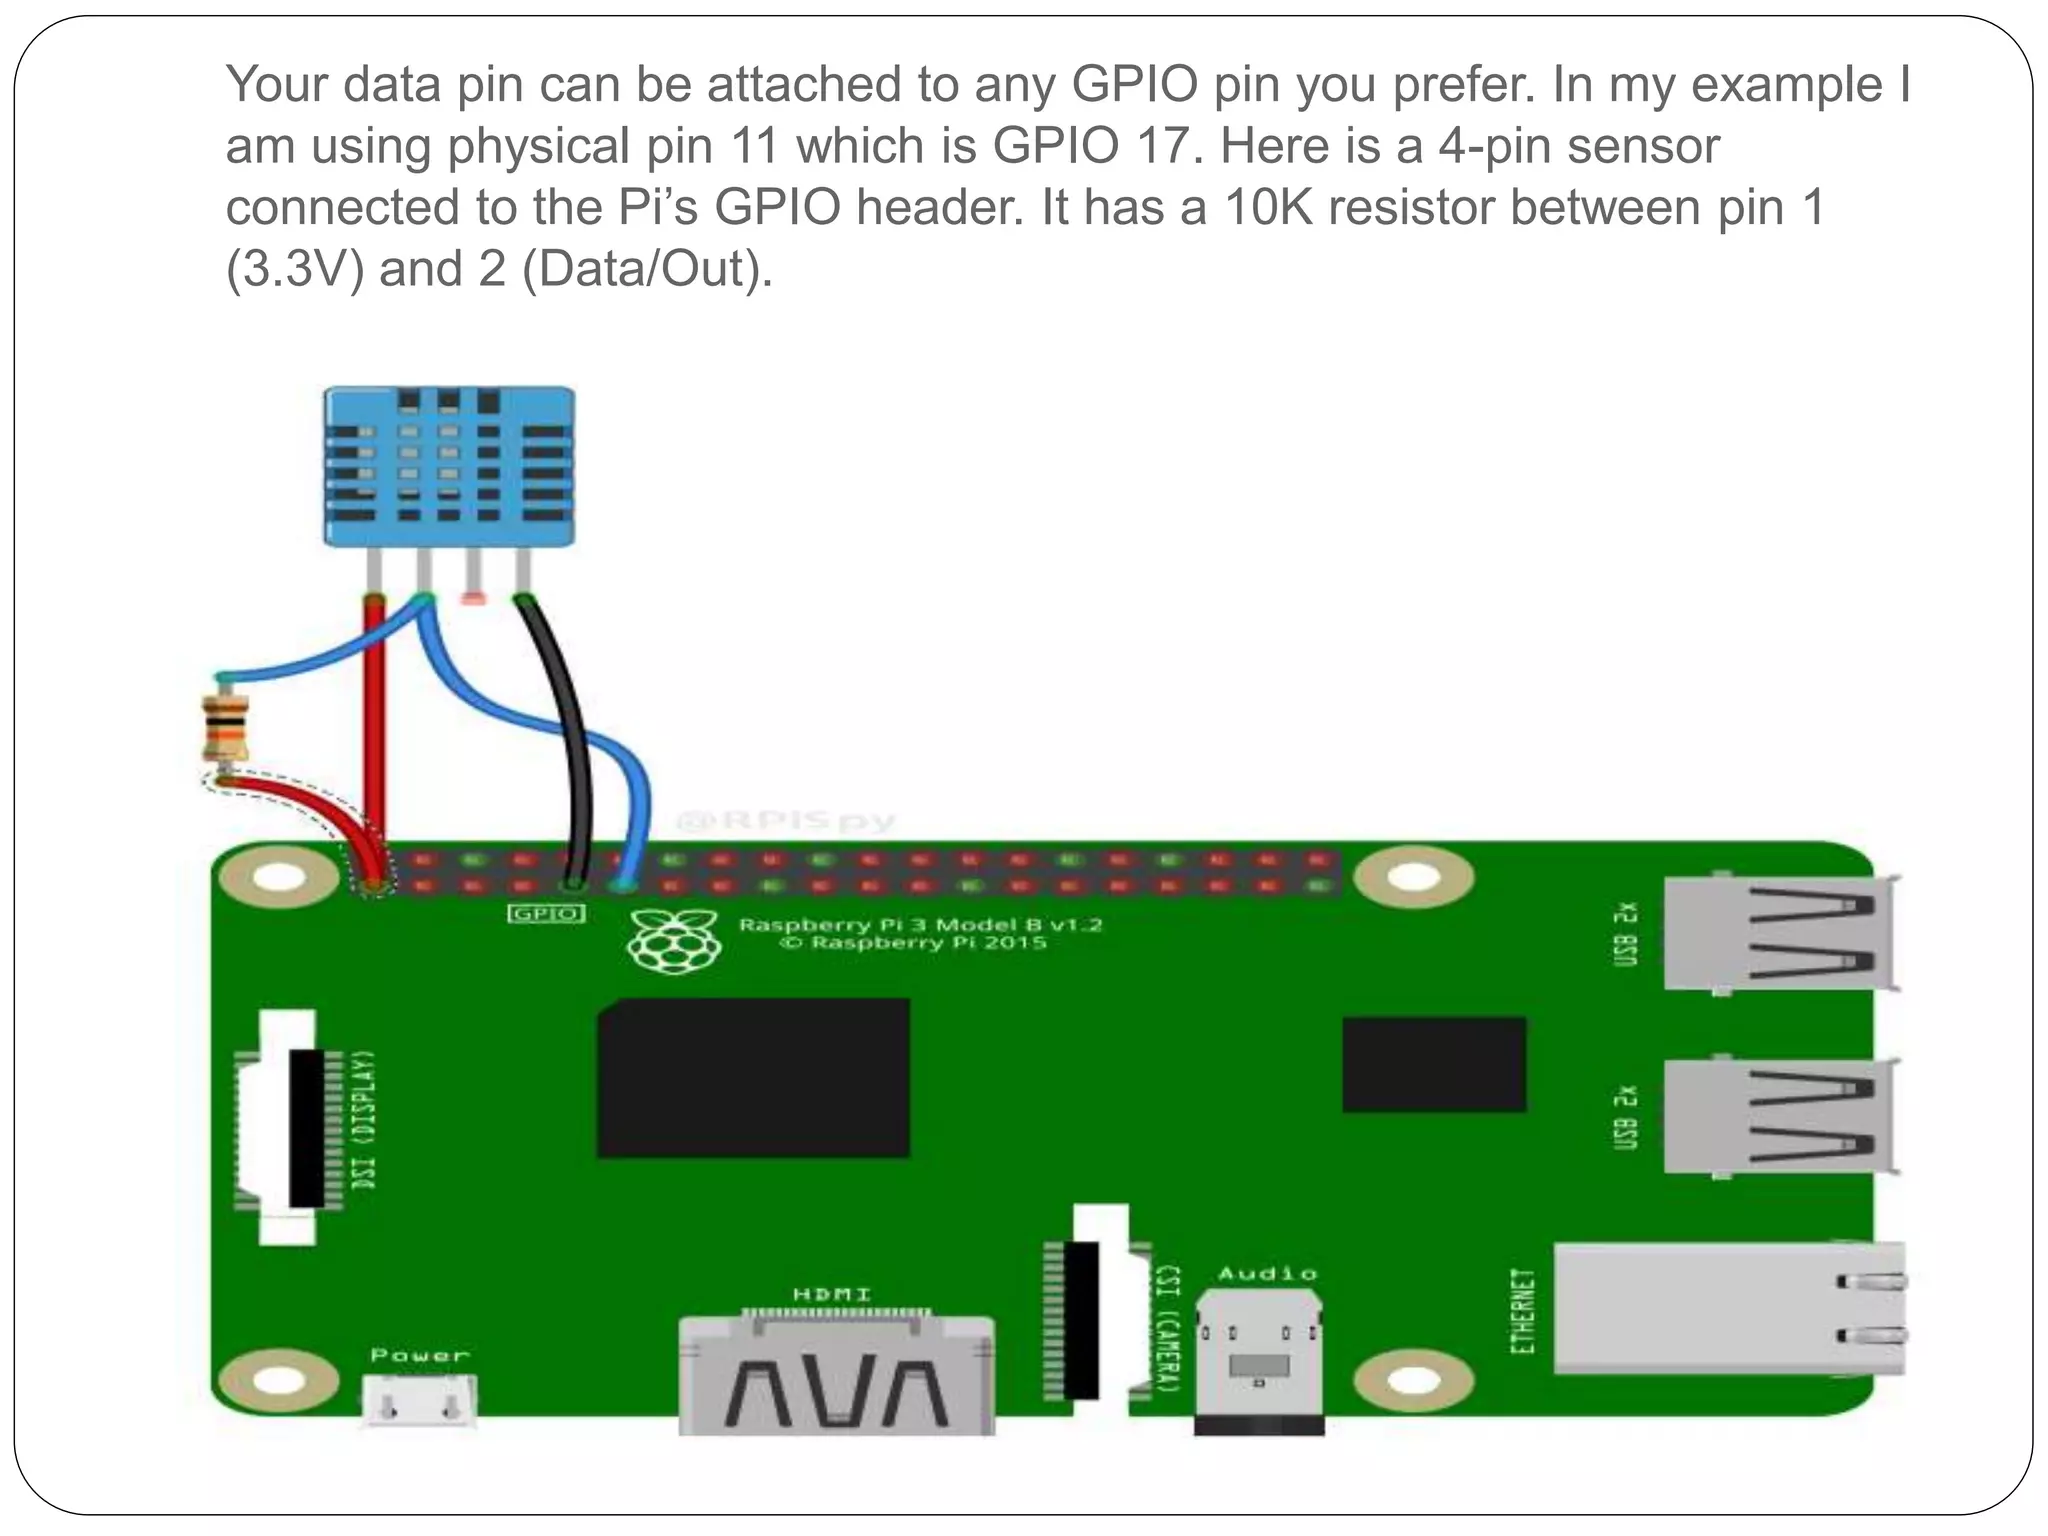
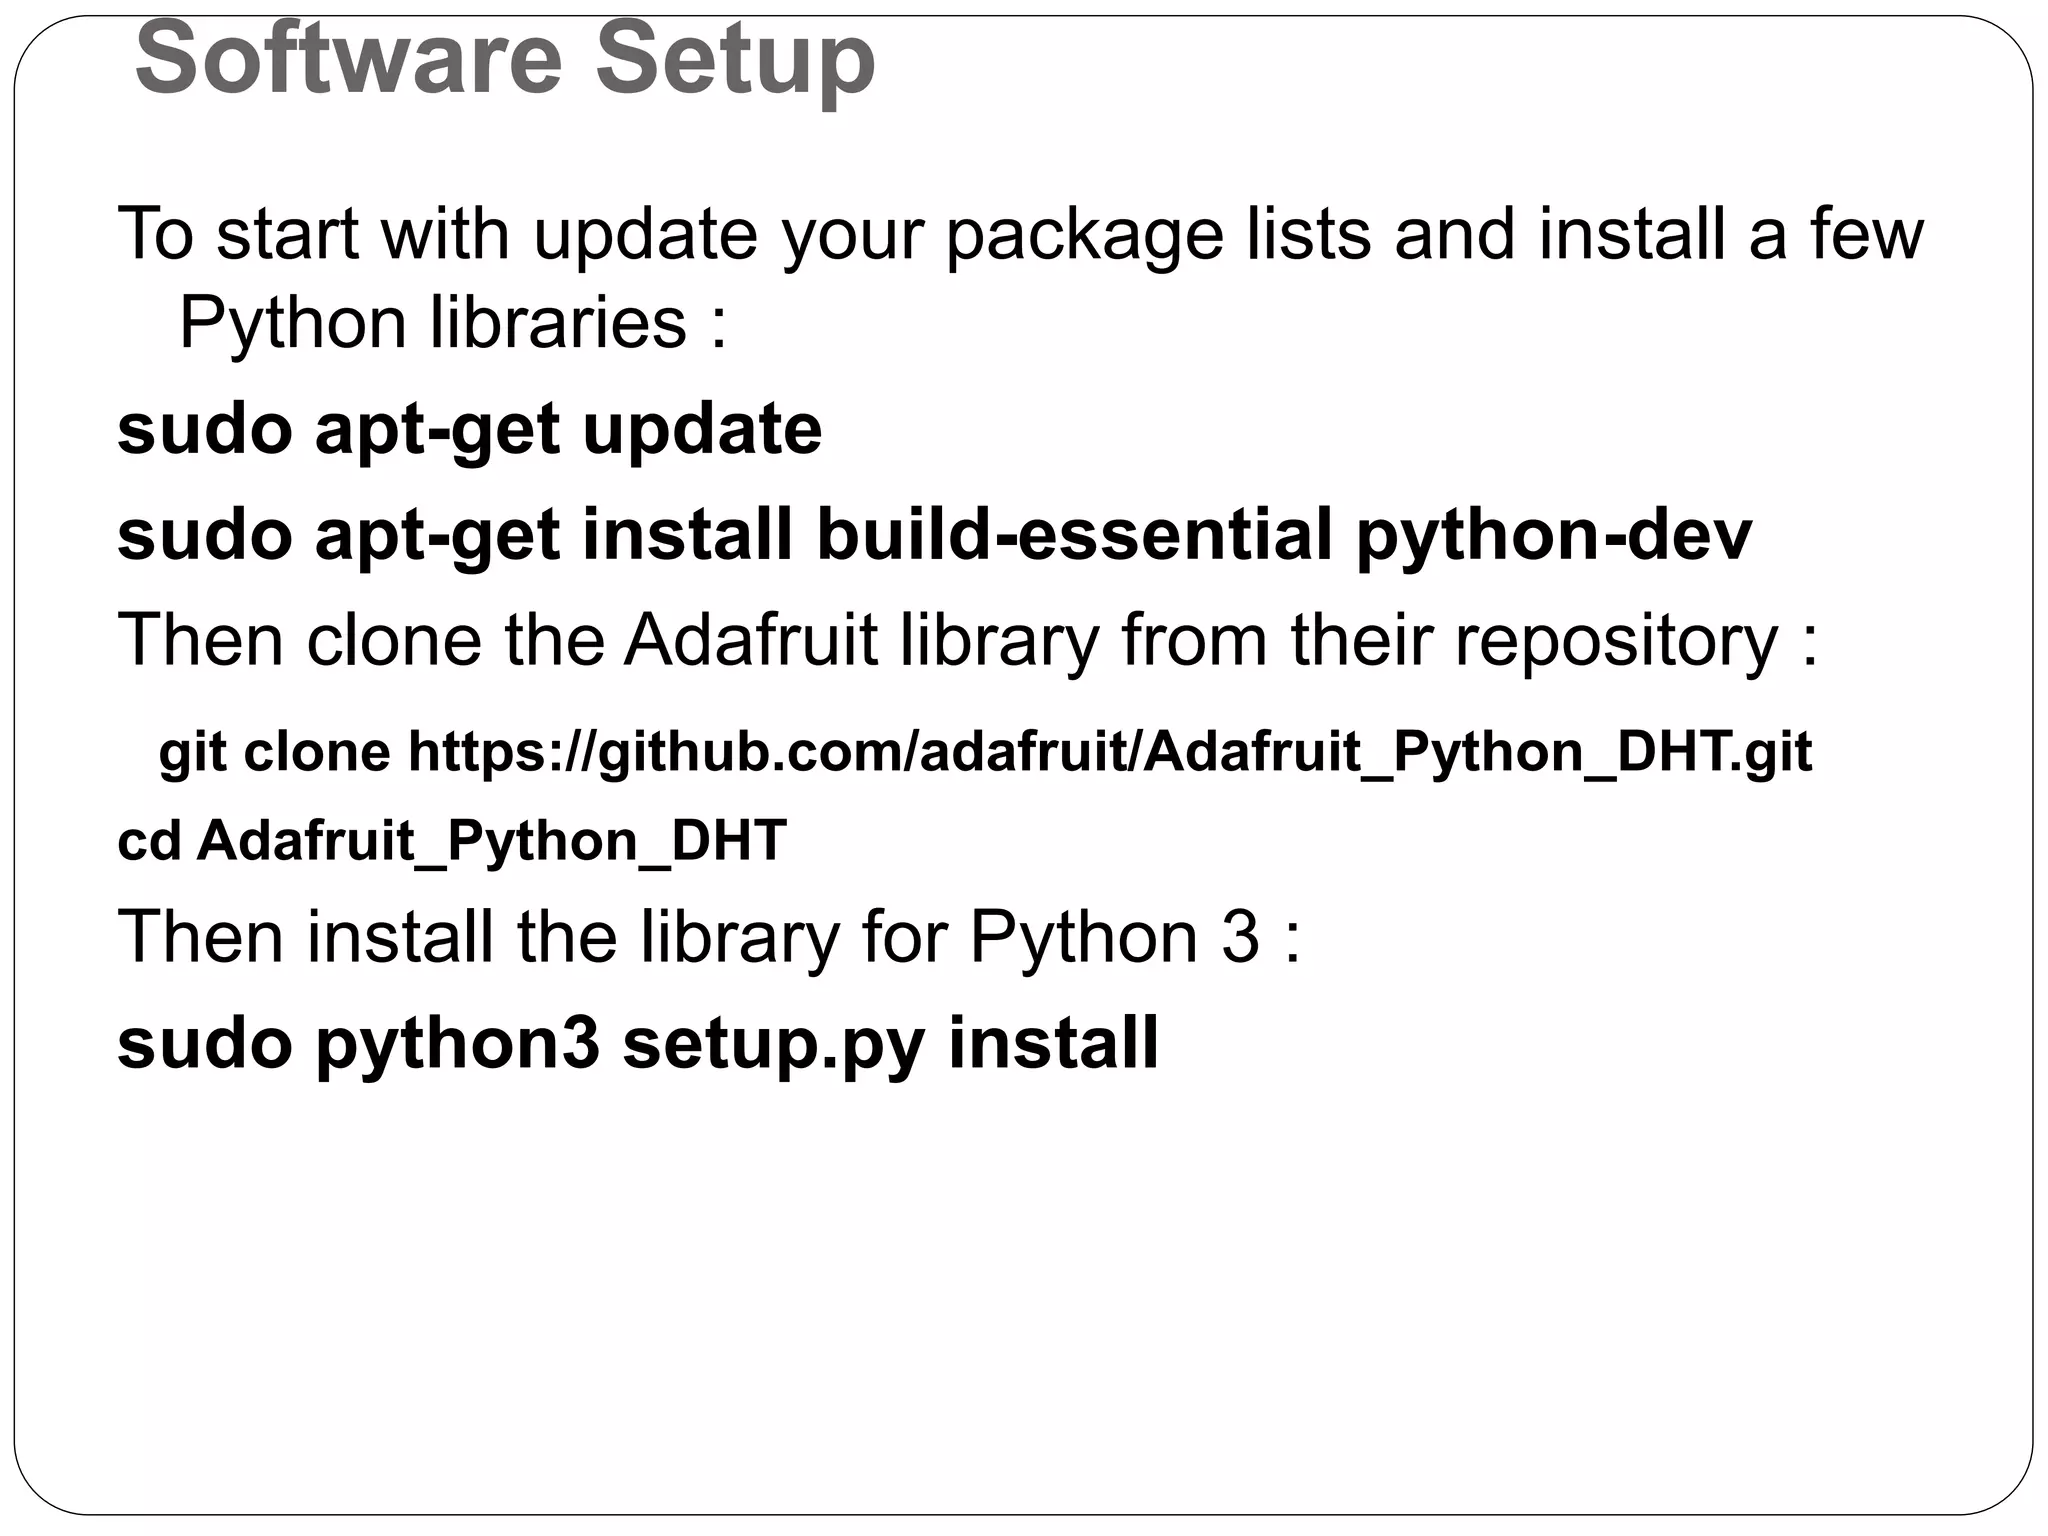
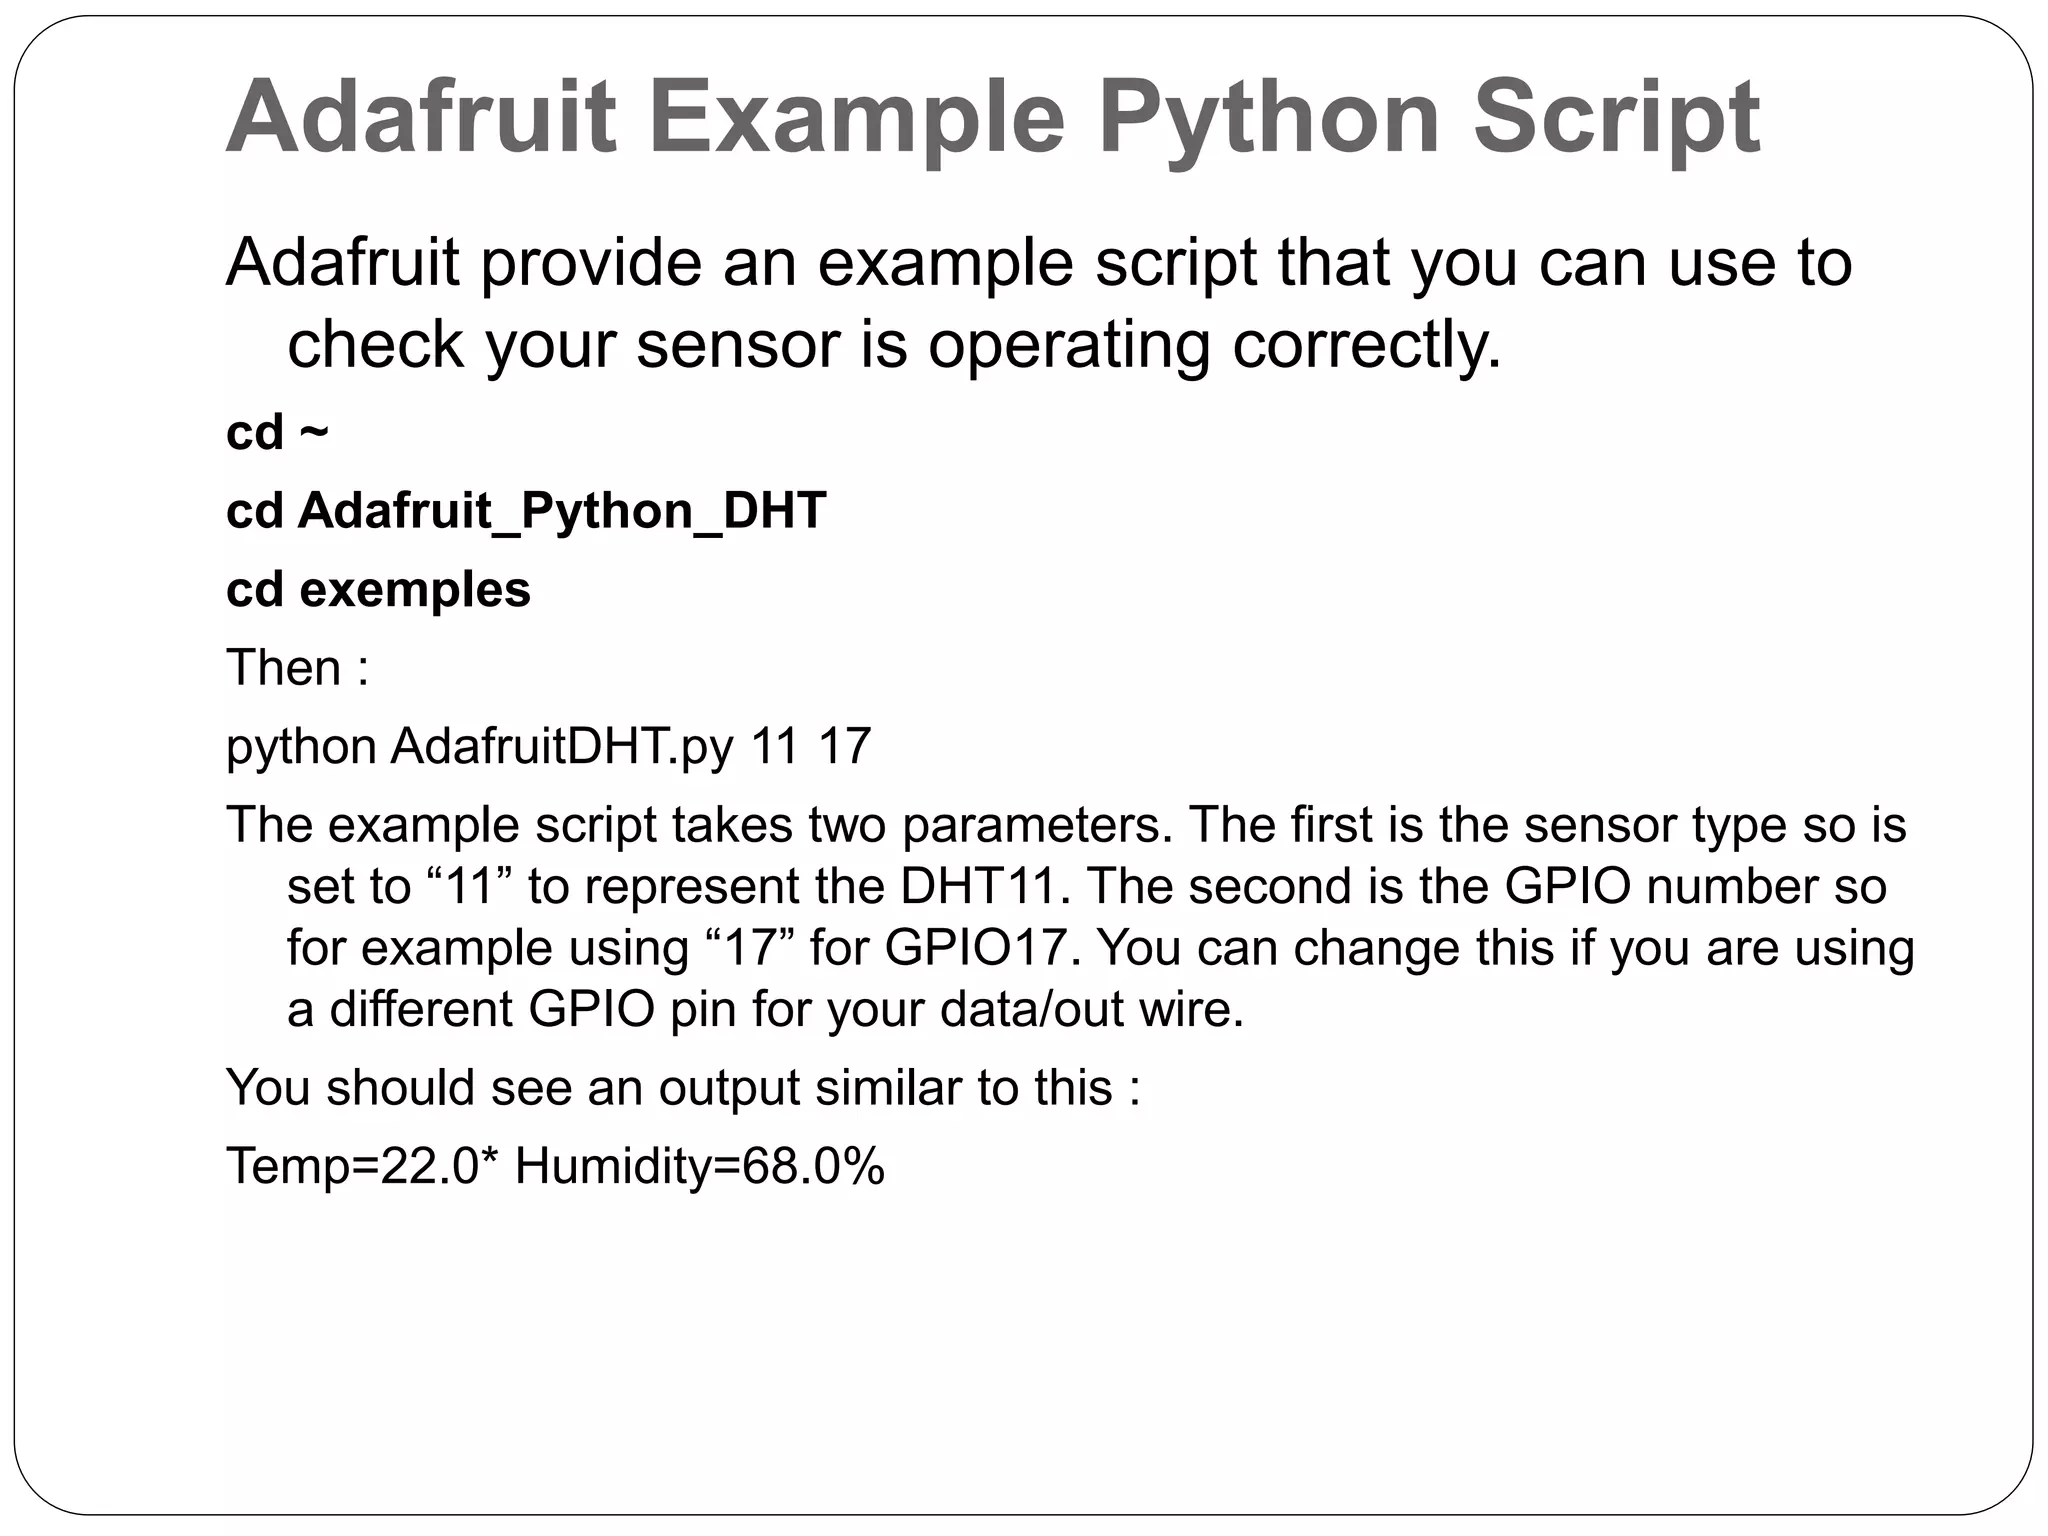
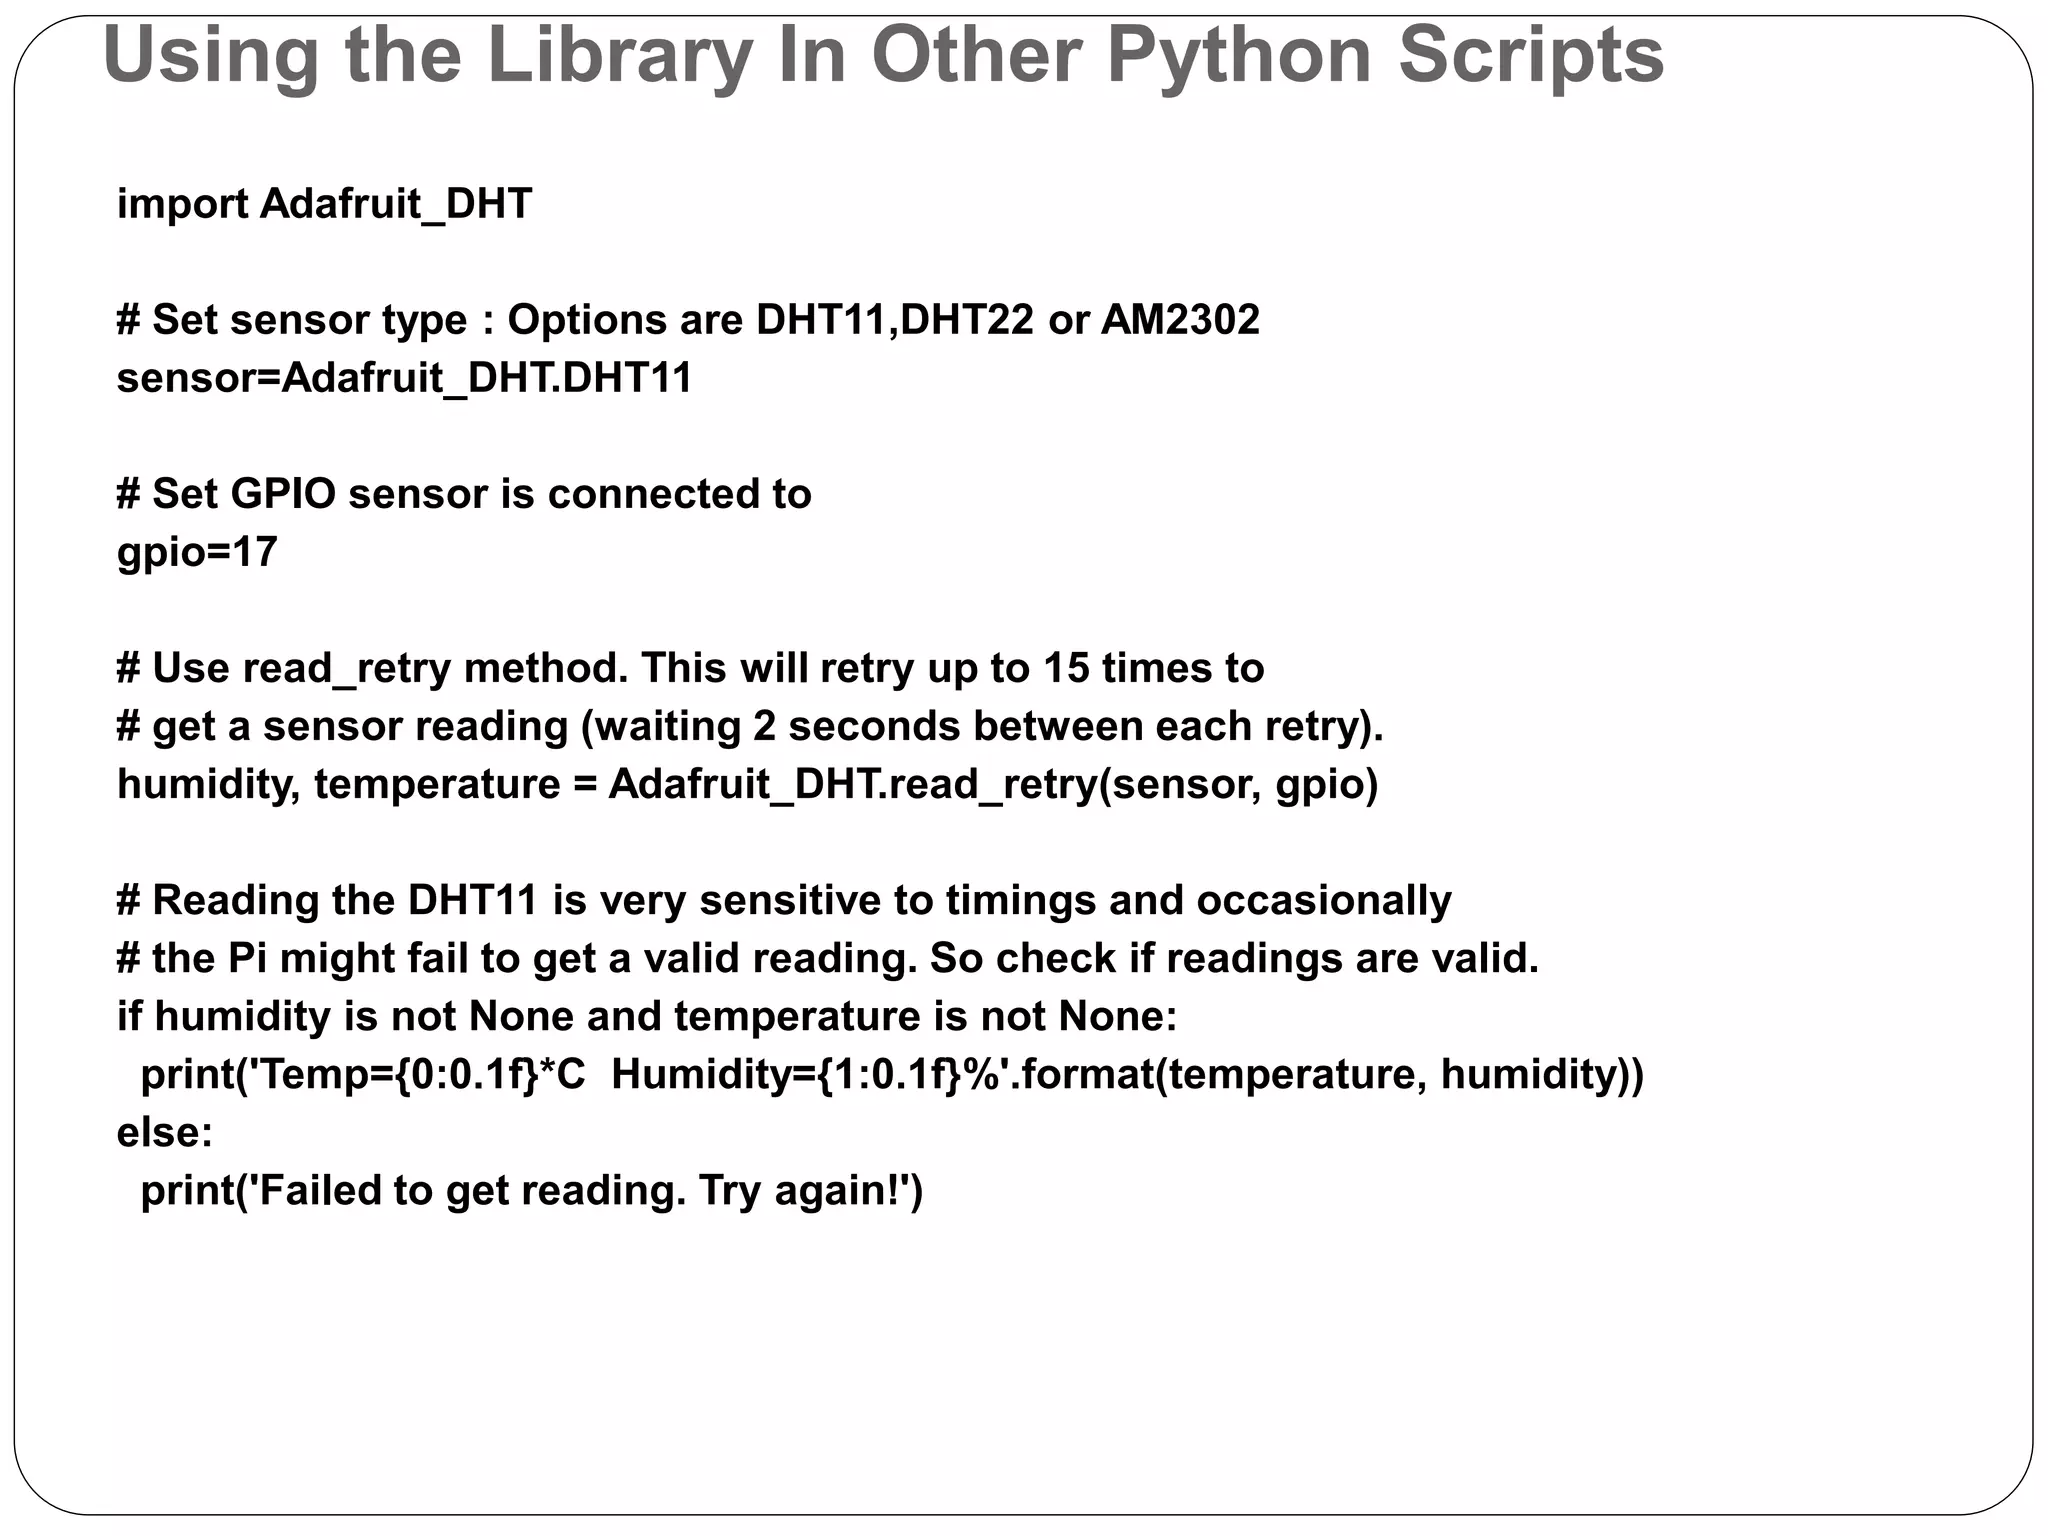
LED BLINKING Raspberry Pi
GPIO  A powerful feature of the Raspberry Pi is the row of GPIO (general-purpose input/output) pins along the top edge of the board. A 40-pin GPIO header is found on all current Raspberry Pi boards (unpopulated on Pi Zero and Pi Zero W). Prior to the Pi 1 Model B+ (2014), boards comprised a shorter 26-pin header.
There are two kinds of Input and Output pin numbering for the Raspberry pi. One is the BCM and the other is BOARD. Basically these pin numberings are useful for writing python script for the Raspberry Pi.
GPIO BOARD This type of pin numbering refers to the number of the pin in the plug, i.e, the numbers printed on the board, for example, P1. The advantage of this type of numbering is, it will not change even though the version of board changes.
GPIO BCM  The BCM option refers to the pin by “Broadcom SOC Channel. They signify the Broadcom SOC channel designation. The BCM channel changes as the version number changes.  Note: It is very important to wire the GPIO pins with limited resistors to avoid serious damage to the Raspberry Pi. LEDs must have resistors to limit the current passing through them. The motors should not be connected to the GPIO pins directl
What is the difference between BOARD and BCM for GPIO pin numbering?  The GPIO.BOARD option specifies that you are referring to the pins by the number of the pin the the plug - i.e the numbers printed on the board (e.g. P1) and in the middle of the diagrams below.  The GPIO.BCM option means that you are referring to the pins by the "Broadcom SOC channel" number, these are the numbers after "GPIO" in the green rectangles around the outside of the below diagrams:
Identification of the pin numberings via Linux command  There is a Linux command to find out which name is for which GPIO pin. So in that case, we do not have to worry about a tutorial to have by our side to check out the pin numberings of the Raspberry Pi all the time.  Type the following command in the terminal, pinout
How to use the GPIO pin numbers in Python?  simple LED blink python program with Raspberry Pi. The number 11 is the pin for LED and considered as an output. import RPi.GPIO as GPIO from time import sleep GPIO.setmode (GPIO.BOARD) GPIO.setup (11,GPIO.OUT) while True: GPIO.output(11,True) time.sleep(2) GPIO.output(11,False) time.sleep(2)
How to make an LED blink with Raspberry Pi? Things you need  Breadboard  Light Emitting Diode  Resistor > 68 ohms  Raspberry Pi  wires
Circuit Diagram
Procedure  Insert an LED into a breadboard.  Connect the resistor which is more than 68 ohms across the longer end of the LED.  Connect the GPIO pin 11 to the shorter end of the LED.  Connect the GPIO pin 6 (ground) to the other end of the resistor.
import RPi.GPIO as GPIO from time import sleep  The two lines above from the code explains, importing the libraries you will need RPi.GPIO to control the GPIO pins. Importing time to control how long the pin will be ON or OFF.
GPIO.setmode (GPIO.BOARD) GPIO.setup (11,GPIO.OUT)  GPIO.BOARD indicates the numbering scheme you are using. The line (11,GPIO.OUT) means you are using GPIO pin 11 as output pin.
while True: GPIO.output(11,True) time.sleep(2) GPIO.output(11,False) time.sleep(2)  while is used to continue as long as the program runs. GPIO.output(11,True) sets the output to high and remain that way for 2 seconds ( sleep(2)). The same is set to low and remain that way for 2 seconds. If you need time-lapse for 5 seconds, you can change that in time.sleep(5).
LED BLINK with switch
 import RPi.GPIO as GPIO  #GPIO.setwarnings(False)  GPIO.setmode(GPIO.BCM)  GPIO.setup(4,GPIO.OUT)  GPIO.setup(3,GPIO.IN,pull_up_down=GPIO.PUD _UP)  while True:  i=GPIO.input(3)  if i==True:  GPIO.output(4,True)  else:  GPIO.output(4,False) 
Build a simple app that interacts with Raspberry Pi GPIO. using three LEDs, which are attached to the Raspberry Pi board. Furthermore, turn the LEDs on/off sequentially. The following hardware components are needed:  Raspberry Pi  Three LEDs of any color  Three resistors (330 Ω or 220 Ω)
 LED 1 is connected to Pi GPIO18 LED 2 is connected to Pi GPIO23 LED 3 is connected to Pi GPIO24
We can write a program using WiringPi with Python. The following is the complete Python code for blinking LEDs: import wiringpi2 as wiringpi import time # initialize wiringpi.wiringPiSetup() # define GPIO mode GPIO18 = 1 GPIO23 = 4 GPIO24 = 5
LOW = 0 HIGH = 1 OUTPUT = 1 wiringpi.pinMode(GPIO18, OUTPUT) wiringpi.pinMode(GPIO23, OUTPUT) wiringpi.pinMode(GPIO24, OUTPUT) # make all LEDs off def clear_all(): wiringpi.digitalWrite(GPIO18, LOW) wiringpi.digitalWrite(GPIO23, LOW) wiringpi.digitalWrite(GPIO24, LOW) try: while 1: clear_all() print("turn on LED 1") wiringpi.digitalWrite(GPIO18, HIGH) time.sleep(2) clear_all() print("turn on LED 2") wiringpi.digitalWrite(GPIO23, HIGH) time.sleep(2) clear_all() print("turn on LED 3") wiringpi.digitalWrite(GPIO24, HIGH) time.sleep(2) except KeyboardInterrupt: clear_all() print("done")
three LED operation with single switch
import RPi.GPIO as GPIO GPIO.setmode(GPIO.BCM) GPIO.setup(4,GPIO.OUT) GPIO.setup(17,GPIO.OUT) GPIO.setup(27,GPIO.OUT) GPIO.setup(3,GPIO.IN,pull_up_down=GPIO.PUD_UP) x=0 y=0 while True: i=GPIO.input(3) print("i=",i) if i==True: x=x+1
print("x=",x) if x==1: y=y+1 print("y=",y) if y==4: y=1 if y==1: GPIO.output(4,True) GPIO.output(17,False) GPIO.output(27,False) elif y==2: GPIO.output(4,False) GPIO.output(17,True) GPIO.output(27,False) elif y==3: GPIO.output(4,False) GPIO.output(17,False) GPIO.output(27,True) else: x=0
import RPi.GPIO as GPIO import time GPIO.setmode(GPIO.BCM) GPIO.setwarnings(False) GPIO.setup(19,GPIO.OUT) while True: GPIO.output(19,GPIO.HIGH) time.sleep(1) GPIO.output(19,GPIO.LOW) time.sleep(1)
 https://create.withcode.uk/python/A3
DHT11 Temperature and Humidity Sensor and the Raspberry Pi  DHT11 is a low-cost temperature and humidity sensor. It isn’t the fastest sensor around but its cheap price makes it useful for experimenting or projects where you don’t require new readings multiple times a second. The device only requires three connections to the Pi. +3.3v, ground and one GPIO pin.
DHT11 Specifications  The device itself has four pins but one of these is not used. You can buy the 4-pin device on its own or as part of a 3-pin module.  The modules have three pins and are easy to connect directly to the Pi’s GPIO header. Humidity : 20-80% (5% accuracy) Temperature : 0-50°C (±2°C accuracy) The manufacturers do not recommended that you read data from this device more than once per 2 seconds. If you do you may get incorrect
Hardware Setup  The 4-pin device will require a resistor (4.7K-10K) to be placed between Pin 1 (3.3V) and Pin 2 (Data).  The 3-pin modules will usually have this resistor included which makes the wiring a bit easier. For this reason I got hold of the module which I could then attach to the Pi with a piece of 3-way cable.  Different suppliers may wire the module pins differently so check the PCB markings to identify Vcc (+), data and Ground (-).  The 3 pins should be connected to the Pi as shown in the table below :DHT Pin Signal Pi Pin 1 3.3V 1 2 Data/Out 11 (GPIO17) 3 not used – 4 Ground 6 or 9
Your data pin can be attached to any GPIO pin you prefer. In my example I am using physical pin 11 which is GPIO 17. Here is a 4-pin sensor connected to the Pi’s GPIO header. It has a 10K resistor between pin 1 (3.3V) and 2 (Data/Out).
Python Library  The DHT11 requires a specific protocol to be applied to the data pin. In order to save time trying to implement this yourself it’s far easier to use the Adafruit DHT library.  The library deals with the data that needs to be exchanged with the sensor but it is sensitive to timing issues. The Pi’s operating system may get in the way while performing other tasks so to compensate for this the library requests a number of readings from the device until it gets one that is valid.
Software Setup To start with update your package lists and install a few Python libraries : sudo apt-get update sudo apt-get install build-essential python-dev Then clone the Adafruit library from their repository : git clone https://github.com/adafruit/Adafruit_Python_DHT.git cd Adafruit_Python_DHT Then install the library for Python 3 : sudo python3 setup.py install
Adafruit Example Python Script Adafruit provide an example script that you can use to check your sensor is operating correctly. cd ~ cd Adafruit_Python_DHT cd exemples Then : python AdafruitDHT.py 11 17 The example script takes two parameters. The first is the sensor type so is set to “11” to represent the DHT11. The second is the GPIO number so for example using “17” for GPIO17. You can change this if you are using a different GPIO pin for your data/out wire. You should see an output similar to this : Temp=22.0* Humidity=68.0%
Using the Library In Other Python Scripts import Adafruit_DHT # Set sensor type : Options are DHT11,DHT22 or AM2302 sensor=Adafruit_DHT.DHT11 # Set GPIO sensor is connected to gpio=17 # Use read_retry method. This will retry up to 15 times to # get a sensor reading (waiting 2 seconds between each retry). humidity, temperature = Adafruit_DHT.read_retry(sensor, gpio) # Reading the DHT11 is very sensitive to timings and occasionally # the Pi might fail to get a valid reading. So check if readings are valid. if humidity is not None and temperature is not None: print('Temp={0:0.1f}*C Humidity={1:0.1f}%'.format(temperature, humidity)) else: print('Failed to get reading. Try again!')

Raspberry pi led blink

  • 1.
  • 3.
    GPIO  A powerfulfeature of the Raspberry Pi is the row of GPIO (general-purpose input/output) pins along the top edge of the board. A 40-pin GPIO header is found on all current Raspberry Pi boards (unpopulated on Pi Zero and Pi Zero W). Prior to the Pi 1 Model B+ (2014), boards comprised a shorter 26-pin header.
  • 5.
    There are twokinds of Input and Output pin numbering for the Raspberry pi. One is the BCM and the other is BOARD. Basically these pin numberings are useful for writing python script for the Raspberry Pi.
  • 6.
    GPIO BOARD This typeof pin numbering refers to the number of the pin in the plug, i.e, the numbers printed on the board, for example, P1. The advantage of this type of numbering is, it will not change even though the version of board changes.
  • 7.
    GPIO BCM  TheBCM option refers to the pin by “Broadcom SOC Channel. They signify the Broadcom SOC channel designation. The BCM channel changes as the version number changes.  Note: It is very important to wire the GPIO pins with limited resistors to avoid serious damage to the Raspberry Pi. LEDs must have resistors to limit the current passing through them. The motors should not be connected to the GPIO pins directl
  • 8.
    What is thedifference between BOARD and BCM for GPIO pin numbering?  The GPIO.BOARD option specifies that you are referring to the pins by the number of the pin the the plug - i.e the numbers printed on the board (e.g. P1) and in the middle of the diagrams below.  The GPIO.BCM option means that you are referring to the pins by the "Broadcom SOC channel" number, these are the numbers after "GPIO" in the green rectangles around the outside of the below diagrams:
  • 9.
    Identification of thepin numberings via Linux command  There is a Linux command to find out which name is for which GPIO pin. So in that case, we do not have to worry about a tutorial to have by our side to check out the pin numberings of the Raspberry Pi all the time.  Type the following command in the terminal, pinout
  • 10.
    How to usethe GPIO pin numbers in Python?  simple LED blink python program with Raspberry Pi. The number 11 is the pin for LED and considered as an output. import RPi.GPIO as GPIO from time import sleep GPIO.setmode (GPIO.BOARD) GPIO.setup (11,GPIO.OUT) while True: GPIO.output(11,True) time.sleep(2) GPIO.output(11,False) time.sleep(2)
  • 11.
    How to makean LED blink with Raspberry Pi? Things you need  Breadboard  Light Emitting Diode  Resistor > 68 ohms  Raspberry Pi  wires
  • 12.
  • 13.
    Procedure  Insert anLED into a breadboard.  Connect the resistor which is more than 68 ohms across the longer end of the LED.  Connect the GPIO pin 11 to the shorter end of the LED.  Connect the GPIO pin 6 (ground) to the other end of the resistor.
  • 14.
    import RPi.GPIO asGPIO from time import sleep  The two lines above from the code explains, importing the libraries you will need RPi.GPIO to control the GPIO pins. Importing time to control how long the pin will be ON or OFF.
  • 15.
    GPIO.setmode (GPIO.BOARD) GPIO.setup (11,GPIO.OUT) GPIO.BOARD indicates the numbering scheme you are using. The line (11,GPIO.OUT) means you are using GPIO pin 11 as output pin.
  • 16.
    while True: GPIO.output(11,True) time.sleep(2) GPIO.output(11,False) time.sleep(2)  whileis used to continue as long as the program runs. GPIO.output(11,True) sets the output to high and remain that way for 2 seconds ( sleep(2)). The same is set to low and remain that way for 2 seconds. If you need time-lapse for 5 seconds, you can change that in time.sleep(5).
  • 19.
  • 20.
     import RPi.GPIOas GPIO  #GPIO.setwarnings(False)  GPIO.setmode(GPIO.BCM)  GPIO.setup(4,GPIO.OUT)  GPIO.setup(3,GPIO.IN,pull_up_down=GPIO.PUD _UP)  while True:  i=GPIO.input(3)  if i==True:  GPIO.output(4,True)  else:  GPIO.output(4,False) 
  • 21.
    Build a simpleapp that interacts with Raspberry Pi GPIO. using three LEDs, which are attached to the Raspberry Pi board. Furthermore, turn the LEDs on/off sequentially. The following hardware components are needed:  Raspberry Pi  Three LEDs of any color  Three resistors (330 Ω or 220 Ω)
  • 22.
     LED 1is connected to Pi GPIO18 LED 2 is connected to Pi GPIO23 LED 3 is connected to Pi GPIO24
  • 23.
    We can writea program using WiringPi with Python. The following is the complete Python code for blinking LEDs: import wiringpi2 as wiringpi import time # initialize wiringpi.wiringPiSetup() # define GPIO mode GPIO18 = 1 GPIO23 = 4 GPIO24 = 5
  • 24.
    LOW = 0 HIGH= 1 OUTPUT = 1 wiringpi.pinMode(GPIO18, OUTPUT) wiringpi.pinMode(GPIO23, OUTPUT) wiringpi.pinMode(GPIO24, OUTPUT) # make all LEDs off def clear_all(): wiringpi.digitalWrite(GPIO18, LOW) wiringpi.digitalWrite(GPIO23, LOW) wiringpi.digitalWrite(GPIO24, LOW) try: while 1: clear_all() print("turn on LED 1") wiringpi.digitalWrite(GPIO18, HIGH) time.sleep(2) clear_all() print("turn on LED 2") wiringpi.digitalWrite(GPIO23, HIGH) time.sleep(2) clear_all() print("turn on LED 3") wiringpi.digitalWrite(GPIO24, HIGH) time.sleep(2) except KeyboardInterrupt: clear_all() print("done")
  • 25.
    three LED operationwith single switch
  • 26.
    import RPi.GPIO asGPIO GPIO.setmode(GPIO.BCM) GPIO.setup(4,GPIO.OUT) GPIO.setup(17,GPIO.OUT) GPIO.setup(27,GPIO.OUT) GPIO.setup(3,GPIO.IN,pull_up_down=GPIO.PUD_UP) x=0 y=0 while True: i=GPIO.input(3) print("i=",i) if i==True: x=x+1
  • 27.
    print("x=",x) if x==1: y=y+1 print("y=",y) if y==4: y=1 ify==1: GPIO.output(4,True) GPIO.output(17,False) GPIO.output(27,False) elif y==2: GPIO.output(4,False) GPIO.output(17,True) GPIO.output(27,False) elif y==3: GPIO.output(4,False) GPIO.output(17,False) GPIO.output(27,True) else: x=0
  • 28.
    import RPi.GPIO asGPIO import time GPIO.setmode(GPIO.BCM) GPIO.setwarnings(False) GPIO.setup(19,GPIO.OUT) while True: GPIO.output(19,GPIO.HIGH) time.sleep(1) GPIO.output(19,GPIO.LOW) time.sleep(1)
  • 29.
  • 30.
    DHT11 Temperature andHumidity Sensor and the Raspberry Pi  DHT11 is a low-cost temperature and humidity sensor. It isn’t the fastest sensor around but its cheap price makes it useful for experimenting or projects where you don’t require new readings multiple times a second. The device only requires three connections to the Pi. +3.3v, ground and one GPIO pin.
  • 31.
    DHT11 Specifications  Thedevice itself has four pins but one of these is not used. You can buy the 4-pin device on its own or as part of a 3-pin module.  The modules have three pins and are easy to connect directly to the Pi’s GPIO header. Humidity : 20-80% (5% accuracy) Temperature : 0-50°C (±2°C accuracy) The manufacturers do not recommended that you read data from this device more than once per 2 seconds. If you do you may get incorrect
  • 32.
    Hardware Setup  The4-pin device will require a resistor (4.7K-10K) to be placed between Pin 1 (3.3V) and Pin 2 (Data).  The 3-pin modules will usually have this resistor included which makes the wiring a bit easier. For this reason I got hold of the module which I could then attach to the Pi with a piece of 3-way cable.  Different suppliers may wire the module pins differently so check the PCB markings to identify Vcc (+), data and Ground (-).  The 3 pins should be connected to the Pi as shown in the table below :DHT Pin Signal Pi Pin 1 3.3V 1 2 Data/Out 11 (GPIO17) 3 not used – 4 Ground 6 or 9
  • 33.
    Your data pincan be attached to any GPIO pin you prefer. In my example I am using physical pin 11 which is GPIO 17. Here is a 4-pin sensor connected to the Pi’s GPIO header. It has a 10K resistor between pin 1 (3.3V) and 2 (Data/Out).
  • 34.
    Python Library  TheDHT11 requires a specific protocol to be applied to the data pin. In order to save time trying to implement this yourself it’s far easier to use the Adafruit DHT library.  The library deals with the data that needs to be exchanged with the sensor but it is sensitive to timing issues. The Pi’s operating system may get in the way while performing other tasks so to compensate for this the library requests a number of readings from the device until it gets one that is valid.
  • 35.
    Software Setup To startwith update your package lists and install a few Python libraries : sudo apt-get update sudo apt-get install build-essential python-dev Then clone the Adafruit library from their repository : git clone https://github.com/adafruit/Adafruit_Python_DHT.git cd Adafruit_Python_DHT Then install the library for Python 3 : sudo python3 setup.py install
  • 36.
    Adafruit Example PythonScript Adafruit provide an example script that you can use to check your sensor is operating correctly. cd ~ cd Adafruit_Python_DHT cd exemples Then : python AdafruitDHT.py 11 17 The example script takes two parameters. The first is the sensor type so is set to “11” to represent the DHT11. The second is the GPIO number so for example using “17” for GPIO17. You can change this if you are using a different GPIO pin for your data/out wire. You should see an output similar to this : Temp=22.0* Humidity=68.0%
  • 37.
    Using the LibraryIn Other Python Scripts import Adafruit_DHT # Set sensor type : Options are DHT11,DHT22 or AM2302 sensor=Adafruit_DHT.DHT11 # Set GPIO sensor is connected to gpio=17 # Use read_retry method. This will retry up to 15 times to # get a sensor reading (waiting 2 seconds between each retry). humidity, temperature = Adafruit_DHT.read_retry(sensor, gpio) # Reading the DHT11 is very sensitive to timings and occasionally # the Pi might fail to get a valid reading. So check if readings are valid. if humidity is not None and temperature is not None: print('Temp={0:0.1f}*C Humidity={1:0.1f}%'.format(temperature, humidity)) else: print('Failed to get reading. Try again!')