Download to read offline
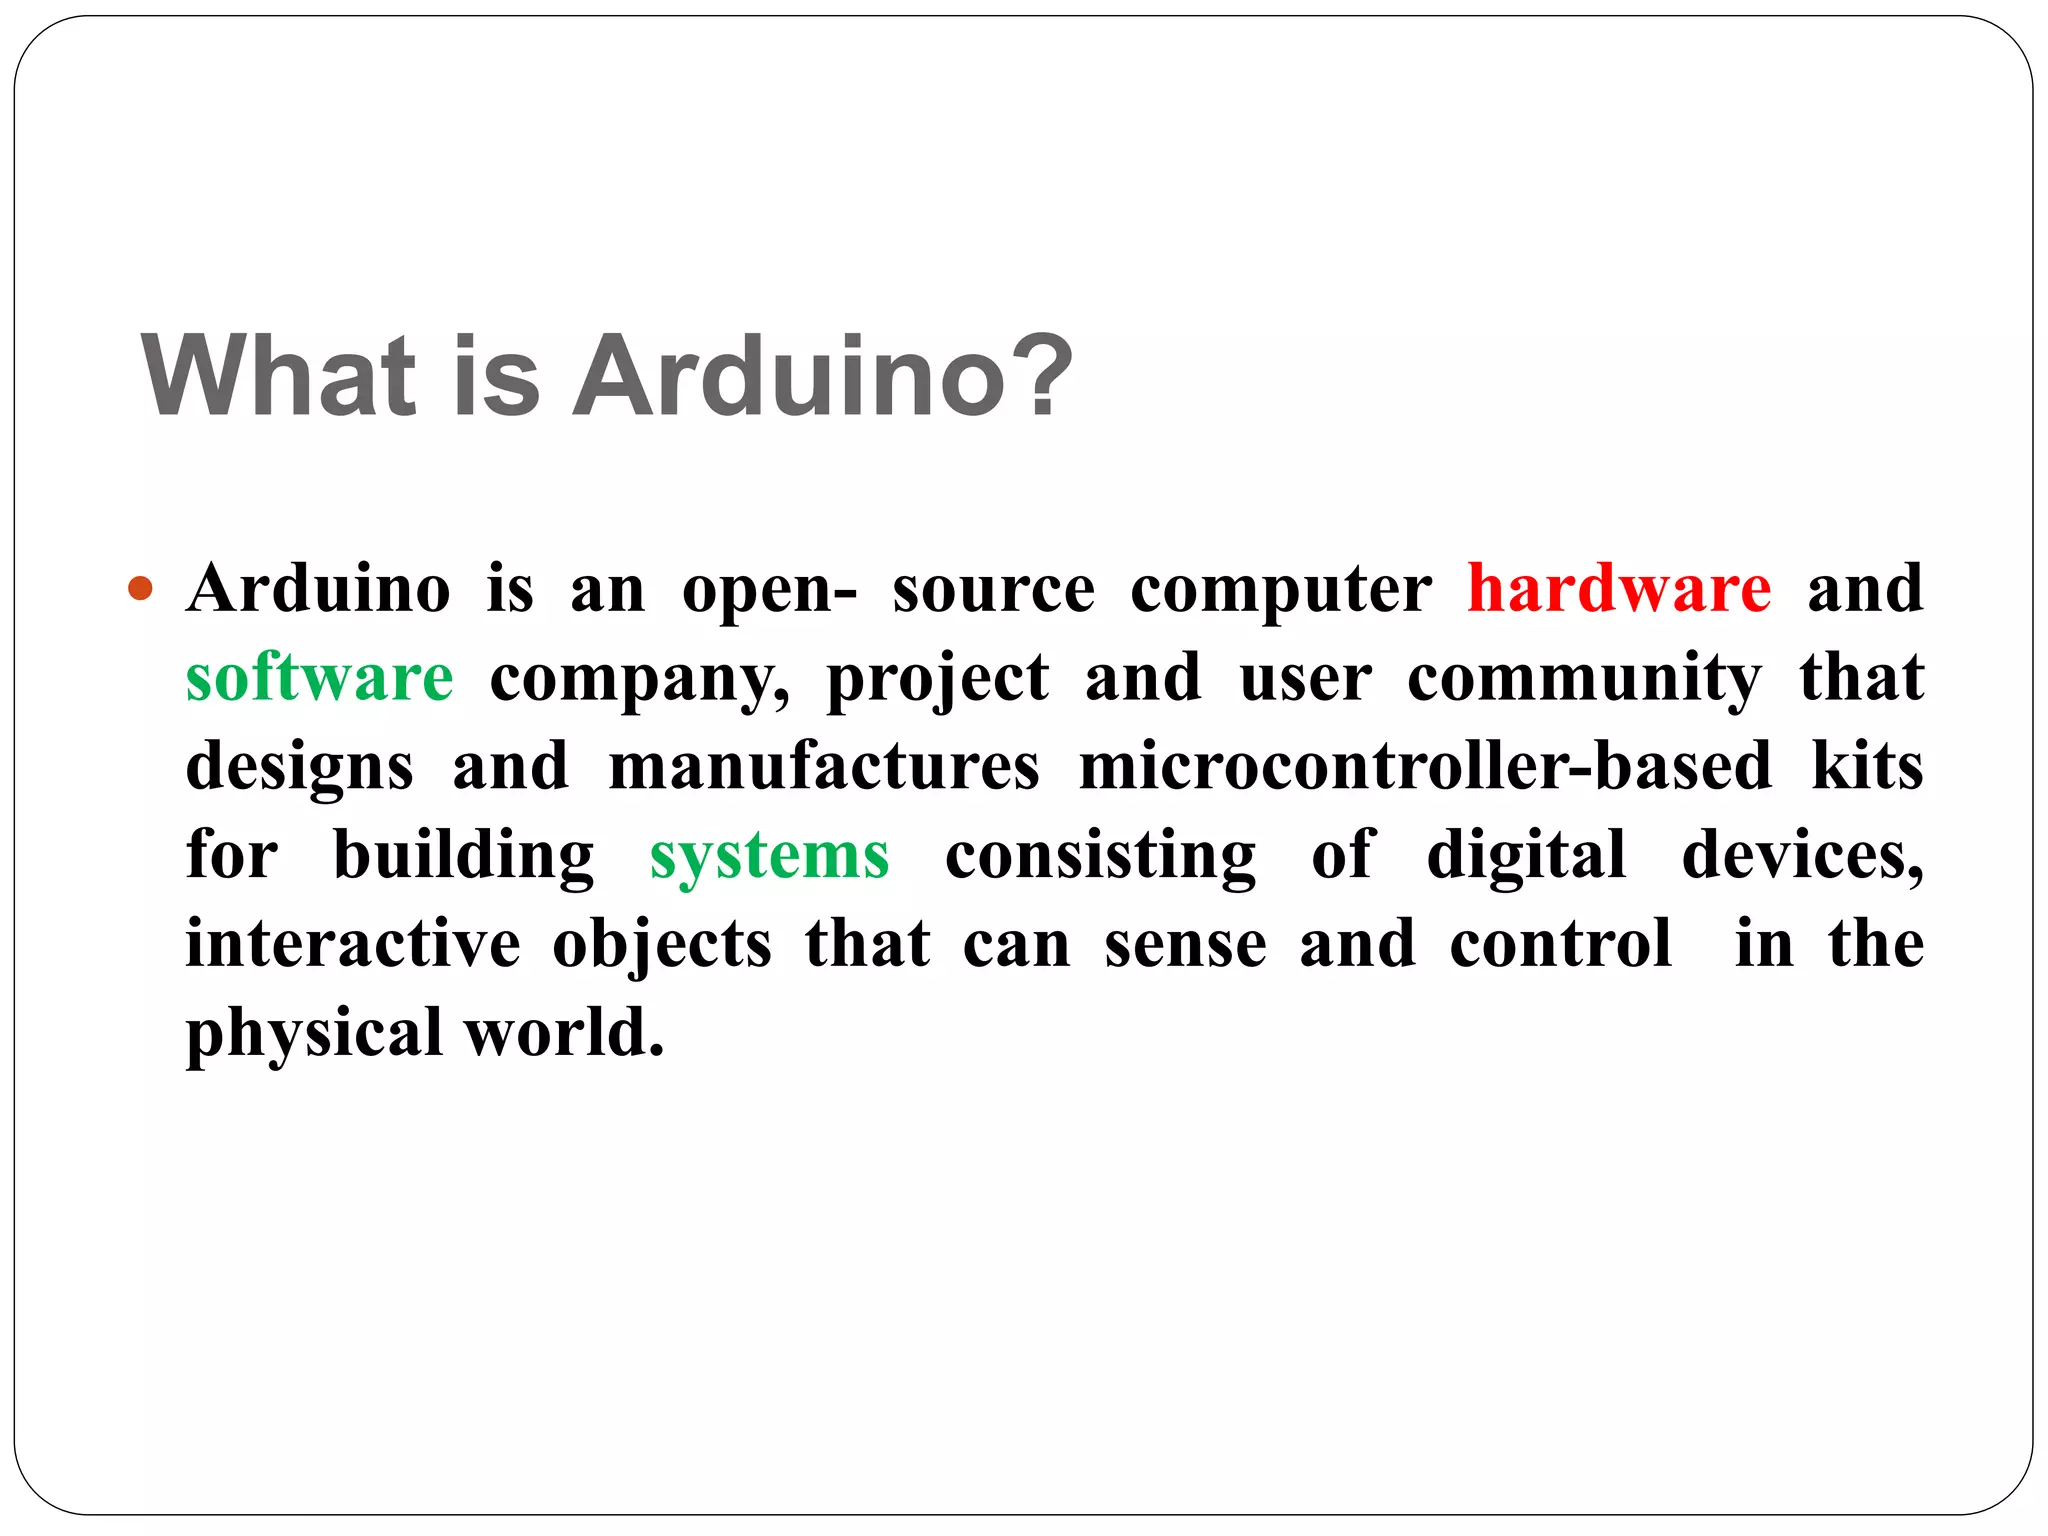
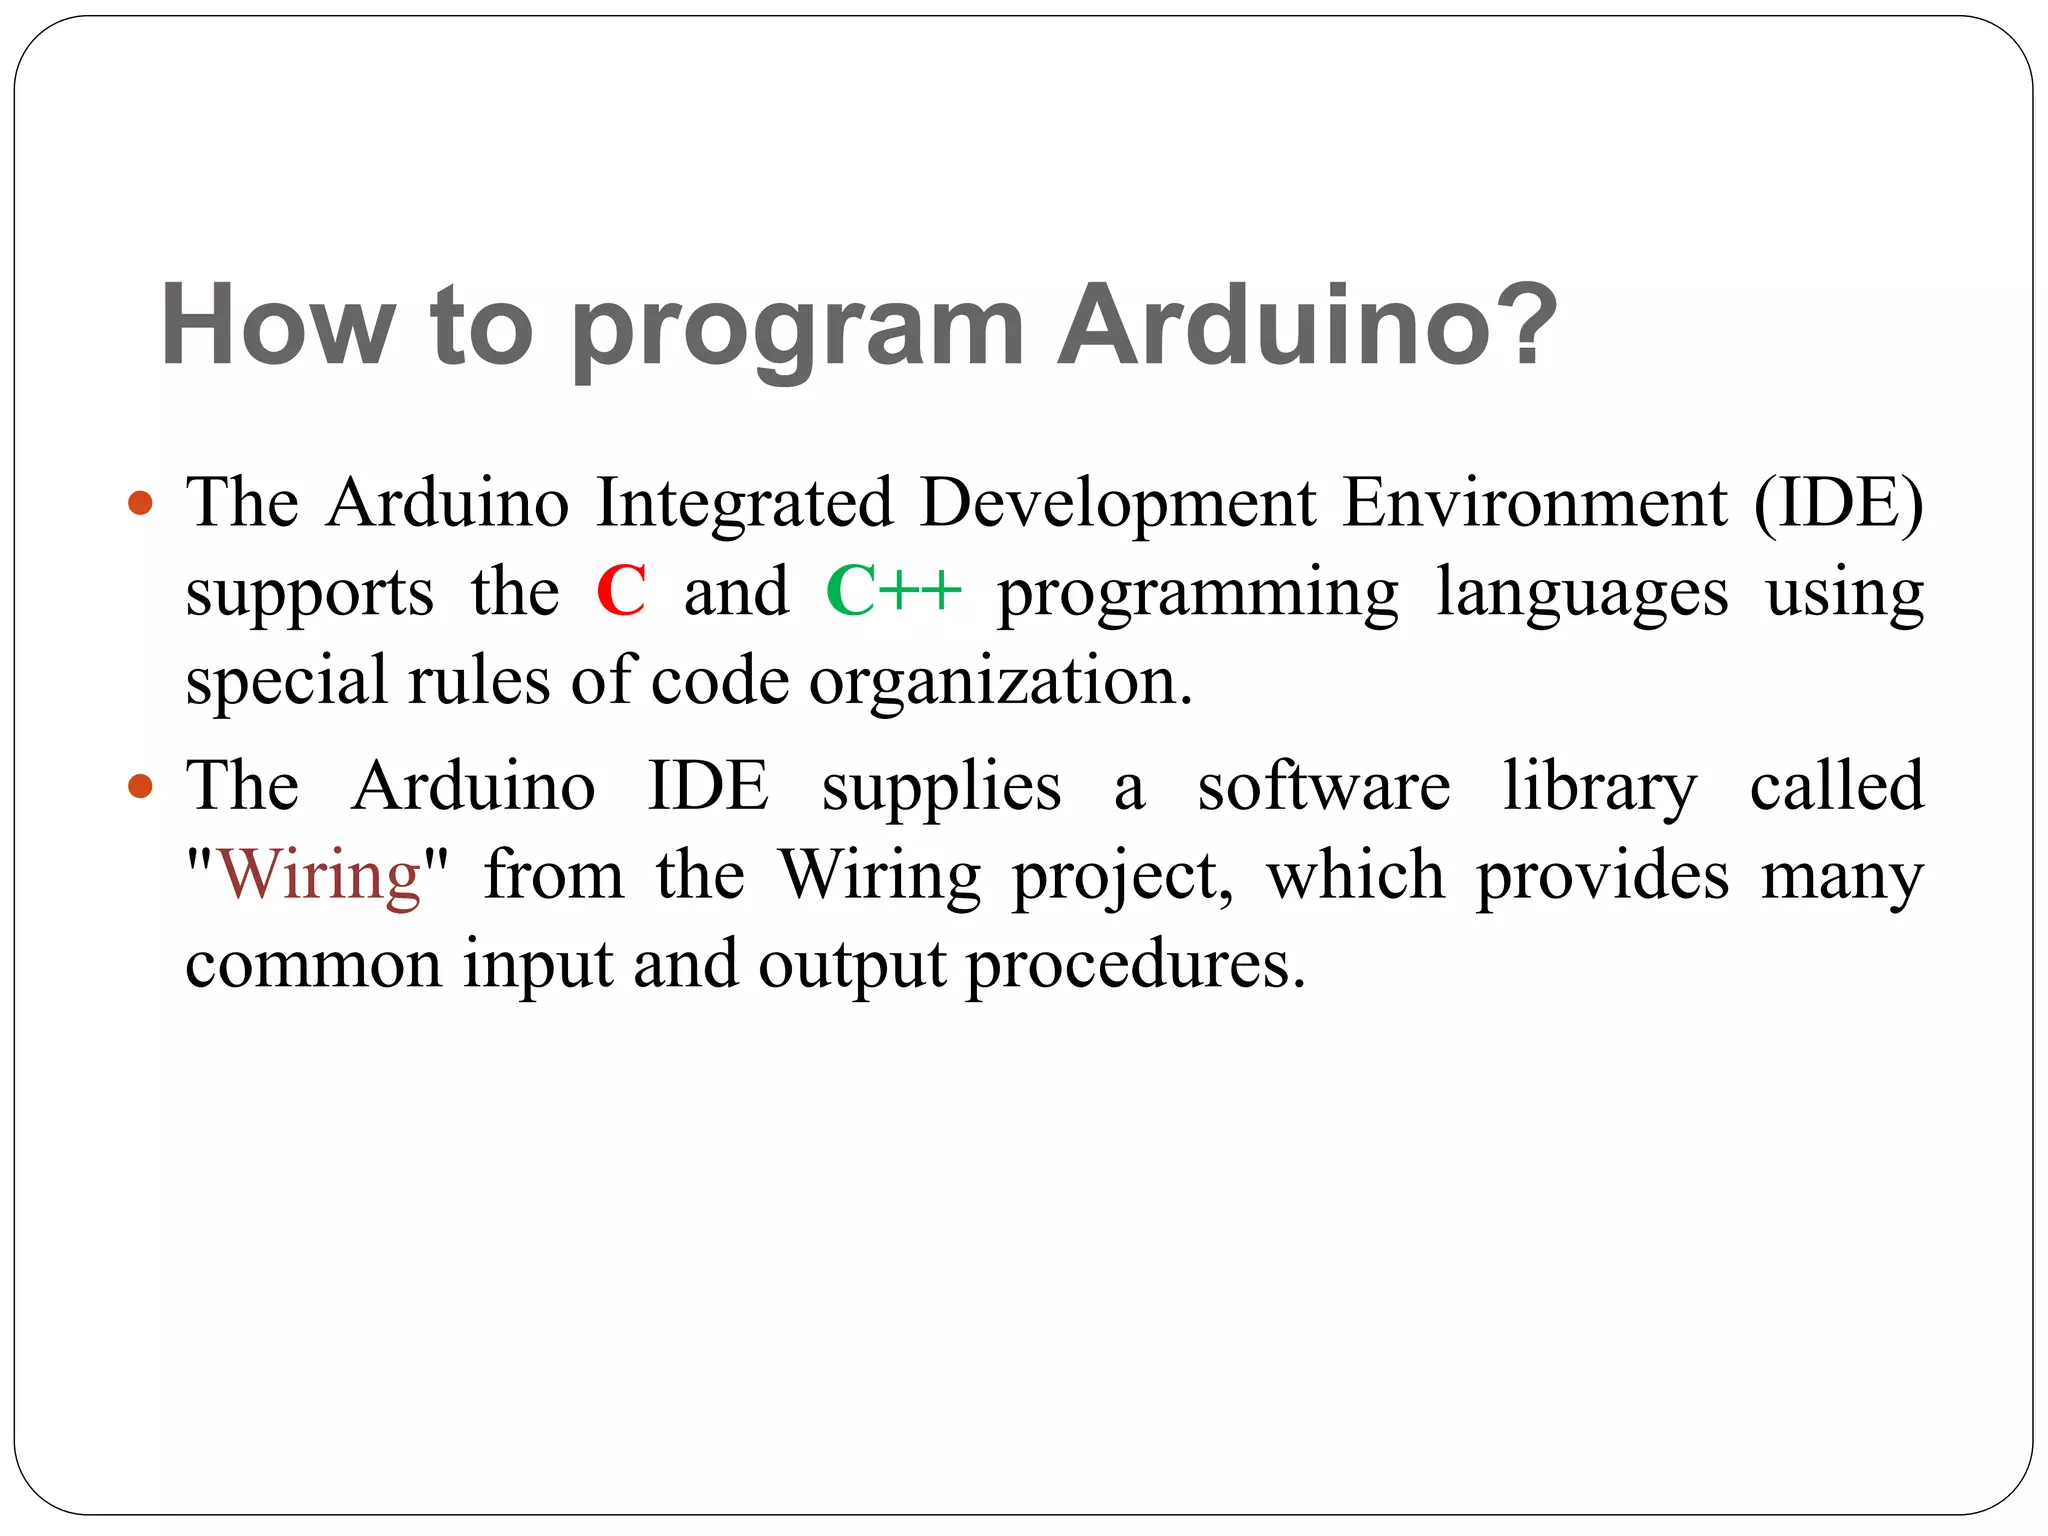
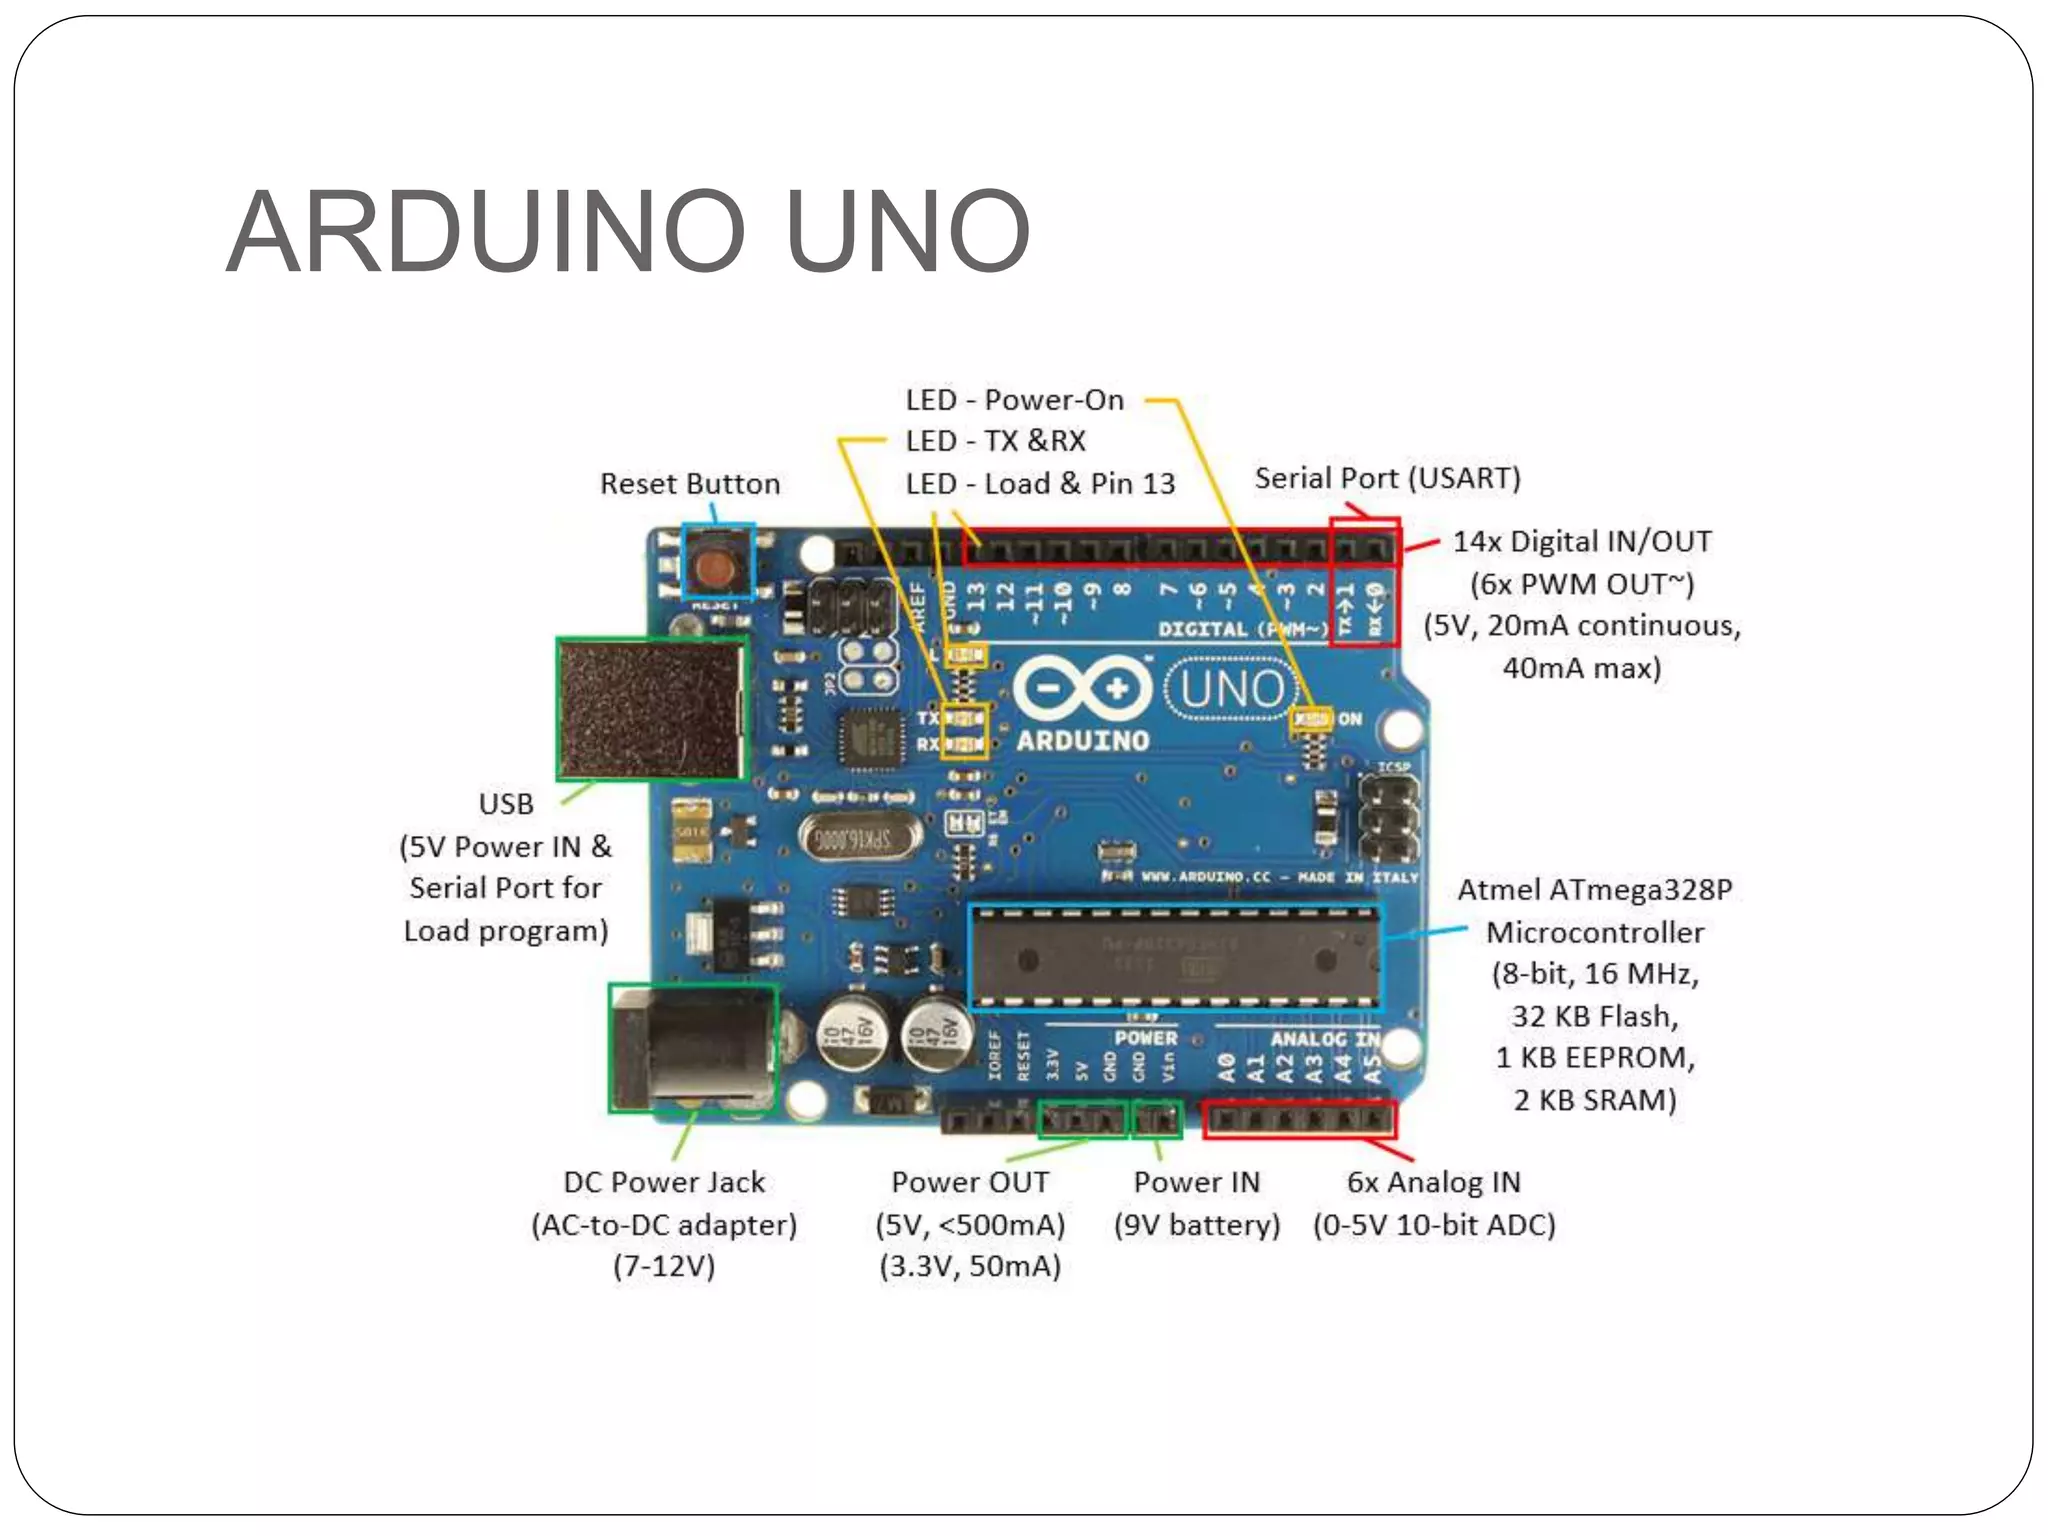
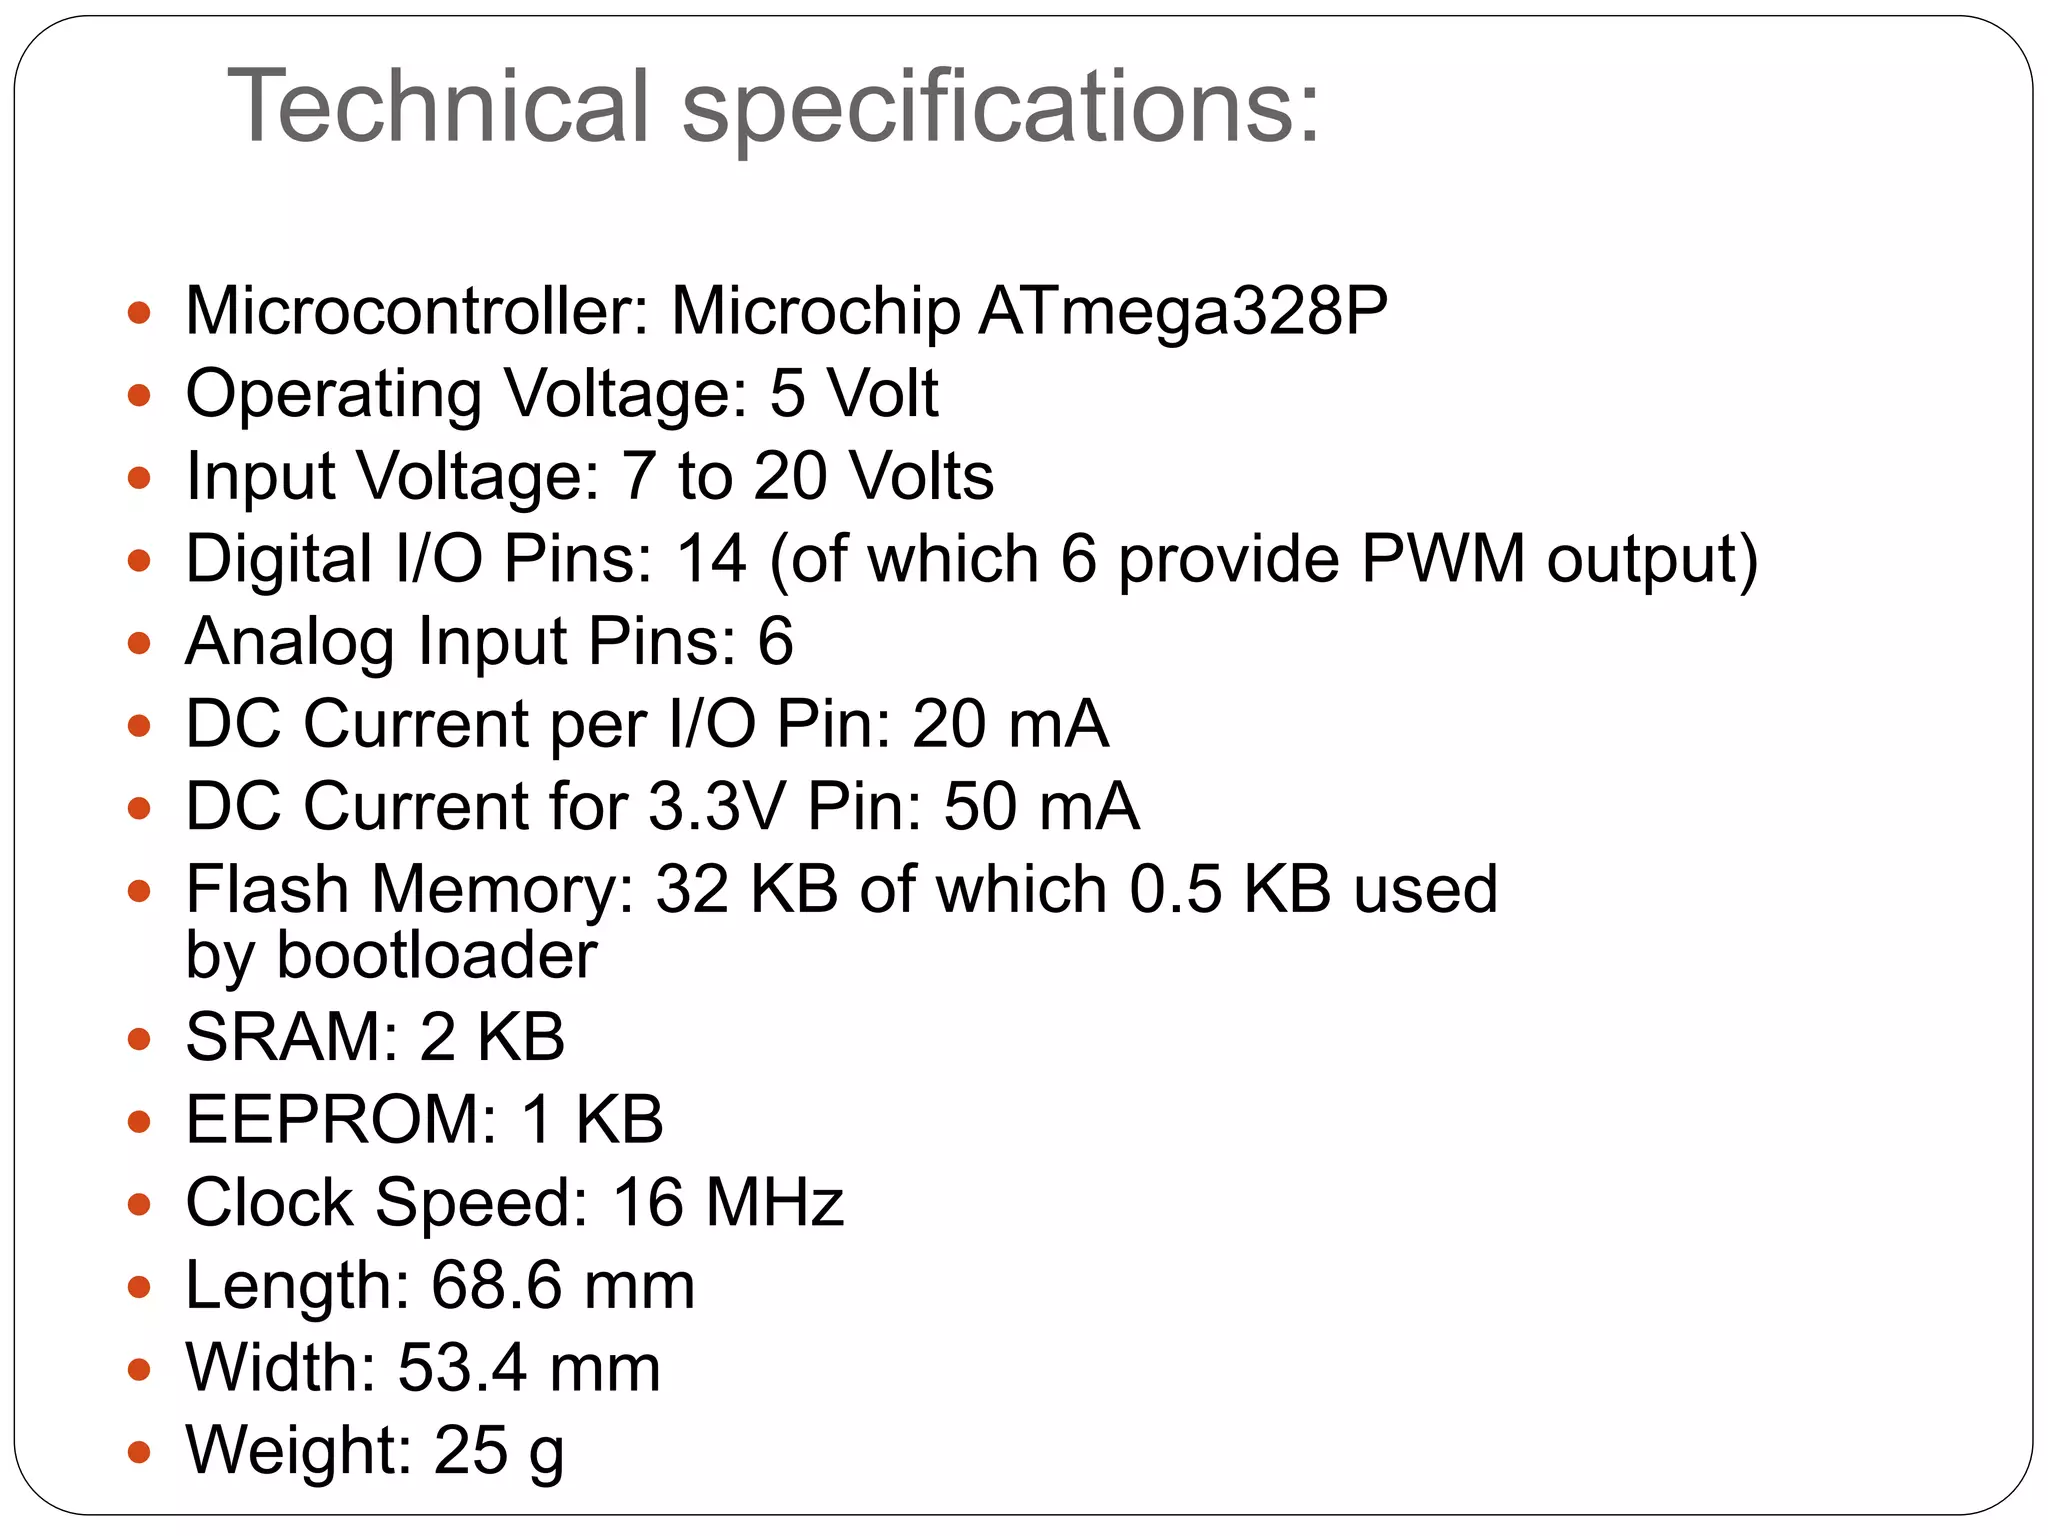
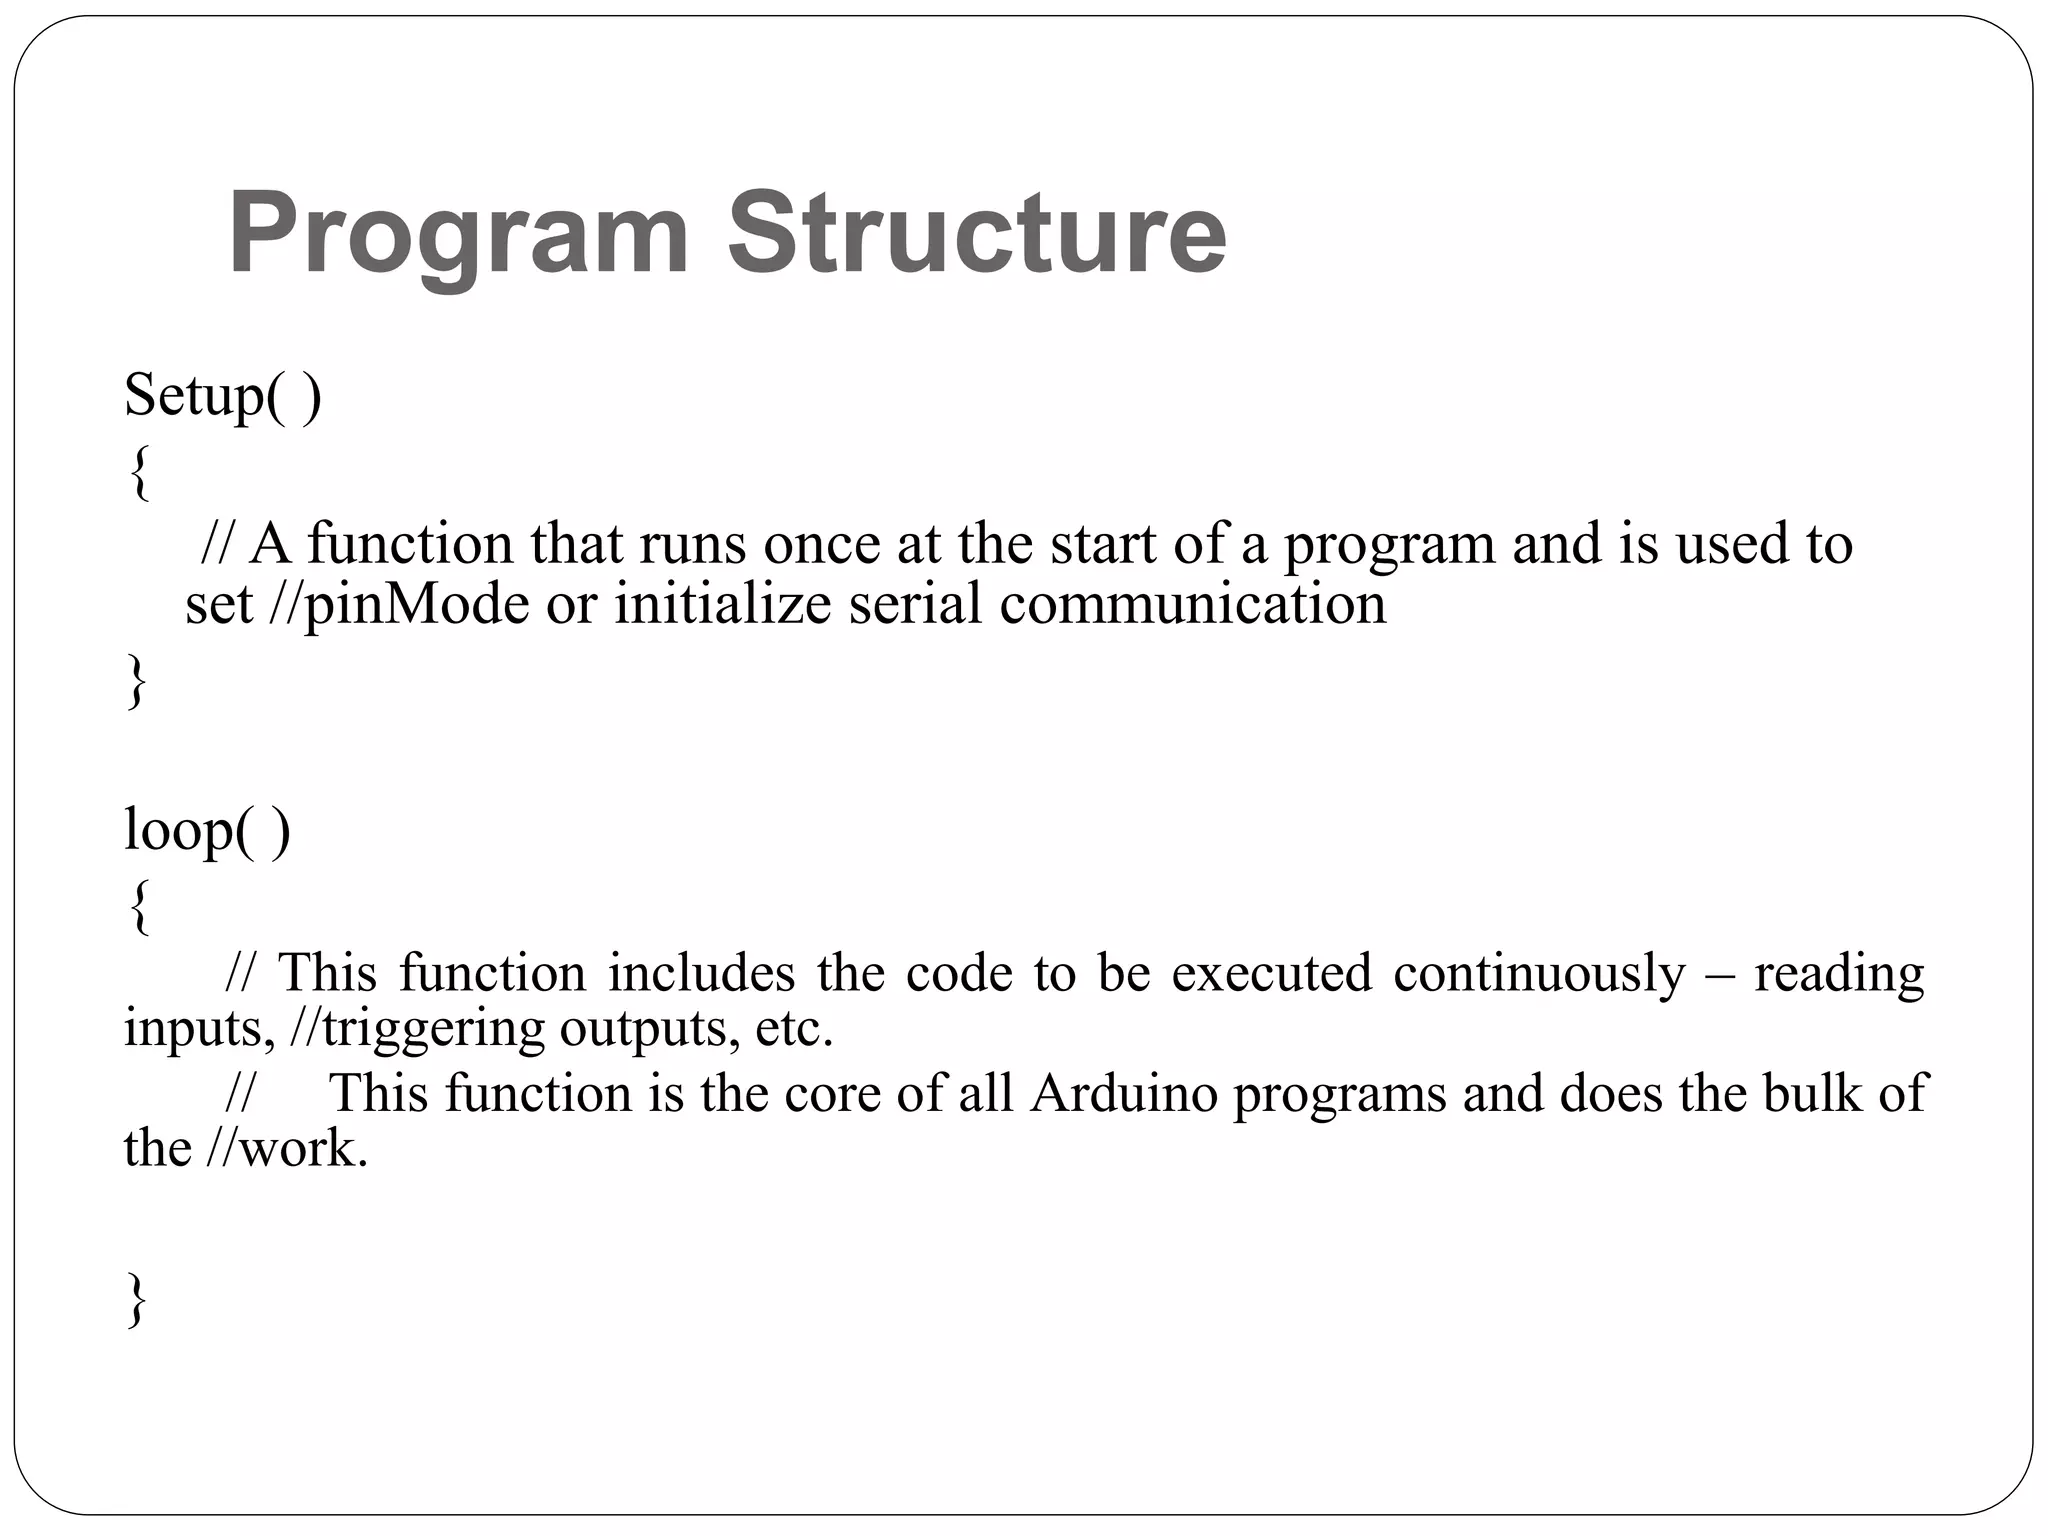
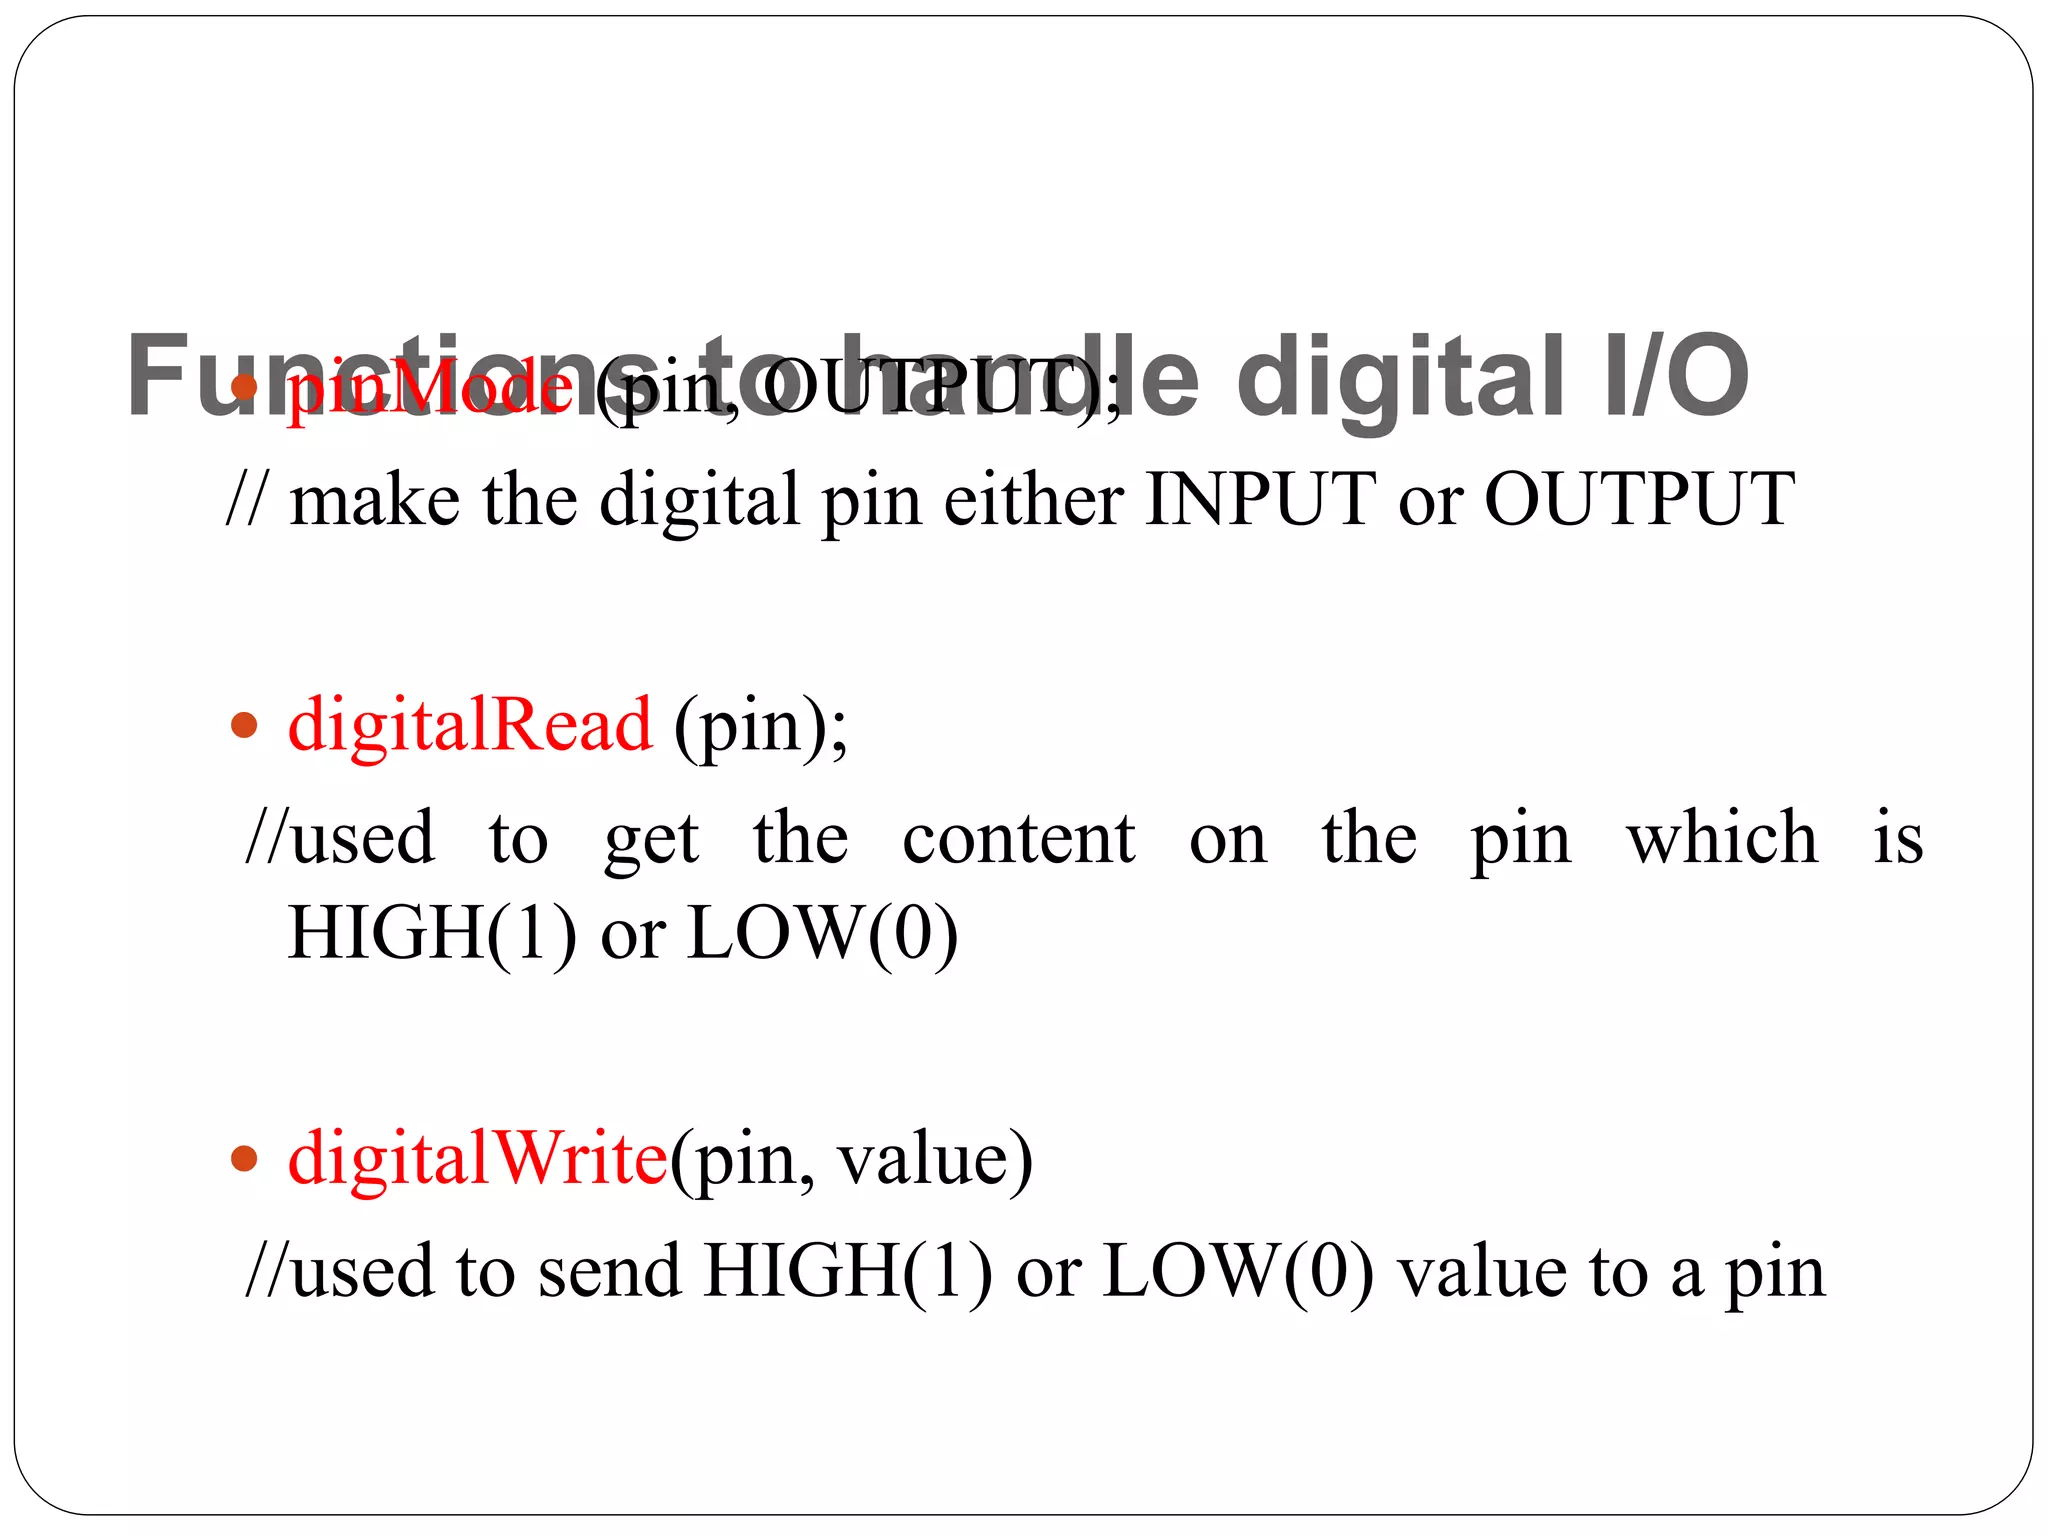
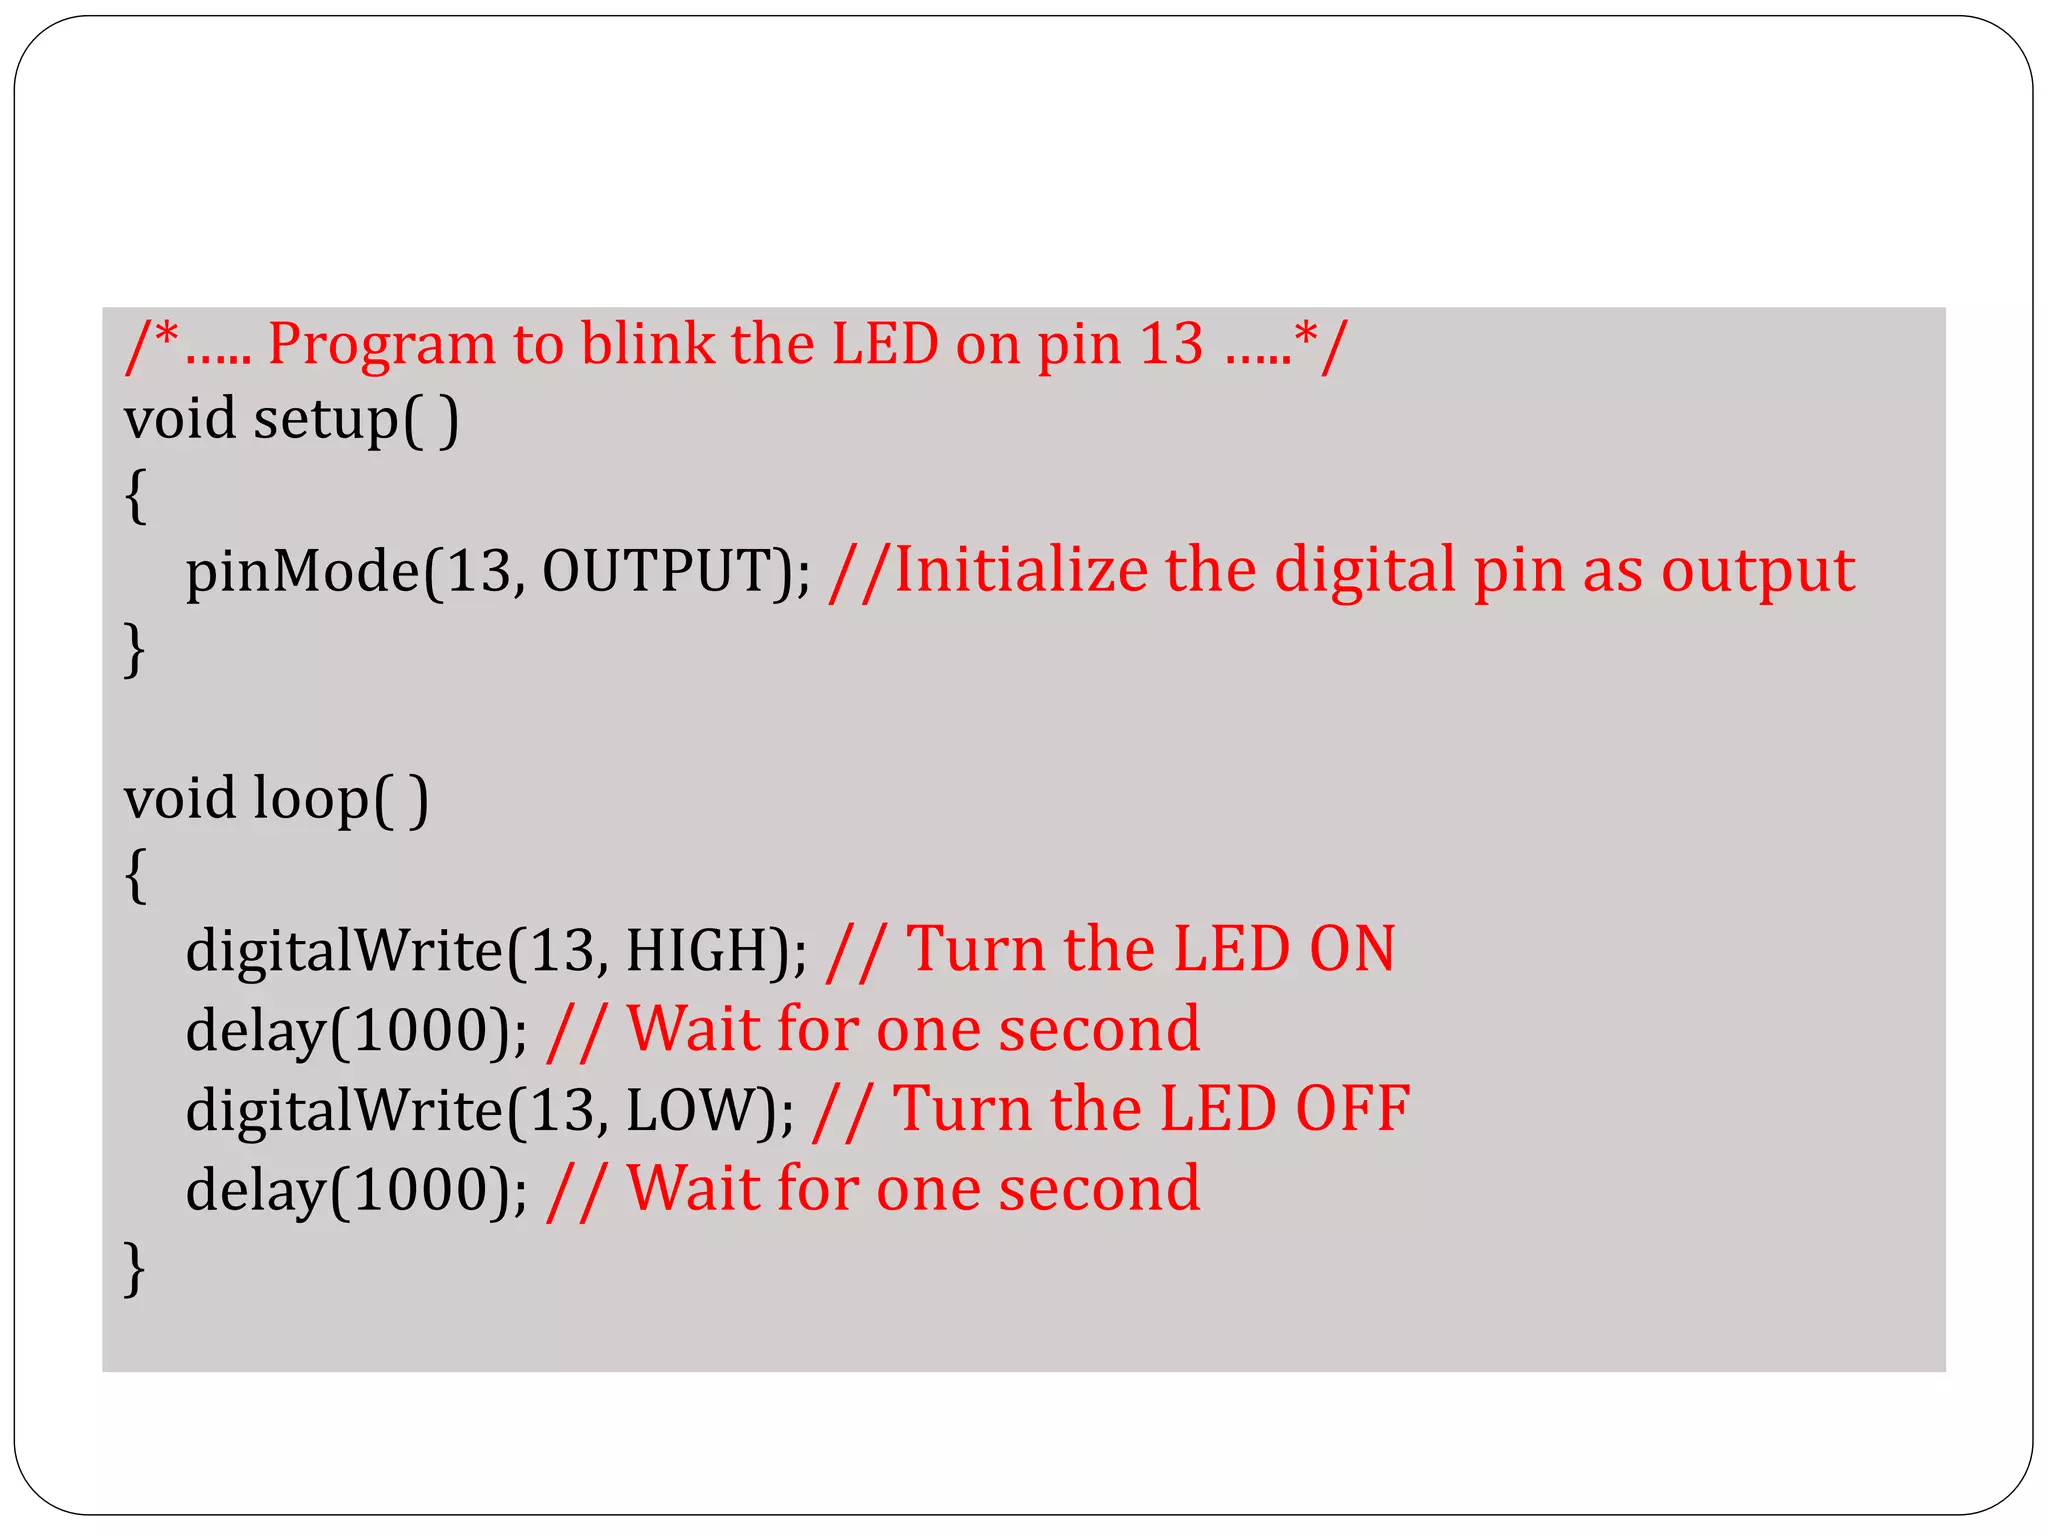


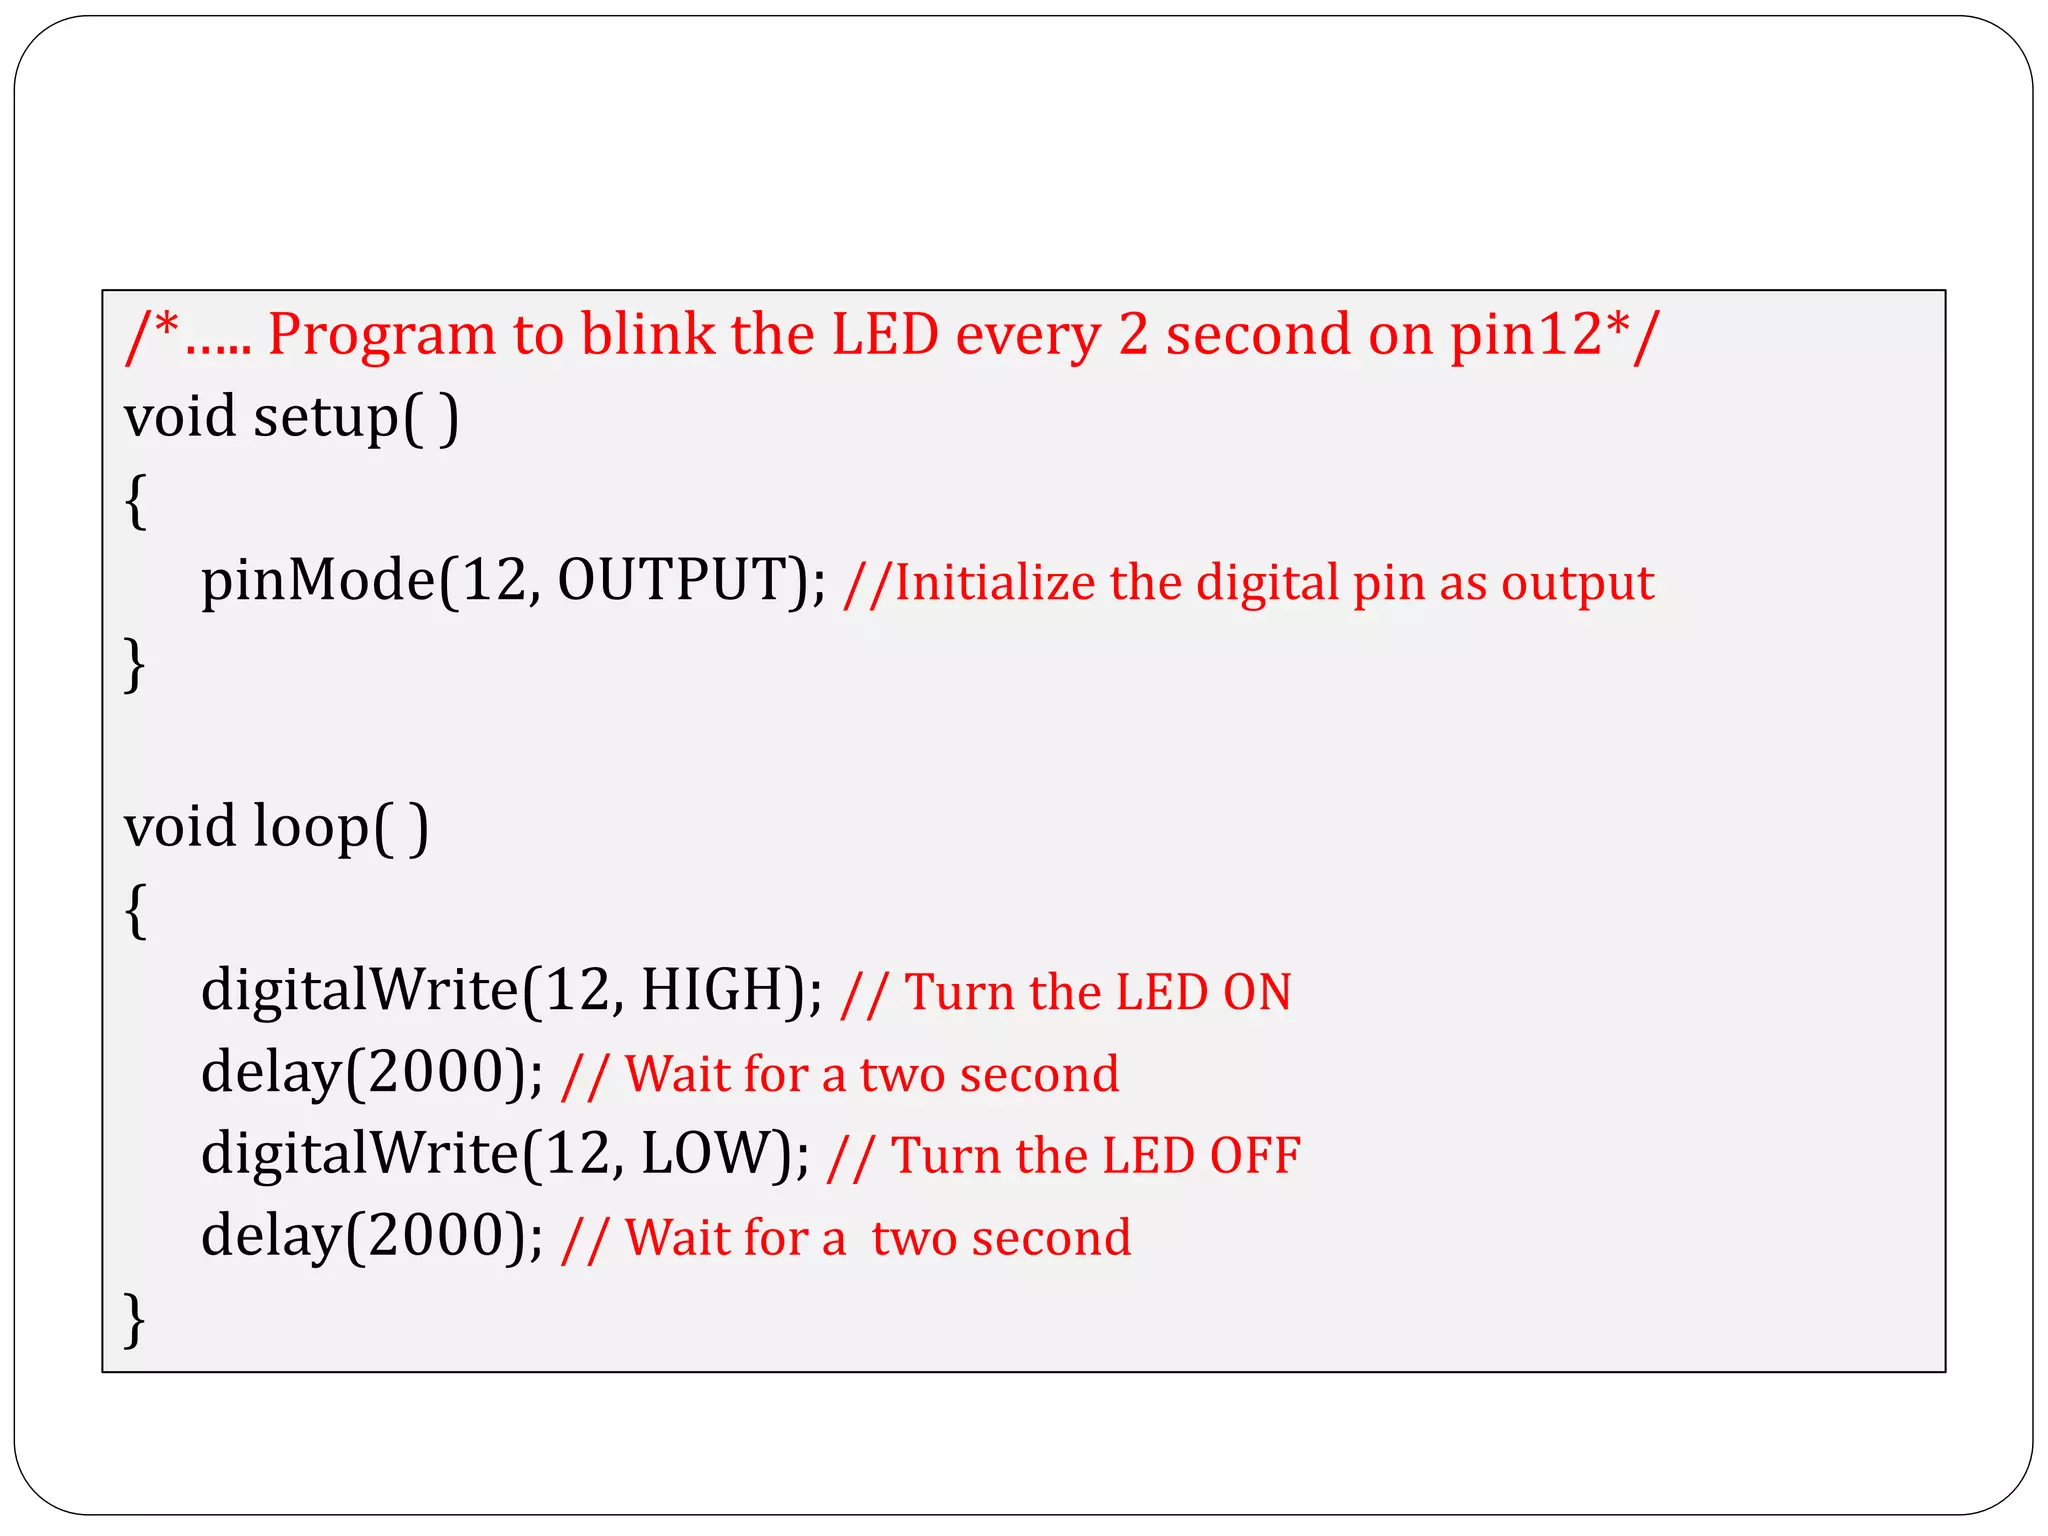
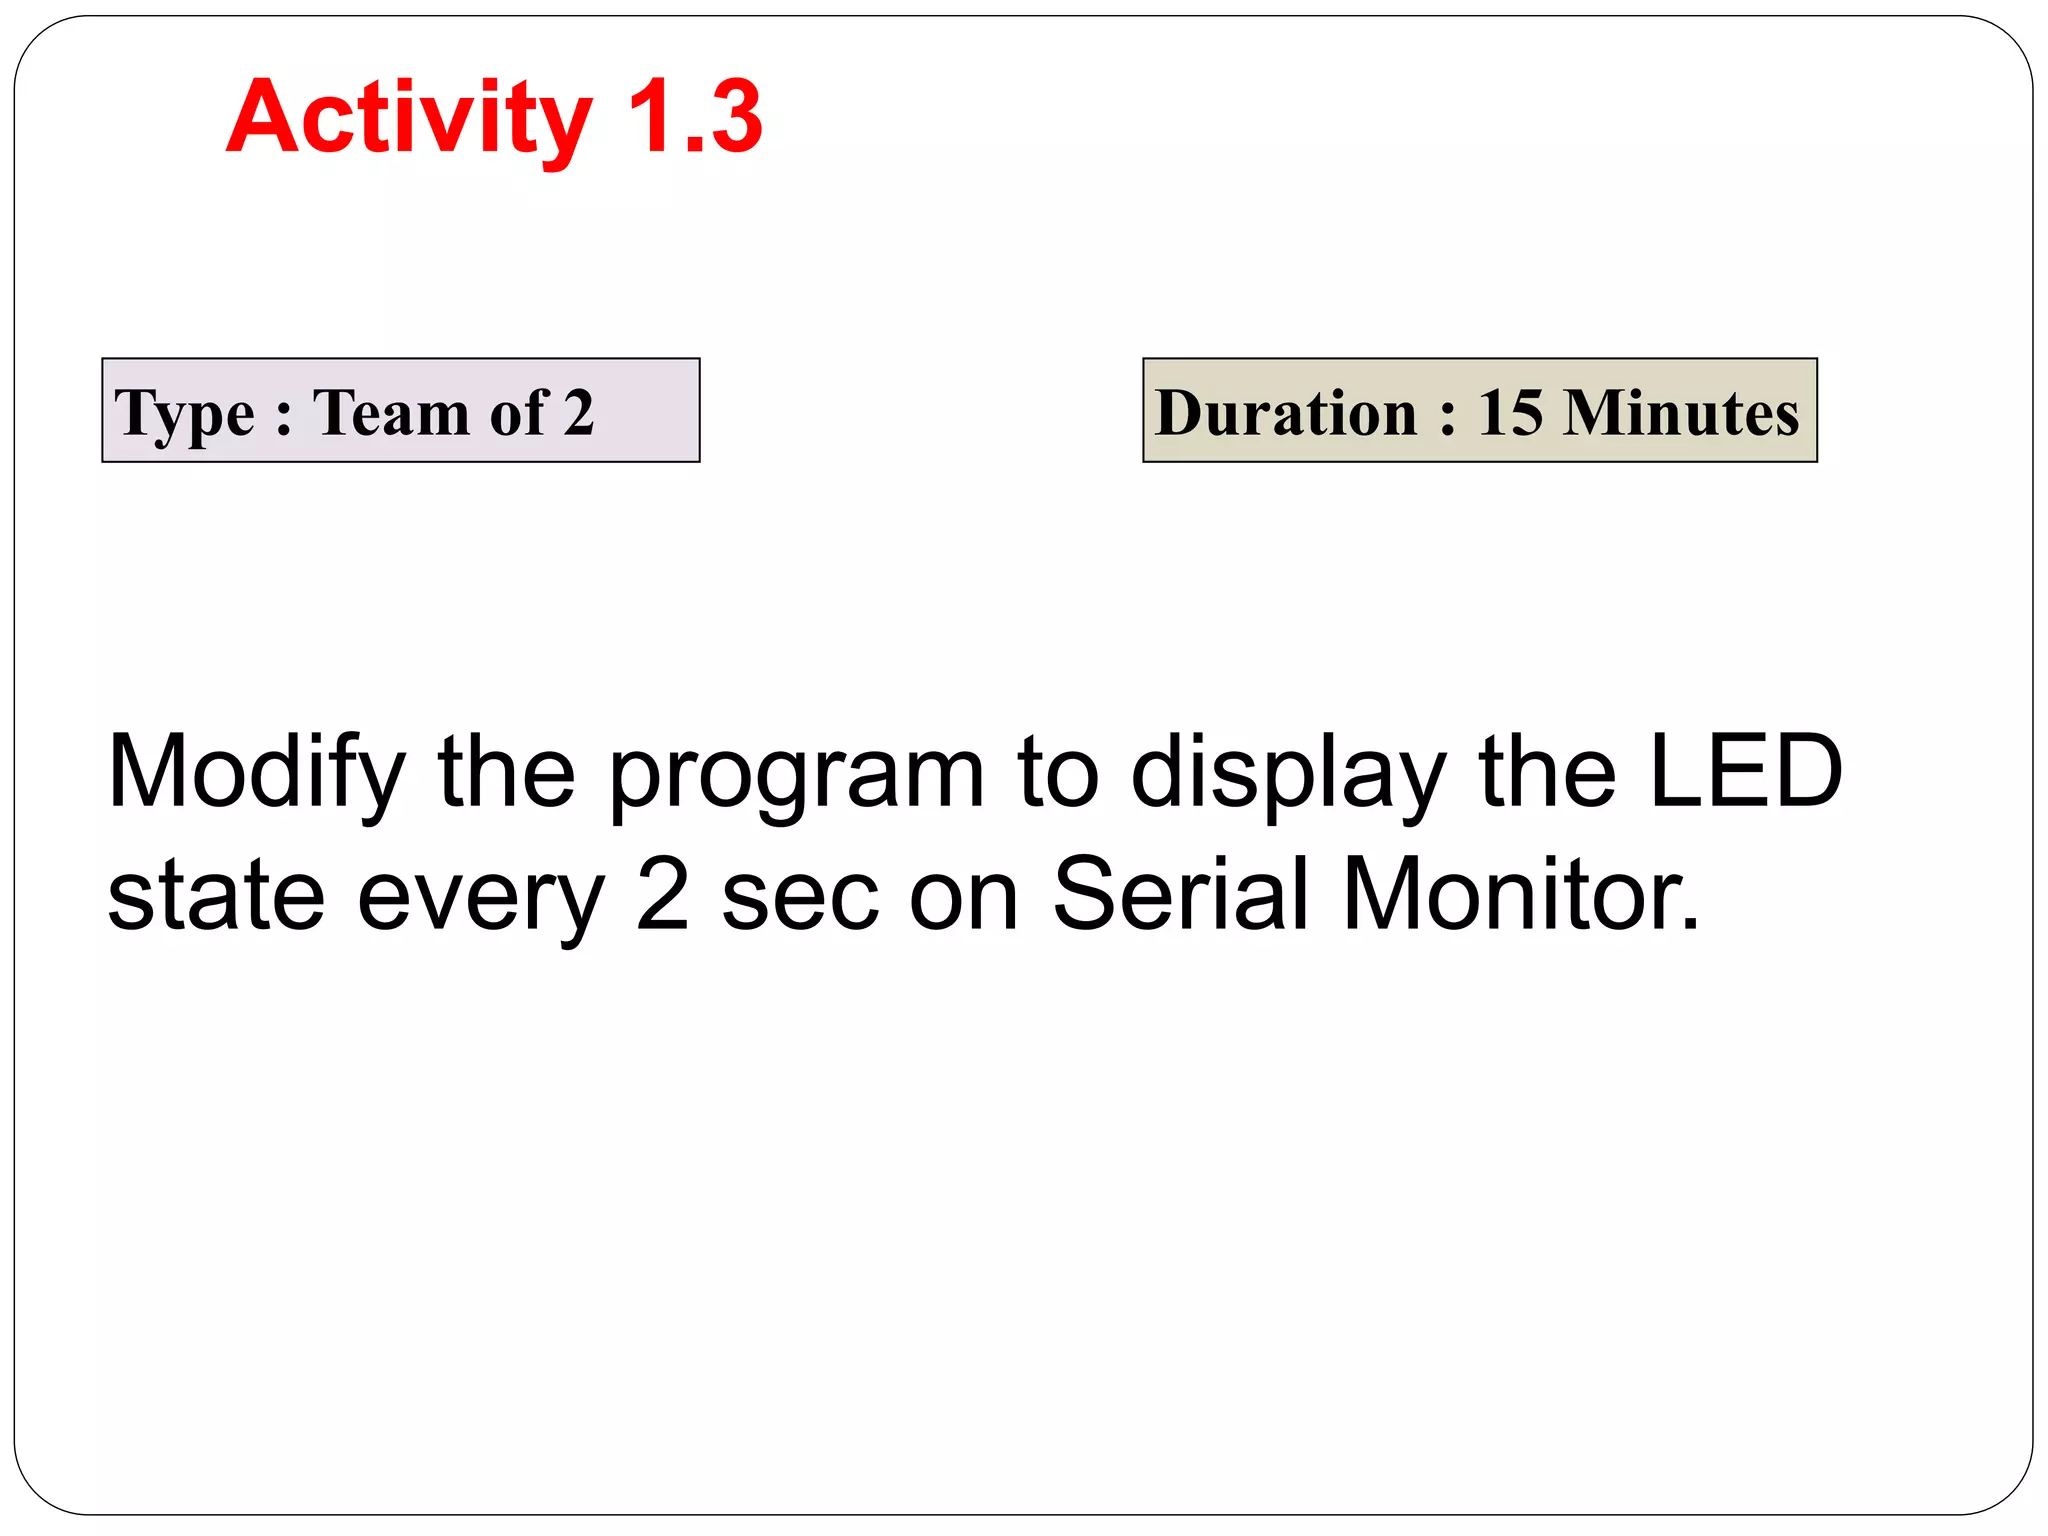
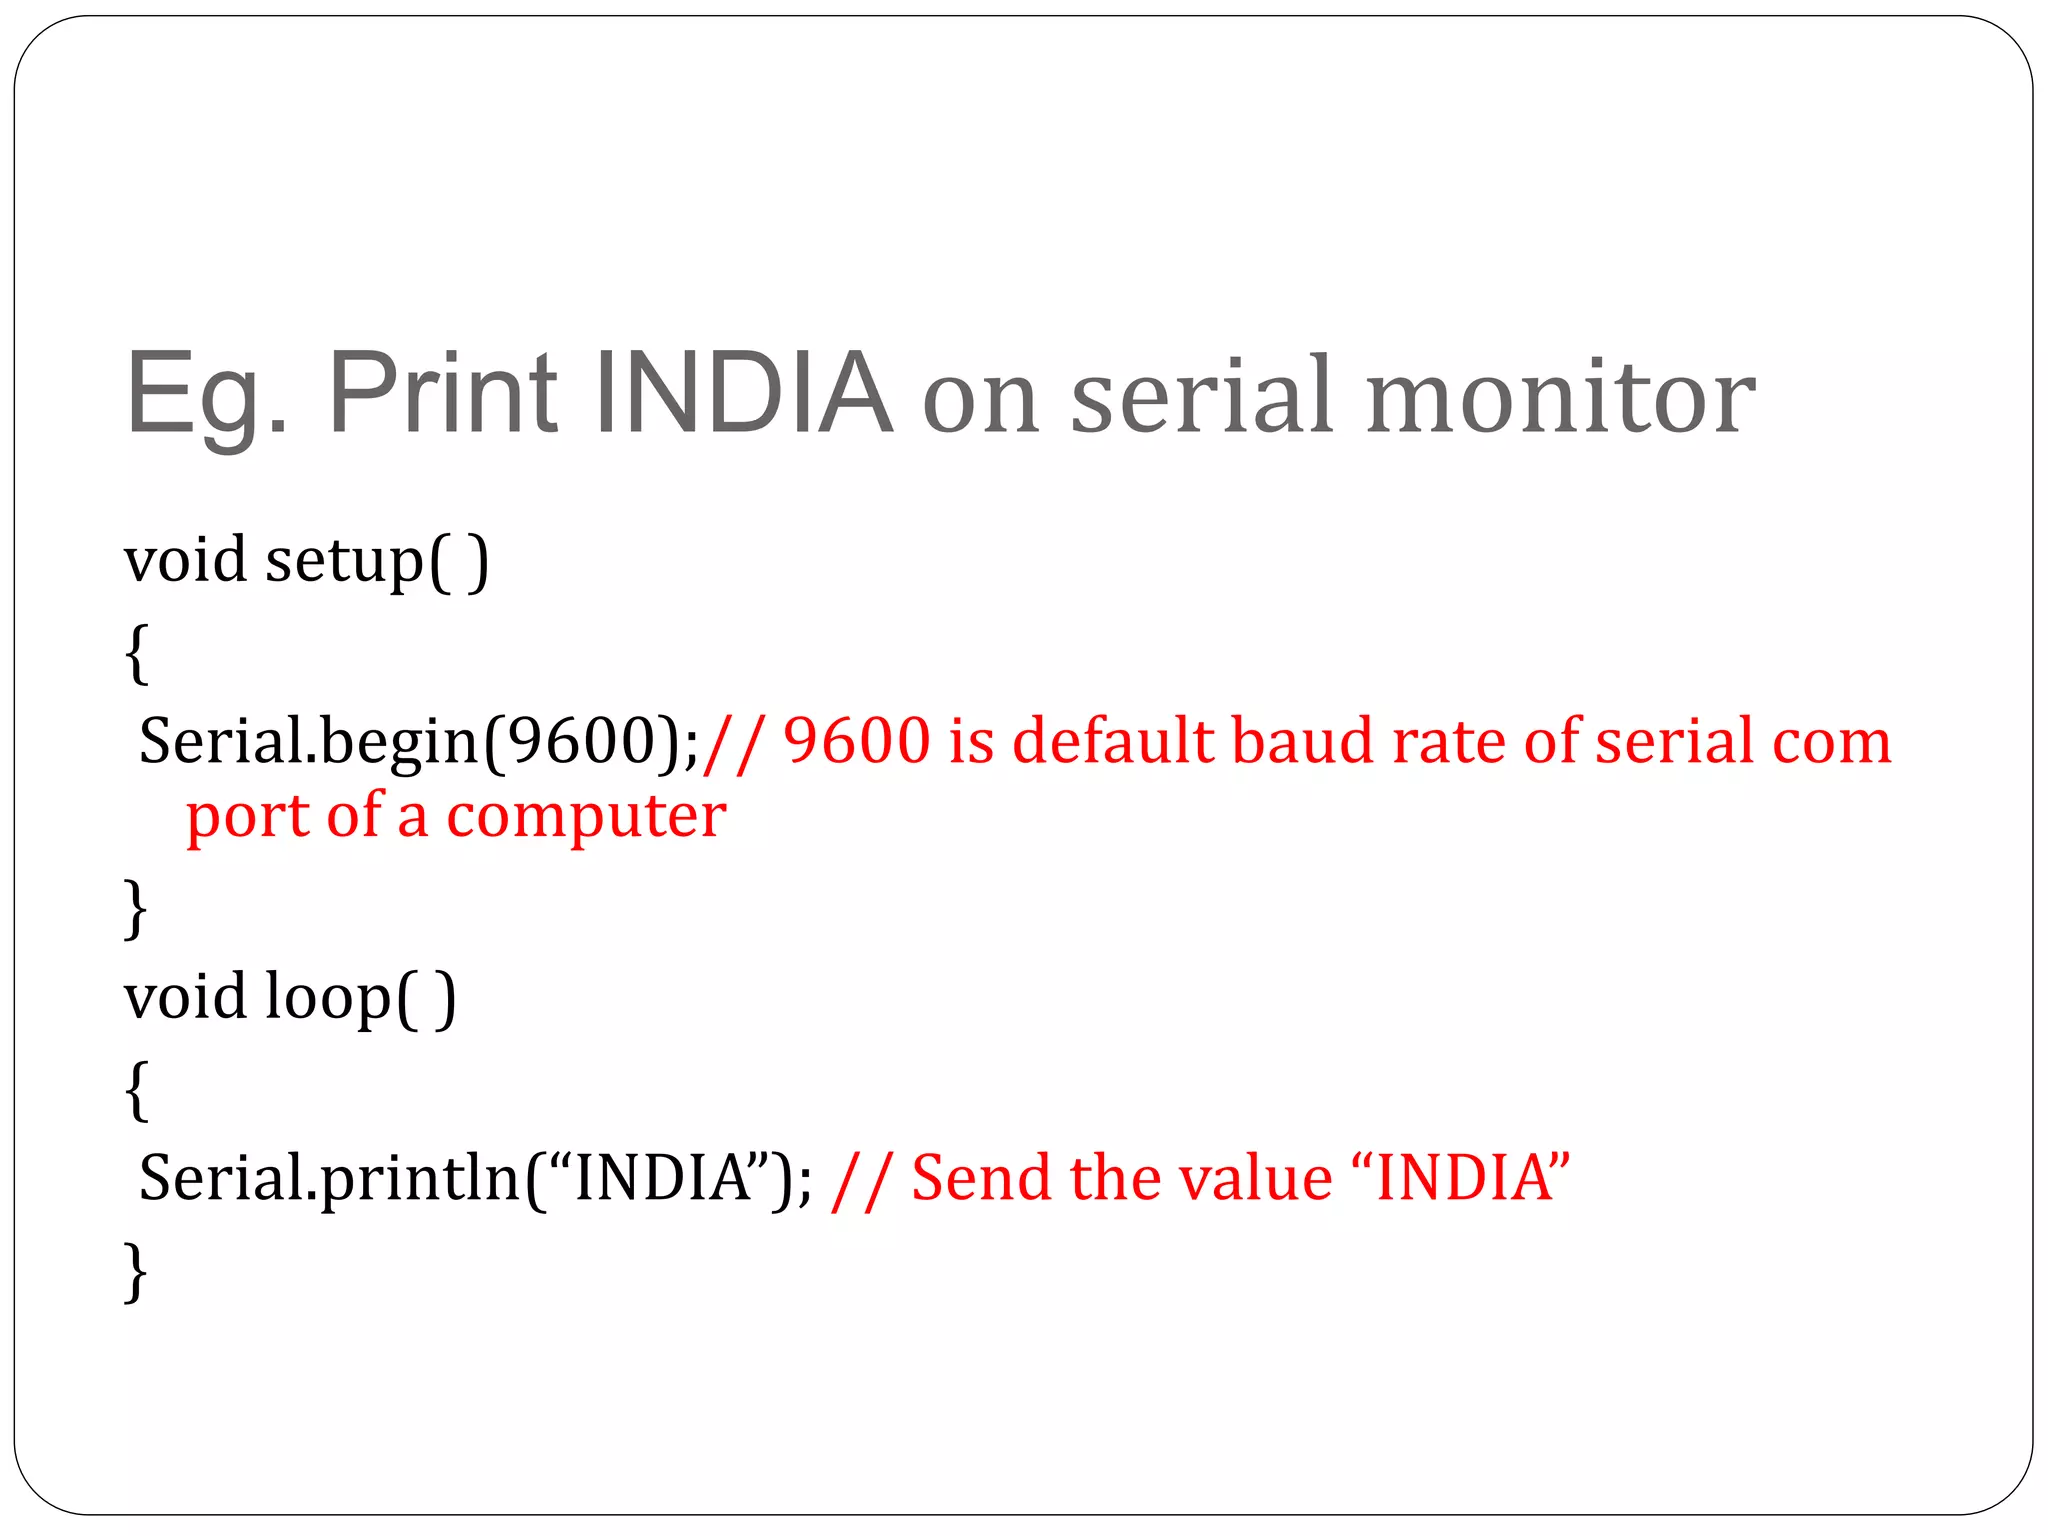
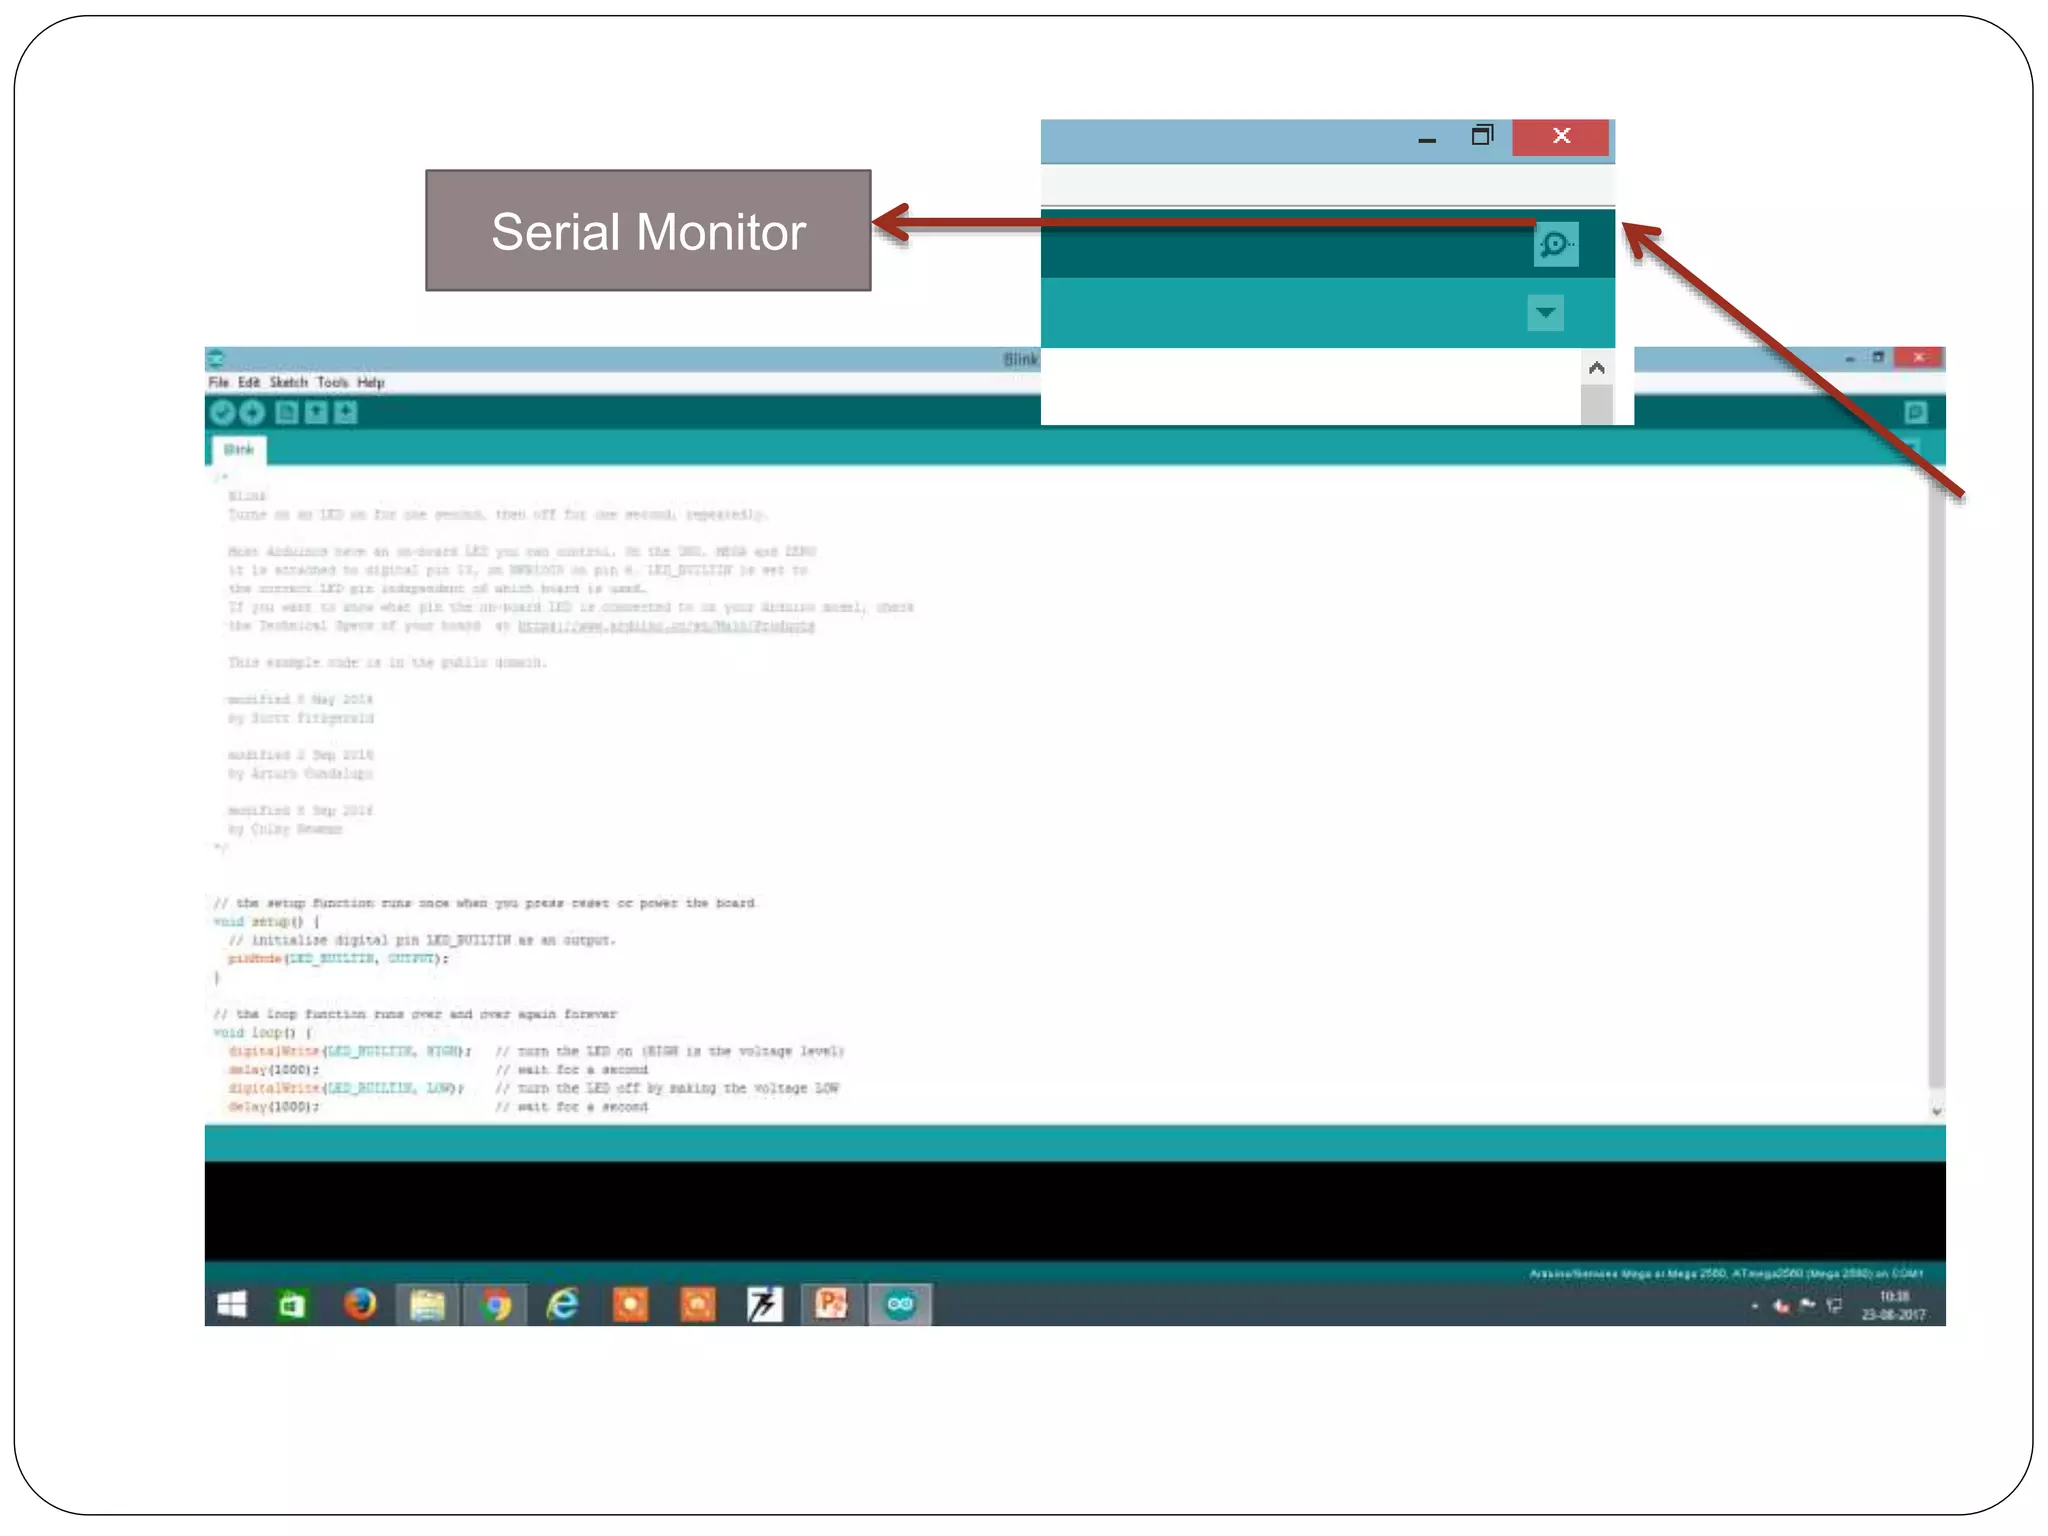
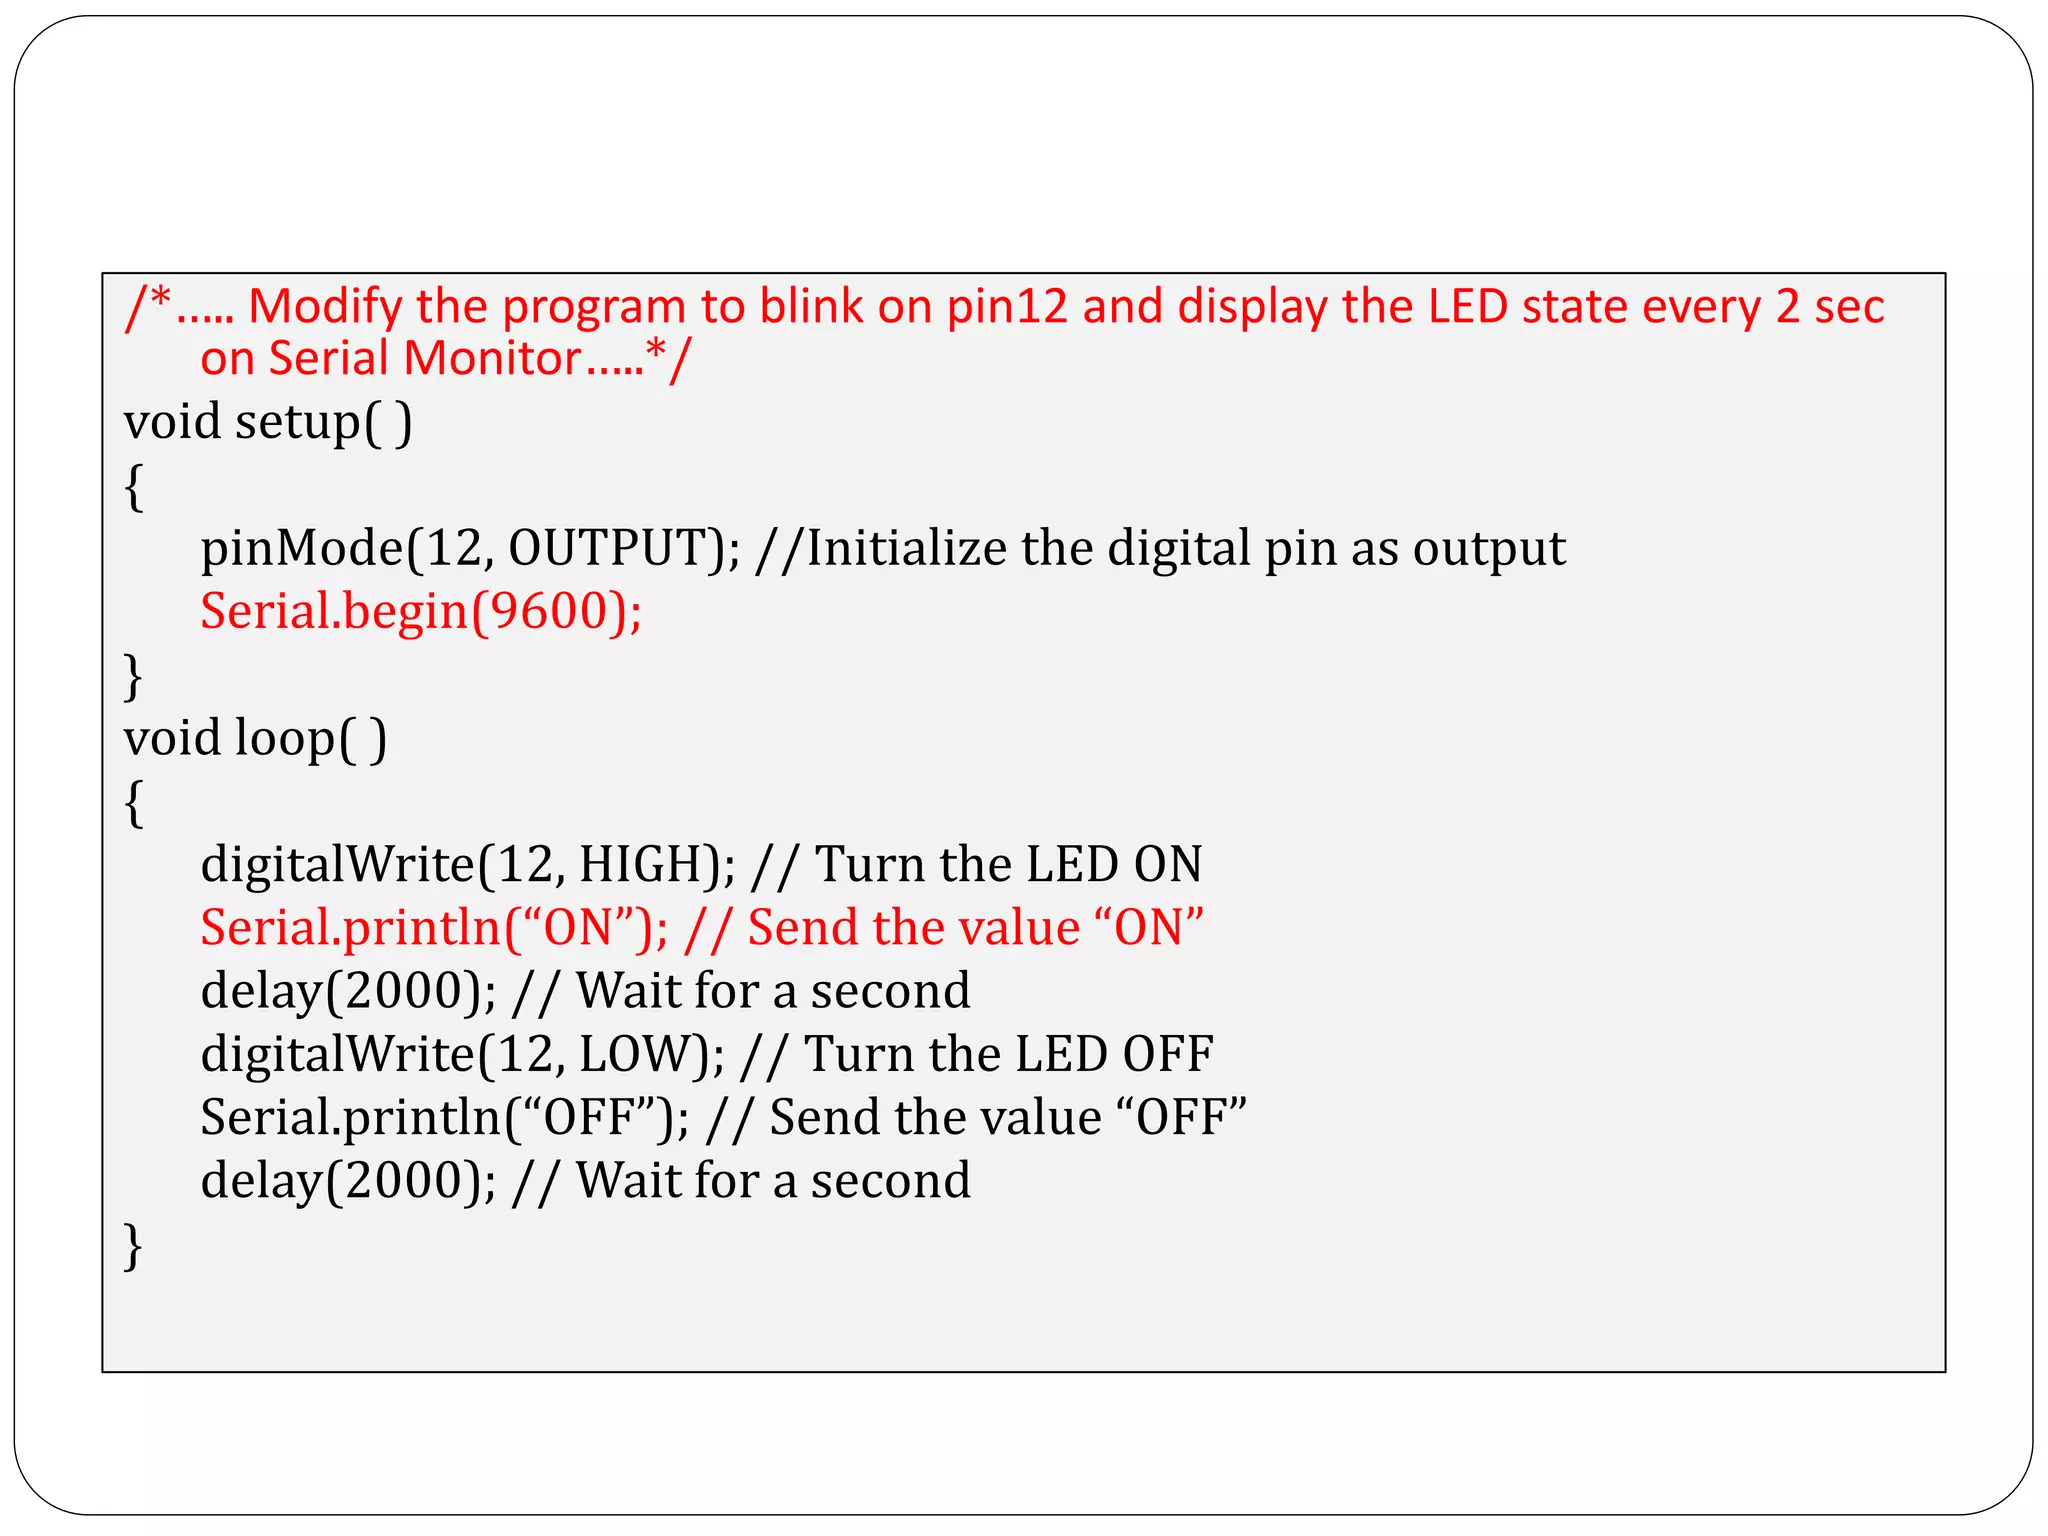
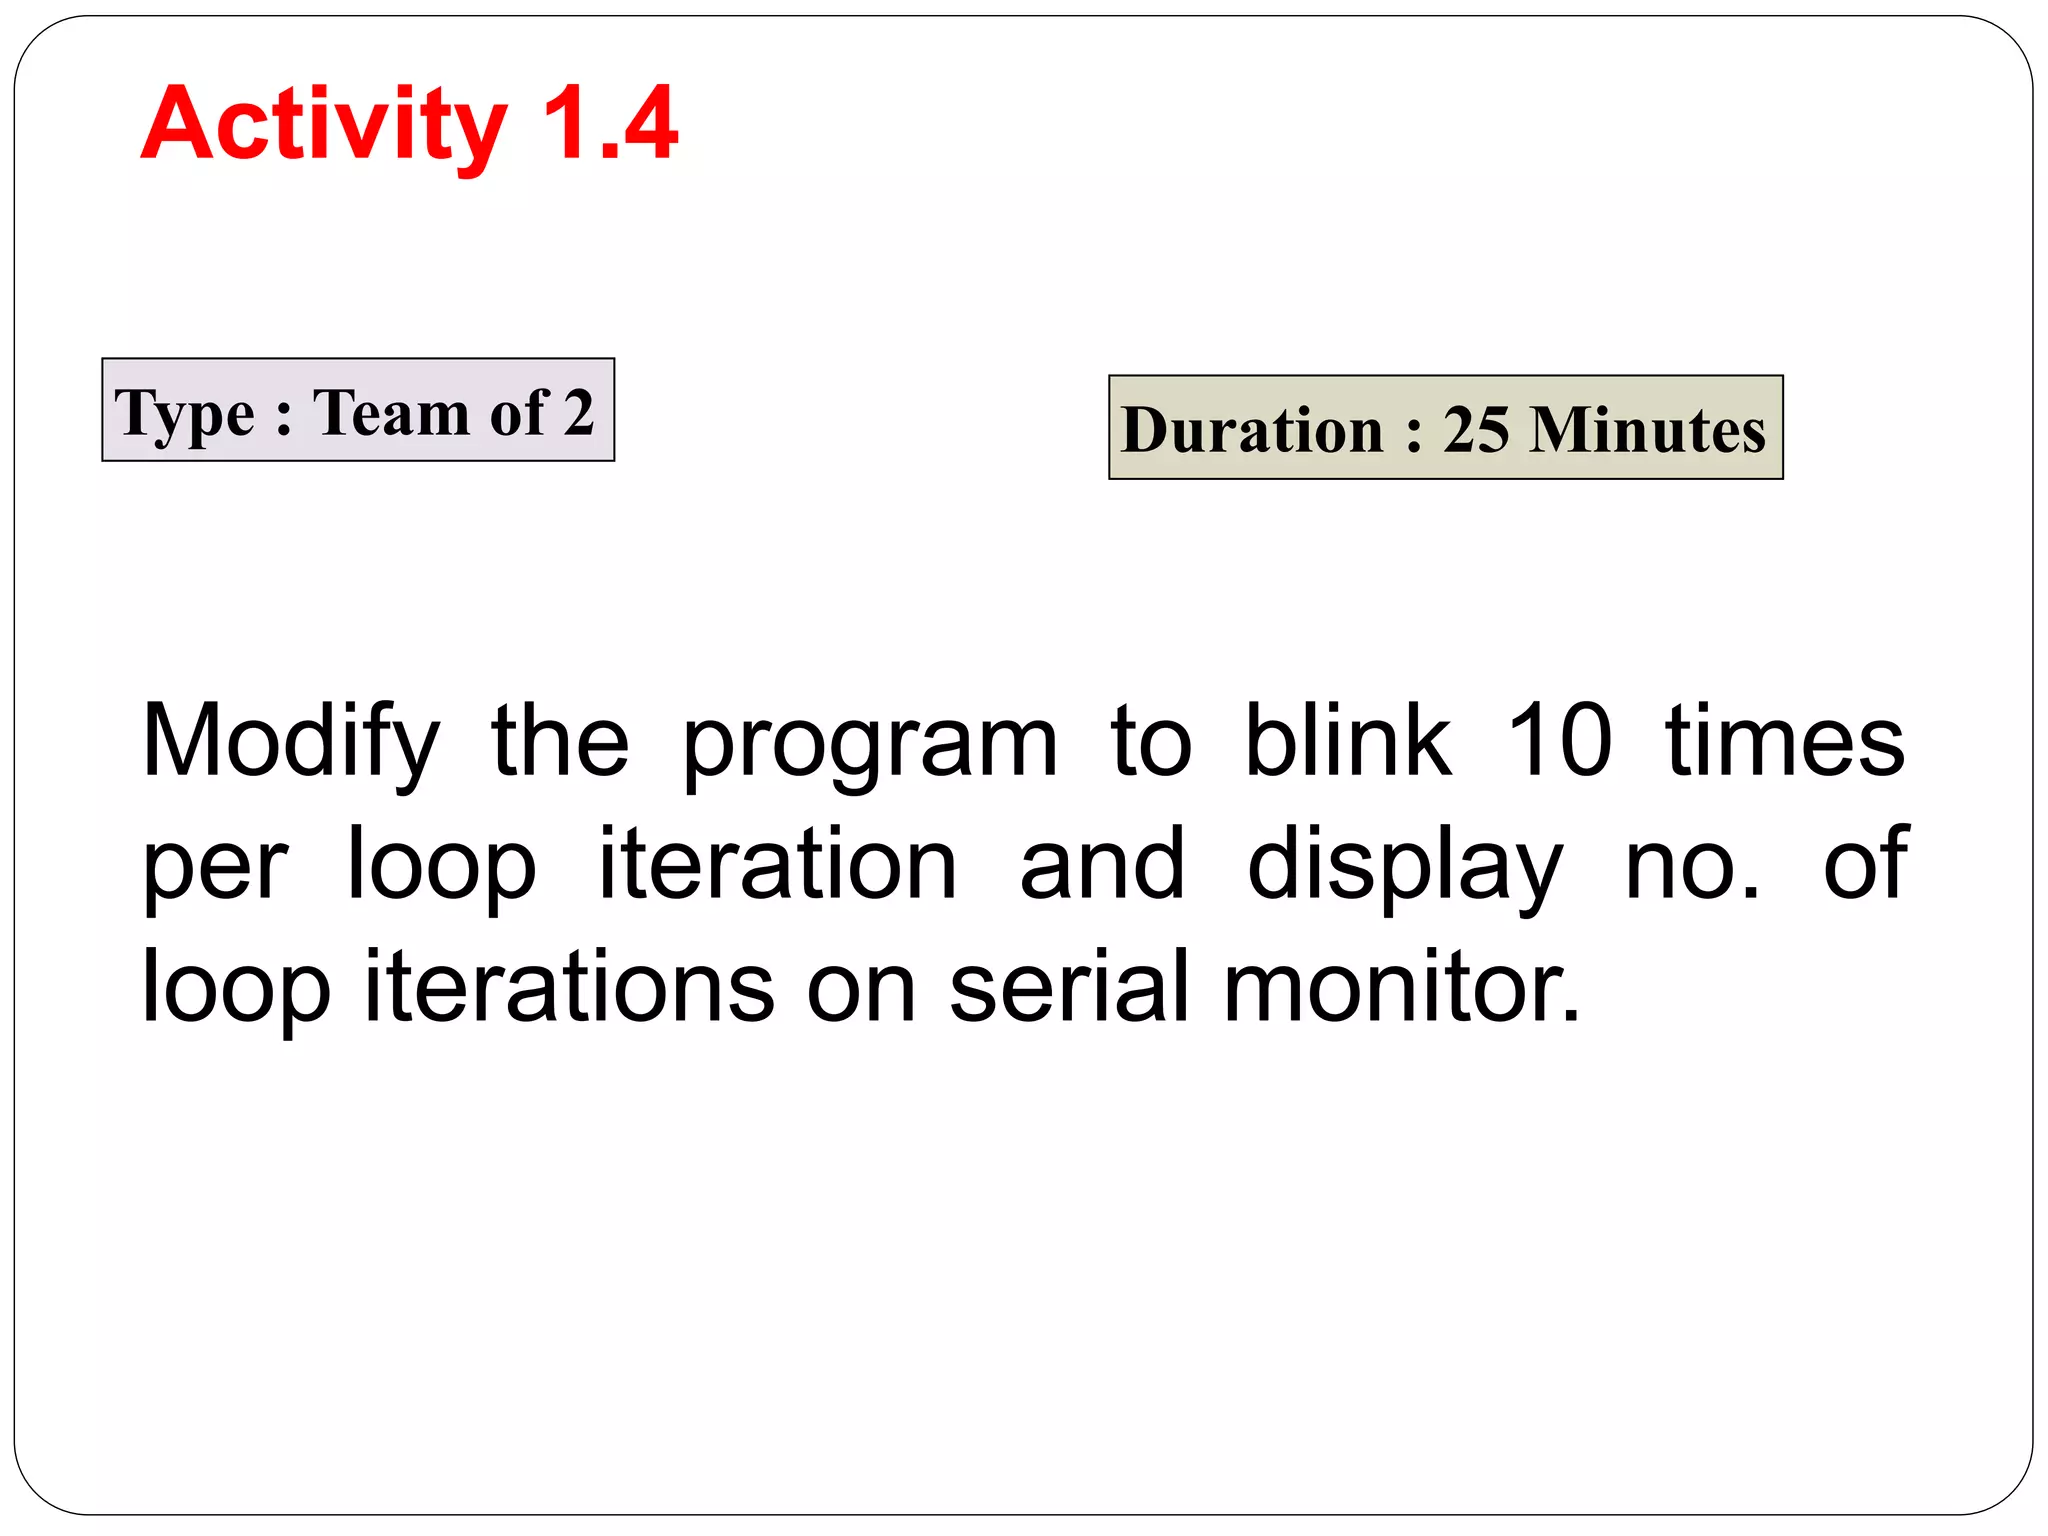
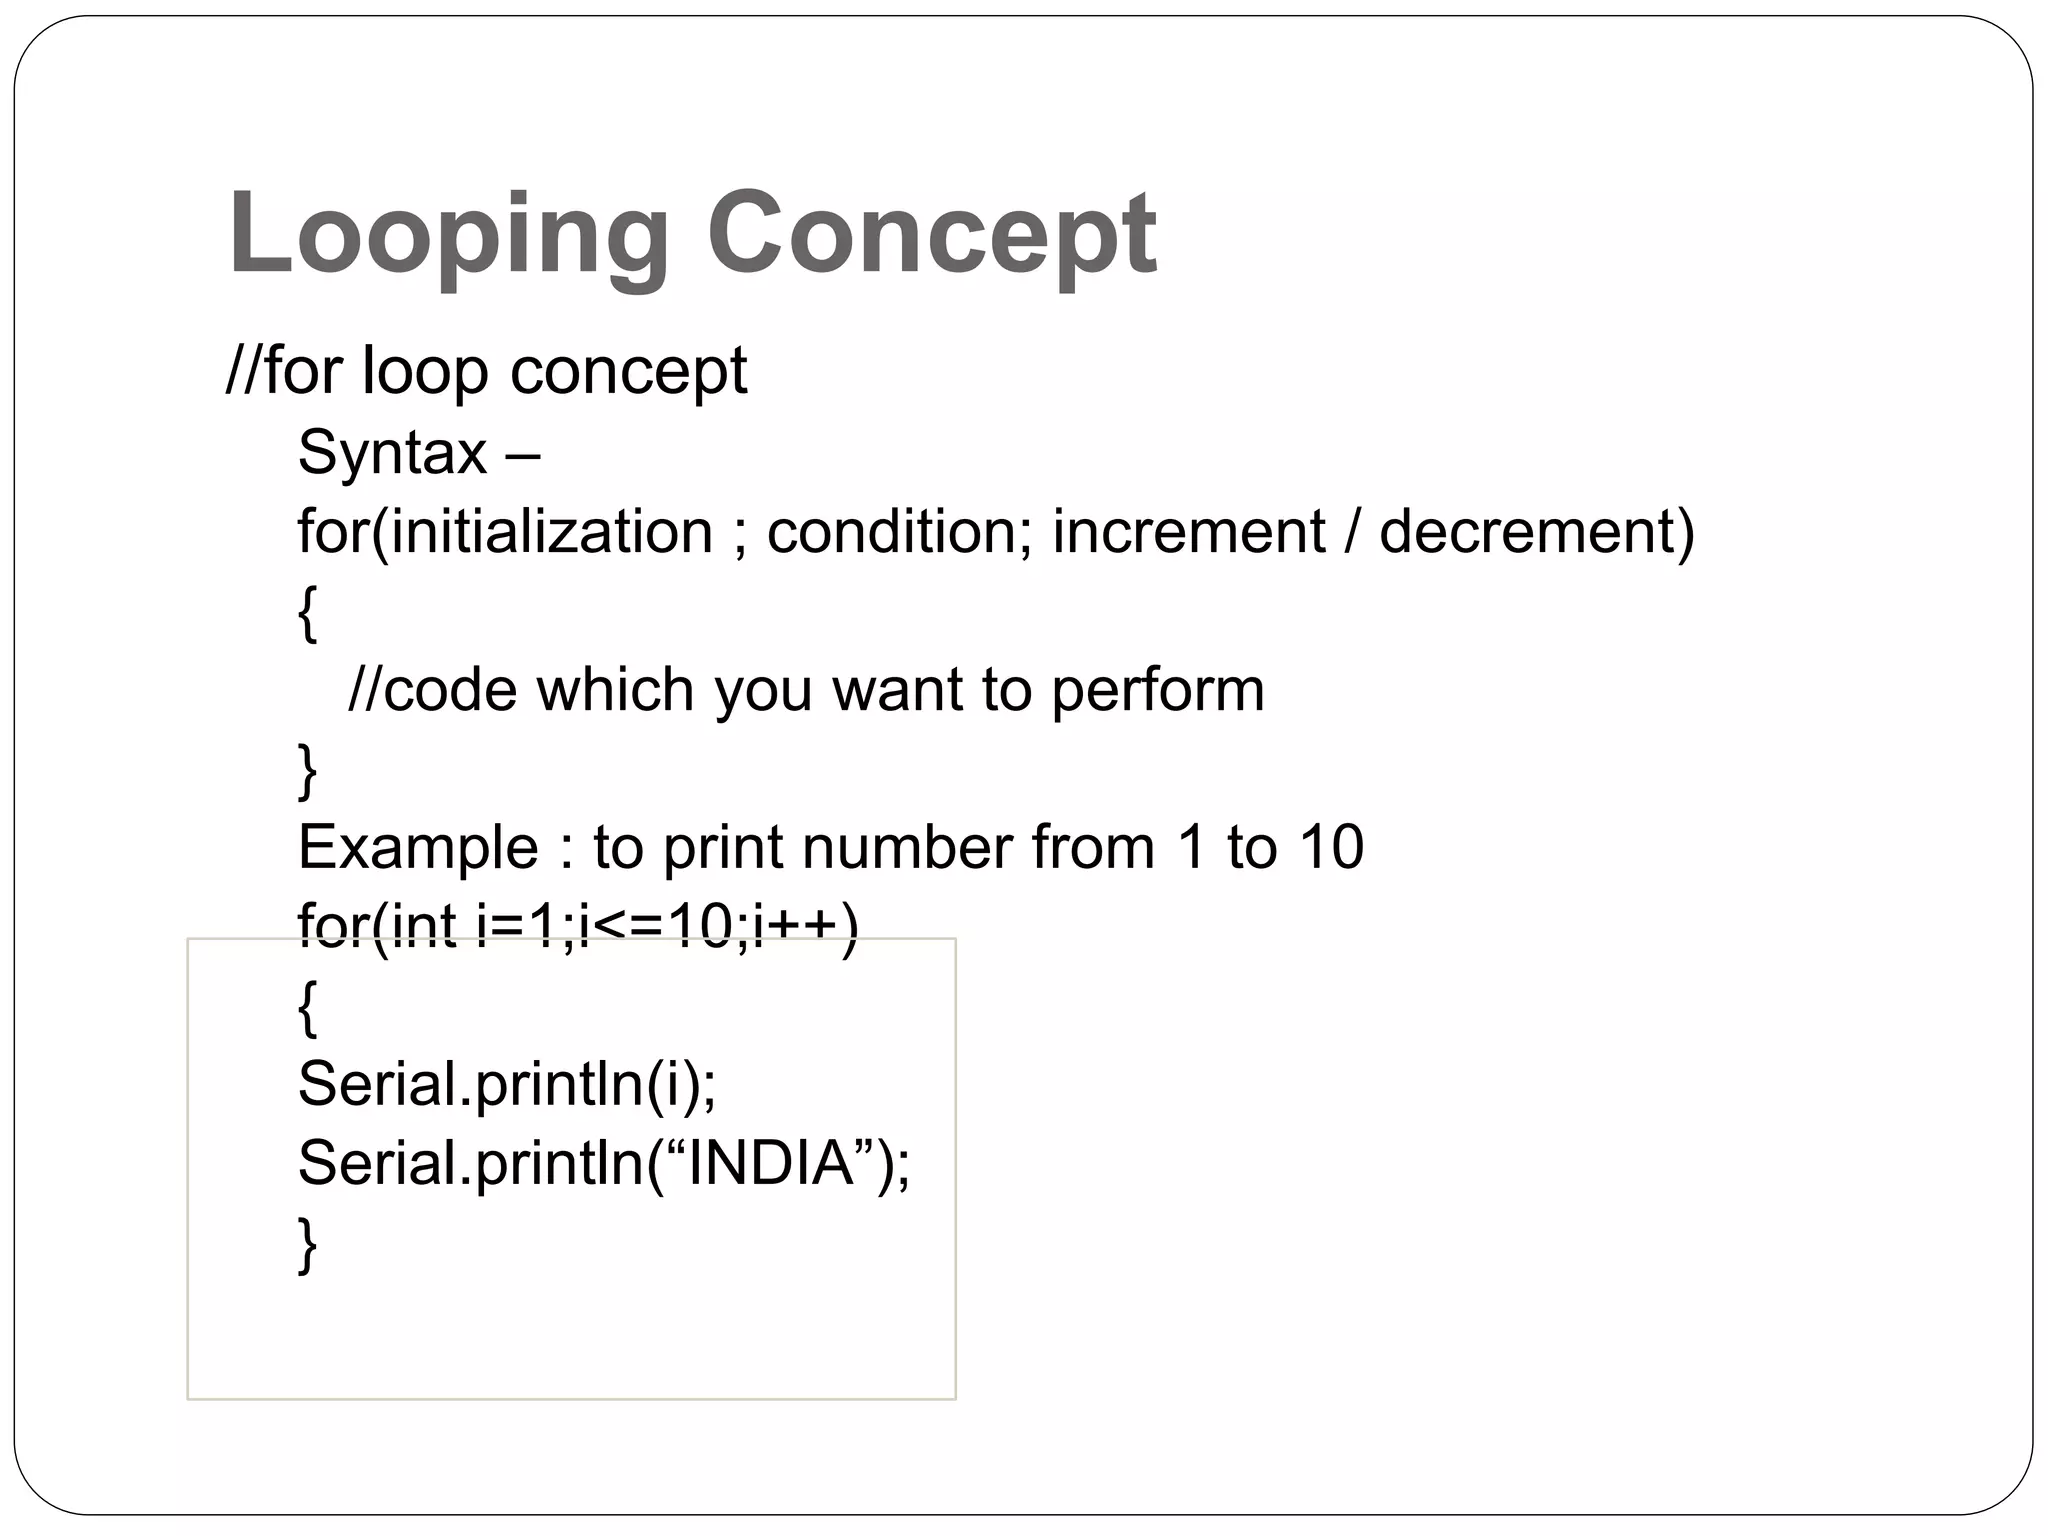
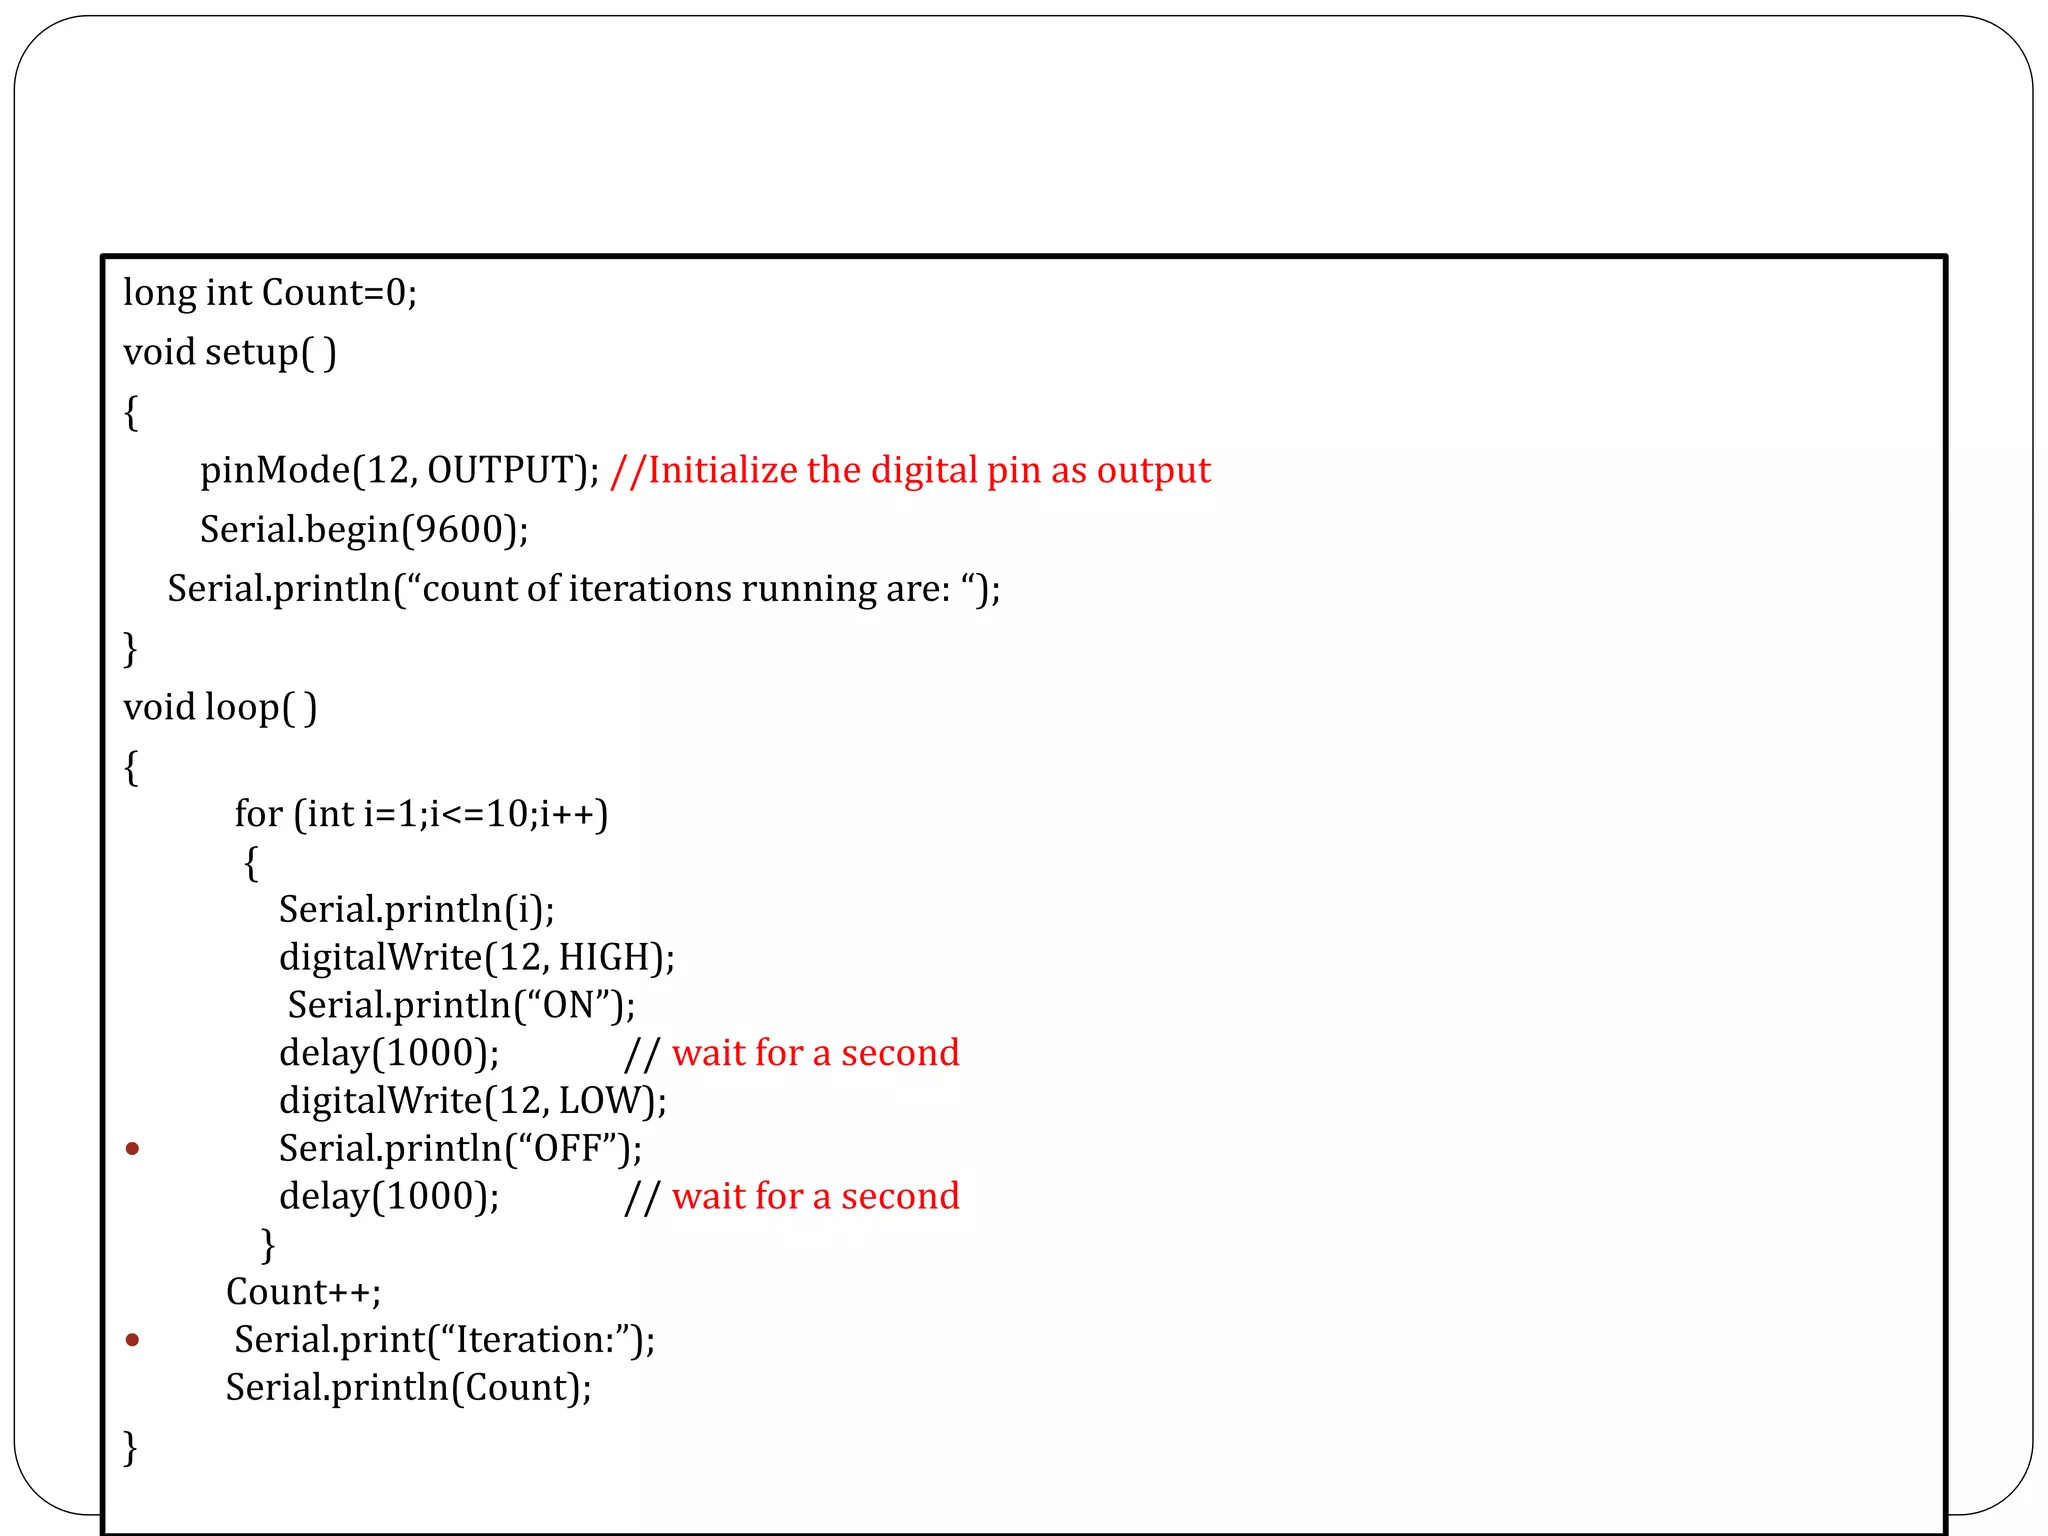


Arduino is an open-source platform used for building electronics projects. It has a microcontroller and can sense and control the physical world. The Arduino IDE is used to write programs for the Arduino board in C/C++. Programs have a setup() and loop() function. Setup() runs once at startup and loop() runs continuously. Example programs were shown to blink an LED on pin 12 every 2 seconds and print the LED state to the serial monitor. Further programs demonstrated using for loops to blink an LED 10 times per loop iteration and print the loop count.