Download as PDF, PPTX

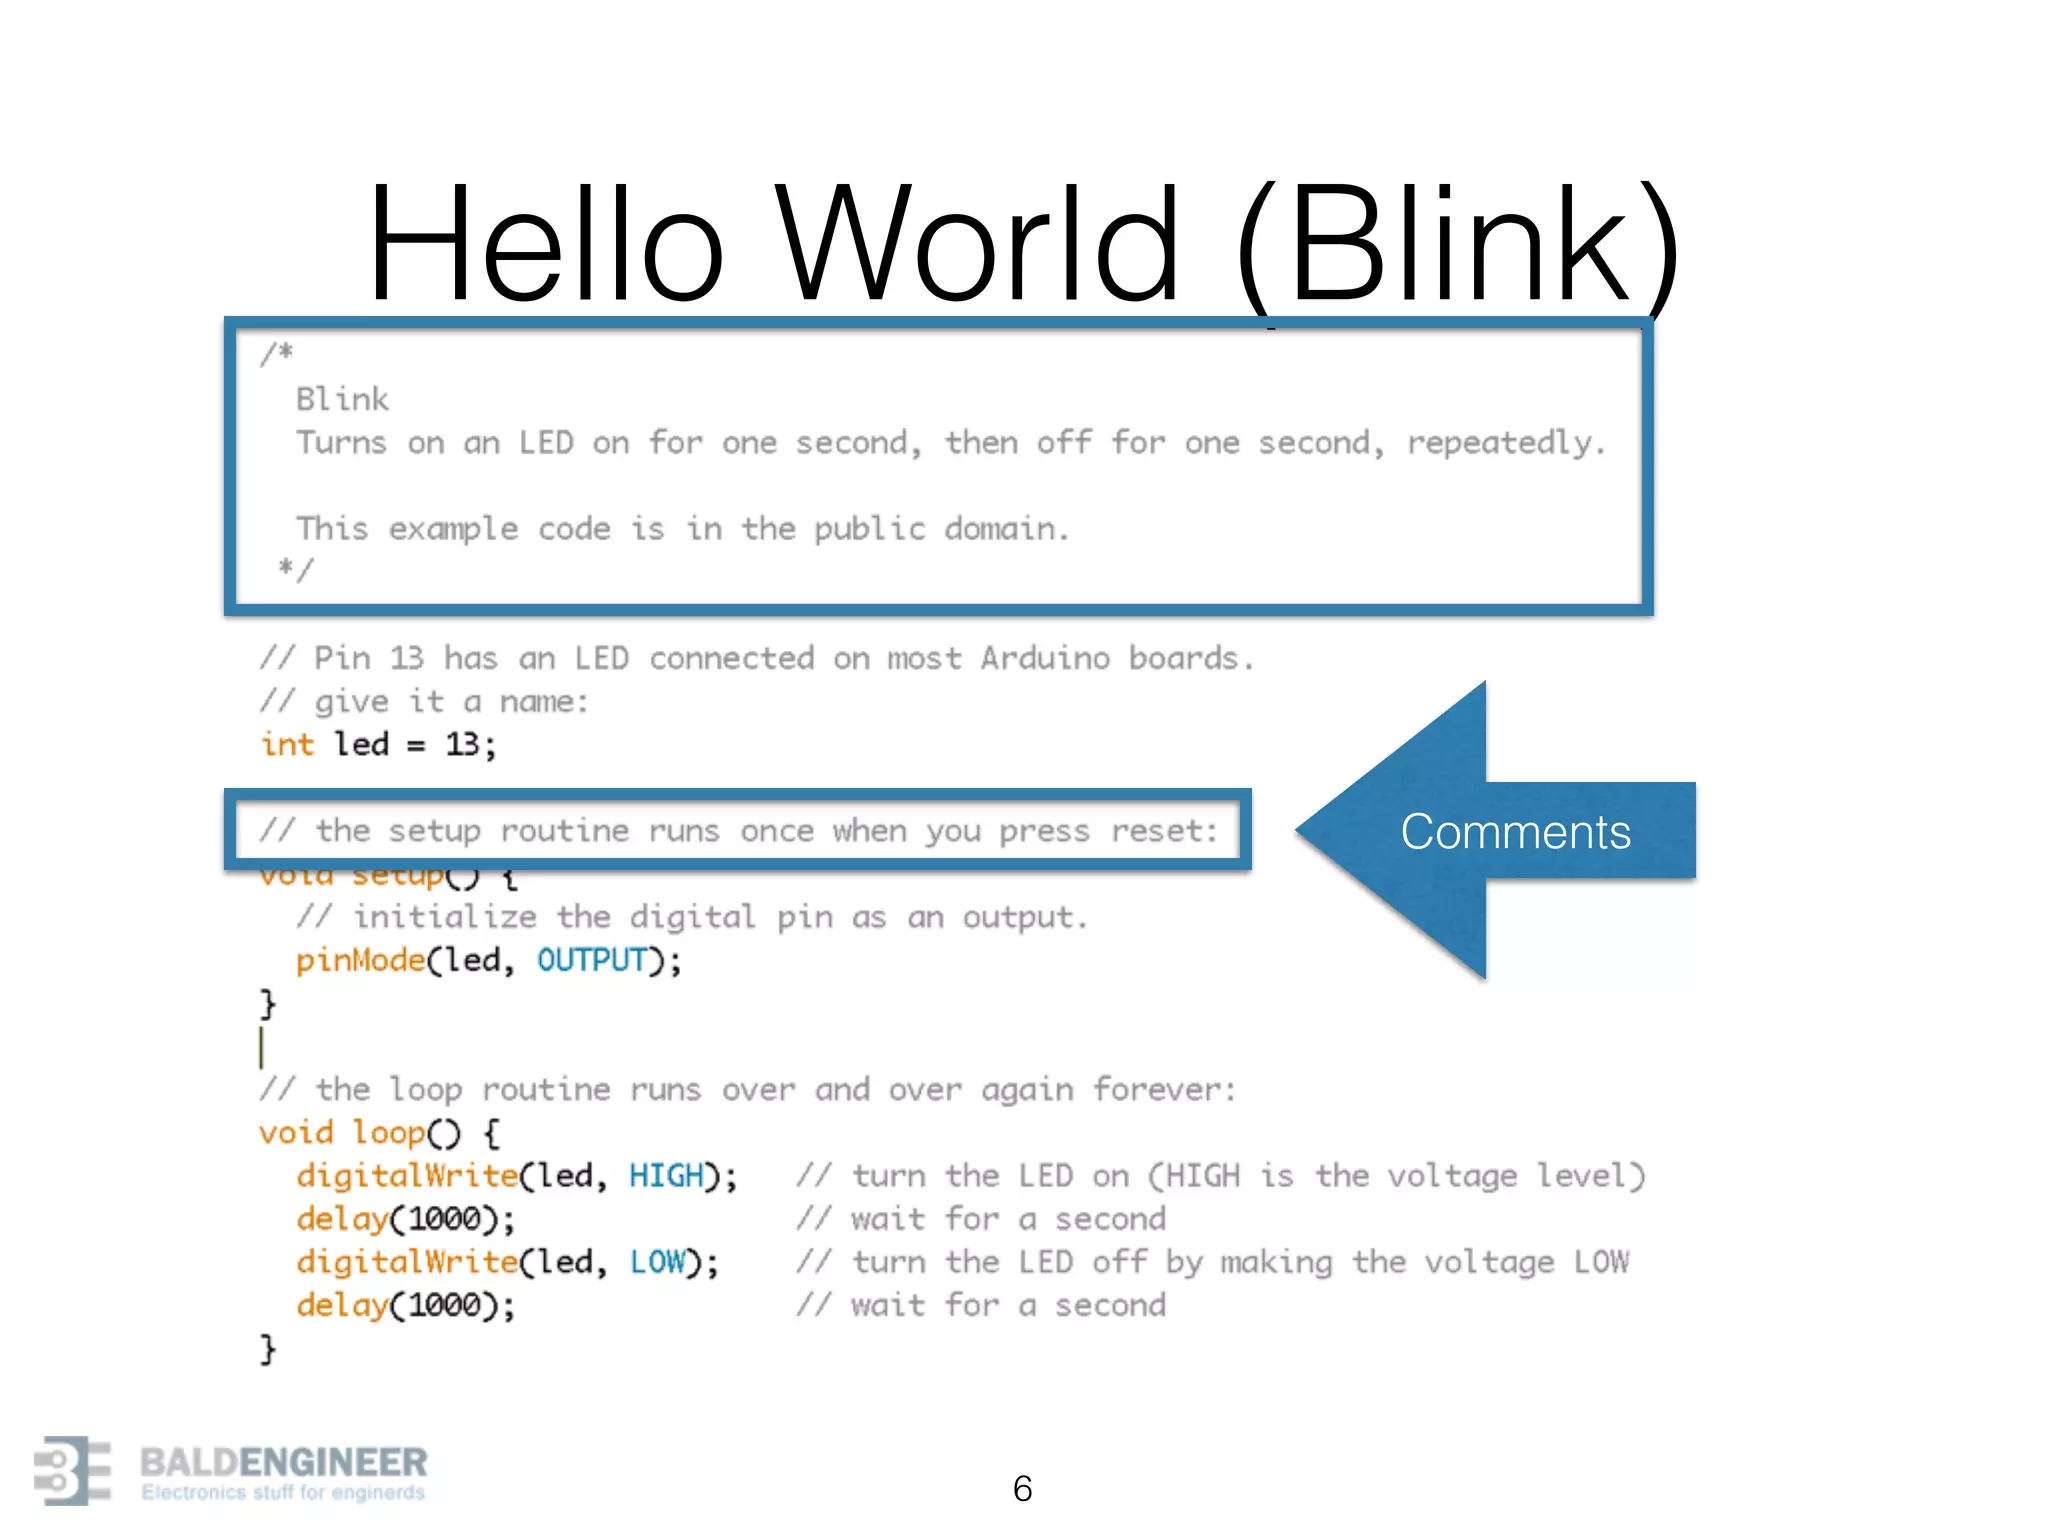


![analogReadings[] arrays 40 0 1 2 3 4 5](https://image.slidesharecdn.com/arduinoprogrammingr1-150417185248-conversion-gate02/75/Introduction-to-Arduino-Programming-40-2048.jpg)
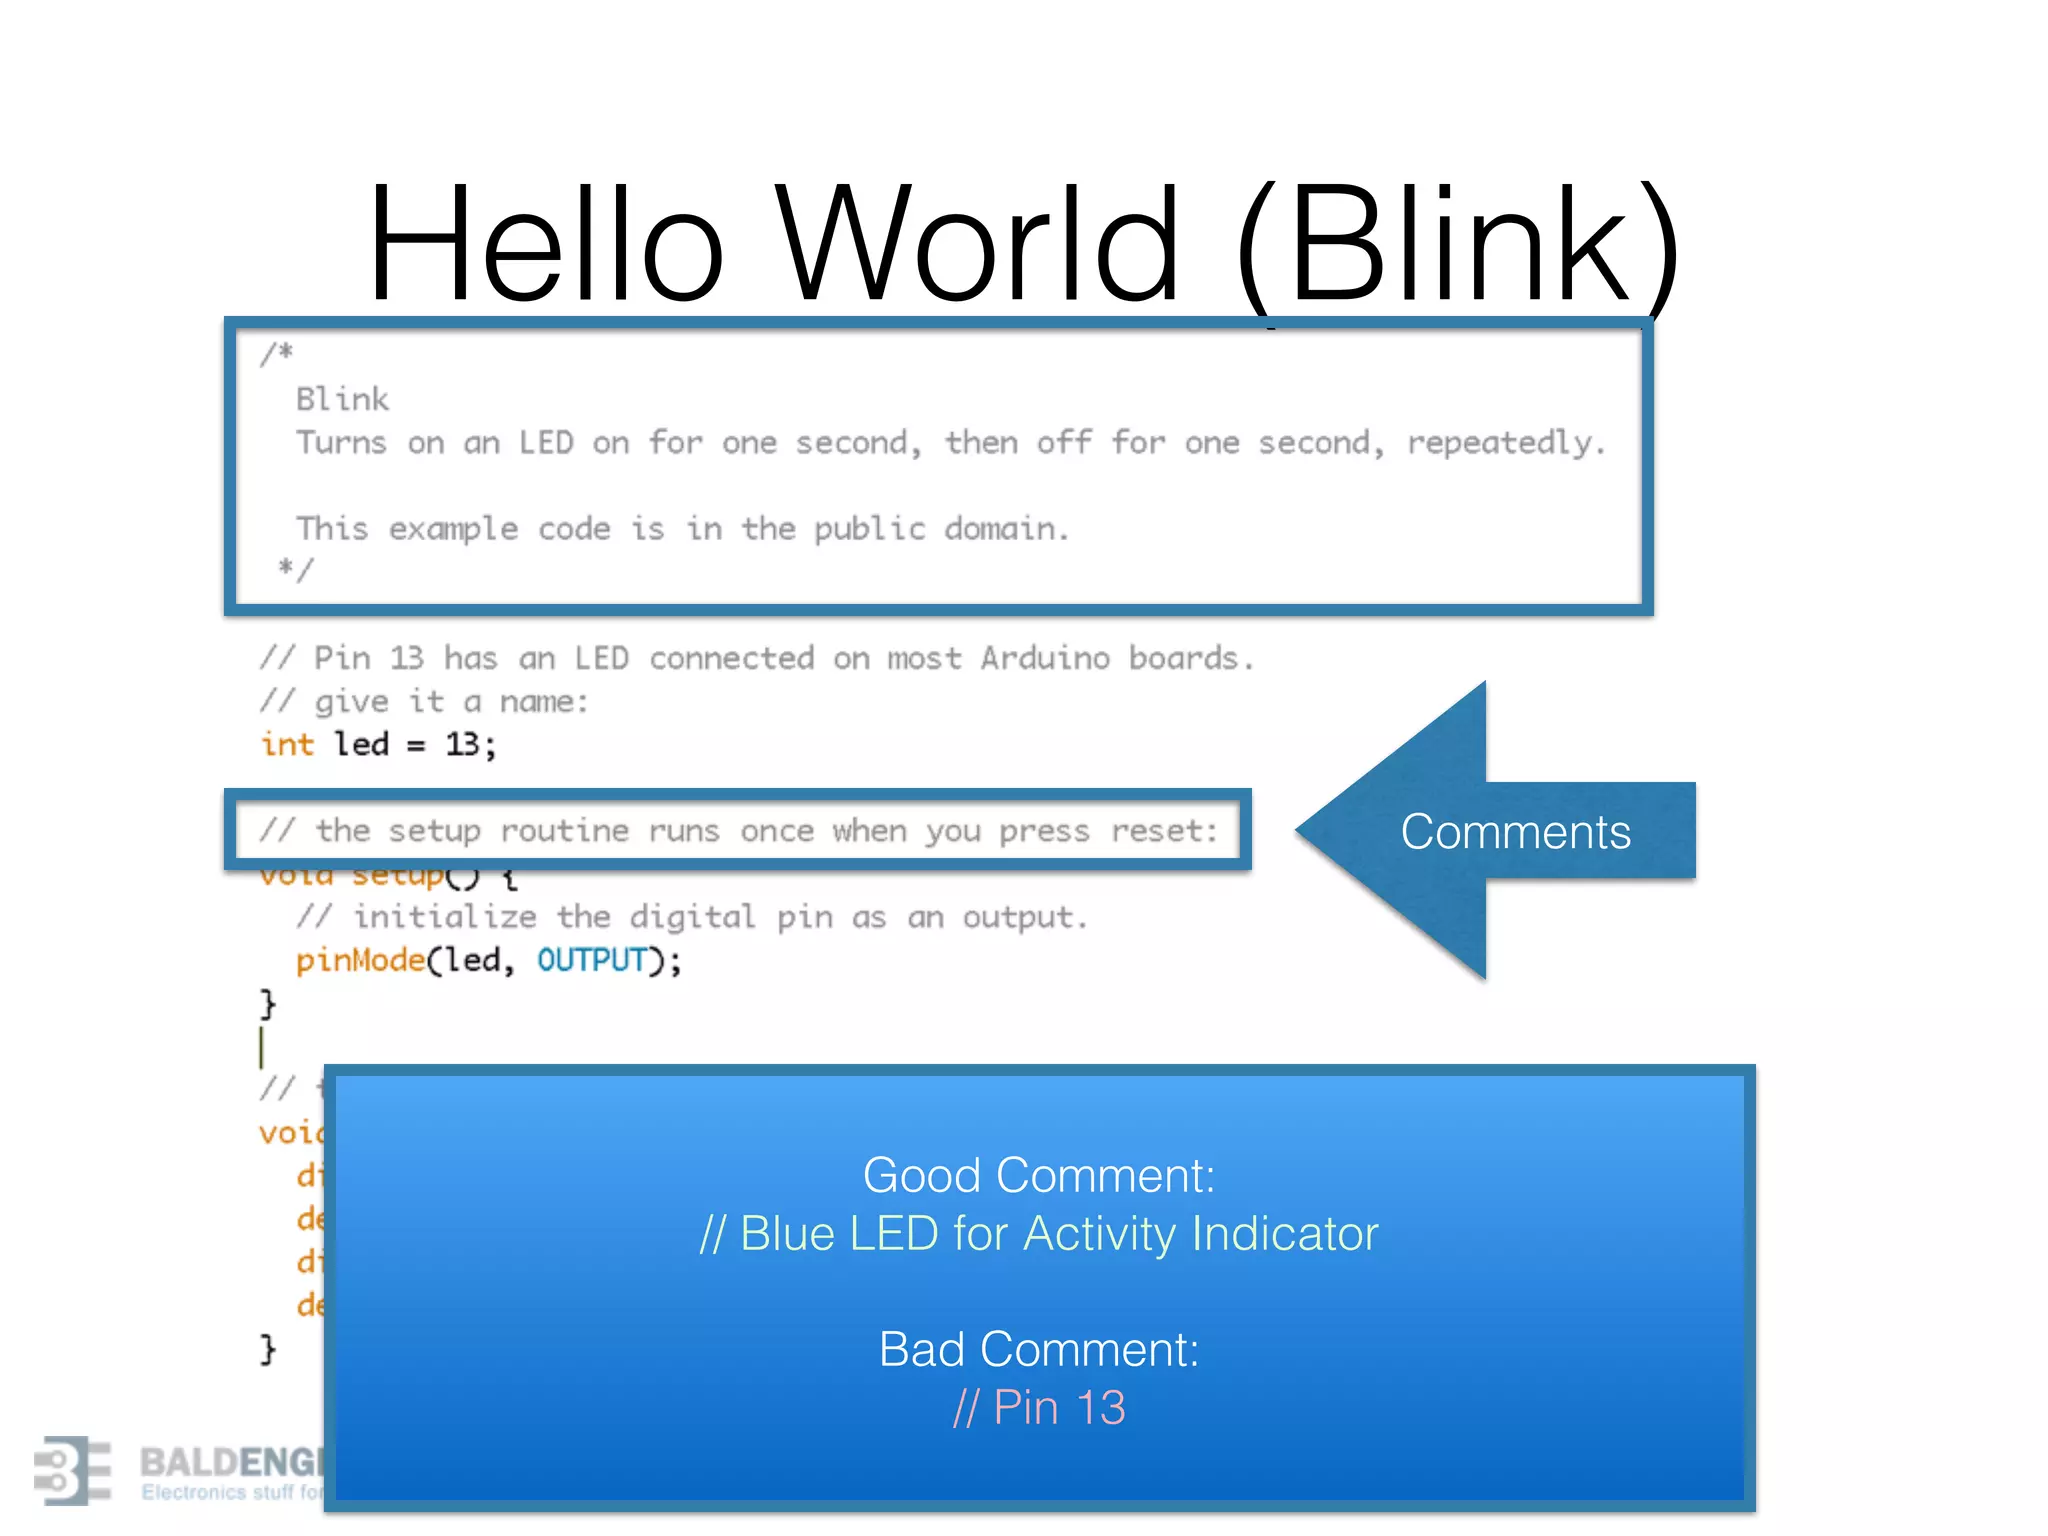
![analogReadings[] arrays 41 0 1 2 3 4 5 Size Elements](https://image.slidesharecdn.com/arduinoprogrammingr1-150417185248-conversion-gate02/75/Introduction-to-Arduino-Programming-41-2048.jpg)
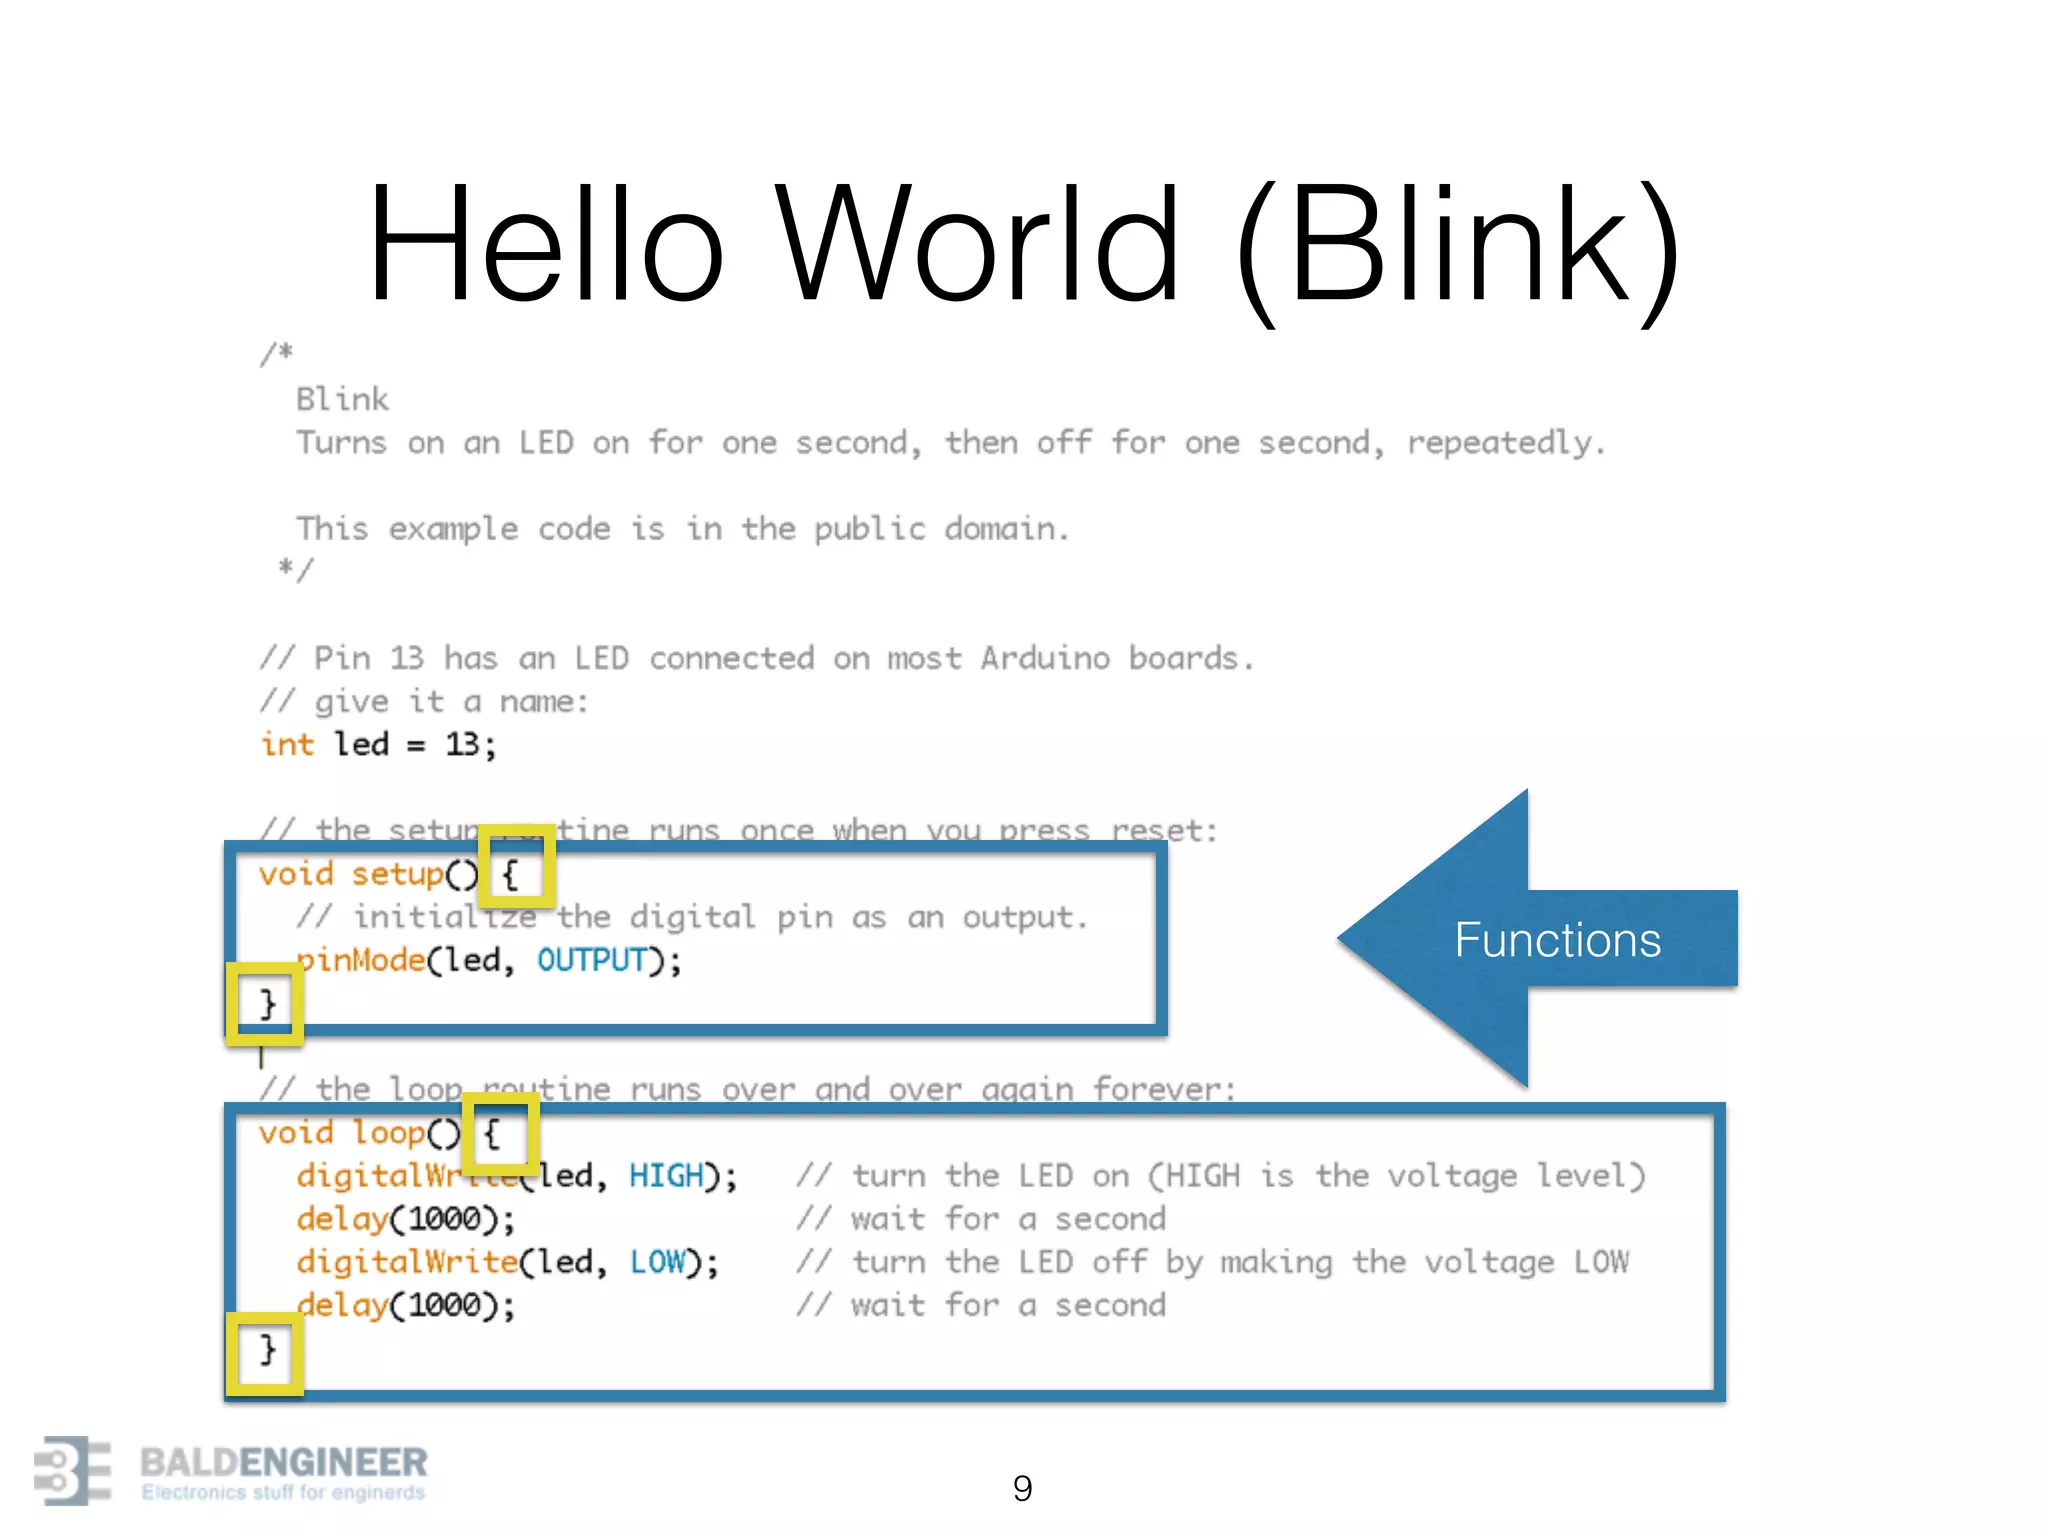
![analogReadings[] arrays 42 0 1 2 3 4 5 Size Elements arrays are
0-index based.
So last element
is always
“1 less”
than the size!](https://image.slidesharecdn.com/arduinoprogrammingr1-150417185248-conversion-gate02/75/Introduction-to-Arduino-Programming-42-2048.jpg)


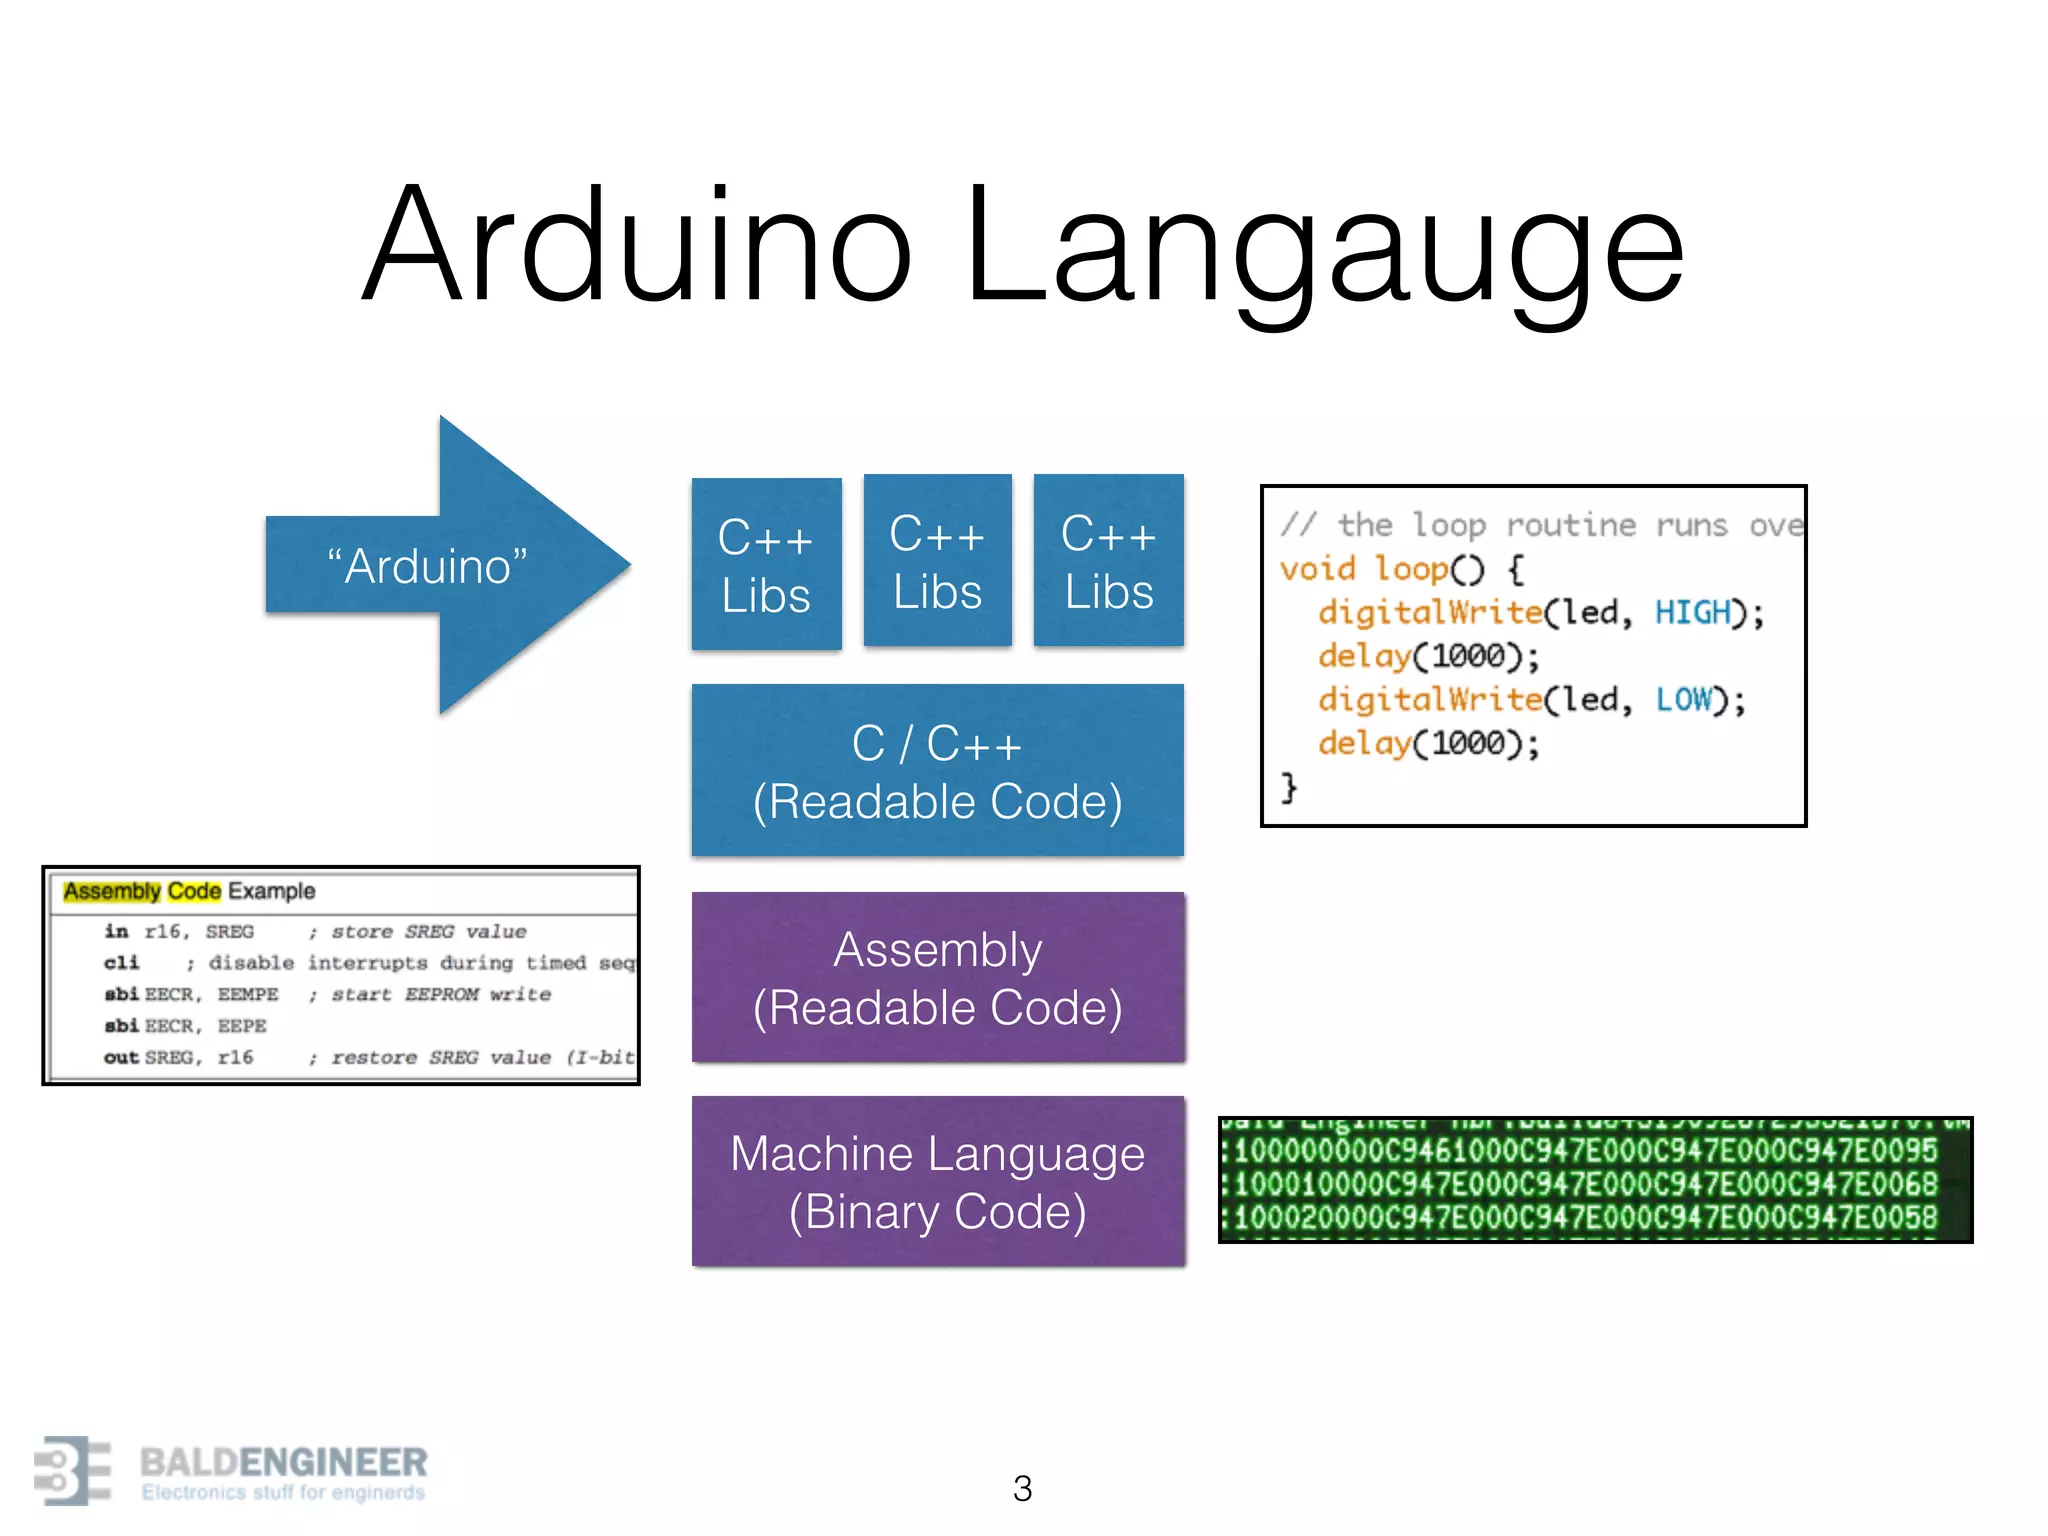
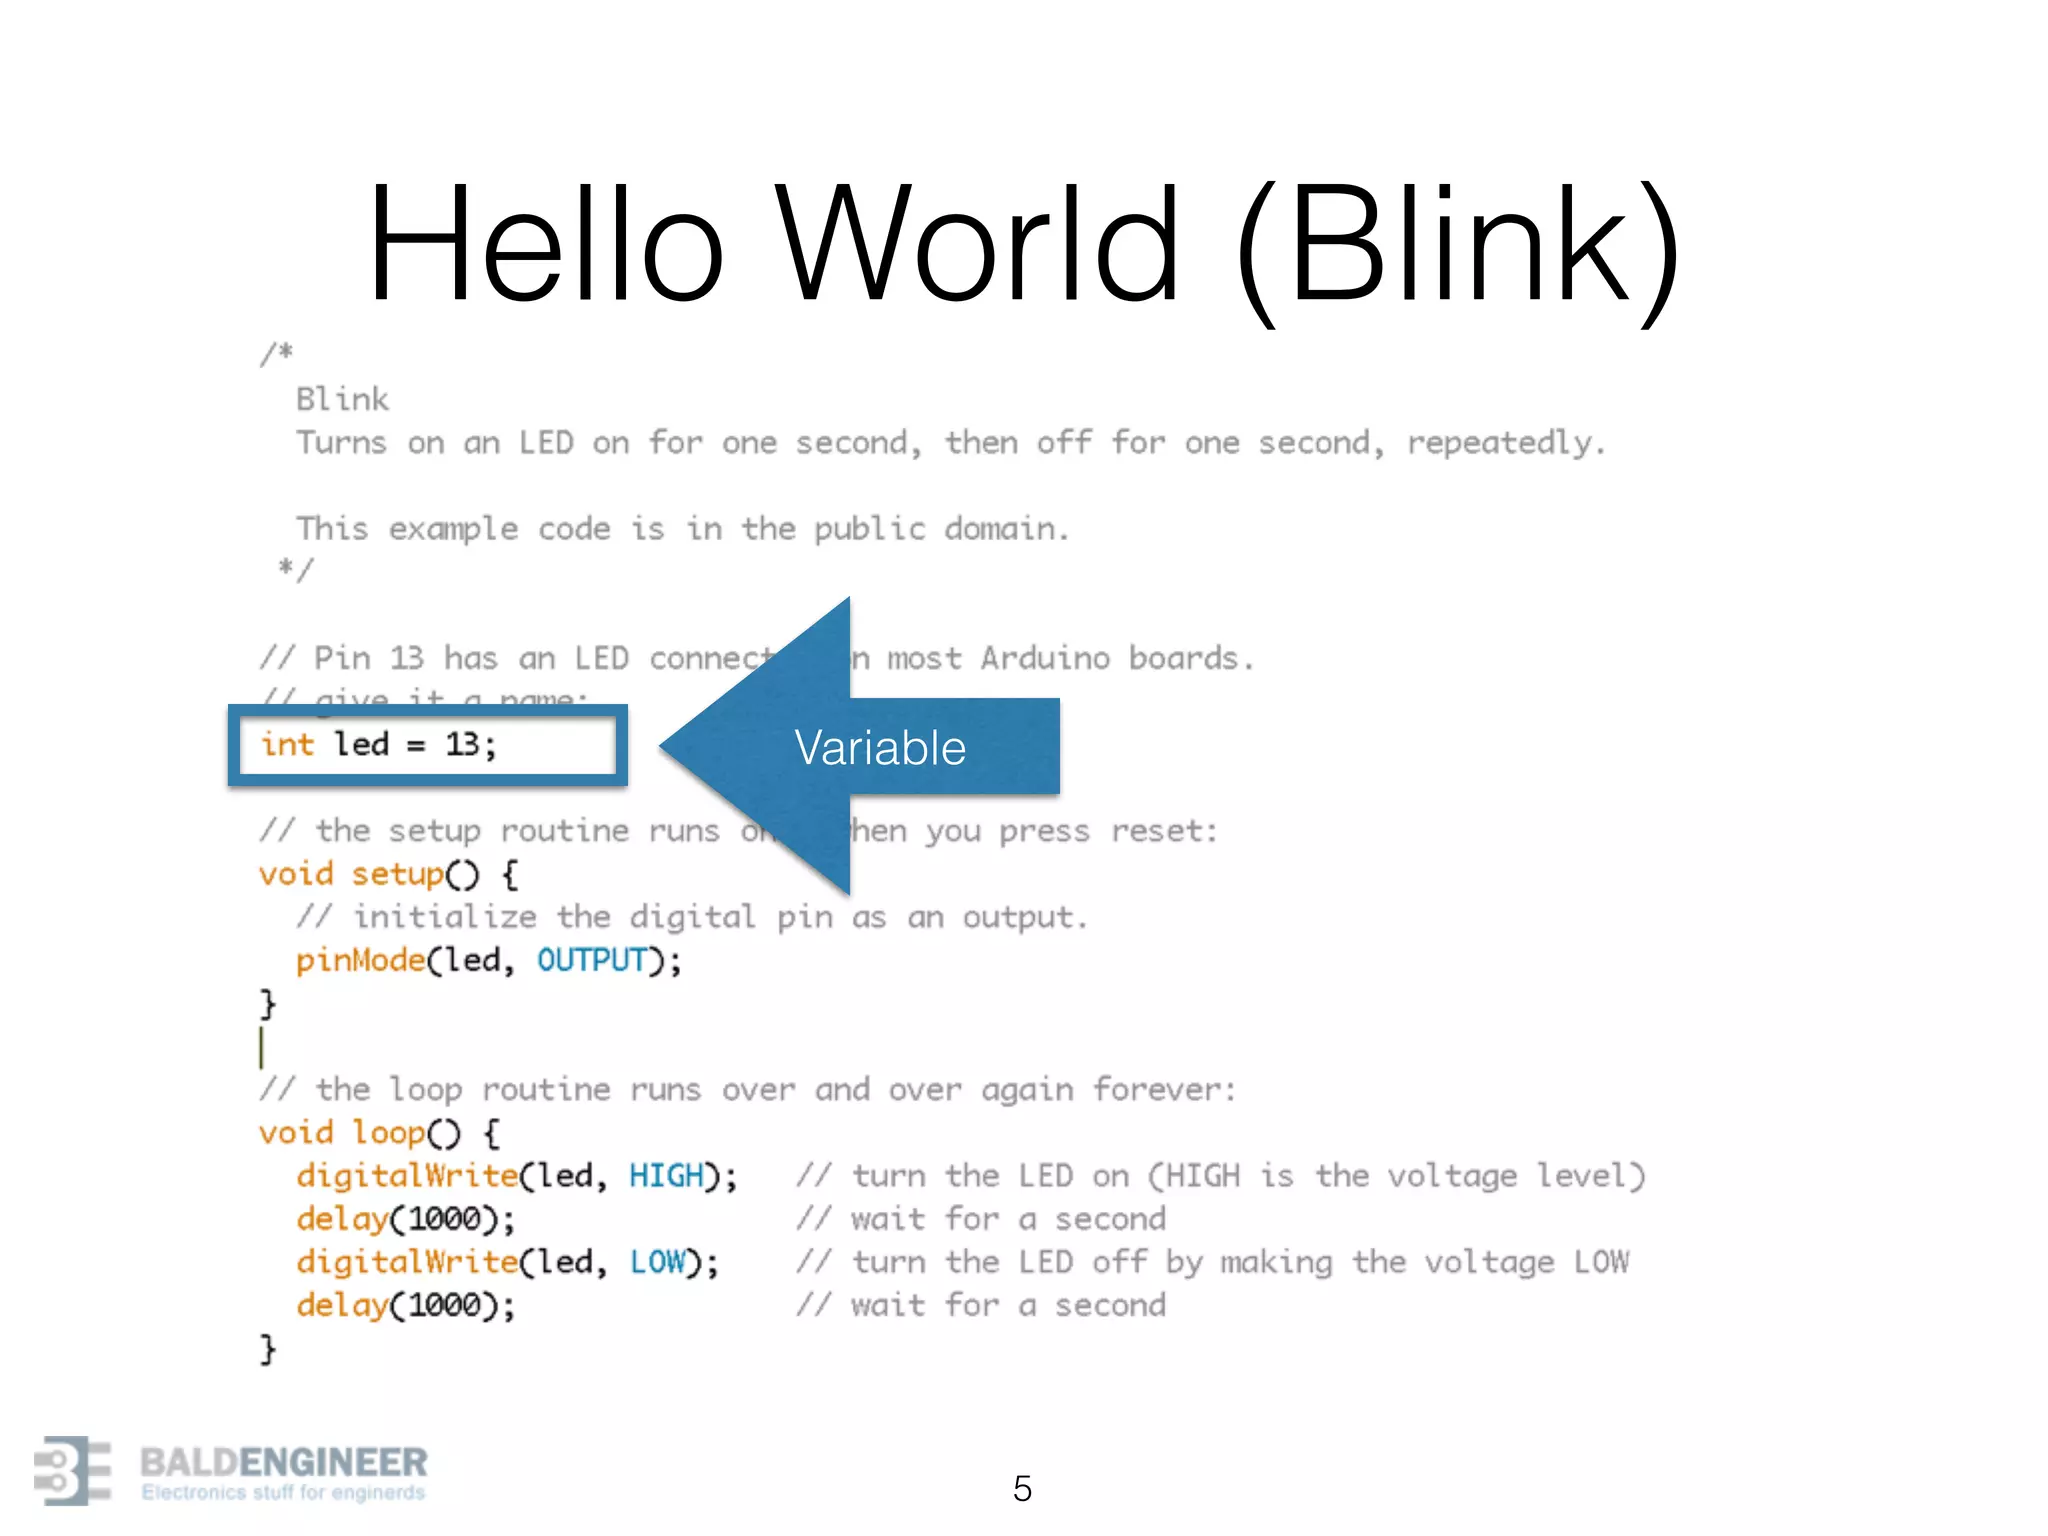
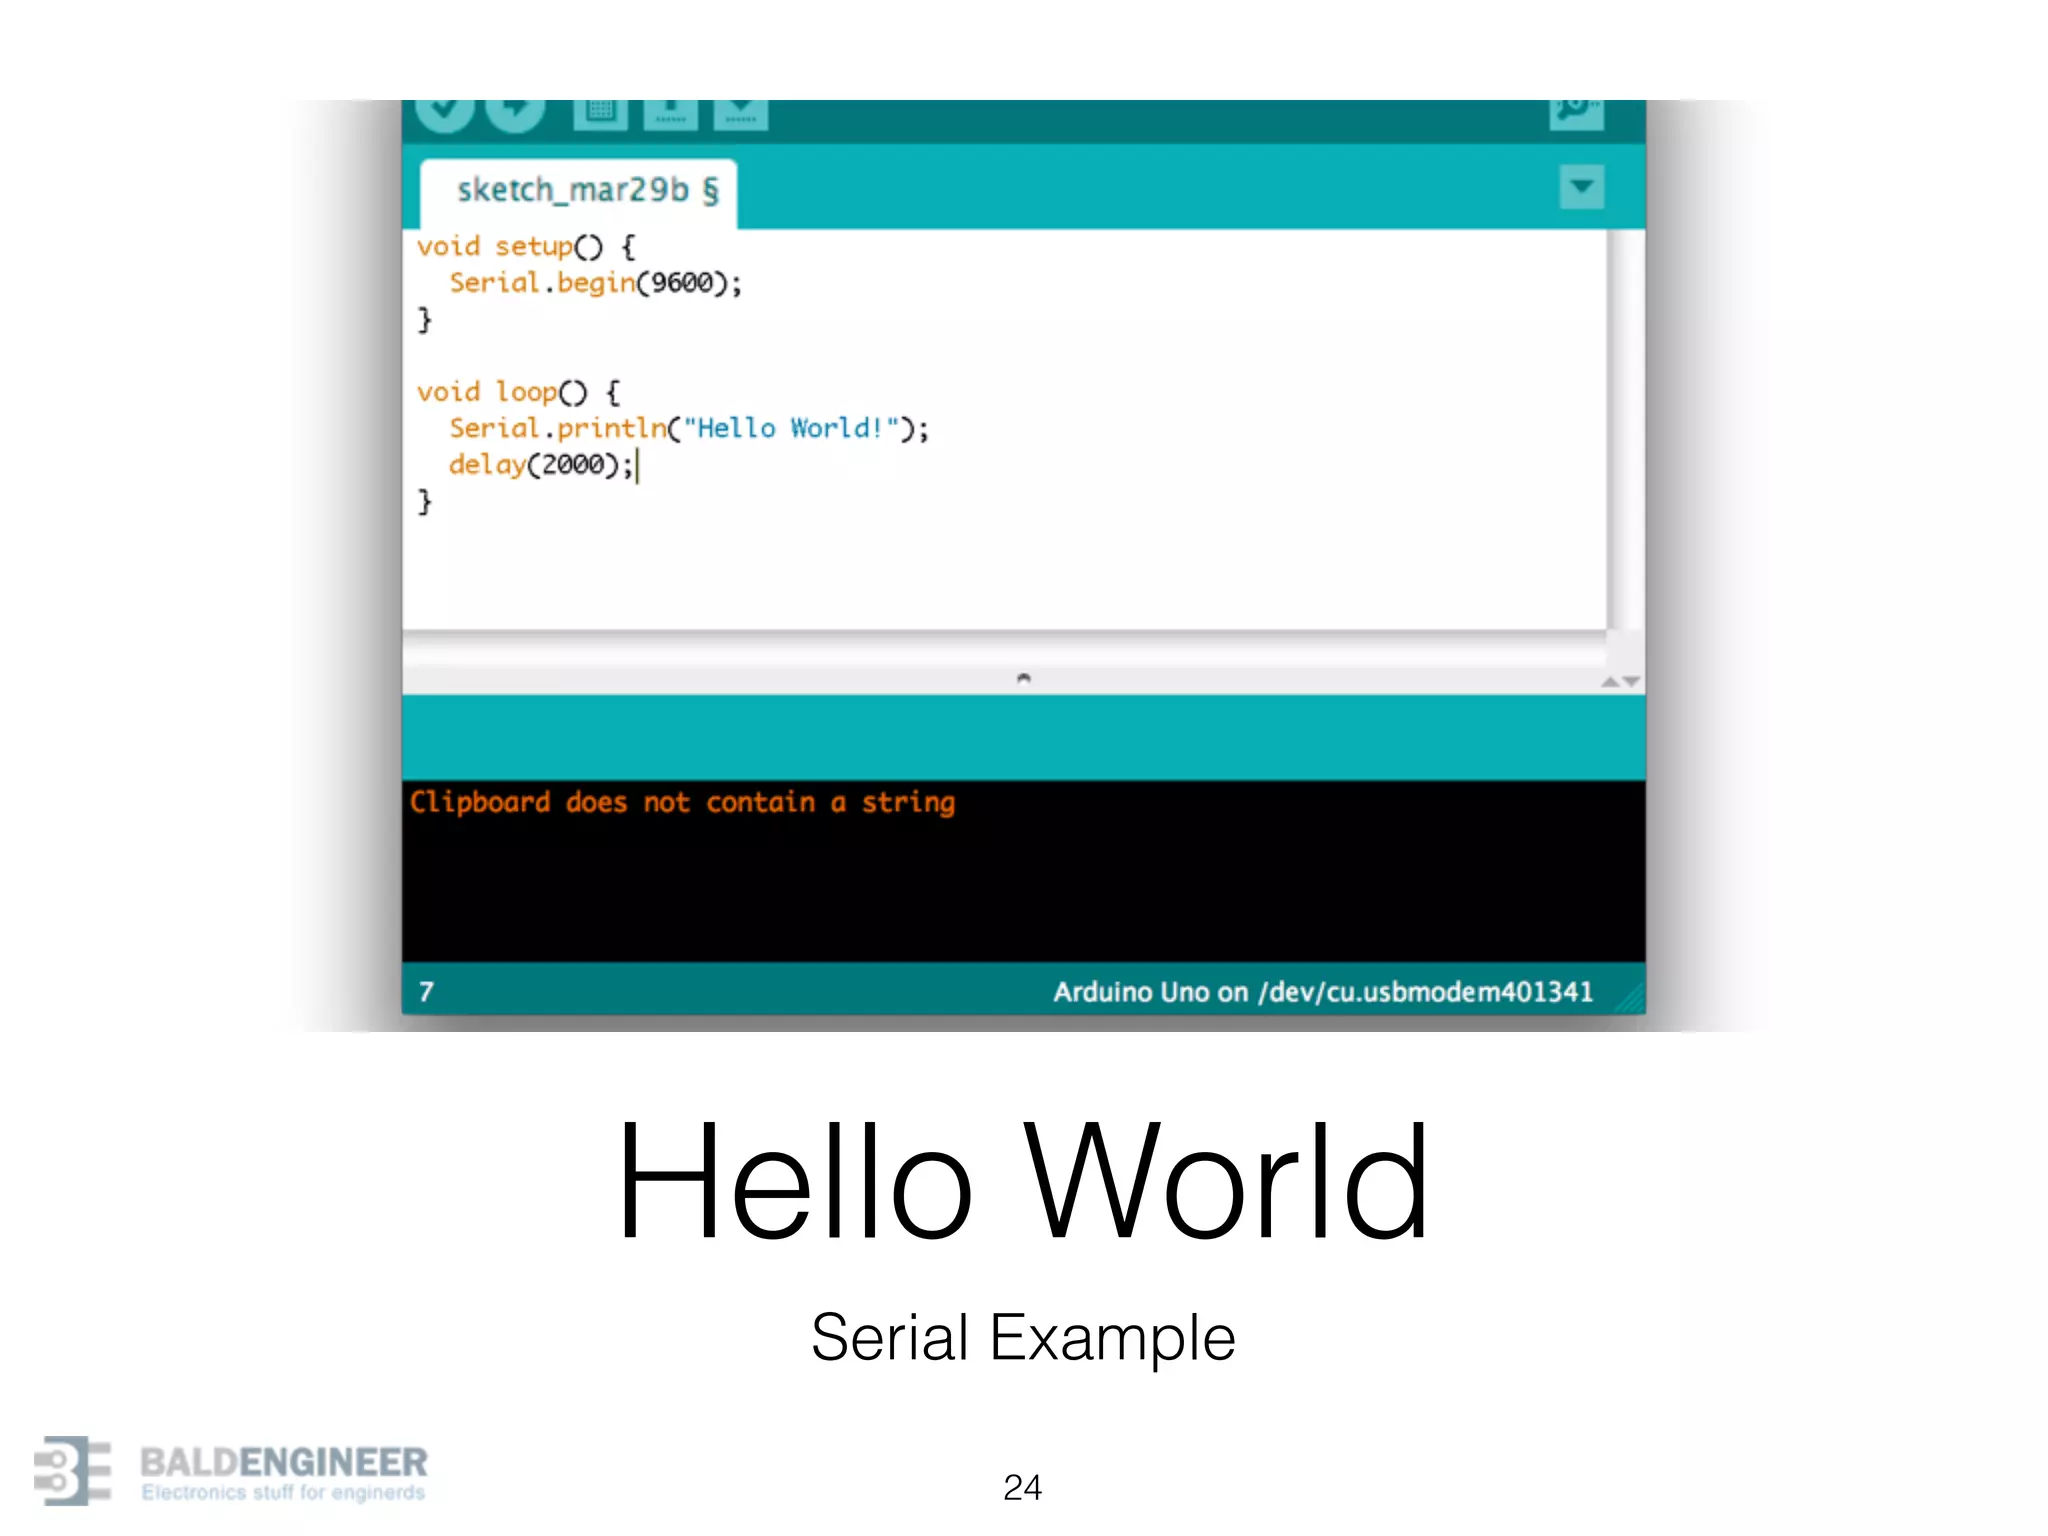
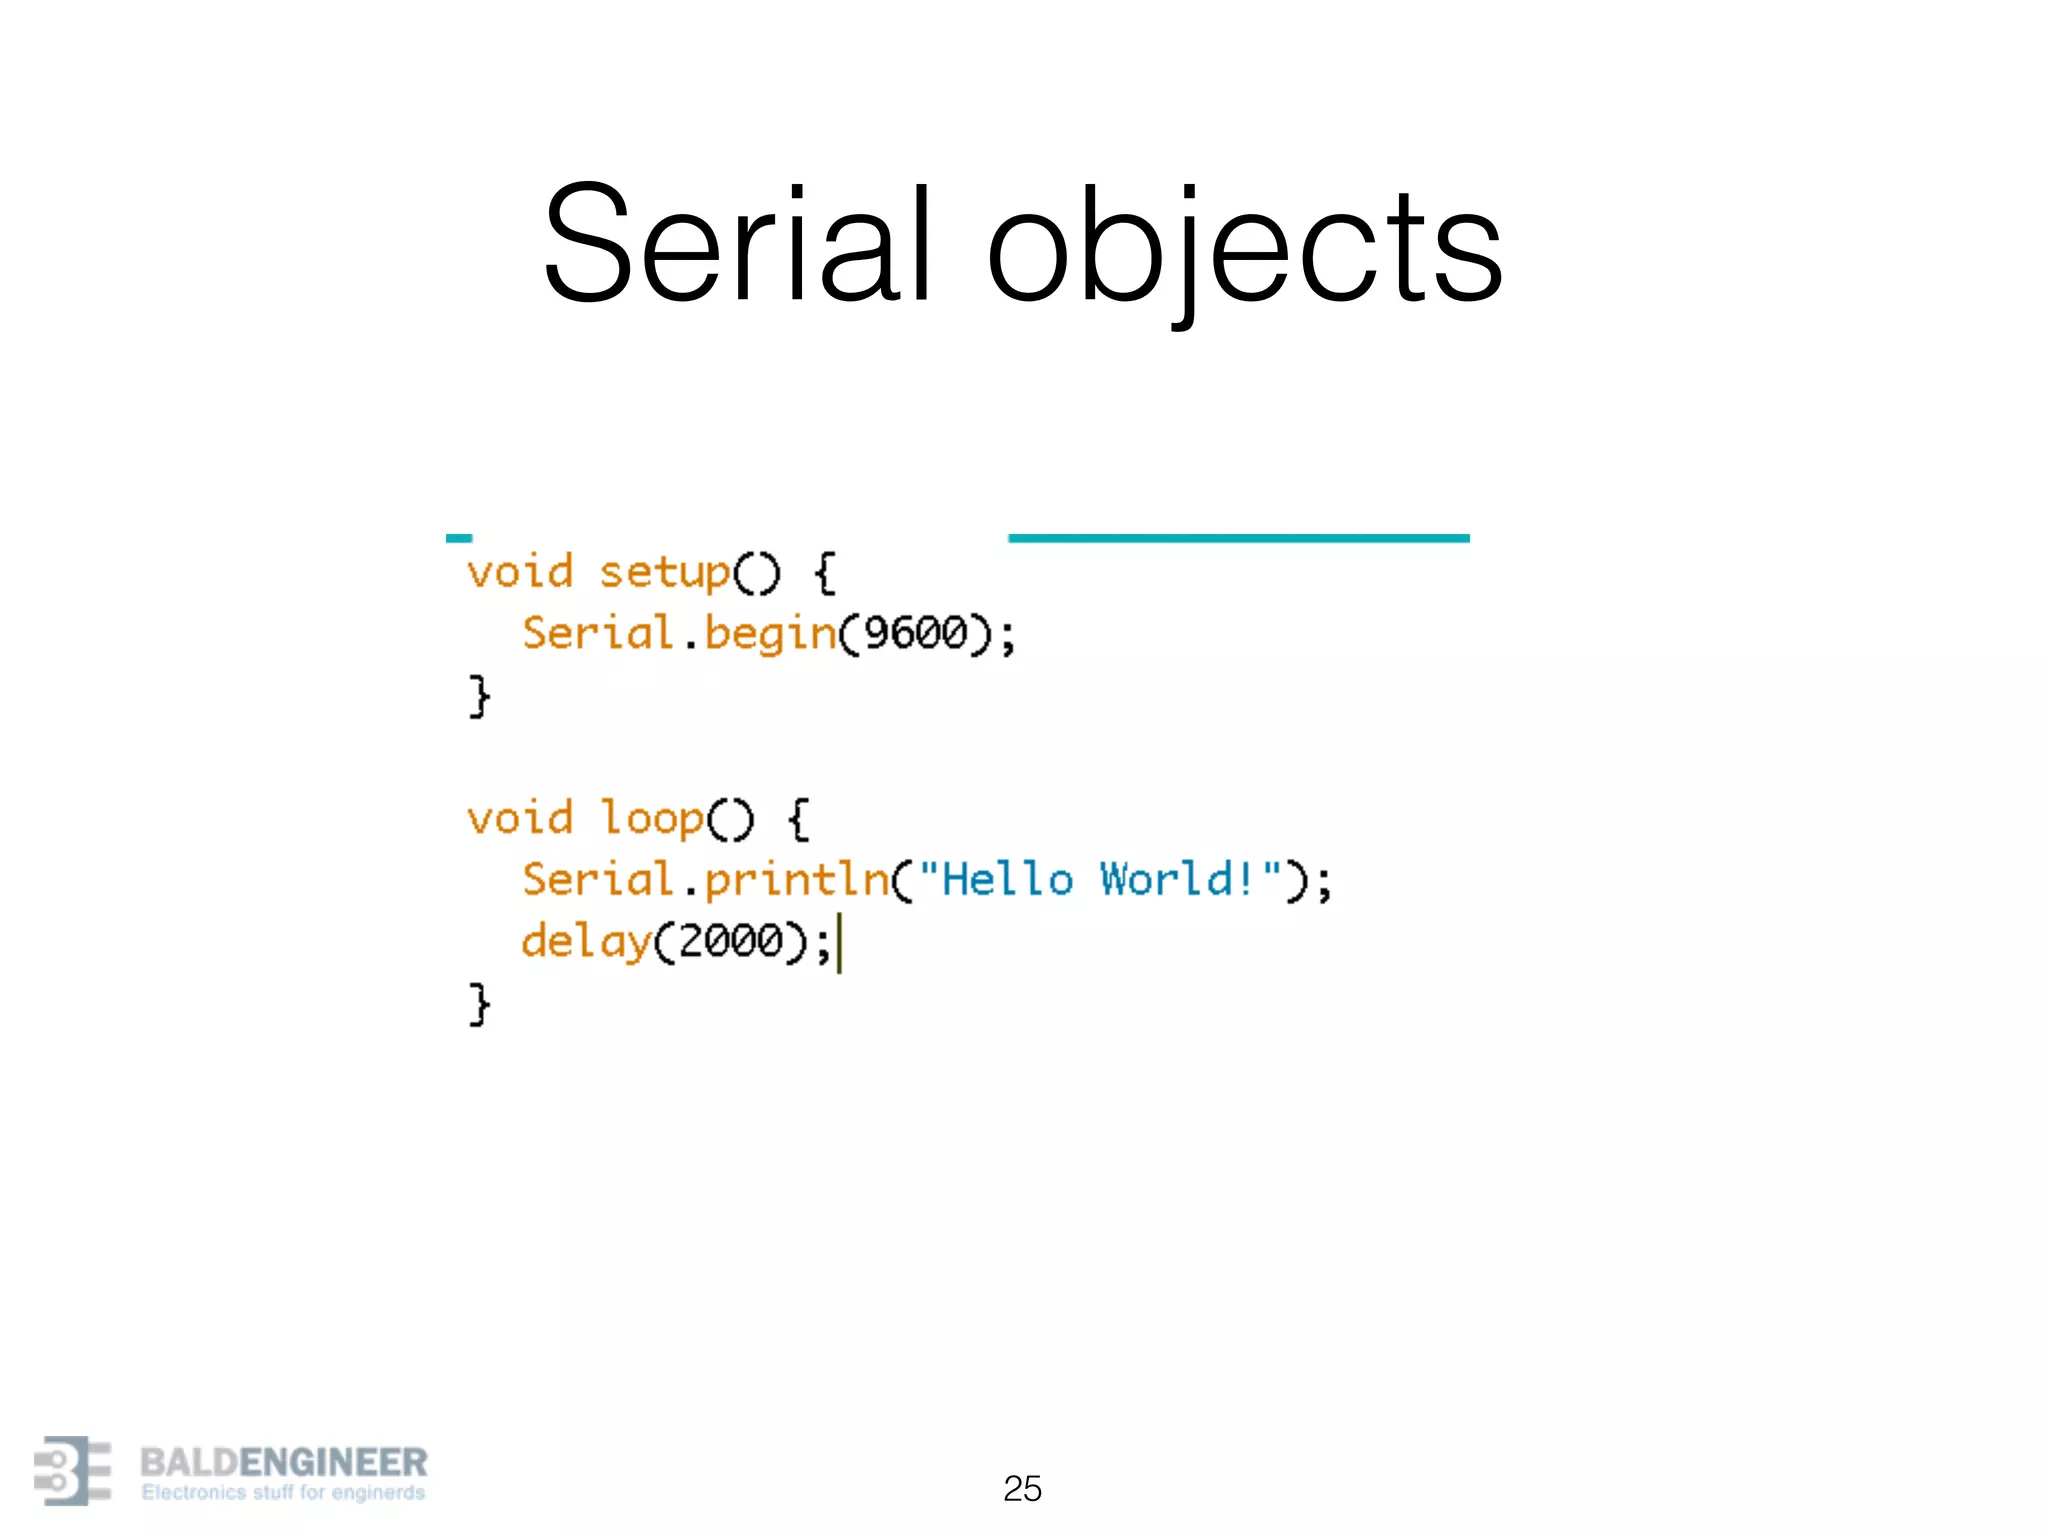
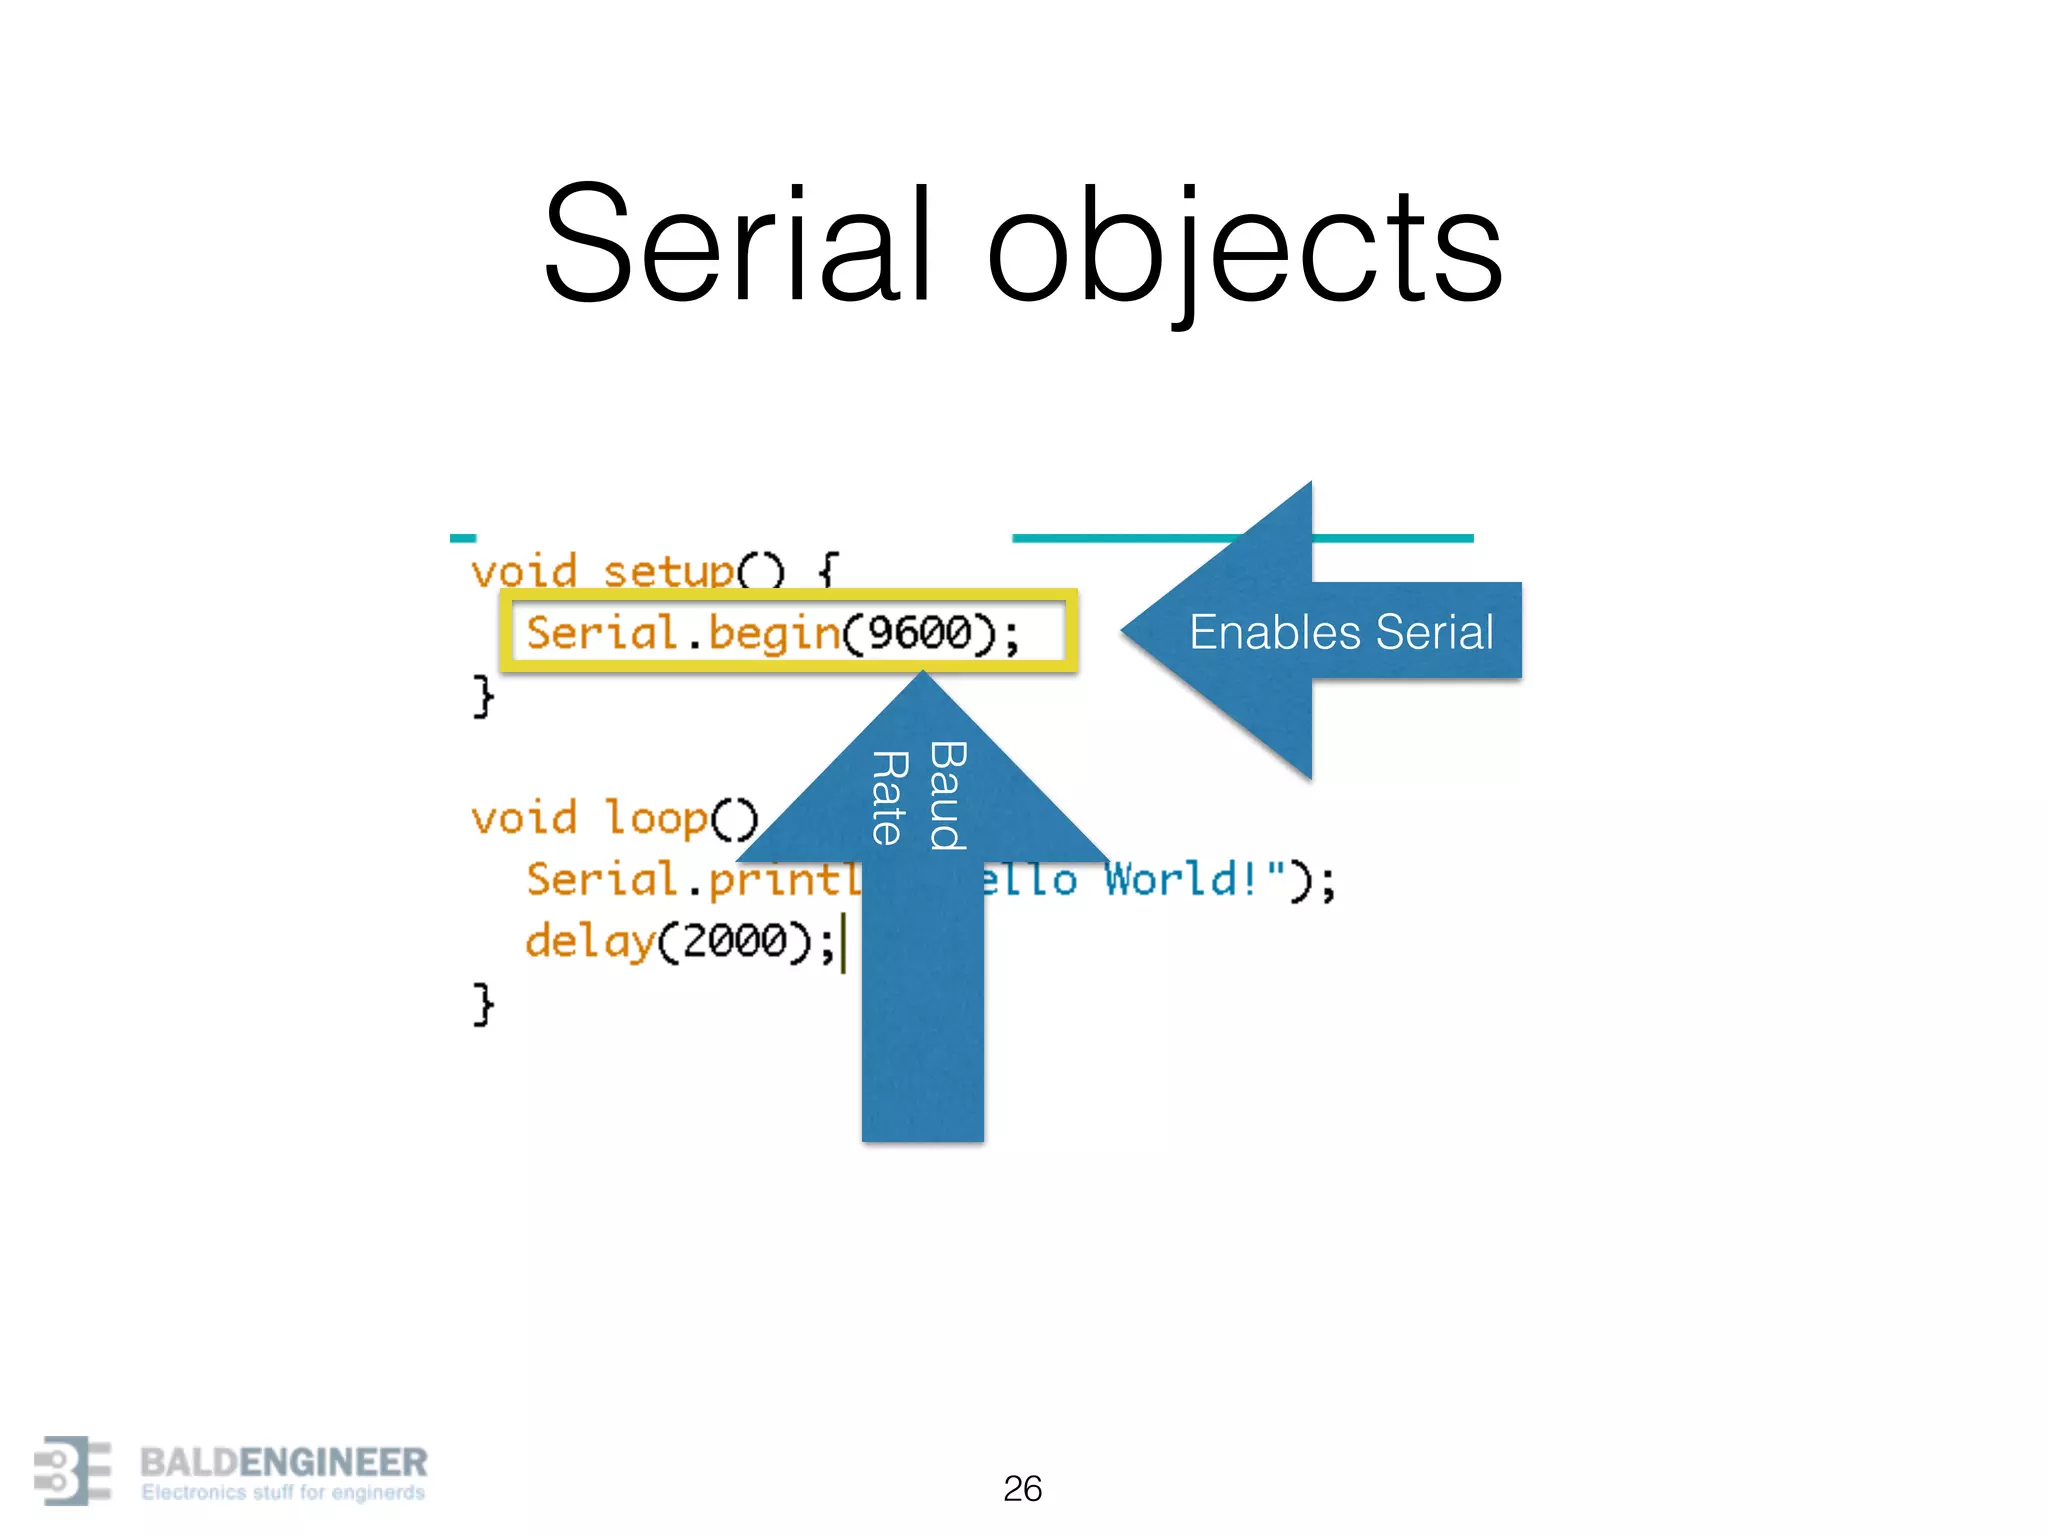
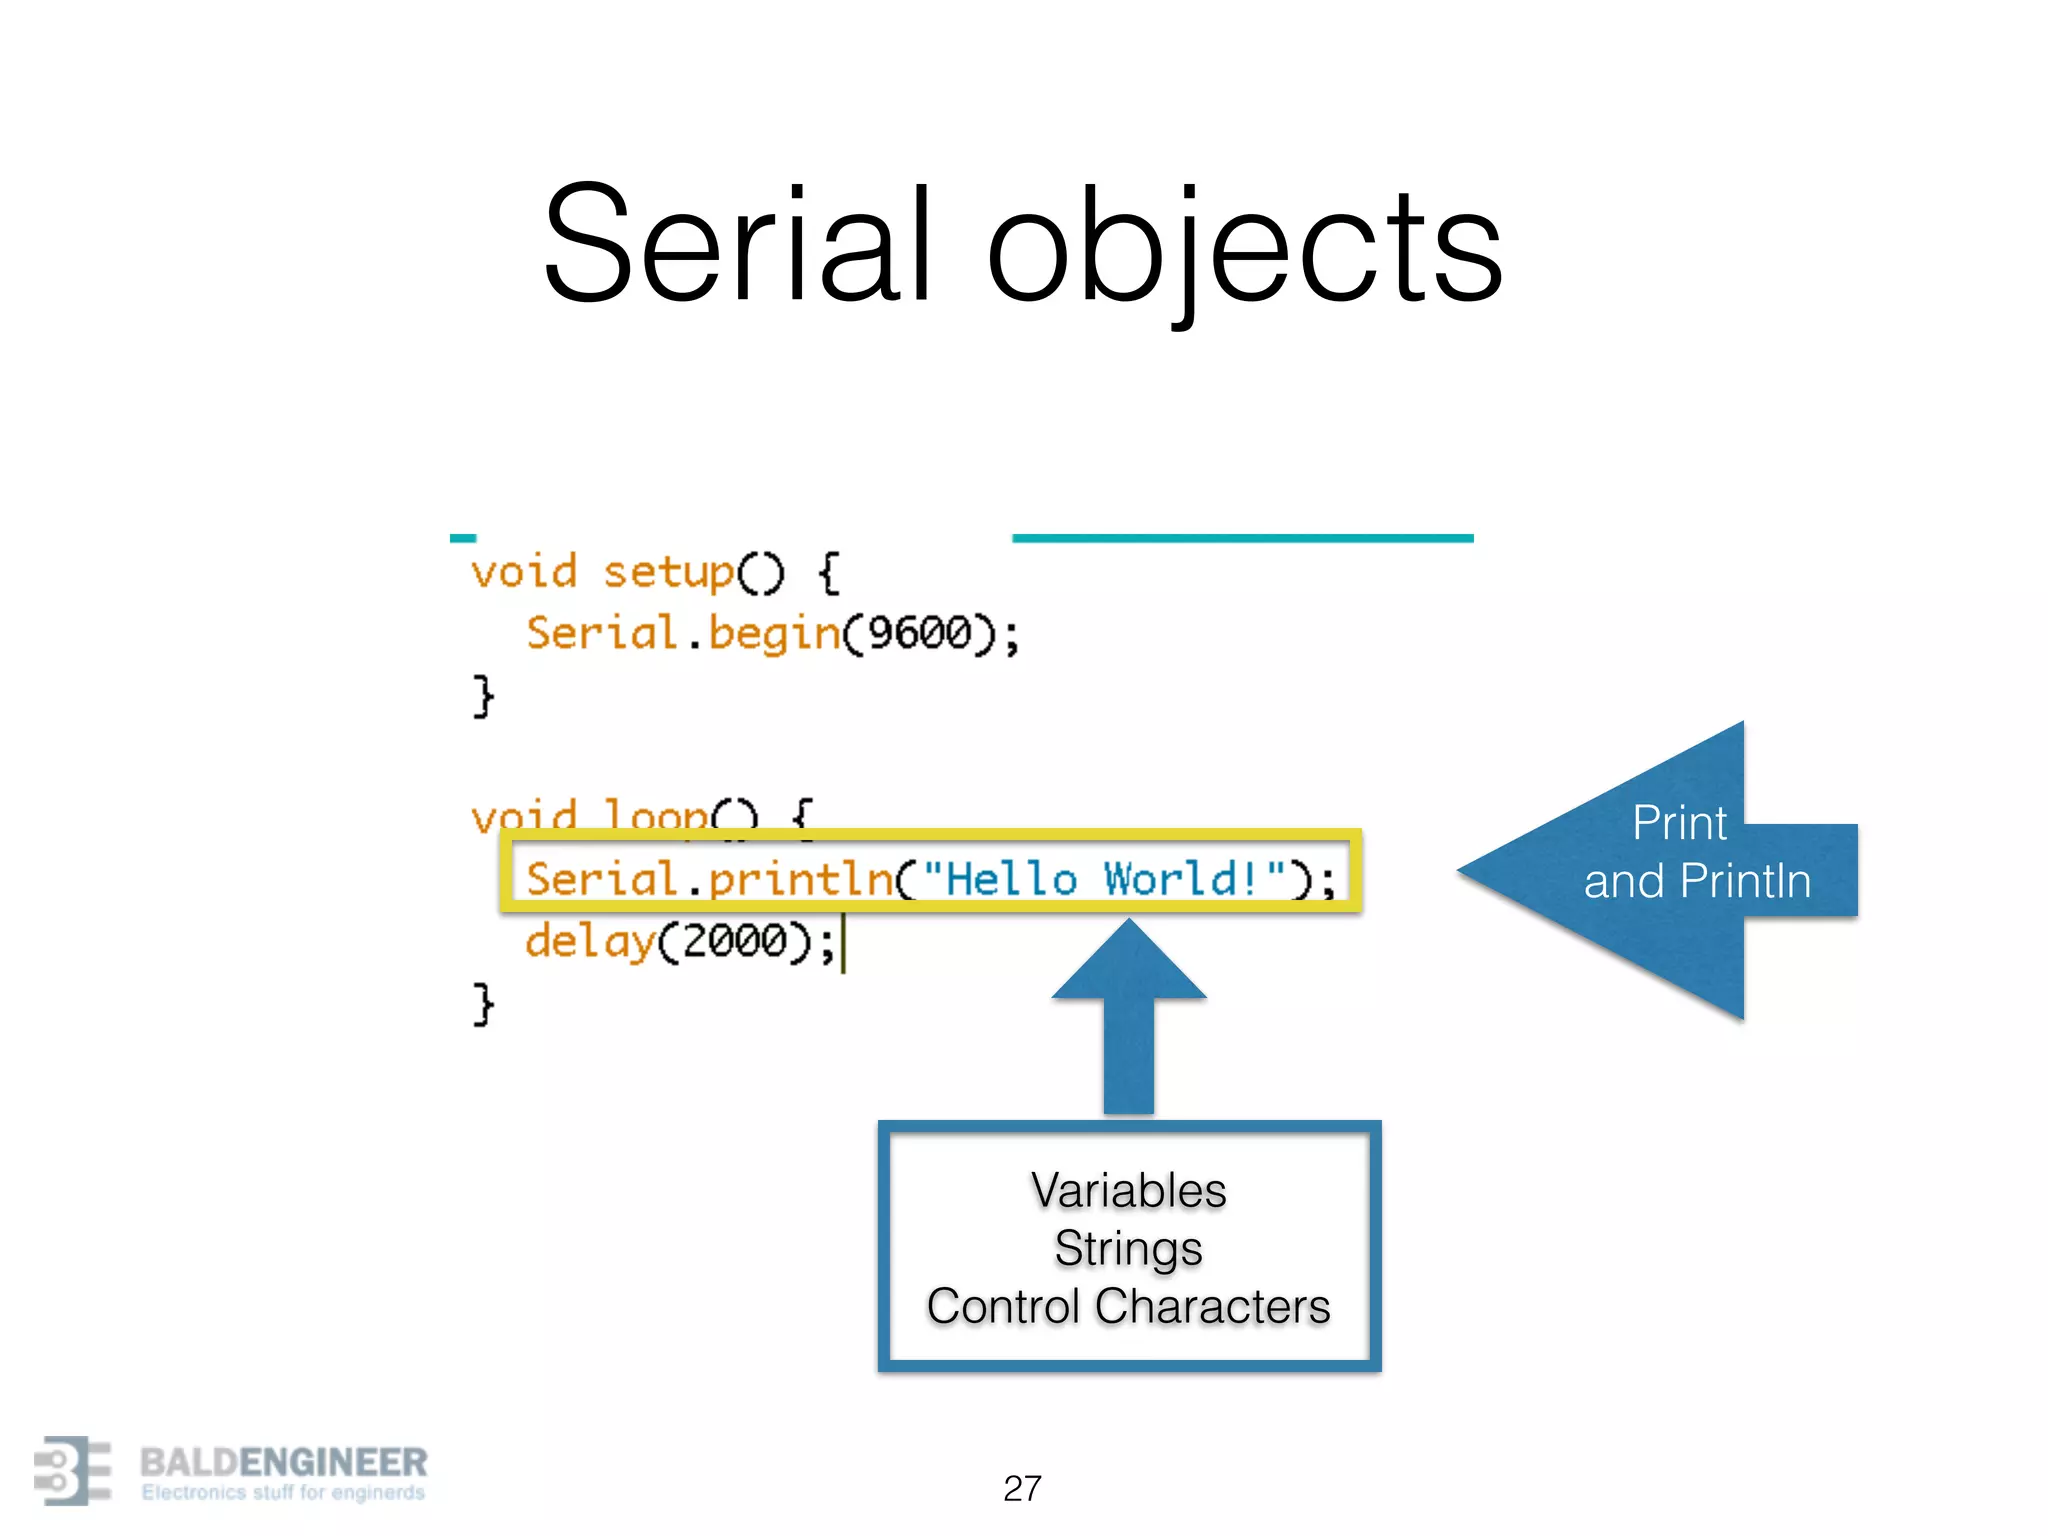
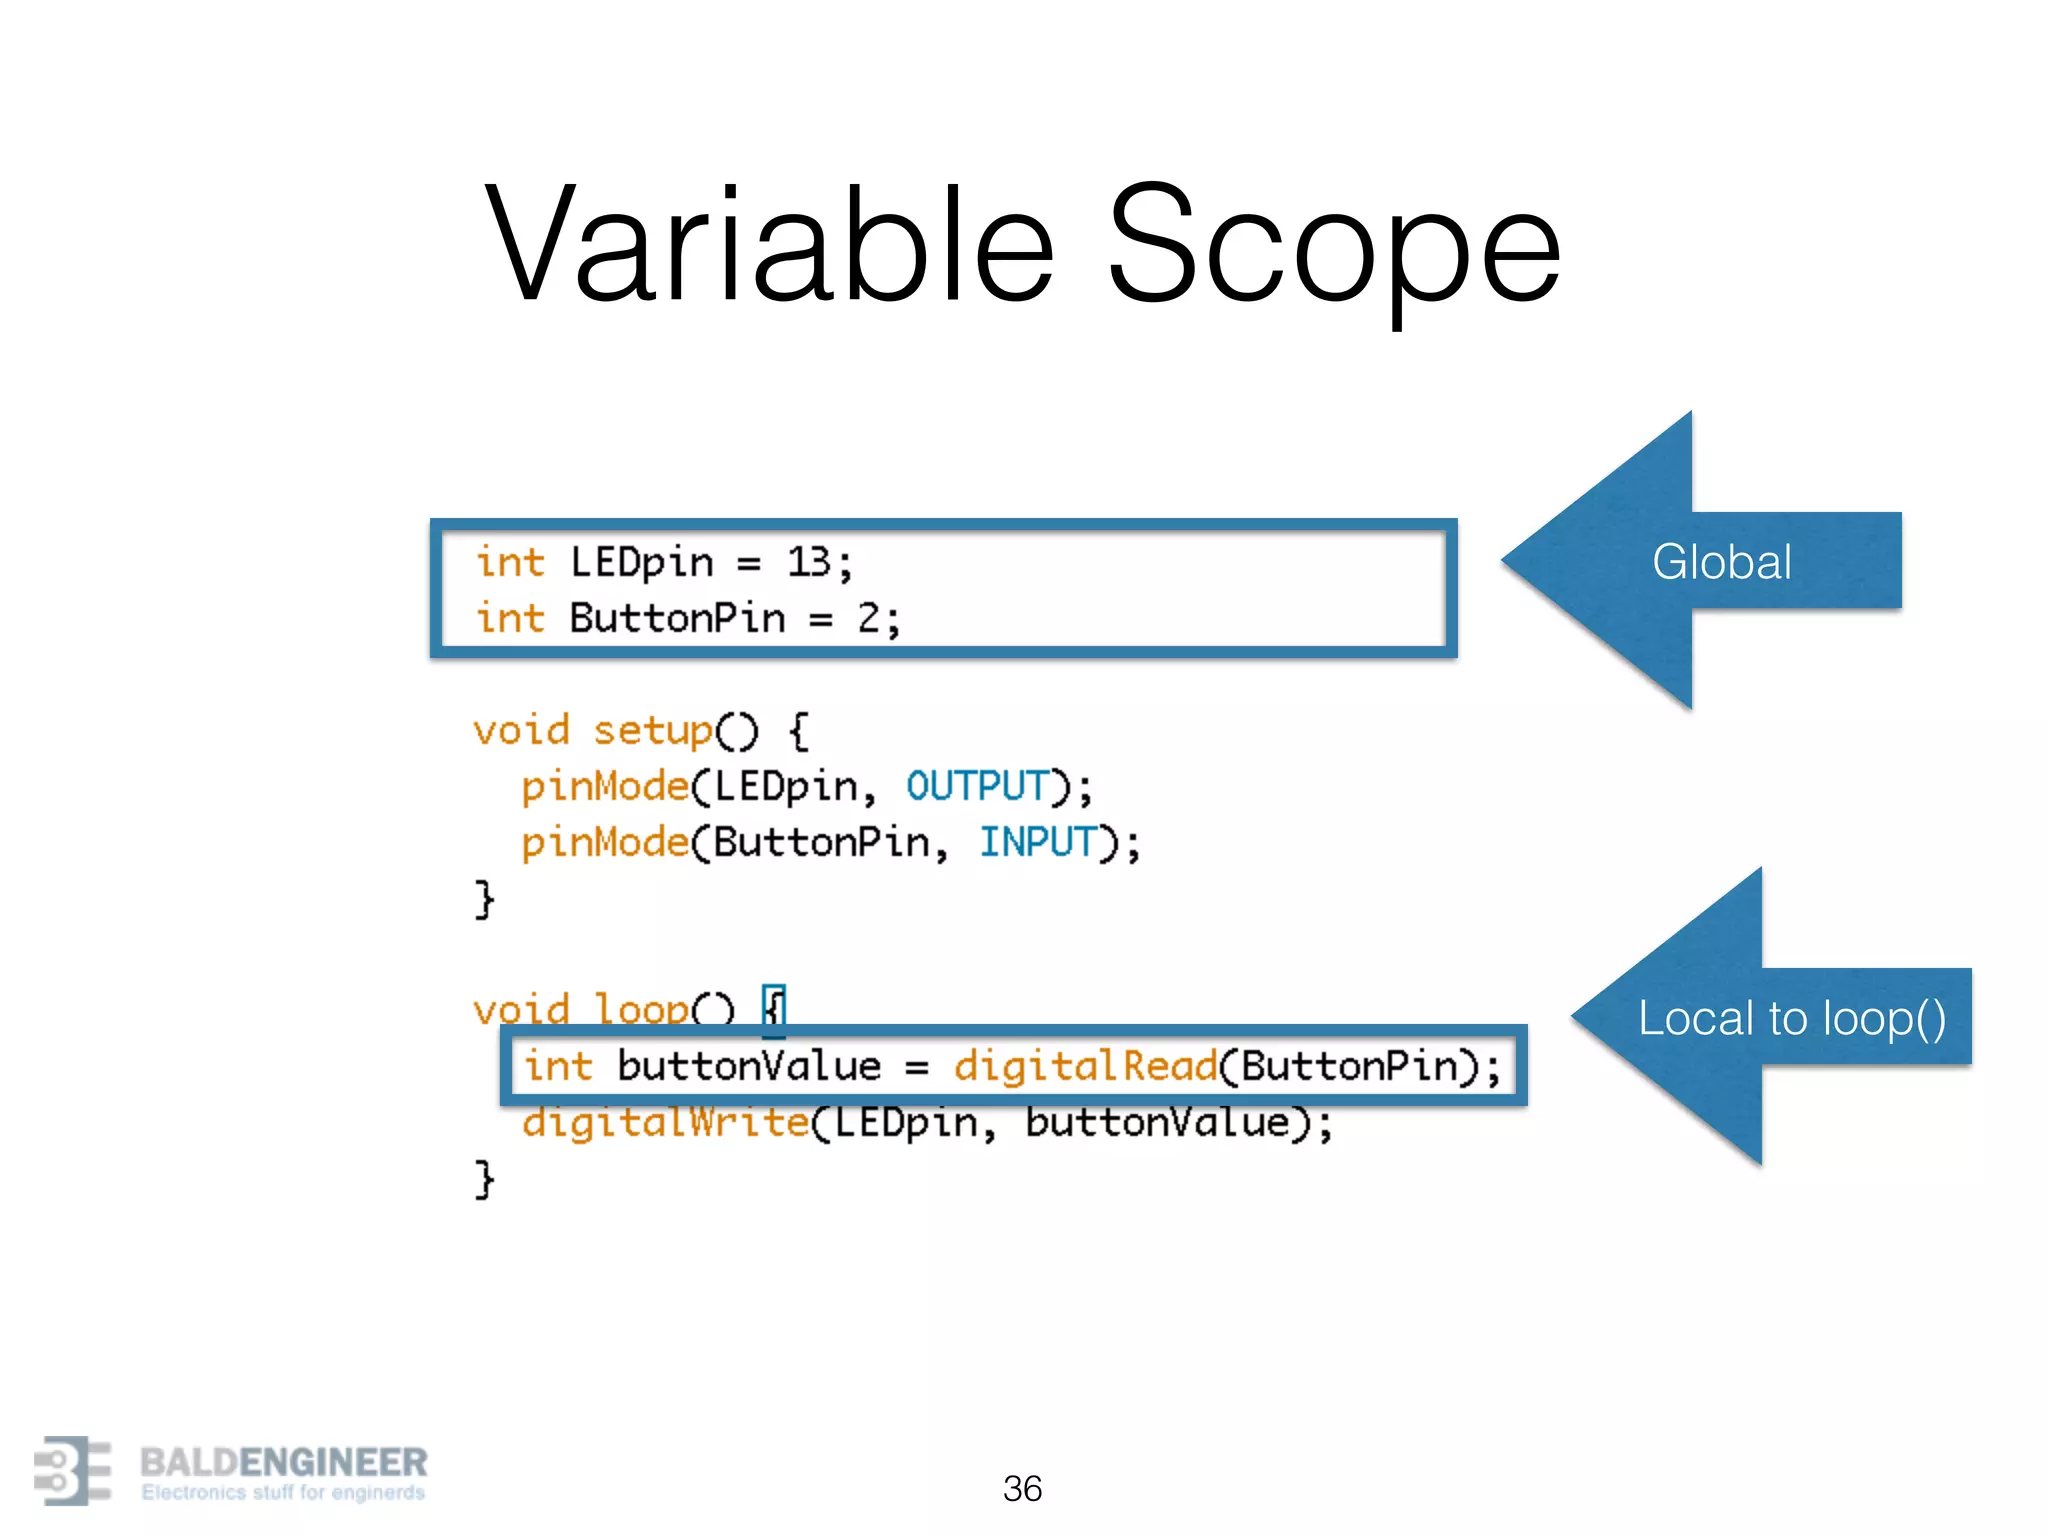
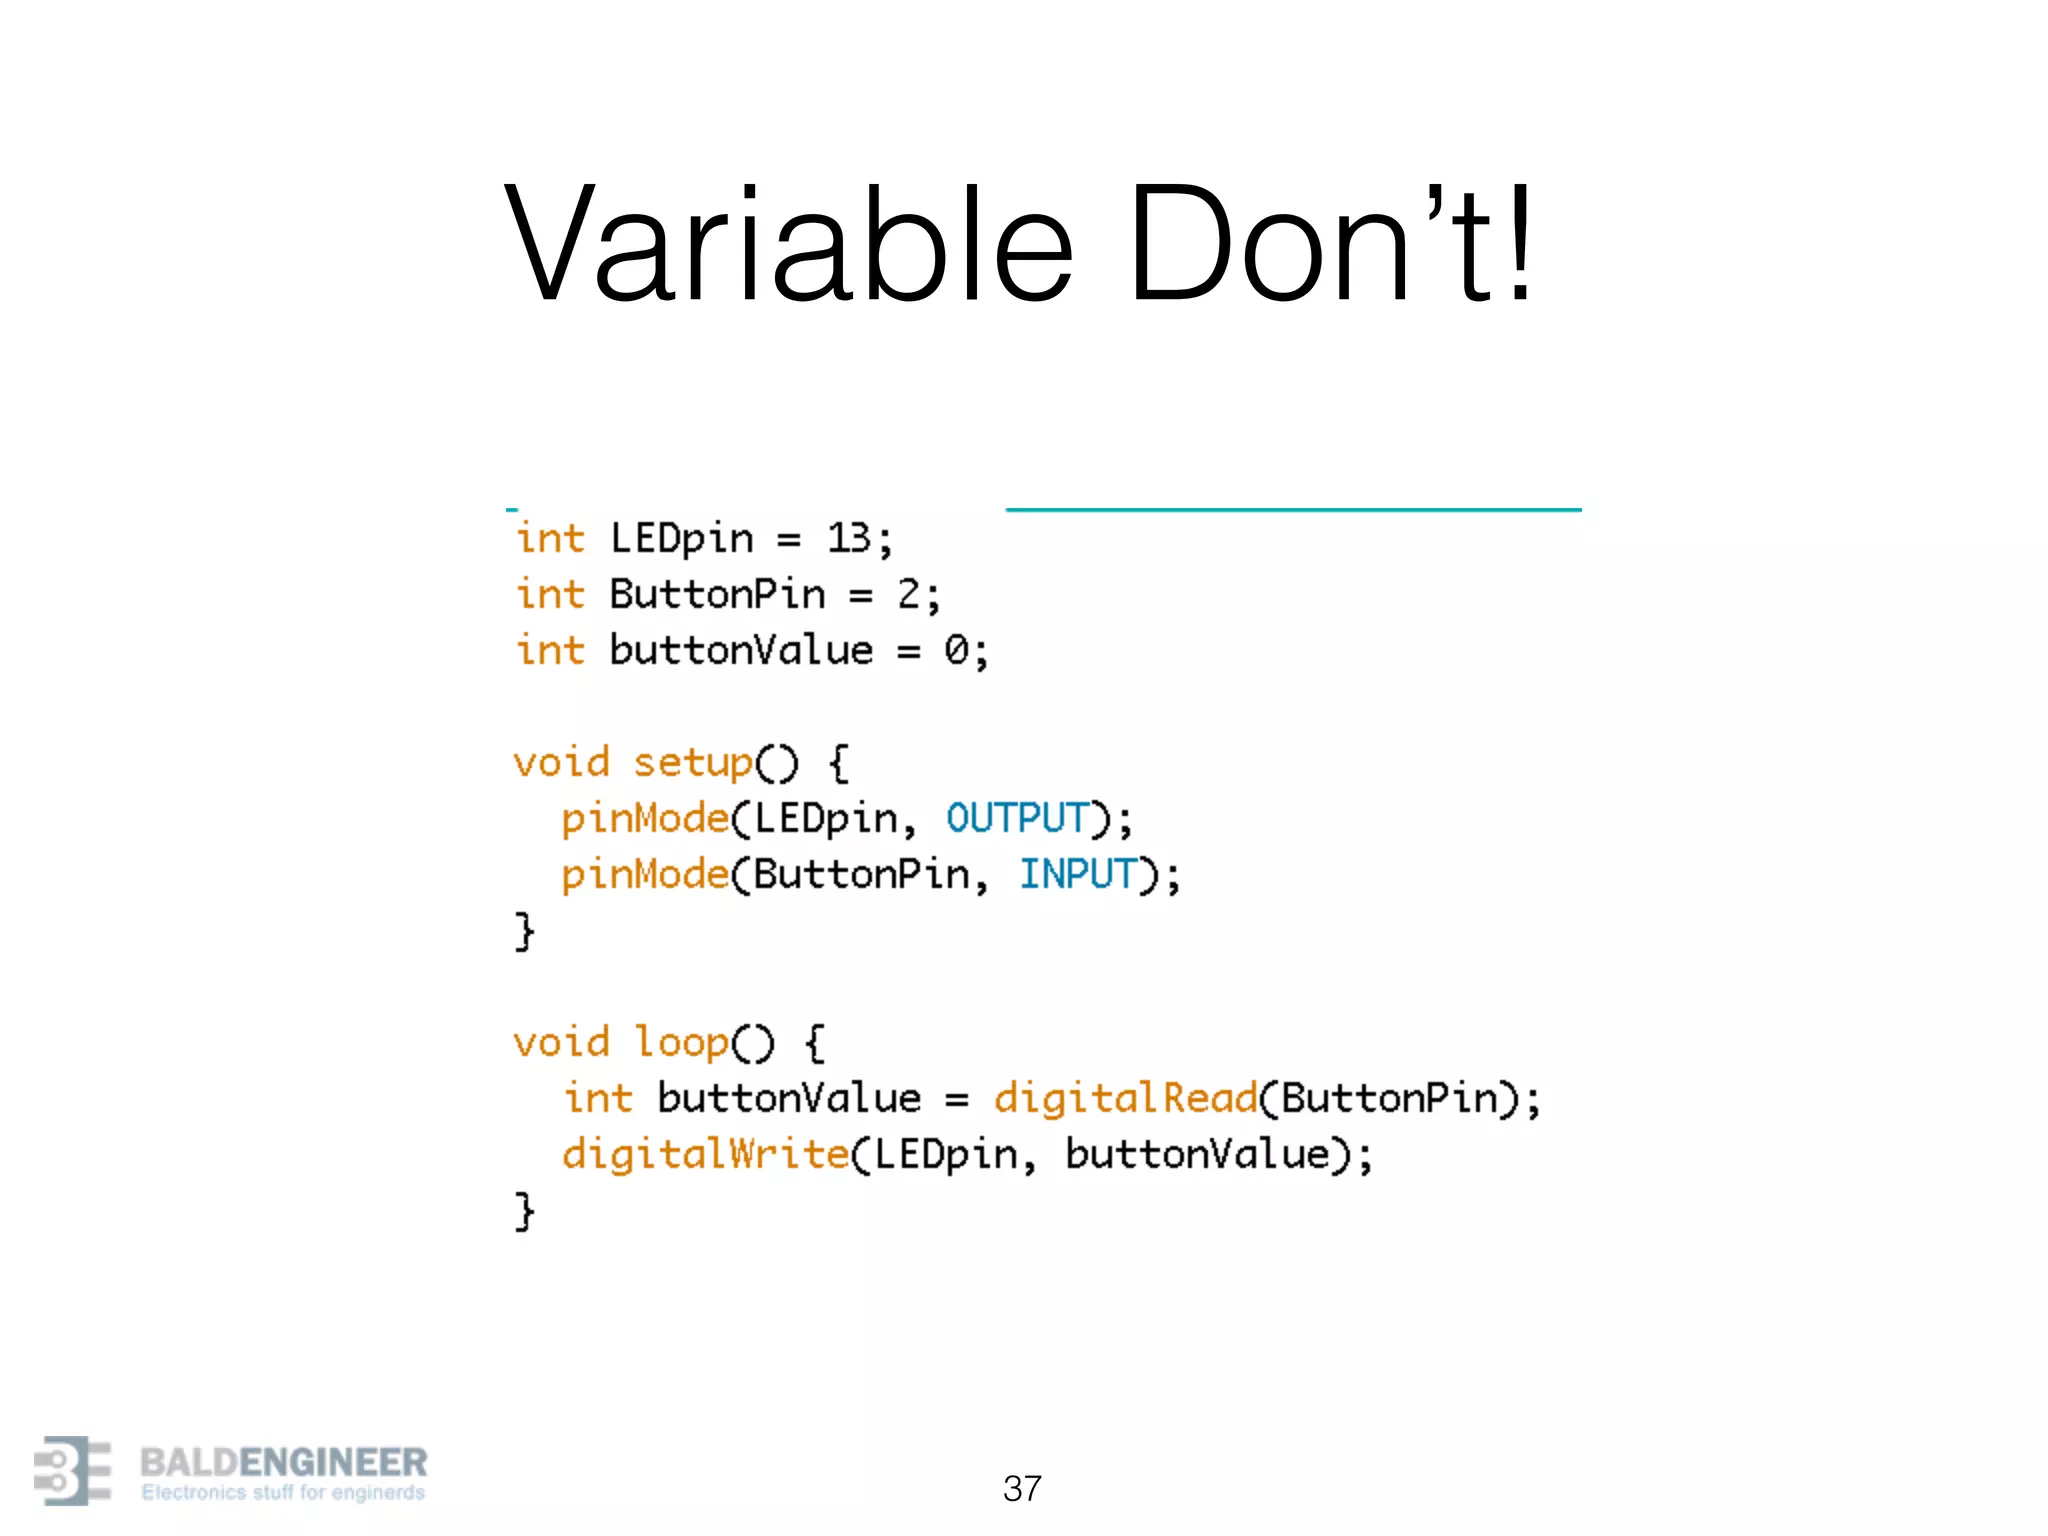
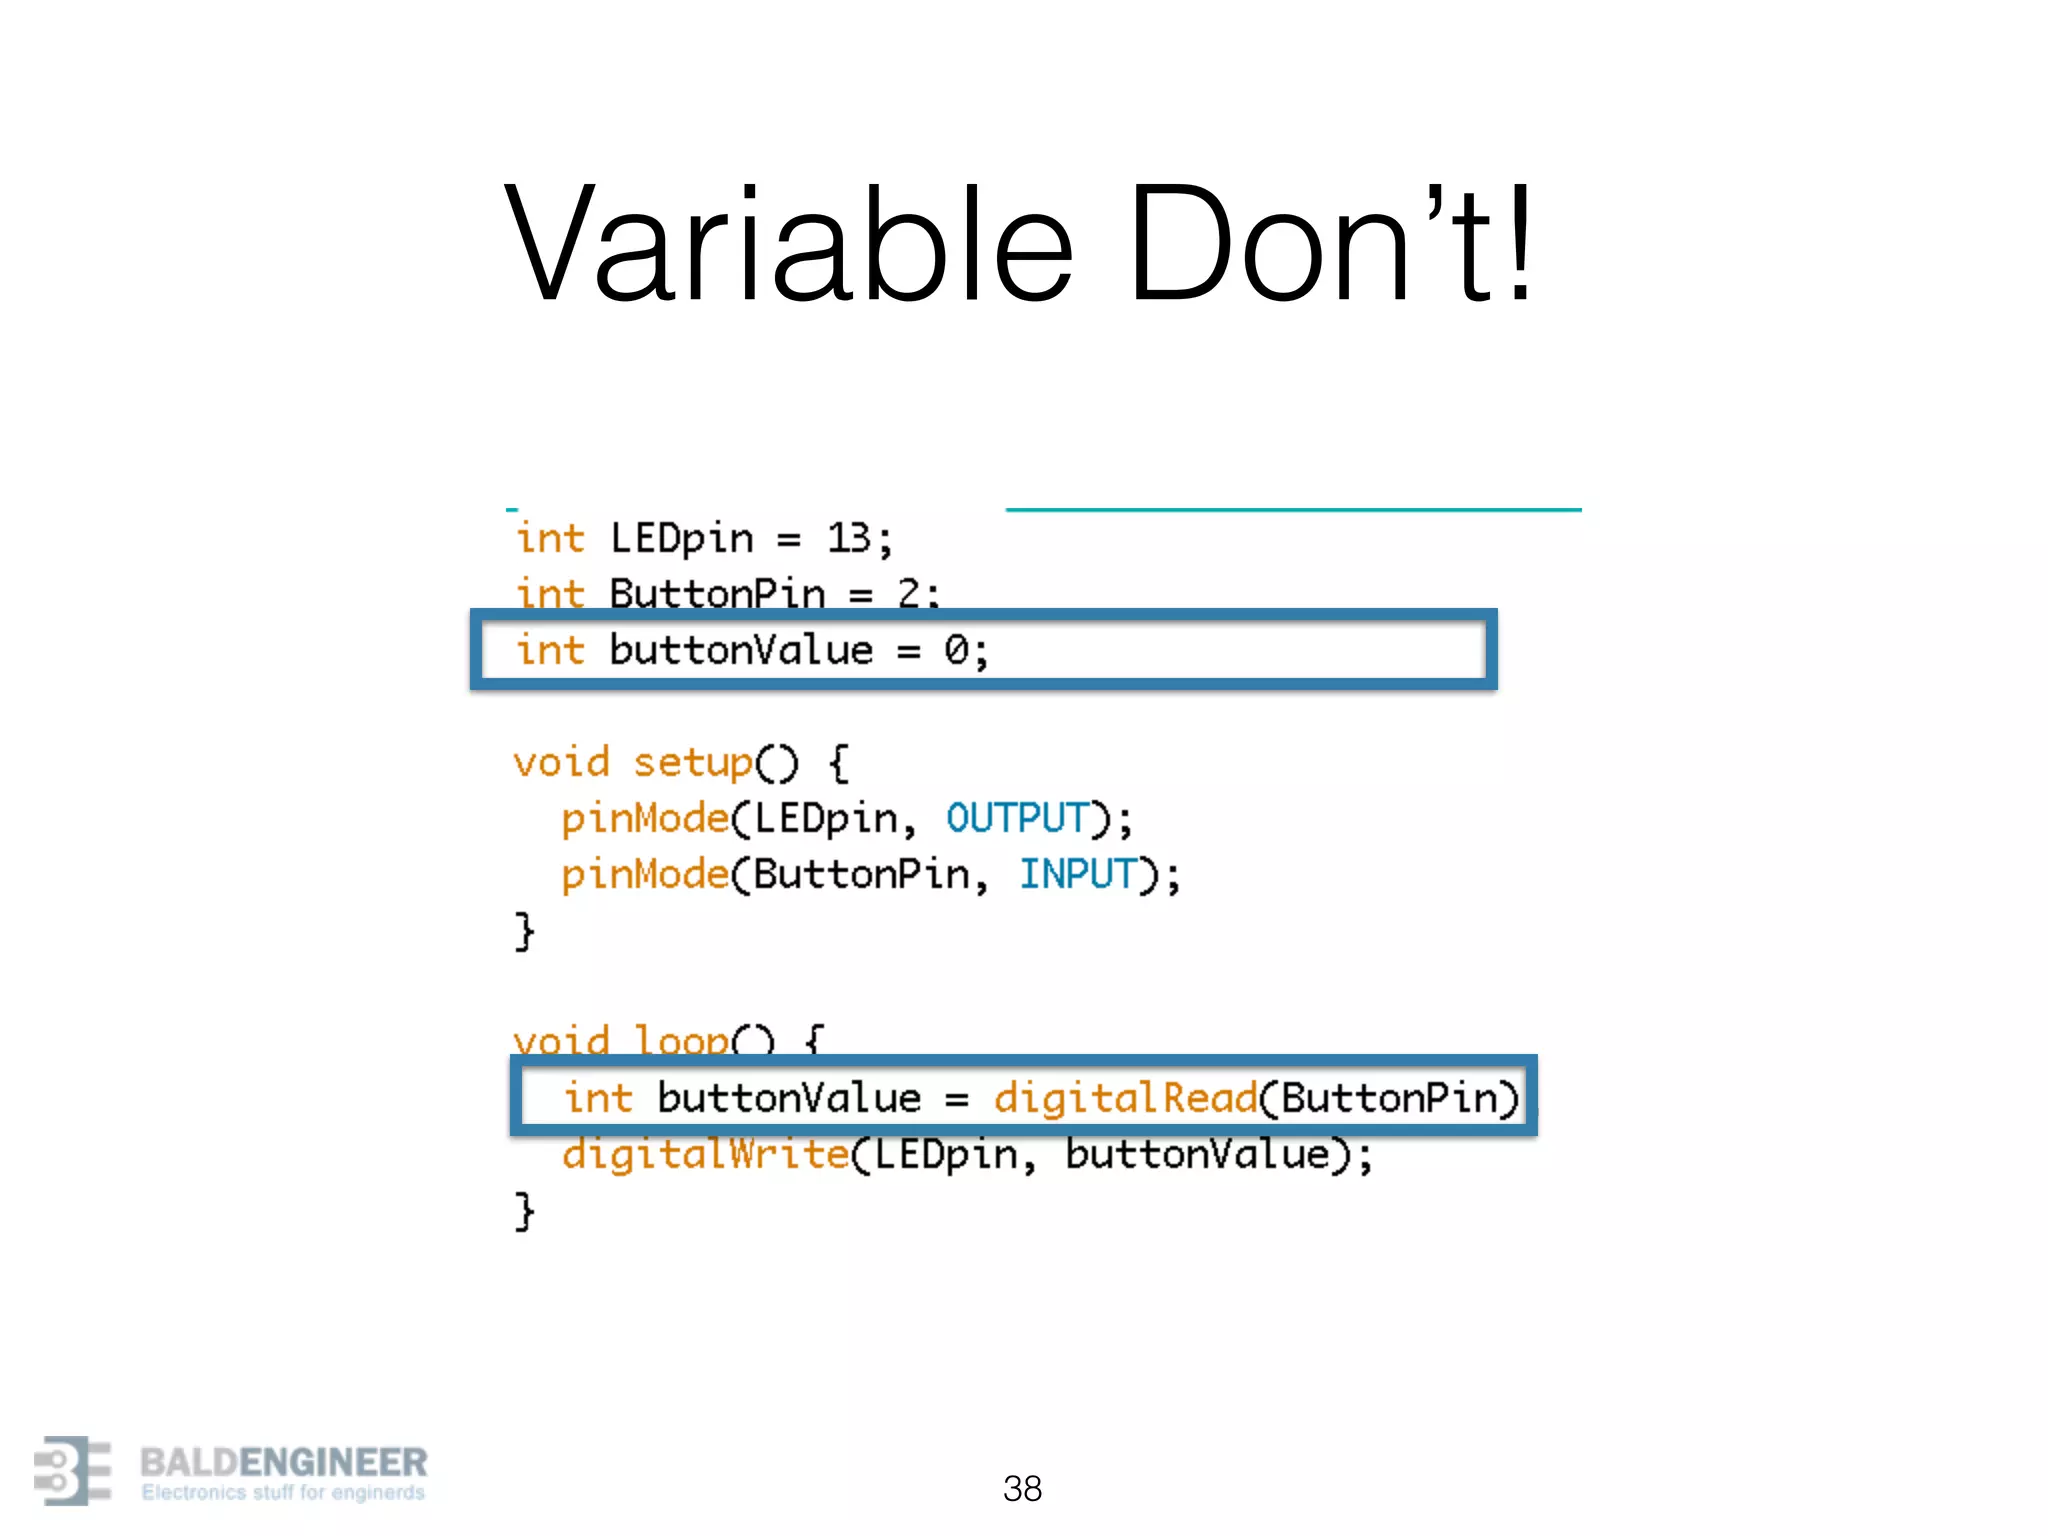
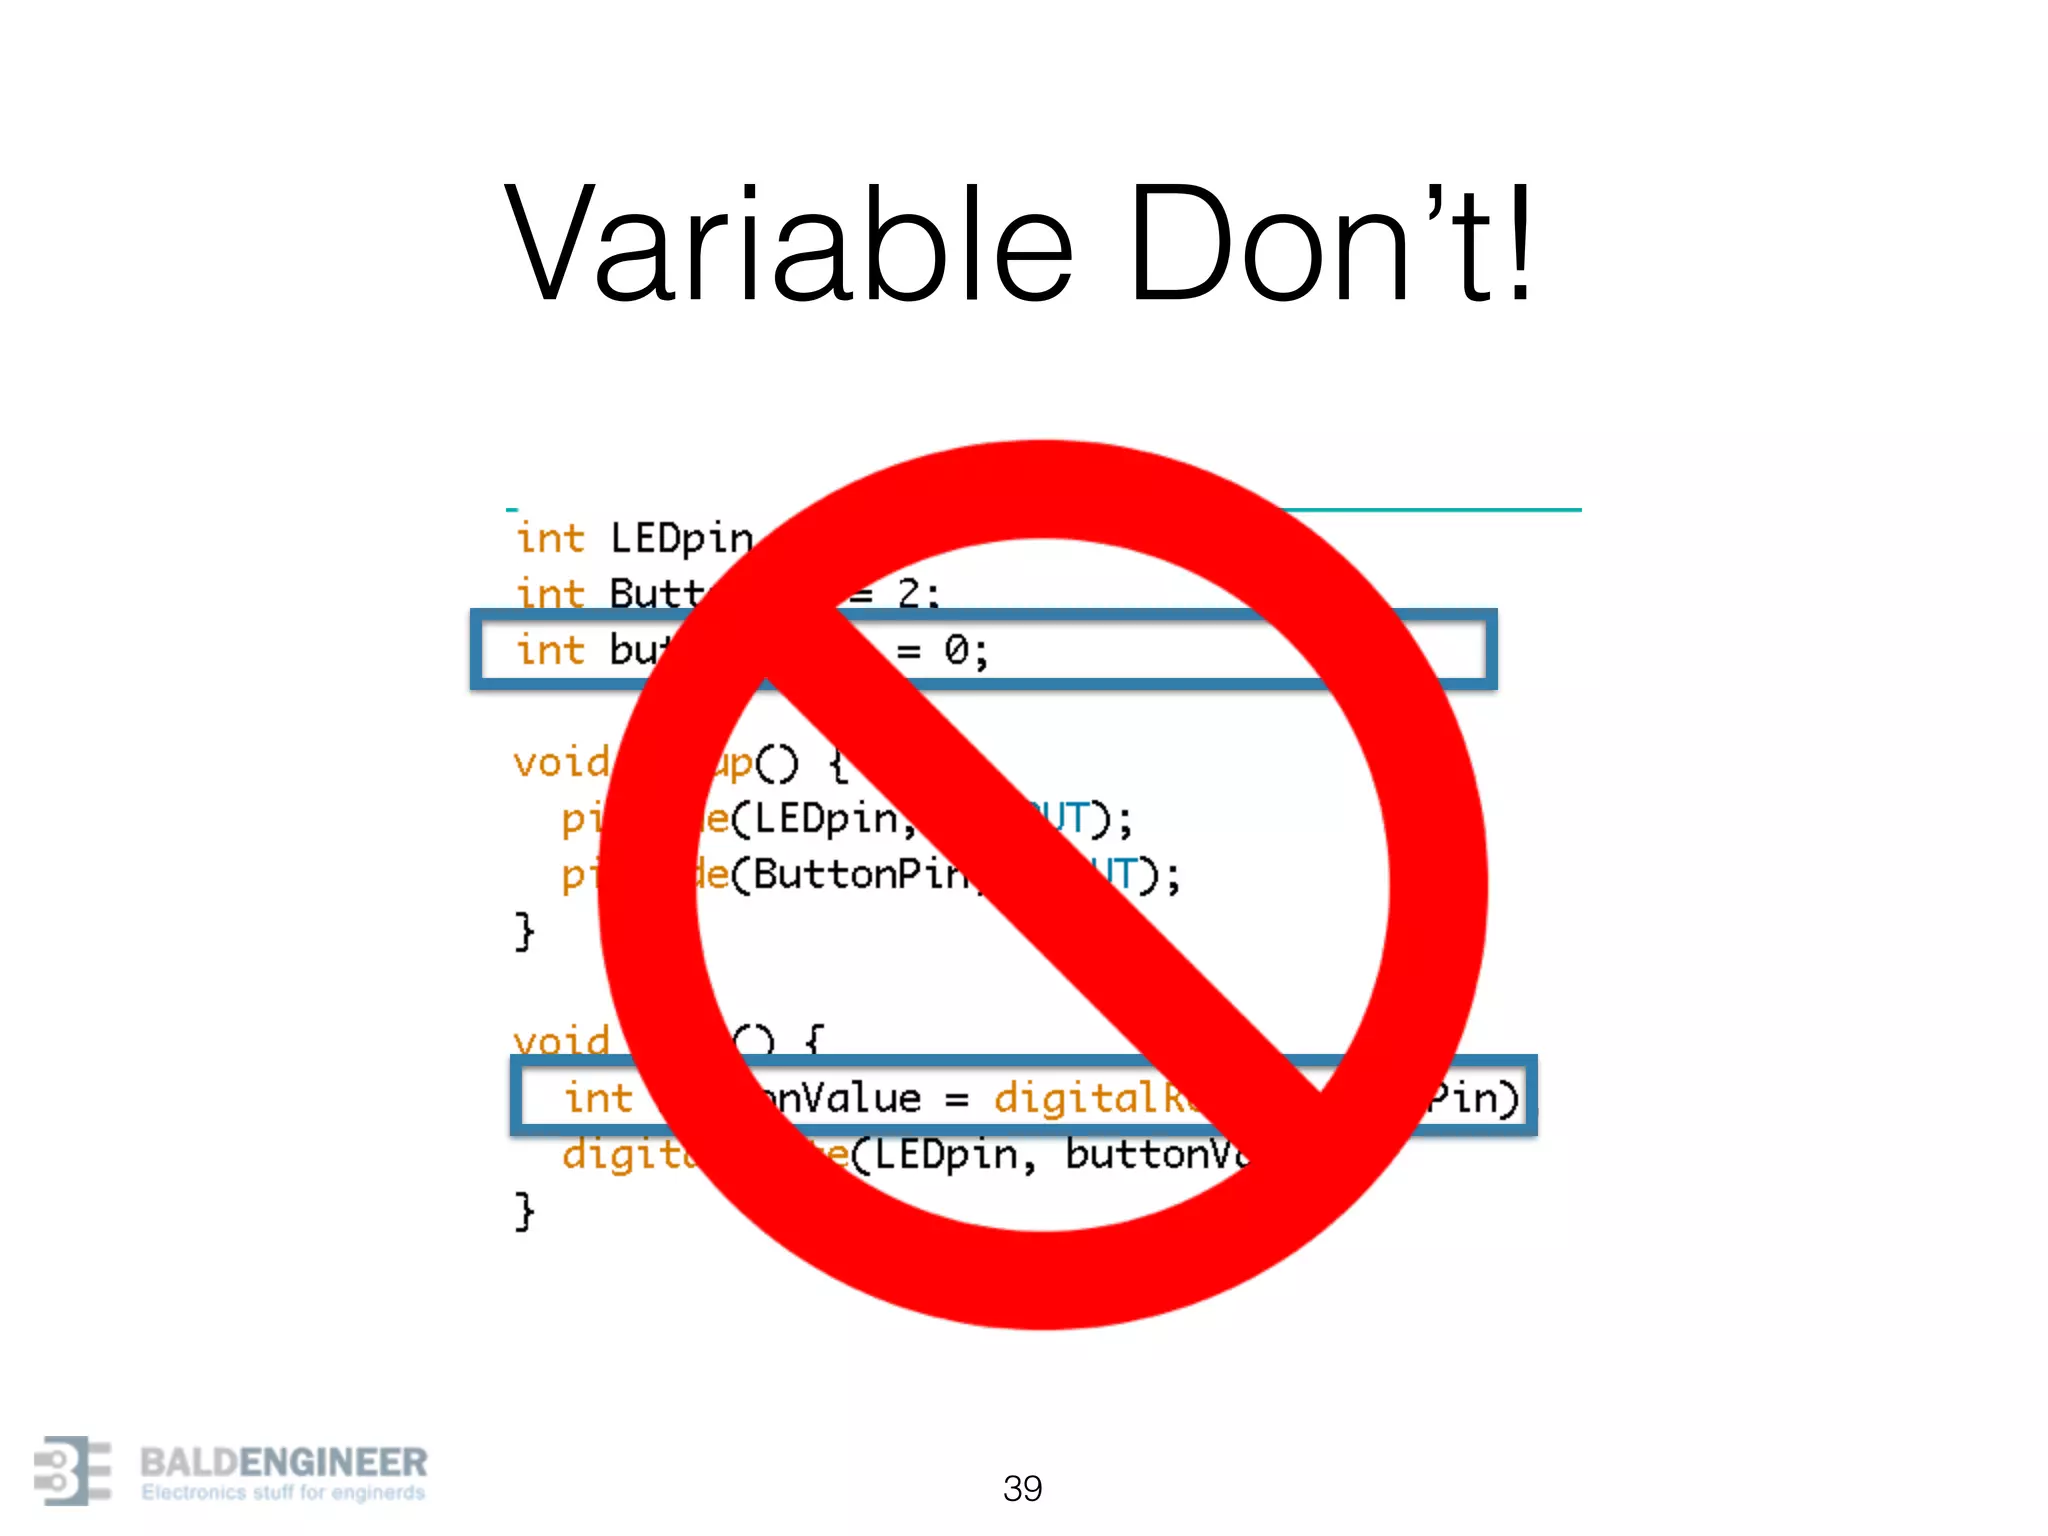
This document provides an overview of Arduino programming concepts including: - The Arduino programming language is based on C/C++ and includes libraries for interfacing with hardware. - Examples are provided for basic blink programs, using variables, functions, control structures like if statements and loops, reading analog/digital pins, and using the serial monitor. - Key concepts covered include variable scope, data types, naming conventions, pin modes, analog/digital reading and writing, functions, arrays, and different loop structures.