Download as PDF, PPTX


![Example October 9, 2018 25 • Tensor import torch as tc #Tensor a = tc.Tensor([2.5, 4]) b = tc.Tensor([[1, 2.5], [2.5, 6]]) #reshape c = b.reshape(1, 4) d = b.reshape(1, -1) Tensor a : tensor([ 2.5000, 4.0000]) Size of a : torch.Size([2]) Tensor b : tensor([[ 1.0000, 2.5000], [ 2.5000, 6.0000]]) Size of b : torch.Size([2, 2]) Tensor c : tensor([[ 1.0000, 2.5000, 2.5000, 6.0000]]) Size of c : torch.Size([1, 4]) Tensor d : tensor([[ 1.0000, 2.5000, 2.5000, 6.0000]]) Size of d : torch.Size([1, 4])](https://image.slidesharecdn.com/pytorch-181009013531/75/PyTorch-Touch-to-PyTorch-26-2048.jpg)
![Example October 9, 2018 26 • Tensor Start End 0 #ones, zeros real = tc.ones(2, 2) fake = tc.zeros(2, 2) 1 #linspace x = tc.linspace(-1, 1, 9) Tensor x : tensor([-1.0000, -0.7500, -0.5000, -0.2500, 0.0000, 0.2500, 0.5000, 0.7500, 1.0000]) Size of x : torch.Size([9]) Tensor real : tensor([[ 1., 1.], [ 1., 1.]]) Size of real : torch.Size([2, 2]) Tensor fake : tensor([[ 0., 0.], [ 0., 0.]]) Size of fake : torch.Size([2, 2])](https://image.slidesharecdn.com/pytorch-181009013531/75/PyTorch-Touch-to-PyTorch-27-2048.jpg)
![Example October 9, 2018 27 • Tensor 0 1 0 1 #randn, rand z1 = tc.randn(2, 3) z2 = tc.rand(2, 3) Tensor z1 : tensor([[-0.0750, -1.0555, -0.0706], [-0.1946, -0.8593, -0.2238]]) Size of z1 : torch.Size([2, 3]) Tensor z2 : tensor([[ 0.8204, 0.3505, 0.1034], [ 0.5318, 0.9543, 0.8781]]) Size of z2 : torch.Size([2, 3]) #to, cuda z_cuda = z1.cuda() device = tc.device('cuda' if tc.cuda.is_available() else 'cpu') z_device = z1.to(device) Tensor z_cuda : tensor([[-0.0750, -1.0555, -0.0706], [-0.1946, -0.8593, -0.2238]], device='cuda:0') Tensor z_device : tensor([[-0.0750, -1.0555, -0.0706], [-0.1946, -0.8593, -0.2238]], device='cuda:0')](https://image.slidesharecdn.com/pytorch-181009013531/75/PyTorch-Touch-to-PyTorch-28-2048.jpg)
![Example October 9, 2018 28 • Tensor #from_numpy, numpy import numpy as np a = np.array([3.5, 4]) b = tc.from_numpy(a) c = b.numpy() array a : [3.5 4. ] Tensor b : tensor([ 3.5000, 4.0000], dtype=torch.float64) array c : [3.5 4. ]](https://image.slidesharecdn.com/pytorch-181009013531/75/PyTorch-Touch-to-PyTorch-29-2048.jpg)
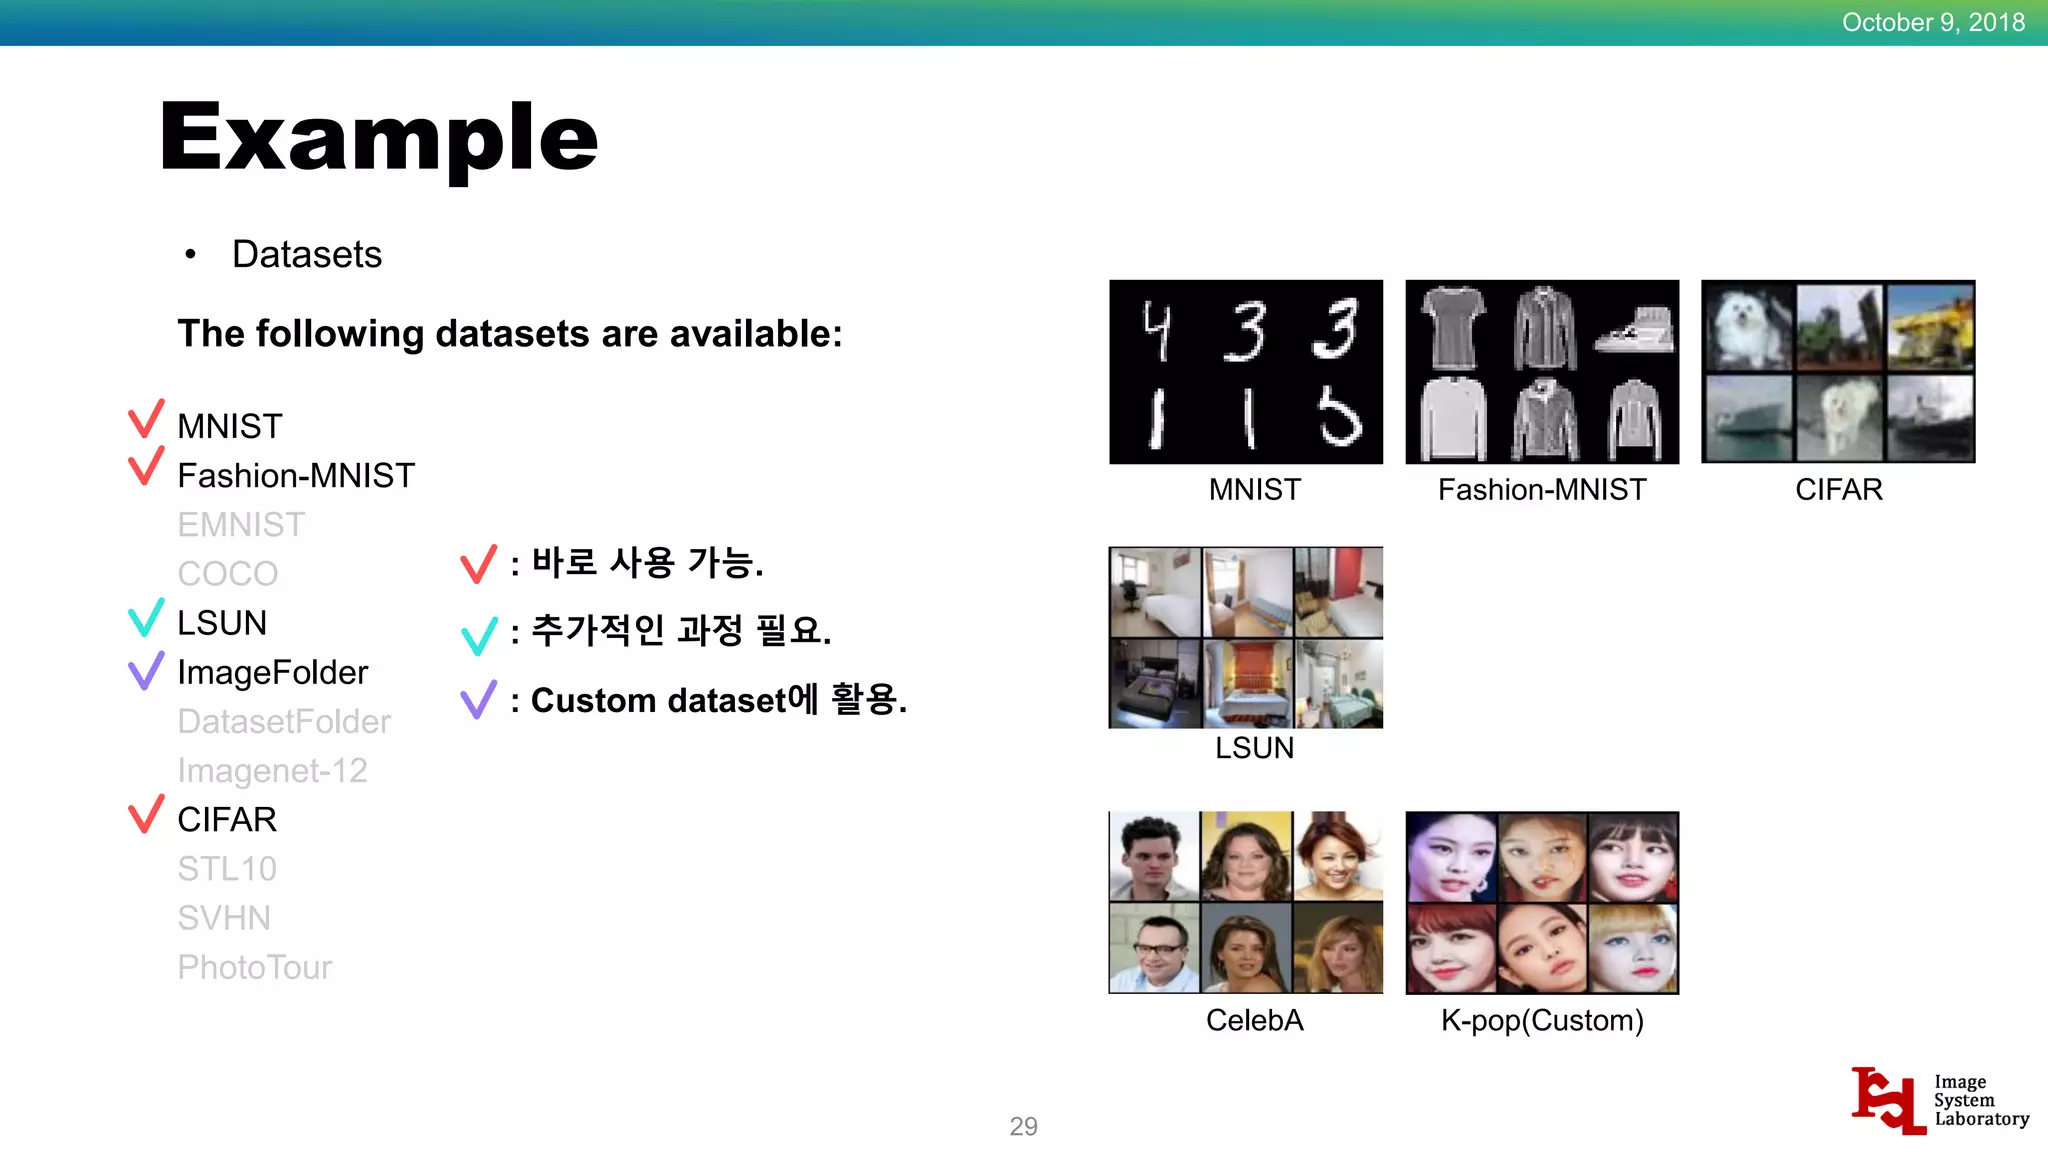
![Example October 9, 2018 30 • Datasets – MNIST trans Compose()is used when there are multiple transform options. Here, ToTensor() and Normalize(mean, std) are used. ToTensor () changes the PIL Image to a tensor. torchvision dataset The default type is PIL Image. Normalize (mean, std) transforms the range of the image. Here, the value of [0, 1] is adjusted to [-1, 1]. ((value-mean) / std) trans = transforms.Compose([transforms.ToTensor(), transforms.Normalize((0.5, 0.5, 0.5), (0.5, 0.5, 0.5))]) datasets = tv.datasets.MNIST(root='./MNIST', train=True, download=True, transform=trans) dataloader = tc.utils.data.DataLoader(datasets=datasets, batch_size=100, shuffle=True) import torch as tc import torchvision as tv import torchvision.transforms as transforms](https://image.slidesharecdn.com/pytorch-181009013531/75/PyTorch-Touch-to-PyTorch-31-2048.jpg)
![Example October 9, 2018 31 • Datasets – MNIST dataset root : This is the path to store (MNIST data). Folders are automatically created with the specified name. train : Set the data to be used for the train. transform : Transform the data according to the transform option set previously. download : Download (MINST data). (If you downloaded it once, it will not do it again.) trans = transforms.Compose([transforms.ToTensor(), transforms.Normalize((0.5, 0.5, 0.5), (0.5, 0.5, 0.5))]) datasets = tv.datasets.MNIST(root='./MNIST', train=True, download=True, transform=trans) dataloader = tc.utils.data.DataLoader(datasets=datasets, batch_size=100, shuffle=True) import torch as tc import torchvision as tv import torchvision.transforms as transforms](https://image.slidesharecdn.com/pytorch-181009013531/75/PyTorch-Touch-to-PyTorch-32-2048.jpg)
![Example October 9, 2018 32 • Datasets – MNIST dataloader dataset : Set the dataset to load. batch_size : Set the batch size. shuffle : Shuffle the data and load it. trans = transforms.Compose([transforms.ToTensor(), transforms.Normalize((0.5, 0.5, 0.5), (0.5, 0.5, 0.5))]) datasets = tv.datasets.MNIST(root='./MNIST', train=True, download=True, transform=trans) dataloader = tc.utils.data.DataLoader(datasets=datasets, batch_size=100, shuffle=True) import torch as tc import torchvision as tv import torchvision.transforms as transforms](https://image.slidesharecdn.com/pytorch-181009013531/75/PyTorch-Touch-to-PyTorch-33-2048.jpg)
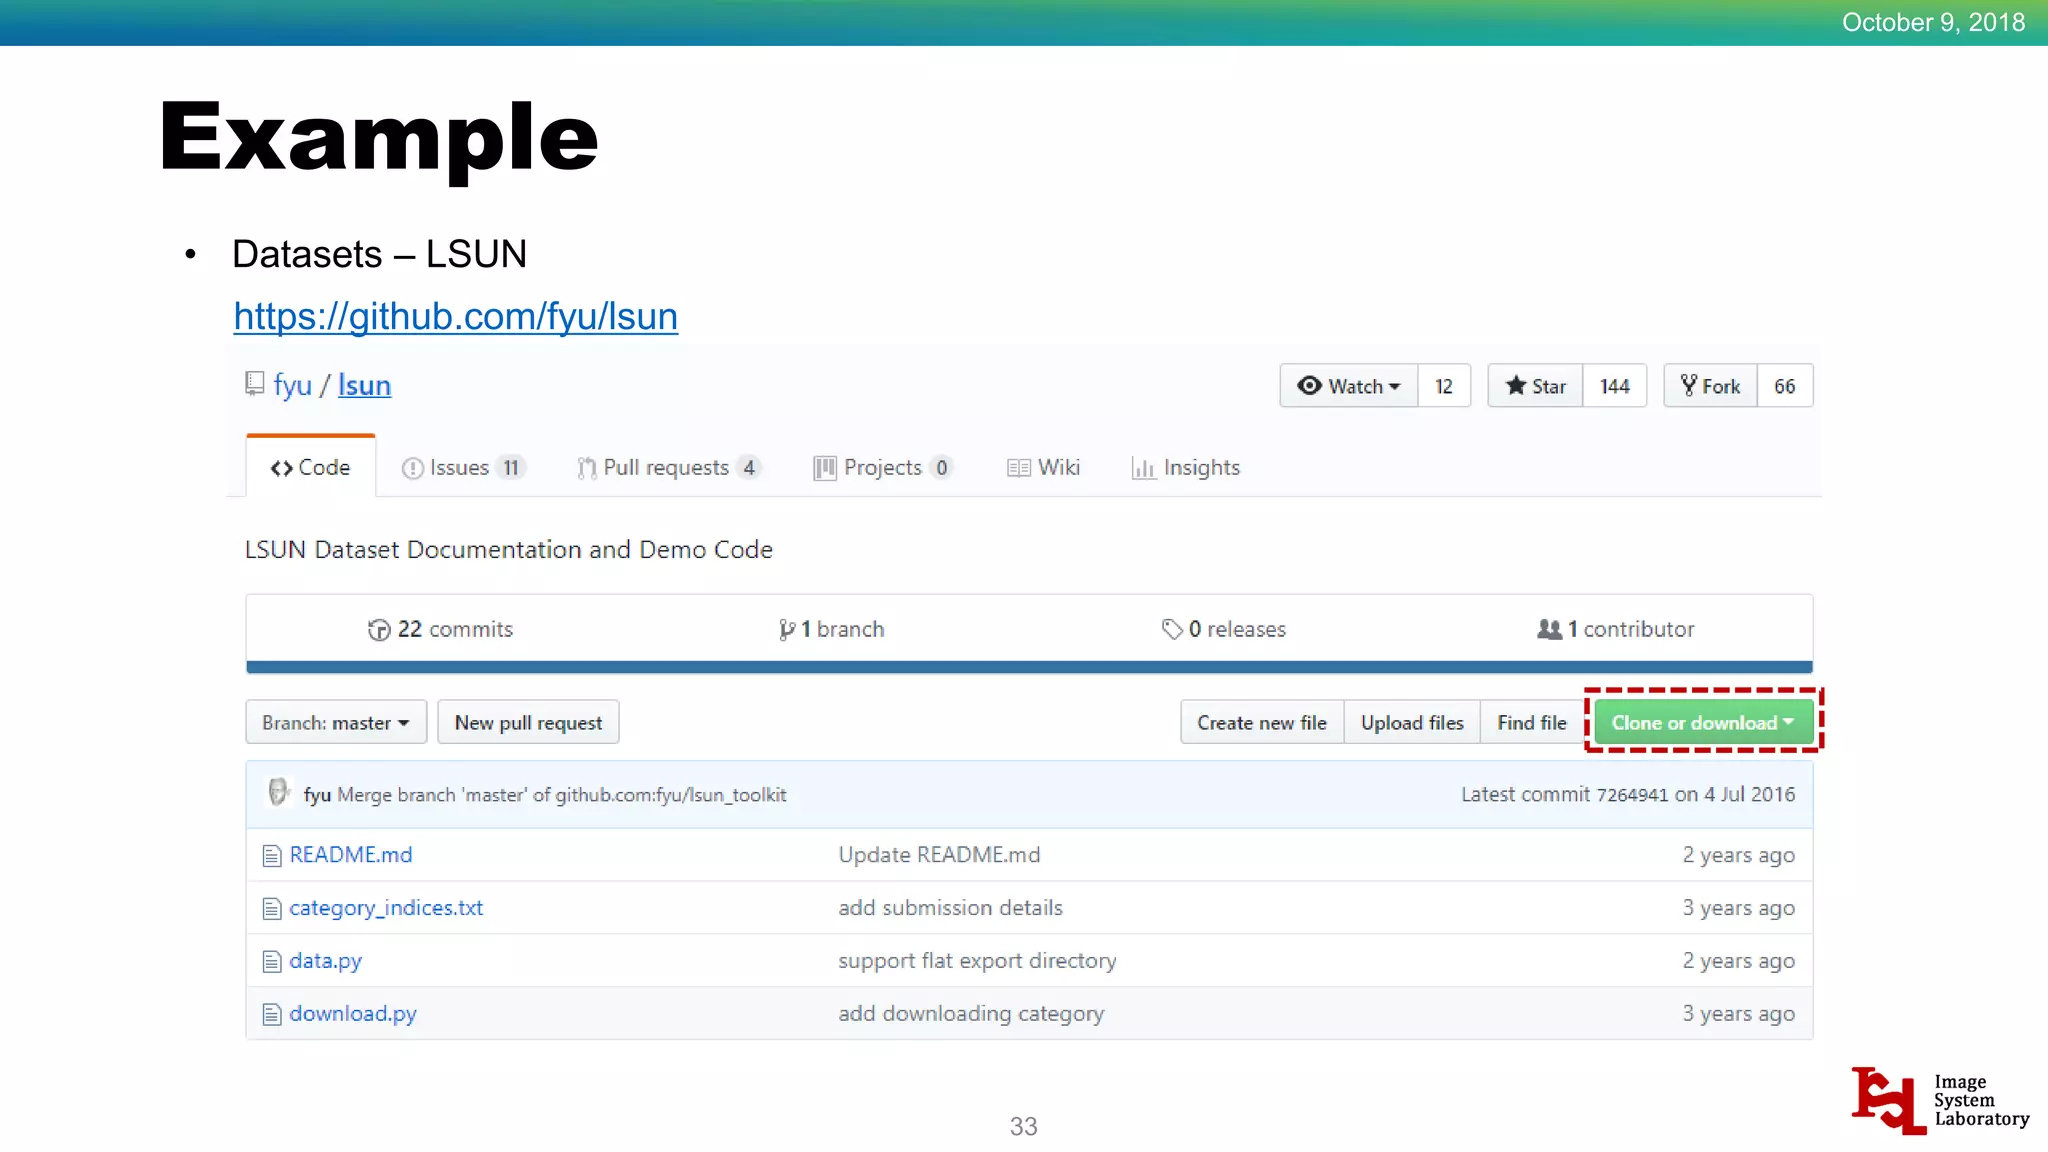
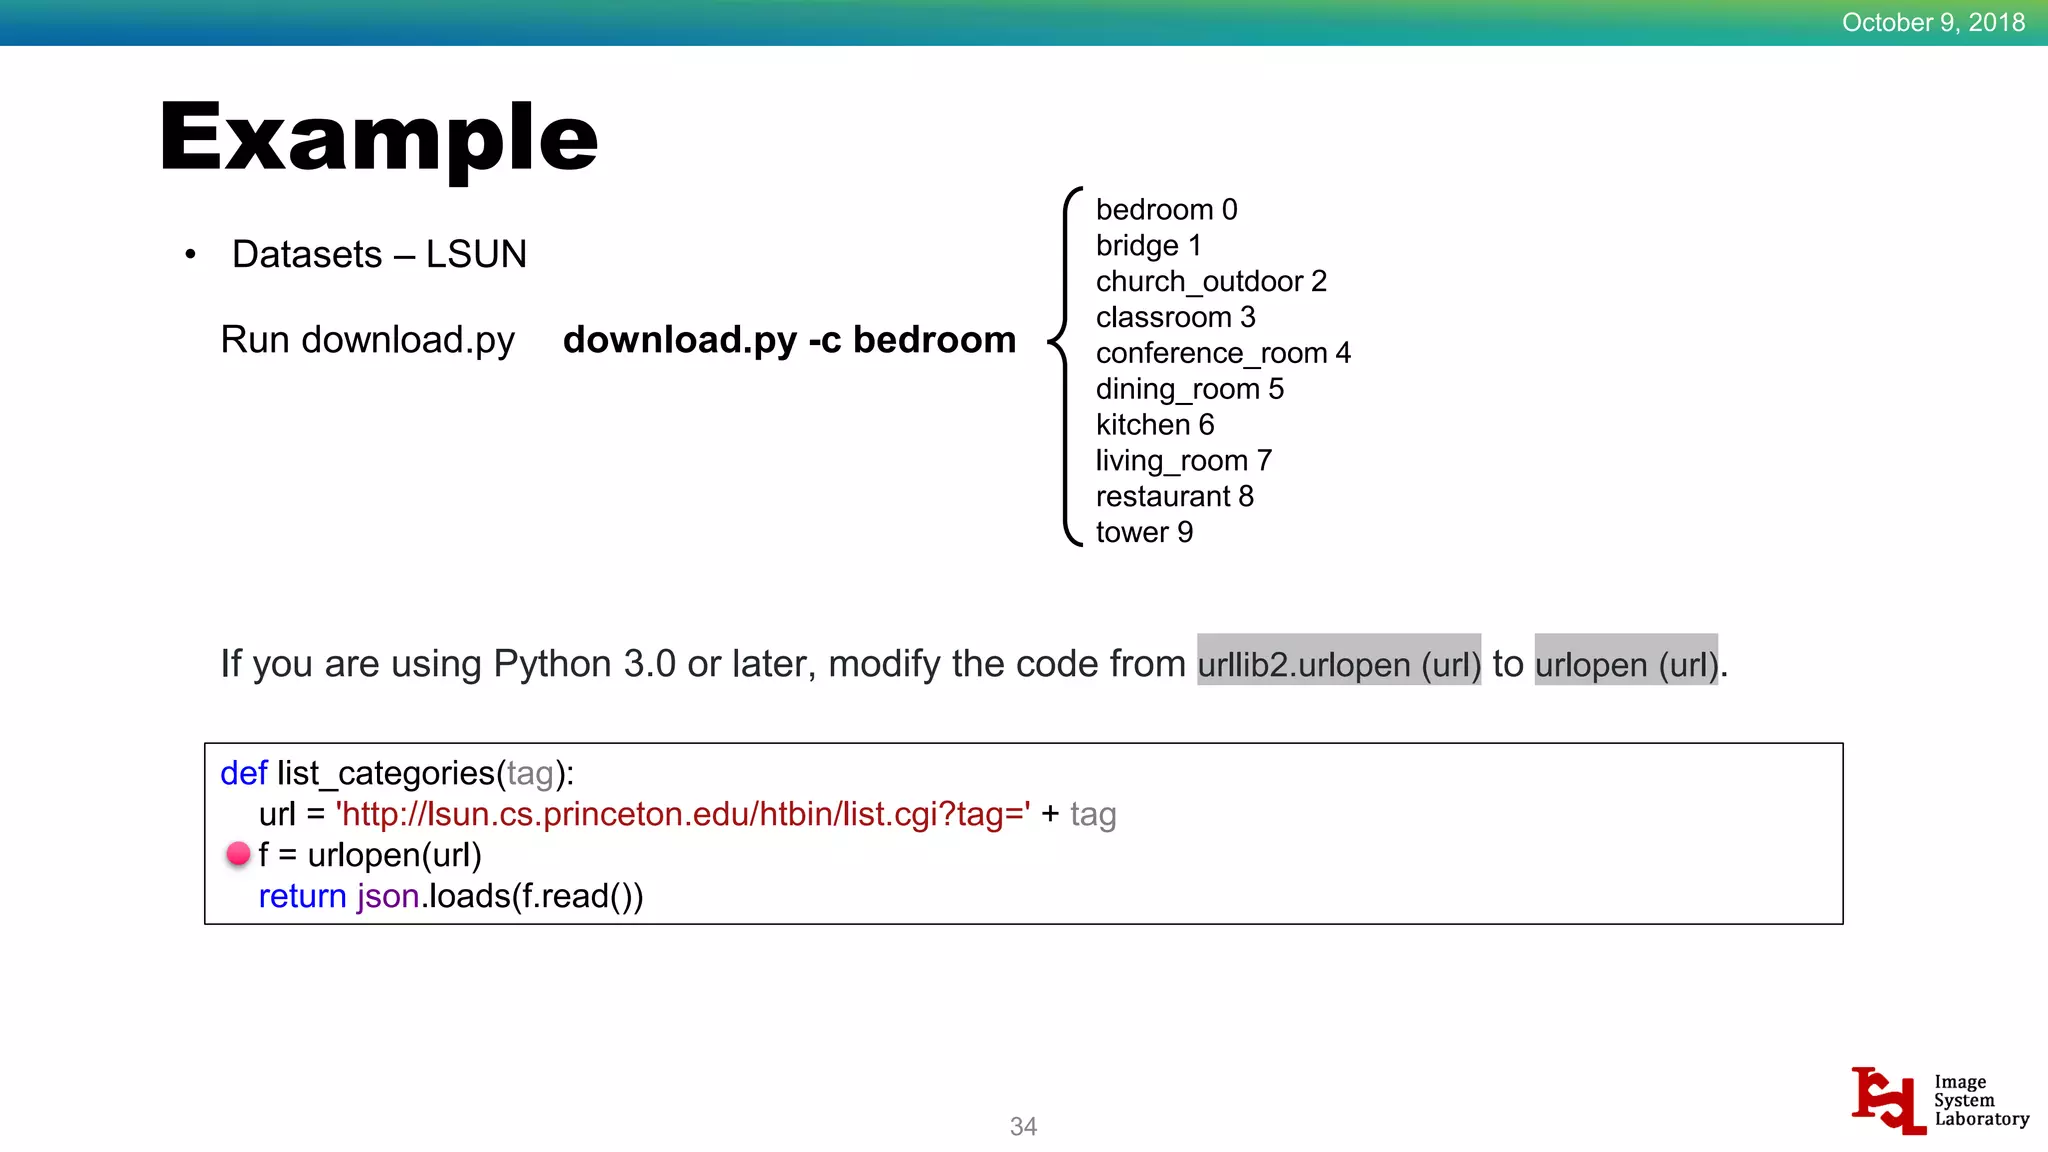
![Example October 9, 2018 35 • Datasets – LSUN trans = transforms.Compose([transforms.Resize((64,64)) ,transforms.ToTensor(), transforms.Normalize((0.5, 0.5, 0.5), (0.5, 0.5, 0.5))]) datasets = tv.datasets.LSUN('.', classes=['bedroom_train'], transform=trans) dataloader = tc.utils.data.DataLoader(datasets=datasets, batch_size=100, shuffle=True) trans Resize() is used to resize the image. datasets root : Root directory for the database files. classes : One of {‘train’, ‘val’, ‘test’} or a list of categories to load. e,g. [‘bedroom_train’, ‘church_train’].](https://image.slidesharecdn.com/pytorch-181009013531/75/PyTorch-Touch-to-PyTorch-36-2048.jpg)
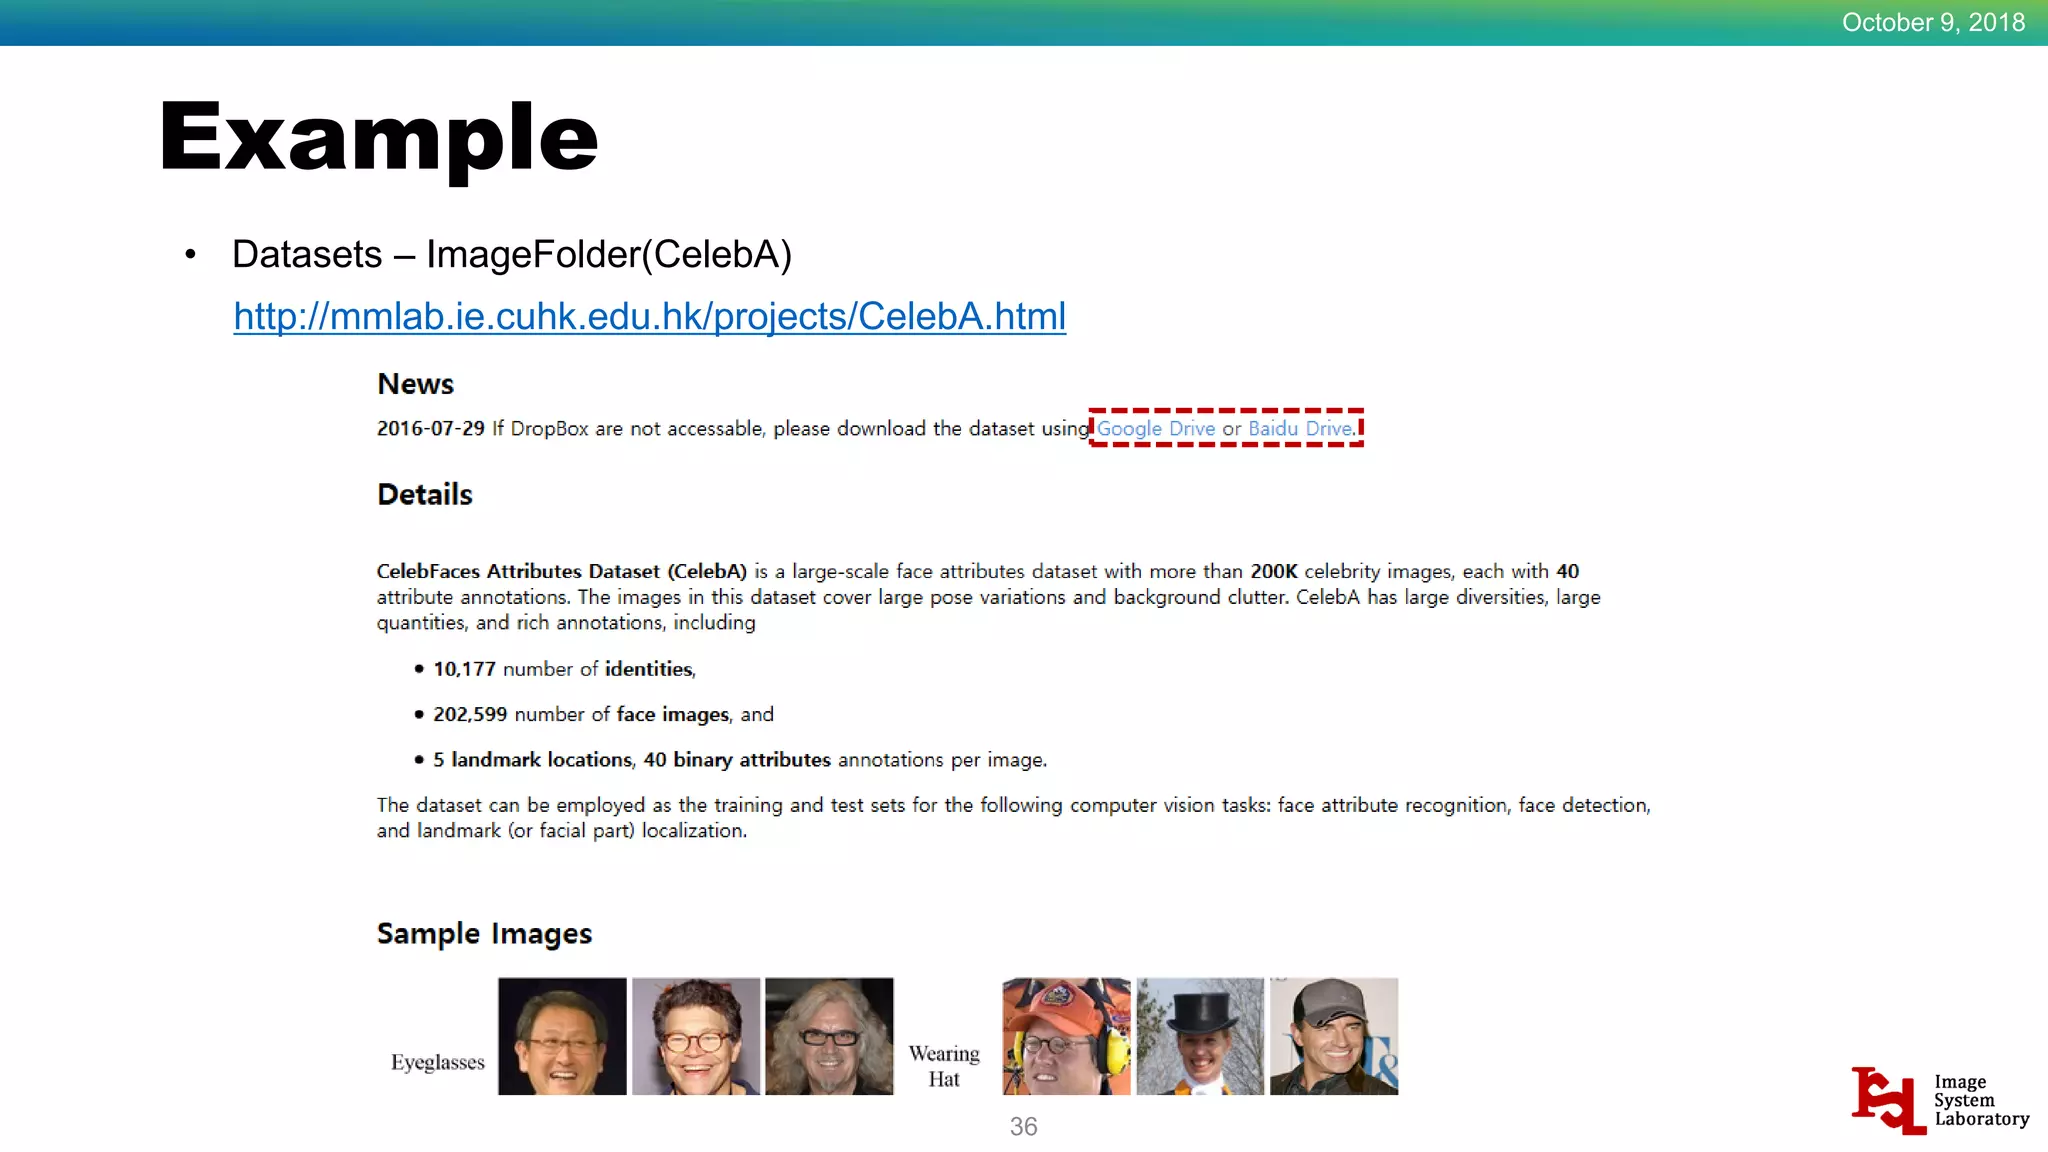
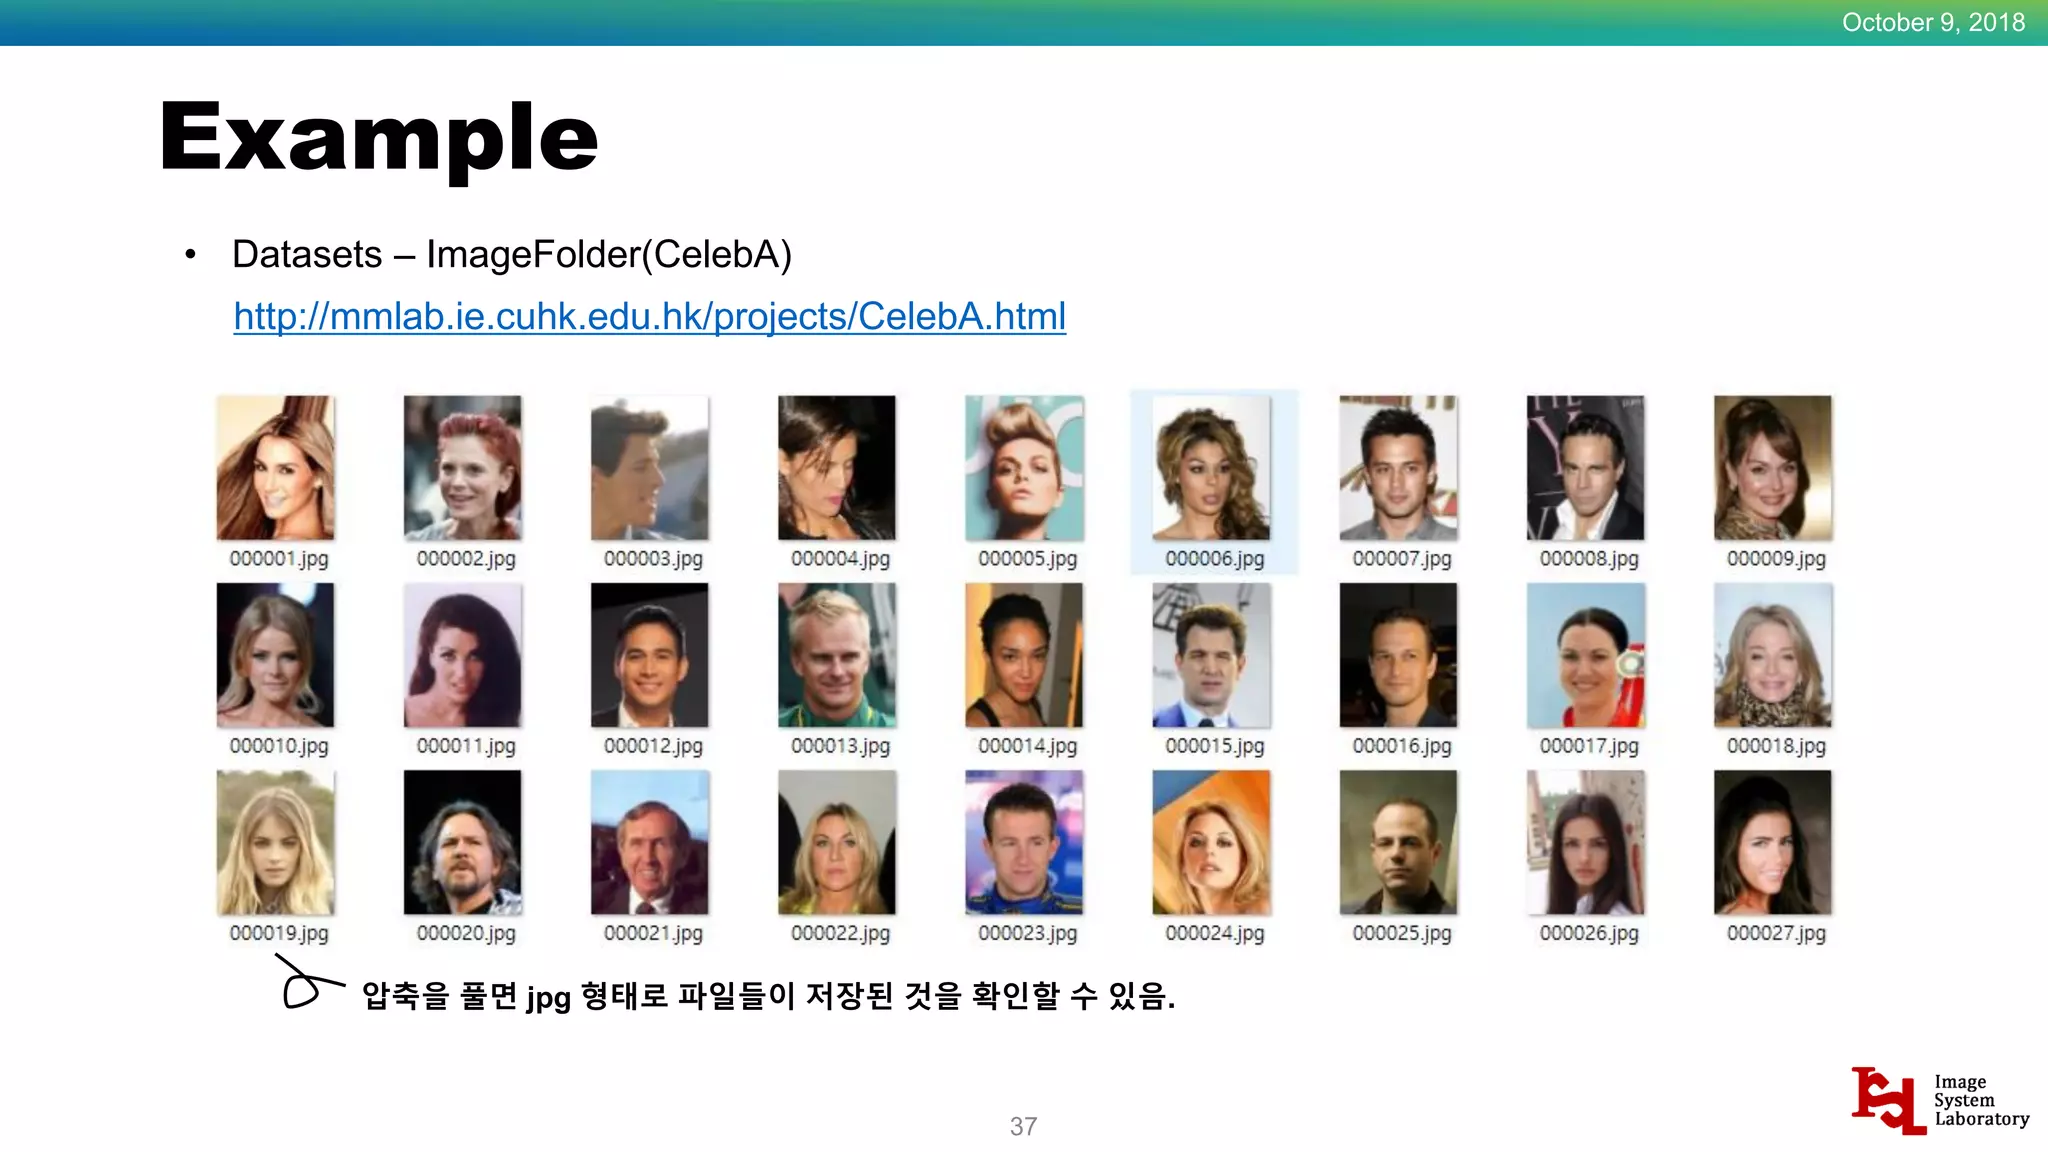
![Example October 9, 2018 38 • Datasets – ImageFolder(CelebA) trans = transforms.Compose([transforms.Resize((64,64)) ,transforms.ToTensor(), transforms.Normalize((0.5, 0.5, 0.5), (0.5, 0.5, 0.5))]) datasets = tv.datasets.ImageFolder('./img_align_celeba', trans) dataloader = tc.utils.data.DataLoader(datasets=datasets, batch_size=100, shuffle=True) datasets root : Root directory for the database files. transform : Transform the data according to the transform option set previously.](https://image.slidesharecdn.com/pytorch-181009013531/75/PyTorch-Touch-to-PyTorch-39-2048.jpg)
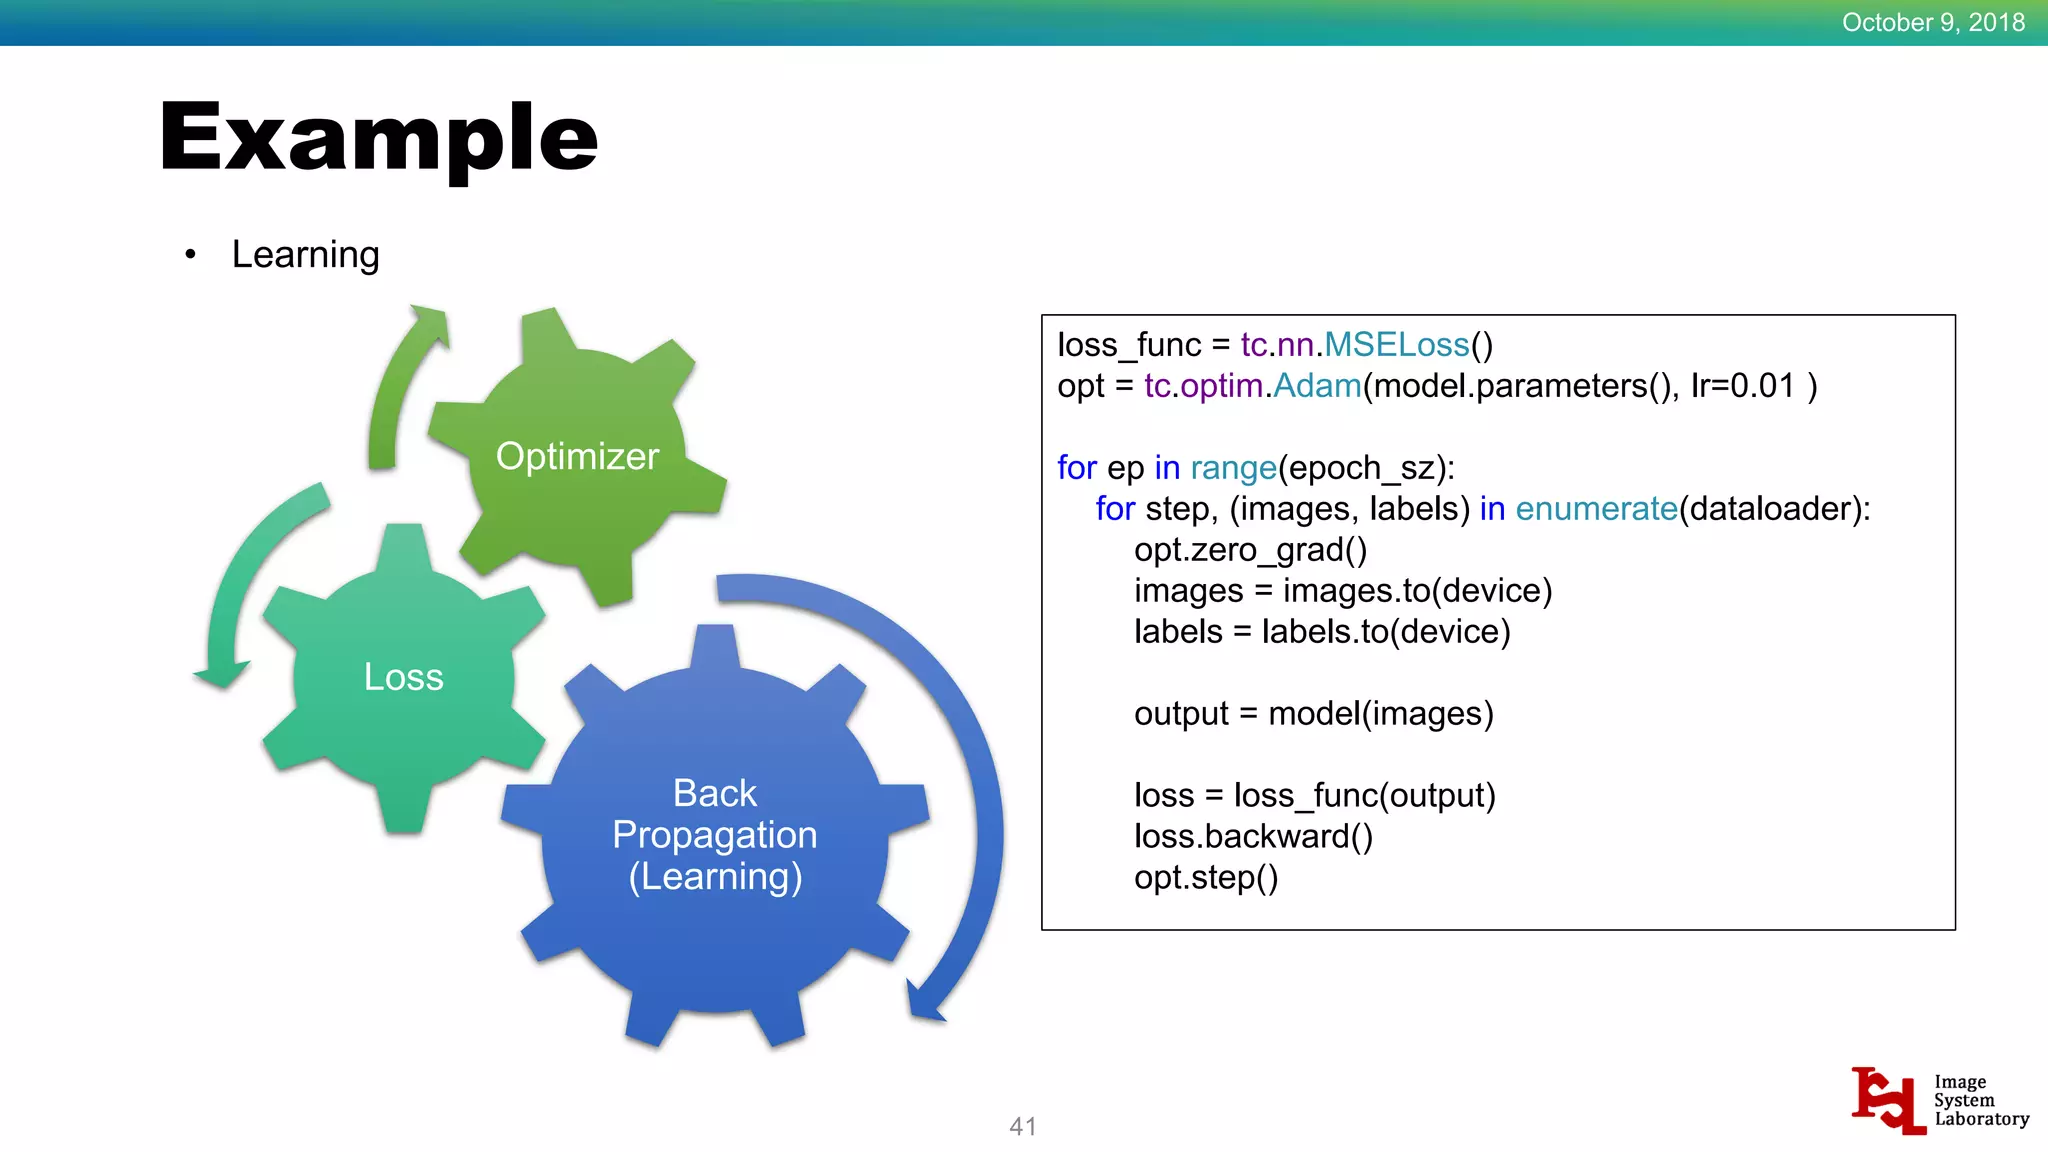
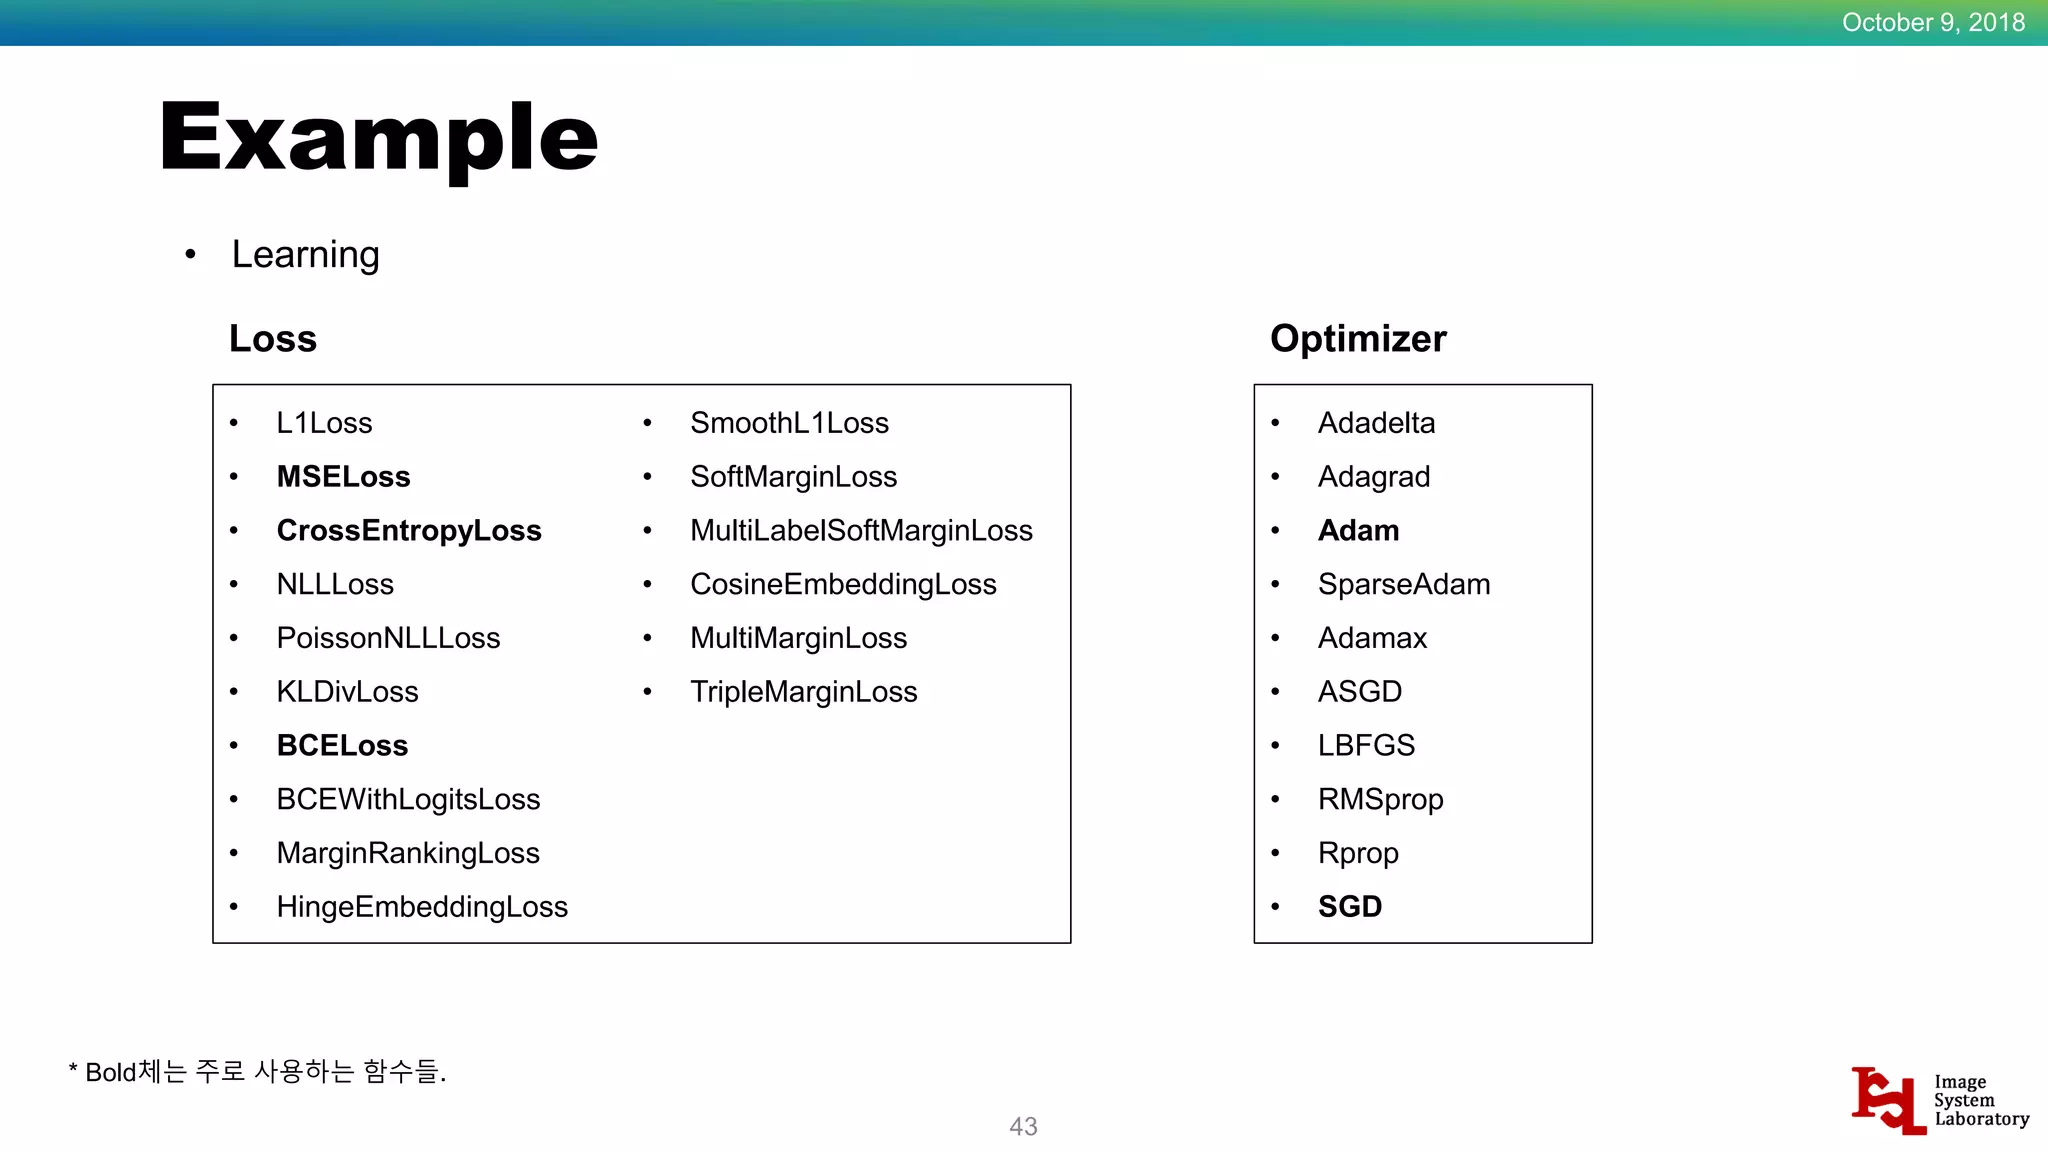
![Example October 9, 2018 42 • Learning loss_func = tc.nn.MSELoss() opt = tc.optim.Adam(model.parameters(), lr=0.01 ) for ep in range(epoch_sz): for step, (images, labels) in enumerate(dataloader): opt.zero_grad() images = images.to(device) labels = labels.to(device) output = model(images) loss = loss_func(output) loss.backward() opt.step() Loss 선언 Optimizer 선언 (업데이트 하려는 parameter) 정해진 epoch 만큼 수행 앞서 설정한 dataloader에 따라 image(data)와 label(_) 불러옴 Gradient 초기화. Loss 구함 Back propagation(Gradient 구함) 정해진 optimizer에 따라 parameter 업데이트 trans = transforms.Compose([transforms.ToTensor(), transforms.Normalize((0.5, 0.5, 0.5), (0.5, 0.5, 0.5))]) datasets = tv.datasets.MNIST(root='./MNIST', train=True, download=True, transform=trans) dataloader = tc.utils.data.DataLoader(datasets=datasets, batch_size=100, shuffle=True) Cf.](https://image.slidesharecdn.com/pytorch-181009013531/75/PyTorch-Touch-to-PyTorch-43-2048.jpg)


PyTorch is an open-source machine learning library for Python. It is primarily developed by Facebook's AI research group. The document discusses setting up PyTorch, including installing necessary packages and configuring development environments. It also provides examples of core PyTorch concepts like tensors, common datasets, and constructing basic neural networks.