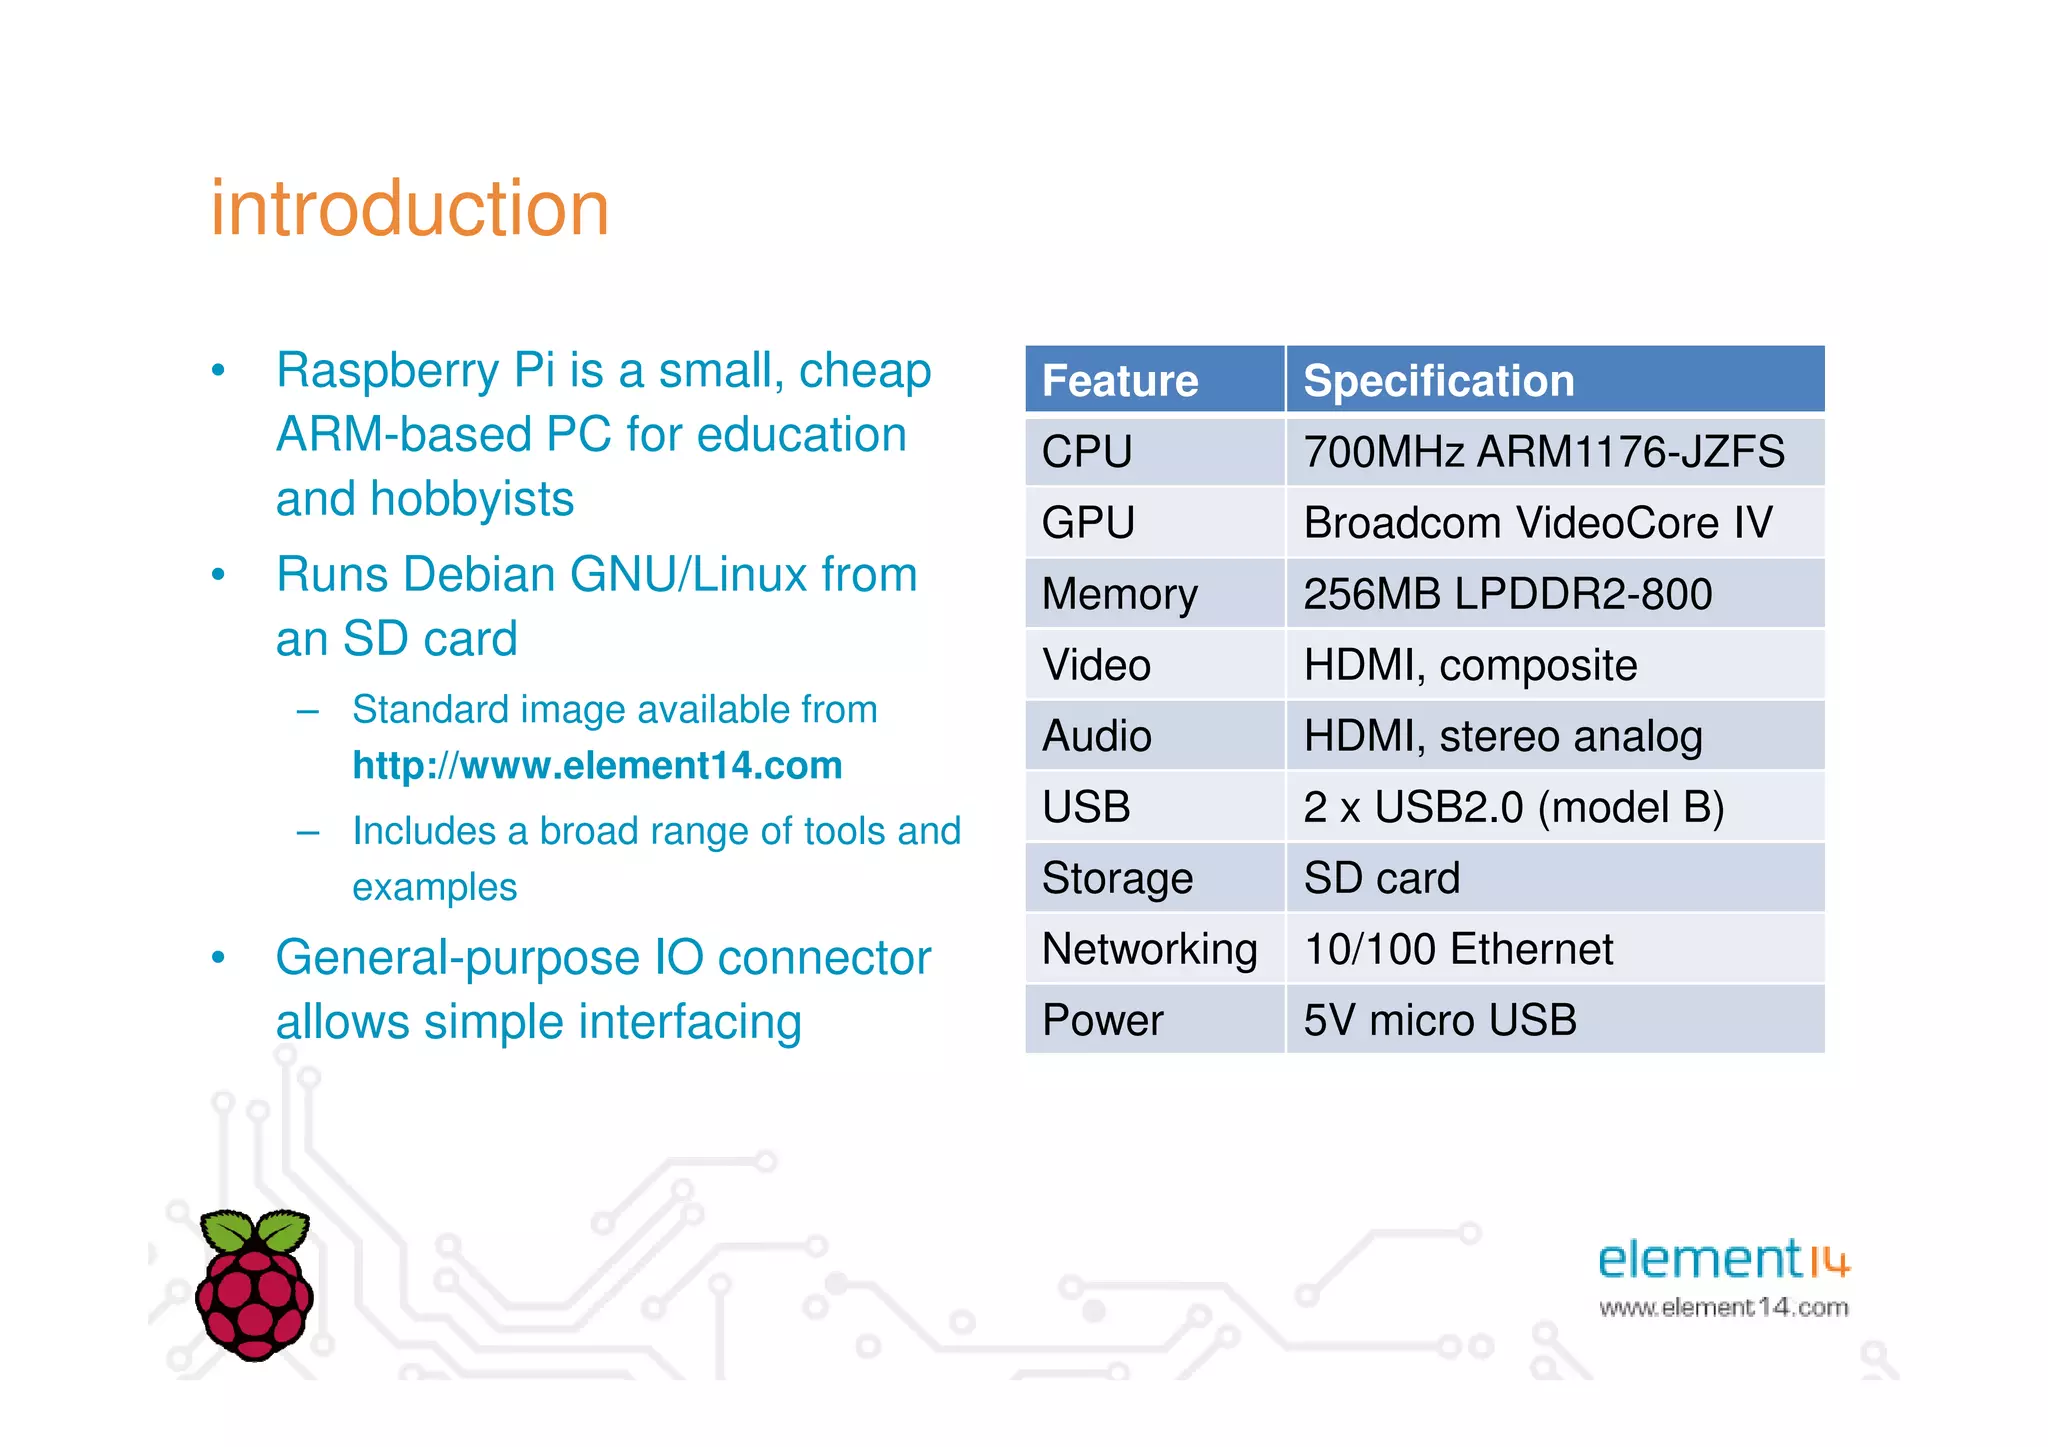
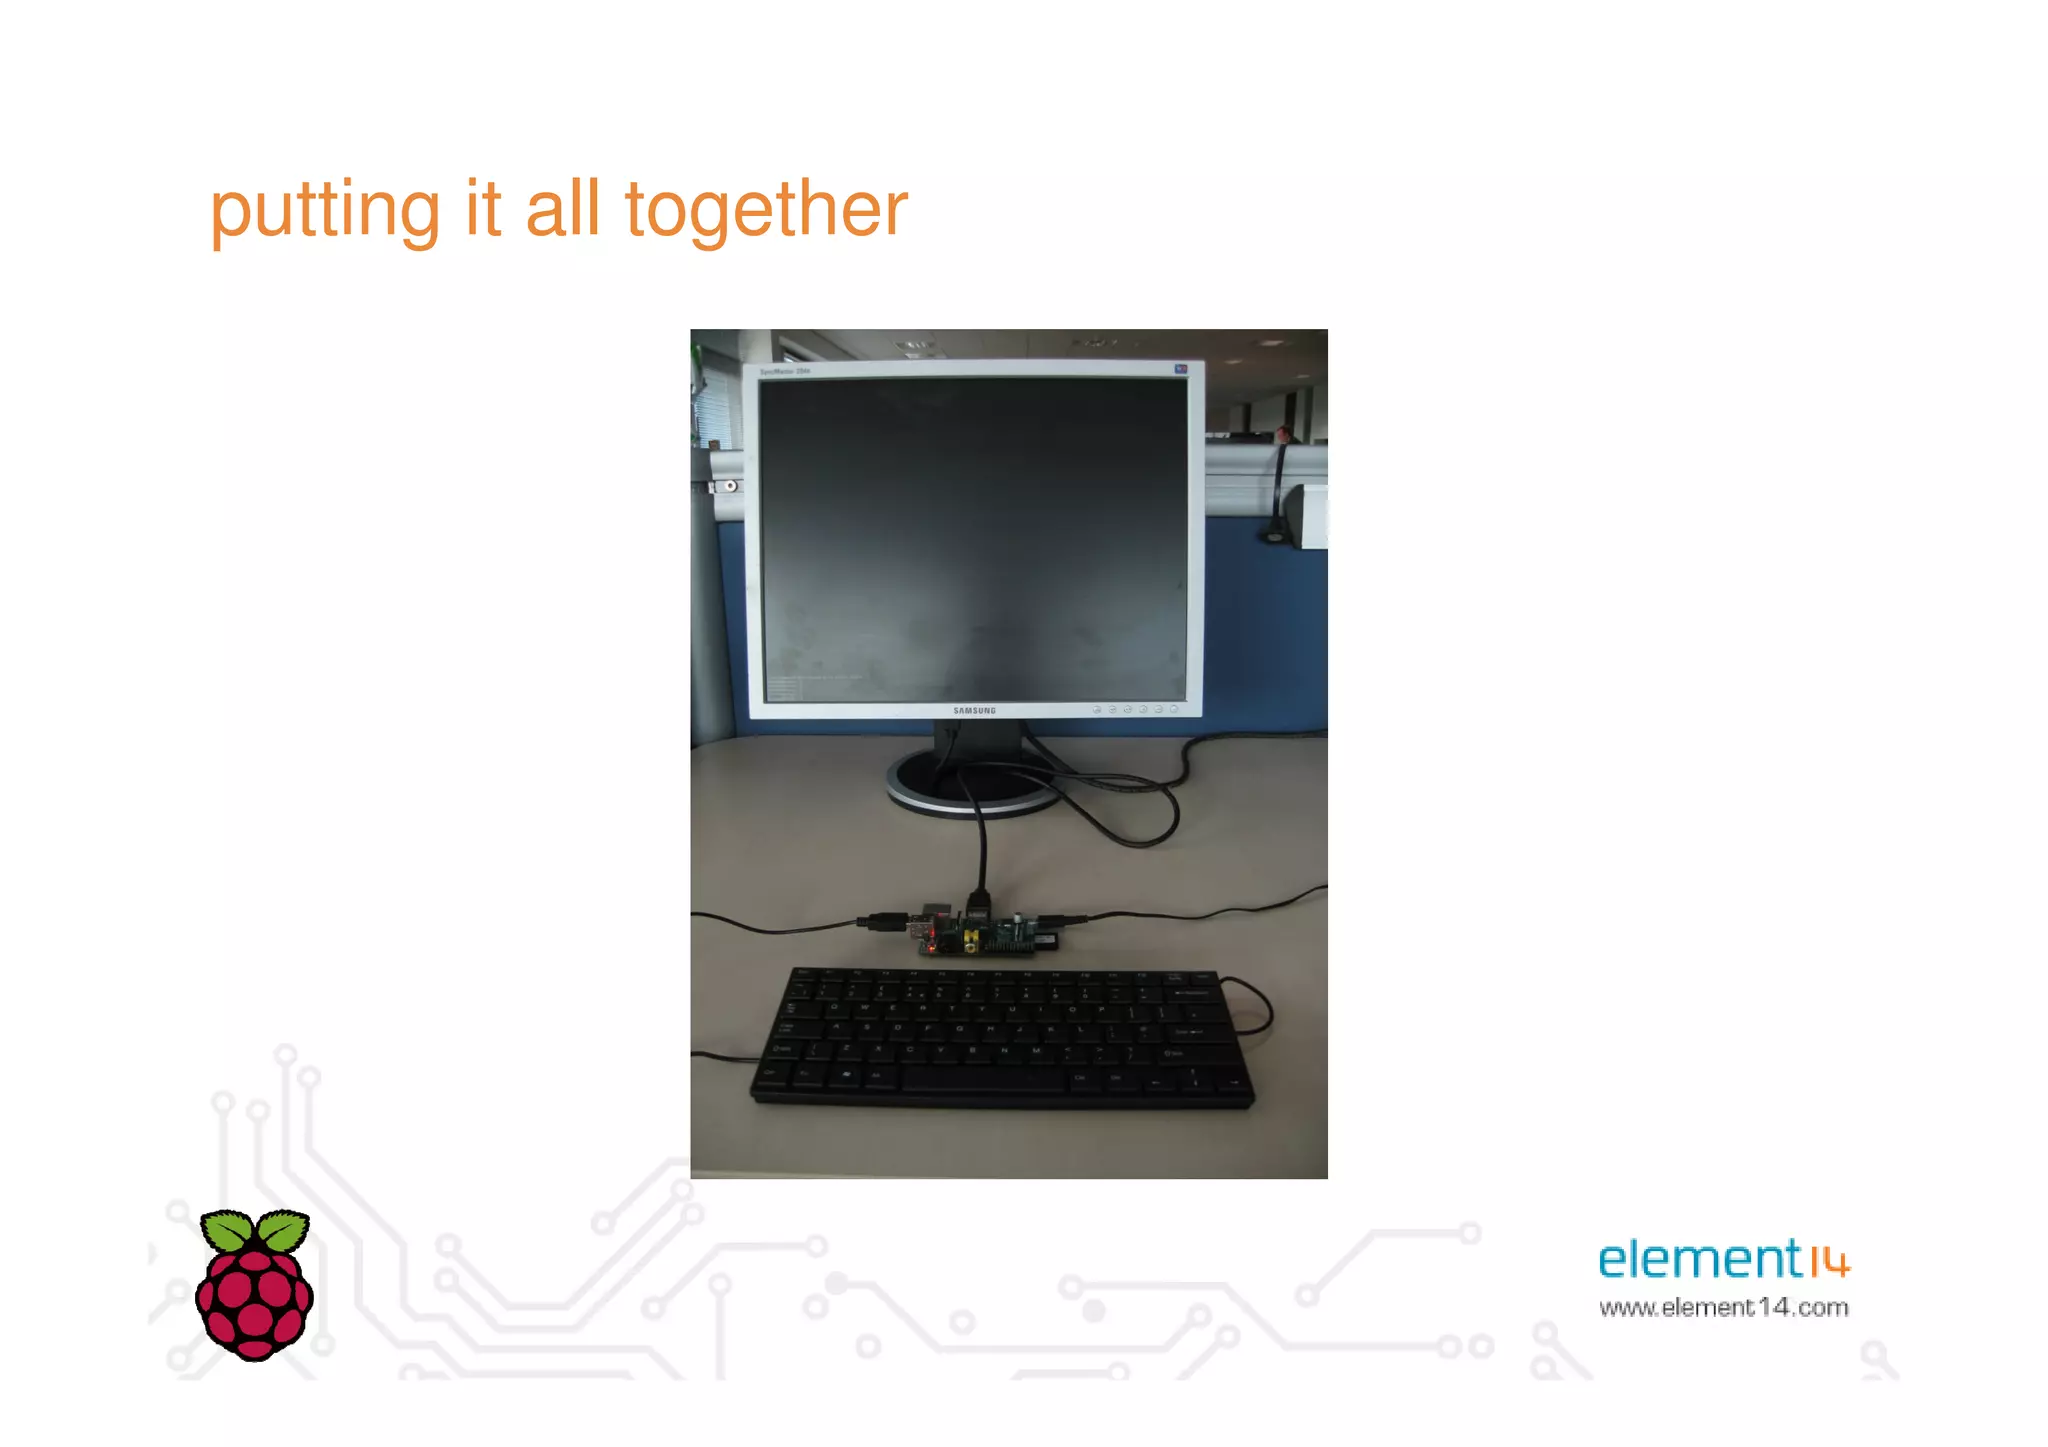
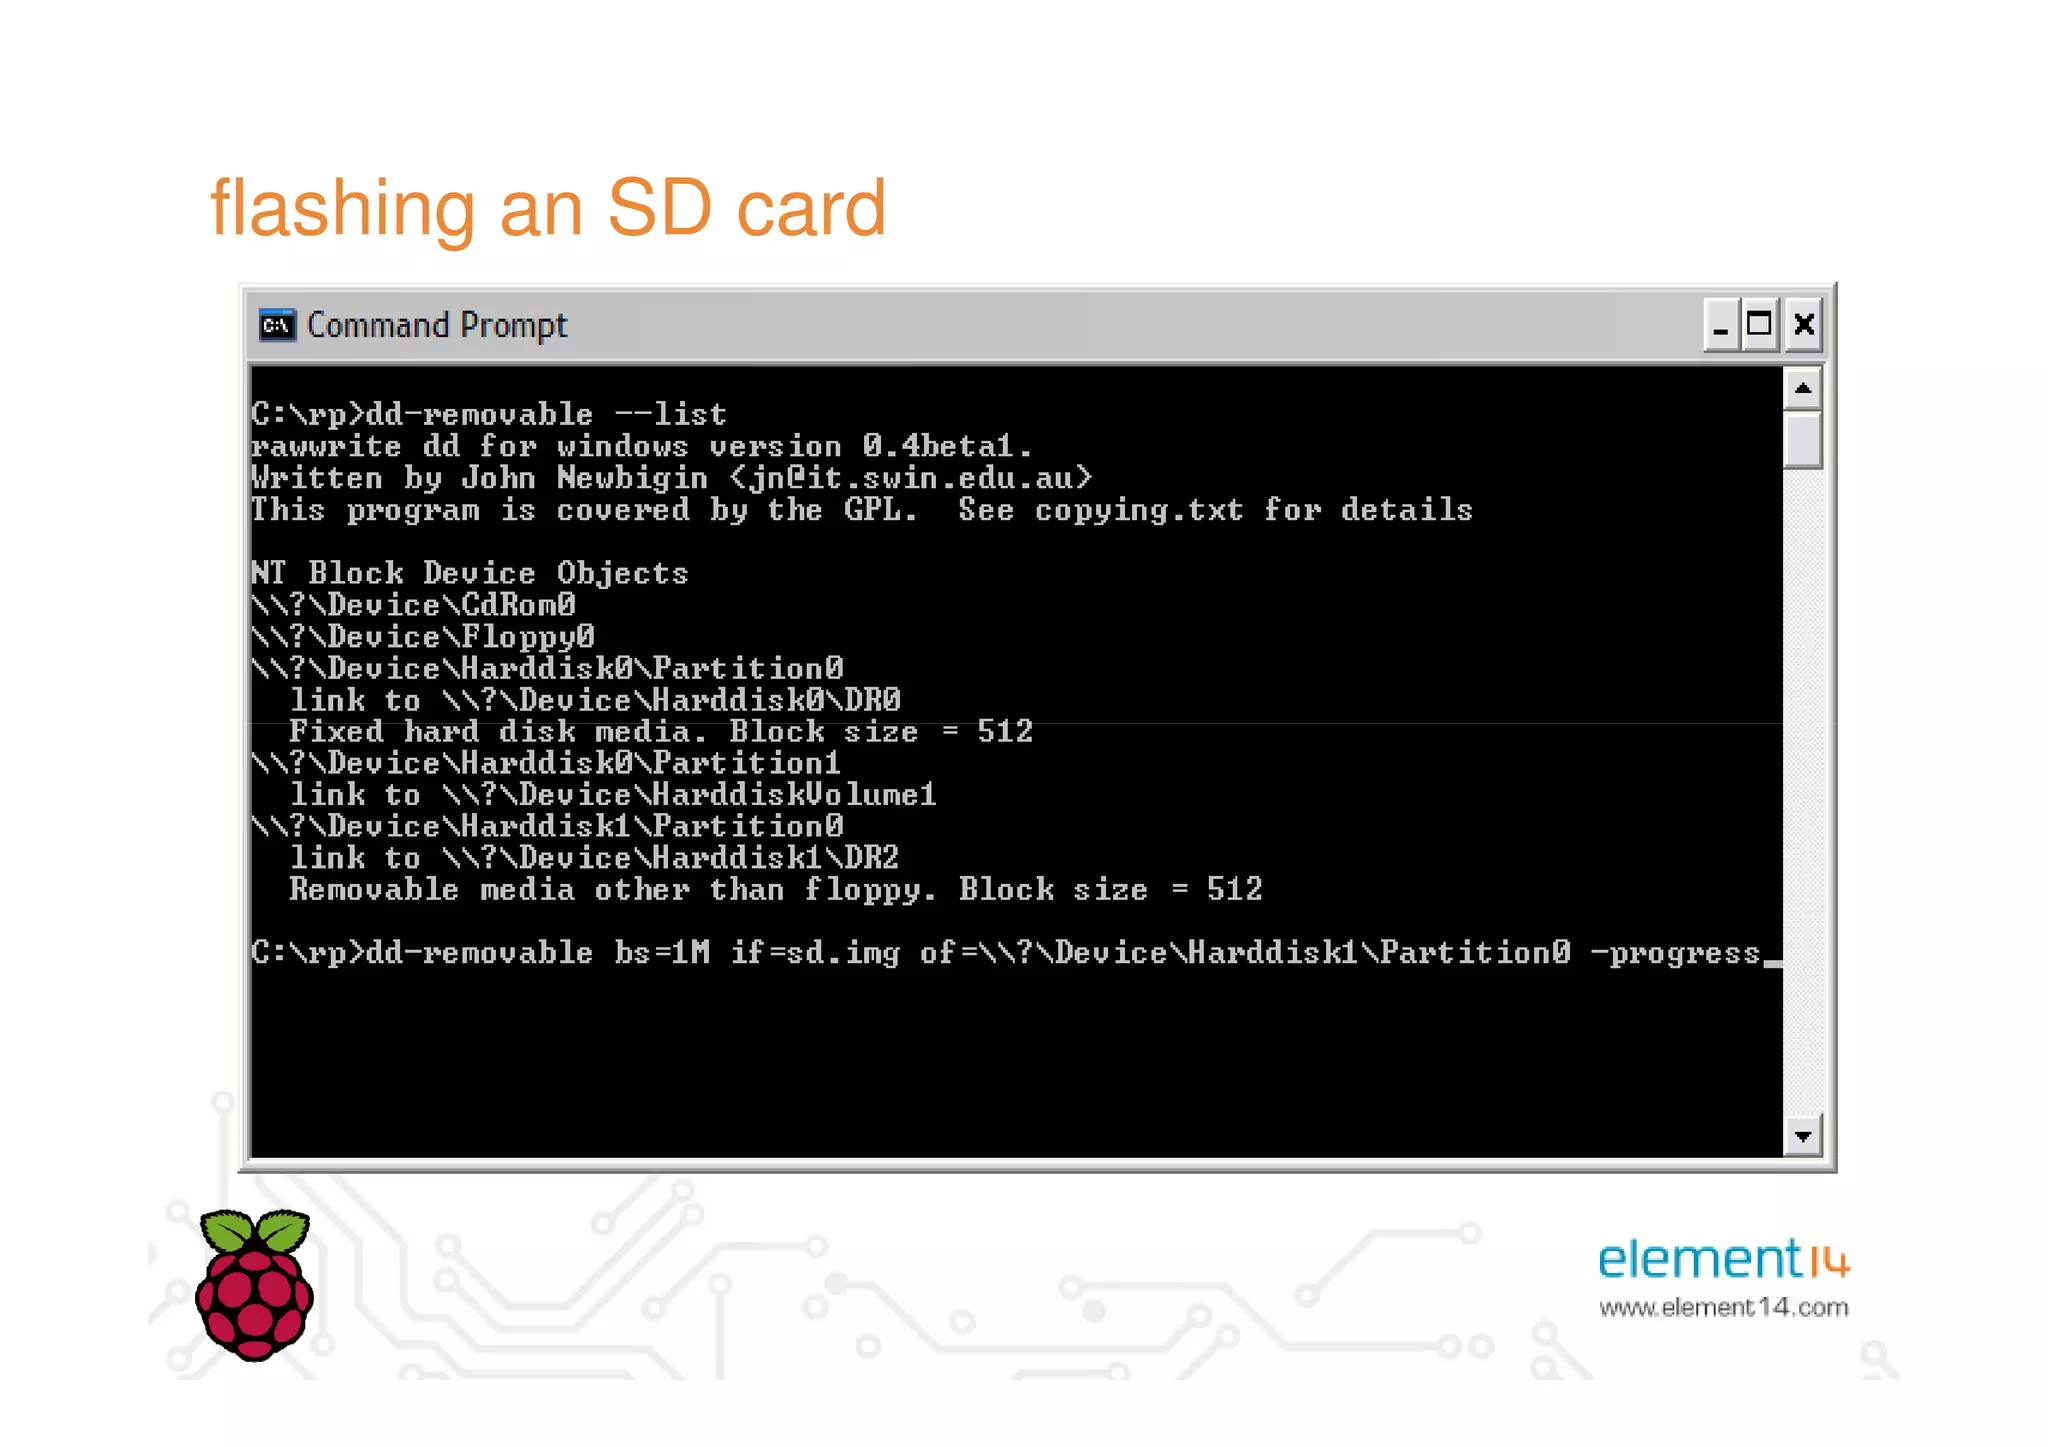
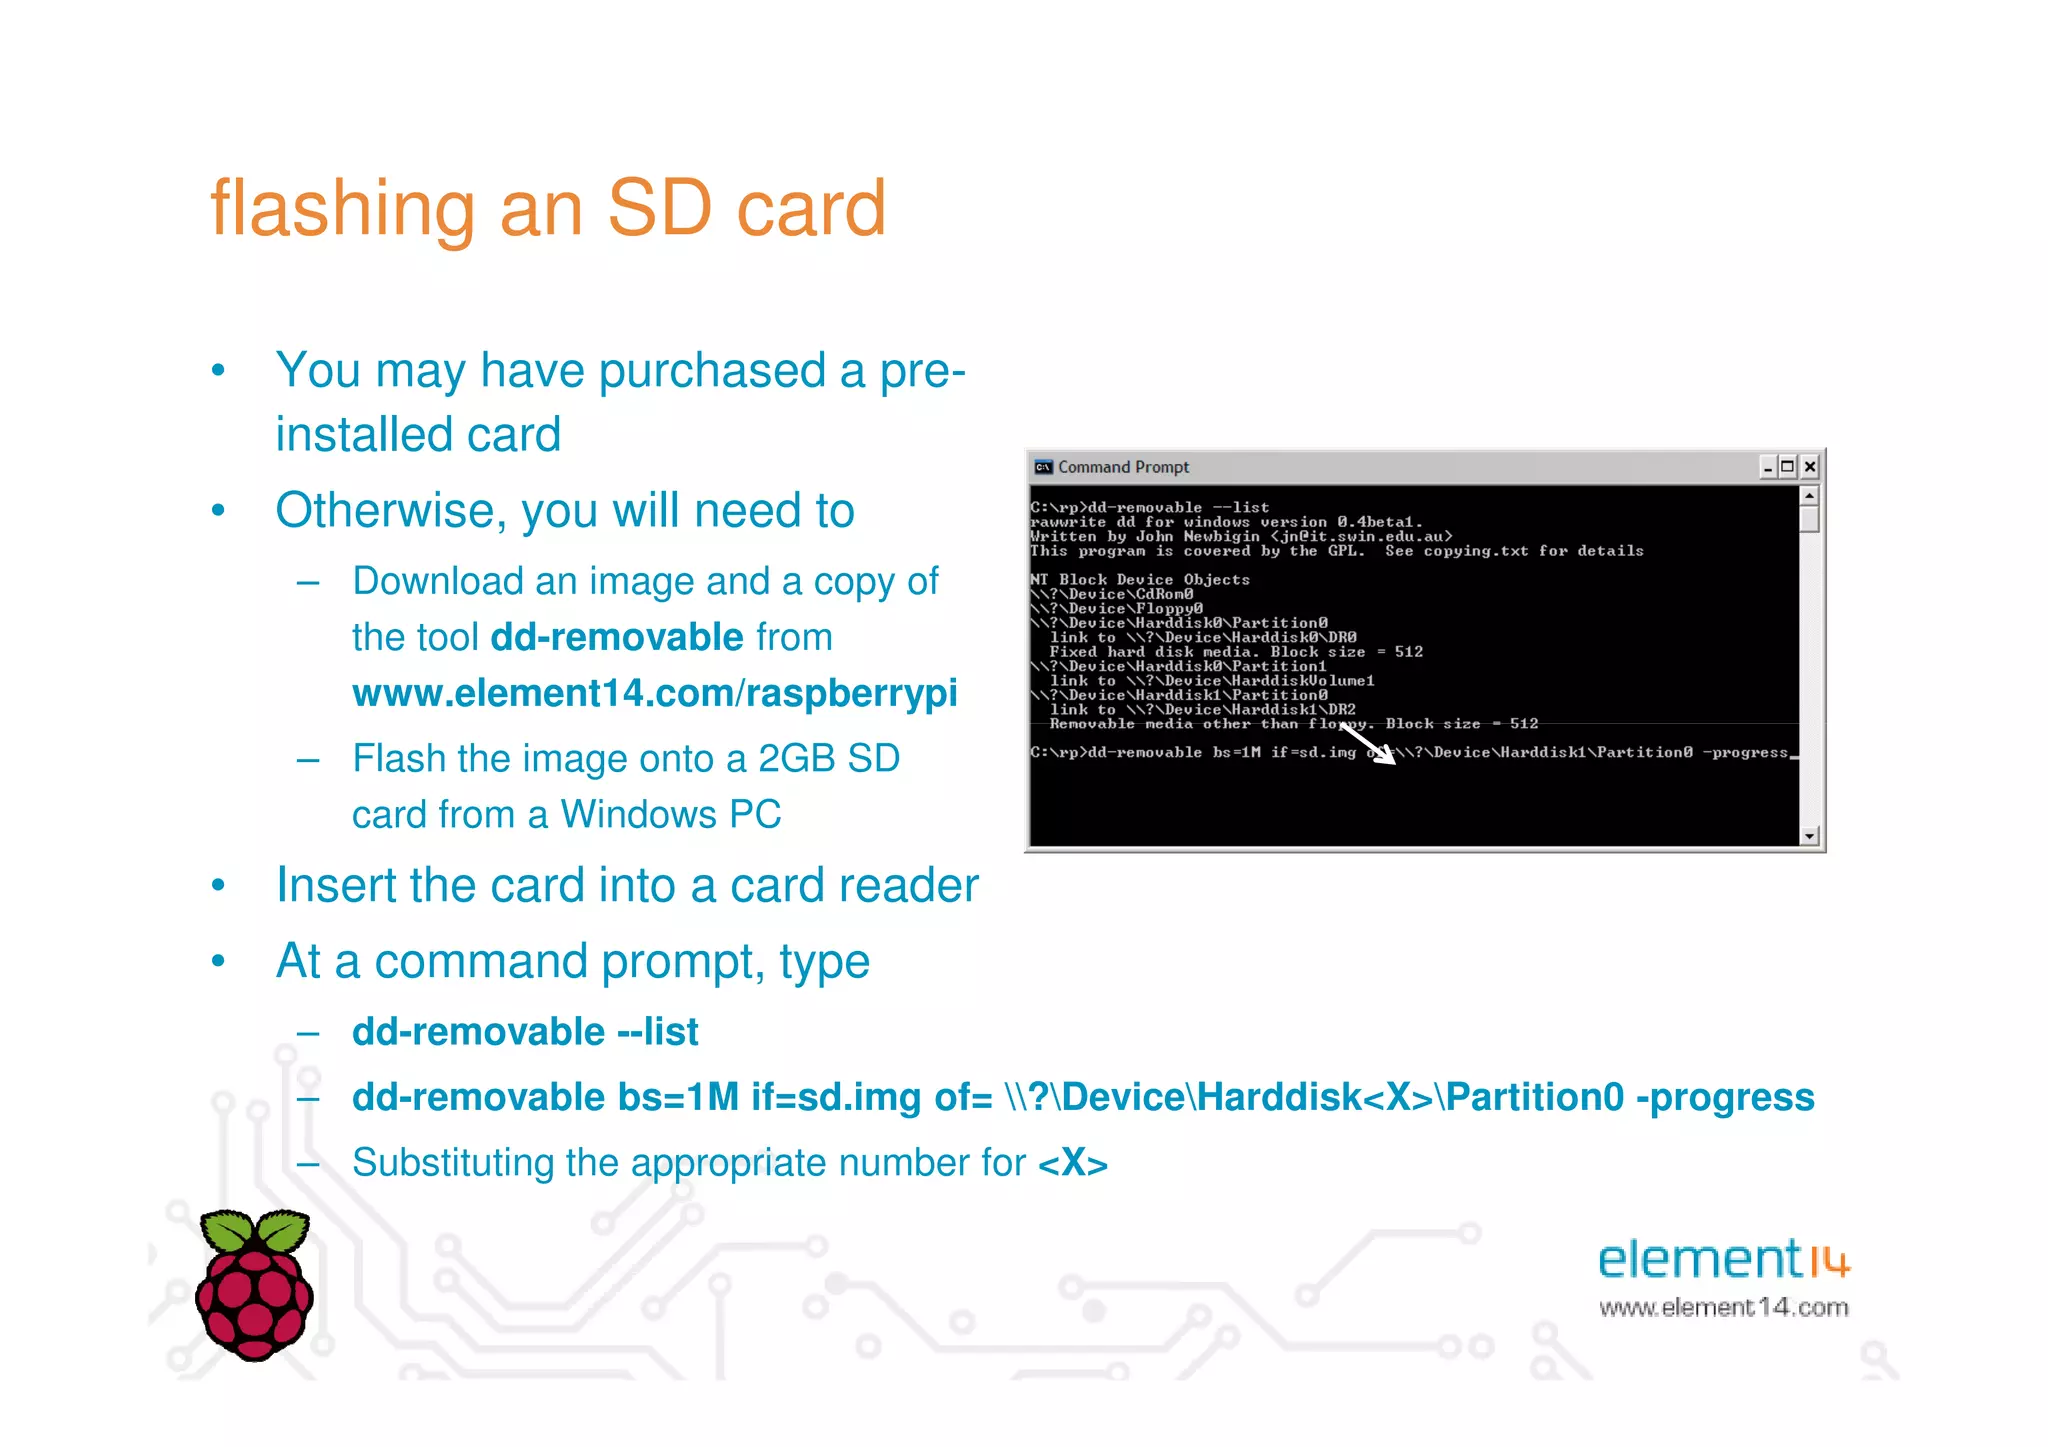
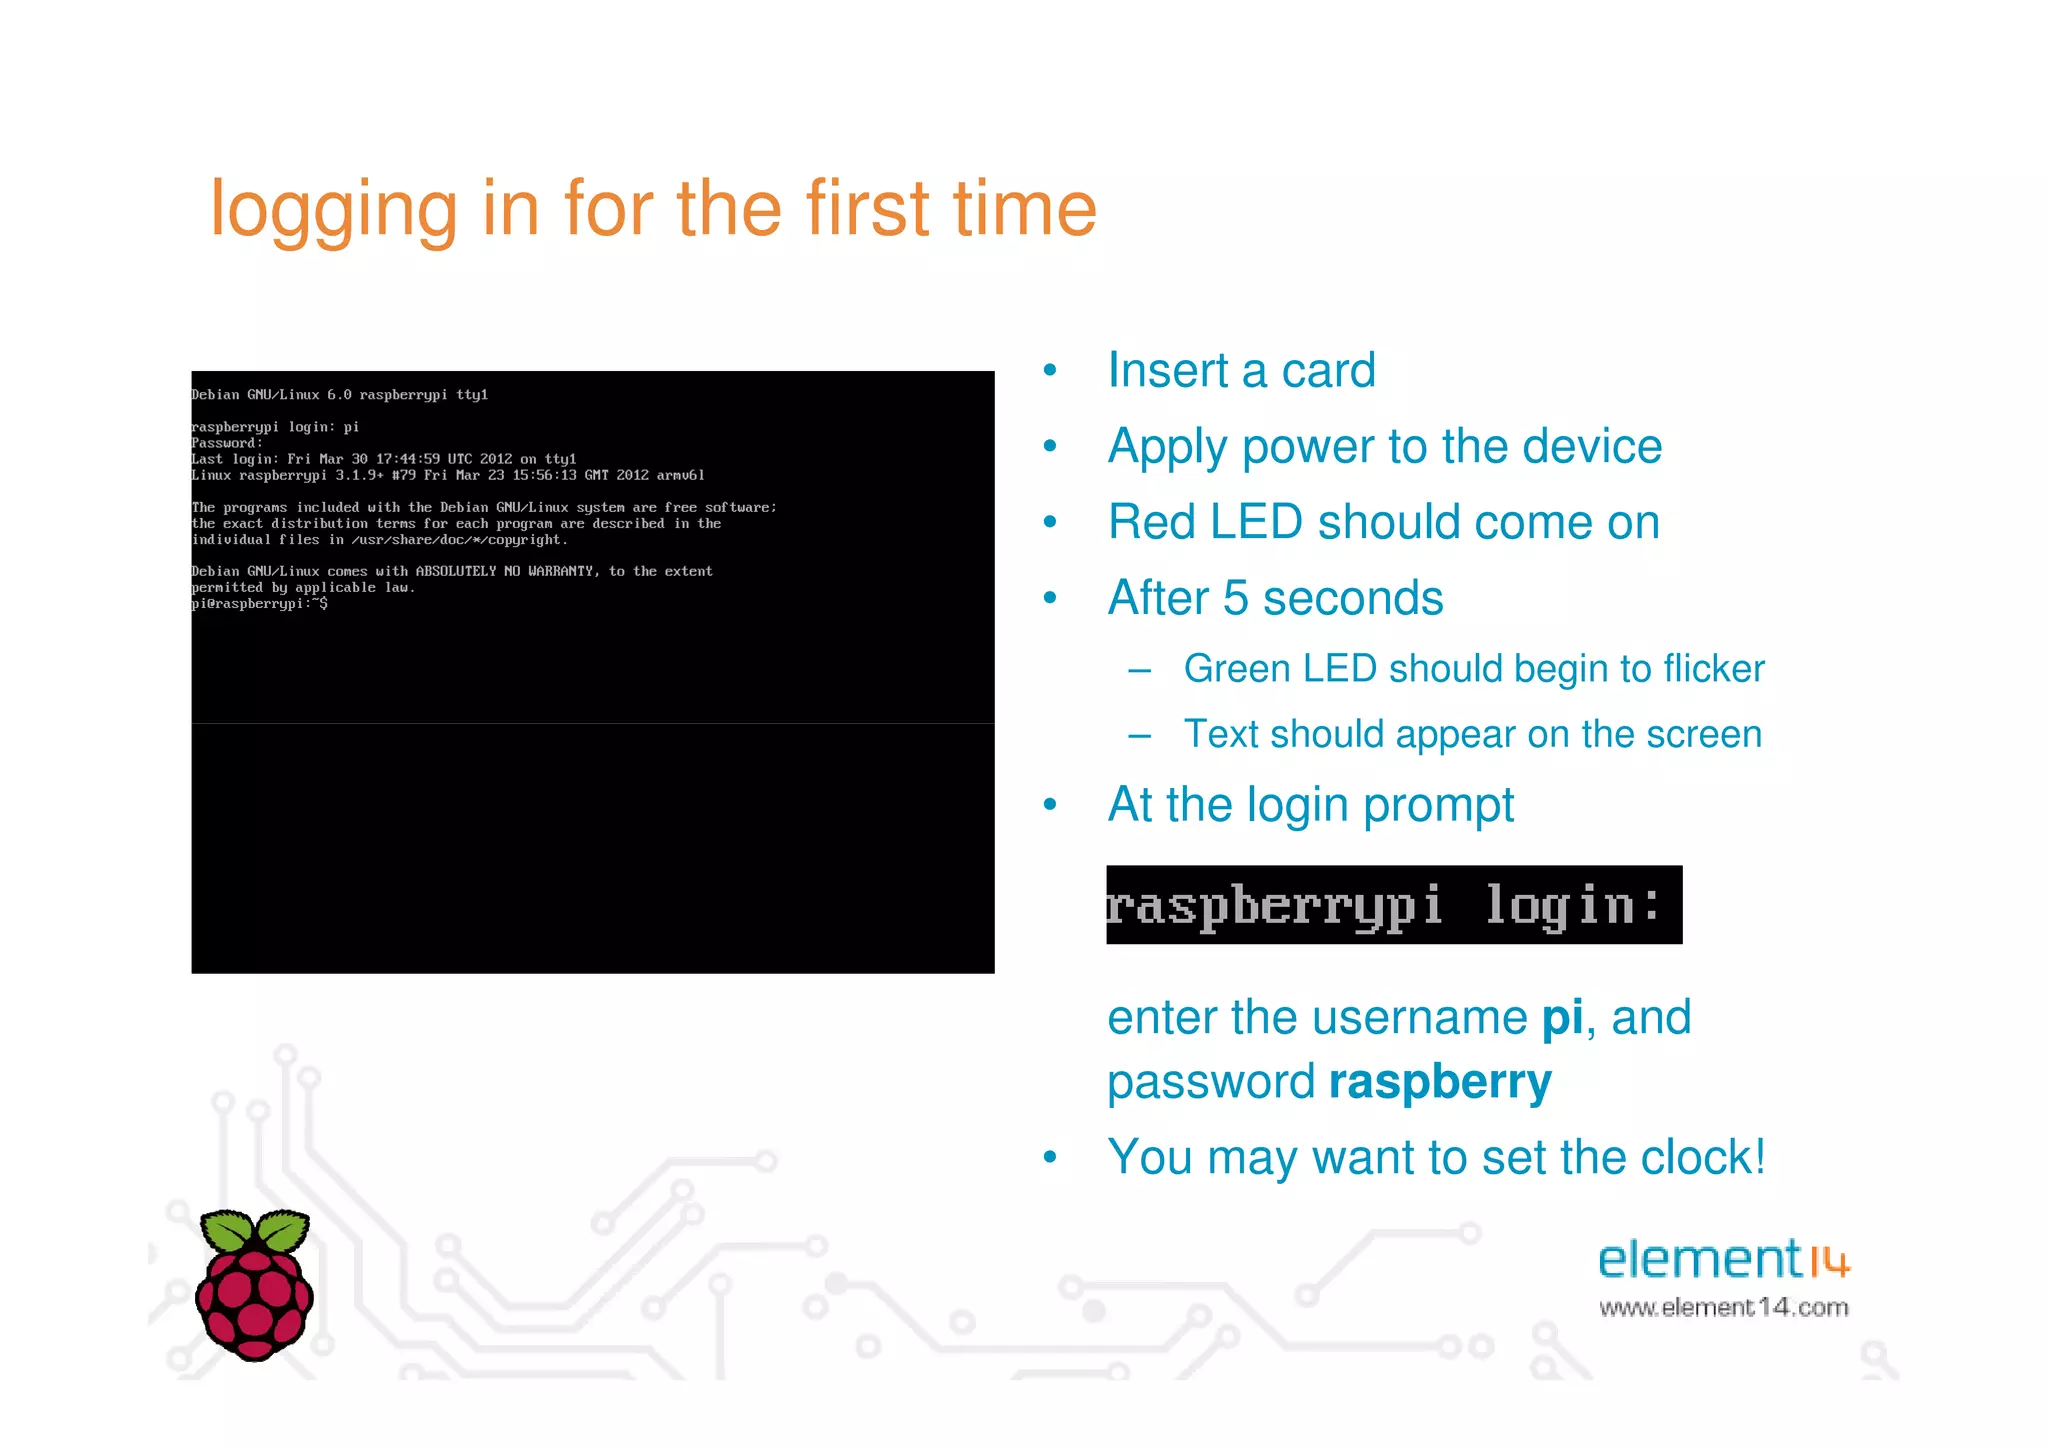
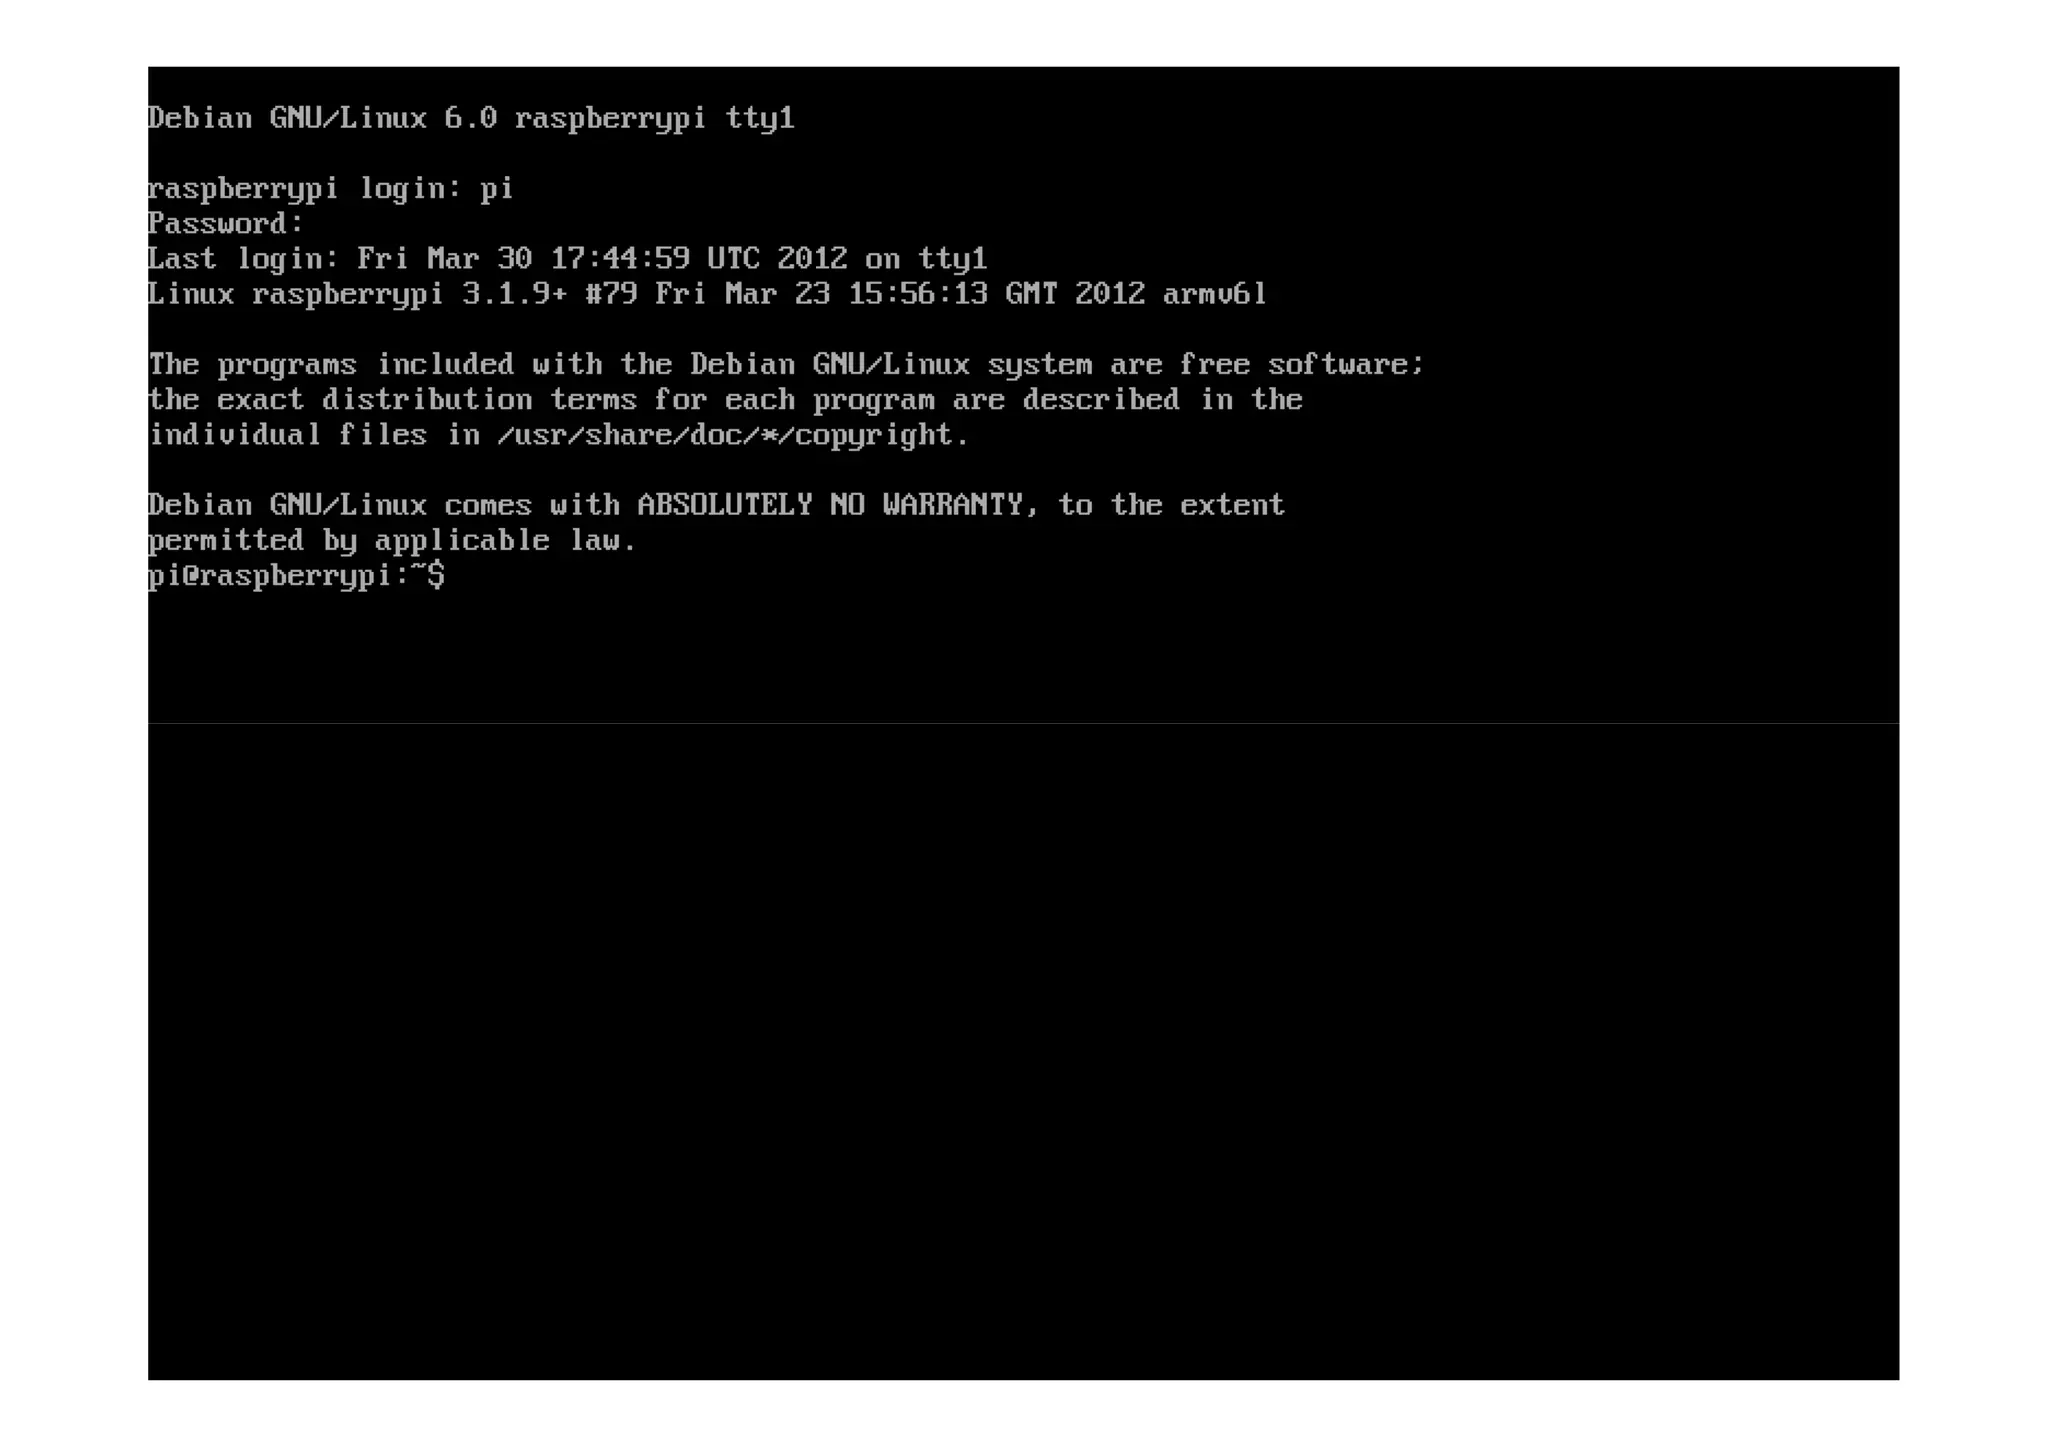
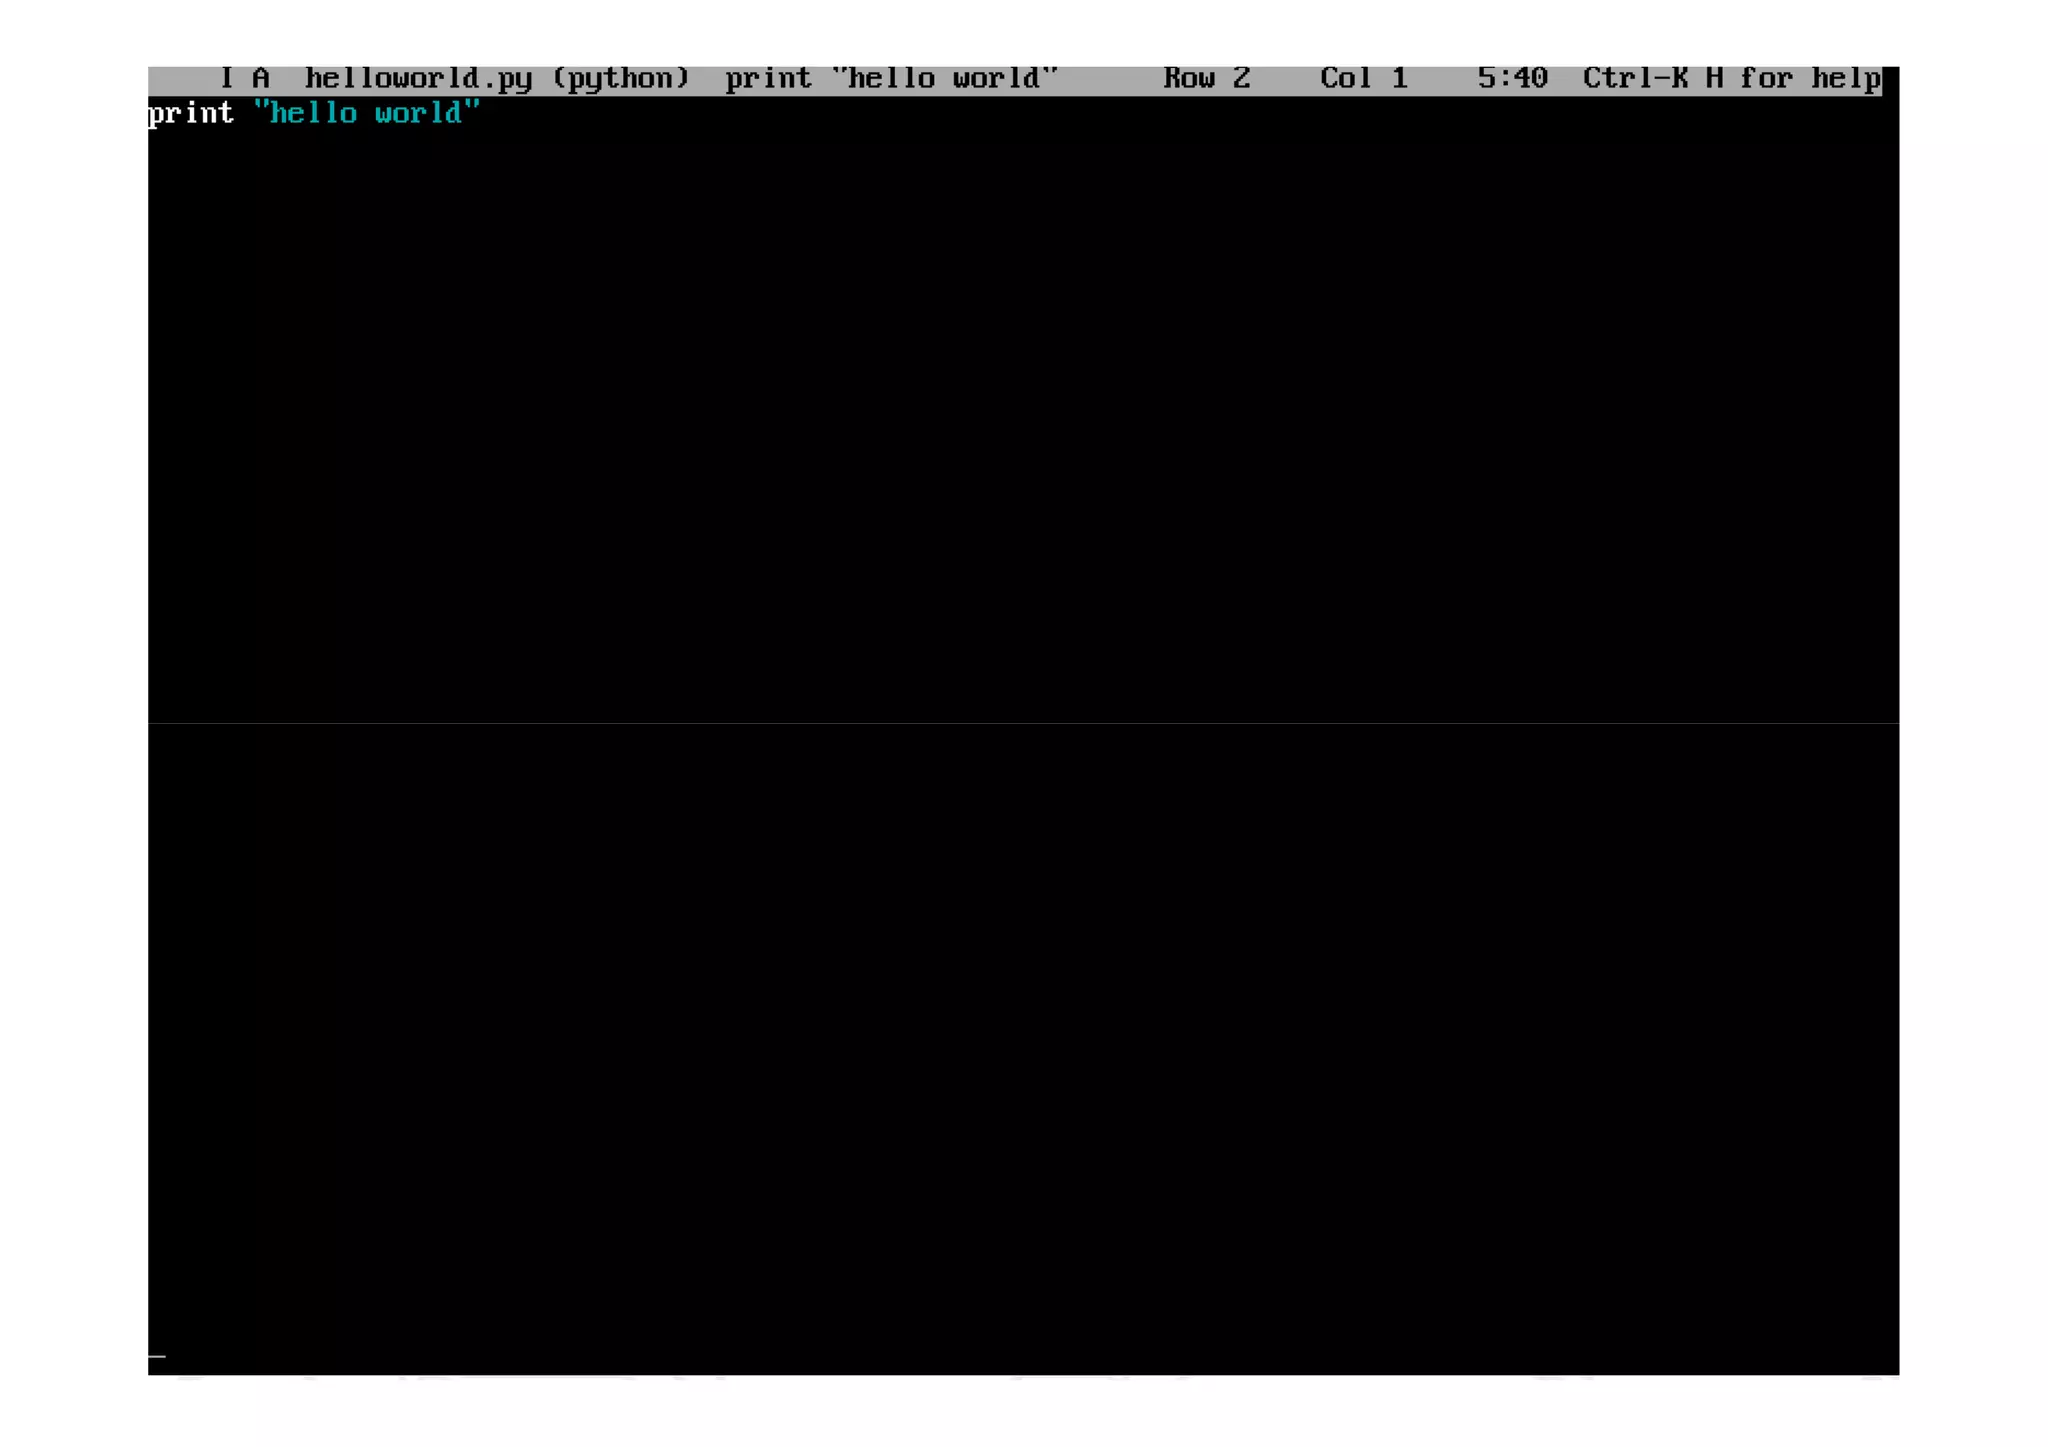
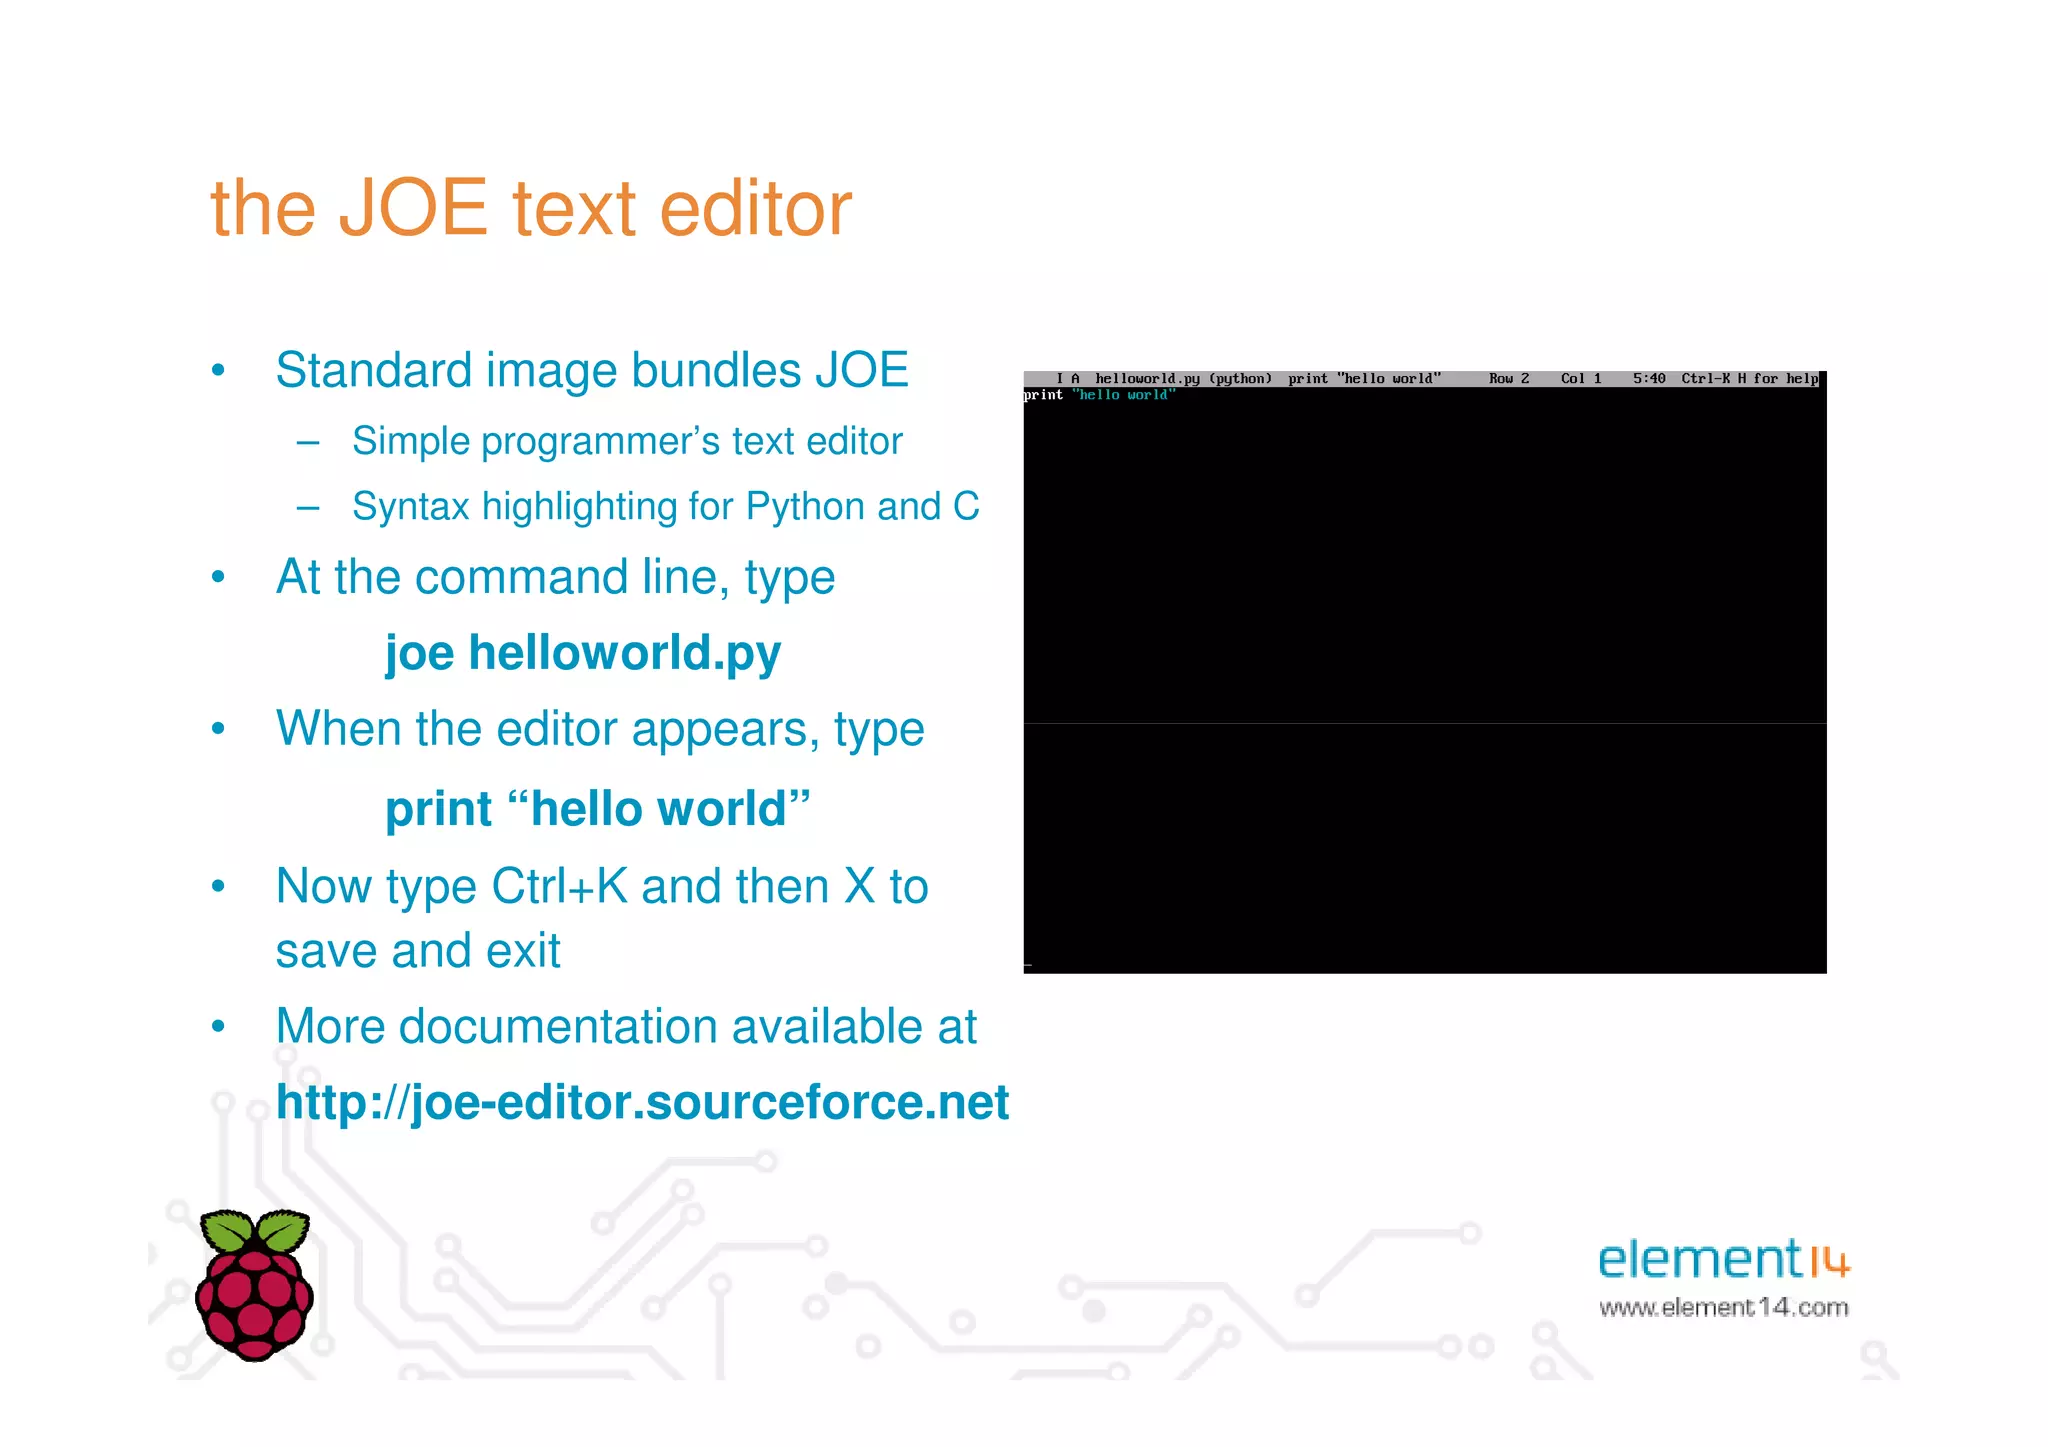
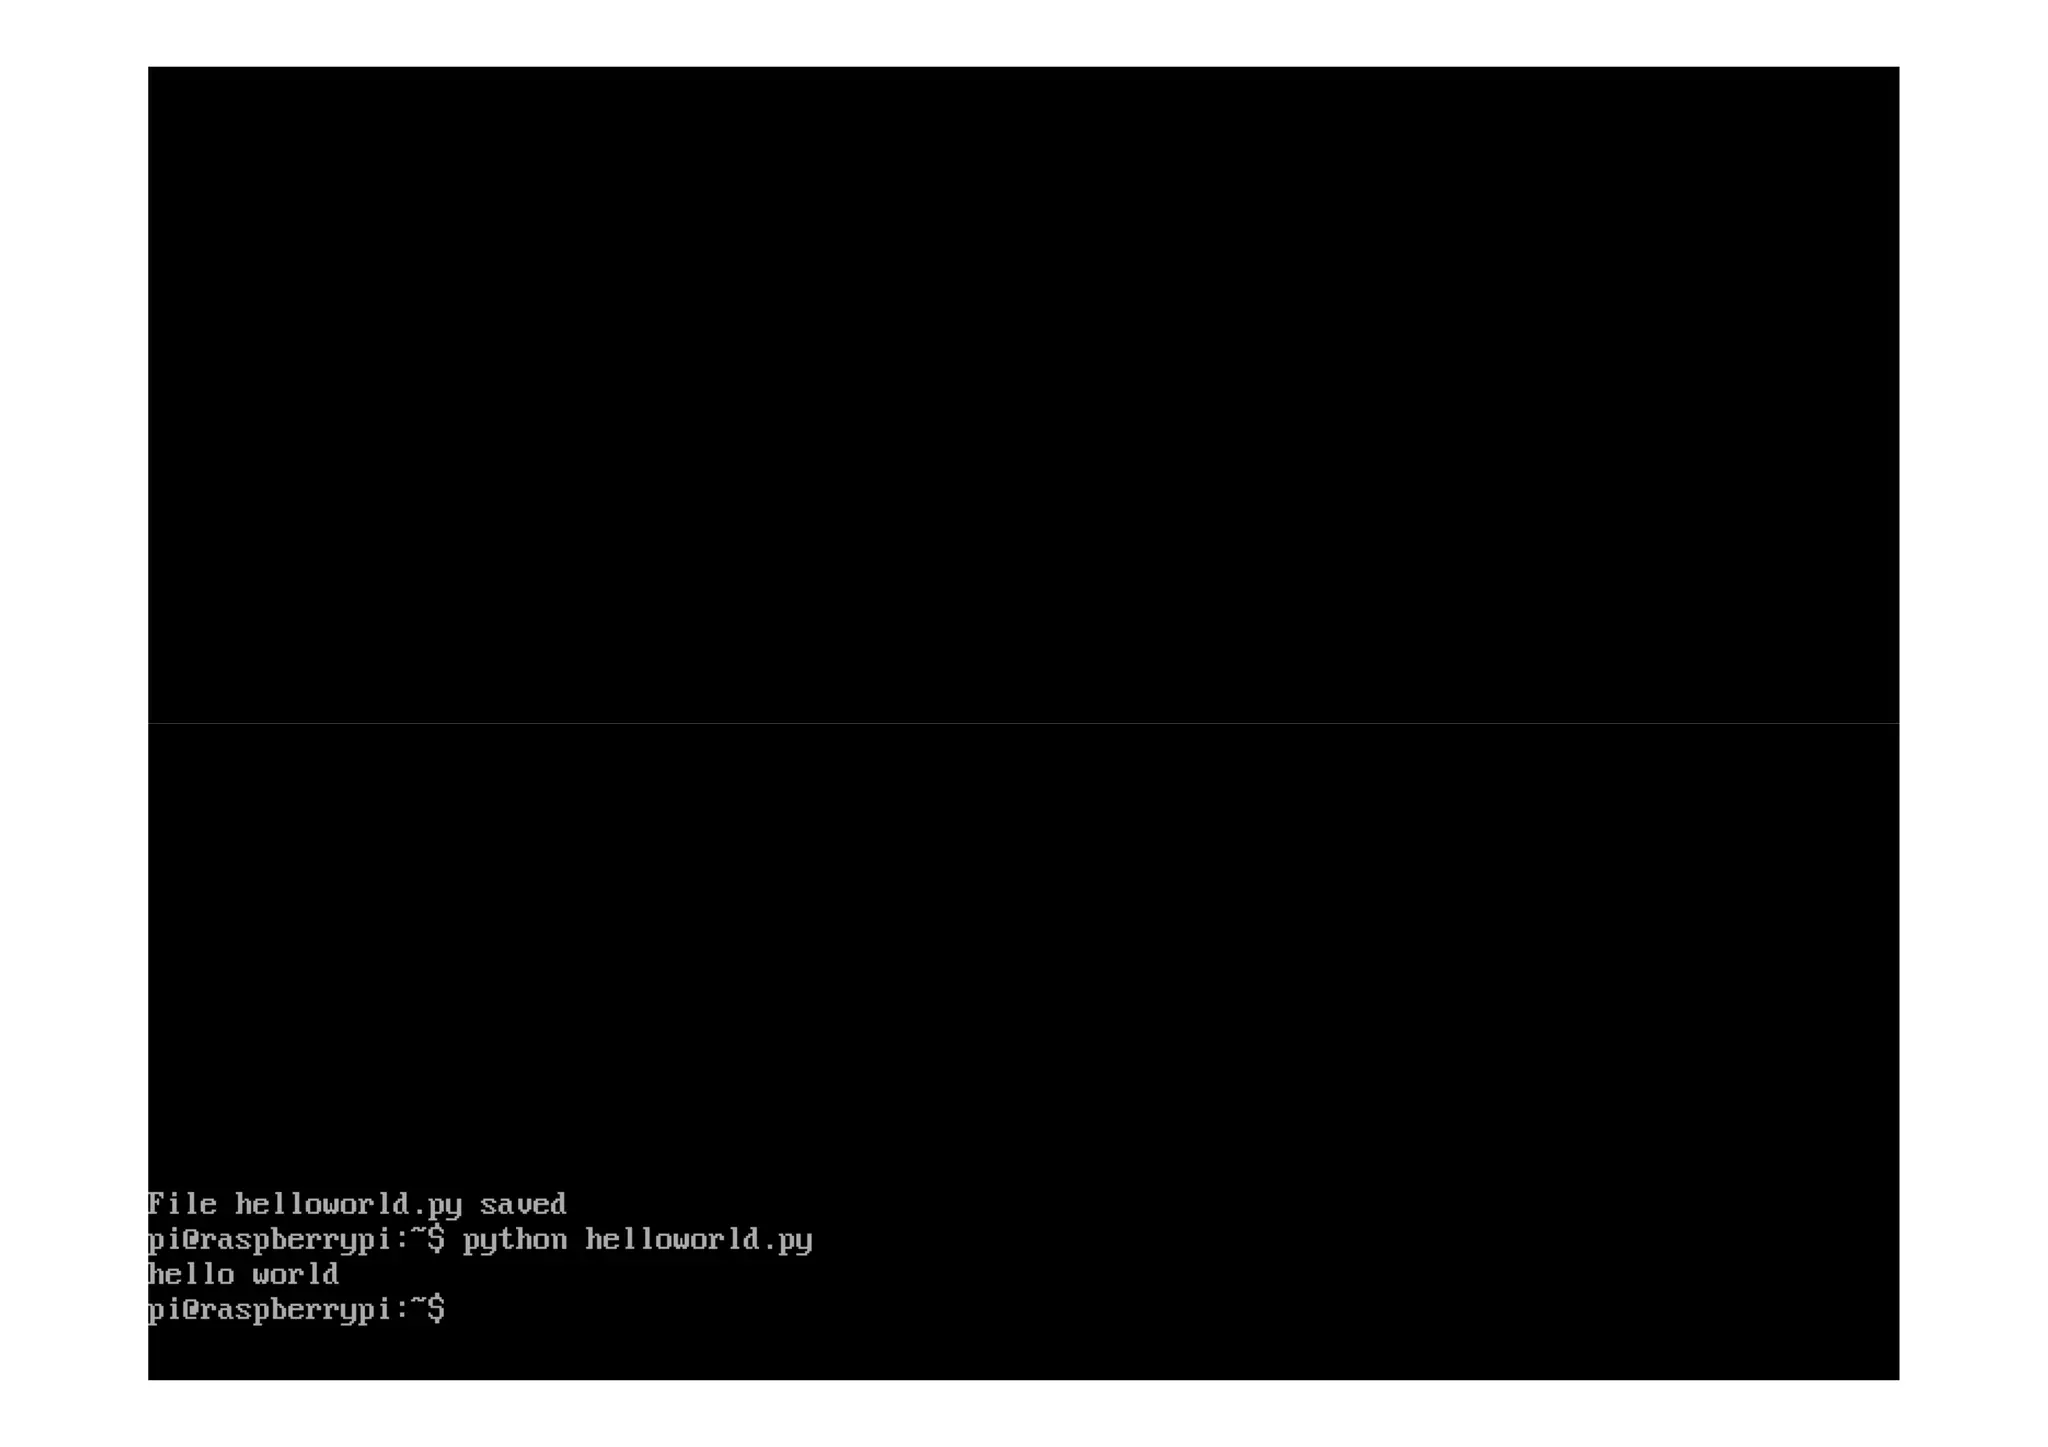
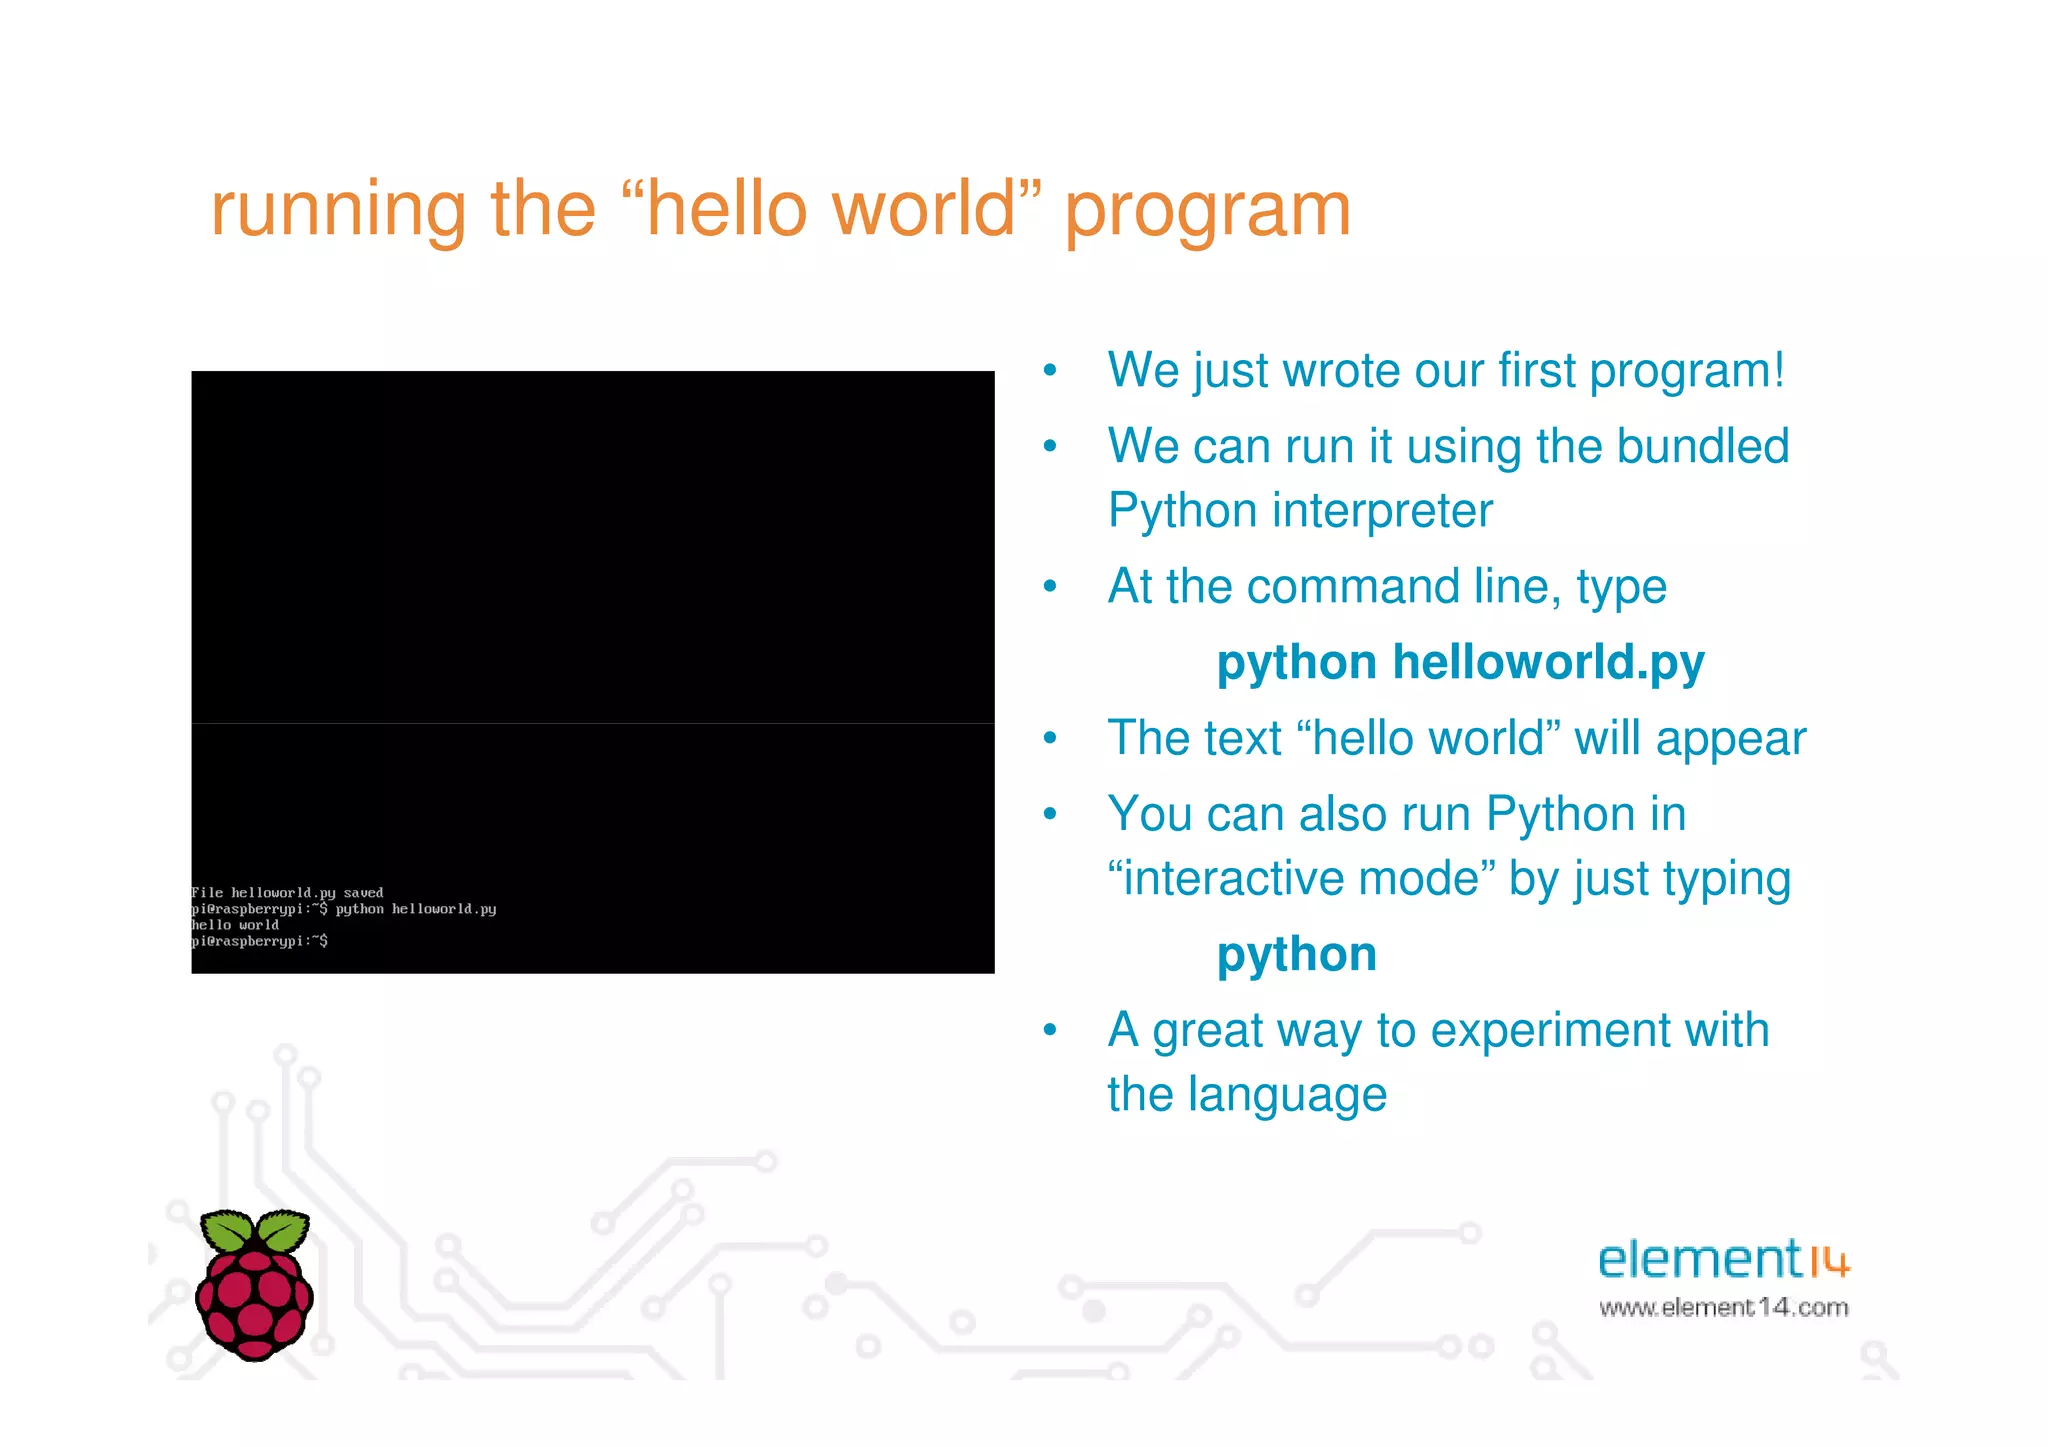
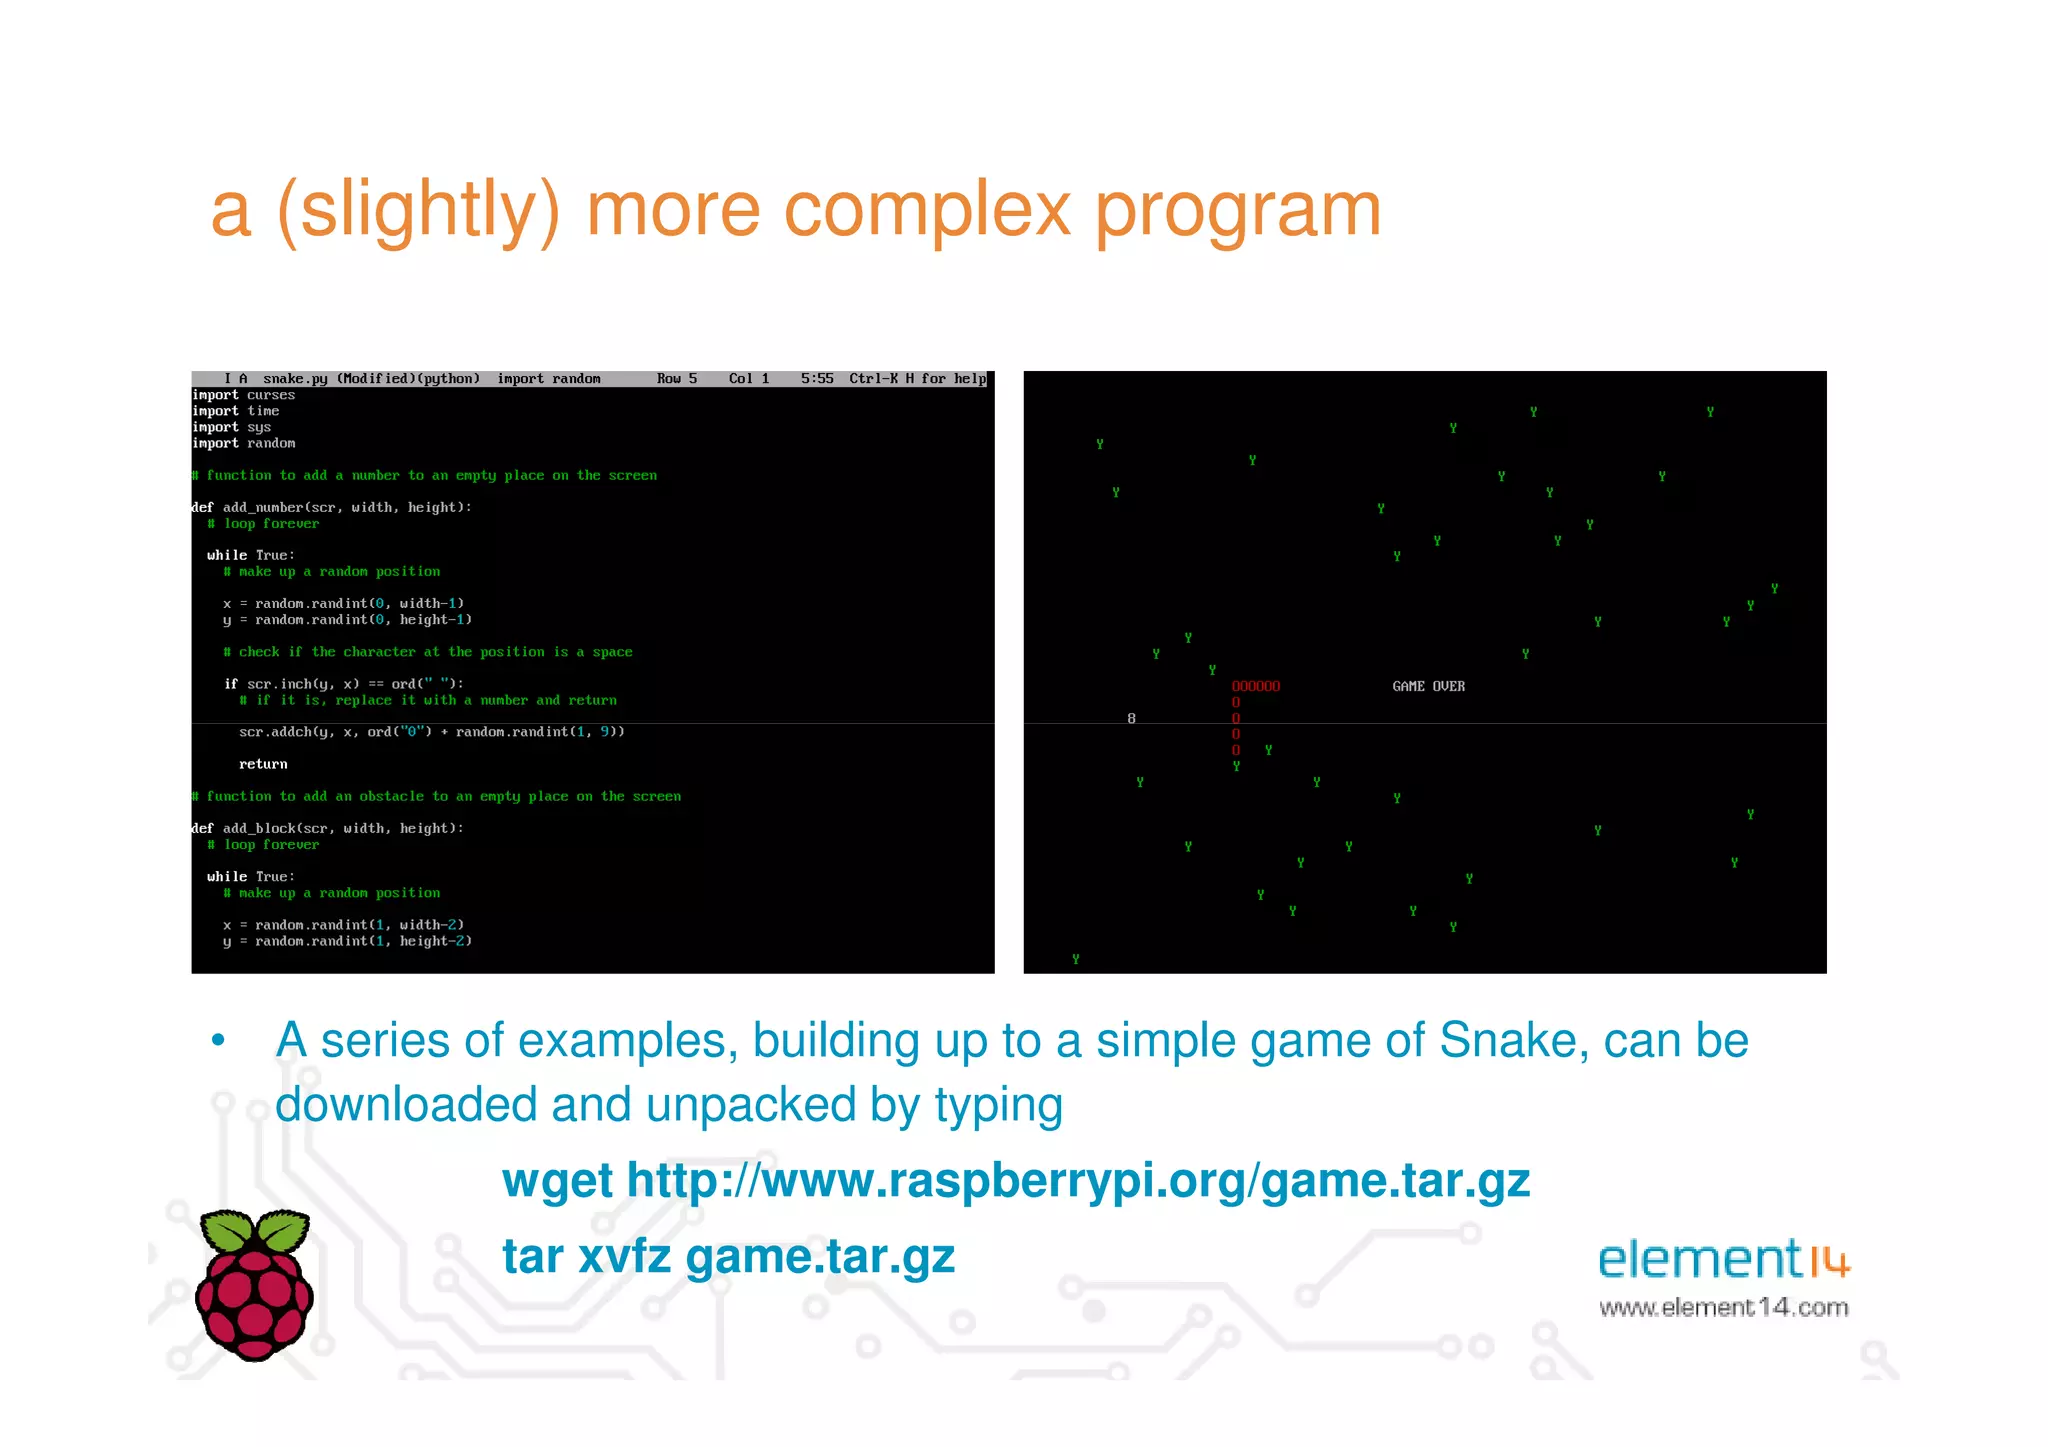
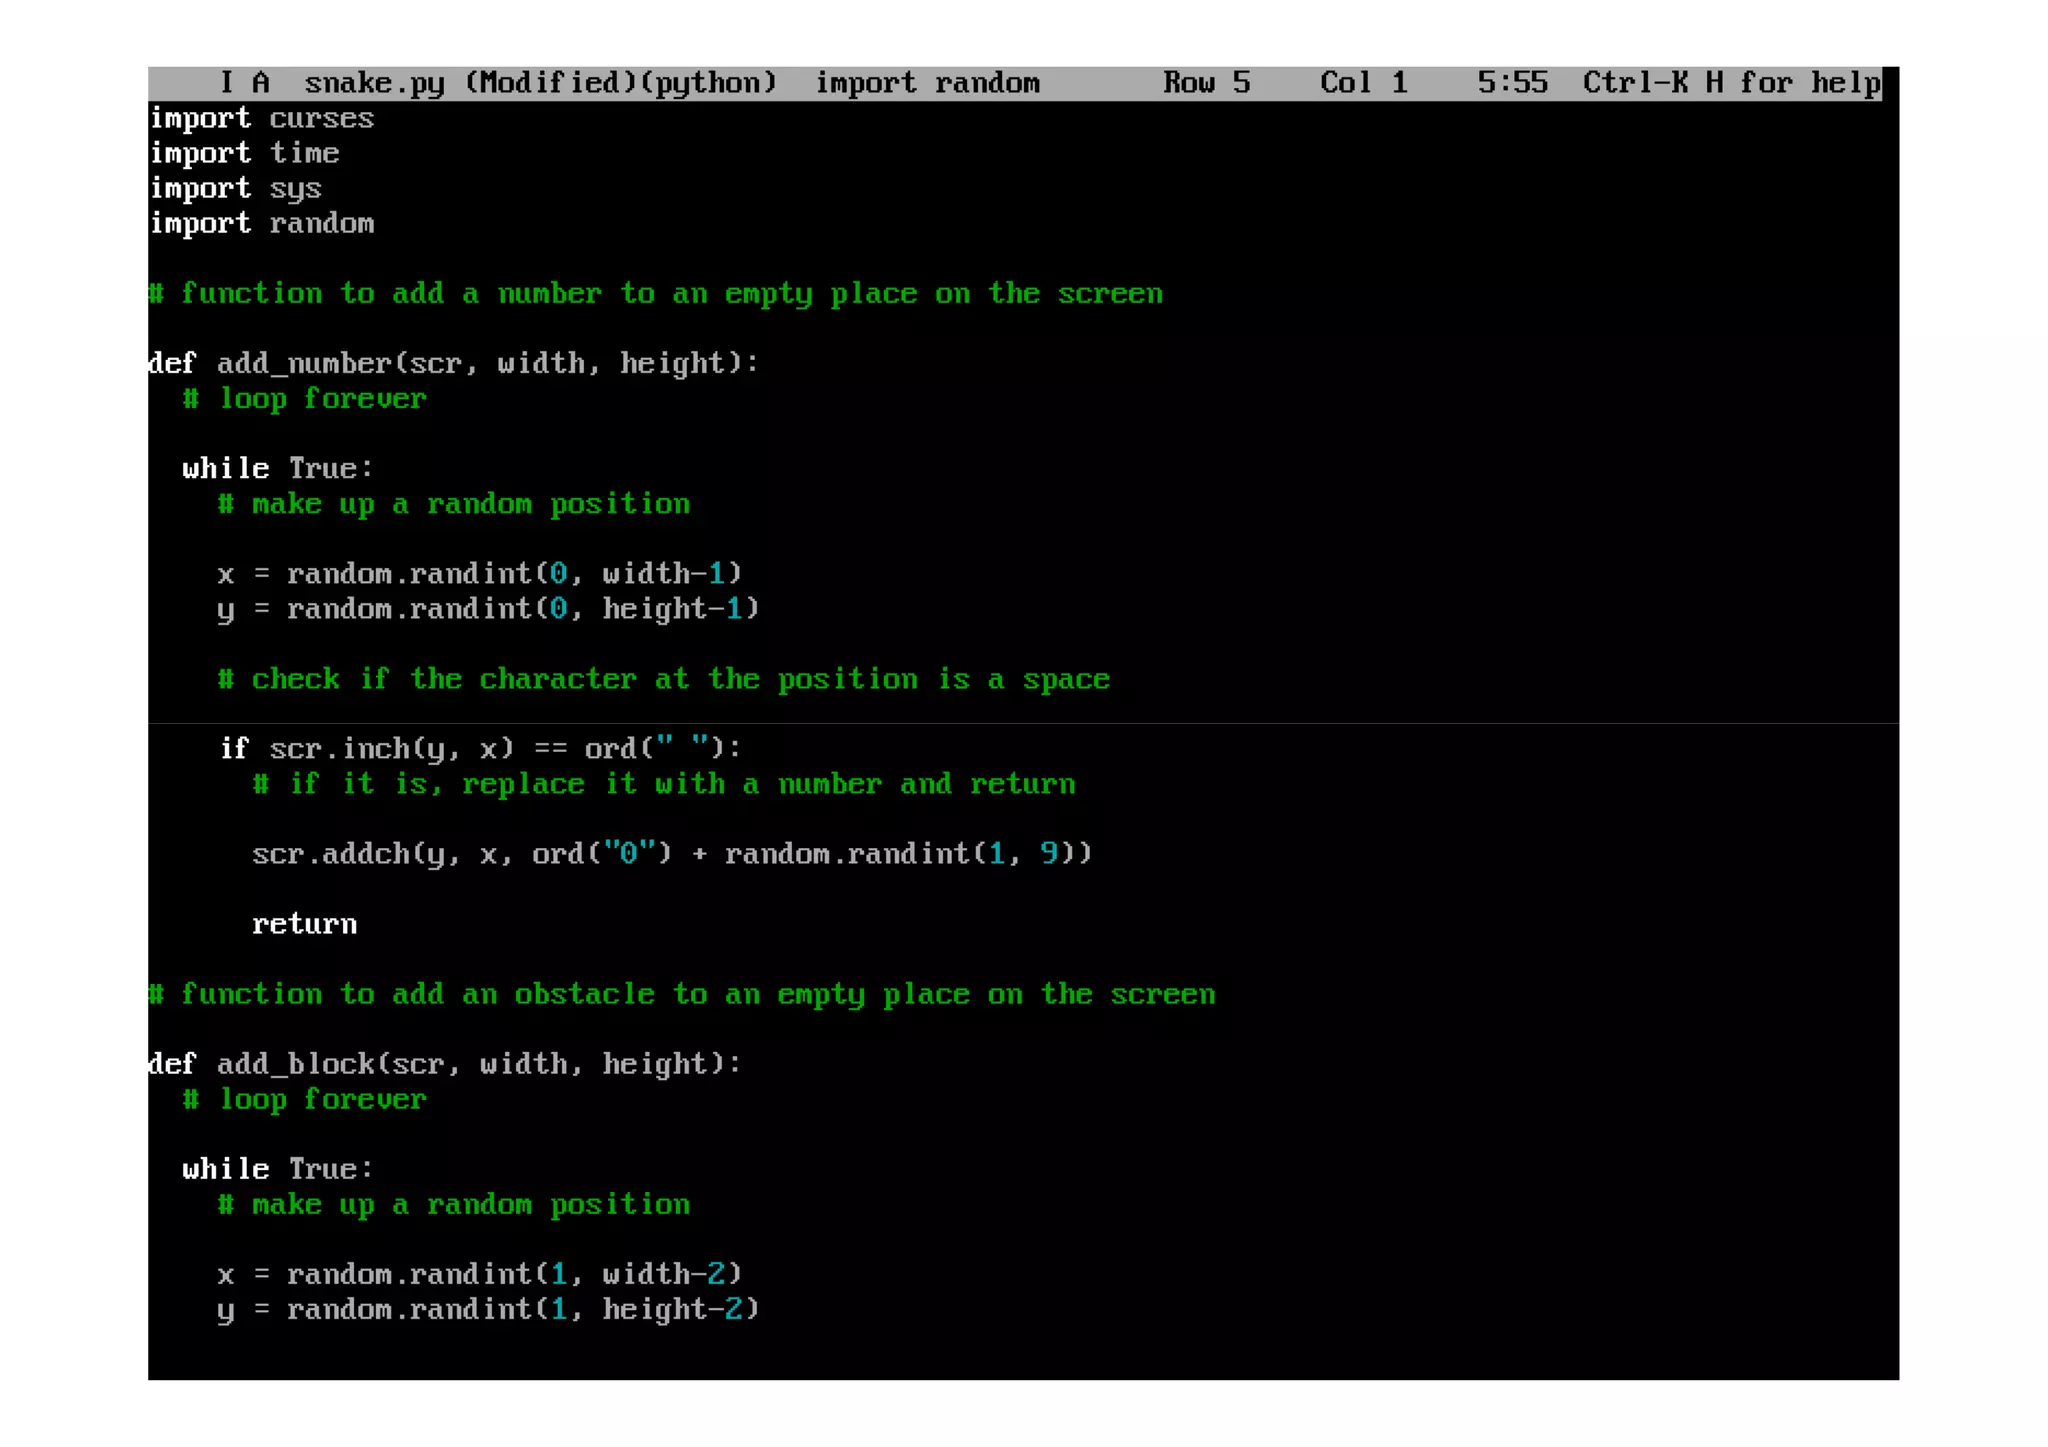
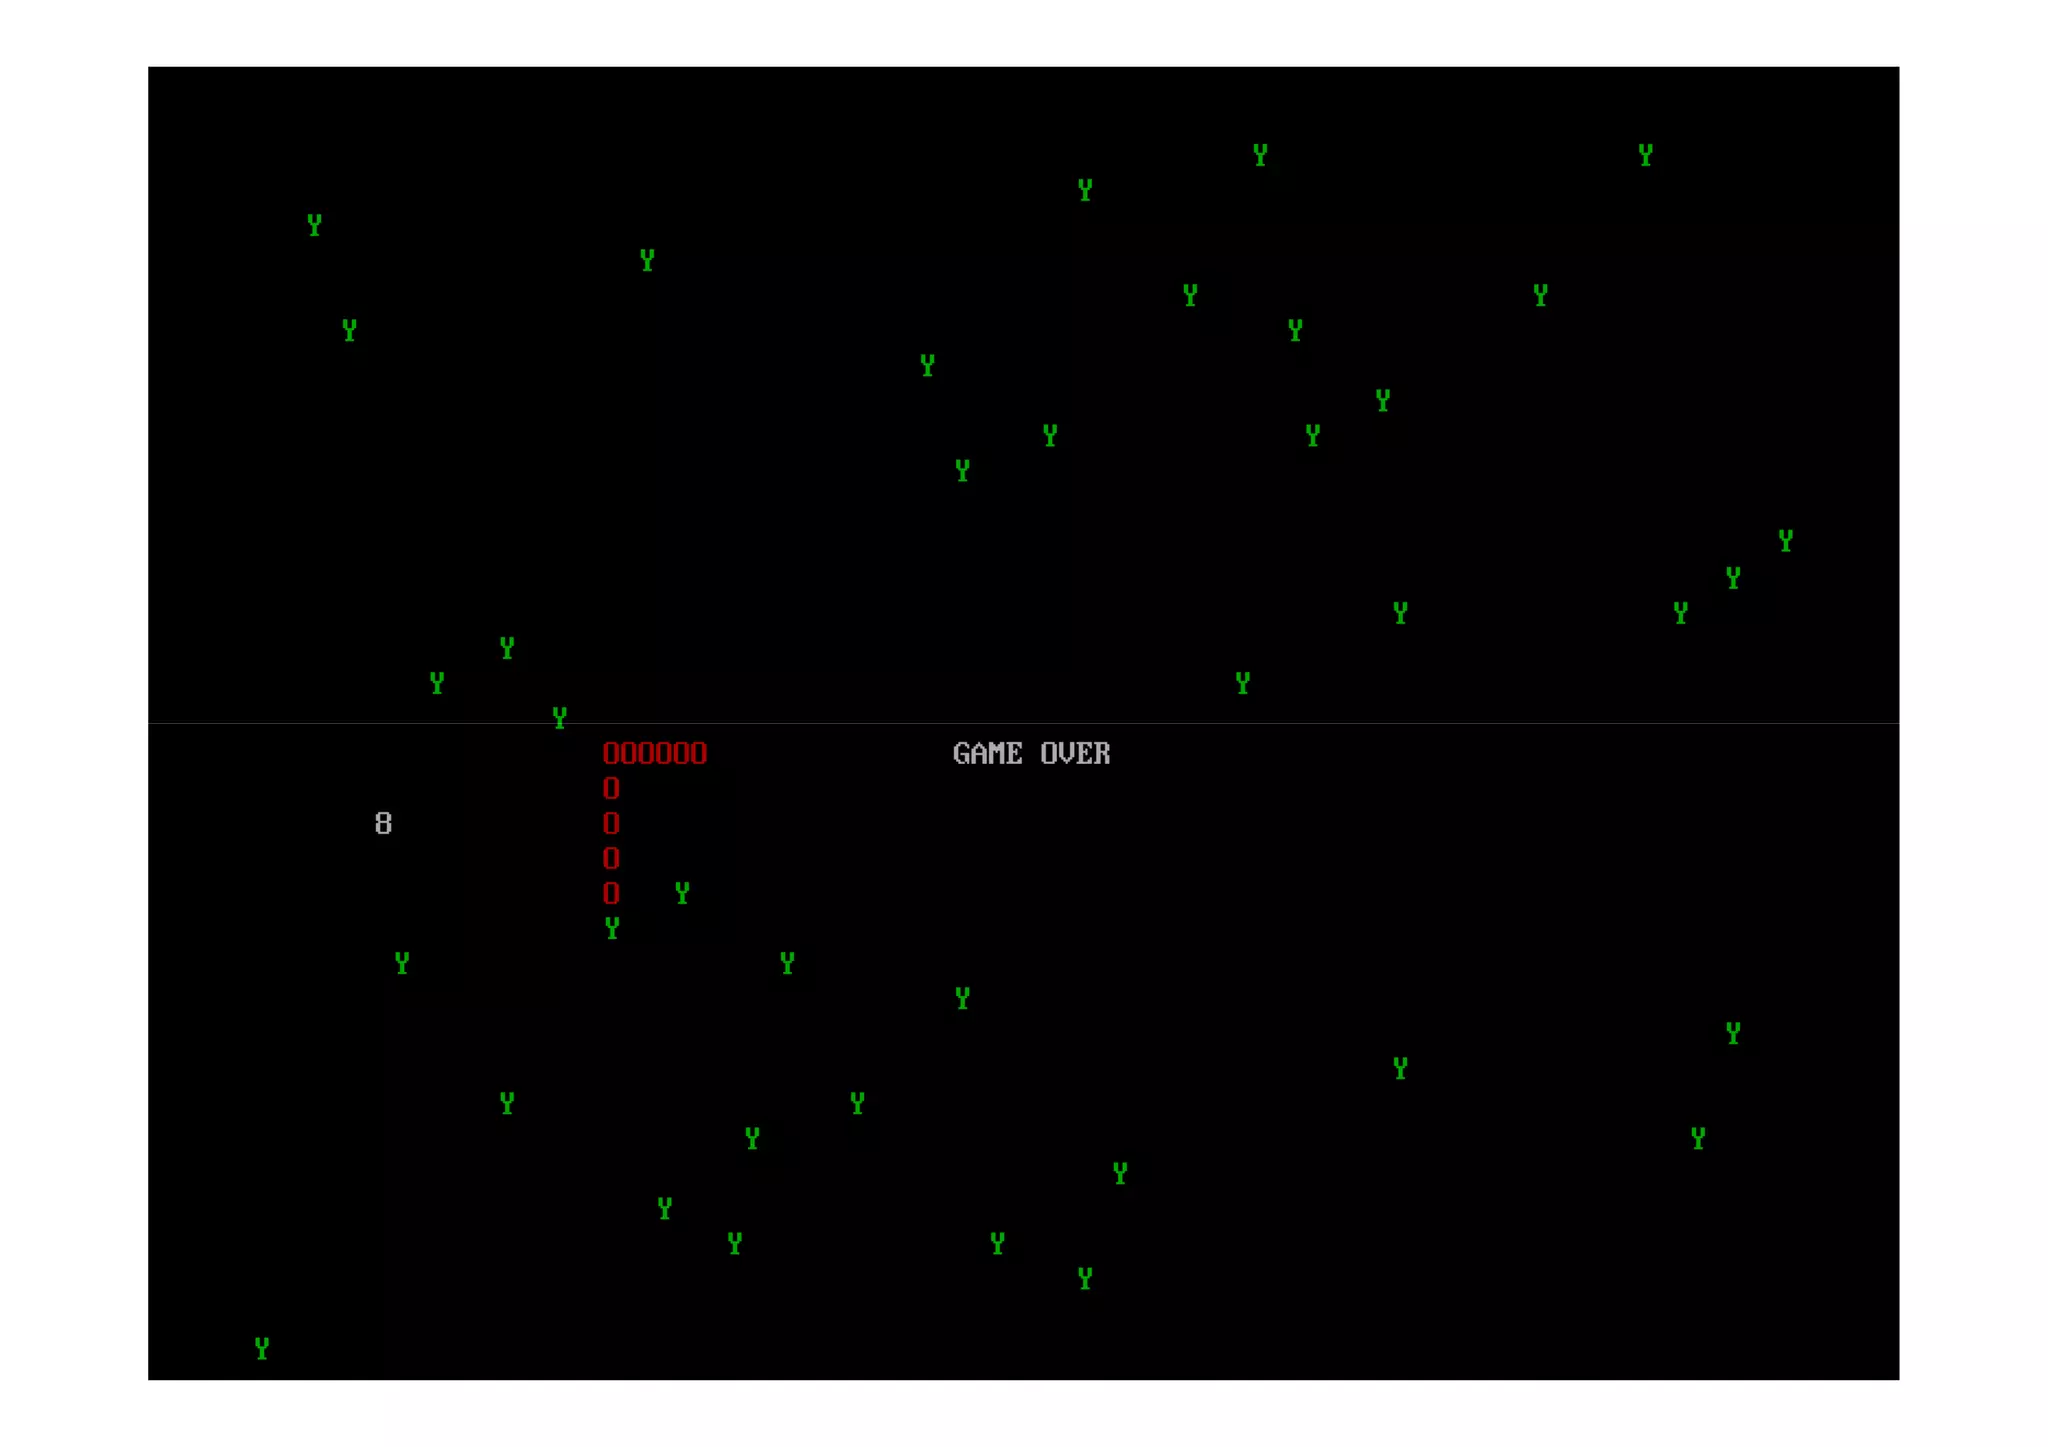
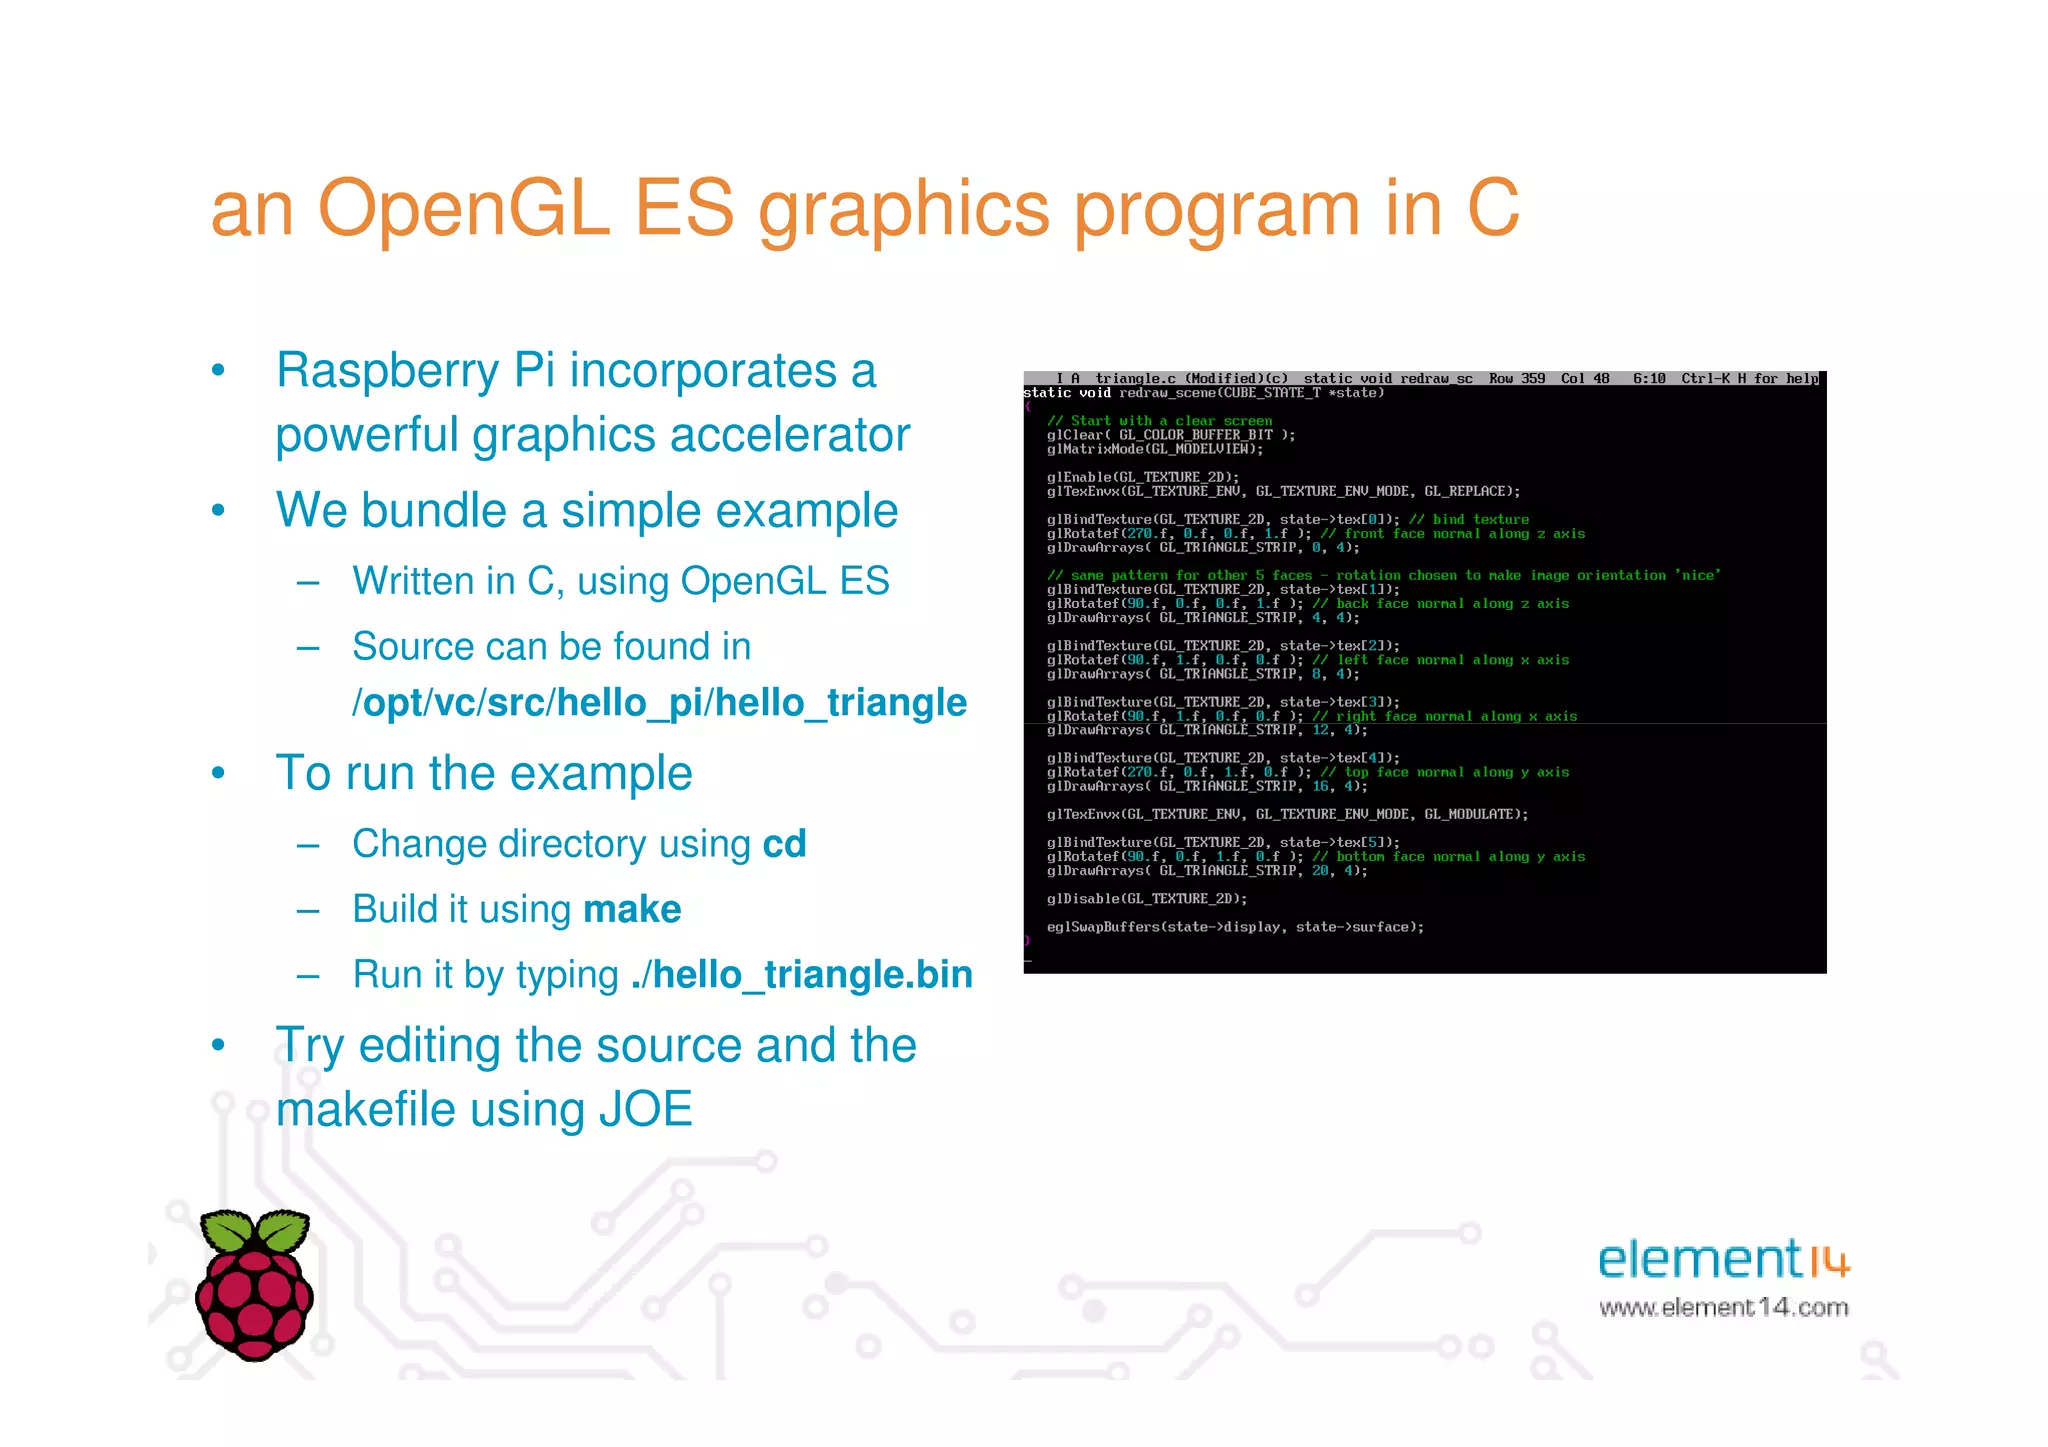
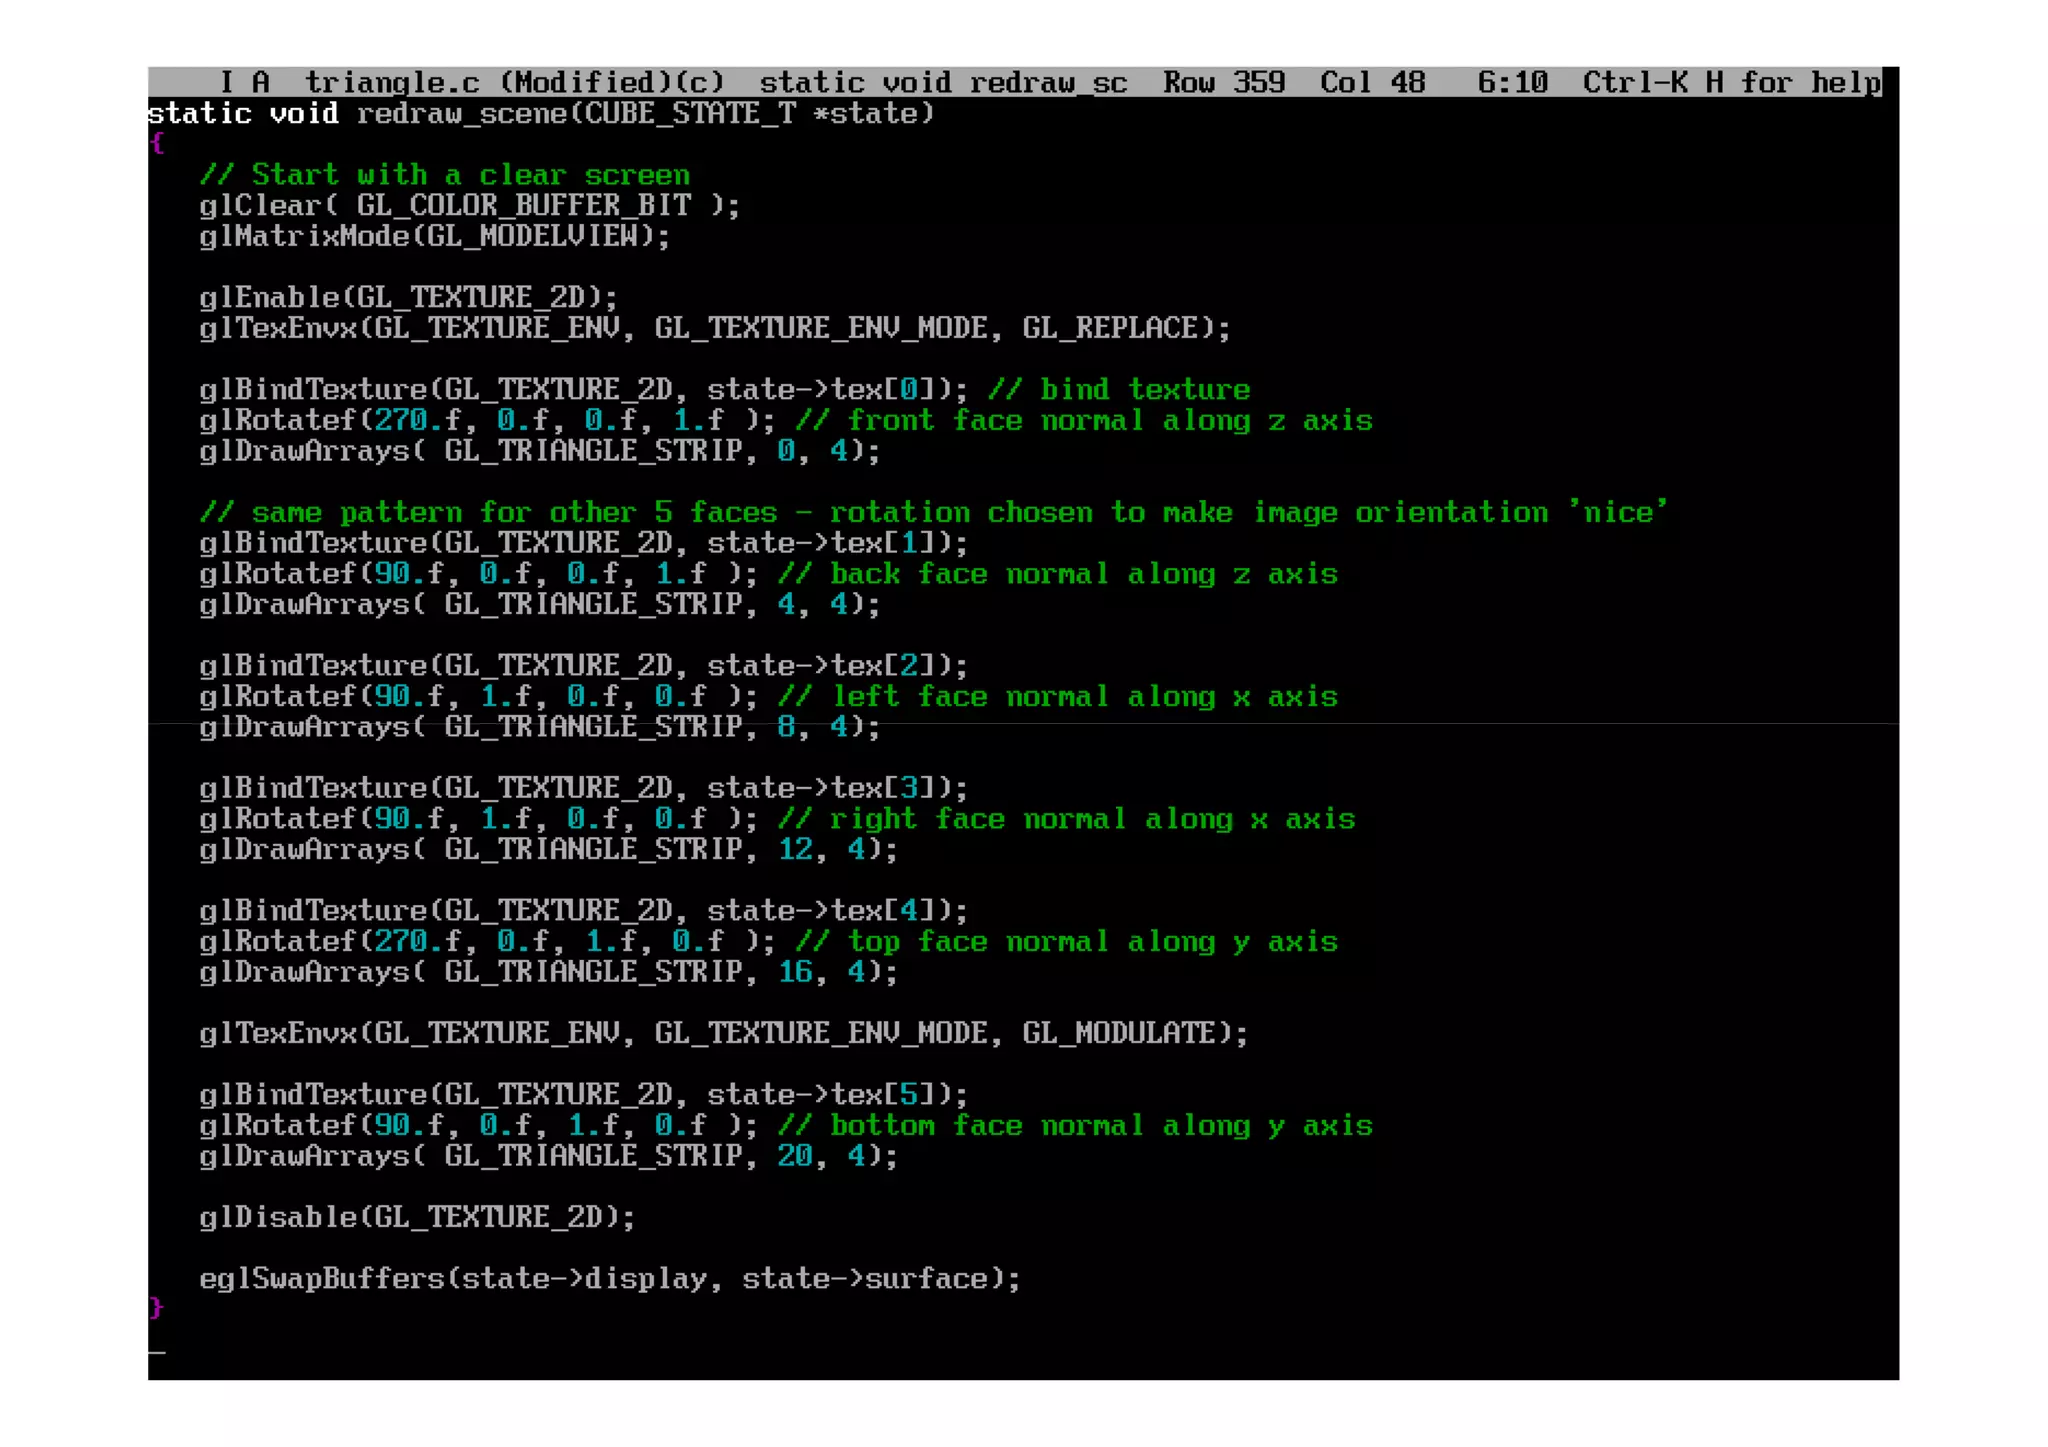
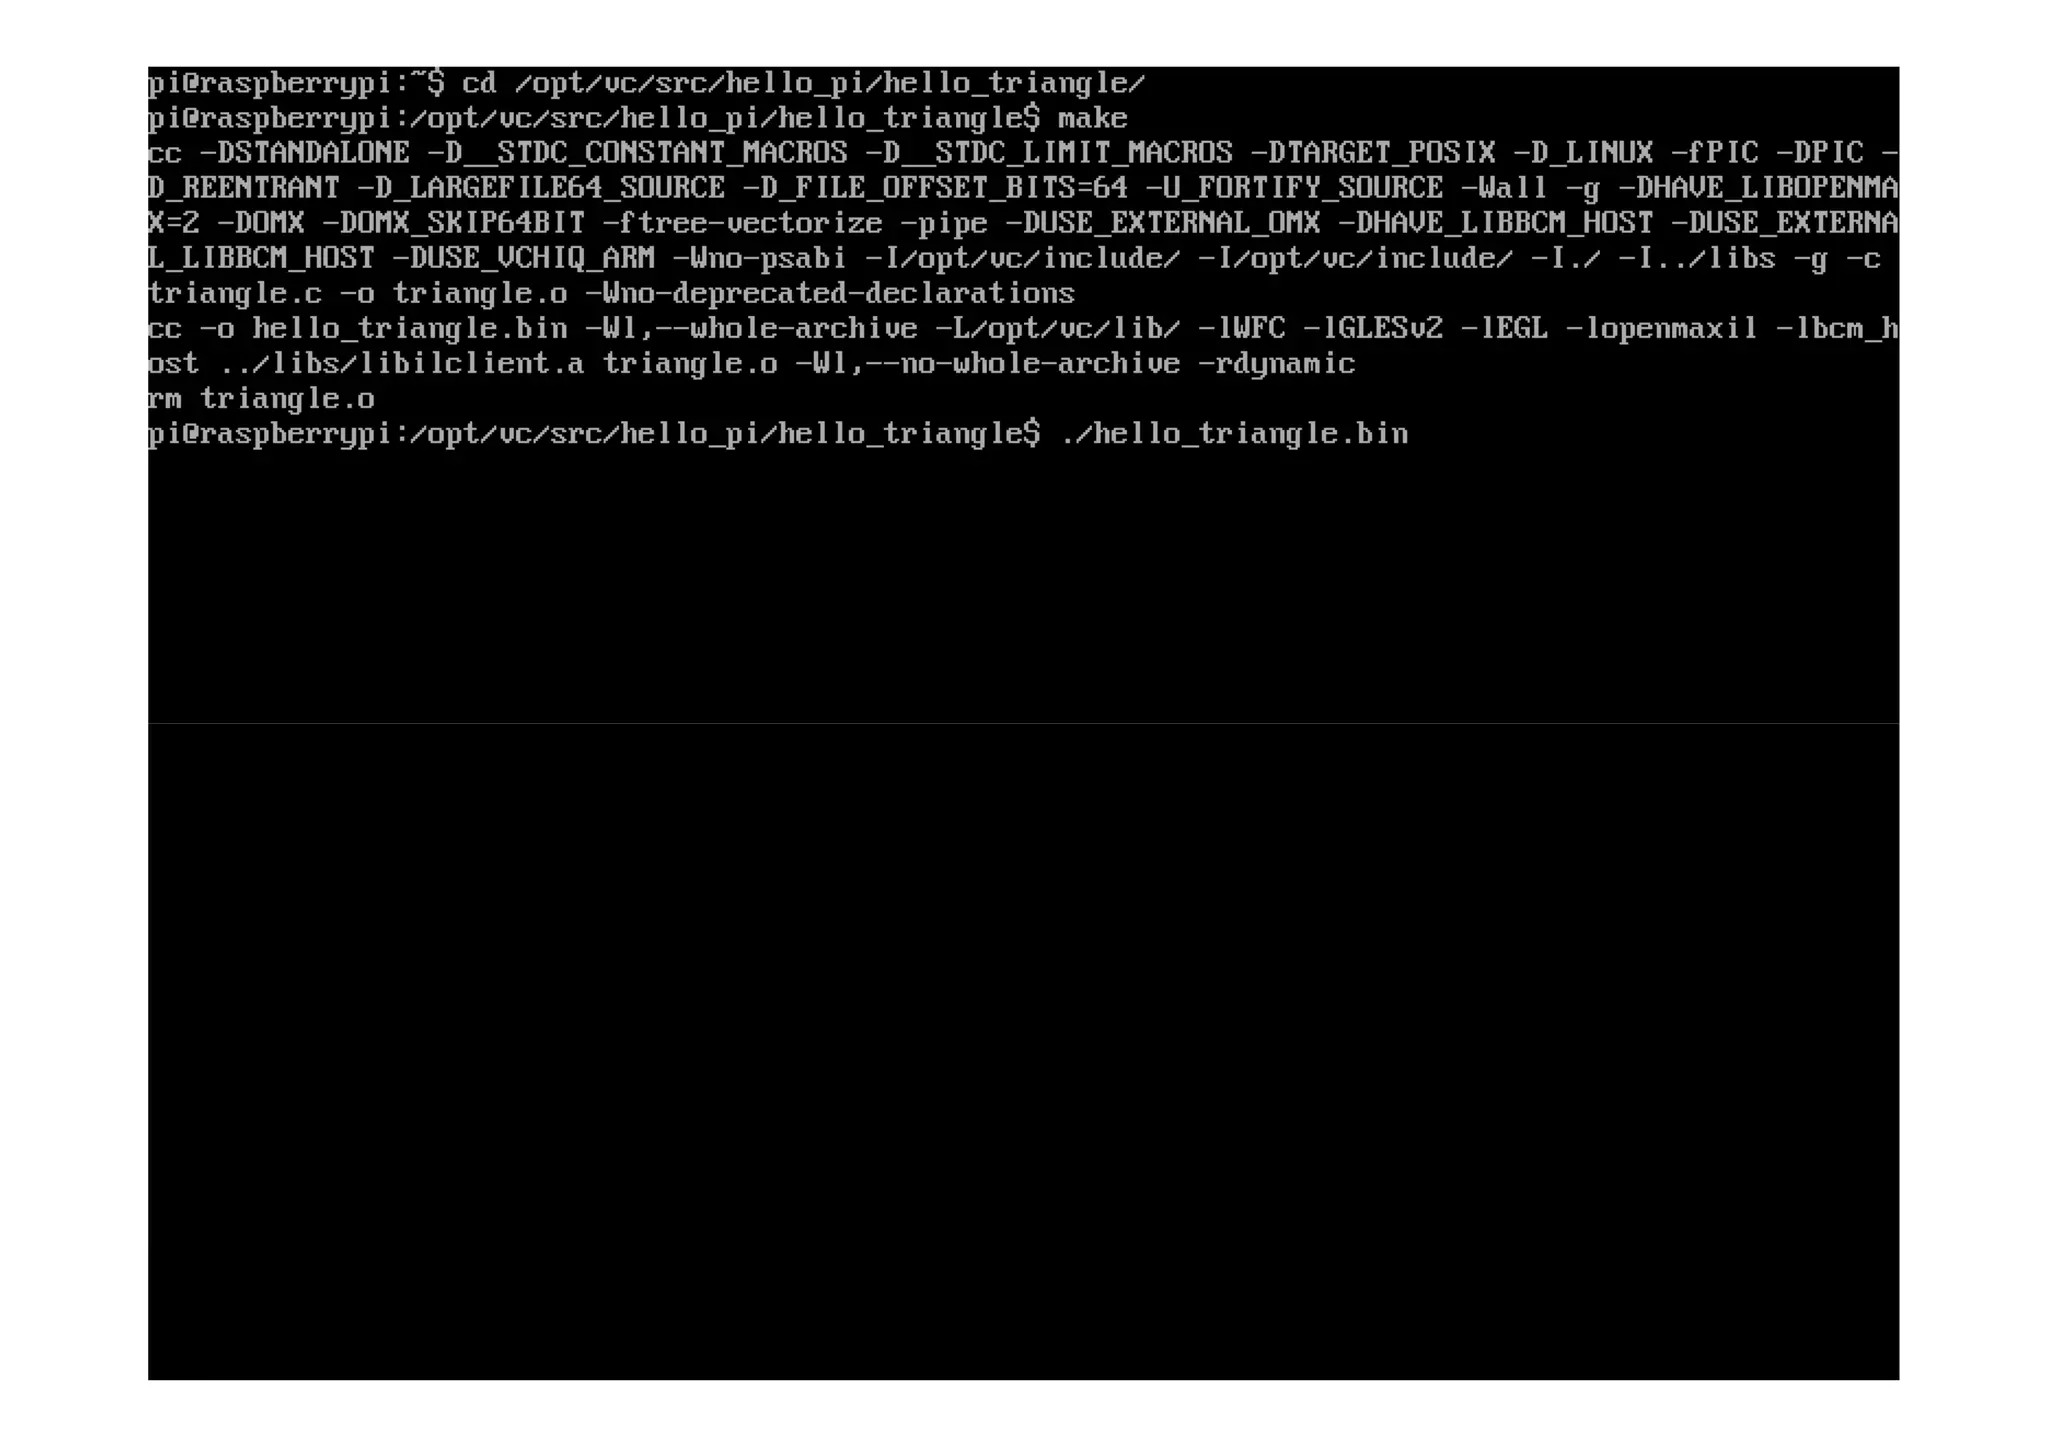
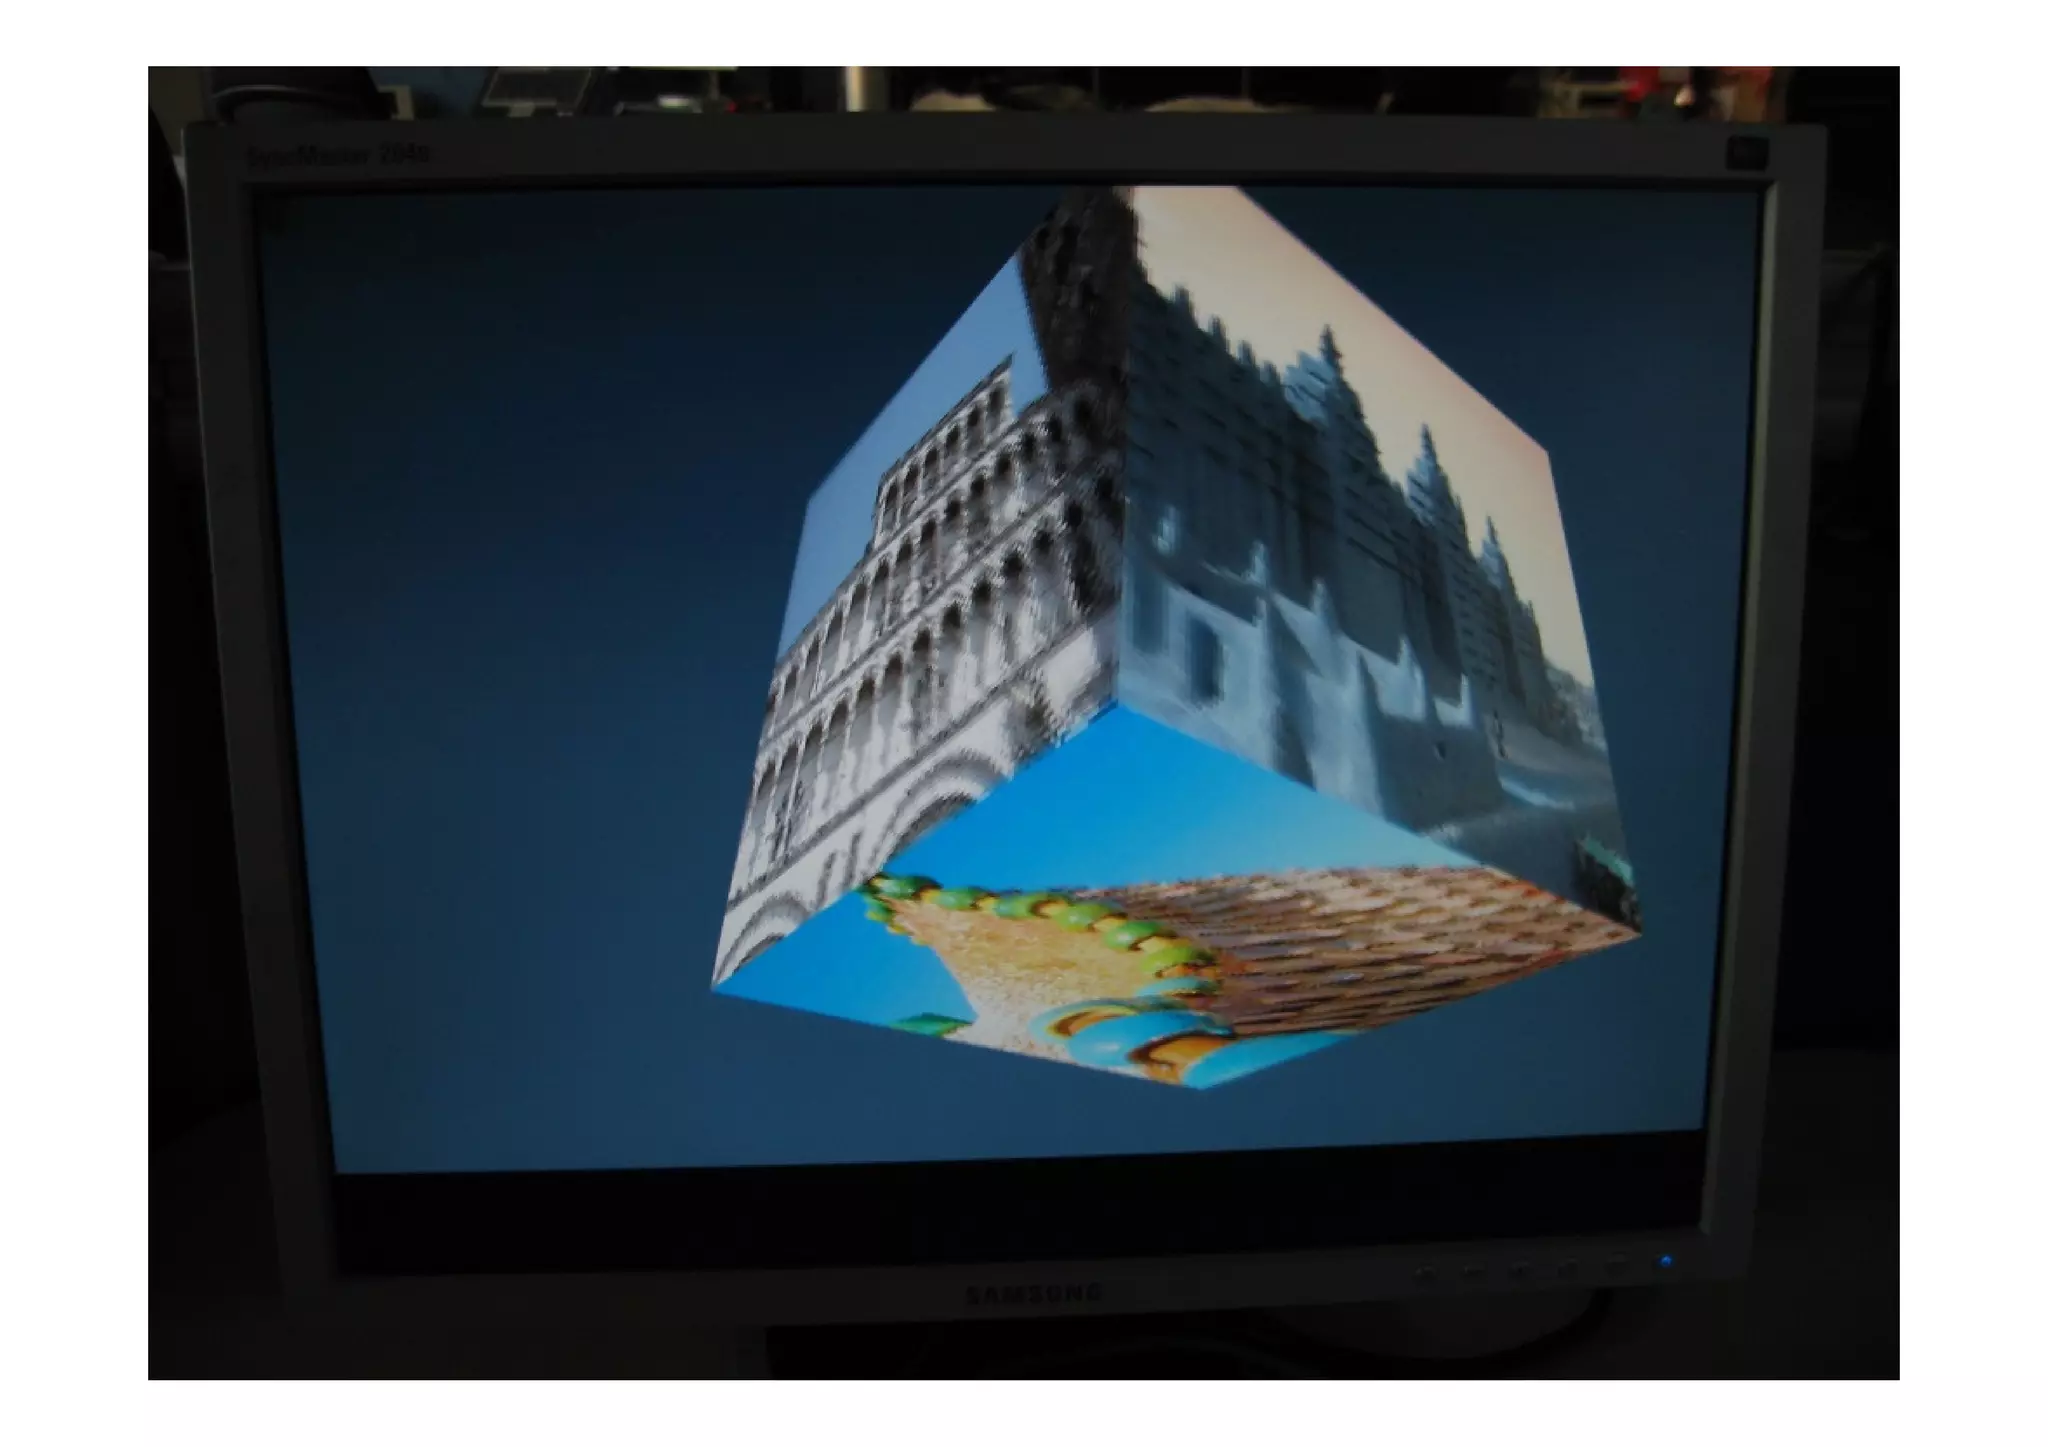
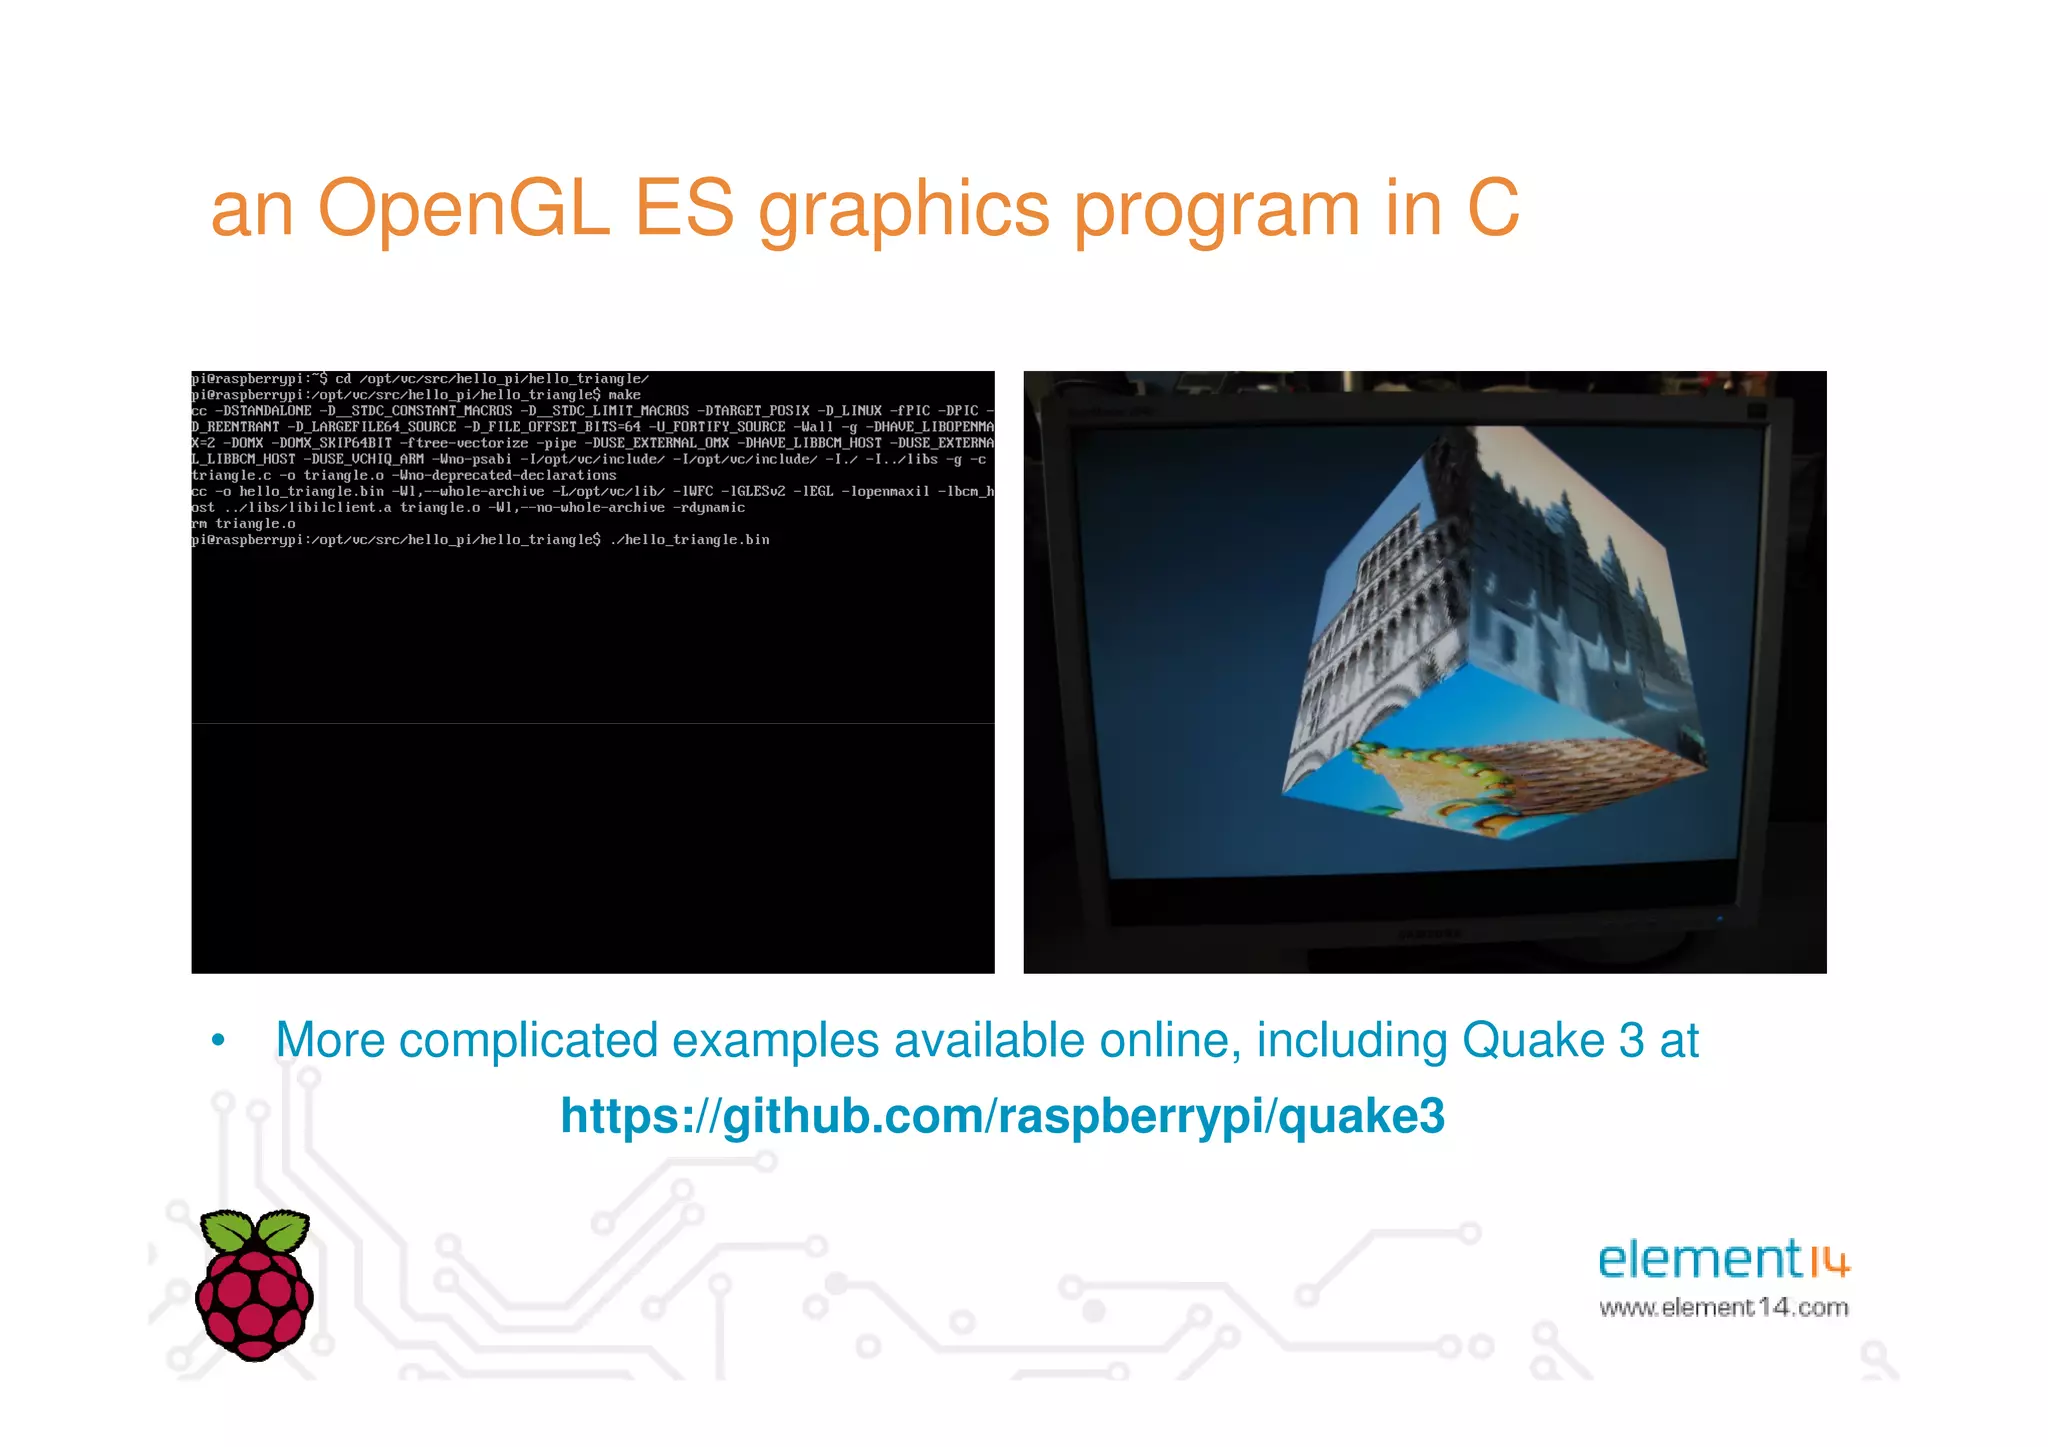
Programming the Raspberry Pi Dr Eben Upton Raspberry Pi Foundation
contents • introduction • unboxing and setup • flashing an SD card • logging in for the first time • the JOE text editor • running the “hello world” program• running the “hello world” program • a (slightly) more complex example • an OpenGL ES graphics program in C • the configuration file • wrap up
introduction • Raspberry Pi is a small, cheap ARM-based PC for education and hobbyists • Runs Debian GNU/Linux from an SD card – Standard image available from Feature Specification CPU 700MHz ARM1176-JZFS GPU Broadcom VideoCore IV Memory 256MB LPDDR2-800 Video HDMI, composite Audio HDMI, stereo analog – Standard image available from http://www.element14.com – Includes a broad range of tools and examples • General-purpose IO connector allows simple interfacing Audio HDMI, stereo analog USB 2 x USB2.0 (model B) Storage SD card Networking 10/100 Ethernet Power 5V micro USB
unboxing
a quick tour
a quick tour Power
a quick tour Power HDMI
a quick tour Power HDMI Ethernet
a quick tour Power HDMI Ethernet USB
a quick tour Audio Power HDMI Ethernet USB
a quick tour Audio Video Power HDMI Ethernet USB
a quick tour Audio Video Power GPIO HDMI Ethernet USB
a quick tour Audio Video Power GPIO SD HDMI Ethernet USB
cables and accessories
putting it all together
flashing an SD card • You may have purchased a pre- installed card • Otherwise, you will need to – Download an image and a copy of the tool dd-removable from www.element14.com/raspberrypi – Flash the image onto a 2GB SD card from a Windows PC • Insert the card into a card reader • At a command prompt, type – dd-removable --list – dd-removable bs=1M if=sd.img of= ?DeviceHarddisk<X>Partition0 -progress – Substituting the appropriate number for <X>
flashing an SD card
flashing an SD card • You may have purchased a pre- installed card • Otherwise, you will need to – Download an image and a copy of the tool dd-removable from www.element14.com/raspberrypi – Flash the image onto a 2GB SD card from a Windows PC • Insert the card into a card reader • At a command prompt, type – dd-removable --list – dd-removable bs=1M if=sd.img of= ?DeviceHarddisk<X>Partition0 -progress – Substituting the appropriate number for <X>
logging in for the first time • Insert a card • Apply power to the device • Red LED should come on • After 5 seconds – Green LED should begin to flicker – Text should appear on the screen– Text should appear on the screen • At the login prompt enter the username pi, and password raspberry • You may want to set the clock!
logging in for the first time
logging in for the first time • Insert a card • Apply power to the device • Red LED should come on • After 5 seconds – Green LED should begin to flicker – Text should appear on the screen– Text should appear on the screen • At the login prompt enter the username pi, and password raspberry • You may want to set the clock!
the JOE text editor • Standard image bundles JOE – Simple programmer’s text editor – Syntax highlighting for Python and C • At the command line, type joe helloworld.py • When the editor appears, type• When the editor appears, type print “hello world” • Now type Ctrl+K and then X to save and exit • More documentation available at http://joe-editor.sourceforce.net
the JOE text editor
the JOE text editor • Standard image bundles JOE – Simple programmer’s text editor – Syntax highlighting for Python and C • At the command line, type joe helloworld.py • When the editor appears, type• When the editor appears, type print “hello world” • Now type Ctrl+K and then X to save and exit • More documentation available at http://joe-editor.sourceforce.net
running the “hello world” program • We just wrote our first program! • We can run it using the bundled Python interpreter • At the command line, type python helloworld.py • The text “hello world” will appear• The text “hello world” will appear • You can also run Python in “interactive mode” by just typing python • A great way to experiment with the language
running the “hello world” program
running the “hello world” program • We just wrote our first program! • We can run it using the bundled Python interpreter • At the command line, type python helloworld.py • The text “hello world” will appear• The text “hello world” will appear • You can also run Python in “interactive mode” by just typing python • A great way to experiment with the language
a (slightly) more complex program • A series of examples, building up to a simple game of Snake, can be downloaded and unpacked by typing wget http://www.raspberrypi.org/game.tar.gz tar xvfz game.tar.gz
a (slightly) more complex program
a (slightly) more complex program • A series of examples, building up to a simple game of Snake, can be downloaded and unpacked by typing wget http://www.raspberrypi.org/game.tar.gz tar xvfz game.tar.gz
an OpenGL ES graphics program in C • Raspberry Pi incorporates a powerful graphics accelerator • We bundle a simple example – Written in C, using OpenGL ES – Source can be found in /opt/vc/src/hello_pi/hello_triangle/opt/vc/src/hello_pi/hello_triangle • To run the example – Change directory using cd – Build it using make – Run it by typing ./hello_triangle.bin • Try editing the source and the makefile using JOE
an OpenGL ES graphics program in C
an OpenGL ES graphics program in C • Raspberry Pi incorporates a powerful graphics accelerator • We bundle a simple example – Written in C, using OpenGL ES – Source can be found in /opt/vc/src/hello_pi/hello_triangle/opt/vc/src/hello_pi/hello_triangle • To run the example – Change directory using cd – Build it using make – Run it by typing ./hello_triangle.bin • Try editing the source and the makefile using JOE
an OpenGL ES graphics program in C • More complicated examples available online, including Quake 3 at https://github.com/raspberrypi/quake3
an OpenGL ES graphics program in C
an OpenGL ES graphics program in C • More complicated examples available online, including Quake 3 at https://github.com/raspberrypi/quake3
the configuration file (advanced users) • At startup, Raspberry Pi reads config.txt from the SD card – Controls display and overclocking – Edit from a PC or on device using joe /boot/config.txt • Common options include • A typical configuration file # select 16:9 PAL sdtv_mode=2 sdtv_aspect=3 • Common options include – arm_freq set ARM clock speed – gpu_freq set GPU clock speed – sdtv_mode select PAL/NTSC – hdmi_mode force HDMI resolution – overscan_* set screen border • Very easy to break your install # medium size borders overscan_left=28 overscan_right=28 overscan_top=16 overscan_bottom=16
wrap up • We’ve seen how to – Set up, boot and configure your Raspberry Pi – Create and edit text files using the JOE editor – Run a simple Python script – Download and unpack more examples – Build and run one of the bundled C programs– Build and run one of the bundled C programs • Remember Raspberry Pi is just a GNU/Linux box – Many books and online tutorials available • Don’t be afraid to play around with software – At worst you’ll have to reflash your SD card

Programming the Raspberry Pi element14

  • 1.
    Programming the RaspberryPi Dr Eben Upton Raspberry Pi Foundation
  • 2.
    contents • introduction • unboxingand setup • flashing an SD card • logging in for the first time • the JOE text editor • running the “hello world” program• running the “hello world” program • a (slightly) more complex example • an OpenGL ES graphics program in C • the configuration file • wrap up
  • 3.
    introduction • Raspberry Piis a small, cheap ARM-based PC for education and hobbyists • Runs Debian GNU/Linux from an SD card – Standard image available from Feature Specification CPU 700MHz ARM1176-JZFS GPU Broadcom VideoCore IV Memory 256MB LPDDR2-800 Video HDMI, composite Audio HDMI, stereo analog – Standard image available from http://www.element14.com – Includes a broad range of tools and examples • General-purpose IO connector allows simple interfacing Audio HDMI, stereo analog USB 2 x USB2.0 (model B) Storage SD card Networking 10/100 Ethernet Power 5V micro USB
  • 4.
  • 5.
  • 6.
  • 7.
  • 8.
  • 9.
  • 10.
  • 11.
  • 12.
  • 13.
  • 14.
  • 15.
  • 16.
  • 17.
    flashing an SDcard • You may have purchased a pre- installed card • Otherwise, you will need to – Download an image and a copy of the tool dd-removable from www.element14.com/raspberrypi – Flash the image onto a 2GB SD card from a Windows PC • Insert the card into a card reader • At a command prompt, type – dd-removable --list – dd-removable bs=1M if=sd.img of= ?DeviceHarddisk<X>Partition0 -progress – Substituting the appropriate number for <X>
  • 18.
  • 19.
    flashing an SDcard • You may have purchased a pre- installed card • Otherwise, you will need to – Download an image and a copy of the tool dd-removable from www.element14.com/raspberrypi – Flash the image onto a 2GB SD card from a Windows PC • Insert the card into a card reader • At a command prompt, type – dd-removable --list – dd-removable bs=1M if=sd.img of= ?DeviceHarddisk<X>Partition0 -progress – Substituting the appropriate number for <X>
  • 20.
    logging in forthe first time • Insert a card • Apply power to the device • Red LED should come on • After 5 seconds – Green LED should begin to flicker – Text should appear on the screen– Text should appear on the screen • At the login prompt enter the username pi, and password raspberry • You may want to set the clock!
  • 21.
    logging in forthe first time
  • 22.
    logging in forthe first time • Insert a card • Apply power to the device • Red LED should come on • After 5 seconds – Green LED should begin to flicker – Text should appear on the screen– Text should appear on the screen • At the login prompt enter the username pi, and password raspberry • You may want to set the clock!
  • 23.
    the JOE texteditor • Standard image bundles JOE – Simple programmer’s text editor – Syntax highlighting for Python and C • At the command line, type joe helloworld.py • When the editor appears, type• When the editor appears, type print “hello world” • Now type Ctrl+K and then X to save and exit • More documentation available at http://joe-editor.sourceforce.net
  • 24.
  • 25.
    the JOE texteditor • Standard image bundles JOE – Simple programmer’s text editor – Syntax highlighting for Python and C • At the command line, type joe helloworld.py • When the editor appears, type• When the editor appears, type print “hello world” • Now type Ctrl+K and then X to save and exit • More documentation available at http://joe-editor.sourceforce.net
  • 26.
    running the “helloworld” program • We just wrote our first program! • We can run it using the bundled Python interpreter • At the command line, type python helloworld.py • The text “hello world” will appear• The text “hello world” will appear • You can also run Python in “interactive mode” by just typing python • A great way to experiment with the language
  • 27.
    running the “helloworld” program
  • 28.
    running the “helloworld” program • We just wrote our first program! • We can run it using the bundled Python interpreter • At the command line, type python helloworld.py • The text “hello world” will appear• The text “hello world” will appear • You can also run Python in “interactive mode” by just typing python • A great way to experiment with the language
  • 29.
    a (slightly) morecomplex program • A series of examples, building up to a simple game of Snake, can be downloaded and unpacked by typing wget http://www.raspberrypi.org/game.tar.gz tar xvfz game.tar.gz
  • 30.
    a (slightly) morecomplex program
  • 31.
    a (slightly) morecomplex program
  • 32.
    a (slightly) morecomplex program • A series of examples, building up to a simple game of Snake, can be downloaded and unpacked by typing wget http://www.raspberrypi.org/game.tar.gz tar xvfz game.tar.gz
  • 33.
    an OpenGL ESgraphics program in C • Raspberry Pi incorporates a powerful graphics accelerator • We bundle a simple example – Written in C, using OpenGL ES – Source can be found in /opt/vc/src/hello_pi/hello_triangle/opt/vc/src/hello_pi/hello_triangle • To run the example – Change directory using cd – Build it using make – Run it by typing ./hello_triangle.bin • Try editing the source and the makefile using JOE
  • 34.
    an OpenGL ESgraphics program in C
  • 35.
    an OpenGL ESgraphics program in C • Raspberry Pi incorporates a powerful graphics accelerator • We bundle a simple example – Written in C, using OpenGL ES – Source can be found in /opt/vc/src/hello_pi/hello_triangle/opt/vc/src/hello_pi/hello_triangle • To run the example – Change directory using cd – Build it using make – Run it by typing ./hello_triangle.bin • Try editing the source and the makefile using JOE
  • 36.
    an OpenGL ESgraphics program in C • More complicated examples available online, including Quake 3 at https://github.com/raspberrypi/quake3
  • 37.
    an OpenGL ESgraphics program in C
  • 38.
    an OpenGL ESgraphics program in C
  • 39.
    an OpenGL ESgraphics program in C • More complicated examples available online, including Quake 3 at https://github.com/raspberrypi/quake3
  • 40.
    the configuration file(advanced users) • At startup, Raspberry Pi reads config.txt from the SD card – Controls display and overclocking – Edit from a PC or on device using joe /boot/config.txt • Common options include • A typical configuration file # select 16:9 PAL sdtv_mode=2 sdtv_aspect=3 • Common options include – arm_freq set ARM clock speed – gpu_freq set GPU clock speed – sdtv_mode select PAL/NTSC – hdmi_mode force HDMI resolution – overscan_* set screen border • Very easy to break your install # medium size borders overscan_left=28 overscan_right=28 overscan_top=16 overscan_bottom=16
  • 41.
    wrap up • We’veseen how to – Set up, boot and configure your Raspberry Pi – Create and edit text files using the JOE editor – Run a simple Python script – Download and unpack more examples – Build and run one of the bundled C programs– Build and run one of the bundled C programs • Remember Raspberry Pi is just a GNU/Linux box – Many books and online tutorials available • Don’t be afraid to play around with software – At worst you’ll have to reflash your SD card