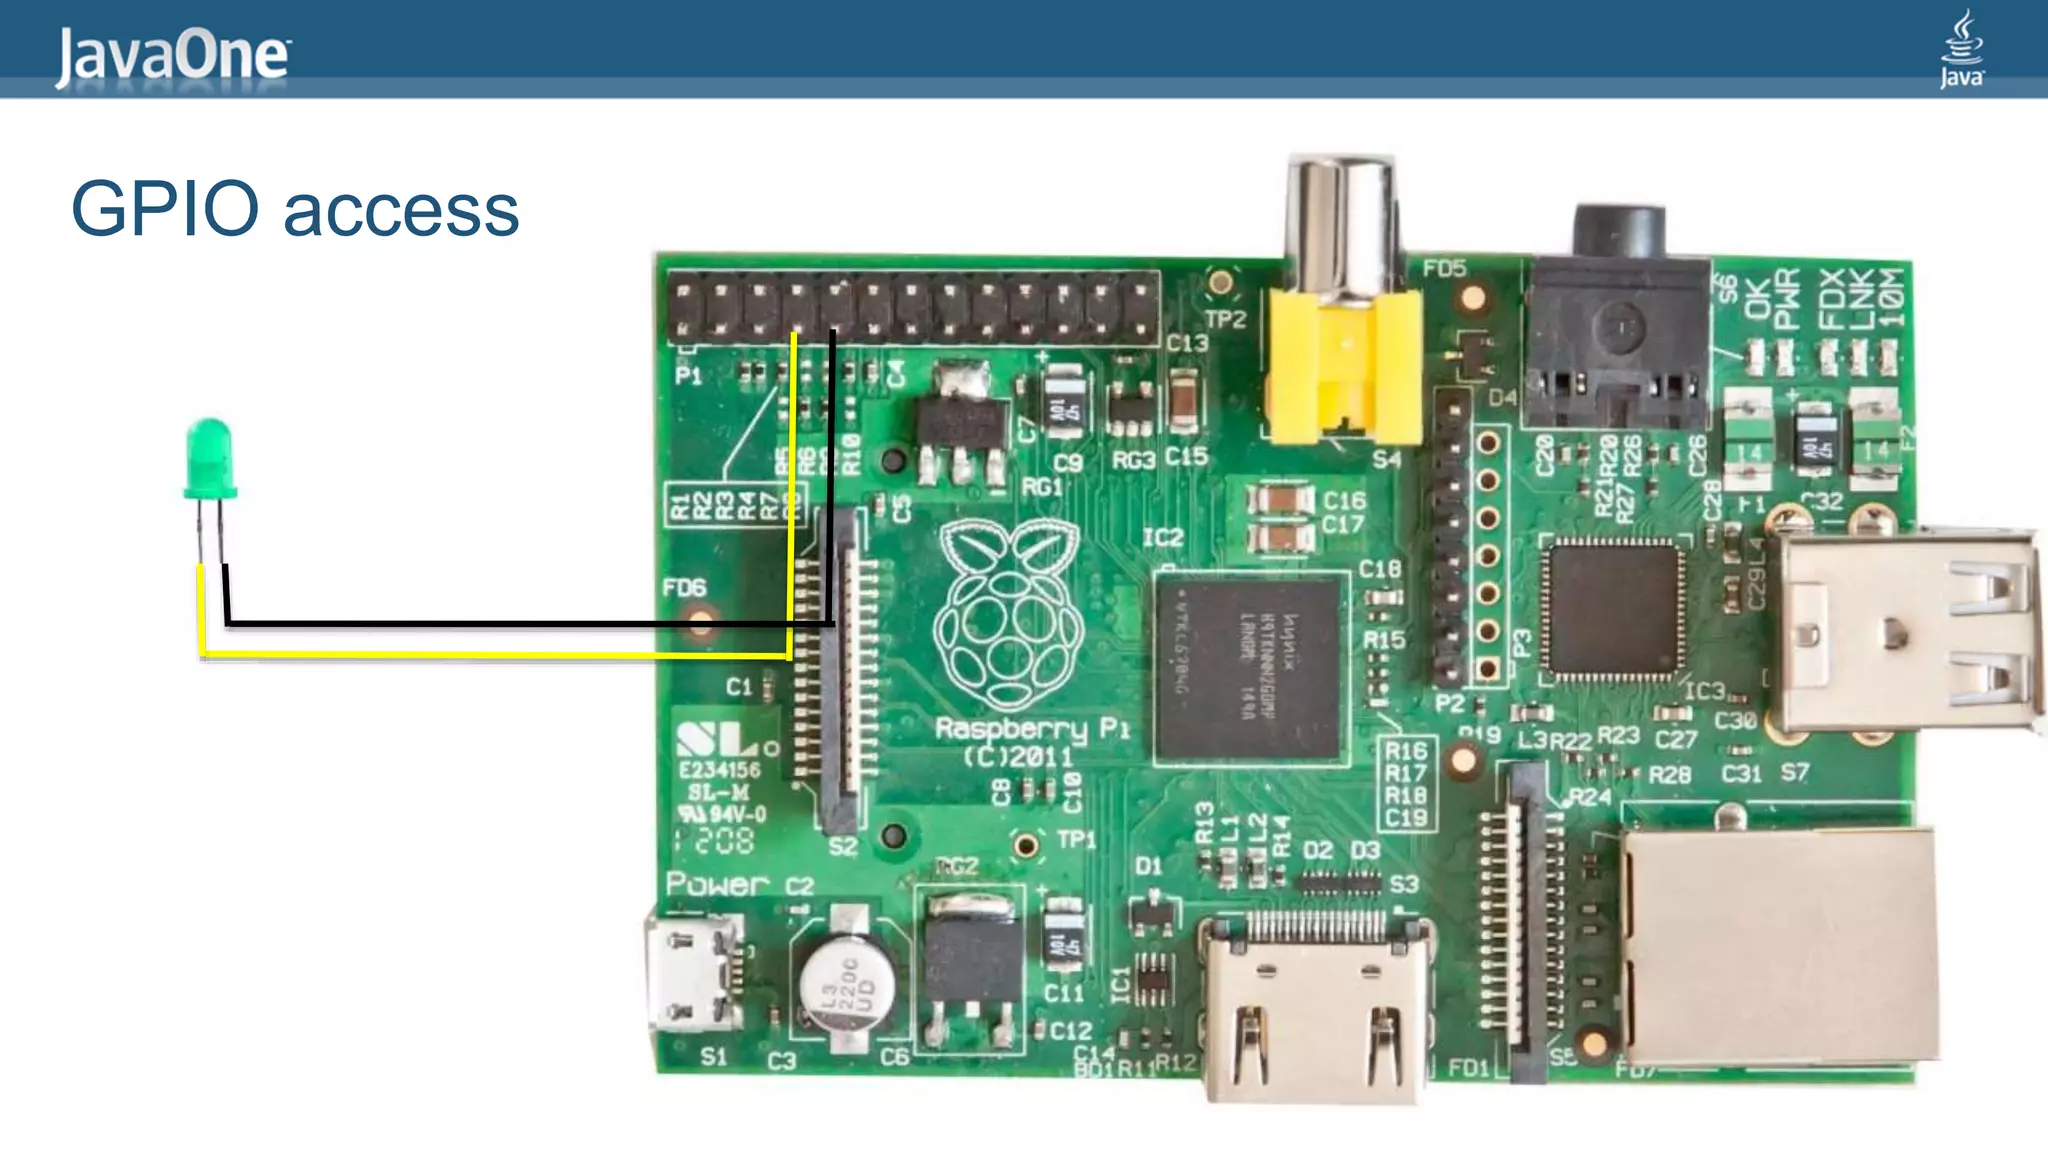
Java on Raspberry Pi Lab Stephen Chin Java Technology Ambassador JavaOne Content Chair @steveonjava
What Runs Java?
= Have Java With Your Dessert Raspberry Pi
Chalkboard Electronics Touchscreen  10" or 7" Form Factor  Connects via HDMI/USB  Tested with JavaFX 8  10% Exclusive Discount: G1F0U796Z083
GPIO access
How to Setup Your Pi > Step 1: Install Linux > Step 2: Download/Copy Java 8 for ARM EA > Step 3: Deploy and Run JVM Language Apps http://steveonjava.com/ javafx-on-raspberry-pi-3-easy-steps/
Electronic Safety! > Unplug from wall before wiring > Get rid of static by touching a metal surface > Don't touch exposed wires/metal > Never remove/insert SD Card while power is on 7
What Comes in Your Lab Kit 1. Touch Screen 2. SD Card 3. Keyboard 4. Yellow Box:  Power Adapter  LVDS Cable/Board  Raspberry Pi Model B  Mini-USB Cable (power)  Micro-USB Cable (keyboard)  Wifi Adapter Please Save All the Packaging for Later
Hooking Up the Pi (Part A) 1. Insert the SD Card in to the Pi  Will appear upside down when looking at the top of your Pi 2. Insert the HDMI board into the Pi's HDMI jack 3. Connect the Pi power to the HDMI board  Use the Micro USB Cable (short one) 9 Important: Connect everything before plugging into the wall
Hooking Up the Pi (Part B) 4. Slide the LCD cable into the back of the display  Side with gold connectors goes up  Be careful, the connector is fragile! 5. Insert the wifi adapter into one of the USB ports 6. Hook up the USB keyboard  Use the Mini USB cable (long one) 7. [Optional ] Connect the USB end to one of the Pi's USB host ports  This provides touch input – will need to unplug wifi or keyboard 10 Verify connections and plug into power now
Is it Working? > Should get a bunch of flashing LEDs to indicate booting  Boot takes approx 30 seconds > The LCD screen should light up  Might be dim if the light sensor is obstructed > And you will should see a Linux boot screen with lots of text
Logging In At the login prompt type your username: > pi And enter the password: > raspberry
Running the JavaFX Sample Application Change directory to the project folder > cd MaryHadALittleLambda Run the build script > ant
14
Connecting to the Wifi network > On your computer:  SSID: NightHacking  Password: steveonjava > To get the Pi's ip address 1. Type "ifconfig" 2. Look for the "wlan0" settings 15
Downloading Lab Software > Start a web browser and navigate to the Pi's IP:  http://10.0.1.xx (something like this) > Download and install Java 8 SDK  Make sure you use this SDK for compiling and testing on the Pi > Grab an SFTP and SSH client if you need one  Real hackers use the command line!
Interacting With Your Pi > Connect via SSH command line or Putty  ssh pi@10.0.1.xx  Password: raspberry > Connect via SFTP command line or GUI Client  sftp pi@10.0.1.xx  Password: raspberry Accept the generated SSH certificate from your Pi
To make an application run > Build and package your application as a jar > Copy this to the Raspberry Pi using SFTP > Execute it via SSH: > java –jar YourApp.jar Hacking Time!
Stuff to do… > Changes to MaryHadALittleLambda:  Change the number of sheep  Make the rainbow have different colors  Change the fox size to be fatter/skinnier  Add new graphics (additional image files under images/extra) > Playing with hardware  Pi4j is in /opt/pi4j  Check out the sample and try blinking the LED (pin wiring is different)  Come up and get additional hardware to play with 19
Pi4J Help > The samples build script is hardcoded to /opt/pi4j directory. Easiest fix is to rename the folder to match this. > Pi4j needs root access to use GPIO (use "sudo") > Debian uses secure paths for sudo by default. Either disable this, or type the full path to the java executable (easily discovered using "which java") 20 LED is on GPIO 7
Using the other sensors… > Read Angela's blog here:  https://blogs.oracle.com/acaicedo/entry/some_samples_using_gpio_an d > Download the source for the…  Pressure/Temperature sensor: https://blogs.oracle.com/acaicedo/resource/RPi-HOL/Sensor.java  Accelerometer/Gyroscope/Compass sensor: https://blogs.oracle.com/acaicedo/resource/RPi-HOL/Sensor.java 21
Stephen Chin tweet: @steveonjava blog: http://steveonjava.com nighthacking.com Real Geeks Live Hacking NightHacking Tour
Safe Harbor Statement The preceding is intended to outline our general product direction. It is intended for information purposes only, and may not be incorporated into any contract. It is not a commitment to deliver any material, code, or functionality, and should not be relied upon in making purchasing decisions. The development, release, and timing of any features or functionality described for Oracle’s products remains at the sole discretion of Oracle.

Java on Raspberry Pi Lab

  • 1.
    Java on RaspberryPi Lab Stephen Chin Java Technology Ambassador JavaOne Content Chair @steveonjava
  • 2.
  • 3.
    = Have Java WithYour Dessert Raspberry Pi
  • 4.
    Chalkboard Electronics Touchscreen 10" or 7" Form Factor  Connects via HDMI/USB  Tested with JavaFX 8  10% Exclusive Discount: G1F0U796Z083
  • 5.
  • 6.
    How to SetupYour Pi > Step 1: Install Linux > Step 2: Download/Copy Java 8 for ARM EA > Step 3: Deploy and Run JVM Language Apps http://steveonjava.com/ javafx-on-raspberry-pi-3-easy-steps/
  • 7.
    Electronic Safety! > Unplugfrom wall before wiring > Get rid of static by touching a metal surface > Don't touch exposed wires/metal > Never remove/insert SD Card while power is on 7
  • 8.
    What Comes inYour Lab Kit 1. Touch Screen 2. SD Card 3. Keyboard 4. Yellow Box:  Power Adapter  LVDS Cable/Board  Raspberry Pi Model B  Mini-USB Cable (power)  Micro-USB Cable (keyboard)  Wifi Adapter Please Save All the Packaging for Later
  • 9.
    Hooking Up thePi (Part A) 1. Insert the SD Card in to the Pi  Will appear upside down when looking at the top of your Pi 2. Insert the HDMI board into the Pi's HDMI jack 3. Connect the Pi power to the HDMI board  Use the Micro USB Cable (short one) 9 Important: Connect everything before plugging into the wall
  • 10.
    Hooking Up thePi (Part B) 4. Slide the LCD cable into the back of the display  Side with gold connectors goes up  Be careful, the connector is fragile! 5. Insert the wifi adapter into one of the USB ports 6. Hook up the USB keyboard  Use the Mini USB cable (long one) 7. [Optional ] Connect the USB end to one of the Pi's USB host ports  This provides touch input – will need to unplug wifi or keyboard 10 Verify connections and plug into power now
  • 11.
    Is it Working? >Should get a bunch of flashing LEDs to indicate booting  Boot takes approx 30 seconds > The LCD screen should light up  Might be dim if the light sensor is obstructed > And you will should see a Linux boot screen with lots of text
  • 12.
    Logging In At thelogin prompt type your username: > pi And enter the password: > raspberry
  • 13.
    Running the JavaFXSample Application Change directory to the project folder > cd MaryHadALittleLambda Run the build script > ant
  • 14.
  • 15.
    Connecting to theWifi network > On your computer:  SSID: NightHacking  Password: steveonjava > To get the Pi's ip address 1. Type "ifconfig" 2. Look for the "wlan0" settings 15
  • 16.
    Downloading Lab Software >Start a web browser and navigate to the Pi's IP:  http://10.0.1.xx (something like this) > Download and install Java 8 SDK  Make sure you use this SDK for compiling and testing on the Pi > Grab an SFTP and SSH client if you need one  Real hackers use the command line!
  • 17.
    Interacting With YourPi > Connect via SSH command line or Putty  ssh pi@10.0.1.xx  Password: raspberry > Connect via SFTP command line or GUI Client  sftp pi@10.0.1.xx  Password: raspberry Accept the generated SSH certificate from your Pi
  • 18.
    To make anapplication run > Build and package your application as a jar > Copy this to the Raspberry Pi using SFTP > Execute it via SSH: > java –jar YourApp.jar Hacking Time!
  • 19.
    Stuff to do… >Changes to MaryHadALittleLambda:  Change the number of sheep  Make the rainbow have different colors  Change the fox size to be fatter/skinnier  Add new graphics (additional image files under images/extra) > Playing with hardware  Pi4j is in /opt/pi4j  Check out the sample and try blinking the LED (pin wiring is different)  Come up and get additional hardware to play with 19
  • 20.
    Pi4J Help > Thesamples build script is hardcoded to /opt/pi4j directory. Easiest fix is to rename the folder to match this. > Pi4j needs root access to use GPIO (use "sudo") > Debian uses secure paths for sudo by default. Either disable this, or type the full path to the java executable (easily discovered using "which java") 20 LED is on GPIO 7
  • 21.
    Using the othersensors… > Read Angela's blog here:  https://blogs.oracle.com/acaicedo/entry/some_samples_using_gpio_an d > Download the source for the…  Pressure/Temperature sensor: https://blogs.oracle.com/acaicedo/resource/RPi-HOL/Sensor.java  Accelerometer/Gyroscope/Compass sensor: https://blogs.oracle.com/acaicedo/resource/RPi-HOL/Sensor.java 21
  • 22.
    Stephen Chin tweet: @steveonjava blog:http://steveonjava.com nighthacking.com Real Geeks Live Hacking NightHacking Tour
  • 23.
    Safe Harbor Statement Thepreceding is intended to outline our general product direction. It is intended for information purposes only, and may not be incorporated into any contract. It is not a commitment to deliver any material, code, or functionality, and should not be relied upon in making purchasing decisions. The development, release, and timing of any features or functionality described for Oracle’s products remains at the sole discretion of Oracle.