Hands-on Material for Arduino Basics
What is a Microcontroller? • A miniature programmable computer • Contains memory • RAM • Flash • Peripherals • Serial communications • Pulse Width Modulation • Analog Digital Converter
Arduino Arduino is an open-source platform used for building electronics projects. Arduino consists of both a physical programmable circuit board (often referred to as a microcontroller) and a piece of software, or IDE (Integrated Development Environment) that runs on your computer, used to write and upload computer code to the physical board.
Arduino Hardware Every Arduino board needs a way to be connected to a power source. The Arduino UNO can be powered from a USB cable coming from your computer or a wall power supply that is terminated in a barrel jack. In the picture above the USB connection is labeled (1) and the barrel jack is labeled (2).
Arduino Hardware Arduino can also be powered through Vin.
Arduino Hardware Do NOT use a power supply greater than 20 Volts as you will overpower (and thereby destroy) your Arduino. The recommended voltage for most Arduino models is between 6 and 12 Volts.
Arduino Hardware GND (3): Short for ‘Ground’. There are several GND pins on the Arduino, any of which can be used to ground your circuit. 5V (4) & 3.3V (5): As you might guess, the 5V pin supplies 5 volts of power, and the 3.3V pin supplies 3.3 volts of power. Most of the simple components used with the Arduino run happily off of 5 or 3.3 volts.
Arduino Hardware Analog (6): The area of pins under the ‘Analog In’ label (A0 through A5 on the UNO) are Analog In pins. These pins can read the signal from an analog sensor and convert it into a digital value that we can read. Digital (7): Across from the analog pins are the digital pins (0 through 13 on the UNO). These pins can be used for both digital input (like telling if a button is pushed) and digital output (like powering an LED).
Arduino Hardware PWM (8): You may have noticed the tilde (~) next to some of the digital pins (3, 5, 6, 9, 10, and 11 on the UNO). These pins act as normal digital pins, but can also be used for something called Pulse-Width Modulation (PWM). Think of these pins as being able to simulate analog output (like fading an LED in and out).
Arduino Hardware AREF (9): Stands for Analog Reference. Most of the time you can leave this pin alone. It is sometimes used to set an external reference voltage (between 0 and 5 Volts) as the upper limit for the analog input pins.
Arduino Hardware Reset Button(10): Pushing it will temporarily connect the reset pin to ground and restart any code that is loaded on the Arduino. This can be very useful if your code doesn’t repeat, but you want to test it multiple times.
Arduino Hardware Integrated Circuit (13) Voltage regulator (14)
Jump wire ØJumper wires are simply wires that have connector pins at each end, allowing them to be used to connect two points to each other without soldering. ØJumper wires are typically used with breadboards and other prototyping tools in order to make it easy to change a circuit as needed. Fairly simple. In fact, it doesn’t get much more basic than jumper wires. Basically we have three types 1. male to male 2. female to female 3. male to female
Sensors (Input) With some simple code, the Arduino can control and interact with a wide variety of sensors. It can measure • Light • Temperature • Pressure • Proximity • Acceleration • Carbon Monoxide • Radioactivity • Humidity • Barometric Pressure you name it, you can sense it!
Outputs We can interface various devices with the arduino to give suitable results. • Led • Speaker • Motors • LCD Display
Shields Additionally, there are these things called shields – basically they are pre-built circuit boards that fit on top of your Arduino and provide additional capabilities like • Controlling Motors • Connecting to the Internet • Providing Cellular Communication • Controlling an LCD screen and much more.
Arduino Software Arduino IDE: Tool used to write code and upload it onto the physical board.
Arduino Sketch Every sketch has these functions: • void setup() • Runs once at the very beginning • Set up your variables, peripherals • void loop() • Runs forever • Code that does actual work goes here
Analog vs Digital
Essential Functions • pinMode() • digitalWrite() • digitalRead() • analogWrite() • analogRead() • delay() • Serial.begin() • Serial.print()
pinMode() Function The pinMode() function is used to configure a specific pin to behave either as an input or an output. It is possible to enable the internal pull-up resistors with the mode INPUT_PULLUP. Additionally, the INPUT mode explicitly disables the internal pull-ups. Syntax void setup() { pinMode(pin, mode); } • pin − the number of the pin whose mode you wish to set • mode − INPUT, OUTPUT, or INPUT_PULLUP.
digitalWrite() Function The digitalWrite() function is used to write a HIGH or a LOW value to a digital pin. If the pin has been configured as an OUTPUT with pinMode(), its voltage will be set to the corresponding value: 5V (or 3.3V on 3.3V boards) for HIGH, 0V (ground) for LOW. Syntax void loop() { digitalWrite(pin, value); } • pin − the number of the pin where you wish to set the value • value −HIGH or LOW
digitalRead() Function The digitalRead() function is used to write a HIGH or a LOW value to a digital pin. If the pin has been configured as an INPUT with pinMode(), its voltage will be read to the corresponding value: 1 for 5V, 0 for 0V. Syntax void loop() { digitalRead(pin); } • pin − the number of the pin where you wish to read the value
analogRead( ) function In the lower-right part of the Arduino board, you will see six pins marked “Analog In”. These special pins not only tell whether there is a voltage applied to them, but also its value. By using the analogRead() function, we can read the voltage applied to one of the pins. This function returns a number between 0 and 1023, which represents voltages between 0 and 5 volts. For example, if there is a voltage of 2.5 V applied to pin number 0, analogRead(0) returns 512. Syntax void loop() { analogRead(pin); } • pin − the number of the pin whose value you wish to read
analogWrite() Function The analogWrite() function writes an analog value (PWM wave) to a pin. After a call of the analogWrite() function, the pin will generate a steady square wave of the specified duty cycle until the next call to analogWrite() or a call to digitalRead() or digitalWrite() on the same pin. The frequency of the PWM signal on most pins is approximately 490 Hz. On the Uno and similar boards, pins 5 and 6 have a frequency of approximately 980 Hz. Syntax void loop() { analogWrite(pin, value); } • pin − the number of the pin where you wish to set the value • value −HIGH or LOW
Serial.begin() Sets the data rate in bits per second (baud) for serial data transmission. For communicating with the computer, use one of these rates: 300, 600, 1200, 2400, 4800, 9600, 14400, 19200, 28800, 38400, 57600, or 115200 Syntax: void setup() { Serial.begin(9600); }
Serial.print() Used to print data onto the serial monitor. Serial.print will keep cursor on same line after printing Serial.println will move cursor to the next line after printing It can work only if Serial.begin() function is present Syntax: void loop() { Serial.println (“Hello World”); }
Breadboard Used to make connections simpler. Holes are shorted as shown
Breadboard More common type Likely to be used in projects
External Led Connection
Infrared Sensor Used to Detect Obstacles. Connected to a digital pin of the arduino
Infrared Sensor
Code const int IRSensor=7;// IR Sensor connected to pin 7 void setup() { Serial.begin(9600); pinMode(IRSensor,INPUT); //Setting Mode of pin 7 as INPUT } void loop() { int a=digitalRead(IRSensor);//Reading value of the IR Sensor Serial.println(a); //Printing value in the Serial Monitor delay(500); }
Light Dependant Resistor (LDR) Measures Light Intensity. It is a variable resistor whose resistance changes in accordance with the light intensity.
LDR
Code int ldrPin=A0; // select the input pin for LDR int ldrValue=0; // variable to store the value coming from the sensor void setup() { pinMode(ldrPin,INPUT); Serial.begin(9600); //sets serial port for communication } void loop() { ldrValue=analogRead(ldrPin); // read the value from the sensor Serial.println(ldrValue); //prints the values coming from the sensor on the screen delay(100); }
Push Button A Push Button is a type of switch work on a simple mechanism called “Push-to-make”. When pressed it allows current to pass through it or else it remains in off state(or open state) It has four legs out of which two legs are internally connected.
CODE int ledPin = 13; // choose the pin for the LED int inPin = 7; // choose the input pin (for a pushbutton) int val = 0; // variable for reading the pin status void setup() { pinMode(ledPin, OUTPUT); // declare LED as output pinMode(inPin, INPUT); // declare pushbutton as input } void loop(){ val = digitalRead(inPin); // read input value if (val == HIGH) { // check if the input is HIGH (button released) digitalWrite(ledPin, LOW); // turn LED OFF } else { digitalWrite(ledPin, HIGH); // turn LED ON } }
Buzzer
Code const int buzzer = 9; //buzzer to arduino pin 9 void setup(){ pinMode(buzzer, OUTPUT); // Set buzzer - pin 9 as an output id loop() { } void loop(){ tone(buzzer, 1000); // Send 1KHz sound signal... delay(1000); // ...for 1 sec noTone(buzzer); // Stop sound... delay(1000); // ...for 1sec }
Servo Motor A servo motor is an electrical device which can push or rotate an object with great precision. If you want to rotate and object at some specific angles or distance, then you use servo motor. It is just made up of simple motor which run through servo mechanism
Code #include <Servo.h> Servo servo; void setup() { // put your setup code here, to run once: servo.attach(8); servo.write(0); delay(2000); } void loop() { // put your main code here, to run repeatedly: servo.write(90); delay(1000); servo.write(0); delay(1000); }
C language Basics Lets goooo…….
Structure of a C program
C Control Statements If Statement :- The if statement is used to check some given condition and perform some operations depending upon the correctness of that condition. It is mostly used in the scenario where we need to perform the different operations for the different conditions. The syntax of the if statement is given below. if(expression){ //code to be executed }
for example:- #include<stdio.h> int main(){ int number=0; printf("Enter a number:"); scanf("%d",&number); if(number%2==0){ printf("%d is even number",number); } return 0; } Output Enter a number:4 4 is even number
If-else Statement:- The if-else statement is used to perform two operations for a single condition. The if-else statement is an extension to the if statement using which, we can perform two different operations, i.e., one is for the correctness of that condition, and the other is for the incorrectness of the condition. Here, we must notice that if and else block cannot be executed simiultaneously. Using if-else statement is always preferable since it always invokes an otherwise case with every if condition. The syntax of the if-else statement is given below. if(expression){ //code to be executed if condition is true }else{ //code to be executed if condition is false }
#include <stdio.h> int main() { int age; printf("Enter your age?"); scanf("%d",&age); if(age>=18) { printf("You are eligible to vote..."); } else { printf("Sorry ... you can't vote"); } } Output Enter your age?18 You are eligible to vote... Enter your age?13 Sorry ... you can't vote
If else-if ladder Statement:- The if-else-if ladder statement is an extension to the if-else statement. It is used in the scenario where there are multiple cases to be performed for different conditions.
C Switch Statement:- The switch statement in C is an alternate to if-else-if ladder statement which allows us to execute multiple operations for the different possibles values of a single variable called switch variable. Here, We can define various statements in the multiple cases for the different values of a single variable. switch(expression){ case value1: //code to be executed; break; //optional case value2: //code to be executed; break; //optional ...... default: code to be executed if all cases are not matched; }
#include <stdio.h> int main() { int x = 10, y = 5; switch(x>y && x+y>0) { case 1: printf("hi"); break; case 0: printf("bye"); break; default: printf(" Hello bye "); } } Output hi
C Loops vThe looping can be defined as repeating the same process multiple times until a specific condition satisfies. Why use loops in C language? vThe looping simplifies the complex problems into the easy ones. vIt enables us to alter the flow of the program so that instead of writing the same code again and again, we can repeat the same code for a finite number of times. Advantage of loops in C 1) It provides code reusability. 2) Using loops, we do not need to write the same code again and again. 3) Using loops, we can traverse over the elements of data structures (array or linked lists).
Types of C Loops There are three types of loops in C language that is given below: 1.do while 2.while 3. for qdo-while loop in C The do-while loop continues until a given condition satisfies. It is also called post tested loop. It is used when it is necessary to execute the loop at least once (mostly menu driven programs). The syntax of do-while loop in c language is given below: do{ //code to be executed }while(condition);
#include<stdio.h> int main(){ int i=1; do{ printf("%d n",i); i++; }while(i<=10); return 0; } Output 1 2 3 4 5 6 7 8 9 10
qwhile loop in C The while loop in c is to be used in the scenario where we don't know the number of iterations in advance. The block of statements is executed in the while loop until the condition specified in the while loop is satisfied. It is also called a pre-tested loop. The syntax of while loop in c language is given below: while(condition){ //code to be executed }
#include<stdio.h> int main(){ int i=1; while(i<=10){ printf("%d n",i); i++; } return 0; } Output 1 2 3 4 5 6 7 8 9 10
q for loop The for loop is used in the case where we need to execute some part of the code until the given condition is satisfied. The for loop is also called as a per-tested loop. It is better to use for loop if the number of iteration is known in advance. The syntax of for loop in c language is given below: for(initialization;condition;incr/decr){ //code to be executed } #include<stdio.h> int main(){ int i=0; for(i=1;i<=10;i++){ printf("%d n",i); } return 0; }
#include<stdio.h> int main(){ int i=0; for(i=1;i<=10;i++){ printf("%d n",i); } return 0; } Output 1 2 3 4 5 6 7 8 9 10
TASKS Application on components discussed
TASK 1 Using Four LEDS make them blink alternately, first with a gap of 4 seconds, then with a gap of 3 seconds,then with a gap of 2 seconds, then with a gap of 1 second and finally light all up together and repeat the process in the least possible number of lines.
TASK 2 Using 4 LEDs write an arduino code to display 0000 upto 1111 in the least possible number of lines.
TASK 3 Replicate automatic brightness of your phone screen
TASK 4 Design a smart room lighting system. Room should turn on only if it is dark inside and if someone enters the room.
TASK 5 Sheldon is working with an undisclosed nation to encrypt nuclear war codes. Unfortunately cyber terrorists have hacked into his personal systems and the only option he has is to build cryptographic systems on his Arduino Uno The specifications are as follows: Input is a 5 letter word upper case. Input id entered through the serial monitor. To encrypt data, he has to roll alphabets by key value which changes according to the brightness Keys are +5 for high brightness And -5 for darkness For example, ABC will be encrypted as FGH in bright condition and VWX in dark condition
TASK 6 Write an arduino code to allow easy passage of vehicle through a toll gate. The Red LED indicates the closed gate. The Green LED indicates the opened gate. The Gate should be opened to allow passage of the vehicle only after amount is paid and validated. If the vehicle is detected is a four wheeler then Rs 50 should be taken from the driver and the remaining should be returned, if the vehicles detected is a two wheeler, then Rs 30 should be taken from the rider and the remaining should be returned. The user should enter what type of vehicle it is and amount being paid using Serial Monitor. All transactions are done via Serial Monitor.

Arduino-workshop.computer engineering.pdf

  • 1.
  • 3.
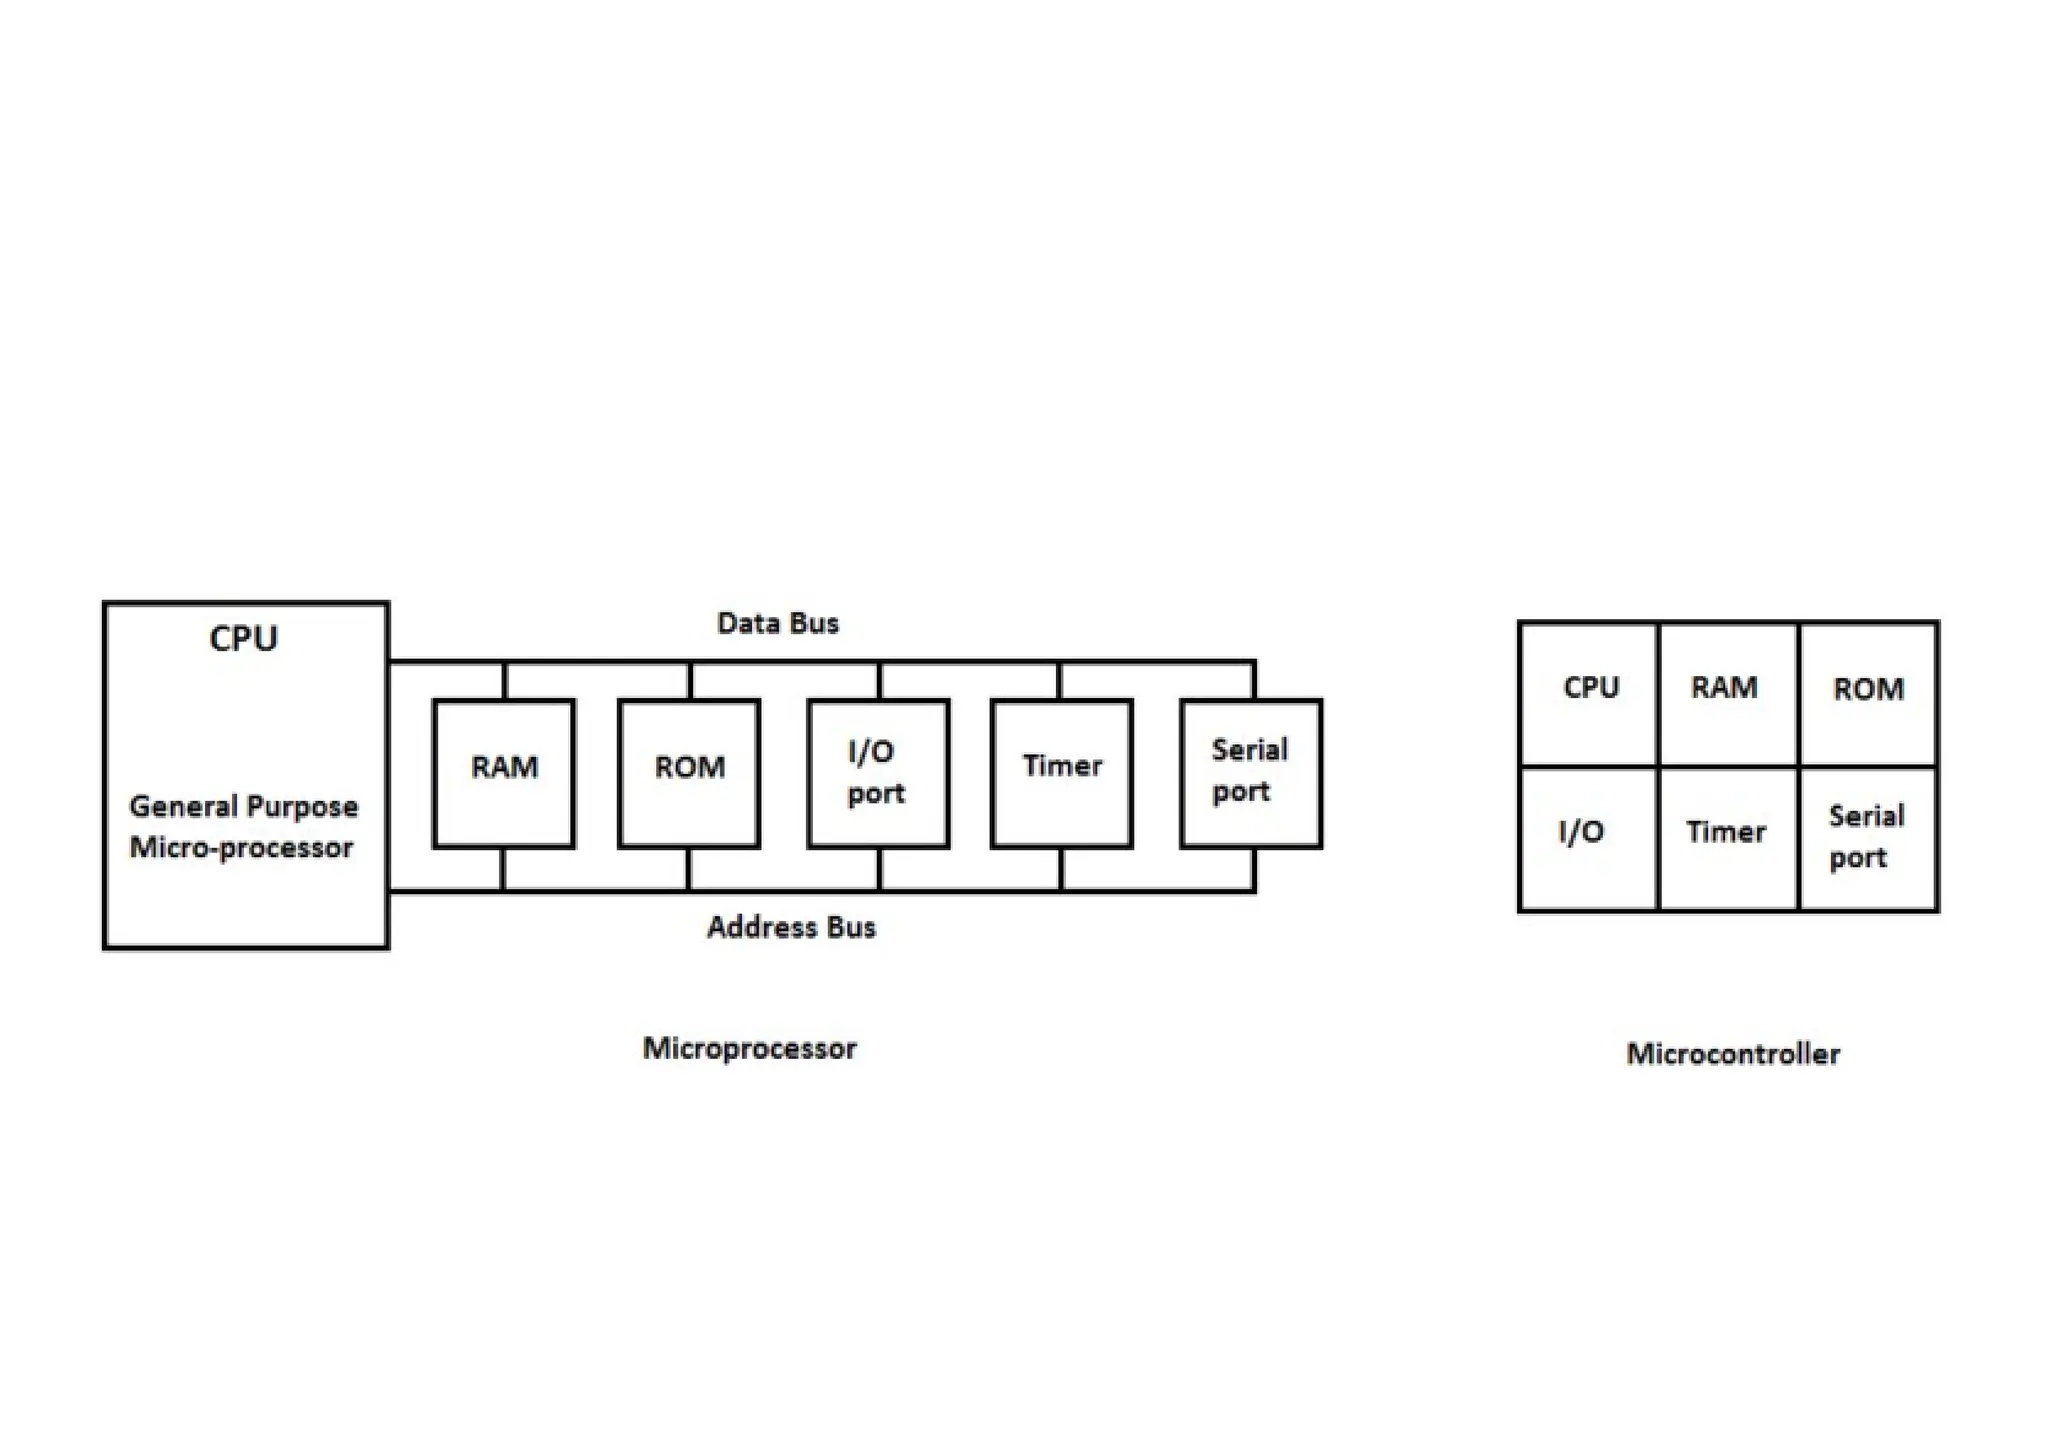
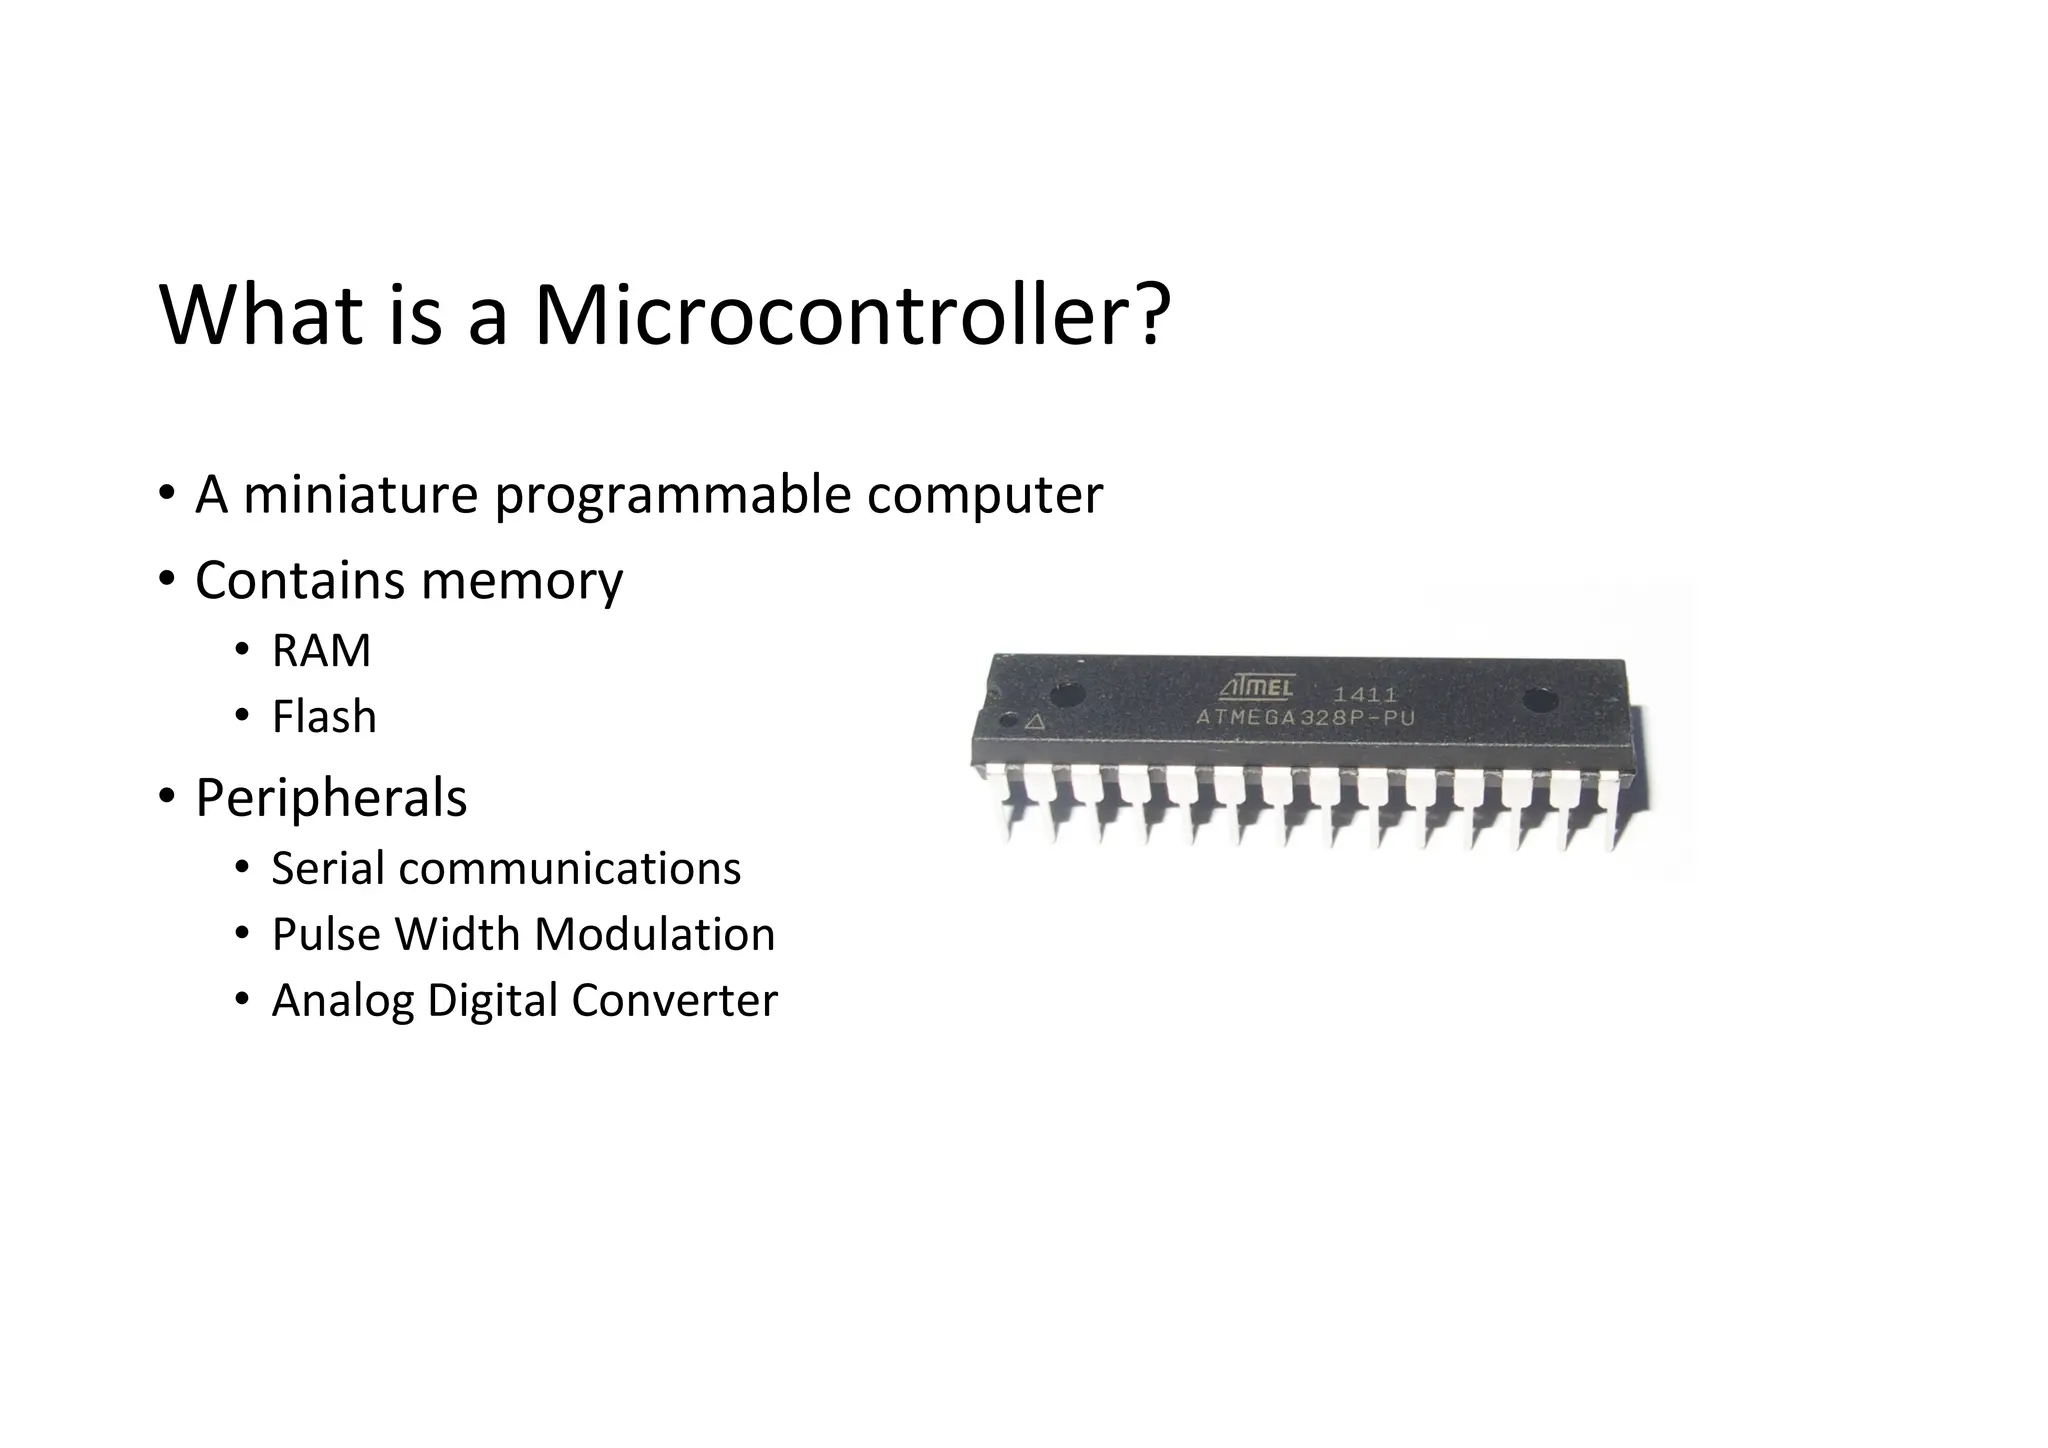
    What is aMicrocontroller? • A miniature programmable computer • Contains memory • RAM • Flash • Peripherals • Serial communications • Pulse Width Modulation • Analog Digital Converter
  • 4.
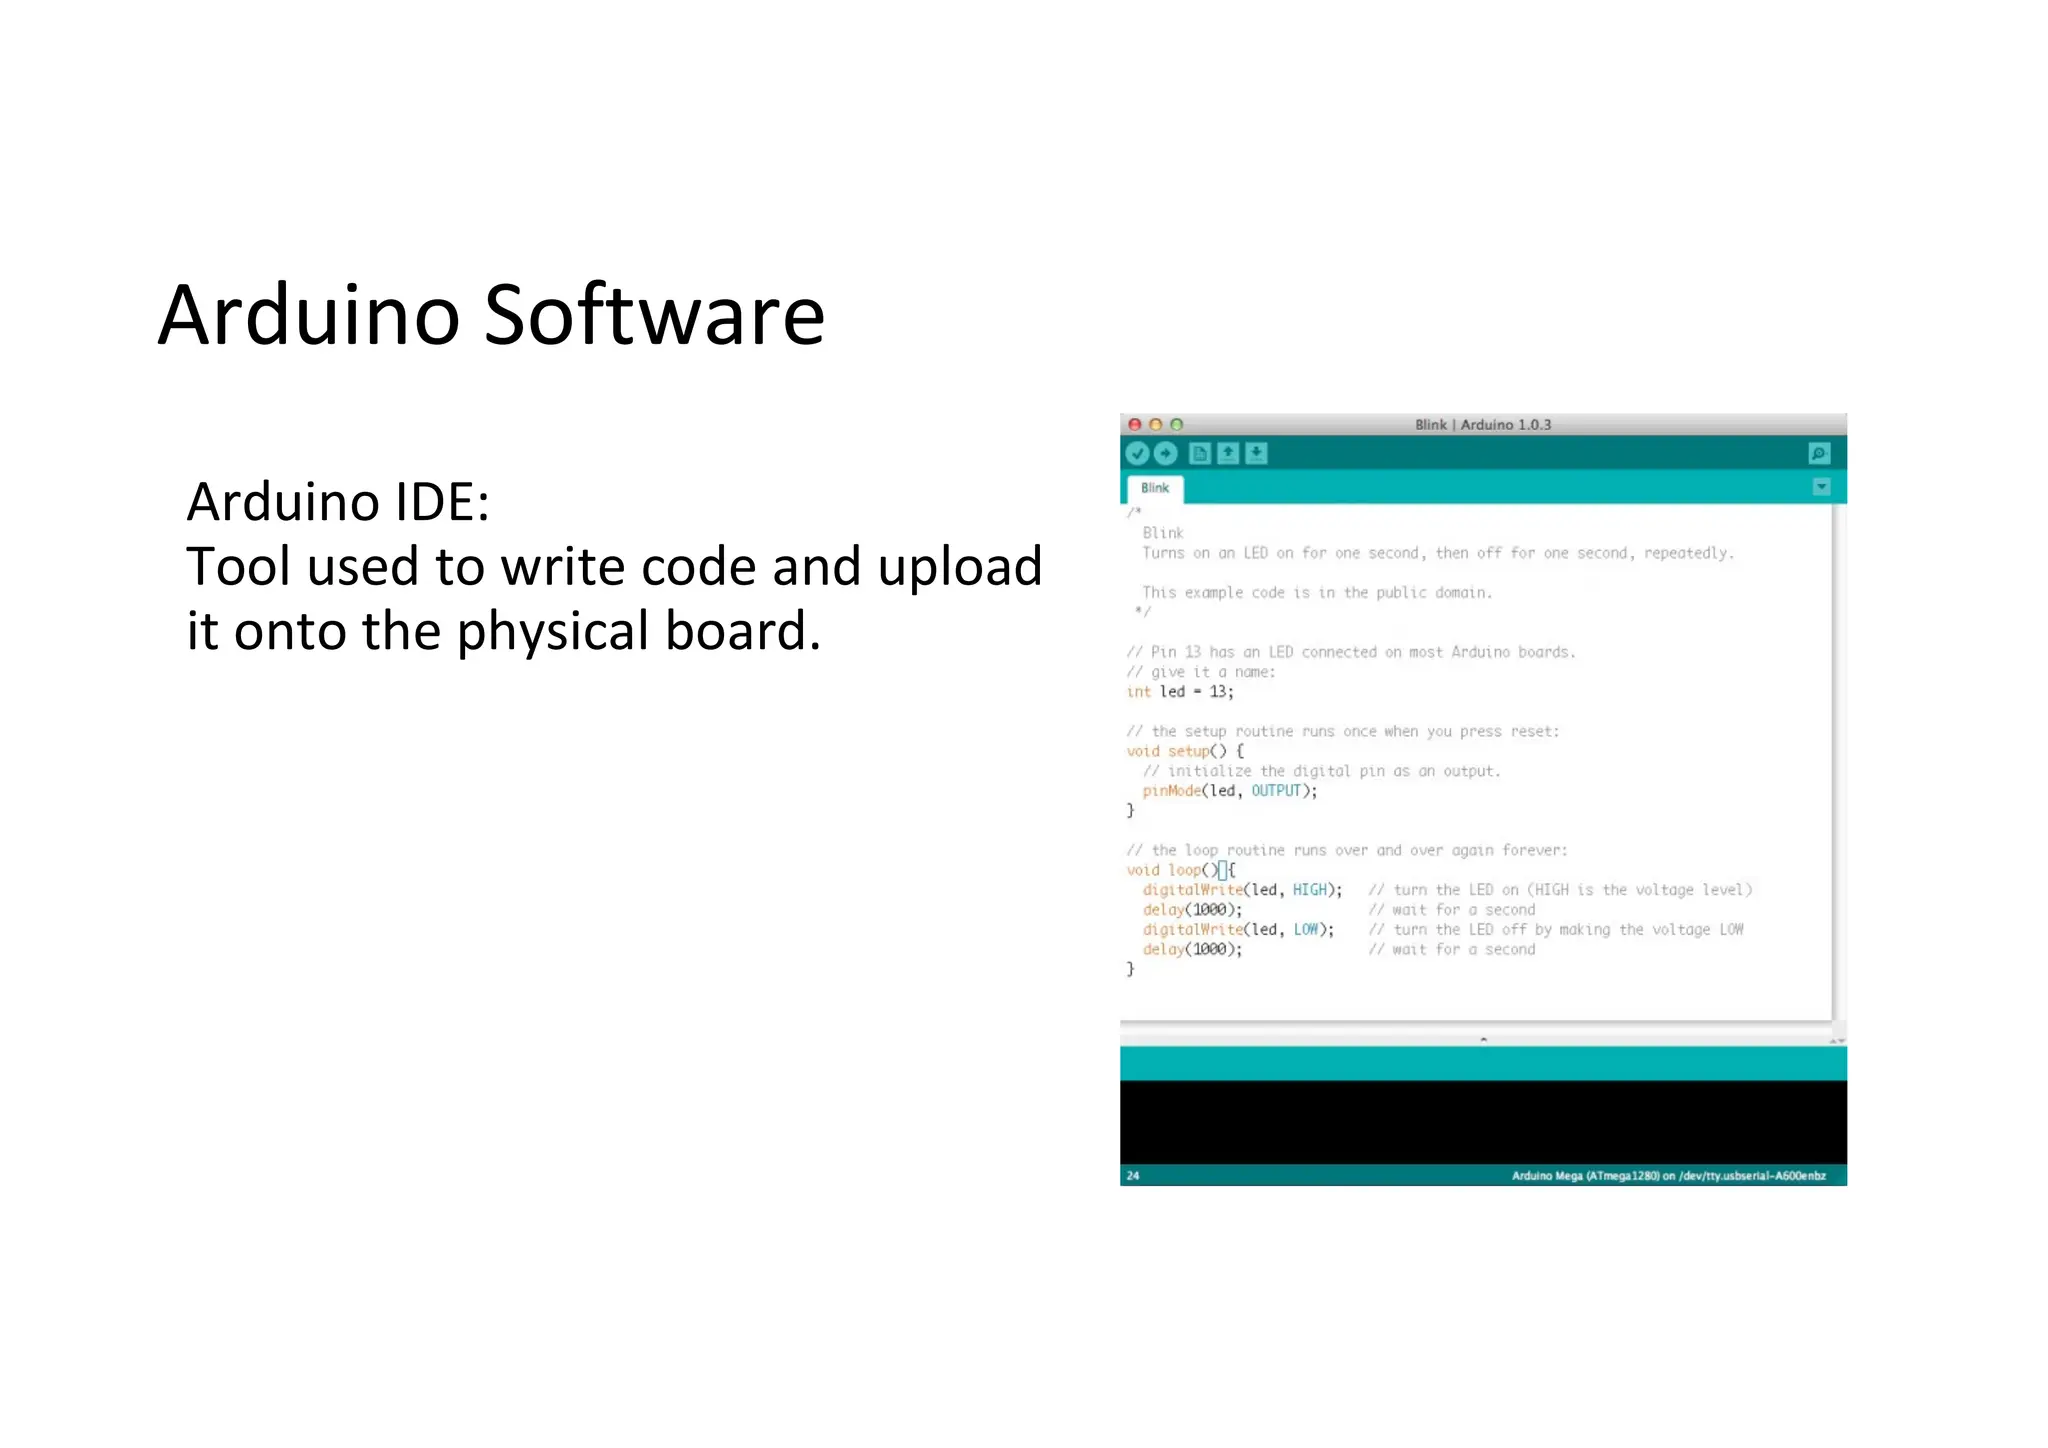
    Arduino Arduino is anopen-source platform used for building electronics projects. Arduino consists of both a physical programmable circuit board (often referred to as a microcontroller) and a piece of software, or IDE (Integrated Development Environment) that runs on your computer, used to write and upload computer code to the physical board.
  • 5.
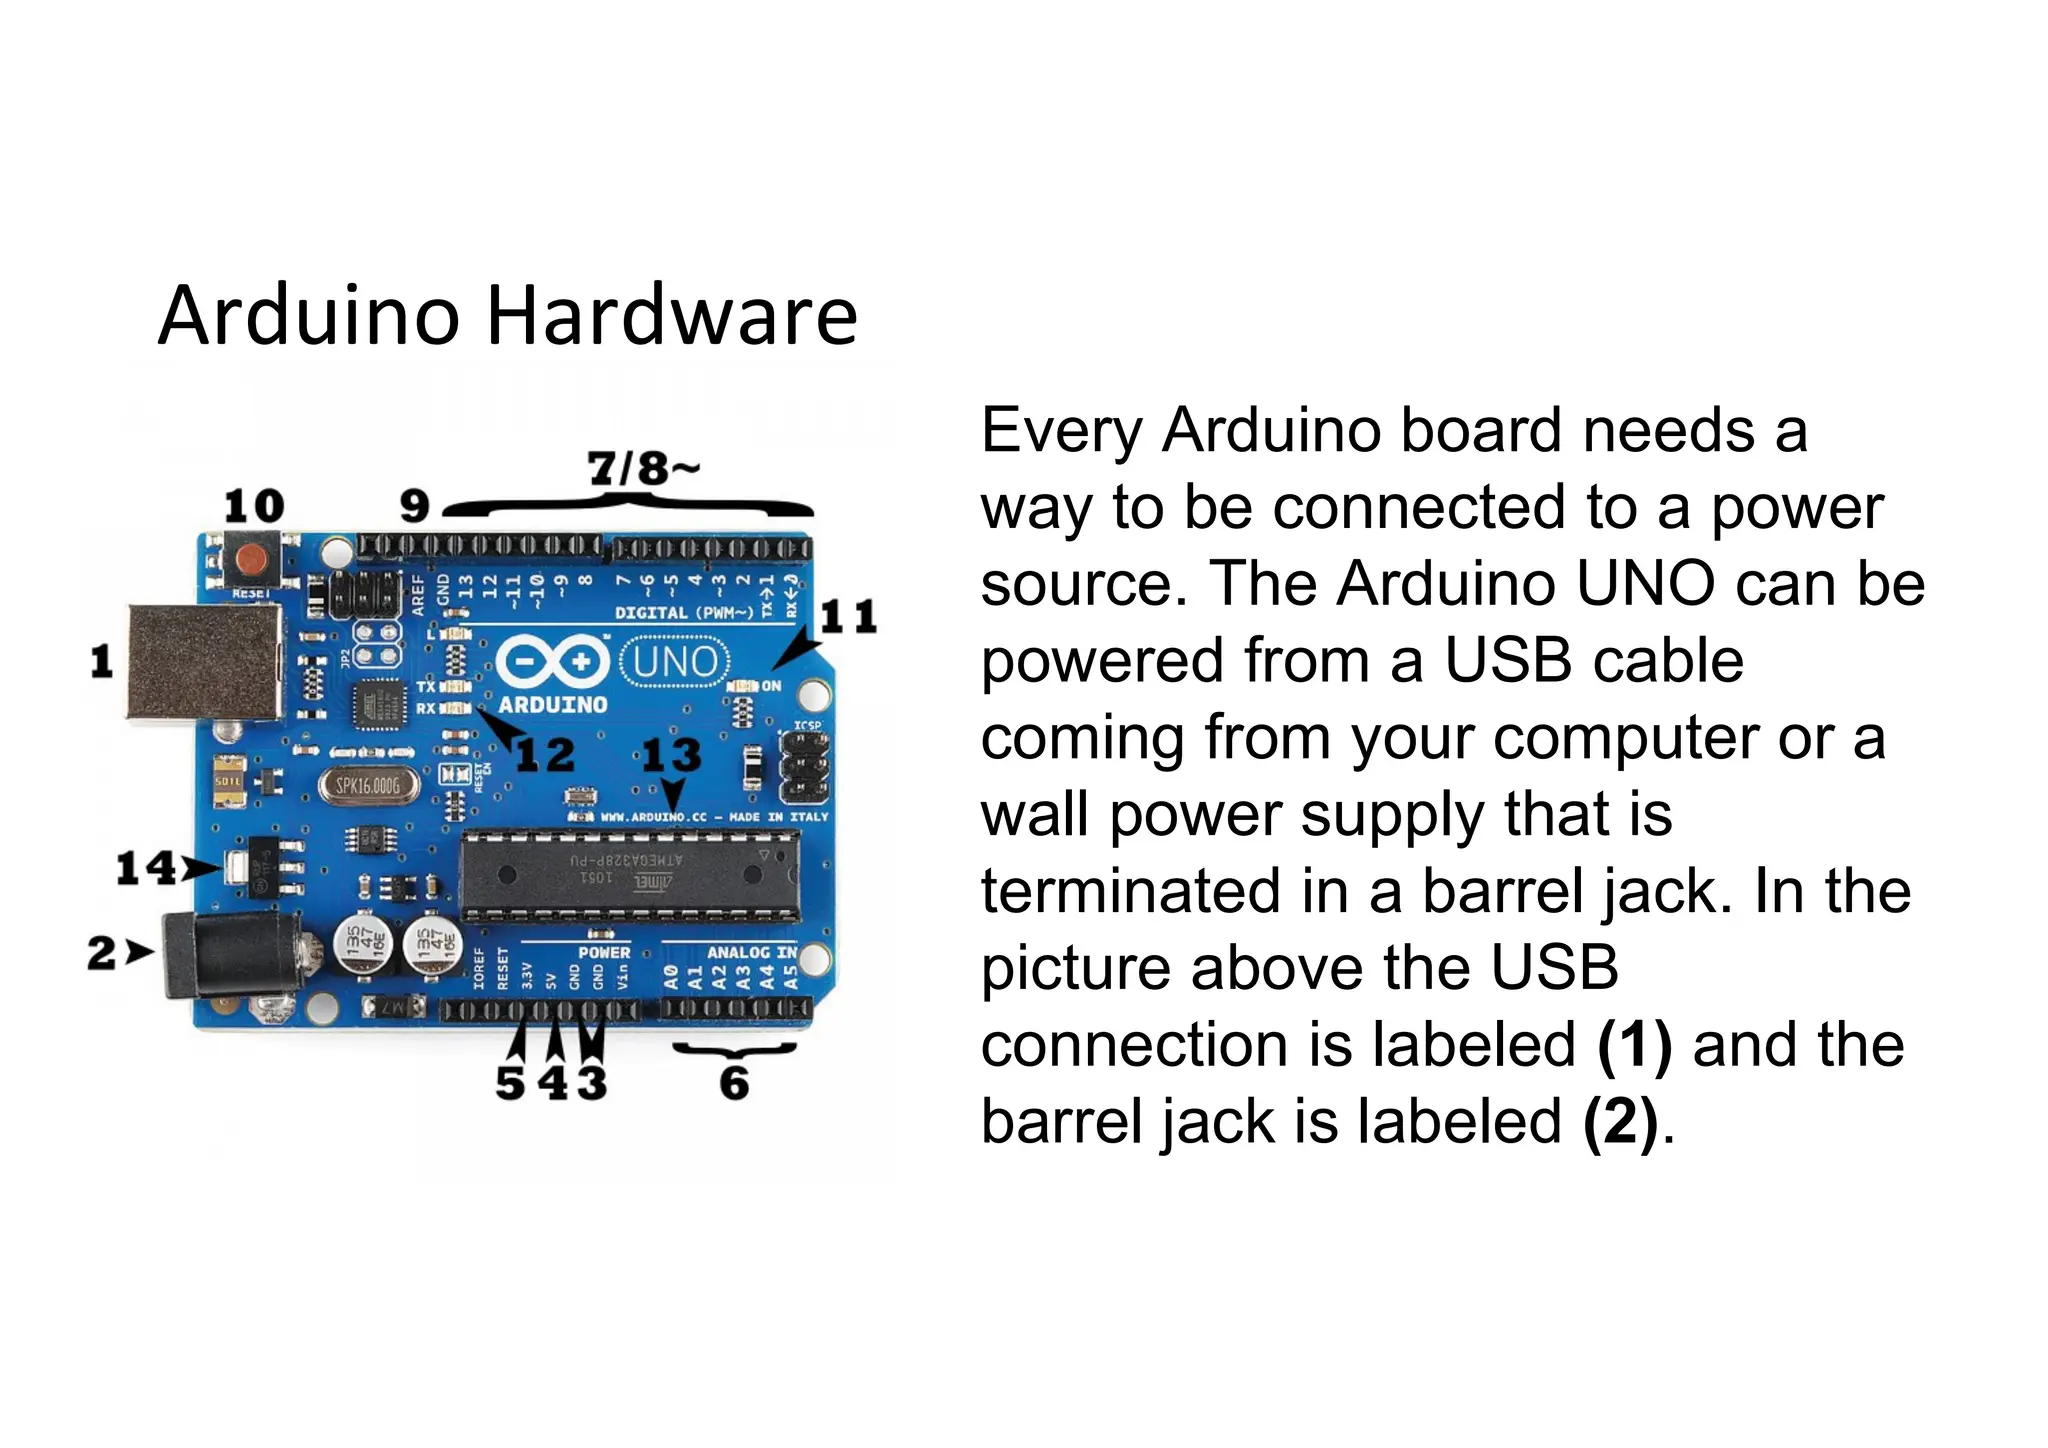
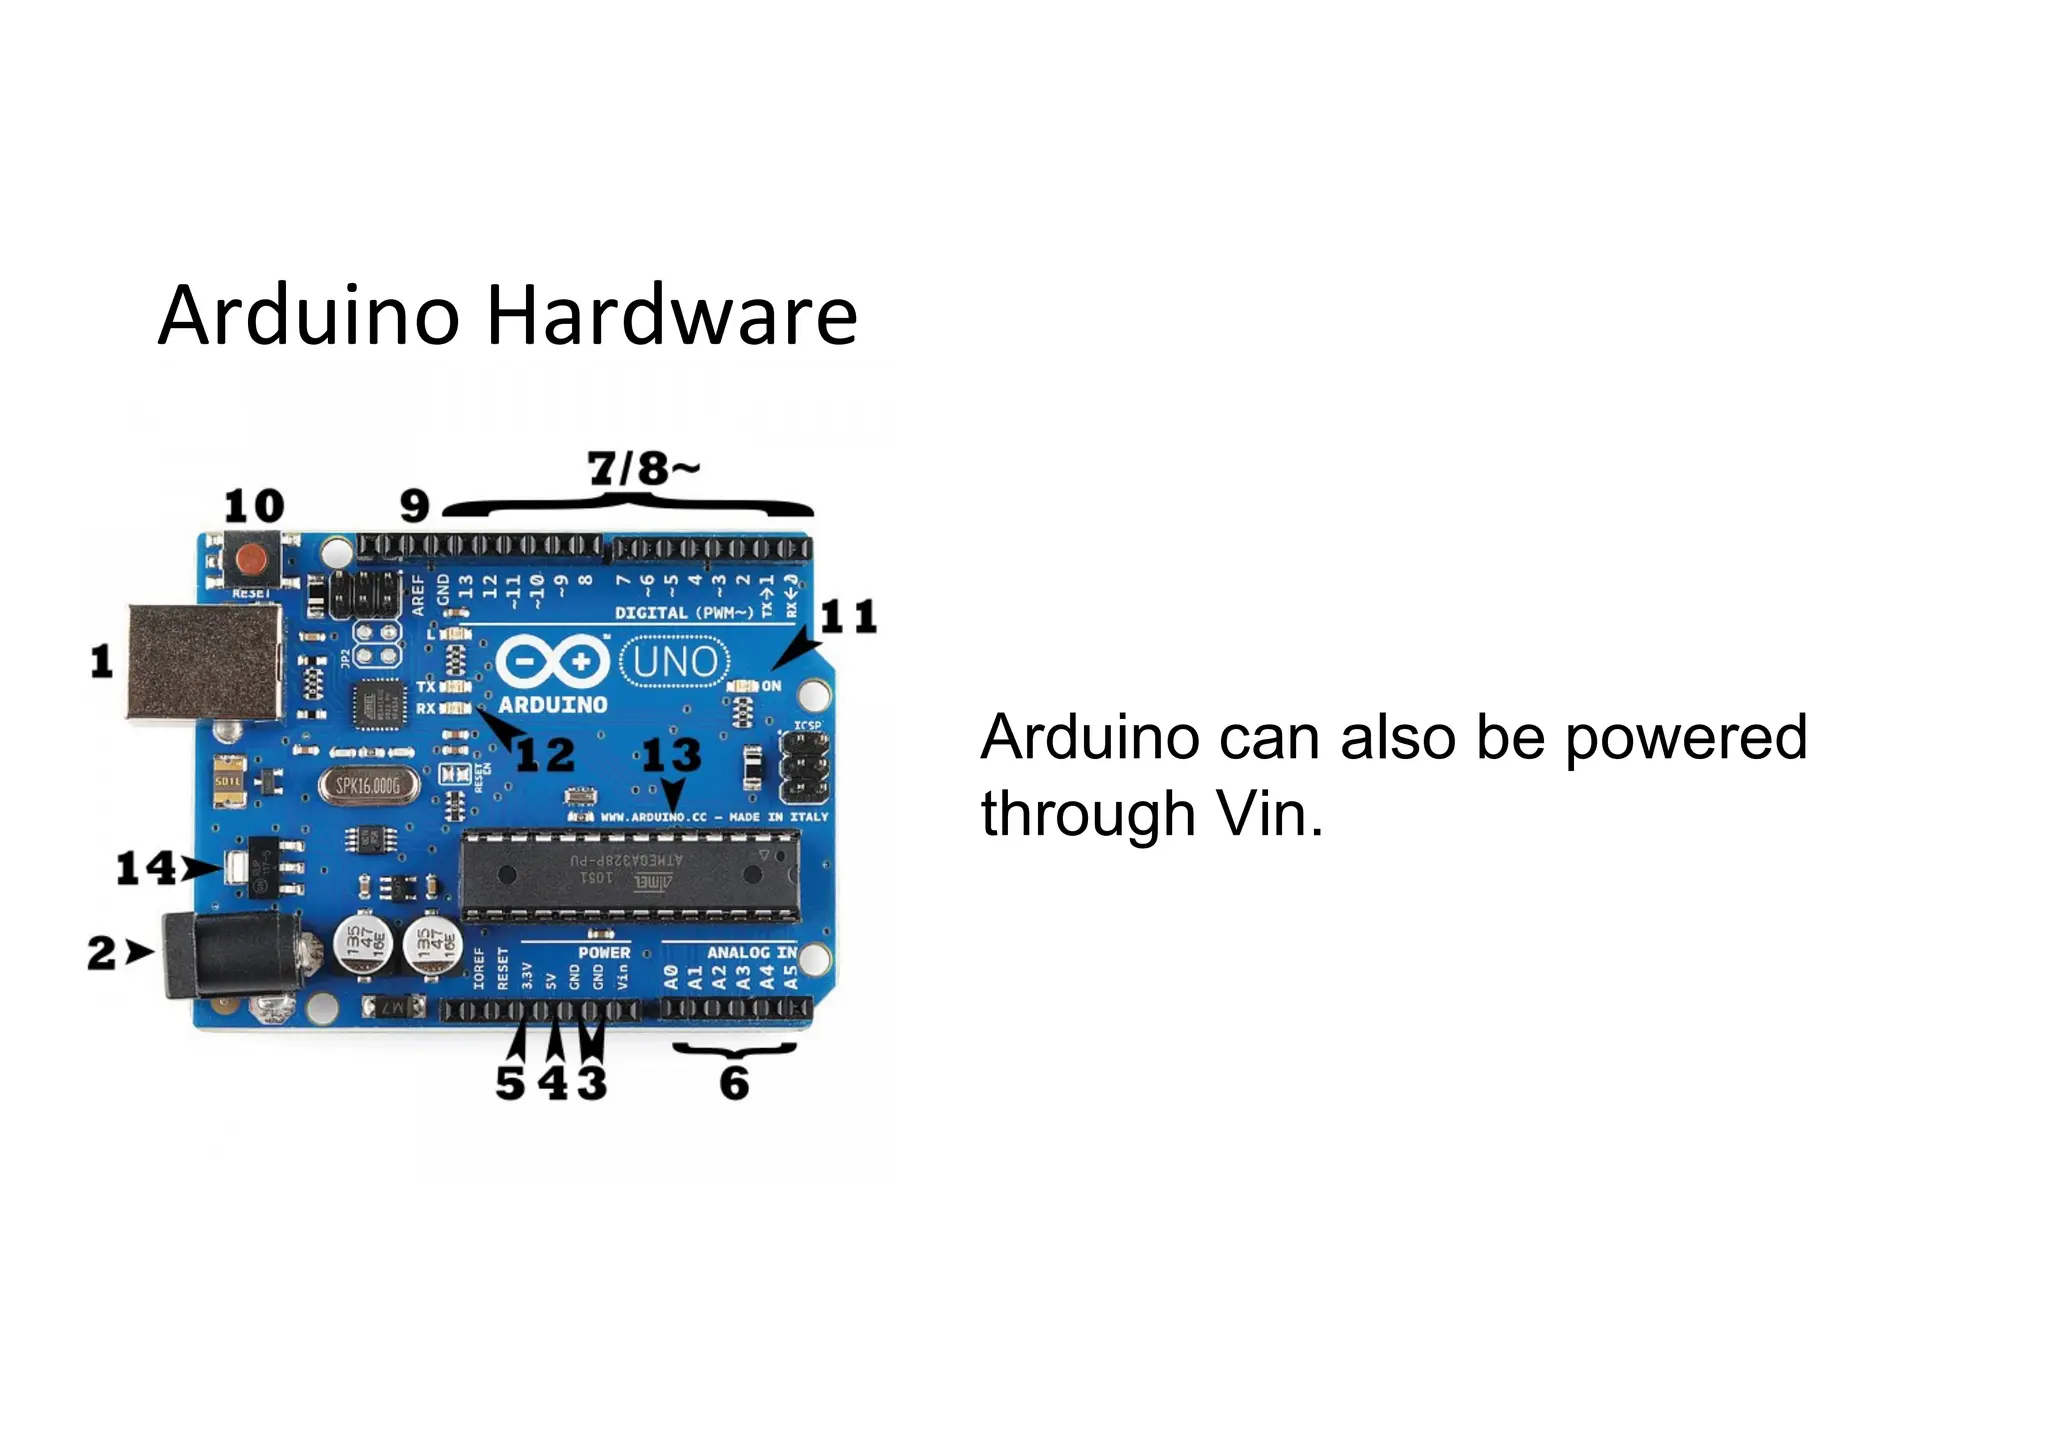
    Arduino Hardware Every Arduinoboard needs a way to be connected to a power source. The Arduino UNO can be powered from a USB cable coming from your computer or a wall power supply that is terminated in a barrel jack. In the picture above the USB connection is labeled (1) and the barrel jack is labeled (2).
  • 6.
    Arduino Hardware Arduino canalso be powered through Vin.
  • 7.
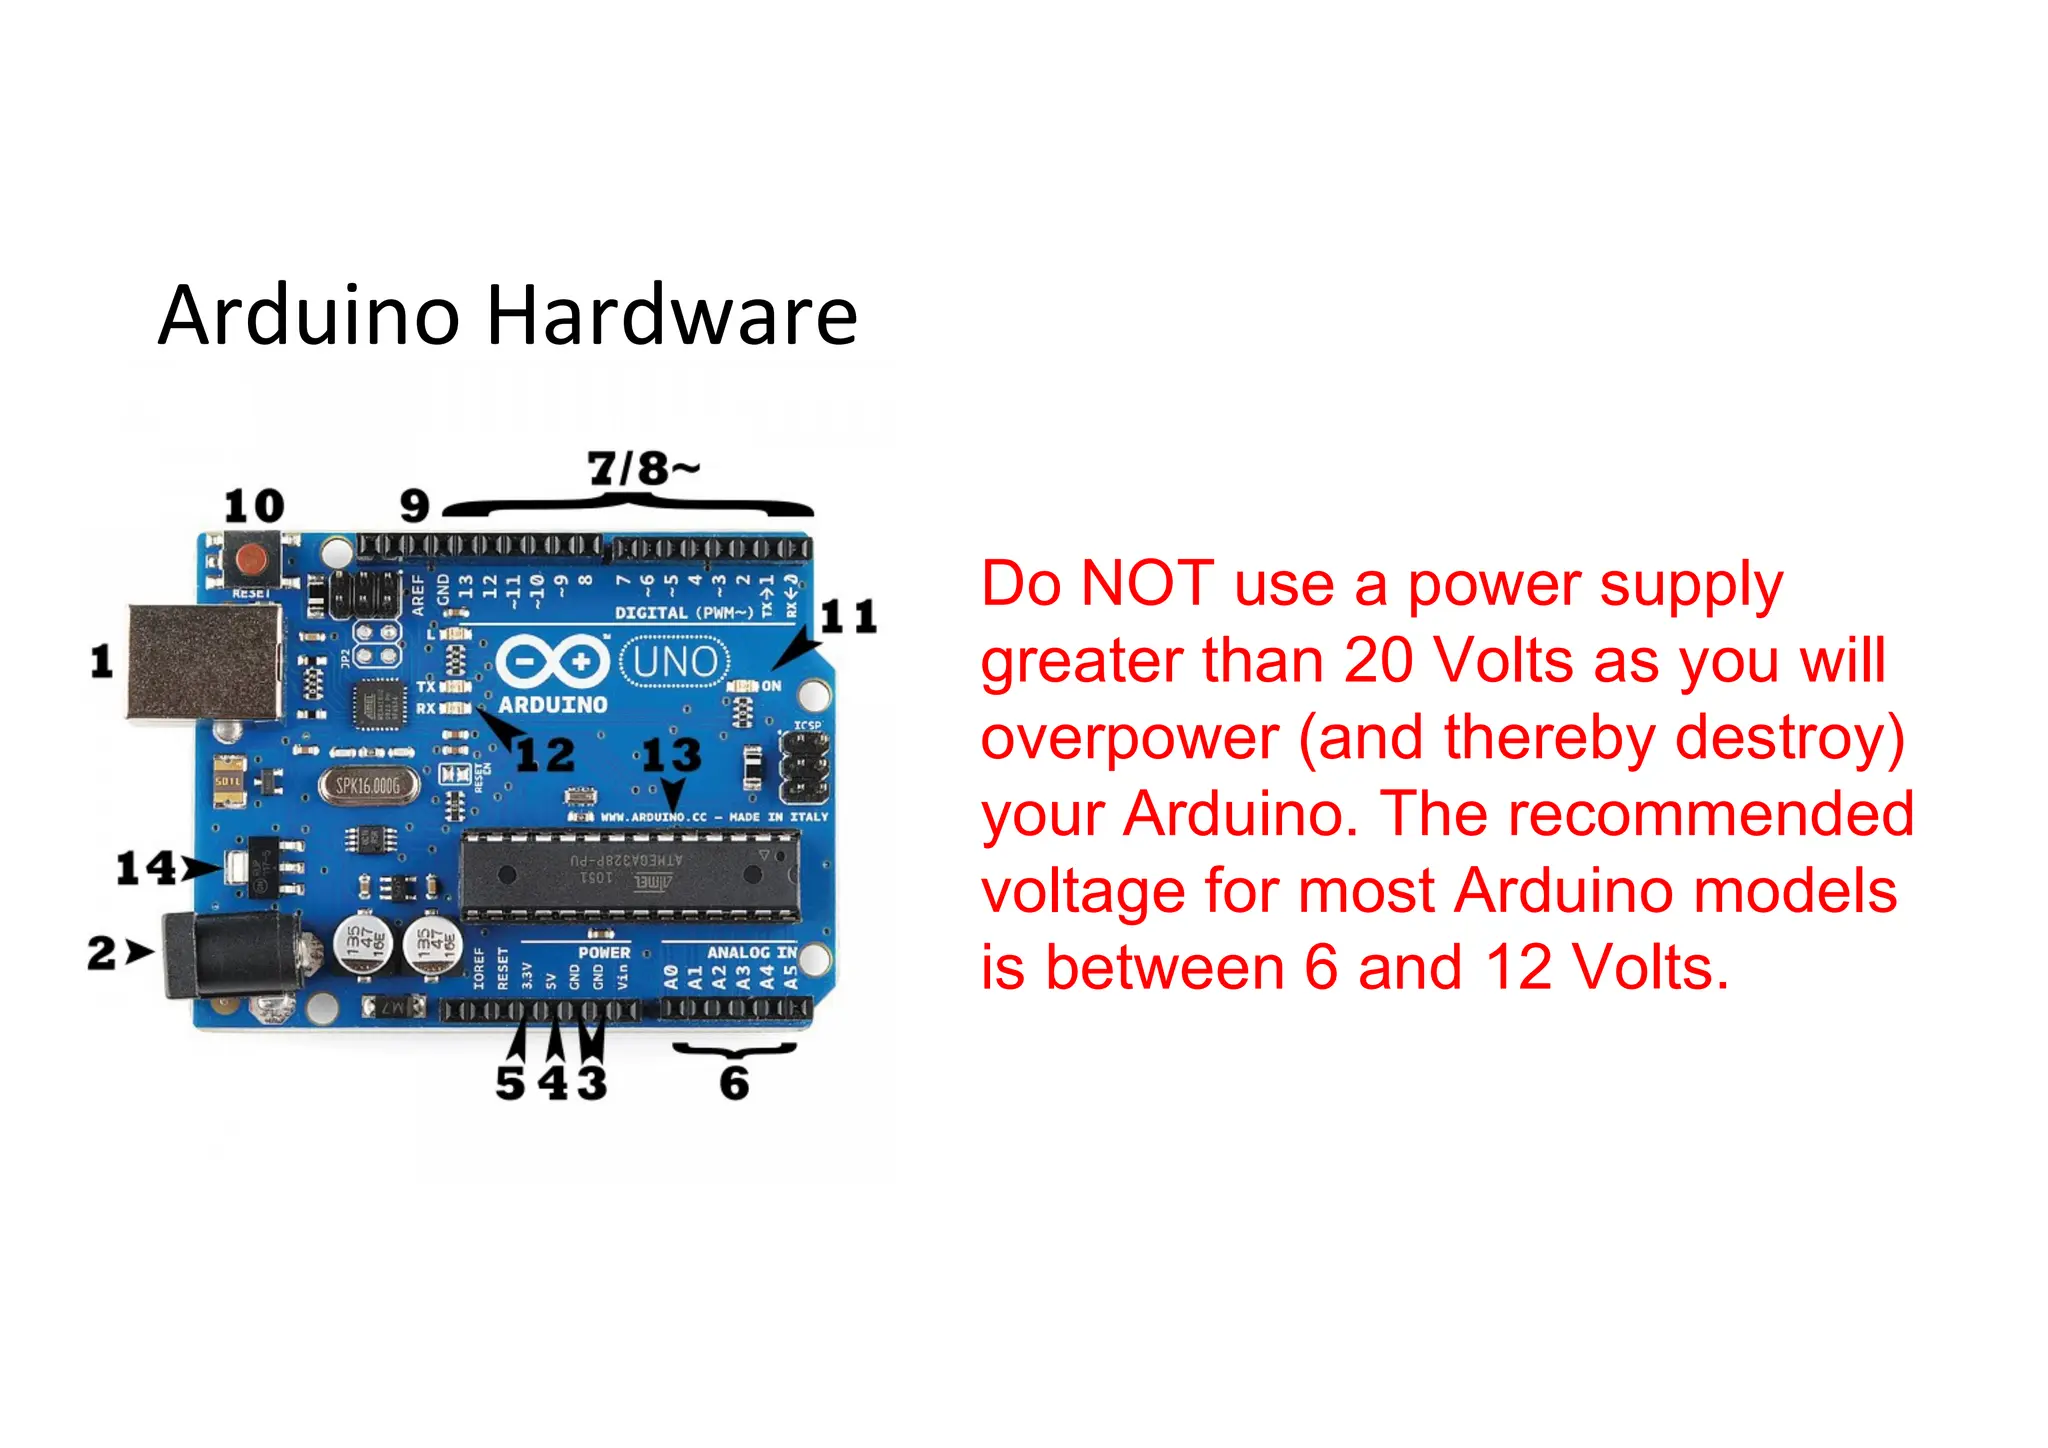
    Arduino Hardware Do NOTuse a power supply greater than 20 Volts as you will overpower (and thereby destroy) your Arduino. The recommended voltage for most Arduino models is between 6 and 12 Volts.
  • 8.
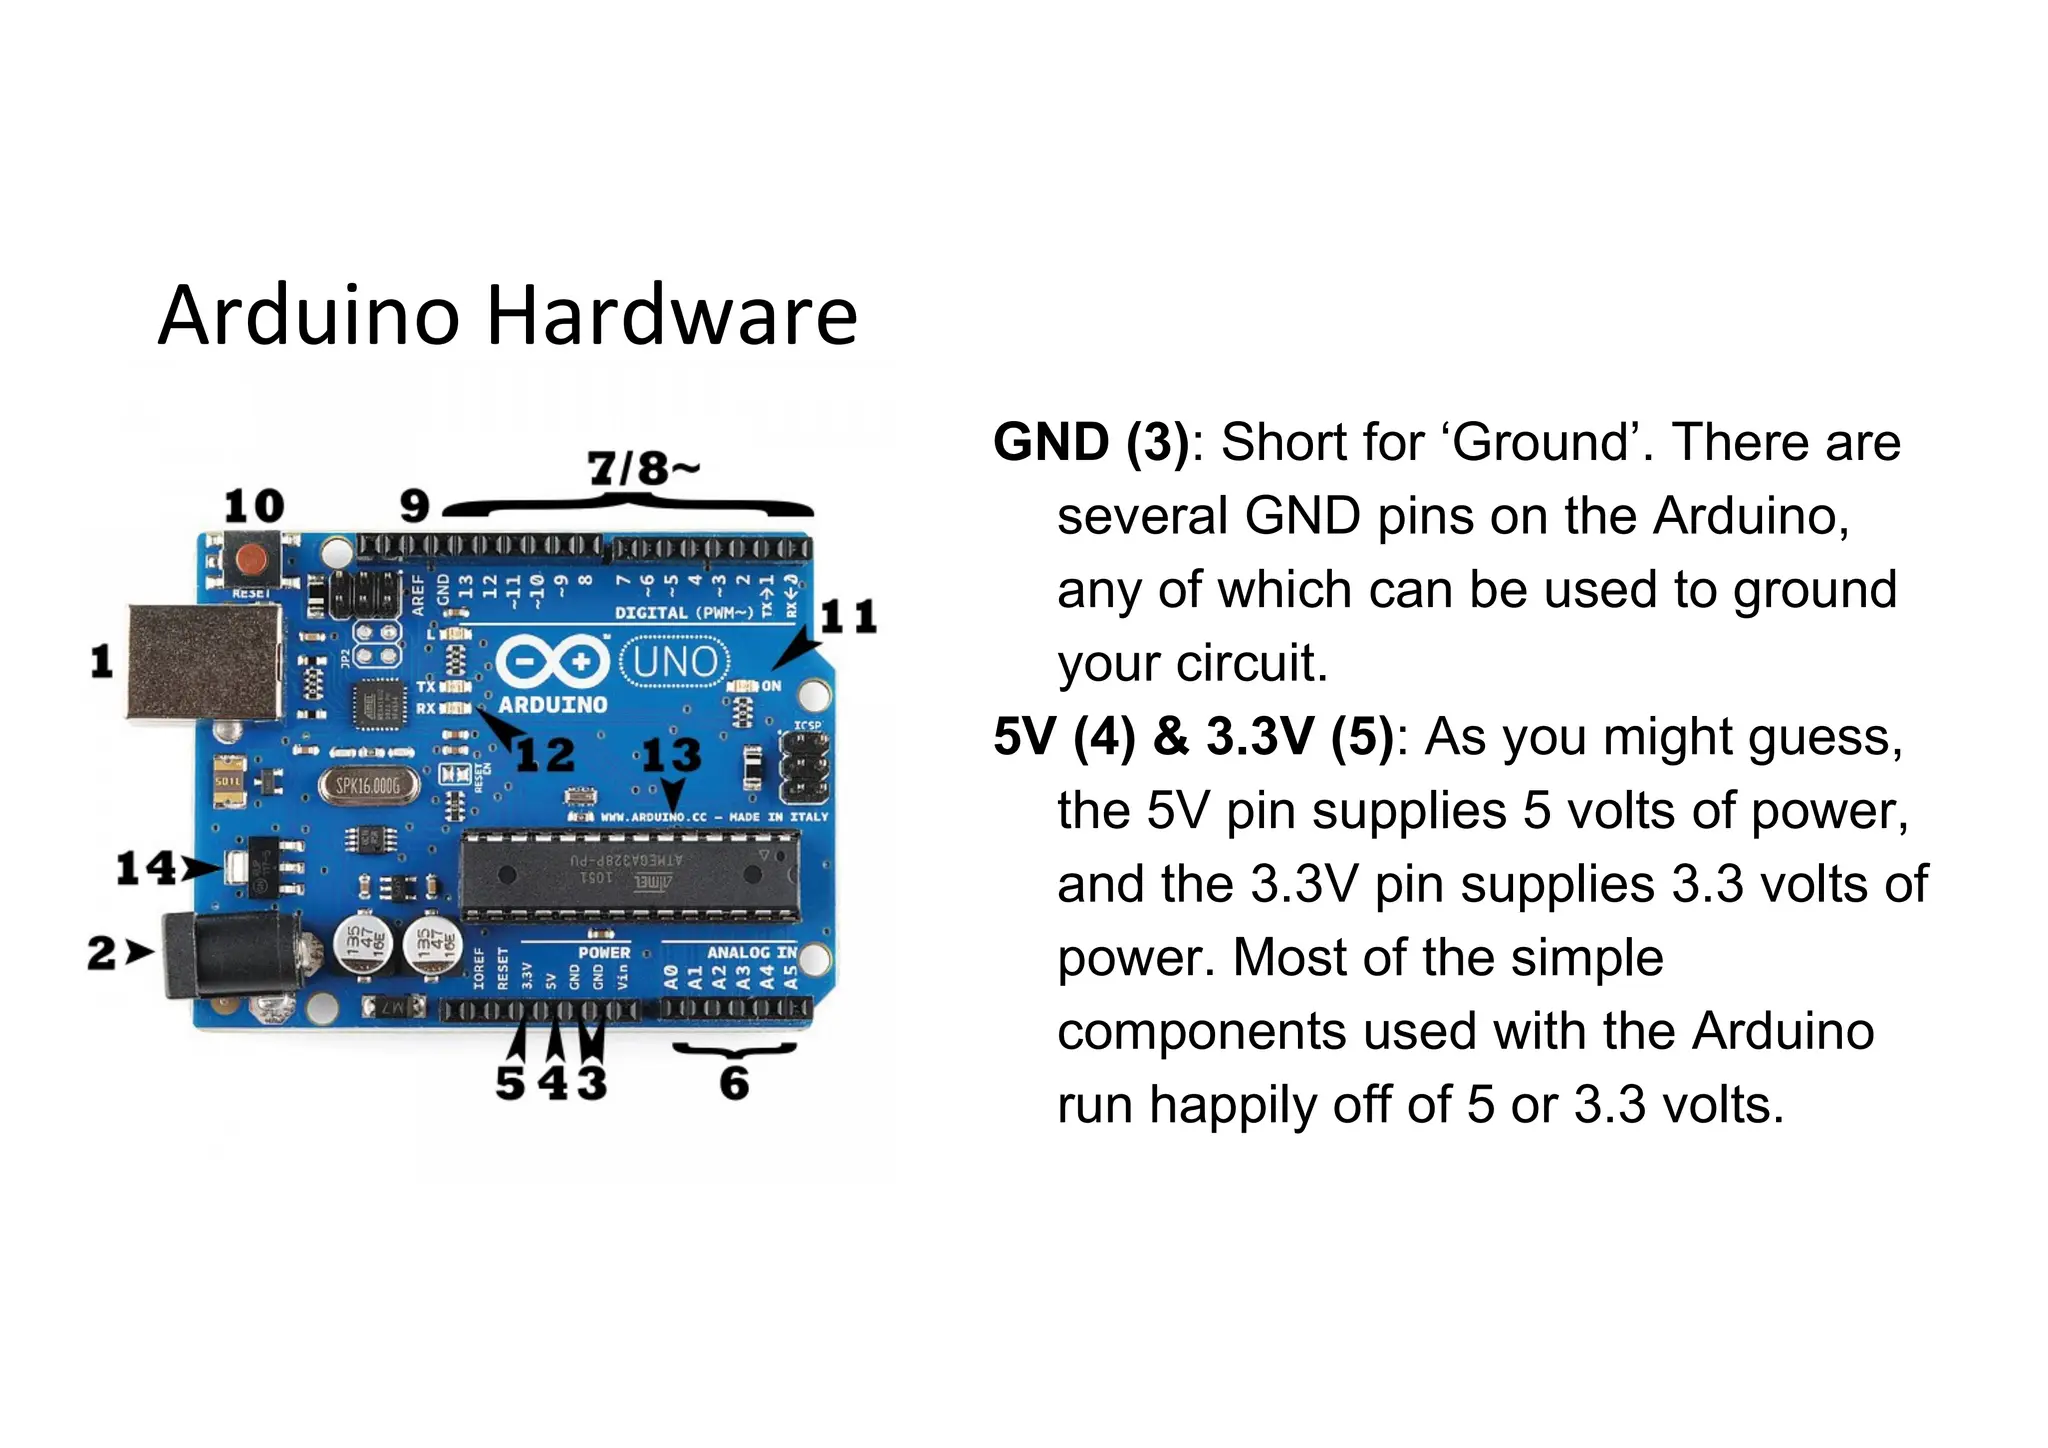
    Arduino Hardware GND (3):Short for ‘Ground’. There are several GND pins on the Arduino, any of which can be used to ground your circuit. 5V (4) & 3.3V (5): As you might guess, the 5V pin supplies 5 volts of power, and the 3.3V pin supplies 3.3 volts of power. Most of the simple components used with the Arduino run happily off of 5 or 3.3 volts.
  • 9.
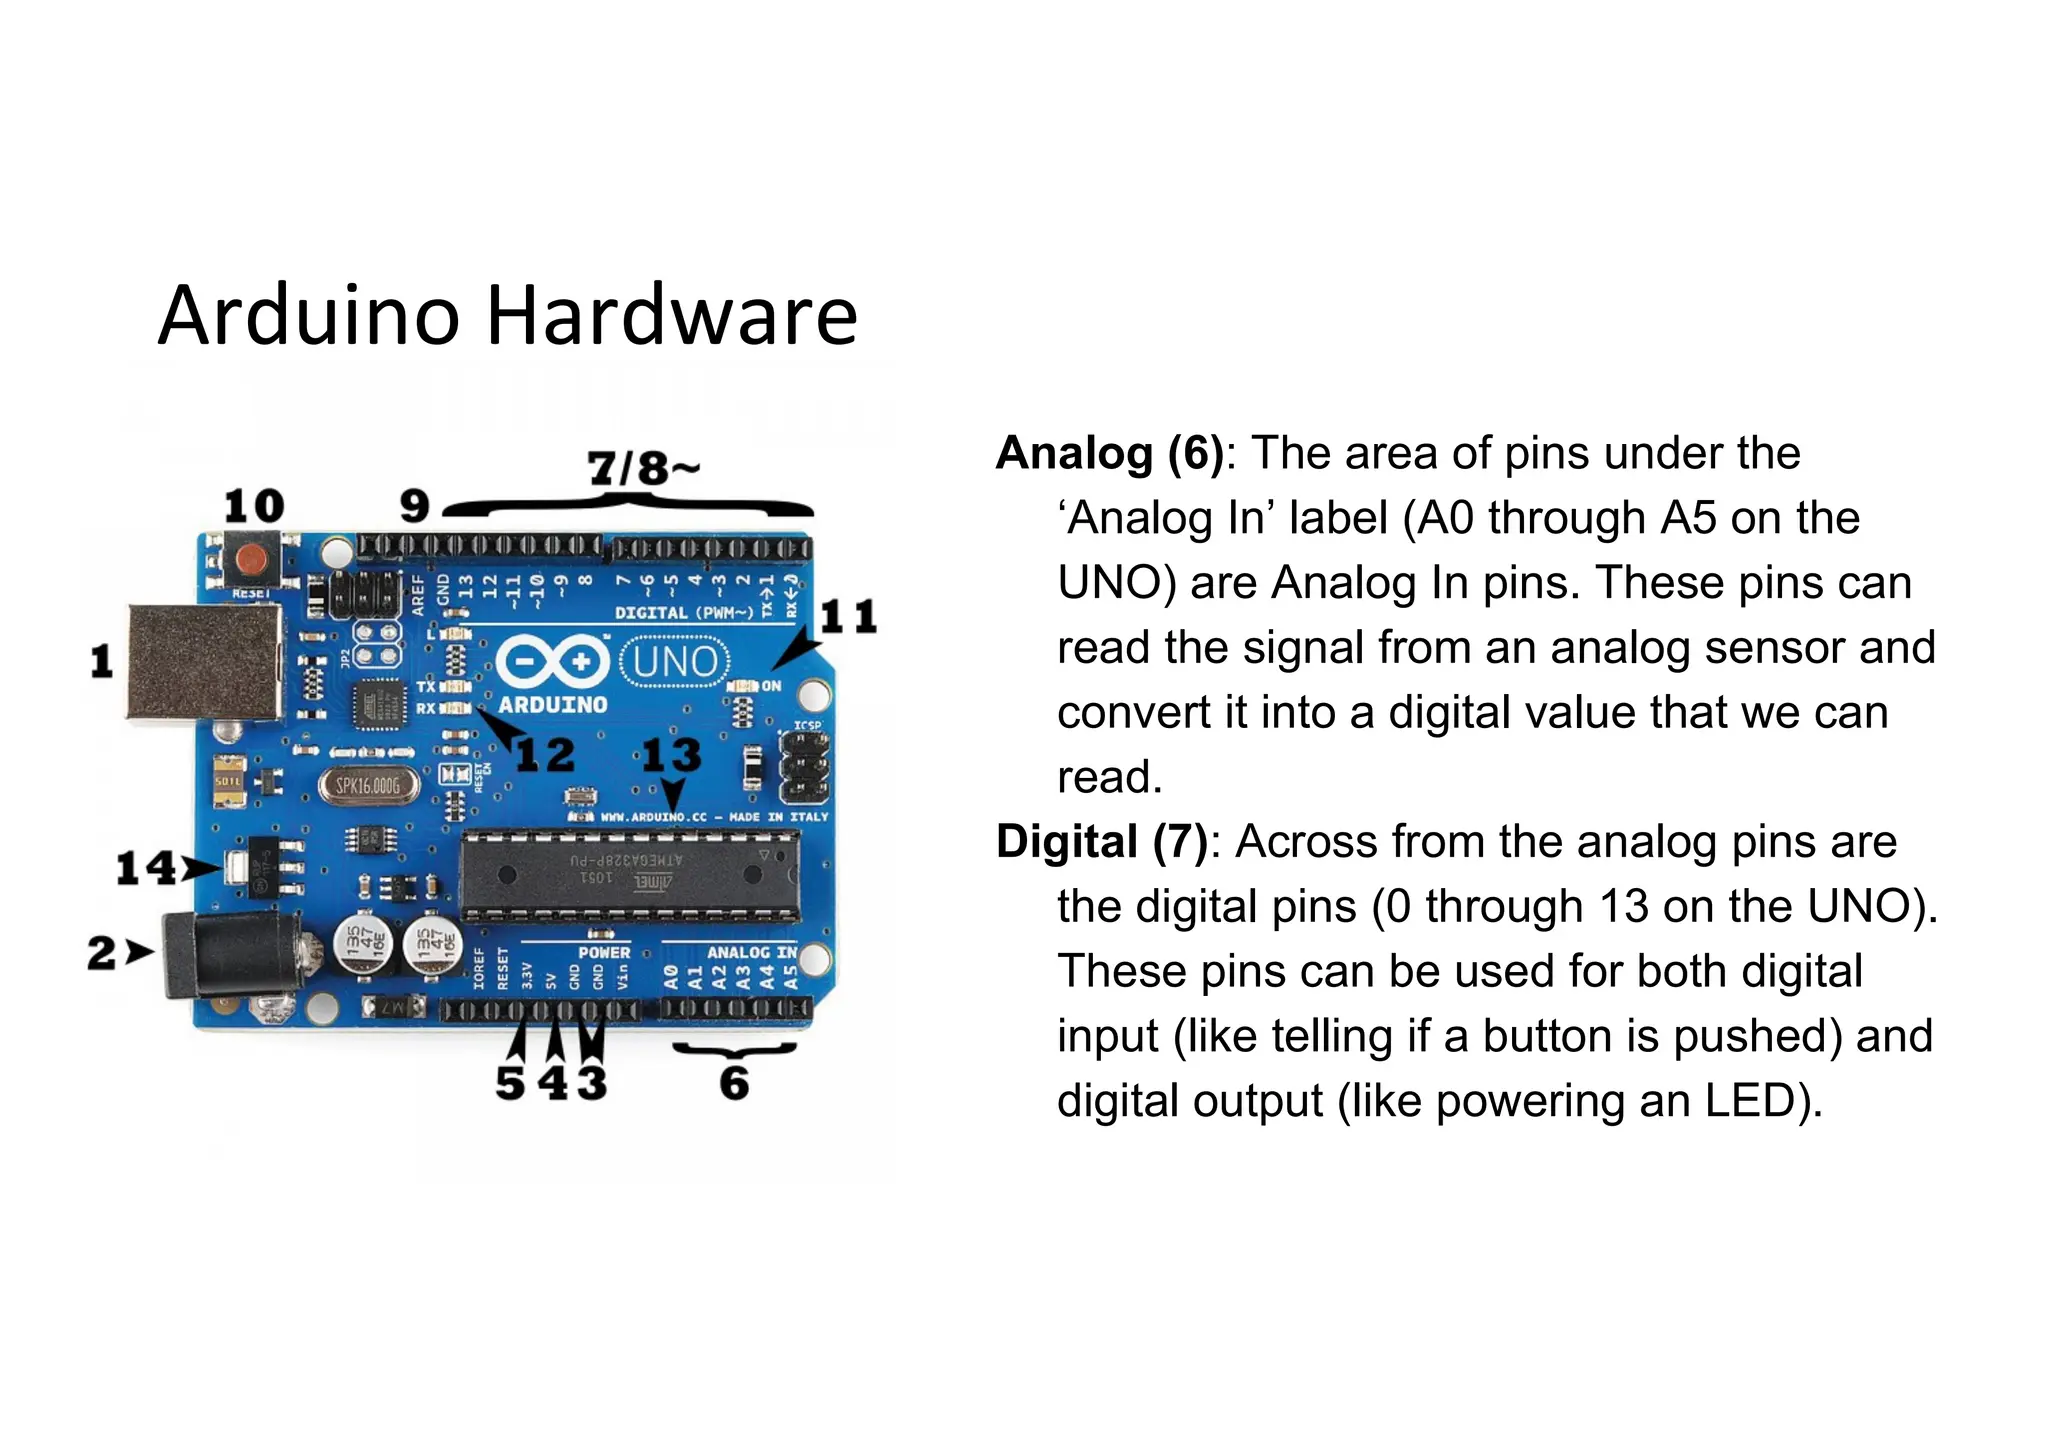
    Arduino Hardware Analog (6):The area of pins under the ‘Analog In’ label (A0 through A5 on the UNO) are Analog In pins. These pins can read the signal from an analog sensor and convert it into a digital value that we can read. Digital (7): Across from the analog pins are the digital pins (0 through 13 on the UNO). These pins can be used for both digital input (like telling if a button is pushed) and digital output (like powering an LED).
  • 10.
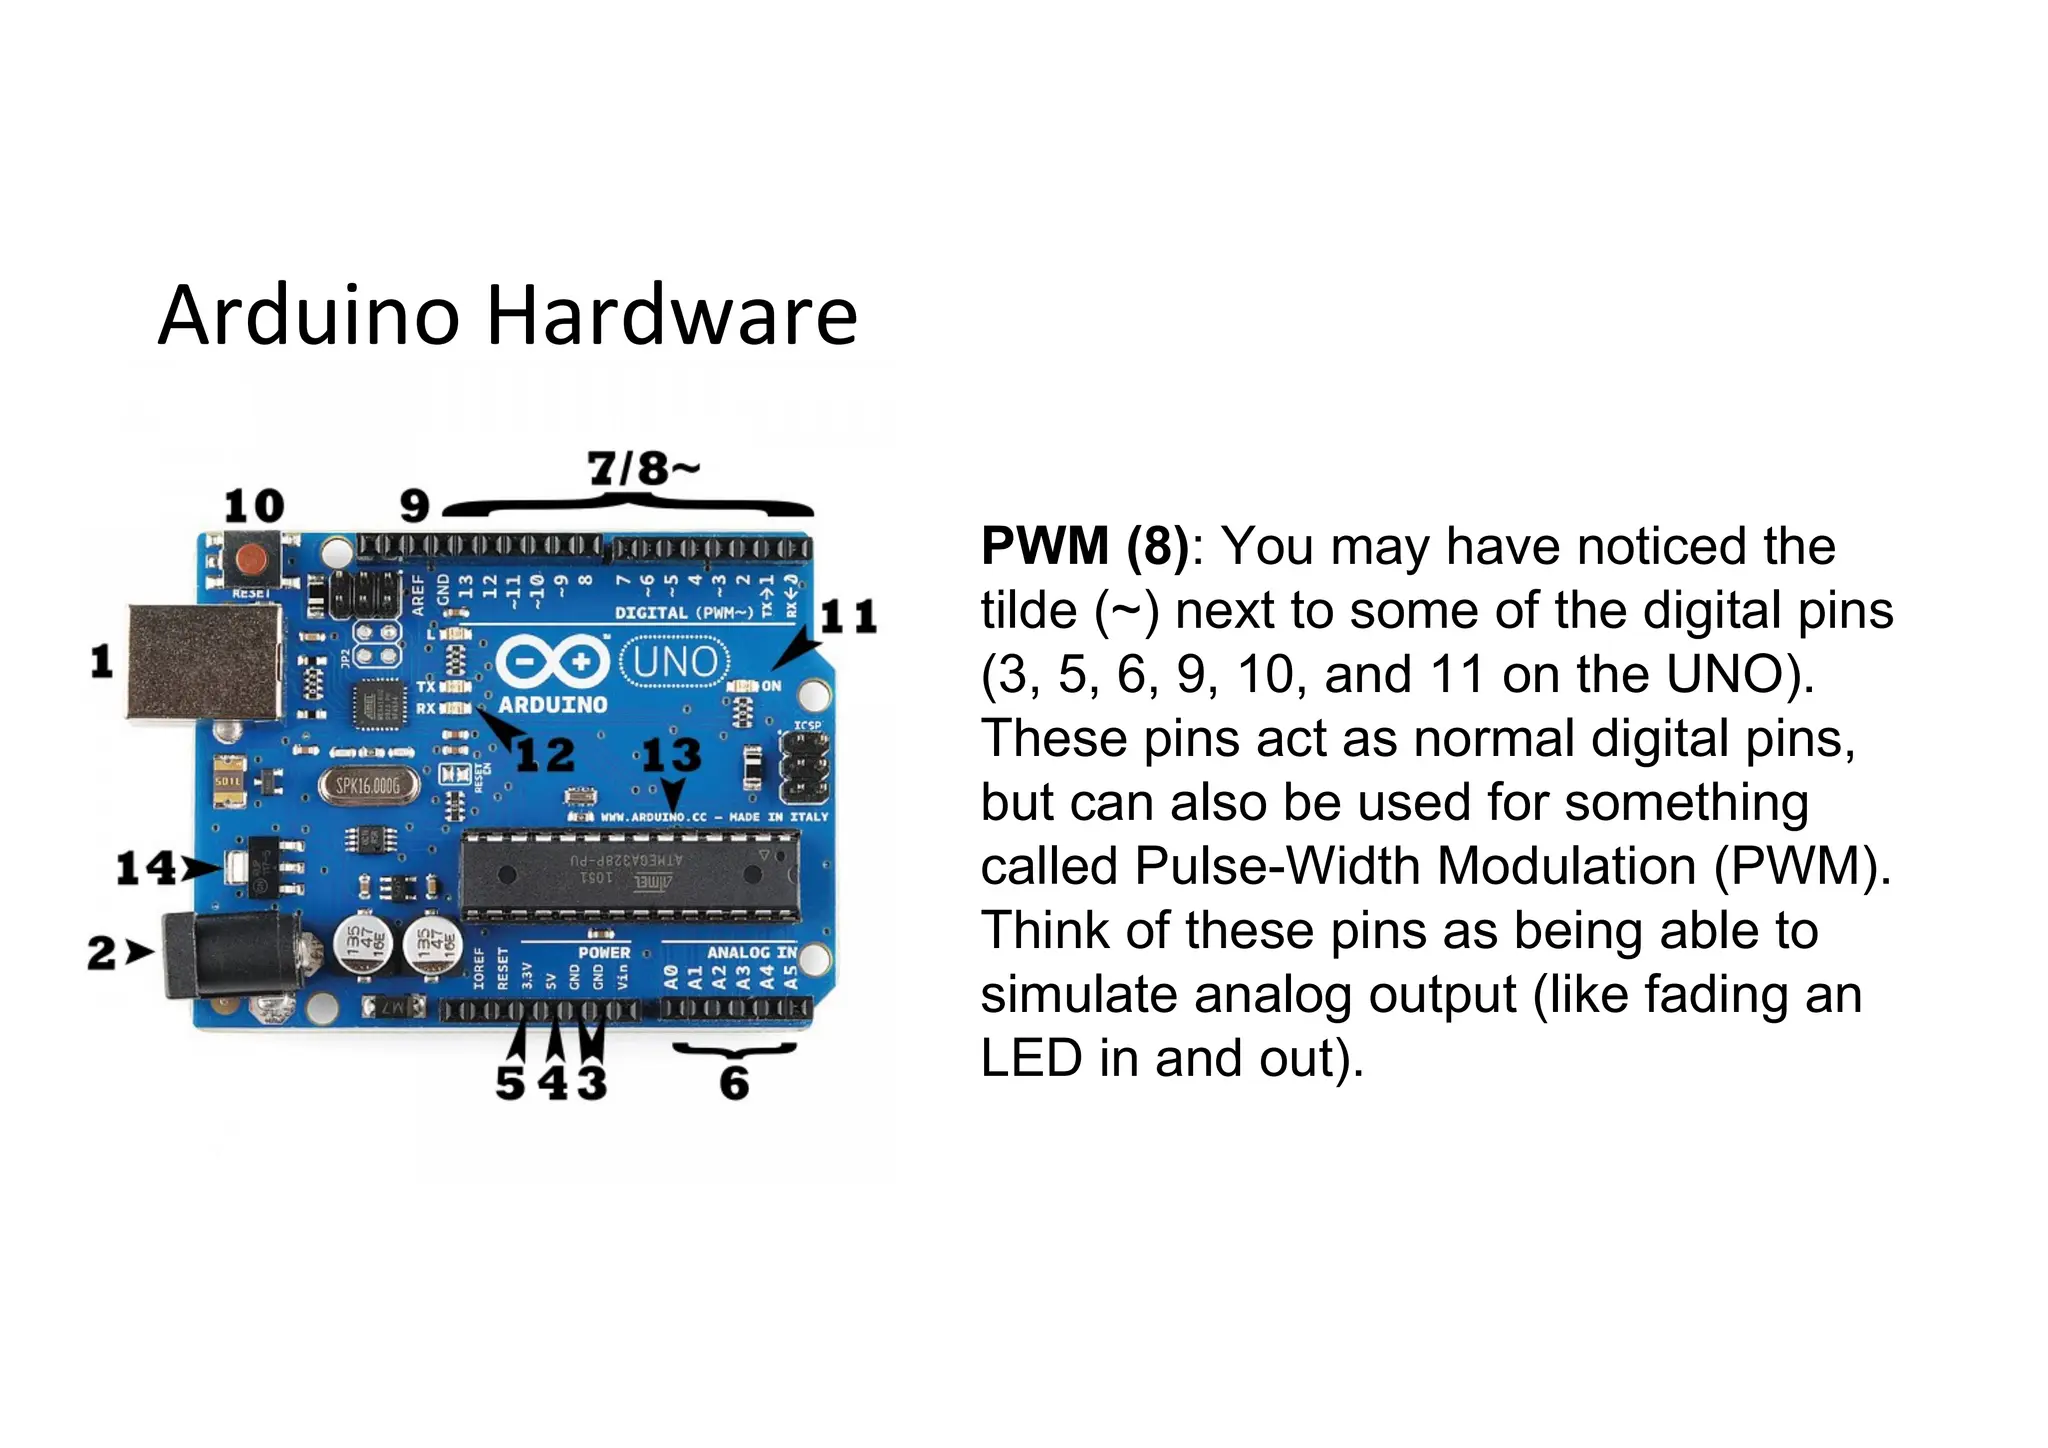
    Arduino Hardware PWM (8):You may have noticed the tilde (~) next to some of the digital pins (3, 5, 6, 9, 10, and 11 on the UNO). These pins act as normal digital pins, but can also be used for something called Pulse-Width Modulation (PWM). Think of these pins as being able to simulate analog output (like fading an LED in and out).
  • 11.
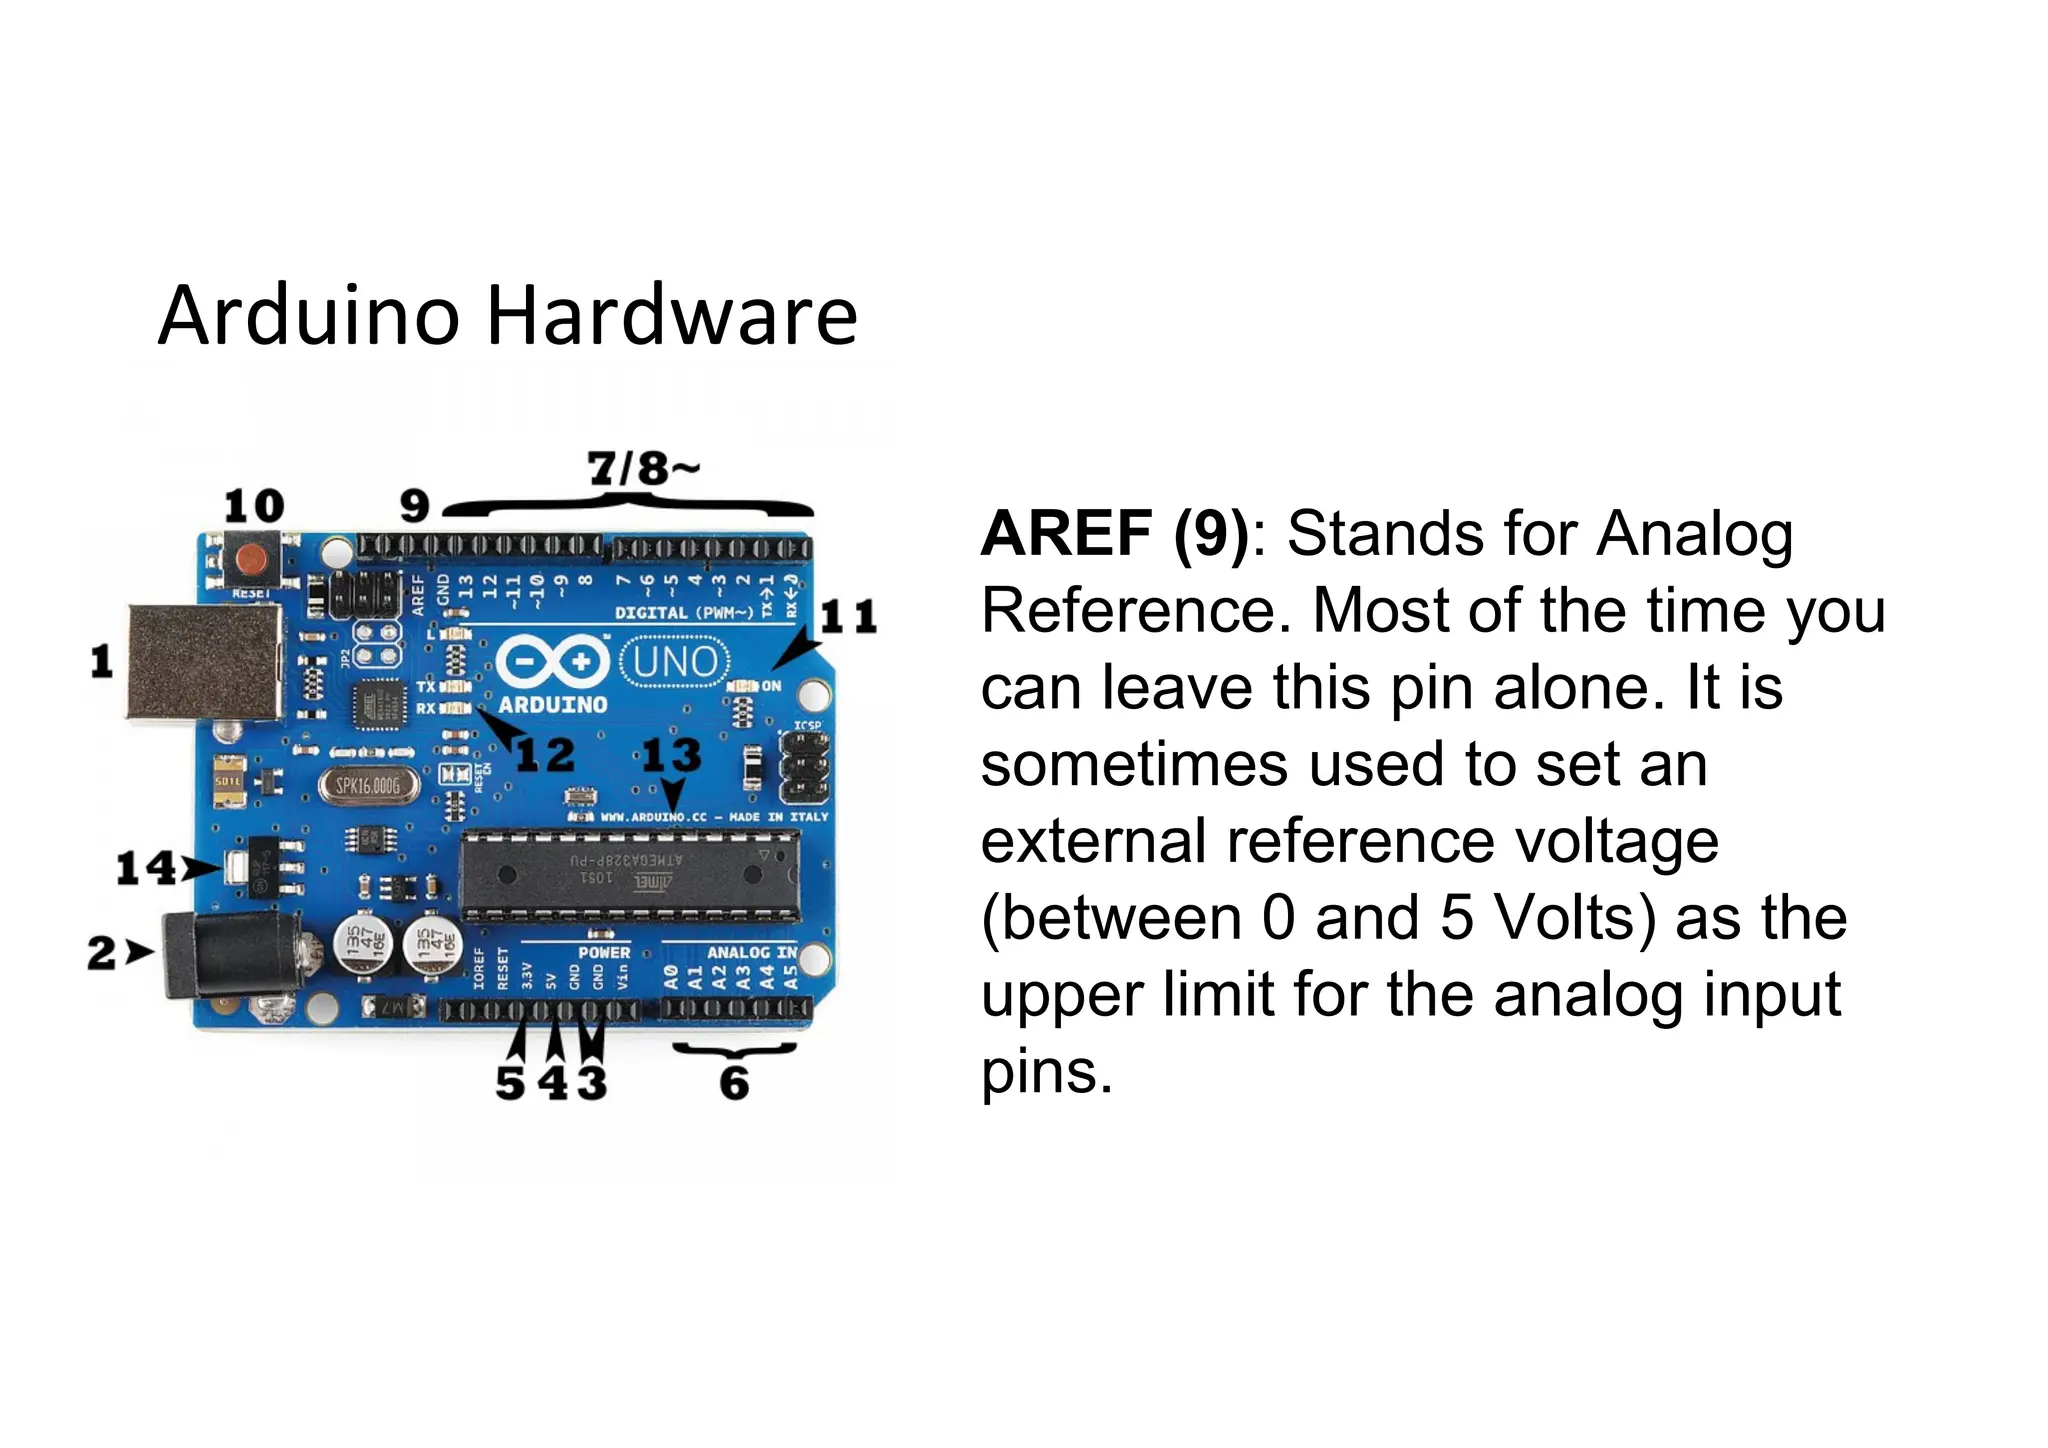
    Arduino Hardware AREF (9):Stands for Analog Reference. Most of the time you can leave this pin alone. It is sometimes used to set an external reference voltage (between 0 and 5 Volts) as the upper limit for the analog input pins.
  • 12.
    Arduino Hardware Reset Button(10): Pushingit will temporarily connect the reset pin to ground and restart any code that is loaded on the Arduino. This can be very useful if your code doesn’t repeat, but you want to test it multiple times.
  • 13.
    Arduino Hardware Integrated Circuit(13) Voltage regulator (14)
  • 14.
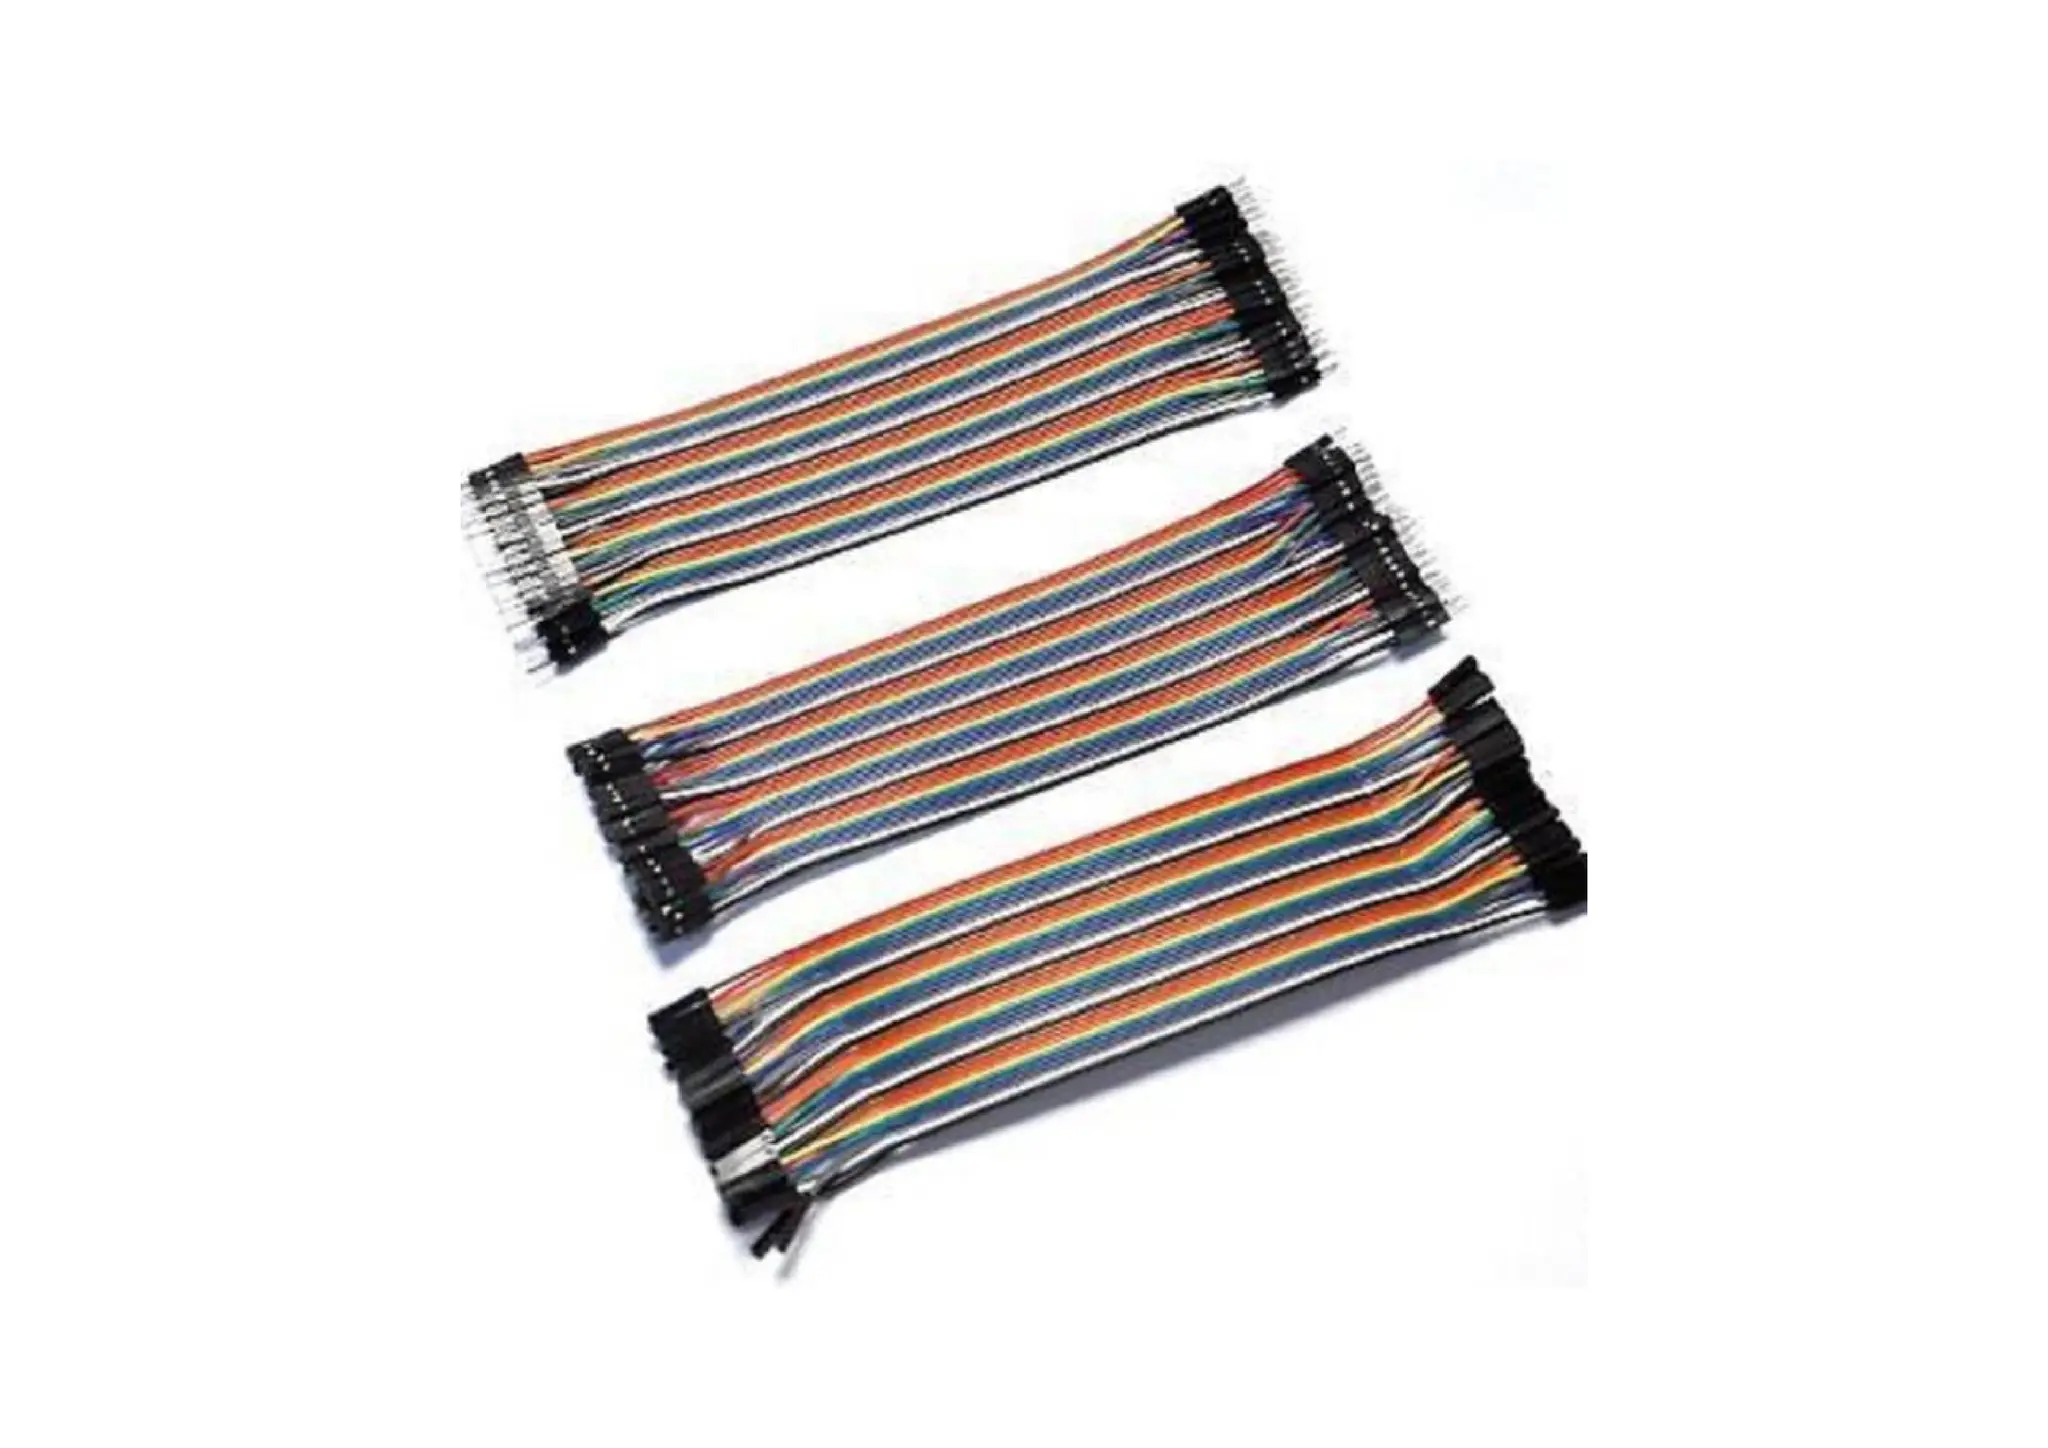
    Jump wire ØJumper wiresare simply wires that have connector pins at each end, allowing them to be used to connect two points to each other without soldering. ØJumper wires are typically used with breadboards and other prototyping tools in order to make it easy to change a circuit as needed. Fairly simple. In fact, it doesn’t get much more basic than jumper wires. Basically we have three types 1. male to male 2. female to female 3. male to female
  • 16.
    Sensors (Input) With somesimple code, the Arduino can control and interact with a wide variety of sensors. It can measure • Light • Temperature • Pressure • Proximity • Acceleration • Carbon Monoxide • Radioactivity • Humidity • Barometric Pressure you name it, you can sense it!
  • 17.
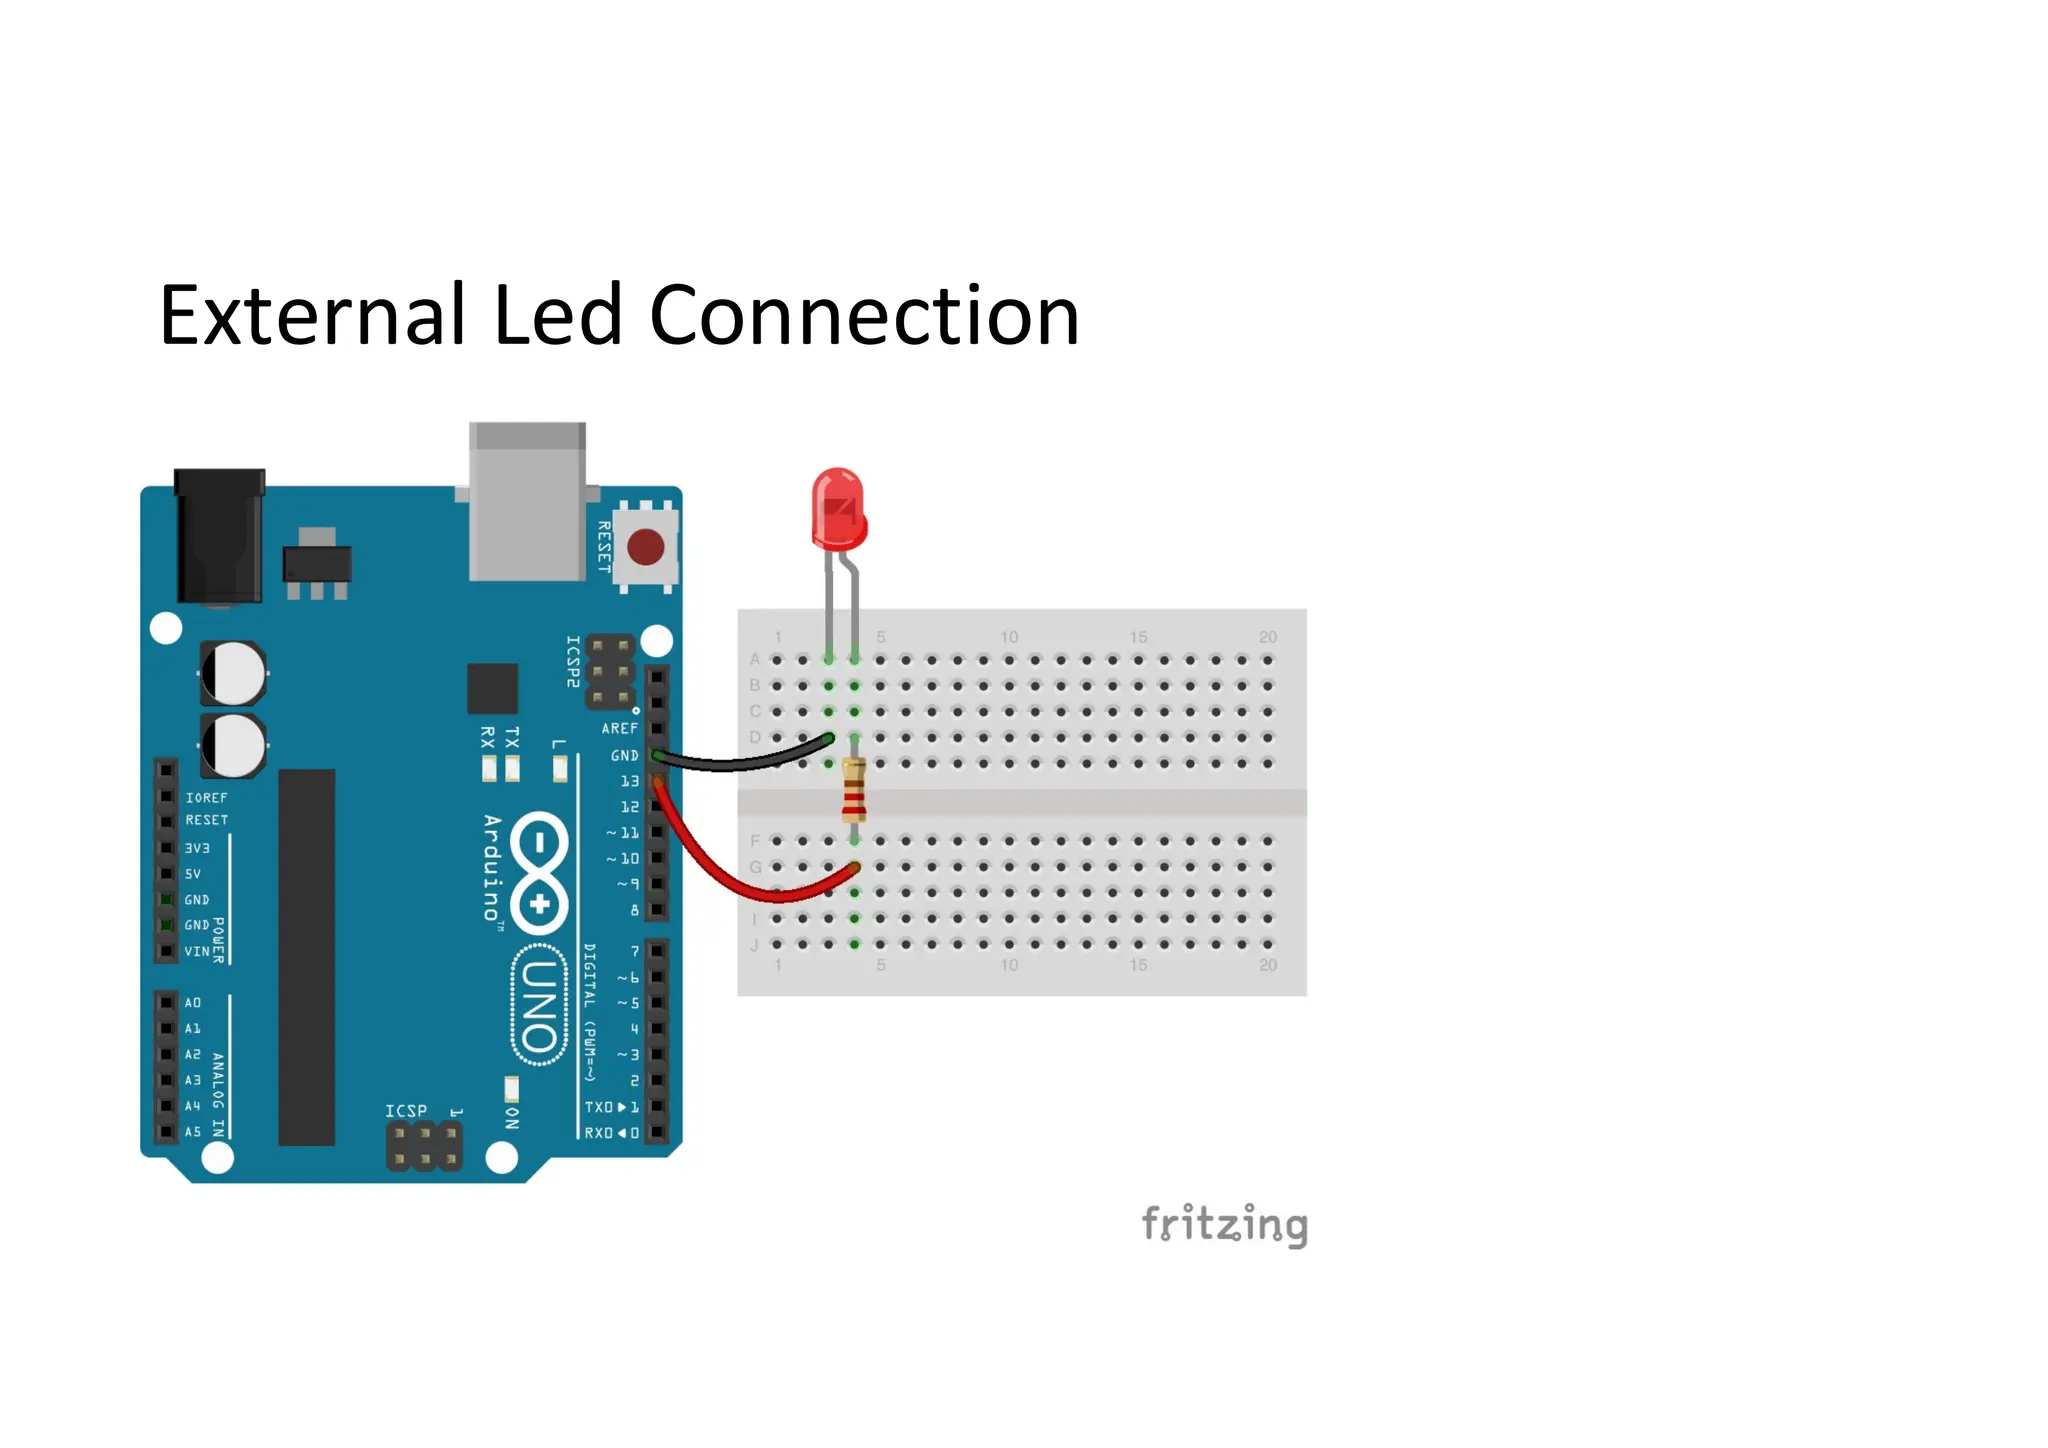
    Outputs We can interfacevarious devices with the arduino to give suitable results. • Led • Speaker • Motors • LCD Display
  • 18.
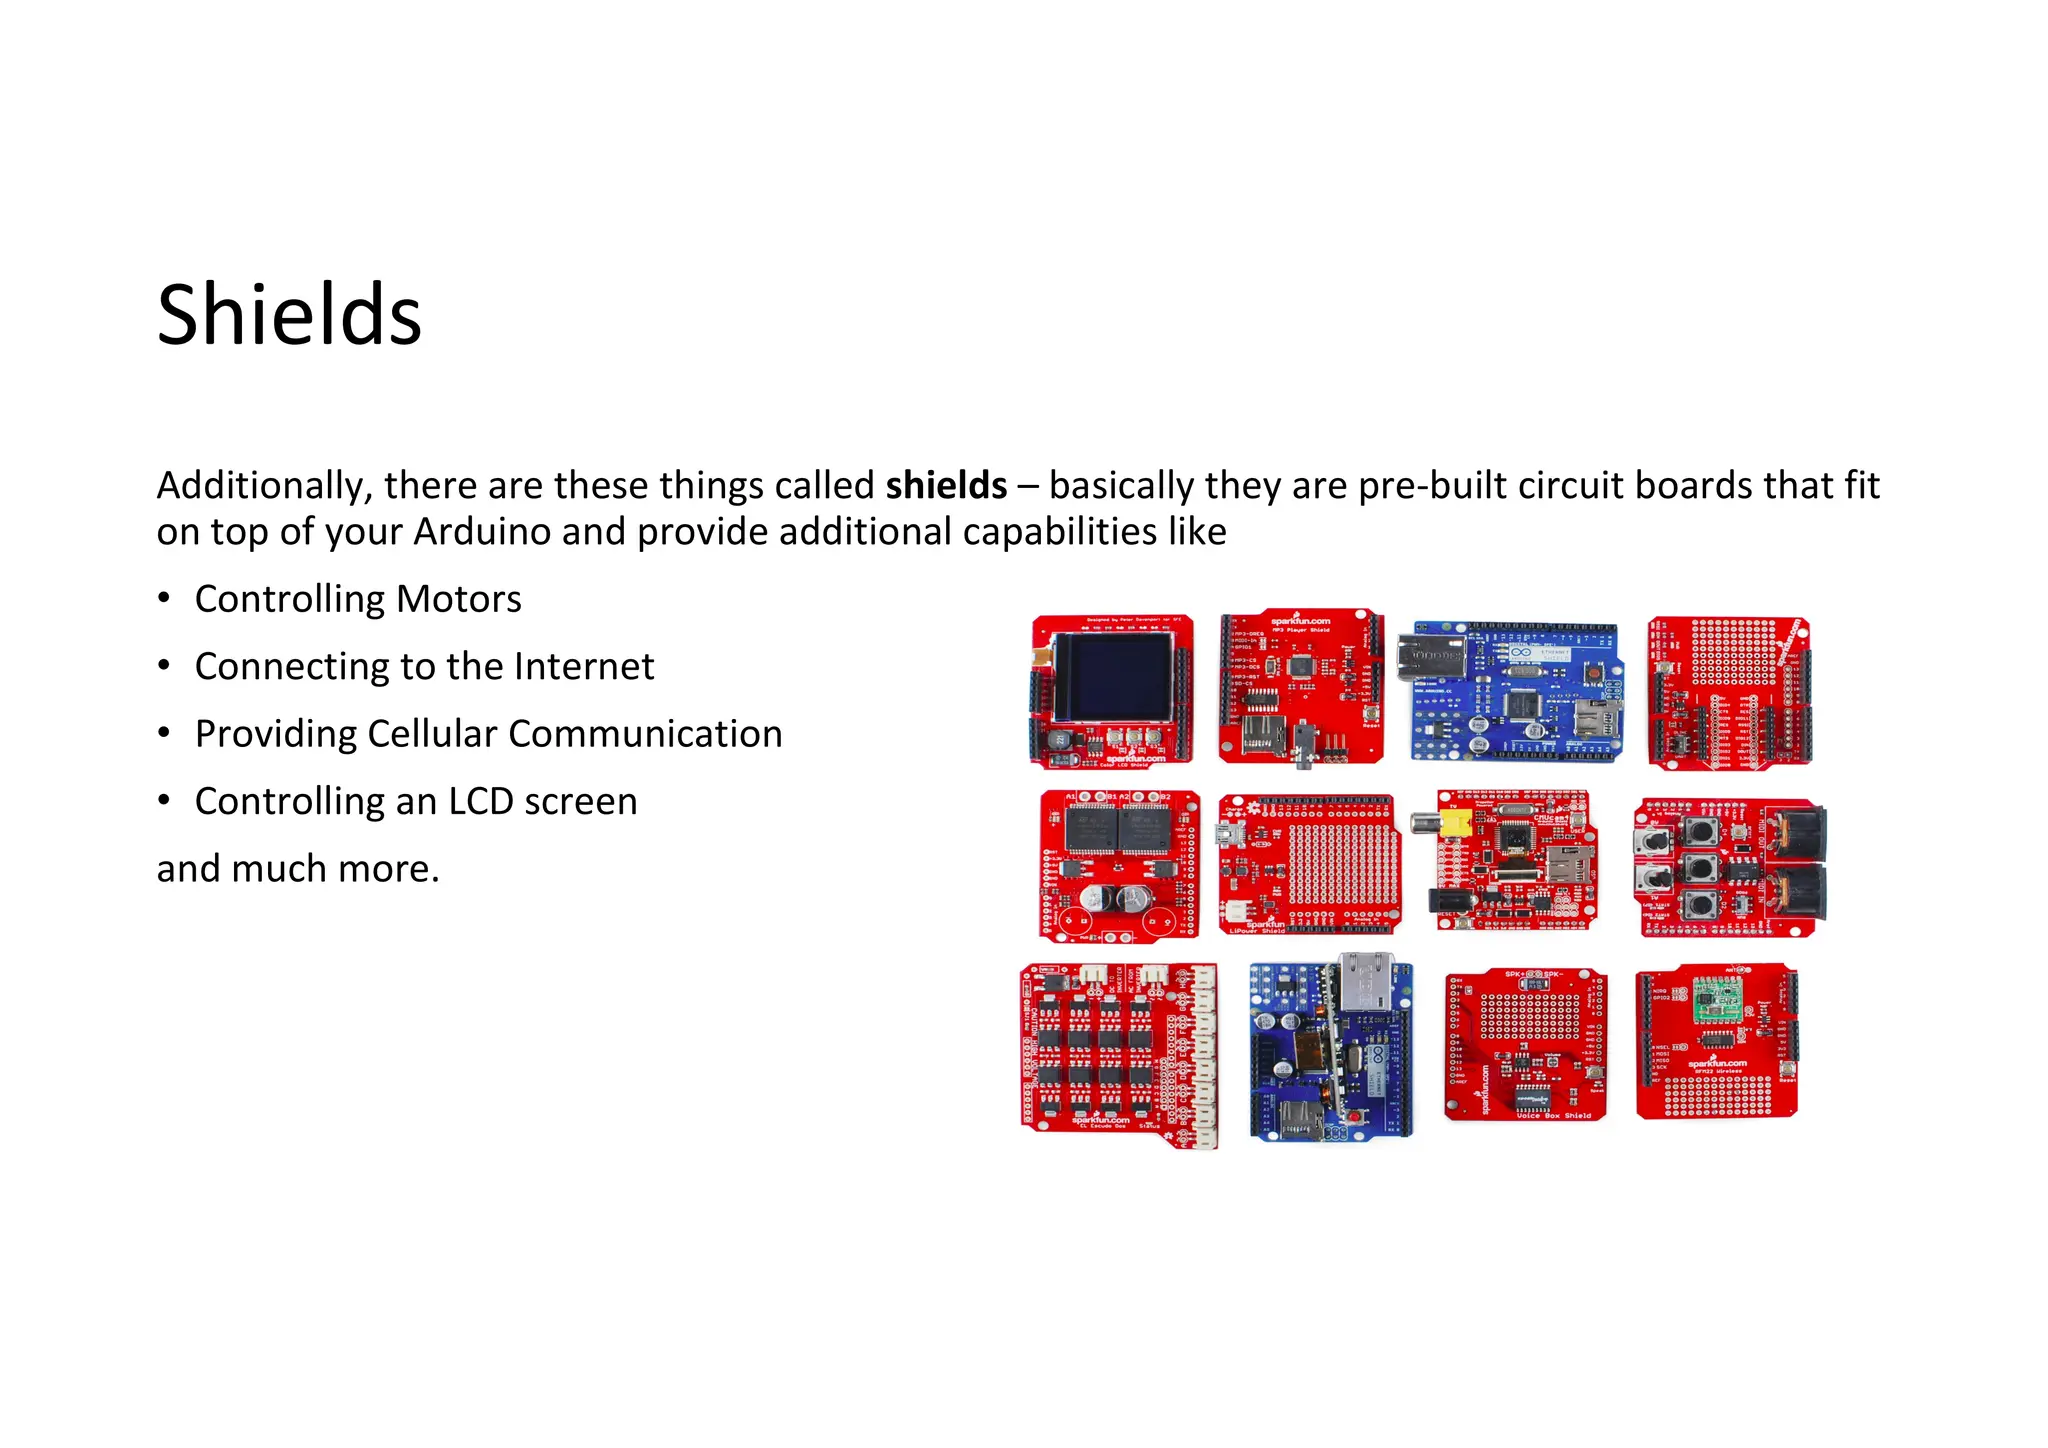
    Shields Additionally, there arethese things called shields – basically they are pre-built circuit boards that fit on top of your Arduino and provide additional capabilities like • Controlling Motors • Connecting to the Internet • Providing Cellular Communication • Controlling an LCD screen and much more.
  • 19.
    Arduino Software Arduino IDE: Toolused to write code and upload it onto the physical board.
  • 20.
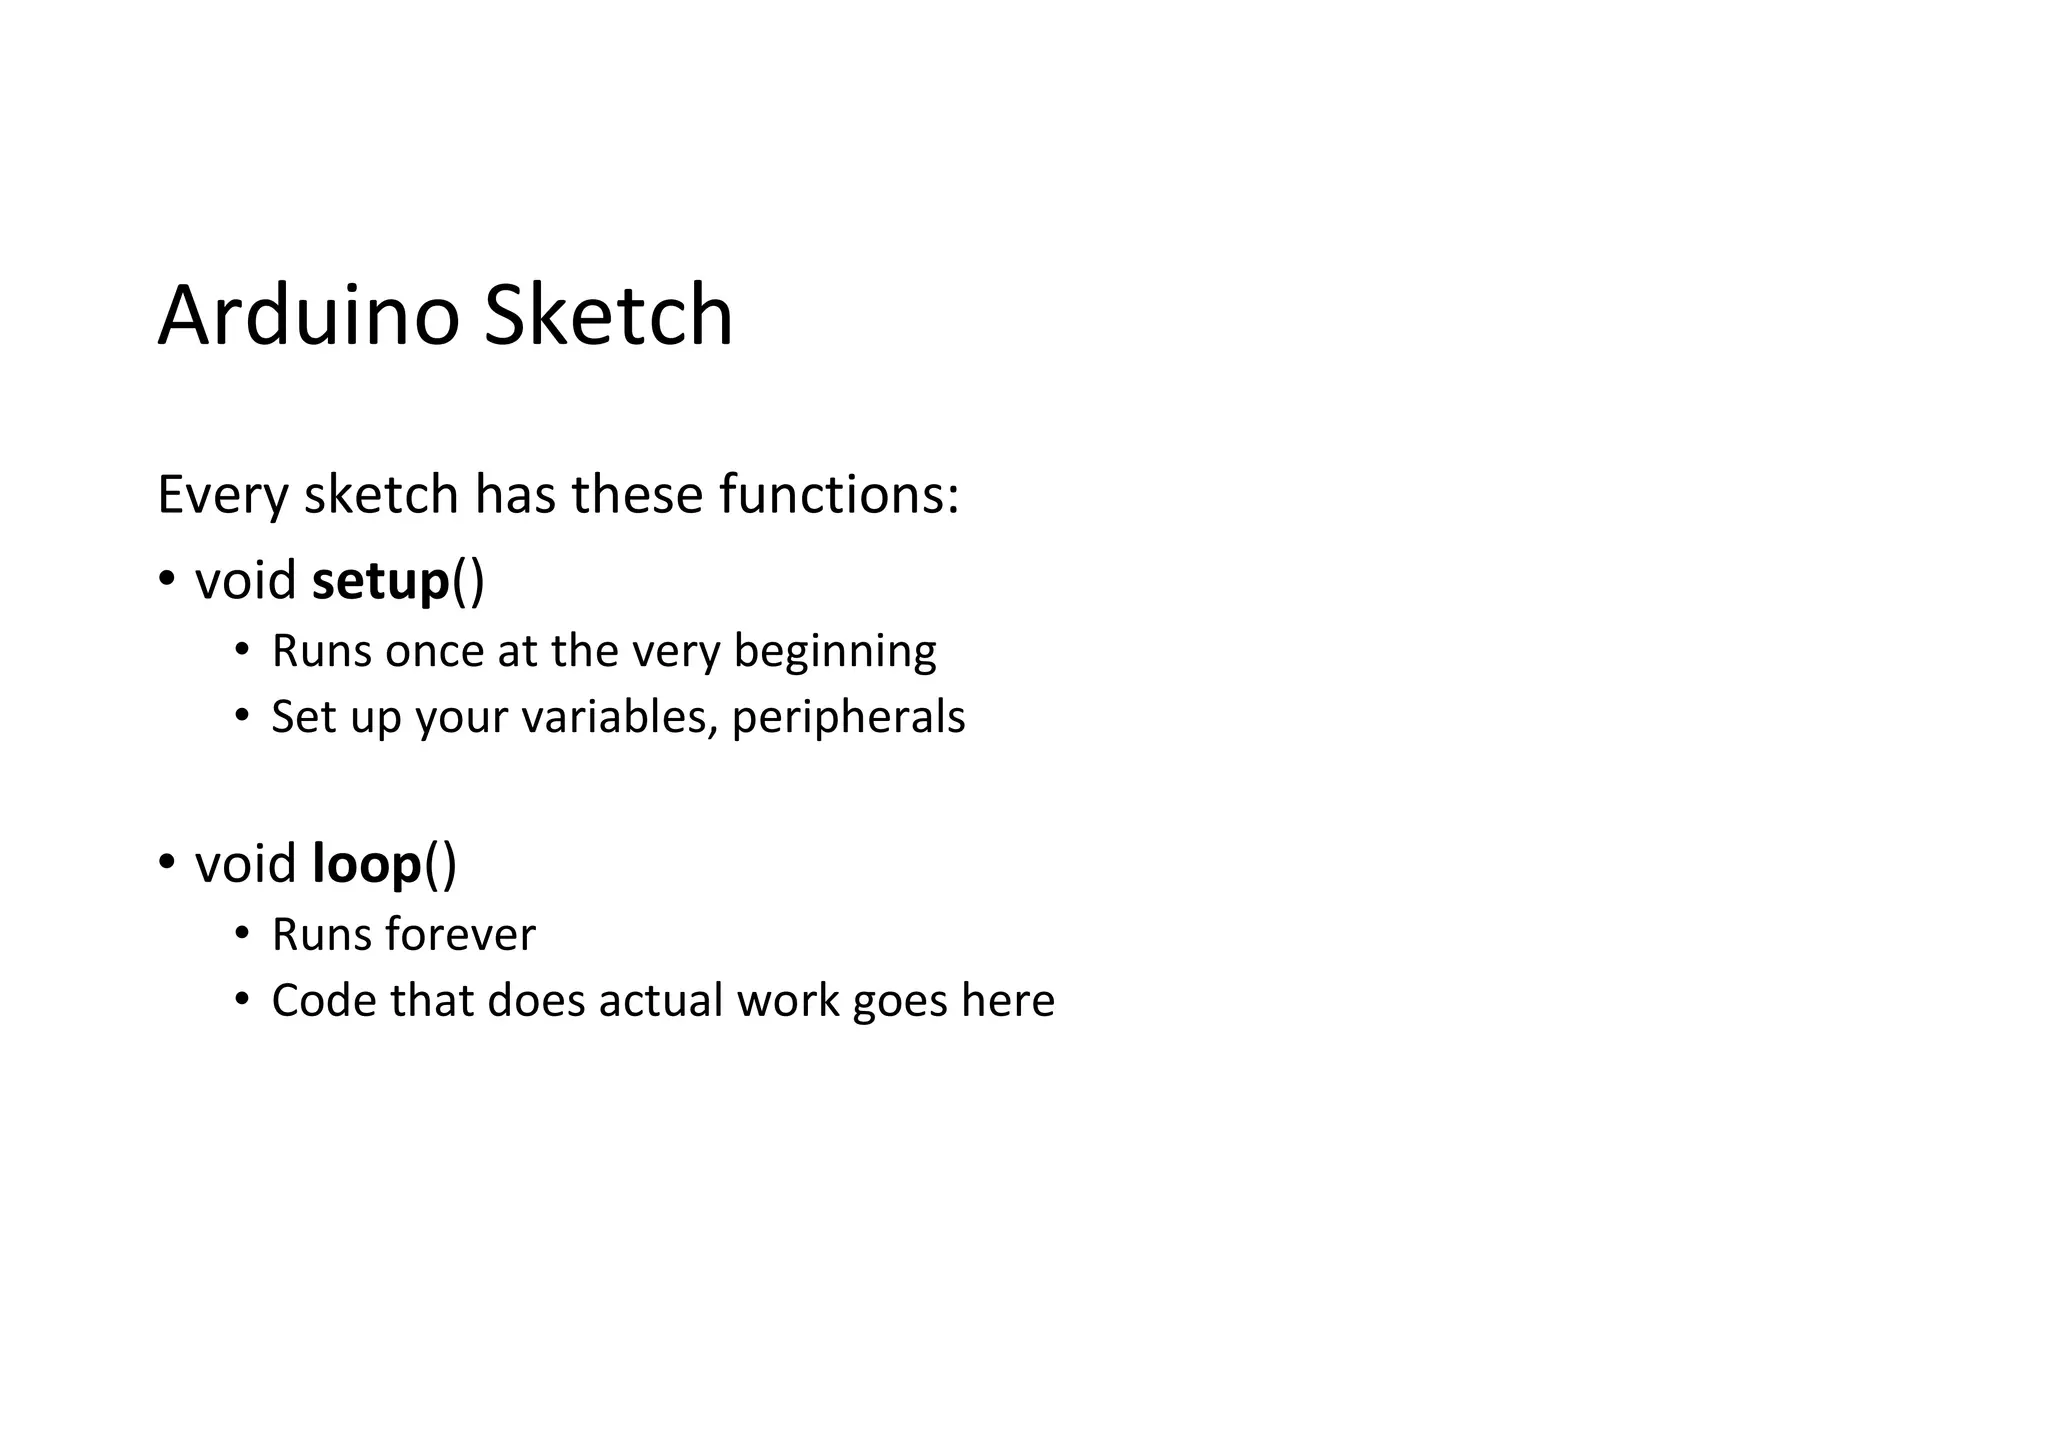
    Arduino Sketch Every sketchhas these functions: • void setup() • Runs once at the very beginning • Set up your variables, peripherals • void loop() • Runs forever • Code that does actual work goes here
  • 21.
  • 22.
    Essential Functions • pinMode() •digitalWrite() • digitalRead() • analogWrite() • analogRead() • delay() • Serial.begin() • Serial.print()
  • 23.
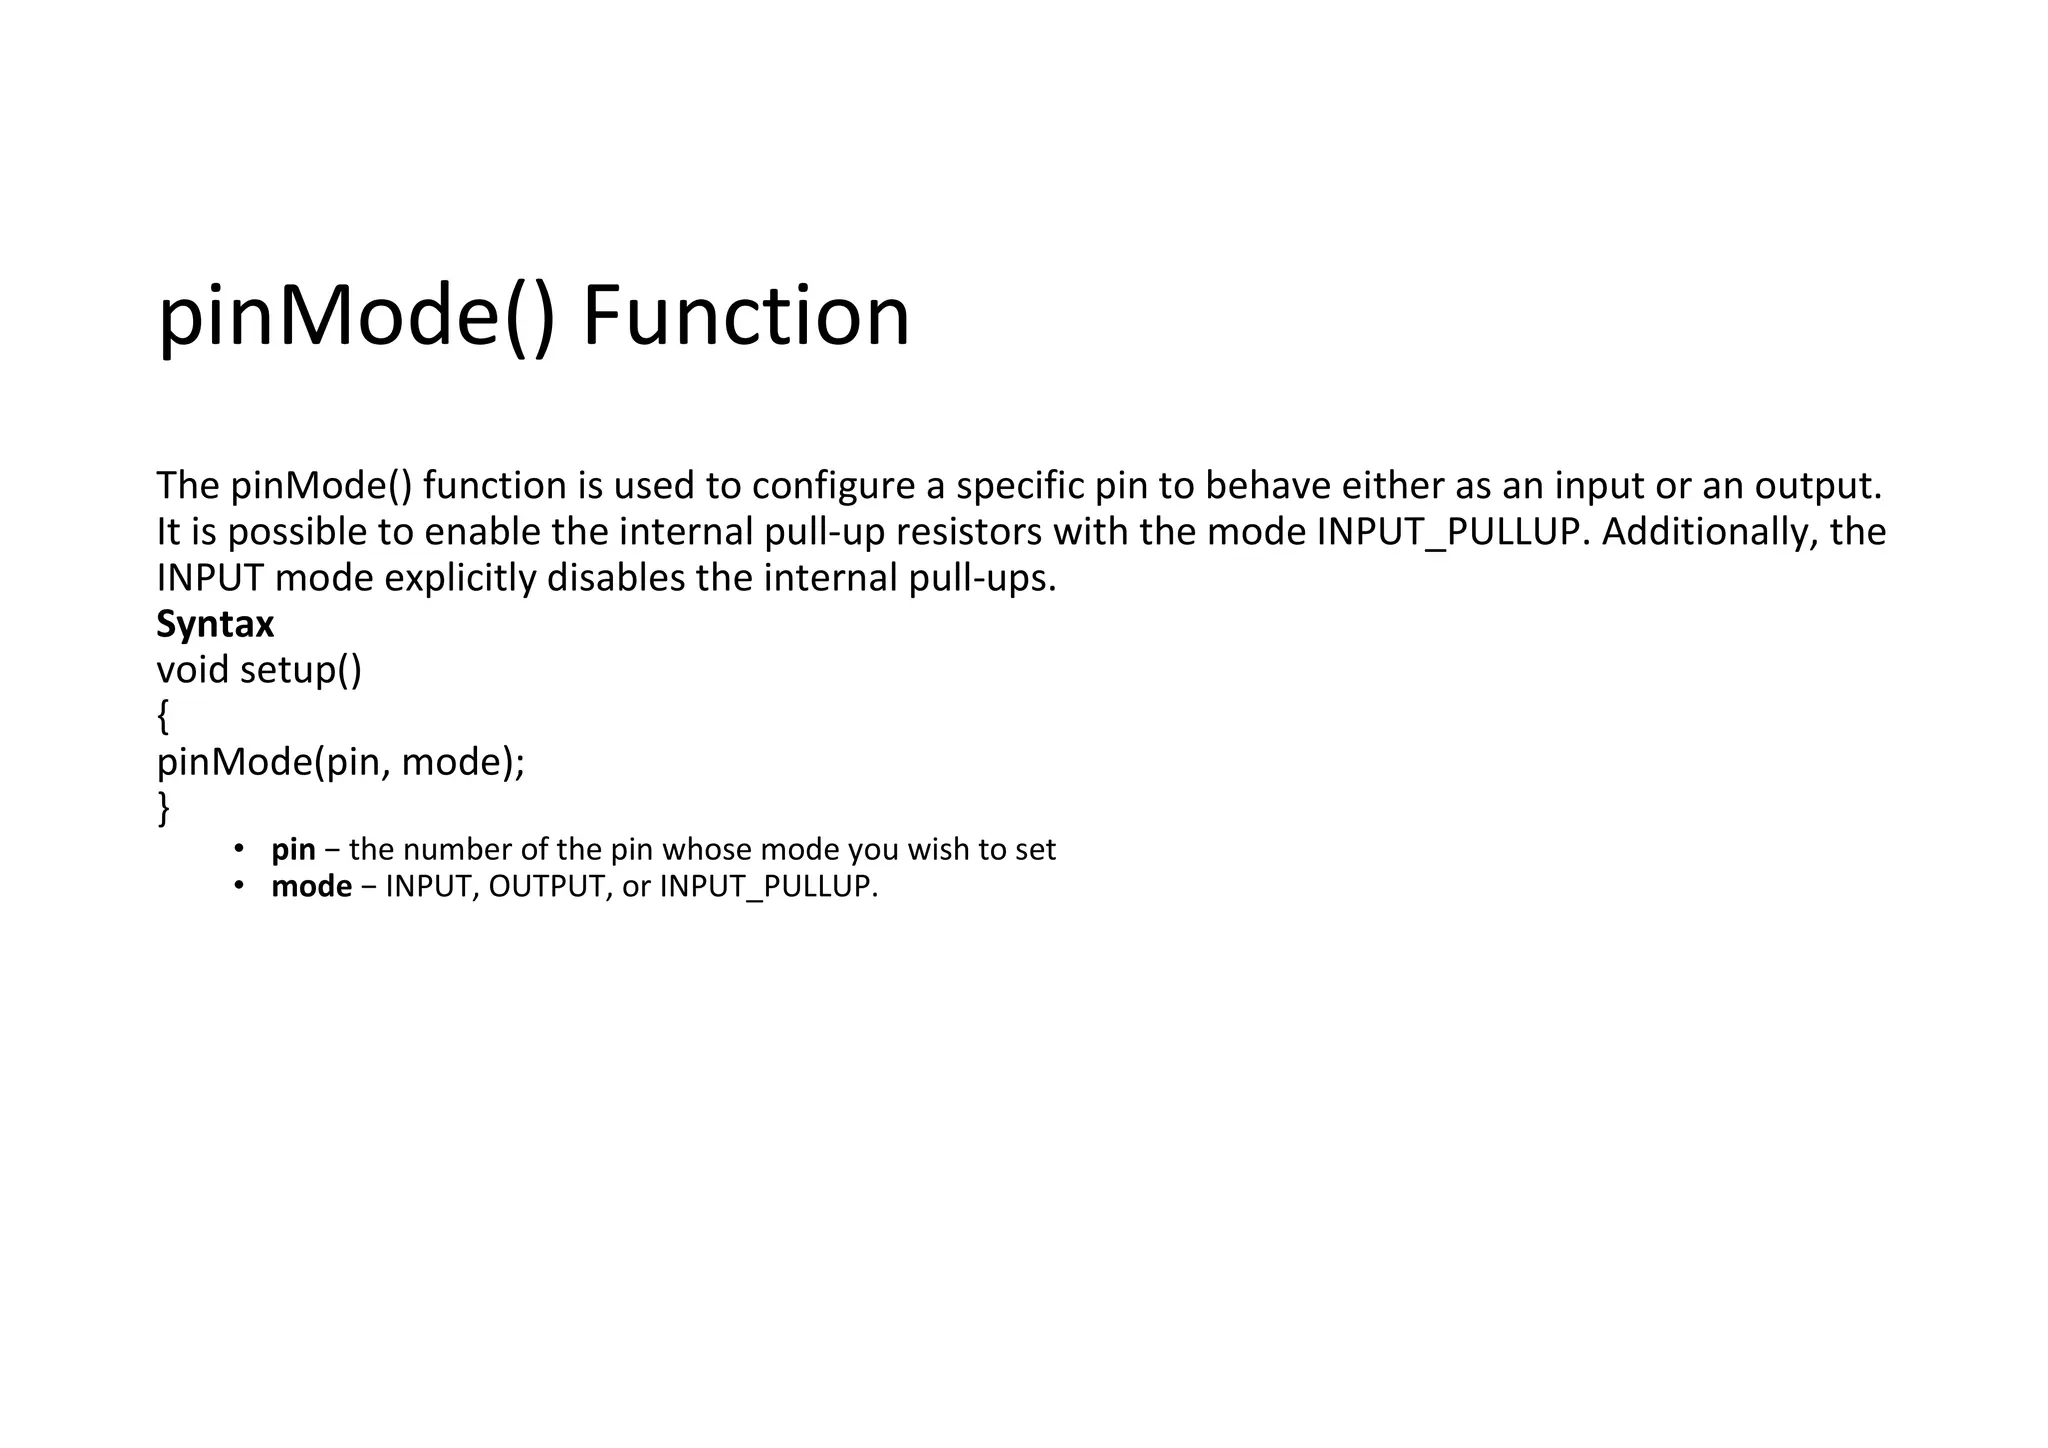
    pinMode() Function The pinMode()function is used to configure a specific pin to behave either as an input or an output. It is possible to enable the internal pull-up resistors with the mode INPUT_PULLUP. Additionally, the INPUT mode explicitly disables the internal pull-ups. Syntax void setup() { pinMode(pin, mode); } • pin − the number of the pin whose mode you wish to set • mode − INPUT, OUTPUT, or INPUT_PULLUP.
  • 24.
    digitalWrite() Function The digitalWrite()function is used to write a HIGH or a LOW value to a digital pin. If the pin has been configured as an OUTPUT with pinMode(), its voltage will be set to the corresponding value: 5V (or 3.3V on 3.3V boards) for HIGH, 0V (ground) for LOW. Syntax void loop() { digitalWrite(pin, value); } • pin − the number of the pin where you wish to set the value • value −HIGH or LOW
  • 25.
    digitalRead() Function The digitalRead()function is used to write a HIGH or a LOW value to a digital pin. If the pin has been configured as an INPUT with pinMode(), its voltage will be read to the corresponding value: 1 for 5V, 0 for 0V. Syntax void loop() { digitalRead(pin); } • pin − the number of the pin where you wish to read the value
  • 26.
    analogRead( ) function Inthe lower-right part of the Arduino board, you will see six pins marked “Analog In”. These special pins not only tell whether there is a voltage applied to them, but also its value. By using the analogRead() function, we can read the voltage applied to one of the pins. This function returns a number between 0 and 1023, which represents voltages between 0 and 5 volts. For example, if there is a voltage of 2.5 V applied to pin number 0, analogRead(0) returns 512. Syntax void loop() { analogRead(pin); } • pin − the number of the pin whose value you wish to read
  • 27.
    analogWrite() Function The analogWrite()function writes an analog value (PWM wave) to a pin. After a call of the analogWrite() function, the pin will generate a steady square wave of the specified duty cycle until the next call to analogWrite() or a call to digitalRead() or digitalWrite() on the same pin. The frequency of the PWM signal on most pins is approximately 490 Hz. On the Uno and similar boards, pins 5 and 6 have a frequency of approximately 980 Hz. Syntax void loop() { analogWrite(pin, value); } • pin − the number of the pin where you wish to set the value • value −HIGH or LOW
  • 28.
    Serial.begin() Sets the datarate in bits per second (baud) for serial data transmission. For communicating with the computer, use one of these rates: 300, 600, 1200, 2400, 4800, 9600, 14400, 19200, 28800, 38400, 57600, or 115200 Syntax: void setup() { Serial.begin(9600); }
  • 29.
    Serial.print() Used to printdata onto the serial monitor. Serial.print will keep cursor on same line after printing Serial.println will move cursor to the next line after printing It can work only if Serial.begin() function is present Syntax: void loop() { Serial.println (“Hello World”); }
  • 30.
    Breadboard Used to makeconnections simpler. Holes are shorted as shown
  • 31.
    Breadboard More common type Likelyto be used in projects
  • 32.
  • 33.
    Infrared Sensor Used toDetect Obstacles. Connected to a digital pin of the arduino
  • 34.
  • 35.
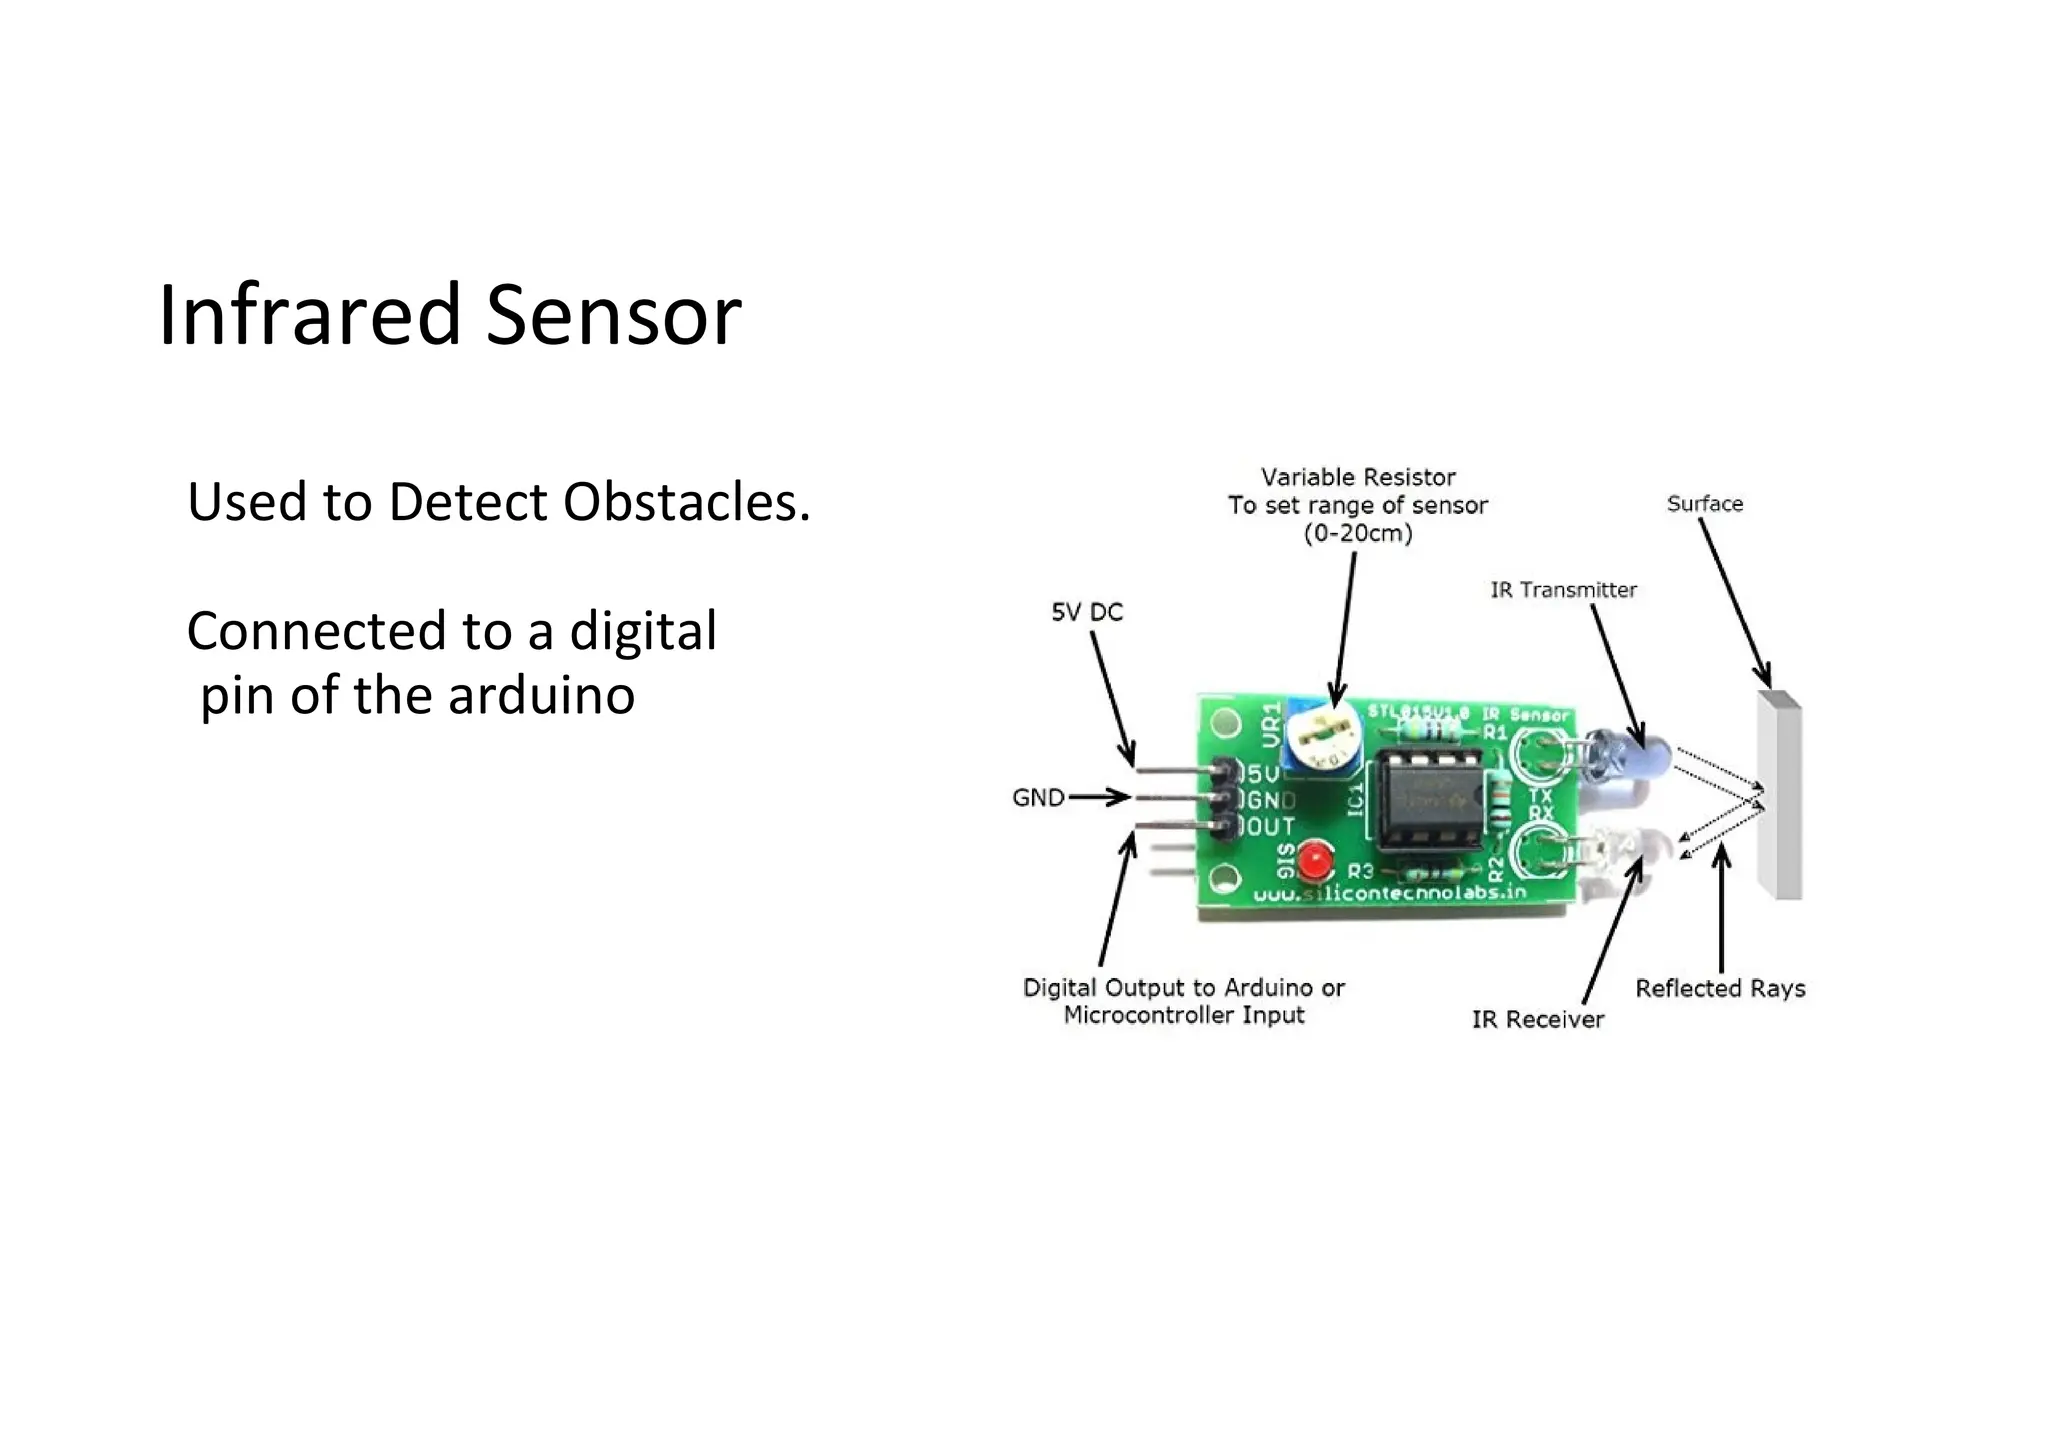
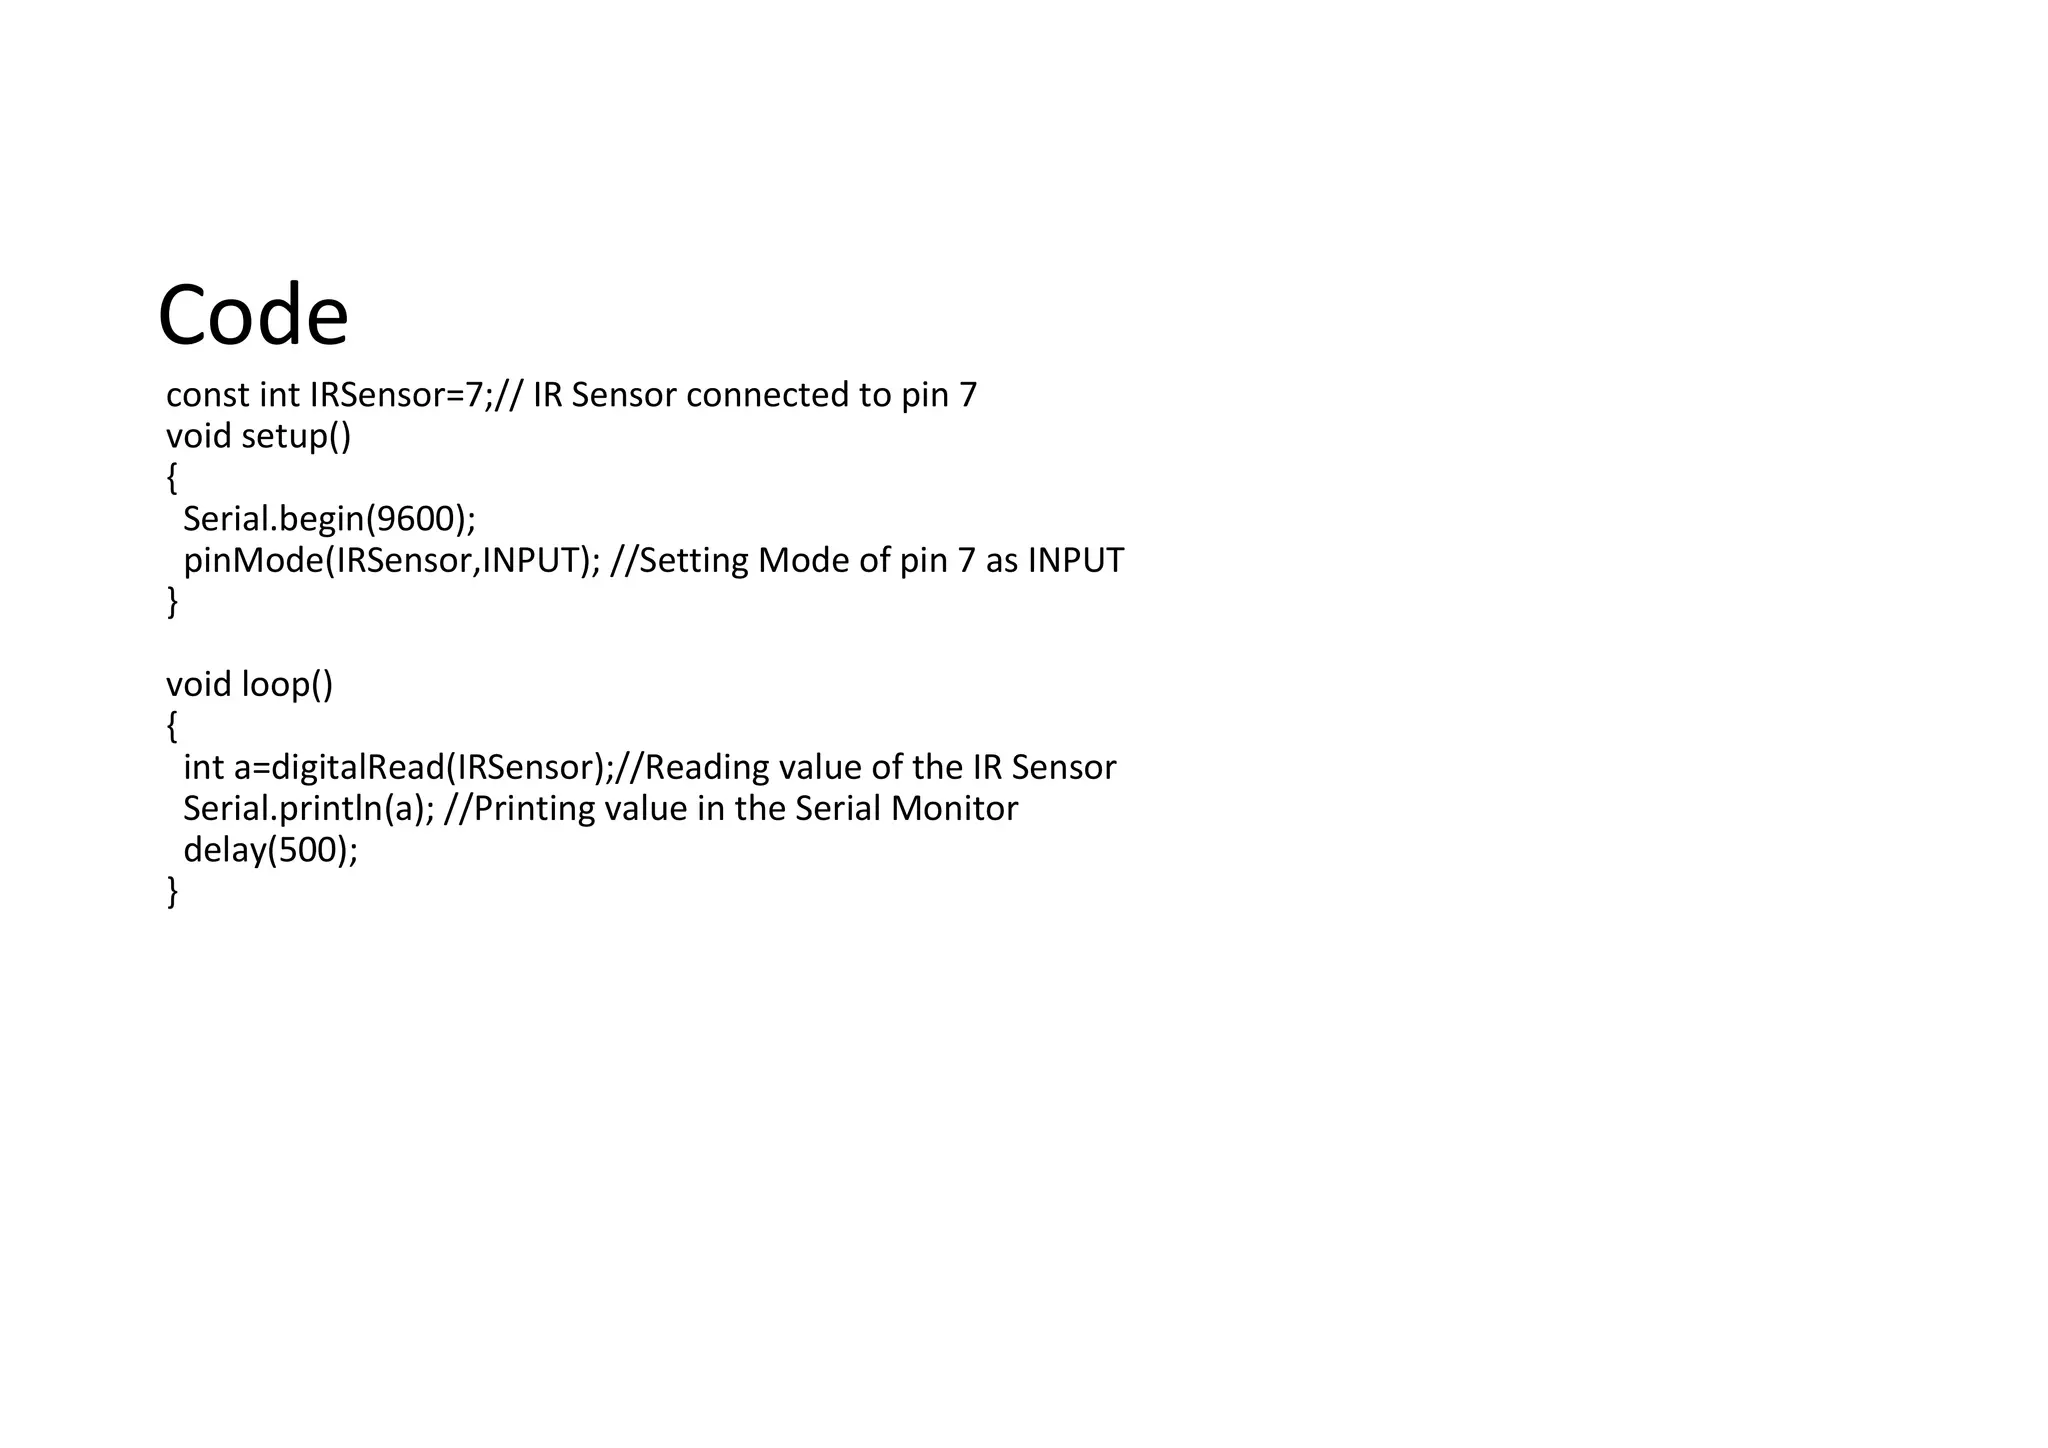
    Code const int IRSensor=7;//IR Sensor connected to pin 7 void setup() { Serial.begin(9600); pinMode(IRSensor,INPUT); //Setting Mode of pin 7 as INPUT } void loop() { int a=digitalRead(IRSensor);//Reading value of the IR Sensor Serial.println(a); //Printing value in the Serial Monitor delay(500); }
  • 36.
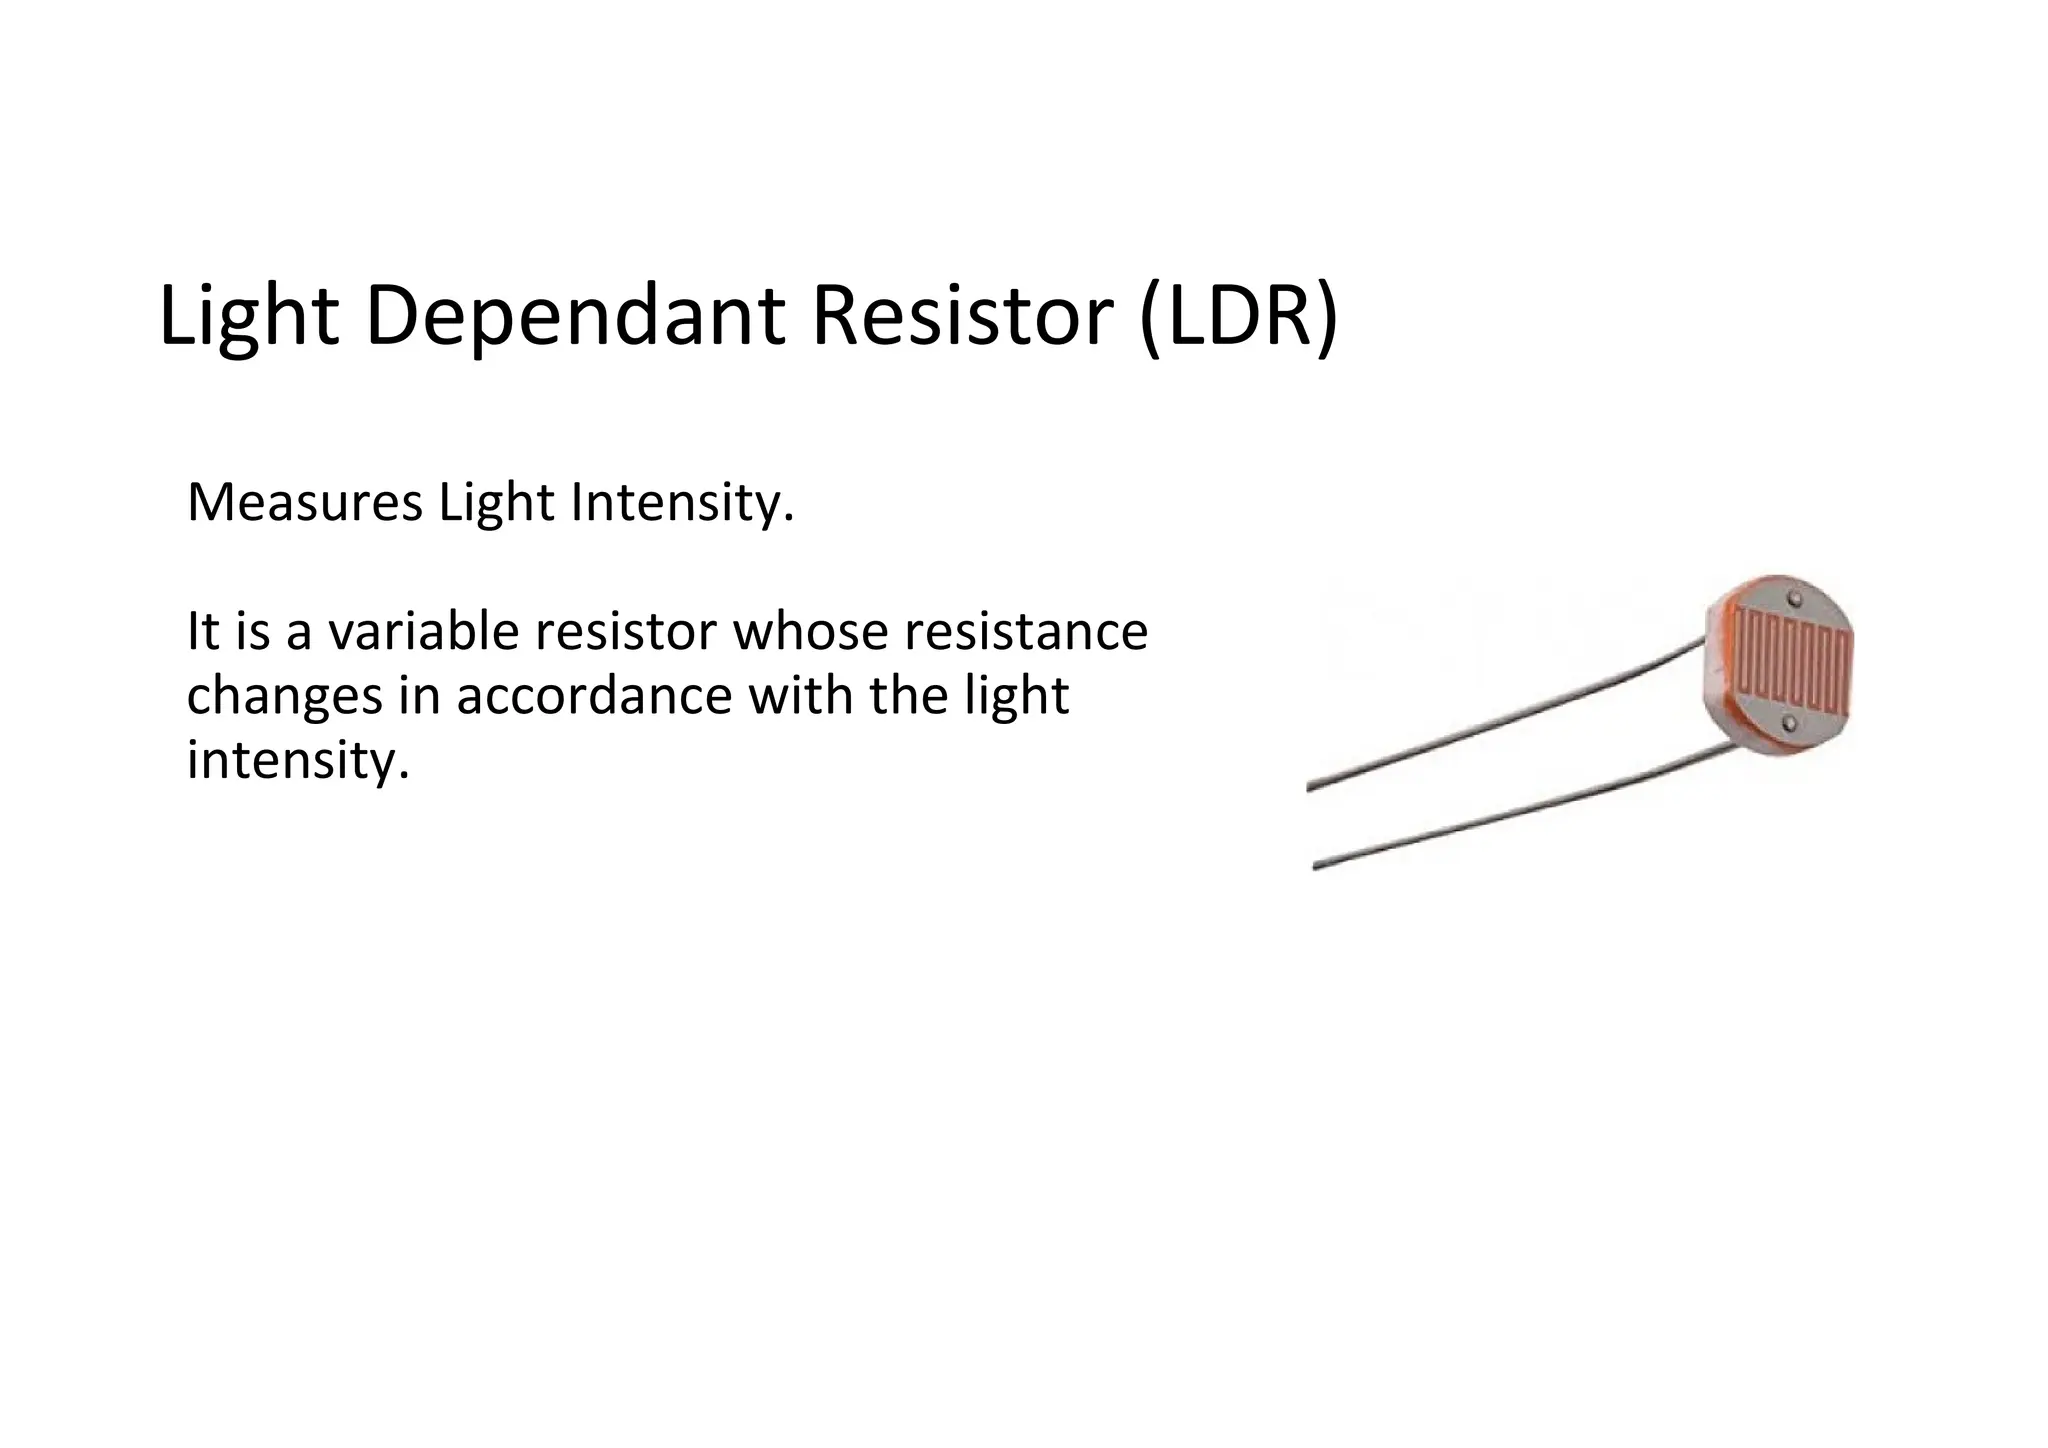
    Light Dependant Resistor(LDR) Measures Light Intensity. It is a variable resistor whose resistance changes in accordance with the light intensity.
  • 37.
  • 38.
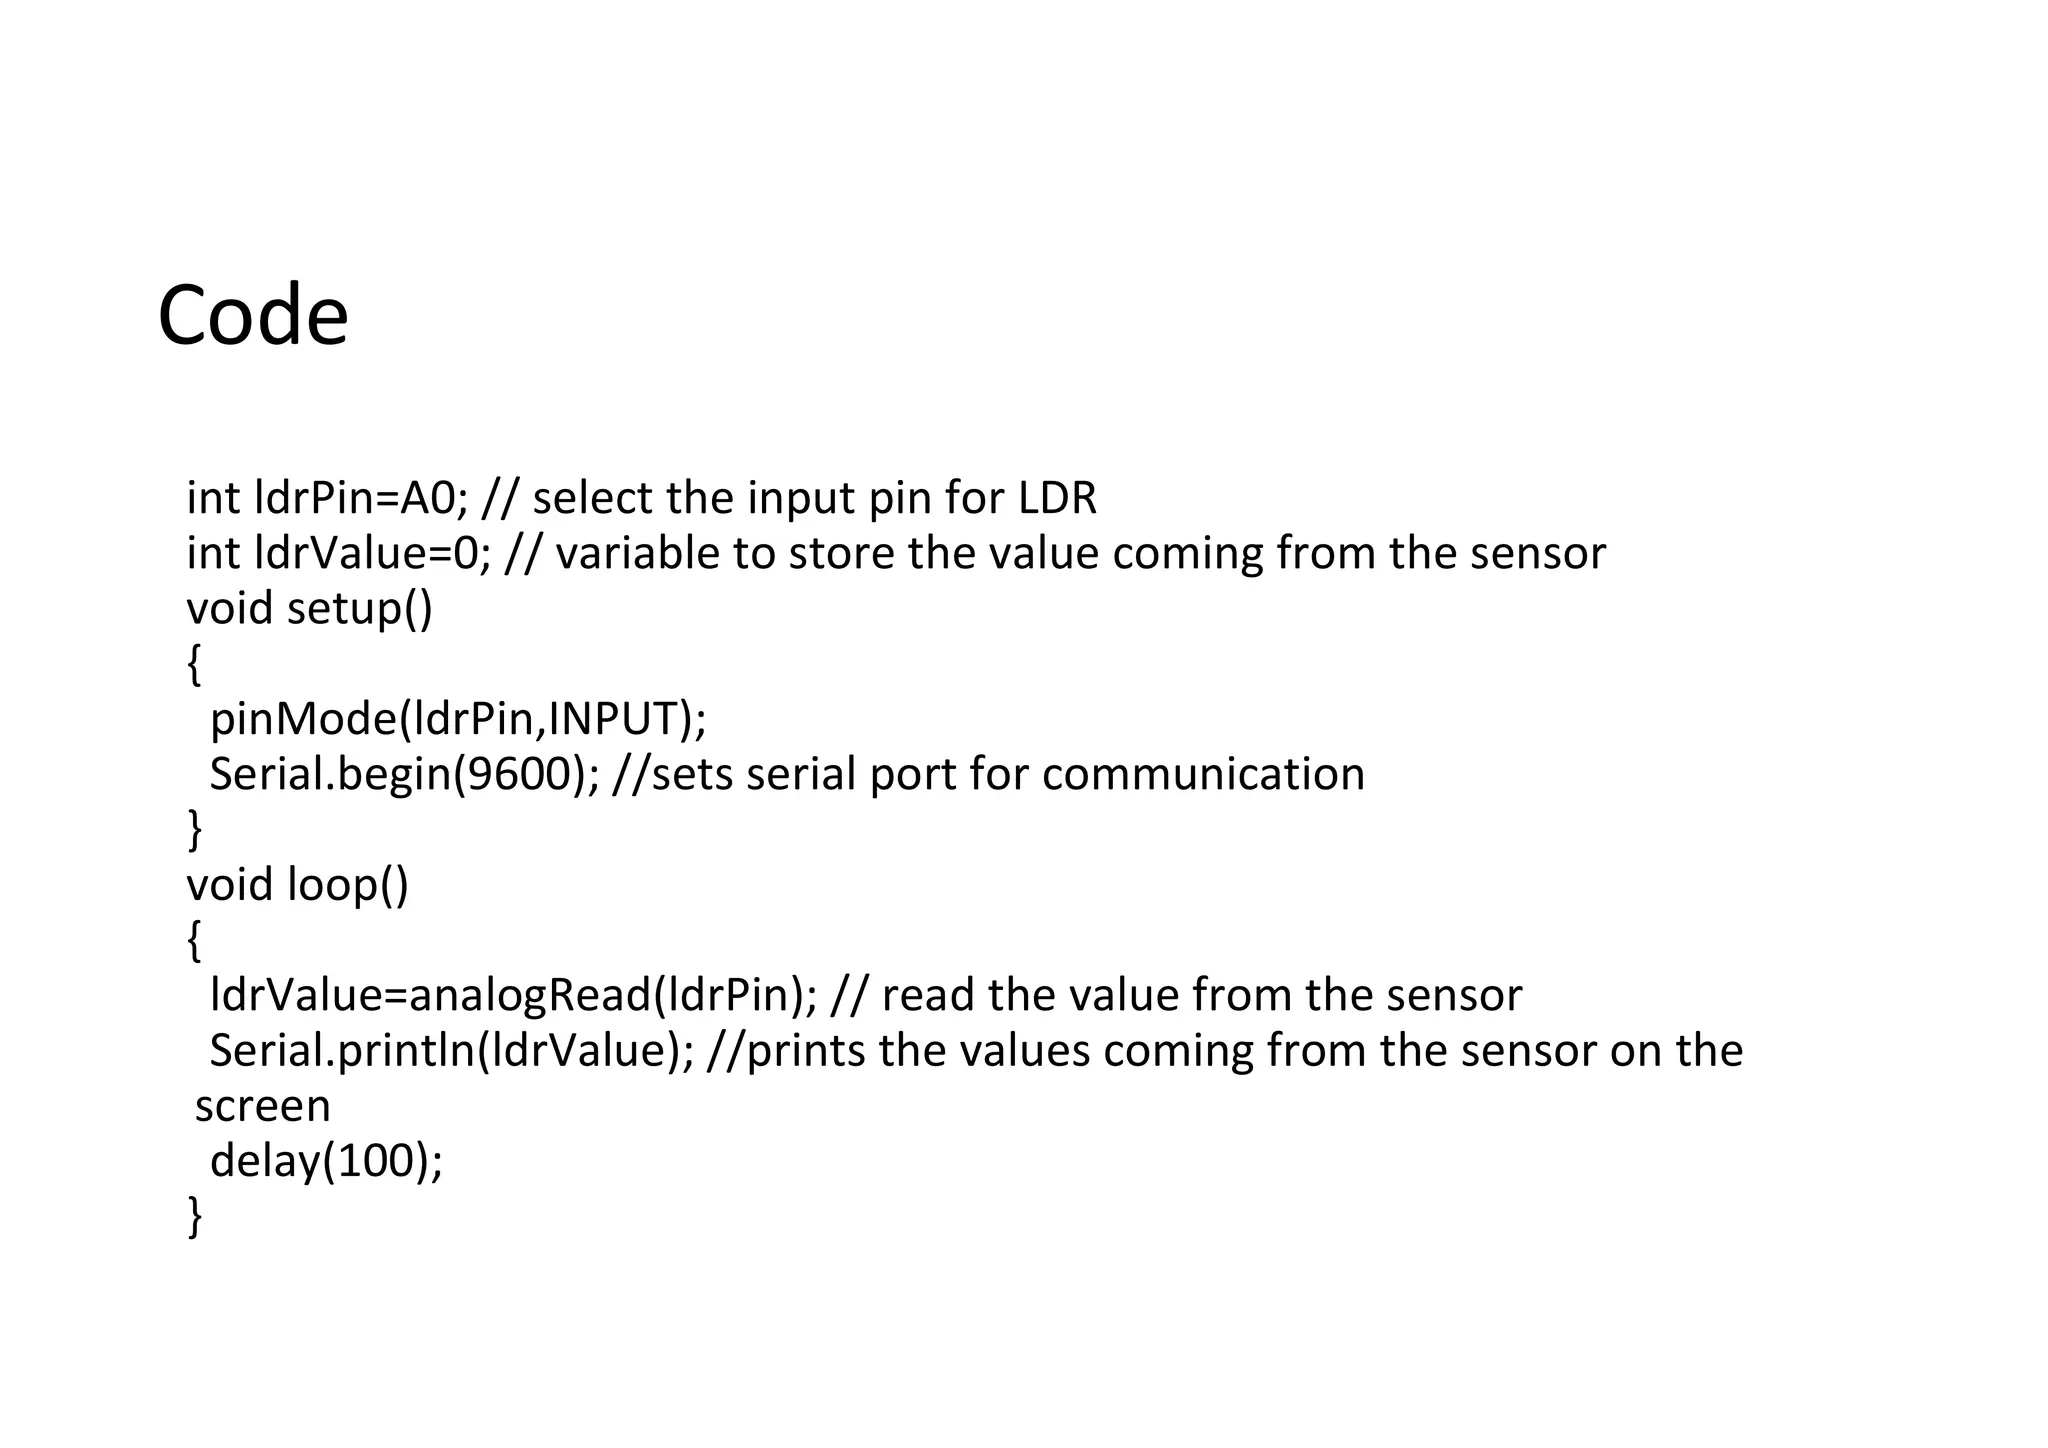
    Code int ldrPin=A0; //select the input pin for LDR int ldrValue=0; // variable to store the value coming from the sensor void setup() { pinMode(ldrPin,INPUT); Serial.begin(9600); //sets serial port for communication } void loop() { ldrValue=analogRead(ldrPin); // read the value from the sensor Serial.println(ldrValue); //prints the values coming from the sensor on the screen delay(100); }
  • 39.
    Push Button A PushButton is a type of switch work on a simple mechanism called “Push-to-make”. When pressed it allows current to pass through it or else it remains in off state(or open state) It has four legs out of which two legs are internally connected.
  • 40.
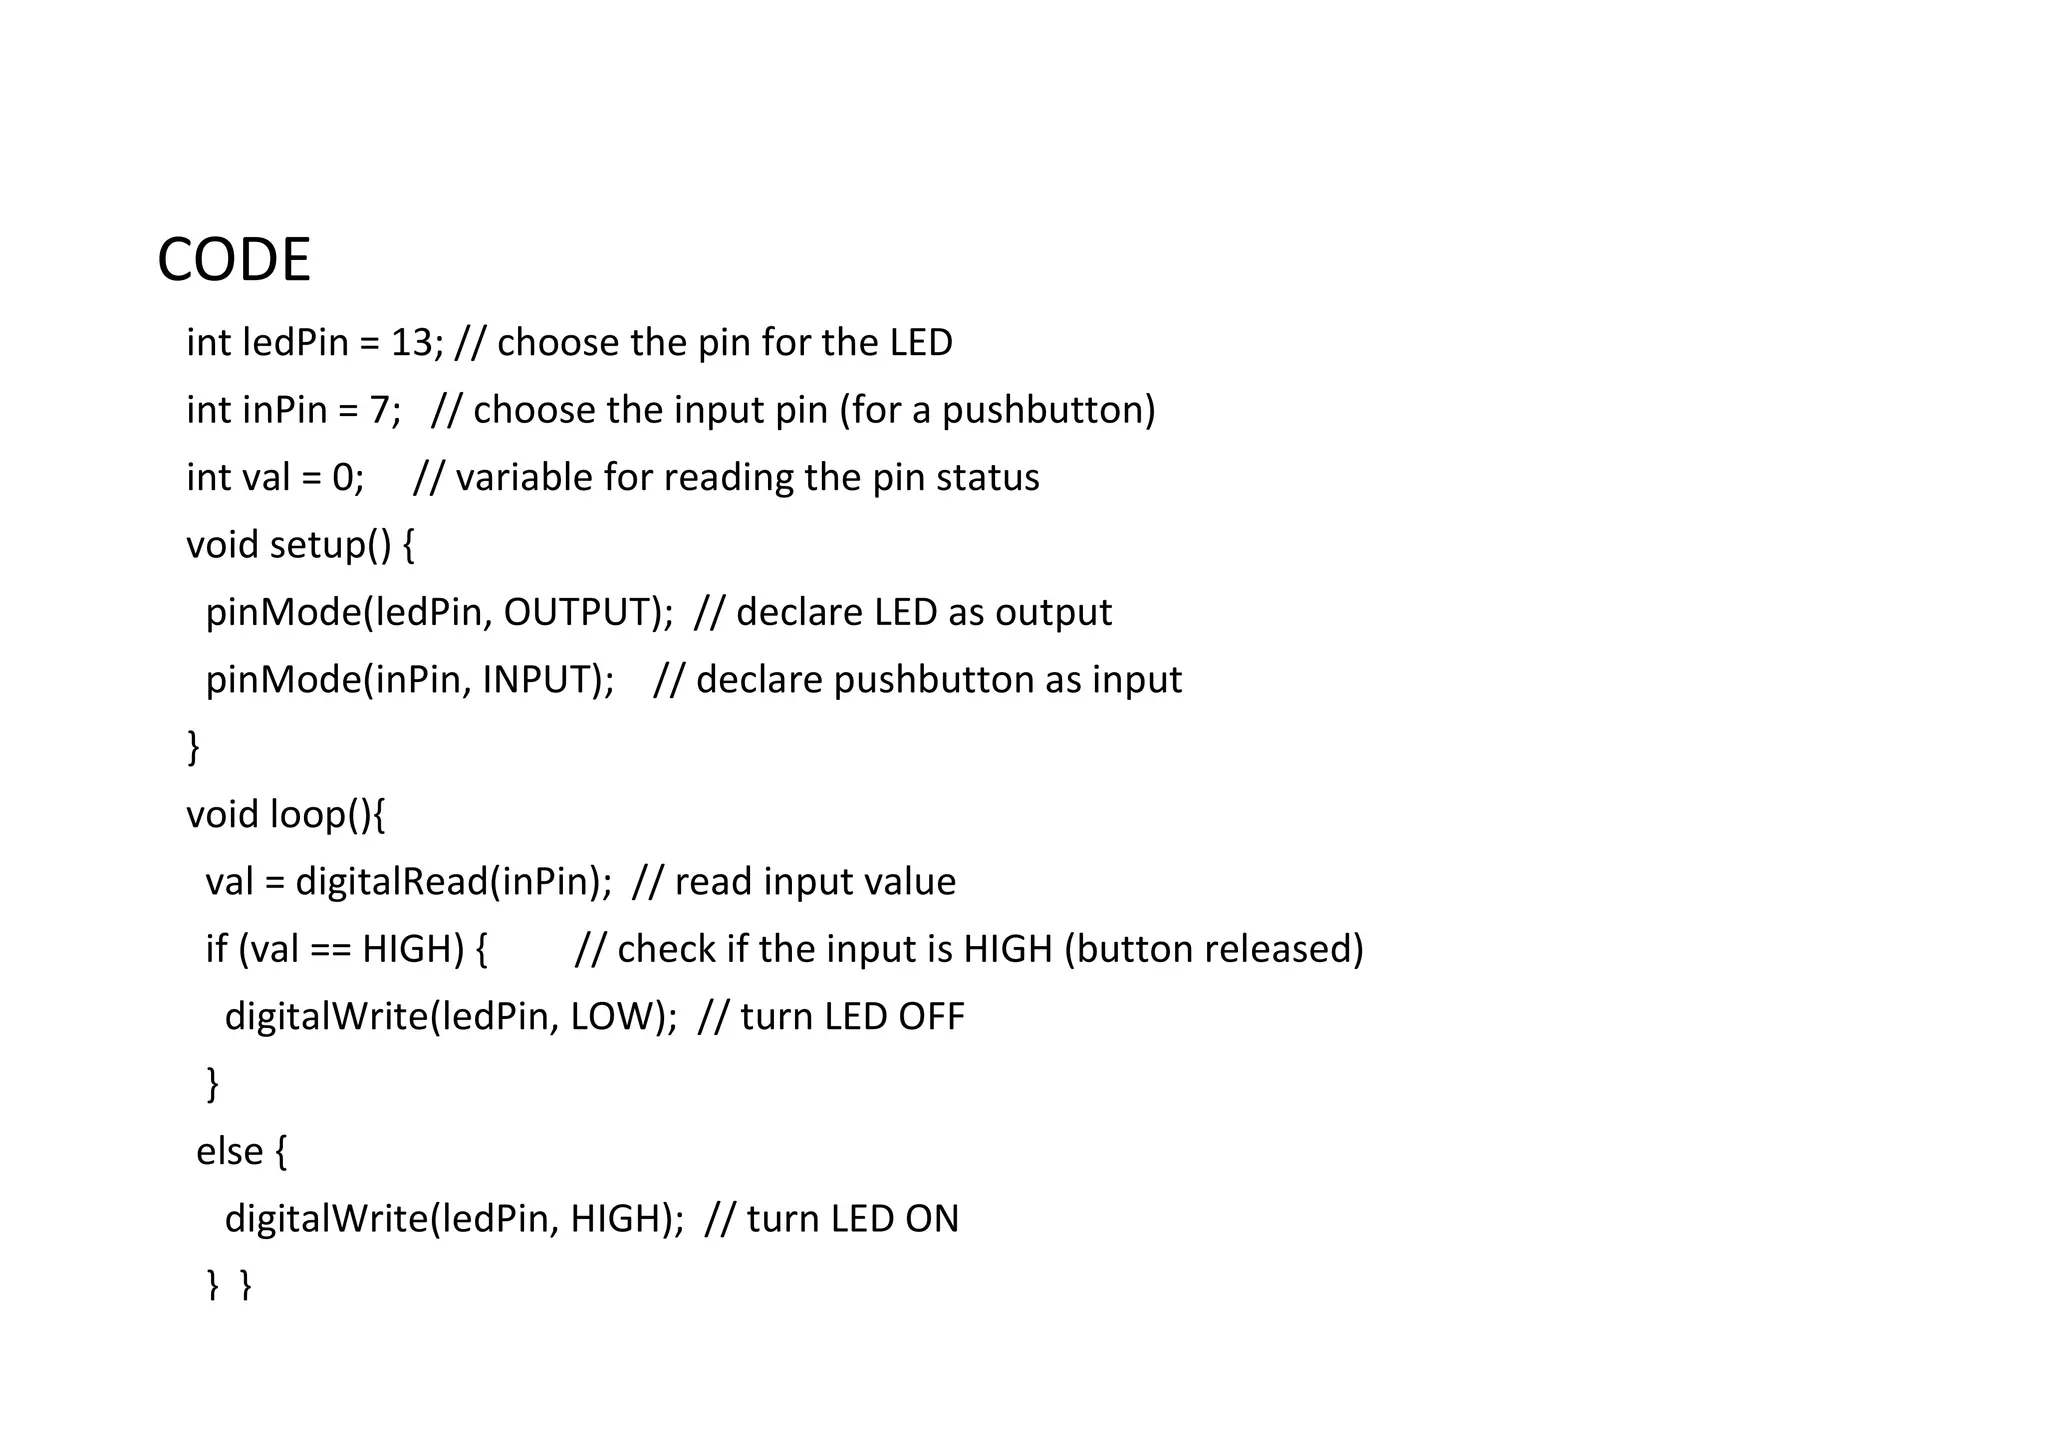
    CODE int ledPin =13; // choose the pin for the LED int inPin = 7; // choose the input pin (for a pushbutton) int val = 0; // variable for reading the pin status void setup() { pinMode(ledPin, OUTPUT); // declare LED as output pinMode(inPin, INPUT); // declare pushbutton as input } void loop(){ val = digitalRead(inPin); // read input value if (val == HIGH) { // check if the input is HIGH (button released) digitalWrite(ledPin, LOW); // turn LED OFF } else { digitalWrite(ledPin, HIGH); // turn LED ON } }
  • 42.
  • 44.
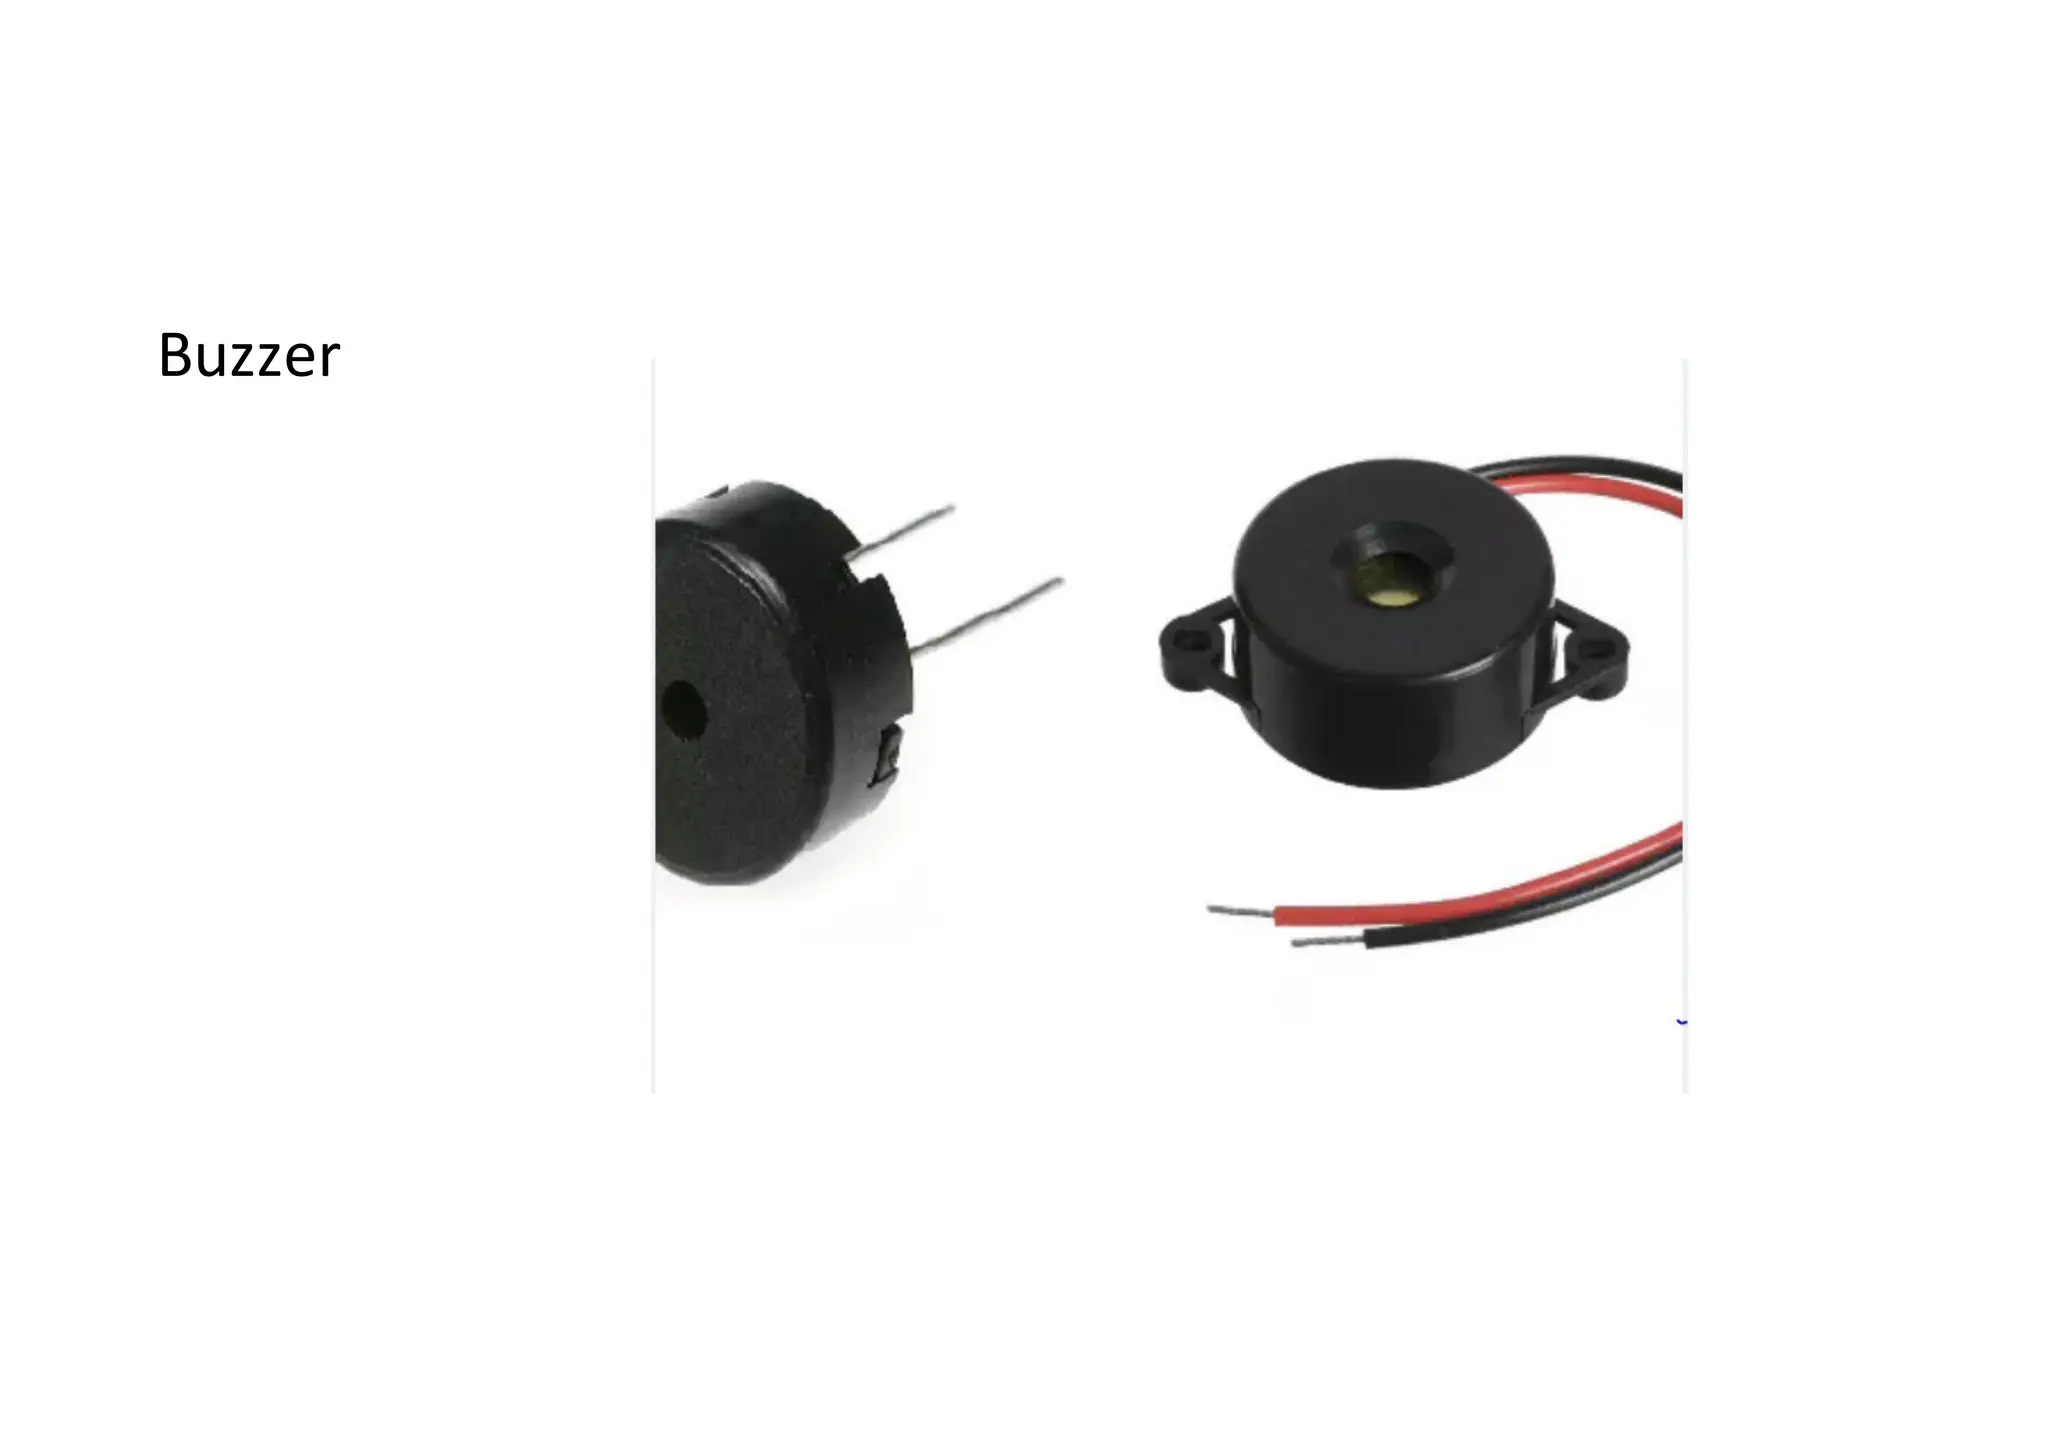
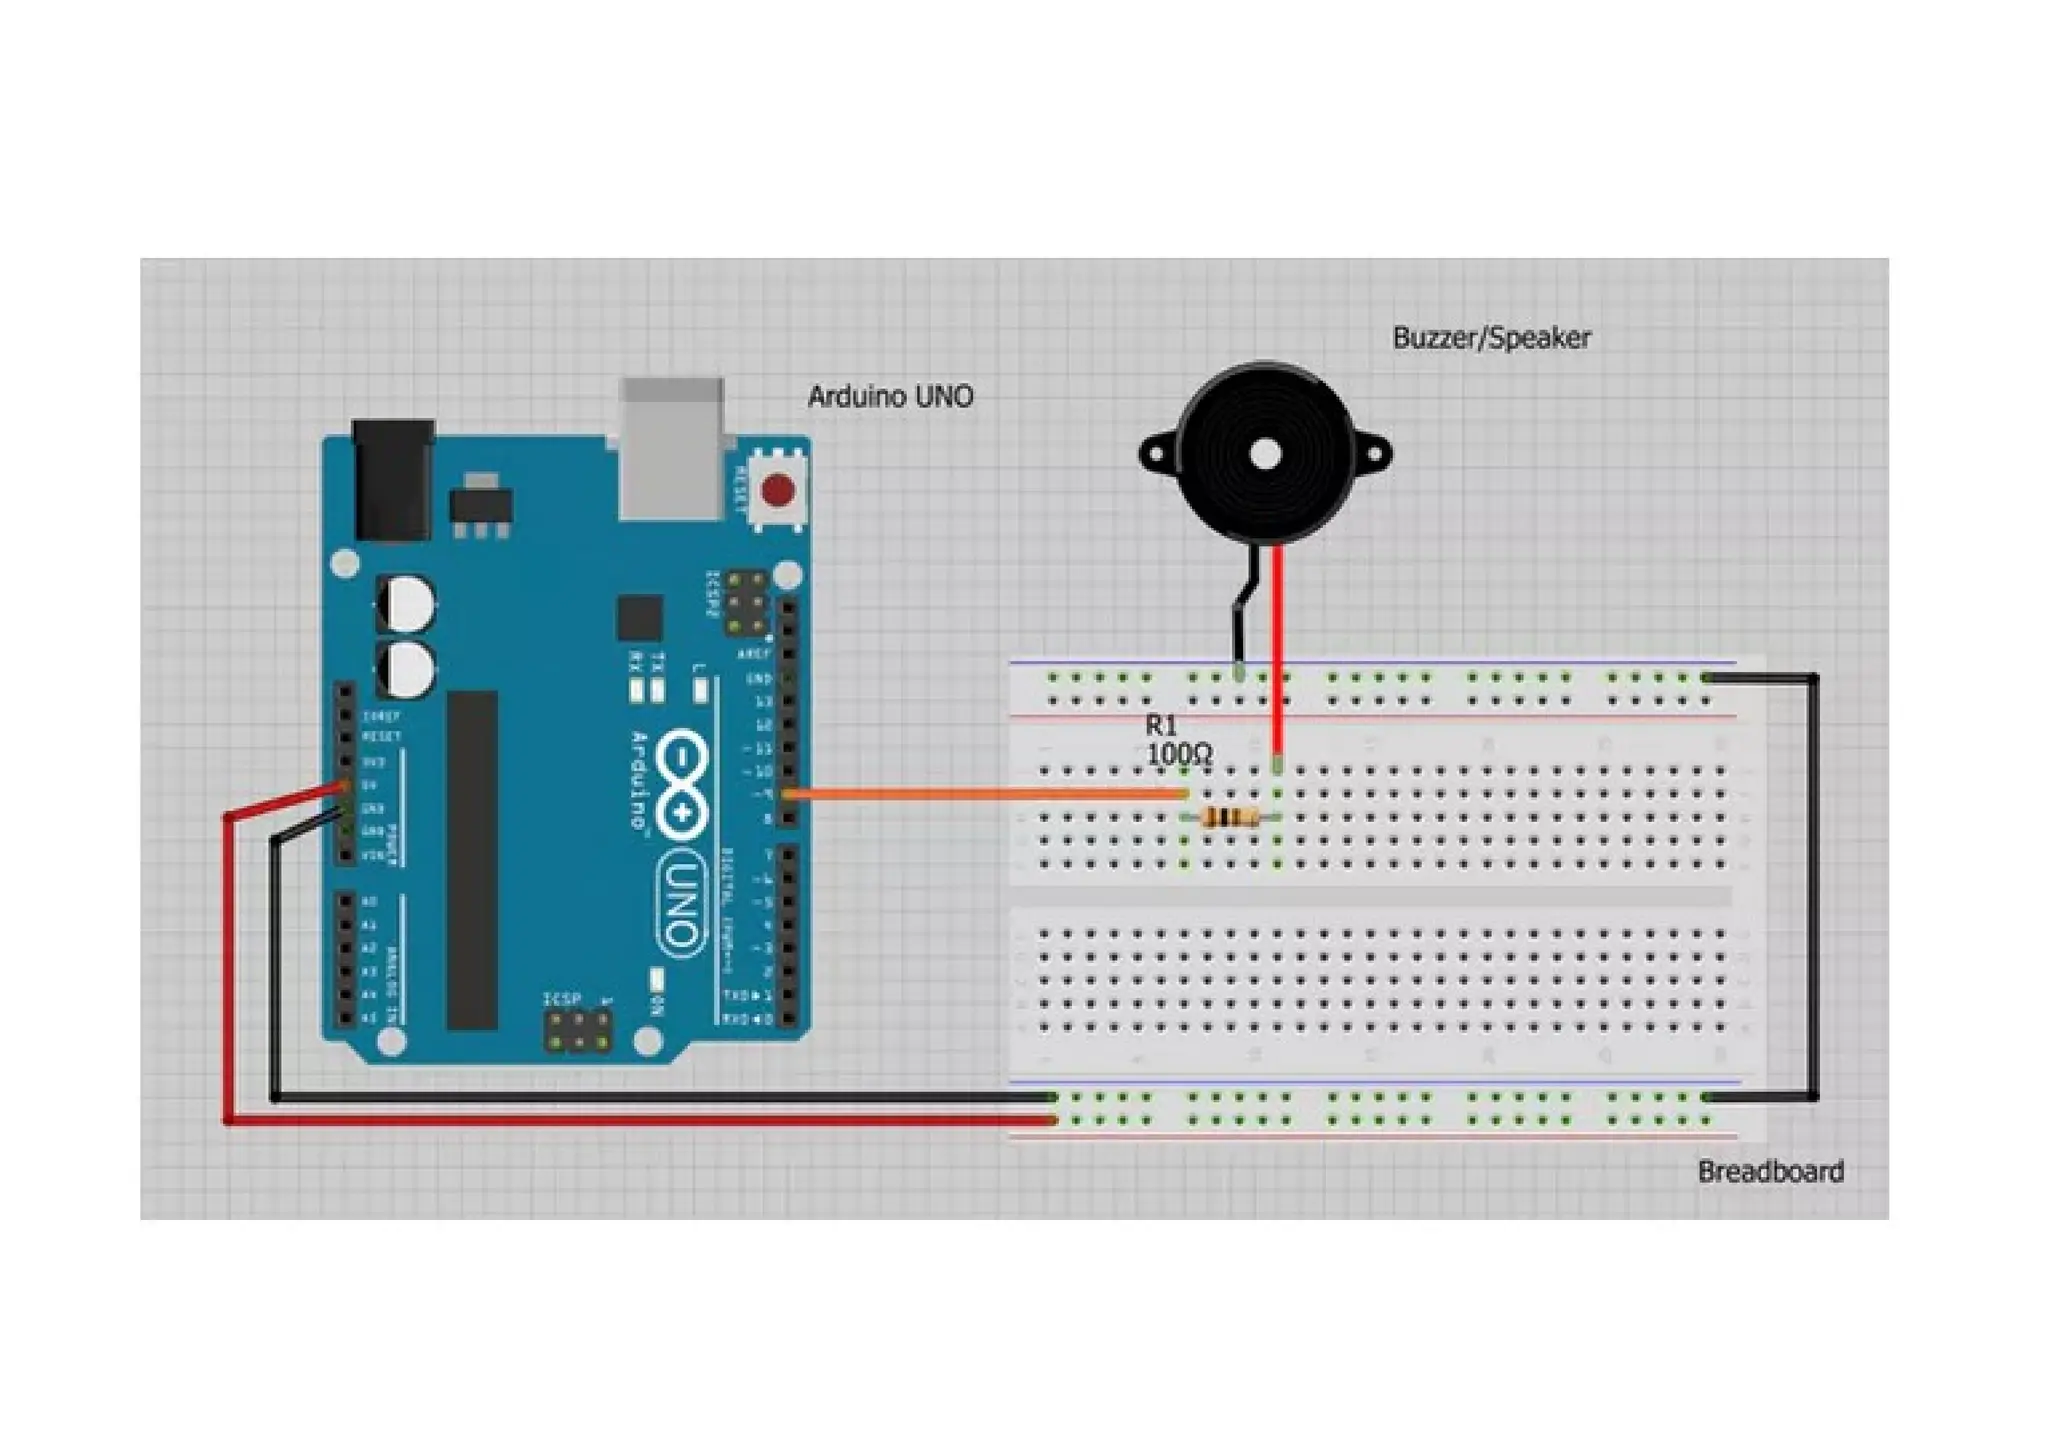
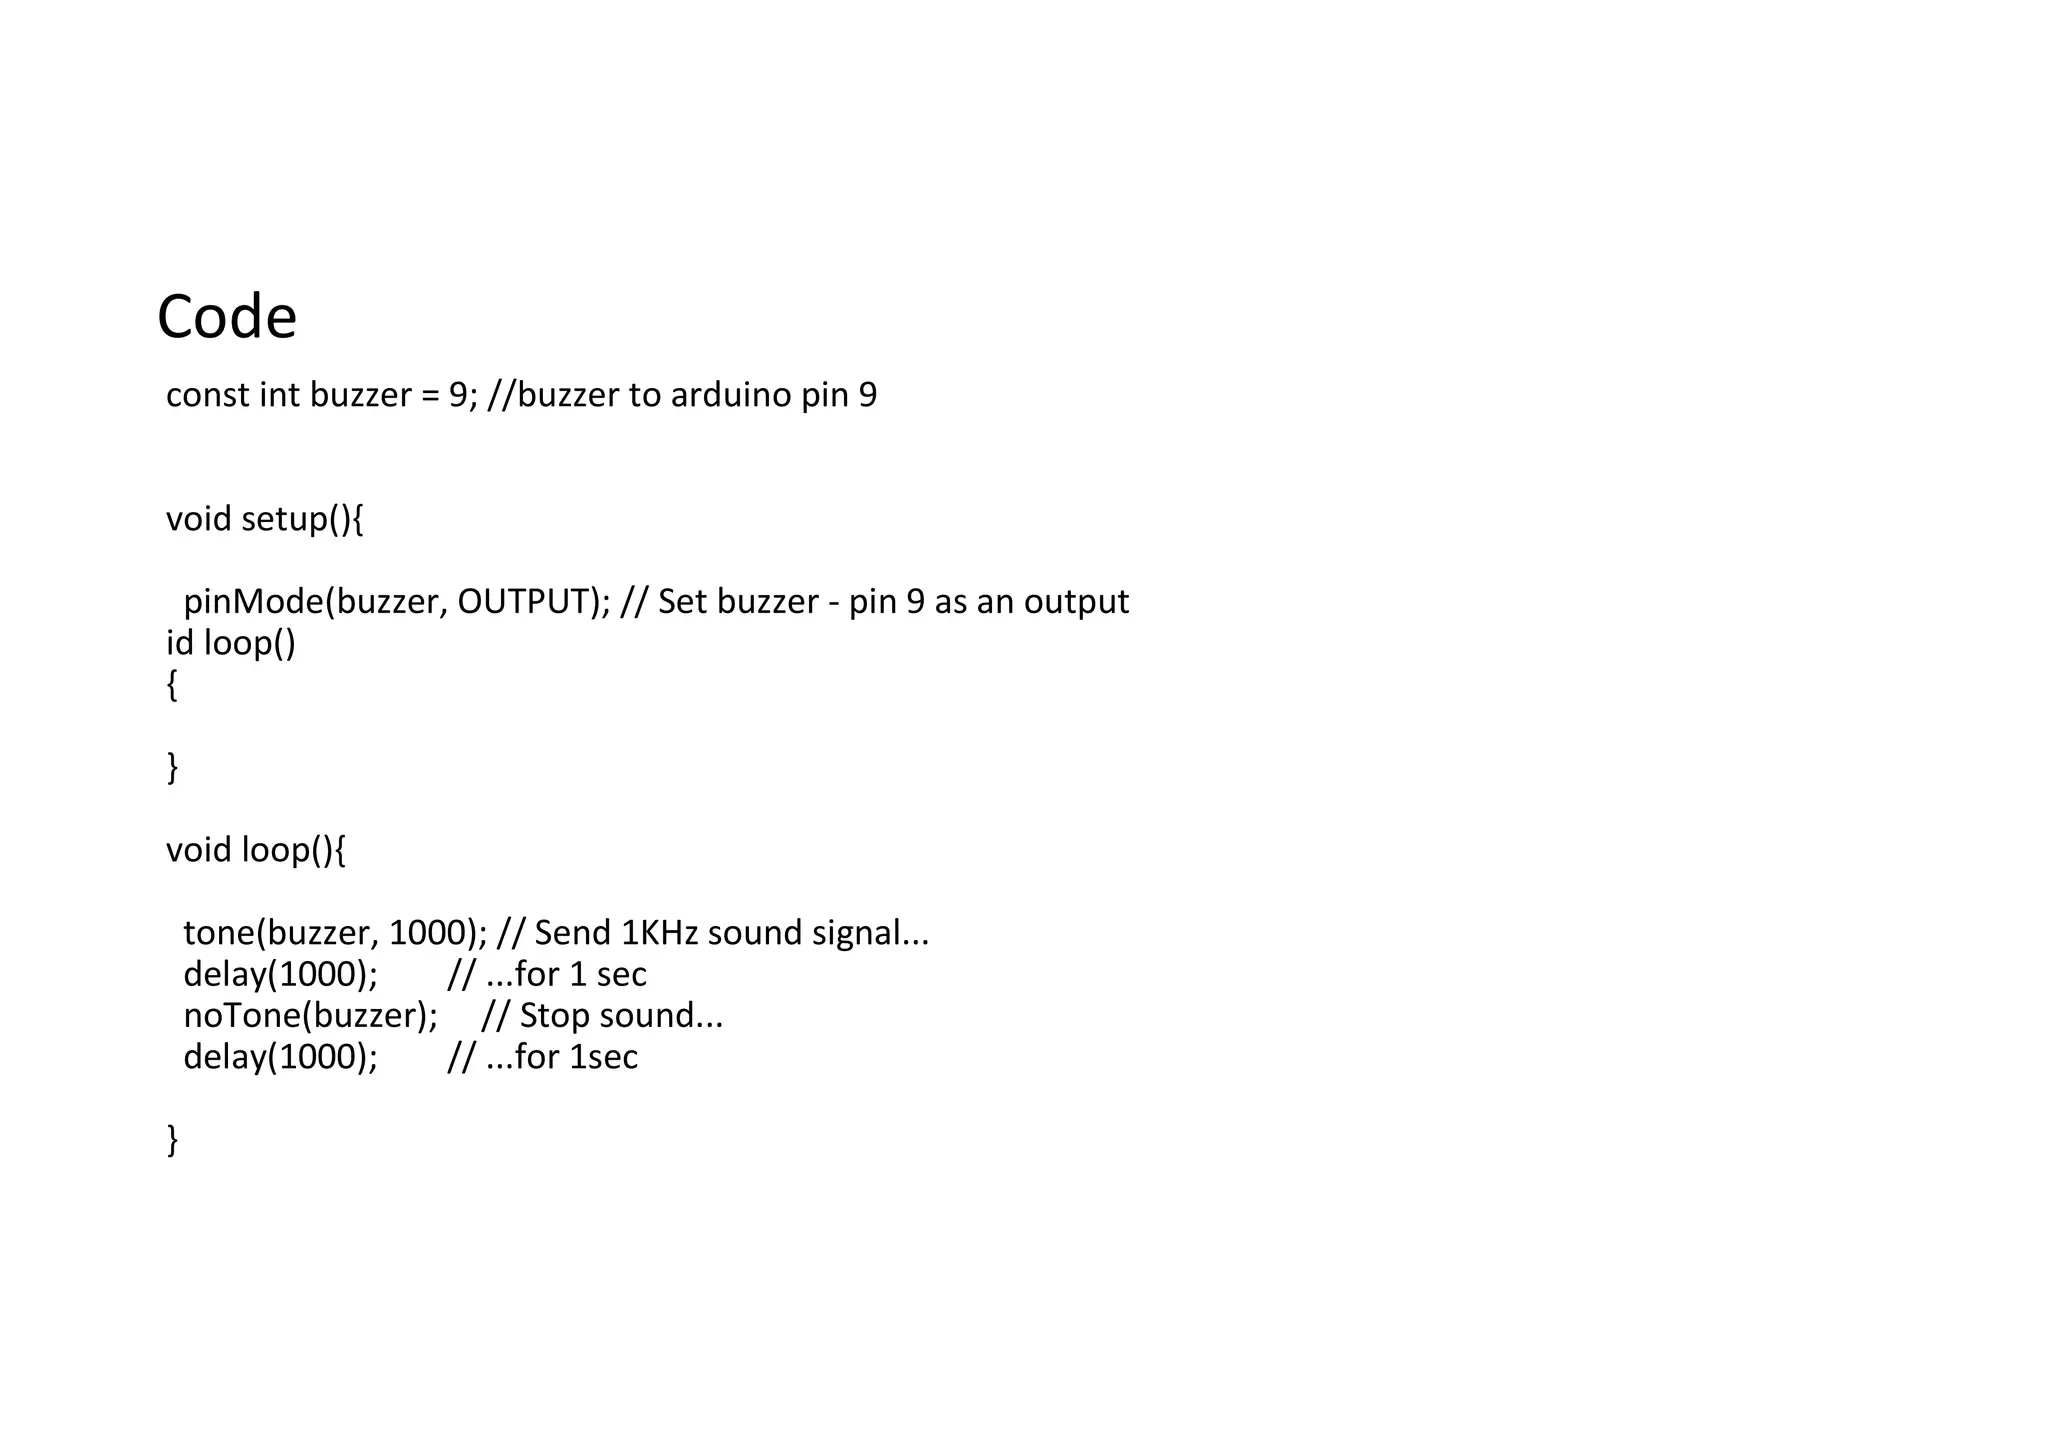
    Code const int buzzer= 9; //buzzer to arduino pin 9 void setup(){ pinMode(buzzer, OUTPUT); // Set buzzer - pin 9 as an output id loop() { } void loop(){ tone(buzzer, 1000); // Send 1KHz sound signal... delay(1000); // ...for 1 sec noTone(buzzer); // Stop sound... delay(1000); // ...for 1sec }
  • 45.
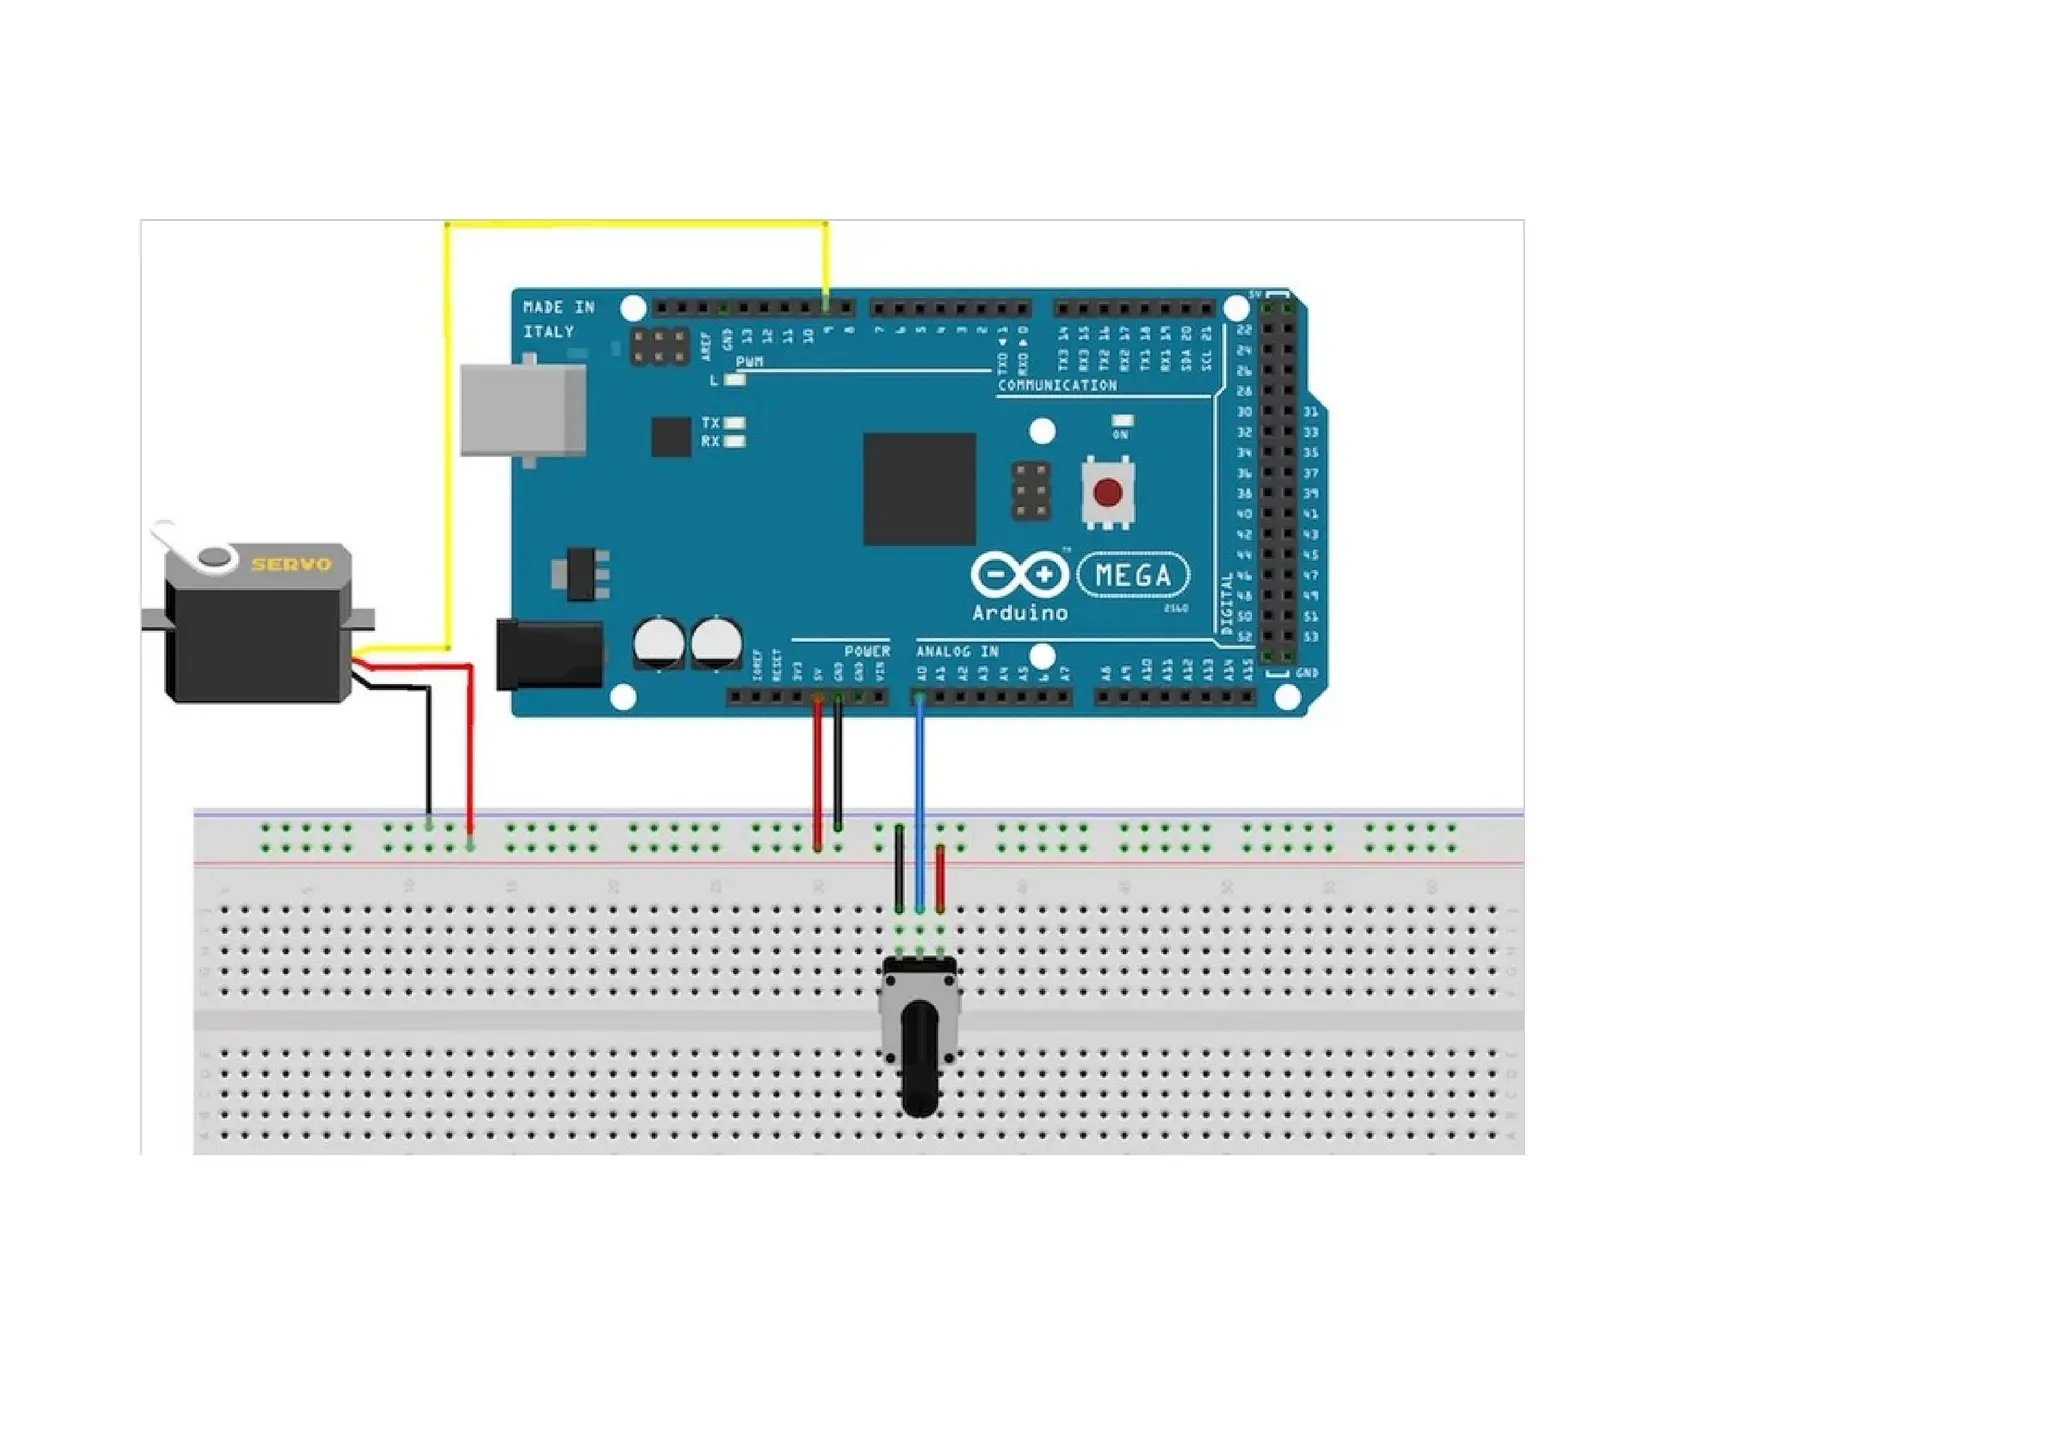
    Servo Motor A servomotor is an electrical device which can push or rotate an object with great precision. If you want to rotate and object at some specific angles or distance, then you use servo motor. It is just made up of simple motor which run through servo mechanism
  • 47.
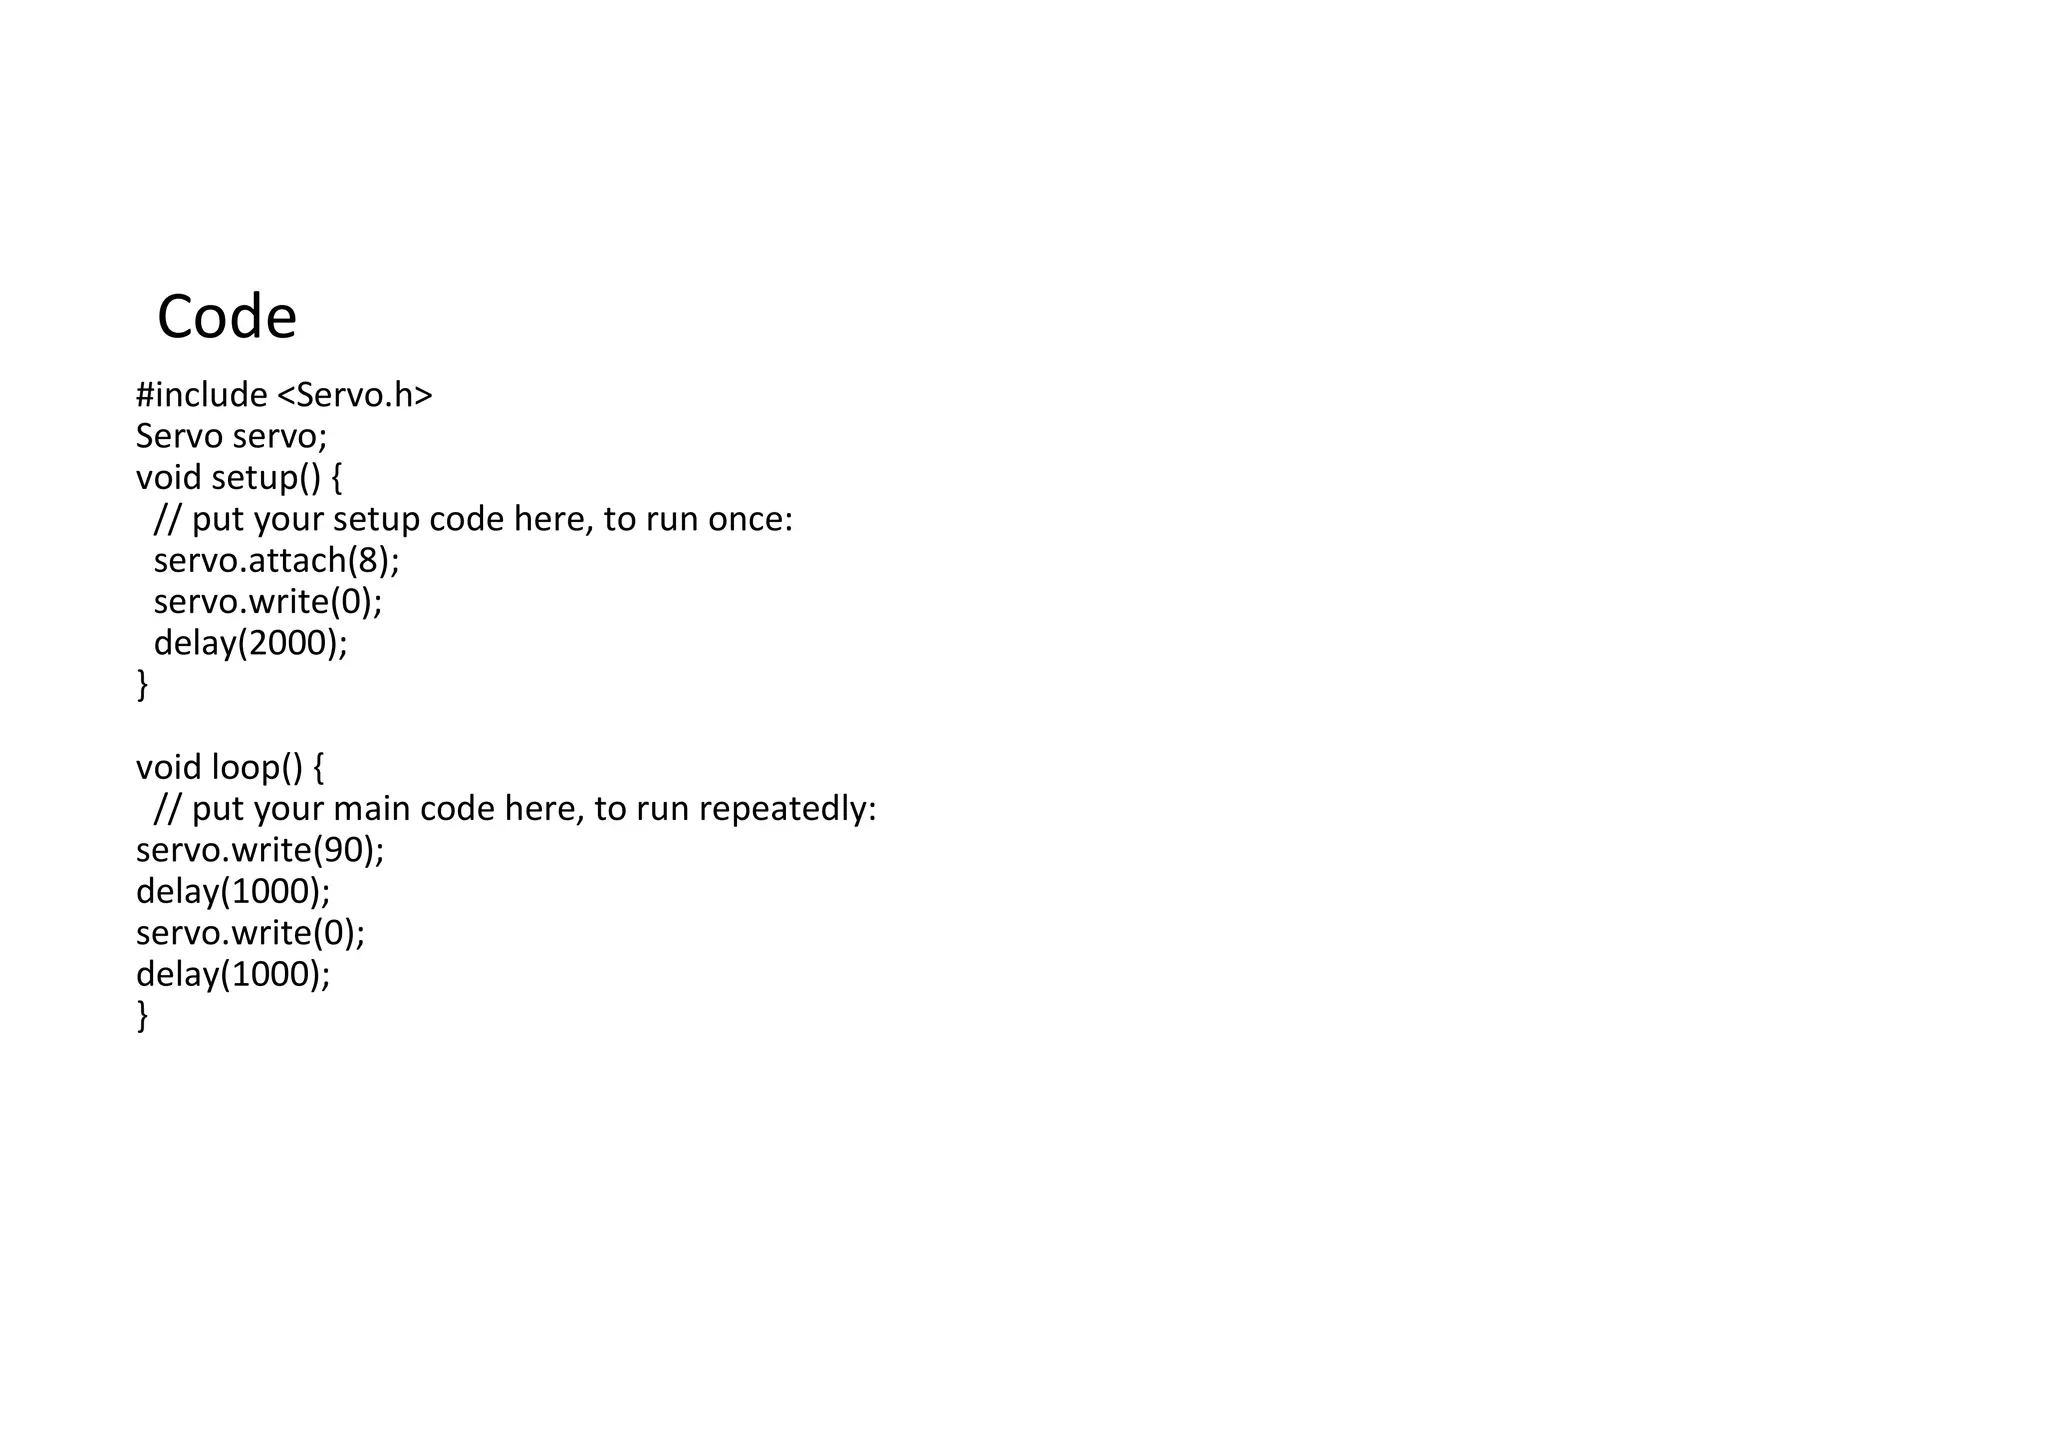
    Code #include <Servo.h> Servo servo; voidsetup() { // put your setup code here, to run once: servo.attach(8); servo.write(0); delay(2000); } void loop() { // put your main code here, to run repeatedly: servo.write(90); delay(1000); servo.write(0); delay(1000); }
  • 48.
  • 49.
    Structure of aC program
  • 50.
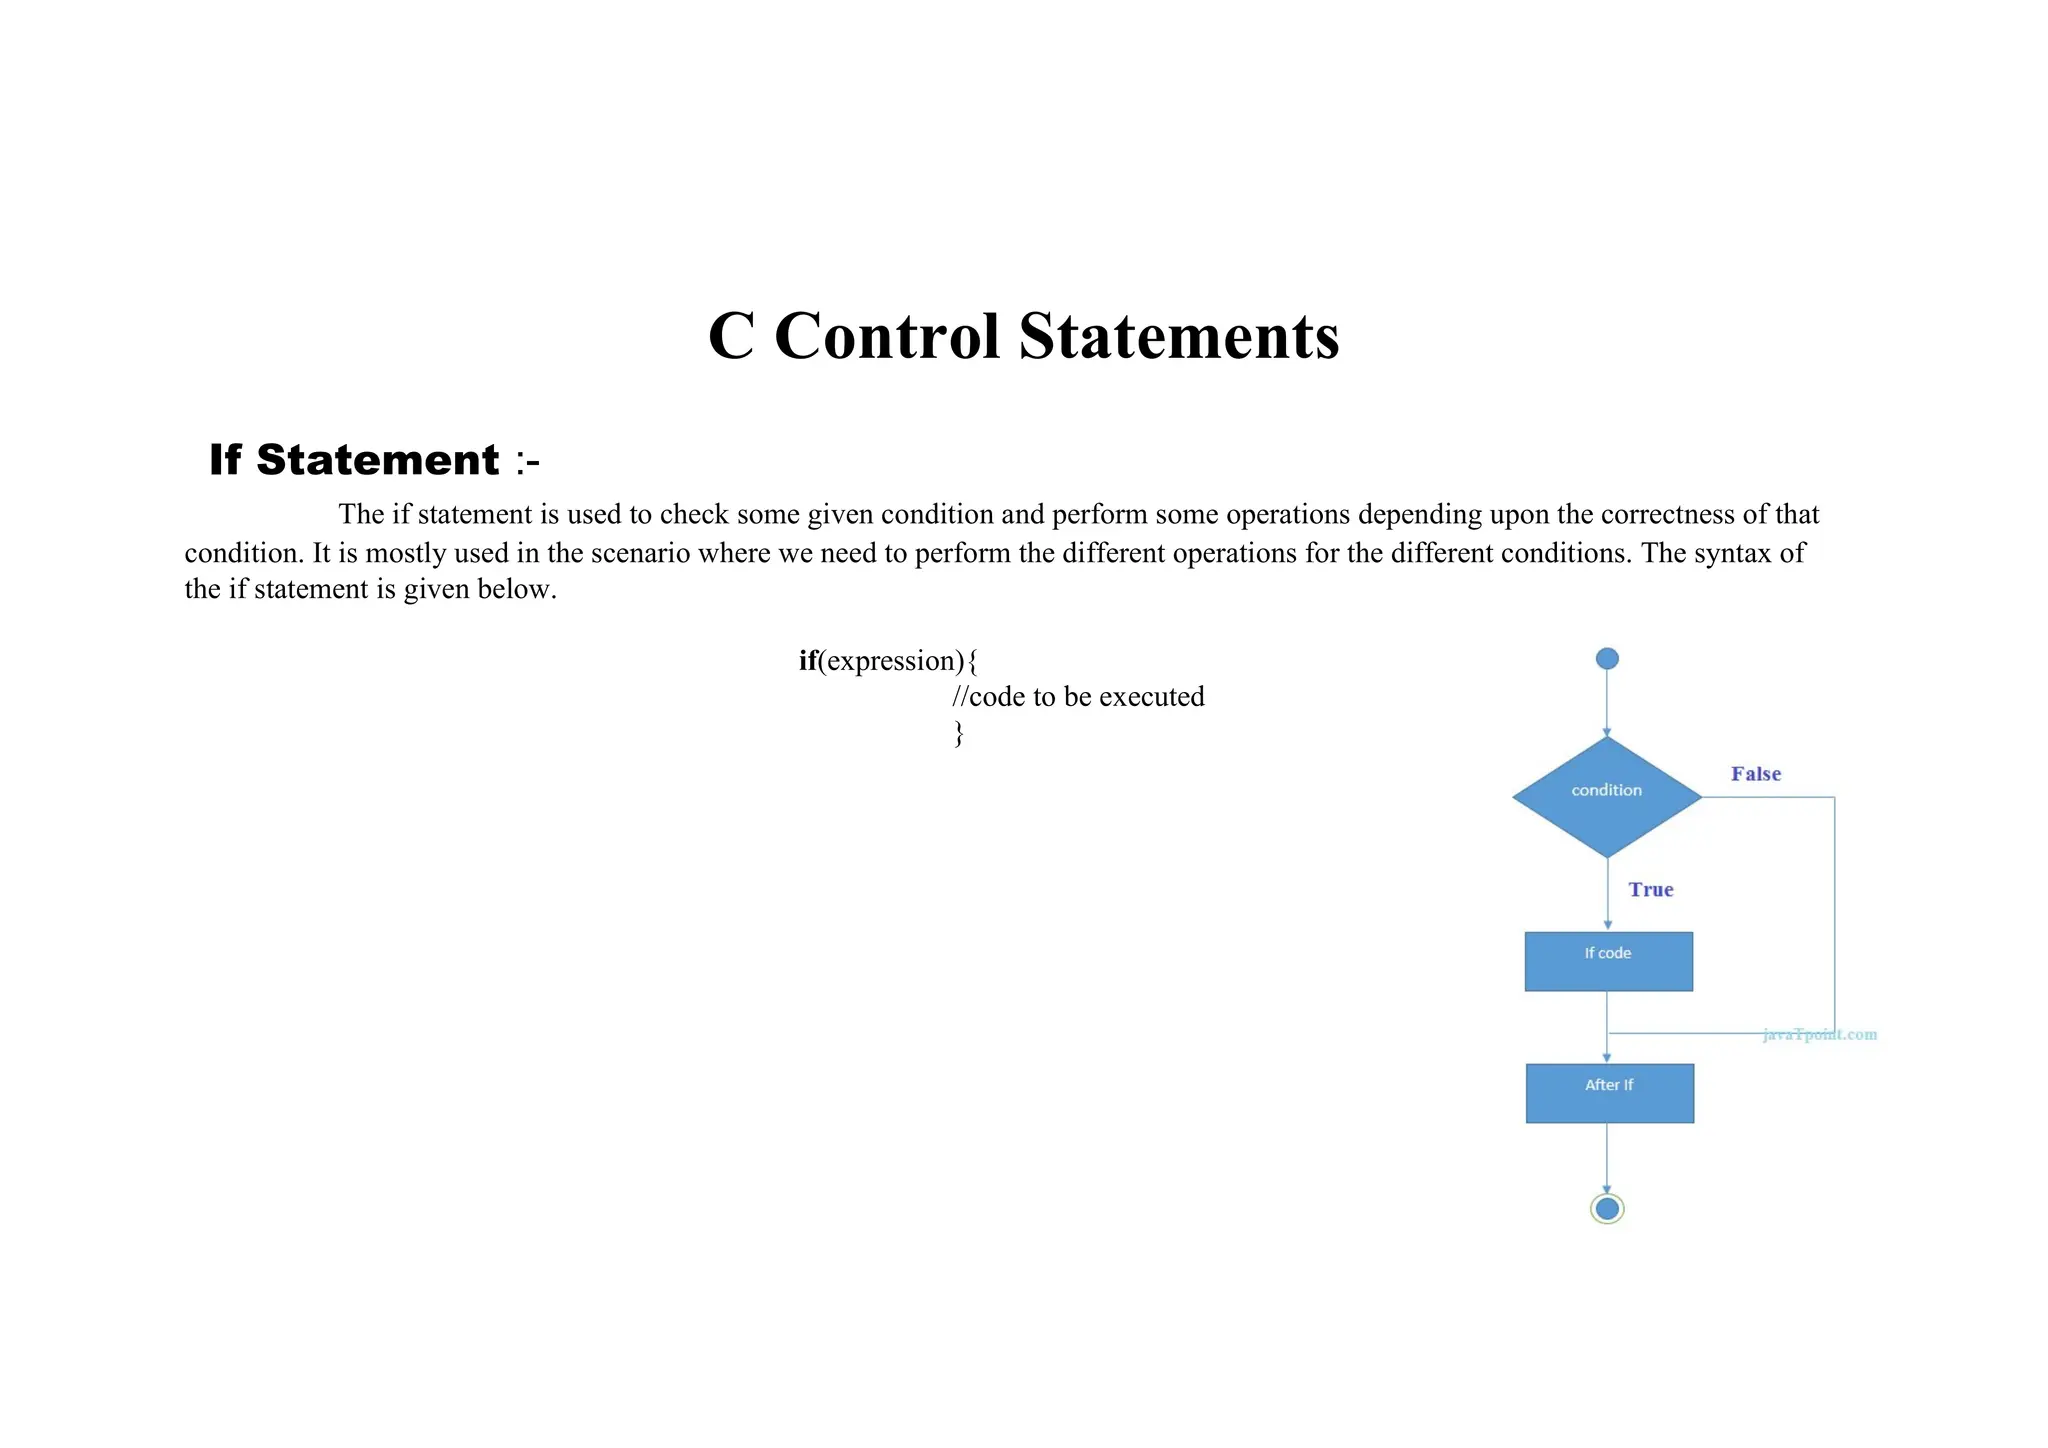
    C Control Statements IfStatement :- The if statement is used to check some given condition and perform some operations depending upon the correctness of that condition. It is mostly used in the scenario where we need to perform the different operations for the different conditions. The syntax of the if statement is given below. if(expression){ //code to be executed }
  • 51.
    for example:- #include<stdio.h> int main(){ intnumber=0; printf("Enter a number:"); scanf("%d",&number); if(number%2==0){ printf("%d is even number",number); } return 0; } Output Enter a number:4 4 is even number
  • 52.
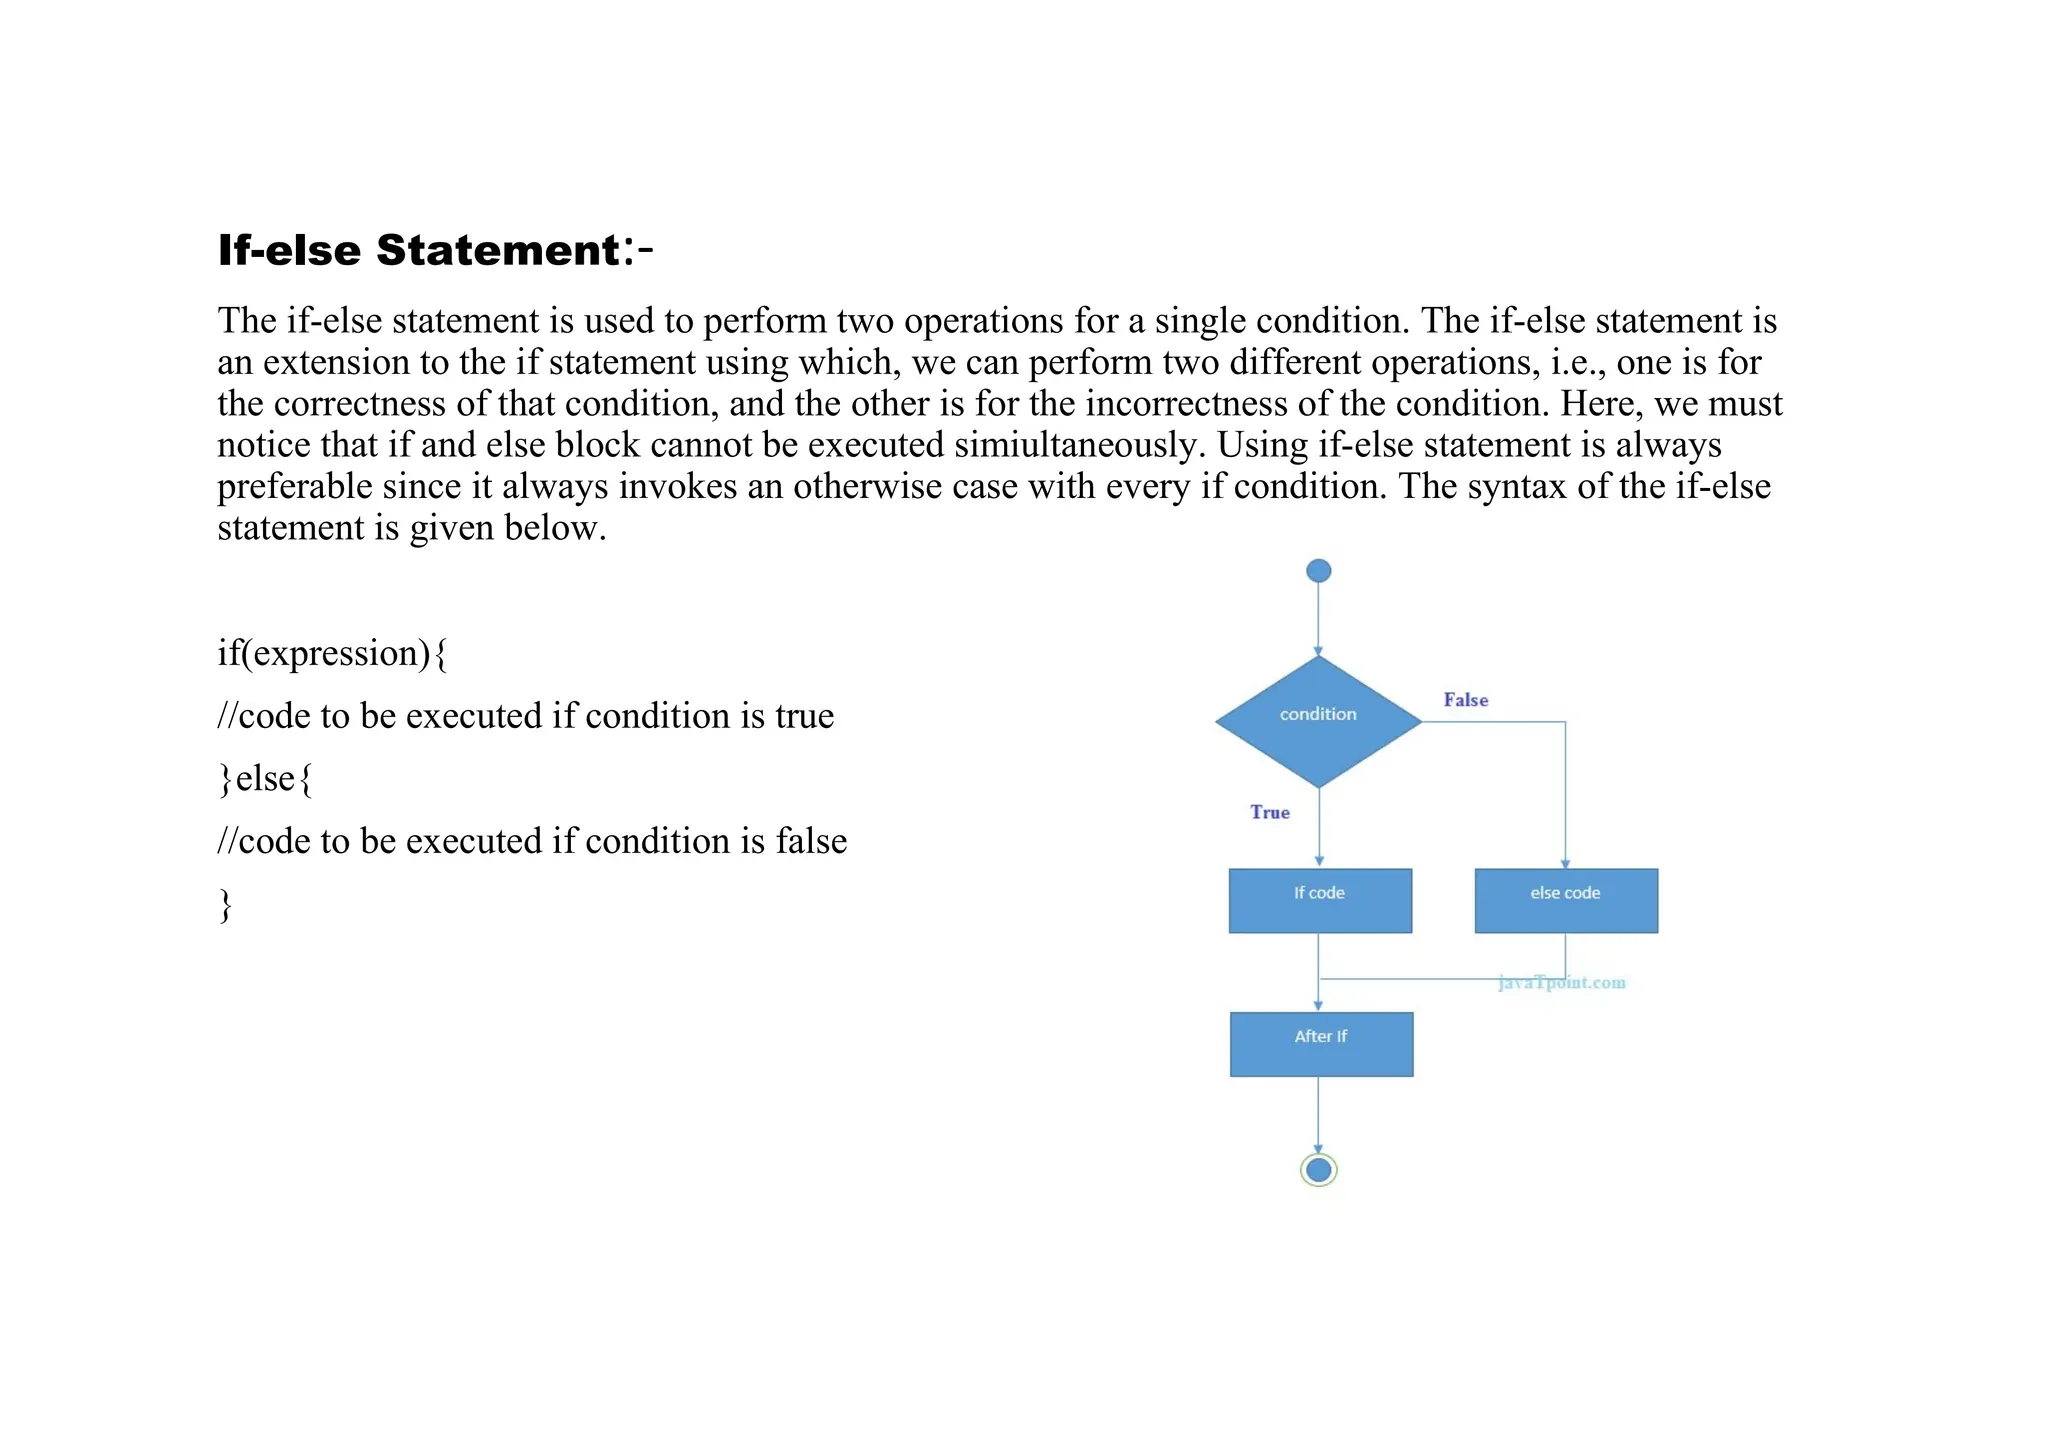
    If-else Statement:- The if-elsestatement is used to perform two operations for a single condition. The if-else statement is an extension to the if statement using which, we can perform two different operations, i.e., one is for the correctness of that condition, and the other is for the incorrectness of the condition. Here, we must notice that if and else block cannot be executed simiultaneously. Using if-else statement is always preferable since it always invokes an otherwise case with every if condition. The syntax of the if-else statement is given below. if(expression){ //code to be executed if condition is true }else{ //code to be executed if condition is false }
  • 53.
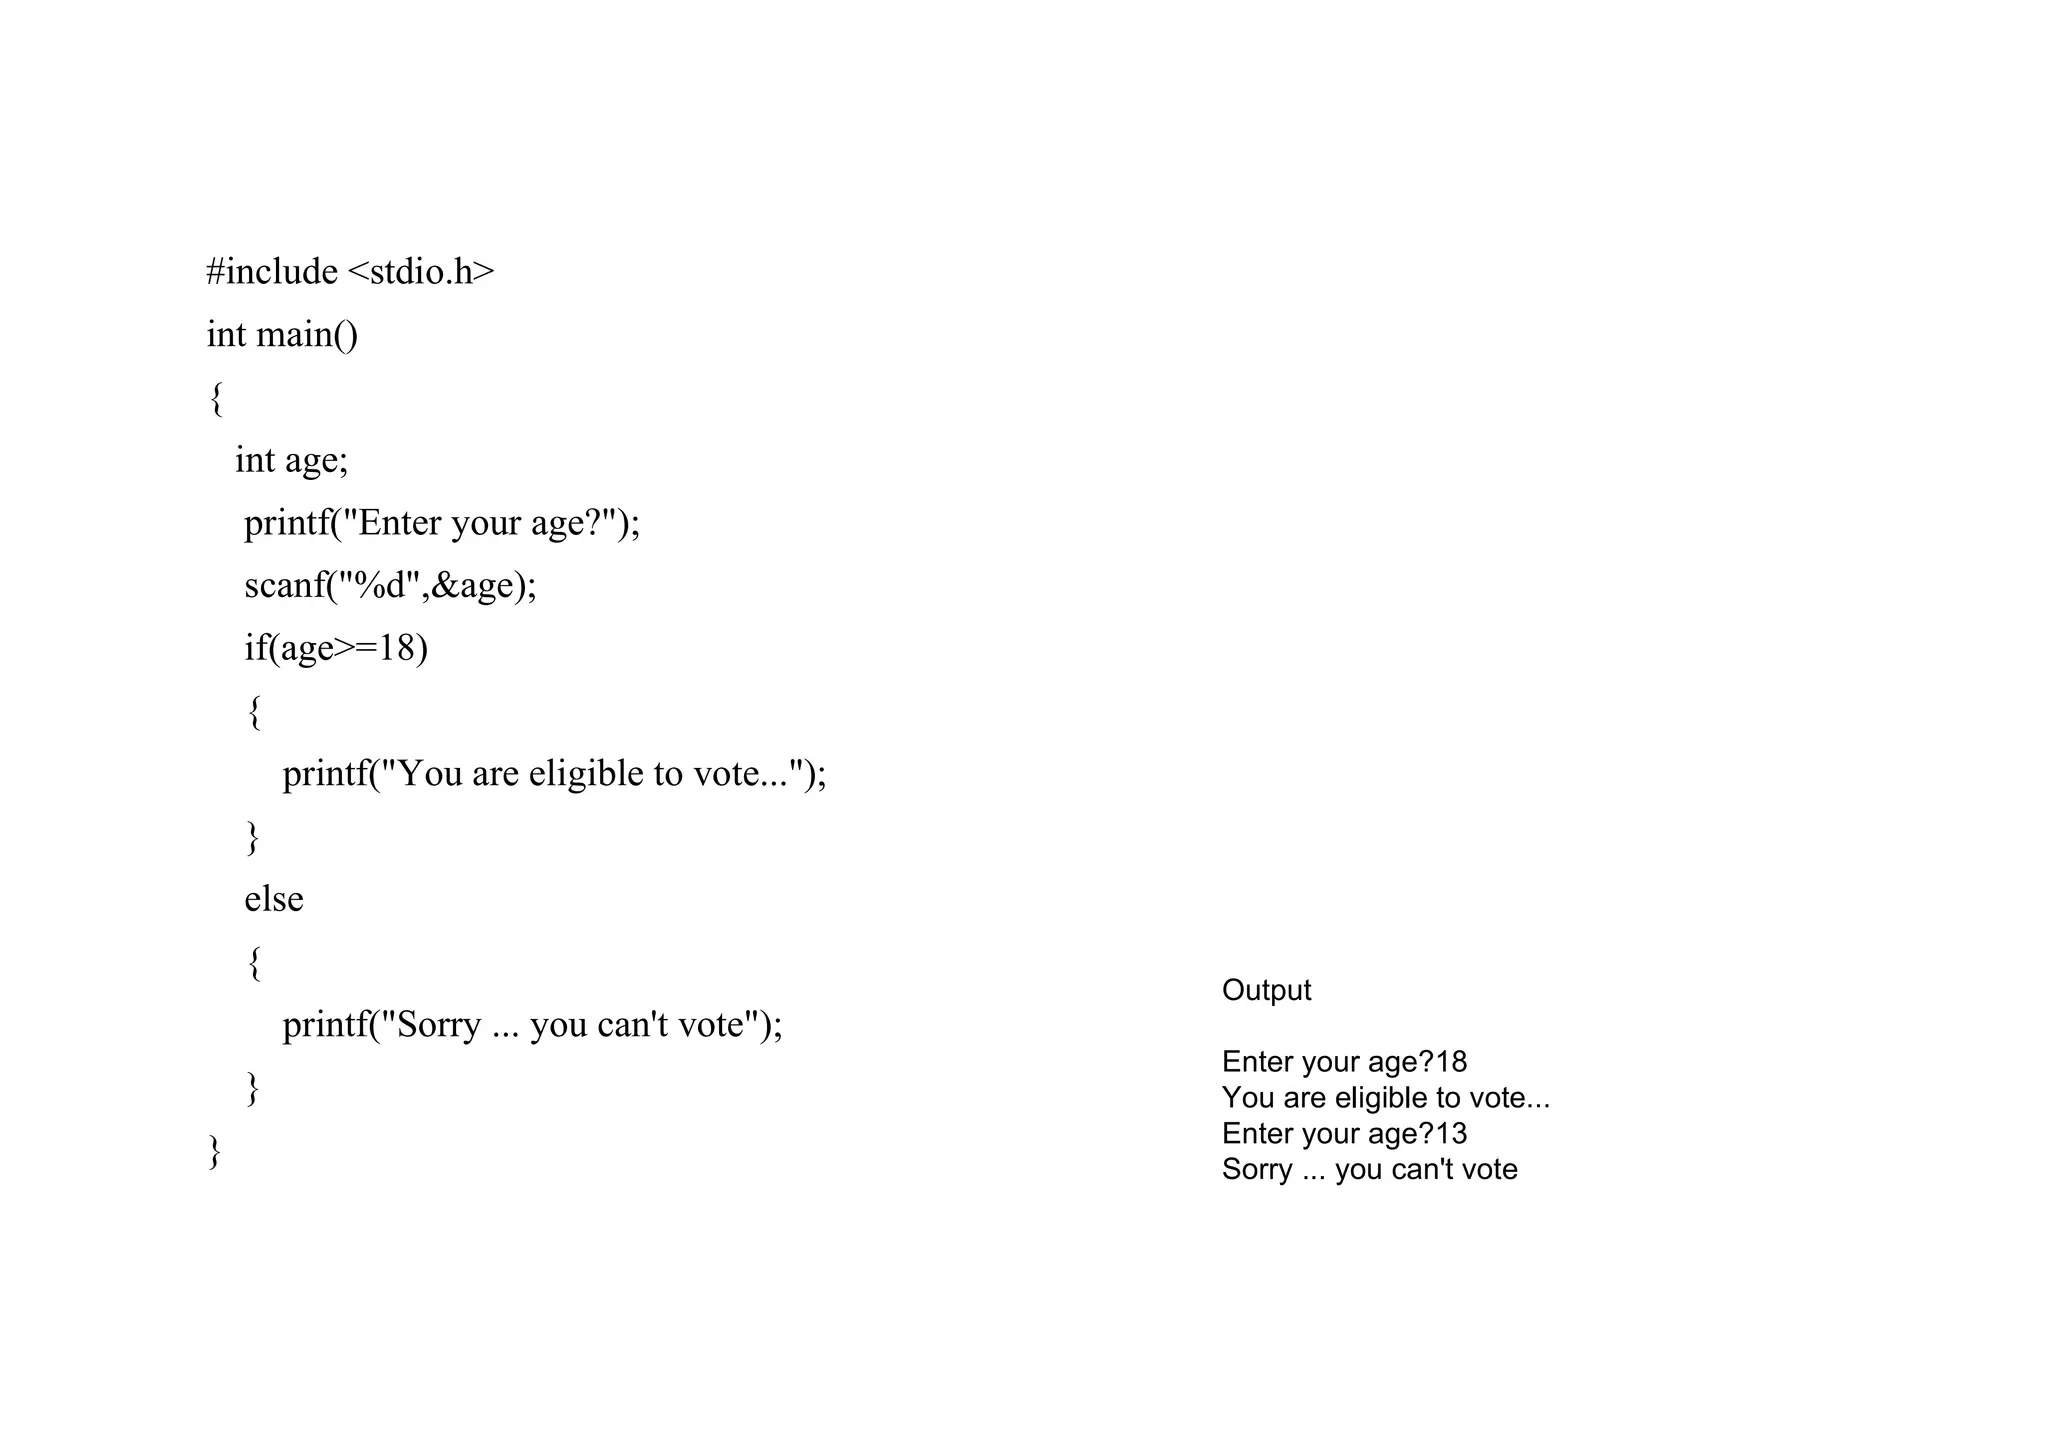
    #include <stdio.h> int main() { intage; printf("Enter your age?"); scanf("%d",&age); if(age>=18) { printf("You are eligible to vote..."); } else { printf("Sorry ... you can't vote"); } } Output Enter your age?18 You are eligible to vote... Enter your age?13 Sorry ... you can't vote
  • 54.
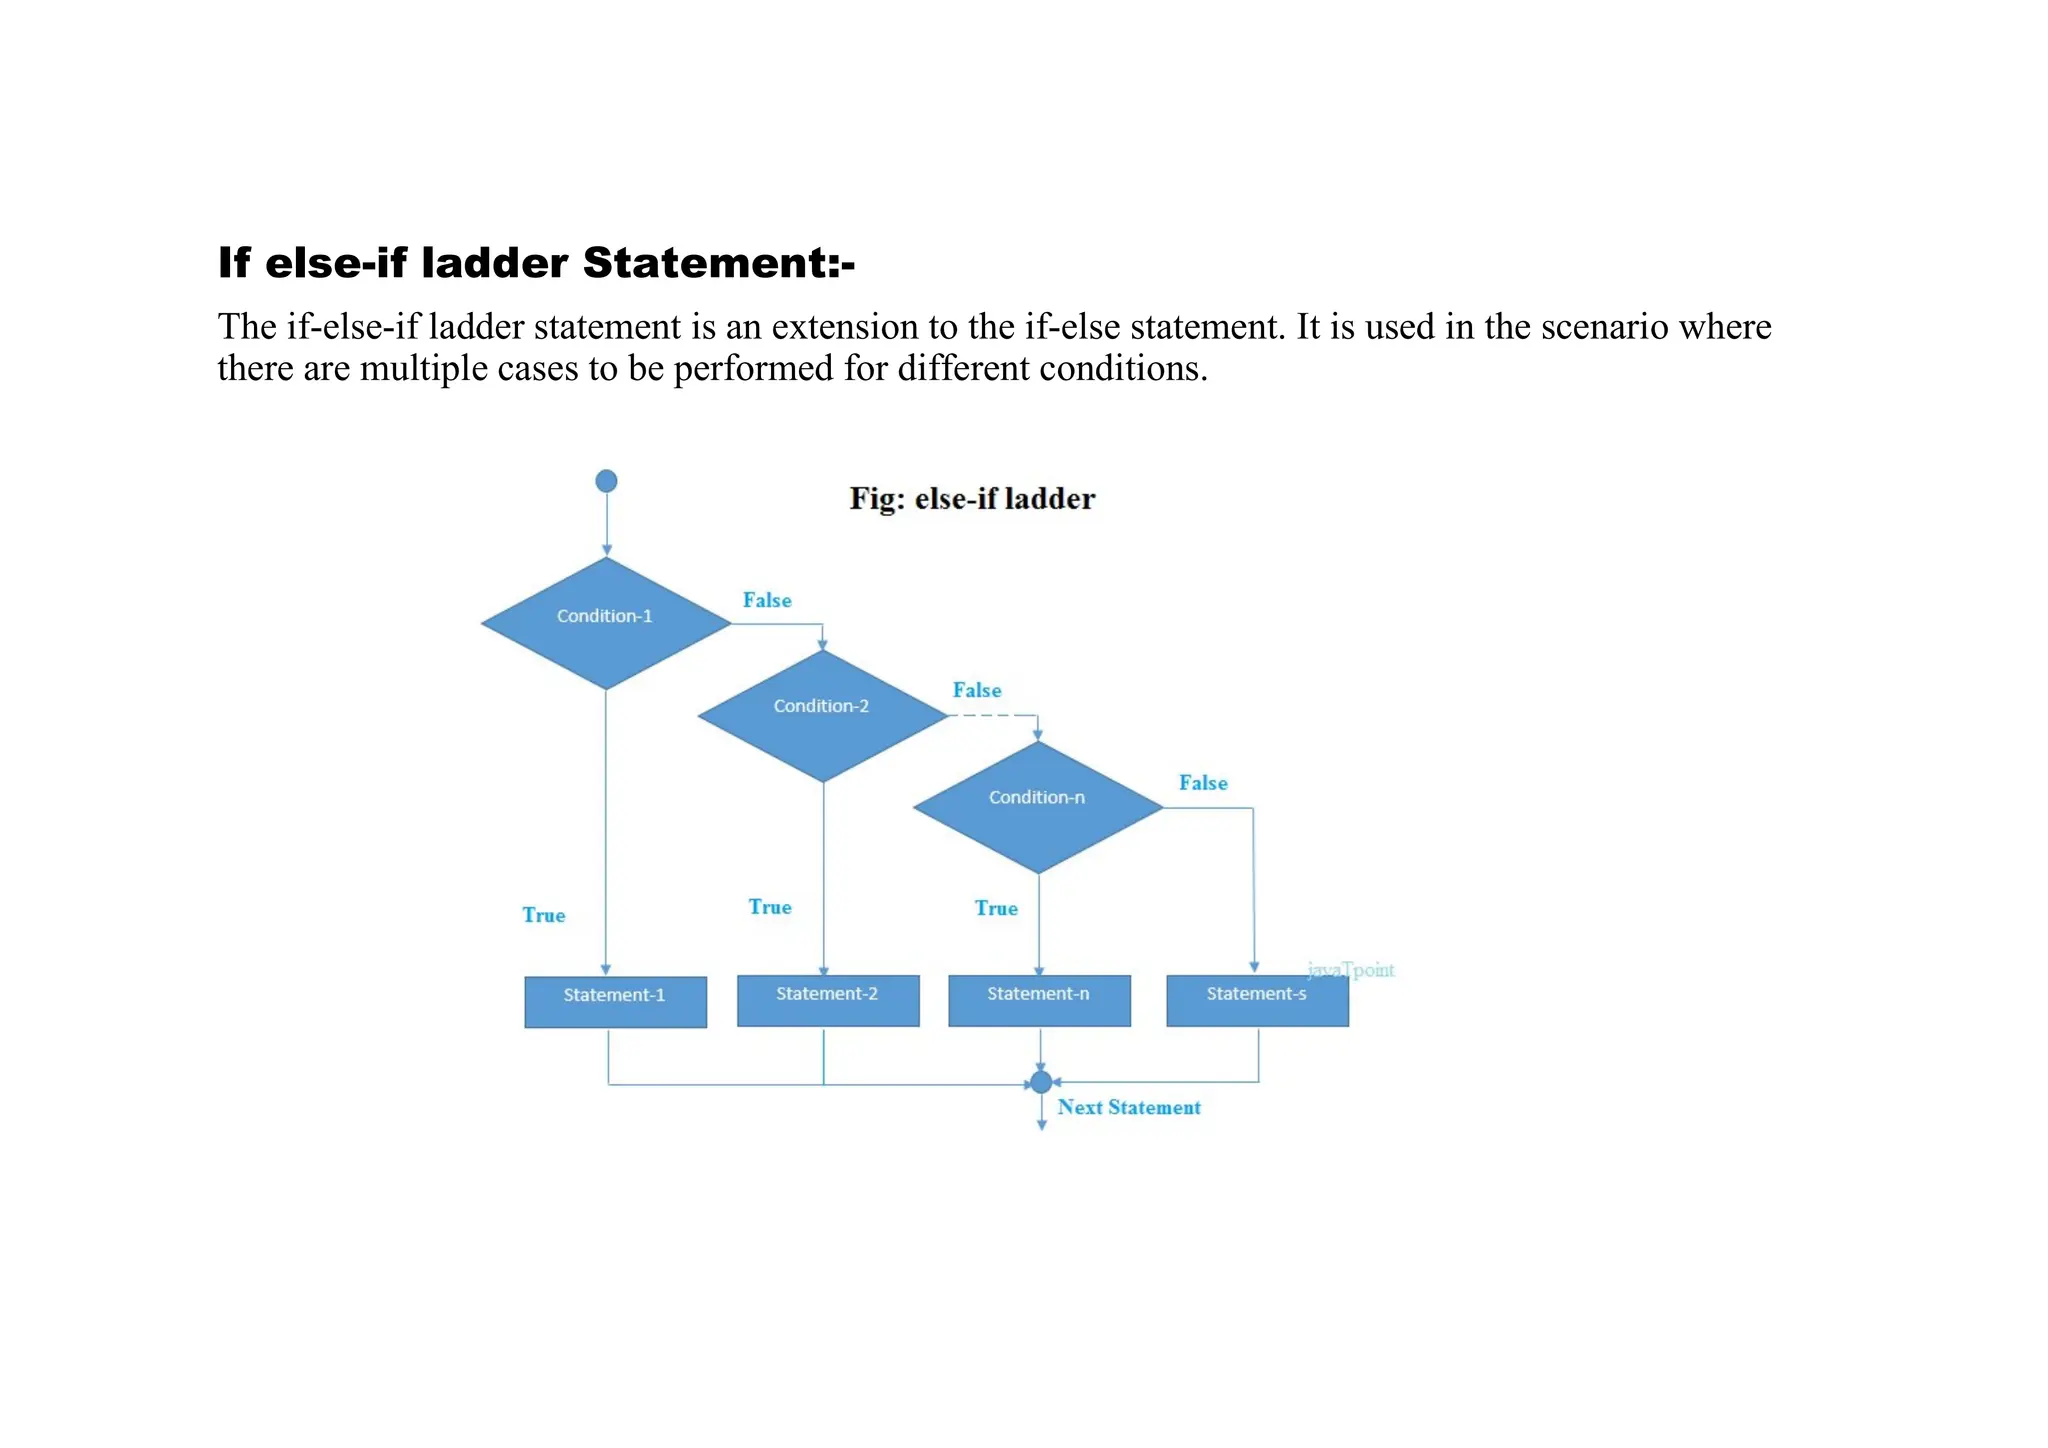
    If else-if ladderStatement:- The if-else-if ladder statement is an extension to the if-else statement. It is used in the scenario where there are multiple cases to be performed for different conditions.
  • 55.
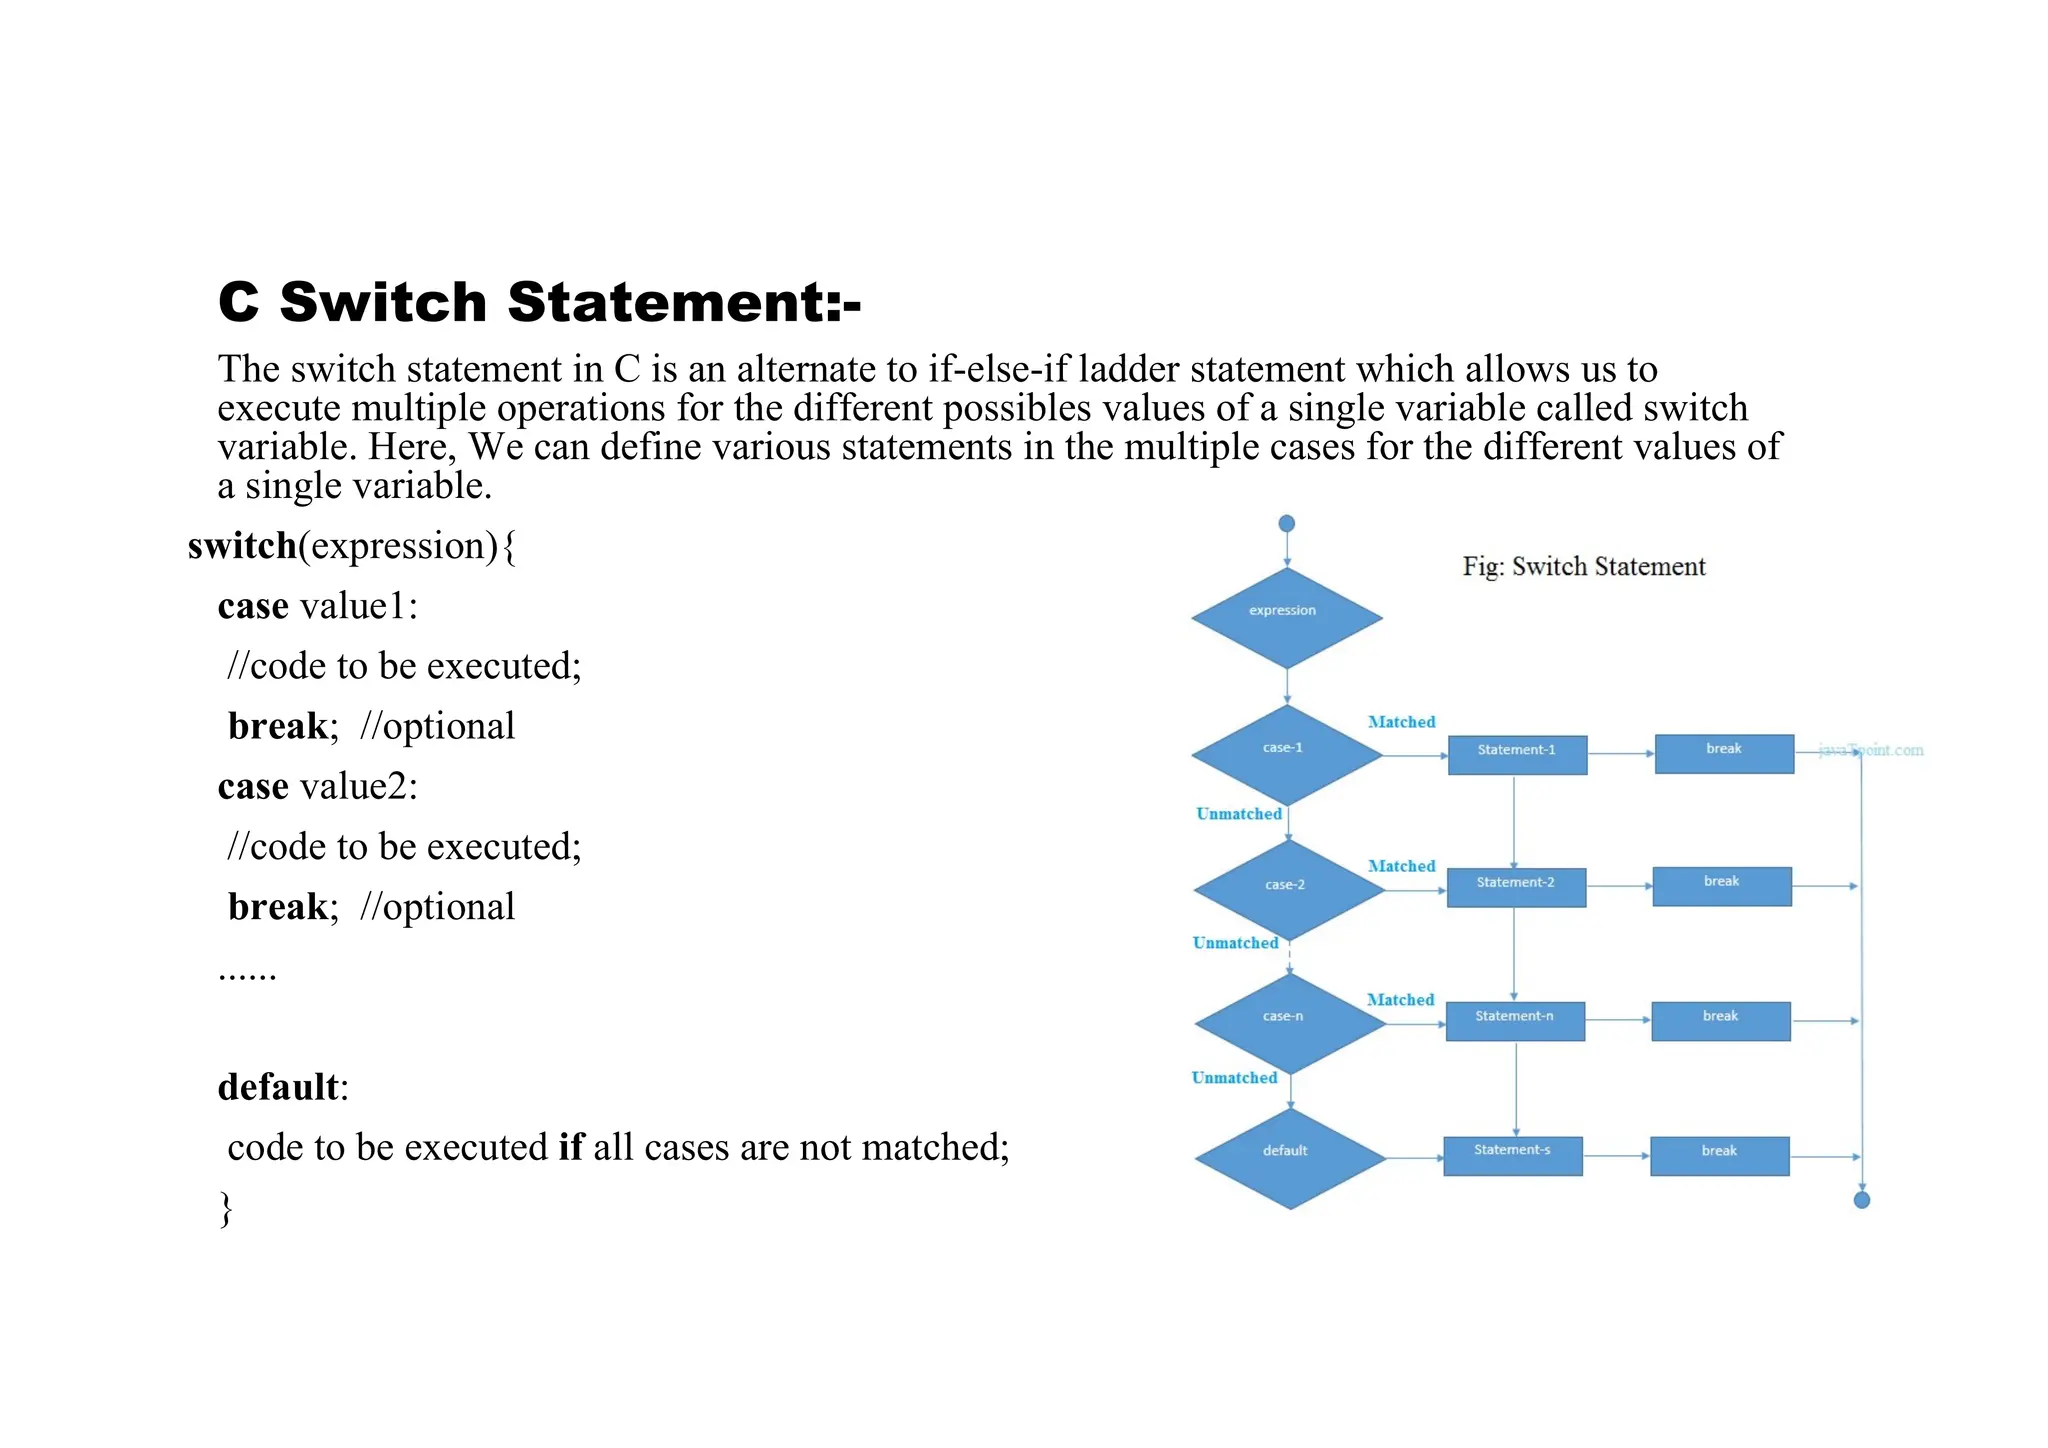
    C Switch Statement:- Theswitch statement in C is an alternate to if-else-if ladder statement which allows us to execute multiple operations for the different possibles values of a single variable called switch variable. Here, We can define various statements in the multiple cases for the different values of a single variable. switch(expression){ case value1: //code to be executed; break; //optional case value2: //code to be executed; break; //optional ...... default: code to be executed if all cases are not matched; }
  • 56.
    #include <stdio.h> int main() { intx = 10, y = 5; switch(x>y && x+y>0) { case 1: printf("hi"); break; case 0: printf("bye"); break; default: printf(" Hello bye "); } } Output hi
  • 57.
    C Loops vThe loopingcan be defined as repeating the same process multiple times until a specific condition satisfies. Why use loops in C language? vThe looping simplifies the complex problems into the easy ones. vIt enables us to alter the flow of the program so that instead of writing the same code again and again, we can repeat the same code for a finite number of times. Advantage of loops in C 1) It provides code reusability. 2) Using loops, we do not need to write the same code again and again. 3) Using loops, we can traverse over the elements of data structures (array or linked lists).
  • 58.
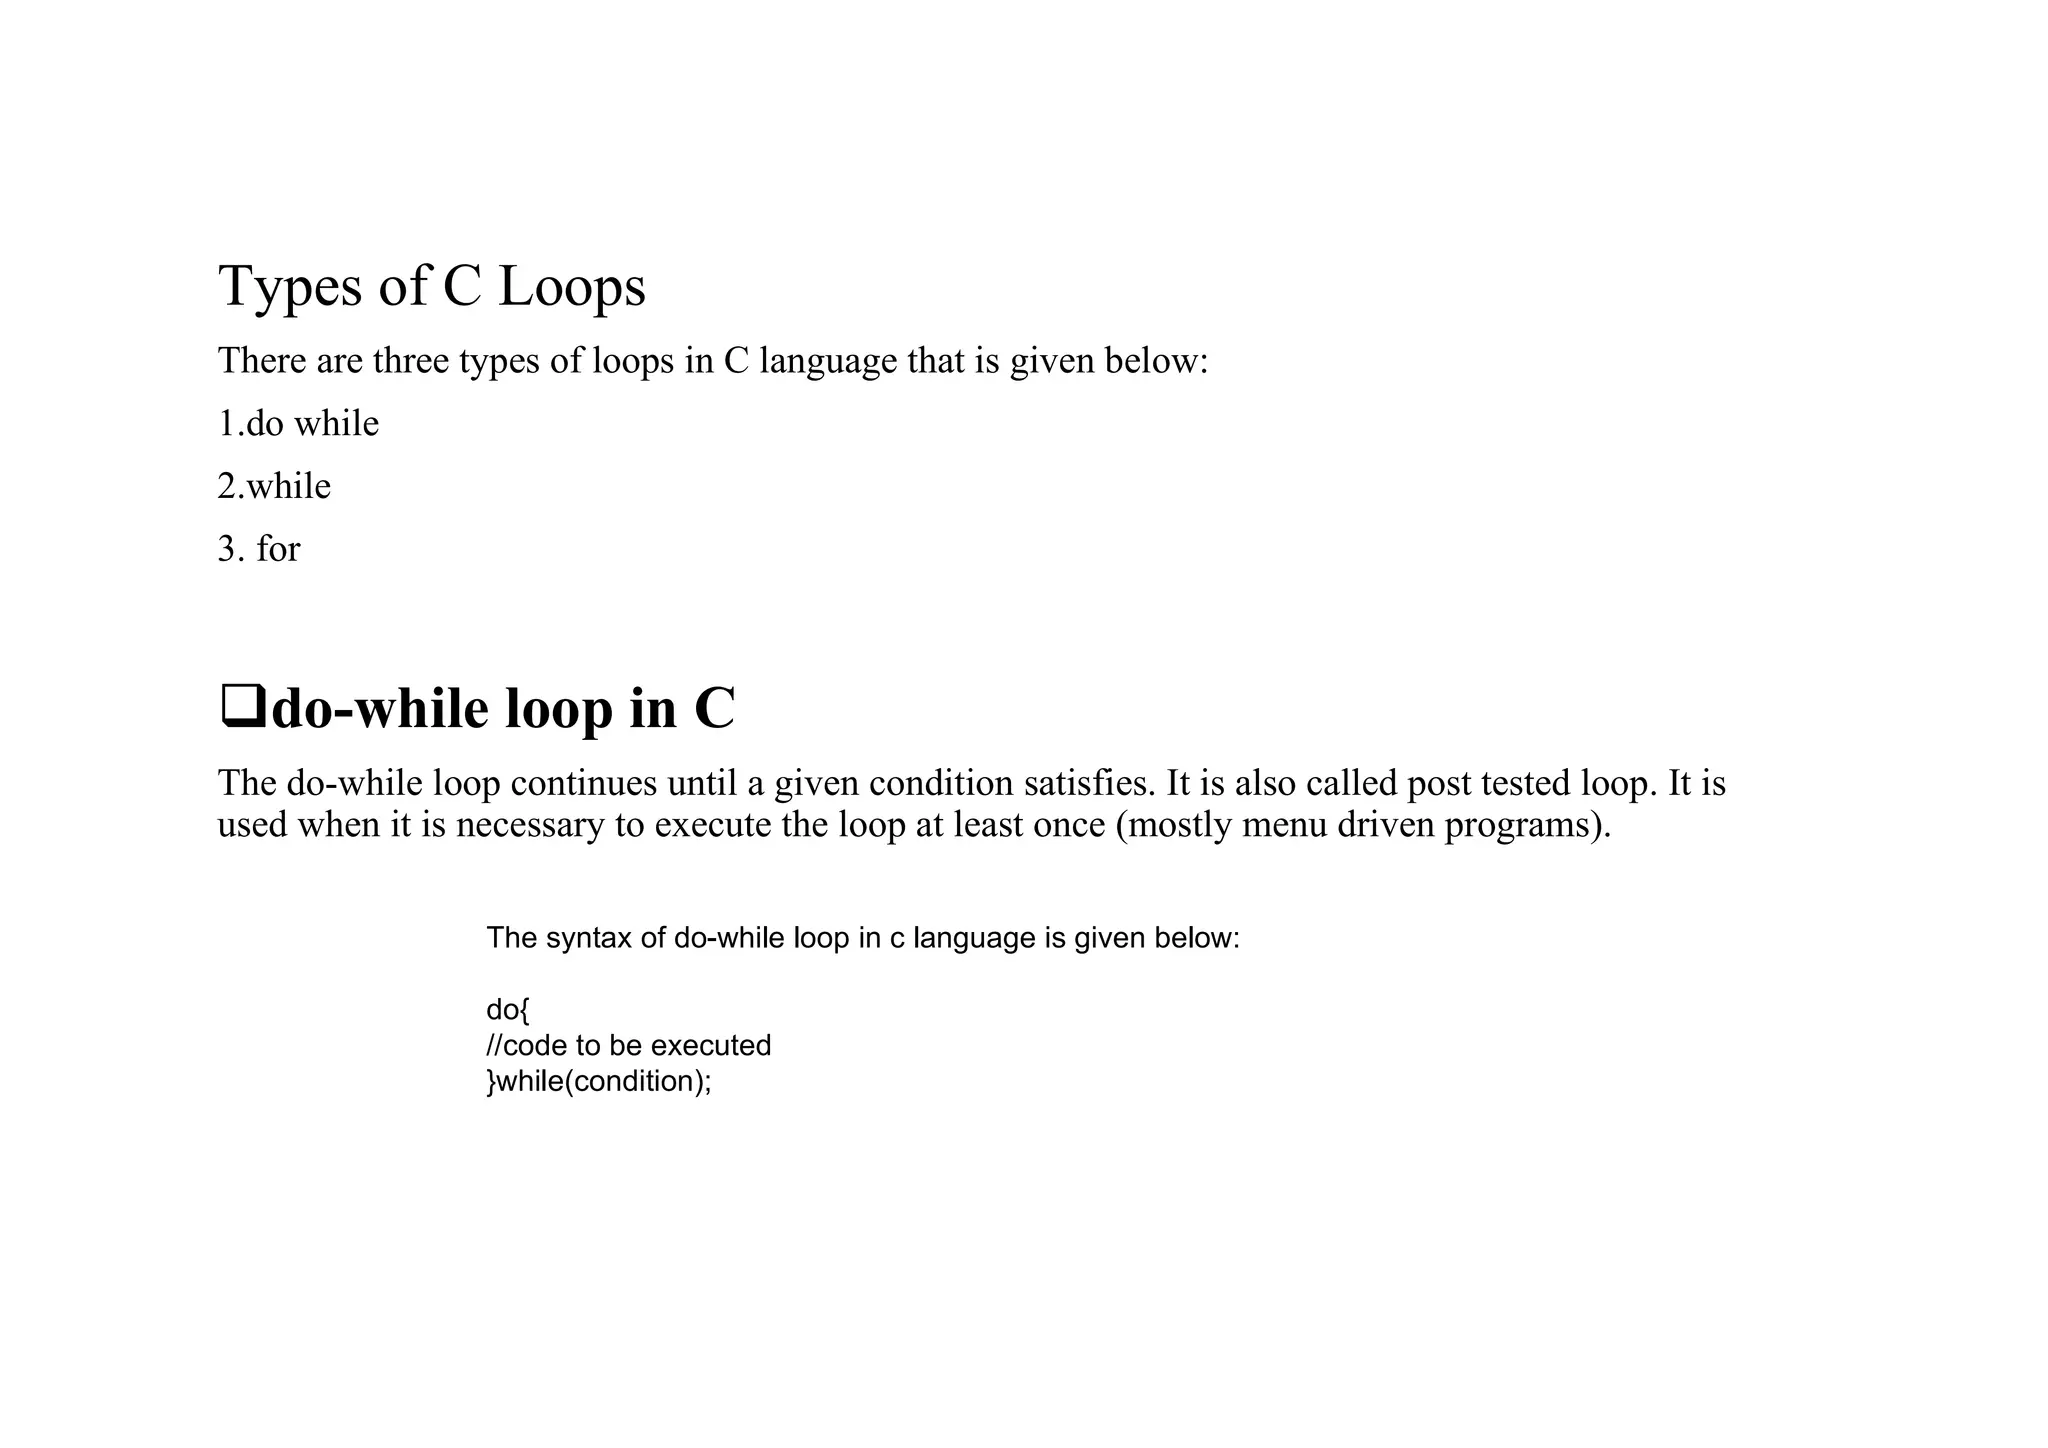
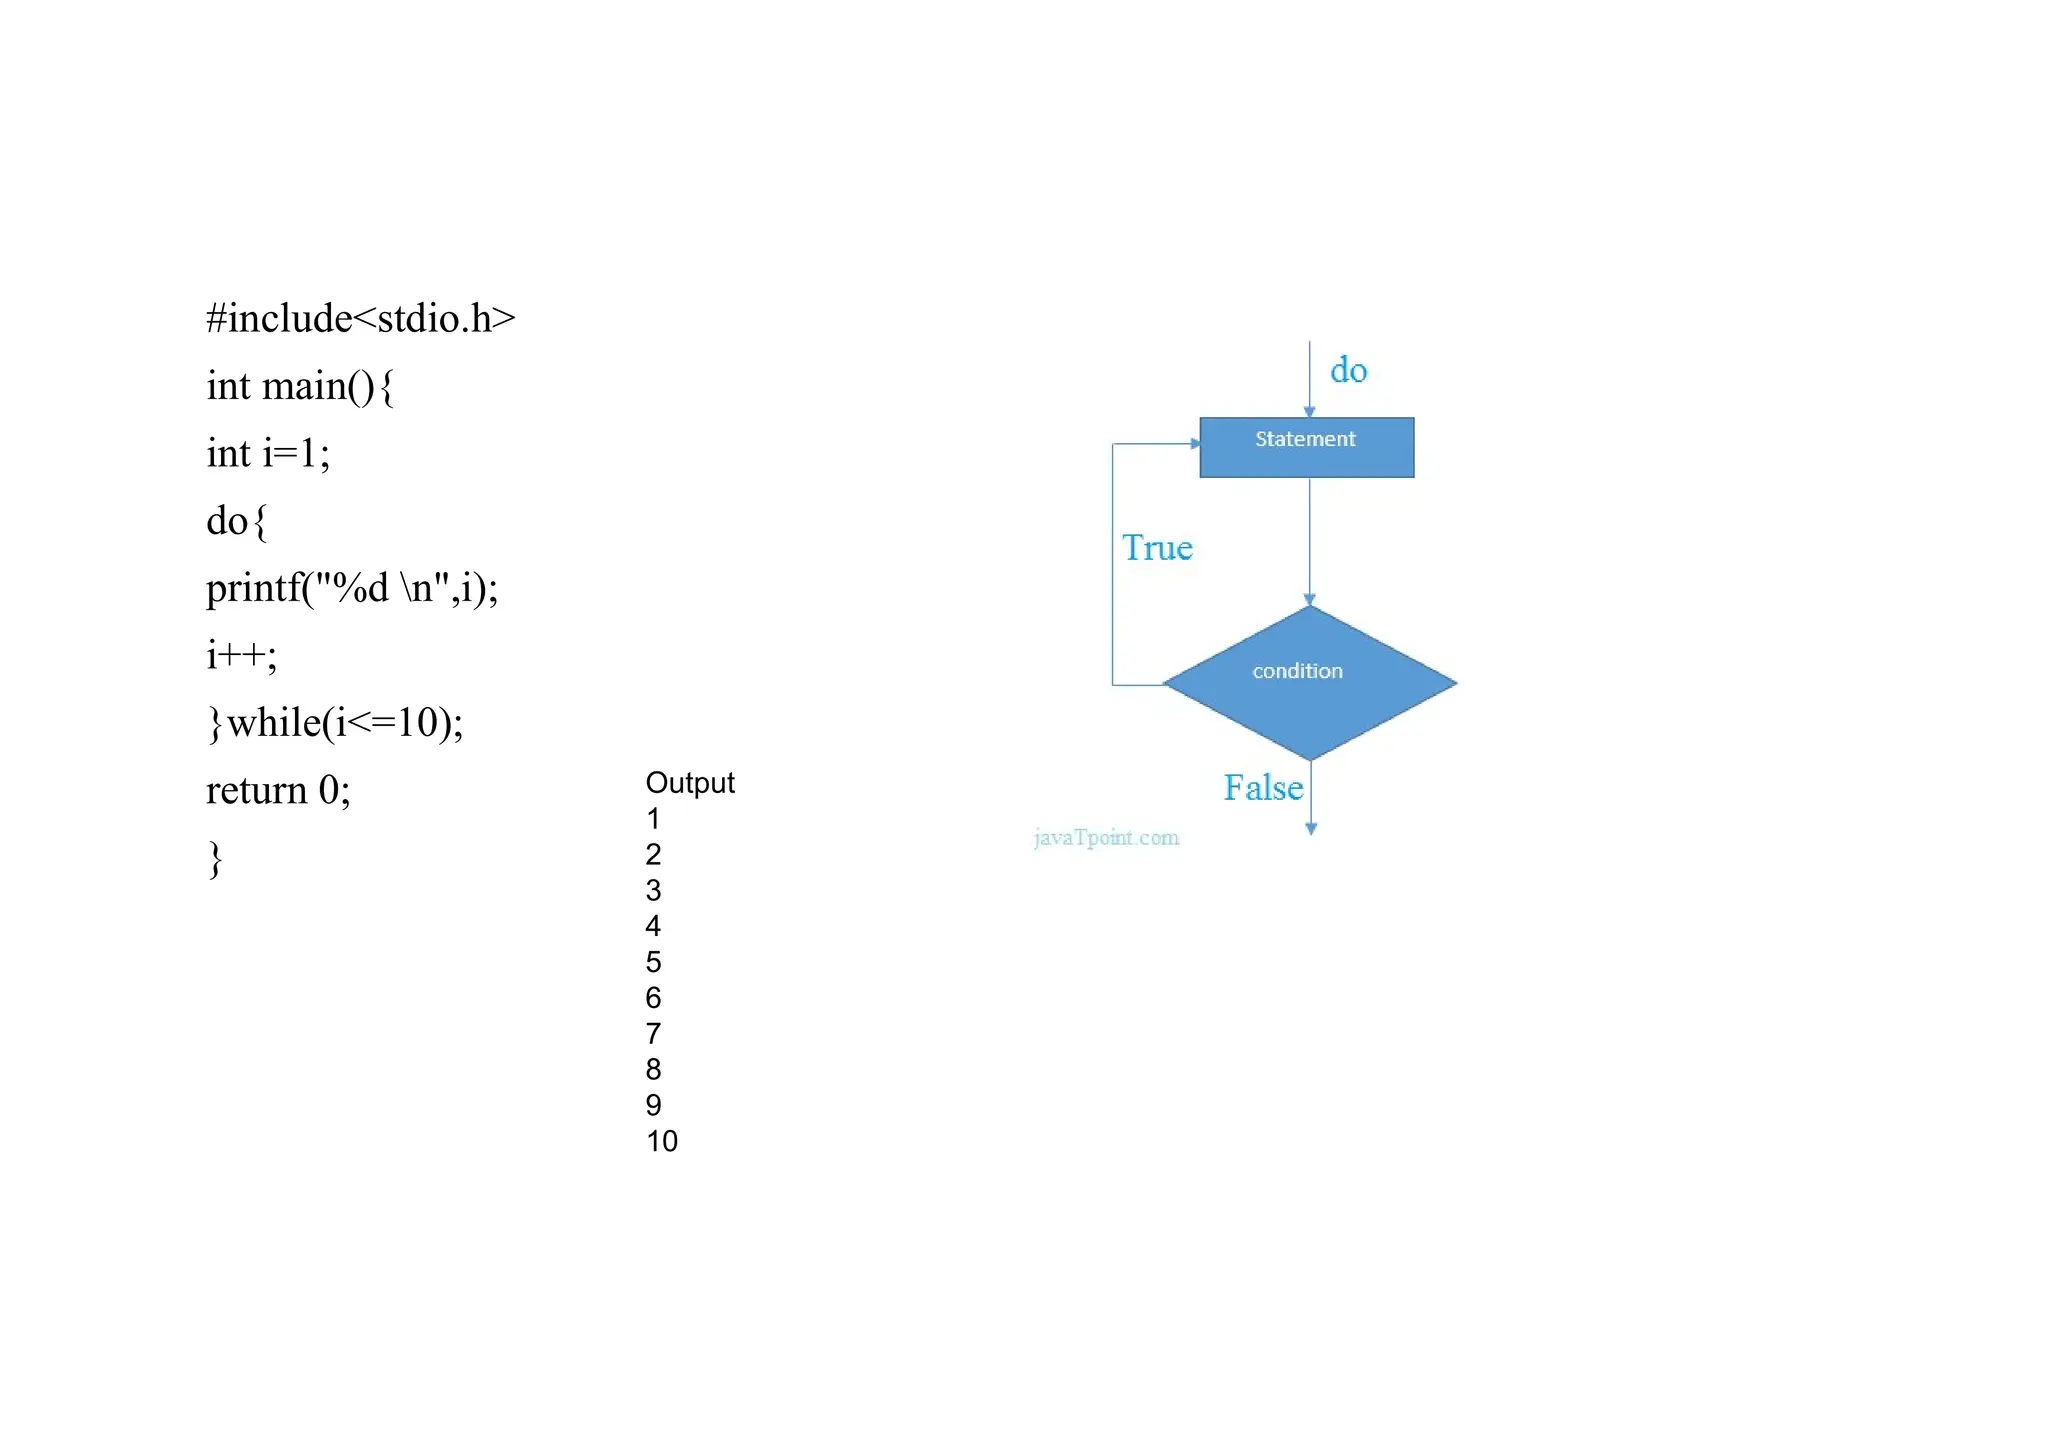
    Types of CLoops There are three types of loops in C language that is given below: 1.do while 2.while 3. for qdo-while loop in C The do-while loop continues until a given condition satisfies. It is also called post tested loop. It is used when it is necessary to execute the loop at least once (mostly menu driven programs). The syntax of do-while loop in c language is given below: do{ //code to be executed }while(condition);
  • 59.
    #include<stdio.h> int main(){ int i=1; do{ printf("%dn",i); i++; }while(i<=10); return 0; } Output 1 2 3 4 5 6 7 8 9 10
  • 60.
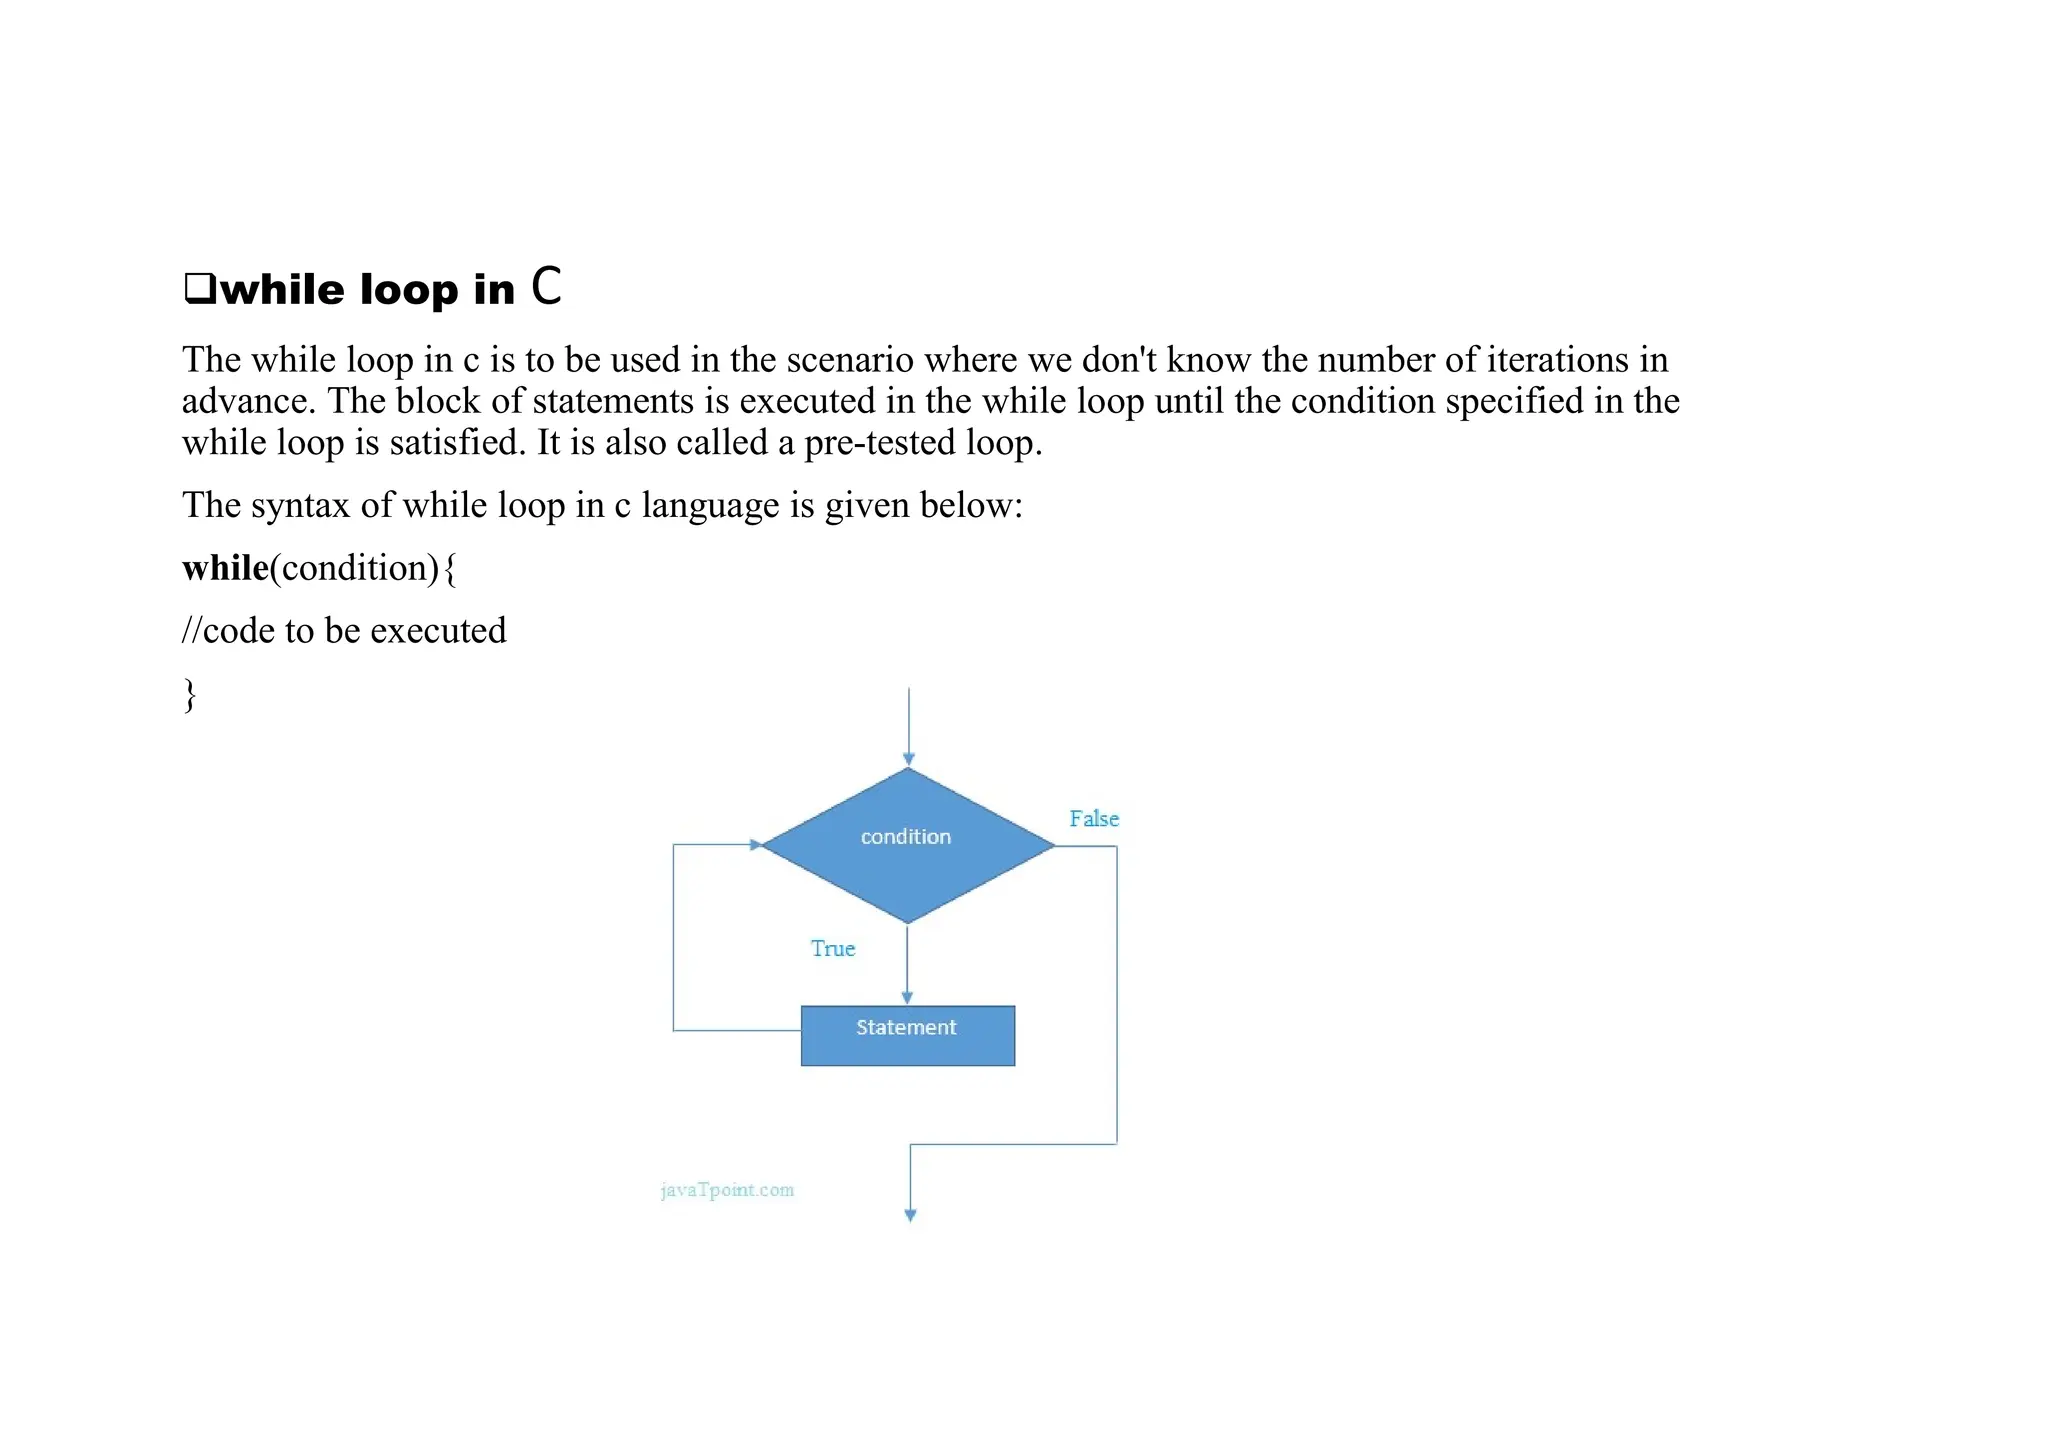
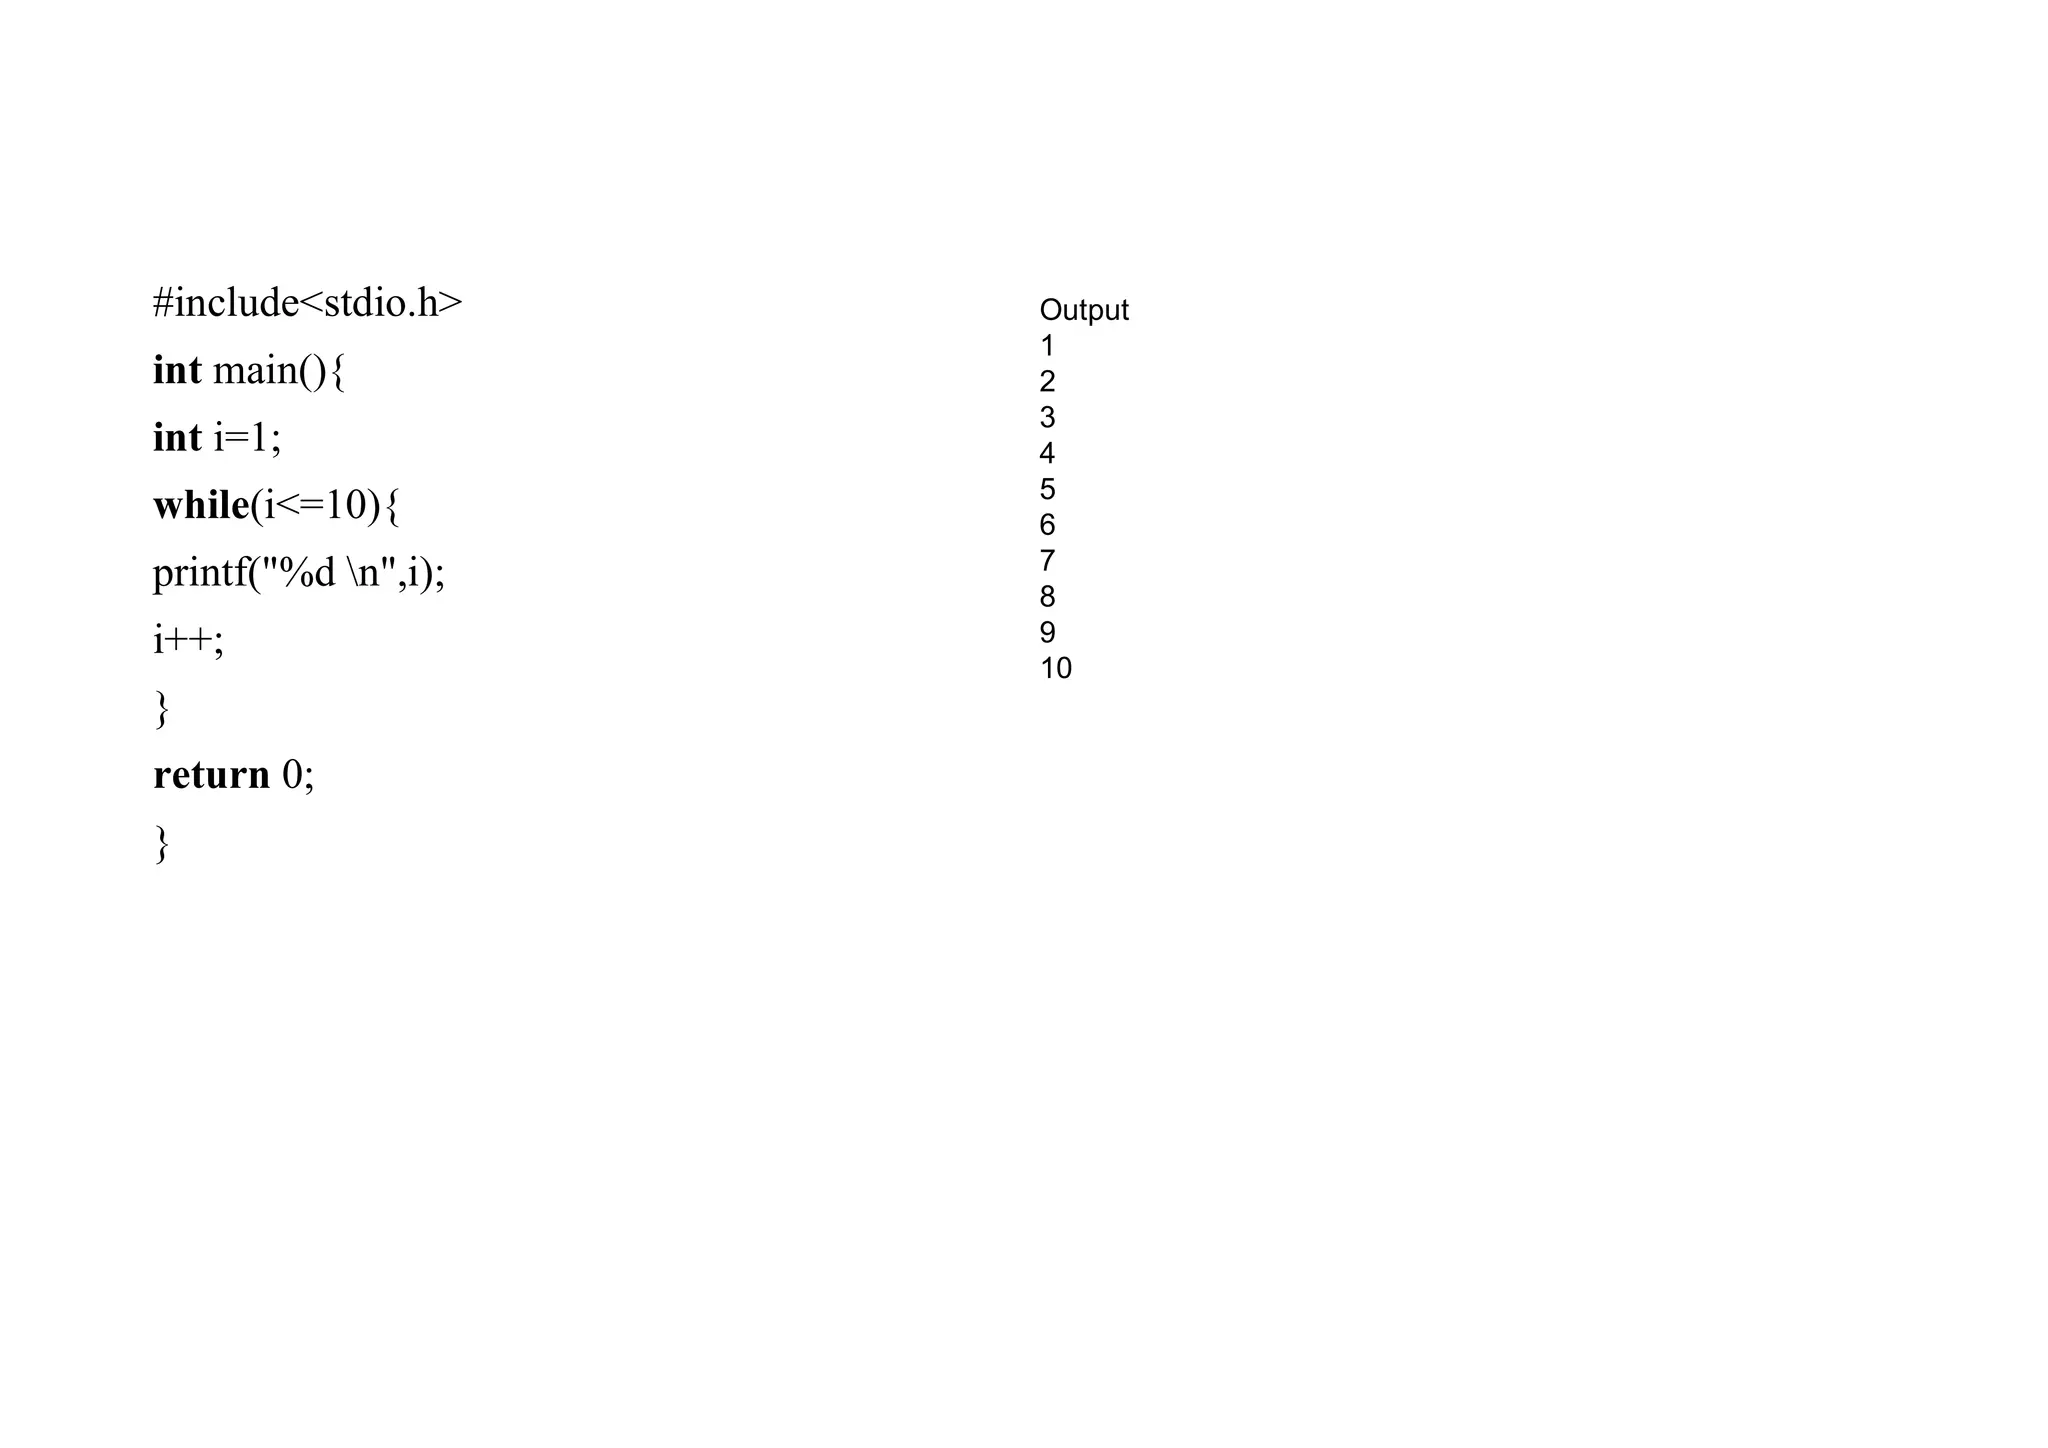
    qwhile loop inC The while loop in c is to be used in the scenario where we don't know the number of iterations in advance. The block of statements is executed in the while loop until the condition specified in the while loop is satisfied. It is also called a pre-tested loop. The syntax of while loop in c language is given below: while(condition){ //code to be executed }
  • 61.
    #include<stdio.h> int main(){ int i=1; while(i<=10){ printf("%dn",i); i++; } return 0; } Output 1 2 3 4 5 6 7 8 9 10
  • 62.
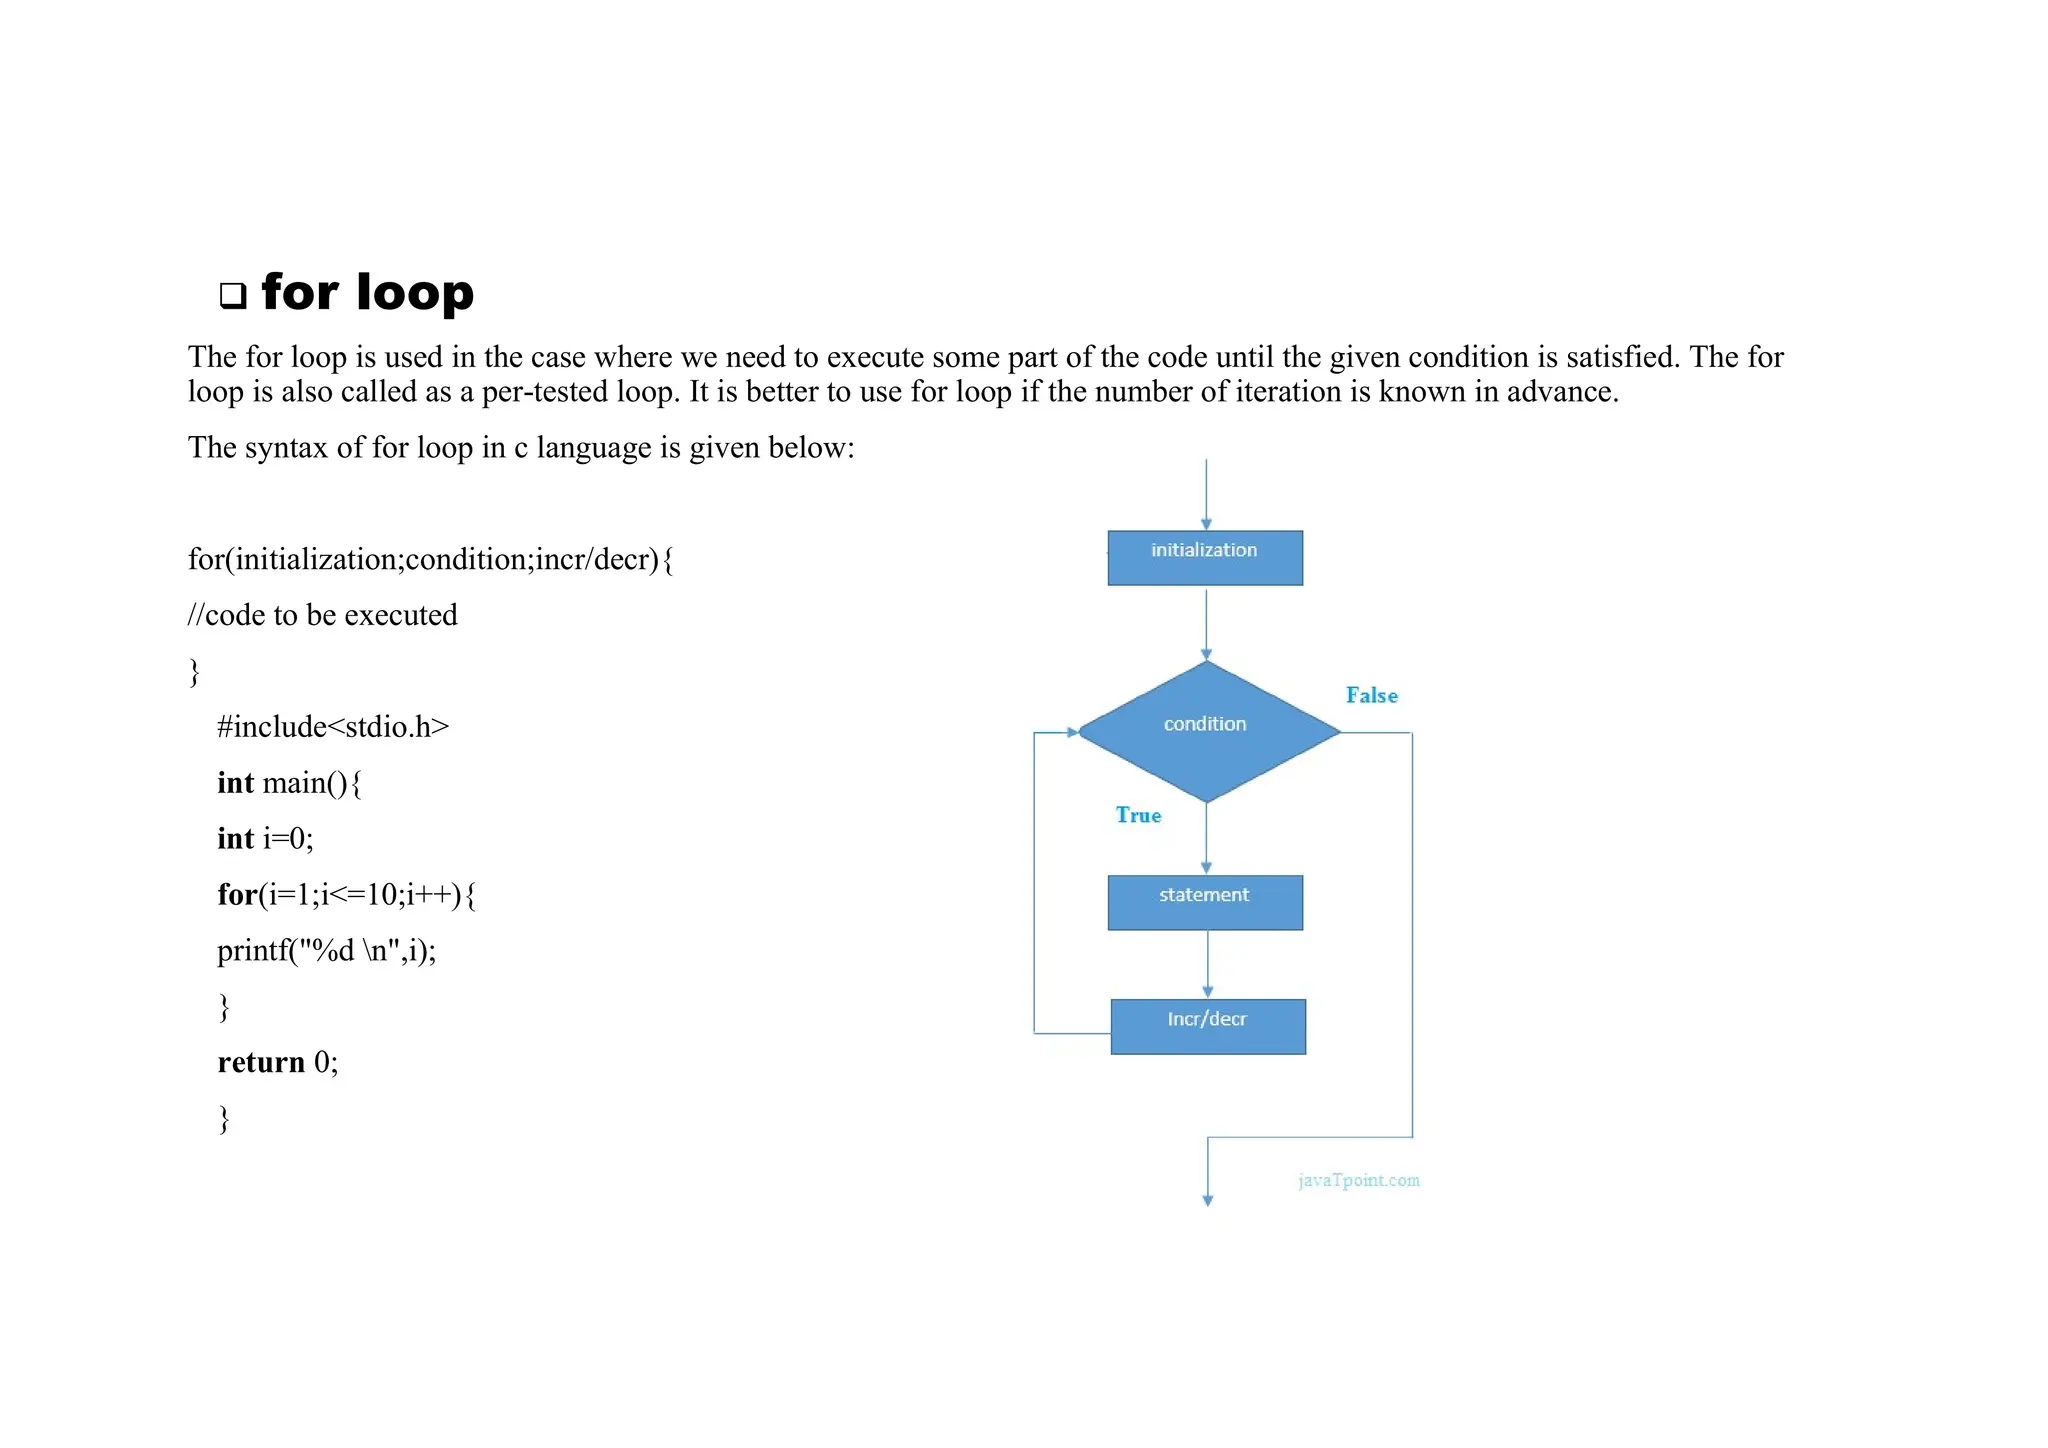
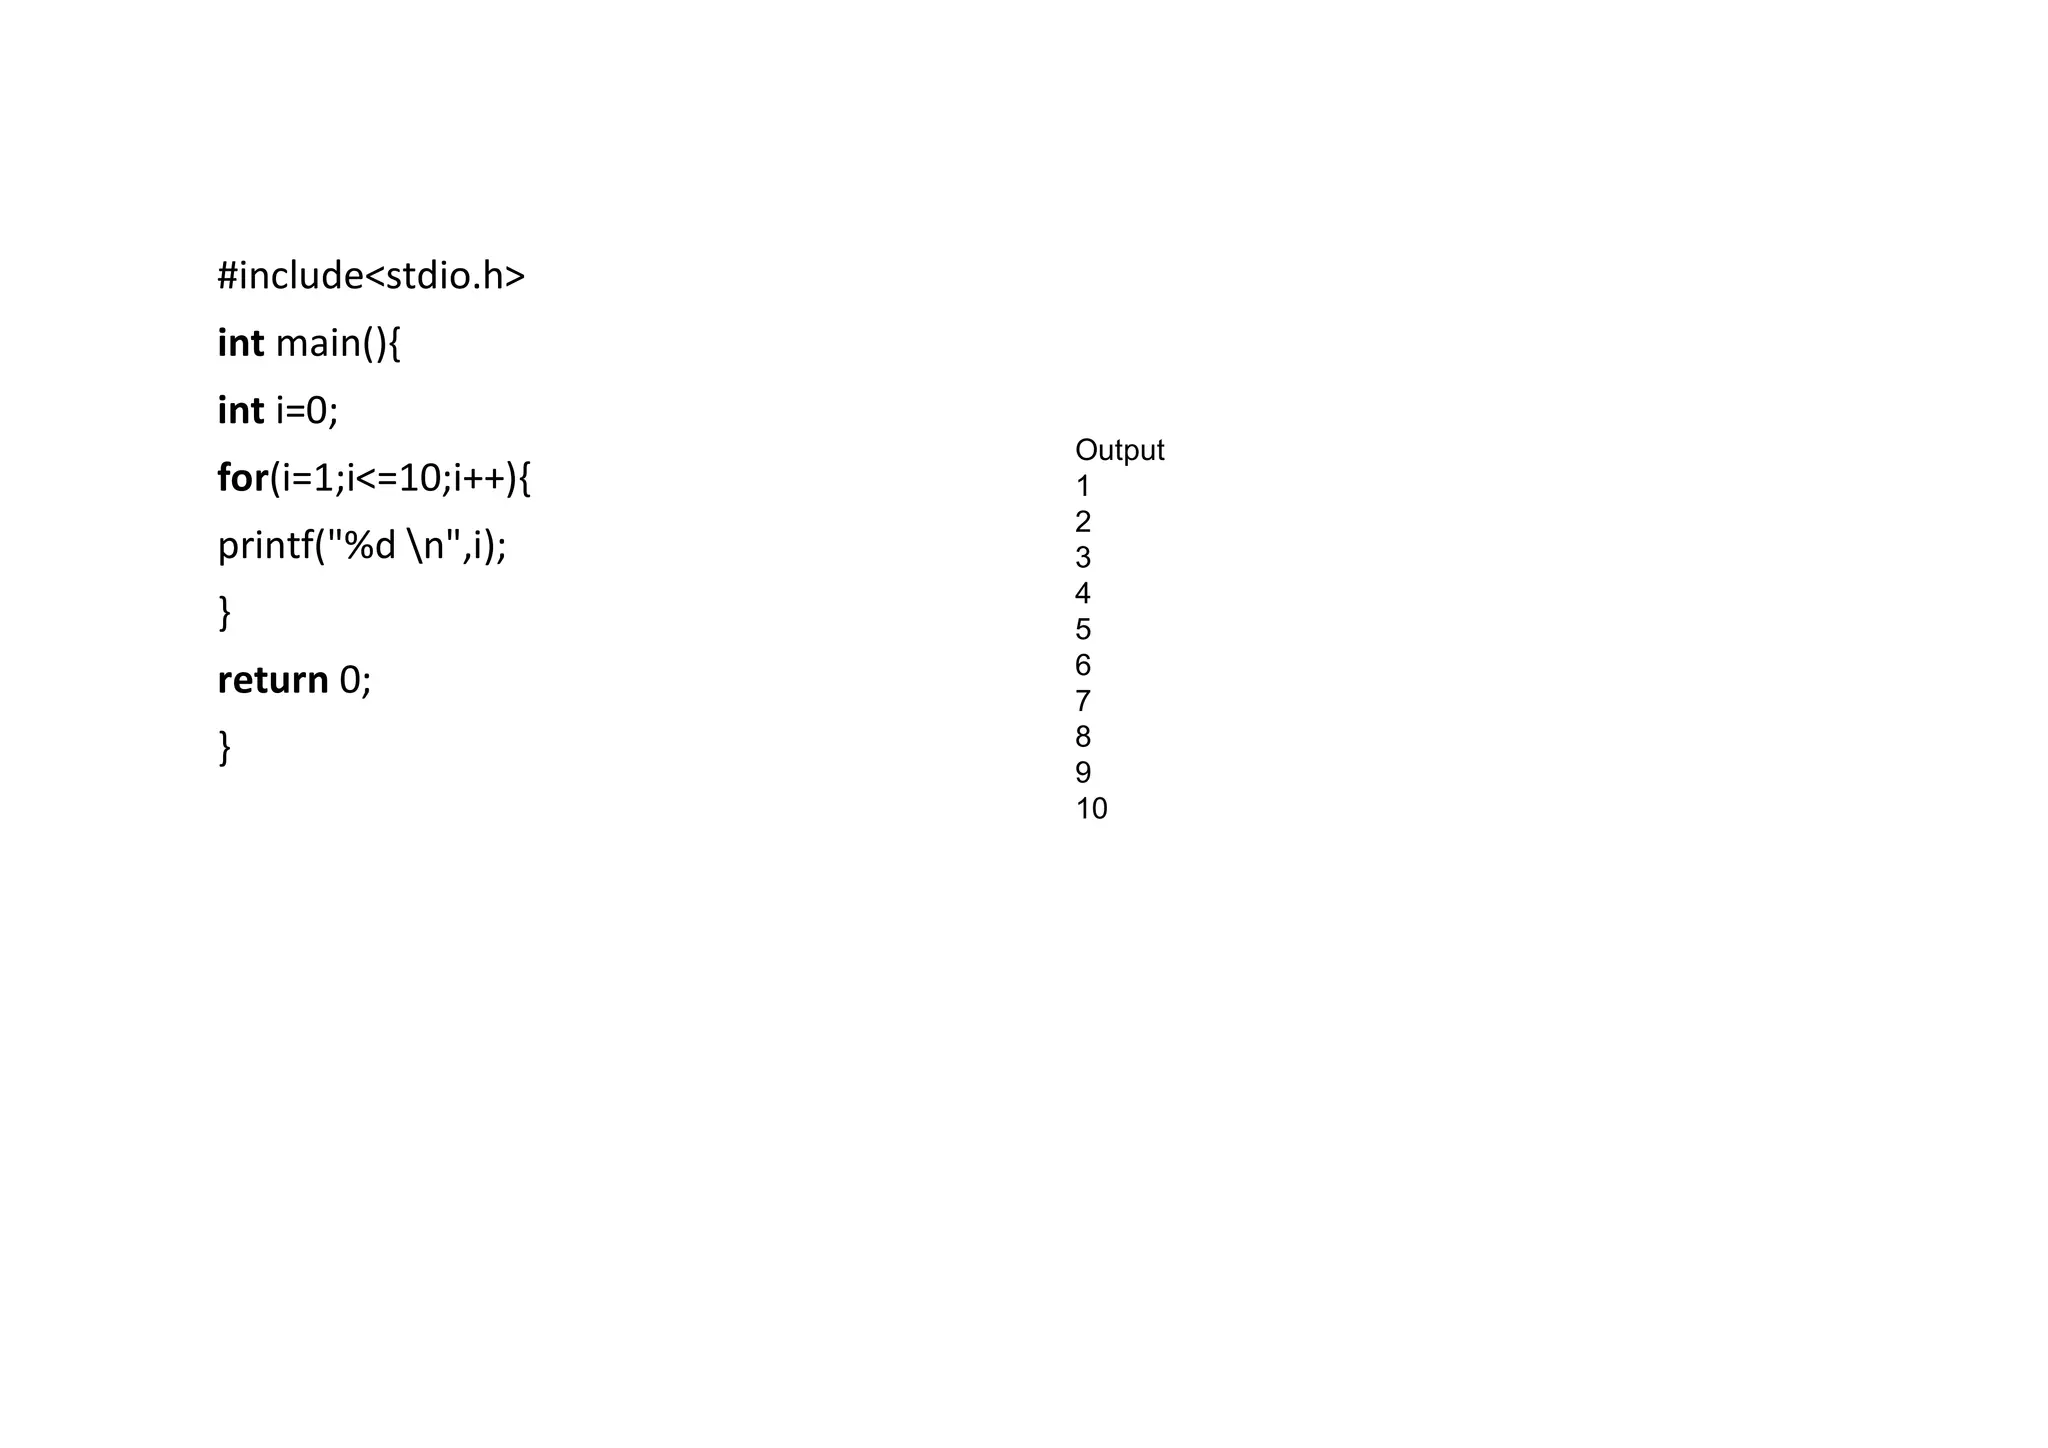
    q for loop Thefor loop is used in the case where we need to execute some part of the code until the given condition is satisfied. The for loop is also called as a per-tested loop. It is better to use for loop if the number of iteration is known in advance. The syntax of for loop in c language is given below: for(initialization;condition;incr/decr){ //code to be executed } #include<stdio.h> int main(){ int i=0; for(i=1;i<=10;i++){ printf("%d n",i); } return 0; }
  • 63.
    #include<stdio.h> int main(){ int i=0; for(i=1;i<=10;i++){ printf("%dn",i); } return 0; } Output 1 2 3 4 5 6 7 8 9 10
  • 64.
  • 65.
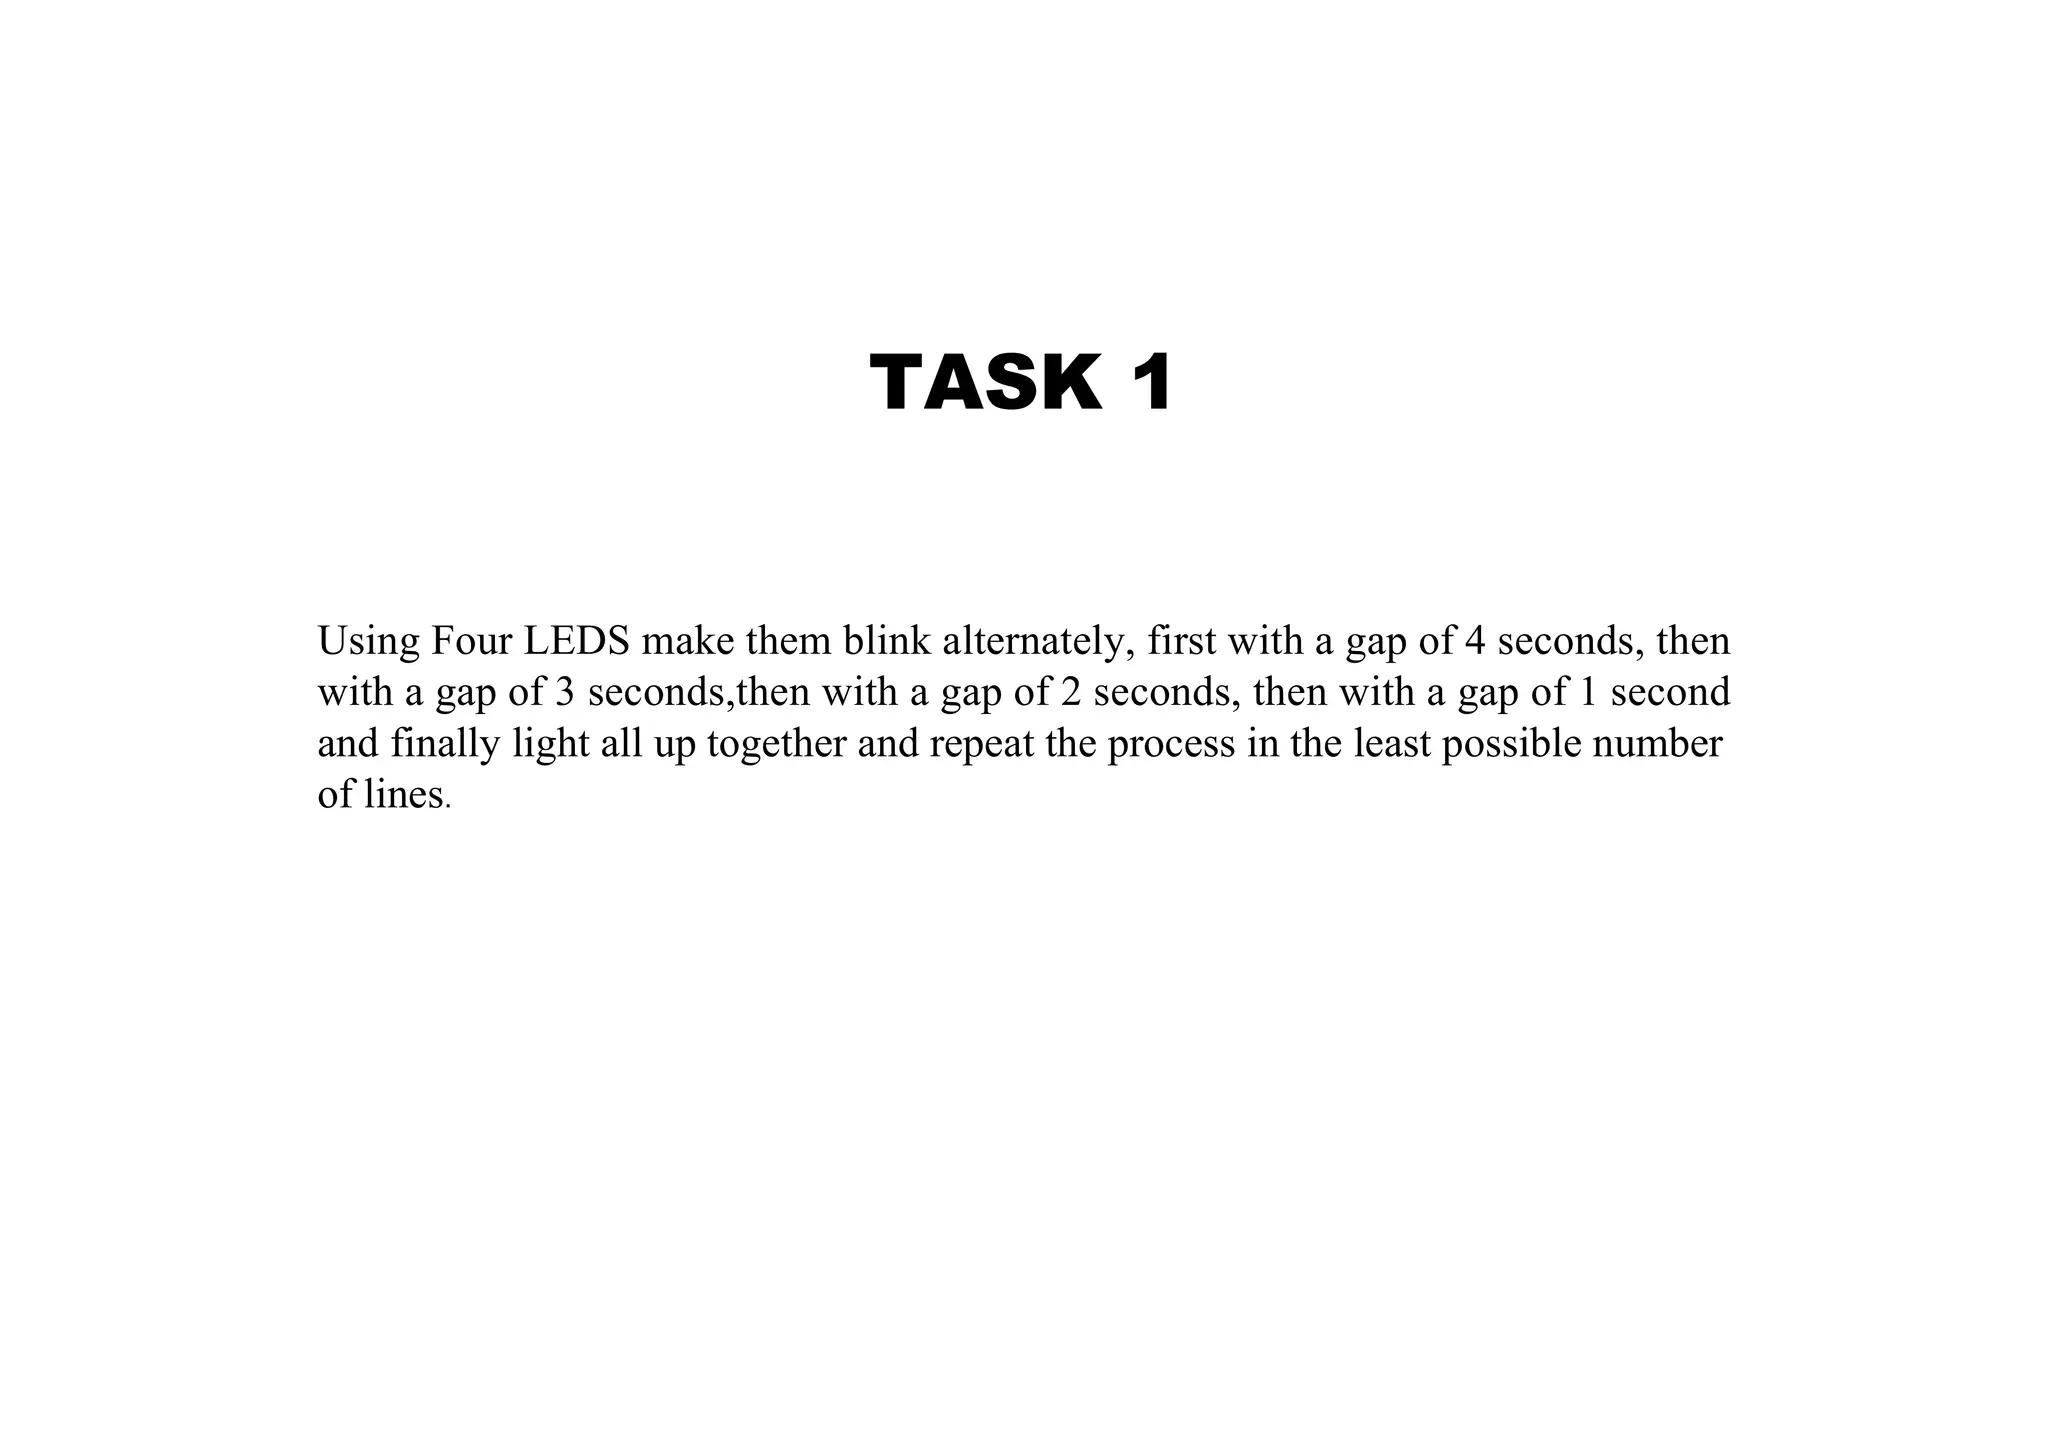
    TASK 1 Using FourLEDS make them blink alternately, first with a gap of 4 seconds, then with a gap of 3 seconds,then with a gap of 2 seconds, then with a gap of 1 second and finally light all up together and repeat the process in the least possible number of lines.
  • 66.
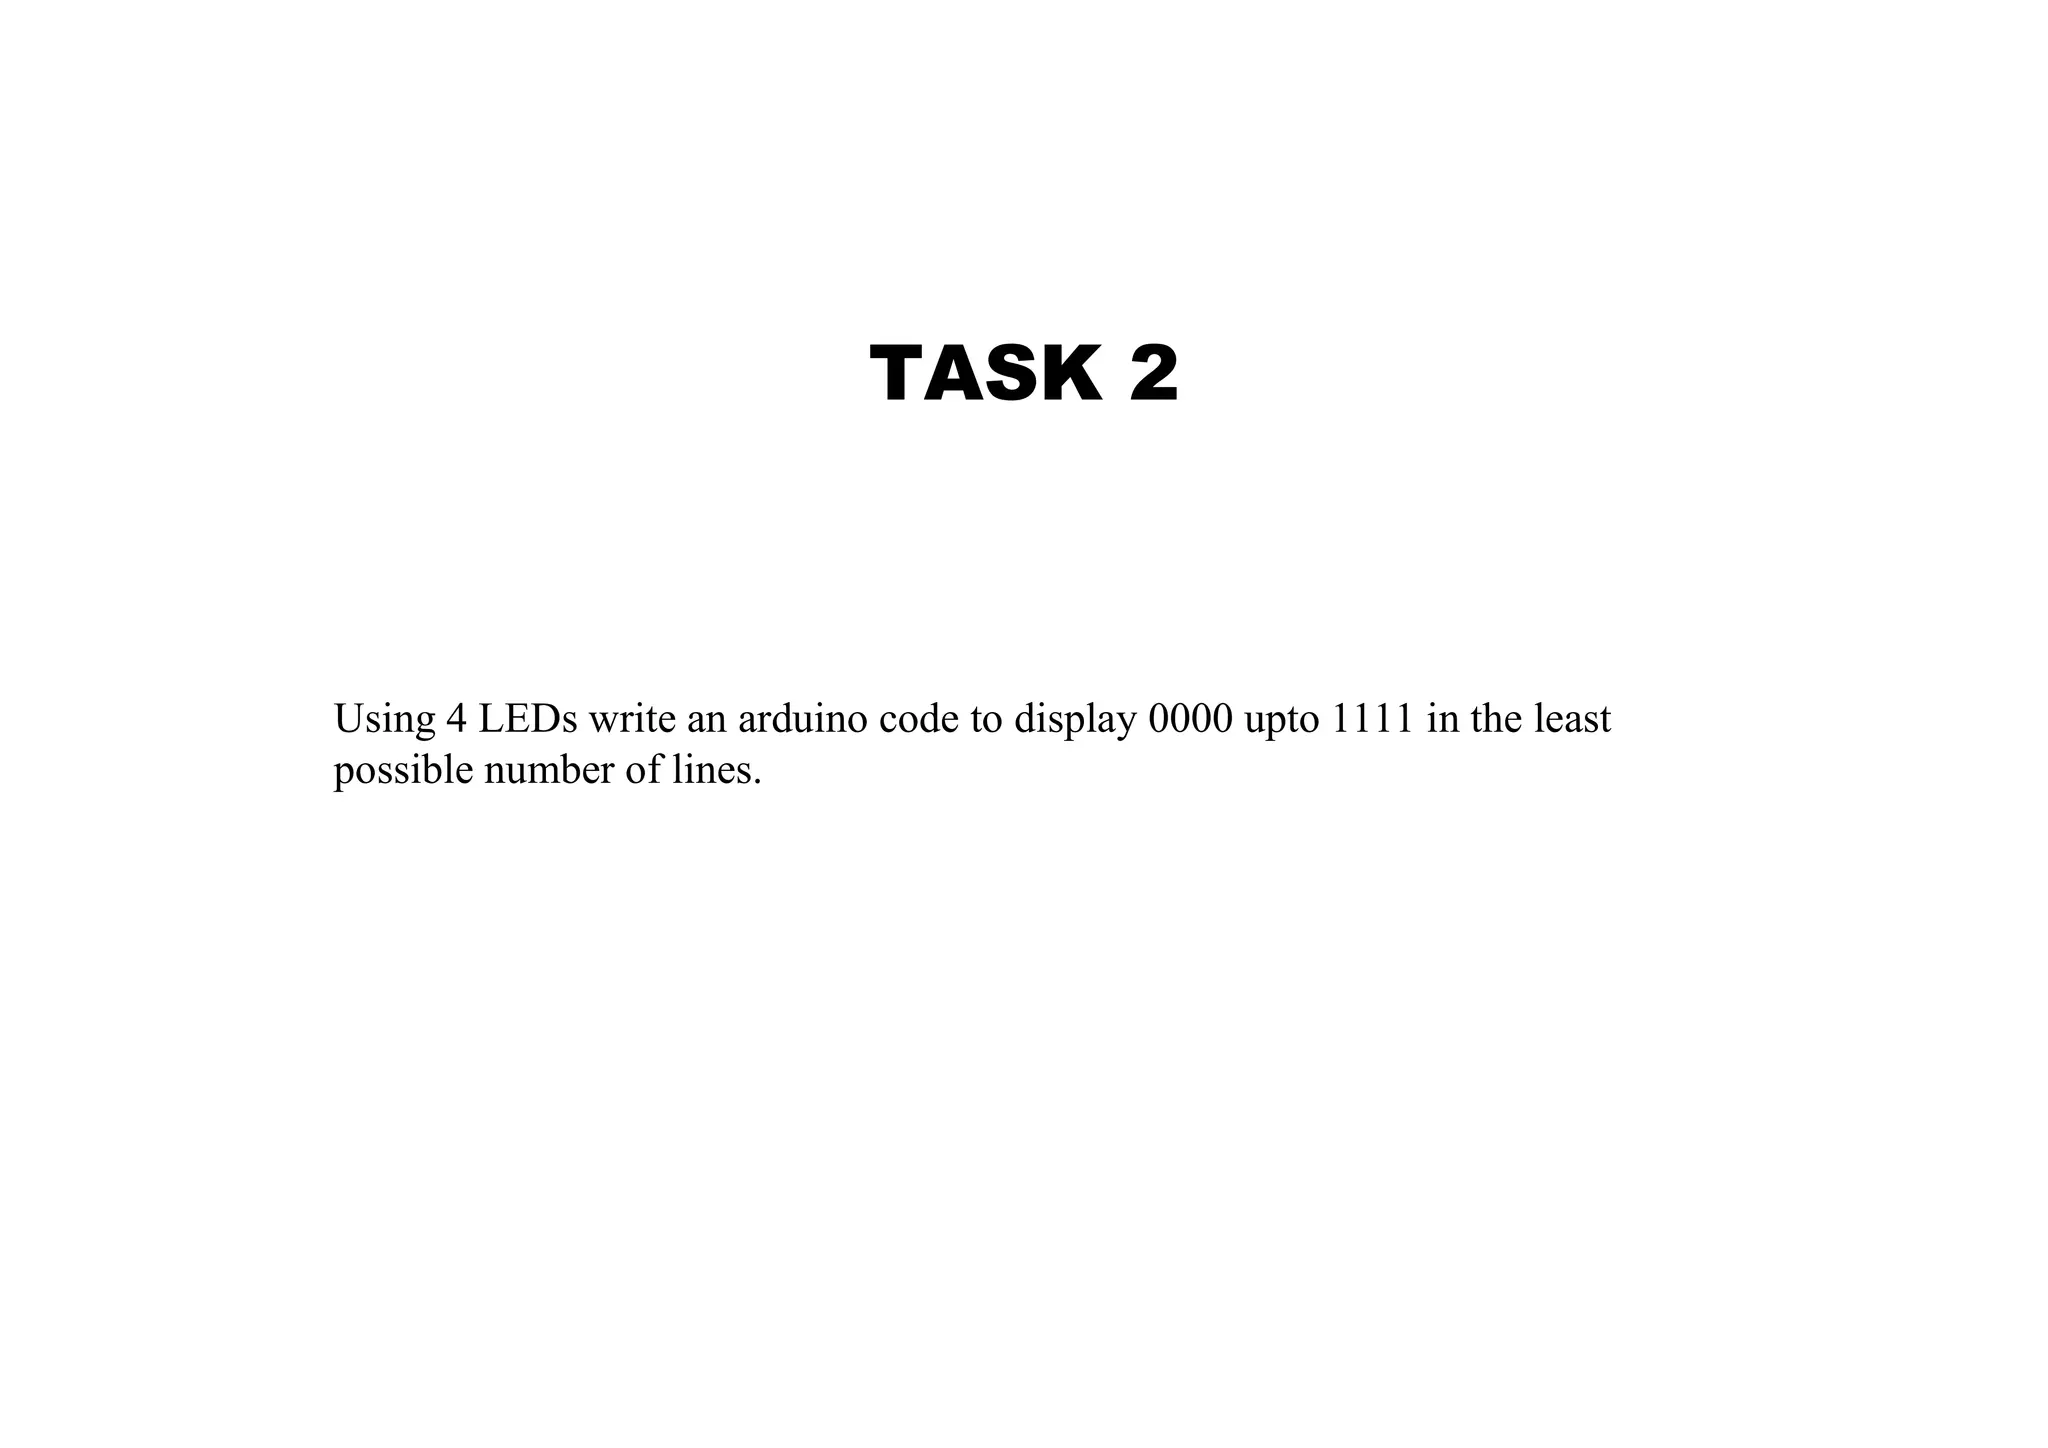
    TASK 2 Using 4LEDs write an arduino code to display 0000 upto 1111 in the least possible number of lines.
  • 67.
    TASK 3 Replicate automaticbrightness of your phone screen
  • 68.
    TASK 4 Design asmart room lighting system. Room should turn on only if it is dark inside and if someone enters the room.
  • 69.
    TASK 5 Sheldon isworking with an undisclosed nation to encrypt nuclear war codes. Unfortunately cyber terrorists have hacked into his personal systems and the only option he has is to build cryptographic systems on his Arduino Uno The specifications are as follows: Input is a 5 letter word upper case. Input id entered through the serial monitor. To encrypt data, he has to roll alphabets by key value which changes according to the brightness Keys are +5 for high brightness And -5 for darkness For example, ABC will be encrypted as FGH in bright condition and VWX in dark condition
  • 70.
    TASK 6 Write anarduino code to allow easy passage of vehicle through a toll gate. The Red LED indicates the closed gate. The Green LED indicates the opened gate. The Gate should be opened to allow passage of the vehicle only after amount is paid and validated. If the vehicle is detected is a four wheeler then Rs 50 should be taken from the driver and the remaining should be returned, if the vehicles detected is a two wheeler, then Rs 30 should be taken from the rider and the remaining should be returned. The user should enter what type of vehicle it is and amount being paid using Serial Monitor. All transactions are done via Serial Monitor.