This document contains the table of contents for the book "Advanced JavaScript" by Chuck Easttom. The table of contents lists 28 chapters that cover topics like JavaScript fundamentals, objects, functions, operators, events, arrays, dates, strings, the document object model, forms, cookies, images and more. It also includes 6 appendices on related topics like HTML, JavaScript syntax, ASCII characters, and online resources.


![“string has no property indexed by [i]” . . . . . . . . . . . . . . . . . . . . . 548 “string cannot be set by assignment” . . . . . . . . . . . . . . . . . . . . . . 549 “test for equality (==) mistyped as assignment (=)? Assuming equality test” . . . . . . . . . . . . . . . . . . . . . . . . . . . . . . . . . 549 “function does not always return a value” . . . . . . . . . . . . . . . . . . . 549 “access disallowed from scripts at URL_1 to documents at URL_2” . . . . . 549 “Lengthy JavaScript still running. Continue?” . . . . . . . . . . . . . . . . . 549 “syntax error”. . . . . . . . . . . . . . . . . . . . . . . . . . . . . . . . . . . 549 Manual Debugging Techniques . . . . . . . . . . . . . . . . . . . . . . . . . . . 549 Match Those Tag Pairs . . . . . . . . . . . . . . . . . . . . . . . . . . . . . . 550 View the Intermediate HTML Source. . . . . . . . . . . . . . . . . . . . . . 550 Reopen the File . . . . . . . . . . . . . . . . . . . . . . . . . . . . . . . . . . 550 Print Messages . . . . . . . . . . . . . . . . . . . . . . . . . . . . . . . . . . 550 Comment Out Statements . . . . . . . . . . . . . . . . . . . . . . . . . . . . 550 Watching and Tracing Variables . . . . . . . . . . . . . . . . . . . . . . . . . 551 Getting It Right the First Time . . . . . . . . . . . . . . . . . . . . . . . . . . . 551 Build the Script’s Skeleton First. . . . . . . . . . . . . . . . . . . . . . . . . 551 Keep Testing While Developing . . . . . . . . . . . . . . . . . . . . . . . . . 552 Evaluate Expressions Outside Your Source. . . . . . . . . . . . . . . . . . . 552 Test Your Functions Outside Your Source. . . . . . . . . . . . . . . . . . . . 552 Testing Your Script . . . . . . . . . . . . . . . . . . . . . . . . . . . . . . . . . . 553 Summary . . . . . . . . . . . . . . . . . . . . . . . . . . . . . . . . . . . . . . . 553 Appendix A HTML Primer . . . . . . . . . . . . . . . . . . . . . . . 554 Appendix B JavaScript Object Specification Syntax . . . . . . . . . 560 Appendix C ASCII Character Set . . . . . . . . . . . . . . . . . . . 578 Appendix D Online Resources . . . . . . . . . . . . . . . . . . . . . 582 Index . . . . . . . . . . . . . . . . . . . . . . . . . . . . . . 584 xx n Contents](https://image.slidesharecdn.com/wordware-advancedjavascript3rded-160421130838/75/www-webre24h-com-Wordware-advanced-javascript-3rd-ed-easttom-21-2048.jpg)
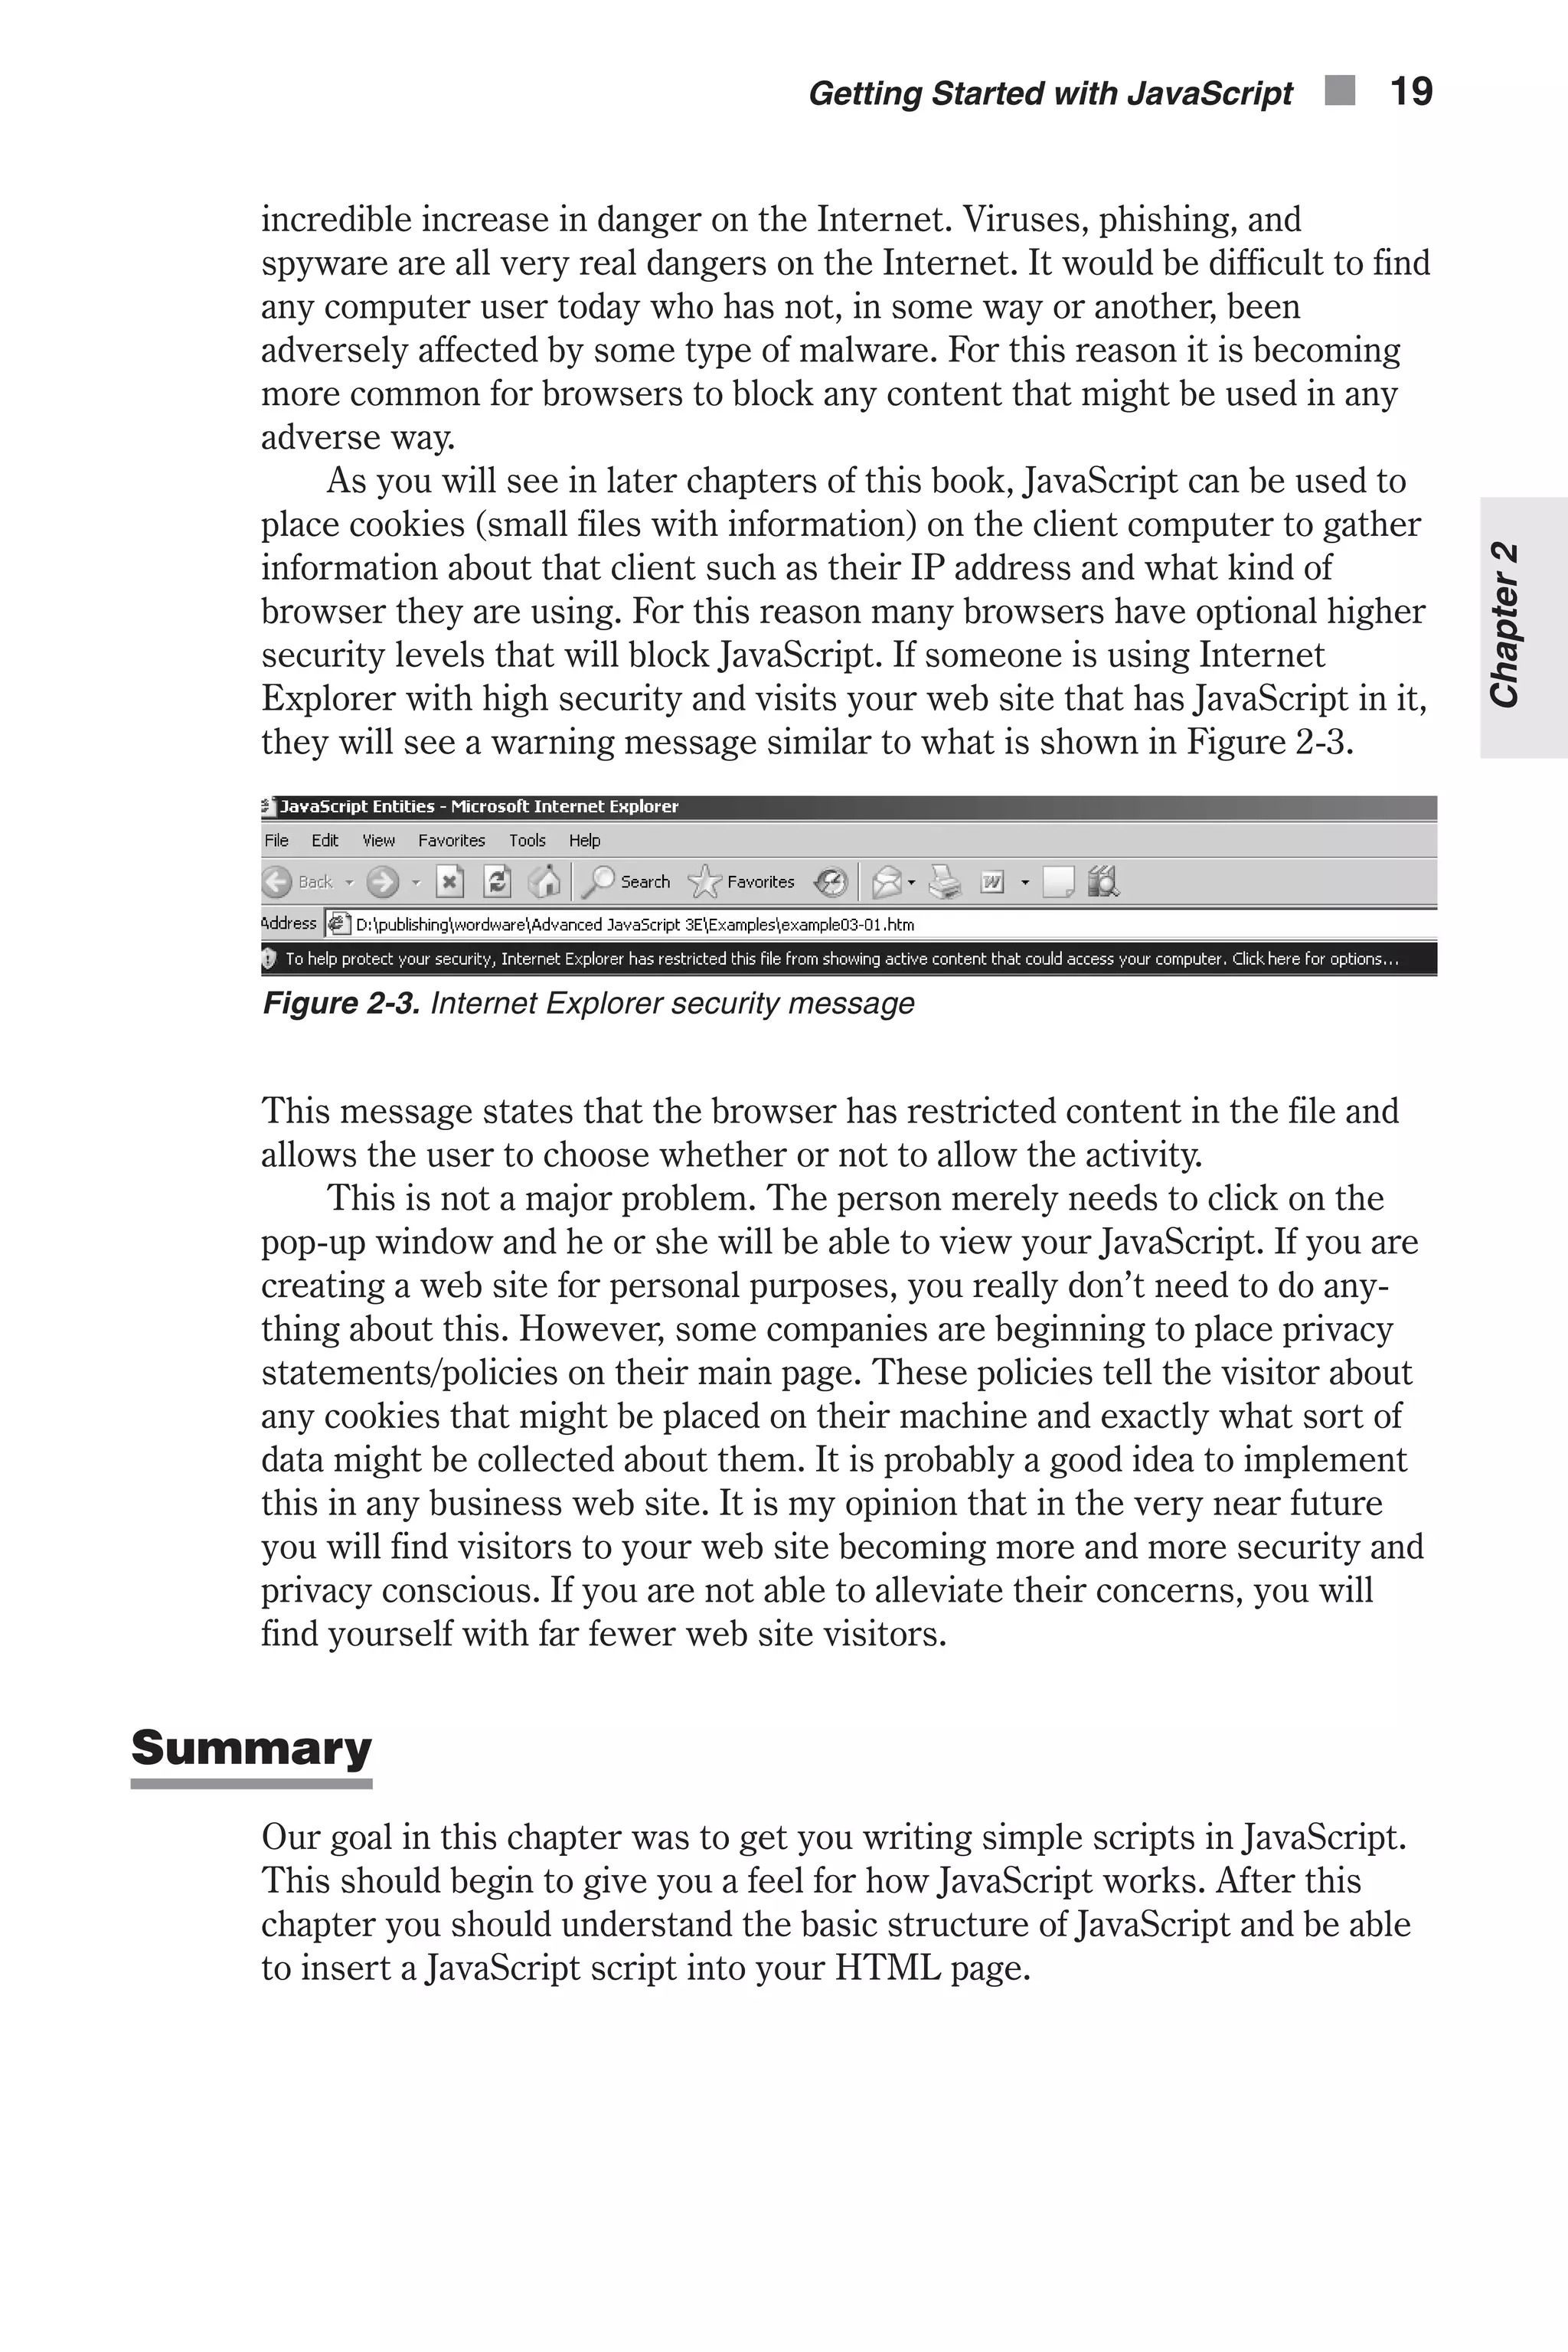
![JavaScript is a viable scripting language for both Netscape and Internet Explorer, so I will use examples from both browsers and will point out any differences. If you have the latest version of either Netscape or Internet Explorer, then virtually all the examples should work fine for you. Older ver- sions of both browsers, particularly 3.0 and earlier, lacked support for some JavaScript features. Programming Style As both an aid to the reader and to illustrate good programming practices, I use a uniform style throughout this entire text and in all the sample code you will find in the companion files (available at www.wordware.com/files/ java0330). For example, all variables are in Hungarian notation, meaning the variable is preceded by one to three letters designating the type of variable it is. That is, an integer being used as a loop counter might be named intcounter, and a float that holds an account balance might be named fltbalance. I also have a tendency to comment very heavily; some would say too much. This comes from teaching and creating code samples for stu- dents. I hope you will find this helpful: for (var intcounter = 0; intcounter < 10; ++intcounter) { [JavaScript statements] }// end of for loop Some JavaScript scripters prefer to use a different style: for (var num = 0; num < 10; ++num) { [JavaScript statements] } A lot of my style preferences are just that—preferences. It is hard to call one style right and another wrong. However, I strongly suggest that when you are writing code you consider the fact that other programmers will probably need to read your code at some point. They will have absolutely no idea what you were thinking when you wrote your code. I try to write code in such a way that even a novice programmer with no prior knowledge of the project at hand could easily deduce the intended purpose of the code. Reading Examples It seems obvious but read the examples thoroughly. Make sure you have a firm understanding of how and why they work. It is also helpful to actually run them. If you don’t wish to run them, at least read them thoroughly and make certain that you fully understand every line of code and what it does. Introduction n xxiii](https://image.slidesharecdn.com/wordware-advancedjavascript3rded-160421130838/75/www-webre24h-com-Wordware-advanced-javascript-3rd-ed-easttom-24-2048.jpg)


![Choosing a Browser Besides the basic programming tool, you need to be able to run your scripts and view their output. In order to run JavaScript, you need a compatible browser. Many years ago this was a problem, as not all browsers supported JavaScript and some only supported portions of JavaScript. However, it has been quite a few years since this was an issue. Any version of Microsoft Internet Explorer, Netscape Navigator, or Mozilla Firefox produced in the past five years will support JavaScript. Many lesser-known browsers such as Galleon and Opera also support JavaScript. As I stated earlier, it has become a standard for web development and one would be hard pressed to find a browser that did not support JavaScript, so it doesn’t really matter which browser you choose. þ Note: With most web development technologies (JavaScript, ASP .NET, etc.) things don’t always look the same in different browsers. For this reason, most professional web developers use multiple browsers to test their code. I would recommend you have at least Internet Explorer and Mozilla Firefox. Since almost all browsers are free downloads, keeping multiple browsers should not be a problem. Basic JavaScript Structure In order to run client-side JavaScript, you must embed the code in the HTML document. Obviously, you cannot place JavaScript statements in the source code in just any location. There are several different ways to embed JavaScript scripts in HTML: n As statements and functions using the <SCRIPT> tag n As event handlers using HTML tag attributes n As short statements resembling URLs The <SCRIPT> Tag Internal Scripts The <SCRIPT> tag is used to enclose JavaScript code in HTML documents. Here is the general syntax: <SCRIPT LANGUAGE="JavaScript"> [JavaScript statements...] </SCRIPT> The <SCRIPT LANGUAGE="JavaScript"> tag acts like all other HTML tags. Notice that it must be followed by its closing counterpart, </SCRIPT>. Every statement you put between the two tags is interpreted as JavaScript code. This is probably the most common method for inserting JavaScript into HTML documents. 14 n Chapter 2](https://image.slidesharecdn.com/wordware-advancedjavascript3rded-160421130838/75/www-webre24h-com-Wordware-advanced-javascript-3rd-ed-easttom-39-2048.jpg)
![and a slow-loading web site is unlikely to be successful. Always keep in mind that unnecessary HTTP hits to the server should be avoided. Enough theory. Here is the syntax for defining an external script in the <SCRIPT> tag: <SCRIPT LANGUAGE="JavaScript" SRC="yourFile.js"> [additional JavaScript statements...] </SCRIPT> Note that the extension of the external file must be .js, just as the extension of an HTML file must be .html or .htm. The name of the file does not have to include the full path; a relative (virtual) path is enough. The .js, obviously, stands for JavaScript. Suppose abc1.js contains the following code: var counter = 100 function alertMe(message) { alert(message) } function writeMe(message) { document.write(message) } At this point, the meaning of the JavaScript statements themselves is unim- portant. They are all explained in the following chapters. Here’s the basic HTML file: <HTML> <HEAD> <TITLE>Using external files</TITLE> <SCRIPT LANGUAGE="JavaScript" SRC="abc1.js"> <!-- var digit = 8 alertMe("Hello!") writeMe("Howdy!") // --> </SCRIPT> </HEAD> </HTML> The preceding structure is equivalent to the following HTML document: <HTML> <HEAD> <TITLE>Equivalent Script</TITLE> <SCRIPT LANGUAGE="JavaScript"> <!-- var counter = 100 function alertMe(message) { alert(message) } 16 n Chapter 2](https://image.slidesharecdn.com/wordware-advancedjavascript3rded-160421130838/75/www-webre24h-com-Wordware-advanced-javascript-3rd-ed-easttom-41-2048.jpg)

![functions. Since a function usually does something besides storing a value, it is common to include a verb in its name. The function’s parameters are writ- ten in brackets after the name. A command block follows the parameters. The syntax of a function definition is: function functionName([parameters]) { [statements] } Parameters are local variables that are assigned values when the function is called. Essentially a parameter is the raw materials the function will process. In our earlier example of a function that calculates mortgage payments, the principal and interest rate would be parameters for that function. Another word you will often hear used for parameters is argument. Arguments and parameters are synonymous in programming. At this point, you should always give a name to every parameter. In a formal syntax specification, the square brackets ([]) usually denote optional elements. Since a function does not have to have parameters or statements, both are enclosed in such brackets. The curly braces enclosing the function body can be placed anywhere following the parameter section. The following functions are valid: function functionName([parameters]) {[statement1]; [statement2]; ...} function functionName([parameters]) { [statement1] [statement2] } The following example demonstrates a function declaration: <HTML> <HEAD> <SCRIPT LANGUAGE="JavaScript"> function square(number) { document.write("The call passed ", number, // the function's parameter " to the function.<BR>", number, // the function's parameter " square is ", number * number, ".<BR>") } // *** add function call </SCRIPT> </HEAD> <BODY> </BODY> </HTML> Example 3-2 (ex3-2.htm). A function definition (deferred code) 36 n Chapter 3](https://image.slidesharecdn.com/wordware-advancedjavascript3rded-160421130838/75/www-webre24h-com-Wordware-advanced-javascript-3rd-ed-easttom-61-2048.jpg)
![Example 3-2 does not print anything to the browser’s window, nor does it generate any other form of output. The reason is that the function is only defined in the script but is never called. When the browser locates a func- tion, it loads its statements into memory, ready to be executed later. Calling Functions In order to execute the set of statements located in the function block, you must call the function. The syntax of a function call is: functionName([arguments]) By adding the statement square(5) to Example 3-2, at the specified place, we call the function. The statements in the function are executed, and the following message is output: The call passed 5 to the function. 5 square is 25. You can also call a function from within another function, as the following example demonstrates: <HTML> <HEAD> <TITLE>Calling a function from within another function</TITLE> <SCRIPT LANGUAGE="JavaScript"> function makeBar() { var output = "<HR ALIGN='left' WIDTH=400>" document.write(output) } function makeHeader(text, color, size) { var output = "<FONT COLOR='" + color + "' SIZE=" + size + ">" + text + "</FONT>" document.write(output) makeBar() } makeHeader("JavaScript Examples", "red", "+4") </SCRIPT> </HEAD> <BODY> </BODY> </HTML> Example 3-3 (ex3-3.htm). A function call in a function block Example 3-3 summarizes many of the terms discussed in this chapter. It includes two function definitions. In both functions, the output is assigned to a variable (output) and then printed to the client window using the docu- ment.write() method. Assigning strings to variables before printing them is extremely useful when the string is long (i.e., you want to print a lot of data). You can see the result of Example 3-3 in Figure 3-2. JavaScript Fundamentals n 37 Chapter3](https://image.slidesharecdn.com/wordware-advancedjavascript3rded-160421130838/75/www-webre24h-com-Wordware-advanced-javascript-3rd-ed-easttom-62-2048.jpg)
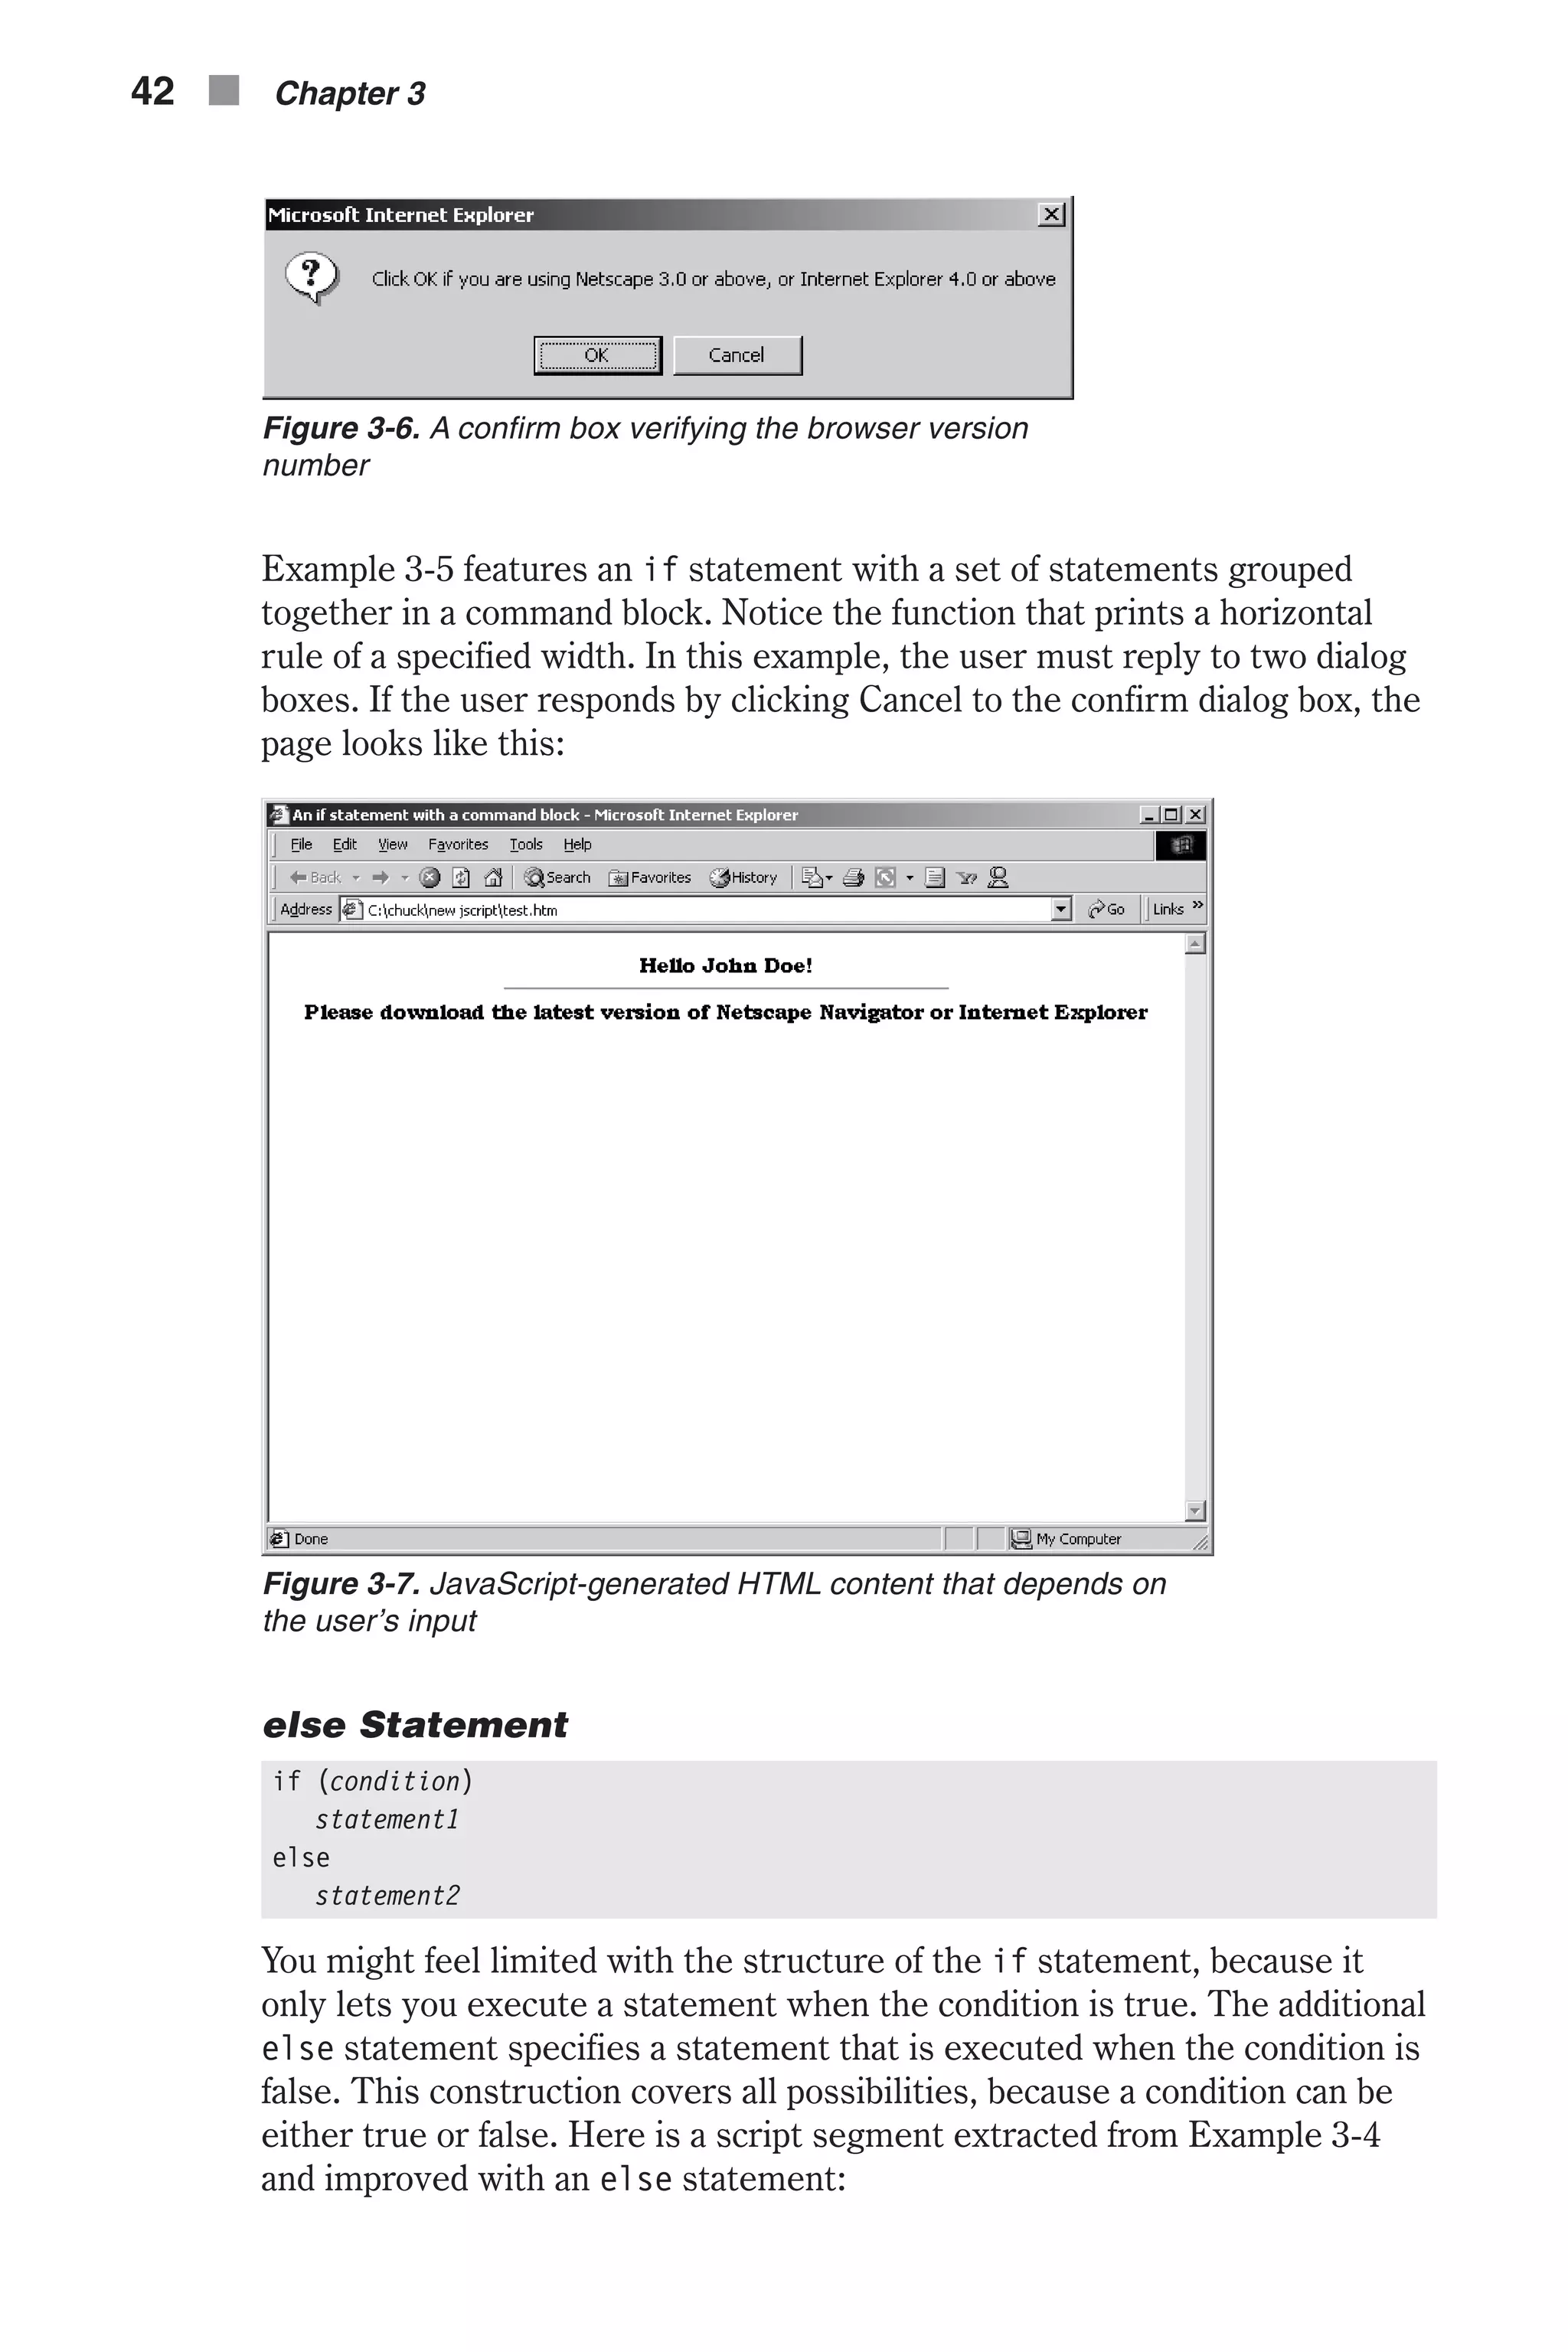
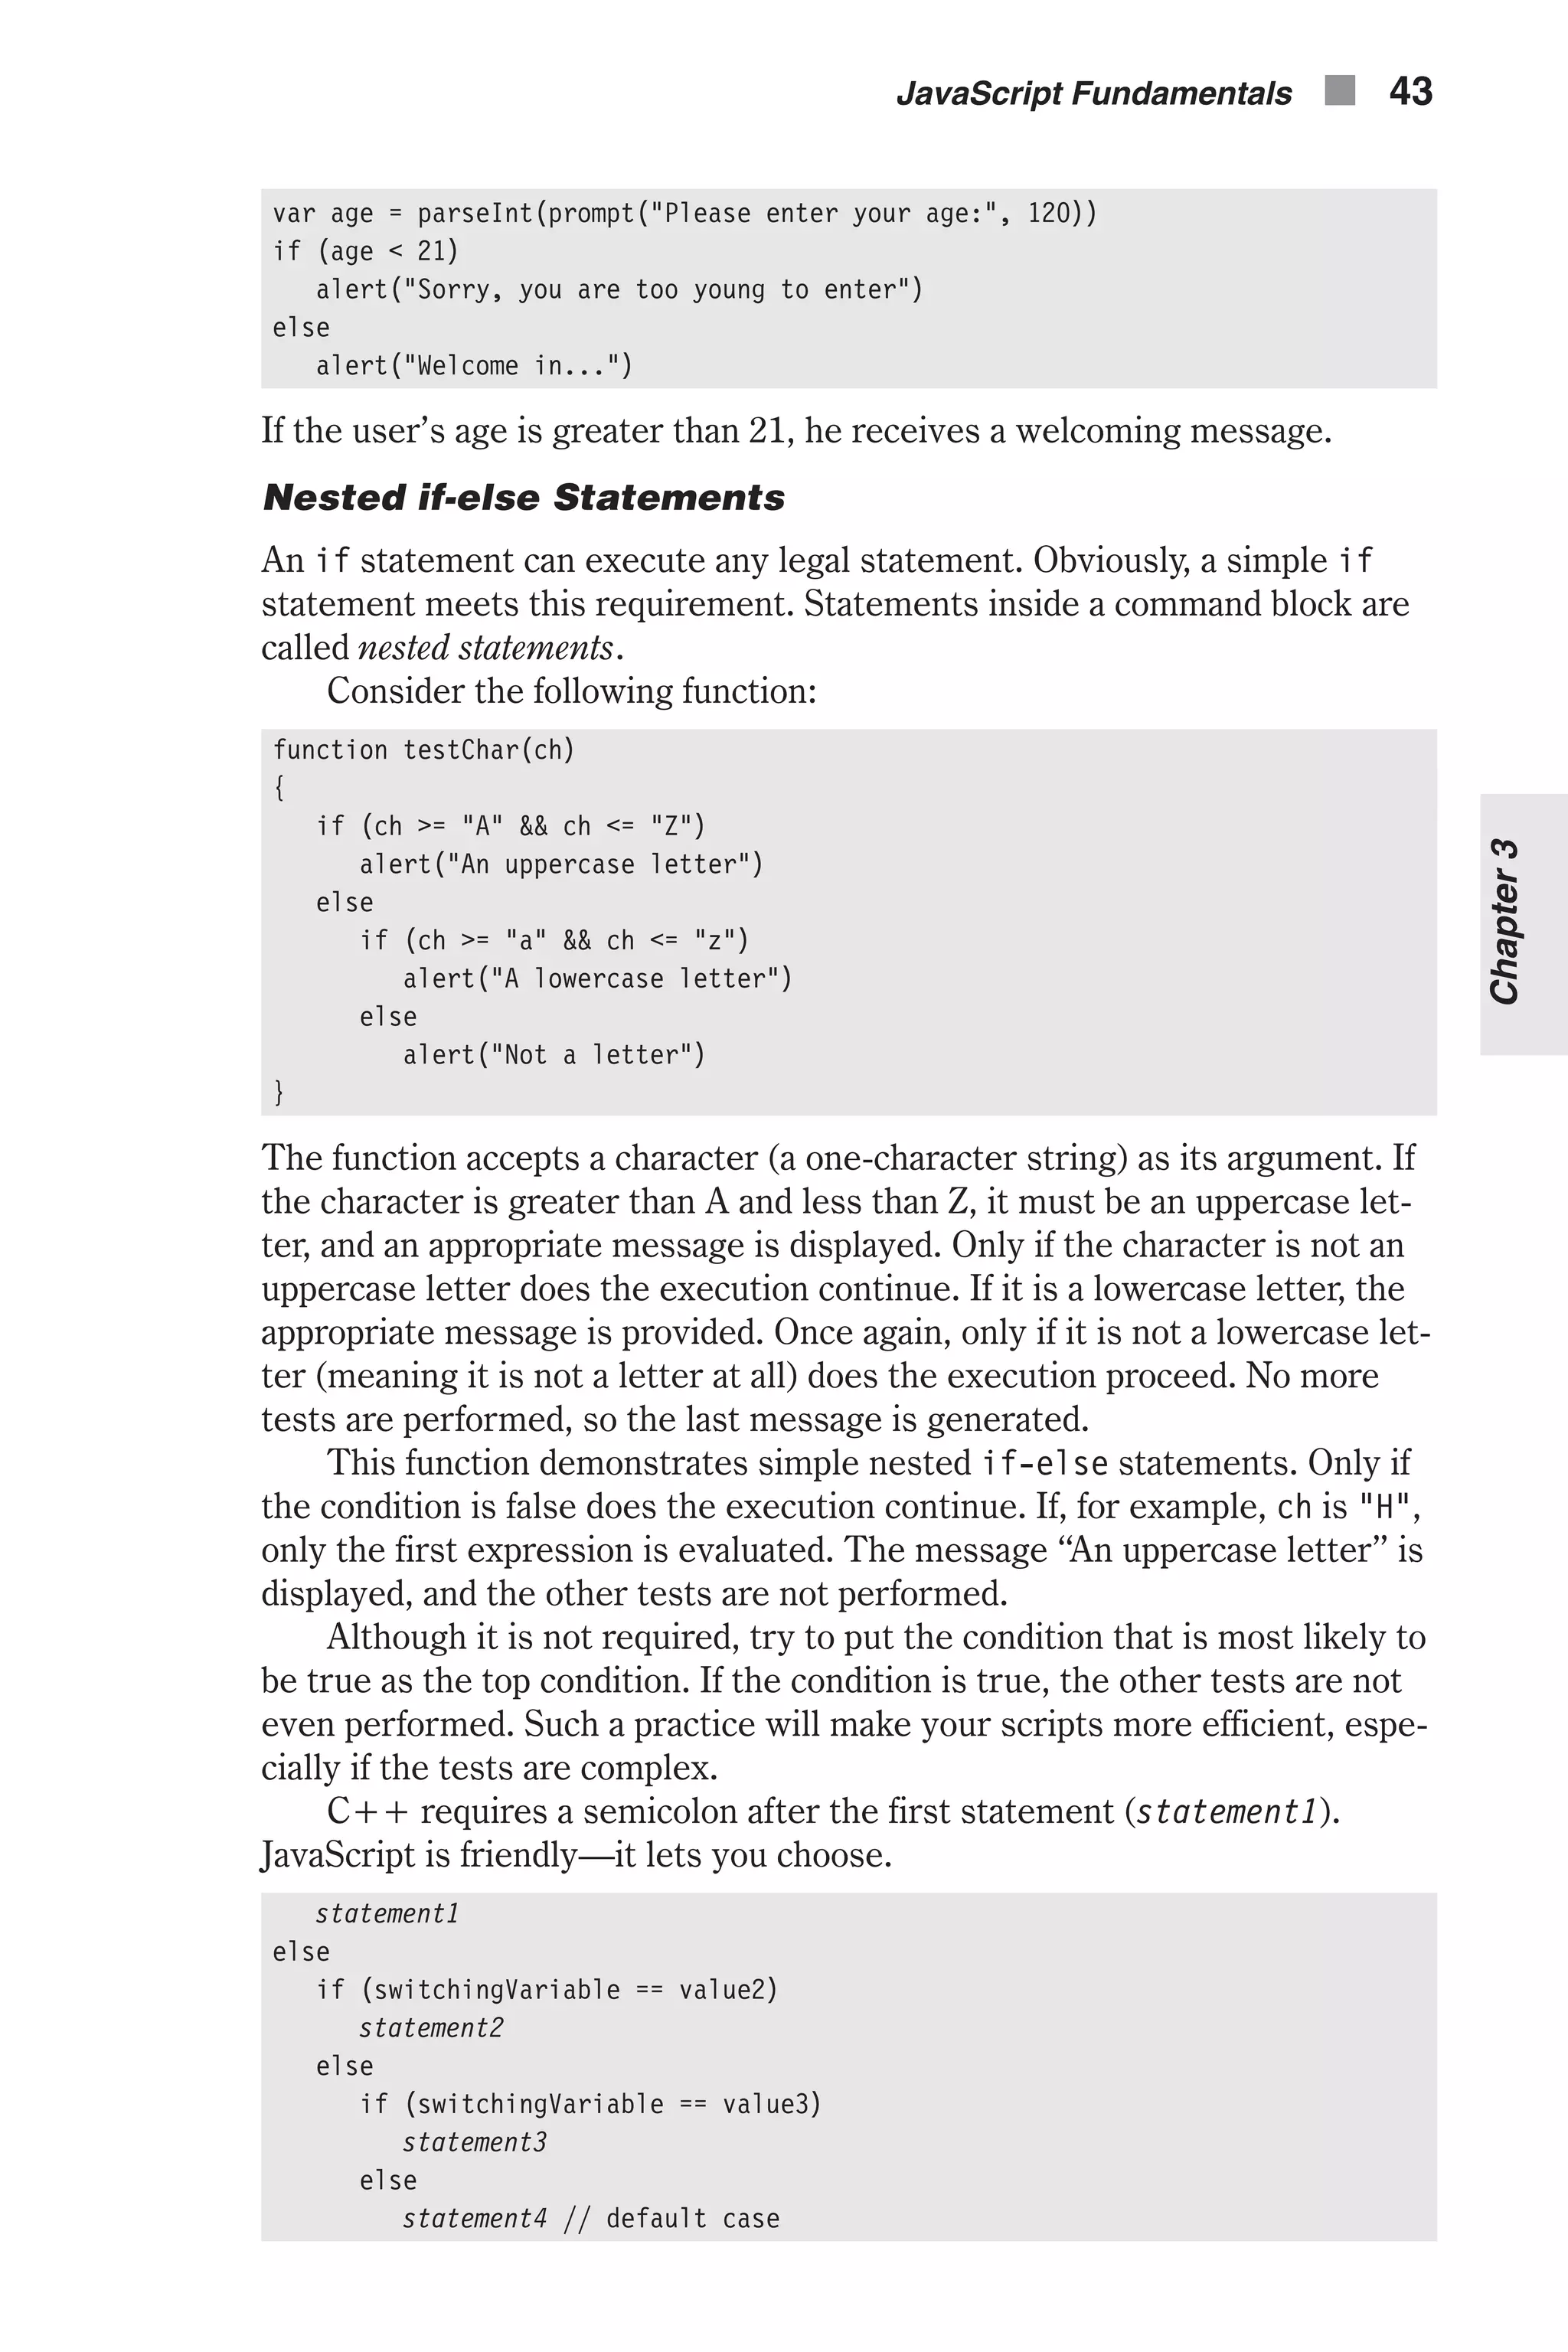
![reply is assigned a true value if the user chooses OK, and false if the user selects Cancel. The generic form of this function is confirm(message). Prompt Boxes The prompt() method displays a prompt dialog box with a message and an input field. You can use these boxes to receive input from the user. It is simi- lar to the confirm box, except that it returns the value of the input field, rather than true or false. Here is an example: var name = prompt("Enter your name:", "anonymous") The method returns a value of null if the user chooses Cancel. Figure 3-3 shows a typical prompt box. The value of the field is always a string. If the user enters 16 in the form, the string "16" is returned rather than the number 16. When you want to prompt the user for a number, you must convert the input into a numeric value. JavaScript features a built-in function that does this—parseInt(). You can use the following statement to ask the user for a number: var number = parseInt(prompt("Enter a number:", 0)) or var number = prompt("Enter a number:", 0) number = parseInt(number) The generic form of this function is prompt(message[, inputDefault]). You can see that this function works by using the typeof operator for testing: var number = prompt("Enter a number:", 0) alert(number + " is a " + typeof(number)) // "... is a string" number = parseInt(number) alert(number + " is a " + typeof(number)) // "... is a number" The input must be of a numeric type, of course (e.g., 99). Conditional Statements Conditional statements are key to all programming languages. They allow your program (or script in this case) to execute different code segments based on varying conditions. JavaScript Fundamentals n 39 Chapter3 Figure 3-3. The prompt box](https://image.slidesharecdn.com/wordware-advancedjavascript3rded-160421130838/75/www-webre24h-com-Wordware-advanced-javascript-3rd-ed-easttom-64-2048.jpg)
![Loop Statements Loops are control structures that perform a set of actions more than once. Everyone agrees that a computer can calculate faster than a human. Using loops you can repeat calculations and take advantage of the computer’s abil- ity to do them faster. Theoretically, a loop repeats only one statement. However, you already know that a statement can be a block of statements, allowing the repetition of many statements or perhaps the whole program. JavaScript features two basic loop types: n The for loop n The while loop Each loop type has its own advantages. However, the for loop is the most commonly used loop, and thus we will focus primarily on it in this chapter. for Statement for ([initialExpression;] [condition;] [operation]) statement Because a loop usually repeats more than one statement, you use a com- mand block in the following format: for ([initialExpression;] [condition;] [operation]) { statements } initialExpression is usually a statement or a variable declaration. It should evaluate to a single value and is typically used to initialize a counter variable. This expression may optionally declare new variables with the var keyword. condition is a condition that is evaluated before each successive pass through the loop. The statement is executed only if the condition evaluates to true. operation is a statement that is executed after each consecutive pass through the loop’s body. It is typically used to update or increment the coun- ter variable, which counts the number of passes through the loop. Consider the following looping script fragment: var number1 = 1 var number2 = 1 for (var counter = 1; counter <= 10; counter++) { document.write(number1 + " ") number2 = number2 + number1 number1 = number2 – number1 } This piece of code prints the first ten numbers of the Fibonacci sequence. The Fibonacci sequence is a sequence of numbers that is commonly used in computer science and is intriguing from a mathematical point of view 44 n Chapter 3](https://image.slidesharecdn.com/wordware-advancedjavascript3rded-160421130838/75/www-webre24h-com-Wordware-advanced-javascript-3rd-ed-easttom-69-2048.jpg)

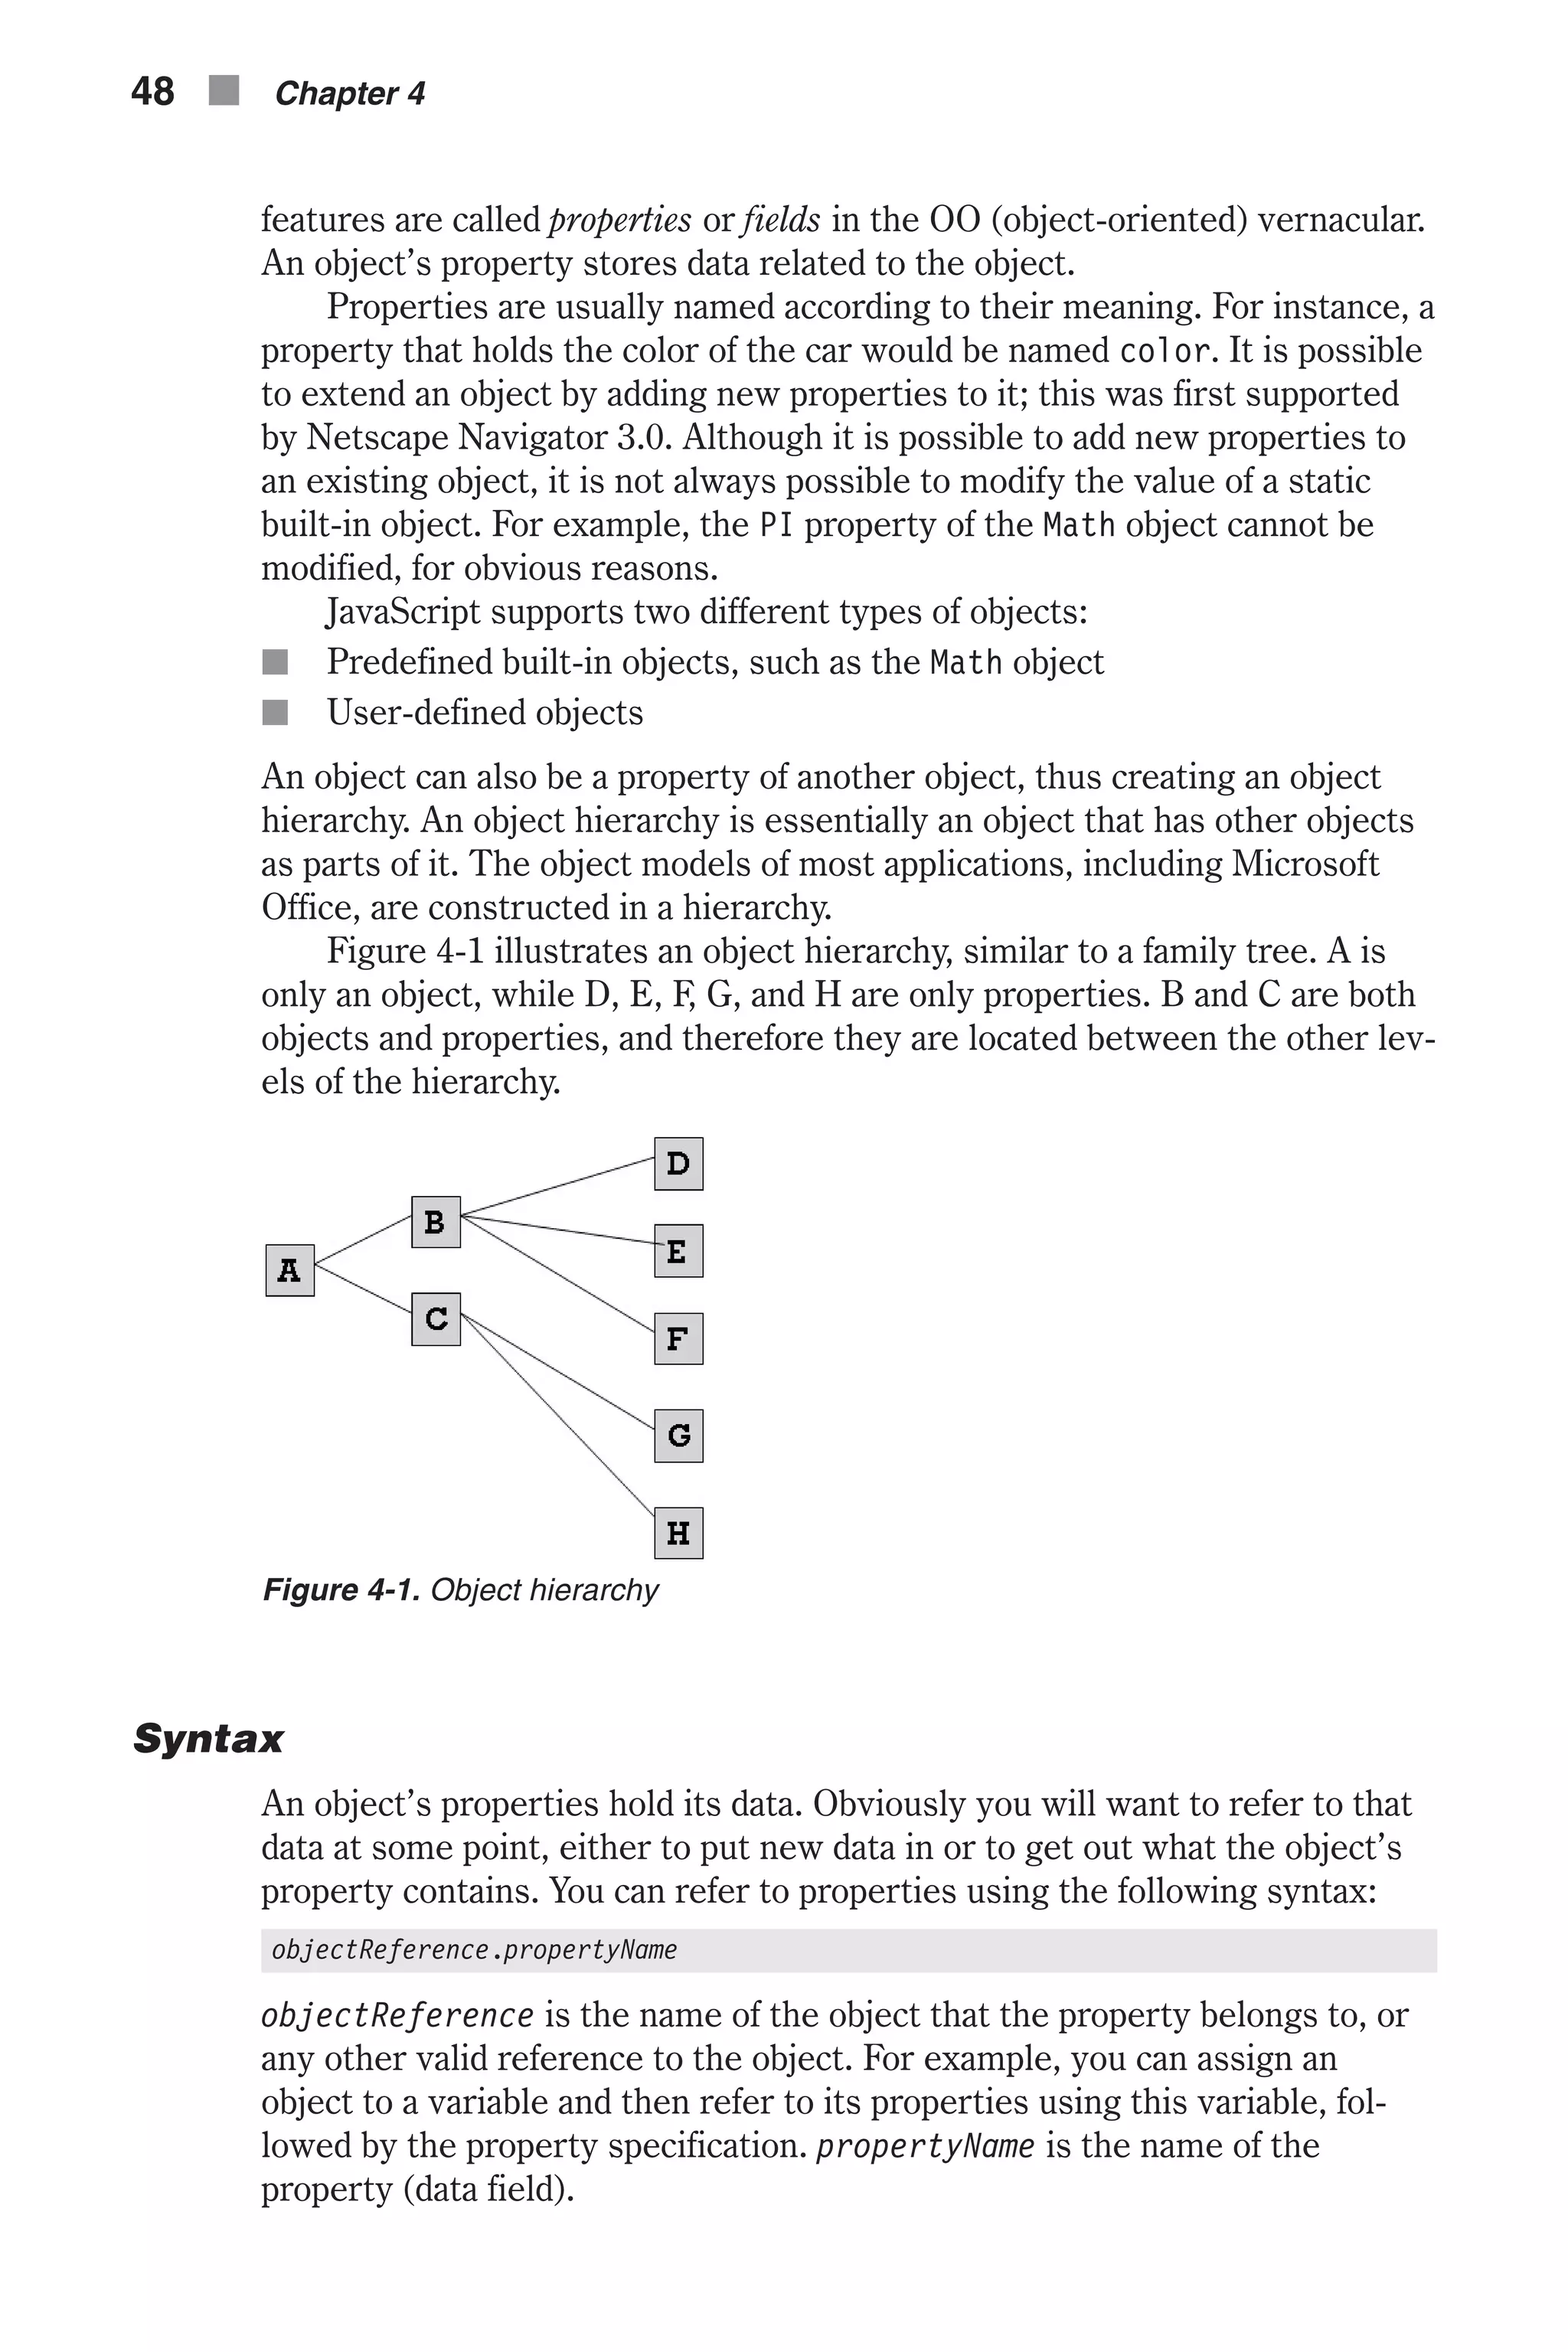
![As you can see, a variable may be named exactly like a property of an object. This is possible because properties are not of the same scope as variables. However, a variable cannot have the same name as an object at the same level. For example, the statement var a = a.b.d is not valid (actually it is valid, but the value of a is lost). The main object is at the same scope of the variable because they are not properties of any other object. As a matter of fact, an object is a variable, and two variables that have the exact same name are associated with the same location in memory. The statement var a = a.b.d converts a to a simple variable containing the value 16, and not an object. It is generally a good practice to avoid naming variables by an object’s property or method, at least until you feel comfortable with objects and properties. The output of the statement document.write(a) might be [object create] because that is the object’s string equivalent. Methods Properties hold the data of an object, and methods are what execute the actions of an object. If you think about it for just a moment you will realize that method is just another word for a function, if that function is part of an object. During execution of a JavaScript script, an object may invoke one or more methods to accomplish a task. As you know, objects consist of both data (properties) and functions that handle the data. These functions are called methods. Methods enable an object to perform different actions, mostly on its own properties. Methods, as previously stated, are simply functions that are part of the object. However, since they are part of the object they have access to the properties of the object, including private properties that cannot otherwise be accessed. Most advantages of OOP (object-oriented programming) are associated with methods. JavaScript does not completely support external libraries (other than the SRC attribute of the <SCRIPT> tag), so the following features apply mostly to built-in objects: n Because an object encapsulates related data and functions (methods) into a single cohesive unit, it is easy to perform maintenance activities. n Every language paradigm influences its application design. Therefore, scripts developed in JavaScript often make use of objects. Although you can design your scripts in a traditional procedural way, you will find it a great deal easier to use objects and methods. You will notice the differ- ence between the traditional style and the OO style as soon as you start writing complex scripts. JavaScript’s implementation of objects is not as powerful as that of Java, C++, or .NET, so some OO programming advantages that apply to Java do not apply to JavaScript. 50 n Chapter 4](https://image.slidesharecdn.com/wordware-advancedjavascript3rded-160421130838/75/www-webre24h-com-Wordware-advanced-javascript-3rd-ed-easttom-75-2048.jpg)
![Syntax A method can exist at different levels of an object’s hierarchy. You can invoke a method using the same syntax you use to reference a property, i.e., the “dot” syntax. Methods are actually functions associated with objects. Therefore, they resemble functions in many aspects. A method is called in the following fashion: objectReference.methodName([arguments]) objectReference is the name of the object, or any other reference. methodName is the name of the method, and arguments are the arguments that the method accepts. Because a method is a function, the name of the method is always fol- lowed by a pair of parentheses. This rule also applies to methods that do not accept arguments. You probably find this syntax familiar. We have been using docu- ment.write ([expression]) to print HTML expressions to the page. write() is a method belonging to the built-in document object. Using the Array Notation You can refer to properties and methods using either the “dot” syntax or the array notation. In array notation, square brackets replace the dots. For exam- ple, the following expression refers to a.b.d: a["b"]["d"] You can use the array notation for both properties and methods. The general syntax is: objectReference["propertyName"] objectReference["methodName"]([arguments]) It is important to understand this alternative syntax, because you cannot always use the traditional dot syntax. For example, the first character of a property name cannot be a digit when using the dot syntax. When you create an array using the built-in Array object, you can only refer to the elements of the array via the array notation (e.g., myArray[0], myArray[99]). You must always use double quotes when you refer to a property of an object that is not an array. Here are some examples for using the array notation to reference methods and properties: document["write"]("hello!") window["alert"]("howdy!") // note: alert() == window.alert() Math["PI"] Sometimes you can only use the array notation. Suppose the variable str holds the string "write". You can use the following syntax instead of docu- ment.write(): document[str]() Object-Oriented Programming n 51 Chapter4](https://image.slidesharecdn.com/wordware-advancedjavascript3rded-160421130838/75/www-webre24h-com-Wordware-advanced-javascript-3rd-ed-easttom-76-2048.jpg)
![However, you cannot use document.str() because that is equivalent to document["str"](). Another situation in which you should use the array notation is when you want to name a property not according to the identifier rules. For example, myObject["*"] is possible only with the array notation. When you use the array notation, the value in the square brackets should be a string, because the content is evaluated. Object Oriented vs. Object Based JavaScript is based on a simple object-oriented paradigm. This paradigm is often called object based, as opposed to object oriented. If you are used to a truly object-oriented language such as C#, Java, or C++, you will find much of that functionality is missing in JavaScript. For example, classes do not exist in JavaScript (all objects belong to one “class”), nor do packages (because a package groups classes together). The object hierarchy in JavaScript is a containment hierarchy, not an inheritance hierarchy as in Java and C++. That is, an object does not inherit from other objects, but it can be contained by another object if it is a property of that object. Most object-oriented languages require static resolution of objects at compile time. If all this talk of inheritance hierarchies seems foreign to you, don’t worry. The purpose of this section is to explain to readers who are used to true object-oriented programming what is not available to them in JavaScript. However, an object-oriented language may require dynamic method bindings because polymorphism allows multiple definitions of methods shar- ing a common name. Calling such polymorphic methods often cannot be resolved until run time. JavaScript is completely based on dynamic binding. That is, object references are checked at run time. There are many other dif- ferences between the object paradigm in JavaScript and the one in full object-oriented languages (such as Java and C++). Summary This chapter discussed the basics of object-based programming, based on JavaScript’s object model. Its purpose is to introduce you to general object-oriented and object-based terminology and to a bit of JavaScript syn- tax. Every language paradigm heavily influences the design of applications in that language. Therefore, scripts written in JavaScript are typically object-based systems. Procedural scripting is possible in JavaScript, but object-based scripting has many advantages. Because JavaScript has a large set of built-in objects, including very useful methods and properties, a basic understanding of the object structure is necessary. If you are a beginner and find objects difficult to understand, don’t be too concerned. I promise that you will understand these concepts as we move on, mostly by studying examples. 52 n Chapter 4](https://image.slidesharecdn.com/wordware-advancedjavascript3rded-160421130838/75/www-webre24h-com-Wordware-advanced-javascript-3rd-ed-easttom-77-2048.jpg)


![an error. However, at that point, the variable does not retain any value, so it is undefined. The following definitions of a function are equivalent: // #1 function functionName { [JavaScript statements...] var varName = initialValue [JavaScript statements...] } // #2 function functionName { var varName [JavaScript statements...] varName = initialValue [JavaScript statements...] } Some programmers find it easier to use the second form. Each form has its own advantages and disadvantages, so you should choose the one that is most convenient for you. In this book, we use the first form because we pre- fer to use the var keyword in an assignment statement. If you declare global variables inside a function, you must assign an ini- tial value to the variable; otherwise, JavaScript returns an error. The following script segment and screen capture demonstrate this fact: function foo() { // local variable declarations var a // without initialization var b = 0 // with initialization // global variable declarations c // without initialization — error! d = 0 // with initialization } foo() Notice that the variable does not hold an undefined value as it would if the declaration used the var keyword—it causes an error instead. Functions and Variable Scope n 59 Chapter5 Figure 5-2. The error message returned when a global variable is declared without an initial value](https://image.slidesharecdn.com/wordware-advancedjavascript3rded-160421130838/75/www-webre24h-com-Wordware-advanced-javascript-3rd-ed-easttom-84-2048.jpg)
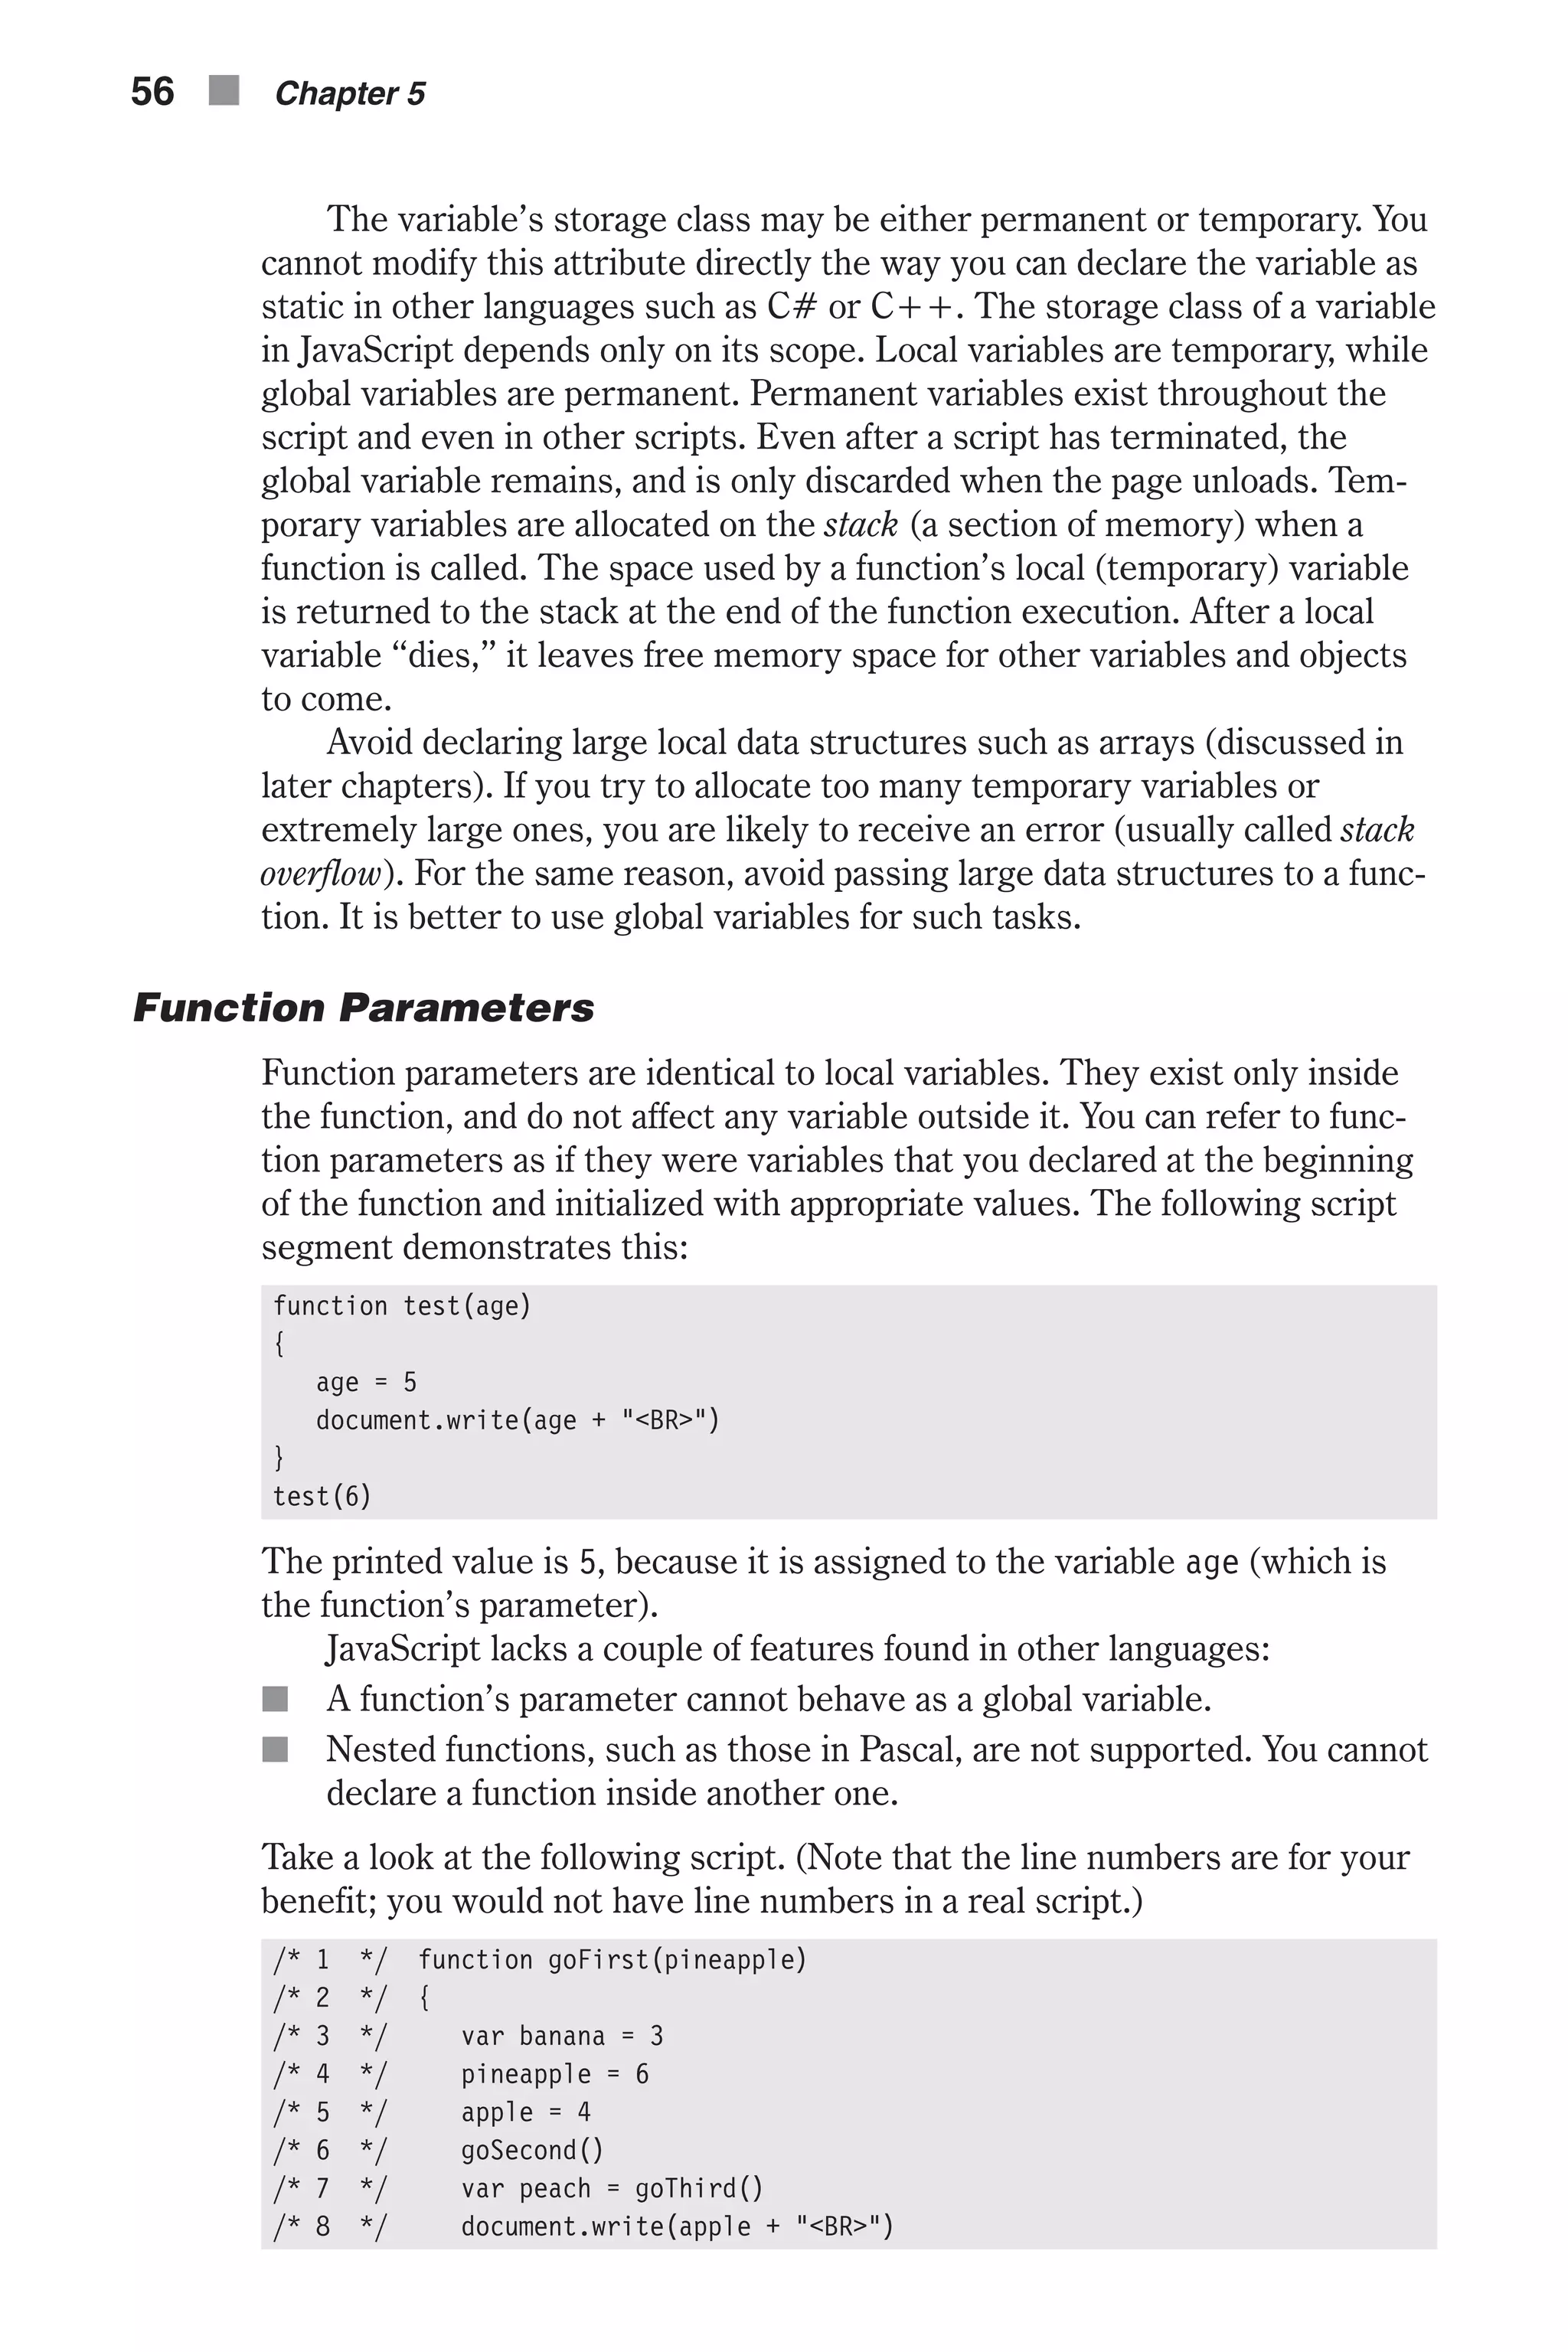
![The var keyword is used to “officially” declare variables. JavaScript only remembers the scope of variables that are declared in that fashion. It recog- nizes other variables during the execution of the script, and automatically refers to them as global variables. Although it does not really matter whether or not you use var to declare global variables in the main script, it might affect the result of the script under certain circumstances. If you do not use var and, when the variable is still undefined, you use it in a value-requiring statement, an error will occur. But this is an easy problem to fix because you will get a message. The problem with the var declaration is that not all statements that require a variable with a meaningful value use the undefined string when the variable has no value. The basic docu- ment.write() statement may print nothing at all if the variable is undefined. What Are Functions? We have been using functions in this book already, but have not really defined them. Basically, a function is a logical grouping of code statements that perform some task. For example, a function might calculate a mortgage payment or how many days since you were born. Functions group a sequence of statements to perform a specific task or a function. JavaScript features many built-in functions that are presented later in the book. Such functions are predefined for you to use. In this chapter we will focus on those functions you build for yourself. Defining and Calling Functions Before you can use a function you must define it. You have already seen function definitions in this book, although we have not explicitly identified them as such. The general syntax of a function definition is: function functionName([parameters]) { statements } and the form of a function call is: functionName(arguments) The first line of the function definition is called the signature of the function. It tells you what the function’s name is and what parameters it takes. Function Parameters Parameters, also called arguments, are the raw materials you pass to a func- tion. The function should then be able to use these values to perform a specific task. When you define a function, you should specify the names by which you refer to the custom values handed off to the function from out- side. These names must follow the same rules that apply to identifiers in the language. Think of it like this: a parameter is something you must give the 60 n Chapter 5](https://image.slidesharecdn.com/wordware-advancedjavascript3rded-160421130838/75/www-webre24h-com-Wordware-advanced-javascript-3rd-ed-easttom-85-2048.jpg)
![function in order for it to produce the results you need. For example, if you are creating a function that calculates mortgage payments, you would have to give it the principal, interest rate, and length of loan. So those would be three parameters you would pass to that function. Parameters become local variables for the function, so they exist only inside the function where they are defined. Therefore, a parameter may use the same name as a global variable or a local variable in a different function. I don’t recommend that, however, as using the same names will just confuse anyone reading your code. You can manipulate and modify the value of a parameter as if it were a common variable. There is no need to explicitly declare a parameter inside the function’s body as you would with a regular variable. JavaScript is loosely typed, so you do not specify the data type of the arguments as in C++, Java, Pascal, and other strictly typed programming languages. Both variables and literals can be passed to a function. All param- eters in a function definition header should be delimited by the comma operator (,). Here is a simple JavaScript function with two parameters: function printName(name, ruleWidth) { document.write("<CENTER><H1>" + name + "</H1></CENTER>") document.write("<HR WIDTH=" + ruleWidth + "%>") } You can call this function with a simple function call, such as: printName(prompt("Enter your name:", "John Doe"), 60) Using the arguments Array JavaScript supports functions that accept a variable number of arguments. The first argument is functionName.arguments[0], the second one is functionName.arguments[1], the third one is functionName.argu- ments[2], and so on. The number of arguments handed to the function is stored in the length property of the arguments object: functionName.arguments.length The following script demonstrates this concept: function calc() { document.write("The first argument is ", calc.arguments[0], "<BR>") document.write("The fourth argument is ", calc.arguments[3], "<BR>") document.write("There are ", calc.arguments.length, " arguments<BR>") } var company = "Yahoo" calc(2, 999, "internet", company, 0.0) Functions and Variable Scope n 61 Chapter5](https://image.slidesharecdn.com/wordware-advancedjavascript3rded-160421130838/75/www-webre24h-com-Wordware-advanced-javascript-3rd-ed-easttom-86-2048.jpg)
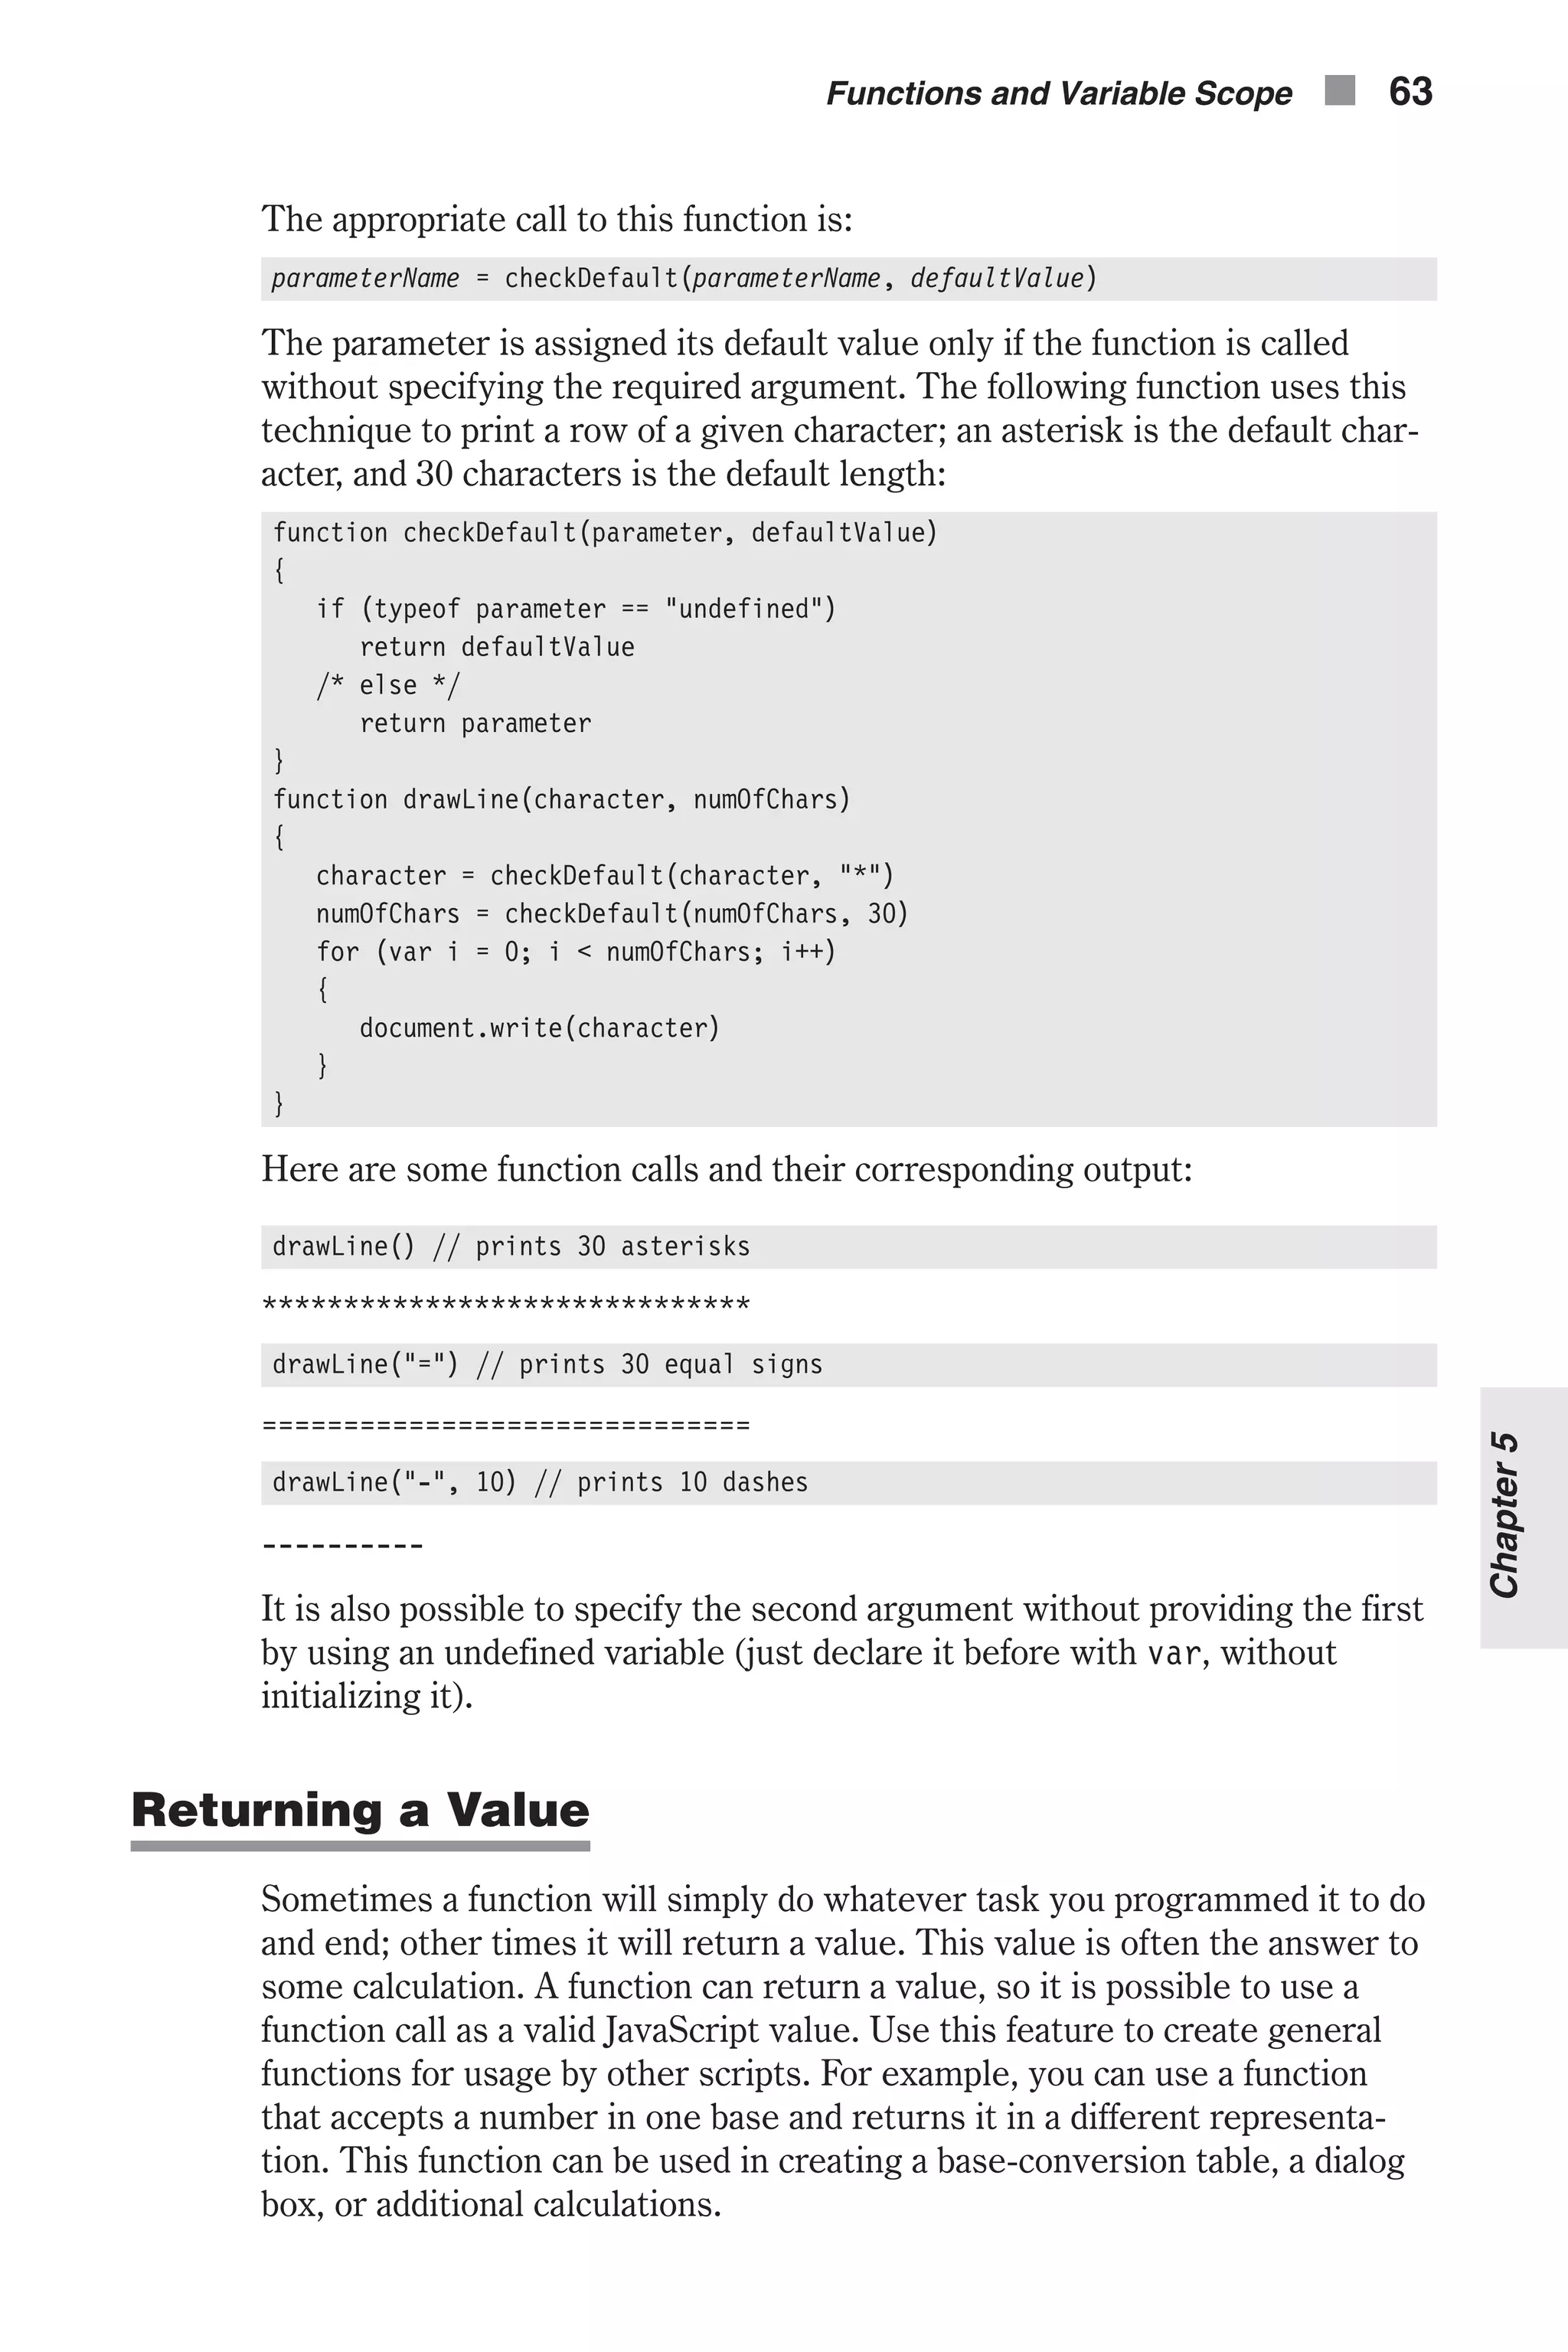
![The script’s output is: The first argument is 2 The fourth argument is Yahoo There are 5 arguments The scope of the arguments object’s properties is the current function, so it can only be used inside a function. You can use loop statements to print a list of arguments handed to a function: function createList() { var result = "" for (var i = 0; i < createList.arguments.length; ++i) { result += createList.arguments[i] + "r" } alert(result) } Here is a simple function call: createList("C", "H", "U", "C", "K”) When invoked with the preceding statement, the function generates the fol- lowing dialog box: Creating Functions with Default Arguments JavaScript does not support functions with default arguments. In C++, these are the values supplied to the parameters in a function’s prototype. There are, however, ways you can “fake it” and make JavaScript behave as if it used default parameters. Calling the following function at the beginning of a function is a simple workaround you can use in JavaScript: function checkDefault(parameter, defaultValue) { if (typeof parameter == "undefined") return defaultValue /* else */ return parameter } 62 n Chapter 5 Figure 5-3. Each line displayed is a distinct argument handed to the createList() function.](https://image.slidesharecdn.com/wordware-advancedjavascript3rded-160421130838/75/www-webre24h-com-Wordware-advanced-javascript-3rd-ed-easttom-87-2048.jpg)


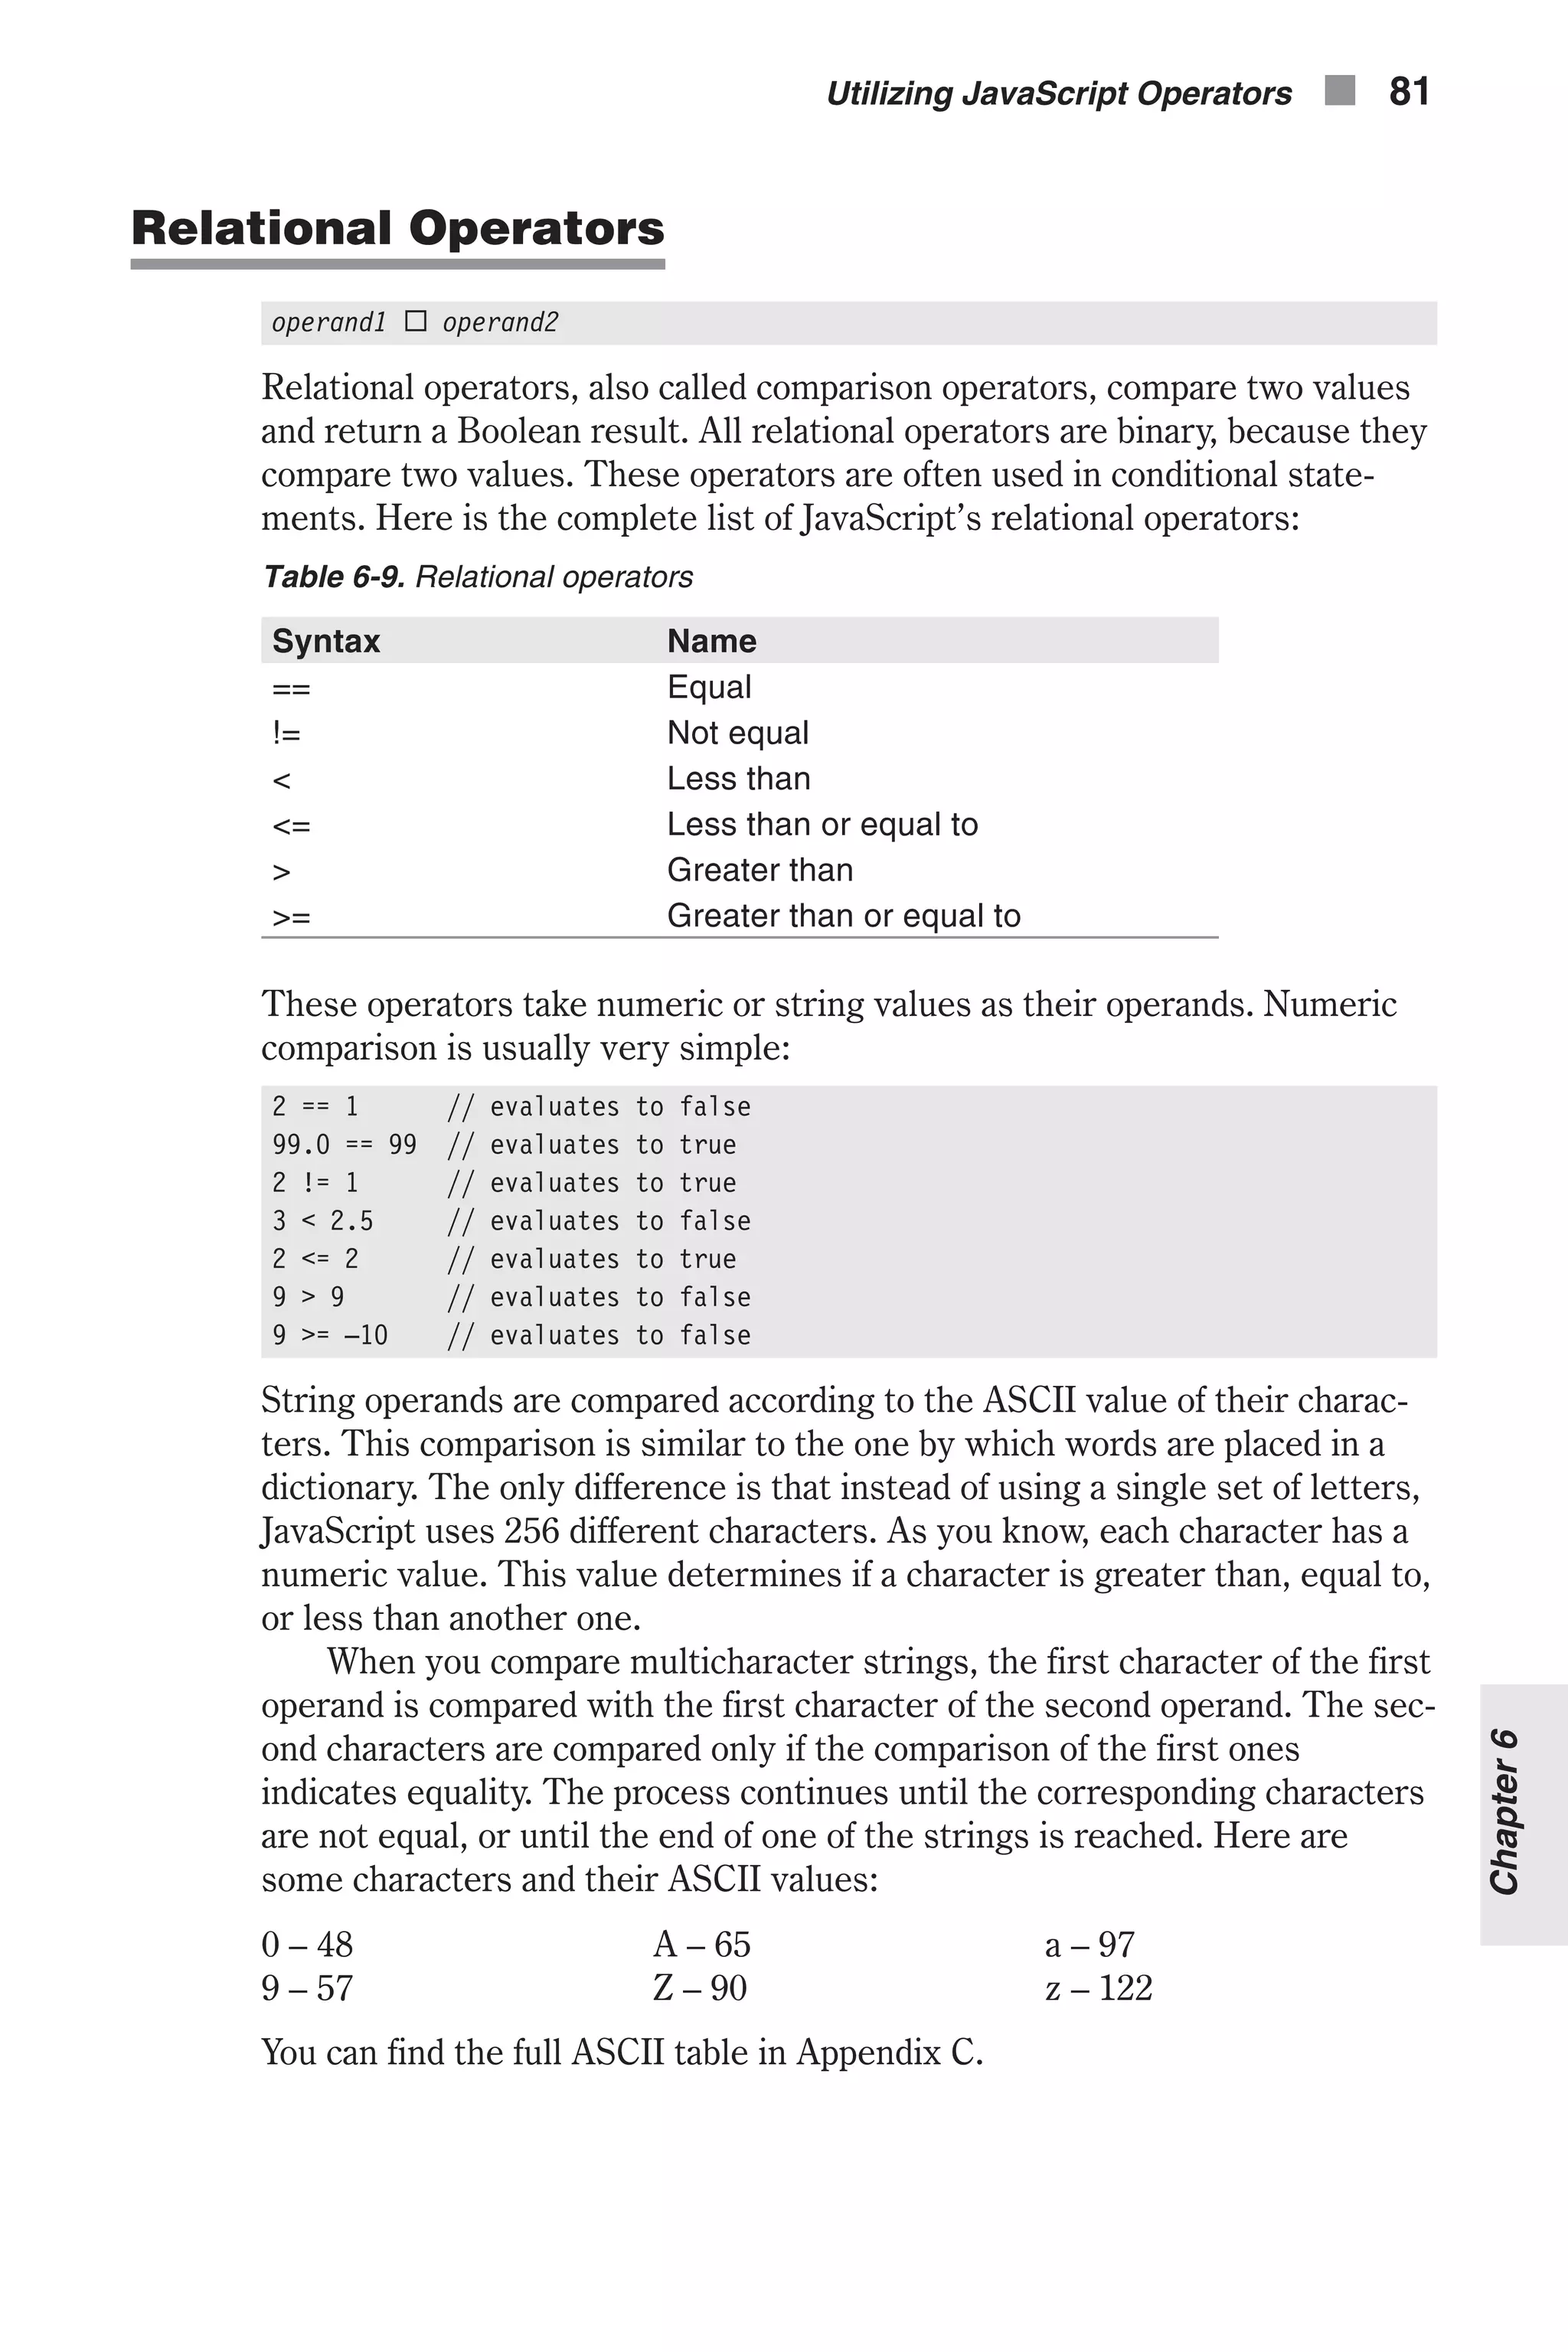
![Here is an example: "computerA" > "computerB" "c" == "c" "o" == "o" "m" == "m" "p" == "p" "u" == "u" "t" == "t" "e" == "e" "r" == "r" "A" < "B" Þ ("computerA" > "computerB" Þ false) Take a look at the following results for a better understanding: "JavaScript" == "javascript" // evaluates to false "bill" != "bill" // evaluates to false " " < " " // ([one space] < [two spaces]) evaluates to true 16 <= "16" // evaluates to true "luck" > "Work" // evaluates to true! "XT" >= "pentium pro " // evaluates to false Equality and Inequality As you can see, the Boolean equality operator (==) is similar to the assign- ment operator (=). This similarity is the source of many programming errors, not only in JavaScript but also in other languages such as C, C++, and Java. Equality operators are often used in if-else statements, where the assignment operator cannot be used. (JavaScript does not allow side effects in a conditional statement.) In this case, the interpreter produces a meaningful error saying: “test for equality (==) mistyped as assignment (=)? Assuming equality test.” However, in some other situations, both the equality and assignment operators are valid and the browser, rightly so, does not generate any errors. This is why such errors are very difficult to debug. The following example demonstrates a situation in which both operators are acceptable: var i = 1 document.write(i = 2) var j = 1 document.write(j == 2) The first printing statement prints 2, because an assignment expression evaluates to the assigned value. The second printing statement prints false under Netscape Navigator, and 0 on Internet Explorer (Internet Explorer converts the Boolean value false to 0 for printing), because 1 is not equal to 2. In a long script, if you accidentally replaced one operator with the other, you would have a hard time finding the mistake. Another problem with the equality operator has to do with the way a computer deals with floating-point numbers. This problem is especially diffi- cult when you try to store integer numbers in the form of floating-point numbers (e.g., 3.0). Depending on the underlying machine, the results may 82 n Chapter 6](https://image.slidesharecdn.com/wordware-advancedjavascript3rded-160421130838/75/www-webre24h-com-Wordware-advanced-javascript-3rd-ed-easttom-107-2048.jpg)
![Operator Precedence You probably remember that 2 + 6 * 9 is 56 and not 72, because multiplica- tion precedes addition. That is exactly the meaning of operator precedence. It is not necessary to remember the precedence rules because parentheses can be used to force evaluation in the desired order. The expressions are evaluated according to the precedence rules. Operators at the same level are evaluated from left to right. The following table will help you when you want to define complex expressions. Table 6-13. Operator precedence Level Operators Notes 1 () [] . call, member (including typeof and void) 2 ! ~ – ++ – – negation, increment 3 * / % multiply/divide 4 + – addition/subtraction 5 << >> >>> bitwise shift 6 < <= > >= relational 7 == != equality 8 & bitwise AND 9 ^ bitwise XOR 10 | bitwise OR 11 && logical AND 12 || logical OR 13 ?: conditional 14 = += –= *= /= %= <<= >>= >>>= &= ^= |= assignment 15 , comma Expressions The term expression has been mentioned dozens of times throughout this chapter. An expression is any valid set of literals, variables, operators, and other expressions that evaluates to a single value. The value may be a num- ber, a string, or a Boolean value. Conceptually, there are two types of expressions: n Those that assign a value to a variable (or another data structure) n Those that have a value The following are expressions: a = "Dog" "Netscape" 256 false b = true 88 n Chapter 6](https://image.slidesharecdn.com/wordware-advancedjavascript3rded-160421130838/75/www-webre24h-com-Wordware-advanced-javascript-3rd-ed-easttom-113-2048.jpg)
![<A HREF="http://www.wordware.com/" onMouseOver="window.status = 'Wordware Publishing'; return true" >Wordware</A> </BODY> </HTML> Example 7-2 (ex7-2.htm). An event handler example It is sometimes problematic to execute statements directly in an event han- dler script. For example, if you want to include a long script, placing it in the event handler script makes the HTML page cumbersome, and maintenance becomes difficult. Another case in which difficulties can arise is when you want to correlate a script containing strings—quotation marks—to an event handler. The quotation marks themselves can cause a problem. As you can see in Example 7-2, the event handler requires quotation marks to delimit the specified JavaScript code from the surrounding HTML content. JavaScript requires alternation of quotation types, single and double, so you will probably find it annoying to write scripts with an emphasis on quotes. Event handlers accept any JavaScript script as long as it is valid. For that reason, you should associate functions with event handlers. The only state- ment you need in the event handler script is the function call. You should normally place all functions at the top of the page, or more accurately, in the <HEAD></HEAD> portion of the document. This action forces JavaScript to evaluate your functions before it continues laying out the page. With this practice you guarantee that when the browser comes across an event handler in the HTML portion of the page, it will succeed in calling the function associated with that event if it occurs. The only restriction is that you do not place any event handlers to pick up events before the JavaScript script in the <HEAD></HEAD> portion. Such a restriction applies also to exter- nal files implemented via the SRC attribute of the <SCRIPT> tag. The basic structure of such a page is: <HTML> <HEAD> <TITLE>The title of the page</TITLE> <SCRIPT LANGUAGE="JavaScript" [SRC="path.js"]> <!-- function functionName(parameters) { statement1 statement2 statement3 } // --> </SCRIPT> </HEAD> <BODY> <TAG otherAttributes eventHandler="functionName(arguments)"> </BODY> </HTML> Events in JavaScript n 95 Chapter7](https://image.slidesharecdn.com/wordware-advancedjavascript3rded-160421130838/75/www-webre24h-com-Wordware-advanced-javascript-3rd-ed-easttom-120-2048.jpg)
![<HTML> <HEAD> <TITLE>Disabling error messages</TITLE> <SCRIPT LANGUAGE="JavaScript"> <!-- // disable error reports window.onerror = null // create an error-generating function (infinite recursion) function testErrorFunction() { testErrorFunction() } // --> </SCRIPT> </HEAD> <BODY onload="testErrorFunction()"> </BODY> </HTML> An error occurs with or without assigning null to the event handler. The dif- ference is that no response to the error on the browser’s behalf is generated. See “Calling Event Handlers Explicitly” later in this chapter for a discussion on assigning values to event handlers via JavaScript. Another option is to write a function to handle errors in place of the standard JavaScript error-reporting dialog boxes. The function should accept three arguments: n The error message n The URL of the script that caused the error n The error line number The function intercepts JavaScript errors. It must return the value true. Here is a classic set of functions and statements for error handling: <HTML> <HEAD> <SCRIPT LANGUAGE="JavaScript"> <!-- // assign user-defined function to intercept errors window.onerror = myOnError // create array to hold error messages messageArray = new Array(0) // create array to hold URLs of errors urlArray = new Array(0) // create array to hold line numbers of errors lineNumberArray = new Array(0) // error-intercepting function function myOnError(msg, url, lno) { // assign message of current error to the array element following the last element messageArray[messageArray.length] = msg // assign URL of current error to the array element following the last element 98 n Chapter 7](https://image.slidesharecdn.com/wordware-advancedjavascript3rded-160421130838/75/www-webre24h-com-Wordware-advanced-javascript-3rd-ed-easttom-123-2048.jpg)
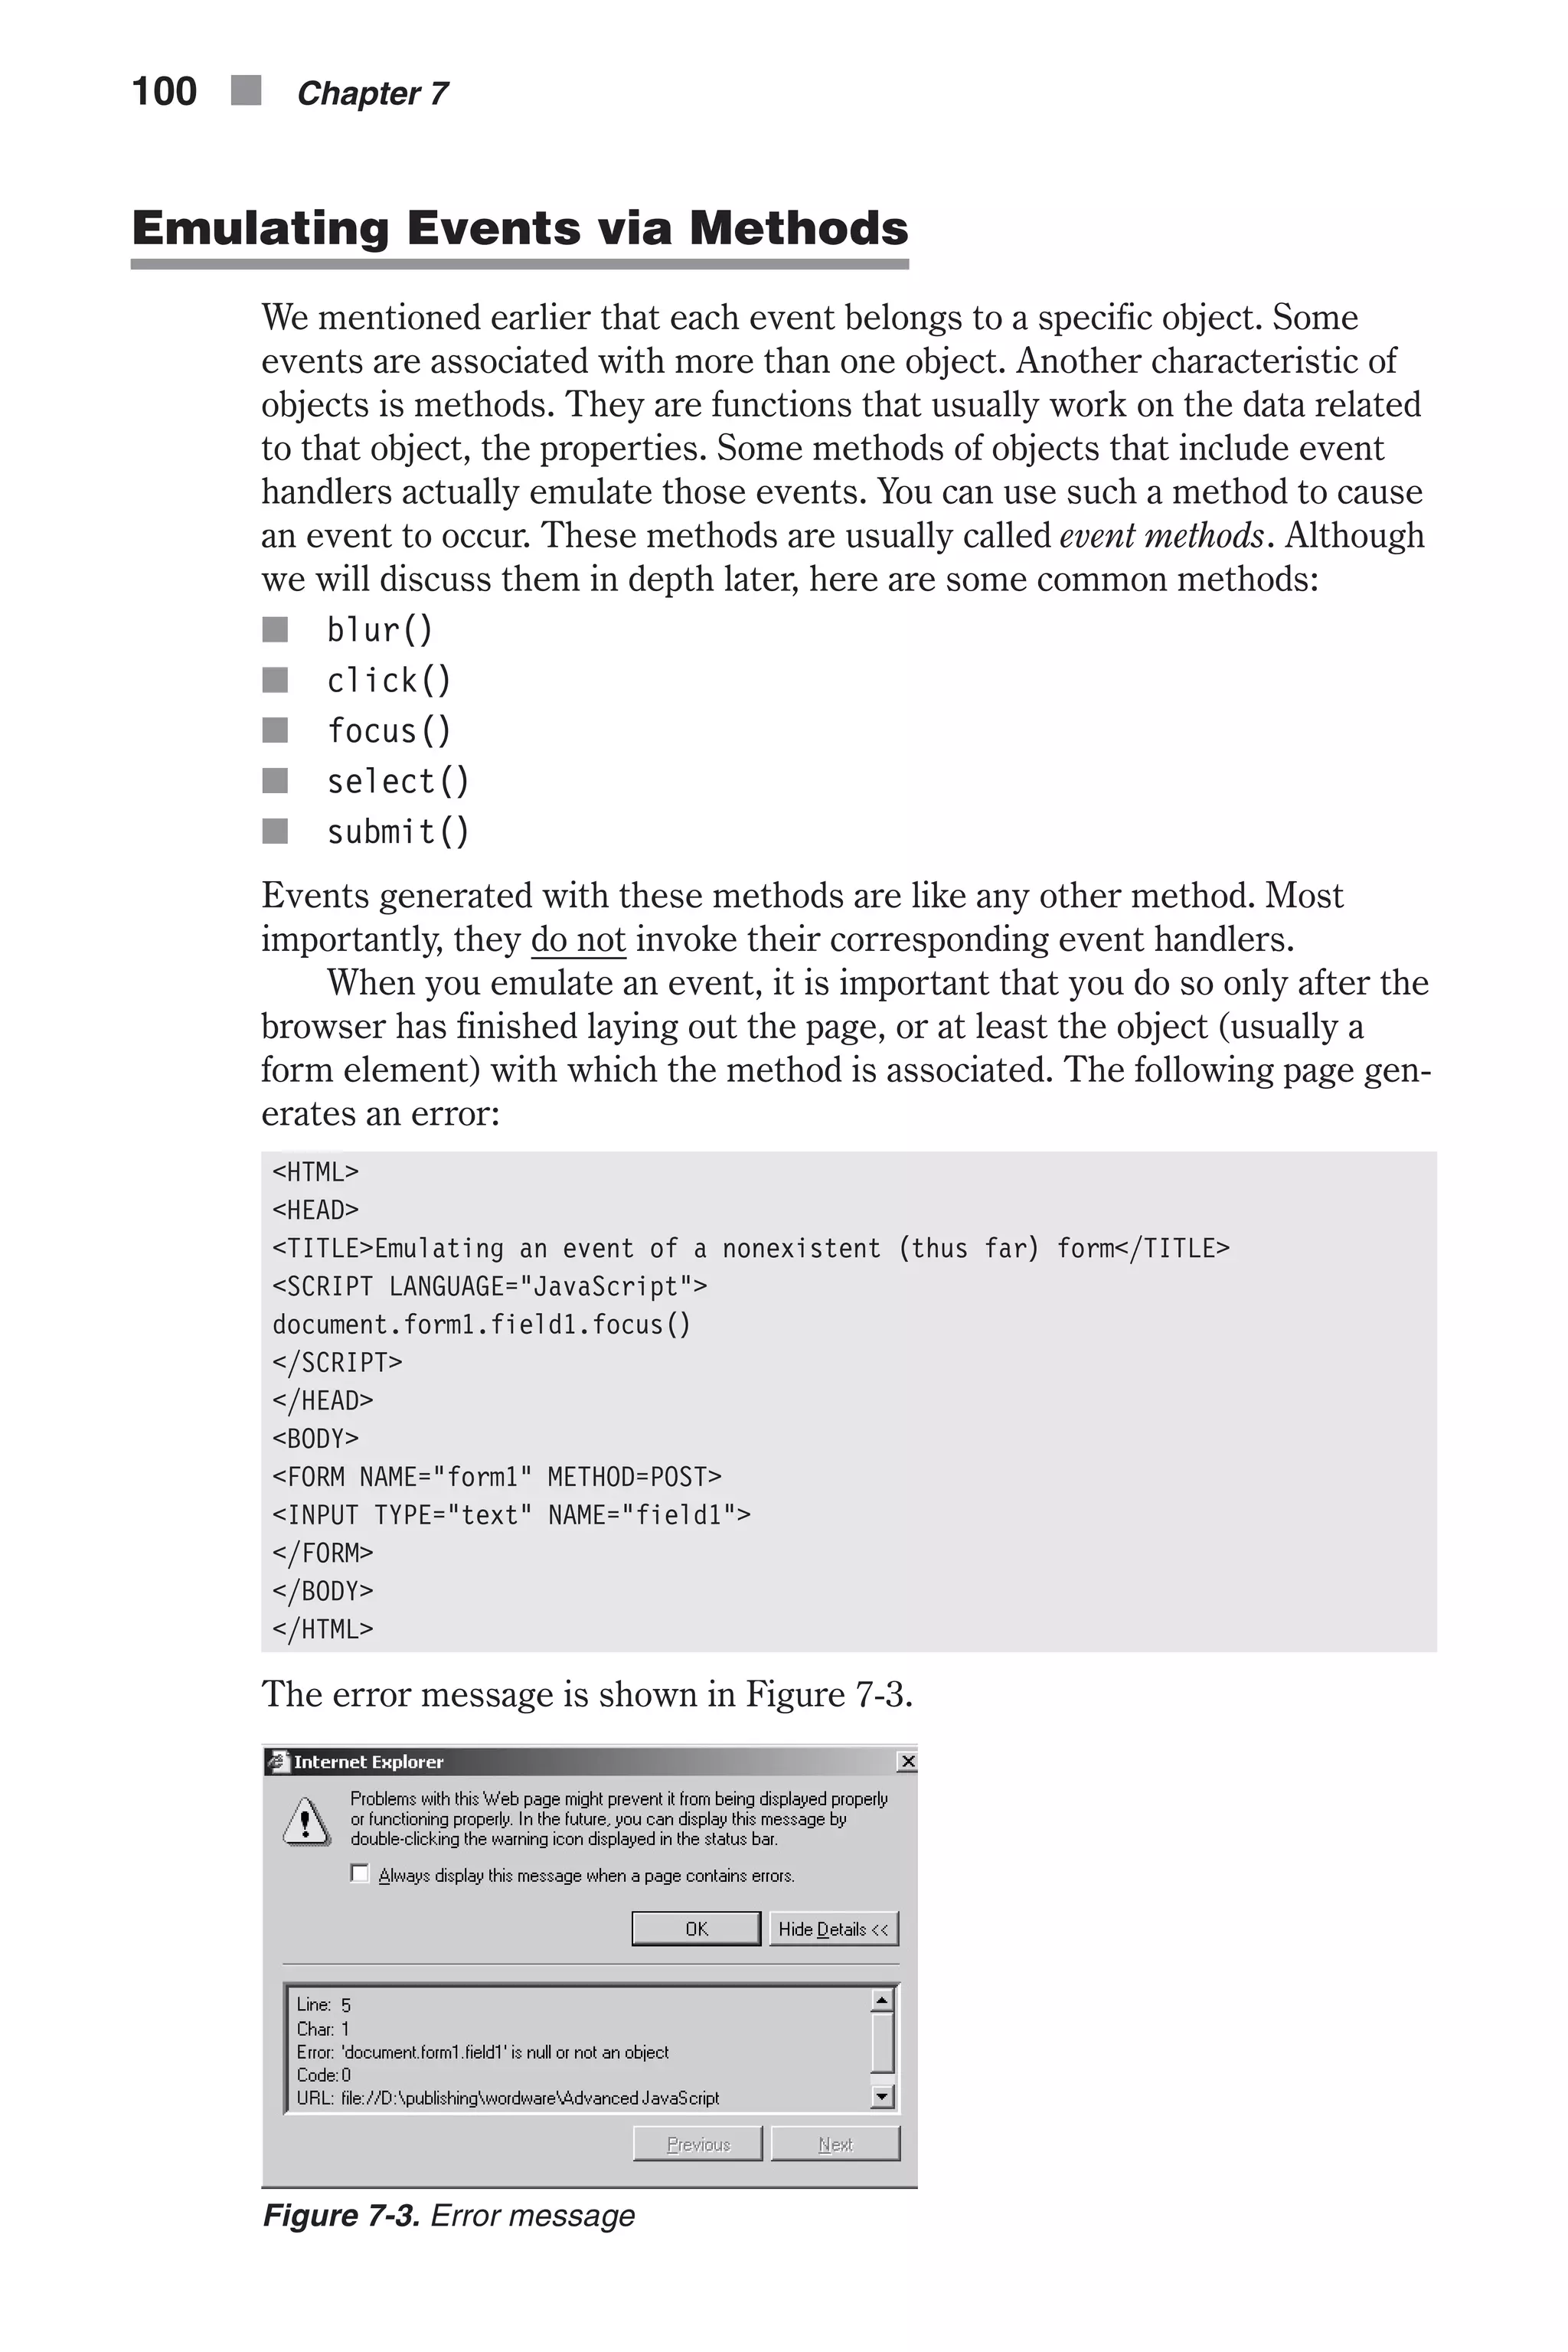
![urlArray[urlArray.length] = url // assign line number of current error to the array element following the last element lineNumberArray[lineNumberArray.length] = lno // return true to intercept JavaScript errors return true } function displayErrors() { // open new browser window to report errors errorWindow = window.open('','errors','scrollbars=yes') // write header to window errorWindow.document.write('<B>Error Report</B><P>') // loop to print all error data for (var i = 0; i < messageArray.length; ++i) { errorWindow.document.write('<B>Error in file:</B> ' + urlArray[i] + '<BR>') errorWindow.document.write('<B>Line number:</B> ' + lineNumberArray[i] + '<BR>') errorWindow.document.write('<B>Message:</B> ' + messageArray[i] + '<P>') } // close data stream errorWindow.document.close() } // --> </SCRIPT> </HEAD> <BODY> <FORM> <INPUT TYPE="button" onClick="displayErrors()" VALUE="display errors"> </FORM> </BODY> </HTML> Example 7-3 (ex7-3.htm). A complex event handler example At first, the function reference is assigned to window.onerror. Three arrays are then created; each holds a different piece of data associated with errors that might occur. The length of each array is set to 0, because no errors have occurred thus far. The function that intercepts the JavaScript errors is myOnError(). Its arguments are the error message, URL, and line number, respectively. You do not need to understand the functions at this stage because they use concepts that have not been discussed yet, such as arrays and windows. The only point you should be aware of is that the function returns true to instruct JavaScript that it is intended to intercept the standard JavaScript errors. In general, a list of the JavaScript errors generated by the script is printed in another window when the user clicks the button. See the section “Calling Event Handlers Explicitly” for more details on the event handler implementation demonstrated in Example 7-3 (window.onerror). Events in JavaScript n 99 Chapter7](https://image.slidesharecdn.com/wordware-advancedjavascript3rded-160421130838/75/www-webre24h-com-Wordware-advanced-javascript-3rd-ed-easttom-124-2048.jpg)
![Chapter 8 Building and Extending Objects Creating Instances We introduced the concepts of object-oriented programming in Chapter 4, so you should already realize that not only does JavaScript support only limited object-oriented programming, but that some terms used here might not be used the same way they are in other languages (such as C++, C#, or Java). In JavaScript, an object is the template from which you make instances. In purely object-oriented languages, an object is the instance made from a class. If you have experience in true object-oriented languages, don’t let this terminology throw you off. For example, suppose you have defined an employee object that includes some methods and properties of an employee, such as his or her social security number and address. This definition has no effect on the script, because no new entity has been changed or created. Only when you apply the object’s definition to a specific person, say John Doe, is a new entity created—an instance of that object. The number of instances you cre- ate with a single object definition is unlimited. The object definition can be either one you define with a function or a built-in one. Creating an instance of a built-in object is relatively simple because the object is predefined. Unlike C++ and Java, you cannot create your own objects (what would be called classes in C++ and Java). You can only use the ones built into JavaScript. You should use the following syntax to create an instance: var name = new objectname([arguments]) So, if you want to create an instance of the String object, you can use the following statement: var str1 = new String("Hello!") 104 n Chapter 8](https://image.slidesharecdn.com/wordware-advancedjavascript3rded-160421130838/75/www-webre24h-com-Wordware-advanced-javascript-3rd-ed-easttom-129-2048.jpg)
![obj.grade = avgGrade obj.description = (sex == "female") ? "girl" : "boy" } Notice that the calling object, referred to as this, is assigned to a variable. This variable must be global because a constructor function’s purpose is to create an instance for use outside of that function. A local variable does not have any effect outside the function where it is declared. Personally, I never use this method and don’t see it used very often. I simply include it here so that you will not be confused if you see it somewhere. You now know how to define properties via constructor functions. If you only want to create one instance of an object, you must also use a construc- tor function. You can use the following function to view the properties of an object: function getProps(obj, objName) { var result = "" // initialize output string for (var i in obj) { result += objName + "." + i + " = " + obj[i] + "<BR>" } result += "<HR>" // add horizontal rule to output string return(result) // return output string } To invoke this method, use a statement such as: document.write(getProps(student1, "student1")) Note that the arguments are not always the same. For example, if you use this statement from within another function that accepts the instance student1 as the parameter person, you should use the following statement instead: document.write(getProps(person, "student1")) If a property of an object holds a null value, it does not exist. Assigning a null value to a property will cause the function getProps() to count out that property. Keep this in mind, especially when you are debugging a script. Nested Objects JavaScript supports nested objects. A nested object is an object that is also a property of another object. Or put another way, it is a case where an object has other objects inside of it. If you think about this it should not be too much of a surprise. Remember that objects have properties, and inside the object those properties are simply variables. Also recall that an object is just a complex type of variable. When you put those two facts together, having objects contain other objects is really not surprising at all. There are a few ways to create nested objects. Take a look at the following script segment: 108 n Chapter 8](https://image.slidesharecdn.com/wordware-advancedjavascript3rded-160421130838/75/www-webre24h-com-Wordware-advanced-javascript-3rd-ed-easttom-133-2048.jpg)
![function student(name, age, grade, father, mother) { this.name = name this.age = age this.grade = grade this.parents = new parents(father, mother) } function parents(father, mother) { this.father = father this.mother = mother } var student1 = new student("Sharon", 16, 85, "Mark", "Stacy") This script consists of two functions. The function parents() creates an instance containing two properties, father and mother. It accepts both val- ues as arguments. The first function, student(), creates a function consisting of four prop- erties. The first three are simple properties like the ones you have seen earlier in this chapter. The fourth property is an instance of an object. This instance is created by the parents() function, as described earlier. You can refer to all elements of an object with the “dot” syntax: student1.name student1.age student1.grade student1.parents.father student1.parents.mother To print the properties of a general object you can use the following recur- sive function: function getProps(obj, objName) { // initialize accumulative variable var result = "" // loop through properties for (var i in obj) { // if current property is an object, call function for it if (typeof obj[i] == "object") result += getProps(obj[i], objName + "." + i) else result += objName + "." + i + " = " + obj[i] + "<BR>" } // return final result return result } The function’s algorithm is fairly simple. It loops through the properties of the main object. If the current property, represented by i, is an object, the function is called once again with the property obj[i] as the object, and the property’s name attached to the object’s name with a separating dot (objName + "." + i). Each call to the function returns the string listing the Building and Extending Objects n 109 Chapter8](https://image.slidesharecdn.com/wordware-advancedjavascript3rded-160421130838/75/www-webre24h-com-Wordware-advanced-javascript-3rd-ed-easttom-134-2048.jpg)
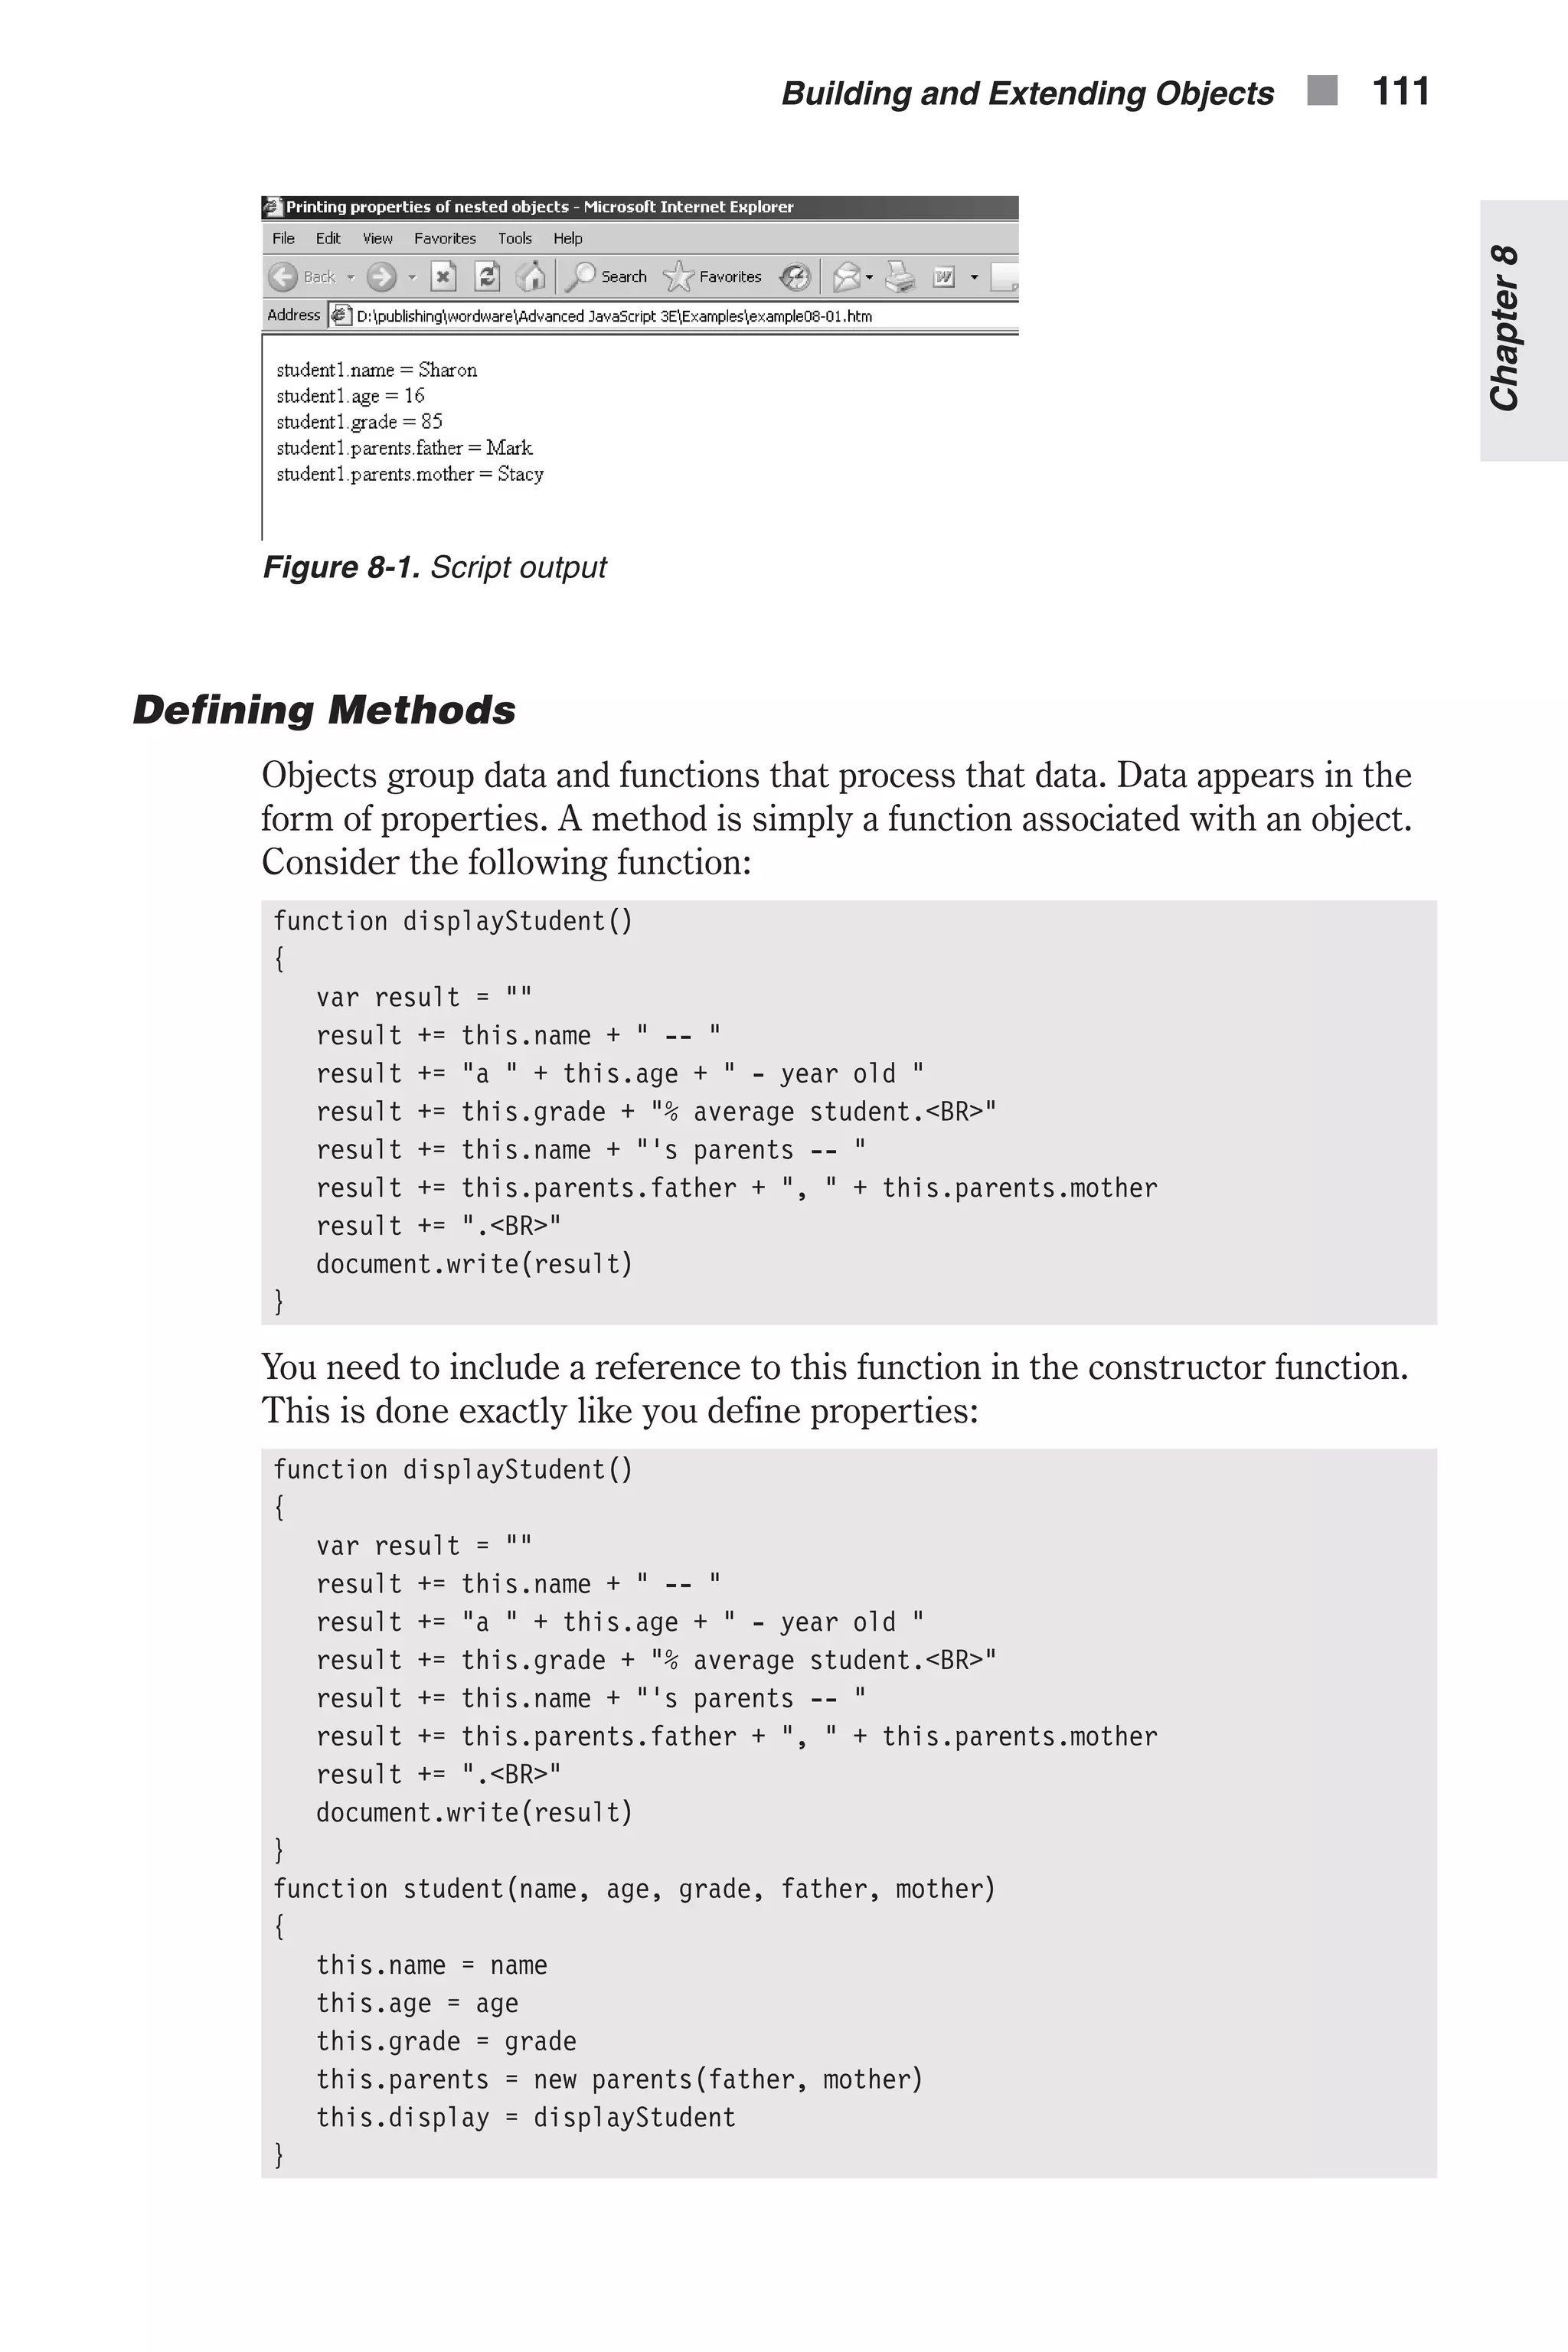
![properties at the current level. The value returned by a recursive call is assigned to the variable result, which is local in the calling function. Here is an entire HTML document and its output to help you understand this concept: <HTML> <HEAD> <TITLE>Printing properties of nested objects</TITLE> <SCRIPT LANGUAGE="JavaScript"> <!-- function student(name, age, grade, father, mother) { this.name = name this.age = age this.grade = grade this.parents = new parents(father, mother) } function parents(father, mother) { this.father = father this.mother = mother } var student1 = new student("Sharon", 16, 85, "Mark", "Stacy") function getProps(obj, objName) { var result = "" for (var i in obj) { if (typeof obj[i] == "object") result += getProps(obj[i], objName + "." + i) else result += objName + "." + i + " = " + obj[i] + "<BR>" } return result } document.write(getProps(student1, "student1")) // --> </SCRIPT> </HEAD> <BODY> </BODY> </HTML> Example 8-1 (ex8-1.htm). A script that uses the getProps() function to analyze the structure of an object The output for that script looks like Figure 8-1. 110 n Chapter 8](https://image.slidesharecdn.com/wordware-advancedjavascript3rded-160421130838/75/www-webre24h-com-Wordware-advanced-javascript-3rd-ed-easttom-135-2048.jpg)
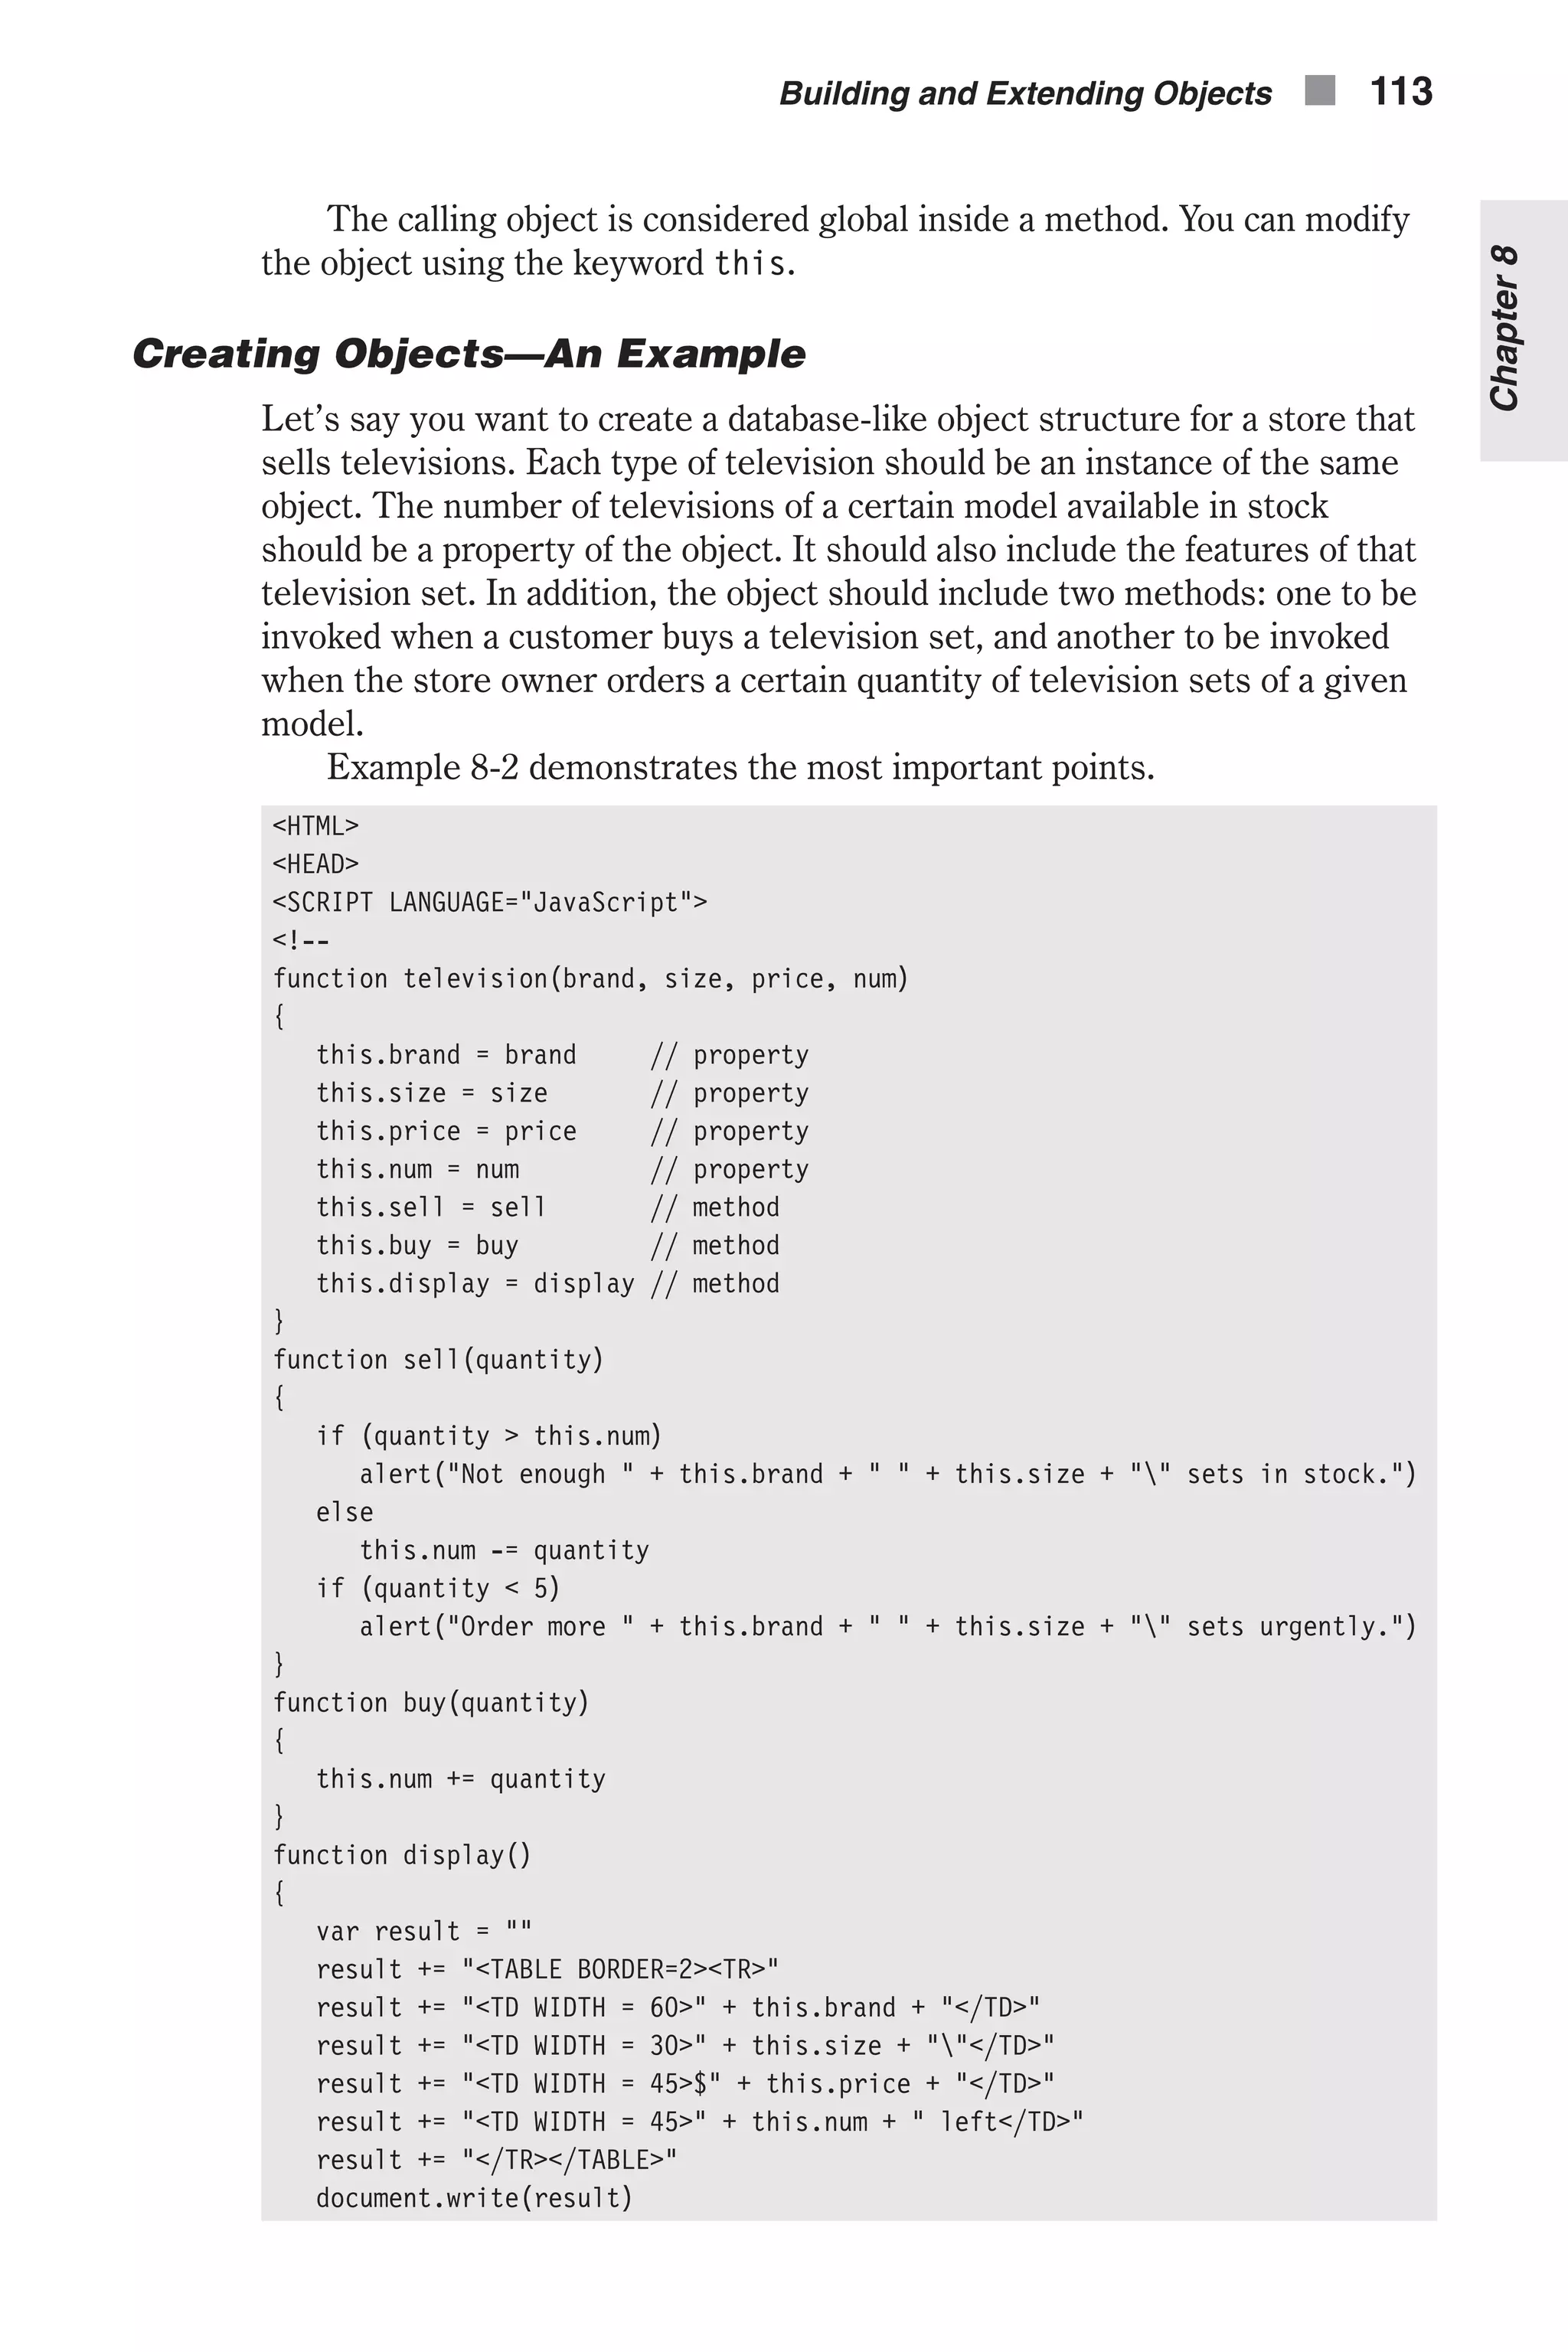
![function parents(father, mother) { this.father = father this.mother = mother } The following statements create an instance and invoke the display() method: var student1 = new student("Sharon", 16, 85, "Mark", "Stacy") student1.display() Notice the extensive use of the keyword this inside the function to refer to the object. The main characteristic of a method is that it usually processes the data of its object. You can even create a “constructor method” in the fol- lowing fashion: function construct(name, val) { this[name] = val } function student(name, age, grade, father, mother) { this.construct = construct this.name = name this.age = age this.grade = grade this.parents = new parents(father, mother) } function parents(father, mother) { this.father = father this.mother = mother } var student1 = new student("Sharon", 16, 85, "Mark", "Stacy") student1.construct("boyfriend", "Tom") Notice that the method (construct()) refers to the new property via the array notation. You may recall from Chapter 4, “Object-Oriented Pro- gramming,” that you must use this notation if you wish to use a data value. You can only use the “dot” syntax when you use literals. In this case, name is a data structure, not a literal (a literal is a constant value you can see, such as "boyfriend"). Now you can use the recursive function presented earlier to view the elements of an object and to see how it works with methods. Notice that the recursive function works with methods as well as with properties. The statements of the method are placed on the same line. JavaScript automatically adds semicolons to delimit the statement. It also uses a uniform coding scheme if you did not do so originally in the function, as you should. A method in JavaScript, like a property, belongs only to one instance. You can only invoke it from that instance. All “communication” with an object is done via methods. 112 n Chapter 8](https://image.slidesharecdn.com/wordware-advancedjavascript3rded-160421130838/75/www-webre24h-com-Wordware-advanced-javascript-3rd-ed-easttom-137-2048.jpg)
![Chapter 9 Arrays What Is an Array? The concept of an array is found in all programming languages. Arrays are actually variables, just a little more complicated than the standard variables you have encountered so far in this book. You can think about an array as a set of variables with the same name. We use arrays when we want to work with a certain set of related data all of the same data type. An example would be a set of students’ ages. These would all be integer values and they would be related. As a programmer, if you want to process an individual item of an array you need to specify the array name and indicate which array element is being referenced. Specific elements are indicated by an index or a subscript. Some History Way back in the dark ages of JavaScript (the early 1990s), JavaScript did not have arrays. One reason to point this out is to demonstrate how quickly things change in the world of computers. A time of only 15 to 20 years in the past is ancient history. This is important to realize since, as a JavaScript pro- grammer, you will want to keep up to date with changes. The first version of JavaScript, the one supported by Navigator 2.x, did not feature arrays. JavaScript scripters had no choice but to come up with a simple workaround. Everyone used (and a few still use) the following func- tion to create arrays: function createArray(n, init) { this.length = n for (i = 1 ; i <= n ; i++) { this[i] = init } } 118 n Chapter 9](https://image.slidesharecdn.com/wordware-advancedjavascript3rded-160421130838/75/www-webre24h-com-Wordware-advanced-javascript-3rd-ed-easttom-143-2048.jpg)
![This method is rarely used now and is not necessary. However, you may see it in the field so I am showing it to you so that you are not confused if you do. Creating Simple Arrays Okay, you know what an array is, and you are eager to use them, but how do you create one? Arrays in JavaScript are simple built-in objects. You create an array just like an instance of an object, because that is exactly what it is. The formal name of the object is Array—notice the capitalized “A.” The general syntax is: var arrayObjectName = new Array() var arrayObjectName = new Array(arrayLength) arrayObjectName is the name of a new object, an existing variable, or a property of an existing object. arrayLength is the number of individual elements in the array. In JavaScript, specifying the length of the array or the number of ele- ments is not vital. An array is an object like any other object. There is no explicit array type in JavaScript. Here are some arrays: var day = new Array(31) var month = new Array(12) var year = new Array() // number of years "not known" All elements of an array are initially null. This is important because such elements do not have any influence on your script. An element with a null value actually does not exist. You can prove this to yourself by running getProps() on a new array: function getProps(obj, objName) { var result = "" for (var i in obj) { if (typeof obj[i] == "object") result += getProps(obj[i], objName + "[" + i + "]") else result += objName + "[" + i + "] = " + obj[i] + "<BR>" } return result } var ar = new Array(3) document.write(getProps(ar, "ar")) This script does not generate any output, because if a property of an object has a null value, it does not exist in the computer memory; thus it is not recognized. Arrays n 119 Chapter9](https://image.slidesharecdn.com/wordware-advancedjavascript3rded-160421130838/75/www-webre24h-com-Wordware-advanced-javascript-3rd-ed-easttom-144-2048.jpg)
![Strongly typed programming languages require that you specify the number of elements in an array. In such languages all elements of an array must contain values of the same type (int, char, …). An array is an explicit data structure in those languages. From the moment an array is declared, it takes up the required storage area in memory. It does not matter if you ini- tialized its values or not. JavaScript, however, does not require you to initialize the elements in an array when you create it. Theoretically, if you created an array without specifying the number of elements, it would be as if you created one with zero elements. Extending an array in such languages is usually not possible; therefore, you must specify the length in all array declarations. The null value is given by default to each element of an array in JavaScript. When the value is null, the element is not stored in the com- puter’s memory. So creating an array with an infinite number of elements is fine in JavaScript. However, doing so is not recommended since it would be confusing to people who read your code, and not particularly useful. Keep in mind that elements holding a null value do not take up space in memory, but they are considered elements in the array, so they are added to the array’s length property. With JavaScript (unlike C++), it doesn’t matter whether the elements of an array are of the same data type. They can be a mix of numbers, strings, Boolean values, objects, and even arrays (which are actually objects). Referring to an Array’s Elements Creating an array is fine, but you must be able to use it. To use an array, whether you are putting data in or taking it out, you need to access the ele- ments of that array. Keep in mind that arrays in JavaScript are objects. Like all other objects, they have properties and methods: arrayObjectName[subscript] // ar1[4] The subscript follows the array name and is enclosed in square brackets. Subscripts are simple integers that start at zero. Here is a simple array: var ar = new Array(5) This array has five elements: ar[0], ar[1], ar[2], ar[3], and ar[4]. After you create an array you can increase its length by specifying a value for the highest subscript element. The following code creates an array of length zero, then assigns a null value to element 99. This changes the length of the array to 100. accounts = new Array() // array of zero elements accounts[99] = null // array of 100 elements Note that the array does not take up any storage space, even after it is extended. 120 n Chapter 9](https://image.slidesharecdn.com/wordware-advancedjavascript3rded-160421130838/75/www-webre24h-com-Wordware-advanced-javascript-3rd-ed-easttom-145-2048.jpg)
![When referring to an element, the subscript can be either a literal (e.g., 3) or a variable (e.g., num = 3). An element of an array can be any valid value. It can be a string, a num- ber, a Boolean value, a null value, or even another object. For example, if you want to create an array in which each element is a student object, you can use the following statements: function student() { // constructor function // properties not initialized to meaningful value this.name = "" this.age = "" this.grade = "" } var size = 35 // num of students in class var students = new Array(size) // array is defined for (var i = 0; i < size; i++) { students[i] = new student() } students[0].name = "Mark" students[32].grade = 88 At first, the desired size of the array, the number of students in the class, is assigned to the variable size. An array of that size is then created. All ele- ments of the array, from students[0] to students[34], are then defined using the constructor function student(). In this example, all of the ele- ments in the array are of the same type. An array can also have elements of different types. Here is an example: function student() { // constructor function // properties not initialized to meaningful value this.name = "" this.age = "" this.grade = "" } function teacher(name, age) { this.name = name this.age = age } var size = 35 // num of students in class var students = new Array(size + 1) // array is defined students[0] = new teacher("Kate", 45) for (var i = 1; i < size + 1; i++) { // or i <= size students[i] = new student() } alert(" is the teacher." + students[0].name) In this script segment an array of size + 1 elements is defined, because the first element, students[0], holds an instance of the teacher object. Arrays n 121 Chapter9](https://image.slidesharecdn.com/wordware-advancedjavascript3rded-160421130838/75/www-webre24h-com-Wordware-advanced-javascript-3rd-ed-easttom-146-2048.jpg)
![The most important rule is that the subscript, or index, starts at zero. Although it might seem quite awkward, use this element like all other ele- ments of the array. Creating Dense Arrays Recall that we stated earlier that you need not initialize the elements in an array before you use it. However, nothing says you cannot initialize them. This is often referred to as a dense array. A dense array is one in which each element has a value. You can construct a dense array of two or more ele- ments starting with index (subscript) 0, if you define initial values for all elements. They are very popular in many scripting languages. You can popu- late an array by specifying the values of its elements: var bb = "baseball" var sports = new Array("football", bb, "basketball", "soccer") You can refer to the elements of this array with the common syntax: sports[0] == "football" sports[1] == "baseball" var val = 2 sports[val] == "basketball" sports[3] == "soccer" JavaScript for early versions of Netscape Navigator had problems with some aspects of dense arrays, but you should not encounter these unless you are using a very old browser: n You cannot assign a list of elements to an array (except when you create it). n You cannot assign a range to an array. n You cannot assign elements of one array’s values to another array (the resulting array is an array slice). Array Types You must keep in mind that JavaScript is a loosely typed language. It should not be surprising, therefore, that elements of an array can be of different types. Some elements of a given array can be strings, while others can be numbers, Boolean values, and even objects. Basically, there are five types of arrays: n String arrays n Number arrays n Boolean arrays n Object arrays (including null arrays, because null is an object) n Mixed arrays 122 n Chapter 9](https://image.slidesharecdn.com/wordware-advancedjavascript3rded-160421130838/75/www-webre24h-com-Wordware-advanced-javascript-3rd-ed-easttom-147-2048.jpg)
![Sometimes you want to know what type of array you are dealing with. JavaScript does not include any tool to facilitate this. However, using a pro- totype we can add a property to all arrays (remember, arrays are objects by which you can create instances) that will return the type of the array. Here is the desired method: function getType() { var arrayType = typeof this[0] for (var i = 1; i < this.length; ++i) { if (typeof this[i] != arrayType) { arrayType = "mixed" break } } return arrayType } Array.prototype.getType = getType The following script segment is based on the preceding prototype definition: var ar1 = new Array(3) ar1[0] = "a" ar1[1] = "b" ar1[2] = "" document.write(ar1.getType()) // string var ar2 = new Array(2) ar2[0] = 17 ar2[1] = 15.5 document.write(ar2.getType()) // number var ar3 = new Array() document.write(ar3.getType()) // object var ar4 = new Array(0) document.write(ar4.getType()) // object var ar5 = new Array(1) ar5[9999] = 5 document.write(ar5.getType()) // mixed If you tried out the fifth array, you probably had to wait for a while, because the loop executed 10,000 times! You can use a more efficient function for the same prototype: function getType() { var arrayType = typeof this[0] for (var i in this) { if (typeof this[i] != arrayType) { arrayType = "mixed" break } Arrays n 123 Chapter9](https://image.slidesharecdn.com/wordware-advancedjavascript3rded-160421130838/75/www-webre24h-com-Wordware-advanced-javascript-3rd-ed-easttom-148-2048.jpg)
![} return arrayType } Array.prototype.getType = getType The improvement in this function is the type of loop used. The for...in construct loops only through the existing properties, or elements, not including the null ones. The function works just like the previous one. At first, the data type of the first element of the array is assigned to arrayType. In every iteration of the loop, if a different type of element is found, the value of arrayType is changed to "mixed" because at least two different data types have been found in the array. Once a "mixed" array is detected, the loop is immediately terminated using a break statement. The function returns the value held by arrayType. Sometimes you want to refer to all elements of a uniform-type array. The following method is designed to be a prototype of the Array object, returning an array of element subscripts where the specified value has been found. Here is the method: function getSubscripts(type) { var ar = new Array() var arSub = 0 for (var i = 0; i < this.length; ++i) { if (typeof this[i] == type) { ar[arSub] = this[i] ++arSub } } return ar } Array.prototype.getSubscripts = getSubscripts You can use the preceding prototype with arrays. For example: var ar1 = new Array(6) ar1[1] = 5 ar1[2] = 7 ar1[3] = "a" ar1[4] = 2 ar1[5] = "b" var ar1Temp = ar1.getSubscripts("number") alert("There are " + ar1Temp.length + " numeric values in ar1")// 3 alert("The third number of ar1 is " + ar1Temp[2]) // 2 alert(ar1Temp) // 5, 7, 2 (discussed later in this chapter!) 124 n Chapter 9](https://image.slidesharecdn.com/wordware-advancedjavascript3rded-160421130838/75/www-webre24h-com-Wordware-advanced-javascript-3rd-ed-easttom-149-2048.jpg)
![This method returns an array. You can refer directly to the returned array: var ar1 = new Array(6) ar1[1] = 5 ar1[2] = 7 ar1[3] = "a" ar1[4] = 2 ar1[5] = "b" alert("The third number of ar1 is " + ar1.getSubscripts("number")[2]) Strings in JavaScript are String objects, not arrays. There are many useful methods that operate only on strings, so dealing with strings as arrays of characters, as is often the practice in other languages, is useless and almost impossible. Chapter 12 deals with strings in depth. If you try to print an array, you will see that JavaScript prints the values of all elements in consecutive order, with a delimiting comma in between. You can use a user-defined prototype method to return a string containing all values delimited by a user-provided string: function getList(str) { var text = "" for (var i = 0; i < this.length – 1; ++i) { text += this[i] + str } text += this[this.length – 1] return text } Array.prototype.getList = getList var ar = new Array(5) ar[1] = 3 ar[3] = "a" ar[4] = "b b b" document.write(ar.getList(" ; ")) // null ; 3 ; null ; a ; b b b Notice that the loop in the method executes until i < this.length – 1. The reason is that the loop concatenates the delimiter (the method’s param- eter) after each element of the array. We do not want one placed after the last element, so the last element is concatenated to the accumulated string after the loop terminates. Array Properties Although you can add your own properties to the Array object, not all tasks can be achieved by high-level programming via JavaScript. The only built-in property of the Array object is length. Fortunately, this is also the most commonly needed property for any array. When you create an instance of an object (an array), the number of properties (elements) is stored in the length property. You can refer to it as a regular property. We have already seen this property in action earlier in this chapter. Arrays n 125 Chapter9](https://image.slidesharecdn.com/wordware-advancedjavascript3rded-160421130838/75/www-webre24h-com-Wordware-advanced-javascript-3rd-ed-easttom-150-2048.jpg)
![Let’s say you want to display some messages, one after the other. You should use an array to store the messages: var messages = new Array() messages[0] = "message 1" messages[1] = "message 2" messages[2] = "message 3" You can then use a loop to display the messages successively: for (var i = 0; i < messages.length; i++) { document.write(messages[i] + "<BR>") } The length property can also be modified; that is, you can change the length of the array by assigning the property a value. Here is an example: var ar = new Array(6) ar[0] = "Mouse" ar[1] = 8 ar[2] = 18 ar[3] = true ar[4] = "Dog" ar[5] = "Cat" ar.length = 3 alert(ar[2]) // 18 alert(ar[3]) // null The array consisting of six elements was reduced to three. The last three values were chopped off. Be extra careful when you reduce the size of an array because shifted-off values are unrecoverable. Array Methods We just dealt with properties, or rather the single property of length. In this section we will deal with many array methods and will simulate some array functions in Perl using prototype methods. JavaScript features a number of methods, three of which are built-in methods: n join() n reverse() n sort() In this section we use the getList prototype method, introduced in the sec- tion “Array Types,” to print arrays. 126 n Chapter 9](https://image.slidesharecdn.com/wordware-advancedjavascript3rded-160421130838/75/www-webre24h-com-Wordware-advanced-javascript-3rd-ed-easttom-151-2048.jpg)
![chop() The chop() method chops off the last character of all strings that are ele- ments of an array. Here is an example: function chop() { for (var i in this) { if (typeof this[i] == "string") this[i] = this[i].substring(0, this[i].length – 1) } } Array.prototype.chop = chop // EXAMPLE var line = new Array("red", "green", "blue") line.chop() document.write(line.getList(" ")) The script’s output is: re gree blu The general syntax is: arrayInstance.chop() The substring() method is explained in Chapter 12, “Handling Strings.” grep() The term “grep” is borrowed from the Unix world where grep is a standard search function. We use that same concept here in JavaScript. The grep() method evaluates the expression (expr) for each element of the array. It returns another array consisting of those elements for which the expression evaluated to true (the pattern was matched). To understand this method you should know that if string2 is found in string1, string1.indexOf(string2) is not equal to –1. Here is the method: function grep(str) { var ar = new Array() var arSub = 0 for (var i in this) { if (typeof this[i] == "string" && this[i].indexOf(str) != –1) { ar[arSub] = this[i] arSub++ } } return ar } Array.prototype.grep = grep var line = new Array("mask", "Mascot", "mine", "amass", "hot") Arrays n 127 Chapter9](https://image.slidesharecdn.com/wordware-advancedjavascript3rded-160421130838/75/www-webre24h-com-Wordware-advanced-javascript-3rd-ed-easttom-152-2048.jpg)
![document.write(line.grep("mas").getList(" ")) document.write("<BR>") document.write(line.grep("mas").length) The output of this script is: mask amass 2 The general syntax is: arrayInstance.grep(expr) An important concept used by this method is short-circuit evaluation. If JavaScript evaluates the first conditional expression (typeof this[i] == "string") to false, the final expression (typeof this[i] == "string" && this[i].indexOf(str) != –1) is obviously false, so the second expression (this[i].indexOf(str) != –1) is not even evaluated. This is critical because the indexOf() method works only with strings, and generates an error otherwise. However, if the current element (this[i]) is not a string, JavaScript does not evaluate the second expression due to short-circuit evaluation. join() The join() method is a built-in one in JavaScript. It is equivalent to the same function in Perl. It joins the elements of an array into a single string and separates each element with a given delimiter. This method is exactly like the getList method we created earlier, so we will use it from this point on instead. Its general syntax is: arrayInstance.join(delimiter) The delimiter is automatically cast to a string if it is not already one. Here is an example using this method: var line = new Array("a", "b", "c", "d", "e") document.write(line.join(" : ")) var str = line.join(", ") document.write("<BR>" + str) Its output is shown in Figure 9-1. 128 n Chapter 9 Figure 9-1. The join() method’s output](https://image.slidesharecdn.com/wordware-advancedjavascript3rded-160421130838/75/www-webre24h-com-Wordware-advanced-javascript-3rd-ed-easttom-153-2048.jpg)
![pop() The pop() method pops off the last element of an array and returns it. The array size is automatically decreased by one. The general format is: arrayInstance.pop() This method is not built in, so we need to define it. The following script defines the method as a prototype of the Array object, and demonstrates its use: function pop() { var lastElement = this[this.length – 1] this.length-- return lastElement } Array.prototype.pop = pop Here is an example using the pop() method of an array: var names = new Array("Tom", "Mark", "Bart", "John") var last = names.pop() document.write(last + "<BR>") document.write(names.join(" ") + "<BR>") document.write(names.length) The script’s output by rows is shown in Figure 9-2. Arrays n 129 Chapter9 Figure 9-2. The pop() method’s output](https://image.slidesharecdn.com/wordware-advancedjavascript3rded-160421130838/75/www-webre24h-com-Wordware-advanced-javascript-3rd-ed-easttom-154-2048.jpg)
![push() The push() method pushes values onto the end of an array, increasing its length. Here is the method declared as a prototype of the Array object type: function push() { var sub = this.length for (var i = 0; i < push.arguments.length; ++i) { this[sub] = push.arguments[i] sub++ } } Array.prototype.push = push Here is an example using the push() method of an array: var names = new Array("Tom", "Mark", "Bart", "John") names.push("Jim", "Richard", "Tim") document.write(names.join(" ")) The output is shown in Figure 9-3. The general syntax is: arrayInstance.push(list) þ Note: This method was not supported by earlier versions of JavaScript but is now supported. 130 n Chapter 9 Figure 9-3. The push() method’s output](https://image.slidesharecdn.com/wordware-advancedjavascript3rded-160421130838/75/www-webre24h-com-Wordware-advanced-javascript-3rd-ed-easttom-155-2048.jpg)
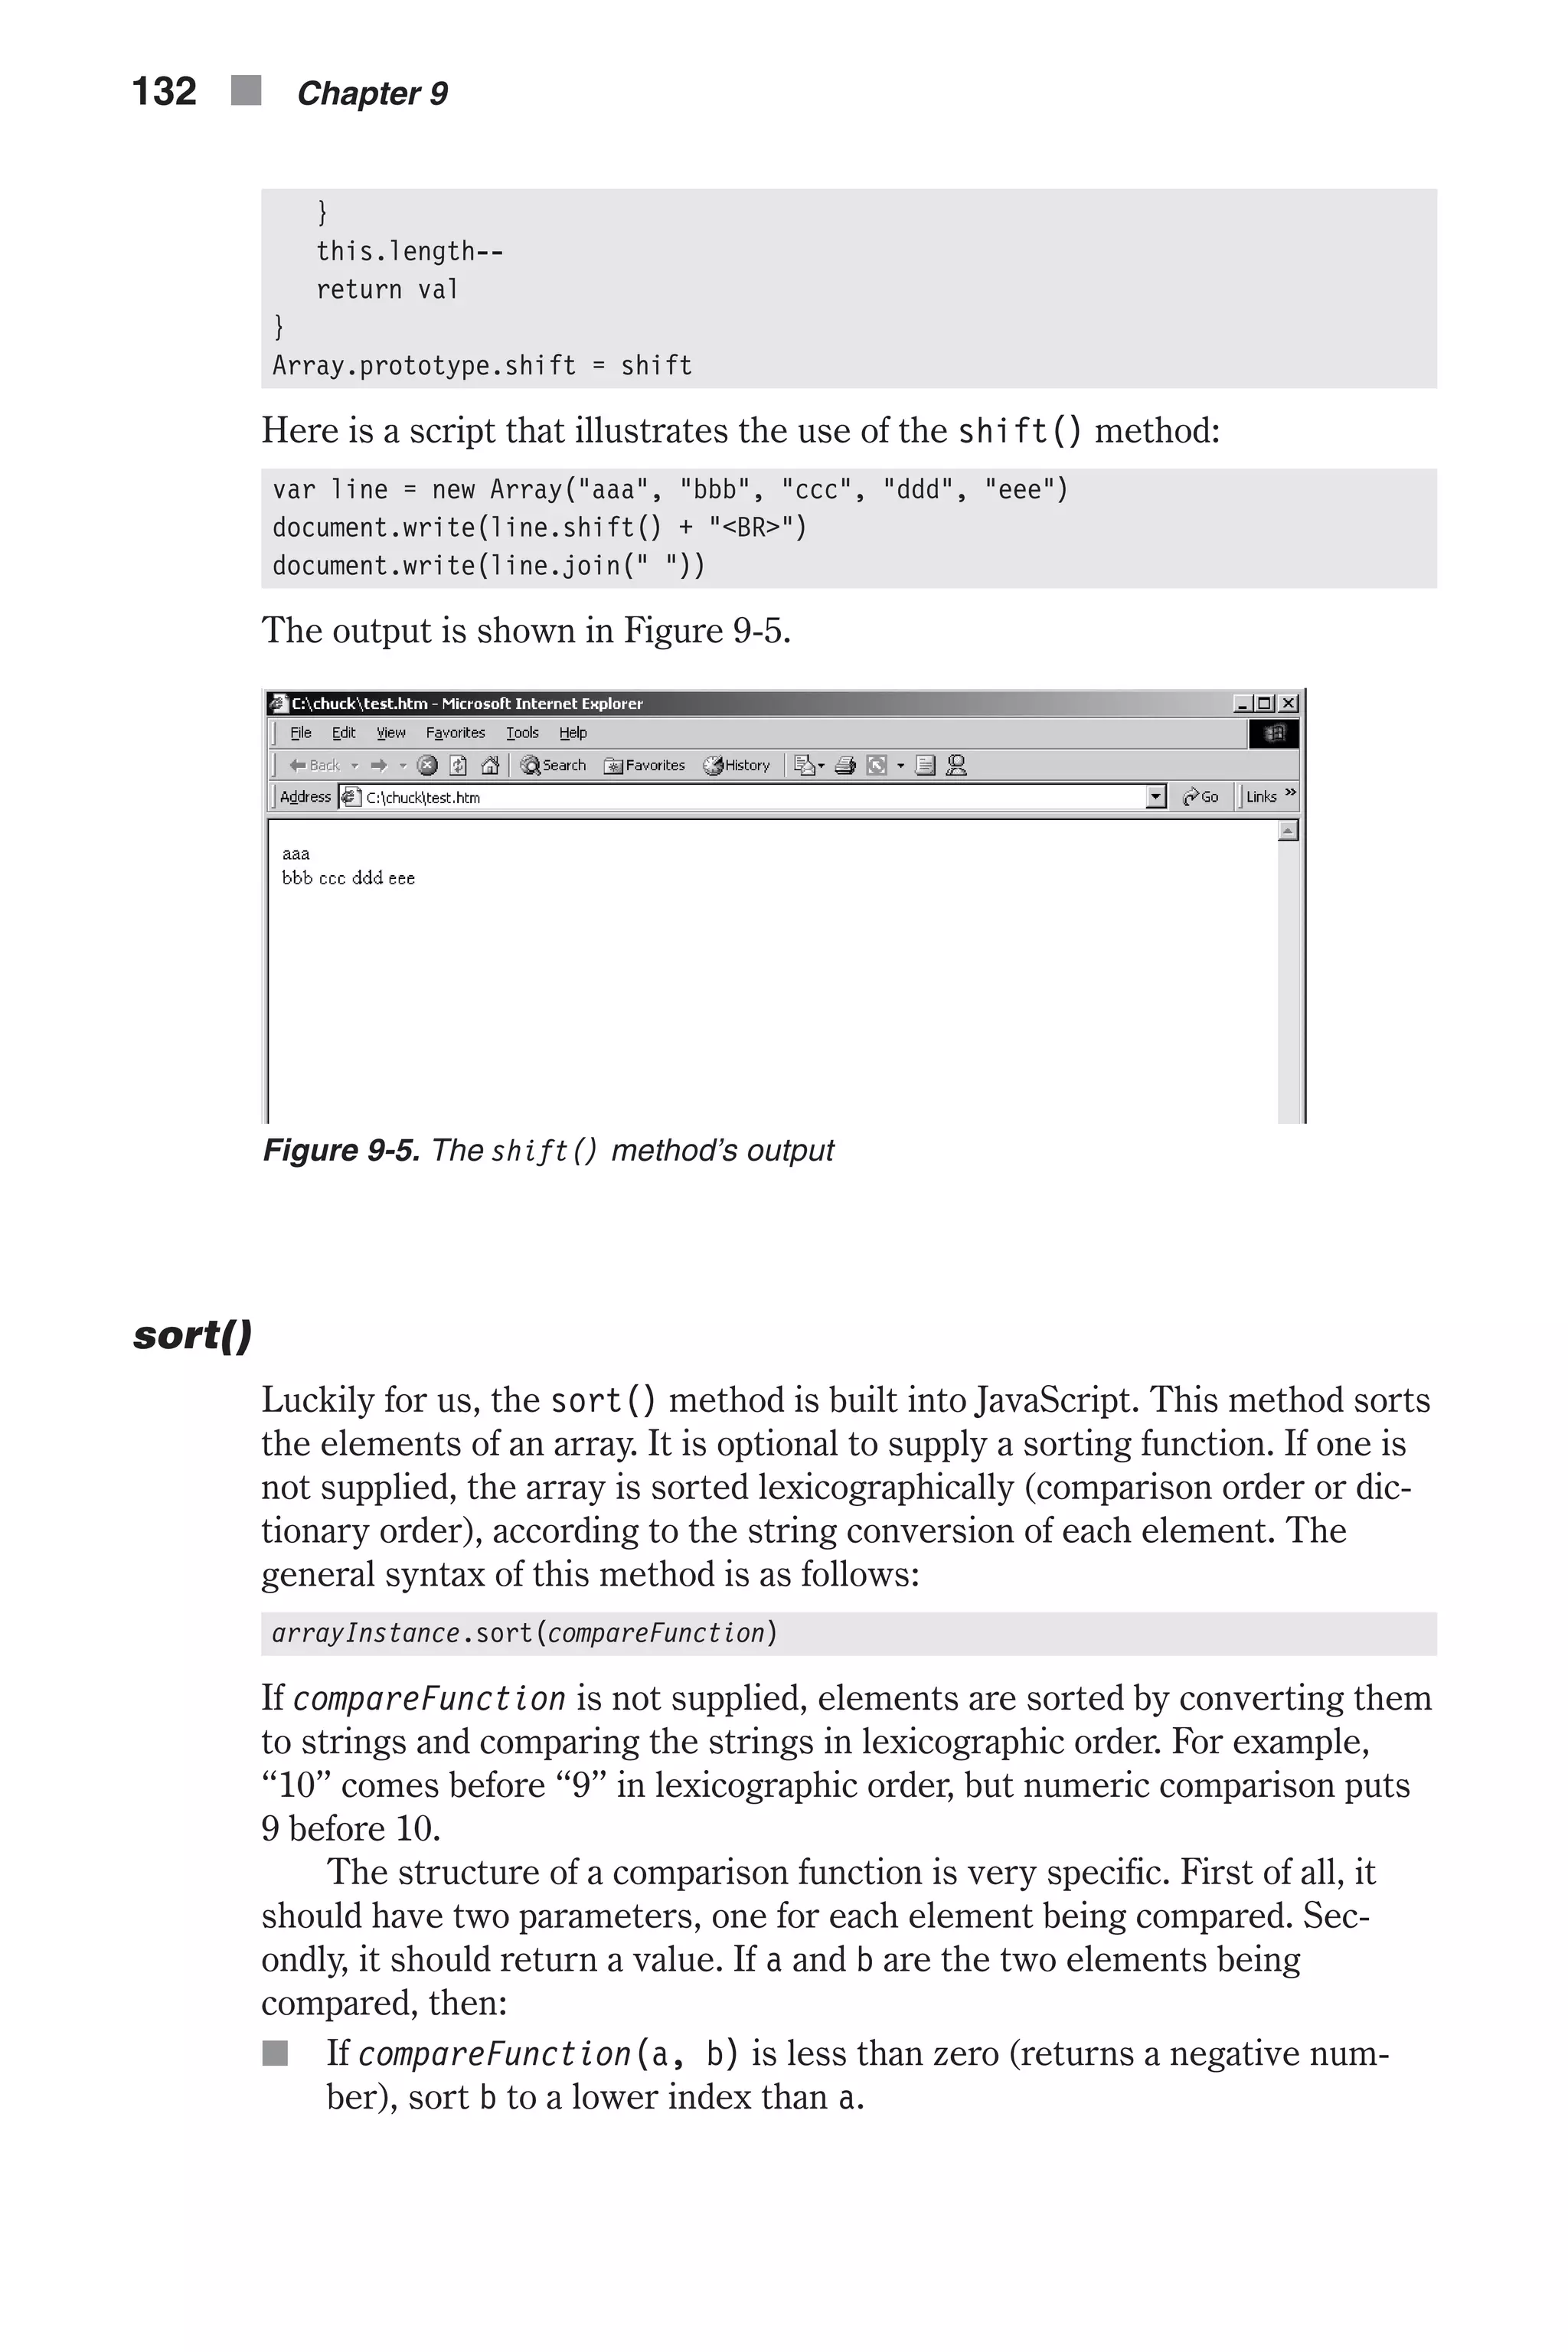
![reverse() The reverse() method transposes the elements of the calling array object. If it was descending, now it is ascending, etc. The last element becomes the first one, and vice versa. This is a built-in method. The general syntax is: arrayInstance.reverse() Here is a script that illustrates the reverse() function: var names = new Array("Tom", "Mark", "Bart", "John") var colors = new Array("red", "orange", "yellow", "green", "blue", "purple") document.write("<B>original names: </B>" + names.join(" ") + "<BR>") names.reverse() document.write("<B>reversed names: </B>" + names.join(" ") + "<BR>") document.write("<B>original colors: </B>" + colors.join(" ") + "<BR>") colors.reverse() document.write("<B>reversed colors: </B>" + colors.join(" ") + "<BR>") The corresponding output is shown in Figure 9-4. shift() The shift() method is not defined in JavaScript so we will have to create it. It shifts off and returns the first element of an array, decreasing the size of an array by one element. The general format of this method call (after defining its prototype) is: arrayInstance.shift() Here is the method along with an example: function shift(str) { var val = this[0] for (var i = 1; i < this.length; ++i) { this[i – 1] = this[i] Arrays n 131 Chapter9 Figure 9-4. The reverse() method’s output](https://image.slidesharecdn.com/wordware-advancedjavascript3rded-160421130838/75/www-webre24h-com-Wordware-advanced-javascript-3rd-ed-easttom-156-2048.jpg)
![splice() Another method not featured yet by JavaScript is splice(). It removes and replaces elements in an array. Its general syntax is: arrayInstance.splice(offset, length, list) offset is the starting position from which elements are to be removed. The length is the number of elements to be removed, starting at offset. The list parameter consists of new elements that are designated to replace the removed ones. Here is the method: function splice(offset, length) { var ar1 = new Array() var ar2 = new Array() for (i = 0; i < length; ++i) { ar1[i] = this[i + offset] } for (i = 0; i < this.length – (offset + length); ++i) { ar2[i] = this[i + offset + length] } var args = new Array() for (i = 0; splice.arguments[i + 2] != null; ++i) { args[i] = splice.arguments[i + 2] // second argument } j = offset for (i = 0; i < args.length; ++i) { this[j] = args[i] Arrays n 135 Chapter9 Figure 9-6. The sort() method’s output](https://image.slidesharecdn.com/wordware-advancedjavascript3rded-160421130838/75/www-webre24h-com-Wordware-advanced-javascript-3rd-ed-easttom-160-2048.jpg)
![j++ } for (i = 0; i < ar2.length; ++i) { this[j] = ar2[i] j++ } this.length = j // notice that j is one more than subscript of last element return ar1 } Array.prototype.splice = splice This method is more complicated than the previous ones. At first, two arrays are declared. Although it is possible to calculate their size, it is com- pletely unnecessary because they will accommodate the proper size as we expand them. The first loop in the function is: for (i = 0; i < length; ++i) { ar1[i] = this[i + offset] } This loop assigns all elements that are to be removed to the array ar1, according to the values of the offset and length parameters. The number of times the loop iterates is exactly the value of length, the number of ele- ments specified to be removed. The array ar1 is populated from the beginning, 0. It is assigned the elements of the calling array (this), starting from offset, because only elements following offset (exactly length of them) are to be removed. When the loop terminates, the array ar1 already consists of elements that should be removed from the calling array. Notice that this array is returned at the end of the function. Now take a look at the second loop: for (i = 0; i < this.length – (offset + length); ++i) { ar2[i] = this[i + offset + length] } This loop assigns all elements following the removed ones to the array ar2. The loop terminates after it has completed assigning all these elements. this.length – (offset + length) is equal to the number of elements fol- lowing the removed one. The subscript of the first element following the removed set is offset + length. Subtracting this number from the full length of the calling array gives the number of elements following the removed set. The next loop is as follows: for (i = 0; splice.arguments[i + 2] != null; ++i) { args[i] = splice.arguments[i + 2] // second argument } 136 n Chapter 9](https://image.slidesharecdn.com/wordware-advancedjavascript3rded-160421130838/75/www-webre24h-com-Wordware-advanced-javascript-3rd-ed-easttom-161-2048.jpg)
![The preceding loop assigns all items of list (the third parameter of the method) to the array args. These items are all arguments handed over to the method except for the first two. We use the condition splice.argu- ments[i + 2] != null to terminate the loop due to some unexpected behavior of the arguments.length property on some platforms. That is, when the function comes across the first null element of splice.arguments, it terminates. This action is based on the fact that the method will never be called to replace an element of the calling array by a null one. This concept is explained later in this chapter in depth. The expression i + 2 is used because the needed elements of the arguments array are only the third one (subscript == 2) on. However, the args array created in the function should store the elements starting at subscript 0, so i is used as the sub- script of that array. We now have four arrays: n this (the calling array) n args n ar2 n ar1 Keep in mind that the splice() method needs to modify the calling script. It concatenates the beginning of this array (up to the first removed, exclu- sively) with args and ar2, in this order. The last portion of the script does just that: j = offset for (i = 0; i < args.length; ++i) { this[j] = args[i] j++ } for (i = 0; i < ar2.length; ++i) { this[j] = ar2[i] j++ } this.length = j At first, j is set to offset, the first value of the array this that should be modified (all the existing elements before should remain at the beginning of the array, as they were before calling the method). The following loops assign elements from the other arrays, args and ar2, respectively, to the calling array (this). The variable j is important because it holds the sub- script of the current element of the calling array throughout both loops. At the end, the length of the calling array (now modified) is set to j, so if there were more elements in the original array, they are chopped off. The last statement of the splice() function returns the removed ele- ments in the form of an array, ar1. Now that you have pored over this long and perhaps arduous explana- tion, it’s probably a good idea to see an example: Arrays n 137 Chapter9](https://image.slidesharecdn.com/wordware-advancedjavascript3rded-160421130838/75/www-webre24h-com-Wordware-advanced-javascript-3rd-ed-easttom-162-2048.jpg)
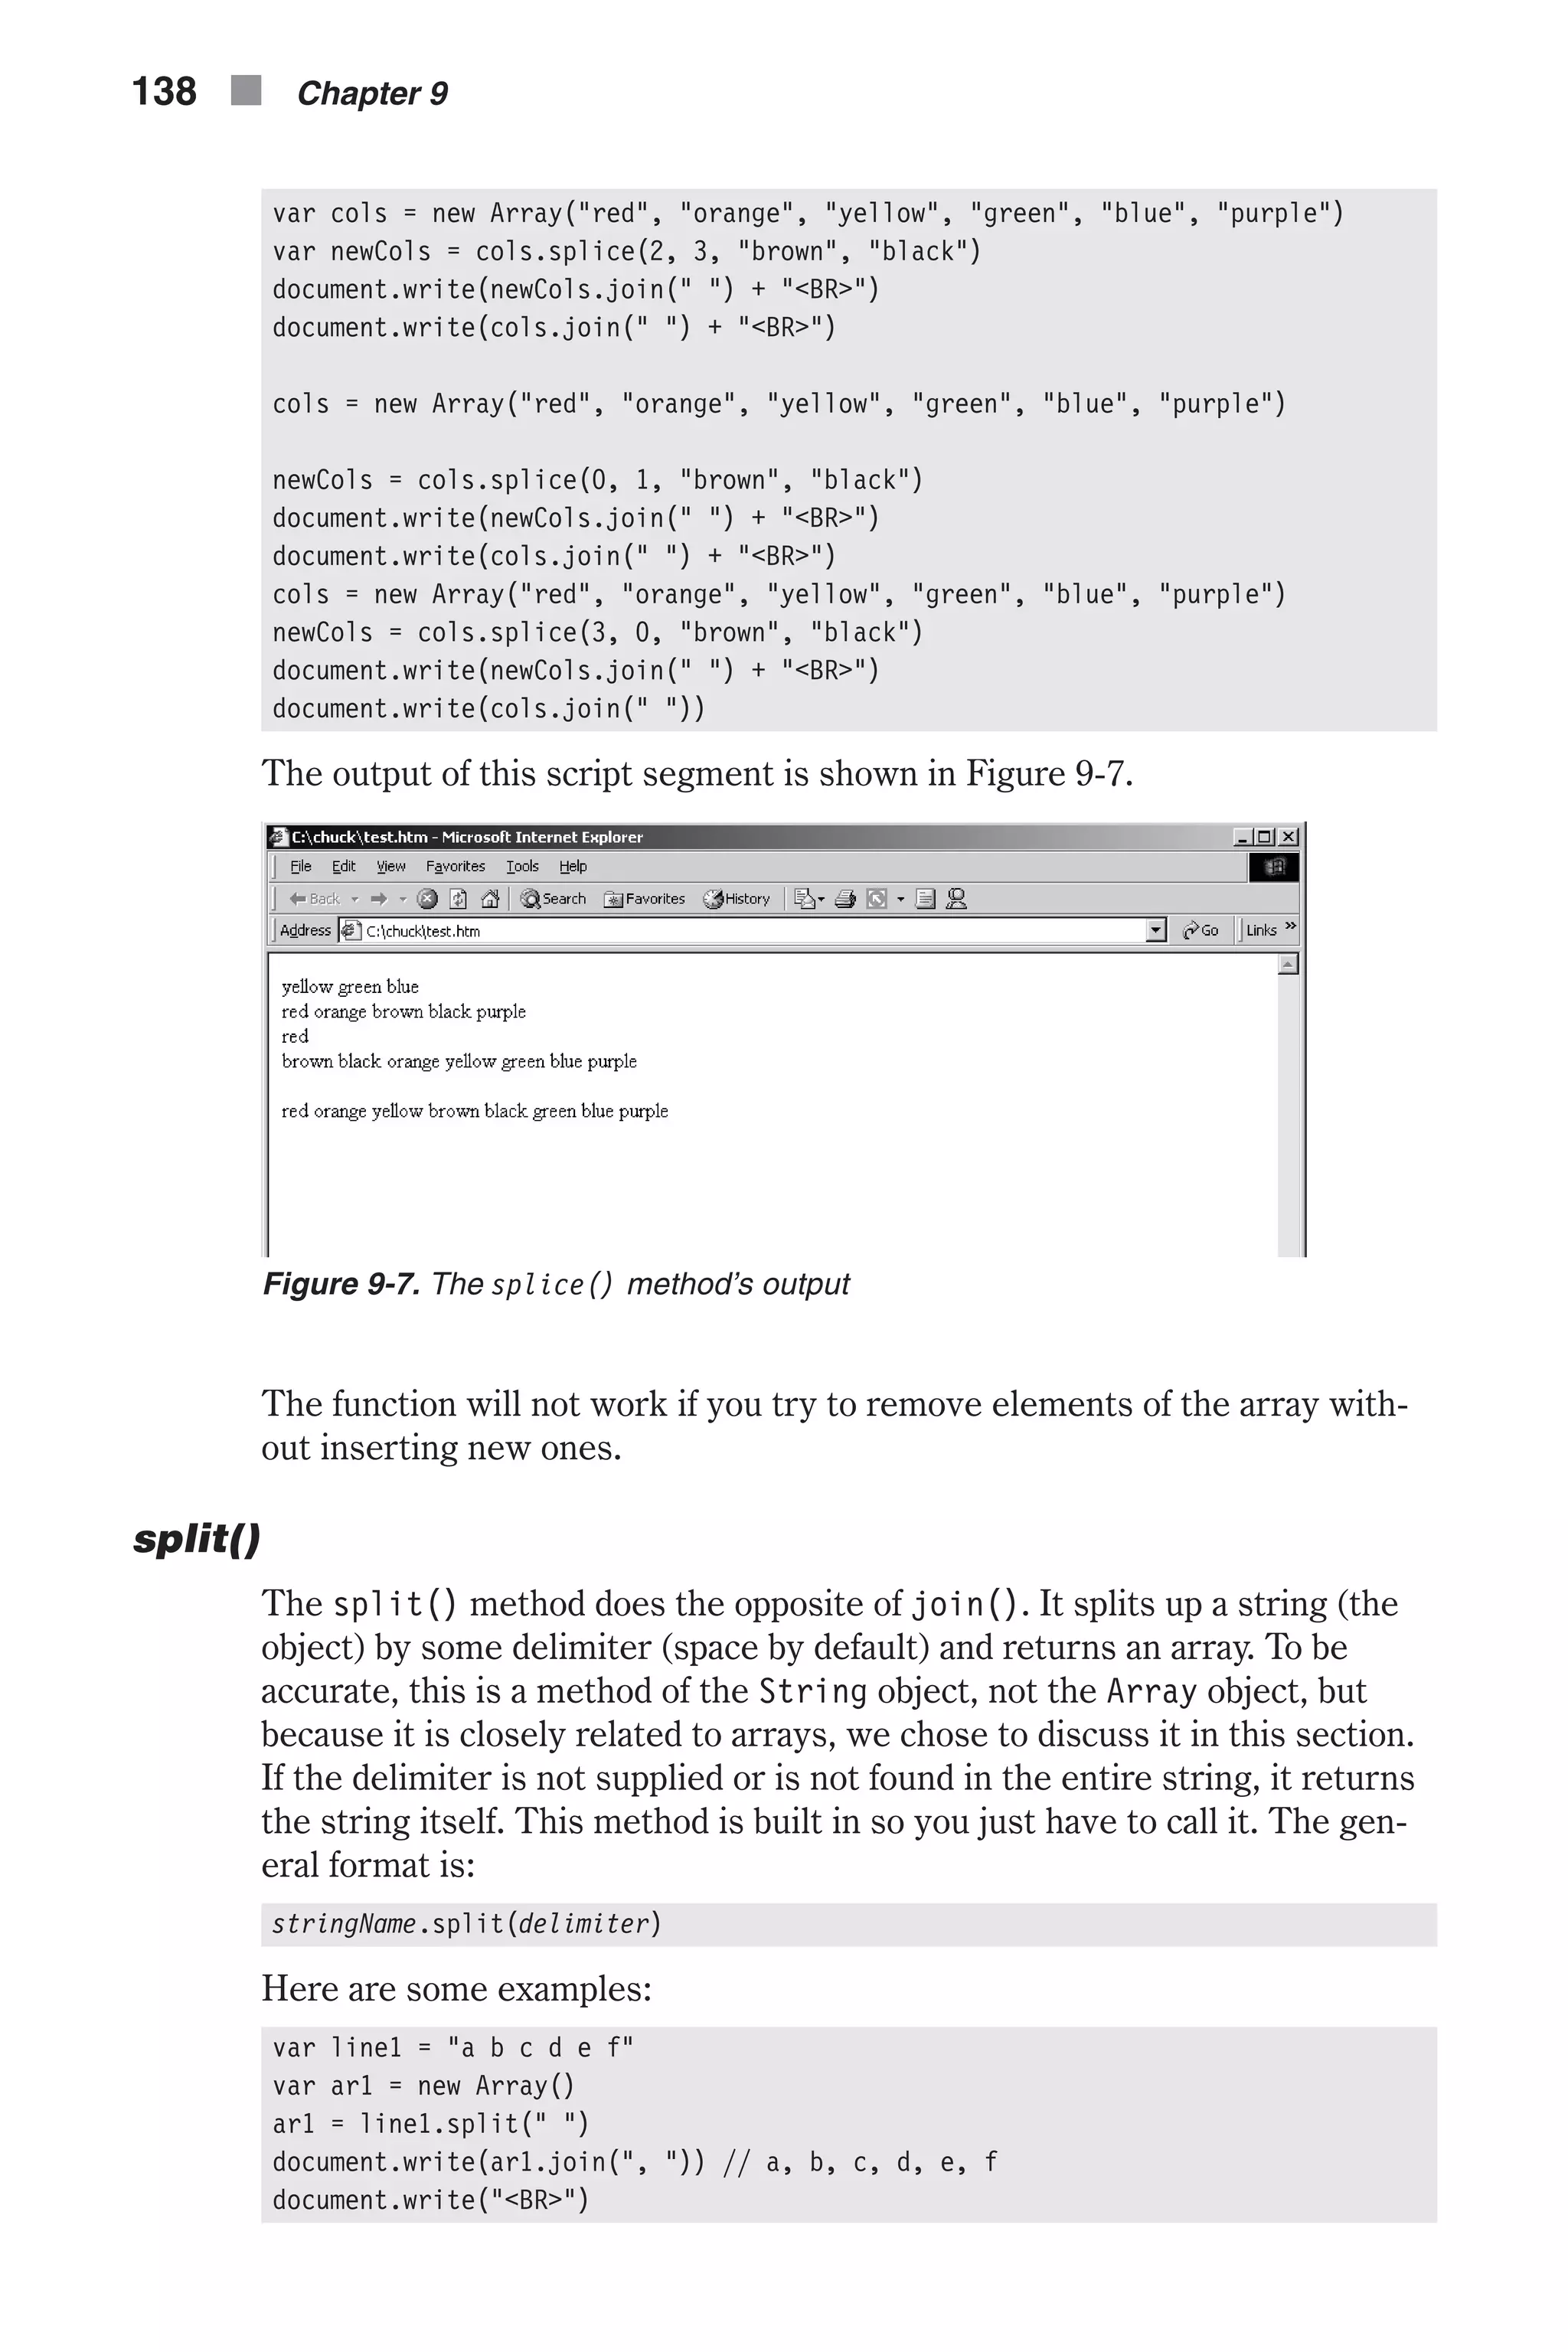
![ar2 = line1.split(";") document.write(ar2) // a b c d e f document.write("<BR>") ar3 = line1.split() document.write(ar3) // a b c d e f document.write("<BR>") ar4 = line1.split("") document.write(ar4) // [infinite function!] All of these examples follow the rules explained previously, except for the last one, ar4. The statement ar4 = line1.split("") causes an infinite method execution that will eventually crash the browser, or even the operat- ing system, if you are on a 16-bit version of Windows. The reason for this behavior is obvious—JavaScript tries to split the string with an empty string. Everyone knows that an empty string is found an infinite number of times between two characters, and between two empty strings lies another empty string! unshift() The unshift() method is the opposite of the shift() method. It appends a list of elements to the beginning of an array. Here is the method defined as a prototype of the Array object type, along with an example to demonstrate it: function unshift() { for (var i = 0; i < unshift.arguments.length; ++i) { if (unshift.arguments[i] == null) break } // i = number of arguments! (remember ++i is executed during last loop) // i holds the number of arguments for (var j = this.length – 1; j >= 0; --j) { this[j + i] = this[j] } // j == –1 // i == number of arguments for (j = 0; j < i; ++j) { this[j] = unshift.arguments[j] } } Array.prototype.unshift = unshift Here is an example of the unshift() function: var line = new Array("ccc", "ddd", "eee") line.unshift("aaa", "bbb") document.write(line.join(" ")) Arrays n 139 Chapter9](https://image.slidesharecdn.com/wordware-advancedjavascript3rded-160421130838/75/www-webre24h-com-Wordware-advanced-javascript-3rd-ed-easttom-164-2048.jpg)
![The arguments Array The functionName.arguments array holds the arguments by order that were passed to the function functionName when that function was last called. Here is an example: function func() { document.write(func.arguments[2]) } func(1, 2, 3, 4, 5) document.write("<BR>") func() The output of this script is: 3 3 The second 3 is not an argument passed to the function during the second call, but an argument passed to the function during the first call. It remains an element in the array provided that no argument of a later call replaces it. You can therefore conclude that the functionName.arguments array has a permanent storage class. Let’s say you want to create a function that accepts string arguments and prints them with a line break after each one. The intuitive function would be: function printList() { for (var i = 0; i < printList.arguments.length; ++i) { document.write(printList.arguments[i] + "<BR>") } } You can use this function in the following form: printList("message 1", "message 2", "message 3", "message 4") And the output is: message 1 message 2 message 3 message 4 You can also use the function twice in a row as in: printList("message 1", "message 2", "message 3", "message 4") printList("message 5", "message 6", "message 7", "message 8") 140 n Chapter 9](https://image.slidesharecdn.com/wordware-advancedjavascript3rded-160421130838/75/www-webre24h-com-Wordware-advanced-javascript-3rd-ed-easttom-165-2048.jpg)
![Once again, the expected output is: message 1 message 2 message 3 message 4 message 5 message 6 message 7 message 8 Now let’s change the function to the following code: function printList() { document.write("There are " + printList.arguments.length + " arguments.") document.write("<BR>") document.write("The fourth argument is " + printList.arguments[3] + ".") document.write("<BR>") for (var i = 0; i < printList.arguments.length; ++i) { document.write(printList.arguments[i] + "<BR>") } } The function now displays the number of arguments according to the functionName.arguments.length property. It also displays the fourth argu- ment, whether or not there are four arguments. Consider the following statements: printList("message 1", "message 2", "message 3", "message 4") printList("message 5", "message 6", "message 7") The output is: There are 4 arguments. The fourth argument is message 4. message 1 message 2 message 3 message 4 There are 3 arguments. The fourth argument is message 4. (!!!) message 5 message 6 message 7 Notice that the function prints the fourth argument passed to the function in each call. However, the second call provides only three arguments! The arguments.length property holds the correct value, 3. The fourth argument is actually a leftover from the first function call. Arrays n 141 Chapter9](https://image.slidesharecdn.com/wordware-advancedjavascript3rded-160421130838/75/www-webre24h-com-Wordware-advanced-javascript-3rd-ed-easttom-166-2048.jpg)
![As you can see, the arguments array does not follow the rules of arrays that are instances of the Array object. The following script demonstrates the difference: var ar = new Array("message 1", "message 2", "message 3") document.write("The array is: " + ar.join(", ") + "<BR>") document.write("There are " + ar.length + " elements.<BR>") document.write("The third element is " + ar[2] + ".<BR>") ar.length = 2 document.write("There are " + ar.length + " elements.<BR>") document.write("The third element is " + ar[2] + ".<BR>") The output of this script is: The array is: message 1, message 2, message 3 There are 3 elements. The third element is message 3. There are 2 elements. The third element is null. The simple rule regarding arrays is that the last element’s subscript is arrayName.length – 1. When you reduce the size of an array by assigning a smaller number to the length property, all elements that were in the range of the array and are now out of range are lost. If you try referring to them, you see that they are null. The functionName.arguments array is different in that its last element has nothing to do with its length. Multidimensional Arrays While JavaScript shares many characteristics with traditional programming languages like C++, it is just a scripting language designed for the web. And as such it has some limitations. For example, JavaScript does not fea- ture multidimensional arrays. However, like many other JavaScript limita- tions you will encounter in this book, you can create your own workaround for this problem. Up to this point we have discussed one-dimensional arrays (1D arrays). Such arrays consist of elements gathered in a row-like struc- ture. The basic structure of a one-dimensional array is outlined in the fol- lowing illustration: Let’s say you want to store a runner’s record times in different years and for different distances. If the array is called curDis, the record time for 2005 could be put in curDis[0], the record time for 2006 in curDis[1], the record time for 2007 in curDis[2], and so forth. However, you probably 142 n Chapter 9 Figure 9-8. A one-dimensional array](https://image.slidesharecdn.com/wordware-advancedjavascript3rded-160421130838/75/www-webre24h-com-Wordware-advanced-javascript-3rd-ed-easttom-167-2048.jpg)
![noticed that we can only store the record time for a single distance, such as a 400-meter run. It would be easy to store the record times of various runs in this format using a table or spreadsheet-like array. Such arrays are known as two-dimensional (2D) arrays. Remember that JavaScript does not have a built-in two-dimensional array object type. Take a look at the subscripts of the elements. The two-dimen- sional array is constructed from horizontal arrays (horizontal in the illustration as well), which form an array of their own. That is, the general structure is a regular array of arrays. The main array in the illustration is the vertical one; its subscripts are specified to the left of the arrows. Note that the dimensions of a multidimensional array do not have to be equal. The standard reference to elements of a two-dimensional array (2DA) is: ar[1][5] ar[8][0] ar[3][3] The first number is the subscript of the first dimension, whereas the second one specifies the subscript of the second dimension. Arrays n 143 Chapter9 Figure 9-9. A two-dimensional array](https://image.slidesharecdn.com/wordware-advancedjavascript3rded-160421130838/75/www-webre24h-com-Wordware-advanced-javascript-3rd-ed-easttom-168-2048.jpg)
![Creation with a Single Constructor Function The easiest way to create a two-dimensional array (2DA) is to use a con- structor function such as the following: function Array2D(dim1, dim2) { for (var i = 0; i < dim1; ++i) { this[i] = new Array(dim2) } this.length = new Array(dim1, dim2) } The following script demonstrates the creation and usage of an array created by this function: var ar = new Array2D(4,7) ar[2][1] = 6 ar[0][0] = "Hello" // this is the "first" element ar[3][6] = true // this is the "last" element alert("Length of first dimension is " + ar.length[0]) alert("Length of second dimension is " + ar.length[1]) alert(""Last" element: " + ar[ar.length[0] – 1][ar.length[1] – 1]) The messages displayed via alert boxes are: Length of first dimension is 4 Length of second dimension is 7 "Last" element: true The constructor function uses a loop. The first array (ar) is not an explicit Array object. It is simply a regular object whose properties are specified using the array notation. The built-in methods of the Array object type do not operate on this array. The loop executes dim1 times, the length of the first dimension. Each property (or element) of the calling object is assigned a “real” array consisting of dim2 elements. Since these are real arrays, you can use the built-in methods and properties of the Array object type. For example, ar[0] is an array of dim2 elements, so you can refer to its ele- ments: ar[0][0], ar[0][1], ar[0][2], etc. The 2DA is actually a one-dimensional array of which all elements are one-dimensional arrays. Therefore, you should be careful not to ruin the structure of the 2DA by assigning values to its main array, such as: ar[3] = "Do not do this to a 2DA!" The preceding constructor method also includes a length property that is an array of two elements. The first element holds the number of elements in the main array (the specified length of the first dimension), while the second element holds the specified length of the second dimension. The example demonstrates this best. Keep in mind that these are static properties. Assigning a value to an element of the length property does not affect the 144 n Chapter 9](https://image.slidesharecdn.com/wordware-advancedjavascript3rded-160421130838/75/www-webre24h-com-Wordware-advanced-javascript-3rd-ed-easttom-169-2048.jpg)
![array, but can trip you up when you need the correct values regarding the length of the array’s dimensions. Creation without a Constructor Function It is possible to create a two-dimensional array without a constructor func- tion. This method is based on creating instances of the Array object: function addDim2(array1D, dim2) { for (var i = 0; i < array1D.length; ++i) { array1D[i] = new Array(dim2) } return array1D } This function alone means almost nothing, so take a look at a working example: var dim1 = 4 var dim2 = 7 var ar = new Array(dim1) ar = addDim2(ar, dim2) ar[2][1] = 6 ar[0][0] = "Hello" // this is the "first" element ar[3][6] = true // this is the "last" element alert("Length of first dimension is " + ar.length) alert("Length of second dimension is " + ar[0].length) alert(""Last" element: " + ar[ar.length – 1][ar[0].length – 1]) At first, the length of the first dimension, 4, is assigned to dim1. The length of the second dimension is then assigned to dim2. A new array, named ar, is created according to the Array object type. Its length is the length of the first dimension of the desired array. The function addDim2 is then called with the array and the length of the second dimension. It returns the final 2DA to the original one-dimensional array, ar. The function is based on a simple loop that assigns an array of dim2 elements to each element of the original one-dimensional array. Since both the first dimension array and the second dimension array are instances of the Array object type, you can refer to the length of each dimension in the following way: ar.length == length of first dimension ar[0].length == length of second dimension == ar[1].length == ... Note that for the second expression to be true, you must not change the length of the 2DA at any time during the script execution. Otherwise, it does not simulate a 2DA anymore. Arrays n 145 Chapter9](https://image.slidesharecdn.com/wordware-advancedjavascript3rded-160421130838/75/www-webre24h-com-Wordware-advanced-javascript-3rd-ed-easttom-170-2048.jpg)
![Associative Arrays This topic is rather advanced, and one can certainly use JavaScript without mastering this. However, it is very useful in certain situations. Associative arrays use strings as subscripts. For example, an element of the array can be: color["yellow"] = "FFFF00" Such arrays group together related data. These arrays are actually objects, except that you use square brackets instead of a dot. Another important dif- ference is that array specification (square brackets) enables you to refer to the value of a variable as the property of method specification rather than the actual literal. For example: var col = "yellow" color[col] = "FFFF00" Here is another interesting example: var w = "write" document[w]("Hello!") // prints "Hello!" If you replace the array notation with the regular dot specification you receive an error: var w = "write" document.w("Hello!") The dot notation requires the actual literal specified, as it does not evaluate the written value. You can use associative arrays to create nested objects resembling multidimensional arrays. For example, you can create an associa- tive array where its subscripts are names of students in a class, so each element of the associative array is an object containing fields such as the student’s grade, age, and so on. Note that associative arrays cannot be created as instances of the built-in Array object. You must use a constructor function to create one. Here is an example using students: function studentClass() { for (var i = 0; i < arguments.length; ++i) { this[studentClass.arguments[i]] = new student() } } function student() { // this.grade = null // this.age = null } var students = new studentClass("Bob", "John", "Frank", "Alfred", "Sheila", "Mary") 146 n Chapter 9](https://image.slidesharecdn.com/wordware-advancedjavascript3rded-160421130838/75/www-webre24h-com-Wordware-advanced-javascript-3rd-ed-easttom-171-2048.jpg)
![students["Bob "].grade = 40 students["John "].age = 11 students["Frank "].grade = "N/A" alert(students["Frank "].grade) Creating an associative array is not difficult. Array elements are created according to the names of the students accepted as parameters by the func- tion studentClass(). The second function is rather strange—it contains no statements. When you create an instance you can use an “empty” construc- tor function. You may recall from an earlier discussion that objects may be extended by simply assigning values to them. So, the statement this[studentClass.arguments[i]] = new student() just makes sure each element of the associative array is an object. The global statements later create the properties simply by assigning them values. Another important concept to remember is that associative arrays are not explicit arrays. You can also refer to them using the dot syntax, as in: students.John.age Suppose you created a database structure listing all the students in a class with their ages and grades. Assume that both fields are fed with the proper values. You can let the user view these values via a prompt dialog box. For example: var grade = students[prompt("Enter name:", "John Doe")].grade document.write(grade) In this case you must use the array convention because you are prompting the user for the property name. You can use the dot notation only when you know the property name. If you use the dot notation: students.prompt(...) JavaScript assumes you are referring to a method of the students object named prompt(), which does not exist at all, of course. Populating an Associative Array Creating a dense array is simple when using regular arrays. You simply cre- ate the array with the desired values. However, associative arrays require two real values for each element, the key (subscript) and the value. You can create a constructor function to create and populate associative arrays: function AssociativeArray() { for (var i = 0; i < arguments.length – 1; i += 2) { this[arguments[i]] = arguments[i + 1] } } Arrays n 147 Chapter9](https://image.slidesharecdn.com/wordware-advancedjavascript3rded-160421130838/75/www-webre24h-com-Wordware-advanced-javascript-3rd-ed-easttom-172-2048.jpg)
![You can use this function to create associative arrays in the following format: var ar = new AssociativeArray("red", "FF0000", "green", "00FF00", "blue", "0000FF") document.write("green = " + ar["green"] + "<BR>") var col = "blue" document.write("blue = " + ar[col] + "<BR>") document.write("red = " + ar.red) The relative output of this script is: green = 00FF00 blue = 0000FF red = FF0000 Let’s take a look at the constructor function. It accepts the keys of the array elements followed by their corresponding values. Each key must be followed by its own value. The function loops through the arguments and terminates after it has reached the argument before the last one. During each pass through the function, a property of the calling object is created (an “ele- ment” in the array lexicon). The key of the property, or element, is the current argument, whereas its value is extracted from the following argu- ment. The loop counter is advanced by two after each execution of the block, because each element of the associative array is related to two argu- ments—its key and its value. Although an associative array is primarily a regular object, this constructor must use square brackets, the array notation, for reference and initialization because the values of the keys (subscripts) are not literals, but rather values stored as parameters. Splitting a String into an Associative Array The split() method splits a string by a specified delimiter into a real instance of an Array object. For example: var str = "a;b;c;d;e;f" var ar = str.split(";") // ar[0] == "a", ar[1] == "b", ar[2] == "c", ... Let’s use the split() method to create a function named associativeSplit() as a prototype of the String object: function associativeSplit(del) { var tempAr = new Array() tempAr = this.split(del) var ar = new Obj() // not an array, just an object for (var i = 0; i < tempAr.length – 1; i += 2) { ar[tempAr[i]] = tempAr[i + 1] } return ar } function Obj() { } String.prototype.associativeSplit = associativeSplit 148 n Chapter 9](https://image.slidesharecdn.com/wordware-advancedjavascript3rded-160421130838/75/www-webre24h-com-Wordware-advanced-javascript-3rd-ed-easttom-173-2048.jpg)
![Notice the use of an empty function to create an object. At first, the function splits the string via the regular method into a regular array. It then loops through the array, using the next element as the key of an element in the associative array and its following element as the value of the same element in the associative array. Upon completion, the function returns the associa- tive array. The function is then declared as a prototype of the built-in String object, applying to all strings. Now take a look at an example: var str = "a b c d e f" var ar1 = str.associativeSplit(" ") document.write(ar1.a + "<BR>") document.write(ar1.b + "<BR>") document.write(ar1["c"] + "<BR>") document.write(ar1["d"] + "<BR>") // document.write(ar1[e] + "<BR>") document.write(ar1.f + "<BR>") Note that “associative array” is not a JavaScript term, but rather a regular object. We just prefer to refer to its properties via the array notation. Summary This was a complex but very important chapter. In this chapter we learned about arrays in JavaScript. It is important that you remember that in JavaScript an array is an object. We discussed the Array object, including its properties and methods. Other important concepts brought together in this chapter were constructor functions and prototypes, used mainly to simulate array methods featured by Perl. By now, you should have a grasp of arrays and constructor functions, two very important elements of the language. You should also know how to create and use two-dimensional arrays, as well as multidimensional ones, although they are rarely used. In this chapter we also introduced the term “associative arrays.” Such arrays are regular objects with regular properties, but they remind us of the associative arrays widely used in other languages such as Perl. In following chapters we shall look further into JavaScript’s object model, while arrays and constructors will serve as the base of some scripts. Arrays n 149 Chapter9](https://image.slidesharecdn.com/wordware-advancedjavascript3rded-160421130838/75/www-webre24h-com-Wordware-advanced-javascript-3rd-ed-easttom-174-2048.jpg)
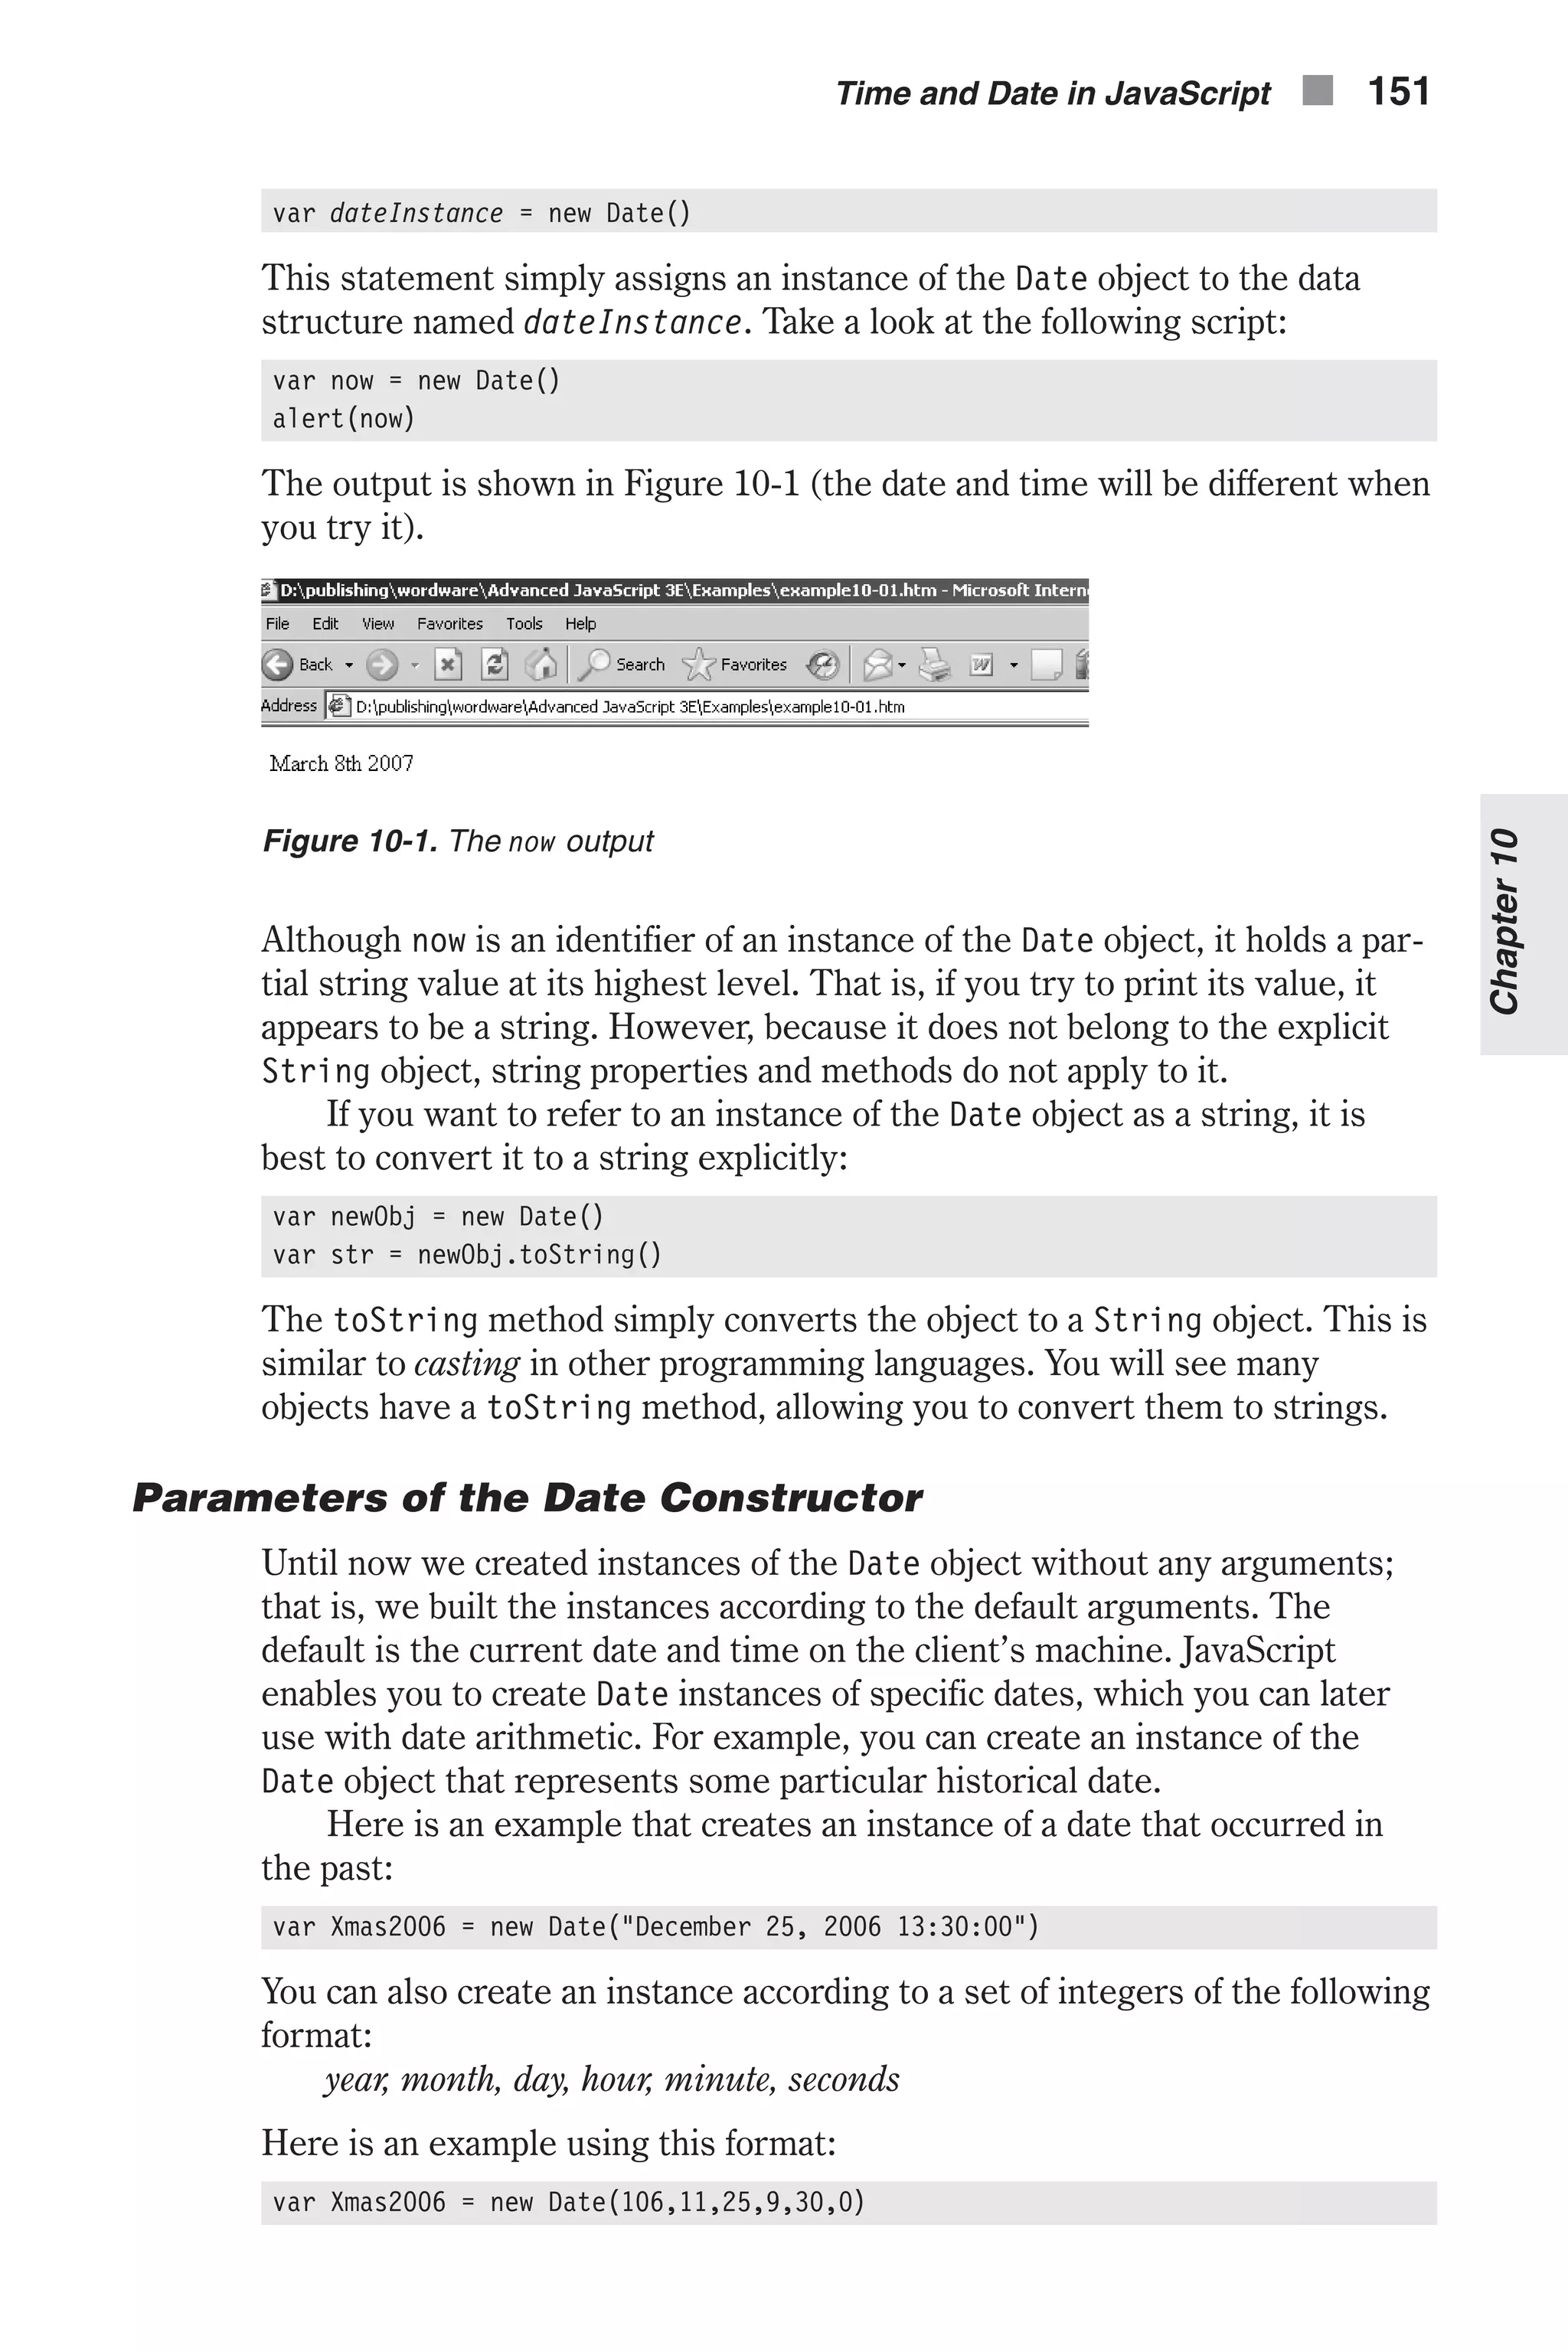
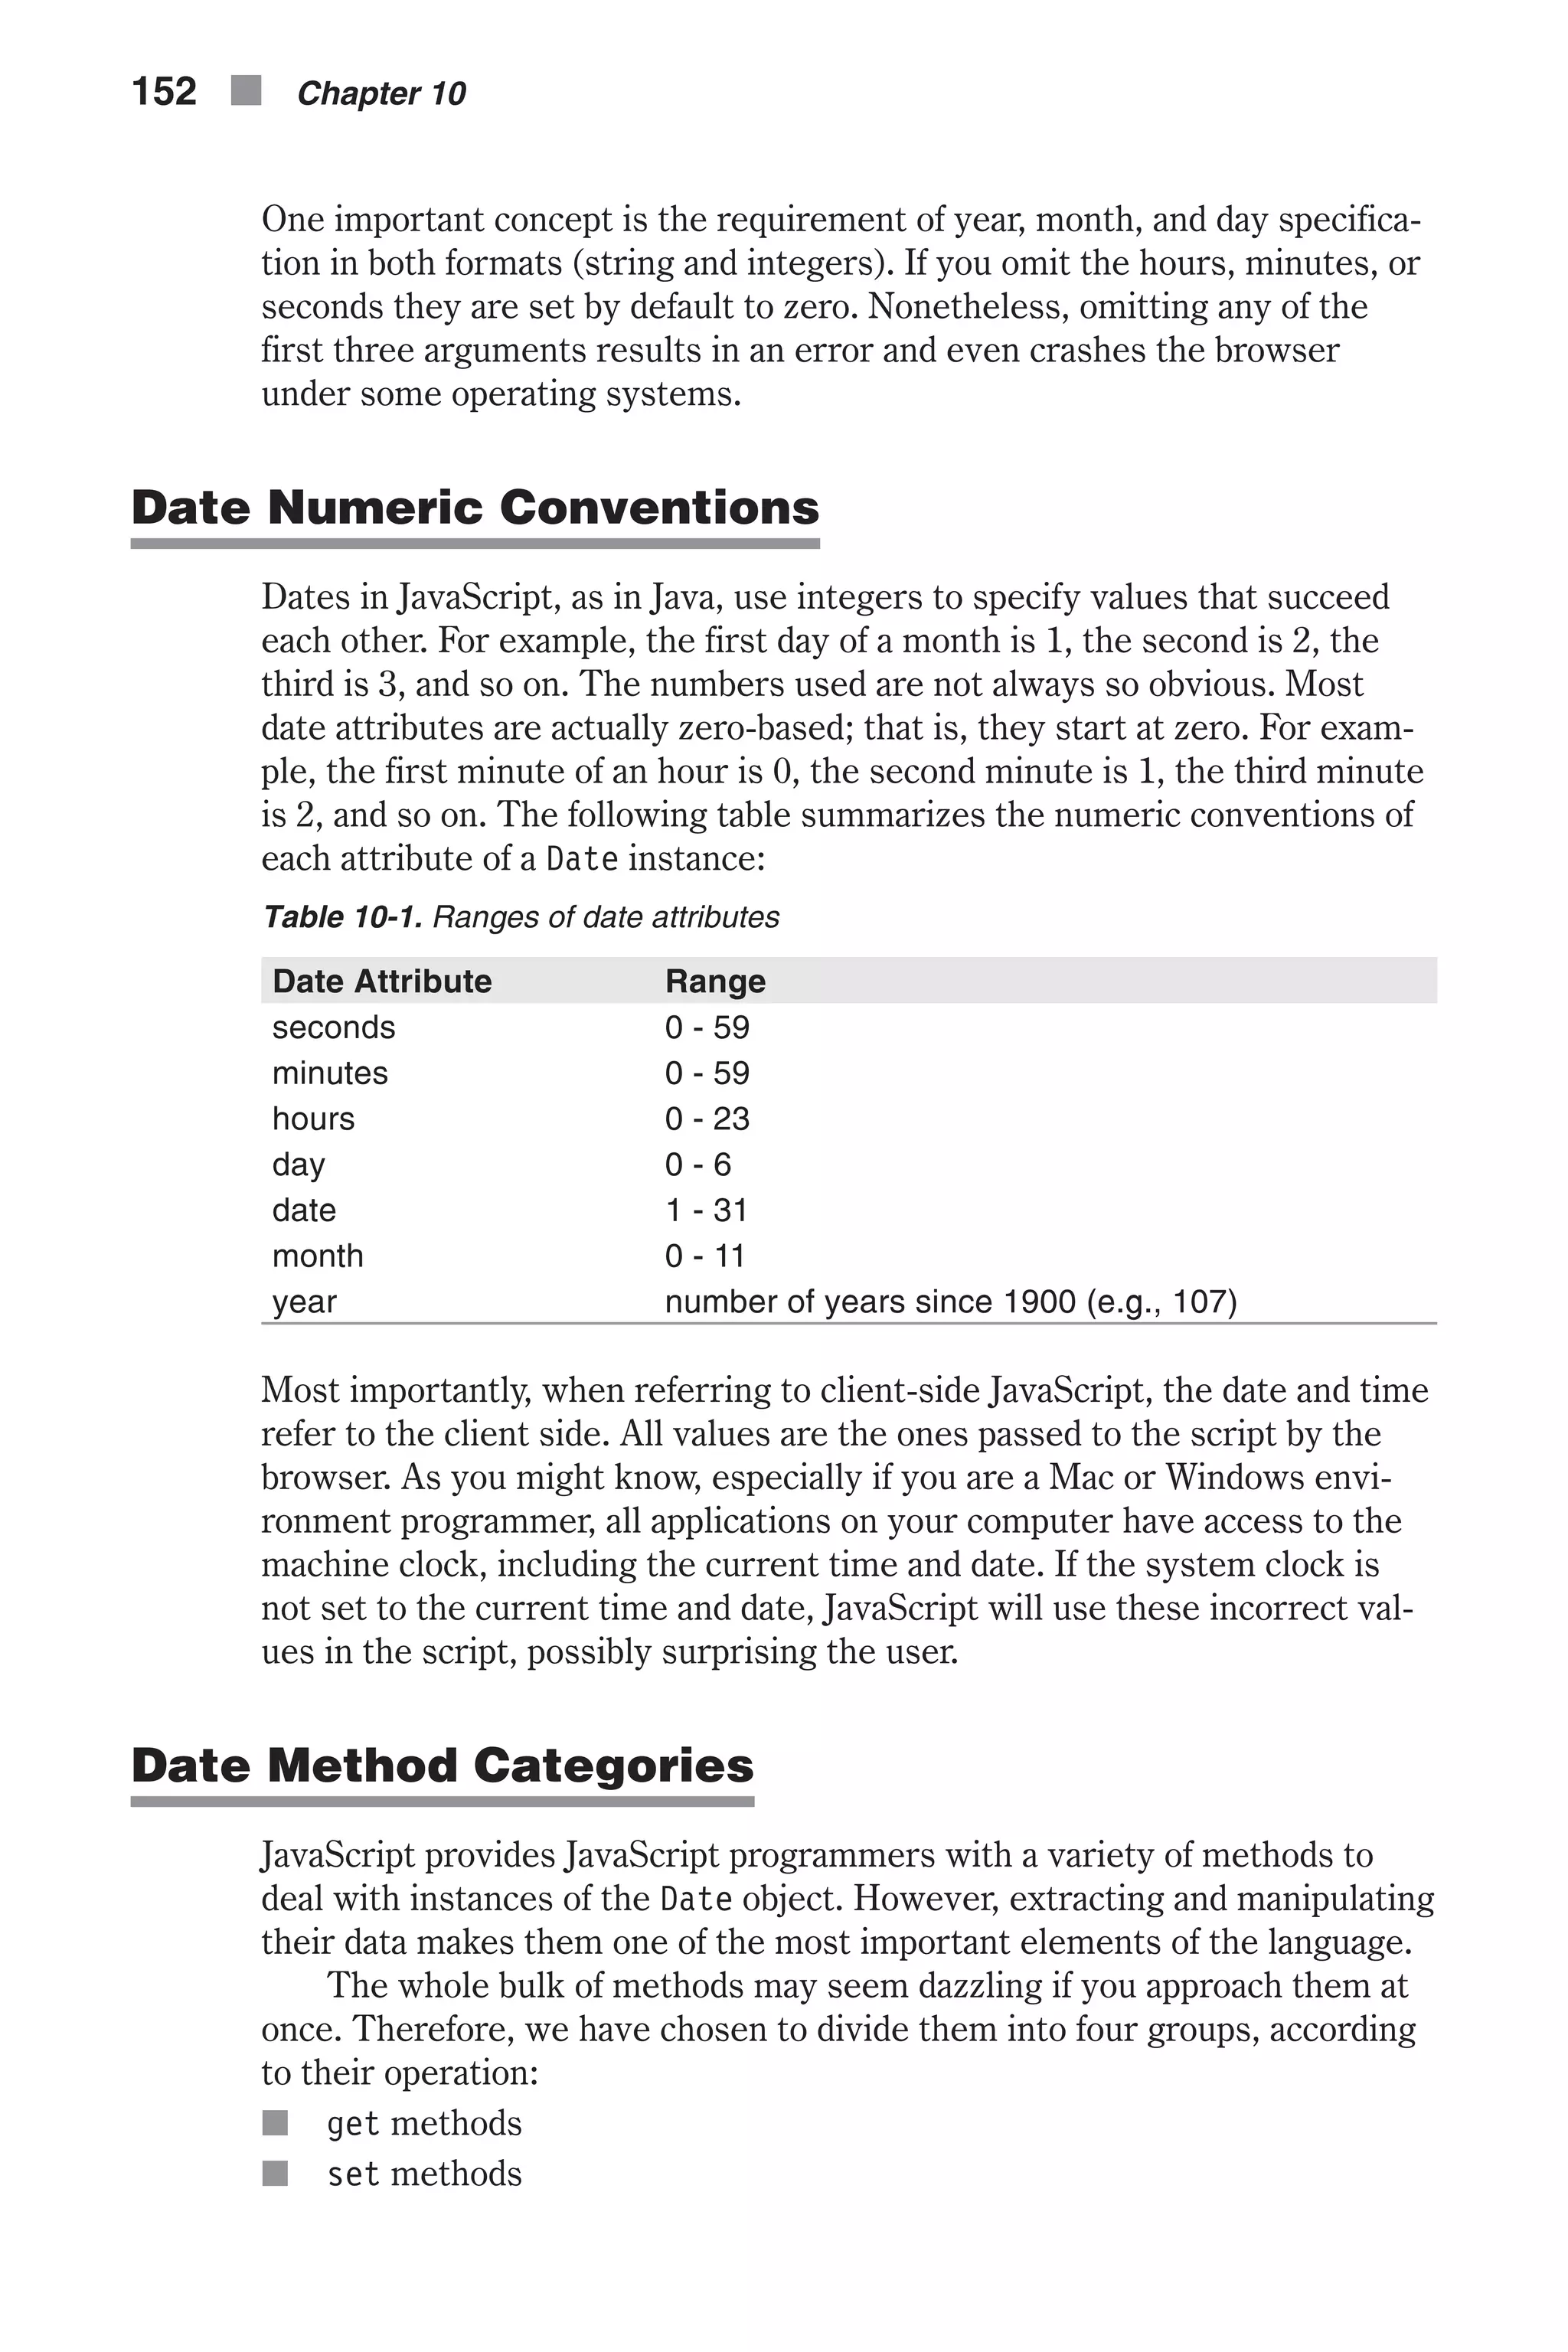
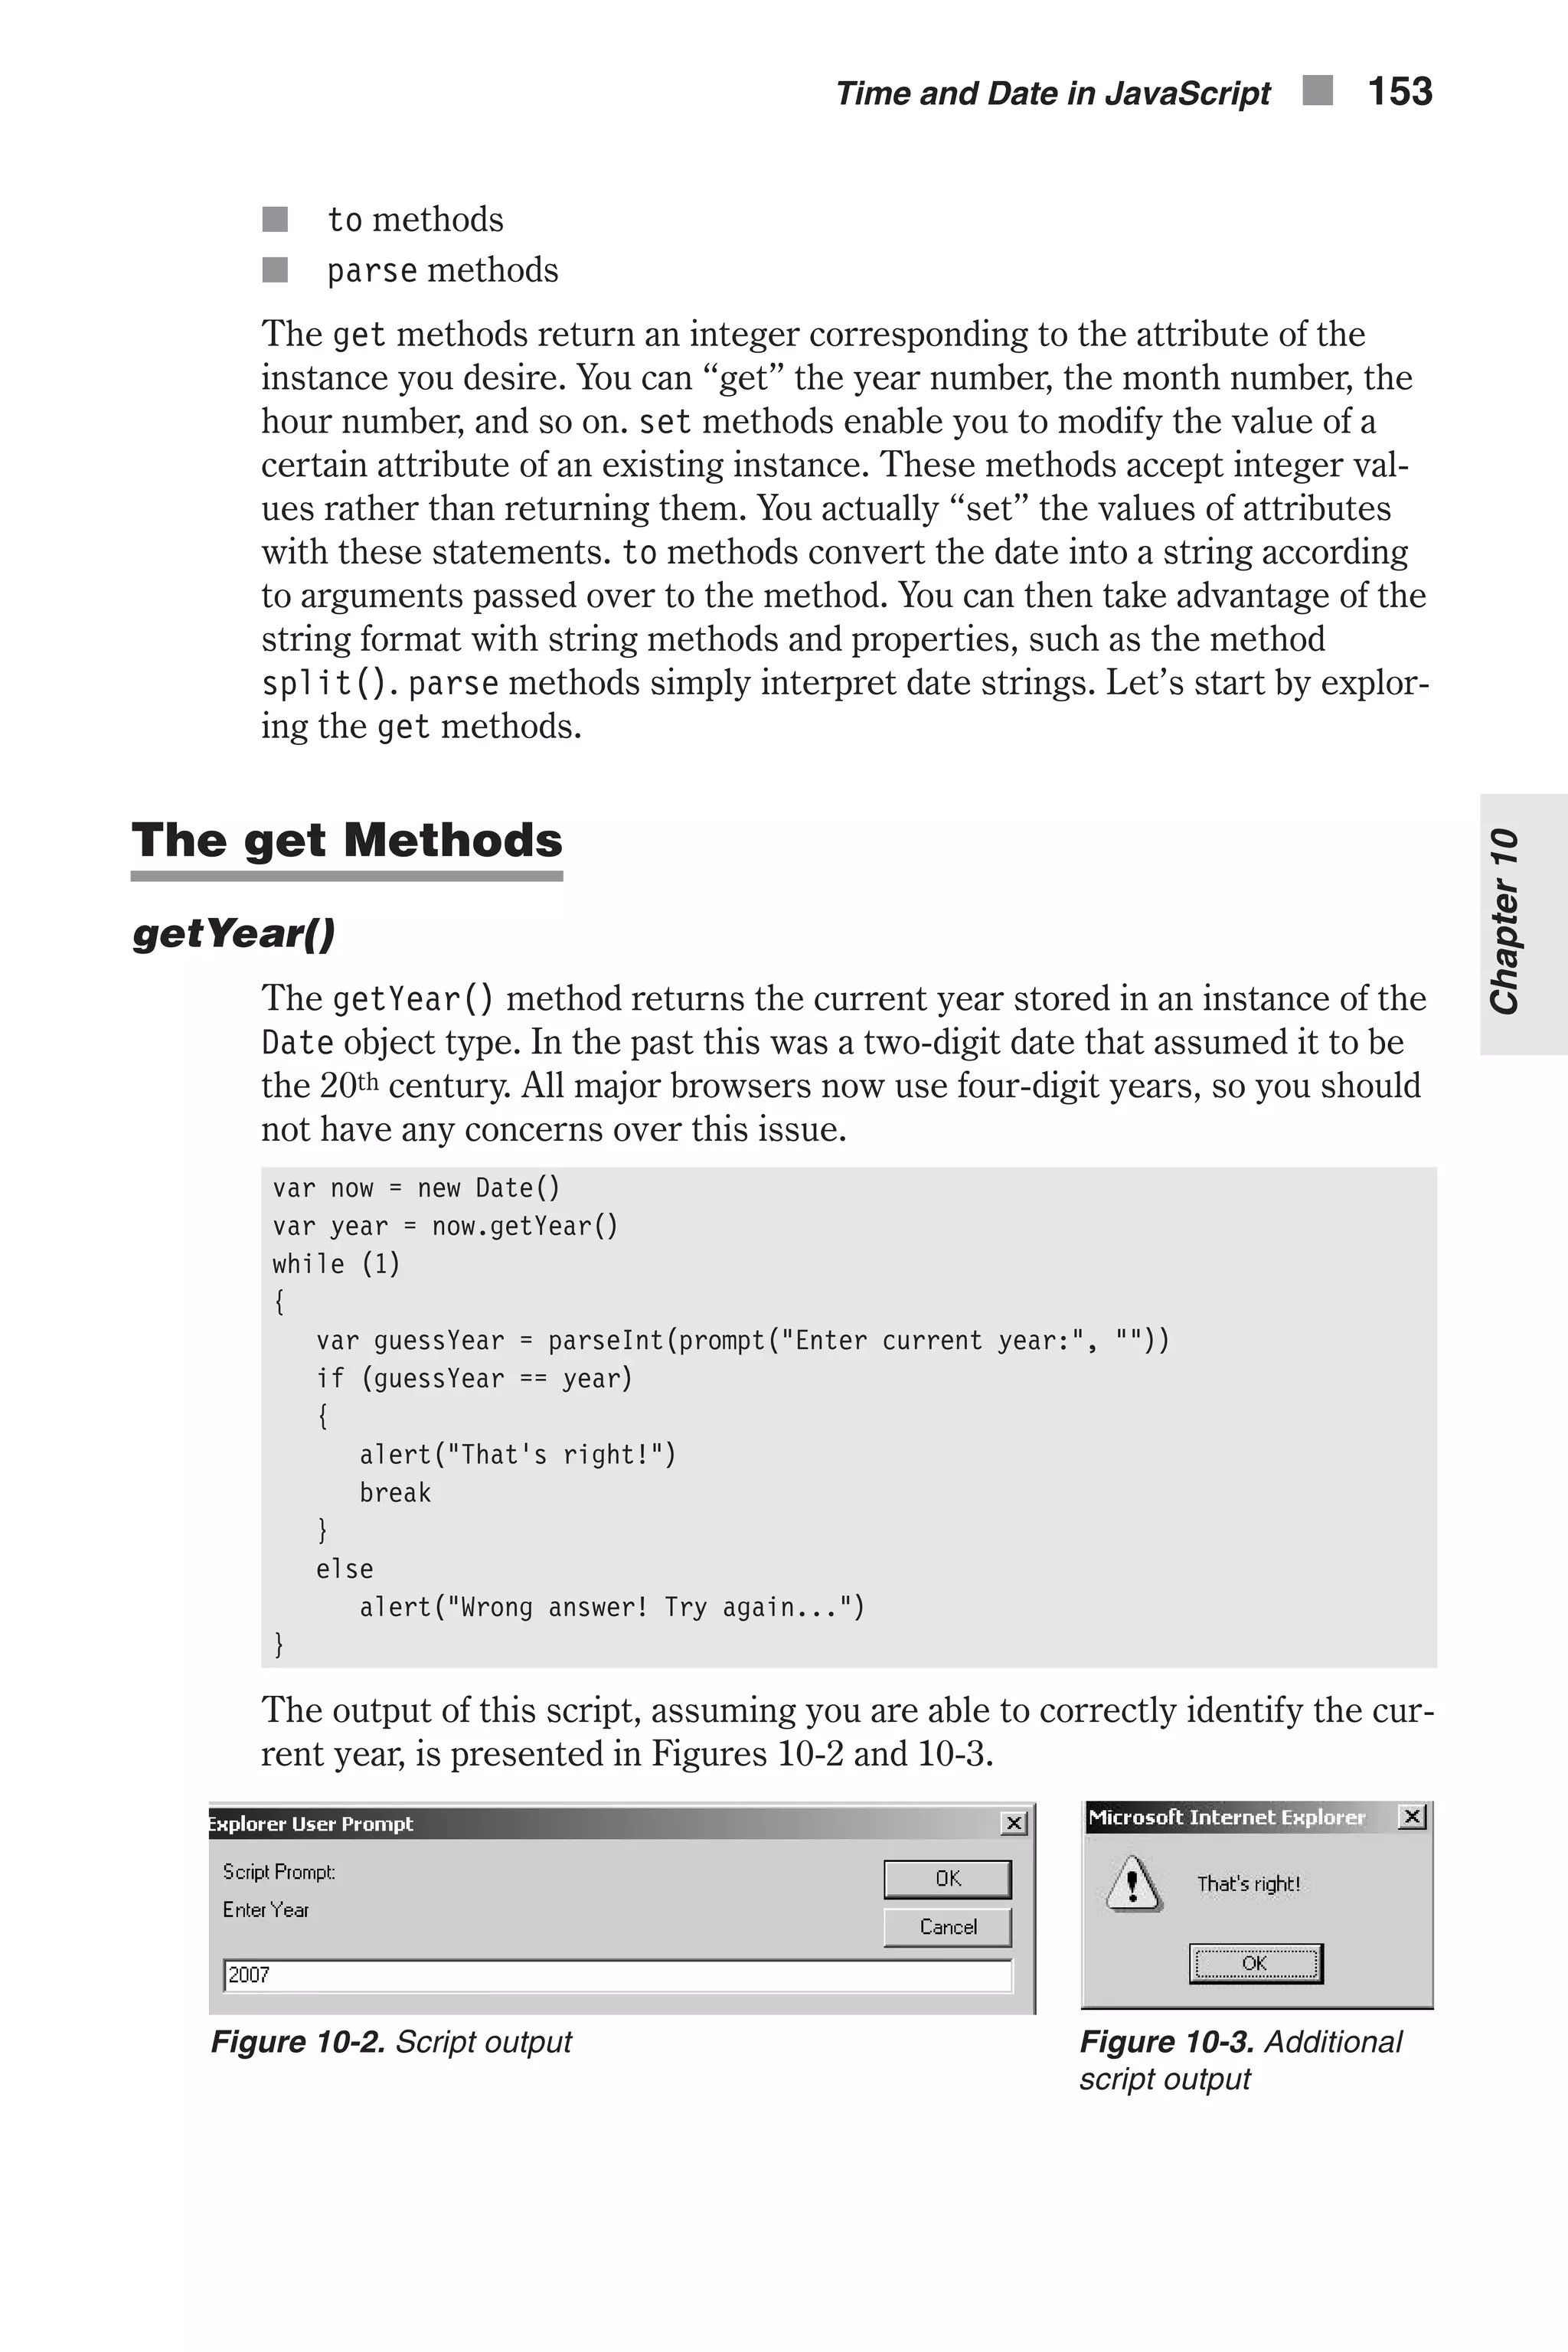
![The current year (based on the system clock) is extracted from the instance now, created according to default arguments (current time and date). A loop without a terminating condition is executed next. The user is asked to enter the current year, according to his or her knowledge. Another if statement checks if the user entered the correct year. If so, the proper message is dis- played, and the loop is broken up with a break statement. Otherwise, a message informs the user that his or her input was incorrect, and the loop iterates once more. The problem with getYear() is that Netscape still returns the years since 1900 (thus 2007 is returned as 107), whereas Internet Explorer simply returns the four-digit date (making 2007 return as simply “2007”). You can also use the newer command getFullYear, which will get a simple four-digit year in both browsers. getMonth() The getMonth() method extracts and returns the month of its calling object. Months range from January to December, or more accurately, from 0 to 11. The reason this begins with 0 rather than 1 is that the Date object internally stores months as an array, and all arrays start with element zero. Here is a simple example demonstrating this method as well as an array instance: var now = new Date() var month = now.getMonth() var ar = new Array(12) ar[0] = "January" ar[1] = "February" ar[2] = "March" ar[3] = "April" ar[4] = "May" ar[5] = "June" ar[6] = "July" ar[7] = "August" ar[8] = "September" ar[9] = "October" ar[10] = "November" ar[11] = "December" var message = "It is now " + ar[month] + ", my favorite.<BR>" document.write(message) The output of this script is shown in Figure 10-4. 154 n Chapter 10 Figure 10-4. getMonth() output](https://image.slidesharecdn.com/wordware-advancedjavascript3rded-160421130838/75/www-webre24h-com-Wordware-advanced-javascript-3rd-ed-easttom-179-2048.jpg)
![The current month is extracted from the now instance, which holds the attributes of the current time (after the statement has executed). A static array is then created to hold all months’ names (as strings), matching each name to its corresponding number in JavaScript, starting at zero. This obvi- ously fits the default array structure, featuring the first index as zero. Therefore, no math needs to be done, and the current month, by name, is used to construct a message, obviously a string. The message is then printed as plain HTML. getDate() The getDate() method returns the day of the month as an integer from 1 to 31. Here is an example: <HTML> <HEAD> <SCRIPT LANGUAGE = "JavaScript"> function datedemo() { var now = new Date() var year = now.get Year() var month = now.getMonth() var date = now.getDate() var suf if (date < 10) var lastDigit = date else var lastDigit = date % 10 var exp = "" // determine suffix if (lastDigit == 1) suf = "st" else if (lastDigit == 2) suf = "nd" else if (lastDigit == 3) suf = "rd" else suf = "th" // array for name of month var ar = new Array(12) ar[0] = "January" ar[1] = "February" ar[2] = "March" ar[3] = "April" ar[4] = "May" ar[5] = "June" ar[6] = "July" ar[7] = "August" ar[8] = "September" Time and Date in JavaScript n 155 Chapter10](https://image.slidesharecdn.com/wordware-advancedjavascript3rded-160421130838/75/www-webre24h-com-Wordware-advanced-javascript-3rd-ed-easttom-180-2048.jpg)
![ar[9] = "October" ar[10] = "November" ar[11] = "December" var formDate = date + suf // build full date such as "May 5th, 2007" var totalDate totalDate = ar[month] + " " + formDate + " " + year document.write(totalDate) } </SCRIPT> </HEAD> <TITLE> Example 10-01</TITLE> <BODY bgcolor = white> <INPUT TYPE = "button" onClick = "datedemo()" VALUE = "Date Demo"> </BODY> <HTML> Example 10-1 (ex10-1.htm) The output for this script is shown in Figure 10-5. This script segment combines all methods learned so far to display a nicely formatted date. At first, all needed attributes of the previously created instance of the Date object are received and assigned to their corresponding variables (e.g., year, month, date). The last digit of the date (1-31) is then assigned to the variable lastDigit. According to the value of lastDigit, the proper suffix is assigned to suf via a nested if-else statement. For the digit 1, the suffix is “st” (1st); for the digit 2, the suffix is “nd” (2nd); for the digit 3, it is “rd” (3rd); for all other digits, it is “th” (5th, 6th, …). Note that the last else statement associates the “th” suffix with all digits other than 1, 2, and 3. This suffix even applies to digits ending with a 0. An array of month names is created as before. The current date is then combined with its suffix to create a string such as “27th.” This string, along with all the other desired values, is used to build a complete date format, such as “April 24th, 2007.” The full string is then printed. If you understand this script, then you have a good understanding of date and time in JavaScript. 156 n Chapter 10 Figure 10-5. getDate() output](https://image.slidesharecdn.com/wordware-advancedjavascript3rded-160421130838/75/www-webre24h-com-Wordware-advanced-javascript-3rd-ed-easttom-181-2048.jpg)
![getDay() This method returns the day of the week as an integer from 0 to 6. The day of the week is calculated according to the other attributes, so this method does not have a corresponding setDay() method. Here is an example: ar = new Array(7) ar[0] = "Sunday" ar[1] = "Monday" ar[2] = "Tuesday" ar[3] = "Wednesday" ar[4] = "Thursday" ar[5] = "Friday" ar[6] = "Saturday" var birthday = new Date("January 3, 1978") var day = birthday.getDay() alert("You were born on " + ar[day]) getHours() The getHours() function returns the number of hours since midnight. That is, it returns the current hour according to the 24-hour clock. Note that the range is 0 to 23, from midnight (0) to 11 PM (23). Here is an example: var now = new Date() var hour = now.getHours() var text = "" if (hour < 12) text = "morning" else if (hour < 16) text = "afternoon" else if (hour < 20) text = "evening" else text = "night" document.write("Good " + text + "!") This script segment prints a short greeting based on the time of day. For example, if it is between 12:00 (noon) and 16:00 (4 PM), it prints “Good afternoon!” It is based on a nested if-else construct. getMinutes() The getMinutes() method returns the minute attribute of a Date instance. The integer returned is always from 0 to 59. Here is a short example to demonstrate the method: var now = new Date() var minute = now.getMinutes() var hour = now.getHours() var text = "Don't you have an appointment for " + (hour + 1) text += ":00 ?" Time and Date in JavaScript n 157 Chapter10](https://image.slidesharecdn.com/wordware-advancedjavascript3rded-160421130838/75/www-webre24h-com-Wordware-advanced-javascript-3rd-ed-easttom-182-2048.jpg)
![else alert("Sorry, this script is intended for U.S. residents only") The script starts by asking the user if he or she lives in the United States. If not, a message is displayed. Otherwise, the following command block is exe- cuted. The area in the United States is determined according to the difference in hours between the local time zone and the GMT. The preceding preposition (e.g., “in”, “on”) is determined as well in the if-else construct. JavaScript then builds an appropriate message based on the current location of the user as well as the proper preposition. getTime() The getTime() method returns the number of milliseconds since January 1, 1970 00:00:00. The set Methods Just as JavaScript provides you with get methods so you can retrieve date and time information, it also provides you with set methods so you can set the Date object to a particular date and time. This can be quite useful. For example, you can set a Date object to a person’s birthday, then find out what day of the week that was. setYear() This method sets the year attribute of a given Date instance. The following example computes the day of the current date last year: var now = new Date() var year = now.getYear() now.setYear(year - 1) ar = new Array(7) ar[0] = "Sunday" ar[1] = "Monday" ar[2] = "Tuesday" ar[3] = "Wednesday" ar[4] = "Thursday" ar[5] = "Friday" ar[6] = "Saturday" document.write("Last year, the current day was " + ar[now.getDay()]) First, an instance of the current date is created, and the current year is assigned to the variable year. The year attribute of the instance now is set to one year behind. The day attribute is then extracted from the modified instance, and a message is built based on that day, transformed to a string (via the array). Time and Date in JavaScript n 159 Chapter10](https://image.slidesharecdn.com/wordware-advancedjavascript3rded-160421130838/75/www-webre24h-com-Wordware-advanced-javascript-3rd-ed-easttom-184-2048.jpg)
![setMonth() This method sets the month attribute of a given instance of the Date object. The following script sets the month attribute of the current date to May: var now = new Date() now.setMonth(4) setDate() The setDate() method sets the date attribute of a given instance of the Date object. The following script prints the day on which the first day of the month occurred: var now = new Date() now.setDate(1) ar = new Array(7) ar[0] = "Sunday" ar[1] = "Monday" ar[2] = "Tuesday" ar[3] = "Wednesday" ar[4] = "Thursday" ar[5] = "Friday" ar[6] = "Saturday" document.write("The first day of the month occurred on " + ar[now.getDay()]) setHours() This method sets the hour attribute of a given instance of the Date object. Here is an example: var obj = new Date("December 4, 2006 18:50:59") // JS press release obj.setHours(obj.getHours() – 2) alert(obj.getHours()) // 16 setMinutes() This method sets the minutes of a given Date instance. Here is a simple example: var obj = new Date("December 4, 2006 18:50:59") // JS press release obj.setMinutes(obj.getMinutes() – 1) alert(obj.getMinutes()) // 49 setSeconds() The setSeconds() method sets the seconds of a given instance of the Date object type. The following example demonstrates its usage: var obj = new Date("December 4, 2006 18:50:59") // JS press release obj.setSeconds(obj.getSeconds() – 9) alert(obj.getSeconds()) // 50 160 n Chapter 10](https://image.slidesharecdn.com/wordware-advancedjavascript3rded-160421130838/75/www-webre24h-com-Wordware-advanced-javascript-3rd-ed-easttom-185-2048.jpg)
![setTime() This method sets the number of milliseconds since January 1, 1970 00:00:00. It actually modifies all fields of its calling object. Here is an example: var obj = new Date() obj.setTime(867999600000) var date = obj.getDate() var month = obj.getMonth() if (date < 10) var lastDigit = date else var lastDigit = date % 10 var exp = "" // determine suffix if (lastDigit == 1) suf = "st" else if (lastDigit == 2) suf = "nd" else if (lastDigit == 3) suf = "rd" else suf = "th" // array for name of month var ar = new Array(12) ar[0] = "January" ar[1] = "February" ar[2] = "March" ar[3] = "April" ar[4] = "May" ar[5] = "June" ar[6] = "July" ar[7] = "August" ar[8] = "September" ar[9] = "October" ar[10] = "November" ar[11] = "December" var text = ar[month] + " " + date + suf alert(text) // July 4th (setTime modifies the entire instance) The to Methods toGMTString() This method converts a date to a string, using the Internet GMT conven- tions. The conversion is done according to the operating system’s time zone offset and returns a string value that is similar to the following form: Tue, 30 Jul 2006 01:03:46 GMT Time and Date in JavaScript n 161 Chapter10](https://image.slidesharecdn.com/wordware-advancedjavascript3rded-160421130838/75/www-webre24h-com-Wordware-advanced-javascript-3rd-ed-easttom-186-2048.jpg)
![The exact format depends on the platform. Here is a simple example: var now = new Date() var ar1 = now.toGMTString().split(" ") document.write("The current time in Greenwich is " + ar1[4]) A sample output of this script segment is: The current time in Greenwich is 01:08:21 toLocaleString() This method returns the date in the form of a string, using the current locale’s conventions. If you are trying to pass a date using toLocaleString, be aware that different locales assemble the string in different ways. Using methods such as getHours, getMinutes, and getSeconds will give more portable results. The following example demonstrates the function: var now = new Date() var ar1 = now.toLocaleString().split(" ") document.write("The current time is " + ar1[1]) The script’s output is: The current time is 18:12:51 The general format of the converted string is: MM/DD/YY HH:MM:SS The parse Methods parse methods are used to extract one type of information from another. For example, when programming in C, Java, or C++, when you compile your program, the compiler parses your source code looking for commands it rec- ognizes. When you load a web page, the browser parses your HTML looking for specific tags. parse() The parse() method accepts a date string in the IETF standard and con- verts it to the number of milliseconds since January 1, 1970 00:00:00. The IETF standard date representation is: DayAbb, date MonthAbb year HH:MM:SS TimeZoneAbb An example for this standard is “Mon, 25 Dec 2001 13:30:00 GMT.” This method also understands the continental U.S. time zone abbreviations such as PST (Pacific Standard Time) and EST (Eastern Standard Time). However, time zones outside the United States (and their equivalent in Canada, for instance) do not have a standard abbreviation accepted by JavaScript. For such time zones the offset must be specified; that is, you must specify the difference in hours and minutes between the local time zone and Greenwich 162 n Chapter 10](https://image.slidesharecdn.com/wordware-advancedjavascript3rded-160421130838/75/www-webre24h-com-Wordware-advanced-javascript-3rd-ed-easttom-187-2048.jpg)
![Mean Time. For example, in “Mon, 25 Dec 2001 13:30:00 GMT+0430,” GMT+0430 is shorthand for 4 hours, 30 minutes west of the Greenwich meridian. If you do not specify a time zone, the local time zone is assumed, according to the settings of the clock in the operating system. If your time zone is not set correctly, you should change it in the control panel, both on Macs and Windows-based machines. GMT is also known as Universal Time Coordinate, or UTC. The parse() method is a static one. It does not belong to a specific instance of the Date object, but to the object type itself. Therefore, it is always used as Date.parse(). Here is an example for this method: var aDate = "Aug 27 2006" var birthday = new Date() birthday.setTime(Date.parse(aDate)) UTC() The UTC() method takes a comma-delimited list and returns the number of milliseconds since January 1, 1970 00:00:00, Greenwich Mean Time (GMT, UTC). This is also a static method, so it is called along with the general Date object. You cannot use this method to refer to a specific date in the local time zone, because it constantly refers to the Universal Time Coordinate (GMT, UTC). For example, the following statement creates a Date object using GMT instead of local time, as it would if the method were not used: gmtDate = new Date(Date.UTC(99, 11, 1, 0, 0, 0)) The general syntax of the method is: Date.UTC(year, month, day [, hrs] [, min] [, sec]) All attributes should be specified as integers. Time-Related Methods of Other Objects setTimeout() The setTimeout() method evaluates an expression after a specified number of milliseconds have elapsed. Its general syntax is: timeoutID = setTimeout(expression, msec) timeoutID is an identifier used to identify the current timeout. expression is a string expression or property of an existing object. It is normally a simple statement that is to be executed after the specified time has ticked off. msec is a numeric value, a numeric string, or a property of an existing object in millisecond units. The setTimeout() method evaluates an expression after a specified amount of time. Take a look at the following example: Time and Date in JavaScript n 163 Chapter10](https://image.slidesharecdn.com/wordware-advancedjavascript3rded-160421130838/75/www-webre24h-com-Wordware-advanced-javascript-3rd-ed-easttom-188-2048.jpg)
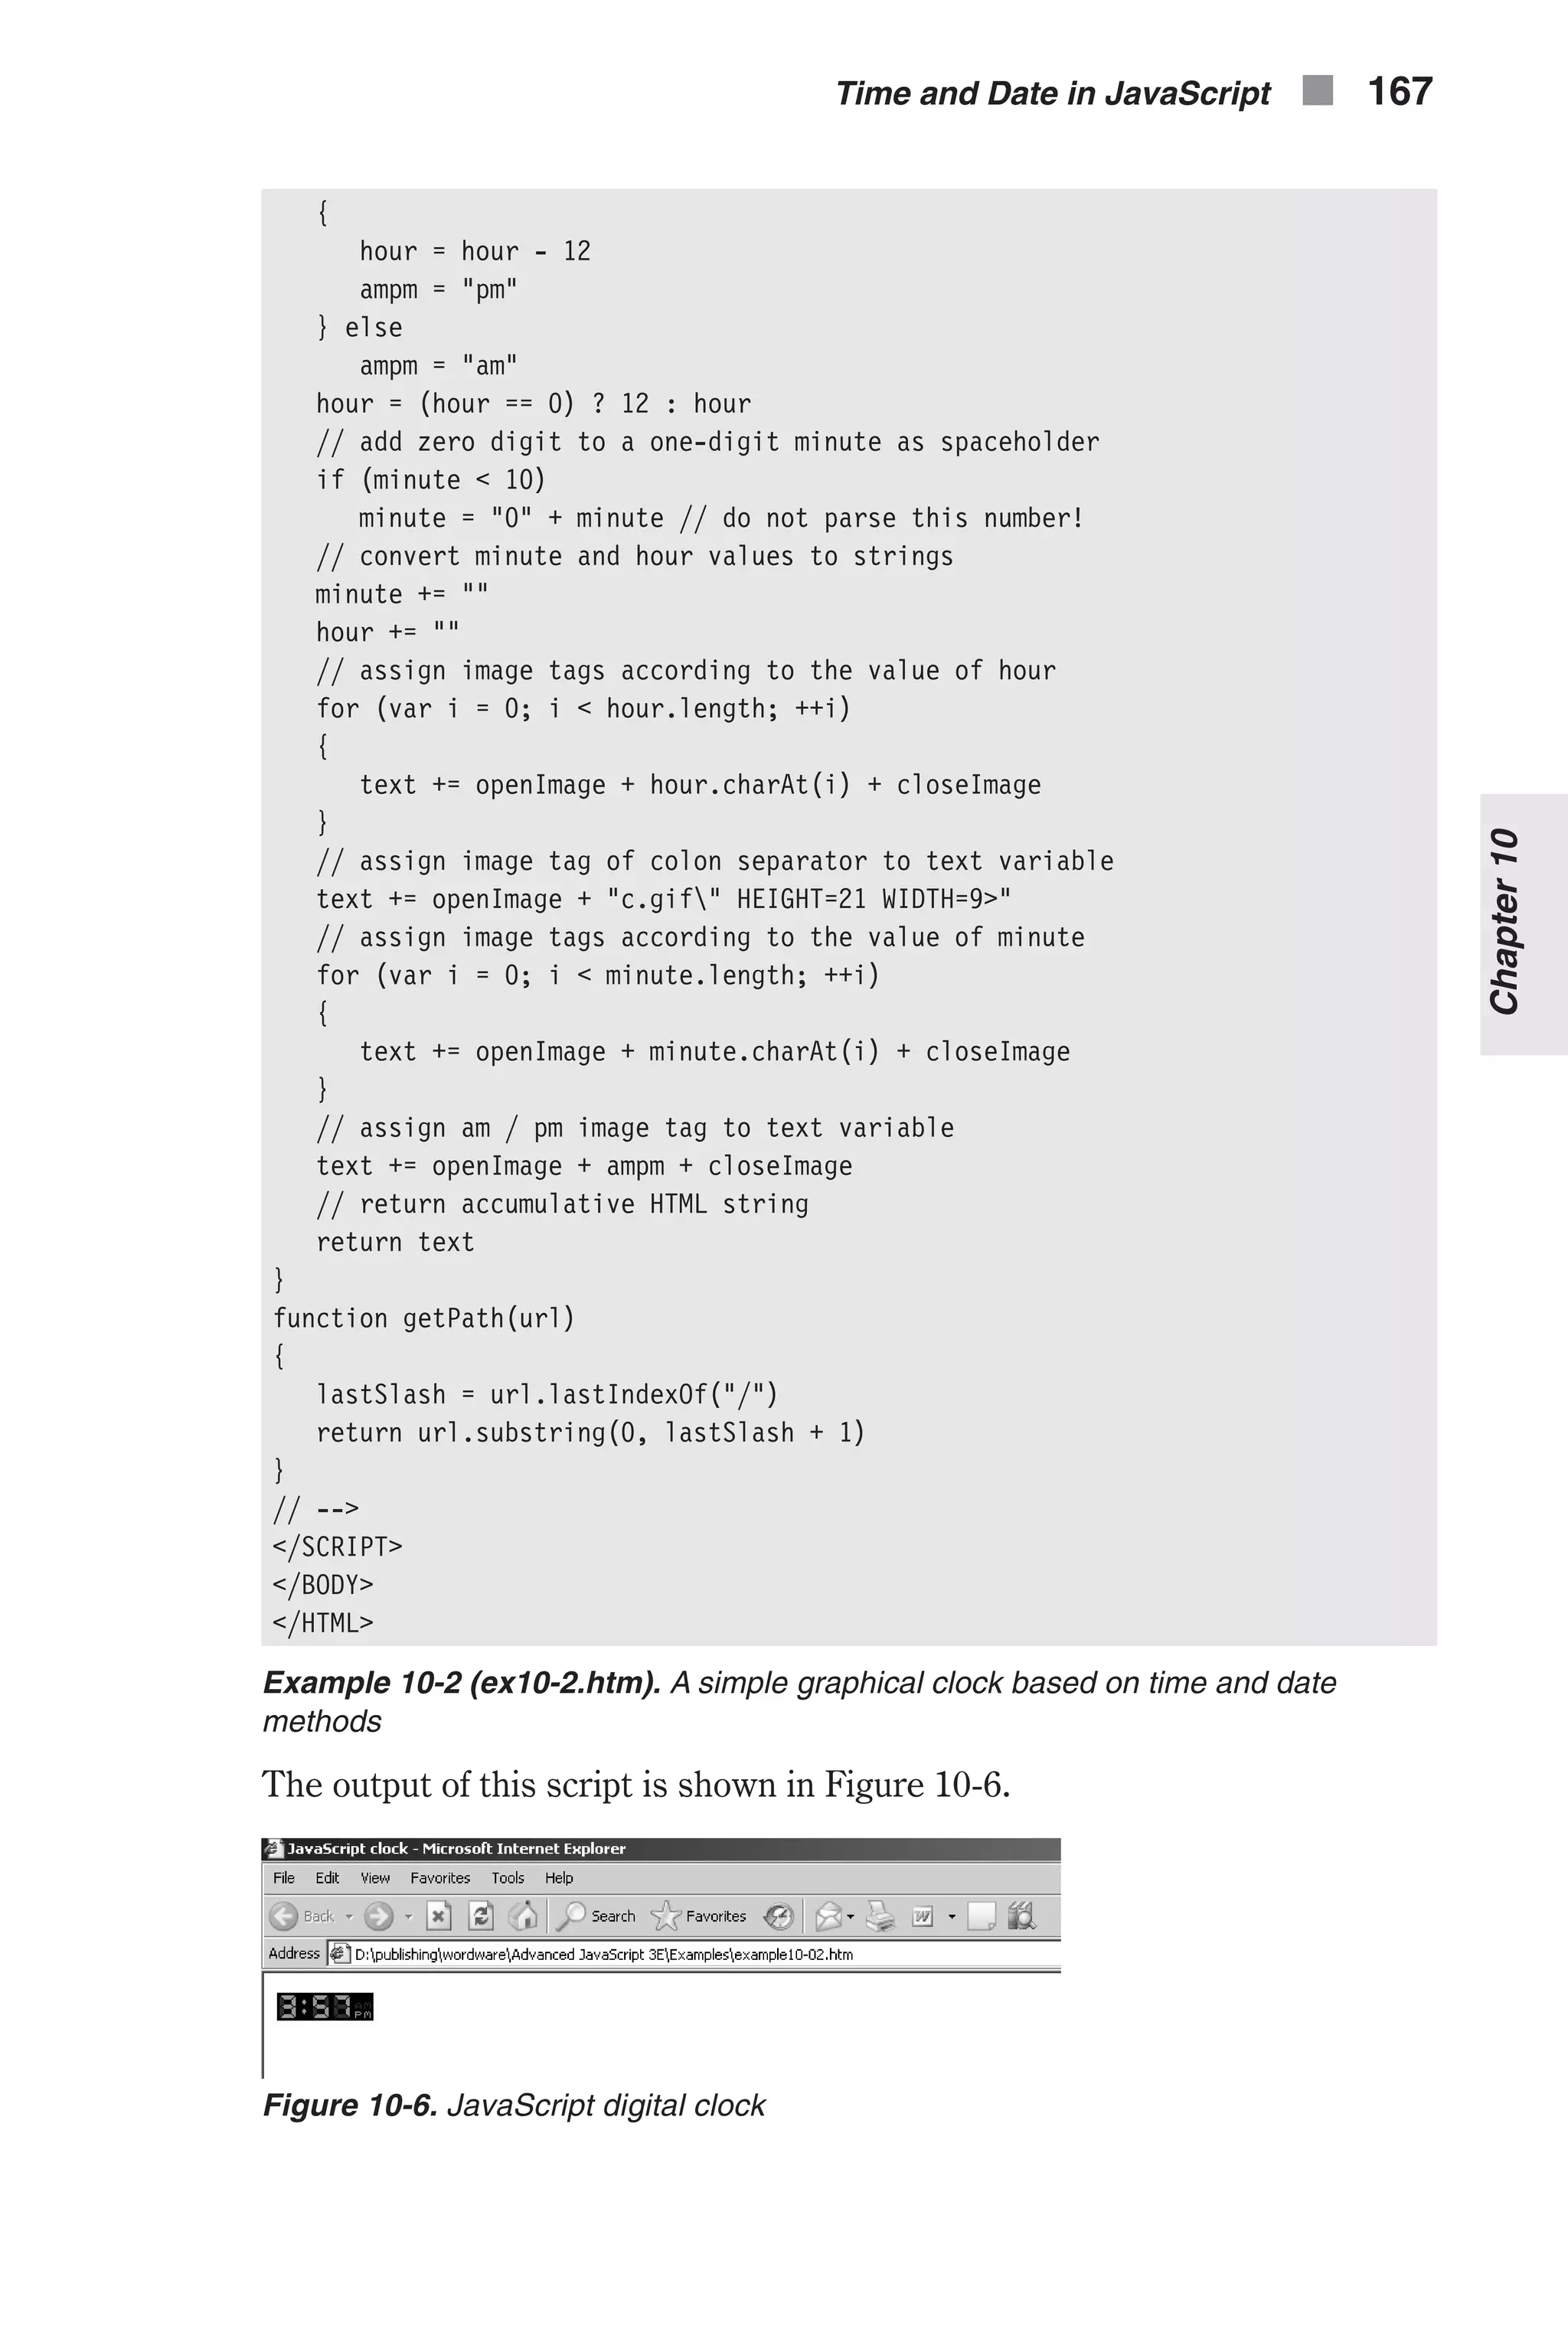
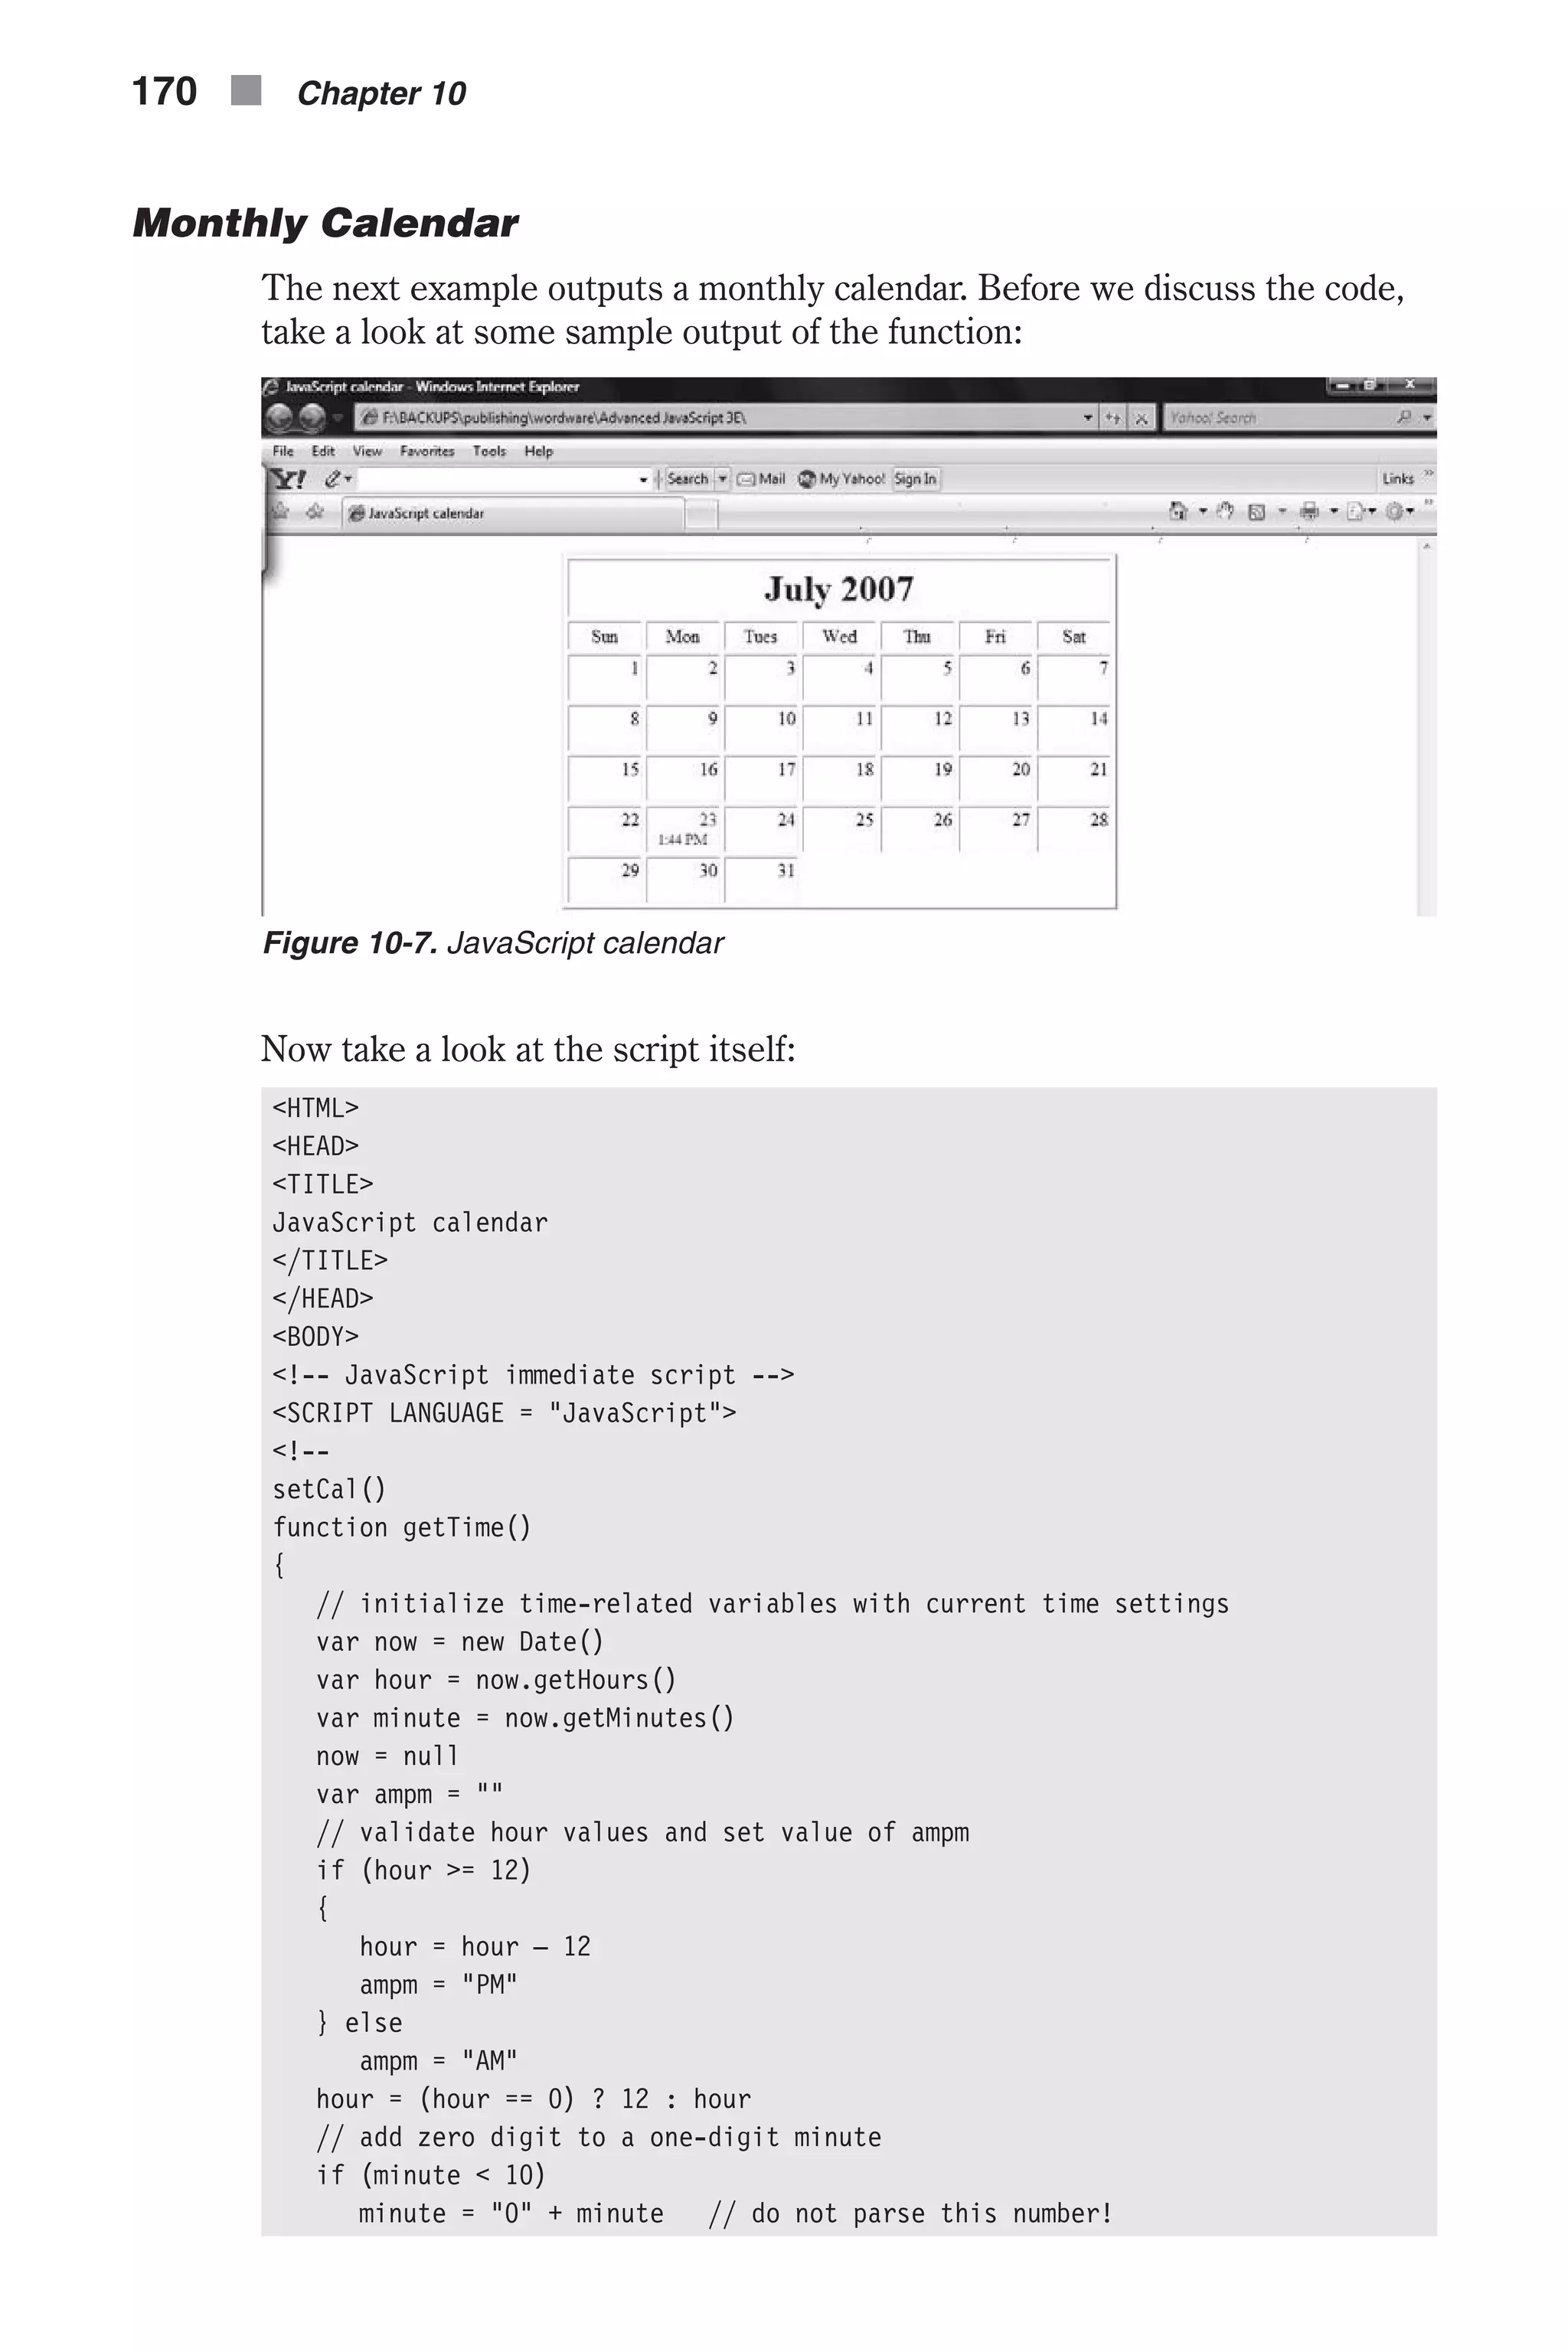
![// return time string return hour + ":" + minute + " " + ampm } function leapYear(year) { if (year % 4 == 0) // basic rule return true // is leap year /* else */ // else not needed when statement is "return" return false // is not leap year } function getDays(month, year) { // create array to hold number of days in each month var ar = new Array(12) ar[0] = 31 // January ar[1] = (leapYear(year)) ? 29 : 28 // February ar[2] = 31 // March ar[3] = 30 // April ar[4] = 31 // May ar[5] = 30 // June ar[6] = 31 // July ar[7] = 31 // August ar[8] = 30 // September ar[9] = 31 // October ar[10] = 30 // November ar[11] = 31 // December // return number of days in the specified month (parameter) return ar[month] } function getMonthName(month) { // create array to hold name of each month var ar = new Array(12) ar[0] = "January" ar[1] = "February" ar[2] = "March" ar[3] = "April" ar[4] = "May" ar[5] = "June" ar[6] = "July" ar[7] = "August" ar[8] = "September" ar[9] = "October" ar[10] = "November" ar[11] = "December" // return name of specified month (parameter) return ar[month] } function setCal() { // standard time attributes var now = new Date() Time and Date in JavaScript n 171 Chapter10](https://image.slidesharecdn.com/wordware-advancedjavascript3rded-160421130838/75/www-webre24h-com-Wordware-advanced-javascript-3rd-ed-easttom-196-2048.jpg)
![var year = now.getYear() var month = now.getMonth() var monthName = getMonthName(month) var date = now.getDate() now = null // create instance of first day of month, and extract the day it occurs on var firstDayInstance = new Date(year, month, 1) var firstDay = firstDayInstance.getDay() firstDayInstance = null // number of days in current month var days = getDays(month, year) // call function to draw calendar drawCal(firstDay + 1, days, date, monthName, year) } function drawCal(firstDay, lastDate, date, monthName, year) { // constant table settings var headerHeight = 50 // height of the table's header cell var border = 2 // 3D height of table's border var cellSpacing = 4 // width of table's border var headerColor = "midnightblue" // color of table's header var headerSize = "+3" // size of table’s header font var colWidth = 60 // width of columns in table var dayCellHeight = 25 // height of cells containing days of the week var dayColor = "darkblue" // color of font representing week days var cellHeight = 40 // height of cells representing dates in the calendar var todayColor = "red" // color specifying today's date in the calendar var timeColor = "purple" // color of font representing current time // create basic table structure var text = "" // initialize accumulative variable to empty string text += '<CENTER>' text += '<TABLE BORDER = ' + border + ' CELLSPACING = ' + cellspacing + '>' // table settings text += '<TH COLSPAN = 7 HEIGHT = ' + headerHeight + '>' // create table // header cell text += "<FONT COLOR = " + headerColor + " SIZE = " + headerSize + ">" // set font for table header text += monthName + ' ' + year text += '</FONT>' // close table header's font settings text += '</TH>' // close header cell // variables to hold constant settings var openCol = '<TD WIDTH = ' + colWidth + ' HEIGHT = ' + dayCellHeight + '>' openCol = openCol + '<FONT COLOR = "' + dayColor + '">' var closeCol = '</FONT></TD>' // create array of abbreviated day names var weekDay = new Array(7) weekDay[0] = "Sun" weekDay[1] = "Mon" weekDay[2] = "Tues" 172 n Chapter 10](https://image.slidesharecdn.com/wordware-advancedjavascript3rded-160421130838/75/www-webre24h-com-Wordware-advanced-javascript-3rd-ed-easttom-197-2048.jpg)
![weekDay[3] = "Wed" weekDay[4] = "Thu" weekDay[5] = "Fri" weekDay[6] = "Sat" // create first row of table to set column width and specify week day text += '<TR ALIGN = "center" VALIGN = "center">' for (var dayNum = 0; dayNum < 7; ++dayNum) { text += openCol + weekDay[dayNum] + closeCol } text += '</TR>' // declaration and initialization of two variables to help with tables var digit = 1 var curCell = 1 for (var row = 1; row <= Math.ceil((lastDate + firstDay – 1) / 7); ++row) { text += '<TR ALIGN = "right" VALIGN = "top">' for (var col = 1; col <= 7; ++col) { if (digit > lastDate) break if (curCell < firstDay) { text += '<TD></TD>' curCell++ } else { if (digit == date) { // current cell represent today's date text += '<TD HEIGHT = ' + cellHeight + '>' text += '<FONT COLOR = "' + todayColor + '">' text += digit text += '</FONT><BR>' text += '<FONT COLOR = "' + timeColor + '" SIZE = 2>' text += '<CENTER>' + getTime() + '</CENTER>' text += '</FONT>' text += '</TD>' } else text += '<TD HEIGHT = ' + cellHeight + '>' + digit + '</TD>' digit++ } } text += '</TR>' } // close all basic table tags text += '</TABLE>' text += '</CENTER>' // print accumulative HTML string document.write(text) } Chapter10 Time and Date in JavaScript n 173](https://image.slidesharecdn.com/wordware-advancedjavascript3rded-160421130838/75/www-webre24h-com-Wordware-advanced-javascript-3rd-ed-easttom-198-2048.jpg)
![// --> </SCRIPT> </BODY> </HTML> Example 10-3 (ex10-3.htm). A calendar based on HTML tables printed via JavaScript Let’s follow the script step by step, explaining the task of every function. getTime() This function simply returns a string representing the current local time in the following format: hours : minutes AM/PM Note that there are no spaces between any characters. The function is based on the same algorithm as the first part of setClock() in Example 10-2. Refer to the explanation regarding that example for further insights. leapYear(year) This function returns true if the current year is a leap year; otherwise, it returns false. The basic rule used for the decision is that a leap year occurs every four years, in the same year of the summer Olympic games. More exactly, if the year is divisible by 4, it is a leap year. Therefore, the modulo operator suits the case perfectly. If year % 4 is zero, the year is divisible by 4, meaning the current year is a leap year. Otherwise, the year is not divisi- ble by 4, so false is returned. An obvious call to this function is: if (leapYear(current year)) // is a leap year else // is not a leap year Another possibility is to use the returned value in a conditional statement, or operation (?:). Note that the parameter of the function must accept an integer value, which is reasonable when computing years. getDays(month, year) This function accepts two arguments: a month and a year. An array of 12 ele- ments is then created. The array is an instance of the built-in Array object. Therefore, the keyword new is used. Each element of the array represents the number of days in its corresponding month. ar[0] holds the number of days in January (31); ar[11] holds the number of days in December. The array is simply assigned the proper data, according to the constant number of days in each month. However, the number of days in February is not con- stant. In leap years there are 29 days in February, whereas in all other years there are 28 days. The function leapYear() is used to decide if the specified year is a leap year. This situation is a typical one for a conditional operator, because one of two values is to be assigned to a variable depending on the 174 n Chapter 10](https://image.slidesharecdn.com/wordware-advancedjavascript3rded-160421130838/75/www-webre24h-com-Wordware-advanced-javascript-3rd-ed-easttom-199-2048.jpg)
![value of the condition (the Boolean value returned by the function leapYear()). Notice the extensive use of comments to help you understand the script. The value returned by the function is equal to the number of days in the month passed over to the function upon calling. For example, if the value of month is 0 (as passed to the function), the value ar[0] == 31 is returned by the function. Note that both arguments must be integers. The month must be speci- fied as an integer from 0 to 11, with 0 representing January and 11 representing December. getMonthName(month) This function accepts the integer value of a certain month (0 for January, 11 for December) and returns the full name of the function, obviously in the form of a string. This function, like the preceding one, uses an instance of the Array object to store constant values. The name of the desired month is retrieved from the array by its index (subscript). setCal() At first, the function creates a new instance of the Date object, holding the attributes of the current local time. The current year is assigned to year via the method getYear(), and the current month is assigned to month via the method getMonth(). The name of the month, returned by getMonthName(), is assigned to monthName. After the current date is assigned to date, the instance now is assigned null, a good JavaScript programming practice. The next statement of the function is: var firstDayInstance = new Date(year, month, 1) It creates a new instance of the Date object; this time it is for the first day of the current month. Therefore, the value 1 is used to specify the date. This obviously influences the day of the week on which the date occurred. This value is assigned to firstDay in the following statement. The instance firstDayInstance is then assigned null. This script segment computes the day of the week (Sunday, Monday, Tuesday, etc.) on which the month started. Another possible way to achieve this goal is to create an instance of the cur- rent date as usual: var firstDayInstance = new Date() // not first day yet! You then need to set the date to 1, via the setDate() method. You should use the following statement to do so: firstDayInstance.setDate(1) The next portion of the function consists of only one statement. It assigns days the number of days in the current month. The last statement of the function draws the calendar: drawCal(firstDay + 1, days, date, monthName, 1900 + year) Time and Date in JavaScript n 175 Chapter10](https://image.slidesharecdn.com/wordware-advancedjavascript3rded-160421130838/75/www-webre24h-com-Wordware-advanced-javascript-3rd-ed-easttom-200-2048.jpg)
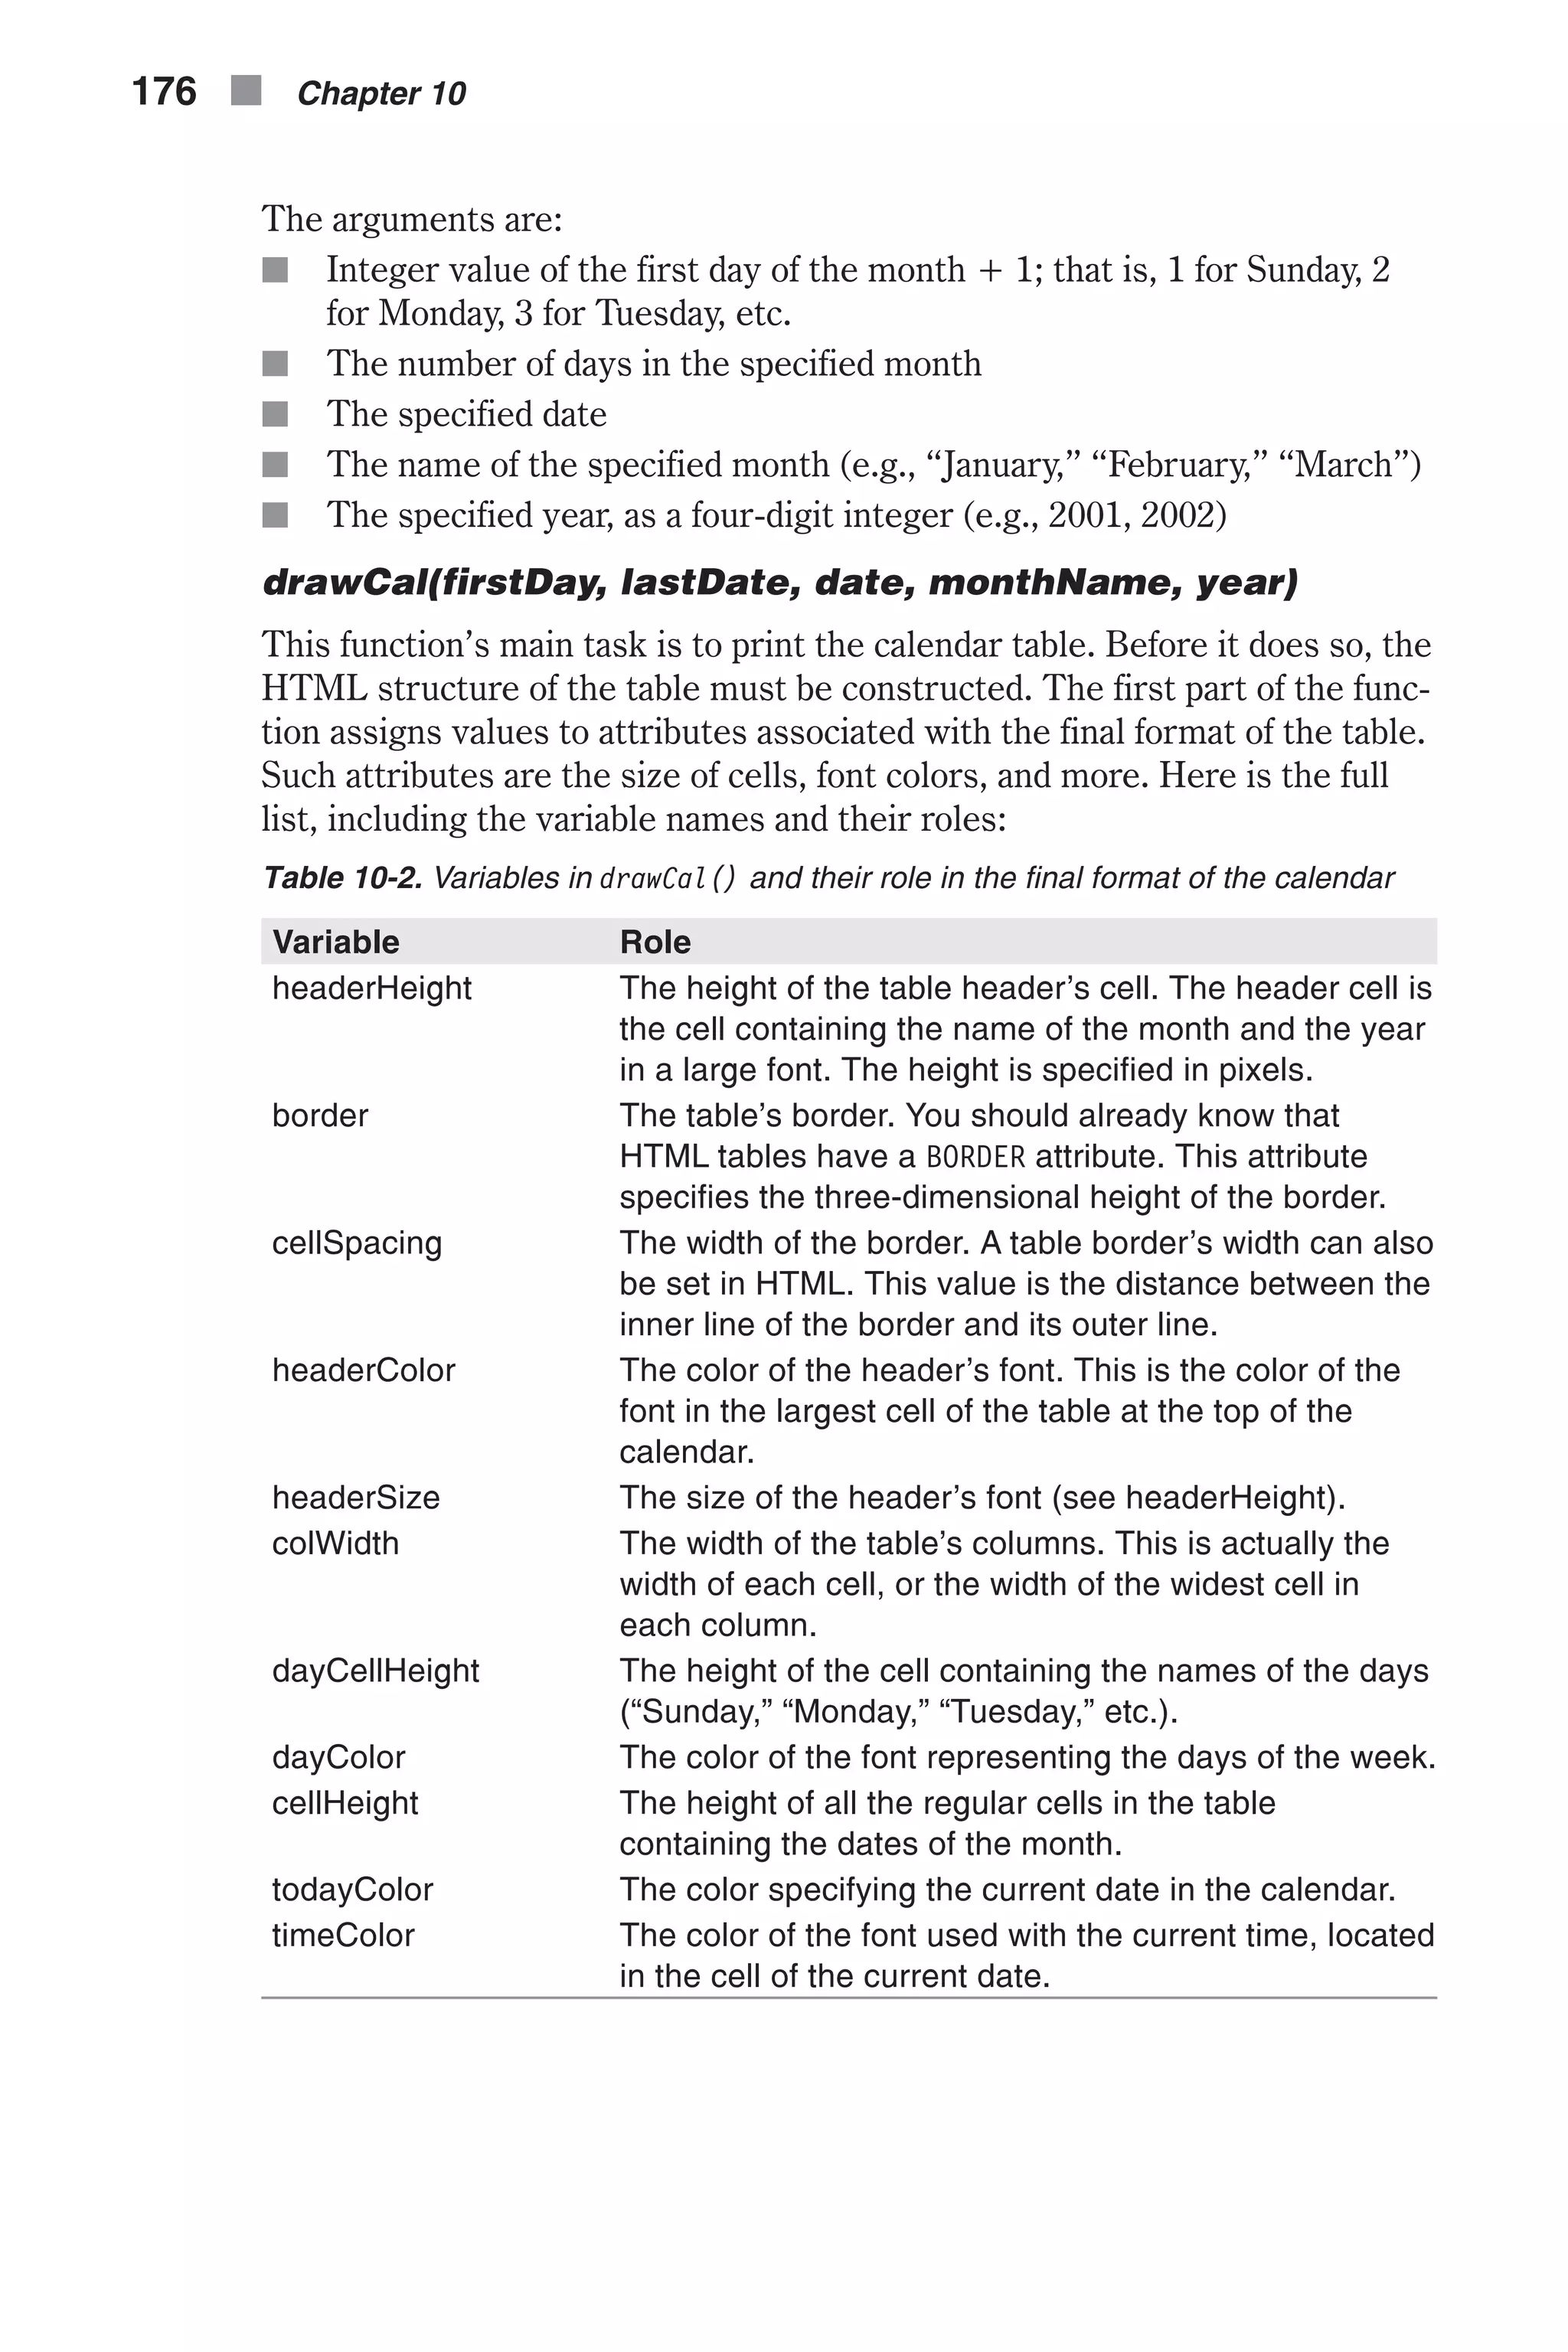
![The portion of the function that follows creates the basic table structure, including all general HTML tags referring to the outline of the table. Notice how the variables are implemented in the script. Now take a look at the fol- lowing two statements of the script: var openCol = '<TD WIDTH = ' + colWidth + ' HEIGHT = ' + dayCellHeight + '>' openCol += '<FONT COLOR = "' + dayColor + '">' var closeCol = '</FONT></TD>' These are the tags used to create each of the cells containing the day names. For example, the syntax for “Sunday” using the default values of the vari- ables is: <TD WIDTH = 60 HEIGHT = 25><FONT COLOR = "midnightblue"></FONT></TD> Here are the next two portions of the function for reference: // create array of abbreviated day names var weekDay = new Array(7) weekDay[0] = "Sun" weekDay[1] = "Mon" weekDay[2] = "Tues" weekDay[3] = "Wed" weekDay[4] = "Thu" weekDay[5] = "Fri" weekDay[6] = "Sat" // create first row of table to set column width and specify week day text += '<TR ALIGN = "center" VALIGN = "center">' for (var dayNum = 0; dayNum < 7; ++dayNum) { text += openCol + weekDay[dayNum] + closeCol } text += '</TR>' In the first segment, a regular array is created. It is then assigned the abbre- viated names of the days. This array enables us to refer to each name via a number. The following portion, where a cell is created for each day, takes advantage of this referencing method. A new day is printed on every itera- tion of the loop. Note that the tags associated with the beginning and the end of the table’s current row are not located inside the loop. A new row with all day names is started before the loop. The current row is terminated after the tags related to the cell of “Sat” are assigned to text. The following portion of the function is: var digit = 1 var curCell = 1 You will see the role of these variables later in the function. By now, all tags associated with the table’s header and the column head- ers have been assigned to the accumulative string variable text. The remaining part of the function assigns the tags associated with all the table’s cells. As you know, the calendar is a rectangular table. Therefore, we prefer to use a nested loop structure to refer to its cells. If you want to practice Time and Date in JavaScript n 177 Chapter10](https://image.slidesharecdn.com/wordware-advancedjavascript3rded-160421130838/75/www-webre24h-com-Wordware-advanced-javascript-3rd-ed-easttom-202-2048.jpg)
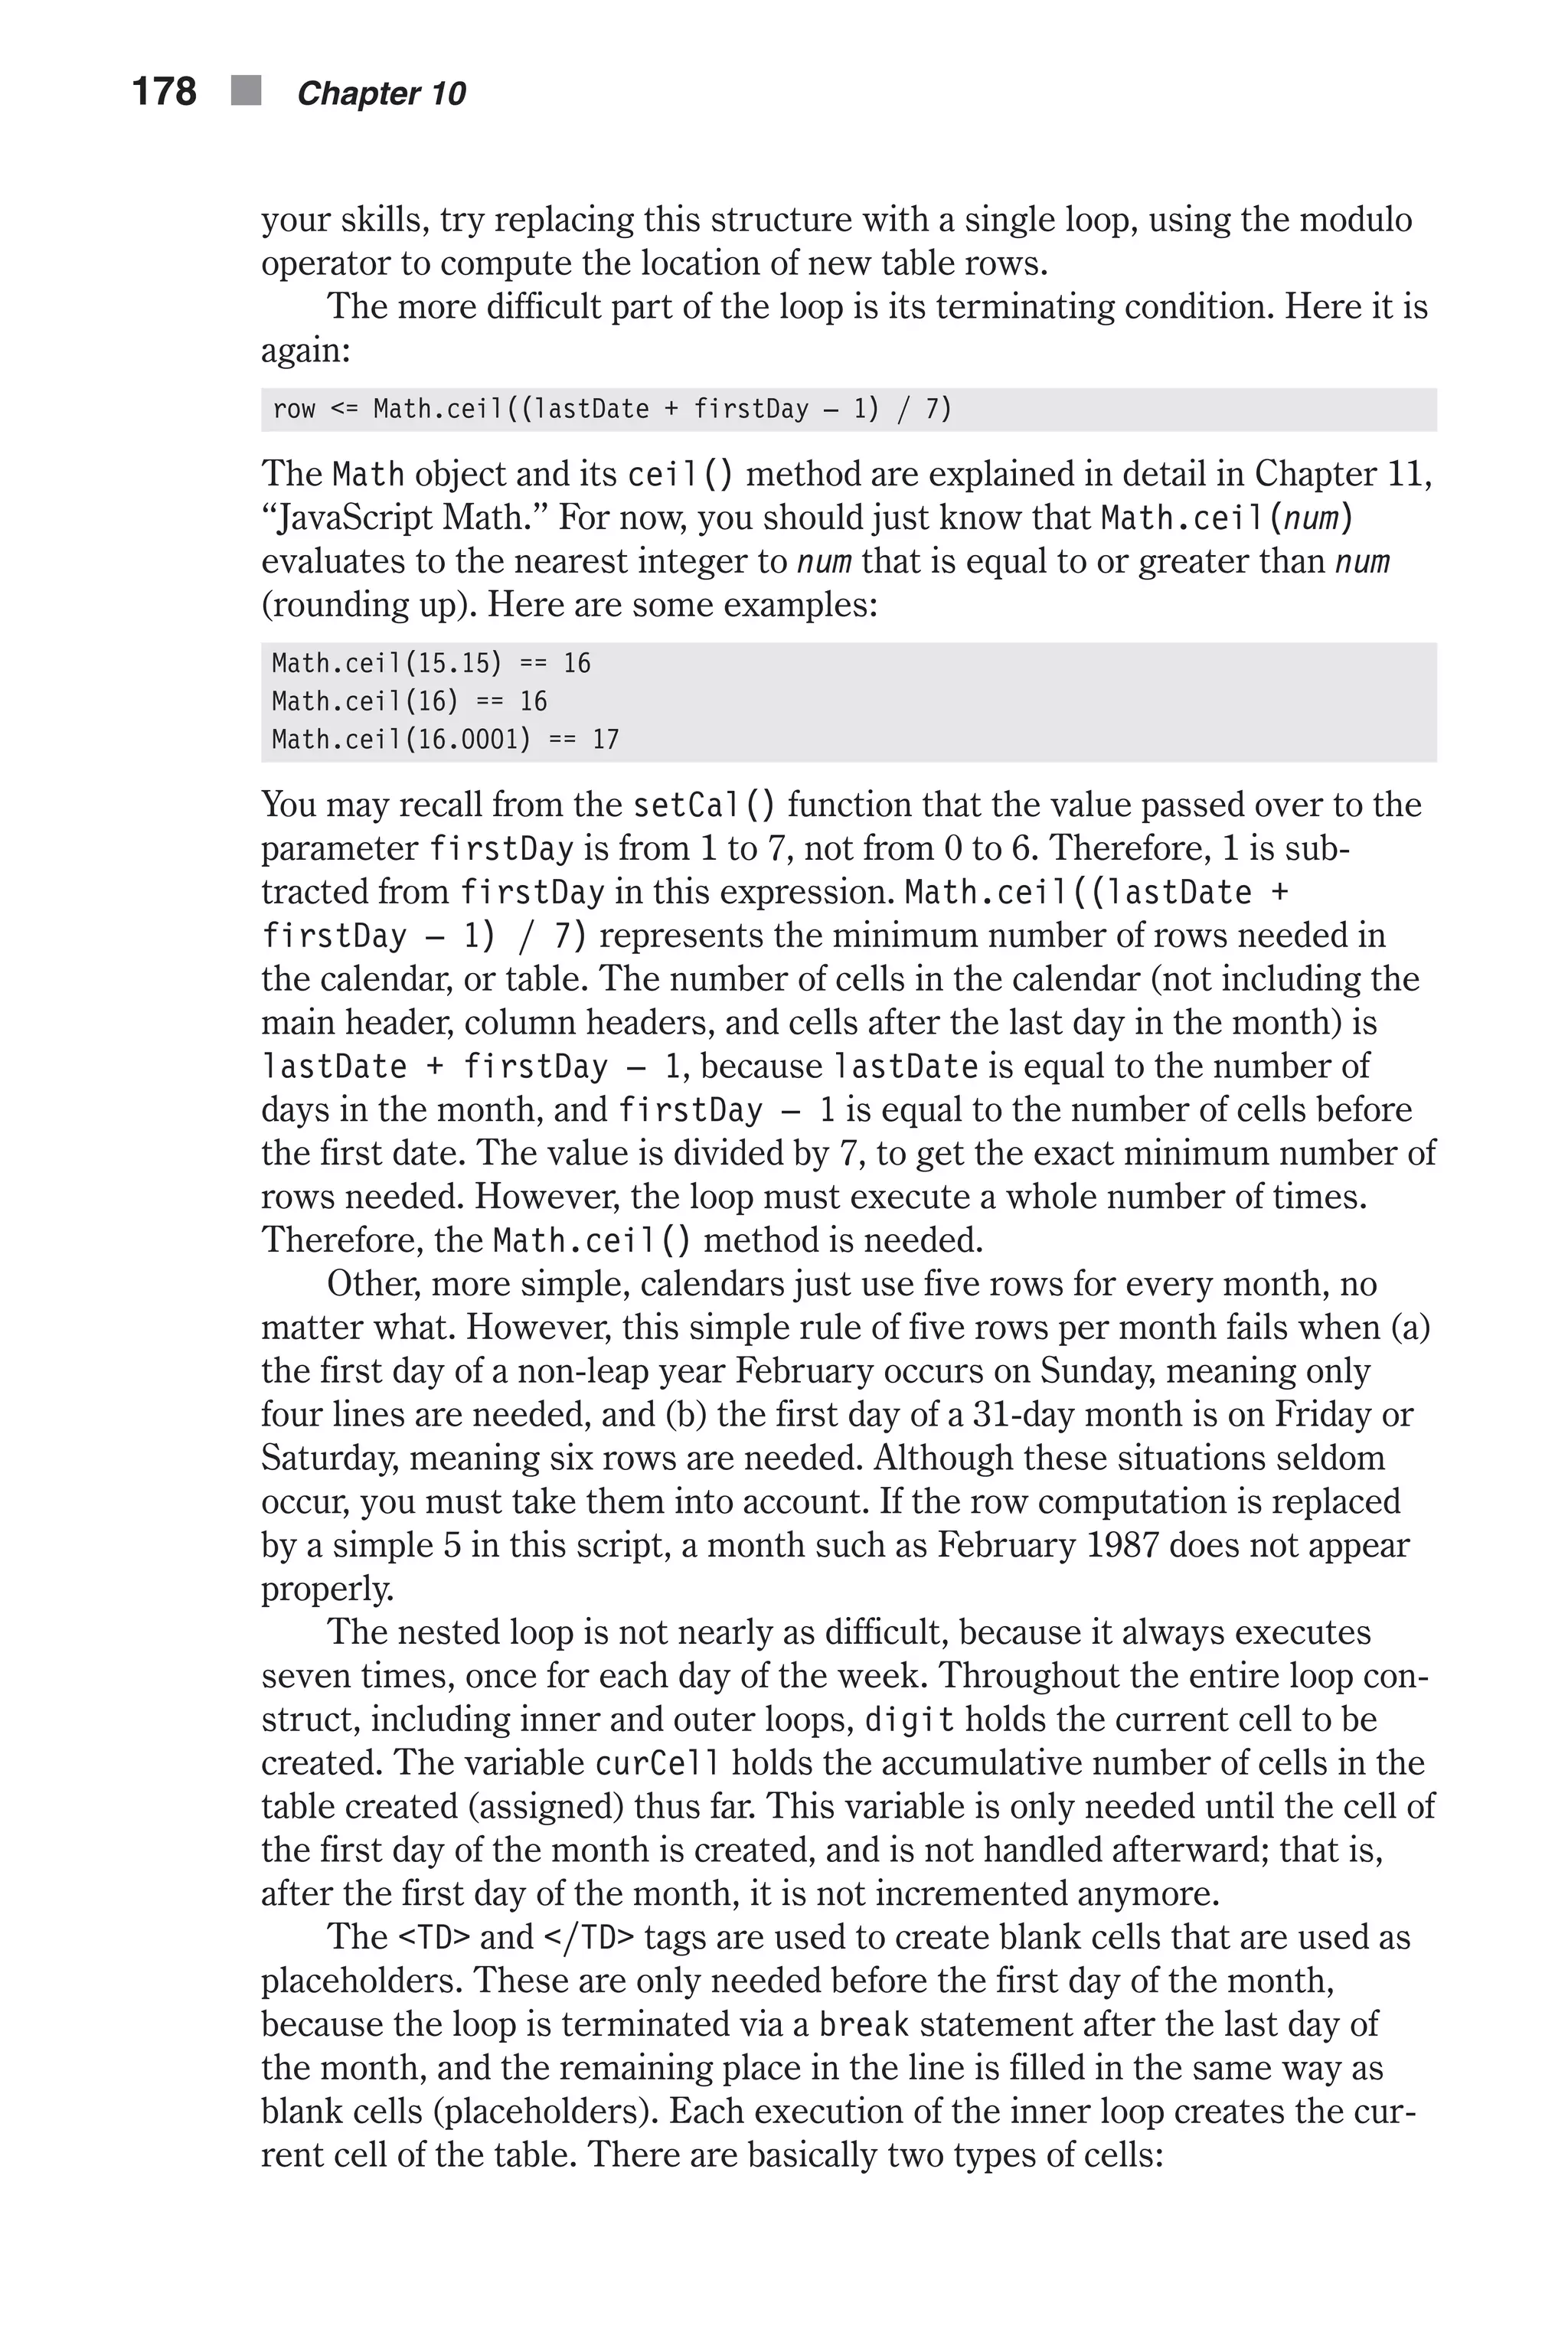
![n A cell representing the current day, which uses a special font color and displays the time inside the cell n All other cells The HTML tags used are obvious and are not dealt with in depth here. There are two statements outside the inner loop but inside the contain- ment loop. The first one creates a new table row and the second one ends the current row. Each execution of the inner loop (seven executions or its command block) is responsible for the creation of an entire row, or a partial one if it is the last row and the last day of the month is encountered before the last cell of the row—in this case the loop is terminated via a break state- ment. The term “create” refers to the concatenation of the proper strings and values and assignment to the variable text. The last, but definitely not least, statement of the function is the one that actually prints the table to the HTML document. Up to that statement, the HTML document was stored as a string in the variable text. Random Quotes The finale for this chapter is a simple, yet interesting script to display a dif- ferent message each time the page is loaded. Here is the script: <HTML> <HEAD> <TITLE>Random quote</TITLE> <SCRIPT LANGUAGE = "JavaScript"> <!-- function getMessage() { // create array of Murphy's laws var ar = new Array(20) ar[0] = "Nothing is as easy as it looks." ar[1] = "Everything takes longer than you think." ar[2] = "Anything that can go wrong will go wrong." ar[3] = "If there is a possibility of several things going wrong, the one that will cause the most damage will be the one to go wrong." ar[4] = "If there is a worse time for something to go wrong, it will happen then." ar[5] = "If anything simply cannot go wrong, it will anyway." ar[6] = "If you perceive that there are four possible ways in which a procedure can go wrong, and circumvent these, then a fifth way, unprepared for, will promptly develop." ar[7] = "Left to themselves, things tend to go from bad to worse." ar[8] = "If everything seems to be going well, you have obviously overlooked something." ar[9] = "Nature always sides with the hidden flaw." ar[10] = "Mother nature is a bitch." ar[11] = "It is impossible to make anything foolproof because fools are so ingenious." Time and Date in JavaScript n 179 Chapter10](https://image.slidesharecdn.com/wordware-advancedjavascript3rded-160421130838/75/www-webre24h-com-Wordware-advanced-javascript-3rd-ed-easttom-204-2048.jpg)
![ar[12] = "Whenever you set out to do something, something else must be done first." ar[13] = "Every solution breeds new problems." ar[14] = "Trust everybody ... then cut the cards." ar[15] = "Two wrongs are only the beginning." ar[16] = "If at first you don't succeed, destroy all evidence that you tried." ar[17] = "To succeed in politics, it is often necessary to rise above your principles." ar[18] = "Exceptions prove the rule ... and wreck the budget." ar[19] = "Success always occurs in private, and failure in full view." var now = new Date() var sec = now.getSeconds() alert("Murphy's Law:r" + ar[sec % 20]) } //--> </SCRIPT> </HEAD> <BODY onLoad = "getMessage()"> </BODY> </HTML> Example 10-4 (ex10-4.htm). A script to display a random message each time the page is loaded The first statement in the function creates an array, an instance of the built-in Array object. The array includes 20 elements, starting from ar[0] and ending with ar[19]. Each element is assigned a string, or to be exact, a Murphy’s law. An instance of the Date object, now, is then created. The number of seconds in the current time is retrieved from now via the getSeconds() method. As you know, the value of sec is an integer from 0 to 59, with a random possibility for each. In total there are 60 consecutive inte- gers. Due to this fact, the expression sec % 20 returns an integer from 0 to 19, with an equal chance for each, because 60 is divisible by 20 (60 / 20 = 3!). The ability to create a random number from 0 to 19 using this technique enables us to randomly choose a Murphy’s law from the array. The selected Murphy’s law is displayed by an alert box. The most important part of the script to pay attention to is the use of an event handler to respond to the load event—onLoad. When the event han- dler is triggered (when the page has completed loading), the function getMessage() is called to display an alert message as described earlier. Also notice the use of an escape sequence, the carriage return character (r). 180 n Chapter 10](https://image.slidesharecdn.com/wordware-advancedjavascript3rded-160421130838/75/www-webre24h-com-Wordware-advanced-javascript-3rd-ed-easttom-205-2048.jpg)
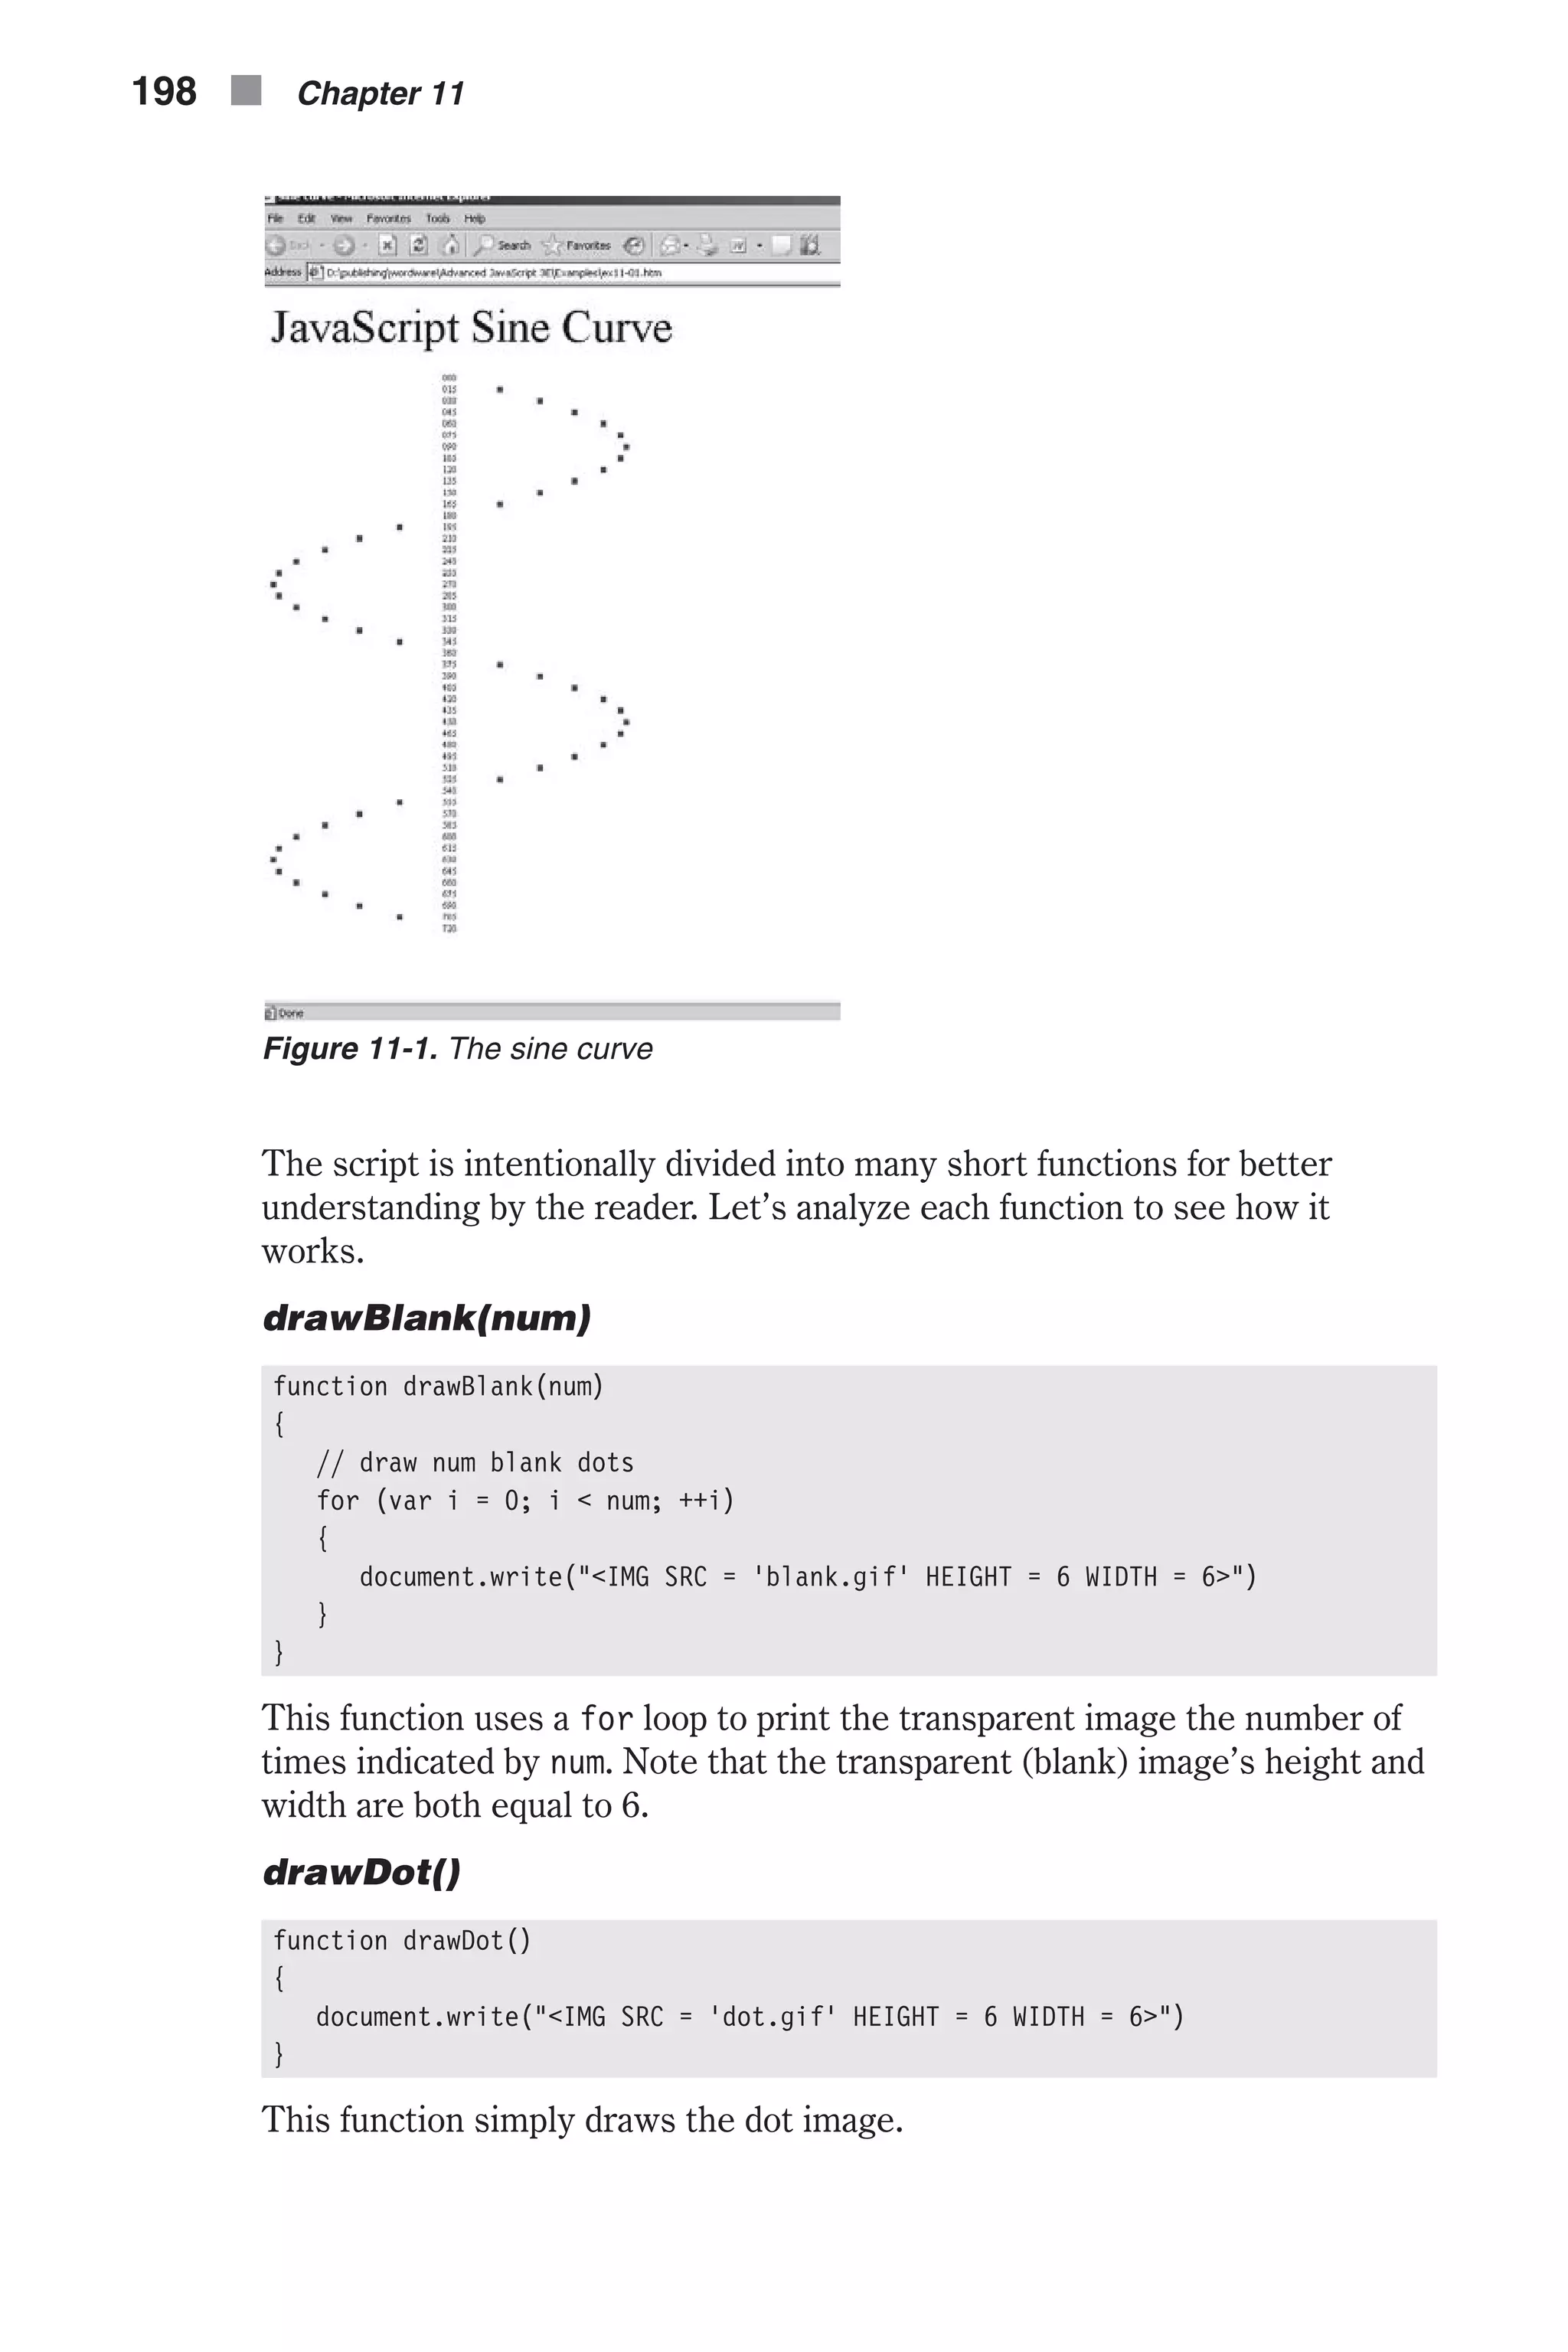
![appears. The second argument specifies the difference between each two angles. Global Statements The script includes only one global statement, a function call. It calls the drawCurve() function with the desired arguments. General Plotting Utility As you can see, it is not difficult to plot a specific curve in JavaScript using two different images. The following example enables you to plot the curve of almost any function. Obviously, if you are not familiar with the mathematics involved, this script may be hard to follow. The purpose of this script is to illustrate the power of JavaScript’s Math object. <HTML> <HEAD> <TITLE>Function Plotting Utility</TITLE> </HEAD> <BODY> <SCRIPT LANGUAGE = "JavaScript"> <!-- function root(a, b) { // return b to the root of a return Math.pow(b, 1 / a) } function logab(a, b) { // return log base-a of b return Math.log(b) / Math.log(a) } function factorial(a) { // set recursion termination condition if (a == 0) return 1 return a * factorial(a - 1) } function startWizard() { // create array to hold messages var ar = new Array() ar[0] = "rrWelcome to the easy JavaScript function plotter!rr" ar[0] += "Press OK to continue, or CANCEL to exit the wizard...rr" ar[1] = "rrYou can plot almost any function you wish with this script.r" ar[1] += "The plotter supports common arithmetic and trigonometric functions.r" ar[1] += "It also supports widely used mathematical constants.r" ar[1] += "For a list of the supported functions press OK...rr" ar[2] = "rr" ar[2] += "abs(val) = absolute value of valr" 202 n Chapter 11](https://image.slidesharecdn.com/wordware-advancedjavascript3rded-160421130838/75/www-webre24h-com-Wordware-advanced-javascript-3rd-ed-easttom-227-2048.jpg)
![ar[2] += "acos(val) = arc cosine of valr" ar[2] += "asine(val) = arc sine of valr" ar[2] += "atan(val) = arc tangent of valr" ar[2] += "atan2(val) = angle (theta component) of the polar " ar[2] += "coordinate (r,theta) that corresponds to the specified " ar[2] += "cartesian coordinate (x,y).r" ar[2] += "ceil(val) = next integer greater than or equal to valr" ar[2] += "cos(val) = cosine of valr" ar[2] += "exp(val) = Euler's constant to the power of valr" ar[2] += "factorial(val) = val factorial (val!)r" ar[2] += "floor(val) = next integer less than or equal to valr" ar[2] += "log(val1, val2) = logarithm base-val1 of val2r" ar[2] += "loge(val) = natural logarithm of valr" ar[2] += "max(val1, val2) = greater of val1 and val2r" ar[2] += "min(val1, val2) = lesser of val1 and val2r" ar[2] += "pow(val1, val2) = val1 to the power of val2r" ar[2] += "root(val1, val2) = val1-root of val2r" ar[2] += "round(val) = val rounded off to the nearest integerr" ar[2] += "sin(val) = sine of valr" ar[2] += "sqrt(val) = square root of valr" ar[2] += "tan(val) = tangent of valr" ar[2] += "r* all trigonometric functions deal with radians only *rr" ar[2] += "Click OK to view the supported constants...rr" ar[3] = "rr" ar[3] += "e = Euler's constantr" ar[3] += "ln2 = Natural log of 2r" ar[3] += "ln10 = Natural log of 10r" ar[3] += "log2e = log base-2 of Euler's constantr" ar[3] += "log10e = log base-10 of Euler's constantr" ar[3] += "pi = pi (3.14...)r" ar[3] += "sqrt1_2 = square root of 0.5r" ar[3] += "sqrt2 = square root of 2r" ar[3] += "rrEnjoy the plotter...rr" for (var i = 0; i < ar.length; ++i) { if (!confirm(ar[i])) break } } function drawBlank(num) { // draw num blank dots for (var i = 0; i < num; ++i) { document.write("<IMG SRC = 'blank.gif' HEIGHT = 4 WIDTH = 4>") } } function drawDot(x, y) { // print dot image document.write("<A HREF = "javascript:alert('X = " + x + ", Y = " + y + "')"><IMG SRC = 'dot.gif' HEIGHT = 4 WIDTH = 4 BORDER = 0></A>") } function replaceSpecialSequence(str) JavaScript Math n 203 Chapter11](https://image.slidesharecdn.com/wordware-advancedjavascript3rded-160421130838/75/www-webre24h-com-Wordware-advanced-javascript-3rd-ed-easttom-228-2048.jpg)
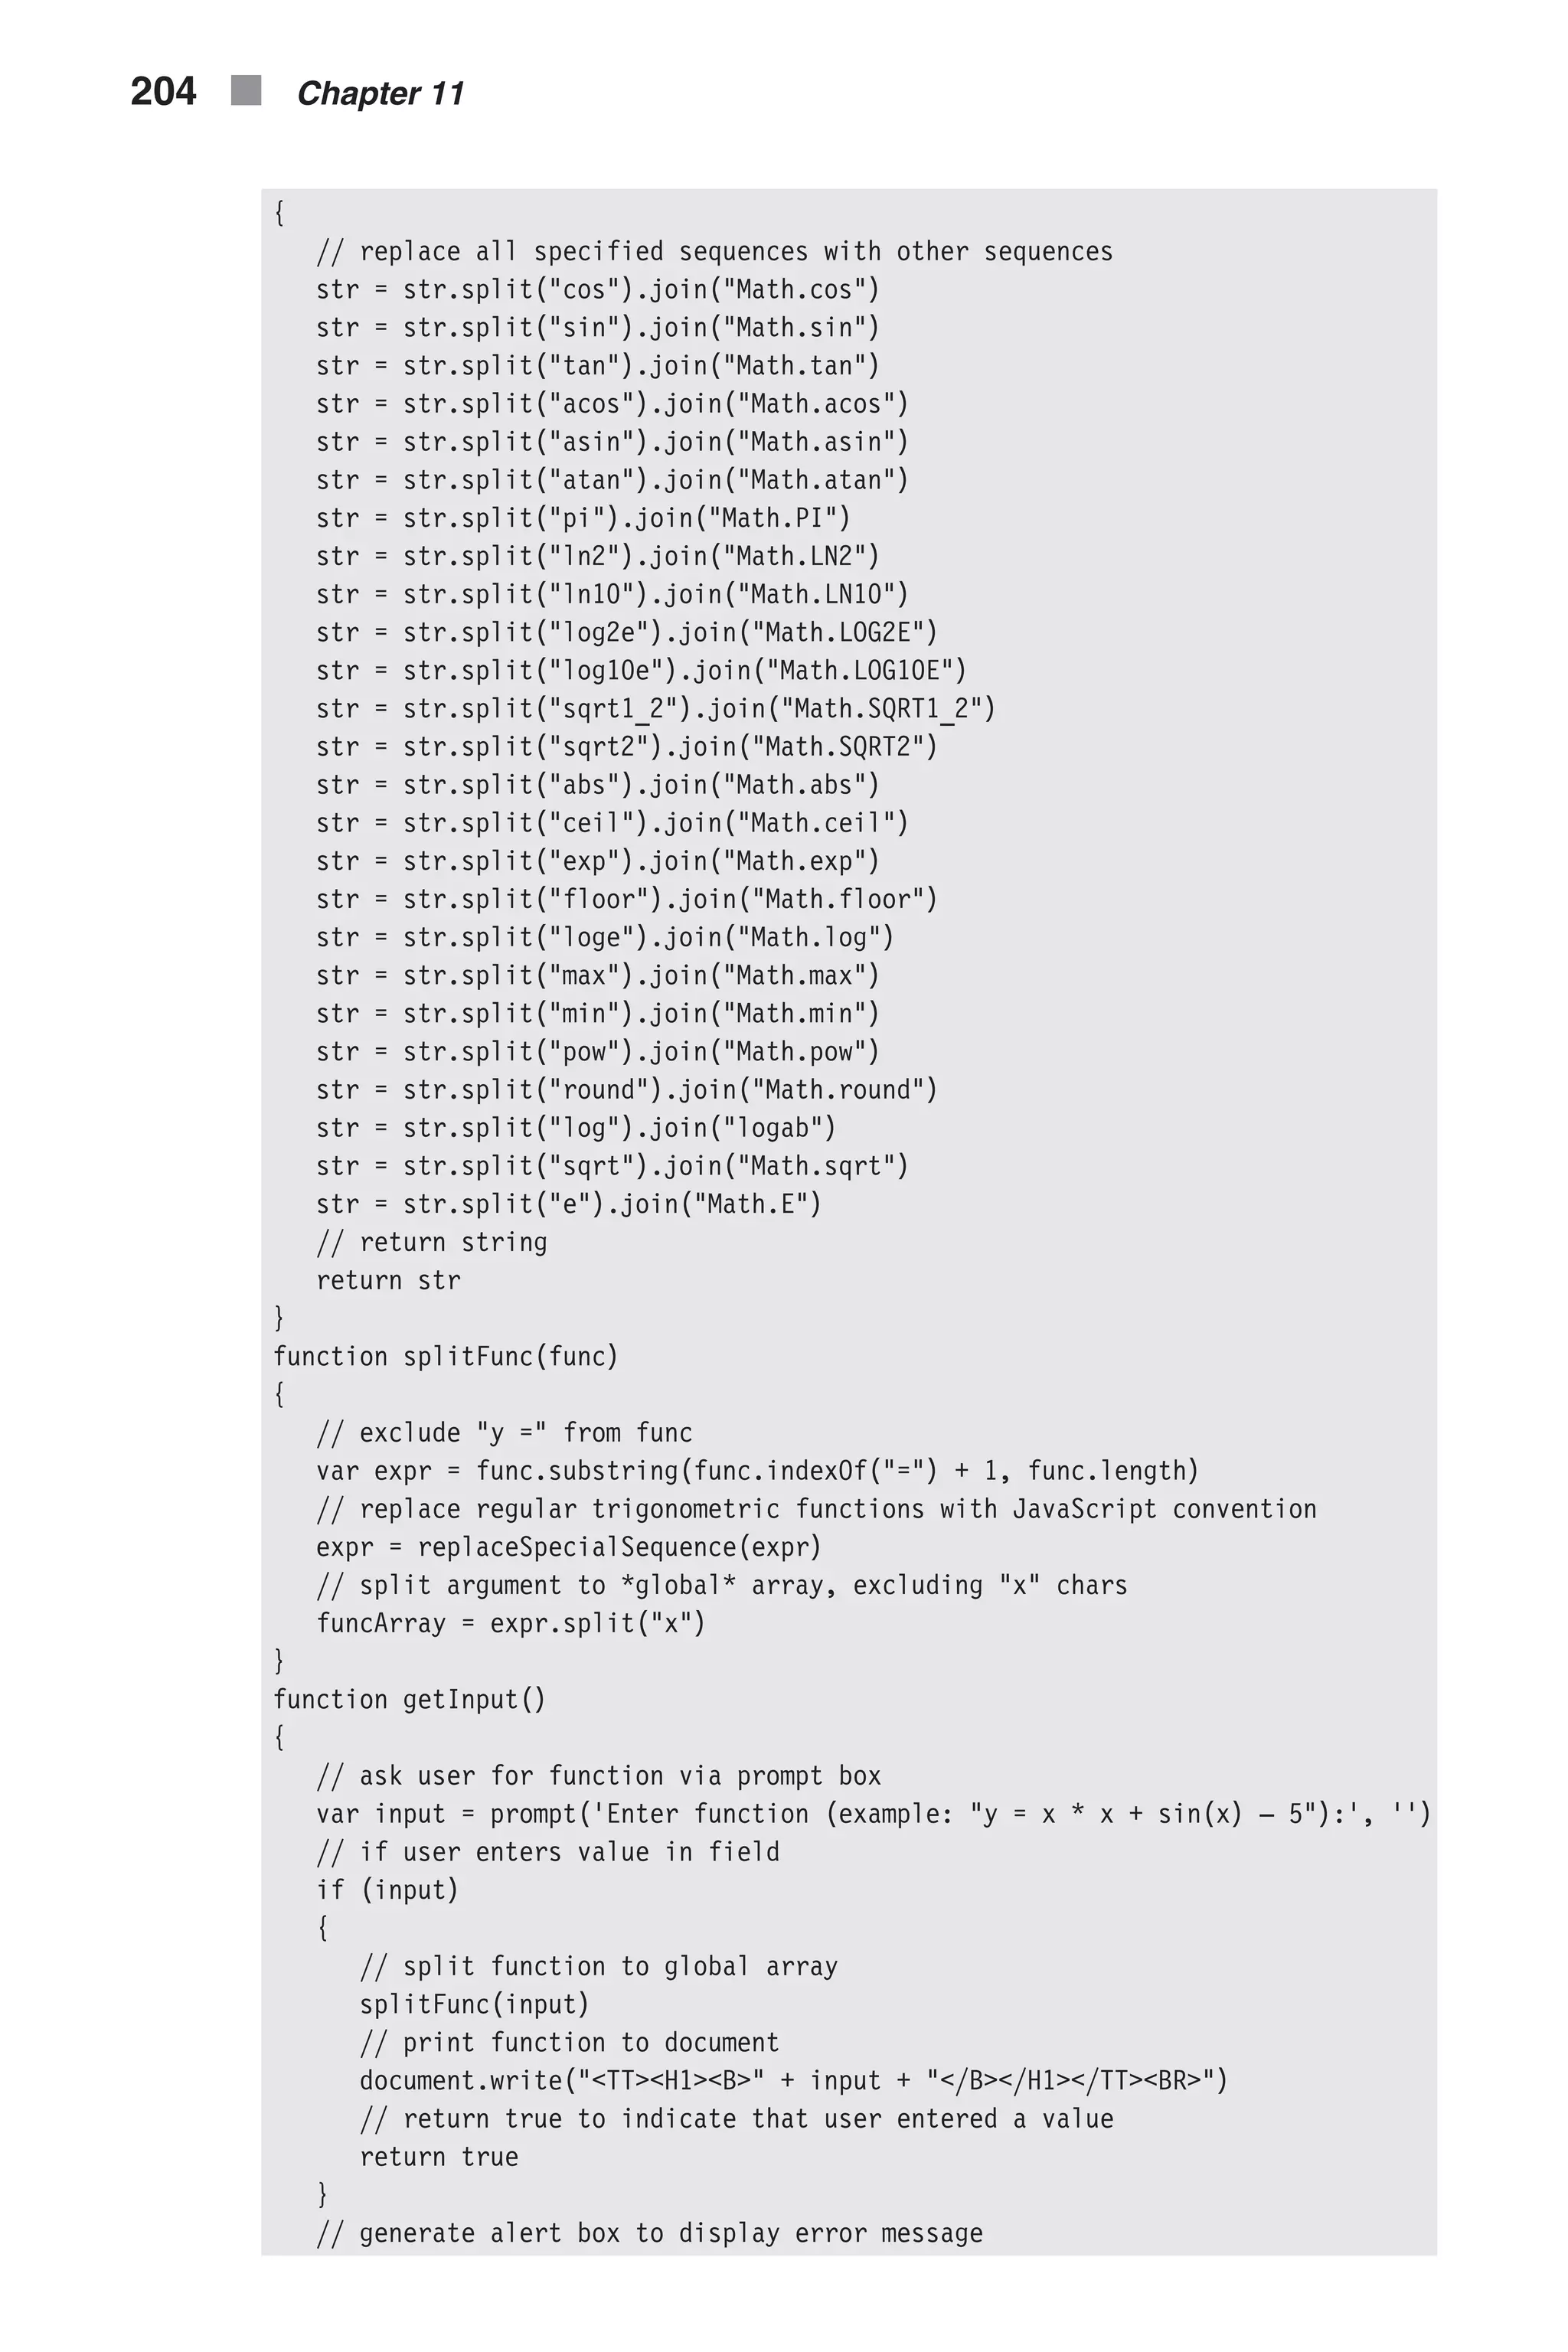
![alert("Error in input...") // return false to indicate cancellation return false } function yVal(xVal) { // build expression with xVal instead of x in original equation var expr = funcArray.join(xVal) // return evaluated expression return eval(expr) } function makeArray(min, max, dif) { // create properties of array-like object for (var i = min; i <= max; i += dif) { this[i] = yVal(i) } } function printUnit(num) { // print number in specified font and size, inside a table cell document.write("<FONT SIZE = 1 COLOR = 'purple'>" + num + "</FONT>") } function drawCurve() { for (var x = minX; x <= maxX; x += dif) { // print opening table attributes and cell to hold current unit document.write("<TABLE BORDER = 0><TR><TD WIDTH = 90>") // print current number on axis printUnit(x) // close table cell and open new one document.write("</TD><TD>") // assign Y value to variable var y = ar[x] // get y value as integer from 1 to 100 var ySpot = (y – minY) / (maxY – minY) * 100 // draw transparent images drawBlank(ySpot – 1) // draw dot on curve drawDot(x, y) // close cell, row, and table (new line is automatic) document.write("</TD></TR></TABLE>") } } function main() { // start wizard startWizard() // get input from user; if user cancels, function is terminated if (!getInput()) return // accept minimum X value from user and assign to global variable JavaScript Math n 205 Chapter11](https://image.slidesharecdn.com/wordware-advancedjavascript3rded-160421130838/75/www-webre24h-com-Wordware-advanced-javascript-3rd-ed-easttom-230-2048.jpg)
![minX = prompt("Enter minimum value on X axis:", "") // if user pressed "cancel" terminate function if (!minX) return // accept maximum X value from user and assign to global variable maxX = prompt("Enter maximum value on X axis:", "") // if user pressed "cancel" terminate function if (!maxX) return // assign difference between numbers on X axis global variable dif = prompt("Enter difference between each value on X axis:", "") // if user pressed "cancel" terminate function if (!dif) return // convert all input to numbers, replacing special sequences maxX = eval(replaceSpecialSequence(maxX)) minX = eval(replaceSpecialSequence(minX)) dif = eval(replaceSpecialSequence(dif)) // create global array and assign Y values via function call ar = new makeArray(minX, maxX, dif) // assign maxY and minY (global variables) property of ar maxY = ar[minX] minY = ar[minX] // determine maximum and minimum Y values for (var i in ar) { if (ar[i] < minY) minY = ar[i] else if (ar[i] > maxY) maxY = ar[i] } // draw the final curve drawCurve() } main() // --> </SCRIPT> </BODY> </HTML> Example 11-2 (ex11-2.htm). A general function plotter When you load the page, the “wizard” pops up. The wizard displays the basic features and usage instructions via a few confirm boxes. Here are two of them: 206 n Chapter 11 Figure 11-2. A confirm box presented by the wizard displays a welcome message.](https://image.slidesharecdn.com/wordware-advancedjavascript3rded-160421130838/75/www-webre24h-com-Wordware-advanced-javascript-3rd-ed-easttom-231-2048.jpg)

![is another feature to solve this problem. You can click on a point to view its coordinates via an alert box. Now that we know exactly what the script does, let’s see how it does that by analyzing each function. root(a, b) function root(a, b) { // return b to the root of a return Math.pow(b, 1 / a) } This function returns aÖb, which is equal to b1/a. logab(a, b) function logab(a, b) { // return log base-a of b return Math.log(b) / Math.log(a) } This function returns log base-a of b. This value is equal to log base-x of b divided by log base-x of a. In this case, we use the natural logarithm, where the base is Euler’s constant. The following statement explains this computation: logeb / logea = logab factorial(a) function factorial(a) { // set recursion termination condition if (a == 0) return 1 return a * factorial(a – 1) } This function returns a factorial (a!). Its algorithm is recursive. startWizard() function startWizard() { // create array to hold messages var ar = new Array() ar[0] = "rrWelcome to the easy JavaScript function plotter!rr" ar[0] += "Press OK to continue, or CANCEL to exit the wizard...rr" ar[1] = "rrYou can plot almost any function you wish with this script.r" ar[1] += "The plotter supports common arithmetic and trigonometric functions.r" ar[1] += "It also supports widely used mathematical constants.r" 208 n Chapter 11](https://image.slidesharecdn.com/wordware-advancedjavascript3rded-160421130838/75/www-webre24h-com-Wordware-advanced-javascript-3rd-ed-easttom-233-2048.jpg)
![ar[1] += "For a list of the supported functions press OK...rr" ar[2] = "rr" ar[2] += "abs(val) = absolute value of valr" ar[2] += "acos(val) = arc cosine of valr" ar[2] += "asine(val) = arc sine of valr" ar[2] += "atan(val) = arc tangent of valr" ar[2] += "atan2(val) = angle (theta component) of the polar " ar[2] += "coordinate (r,theta) that corresponds to the specified " ar[2] += "cartesian coordinate (x,y).r" ar[2] += "ceil(val) = next integer greater than or equal to valr" ar[2] += "cos(val) = cosine of valr" ar[2] += "exp(val) = Euler's constant to the power of valr" ar[2] += "factorial(val) = val factorial (val!)r" ar[2] += "floor(val) = next integer less than or equal to valr" ar[2] += "log(val1, val2) = logarithm base-val1 of val2r" ar[2] += "loge(val) = natural logarithm of valr" ar[2] += "max(val1, val2) = greater of val1 and val2r" ar[2] += "min(val1, val2) = lesser of val1 and val2r" ar[2] += "pow(val1, val2) = val1 to the power of val2r" ar[2] += "root(val1, val2) = val1-root of val2r" ar[2] += "round(val) = val rounded off to the nearest integerr" ar[2] += "sin(val) = sine of valr" ar[2] += "sqrt(val) = square root of valr" ar[2] += "tan(val) = tangent of valr" ar[2] += "r* all trigonometric functions deal with radians only *rr" ar[2] += "Click OK to view the supported constants...rr" ar[3] = "rr" ar[3] += "e = Euler's constantr" ar[3] += "ln2 = Natural log of 2r" ar[3] += "ln10 = Natural log of 10r" ar[3] += "log2e = log base-2 of Euler's constantr" ar[3] += "log10e = log base-10 of Euler's constantr" ar[3] += "pi = pi (3.14...)r" ar[3] += "sqrt1_2 = square root of 0.5r" ar[3] += "sqrt2 = square root of 2r" ar[3] += "rrEnjoy the plotter...rr" for (var i = 0; i < ar.length; ++i) { if (!confirm(ar[i])) break } } This function is responsible for the wizard. At first, an array is created as an instance of the Array object. Four different messages are assigned to the array as elements. The first is stored in ar[0], the second in ar[1], and so on. Note that the assigned strings are very long, so the assignment operator concatenates them by assigning them, one after the other, to the element of the array. The function uses a for loop to print the messages to the confirm boxes. If the user presses Cancel, the confirm box evaluates to false, and the break statement is executed, causing the loop to terminate immediately. JavaScript Math n 209 Chapter11](https://image.slidesharecdn.com/wordware-advancedjavascript3rded-160421130838/75/www-webre24h-com-Wordware-advanced-javascript-3rd-ed-easttom-234-2048.jpg)
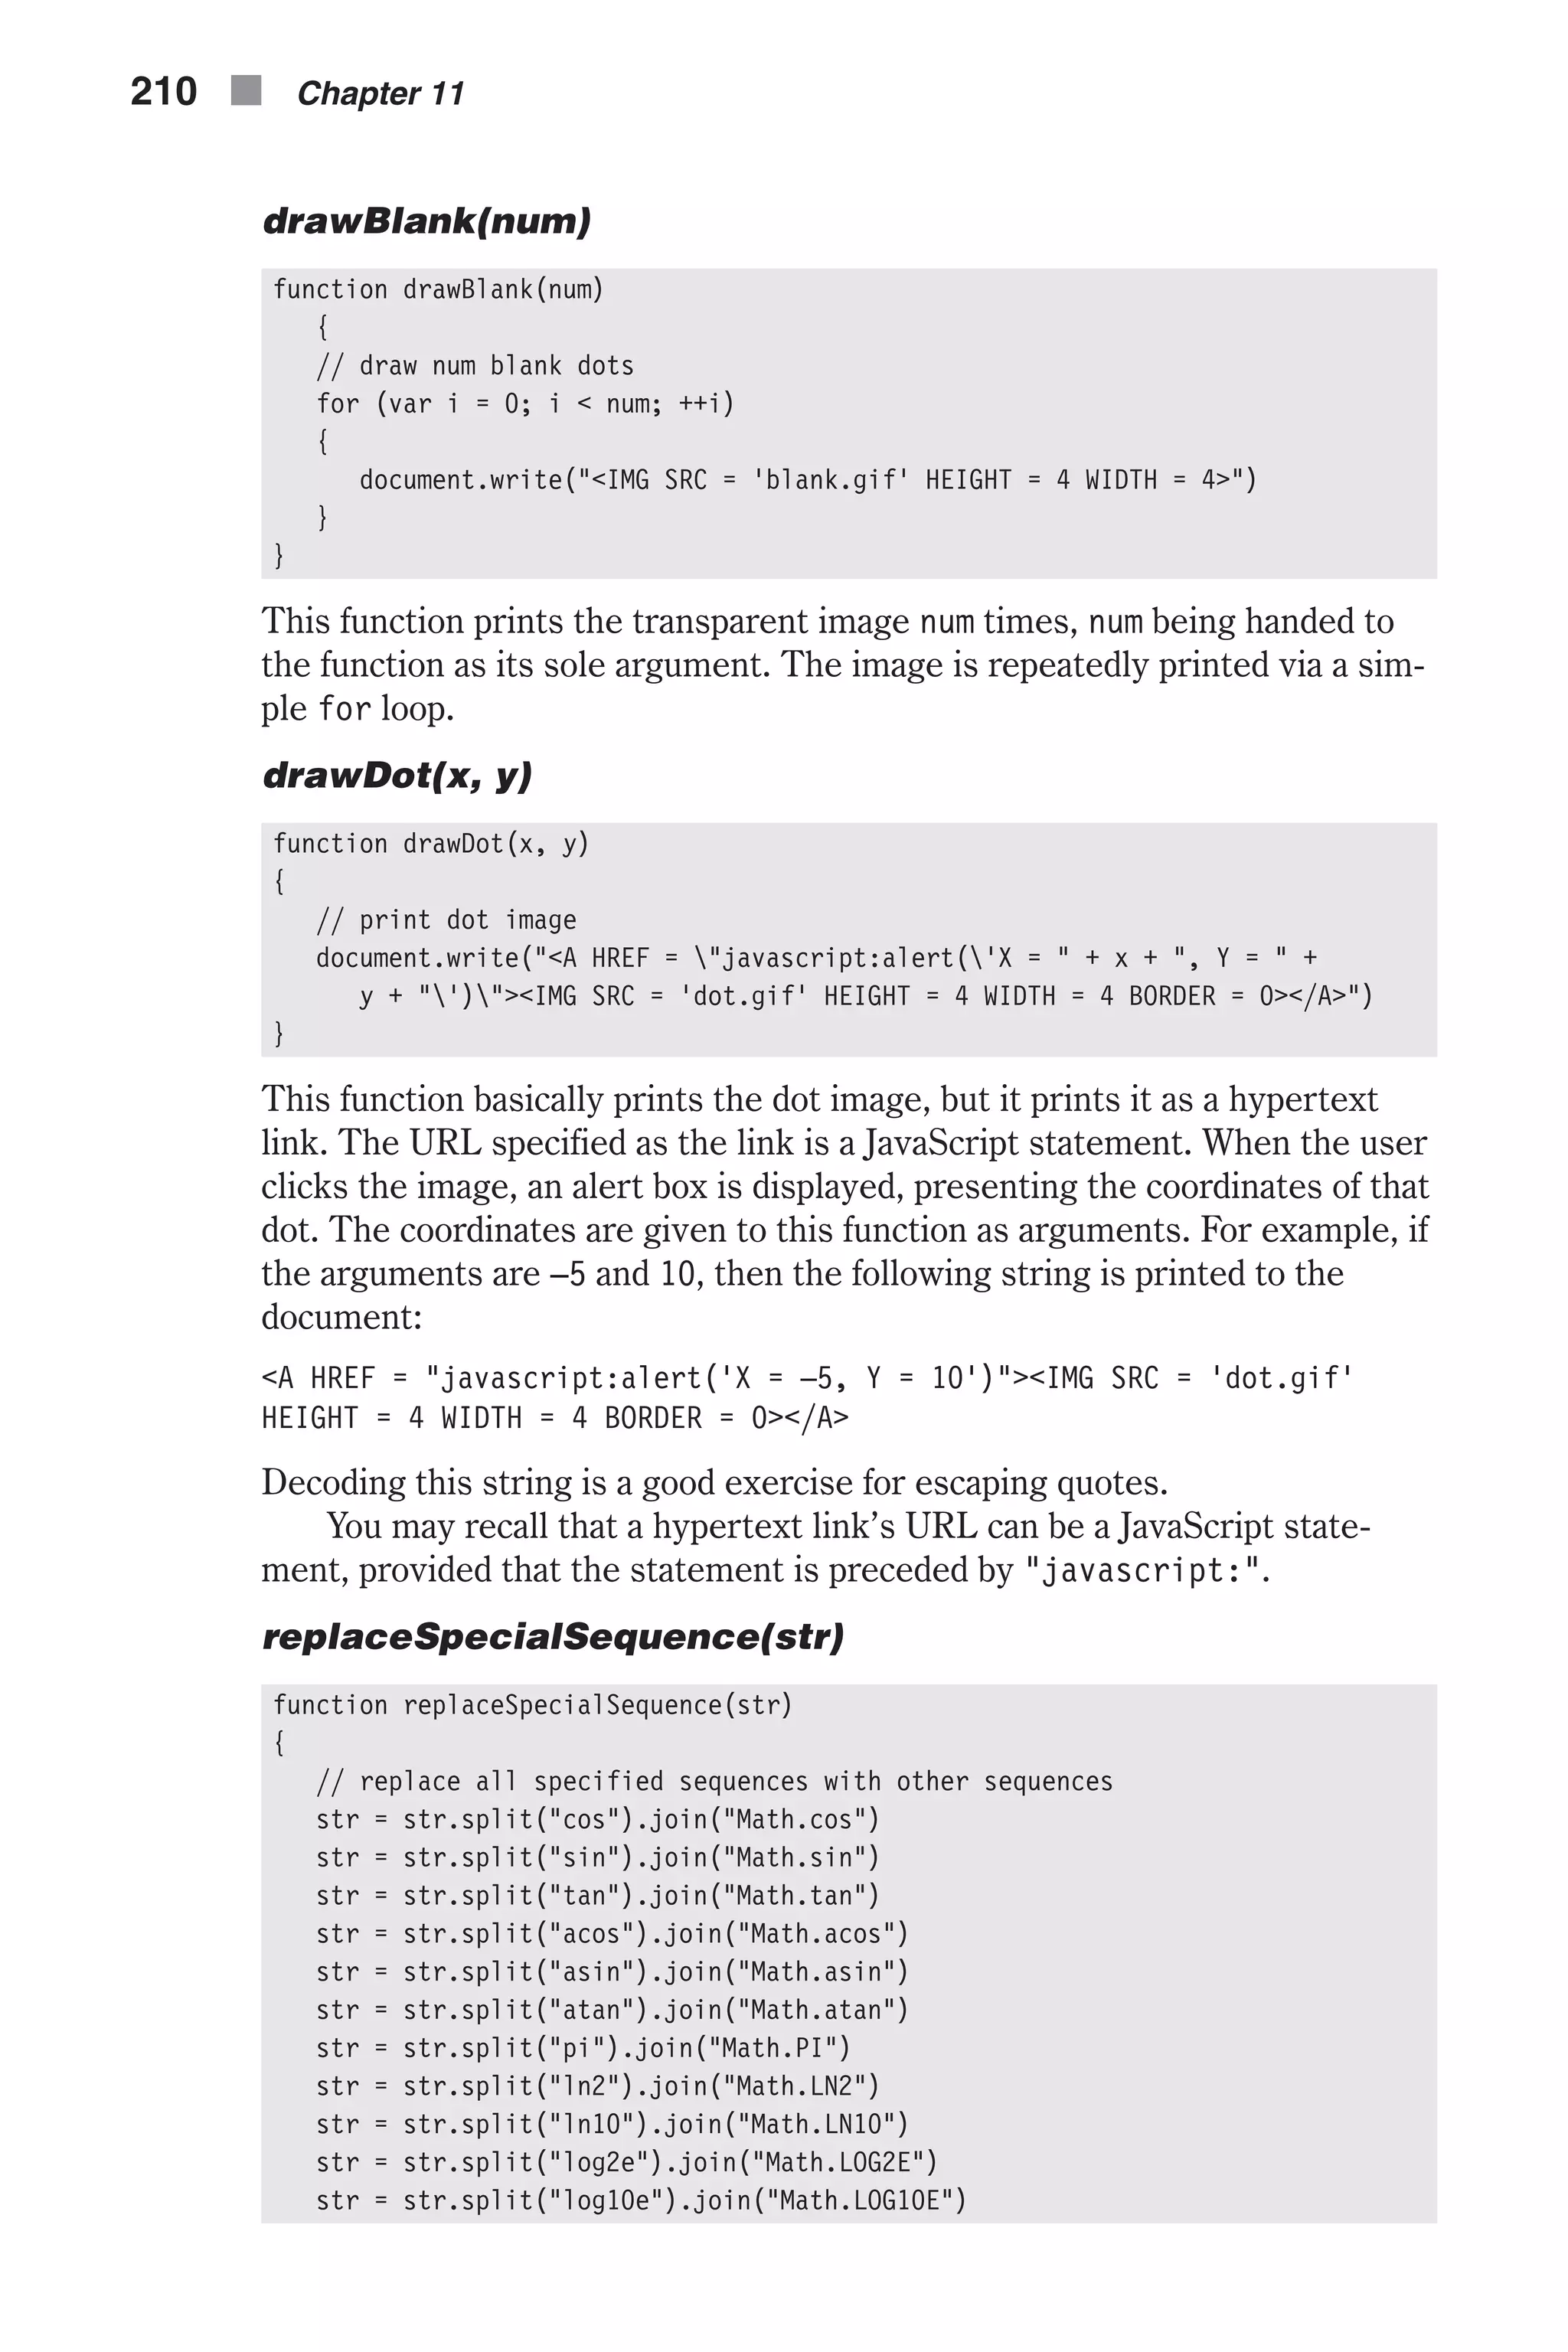
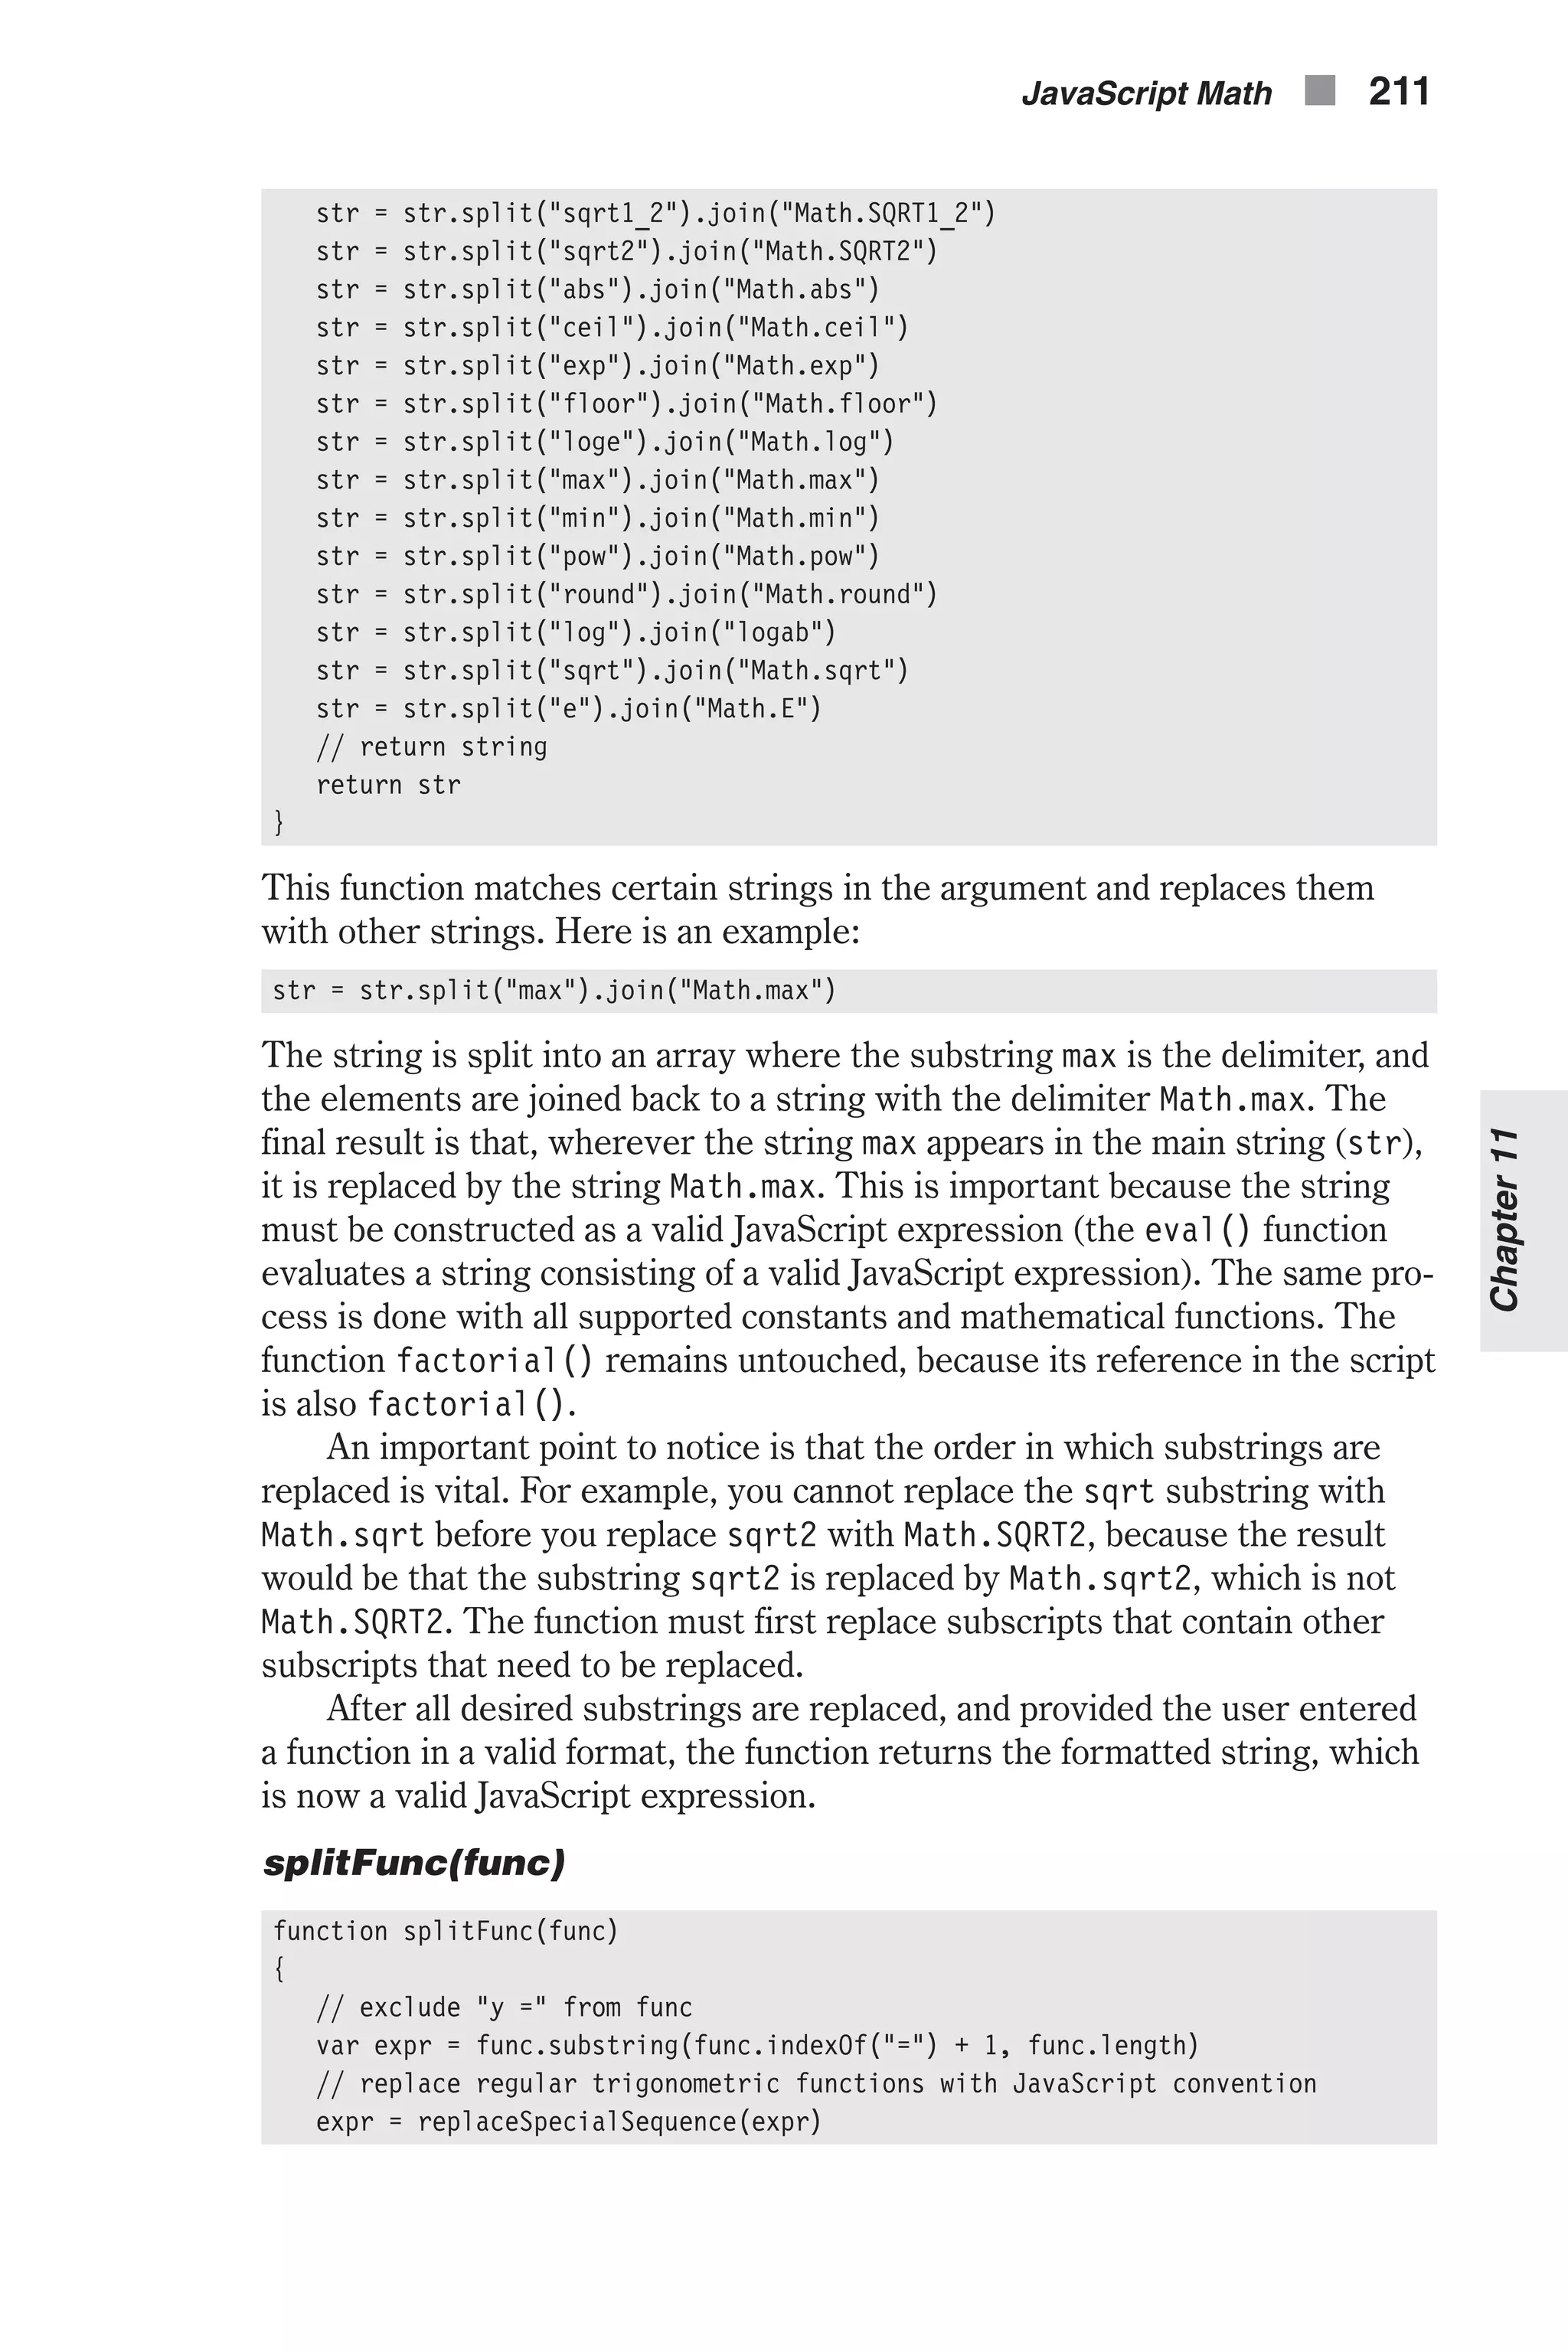
![// split argument to *global* array, excluding "x" chars funcArray = expr.split("x") } This function accepts one parameter—the function. As you know, the gen- eral format of the function is y = f(x). At first, the function assigns everything after the equal sign to the local variable expr. It then sends the value of expr to the function replaceSpecialSequence() and accepts a string in return in which the special substrings were replaced (see the explanation about that function). A global array, funcArray, is created by assigning it a value without using the keyword var. The string stored in the variable expr is split into the funcArray array, using the character x as a delimiter. Let’s say the function’s argument is y = x * sin(x). The vari- able expr is assigned x * sin(x). This value is sent to the function replaceSpecialSequence(), and the string x * Math.sin(x) is assigned to expr. This string is split by x to the global array, funcArray. Its elements are now: funcArray[0] == " " funcArray[1] == " * Math.sin(" funcArray[2] == ")" getInput() function getInput() { // ask user for function via prompt box var input = prompt('Enter function (example: "y = x * x + sin(x) – 5"):', '') // if user enters value in field if (input) { // split function to global array splitFunc(input) // print function to document document.write("<TT><H1><B>" + input + "</B></H1></TT><BR>") // return true to indicate that user entered a value return true } // generate alert box to display error message alert("Error in input...") // return false to indicate cancellation return false } This function is responsible for prompting the user for the function he or she wants to plot. The function, as entered by the user in a prompt box, is first assigned to the local variable input. If the user entered a value and selected OK, the following command block is executed. This command block consists of a call to the function splitFunc(). It also includes a statement that prints the function to the document as a bold level-1 header. After the Boolean value true is returned to indicate that the user entered a value and pressed OK, the function is terminated. If the user selected Cancel, the 212 n Chapter 11](https://image.slidesharecdn.com/wordware-advancedjavascript3rded-160421130838/75/www-webre24h-com-Wordware-advanced-javascript-3rd-ed-easttom-237-2048.jpg)
![command block is not executed, so the execution continues immediately after the block. An error message is displayed in an alert box, and the value false is returned. yVal(xVal) function yVal(xVal) { // build expression with xVal instead of x in original equation var expr = funcArray.join(xVal) // return evaluated expression return eval(expr) } This function accepts a value representing the x coordinate of a dot on the curve and returns its corresponding y coordinate. The first statement declares a local variable, expr. It joins the elements of the global array funcArray back to a string, with the value of xVal between each two. Refer back to the function splitFunc() and read the example given (y = x * sin(x)). The values of the elements of the array are the following: funcArray[0] == " " funcArray[1] == " * Math.sin(" funcArray[2] == ")" The function yVal() joins these elements using the value of xVal as a glue between each two. Let’s say the value of xVal is 5. The constructed string assigned to expr in this case is: " 5 * Math.sin(5)" The function returns the evaluated value of this string. For the preceding string, the value returned is: " 5 * Math.sin(5)" == –4.794621373315692 makeArray(min, max, dif) function makeArray(min, max, dif) { // create properties of array-like object for (var i = min; i <= max; i += dif) { this[i] = yVal(i) } } makeArray() is a constructor function. It creates an object consisting of properties only. The names of the properties are the x values of the points that are to be drawn on the curve. Their value is the corresponding y coordi- nates of the points. The function accepts three arguments, which are all entered by the user via prompt boxes outside this function. The function creates the properties of the calling instance via a loop. The loop counter starts at min, and is incremented by dif after iteration. The loop continues JavaScript Math n 213 Chapter11](https://image.slidesharecdn.com/wordware-advancedjavascript3rded-160421130838/75/www-webre24h-com-Wordware-advanced-javascript-3rd-ed-easttom-238-2048.jpg)
![as long as its counter is less than or equal to max. The corresponding y coor- dinate of each x coordinate is retrieved by the function yVal(). printUnit(num) function printUnit(num) { // print number in specified font and size, inside a table cell document.write("<FONT SIZE = 1 COLOR = 'purple'>" + num + "</FONT>") } This function accepts a numeric value and prints it in the specified font color and size. drawCurve() function drawCurve() { for (var x = minX; x <= maxX; x += dif) { // print opening table attributes and cell to hold current unit document.write("<TABLE BORDER = 0>><TR><TD WIDTH = 90>") // print current number on axis printUnit(x) // close table cell and open new one document.write("</TD><TD>") // assign Y value to variable var y = ar[x] // get y value as integer from 1 to 100 var ySpot = (y – minY) / (maxY – minY) * 100 // draw transparent images drawBlank(ySpot – 1) // draw dot on curve drawDot(x, y) // close cell, row, and table (new line is automatic) document.write("</TD></TR></TABLE>") } } This function does not accept any argument. It is responsible for printing the curve. To understand this function you must first understand how each row of the bitmap is printed. The entire row is placed inside an HTML table. The x value, or unit, is printed in the first cell of the table. This cell’s width is fixed in order to preserve uniformity across rows. The second, and last, cell of the table is located on the same row, and contains all the images, both the transparent ones as well as the dot. The dot image is obviously the last image on the second cell of every row. Note that the left cell (the first in each table) is wide enough to hold almost any number. The entire function is built of a single loop, which iterates through the points that are to be placed on the curve. See the explanation for the func- tion makeArray() for information on the loop’s algorithm. The function first prints the opening <TABLE>, <TR>, and <TD> tags. The border of the table is set to zero, so it is not seen. The width of the cell is set to 90 pixels. The 214 n Chapter 11](https://image.slidesharecdn.com/wordware-advancedjavascript3rded-160421130838/75/www-webre24h-com-Wordware-advanced-javascript-3rd-ed-easttom-239-2048.jpg)
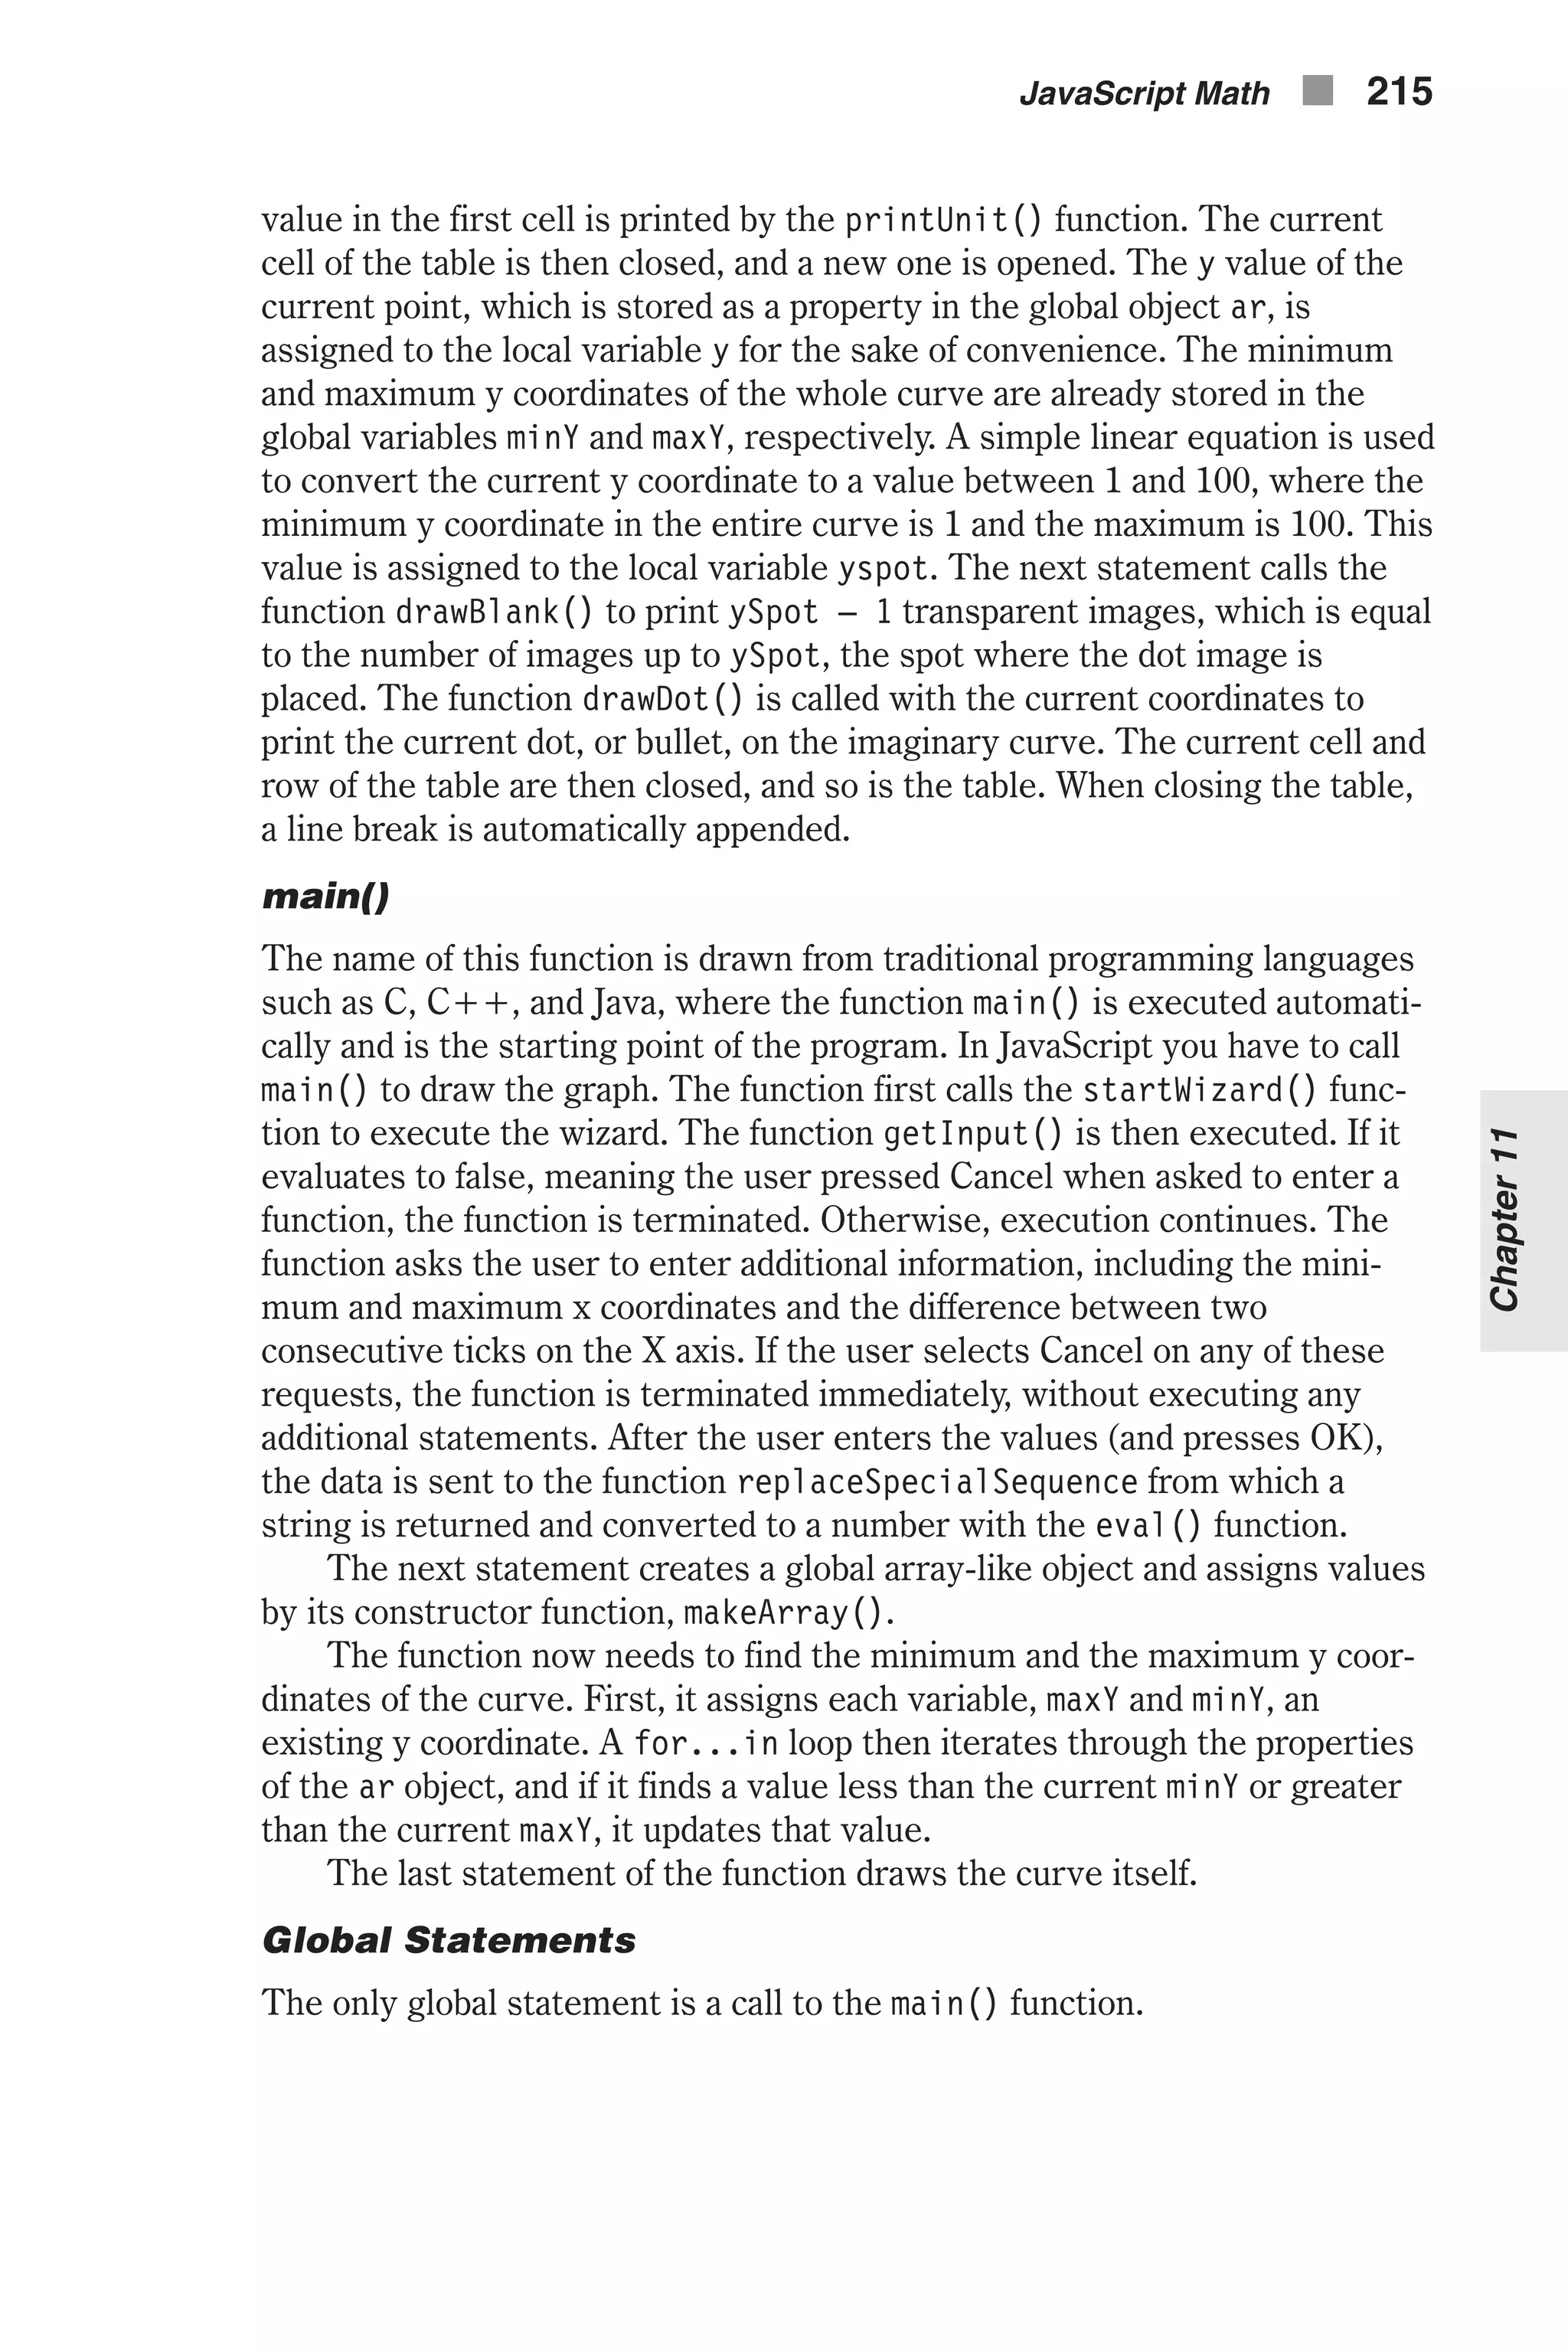


![only once. The output of the preceding script segment is actually the string itself, printed one character at a time (no, you cannot notice the difference!). indexOf() This method returns the index of the first occurrence of the specified substring in the calling String object, starting the search at the beginning of the string. An example will surely clear things up: var str = "ababa" document.write(str.indexOf("ba")) This script’s output is the number 1. The first occurrence of the substring "ba" in the calling String object is at the second character, whose index is 1. The search for the specified substring starts at index 0, the beginning of the string. However, you can also instruct JavaScript to start the search at a different index, such as somewhere in the middle of the string. The follow- ing script segment prints the number 3: var str = "ababa" document.write(str.indexOf("ba", 2)) The general syntax of this method is: stringName.indexOf(searchValue, [fromIndex]) Note that fromIndex must be an integer between 0 and the string’s length minus 1. searchValue does not have to be a string. The following script prints the number 8: var str = "August 27, 1985" document.write(str.indexOf(7)) If the index to start looking for the substring is not specified, the default value of 0 is used. If the specified substring is not found in the entire string, the method returns one less than the base, –1. This method is equivalent to the index function in Perl. lastIndexOf() This method is identical to the indexOf method, except that it returns the index of the last occurrence of the specified value, rather than the first occurrence. Its syntax is, therefore, the same: stringName.lastIndexOf(searchValue, [fromIndex]) The following script prints the number 3: var str = "a/b/c" document.write(str.lastIndexOf("/")) See the indexOf method for more details on this method. Handling Strings n 221 Chapter12](https://image.slidesharecdn.com/wordware-advancedjavascript3rded-160421130838/75/www-webre24h-com-Wordware-advanced-javascript-3rd-ed-easttom-246-2048.jpg)
![the following string. So the value of str in this case is 99 bottles of beer on the wall. The following statement demonstrates a slightly different situation: var str = "bottles of beer on the wall -- " + 50 + 49 Like always, evaluation is done from left to right. The string, bottles of beer on the wall -- , is concatenated with 50 and evaluates to bottles of beer on the wall -- 50. This value in turn is concatenated with the number 49, and evaluates to bottles of beer on the wall -- 5049, which is certainly not the value we want. A simple workaround is to enclose the numeric operation in parentheses in the following form: var str = "bottles of beer on the wall -- " + (50 + 49) The parentheses instruct JavaScript to evaluate the enclosed expression first, so the value of str in this case is bottles of beer on the wall -- 99. String Instance Construction Another way to convert a number to a string is by providing the number to the String() constructor function, which returns a regular String object. Here is a simple example to demonstrate this: var num = 987 num = new String(num) The data type of the variable num in this case is not a string, but an object. As mentioned earlier, strings created via the String() constructor are regu- lar objects. However, you can still use any property or method associated with strings on such objects. A more obvious way to convert a number to a string via the constructor function is to assign the new string, or object, to a new variable in the following form: var num = 987 var numericString = new String(num) The toString() Method The toString() method belongs to all objects. Its general syntax is: objectName.toString([radix]) objectName is the object to convert to a string, whereas radix is the base to use for representing numeric values when the calling object is a number. The following example prints the string equivalents of the numbers 0 through 9 in decimal and binary: for (x = 0; x < 10; x++) { document.write("Decimal: ", x.toString(10), " Binary: ", x.toString(2), "<BR>") } Chapter12 Handling Strings n 225](https://image.slidesharecdn.com/wordware-advancedjavascript3rded-160421130838/75/www-webre24h-com-Wordware-advanced-javascript-3rd-ed-easttom-250-2048.jpg)
![The loop’s output is: Decimal: 0 Binary: 0 Decimal: 1 Binary: 1 Decimal: 2 Binary: 10 Decimal: 3 Binary: 11 Decimal: 4 Binary: 100 Decimal: 5 Binary: 101 Decimal: 6 Binary: 110 Decimal: 7 Binary: 111 Decimal: 8 Binary: 1000 Decimal: 9 Binary: 1001 All objects, numbers included, have a toString() method. If an object has no string value, the method returns [object type], where type is the object type (e.g., Date, Array, Object (user-defined), Image). When used with an array, toString() joins the array elements and returns one string where elements are separated by commas. This operation is exactly like the join() method, which concatenates the elements with a specified delimiter, possibly a comma. For functions, toString() decompiles the function back into a canonical source string. Take a look at the following script segment: function foo() { var a = 5 alert(a) document.write("wow") } document.write(foo.toString()) The script’s output is: function foo() { var a = 5; alert(a); document.write("wow"); } String-to-Number Conversion Mathematical operators, for example, accept numeric strings as operands and handle them fine. Here is an example for such an operation: var num1= "7" var num2 = "2" var result = num1 – num2 document.write(result) This script prints 5, just as if both variables were assigned a plain numeric value rather than a numeric string (we use the term numeric string to char- acterize a string that encloses a number, such as "911"). An operation consisting of numeric string operands returns a plain numeric value, not a string. Therefore, you can theoretically convert a numeric string to a num- ber by performing an arithmetical operation on it. If you want, you can even use a function to execute the conversion in the following form: 226 n Chapter 12](https://image.slidesharecdn.com/wordware-advancedjavascript3rded-160421130838/75/www-webre24h-com-Wordware-advanced-javascript-3rd-ed-easttom-251-2048.jpg)
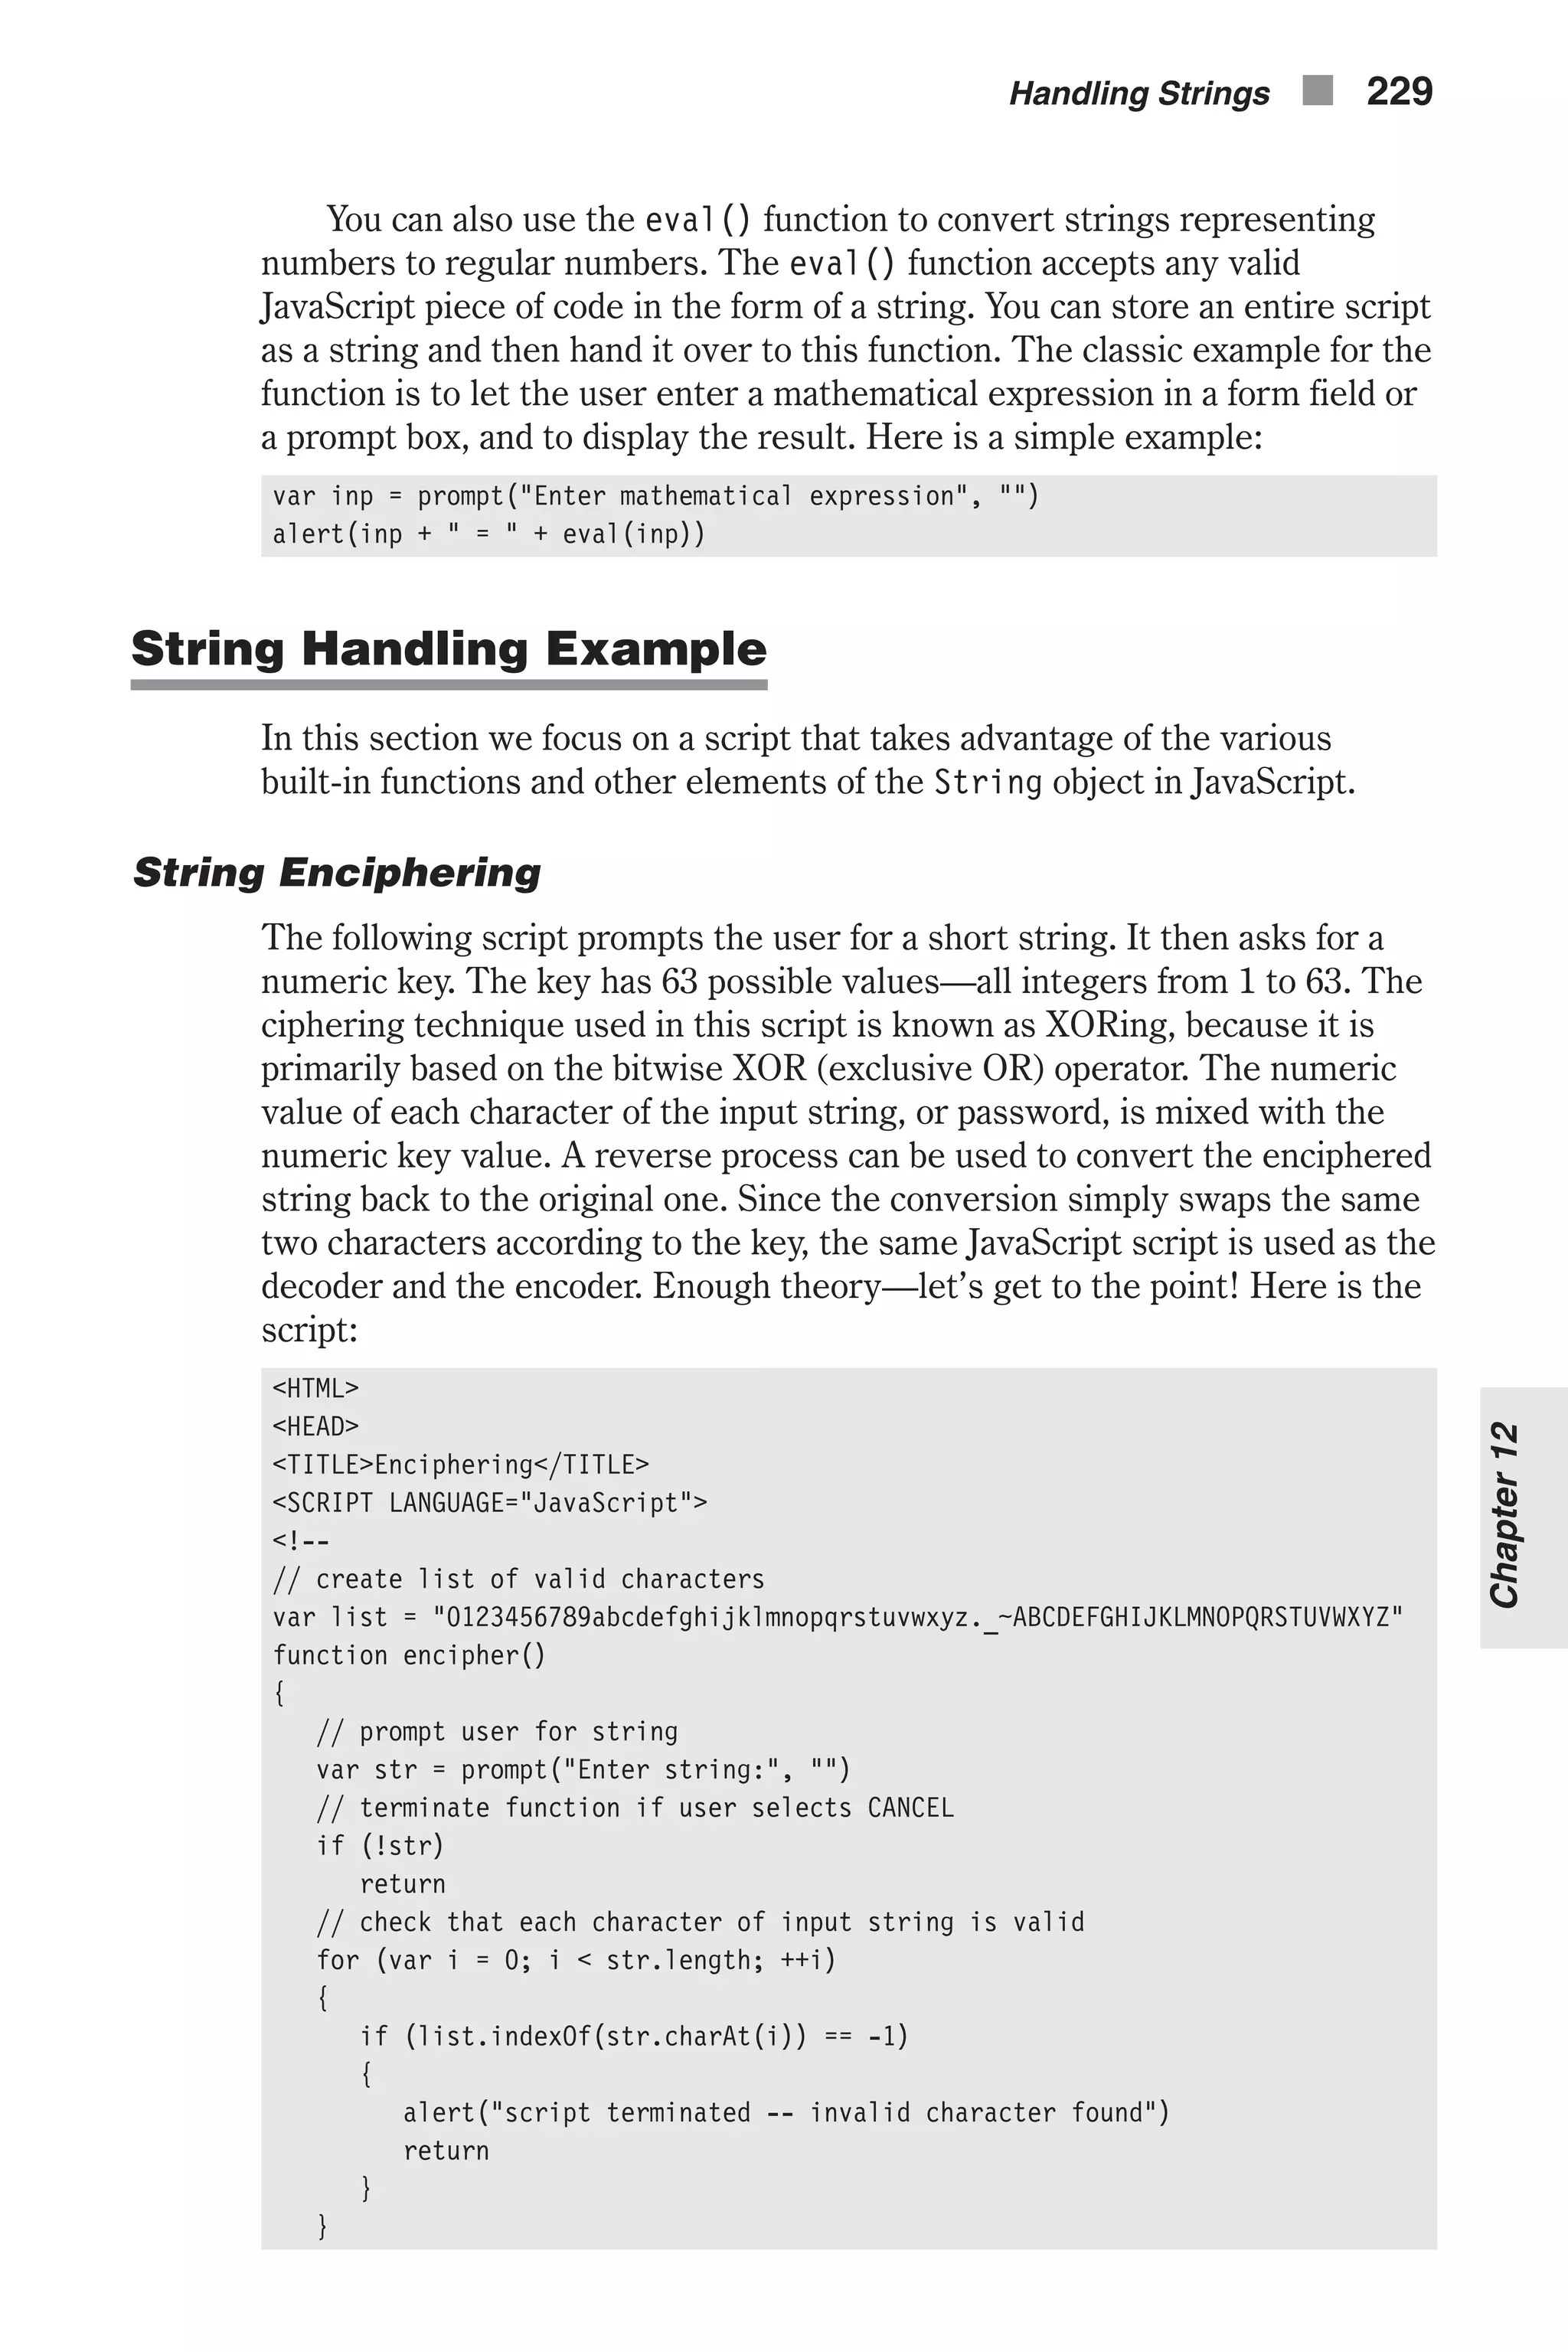
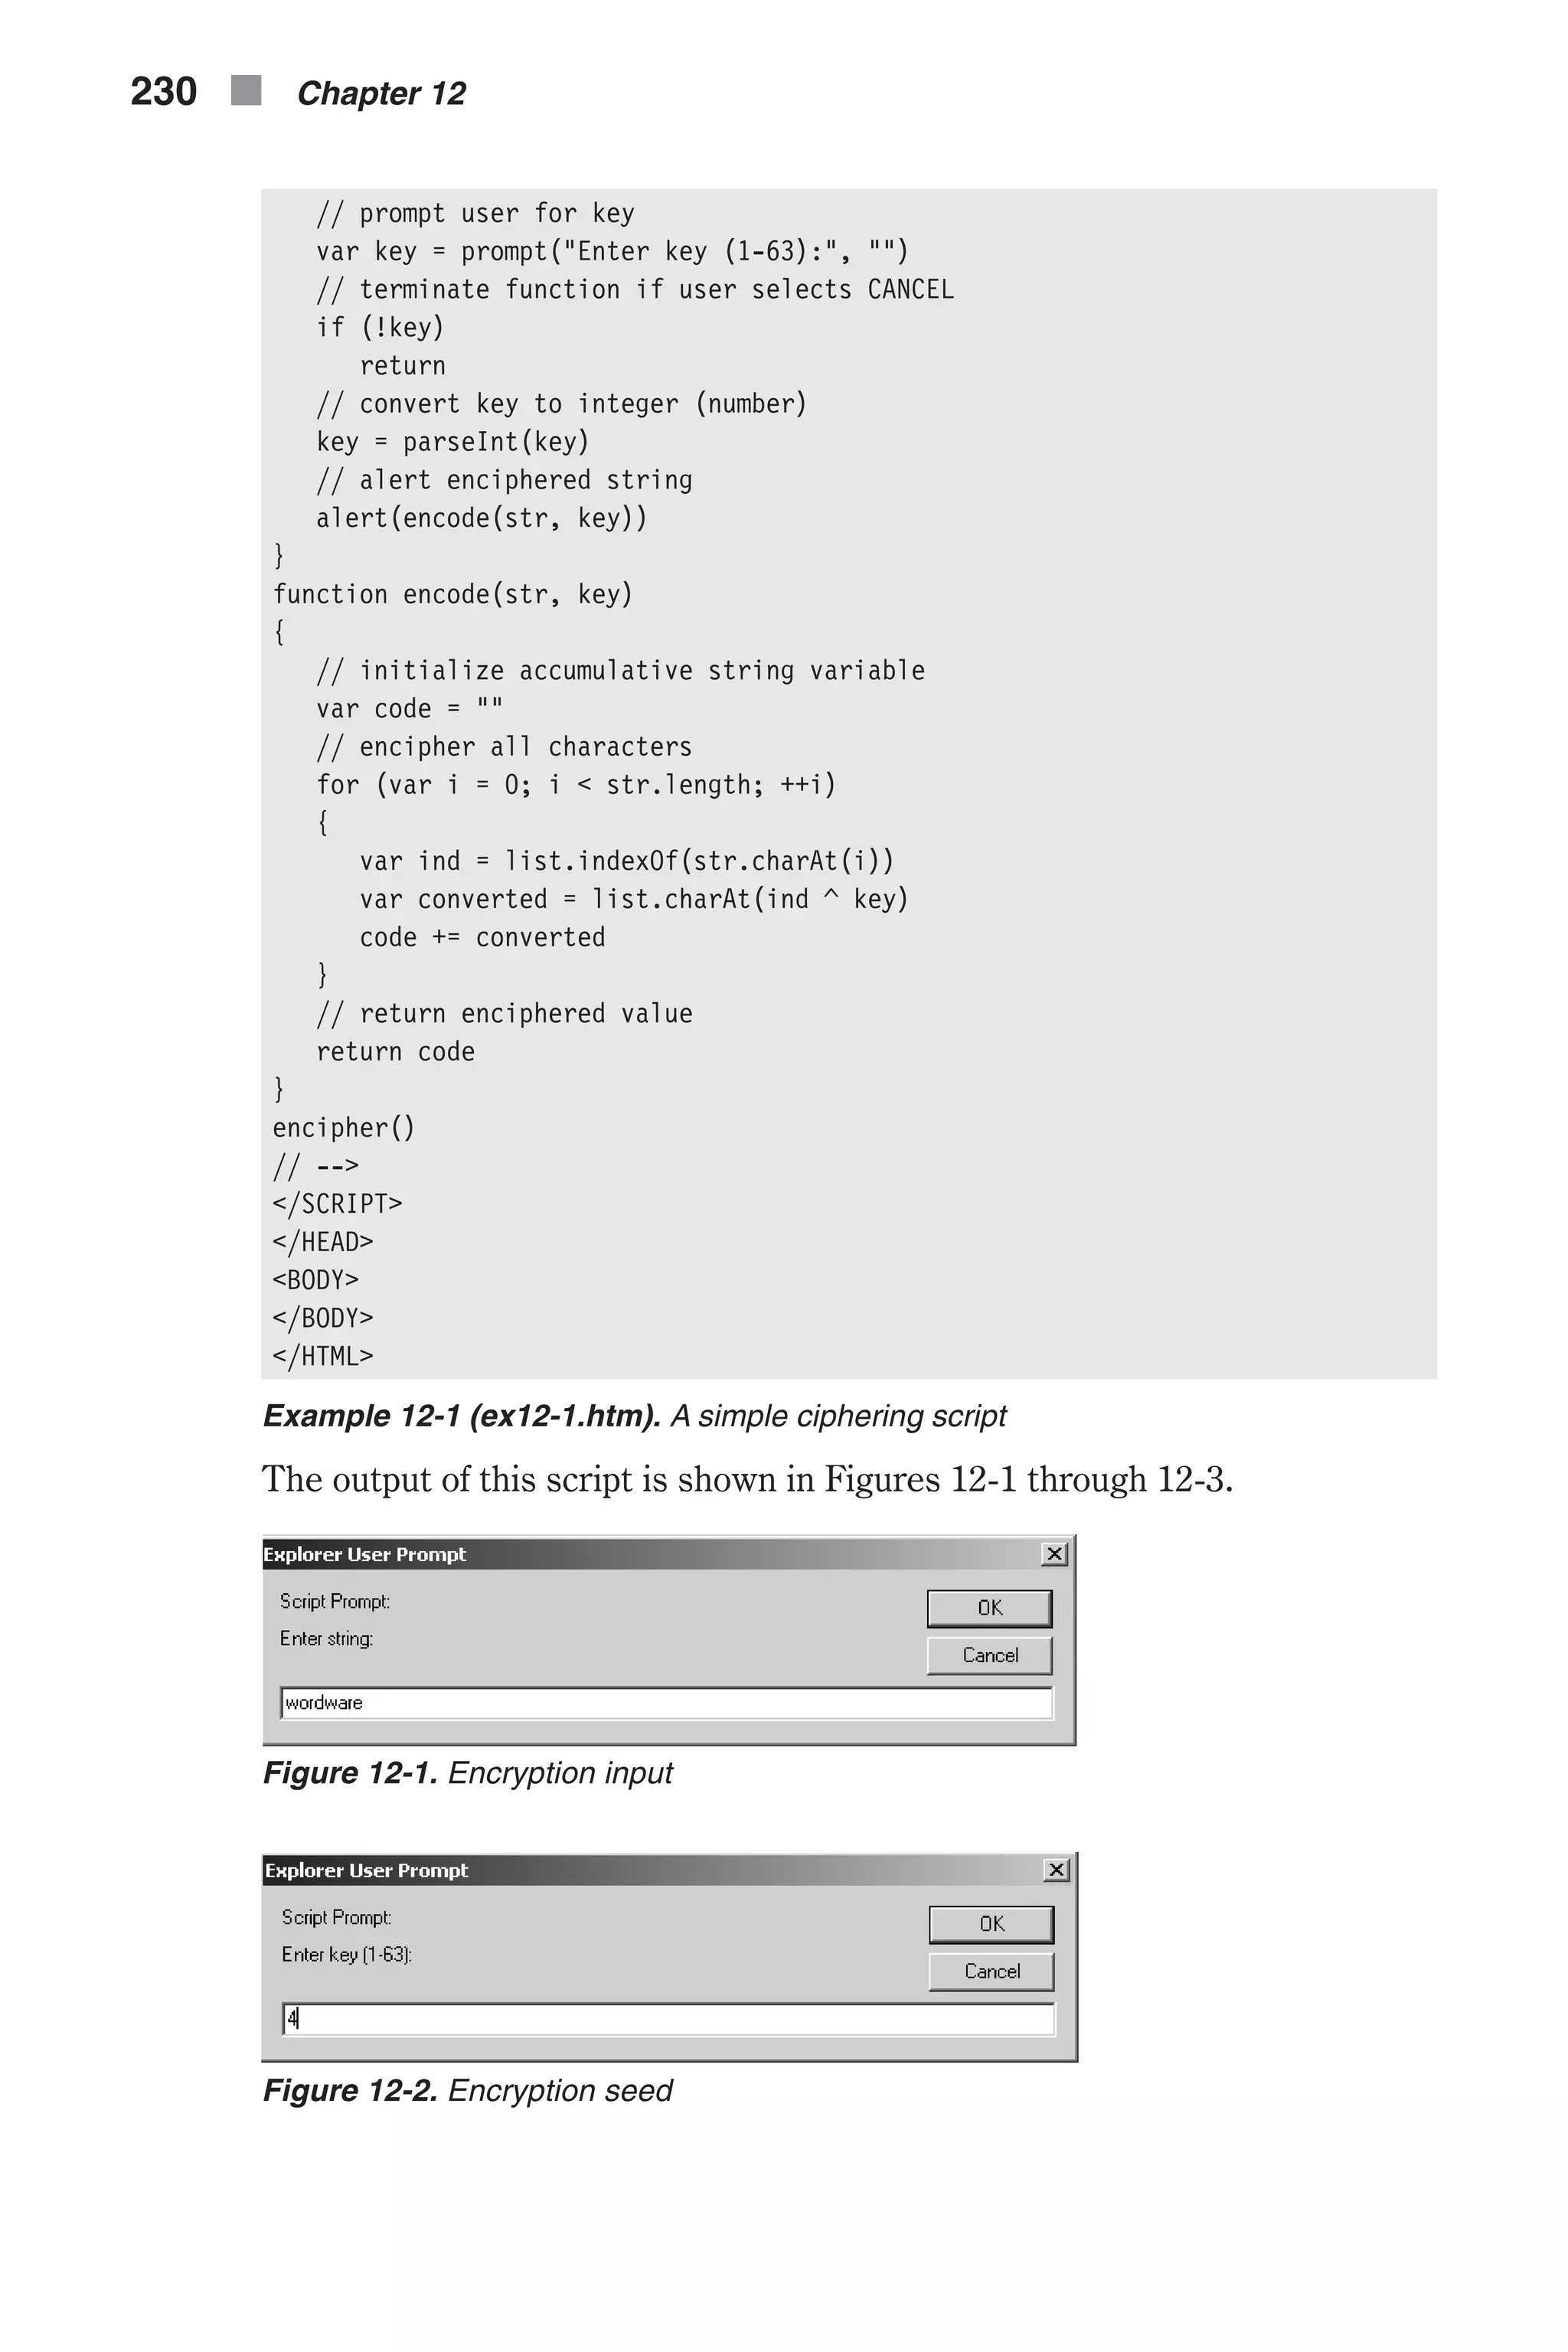
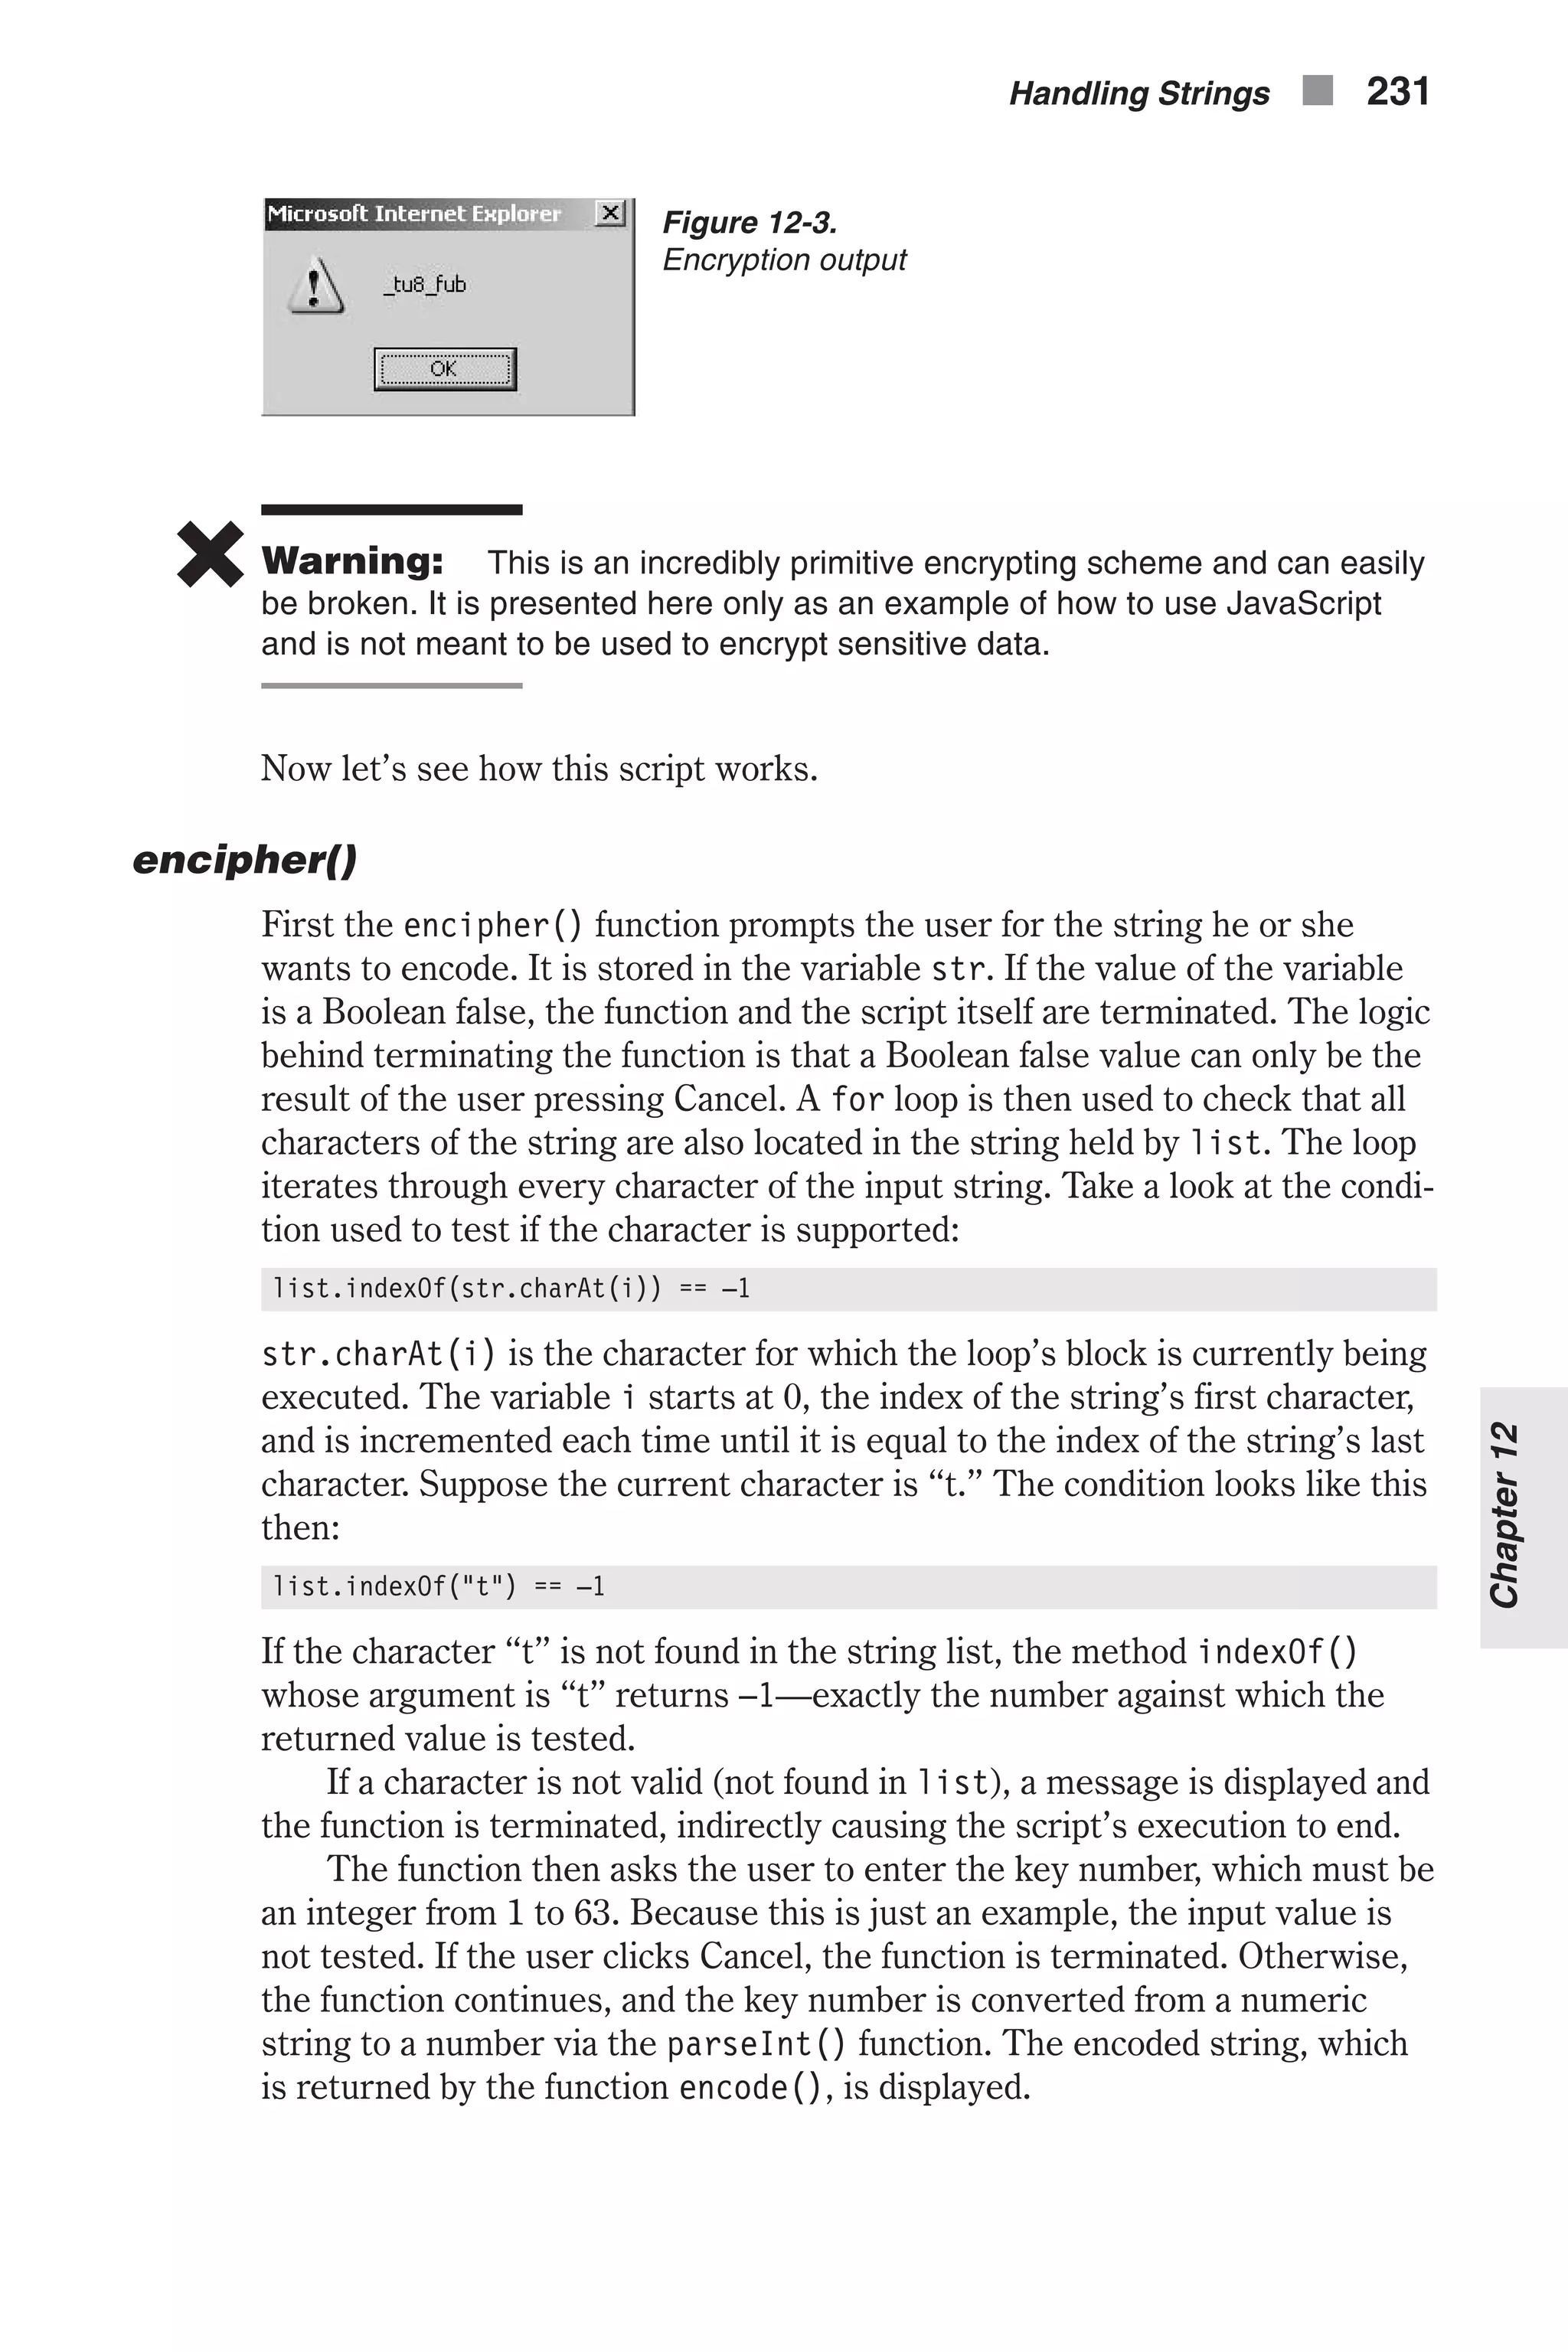
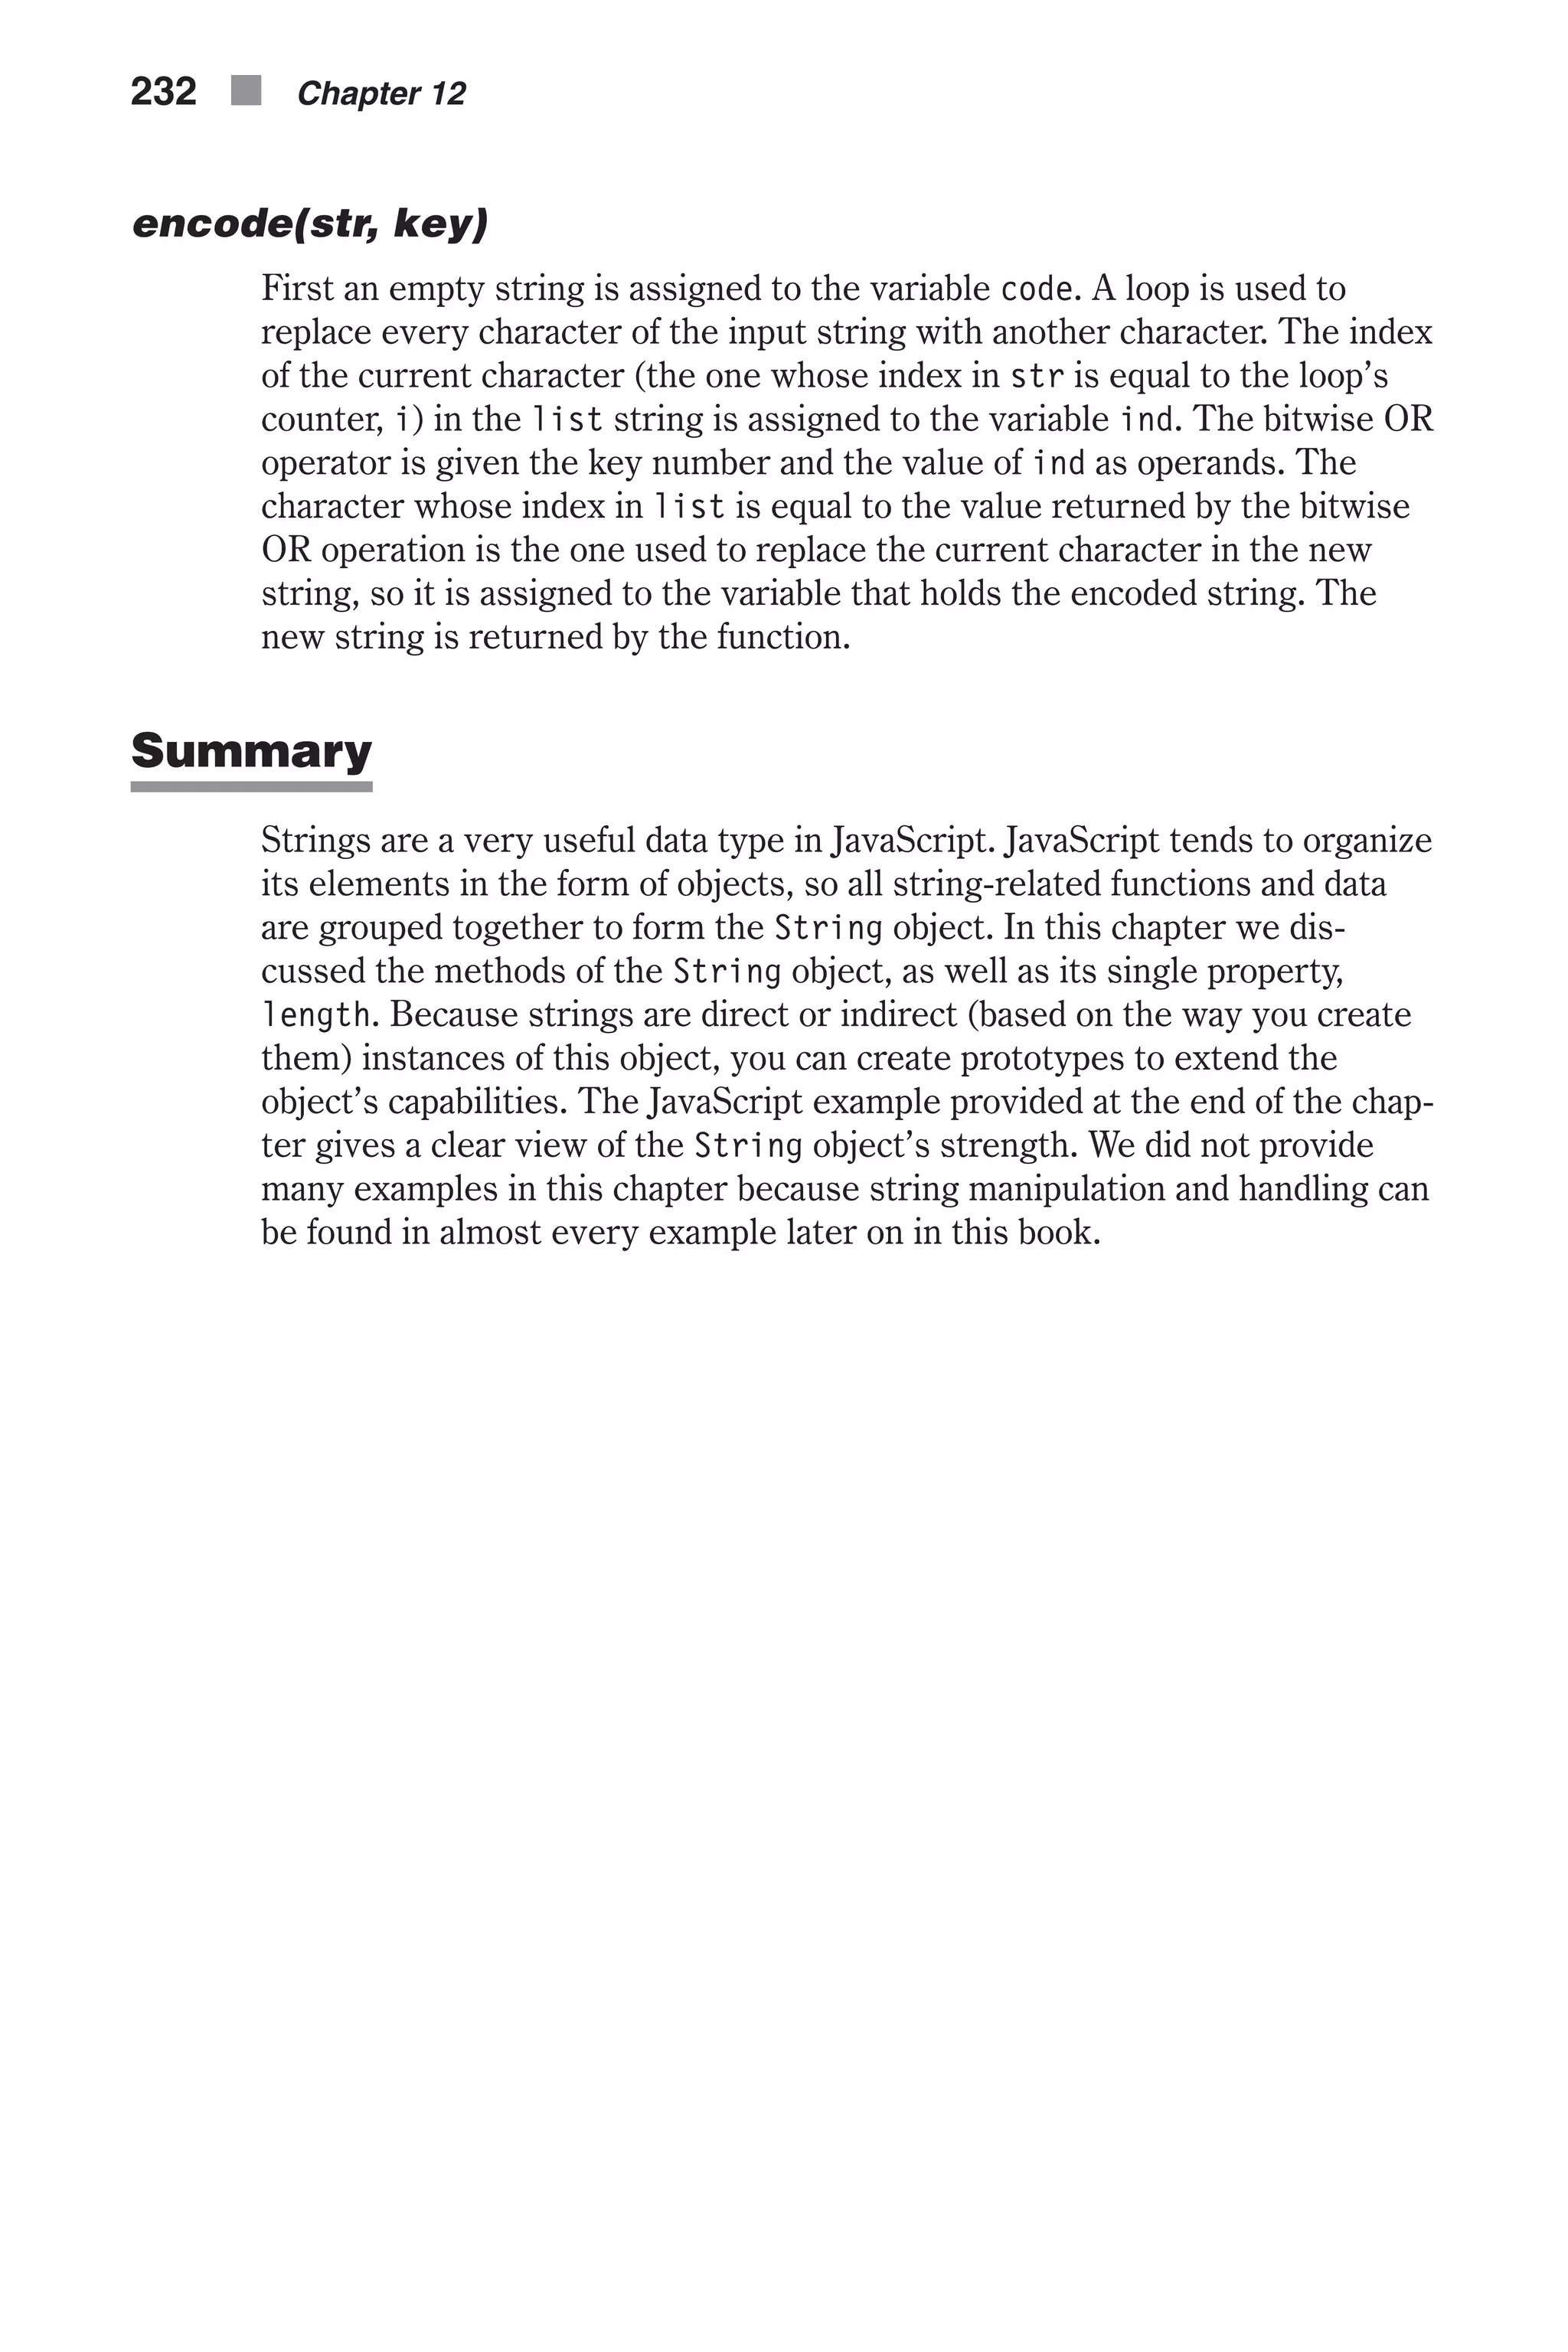
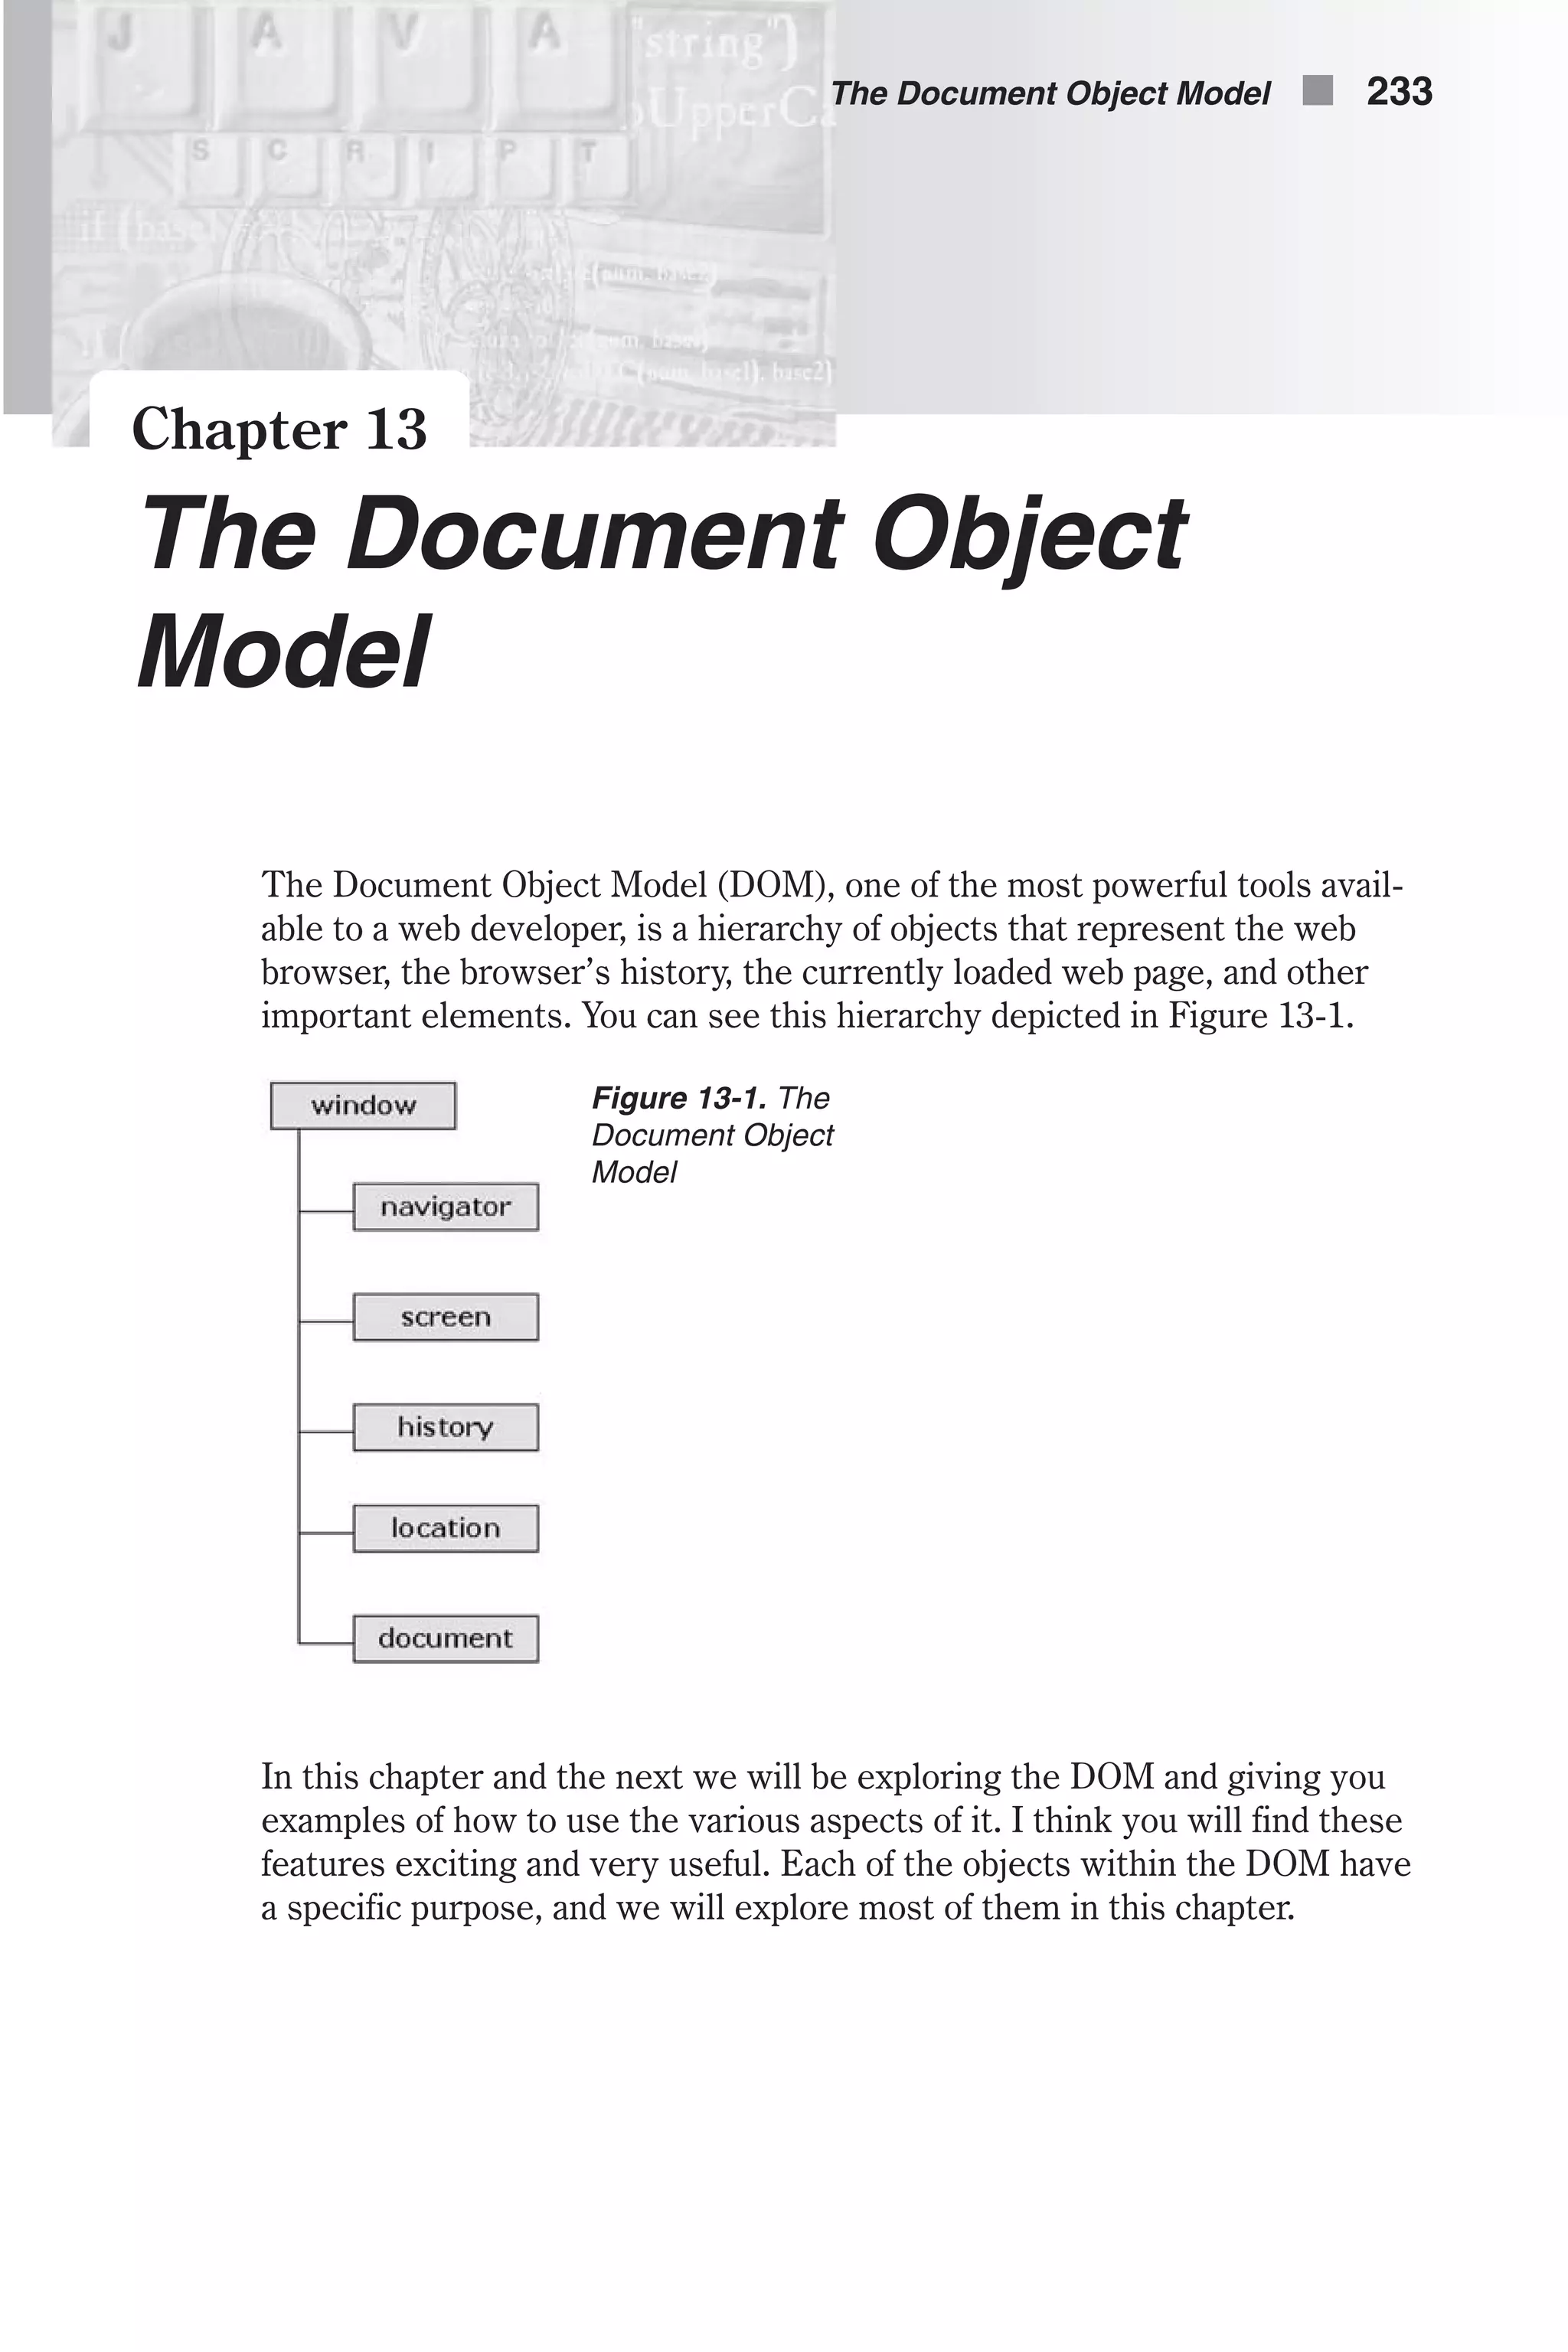

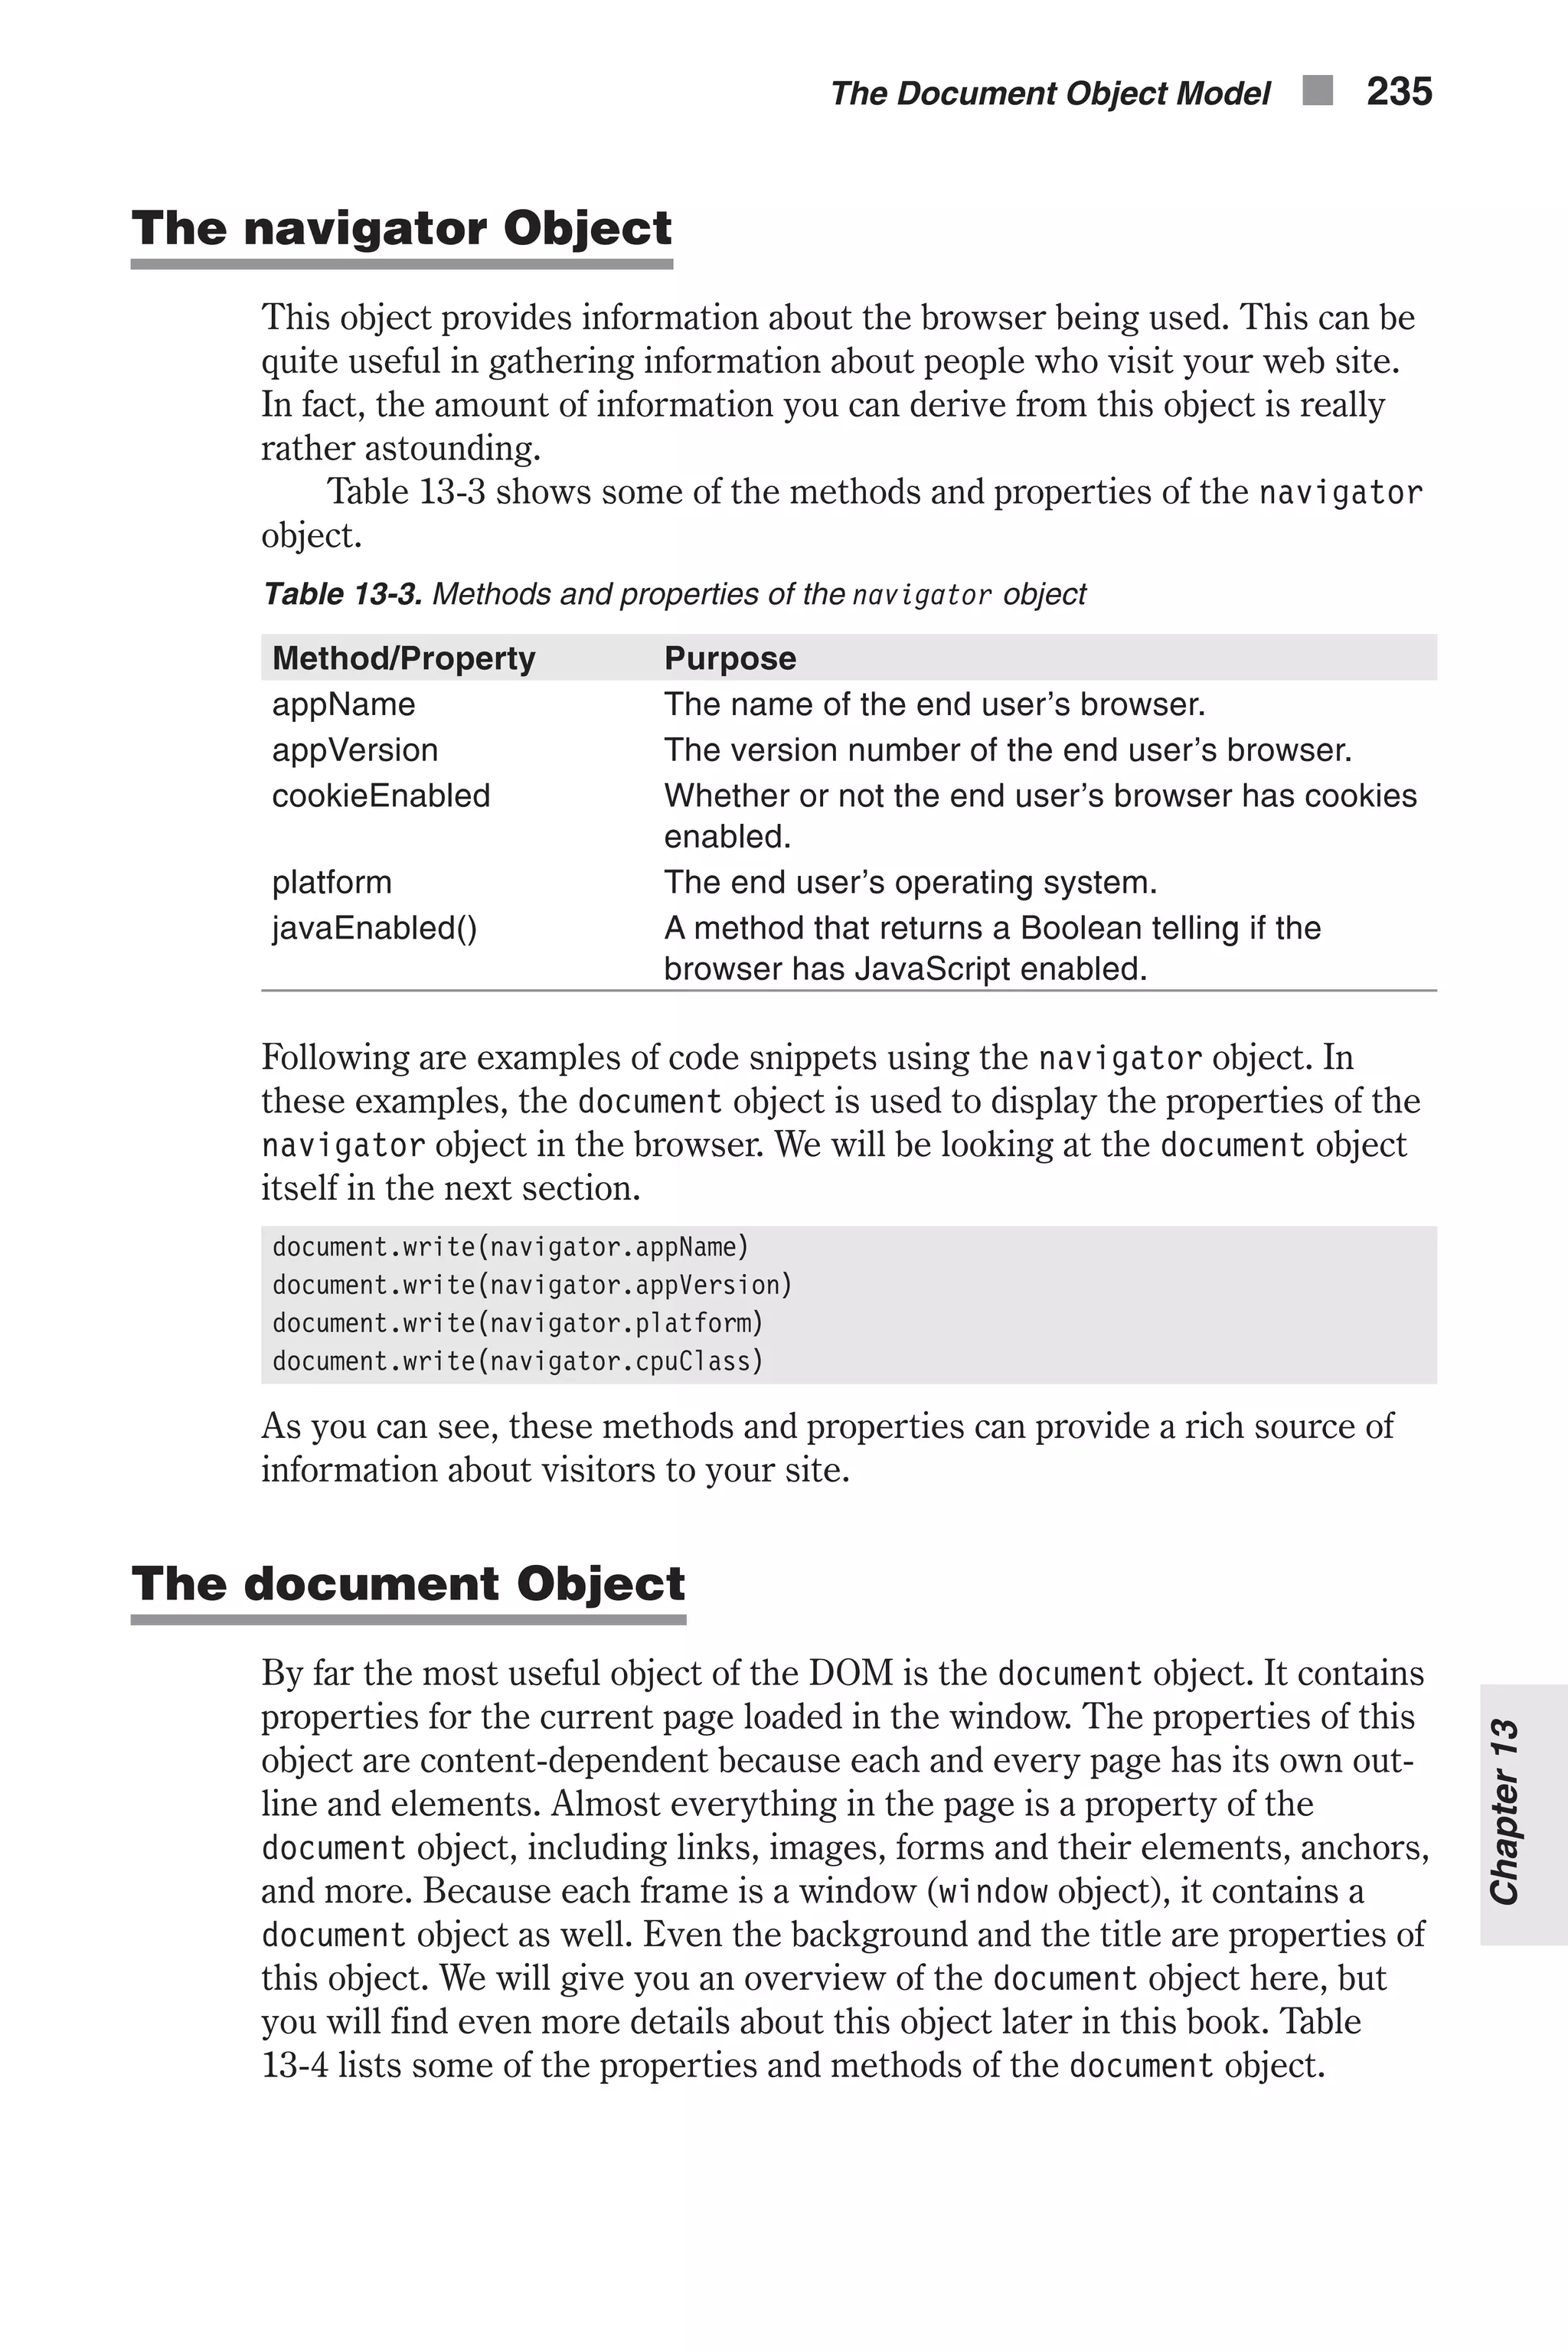
![Table 13-4. Methods and properties of the document object Method/Property Purpose write() This is a very commonly used method and writes to the HTML page whatever is passed to the write function. fileCreatedDate This property shows when the loaded HTML file was created. linkColor This property shows the color of HTML links in the document. It is specified in the <BODY> tag. open() This method opens a new document in a new window. embeds An array containing all the plug-ins in a document. Let’s take a look at an example that uses the document object, since it is such a commonly used object. <HTML> <HEAD> <TITLE>Sample Color Cube</TITLE> </HEAD> <BODY> <SCRIPT LANGUAGE="JavaScript"> <!-- // create six-element array var hex = new Array(6) // assign non-dithered descriptors hex[0] = "FF" hex[1] = "CC" hex[2] = "99" hex[3] = "66" hex[4] = "33" hex[5] = "00" // accept triplet string and display as background color function display(triplet) { // set color as background color document.bgColor = '#' + triplet // display the color hexadecimal triplet alert('Background color is now ' + triplet) } // draw a single table cell based on all descriptors function drawCell(red, green, blue) { // open cell with specified hexadecimal triplet background color document.write('<TD BGCOLOR = "#' + red + green + blue + '">') // open a hypertext link with javascript: scheme to call display function document.write('<A HREF = "javascript:display('' + (red + green + blue) + '')">') // print transparent image (use any height and width) document.write('<IMG SRC="place.gif" BORDER=0 HEIGHT=12 WIDTH=12>') 236 n Chapter 13](https://image.slidesharecdn.com/wordware-advancedjavascript3rded-160421130838/75/www-webre24h-com-Wordware-advanced-javascript-3rd-ed-easttom-261-2048.jpg)
![// close link tag document.write('</A>') // close table cell document.write('</TD>') } // draw table row based on red and blue descriptors function drawRow(red, blue) { // open table row document.write('<TR>') // loop through all non-dithered color descripters as green hex for (var i = 0; i < 6; ++i) { drawCell(red, hex[i], blue) } // close current table row document.write('</TR>') } // draw table for one of six color cube panels function drawTable(blue) { // open table (one of six cube panels) document.write('<TABLE CELLPADDING=0 CELLSPACING=0 BORDER=0>') // loop through all non-dithered color descripters as red hex for (var i = 0; i < 6; ++i) { drawRow(hex[i], blue) } // close current table document.write('</TABLE>') } // draw all cube panels inside table cells function drawCube() { // open table document.write('<TABLE CELLPADDING=5 CELLSPACING=0 BORDER=1><TR>') // loop through all non-dithered color descripters as blue hex for (var i = 0; i < 6; ++i) { // open table cell with white background color document.write('<TD BGCOLOR="#FFFFFF">') // call function to create cube panel with hex[i] blue hex drawTable(hex[i]) // close current table cell document.write('</TD>') } // close table row and table document.write('</TR></TABLE>') } // call function to begin execution drawCube() // --> The Document Object Model n 237 Chapter13](https://image.slidesharecdn.com/wordware-advancedjavascript3rded-160421130838/75/www-webre24h-com-Wordware-advanced-javascript-3rd-ed-easttom-262-2048.jpg)

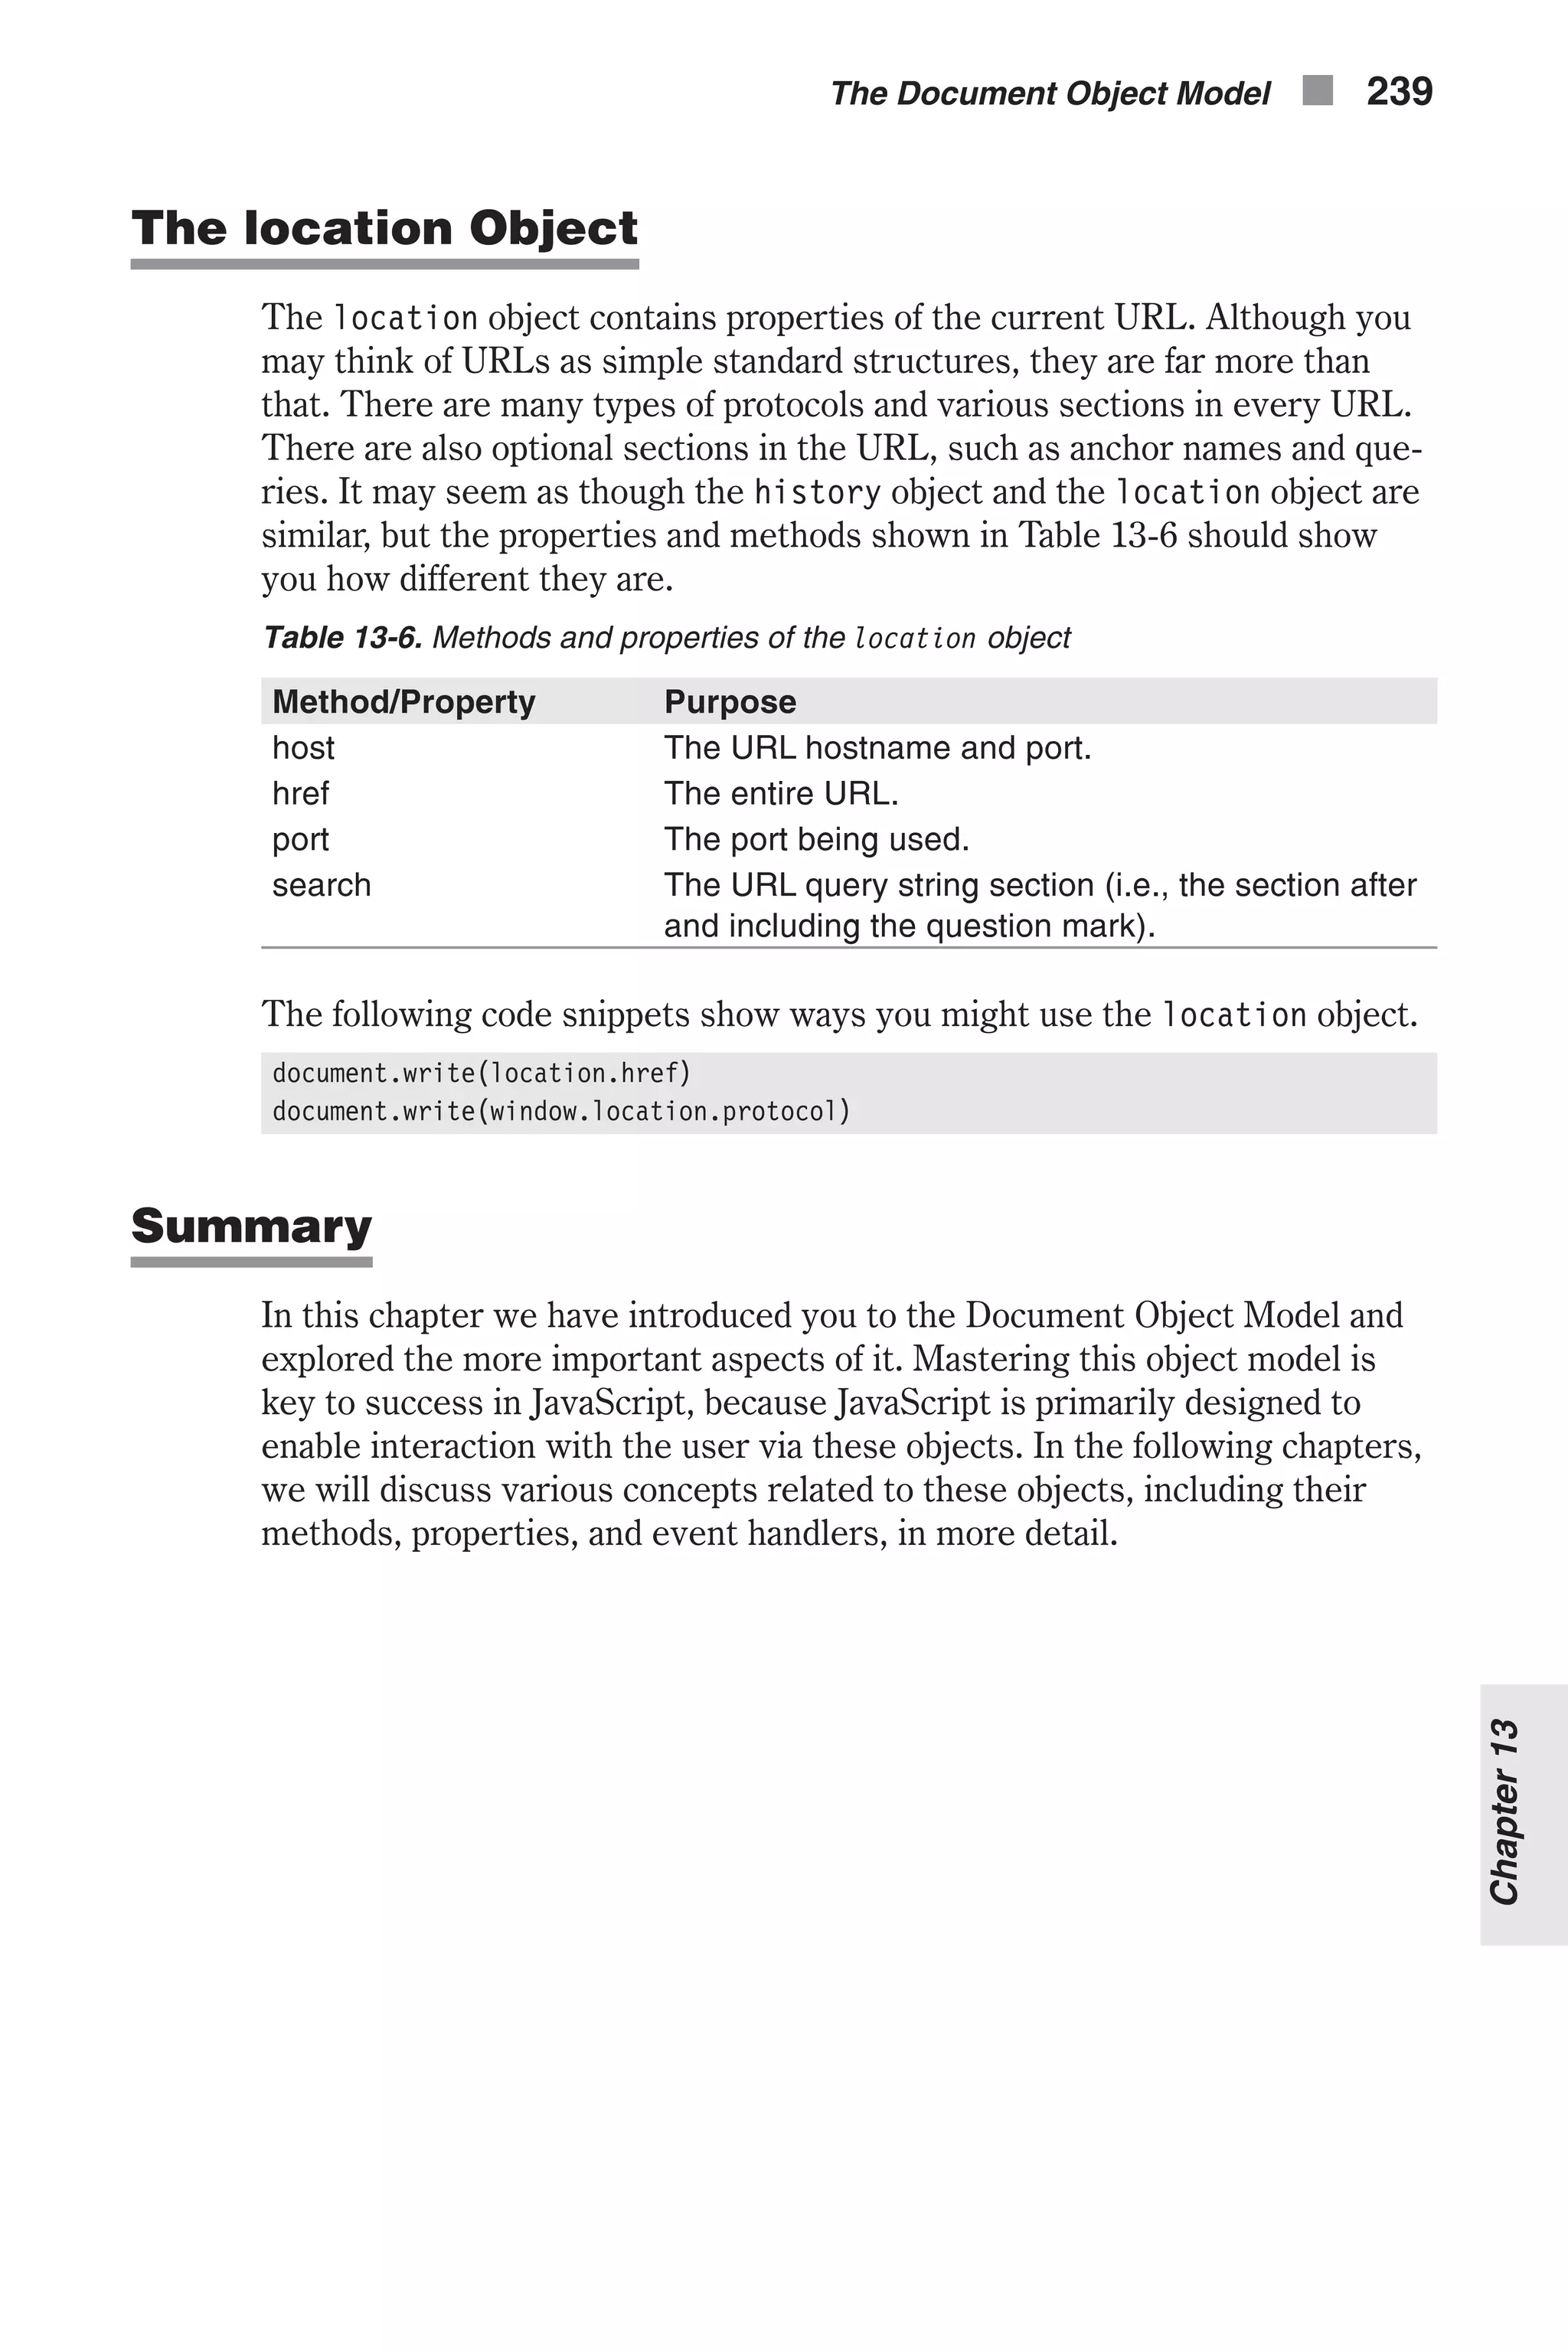
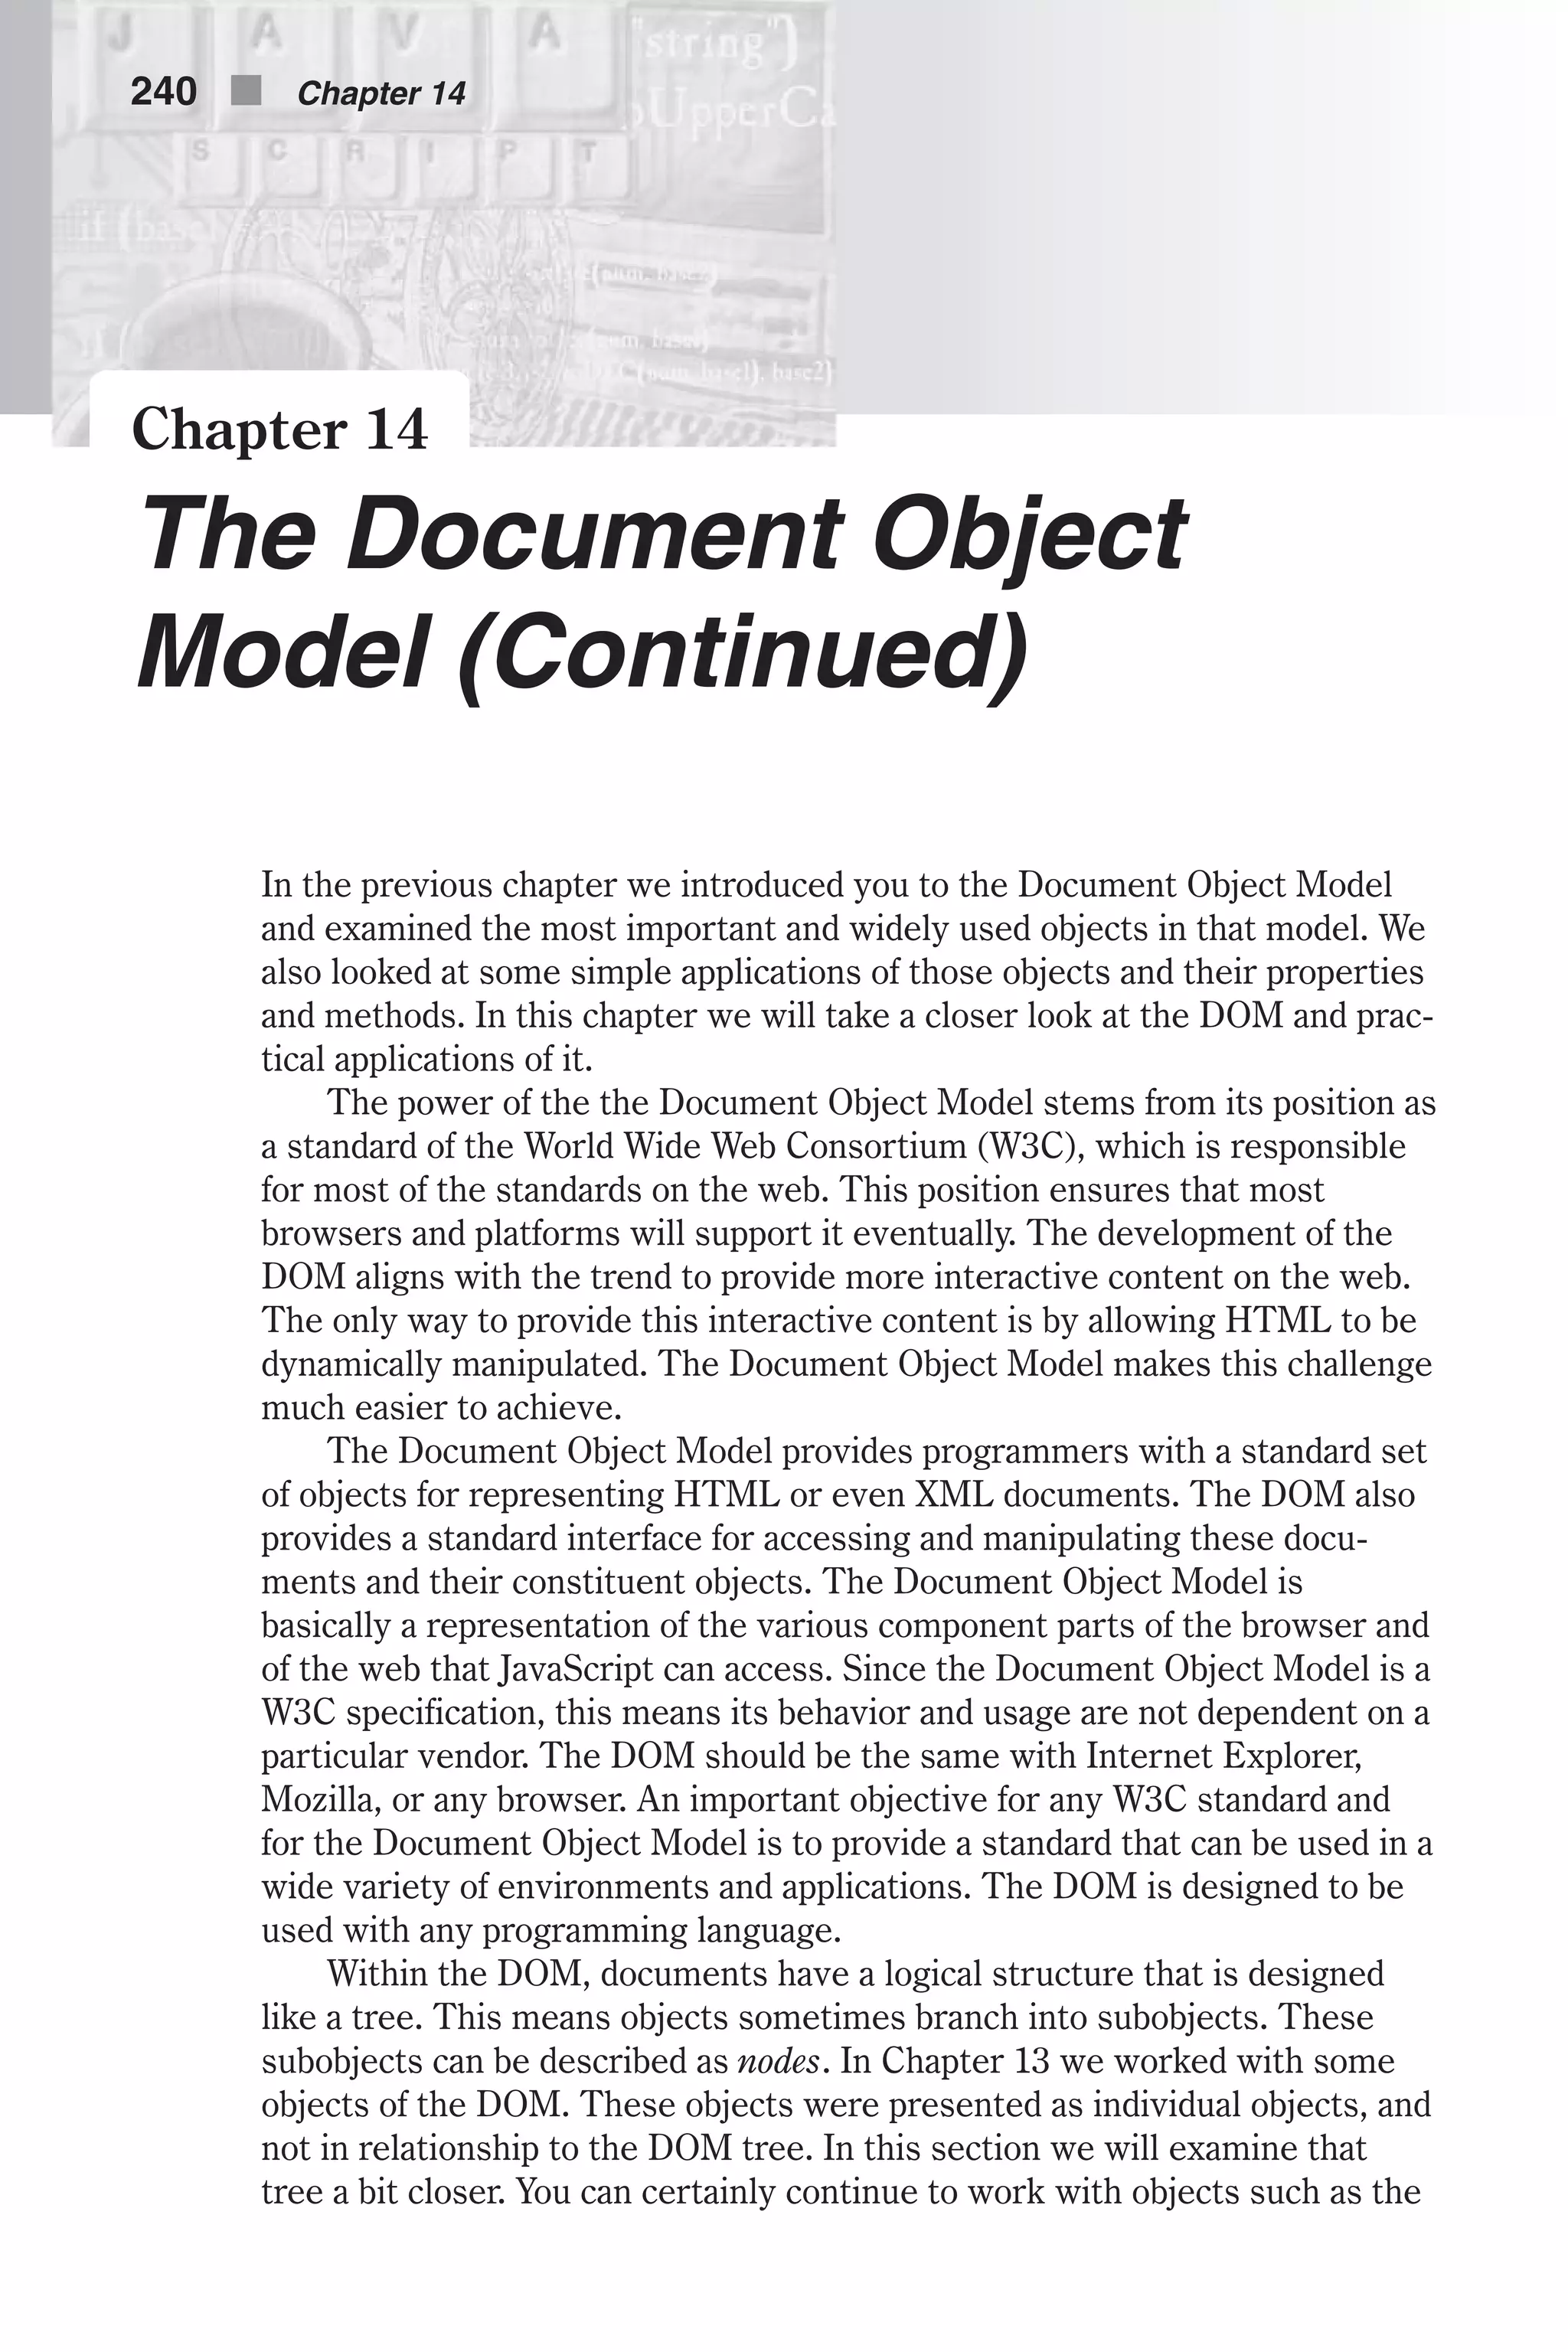
![One goal of the DOM specification is to define a programmatic interface for both XML and HTML. We saw in Table 14-1 an overview of the various lev- els; however, there are a few details that table does not address. The DOM Level 1 specification is separated into two parts: Core and HTML. The Core DOM Level 1 section provides a set of basic interfaces that can represent any structured document. The Core Level 1 also defines extended interfaces for representing an XML document. These extended XML interfaces don’t need to be implemented by a DOM implementation that only provides access to HTML documents. Accessing a Document’s Structure with the DOM The primary function of the Document Object Model is to view, access, and change the structure of an HTML document. You saw in Chapter 13 how you can access parts of the browser and even write to the HTML page using the Document Object Model. You can access certain HTML elements based on their id identifier, or allocate arrays of elements by their tag or CSS class type. All transformations are done according to the most recent HTML specification. More importantly, they happen dynamically—any transforma- tion will happen without reloading the page. Some of the most commonly-used elements are listed in Table 14-2. Table 14-2. Common DOM elements DOM Element Description document Returns the document object for the page. It also is the root node of the DOM tree. element Represents an instance of most structures and substructures in the DOM tree. For example, a text block can be an element or an item in an HTML form. nodeList A nodeList is basically an array of elements. You can access items in a nodeList through common syntax like myList[n], where n is an integer. There are a number of JavaScript methods specified by the Document Object Model that allow you to access its structure. Some of the most commonly used methods are listed in Table 14-3. Table 14-3. Commonly used DOM methods DOM Method Description element getElementById(id) Returns the element uniquely identified by its id identifier. nodeList getElementsByTag- Name(name) Returns a nodeList of any elements that have a given tag (such as a <p> tag), specified by name. 242 n Chapter 14](https://image.slidesharecdn.com/wordware-advancedjavascript3rded-160421130838/75/www-webre24h-com-Wordware-advanced-javascript-3rd-ed-easttom-267-2048.jpg)
![Banners You can use the status bar to create banners. Banners are classic JavaScript scripts. They were, and still are, an attractive addition to any web page. Ori- ginally banners appeared in the status bar, scrolling several messages in sequence. Some programmers prefer to place the banner in a text box, because they feel that status bar-based banners are annoying to the common surfer. Banners are sometimes very unsteady; their speed is not uniform and they sometimes blink. There is no workaround to make them better. But, all in all, they are still a lot of fun. In this section we take a look at a few different banner-like scripts, most of which were created exclusively for this book. T-banner The T-banner simulates a typewriter and is one of my favorite banners. The typewriter style display catches the user’s eye and ensures the message will be noticed. It displays each message by typing it in, one character at a time. It seems as if someone is typing the message at a certain speed and deleting it upon completion. First, take a look at the script: <HTML> <HEAD> <TITLE>T-banner</TITLE> <SCRIPT LANGUAGE = "JavaScript"> <!-- // set speed of banner (pause in milliseconds between characters) var speed = 100 // decrease value to increase speed (must be positive) // set pause between completion of message and beginning of following one var pause = 1000 // increase value to increase pause // set initial values var timerID = null var bannerRunning = false // create global array var ar = new Array() // assign the strings to the array's elements ar[0] = "Welcome to this JavaScript page" ar[1] = "I hope you enjoy the T-banner script" ar[2] = "It's kind of a cool banner" ar[3] = "Don't forget to check out my other scripts" // set index of first message to be displayed first var currentMessage = 0 // set index of last character to be displayed first var offset = 0 // stop the banner if it is currently running function stopBanner() { // if banner is currently running if (bannerRunning) Utilizing the Status Bar n 251 Chapter15](https://image.slidesharecdn.com/wordware-advancedjavascript3rded-160421130838/75/www-webre24h-com-Wordware-advanced-javascript-3rd-ed-easttom-276-2048.jpg)
![// stop the banner clearTimeout(timerID) // timer is now stopped bannerRunning = false } // start the banner function startBanner() { // make sure the banner is stopped stopBanner() // start the banner from the current position showBanner() } // type in the current message function showBanner() { // assign current message to variable var text = ar[currentMessage] // if current message has not finished being displayed if (offset < text.length) { // if last character of current message is a space if (text.charAt(offset) == " ") // skip the current character offset++ // assign the up-to-date to-be-displayed substring // second argument of method accepts index of last char plus one var partialMessage = text.substring(0, offset + 1) // display partial message in status bar window.status = partialMessage // increment index of last character to be displayed offset++ // recursive call after specified time timerID = setTimeout("showBanner()", speed) // banner is running bannerRunning = true } else { // reset offset offset = 0 // increment subscript (index) of current message currentMessage++ // if subscript of current message is out of range if (currentMessage == ar.length) // wrap around (start from beginning) currentMessage = 0 // recursive call after specified time timerID = setTimeout("showBanner()", pause) // banner is running bannerRunning = true } } 252 n Chapter 15](https://image.slidesharecdn.com/wordware-advancedjavascript3rded-160421130838/75/www-webre24h-com-Wordware-advanced-javascript-3rd-ed-easttom-277-2048.jpg)
![// --> </SCRIPT> </HEAD> <BODY onLoad = "startBanner()"> </BODY> </HTML> Example 15-4 (ex15-4.htm). A T-banner Global Statements // set speed of banner (pause in milliseconds between characters) var speed = 100 // decrease value to increase speed (must be positive) // set pause between completion of message and beginning of following one var pause = 1000 // increase value to increase pause // set initial values var timerID = null var bannerRunning = false // create global array var ar = new Array() // assign the strings to the array's elements ar[0] = "Welcome to this JavaScript page" ar[1] = "I hope you enjoy the T-banner script" ar[2] = "It is designed to be more stable than regular banners" ar[3] = "Don't forget to check out my other scripts" // set index of first message to be displayed first var currentMessage = 0 // set index of last character to be displayed first var offset = 0 At first, the speed of the banner is set to 100. This is equal to the pause between each character of a message in milliseconds. The pause (in milli- seconds) between the completion of a message (string) and its deletion is assigned to the variable pause. The identifier for the current timeout is assigned null, because no timeout is set yet. The current state of the banner (false because it is not running yet) is assigned to the variable bannerRunning. An array is then created to hold the strings that are to be displayed as banner messages. The first string is assigned to the first ele- ment of the array, ar[0], and so on. The number 0 is assigned to currentMessage because the first message displayed is ar[0]. The index of the last character displayed at a given moment in the status bar is assigned to the global variable offset. It is set to zero because the first appearance of the banner consists of only one character—the first one—whose index is zero. stopBanner() // start the banner function startBanner() { // make sure the banner is stopped Utilizing the Status Bar n 253 Chapter15](https://image.slidesharecdn.com/wordware-advancedjavascript3rded-160421130838/75/www-webre24h-com-Wordware-advanced-javascript-3rd-ed-easttom-278-2048.jpg)
![stopBanner() // start the banner from the current position showBanner() } This function is called to stop the banner. If the banner is running, the cur- rent timeout is cleared. The variable bannerRunning is set to false because the banner is stopped. startBanner() // start the banner function startBanner() { // make sure the banner is stopped stopBanner() // start the banner from the current position showBanner() } This function calls the stopBanner function to make sure the banner is stopped, and then calls the function showBanner to start running the T-banner. showBanner() // type in the current message function showBanner() { // assign current message to variable var text = ar[currentMessage] // if current message has not finished being displayed if (offset < text.length) { // if last character of current message is a space if (text.charAt(offset) == " ") // skip the current character offset++ // assign the up-to-date to-be-displayed substring // second argument of method accepts index of last char plus one var partialMessage = text.substring(0, offset + 1) // display partial message in status bar window.status = partialMessage // increment index of last character to be displayed offset++ // recursive call after specified time timerID = setTimeout("showBanner()", speed) // banner is running bannerRunning = true } else { // reset offset offset = 0 // increment subscript (index) of current message 254 n Chapter 15](https://image.slidesharecdn.com/wordware-advancedjavascript3rded-160421130838/75/www-webre24h-com-Wordware-advanced-javascript-3rd-ed-easttom-279-2048.jpg)

![<HTML> <HEAD> <TITLE>R-banner</TITLE> <SCRIPT LANGUAGE = "JavaScript"> <!-- // set speed of banner (pause in milliseconds between addition of new character) var speed = 10 // decrease value to increase speed (must be positive) // set pause between completion of message and beginning of following one var pause = 1500 // increase value to increase pause // set initial values var timerID = null var bannerRunning = false // create array var ar = new Array() // assign the strings to the array's elements ar[0] = "Welcome to my JavaScript page" ar[1] = "I hope you enjoy the R-banner script" ar[2] = "It is pretty cool" ar[3] = "Don't forget to check out my other scripts" // assign index of current message var message = 0 // empty string initialization var state = "" // no value is currently being displayed clearState() // stop the banner if it is currently running function stopBanner() // if banner is currently running if (bannerRunning) // stop the banner clearTimeout(timerID) // banner is now stopped bannerRunning = false } // start the banner function startBanner() { // make sure the banner is stopped stopBanner() // start the banner from the current position showBanner() } // assign state a string of "0" characters of the length of the current message function clearState() { // initialize to empty string state = "" // create string of same length containing 0 digits for (var i = 0; i < ar[message].length; ++i) { state += "0" } } // display the current message 256 n Chapter 15](https://image.slidesharecdn.com/wordware-advancedjavascript3rded-160421130838/75/www-webre24h-com-Wordware-advanced-javascript-3rd-ed-easttom-281-2048.jpg)
![function showBanner() { // if the current message is done if (getString()) { // increment message message++ // if new message is out of range wrap around to first message if (ar.length <= message) message = 0 // new message is first displayed as empty string clearState() // display next character after pause milliseconds timerID = setTimeout("showBanner()", pause) // banner is now running bannerRunning = true } else { // initialize to empty string var str = "" // build string to be displayed (only characters selected thus far // are displayed) for (var j = 0; j < state.length; ++j) { str += (state.charAt(j) == "1") ? ar[message].charAt(j) : " " } // partial string is placed in status bar window.status = str // add another character after speed milliseconds timerID = setTimeout("showBanner()", speed) // banner is now running bannerRunning = true } } function getString() { // set variable to true (it will stay true unless proven otherwise) var full = true // set variable to false if a free space is found in string (a // not-displayed char) for (var j = 0; j < state.length; ++j) { // if character at index j of current message has not been // placed in displayed string if (state.charAt(j) == 0) full = false } // return true immediately if no space found (avoid infinite loop later) if (full) return true // search for random until free space found (broken up via break statement) while (1) { // a random number (between 0 and state.length – 1 == message.length – 1) Utilizing the Status Bar n 257 Chapter15](https://image.slidesharecdn.com/wordware-advancedjavascript3rded-160421130838/75/www-webre24h-com-Wordware-advanced-javascript-3rd-ed-easttom-282-2048.jpg)
![var num = getRandom(ar[message].length) // if free space found, break infinite loop if (state.charAt(num) == "0") break } // replace the 0 character with 1 character at place found state = state.substring(0, num) + "1" + state.substring(num + 1,state.length) // return false because the string was not full (free space was found) return false } function getRandom(max) { return Math.round((max – 1) * Math.random()) } // --> </SCRIPT> </HEAD> <BODY onLoad = "startBanner()"> </BODY> </HTML> Example 15-5 (ex15-5.htm). An R-banner Global Statements // set speed of banner (pause in milliseconds between addition of new character) var speed = 10 // decrease value to increase speed (must be positive) // set pause between completion of message and beginning of following one var pause = 1500 // increase value to increase pause // set initial values var timerID = null var bannerRunning = false // create array var ar = new Array() // assign the strings to the array's elements ar[0] = "Welcome to my JavaScript page" ar[1] = "I hope you enjoy the R-banner script" ar[2] = "It is pretty cool" ar[3] = "Don't forget to check out my other scripts" // assign index of current message var message = 0 // empty string initialization var state = "" // no value is currently being displayed clearState() First, the number 10 is assigned to the variable speed, representing the pause in milliseconds between the popping up of two consecutive characters in the current message. A longer pause is assigned to the variable pause, representing the number of milliseconds between the completion of the cur- rent message and its deletion. A null value is assigned to the global variable timerID and the Boolean value false is assigned to the variable bannerRunning. Predefined messages are stored in an array. The variable 258 n Chapter 15](https://image.slidesharecdn.com/wordware-advancedjavascript3rded-160421130838/75/www-webre24h-com-Wordware-advanced-javascript-3rd-ed-easttom-283-2048.jpg)
![message is assigned zero, the index of the first element of the array to be displayed, ar[0]. The second section of the global statement section consists of only two statements, but they are important for understanding the entire script. The first statement in this section assigns an empty string to the global variable state. The clearState() function is called next. It modifies the value of the global variable state, by assigning it n “0” characters, where n is the length of the current message. The variable state is basically constructed of 0s and 1s. Suppose the first character is a 0. That means that the first character of the current message has not been popped up yet. The same applies to the second character and all the following ones. Therefore, the string starts off at all 0s, and the message is finished when all characters are 1s. stopBanner() See the explanation of this function in the T-banner section. startBanner() See the explanation of this function in the T-banner section. clearState() See the “Global Statements” section above for information regarding this function. getRandom(max) This simply returns an integer between 0 and max – 1. (See the explanation of Math.random() in Chapter 11.) getString() function getString() { // set variable to true (it will stay true unless proven otherwise) var full = true // set variable to false if a free space is found in string (a // not-displayed char) for (var j = 0; j < state.length; ++j) { // if character at index j of current message has not been // placed displayed string if (state.charAt(j) == 0) full = false } // return true immediately if no space found (avoid infinite loop later) if (full) return true // search for random until free space found (broken up via break statement) while (1) { // a random number (between 0 and state.length – 1 == message.length – 1) var num = getRandom(ar[message].length) Utilizing the Status Bar n 259 Chapter15](https://image.slidesharecdn.com/wordware-advancedjavascript3rded-160421130838/75/www-webre24h-com-Wordware-advanced-javascript-3rd-ed-easttom-284-2048.jpg)
![// if free space found, break infinite loop if (state.charAt(num) == "0") break } // replace the 0 character with 1 character at place found state = state.substring(0, num) + "1" + state.substring(num + 1, state.length) // return false because the string was not full (free space was found) return false } First, the variable full is initialized to true. An infinite loop (terminated by the break statement) is employed to go over all 0 and 1 characters of the state string. If a 0 character is found, the variable full is changed to false. It is not mandatory to break up the loop (as done above in getString()) when a free space, or 0, is found, because efficiency is not a concern in a ran- dom banner. The remaining part of the function is executed only if a free space is available. An infinite loop generates a new random index every iteration and checks if the space at that index is taken up. The loop continues to execute as long as the space at the random index is taken up. When a free space is finally found, the loop breaks up, returning the index num of the free space. The value of state is updated by replacing the 0 character at index num with a 1 character. The function returns false upon termination, indicating that the message was not completed. showBanner() Like in the T-banner script, this is the main function. The function getString() is called to update the value of state and to check if the mes- sage has been completed. If it has, the current message is updated to the following one by incrementing the value of message, representing the index of the array’s element where the current message is. If the new value is out of range, it is reset to the initial zero value. The function clearState() is called to set up the variable state, as explained above in the “Global State- ments” section. The function is then called recursively after pause milliseconds. In an ordinary case in which the message is not complete yet, the spe- cial display effects are generated. An empty string is assigned to the local variable str, ready to accumulate characters for display. A for loop iterates through the characters of the string ar[message]. If there is a 1 at the same index of the string state, the character from ar[message] is appended to the end of str. An alternative string is appended if a 0 character is found in the string state. The only way to create a right-to-left scrolling effect is to use a fairly long alternative string of a few spaces. Since a space has a very small horizontal span (characters are not uniform in width), a single-space alternative string will create a friendly left-to-right movement! Using an empty alternative string squeezes the string and creates a different 260 n Chapter 15](https://image.slidesharecdn.com/wordware-advancedjavascript3rded-160421130838/75/www-webre24h-com-Wordware-advanced-javascript-3rd-ed-easttom-285-2048.jpg)
![right-to-left movement. The built-up string is placed in the status bar, and the function is called recursively after a pause of speed milliseconds. Event Handlers When the document is completely loaded, the startBanner() function is called by the onLoad event handler. N-banner The N-banner (for “normal”) scrolls from right to left in the status bar. You have probably seen hundreds of these banners on the web. Here is a script to implement such a banner: <HTML> <HEAD> <TITLE>N-banner</TITLE> <SCRIPT LANGUAGE = "JavaScript"> <!-- function scrollBanner(seed) { // set pause in milliseconds between each movement var speed = 10 // assign one-space string to variable (space pads left side of status bar) var str = " " // create global array var ar = new Array() // assign the strings to the array's elements ar[0] = "Welcome to my JavaScript page. " ar[1] = "I hope you enjoy the N-banner script. " ar[2] = "It is kind of cool. " ar[3] = "Don't forget to check out my other scripts. " // join all messages to one string variable with no delimiter var total = ar.join("") // if message has not yet reached the left side of the status bar if (seed > 0) { // assign string of seed spaces to variable for (var i = 0; i < seed; ++i) { str += " " } // append message to end of output string str += total // message moved one position to the left seed-- // assign expression containing recursive call with literal // argument in form of string var cmd = "scrollBanner(" + seed + ")" // place computed message in status bar window.status = str Utilizing the Status Bar n 261 Chapter15](https://image.slidesharecdn.com/wordware-advancedjavascript3rded-160421130838/75/www-webre24h-com-Wordware-advanced-javascript-3rd-ed-easttom-286-2048.jpg)


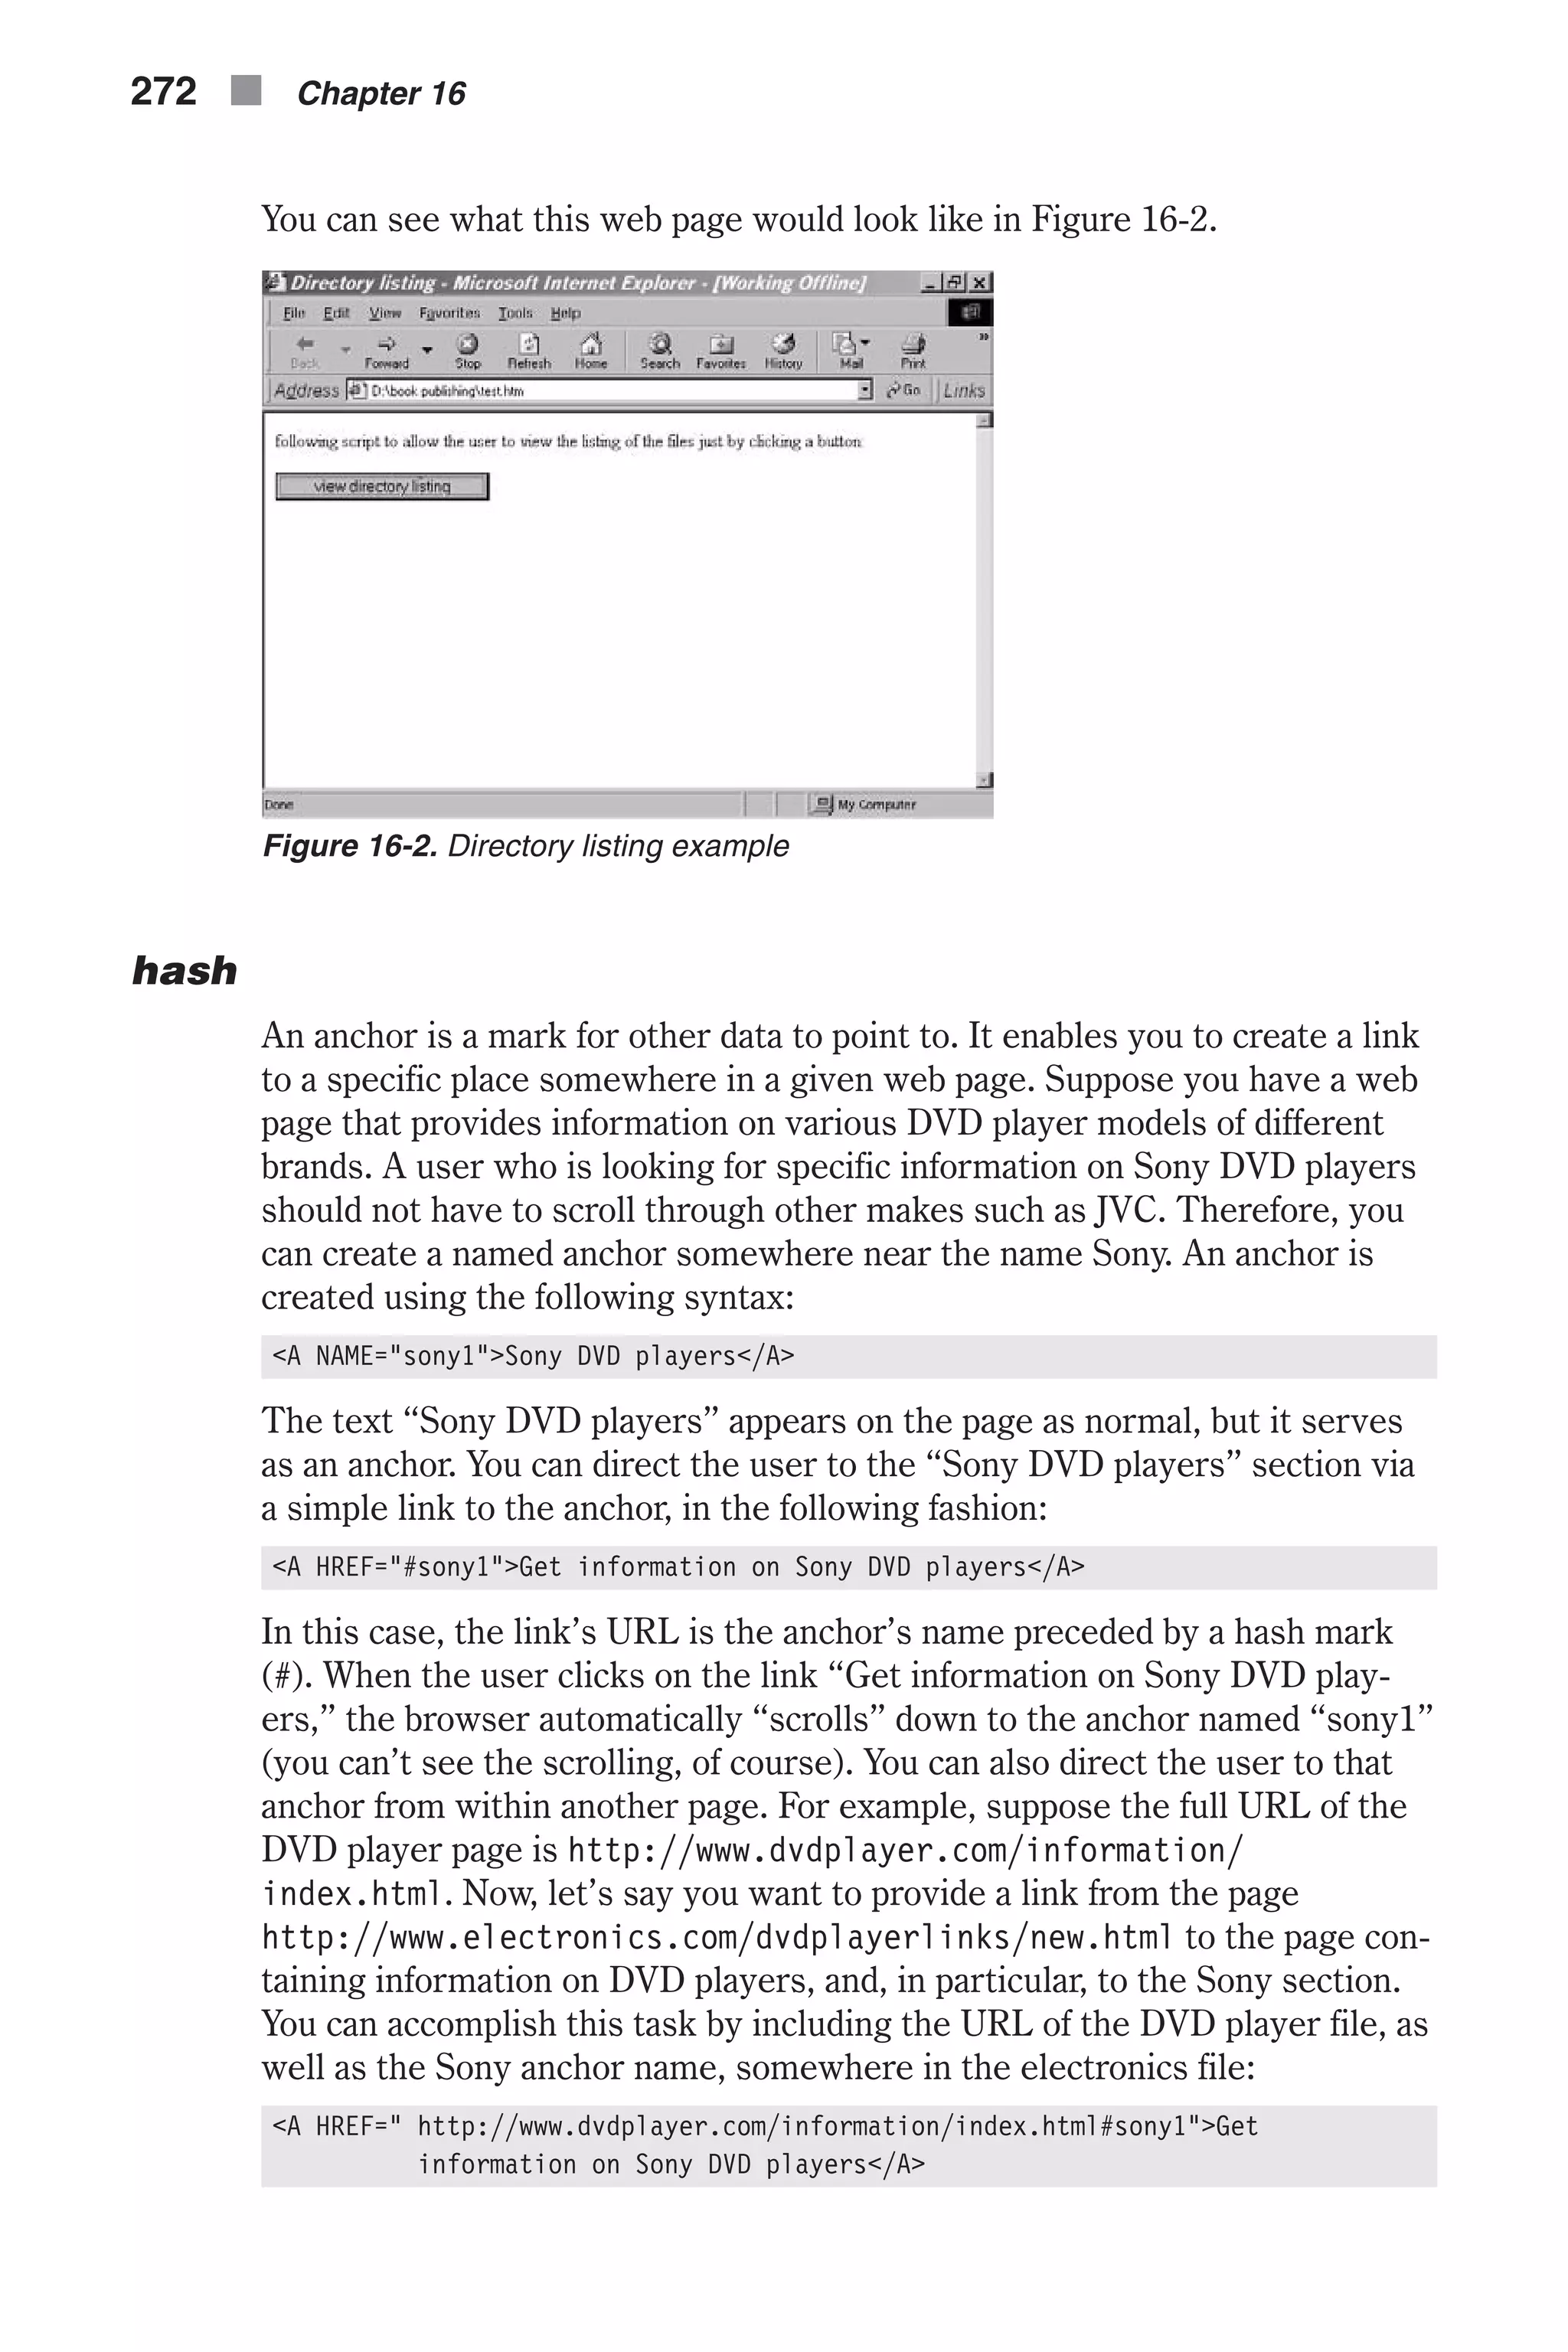

![because the computer always completes the user’s move to four—see expla- nation of algorithm above). The global statements are also a very important part of the script. At first, the query of the current page is converted from a numeric string to a number and then assigned to the variable num. If the value of num is 25, the game has just begun, and the instructions are displayed in the form of an alert box. If the value of num is 1, the game is over (the computer wins), and a corresponding message is displayed, followed by a link to restart the game by loading the current document without a query. If the value of num is less than 1, an impossible state has been encountered, meaning that the user has tried to cheat or override the script by modifying the search query and an alert box reports this finding. The game is currently underway for all other values of num, so the function placeMatches() is called to place the matches according to the given situation. location Methods The location object (window.location) also has several methods. They are supported by the latest Netscape and Microsoft browsers. reload The location.reload method forces a reload of the window’s current docu- ment. Its general syntax is: location.reload([true]) Specifying the Boolean value true as the method’s optional argument forces an unconditional HTTP get of the document from the server. An uncondi- tional get retrieves a document directly from the server, ignoring the content of the browser’s cache, which might already contain the desired data from that document. Therefore, true should not be specified unless you have reason to believe that either disk or memory cache is broken, or the server has a new version of the document. If such a version is available, you must force an unconditional HTTP get because the version of the document stored in cache is different from the new version on the server. This situa- tion is common to CGI-generated documents. The reload() method simply reloads the document its URL stored in location.href. It uses the same policy as the Reload or Refresh button. Microsoft has opted to label the button “refresh” rather than “reload,” but will probably keep the same method names. The exact reload policy depends on the cache handling menu option. In Netscape Navigator, the user sets the default value of this policy by choosing Network Preferences from the Options menu, and specifying Verify Documents on the Cache tab of the Preferences dialog box. The reload() method does not force a transaction with the server under normal conditions. However, if the user has set the preference to “Every Time,” the request is an unconditional get using an “if-modified- URLs and JavaScript n 281 Chapter16](https://image.slidesharecdn.com/wordware-advancedjavascript3rded-160421130838/75/www-webre24h-com-Wordware-advanced-javascript-3rd-ed-easttom-306-2048.jpg)
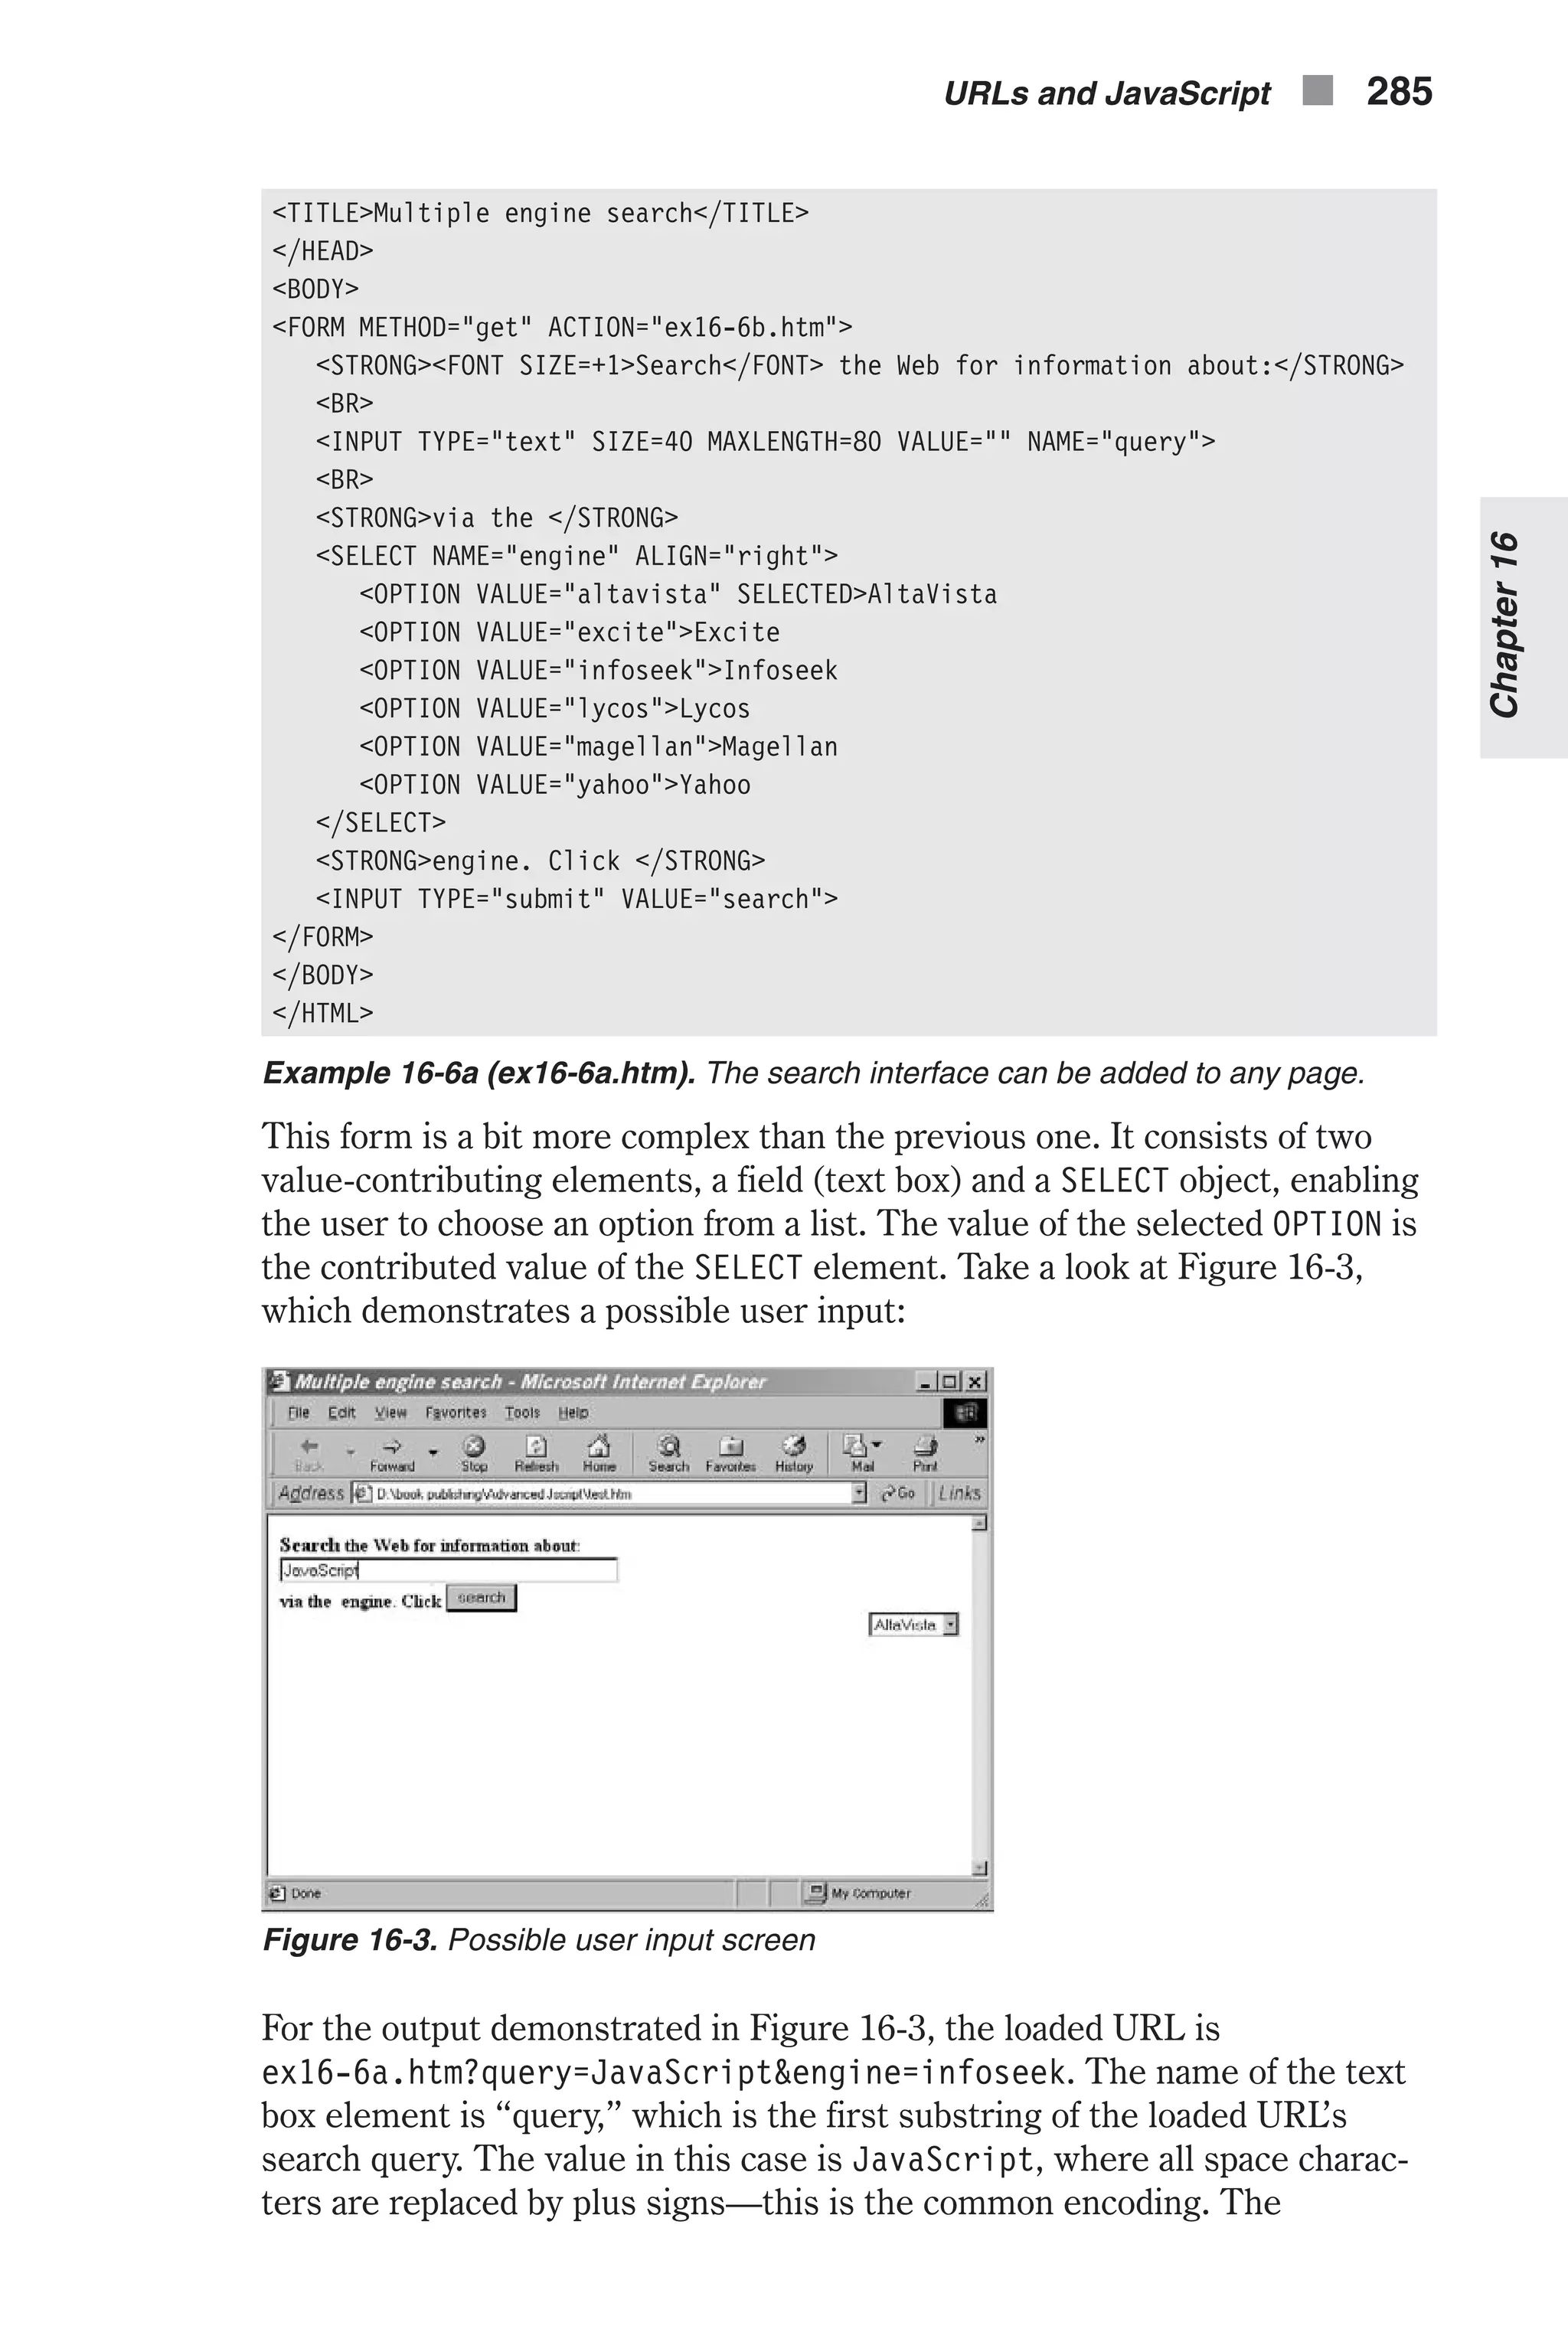
![submitted form includes the SELECT object as well. Its name is engine and it follows the delimiting ampersand. Its value is the selected OPTION, infoseek. You now understand all the components of the retrieved URL, so we can go on to analyze the script itself. <HTML> <HEAD> <TITLE>Please wait</TITLE> <SCRIPT LANGUAGE="JavaScript"> <!-- // create object of all prefixes var prefix = new prefixObject() // create object of query prefixes function prefixObject() { // lycos prefix this.lycos = "http://www.lycos.com/cgi-bin/pursuit?query=" // altavista prefix this.altavista = "http://www.altavista.digital.com/cgi-bin/query?pg=q&q=" // infoseek prefix this.infoseek = "http://guide-p.infoseek.com//Titles?qt=" // yahoo prefix this.yahoo = "http://av.yahoo.com/bin/search?p=" // magellan prefix this.magellan = "http://searcher.mckinley.com/searcher.cgi?query=" // excite prefix this.excite = "http://www.excite.com/search.gw?search=" } // execute search function callSearch() { // create array to hold search engine and search query var queryArray = location.search.split("=") // assign search query var query = queryArray[1].substring(0, queryArray[1].indexOf("&")) // assign search engine var engine = queryArray[2] // load the desired page to display search results location.href = prefix[engine] + query } // --> </SCRIPT> </HEAD> <BODY BGCOLOR="white" onLoad="timerID = setTimeout('callSearch()', 3000)"> <CENTER> <BR> <B>P<FONT SIZE=-1>LEASE </FONT>W<FONT SIZE=-1>AIT...</FONT></B> <BR> <BR> Click the button to terminate search... <FORM> <INPUT TYPE="button" VALUE="terminate search" onClick="clearTimeout(timerID)"> </FORM> 286 n Chapter 16](https://image.slidesharecdn.com/wordware-advancedjavascript3rded-160421130838/75/www-webre24h-com-Wordware-advanced-javascript-3rd-ed-easttom-311-2048.jpg)
![</CENTER> </BODY> </HTML> Example 16-6b (ex16-6b.htm). The script that interprets the user’s input and calls the appropriate search engine The script consists of only two functions. The first one, prefixObject(), is a constructor. It creates an object whose properties are the query prefixes for the supported search engines. A query prefix is the URL by which a query can be submitted to a search engine. The prefix is followed by the encoded inquiry (e.g., the user’s keywords). For example, you can look up the key- word “JavaScript” in Infoseek by loading http://guide-p.infoseek.com// Titles?qt=JavaScript. Each search engine has its own unique prefix, so the prefix for each of the supported engines must be explicitly specified. The constructor function prefixObject() assigns each prefix to a property, named according to the search engine with which the prefix is associated. For example, Infoseek’s prefix is assigned to a property named infoseek in the following fashion: this.infoseek = "http://guide-p.infoseek.com//Titles?qt=" If you know the prefixes, you can easily extend the script to support addi- tional search engines. It is not difficult to find such a prefix—just run a normal search on the desired engine and then extract the desired prefix. Since prefixes are sufficient for most engines, suffixes are only occasionally used. Search engines’ prefixes are subject to change and should be main- tained by the script owner (webmaster). The global variable prefix is an instance of this object, so its properties are the search engines’ prefixes. The callSearch() function is also very simple. At first, it assigns the encoded user input (keywords) to the variable query. It also assigns the selected search engine to the variable engine. The expression pre- fix[engine] is equal to the selected search engine’s prefix, because the values of the form’s OPTIONs (see Example 16-6a) are equivalent to the URLs and JavaScript n 287 Chapter16 Figure 16-4. Calling the appropriate search engine](https://image.slidesharecdn.com/wordware-advancedjavascript3rded-160421130838/75/www-webre24h-com-Wordware-advanced-javascript-3rd-ed-easttom-312-2048.jpg)
![names of the properties used in this script. The expressions stored in pre- fix[engine] and query are combined to construct the full desired URL. The combined string is then loaded as the new URL via assignment to the location.href property. You have probably noticed that the function is not called as an immediate script. It is called via the onLoad event handler, which delays the execution until the page has finished loading. In this case, a setTimeout statement is used to delay the execution another three seconds, giving the user a chance to terminate the process. This is extremely important, especially if the user is surfing in “reverse” using the Back button. A form consisting of a single button is used to clear the timeout via the clearTimeout() method, which is handed the identifier of the initial time- out. The user can click this button to terminate the search process before the specified search engine is actually called. Summary In this chapter I discussed JavaScript’s URLs. First, I introduced common URL terms, including the various supported schemes (http, ftp, gopher, etc.). I then presented the window.location object with all its properties and methods. The href property is used to link documents to each other. I have also discussed a URL-processing-based multiple-engine search utility and introduced another URL-related element, the document.URL property, also known as document.location. You should be mastering URL handling by now, because we will move on to more advanced URL-related concepts, such as frames, later in the book. 288 n Chapter 16](https://image.slidesharecdn.com/wordware-advancedjavascript3rded-160421130838/75/www-webre24h-com-Wordware-advanced-javascript-3rd-ed-easttom-313-2048.jpg)
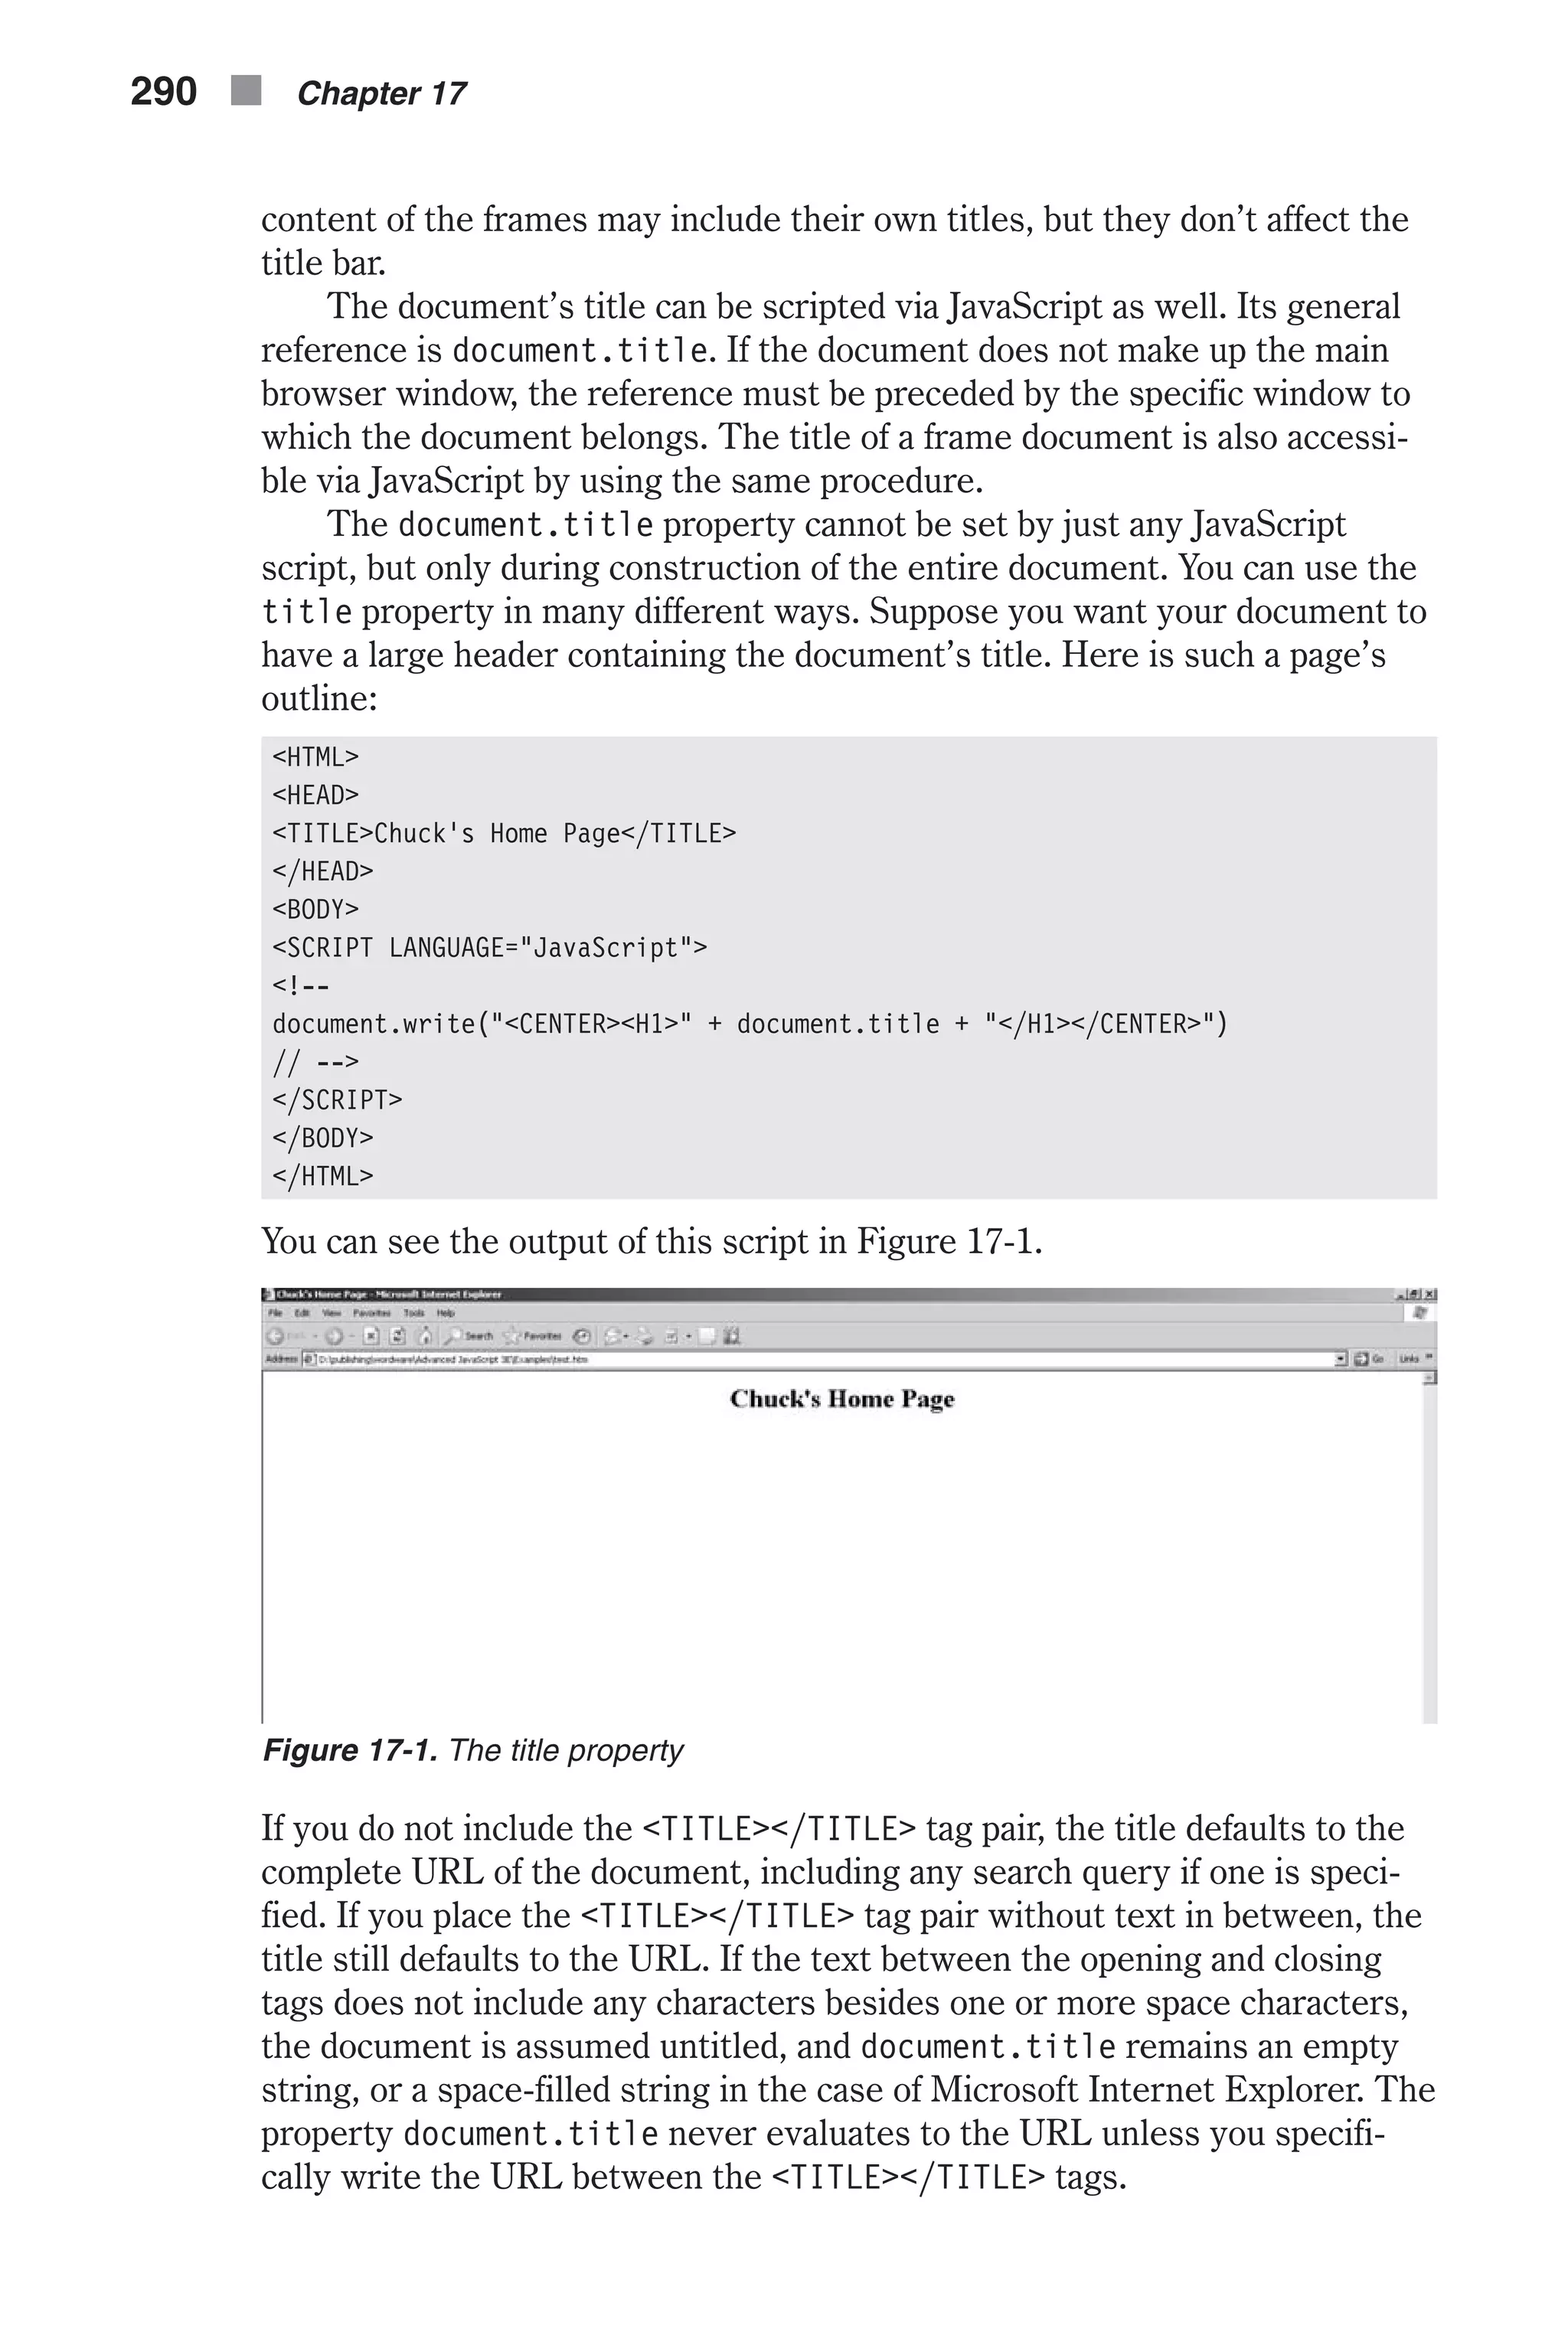
![Because the value of the title bar also identifies the browser application in the operating system environment, neither Netscape nor Microsoft have made it possible to explicitly modify it. Since it would not make any sense to identify an application as scrolling text, for example, the value of the title bar can be assigned only via the document.title property. Colors JavaScript supports several web page color properties, such as background colors and activated link colors. They are all constructed by the same method. There are generally two ways to construct color specifications: n Netscape color names n Hexadecimal triplets The tendency among web page designers is to use Netscape color name specification, which is more intuitive and easier to maintain. For example, you can set the document’s background color in the following fashion: <BODY BGCOLOR="white"> Before Netscape and Microsoft implemented such color names, the only way to specify a color was via hexadecimal triplets. These are still supported, so you can set the background color to white, for instance, in the following way: <BODY BGCOLOR="#ffffff"> Even though this method is not necessary any longer, you will still see it used frequently so it is a good idea to have a basic understanding of how it works. As you can see, the triplet is constructed of three two-digit hexadeci- mal numbers. They represent the red, green, and blue elements of the color descriptor. In total, there are approximately 17 million combinations, which is equal to the number of colors supported by a typical Macintosh or SVGA color display. However, Netscape uses a much more limited color cube. The cube consists of all the combinations of 00, 33, 66, 99, CC, and FF for each of the color descriptors. The result is 216 (6 * 6 * 6) distinct colors. The cube occasionally varies. On Macs, it includes the full 256-color palette. On Win- dows systems, if more than 40 (256 – 216) colors are already in use, the cube is minimized to only 125 (5 * 5 * 5) colors. For now, we will base our discussion on the standard 216-color cube. Colors that are the result of dith- ering, or mixing, are beyond the standard cube. An HTML document may consist of several color specifications. The following script segment demonstrates them: <BODY [BGCOLOR="#backgroundColor"] [TEXT="#foregroundColor"] [LINK="#unfollowedLinkColor"] [ALINK="#activatedLinkColor"] [VLINK="#followedLinkColor"]> </BODY> The Document Object and the History List n 291 Chapter17](https://image.slidesharecdn.com/wordware-advancedjavascript3rded-160421130838/75/www-webre24h-com-Wordware-advanced-javascript-3rd-ed-easttom-316-2048.jpg)
![All color attributes are scripted via JavaScript as properties of the document object. bgColor The document.bgColor property is expressed as a hexadecimal RGB triplet or as a string literal (such as “white,” “blue,” etc.). This property is the JavaScript reflection of the BGCOLOR attribute of the <BODY> tag. You can change the background color at any time, even via a deferred script. If you express the color as a hexadecimal RGB triplet, you must use the format rrggbb (case insensitive). The bgColor property is a commonly scripted property. You can set it to create fade effects, color cubes, and so forth, as will be demonstrated in this chapter. The following script creates a sample color cube and sets the back- ground color to the one the user selected from the cube: <HTML> <HEAD> <TITLE>Sample Color Cube</TITLE> </HEAD> <BODY> <SCRIPT LANGUAGE="JavaScript"> <!-- // create 6-element array var hex = new Array(6) // assign non-dithered descriptors hex[0] = "FF" hex[1] = "CC" hex[2] = "99" hex[3] = "66" hex[4] = "33" hex[5] = "00" // accept triplet string and display as background color function display(triplet) { // set color as background color document.bgColor = '#' + triplet // display the color hexadecimal triplet alert('Background color is now ' + triplet) } // draw a single table cell based on all descriptors function drawCell(red, green, blue) { // open cell with specified hexadecimal triplet background color document.write('<TD BGCOLOR="#' + red + green + blue + '">') // open a hypertext link with javascript: scheme to call display function document.write('<A HREF="javascript:display('' + (red + green + blue) + '')">') // print transparent image (use any height and width) document.write('<IMG SRC="place.gif" BORDER=0 HEIGHT=12 WIDTH=12>') 292 n Chapter 17](https://image.slidesharecdn.com/wordware-advancedjavascript3rded-160421130838/75/www-webre24h-com-Wordware-advanced-javascript-3rd-ed-easttom-317-2048.jpg)
![// close link tag document.write('</A>') // close table cell document.write('</TD>') } // draw table row based on red and blue descriptors function drawRow(red, blue) { // open table row document.write('<TR>') // loop through all non-dithered color descripters as green hex for (var i = 0; i < 6; ++i) { drawCell(red, hex[i], blue) } // close current table row document.write('</TR>') } // draw table for one of six color cube panels function drawTable(blue) { // open table (one of six cube panels) document.write('<TABLE CELLPADDING=0 CELLSPACING=0 BORDER=0>') // loop through all non-dithered color descripters as red hex for (var i = 0; i < 6; ++i) { drawRow(hex[i], blue) } // close current table document.write('</TABLE>') } // draw all cube panels inside table cells function drawCube() { // open table document.write('<TABLE CELLPADDING=5 CELLSPACING=0 BORDER=1><TR>') // loop through all non-dithered color descripters as blue hex for (var i = 0; i < 6; ++i) { // open table cell with white background color document.write('<TD BGCOLOR="#FFFFFF">') // call function to create cube panel with hex[i] blue hex drawTable(hex[i]) // close current table cell document.write('</TD>') } // close table row and table document.write('</TR></TABLE>') } // call function to begin execution drawCube() // --> The Document Object and the History List n 293 Chapter17](https://image.slidesharecdn.com/wordware-advancedjavascript3rded-160421130838/75/www-webre24h-com-Wordware-advanced-javascript-3rd-ed-easttom-318-2048.jpg)
![</SCRIPT> </BODY> </HTML> Example 17-1. (ex17-1.htm). A color cube You can see the output of this in Figure 17-2. This script basically prints tables. Each table cell contains a transparent image that defines the size of the cell. Each cell is also assigned a back- ground color that determines the color that fills that cell. When you click on the image, the hexadecimal triplet is displayed via an alert box, and the background color is set to the selected color. The main outline of the cube is a table with one row and six cells (col- umns). Each cell contains a table of all non-dithered colors with a given blue descriptor. There are six tables in total, one for each of the non-dithered col- ors: 00, 33, 66, 99, CC, FF. Since there are six non-dithered hexadecimal values, each table is 6 x 6. Each row presents a red hexadecimal value and each column represents a green one. Now let’s analyze the script itself. Global Statements // create 6-element array var hex = new Array(6) // assign non-dithered descriptors hex[0] = "FF" hex[1] = "CC" hex[2] = "99" hex[3] = "66" hex[4] = "33" hex[5] = "00" A six-element array is created as an instance of the Array object. The ele- ments of the array are assigned the six values from which the 216 non- dithered colors, which are supported on all platforms, can be combined. The drawCube() function call at the end of the script is also global. 294 n Chapter 17 Figure 17-2. A color cube](https://image.slidesharecdn.com/wordware-advancedjavascript3rded-160421130838/75/www-webre24h-com-Wordware-advanced-javascript-3rd-ed-easttom-319-2048.jpg)
![display(triplet) // accept triplet string and display as background color function display(triplet) { // set color as background color document.bgColor = '#' + triplet // display the color hexadecimal triplet alert('Background color is now ' + triplet) } This function’s single argument is a six-character string representing the hexadecimal RGB triplet of a color. The document’s background color is set, and an alert box displays the selected color’s exact RGB triplet. drawCell(red, green, blue) // draw a single table cell based on all descriptors function drawCell(red, green, blue) { // open cell with specified hexadecimal triplet background color document.write('<TD BGCOLOR="#' + red + green + blue + '">') // open a hypertext link with javascript: scheme to call display function document.write('<A HREF="javascript:display('' + (red + green +blue) + '')">') // print transparent image (use any height and width) document.write('<IMG SRC="place.gif" BORDER=0 HEIGHT=12 WIDTH=12>') // close link tag document.write('</A>') // close table cell document.write('</TD>') } This function accepts three arguments: the red, green, and blue descriptors. It creates a table cell with the combined triplet as the background color. The content of each cell is a gif89 transparent image, place.gif. The image’s height and width specification determines the size of each cell. Each image is also a hypertext link to a "javascript:"-scheme URL, which calls the display() function. The argument to this function is a hexadecimal triplet that is also used for the cell’s background. Note that all the global array descriptors are strings, so the plus sign is used to concatenate the three double-digit hexadecimal values. drawRow(red, blue) // draw table row based on red and blue descriptors function drawRow(red, blue) { // open table row document.write('<TR>') // loop through all non-dithered color descriptors as green hex for (var i = 0; i < 6; ++i) { drawCell(red, hex[i], blue) The Document Object and the History List n 295 Chapter17](https://image.slidesharecdn.com/wordware-advancedjavascript3rded-160421130838/75/www-webre24h-com-Wordware-advanced-javascript-3rd-ed-easttom-320-2048.jpg)
![} // close current table row document.write('</TR>') } This function accepts the red and blue descriptors and prints a table row. The content of the table is created by six calls to the drawCell() function, passing the red and blue descriptors “as is” and a different green descriptor (from the global hex array) on each call. drawTable(blue) // draw table for one of six color cube panels function drawTable(blue) { // open table (one of six cube panels) document.write('<TABLE CELLPADDING=0 CELLSPACING=0 BORDER=0>') // loop through all non-dithered color descriptors as red hex for (var i = 0; i < 6; ++i) { drawRow(hex[i], blue) } // close current table document.write('</TABLE>') } This function is very similar to the drawRow() function. The only difference is that it draws a 6 x 6 table instead of a 6 x 1 row. It calls the drawRow() function six times, each time with a different red descriptor. All table attrib- utes are set to 0 in order to avoid boundaries between the cells, creating the appearance of gradually changing colors across the cube. drawCube() // draw all cube panels inside table cells function drawCube() { // open table document.write('<TABLE CELLPADDING=5 CELLSPACING=0 BORDER=1><TR>') // loop through all non-dithered color descripters as blue hex for (var i = 0; i < 6; ++i) { // open table cell with white background color document.write('<TD BGCOLOR="#FFFFFF">') // call function to create cube panel with hex[i] blue hex drawTable(hex[i]) // close current table cell document.write('</TD>') } // close table row and table document.write('</TR></TABLE>') } 296 n Chapter 17](https://image.slidesharecdn.com/wordware-advancedjavascript3rded-160421130838/75/www-webre24h-com-Wordware-advanced-javascript-3rd-ed-easttom-321-2048.jpg)
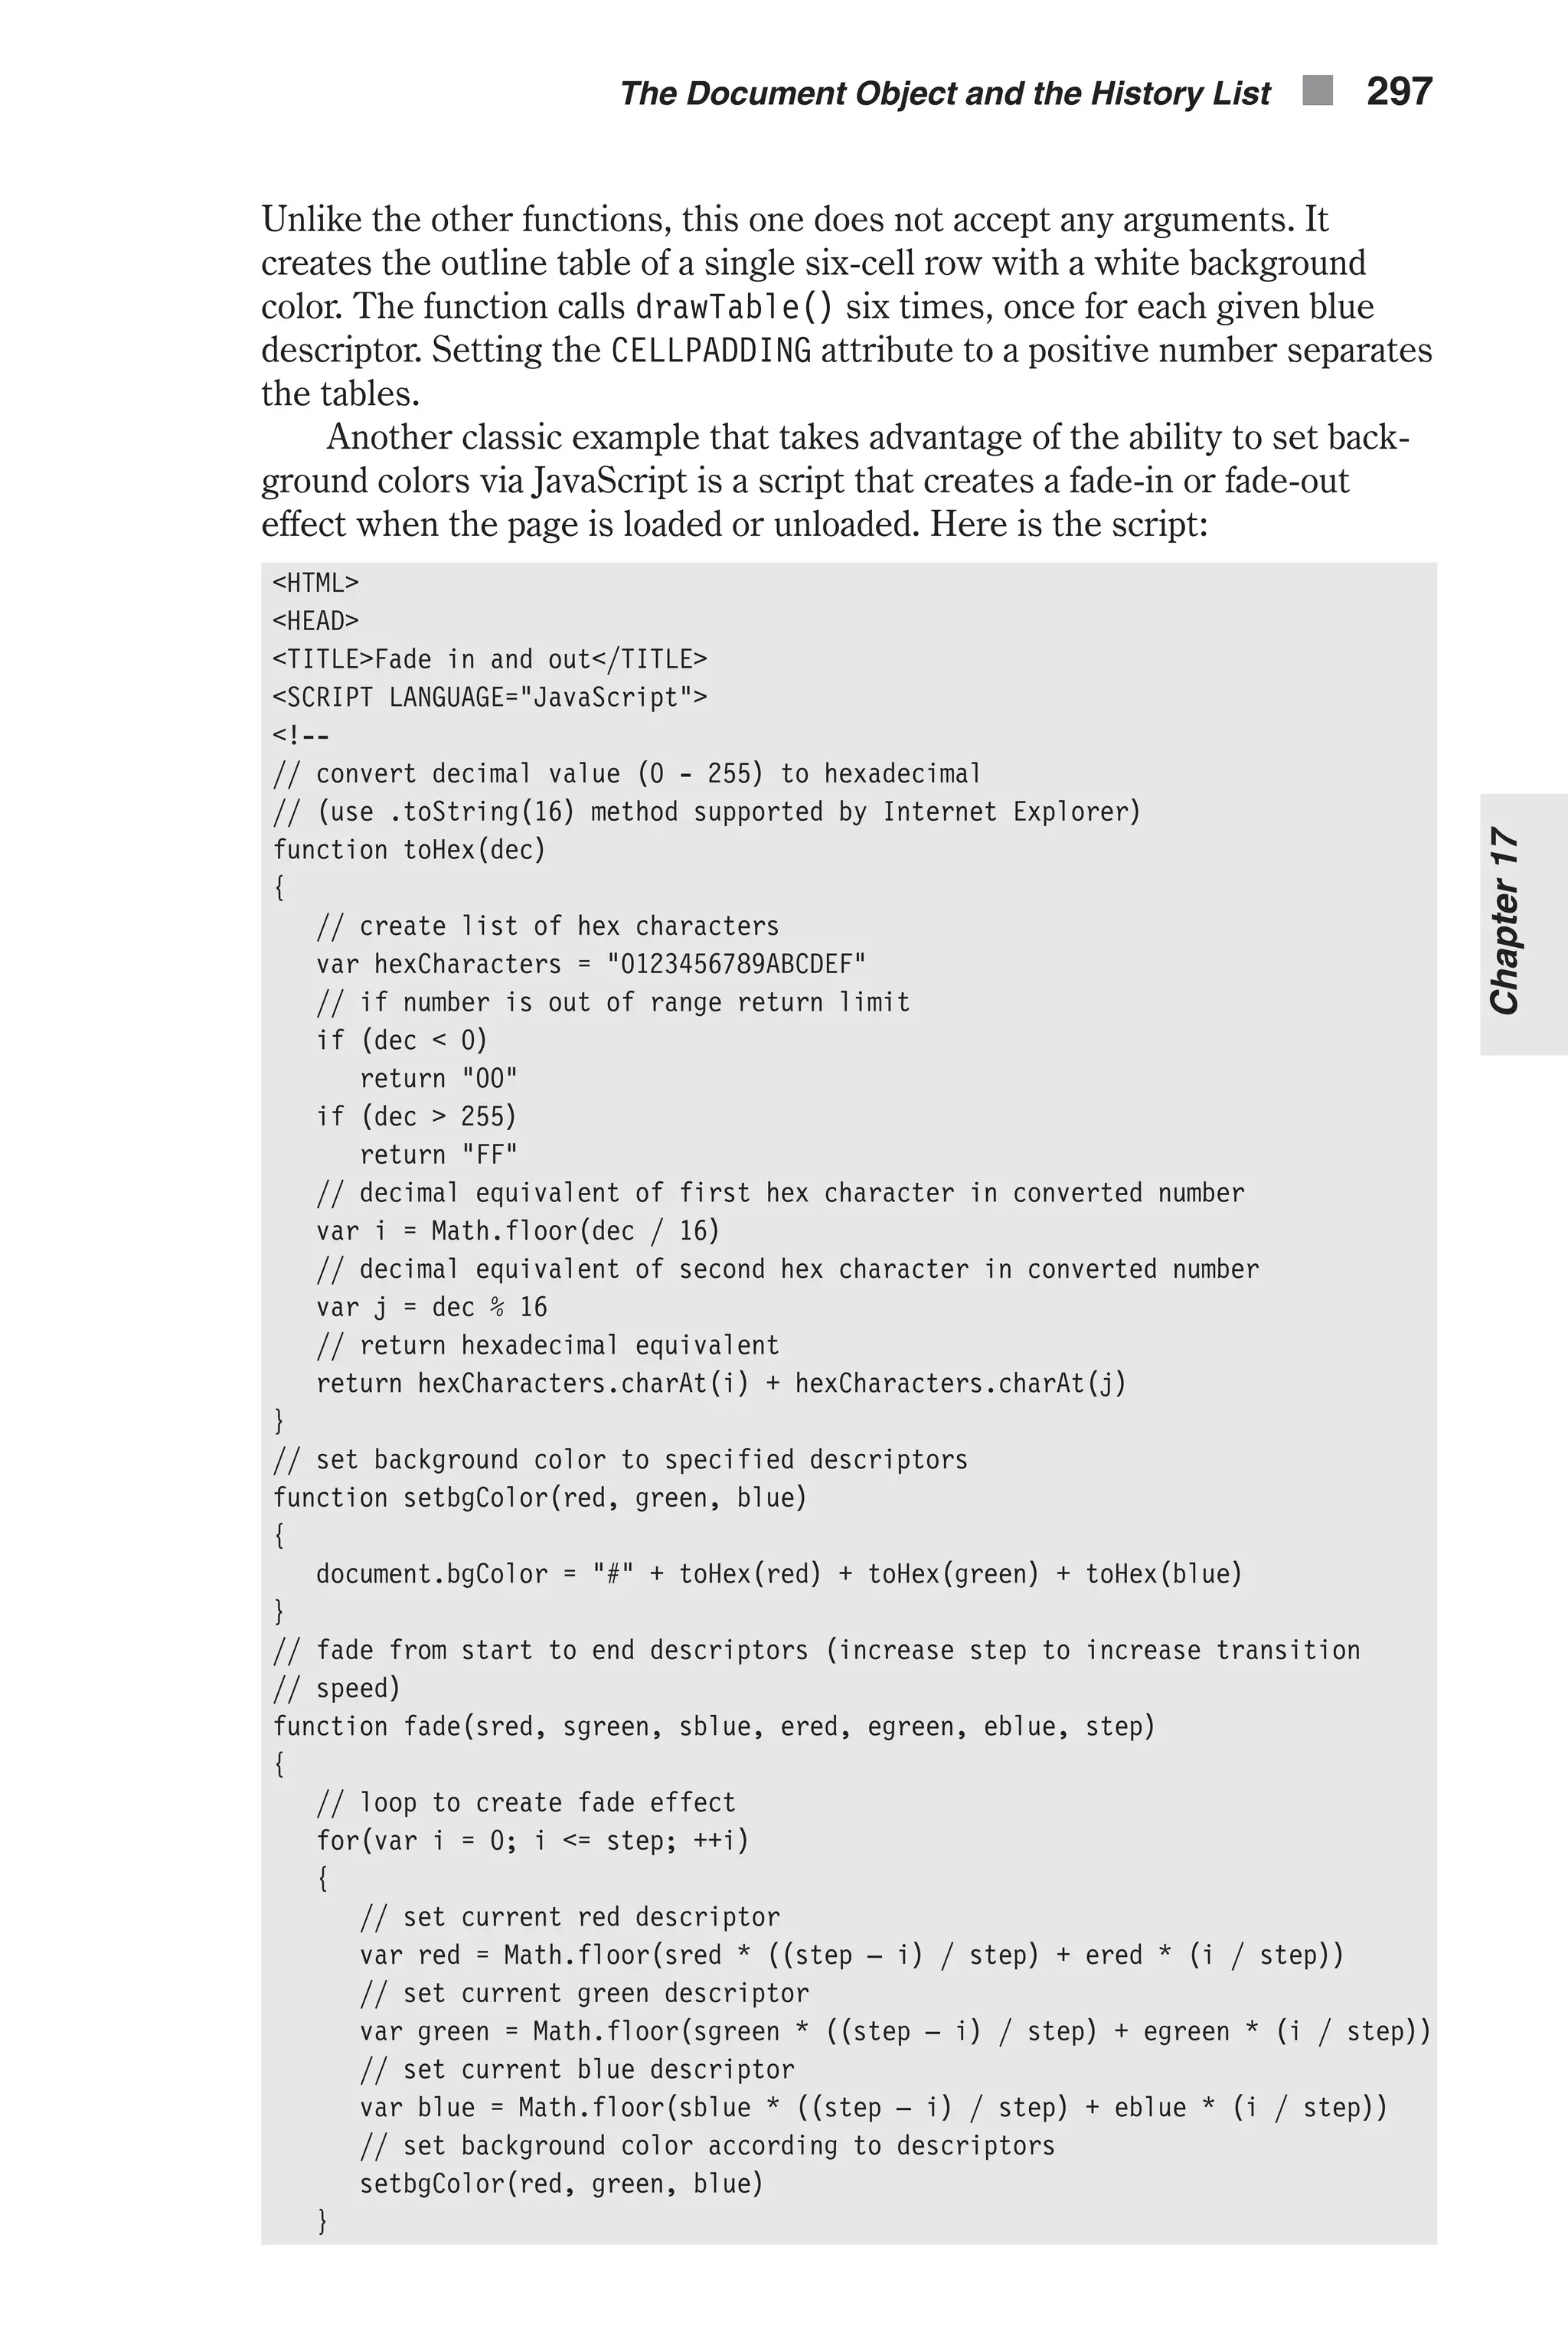

![Output Methods and Streams write and writeln The document.write method displays any number of expressions in a docu- ment window. Expressions to be printed can be of any type, including numerics, strings, and logicals. This method prints its arguments to the plain HTML document window. It does not append any external character to the printed arguments. The method document.write, also accessible as window.document.write, can be used from either a plain script (<SCRIPT LANGUAGE="JavaScript">... </SCRIPT>) or an event handler. Bear in mind that event handler scripts are executed only after the HTML source has been through layout. The write() method implicitly opens a new document of mimeType text/html if you do not explicitly invoke a document.open() method prior to the document.write() call. The writeln() method acts exactly like the write() method, except that it appends a new line character to the end of the output. HTML gener- ally ignores this character, but certain tags, such as <PRE>, use it: <PRE> one two three <PRE> After interpretation, the web page appears as: one two three You can create the same output via JavaScript in the following fashion: document.write("<PRE>") document.writeln("one") document.writeln("two") document.writeln("three") document.write("</PRE>") Data Streams The document.open() method opens a stream to collect the output of the write() and writeln() methods. Its general syntax is: document.open(["mimeType"]) mimeType specifies the type of document, which is one of the following: text/html text/plain image/gif image/jpeg The Document Object and the History List n 301 Chapter17](https://image.slidesharecdn.com/wordware-advancedjavascript3rded-160421130838/75/www-webre24h-com-Wordware-advanced-javascript-3rd-ed-easttom-326-2048.jpg)
![forms Array Suppose you have an HTML document that includes several forms, each defined by a regular <FORM></FORM> tag pair. You can refer to each form by its index in the forms array. The forms array is a property of the document object, so it is referred to as document.forms. The object representing the first form in the page is document.forms[0], the second form is docu- ment.forms[1], the third one is document.forms[2], and so forth. The forms array includes an entry for each of the document’s forms (<FORM> tag), in source order. The general reference to a form is as follows: document.forms[index] As with all of JavaScript’s arrays, the forms array includes a length prop- erty representing the number of forms on the page. The last form in the document, therefore, is: document.forms[document.forms.length – 1] Elements in the forms array can be set only by the HTML document and, hence, they are read-only for JavaScript. The following statement, for exam- ple, has no effect: document.forms[0] = "work hard" The string value of a form is <object nameAttribute>, where nameAttribute is the NAME attribute of the form. Form Name You can refer to a form by its name, rather than by its index: document.formName In order to take advantage of this referencing method, you have to explicitly assign a name to the form, via the NAME attribute. I strongly recommend using this method. If your HTML page has more than one form, indices to the forms array are less meaningful than form names. þ Note: The term reference is used to describe an object’s scripting protocol. A single object can be referenced via different but equivalent protocols. 308 n Chapter 18](https://image.slidesharecdn.com/wordware-advancedjavascript3rded-160421130838/75/www-webre24h-com-Wordware-advanced-javascript-3rd-ed-easttom-333-2048.jpg)
![form Object HTML Syntax All forms are basically just another set of HTML tags. The top-level tags are the <FORM></FORM> tag pair. All form elements must be placed within these tags in order to be interpreted correctly. The general syntax of the <FORM> tag is as follows: <FORM [NAME="formName"] [TARGET="windowName"] [ACTION="serverURL"] [METHOD="get" | "post"] [ENCTYPE="encodingType"] [onSubmit="handlerText"] [onReset="handlerText"]> </FORM> The attributes are: n NAME—specifies the name of the form. This attribute is seldom used because it does not have any effect when using a server-side script. When using client-side JavaScript, though, it is recommended you name the form for easier referencing. Since a form’s name will be mostly used by JavaScript’s scripts, it is also preferred to use the JavaScript identi- fier naming standards. n TARGET—specifies the window to which form responses go. This attrib- ute instructs the browser to display the server responses in the speci- fied window rather than in the default window where the form resides. The specified value cannot be a JavaScript reference to a window—it must be a plain HTML frame or a window reference. n ACTION—specifies the URL of the server-side script that processes the data submitted by the form. This attribute is necessary only when the processing script resides on the server. In this case, the script will be written in either C or Perl and will adhere to the CGI (Common Gate- way Interface) protocol. The URL scheme must be HTTP. n METHOD—specifies how to submit the form. It can be either get or post. The latter is more popular because it enables the client to send a greater amount of data to the processing script. Nonetheless, get is much easier to use and is also suitable for JavaScript scripts. If a form is returned with get, the data is placed in the QUERY_STRING environment variable. post, on the other hand, instructs the client to pass the data to the server via its operating system’s standard input method. n ENCTYPE—specifies the MIME type of the submitted data, such as "text/plain" for plain text. The default MIME encoding of the data sent is "application/x-www-form-urlencoded". Forms n 309 Chapter18](https://image.slidesharecdn.com/wordware-advancedjavascript3rded-160421130838/75/www-webre24h-com-Wordware-advanced-javascript-3rd-ed-easttom-334-2048.jpg)
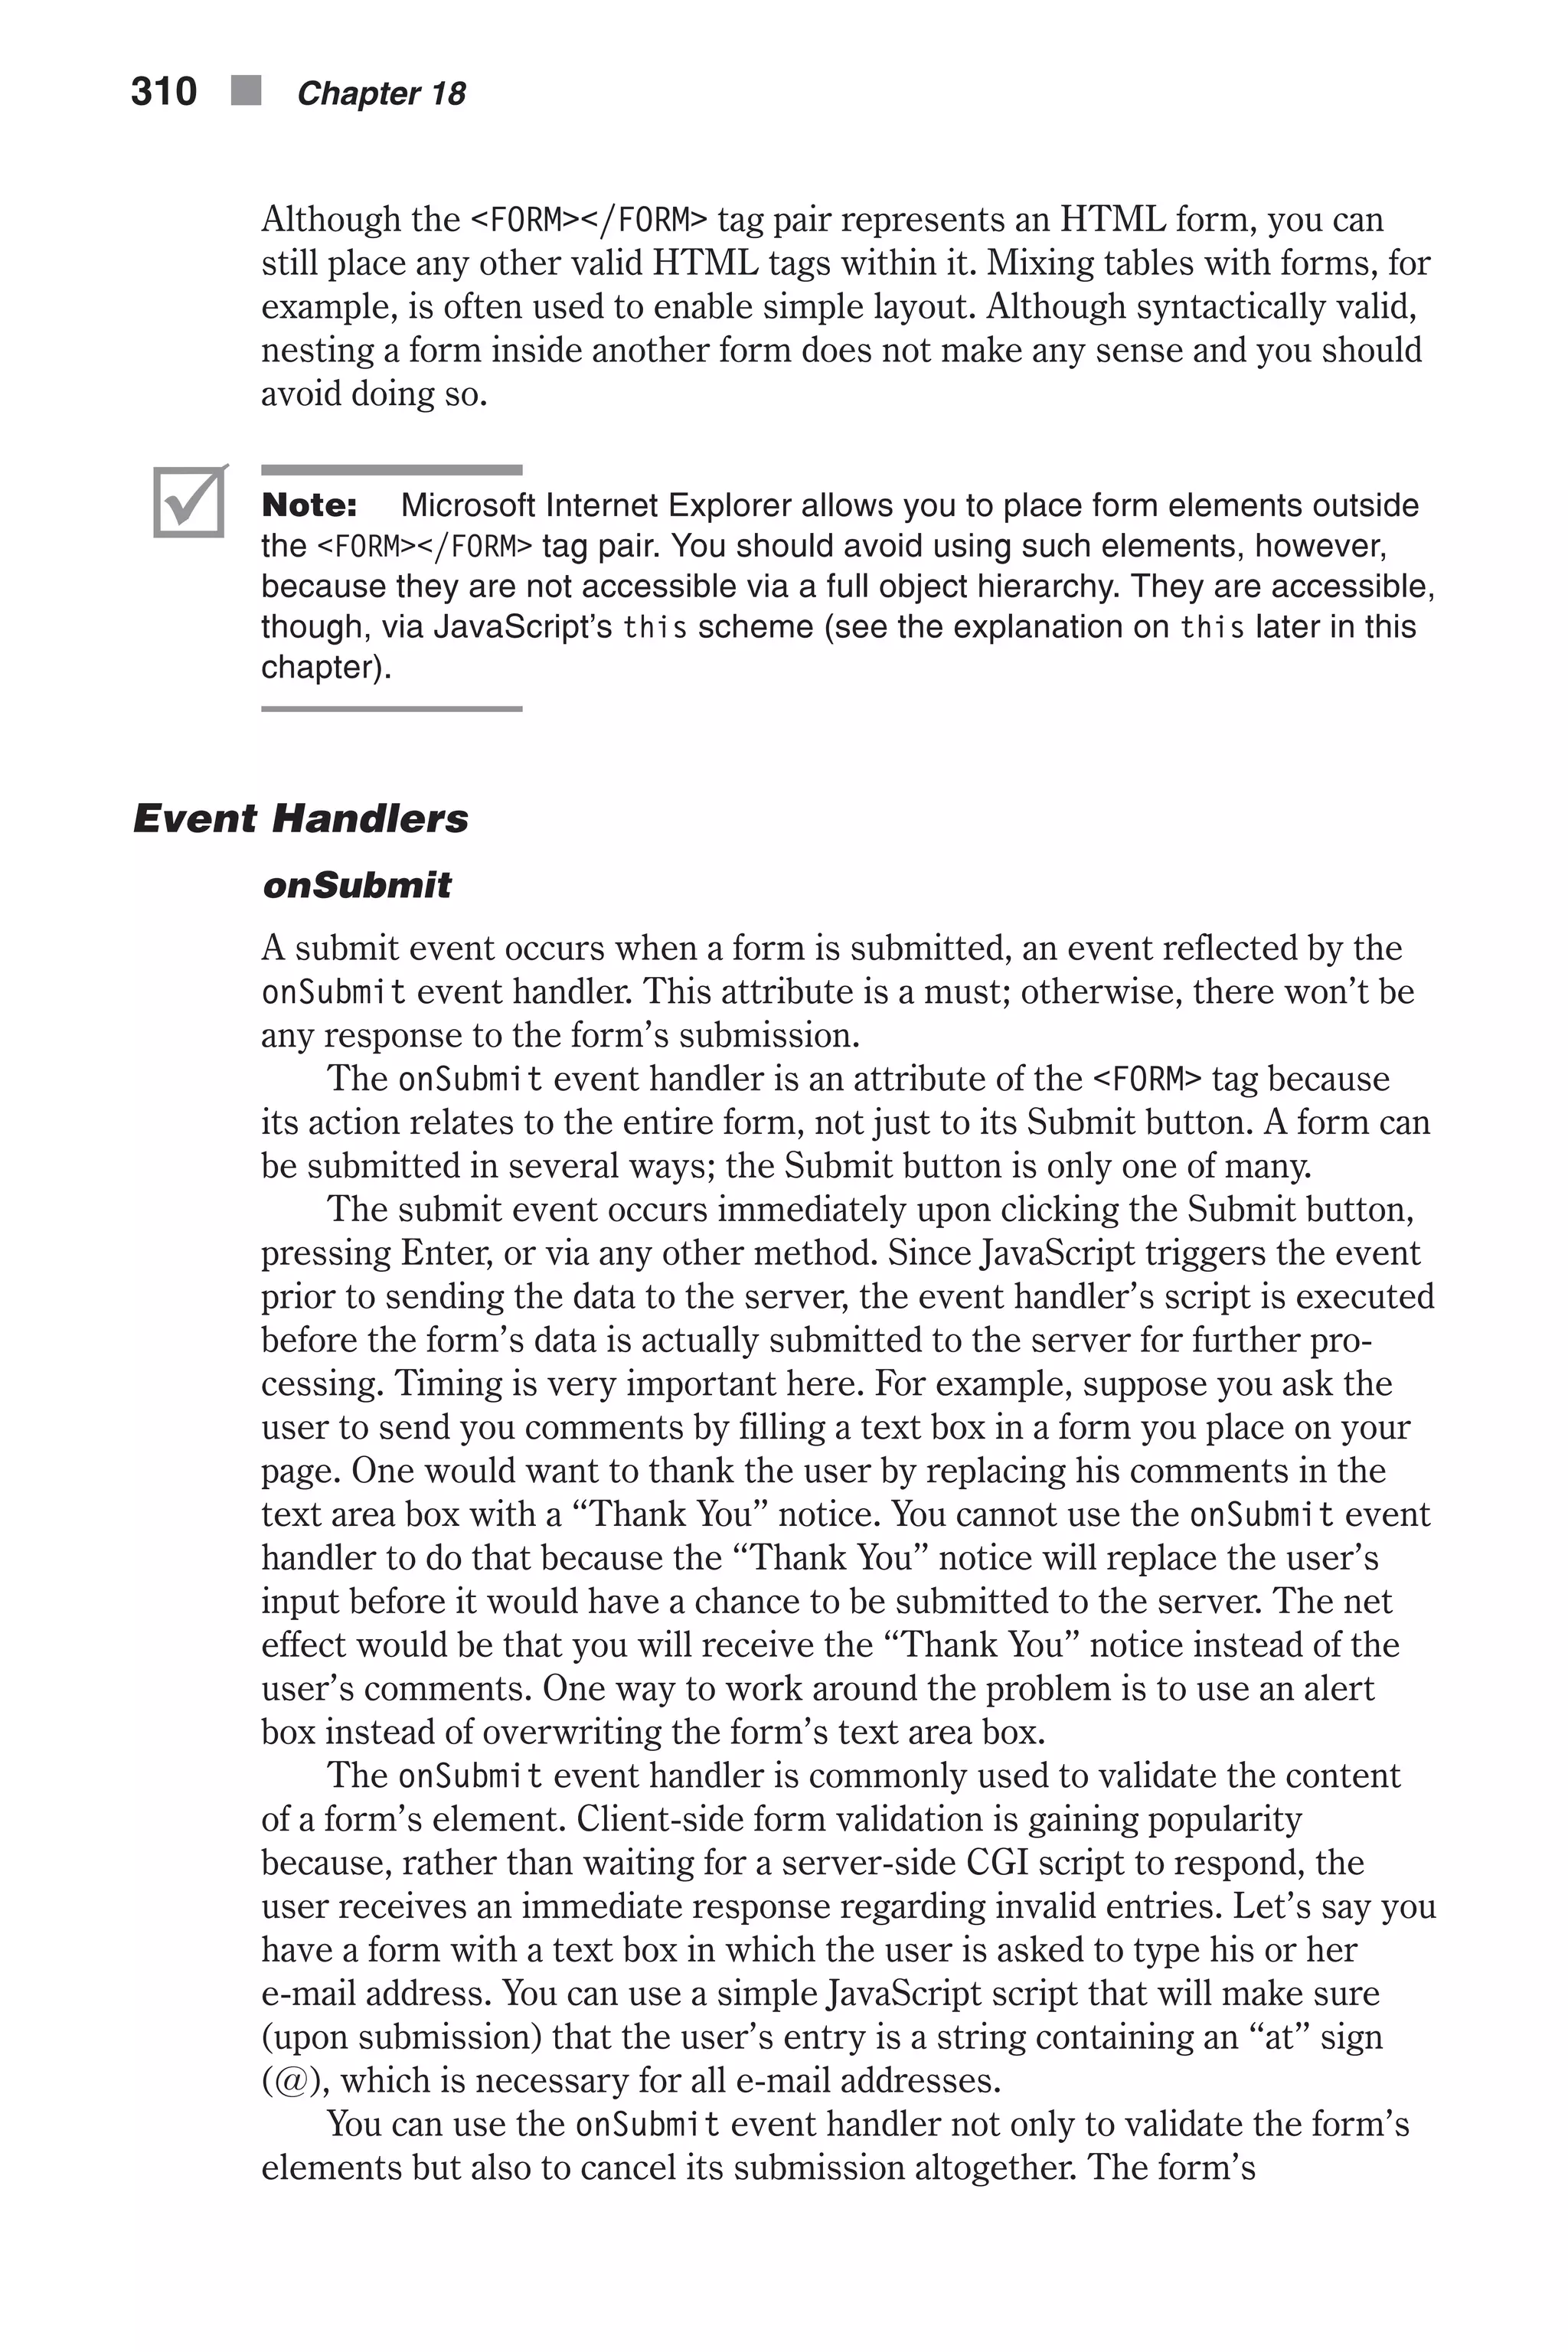
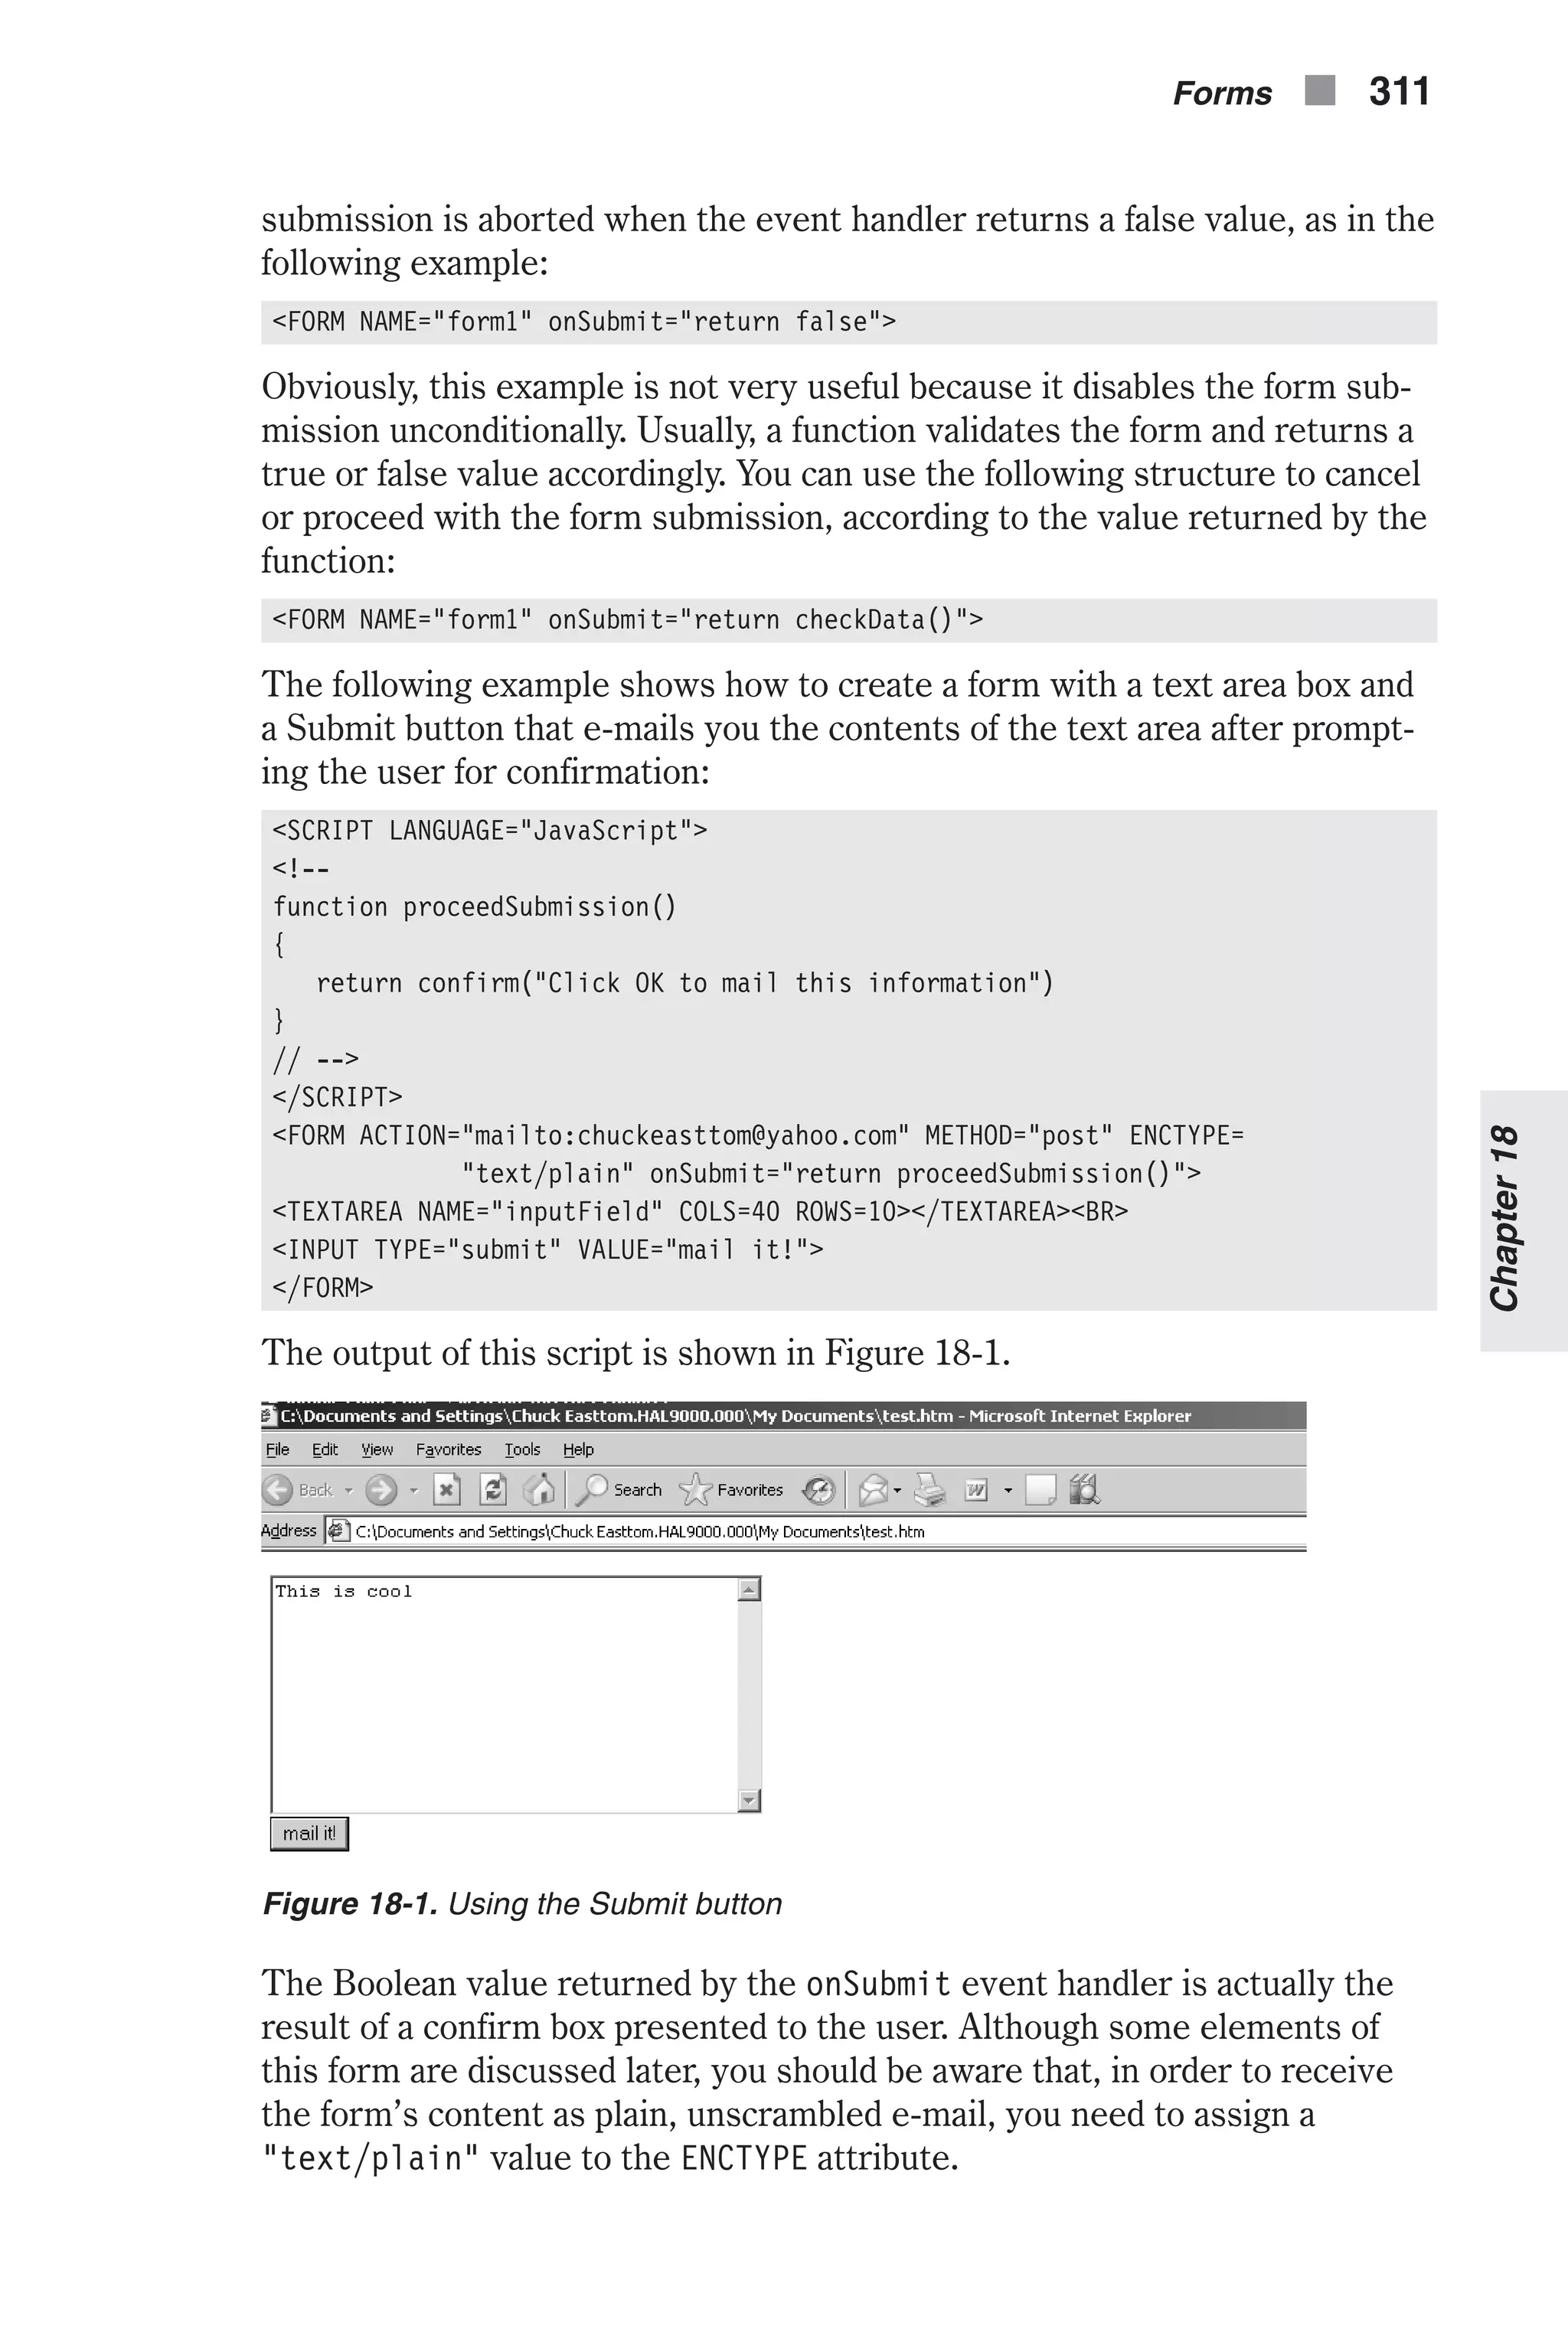
![onReset Another event handler of the <FORM> tag is onReset. A reset event usually occurs when the user clicks the Reset button. Except for the triggering event, the onReset event handler behaves like the onSubmit event handler. The following example asks the user to confirm the resetting process before executing it: <FORM ACTION="mailto:chuckeasttom@yahoo.com" METHOD="post" ENCTYPE="text/plain" onReset="return confirm('Click OK to reset form to default status')"> <TEXTAREA NAME="input" COLS=40 ROWS=10></TEXTAREA><BR> <INPUT TYPE="reset" VALUE="reset it!"> </FORM> þ Note: The onReset event handler was first implemented years ago in Navigator 3.0. Methods submit() The submit() method submits a form much the same way as the Submit button. The submit() method sends data back to the HTTP server via get or post submission schemes. The general syntax is as follows: formName.submit() formName is the exact reference of the form object. You can invoke this method when the user clicks a given hypertext link. Take a look at the fol- lowing example: <HTML> <HEAD> <TITLE>hypertext link submission</TITLE> <SCRIPT LANGUAGE="JavaScript"> <!-- function submitForm(sub) { document.forms[sub].submit() } function proceedSubmission() { return confirm("Click OK to mail this information") } // --> </SCRIPT> </HEAD> <BODY> <FORM METHOD="post" ACTION="mailto:chuckeasttom@yahoo.com" ENCTYPE= "text/plain" onSubmit="return proceedSubmission()"> <TEXTAREA NAME="inputField" COLS=40 ROWS=10></TEXTAREA><BR> <A HREF="example18-01b.htm" onClick="submitForm(0)">Mail it!</A> 312 n Chapter 18](https://image.slidesharecdn.com/wordware-advancedjavascript3rded-160421130838/75/www-webre24h-com-Wordware-advanced-javascript-3rd-ed-easttom-337-2048.jpg)
![</FORM> </BODY> </HTML> Example 18-1a (ex18-1a.htm). A hypertext link used to submit a form just like a Sub- mit button In Example 18-1a the form is submitted by the submitForm function, which is invoked via the onClick event handler of a link object. After prompting the user for confirmation via the onSubmit event handler, the form, refer- enced as document.forms[0] (it is the first and only form in the page), is submitted through its submit() method. Example 18-1b shows the file ex18-1b.htm, which displays the “Thank You” notice referenced in Example 18-1a: <HTML> <HEAD> <TITLE>Thank you</TITLE> </HEAD> <BODY> Thank you very much for your feedback </BODY> </HTML> Example 18-1b (ex18-1b.htm). The “Thank You” message displayed after submitting the mail in Example 18-1a þ Note: The submit method is broken in many versions of Navigator prior to 4.5 and Internet Explorer prior to 4.0. Test every new release before usage. reset() The reset() method resets a given form and is equivalent to clicking the Reset button. Its syntax and usage is exactly the same as the submit() method. See the onReset event handler for more information on resetting a form. Properties action The action property reflects the value of the <FORM> tag’s ACTION attribute. Its value is the URL of a CGI or LiveWire application on the server that needs to execute upon submission. If no explicit URL for the server-side application is specified, the value of action in Navigator defaults to the URL of the current document (the one containing the form). Microsoft Internet Explorer defaults the property to an empty string. The formReference.action property can also be assigned a value by JavaScript. You can take advantage of this feature to modify the form’s behavior after the page has been laid out, according to the user’s preferences. Forms n 313 Chapter18](https://image.slidesharecdn.com/wordware-advancedjavascript3rded-160421130838/75/www-webre24h-com-Wordware-advanced-javascript-3rd-ed-easttom-338-2048.jpg)
![In general, you can assign the form’s properties by JavaScript, instead of HTML attributes. Take a look at the following form example: <FORM NAME="form1" METHOD="post" ACTION="http://www.foo.com/trash.cgi"> </FORM> An alternative to this construct is the following combination of HTML and JavaScript: <FORM NAME="form1" METHOD="post"> </FORM> <SCRIPT LANGUAGE="JavaScript"> <!-- document.form1.action = "http://www.foo.com/trash.cgi" // --> </SCRIPT> elements The elements property is an array of objects corresponding to the form ele- ments. It is a property of any form and is referenced as formReference.elements. As you already know, since all form objects are elements of the docu- ment.forms object, it is possible to refer to a specific form within a document if you know its index in relationship to the other forms in the doc- ument. Similarly, a specific form’s elements are elements of the elements array. The first element of this array is a reference to the first form element (button, checkbox, hidden, password, radio, reset, select, submit, text, or textarea object), the second entry is a reference to the second form ele- ment, and so on, in source order. For example, if a form has one text box and three radio buttons, you can reference these elements as formReference.elements[0], formReference.elements[1], formReference.elements[2], and formReference.elements[3]. Like the forms array, the elements array is an alternative to referencing by name. Some programmers prefer to use array reflection, whereas others prefer to trace elements by their names. It is convenient to implement the elements array when a form contains many elements that are related to indices. A form with ten text boxes that each accept a telephone number, for example, should be referenced via the elements array. Such referencing will allow you to use a loop to iterate through the ten different elements. Usually, though, you will use forms to collect data fields of different meanings that are not similar to each other as the phone numbers in the pre- vious example. In such cases, referencing by name is much more convenient and easier to understand, follow, and maintain. You can easily redesign the physical layout of the form or even add new elements in the middle while keeping the old references. If you use the elements array, on the other hand, any layout modification causes the indices to shift, invalidating all previous references. 314 n Chapter 18](https://image.slidesharecdn.com/wordware-advancedjavascript3rded-160421130838/75/www-webre24h-com-Wordware-advanced-javascript-3rd-ed-easttom-339-2048.jpg)
![The number of elements in a form is formReference.elements.length. Therefore, the last element in a form is reflected by the formReference.elements[formReference.elements.length – 1] entry. Elements in the elements array are read-only, so the following state- ment, for example, has no effect: formReference.elements[0] = "do not do this" The first few elements of the elements array represent the form elements. The following property, length, reflects the number of form elements. Suppose a form element evaluates to foo. Then, the following refer- ences all evaluate to foo: document.forms[0].elements[0].value document.forms[0].elements.elements[0].value document.forms[0].elements.elements.elements[0].value These bizarre references are possible due to the fact that an elements object contains all the properties of its form, in addition to the form’s elements. A form, say document.forms[0], can also have a property named name reflect- ing the value of the NAME attribute of the corresponding <FORM> tag. You can also reference this property in Navigator using one of the following known methods: document.forms[0].name document.forms[0].elements.name document.forms[0].elements.elements.name You may recall from Chapter 5 that the for...in loop statement provides the capability to list an object’s properties, top to bottom. The following function can be used to list the properties of a typical elements object by name (not index): function printElements(form, formString) { // initialize output string var result = "" for (var i in form.elements) { result += formString + ".elements." + i + " = " + form.elements[i] + "r" } alert(result) } You can use this function by invoking it with a specific form’s reference and a name. Consider the following simple HTML form: <FORM NAME="form1" ACTION="http://www.yourserver.com/filename.cgi" METHOD="post"> <INPUT TYPE="text" NAME="num1" VALUE="bla"> <INPUT TYPE="hidden" NAME="num2" VALUE="foo"> <TEXTAREA NAME="num3">wow</TEXTAREA> </FORM> Forms n 315 Chapter18](https://image.slidesharecdn.com/wordware-advancedjavascript3rded-160421130838/75/www-webre24h-com-Wordware-advanced-javascript-3rd-ed-easttom-340-2048.jpg)
![The preceding printElements() function returns the following output when provided with the arguments document.forms[0] and "docu- ment.forms[0]": Notice that the first four lines list the exclusive properties of the elements object. The following lines represent properties of elements that are identi- cal to those of the form itself, document.forms[0] in this case. Theo- retically, you can reference all forms properties of a given form as properties of its elements object. If you think this wealth of referencing methods is confusing, you are right. The best solution is to stick to some standards. Suppose you have a form in a document that is referenced as document.forms[index], docu- ment.formName, or formReference. The following objects include all forms properties: formReference formReference.elements The elements property of formReference is just another interface to the same object. Since Netscape originally documented the above two objects as different ones (and still does), it is common to refer to formReference when accessing a form’s general properties and to formReference.elements when accessing the properties of the form’s elements. Theoretically, you can also access the first element of the form by: formReference[0] As you already know, any form element object can be referenced by its name. For example, a text object whose name is field1 in the first form of a page can be accessed as follows: document.forms[0].field1 When two or more elements have the same name, they form an array in which the indices are determined according to their layout order. For exam- ple, if there are three text objects in one form, all named inputField, you can reference these elements in the following fashion: document.forms[0].inputField[0] 316 n Chapter 18 Figure 18-2. A list of the elements object’s properties](https://image.slidesharecdn.com/wordware-advancedjavascript3rded-160421130838/75/www-webre24h-com-Wordware-advanced-javascript-3rd-ed-easttom-341-2048.jpg)
![document.forms[0].inputField[1] document.forms[0].inputField[2] encoding The content of a form is encoded before it is submitted to the server. There are various types of encoding, or MIME encoding—some suitable for files, while others are suitable for plain text or other purposes. The encoding method is initially specified by assigning it to the <FORM> tag’s ENCTYPE attribute. The default encoding method is application/x-www-form- urlencoded, but others such as multipart/form-data and text/plain are also available. Every HTML form has a MIME encoding specification, even if it is not explicitly shown. The value of JavaScript’s formReference.encoding is ini- tially the value assigned to the HTML ENCTYPE attribute. This property is not read-only, so it can be set at any time, even after layout has been com- pleted. Setting encoding overrides the ENCTYPE attribute and instructs the browser (primarily Navigator) to use the new MIME encoding method. For your reference, the general syntax of this property is: formReference.encoding If no value is specified as the ENCTYPE attribute of a form, it is defaulted to application/x-www-form-urlencoded. Nevertheless, the value of formReference.encoding remains an empty string. method The METHOD attribute of a <FORM> tag accepts either a get or a post value. JavaScript reflects the value of this attribute in the form of a method prop- erty. You can use this property like all other form properties. It can be read or set at any time, even after layout has been completed. The term “method,” in this case, has no relation whatsoever to the object-oriented interpretation of the word (a function associated with an object). The formReference.method property is active when the client-side JavaScript script interacts with a specific server-side CGI or LiveWire appli- cation. In this case, you can set the method property along with other form-related properties to modify the form’s layout on the fly. The general syntax to reference this property is: formReference.method The default value of the HTML METHOD attribute is get. The value of the JavaScript method property, however, has no default and stays empty. target When you “surf the web,” you often encounter HTML forms that submit data to the server and return a result, such as a list of sites or a simple “Thank You” page. Since most forms serve as a means to interact with the user, you will seldom find forms that submit to the server and do not respond. Furthermore, even forms that just receive input from the user and Forms n 317 Chapter18](https://image.slidesharecdn.com/wordware-advancedjavascript3rded-160421130838/75/www-webre24h-com-Wordware-advanced-javascript-3rd-ed-easttom-342-2048.jpg)
![submit it to a server-side script are expected to respond and give the user an indication that the content of the form was correctly submitted. Most server-side applications return a new HTML page in the same window as the form. Sometimes, however, you may prefer to receive the results in a different window or frame. You can specify the target of the returned page by setting the TARGET attribute of the <FORM> tag. This value is reflected by JavaScript’s target property, which belongs to the form object. The general syntax for referencing this property is: formReference.target This property can be both read and set at any time, even after the page has been laid out. Despite the fact that the TARGET attribute defaults to the cur- rent window or frame’s HTML document, the JavaScript’s target property does not default to any string. The value of the JavaScript’s target property, like the HTML’s TARGET attribute, can be either a window or a frame name. In addition to these obvi- ous values, there are several common references: _top, _parent, _self, and _blank. These values will be covered again when we discuss frames and windows and, for detailed information, you may also refer to HTML docu- mentation. It may seem convenient to assign window or frame objects to this property, but unfortunately it only accepts HTML specifications. Element Types Each and every form element (button, radio, text area, etc.) features a type property that reflects the type of that form element. As usual in JavaScript syntax, the type property follows the element reference. For example, you can access the type of the first element of the first form in the following fashion: document.forms[0].elements[0].type Table 18-1 lists the various form elements with their corresponding types. Table 18-1. Form elements HTML Element Value of type Attribute INPUT TYPE="button" "button" INPUT TYPE="checkbox" "checkbox" INPUT TYPE="file" "file" INPUT TYPE="hidden" "hidden" INPUT TYPE="password" "password" INPUT TYPE="radio" "radio" INPUT TYPE="reset" "reset" INPUT TYPE="submit" "submit" INPUT TYPE="text" "text" SELECT "select-one" SELECT MULTIPLE "select-multiple" TEXTAREA "textarea" 318 n Chapter 18](https://image.slidesharecdn.com/wordware-advancedjavascript3rded-160421130838/75/www-webre24h-com-Wordware-advanced-javascript-3rd-ed-easttom-343-2048.jpg)
![All values listed in the right column are plain strings representing the ele- ment type. Using this with Event Handlers When you call a function via an event handler, you may refer to the form ele- ment that triggered the event handler, such as a text object or a button. The following script segment and figure demonstrate this concept: <SCRIPT LANGUAGE="JavaScript"> <!-- function process() { document.forms[0].elements[0].value = "thank you" } // --> </SCRIPT> <FORM> <INPUT TYPE="text" NAME="myField" VALUE="email..." onChange="process()"> </FORM> You can see the output of this script in Figure 18-3. At this point, it is not so important to understand exactly what this script does. The INPUT TYPE="text" definition creates a simple text box in which the user can enter a value. The text box (or text object) is assigned the string "email..." as its default value (the form comes up with this text inside the box). The onChange event handler captures the change event that occurs when the user changes the value of the text object and clicks outside of it. When such an event occurs, the function process is invoked and assigns the string "thank you" to that text object’s value property. Notice that a full object path specification, from the document browser object down- ward, is used to access the text object. Such referencing has two disadvantages: n The path is fairly long and complex. n If you change the position or the name of either a form or an element, the path must be modified to reflect this change, making the mainte- nance very difficult. Forms n 319 Chapter18 Figure 18-3. Calling a function via an event handler](https://image.slidesharecdn.com/wordware-advancedjavascript3rded-160421130838/75/www-webre24h-com-Wordware-advanced-javascript-3rd-ed-easttom-344-2048.jpg)
![The answer to this problem is using the keyword this to refer to the “cur- rent” object. For example, you can simplify the preceding code by implementing the this reference in the following way: <SCRIPT LANGUAGE="JavaScript"> <!-- function process(callingElement) { callingElement.value = "thank you" } // --> </SCRIPT> <FORM> <INPUT TYPE="text" NAME="myField" VALUE="email..." onChange="process(this)"> </FORM> Using the above scheme, you can change the element’s position, name, or any other optional attribute (other than the event handler) and the script will still work without any modifications. The keyword this refers to the ele- ment providing the event handler. In this case, the value of this is equal to document.forms[0].elements[0]. When the function process is called, the value assigned to the callingElement parameter is this, so callingEle- ment.value is equivalent to document.forms[0].elements[0].value. The keyword this within an event handler script refers to the form ele- ment to which the event handler belongs. For example, the keyword this in an event handler that belongs to the first element of the first form in a docu- ment can be safely replaced by document.form[0].element[0]. Using the object this is very convenient when you use a single function to refer to different form elements. You can use this in an event handler script for purposes other than a function’s argument. You can also hand any property of the this object to a function, as demonstrated by the following script segment: <SCRIPT LANGUAGE="JavaScript"> <!-- function display(str) { alert(str) } // --> </SCRIPT> <FORM> <INPUT TYPE="text" NAME="myField1" VALUE="d" onChange="display(this.value)"> <INPUT TYPE="text" NAME="myField2" VALUE="f" onChange="display(this.value)"> </FORM> 320 n Chapter 18](https://image.slidesharecdn.com/wordware-advancedjavascript3rded-160421130838/75/www-webre24h-com-Wordware-advanced-javascript-3rd-ed-easttom-345-2048.jpg)
![þ Note: Object, property, and method references can be passed as function arguments. Just like assigning any other value, they can be assigned to a variable as well. For example, you can use the following script segment instead of a window.document.write statement: var obj = window.document obj.write("Cool<BR>") Be careful not to enclose an object reference in quotation marks—it is not a string. Until now, the special object this was used as a substitute for a form ele- ment’s full path. JavaScript also allows you to reference a form from an element’s event handler script via the form property of this object. The pre- vious source can be rewritten in the following form: <SCRIPT LANGUAGE="JavaScript"> <!-- function process(callingElement) { callingElement.elements[0].value = "thank you" } // --> </SCRIPT> <FORM> <INPUT TYPE="text" NAME="myField" VALUE="email..." onChange= "process(this.form)"> </FORM> The object representing the form is equivalent to document.forms[0]. Generally speaking, every form element includes a form property that enables reverse access; that is, the ability to reach the form from its element (although the element is really the form’s property). Therefore, you can use any one of the following expressions to access the first element of the first form in a given document: document.forms[0].elements[0] document.forms[0].elements[0].form.elements[0] document.forms[0].elements[0].form.elements[0].form.elements[0] You will probably never use this property independently in a script, because you can always refer to a form directly as a property of a window’s document object. However, such a reference is used often with forms, because an event handler’s script references the event handler as this, and the form property enables you to reference the form through a back door. In addition to event handlers associated with form elements, you can also use this with event handlers of the <FORM> tag. In this case, this represents the object encompassing the entire form (such as docu- ment.forms[0]). Suppose you want to call a function from an onSubmit Forms n 321 Chapter18](https://image.slidesharecdn.com/wordware-advancedjavascript3rded-160421130838/75/www-webre24h-com-Wordware-advanced-javascript-3rd-ed-easttom-346-2048.jpg)
![event handler. You can use the following outline to hand an object reference representing the form object to the function: <FORM ... onSubmit="functionName(this)"> In this case, the expression this.form has no logical meaning. Utilizing the form Property In this chapter we discuss the various objects reflecting HTML form ele- ments. Each form element is a direct property of the form to which it belongs. Take a look at the following example: <FORM NAME="myForm"> <INPUT TYPE="text" NAME="myField" SIZE=10> </FORM> In this simple example, the text object may be referenced as docu- ment.myForm.myField. This top-to-bottom hierarchy enables you to access any form element object if you already have access to the form object itself. However, you may encounter a situation in which you pass a form element object to a function, for instance, and you want to reference the form object through a back door. JavaScript enables you to do so with the form property. For example, suppose you have a variable myField that holds a form element object. (For now, simply ignore how the object was assigned to the variable.) Assume the variable is named objRef and the object reference was explicitly assigned to it by the following statement: var objRef = document.myForm.myField Bear in mind that you do not have this statement in the script—all you have is the variable objRef, and you are attempting to reference the form object, myForm. You can use the form property to do so: var formObjRef = objRef.form form is a property of every form element object, with no exceptions. It is very convenient to invoke a function from an event handler with this as an argument. For example, consider the following script segment: <SCRIPT LANGUAGE="JavaScript"> <!-- function getValue(otherElement) { alert(otherElement.form.elements[1].value) } // --> </SCRIPT> <FORM> <INPUT TYPE="button" VALUE="click me" onClick="getValue(this)"> <INPUT TYPE="text" VALUE="Baruch Spinoza" SIZE=10> </FORM> 322 n Chapter 18](https://image.slidesharecdn.com/wordware-advancedjavascript3rded-160421130838/75/www-webre24h-com-Wordware-advanced-javascript-3rd-ed-easttom-347-2048.jpg)
![The output of this script is shown in Figure 18-4. The first text object (form element) invokes the getValue function with this object as the argument. The function is designed to print the value of the second element, elements[1]. The only relation between the value handed to the function (the object representing the first form element) and the second form element is that they are both “children” of the same “par- ent.” The function accepts the object reflecting the first element, so it must access the second element through the common parent, the form object. Therefore, the correct syntax must include the form property (which is an object as well): firstElement.form.secondElement The form property acts like a connector in this case. If you implement a function that references various elements of a form, you may want to ini- tially use this.form as the function’s argument. You should then use the following code in place of the preceding script segment: <SCRIPT LANGUAGE="JavaScript"> <!-- function getValue(form) { alert(form.elements[1].value) } // --> </SCRIPT> <FORM> <INPUT TYPE="button" VALUE="click me" onClick="getValue(this.form)"> <INPUT TYPE="text" VALUE="Baruch Spinoza" SIZE=10> </FORM> Forms n 323 Chapter18 Figure 18-4. Form elements](https://image.slidesharecdn.com/wordware-advancedjavascript3rded-160421130838/75/www-webre24h-com-Wordware-advanced-javascript-3rd-ed-easttom-348-2048.jpg)
![text Object HTML Syntax A text object is defined by the following plain HTML syntax: <INPUT TYPE="text" NAME="textName" [VALUE="contents"] [SIZE="integer"] [MAXLENGTH="integer"] [onBlur="handlerStatement"] [onChange="handlerStatement"] [onFocus="handlerStatement"] [onSelect="handlerStatement"]> The NAME attribute enables you to assign this HTML object a name that identifies it in both server-side queries and JavaScript scripts. The VALUE attribute accepts the initial string that should appear in the box when the page loads. Not only is this string the initial one in the text box, but it is also the default string. When you reset the form via a Reset button or the reset() method, this string reappears in the text box. The SIZE attribute is essential because it determines the size (in characters) of the text box. The MAXLENGTH attribute specifies the maximum input length allowed in this field. If the user enters a string that is longer than MAXLENGTH, only the first MAXLENGTH characters are entered. This option is especially handy when requesting a specific string, such as a password, which is naturally limited to a given length. The following script segment demonstrates the use of the text object in an HTML document: Processor: <INPUT TYPE="text" NAME="comp" SIZE=15 MAXLENGTH=20 VALUE="Intel Xeon"> A text object can hold a maximum of one line. You can use a textarea object to display multiple lines. JavaScript Access There are basically four ways to access a text object via JavaScript: [window.]document.formName.textName [window.]document.formName.elements[index] [window.]document.forms[index].textName [window.]document.forms[index].elements[index] You already know that a form can be accessed through its name or via the forms object when the form’s index is known. Similarly, you can access a form’s element by its name or through the elements array if the element’s index is known. 324 n Chapter 18](https://image.slidesharecdn.com/wordware-advancedjavascript3rded-160421130838/75/www-webre24h-com-Wordware-advanced-javascript-3rd-ed-easttom-349-2048.jpg)
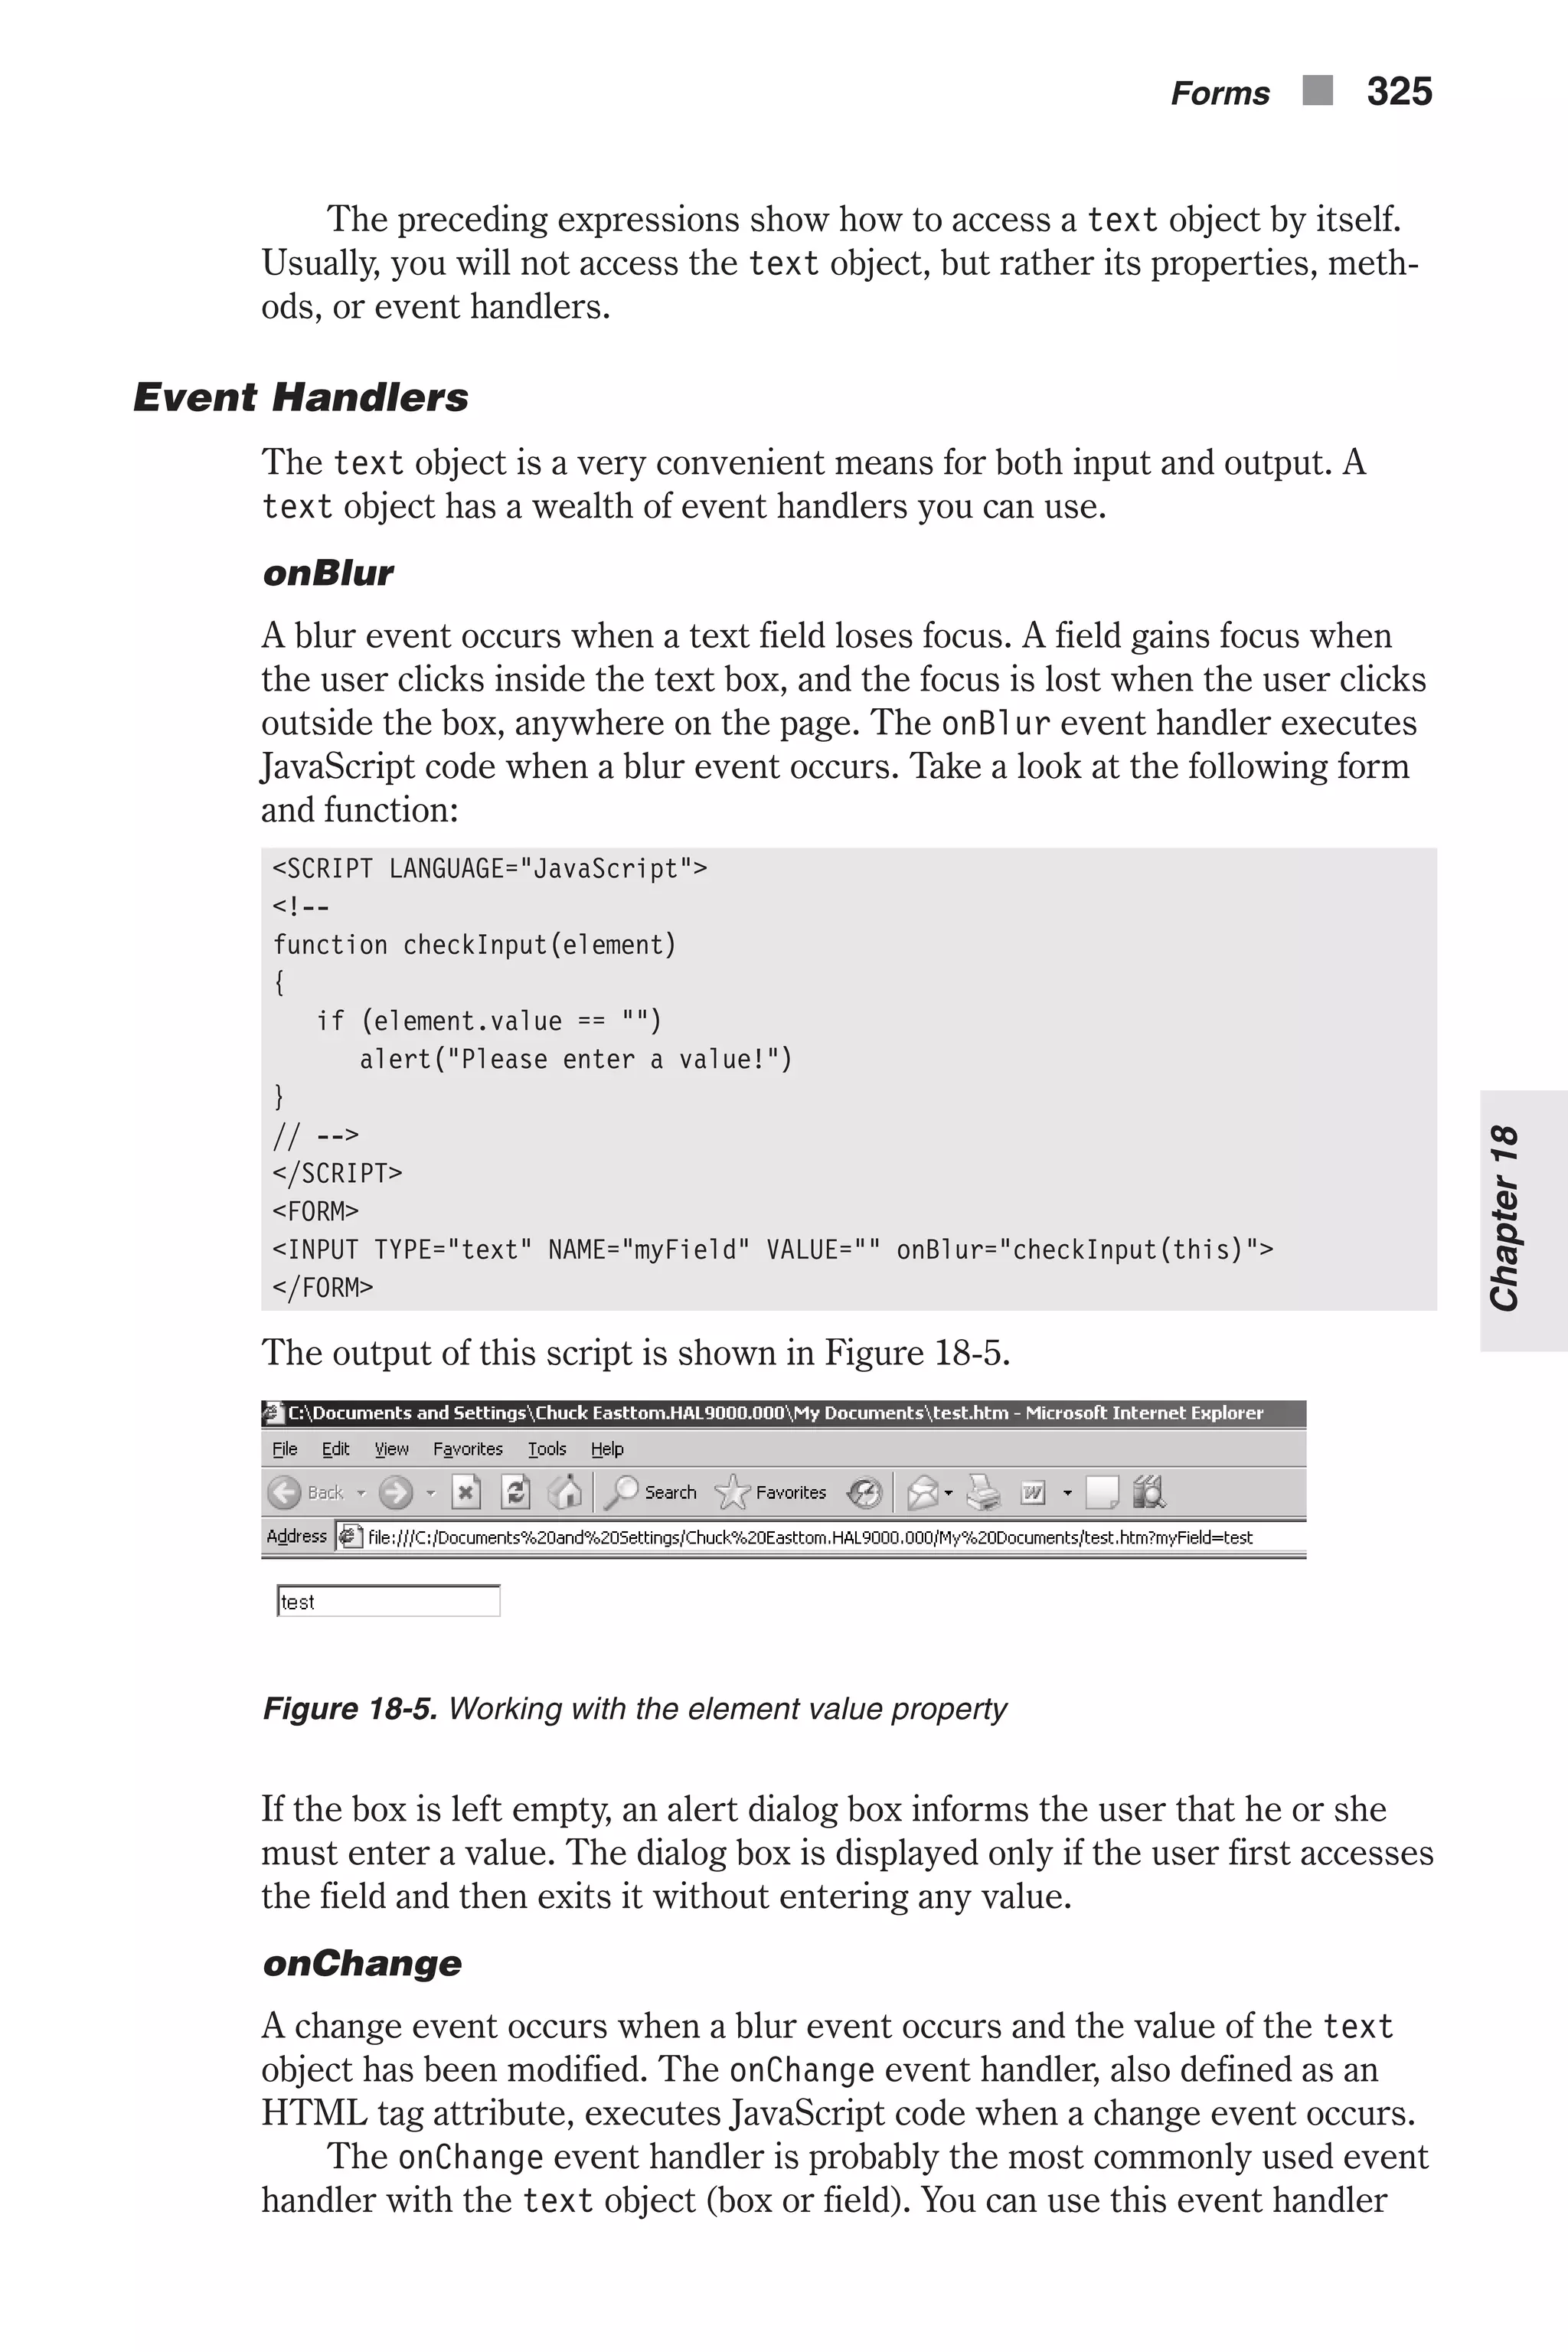
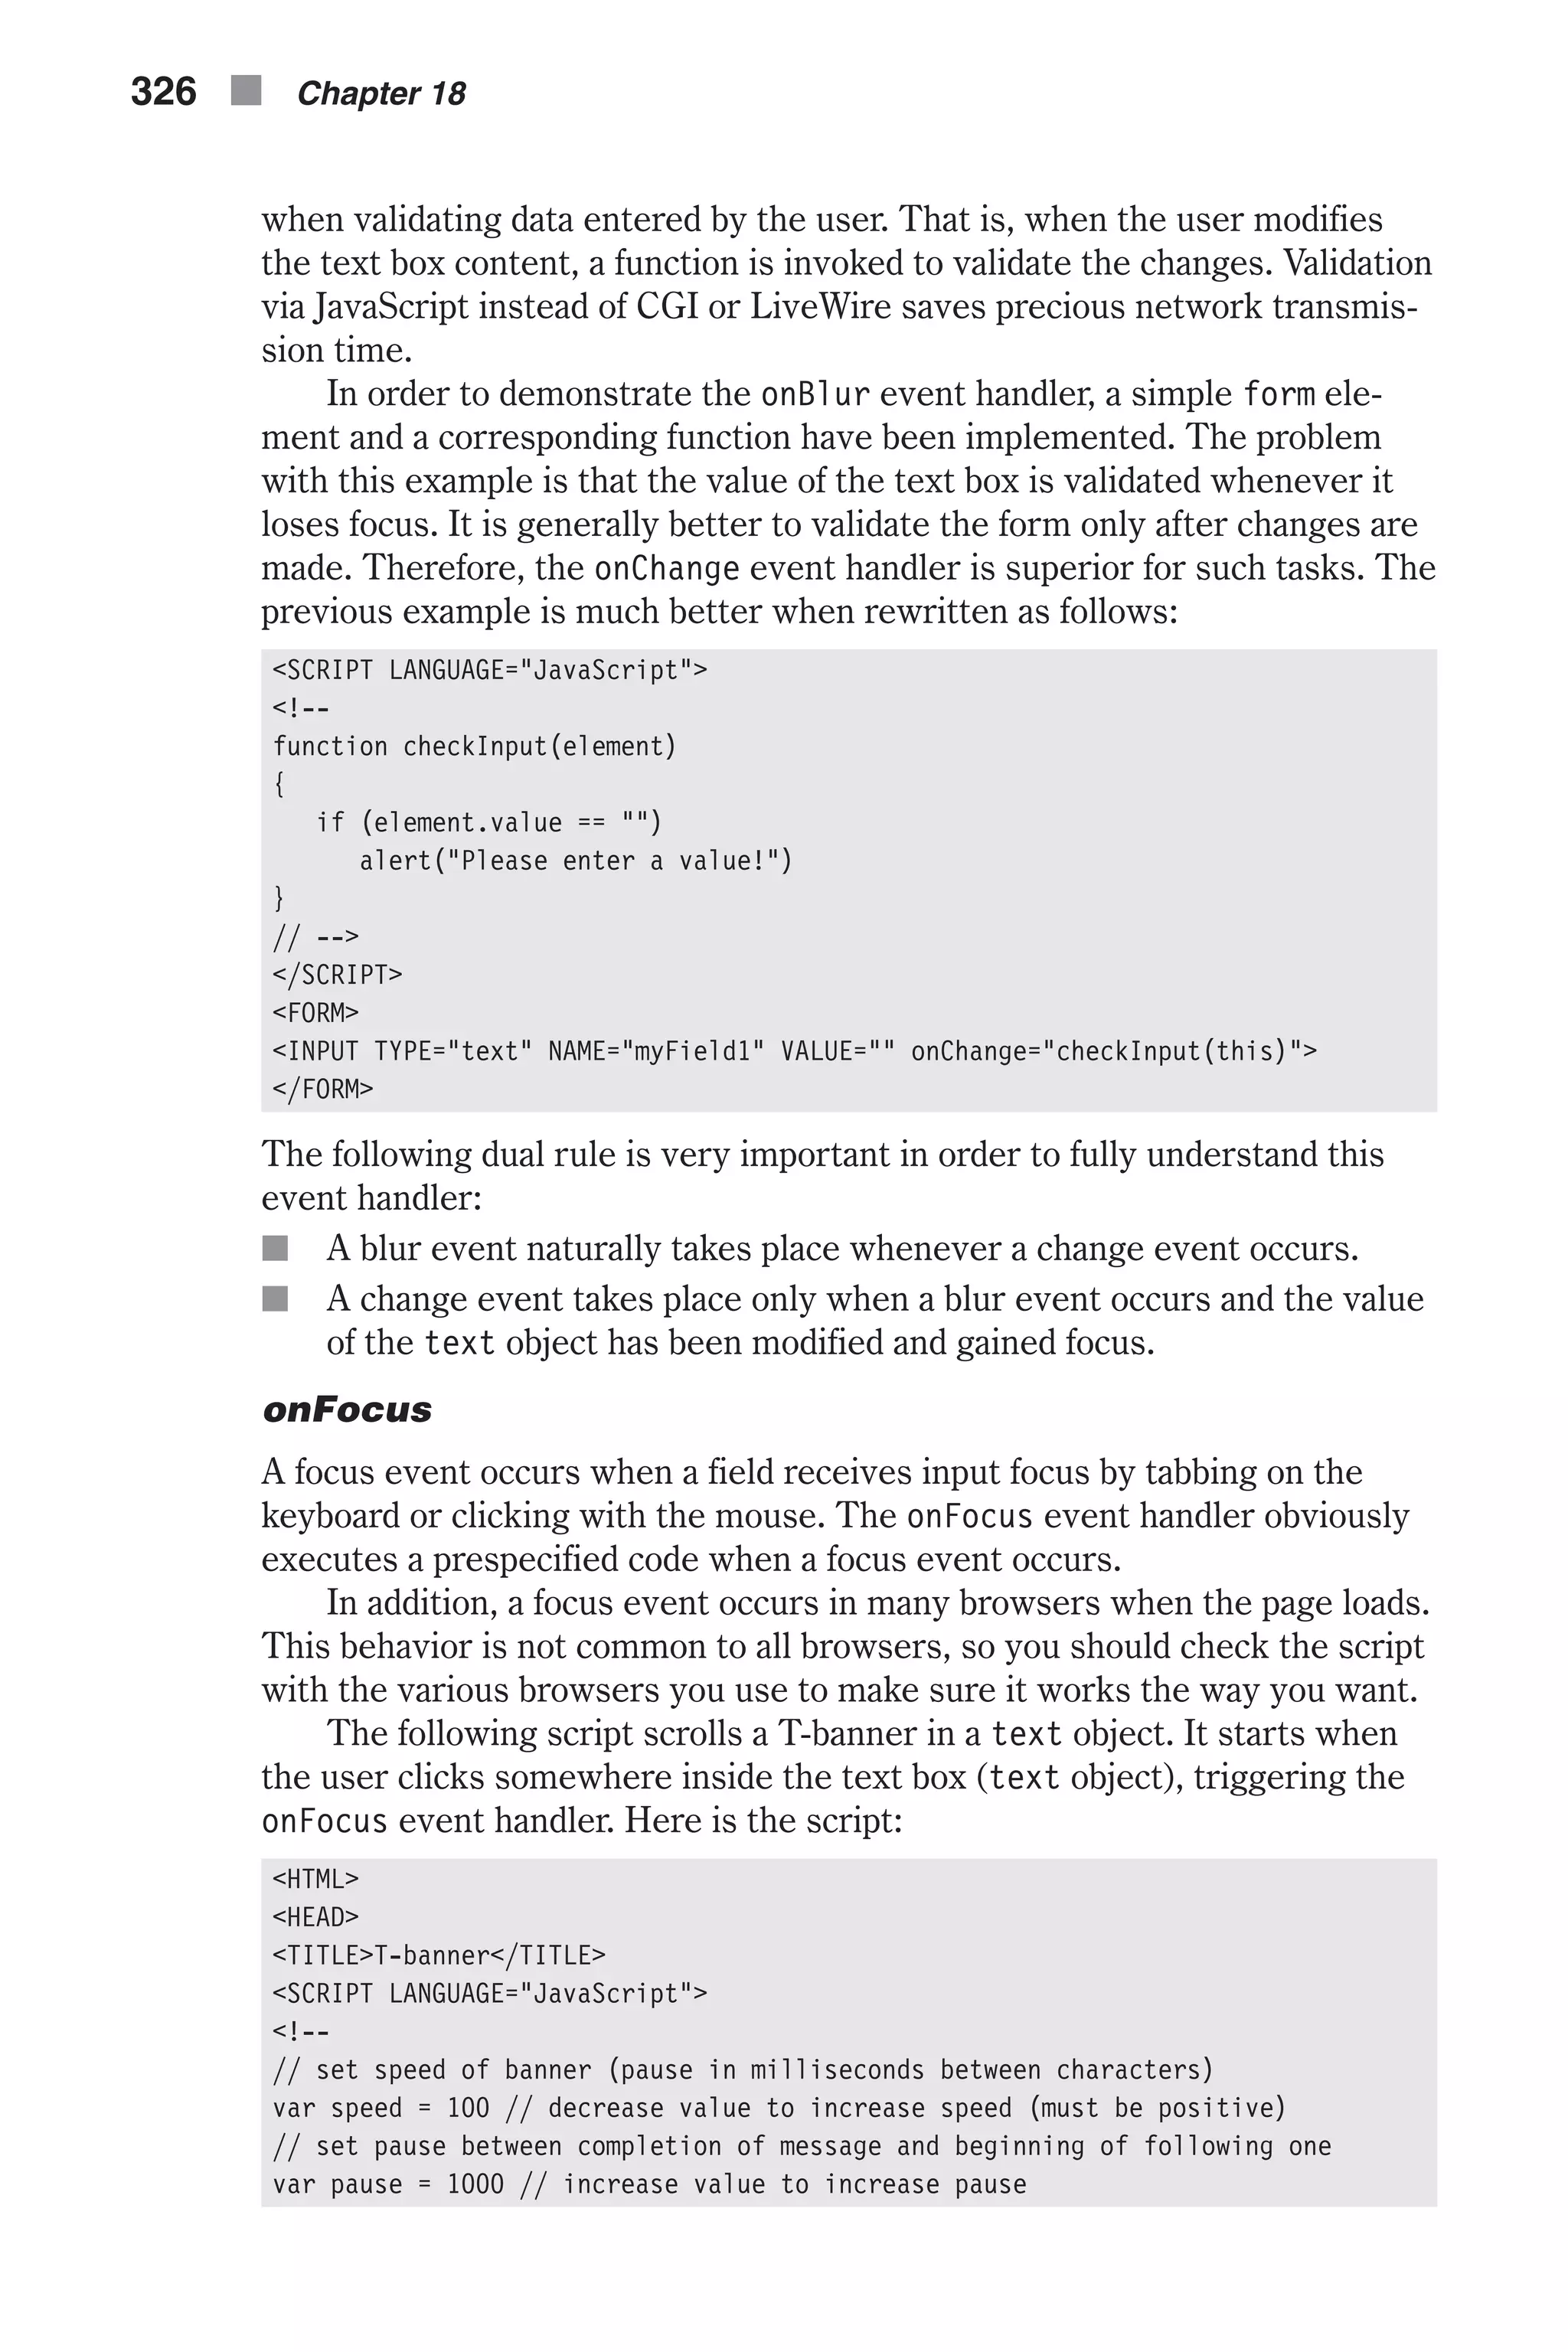
![// set initial values var timerID = null var bannerRunning = false // create global array var ar = new Array() // assign the strings to the array's elements ar[0] = "Welcome to our JavaScript page" ar[1] = "We hope you enjoy the T-banner script" ar[2] = "It is designed to be more stable than regular banners" ar[3] = "Don't forget to check out my other scripts" // set index of first message to be displayed first var currentMessage = 0 // set index of last character to be displayed first var offset = 0 // stop the banner if it is currently running function stopBanner() { // if banner is currently running if (bannerRunning) // stop the banner clearTimeout(timerID) // timer is now stopped bannerRunning = false } // start the banner function startBanner() { // make sure the banner is stopped stopBanner() // start the banner from the current position showBanner() } // type in the current message function showBanner() { // assign current message to variable var text = ar[currentMessage] // if current message has not finished being displayed if (offset < text.length) { // if last character of current message is a space if (text.charAt(offset) == " ") // skip the current character offset++ // assign the up-to-date to-be-displayed substring // second argument of method accepts index of last character plus one var partialMessage = text.substring(0, offset + 1) // display partial message in text field document.bannerForm.bannerField.value = partialMessage // increment index of last character to be displayed offset++ // IE sometimes has trouble with "++offset" // recursive call after specified time timerID = setTimeout("showBanner()", speed) // banner is running Forms n 327 Chapter18](https://image.slidesharecdn.com/wordware-advancedjavascript3rded-160421130838/75/www-webre24h-com-Wordware-advanced-javascript-3rd-ed-easttom-352-2048.jpg)
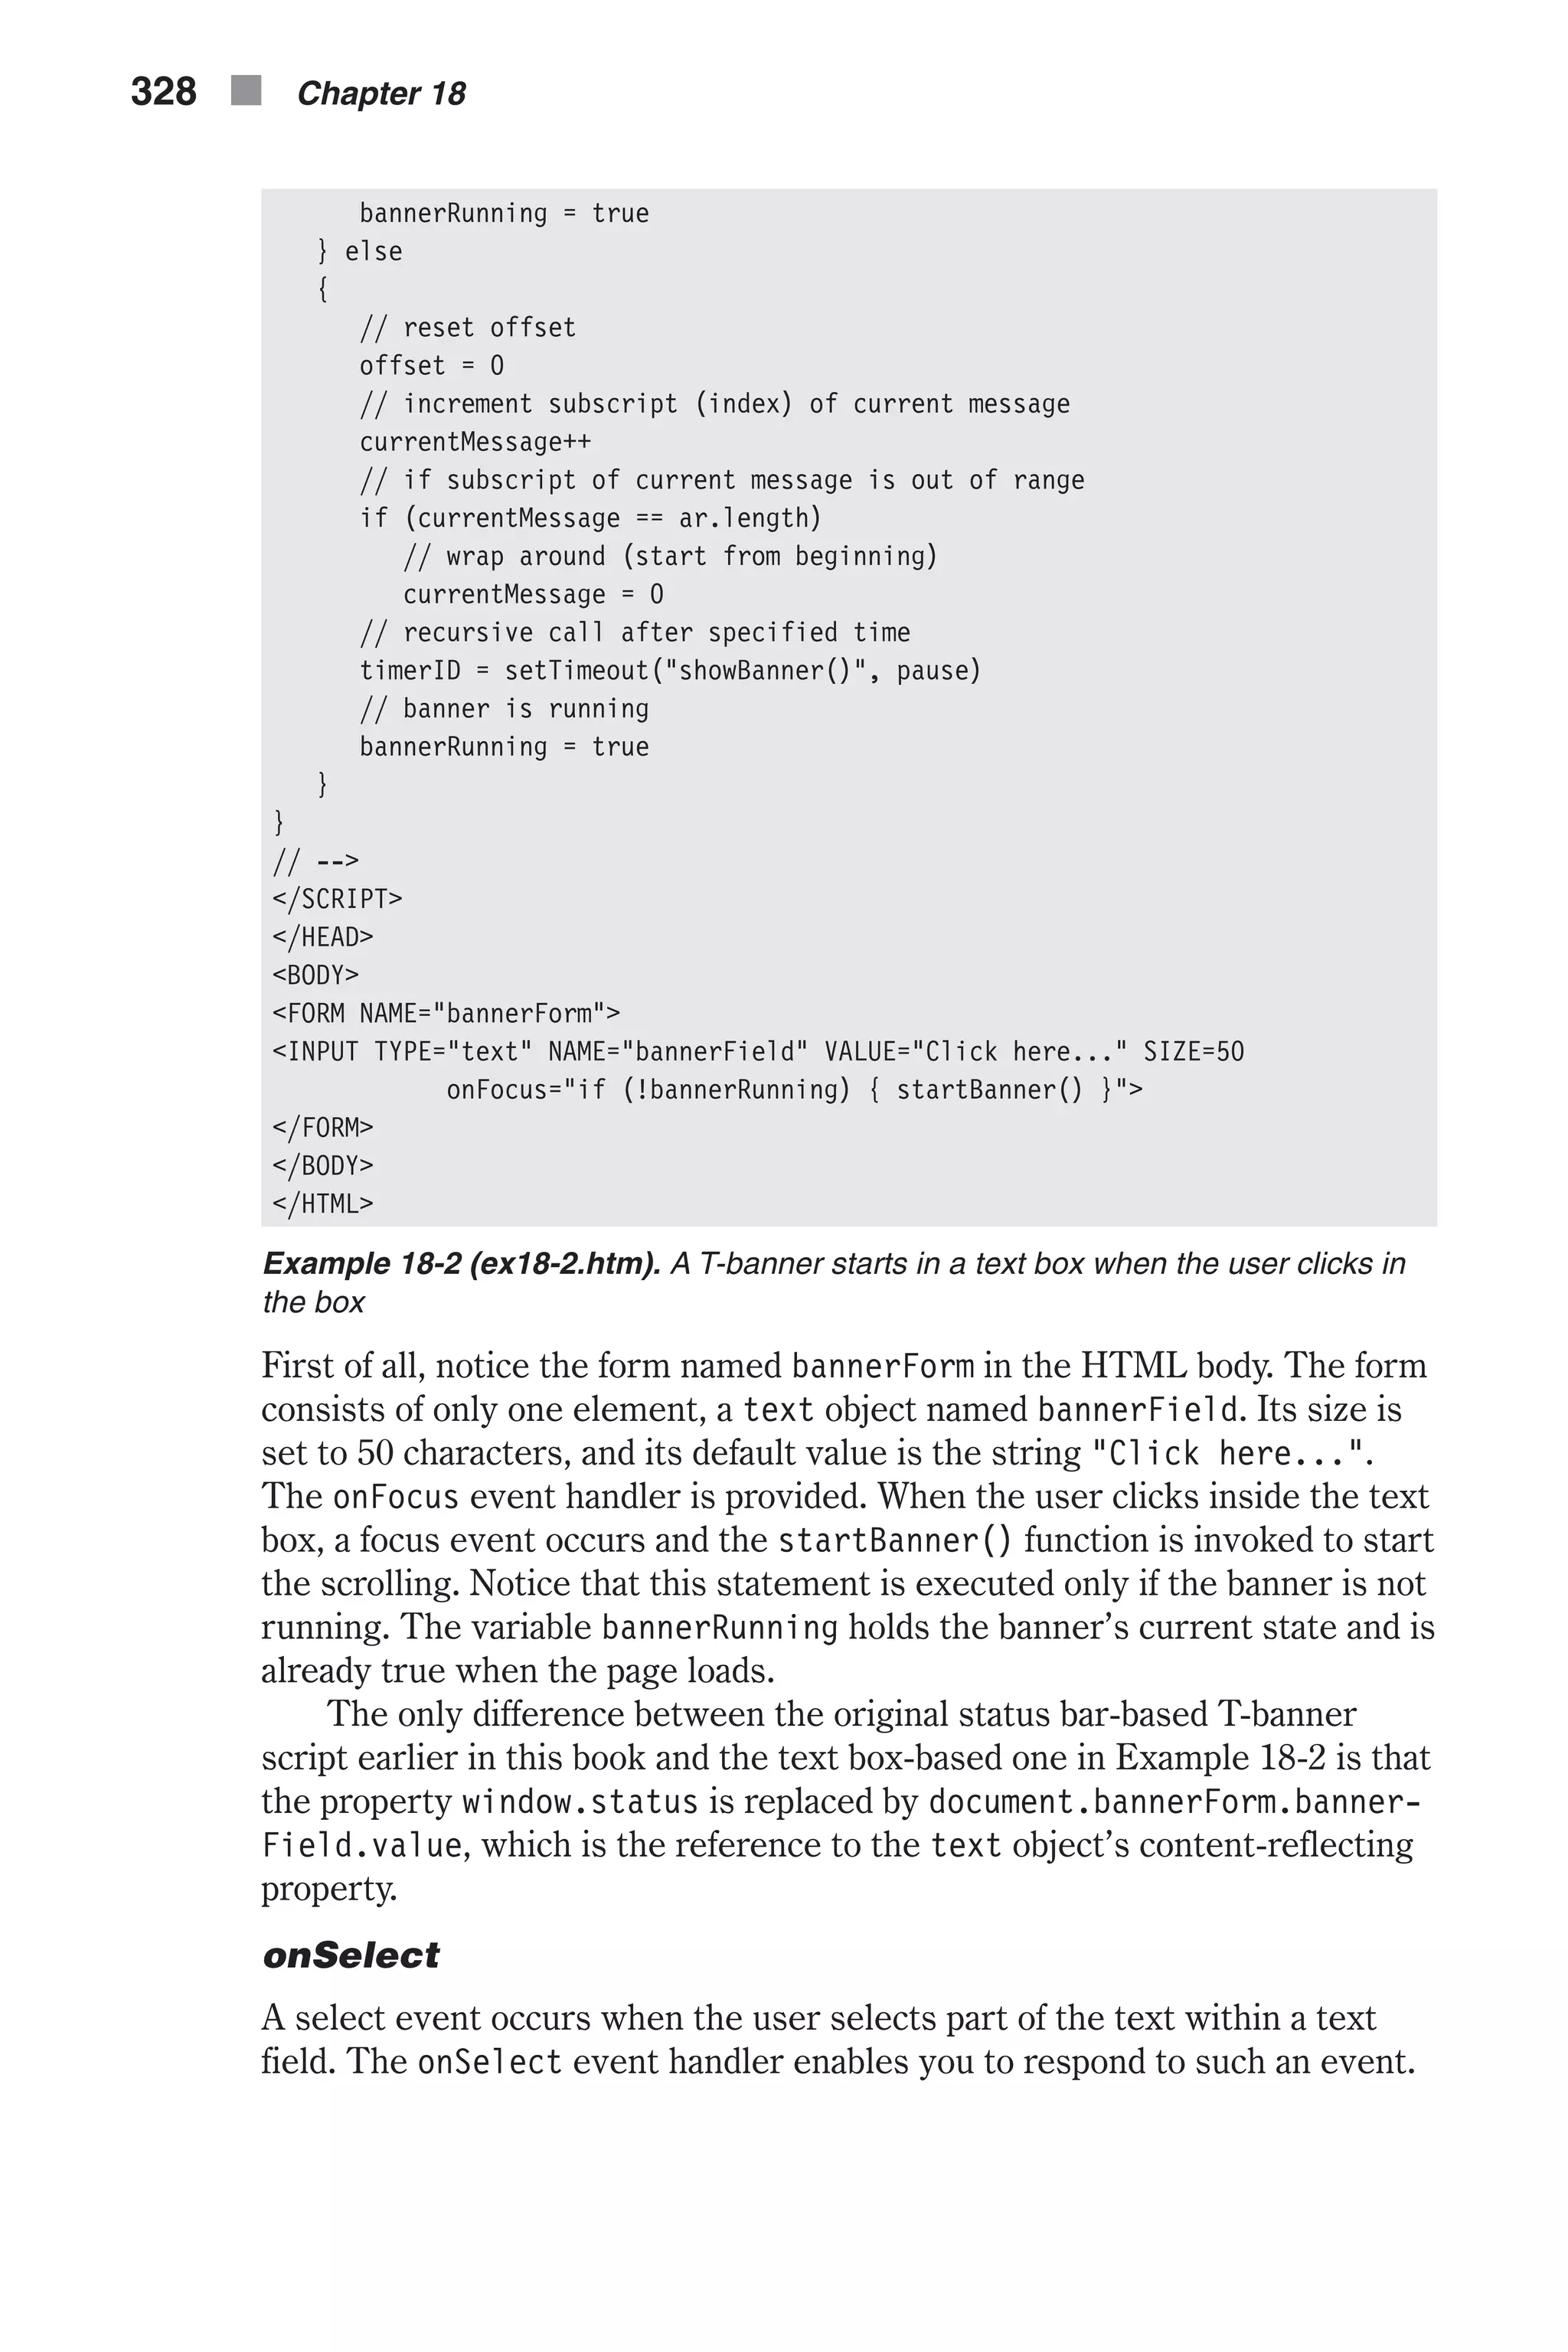
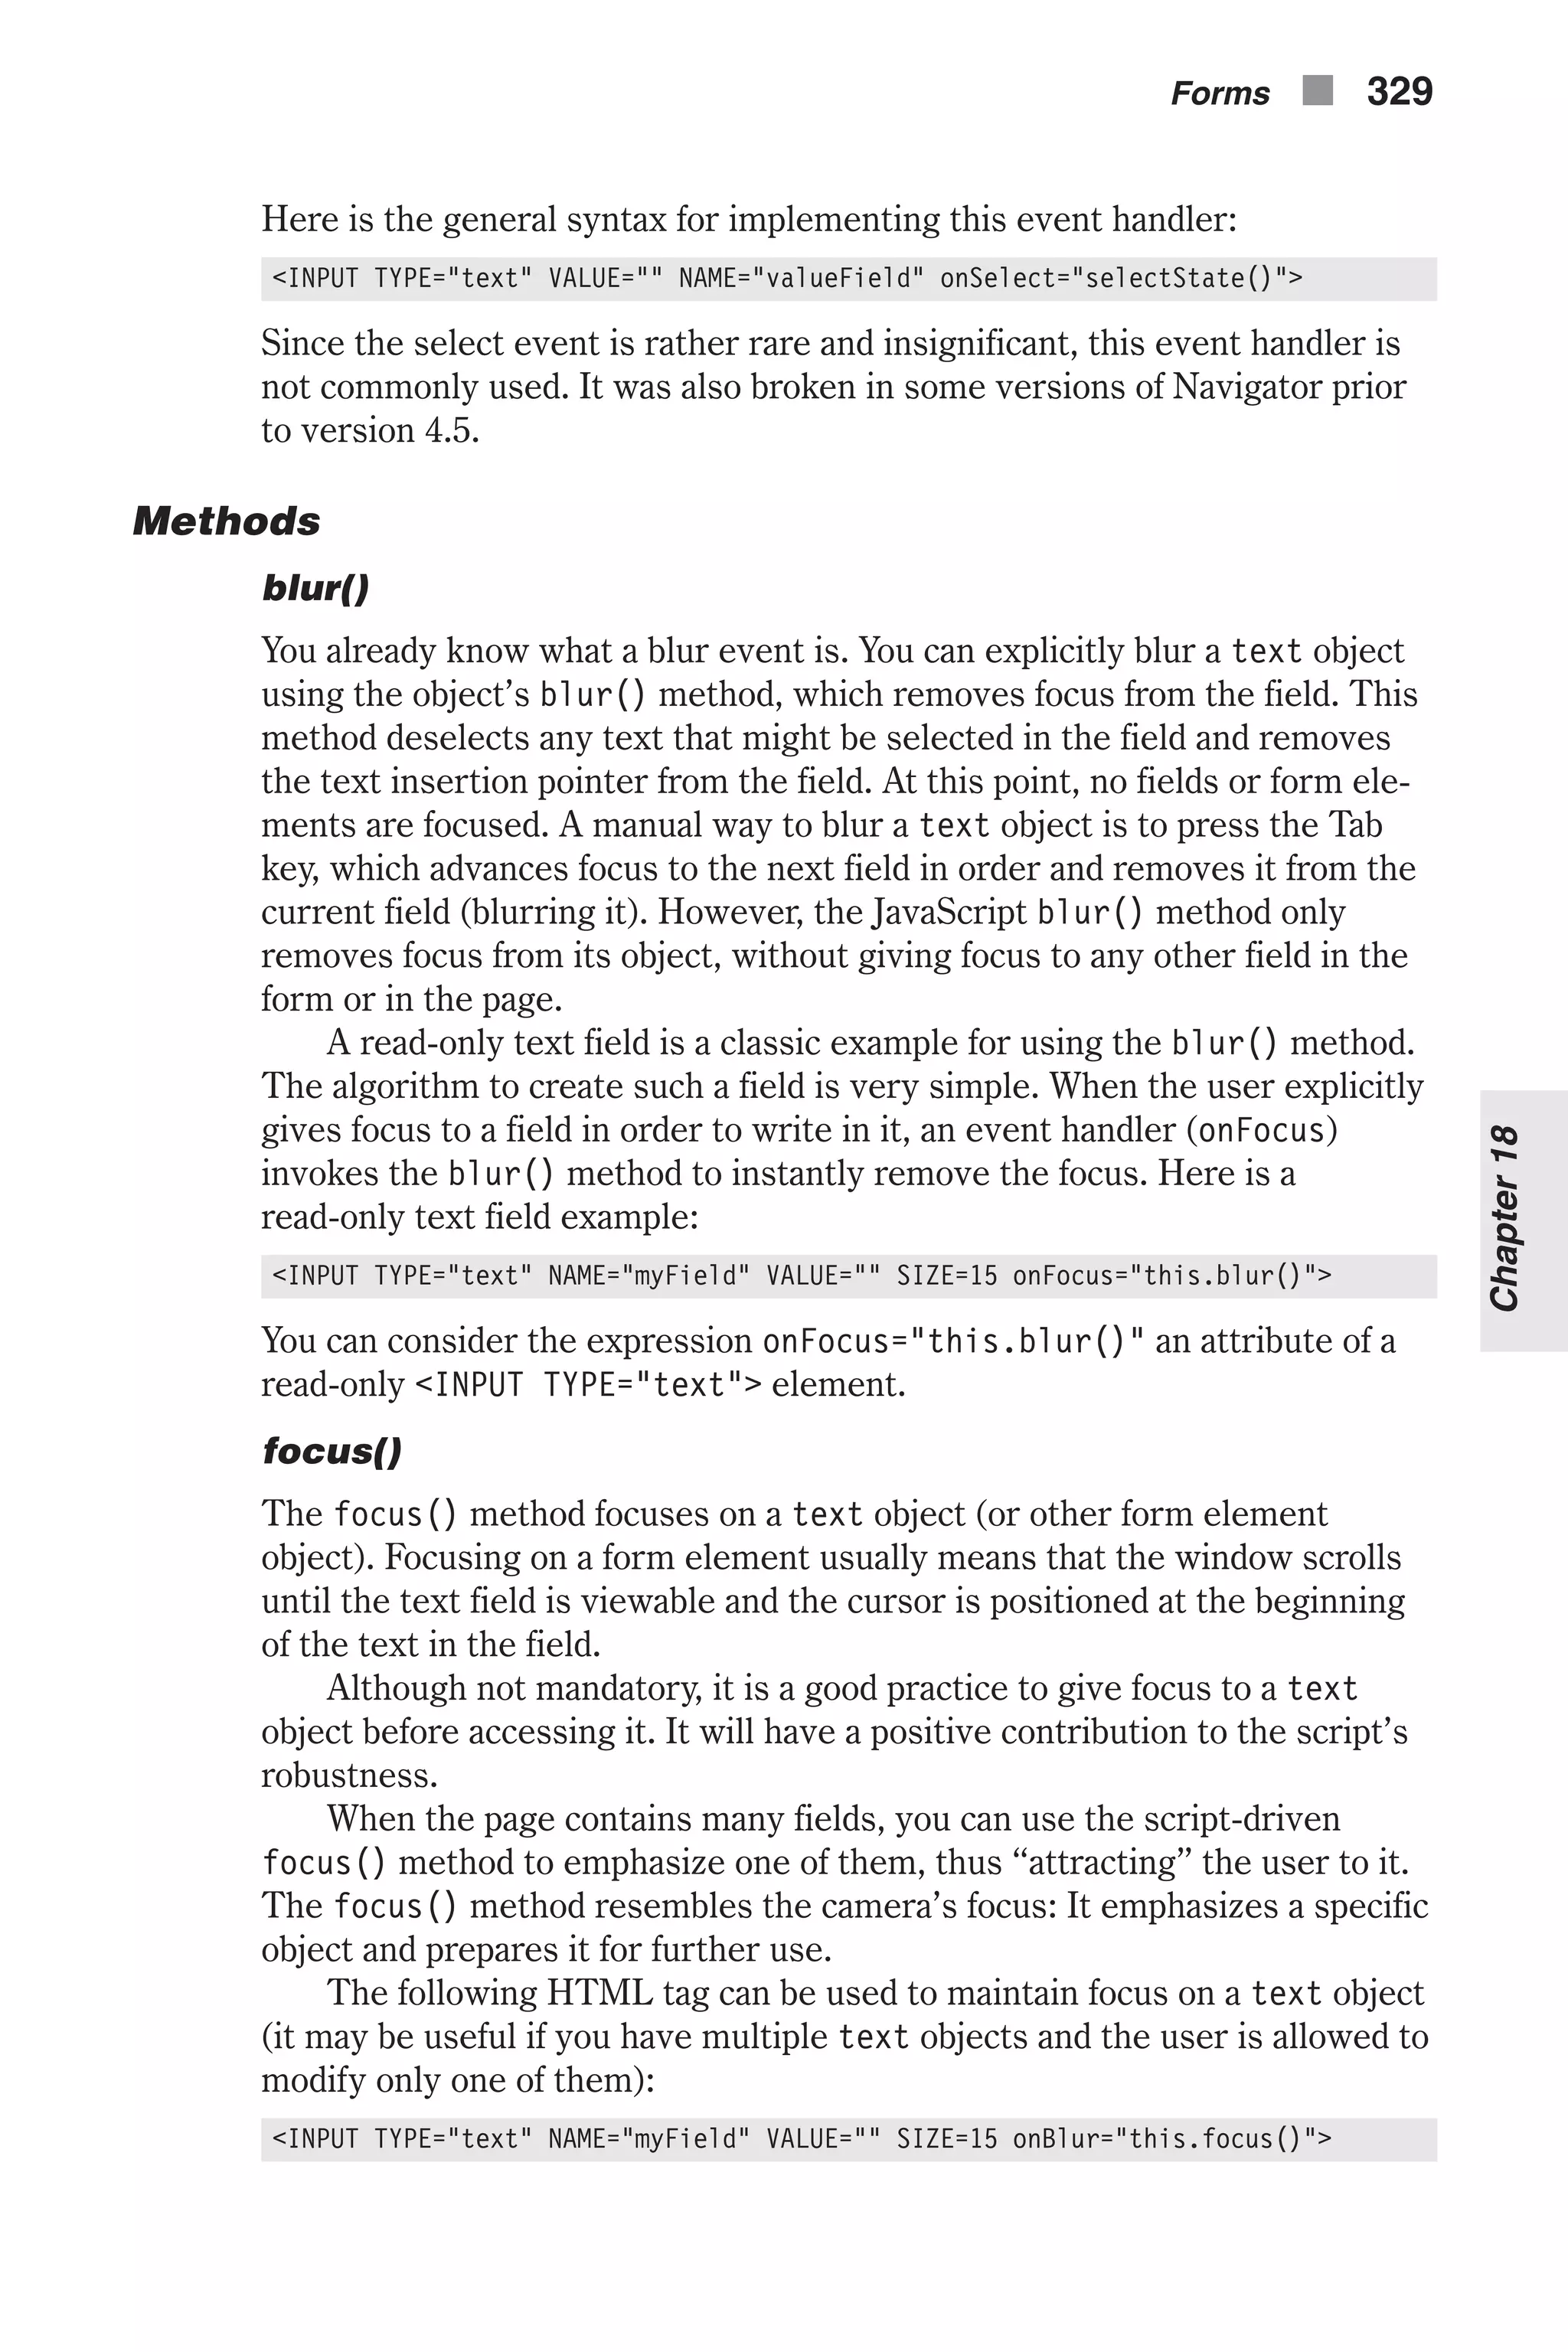
![When the text field loses focus, a blur event occurs, the onBlur event han- dler is triggered, and focus is given once again to the field. The focus() method usually belongs to text objects (fields), but, as will be explained later in this chapter, other kinds of objects use it as well. select() The most useful method of the text object is the select() method. When you select a field via JavaScript, all the text in the field is selected. In Navigator on some platforms, you must give focus to a text field before selecting it. Suppose you have a document with one form that con- tains one element, a text object. The following script segment is needed in order to select that text field via JavaScript: document.forms[0].elements[0].focus() document.forms[0].elements[0].blur() The select() method is extremely useful and very convenient when vali- dating a form on the client side. For example, let’s say you have a form that accepts inputs from the user for several elements and validates each ele- ment in turn before submitting the data to the server. The most basic way to report an error is to display a message in an alert dialog box. More sophisti- cated error reporting includes automatic preparation of the form for the user’s corrections. Such preparation can be implemented by using the focus() and select() methods together. When the script encounters a text field that contains invalid data, you can direct the cursor to that field and automatically highlight the interior text. The user can then write the new, correct value without having to delete the invalid entry. Sounds quite com- plicated on the programmer’s behalf, but it is actually very simple. The following script and form demonstrate simple validation and handy error reporting: <HTML> <HEAD> <TITLE>Simple form validation</TITLE> </HEAD> <SCRIPT LANGUAGE="JavaScript"> <!-- function checkName(field) { if (field.value == "") { alert("Value is required") field.focus() field.select() } else if (field.value.split(" ").length < 2) { alert("Enter full name") field.focus() field.select() } 330 n Chapter 18](https://image.slidesharecdn.com/wordware-advancedjavascript3rded-160421130838/75/www-webre24h-com-Wordware-advanced-javascript-3rd-ed-easttom-355-2048.jpg)
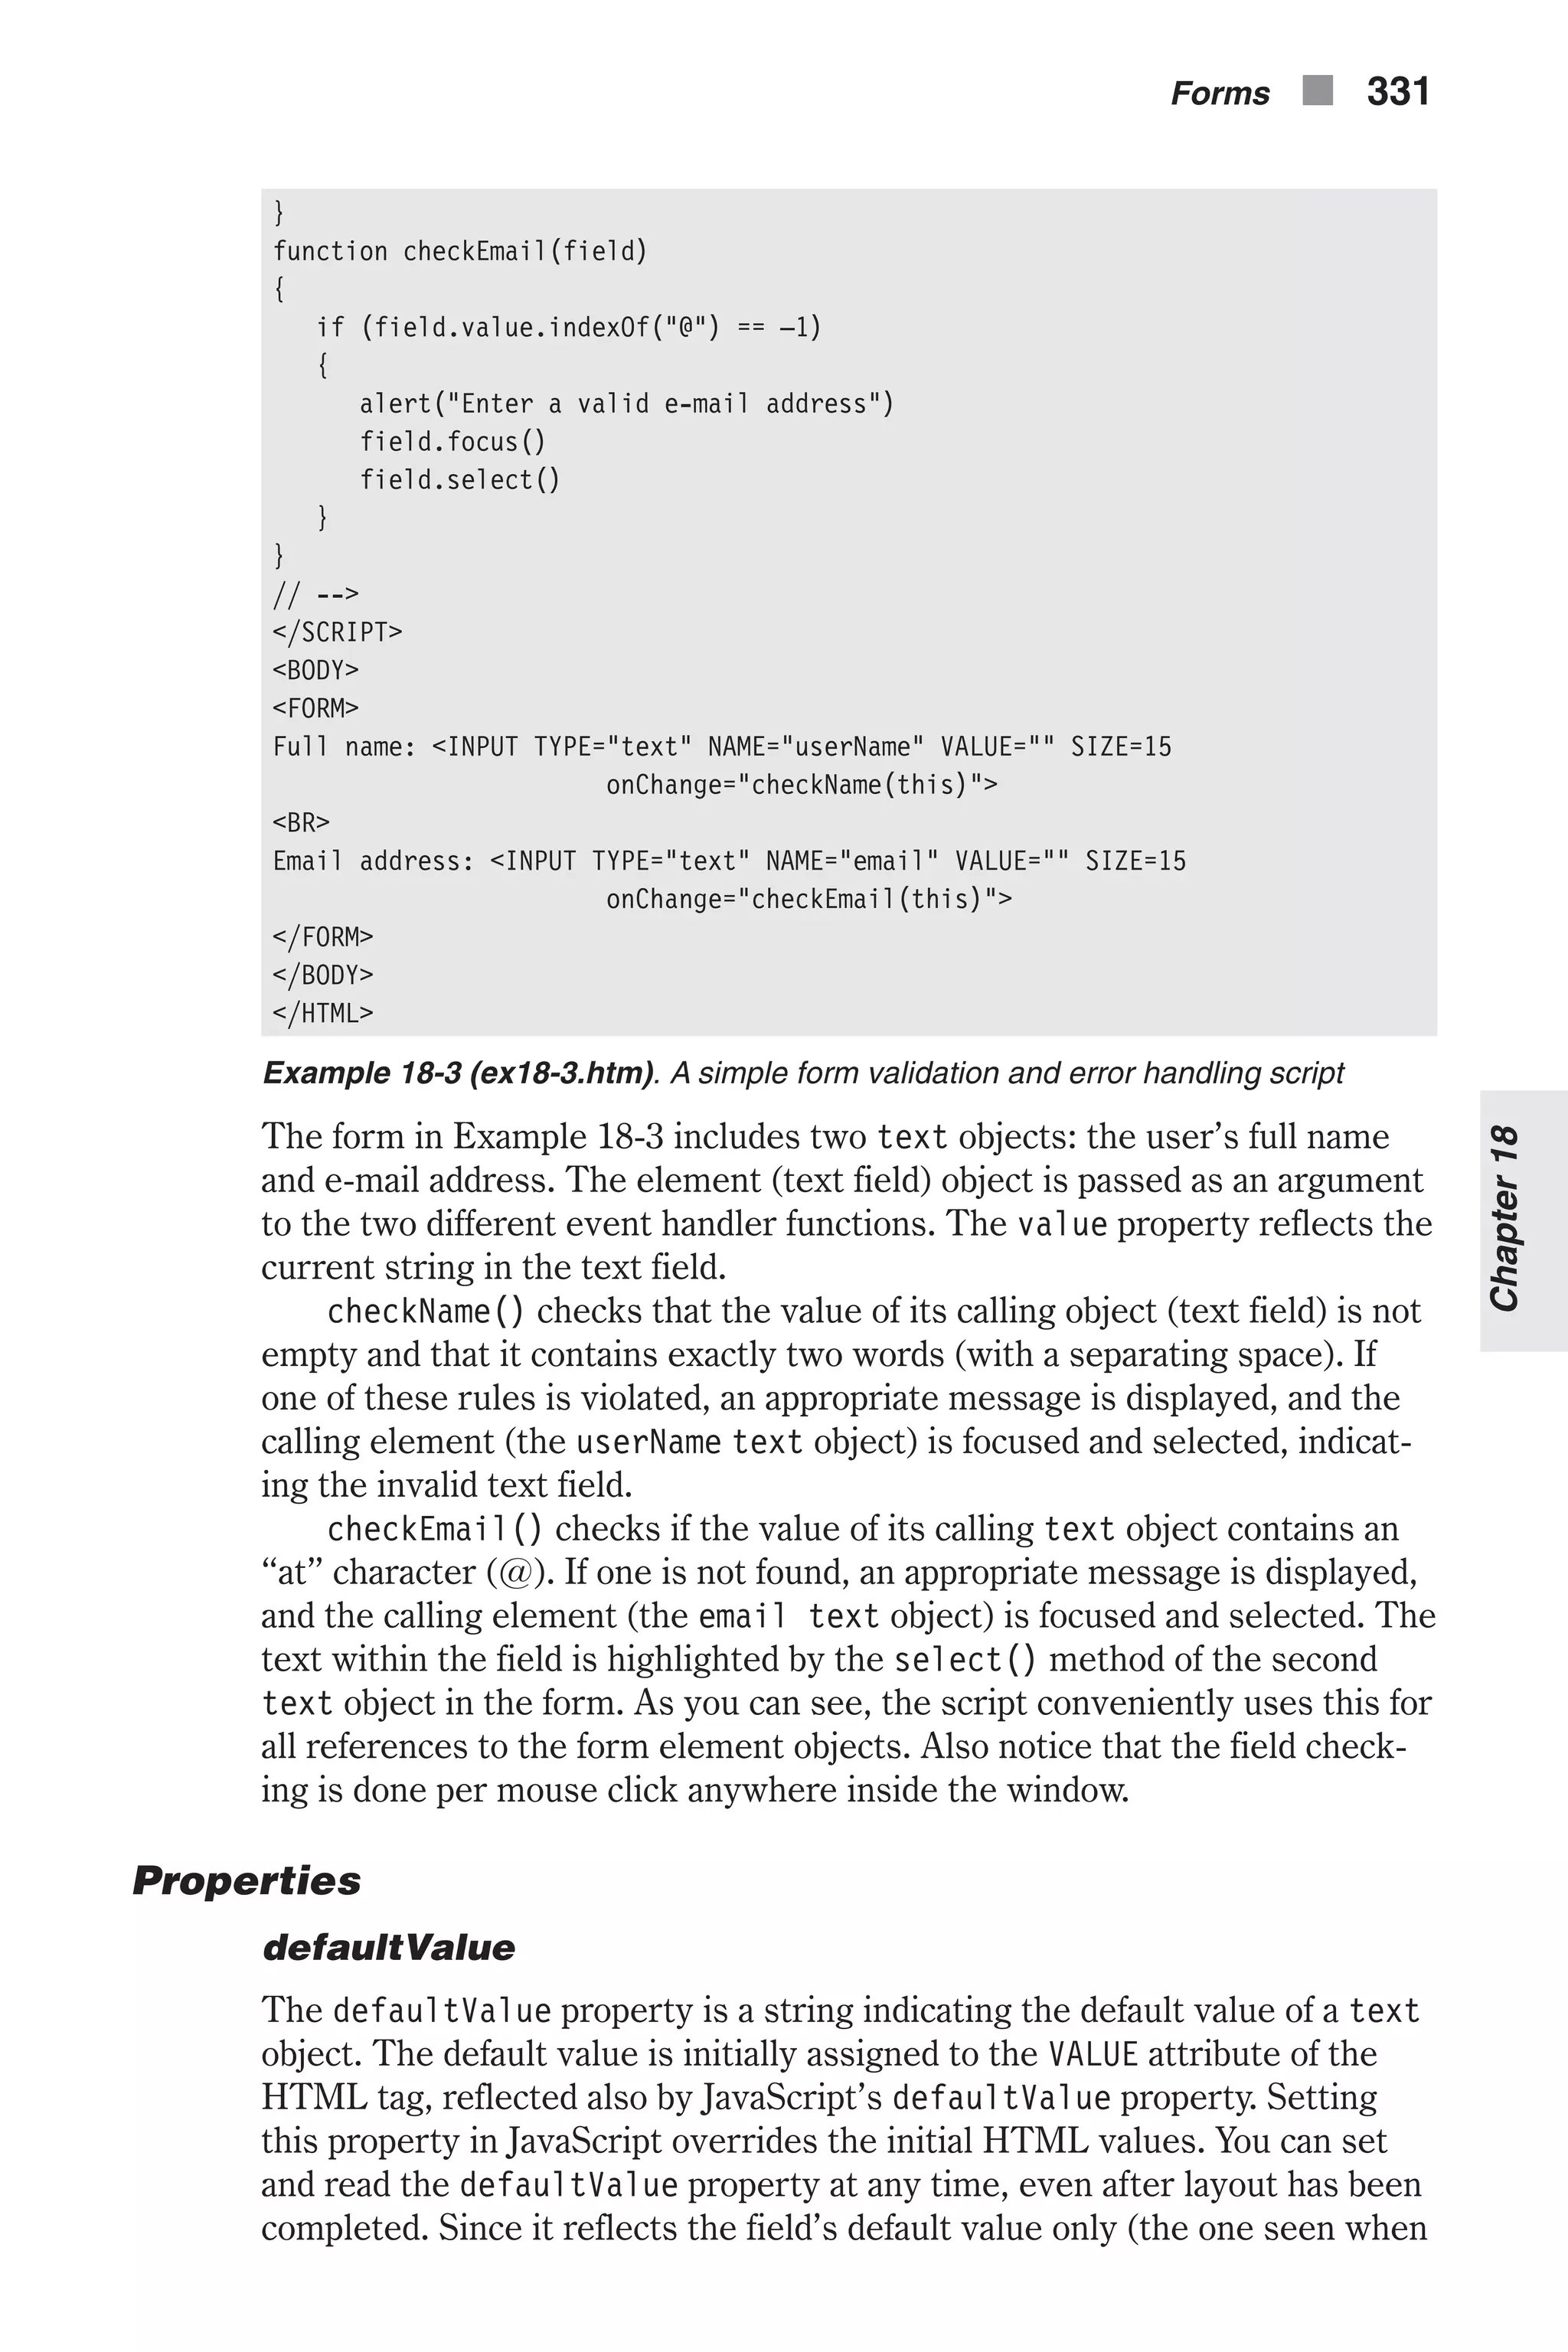
![the page loads or after resetting the form), this property cannot be used to dynamically update the text in the field. If the HTML attribute VALUE is not specified, defaultValue defaults to an empty string, as if explicitly specifying VALUE="". The following script segment demonstrates a simple use of the defaultValue property to reset only a specific form element (a text object in this case), rather than resetting the entire form with the Reset button or the reset() method. Note that this script uses the value property, which we discuss later. <SCRIPT LANGUAGE="JavaScript"> <!-- function resetField(sub) { document.forms[0].elements[sub].value = document.forms[0] .elements[sub].defaultValue } // --> </SCRIPT> <FORM NAME="fields"> <INPUT TYPE="text" NAME="field1" VALUE="enter first" SIZE=15> <A HREF="javascript:resetField(0)">reset</A><BR> <INPUT TYPE="text" NAME="field2" VALUE="enter second" SIZE=15> <A HREF="javascript:resetField(1)">reset</A><BR> <INPUT TYPE="text" NAME="field3" VALUE="enter third" SIZE=15> <A HREF="javascript:resetField(2)">reset</A><BR> </FORM> Since we haven’t discussed buttons yet, this script uses links for invoking JavaScript functions. A link is not a form element, so you cannot refer to this or this.form inside the resetField() function. To work around this problem, each link is identified by the index of the corresponding text object and is handed to the function as an argument. The first link, for exam- ple, is responsible for resetting the first text object in the form, so it hands a 0 to the resetField() function. Instead of resetting the form element, the function sets the current value of the corresponding text field to its default value. name It is generally a good practice to name every form element, especially the text objects. Names are mandatory for CGI scripts, which use them for field identification and value extraction. Since it allows more logical and conve- nient access to JavaScript text objects, identifying text objects by name contributes significantly to the script’s robustness and ease of maintenance. All names, therefore, should be meaningful and adhere to JavaScript’s nam- ing conventions. The name property initially reflects the value of the HTML’s NAME attrib- ute. Changing the value of this property overrides the initial HTML setting. By assigning a new string to the name property, you can set the name of a text object at any time. 332 n Chapter 18](https://image.slidesharecdn.com/wordware-advancedjavascript3rded-160421130838/75/www-webre24h-com-Wordware-advanced-javascript-3rd-ed-easttom-357-2048.jpg)
![Do not confuse this property with the text that appears in the field. A field’s content is represented by the VALUE attribute, rather than the NAME attribute. Hence, if you modify the value of name, you will notice no change in the page’s appearance. You should recall that a form element can be referenced by its index or by its name. If a form contains multiple elements with identical names, they form an array. Although this situation is especially common to radio buttons, as you will see later in this chapter, you may encounter it with text objects as well. The following example demonstrates the use of such arrays to han- dle complex forms: <HTML> <HEAD> <TITLE>Form element arrays</TITLE> <SCRIPT LANGUAGE="JavaScript"> <!-- function correctName() { for (var i = 0; i < document.fields.username.length; ++i) { var field = document.fields.username[i] field.value = field.value.charAt(0).toUpperCase() + field .value.substring(1, field.value.length) } } function checkEmail() { for (var i = 0; i < document.fields.email.length; ++i) { var field = document.fields.email[i] if (field.value.indexOf("@") == –1) { alert("Error in email address!") field.focus() field.select() return } } } // --> </SCRIPT> </HEAD> <BODY> <FORM NAME="fields"> Employee #1: <INPUT TYPE="text" NAME="username" VALUE="first name" SIZE=10> <INPUT TYPE="text" NAME="username" VALUE="last name" SIZE=10> <INPUT TYPE="text" NAME="email" VALUE="email" SIZE=10><BR> Employee #2: <INPUT TYPE="text" NAME="username" VALUE="first name" SIZE=10> <INPUT TYPE="text" NAME="username" VALUE="last name" SIZE=10> <INPUT TYPE="text" NAME="email" VALUE="email" SIZE=10><BR> Employee #3: <INPUT TYPE="text" NAME="username" VALUE="first name" SIZE=10> <INPUT TYPE="text" NAME="username" VALUE="last name" SIZE=10> <INPUT TYPE="text" NAME="email" VALUE="email" SIZE=10><BR> Forms n 333 Chapter18](https://image.slidesharecdn.com/wordware-advancedjavascript3rded-160421130838/75/www-webre24h-com-Wordware-advanced-javascript-3rd-ed-easttom-358-2048.jpg)
![<P> <A HREF="javascript:checkEmail()">Check email addresses</A>. <A HREF="javascript:correctName()">Correct names</A>. </FORM> </BODY> </HTML> Example 18-4 (ex18-4.htm). A form validation script based on arrays reflecting ele- ments with identical names In order to understand this listing you must be aware of the page’s initial appearance: As you can see, this form is divided into nine text objects. All six text objects for entering first and last names are named username. The value of document.forms[0].elements[0].name, for example, is equal to the string "username". The three text objects for entering e-mail addresses are named email. There are basically two element groups, username and email. Since all form elements are named fields, you can reference these two groups as arrays via the following syntax: document.fields.username document.fields.email Both arrays have a length property, representing the number of elements sharing the given name. The length and elements of the username array, for example, can be referenced as follows: document.fields.username.length // number of name-related elements document.fields.username[0] // first First Name object document.fields.username[1] // first Last Name object document.fields.username[2] // second First Name object document.fields.username[3] // second Last Name object document.fields.username[4] // third First Name object document.fields.username[5] // third Last Name object 334 n Chapter 18 Figure 18-6. A form that collects data about several people](https://image.slidesharecdn.com/wordware-advancedjavascript3rded-160421130838/75/www-webre24h-com-Wordware-advanced-javascript-3rd-ed-easttom-359-2048.jpg)
![The same syntax is also used to reference elements of the email array. Take another look at the script in Example 18-4. It includes two functions, one for handling name input fields and one for e-mails. The first function, correctName(), loops through all username elements and capitalizes their first letters. The second function uses the same technique to alert the user if any of the e-mail addresses do not include the “at” character (@). If such a field is found, the function focuses on and selects it, in order to attract the user’s attention to the invalid field. You should normally assign a distinct name to each and every form ele- ment. Example 18-4 demonstrates that in some cases, however, it is much more convenient to reuse a specific name in order to enable a loop-based processing of elements that share similar characteristics. value The value property reflects the current text located in a given text object (field). It is not equivalent to any HTML attribute. You can read and set this property at any time. The field’s content is updated immediately upon set- ting. Although we have been using this property throughout this chapter, here is another example that shows how to reference the value attribute of the first element of the first form in a page: document.forms[0].elements[0].value password Object HTML Syntax Another possible value for the TYPE attribute is "password". It is similar to the "text" option except that, instead of displaying the user’s input, it responds to any typed character with a predefined single character, such as an asterisk (*). The general syntax of this object is as follows: <INPUT TYPE="password" NAME="passwordName" [VALUE="contents"] [SIZE="integer"] [MAXLENGTH="integer"] [onBlur="handlerStatement"] [onChange="handlerStatement"] [onFocus="handlerStatement"] [onSelect="handlerStatement"]> The value property is an asterisk character (or any other character chosen by the browser). The additional properties are identical to those of the text input type. Here is a simple password box code: Password: <INPUT TYPE="password" NAME="pswrd" SIZE=15 MAXLENGTH=20 VALUE=""> Forms n 335 Chapter18](https://image.slidesharecdn.com/wordware-advancedjavascript3rded-160421130838/75/www-webre24h-com-Wordware-advanced-javascript-3rd-ed-easttom-360-2048.jpg)
![The value of the password box is the typed-in string, not the asterisks (or other characters) that appear. The value is hidden so it cannot be seen by someone near the user. JavaScript Access Like all other elements, there are four ways to access a password object via JavaScript: [window.]document.formName.passwordName [window.]document.formName.elements[index] [window.]document.forms[index].passwordName [window.]document.forms[index].elements[index] All methods and element references adhere to one of these alternatives. Event Handlers The password event handlers are identical to those of the text object in all aspects. Refer to earlier discussion in this and other chapters. Properties and Methods The password object’s properties are: n defaultValue n name n value The password object’s methods are identical to those of the text object: n focus n blur n select The password object was not very useful in Netscape Navigator 2.0 because JavaScript was not allowed to access its value. Starting with version 3.0, JavaScript on Navigator and Internet Explorer can freely access the VALUE attribute as if it were a text object. In terms of JavaScript, the password object is identical to the text object. The only difference is that the value of the password field is never displayed. textarea Object HTML Syntax Multiple lines of text can be entered into a form via text areas, which are defined by the <TEXTAREA></TEXTAREA> tag pair. You should always name a text area and specify its size. The general syntax of the <TEXTAREA> tag is as follows: 336 n Chapter 18](https://image.slidesharecdn.com/wordware-advancedjavascript3rded-160421130838/75/www-webre24h-com-Wordware-advanced-javascript-3rd-ed-easttom-361-2048.jpg)
![<TEXTAREA NAME="textareaName" ROWS="integer" COLS="integer" WRAP="off | virtual | physical" [onBlur="handlerStatement"] [onChange="handlerStatement"] [onFocus="handlerStatement"] [onSelect="handlerStatement"]> textToDisplay </TEXTAREA> The attributes are: n NAME—specifies the name (label) of the text area element. It is very dif- ficult to work with unnamed text areas, so always name your text areas according to JavaScript naming conventions. n ROWS—specifies the number of text rows in the text area. Since Netscape Navigator and Microsoft Internet Explorer use different size fonts in text fields, you cannot set the text area size in pixels by setting ROWS. n COLS—specifies the number of text columns in the text area. It is equal to the number of characters in one text line. It is possible to initialize the text area by placing text between the <TEXTAREA> and </TEXTAREA> tags in the following fashion: <TEXTAREA NAME="comments" COLS=35 ROWS=5> Write any comments regarding this page here. Don't forget to mention your e-mail address. </TEXTAREA> Carriage return characters are interpreted as new lines in this text zone. Netscape Navigator enables you to write HTML tags in the text area by sim- ply placing the script between the opening and closing <TEXTAREA> tags. Another attribute accepted by the <TEXTAREA> tag is WRAP. It can be set to one of the following values: n off—do not wrap lines (default value). n virtual—wrap lines on the screen but refer to them as one line otherwise. n physical—insert actual line breaks (CR characters) in the string. JavaScript Access There are four ways to access a textarea object via JavaScript: [window.]document.formName.textareaName [window.]document.formName.elements[index] [window.]document.forms[index].textareaName [window.]document.forms[index].elements[index] Forms n 337 Chapter18](https://image.slidesharecdn.com/wordware-advancedjavascript3rded-160421130838/75/www-webre24h-com-Wordware-advanced-javascript-3rd-ed-easttom-362-2048.jpg)
![Event Handlers The textarea object’s event handlers are identical to those of the text object. Properties and Methods Like the event handlers, all properties and methods of the textarea object are exactly the same as those of the text object and password object. Please refer to previous listings for the text object in order to learn about its prop- erties, methods, and event handlers. Inserting New Line Characters A text area field is actually a multiline text field. Printing output to a textarea object is somewhat more complicated than printing to a text object due to the extra complication of new line insertion. This is especially important when the WRAP attribute is set to off and you are interested in avoiding a long horizontal text span. Since the new line character is not uniform across different platforms, inserting a new line is not as simple as inserting any other printable charac- ter. The new line character on Unix- and Macintosh-based machines is "n", while Windows operating systems require the "rn" pair. The simplest way to work around the problem is to test the actual platform and insert the cor- responding new line character. Here is a function that automatically returns the correct string for the user’s platform: function getNL() { if (navigator.appVersion.lastIndexOf('Win') != –1) return "rn" /* else */ return "n" } You can assign the new line character in the following fashion: var NL = getNL() Now, you can use the function’s return value to place multiple-line text in a textarea object. Here is a simple example: document.forms[0].elements[0].value = "line 1" + NL + "line 2" þ Important Note: Netscape Navigator supports "n" as a new line character on all platforms. 338 n Chapter 18](https://image.slidesharecdn.com/wordware-advancedjavascript3rded-160421130838/75/www-webre24h-com-Wordware-advanced-javascript-3rd-ed-easttom-363-2048.jpg)
![Handling textareas by Line In general, you cannot deal with specific lines of text area content. The fol- lowing function overcomes this deficiency by assigning the text to an array, line by line: function getLines(textareaReference) { var str = escape(textareaReference.value) var ar = str.split("%0D%0A") // "%0D%0A" <=> "rn" if (ar.length == 0) ar = str.split("%0A") // "%0A" <=> "n" for (var i = 0; i < ar.length; ++i) { ar[i] = unescape(ar[i]) } return ar } The function is a bit tricky. It first encodes the textarea’s value via the escape function and assigns the “escaped” string to a local variable, str. You may recall that after escape, any nonalphanumeric characters are repre- sented in a “%XX” format. The escape sequence "n" is represented as "%0A" (zero + A), whereas "r" is converted to "%0D" (zero + D). The entire encoded string is then spliced with the split() method, using either the "%0D%0A" or the "%0A" string as the delimiter. The “trick” is to use the second delimiter ("%0A") only after the first one ("%0D%0A") fails to split the text. At the end, each element of the ar array is decoded back by the unescape function and the final array of lines is returned. hidden Object HTML Syntax A hidden form field is one that is not displayed on an HTML page. It is used for passing unique identification values upon submission. Since the user can- not modify or interact with a hidden element, the initial value given when the page loads stays the same throughout the life of the page. The hidden object, then, is not useful for the user but rather for the programmer. For example, on a large web site, a server-side application can use a hidden object to distinguish between different forms submitted to the server. Except that it is not viewable, you should basically treat the hidden ele- ment exactly like the text type. The element’s general syntax is: <INPUT TYPE="hidden" NAME="hiddenName" [VALUE="textValue"]> Forms n 339 Chapter18](https://image.slidesharecdn.com/wordware-advancedjavascript3rded-160421130838/75/www-webre24h-com-Wordware-advanced-javascript-3rd-ed-easttom-364-2048.jpg)
![The NAME property specifies the name of the hidden object, whereas VALUE specifies the value of the field. Although not viewable, they are part of the form’s content, as any other element type’s attributes. JavaScript Access There are four ways to reference a hidden object: [window.]document.formName.hiddenName [window.]document.formName.elements[index] [window.]document.forms[index].hiddenName [window.]document.forms[index].elements[index] Event Handlers Since a hidden object cannot be seen on a page, no events can be associated with it, and hence there is no support for event handlers for hidden objects. Properties and Methods Since all methods associated with form element objects emulate events, a hidden object does not have any methods. A hidden object does have several properties that you can access via JavaScript. The object’s properties are: n defaultValue n name n value These properties are equivalent to those of the text, password, and textarea objects. You can read and set the value property, for example, at any time. The value property can be used to earmark forms submitted to the server for identification by a server-side application. button, submit, and reset Objects HTML Syntax The most precise input event is a button click. submit, reset, and button objects are all buttons that feature identical properties and attributes. The general syntax of a button object is as follows: <INPUT TYPE="button" | "submit" | "reset" NAME="buttonName" VALUE="buttonText" [onClick="handlerText"]> Although a plain button (<INPUT TYPE="button">) does not have any explicit meaning in HTML, it is extremely useful in JavaScript scripts. A 340 n Chapter 18](https://image.slidesharecdn.com/wordware-advancedjavascript3rded-160421130838/75/www-webre24h-com-Wordware-advanced-javascript-3rd-ed-easttom-365-2048.jpg)
![Submit button plays a very important role in all forms that are submitted to a server. A Reset button resets the form in which it is located. A button’s style depends on the client’s platform. Macintosh buttons, for example, are different from Windows buttons. The only control you have over a button’s appearance is by determining its label, initially defined by the VALUE attribute. Since the button size is determined solely by the label string, you can only modify its width by padding it with spaces on both ends. This “sophisticated” technique may be very annoying, but it is the only way to explicitly control a button’s size. A Submit button’s syntax differs from plain buttons and Reset buttons only in the value assigned to the TYPE attribute, "submit". This button is primarily designed for server-side applications. When the user clicks such a button, the form’s data is sent to the URL specified in the <FORM> tag’s ACTION attribute. A Reset button’s TYPE is "reset" and, when clicked, it resets the entire form. A plain button (with no HTML meaning) is defined by assigning "button" to the TYPE attribute. JavaScript Access The four ways you can reference a button via JavaScript are: [window.]document.formName.buttonName [window.]document.formName.elements[index] [window.]document.forms[index].buttonName [window.]document.forms[index].elements[index] Event Handlers All button objects (button, reset, and submit) are associated with a single event, and therefore support only one event handler. This event handler is probably the most important of all form-related event handlers. onClick A button, by definition, has only one designation—to be clicked. Its event handler, therefore, responds only to a click event. Such an event occurs when the user presses the button and then releases it while the pointer is still atop the button. The event does not take place immediately when the user presses the button, in order to give the user a chance to cancel the clicking action by releasing it outside the button area. You can also use this event handler with Submit and Reset buttons. The onClick event handler script is executed prior to performing the built-in action associated with a button. You can use this event, for example, to com- pute a certain expression and assign its value to the value property of an existing form element object. The general syntax for this event handler is as follows: <INPUT TYPE=... onClick="handlerScript"> Netscape Navigator supports an option to cancel a click event. This is also supported in Mozilla Firefox. This can be done by having the event handler Forms n 341 Chapter18](https://image.slidesharecdn.com/wordware-advancedjavascript3rded-160421130838/75/www-webre24h-com-Wordware-advanced-javascript-3rd-ed-easttom-366-2048.jpg)
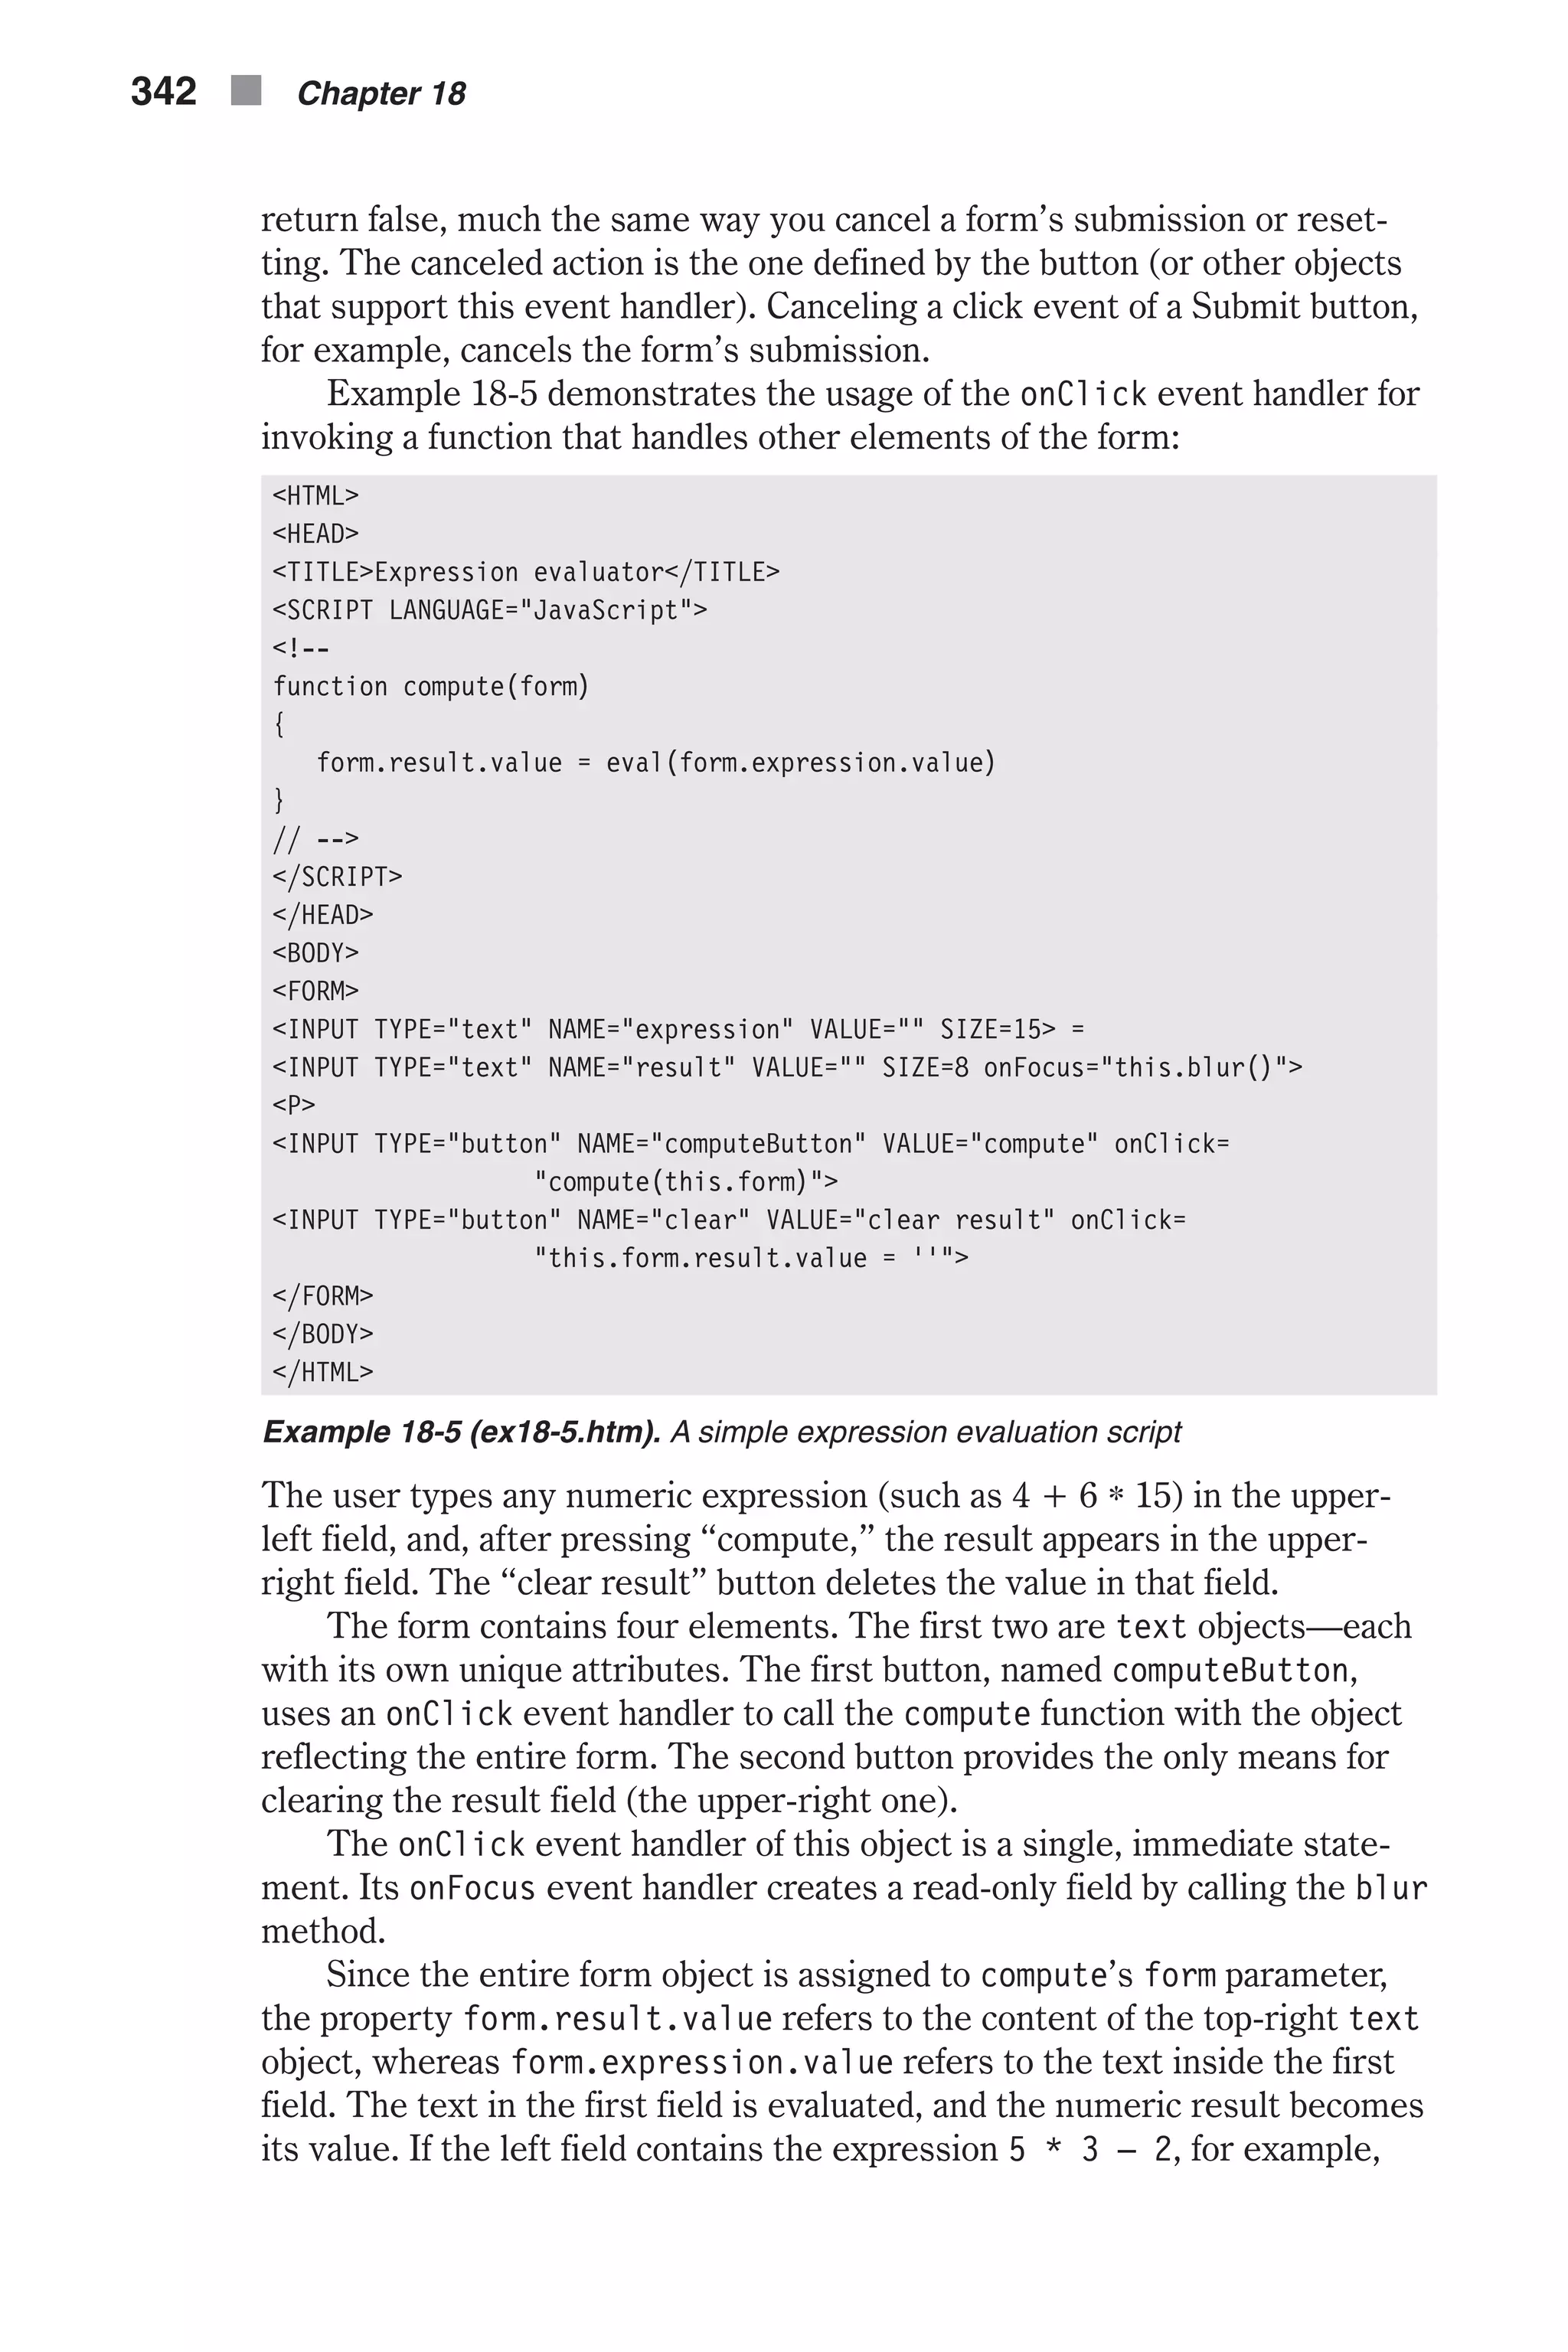
![then eval returns 13, which is placed in the second text object by assigning 13 to its value property. Methods click() A button’s click() method simulates the user’s action of clicking that but- ton. It causes the same action as would a human click, except that the button’s onClick event handler is not triggered. Since their only usefulness is in triggering the onClick event handler, this method is not useful for TYPE="button" buttons. On some platforms, a visual border effect is created when invoking this method. You will probably never need to use this method, but here is an example for your reference: document.forms[0].elements[0].click() Properties name A button’s name property is an exact reflection of the NAME attribute and is read-only. In order to respond correctly to an event, the onClick event han- dler function commonly uses this property to figure out which button was clicked. Here is an example of how to reference this property: var buttonName = document.forms[0].elements[0].name value A button’s value is the visual label you give the button by assigning it to the VALUE attribute of the <INPUT> tag. All form elements defined by the <INPUT> tag feature this attribute. As far as buttons are concerned, the length of the string determines the button’s size. The VALUE attribute can be more than one word, and should generally be enclosed by quotation marks. The VALUE attribute is reflected in JavaScript by the value property. Although it is unlikely you will ever need to extract the property’s value, its modification may be useful. Suppose you have a single button on a web page, and you want its label to change whenever the user clicks the button. You can implement such behavior by modifying the value property as a response to the click event. Netscape Navigator began enabling explicit JavaScript setting of event handlers in version 3.0, so you can even modify the event handler’s script along with the button’s label to create a “new” button on the fly (without reloading the page). Example 18-6 uses these features to create a simple stopwatch. <HTML> <HEAD> <TITLE>stopwatch (timer)</TITLE> <SCRIPT LANGUAGE="JavaScript"> <!-- Forms n 343 Chapter18](https://image.slidesharecdn.com/wordware-advancedjavascript3rded-160421130838/75/www-webre24h-com-Wordware-advanced-javascript-3rd-ed-easttom-368-2048.jpg)
![// set initial values var timerRunning = false var timerID = null // create instance of Date object representing current time var initial = new Date() // start timer function start() { // set the button's label to "stop" document.forms[0].general.value = "stop" // assign the stop function reference to the button's onClick event handler document.forms[0].general.onclick = stop // ask if the user wants to reset the timer if (confirm("Would you like to reset the timer?")) // set global variable to new time initial = new Date() // assign milliseconds since 1970 to global variable startTime = initial.getTime() | // make sure the timer is stopped stopTimer() // run and display timer showTimer() } // set button to initial settings function stop() { // set the button's label to "start" document.forms[0].general.value = "start" // assign the start function reference to the button's onClick event handler document.forms[0].general.onclick = start // stop timer stopTimer() } // stop timer function stopTimer() { // if the timer is currently running if (timerRunning) // clear the current timeout (stop the timer) clearTimeout(timerID) // assign false to global variable because timer is not running timerRunning = false } function showTimer() { // create instance of Date representing current timer var current = new Date() // assign milliseconds since 1970 to local variable var curTime = current.getTime() // assign difference in milliseconds since timer was cleared var dif = curTime – startTime // assign difference in seconds to local variable var result = dif / 1000 // if result is not positive 344 n Chapter 18](https://image.slidesharecdn.com/wordware-advancedjavascript3rded-160421130838/75/www-webre24h-com-Wordware-advanced-javascript-3rd-ed-easttom-369-2048.jpg)
![if (result < 1) // attach an initial "0" to beginning result = "0" + result // convert result to string result = result.toString() // if result is integer if (result.indexOf(".") == –1) // attach ".00" to end result += ".00" // if result contains only one digit after decimal point if (result.length – result.indexOf(".") <= 2) // add a second digit after point result += "0" // place result in text field document.forms[0].display.value = result // call function recursively immediately (must use setTimeout to // avoid overflow) timerID = setTimeout("showTimer()", 0) // timer is currently running timerRunning = true } // --> </SCRIPT> </HEAD> <BODY> <FORM> <INPUT TYPE="text" NAME="display" VALUE="" onFocus="this.blur()"> <INPUT TYPE="button" NAME="general" VALUE="start" onClick="start()"> </FORM> </BODY> </HTML> Example 18-6 (ex18-6.htm). A simple timer with an adjusting button Look through the script for a few minutes, and make sure you understand the recursive flow and the handling of time-related features. Since most of the features in this script should be well known to you by now, we’ll just cover the new and difficult ones. Take a look at the following statements from the start() function: // set the button's label to "stop" document.forms[0].general.value = "stop" // assign the stop function reference to the button's onClick event handler document.forms[0].general.onclick = stop The first statement adjusts the button’s label by assigning it a new value— stop. The second statement assigns a function reference (no parentheses because it is a function reference, not a function call) to the button’s onClick event handler. Notice that the event handler must be specified in lowercase letters. These statements convert the Start button to a Stop button. The fol- lowing statements from the stop() function convert the Stop button back to a Start button, on the fly: Forms n 345 Chapter18](https://image.slidesharecdn.com/wordware-advancedjavascript3rded-160421130838/75/www-webre24h-com-Wordware-advanced-javascript-3rd-ed-easttom-370-2048.jpg)
![// set the button's label to "start" document.forms[0].general.value = "start" // assign the start function reference to the button's onClick event handler document.forms[0].general.onclick = start Notice that the button is labeled “stop” when the timer is running and is labeled “start” otherwise. The form in Example 18-6 consists of two elements. The first one is a read-only text object (set via an event handler), whereas the second one is a simple button. Setting the value of a button is somewhat problematic. First, the button size is not adjusted to the new label, so any excess text is dropped on both sides. Another problem is that since the button label is centered, you do not have control over its alignment with other buttons of different form ele- ments. If you initialize a button to a very long string via its HTML attribute (try assigning a string with many spaces to VALUE), you can even run a T-banner on the button! checkbox Object HTML Syntax A check box is a small box that reflects an “on” or “off” state. An HTML check box is a form element that closely resembles a check box on a paper form. If a mark is placed in the box, the current state is considered true. If the check box is unchecked, the current state is false. Check boxes are used a lot in server-based forms. If a box is checked, it is included in the submitted data, whereas if it is empty it is excluded from the data submitted to the server. Since a check box is an individual form ele- ment that is not grouped with other elements, you should apply a distinct name to every check box in a form. The user can check or uncheck a box at any time after the page has been laid out. The general syntax of a checkbox object is as follows: <INPUT TYPE="checkbox" NAME="checkboxName" VALUE="checkboxValue" [CHECKED] [onClick="handlerText"]> Both the NAME and VALUE attributes specify internal values that are not dis- played on the page. In order to label a check box, you should simply place the label directly after the check box, so it appears as if connected to the object. The following piece of code demonstrates this trick: 346 n Chapter 18](https://image.slidesharecdn.com/wordware-advancedjavascript3rded-160421130838/75/www-webre24h-com-Wordware-advanced-javascript-3rd-ed-easttom-371-2048.jpg)
![Select all the computers used at your business: <P> <INPUT TYPE="checkbox" NAME="PC">PC <P> <INPUT TYPE="checkbox" NAME="Mac">Macintosh <P> <INPUT TYPE="checkbox" NAME="Unix">Unix (X-Windows) In order to create a check box that is initially checked, you simply specify the CHECKED attribute, without assigning it any value. Its presence deter- mines the initial state of the check box when the page loads. A JavaScript checkbox provides a wide variety of functionality, but you should not use it as a regular button (supporting, for example, an onClick event handler); rather use it only as a yes/no selection interface. You can, however, use the click event to trigger a side-effect statement. It is impor- tant to recognize that a check box is primarily a toggle switch. JavaScript Access There are basically four ways to reference a checkbox: [window.]document.formName.checkboxName [window.]document.formName.elements[index] [window.]document.forms[index].checkboxName [window.]document.forms[index].elements[index] Event Handlers onClick Since a check box responds to only the click event, the checkbox object does not support event handlers other than onClick. Use this event handler when you want to invoke a function or execute a statement immediately when the user clicks a check box. A click event occurs when the user clicks a check box, regardless of whether it is checked or empty. Again, be extremely conservative when using this event handler. A check box should be used only for yes/no selection. Methods click() The checkbox object supports only the click() method, which is equivalent to manually clicking the check box. You can use this method to implement a nonmodifiable check box, for example, by clicking the check box whenever the user clicks it, thus always reversing the user’s action and leaving the check box untouched. Here is how to define such a “read-only” check box: <INPUT TYPE="checkbox" onClick="this.click()"> Another useful implementation of this method is to open an invisible con- nection between two or more check boxes. Here is an example script that always keeps two check boxes at the same state (checked or unchecked): Forms n 347 Chapter18](https://image.slidesharecdn.com/wordware-advancedjavascript3rded-160421130838/75/www-webre24h-com-Wordware-advanced-javascript-3rd-ed-easttom-372-2048.jpg)
![<SCRIPT LANGUAGE="JavaScript"> <!-- function connectMe(destination) { document.forms[0].elements[destination].click() } // --> </SCRIPT> </HEAD> <BODY> <FORM> <INPUT TYPE="checkbox" onClick="connectMe(1)"> Number 1<BR> <INPUT TYPE="checkbox" onClick="connectMe(0)"> Number 2 </FORM> Each check box’s onClick event handler invokes the connectMe() function with the target check box’s index as the argument. The second check box’s event handler, for example, calls connectMe() with a 0 value because it is connected to the first check box (its index is 0). The connectMe() function simply emulates a click event for the form element at the given index. The click() method does not trigger the onClick event handler so you should not worry about the script getting into an infinite loop here. You can generalize the connectMe() function to handle an array of check boxes with a for loop. Properties checked The checkbox’s Boolean property checked reflects the button’s current state. A true value means that the specified check box is checked, whereas a false one represents an unchecked box. Of the properties supported by the checkbox object, this property is both the simplest and the most useful. You can read and adjust this property at any time, even after layout has been completed. Checking and unchecking a check box is accomplished by simply assign- ing the corresponding Boolean value to the object’s checked property. The following statement unchecks a box: document.forms[0].elements[0].checked = false Since a check box can be set to either of the two possible states regardless of the current one, you do not have to use an if statement to determine the current state and then invoke the action accordingly. Be aware that setting the state of a check box by assigning checked is much more efficient than probing the current state and calling the check box’s click() method. Example 18-7 demonstrates the use of the checked property in a simple game. It features both reading the checked property as well as setting it. The objective of the game is to check as many boxes as possible within 20 seconds (20,000 milliseconds). The accumulated number of currently checked boxes is displayed in a text object at the top. When the time has 348 n Chapter 18](https://image.slidesharecdn.com/wordware-advancedjavascript3rded-160421130838/75/www-webre24h-com-Wordware-advanced-javascript-3rd-ed-easttom-373-2048.jpg)
![elapsed, all check boxes become read-only, and a Start button is placed at the bottom for restarting the game. <HTML> <HEAD> <TITLE>Checkbox game</TITLE> <SCRIPT LANGUAGE="JavaScript"> <!-- // assign initial values to global variables var total = 0 var play = false // react to a click in a checkbox (element == clicked checkbox object) function display(element) { // assign instance of Date object representing current time var now = new Date() // if the game has not started yet if (!play) { // game starts now play = true // milliseconds since 1970 for time at beginning startTime = now.getTime() } // if more than 20 seconds have passed since startTime was last set if (now.getTime() – startTime > 20000) { // reject modification (make "read-only") element.checked = !element.checked // terminate function return } // if the clicked checkbox is now checked if (element.checked) // increment total total++ else // decrement total total-- // display total in text object element.form.num.value = total } function restart(form) { // set global variables back to initial values total = 0 play = false // uncheck all 100 check boxes for (var i = 1; i <= 100; ++i) { // uncheck current check box form.elements[i].checked = false } } Forms n 349 Chapter18](https://image.slidesharecdn.com/wordware-advancedjavascript3rded-160421130838/75/www-webre24h-com-Wordware-advanced-javascript-3rd-ed-easttom-374-2048.jpg)
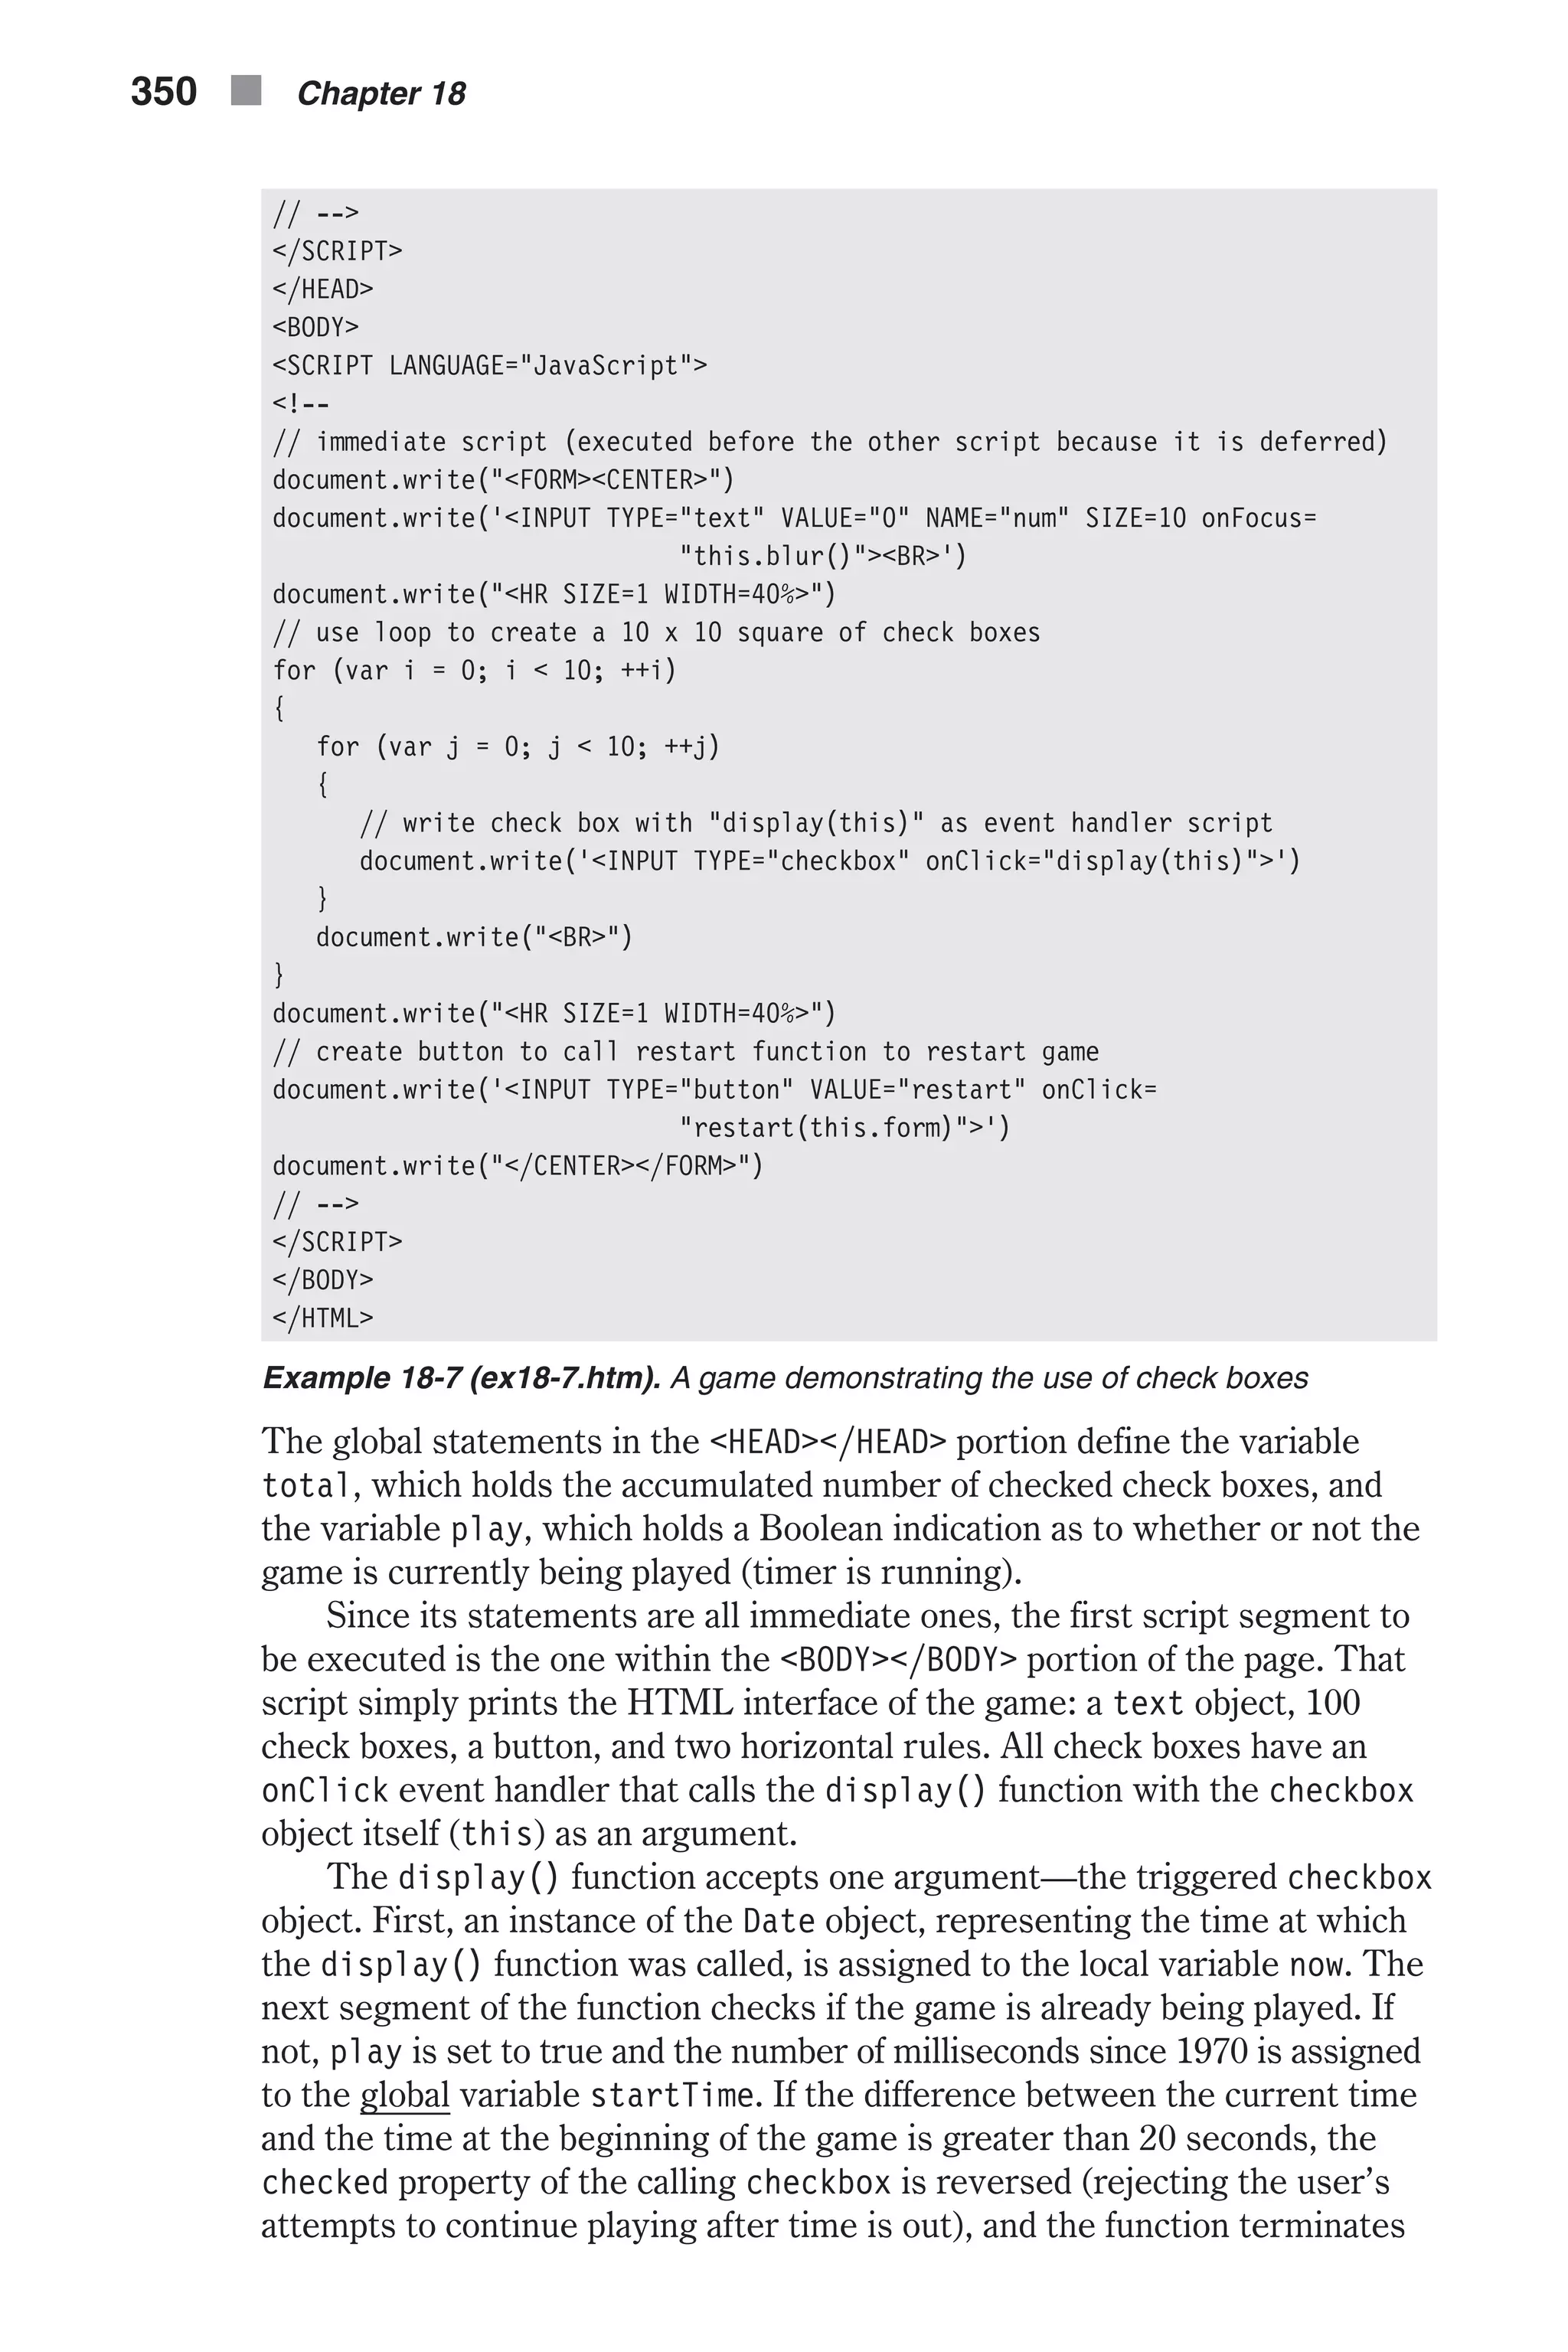
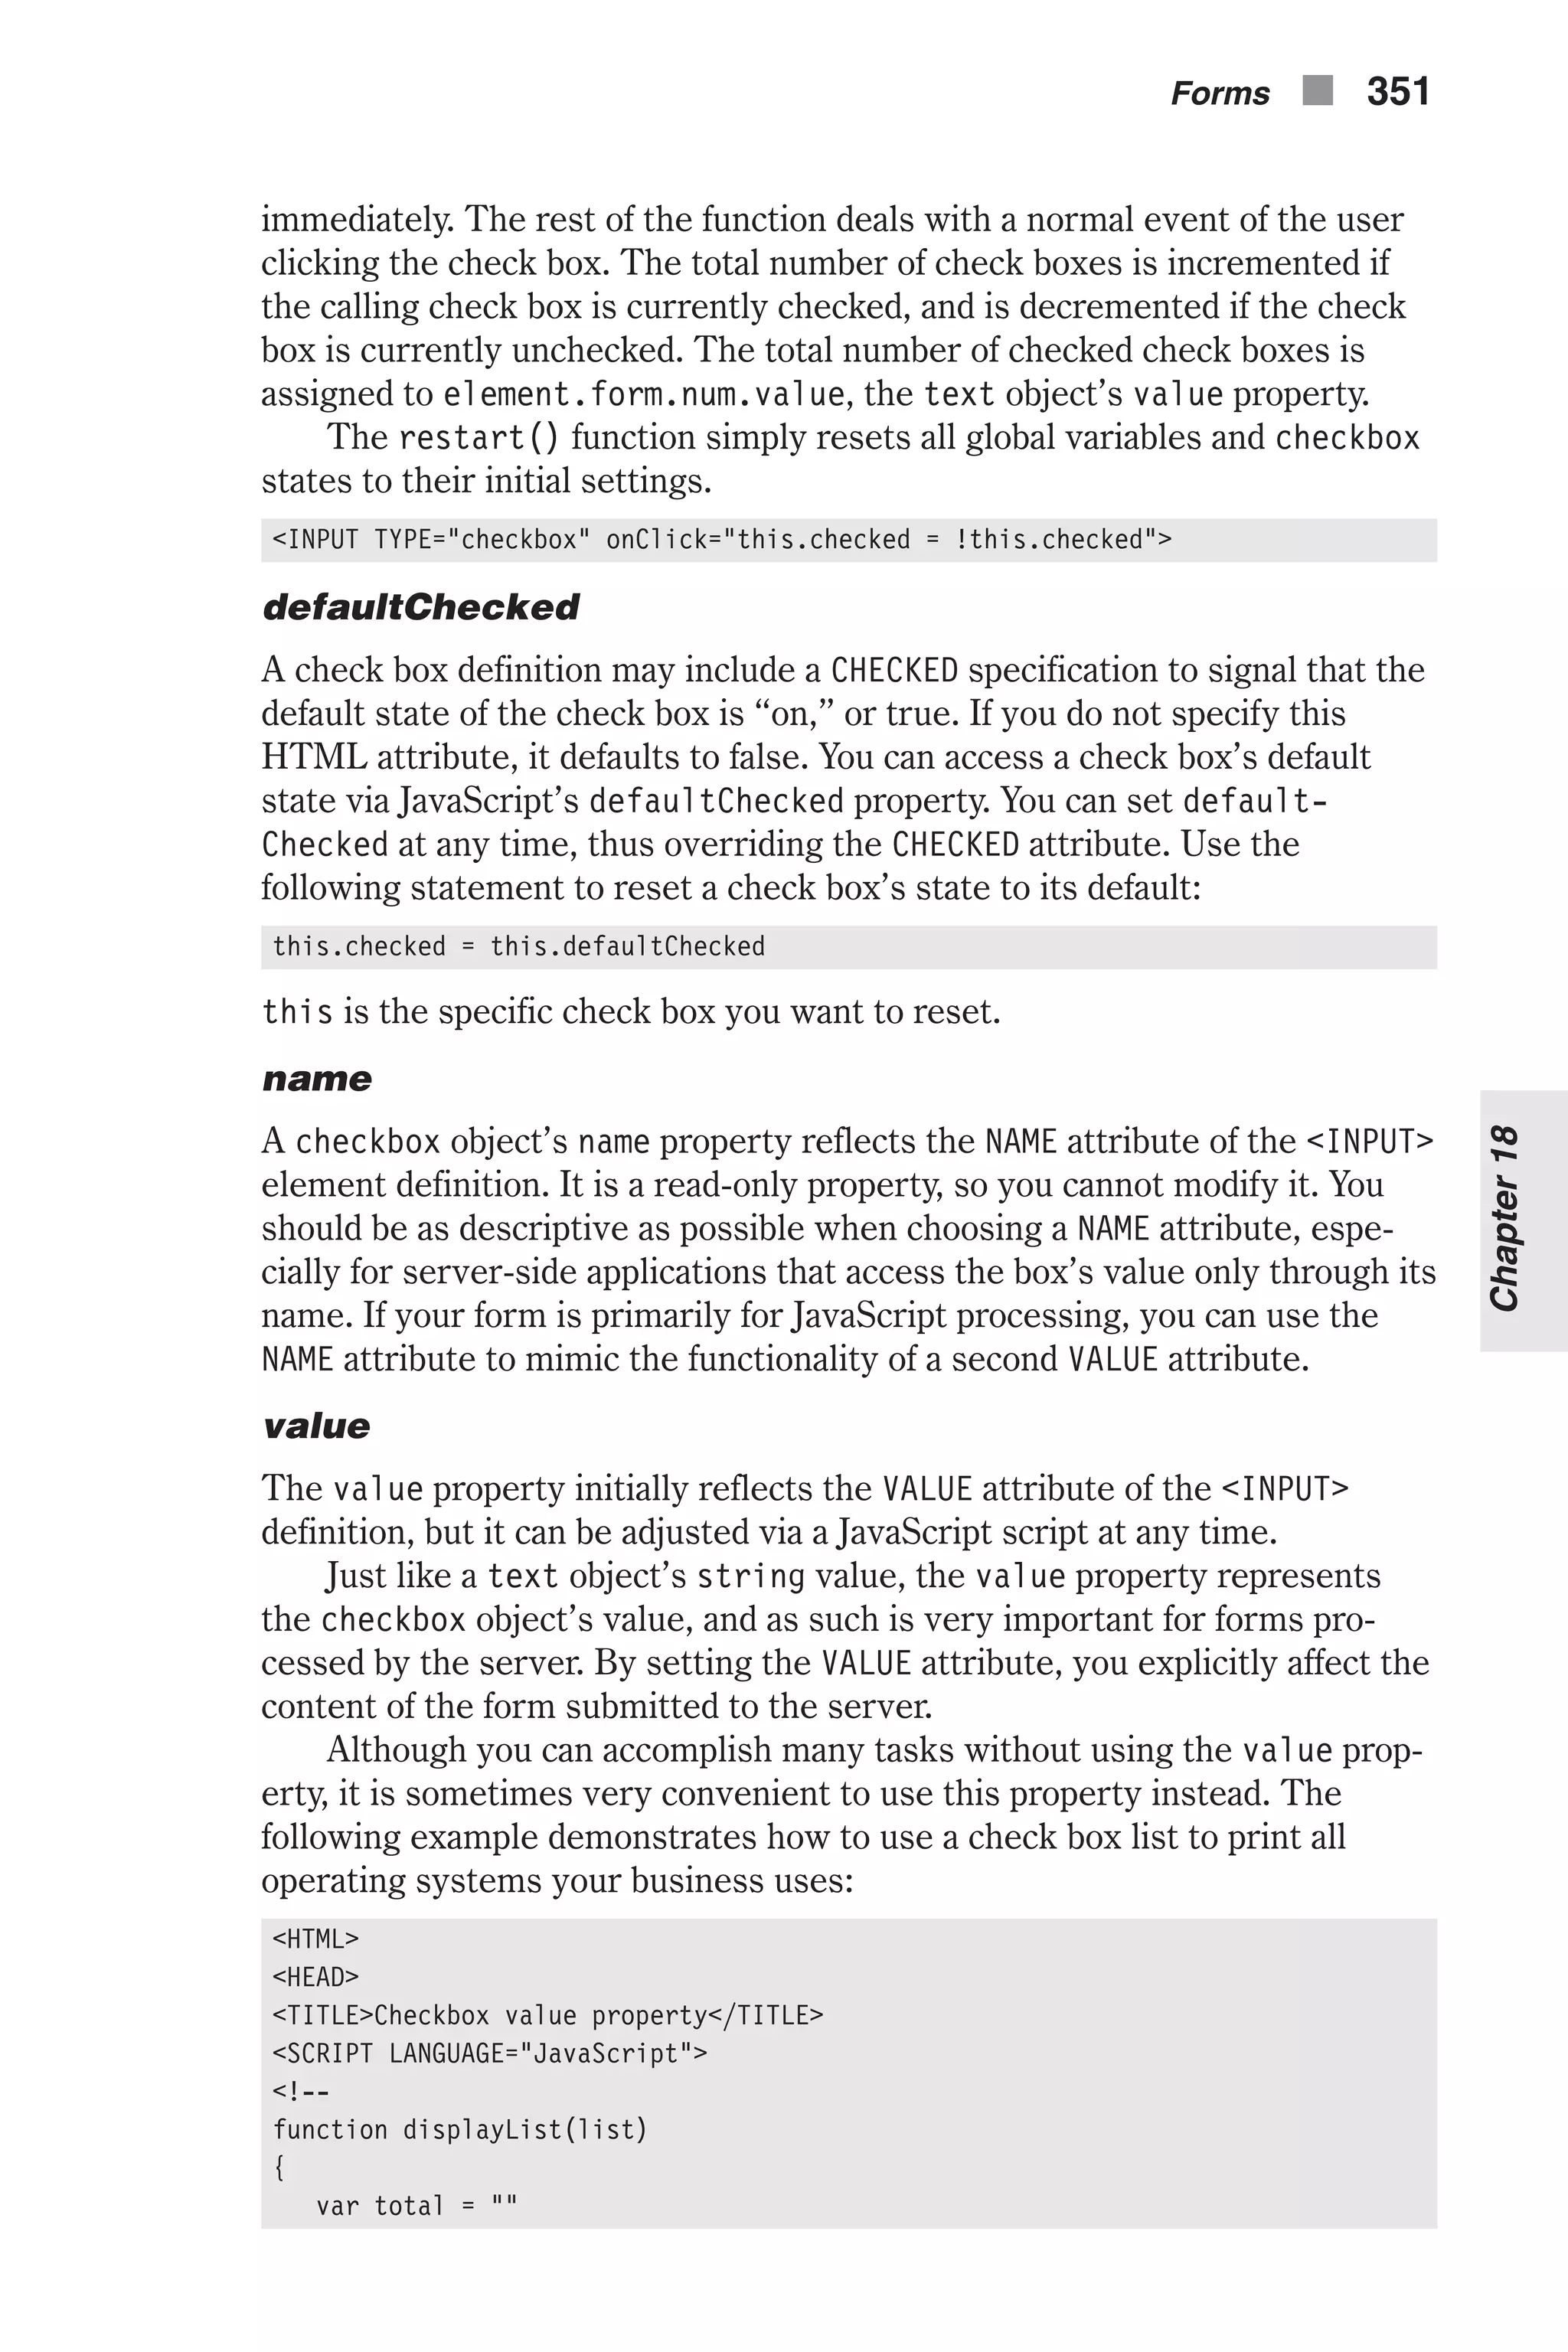
![for (var i = 0; i < list.length; ++i) { if (list[i].checked) total += list[i].value + "r" } if (total == "") alert("No OS selected!") else alert(total) } // --> </SCRIPT> </HEAD> <BODY> <FORM> <INPUT TYPE="checkbox" VALUE="DOS / Windows" NAME="computer">DOS / Windows XP<BR> <INPUT TYPE="checkbox" VALUE="Windows Vista" NAME="computer">Windows Vista<BR> <INPUT TYPE="checkbox" VALUE="Macintosh" NAME="computer">Macintosh<BR> <INPUT TYPE="checkbox" VALUE="Linux" NAME="computer">Linux<BR> <INPUT TYPE="button" VALUE="display list" onClick= "displayList(this.form.computer)"> </FORM> </BODY> </HTML> First of all, notice that the form consists of four check boxes and one button. The button’s onClick event handler invokes the displayList() function, passing the computer form element as an argument. Since there are four elements matching that name, this.form.computer is actually an array of four check box elements. A checkbox’s VALUE attribute specifies the operat- ing system associated with that check box. The displayList() function is based on a simple for loop that concate- nates the check box values inside the local variable total, inserting new line characters as delimiters. When the loop terminates, total holds a list of all the operating systems that the user checked. If the value of total is an empty string, the user did not check any of the boxes, and an appropriate message is displayed. Otherwise, the list of the checked operating systems is displayed in an alert box. radio Object HTML Syntax A radio button provides an interface to select an option among multiple choices. Unlike check boxes, which are rectangular in shape, radio buttons are circular. Another difference between the two types of buttons is that radio buttons belong to a group of buttons and are not independent. A group of radio buttons behaves exactly like the station buttons on an old car radio. It has two possible states: one button is pressed (on) or all buttons are 352 n Chapter 18](https://image.slidesharecdn.com/wordware-advancedjavascript3rded-160421130838/75/www-webre24h-com-Wordware-advanced-javascript-3rd-ed-easttom-377-2048.jpg)
![released (off). When a button is pressed, the button that was pressed is auto- matically released. All buttons of the same group share the same name. In fact, the identical name is an indication to the browser to restrict the number of checked radio buttons to one. Clicking a button automatically deselects the currently selected button of the same group. The general syntax of a single radio but- ton is as follows: <INPUT TYPE="radio" NAME="groupName" VALUE="buttonValue" [CHECKED] [onClick="handlerText"]> Keep in mind that you should only use this type of button to enable a single selection among multiple choices. The following construct, for example, pro- vides the means to choose a computer type from three options: What computer do you most often use: <P> <INPUT TYPE="radio" NAME="computers" VALUE="unix">Unix (X-Windows) <P> <INPUT TYPE="radio" NAME="computers" VALUE="pc">PC <P> <INPUT TYPE="radio" NAME="computers" VALUE="mac">Macintosh JavaScript Access Although a radio button is a simple form element, its reference is an unusual one. You can reference a radio button group via one of the following expressions: [window.]document.formName.radioGroupName [window.]document.formName.elements[ElementIndex] [window.]document.forms[FormIndex].radioGroupName [window.]document.forms[FormIndex].elements[ElementIndex] As explained at the beginning of this chapter, elements with the same names are combined and indexed into a single array. Therefore, the above refer- ences are actually arrays, where each element is a single radio button. Hence, the four ways to reference a specific radio button are as follows: [window.]document.formName.radioGroupName[ButtonIndex] [window.]document.formName.elements[ElementIndex][ButtonIndex] [window.]document.forms[FormIndex].radioGroupName[ButtonIndex] [window.]document.forms[FormIndex].elements[ElementIndex][ButtonIndex] You can look up the number of radio buttons in a group by accessing the group’s LENGTH attribute. For more details, check the section about the name property of the text object earlier in this chapter. Some versions of Internet Explorer do not work perfectly with the radio object, so be sure to test your script. Forms n 353 Chapter18](https://image.slidesharecdn.com/wordware-advancedjavascript3rded-160421130838/75/www-webre24h-com-Wordware-advanced-javascript-3rd-ed-easttom-378-2048.jpg)
![When a radio button group consists of only one radio button, it is not considered a group. Therefore, you cannot access the array, and references such as the following ones are not valid: [window.]document.formName.radioGroupName[index] [window.]document.formName.radioGroupName.length Instead, you must access the radio button directly, without an array: [window.]document.formName.radioButtonName The difference in referencing a single button and a multiple-button group complicates scripts quite a bit. If the radio buttons are created with plain HTML, you obviously know if the number of radio buttons is greater than one and access them accordingly. If the radio buttons are automatically gen- erated by a script, then you have to add a counter that will indicate if the number of buttons is greater than one. Event Handlers onClick A radio object supports only one event handler—the onClick event. When the user checks (fills) a radio button, a click event occurs, and the specified statements are executed. See the listings for the checkbox object for more details, syntax, and examples. Methods click() The click() method emulates a button click on the calling radio object. It does not, however, trigger the button’s onClick event handler. Example 18-8 demonstrates the use of this method to create a “Christmas lights” effect. <HTML> <HEAD> <TITLE>Blinking lights</TITLE> </HEAD> <BODY onLoad="animate()"> <SCRIPT LANGUAGE="JavaScript"> <!-- // create row of radio buttons lay(20) // set index of lamp to start animation var current = 0 // set speed (pause in milliseconds between each movement) var speed = 100 function lay(num) { // assign "greater than" character to variable var gt = unescape("%3e") // open form 354 n Chapter 18](https://image.slidesharecdn.com/wordware-advancedjavascript3rded-160421130838/75/www-webre24h-com-Wordware-advanced-javascript-3rd-ed-easttom-379-2048.jpg)
![document.write("<FORM NAME='animation'" + gt) // use loop to lay radio buttons down (all buttons in same group) for (var i = 0; i < num; ++i) { document.write("<INPUT TYPE='radio' NAME='lamps'" + gt) } // close form document.write("</FORM" + gt) } function animate() { // click next radio button document.animation.lamps[current].click() // if radio button is the last one reset variable to 0 (otherwise increment) current = (current == document.animation.lamps.length – 1) ? 0 : ++current // recursive call after speed milliseconds timerID = setTimeout("animate()", speed) } // --> </SCRIPT> </BODY> </HTML> Example 18-8 (ex18-8.htm). A radio button animation The function lay() prints a form with a given number of radio objects. Notice a very important technique to encode the greater than character. This character (>) is assigned to the variable gt via the unescape() func- tion. You may recall from Chapter 2, “Getting Started with JavaScript,” that Netscape uses a different HTML comment than other browsers. While stan- dard browsers terminate a comment with a greater than character (>), Navigator uses a three-character string (-->) instead. Therefore, if a greater than character is really placed in the script, it terminates the comment that hides the script from browsers that do not support JavaScript (specified by the <SCRIPT> tag). When creating a JavaScript-powered web page, you should be sure to use this technique whenever possible, especially to close HTML tags that are printed via document.write. You can also use less than operators instead of greater than operators, simply by reversing the order of the operands of a conditional statement. If your page is based on JavaScript, though, you may choose to disregard other browsers because they probably won’t be able to display the page anyway. Nevertheless, if you are using JavaScript only to add some special effects, you should use this technique to make it clearly viewable with any browser, even with those that do not fea- ture JavaScript. Yahoo!, for example, used this technique to create a “Yahoo Remote” for its page. The button that launched this JavaScript device was printed by a script, so browsers without JavaScript didn’t even see the but- ton. Had the greater than character not been encoded, the whole page (not just one button) would have been scrambled for users without JavaScript-enabled browsers. Back to the lay() function. It is important to name the form for later access—animation is chosen. A simple for loop is executed to print num Forms n 355 Chapter18](https://image.slidesharecdn.com/wordware-advancedjavascript3rded-160421130838/75/www-webre24h-com-Wordware-advanced-javascript-3rd-ed-easttom-380-2048.jpg)
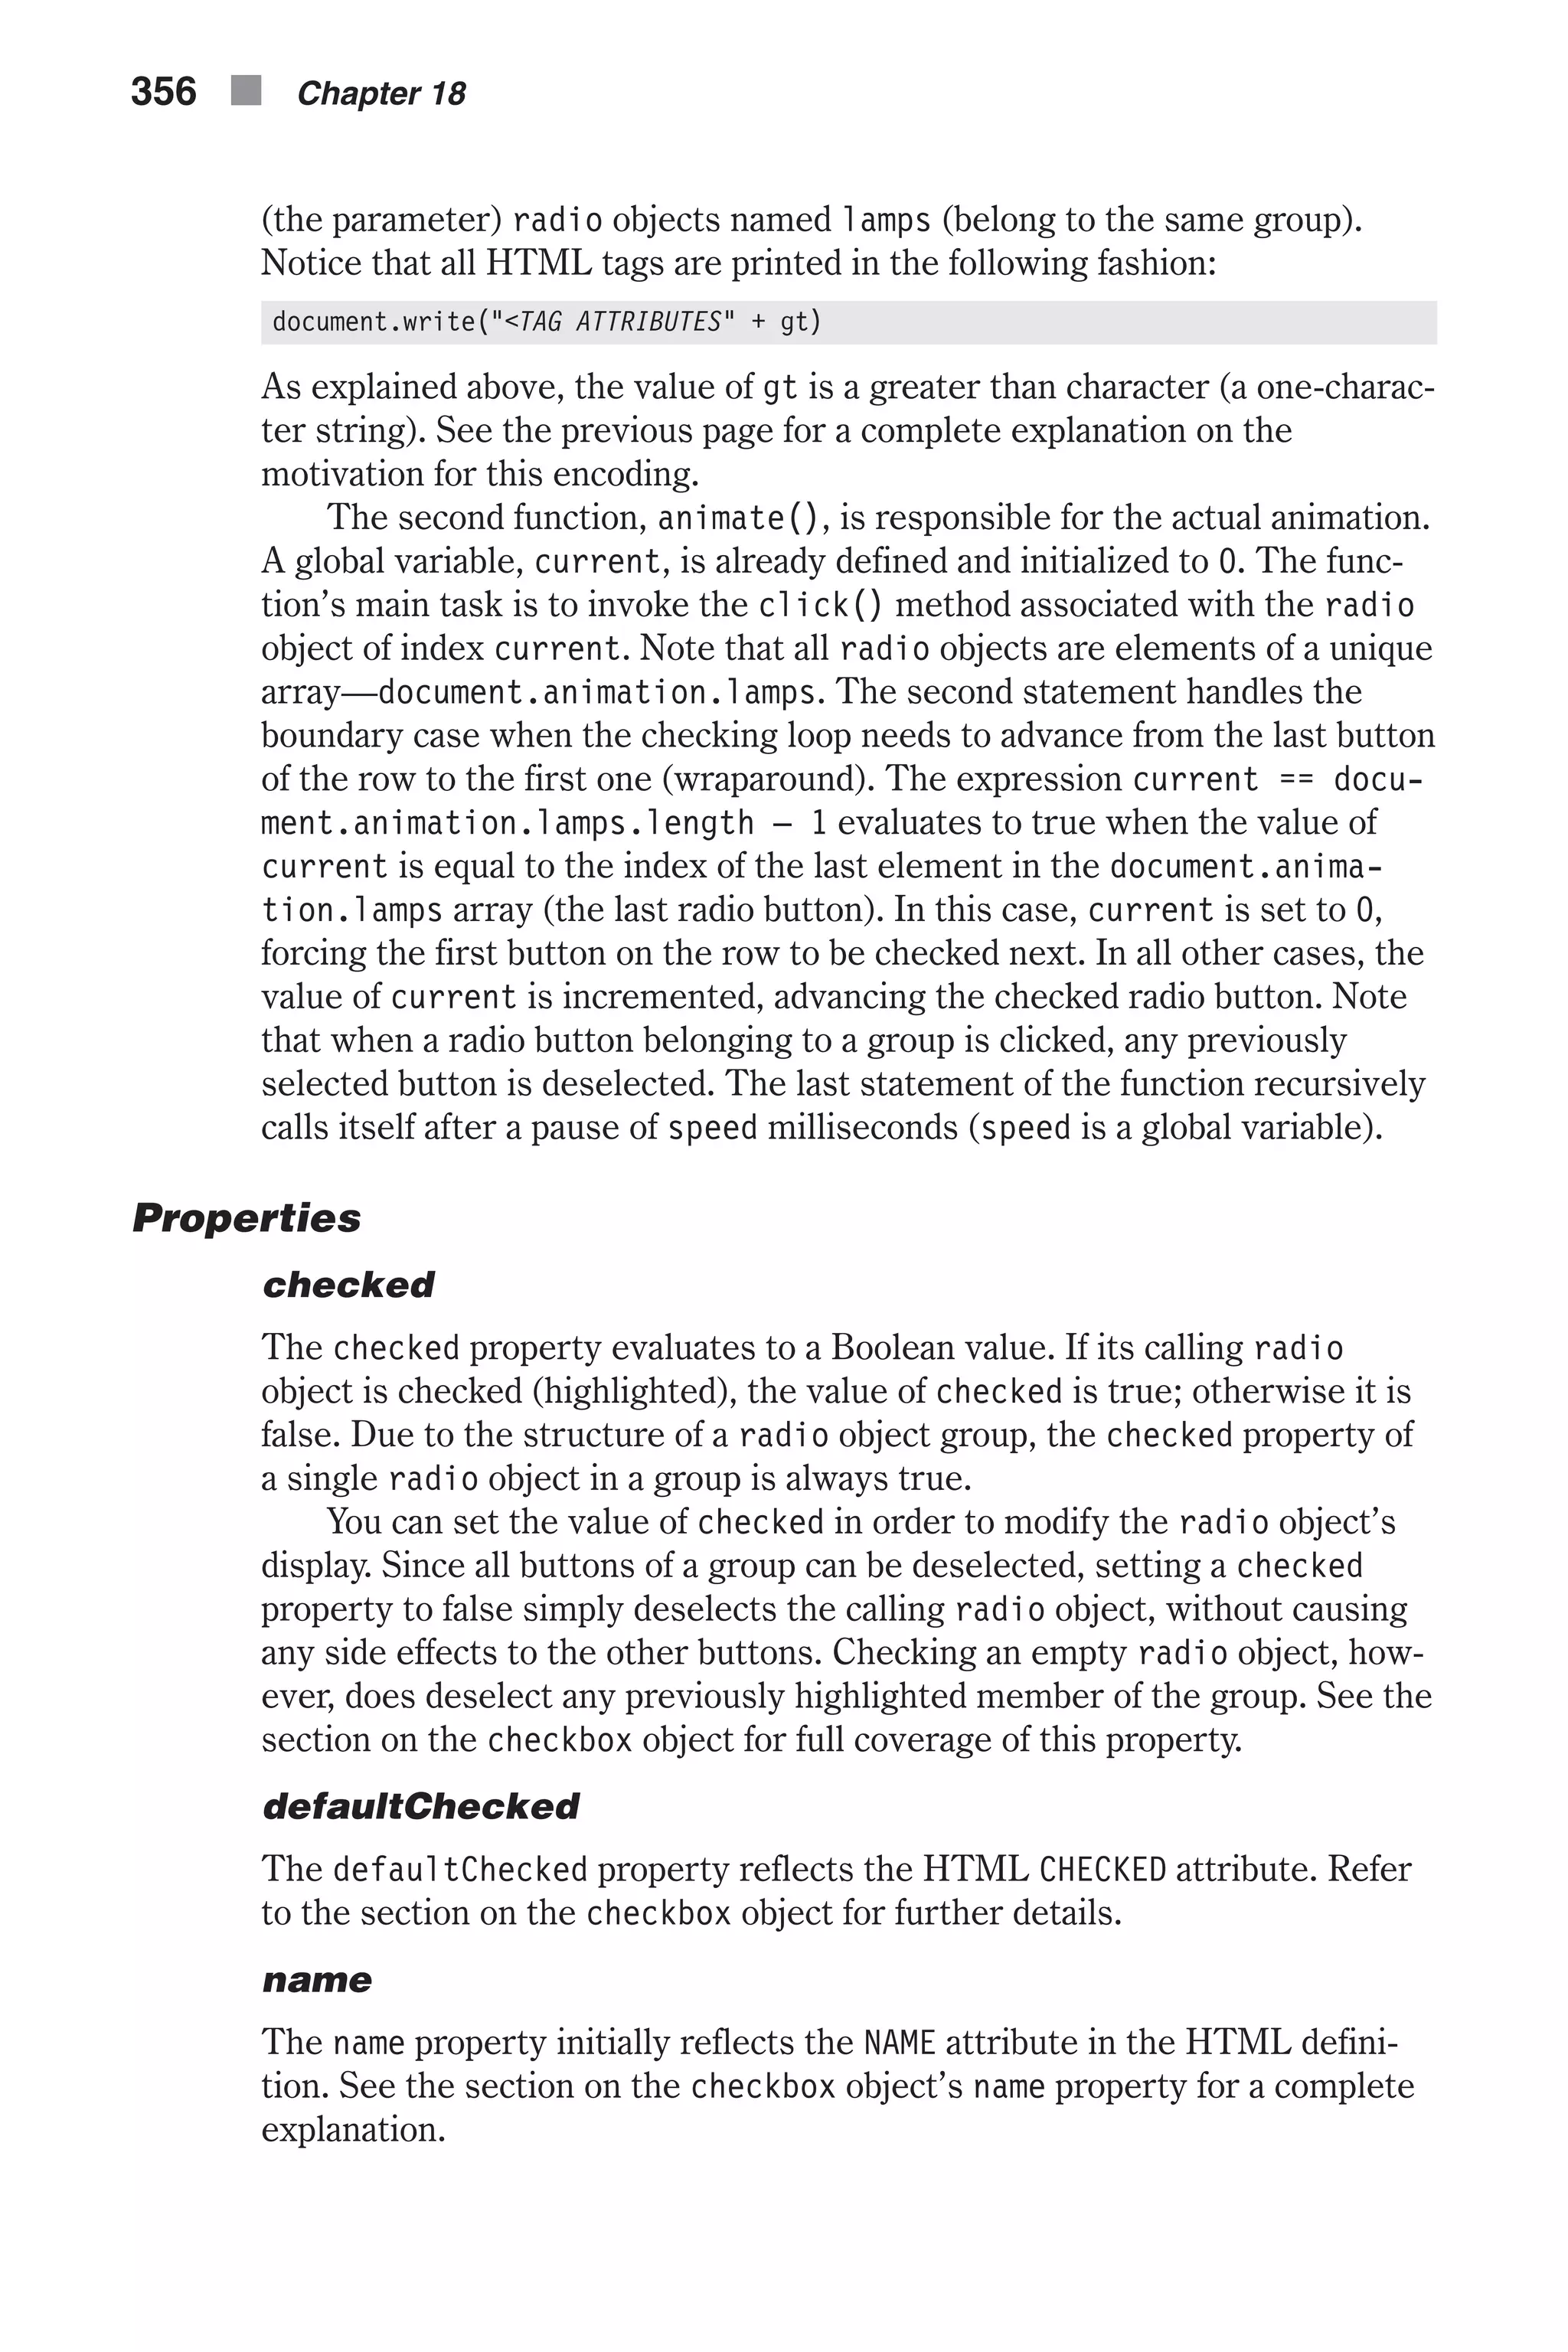
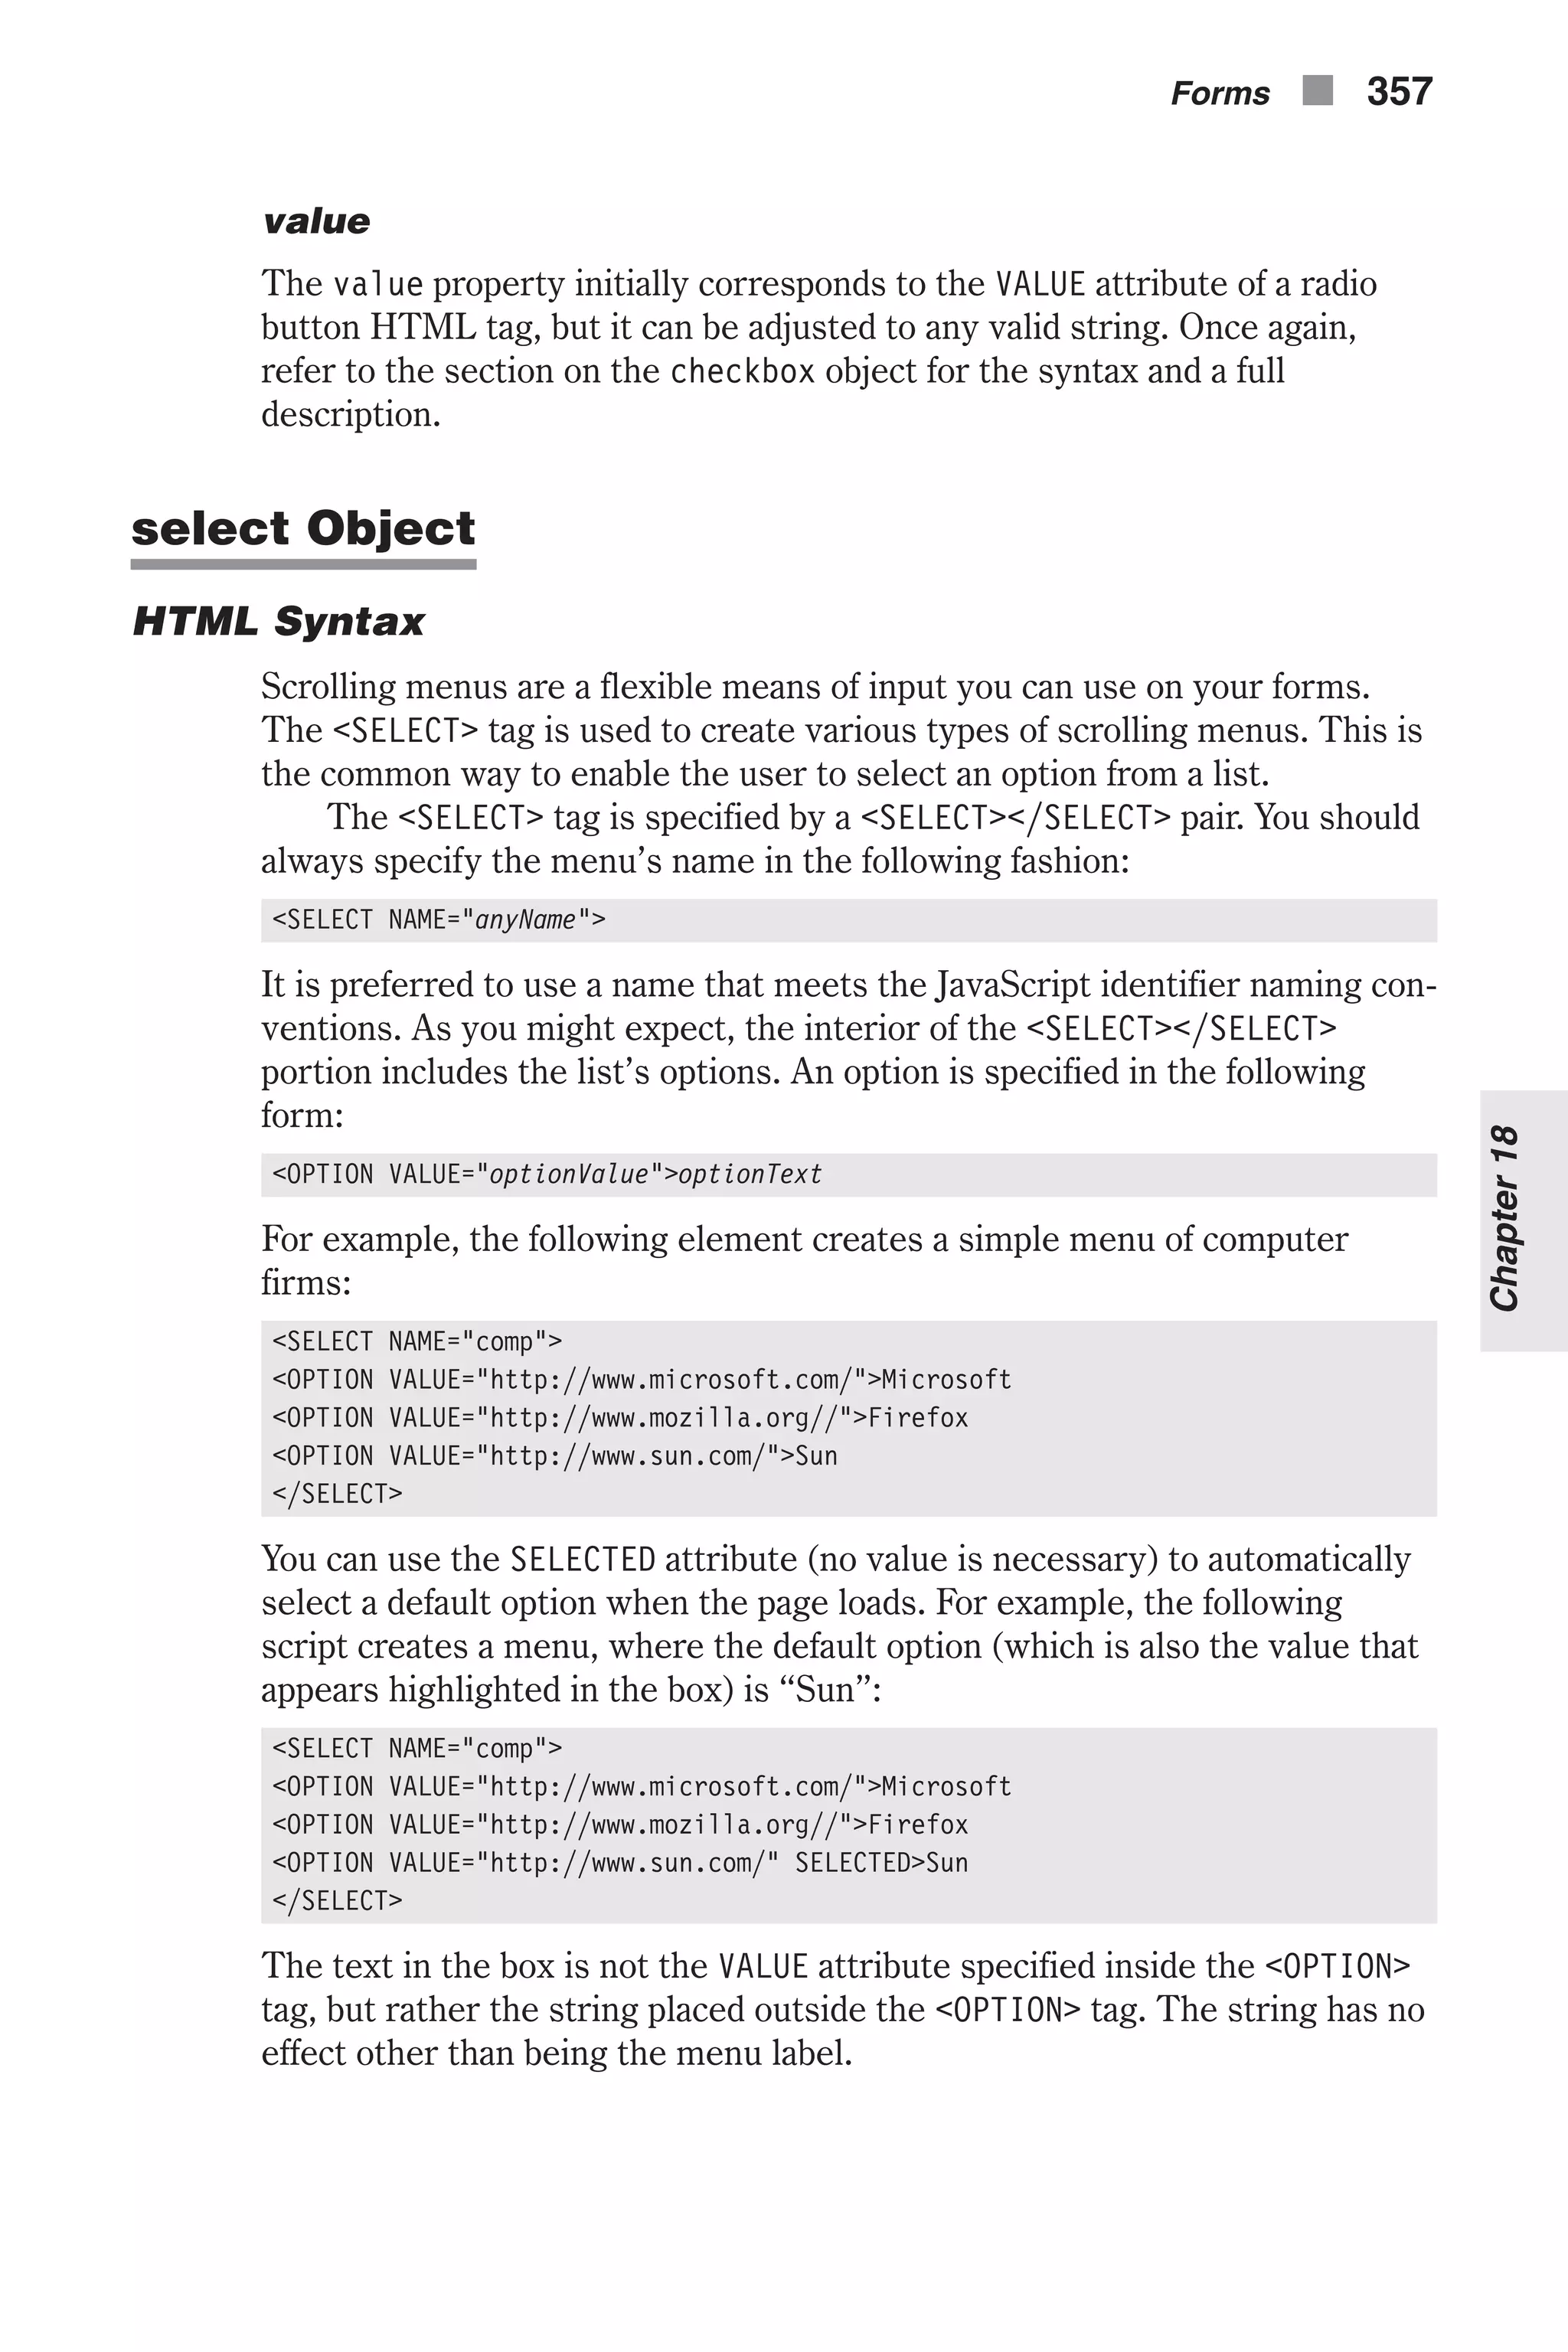
![The main advantage of this menu is that, due to its pop-up configuration, it does not take up much space on the page. Its disadvantage is that the user can select only one option. To work around this deficiency, you can specify the MULTIPLE attribute, but, since all options are laid out instead of popping up, you lose the space advantage. Here is a simple example: <SELECT NAME="comp" MULTIPLE> <OPTION VALUE="http://www.microsoft.com/">Microsoft <OPTION VALUE="http://www.mozilla.org/">Firefox <OPTION VALUE="http://www.sun.com/" SELECTED>Sun </SELECT> You can select multiple options by holding the Shift key down and selecting or deselecting options from the menu. The Control key can also be held in order to select each option individually. These keys are commonly used in all major operating systems. The complete syntax for the select object is as follows: <SELECT NAME="selectName" [SIZE="integer"] [MULTIPLE] [onBlur="handlerText"] [onChange="handlerText"] [onFocus="handlerText"]> <OPTION VALUE="optionValue" [SELECTED]>textToDisplay […<OPTION VALUE="optionValue" [SELECTED]>textToDisplay] </SELECT> You should recognize all attributes except for the event handlers, which are explained later. JavaScript Access There are several ways to reference a select object: [window.]document.formName.selectName [window.]document.formName.elements[index] [window.]document.forms[index].selectName [window.]document.forms[index].elements[index] You can access a specific option in a select object by appending an options property to its reference. This property is actually an array of options start- ing at index 0. You can reference, for example, the first option of a select object in the following fashion: [window.]document.formName.selectName.options[0] The options array is discussed later as one of the select object’s properties. 358 n Chapter 18](https://image.slidesharecdn.com/wordware-advancedjavascript3rded-160421130838/75/www-webre24h-com-Wordware-advanced-javascript-3rd-ed-easttom-383-2048.jpg)
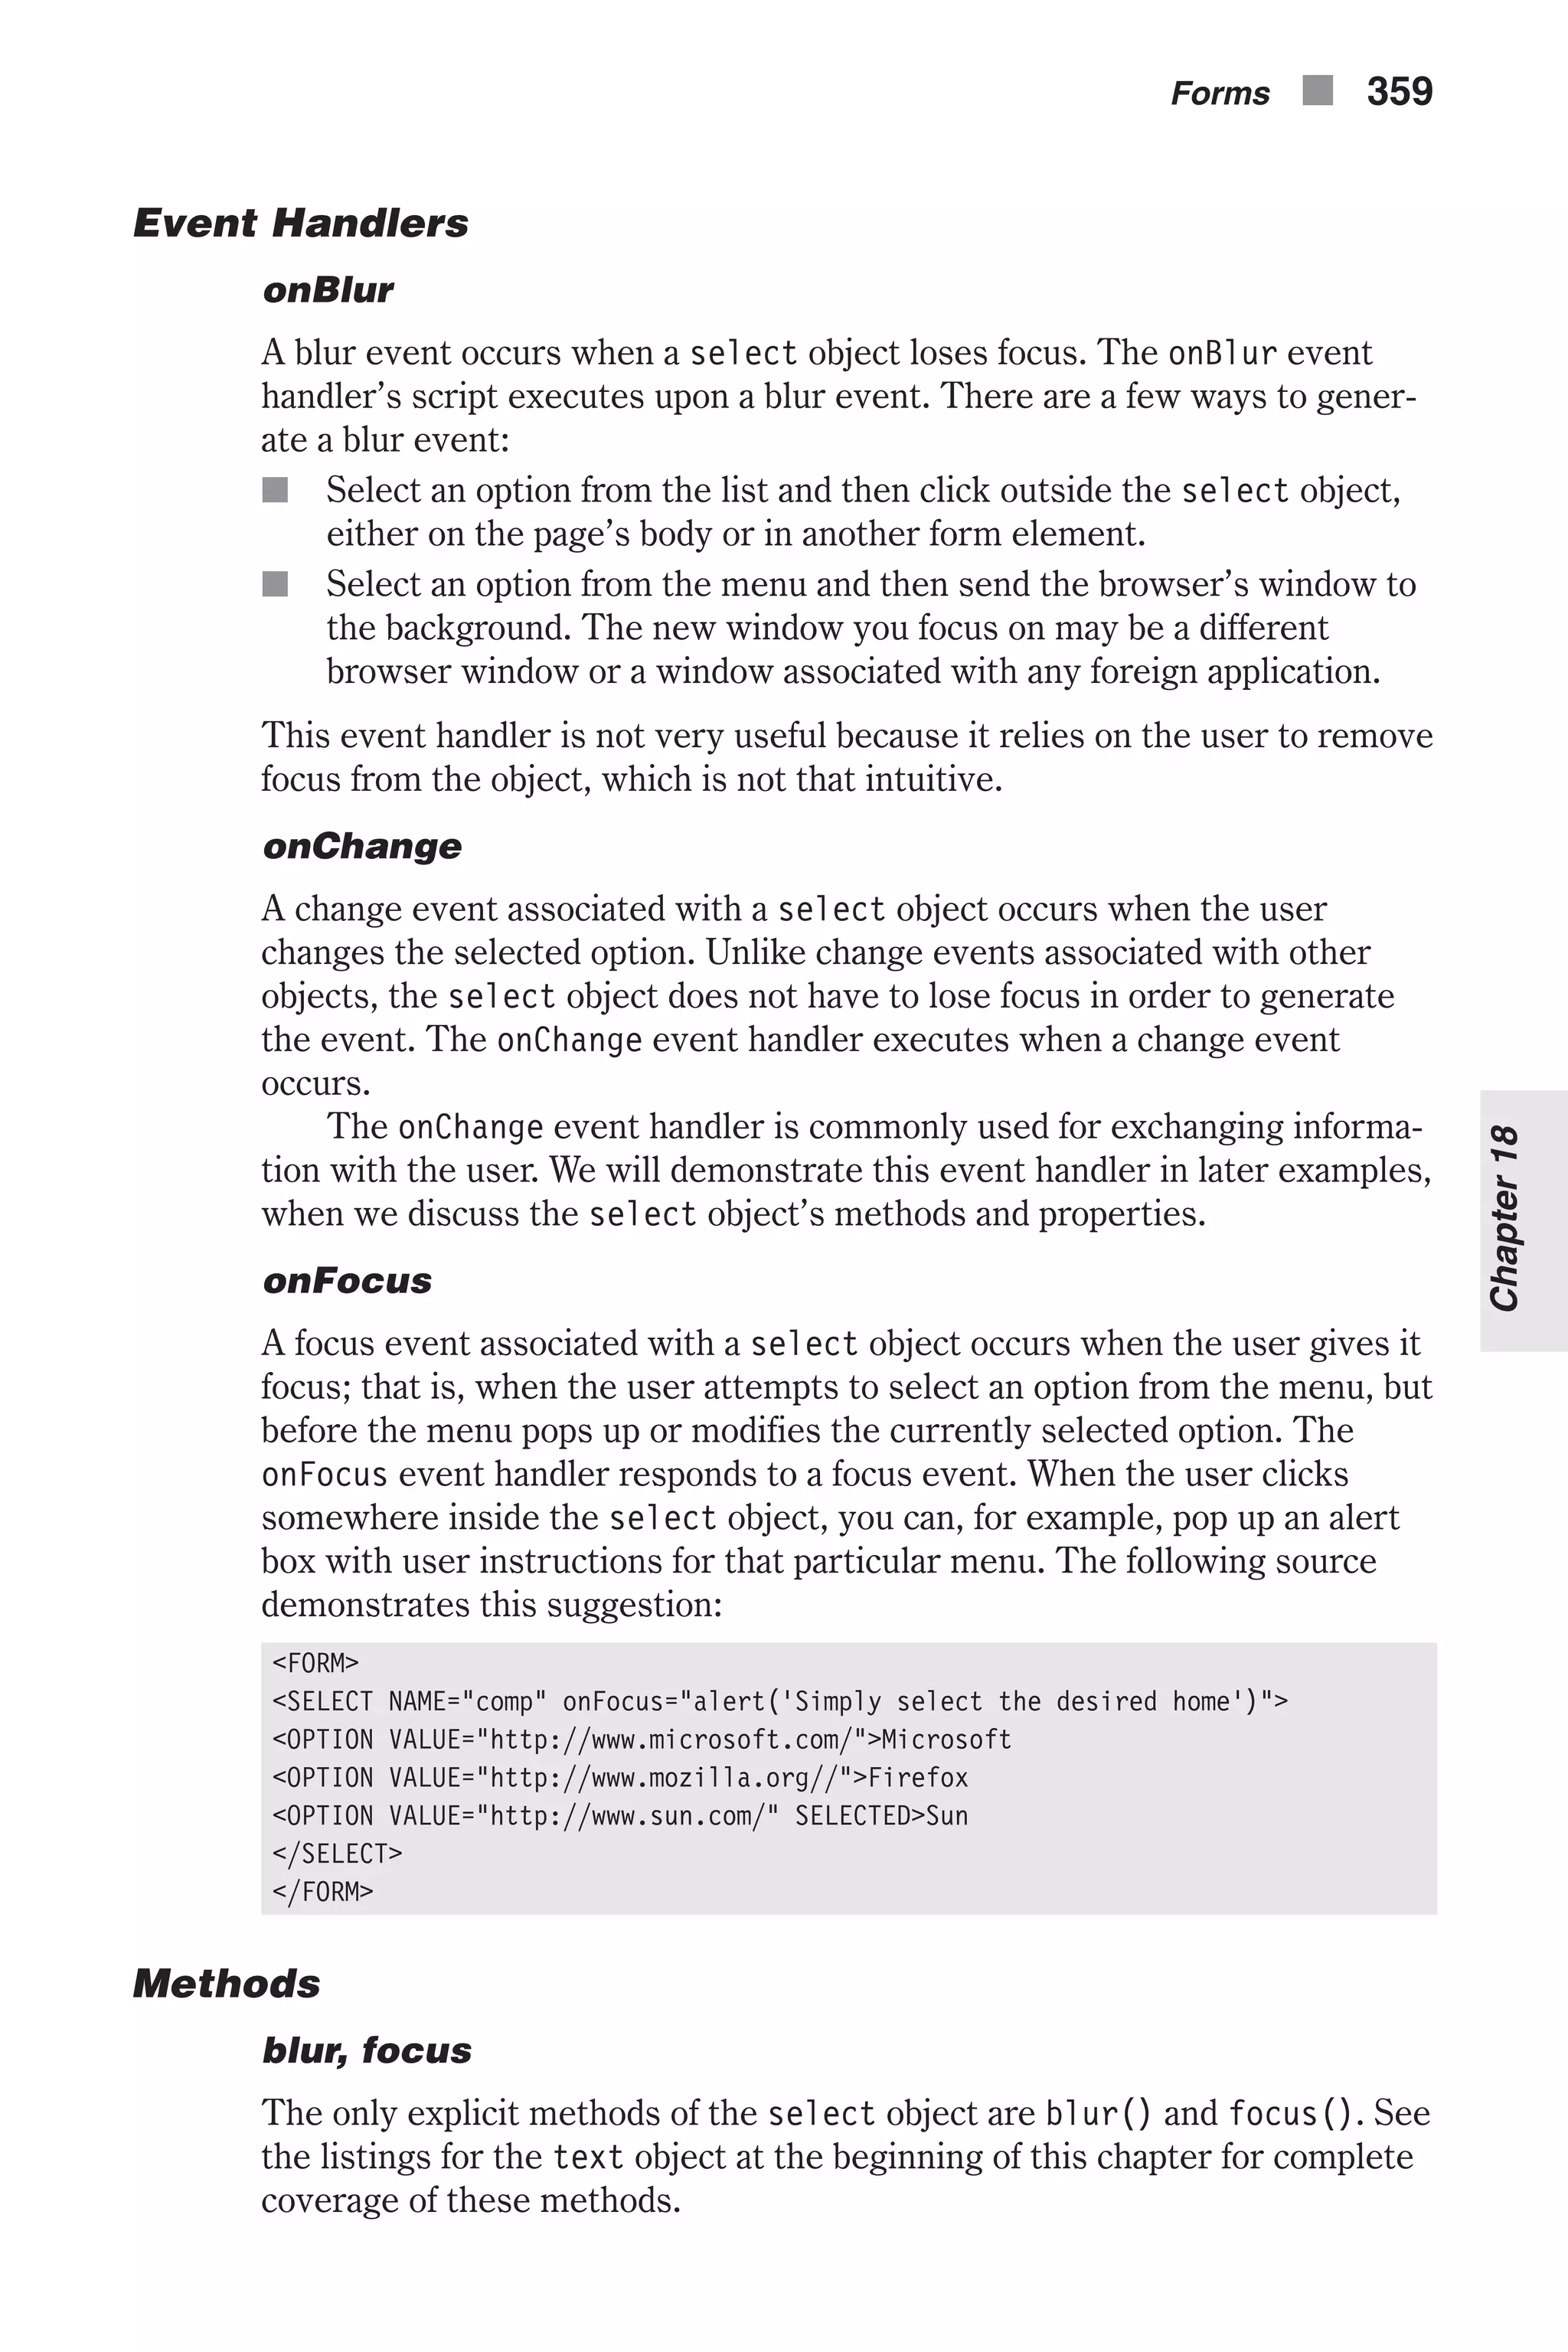
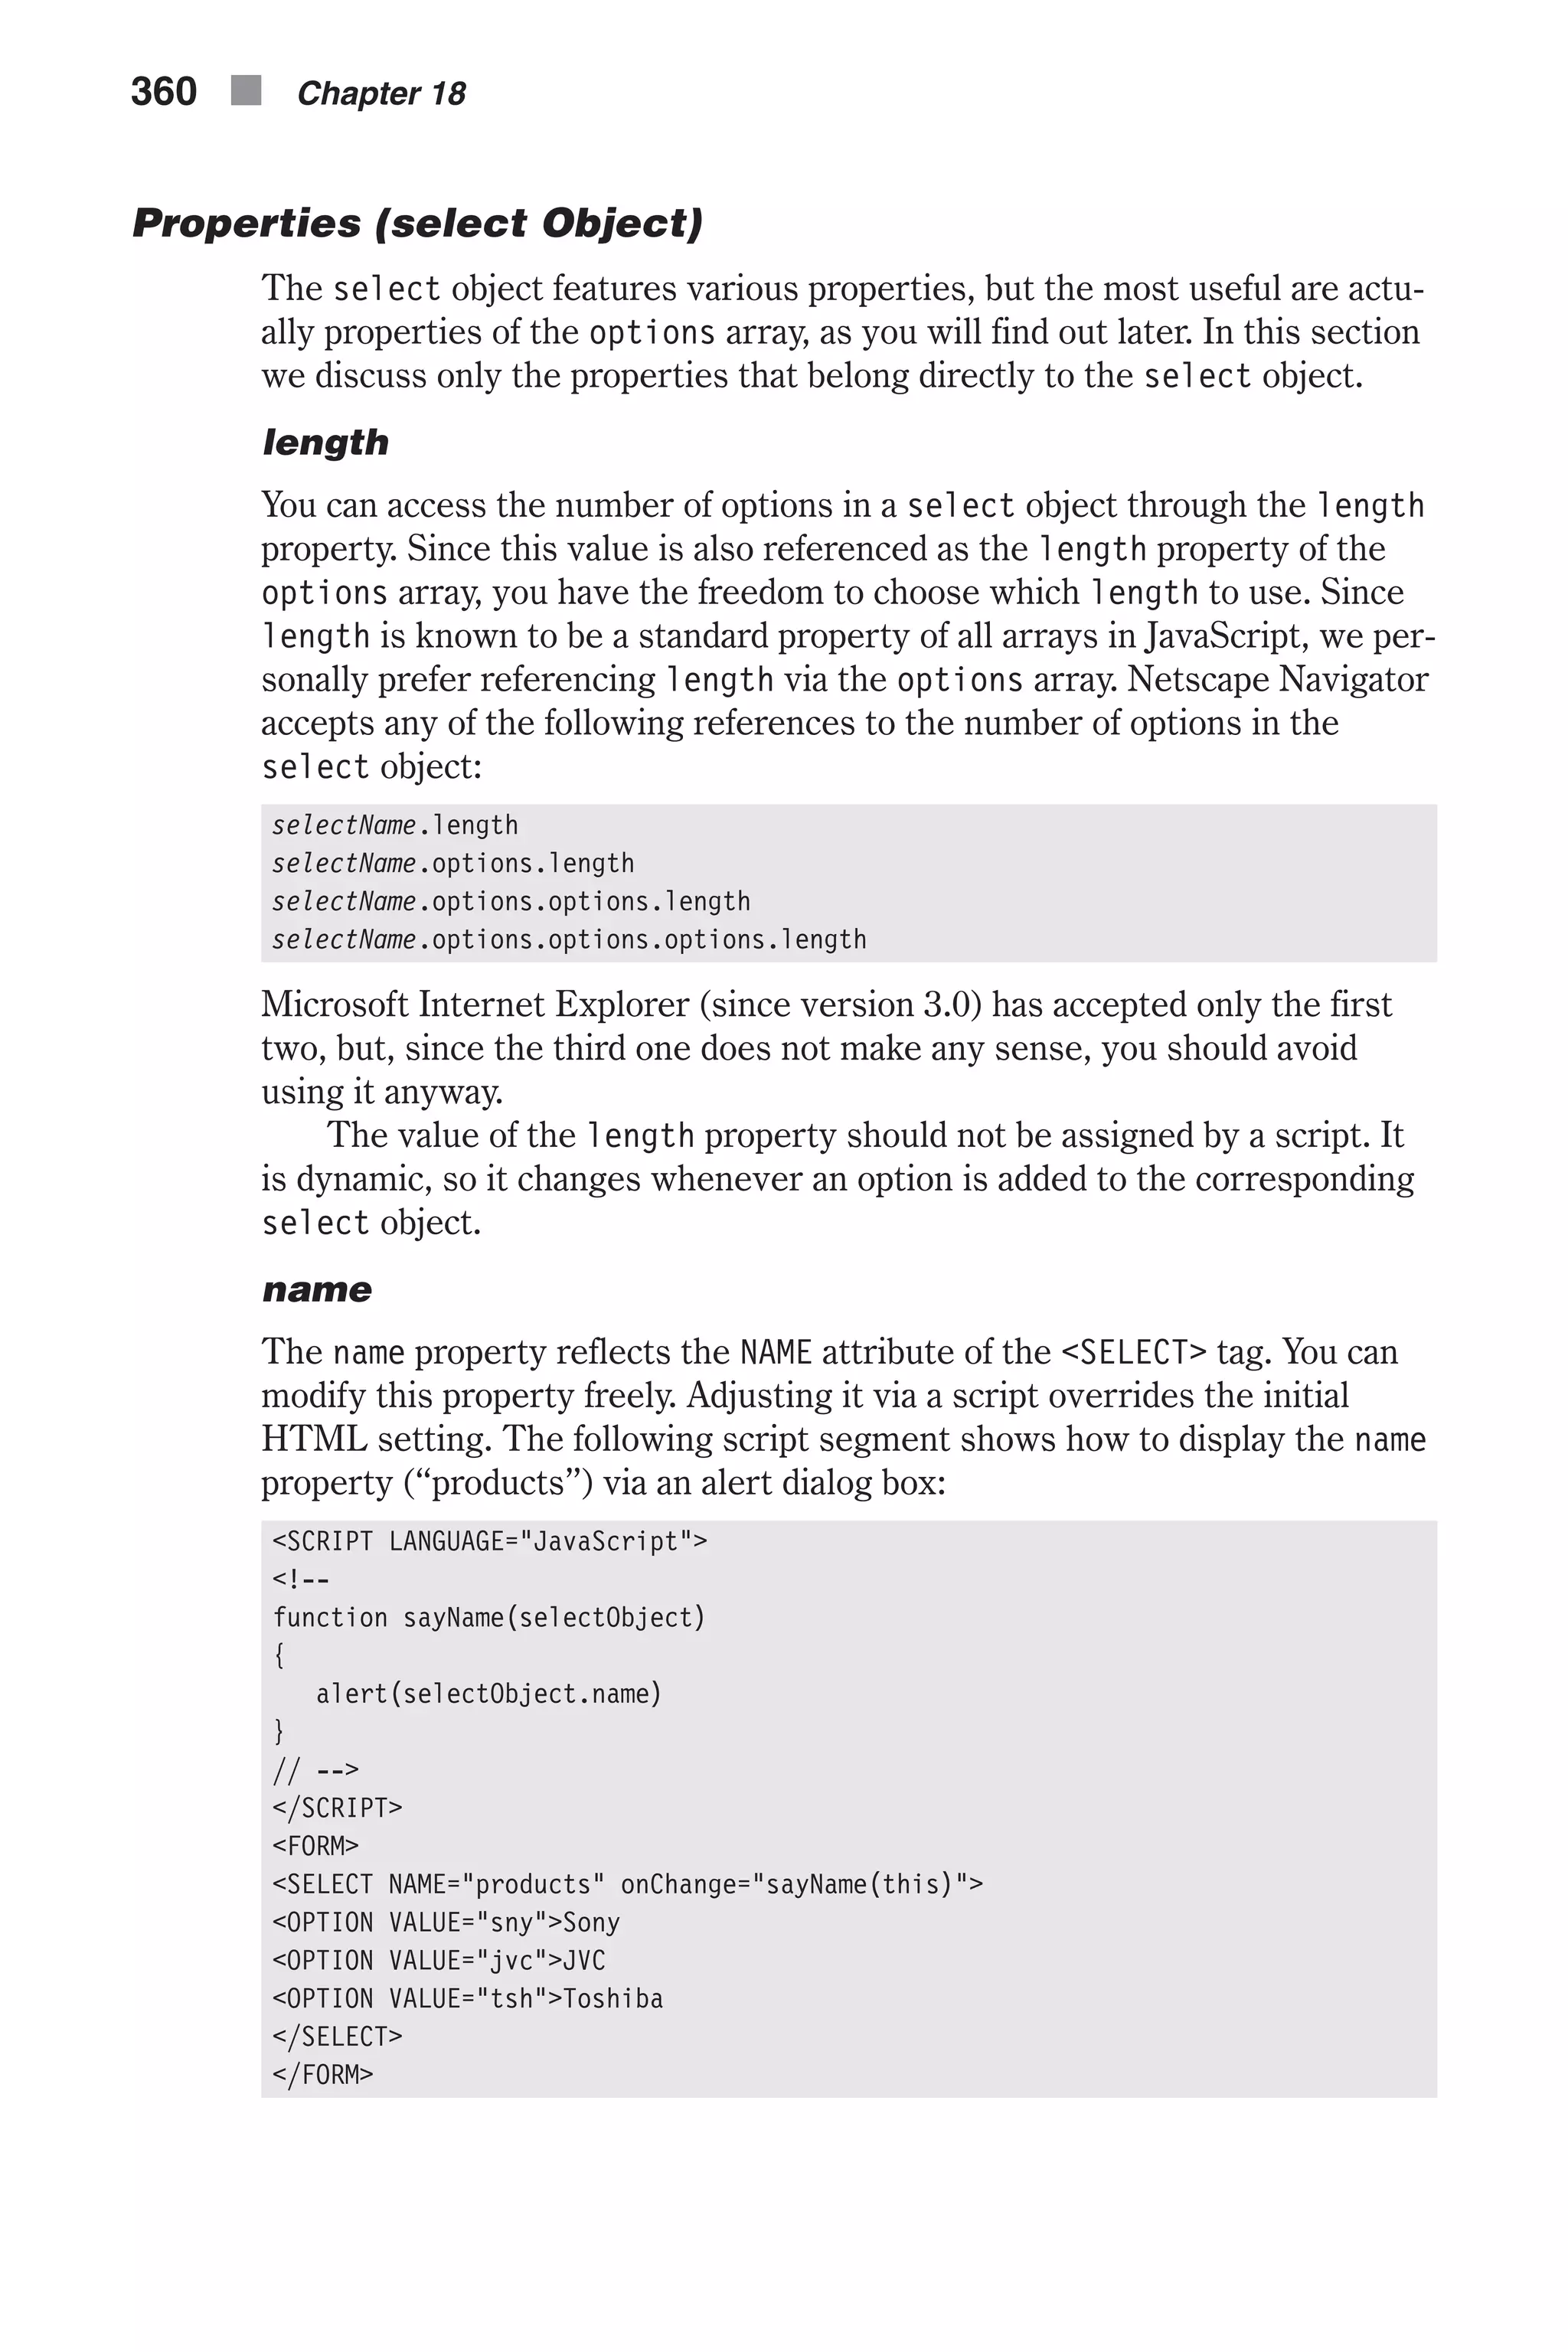
![options You can reference the options in a select object by the options property. Generally speaking, this array contains an entry for each option (<OPTION>) in a select object (<SELECT>). Suppose the first element of the first form in a document is a select object with three options. These options can be ref- erenced in JavaScript as: document.forms[0].elements[0].options[0] document.forms[0].elements[0].options[1] document.forms[0].elements[0].options[2] As always, the length of the array, which is equal to the number of options in the given select object, is stored in the array’s length property. In the pre- ceding examples that would be: document.forms[0].elements[0].options.length Elements of the options array are read-only. Although it does not generate a JavaScript error, assigning a value to any of the elements has no effect. The bare-bones selectObject.options reference evaluates to the full HTML syntax used to create the specified selectObject. Note that you can also access the properties of the select object as if they were direct properties of the options array. selectedIndex The selectedIndex property is an integer specifying the index of the selected option in a select object. Options in a select object are indexed in the order of definition, i.e., in the same order they are entered in the options array. You can also set the value of selectedIndex in a script to immediately update the state (the selected option) of a select object. The selectedIndex property is not useful with multiple select objects because it can only refer to the first selected option in the list. You can work around this problem by using the selected property of the options array and a simple loop. See the selected property in the next section, “Prop- erties (options Array)” for further details. Example 18-9 demonstrates the selectedIndex property. Although we have not discussed the value property yet, its role is obvious. If needed, refer to its description later in this chapter. <HTML> <HEAD> <TITLE>URL option</TITLE> <SCRIPT LANGUAGE="JavaScript"> <!-- function loadPage(list) { location.href = list.options[list.selectedIndex].value } // --> </SCRIPT> </HEAD> Forms n 361 Chapter18](https://image.slidesharecdn.com/wordware-advancedjavascript3rded-160421130838/75/www-webre24h-com-Wordware-advanced-javascript-3rd-ed-easttom-386-2048.jpg)
![<BODY> <FORM> <SELECT onChange="loadPage(this)"> <OPTION VALUE="http://www.cnn.com/">CNN <OPTION VALUE="http://www.msnbc.com/">MSNBC <OPTION VALUE="http://www.usatoday.com/">USA TODAY </SELECT> </FORM> </BODY> </HTML> Example18-9 (ex18-9.htm). A URL picker When the user selects an option in the select object, the loadPage() func- tion is invoked by the onChange event handler, passing the select object as an argument. The URL associated with each option is stored as the option’s VALUE attribute, or value property in terms of JavaScript. The selected option is list.options[list.selectedIndex] because list.selected- Index is an integer representing the index of the selected option. The value property is used to access the URL of the selected object, which is then assigned to location.href, in order to load that page to the browser win- dow. You may prefer to use a button in place of the onChange event handler: <HTML> <HEAD> <TITLE>URL option with button</TITLE> <SCRIPT LANGUAGE="JavaScript"> <!-- function loadPage(list) { location.href = list.options[list.selectedIndex].value } // --> </SCRIPT> </HEAD> <BODY> <FORM> <SELECT> <OPTION VALUE="http://www.cnn.com/">CNN <OPTION VALUE="http://www.msnbc.com/">MSNBC <OPTION VALUE="http://www.usatoday.com/">USA TODAY </SELECT> <INPUT TYPE="button" VALUE="load page" onClick= "loadPage(this.form.elements[0])"> </FORM> </BODY> </HTML> Example 18-10 (ex18-10.htm). Another version of the URL picker—this one uses a button The only difference between Example 18-9 and Example 18-10 is that in Example 18-9 the event handler is attached to a select object, while in Example 18-10 it is attached to a button object. In order to avoid changing 362 n Chapter 18](https://image.slidesharecdn.com/wordware-advancedjavascript3rded-160421130838/75/www-webre24h-com-Wordware-advanced-javascript-3rd-ed-easttom-387-2048.jpg)
![the function, we have modified the argument handed to the function to keep passing the select object. The expression this.form references the form and elements[0] references the select object, which is the first element in the form. Properties (options Array) An element in the options array reflects a select object’s option defined by the <OPTION> tag in HTML. Properties of the options array are properties of specific options in a select object. defaultSelected The defaultSelected property evaluates to a Boolean value. If the speci- fied option is defined with a SELECTED attribute (<OPTION...SELECTED>), the value of defaultSelected is true. Otherwise, it is false. defaultSelected initially reflects whether the SELECTED attribute is used within an <OPTION> tag. Setting the defaultSelected property via a script overrides the initial HTML setting. In a select object without a MULTIPLE specification you can only have one option selected by default. Therefore, setting the defaultSelected property of a given option to true clears any previous default selections, including those set with SELECTED. Nevertheless, if you set default- Selected in a select object defined with the MULTIPLE attribute, previous default selections are not cleared. index The index property of a single option in a select object is the number iden- tifying the position of the object in the selection list, starting from zero. Under normal circumstances, there is no justification for the existence of the index property, because in order to reference an option, you need to know its index: document.selectObject.options[indexValue] and when you reference the index property, you supposedly know the index already: document.selectObject.options[indexValue].index length See the listings for the length property in the preceding section—“Prop- erties (select Object).” selected The selected property is a Boolean value specifying the current selection state of an option in a select object. Its general syntax is as follows: selectName.options[index].selected Forms n 363 Chapter18](https://image.slidesharecdn.com/wordware-advancedjavascript3rded-160421130838/75/www-webre24h-com-Wordware-advanced-javascript-3rd-ed-easttom-388-2048.jpg)
![If an option in a select object (selectName.options[index]) is selected, the selected property evaluates to true. Otherwise, it evaluates to false. You can set this property at any time, which immediately affects the display of the select object. The selected and defaultSelected properties are very useful. Sup- pose you want to create a button by which the user can reset the select object. Using the Reset button is not desirable because it resets the entire form, not just the select object. You can solve the problem by using a sim- ple JavaScript function to revert the select object to its default state. Here is the function that the button should invoke: <HTML> <HEAD> <TITLE>Reset select object</TITLE> <SCRIPT LANGUAGE="JavaScript"> <!-- function setDefault(selectName) { for (var i = 0; i < selectName.options.length; ++i) { selectName.options[i].selected = selectName.options[i].defaultSelected } } // --> </SCRIPT> </HEAD> <BODY> <FORM> <SELECT NAME="myMenu" MULTIPLE> <OPTION> First option <OPTION SELECTED> Second option <OPTION> Third option <OPTION> Fourth option <OPTION SELECTED> Fifth option </SELECT> <INPUT TYPE="button" VALUE="reset menu" onClick="setDefault(this.form.myMenu)"> </FORM> </BODY> </HTML> Example 18-11 (ex18-11.htm). A simple function to reset a select object The setDefault() function works with any type of select object, whether it is a multiple one or not. It simply loops through the options of the select object and sets the selected property of each to its defaultSelected prop- erty, reverting all options to their default selection state. The value handed to the function is the select object, referenced as this.form.myMenu. 364 n Chapter 18](https://image.slidesharecdn.com/wordware-advancedjavascript3rded-160421130838/75/www-webre24h-com-Wordware-advanced-javascript-3rd-ed-easttom-389-2048.jpg)
![þ Note: Microsoft Internet Explorer does not fully support the select object. This entire discussion is based on Navigator because it simply does not work for Microsoft’s browser. As you can see, Microsoft has focused on the user interface of its browser but did not pay much attention to script-level access via JavaScript. The average web surfer does not feel the disadvantages because web content providers use only features that are supported by both browsers. text There is no HTML attribute that defines the option’s label. Take a look at Example 18-11. The strings “First option,” “Second option,” and so forth are not specified in any HTML attribute as you could expect. They are simply appended to the <OPTION> definitions. The text property can be set at any time, immediately affecting the dis- play. Example 18-12 demonstrates the use of this property. When the user selects an option from the list, that option is automatically placed at the top of the list, shifting all other options downward. See the listings for the value property if this is not completely clear. <HTML> <HEAD> <TITLE>Swapping options</TITLE> <SCRIPT LANGUAGE="JavaScript"> <!-- var choiceIndex = –1 function swap(opt1, opt2) { var tempText = opt1.text var tempValue = opt1.value var tempDefault = opt1.defaultSelected opt1.text = opt2.text opt1.value = opt2.value opt1.defaultSelected = opt2.defaultSelected opt2.text = tempText opt2.value= tempValue opt2.defaultSelected = tempDefault } function shift(selectName) { if (choiceIndex == –1) { choiceIndex = selectName.selectedIndex swap(selectName.options[choiceIndex], selectName.options[0]) } else { swap(selectName.options[choiceIndex], selectName.options[0]) choiceIndex = selectName.selectedIndex swap(selectName.options[choiceIndex], selectName.options[0] } Forms n 365 Chapter18](https://image.slidesharecdn.com/wordware-advancedjavascript3rded-160421130838/75/www-webre24h-com-Wordware-advanced-javascript-3rd-ed-easttom-390-2048.jpg)
![selectName.options[0].selected = true } // --> </SCRIPT> </HEAD> <BODY> <FORM> <SELECT onChange="shift(this)"> <OPTION VALUE="val1"> First option <OPTION VALUE="val2" SELECTED> Second option <OPTION VALUE="val3"> Third option <OPTION VALUE="val4"> Fourth option <OPTION VALUE="val5"> Fifth option </SELECT> </FORM> </BODY> </HTML> Example 18-12 (ex18-12.htm). You can swap options in a select object by swap- ping their values. When the user selects an option from the select object, the top option is swapped back to its original position and then the selected option is swapped with the top option that the first swap yielded. At first, when the page loads and the select object has not been through layout yet, the global variable choiceIndex is initialized to –1. Since the index of an option in a select object is always non-negative, –1 is used to indicate that this is the first execution and that the current state of the select object is its initial one. The swap() function accepts two options associated with a select object and simply swaps them by swapping their three properties: n text n value n defaultSelected You cannot directly swap two options because the options array is read-only. The shift() function accepts one argument—a select object. If the value of choiceIndex is –1, then choiceIndex is assigned the index of the selected option, and the selected option is swapped with the option at the top of the list (index is 0). Since choiceIndex is a global variable, its value will remain intact until the next invocation of the shift() function. When the value of choiceIndex is not –1, the function runs a different set of state- ments. First, it swaps the option at the top of the menu with option number choiceIndex. Since choiceIndex has not been set yet during the current execution of the function, it holds the index of the option that the user selected on the previous round. That is, the function simply returns the select object to the state that preceded the previous function’s execution. The following two statements are identical to those executed when the value of choiceIndex is –1. It is unnecessary to specify these statements 366 n Chapter 18](https://image.slidesharecdn.com/wordware-advancedjavascript3rded-160421130838/75/www-webre24h-com-Wordware-advanced-javascript-3rd-ed-easttom-391-2048.jpg)
![twice. Instead, you may conditionally execute the first statement (if choiceIndex is not –1) and then unconditionally execute the other two. value The value property initially reflects the VALUE attribute of an <OPTION> defi- nition. You can override the initial setting at any given time by assigning this property a value. We have seen this property in action before. For working examples, see the listings for the defaultSelected property of the select object and the preceding listings for the text property. The Option Object—Adding Options Using the Option Constructor JavaScript for Netscape Navigator (beginning back with version 3.0) enables you to explicitly create options via the Option constructor. Options you cre- ate are instances of the option object. The syntax for creating an option is as follows: var optionName = new Option([optionText, optionValue, defaultSelected, selected]) Here is a brief explanation of the arguments you should normally hand to the constructor function: n optionText—a string representing the option’s text property. n optionValue—a string representing the option’s value property. n defaultSelected—a string representing the option’s defaultSelected property. n selected—a string representing the option’s selected property. See the listings for each of these properties for more details. You can add an option to an existing select object in the following fashion: selectName.options[index] = optionName After you create an option and add it to a select object, you must refresh the document. You can do that via JavaScript using the following statement: history.go(0) You can also refresh a document using the browser control options either by clicking in the Location box and pressing Enter, or by selecting Refresh from the View menu. You can delete an option from a select object by assigning it a null value. The general syntax is as follows: selectName.options[index] = null Once again, you must refresh the document via history.go(0) in order to see the updated appearance of the select object. An option created as an instance of the option object includes the same properties as an option associated with a select object. Forms n 367 Chapter18](https://image.slidesharecdn.com/wordware-advancedjavascript3rded-160421130838/75/www-webre24h-com-Wordware-advanced-javascript-3rd-ed-easttom-392-2048.jpg)
![Example 18-13 demonstrates the use of the Option constructor to cre- ate a nested select object structure. <HTML> <HEAD> <TITLE>Nested select structure</TITLE> <SCRIPT LANGUAGE="JavaScript"> <!-- var menu = new Array(3) for (var i = 0; i < menu.length; ++i) { menu[i] = new Array() } menu[0][0] = new Option("Option 1-1", "", true, true) menu[0][1] = new Option("Option 1-2") menu[0][2] = new Option("Option 1-3") menu[0][3] = new Option("Option 1-4") menu[0][4] = new Option("Option 1-5") menu[1][0] = new Option("Option 2-1", "", true, true) menu[1][1] = new Option("Option 2-2") menu[1][2] = new Option("Option 2-3") menu[2][0] = new Option("Option 3-1", "", true, true) menu[2][1] = new Option("Option 3-2") menu[2][2] = new Option("Option 3-3") menu[2][3] = new Option("Option 3-4") function updateSub(index, subMenu) { // delete all options in submenu for (var j = 0; j < subMenu.options.length; ++j) { subMenu.options[j] = null } // add options to submenu for (var k = 0; k < menu[index].length; ++k) { subMenu.options[k] = menu[index][k] } history.go(0) } // --> </SCRIPT> </HEAD> <BODY> <FORM> <SELECT NAME="main" onChange= "updateSub(this.selectedIndex, this.form.sub)"> <OPTION SELECTED> Option 1 <OPTION> Option 2 <OPTION> Option 3 </SELECT> <SELECT NAME="sub"> <SCRIPT LANGUAGE="JavaScript"> <!-- for (var ind = 0; ind < menu[0].length; ++ind) { 368 n Chapter 18](https://image.slidesharecdn.com/wordware-advancedjavascript3rded-160421130838/75/www-webre24h-com-Wordware-advanced-javascript-3rd-ed-easttom-393-2048.jpg)
![document.write("<OPTION> Option 1-" + (ind + 1)) } // --> </SCRIPT> </SELECT> </FORM> </BODY> </HTML> Example 18-13 (ex18-13.htm). “Nested” select objects connected via JavaScript When the page first loads, two select objects are created. The first one includes three options and is not modified at any stage. The second one is a dynamic select object, i.e., its options and length change. The script in the <HEAD></HEAD> portion of the page defines a two-dimensional array. The first index is of the first select object (an integer from 0 to 2). The second index is an integer between 0 and the index of the last option of the second select object. The number of options in the second select object depends on the option selected from the first select object. Sounds difficult, but it’s not! First you must understand what the script does. When the user selects an option from the first menu (select object), the second select object is updated with the corresponding option list. For example, if the second option in the main menu is selected, the script uses its index (1) to determine the array of elements (menu[1]) that should con- stitute the options of the second select object. For the sake of the example, we used text properties to identify the structure (1-1, 0-3, etc.). When the user first loads the page, the first select object is laid out according to its HTML definition, while the second select object is gener- ated via a JavaScript for loop that iterates over the menu[0] array and writes out its elements. The first select object includes an onChange event handler that invokes the updateSub() function, passing, as arguments, the form and the selected index. The function is based on two loops. The first one deletes the current options of the second menu by assigning each a null value. The second loop adds new options to the second menu, according to the elements of the selected menu array. Notice that we did not add properties for all options, but rather only for the first option of each menu array (a value, a default property, and a defaultSelected property). The elements of the menu array are obviously instances of the option object. The document is refreshed by history.go(0). An instance of the option object has the same structure as an element of a select object’s element array. Both objects include the same properties and none have methods. Forms n 369 Chapter18](https://image.slidesharecdn.com/wordware-advancedjavascript3rded-160421130838/75/www-webre24h-com-Wordware-advanced-javascript-3rd-ed-easttom-394-2048.jpg)
![fileUpload Object HTML Syntax A file upload element of an HTML form enables the user to supply a local file as input. Generally speaking, its syntax is as follows: <INPUT TYPE="file" NAME="fileUploadName"> Note that fileUploadName is not the name of the file, but rather the name of the form element that enables the user to supply the file. JavaScript Access The regular syntax is as follows: [window.]document.formName.fileUploadName [window.]document.formName.elements[index] [window.]document.forms[index].fileUploadName [window.]document.forms[index].elements[index] Event Handlers and Methods A discussion of the various event handlers and methods for this object are out of the scope of this book. Properties The fileUpload object includes these two properties. name The name property initially reflects the NAME attribute of the HTML defini- tion. You may set its value at any time. value This read-only property reflects the current value of the fileUpload ele- ment’s field—the name of the file to upload. Summary You deserve a reward if you had the motivation to read through this lengthy chapter. I believe that you have already been rewarded with the knowledge to implement interactive forms including their event handlers. Forms are a convenient means of collecting user’s input without producing annoying dia- log boxes. Some form elements such as text and textarea objects also come in handy when you need to display changing output, such as a clock or 370 n Chapter 18](https://image.slidesharecdn.com/wordware-advancedjavascript3rded-160421130838/75/www-webre24h-com-Wordware-advanced-javascript-3rd-ed-easttom-395-2048.jpg)
![Chapter 19 Links, Anchors, and Image Maps Defining a Link A link is basically a piece of HTML code that allows you to redirect the browser to a different resource on the Internet. That redirection can be to another page on your site, a different site entirely, an e-mail address, or even an FTP address for file download. Here is the general HTML syntax: <A HREF="locationOrURL" [NAME="anchorName"] [TARGET="windowName"]> linkText </A> The HREF attribute defines the document or anchor to which you are linking. HREF literally stands for HyperText Reference. The NAME attribute specifies a tag that becomes an available hypertext target within the current docu- ment. If this attribute is present, the link object is also an anchor object. The TARGET attribute specifies the window the linked document should load (e.g., a name of a window, a name of a frame, a special literal frame name such as _top, _parent, _self, and _blank). You can create a link with a plain HTML tag as shown above, but you can also use JavaScript for that. The following script segment demonstrates how to create a link with JavaScript: document.write(linkText.link(hrefAttribute)) This statement uses the link() method of the String object. See Chapter 12, “Handling Strings,” for instructions on using this method. Another obvious way to create a link with JavaScript is by printing the plain HTML syntax via document.write in the following form: document.write('<A HREF="locationOrURL" [NAME="anchorName"] [TARGET="windowName"]>linkText</A>') 372 n Chapter 19](https://image.slidesharecdn.com/wordware-advancedjavascript3rded-160421130838/75/www-webre24h-com-Wordware-advanced-javascript-3rd-ed-easttom-397-2048.jpg)
![Although this syntax works on a JavaScript-enabled browser, it contains sev- eral flaws that will spoil the appearance of the page when viewed with a browser that does not support JavaScript. The problem is that greater than (>) characters in a script terminate code hiding. Most of the common browsers currently support JavaScript, however. Defining an Anchor The plain HTML definition of an anchor is as follows: <A [HREF=locationOrURL] NAME="anchorName" [TARGET="windowName"]> anchorText </A> The attributes are the same as those of a link. You can also use the String object’s anchor() method to create an anchor using the following format: text.anchor(nameAttribute) Defining an Image Map Area The general syntax of a client-side image map is as follows: <MAP NAME="mapName"> <AREA [NAME="areaName"] COORDS="x1,y1,x2,y2,..." | "x-center,y-center,radius" HREF="location" [SHAPE="rect" | "poly" | "circle" | "default"] [TARGET="windowName"]> </MAP> The first NAME attribute specifies the name of the image map that contains various areas, whereas the second one specifies the name of a single area in the image map. An image map can consist of any number of areas. The COORDS attribute specifies the coordinates of a specific area in a map. This attribute consists of either four coordinates, if the area is defined as a rectan- gle (an x and y for the top-left and bottom-right corners), or three coordinates, if the area is a circle (x and y for the center and the radius). HREF specifies the URL of the document to load when the user clicks the area. Any area of the image map that does not have this attribute does not act as a hypertext link. You can use any scheme (protocol) for the location, including a JavaScript statement via javascript:. The SHAPE attribute determines the shape of an area in an image map. If not specified, the shape defaults to rect. TARGET specifies the window or frame in which the destination document is loaded. See the section above on link definition for additional information regarding this attribute. Links, Anchors, and Image Maps n 373 Chapter19](https://image.slidesharecdn.com/wordware-advancedjavascript3rded-160421130838/75/www-webre24h-com-Wordware-advanced-javascript-3rd-ed-easttom-398-2048.jpg)
![links Array The only way to reference a link object in your code is by using the links array. This array is similar to the forms array you saw in the previous chap- ter. It is also a property of the document object, so you can access this array in the following fashion: [window.]document.links This links array contains an entry for each link (<A HREF="...">) and area (<AREA HREF="...">) object in the document. Suppose you have a doc- ument containing three links. You can reference these links using the following syntax: document.links[0] document.links[1] document.links[2] These references can equally apply to a document with three area objects (within a single map or multiple image maps), as well as for a document with two links and one image map area. The total number of qualifying links and image map areas is reflected by the length property of the array: document.forms.length This is probably the most useful link-related property. Elements in the links array are obviously read-only, but assigning a value to a given element does not cause an error—it simply doesn’t work. anchors Array You can reference the anchors in your code via the anchors array. This array contains an entry for each tag containing a NAME attribute in a docu- ment, in source order. If a document contains three named anchors, for example, these anchors are reflected as document.anchors[0], docu- ment.anchors[1], and document.anchors[2]. You can use this array in one of two ways, exactly like you use the links array or the forms array: document.anchors[index] document.anchors.length Each element of the document.anchors array holds a null value and does not feature any methods or properties. The value of document.anchors[0], for example, is null, regardless of whether there are anchors in the docu- ment. The anchors array does not play a role in any script, but its length property occasionally does. If you use a systematic naming scheme for all anchors in a document, you can take advantage of the length property (doc- ument.anchors.length). Suppose a document contains a variable number of anchors. You can name these anchors anchor0, anchor1, anchor2, and so forth, or, alternatively, test0, test1, and test2, if you so desire. The latter anchors would use the following syntax: 374 n Chapter 19](https://image.slidesharecdn.com/wordware-advancedjavascript3rded-160421130838/75/www-webre24h-com-Wordware-advanced-javascript-3rd-ed-easttom-399-2048.jpg)
![<A ... NAME="test0" ...></A> <A ... NAME="test1" ...></A> <A ... NAME="test2" ...></A> Take a look at the following function: function goAnchor(num) { if (num >= document.anchors.length) alert("Anchor does not exist!") else location.hash = "test" + num } This function accepts an existing anchor’s index and scrolls the page to that anchor by assigning its name to the location.hash property. It also demon- strates a possible usage of the anchors array, or its length property, to be exact. See Chapter 16, “URLs and JavaScript,” for details on the loca- tion.hash property. Link and Area Event Handlers Anchors do not feature any event handlers, but links and image map areas do provide them. Some of the event handlers are very useful, so it is important that you know how to use them. Calling Event Handlers Explicitly Since the document.links array holds an entry for every link and image map area in a document, it is fairly straightforward to explicitly call an event handler for a specific link or area by assigning it to the corresponding array element. You can use the following statement to explicitly call the event handler doSomething for the first link or area (whichever is first in source order): document.links[0].onmouseover = doSomething onClick You can add an onClick event handler in the following fashion: <A ... onClick="validJavaScriptCode"> <AREA ... onClick="validJavaScriptCode"> A click event associated with a link object or an area object occurs when the user clicks the content of the link, which can be plain text, an image, and so forth. In the case of an area object, the link content is (usually) a portion of an image. The JavaScript statements you specify for the onClick event handler are executed prior to loading the URL defined by the HREF attribute. They can be used to do any last-minute preparations. Links, Anchors, and Image Maps n 375 Chapter19](https://image.slidesharecdn.com/wordware-advancedjavascript3rded-160421130838/75/www-webre24h-com-Wordware-advanced-javascript-3rd-ed-easttom-400-2048.jpg)
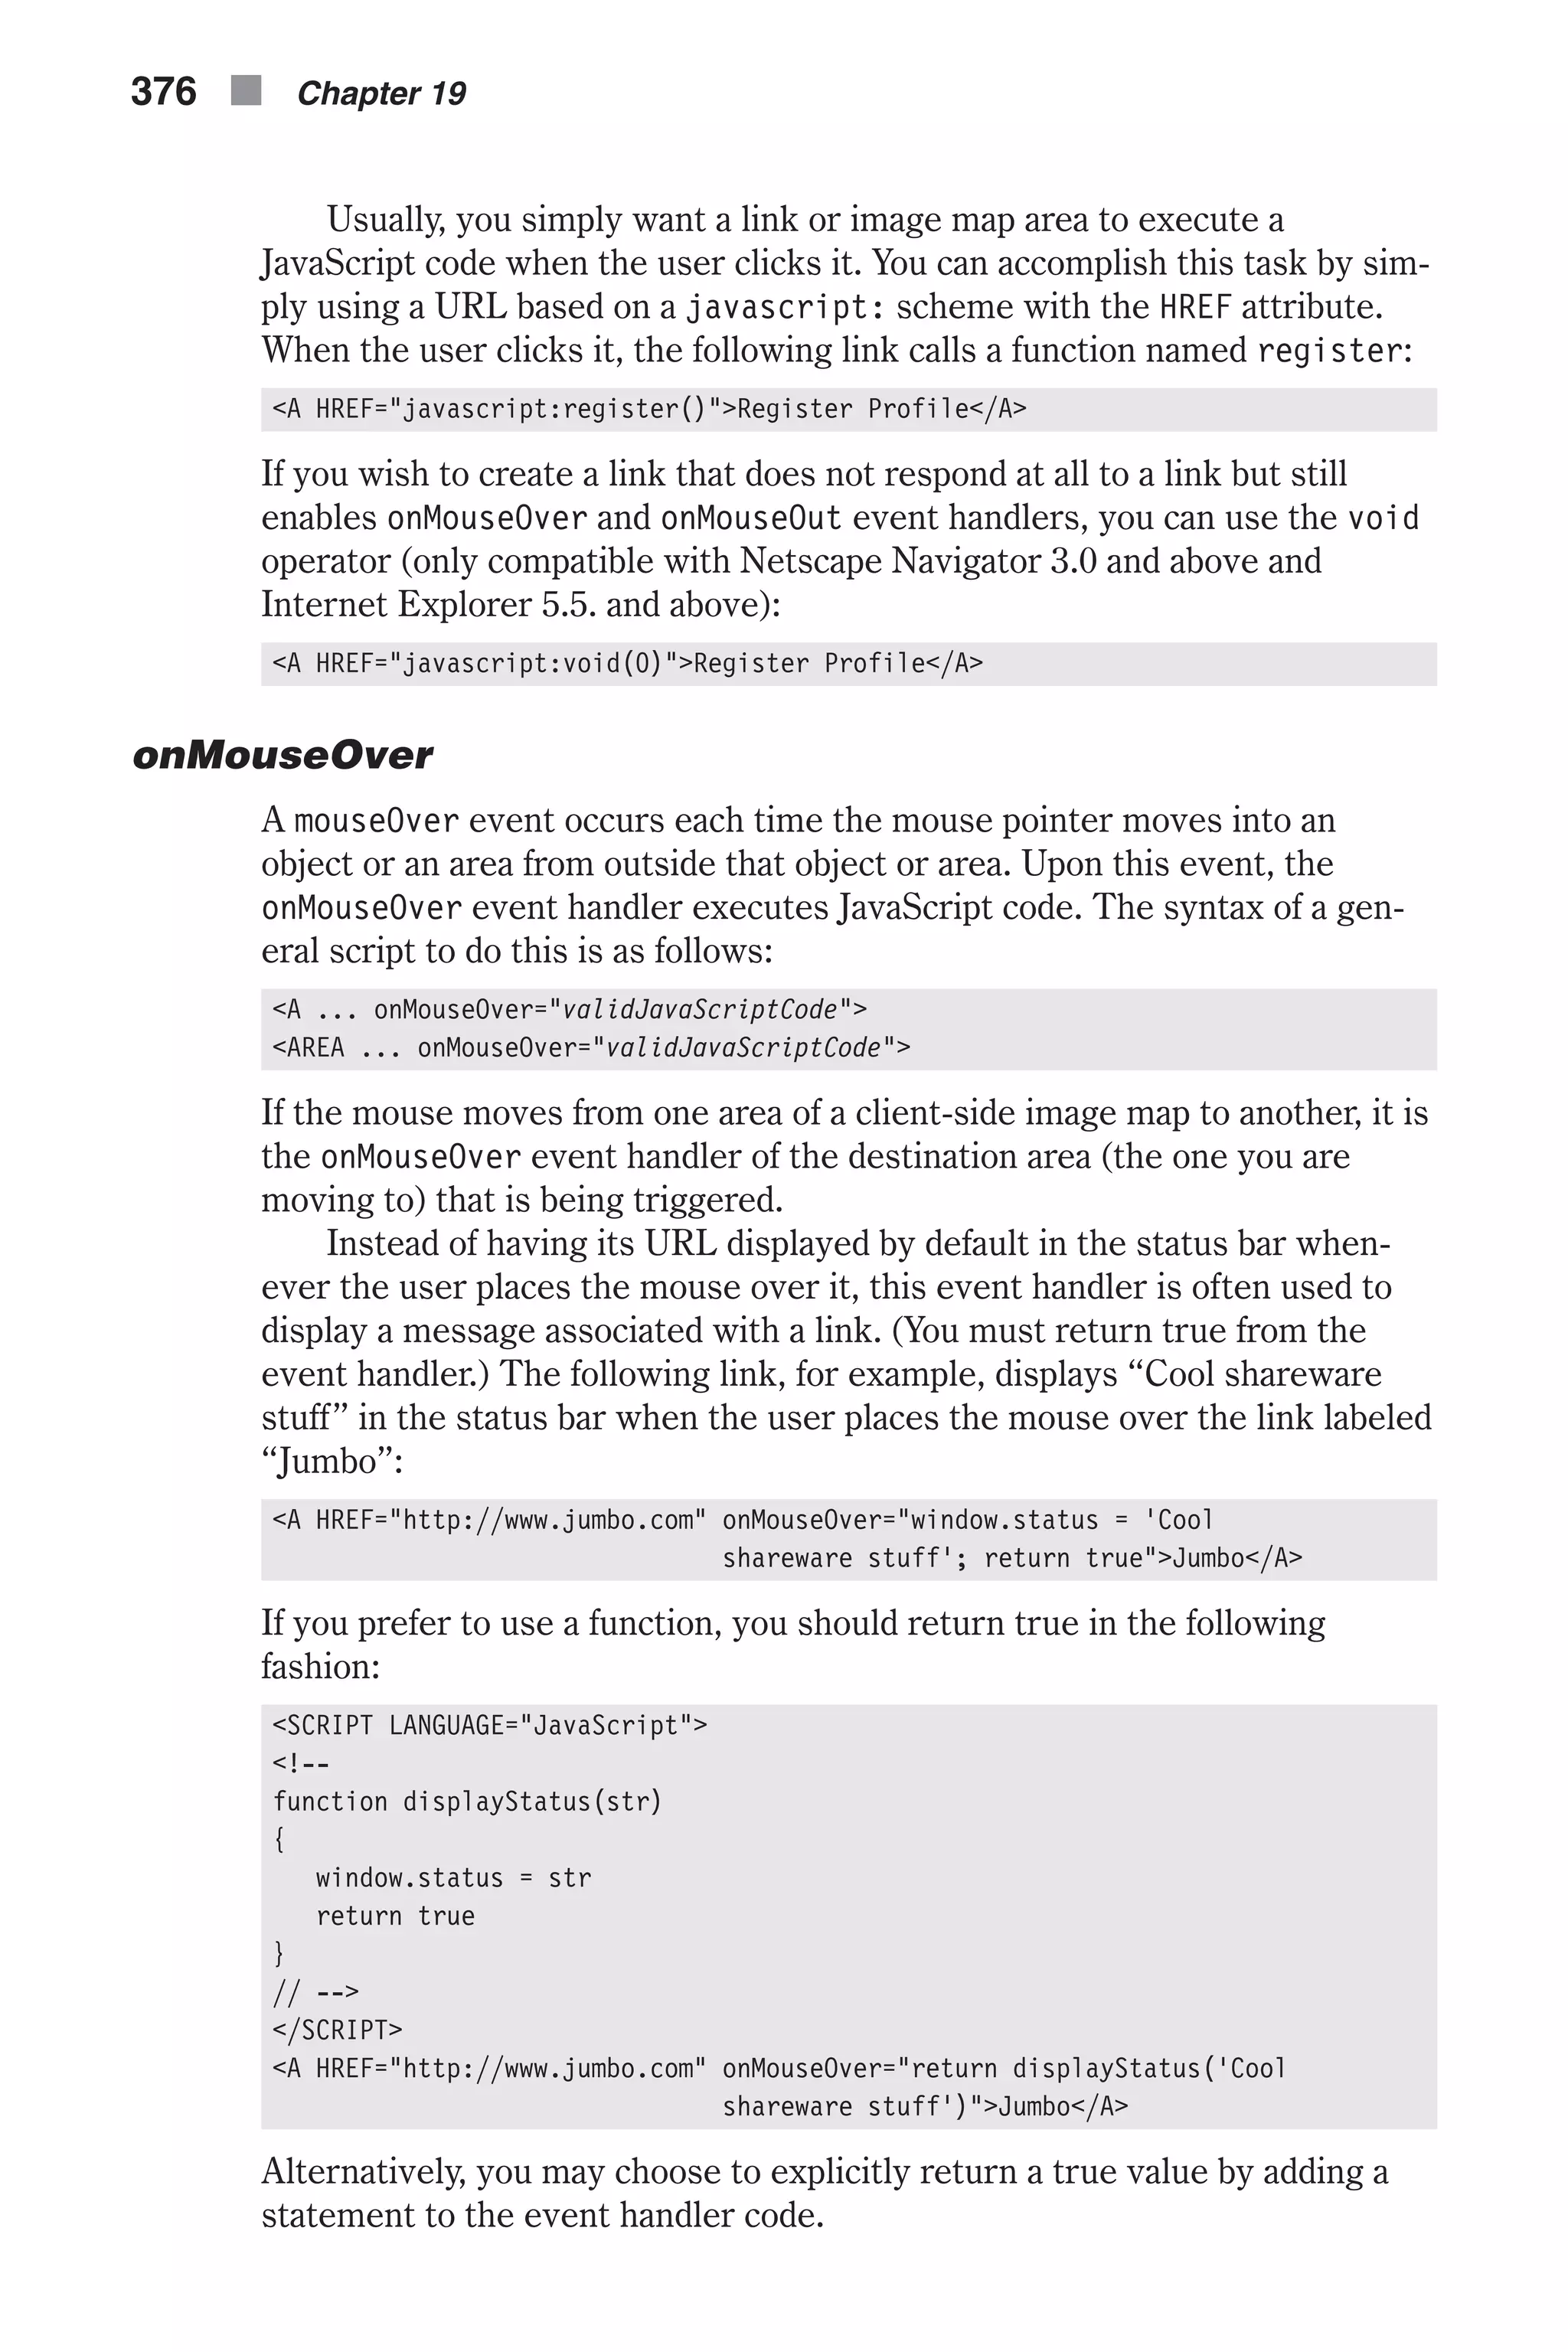
![<AREA NAME="L" COORDS="161, 0, 194, 69" HREF="javascript:alert('Language')" SHAPE="rect" onMouseOver="window.status = 'Language'; return true" onMouseOut="window.status = ''; return true"> First, notice that this area is defined as a rectangle (SHAPE="rect"). The x and y coordinates of the upper-left corner are 161 and 0, respectively. Coor- dinates are measured in pixels starting at (0, 0), the first pixel in the image. The x and y coordinates of the bottom-right corner are 194 and 69, respec- tively, which are the HEIGHT and WIDTH attributes of the image. When the user places the mouse pointer over this area, the status bar displays the string “Language” (for “L”) (the string is assigned to the status property), and the Boolean value true is returned. When the user removes the mouse from this area, the status bar is blanked (assigned an empty string). Since the onMouseOver event handler of the destination area immediately overtakes the onMouseOut operation of the source area, the user usually won’t notice this interim state when moving the pointer to one of the adja- cent image map areas. When the user removes the mouse pointer from this area to outside of the entire image, the status bar is cleared and remains empty, until either a different value is explicitly assigned to the status bar or the mouse moves back into the image map area. When the user clicks this area, the location specified in HREF is loaded, and since the value of this attribute is a JavaScript statement preceded by the javascript: scheme, it does not load a new document but rather pops up an alert dialog box with the string “Language.” Link and Area Properties Location-Equivalent Properties Most of the properties that belong to a link or an area object (docu- ment.links[index]) are associated with the URL of the HREF definition. These are all properties of the window.location object, which we describe briefly below. The only way to reference a property of a link or an area object is to use the following syntax: document.links.propertyName Note that links do not have any methods. Here is the equivalence list between the properties of document.links and those of window.location: n hash specifies an anchor name in the URL. n host specifies the hostname:port portion of the URL. n hostname specifies the host and domain name, or IP address, of a net- work host. Links, Anchors, and Image Maps n 379 Chapter19](https://image.slidesharecdn.com/wordware-advancedjavascript3rded-160421130838/75/www-webre24h-com-Wordware-advanced-javascript-3rd-ed-easttom-404-2048.jpg)
![n href specifies the entire URL. n pathname specifies the url-path portion of the URL. n port specifies the communications port that the server uses for commu- nications (80 by default). n protocol specifies the beginning of the URL, including the colon (also known as the scheme). n search specifies a query. target The target property initially reflects the TARGET attribute of the <A HREF="..."> or <AREA HREF="..."> HTML definitions. Setting the value of this property overrides the initial definition. The target property (document.links[index].target) cannot be assigned a JavaScript expression or variable. Referring Documents When a user clicks a link in one document and causes a new page to load in the same or another window, the calling document is known as the referring document. When a user arrives at a page via a link from another page (and not from his or her bookmark, history list, favorites, etc.), the URL of the referring page is reflected in the new page as a read-only property, docu- ment.referrer. A referring document is also called the source document, whereas the new page the referrer document links to is known as the desti- nation document. The property document.referred is very useful for tracking a user’s movement inside a large site you maintain by yourself. It is not helpful at all if the user surfs to foreign pages, so, unless Playboy provides a link to your page, you won’t be able to greet the user with a message such as “Naughty boy—Playboy is for grown-ups only!” Suppose you have a page on your site, C.html, that is linked from two different pages, A.html and B.html. Let’s say A.html includes important copyright information on a shareware product available on C.html, and B.html provides important instructions on installing the software package. You can use the following JavaScript script on C.html to check where the user came from and to print a link to the third page: <SCRIPT LANGUAGE="JavaScript"> <!-- begin JavaScript *immediate* script // assign greater than character without literally displaying it var gt = unescape("%3E") if (document.referred.indexOf("A.html") == –1) document.write('<A HREF="A.html"' + gt + 'Copyright notice</A>' + gt) 380 n Chapter 19](https://image.slidesharecdn.com/wordware-advancedjavascript3rded-160421130838/75/www-webre24h-com-Wordware-advanced-javascript-3rd-ed-easttom-405-2048.jpg)
![You may find the following functions useful when you want to perform one of the above actions. All functions are self-explanatory and are fully commented: // Boolean variable specified if alert should be displayed if cookie exceeds 4KB var caution = false // name - name of the cookie // value - value of the cookie // [expires] - expiration date of the cookie (defaults to end of current session) // [path] - path for which the cookie is valid (defaults to path of calling document) // [domain] - domain for which the cookie is valid (defaults to domain of calling document) // [secure] - Boolean value indicating if the cookie transmission requires a secure transmission // * an argument defaults when it is assigned null as a placeholder // * a null placeholder is not required for trailing omitted arguments function setCookie(name, value, expires, path, domain, secure) { var curCookie = name + "=" + escape(value) + ((expires) ? "; expires=" + expires.toGMTString() : "") + ((path) ? "; path=" + path : "") + ((domain) ? "; domain=" + domain : "") + ((secure) ? "; secure" : "") if (!caution || (name + "=" + escape(value)).length <= 4000) document.cookie = curCookie else if (confirm("Cookie exceeds 4KB and will be cut!")) document.cookie = curCookie } // name - name of the desired cookie // * return string containing value of specified cookie or null if cookie does not exist function getCookie(name) { var prefix = name + "=" var cookieStartIndex = document.cookie.indexOf(prefix) if (cookieStartIndex == –1) return null var cookieEndIndex = document.cookie.indexOf(";", cookieStartIndex + prefix.length) if (cookieEndIndex == –1) cookieEndIndex = document.cookie.length return unescape(document.cookie.substring(cookieStartIndex + prefix.length, cookieEndIndex)) } // name - name of the cookie // [path] - path of the cookie (must be same as path used to create cookie) // [domain] - domain of the cookie (must be same as domain used to create cookie) // * path and domain default if assigned null or omitted if no explicit argument proceeds Implementing Cookies n 387 Chapter20](https://image.slidesharecdn.com/wordware-advancedjavascript3rded-160421130838/75/www-webre24h-com-Wordware-advanced-javascript-3rd-ed-easttom-412-2048.jpg)
![function deleteCookie(name, path, domain) { if (getCookie(name)) { document.cookie = name + "=" + ((path) ? "; path=" + path : "") + ((domain) ? "; domain=" + domain : "") + "; expires=Thu, 01-Jan-70 00:00:01 GMT" } } // date - any instance of the Date object // * you should hand all instances of the Date object to this function for "repairs" // * this function is taken from Chapter 10, "Time and Date in JavaScript," in " Advanced JavaScript, Third Edition" function fixDate(date) { var base = new Date(0) var skew = base.getTime() if (skew > 0) date.setTime(date.getTime() – skew) } Read through the functions and comments so you understand how to use them. The most basic demonstration of these functions is a script that counts the number of times a user has visited the page that hosts the code: <HTML> <HEAD> <TITLE>Remember number of visits</TITLE> <SCRIPT LANGUAGE="JavaScript"> <!-- // Boolean variable specified if alert should be displayed if cookie exceeds 4KB var caution = false // name - name of the cookie // value - value of the cookie // [expires] - expiration date of the cookie (defaults to end of current session) // [path] - path for which the cookie is valid (defaults to path of calling document) // [domain] - domain for which the cookie is valid (defaults to domain of calling document) // [secure] - Boolean value indicating if the cookie transmission requires a secure transmission // * an argument defaults when it is assigned null as a placeholder // * a null placeholder is not required for trailing omitted arguments function setCookie(name, value, expires, path, domain, secure) { var curCookie = name + "=" + escape(value) + ((expires) ? "; expires=" + expires.toGMTString() : "") + ((path) ? "; path=" + path : "") + ((domain) ? "; domain=" + domain : "") + ((secure) ? "; secure" : "") 388 n Chapter 20](https://image.slidesharecdn.com/wordware-advancedjavascript3rded-160421130838/75/www-webre24h-com-Wordware-advanced-javascript-3rd-ed-easttom-413-2048.jpg)
![if (!caution || (name + "=" + escape(value)).length <= 4000) document.cookie = curCookie else if (confirm("Cookie exceeds 4KB and will be cut!")) document.cookie = curCookie } // name - name of the desired cookie // * return string containing value of specified cookie or null if cookie does not exist function getCookie(name) { var prefix = name + "=" var cookieStartIndex = document.cookie.indexOf(prefix) if (cookieStartIndex == –1) return null var cookieEndIndex = document.cookie.indexOf(";", cookieStartIndex + prefix.length) if (cookieEndIndex == –1) cookieEndIndex = document.cookie.length return unescape(document.cookie.substring(cookieStartIndex + prefix.length, cookieEndIndex)) } // name - name of the cookie // [path] - path of the cookie (must be same as path used to create cookie) // [domain] - domain of the cookie (must be same as domain used to create cookie) // * path and domain default if assigned null or omitted if no explicit argument proceeds function deleteCookie(name, path, domain) { if (getCookie(name)) { document.cookie = name + "=" + ((path) ? "; path=" + path : "") + ((domain) ? "; domain=" + domain : "") + "; expires=Thu, 01-Jan-70 00:00:01 GMT" } } // date - any instance of the Date object // * you should hand all instances of the Date object to this function for "repairs" function fixDate(date) { var base = new Date(0) var skew = base.getTime() if (skew > 0) date.setTime(date.getTime() – skew) } var now = new Date() fixDate(now) now.setTime(now.getTime() + 365 * 24 * 60 * 60 * 1000) var visits = getCookie("counter") if (!visits) visits = 1 Implementing Cookies n 389 Chapter20](https://image.slidesharecdn.com/wordware-advancedjavascript3rded-160421130838/75/www-webre24h-com-Wordware-advanced-javascript-3rd-ed-easttom-414-2048.jpg)
![else visits = parseInt(visits) + 1 setCookie("counter", visits, now) document.write("You have been here " + visits + " time(s).") // --> </SCRIPT> </HEAD> </HTML> Example 20-1 (ex20-1.htm). A simple cookie-based counter You can see the output of this script in Figure 20-1. Bear in mind that this script does not emulate a regular counter that counts the number of visitors to a given site. Because cookies are stored on the cli- ent side, they can only be used to count the number of visits by a specific client. At first, an instance of the Date object reflecting the current date is assigned to the variable now. The instance is then handed to the fixDate() function, which is needed to properly format the date values for Macintosh OS users. The now.setTime(now.getTime() + 365 * 24 * 60 * 60 * 1000) statement sets the cookie expiration date to one year in the future. This expiration date is used later when setting the cookie. The script gets a cookie named counter and retrieves the number of visits from it. If there is no cookie by the specified name, the variable visits is initialized to one; otherwise, the number of visits in the cookie is incremented by one. The script then writes the new number of visits back to the cookie by setCookie(). The last statement of the script informs the user how many visits the user had in the current page. The following script is similar to the preceding one, but it asks the user for his or her name and “remembers” it. Here is the script: <HTML> <HEAD> <TITLE>Remember user's name</TITLE> <SCRIPT LANGUAGE="JavaScript"> <!-- // Boolean variable specified if alert should be displayed if cookie exceeds 4KB var caution = false // name - name of the cookie // value - value of the cookie // [expires] - expiration date of the cookie (defaults to end of current 390 n Chapter 20 Figure 20-1. A cookie-based counter](https://image.slidesharecdn.com/wordware-advancedjavascript3rded-160421130838/75/www-webre24h-com-Wordware-advanced-javascript-3rd-ed-easttom-415-2048.jpg)
![session) // [path] - path for which the cookie is valid (defaults to path of calling document) // [domain] - domain for which the cookie is valid (defaults to domain of calling document) // [secure] - Boolean value indicating if the cookie transmission requires a secure transmission // * an argument defaults when it is assigned null as a placeholder // * a null placeholder is not required for trailing omitted arguments function setCookie(name, value, expires, path, domain, secure) { var curCookie = name + "=" + escape(value) + ((expires) ? "; expires=" + expires.toGMTString() : "") + ((path) ? "; path=" + path : "") + ((domain) ? "; domain=" + domain : "") + ((secure) ? "; secure" : "") if (!caution || (name + "=" + escape(value)).length <= 4000) document.cookie = curCookie else if (confirm("Cookie exceeds 4KB and will be cut!")) document.cookie = curCookie } // name - name of the desired cookie // * return string containing value of specified cookie or null if cookie does not exist function getCookie(name) { var prefix = name + "=" var cookieStartIndex = document.cookie.indexOf(prefix) if (cookieStartIndex == –1) return null var cookieEndIndex = document.cookie.indexOf(";", cookieStartIndex + prefix.length) if (cookieEndIndex == –1) cookieEndIndex = document.cookie.length return unescape(document.cookie.substring(cookieStartIndex + prefix.length, cookieEndIndex)) } // name - name of the cookie // [path] - path of the cookie (must be same as path used to create cookie) // [domain] - domain of the cookie (must be same as domain used to create cookie) // * path and domain default if assigned null or omitted if no explicit argument proceeds function deleteCookie(name, path, domain) { if (getCookie(name)) { document.cookie = name + "=" + ((path) ? "; path=" + path : "") + ((domain) ? "; domain=" + domain : "") + "; expires=Thu, 01-Jan-70 00:00:01 GMT" } } Implementing Cookies n 391 Chapter20](https://image.slidesharecdn.com/wordware-advancedjavascript3rded-160421130838/75/www-webre24h-com-Wordware-advanced-javascript-3rd-ed-easttom-416-2048.jpg)
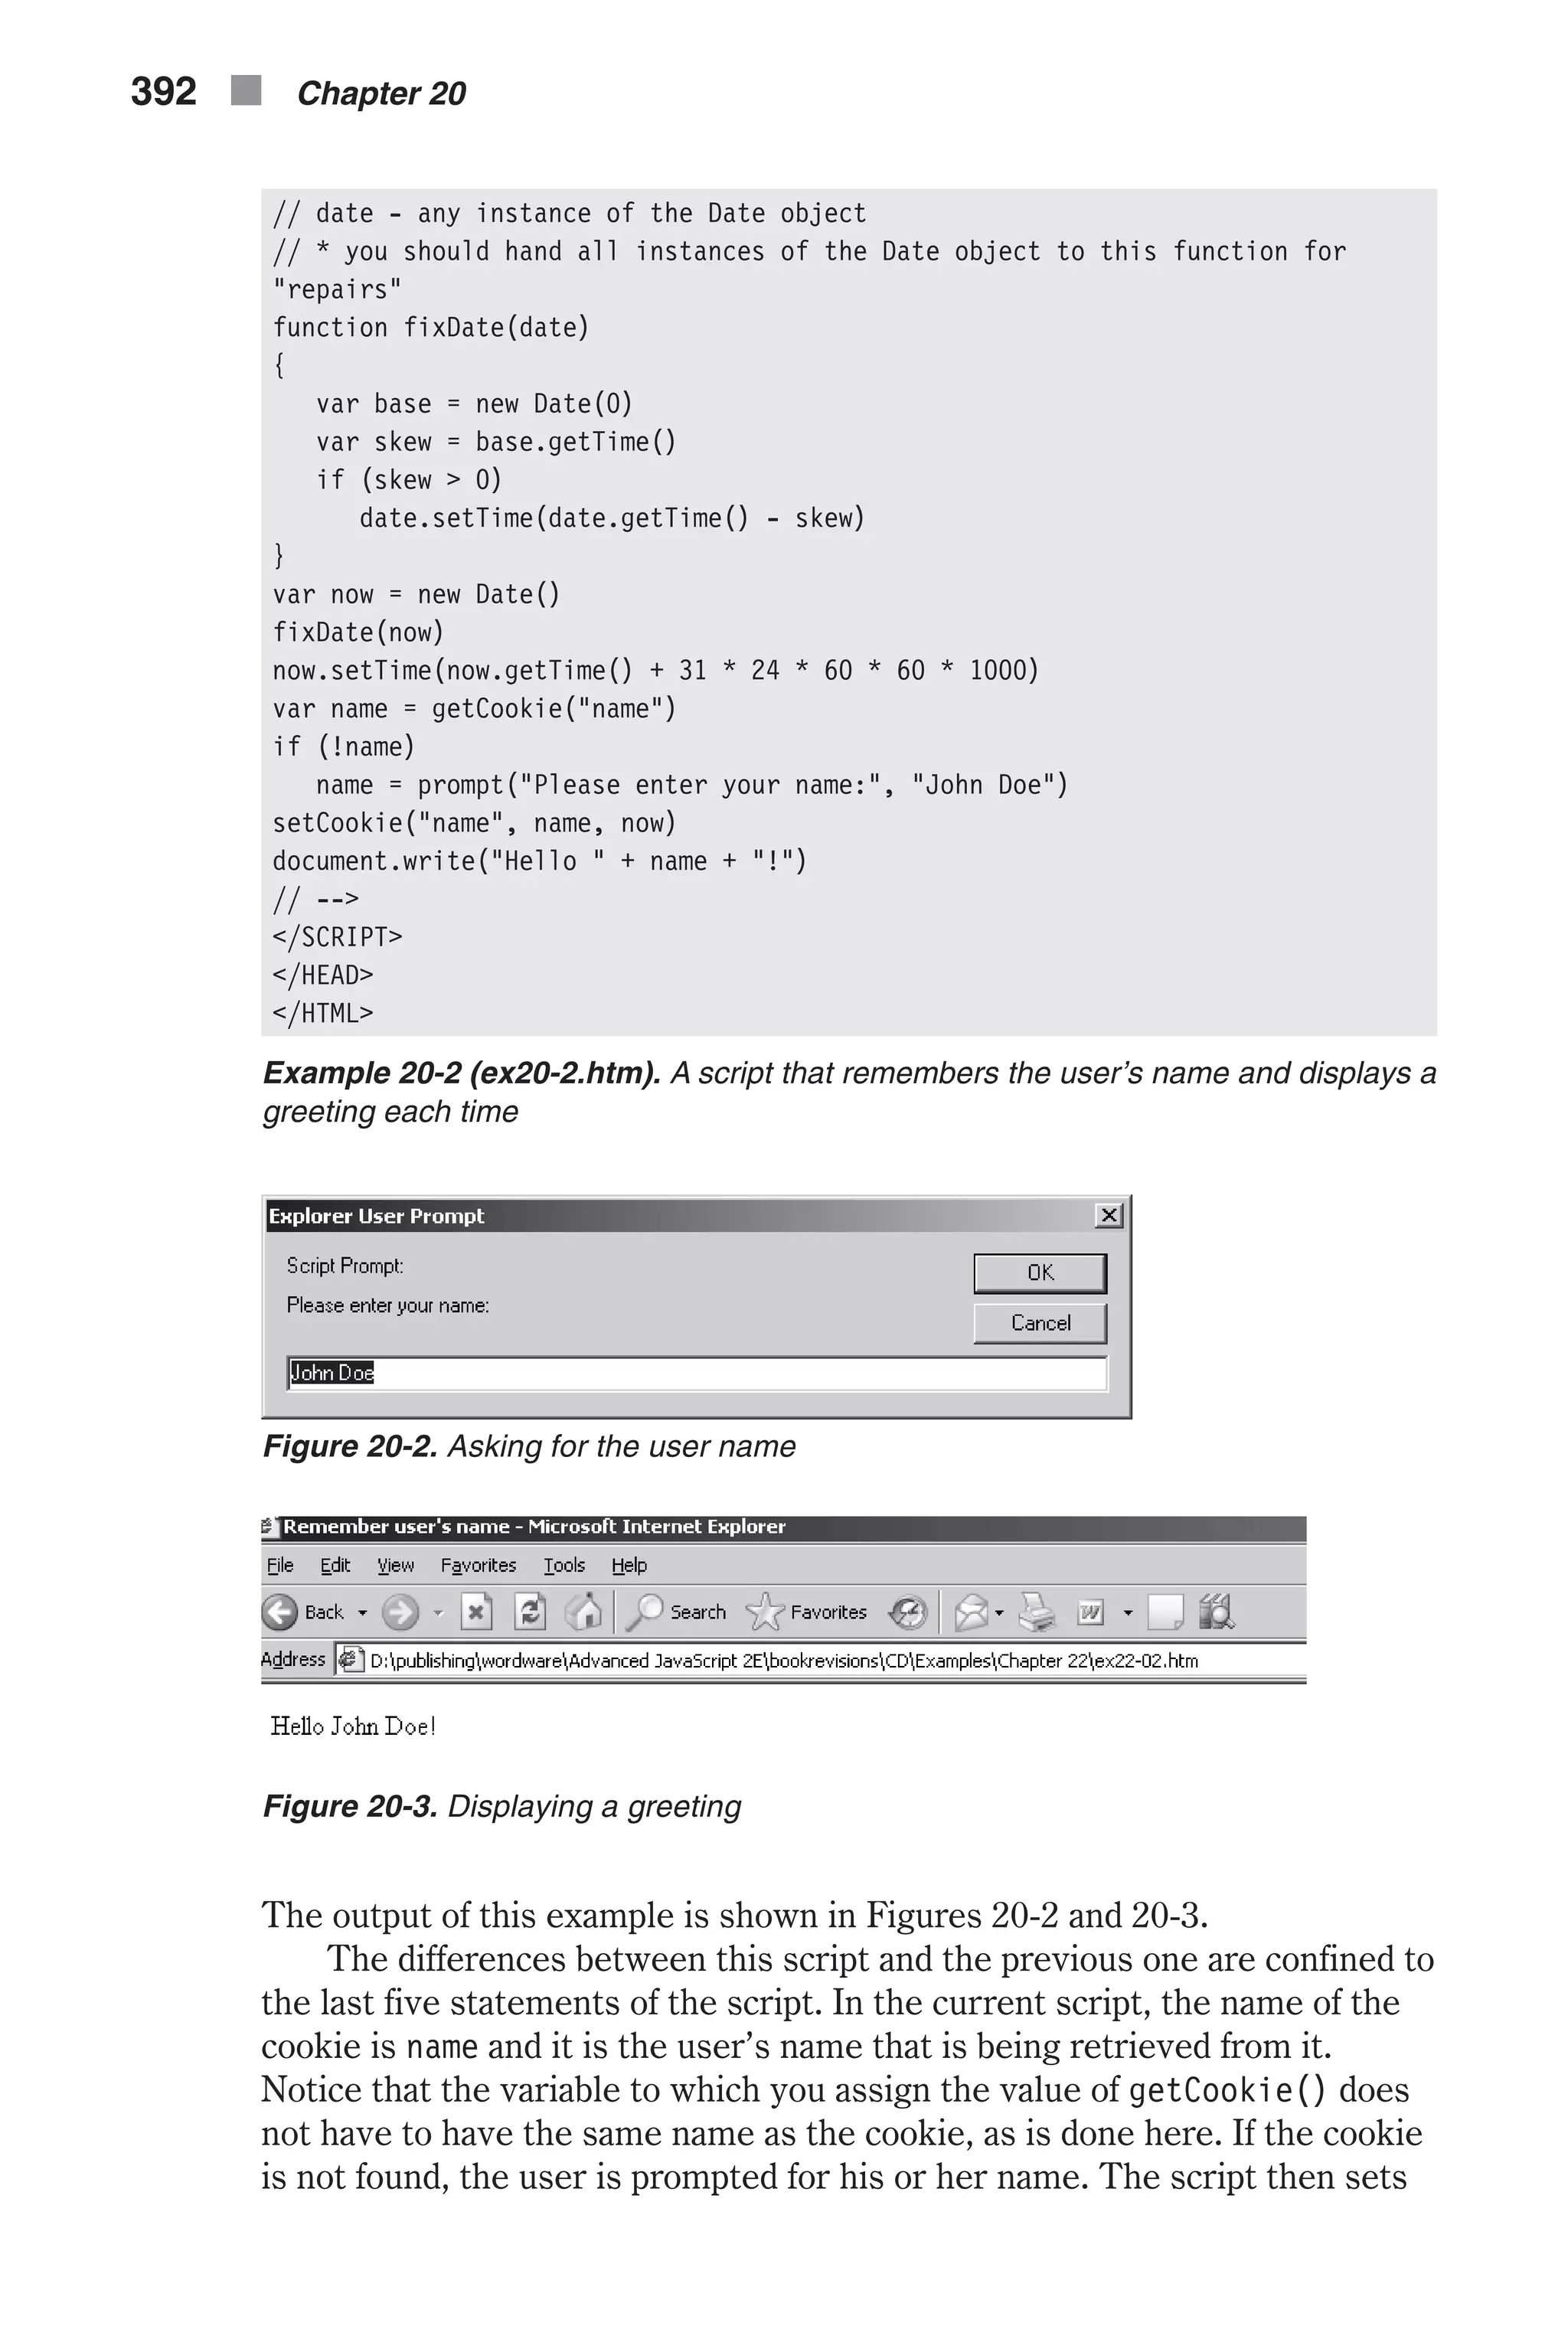
![the cookie with the user’s name and prints a personalized welcome message. Examples 20-1 and 20-2 were rather simple, because they only set and read a cookie. Example 20-3 demonstrates using cookies in a slightly differ- ent way. It creates a calendar that enables the user to enter reminders for specific days of the month. This reminder calendar stores the data for the entire month, even if the user turns off his or her computer. Since there are up to 31 days in a month, and since you are limited to 20 cookies per domain or server, the script stores all reminders in a single cookie, with special delimiting sequences. Assuming a reminder does not exceed 100 characters, storing 31 values takes up 31 * 100, or 3100 characters, which is less than the 4KB upper limit. Here is the script: <HTML> <HEAD> <TITLE> JavaScript calendar </TITLE> </HEAD> <BODY> <SCRIPT LANGUAGE="JavaScript"> <!-- // // Cookie functions to store and retrieve cookies // // Boolean variable specified if alert should be displayed if cookie exceeds 4KB var caution = false // name - name of the cookie // value - value of the cookie // [expires] - expiration date of the cookie (defaults to end of current session) // [path] - path for which the cookie is valid (defaults to path of calling document) // [domain] - domain for which the cookie is valid (defaults to domain of calling document) // [secure] - Boolean value indicating if the cookie transmission requires a secure transmission // * an argument defaults when it is assigned null as a placeholder // * a null placeholder is not required for trailing omitted arguments function setCookie(name, value, expires, path, domain, secure) { var curCookie = name + "=" + escape(value) + ((expires) ? "; expires=" + expires.toGMTString() : "") + ((path) ? "; path=" + path : "") + ((domain) ? "; domain=" + domain : "") + ((secure) ? "; secure" : "") if (!caution || (name + "=" + escape(value)).length <= 4000) document.cookie = curCookie else if (confirm("Cookie exceeds 4KB and will be cut!")) document.cookie = curCookie } Implementing Cookies n 393 Chapter20](https://image.slidesharecdn.com/wordware-advancedjavascript3rded-160421130838/75/www-webre24h-com-Wordware-advanced-javascript-3rd-ed-easttom-418-2048.jpg)
![// name - name of the desired cookie // * return string containing value of specified cookie or null if cookie does not exist function getCookie(name) { var prefix = name + "=" var cookieStartIndex = document.cookie.indexOf(prefix) if (cookieStartIndex == –1) return null var cookieEndIndex = document.cookie.indexOf(";", cookieStartIndex + prefix.length) if (cookieEndIndex == –1) cookieEndIndex = document.cookie.length return unescape(document.cookie.substring(cookieStartIndex + prefix.length, cookieEndIndex)) } // name - name of the cookie // [path] - path of the cookie (must be same as path used to create cookie) // [domain] - domain of the cookie (must be same as domain used to create cookie) // * path and domain default if assigned null or omitted if no explicit argument proceeds function deleteCookie(name, path, domain) { if (getCookie(name)) { document.cookie = name + "=" + ((path) ? "; path=" + path : "") + ((domain) ? "; domain=" + domain : "") + "; expires=Thu, 01-Jan-70 00:00:01 GMT" } } // date - any instance of the Date object // * you should hand all instances of the Date object to this function for "repairs" function fixDate(date) { var base = new Date(0) var skew = base.getTime() if (skew > 0) date.setTime(date.getTime() – skew) } function initCookie(monthName) { // initializes cookie with the following format: // ^1^^2^^3^^4^...^30^^31^ // initialize accumulative variable var text = "" for (var i = 1; i <= 31; ++i) { text += "^" + i + "^" } var now = new Date() fixDate(now) // set time to one month (31 days) in the future 394 n Chapter 20](https://image.slidesharecdn.com/wordware-advancedjavascript3rded-160421130838/75/www-webre24h-com-Wordware-advanced-javascript-3rd-ed-easttom-419-2048.jpg)

![} else ampm = "AM" hour = (hour == 0) ? 12 : hour // add zero digit to a one-digit minute if (minute < 10) minute = "0" + minute // do not parse this number! // return time string return hour + ":" + minute + " " + ampm } function leapYear(year) { if (year % 4 == 0) // basic rule return true // is leap year return false // is not leap year } function getDays(month, year) { // create array to hold number of days in each month var ar = new Array(12) ar[0] = 31 // January ar[1] = (leapYear(year)) ? 29 : 28 // February ar[2] = 31 // March ar[3] = 30 // April ar[4] = 31 // May ar[5] = 30 // June ar[6] = 31 // July ar[7] = 31 // August ar[8] = 30 // September ar[9] = 31 // October ar[10] = 30 // November ar[11] = 31 // December // return number of days in the specified month (parameter) return ar[month] } function getMonthName(month) { // create array to hold name of each month var ar = new Array(12) ar[0] = "January" ar[1] = "February" ar[2] = "March" ar[3] = "April" ar[4] = "May" ar[5] = "June" ar[6] = "July" ar[7] = "August" ar[8] = "September" ar[9] = "October" ar[10] = "November" ar[11] = "December" // return name of specified month (parameter) return ar[month] } 396 n Chapter 20](https://image.slidesharecdn.com/wordware-advancedjavascript3rded-160421130838/75/www-webre24h-com-Wordware-advanced-javascript-3rd-ed-easttom-421-2048.jpg)
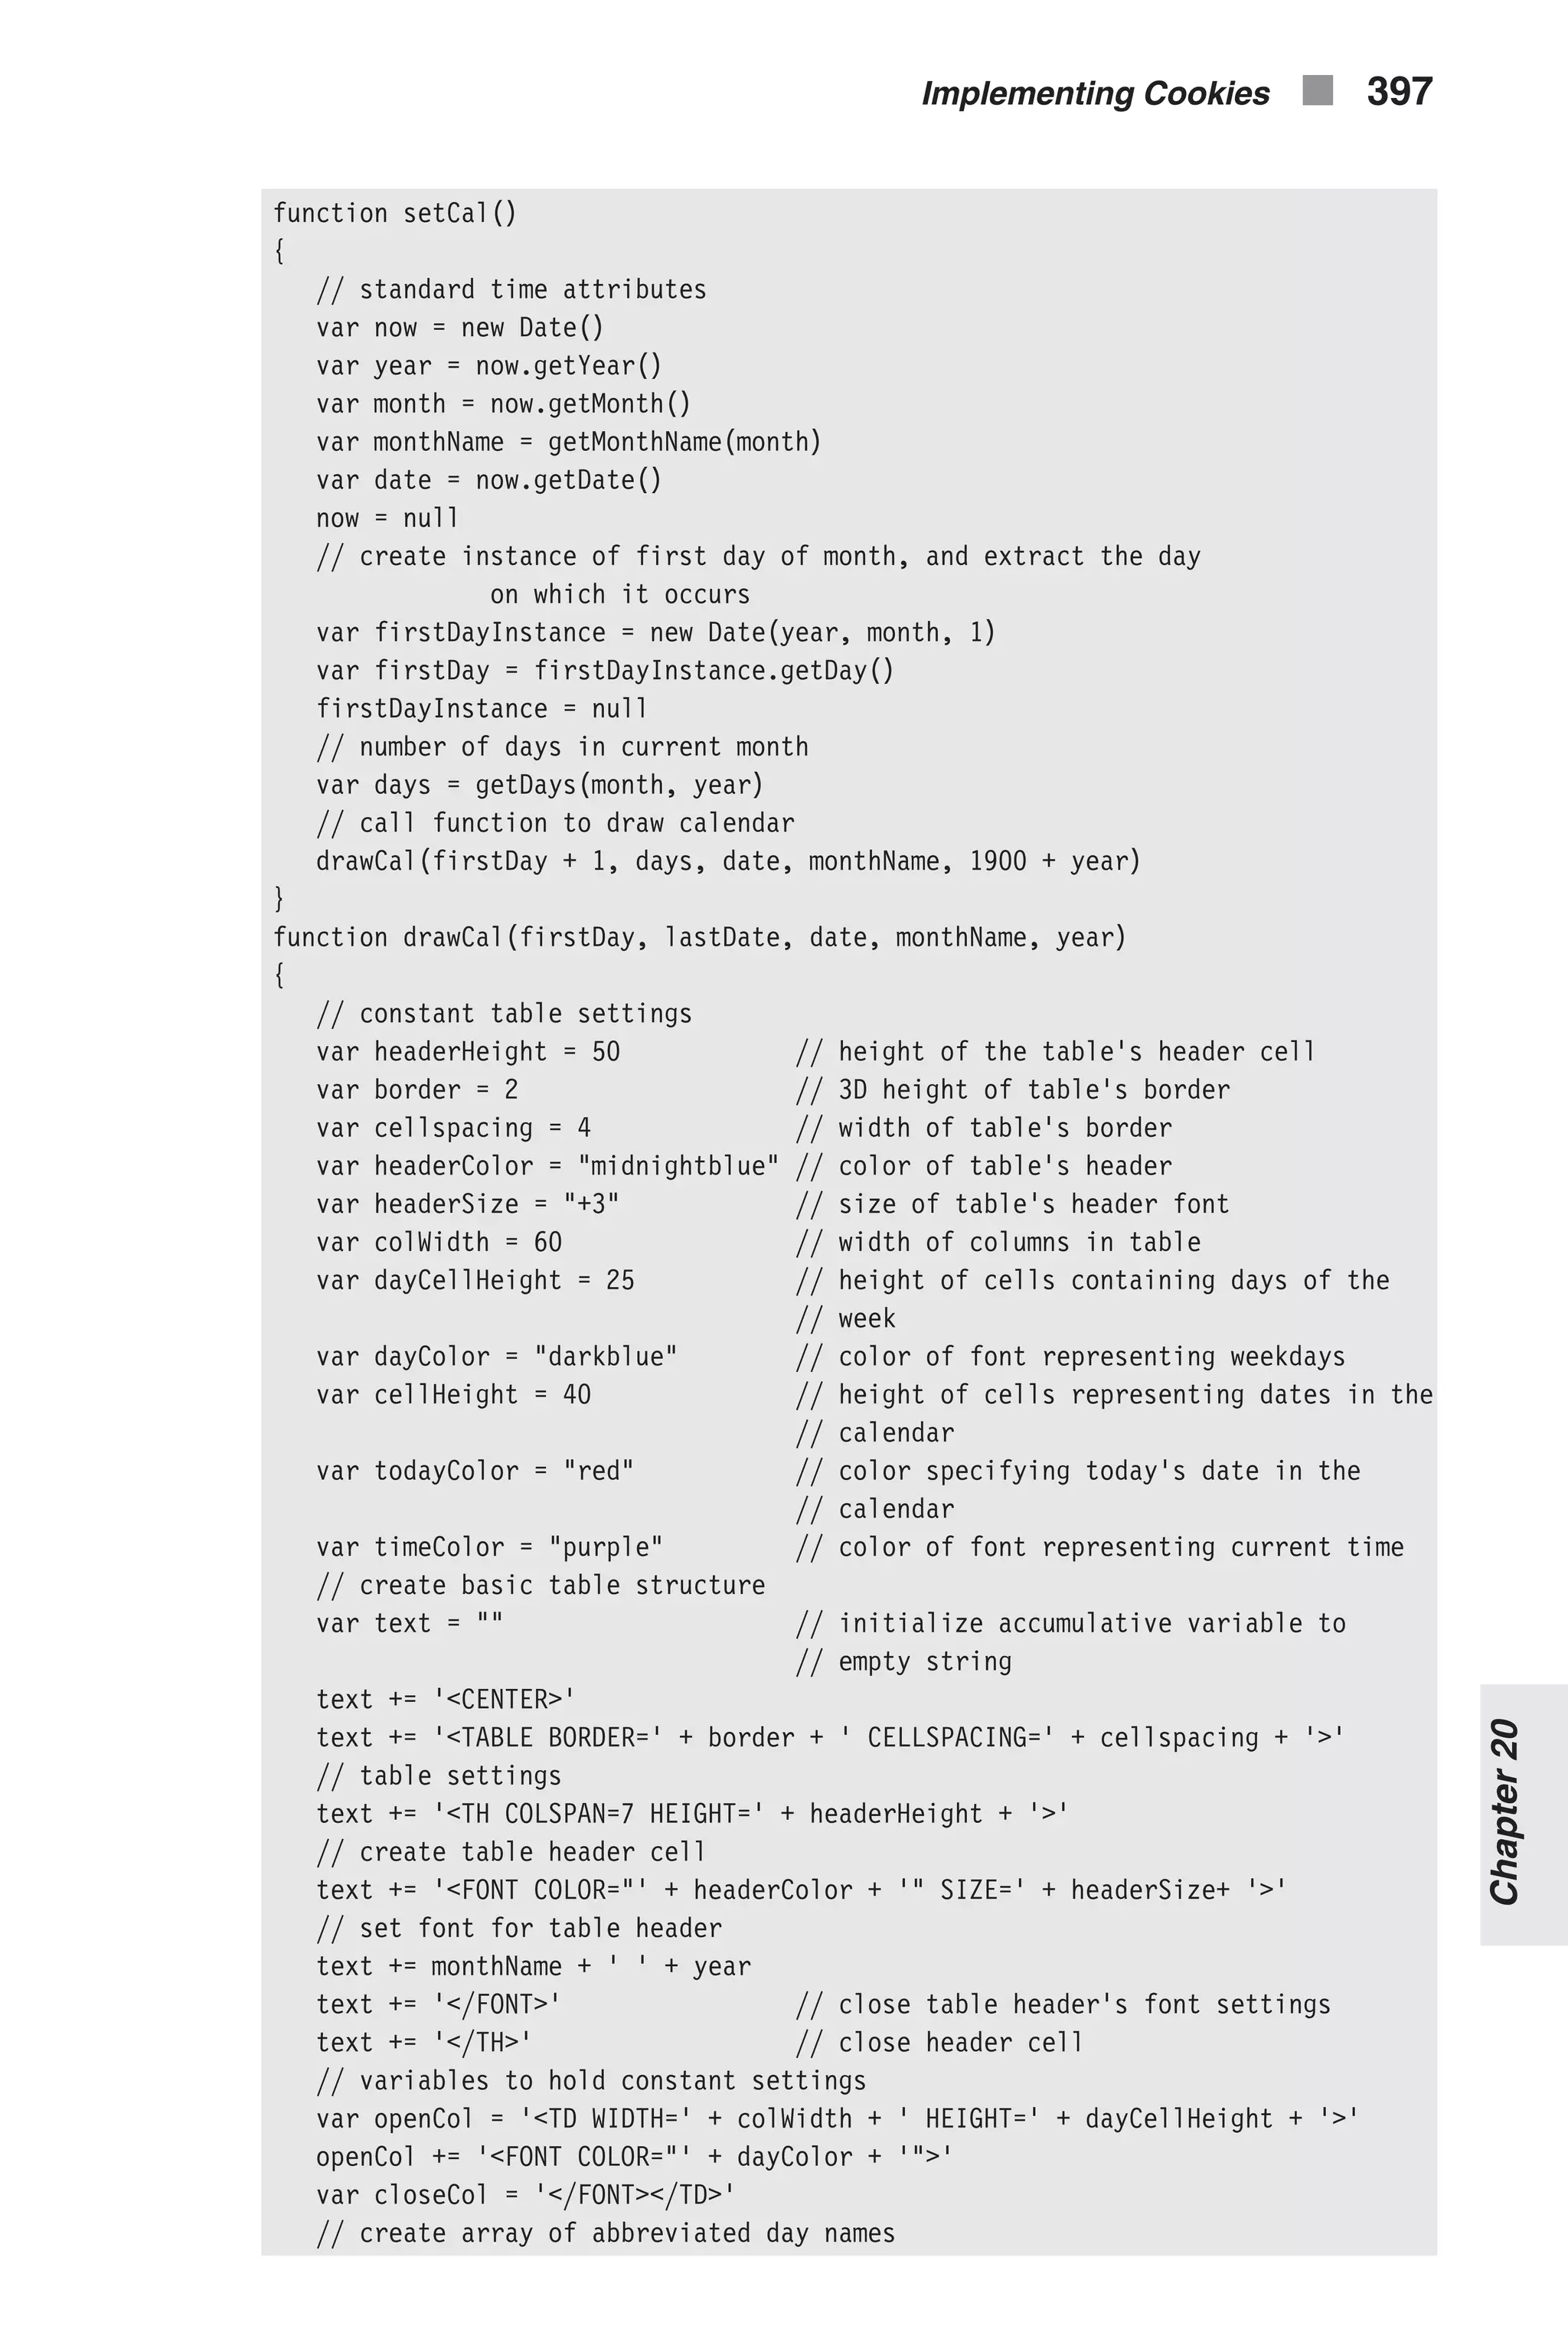
![var weekDay = new Array(7) weekDay[0] = "Sun" weekDay[1] = "Mon" weekDay[2] = "Tues" weekDay[3] = "Wed" weekDay[4] = "Thu" weekDay[5] = "Fri" weekDay[6] = "Sat" // create first row of table to set column width and specify week day text += '<TR ALIGN="center" VALIGN="center">' for (var dayNum = 0; dayNum < 7; ++dayNum) { text += openCol + weekDay[dayNum] + closeCol } text += '</TR>' // declaration and initialization of two variables to help with tables var digit = 1 var curCell = 1 for (var row = 1; row <= Math.ceil((lastDate + firstDay – 1) / 7);++row) { text += '<TR ALIGN="right" VALIGN="top">' for (var col = 1; col <= 7; ++col) { if (digit > lastDate) break if (curCell < firstDay) { text += '<TD></TD>'; curCell++ } else { if (digit == date) { // current cell represents today's date text += '<TD HEIGHT=' + cellHeight + '>' text += '<FONT COLOR="' + todayColor + '">' text += '<A HREF="javascript:getInput(' + digit + ', '' + monthName + '')"onMouseOver ="window.status = 'Store or retrieve data for ' + monthName + ' ' + digit + ''; return true"><FONT COLOR="' + todayColor + '">' + digit + '</FONT></A>' text += '<BR>' text += '<FONT COLOR="' + timeColor + '" SIZE=2>' text += '<CENTER>' + getTime() + '</CENTER>' text += '</FONT>' text += '</TD>' } else text += '<TD HEIGHT=' + cellHeight + '><A HREF= "javascript:getInput(' + digit + ', '' + monthName + '')" onMouseOver="window. status = 'Store or retrieve data for ' + monthName + ' ' + digit + ''; return true">' + digit + '</A></TD>' 398 n Chapter 20](https://image.slidesharecdn.com/wordware-advancedjavascript3rded-160421130838/75/www-webre24h-com-Wordware-advanced-javascript-3rd-ed-easttom-423-2048.jpg)
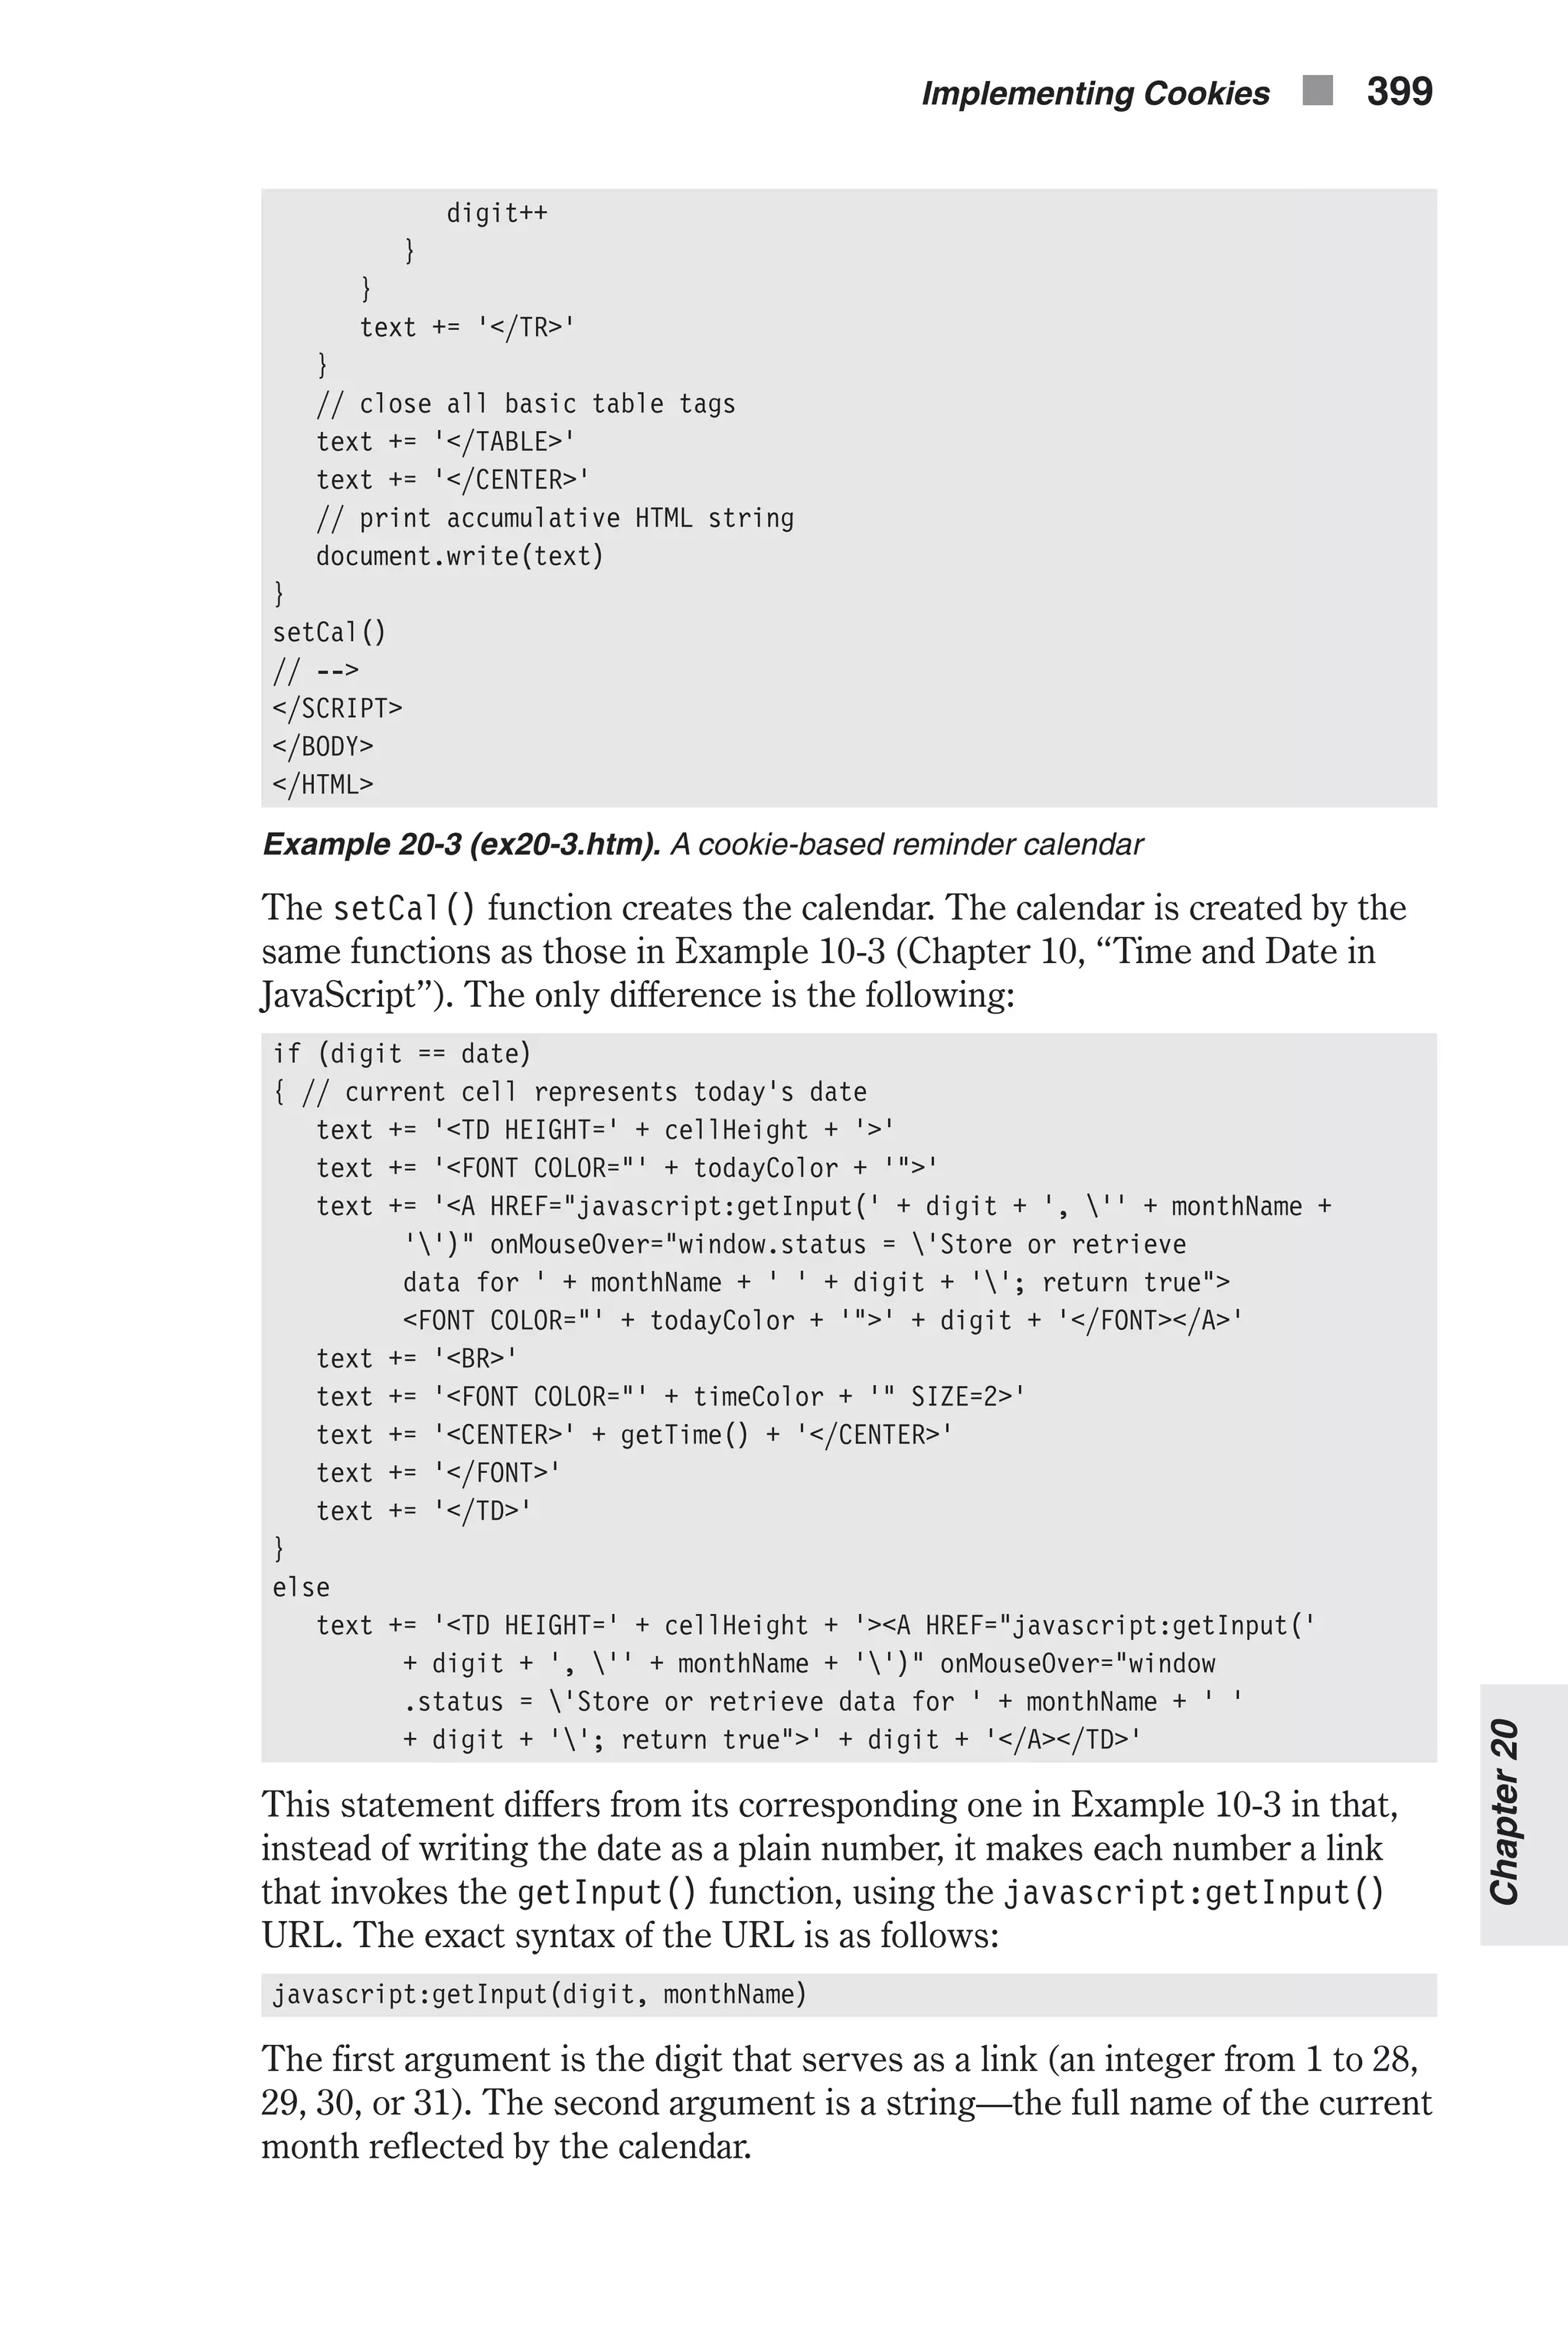
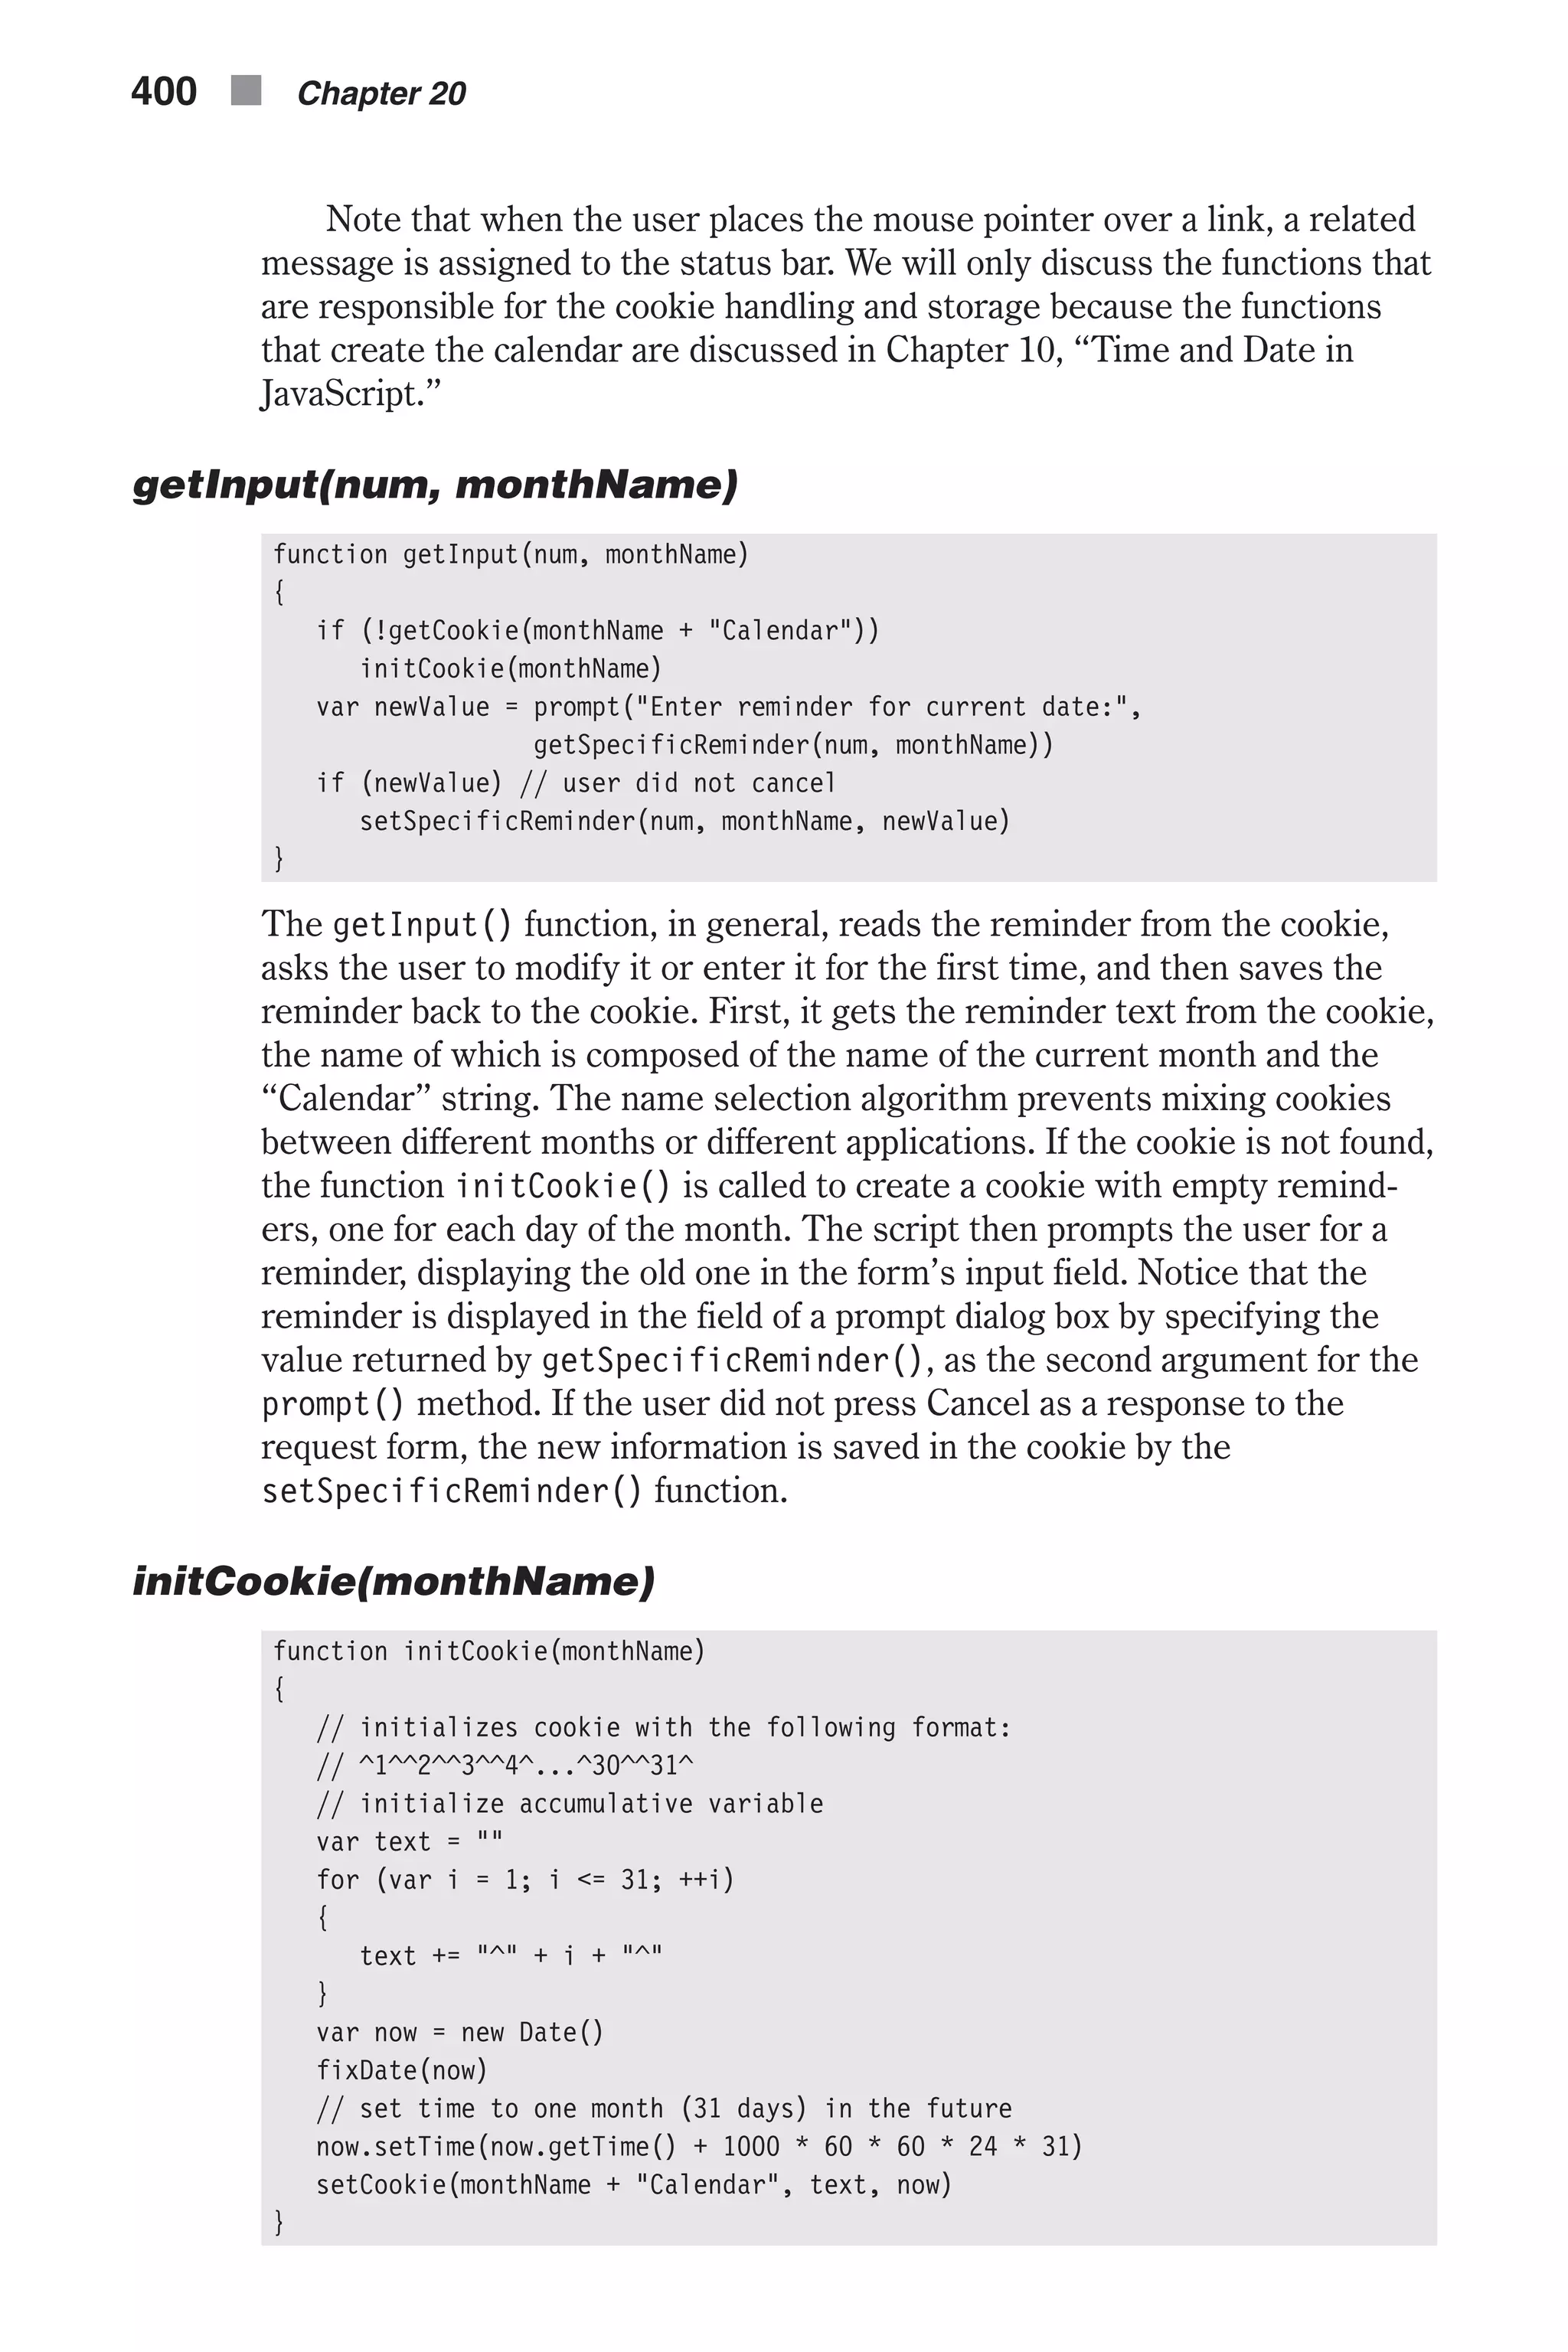
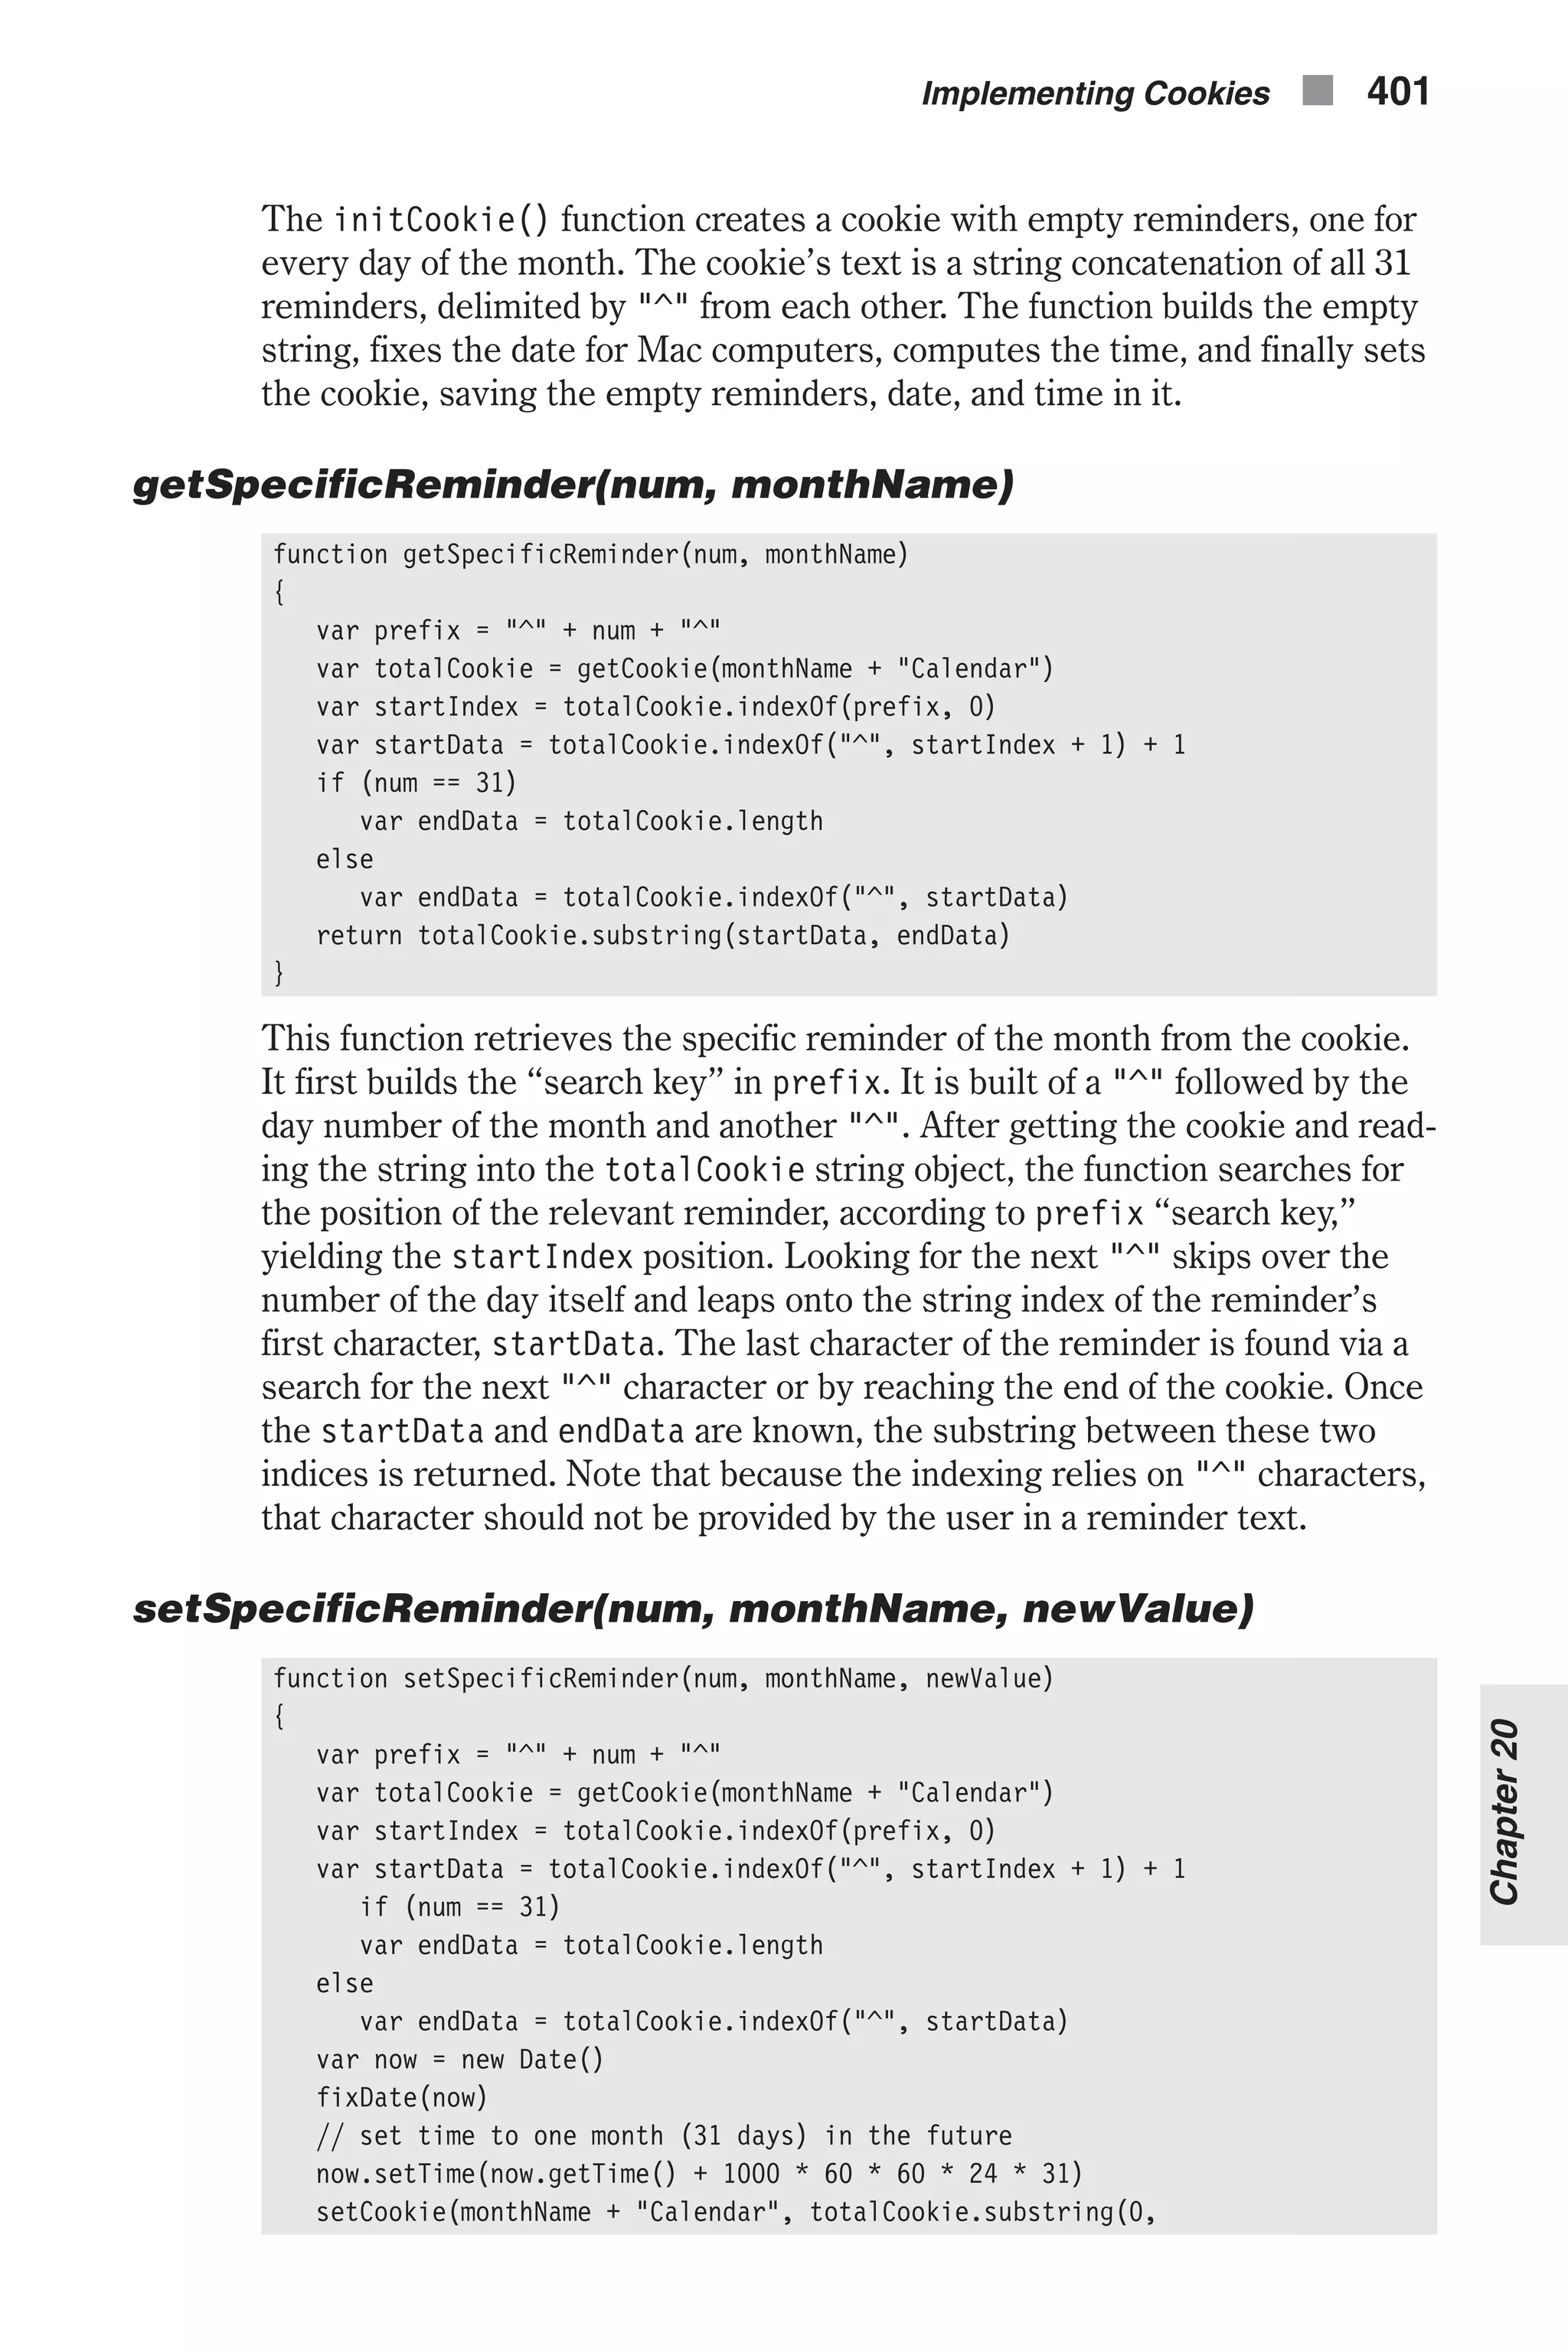
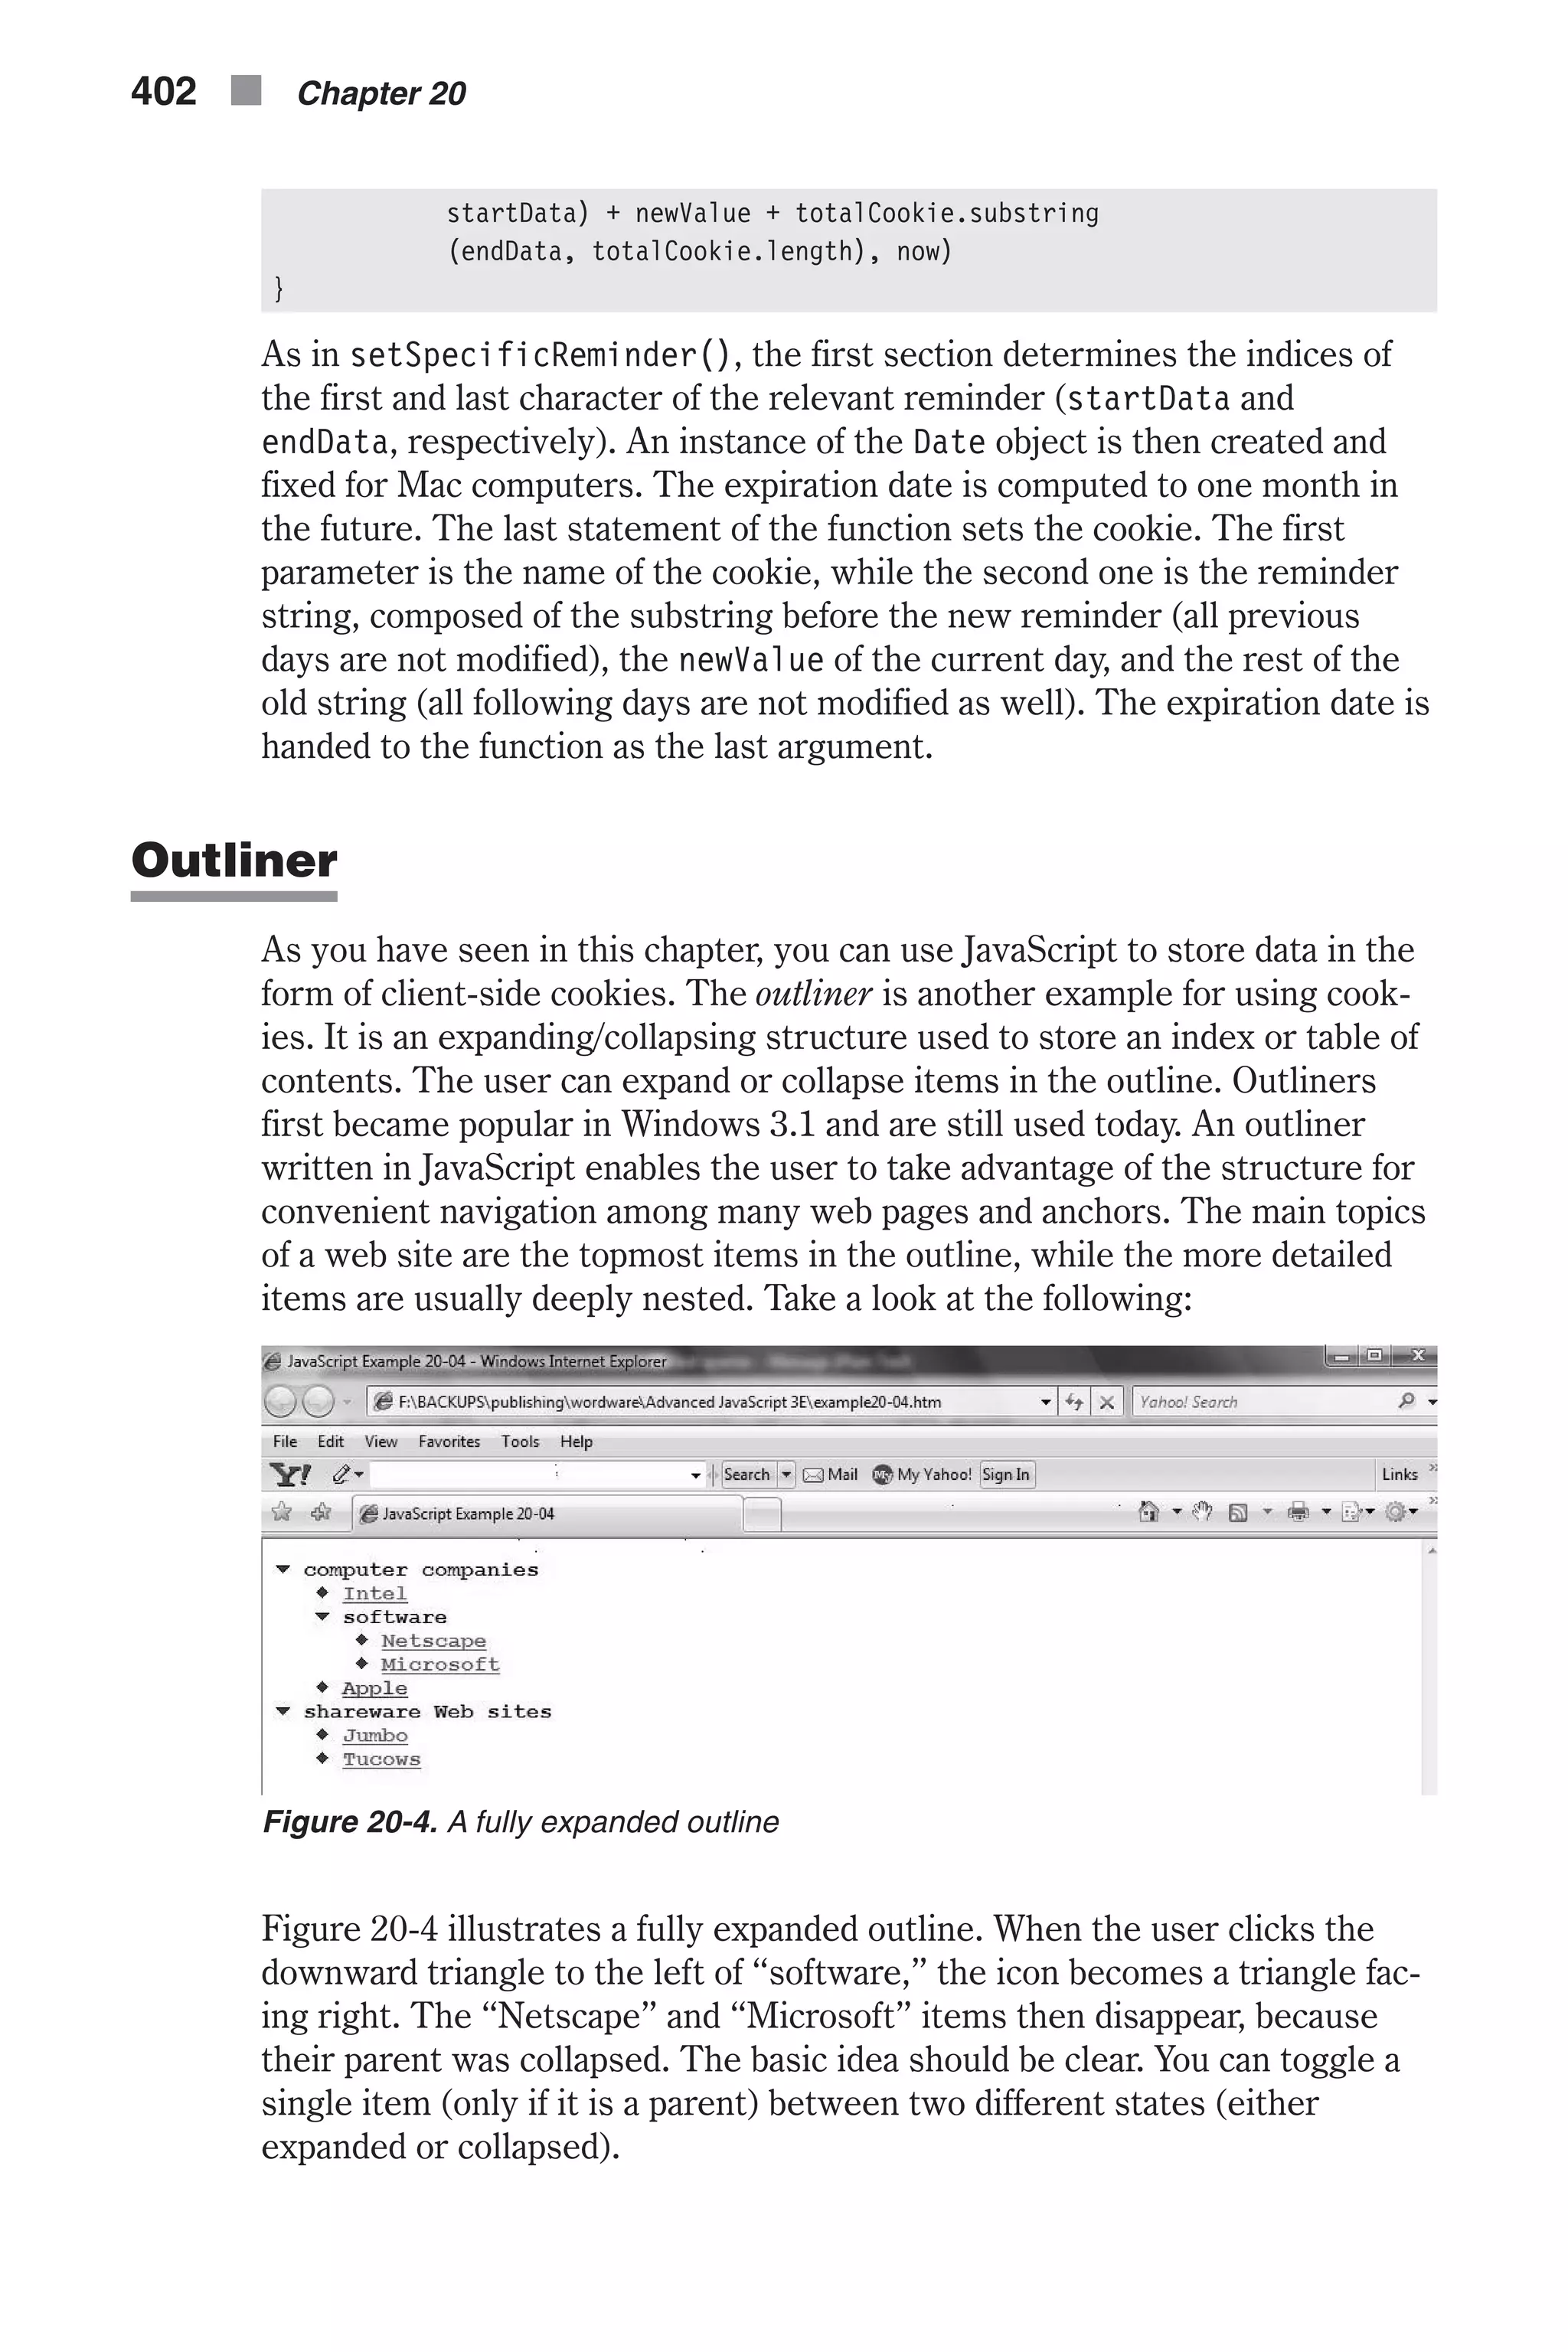
![Before we discuss the script itself, it is important that you understand exactly what the script does and how it differs from other JavaScript outliners available. Compared to other variants you might find on the web, our outliner script has the following advantages: n You can use any HTML tag for an item. You can use colored text, hyper- text links, and even small images. n The current state of the outline structure is stored in the form of a cookie, so it is safe, even if you leave the page. n You can use as many nested items as you wish. Some outline designs limit you to two levels, which is very restrictive. n The outliner design is not limited to frame documents. Since you can use any HTML for the text of an item, you can target any link to any frame or window you wish. First, study the script (Example 20-4) and try to understand as much as you can: <HTML> <HEAD> <TITLE>Outliner</TITLE> <SCRIPT LANGUAGE="JavaScript"> <!-- // Boolean variable specified if alert should be displayed if cookie exceeds 4KB var caution = false // name - name of the cookie // value - value of the cookie // [expires] - expiration date of the cookie (defaults to end of current session) // [path] - path for which the cookie is valid (defaults to path of calling document) // [domain] - domain for which the cookie is valid (defaults to domain of calling document) // [secure] - Boolean value indicating if the cookie transmission requires a secure transmission // * an argument defaults when it is assigned null as a placeholder // * a null placeholder is not required for trailing omitted arguments function setCookie(name, value, expires, path, domain, secure) { var curCookie = name + "=" + escape(value) + ((expires) ? "; expires=" + expires.toGMTString() : "") + ((path) ? "; path=" + path : "") + ((domain) ? "; domain=" + domain : "") + ((secure) ? "; secure" : "") if (!caution || (name + "=" + escape(value)).length <= 4000) document.cookie = curCookie else if (confirm("Cookie exceeds 4KB and will be cut!")) document.cookie = curCookie } // name - name of the desired cookie // * return string containing value of specified cookie or null if cookie does not exist Implementing Cookies n 403 Chapter20](https://image.slidesharecdn.com/wordware-advancedjavascript3rded-160421130838/75/www-webre24h-com-Wordware-advanced-javascript-3rd-ed-easttom-428-2048.jpg)
![function getCookie(name) { var prefix = name + "=" var cookieStartIndex = document.cookie.indexOf(prefix) if (cookieStartIndex == –1) return null var cookieEndIndex = document.cookie.indexOf(";", cookieStartIndex + prefix.length) if (cookieEndIndex == –1) cookieEndIndex = document.cookie.length return unescape(document.cookie.substring(cookieStartIndex + prefix.length, cookieEndIndex)) } // name - name of the cookie // [path] - path of the cookie (must be same as path used to create cookie) // [domain] - domain of the cookie (must be same as domain used to create cookie) // * path and domain default if assigned null or omitted if no explicit argument proceeds function deleteCookie(name, path, domain) { if (getCookie(name)) { document.cookie = name + "=" + ((path) ? "; path=" + path : "") + ((domain) ? "; domain=" + domain : "") + "; expires=Thu, 01-Jan-70 00:00:01 GMT" } } // date - any instance of the Date object // * you should hand all instances of the Date object to this function for "repairs" function fixDate(date) { var base = new Date(0) var skew = base.getTime() if (skew > 0) date.setTime(date.getTime() – skew) } // constructor function to create an entry (parent or child) function item(parent, text, depth) { this.parent = parent // is this item a parent? this.text = text // text for link (may include HTML) this.depth = depth // nested depth } // constructor function to create array (compatible with all browsers) function makeArray(length) { this.length = length // length of array (integer) } // create items of outline function makeDatabase() { 404 n Chapter 20](https://image.slidesharecdn.com/wordware-advancedjavascript3rded-160421130838/75/www-webre24h-com-Wordware-advanced-javascript-3rd-ed-easttom-429-2048.jpg)
![outline = new makeArray(9) // create global object // create items in outline outline[0] = new item(true, 'computer companies', 0) outline[1] = new item(false, '<A HREF="http://www.intel.com">Intel</A>', 1) outline[2] = new item(true, 'software', 1) outline[3] = new item(false, '<A HREF="http://www.netscape.com"> Netscape</A>', 2) outline[4] = new item(false, '<A HREF="http://www.microsoft.com"> Microsoft</A>', 2) outline[5] = new item(false, '<A HREF="http://www.apple.com">Apple</A>', 1) outline[6] = new item(true, 'shareware web sites', 0) outline[7] = new item(false, '<A HREF="http://www.jumbo.com">Jumbo</A>', 1) outline[8] = new item(false, '<A HREF="http://www.tucows.com"> Tucows.com</A>', 1) // determine current state of each item and assign to state properties setStates() // set image for each item (only items with true state) setImages() } function setStates() { // assign current cookie to local variable var storedValue = getCookie("outline") // if desired cookie not found (null) if (!storedValue) { // set states to default if no cookie found for (var i = 0; i < outline.length; ++i) { // only topmost level is visible by default if (outline[i].depth == 0) outline[i].state = true else outline[i].state = false } } else { // extract current states from cookie (0 => false, 1 => true) for (var i = 0; i < outline.length; ++i) { if (storedValue.charAt(i) == '1') outline[i].state = true else outline[i].state = false } } } function setImages() { // loop through all elements of the outline "array" (object) for (var i = 0; i < outline.length; ++i) { if (outline[i].state) Implementing Cookies n 405 Chapter20](https://image.slidesharecdn.com/wordware-advancedjavascript3rded-160421130838/75/www-webre24h-com-Wordware-advanced-javascript-3rd-ed-easttom-430-2048.jpg)
![if (outline[i].parent) // outline[i] is a parent if (outline[i + 1].state) // outline[i] is exploded outline[i].pic = '<A HREF="javascript:toggle(' + i + ')"><IMG SRC="exploded.gif" BORDER=0></A>' else // outline[i] is collapsed outline[i].pic = '<A HREF="javascript:toggle(' + i + ')"><IMG SRC="collapsd.gif" BORDER=0></A>' else // outline[i] is only a child (not a parent) outline[i].pic = '<IMG SRC="child.gif" BORDER=0>' } } // change from expanded to collapsed and vice versa function toggle(num) { // loop starts at item following argument // terminate loop when: // a) last element of outline "array" reached // b) current item (outline[i]) is not deeper than toggled item (outline[num]) for (var i = num + 1; i < outline.length && outline[i].depth >= outline[num].depth + 1; ++i) { // if current item (outline[i]) is a direct child of outline[num] if (outline[i].depth == outline[num].depth + 1) outline[i].state = !outline[i].state // toggle state } // store new states in cookie setStorage() // reload page history.go(0) } function setStorage() { // initialize local variable to empty string var text = "" // loop through all properties of outline "array" for (var i = 0; i < outline.length; ++i) { // use "1" character to represent true state, and "0" for false state text += (outline[i].state) ? "1" : "0" } // create cookie named "outline" with "binary" string setCookie("outline", text) } // update database makeDatabase() // --> </SCRIPT> </HEAD> <BODY> <SCRIPT LANGUAGE="JavaScript"> <!-- 406 n Chapter 20](https://image.slidesharecdn.com/wordware-advancedjavascript3rded-160421130838/75/www-webre24h-com-Wordware-advanced-javascript-3rd-ed-easttom-431-2048.jpg)
![// use <PRE> to enable indentation via spaces document.write('<PRE><H4>') // loop through elements of outline "array" for (var i = 0; i < outline.length; ++i) { // if current item's state is true if (outline[i].state) { // place three spaces for each nesting (depth * 3 spaces) for (var j = 0; j < outline[i].depth * 3; ++j) { document.write(' ') } // follow indentation with picture, another space, text, and new line document.write(outline[i].pic, ' ', outline[i].text, '<BR>') } else { // current item's state is false (skip all its children) var previous = i for (var k = i + 1; k < outline.length && outline[k].depth >= outline[previous].depth; ++k) { ++i } } } // end <PRE> to return to normal formatting document.write('</H4></PRE>') // --> </SCRIPT> </BODY> </HTML> Example 20-4 (ex20-4.htm). The outliner script includes deferred script and immediate script. A quick look at Example 20-4 is enough to conclude that the script uses cookies. Our set of cookie-related functions is embedded in the script. Although not all are invoked, we feel that you should always provide all the functions, regardless of whether you require all of them. Also notice that the HTML document includes two scripts—one in the <HEAD></HEAD> portion and one in the <BODY></BODY> portion. The first script is responsible for set- ting up the outline-style table and contents, and for performing the calculations and manipulations. The second script simply interprets the data and prints it to the web page. First let’s take a look at the script in the <HEAD></HEAD> portion. Implementing Cookies n 407 Chapter20](https://image.slidesharecdn.com/wordware-advancedjavascript3rded-160421130838/75/www-webre24h-com-Wordware-advanced-javascript-3rd-ed-easttom-432-2048.jpg)
![item(parent, text, depth) // constructor function to create an entry (parent or child) function item(parent, text, depth) { this.parent = parent // is this item a parent? this.text = text // text for link (may include HTML) this.depth = depth // nested depth } The constructor function item() accepts three arguments and creates three properties with the same names as the function’s parameters: parent, text, and depth. The first parameter (and property), parent, accepts a Boolean value indicating whether or not the item is a parent. An item is considered a parent only if it has children, or nested items. The function’s second argu- ment, text, accepts an HTML-valid string such as <A HREF="http:// www.jumbo.com">Jumbo</A> for the “Jumbo” entry in Figure 20-4. You can use virtually any HTML-valid string such as plain text, a link (as in the “Jumbo” example), or even a small image. The last argument, depth, is the depth of the item being created, i.e., it specifies how deep the item is nested. The topmost level item’s depth property is 0, whereas its children’s depth property is 1, and so forth. makeArray(length) // constructor function to create array (compatible with all browsers) function makeArray(length) { this.length = length // length of array (integer) } This function is an alternative to the built-in Array() constructor of Naviga- tor and Internet Explorer. We decided to write an array constructor on our own in order to make the script compatible with all JavaScript-enabled browsers. We used JavaScript’s support for adding properties to an object to explicitly create length, which holds the number of elements in the array, or the number of its properties (not counting length itself), to be exact. makeDatabase() // create items of outline function makeDatabase() { outline = new makeArray(9) // create global object // create items in outline outline[0] = new item(true, 'computer companies', 0) outline[1] = new item(false, '<A HREF="http://www.intel.com">Intel</A>', 1) outline[2] = new item(true, 'software', 1) outline[3] = new item(false, '<A HREF="http://www.netscape.com"> Netscape</A>', 2) outline[4] = new item(false, '<A HREF="http://www.microsoft.com"> 408 n Chapter 20](https://image.slidesharecdn.com/wordware-advancedjavascript3rded-160421130838/75/www-webre24h-com-Wordware-advanced-javascript-3rd-ed-easttom-433-2048.jpg)
![Microsoft</A>', 2) outline[5] = new item(false, '<A HREF="http://www.apple.com">Apple</A>', 1) outline[6] = new item(true, 'shareware web sites', 0) outline[7] = new item(false, '<A HREF="http://www.jumbo.com">Jumbo</A>', 1) outline[8] = new item(false, '<A HREF="http://www.tucows.com"> Tucows.com</A>', 1) // determine current state of each item and assign to state properties setStates() // set image for each item (only items with true state) setImages() } This function creates the main array used for the outline structure. Notice that the outline array is declared without the keyword var and thus is global. Try adding var to this statement to find out how important “one small word” can be. The next portion of this function deals with the proper- ties (elements) of the outline array. Each property becomes an instance of the item object. The order of the elements in the array is very important. An item’s children should immediately follow the item, so the order in the outline array is the order in which the entries appear, from top to bottom, in a fully expanded table of contents. The function then calls setStates() and setImages(). setStates() function setStates() { // assign current cookie to local variable var storedValue = getCookie("outline") // if desired cookie not found (null) if (!storedValue) { // set states to default if no cookie found for (var i = 0; i < outline.length; ++i) { // only topmost level is visible by default if (outline[i].depth == 0) outline[i].state = true else outline[i].state = false } } else { // extract current states from cookie (0 => false, 1 => true) for (var i = 0; i < outline.length; ++i) { if (storedValue.charAt(i) == '1') outline[i].state = true else outline[i].state = false } Implementing Cookies n 409 Chapter20](https://image.slidesharecdn.com/wordware-advancedjavascript3rded-160421130838/75/www-webre24h-com-Wordware-advanced-javascript-3rd-ed-easttom-434-2048.jpg)
![} } The setStates() function adds a state property to all properties of the outline object (array). If no cookie by the name of “outline” is found, the default states are used, i.e., the entire outline structure is collapsed, and only the topmost level is viewable. If the desired cookie is found, the current states are extracted. The cookie is basically a string of “0” and “1” charac- ters, the first representing a false state, and the latter representing a true one. The first character of the string is associated with the first element of the array (outline[0].state), and so on. An item’s state determines whether or not that item’s parent is expanded. Therefore, on a two-level outline-style table of contents, if an item has a true state it is viewable. setImages() function setImages() { // loop through all elements of the outline "array" (object) for (var i = 0; i < outline.length; ++i) { if (outline[i].state) if (outline[i].parent) // outline[i] is a parent if (outline[i + 1].state) // outline[i] is exploded outline[i].pic = '<A HREF="javascript:toggle (' + i + ')"><IMG SRC="exploded.gif" BORDER=0></A>' else // outline[i] is collapsed outline[i].pic = '<A HREF="javascript:toggle (' + i + ')"><IMG SRC="collapsd.gif" BORDER=0></A>' else // outline[i] is only a child (not a parent) outline[i].pic = '<IMG SRC="child.gif" BORDER=0>' } } This function loops through all elements of the outline object and assigns an image to the pic property of each element whose state is true. Note that this property is an extension of the original instance of the item object. If an element is a parent, there are two possible images—one to represent an expanded item and the other to reflect a collapsed one. Notice that if the Boolean expression outline[i + 1].state is true, outline[i] is expanded. You may recall that an element’s state property is true if its par- ent is expanded (by definition). Since outline[i] is surely a parent in this case (if (outline[i].parent)...), outline[i + 1] is its child. If out- line[i + 1]’s current state is false, the image representing a collapsed item is chosen. If outline[i] is not a parent at all, there is only one option for the image—the one representing a child item. The immediate conclusion 410 n Chapter 20](https://image.slidesharecdn.com/wordware-advancedjavascript3rded-160421130838/75/www-webre24h-com-Wordware-advanced-javascript-3rd-ed-easttom-435-2048.jpg)
![from this function is that in order to use the outliner, you must have three images: n exploded.gif n collapsd.gif n child.gif toggle(num) // change from expanded to collapsed and vice versa function toggle(num) { // loop starts at item following argument // terminate loop when: // a) last element of outline "array" reached // b) current item (outline[i]) is not deeper than toggled item (outline[num]) for (var i = num + 1; i < outline.length && outline[i].depth >= outline[num].depth + 1; ++i) { // if current item (outline[i]) is a direct child of outline[num] if (outline[i].depth == outline[num].depth + 1) outline[i].state = !outline[i].state // toggle state } // store new states in cookie setStorage() // reload page history.go(0) } When the user clicks an image (exploded.gif or collapsd.gif), the item associ- ated with it either collapses or explodes, depending on its current status. The toggle() function accepts an integer reflecting the index of the item whose icon the user clicked, and then toggles the state property of all the item’s direct children. By definition, when an item has no children with a true state, the item is collapsed, and when all children of an item have a true state, the item is expanded. Therefore, toggling the state property of the selected item’s children toggles that item’s current status (exploded or col- lapsed). After all manipulations, the function invokes the setStorage() function to store the current status in a cookie, overwriting any previous cookie used for the outliner. After the cookie is written, the function reloads the page via the history.go() method, with the argument 0 to indicate that the current page should be loaded. We chose to use go(0) rather than reload() because it works with all JavaScript-compatible browsers, and it is perfect for refreshing a document, which is exactly what the script does. Implementing Cookies n 411 Chapter20](https://image.slidesharecdn.com/wordware-advancedjavascript3rded-160421130838/75/www-webre24h-com-Wordware-advanced-javascript-3rd-ed-easttom-436-2048.jpg)
![setStorage() function setStorage() { // initialize local variable to empty string var text = "" // loop through all properties of outline "array" for (var i = 0; i < outline.length; ++i) { // use "1" character to represent true state, and "0" for false state text += (outline[i].state) ? "1" : "0" } // create cookie named "outline" with "binary" string setCookie("outline", text) } The setStorage() function creates a string with binary characters (0s and 1s). The first character of the string is associated with the first element of the outline array, and so forth. The character "0" indicates that the value of the item’s state property is false, and a "1" character means that the item’s state property is true. The last statement of this function sets the cookie via the setCookie() function, using “outline” as the name and the accumu- lative string as the value. No path or expiration date is specified, so the cookie is specific to the creating page and expires at the end of the user’s current session. Global Statements The only global statement in the first script is the one invoking the makeDatabase() function. The second script, on the other hand, consists of global statements only and is responsible for printing the outline-style table of contents. The <PRE></PRE> tags are important because they enable us to use regular spaces for indentation. The most important statement in the second script is the loop itself, which iterates through all elements of the global outline array (created by the makeDatabase() function in the first script). Each indentation level con- sists of three spaces and can be configured to any other integer for customized indentation. The topmost level items are not indented at all (0 * 3 = 0), the second level is indented by three spaces (1 * 3 = 3), the third level by six spaces (2 * 3 = 6), and so on. Note that an item is only printed if the value of its state property is true (by definition, if it is false, its parent is collapsed so you are not supposed to see the item). Each printed item consists of its small image (outline[i].pic), followed by one space and its text (outline[I].text). A new line (<BR>) is appended to each item. When an element whose state property is false is encountered, i is incremented the desired amount of times until its index is that of the next item at its level or a higher one. It passes over all items at lower levels because they do not appear. 412 n Chapter 20](https://image.slidesharecdn.com/wordware-advancedjavascript3rded-160421130838/75/www-webre24h-com-Wordware-advanced-javascript-3rd-ed-easttom-437-2048.jpg)
![Chapter 21 Images and Graphics Defining Images in HTML Without images web pages would be pretty dull. In fact, it is hard to imagine a modern web site without graphics. Inserting images into HTML is very simple. However, the images inserted via HTML simply sit there; they don’t do anything dynamic. Thankfully, adding that dynamic behavior with JavaScript is not a difficult task. The syntax to define an image in HTML is as follows: <IMG [NAME="imageName"] SRC="Location" [LOWSRC="Location"] [HEIGHT="Pixels" | "Value"%] [WIDTH="Pixels" | "Value"%] [SPACE="Pixels"] [BORDER = "Pixels"] [ALIGN = "left" | "right" |"top" | "absmiddle" | "absbottom" |"texttop" | "middle" | "baseline" | "bottom" ] [ISMAP] [USEMAP="Location#MapName"] [onAbort="handlerText"] [onError="handlerText"] [onLoad="handlerText"]> The attributes are: n NAME="imageName" specifies the name of the image object. n SRC="Location" specifies the URL of the image to be displayed in the document. n LOWSRC="Location" specifies the URL of a low-resolution version of the image to be displayed in the document. When this argument is provided, the smaller image is loaded first, and is then replaced by the larger image specified by SRC. Loading a low-resolution version first gives the user the impression of a shorter turnaround time. 414 n Chapter 21](https://image.slidesharecdn.com/wordware-advancedjavascript3rded-160421130838/75/www-webre24h-com-Wordware-advanced-javascript-3rd-ed-easttom-439-2048.jpg)

![immediately upon request. In order to use the image object, you must create an instance associated with a given image. The general syntax is as follows: var imageName = new Image([width, height]) width is the width of the image in pixels, and height is its height. An instance of the image object can be associated with one image at any given time. In order to associate an instance with an existing image, you must assign it a source in the following fashion: var imageName = new Image([width, height]) imageName.src = "imageLocation" imageLocation is the full URL of the image. The second statement in the preceding script segment assigns a value to the instance’s src property. The browser will retrieve the image from the server and will keep it in the cache until needed. Note that the width and height attributes are optional. The images Array When you create an HTML document you usually include several images (defined by the <IMG> definition). JavaScript features an array that reflects all images in a document—document.images. Each element of the array reflects an existing image. The first image in a document, for example, is document.images[0]. Obviously, the total number of images in a document is stored in the length property—document.images.length. Using the array within a deferred script ensures that all images have been loaded and the array reflects all images of a document. An alternative way to reference an image is by its name, which is defined by the NAME attribute of the <IMG> HTML tag. See Example 21-5 for further details and explanations. The size and position of an image in a document are set when the docu- ment is displayed in the browser window, and cannot be changed. Therefore, when creating an animation, you should generally use images of the same height and width. You can only change the image itself by setting the src and lowsrc properties. (See the description of SRC and LOWSRC in the previ- ous section, “Defining Images in HTML.”) Consider the following HTML document: <HTML> <HEAD> <TITLE>images</TITLE> <SCRIPT LANGUAGE="JavaScript"> <!-- function swapImages(a, b) { var asource = document.images[a].src document.images[a].src = document.images[b].src document.images[b].src = asource } // --> </SCRIPT> 416 n Chapter 21](https://image.slidesharecdn.com/wordware-advancedjavascript3rded-160421130838/75/www-webre24h-com-Wordware-advanced-javascript-3rd-ed-easttom-441-2048.jpg)
![</HEAD> <BODY> <IMG SRC="comp1.gif" HEIGHT=60 WIDTH=70> <IMG SRC="comp2.gif" HEIGHT=60 WIDTH=70><P> <FORM> <INPUT TYPE="button" VALUE="swap" onClick="swapImages(0, 1)"> </FORM> </BODY> </HTML> Example 21-1 (ex21-1.htm). A button enables the user to swap two given images. You can see the output of this script in Figure 21-1. When the user clicks the button, the swapImages() function is invoked with two arguments: 0 and 1. The src property of the image whose index is the first argument is assigned to the local variable asource. The src property of the second image is assigned to the src property of the first image, and the src property of the second image is assigned the previous src property of the first image, stored locally in asource. The document.images array is read-only—you cannot explicitly assign a value to any of its elements. Nevertheless, you can assign values to proper- ties of an array element, as the preceding example demonstrates with the src property. As mentioned earlier, an animation should consist of images of the same size. Example 21-2 demonstrates a simple animation with seven images of identical dimensions. Note that recent browser developments may make this example not function in some browsers. <HTML> <HEAD> <TITLE>images</TITLE> <SCRIPT LANGUAGE="JavaScript"> <!-- var pause = 250 var on = new Array() on[0] = new Image(12, 12) on[1] = new Image(12, 12) on[2] = new Image(12, 12) on[3] = new Image(12, 12) Images and Graphics n 417 Chapter21 Figure 21-1. Swapping images](https://image.slidesharecdn.com/wordware-advancedjavascript3rded-160421130838/75/www-webre24h-com-Wordware-advanced-javascript-3rd-ed-easttom-442-2048.jpg)
![on[2] = new Image(12, 12) on[3] = new Image(12, 12) on[4] = new Image(12, 12) on[5] = new Image(12, 12) on[6] = new Image(12, 12) for (var i = 0; i < 7; ++i) { on[i].src = "1" + i + ".gif" } timerID = setTimeout("", 0) function animate(num, imageIndex) { document.images[imageIndex].src = on[num].src num = (num == on.length – 1) ? 0 : (++num) var str = "animate(" + num + ", " + imageIndex + ")" timerID = setTimeout(str, pause) } // --> </SCRIPT> </HEAD> <BODY onLoad="timerID = setTimeout('animate(1, 0)', pause)"> <IMG SRC="&{on[0].src};" HEIGHT="&{on[0].height};" WIDTH="&{on[0].width};"> </BODY> </HTML> Example 21-2 (ex21-2.htm). A simple animation with images of identical size The script consists of a few immediate statements as well as a deferred code. First, an array named on is created to store the images of the anima- tion. Each element is actually an instance of the image object. Take a look at the following statement: timerID = setTimeout("", 0) This statement sets the value of timerID to null, but it does not explicitly assign that value. This syntax is useful with Internet Explorer because it generates an error if you use clearTimeout() with a variable that holds a null value. function animate(num, imageIndex) { document.images[imageIndex].src = on[num].src num = (num == on.length – 1) ? 0 : (++num) var str = "animate(" + num + ", " + imageIndex + ")" timerID = setTimeout(str, pause) } The animate() function accepts two arguments. The first specifies the index of the first image in the animation according to the on array. Take a look at the following statement from animate(), which is the most impor- tant one: document.images[imageIndex].src = on[num].src 418 n Chapter 21](https://image.slidesharecdn.com/wordware-advancedjavascript3rded-160421130838/75/www-webre24h-com-Wordware-advanced-javascript-3rd-ed-easttom-443-2048.jpg)
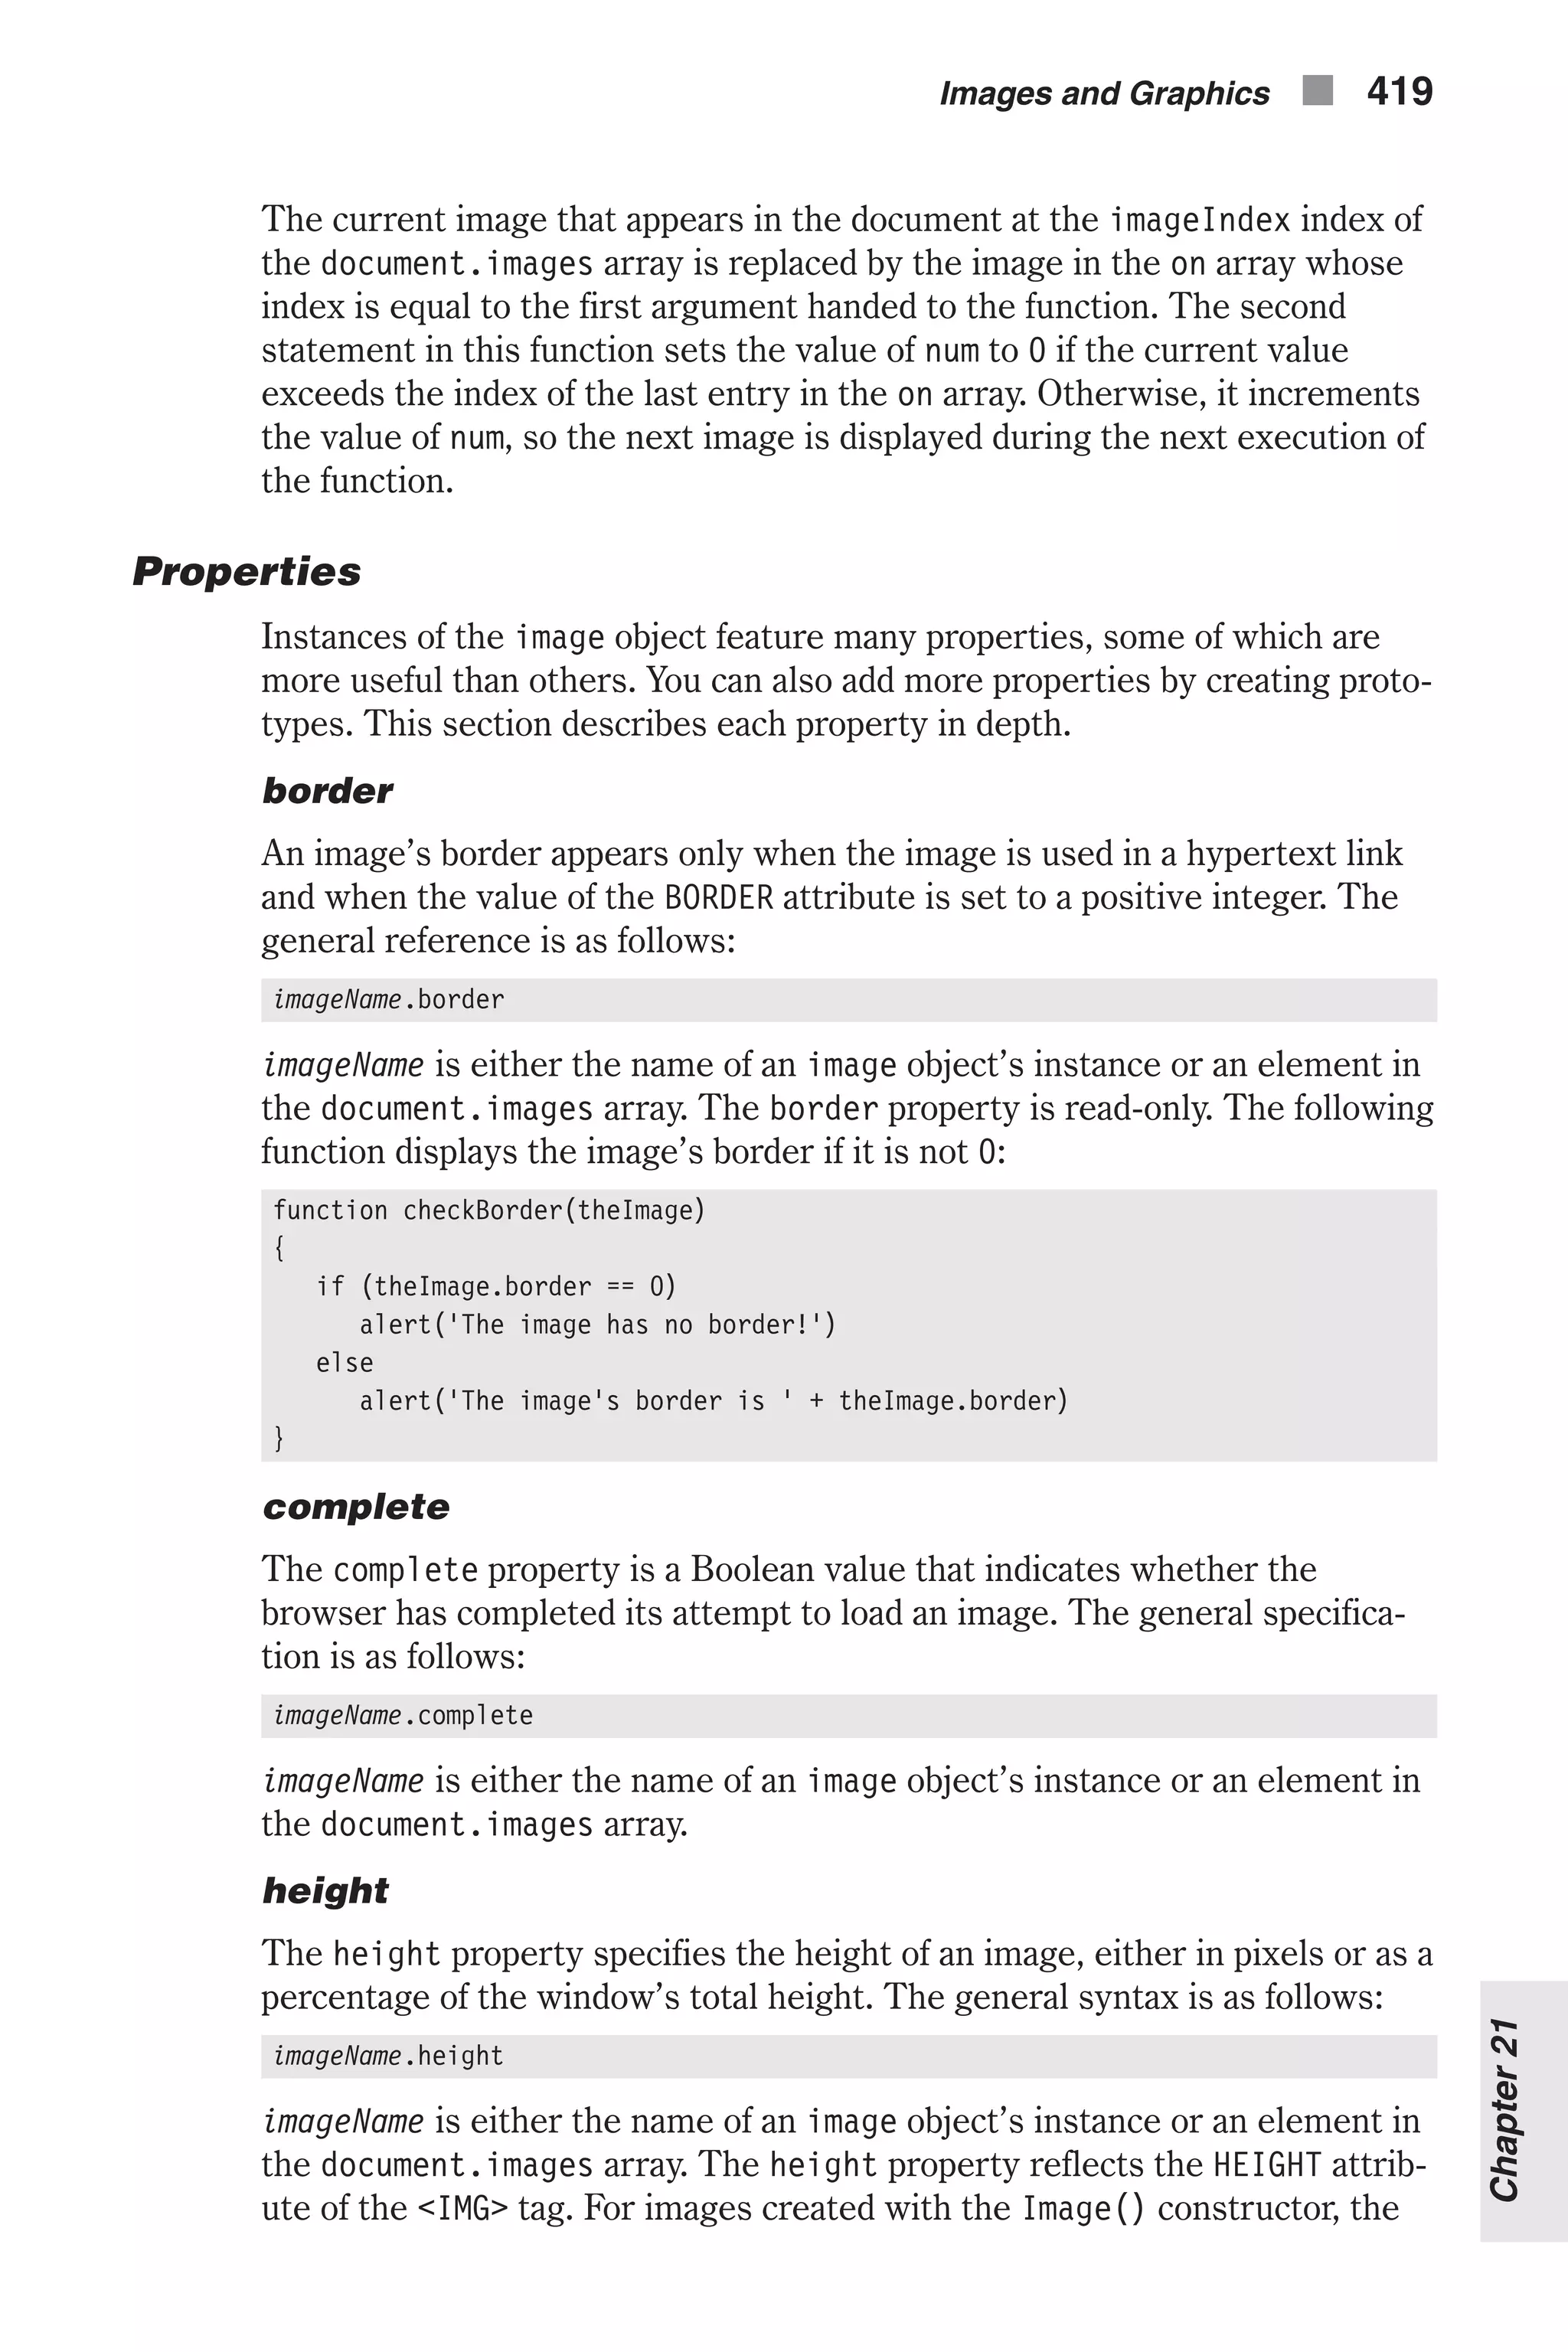
![value of the height property is the actual height, not the displayed height. The height property is read-only. The script in Example 21-3 shows how an alert box can display, upon clicking a button, the height, width, and space around an image. <HTML> <HEAD> <TITLE>images</TITLE> <SCRIPT LANGUAGE="JavaScript"> <!-- function showImageSize(theImage) { alert('height=' + theImage.height + '; width=' + theImage.width + '; hspace=' + theImage.hspace + '; vspace=' + theImage.vspace) } // --> </SCRIPT> </HEAD> <BODY> <IMG SRC="computer2.jpg" HEIGHT=60 WIDTH=70 VSPACE=30 HSPACE=10> <FORM> <INPUT TYPE="button" VALUE="show image size" onClick= "showImageSize(document.images[0])"> </FORM> </BODY> </HTML> Example 21-3 (ex21-3.htm). A script to display the height, width, and space around an image 420 n Chapter 21 Figure 21-2. An alert box that displays the height, width, and space around an image](https://image.slidesharecdn.com/wordware-advancedjavascript3rded-160421130838/75/www-webre24h-com-Wordware-advanced-javascript-3rd-ed-easttom-445-2048.jpg)
![hspace The hspace property specifies the margin in pixels between the left and right edges of an image and the surrounding text. The general syntax is as follows: imageName.hspace imageName is either the name of an image object’s instance or an element in the document.images array. The hspace property reflects the HSPACE attrib- ute of the <IMG> tag. For images created with the Image() constructor, the value of the hspace property is 0. The hspace property is read-only. The script in Example 21-3 shows how an alert box can display, upon clicking a button, the height, width, and space around an image. lowsrc lowsrc is a string specifying the URL of a low-resolution version of an image to be displayed in a document. The general syntax is as follows: imageName.lowsrc imageName is either the name of an image object’s instance or an element in the document.images array. The lowsrc property initially reflects the LOWSRC attribute of the <IMG> tag. The browser loads the smaller image specified by lowsrc and then replaces it with the larger image specified by the src property. You can change the lowsrc property at any time. The script in Example 21-4 lets the user display one image out of three available ones. There are two versions ready for each of the three selec- tions: low resolution and high resolution. When loading the requested selection, the low-resolution image is loaded first and then the high-resolu- tion one: <HTML> <HEAD> <TITLE>Aircraft</TITLE> <SCRIPT LANGUAGE="JavaScript"> <!-- function displayImage(lowRes, highRes) { document.images[0].lowsrc = lowRes document.images[0].src = highRes } // --> </SCRIPT> </HEAD> <BODY> <FORM NAME="imageForm"> <B>Choose an image:</B> <BR><INPUT TYPE="radio" NAME="imageChoice" VALUE="image1" CHECKED onClick="displayImage('img1l.gif', 'img1h.gif')"> IMAGE 1 Images and Graphics n 421 Chapter21](https://image.slidesharecdn.com/wordware-advancedjavascript3rded-160421130838/75/www-webre24h-com-Wordware-advanced-javascript-3rd-ed-easttom-446-2048.jpg)
![<BR><INPUT TYPE="radio" NAME="imageChoice" VALUE="image2" onClick="displayImage('img2l.gif', ‘img2h.gif')"> IMAGE 2 <BR><INPUT TYPE="radio" NAME="imageChoice" VALUE="image3" onClick="displayImage('img3l.gif', 'img3h.gif')"> IMAGE 3 <BR> <IMG NAME="firstImage" SRC="img1h.gif" LOWSRC="img1l.gif" ALIGN="left" VSPACE="10"><BR> </FORM> </BODY> </HTML> Example 21-4 (ex21-4.htm). A script to display one of three images, with low-resolu- tion images loaded first name The name property reflects the NAME attribute of the <IMG> HTML definition. The name property is read-only. As with forms, you can use an image’s name to reference it. If the first image in a document is defined by the following syntax, for instance, you can reference it as document.myImage as well as document.images[0]: <IMG SRC="myPicture.gif" NAME="myImage"> src src specifies the URL of an image to be displayed in a document. The gen- eral syntax is: imageName.src imageName is either the name of an image object’s instance or an element in the document.images array. The src property is used in almost all this chap- ter’s examples. Consider the following statement: var myImage = new Image() An instance of the image object, named myImage, is created with the Image() constructor. When you create an instance of the image object in this fashion, it is not associated with any image. In order to associate it with an existing image, you must assign a value to its src property in the following manner: myImage.src = "myPicture.gif" You can use either a full or relational URL. When you associate an image with an instance in this fashion, the image is cached. Since it is already stored on the client side (where the cache normally is), the user does not have to wait for the image to be received from the server when you decide to display the image. When you adjust the src property of an element from the document.images array (or an image that is viewable on the page), the image immediately changes to the image at the new URL. 422 n Chapter 21](https://image.slidesharecdn.com/wordware-advancedjavascript3rded-160421130838/75/www-webre24h-com-Wordware-advanced-javascript-3rd-ed-easttom-447-2048.jpg)
![vspace This property is a string specifying the margin in pixels between the top and bottom edges of an image and the surrounding text. The general syntax is as follows: imageName.vspace imageName is either the name of an image object’s instance or an element in the document.images array. The vspace property reflects the VSPACE attrib- ute of the <IMG> tag. For images created with the Image() constructor, the value of the vspace property is 0. The vspace property is read-only. The script in Example 21-3 shows how an alert box can display, upon clicking a button, the height, width, and space around an image. width width is a string specifying the width of an image either in pixels or as a per- centage of the window width. The general syntax is as follows: imageName.width imageName is either the name of an image object’s instance or an element in the document.images array. The width property reflects the WIDTH attribute of the <IMG> tag. For images created with the Image() constructor, the value of the width property is the actual, not the displayed, width of the image. The width property is read-only. The script in Example 21-3 shows how an alert box can display, upon clicking a button, the height, width, and space around an image. Event Handlers onAbort An abort event occurs when the user aborts the loading of an image (for example, by clicking a link or the Stop button). The onAbort event handler executes JavaScript code when an abort event occurs. In Example 21-5, an onAbort handler belonging to an image object displays a message when the user aborts the image’s loading: <HTML> <HEAD> <TITLE>Aircraft</TITLE> <SCRIPT LANGUAGE="JavaScript"> <!-- function displayImage(lowRes, highRes) { document.images[0].lowsrc = lowRes document.images[0].src = highRes } // --> </SCRIPT> </HEAD> <BODY> Images and Graphics n 423 Chapter21](https://image.slidesharecdn.com/wordware-advancedjavascript3rded-160421130838/75/www-webre24h-com-Wordware-advanced-javascript-3rd-ed-easttom-448-2048.jpg)
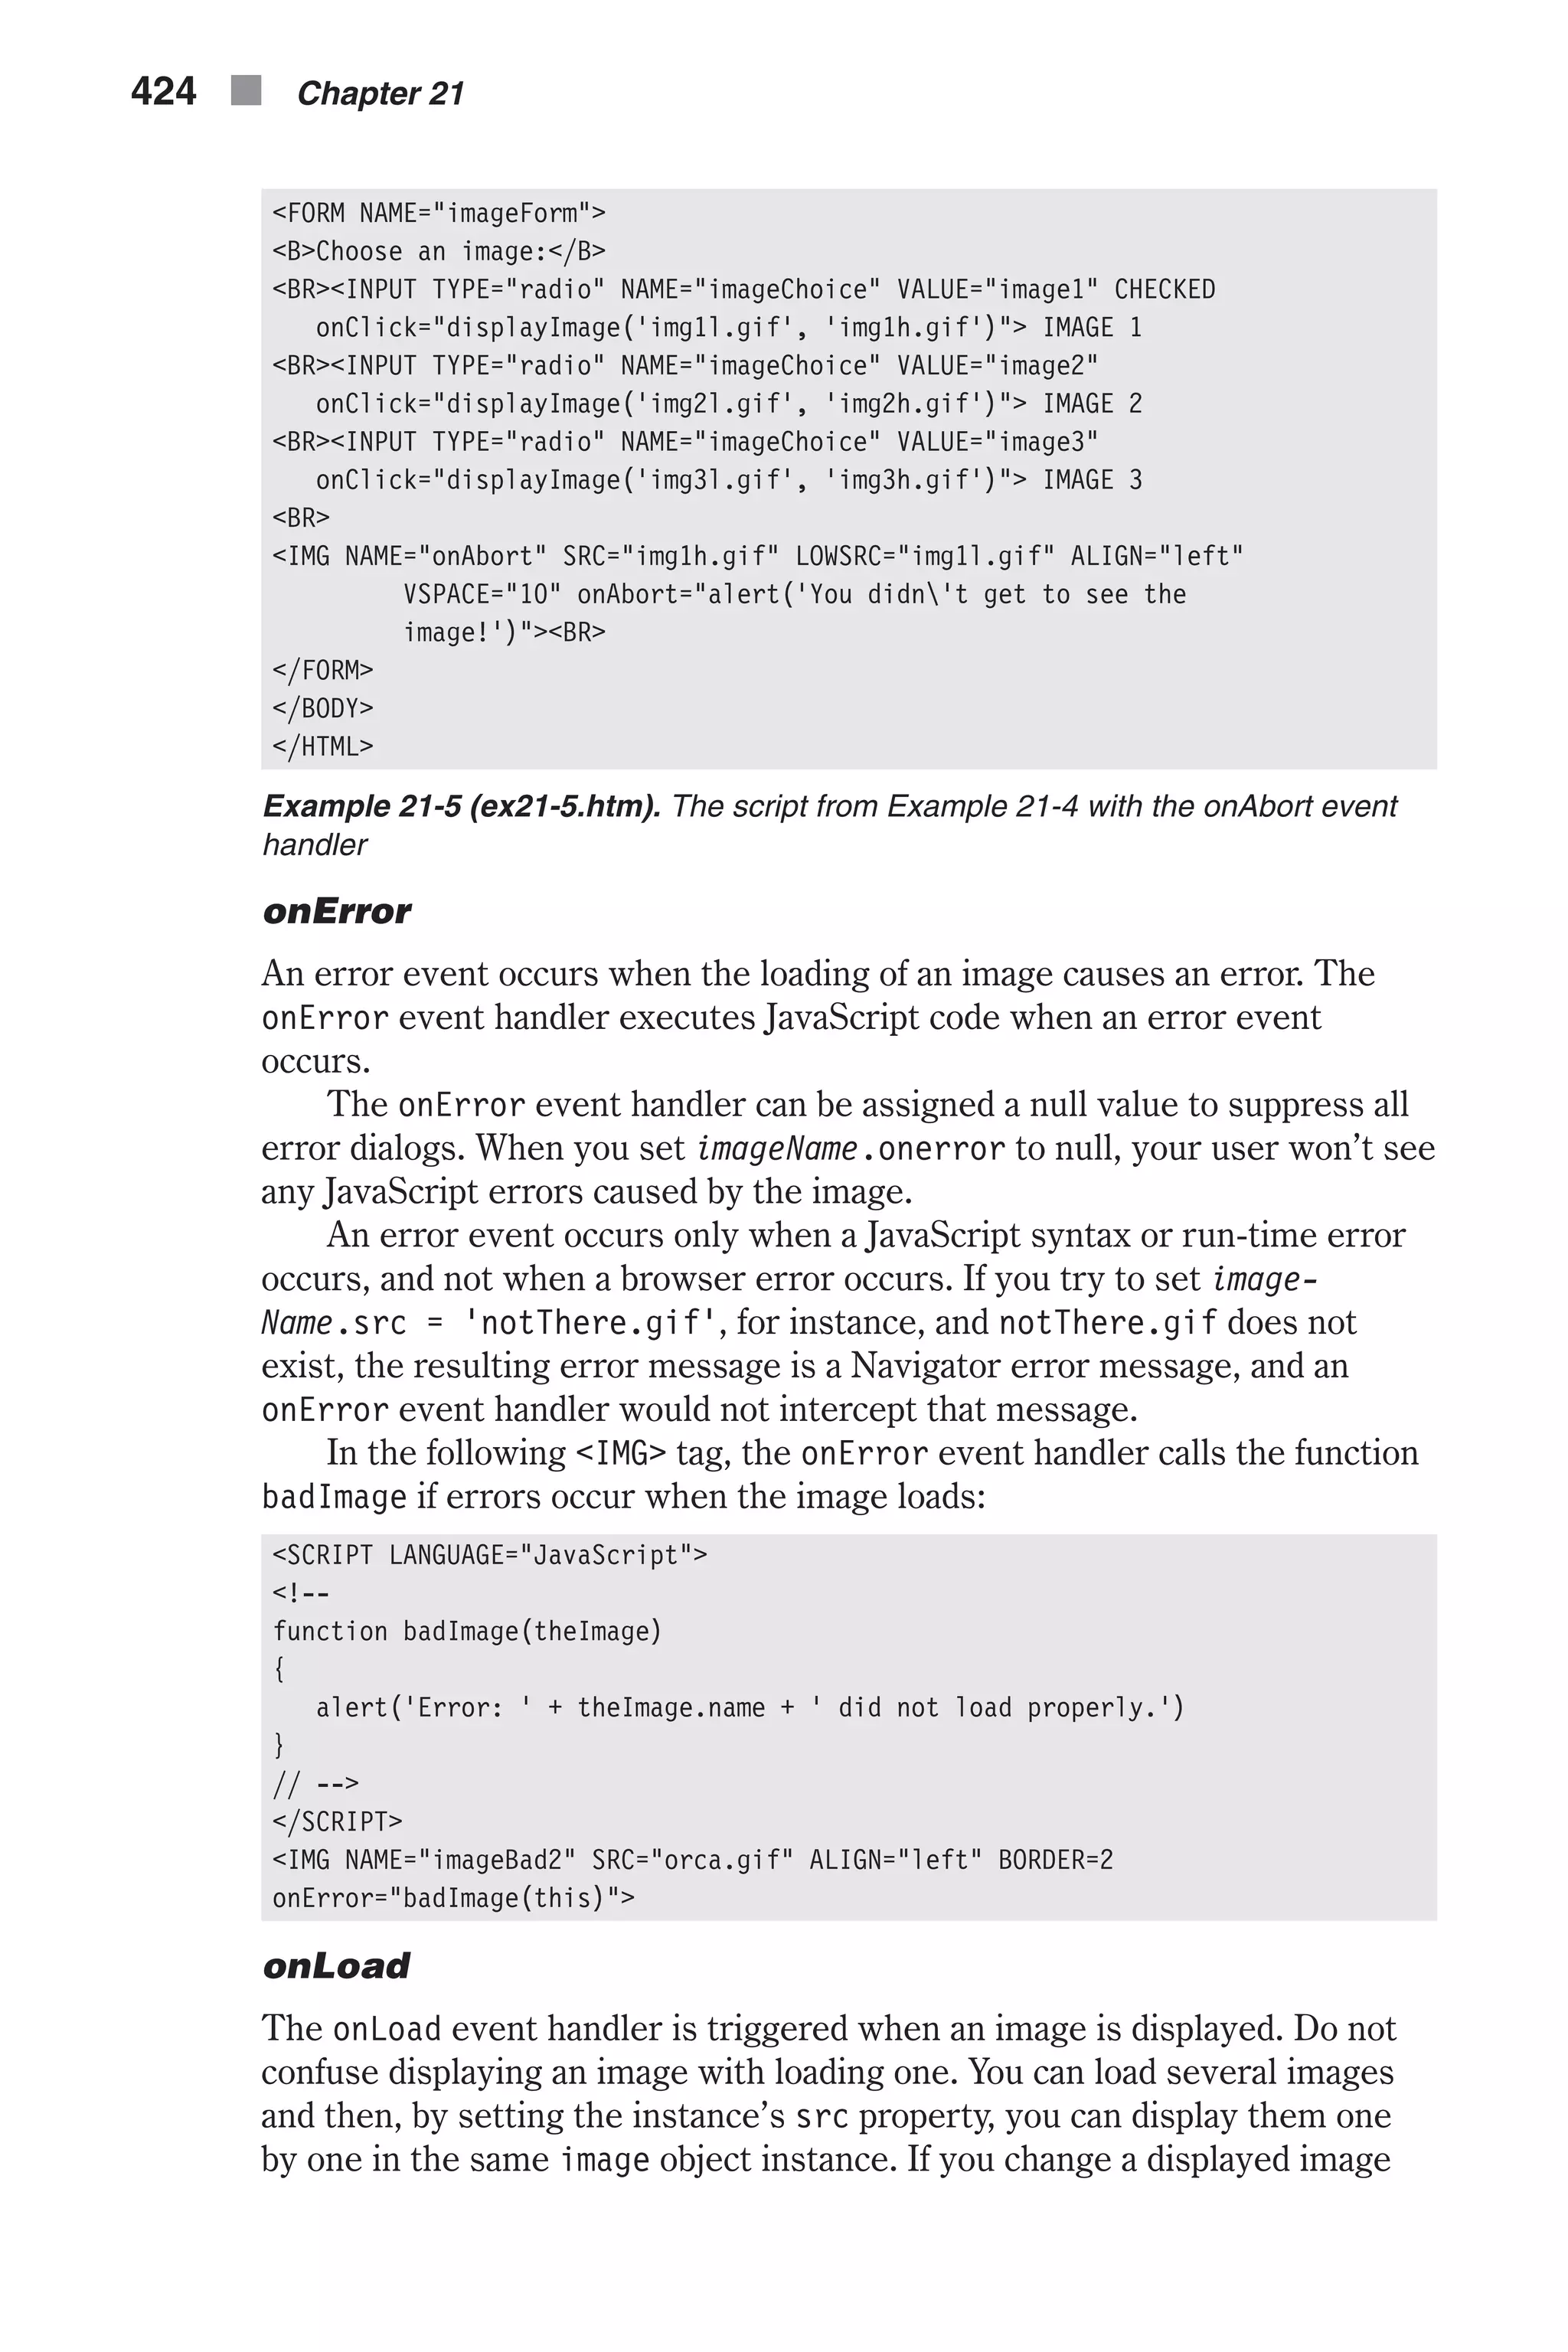
![this way, the onLoad event handler executes every time an image is dis- played, not just when the image is loaded into memory. If you specify an onLoad event handler for an image object that displays a looping GIF animation (multi-image GIF), each loop of the animation trig- gers the onLoad event, and the event handler executes once for each loop. By repeatedly setting the src property of an image’s JavaScript reflec- tion, you can use the onLoad event handler to create a JavaScript animation. Demonstration 1: Updating Digital Clock The following JavaScript script displays a digital clock on your page that is updated every minute. The clock includes two digits for the hour, delimiting colon, two digits for the minute, and am/pm subscript: <HTML> <HEAD> <TITLE> JavaScript clock </TITLE> </HEAD> <BODY> <!-- JavaScript immediate script --> <SCRIPT LANGUAGE="JavaScript"> <!-- // create array of all digit images var digit = new Array() digit[0] = new Image(16, 21) digit[1] = new Image(16, 21) digit[2] = new Image(16, 21) digit[3] = new Image(16, 21) digit[4] = new Image(16, 21) digit[5] = new Image(16, 21) digit[6] = new Image(16, 21) digit[7] = new Image(16, 21) digit[8] = new Image(16, 21) digit[9] = new Image(16, 21) digit[10] = new Image(16, 21) // am digit[11] = new Image(16, 21) // pm digit[12] = new Image(9, 21) // colon digit[13] = new Image(9, 21) // blank // assign sources to digit image objects (0 - 9) for (var i = 0; i < 10; ++i) { digit[i].src = getPath(location.href) + "dg" + i + ".gif" } // assign sources to other image objects digit[10].src = getPath(location.href) + "dgam.gif" digit[11].src = getPath(location.href) + "dgpm.gif" digit[12].src = getPath(location.href) + "dgc.gif" digit[13].src = getPath(location.href) + "dgb.gif" // set initial time values to impossible ones Images and Graphics n 425 Chapter21](https://image.slidesharecdn.com/wordware-advancedjavascript3rded-160421130838/75/www-webre24h-com-Wordware-advanced-javascript-3rd-ed-easttom-450-2048.jpg)
![var hour1 = getHour(0) var hour2 = getHour(1) var minute1 = getMinute(0) var minute2 = getMinute(1) var ampm = getAmpm() var colon = false // get array substring of first clock image in document.images array var start = document.images.length // number of images in document // print initial clock var openImage = "<IMG SRC="" + getPath(location.href) + "dg" var closeImage = ".gif" HEIGHT=21 WIDTH=16>" document.write(openImage + hour1 + closeImage) document.write(openImage + hour2 + closeImage) document.write(openImage + "c.gif" HEIGHT=21 WIDTH=9>") document.write(openImage + minute1 + closeImage) document.write(openImage + minute2 + closeImage) document.write(openImage + ((ampm == 10) ? "am" : "pm") + closeImage) var timerID = null var timerRunning = false update() function setClock() { if (getHour(0) != hour1) { // not getHours()! hour1 = getHour(0) document.images[start].src = digit[hour1].src } if (getHour(1) != hour2) { // not getHours()! hour2 = getHour(1) document.images[start + 1].src = digit[hour2].src } colon = !colon if (!colon) document.images[start + 2].src = digit[13].src else document.images[start + 2].src = digit[12].src if (getMinute(0) != minute1) { // not getMinutes()! minute1 = getMinute(0) document.images[start + 3].src = digit[minute1].src } if (getMinute(1) != minute2) { // not getMinutes()! minute2 = getMinute(1) document.images[start + 4].src = digit[minute2].src } if (getAmpm() != ampm) { 426 n Chapter 21](https://image.slidesharecdn.com/wordware-advancedjavascript3rded-160421130838/75/www-webre24h-com-Wordware-advanced-javascript-3rd-ed-easttom-451-2048.jpg)
![ampm = getAmpm() document.images[start + 5].src = digit[ampm].src } timerID = setTimeout("setClock()",1000) timerRunning = true } function update() { stopClock() setClock() } function stopClock() { if (timerRunning) clearTimeout(timerID) timerRunning = false } function getHour(place) { var now = new Date() var hour = now.getHours() if (hour >= 12) hour –= 12 hour = (hour == 0) ? 12 : hour if (hour < 10) hour = "0" + hour // do not parse number! hour += "" return parseInt(hour.charAt(place)) } function getMinute(place) { var now = new Date() var minute = now.getMinutes() if (minute < 10) minute = "0" + minute // do not parse number! minute += "" return parseInt(minute.charAt(place)) } function getAmpm() { var now = new Date() var hour = now.getHours() if (hour >= 12) return 11 // pm /* else */ return 10 // am } function getPath(url) { lastSlash = url.lastIndexOf("/") return url.substring(0, lastSlash + 1) } // --> Images and Graphics n 427 Chapter21](https://image.slidesharecdn.com/wordware-advancedjavascript3rded-160421130838/75/www-webre24h-com-Wordware-advanced-javascript-3rd-ed-easttom-452-2048.jpg)
![</SCRIPT> </BODY> </HTML> Example 21-6 (ex21-6.htm). An updating clock Global Statements The script starts by creating the digits array, holding 14 instances of the image object, for the digits 0 through 9, am, pm, colon, and blank symbols. All images are 21 pixels high and 16 pixels wide, except for the colon and the blank images, which are thinner (9 pixels): // create array of all digit images var digit = new Array() digit[0] = new Image(16, 21) digit[1] = new Image(16, 21) digit[2] = new Image(16, 21) digit[3] = new Image(16, 21) digit[4] = new Image(16, 21) digit[5] = new Image(16, 21) digit[6] = new Image(16, 21) digit[7] = new Image(16, 21) digit[8] = new Image(16, 21) digit[9] = new Image(16, 21) digit[10] = new Image(16, 21) // am digit[11] = new Image(16, 21) // pm digit[12] = new Image(9, 21) // colon digit[13] = new Image(9, 21) // blank Since the artistic representation of each symbol is given in a GIF format, we assign a GIF filename to the src property of each element of the digit array. The GIF files are located in the same directory as the URL, and the naming algorithm is based on concatenating the dg substring to the charac- ters represented by the image (0 to 9, am, pm). The colon symbol is denoted by a “c” character, and the blank by a “b.” // assign sources to digit image objects (0 - 9) for (var i = 0; i < 10; ++i) { digit[i].src = getPath(location.href) + "dg" + i + ".gif" } // assign sources to other image objects digit[10].src = getPath(location.href) + "dgam.gif" digit[11].src = getPath(location.href) + "dgpm.gif" digit[12].src = getPath(location.href) + "dgc.gif" digit[13].src = getPath(location.href) + "dgb.gif" Then, we find the current time and store it in six variables, four digits for the hour and minute, one for the ampm value, and one Boolean variable for the blinking colon. After initializing the time variables, the script turns off the colon, ready to be turned on next time: 428 n Chapter 21](https://image.slidesharecdn.com/wordware-advancedjavascript3rded-160421130838/75/www-webre24h-com-Wordware-advanced-javascript-3rd-ed-easttom-453-2048.jpg)
![// set initial time values to current time var hour1 = getHour(0) var hour2 = getHour(1) var minute1 = getMinute(0) var minute2 = getMinute(1) var ampm = getAmpm() var colon = false We need to probe and remember the number of images already displayed in the document: // get array substring of first clock image in document.images array var start = document.images.length // number of images in document When the page is loaded, the script displays the clock. Since JavaScript does not support image creation, all images are constructed via HTML: // print initial clock var openImage = "<IMG SRC="" + getPath(location.href) + "dg" var closeImage = ".gif" HEIGHT=21 WIDTH=16>" document.write(openImage + hour1 + closeImage) document.write(openImage + hour2 + closeImage) document.write(openImage + "c.gif" HEIGHT=21 WIDTH=9>") document.write(openImage + minute1 + closeImage) document.write(openImage + minute2 + closeImage) document.write(openImage + ((ampm == 10) ? "am" : "pm") + closeImage) The timerID variable, which holds the elapsed time before the next clock updating, is initialized to null before the clock starts running. For the same reason, the timerRunning variable is set to false. The update() function starts the infinite loop of running the clock: var timerID = null var timerRunning = false update() setClock() function setClock() { if (getHour(0) != hour1) { // not getHours()! hour1 = getHour(0) document.images[start].src = digit[hour1].src } if (getHour(1) != hour2) { // not getHours()! hour2 = getHour(1) document.images[start + 1].src = digit[hour2].src } colon = !colon if (!colon) document.images[start + 2].src = digit[13].src Images and Graphics n 429 Chapter21](https://image.slidesharecdn.com/wordware-advancedjavascript3rded-160421130838/75/www-webre24h-com-Wordware-advanced-javascript-3rd-ed-easttom-454-2048.jpg)
![else document.images[start + 2].src = digit[12].src if (getMinute(0) != minute1) { // not getMinutes()! minute1 = getMinute(0) document.images[start + 3].src = digit[minute1].src } if (getMinute(1) != minute2) { // not getMinutes()! minute2 = getMinute(1) document.images[start + 4].src = digit[minute2].src } if (getAmpm() != ampm) { ampm = getAmpm() document.images[start + 5].src = digit[ampm].src } timerID = setTimeout("setClock()",1000) timerRunning = true } This function retrieves the current value of each digit (and symbol) in the clock and updates only the necessary images, i.e., only those digits that have been changed since the previous iteration. The blinking colon effect is accomplished by simply reversing the value of colon. Notice that the index of the images array is an offset from the last image of the document, not counting the clock’s images. The variable timerID is now modified to recur- sively execute the function setClock() after 1000 milliseconds. update() function update() { stopClock() setClock() } The function update() stops the clock and then restarts it. stopClock() function stopClock() { if (timerRunning) clearTimeout(timerID) timerRunning = false } This function clears the timeout and sets the timerRunning variable to false, indicating that the timer is not running because no timeout is set. 430 n Chapter 21](https://image.slidesharecdn.com/wordware-advancedjavascript3rded-160421130838/75/www-webre24h-com-Wordware-advanced-javascript-3rd-ed-easttom-455-2048.jpg)
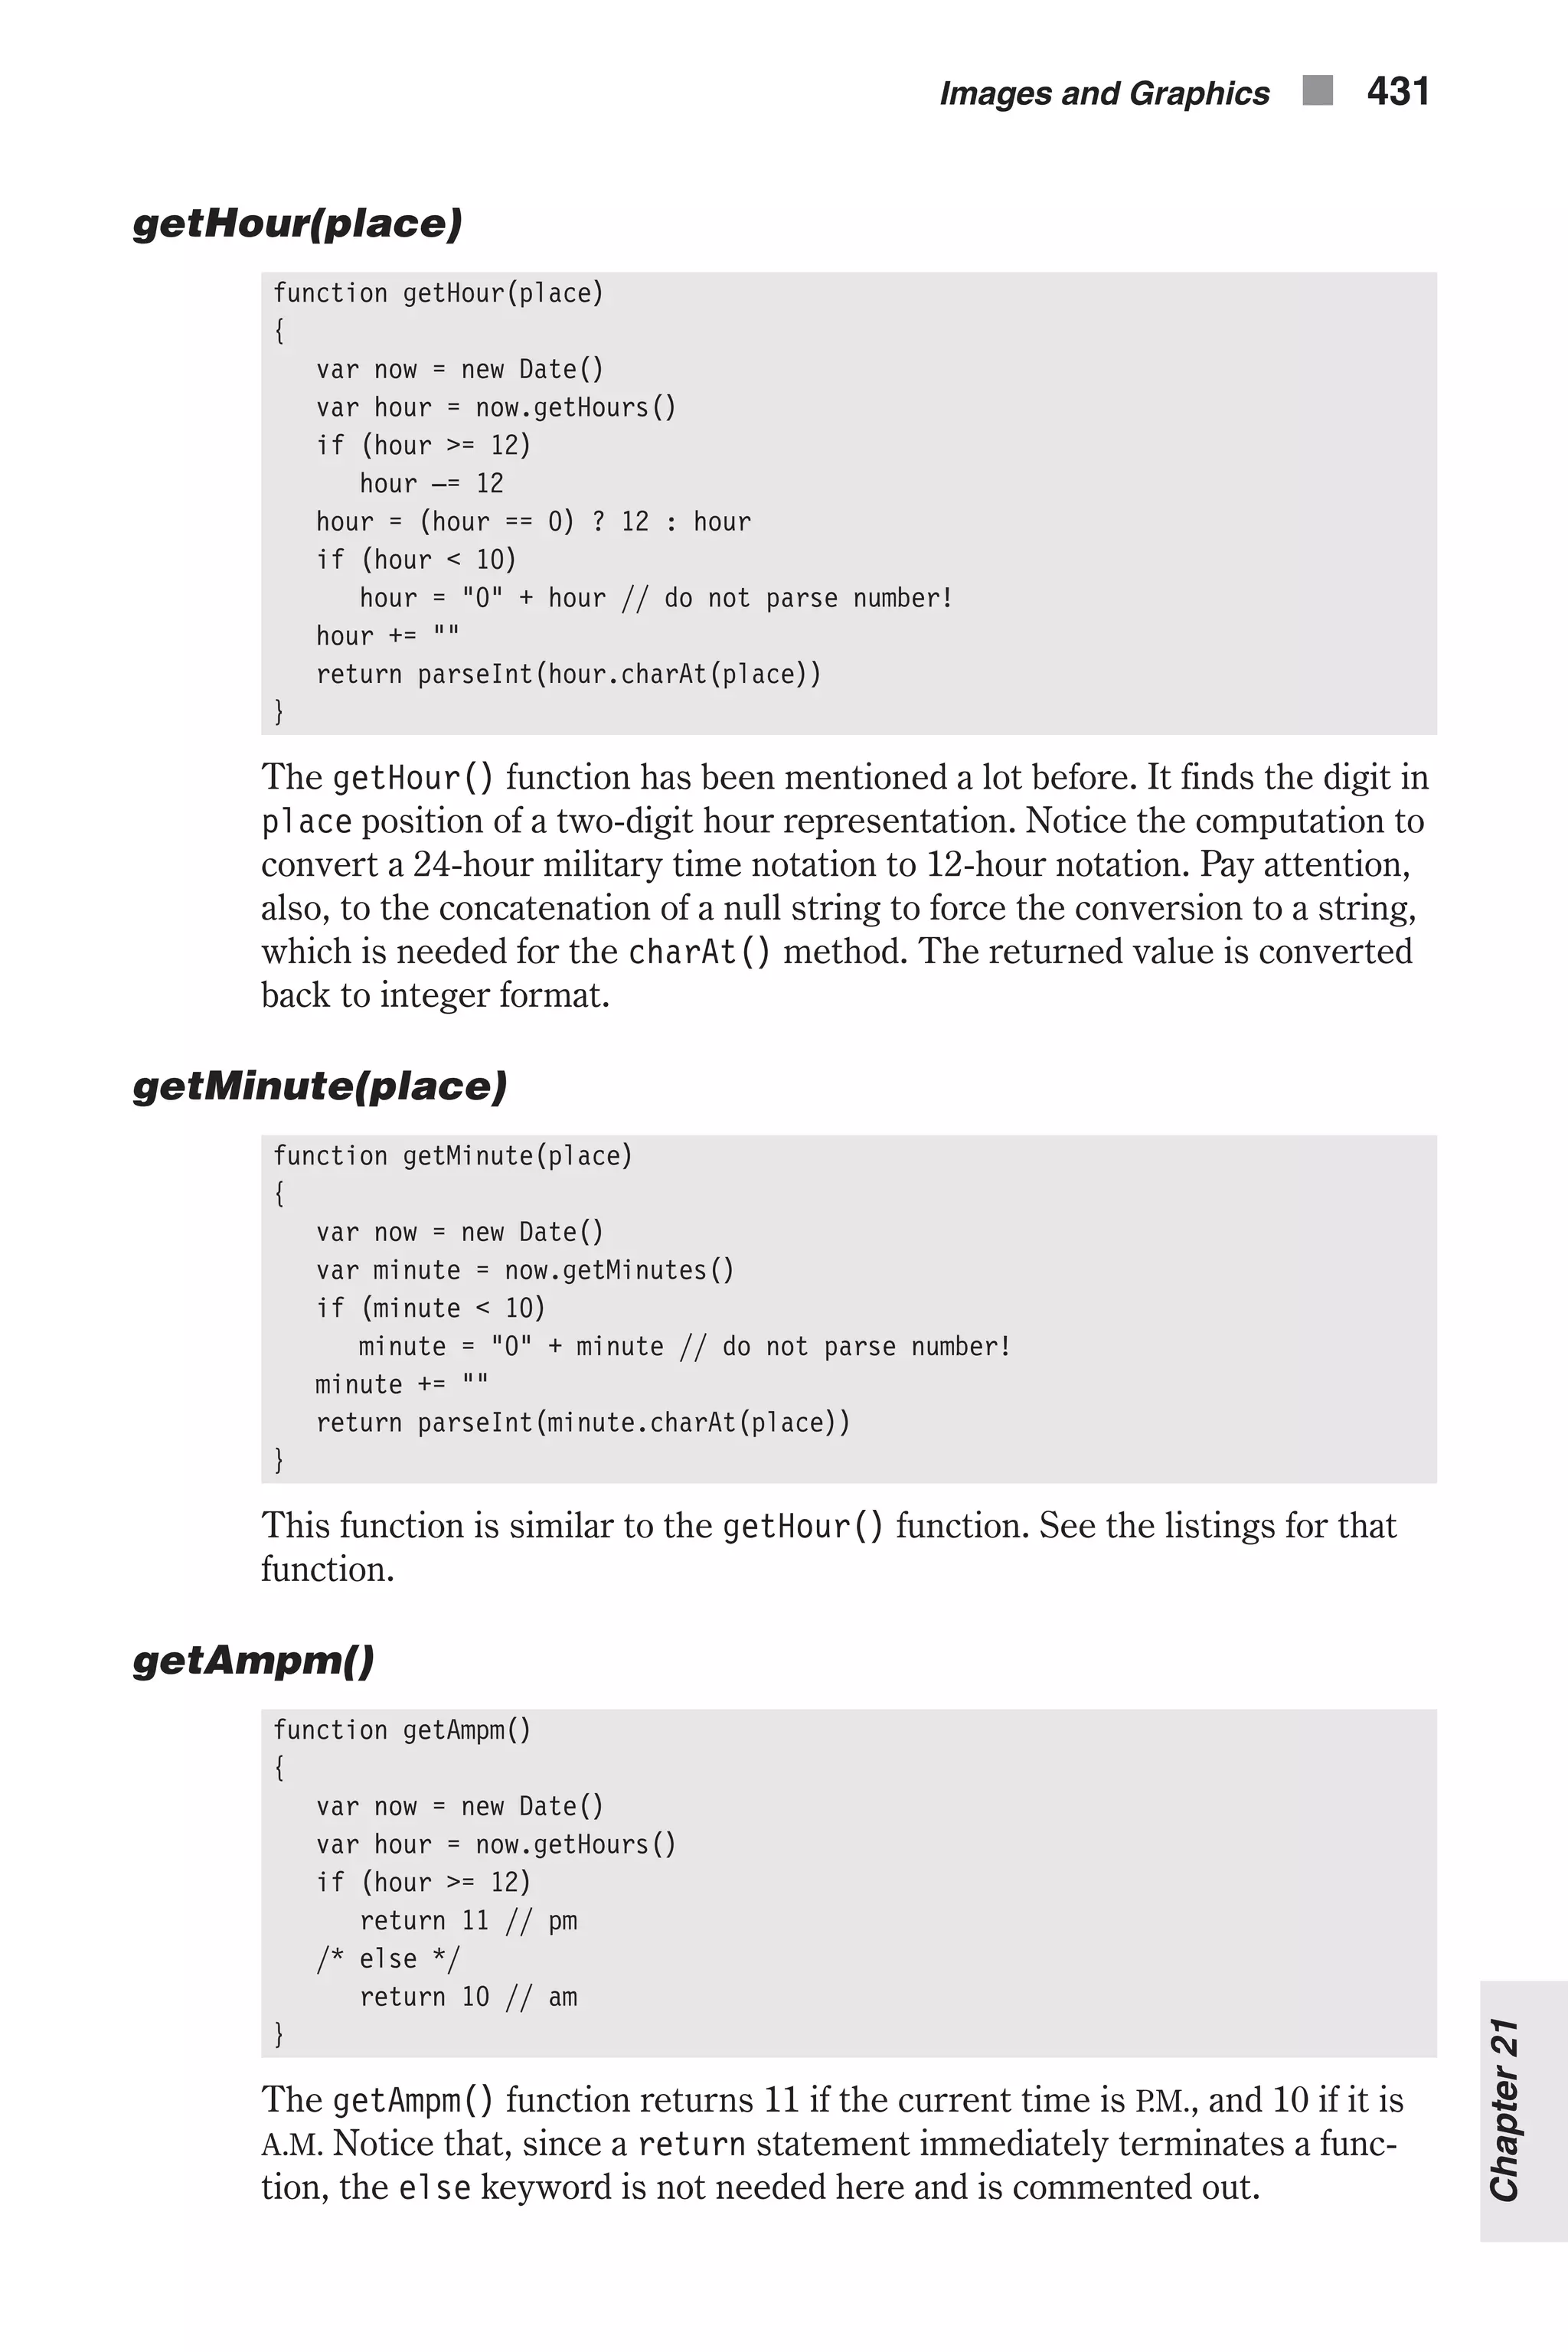
![getPath(url) function getPath(url) { lastSlash = url.lastIndexOf("/") return url.substring(0, lastSlash + 1) } The script’s last function, getPath(), extracts the full URL of the docu- ment’s directory (or folder). It simply finds the last slash in the URL and returns the substring, starting at the beginning of the URL and ending at its last slash. Demonstration 2: LED Sign You have probably seen LED signs in airports and ticker-type bulletin boards. This LED sign displays a given number of messages, one after the other, and returns to the first one when the list is exhausted. Each character is built of on and off dots, where each dot (or light) is a small 5 x 5 GIF image. <HTML> <HEAD> <TITLE>LED sign</TITLE> </HEAD> <BODY> <SCRIPT LANGUAGE="JavaScript"> <!-- // set messages (specify backslash in double form (i.e., ) var messages = new Array() messages[0] = "welcome to my page" messages[1] = "free scripts are available" messages[2] = "new scripts by request" messages[3] = "this site is updated..." messages[4] = "almost every day" messages[5] = "I love javascript..." messages[6] = "And I love..." messages[7] = "wordware publishing!!!" messages[8] = "contact me for more info" // number of milliseconds to pause between two messages var pause = 3000 // set normal spacing between two characters (no whitespace in between) var space = 1 // set height and width of each character var height = 5 var width = 3 // create object of all supported characters in font var letters = new letterArray() // initialize image variables var on = new Image(5, 5) var off = new Image(5, 5) // set image URLs 432 n Chapter 21](https://image.slidesharecdn.com/wordware-advancedjavascript3rded-160421130838/75/www-webre24h-com-Wordware-advanced-javascript-3rd-ed-easttom-457-2048.jpg)
![on.src = "on.gif" off.src = "off.gif" // get number of images already laid out in page var imageNum = document.images.length // compute width of board // var boardWidth = longest * (width + space) – space // set maximum message length in images var boardWidth = 0 for (var i = 0; i < messages.length; ++i) { var lengthWithNoSpaces = messages[i].split(" ").join("").length var numberOfSpaces = messages[i].length – lengthWithNoSpaces var currentBoardWidth = lengthWithNoSpaces * (width + space) – space + numberOfSpaces * space * 2 if (boardWidth < currentBoardWidth) boardWidth = currentBoardWidth } // sign is currently not running var running = false var timerID = null function letterArray() { this.a = new Array(height) this.a[0] = " * " this.a[1] = "* *" this.a[2] = "***" this.a[3] = "* *" this.a[4] = "* *" this.b = new Array(height) this.b[0] = "** " this.b[1] = "* *" this.b[2] = "** " this.b[3] = "* *" this.b[4] = "** " this.c = new Array(height) this.c[0] = "***" this.c[1] = "* " this.c[2] = "* " this.c[3] = "* " this.c[4] = "***" this.d = new Array(height) this.d[0] = "** " this.d[1] = "* *" this.d[2] = "* *" this.d[3] = "* *" this.d[4] = "** " this.e = new Array(height) this.e[0] = "*** " this.e[1] = "* " this.e[2] = "***" this.e[3] = "* " this.e[4] = "***" this.f = new Array(height) this.f[0] = "***" Images and Graphics n 433 Chapter21](https://image.slidesharecdn.com/wordware-advancedjavascript3rded-160421130838/75/www-webre24h-com-Wordware-advanced-javascript-3rd-ed-easttom-458-2048.jpg)
![this.f[1] = "* " this.f[2] = "***" this.f[3] = "* " this.f[4] = "* " this.g = new Array(height) this.g[0] = "***" this.g[1] = "* " this.g[2] = "***" this.g[3] = "* *" this.g[4] = "***" this.h = new Array(height) this.h[0] = "* *" this.h[1] = "* *" this.h[2] = "***" this.h[3] = "* *" this.h[4] = "* *" this.i = new Array(height) this.i[0] = "***" this.i[1] = " * " this.i[2] = " * " this.i[3] = " * " this.i[4] = "***" this.j = new Array(height) this.j[0] = " *" this.j[1] = " *" this.j[2] = " *" this.j[3] = "* *" this.j[4] = "***" this.k = new Array(height) this.k[0] = "* *" this.k[1] = "* *" this.k[2] = "** " this.k[3] = "* *" this.k[4] = "* *" this.l = new Array(height) this.l[0] = "* " this.l[1] = "* " this.l[2] = "* " this.l[3] = "* " this.l[4] = "***" this.m = new Array(height) this.m[0] = "* *" this.m[1] = "***" this.m[2] = "***" this.m[3] = "* *" this.m[4] = "* *" this.n = new Array(height) this.n[0] = "* *" this.n[1] = "***" this.n[2] = "***" this.n[3] = "***" this.n[4] = "* *" this.o = new Array(height) this.o[0] = "***" 434 n Chapter 21](https://image.slidesharecdn.com/wordware-advancedjavascript3rded-160421130838/75/www-webre24h-com-Wordware-advanced-javascript-3rd-ed-easttom-459-2048.jpg)
![this.o[1] = "* *" this.o[2] = "* *" this.o[3] = "* *" this.o[4] = "***" this.p = new Array(height) this.p[0] = "** " this.p[1] = "* *" this.p[2] = "** " this.p[3] = "* " this.p[4] = "* " this.q = new Array(height) this.q[0] = "***" this.q[1] = "* *" this.q[2] = "* *" this.q[3] = "***" this.q[4] = "***" this.r = new Array(height) this.r[0] = "** " this.r[1] = "* *" this.r[2] = "** " this.r[3] = "* *" this.r[4] = "* *" this.s = new Array(height) this.s[0] = "***" this.s[1] = "* " this.s[2] = "***" this.s[3] = " *" this.s[4] = "***" this.t = new Array(height) this.t[0] = "***" this.t[1] = " * " this.t[2] = " * " this.t[3] = " * " this.t[4] = " * " this.u = new Array(height) this.u[0] = "* *" this.u[1] = "* *" this.u[2] = "* *" this.u[3] = "* *" this.u[4] = "***" this.v = new Array(height) this.v[0] = "* *" this.v[1] = "* *" this.v[2] = "* *" this.v[3] = "* *" this.v[4] = " * " this.w = new Array(height) this.w[0] = "* *" this.w[1] = "* *" this.w[2] = "***" this.w[3] = "***" this.w[4] = "***" this.x = new Array(height) this.x[0] = "* *" Images and Graphics n 435 Chapter21](https://image.slidesharecdn.com/wordware-advancedjavascript3rded-160421130838/75/www-webre24h-com-Wordware-advanced-javascript-3rd-ed-easttom-460-2048.jpg)
![this.x[1] = "* *" this.x[2] = " * " this.x[3] = "* *" this.x[4] = "* *" this.y = new Array(height) this.y[0] = "* *" this.y[1] = "* *" this.y[2] = "***" this.y[3] = " * " this.y[4] = " * " this.z = new Array(height) this.z[0] = "***" this.z[1] = " *" this.z[2] = " * " this.z[3] = "* " this.z[4] = "***" this['!'] = new Array(height) this['!'][0] = " * " this['!'][1] = " * " this['!'][2] = " * " this['!'][3] = " " this['!'][4] = " * " this[':'] = new Array(height) this[':'][0] = " " this[':'][1] = " * " this[':'][2] = " " this[':'][3] = " * " this[':'][4] = " " this['.'] = new Array(height) this['.'][0] = " " this['.'][1] = " " this['.'][2] = " " this['.'][3] = " " this['.'][4] = " * " this['='] = new Array(height) this['='][0] = " " this['='][1] = "***" this['='][2] = " " this['='][3] = "***" this['='][4] = " " this['='] = new Array(height) this['='][0] = " " this['='][1] = "***" this['='][2] = " " this['='][3] = "***" this['='][4] = " " this['+'] = new Array(height) this['+'][0] = " " this['+'][1] = " * " this['+'][2] = "***" this['+'][3] = " * " this['+'][4] = " " this['-'] = new Array(height) this['-'][0] = " " 436 n Chapter 21](https://image.slidesharecdn.com/wordware-advancedjavascript3rded-160421130838/75/www-webre24h-com-Wordware-advanced-javascript-3rd-ed-easttom-461-2048.jpg)
![this['-'][1] = " " this['-'][2] = "***" this['-'][3] = " " this['-'][4] = " " this['/'] = new Array(height) this['/'][0] = " *" this['/'][1] = " *" this['/'][2] = " * " this['/'][3] = "* " this['/'][4] = "* " this[''] = new Array(height) this[''][0] = "* " this[''][1] = "* " this[''][2] = " * " this[''][3] = " *" this[''][4] = " *" this[''] = new Array(height) this[''][0] = "* " this[''][1] = "* " this[''][2] = " * " this[''][3] = " *" this[''][4] = " *" this['"'] = new Array(height) this['"'][0] = "* *" this['"'][1] = "* *" this['"'][2] = "* *" this['"'][3] = " " this['"'][4] = " " this["'"] = new Array(height) this["'"][0] = " * " this["'"][1] = " * " this["'"][2] = " * " this["'"][3] = " " this["'"][4] = " " this['('] = new Array(height) this['('][0] = " *" this['('][1] = " * " this['('][2] = " * " this['('][3] = " * " this['('][4] = " *" this[')'] = new Array(height) this[')'][0] = "* " this[')'][1] = " * " this[')'][2] = " * " this[')'][3] = " * " this[')'][4] = "* " this['*'] = new Array(height) this['*'][0] = " " this['*'][1] = "***" this['*'][2] = "***" this['*'][3] = "***" this['*'][4] = " " this['?'] = new Array(height) this['?'][0] = "** " Images and Graphics n 437 Chapter21](https://image.slidesharecdn.com/wordware-advancedjavascript3rded-160421130838/75/www-webre24h-com-Wordware-advanced-javascript-3rd-ed-easttom-462-2048.jpg)
![this['?'][1] = " *" this['?'][2] = " * " this['?'][3] = " " this['?'][4] = " * " this['0'] = new Array(height) this['0'][0] = " * " this['0'][1] = "* *" this['0'][2] = "* *" this['0'][3] = "* *" this['0'][4] = " * " this['1'] = new Array(height) this['1'][0] = " * " this['1'][1] = " * " this['1'][2] = " * " this['1'][3] = " * " this['1'][4] = " * " this['2'] = new Array(height) this['2'][0] = "***" this['2'][1] = " *" this['2'][2] = "***" this['2'][3] = "* " this['2'][4] = "***" this['3'] = new Array(height) this['3'][0] = "***" this['3'][1] = " *" this['3'][2] = "***" this['3'][3] = " *" this['3'][4] = "***" this['4'] = new Array(height) this['4'][0] = "* *" this['4'][1] = "* *" this['4'][2] = "***" this['4'][3] = " *" this['4'][4] = " *" this['5'] = new Array(height) this['5'][0] = "***" this['5'][1] = "* " this['5'][2] = "***" this['5'][3] = " *" this['5'][4] = "** " this['6'] = new Array(height) this['6'][0] = "** " this['6'][1] = "* " this['6'][2] = "***" this['6'][3] = "* *" this['6'][4] = "***" this['7'] = new Array(height) this['7'][0] = "***" this['7'][1] = " *" this['7'][2] = " * " this['7'][3] = "* " this['7'][4] = "* " this['8'] = new Array(height) this['8'][0] = "***" 438 n Chapter 21](https://image.slidesharecdn.com/wordware-advancedjavascript3rded-160421130838/75/www-webre24h-com-Wordware-advanced-javascript-3rd-ed-easttom-463-2048.jpg)
![this['8'][1] = "* *" this['8'][2] = "***" this['8'][3] = "* *" this['8'][4] = "***" this['9'] = new Array(height) this['9'][0] = "***" this['9'][1] = "* *" this['9'][2] = "***" this['9'][3] = " *" this['9'][4] = "***" } function drawBlank() { // assign greater than symbol to variable var gt = unescape("%3e") document.write('<TABLE BORDER=2 CELLPADDING=8' + gt + '<TR' + gt + '<TD BGCOLOR ALIGN="center" VALIGN="center"' + gt) // print entire board of off images for (var y = 0; y < height; ++y) { for (var x = 0; x < boardWidth; ++x) { document.write('<IMG SRC="' + off.src + '" HEIGHT=5 WIDTH=5' + gt) } document.write('<BR' + gt) } document.write('</TD>' + gt + '</TR>' + gt + '</TABLE>' + gt) } function setLight(state, x, y) { // set a specific light in sign to on (true) or off (false) if (state) document.images[computeIndex(x, y)].src = on.src else document.images[computeIndex(x, y)].src = off.src } function drawLetter(letter, startX) { // draws a letter at the given x coordinate for (var x = 0; x < width; ++x) { for (var y = 0; y < height; ++y) { setLight(letters[letter][y].charAt(x) == "*", startX + x, y) } } } function drawSpace(startX) { // create a small space between each two characters for (var x = 0; x < space; ++x) { for (var y = 0; y < height; ++y) { Images and Graphics n 439 Chapter21](https://image.slidesharecdn.com/wordware-advancedjavascript3rded-160421130838/75/www-webre24h-com-Wordware-advanced-javascript-3rd-ed-easttom-464-2048.jpg)
![setLight(false, startX + x, y) } } } function computeIndex(x, y) { // compute the document index of an image in the sign, based on the x-y coordinates return (y * boardWidth + x) + imageNum } function floodBoard(startX) { // set all lights from startX to off for (var x = startX; x < boardWidth; ++x) { for (var y = 0; y < height; ++y) { setLight(false, x, y) } } } function drawMessage(num) { // initialize variable to current message var text = messages[num] // initialize two counters (j - current character in message, i - current x coordinate) var i = 0 var j = 0 while (1) { if (text.charAt(j) != " ") { // draw current letter drawLetter(text.charAt(j), i) // increment i by the constant width of an image i += width } else { // add an extra space (do not advance j yet) drawSpace(i) i += space } // if j is less than index of last character if (j < text.length – 1) { drawSpace(i) i += space } else // j is the index of the last character (last character already printed) break // increment j by one because one letter was printed ++j } 440 n Chapter 21](https://image.slidesharecdn.com/wordware-advancedjavascript3rded-160421130838/75/www-webre24h-com-Wordware-advanced-javascript-3rd-ed-easttom-465-2048.jpg)
![// flood the remaining piece of the sign (turn it off) floodBoard(i) // if message printed this time was not the last one in the array if (num < messages.length – 1) // val *must* be a global variable for use with the timeout val = ++num else val = 0 // start cycle over again // recursive call after waiting 3 seconds (some of the time already passed during printing) timerID = setTimeout("drawMessage(val)", pause) } function startSign() { running = true // wait 3 seconds and then call function to print first message drawMessage(0) } function stopSign() { if(running) clearTimeout(timerID) running = false } // open form document.write('<FORM>') // create initial sign (all signs are off) drawBlank() document.write('<INPUT TYPE="button" VALUE="start" onClick="startSign()">') document.write('<INPUT TYPE="button" VALUE="stop" onClick="stopSign(); floodBoard(0)">') document.write('</FORM>') // --> </SCRIPT> </BODY> </HTML> Example 21-7 (ex21-7.htm). A JavaScript-only LED sign Global Statements The script starts by filling the messages array with nine messages: // set messages (specify backslash in double form (i.e., ) var messages = new Array() messages[0] = "welcome to my page" messages[1] = "free scripts are available" messages[2] = "new scripts by request" messages[3] = "this site is updated..." messages[4] = "almost every day" messages[5] = "I love javascript..." messages[6] = "And I love..." messages[7] = "wordware publishing!!!" messages[8] = "contact me for more info" Images and Graphics n 441 Chapter21](https://image.slidesharecdn.com/wordware-advancedjavascript3rded-160421130838/75/www-webre24h-com-Wordware-advanced-javascript-3rd-ed-easttom-466-2048.jpg)
![Note that all messages must be written in lowercase. The definition of the following variables are documented inline: // number of milliseconds to pause between two messages var pause = 3000 // set normal spacing between two characters (no whitespace in between) var space = 1 // set height and width of each character var height = 5 var width = 3 // create object of all supported characters in font var letters = new letterArray() // initialize image variables var on = new Image(5, 5) var off = new Image(5, 5) The on and off images represent the on and off lights. The artistic presenta- tions of these dots are stored in on.gif and off.gif: on.src = "on.gif" off.src = "off.gif As in Demonstration 1, we load all images to the browser before we start to display the LED sign: // get number of images already laid out in page var imageNum = document.images.length The next section computes the length of the longest message by multiplying the number of nonblank characters with the combined width of a normal character and an intercharacter space, and then adding the width of blanks. The number of nonblank characters is computed by first splitting the mes- sage on blanks, then joining the pieces, and finally extracting the concatenated length: // set maximum message length in images var boardWidth = 0 for (var i = 0; i < messages.length; ++i) { var lengthWithNoSpaces = messages[i].split(" ").join("").length var numberOfSpaces = messages[i].length – lengthWithNoSpaces var currentBoardWidth = lengthWithNoSpaces * (width + space) – space + numberOfSpaces * space * 2 if (boardWidth < currentBoardWidth) boardWidth = currentBoardWidth } After setting the running variable to false and timerID to null (see Demon- stration 1), we define the dots of each character of the alphabet by the function letterArray(). 442 n Chapter 21](https://image.slidesharecdn.com/wordware-advancedjavascript3rded-160421130838/75/www-webre24h-com-Wordware-advanced-javascript-3rd-ed-easttom-467-2048.jpg)
![letterArray() letterArray() is a constructor function. The general syntax to create an instance of this object is as follows: var instanceName = new letterArray() This object has many properties but no methods. Each property represents a single character supported by the script. For example, the “A” character is defined as follows: this.a = new Array(height) this.a[0] = " * " this.a[1] = "* *" this.a[2] = "***" this.a[3] = "* *" this.a[4] = "* *" Notice that each property is defined as an array of five three-character strings. You will see how to use an instance of this object later in the chapter. drawBlank() function drawBlank() { // assign greater than symbol to variable var gt = unescape("%3e") document.write('<TABLE BORDER=2 CELLPADDING=8' + gt + '<TR' + gt + '<TD BGCOLOR ALIGN="center" VALIGN="center"' + gt) // print entire board of off images for (var y = 0; y < height; ++y) { for (var x = 0; x < boardWidth; ++x) { document.write('<IMG SRC="' + off.src + '" HEIGHT=5 WIDTH=5' + gt) } document.write('<BR' + gt) } document.write('</TD>' + gt + '</TR>' + gt + '</TABLE>' + gt) } The next function, drawBlank(), draws the border around the LED sign and then covers the entire board with off dots (GIF images). Notice that the board’s width and height are stored in global variables and thus are not passed as arguments to the drawBlank() function. Also, notice how unescape() is used to avoid the “>” literal. setLight(state, x, y) function setLight(state, x, y) { // set a specific light in sign to on (true) or off (false) if (state) Images and Graphics n 443 Chapter21](https://image.slidesharecdn.com/wordware-advancedjavascript3rded-160421130838/75/www-webre24h-com-Wordware-advanced-javascript-3rd-ed-easttom-468-2048.jpg)
![document.images[computeIndex(x, y)].src = on.src else document.images[computeIndex(x, y)].src = off.src } The setLight() function accepts three arguments. The first one is either a Boolean value or a binary digit (0 or 1). The second parameter accepts the x coordinate of the light, and the third specifies its y coordinate. For example, the following statement replaces the second image from the left and third from the top of the LED sign with an on image, regardless of which image is currently displayed there: setLight(true, 1, 2) It is correct to define this function as one that turns on or off a specific light in the LED sign. drawLetter(letter, startX) function drawLetter(letter, startX) { // draws a letter at the given x coordinate for (var x = 0; x < width; ++x) { for (var y = 0; y < height; ++y) { setLight(letters[letter][y].charAt(x) == "*", startX + x, y) } } } This function accepts two arguments: n The letter that it is supposed to draw n The x coordinate of the letter in the entire LED sign This function reads the letter’s coordinates by scanning the appropriate properties of the letters object. The LED sign is updated by adding characters consecutively, creating the effect of a top-to-bottom, left-to-right motion. drawSpace(startX) function drawSpace(startX) { // create a small space between each two characters for (var x = 0; x < space; ++x) { for (var y = 0; y < height; ++y) { setLight(false, startX + x, y) } } } 444 n Chapter 21](https://image.slidesharecdn.com/wordware-advancedjavascript3rded-160421130838/75/www-webre24h-com-Wordware-advanced-javascript-3rd-ed-easttom-469-2048.jpg)
![This function is very similar to the drawLetter() function. It simply creates space columns of off images, mimicking the space characters of the message. computeIndex() function computeIndex(x, y) { // compute the document index of an image in the sign, based on the // x-y coordinates return (y * boardWidth + x) + imageNum } The computeIndex() function accepts x and y coordinates of a dot and returns the corresponding index of the image in the document.images 1D array. floodBoard(startX) function floodBoard(startX) { // set all lights from startX to off for (var x = startX; x < boardWidth; ++x) { for (var y = 0; y < height; ++y) { setLight(false, x, y) } } } The function floodBoard() sets all dots (images) to the right of a given coordinate, one column at a time, from top to bottom and from left to right. drawMessage(num) function drawMessage(num) { // initialize variable to current message var text = messages[num] // initialize two counters (j - current character in message, i - current x coordinate) var i = 0 var j = 0 while (1) { if (text.charAt(j) != " ") { // draw current letter drawLetter(text.charAt(j), i) // increment i by the constant width of an image i += width } else Images and Graphics n 445 Chapter21](https://image.slidesharecdn.com/wordware-advancedjavascript3rded-160421130838/75/www-webre24h-com-Wordware-advanced-javascript-3rd-ed-easttom-470-2048.jpg)
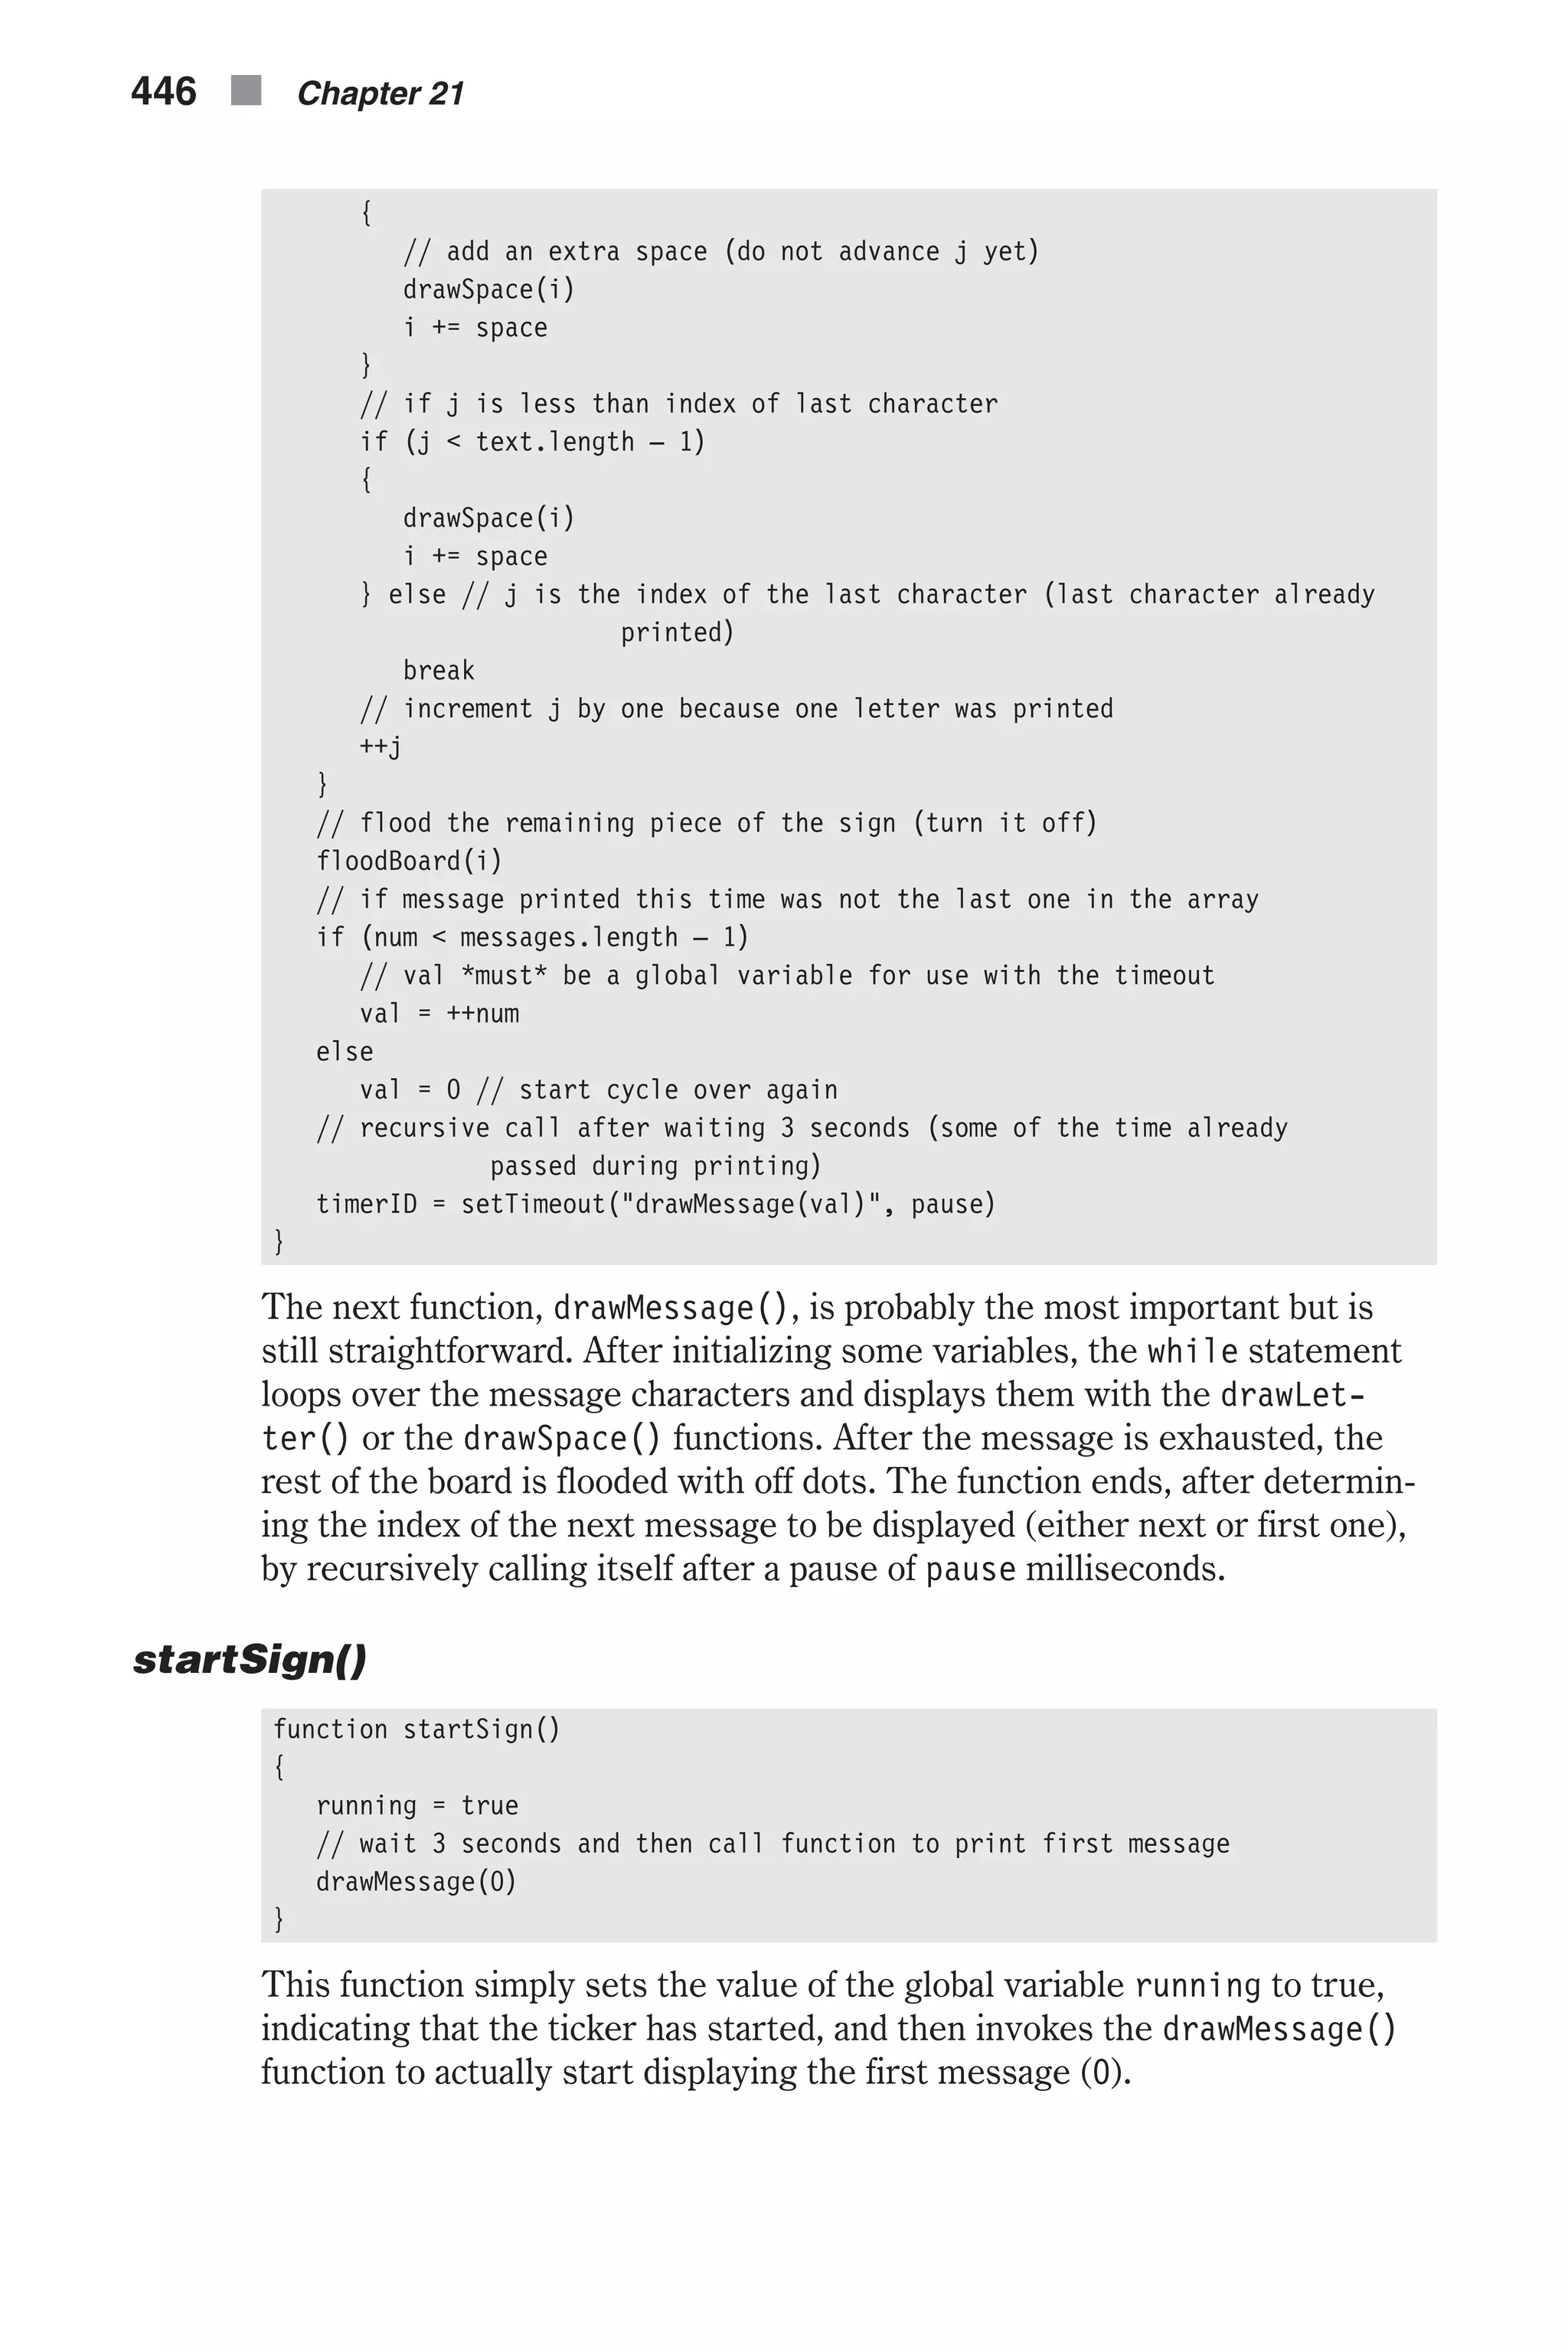
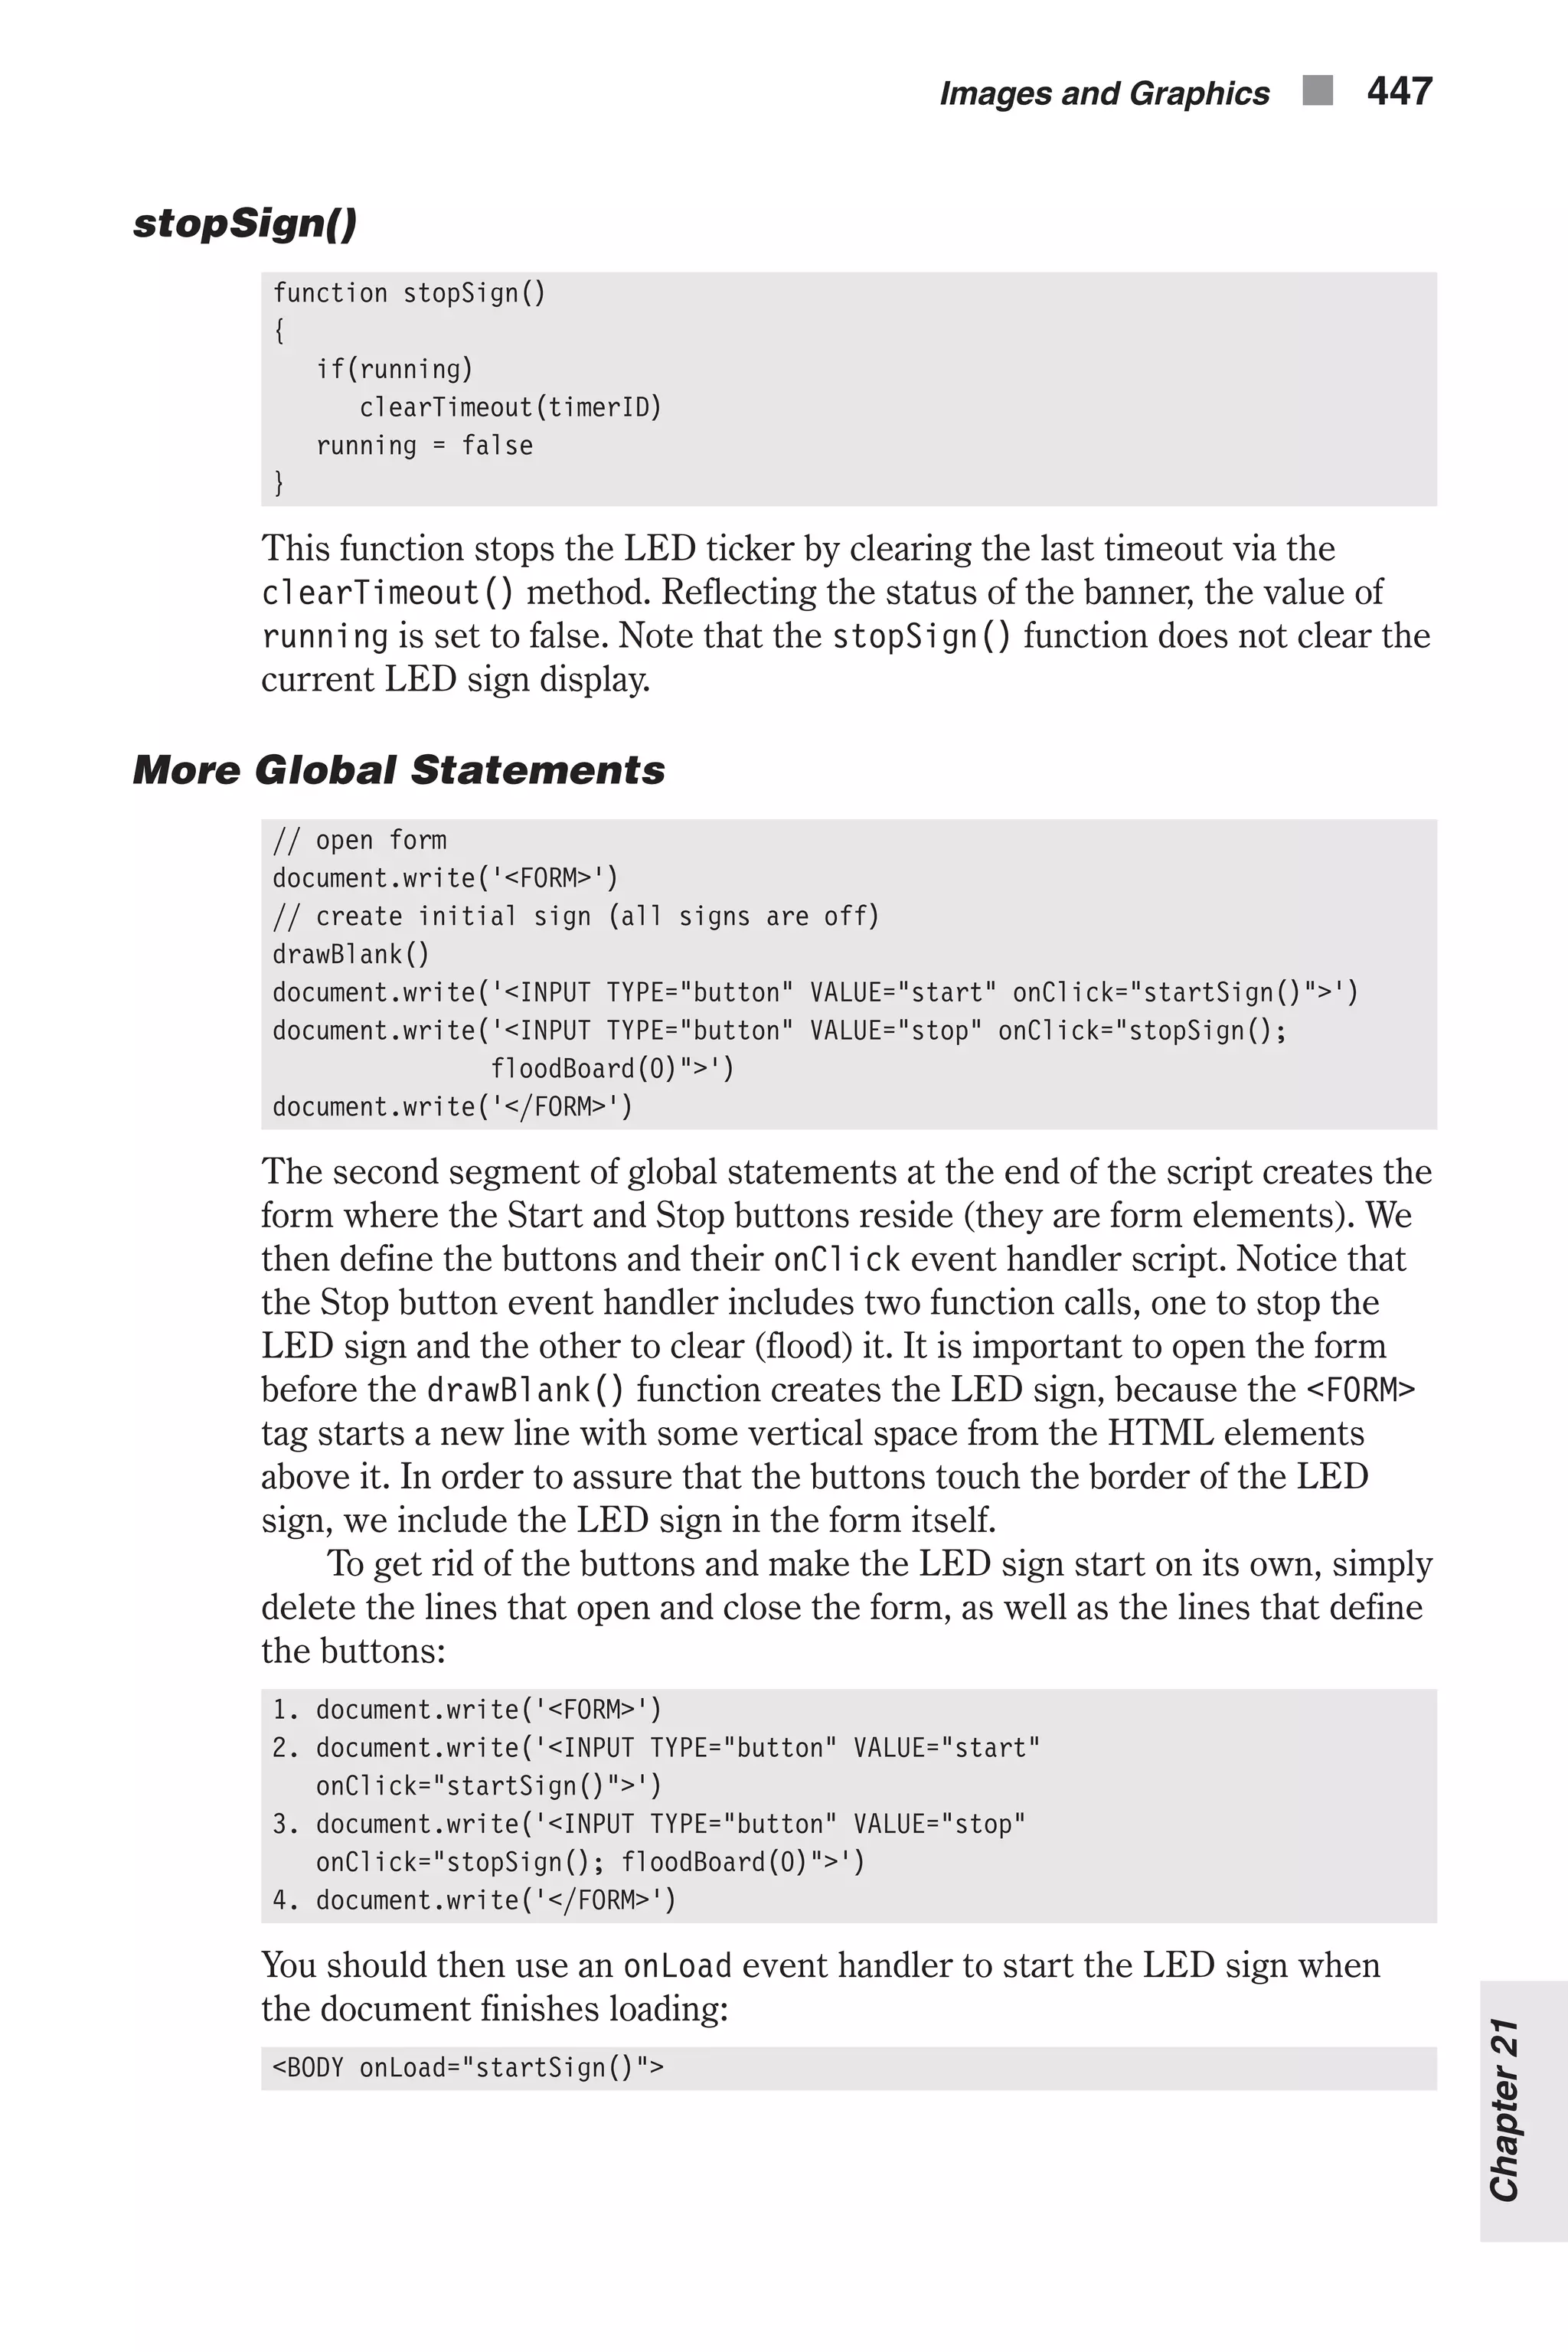
![Demonstration 3: Netris Deluxe “Netris Deluxe” is the name of our JavaScript-only Tetris game. The Netris Deluxe script is approximately 1,000 lines of code, including comments, and we suggest you read its entire description. Although we have more efficient versions, we decided to include the original version because it demonstrates a larger variety of JavaScript features and concepts. First, take a look at the script and find functions you are familiar with: <HTML> <HEAD> <TITLE>Tetris</TITLE> <SCRIPT LANGUAGE="JavaScript"> <!-- // array to hold number of shapes used from each type var statistics = new Array(7) for (var shapeNum = 0; shapeNum < 7; ++shapeNum) { statistics[shapeNum] = 0 } // set pause to false var paused = false // game is currently running var timerRunning = false // no shape currently falling var shape = –1 // timer is not running var timerID = null // initialize image variables for seven shapes var on = new Array() on[0] = new Image(12, 12) 448 n Chapter 21 Figure 21-3. An LED sign](https://image.slidesharecdn.com/wordware-advancedjavascript3rded-160421130838/75/www-webre24h-com-Wordware-advanced-javascript-3rd-ed-easttom-473-2048.jpg)
![on[1] = new Image(12, 12) on[2] = new Image(12, 12) on[3] = new Image(12, 12) on[4] = new Image(12, 12) on[5] = new Image(12, 12) on[6] = new Image(12, 12) // create a transparent block var off = new Image(12, 12) // set image URLs on[0].src = "10.gif" on[1].src = "11.gif" on[2].src = "12.gif" on[3].src = "13.gif" on[4].src = "14.gif" on[5].src = "15.gif" on[6].src = "16.gif" off.src = "0.gif" // get number of images already laid out in the page var firstImage = document.images.length // create initial screen drawScreen() // array of screen (10 x 19) var ar = new Array() for (var i = 0; i < 10; ++i) { ar[i] = new Array(19) for (var j = 0; j < 19; ++j) { ar[i][j] = 0 } } // draw initial empty screen function drawScreen() { with (document) { // center entire game write('<CENTER>') // start main table write('<TABLE BORDER=1 CELLPADDING=0 CELLSPACING=0><TR><TD>') // create board (10 x 19) for (var i = 0; i < 19; ++i) { for (var j = 0; j < 10; ++j) { write('<IMG SRC=' + off.src + ' HEIGHT=' + off.height + ' WIDTH=' + off.width + '>') } write('<BR>') } // close table cell write('</TD><TD VALIGN="top" ALIGN="center">') // make small header ("Netris Deluxe") write('<B><FONT SIZE=+2>N</FONT>ETRIS <FONT SIZE=+2>D</FONT> Images and Graphics n 449 Chapter21](https://image.slidesharecdn.com/wordware-advancedjavascript3rded-160421130838/75/www-webre24h-com-Wordware-advanced-javascript-3rd-ed-easttom-474-2048.jpg)
![ELUXE</B><BR>') // create form for lines and level displays write('<FORM NAME="lineslevel"><TABLE BORDER=0 CELLPADDING=5 CELLSPACING=0>') // make "LINES" table cell and header write('<TR><TD WIDTH=100 ALIGN="center"><FONT SIZE=2>LINES</FONT> <BR><INPUT TYPE="text" NAME="lines" VALUE="" SIZE=5></TD>') // make "LEVEL" table cell and header write('<TD WIDTH=100 ALIGN="center"><FONT SIZE=2>LEVEL</FONT><BR> <INPUT TYPE="text" NAME="level" VALUE="" SIZE=5></TD></TR>') // create start button link write('<TR><TD WIDTH=100 ALIGN="center"><A HREF="javascript:start()" onMouseOver="window.status='Start game'; return true">') // create start button image write('<IMG SRC="start.gif" WIDTH=72 HEIGHT=24 BORDER=0></A></TD>') // create pause button link write('<TD WIDTH=100 ALIGN="center"><A HREF="javascript:pause()" onMouseOver="window.status='Pause / unpause game'; return true">') // create pause button image write('<IMG SRC="pause.gif" WIDTH=72 HEIGHT=24 BORDER=0></A></TD></TR>') // close start + pause table and form write('</TABLE></FORM>') // create table for shape statistics (two rows, seven columns) write('<FORM NAME="stats"><TABLE BORDER=0 CELLPADDING=5 CELLSPACING=0><TR>') // put one block of each type in each cell of upper row for (var k = 0; k < 7; ++k) { write('<TD ALIGN="center"><IMG SRC="' + on[k].src + '" HEIGHT=' + on[k].height + ' WIDTH=' + on[k].width + '></TD>') } // start new table row write('</TR><TR>') // create 7 text fields named "0", "1", "2", ..., "6" for (var l = 0; l < 7; ++l) { write('<TD ALIGN="center"><INPUT TYPE="text" SIZE=2 VALUE="0" NAME="' + l + '"></TD>') } // close statistics table and form write('</TR></TABLE></FORM>') // close table cell for header, start + pause buttons, and statistics, and start new row in main table write('</TD></TR><TR><TD>') // center control panel (left, right, down, rotate) write('<CENTER>') // organize control panel in a table write('<TABLE BORDER=0>') // create left table cell and button write('<TR><TD><A HREF="javascript:moveX(–1)" onMouseOver="window .status='Move left'; return true" onMouseOut="window. status=''; return true"><IMG SRC="left.gif" WIDTH=24 HEIGHT=24 BORDER=0></A></TD>') // create rotate table cell and button 450 n Chapter 21](https://image.slidesharecdn.com/wordware-advancedjavascript3rded-160421130838/75/www-webre24h-com-Wordware-advanced-javascript-3rd-ed-easttom-475-2048.jpg)
![write('<TD><A HREF="javascript:rotate()" onMouseOver="window .status='Rotate'; return true" onMouseOut="window. status=''; return true"><IMG SRC="rotate.gif" WIDTH=24 HEIGHT=24 BORDER=0></A></TD>') // create right table cell and button write('<TD><A HREF="javascript:moveX(1)" onMouseOver="window .status='Move right'; return true" onMouseOut="window. status=''; return true"><IMG SRC="right.gif" WIDTH=24 HEIGHT=24 BORDER=0></A></TD></TR>') // create down table cell and button, preceded and proceeded by a black cell (placeholder) write('<TR><TD></TD><TD><A HREF="javascript:moveY()" onMouseOver= "window.status='Move down'; return true" onMouseOut= "window.status=''; return true"><IMG SRC="down.gif" WIDTH=24 HEIGHT=24 BORDER=0></A></TD><TD></TD></TR>') // close table for control panel write('</TABLE>') // close center of control panel write('</CENTER>') // close control panel table cell (main table) and create another main table cell with credits write('</TD><TD ALIGN="center">JavaScript code: Tomer Shiran<BR> <FONT SIZE=2>Graphics: Dr. Clue</FONT><BR><FONT SIZE=2> Music: Brian Kobashikawa</FONT></TD></TR></TABLE>') // close center of main table write('</CENTER>') } } // return index of image according to given x and y coordinates function computeIndex(x, y) { return (y * 10 + x) + firstImage } // returns state of square (true / false) function state(x, y) { // assign URL of image at given coordinates to local variable var source = document.images[computeIndex(x, y)].src // expression evaluates to 0 or 1 return (source.charAt(source.lastIndexOf('/') + 1) == '0') ? false : true } // set square to 1 / 0 function setSquare(x, y, state) { if (state == 0) document.images[computeIndex(x, y)].src = off.src else document.images[computeIndex(x, y)].src = on[shape].src // if state is 1 square is active, so 1 is assigned to ar[x][y] // otherwise square is not active so 0 is assigned to ar[x][y] ar[x][y] = state } // clear array so no active squares exist function clearActive() Images and Graphics n 451 Chapter21](https://image.slidesharecdn.com/wordware-advancedjavascript3rded-160421130838/75/www-webre24h-com-Wordware-advanced-javascript-3rd-ed-easttom-476-2048.jpg)
![{ // scan entire array and assign 0 to all elements (no active squares) for (var i = 0; i < 10; ++i) { for (var j = 0; j < 19; ++j) { ar[i][j] = 0 } } // no shape is currently in screen shape = –1 } // check if specified move (left or right) is valid function checkMoveX(step) { // scan screen (direction does not matter) for (var x = 0; x < 10; ++x) { for (var y = 0; y < 19; ++y) { // if current square is active if (ar[x][y] == 1) { // check all conditions: // not out of range and not colliding with existing not // block if (x + step < 0 || x + step > 9 || (state(x + step, y) && ar[x + step][y] == 0)) // return false if move (new situation) is not legal return false } } } // return true if no invalid state has been encountered return true } // check if specified move (down) is valid function checkMoveY() { // only possible step is one to the bottom var step = 1 // scan screen (direction does not matter) for (var x = 0; x < 10; ++x) { for (var y = 0; y < 19; ++y) { // if current square is active if (ar[x][y] == 1) { // check all conditions: // not out of range and not colliding with existing notactive block if (y + step > 18 || (state(x, y + step) && ar[x][y + step] == 0)) // return false if move (new situation) is not legal return false 452 n Chapter 21](https://image.slidesharecdn.com/wordware-advancedjavascript3rded-160421130838/75/www-webre24h-com-Wordware-advanced-javascript-3rd-ed-easttom-477-2048.jpg)
![} } } // return true if no invalid state has been encountered return true } // move all active squares step squares on the x axis function moveX(step) { // if specified move is not legal if (!checkMoveX(step)) // terminate function (active blocks are not moved) return // if left movement then scan screen from left to right if (step < 0) { for (var x = 0; x < 10; ++x) { for (var y = 0; y < 19; ++y) { // if current square is active if (ar[x][y] == 1) // call function to handle movement smartX(x, y, step) } } } else // if right movement then scan screen from right to left if (step > 0) { for (var x = 9; x >= 0; --x) { for (var y = 0; y < 19; ++y) { // if current square is active if (ar[x][y] == 1) // call function to handle movement smartX(x, y, step) } } } } // responsible for the blocks' horizontal movement function smartX(x, y, step) { // if moving one step to the left if (step < 0) // if the destination square needs to be turned on explicitly if (ar[x + step][y] == 0) // if there is a block to the right of the current block if (x != 9 && ar[x – step][y] == 1) // set square to the left on without clearing current block setSquare(x + step, y, 1) else Images and Graphics n 453 Chapter21](https://image.slidesharecdn.com/wordware-advancedjavascript3rded-160421130838/75/www-webre24h-com-Wordware-advanced-javascript-3rd-ed-easttom-478-2048.jpg)
![// clear current block and turn square to the left on warp(x, y, x + step, y) else // if there is no block to the right of the current block if (x == 9 || ar[x – step][y] == 0) // clear current block setSquare(x, y, 0) // if moving one step to the right if (step > 0) // if the destination square needs to be turned on explicitly if (ar[x + step][y] == 0) // if there is a block to the left of the current block if (x != 0 && ar[x – step][y] == 1) // set square to the right on without clearing current block setSquare(x + step, y, 1) else // clear current block and turn square to the right on warp(x, y, x + step, y) else // if there is no block to the left of the current block if (x == 0 || ar[x – step][y] == 0) // clear current block setSquare(x, y, 0) } // move all active squares step squares on the y axis function moveY() { // if specified move is not legal (shape is laid down on block or bottom panel) if (!checkMoveY()) { // active squares are not active anymore (should not be moved later) clearActive() // terminate function (active blocks are not moved) return } // scan screen from bottom to top for (var y = 18; y >= 0; --y) { for (var x = 0; x < 10; ++x) { // if current square is active if (ar[x][y] == 1) // call function to handle movement smartY(x, y) } } } // responsible for the blocks' vertical (downward) movement function smartY(x, y) { // if the destination square needs to be turned on explicitly if (ar[x][y + 1] == 0) // if there is a block above current block 454 n Chapter 21](https://image.slidesharecdn.com/wordware-advancedjavascript3rded-160421130838/75/www-webre24h-com-Wordware-advanced-javascript-3rd-ed-easttom-479-2048.jpg)
![if (y != 0 && ar[x][y – 1] == 1) // set square below on without clearing current block setSquare(x, y + 1, 1) else // clear current block and turn square below on warp(x, y, x, y + 1) else // if there is no block above the current block if (y == 0 || ar[x][y – 1] == 0) // clear current block setSquare(x, y, 0) } // construct object containing shape function shapeMap() { // set minimum and maximum coordinates to opposite (minimum and maximum // found thus far) var minX = 9 var minY = 18 var maxX = 0 var maxY = 0 // scan screen to find actual minimum and maximum coordinates of active squares for (var y = 0; y < 19; ++y) { for (var x = 0; x < 10; ++x) { // if current coordinates reflect active square if (ar[x][y] == 1) { if (x < minX) minX = x if (x > maxX) maxX = x if (y < minY) minY = y if (y > maxY) maxY = y } } } // create a length property representing the x coordinate span this.length = maxX – minX + 1 // create properties to hold minimum coordinates of both axes this.offsetX = minX this.offsetY = minY // construct minimum array containing all active squares respectively for (x = 0; x <= maxX – minX; ++x) { this[x] = new Array() for (y = 0; y <= maxY – minY; ++y) { this[x][y] = ar[x + minX][y + minY] } Images and Graphics n 455 Chapter21](https://image.slidesharecdn.com/wordware-advancedjavascript3rded-160421130838/75/www-webre24h-com-Wordware-advanced-javascript-3rd-ed-easttom-480-2048.jpg)
![} } // random function to return an integer from 0 to 6 function getRandom() { // use random number method to find integer from 0 to 8 var randomNum = Math.round(Math.random() * 8) // call function again if random number is 0 or 8. if (randomNum == 0 || randomNum == 8) return getRandom() // 1 to 7 => 0 to 6 randomNum-- // update selected shape's statistics statistics[randomNum]++ // update statistics display form (update *all* fields so user cannot // enter any value in fields) for (var shape = 0; shape < 7; ++shape) { document.stats[shape].value = statistics[shape] } // return the random number return randomNum } // inserts a shape when there is no active shape function insertShape() { // initialize *global* variable shape = getRandom() // The following segment checks if the selected shape has room to enter. // If there is no room, the game is over (function returns false). // If there is room, the function inserts the shape by setting its initial coordinates. if (shape == 0) { if (state(3, 2) || state(3, 2) || state(3, 2) || state(3, 2)) return false setSquare(3, 2, 1) setSquare(4, 2, 1) setSquare(5, 2, 1) setSquare(6, 2, 1) } else if (shape == 1) { if (state(4, 2) || state(5, 2) || state(4, 3) || state(5, 3)) return false setSquare(4, 2, 1) setSquare(5, 2, 1) setSquare(4, 3, 1) setSquare(5, 3, 1) } else if (shape == 2) { if (state(3, 2) || state(4, 2) || state(5, 2) || state(3, 3)) return false 456 n Chapter 21](https://image.slidesharecdn.com/wordware-advancedjavascript3rded-160421130838/75/www-webre24h-com-Wordware-advanced-javascript-3rd-ed-easttom-481-2048.jpg)
![setSquare(3, 2, 1) setSquare(4, 2, 1) setSquare(5, 2, 1) setSquare(3, 3, 1) } else if (shape == 3) { if (state(3, 2) || state(4, 2) || state(4, 3) || state(5, 3)) return false setSquare(3, 2, 1) setSquare(4, 2, 1) setSquare(4, 3, 1) setSquare(5, 3, 1) } else if (shape == 4) { if (state(4, 2) || state(5, 2) || state(3, 3) || state(4, 3)) return false setSquare(4, 2, 1) setSquare(5, 2, 1) setSquare(3, 3, 1) setSquare(4, 3, 1) } else if (shape == 5) { if (state(3, 2) || state(4, 2) || state(5, 2) || state(4, 3)) return false setSquare(3, 2, 1) setSquare(4, 2, 1) setSquare(5, 2, 1) setSquare(4, 3, 1) } else if (shape == 6) { if (state(3, 2) || state(4, 2) || state(5, 2) || state(5, 3)) return false setSquare(3, 2, 1) setSquare(4, 2, 1) setSquare(5, 2, 1) setSquare(5, 3, 1) } // return true because shape was able to enter screen return true } // warp several squares if possible // initial x1, initial y1, destination x1, destination y1, initial x2, initial // y2, destination x2, destination y2, etc. function complexWarp() { // loop through arguments checking that each warp is valid for (var i = 0; i < arguments.length; i += 4) { // if warp is not valid if (!checkWarp(arguments[i], arguments[i + 1], arguments[i + 2], Images and Graphics n 457 Chapter21](https://image.slidesharecdn.com/wordware-advancedjavascript3rded-160421130838/75/www-webre24h-com-Wordware-advanced-javascript-3rd-ed-easttom-482-2048.jpg)
![arguments[i + 3])) // terminate the function -- no squares warped return } // loop through arguments again -- warp squares for (var i = 0; i < arguments.length; i += 4) { // call function to warp the current square corresponding to argument //coordinates warp(arguments[i], arguments[i + 1], arguments[i + 2], arguments[i + 3]) } } // check if warp is valid (used by complexWarp function) function checkWarp(startX, startY, endX, endY) { // if a destination coordinate is invalid or destination square is off // state(endX, endY) must be last due to short-circuit evaluation if (endX < 0 || endX > 9 || endY < 0 || endY > 18 || state(endX, endY)) // return false because warp is invalid return false // return true because warp has not been proved to be invalid (it is valid) return true } // rotate the current active shape function rotate() { // create instance of shapeMap object (similar to minimum 2D array // reflecting active shape) var curMap = new shapeMap() // note: all arguments handed to complexWarp are explained in that function // if shape is 4 x 1 line if (shape == 0) // if line is in horizontal state if (curMap.length == 4) complexWarp(curMap.offsetX, curMap.offsetY, curMap.offsetX + 1, curMap.offsetY + 1, curMap.offsetX + 2, curMap.offsetY, curMap.offsetX + 1, curMap.offsetY – 1, curMap.offsetX + 3, curMap.offsetY, curMap.offsetX + 1, curMap.offsetY – 2) // else line is in vertical state else complexWarp(curMap.offsetX, curMap.offsetY + 3, curMap.offsetX – 1, curMap.offsetY + 2, curMap.offsetX, curMap.offsetY + 1, curMap.offsetX + 1, curMap.offsetY + 2, curMap.offsetX, curMap.offsetY, curMap.offsetX + 2, curMap.offsetY + 2) // if shape is square if (shape == 1) // do not rotate shape because square does not change appearance after rotation return // if shape is L if (shape == 2) // if shape is L tilted 90 degrees to the right if (state(curMap.offsetX, curMap.offsetY) && curMap.length == 3) complexWarp(curMap.offsetX, curMap.offsetY + 1, curMap.offsetX + 1, 458 n Chapter 21](https://image.slidesharecdn.com/wordware-advancedjavascript3rded-160421130838/75/www-webre24h-com-Wordware-advanced-javascript-3rd-ed-easttom-483-2048.jpg)
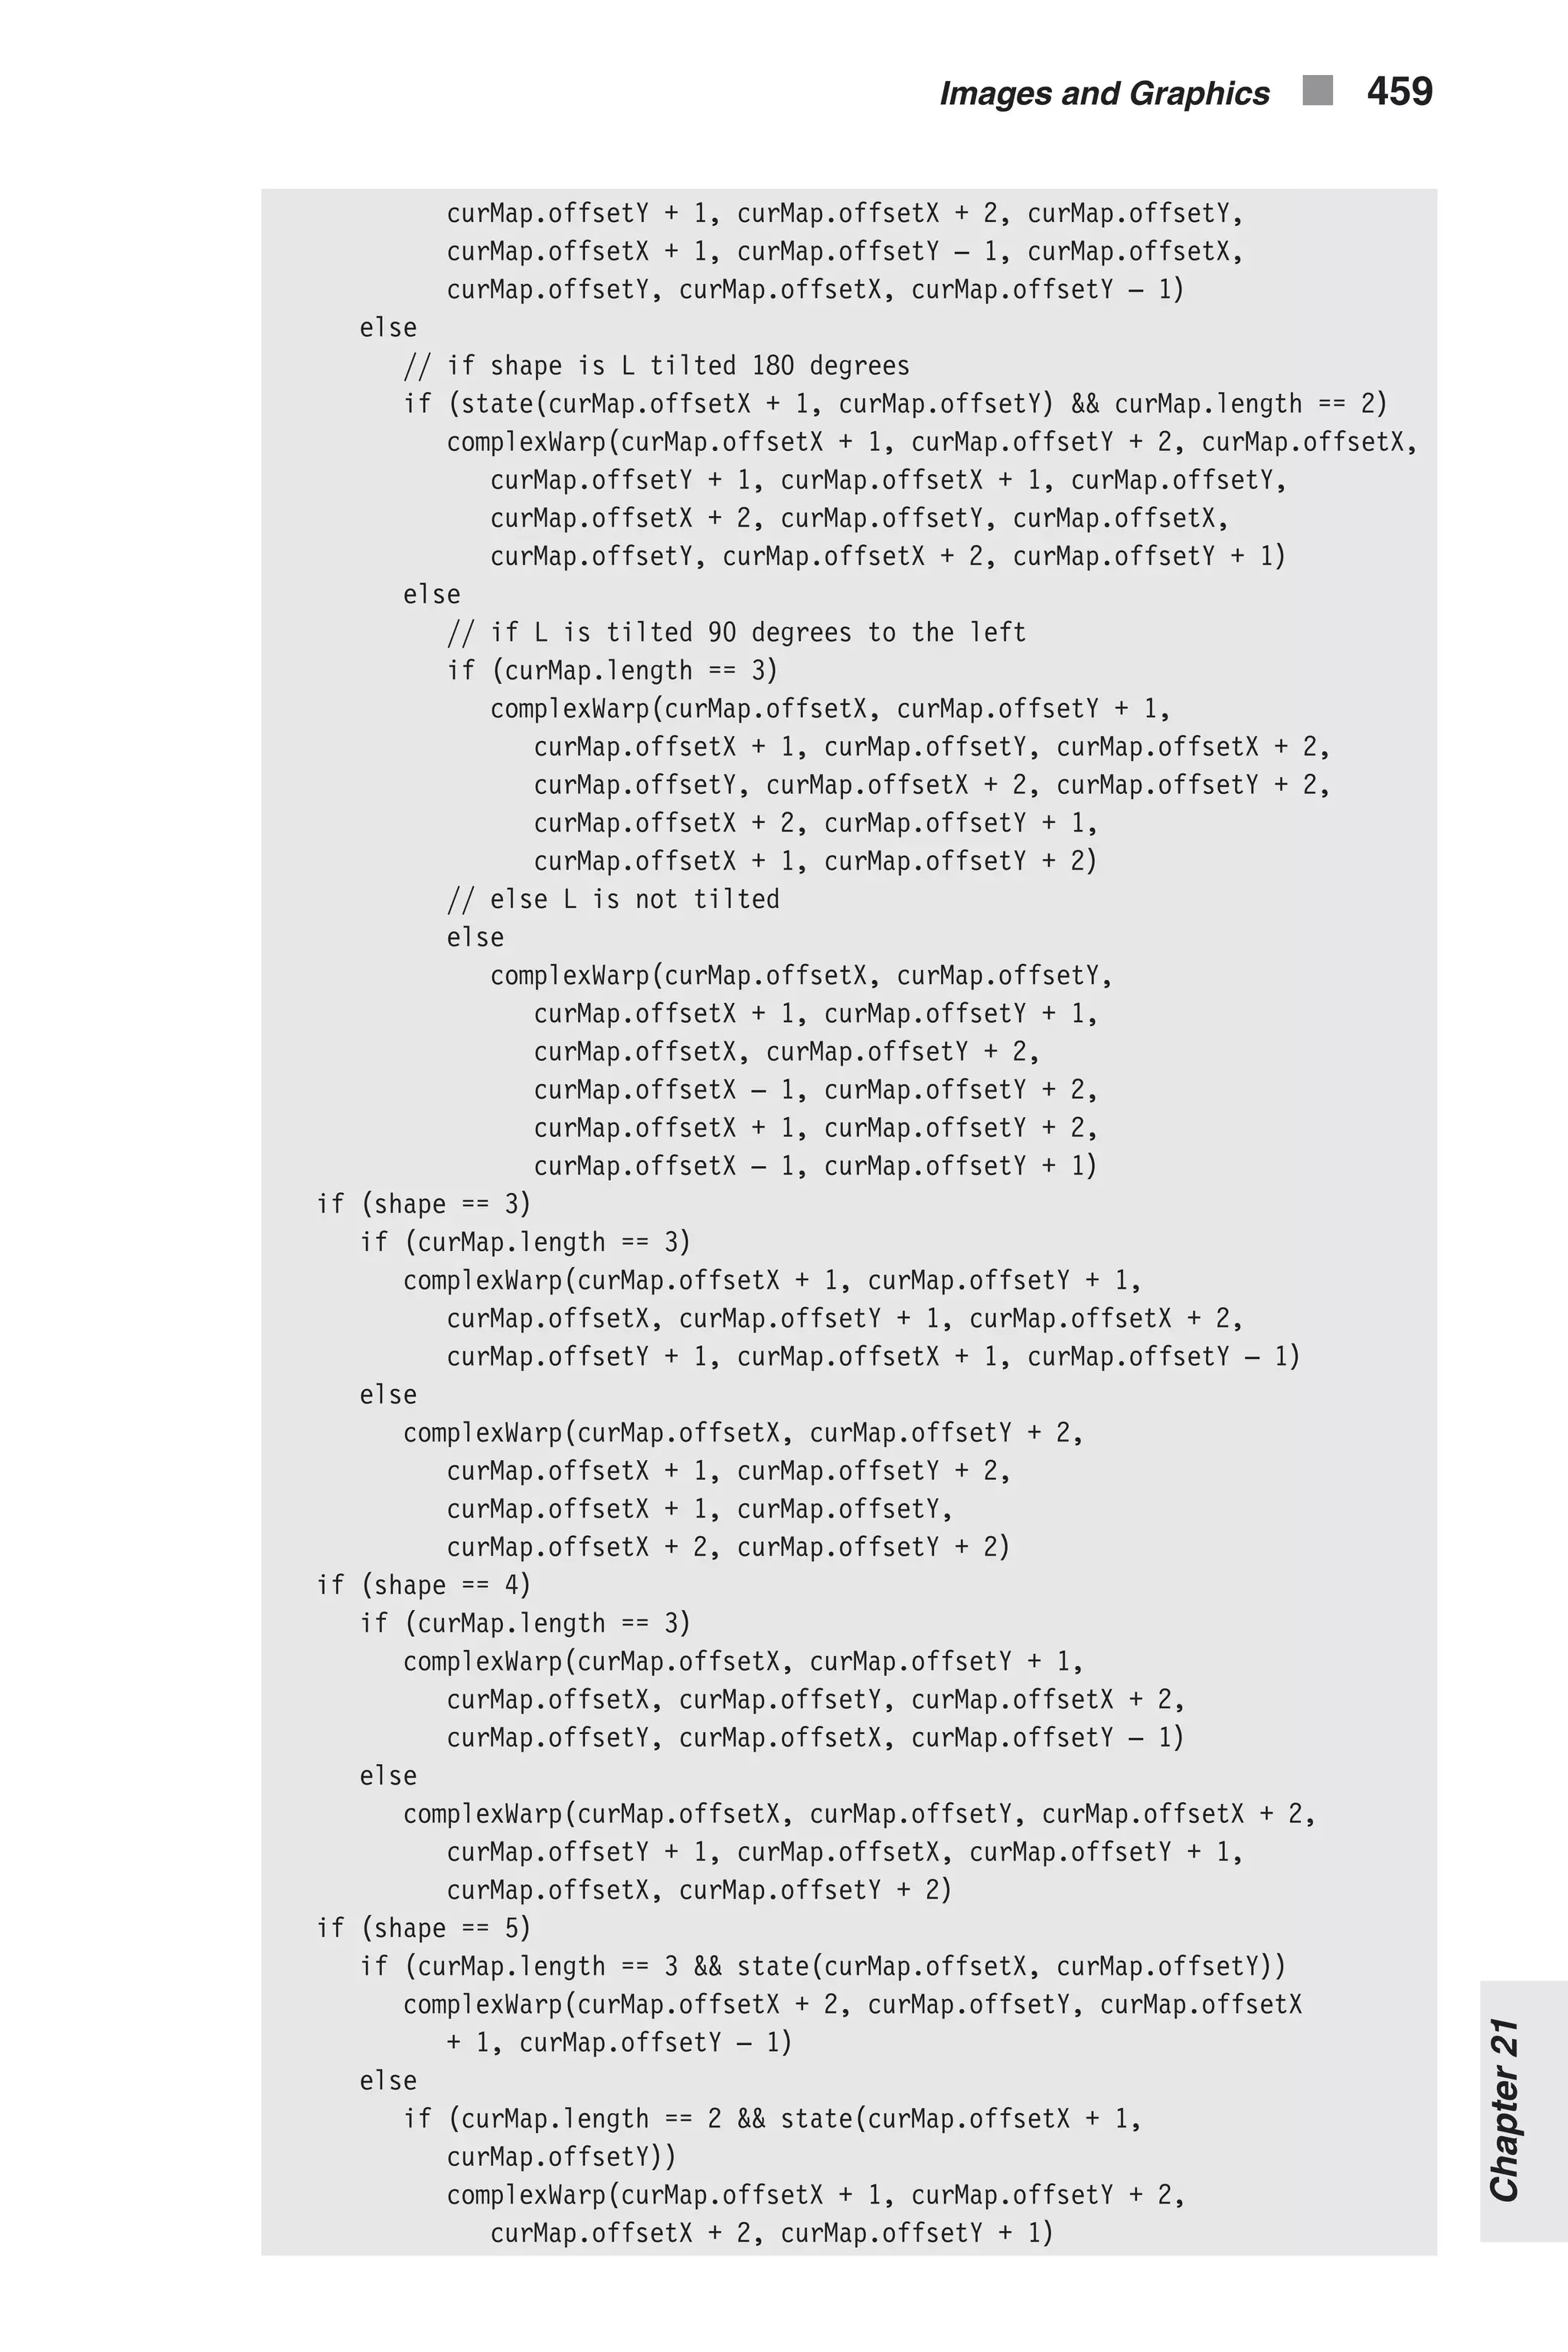
![else if (curMap.length == 3) complexWarp(curMap.offsetX, curMap.offsetY + 1, curMap.offsetX + 1, curMap.offsetY + 2) else complexWarp(curMap.offsetX, curMap.offsetY, curMap .offsetX – 1, curMap.offsetY + 1) if (shape == 6) if (curMap.length == 3 && state(curMap.offsetX + 1, curMap.offsetY)) complexWarp(curMap.offsetX, curMap.offsetY, curMap.offsetX, curMap.offsetY + 1, curMap.offsetX + 2, curMap.offsetY + 1, curMap.offsetX + 1, curMap.offsetY + 1, curMap.offsetX + 2, curMap.offsetY, curMap.offsetX + 1, curMap.offsetY – 1) else if (curMap.length == 2 && state(curMap.offsetX + 1, curMap.offsetY + 1)) complexWarp(curMap.offsetX, curMap.offsetY + 2, curMap.offsetX, curMap.offsetY, curMap.offsetX + 1, curMap.offsetY + 2, curMap.offsetX, curMap.offsetY + 1, curMap.offsetX + 1, curMap.offsetY, curMap.offsetX + 2, curMap.offsetY + 1) else if (curMap.length == 3) complexWarp(curMap.offsetX + 1, curMap.offsetY + 1, curMap.offsetX + 1, curMap.offsetY, curMap.offsetX + 2, curMap.offsetY + 1, curMap.offsetX, curMap.offsetY + 2) else complexWarp(curMap.offsetX, curMap.offsetY, curMap.offsetX + 1, curMap.offsetY + 1, curMap.offsetX + 1, curMap.offsetY, curMap.offsetX + 2, curMap.offsetY + 1, curMap.offsetX, curMap.offsetY + 2, curMap.offsetX + 2, curMap.offsetY + 2) } // flood entire screen with given state function flood(state) { for (var x = 0; x < 10; ++x) { for (var y = 0; y < 19; ++y) { if (state == 0) document.images[computeIndex(x, y)].src = off.src else document.images[computeIndex(x, y)].src = on[3].src } } } // return true if no active squares are found and false otherwise function noActive() { // scan board from top to bottom for (var y = 0; y < 19; ++y) { for (var x = 0; x < 10; ++ x) { 460 n Chapter 21](https://image.slidesharecdn.com/wordware-advancedjavascript3rded-160421130838/75/www-webre24h-com-Wordware-advanced-javascript-3rd-ed-easttom-485-2048.jpg)
![if (ar[x][y] == 1) return false } } // no active square found on the board return true } // return true if the line with the given coordinate is completed function isLine(y) { // horizontal scan of current line for (var x = 0; x < 10; ++x) { // if a square is off the line is not completed if (!state(x, y)) return false } // no square was found off return true } // move block from one position to another function warp(startX, startY, endX, endY) { document.images[computeIndex(endX, endY)].src = document.images [computeIndex(startX, startY)].src document.images[computeIndex(startX, startY)].src = off.src // block in new position is now active ar[endX][endY] = 1 // previous position is no longer active ar[startX][startY] = 0 } // function that starts game (*works with global variables only*) function start() { // accept level from user (no validation to save space) tempLevel = prompt("Enter level to begin game (0 – 10):", "0") // if user cancelled prompt if (!tempLevel) // abort function return // tempLevel is the actual level level = tempLevel // clear states, blocks, and timer clearActive() flood(0) clearTimeout(timerID) // clear statistics for (var i = 0; i < 7; ++i) { statistics[i] = 0 } // convert input from string to integer level = parseInt(level) // calculate speed Images and Graphics n 461 Chapter21](https://image.slidesharecdn.com/wordware-advancedjavascript3rded-160421130838/75/www-webre24h-com-Wordware-advanced-javascript-3rd-ed-easttom-486-2048.jpg)
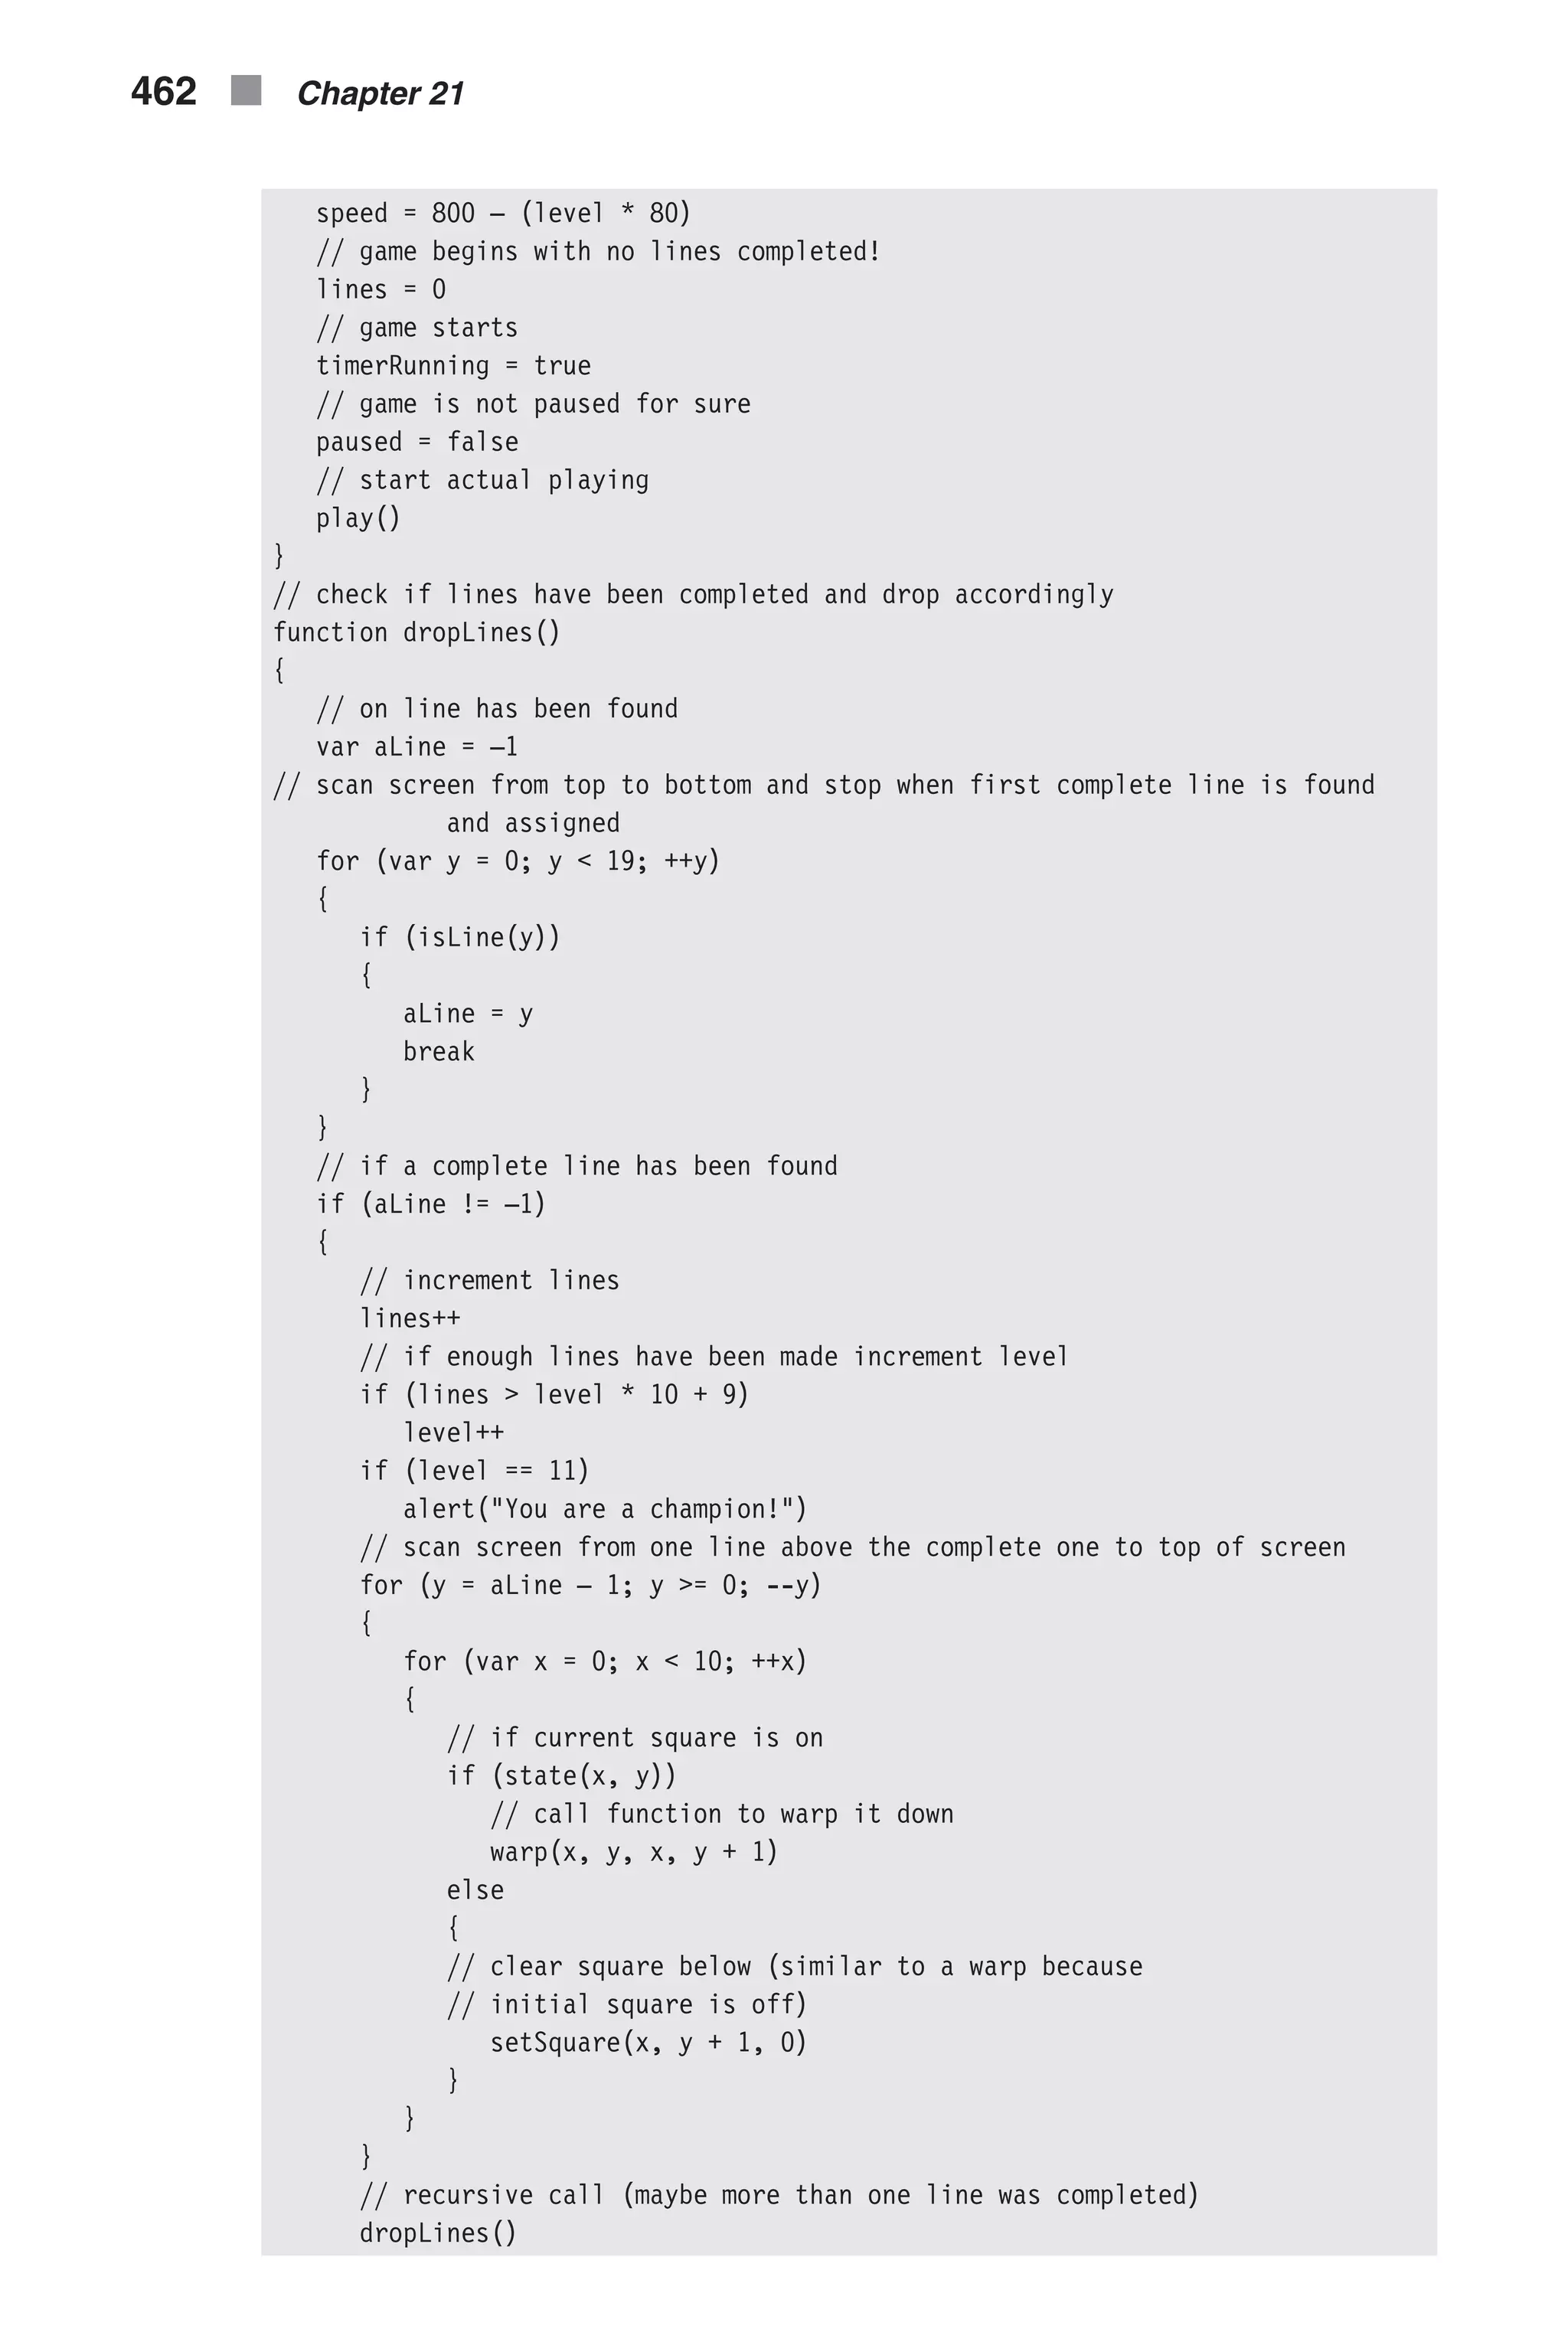
![} // no square should be active clearActive() } // main function responsible for game action function play() { // place values in form fields (display) document.lineslevel.lines.value = lines document.lineslevel.level.value = level // if no shape is falling if (noActive()) { // check for line completions and drop them dropLines() // insert a new shape (if shape is not able to enter) if (!insertShape()) { // flood screen to black flood(1) // flood screen to blank flood(0) // display final results alert('Game over!rrlevel = ' + level + 'rlines = '+ lines) // clear timeout clearTimeout(timerID) // timer is not running timerRunning = false // terminate function (and game) return } } else // a shape is currently falling so move it one square downward moveY() // call after speed milliseconds timerID = setTimeout('play()', speed) } // constructs an object representing a specific position function characteristics(x, y) { // create property to hold status (block or empty) this.state = state(x, y) // if block found in specified position if (state(x, y)) { // local variable to hold URL of image at specified location var src = document.images[computeIndex(x, y)].src // local variable to hold color (0, 1, 2, ..., 6) var color = src.charAt(src.lastIndexOf('/') + 2) } else // no color because no block found at specified position color = –1 // convert color from string to integer and assign to property this.color = parseInt(color) Images and Graphics n 463 Chapter21](https://image.slidesharecdn.com/wordware-advancedjavascript3rded-160421130838/75/www-webre24h-com-Wordware-advanced-javascript-3rd-ed-easttom-488-2048.jpg)
![// create property to hold square's current state (active or not, 1 or 0) this.activity = ar[x][y] } // contructs a map of entire board and status function fullMap() { for (var x = 0; x < 10; ++x) { this[x] = new Array(10) for (var y = 0; y < 19; ++y) { this[x][y] = new characteristics(x, y) } } this.shape = shape } // pause and unpause game function pause() { // if game is not paused if (!paused) { // stop timer clearTimeout(timerID) // game is now paused paused = true // create global map of board map = new fullMap() // flood board so player cannot see current status flood(1) // no active blocks so user cannot move anything with buttons clearActive() alert('Oh no, not the boss...') } else { // return board to status before game was paused, according to the map object for (var x = 0; x < 10; ++x) { for (var y = 0; y < 19; ++y) { if (!map[x][y].state) document.images[computeIndex(x, y)].src = off.src else document.images[computeIndex(x, y)].src = on[map [x][y].color].src ar[x][y] = map[x][y].activity } } shape = map.shape // game is no longer paused paused = false // play ball! play() } 464 n Chapter 21](https://image.slidesharecdn.com/wordware-advancedjavascript3rded-160421130838/75/www-webre24h-com-Wordware-advanced-javascript-3rd-ed-easttom-489-2048.jpg)
![} // --> </SCRIPT> </HEAD> <BODY> <EMBED SRC="tetris1a.mid" AUTOSTART=TRUE LOOP=TRUE HIDDEN=TRUE> </BODY> </HTML> Example 21-8 (ex21-8.htm). A 1,000-line script creates a Tetris game on a web page. Global Statements // array to hold number of shapes used from each type var statistics = new Array(7) for (var shapeNum = 0; shapeNum < 7; ++shapeNum) { statistics[shapeNum] = 0 } Tetris is based on seven shapes, so an array of seven elements named sta- tistics is created first, and its elements are zero-initialized. The first element, statistics[0], is associated with the first shape, and so forth. The array holds the shape statistics from the beginning of the game, so the element statistics[2], for example, holds the number of times shape 3 appeared. // set pause to false var paused = false // game is currently running var timerRunning = false // no shape currently falling var shape = –1 // timer is not running var timerID = null Since the game is paused only when the user clicks the Pause button, we set the paused variable to false. The second variable, timerRunning, is also set to false, as no timeout has been set by the setTimeout() method. The shape variable normally holds the index of the shape that is currently falling down on the screen. It is initialized to –1, indicating that no shape is falling yet (the game has not started). Another global variable, timerID, is initial- ized to null. // initialize image variables for seven shapes var on = new Array() on[0] = new Image(12, 12) on[1] = new Image(12, 12) on[2] = new Image(12, 12) on[3] = new Image(12, 12) on[4] = new Image(12, 12) on[5] = new Image(12, 12) on[6] = new Image(12, 12) Images and Graphics n 465 Chapter21](https://image.slidesharecdn.com/wordware-advancedjavascript3rded-160421130838/75/www-webre24h-com-Wordware-advanced-javascript-3rd-ed-easttom-490-2048.jpg)
![// create a transparent block var off = new Image(12, 12) Like the LED sign, Netris Deluxe is based on image manipulations. In this script we create a seven-element global array named on and a variable named off, and assign an instance of the image object to each element of the array and to the variable. Notice that all images are the same size, 12 pixels by 12 pixels. The off variable holds a transparent GIF image for the background. // set image URLs on[0].src = "10.gif" on[1].src = "11.gif" on[2].src = "12.gif" on[3].src = "13.gif" on[4].src = "14.gif" on[5].src = "15.gif" on[6].src = "16.gif" off.src = "0.gif" After creating the Image instances, we set the src property of each instance to the URL of its image. The images for the seven color blocks (those used to construct shapes) are 10.gif through 16.gif. The URL of the transpar- ent image is 0.gif. Notice that the first character of all block images is “1”, whereas the first character of the “off image” (the transparent one) is “0”. // get number of images already laid out in the page var firstImage = document.images.length // create initial screen drawScreen() // array of screen (10 x 19) var ar = new Array() for (var i = 0; i < 10; ++i) { ar[i] = new Array(19) for (var j = 0; j < 19; ++j) { ar[i][j] = 0 } } Once the essential instances of the image object are ready, we compute the document index of the first image. Since the document.images array starts from index 0, the index of the last image in the document, before loading the game, is document.images.length – 1. The value assigned to firstImage, then, is the index of the first image of the game and is equal to docu- ment.images.length. The function drawScreen() creates the initial screen of the game. The last portion of the global statements creates a simple 10 x 19 2D array. Since the actual height of a Tetris screen is 17 squares instead of 19, all shapes enter two lines above the top. This two-line margin enables the 466 n Chapter 21](https://image.slidesharecdn.com/wordware-advancedjavascript3rded-160421130838/75/www-webre24h-com-Wordware-advanced-javascript-3rd-ed-easttom-491-2048.jpg)
![user to see the entire shape, even if he or she rotates it immediately upon entering the game (17th row). drawScreen() The drawScreen() function simply uses document.write() statements to generate the game. Notice that we use the with(document) construct so that we can use write() rather than document.write(). The function creates several forms and buttons: n The first form includes the LINES and LEVEL text fields, referenced as document.lineslevel.lines and document.lineslevel.level, respectively. n The Start and Pause buttons are images linked with the start() and pause() functions, respectively. n The second form is named “stats.” It includes seven two-character text fields, named 0 through 6. n The control panel includes direction and rotation buttons as well. The left movement button calls moveX() with the argument –1, the right movement button invokes moveX() with the argument 1, the downward movement button calls the moveY() function with no argument, and the rotation button calls the rotate() function. computeIndex(x, y) See the listings for Demonstration 2 for a detailed explanation of this function. state(x, y) // returns state of square (true / false) function state(x, y) { // assign URL of image at given coordinates to local variable var source = document.images[computeIndex(x, y)].src // expression evaluates to 0 or 1 return (source.charAt(source.lastIndexOf('/') + 1) == '0') ? false : true } This function first finds the URL of the image located at the given x and y coordinates and assigns it to the local variable source. You may recall from the beginning of our discussion that the filename of an image starts with either a “0” (for the off image) or a“1” (for a color block). Since source.lastIndexOf('/') + 1 is the index of the first character of the image’s filename, the following expression evaluates to either a “1” or a “0”: source.charAt(source.lastIndexOf('/') + 1) This computation also applies to the case when the images are stored in the same directory in which the document resides (there is no slash in the URL expression). The source.lastIndexOf('/') evaluates to –1, and Images and Graphics n 467 Chapter21](https://image.slidesharecdn.com/wordware-advancedjavascript3rded-160421130838/75/www-webre24h-com-Wordware-advanced-javascript-3rd-ed-easttom-492-2048.jpg)
![source.lastIndexOf('/') + 1 yields a 0 value, the index of the first character. The state() function returns true if the image at the given coordinates is a block (its filename starts with a “1”), and false if it is a transparent image (its filename starts with a “0”). setSquare(x, y, state) // set square to 1 / 0 function setSquare(x, y, state) { if (state == 0) document.images[computeIndex(x, y)].src = off.src else document.images[computeIndex(x, y)].src = on[shape].src // if state is one square is active, so 1 is assigned to ar[x][y] // otherwise square is not active so 0 is assigned to ar[x][y] ar[x][y] = state } The setSquare() function accepts three arguments: the x coordinate of a square, its y coordinate, and a state (0 or 1) assignment. If the value of state is 0, the square at the given position is cleared by assigning off.src to its src property. On the other hand, if state is 1 (or any other value), the box at the given position is assigned the block image whose index is shape, where shape is a global integer from 0 to 6. The current state of the square, at the specified position, is stored in the global array ar. See the inline comments for additional explanations regarding this statement. clearActive() // clear array so no active squares exist function clearActive() { // scan entire array and assign 0 to all elements (no active squares) for (var i = 0; i < 10; ++i) { for (var j = 0; j < 19; ++j) { ar[i][j] = 0 } } // no shape is currently in screen shape = –1 } The ar array, which is 10 x 19, keeps track of all current “active” blocks, i.e., those that belong to a falling shape. Moving blocks around is done simply by visiting all active ones and assigning their next locations. Whenever a block hits the bottom of the board or lies on top of another block, the falling shape is inactivated by the clearActive() function, which clears the entire board. 468 n Chapter 21](https://image.slidesharecdn.com/wordware-advancedjavascript3rded-160421130838/75/www-webre24h-com-Wordware-advanced-javascript-3rd-ed-easttom-493-2048.jpg)
![The last statement of the function sets shape to –1, signaling that there is no falling shape on the board. checkMoveX(step) // check if specified move (left or right) is valid function checkMoveX(step) { // scan screen (direction does not matter) for (var x = 0; x < 10; ++x) { for (var y = 0; y < 19; ++y) { // if current square is active if (ar[x][y] == 1) { // check all conditions: // not out of range and not colliding with existing not active block if (x + step < 0 || x + step > 9 || (state(x + step, y) && ar[x + step][y] == 0)) // return false if move (new situation) is notlegal return false } } } // return true if no invalid state has been encountered return true } This function accepts one argument, either 1 or –1, and checks if it is possi- ble to move the active shape one square to the right (if the argument is 1) or to the left (if the argument is –1). The function looks for all active squares on the board and the following condition is evaluated for each active one: x + step < 0 || x + step > 9 || (state(x + step, y) && ar[x + step] [y] == 0) This expression yields true if the active square, after moving it step posi- tions to the right, finds itself out of the board’s range or in the territory of an inactive block (an active block obviously belongs to the same shape). If the specified movement is not valid, the function returns false. Otherwise, it returns true. The efficiency of this function can be improved in two ways. First, to reduce the number of checks, the function can be spliced into CheckMoveXright() and CheckMoveXleft(). Second, instead of searching the whole board for active squares, a more localized algorithm that takes advantage of the current shape and position information can be devised. Images and Graphics n 469 Chapter21](https://image.slidesharecdn.com/wordware-advancedjavascript3rded-160421130838/75/www-webre24h-com-Wordware-advanced-javascript-3rd-ed-easttom-494-2048.jpg)
![checkMoveY() // check if specified move (down) is valid function checkMoveY() { // only possible step is one to the bottom var step = 1 // scan screen (direction does not matter) for (var x = 0; x < 10; ++x) { for (var y = 0; y < 19; ++y) { // if current square is active if (ar[x][y] == 1) { // check all conditions: // not out of range and not colliding with existing not active block if (y + step > 18 || (state(x, y + step) && ar[x] [y + step] == 0)) // return false if move (new situation) is not legal return false } } } // return true if no invalid state has been encountered return true } This function is very similar to checkMoveX(), except that, since the move- ment is always downward, it does not accept any argument. The step variable appears in this function for historical reasons; it could have been replaced by 1. moveX(step) // move all active squares step squares on the x axis function moveX(step) { // if specified move is not legal if (!checkMoveX(step)) // terminate function (active blocks are not moved) return // if left movement then scan screen from left to right if (step < 0) { for (var x = 0; x < 10; ++x) { for (var y = 0; y < 19; ++y) { // if current square is active if (ar[x][y] == 1) // call function to handle movement smartX(x, y, step) 470 n Chapter 21](https://image.slidesharecdn.com/wordware-advancedjavascript3rded-160421130838/75/www-webre24h-com-Wordware-advanced-javascript-3rd-ed-easttom-495-2048.jpg)
![} } } else // if right movement then scan screen from right to left if (step > 0) { for (var x = 9; x >= 0; --x) { for (var y = 0; y < 19; ++y) { // if current square is active if (ar[x][y] == 1) // call function to handle movement smartX(x, y, step) } } } } The moveX() function accepts one argument, specifying the number of posi- tions that all active squares need to be moved. A positive value means that they should be moved to the right, while a negative value means that they should be moved to the left. The scanning algorithm is coordinated with the movement direction, so it does not visit the same square again (after it has been moved). The movement itself is accomplished by the smartX() func- tion. Refer to the inline comments for statement-specific notes. smartX(x, y, step) // responsible for the blocks' horizontal movement function smartX(x, y, step) { // if moving one step to the left if (step < 0) // if the destination square needs to be turned on explicitly if (ar[x + step][y] == 0) // if there is a block to the right of the current block if (x != 9 && ar[x – step][y] == 1) // set square to the left on without clearing current block setSquare(x + step, y, 1) else // clear current block and turn square to the left on warp(x, y, x + step, y) else // if there is no block to the right of the current block if (x == 9 || ar[x – step][y] == 0) // clear current block setSquare(x, y, 0) // if moving one step to the right if (step > 0) // if the destination square needs to be turned on explicitly if (ar[x + step][y] == 0) // if there is a block to the left of the current block Images and Graphics n 471 Chapter21](https://image.slidesharecdn.com/wordware-advancedjavascript3rded-160421130838/75/www-webre24h-com-Wordware-advanced-javascript-3rd-ed-easttom-496-2048.jpg)
![if (x != 0 && ar[x – step][y] == 1) // set square to the right on without clearing current block setSquare(x + step, y, 1) else // clear current block and turn square to the right on warp(x, y, x + step, y) else // if there is no block to the left of the current block if (x == 0 || ar[x – step][y] == 0) // clear current block setSquare(x, y, 0) } The smartX() function is responsible for the horizontal movement of the affected blocks. Notice that when you move a horizontal bar (four blocks) shape to the right, for example, you only need to move the far-right block to the right of the shape and clear the pre-movement far-left block. Moving a shape consisting of four blocks one step to the right requires the setting of two blocks and the clearing of two other blocks. moveY() // move all active squares step squares on the y axis function moveY() { // if specified move is not legal (shape is laid down on block or bottom panel) if (!checkMoveY()) { // active squares are not active anymore (should not be moved later) clearActive() // terminate function (active blocks are not moved) return } // scan screen from bottom to top for (var y = 18; y >= 0; --y) { for (var x = 0; x < 10; ++x) { // if current square is active if (ar[x][y] == 1) // call function to handle movement smartY(x, y) } } } The moveY() function is identical to the moveX() function, except that if a move is not possible, the clearActive() function is called, inactivating the whole board. Also, since the movement is always downward, no argument is needed. 472 n Chapter 21](https://image.slidesharecdn.com/wordware-advancedjavascript3rded-160421130838/75/www-webre24h-com-Wordware-advanced-javascript-3rd-ed-easttom-497-2048.jpg)
![smartY(x, y) // responsible for the blocks' vertical (downward) movement function smartY(x, y) { // if the destination square needs to be turned on explicitly if (ar[x][y + 1] == 0) // if there is a block above current block if (y != 0 && ar[x][y – 1] == 1) // set square below on without clearing current block setSquare(x, y + 1, 1) else // clear current block and turn square below on warp(x, y, x, y + 1) else // if there is no block above the current block if (y == 0 || ar[x][y – 1] == 0) // clear current block setSquare(x, y, 0) } This function is the y axis equivalent of the smartX() function presented earlier. See the listing for that function. shapeMap() // construct object containing shape function shapeMap() { // set minimum and maximum coordinates to opposite (minimum and maximum found thus far) var minX = 9 var minY = 18 var maxX = 0 var maxY = 0 // scan screen to find actual minimum and maximum coordinates of active squares for (var y = 0; y < 19; ++y) { for (var x = 0; x < 10; ++x) { // if current coordinates reflect active square if (ar[x][y] == 1) { if (x < minX) minX = x if (x > maxX) maxX = x if (y < minY) minY = y if (y > maxY) maxY = y } Images and Graphics n 473 Chapter21](https://image.slidesharecdn.com/wordware-advancedjavascript3rded-160421130838/75/www-webre24h-com-Wordware-advanced-javascript-3rd-ed-easttom-498-2048.jpg)
![} } // create a length property representing the x coordinate span this.length = maxX – minX + 1 // create properties to hold minimum coordinates of both axes this.offsetX = minX this.offsetY = minY // construct minimum array containing all active squares respectively for (x = 0; x <= maxX – minX; ++x) { this[x] = new Array() for (y = 0; y <= maxY – minY; ++y) { this[x][y] = ar[x + minX][y + minY] } } } Before the script rotates a shape, it must know which shape is currently active and its exact position. The shapeMap() constructor builds the mini- mum 2D array that encloses the current shape. In addition to the array elements, an instance of shapeMap features the board’s x and y coordinates (offsetX and offsetY) of the shape-enclosing rectangle’s top-left square (shapeMapInstance[0][0]). The 2D array and these two properties are enough to determine the current active shape and its location. For a complete discussion of each statement in the function, refer to the comments. getRandom() // random function to return an integer from 0 to 6 function getRandom() { // use random number method to find integer from 0 to 8 var randomNum = Math.round(Math.random() * 8) // call function again if random number is 0 or 8. if (randomNum == 0 || randomNum == 8)return getRandom() // 1 to 7 => 0 to 6 randomNum-- // update selected shape's statistics statistics[randomNum]++ // update statistics display form (update *all* fields so user cannot enter any value in fields) for (var shape = 0; shape < 7; ++shape) { document.stats[shape].value = statistics[shape] } // return the random number return randomNum } The getRandom() function returns a random integer from 0 to 6. First, it uses the Math object’s random() method to generate a random number. 474 n Chapter 21](https://image.slidesharecdn.com/wordware-advancedjavascript3rded-160421130838/75/www-webre24h-com-Wordware-advanced-javascript-3rd-ed-easttom-499-2048.jpg)
![Peculiarly enough, we found out that the random generator prefers the inner integers (1, 2, 3, 4, and 5) over the boundary ones (0 and 6). To remedy the situation, we decided to generate random integers from 0 to 8, and then do some juggling to fit the result into the 0 to 6 range. If the integer is 0 or 8, the function invokes itself recursively until an integer from 1 to 7 is ran- domly generated. The number then decrements by 1 to fit the 0 to 6 range, and is returned by the function. After updating the statistics array, the text fields, representing the number of appearances of each shape, are updated as well. insertShape() This function inserts a new shape whose index is a random integer stored in the global variable shape. Take a look at the following code segment: if (shape == 4) { if (state(4, 2) || state(5, 2) || state(3, 3) || state(4, 3)) return false setSquare(4, 2, 1) setSquare(5, 2, 1) setSquare(3, 3, 1) setSquare(4, 3, 1) } The insertShape() function includes such a script segment for each of the seven supported shapes. The conditional statement uses the function state() to check whether all four squares are empty. If one of the four is blocked, the insertShape() function returns false and terminates. Otherwise, the function proceeds by invoking the setSquare() function four times, one for each block of the new shape. complexWarp() // warp several squares if possible // initial x1, initial y1, destination x1, destination y1, initial x2, initial y2, destination x2, destination y2, etc. function complexWarp() { // loop through arguments checking that each warp is valid for (var i = 0; i < arguments.length; i += 4) { // if warp is not valid if (!checkWarp(arguments[i], arguments[i + 1], arguments[i + 2], arguments[i + 3])) // terminate the function -- no squares warped return } // loop through arguments again -- warp squares for (var i = 0; i < arguments.length; i += 4) { Images and Graphics n 475 Chapter21](https://image.slidesharecdn.com/wordware-advancedjavascript3rded-160421130838/75/www-webre24h-com-Wordware-advanced-javascript-3rd-ed-easttom-500-2048.jpg)
![// call function to warp the current square corresponding to argument coordinates warp(arguments[i], arguments[i + 1], arguments[i + 2], arguments[i + 3]) } } This function moves a shape’s blocks from their current positions to their new ones. The argument list includes sets of four coordinates: x and y val- ues of these positions. Since the number of sets depends on the shape type, the arguments are accessed via the arguments array, rather than as parameters. First, the function calls checkWarp() to check if the destination squares are populated or not. The complexWarp() function terminates immediately whenever one of the squares is occupied. The warping itself is accomplished by calling the warp() function, once for each set of four arguments. checkWarp(startX, startY, endX, endY) // check if warp is valid (used by complexWarp function) function checkWarp(startX, startY, endX, endY) { // if a destination coordinate is invalid or destination square is off // state(endX, endY) must be last due to short-circuit evaluation if (endX < 0 || endX > 9 || endY < 0 || endY > 18 || state(endX,endY)) // return false because warp is invalid return false // return true because warp has not been proved to be invalid (it is valid) return true } Out of the four arguments this function accepts, it uses the last two (endX, endY) to check if the given position is occupied. rotate() First, rotate() assigns an instance of the shapeMap object to a local vari- able, curMap. The shapeMap object is used to find out the current angle of the shape. The “L” shape, for example, has four different angles, whereas a “square” (2 x 2) shape has only one. It then calls the complexWarp() func- tion with the coordinates of the blocks that need to be “warped” during rotation. flood(state) // flood entire screen with given state function flood(state) { for (var x = 0; x < 10; ++x) { for (var y = 0; y < 19; ++y) { 476 n Chapter 21](https://image.slidesharecdn.com/wordware-advancedjavascript3rded-160421130838/75/www-webre24h-com-Wordware-advanced-javascript-3rd-ed-easttom-501-2048.jpg)
![if (state == 0) document.images[computeIndex(x, y)].src = off.src else document.images[computeIndex(x, y)].src = on[3].src } } } When its argument is 0, the flood() function clears the entire board by set- ting the URL of all images to off.src. If the argument is not 0, all board images are replaced with on[3].src. Note that, instead of the doubly nested loop, you can use a single loop to fill the document.images 1D array. Since you would not have to invoke the computeIndex() function for each posi- tion, the flooding would have been more efficient. noActive() // return true if no active squares are found and false otherwise function noActive() { // scan board from top to bottom for (var y = 0; y < 19; ++y) { for (var x = 0; x < 10; ++ x) { if (ar[x][y] == 1) return false } } // no active square found on the board return true } This function is self-explanatory. isLine(y) // return true if the line with the given coordinate is completed function isLine(y) { // horizontal scan of current line for (var x = 0; x < 10; ++x) { // if a square is off the line is not completed if (!state(x, y)) return false } // no square was found off return true } This function looks for complete lines, i.e., lines with all squares checked. Images and Graphics n 477 Chapter21](https://image.slidesharecdn.com/wordware-advancedjavascript3rded-160421130838/75/www-webre24h-com-Wordware-advanced-javascript-3rd-ed-easttom-502-2048.jpg)
![warp(startX, startY, endX, endY) // move block from one position to another function warp(startX, startY, endX, endY) { document.images[computeIndex(endX, endY)].src = document.images [computeIndex(startX, startY)].src document.images[computeIndex(startX, startY)].src = off.src // block in new position is now active ar[endX][endY] = 1 // previous position is no longer active ar[startX][startY] = 0 } The warp() function “warps” a block from one position to another by setting the URL of the destination image to that of the source image, and then set- ting the URL of the source image to that of the transparent one, off.src. The ar array is also being updated with the recent changes in square assignments. start() // function that starts game (*works with global variables only*) function start() { // accept level from user (no validation to save space) tempLevel = prompt("Enter level to begin game (0 – 10):", "0") // if user cancelled prompt if (!tempLevel) // abort function return // tempLevel is the actual level level = tempLevel // clear states, blocks, and timer clearActive() flood(0) clearTimeout(timerID) // clear statistics for (var i = 0; i < 7; ++i) { statistics[i] = 0 } // convert input from string to integer level = parseInt(level) // calculate speed speed = 800 – (level * 80) // game begins with no lines completed! lines = 0 // game starts timerRunning = true // game is not paused for sure paused = false 478 n Chapter 21](https://image.slidesharecdn.com/wordware-advancedjavascript3rded-160421130838/75/www-webre24h-com-Wordware-advanced-javascript-3rd-ed-easttom-503-2048.jpg)
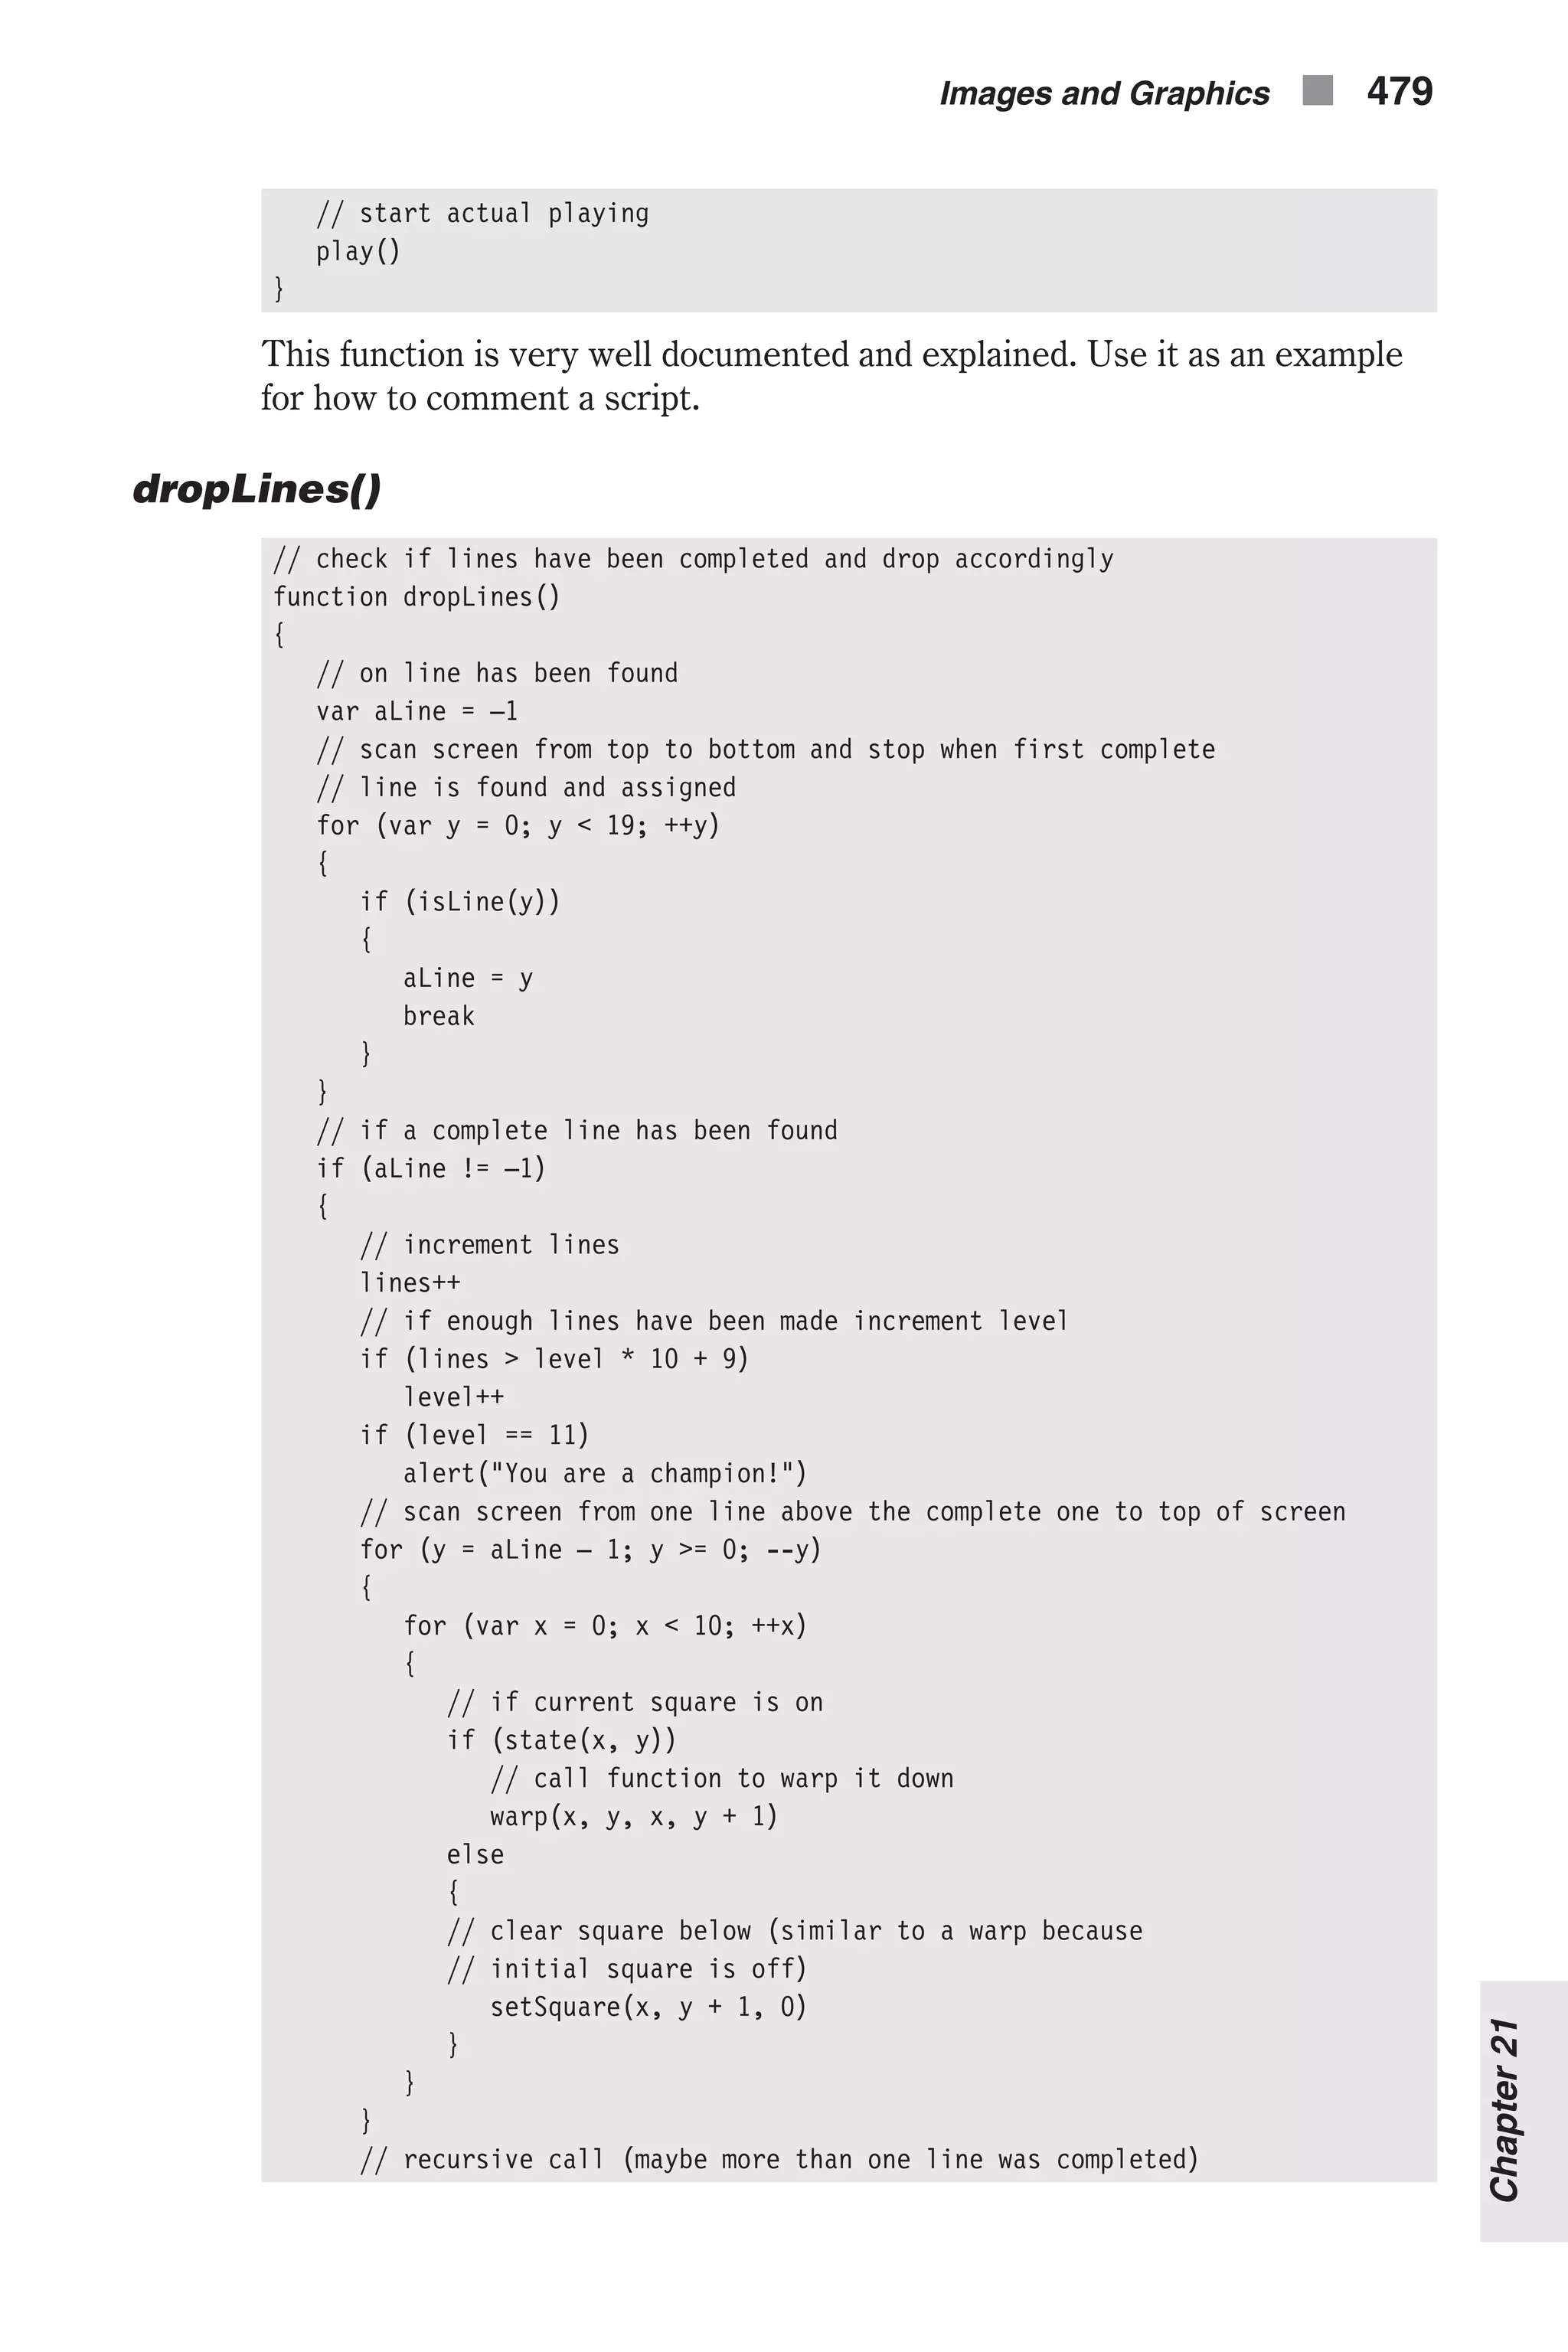
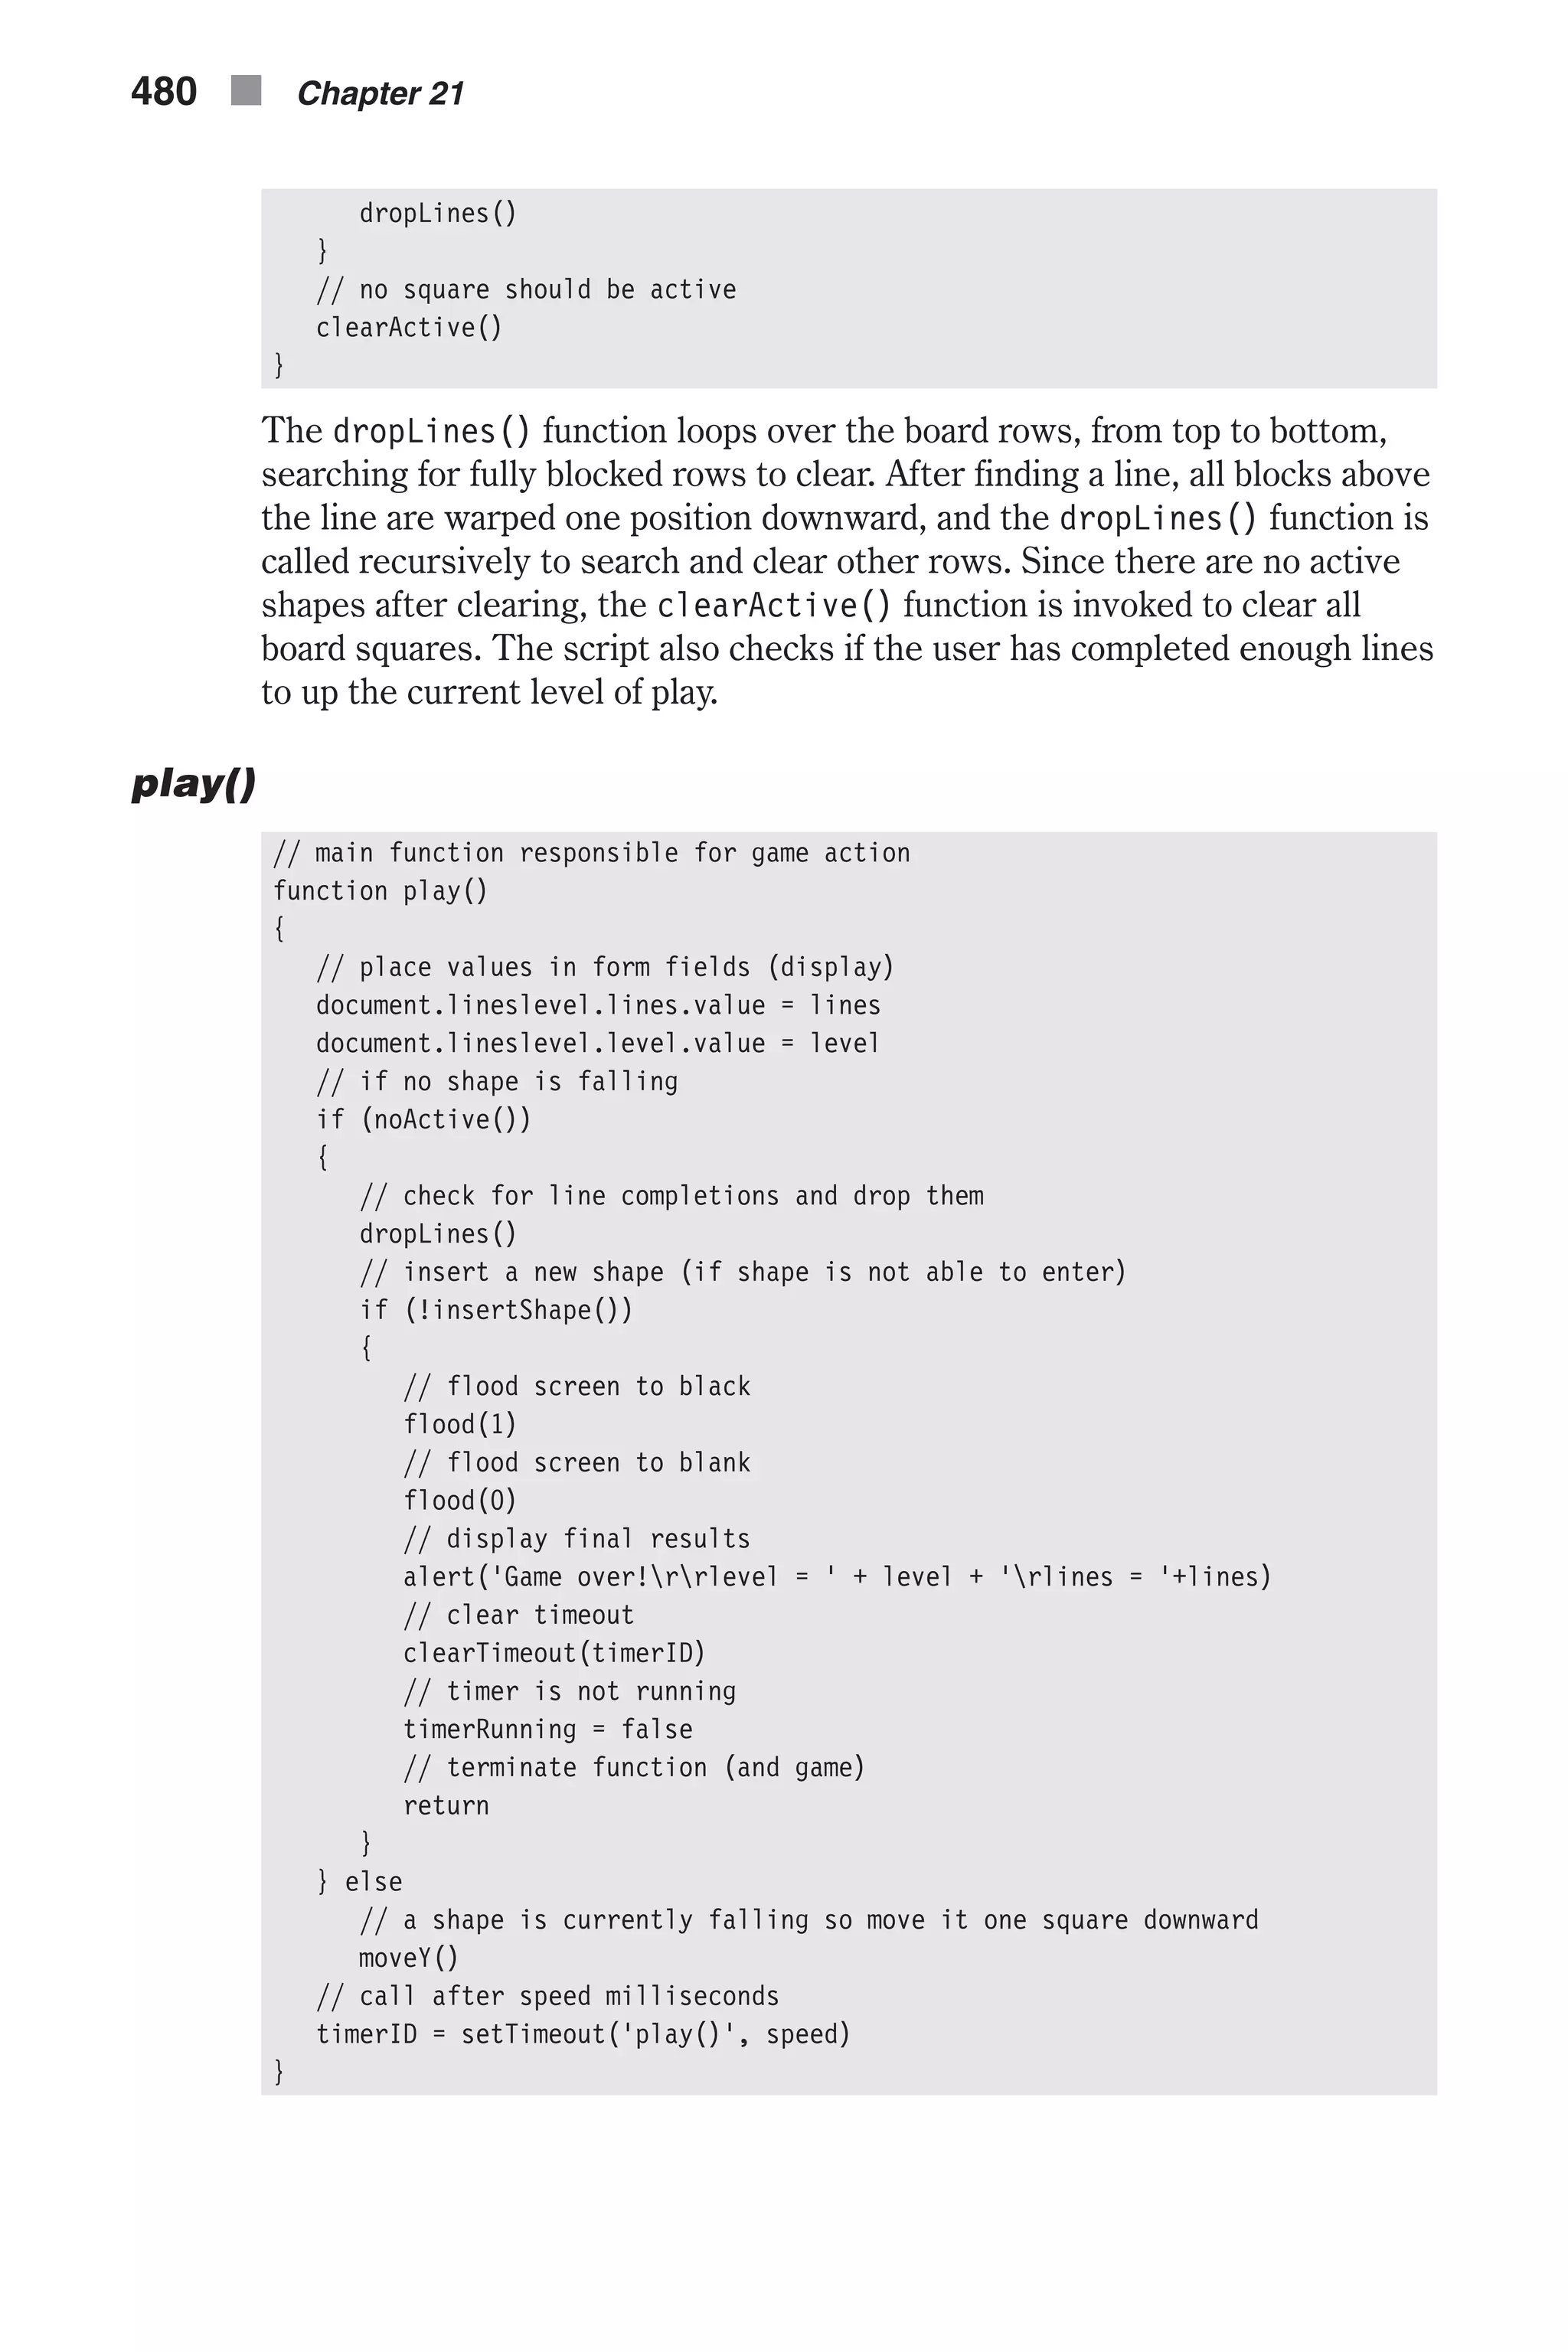
![characteristics(x, y) // constructs an object representing a specific position function characteristics(x, y) { // create property to hold status (block or empty) this.state = state(x, y) // if block found in specified position if (state(x, y)) { // local variable to hold URL of image at specified location var src = document.images[computeIndex(x, y)].src // local variable to hold color (0, 1, 2, ..., 6) var color = src.charAt(src.lastIndexOf('/') + 2) } else // no color because no block found at specified position color = –1 // convert color from string to integer and assign to property this.color = parseInt(color) // create property to hold square's current state (active or not, 1 or 0) this.activity = ar[x][y] } fullMap() // contructs a map of entire board and status function fullMap() { for (var x = 0; x < 10; ++x) { this[x] = new Array(10) for (var y = 0; y < 19; ++y) { this[x][y] = new characteristics(x, y) } } this.shape = shape } pause() // pause and unpause game function pause() { // if game is not paused if (!paused) { // stop timer clearTimeout(timerID) // game is now paused paused = true // create global map of board map = new fullMap() Images and Graphics n 481 Chapter21](https://image.slidesharecdn.com/wordware-advancedjavascript3rded-160421130838/75/www-webre24h-com-Wordware-advanced-javascript-3rd-ed-easttom-506-2048.jpg)
![// flood board so player cannot see current status flood(1) // no active blocks so user cannot move anything with buttons clearActive() alert('Oh no, not the boss...') } else { // return board to status before game was paused, according to the map object for (var x = 0; x < 10; ++x) { for (var y = 0; y < 19; ++y) { if (!map[x][y].state) document.images[computeIndex(x, y)].src = off.src else document.images[computeIndex(x, y)].src= on[map[x][y].color].src ar[x][y] = map[x][y].activity } } shape = map.shape // game is no longer paused paused = false // play ball! play() } } The pause() function is responsible for pausing and unpausing the game, depending on its current state. Music The background music featured by Netris Deluxe is embedded via an HTML statement: <EMBED SRC="tetris1a.mid" AUTOSTART=TRUE LOOP=TRUE HIDDEN=TRUE> Summary In this chapter I discussed the image object, and how it is implemented in client-side JavaScript. Mastering the usage of the image object and the doc- ument.images array is not trivial, but will become easier with experience. This is the reason I included three image-based comprehensive demonstra- tions, including a 1,000-line script (Netris Deluxe). JavaScript is very useful when you want to interact with the user (as in games), or when the anima- tion is customized (as in the updating clock and in the LED sign). Plain animation is better created with gif89, rather than with JavaScript. 482 n Chapter 21](https://image.slidesharecdn.com/wordware-advancedjavascript3rded-160421130838/75/www-webre24h-com-Wordware-advanced-javascript-3rd-ed-easttom-507-2048.jpg)
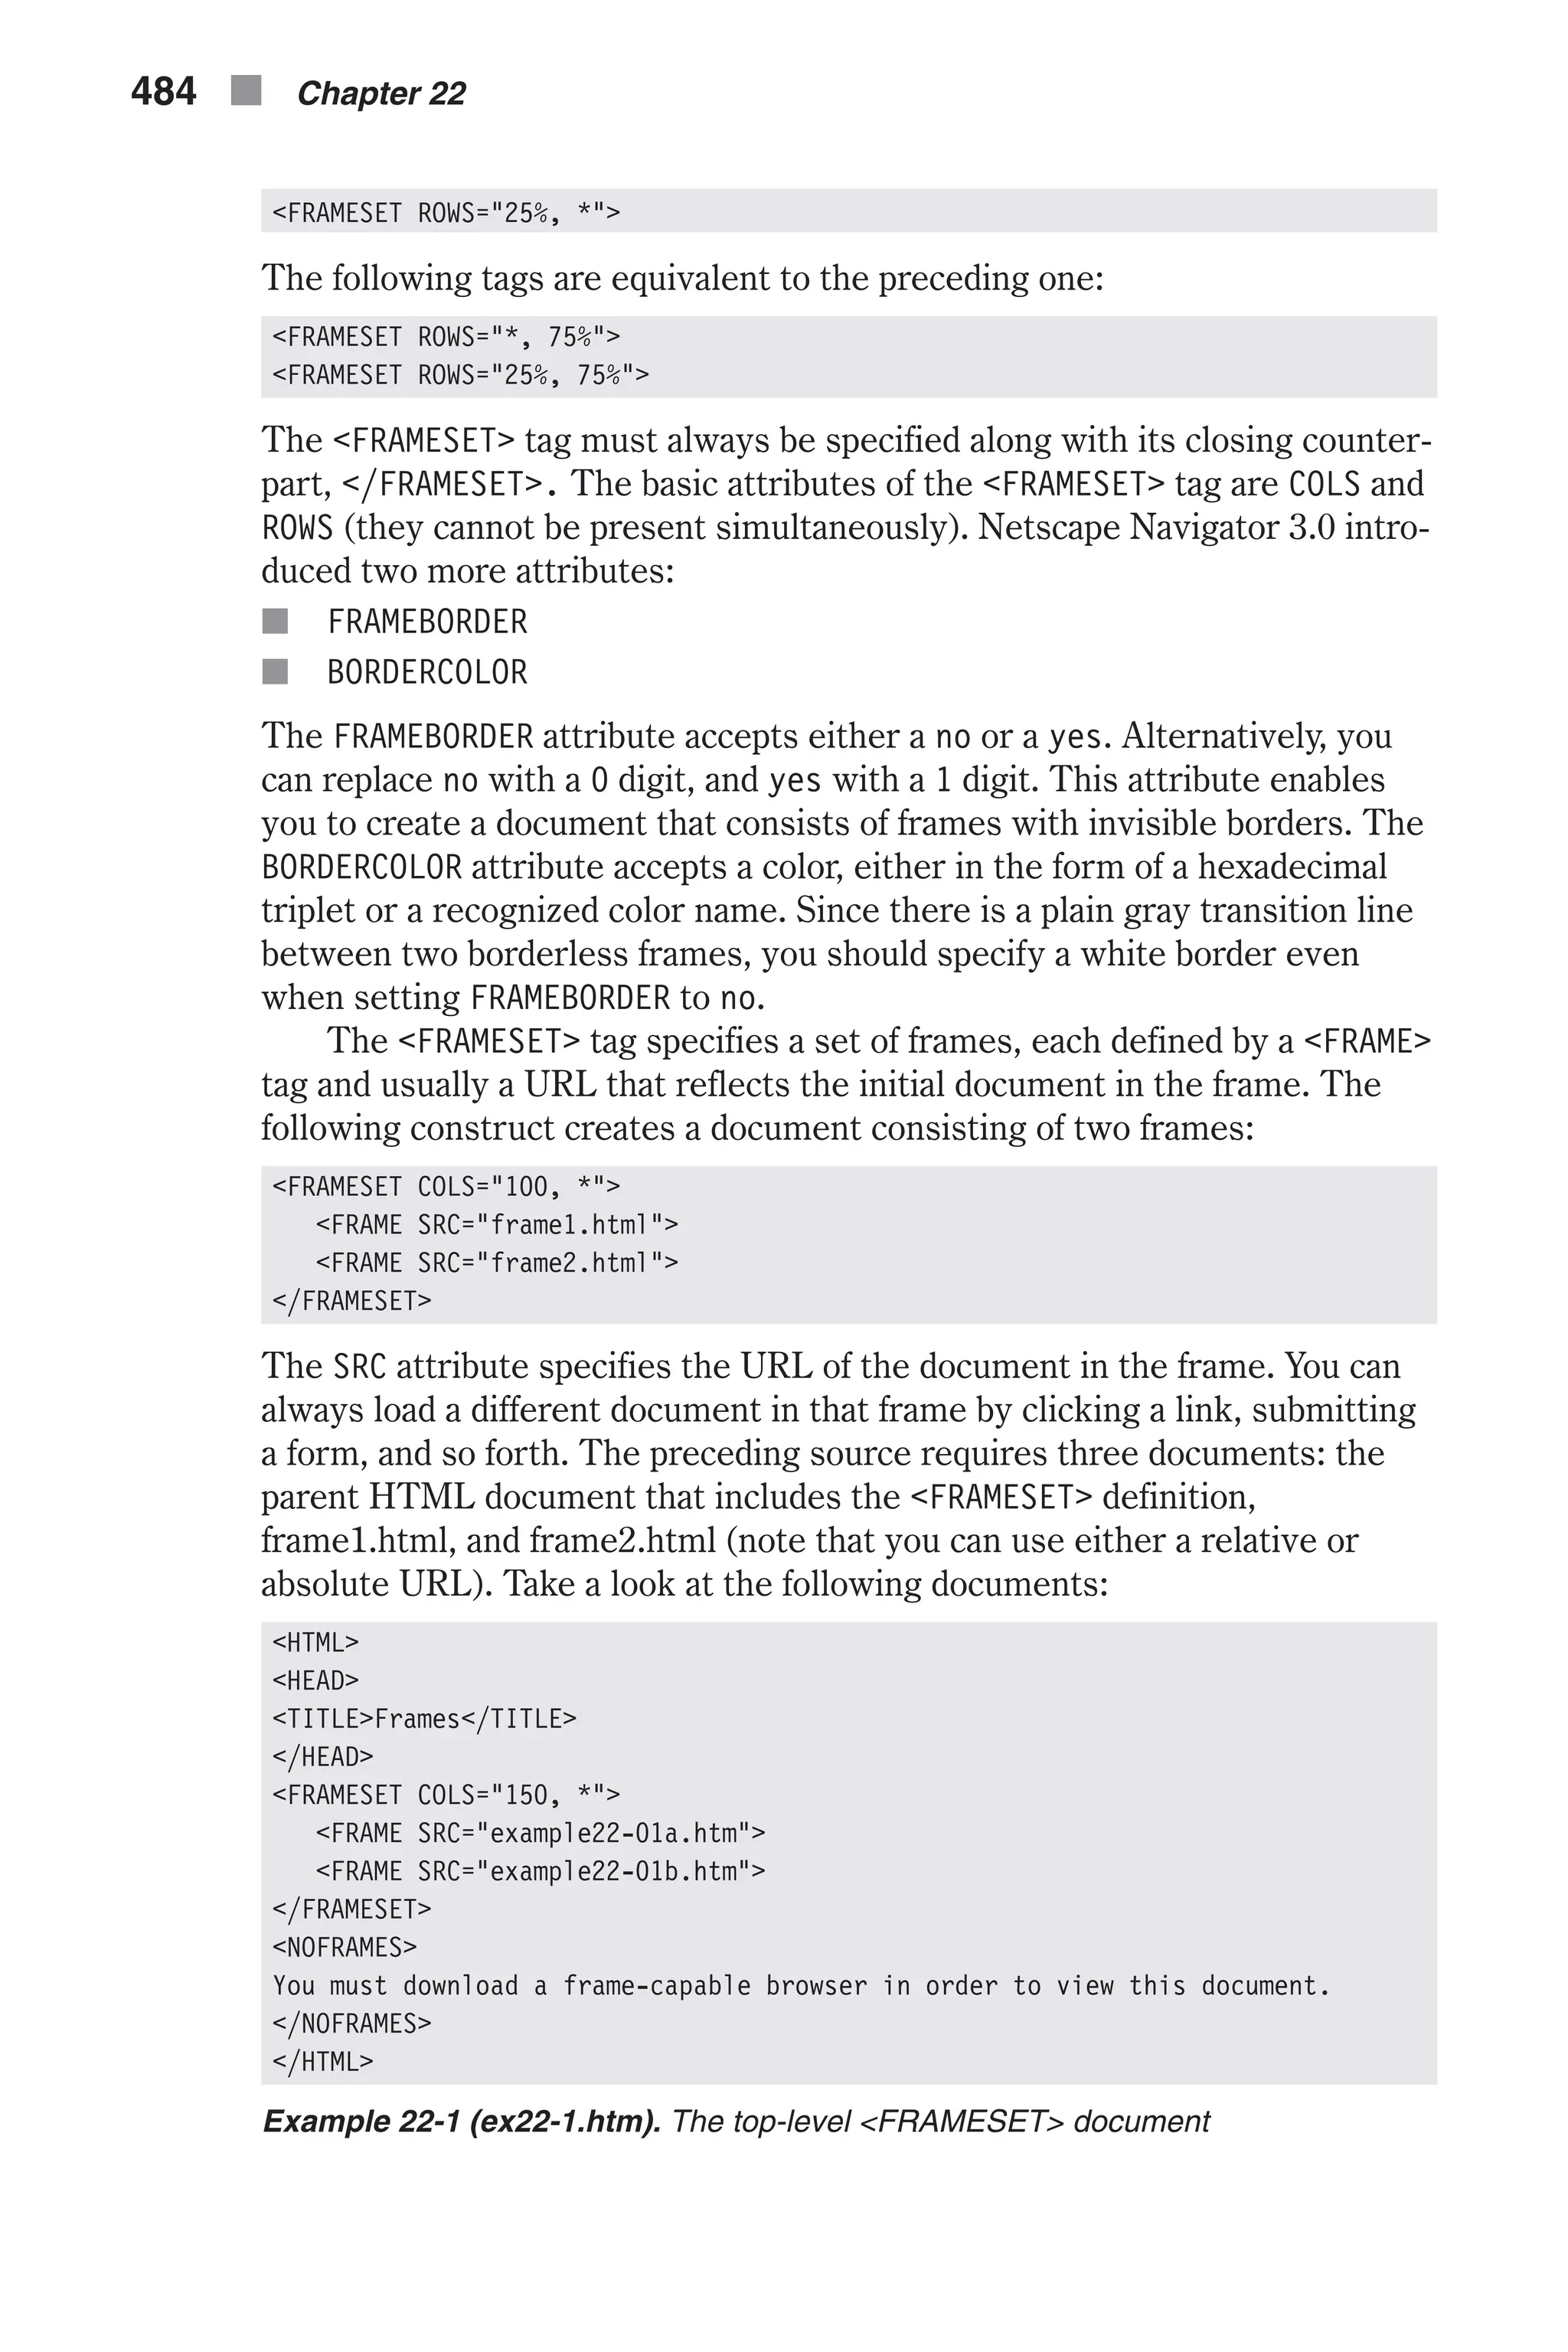
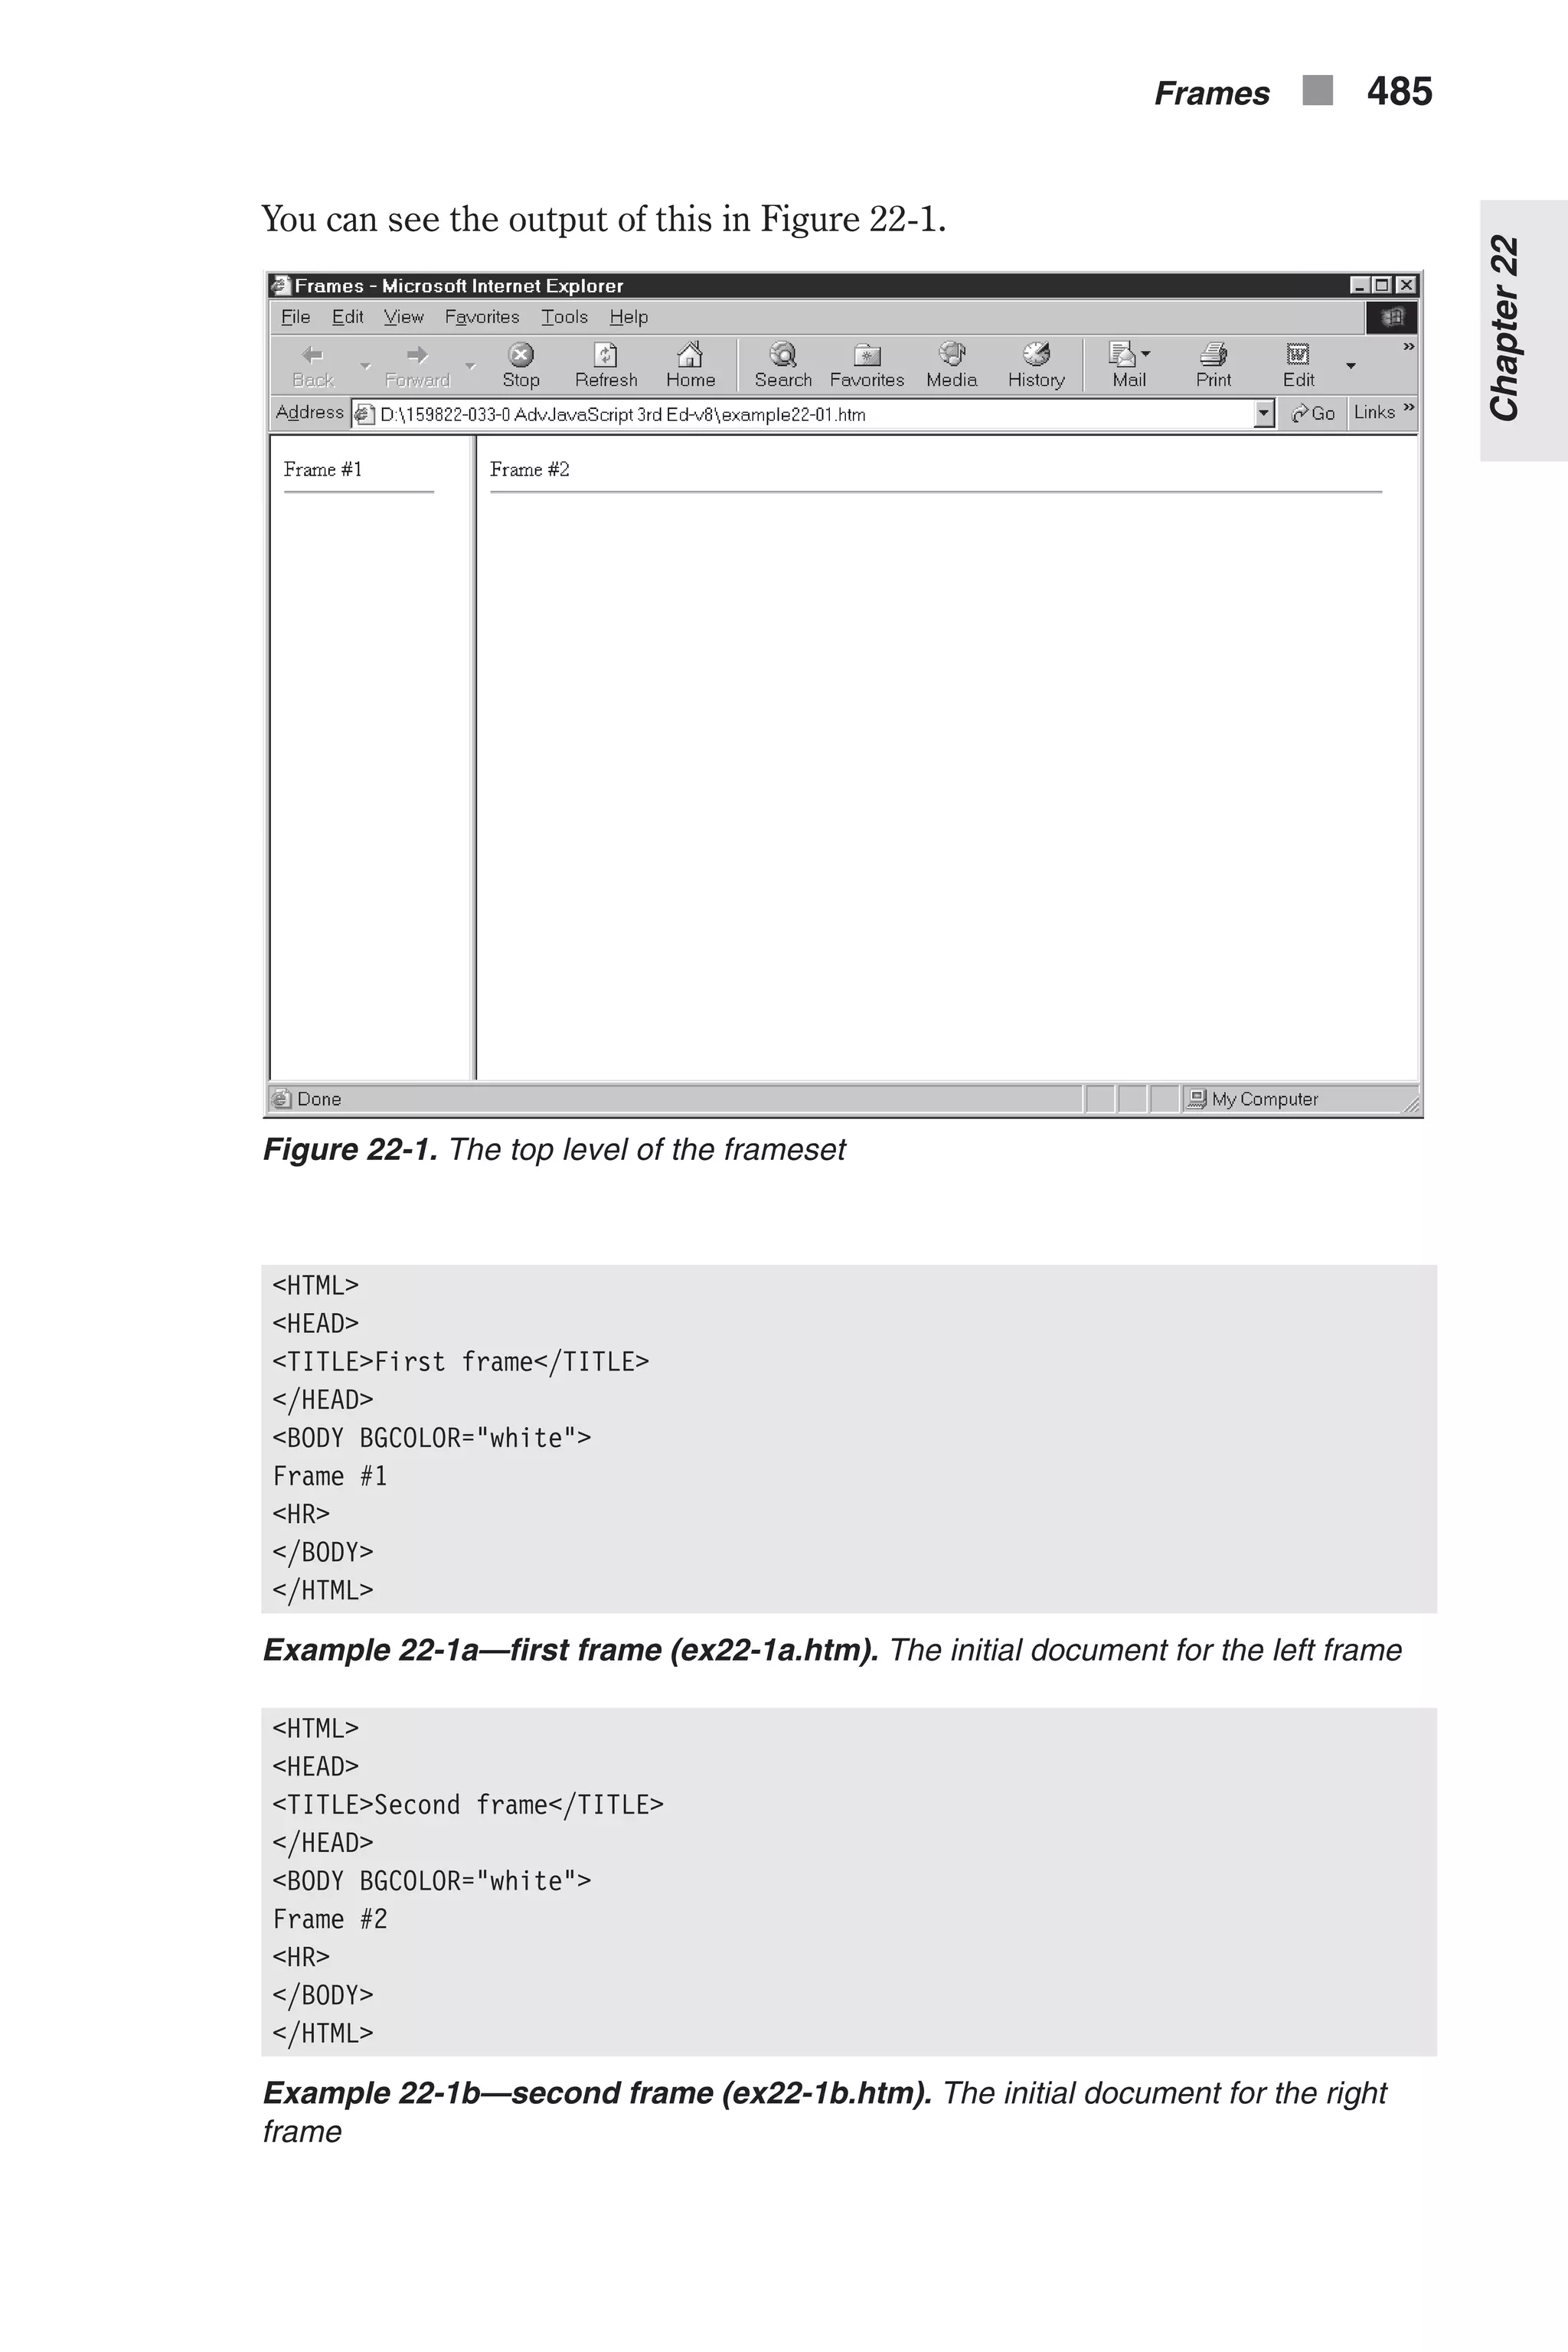
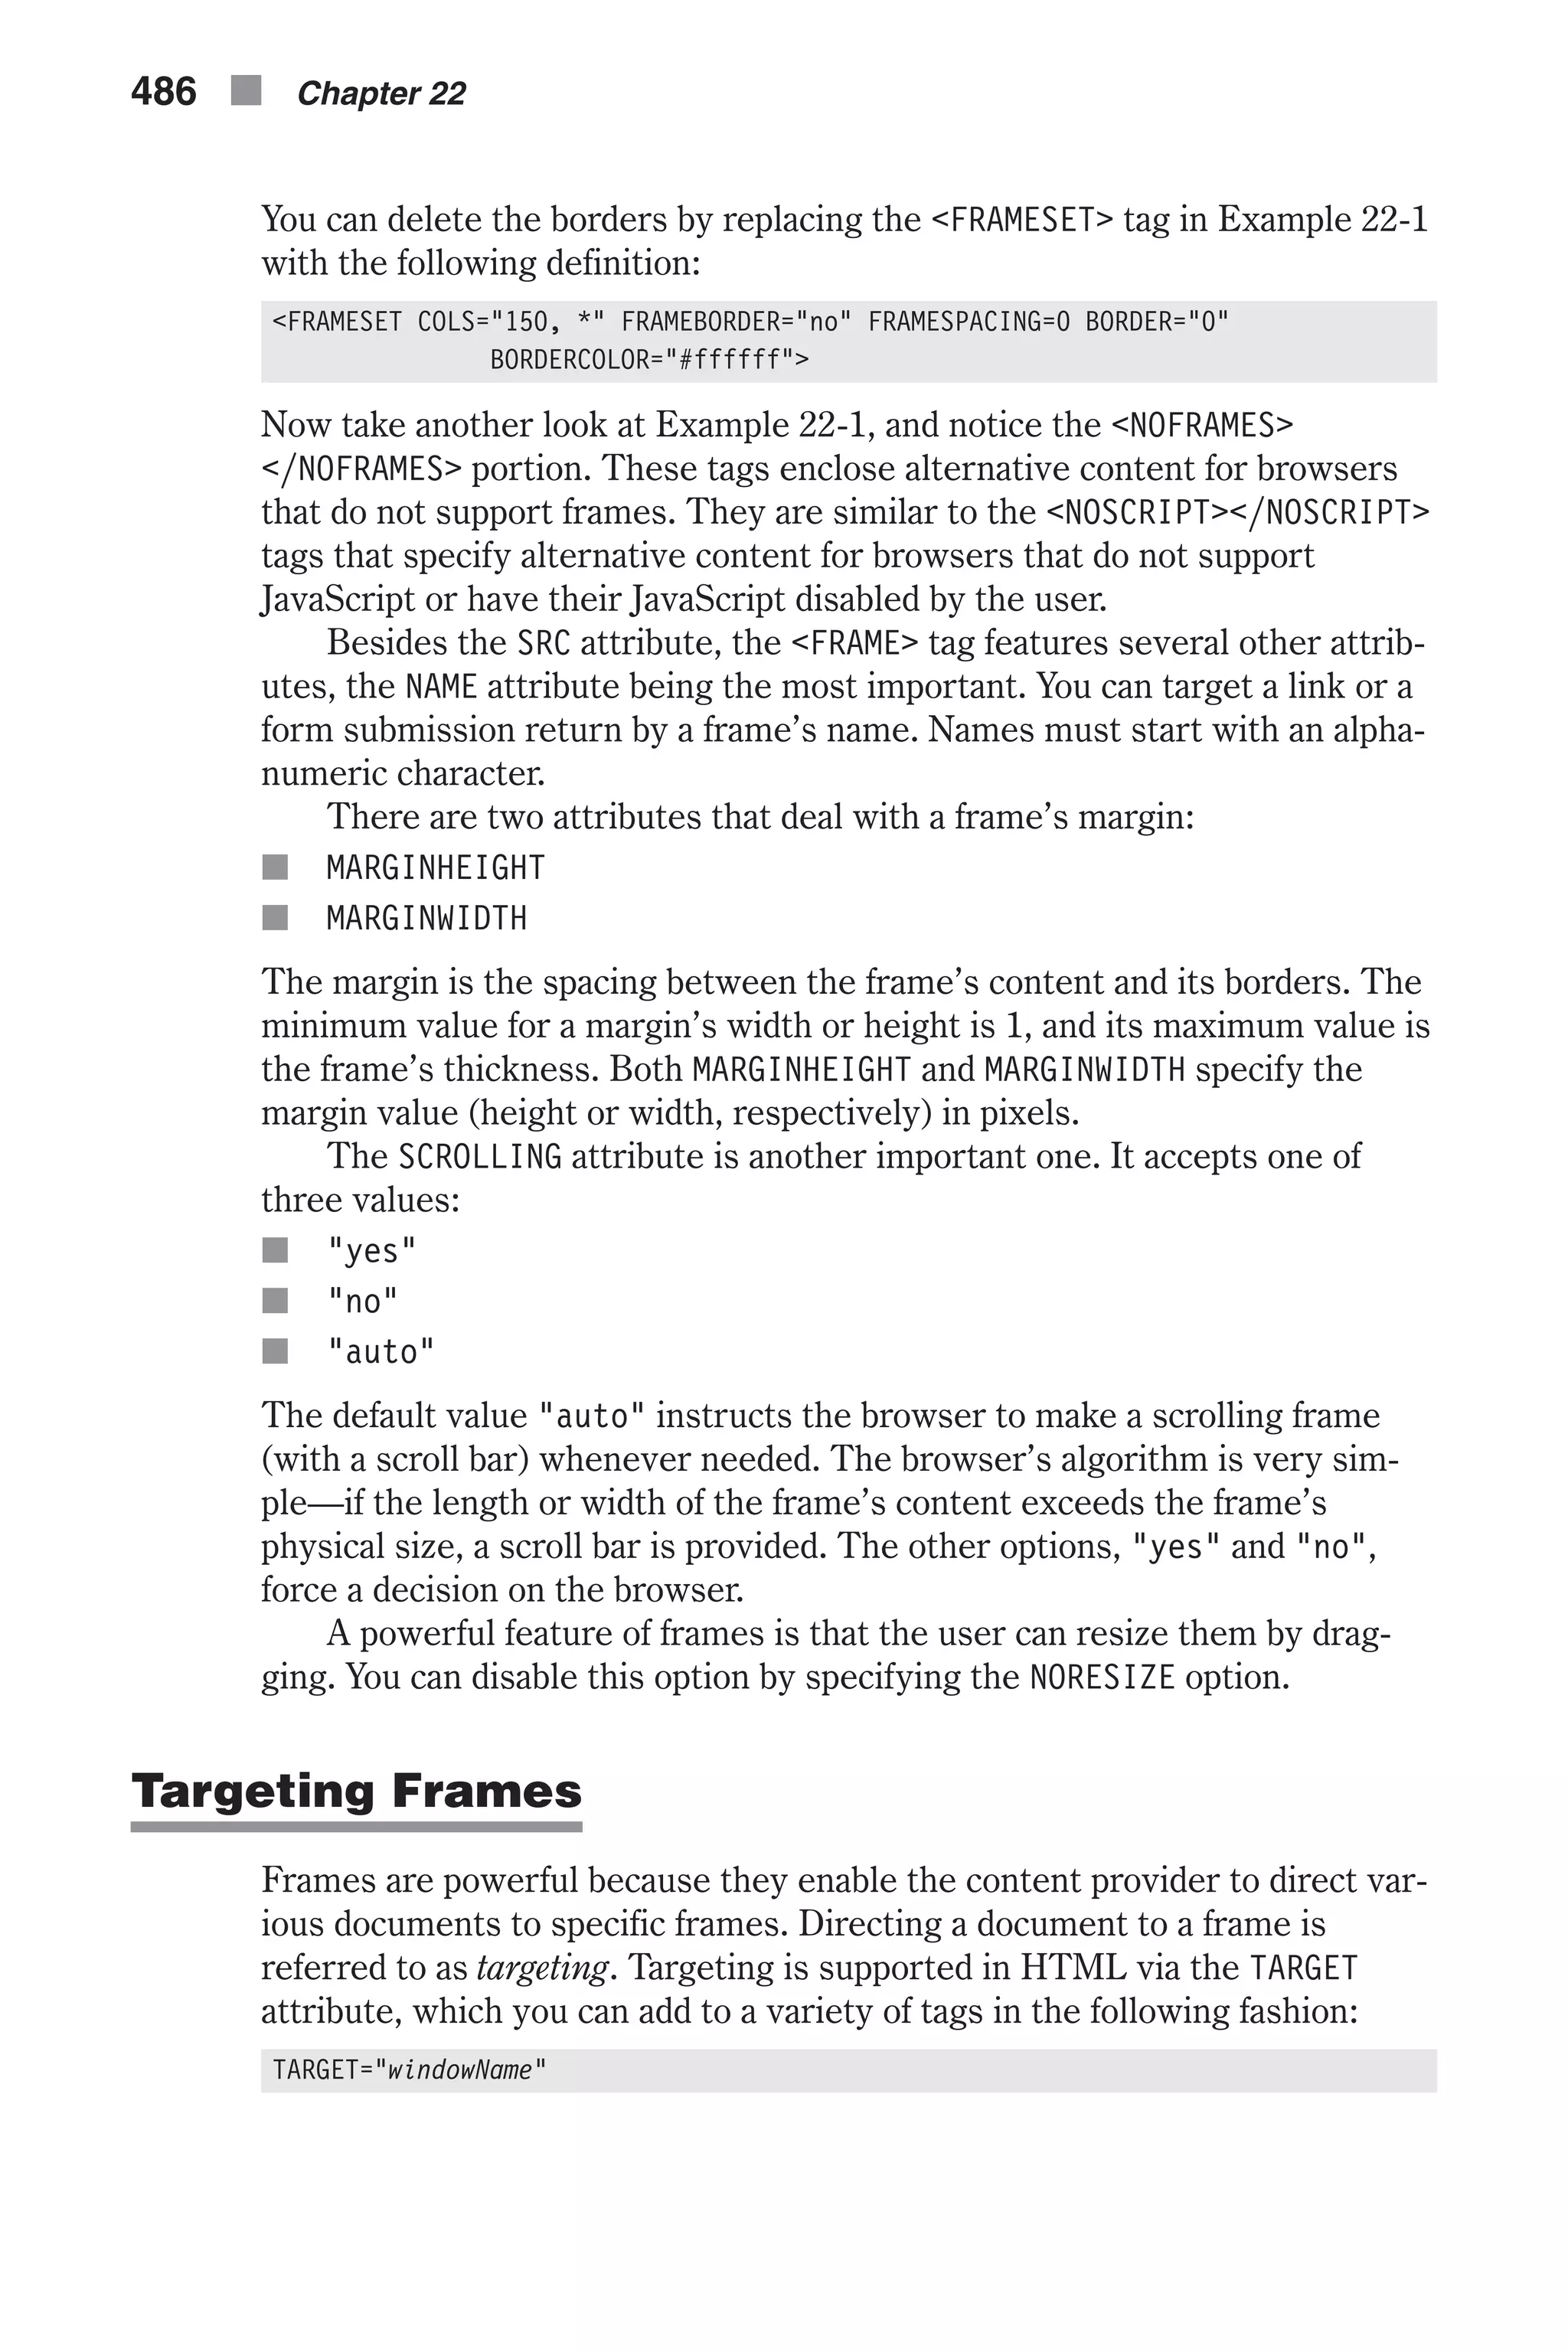
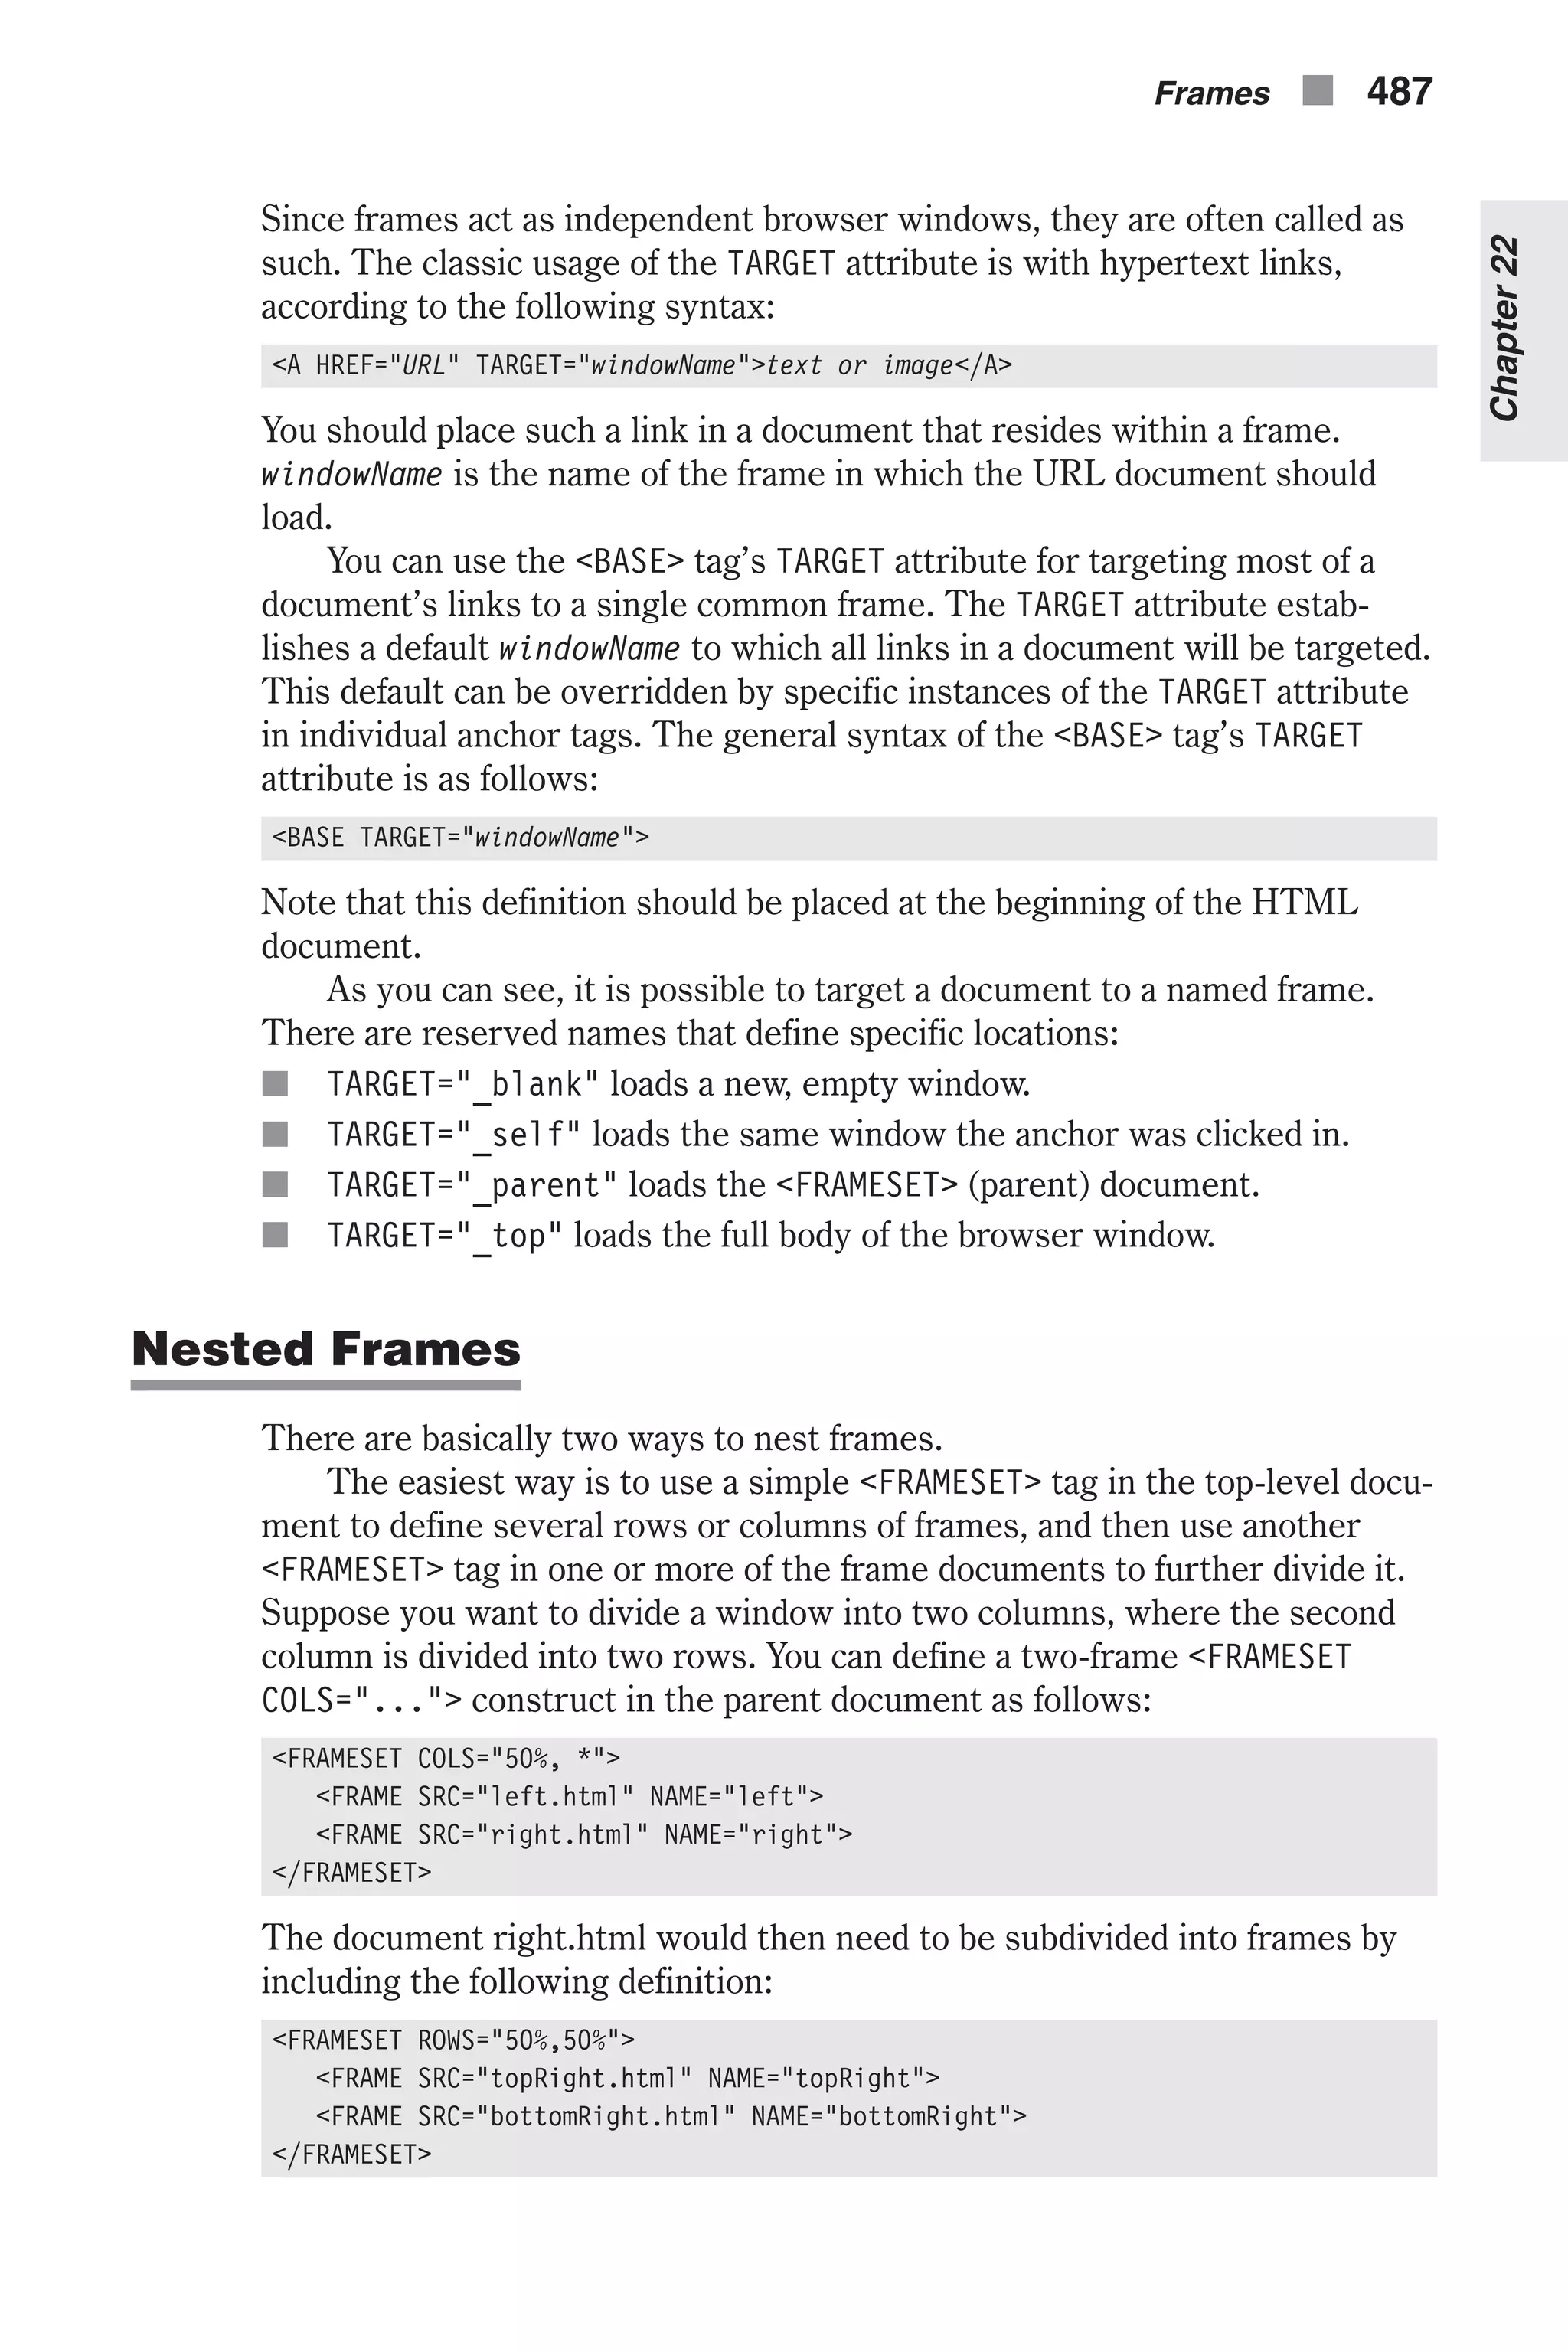
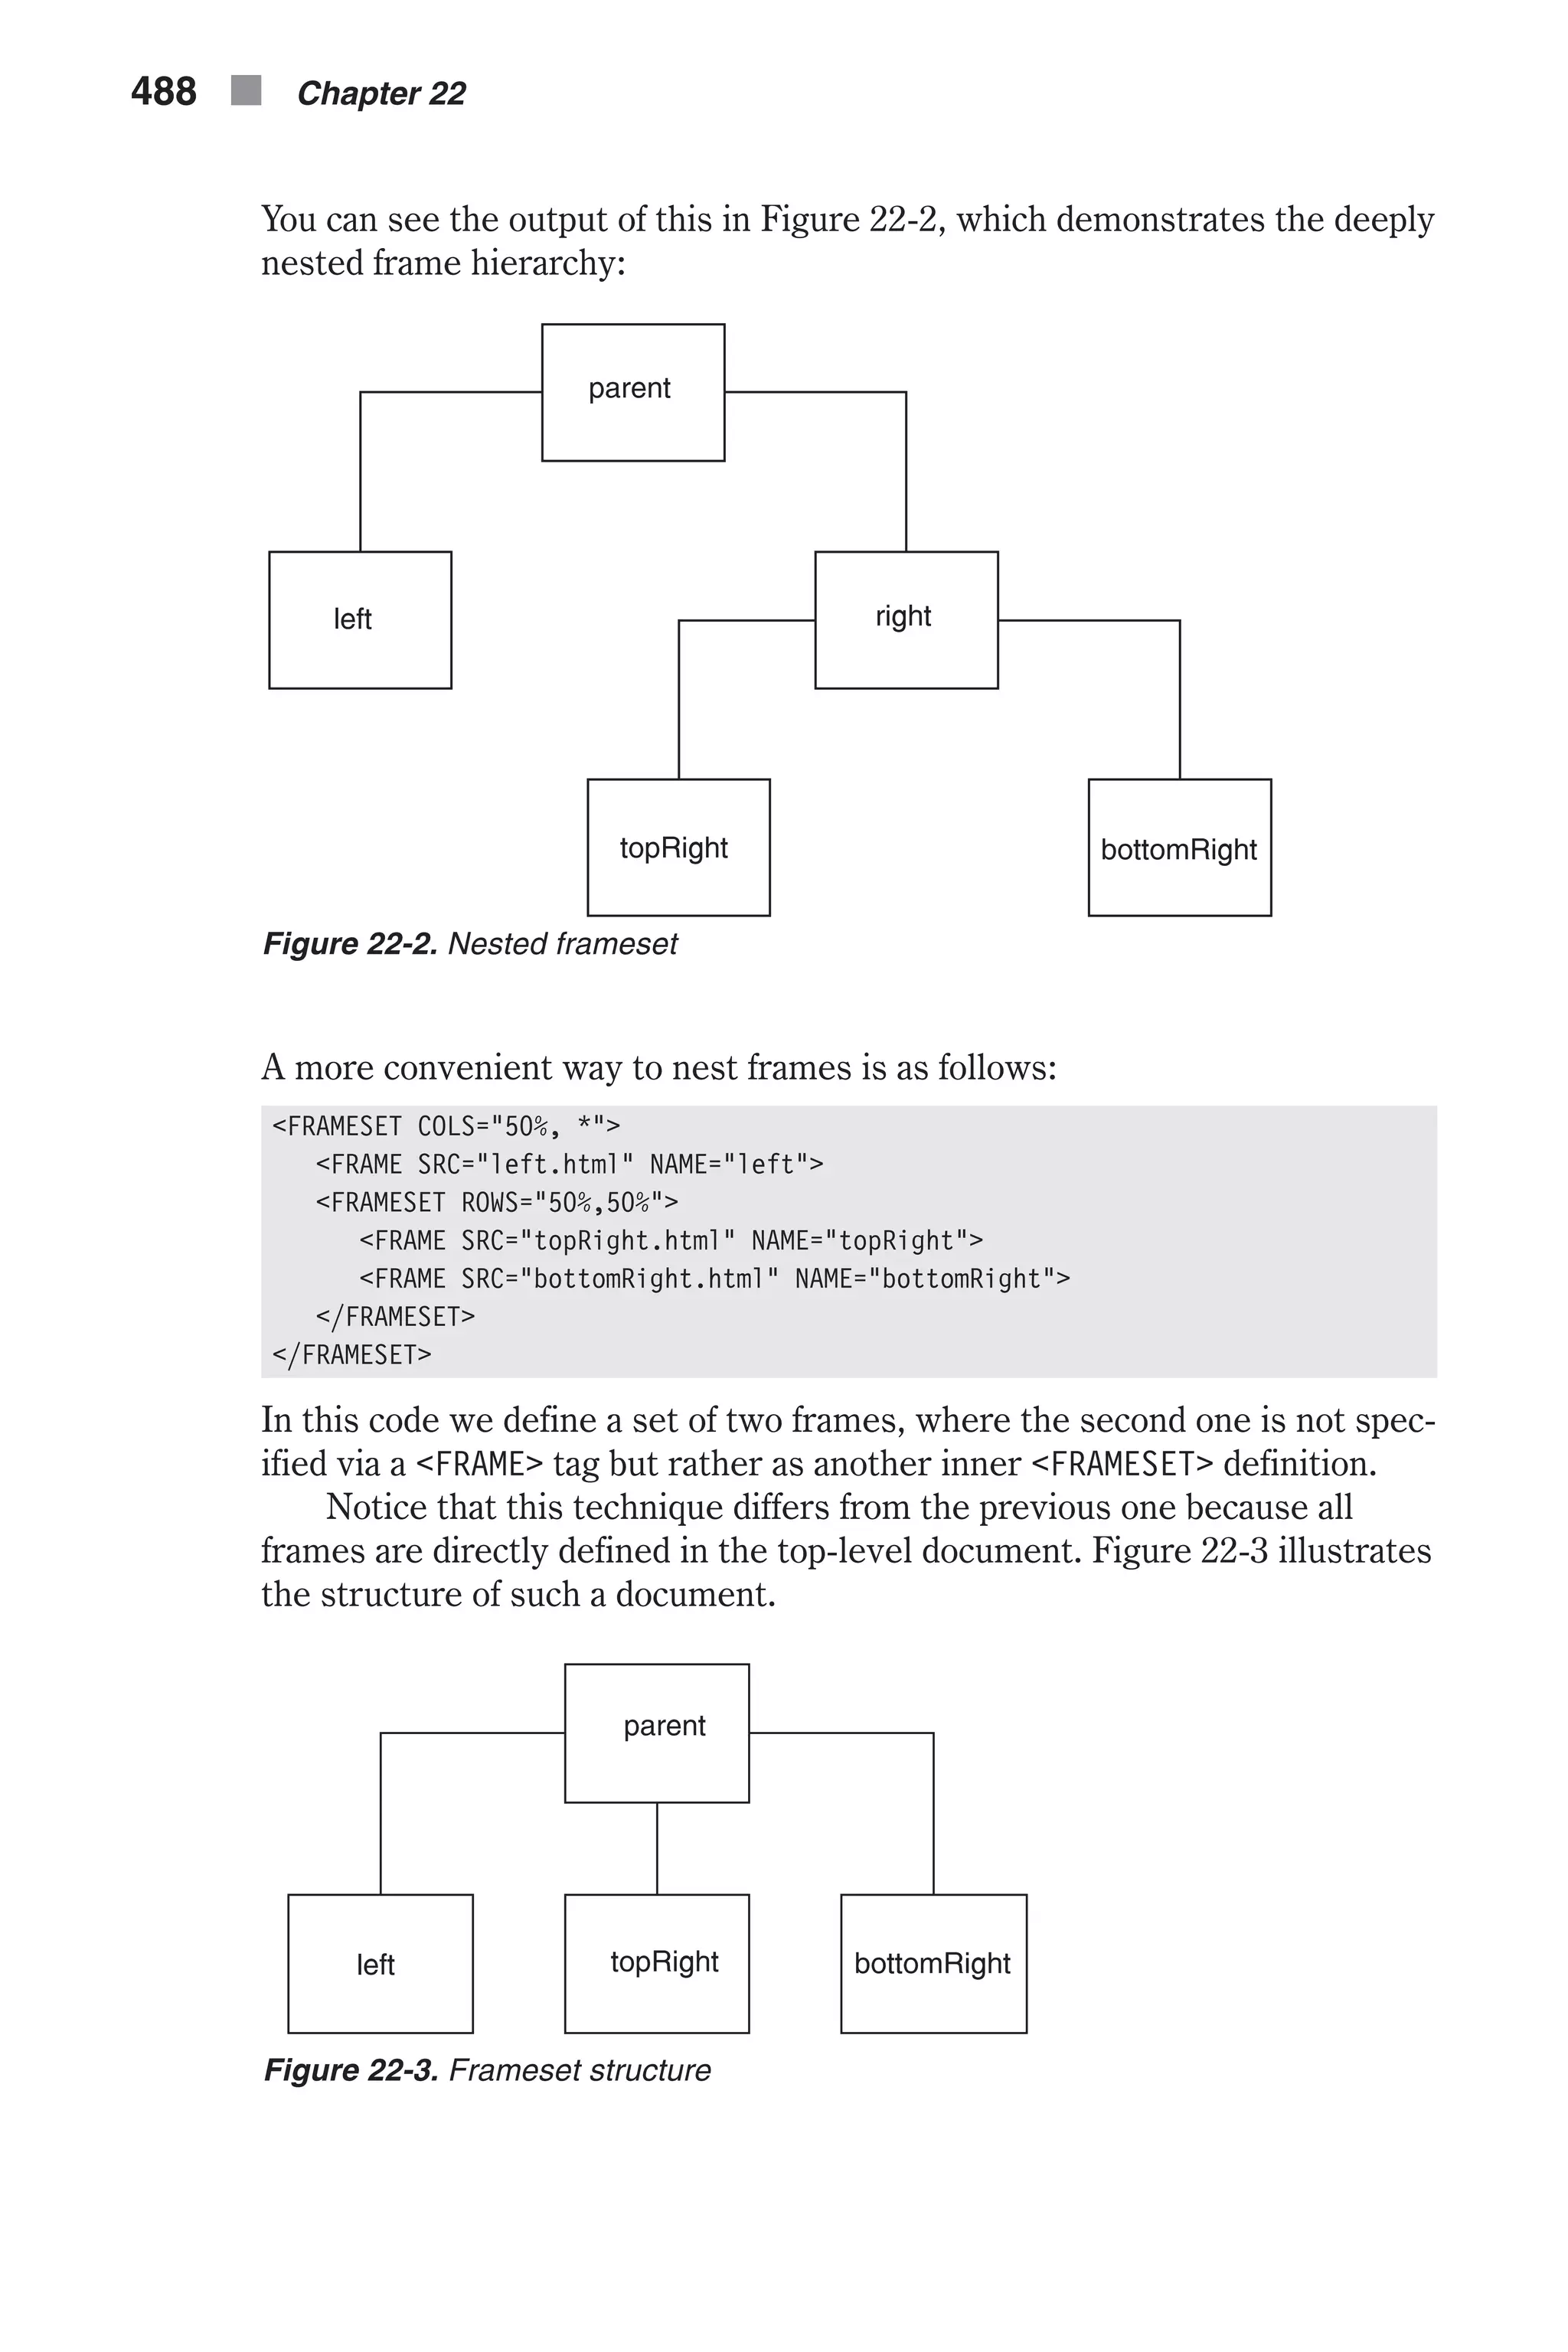
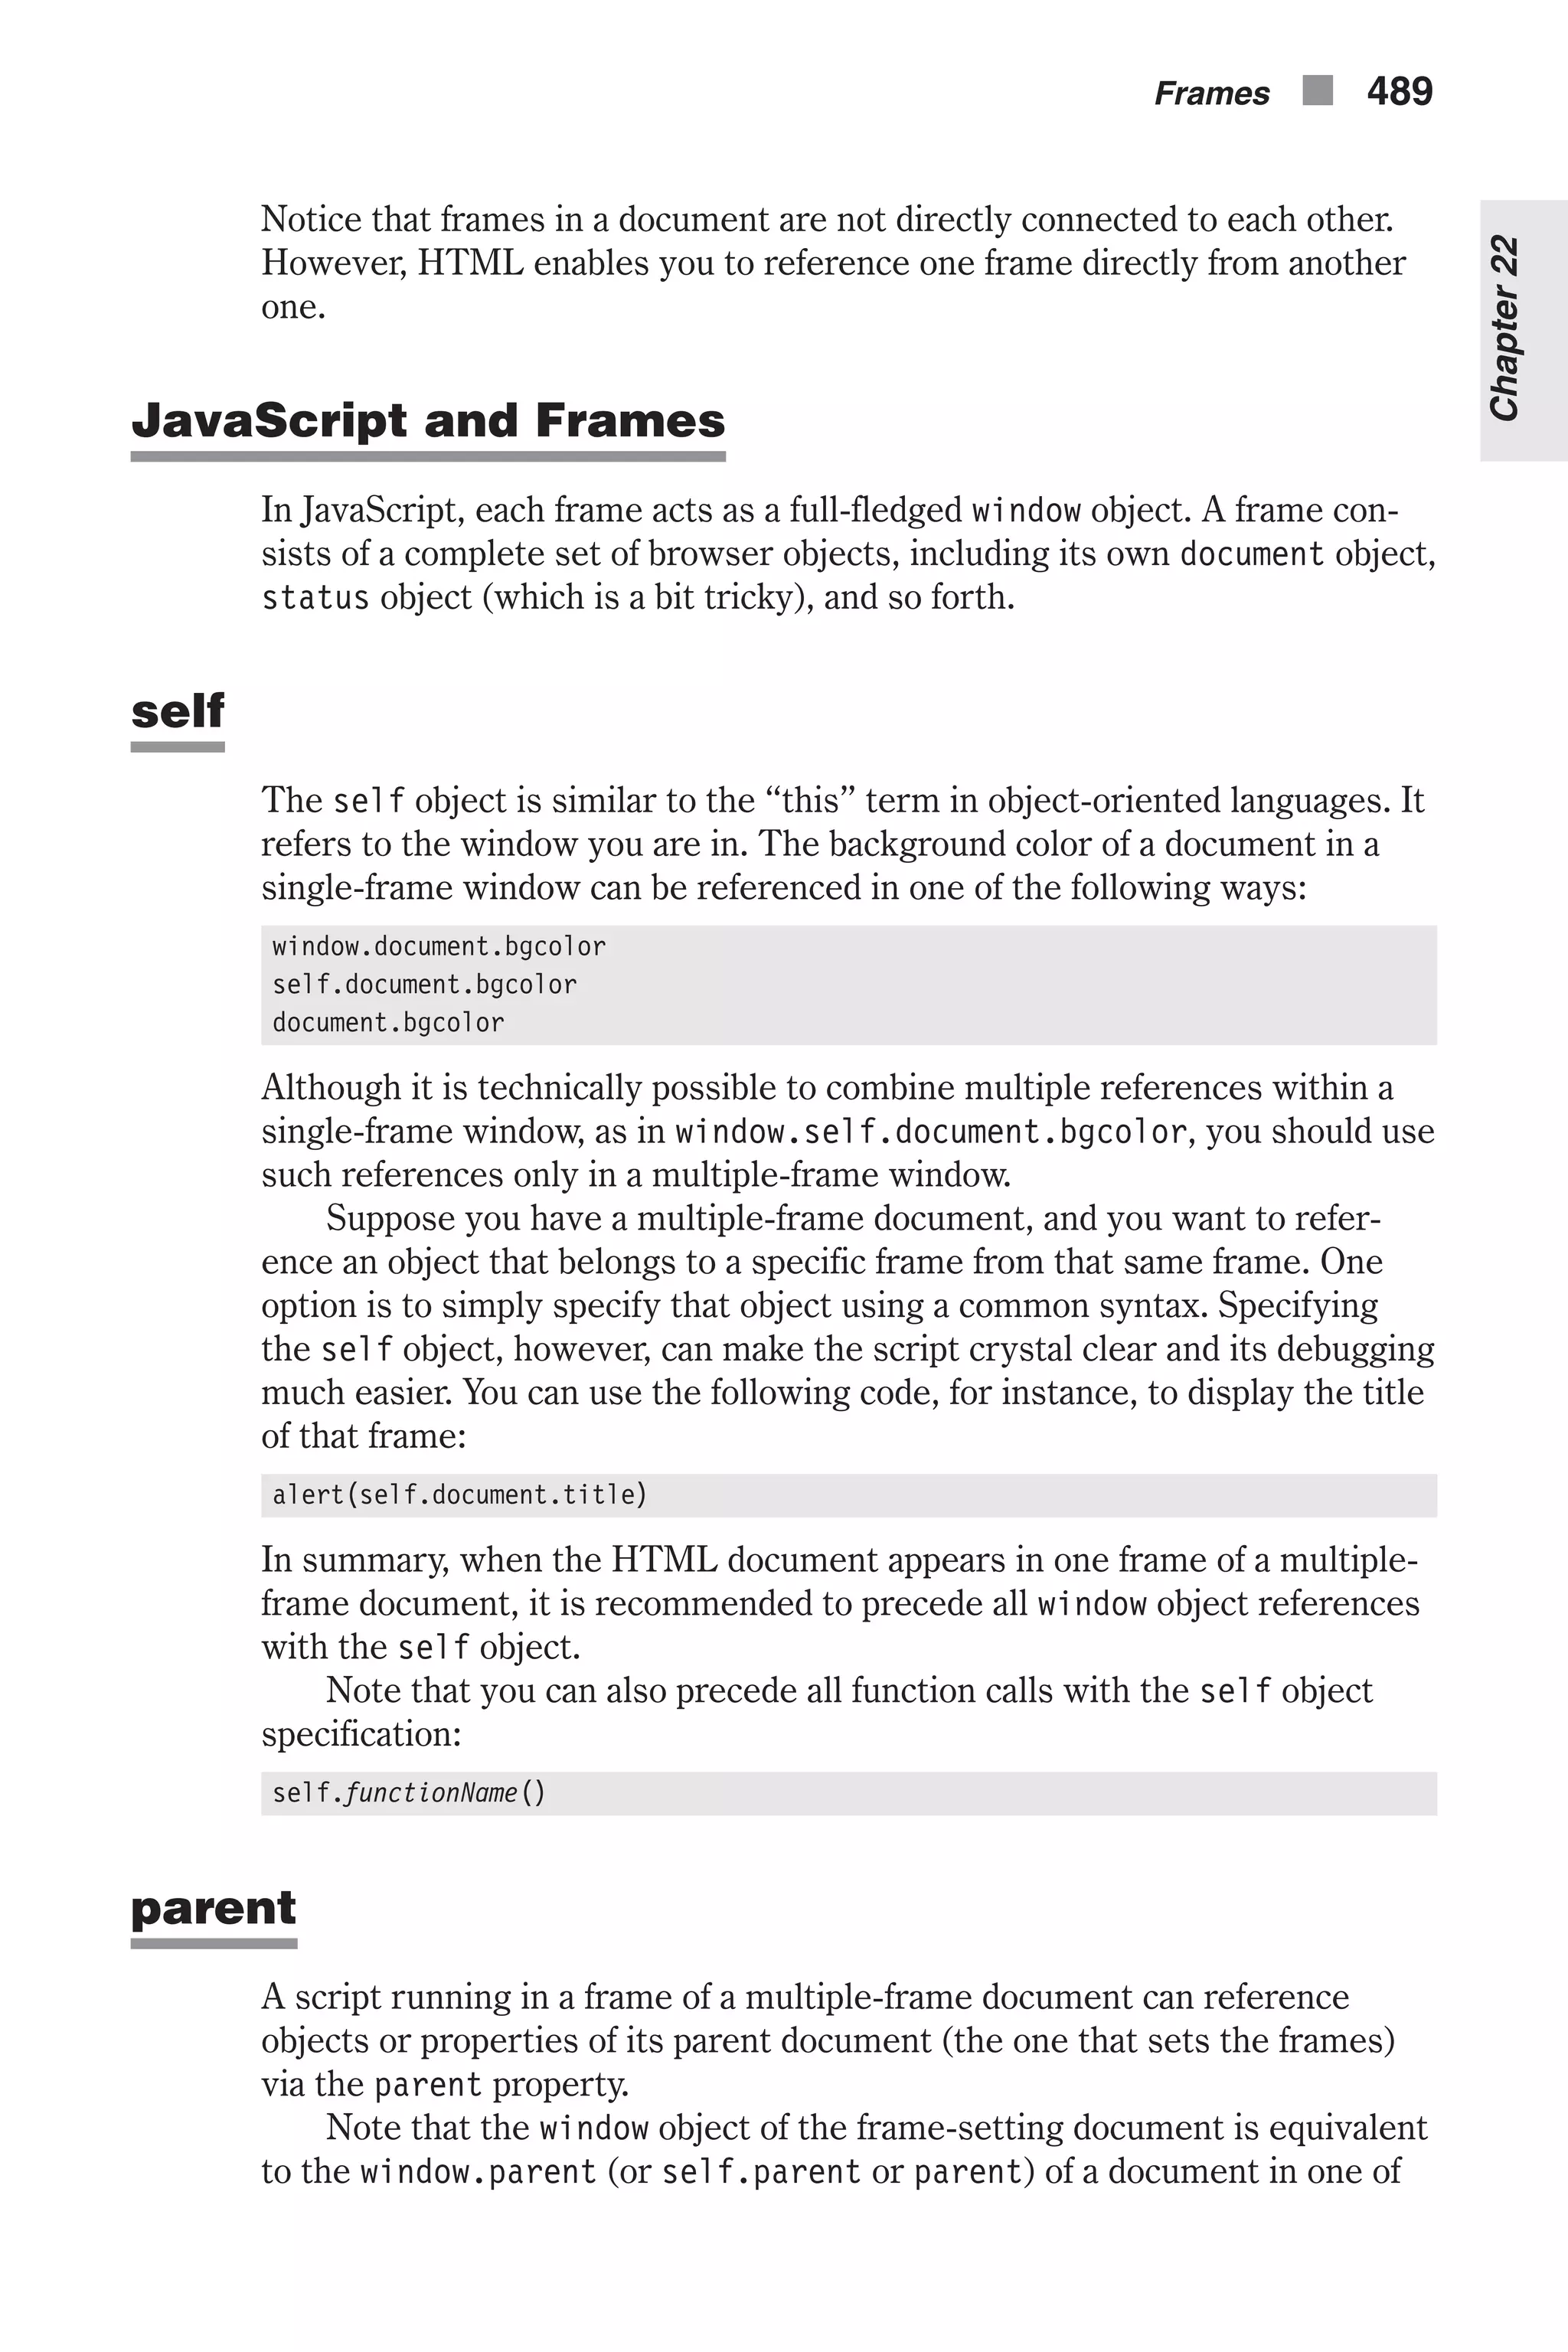
![the frames. In a way, since it points to a higher level of hierarchy, the parent property may seem to violate the object hierarchy rules. A child window can also call a function of the parent window. The refer- ence would be as follows: parent.functionName([arguments]) The parent property of a frame’s window object does not always point to the top-level window. If one of the children of the top-level window is also a frame-setting window, then you wind up with three levels of hierarchies. The parent property of the bottom level of hierarchy points to the second one. I recommend that you draw flowcharts when you design a site with deeply nested frames. (See the section called “Nested Frames” earlier in this chapter for a discussion of the different types of nesting.) top The window object’s top property refers to the topmost window in a JavaScript hierarchy. For a single-frame window, top is equivalent to window, which in turn is equivalent to self and parent. In a multiple-frame window, the top object always reflects the topmost window that defines the first frameset. In a window that contains several frames, where at least one of the frames also contains a frameset, the top property of all window objects (including all generations in the hierarchy) refers to the window with the first frameset. In terms of flowcharts, the top property always refers to the highest rectangle. The top-level window can be referenced from the “youngest” child as parent.parent, top, window.top, or self.top. frames In a multiple-frame window, all frames act like full-fledged window objects. The frames property plays an important role when a statement in one frame must access an object or property located in a different frame. The frames property is an array that reflects all direct children of a given window object. The property window.frames.length reflects the num- ber of direct children from the point of view of that window object. The browser stores information about all visible frames in an indexed array, where the first frame is stored in index 0: window.frames[0] Since you should never deeply nest frames using several frame-setting doc- uments, the frames array should usually be referenced as parent.frames or top.frames. Suppose you have a window divided into three frames. You can access the title of the second frame from a script in the first frame as par- ent.frames[1].document.title. 490 n Chapter 22](https://image.slidesharecdn.com/wordware-advancedjavascript3rded-160421130838/75/www-webre24h-com-Wordware-advanced-javascript-3rd-ed-easttom-515-2048.jpg)
![You can also access frames by their names. You can use the following syntax to retrieve (from any frame) the background color of a document in a frame named myFrame: parent.myFrame.document.bgcolor You can also refer to the frames array as an associative array, in the follow- ing fashion: parent.frames["myFrame"].document.bgcolor An Example: The Color Center The Color Center is a JavaScript application that enables the user to test a variety of colors in order to find the best configurations for his or her web site. There are five distinct attributes that play a role in this tool: n bgcolor—the background color n link—the color of standard links n alink—the color of active links n vlink—the color of visited links n text—the color of plain text The Color Center is compatible with both Internet Explorer and Navigator. It is divided into three frames. The upper frame includes the red, green, and blue text fields that display the RGB values of the current color. It also fea- tures a menu enabling the user to select the attribute (one of five) that he or she wants to customize. A Save button stores the settings in a cookie, and a Load button retrieves them from the cookie. The left frame displays the color cube—a complete set of 216 non-dith- ering colors. The user can select a color from the color cube and assign it to the attribute selected in the upper frame. The right frame is the most simple one. Its initial document does not contain any data besides the basic HTML tags. Its content is generated by document.write() statements, executed in the parent frame-setting document. The Frame-setting Window Example 22-2 shows the frame-setting document. <HTML> <HEAD> <TITLE>Color Center</TITLE> <SCRIPT LANGUAGE="JavaScript"> <!-- // Boolean variable specified if alert should be displayed if cookie exceeds 4KB var caution = false deleteCookie("slot") // name - name of the cookie // value - value of the cookie Frames n 491 Chapter22](https://image.slidesharecdn.com/wordware-advancedjavascript3rded-160421130838/75/www-webre24h-com-Wordware-advanced-javascript-3rd-ed-easttom-516-2048.jpg)
![// [expires] - expiration date of the cookie (defaults to end of current session) // [path] - path for which the cookie is valid (defaults to path of calling document) // [domain] - domain for which the cookie is valid (defaults to domain of calling document) // [secure] - Boolean value indicating if the cookie transmission requires a secure transmission // * an argument defaults when it is assigned null as a placeholder // * a null placeholder is not required for trailing omitted arguments function setCookie(name, value, expires, path, domain, secure) { var curCookie = name + "=" + escape(value) + ((expires) ? "; expires=" + expires.toGMTString() : "") + ((path) ? "; path=" + path : "") + ((domain) ? "; domain=" + domain : "") + ((secure) ? "; secure" : "") if (!caution || (name + "=" + escape(value)).length <= 4000) document.cookie = curCookie else if (confirm("Cookie exceeds 4KB and will be cut!")) document.cookie = curCookie } // name - name of the desired cookie // * return string containing value of specified cookie or null if cookie does not exist function getCookie(name) { var prefix = name + "=" var cookieStartIndex = document.cookie.indexOf(prefix) if (cookieStartIndex == –1) return null var cookieEndIndex = document.cookie.indexOf(";", cookieStartIndex + prefix.length) if (cookieEndIndex == –1) cookieEndIndex = document.cookie.length return unescape(document.cookie.substring(cookieStartIndex + prefix.length, cookieEndIndex)) } // name - name of the cookie // [path] - path of the cookie (must be same as path used to create cookie) // [domain] - domain of the cookie (must be same as domain used to create cookie) // * path and domain default if assigned null or omitted if no explicit argument proceeds function deleteCookie(name, path, domain) { if (getCookie(name)) { document.cookie = name + "=" + ((path) ? "; path=" + path : "") + ((domain) ? "; domain=" + domain : "") + "; expires=Thu, 01-Jan-70 00:00:01 GMT" 492 n Chapter 22](https://image.slidesharecdn.com/wordware-advancedjavascript3rded-160421130838/75/www-webre24h-com-Wordware-advanced-javascript-3rd-ed-easttom-517-2048.jpg)
![} } // date - any instance of the Date object // * you should hand all instances of the Date object to this function for "repairs" function fixDate(date) { var base = new Date(0) var skew = base.getTime() if (skew > 0) date.setTime(date.getTime() – skew) } // updates the R, G, and B text fields (invoked as a method) function display() { frames[0].document.forms[0].red.value = this.r frames[0].document.forms[0].green.value = this.g frames[0].document.forms[0].blue.value = this.b } // constructs an attribute function makeAttribute(r, g, b) { this.r = r + "" this.g = g + "" this.b = b + "" this.display = display } // create instances for all attributes var link = new makeAttribute("00", "00", "00") // black var alink = new makeAttribute("00", "00", "00") // black var vlink = new makeAttribute("00", "00", "00") // black var text = new makeAttribute("00", "00", "00") // black var bgcolor = new makeAttribute("FF", "FF", "FF") // white // invoked when user selects a color from swatches function select(r, g, b) { // assign string reflecting selected attribute ("text", "bgcolor", etc.) var attribute = curAttribute() // assign new descriptors eval(attribute).r = r eval(attribute).g = g eval(attribute).b = b // display new descriptors in R, G, and B text fields eval(attribute).display() // update main frame update() } // return string reflecting selected attribute ("text", "bgcolor", etc.) function curAttribute() { var list = frames[0].document.forms[0].attribute return list.options[list.selectedIndex].value } Frames n 493 Chapter22](https://image.slidesharecdn.com/wordware-advancedjavascript3rded-160421130838/75/www-webre24h-com-Wordware-advanced-javascript-3rd-ed-easttom-518-2048.jpg)
![// returns <BODY> tag (excluding ">" and "<") reflecting all selections function bodyDefinition() { var str = 'BODY ' str += 'BGCOLOR="#' + bgcolor.r + bgcolor.g + bgcolor.b + '" ' str += 'LINK="#' + link.r + link.g + link.b + '" ' str += 'ALINK="#' + alink.r + alink.g + alink.b + '" ' str += 'VLINK="#' + vlink.r + vlink.g + vlink.b + '" ' str += 'TEXT="#' + text.r + text.g + text.b + '"' return str } // update main window function update() { var bodyDef = bodyDefinition() var result = "" result += '<HTML><HEAD><TITLE>Main</TITLE></HEAD>' result += '<' + bodyDef + '>' result += '<CENTER>' result += 'Text <B>Text</B><HR WIDTH=50%>' result += '<FONT COLOR="#' + link.r + link.g + link.b + '"> Link <B>Link</B><HR WIDTH=50%></FONT>' result += '<FONT COLOR="#' + alink.r + alink.g + alink.b + '"> Alink <B>Alink</B><HR WIDTH=50%></FONT>' result += '<FONT COLOR="#' + vlink.r + vlink.g + vlink.b + '"> Vlink <B>Vlink</B><HR WIDTH=50%></FONT>' result += '<BR><FONT SIZE=2><' + bodyDef + '></FONT>' result += '</CENTER></HTML>' // assign document object of main frame to local variable var doc = frames[2].document // close data stream to document doc.close() // open new data stream to document (text/html) doc.open('text/html') // print HTML content doc.write(result) // close data stream to document doc.close() } // stores all selections as a cookie function save() { var slot = link.r + link.g + link.b + alink.r + alink.g + alink.b + vlink.r + vlink.g + vlink.b + text.r + text.g + text.b + bgcolor.r + bgcolor.g + bgcolor.b var now = new Date() fixDate(now) now.setTime(now.getTime() + 31 * 22 * 60 * 60 * 1000) // one month setCookie("slot", slot, now) } // load values from cookie (concatenation order in save() matters!) 494 n Chapter 22](https://image.slidesharecdn.com/wordware-advancedjavascript3rded-160421130838/75/www-webre24h-com-Wordware-advanced-javascript-3rd-ed-easttom-519-2048.jpg)
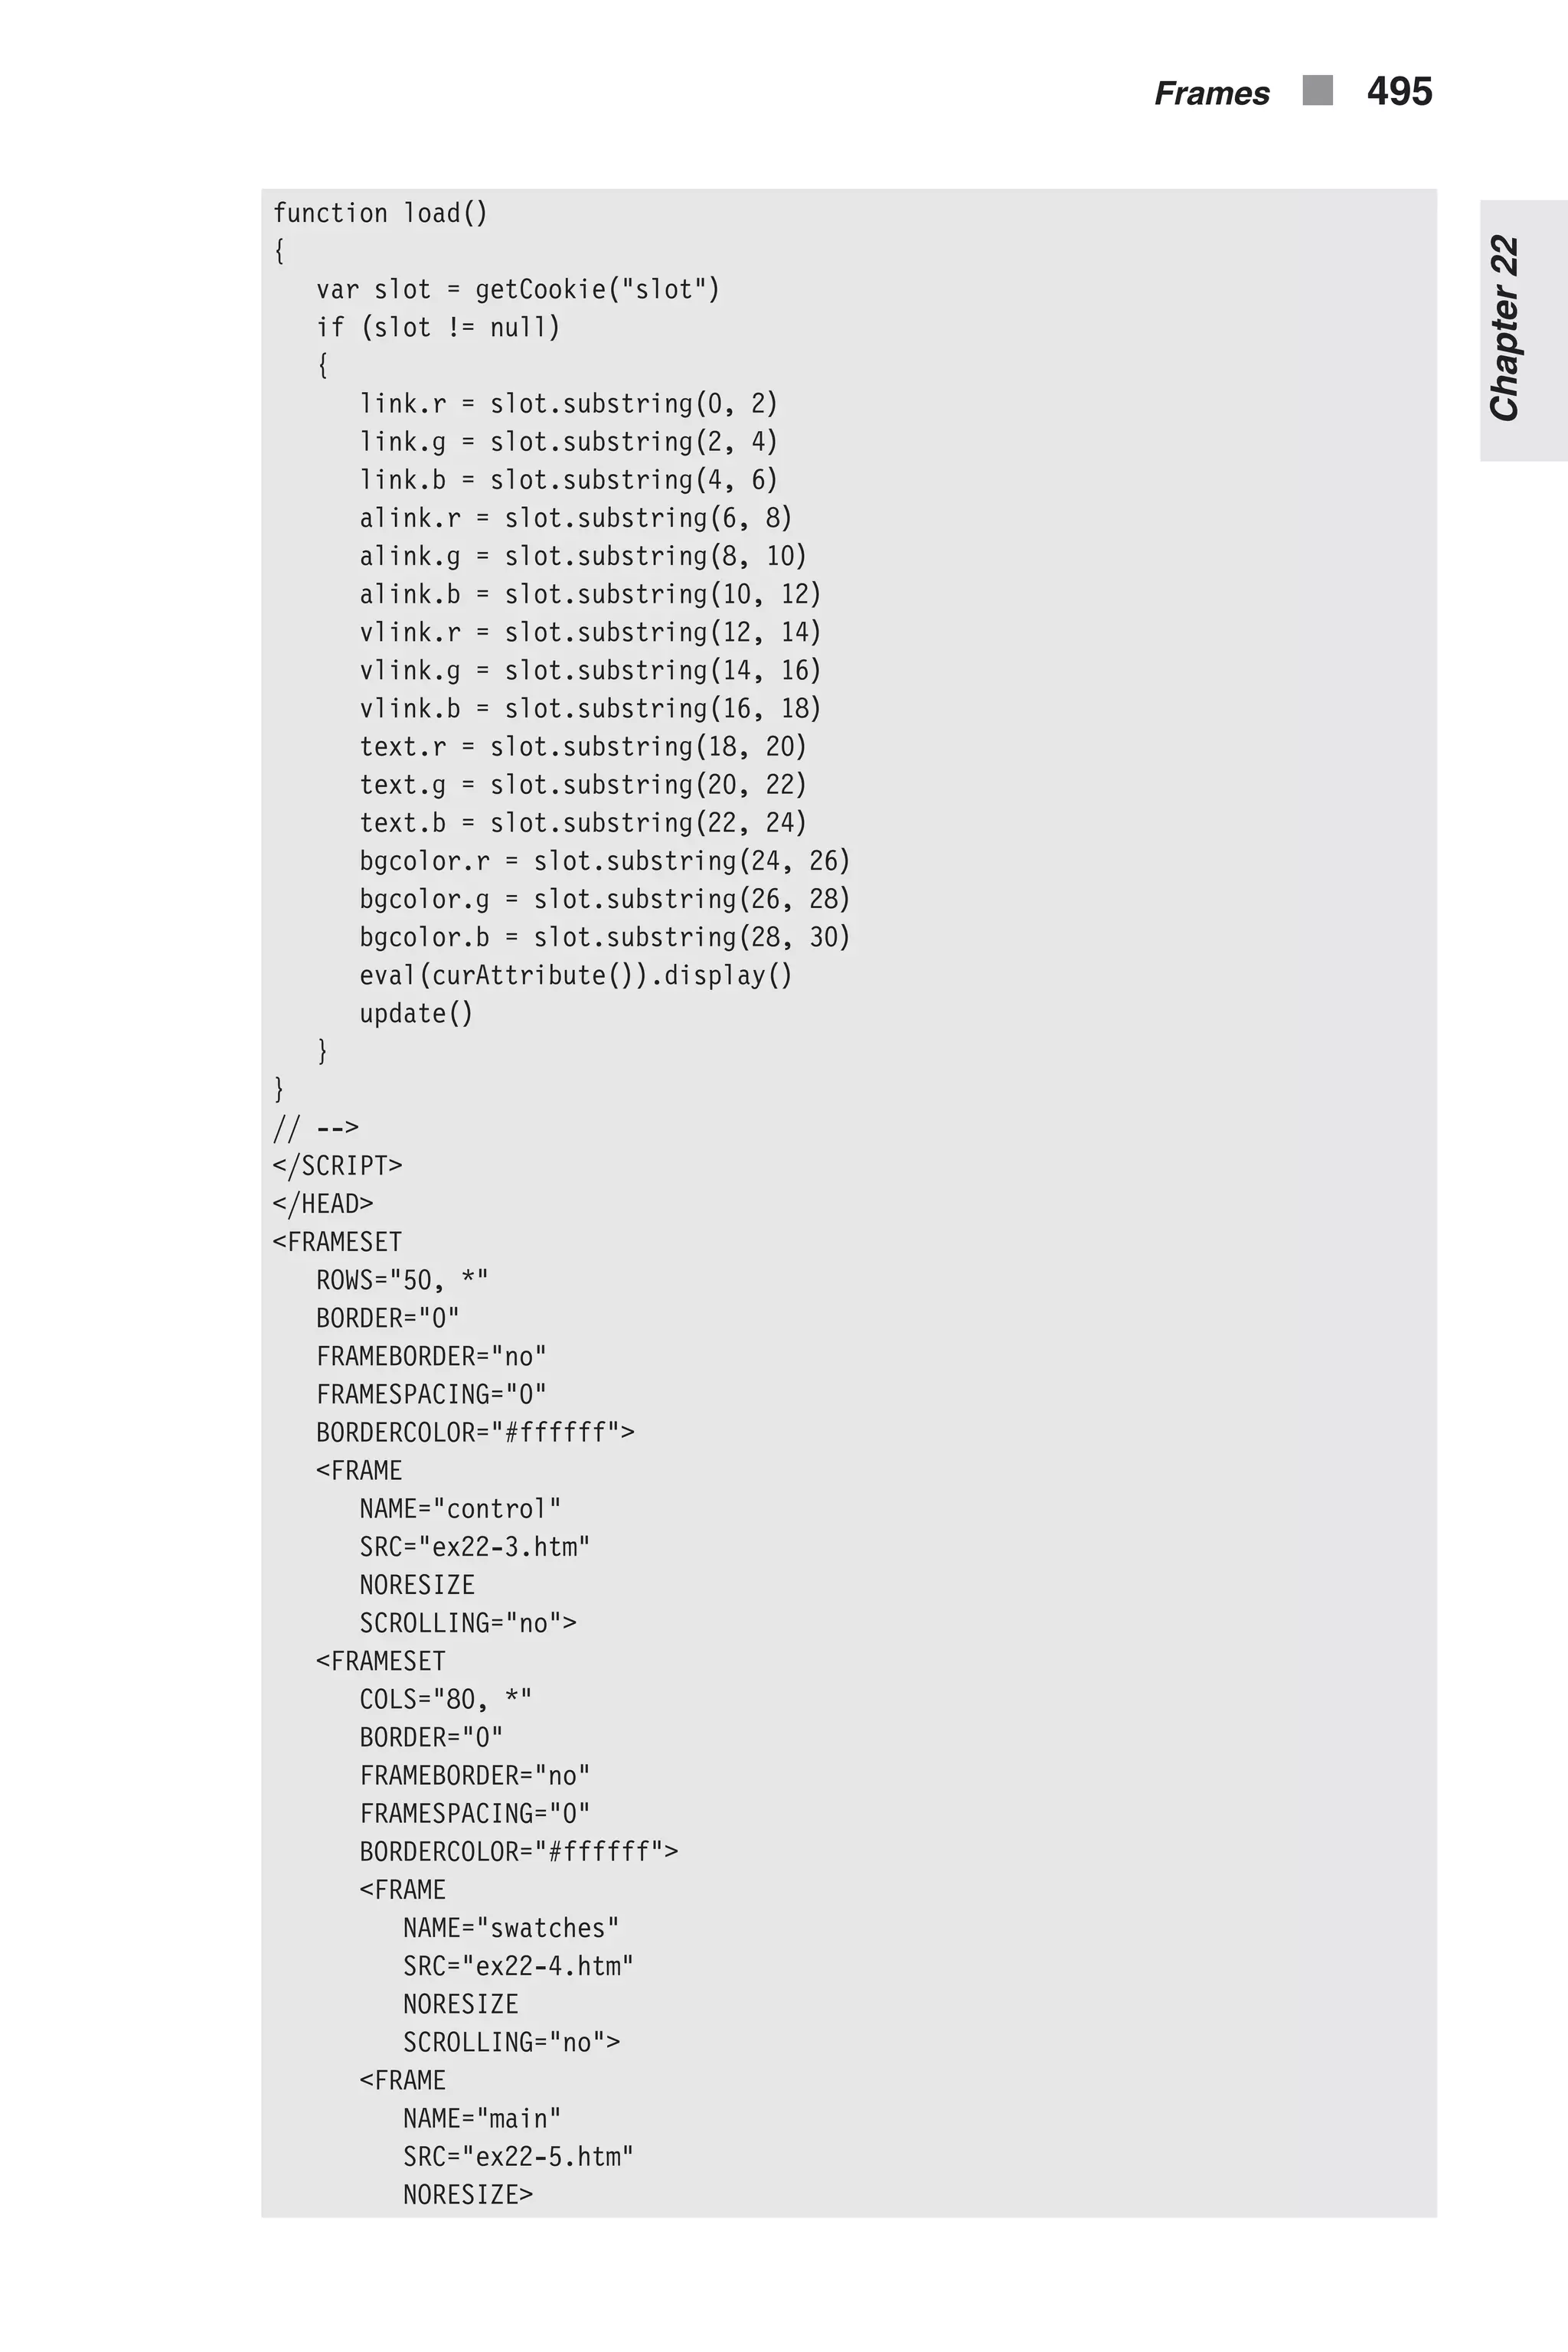
![</FRAMESET> </FRAMESET> <NOFRAMES>Please download a frames-capable browser!</NOFRAMES> </HTML> Example 22-2 (ex22-2.htm). Using the frame center as a control center The first portion of the script in Example 22-2 consists of a complete set of cookie functions, which are not repeated here. This chapter focuses on func- tions that are specific to the Color Center application. display(r, g, b) // updates the R, G, and B text fields (invoked as a method) function display() { frames[0].document.forms[0].red.value = this.r frames[0].document.forms[0].green.value = this.g frames[0].document.forms[0].blue.value = this.b } All attributes are defined as instances supporting the display() method. You can call this function, for example, to display the color of bgcolor: bgcolor.display() The display() method sets the values of the R, G, and B fields in the upper frame to the corresponding RGB values of the calling instance. Those val- ues, named r, g, and b, are stored as properties of the calling instance. The upper frame is the first frame to be defined, so we reference it as frames[0]. You can alternatively use self.frames[0], window.frames[0], parent.frames[0], or top.frames[0]. makeAttribute(r, g, b) // constructs an attribute function makeAttribute(r, g, b) { this.r = r + "" this.g = g + "" this.b = b + "" this.display = display } makeAttribute() is a constructor function. All attributes are created as instances of this object, so each attribute has three properties (r, g, and b) and one method (display()). The function accepts three arguments repre- senting the red, green, and blue descriptors. Just to be on the safe side, the arguments are converted to strings. Global Statements // create instances for all attributes var link = new makeAttribute("00", "00", "00") // black var alink = new makeAttribute("00", "00", "00") // black 496 n Chapter 22](https://image.slidesharecdn.com/wordware-advancedjavascript3rded-160421130838/75/www-webre24h-com-Wordware-advanced-javascript-3rd-ed-easttom-521-2048.jpg)
![var vlink = new makeAttribute("00", "00", "00") // black var text = new makeAttribute("00", "00", "00") // black var bgcolor = new makeAttribute("FF", "FF", "FF") // white We define five global variables in this script segment. All variables are defined as instances of the makeAttribute object. The arguments handed to the makeAttribute() function reflect the default colors for each attribute. select(r, g, b) // invoked when user selects a color from swatches function select(r, g, b) { // assign string reflecting selected attribute ("text", "bgcolor", etc.) var attribute = curAttribute() // assign new descriptors eval(attribute).r = r eval(attribute).g = g eval(attribute).b = b // display new descriptors in R, G, and B text fields eval(attribute).display() // update main frame update() } The select() function is invoked when the user selects a color from the swatches in the left frame, and it accepts the red, green, and blue descriptors of the selected color. The function first assigns the currently selected attribute to the local variable attribute. For example, if the cur- rent attribute (chosen from the menu in the upper frame) is “Visited link,” the value of attribute is "vlink". Therefore, eval(attribute) is an instance of the makeAttribute object, holding the red, green, and blue descriptors of the attribute. curAttribute() // return string reflecting selected attribute ("text", "bgcolor", etc.) function curAttribute() { var list = frames[0].document.forms[0].attribute return list.options[list.selectedIndex].value } This function returns the currently selected attribute in the form of a string. First, the object representing the select element of the form in the upper frame is assigned to the local variable list. The text value of the selected option is then returned. As shown above, it is often convenient to assign an object reference to a local variable, especially when that reference is extremely lengthy. In this case, we specify the variable list twice, instead of specifying the entire object reference (frames[0].docu- ment.forms[0].attribute) twice. Frames n 497 Chapter22](https://image.slidesharecdn.com/wordware-advancedjavascript3rded-160421130838/75/www-webre24h-com-Wordware-advanced-javascript-3rd-ed-easttom-522-2048.jpg)
![bodyDefinition() // returns <BODY> tag (excluding ">" and "<") reflecting all selections function bodyDefinition() { var str = 'BODY ' str += 'BGCOLOR="#' + bgcolor.r + bgcolor.g + bgcolor.b + '" ' str += 'LINK="#' + link.r + link.g + link.b + '" ' str += 'ALINK="#' + alink.r + alink.g + alink.b + '" ' str += 'VLINK="#' + vlink.r + vlink.g + vlink.b + '" ' str += 'TEXT="#' + text.r + text.g + text.b + '"' return str } The bodyDefinition() function constructs and returns a complete <BODY> tag, based on the current values of the descriptors of each attribute. For instance, the function might return the following string: BODY BGCOLOR="#FFFFCC" LINK="#FF00CC" ALINK="#00FF99" VLINK="#006633" TEXT="#0000FF" Notice that we do not include the less than (<) and greater than (>) charac- ters in the final string. update() // update main window function update() { var bodyDef = bodyDefinition() var result = "" result += '<HTML><HEAD><TITLE>Main</TITLE></HEAD>' result += '<' + bodyDef + '>' result += '<CENTER>' result += 'Text <B>Text</B><HR WIDTH=50%>' result += '<FONT COLOR="#' + link.r + link.g + link.b + '"> Link <B>Link</B><HR WIDTH=50%></FONT>' result += '<FONT COLOR="#' + alink.r + alink.g + alink.b + '"> Alink <B>Alink</B><HR WIDTH=50%></FONT>' result += '<FONT COLOR="#' + vlink.r + vlink.g + vlink.b + '"> Vlink <B>Vlink</B><HR WIDTH=50%></FONT>' result += '<BR><FONT SIZE=2><' + bodyDef + '></FONT>' result += '</CENTER></BODY></HTML>' // assign document object of main frame to local variable var doc = frames[2].document // close data stream to document doc.close() // open new data stream to document (text/html) doc.open('text/html') // print HTML content doc.write(result) // close data stream to document doc.close() } 498 n Chapter 22](https://image.slidesharecdn.com/wordware-advancedjavascript3rded-160421130838/75/www-webre24h-com-Wordware-advanced-javascript-3rd-ed-easttom-523-2048.jpg)
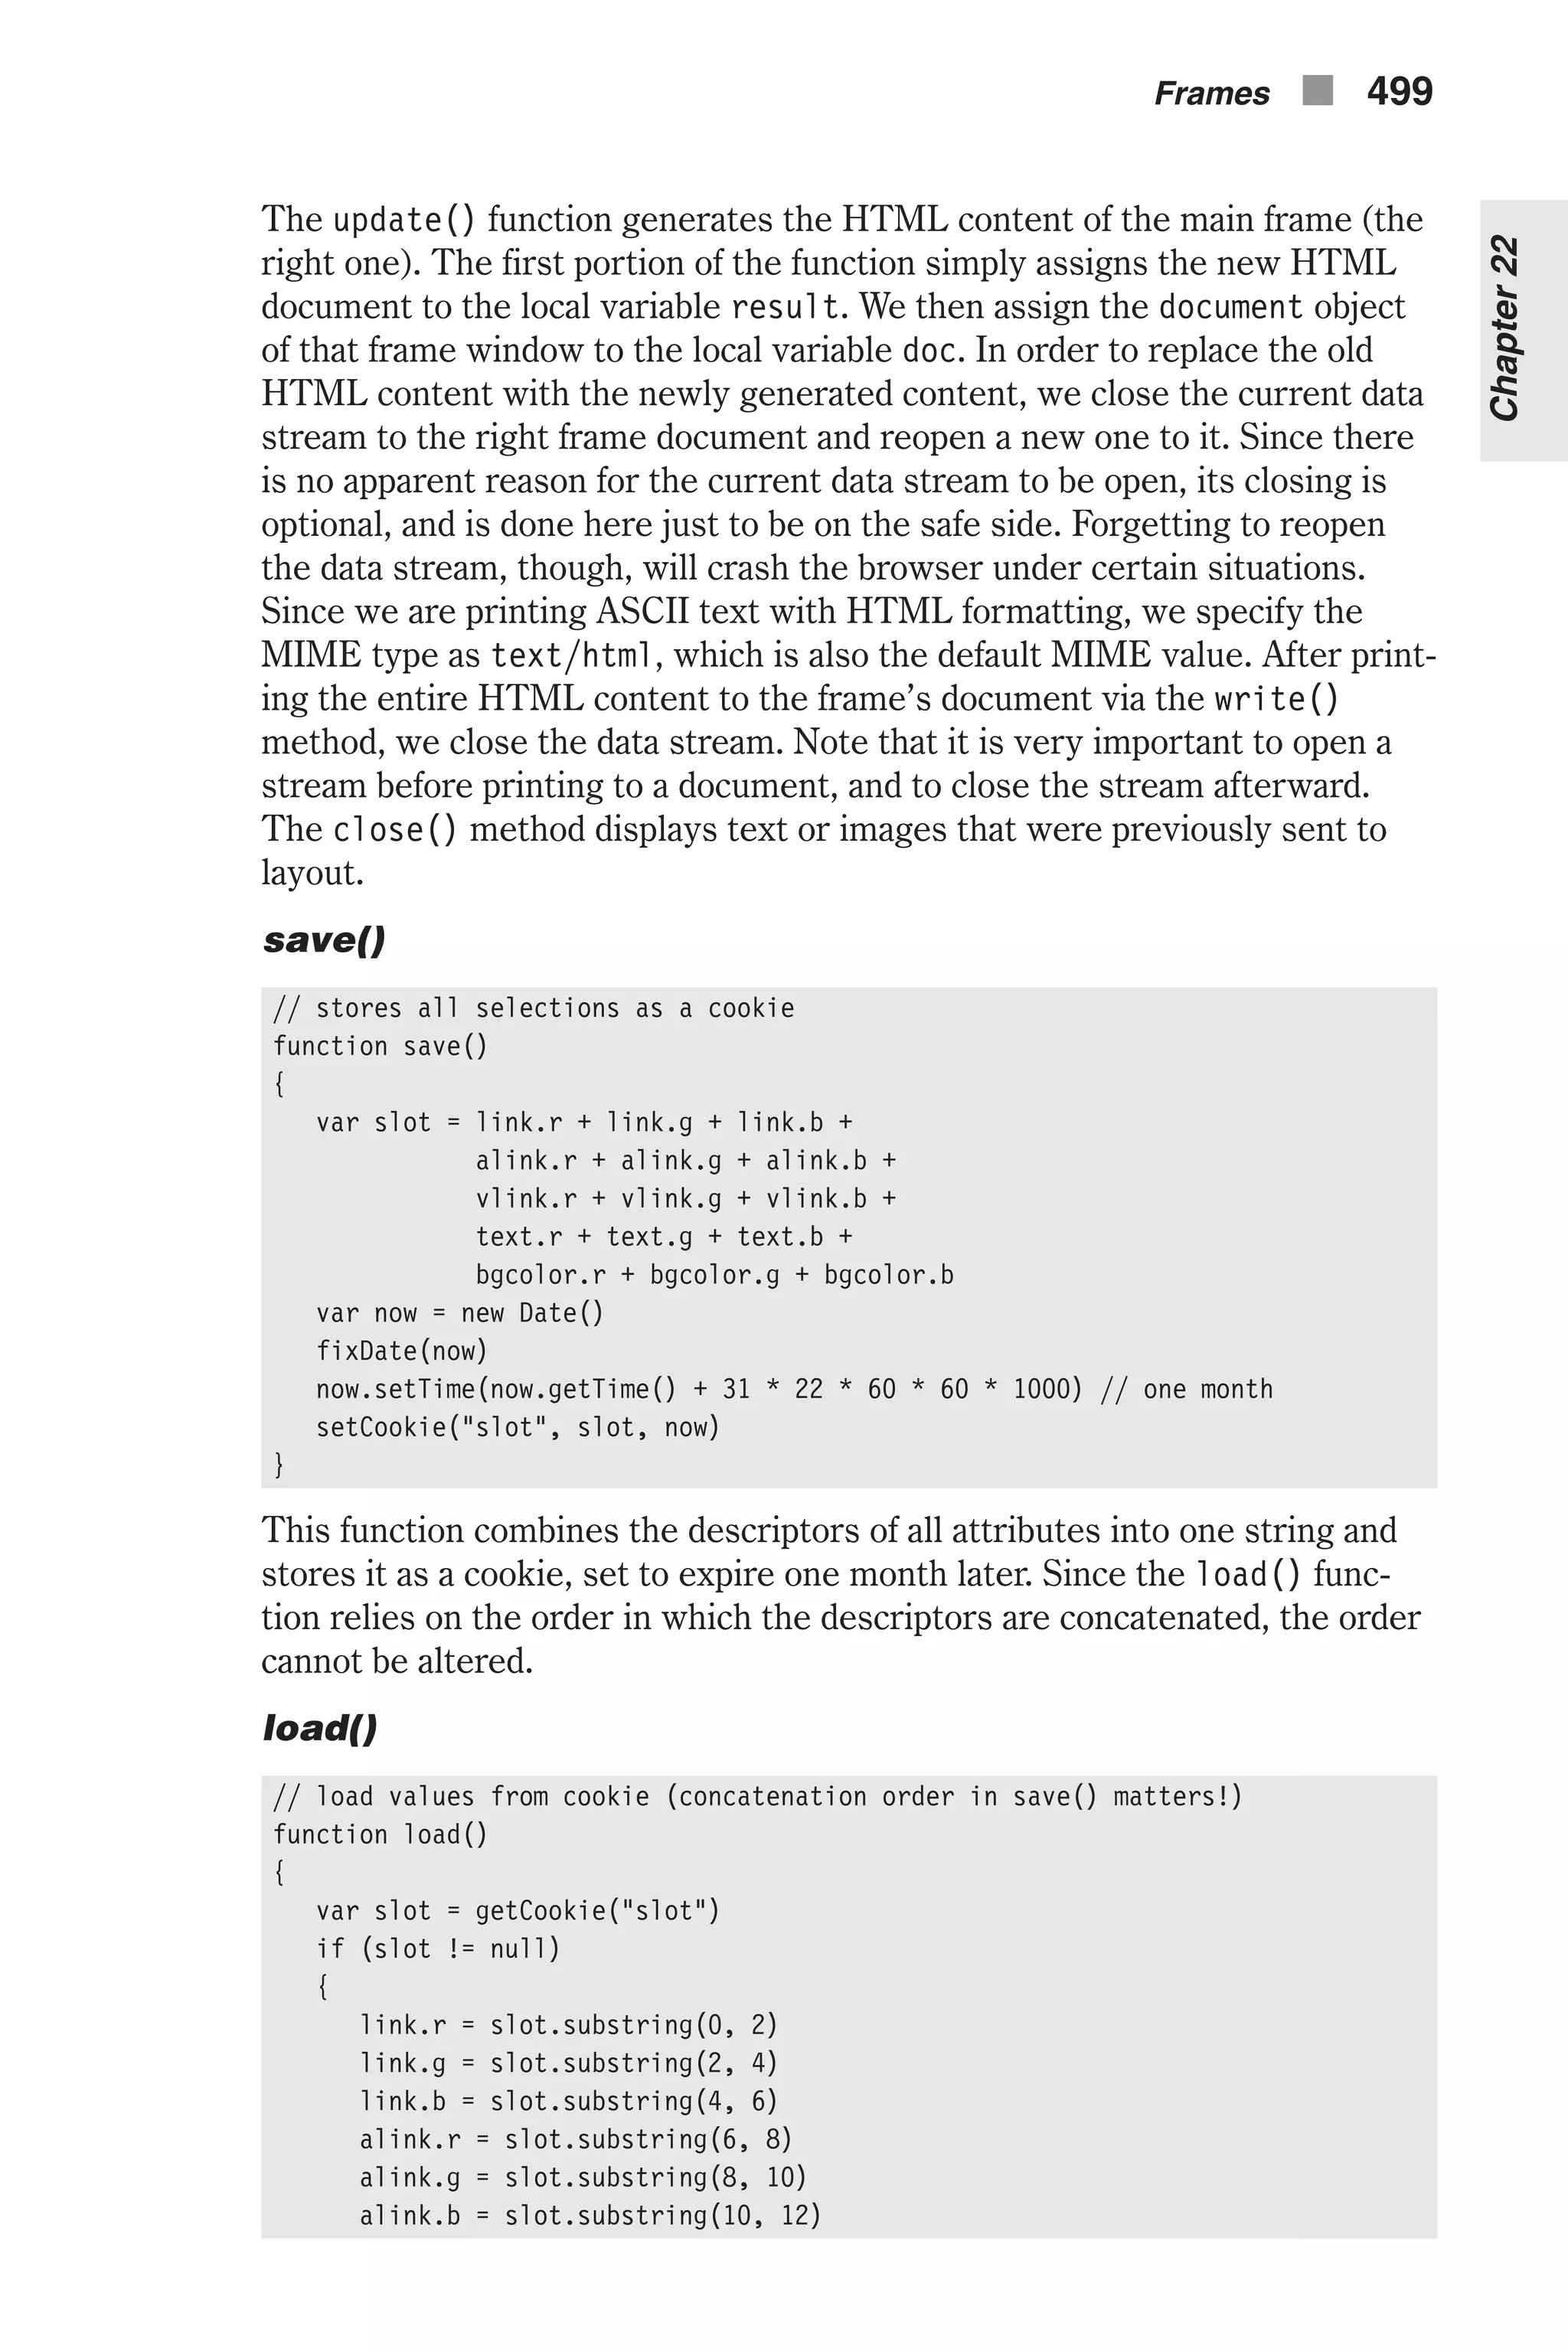
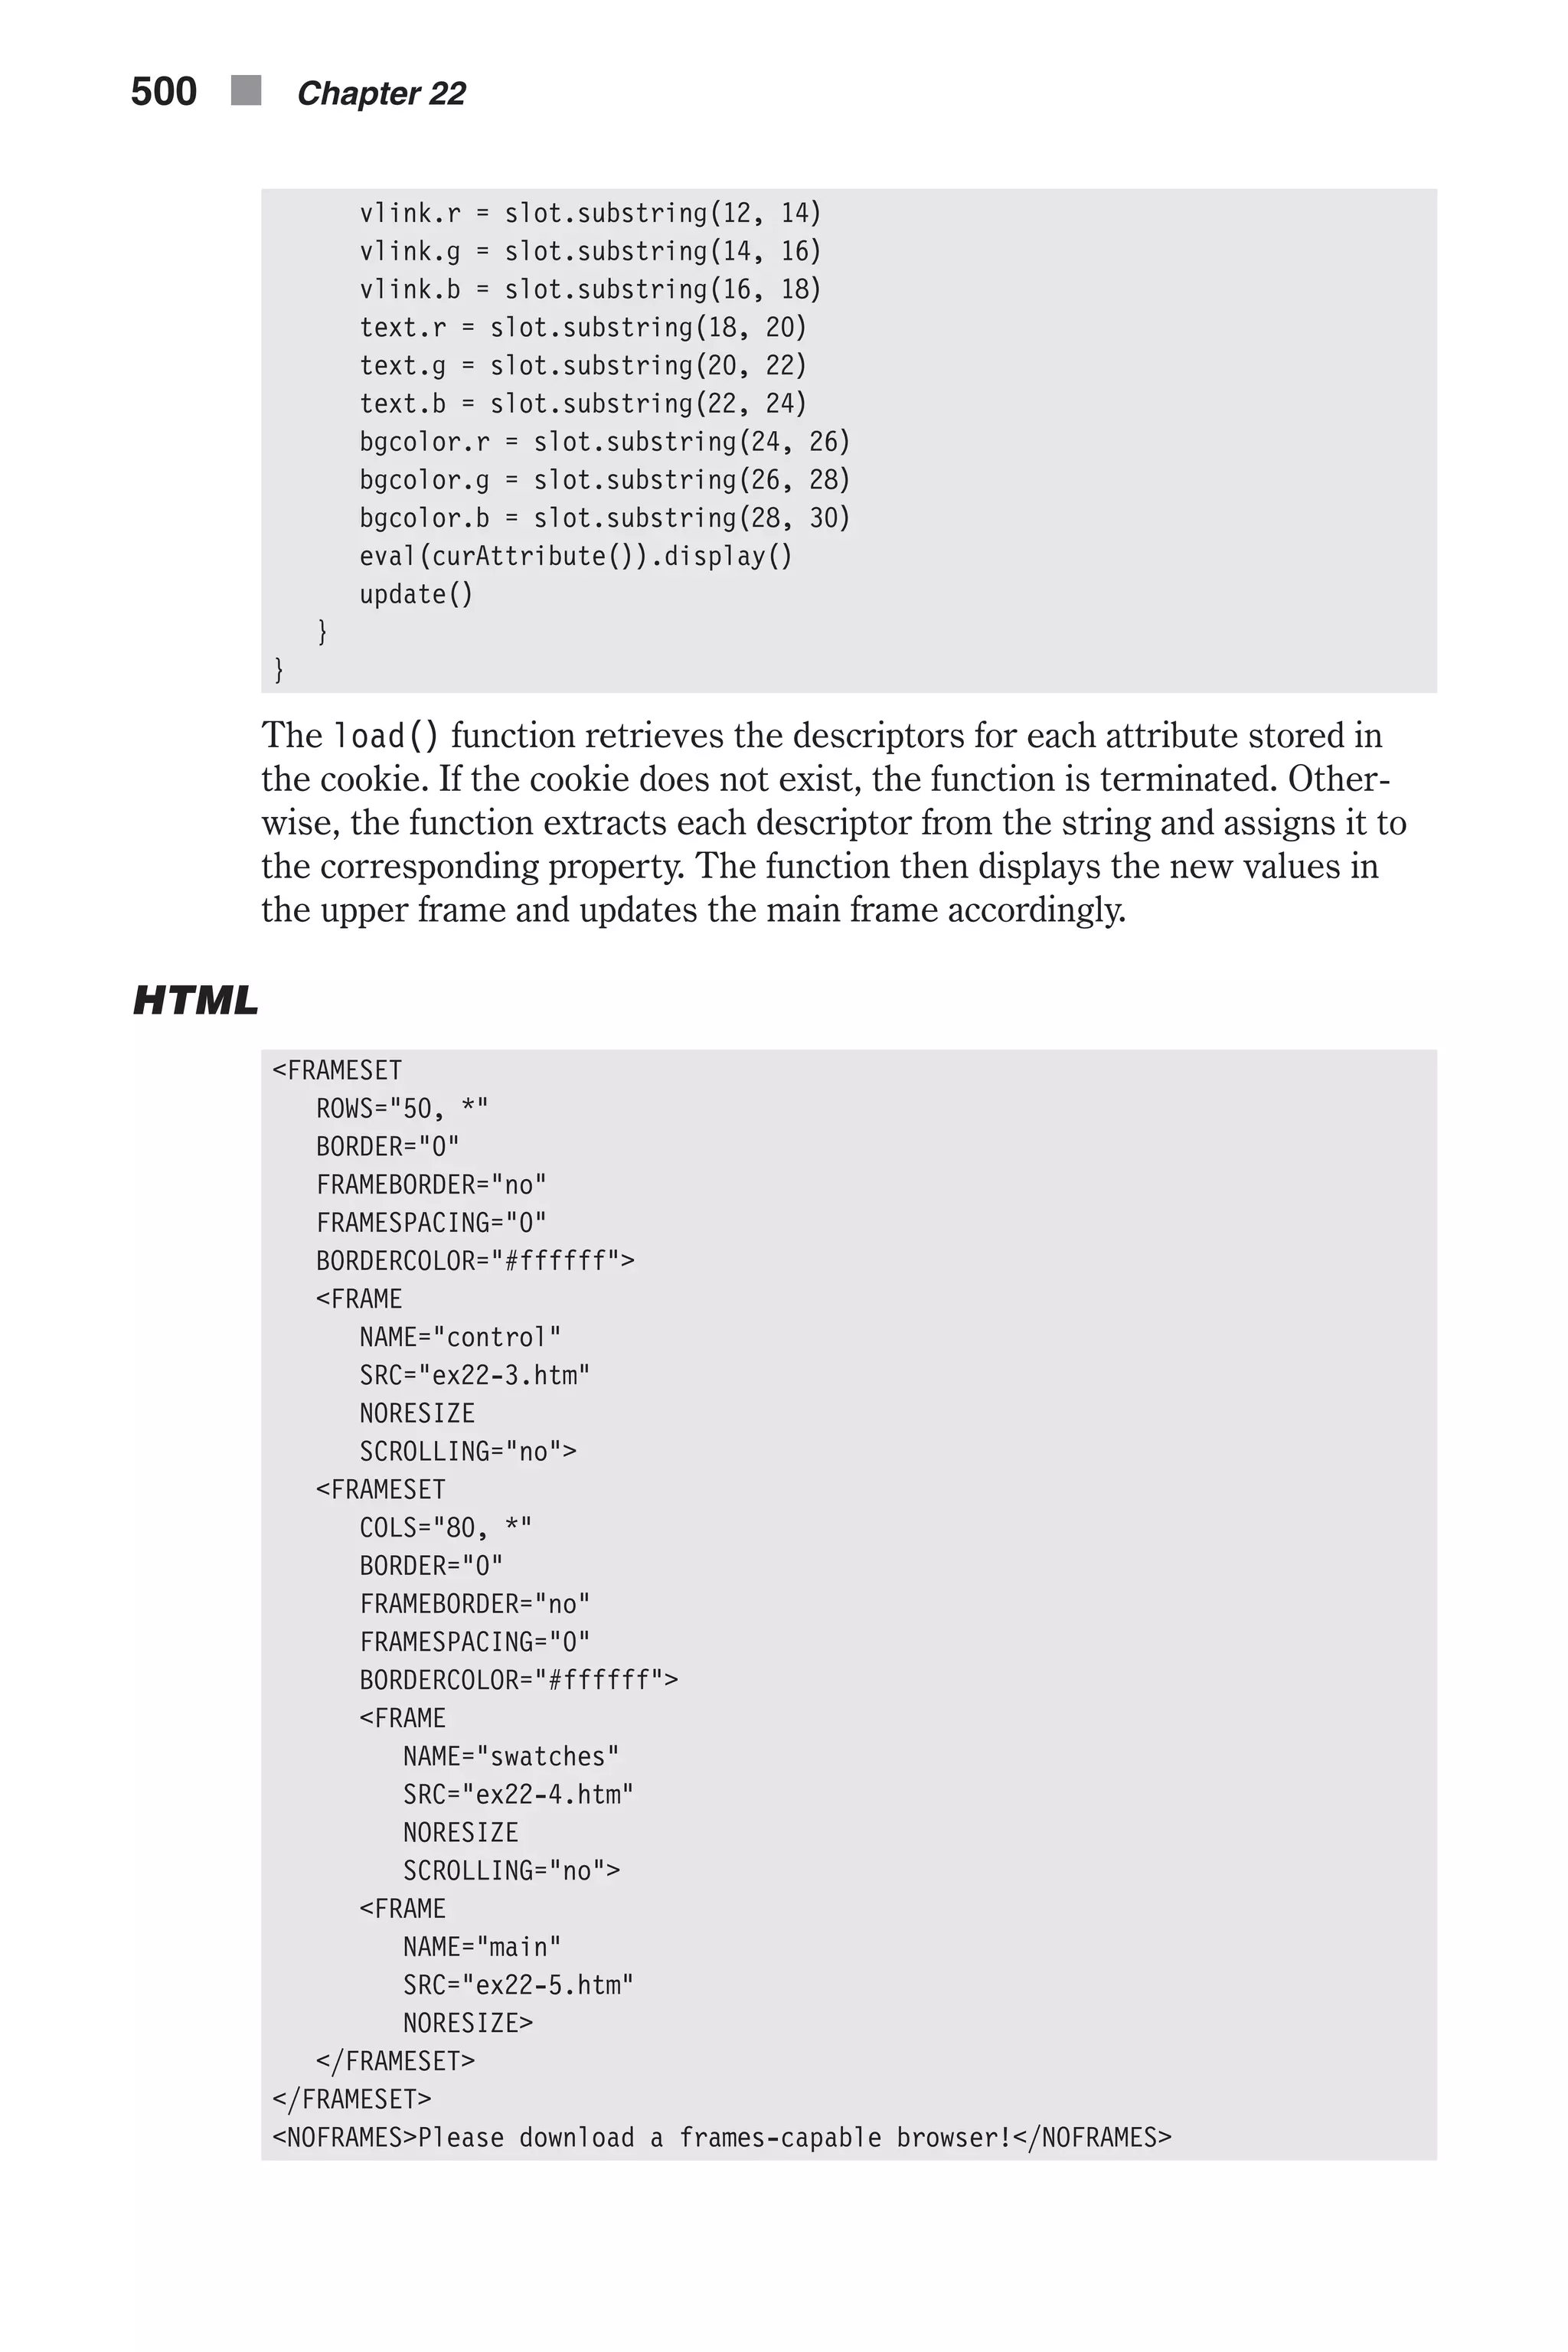
![As you can see, all frames are defined in one frame-setting document. The upper frame is named "control", the bottom left frame is named "swatches", and the bottom right frame is named "main". Their URLs are ex22-3.htm, ex22-4.htm, and ex22-5.htm, respectively. Notice the configura- tions used to create “borderless” frames. The “control” Frame Example 22-3 shows that the upper frame consists of very little JavaScript. The only JavaScript in this document is used to interact with the JavaScript objects in the frame-setting window (self.top or self.parent). <HTML> <HEAD> <TITLE>Control Panel</TITLE> <SCRIPT LANGUAGE="JavaScript"> <!-- function display() { top[top.curAttribute()].display() } // --> </SCRIPT> </HEAD> <BODY BGCOLOR="#ffffff" onLoad="self.display()"> <FORM> <FONT SIZE=2> <FONT COLOR="#ff0000">R</FONT>: <INPUT TYPE="text" SIZE=3 VALUE="" NAME="red" onFocus="this.blur()"> <FONT COLOR="#00ff00">G</FONT>: <INPUT TYPE="text" SIZE=3 VALUE="" NAME="green" onFocus="this.blur()"> <FONT COLOR="#0000ff">B</FONT>: <INPUT TYPE="text" SIZE=3 VALUE="" NAME="blue" onFocus="this.blur()"> Attribute: <SELECT NAME="attribute" onChange="self.display()"> <OPTION VALUE="bgcolor">Background <OPTION VALUE="text">Text <OPTION VALUE="link">Link <OPTION VALUE="alink">Active link <OPTION VALUE="vlink">Visited link </SELECT> Save settings: <INPUT TYPE="button" VALUE="save" onClick="top.save()"> Load settings:<INPUT TYPE="button" VALUE="load" onClick="top.load()"> </FONT> </FORM> </BODY> </HTML> Example 22-3 (ex22-3.htm). The “control” frame Frames n 501 Chapter22](https://image.slidesharecdn.com/wordware-advancedjavascript3rded-160421130838/75/www-webre24h-com-Wordware-advanced-javascript-3rd-ed-easttom-526-2048.jpg)
![display() function display() { top[top.curAttribute()].display() } The script in the "control" frame’s document consists of just one function, display(). There is a function named display() in the frame-setting docu- ment as well, but due to JavaScript’s object hierarchy, each function is actually a method of a different object. The display() function in the "con- trol" frame document invokes the display() function of the frame-setting document as a method of the selected attribute’s instance. For example, if the selected attribute is “Background,” the function’s statement is equiva- lent to: top.bgcolor.display() Event Handlers The "control" frame’s document features an onLoad event handler that invokes the local display() function. This is why the text fields in the upper frame are not empty when you first load the Color Center application. When the user selects a new option, the onChange event handler, associated with the select object, invokes the local display() function. Notice that the text fields in this frame are read-only, thanks to the onFocus event handler which, whenever the user attempts to gain focus, immediately issues the blur() method to remove focus from the field. The “swatches” Frame <HTML> <HEAD> <TITLE>Swatches</TITLE> </HEAD> <BODY BGCOLOR="#ffffff"> <SCRIPT LANGUAGE="JavaScript"> <!-- // create 6-element array var hex = new Array(6) // assign non-dithered descriptors hex[0] = "FF" hex[1] = "CC" hex[2] = "99" hex[3] = "66" hex[4] = "33" hex[5] = "00" // accept triplet string and display as background color function display(triplet) { // set color as background color self.document.bgColor = '#' + triplet 502 n Chapter 22](https://image.slidesharecdn.com/wordware-advancedjavascript3rded-160421130838/75/www-webre24h-com-Wordware-advanced-javascript-3rd-ed-easttom-527-2048.jpg)
![// display the color hexadecimal triplet self.alert('Background color is now ' + triplet) } // draw a single table cell based on all descriptors function drawCell(red, green, blue) { // open cell with specified hexadecimal triplet background color self.document.write('<TD BGCOLOR="#' + red + green + blue + '">') // open a hypertext link with javascript: scheme to call display function self.document.write('<A HREF="javascript:top.select('' + (red + '', '' + green + '', '' + blue) + '')">') // print transparent image (use any height and width) self.document.write('<IMG SRC="place.gif" BORDER=0 HEIGHT=7 WIDTH=7>') // close link tag self.document.write('</A>') // close table cell self.document.write('</TD>') } // draw table row based on red and blue descriptors function drawRow(red, blue) { // open table row self.document.write('<TR>') // loop through all non-dithered color descripters as green hex for (var i = 0; i < 6; ++i) { drawCell(red, hex[i], blue) } // close current table row self.document.write('</TR>') } // draw table for one of six color cube panels function drawTable(blue) { // open table (one of six cube panels) self.document.write('<TABLE CELLPADDING=0 CELLSPACING=0 BORDER=0>') // loop through all non-dithered color descripters as red hex for (var i = 0; i < 6; ++i) { drawRow(hex[i], blue) } // close current table self.document.write('</TABLE>') } // draw all cube panels inside table cells function drawCube() { // open table self.document.write('<TABLE CELLPADDING=0 CELLSPACING=5 BORDER=0>') // loop through all non-dithered color descripters as blue hex for (var i = 0; i < 6; ++i) { // open table cell with white background color Frames n 503 Chapter22](https://image.slidesharecdn.com/wordware-advancedjavascript3rded-160421130838/75/www-webre24h-com-Wordware-advanced-javascript-3rd-ed-easttom-528-2048.jpg)
![self.document.write('<TR><TD>') // call function to create cube panel with hex[i] blue hex drawTable(hex[i]) // close current table cell self.document.write('</TD></TR>') } // close table row and table self.document.write('</TABLE>') } // call function to begin execution drawCube() // --> </SCRIPT> </BODY> </HTML> Example 22-4 (ex22-4.htm). The “swatches” frame The “main” Frame Here is the complete source for the "main" frame: <HTML> <HEAD> <TITLE>Main</TITLE> </HEAD> <BODY onLoad="top.update()"> </BODY> </HTML> Example 22-5 (ex22-5.htm). The “main” frame Notice the onLoad event handler, which invokes the update() function of the frame-setting document’s script. Frames, Events, and Event Handlers Using Event Handlers in a Frame A child frame normally contains an HTML document. As opposed to a frame-setting document, an HTML document in a child frame is structured as a standard HTML document: <HTML> <HEAD> <TITLE></TITLE> </HEAD> <BODY> </BODY> </HTML> You can load any document in a frame, regardless of its content. If a frame does not contain another frame-setting document, you can use any event handler in its document. You can issue, for example, an onLoad event 504 n Chapter 22](https://image.slidesharecdn.com/wordware-advancedjavascript3rded-160421130838/75/www-webre24h-com-Wordware-advanced-javascript-3rd-ed-easttom-529-2048.jpg)
![handler in the <BODY> tag, an onSubmit event handler in a <FORM> tag, and so forth. HTML documents that users see in frames of a multiple-frame browser window are different from the frame-setting document, in that the latter remains in memory and is not otherwise visible to the user. It only instructs the browser to divide the window into sections, and assigns a visible docu- ment to each one of them. Since a child frame’s document is visible, it can consist of forms, links, image maps, images, etc., which are rich in events and event handlers. As a document in a frame behaves exactly like a docu- ment in a single-frame browser window, the common event handler rules apply. Using Event Handlers in a Frame-Setting Document A frame-setting document differs from a regular HTML document in that it is not visible, and therefore does not include any output-generating HTML tags. Nevertheless, a frame-setting document can feature several event han- dlers that are very important for a frameset. All event handlers that you normally issue within a <BODY> tag can be issued within a <FRAMESET> tag. An onLoad event handler within a <FRAMESET> tag, for example, specifies a JavaScript code to be executed when all frames defined in that frameset have finished loading. Therefore, the onLoad event handler in the <BODY> tag of a child frame triggers before the onLoad event handler in the <FRAMESET> tag. When all frames under its control have finished loading, the frameset that governs the frames receives a separate load event. onFocus and onBlur Netscape Navigator 3.0 introduced a new functionality to the onFocus and onBlur event handlers. You can use these event handlers to capture focus and blur events that are associated with a frame. A frame gains focus when the user clicks anywhere in that frame or issues a focus event in an element of that frame. A frame’s blur event occurs when the frame loses focus. There are two equivalent ways to specify an onFocus or an onBlur event handler for a single frame: n In the <BODY> tag of the frame’s document. n In the <FRAMESET> tag of the frame-setting document. You can execute, for example, the statement frames[0].onfocus = display from a script within the frame-setting document. An event handler specified using this technique overrides an event handler issued in the child frame’s <BODY> tag. Never use an alert() method or any other dialog box within a frame’s onFocus event handler. Doing so results in an endless loop: When you press OK to dismiss the alert, the underlying window gains focus again, and pro- duces another focus event. Frames n 505 Chapter22](https://image.slidesharecdn.com/wordware-advancedjavascript3rded-160421130838/75/www-webre24h-com-Wordware-advanced-javascript-3rd-ed-easttom-530-2048.jpg)
![The following <BODY> definition of a frame’s document demonstrates a common usage of the onBlur and onFocus event handlers: <BODY BGCOLOR="lightgray" onBlur="document.bgColor='lightgray'" onFocus="document.bgColor='antiquewhite'"> The frame’s background color depends on whether or not the frame has focus. Emulating Events As with many other events, you can emulate the blur and focus events via their corresponding methods. You can use, for instance, the following state- ment to focus on the first frame from the point of view of another frame: self.parent.frames[0].focus() The same applies to the blur() method: self.parent.frames[0].blur() Since it is barely noticeable when a frame gains or loses focus, these meth- ods are not that useful. Targeting Multiple Frames Creating a link in one frame to load a document in a different frame requires a simple HTML attribute—TARGET. Consider the following frameset: <FRAMESET ROWS="150, *"> <FRAME NAME="one" SRC="docA.htm"> <FRAMESET COLS="120, *"> <FRAME NAME="two" SRC="docB.htm"> <FRAME NAME="three" SRC="docC.htm"> </FRAMESET> </FRAMESET> A link in docA.htm that loads Netscape’s home page in the right frame ("three") would use the following syntax: <A HREF="http://www.netscape.com/" TARGET="three">Netscape</A> Now suppose you want a single link in docA.htm to load both Netscape’s page in the frame named "three" and Microsoft’s page in the frame named "two". JavaScript’s object hierarchy enables such operations: <SCRIPT LANGUAGE="JavaScript"> <!-- function loadPages() { parent.two.location.href = 'http://www.microsoft.com/' parent.three.location.href = 'http://www.netscape.com/' } 506 n Chapter 22](https://image.slidesharecdn.com/wordware-advancedjavascript3rded-160421130838/75/www-webre24h-com-Wordware-advanced-javascript-3rd-ed-easttom-531-2048.jpg)
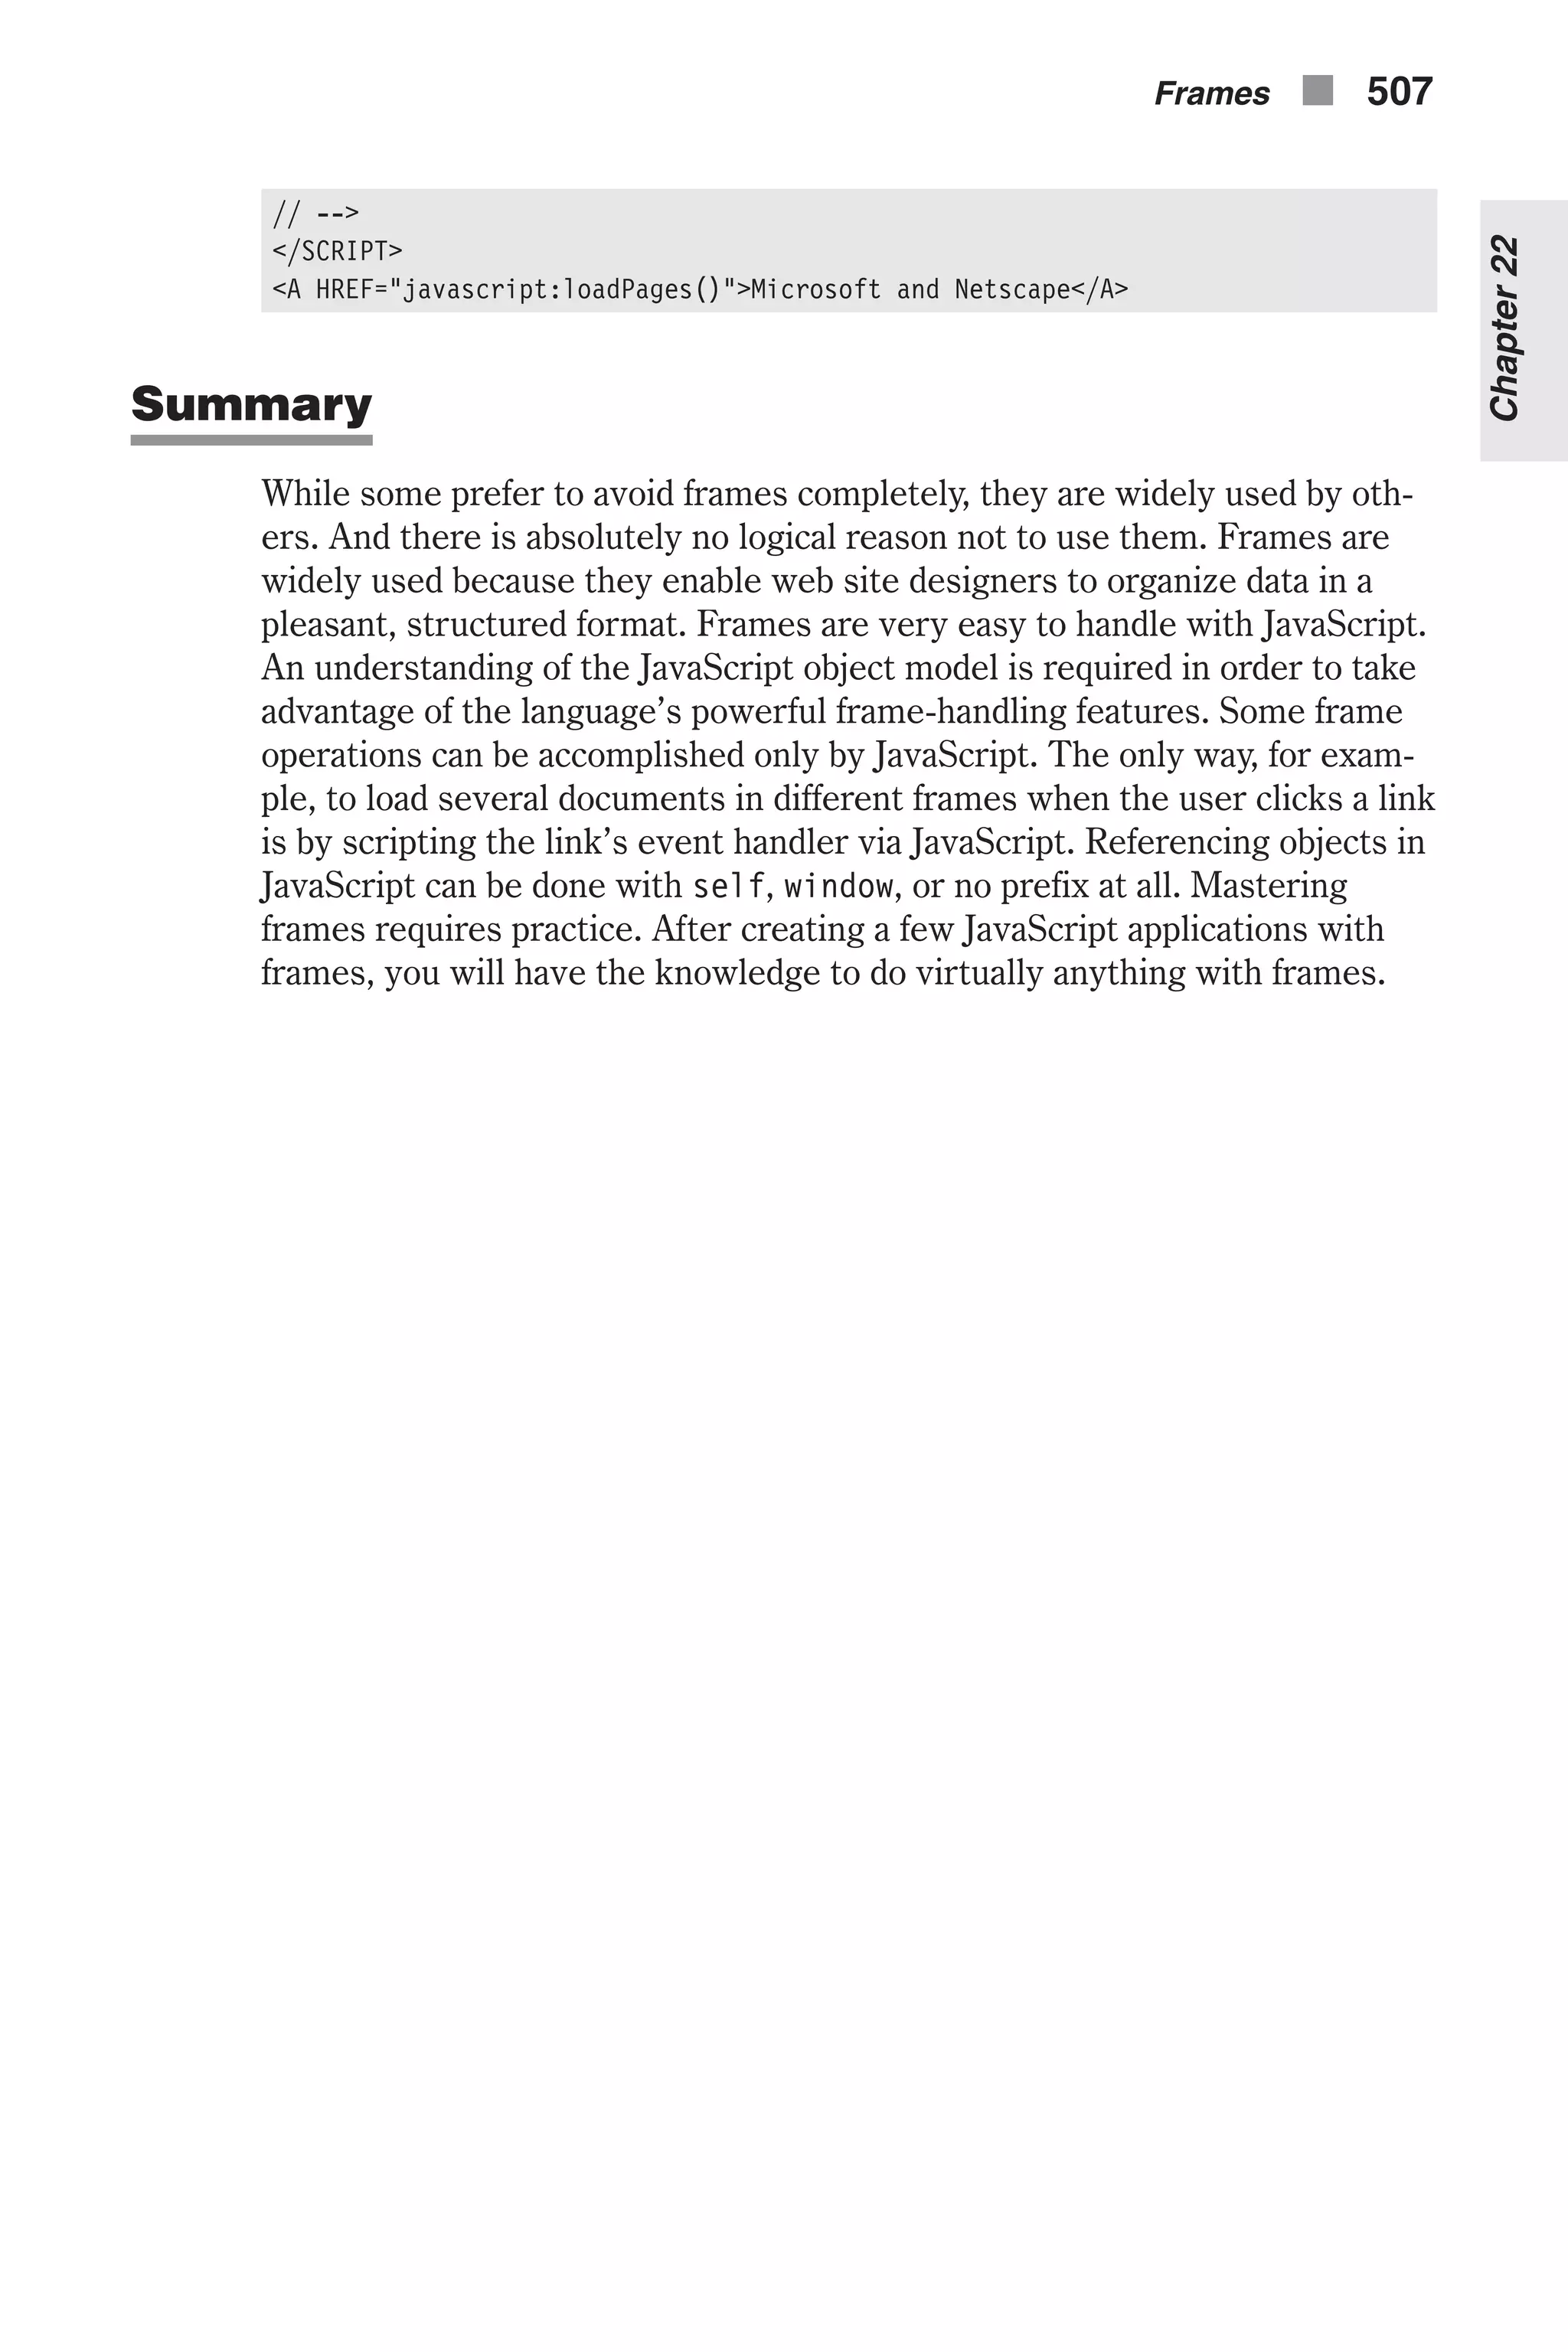
![Chapter 23 Evaluation and Compilation JavaScript is replete with functions that allow you to evaluate various items. The basic idea is that these built-in functions will allow you to extract data about something, such as a string. This is a somewhat advanced topic and many JavaScript developers work for years without ever having to use these functions. So if you have trouble with the functions in this chapter, don’t worry—just do the best you can with them. In time as you encounter places to use them, their use will become more clear. Evaluating a String The eval function executes the JavaScript contained within the brackets. In some cases, this may return a value that can be assigned to a variable. It is used to evaluate whatever is passed to it and then to run it. The eval() function is the easiest way to evaluate a string expression. There are, how- ever, several other ways: var abc = "def" document.write(abc) // 1 document.write("<BR>") document.write(eval("abc")) // 2 document.write("<BR>") document.write(window.abc) // 3 document.write("<BR>") document.write(window["abc"]) // 4 document.write("<BR>") document.write(window.eval("abc")) // 5 In the preceding script segment, all five lines (1, 2, 3, 4, 5) print the same output: def (except for the fifth one in versions of Internet Explorer prior to 5.0). n Line 1 The document.write() method automatically evaluates its argu- ment, whether it is stored in a variable or handed to the function in the form of a literal. In this particular case, I hand the function a data 508 n Chapter 23](https://image.slidesharecdn.com/wordware-advancedjavascript3rded-160421130838/75/www-webre24h-com-Wordware-advanced-javascript-3rd-ed-easttom-533-2048.jpg)
![structure (a variable), which evaluates to def. This method always eval- uates the argument, so you must surround a string literal with quotes (of any type). n Line 2 The eval() function evaluates its argument and returns it as is. Unlike the document.write() function, eval() does not do anything with the value except return it. In this case, the function returns abc (not "abc"), and document.write(eval("abc")) is then equivalent to document.write(abc), which outputs def, as explained above. n Line 3 Since all variables in a document are actual properties of the window object, the variable abc can be specified with a complete object reference, as shown on this line. n Line 4 You can use the array notation instead of the dot syntax (win- dow["abc"] is equivalent to window.abc). Since the square brackets evaluate their content, you should place a quoted string inside. n Line 5 Based on the preceding discussion, window.eval("abc") is equivalent to window.abc. Here is another set of slightly more complicated statements: var abc = "def" var def = "abc" document.write(eval('eval("abc")')) // 1 document.write("<BR>") document.write(eval(eval("abc"))) // 2 document.write("<BR>") document.write(eval('window.eval("def")')) // 3 document.write("<BR>") document.write(eval(window.eval("def"))) // 4 document.write("<BR>") document.write(window[eval("def")]) // 5 document.write("<BR>") document.write(eval(window[eval("def")])) // 6 These statements output different strings, as explained below. n Line 1 eval('eval("abc")') evaluates to eval("abc") because the top-level eval() removes the quotes. The expression eval("abc") evaluates to abc, so the output of this statement is "def". n Line 2 eval("abc") is evaluated first, because the innermost function call is always evaluated before any other function call in the same expression. (In the previous statement, as the “inner” function call is actually a string, there is only one function call besides the docu- ment.write() statement.) Therefore, eval("abc") evaluates to abc, and eval(eval("abc")) evaluates to eval("def"), which, in turn, eval- uates to def. The statement’s output is then "def". n Line 3 You should have guessed that the output of this statement differs from browser to browser (Internet Explorer and Mozilla). On both browsers, eval('window.eval("def")') evaluates to win- dow.eval("def"). This statement evaluates to "def" on Internet Evaluation and Compilation n 509 Chapter23](https://image.slidesharecdn.com/wordware-advancedjavascript3rded-160421130838/75/www-webre24h-com-Wordware-advanced-javascript-3rd-ed-easttom-534-2048.jpg)
![Explorer, and "abc" on Netscape Navigator. (See the explanation for the last statement in the previous script segment.) n Line 4 I already know that window.eval("def") evaluates to "def" on Internet Explorer, and "abc" on Netscape Navigator. Therefore, eval(window.eval("def")) evaluates to the exact opposite: "abc" on Internet Explorer, and "def" on Netscape Navigator. n Line 5 eval("def") evaluates to def, so window[eval("def")] evalu- ates to window[def], which evaluates to window["abc"]. Therefore, this statement prints "def". n Line 6 eval(window[eval("def")]) is actually the value handed to the document.write() method in the previous statement, evaluated by another eval() function call. Therefore, it evaluates to eval("def"), which evaluates to def, so this statement prints "abc". Function References and Calls Take a look at the following function definition: function multiply(op1, op2) { var result = op1 * op2 return result } A function call is an expression that invokes a function. The following state- ment, for example, consists of a function call: var num = multiply(5, 8) Function calls are very convenient because you can specify arguments for the function and accept the returned value. JavaScript, however, does not always permit function calls. You cannot, for example, use a function call as a constructor function’s method. Instead, you should use a function reference: function makeOperator() { this.multiply = multiply // not multiply() } All functions in JavaScript are objects, so a function reference is actually an object reference. Suppose you want to use a function in one window as a method in a constructor function located in a different window. You should specify the full function reference, using the following format: this.methodName = windowReference.functionName A function reference, as opposed to a function call, is not a command—the JavaScript interpreter cannot execute it. You should treat a function like any other object in JavaScript: Assign it to a variable, hand it to a function, and so forth. Here’s an example: 510 n Chapter 23](https://image.slidesharecdn.com/wordware-advancedjavascript3rded-160421130838/75/www-webre24h-com-Wordware-advanced-javascript-3rd-ed-easttom-535-2048.jpg)
![function myAlert(msg) { alert("*** " + msg + " ***") } function test(func) { func("Hello!") } test(myAlert) In this script segment I invoke the test() function with the function myAlert (a reference) as an argument. I then refer to the function myAlert as func, because the parameter is named func. Since func is equivalent to myAlert, I can call it in the same fashion I would call the myAlert() function. Compiling Code as a Function The function object specifies a string of JavaScript code to be compiled as a function. The general syntax is: var functionTarget = new Function ([arg1, arg2, ..., argn], functionBody) functionTarget is the name of a variable or a property of an existing object. It can also be a browser object followed by an event handler such as win- dow.onerror. arg1, arg2, ..., argn are string arguments to be used by the func- tion as formal parameter names. functionBody is a string specifying the JavaScript code to be compiled as the function body. The function object is supported in early versions of Netscape and Internet Explorer. An instance of the function object is evaluated each time it is used. This is much less efficient than declaring a function and invoking it within your code, because declared functions are compiled. Declared func- tions are evaluated as the page loads, and are stored in memory as machine code. Instances of the function object are stored in memory as objects (consisting of strings), and are converted to machine code for each execution. Specifying the Function’s Body The function body, functionBody, is a string consisting of JavaScript state- ments. You could use, for example, the following string: "document.bgColor='antiquewhite'" Things become more complicated when you want to create an instance with a body of several statements. The string should then include all statements separated by semicolons. Although you will rarely use this feature, I show Evaluation and Compilation n 511 Chapter23](https://image.slidesharecdn.com/wordware-advancedjavascript3rded-160421130838/75/www-webre24h-com-Wordware-advanced-javascript-3rd-ed-easttom-536-2048.jpg)
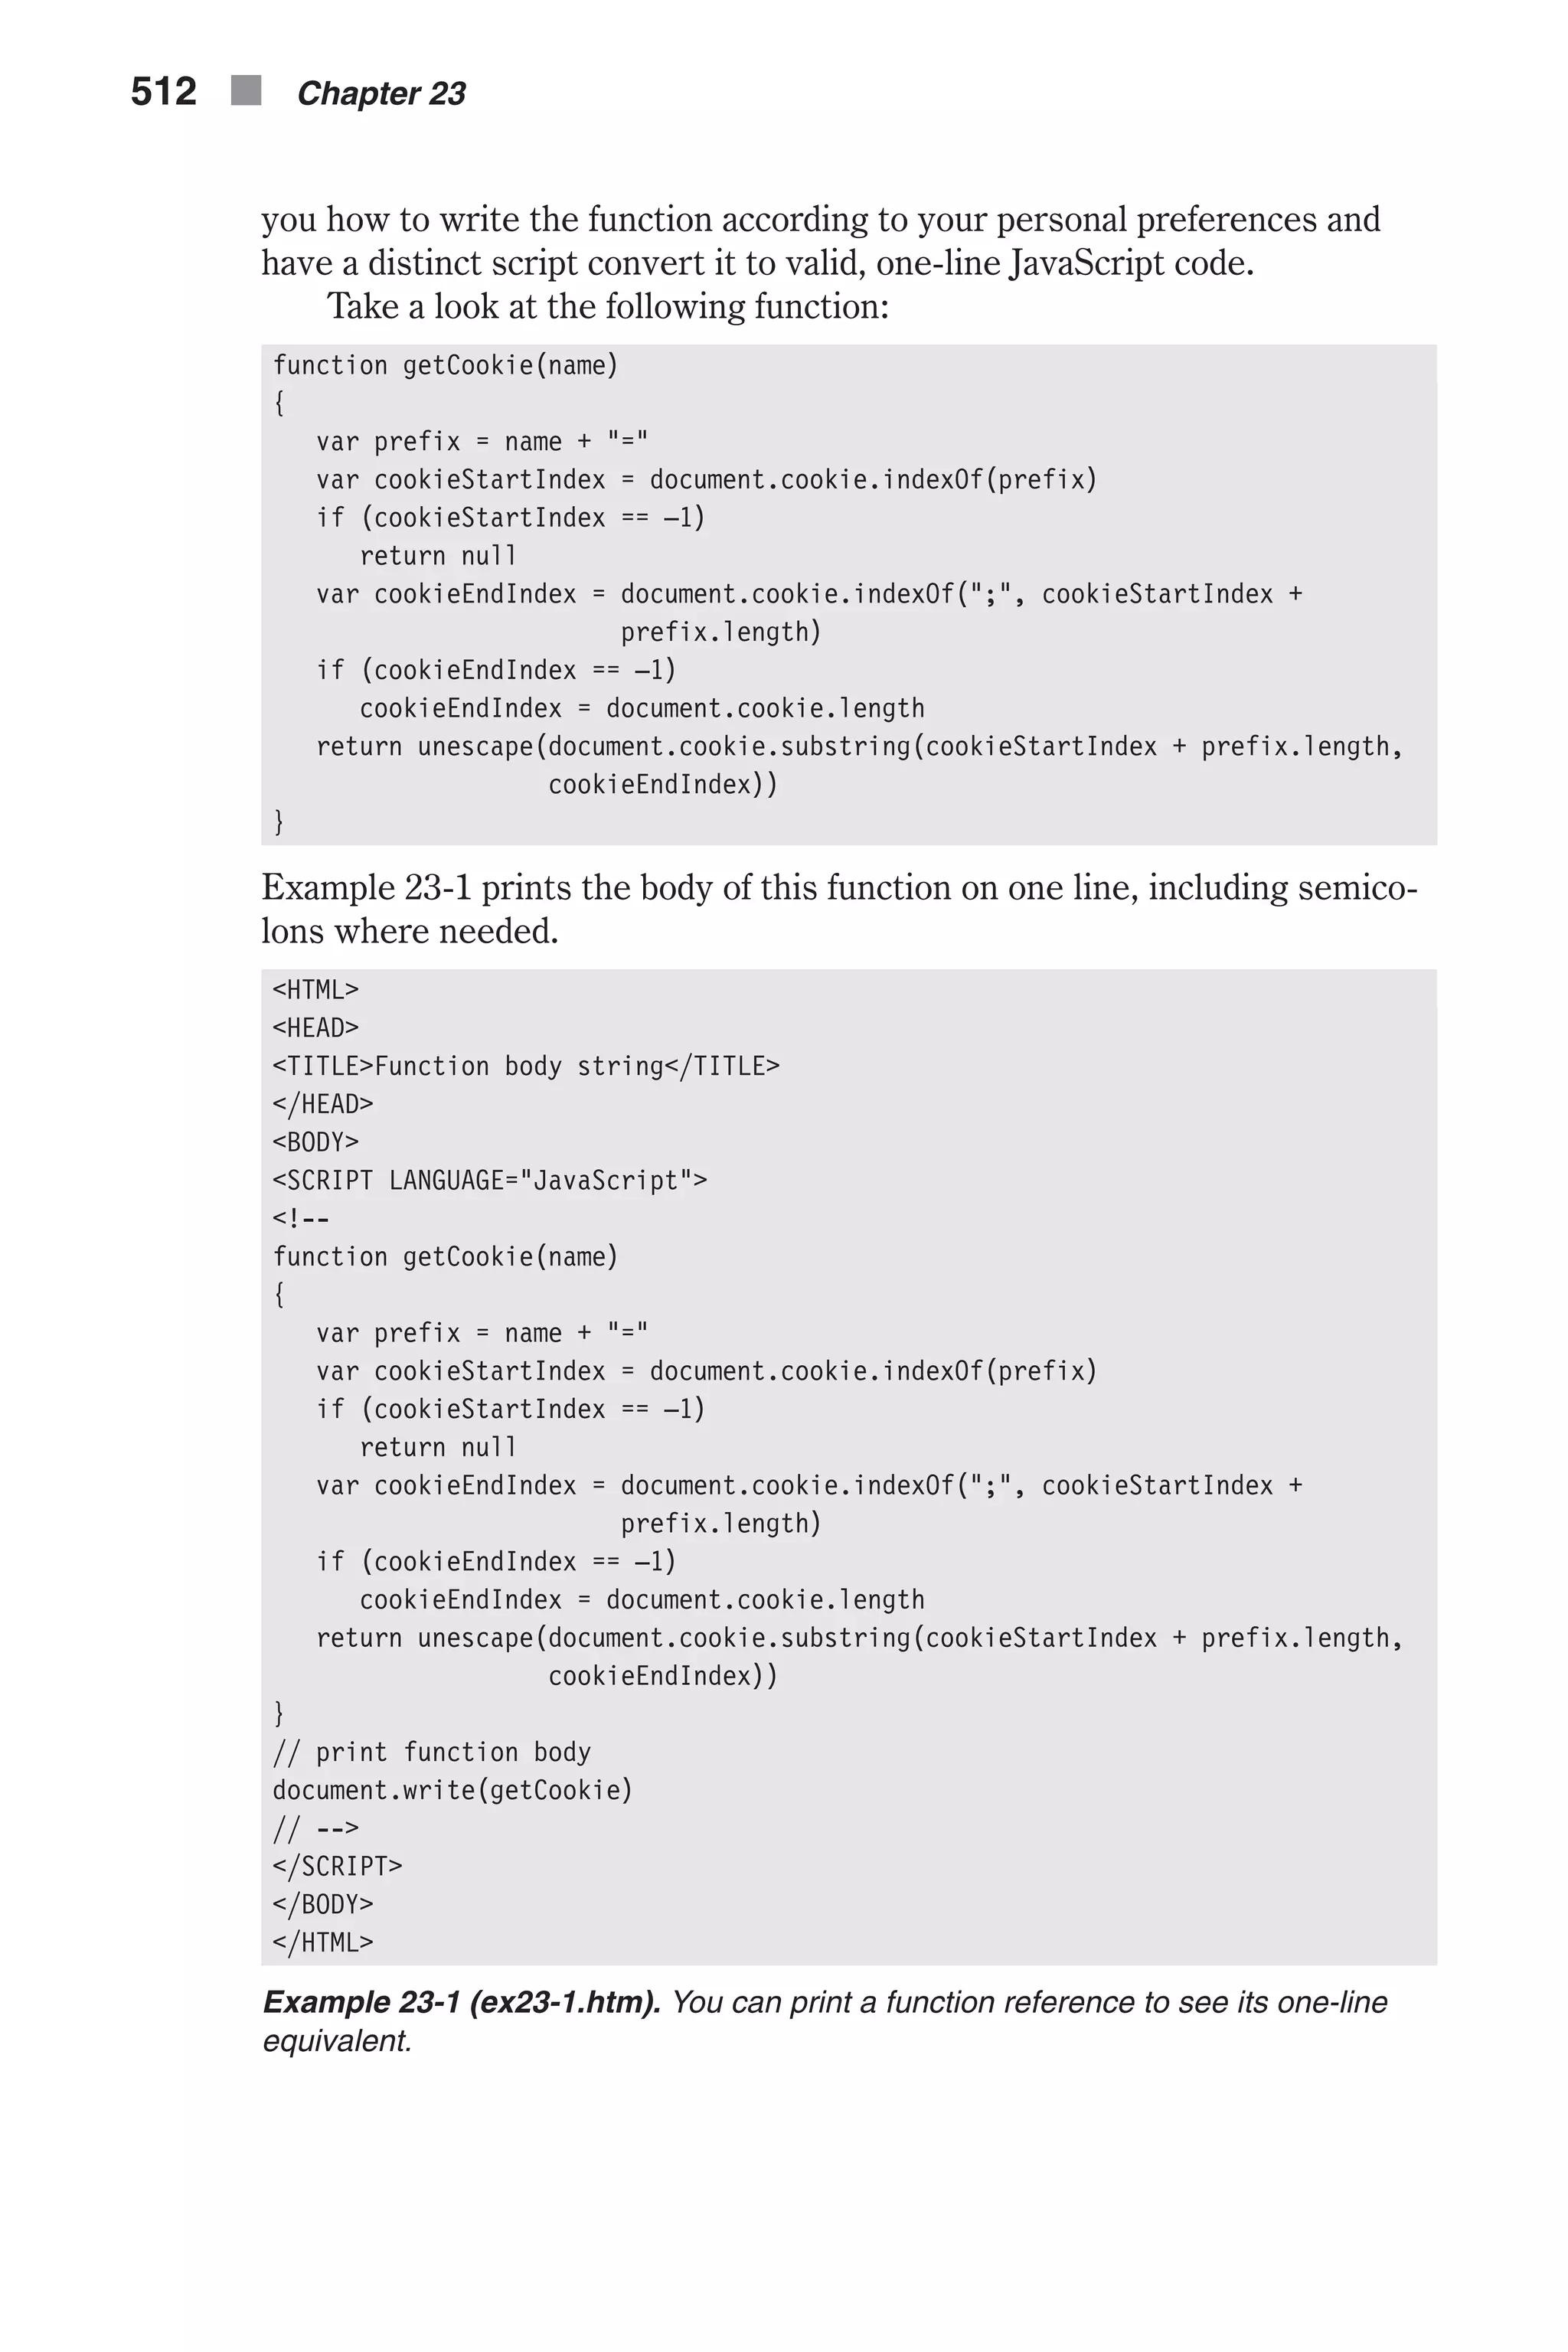
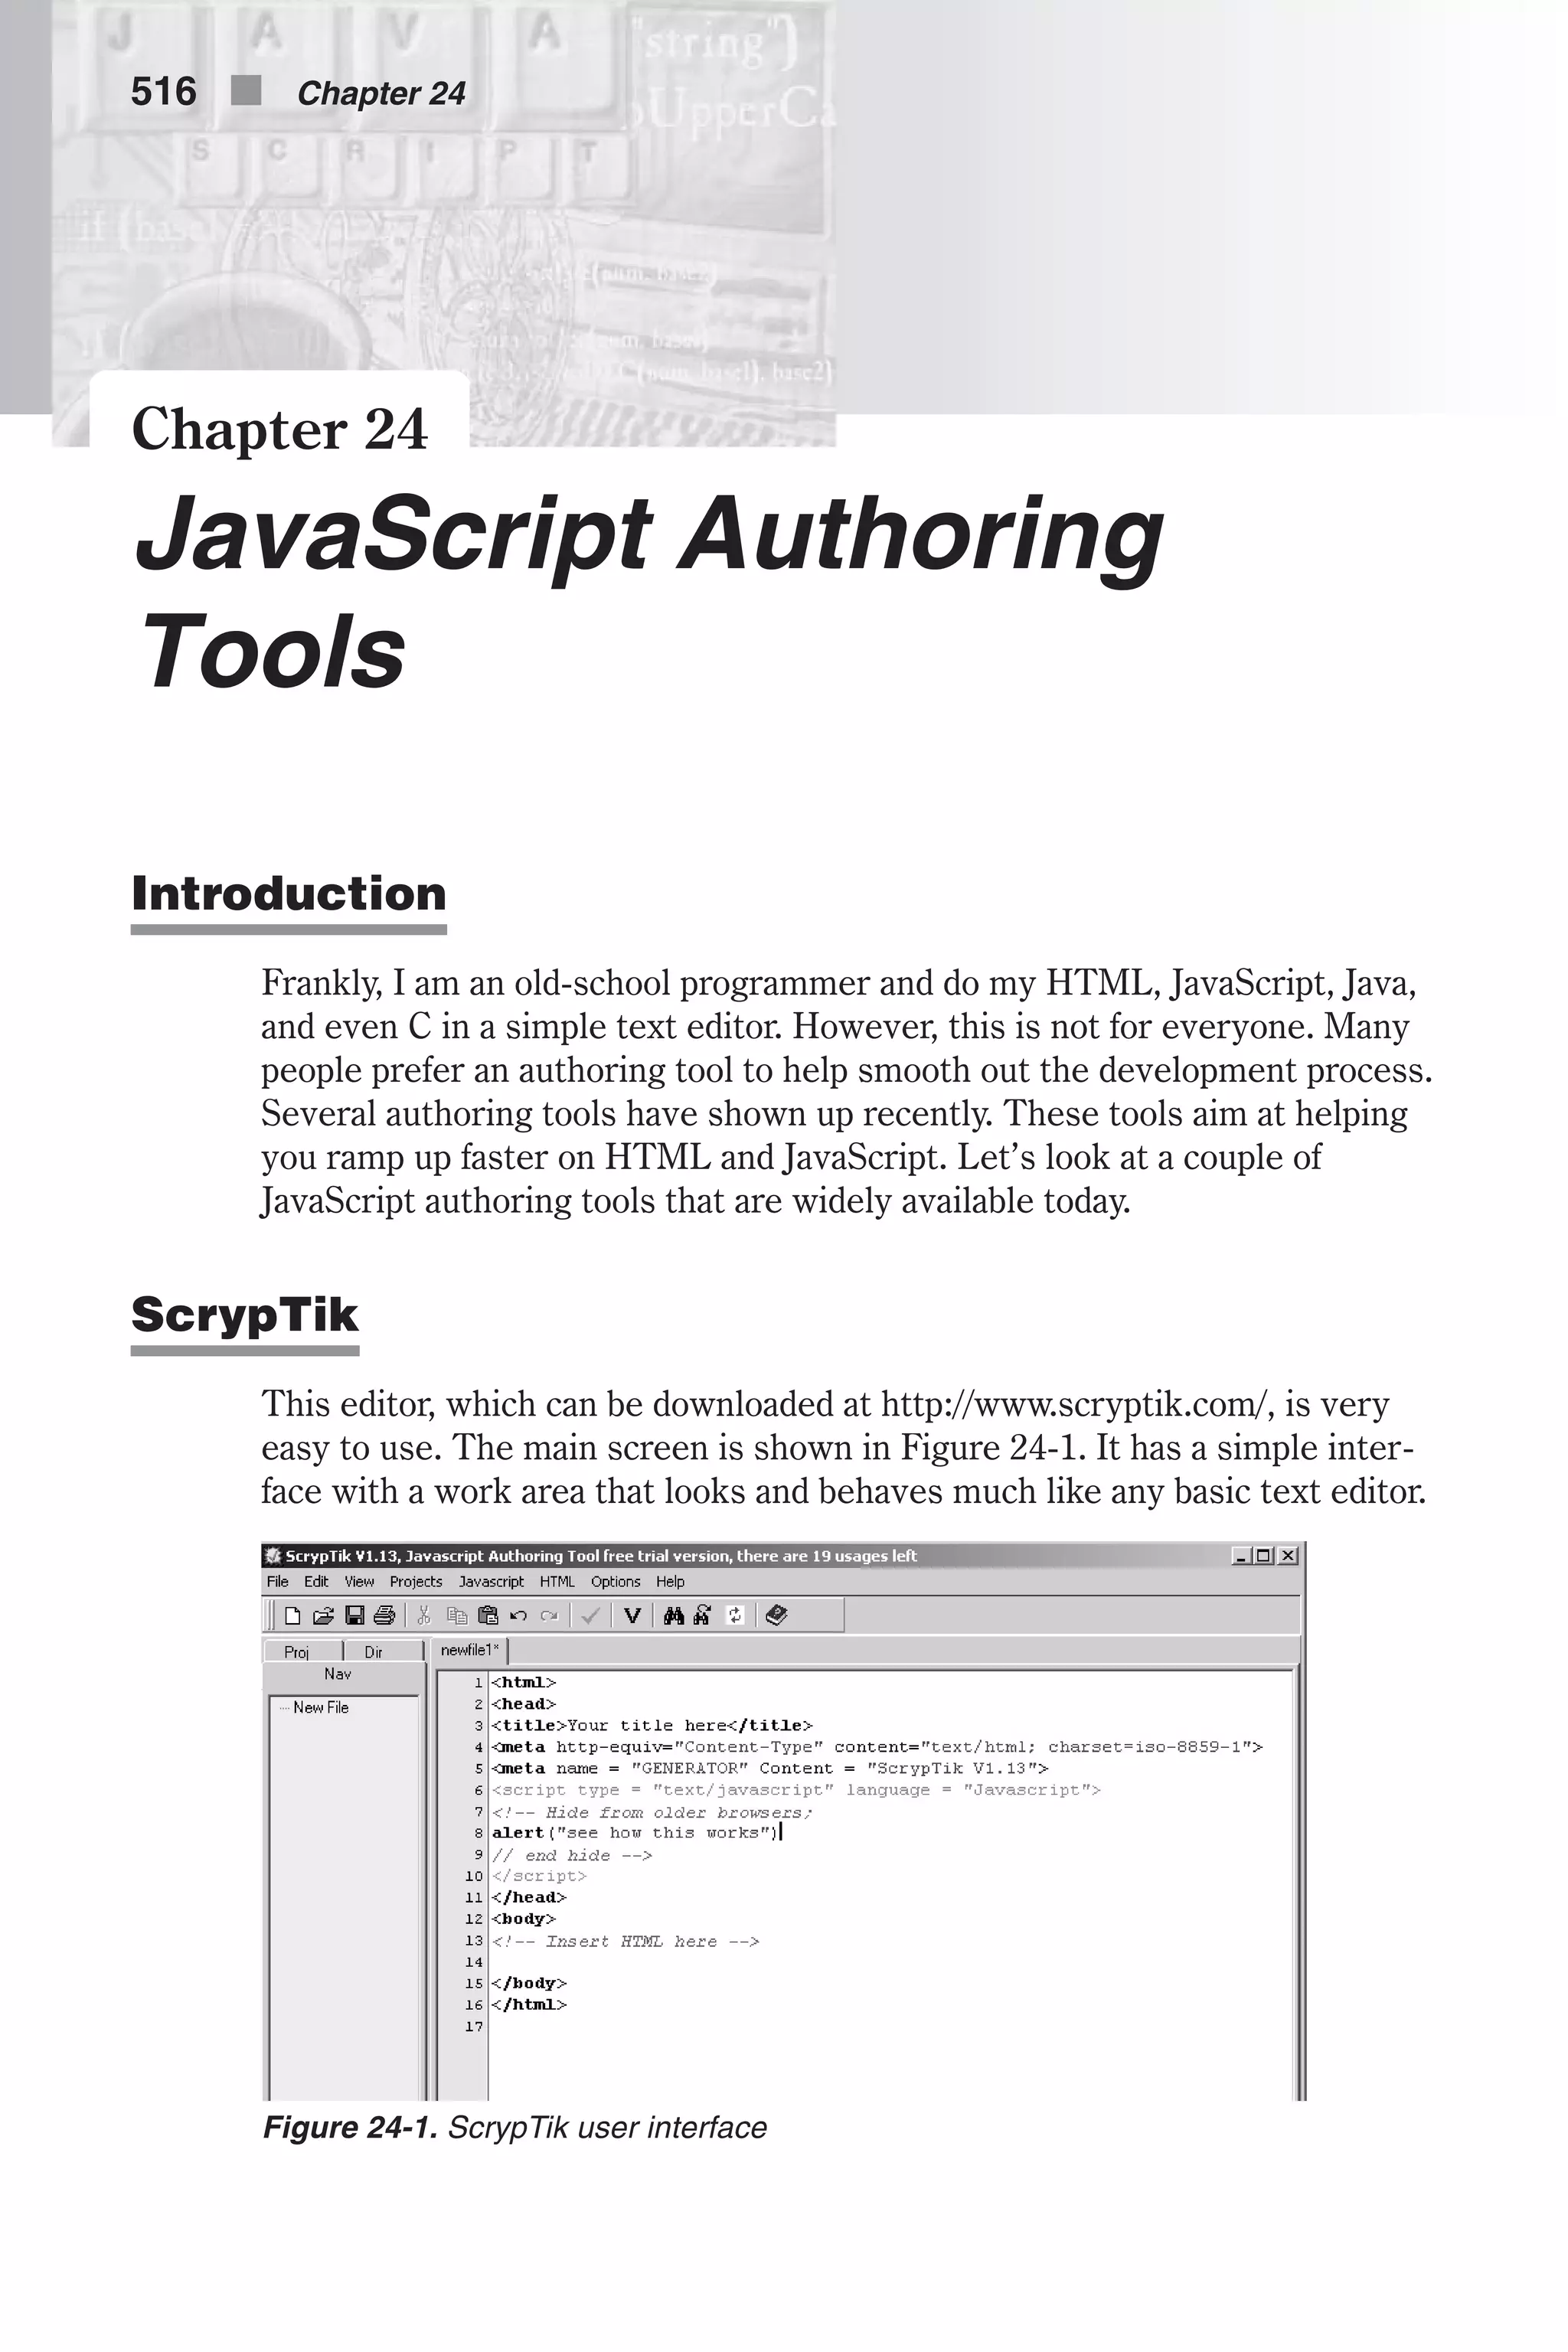

![Chapter 25 Plug-ins Plug-ins are very common parts of web pages. For example, you have proba- bly seen Flash animations inserted into HTML pages. There are a variety of things that can be plugged into HTML. In this chapter we will discuss some of the more common plug-ins and methods of incorporating plug-in objects. Embedding a Plug-in Object in HTML A plug-in is a piece of software that the browser calls to process data refer- enced in an HTML document. In order to reference such data in an HTML tag, you must use the <EMBED> tag. This tag’s general syntax is as follows: <EMBED SRC=source NAME=appletName HEIGHT=height WIDTH=width> [<PARAM NAME=parameterName VALUE=parameterValue>] [...</PARAM>] </EMBED> SRC=source specifies the URL containing the source content to be inter- preted by the plug-in. NAME=appletName specifies the name of the embedded object in the document. HEIGHT=height specifies the height of the applet in pixels within the browser window. WIDTH=width specifies the width of the applet in pixels within the browser window. <PARAM> defines a parameter for the embedded object. NAME=parameterName specifies the name of the parameter. VALUE=parameterValue specifies a value for the parameter (an argument). We will refer to such <EMBED> definitions as plug-ins, although that is not entirely correct. Plug-ins n 521](https://image.slidesharecdn.com/wordware-advancedjavascript3rded-160421130838/75/www-webre24h-com-Wordware-advanced-javascript-3rd-ed-easttom-546-2048.jpg)
![Referencing Plug-ins in JavaScript You can reference the plug-ins in your code by using the embeds array, a property of the document object. This array contains an entry for each plugin object (<EMBED> tag) in a document, in source order. That is, the first plugin object in the document is reflected by the first element of the array, for example, document.embeds[0]. The length property of this array, docu- ment.embeds.length, holds the number of plugin objects in the document. Elements in the embeds array are read-only, so a statement such as the fol- lowing has no effect: document.embeds[0]="myVideo.avi" It is important to understand that each element of the embeds array is a plugin object. As you will see later in this chapter, referencing a plugin object is very useful, because some plug-ins feature JavaScript methods. You can also reference a plugin object by its name. Take a look at the following HTML definition: <EMBED SRC="rabin.avi" AUTOSTART=FALSE LOOP=FALSE HEIGHT=120 WIDTH=159 NAME="rabin"> Assuming this is the first plug-in in the HTML document, you can reference it via JavaScript in two ways: n document.embeds[0] n document.rabin We recommend that you use the second method because it is more conve- nient. It does not rely on the order in which the plug-ins are defined, so you do not have to modify your scripts if you choose to change the order of the plug-ins in the document. Secondly, you can choose meaningful names for your plug-ins so your code becomes much easier to understand. Determining Installed Plug-ins with JavaScript You can use JavaScript to determine if a user has installed a plug-in (the software). You can then display embedded plug-in data if the plug-in is installed, or alternative content if it is not. You can also determine whether a client is capable of handling a particular MIME (Multipart Internet Mail Extension) type. The navigator object has two properties for checking installed plug-ins: n The mimeTypes object is an array of all the MIME types supported by the client. A MIME type can be supported either internally, via a helper application, or by plug-ins. Each element of this array is an object that has properties for its type, description, file extensions, and enabled plug-ins. The array is named mimeTypes, and each element is a mimeTypes object. 522 n Chapter 25](https://image.slidesharecdn.com/wordware-advancedjavascript3rded-160421130838/75/www-webre24h-com-Wordware-advanced-javascript-3rd-ed-easttom-547-2048.jpg)
![n The plugins object is an array of all the plug-ins installed on the client. Each element of this array has properties for its name and description as well as an array of mimeTypes objects for the MIME types supported by that plug-in. Each element of the plugins array is a plugins object. In order to check if a plug-in is supported, you must know that plug-in’s name. The general syntax used to check if a specific plug-in is installed is as follows: if (navigator.plugins["name of the plug-in"]) ... The name often consists of space characters or other nonalphanumeric char- acters, so it is a common practice to use the array notation, even if the dot syntax is possible. The following script segment checks if the Shockwave plug-in is installed, and provides data for that plug-in if it is: if (navigator.plugins["Shockwave"]) document.writeln("<EMBED SRC='myMovie.dir' HEIGHT=100 WIDTH=100>") else document.writeln("You don't have Shockwave installed!") Once you have installed a plug-in on your computer, it is very easy to find its name. Some JavaScript programmers prefer to write a simple Boolean function to assist in determining whether a given plug-in is installed. Here is an example: function isInstalled(plugName) { if (navigator.plugins[plugName]) return true else return false } The following script checks whether the client is capable of displaying QuickTime movies. if (navigator.mimeTypes["video/quicktime"]) document.writeln("Click <A HREF='movie.qt'>here</A> to see a QuickTime movie") else document.writeln("Sorry, can't show you any movies.") You should use such plug-in detection routines with care, because they often conflict with LiveConnect routines located in the same document. Properties of the mimeTypes Object A mimeTypes object, as found in the mimeTypes array (as an element), fea- tures the following properties: n type—the name of the MIME type, such as "video/mpeg" or "audio/x-wav". This property is obviously a string. Plug-ins n 523 Chapter25](https://image.slidesharecdn.com/wordware-advancedjavascript3rded-160421130838/75/www-webre24h-com-Wordware-advanced-javascript-3rd-ed-easttom-548-2048.jpg)
![n description—a description of the MIME type, such as “JPEG image.” n enabledPlugin—a reference to the plugins object that handles the MIME type. n suffixes—a string listing possible filename extensions (suffixes) for the MIME type. This property is a string consisting of any valid suffix, typically three letters long, separated by commas. n length—the number of elements in the array. Example 25-1 shows a list of the MIME types supported by the browser, including all three string properties of each mimeTypes object. <HTML> <HEAD> <TITLE>Supported MIME types</TITLE> </HEAD> <BODY> <SCRIPT LANGUAGE="JavaScript"> <!-- // notice that you do not have to issue </TH> and </TD> tags! document.write("<TABLE BORDER=1><TR VALIGN=TOP>" + "<TH ALIGN=left><I>i</I>" + "<TH ALIGN=left><I>type</I>" + "<TH ALIGN=left><I>description</I>" + "<TH ALIGN=left><I>suffixes</I></TR>") for (var i = 0; i < navigator.mimeTypes.length; ++i) { document.writeln("<TR VALIGN=TOP><TD>" + i + "<TD>" + navigator.mimeTypes[i].type + "<TD>" + navigator.mimeTypes[i].description + "<TD>" + navigator.mimeTypes[i].suffixes + "</TR>") } document.writeln("</TABLE>") // --> </SCRIPT> </BODY> </HTML> Example 25-1 (ex25-1.htm). We use tables to organize the list of supported MIME types. You can see this demonstrated in Figure 25-1. Try loading Example 25-1 in your browser. You should see a fairly long list of MIME types. Figure 25-1 shows the beginning of the list as it appeared on our computer. 524 n Chapter 25](https://image.slidesharecdn.com/wordware-advancedjavascript3rded-160421130838/75/www-webre24h-com-Wordware-advanced-javascript-3rd-ed-easttom-549-2048.jpg)
![Notice that in Example 25-1 we referred to elements of the mimeTypes array by indices. You can also use the MIME type’s name, as shown earlier in this chapter. Here are a few examples: navigator.mimeTypes["image/jpeg"].type navigator.mimeTypes["image/jpeg"].description navigator.mimeTypes["image/jpeg"].suffixes Properties of the plugins Object The plugins object features the following properties: n name—the name of the plug-in. n filename—the name of the plug-in file on disk. n description—a description supplied by the plug-in itself. n length—the number of elements in the array. n [...]—array of mimeTypes objects, indexed by number or type, that the plug-in can handle. The following statement, for example, assigns shorthand variables for the predefined Shockwave properties: var myPlugin = navigator.plugins["Shockwave"].name var myPluginFile = navigator.plugins["Shockwave"].filename var myPluginDesc = navigator.plugins["Shockwave"].description Example 25-2 lists the installed plug-ins, including each plug-in’s name, file- name, description, and MIME types that it handles. <HTML> <HEAD> <TITLE>Installed plug-ins</TITLE> </HEAD> <BODY> <SCRIPT LANGUAGE="JavaScript"> <!-- // notice that you do not have to issue </TH> and </TD> tags! document.write("<TABLE BORDER=1>") for (i = 0; i < navigator.plugins.length; ++i) { document.writeln("<TR><TD><FONT SIZE=2>" + "<U><B>" + navigator.plugins[i].name + "</B></U><BR>" + Plug-ins n 525 Chapter25 Figure 25-1. The plug-ins list](https://image.slidesharecdn.com/wordware-advancedjavascript3rded-160421130838/75/www-webre24h-com-Wordware-advanced-javascript-3rd-ed-easttom-550-2048.jpg)
!["<U>Filename:</U> " + navigator.plugins[i].filename + "<BR>" + "<U>Description:</U> " + navigator.plugins[i].description + "<BR>" + "<U>MIME types:</U> ") for (var j = 0; j < navigator.plugins[i].length; ++j) { document.write(navigator.plugins[i][j].type + "; ") } document.write("</FONT></TD></TR>") } document.write("</TABLE>") // --> </SCRIPT> </BODY> </HTML> Example 25-2 (ex25-2.htm). I use navigator.plugins to list the installed plug-ins and their properties. The following statement assigns the string "LiveAudio" to a variable: var audioPlugin = navigator.mimeTypes["audio/basic"].enabledPlugin.name The name property belongs to a plugins object, because naviga- tor.mimeTypes["audio/basic"].enabledPlugin is equivalent to navigator.plugins["LiveAudio"]. LiveAudio and LiveVideo LiveAudio and LiveVideo are plug-ins that are built into Netscape Navigator 6.0 and above. LiveAudio enables you to embed audio in a web page, whereas LiveVideo supports various video formats. Since both LiveAudio and LiveVideo are plug-ins, you include them in an HTML document via the standard <EMBED> tag. LiveAudio LiveAudio plays audio files in WAV, AIFF, AU, and MIDI formats. Audio con- trols appear according to the size specified in the WIDTH and HEIGHT parameters in the <EMBED> tag. You can create an audio console with any of the following controls: n console—consisting of a Play, Pause, Stop, and volume control lever. This is the most complete suite of controls. n smallConsole—consisting of a Play, Stop, and volume control lever. The buttons in this view are somewhat smaller than those in a console. n playButton—a button that starts the sound playing. n pauseButton—a button that pauses (without unloading) the sound while it is playing. n stopButton—a button that ends the playing of sound and unloads it. n volumeLever—a lever that adjusts the volume level for playback of the sound (and adjusts the system’s volume level). 526 n Chapter 25](https://image.slidesharecdn.com/wordware-advancedjavascript3rded-160421130838/75/www-webre24h-com-Wordware-advanced-javascript-3rd-ed-easttom-551-2048.jpg)
![Here is the general HTML syntax for a LiveAudio control: <EMBED SRC=[URL] AUTOSTART=[TRUE|FALSE] LOOP=[TRUE|FALSE|INTEGER] STARTTIME=[MINUTES:SECONDS] ENDTIME=[MINUTES:SECONDS] VOLUME=[0-100] WIDTH=[#PIXELS] HEIGHT=[#PIXELS] ALIGN=[TOP|BOTTOM|CENTER|BASELINE |LEFT|RIGHT|TEXTTOP|MIDDLE|ABSMIDDLE|ABSBOTTOM] CONTROLS=[CONSOLE |SMALLCONSOLE|PLAYBUTTON|PAUSEBUTTON|STOPBUTTON|VOLUMELEVER] HIDDEN=[TRUE] MASTERSOUND NAME=[UNIQUE NAME TO GROUP CONTROLS TOGETHER SO THAT THEY CONTROL ONE SOUND]...> The syntax may seem very complicated, but a close look shows that it does not consist of many attributes. It’s a bit misleading because there are many different values that can be given to each attribute. Here is a short descrip- tion of each attribute and the values it accepts: n SRC=[URL]—The URL of the source sound file. It can be either a rela- tive URL or a full URL, including the server’s identification. n AUTOSTART=[TRUE|FALSE]—When set to TRUE, the sound will begin playing automatically upon loading the web page. The default is FALSE. n LOOP=[TRUE|FALSE|INTEGER]—When set to TRUE, the sound will play continuously until the Stop button is clicked on the console or the user goes to another page. If an INTEGER value is used, the sound repeats the number of times indicated. n STARTTIME=[MINUTES:SECONDS]—Use STARTTIME to specify where the playback should begin. If you want to begin the sound at 30 seconds, you would set the value to 00:30. n ENDTIME=[MINUTES:SECONDS]—Use ENDTIME to specify where in the sound file you would like playback to end. If you want to stop the sound at 1.5 minutes, you would set the value to 01:30. n VOLUME=[0-100]—This value must be a number from 0 to 100 to repre- sent 0 to 100 percent. This attribute sets the volume for the sound that is playing or for the entire system if MASTERVOLUME (see NAME attribute below) is used. The default volume level is the current system volume. n WIDTH=[#PIXELS]—Use WIDTH to change the width of the console or console element. For the CONSOLE and SMALLCONSOLE, the default is WIDTH=144. For VOLUMELEVER, the default is WIDTH=74. For a button, the default is WIDTH=37 (WIDTH=34 looks much better). We suggest that you specify this attribute regardless of whether it is the default value. n HEIGHT=[#PIXELS]—Use HEIGHT to change the height of the console. For CONSOLE, the default is HEIGHT=60. For the SMALLCONSOLE, the default is HEIGHT=15. For VOLUMELEVER, the default is HEIGHT=20. For a button, the default is HEIGHT=22. We strongly recommend specifying this attribute even if it is the default. n ALIGN=[TOP|BOTTOM|CENTER|BASELINE|LEFT|RIGHT|TEXTTOP|MIDDLE| ABSMIDDLE|ABSBOTTOM]—While RIGHT and LEFT specify the position of the console with respect to the page, the other options tell the browser how you want to align text as it flows around the consoles. It acts Plug-ins n 527 Chapter25](https://image.slidesharecdn.com/wordware-advancedjavascript3rded-160421130838/75/www-webre24h-com-Wordware-advanced-javascript-3rd-ed-easttom-552-2048.jpg)
![similarly to the ALIGN attribute of the <IMG> tag. The default value is BOTTOM. n CONTROLS=[CONSOLE|SMALLCONSOLE|PLAYBUTTON|PAUSEBUTTON| STOPBUTTON|VOLUMELEVER]—Use this attribute to select the control you want to place on your page. The default for this field is CONSOLE. n HIDDEN=[TRUE]—The value for this attribute should be TRUE, or it should not be included in the <EMBED> tag. If it is specified as TRUE, no controls will load and the sound will act as a background one. n MASTERSOUND—This value must be used when grouping sounds together in a NAME group. It takes no value (it must merely be present in the <EMBED> tag), but tells LiveAudio which file is a genuine sound file and allows it to ignore any stub files. In order to associate several <EMBED>s with one sound file, all <EMBED>s should have the same name (see the NAME attribute). The SRC attribute of one of those <EMBED>s should be the URL of the actual sound file, whereas the other SRC attributes should specify the URL of a stub file. A stub file is a text file containing a single space (that’s the recommended content). Its name should consist of a sound extension (e.g., .mid, .wav, .aif). To create a page with four LiveAudio elements (Play, Pause, Stop, and Volume) all controlling the same file, you need to create three sound stubs and of course have one legitimate sound file (for a total of four <EMBED>s). Anytime you use the NAME attribute in a LiveAudio <EMBED>, you must also use a MASTER- SOUND attribute. LiveAudio will play no sound when a NAME attribute exists without a corresponding MASTERSOUND attribute, even if that is the only <EMBED> with that name on the page. Since you do not want LiveAudio to attempt to play a stub file (it contains no sound data), you should specify a NAME attribute with no MASTERSOUND attribute. The <EMBED> reflecting the legitimate sound file, on the other hand, should feature MASTERSOUND in order to play. n NAME=[UNIQUE NAME]—This attribute sets a unique ID for a group of <EMBED>s (each with a distinct CONTROLS attribute), so they all act on the same sound as it plays. The deficiency of <EMBED>’s syntax is that it takes only one value for CONTROLS. For example, if a content creator wishes to have one sound controlled by two embedded objects (a PLAYBUTTON and a STOPBUTTON), he or she must use two separate <EMBED>s and group them by the NAME attribute. In this case, MASTERSOUND is necessary to flag LiveAudio and let it know which of the two <EMBED> tags actually has the sound file you wish to control. LiveAudio ignores any <EMBED>(s) with no MASTERSOUND attribute. If you want one VOLUMELEVER to control multiple NAMEs (or the sys- tem volume), create an <EMBED> using VOLUMELEVER for CONTROLS. Then set NAME to "_MASTERVOLUME". Example 25-3 is a nice summary of the LiveAudio features. 528 n Chapter 25](https://image.slidesharecdn.com/wordware-advancedjavascript3rded-160421130838/75/www-webre24h-com-Wordware-advanced-javascript-3rd-ed-easttom-553-2048.jpg)

![NAME="melrose"> </TD> </TR><TR> <TD COLSPAN=2 BGCOLOR="black" ALIGN="center"> <FONT COLOR="white" SIZE=2>Master Volume</FONT><BR> <EMBED SRC="stub1.aif" CONTROLS=VOLUMELEVER WIDTH=74 HEIGHT=20 NAME="_MASTERVOLUME"> </TD> </TR></TABLE> </BODY> </HTML> Example 25-3 (ex25-3.htm). Two sound files, with three <EMBED>s for each, and an <EMBED> to control the system volume Since each <EMBED> statement can specify one control object, we need three of them to place the PLAYBUTTON, STOPBUTTON, and PAUSEBUTTON. Here’s the syntax for the Master Volume control: <EMBED SRC="stub1.aif" CONTROLS=VOLUMELEVER WIDTH=74 HEIGHT=20 NAME="_MASTERVOLUME"> Notice that the first character in the object’s name is an underscore. LiveVideo LiveVideo plays video files in AVI format. Use the <EMBED> tag to place AVI movies in your web page. The general syntax for this tag is as follows: <EMBED SRC=[URL] AUTOSTART=[TRUE|FALSE] LOOP=[TRUE|FALSE] WIDTH=[#PIXELS] HEIGHT=[#PIXELS] ALIGN=[TOP|BOTTOM|CENTER|BASELINE|LEFT|RIGHT|TEXTTOP| MIDDLE|ABSMIDDLE|ABSBOTTOM]...> We discussed the attributes in the LiveAudio section. Once the AVI video loads, you can start it with a click (only if you didn’t set AUTOSTART to TRUE). Click the right mouse button over the video panel for a list of operations. 530 n Chapter 25](https://image.slidesharecdn.com/wordware-advancedjavascript3rded-160421130838/75/www-webre24h-com-Wordware-advanced-javascript-3rd-ed-easttom-555-2048.jpg)
![www.webre24h.com - [Wordware] advanced javascript, 3rd ed. - [easttom]](https://image.slidesharecdn.com/wordware-advancedjavascript3rded-160421130838/75/www-webre24h-com-Wordware-advanced-javascript-3rd-ed-easttom-560-2048.jpg)
![www.webre24h.com - [Wordware] advanced javascript, 3rd ed. - [easttom]](https://image.slidesharecdn.com/wordware-advancedjavascript3rded-160421130838/75/www-webre24h-com-Wordware-advanced-javascript-3rd-ed-easttom-561-2048.jpg)
![www.webre24h.com - [Wordware] advanced javascript, 3rd ed. - [easttom]](https://image.slidesharecdn.com/wordware-advancedjavascript3rded-160421130838/75/www-webre24h-com-Wordware-advanced-javascript-3rd-ed-easttom-562-2048.jpg)
![www.webre24h.com - [Wordware] advanced javascript, 3rd ed. - [easttom]](https://image.slidesharecdn.com/wordware-advancedjavascript3rded-160421130838/75/www-webre24h-com-Wordware-advanced-javascript-3rd-ed-easttom-563-2048.jpg)
![www.webre24h.com - [Wordware] advanced javascript, 3rd ed. - [easttom]](https://image.slidesharecdn.com/wordware-advancedjavascript3rded-160421130838/75/www-webre24h-com-Wordware-advanced-javascript-3rd-ed-easttom-564-2048.jpg)
![www.webre24h.com - [Wordware] advanced javascript, 3rd ed. - [easttom]](https://image.slidesharecdn.com/wordware-advancedjavascript3rded-160421130838/75/www-webre24h-com-Wordware-advanced-javascript-3rd-ed-easttom-565-2048.jpg)
![www.webre24h.com - [Wordware] advanced javascript, 3rd ed. - [easttom]](https://image.slidesharecdn.com/wordware-advancedjavascript3rded-160421130838/75/www-webre24h-com-Wordware-advanced-javascript-3rd-ed-easttom-566-2048.jpg)
![www.webre24h.com - [Wordware] advanced javascript, 3rd ed. - [easttom]](https://image.slidesharecdn.com/wordware-advancedjavascript3rded-160421130838/75/www-webre24h-com-Wordware-advanced-javascript-3rd-ed-easttom-567-2048.jpg)
![www.webre24h.com - [Wordware] advanced javascript, 3rd ed. - [easttom]](https://image.slidesharecdn.com/wordware-advancedjavascript3rded-160421130838/75/www-webre24h-com-Wordware-advanced-javascript-3rd-ed-easttom-568-2048.jpg)
![www.webre24h.com - [Wordware] advanced javascript, 3rd ed. - [easttom]](https://image.slidesharecdn.com/wordware-advancedjavascript3rded-160421130838/75/www-webre24h-com-Wordware-advanced-javascript-3rd-ed-easttom-569-2048.jpg)
![www.webre24h.com - [Wordware] advanced javascript, 3rd ed. - [easttom]](https://image.slidesharecdn.com/wordware-advancedjavascript3rded-160421130838/75/www-webre24h-com-Wordware-advanced-javascript-3rd-ed-easttom-570-2048.jpg)
![www.webre24h.com - [Wordware] advanced javascript, 3rd ed. - [easttom]](https://image.slidesharecdn.com/wordware-advancedjavascript3rded-160421130838/75/www-webre24h-com-Wordware-advanced-javascript-3rd-ed-easttom-571-2048.jpg)
![www.webre24h.com - [Wordware] advanced javascript, 3rd ed. - [easttom]](https://image.slidesharecdn.com/wordware-advancedjavascript3rded-160421130838/75/www-webre24h-com-Wordware-advanced-javascript-3rd-ed-easttom-572-2048.jpg)
![www.webre24h.com - [Wordware] advanced javascript, 3rd ed. - [easttom]](https://image.slidesharecdn.com/wordware-advancedjavascript3rded-160421130838/75/www-webre24h-com-Wordware-advanced-javascript-3rd-ed-easttom-573-2048.jpg)
![www.webre24h.com - [Wordware] advanced javascript, 3rd ed. - [easttom]](https://image.slidesharecdn.com/wordware-advancedjavascript3rded-160421130838/75/www-webre24h-com-Wordware-advanced-javascript-3rd-ed-easttom-574-2048.jpg)
![www.webre24h.com - [Wordware] advanced javascript, 3rd ed. - [easttom]](https://image.slidesharecdn.com/wordware-advancedjavascript3rded-160421130838/75/www-webre24h-com-Wordware-advanced-javascript-3rd-ed-easttom-575-2048.jpg)
![www.webre24h.com - [Wordware] advanced javascript, 3rd ed. - [easttom]](https://image.slidesharecdn.com/wordware-advancedjavascript3rded-160421130838/75/www-webre24h-com-Wordware-advanced-javascript-3rd-ed-easttom-576-2048.jpg)
![www.webre24h.com - [Wordware] advanced javascript, 3rd ed. - [easttom]](https://image.slidesharecdn.com/wordware-advancedjavascript3rded-160421130838/75/www-webre24h-com-Wordware-advanced-javascript-3rd-ed-easttom-577-2048.jpg)
![www.webre24h.com - [Wordware] advanced javascript, 3rd ed. - [easttom]](https://image.slidesharecdn.com/wordware-advancedjavascript3rded-160421130838/75/www-webre24h-com-Wordware-advanced-javascript-3rd-ed-easttom-578-2048.jpg)
![www.webre24h.com - [Wordware] advanced javascript, 3rd ed. - [easttom]](https://image.slidesharecdn.com/wordware-advancedjavascript3rded-160421130838/75/www-webre24h-com-Wordware-advanced-javascript-3rd-ed-easttom-579-2048.jpg)
![www.webre24h.com - [Wordware] advanced javascript, 3rd ed. - [easttom]](https://image.slidesharecdn.com/wordware-advancedjavascript3rded-160421130838/75/www-webre24h-com-Wordware-advanced-javascript-3rd-ed-easttom-580-2048.jpg)
![www.webre24h.com - [Wordware] advanced javascript, 3rd ed. - [easttom]](https://image.slidesharecdn.com/wordware-advancedjavascript3rded-160421130838/75/www-webre24h-com-Wordware-advanced-javascript-3rd-ed-easttom-581-2048.jpg)
![www.webre24h.com - [Wordware] advanced javascript, 3rd ed. - [easttom]](https://image.slidesharecdn.com/wordware-advancedjavascript3rded-160421130838/75/www-webre24h-com-Wordware-advanced-javascript-3rd-ed-easttom-582-2048.jpg)
![www.webre24h.com - [Wordware] advanced javascript, 3rd ed. - [easttom]](https://image.slidesharecdn.com/wordware-advancedjavascript3rded-160421130838/75/www-webre24h-com-Wordware-advanced-javascript-3rd-ed-easttom-583-2048.jpg)
![www.webre24h.com - [Wordware] advanced javascript, 3rd ed. - [easttom]](https://image.slidesharecdn.com/wordware-advancedjavascript3rded-160421130838/75/www-webre24h-com-Wordware-advanced-javascript-3rd-ed-easttom-584-2048.jpg)
![www.webre24h.com - [Wordware] advanced javascript, 3rd ed. - [easttom]](https://image.slidesharecdn.com/wordware-advancedjavascript3rded-160421130838/75/www-webre24h-com-Wordware-advanced-javascript-3rd-ed-easttom-585-2048.jpg)
![www.webre24h.com - [Wordware] advanced javascript, 3rd ed. - [easttom]](https://image.slidesharecdn.com/wordware-advancedjavascript3rded-160421130838/75/www-webre24h-com-Wordware-advanced-javascript-3rd-ed-easttom-586-2048.jpg)
![www.webre24h.com - [Wordware] advanced javascript, 3rd ed. - [easttom]](https://image.slidesharecdn.com/wordware-advancedjavascript3rded-160421130838/75/www-webre24h-com-Wordware-advanced-javascript-3rd-ed-easttom-587-2048.jpg)
![www.webre24h.com - [Wordware] advanced javascript, 3rd ed. - [easttom]](https://image.slidesharecdn.com/wordware-advancedjavascript3rded-160421130838/75/www-webre24h-com-Wordware-advanced-javascript-3rd-ed-easttom-588-2048.jpg)
![www.webre24h.com - [Wordware] advanced javascript, 3rd ed. - [easttom]](https://image.slidesharecdn.com/wordware-advancedjavascript3rded-160421130838/75/www-webre24h-com-Wordware-advanced-javascript-3rd-ed-easttom-589-2048.jpg)
![www.webre24h.com - [Wordware] advanced javascript, 3rd ed. - [easttom]](https://image.slidesharecdn.com/wordware-advancedjavascript3rded-160421130838/75/www-webre24h-com-Wordware-advanced-javascript-3rd-ed-easttom-590-2048.jpg)
![www.webre24h.com - [Wordware] advanced javascript, 3rd ed. - [easttom]](https://image.slidesharecdn.com/wordware-advancedjavascript3rded-160421130838/75/www-webre24h-com-Wordware-advanced-javascript-3rd-ed-easttom-591-2048.jpg)
![www.webre24h.com - [Wordware] advanced javascript, 3rd ed. - [easttom]](https://image.slidesharecdn.com/wordware-advancedjavascript3rded-160421130838/75/www-webre24h-com-Wordware-advanced-javascript-3rd-ed-easttom-592-2048.jpg)
![www.webre24h.com - [Wordware] advanced javascript, 3rd ed. - [easttom]](https://image.slidesharecdn.com/wordware-advancedjavascript3rded-160421130838/75/www-webre24h-com-Wordware-advanced-javascript-3rd-ed-easttom-593-2048.jpg)
![www.webre24h.com - [Wordware] advanced javascript, 3rd ed. - [easttom]](https://image.slidesharecdn.com/wordware-advancedjavascript3rded-160421130838/75/www-webre24h-com-Wordware-advanced-javascript-3rd-ed-easttom-594-2048.jpg)
![www.webre24h.com - [Wordware] advanced javascript, 3rd ed. - [easttom]](https://image.slidesharecdn.com/wordware-advancedjavascript3rded-160421130838/75/www-webre24h-com-Wordware-advanced-javascript-3rd-ed-easttom-595-2048.jpg)
![www.webre24h.com - [Wordware] advanced javascript, 3rd ed. - [easttom]](https://image.slidesharecdn.com/wordware-advancedjavascript3rded-160421130838/75/www-webre24h-com-Wordware-advanced-javascript-3rd-ed-easttom-596-2048.jpg)
![www.webre24h.com - [Wordware] advanced javascript, 3rd ed. - [easttom]](https://image.slidesharecdn.com/wordware-advancedjavascript3rded-160421130838/75/www-webre24h-com-Wordware-advanced-javascript-3rd-ed-easttom-597-2048.jpg)
![www.webre24h.com - [Wordware] advanced javascript, 3rd ed. - [easttom]](https://image.slidesharecdn.com/wordware-advancedjavascript3rded-160421130838/75/www-webre24h-com-Wordware-advanced-javascript-3rd-ed-easttom-598-2048.jpg)
![www.webre24h.com - [Wordware] advanced javascript, 3rd ed. - [easttom]](https://image.slidesharecdn.com/wordware-advancedjavascript3rded-160421130838/75/www-webre24h-com-Wordware-advanced-javascript-3rd-ed-easttom-599-2048.jpg)
![www.webre24h.com - [Wordware] advanced javascript, 3rd ed. - [easttom]](https://image.slidesharecdn.com/wordware-advancedjavascript3rded-160421130838/75/www-webre24h-com-Wordware-advanced-javascript-3rd-ed-easttom-600-2048.jpg)
![www.webre24h.com - [Wordware] advanced javascript, 3rd ed. - [easttom]](https://image.slidesharecdn.com/wordware-advancedjavascript3rded-160421130838/75/www-webre24h-com-Wordware-advanced-javascript-3rd-ed-easttom-601-2048.jpg)
![www.webre24h.com - [Wordware] advanced javascript, 3rd ed. - [easttom]](https://image.slidesharecdn.com/wordware-advancedjavascript3rded-160421130838/75/www-webre24h-com-Wordware-advanced-javascript-3rd-ed-easttom-602-2048.jpg)
![www.webre24h.com - [Wordware] advanced javascript, 3rd ed. - [easttom]](https://image.slidesharecdn.com/wordware-advancedjavascript3rded-160421130838/75/www-webre24h-com-Wordware-advanced-javascript-3rd-ed-easttom-603-2048.jpg)
![www.webre24h.com - [Wordware] advanced javascript, 3rd ed. - [easttom]](https://image.slidesharecdn.com/wordware-advancedjavascript3rded-160421130838/75/www-webre24h-com-Wordware-advanced-javascript-3rd-ed-easttom-604-2048.jpg)
![www.webre24h.com - [Wordware] advanced javascript, 3rd ed. - [easttom]](https://image.slidesharecdn.com/wordware-advancedjavascript3rded-160421130838/75/www-webre24h-com-Wordware-advanced-javascript-3rd-ed-easttom-605-2048.jpg)
![www.webre24h.com - [Wordware] advanced javascript, 3rd ed. - [easttom]](https://image.slidesharecdn.com/wordware-advancedjavascript3rded-160421130838/75/www-webre24h-com-Wordware-advanced-javascript-3rd-ed-easttom-606-2048.jpg)
![www.webre24h.com - [Wordware] advanced javascript, 3rd ed. - [easttom]](https://image.slidesharecdn.com/wordware-advancedjavascript3rded-160421130838/75/www-webre24h-com-Wordware-advanced-javascript-3rd-ed-easttom-607-2048.jpg)
![www.webre24h.com - [Wordware] advanced javascript, 3rd ed. - [easttom]](https://image.slidesharecdn.com/wordware-advancedjavascript3rded-160421130838/75/www-webre24h-com-Wordware-advanced-javascript-3rd-ed-easttom-608-2048.jpg)
![www.webre24h.com - [Wordware] advanced javascript, 3rd ed. - [easttom]](https://image.slidesharecdn.com/wordware-advancedjavascript3rded-160421130838/75/www-webre24h-com-Wordware-advanced-javascript-3rd-ed-easttom-609-2048.jpg)
![www.webre24h.com - [Wordware] advanced javascript, 3rd ed. - [easttom]](https://image.slidesharecdn.com/wordware-advancedjavascript3rded-160421130838/75/www-webre24h-com-Wordware-advanced-javascript-3rd-ed-easttom-610-2048.jpg)
![www.webre24h.com - [Wordware] advanced javascript, 3rd ed. - [easttom]](https://image.slidesharecdn.com/wordware-advancedjavascript3rded-160421130838/75/www-webre24h-com-Wordware-advanced-javascript-3rd-ed-easttom-611-2048.jpg)
![www.webre24h.com - [Wordware] advanced javascript, 3rd ed. - [easttom]](https://image.slidesharecdn.com/wordware-advancedjavascript3rded-160421130838/75/www-webre24h-com-Wordware-advanced-javascript-3rd-ed-easttom-612-2048.jpg)
![www.webre24h.com - [Wordware] advanced javascript, 3rd ed. - [easttom]](https://image.slidesharecdn.com/wordware-advancedjavascript3rded-160421130838/75/www-webre24h-com-Wordware-advanced-javascript-3rd-ed-easttom-613-2048.jpg)
![www.webre24h.com - [Wordware] advanced javascript, 3rd ed. - [easttom]](https://image.slidesharecdn.com/wordware-advancedjavascript3rded-160421130838/75/www-webre24h-com-Wordware-advanced-javascript-3rd-ed-easttom-614-2048.jpg)
![www.webre24h.com - [Wordware] advanced javascript, 3rd ed. - [easttom]](https://image.slidesharecdn.com/wordware-advancedjavascript3rded-160421130838/75/www-webre24h-com-Wordware-advanced-javascript-3rd-ed-easttom-615-2048.jpg)
![www.webre24h.com - [Wordware] advanced javascript, 3rd ed. - [easttom]](https://image.slidesharecdn.com/wordware-advancedjavascript3rded-160421130838/75/www-webre24h-com-Wordware-advanced-javascript-3rd-ed-easttom-616-2048.jpg)
![www.webre24h.com - [Wordware] advanced javascript, 3rd ed. - [easttom]](https://image.slidesharecdn.com/wordware-advancedjavascript3rded-160421130838/75/www-webre24h-com-Wordware-advanced-javascript-3rd-ed-easttom-617-2048.jpg)