Downloaded 26 times


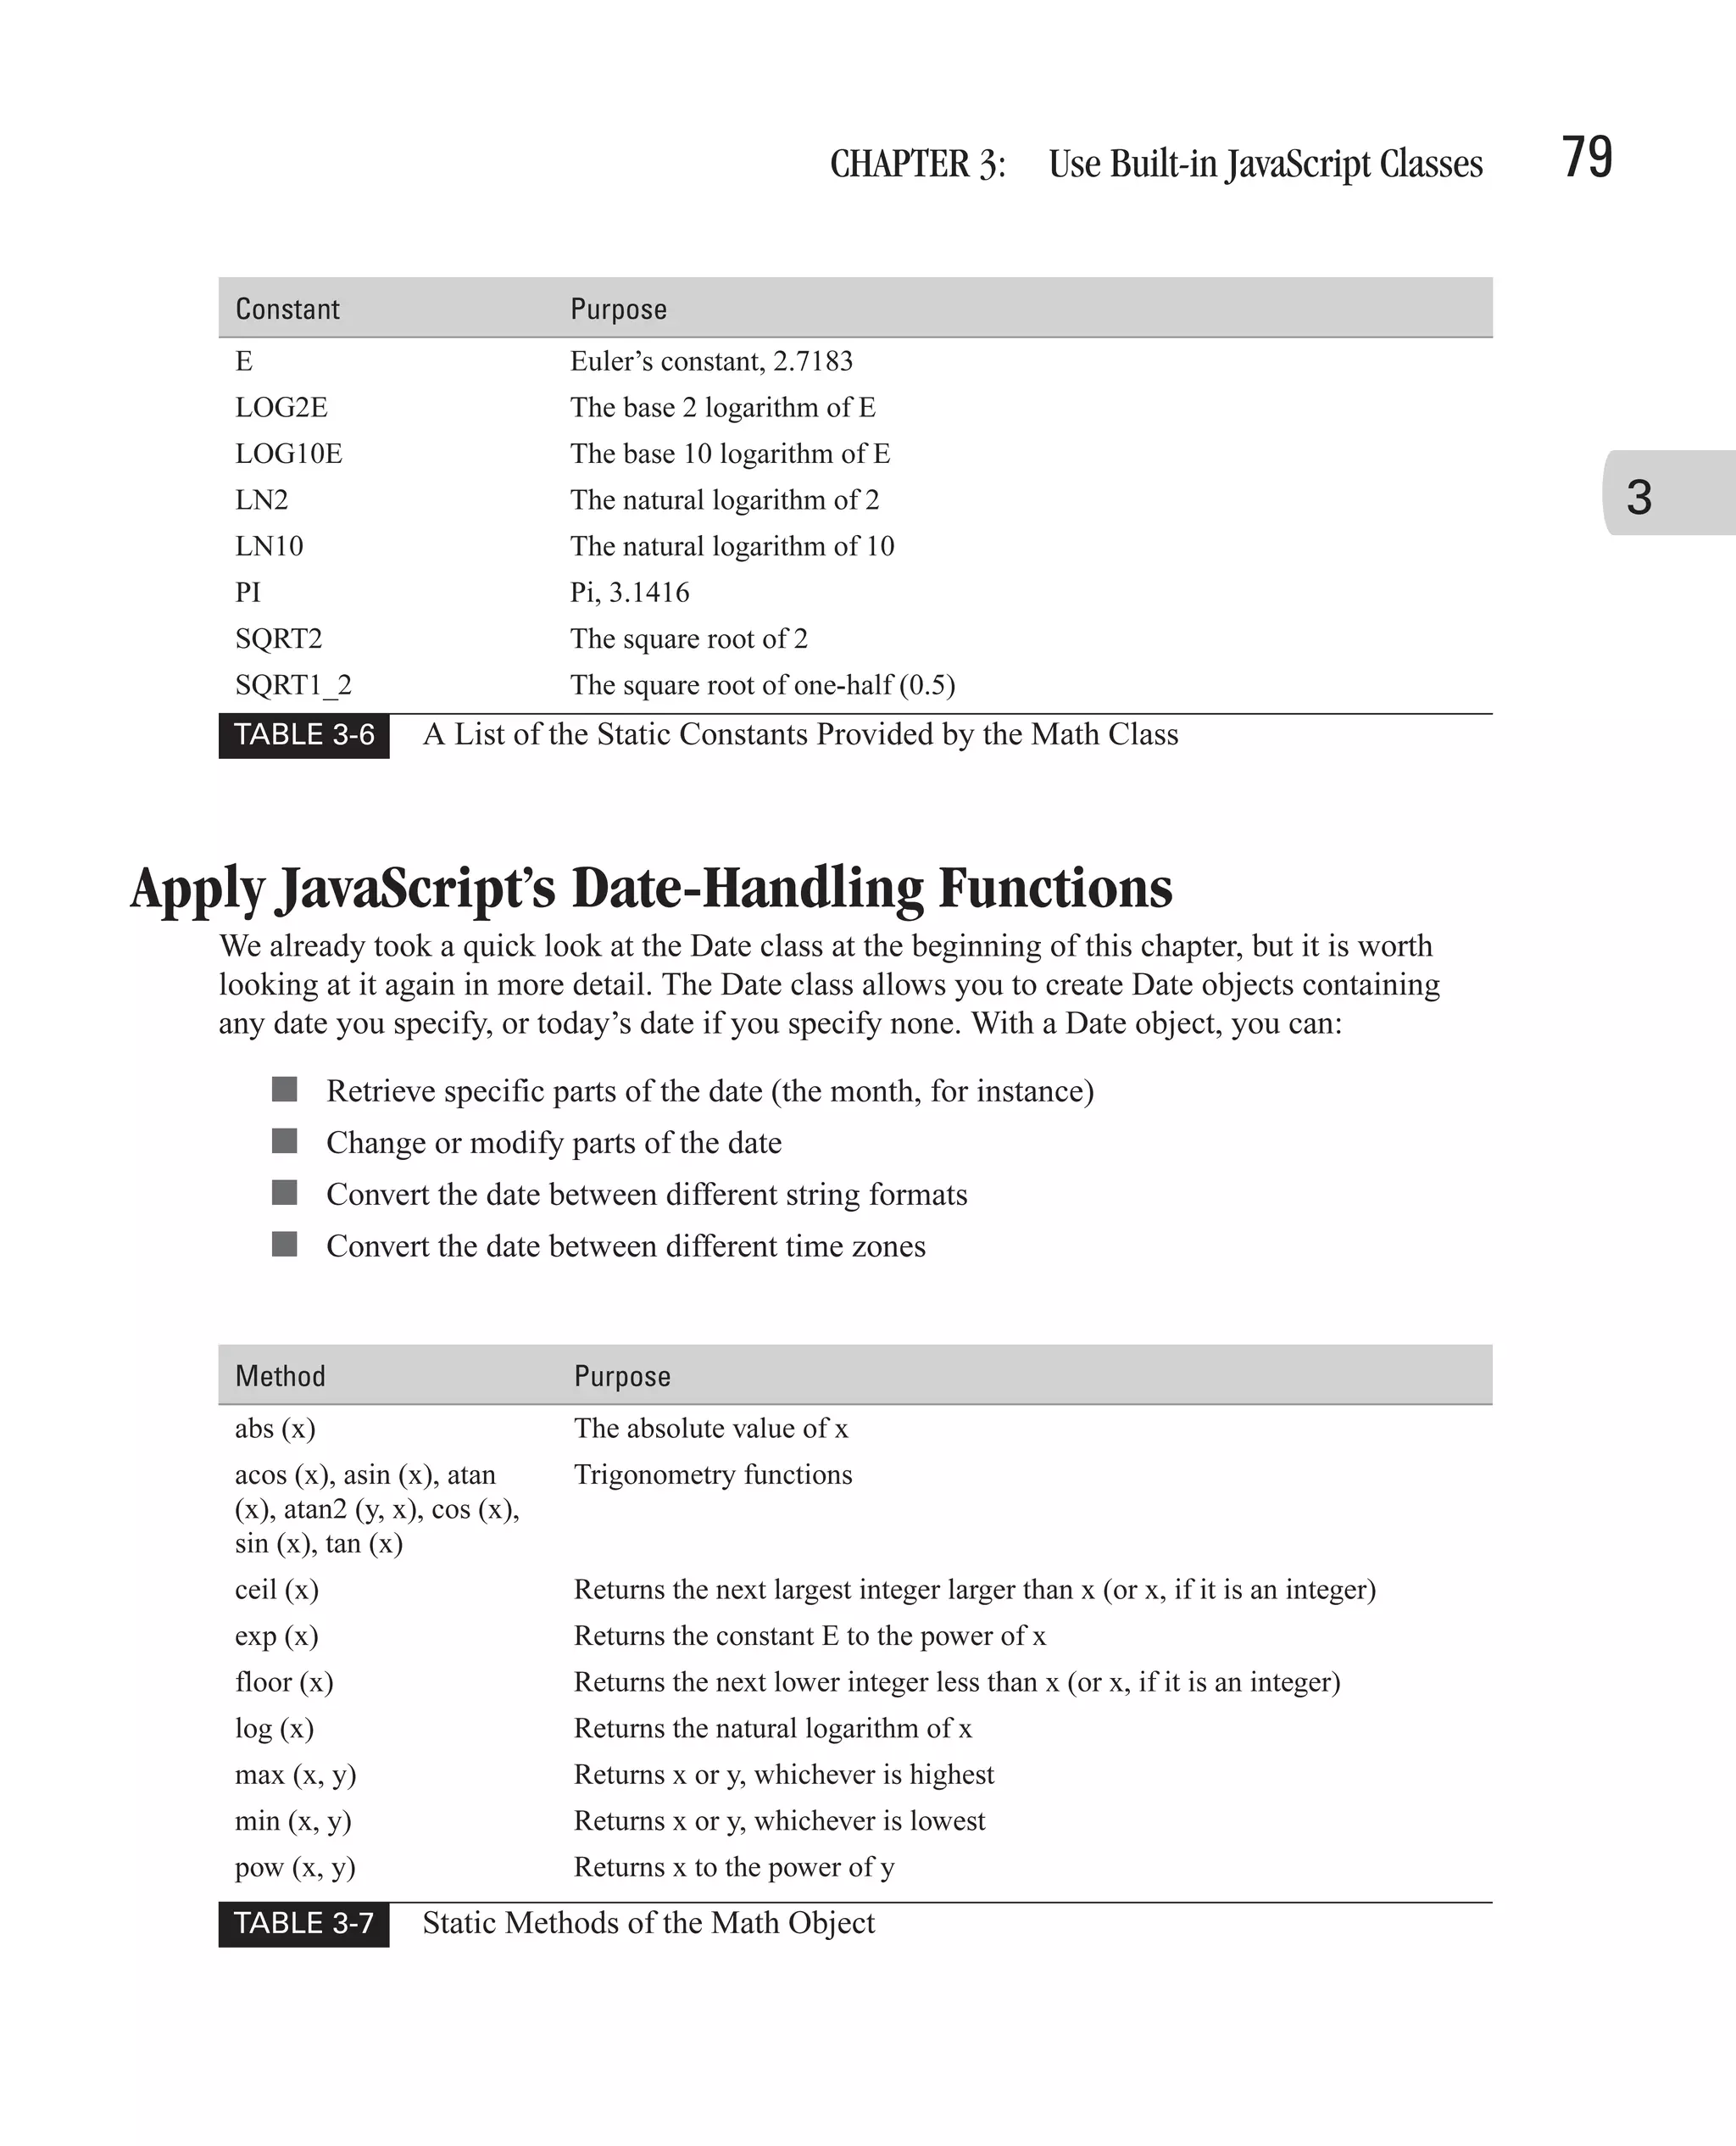
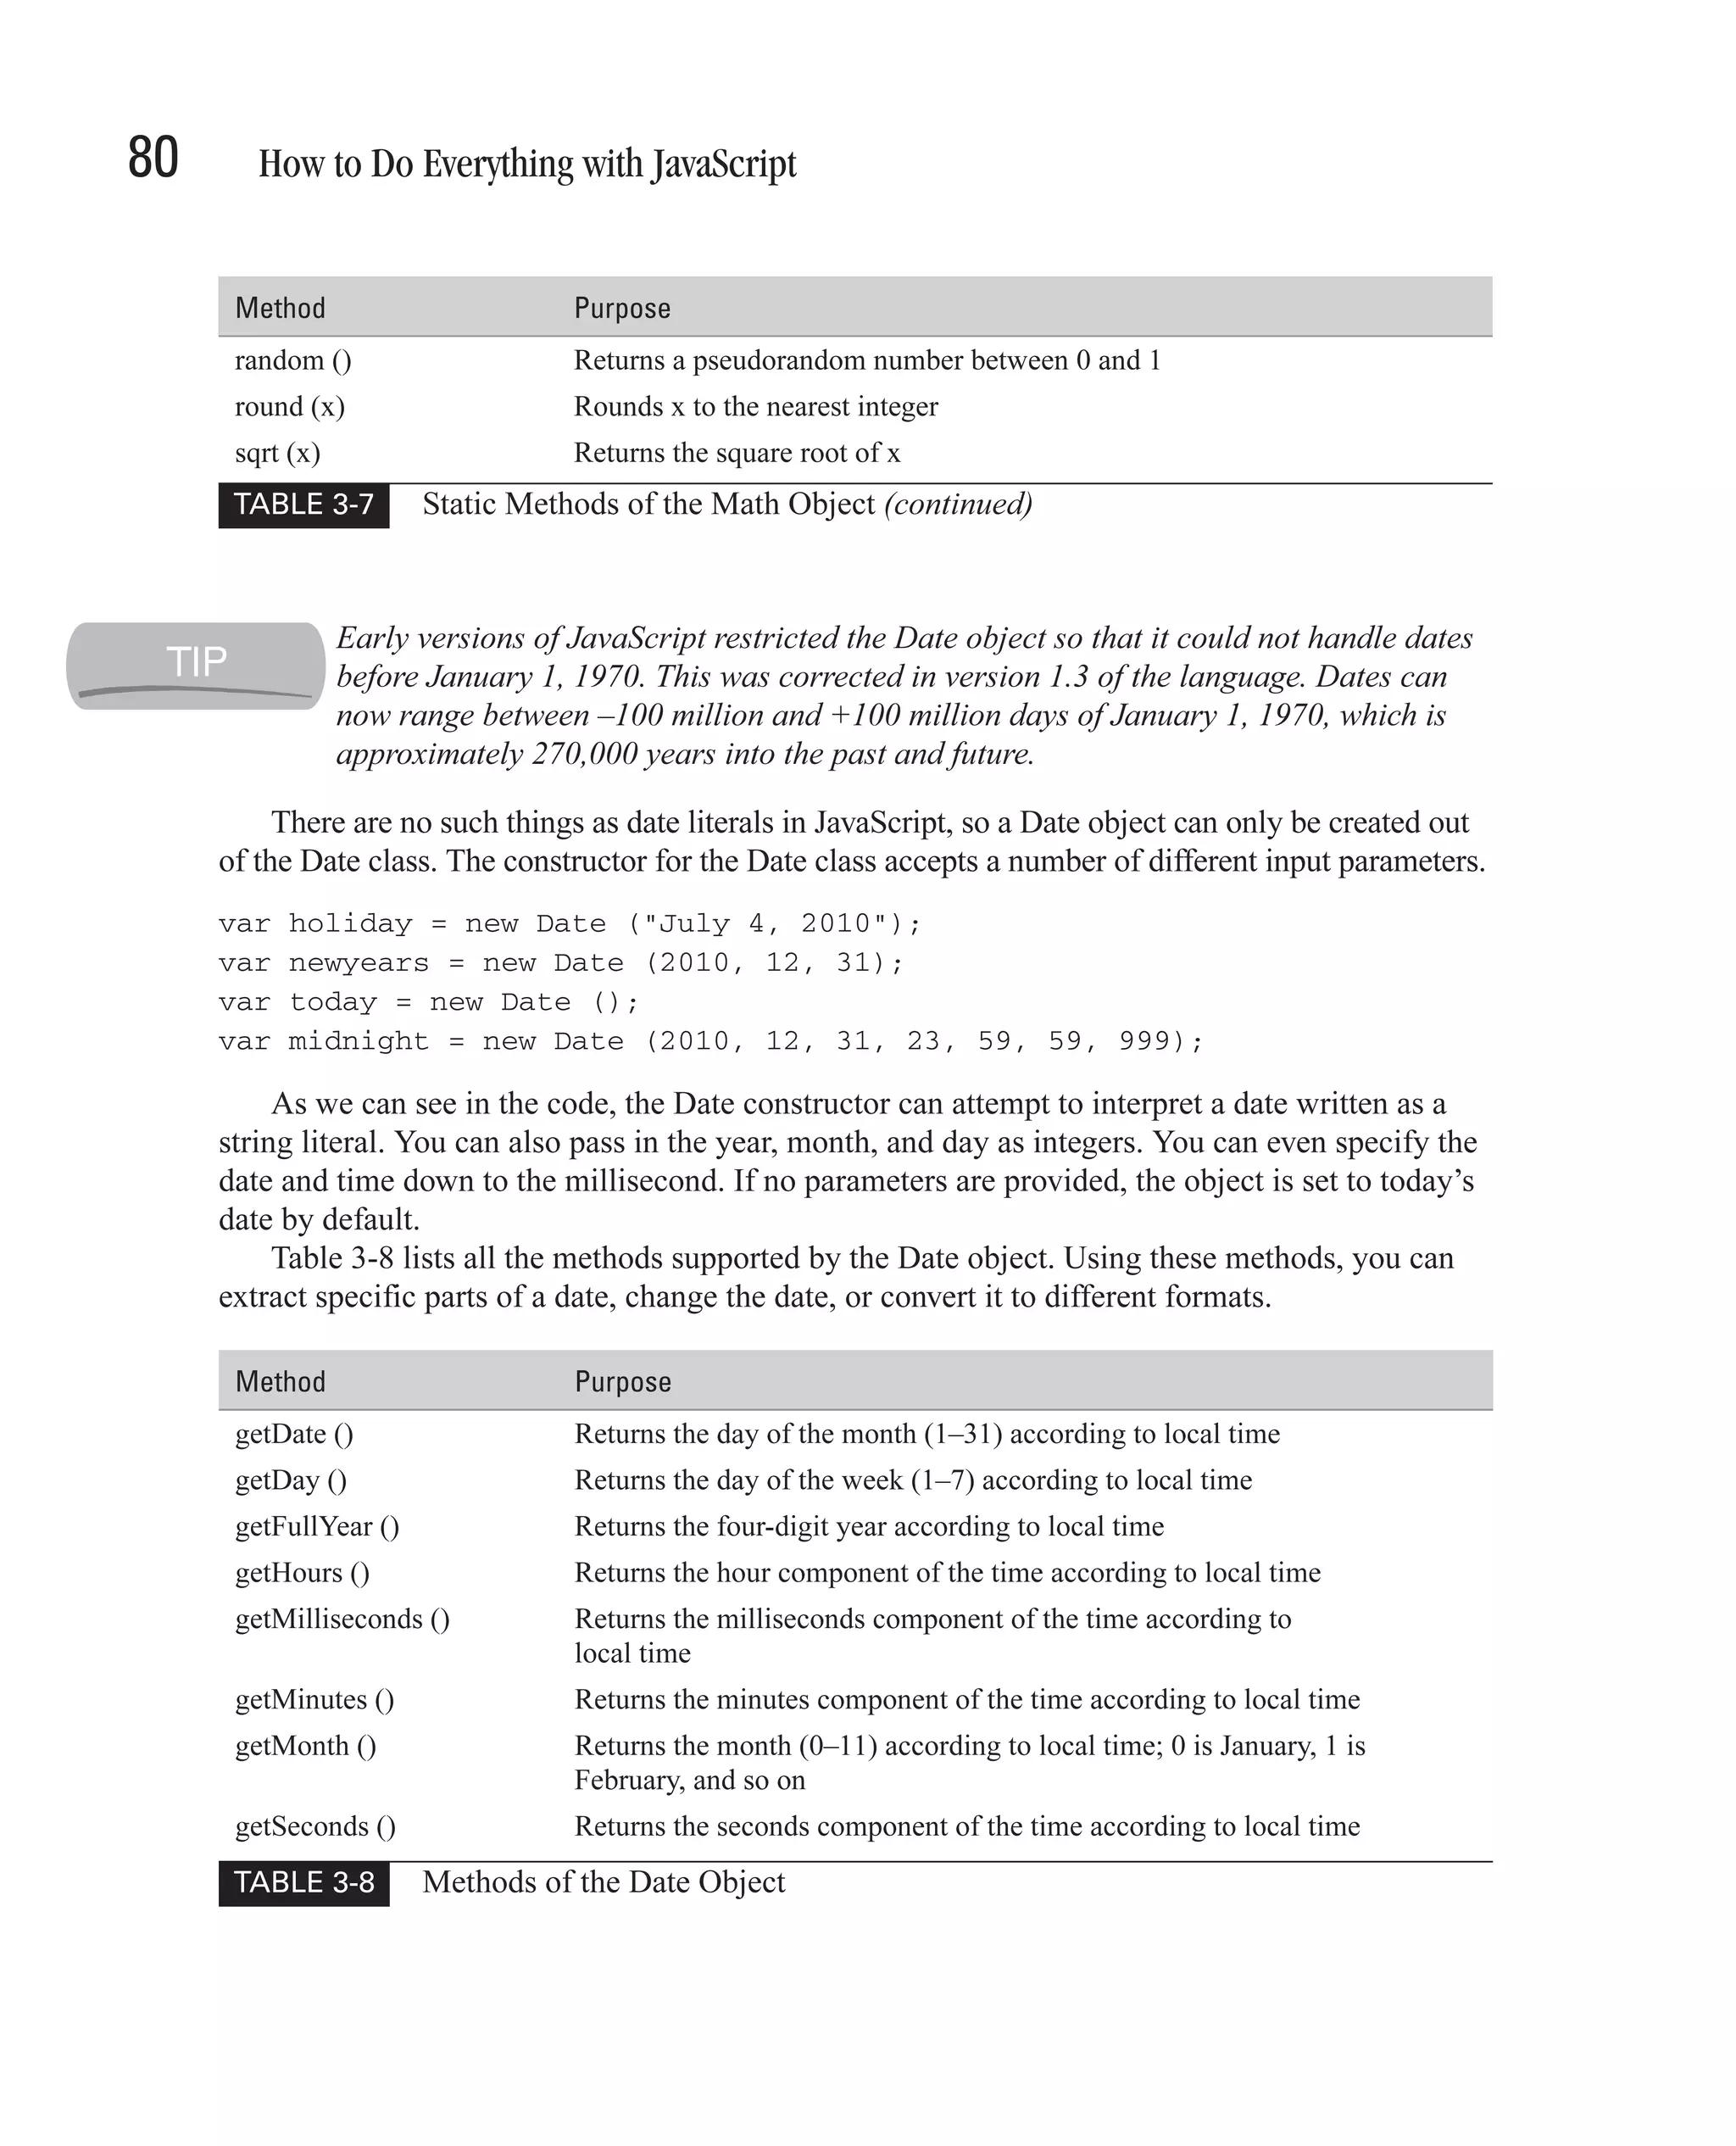
![x How to Do Everything with JavaScript Store Data in Variables . . . . . . . . . . . . . . . . . . . . . . . . . . . . . . . . . . . . . . 26 Define Variables . . . . . . . . . . . . . . . . . . . . . . . . . . . . . . . . . . . . . . 27 Define Constants . . . . . . . . . . . . . . . . . . . . . . . . . . . . . . . . . . . . . . 28 Understand Program Flow . . . . . . . . . . . . . . . . . . . . . . . . . . . . . . . . . . . . 29 Control Program Flow with Statements . . . . . . . . . . . . . . . . . . . . . . . . . 30 Execute Code Conditionally . . . . . . . . . . . . . . . . . . . . . . . . . . . . . 30 Repeat Statements Using Loops . . . . . . . . . . . . . . . . . . . . . . . . . . 34 Comment Your Code . . . . . . . . . . . . . . . . . . . . . . . . . . . . . . . . . . 43 Set a Default Object . . . . . . . . . . . . . . . . . . . . . . . . . . . . . . . . . . . 44 Handle Errors . . . . . . . . . . . . . . . . . . . . . . . . . . . . . . . . . . . . . . . . 46 Understand the Basics of Expressions . . . . . . . . . . . . . . . . . . . . . . . . . . 49 Use Operators to Create Complex Expressions . . . . . . . . . . . . . . . . . . . 50 Organize Your Code into Functions . . . . . . . . . . . . . . . . . . . . . . . . . . . . 51 Define Functions . . . . . . . . . . . . . . . . . . . . . . . . . . . . . . . . . . . . . . 52 Accept Parameters . . . . . . . . . . . . . . . . . . . . . . . . . . . . . . . . . . . . 54 Understand Variable Scope . . . . . . . . . . . . . . . . . . . . . . . . . . . . . . 56 Return Values . . . . . . . . . . . . . . . . . . . . . . . . . . . . . . . . . . . . . . . . 58 Use the Improvements in JavaScript 2.0 to Create More Powerful Functions . . . . . . . . . . . . . . . . . . . . . . . . . . . . . . . . . . . . . . . 59 Use Named Optional Parameters . . . . . . . . . . . . . . . . . . . . . . . . . 60 Accept Any Number of Parameters . . . . . . . . . . . . . . . . . . . . . . . 61 CHAPTER 3 Use Built-in JavaScript Classes . . . . . . . . . . . . . . . . . . . . . . . . . . . . 63 Learn about Objects in JavaScript . . . . . . . . . . . . . . . . . . . . . . . . . . . . . . 64 Write Unstructured Programs . . . . . . . . . . . . . . . . . . . . . . . . . . . . 65 Organize Code into Procedures . . . . . . . . . . . . . . . . . . . . . . . . . . 65 Separate a Program into Modules . . . . . . . . . . . . . . . . . . . . . . . . . 66 Use the Object-Oriented Approach . . . . . . . . . . . . . . . . . . . . . . . 66 Turn Properties and Functions into a Class . . . . . . . . . . . . . . . . . 68 JavaScript’s Built-in Classes and Data Types . . . . . . . . . . . . . . . . . . . . 69 Instantiate an Object with the new Operator . . . . . . . . . . . . . . . . 72 Access an Object with the . Operator . . . . . . . . . . . . . . . . . . . . . . 73 Access an Object with the [] Operator . . . . . . . . . . . . . . . . . . . . . 73 Create a String Object in JavaScript . . . . . . . . . . . . . . . . . . . . . . . . . . . . 73 Create a String Object Using a String Literal . . . . . . . . . . . . . . . . 74 Create a String Object Using the String Data Type . . . . . . . . . . . 76 Use the String Object’s Built-in Functionality . . . . . . . . . . . . . . . 76 Perform Mathematical Functions . . . . . . . . . . . . . . . . . . . . . . . . . . . . . . 78 Apply JavaScript’s Date-Handling Functions . . . . . . . . . . . . . . . . . . . . . 79 Convert Strings into Numbers . . . . . . . . . . . . . . . . . . . . . . . . . . . . . . . . . 82 Use the parseInt and parseFloat Functions . . . . . . . . . . . . . . . . . . 82 Prepare Text Before Sending to Web Server . . . . . . . . . . . . . . . . . . . . . . 84 Use the escape and unescape Functions . . . . . . . . . . . . . . . . . . . . 85](https://image.slidesharecdn.com/3592018/75/How-To-Do-Everything-With-JavaScript-12-2048.jpg)
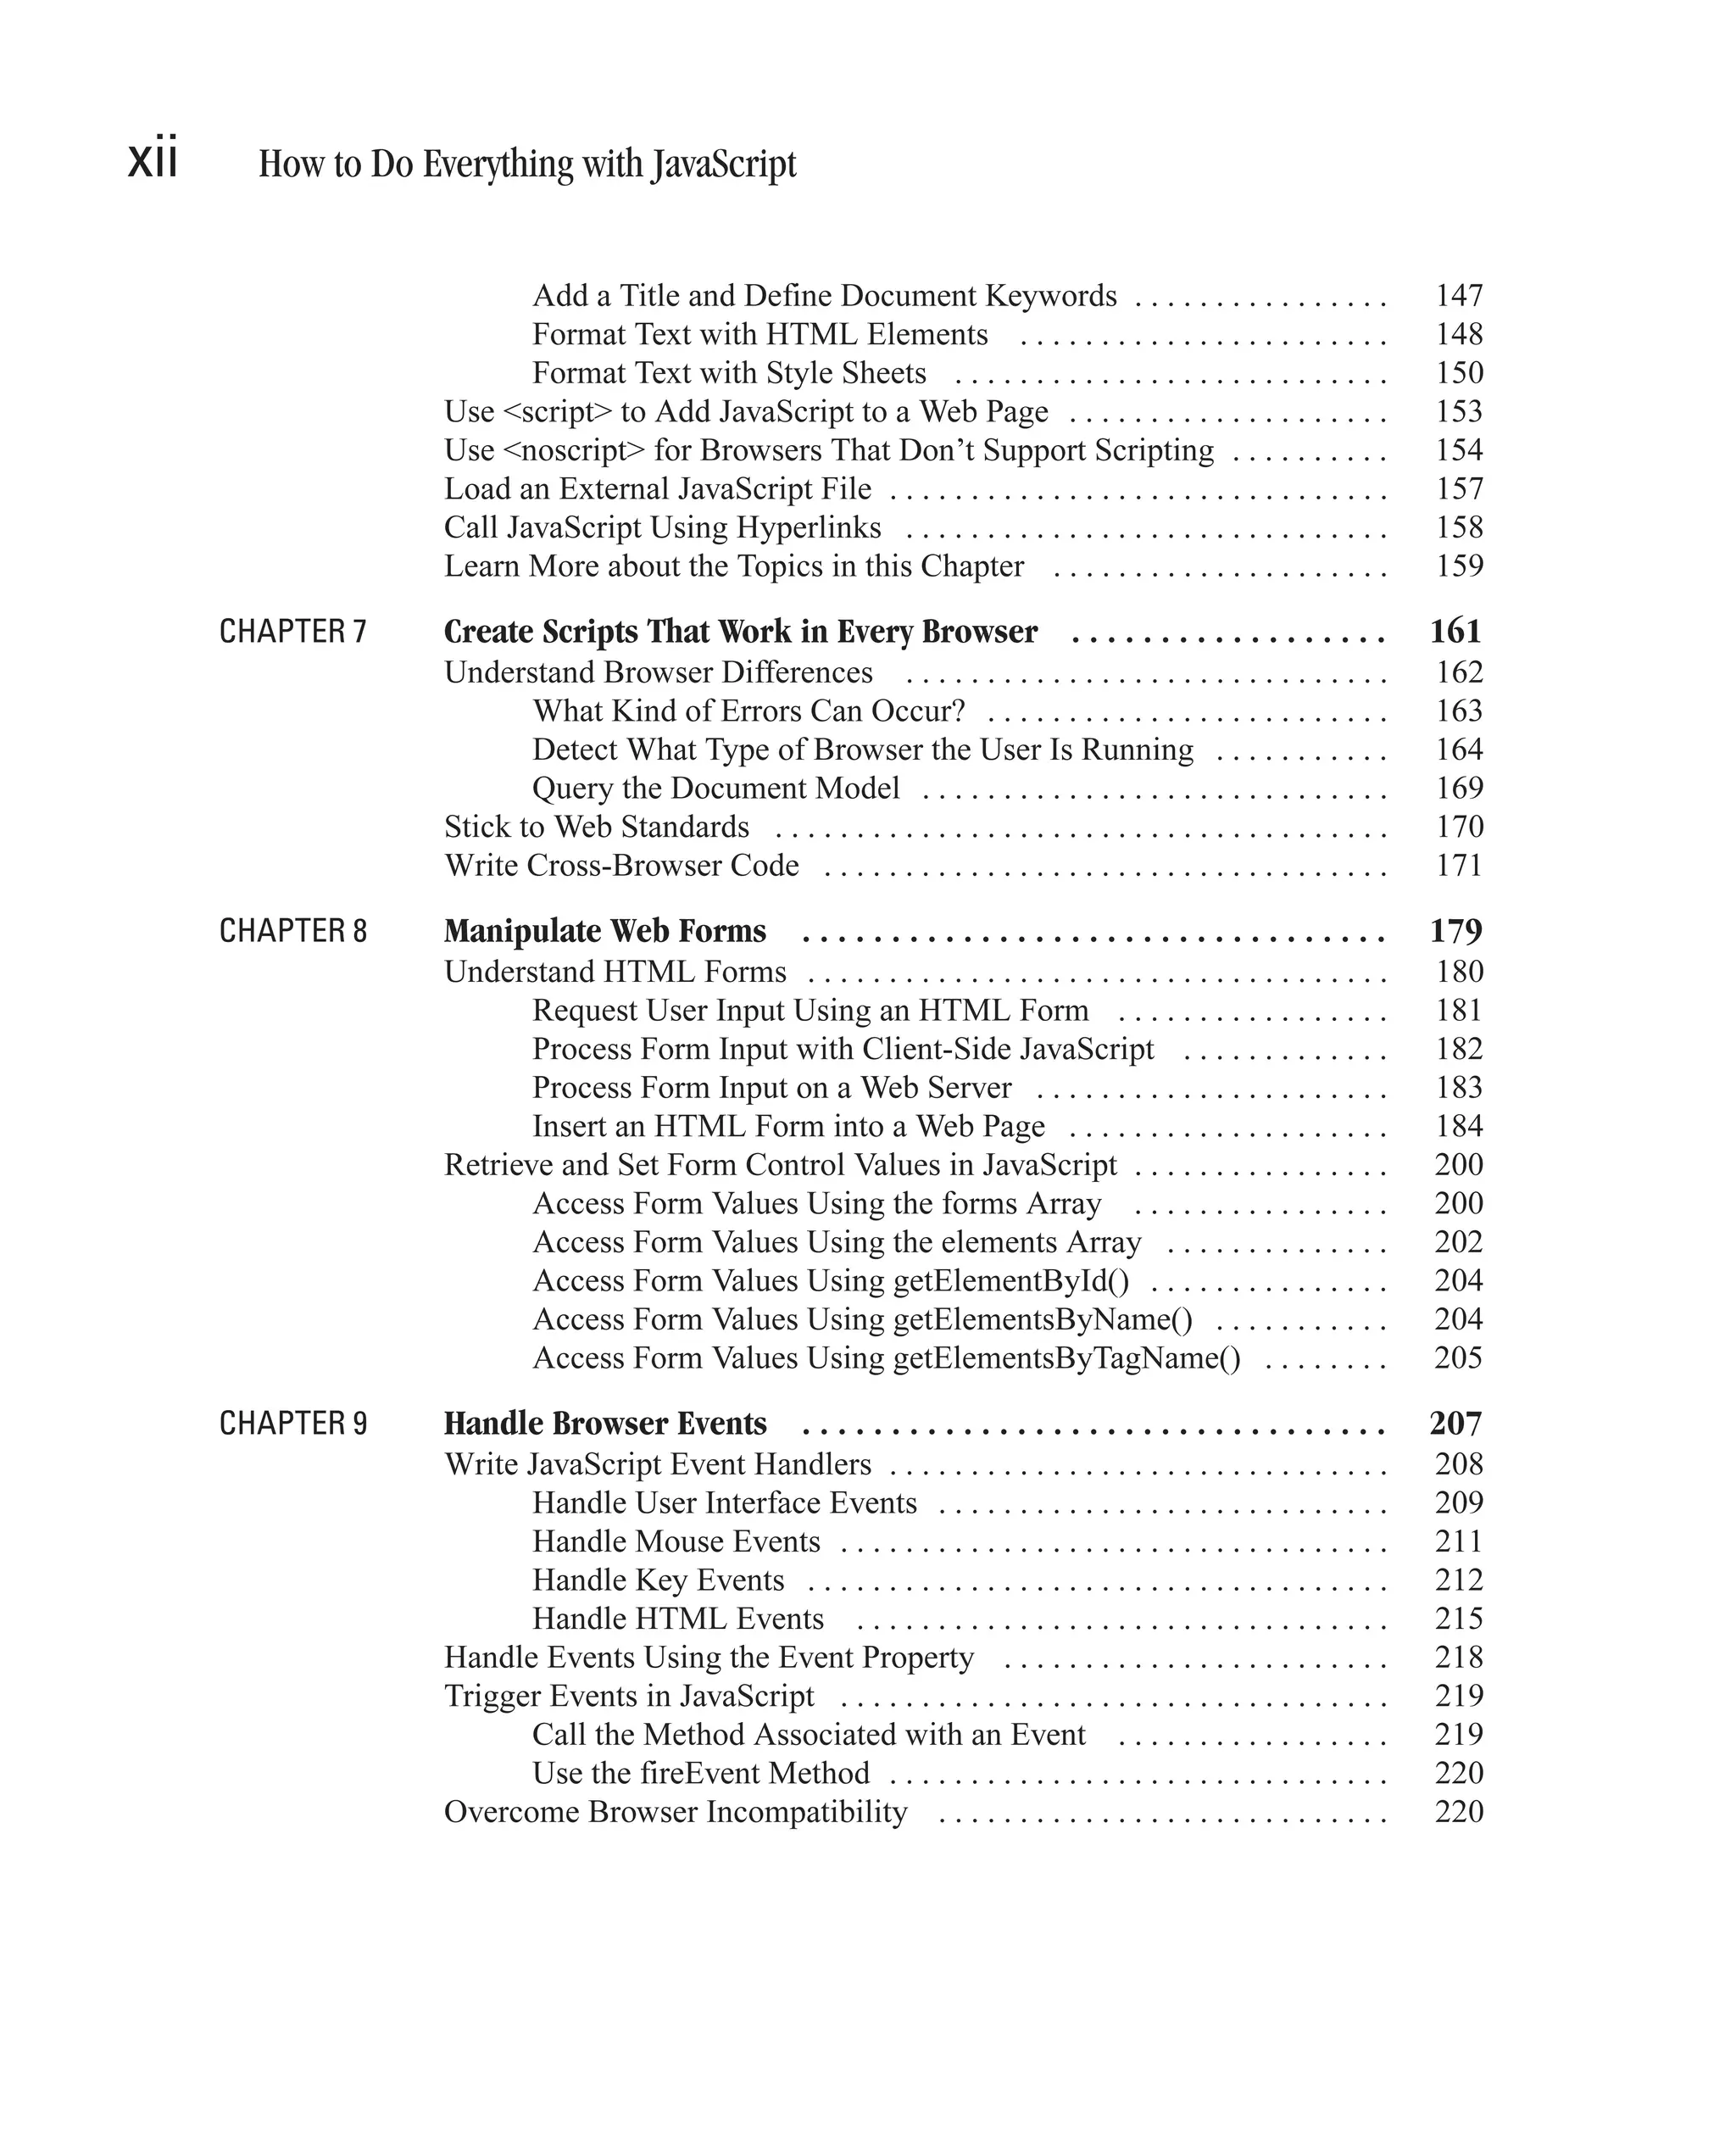


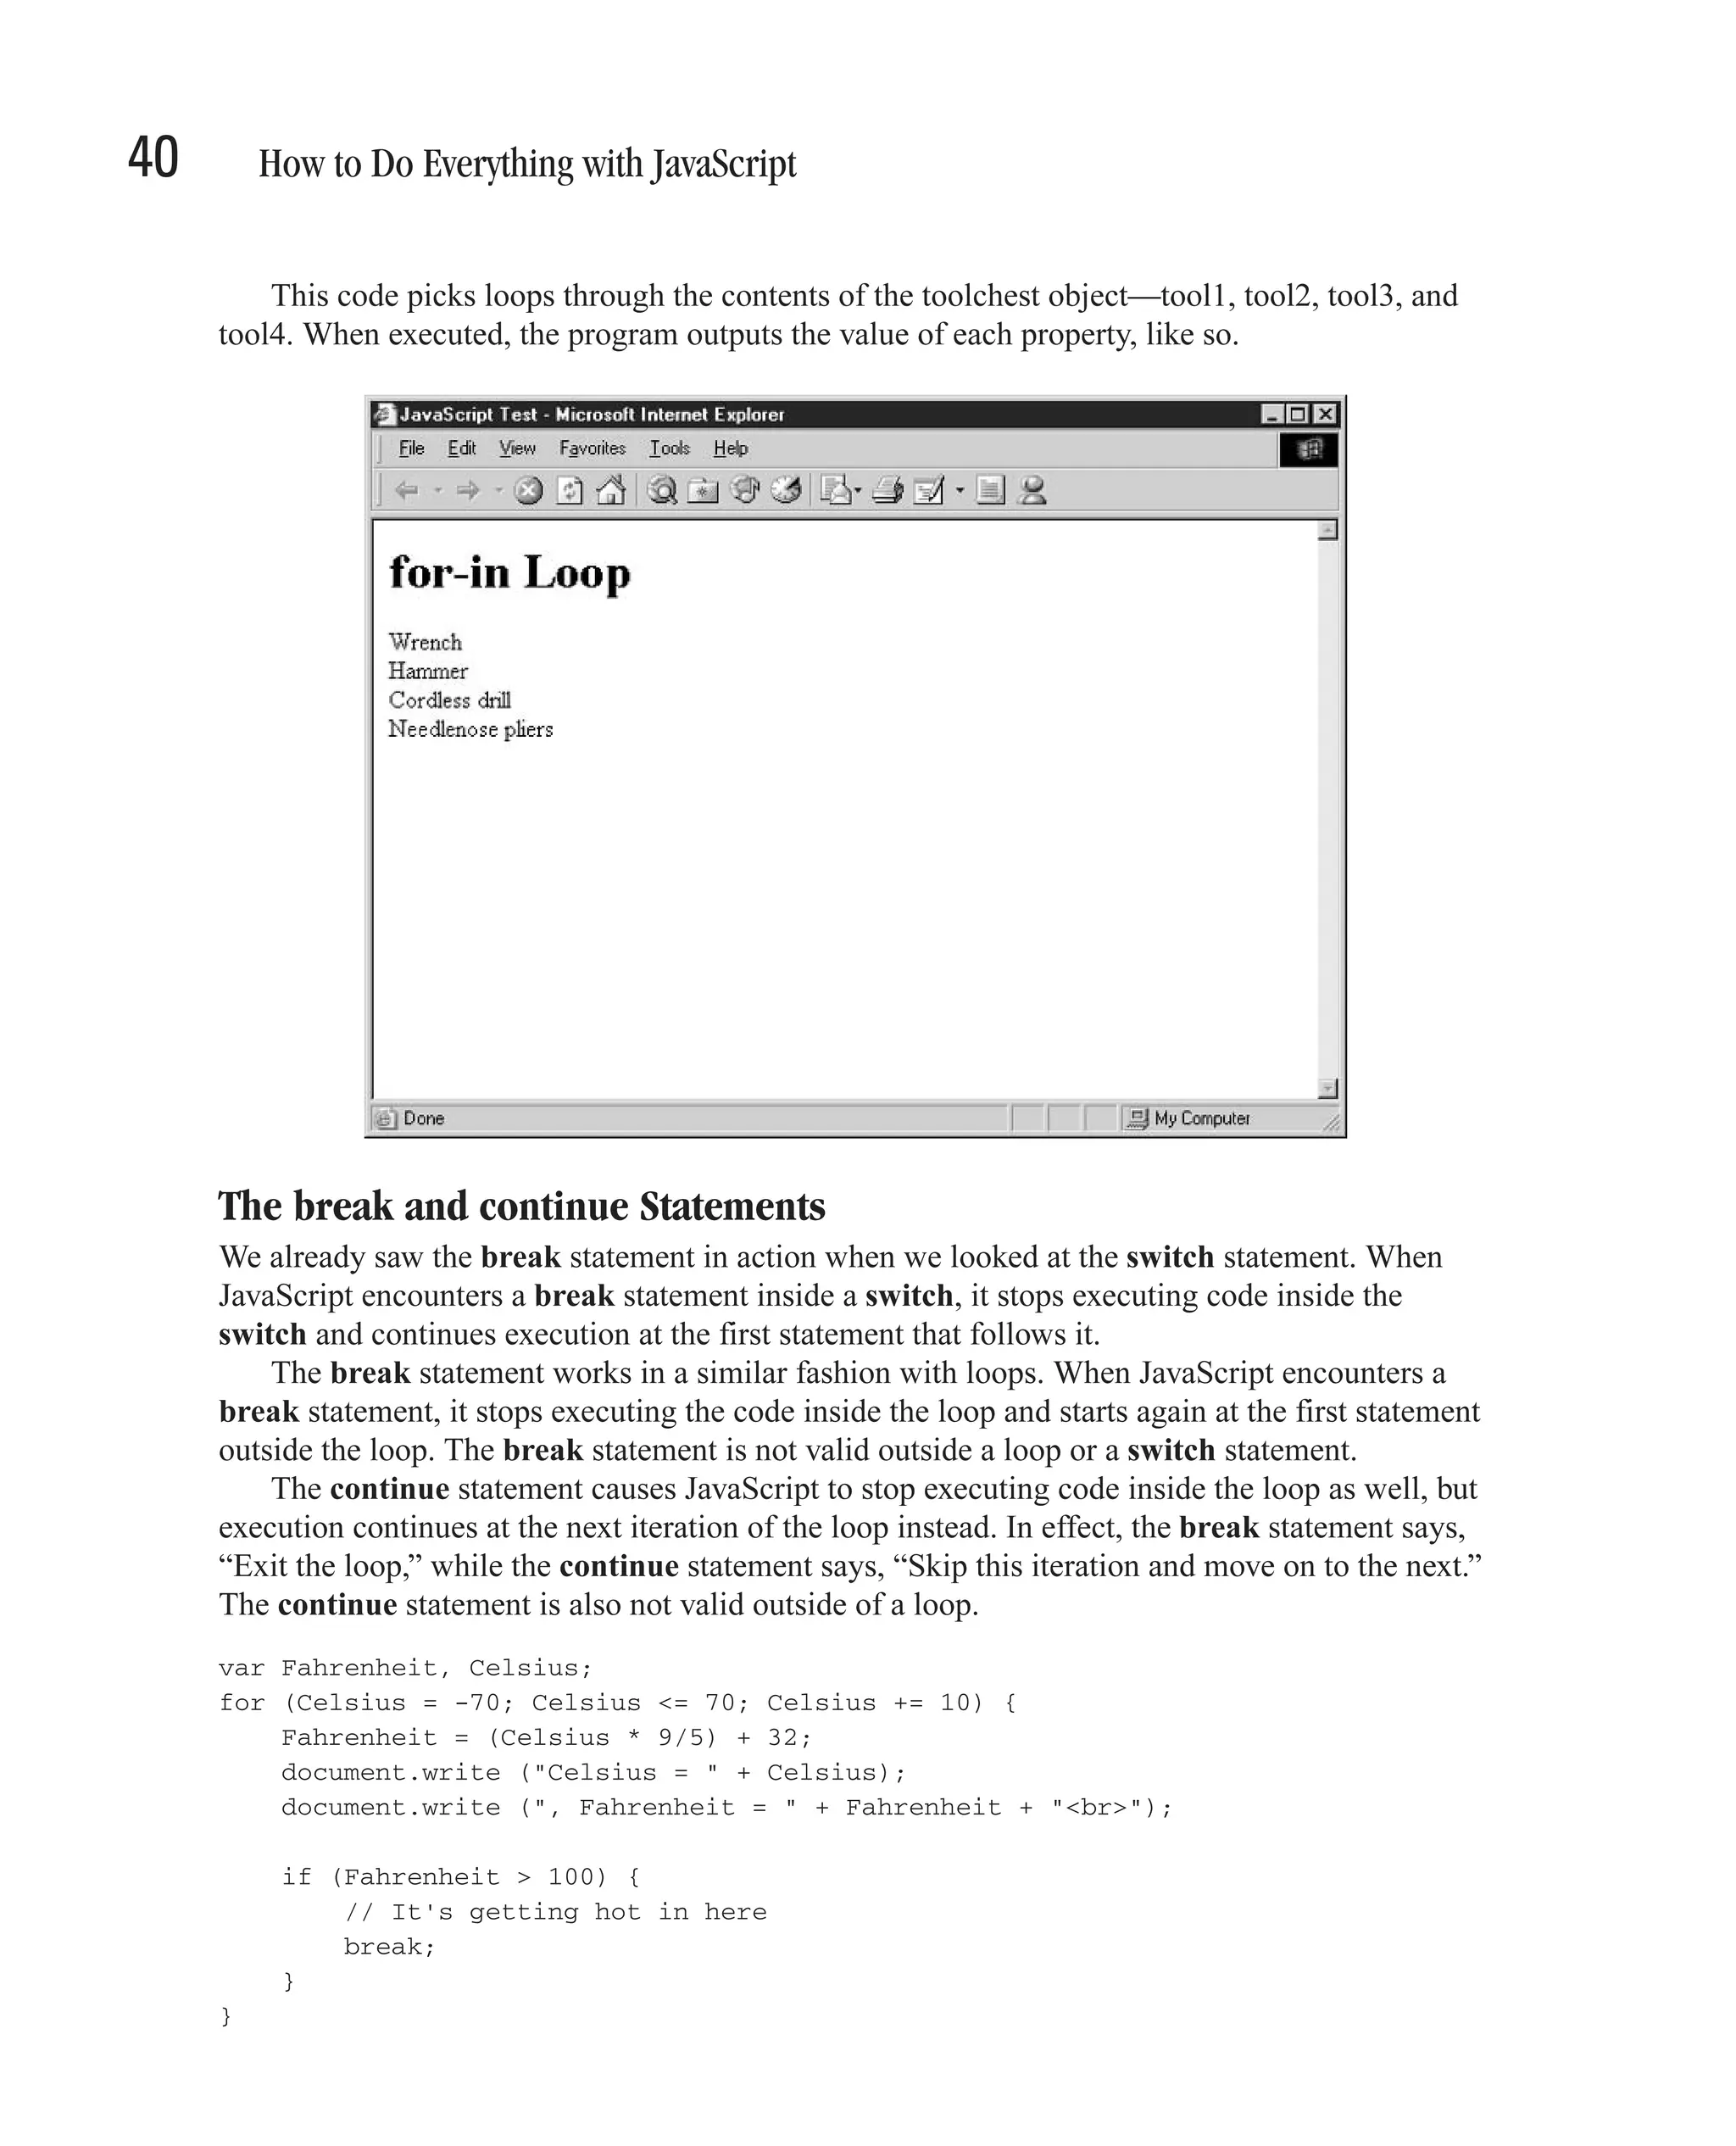
![CHAPTER 2: Learn JavaScript Fundamentals 39 </head> <body> <h1>for-in Loop</h1> <script language="JavaScript" type="text/javascript"> 2 <!-- // Begin // We define the tool chest object var toolchest = {tool1:"Wrench", tool2:"Hammer", tool3:"Cordless drill", tool4:"Needlenose pliers"}; // for-in iterates over its properties for (var tool in toolchest) { document.write(toolchest[tool] + "<BR>"); } // End --> </script> </body> </html> This program creates an object named toolchest. The object is created using an object literal, as discussed in Chapter 5. // We define the tool chest object var toolchest = {tool1:"Wrench", tool2:"Hammer", tool3:"Cordless drill", tool4:"Needlenose pliers"}; The code that we’re interested in is the for-in loop: // for-in iterates over its properties for (var tool in toolchest) { document.write(toolchest[tool] + "<BR>"); }](https://image.slidesharecdn.com/3592018/75/How-To-Do-Everything-With-JavaScript-59-2048.jpg)
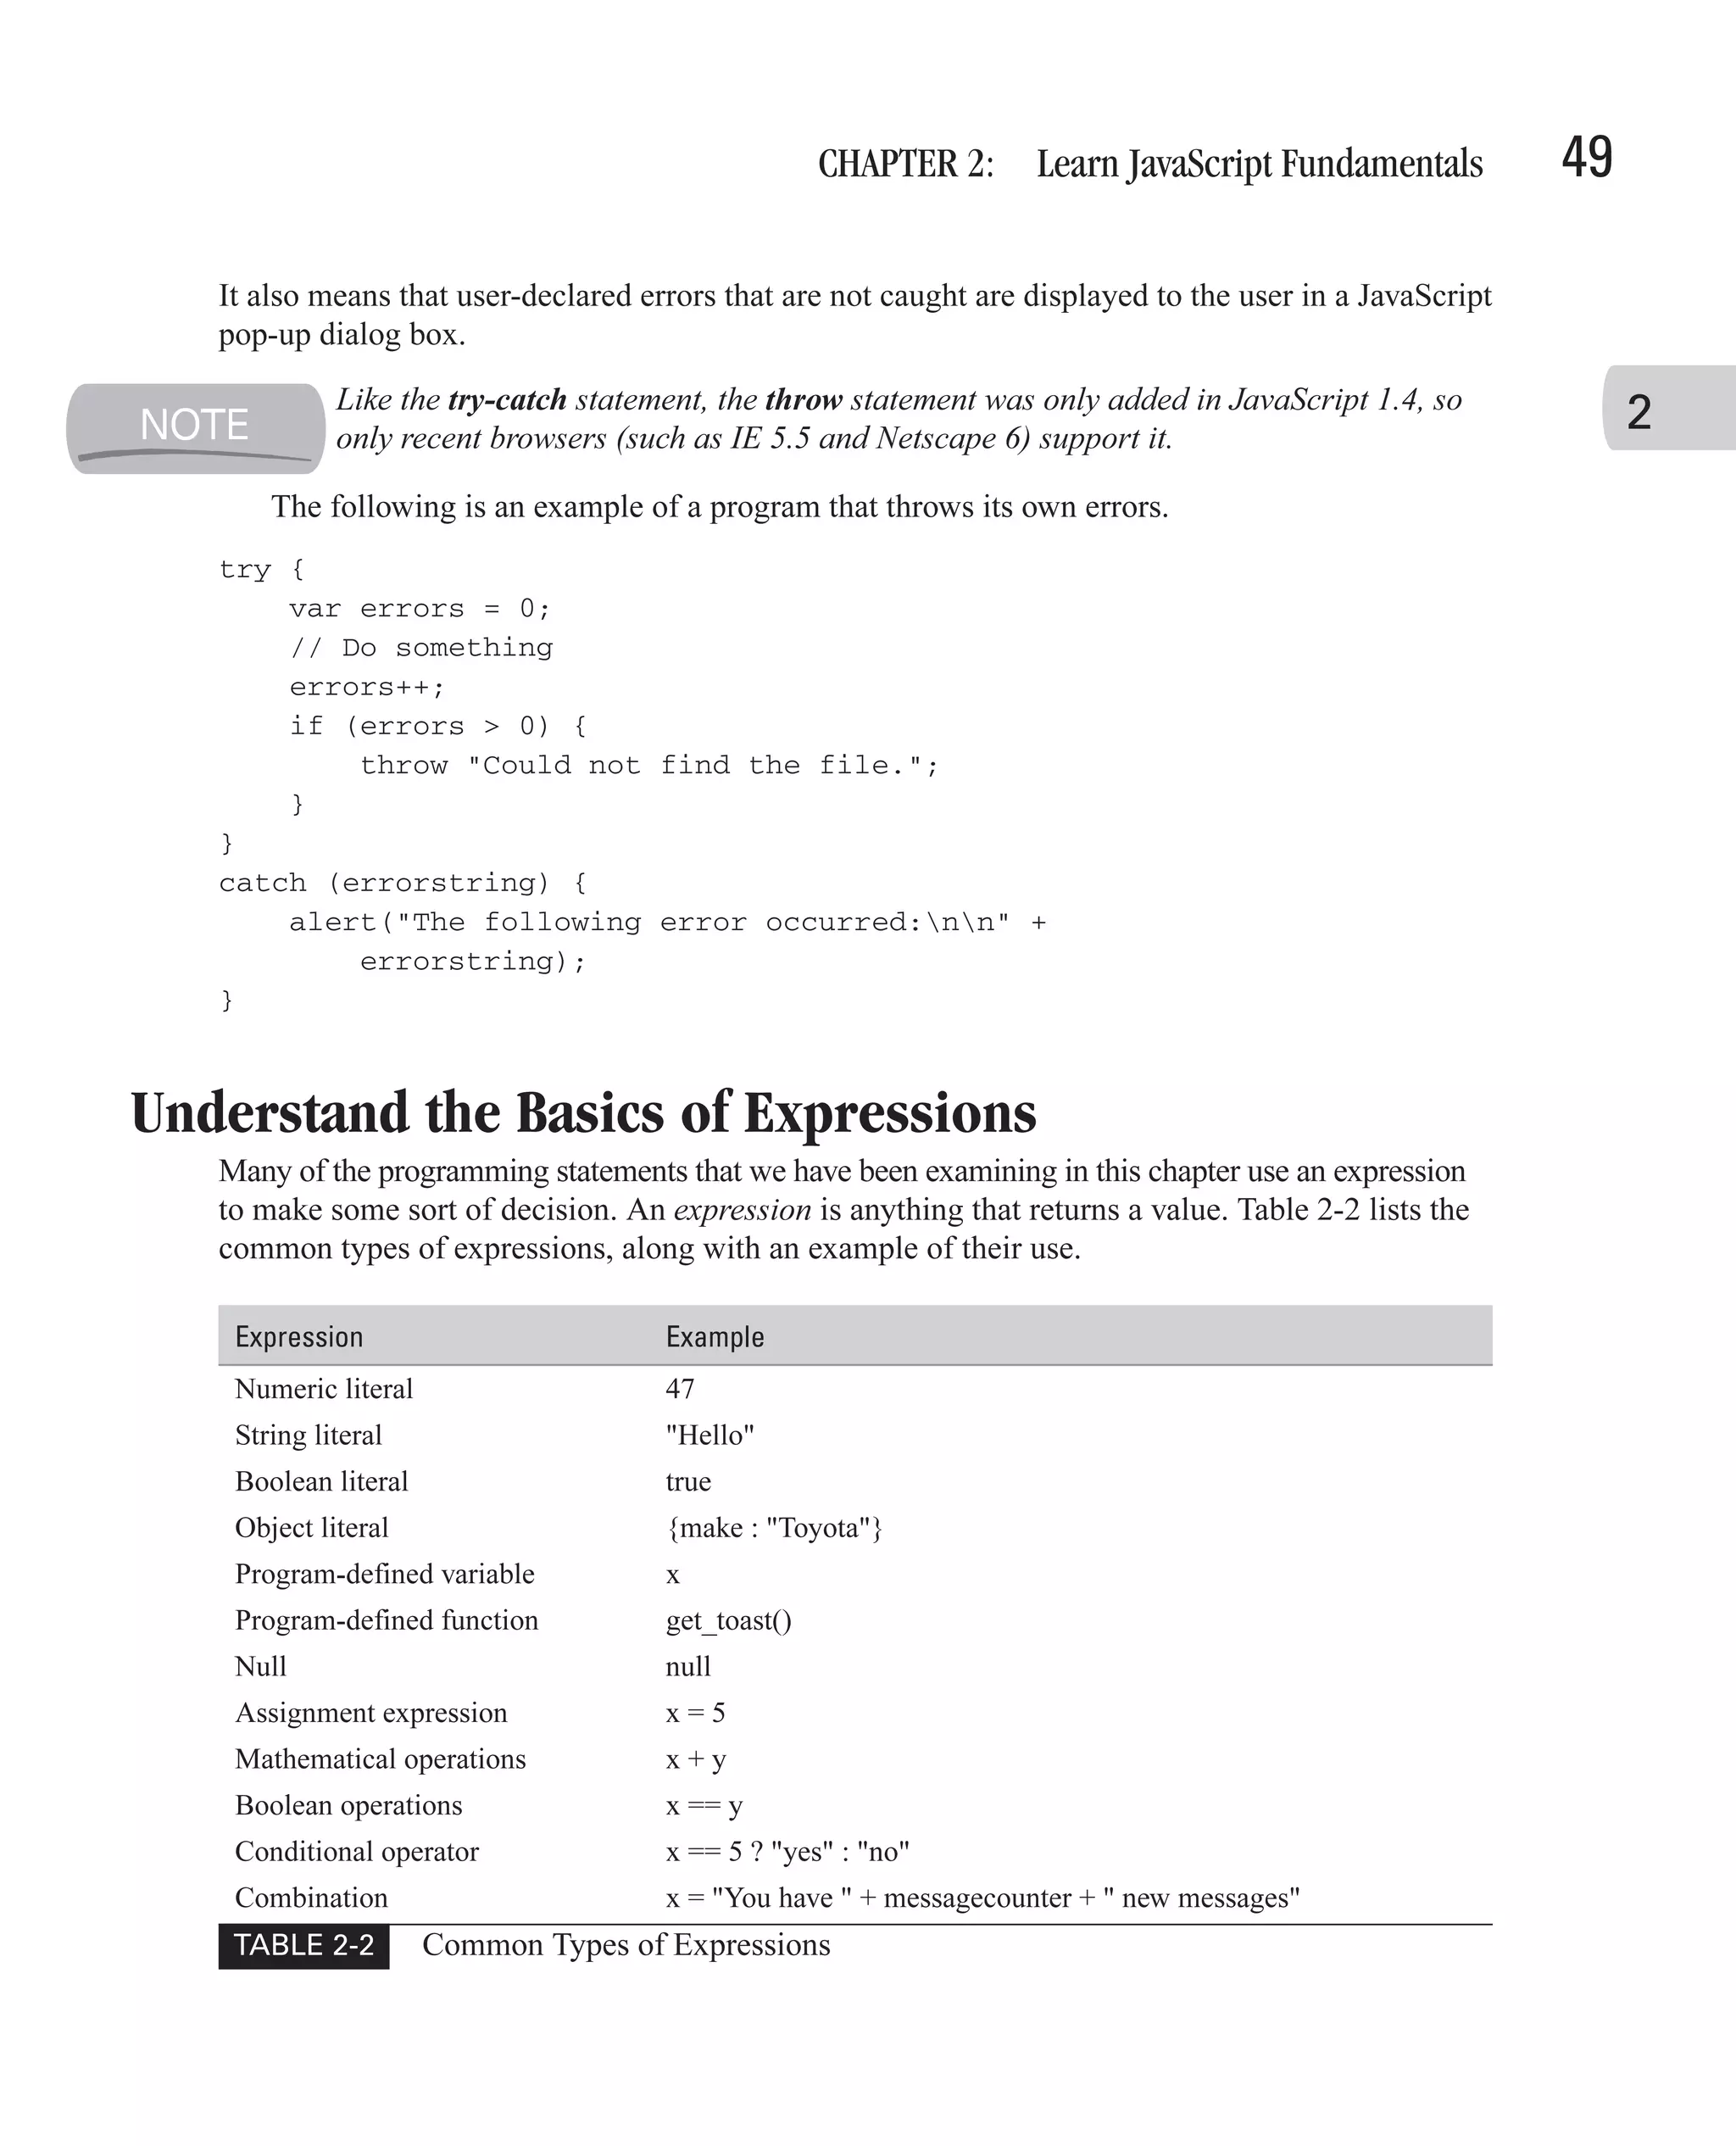
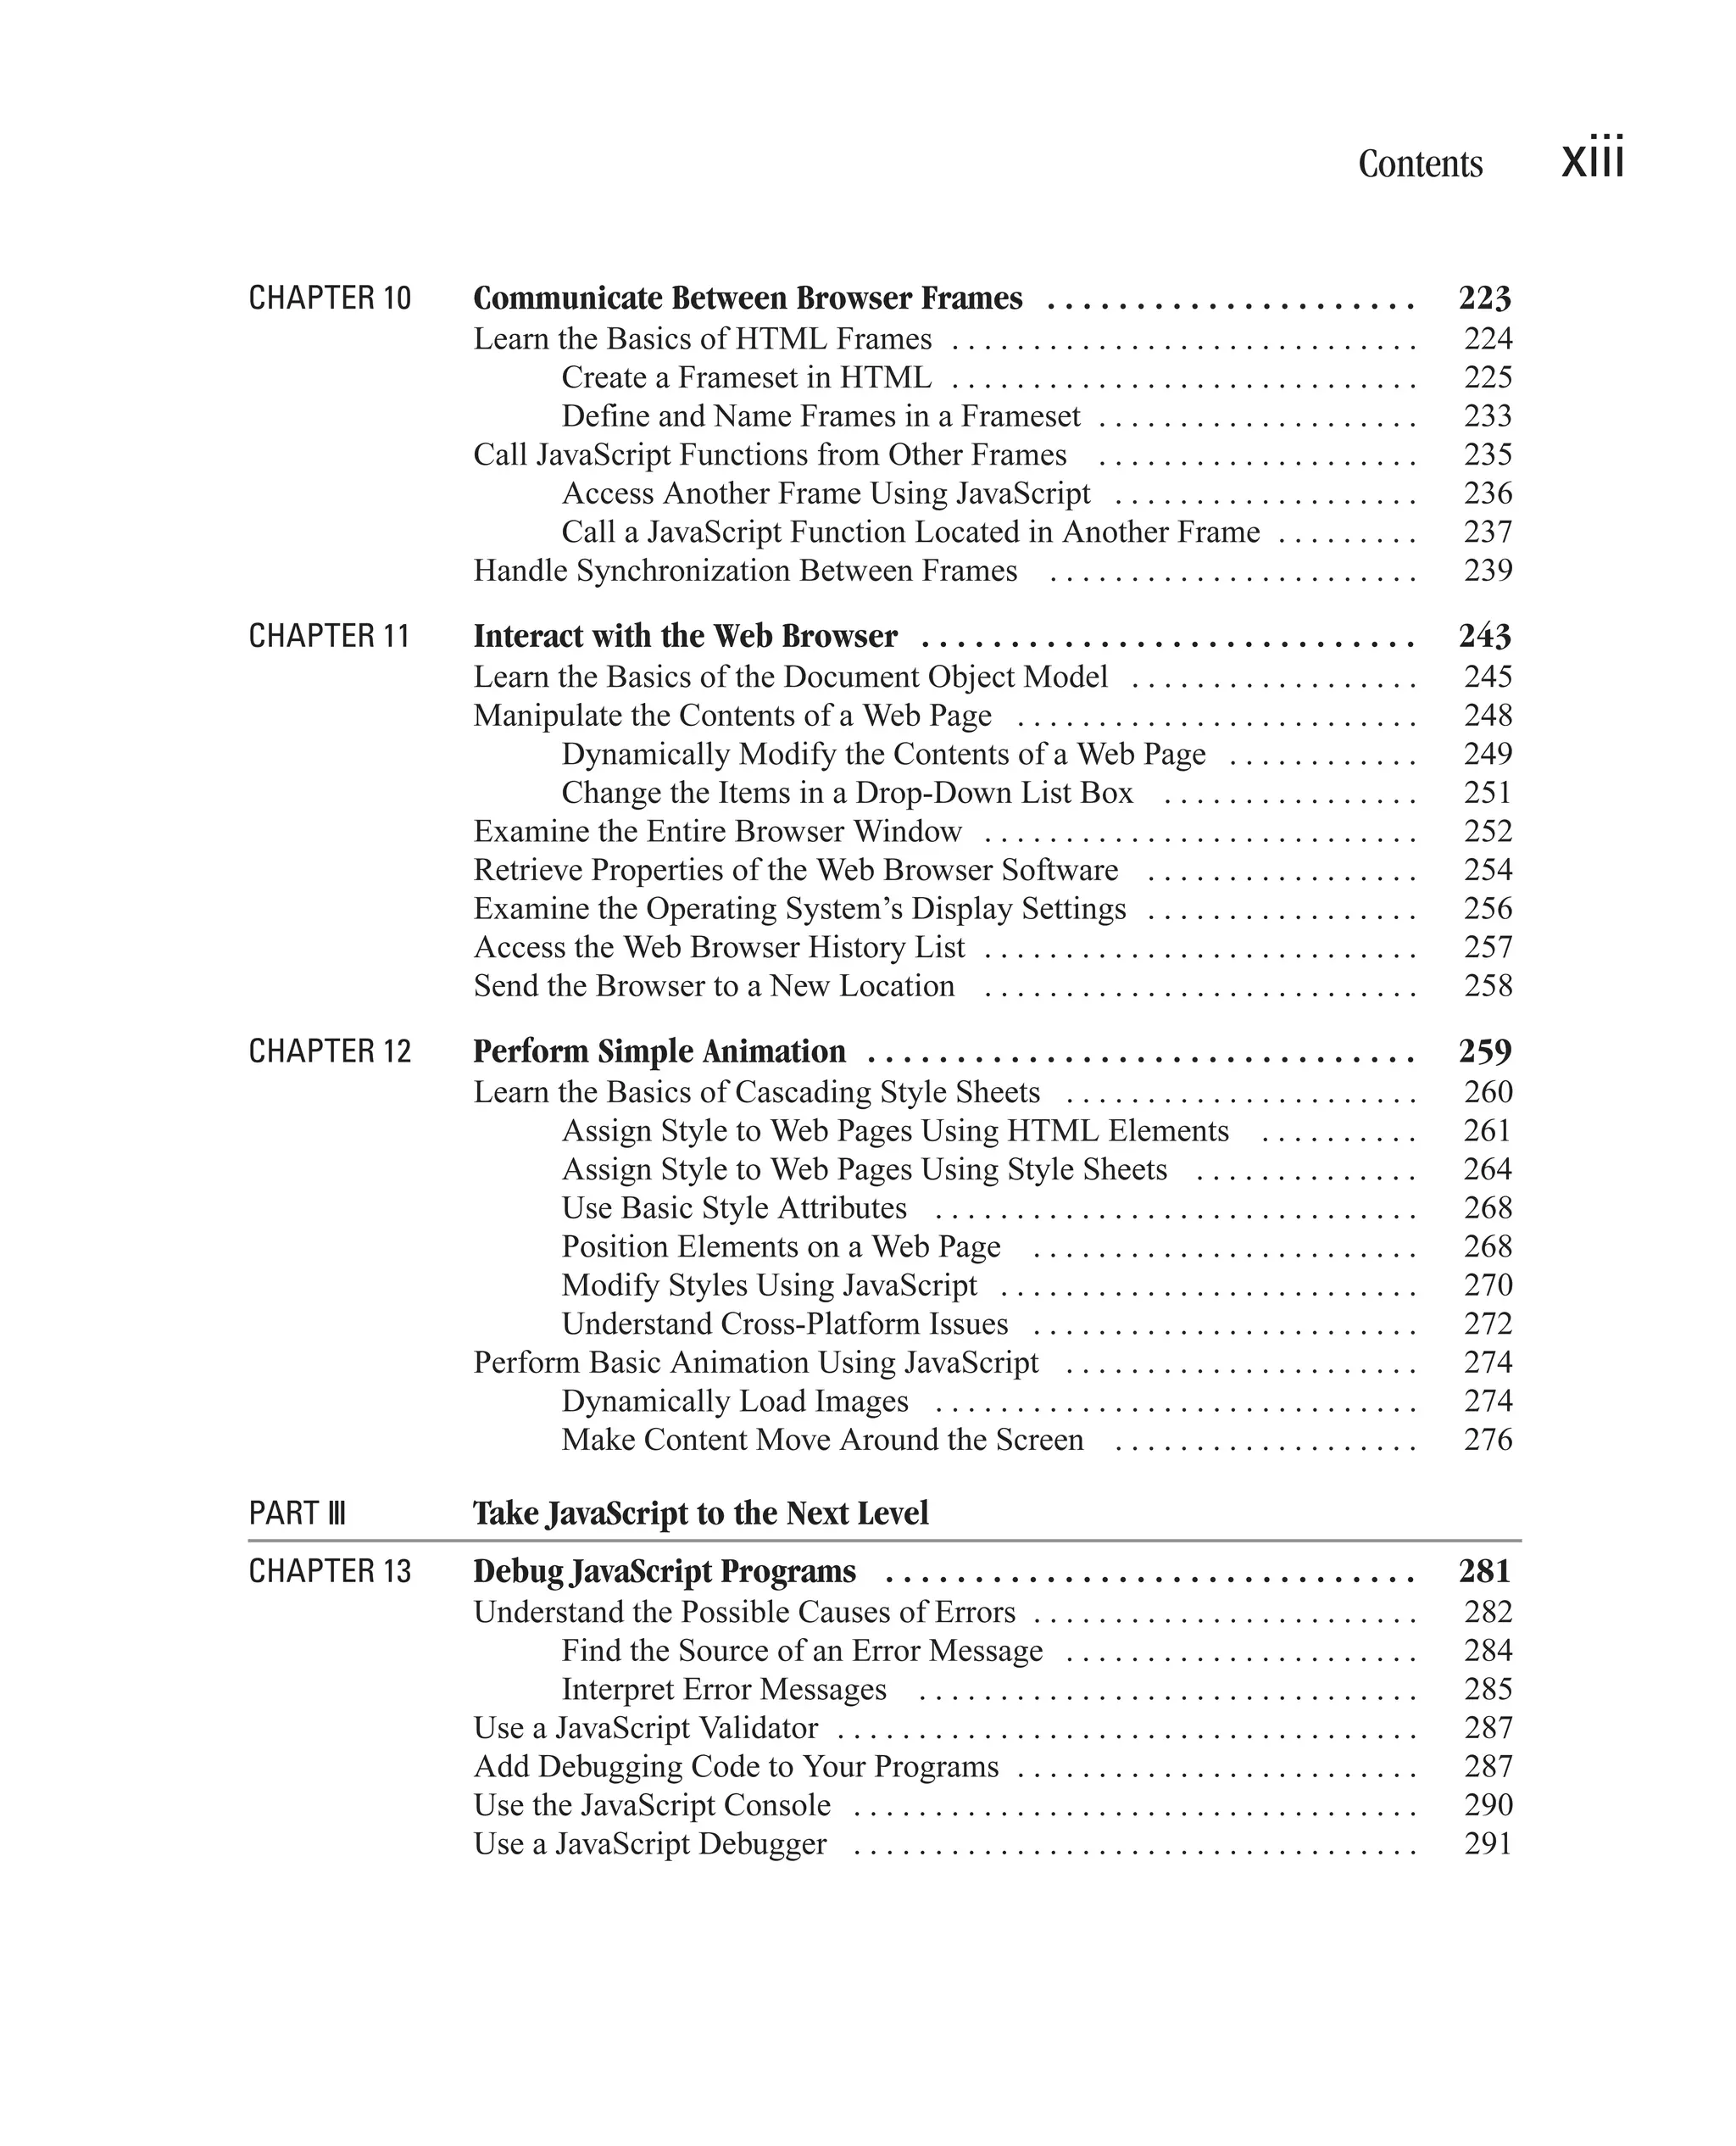
![50 How to Do Everything with JavaScript Some statements, such as the if statement or while statement, specifically require expressions that return a Boolean value (true or false). JavaScript does its best to automatically convert strings and integers to the appropriate Boolean value. Expressions are also often used as parameters to functions, and can also be used as statements themselves. x = 5; This code is an expression, but it is also a statement. It assigns the value 5 to the variable x. Use Operators to Create Complex Expressions JavaScript provides a number of operators to perform mathematical and other functions within your code. Some operators modify the variables they operate on, although most do not. All operators return a value, and thus can be used to create complex expressions. There are 12 types of operators in JavaScript, and several dozen individual operators. Most operators are represented by symbols (like +), while some operators are represented by words (like new). Most operators require two operands, while some operators only require one (particularly the unary operators). Table 2-3 lists the operators available in JavaScript 1.5. Operator Type Operators Member dot (.) square bracket ([]) Unary new delete typeof instanceof void ++ -- negation (-) logical not (!) bitwise not (~) Multiplicative multiply (*) divide (/) modulus (%) Additive add (+) subtract (-) Bitwise Shift shift left (<<), unsigned shift right (>>>), signed shift right (>>) TABLE 2-3 Operators Available in JavaScript](https://image.slidesharecdn.com/3592018/75/How-To-Do-Everything-With-JavaScript-70-2048.jpg)


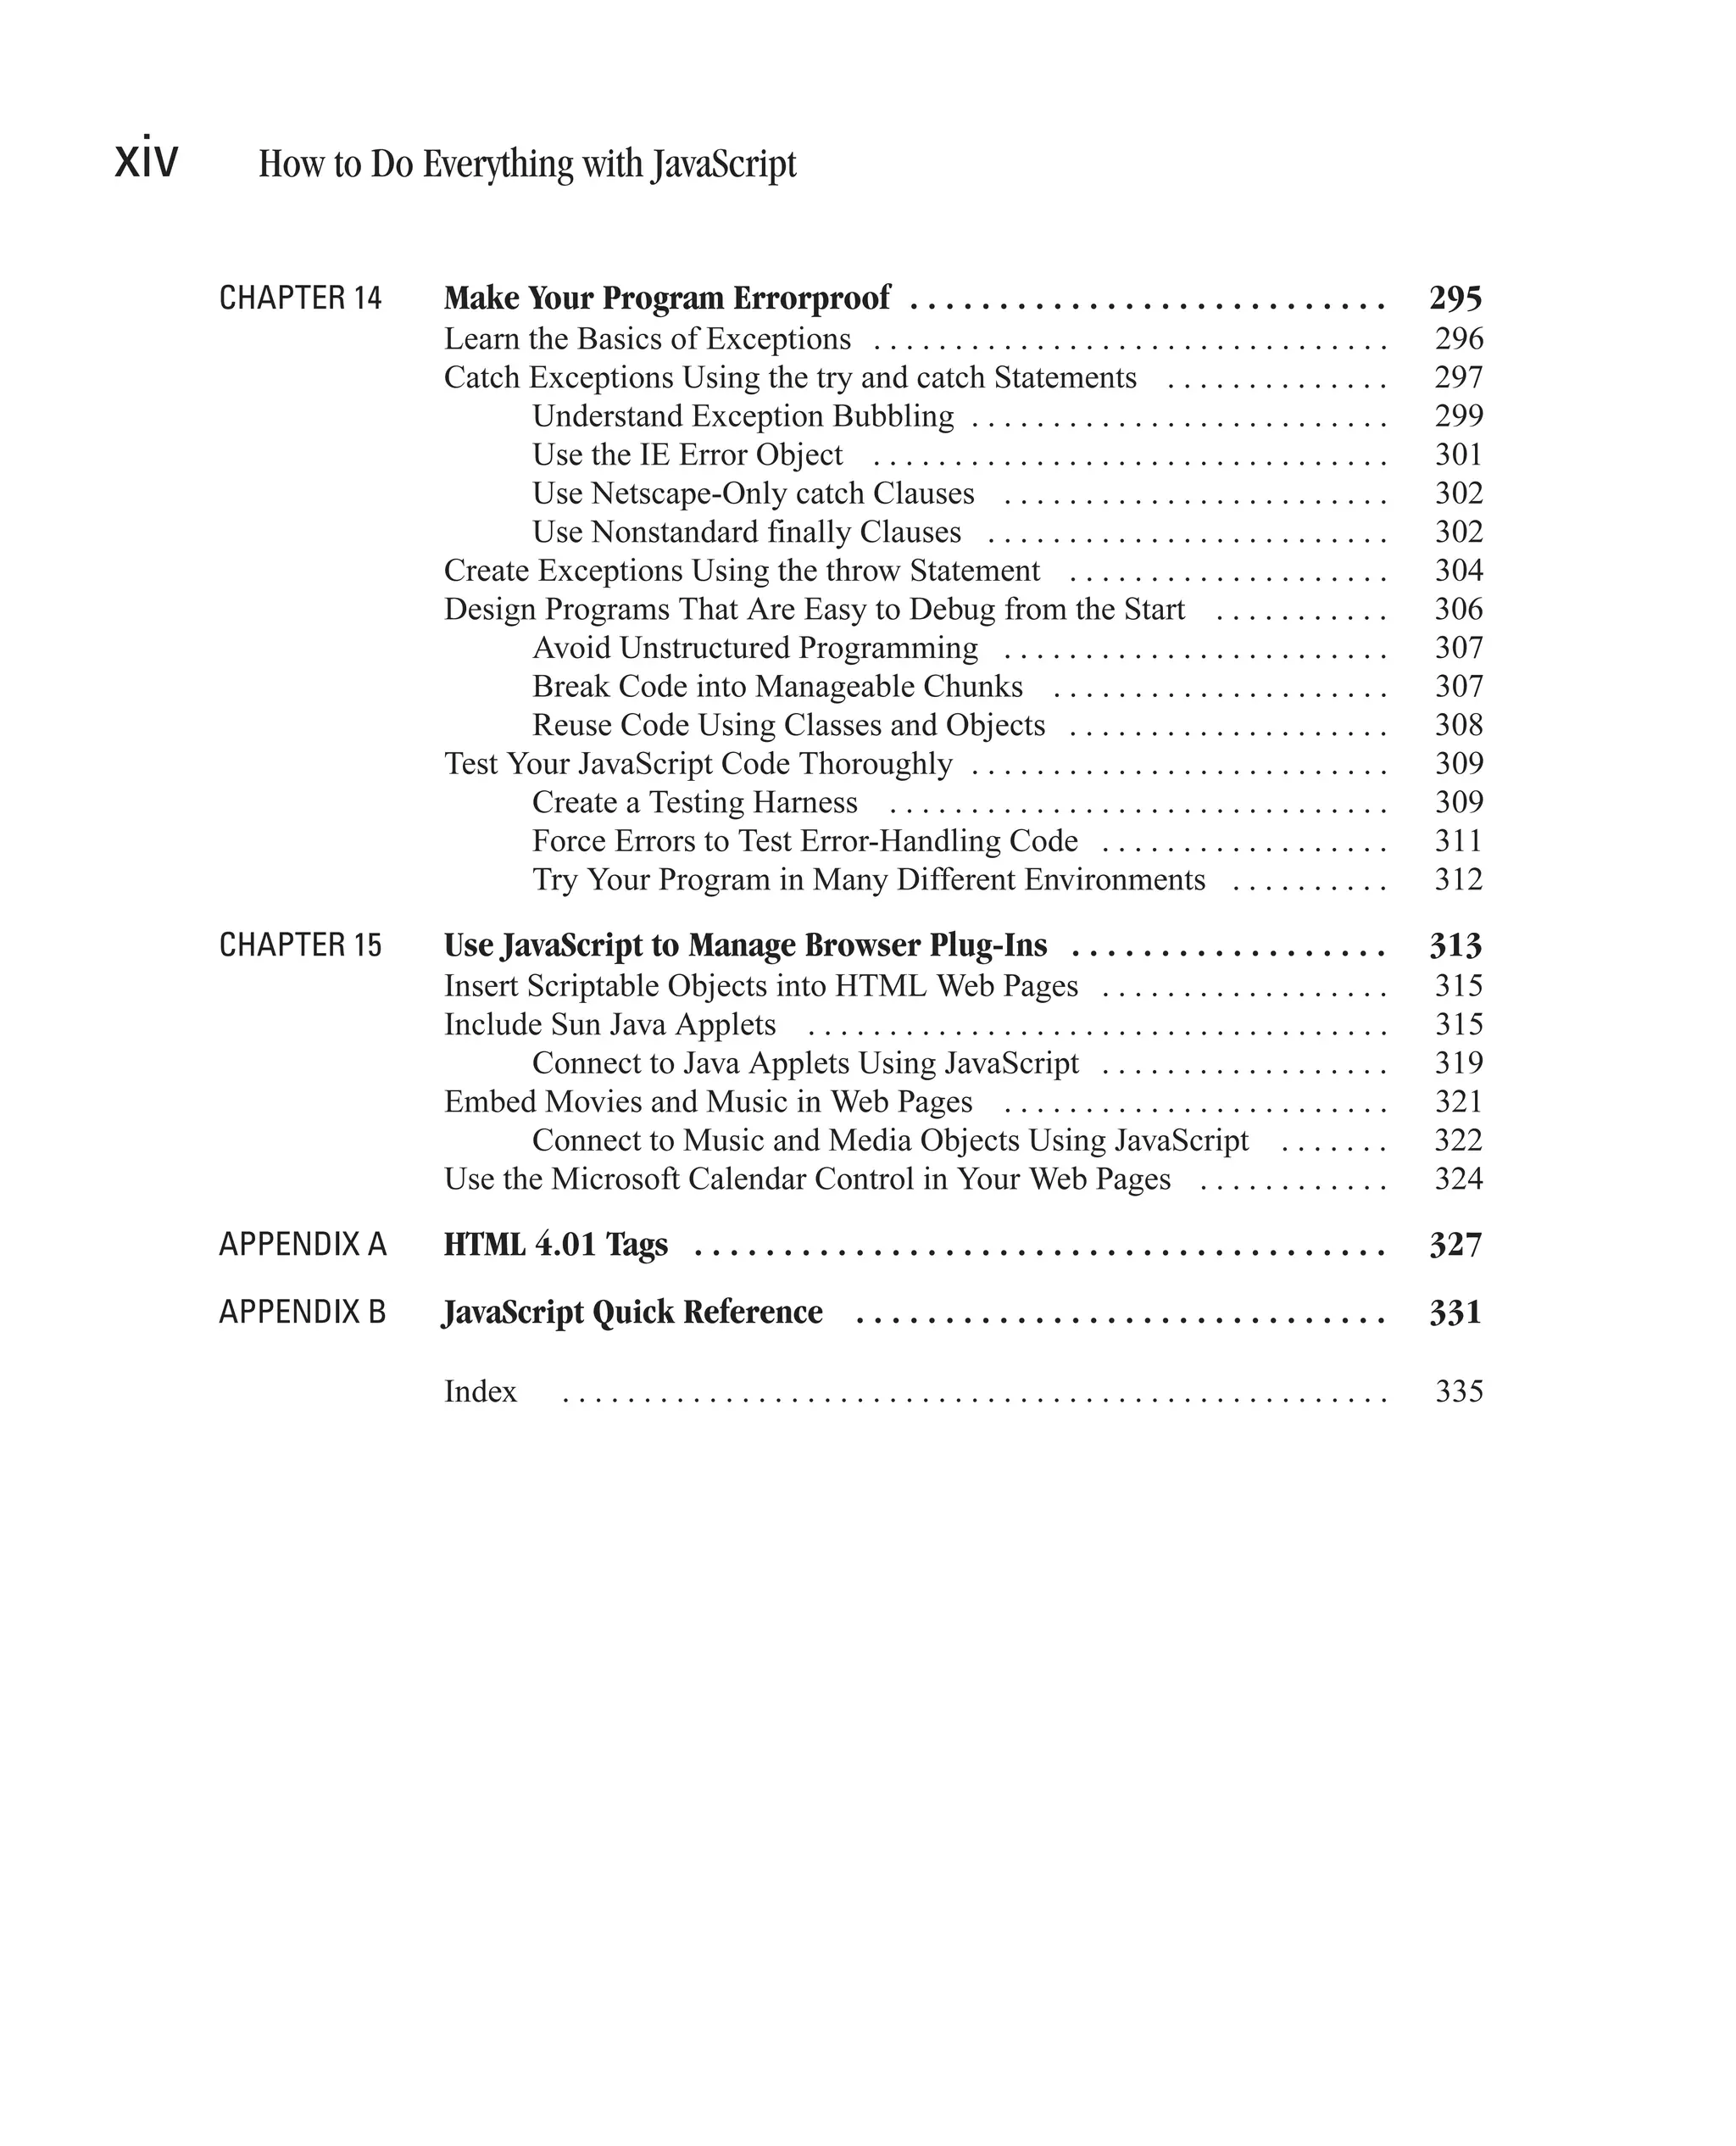
![CHAPTER 2: Learn JavaScript Fundamentals 61 By defining the middle initial parameter as named, we can then call the sayHello() function with only the first and last name specified. Named parameters must always specify an initializer in case a value is not specified for that parameter, so one can be assigned. If you want to provide a value for a named parameter, you have to refer to that parameter by name. 2 Accept Any Number of Parameters Functions in JavaScript 2.0 can be defined so that they can accept an unlimited number of parameters. You would want to do this when your function needs to accept a large number of identical parameters but you do not want to create lots of named optional parameters. The rest parameter must always appear at the end of any unnamed parameters that are defined, using three periods (...). Named parameters, those defined using the named keyword, can still be listed after the rest parameter. Of course, there can only ever be one rest parameter for a single function. The following code defines a function that can accept an unlimited number of parameters. The first four arguments passed will be assigned to the first four parameters defined: name, address, phoneNum, and spouseName. Any arguments passed beyond those four will be assigned to an array called childName. We can use a for-in loop to get the list of names out of that variable. (We will look at arrays in depth in Chapter 4.) function printform (name : String, address : String, phoneNum : String, spouseName : String, ... childName : Array) { // An unlimited number of children can be provided with (document) { write ("Name: " + name + "<br>"); write ("Spouse: " + spouseName + "<br>"); write ("Address: " + address + "<br>"); write ("Phone: " + phoneNum + "<br>"); for (child in childName) { write ("Child " + childName[child] + "<br>"); } } return; } In the next chapter, we will focus on some of JavaScript’s most powerful features—its built-in objects and functions.](https://image.slidesharecdn.com/3592018/75/How-To-Do-Everything-With-JavaScript-81-2048.jpg)


![70 How to Do Everything with JavaScript Class Name Description Array Allows lists of data to be stored in a single variable Boolean A wrapper for Boolean values Date Lets you work with dates and times Function Allows you to define a function programmatically Math Contains convenient mathematical constants and functions Number A wrapper for primitive numeric values Object All objects derive from this data type RegExp Provides support for regular expressions in JavaScript String A wrapper for string values TABLE 3-2 Predefined Core JavaScript 1.5 Classes not meet several of the key attributes of object-oriented programming languages. JavaScript 2.0 meets most of the key attributes. Table 3-3 lists the classes supported by JavaScript 2.0. The list is obviously much longer than that in Table 3-2. Class Name Description Array Allows lists of data of type Object to be stored in a single variable; is equivalent to the Array[Object] data type Array[type] Allows lists of data of type type to be stored in a single variable Boolean Supports variables that can only store true and false char Supports variables that can only store a single character ConstArray Allows lists of data of type Object to be stored in a single constant; is equivalent to the ConstArray[Object] data type ConstArray[type] Allows lists of data of type type to be stored in a single constant DynamicArray[type] Allows resizable lists of data of type type to be stored in a single variable Function The “data type” of functions Integer Supports variables that can only store integers Never Supports variables that cannot contain any value Null Supports variables that can only store “null” Number Supports variables that can only store numbers Object Supports variables that can contain any value Prototype Supports variables that contain prototype-based objects (JavaScript 1.5’s way of handling objects) TABLE 3-3 Predefined Data Types in JavaScript 2.0](https://image.slidesharecdn.com/3592018/75/How-To-Do-Everything-With-JavaScript-90-2048.jpg)
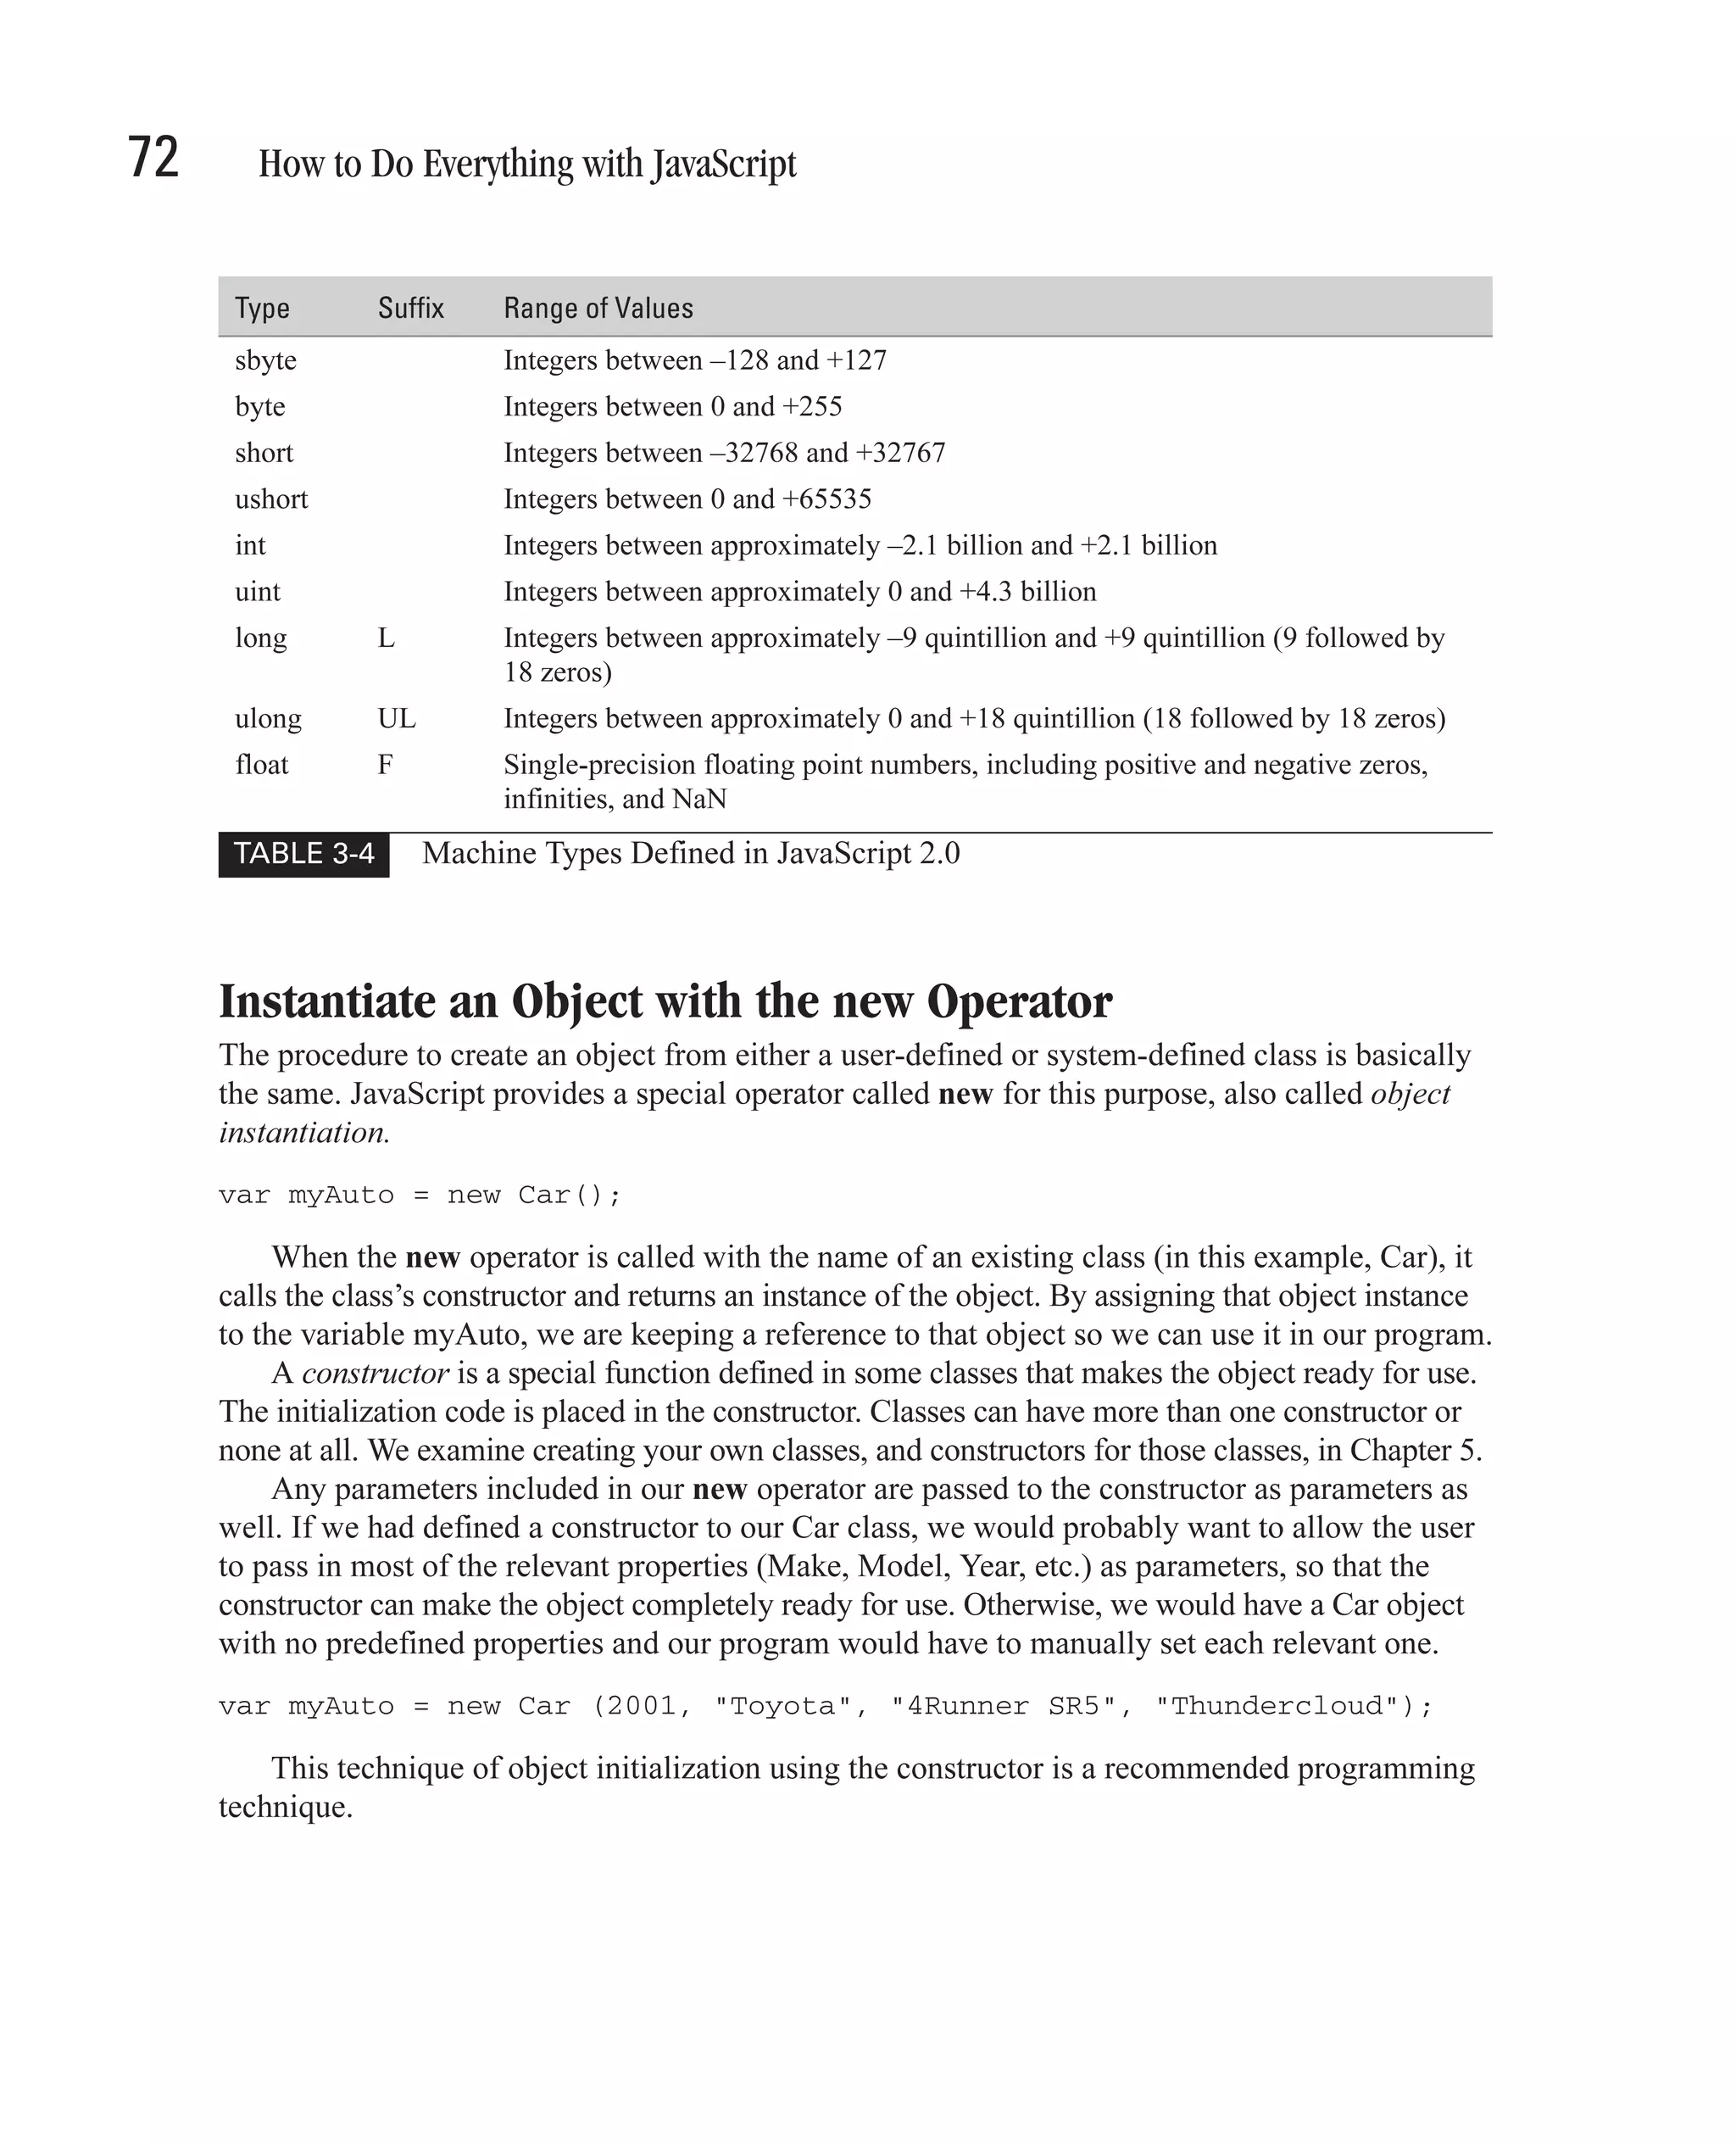
![CHAPTER 3: Use Built-in JavaScript Classes 71 Class Name Description StaticArray[type] Allows writable lists of data of type type to be stored in a single variable String Supports variables that can only store strings Type The “data type” of data types Void Supports variables that can only store “undefined” 3 TABLE 3-3 Predefined Data Types in JavaScript 2.0 (continued) All classes in JavaScript 2.0, even ones you create yourself, can be used as data types. Consequently, the list of classes in Table 3-3 is also a partial list of data types. In addition to the list of predefined classes that can be used as data types in Table 3-3, there are a number of machine types in JavaScript 2.0. These machine types (listed in Table 3-4) are low-level data types that can be used in JavaScript, although not all JavaScript environments will support them. They are provided for compatibility with other languages—for instance, when your JavaScript program needs to exchange data with an external C-language application. NaN (Not a Number) is a defined constant in JavaScript that is, effectively, a number representing that an error occurred when processing that variable. Machine types can be used just like data types derived from classes, although they are not classes themselves. For instance, in the following JavaScript 2.0 code listing, we create a handful of variables defined as machine types. var counter : short = 14; var account_balance : int = 1701330222; var bigNumber : long = 74440000000000; var anotherBigNumber = 312L; The machine type suffixes listed in Table 3-4 are convenient shorthand notation for assigning a machine type to a value. The three suffixes—L, UL, and F—indicate to JavaScript that you wish to treat a number as either a long, unsigned long (ulong), or float number respectively. So the expression “0L” tells JavaScript to treat the value 0 as a long, due to the L machine-type suffix. In the preceding code, the variable anotherBigNumber will be treated as a long integer, since we are assigning the value 312L to it. The L suffix forces the value 312 to be treated as a long integer. This works only when assigning numeric literals to a variable, and will not work with other types of expressions such as variables.](https://image.slidesharecdn.com/3592018/75/How-To-Do-Everything-With-JavaScript-91-2048.jpg)
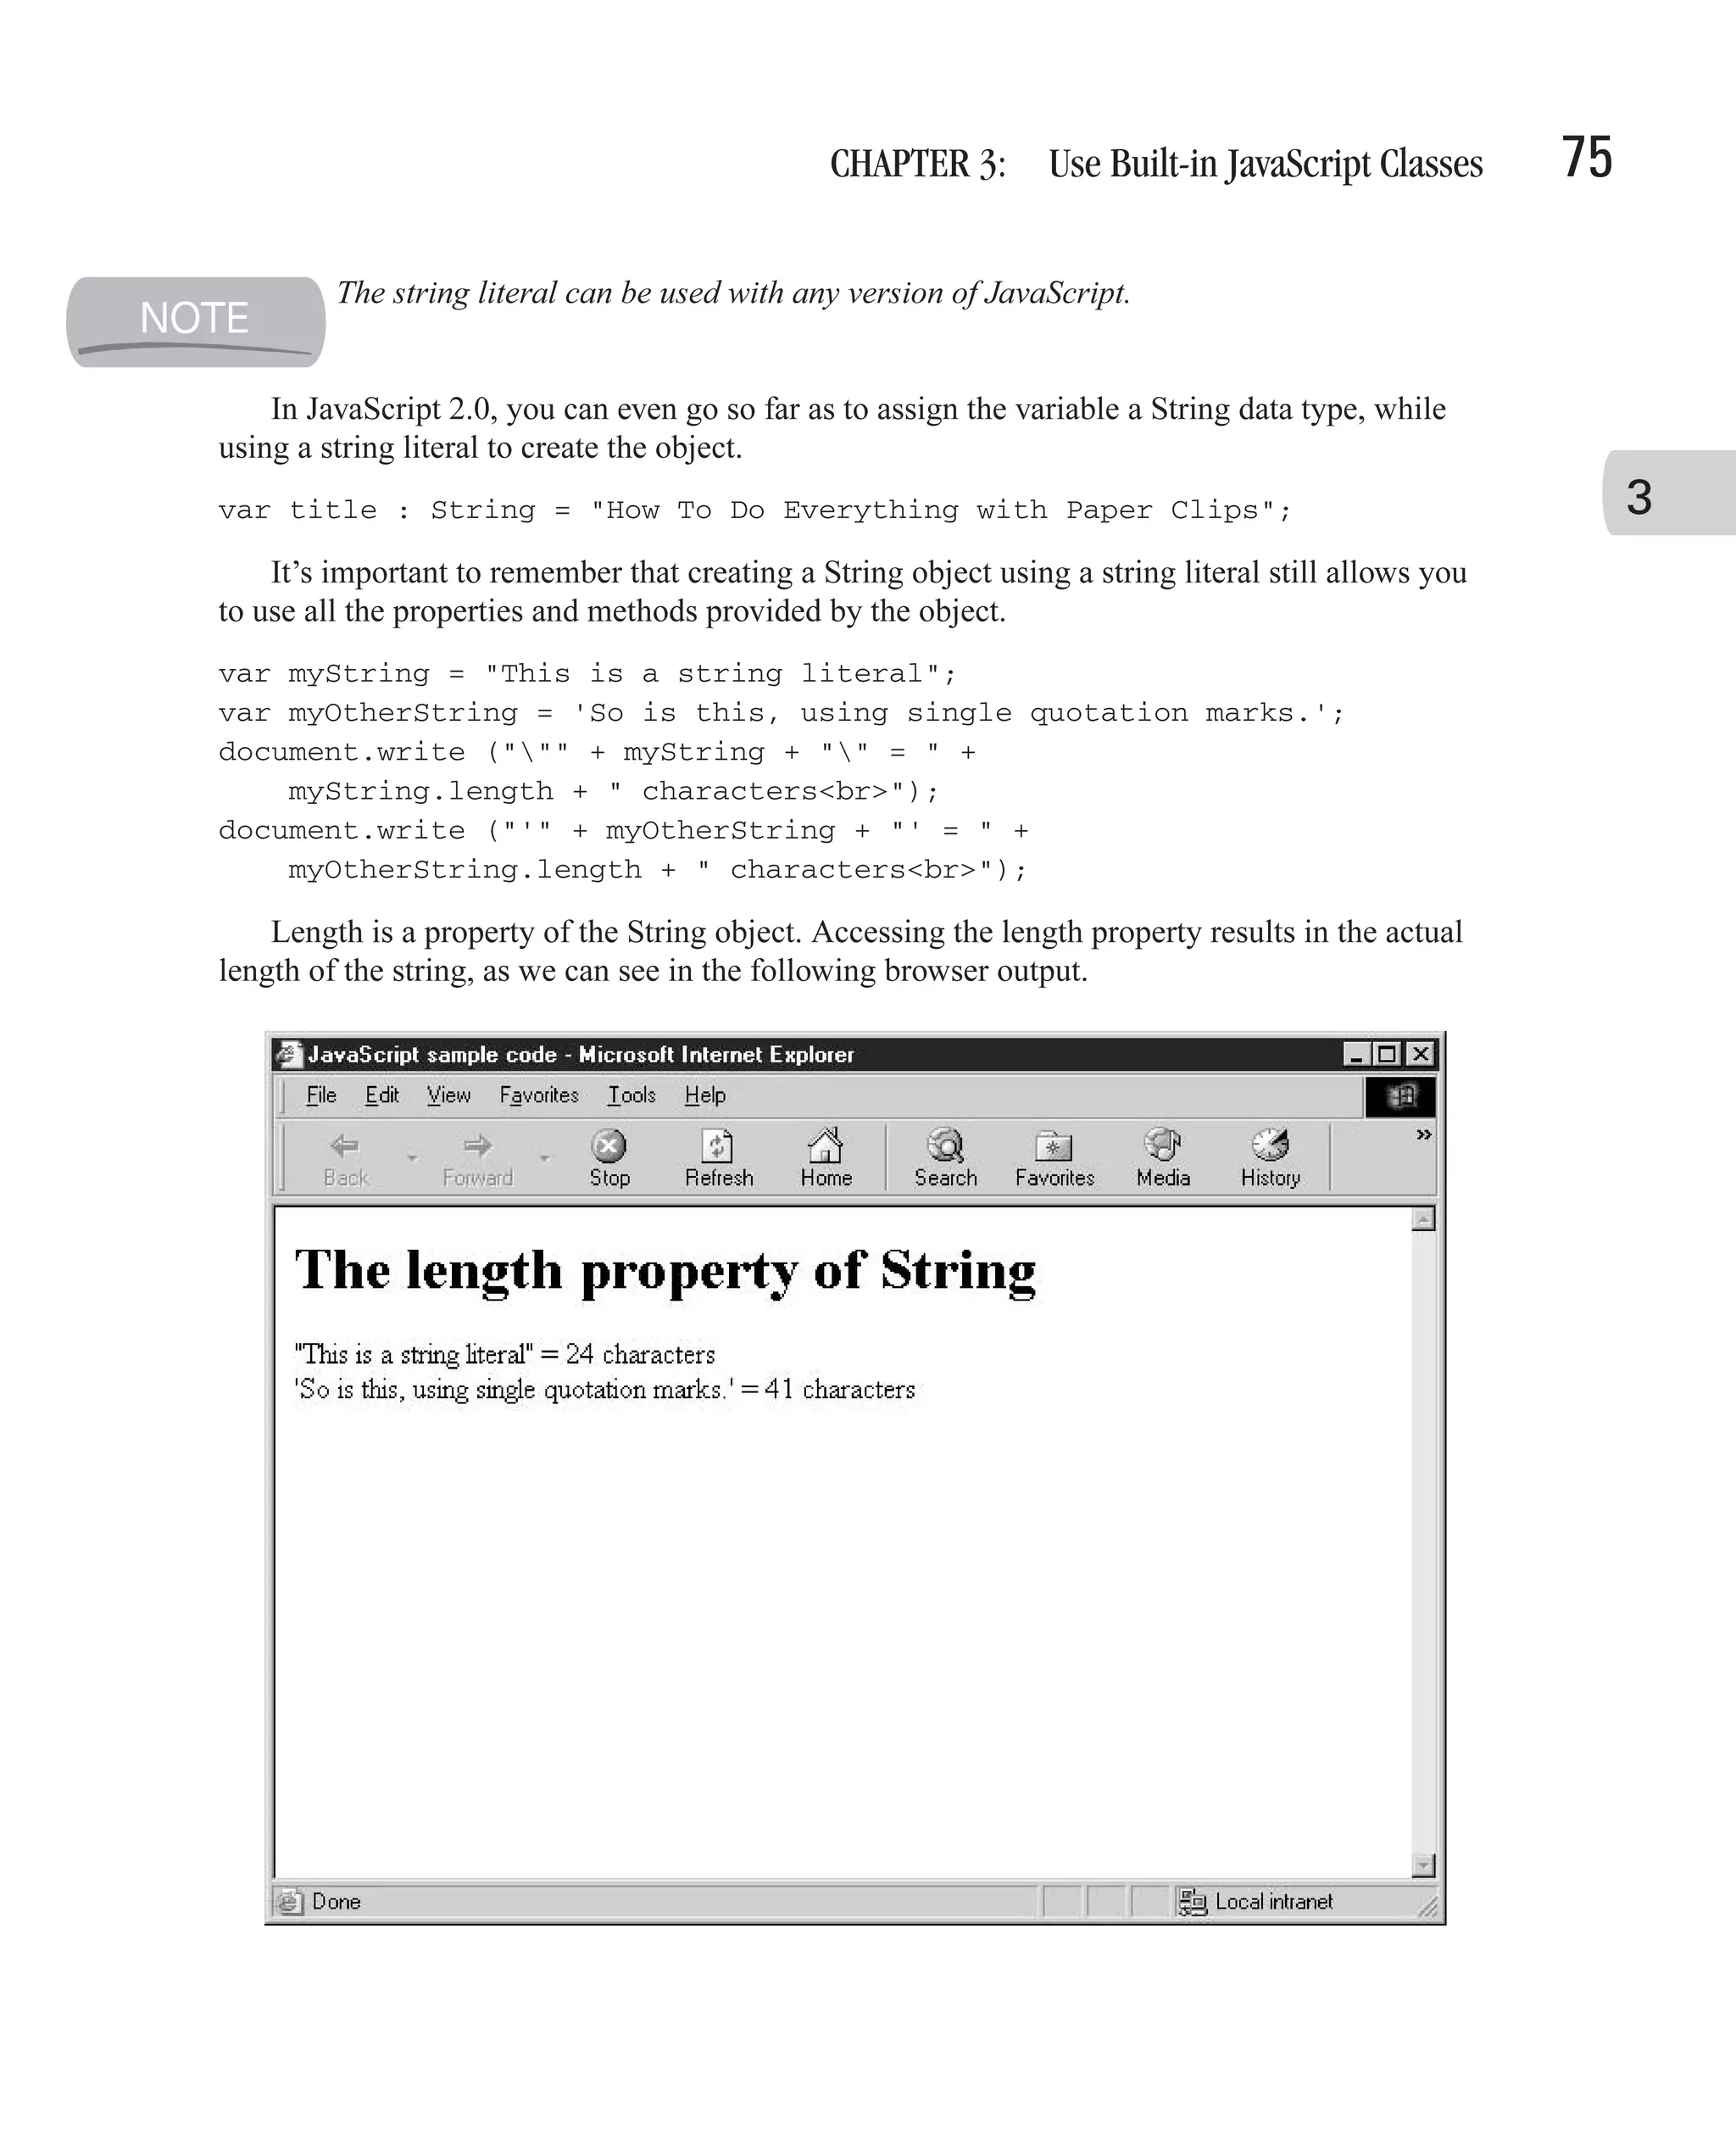
![CHAPTER 3: Use Built-in JavaScript Classes 73 Access an Object with the . Operator Once an object has been created using the new operator, we can access all its public properties and methods using the dot operator (.). The dot operator is placed between the object name (not the class name) and the name of the property or method you wish to access. document.write ("Your car was created in " + myAuto.Year); 3 In this code example, we actually use the dot operator twice. We use it to access the write() method of the built-in document object and also to access the Year property of our user-defined myAuto object, which is an instance of the Car class. You can define properties and methods as private, which restricts the ability to access them using the dot operator. We will examine private properties and methods in Chapter 5. Access an Object with the [] Operator JavaScript also allows access to an object’s properties using the square brackets operator ([]). The one advantage this operator has over the dot operator is that you do not need to know the name of the property you wish to look up. For instance, let’s look at the following for-in loop. for (var tool in toolchest) { document.write(toolchest[tool] + "<BR>"); } In this code example, we are passing a variable named tool to the square brackets operator, which is then able to extract the value of the property from the toolchest object. The public properties of any class defined in JavaScript 2.0 can be accessed using the square brackets operator. This even works for JavaScript’s built-in DOM objects for version 1.5. for (var prop in document) { document.write ("document." + prop + " = " + document[prop] + "<BR>"); } This code results in the entire contents of the DOM document object being written to the web browser window, as you can see in Figure 3-1. Since the DOM is slightly different between different browser makers and even versions of the same browser, your own test will probably reveal different properties and values. Create a String Object in JavaScript A string is simply a sequence of zero or more Unicode characters. The following are all valid strings: ■ "" (an empty string) ■ "How was work today, Sofia?"](https://image.slidesharecdn.com/3592018/75/How-To-Do-Everything-With-JavaScript-93-2048.jpg)


![88 How to Do Everything with JavaScript 5. If we want to match more than one number (as we do with a phone number), we can put multiple d tokens together; ddd would represent three numbers. We can also specify the number in curly braces: d{3}. var pattern = /^d{3}$/; 6. Other characters in the pattern, such as spaces and hyphens, represent only themselves. So the following pattern would match 999-999-9999, which is one way to represent a telephone number. var pattern = /^d{3}-d{3}-d{4}$/; 7. Since the parentheses characters have special meaning in regular expression syntax, to include them we will need to escape them with a backslash: ( and ). That gives us a pattern that matches (999) 999-9999, which is what we want. var pattern = /^(d{3}) d{3}-d{4}$/; There are many special tokens in the regular expression syntax to match different sets of characters. The tokens listed in Table 3-9 are the basic set. Character Meaning Either denotes the start of a special token (for example, d matches a digit) or indicates a special character is to be treated literally ( * matches an asterisk) ^ Matches the beginning of a line; also matches the beginning of every string $ Matches the end of a line; also matches the end of every string * A special quantifier, meaning the preceding token or group of tokens must match zero or more times + A special quantifier, meaning the preceding token or group of tokens must match one or more times ? A special quantifier, meaning the preceding token or group of tokens must match zero or one time only . Matches any single character except the newline character (n) (abcd) Matches “abcd” and remembers the match car|bus Matches either “car” or “bus” {3} Matches exactly three occurrences of the preceding token or group of tokens {3,} Matches three or more occurrences of the preceding token or group of tokens {4,8} Matches four to eight occurrences of the preceding token or group of tokens [abcdef] Matches any one of the characters a through f [a-f] Matches any one of the characters a through f [a-zA-Z0-9] Matches any single alphanumeric character TABLE 3-9 Regular Expression Syntax in JavaScript](https://image.slidesharecdn.com/3592018/75/How-To-Do-Everything-With-JavaScript-108-2048.jpg)
![CHAPTER 3: Use Built-in JavaScript Classes 89 Character Meaning [^aeiou] Matches everything except a, e, i, o, and u d Matches a digit; identical to the pattern [0-9] D Matches a nondigit; identical to the pattern [^0-9] s Matches a space character (there are eight defined space characters) 3 S Matches a nonspace character t Matches a tab n Matches a new line r Matches a carriage return w Matches any alphanumeric (word) character (a–z and 0–9), including underscore ( _ ); identical to the pattern [a-zA-Z0-9_] W Matches any nonword character; identical to the pattern [^a-zA-Z0-9_ ] 0 Matches null TABLE 3-9 Regular Expression Syntax in JavaScript (continued) Create Patterns with a RegExp Object We’ve already seen how to create patterns with a regular expression literal. A regular expression literal starts and ends with a forward slash (/), as follows: var zipCodePattern = /^d{5}(-d{4})?$/; JavaScript also provides a class named RegExp to create these patterns as well. We can rewrite the pattern using this class’s constructor, as follows: var zipCodePattern = new RegExp ("^d{5}(-d{4})?$"); The backslash ( ) character needs to be escaped anytime it is included in a string, and the RegExp constructor is no exception. The double backslash ( ) represents the escaped backslash character. The RegExp object provides two main methods for performing its search and match functions: test() and exec(). Table 3-10 lists the most common methods of the RegExp object. Method Purpose compile () Compiles a regular expression exec () Searches a string for a pattern and returns all the matches test () Compares a string to a pattern and returns true or false based on the result TABLE 3-10 Methods of the RegExp Object](https://image.slidesharecdn.com/3592018/75/How-To-Do-Everything-With-JavaScript-109-2048.jpg)


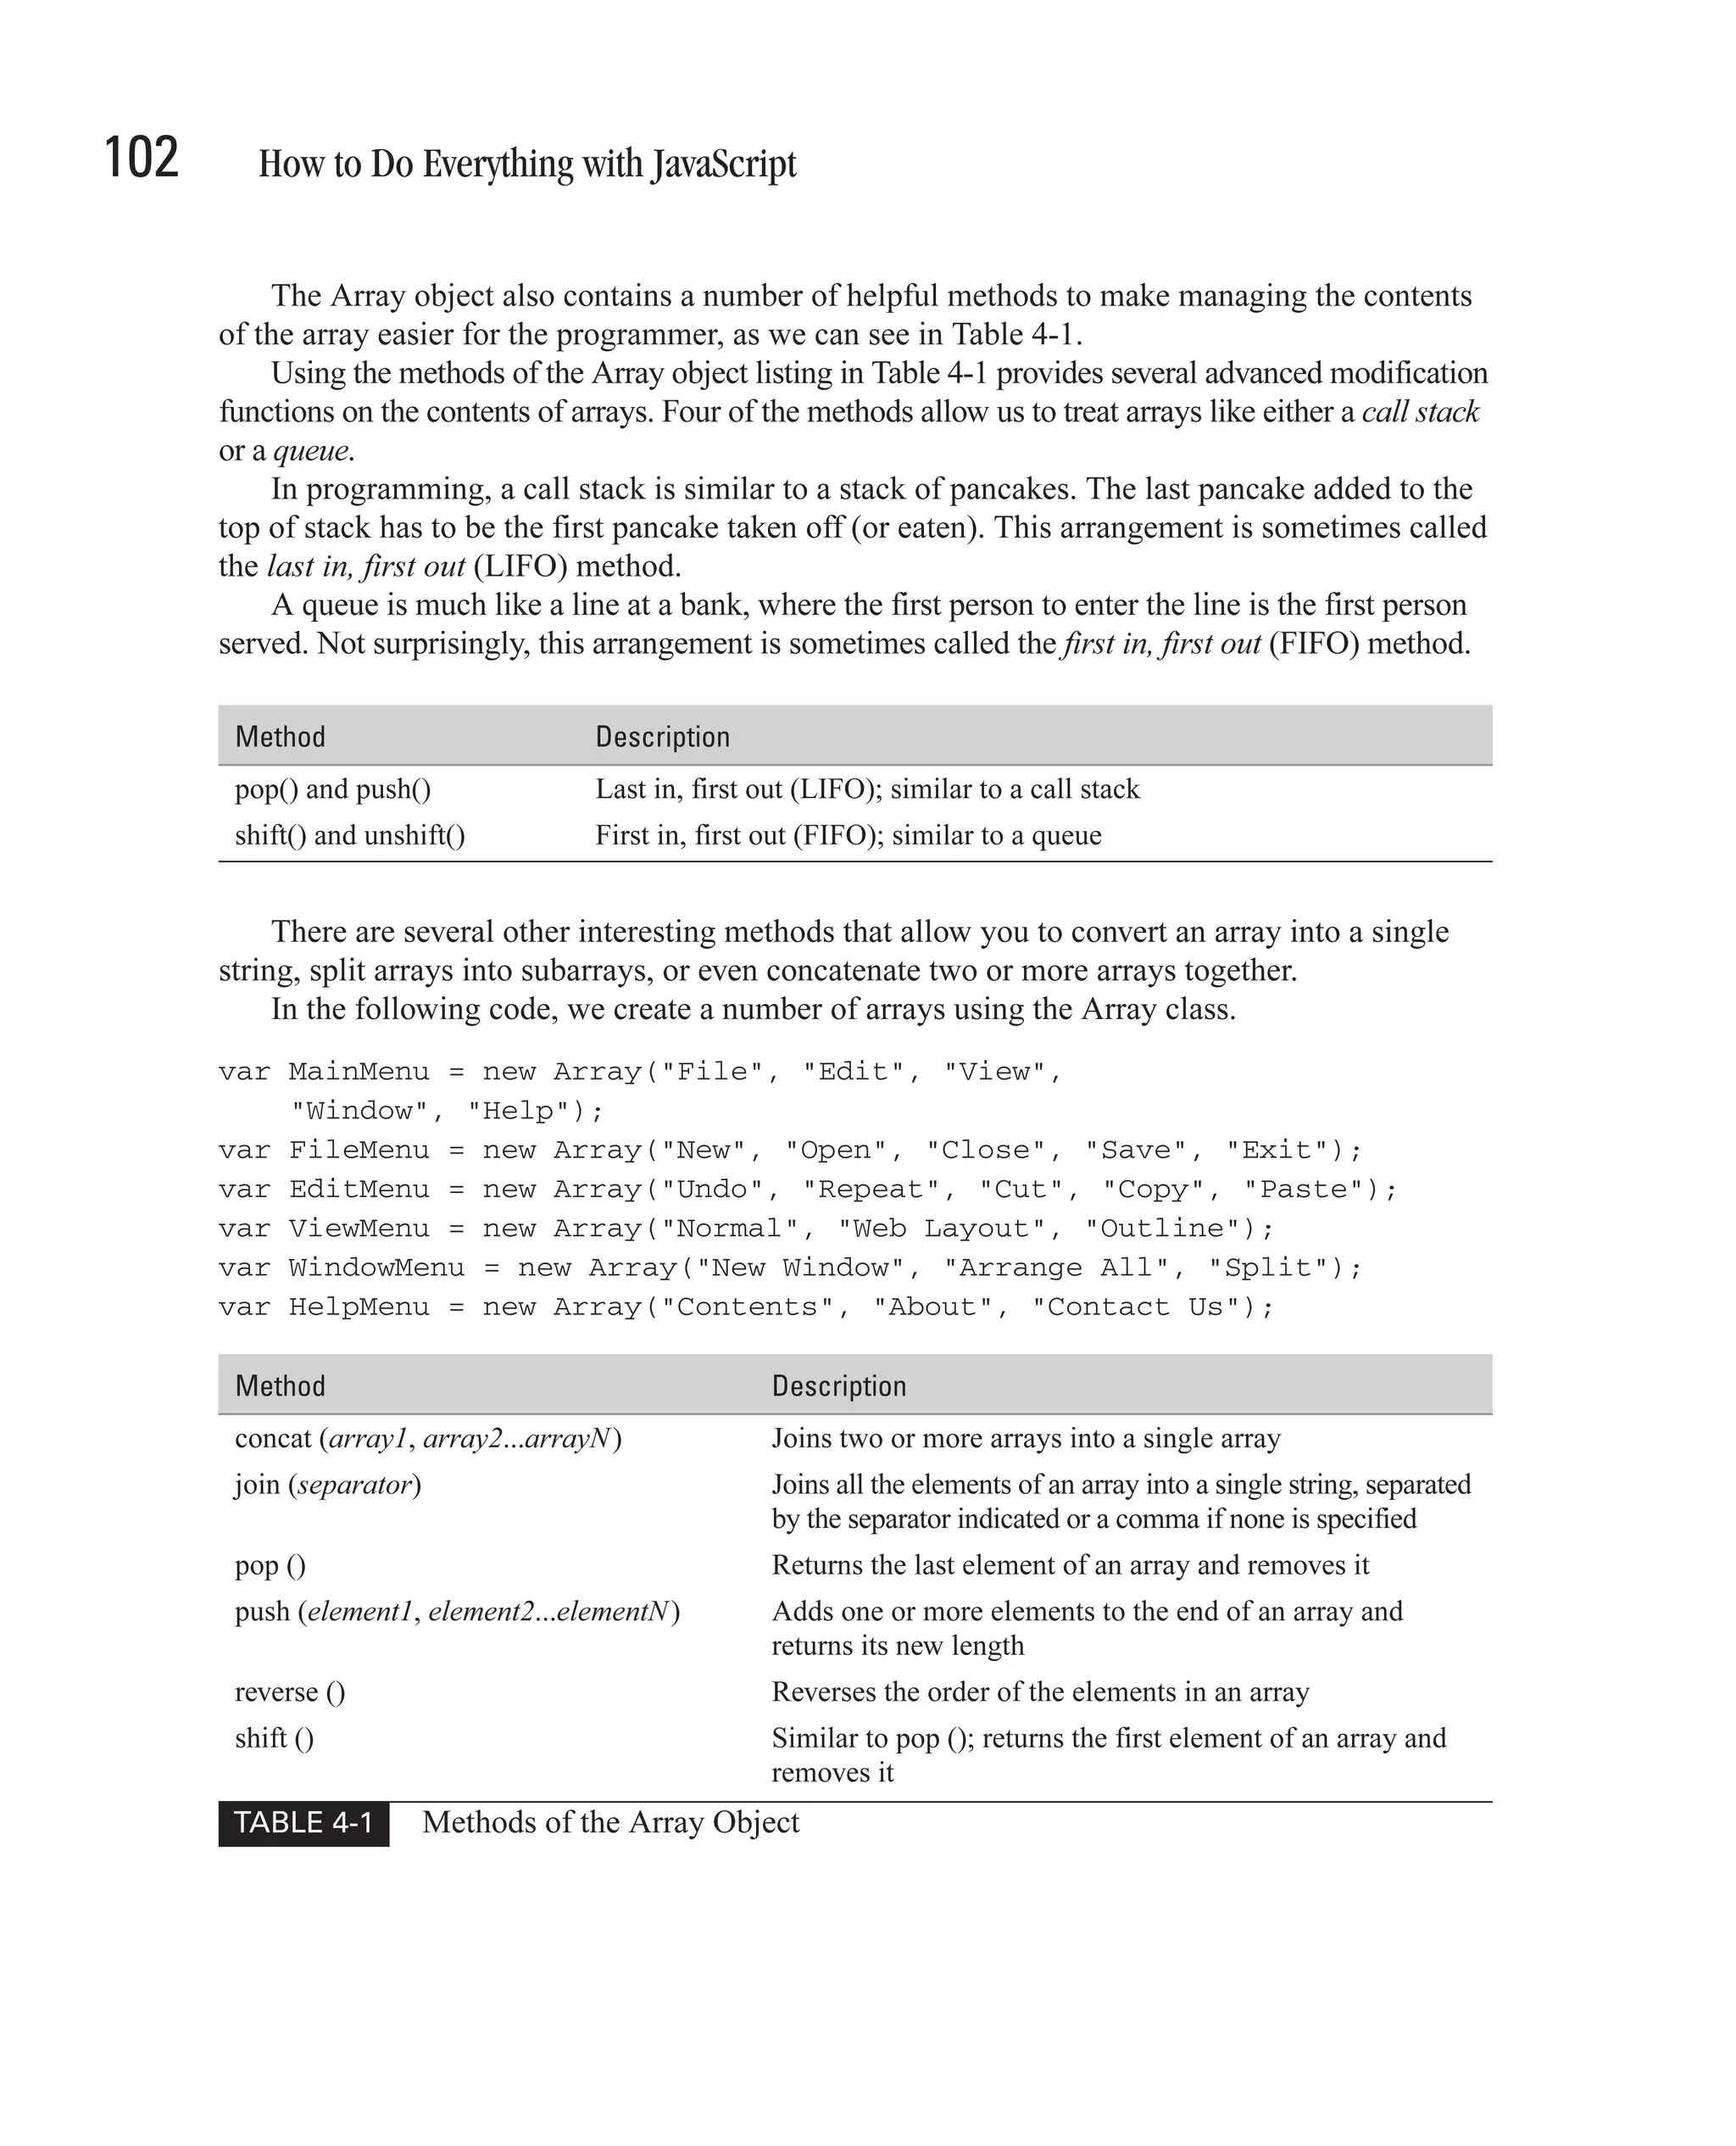
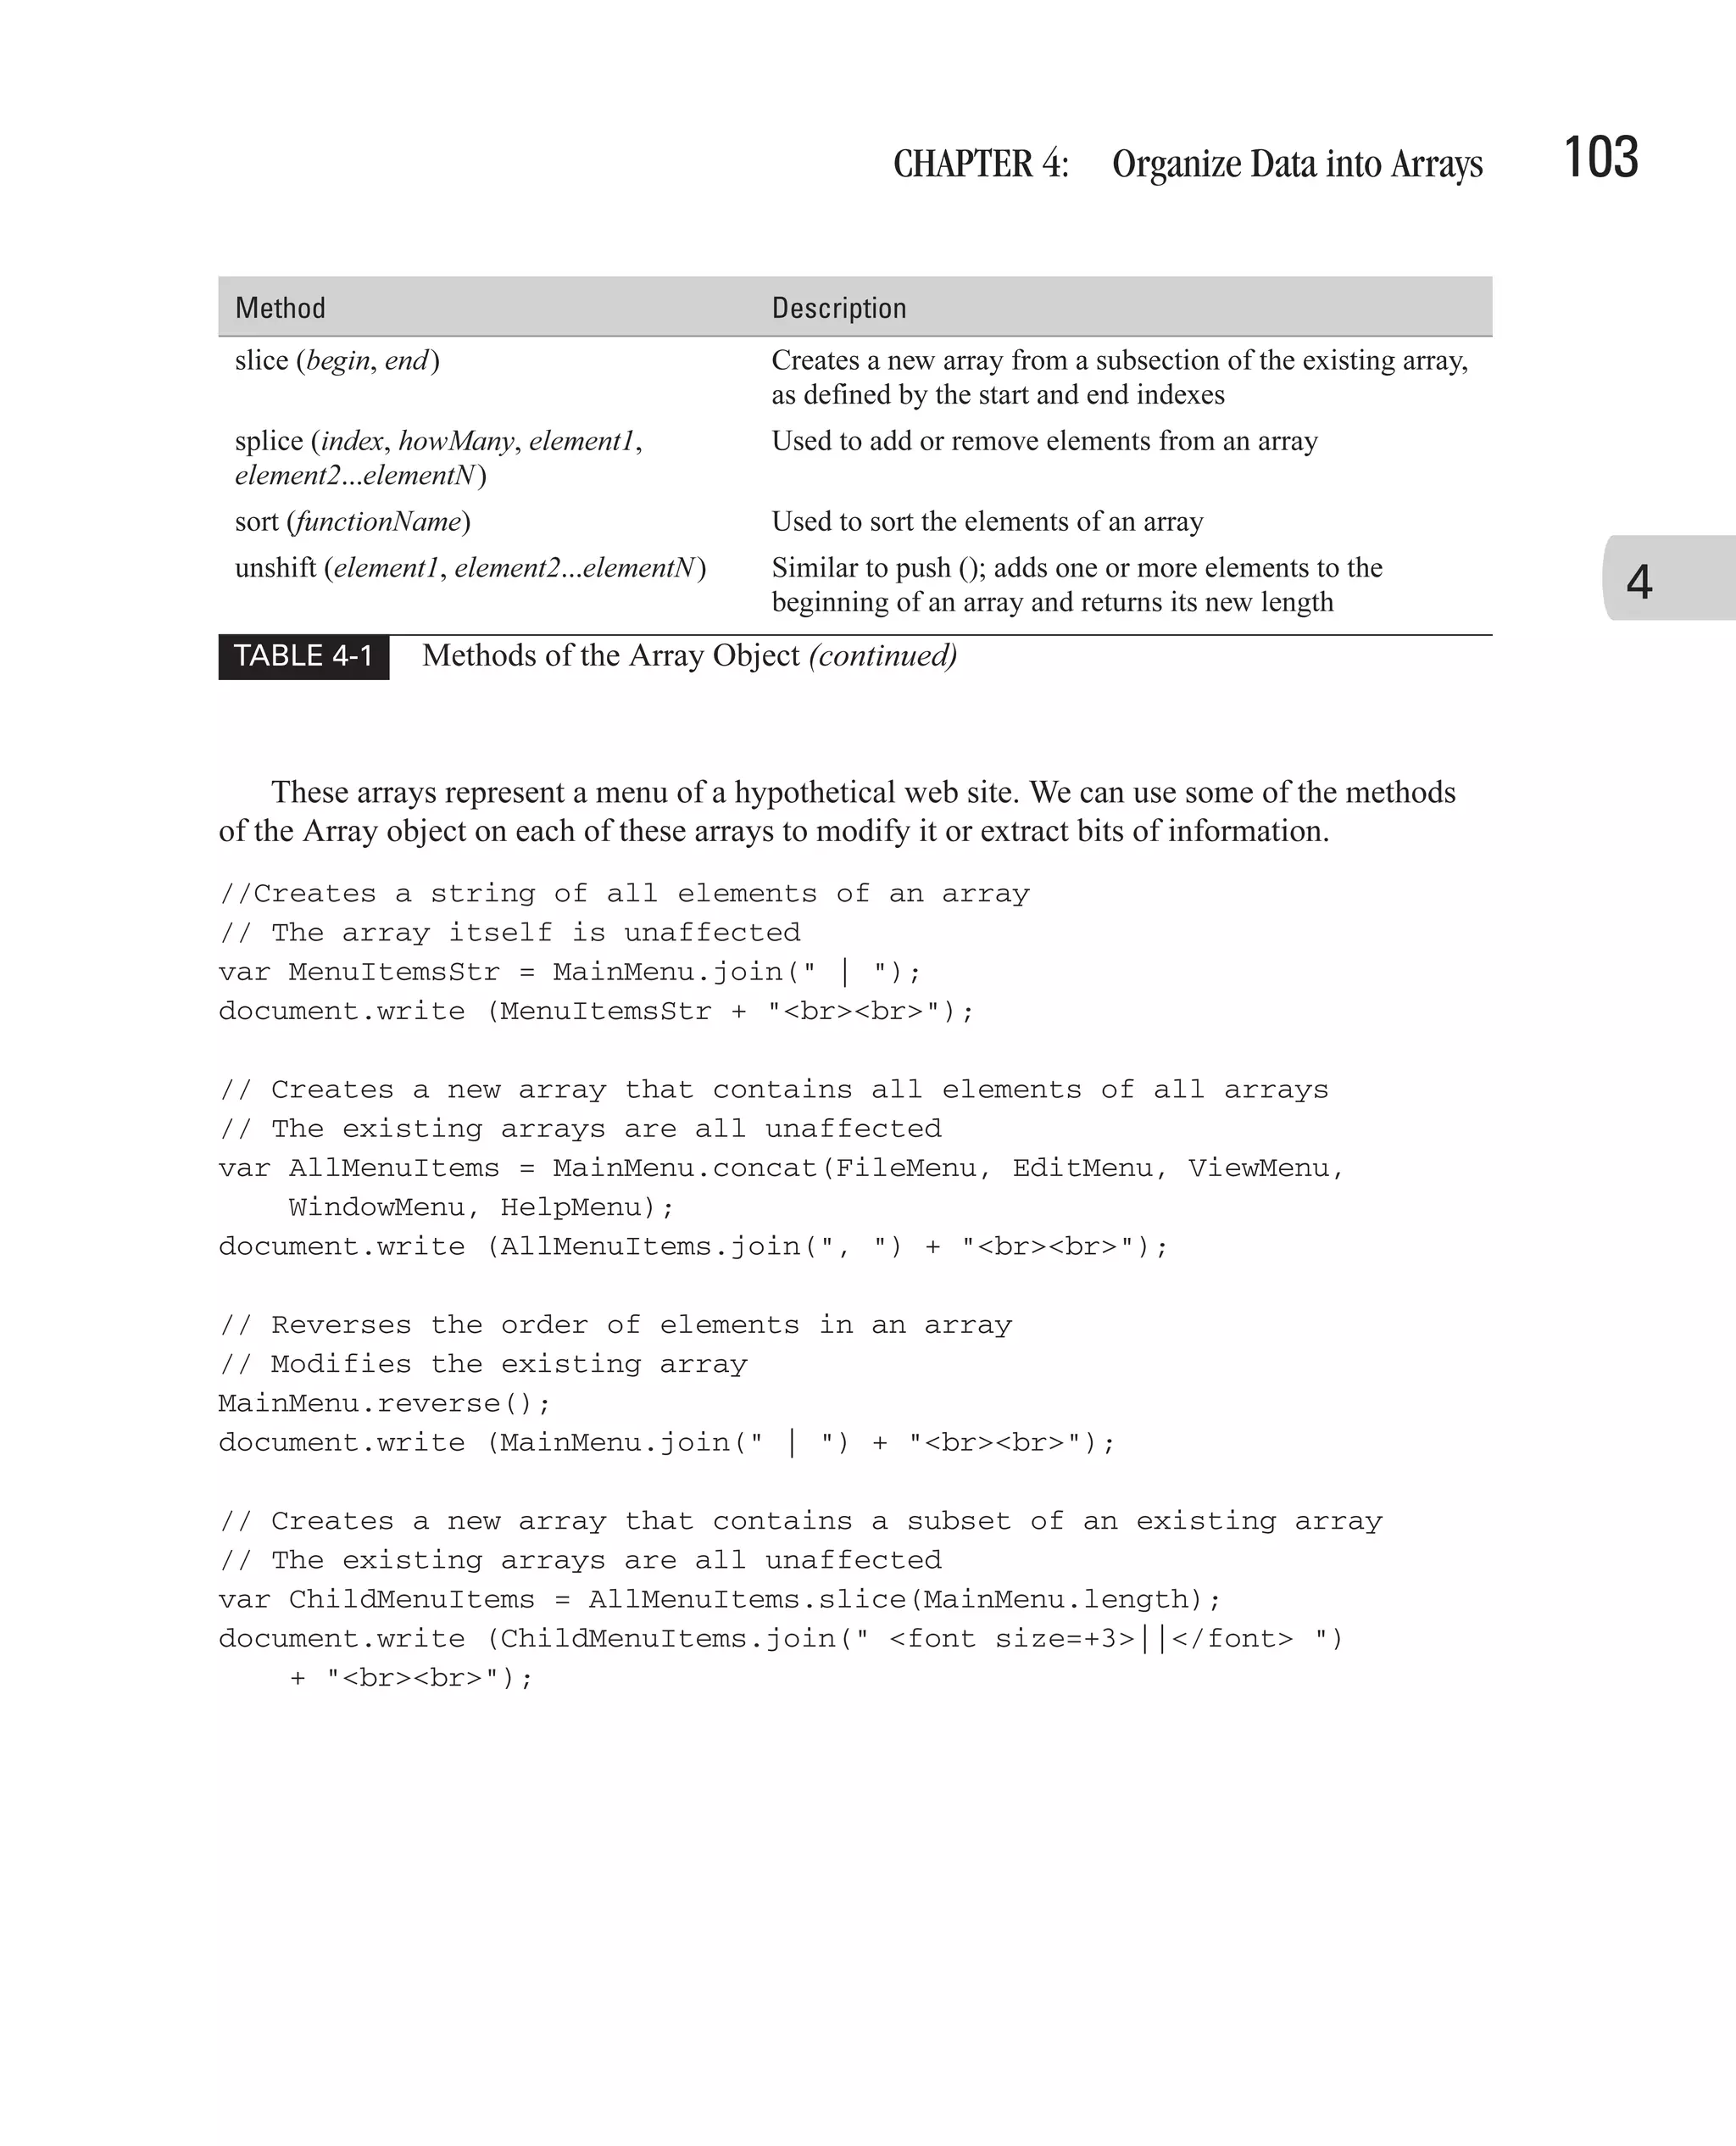
![96 How to Do Everything with JavaScript How to... ■ Create an Array object ■ Set and retrieve values in an array ■ Use multidimensional arrays ■ Use JavaScript 2.0’s enhanced arrays In Chapter 2, we examined how our programs could use variables to store data for later retrieval. There is almost no limit to the number of variables a program can define. The number is limited only by the programmer’s ability to remember what each variable does. But you may sometimes be faced with the task of having to store dozens, or even hundreds, of related values into variable names for later use. For instance, how would you store the following? ■ The names of the 50 U.S. states ■ The names of the months of the year ■ The album titles of the CDs in your collection ■ The list of products in your store inventory You may be able to come up with ways to store the first two lists (state and month names) in JavaScript code, perhaps by assigning each name its own variable (for example, var Nebraska = "Nebraska"). But while this is possible, it’s not that practical. What’s the point of having variables (or even constants) whose value won’t ever change and whose value matches the variable name? So then, how could you store those types of lists (album titles and products in inventory)? After all, these lists could get quite large (your store could carry hundreds of products), the values can (and do) change, and even the length of the list will be different over time. JavaScript provides Array objects to handle lists of data. Arrays can handle long lists of data whose values can be easily retrieved or modified. Arrays can also grow or shrink as required. for (counter = 0; counter < 50; counter ++) { document.write ("State #" + counter + ": " + statesArray[counter]); } In the code, the variable statesArray contains an array of the 50 U.S. state names. We can access this array using its index (which ranges in value from 0 to 49) using the square brackets ([]) operator. statesArray[counter]; Of course, the code neglects to show how the Array object was created. There are two ways to create Array objects: ■ The Array class ■ The Array literal](https://image.slidesharecdn.com/3592018/75/How-To-Do-Everything-With-JavaScript-116-2048.jpg)
![CHAPTER 4: Organize Data into Arrays 97 Unfortunately, there is a little inconsistency between the official specifications and the way each of the major browser manufacturers has implemented arrays in JavaScript. In this chapter, we will examine how arrays are created and how to create code that works across all browsers. We will also take a look at some of the exciting improvements in arrays in JavaScript 2.0. Create an Array Object There are three ways to create an Array using the JavaScript Array class: 4 ■ new Array () ■ new Array (size) ■ new Array (element1, element2, ..., elementN) Create an Empty Array Passing no arguments to the constructor of the Array class creates an empty array, also called an array of zero length. (In JavaScript, the number of items inside an array is known as its length.) We can then populate the array manually, as follows. 1. We start by defining a variable to contain our array. var months; 2. We then create a new Array object using the new operator. var months = new Array(); 3. We manually assign a value to the first index of the array. Indexes start at value 0. var months = new Array(); months[0] = "January"; 4. Now our array has a length of 1. We can then populate the rest of the values for our array. var months = new Array(); months[0] = "January"; months[1] = "February"; months[2] = "March"; months[3] = "April"; months[4] = "May"; months[5] = "June"; months[6] = "July"; months[7] = "August"; months[8] = "September"; months[9] = "October"; months[10] = "November"; months[11] = "December";](https://image.slidesharecdn.com/3592018/75/How-To-Do-Everything-With-JavaScript-117-2048.jpg)
![98 How to Do Everything with JavaScript 5. We now have an array that can be accessed by the rest of our program using only its numerical index. var months = new Array(); months[0] = "January"; months[1] = "February"; months[2] = "March"; months[3] = "April"; months[4] = "May"; months[5] = "June"; months[6] = "July"; months[7] = "August"; months[8] = "September"; months[9] = "October"; months[10] = "November"; months[11] = "December"; for (var i = 0; i < 12; i++) { document.write (months[i] + "<br>"); } 6. As you can see here, JavaScript is able to store a list of related values (months of the year) into a single variable, and then easily access each of those values for later use.](https://image.slidesharecdn.com/3592018/75/How-To-Do-Everything-With-JavaScript-118-2048.jpg)
![CHAPTER 4: Organize Data into Arrays 99 7. A list such as this (months of the year) is convenient if you want your program to convert a numerical month into its string equivalent. Luckily, the Date object’s getMonth() function returns the month in a range of 0 to 11, so we do not even have to adjust the value before using it. var today = new Date(); var monthnum = today.getMonth(); document.write ("Today is a lovely " + months[monthnum] + " day."); 4 Specify an Initial Array Length JavaScript allows you to specify an initial length for your array by passing a single integer as a parameter. var months = new Array(12); Setting the length of an array in advance like this provides few advantages in JavaScript 1.5, since arrays grow automatically. Perhaps the one benefit it does provide is to remind you how large an array you intended to define. The length of an array can also be set within the program by altering the length property of the Array object. var months = new Array(); months.length = 12;](https://image.slidesharecdn.com/3592018/75/How-To-Do-Everything-With-JavaScript-119-2048.jpg)
![100 How to Do Everything with JavaScript Create and Initialize an Array in One Line of Code Looking at the months array defined earlier, we ended up writing 13 lines of code just to create and initialize the array. It would be nice if we could create this same array using only one line of code. Of course, I wouldn’t have mentioned it if JavaScript couldn’t do it... var months = new Array ("January", "February", "March", "April", "May", "June", "July", "August", "September", "October", "November", "December"); The constructor of the Array class also accepts a comma-separated list of the initial values of the array. The first item listed is assigned the index 0, the next item becomes index 1, and so on. This is especially helpful for long lists of items. For instance, if we needed an array containing the 50 U.S. states, it would be much easier to create it in one line of code, as opposed to 51 or more. var USStates = new Array ("Alabama", "Alaska", "Arizona", "Arkansas", "California", "Colorado", "Connecticut", "Delaware", "Florida", "Georgia", "Hawaii", "Idaho", "Illinois", "Indiana", "Iowa", "Kansas", "Kentucky", "Louisiana", "Maine", "Maryland", "Massachusetts", "Michigan", "Minnesota", "Mississippi", "Missouri", "Montana", "Nebraska", "Nevada", "New Hampshire", "New Jersey", "New Mexico", "New York", "North Carolina", "North Dakota", "Ohio", "Oklahoma", "Oregon", "Pennsylvania", "Rhode Island", "South Carolina", "South Dakota", "Tennessee", "Texas", "Utah", "Vermont", "Virginia", "Washington", "West Virginia", "Wisconsin", "Wyoming"); Use Array Literals Just as JavaScript provides ways to create numbers, strings, and regular expressions without having to manually create an object, you can do the same thing with arrays. var months = ["January", "February", "March", "April", "May", "June", "July", "August", "September", "October", "November", "December"]; Break Long Lines of Code into Several Lines To make long lines of code more readable (to yourself and other programmers looking at your code), it is a wise idea to include a carriage return before the text scrolls off the right side of the screen. JavaScript supports code written over several lines, as long they are placed in the proper places. JavaScript will ignore extra spaces and new line characters, as it considers the semicolon (;) the actual end of the statement.](https://image.slidesharecdn.com/3592018/75/How-To-Do-Everything-With-JavaScript-120-2048.jpg)
![CHAPTER 4: Organize Data into Arrays 101 The square brackets in the preceding code cause JavaScript to interpret their contents as the contents of a new array. It is equivalent to creating an array using the proper constructor syntax. var months = new Array("January", "February", "March", "April", "May", "June", "July", "August", "September", "October", "November", "December"); All the properties and methods of the Array object are available to objects created using the Array literal. 4 Call the Properties and Methods of the Array Object The Array object in JavaScript exposes only three properties. Two of those properties are only set when the array being called is the result of a regular expression pattern match, as discussed in Chapter 3. The length property (which is available to all arrays) is the only one of the three that can be modified, as it indicates the current length of the array. Property Description index Related to regular expression pattern matching; contains the index of the matching substring (read-only) input Related to regular expression pattern matching; contains the original string against which the match was made (read-only) length Retrieves or sets the length of the array Not every element in an array has to contain a value. You could just as easily create an array that skips every second index number, or skips an arbitrary number of index numbers. The length property takes into account the number of empty (unused) indexes in an array as well as the number of elements an array contains. So if you skip a large amount of index numbers, the length property will be much larger than the number of elements. var employee = new Array(); employee[127756] = "Tom Jones"; alert(employee.length); This code returns 127,757 as the length of the array, since that is the number of elements (including empty ones) from 0 through 127,756.](https://image.slidesharecdn.com/3592018/75/How-To-Do-Everything-With-JavaScript-121-2048.jpg)
![104 How to Do Everything with JavaScript The results from these array manipulations can be seen in the following screenshot. Set and Retrieve Values in an Array Elements inside the JavaScript Array object are accessed using the square brackets operator. var myArray = new Array(); myArray[16] = "Some value"; document.write (myArray[16]); The number inside the square brackets is called the index. You can think of an array as a series of parking spaces, numbered from 0 up to infinity. When the valet parks your car in one of those spaces, he has to keep note of the spot number in order to be able to find your car again. JavaScript arrays support using strings as indexes. When a string is used as an index, this is called a hash table. var FruitColors = new Array(); FruitColors["Apple"] = "red"; FruitColors["Banana"] = "yellow"; FruitColors["Grape"] = "purple";](https://image.slidesharecdn.com/3592018/75/How-To-Do-Everything-With-JavaScript-124-2048.jpg)
![CHAPTER 4: Organize Data into Arrays 105 Here, the string "Apple" is being used as the index to store the value "red". The string "Apple" can be referred to as the key. Values stored in hash tables can be retrieved using the key, just as they can with numerically indexed arrays. document.write ("Apples are " + FruitColors["Apple"] + ".<br>"); document.write ("Bananas are " + FruitColors["Banana"] + ".<br>"); document.write ("Grapes are " + FruitColors["Grape"] + ".<br>"); As we saw in Chapter 2, arrays can also be accessed using the for-in statement. The for-in statement will loop through each of the elements in an array, returning the indexes or keys. 4 var FruitColors = new Array(); FruitColors["Apple"] = "red"; FruitColors["Banana"] = "yellow"; FruitColors["Grape"] = "purple"; for (var fruit in FruitColors) { document.write (fruit + "s are " + FruitColors[fruit] + ".<br>"); } Here, the for-in loop iterates over the document.write() function three times, once for each of the items in the array. The resulting output can be seen in Figure 4-1. FIGURE 4-1 The for-in loop iterates over a hash table.](https://image.slidesharecdn.com/3592018/75/How-To-Do-Everything-With-JavaScript-125-2048.jpg)
![106 How to Do Everything with JavaScript The same technique can be used for arrays with numerical indexes: var Players = new Array(); Players[0] = "Jaime"; Players[1] = "Mom"; Players[2] = "Bart"; Players[3] = "Liez'l"; // Who do we have playing bridge? for (var name in Players) { document.write (name + ": "); document.write (Players[name] + " is playing bridge.<br>"); } As you can see from the output in Figure 4-2, the for-in loop was able to iterate over each of our bridge players as well. FIGURE 4-2 The for-in loop iterates over an array.](https://image.slidesharecdn.com/3592018/75/How-To-Do-Everything-With-JavaScript-126-2048.jpg)
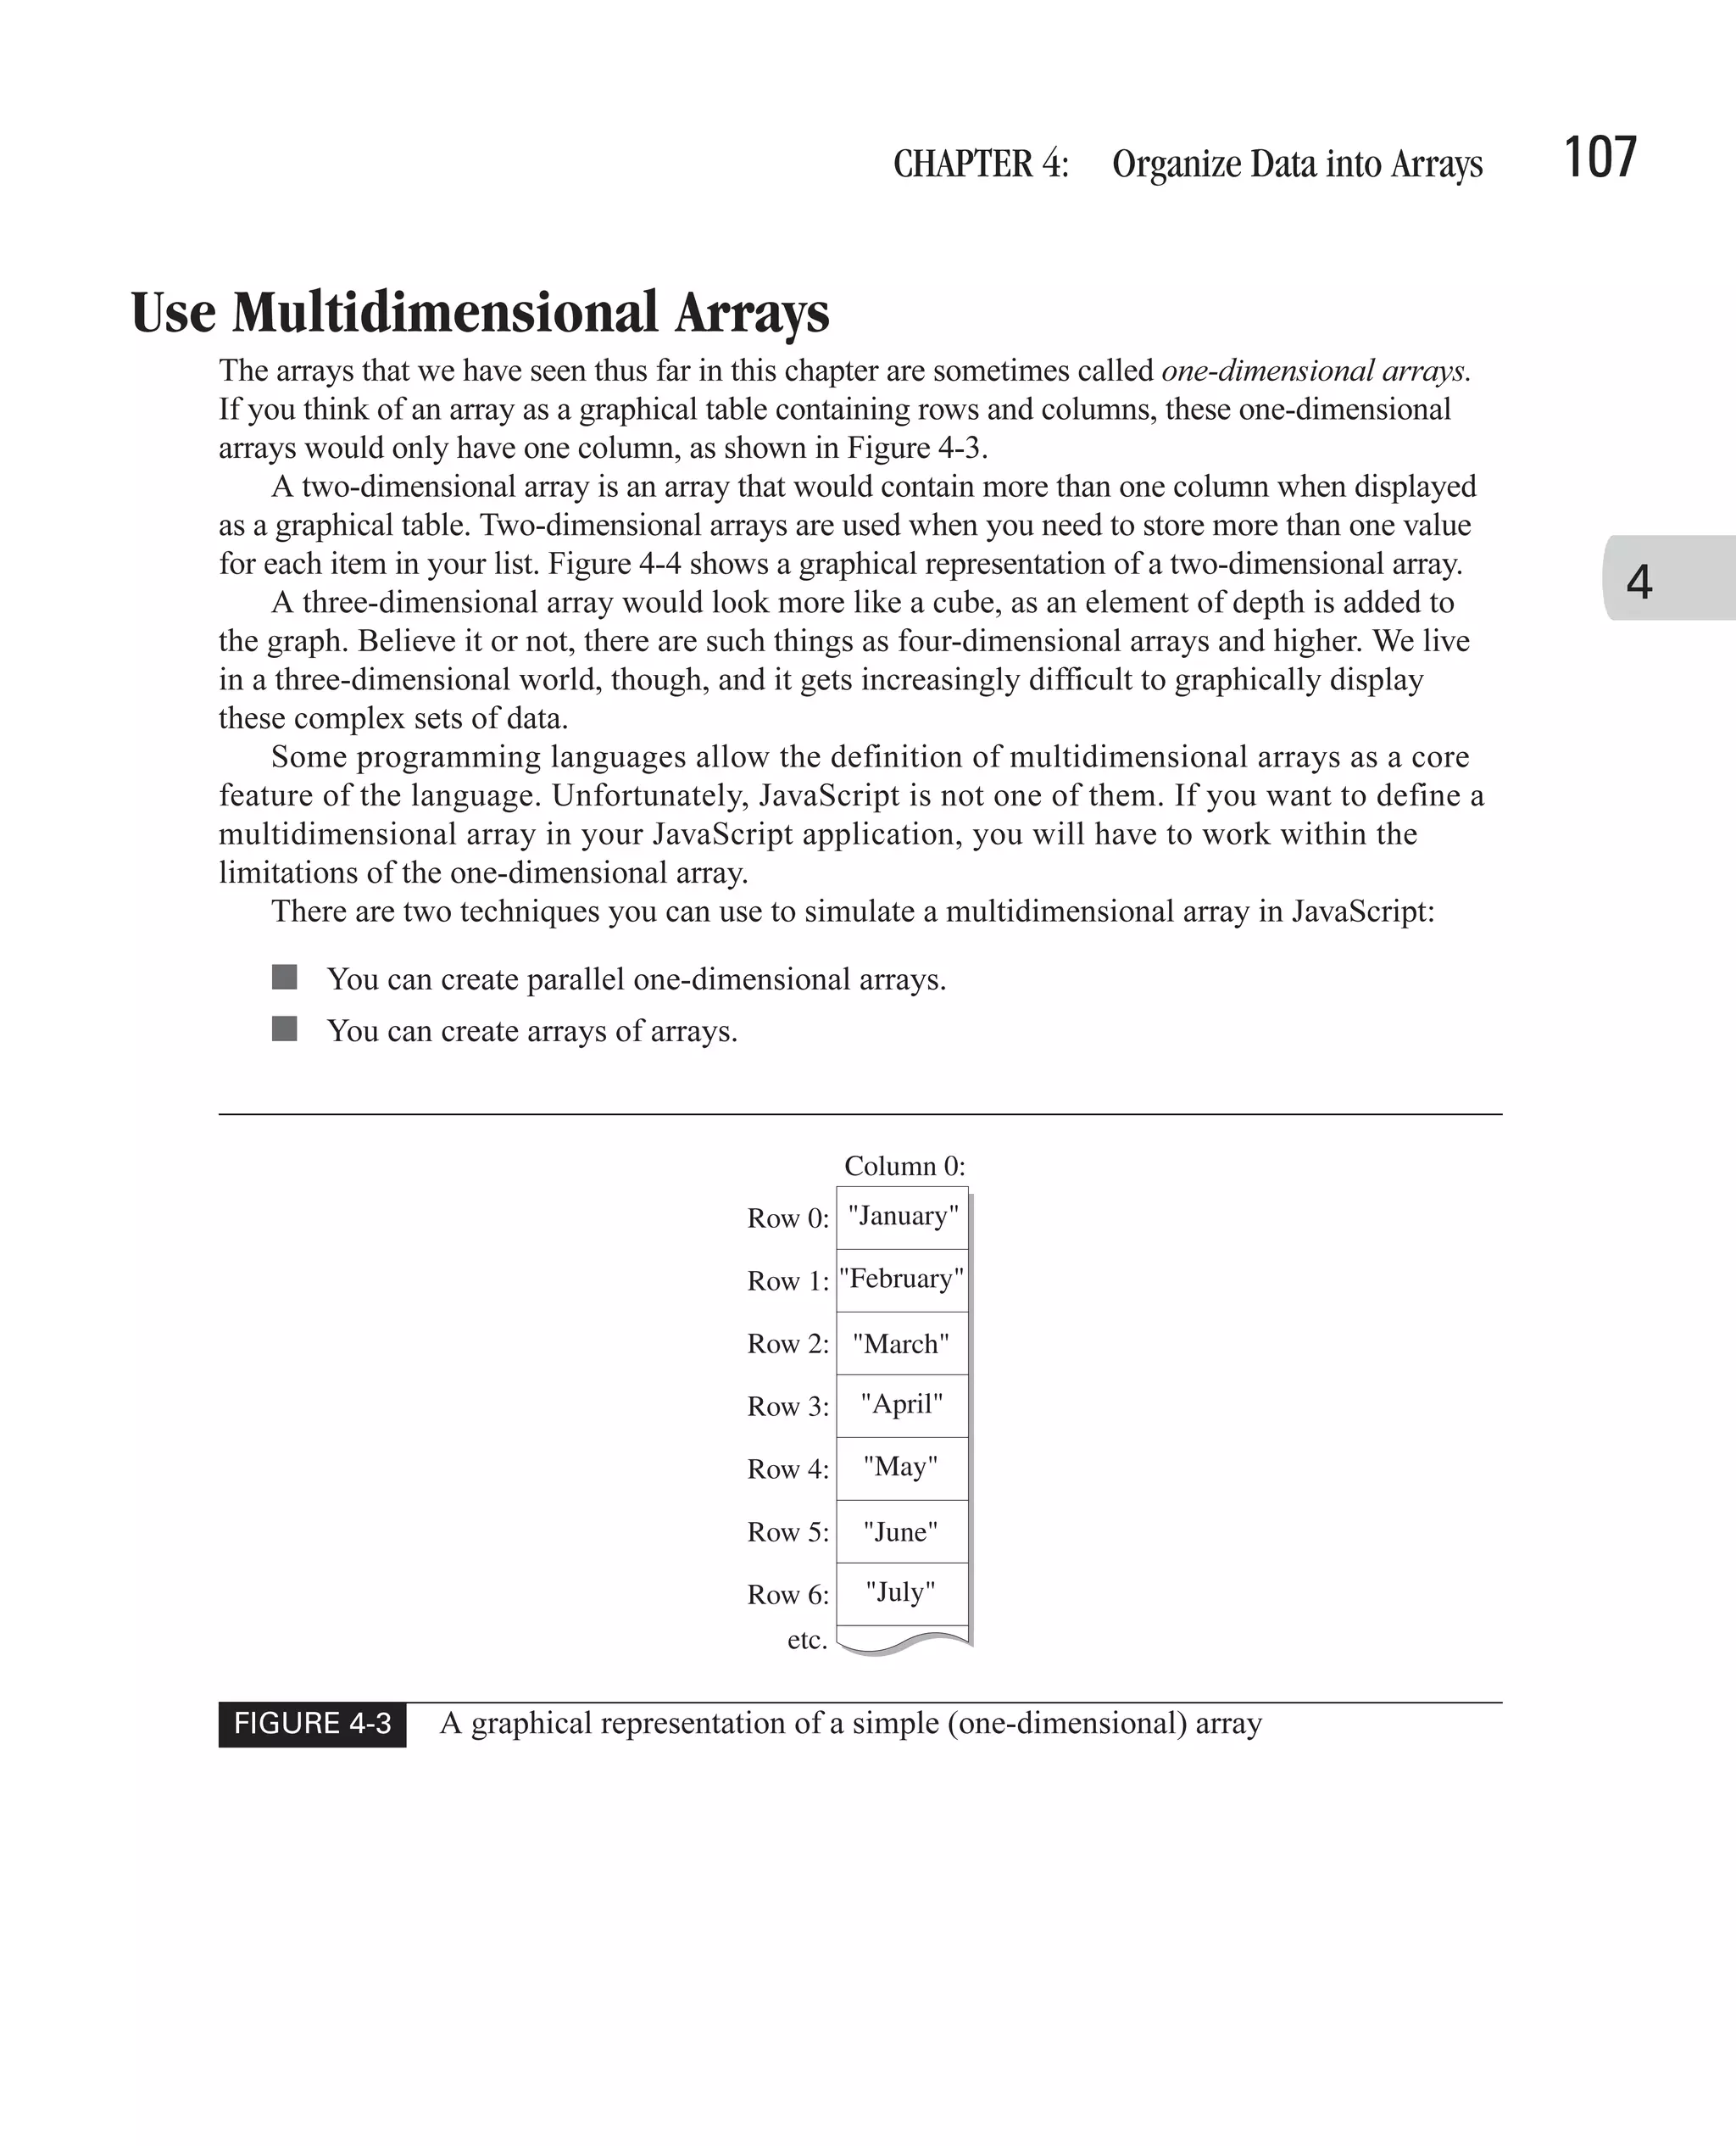
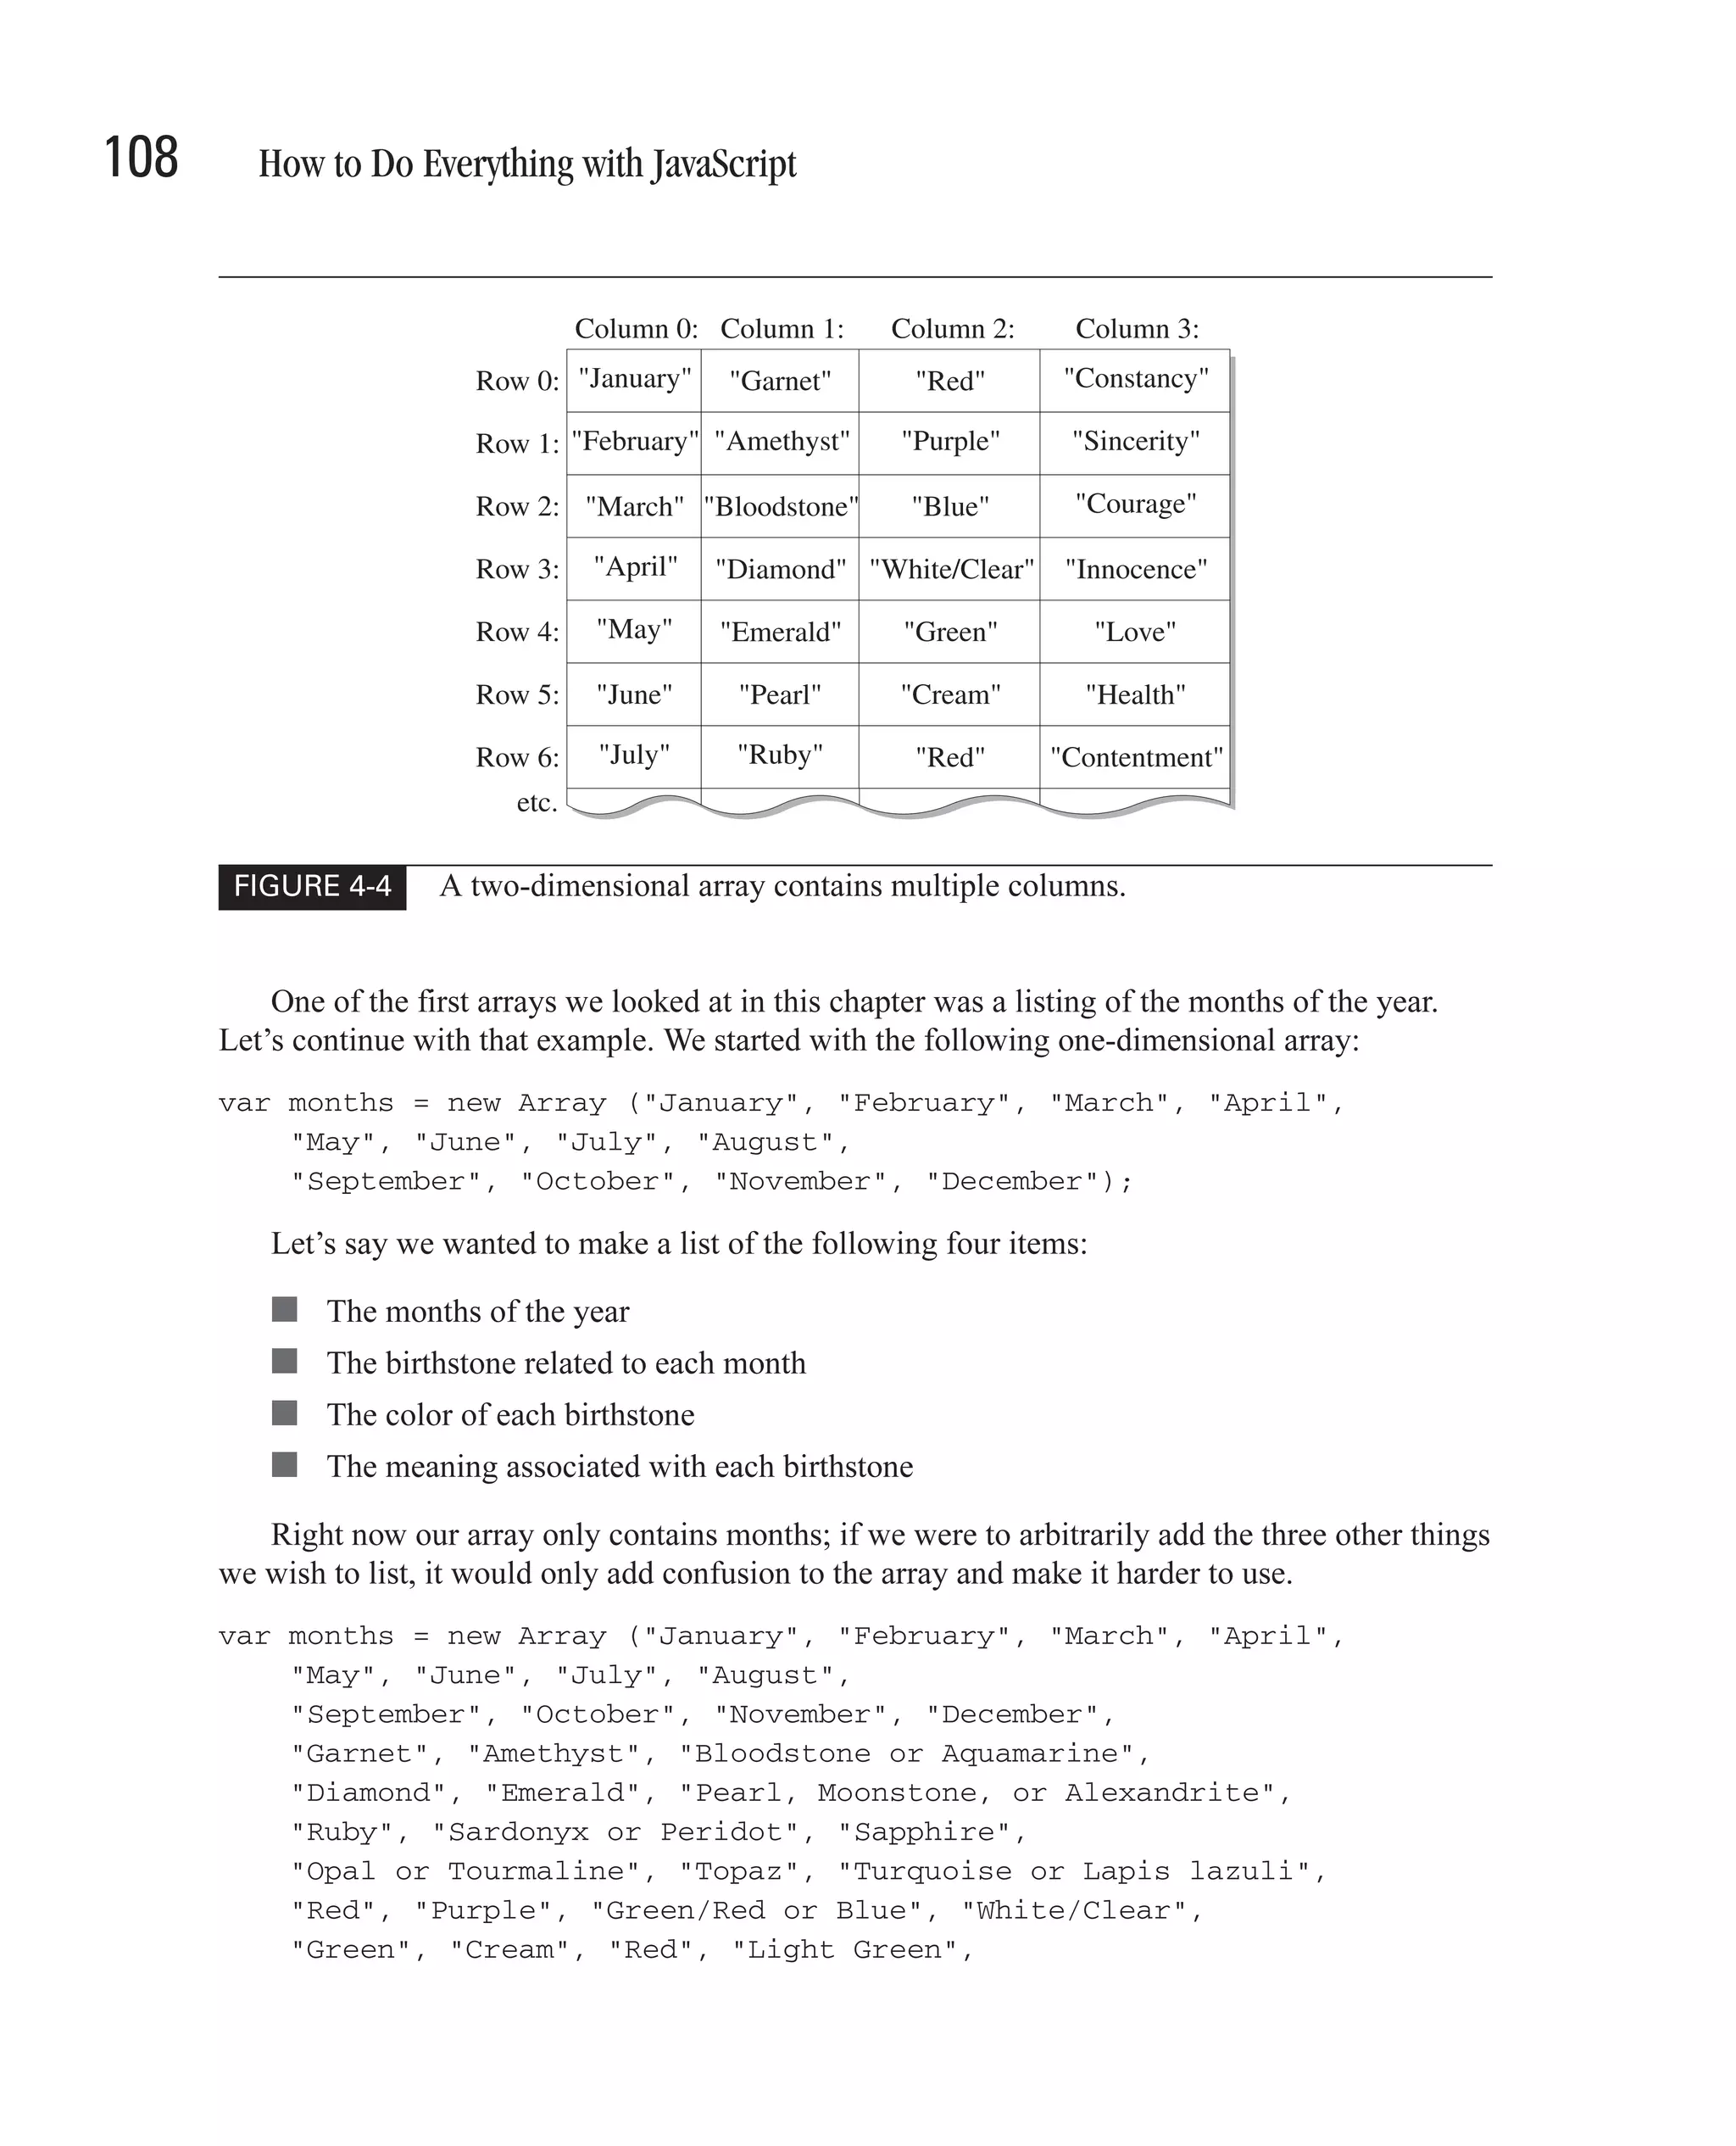
![CHAPTER 4: Organize Data into Arrays 109 "Blue", "Many Colors", "Orange/Brown", "Blue", "Constancy", "Sincerity", "Courage", "Innocence", "Love and success", "Health and longevity", "Contentment", "Married happiness", "Clear thinking", "Hope", "Fidelity", "Prosperity"); As you can see from this code, simply adding the extra lists to the existing array is not the best solution. Not only is it difficult for humans to read and understand, the programmer will also have to be careful when creating the program so that things don’t get mixed up. 4 We can rewrite that messy array using four parallel arrays, as follows. var months = new Array ("January", "February", "March", "April", "May", "June", "July", "August", "September", "October", "November", "December"); var stones = new Array ("Garnet", "Amethyst", "Bloodstone or Aquamarine", "Diamond", "Emerald", "Pearl, Moonstone, or Alexandrite", "Ruby", "Sardonyx or Peridot", "Sapphire", "Opal or Tourmaline", "Topaz", "Turquoise or Lapis lazuli"); var colors = new Array ("Red", "Purple", "Green/Red or Blue", "White/Clear", "Green", "Cream", "Red", "Light Green", "Blue", "Many Colors", "Orange/Brown", "Blue"); var meaning = new Array ("Constancy", "Sincerity", "Courage", "Innocence", "Love and success", "Health and longevity", "Contentment", "Married happiness", "Clear thinking", "Hope", "Fidelity", "Prosperity"); The elements in each of the arrays match exactly to the same indexes in the other arrays, so let’s say I want to find out something about the seventh month of the year. (Remember that the arrays start at index 0, so the seventh month of the year is described at element number 6.) document.write ("The seventh month is <b>" + months[6]); document.write ("</b>. Its birthstone is <b>"); document.write (stones[6] + "</b>. The " + stones[6]); document.write (" is a <b>" + colors[6] + "</b> colored stone, "); document.write ("and it means <b>" + meaning[6] + "</b>"); document.write (" traditionally.<br>"); In this manner, we are able to store several columns of information about each month, by defining them in their own arrays. We can see the results of this code in our web browser screenshot in Figure 4-5.](https://image.slidesharecdn.com/3592018/75/How-To-Do-Everything-With-JavaScript-129-2048.jpg)
![110 How to Do Everything with JavaScript FIGURE 4-5 The use of parallel arrays can simulate two-dimensional arrays. The other method of creating a multidimensional array is to create an array that contains other arrays—an array of arrays, as this is called. To create an array of arrays, you would go through the following steps. 1. First, define the four arrays, just as you would if you were defining parallel arrays. var months = new Array ("January", "February", ...); var stones = new Array ("Garnet", " Amethyst", ...); var colors = new Array ("Red", "Purple", ...); var meanings = new Array ("Constancy", "Sincerity", ...); 2. Next, define a master array that will hold all four arrays. var marray = new Array(); 3. Then, assign each of the four arrays that contain the data to this master array. var marray = new Array(); marray[0] = months;](https://image.slidesharecdn.com/3592018/75/How-To-Do-Everything-With-JavaScript-130-2048.jpg)
![CHAPTER 4: Organize Data into Arrays 111 marray[1] = stones; marray[2] = colors; marray[3] = meanings; 4. You should then modify your program to access the subarrays using the name of the master array with the appropriate index to the array. var marray = new Array(); marray[0] = months; 4 marray[1] = stones; marray[2] = colors; marray[3] = meanings; document.write ("The fourth month is <b>" + marray[0][3]); document.write ("</b>. Its birthstone is <b>"); document.write (marray[1][3] + "</b>. The " + marray[1][3]); document.write (" is a <b>" + marray[2][3] + "</b> " + "colored stone, "); document.write ("and it means <b>" + marray[3][3] + "</b>"); document.write (" traditionally.<br>"); As you see, instead of referring to the array as months[3], we must now refer to it using the name and index of the master array, as in marray[0][3]. As you can see in Figure 4-6, this technique is also a valid way to create two-dimensional arrays. Use JavaScript 2.0’s Enhanced Arrays JavaScript 2.0 has added three distinct subclasses to the traditional Array class. Each subclass is very similar to the way arrays have always worked in JavaScript, with some unique differences. Table 4-2 lists the traditional Array class and the three new classes, and describes the different classes. Array Object Name Description Array [datatype] This (the original Array class) is an abstract class. When called, it returns a DynamicArray object. If no data type is specified, it defaults to type Object. StaticArray [datatype] This new subclass does not automatically grow when new elements are added. It cannot contain empty elements and cannot be called without a data type. DynamicArray [datatype] This new subclass is the traditional JavaScript Array object. It cannot be called without a data type. ConstArray [datatype] This new subclass creates an array of constants whose value cannot be changed once set. It cannot contain empty elements. If no data type is specified, it defaults to type Object. TABLE 4-2 Array Classes in JavaScript 2.0](https://image.slidesharecdn.com/3592018/75/How-To-Do-Everything-With-JavaScript-131-2048.jpg)
![112 How to Do Everything with JavaScript FIGURE 4-6 The array of arrays technique closely simulates true two-dimensional arrays. Each of the Array types is usually instantiated with a data type. Both Array and ConstArray provide defaults for the data type, while the others do not. The data type provided when defining an array restricts the contents of the array to objects of that data type only. In this section, we will examine each of the three new array types and see how they can be used in JavaScript programs. The StaticArray Class The StaticArray class creates arrays of predetermined length whose values can be modified at any time. There are two ways to create a new StaticArray: ■ new StaticArray [datatype] () ■ new StaticArray [datatype] (size) The JavaScript 2.0 specification says that StaticArrays must be defined with a data type. To create an array that can accept any data type, we can define the array to accept values of type](https://image.slidesharecdn.com/3592018/75/How-To-Do-Everything-With-JavaScript-132-2048.jpg)
![CHAPTER 4: Organize Data into Arrays 113 Object. Since Object is the parent data type of all classes in JavaScript, including those that you create yourself, Object arrays can accept any value. Creating a StaticArray without passing in a data type results in an array that can contain any object. Recall from the last chapter that Object is the data type of every class in the system, including those that you define yourself. var myArray : StaticArray = new StaticArray[Object](); myArray.length = 4; myArray[0] = "This is the first element"; 4 myArray[1] = 3.141; myArray[2] = new Car(2001, "Toyota", "4Runner", "Thundercloud"); myArray[3] = new Date(); This code creates a new StaticArray variable of type Object. We take advantage of this by storing a string, a number, a user-defined Car object, and a Date object into this array. Since the StaticArray has to have a predefined length, we started by initializing the length property of the array to the value 4, the number of items we intended to store. Attempting to add an additional item would cause a JavaScript error, unless we manually increased the value of the length. var myArray : StaticArray = new StaticArray[Object](); myArray.length = 5; myArray[0] = "This is the first element"; myArray[1] = 3.141; myArray[2] = new Car(2001, "Toyota", "4Runner", "Thundercloud"); myArray[3] = new Date(); myArray[4] = "This is a new element."; Providing a more specific data type, such as Number, would restrict the elements of the array to only that type. var mySecondArray : StaticArray = new StaticArray[Number](6); mySecondArray[0] = 14.2; mySecondArray[1] = 13; mySecondArray[2] = 21.9999; mySecondArray[3] = 2141330119; mySecondArray[4] = 0.0000003; mySecondArray[5] = 1.0121E26; Arrays of type StaticArray cannot have missing elements; that is, you cannot skip index numbers as you can with DynamicArrays. Attempting to add a string to a StaticArray that accepts only numbers will cause a JavaScript error. mySecondArray[5] = "This is not allowed.";](https://image.slidesharecdn.com/3592018/75/How-To-Do-Everything-With-JavaScript-133-2048.jpg)
![114 How to Do Everything with JavaScript The DynamicArray Class A DynamicArray is similar to a StaticArray, except that the size of the array will adjust itself automatically based on the elements you try to add to it. There are two ways to create a DynamicArray: ■ new DynamicArray [datatype] () ■ new DynamicArray [datatype] (size) This means that you can create an empty array and add elements to it without regard for the existing array length. var Nieces : DynamicArray = new DynamicArray[String](); Nieces[0] = "Sofia"; Nieces[1] = "Monica"; Nieces[2] = "Tiffany"; Nieces[3] = "Liz"; Nieces[4] = "Elke"; Nieces[5] = "Christine"; Nieces[6] = "Leah"; This DynamicArray, Nieces, can continue to grow to almost an unlimited size, limited only by the amount of computer memory. Another difference between DynamicArrays and the other types of arrays is that you are not obligated to fill every element. The following is valid code using DynamicArrays: var emps : DynamicArray = new DynamicArray[String](); emps[9931] = "John H. Smith"; Even though we have not provided values for indexes 0 through 9930, we can skip ahead to 9931 and provide a value for that element of the array. The ConstArray Class The third new array type supported by JavaScript 2.0 is ConstArray. ConstArrays are very similar to DynamicArrays, with three notable differences: ■ They can be defined without specifying a data type. ■ Their value cannot be changed once set. ■ They do not support skipped elements. There are four ways to create a new ConstArray: ■ new ConstArray () ■ new ConstArray (size)](https://image.slidesharecdn.com/3592018/75/How-To-Do-Everything-With-JavaScript-134-2048.jpg)
![CHAPTER 4: Organize Data into Arrays 115 ■ new ConstArray [datatype] () ■ new ConstArray [datatype] (size) The ConstArray class takes its cue from the JavaScript constant variable type. (We looked at constants in Chapter 2.) Once set, the value of a constant cannot be changed. var months : ConstArray = new ConstArray[String](12); months[0] = "January"; months[1] = "February"; 4 months[2] = "March"; months[3] = "April"; months[4] = "May"; months[5] = "June"; months[6] = "July"; months[7] = "August"; months[8] = "September"; months[9] = "October"; months[10] = "November"; months[11] = "December"; Since the names of the months of the year are not likely to change during the execution of our program, we can define them as constants. We are then free to access those strings later in our program using the same square brackets syntax described earlier in the chapter. The last two chapters have focused on the built-in classes provided by JavaScript, and in particular the new classes and data types provided by JavaScript 2.0. The next chapter is all about creating your own classes, in both JavaScript 1.5 and 2.0.](https://image.slidesharecdn.com/3592018/75/How-To-Do-Everything-With-JavaScript-135-2048.jpg)


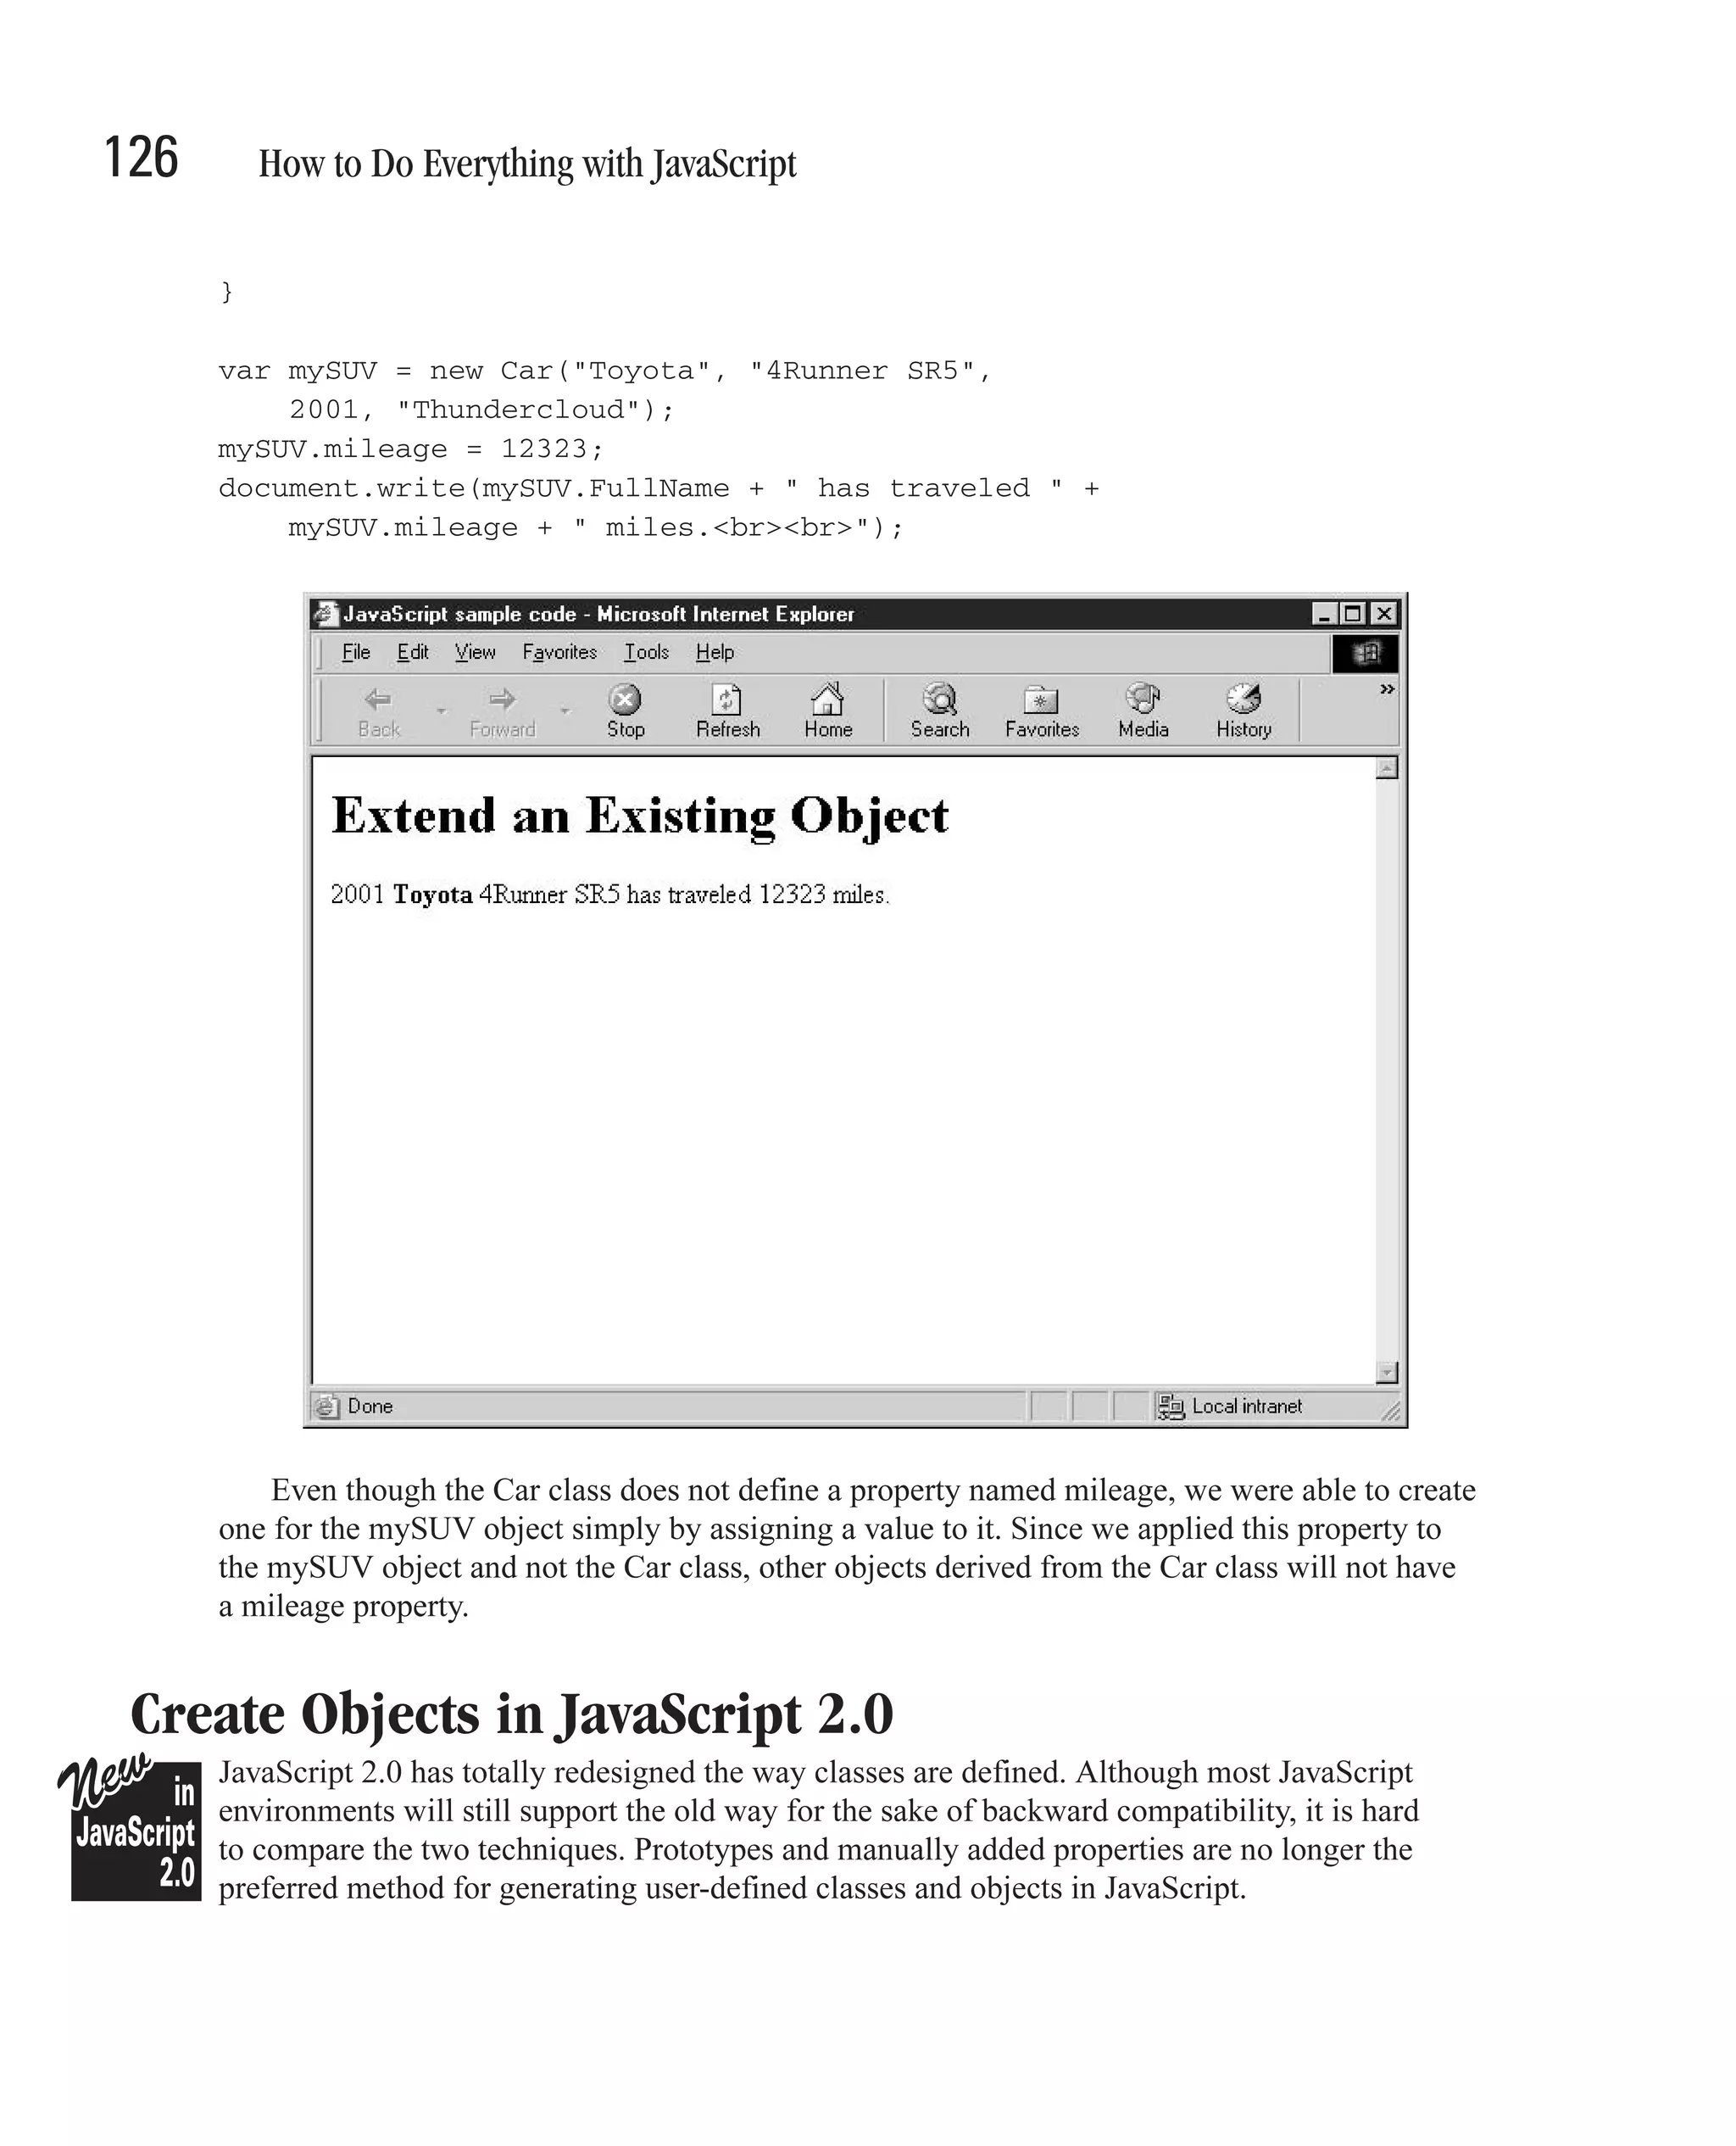
![128 How to Do Everything with JavaScript function Car (make, model, year, color) { this.Make = make; this.Model = model; this.Year = year; this.Color = color; this.FullName = this.Year + " " + "<b>" + this.Make + "</b> " + this.Model; } } 5. The Car class can be instantiated in the exact same manner as classes defined under JavaScript 1.x were, using the new keyword. var mySUV = new Car("Toyota", "4Runner SR5", 2001, "Thundercloud"); 6. With the mySUV object created, we can access any of the properties of the Car class. var mySUV = new Car("Toyota", "4Runner SR5", 2001, "Thundercloud"); document.write ("I drive a " + mySUV.FullName); It is easier to create methods using JavaScript 2.0 classes, as functions can be defined inside of the body of the class. class Book { var title : String; var author : String; var chapters : Array[String]; function print_title () { document.write ("Title: " + this.title + "<br>"); } function print_author () { document.write ("Author: " + this.author + "<br>"); } function print_all () { var counter = 0; print_title(); print_author(); for (chapter in this.chapters) { counter++; document.write ("Chapter " + counter + ": " + this.chapters[chapter] + "<br>"); }](https://image.slidesharecdn.com/3592018/75/How-To-Do-Everything-With-JavaScript-148-2048.jpg)
![CHAPTER 5: Create Your Own JavaScript Classes 129 } } Once the Book class is defined, we can create a Book object using the new keyword. Since our class does not have a constructor, we can then manually set each of the properties. Calling a method of that new object results in the behavior we expect. var thisBook = new Book(); thisBook.title = "How To Do Everything with JavaScript"; thisBook.author = "Scott Duffy"; thisBook.chapters = new Array(15); thisBook.chapters[0] = "Prepare to Program in JavaScript"; 5 thisBook.chapters[1] = "Learn JavaScript Fundamentals"; thisBook.chapters[2] = "Use Built-In JavaScript Classes"; thisBook.chapters[3] = "Organize Data into Arrays"; thisBook.chapters[4] = "Create Your Own JavaScript Classes"; // etc. thisBook.print_all(); This results in the following browser output.](https://image.slidesharecdn.com/3592018/75/How-To-Do-Everything-With-JavaScript-149-2048.jpg)


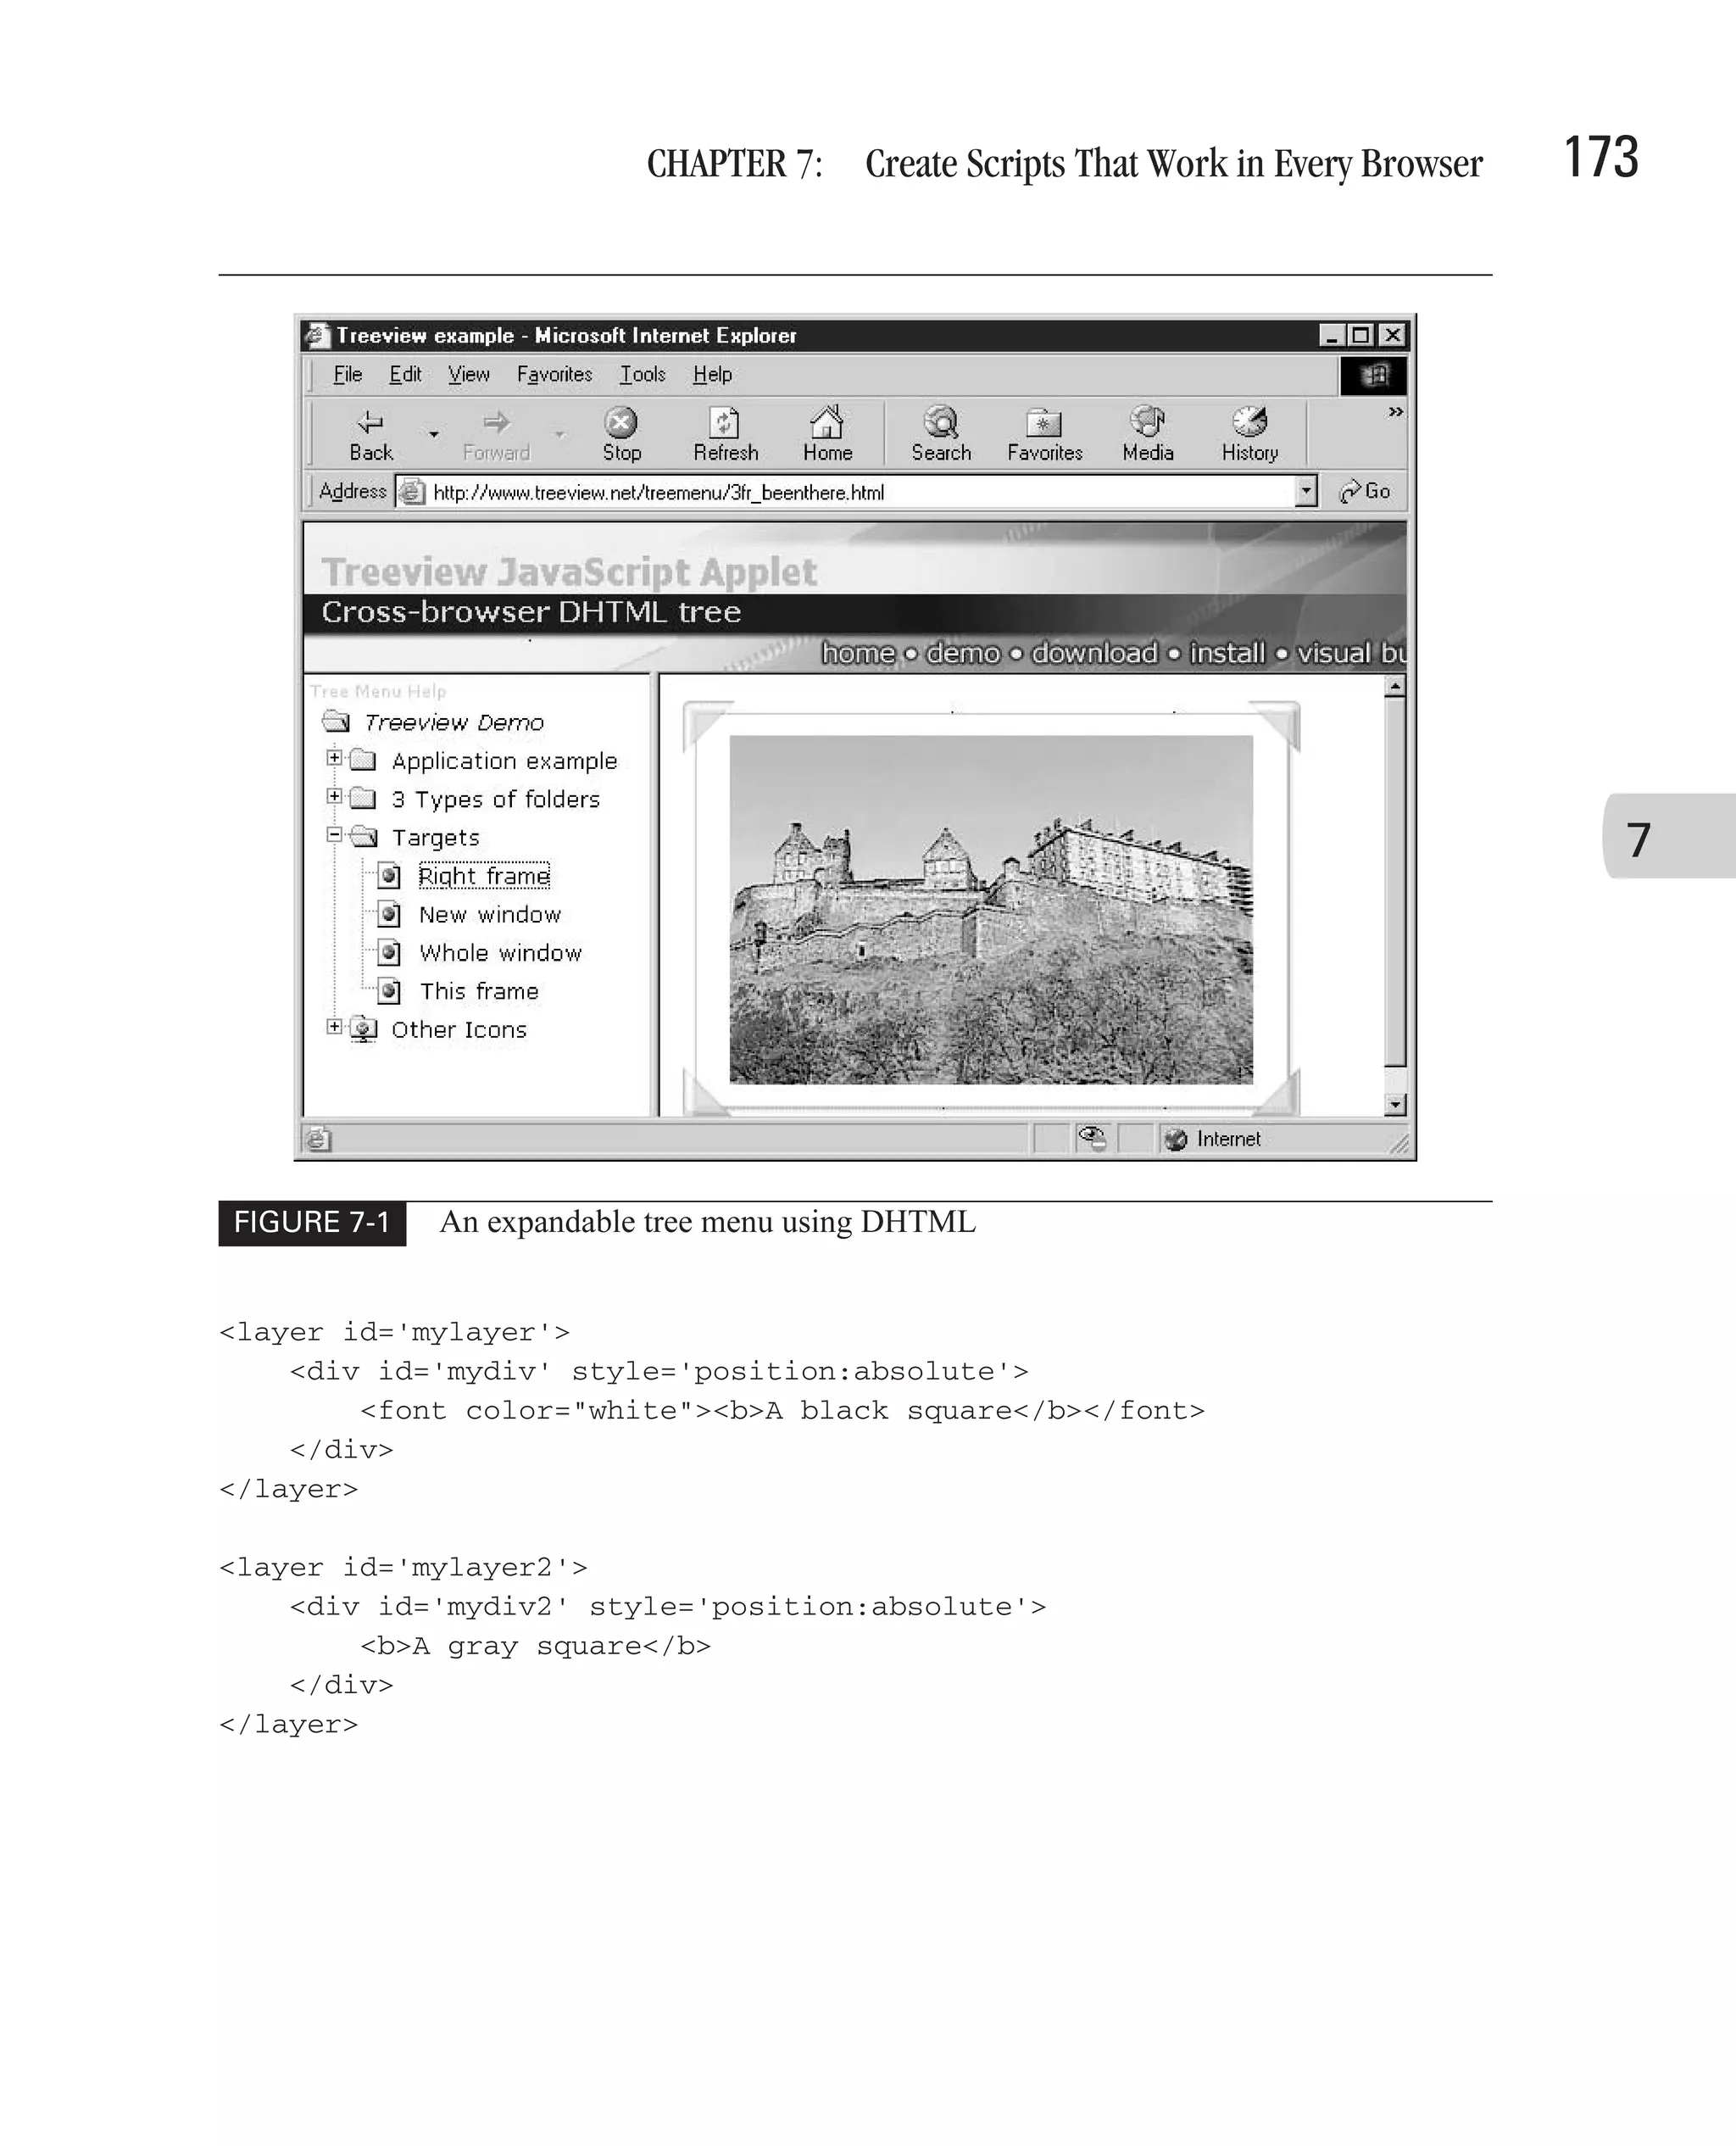
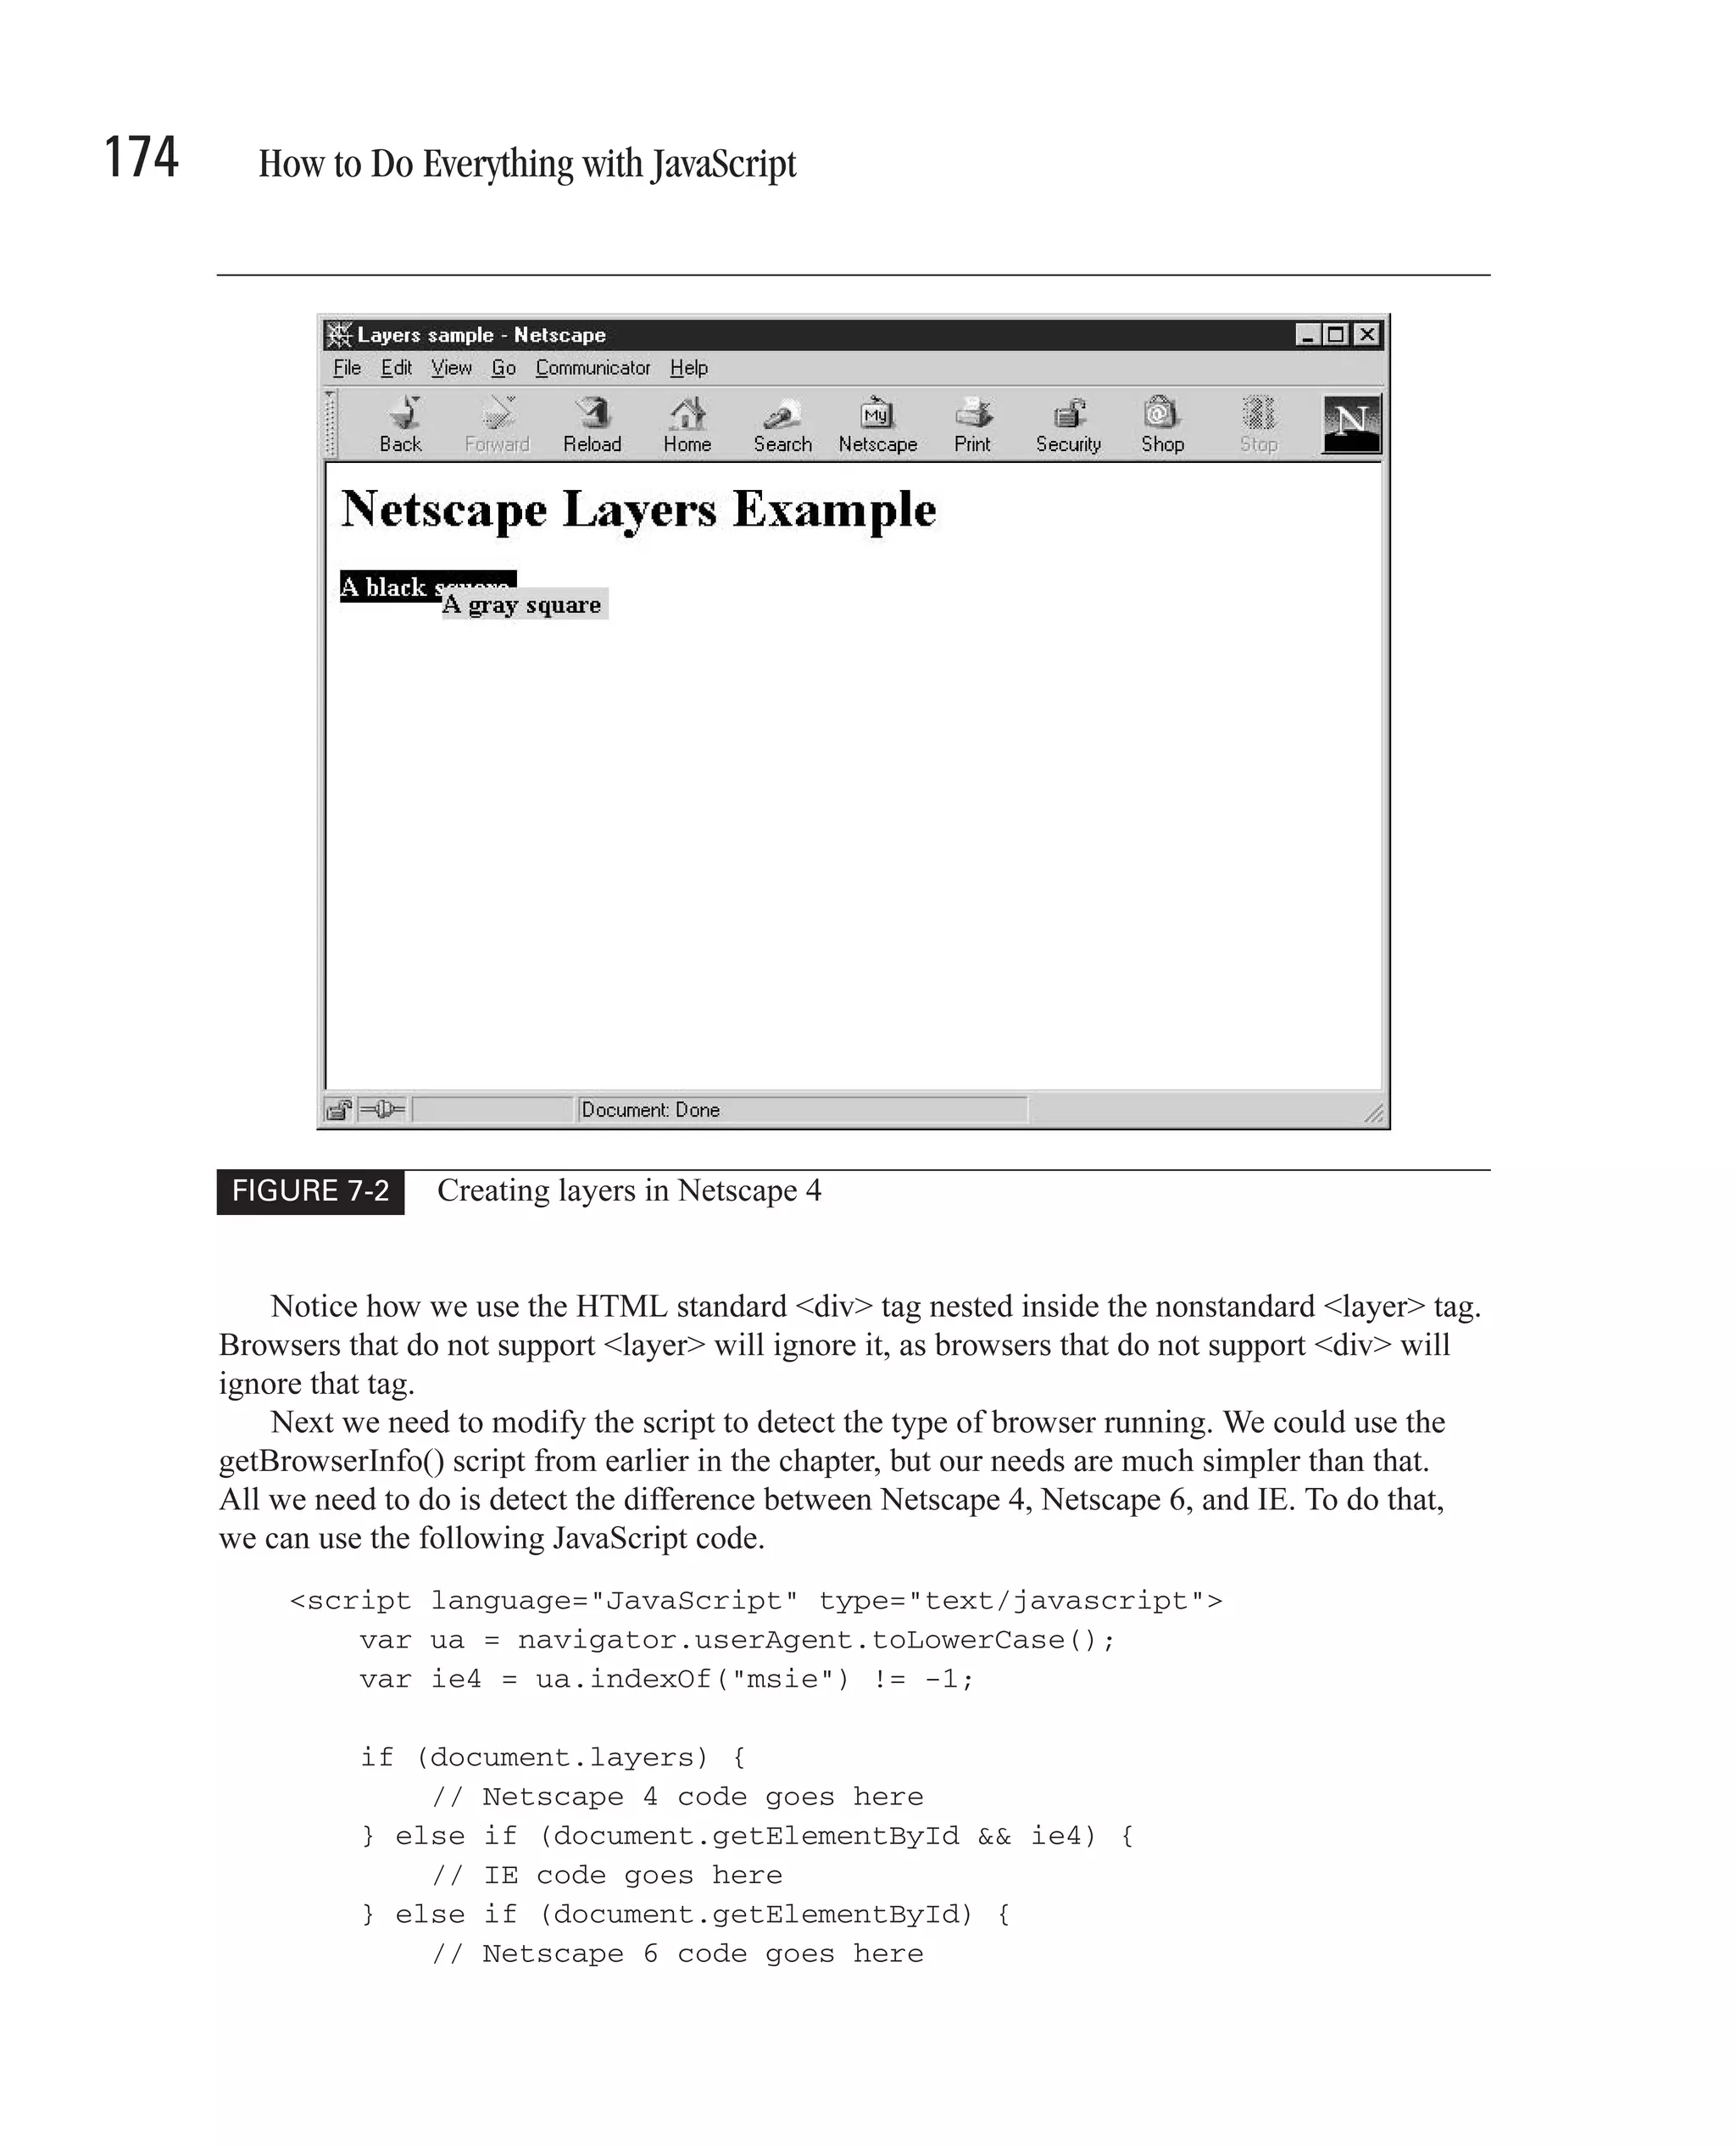
![172 How to Do Everything with JavaScript Figure 7-1 shows an example of a web page that uses DHTML. The hierarchical tree on the left side of the screen can be expanded and contracted with a simple mouse click. Menu items are displayed and hidden dynamically, without having to request new HTML from the web server. This type of DHTML menu gives a nice effect for visitors to your web page. One of the first difficulties you are likely to encounter is that Netscape 4 uses a method called layers to define areas of a web document that can have a style applied to them. <html> <head><title>Layers sample</title></head> <body> <h1>Netscape Layers Example</h1> <layer id="mylayer"> <font color="white"><b>A black square</b></font> </layer> <layer id="mylayer2"> <b>A gray square</b> </layer> <script language="JavaScript" type="text/javascript"> document.layers["mylayer"].bgColor = "black"; document.layers["mylayer2"].bgColor = "#CCCCCC"; document.layers["mylayer2"].moveBy (60, 10); </script> </body> </html> This HTML code is designed to work in Netscape 4.x web browsers only. Our code defines a Netscape layer named mylayer using the HTML <layer> tag. We define a second layer named mylayer2. Using JavaScript, we are able to change the background colors of the two layers, and move one of them so that they don’t completely overlap. The effect can be seen in Figure 7-2. Unfortunately, the preceding code does not work in any version of IE or in the newer Netscape 6 browsers. We will have to modify our code a little to detect the type of browser running, and perform different tasks based on that. First, we need to change the layers to work in all browsers. The following code does not properly conform to HTML standards (since the <layer> tag is not part of the standard), but it will work in both IE and Netscape.](https://image.slidesharecdn.com/3592018/75/How-To-Do-Everything-With-JavaScript-192-2048.jpg)
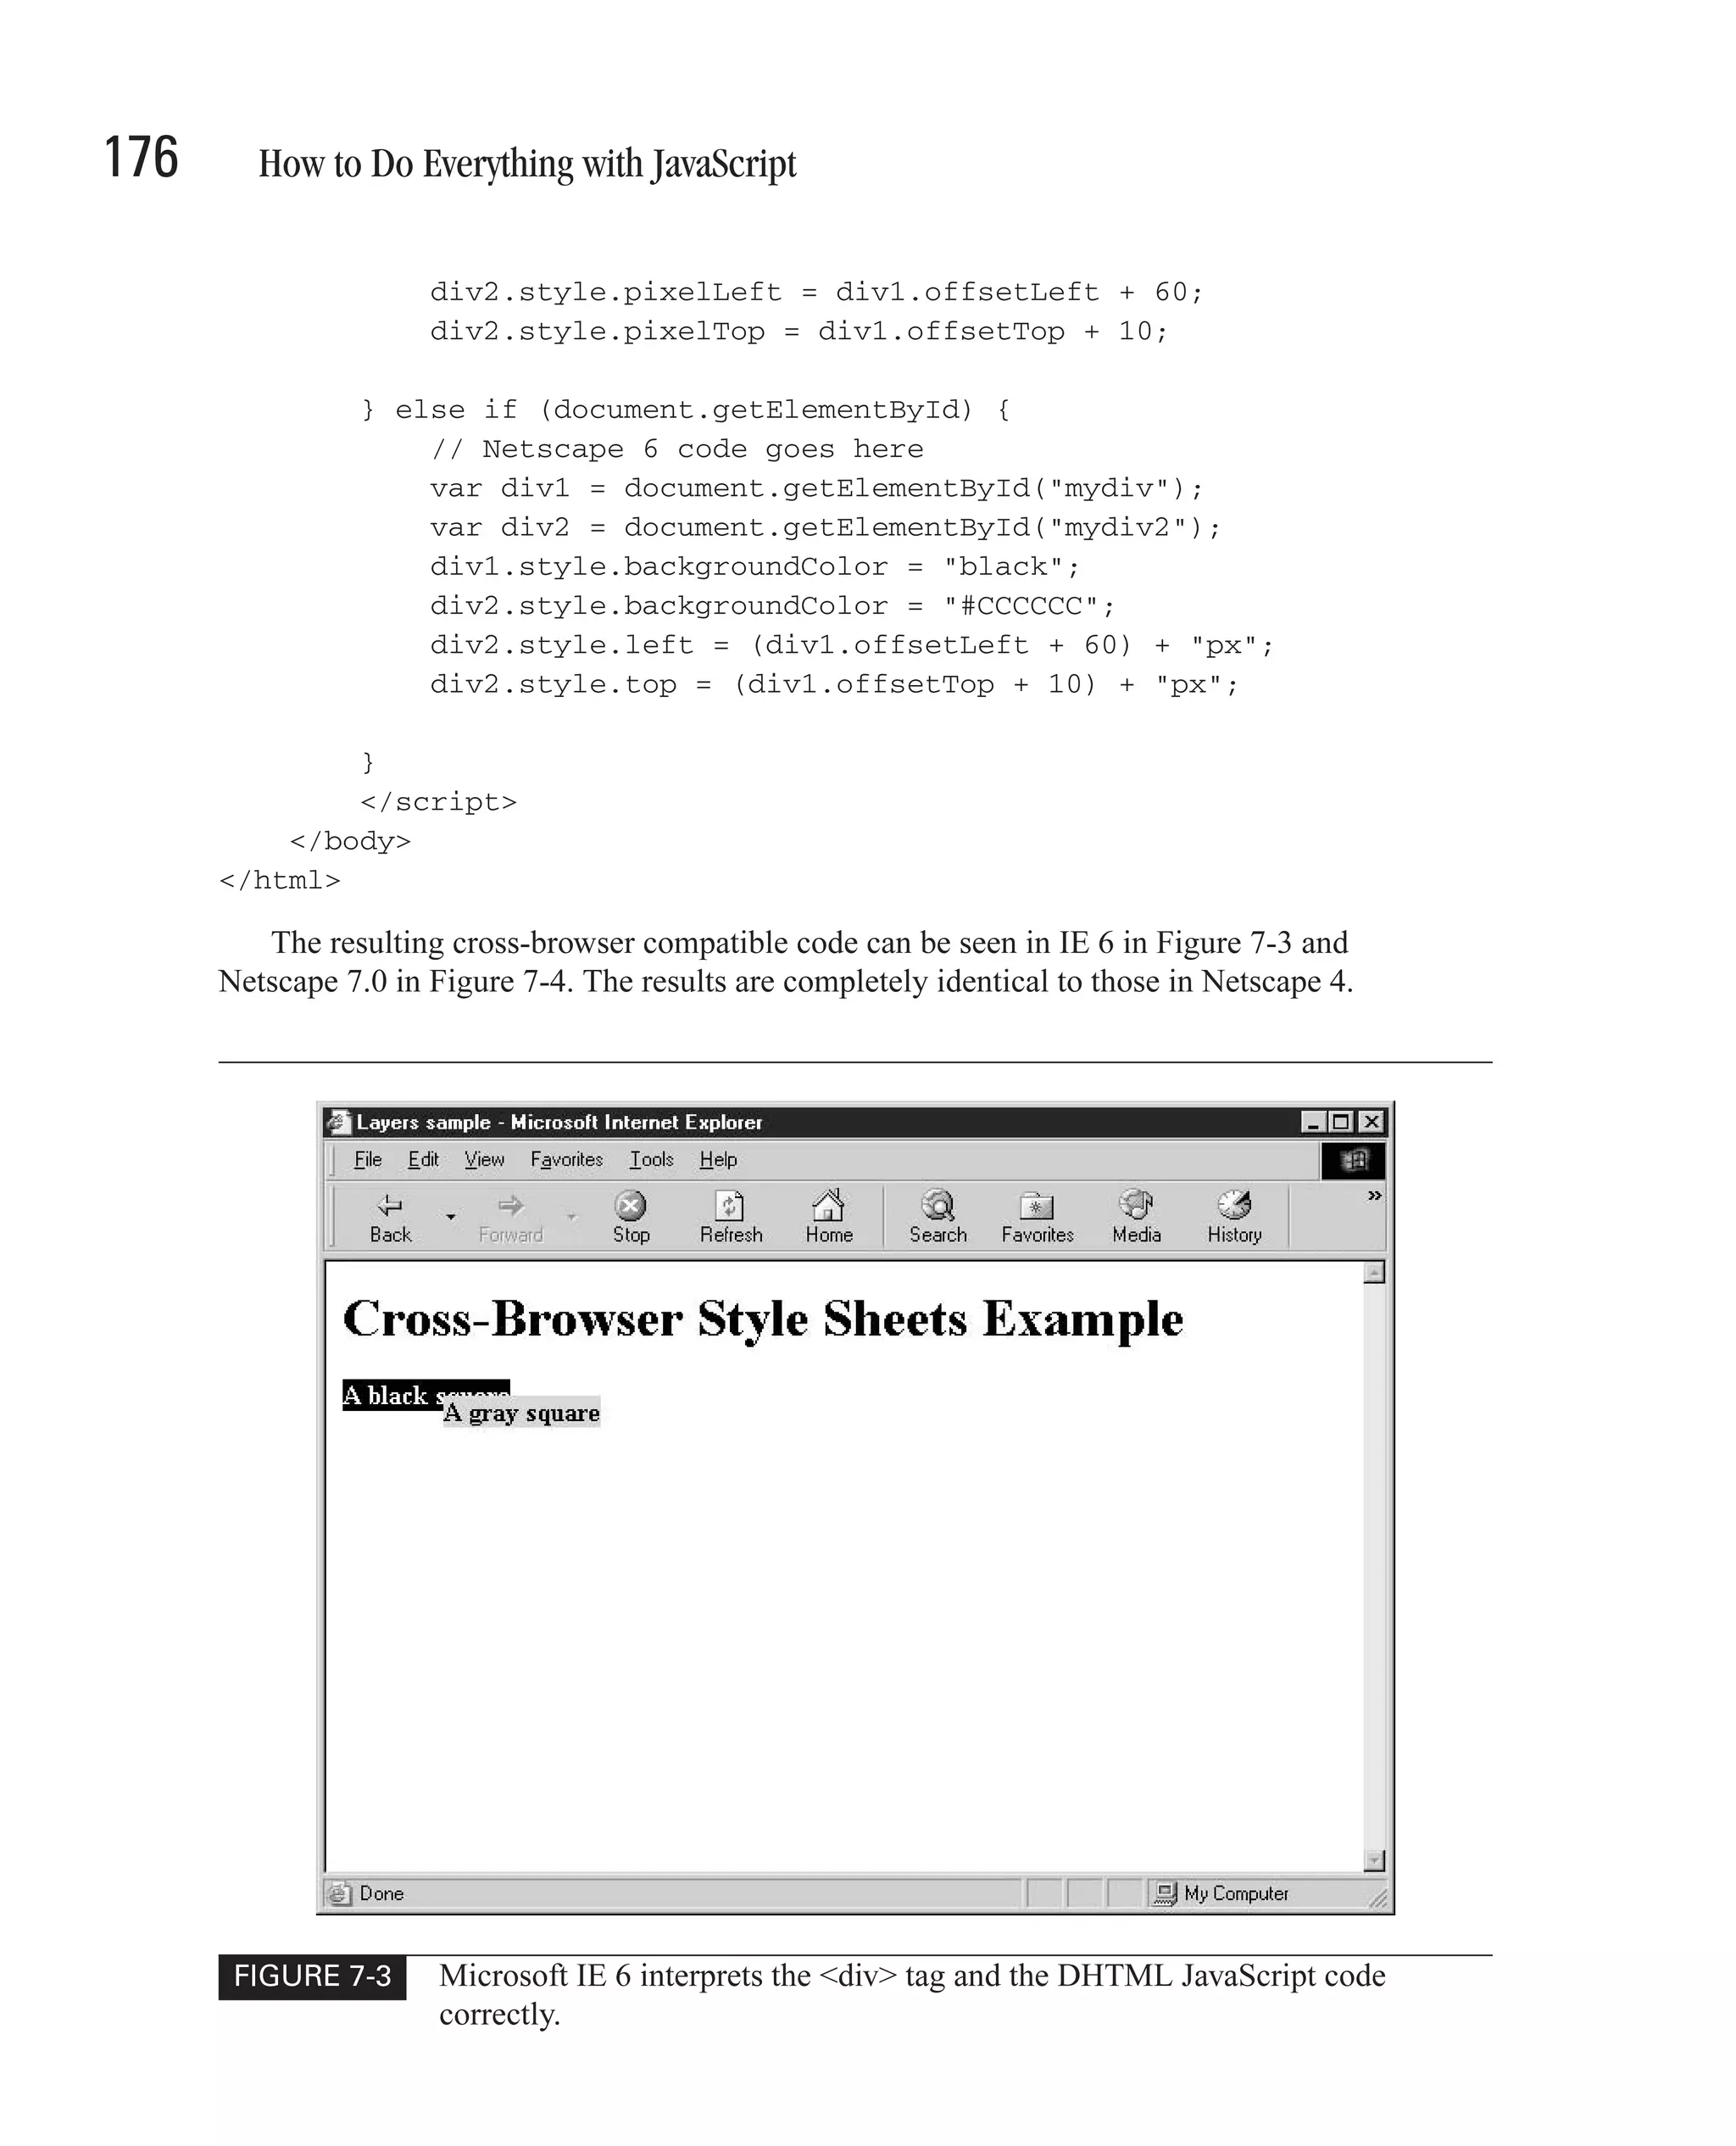
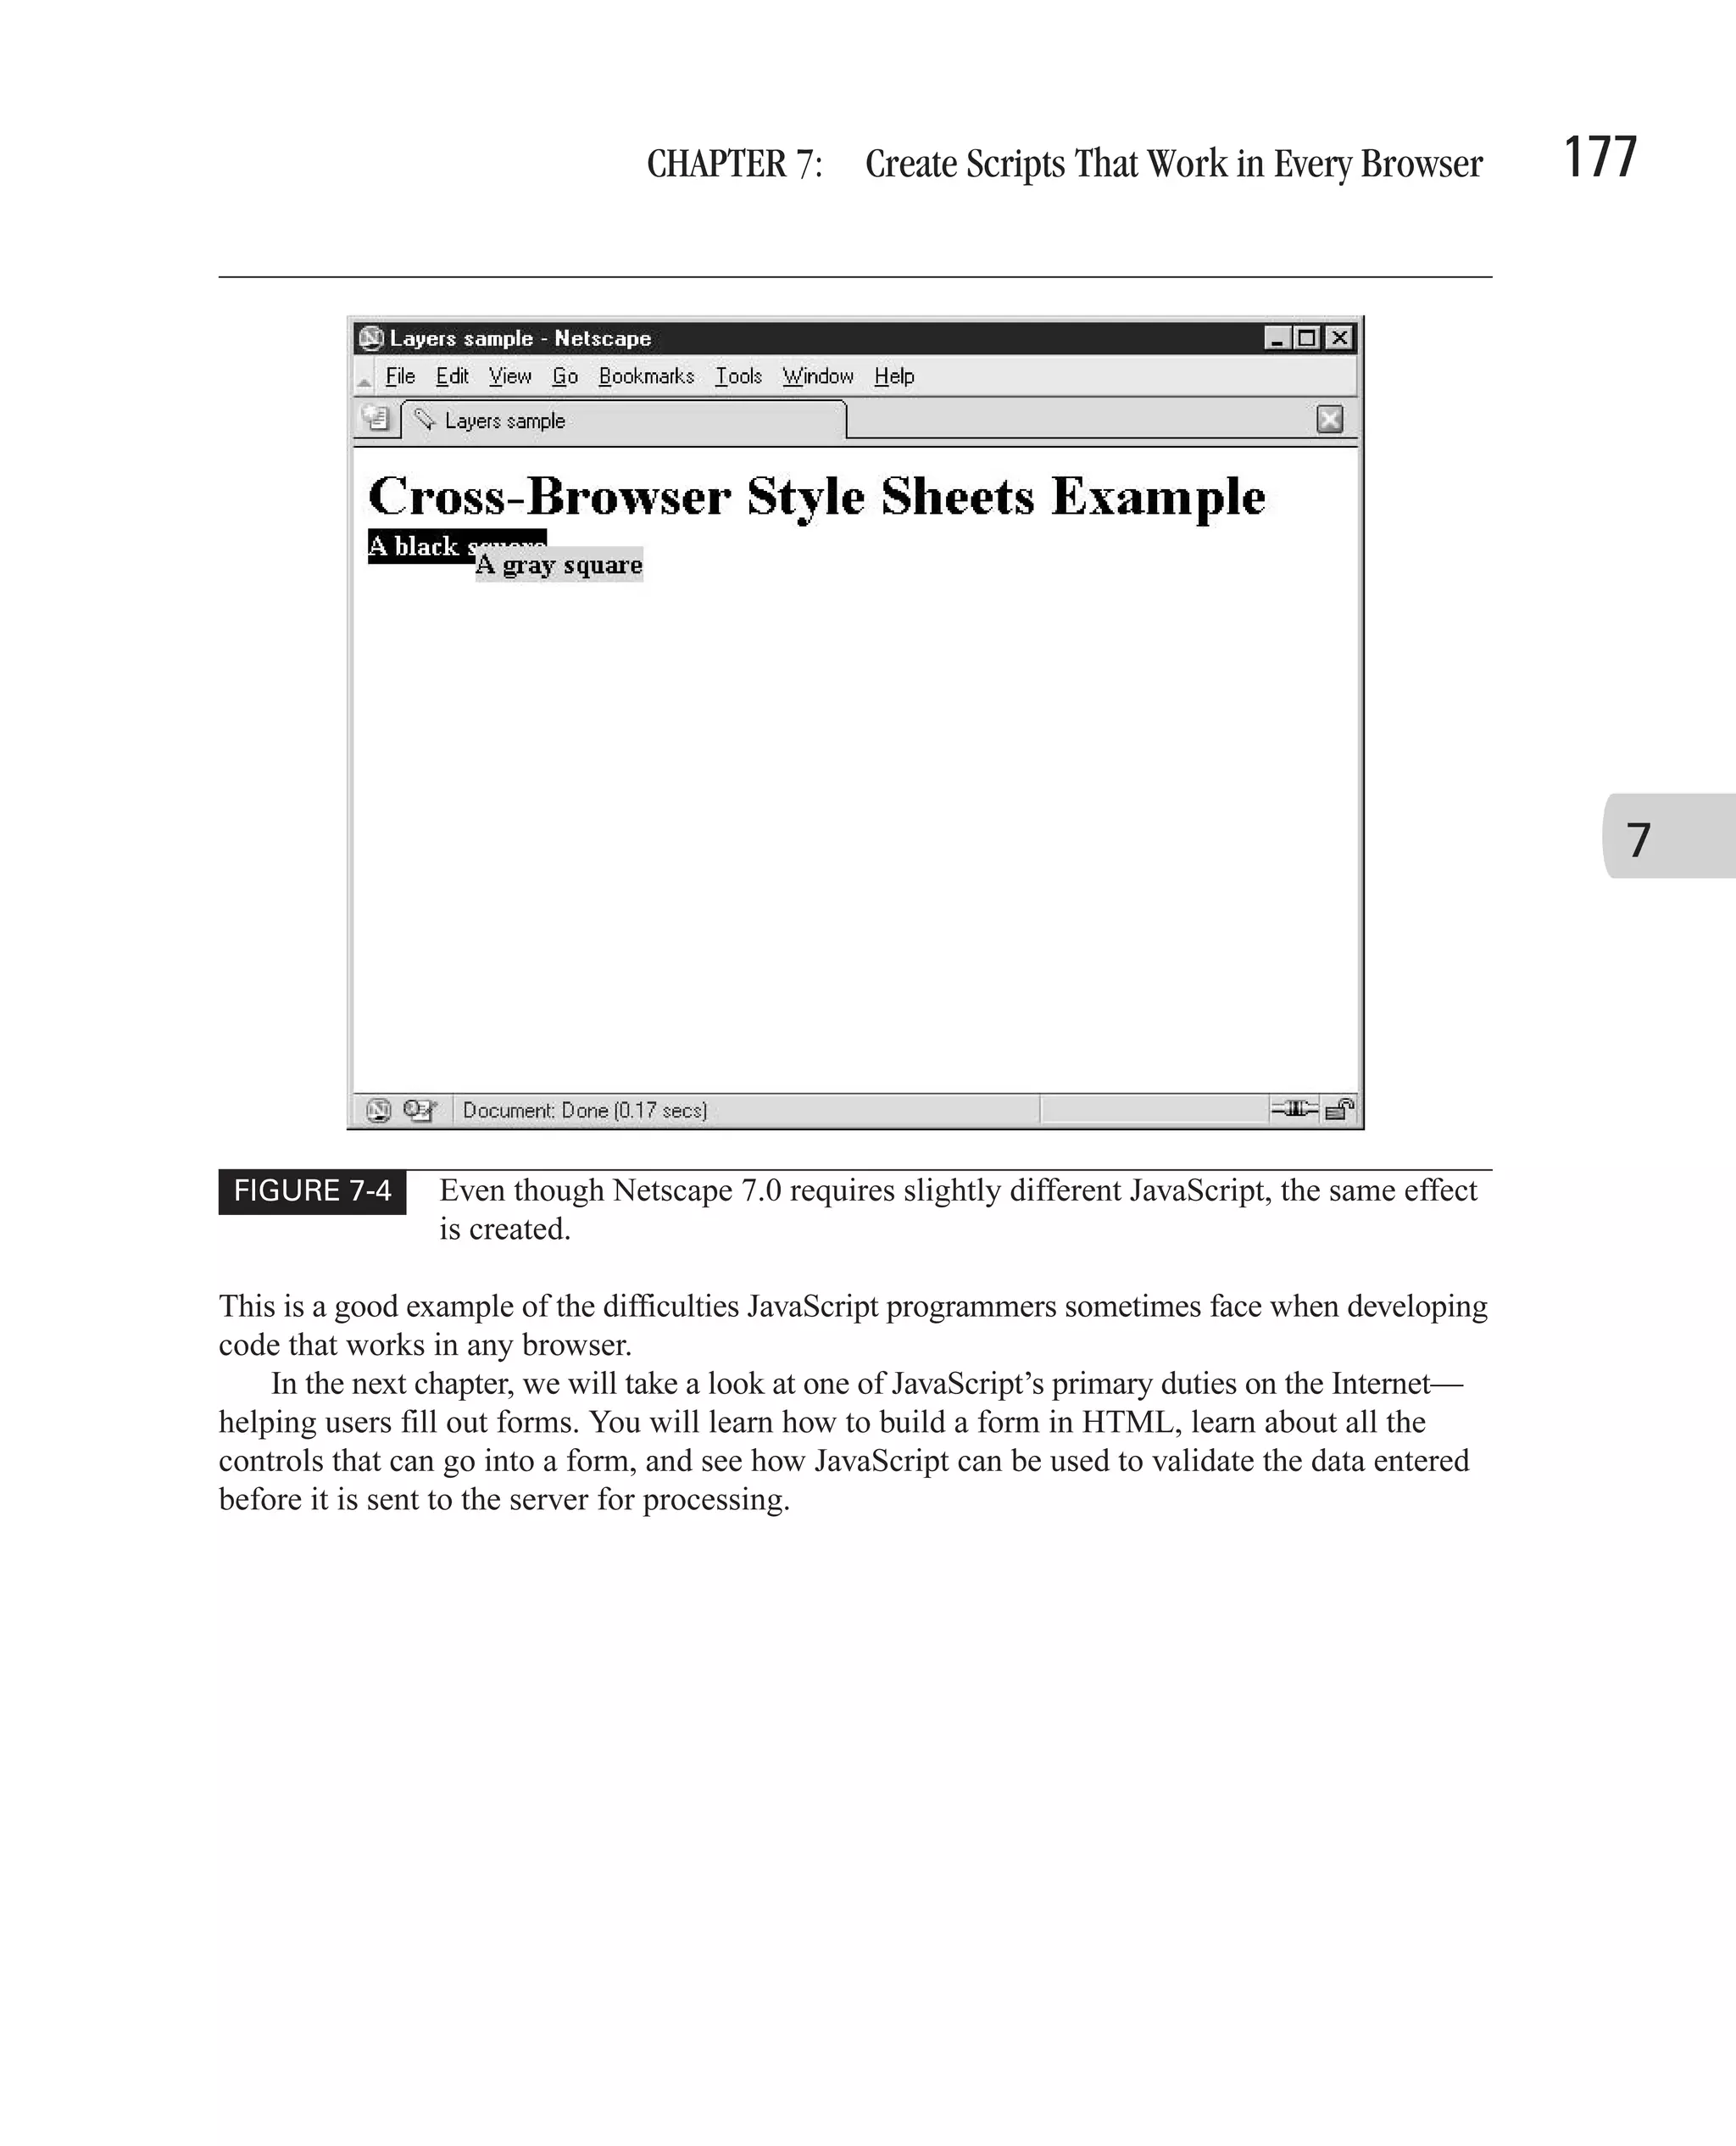
![CHAPTER 7: Create Scripts That Work in Every Browser 175 } </script> This code works in a fairly simple fashion. Netscape 4 is the only browser whose document object has a layers property, so checking for that property’s existence confirms that the browser type is Netscape 4. We can do the same trick using the getElementById method of the document object, except we still need to differentiate between IE 4 and Netscape 6. The navigator.userAgent property allows us to do that. Finally, we add in the browser-specific DHTML code to manipulate the two <layer> or <div> tags on the screen to create a visual effect. <html> <head><title>Layers sample</title></head> <body> <h1>Cross-Browser Style Sheets Example</h1> 7 <layer id='mylayer'> <div id='mydiv' style='position:absolute'> <font color="white"><b>A black square</b></font> </div> </layer> <layer id='mylayer2'> <div id='mydiv2' style='position:absolute'> <b>A gray square</b> </div> </layer> <script language="JavaScript" type="text/javascript"> var ua = navigator.userAgent.toLowerCase(); var ie4 = ua.indexOf("msie") != -1; if (document.layers) { // Netscape 4 code goes here document.layers["mylayer"].bgColor = "black"; document.layers["mylayer2"].bgColor = "#CCCCCC"; document.layers["mylayer2"].moveBy (60, 10); } else if (document.getElementById && ie4) { // IE code goes here var div1 = document.getElementById("mydiv"); var div2 = document.getElementById("mydiv2"); div1.style.backgroundColor = "black"; div2.style.backgroundColor = "#CCCCCC";](https://image.slidesharecdn.com/3592018/75/How-To-Do-Everything-With-JavaScript-195-2048.jpg)


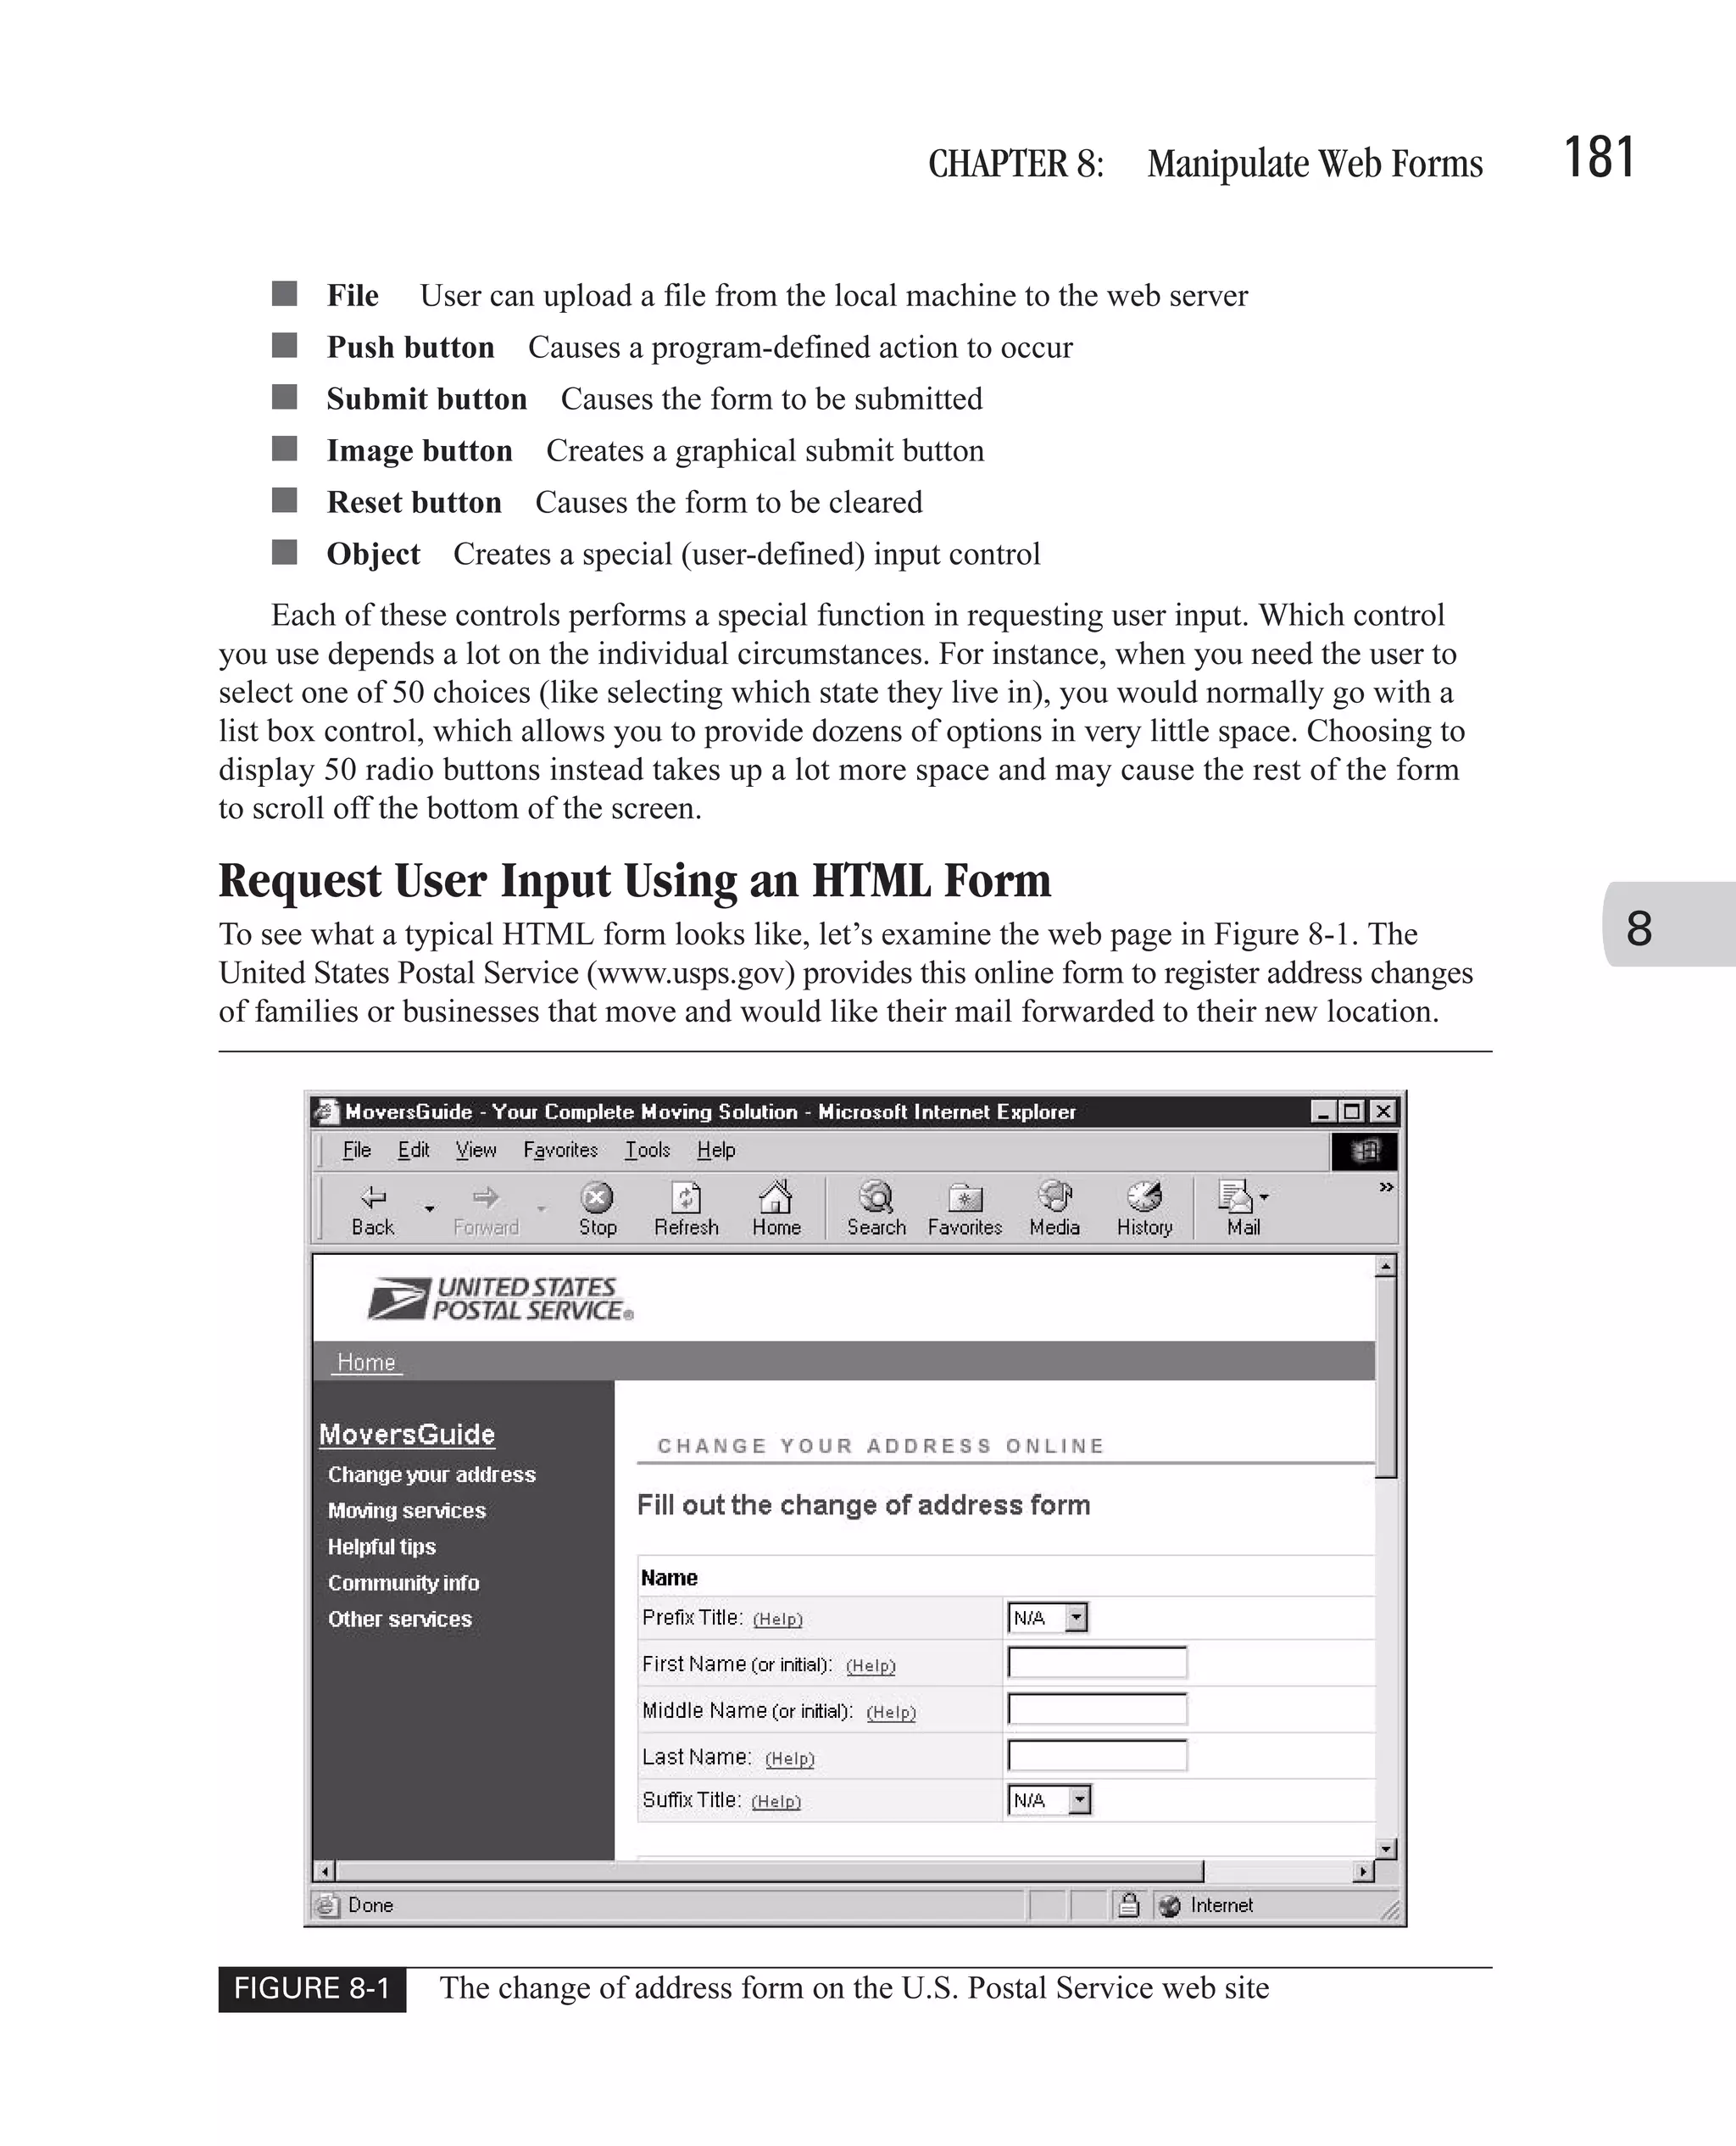
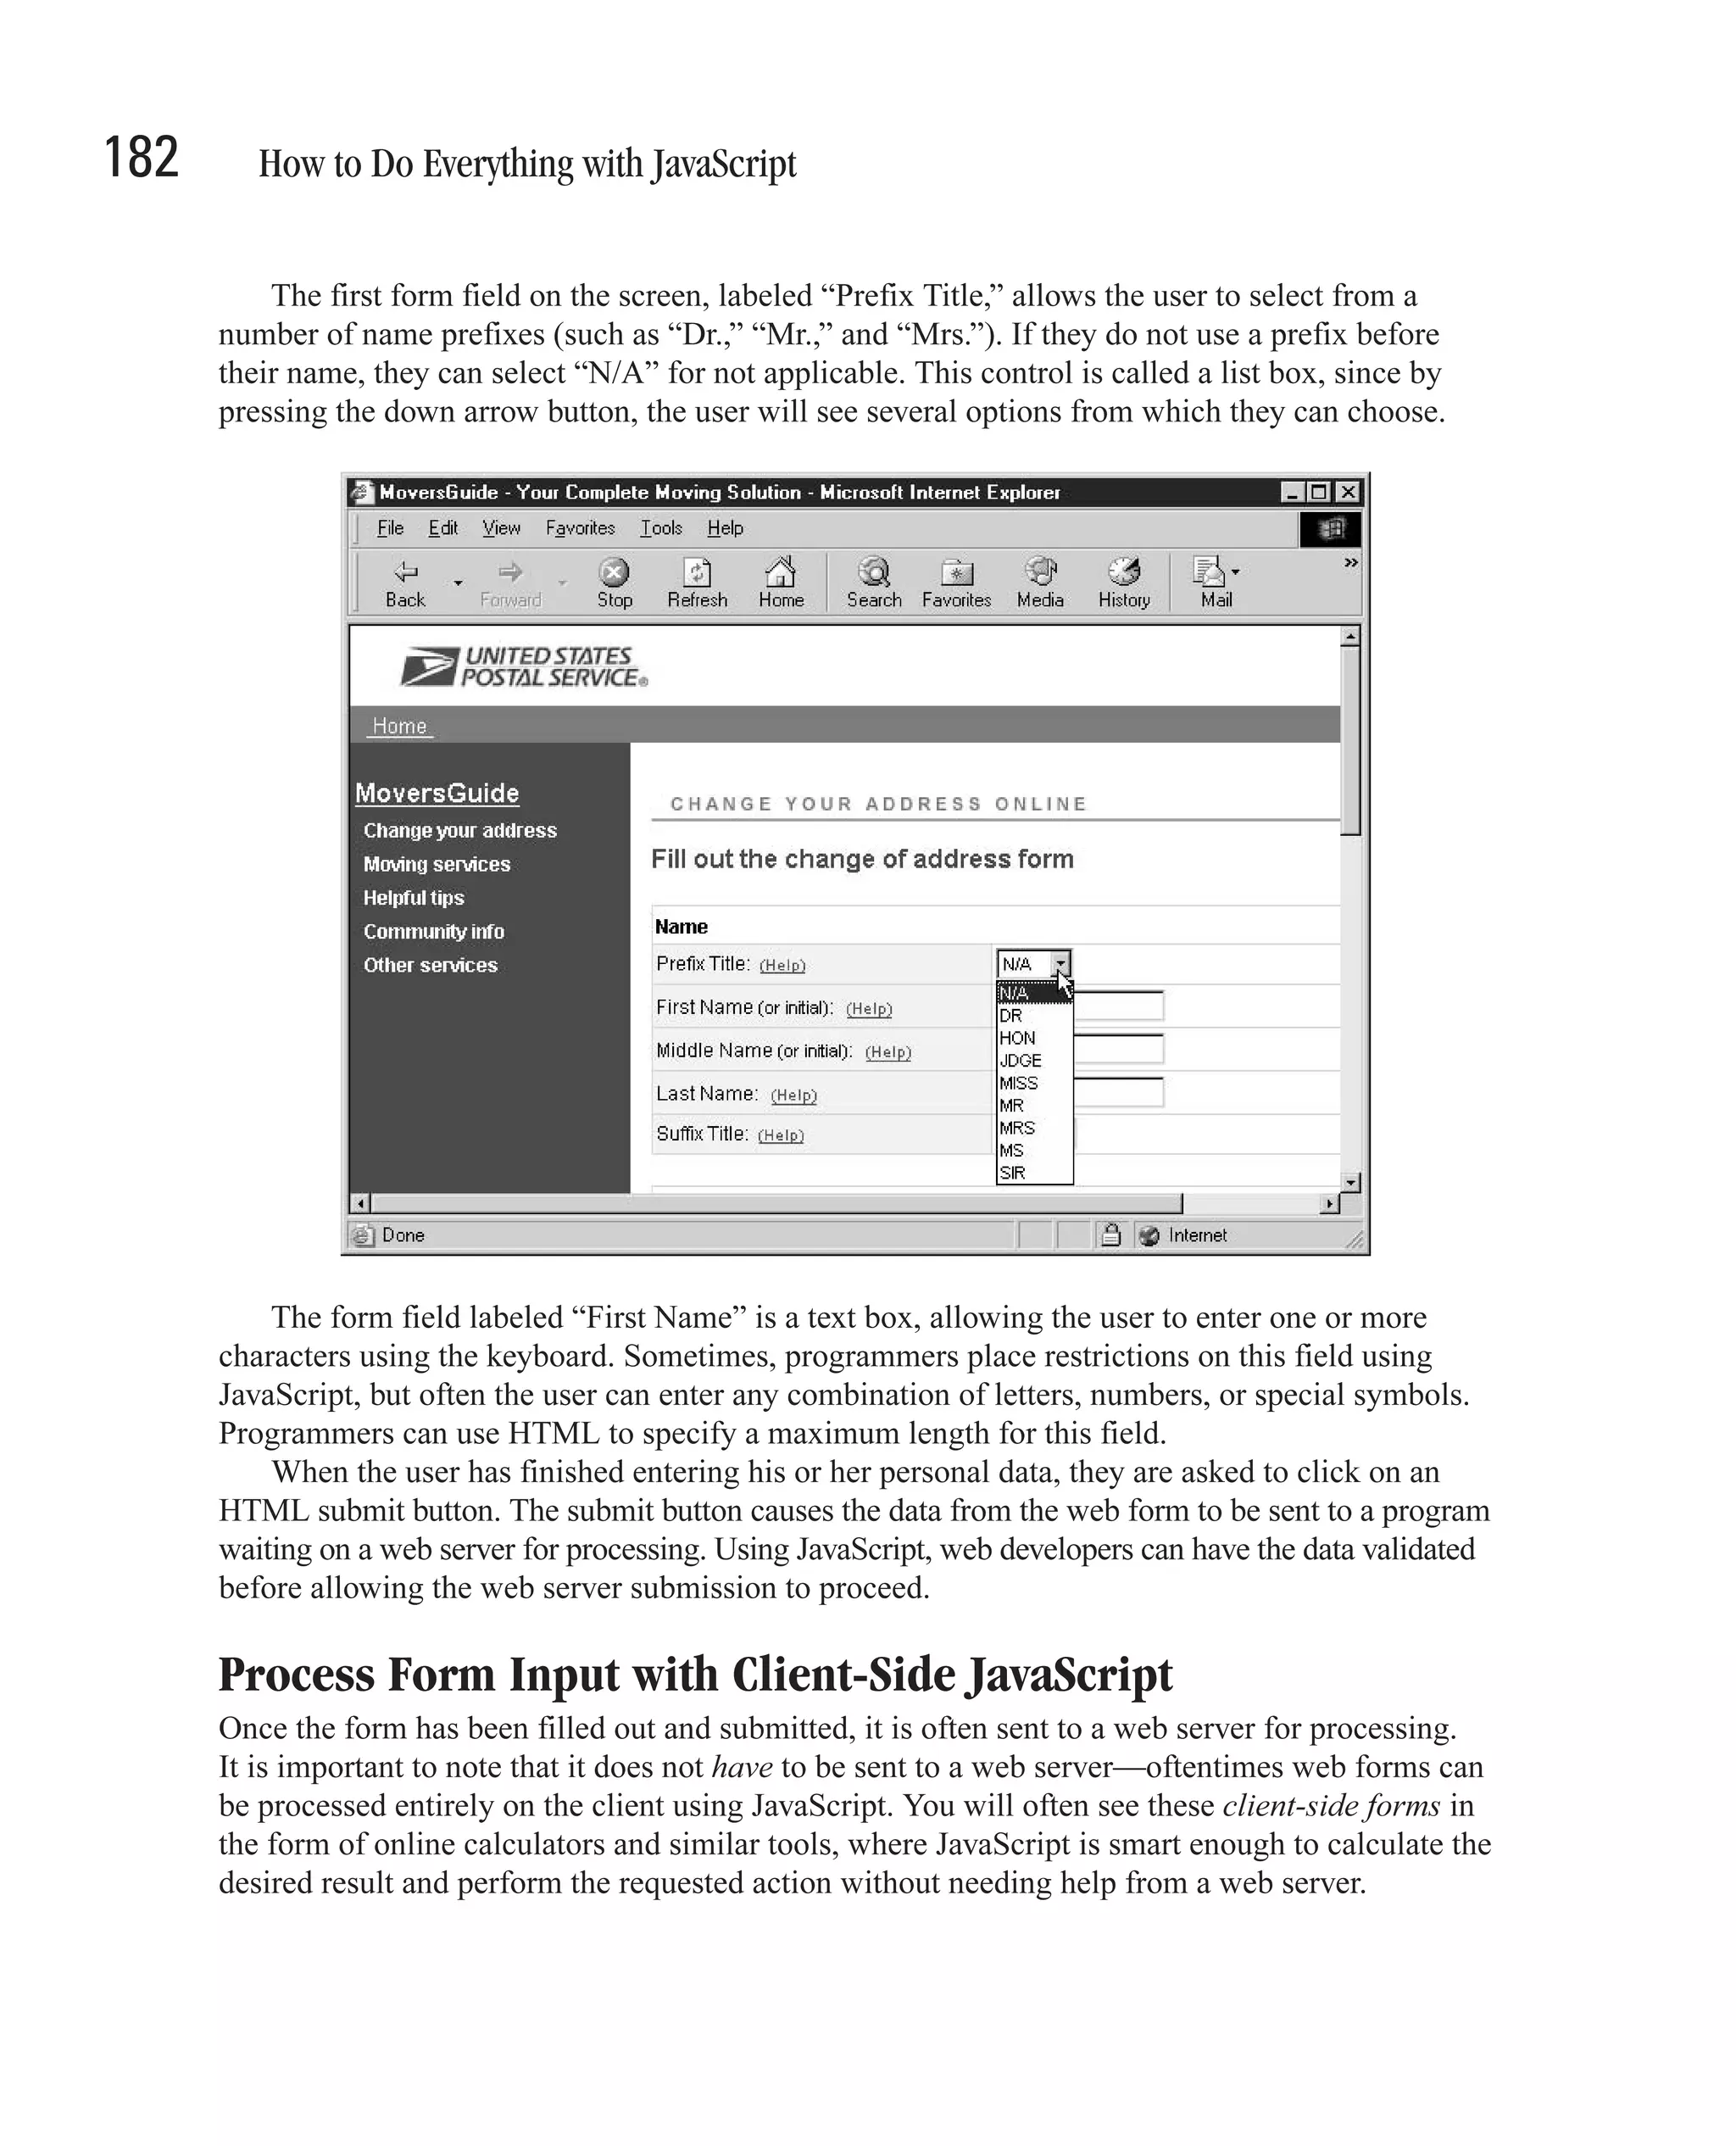

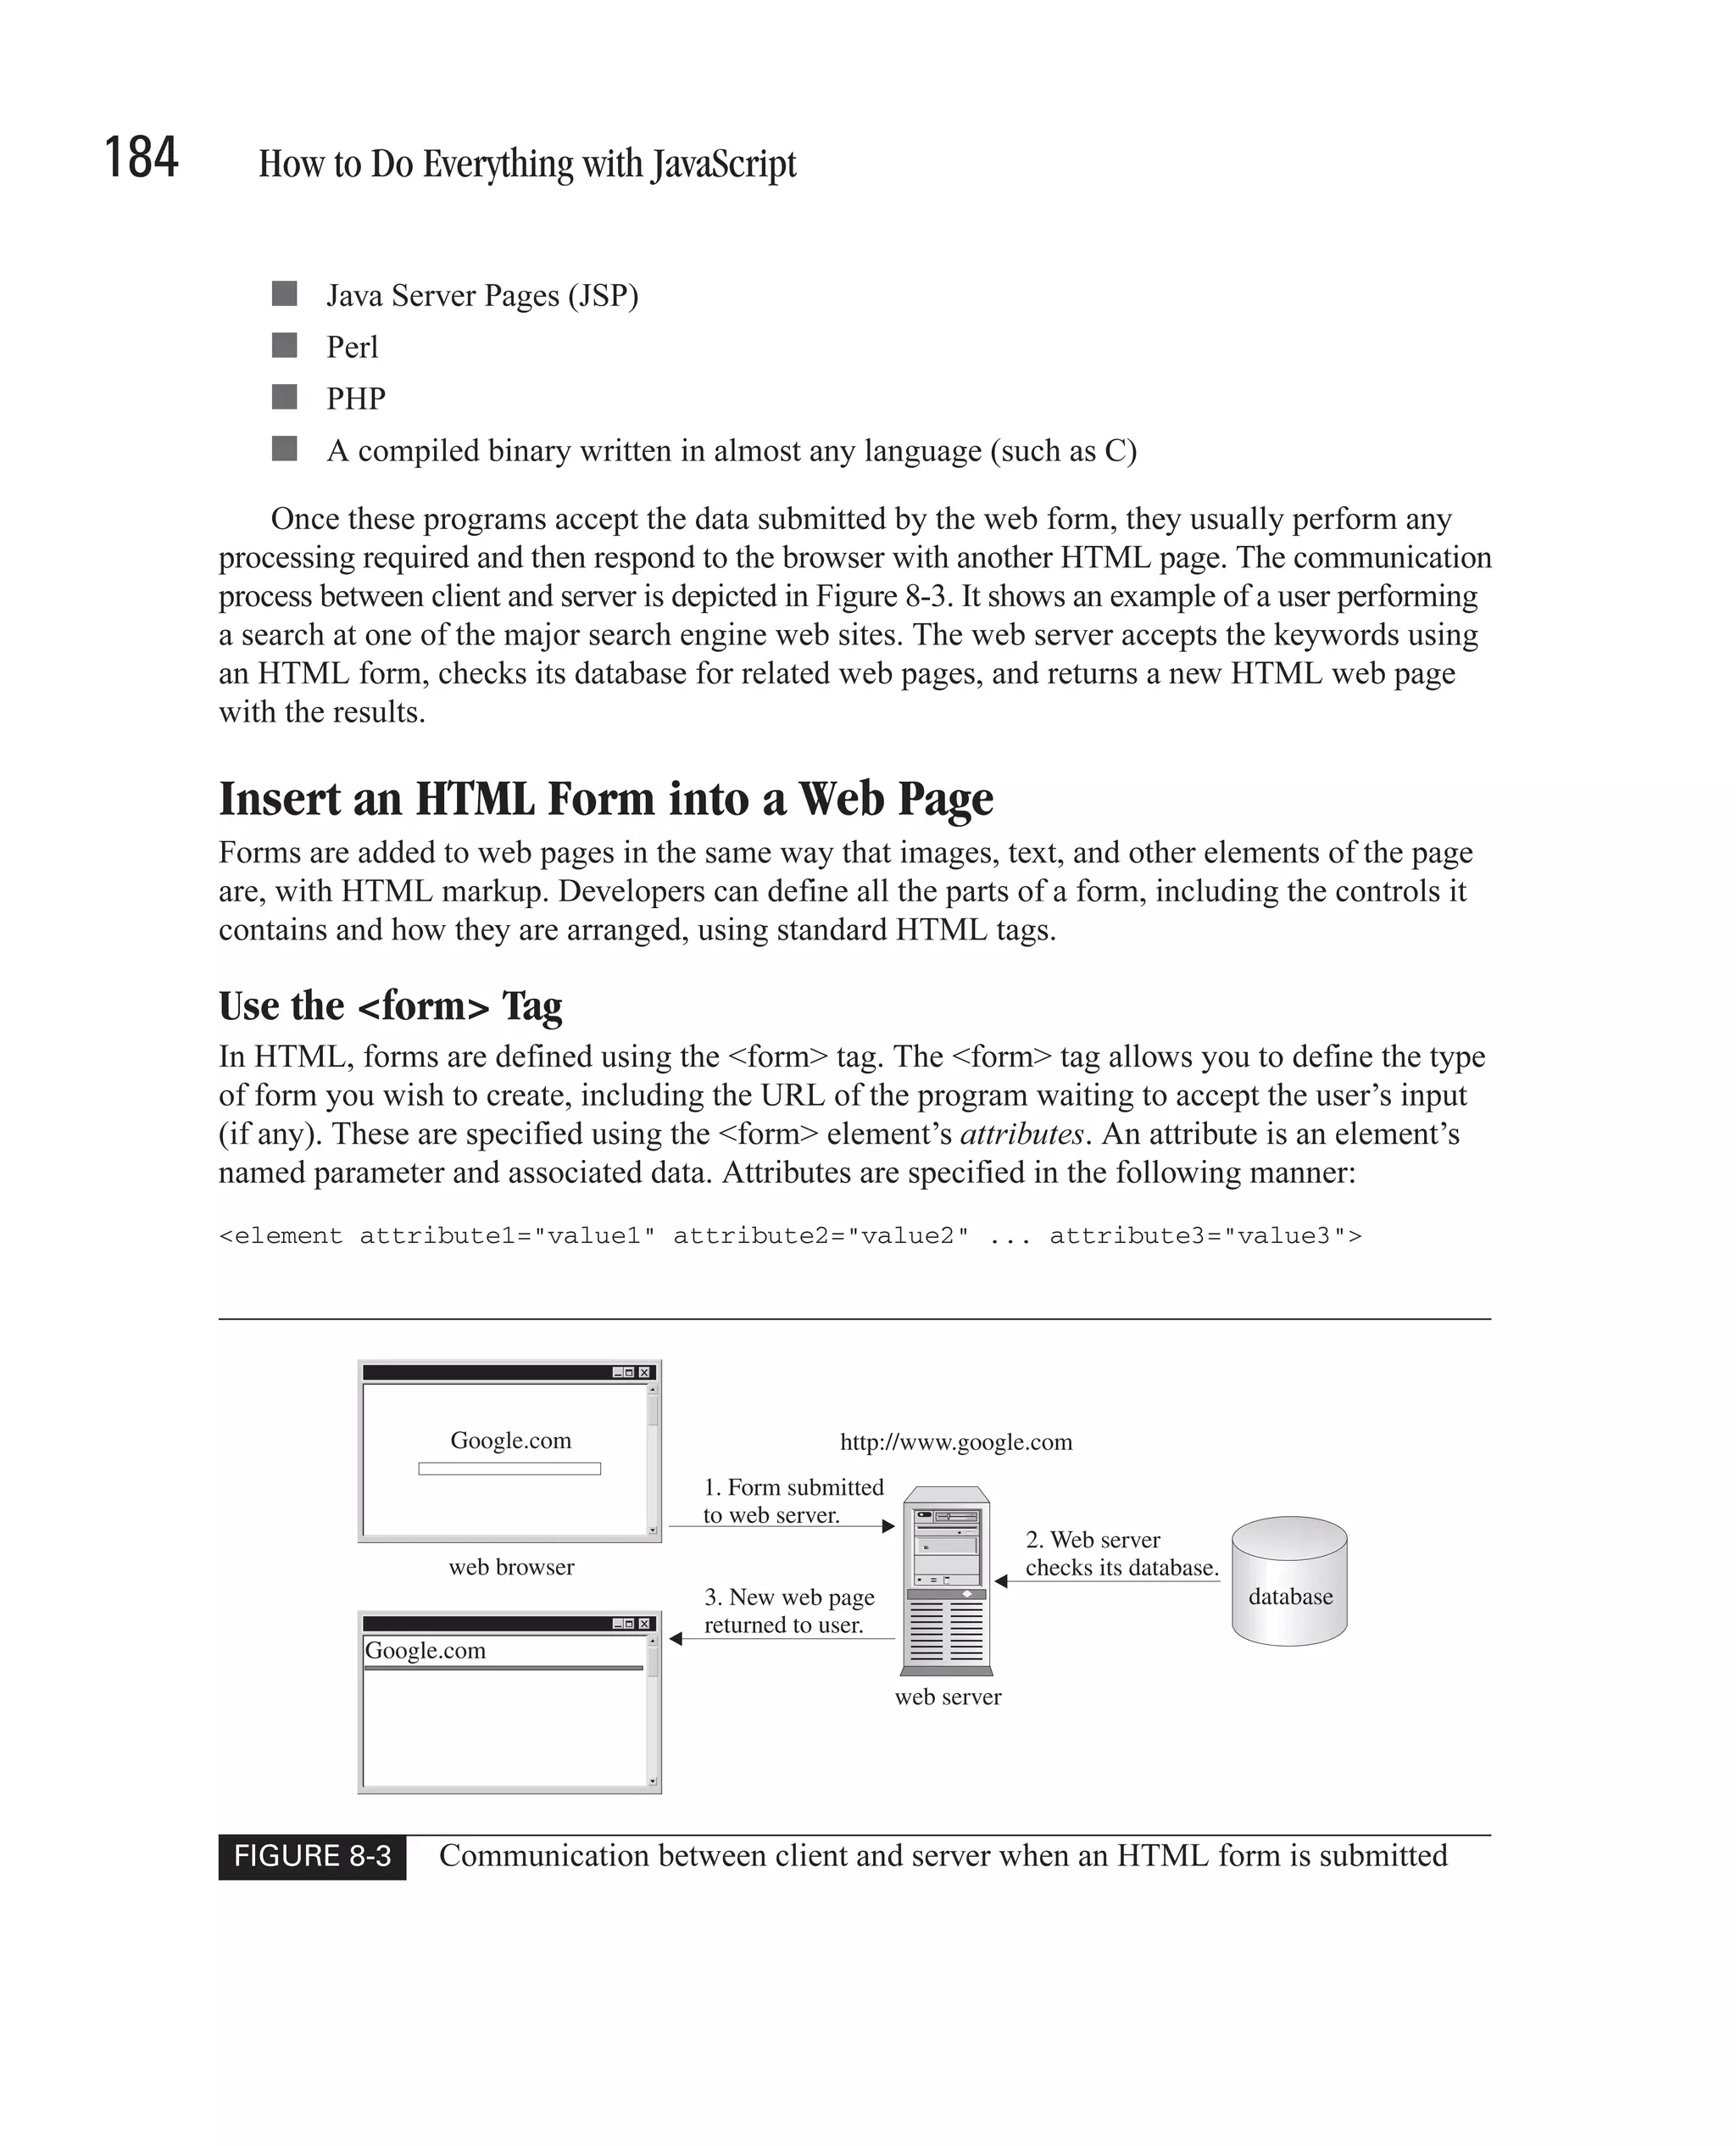


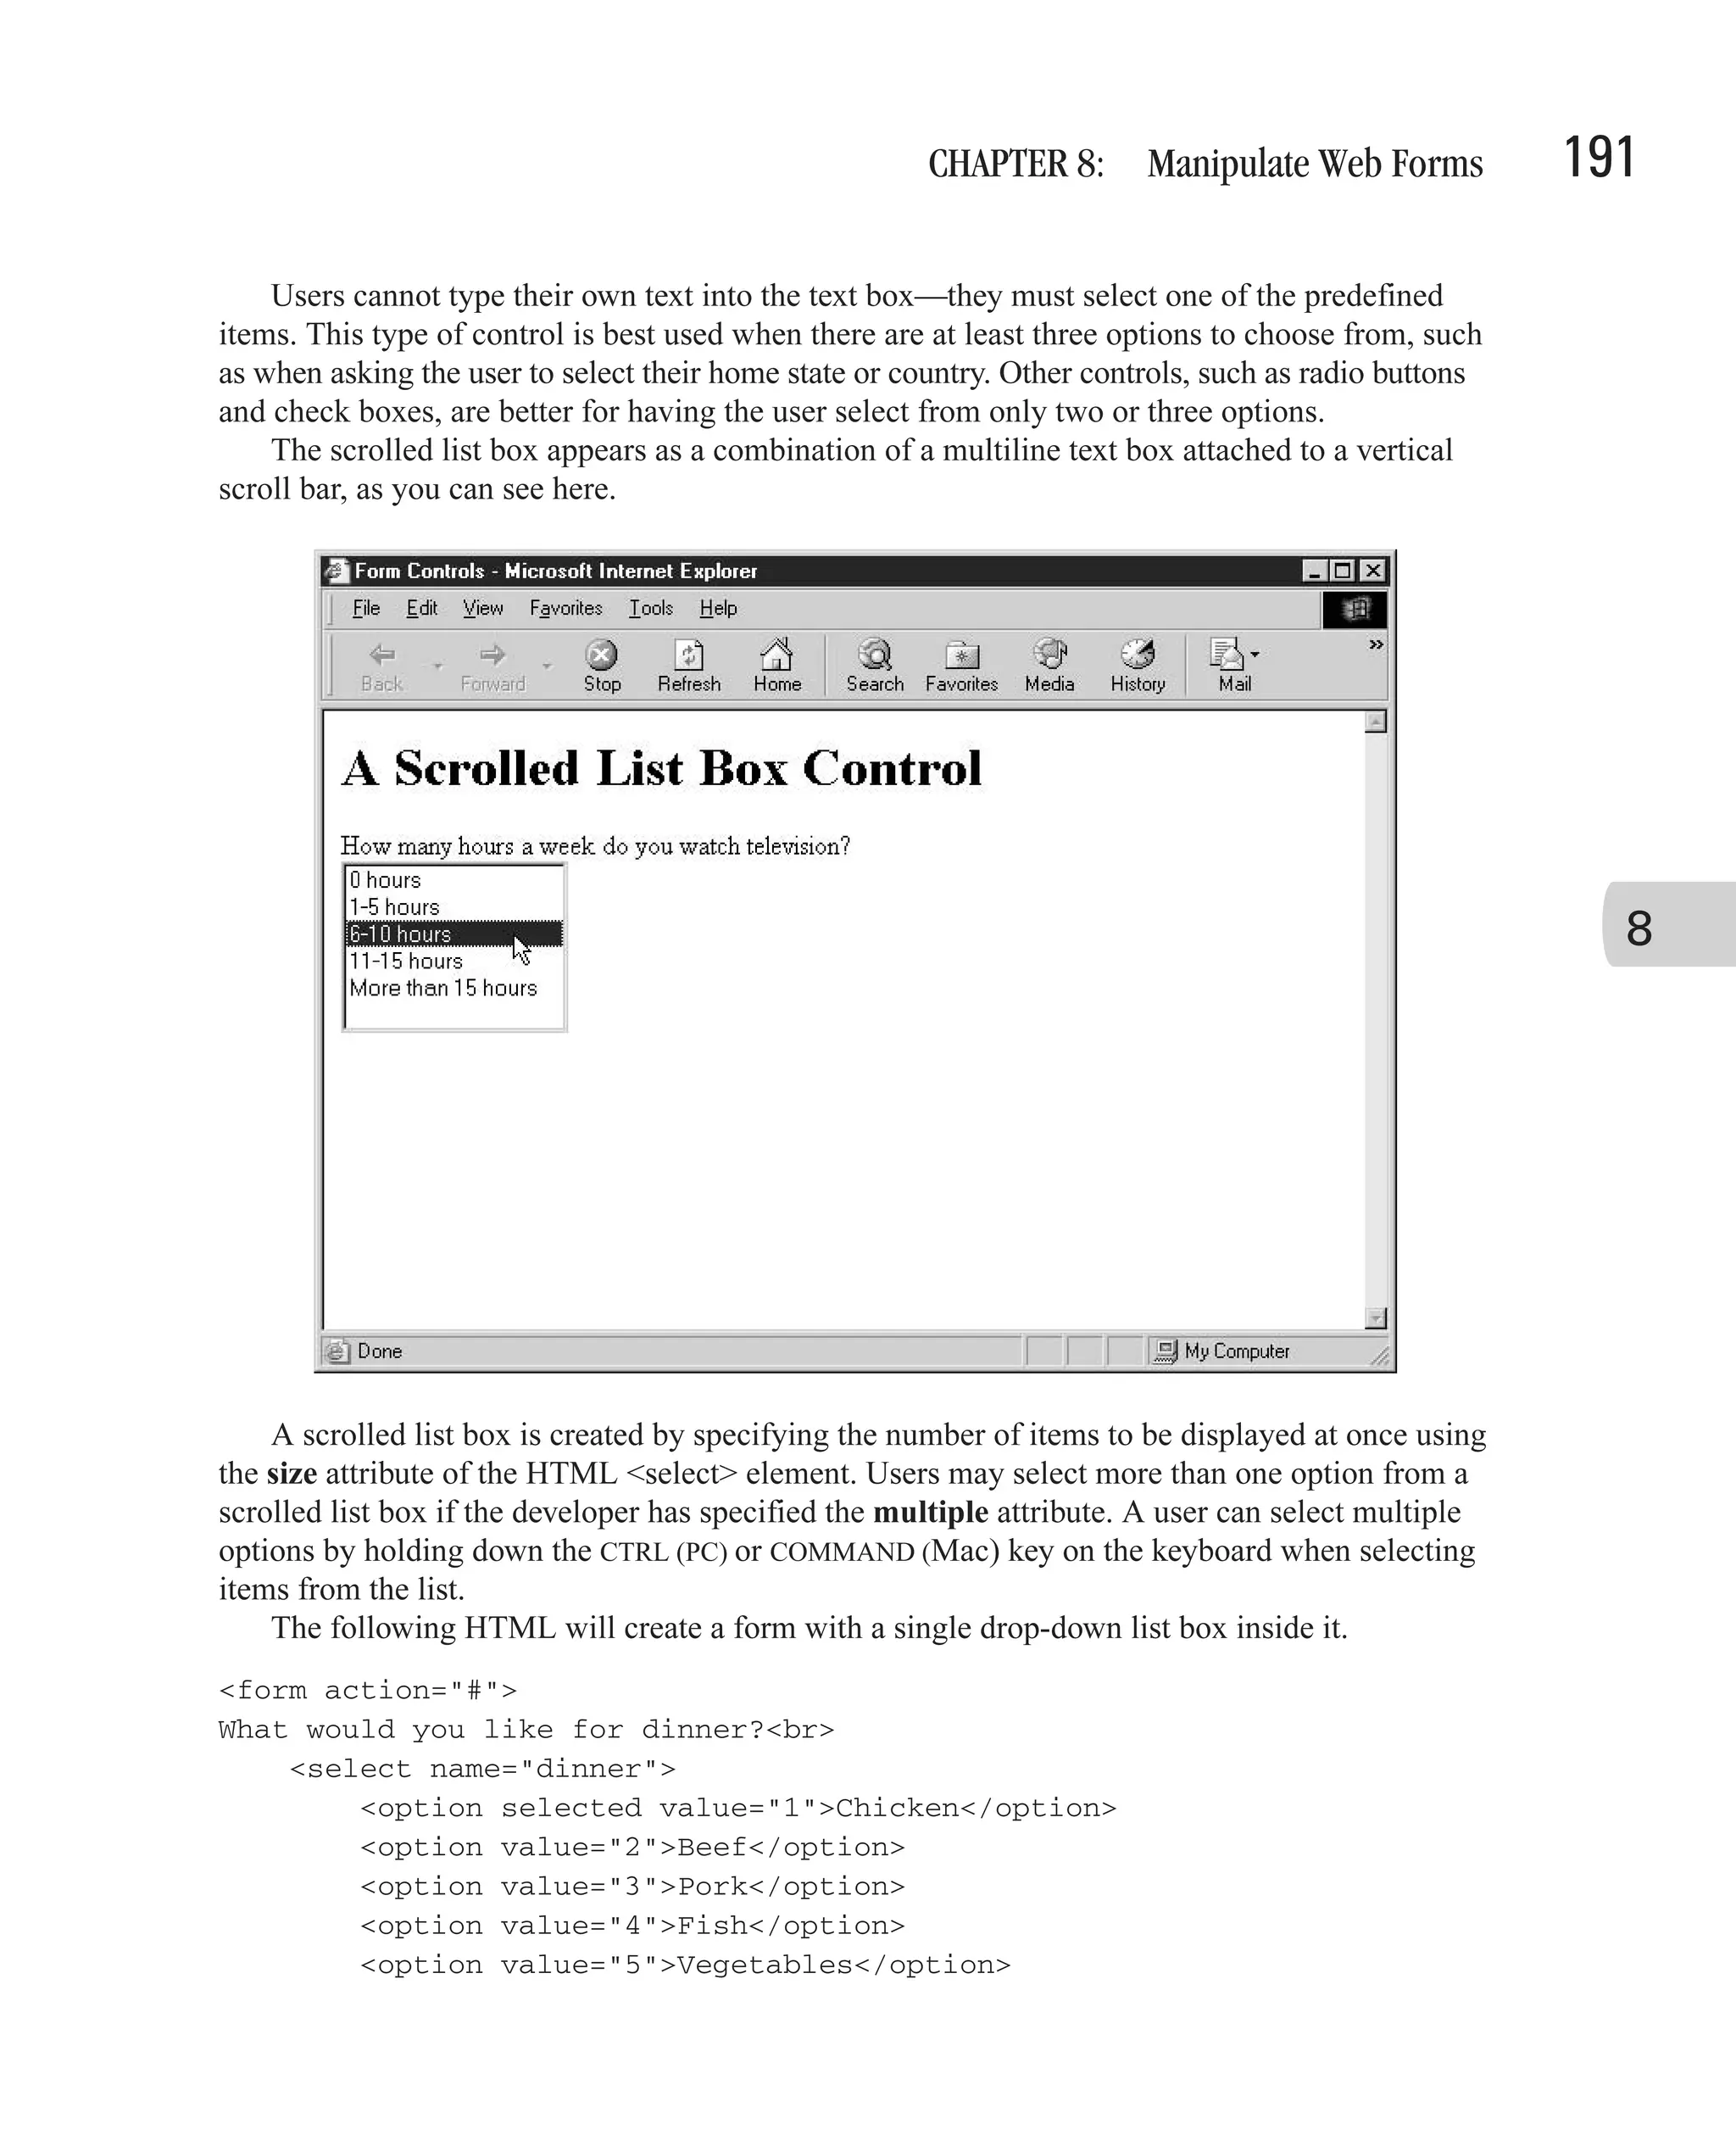

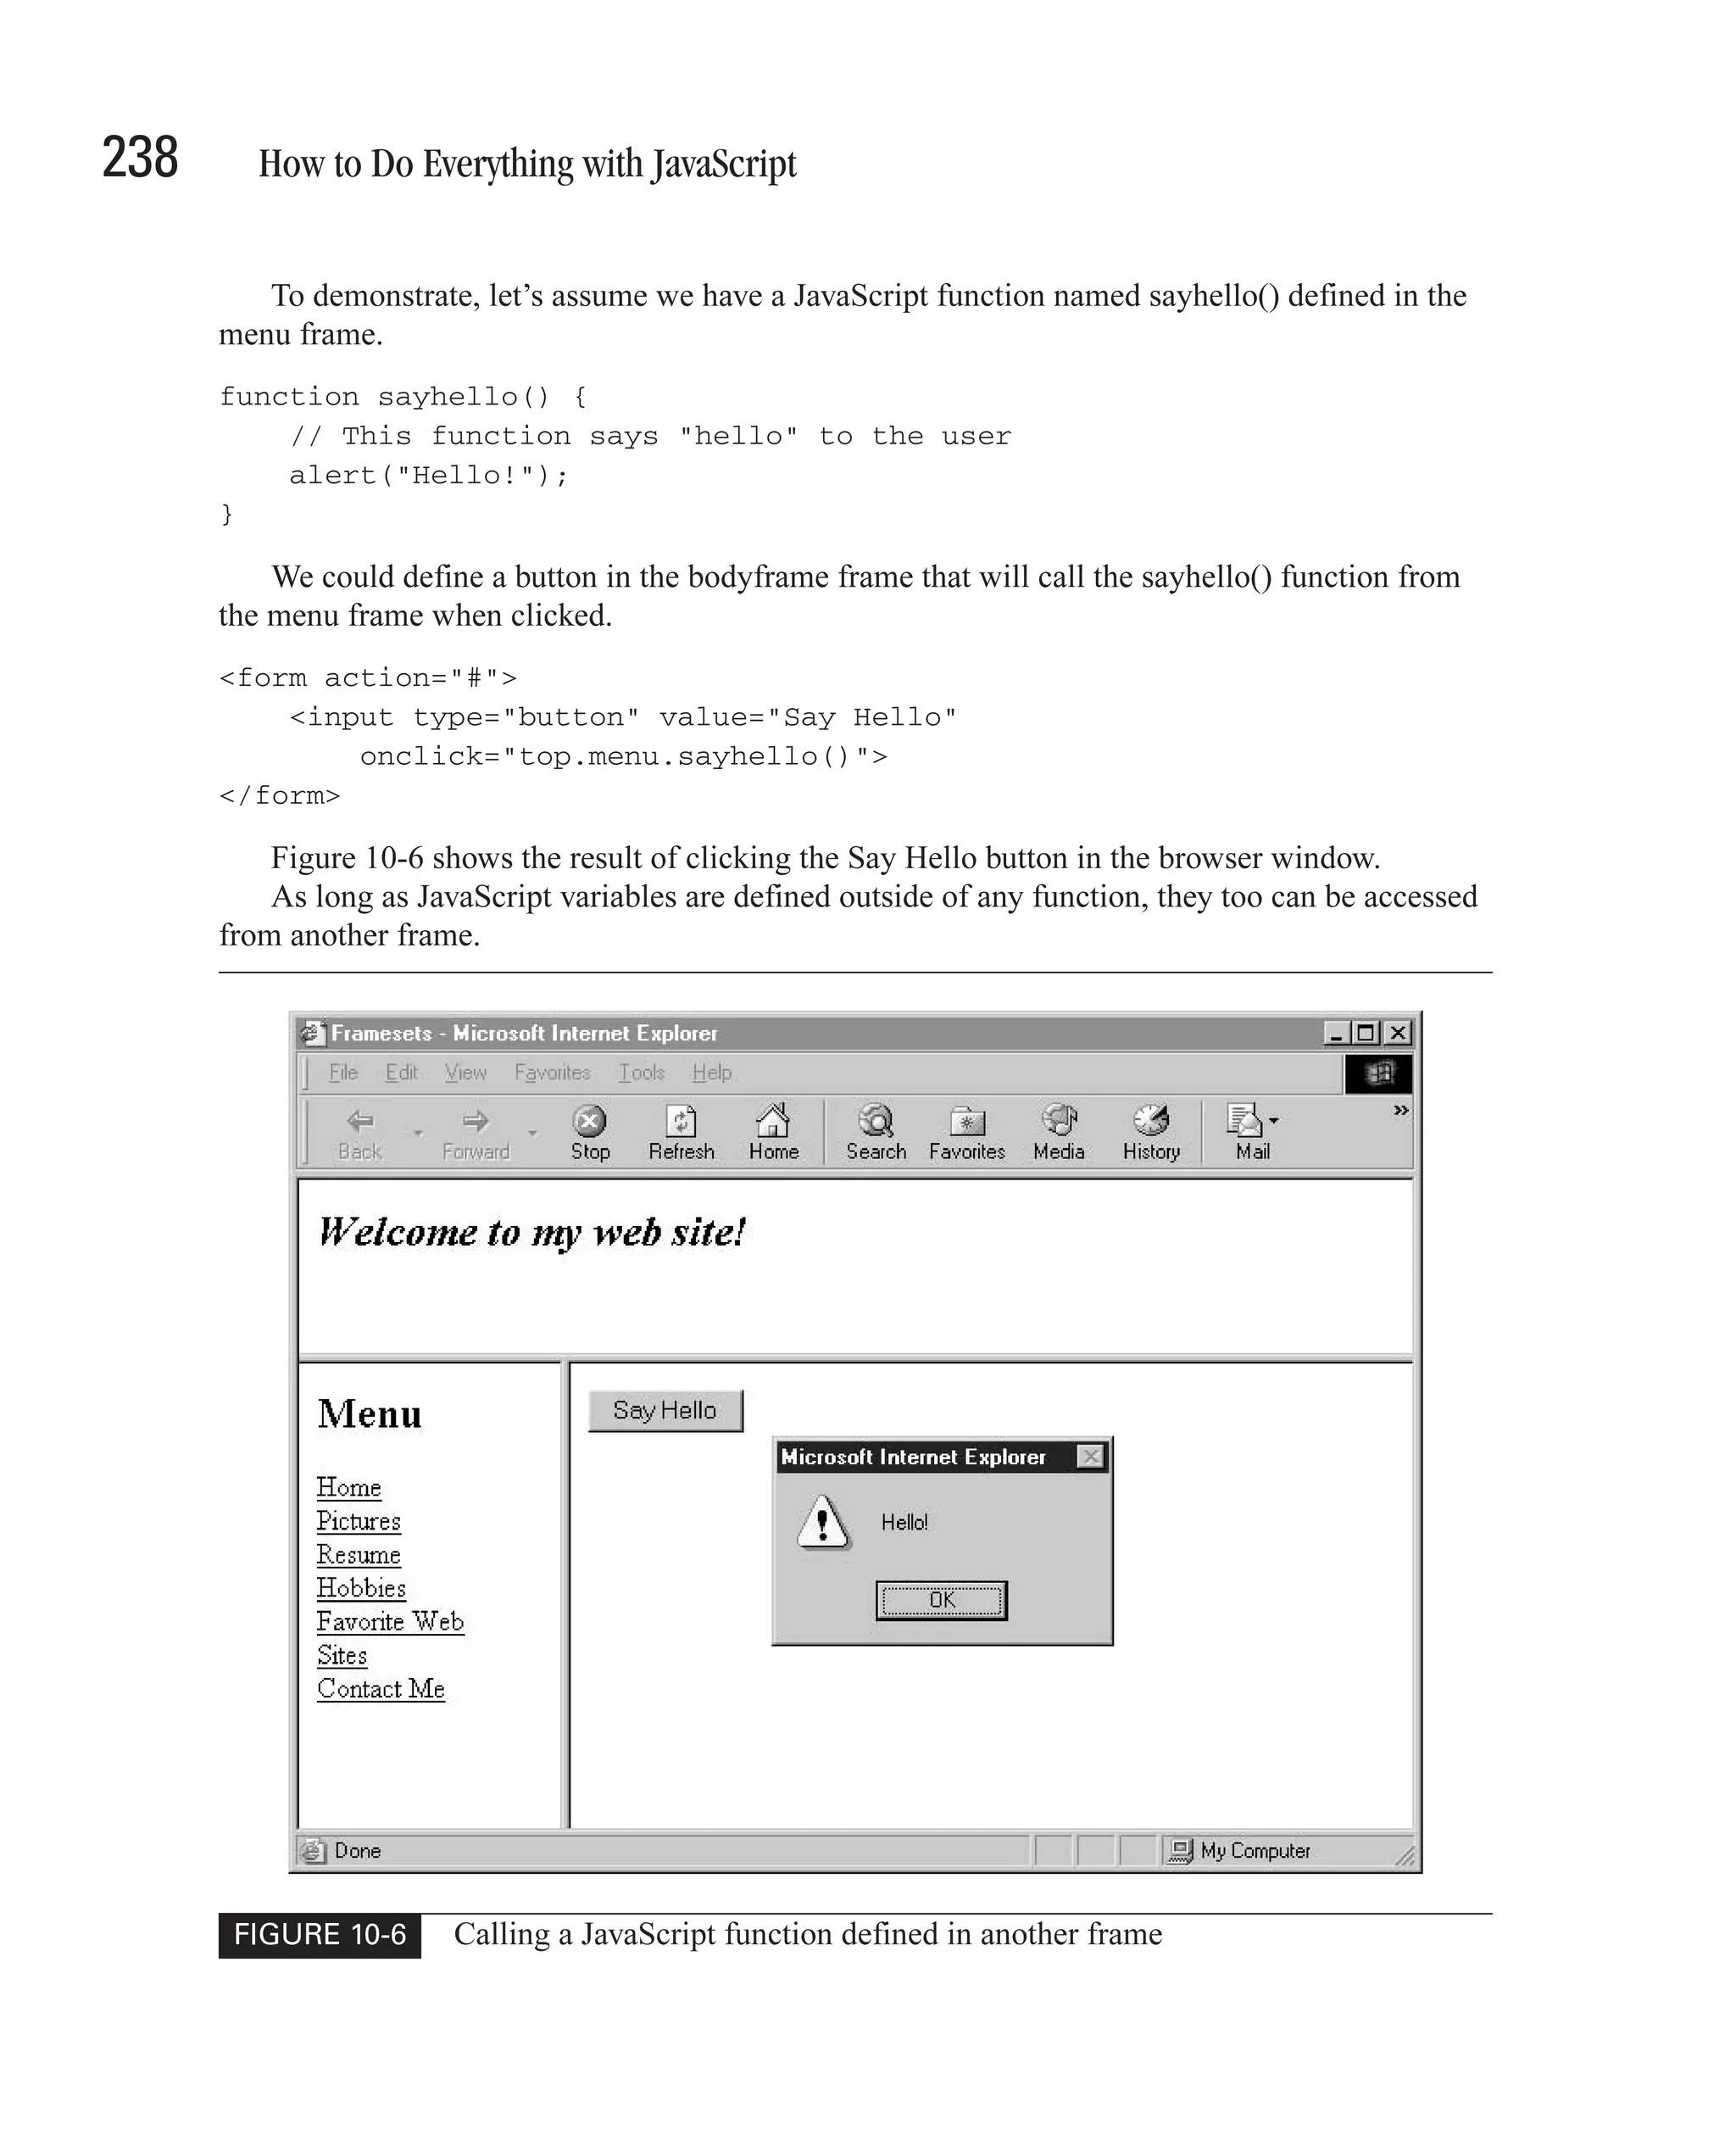
![CHAPTER 8: Manipulate Web Forms 195 Add a Submit Button Submit buttons are a special type of form control, in that they cause a form to submit itself to the server. The variables and data defined in the form are sent to the web server application defined in the action attribute of the <form> element, using the method defined in the method attribute. For instance, the following code defines a form that submits itself to an ASP web page. The ASP web page is responsible for processing the data and sending a new web page for the browser to display. <form action="http://www.example.com/scripts/myscript.asp" method="GET"> Full Name: <input type="text" name="fullname"><br> Age: <input type="text" name="age" size="5"><br> Date of Birth: <input type="text" name="DOB" size="10"><br> <input type="submit" value="Submit Form"> </form> When the user clicks the Submit Form button, the three other form controls on the form 8 (fullname, age, and DOB) will be sent to the ASP web page, along with whatever text the user entered in those fields. Only named form fields will be submitted to the server for processing. Fields without an assigned name attribute, even text fields, will not be submitted to the server. It is common to omit the name of submit buttons. The only time it would be useful to name them would be if there were more than one submit button on a form and the server needed to know which button was used to submit the form. Catch Web Form Submissions with onsubmit Previously in this chapter, in the section entitled “Use the <form> Tag,” we saw that the HTML <form> element has a number of predefined event handlers. Handling an event is known as catching it, and in this section we will take a brief look at one of the <form> element’s events and how to catch it. The onsubmit attribute allows us to specify some JavaScript code that will be executed before the web form is submitted to the web server. This JavaScript code is usually stored inside a function, and so the event handler only refers to that function. But sometimes the JavaScript code will appear directly in the event handler attribute. <script language="JavaScript" type="text/javascript"> function checkname() { alert("Your name is " + document.forms[0].fullname.value); } </script> <form action="http://www.myserver.com/formhandler"](https://image.slidesharecdn.com/3592018/75/How-To-Do-Everything-With-JavaScript-215-2048.jpg)
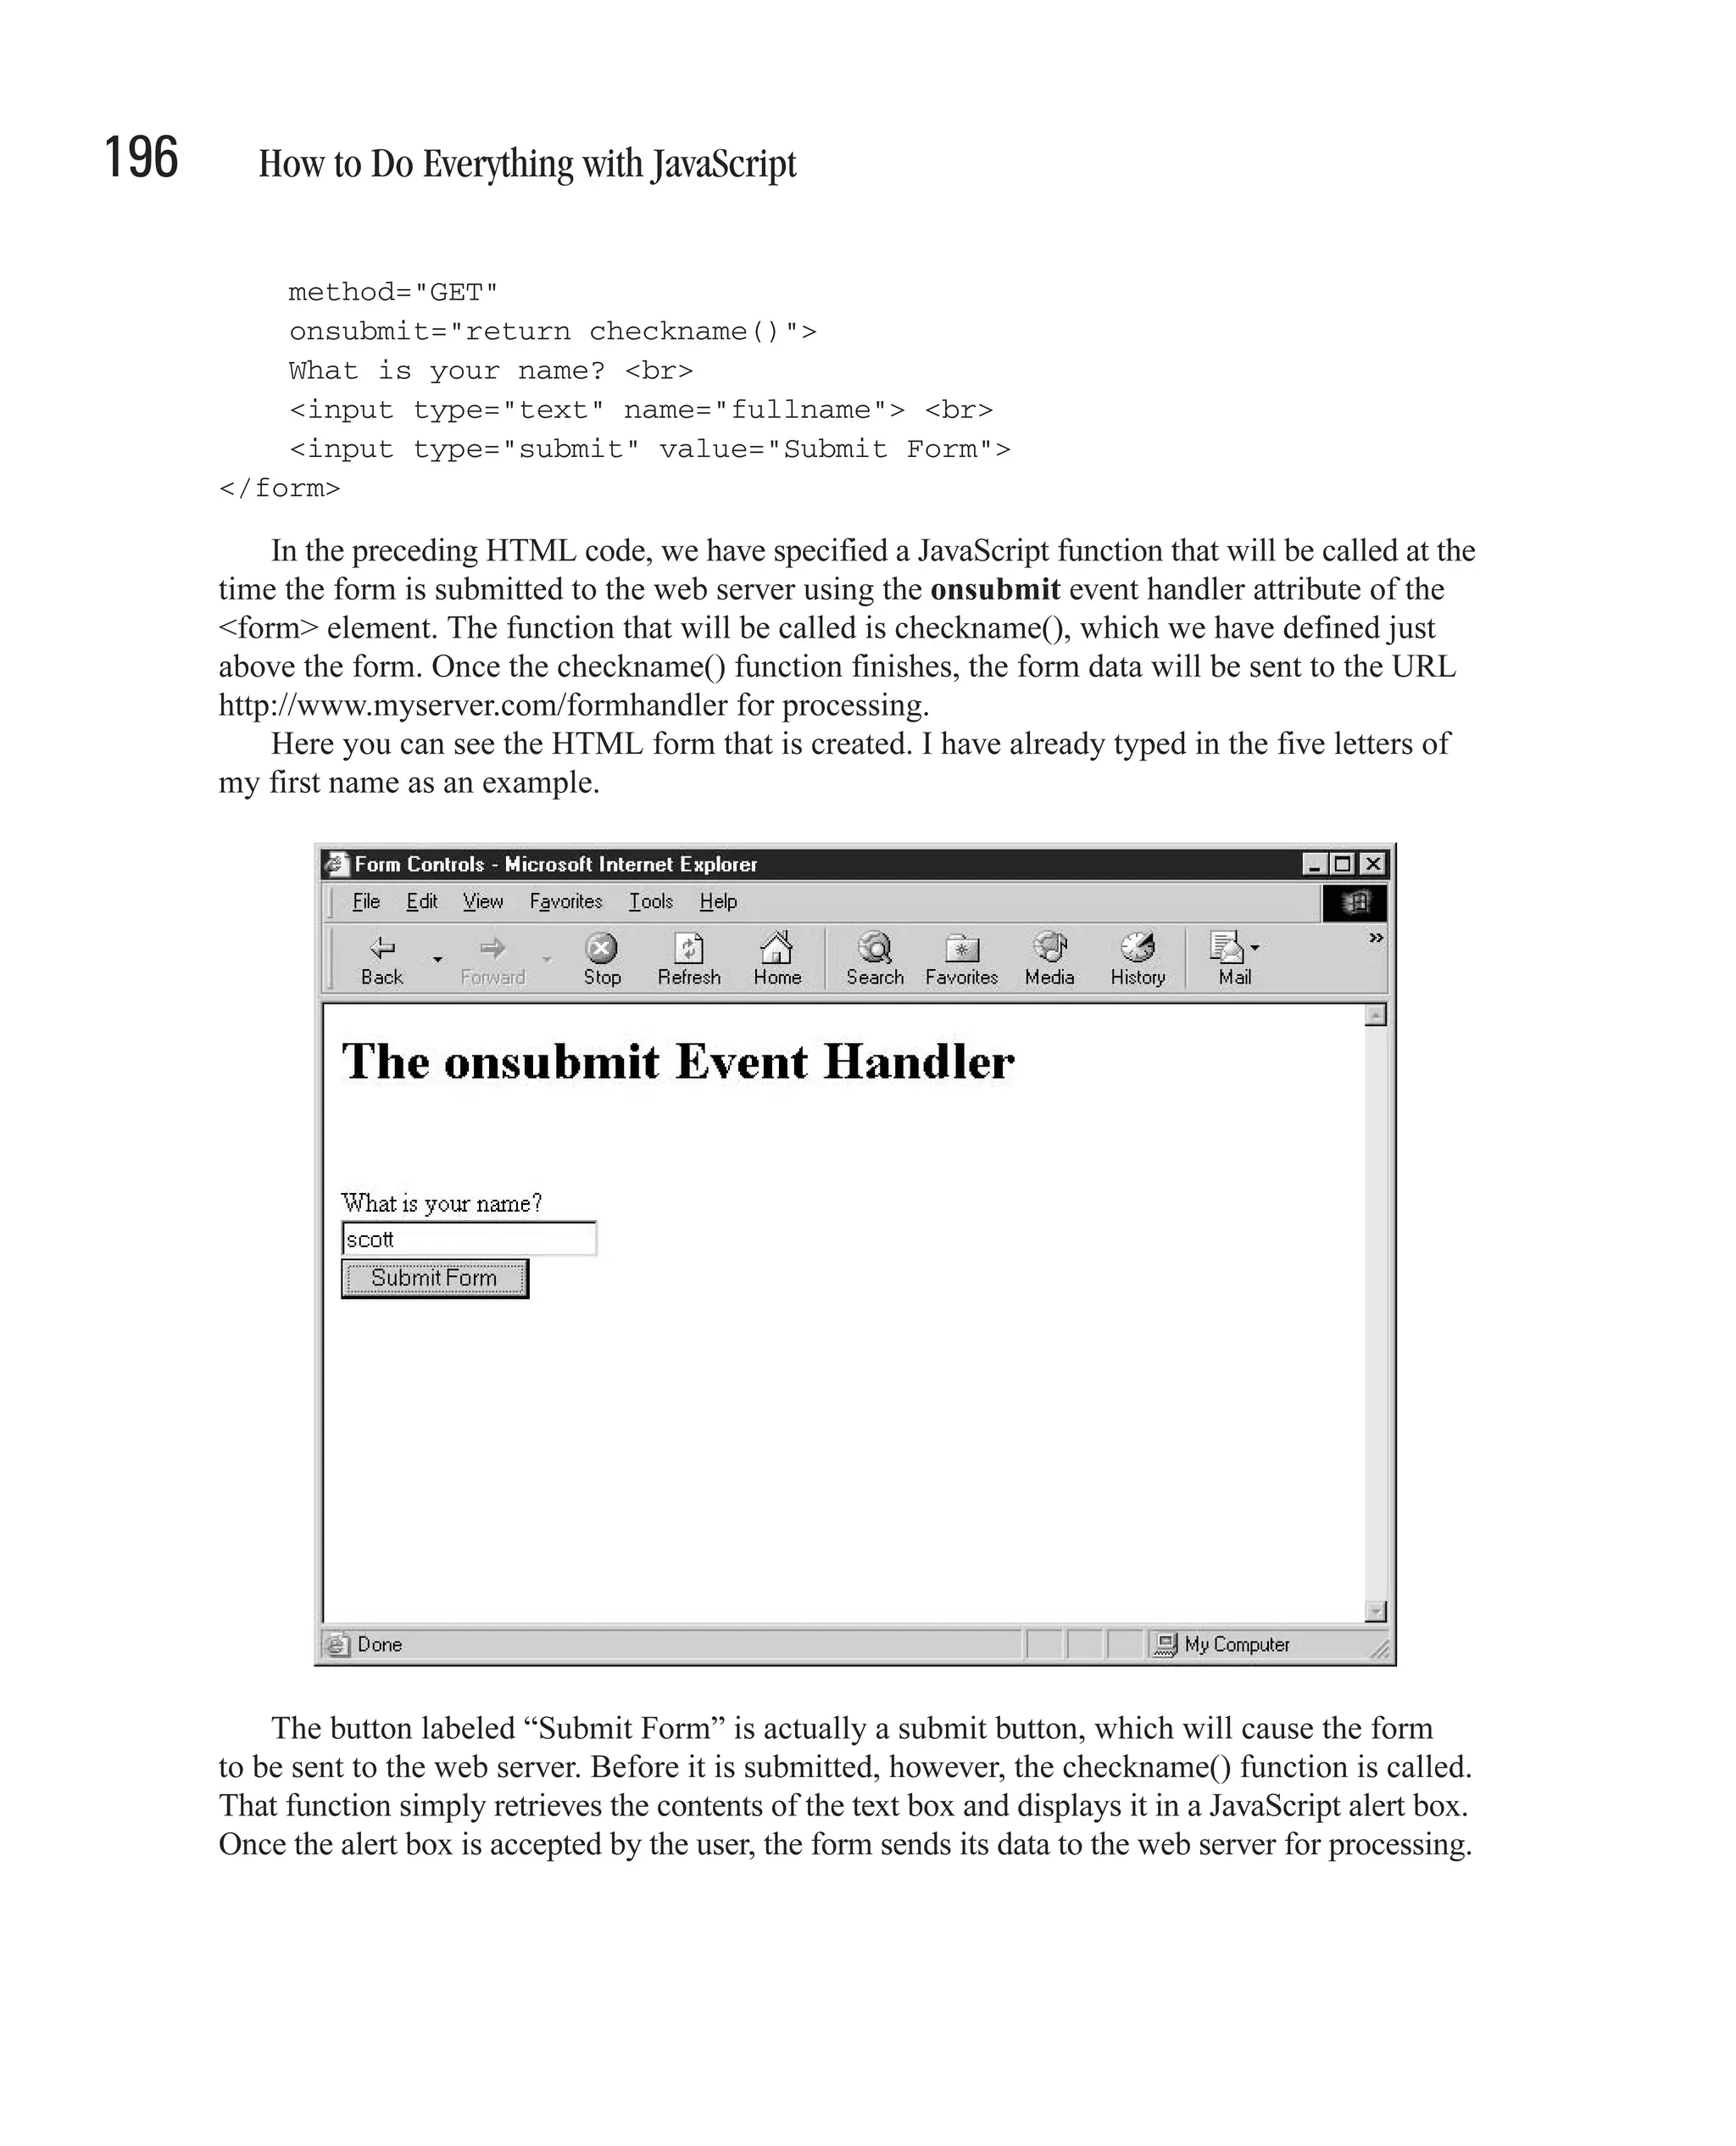
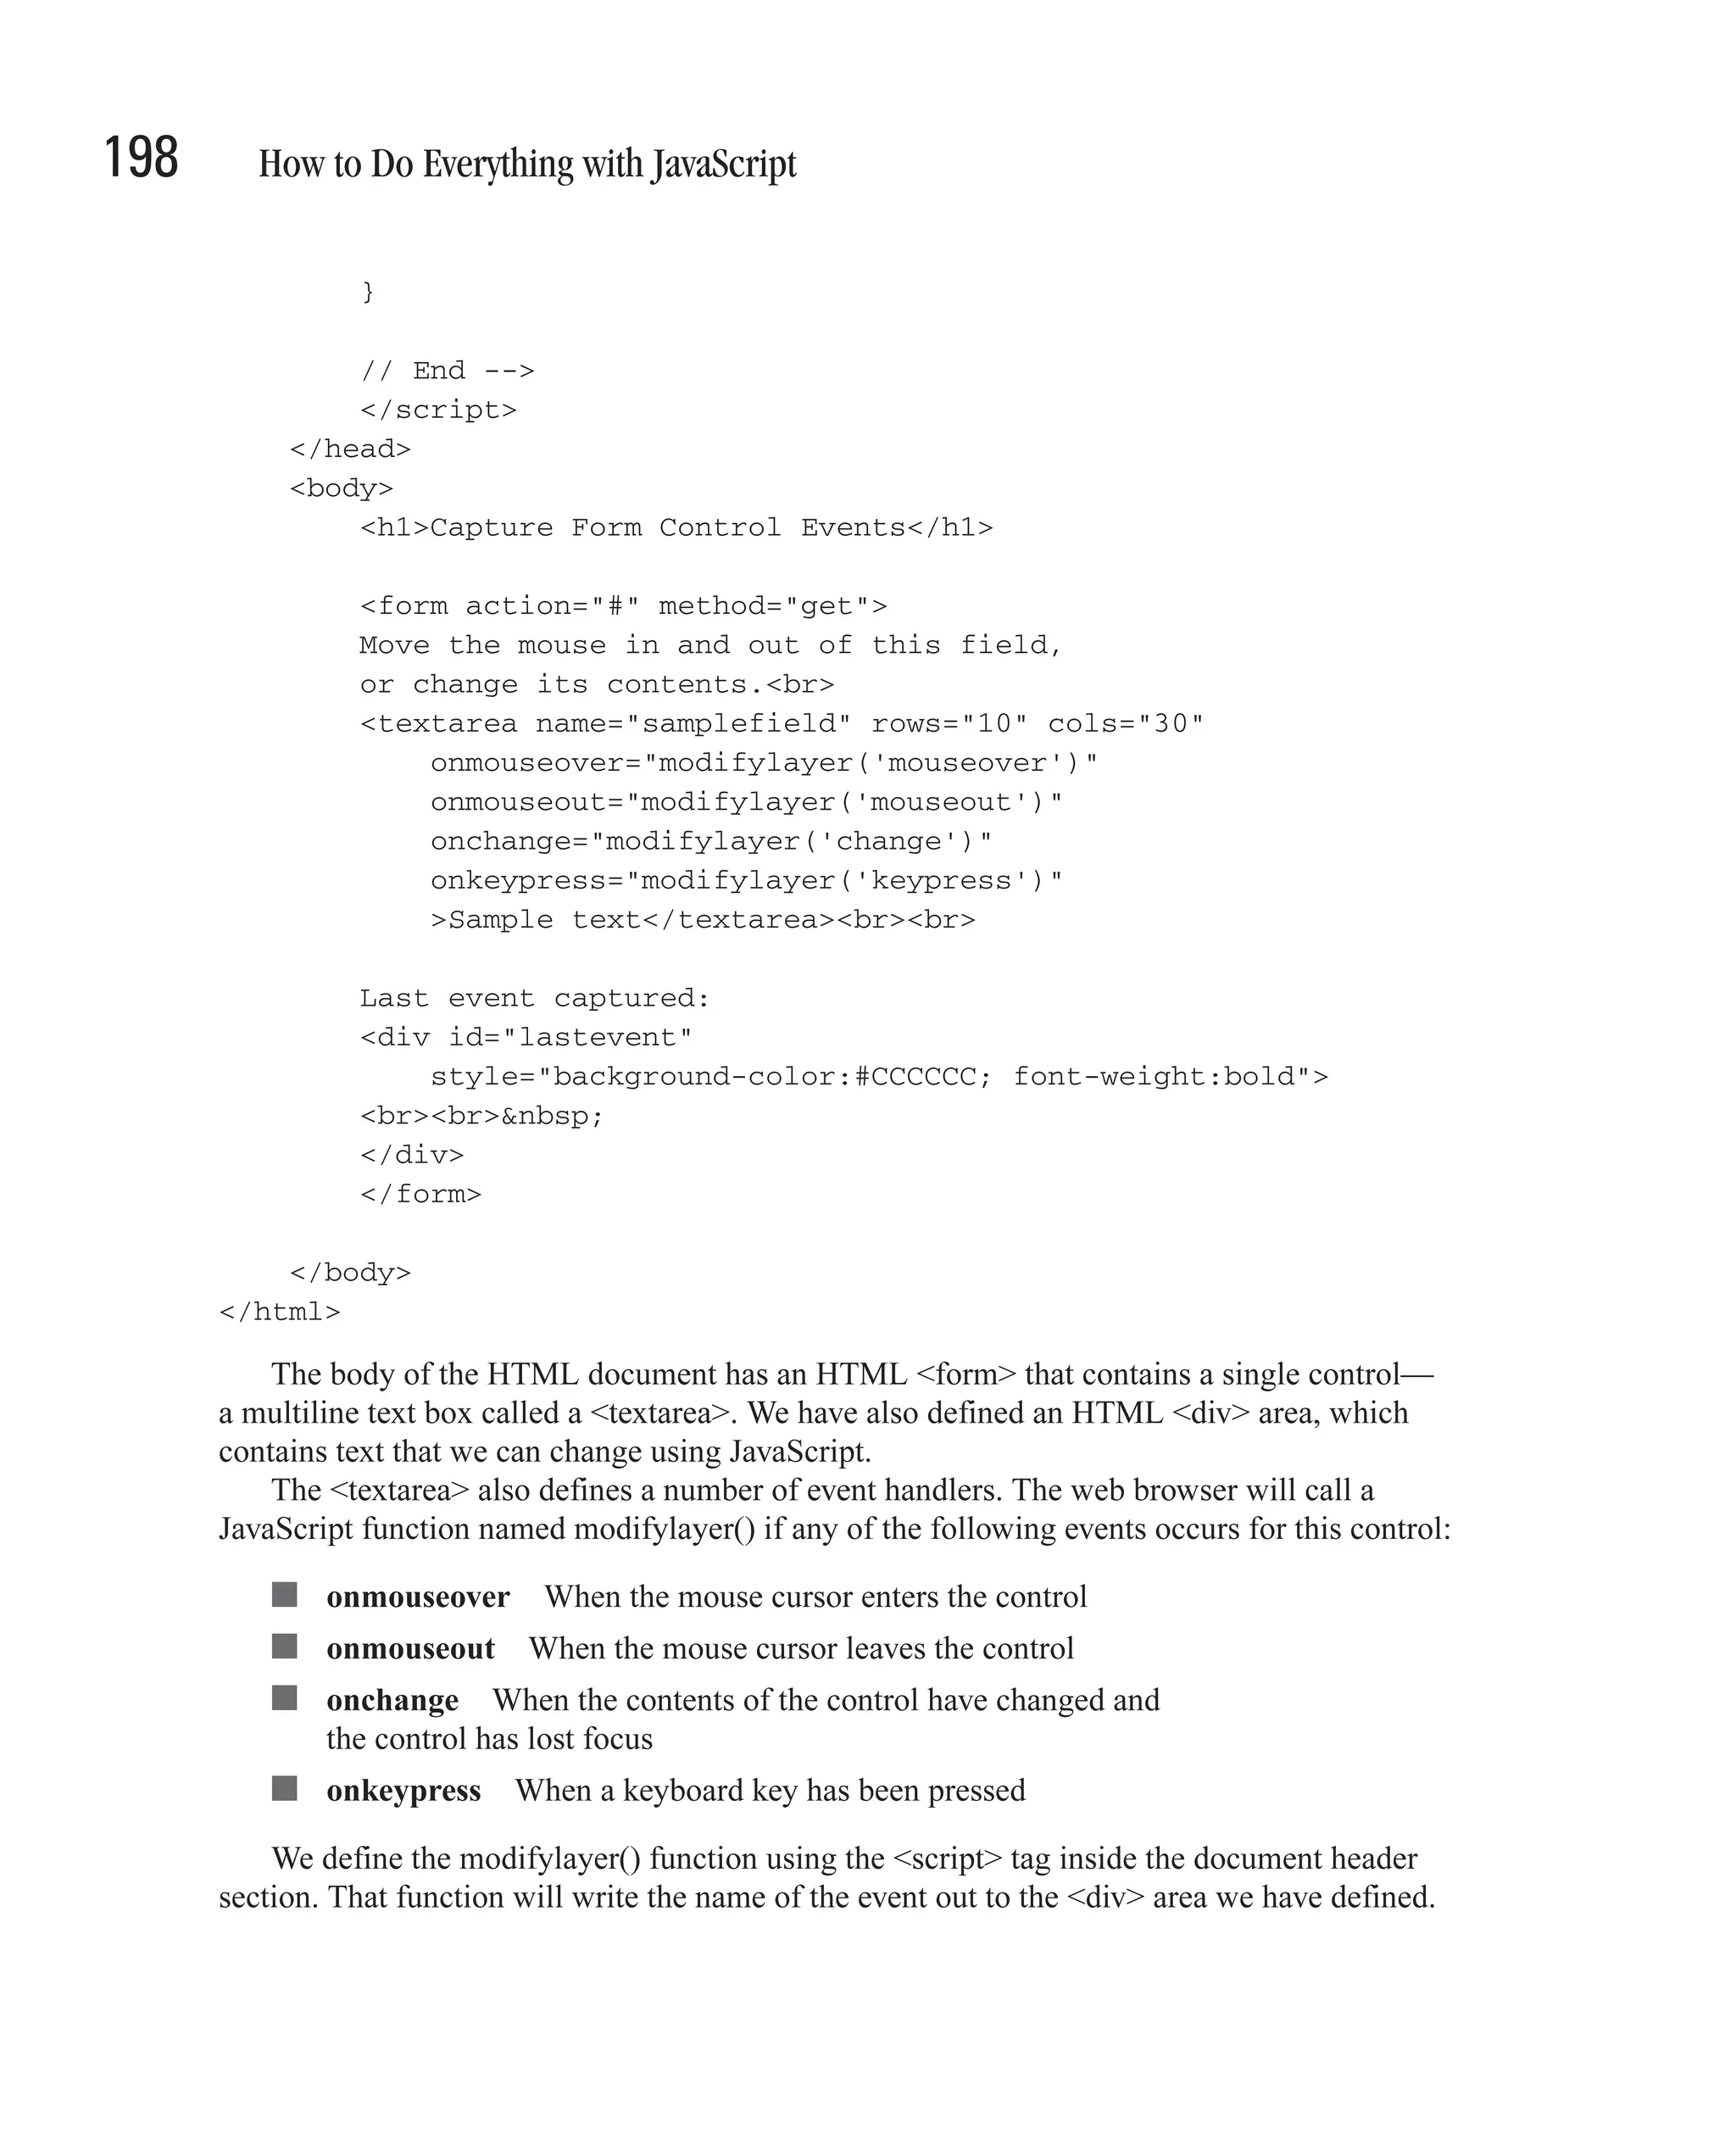
![CHAPTER 8: Manipulate Web Forms 197 Our onsubmit event handler actually has the ability to stop the web form from being submitted. Returning the Boolean value false from the function causes processing to stop without the form being submitted to the server. <script language="JavaScript" type="text/javascript"> function checkname() { var username = document.forms[0].fullname.value; if (username != "Scott") { alert("Sorry, " + username + ". I cannot let you proceed."); return false; } else { return true; 8 } } </script> The preceding JavaScript function, when called by the same HTML form, will not submit to the web server if the user does not type Scott into the name field. Catch Events on Form Controls Like the HTML <form> tag, form controls can also have programmable events. A program can define a JavaScript function or code that will be executed when a certain event occurs. For instance, JavaScript can detect when the mouse cursor passes over a control, when it has gained or lost focus, or when its value has changed. For example, the following code demonstrates how some of the text box control’s events can be captured. <html> <head> <title>Capture Form Control Events</title> <script language="JavaScript" type="text/javascript"> <!-- // Begin function modifylayer(changetext) { var lefield = document.getElementById("lastevent"); lefield.innerHTML = changetext + "<br><br> ";](https://image.slidesharecdn.com/3592018/75/How-To-Do-Everything-With-JavaScript-217-2048.jpg)
![200 How to Do Everything with JavaScript Retrieve and Set Form Control Values in JavaScript One of the code samples from the preceding section demonstrated one of the many possible ways of retrieving values from a web form. The DOM provides JavaScript programs several ways to access the controls on a form and their values, including: ■ As a property of the forms array ■ As key values in the elements array ■ Using one of three different methods of the document object Not all of these techniques work in older versions of the major browsers, so you may have to employ some of the cross-browser scripting techniques discussed in Chapter 7. Access Form Values Using the forms Array One technique that will work in all JavaScript-enabled browsers is accessing form controls using the forms array. The forms array is a property of the DOM document object; it contains an indexed list of all the forms on a web page. Indexes in JavaScript start at zero. We start by creating a variable that refers to the form itself. var myform = document.forms[0]; We can then access any control on the form by name. For instance, the following code allows you to access the contents of a text box called fullname: var fullname = myform.fullname.value; As in “Accept Text Input with a Text Box,” earlier in this chapter, value is a property of the text box control. The preceding code placed the contents of that text box in a variable we called fullname. Using this technique allows us to access any control on the form, as long as it is named. The following code demonstrates a form that contains a text boxes, a list box, and a group of radio buttons. Before the form is submitted, a function named checkform() verifies that the user entered text or made a selection in each of the fields. <html> <head> <title>JavaScript Test</title> <script language="JavaScript" type="text/javascript"> <!-- // Begin function checkform() { var myform = document.forms[0]; // Accessing text boxes is easy](https://image.slidesharecdn.com/3592018/75/How-To-Do-Everything-With-JavaScript-220-2048.jpg)
![CHAPTER 8: Manipulate Web Forms 201 var fullname = myform.fullname.value; var emailaddr = myform.email.value; // Which drop down item is selected? var ageIdx = myform.age.selectedIndex; var age = myform.age.options[ageIdx].value; // Which radio button is selected? var hearObj = myform.hear; var hear = ""; for (var i = 0; i < hearObj.length; i++) { if (hearObj[i].checked) { hear = hearObj[i].value; } } // Check if any fields are blank 8 if ((fullname == "") || (emailaddr == "") || (age == "None") || (hear == "")) { alert("Some information appears to be missing."); return false; } else { return true; } } // End --> </script> </head> <body> <h1>JavaScript forms Array</h1> <form action="#" onsubmit="return checkform()"> <center> <table width="400" cellspacing="12"> <tr> <td align="right"><b>Name:</b></td> <td><input type="text" name="fullname"></td> </tr> <tr> <td align="right"><b>Email:</b></td>](https://image.slidesharecdn.com/3592018/75/How-To-Do-Everything-With-JavaScript-221-2048.jpg)
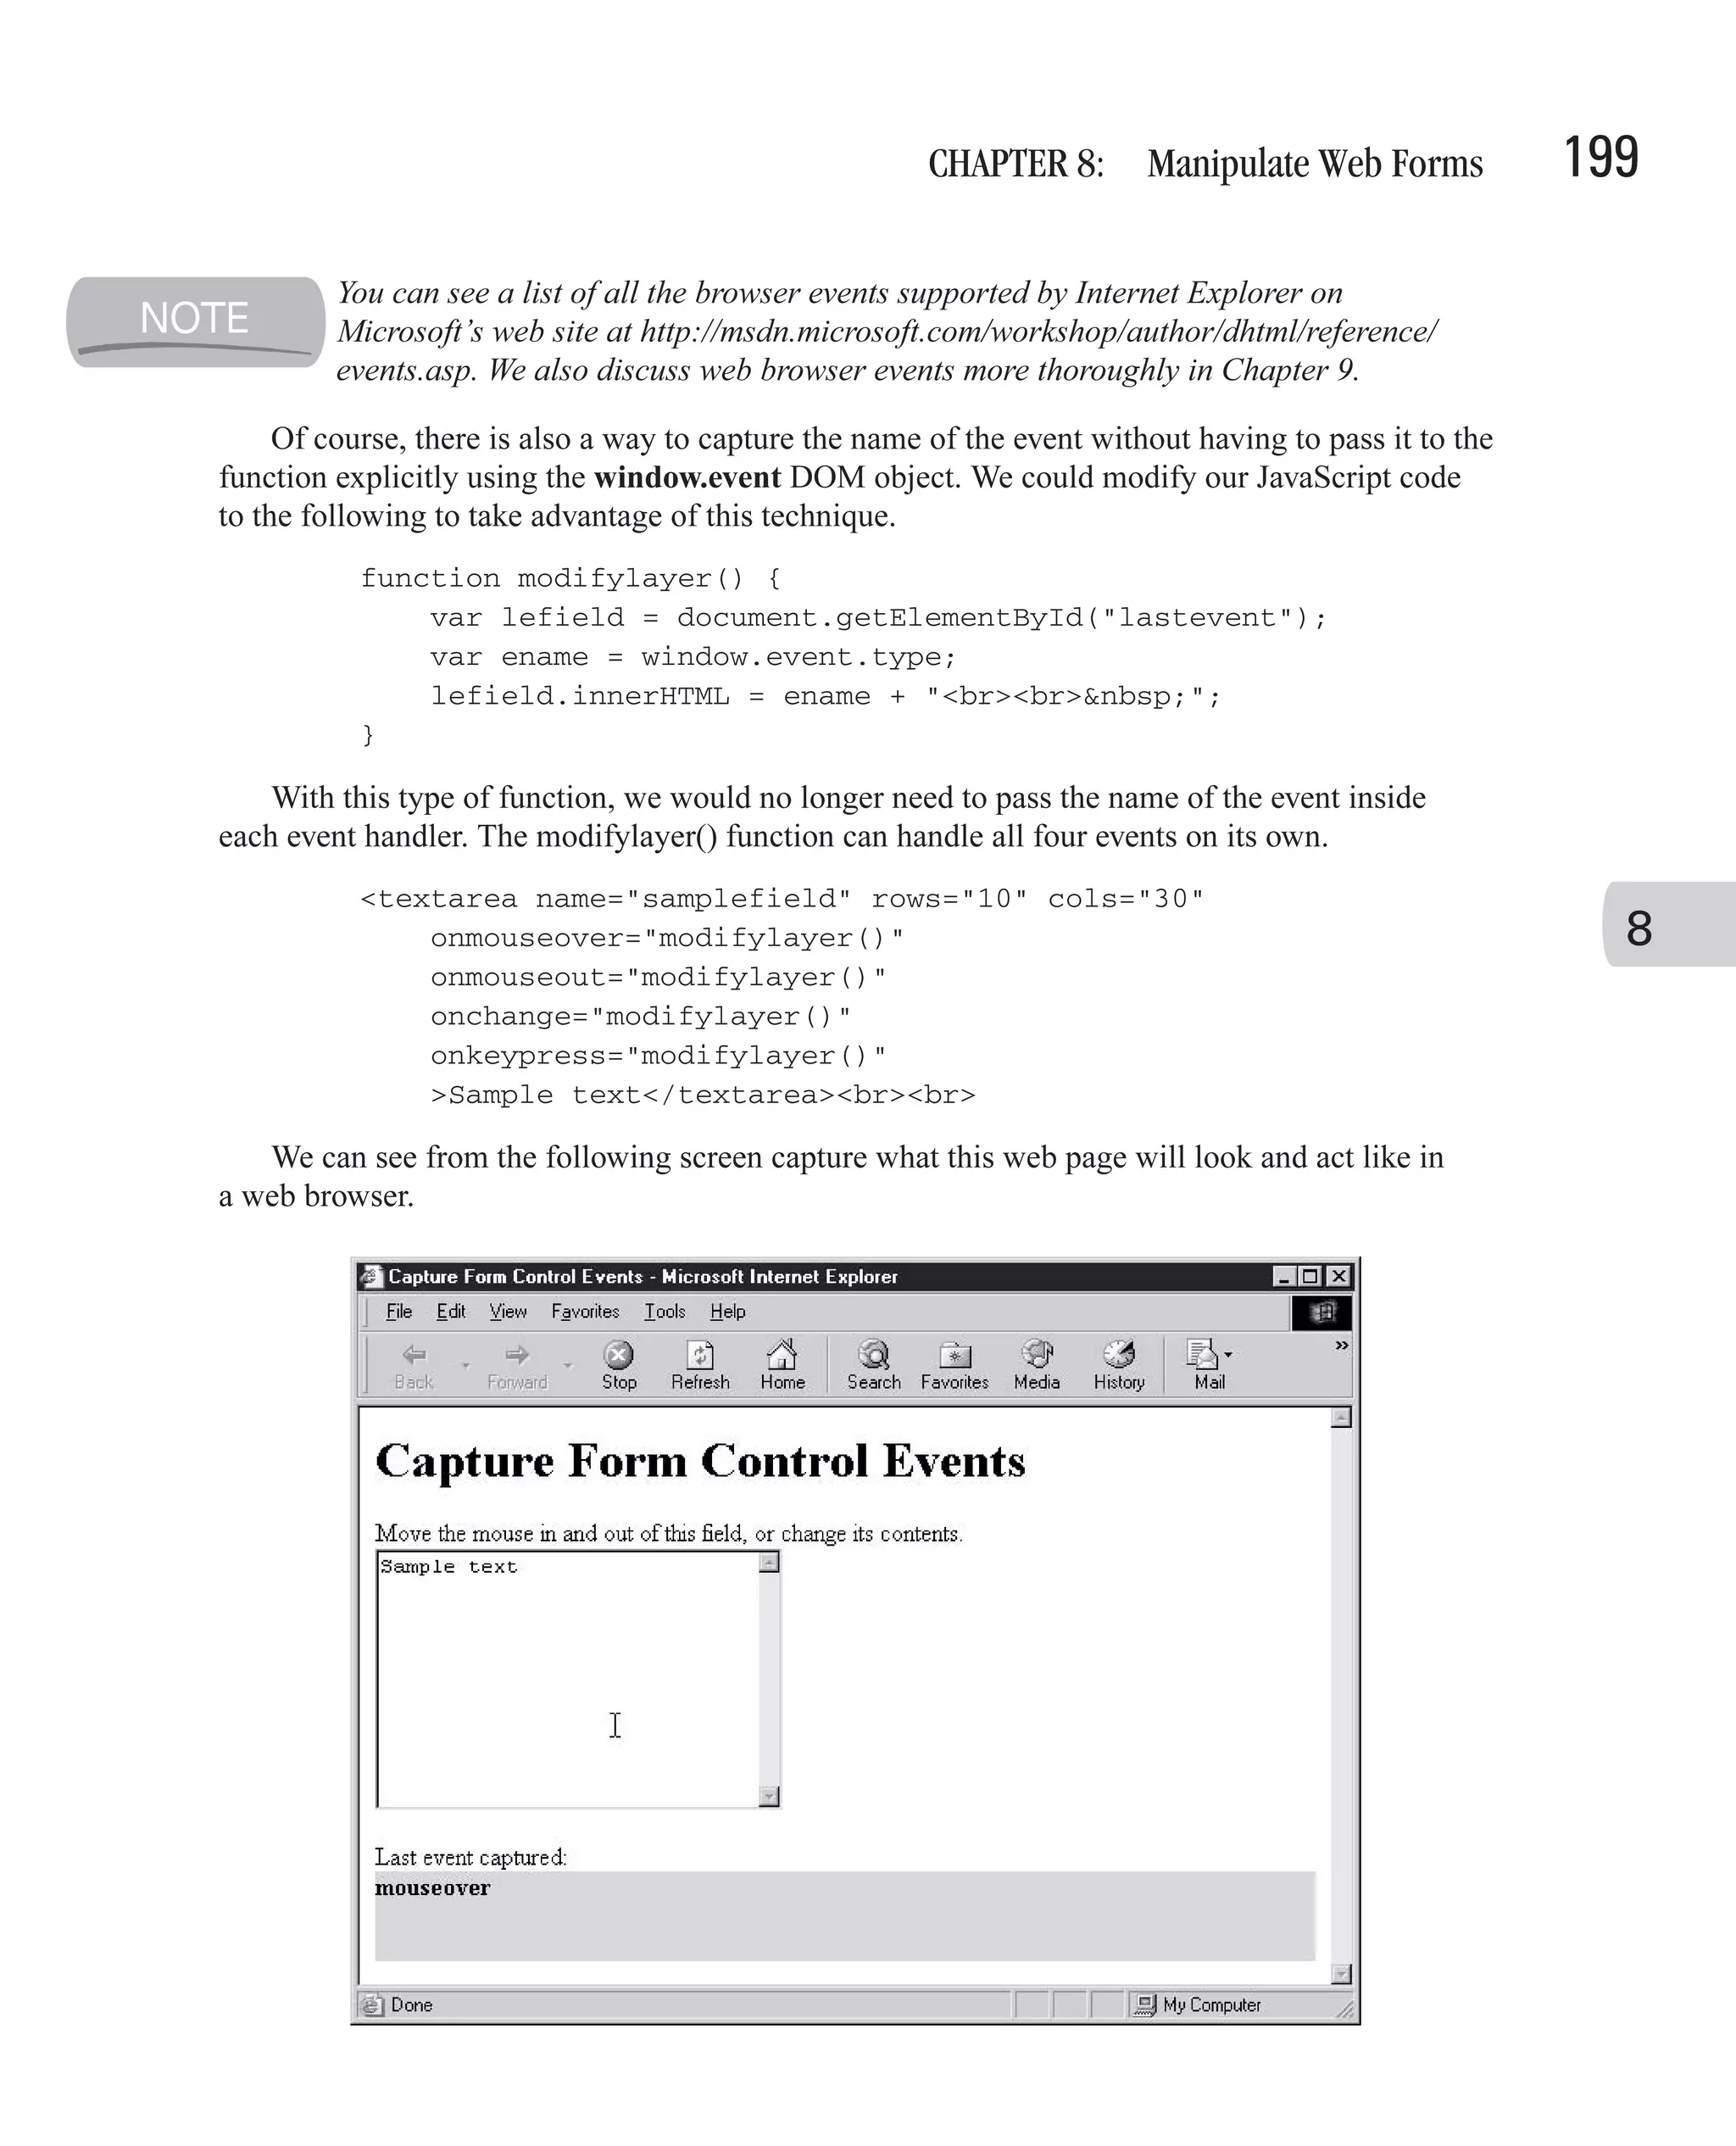
![CHAPTER 8: Manipulate Web Forms 203 8 FIGURE 8-4 A web page that contains various form controls a specific control, you need to know its position in the array beforehand. This array is convenient if you need to access all the controls in an array or search the array for a specific control. var earray = document.forms[0].elements; for (var count = 0; count < earray.length; count++) { alert(earray[count].name); } The preceding code demonstrates how the elements array can be queried. It successfully finds the first control on the form.](https://image.slidesharecdn.com/3592018/75/How-To-Do-Everything-With-JavaScript-223-2048.jpg)
![204 How to Do Everything with JavaScript Access Form Values Using getElementById() Both the techniques we have just examined (forms array and elements array) are the old way of using the DOM. The main problem with those methods is that they are specific to forms. If you wanted to access the contents of the <h1> element (the document heading) and change it, you could not. The getElementById() DOM method is the new preferred way to access any object on a web page—whether it is a form control, a <div> tag, or even a Java applet embedded in the page. To retrieve the value of the fullname text box, we would use the getElementById() function as follows: var fullname = document.getElementById("fullname").value; This code looks for an element with an ID of fullname anywhere inside the current document. JavaScript does not know (or care) at this point what type of object it is—it could be any HTML element. As its name implies, this function attempts to look up an element by its ID. Most HTML elements have an ID attribute (id=""), and in order to use this function on an element, you should set the ID attribute accordingly. <input type="text" id="fullname" name="fullname"> Most browsers will also search for elements by their name attributes if they cannot find an ID that matches. Access Form Values Using getElementsByName() Just as the getElementById() function will search for elements by ID attribute, the getElementsByName() function will search for elements by their name. The one difference between the two functions is that getElementsByName returns an array of elements. Thus, it can return more than one element. var hearObj = document.getElementsByName("hear"); This code will return an array of all the elements named hear on the web page. Earlier we created some HTML that included a set of radio buttons named hear—there were four elements named hear on the page (see “Access Form Values Using the forms Array”). Using this code on that form would return an array of four elements. The JavaScript code we used would then correctly determine which of the four radio buttons were selected. for (var i = 0; i < hearObj.length; i++) { if (hearObj[i].checked) { hear = hearObj[i].value; } }](https://image.slidesharecdn.com/3592018/75/How-To-Do-Everything-With-JavaScript-224-2048.jpg)
![CHAPTER 8: Manipulate Web Forms 205 Access Form Values Using getElementsByTagName() The final method provided by the new JavaScript DOM is getElementsByTagName(). This method is very helpful in retrieving elements that are not named, such as the submit button on our previous form example. This function allows us to look up objects on a web page by their HTML element name. var mybutton = document.getElementsByTagName("input"); mybutton[6].value = "Please wait..."; mybutton[6].disabled = true; By adding this code to the beginning of our checkform() function, we can disable the submit button to stop the user from submitting the form more than once. The getElementsByTagName(“input”) function returns an array of all the <input> elements on a web page. We know the submit button is the seventh element on the web page created using the HTML <input> tag—the other six are two text boxes and four radio buttons. Since the array starts at index zero, the submit button is located in the sixth index in the array. 8 Button has been disabled and caption set to “Please wait.”](https://image.slidesharecdn.com/3592018/75/How-To-Do-Everything-With-JavaScript-225-2048.jpg)


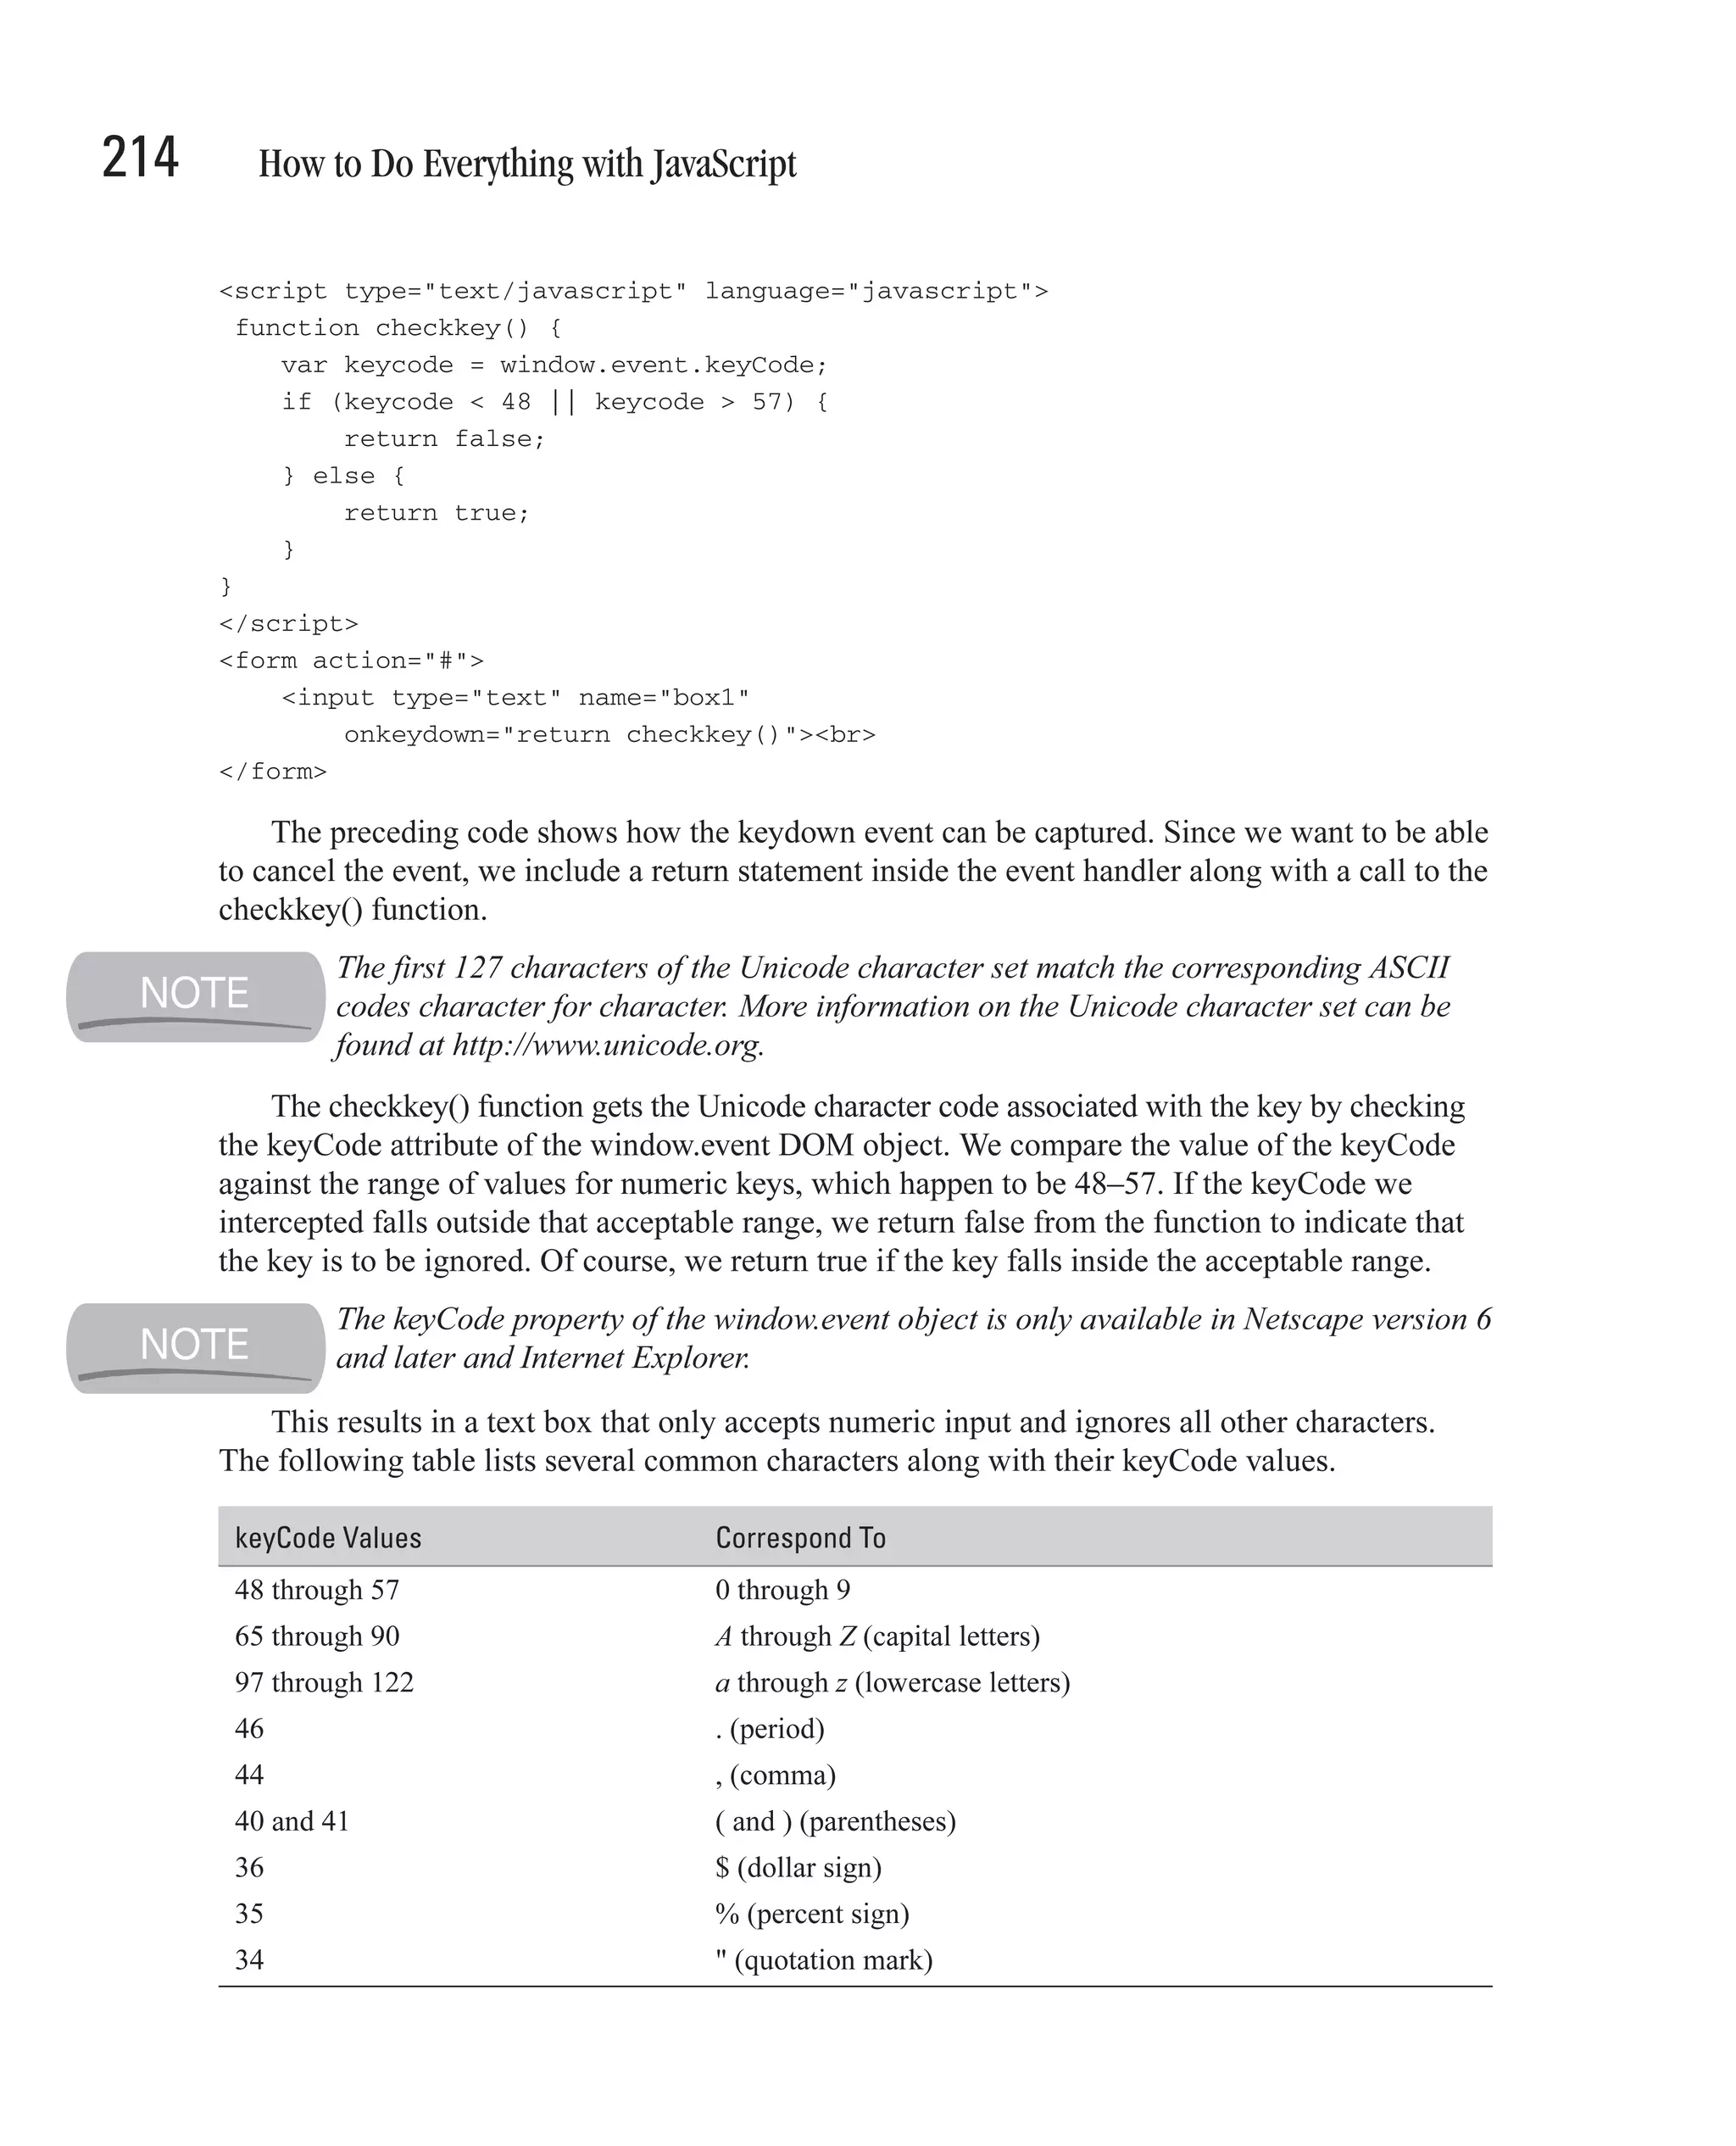
![210 How to Do Everything with JavaScript <script type="text/javascript" language="javascript"> function upd(instr) { document.forms[0].statusbox.value += instr + "; "; } </script> <form action="#"> <input type="text" name="box1" onblur="upd('blur box1')"><br> <input type="text" name="box2" onfocus="upd('focus box2')" onactivate="upd('activate box2')"><br><br> Event firing order: <input type="text" name="statusbox" size="40"> </form> In the preceding code, we have added a third text box called statusbox to the screen, to display the results of our event firing test. We have provided JavaScript to the three event handlers (onblur, onfocus, and onactivate) that will append the event and control names to the end of the statusbox text box. The results of the test are shown in Figure 9-1. As you can see, the events listed in the status box match the order we expected. FIGURE 9-1 User interface events are fired in a predictable order.](https://image.slidesharecdn.com/3592018/75/How-To-Do-Everything-With-JavaScript-230-2048.jpg)
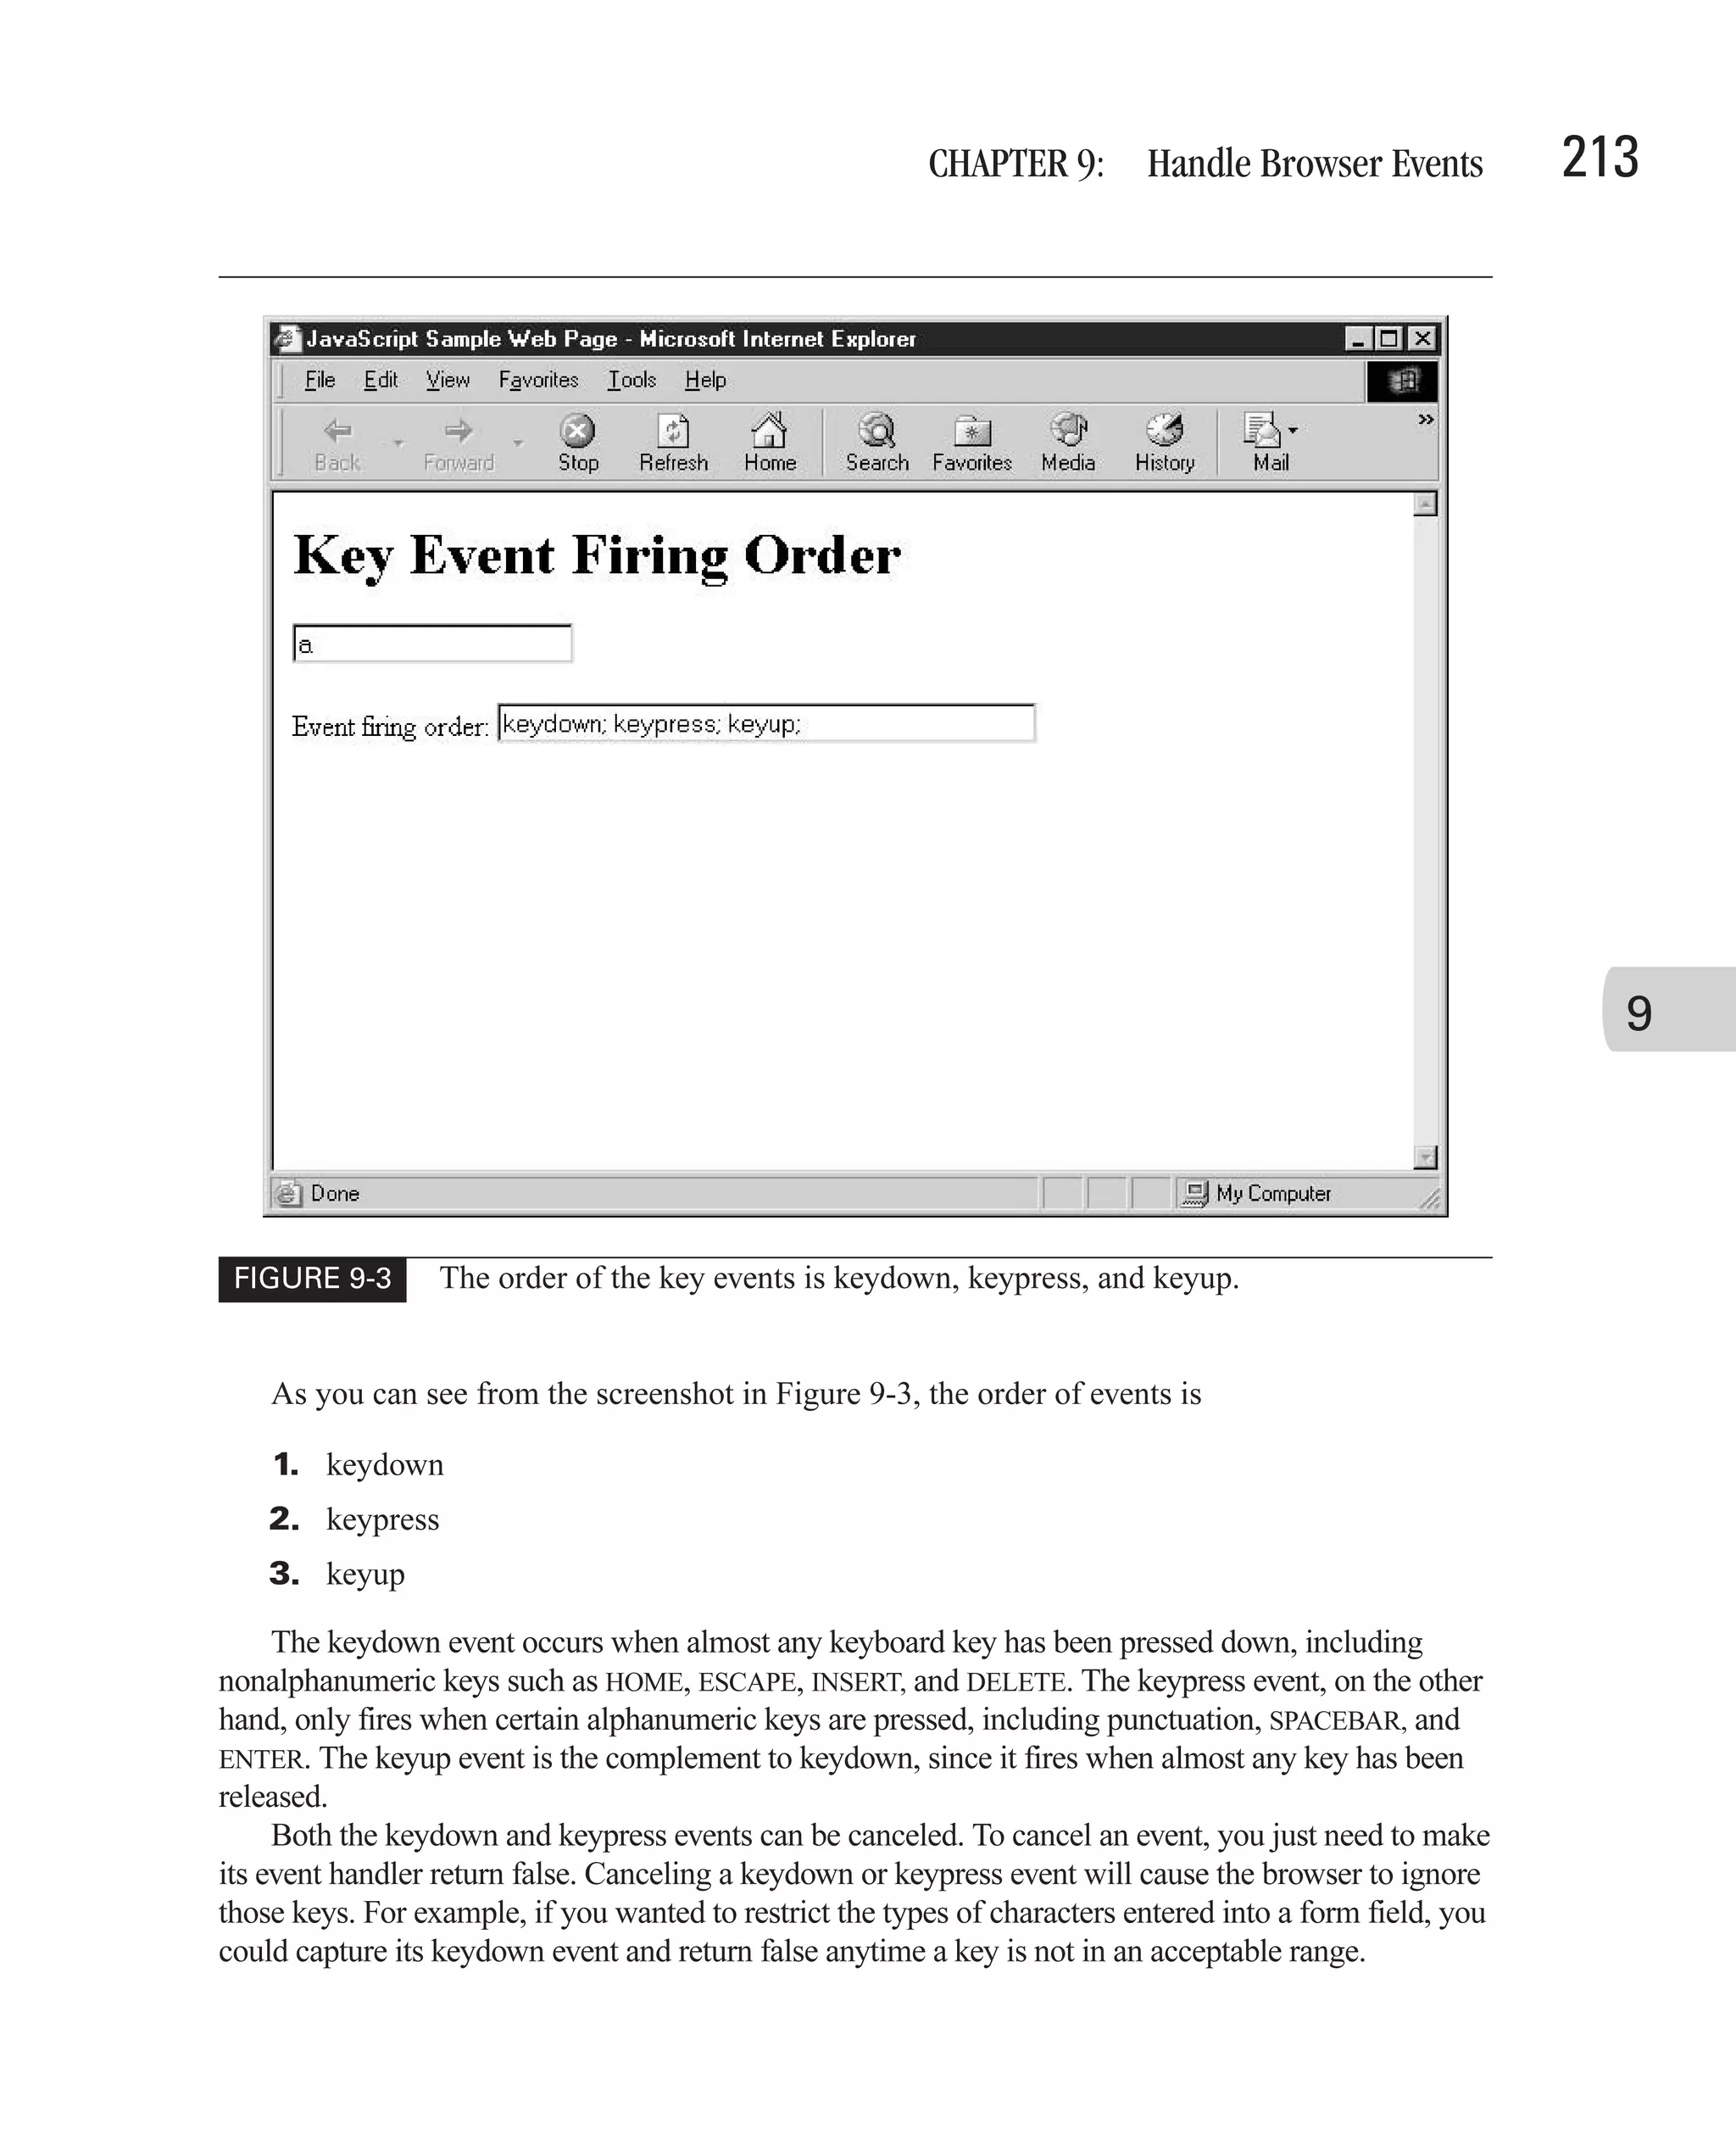
![212 How to Do Everything with JavaScript The mouseout event fires once the mouse pointer leaves the boundaries of the image. The changeimage() function handles this event as well, causing the image to go back to its original source. We can see the effects of this image rollover in Figure 9-2. Handle Key Events JavaScript programmers rarely use key event handlers to catch key events. While there are a few situations where you might want to use them, this type of event handling is more commonly found in Windows applications (such as Visual Basic programs) than in web-based programming. Like the user interface events, key events fire in a predictable sequence. There are three main key events in HTML. Event Name Event Handler Name Defined In keypress onkeypress HTML 4.01 keydown onkeydown HTML 4.01 keyup onkeyup HTML 4.01 By slightly modifying the code found in the “Handle User Interface Events” section, we can see the predictable order the events fire in. <script type="text/javascript" language="javascript"> function upd(instr) { document.forms[0].statusbox.value += instr + "; "; } </script> <form action="#"> <input type="text" name="box1" onkeypress="upd('keypress')" onkeydown="upd('keydown')" onkeyup="upd('keyup')"><br><br> Event firing order: <input type="text" name="statusbox" size="40"> </form> Before After FIGURE 9-2 The mouseover and mouseout events power image rollover effects.](https://image.slidesharecdn.com/3592018/75/How-To-Do-Everything-With-JavaScript-232-2048.jpg)
![216 How to Do Everything with JavaScript ■ select event The select event occurs when the user selects text inside a text box or text area. Text can be selected by holding the left mouse button down while dragging across the text or by holding the SHIFT key down while using the arrow keys to move the cursor across the text. ■ change event The change event occurs when a control loses focus (the user tabs out of it) and its value has been altered. This way, in text boxes the change event does not fire for each and every keystroke when a user is entering a value but only when the user leaves the field. This same event fires on radio buttons, check boxes, and select lists in the same manner. ■ abort event The abort event occurs when the browser stops trying to load an image on the web page. This can occur when the user hits the browser’s Stop button or clicks a link to go to another page. In my experience, this event is rarely used. ■ error event The error event occurs when an error happens while the web page is being loaded. This could be an error specific to a particular object (such as a Java applet’s failing to load) or a run-time error caused by poorly written JavaScript code. This is another event that is rarely captured in most web pages. ■ resize event The resize event fires when an object is being resized—for instance, if a browser window has been resized by the user, or a frame. There may be times when you would like to be able to resize the individual controls inside the window based on the available space, although capturing this event is still rare. ■ scroll event For web objects that scroll, such as the browser window or a text area form control, the scroll event is fired anytime the object’s scroll bar is changed. This can be done using the mouse to move the scroll bar manually, by using arrow keys, or by other means. The following code demonstrates how the load event can be captured using the onload event handler. Our web page contains a form, and the onload event handler code populates a list box on that form with some predefined values. <html> <head> <title>JavaScript Sample Web Page</title> <script language="JavaScript" type="text/javascript"> <!-- // Begin function initialize() { var lst = document.getElementById("samplelist"); var opn = new Array(20); var temp; var counter; for (counter = 1; counter <= 10; counter++) { opn[counter] = document.createElement("option"); lst.options.add(opn[counter]); temp = counter * 10; opn[counter].innerText = temp.toString();](https://image.slidesharecdn.com/3592018/75/How-To-Do-Everything-With-JavaScript-236-2048.jpg)

![CHAPTER 9: Handle Browser Events 219 How Event Bubbling Works Let’s assume you have a web form that contains a push button. You have created JavaScript onclick event handlers for both the <form> tag and the <input type="button"> tag. When you click the push button control using the mouse, which onclick event handler do you think will be called—the one for the button or the one for the form? In fact, the browser will execute both event handlers. The onclick event handler for the button will be called first, since it is the innermost element. Next, the onclick event handler for the form will be called. If there are any other onclick event handlers eligible to handle this event (for instance, on the <body> tag), they will be called in turn as well. This process, where an event is first handled by the innermost element, followed by the next innermost element, and so on, is called event bubbling. Trigger Events in JavaScript There will be times when you would like to have your JavaScript program cause an event to 9 occur. This is called triggering the event, and many objects inside the web page provide methods you can call to trigger the event. There are two ways to cause an event to be triggered in JavaScript: ■ Call the method associated with the event ■ Call the fireEvent method to fire the event manually Call the Method Associated with an Event The first technique is to call the method associated with an event. Most events have a method that will simulate the activity that causes the event to fire. For instance, the HTML <form> object has a method called submit() that will attempt to submit the form, causing the submit event to fire. We can demonstrate this with the following HTML code. The code shows how to use a hyperlink to simulate a submit button. <script type="text/javascript" language="javascript"> function clickme() { document.forms[0].submit(); } </script> <form action="http://www.example.com/cgi-bin/entry.pl"](https://image.slidesharecdn.com/3592018/75/How-To-Do-Everything-With-JavaScript-239-2048.jpg)
![220 How to Do Everything with JavaScript method="get"> Please enter your full name: <br> <input type="text" name="fullname"><br> <a href="javascript:clickme()">Click here to <b>submit</b> the form</a> </form> When the user clicks the hyperlink inside the form, JavaScript calls the clickme() function. The clickme() function calls the submit() method on the form object, which causes the form to submit itself. The submit() method acts exactly as if the user clicked a submit button on the form, causing the submit event to fire. In IE, calling the submit() method will cause the form to submit, but will not call any submit event handlers attached to the form. If your <form> has an onsubmit attribute, you will have to call those JavaScript functions manually before calling the submit() method. Other events also have associated methods that cause the event to occur. For instance, the focus() method will cause a control to gain focus, while the blur() method will cause a control to lose focus. Similarly, there is a click() method that allows HTML objects to simulate being clicked with the mouse. Use the fireEvent Method The second technique is to call the fireEvent() method to trigger the event manually. In IE, fireEvent() is a method of most objects in the DOM, and it can be used to trigger events. For example, you can trigger the onclick event of a push button control in the following manner: var btn1 = document.forms[0].helpButton; btn1.fireEvent("onclick"); Unfortunately, this method is not very reliable. Although this technique is supposed to be able to trigger events on any object, I have found that it does not work for certain events or objects, such as the onsubmit event on a form object, or the onclick event on a submit button object. Given that it is not part of the official DOM standard and does not work in any browser other than IE, developers should be very careful when using this technique. Overcome Browser Incompatibility Browser events are a weak spot when it comes to cross-browser compatibility. Sure, HTML defined a small number of standard events, and the various DOM specifications (Levels 1 and 2) have taken events a step further. But browser manufacturers have added many more programmable events for JavaScript developers to use, as evidenced by the more than 50 events supported by both Netscape and IE. Some of the additional events are slight modifications of existing events. For instance, IE provides onbeforeactivate and onbeforeunload event handlers to allow programmers to capture](https://image.slidesharecdn.com/3592018/75/How-To-Do-Everything-With-JavaScript-240-2048.jpg)


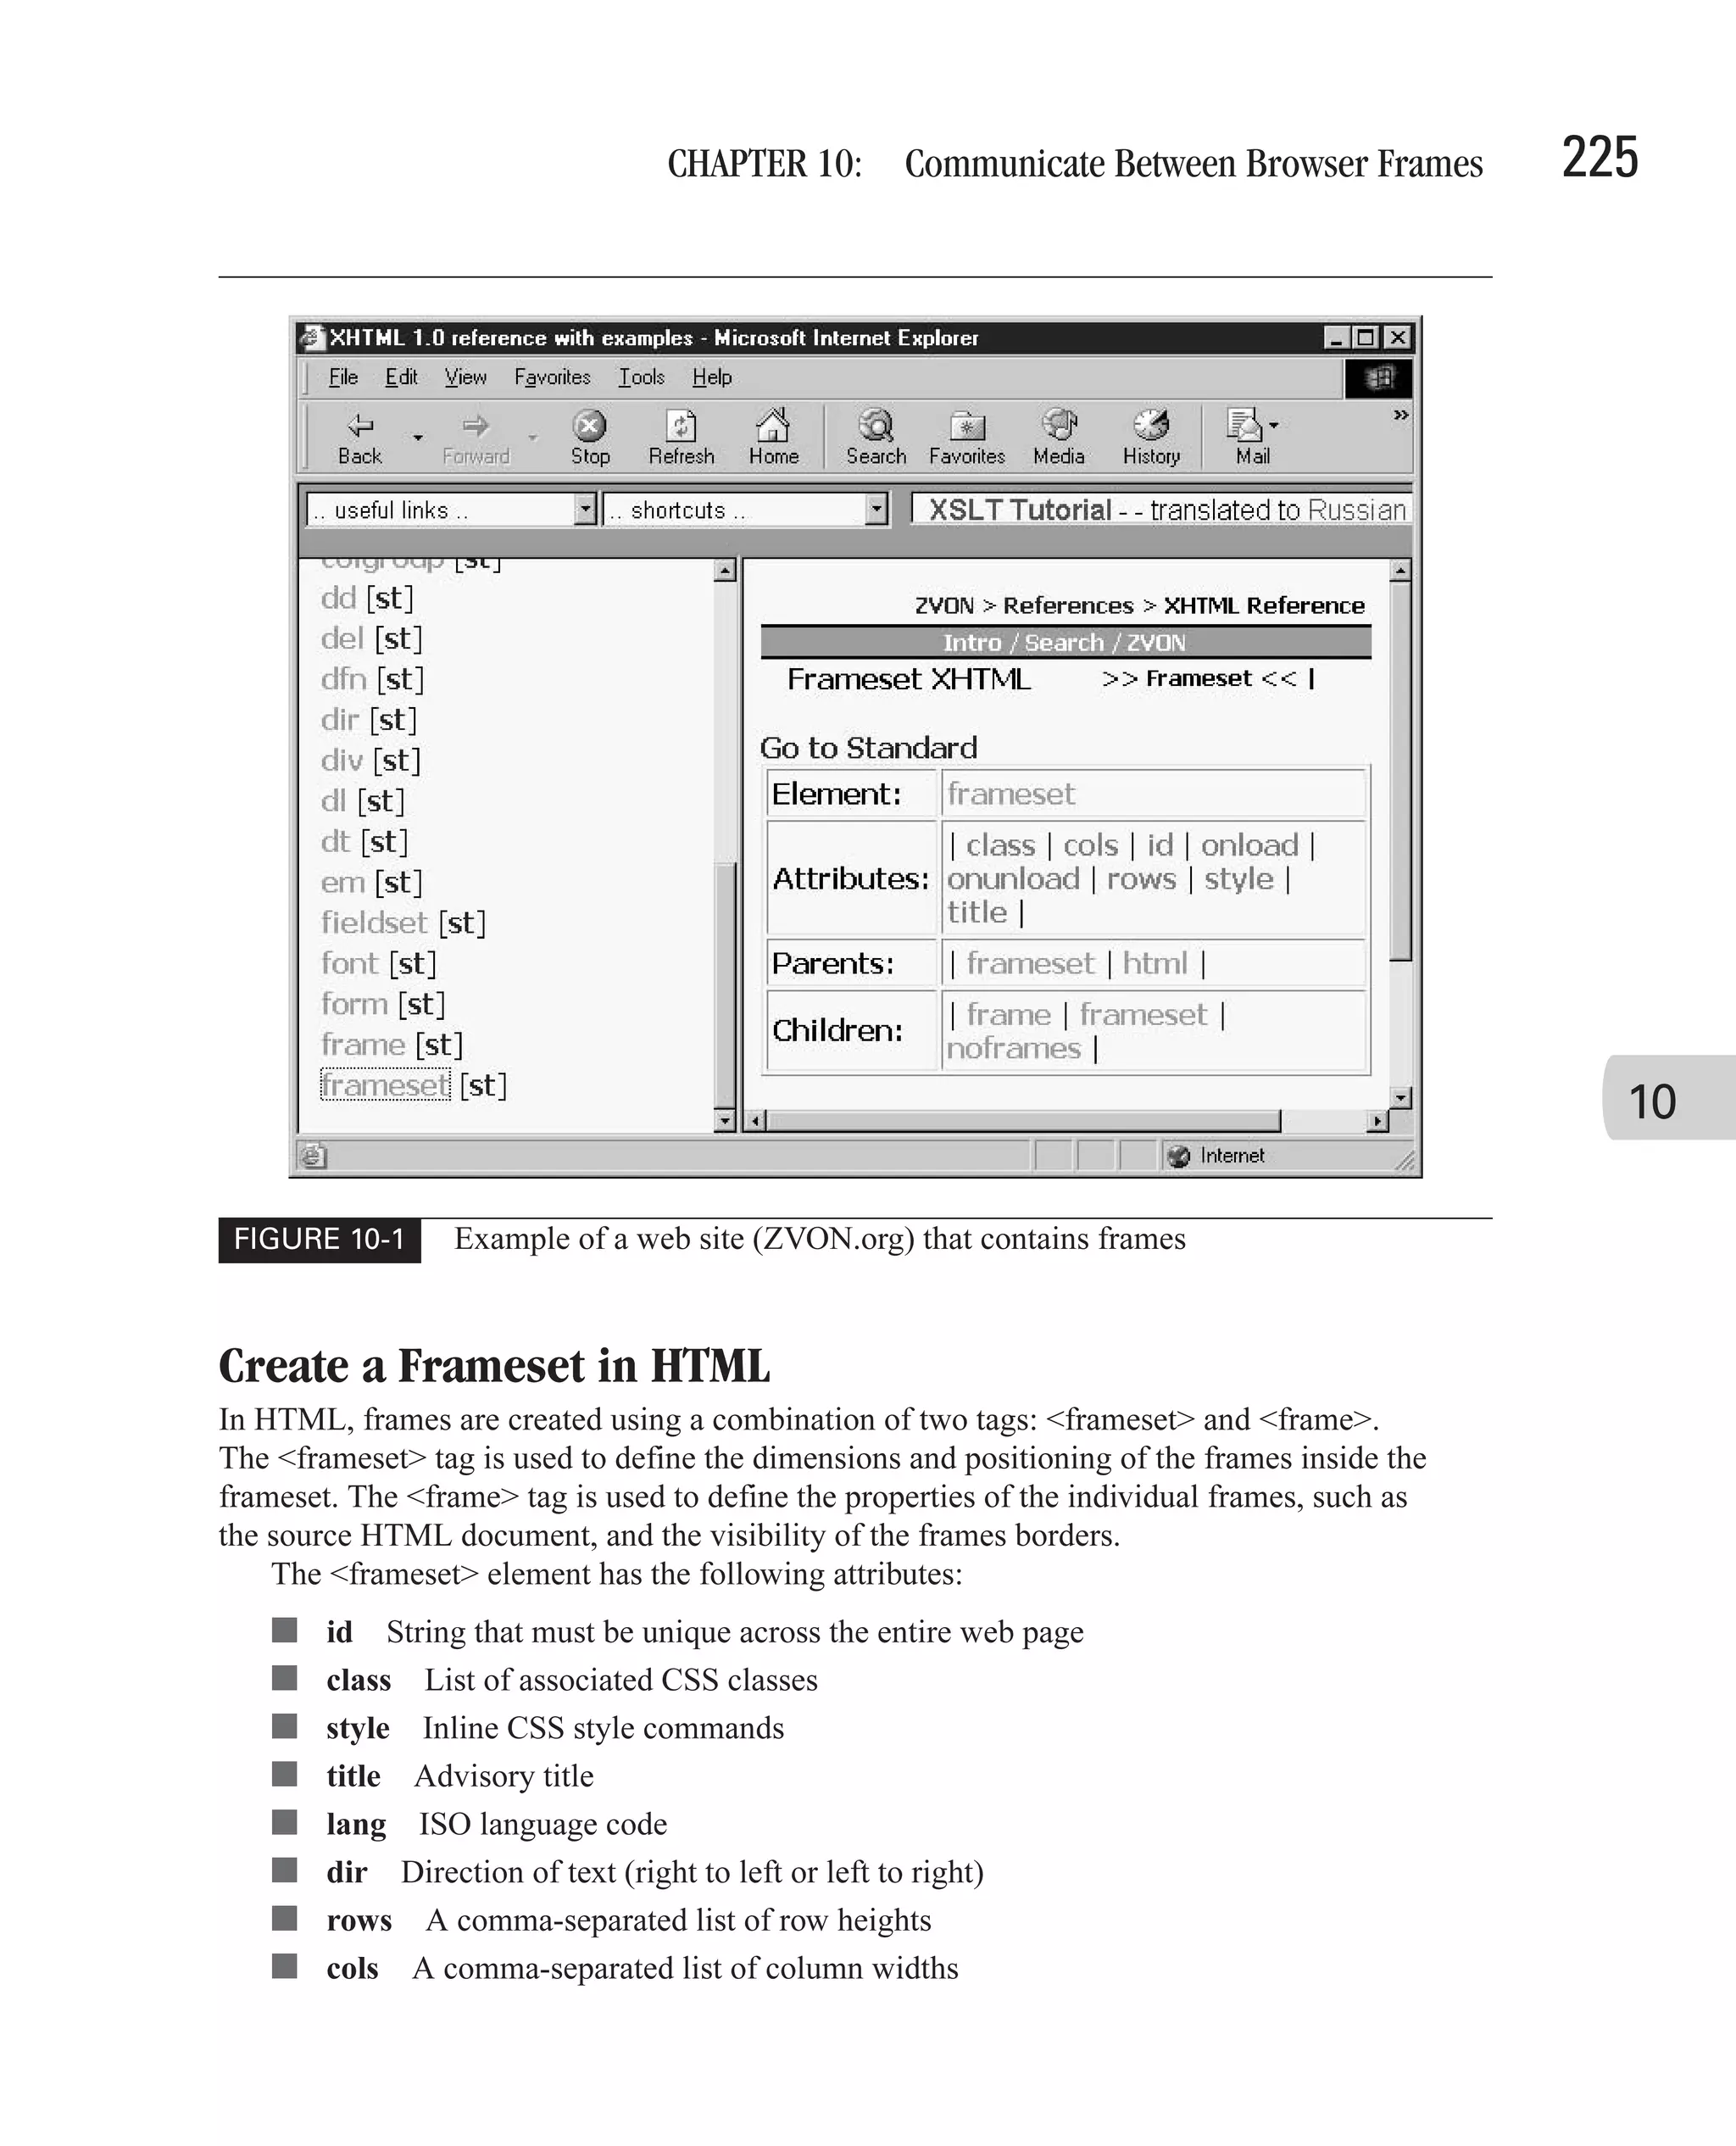

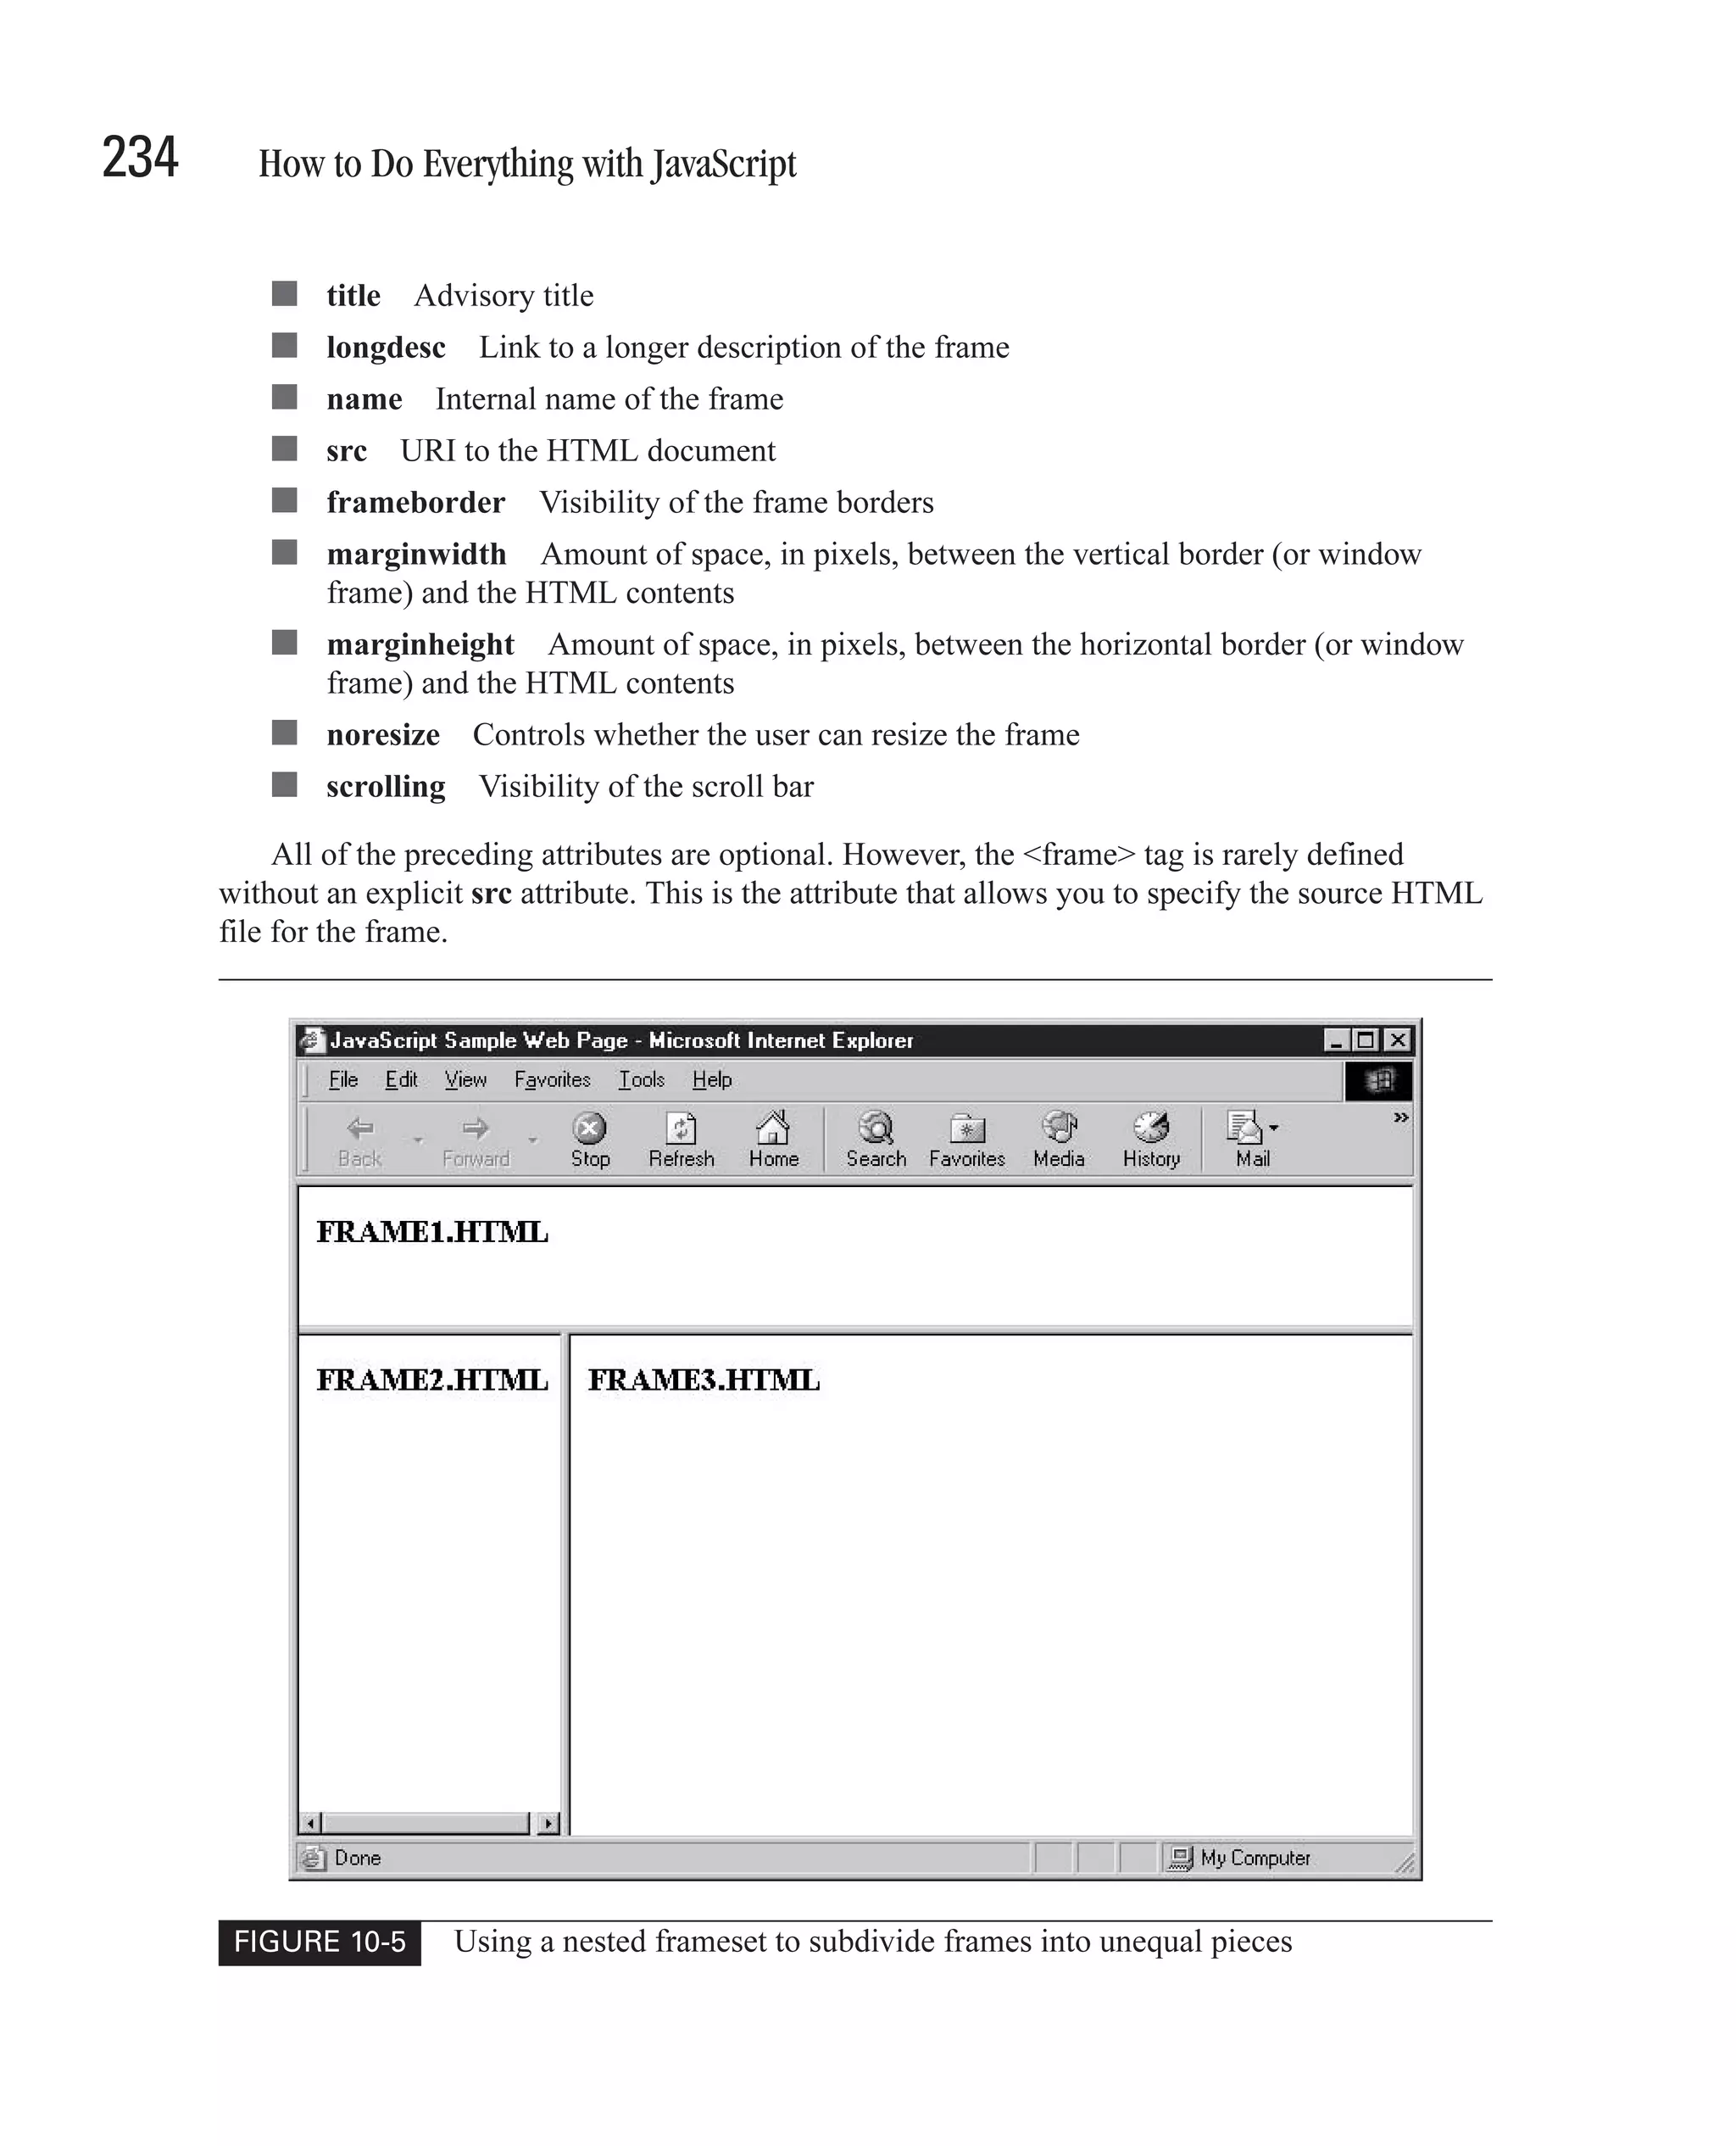
![236 How to Do Everything with JavaScript Access Another Frame Using JavaScript As discussed in Chapter 8, we can use the following JavaScript code to access the contents of a form: var myform = document.forms[0]; var fullname = myform.fullname.value; This code will create a variable named myform, which directly refers to the first form on a web page. It will then use the myform variable to access a control named fullname and its contents. But how would we access the contents of that form if it were in another frame? Let’s assume for a minute that we have a frameset that is defined with the following HTML code. <html> <head> <title>Framesets</title> </head> <frameset rows="100, *"> <frame src="banner.html" name="banner"> <frameset cols="150, *"> <frame src="menu.html" name="menu"> <frame src="mainbody.html" name="bodyframe"> </frameset> </frameset> </html> If we were in the second frame of that frameset (menu), how would we access the contents of a form contained in the third frame (bodyframe)? We do this by accessing the window object for the frameset. JavaScript provides several types of window objects for use in programs. The various JavaScript window objects, and their descriptions, are listed in Table 10-2. The window object and the Document Object Model in general are discussed in greater detail in Chapter 11. Object Name Description window The current frame or window top The topmost window parent The frameset that contains the current frame (not always the topmost window) self The current frame or window; same as the window object TABLE 10-2 The JavaScript Window Objects](https://image.slidesharecdn.com/3592018/75/How-To-Do-Everything-With-JavaScript-256-2048.jpg)
![CHAPTER 10: Communicate Between Browser Frames 237 Each of the window objects listed in Table 10-2 contains an array named frames. When a window object refers to an entire frameset, that object’s frames array contains one element for each of the frames contained in the document. When a window object refers to a single frame, this array will normally be empty. Of course, if the individual frames are also framesets, the frames array will not be empty. To access the contents of the bodyframe frame from JavaScript code inside the menu frame, we start with the topmost window, using the top object. We then access the third element (index 2, since arrays start at index 0) in that array. var bodyframe = top.frames[2]; The bodyframe variable represents a reference to the third frame defined in our frameset. We can then access the document contained by that window using the document object from that frame. var bodyframe = top.frames[2]; var bodydocument = bodyframe.document; Finally, we can access the form, and the elements on that form, in the usual manner from the document object represented by bodydocument. var bodyframe = top.frames[2]; var bodydocument = bodyframe.document; var myform = bodydocument.forms[0]; var fullname = myform.fullname.value; 10 This code is broken into four lines for manageability and easy reading. If a program needed to reference more than a few elements on that form, or other objects on the bodyframe frame, having a local variable that refers to that frame would be handy. To save some unnecessary keystrokes, the preceding code can be written all on one line, like this. var fullname = top.frames[2].document.forms[0].fullname.value; This code is harder for the average programmer to read, however, and is slightly more confusing. Code that is difficult to understand can often be a source of errors. Instead of using the frames array, a frame can also be accessed by name. var fullname = top.bodyframe.document.forms[0].fullname.value; Accessing the frame by name makes the code a bit easier to read and allows frames to be resorted without large code changes. Call a JavaScript Function Located in Another Frame You’ve already seen how the contents of a frame (its forms and other HTML components) can be accessed from external frames, so it should be no surprise that JavaScript variables and functions can be accessed externally as well.](https://image.slidesharecdn.com/3592018/75/How-To-Do-Everything-With-JavaScript-257-2048.jpg)


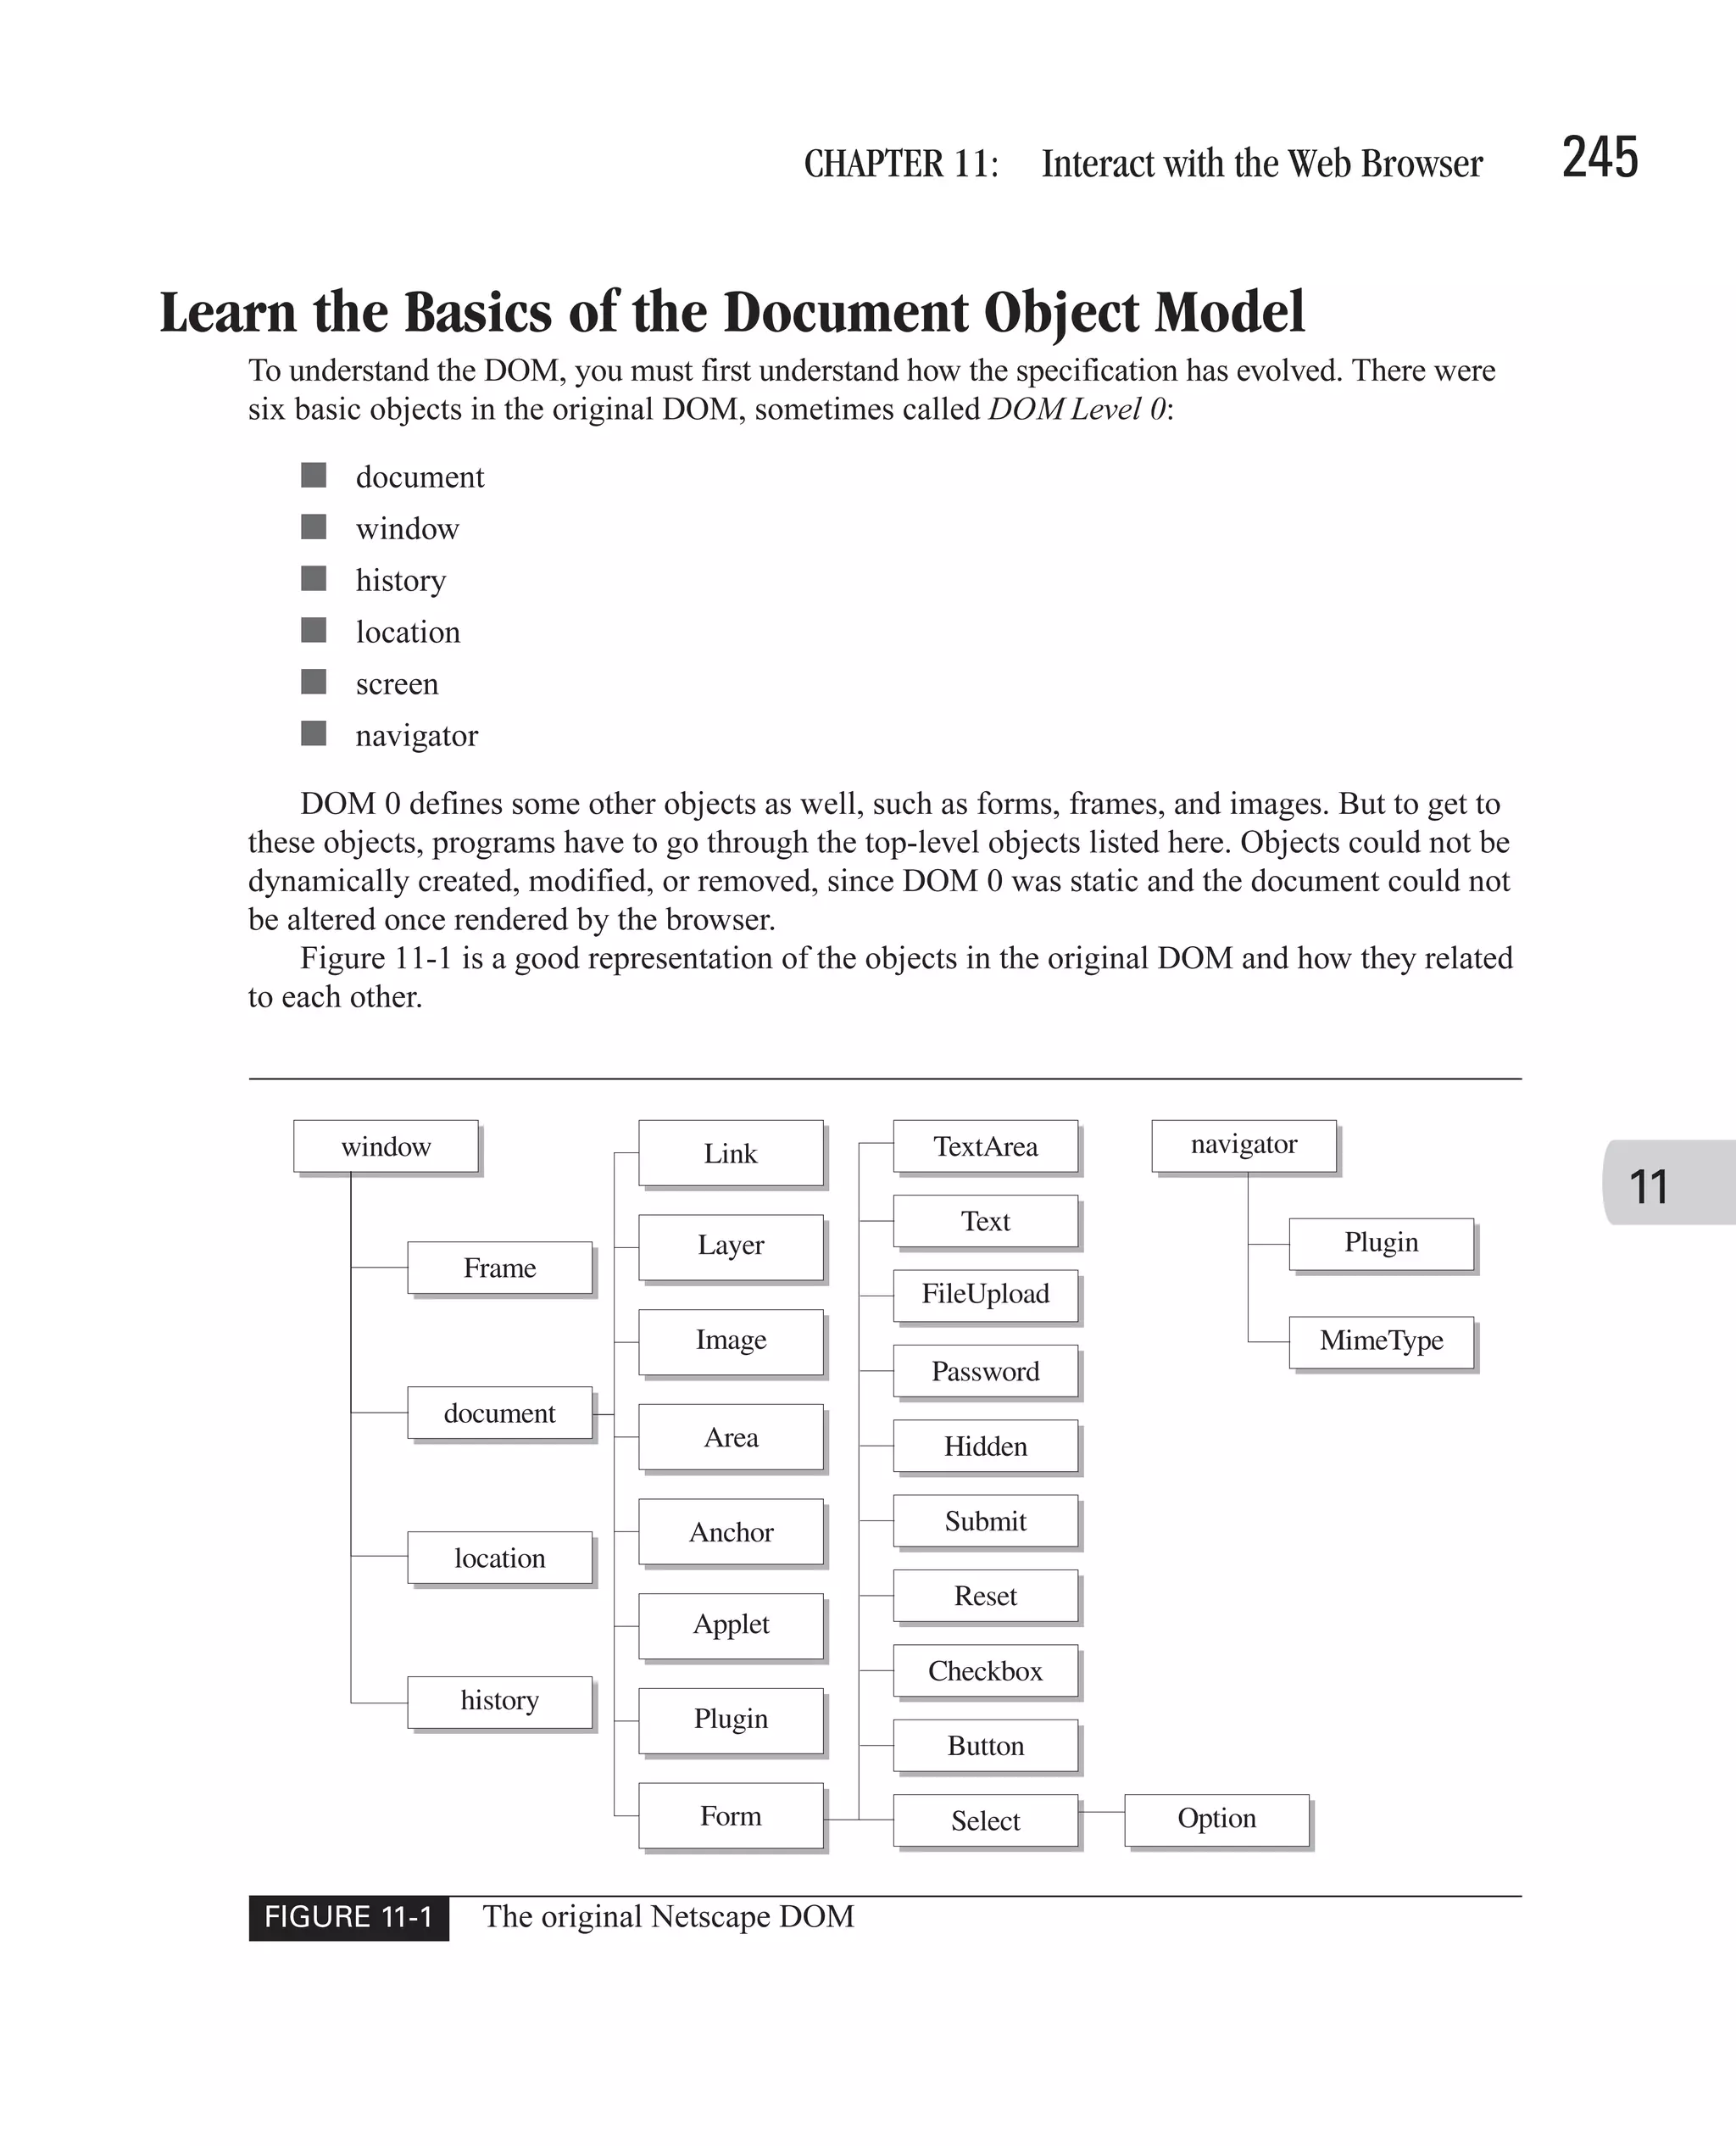
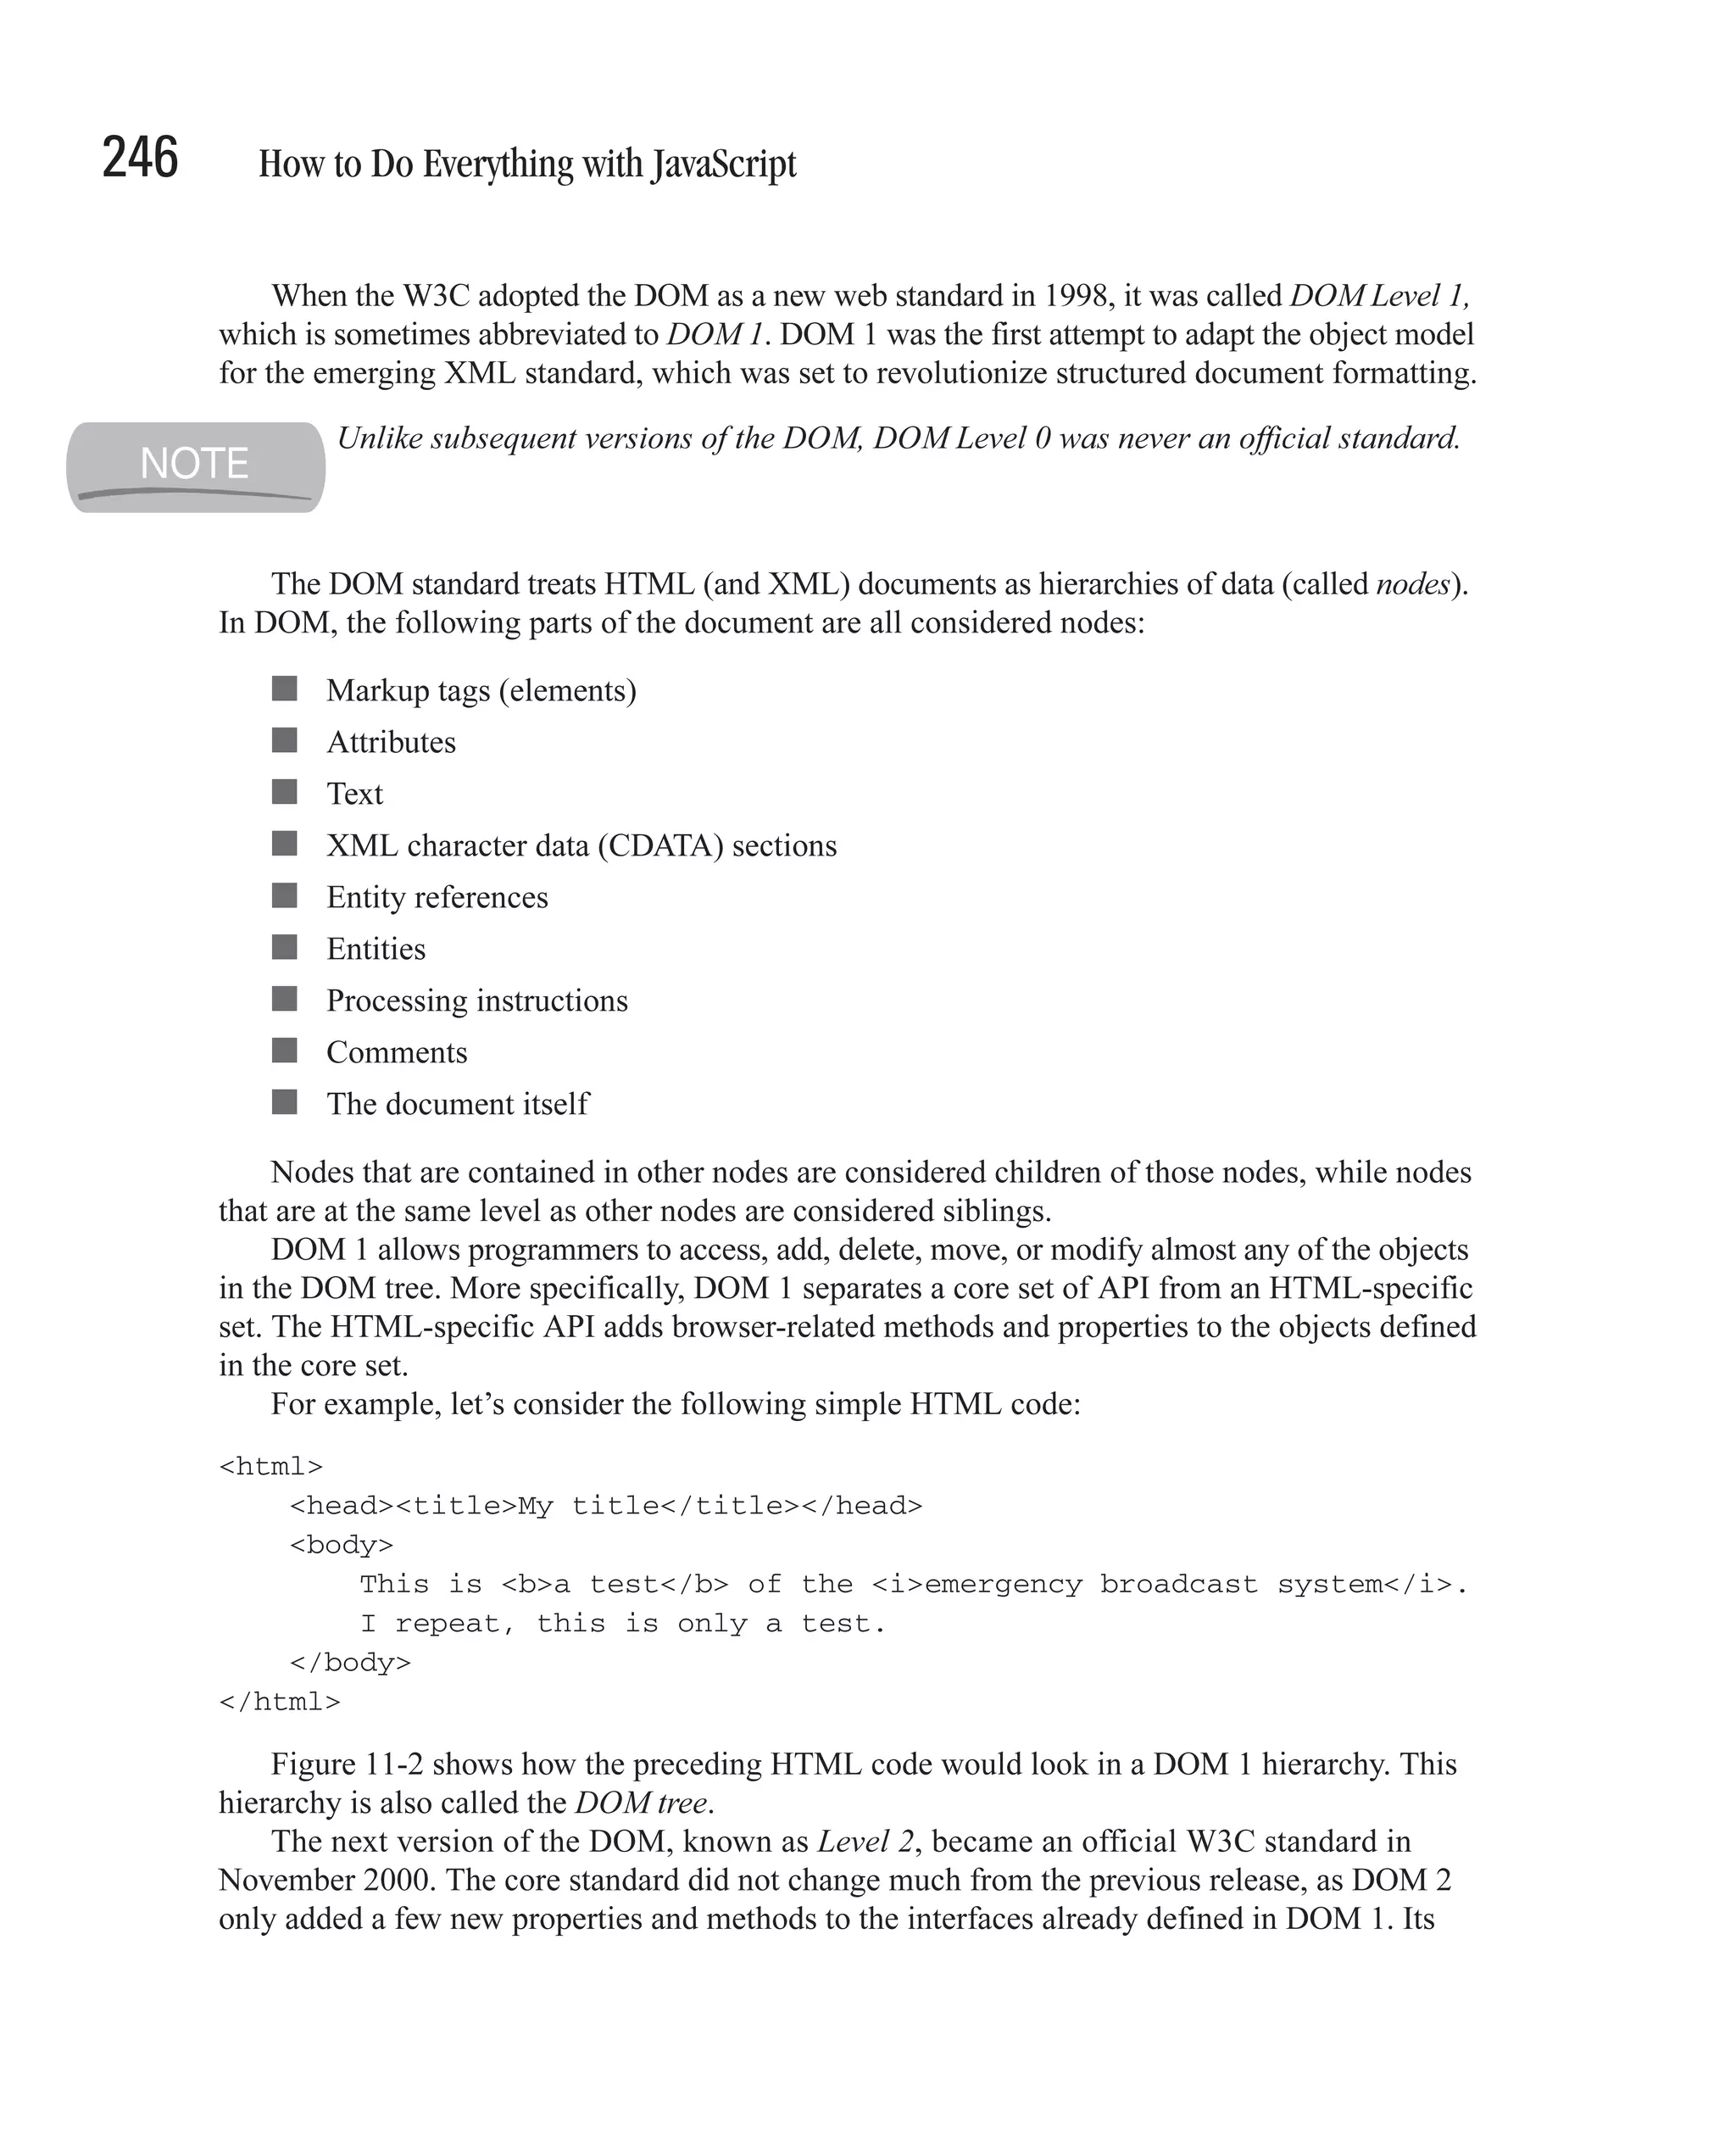
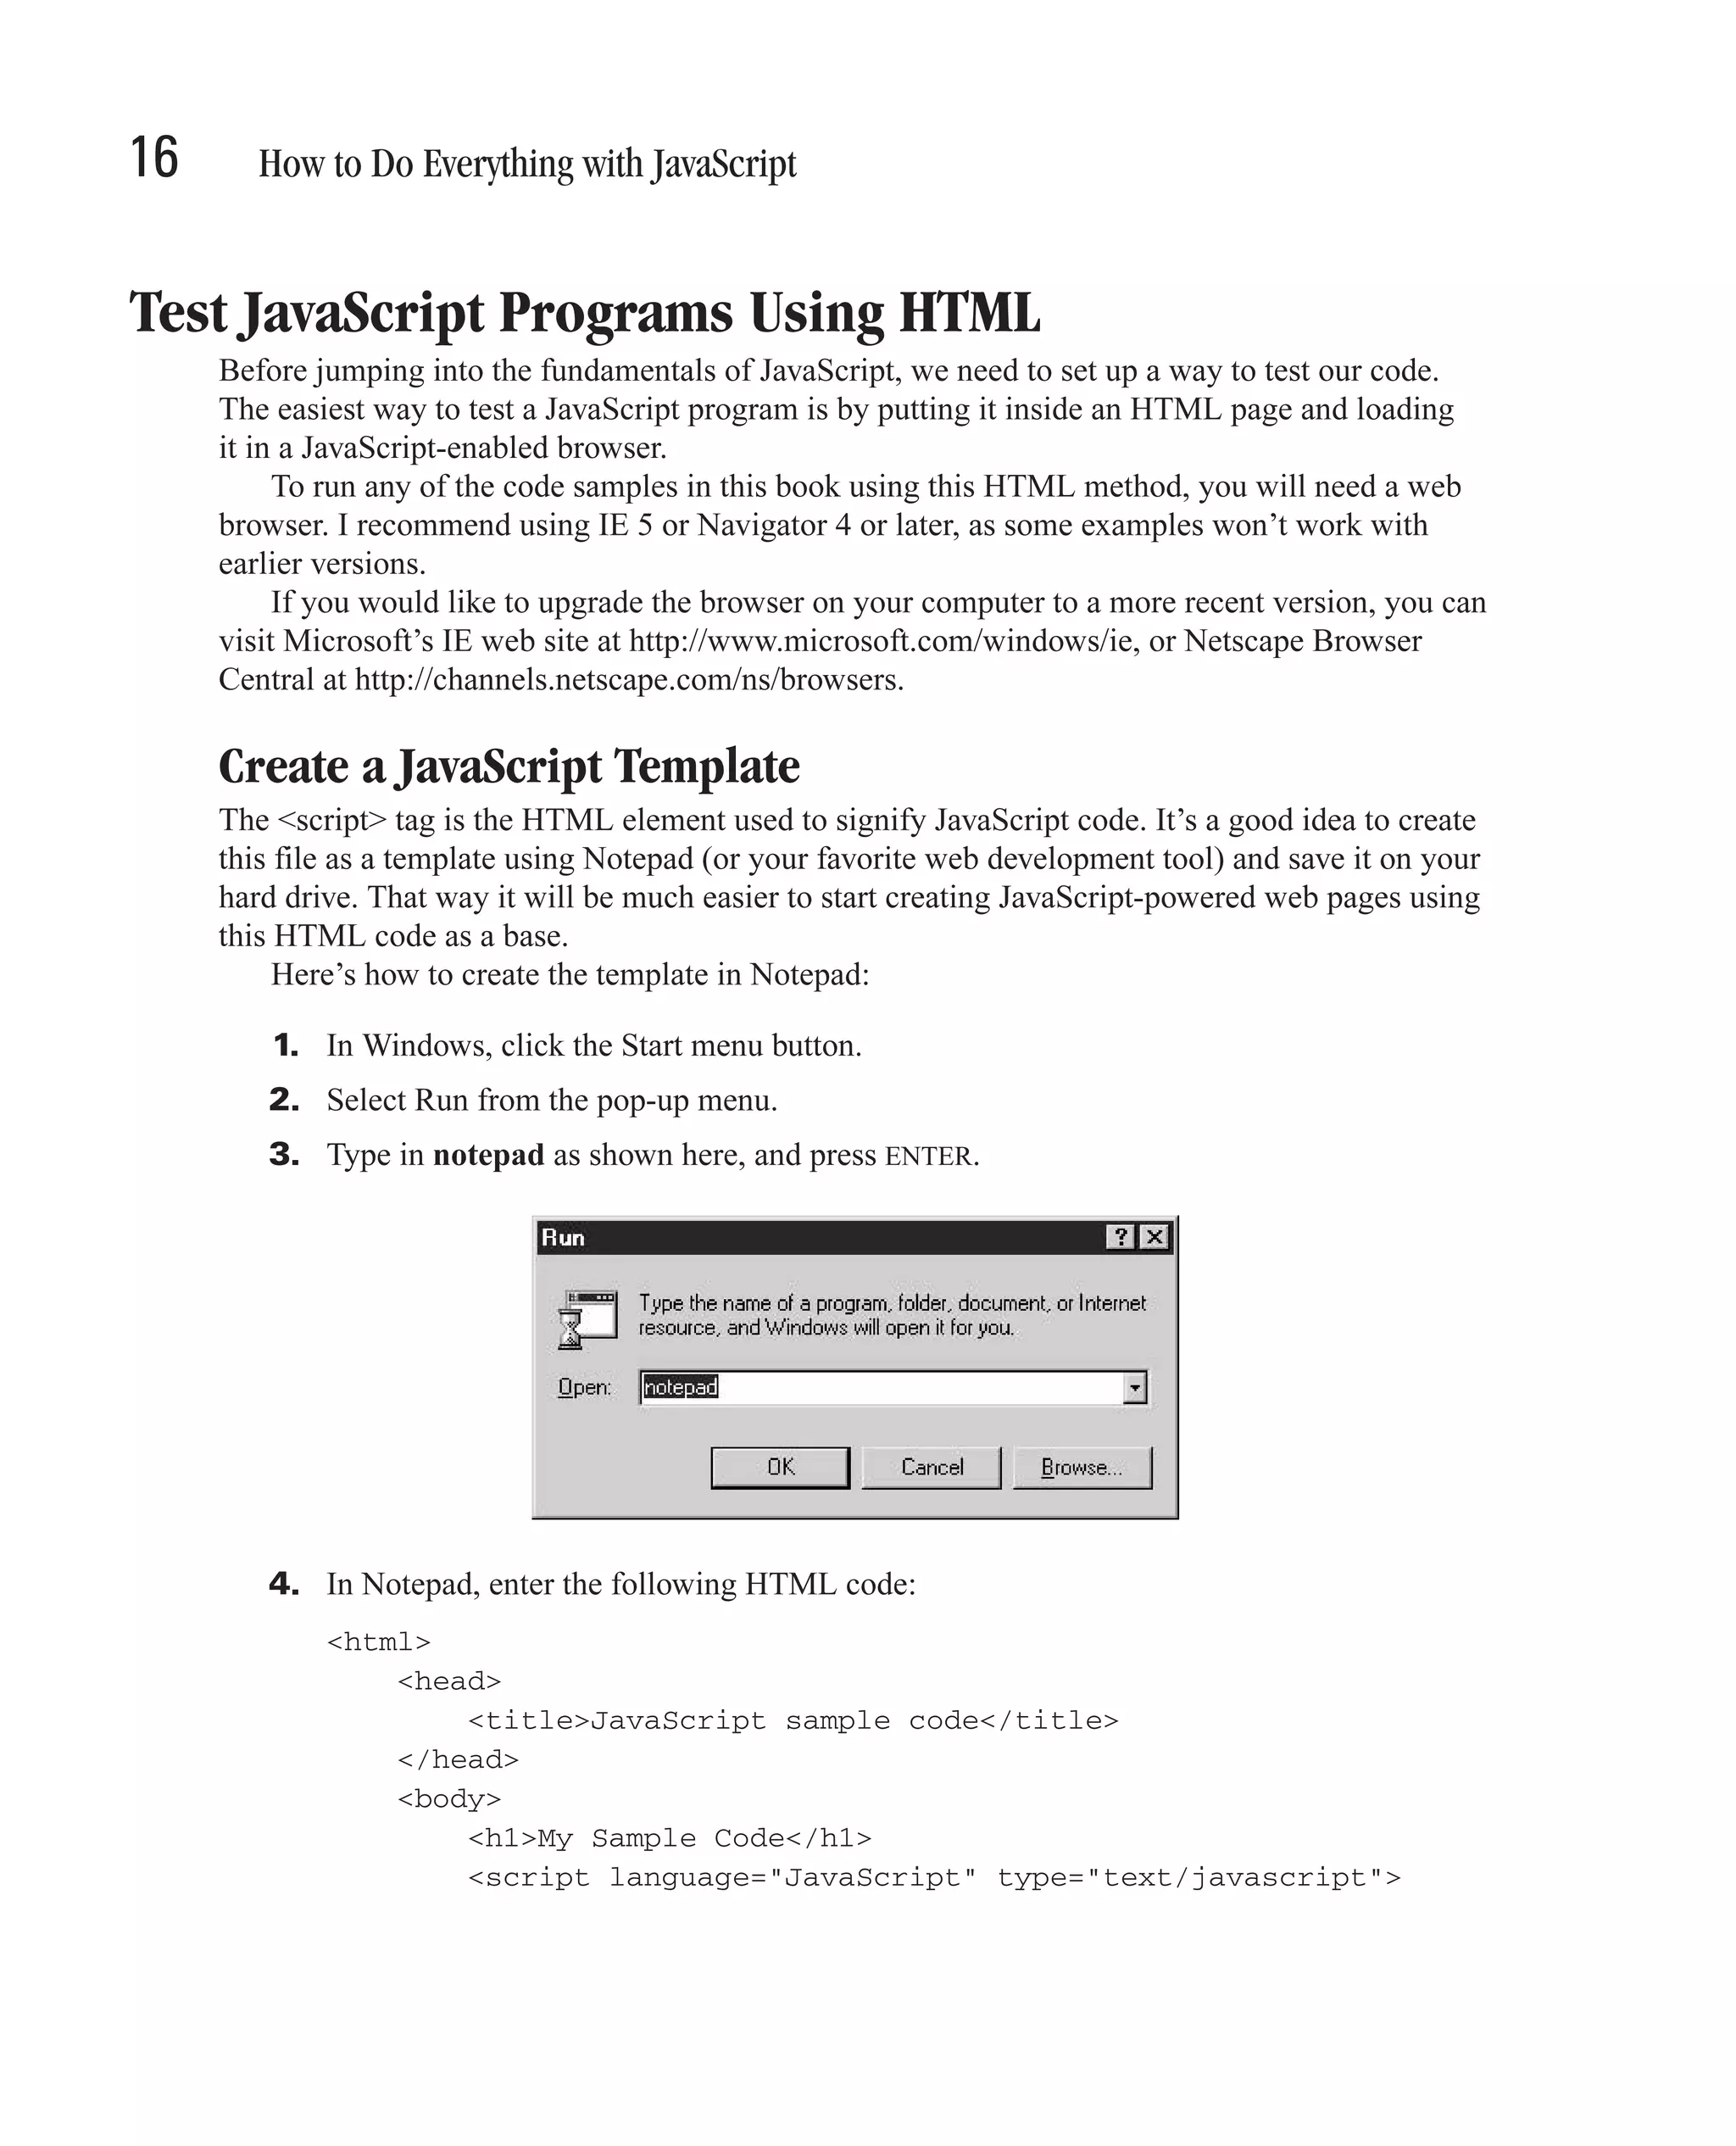
![CHAPTER 11: Interact with the Web Browser 247 FIGURE 11-2 How a simple HTML document would look in a DOM tree main purpose was to add support for views, events, and style sheets to the DOM API. It also defined a specification for DOM traversal, the ability to move forward and backward through a DOM hierarchy. DOM Level 3 was still in the W3C Working Draft stage at the time this book was published. 11 DOM 3 proposes to add two new interfaces to the core specification and will also add support for XPath. The Uses of XPath XPath is a simple yet powerful language for addressing parts of an XML document. For instance, you would use the following XPath expression to access the first <form> element on an XHTML web page. /html/body//form[1] This expression will match the first <form> element that is a descendant (but not necessarily a direct child) of a <body> element, which is itself the direct child of the root <html> element.](https://image.slidesharecdn.com/3592018/75/How-To-Do-Everything-With-JavaScript-267-2048.jpg)
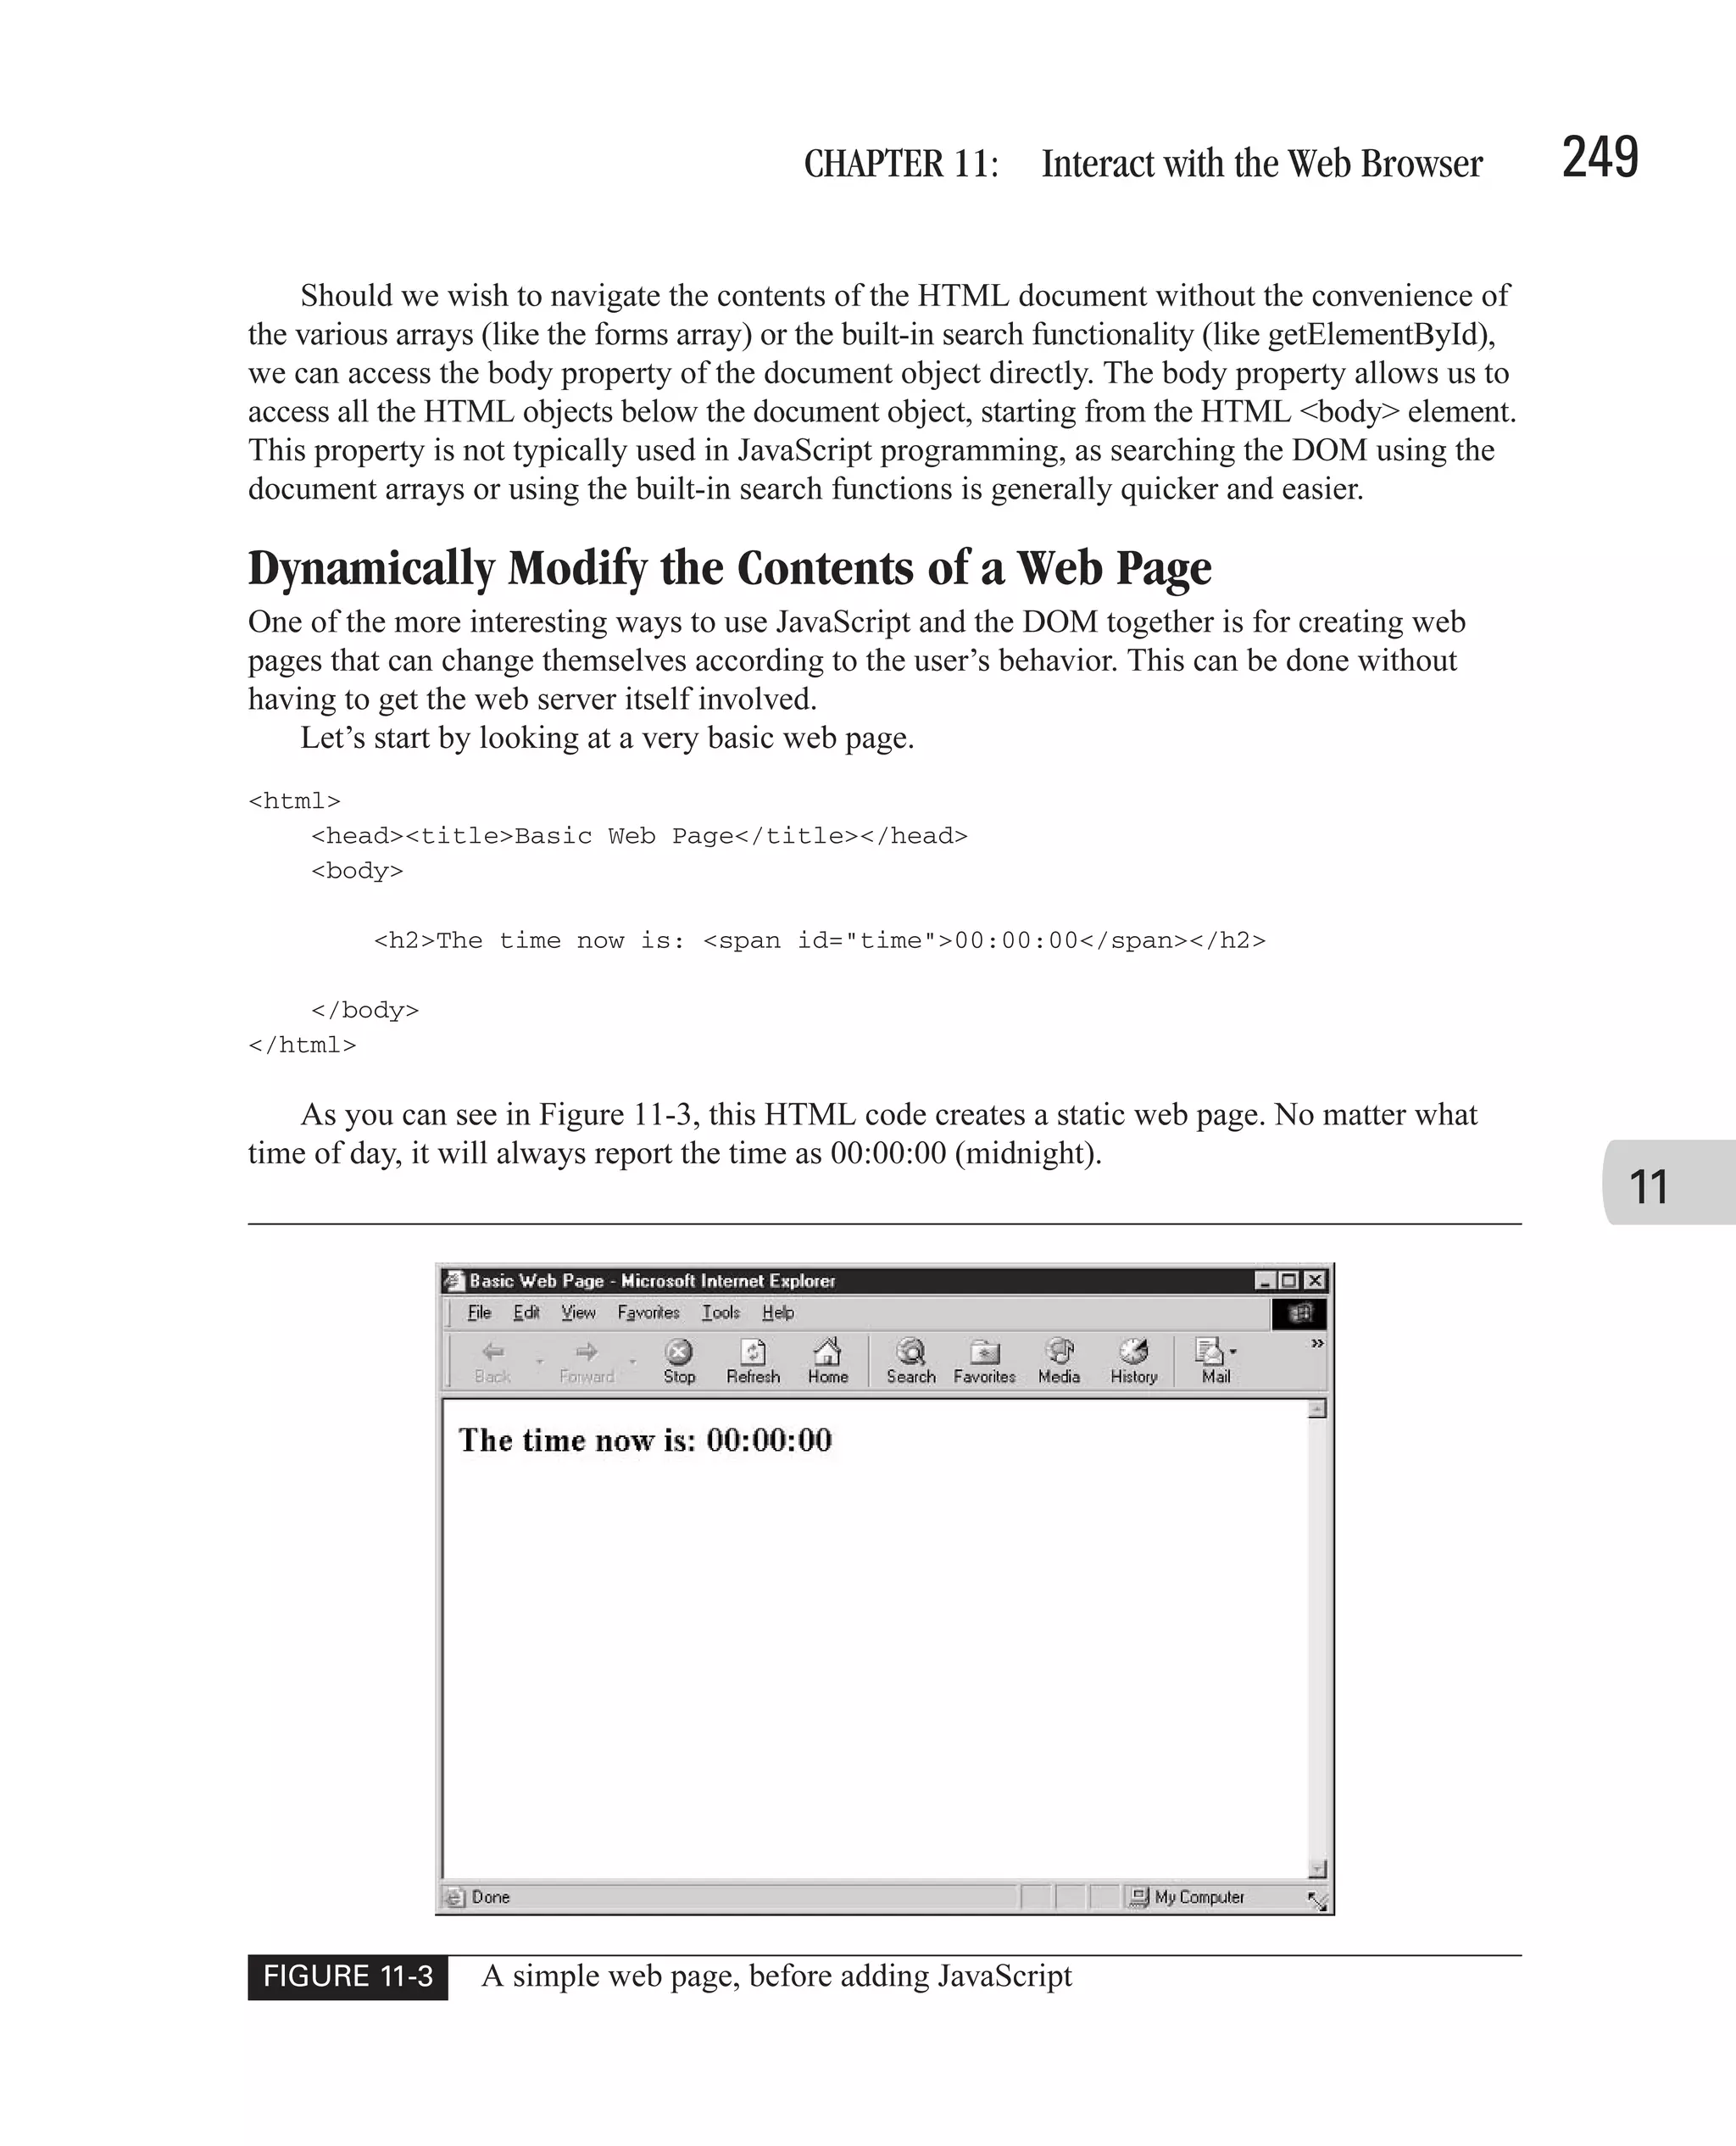
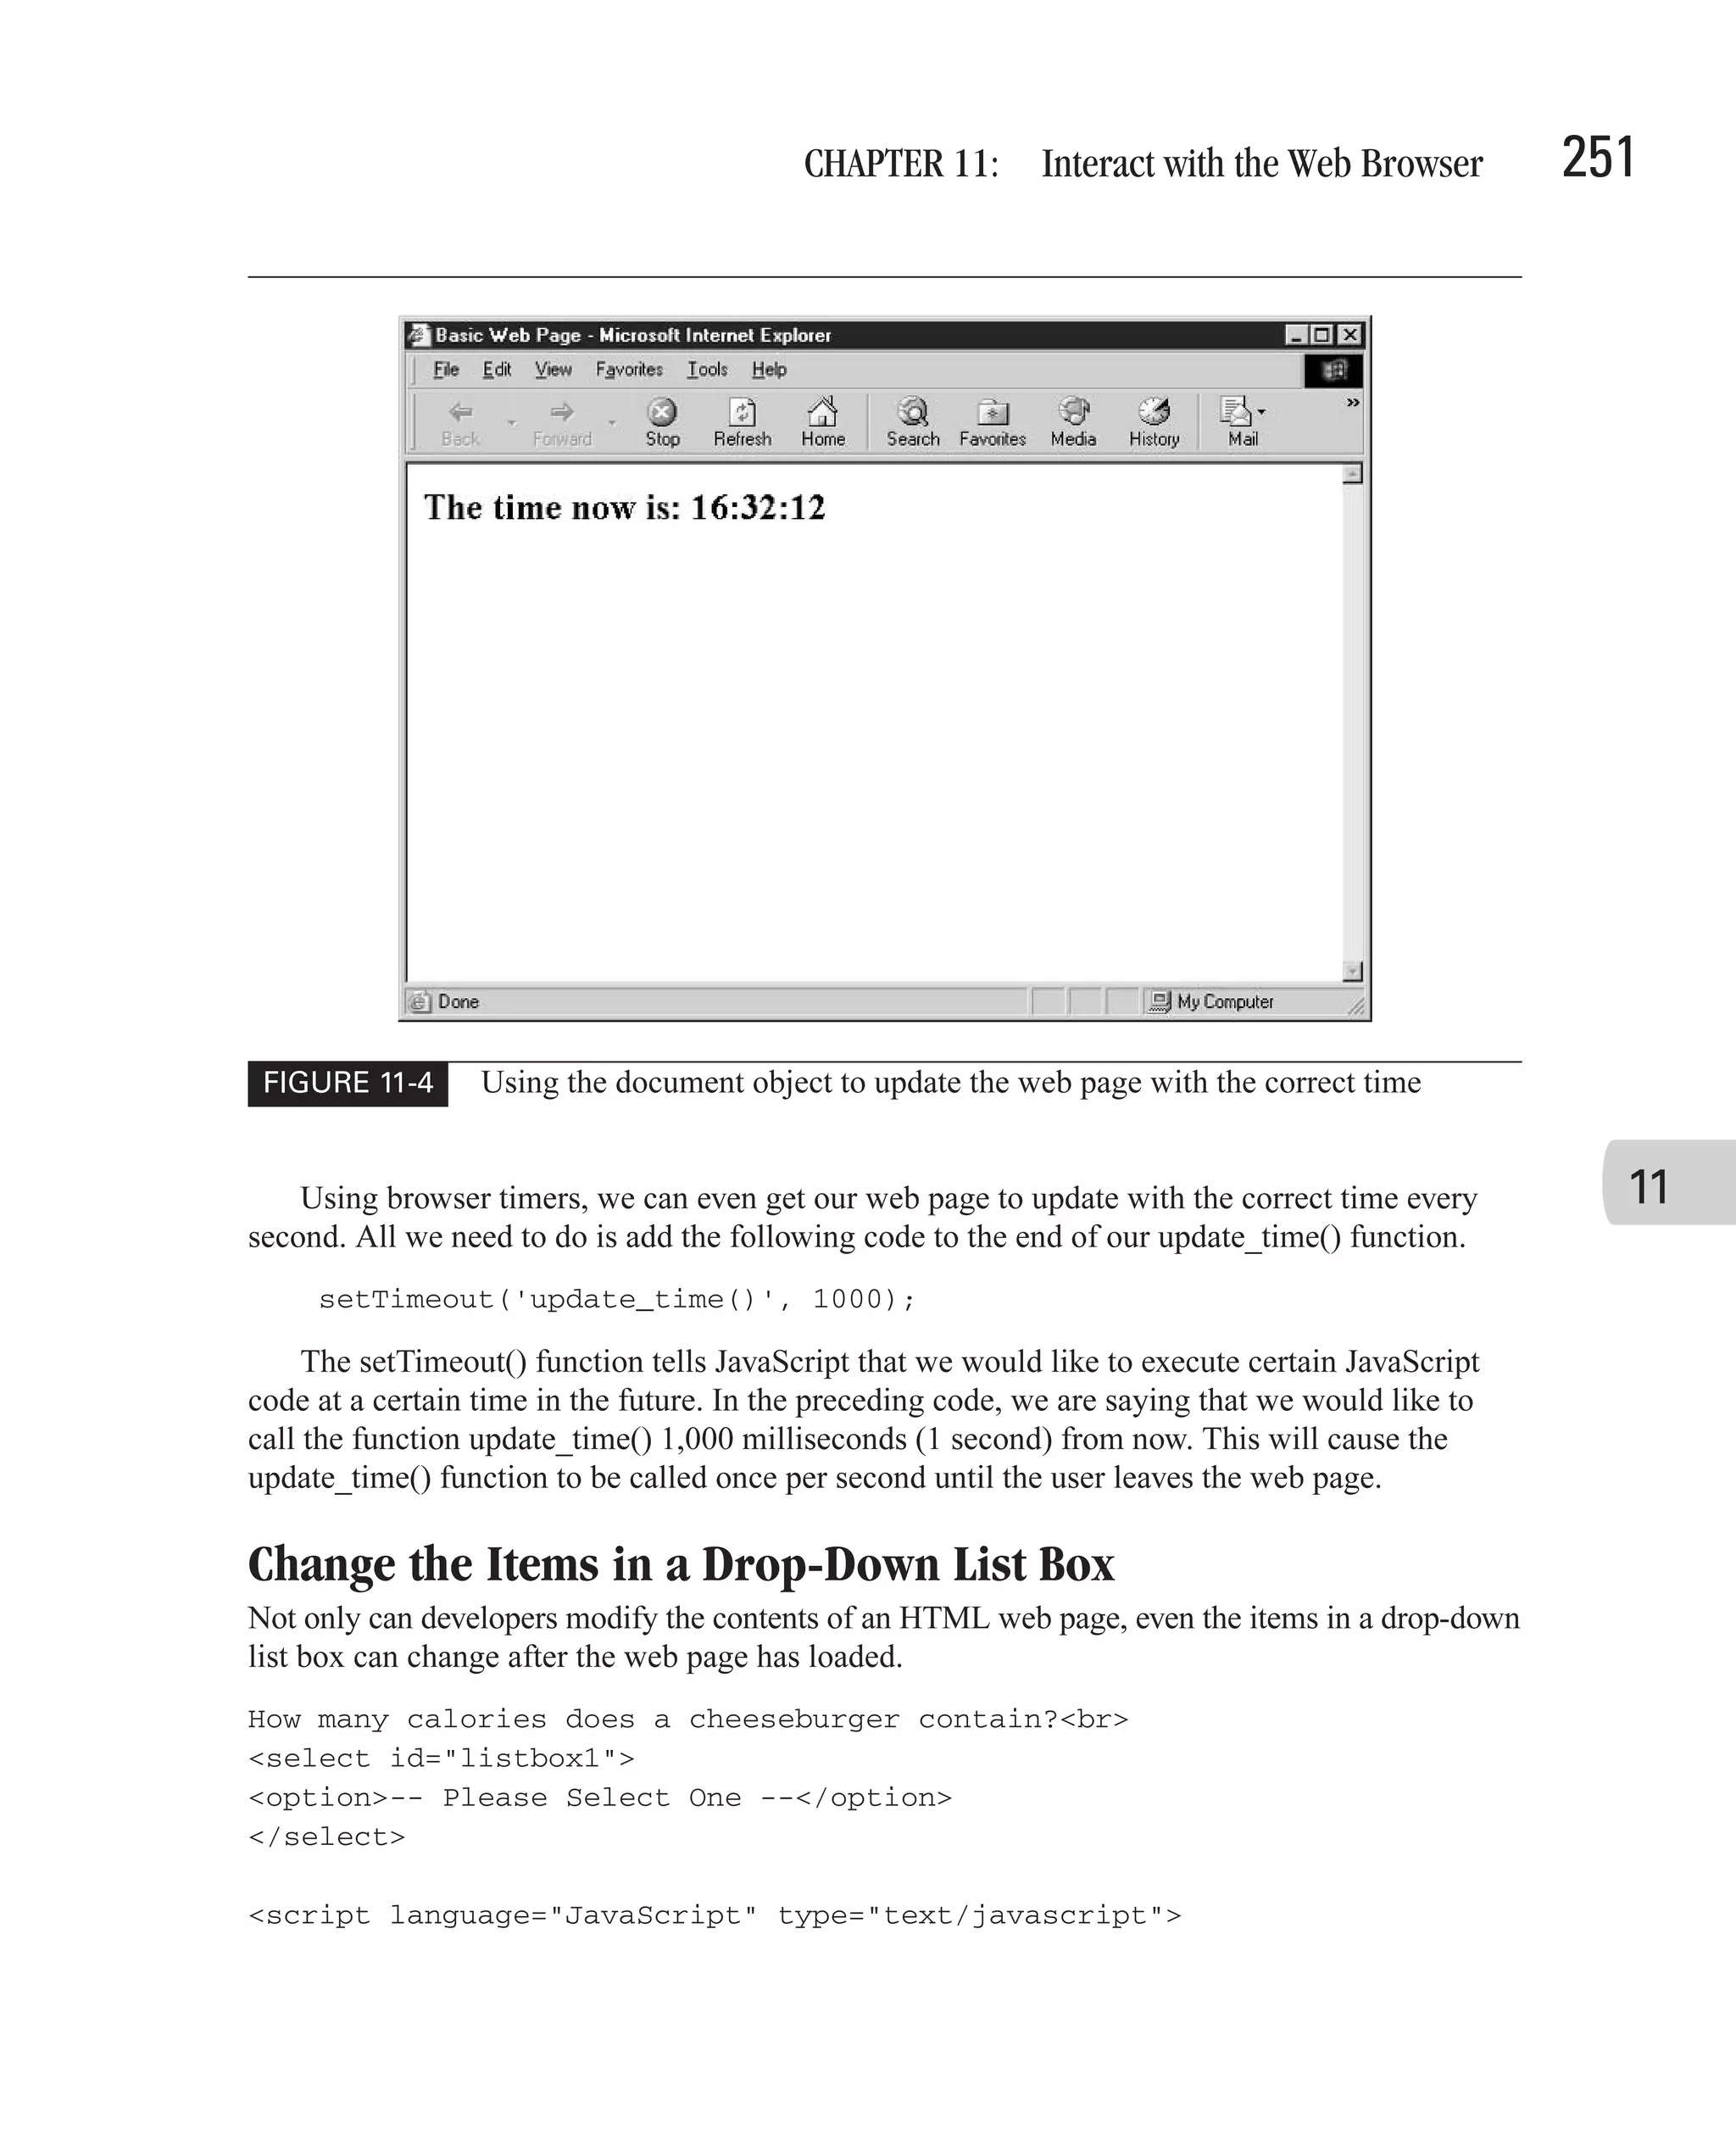
![250 How to Do Everything with JavaScript But what if we wanted to add a small JavaScript script to the page that will constantly keep the time updated to the correct time? We can use the DOM document object to modify the contents of the web page. <script language="JavaScript" type="text/javascript"> function update_time() { // The current date and time var rightnow = new Date(); // Capture the hours as a string, "00" thru "23" var hours = rightnow.getHours(); if (hours < 10) var hourstring = "0" + hours.toString(); else var hourstring = hours.toString(); // Capture the minutes as a string, "00" thru "59" var minutes = rightnow.getMinutes(); if (minutes < 10) var minutestring = "0" + minutes.toString(); else var minutestring = minutes.toString(); // Capture the seconds as a string, "00" thru "59" var seconds = rightnow.getSeconds(); if (seconds < 10) var secondstring = "0" + seconds.toString(); else var secondstring = seconds.toString(); // Put it all together, "00:00:00" var timestring = hourstring + ":" + minutestring + ":" + secondstring; // Manipulate the DOM, display it to the screen! var timeplace = document.getElementById("time"); timeplace.childNodes[0].nodeValue = timestring; } </script> By calling the update_time() function when the document first loads, we can get the browser to update the string "00:00:00" with the current time. <body onload="update_time()"> The screenshot in Figure 11-4 shows how the browser has replaced the original HTML string with the correct time.](https://image.slidesharecdn.com/3592018/75/How-To-Do-Everything-With-JavaScript-270-2048.jpg)
![252 How to Do Everything with JavaScript var counter; var listbox = document.getElementById("listbox1"); for (counter = 100; counter < 500; counter += 50) { listbox.options[listbox.length] = new Option(counter + " - " + (counter+49)); } </script> The preceding code creates an HTML drop-down list box with one item in it—“Please Select One.” Using JavaScript, it then adds eight more items to the list. Our JavaScript code starts by getting a reference to the list box and storing it in the variable named listbox. Using a for loop, we then create several new Option objects and add them to the end of the options array. You can see how the browser displays our dynamic list box here. (I do not, however, care to know how many calories a cheeseburger actually does contain.) Examine the Entire Browser Window The window object is not technically an official DOM Level 1 object. It provides access to other frames or open browser windows. In the last chapter, we discovered that there are four types of window objects in JavaScript. Table 11-2 summarizes those objects.](https://image.slidesharecdn.com/3592018/75/How-To-Do-Everything-With-JavaScript-272-2048.jpg)

![CHAPTER 11: Interact with the Web Browser 255 FIGURE 11-5 A pop-up window can be used to provide quick online help. For example, the following code, for Netscape web browsers, checks to see if the Macromedia Flash plug-in is installed on the user’s computer. var flashinstalled = false; for (var i=0; i < navigator.plugins.length; i++) { 11 if (navigator.plugins[i].name == "Shockwave Flash") { flashinstalled = true; break; } } if (flashinstalled) { document.write ("I see you have Macromedia Flash installed!"); } else { document.write ("If you want to see the multimedia installed "); document.write ("on this web site, you will need to install "); document.write ("Macromedia Flash."); } The navigator object also supports several properties, such as the following. ■ appCodeName ■ appName ■ appVersion](https://image.slidesharecdn.com/3592018/75/How-To-Do-Everything-With-JavaScript-275-2048.jpg)
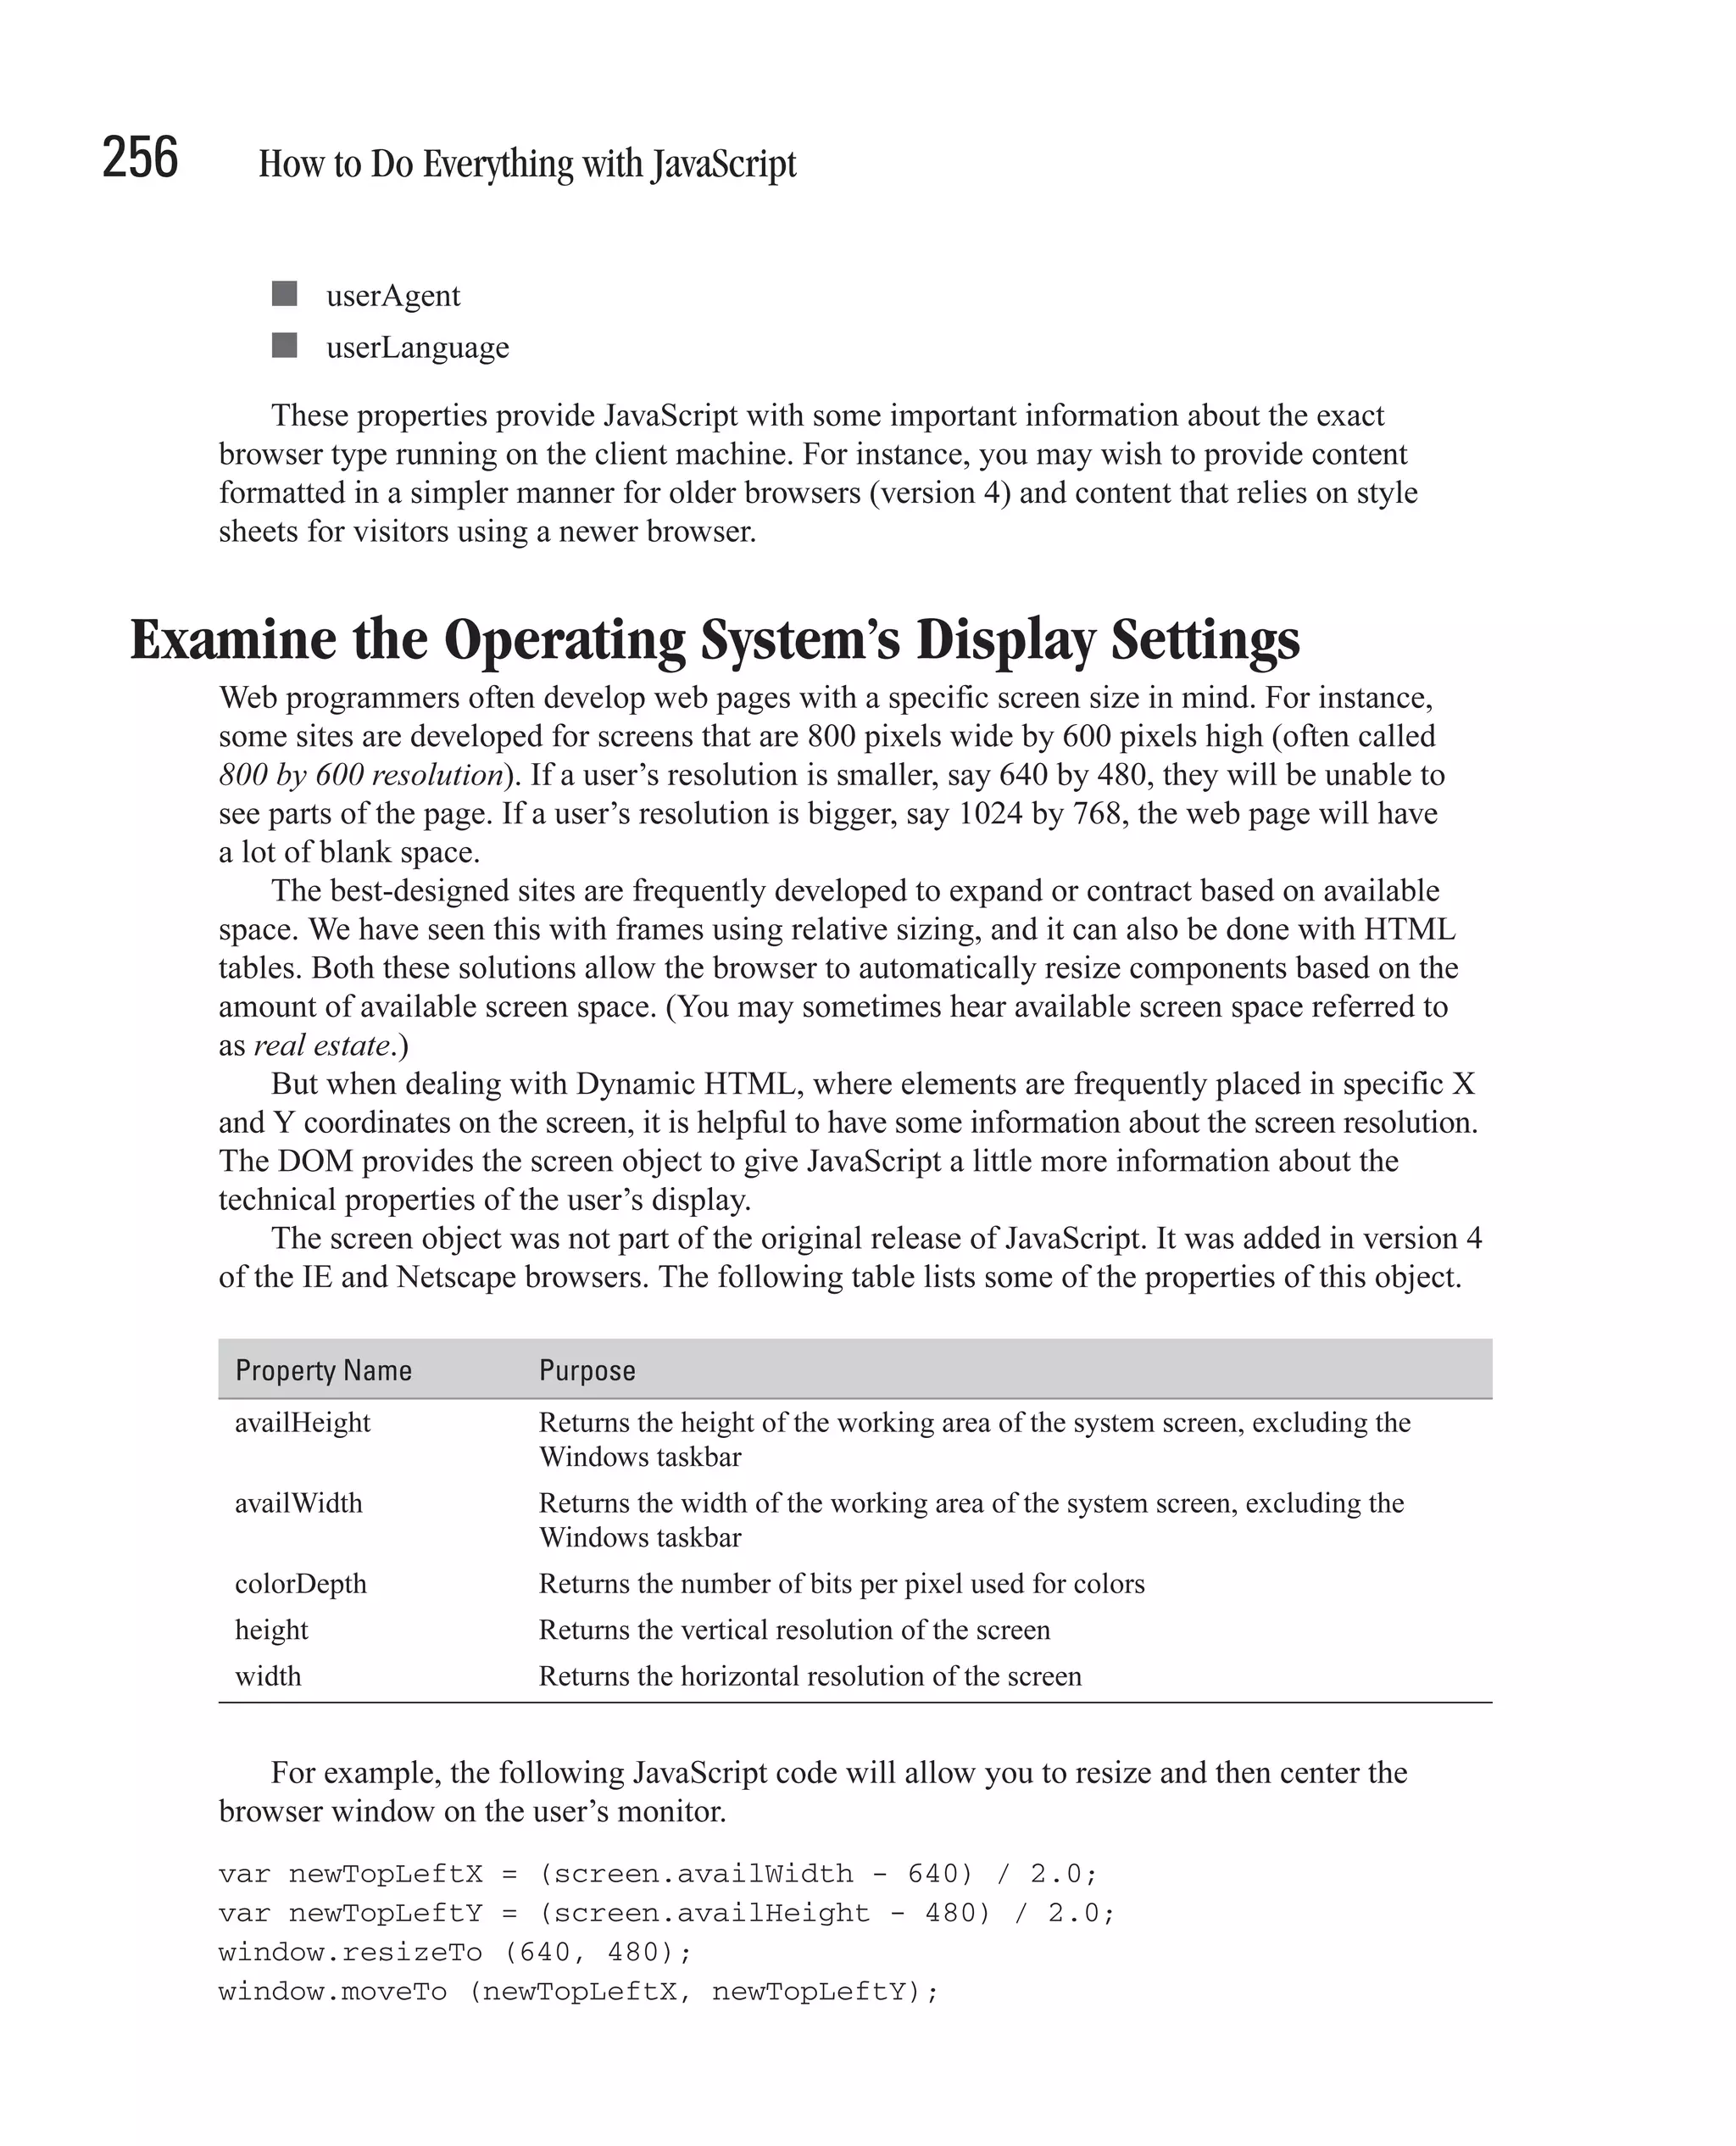
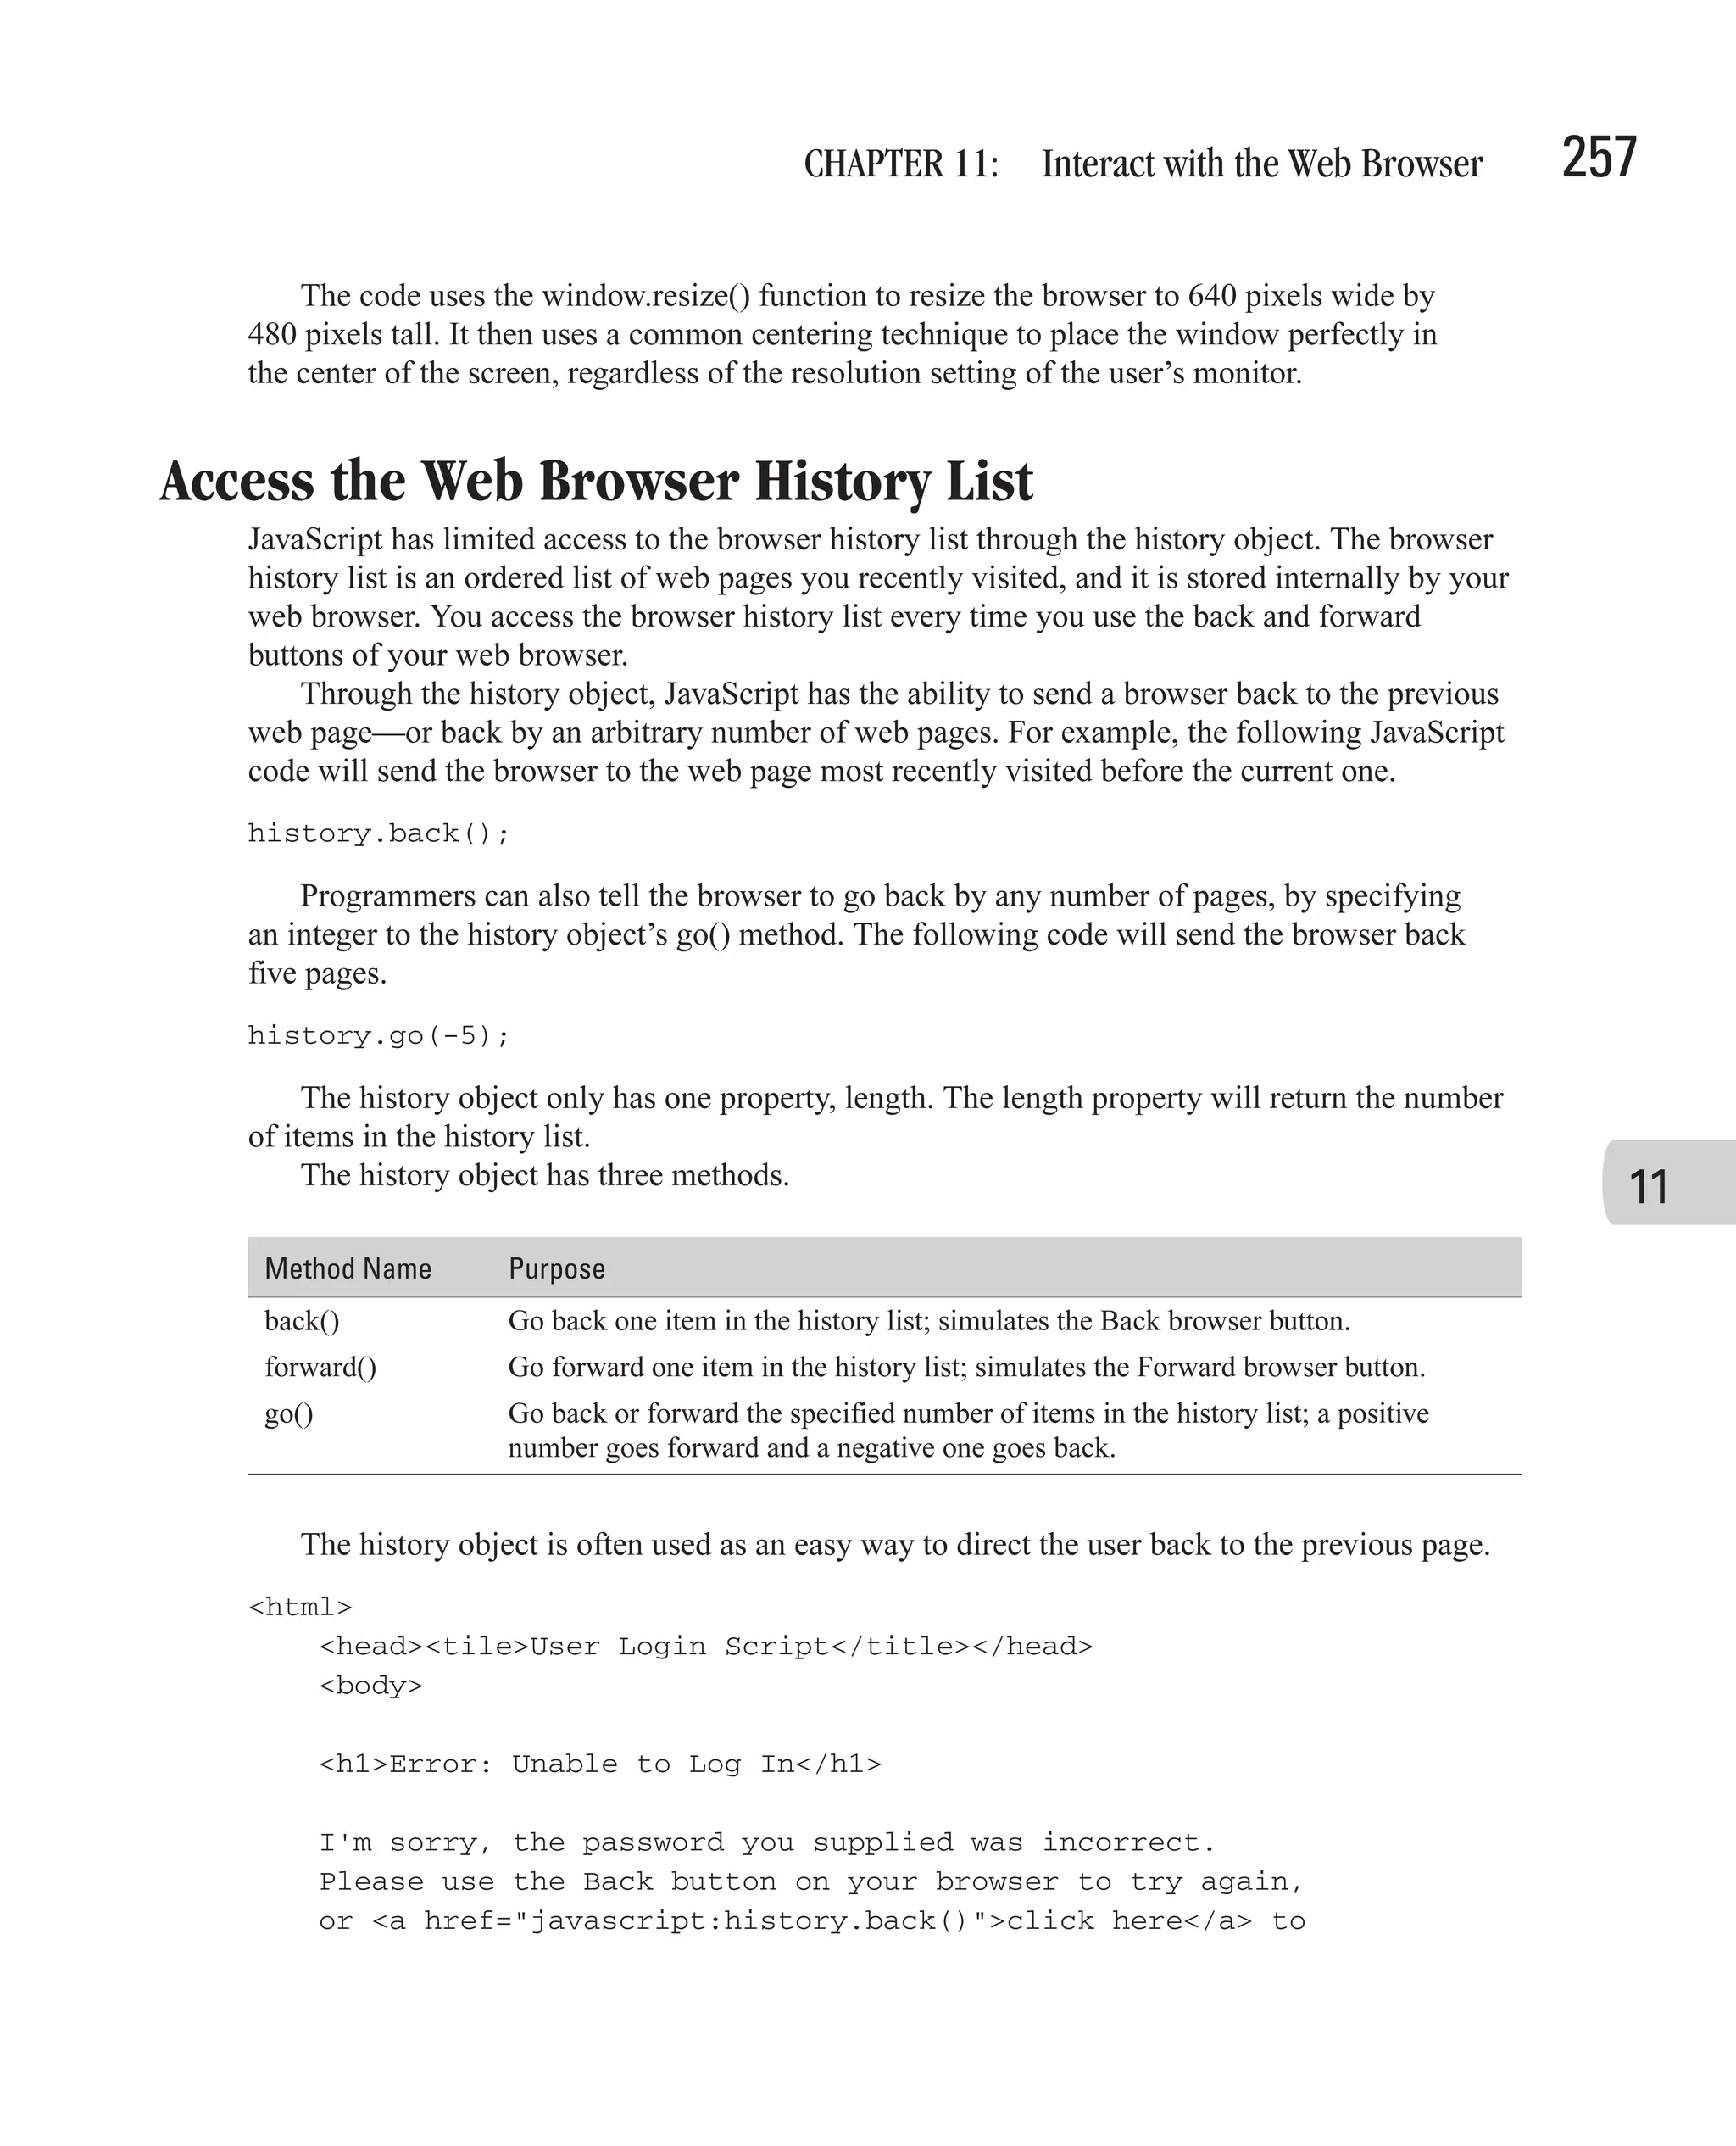
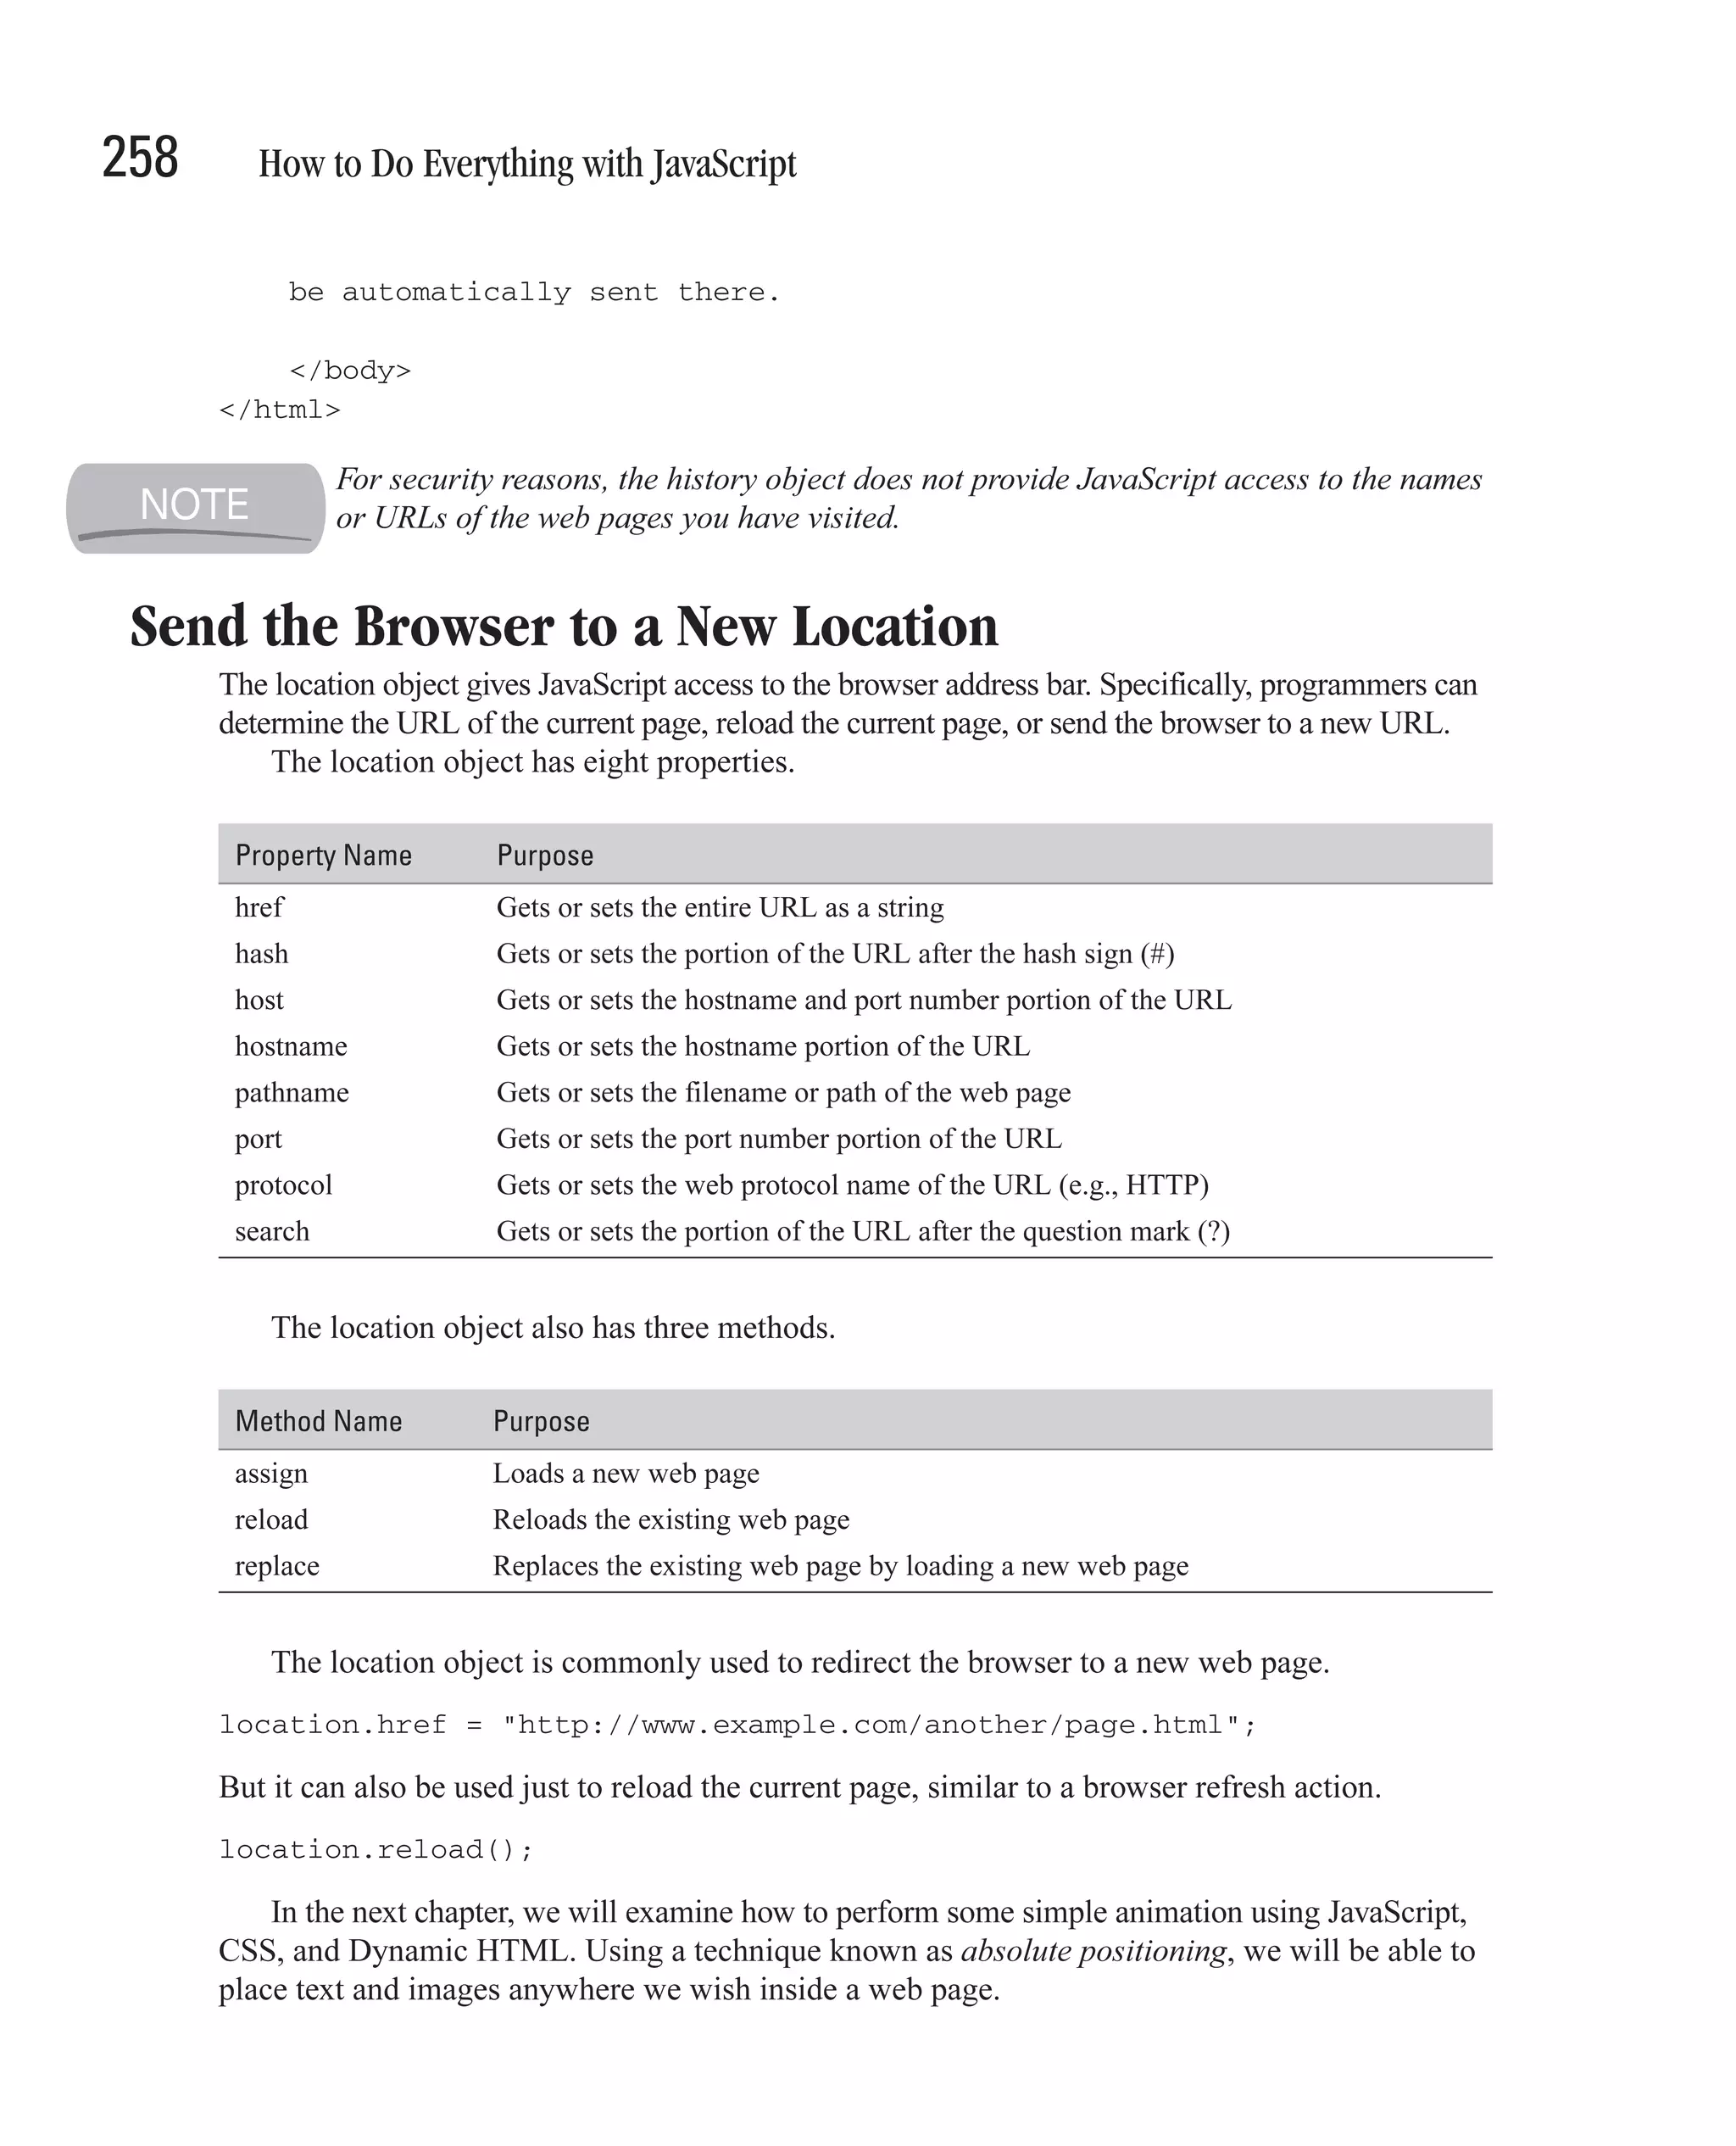

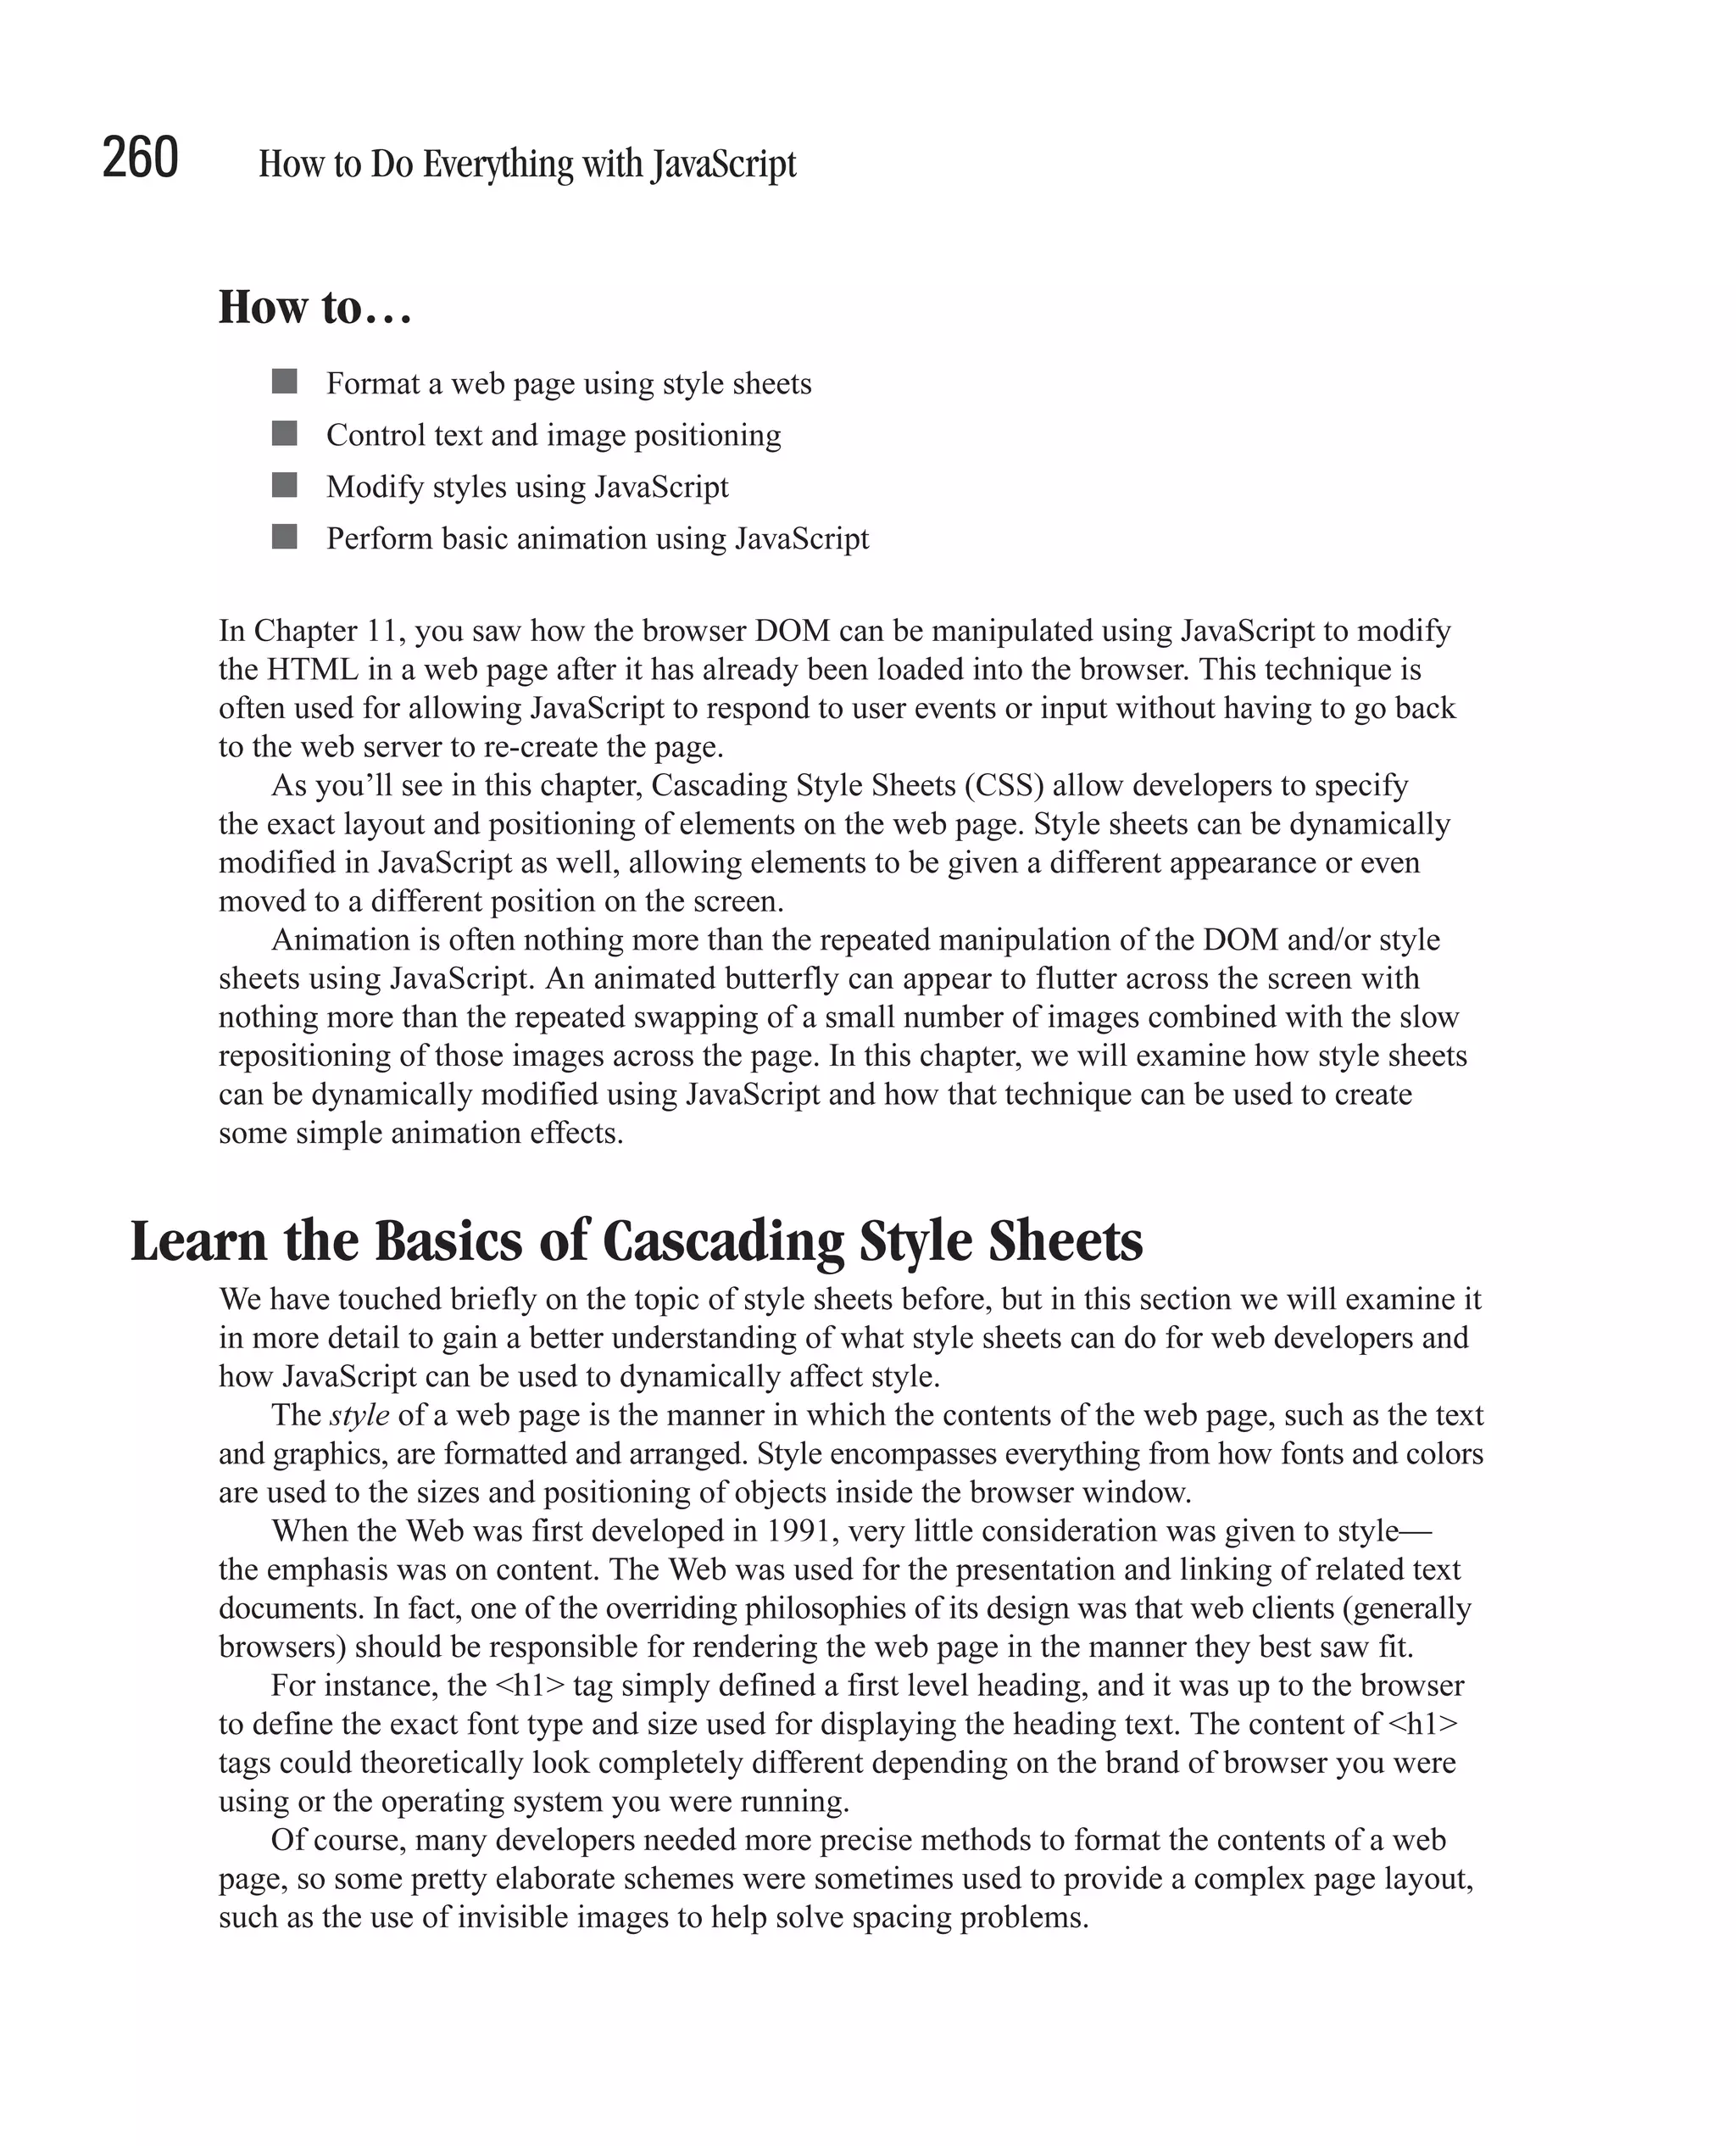
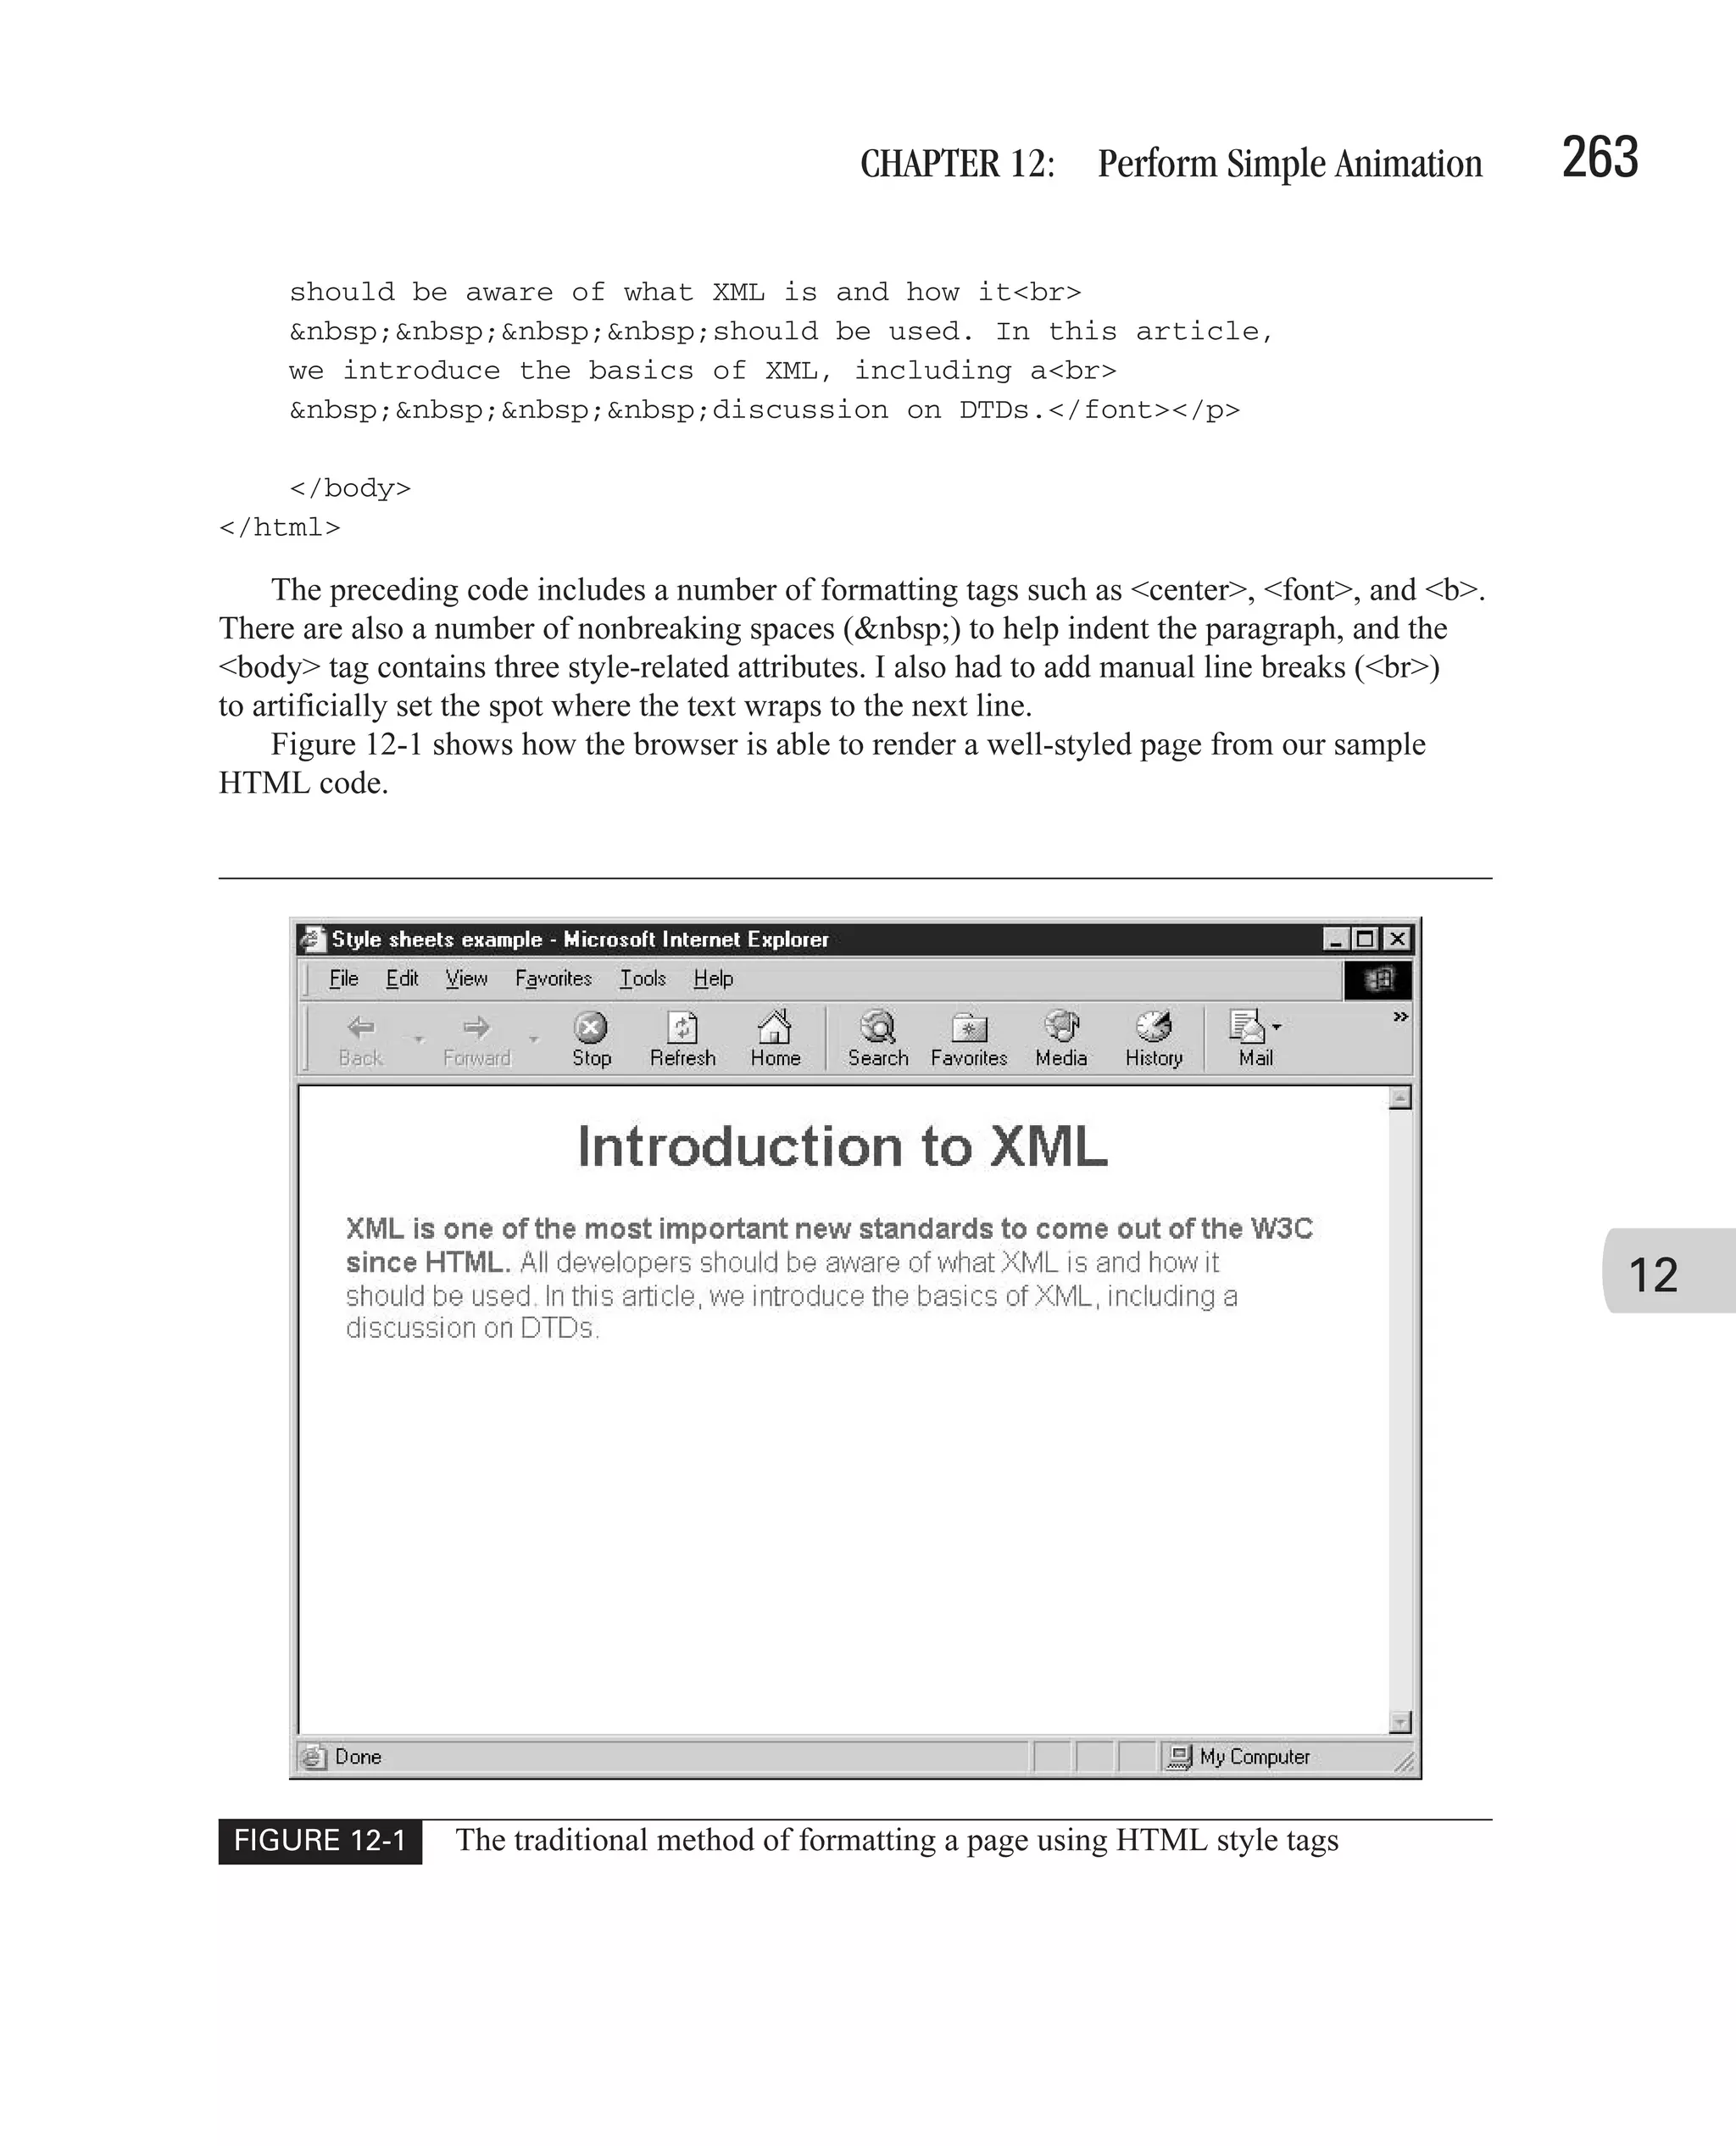
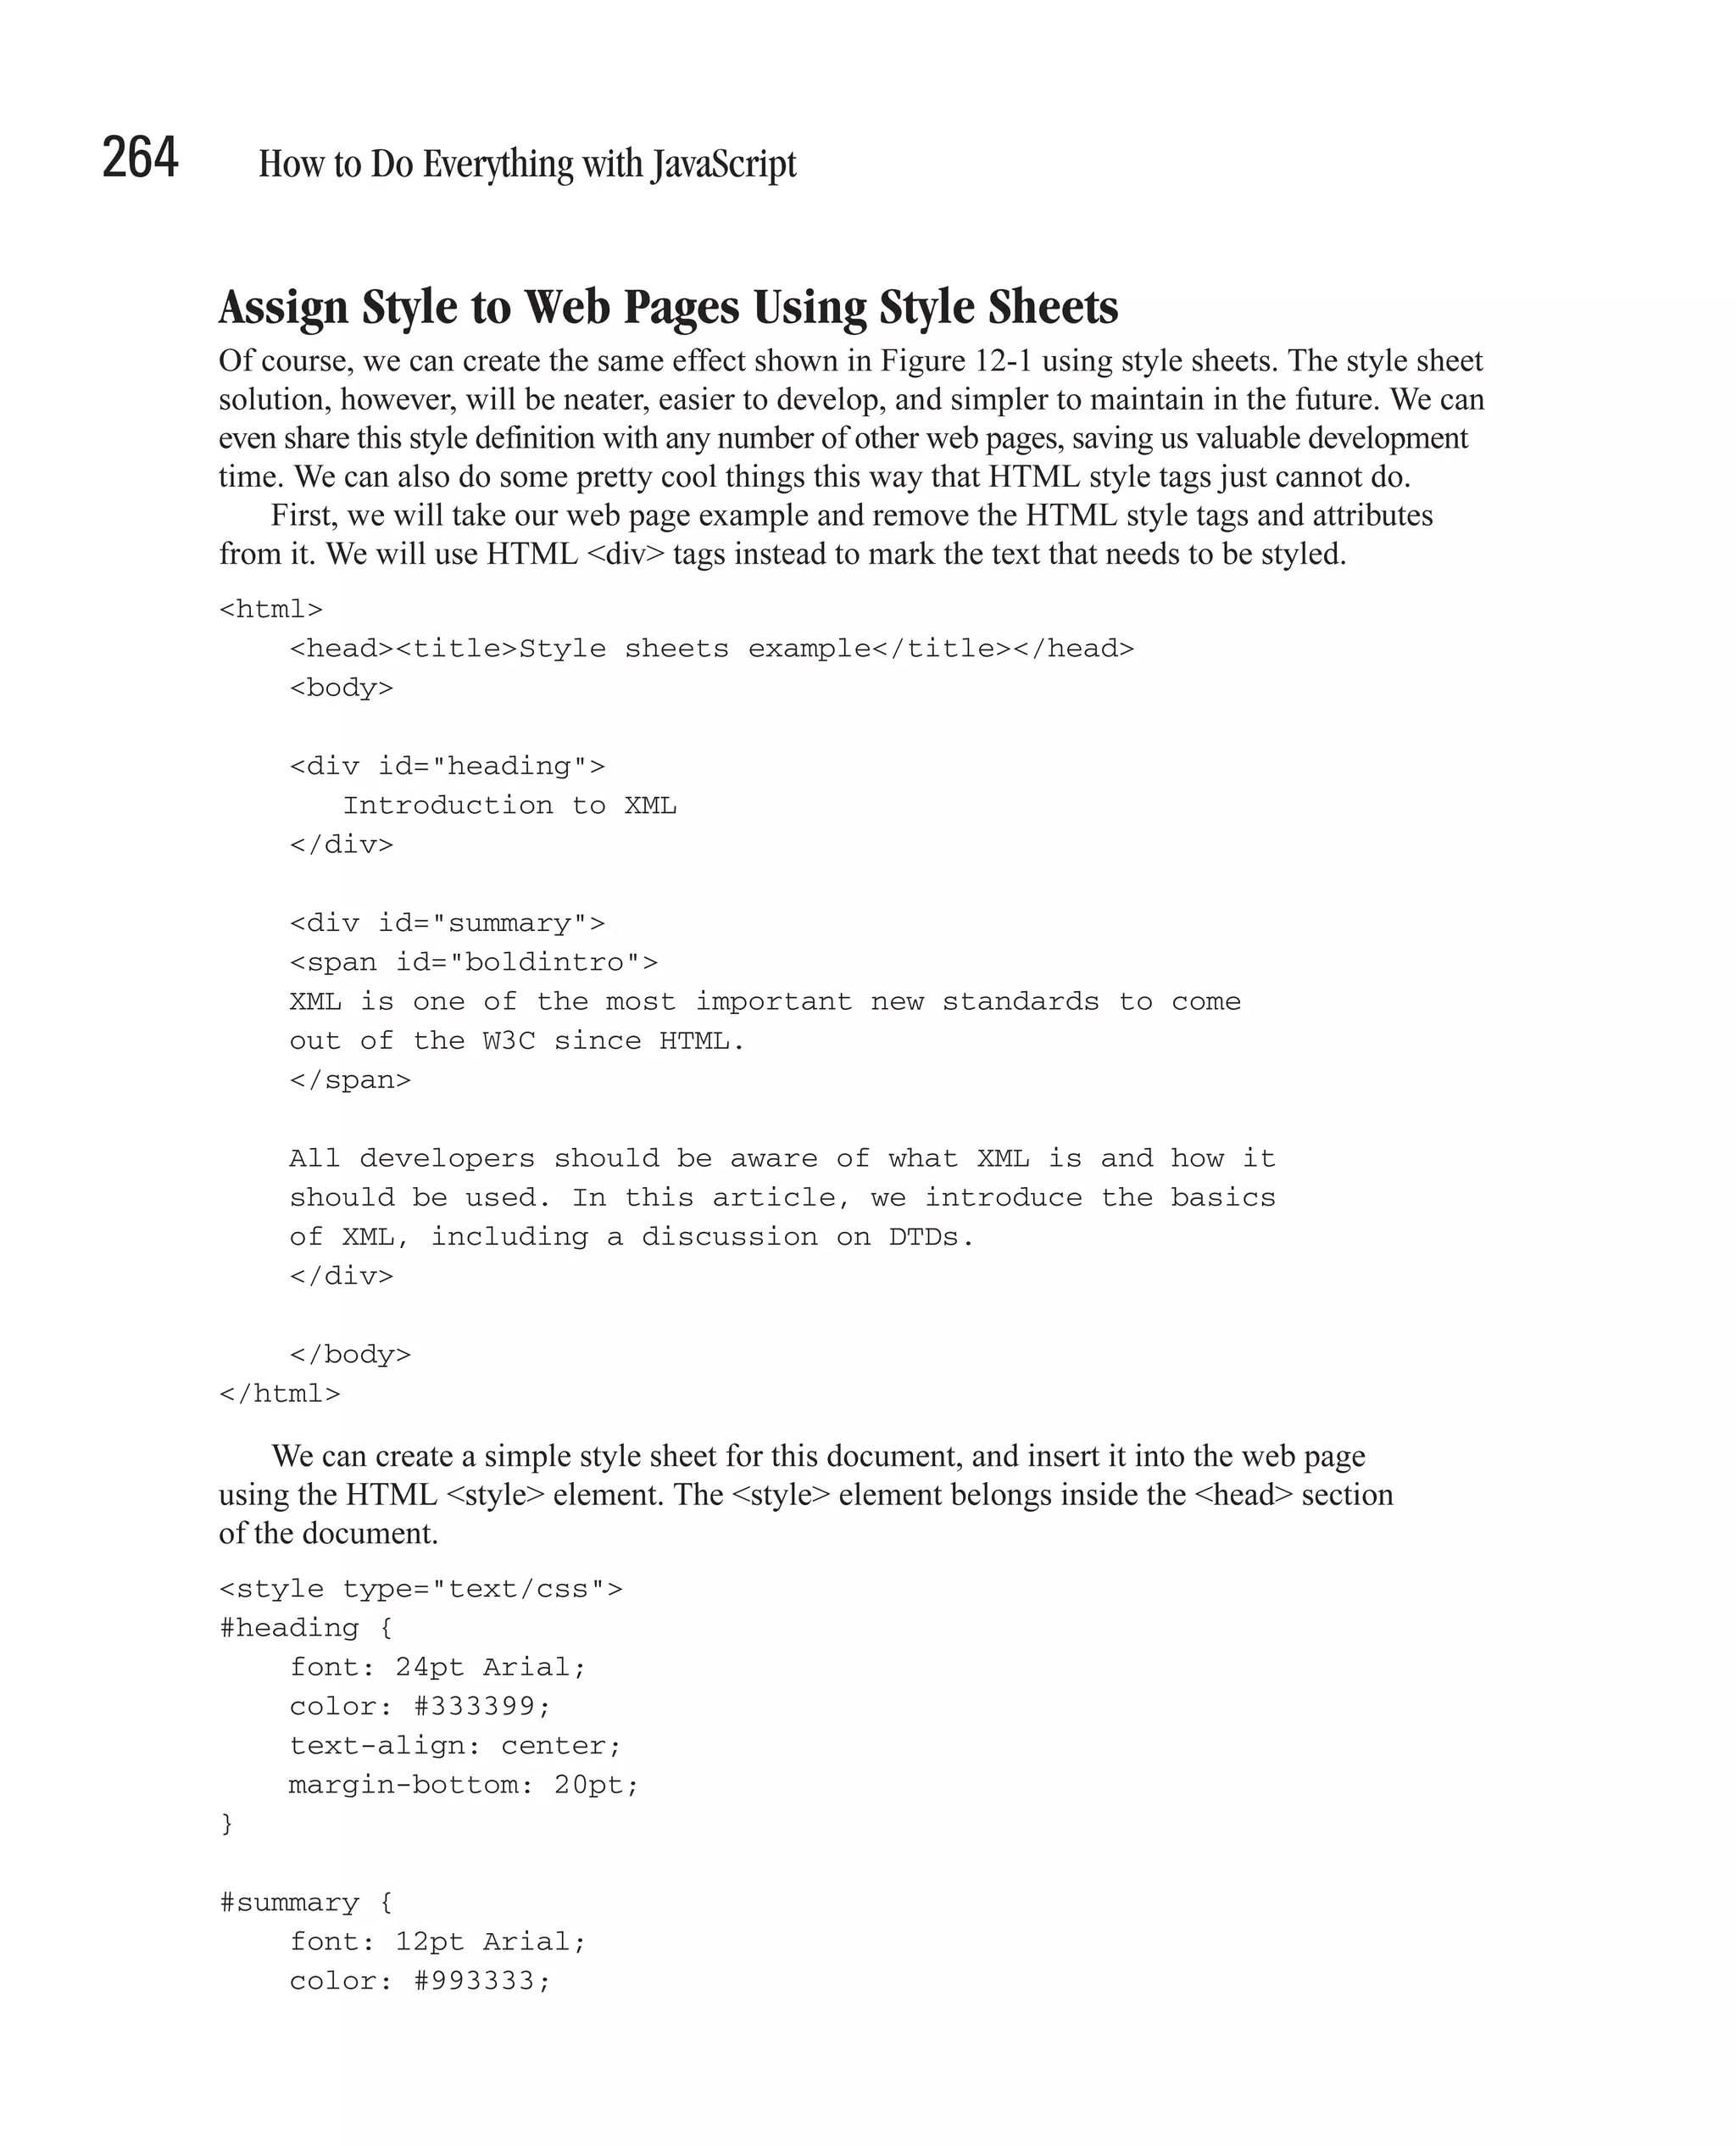

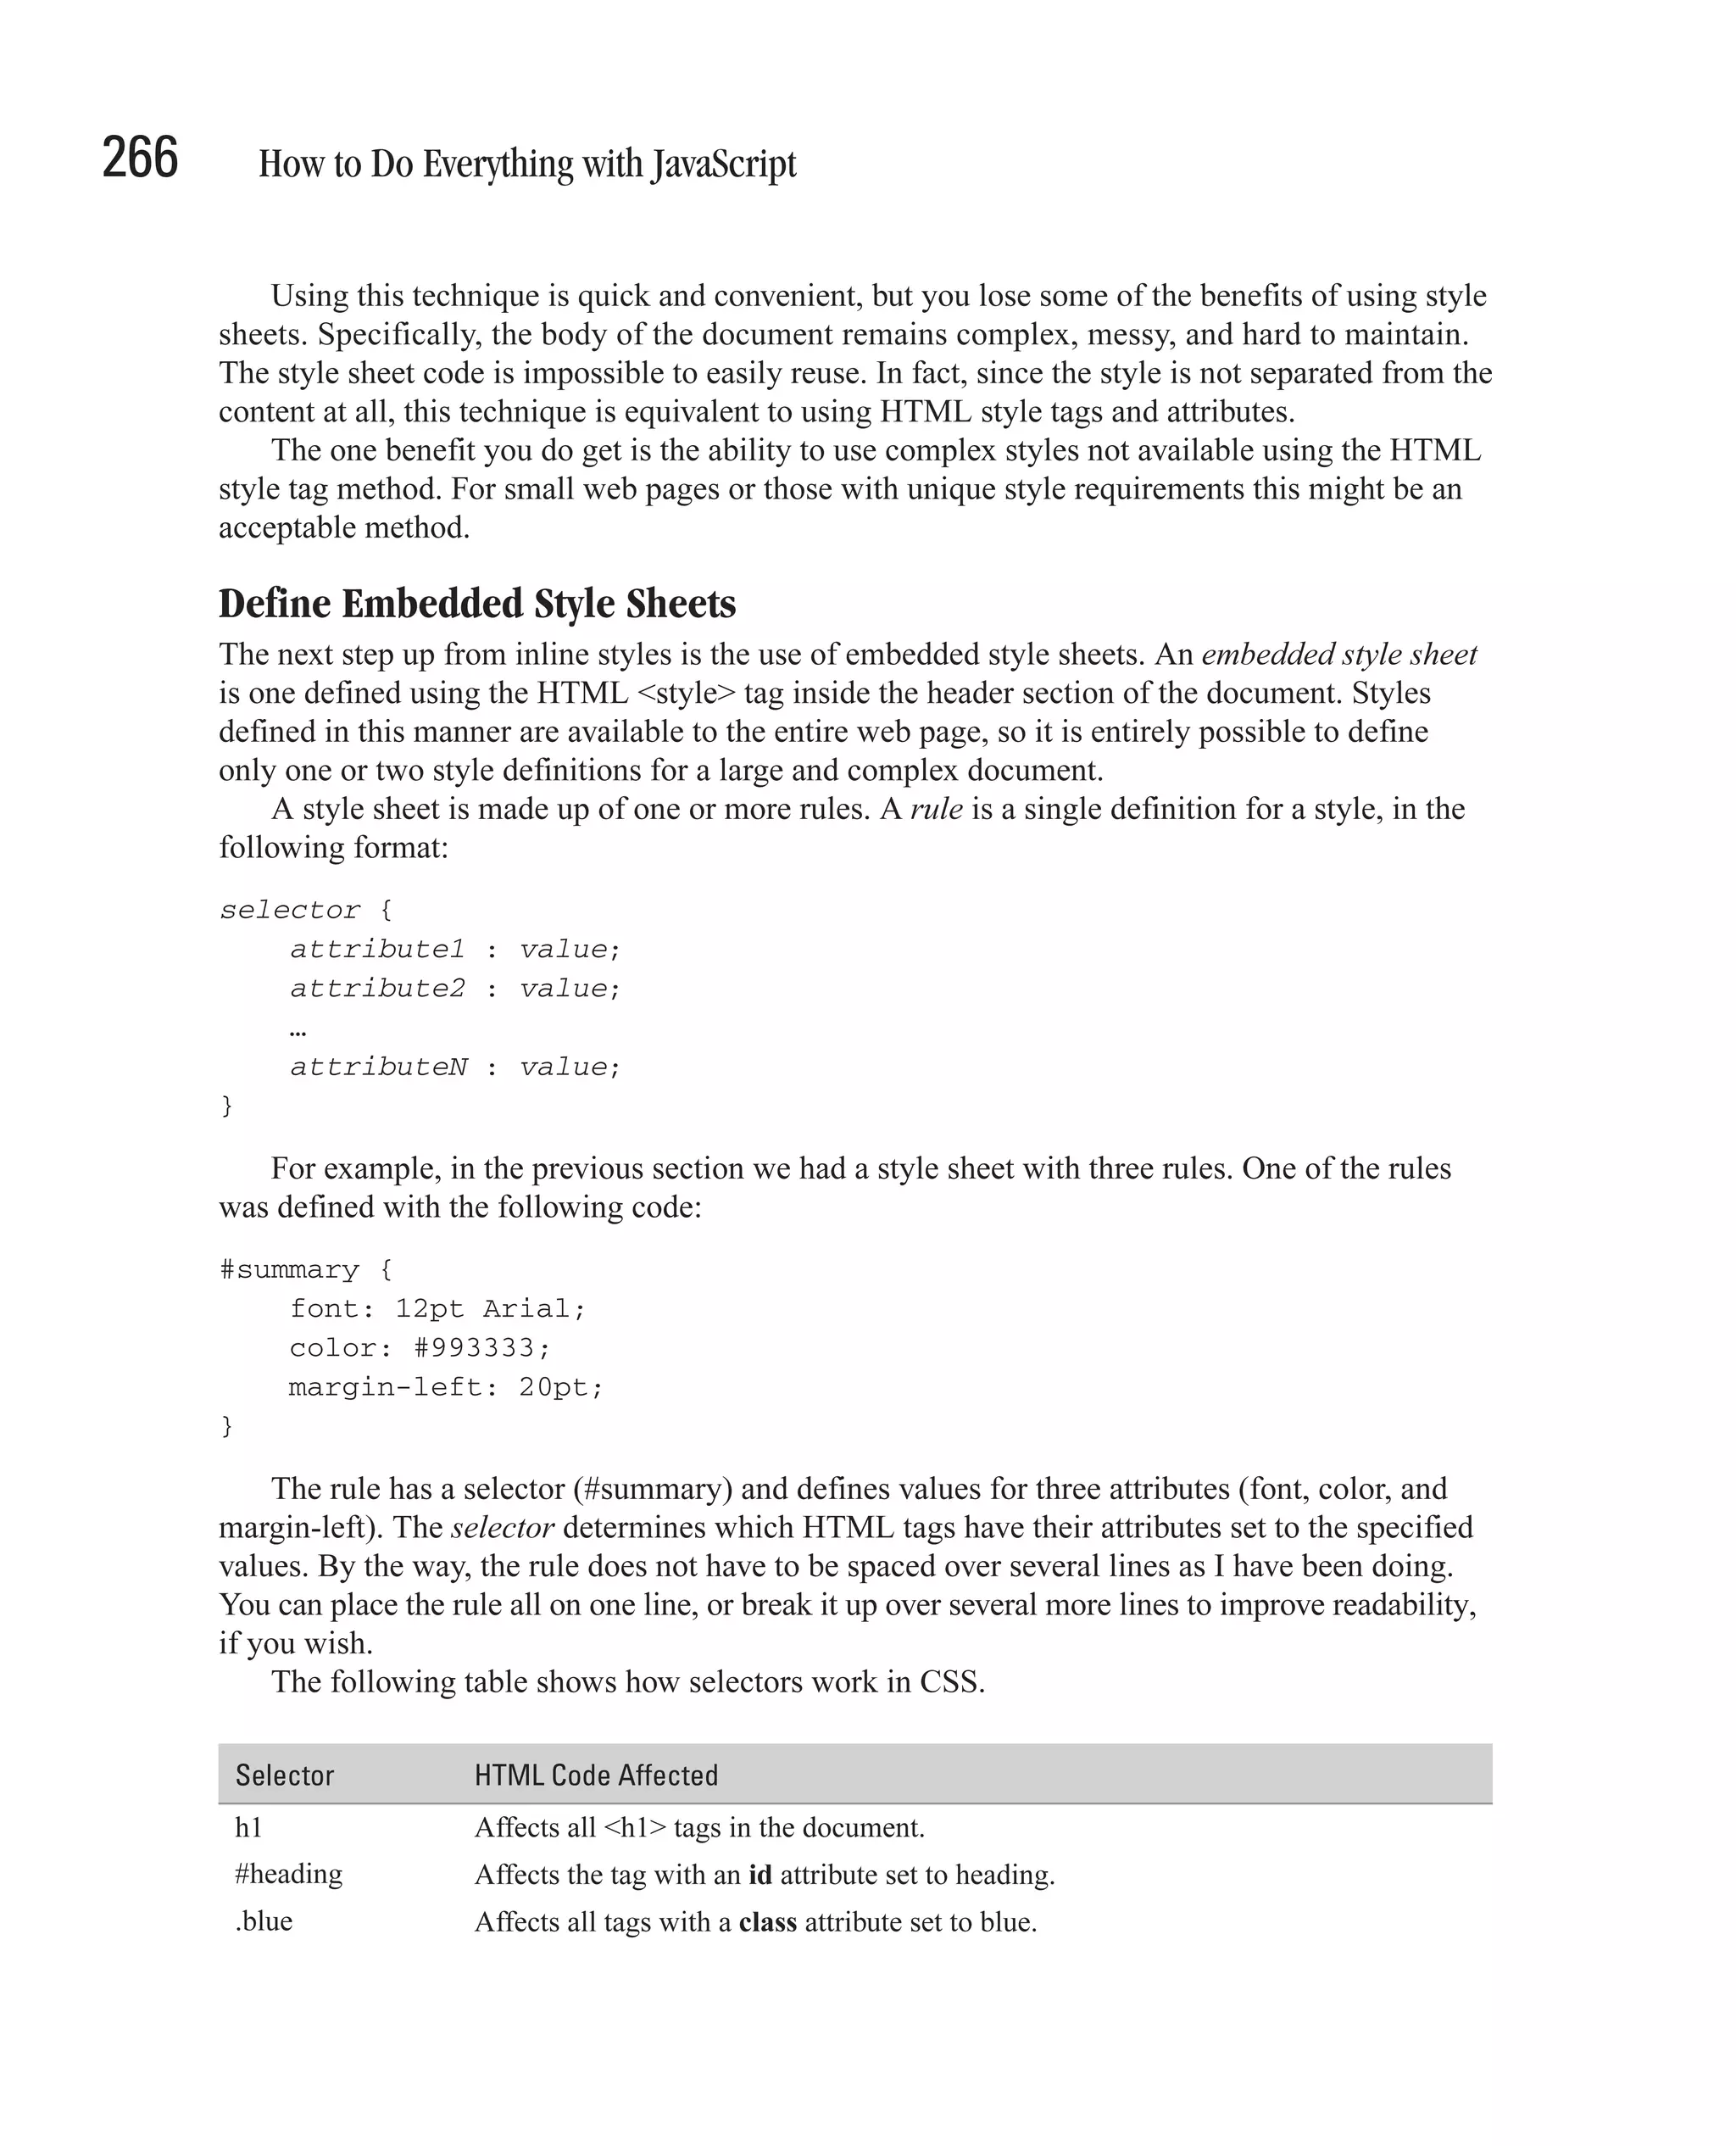
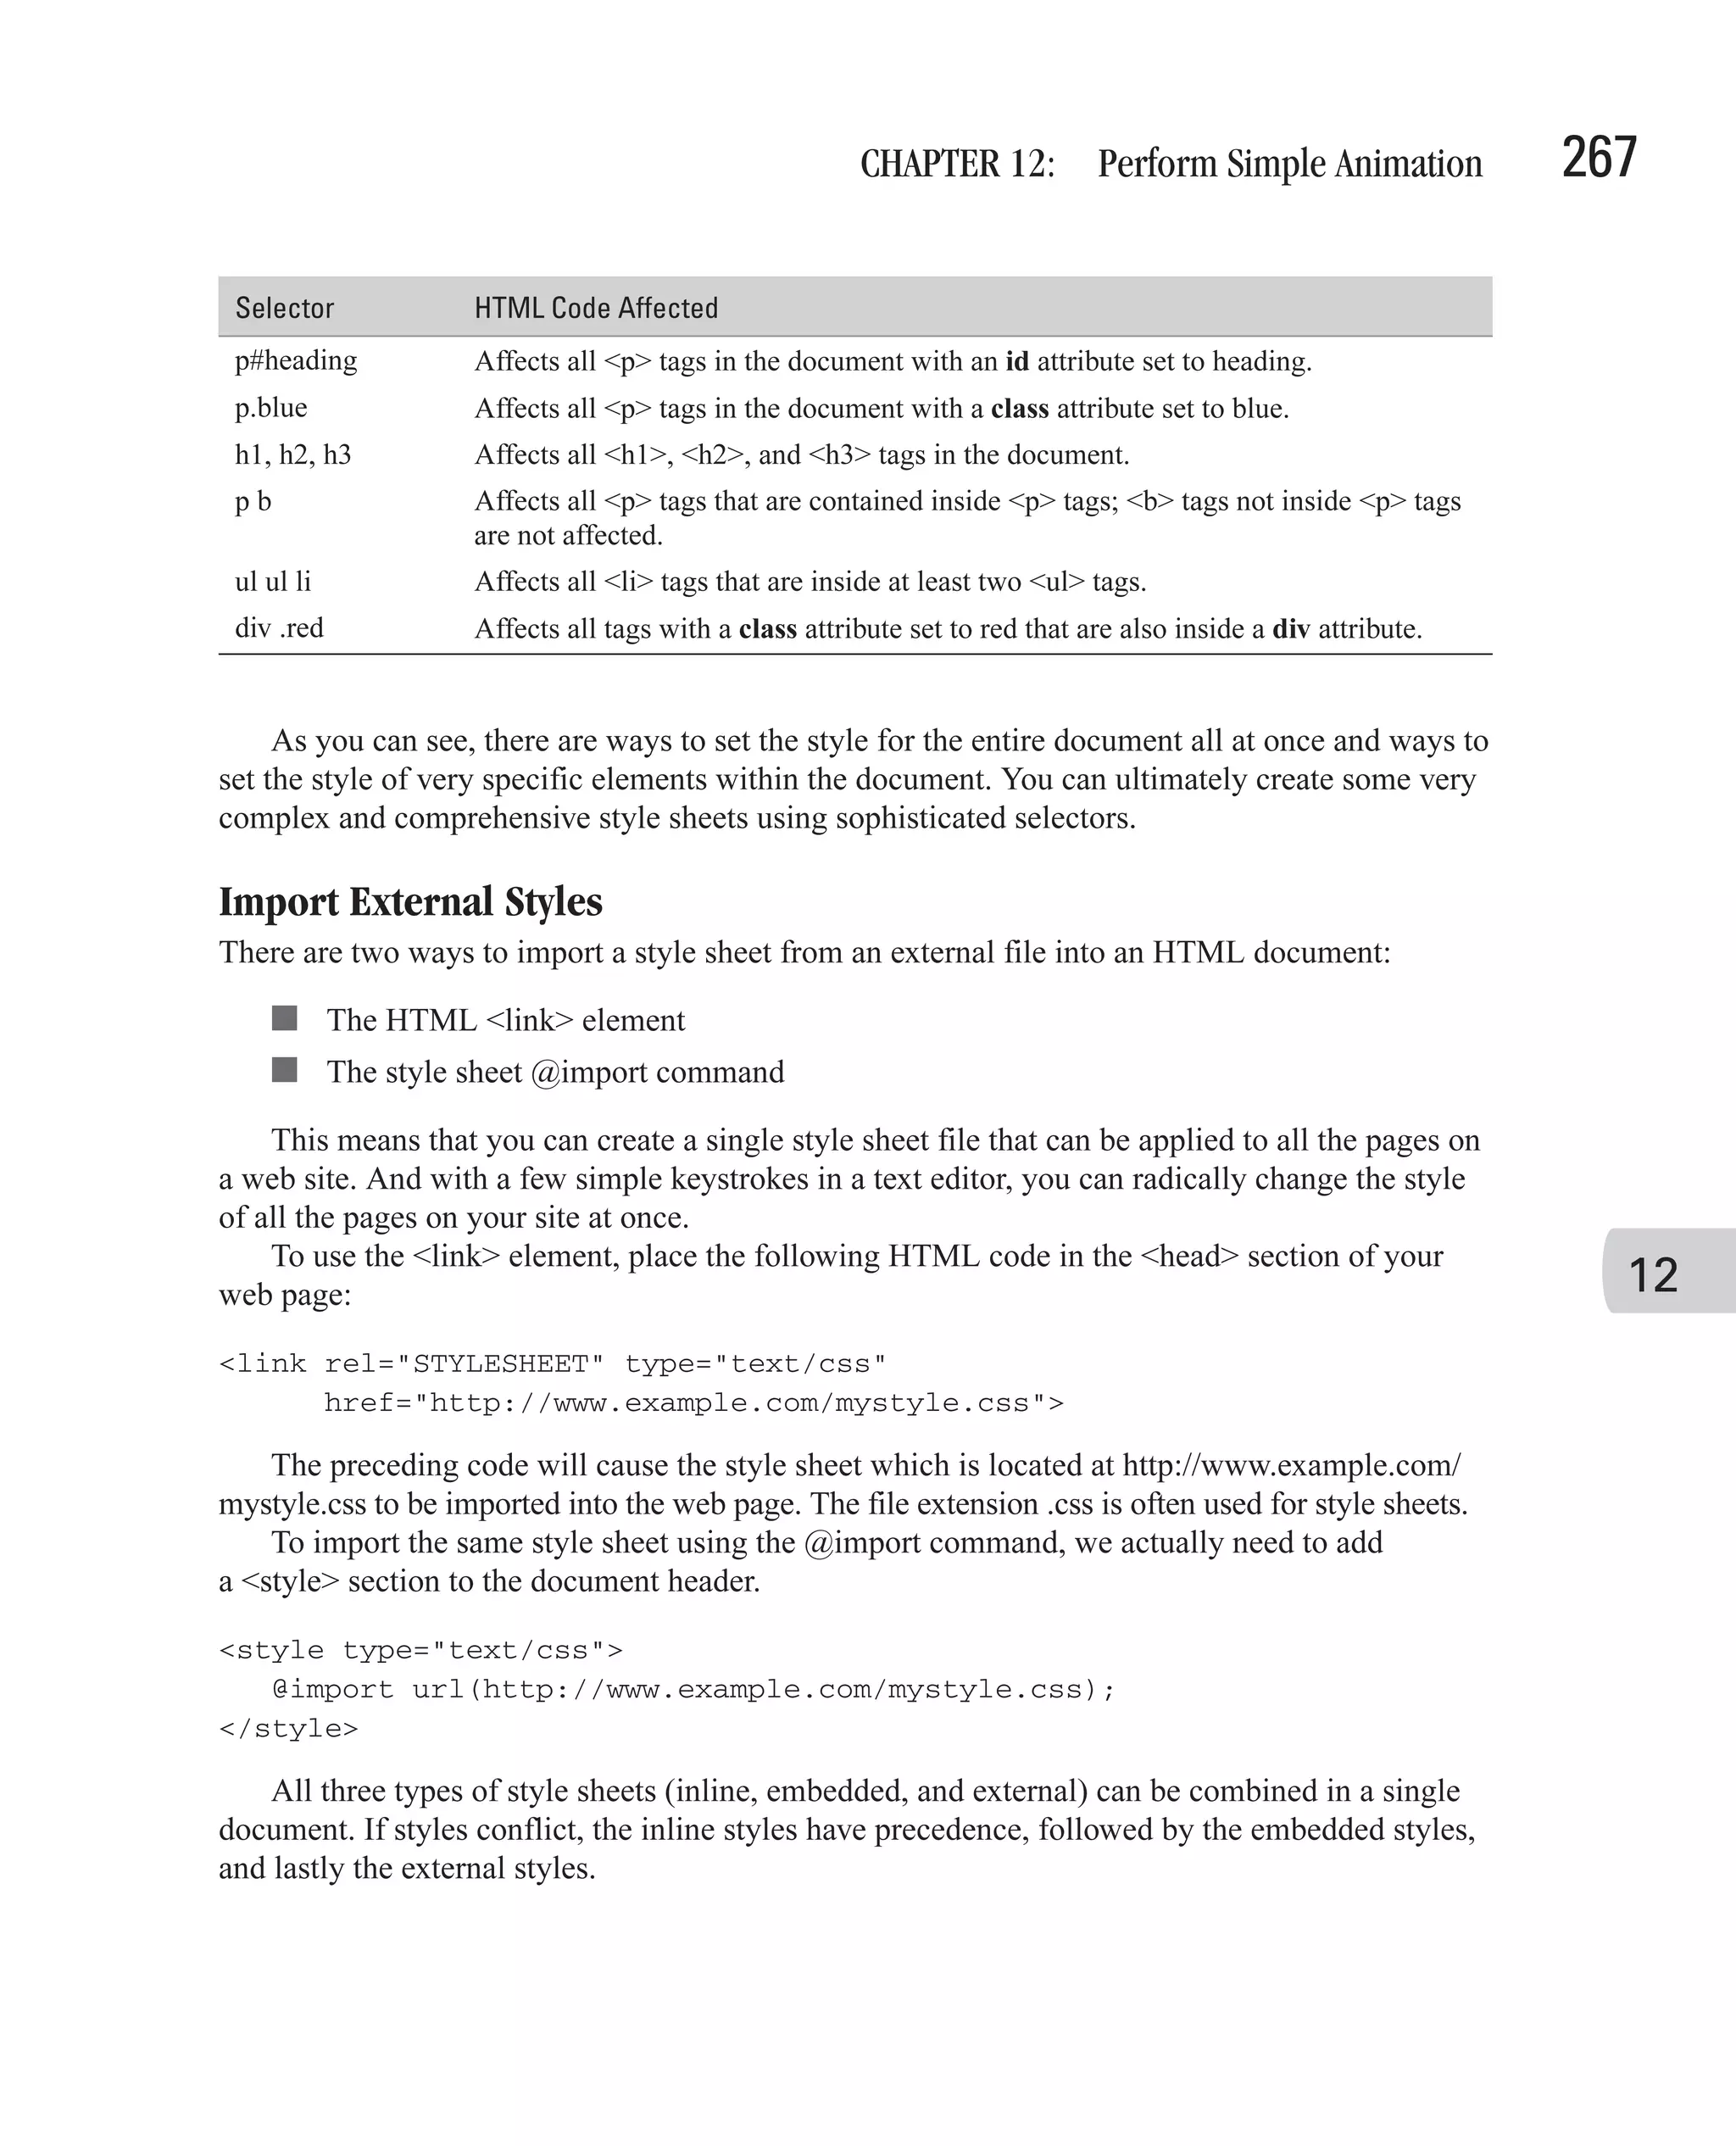
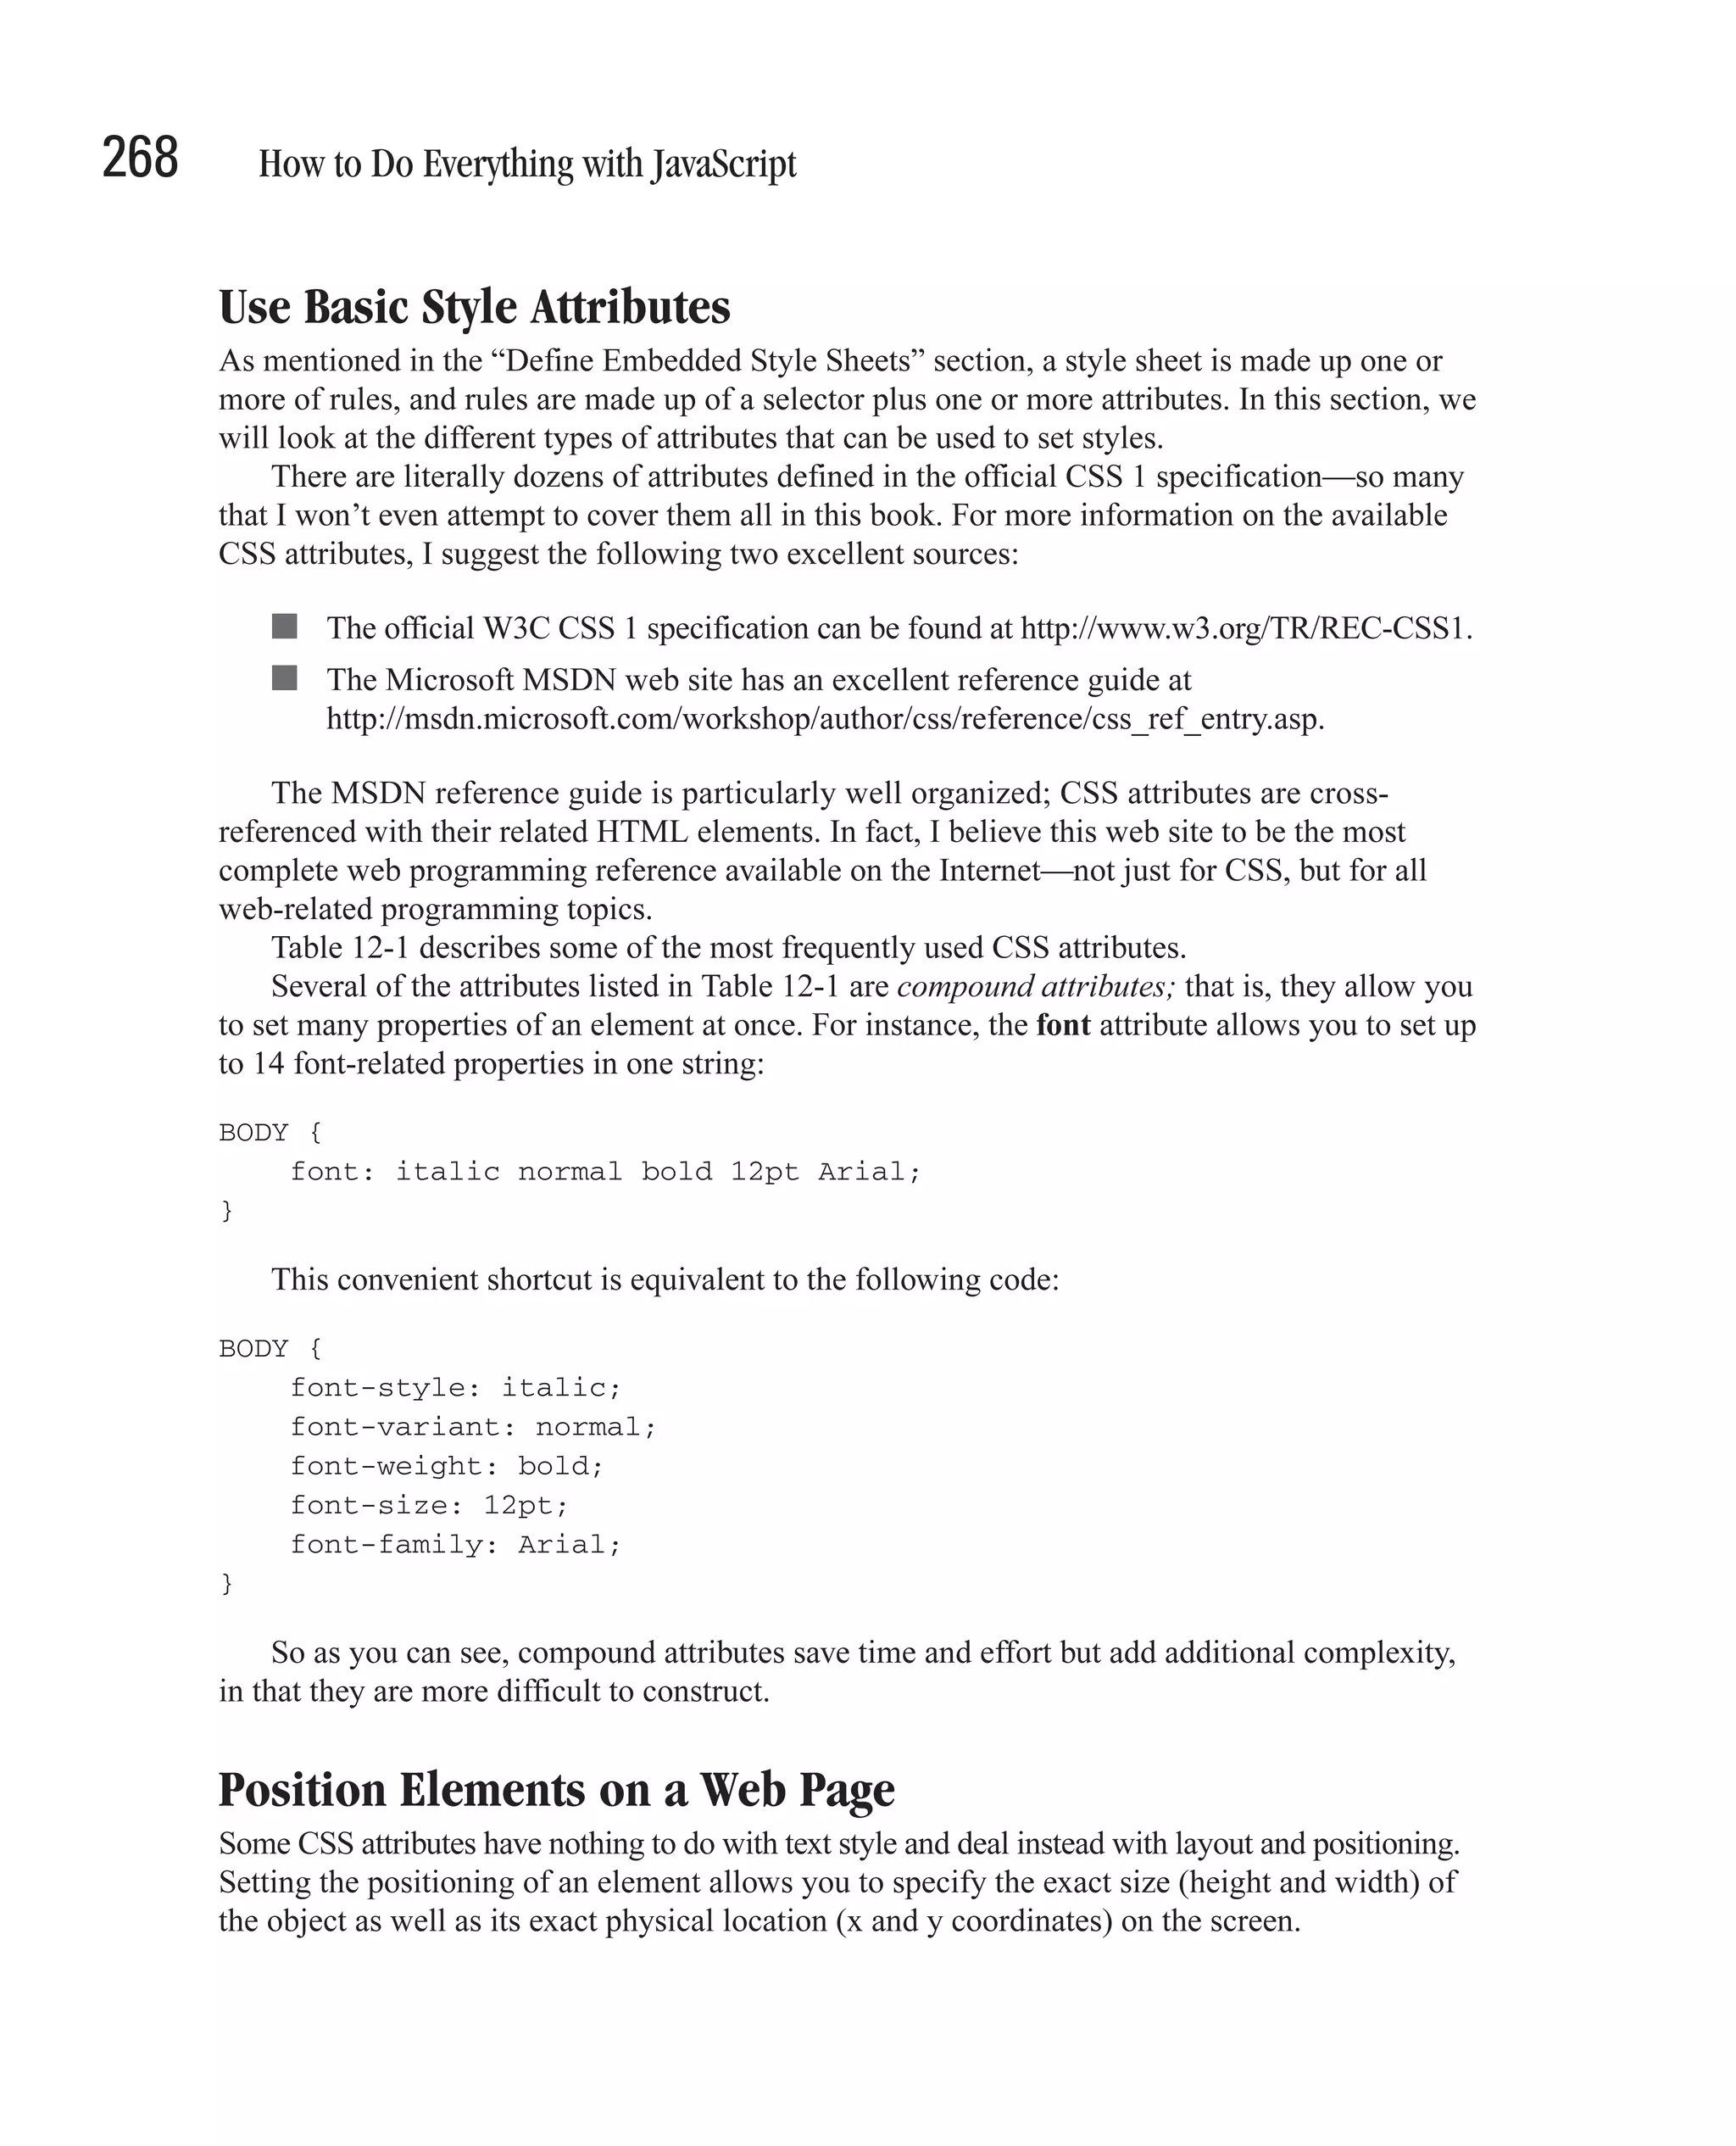
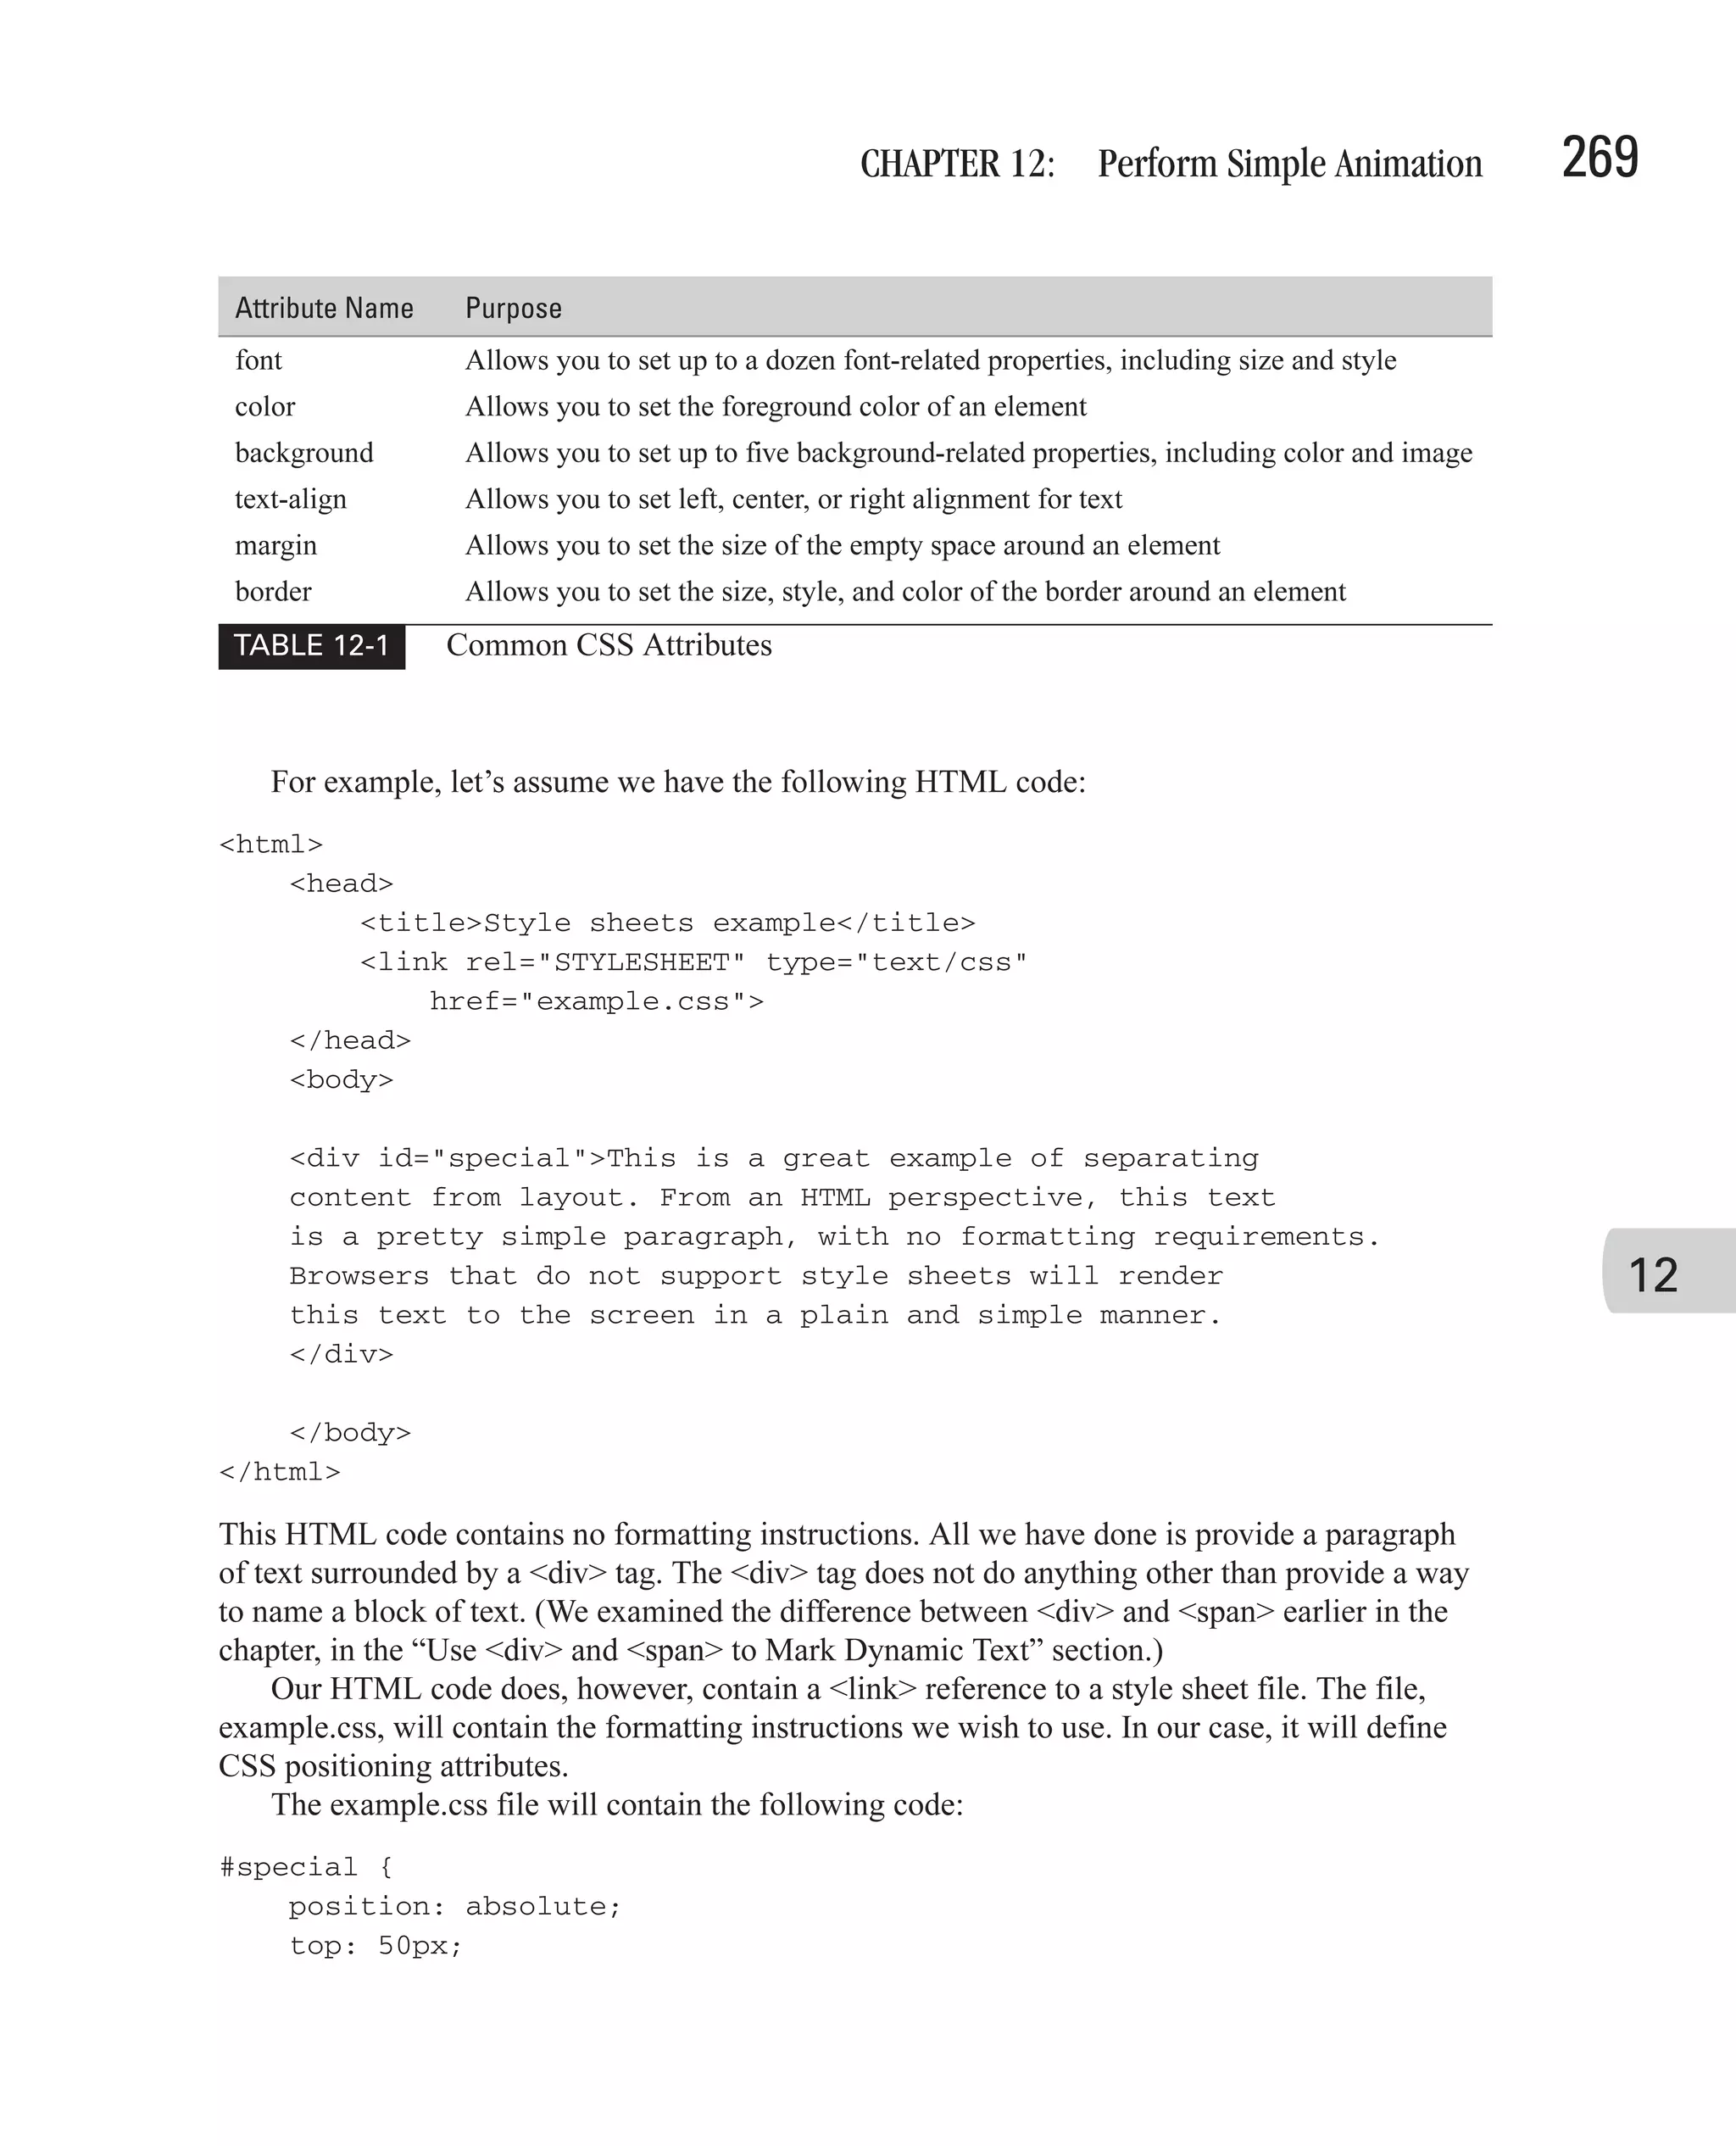
![CHAPTER 12: Perform Simple Animation 271 FIGURE 12-2 The browser has successfully interpreted our style sheet. 12 Our JavaScript program can access the text box control named fullname using the DOM and manipulate its style. var TextBoxes = document.getElementsByTagName("input"); for (var counter=0; counter < TextBoxes.length; counter++) { var myTextBox = TextBoxes[counter]; myTextBox.style.backgroundColor = "black"; myTextBox.style.color = "white"; myTextBox.style.font = "22pt Arial"; } The preceding JavaScript code will locate all the <input> elements on the page and alter their style properties. What we will end up with are two text boxes that have black backgrounds, white text, and a large, 22-point Arial font. You can see the results of this code in Figure 12-3.](https://image.slidesharecdn.com/3592018/75/How-To-Do-Everything-With-JavaScript-291-2048.jpg)

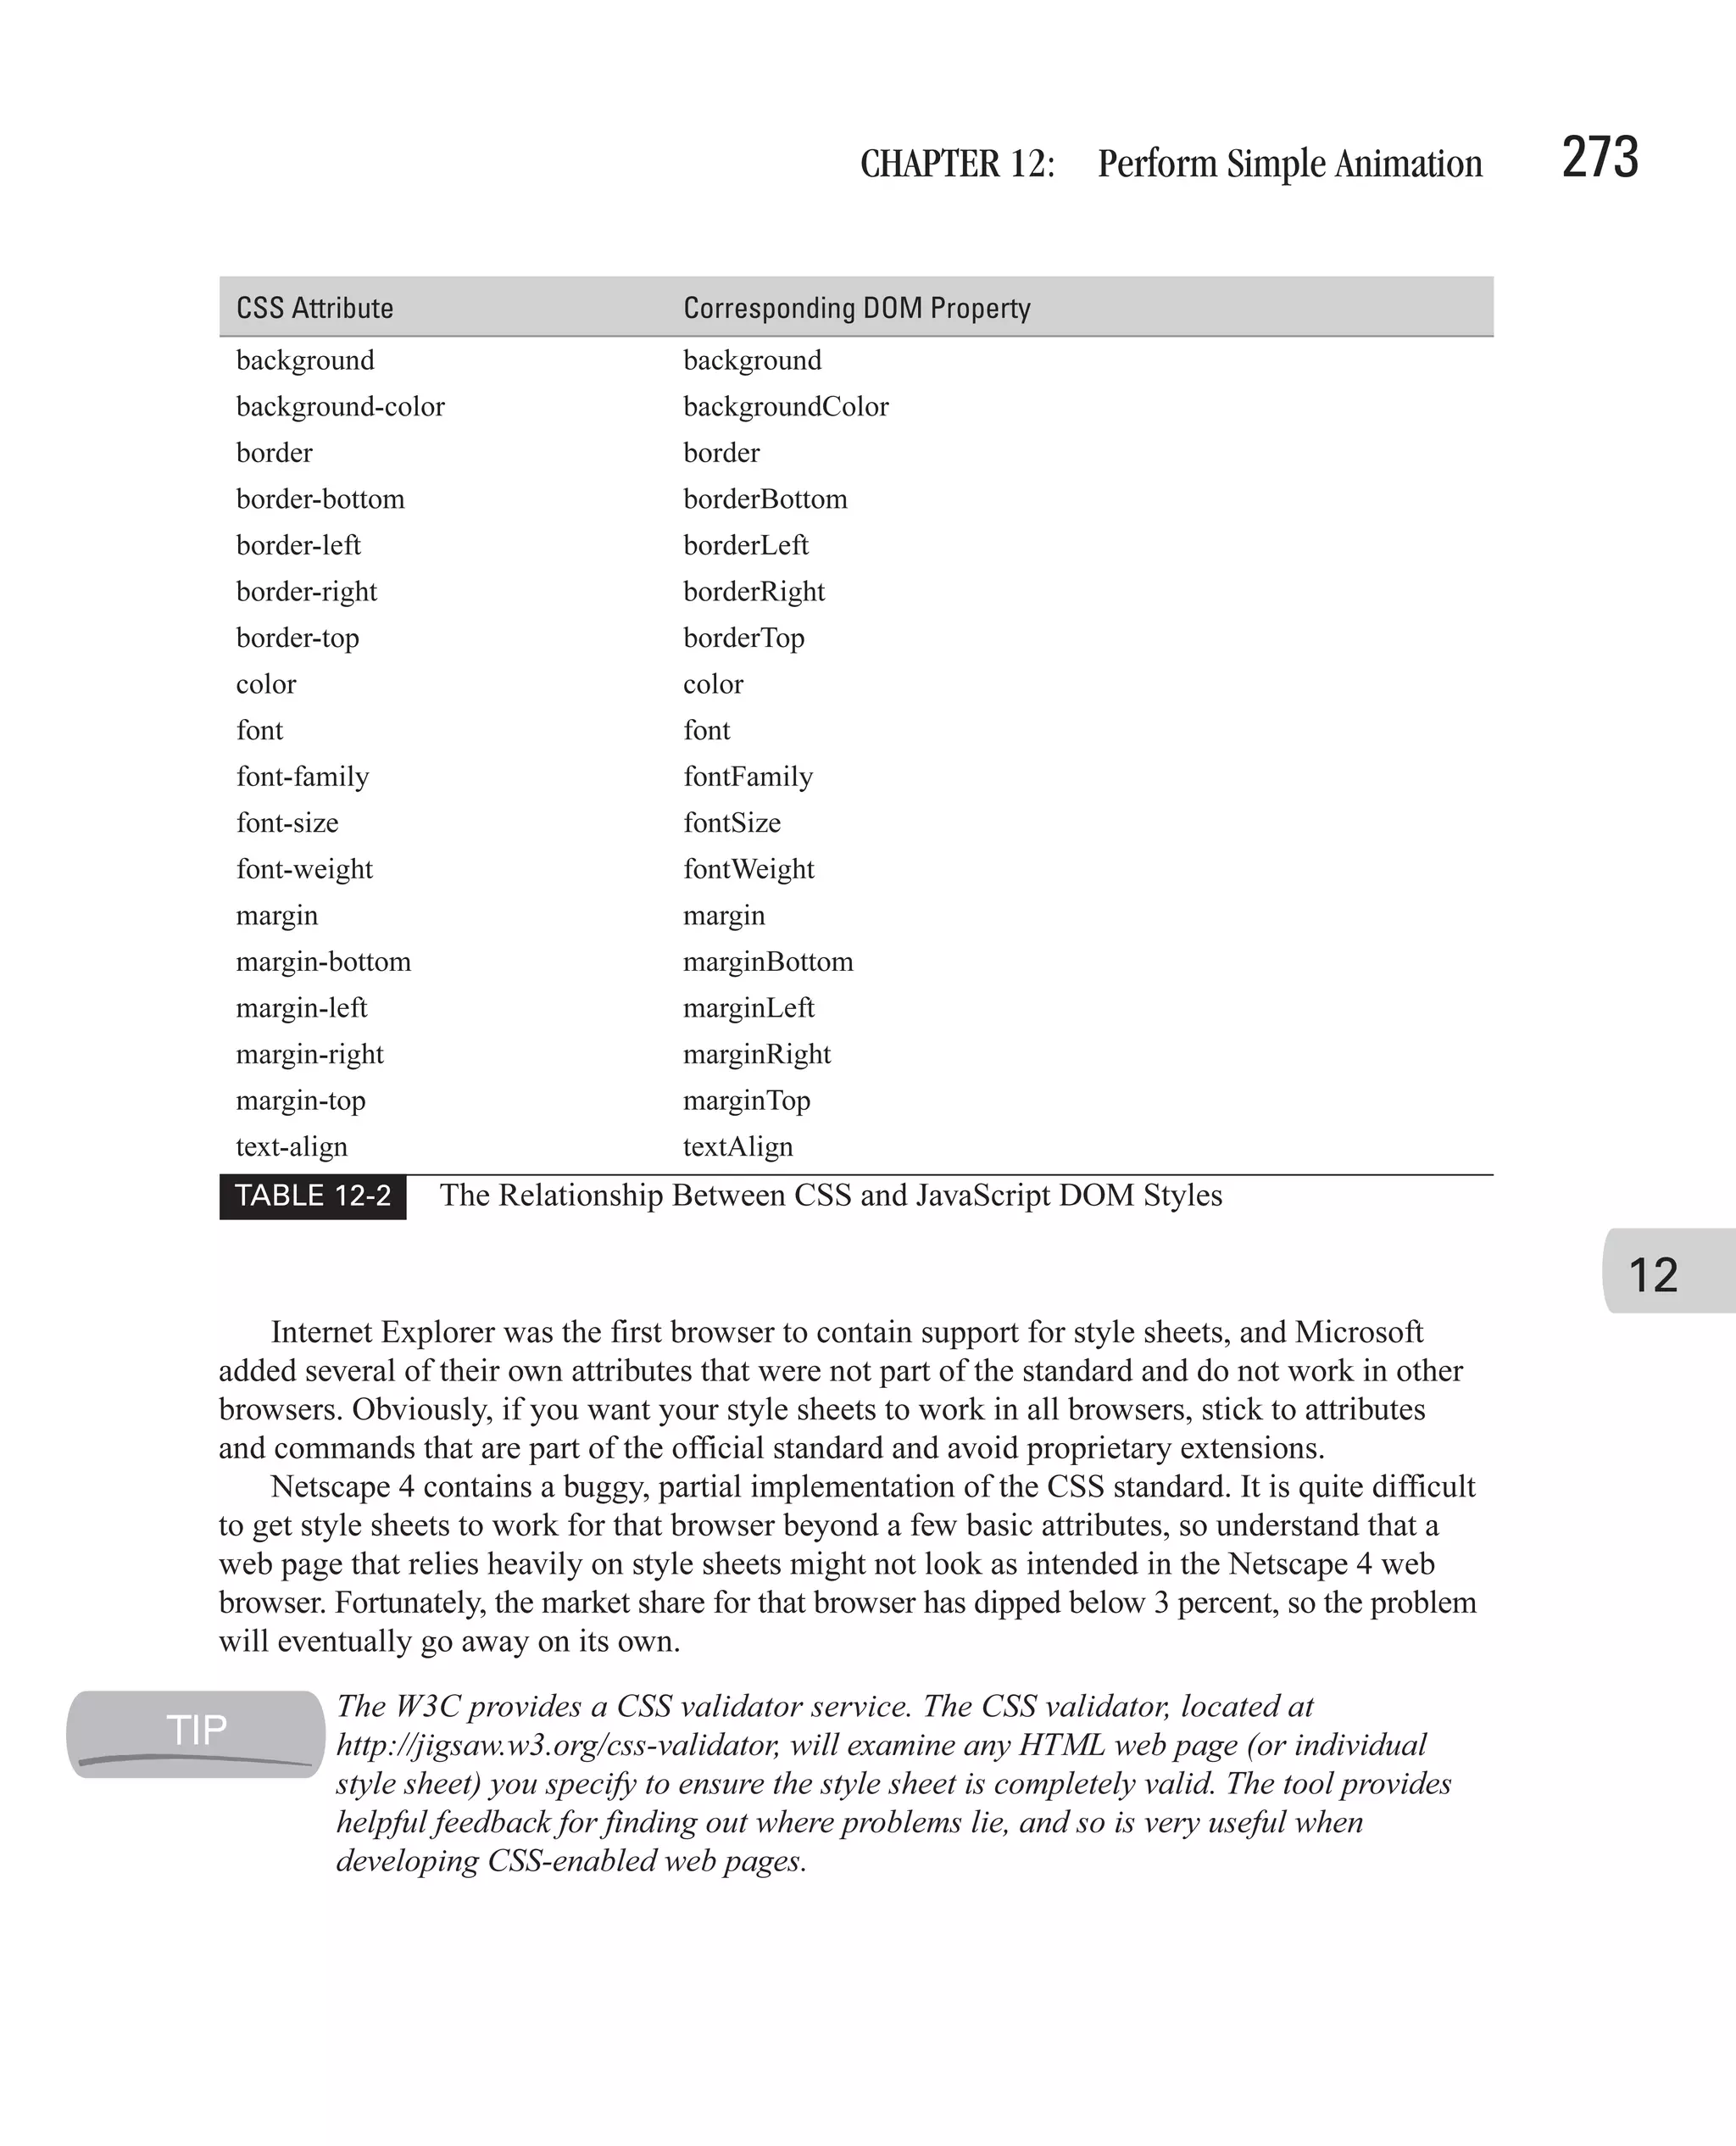
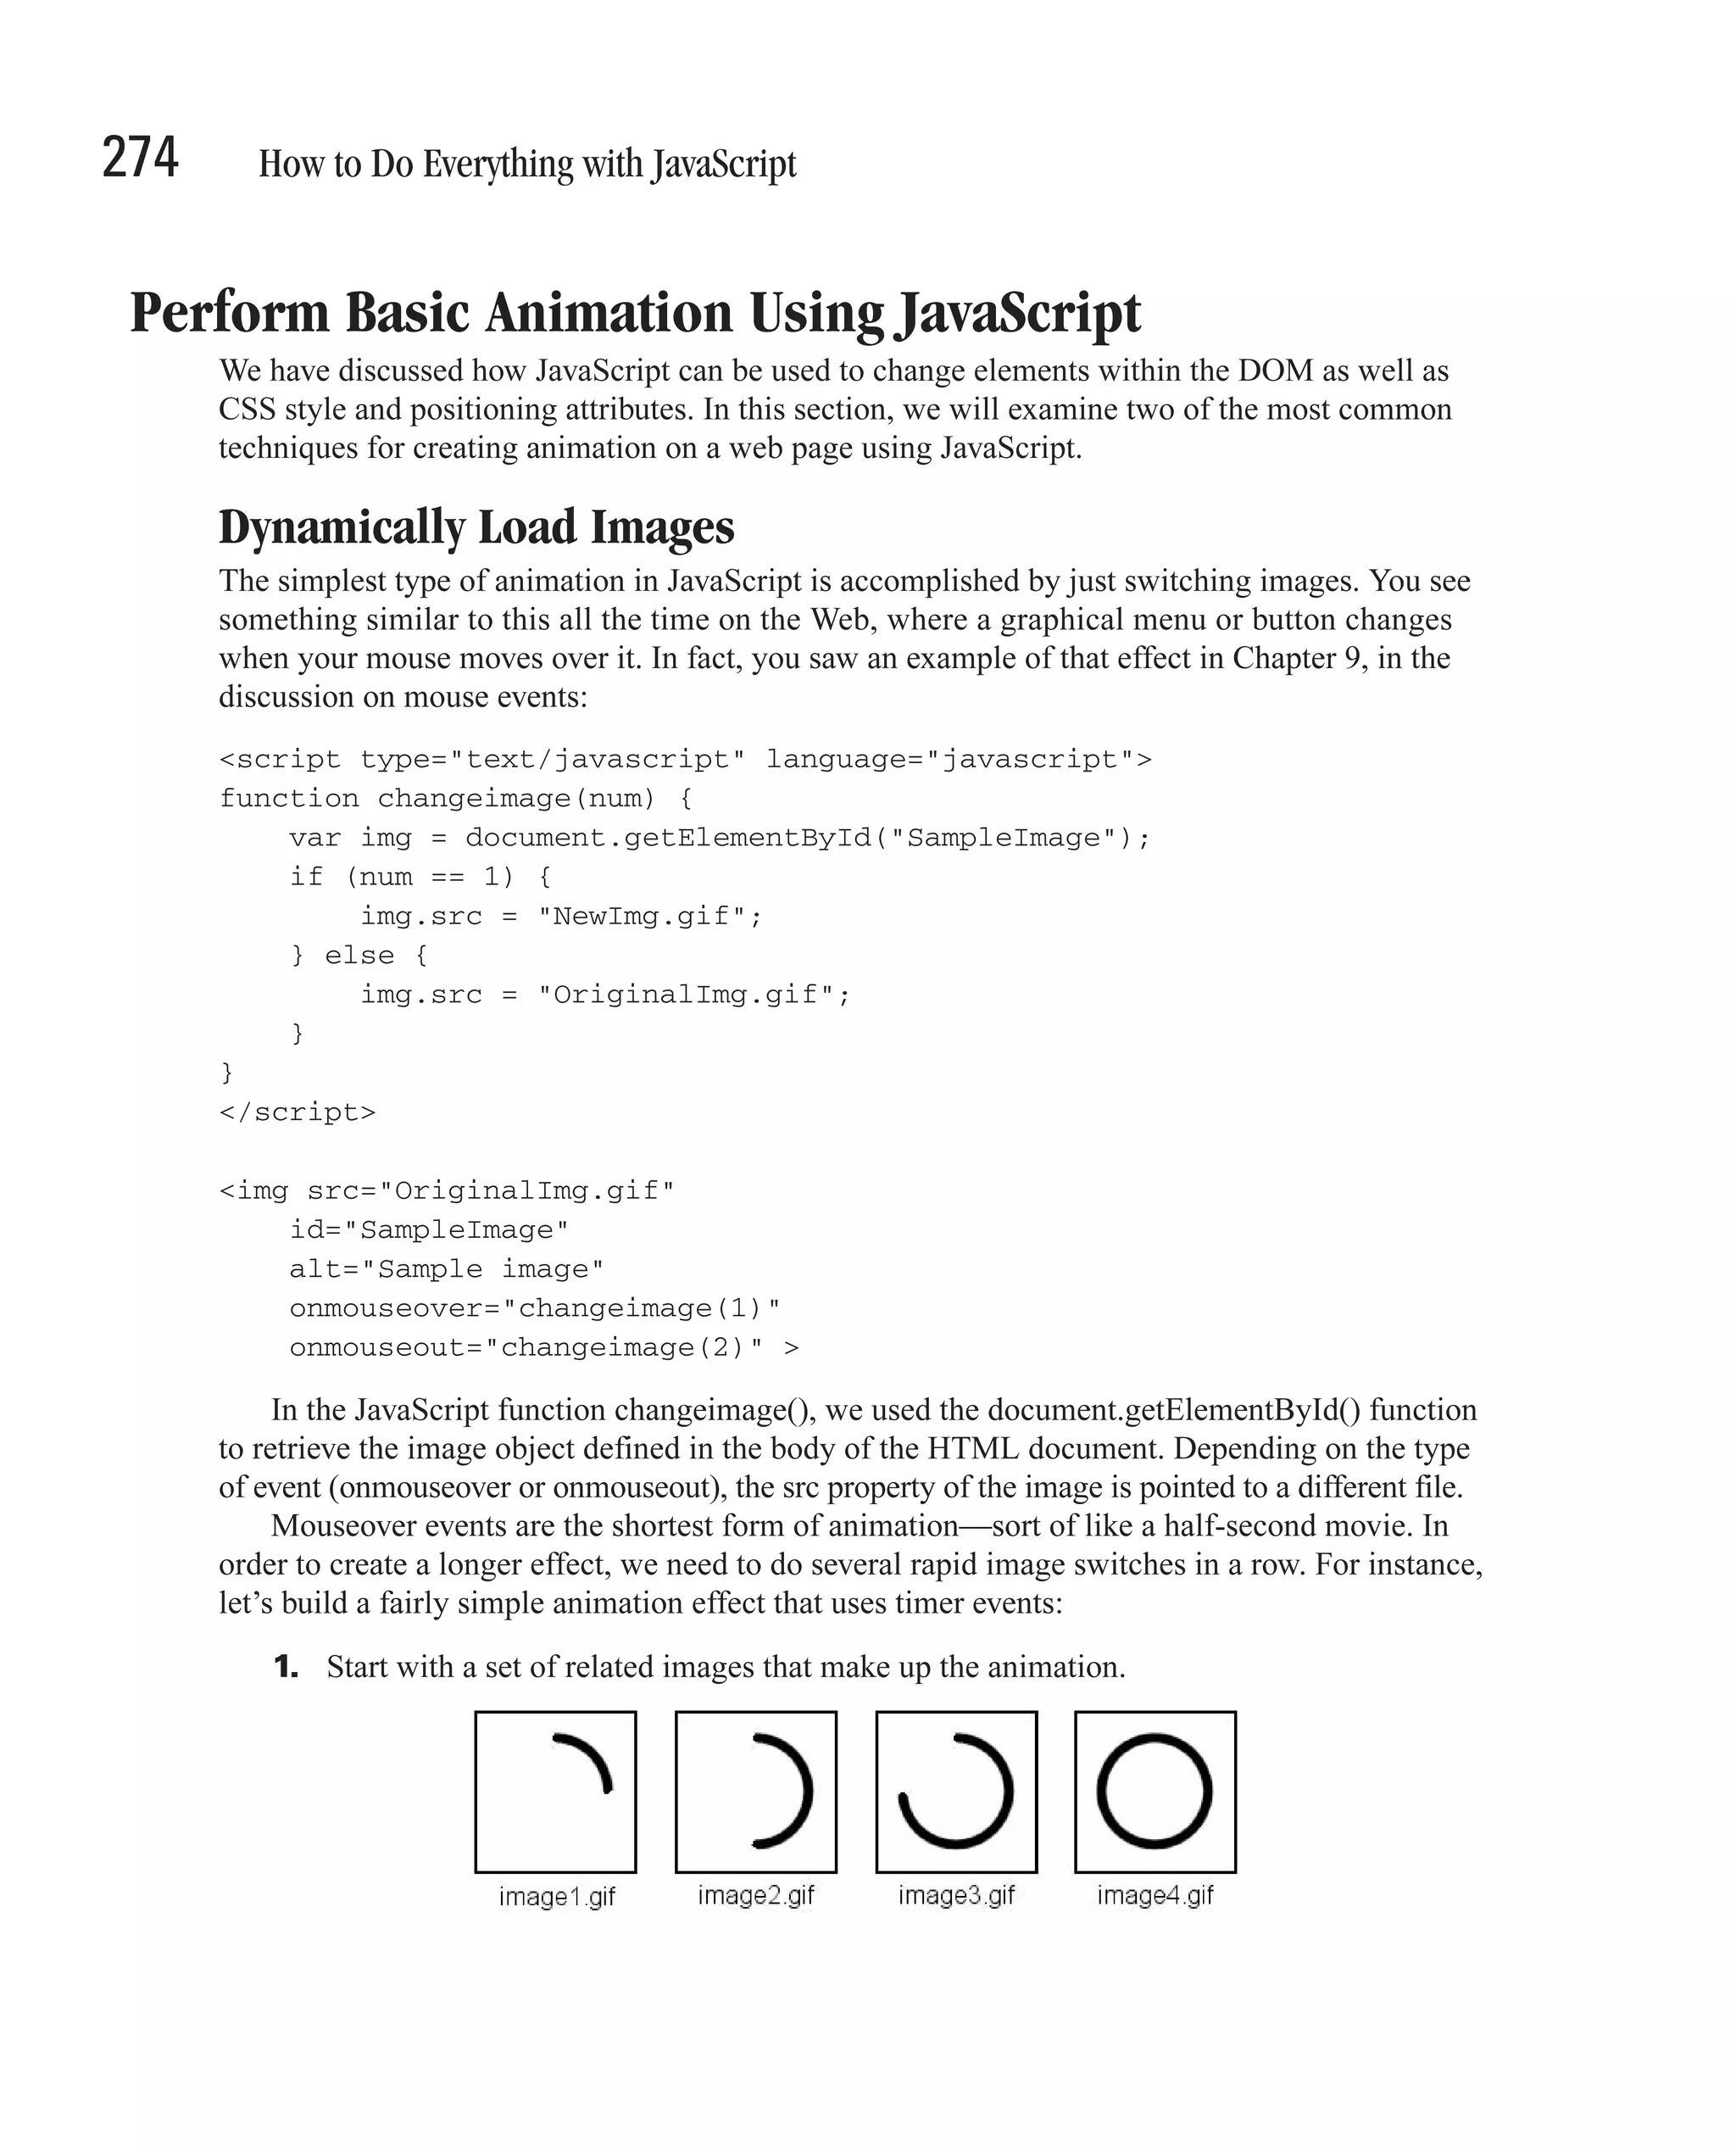
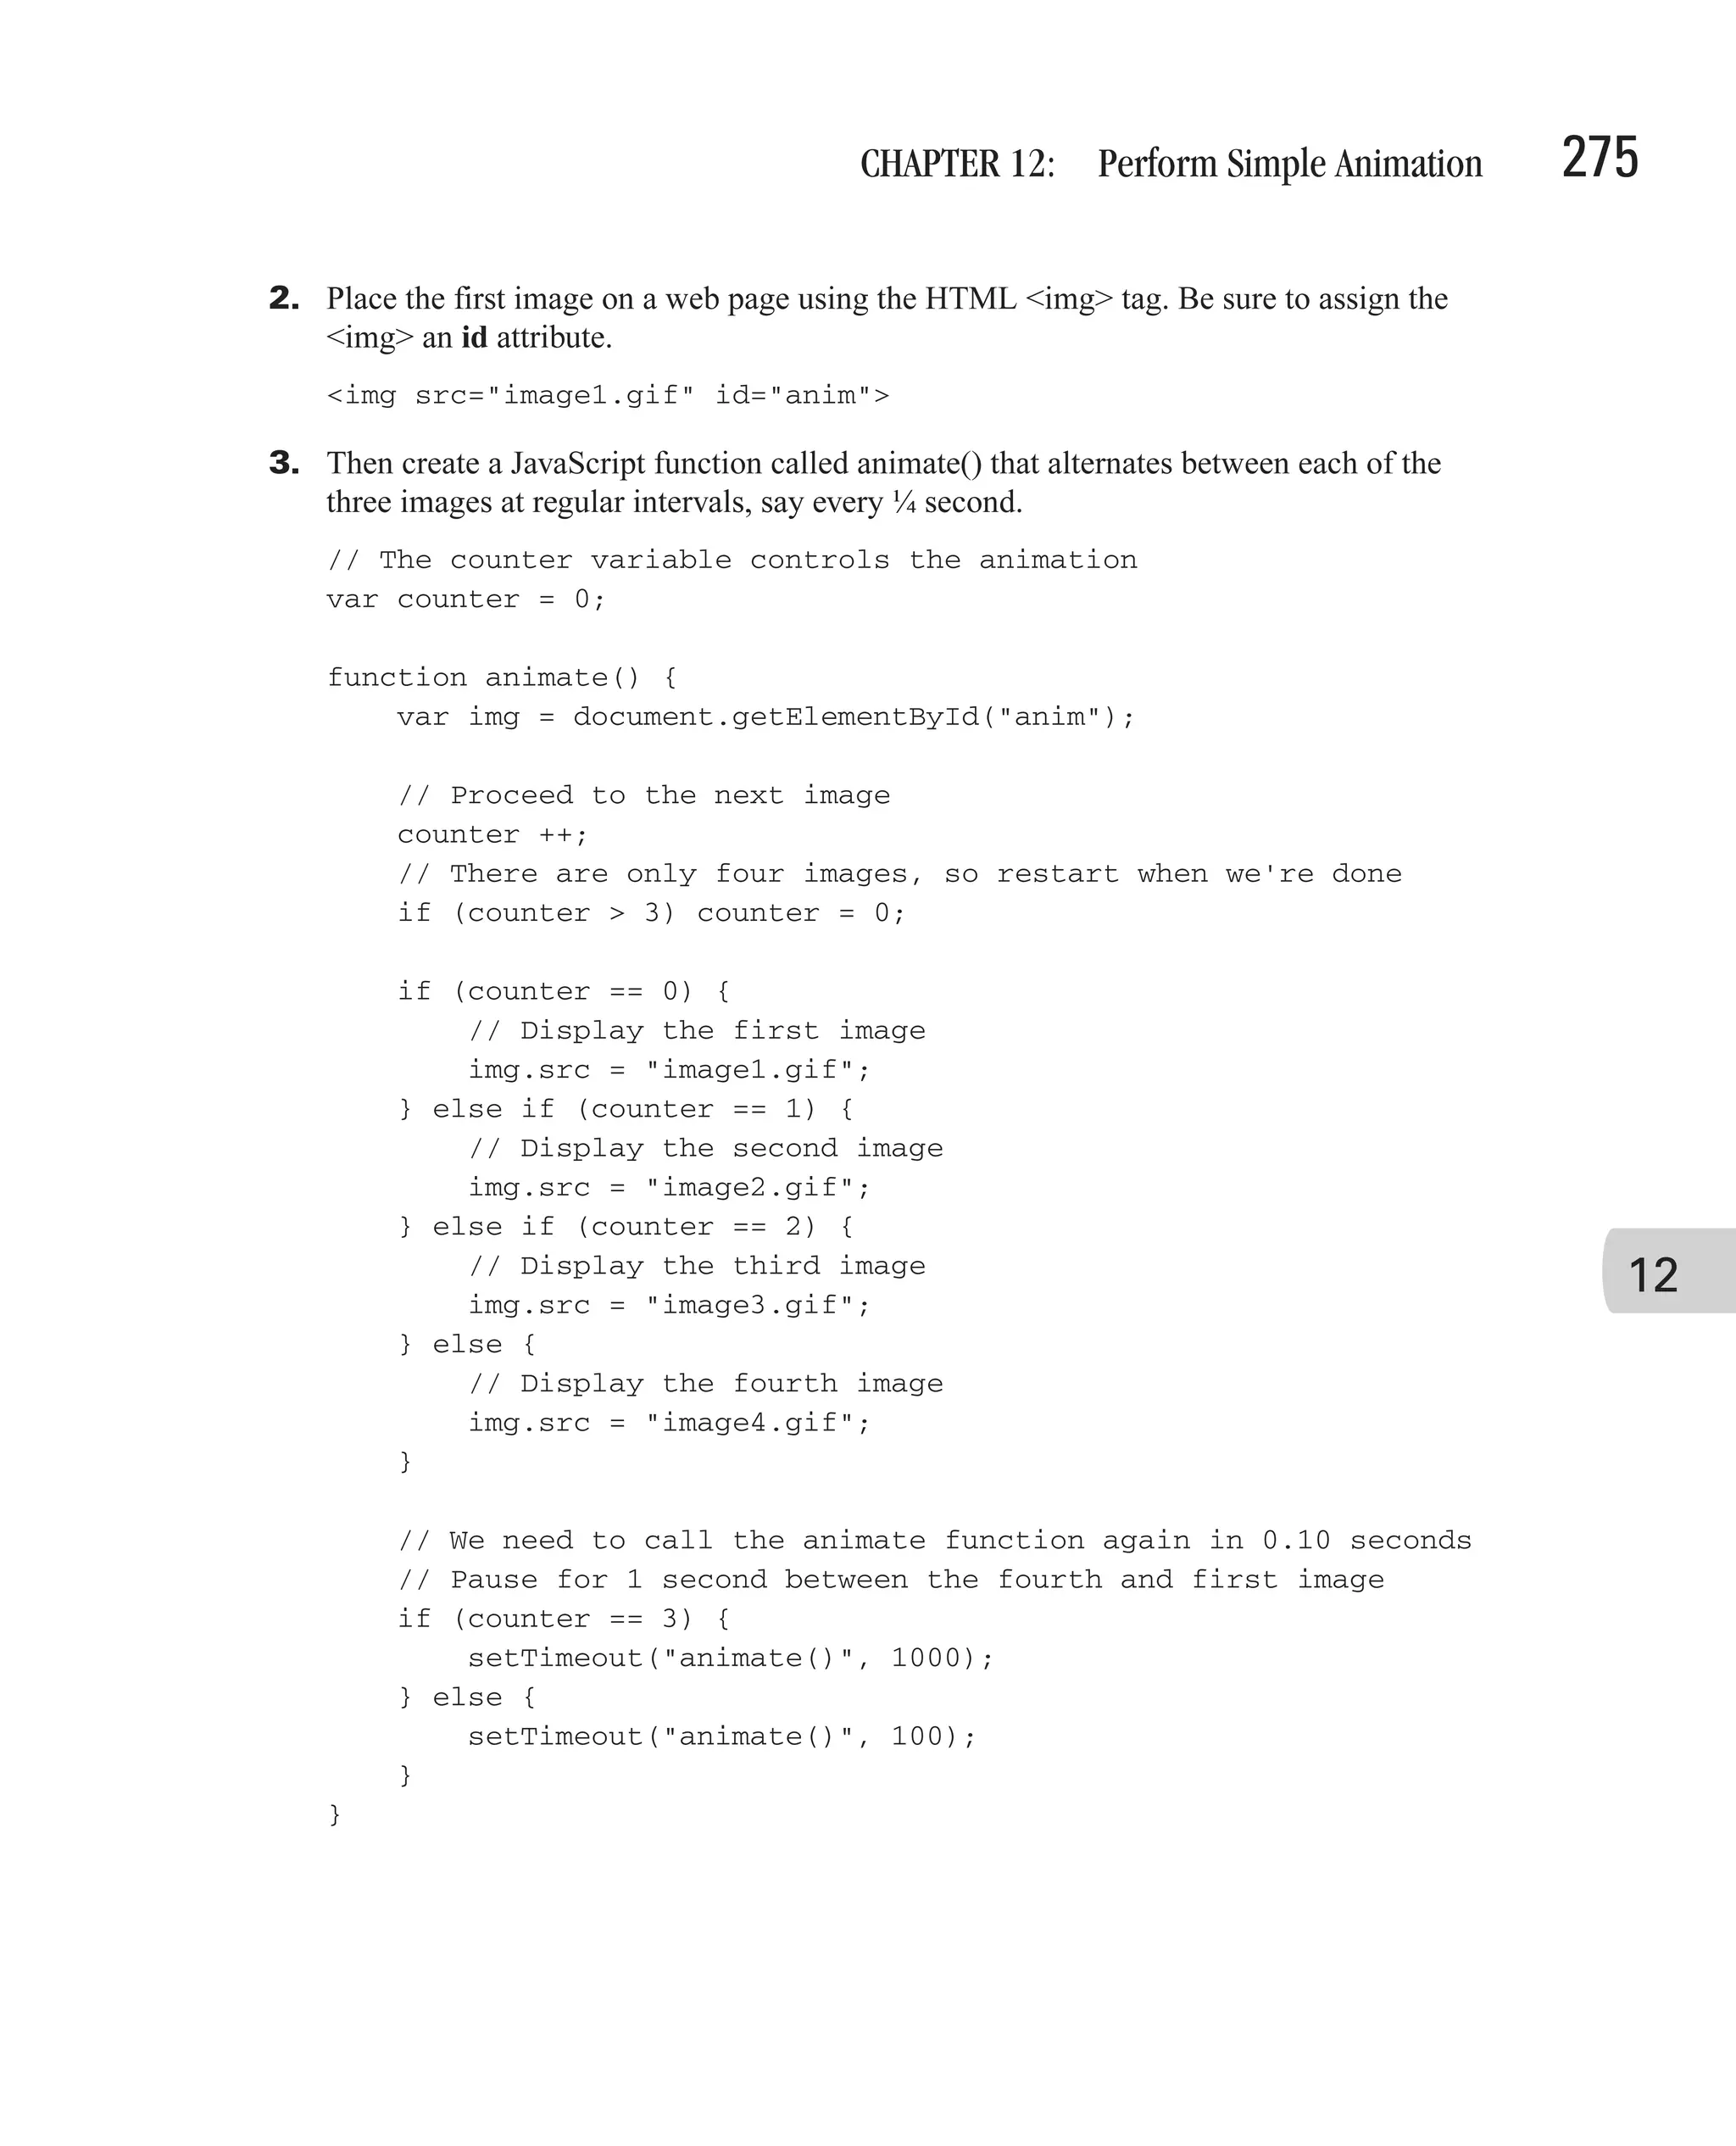
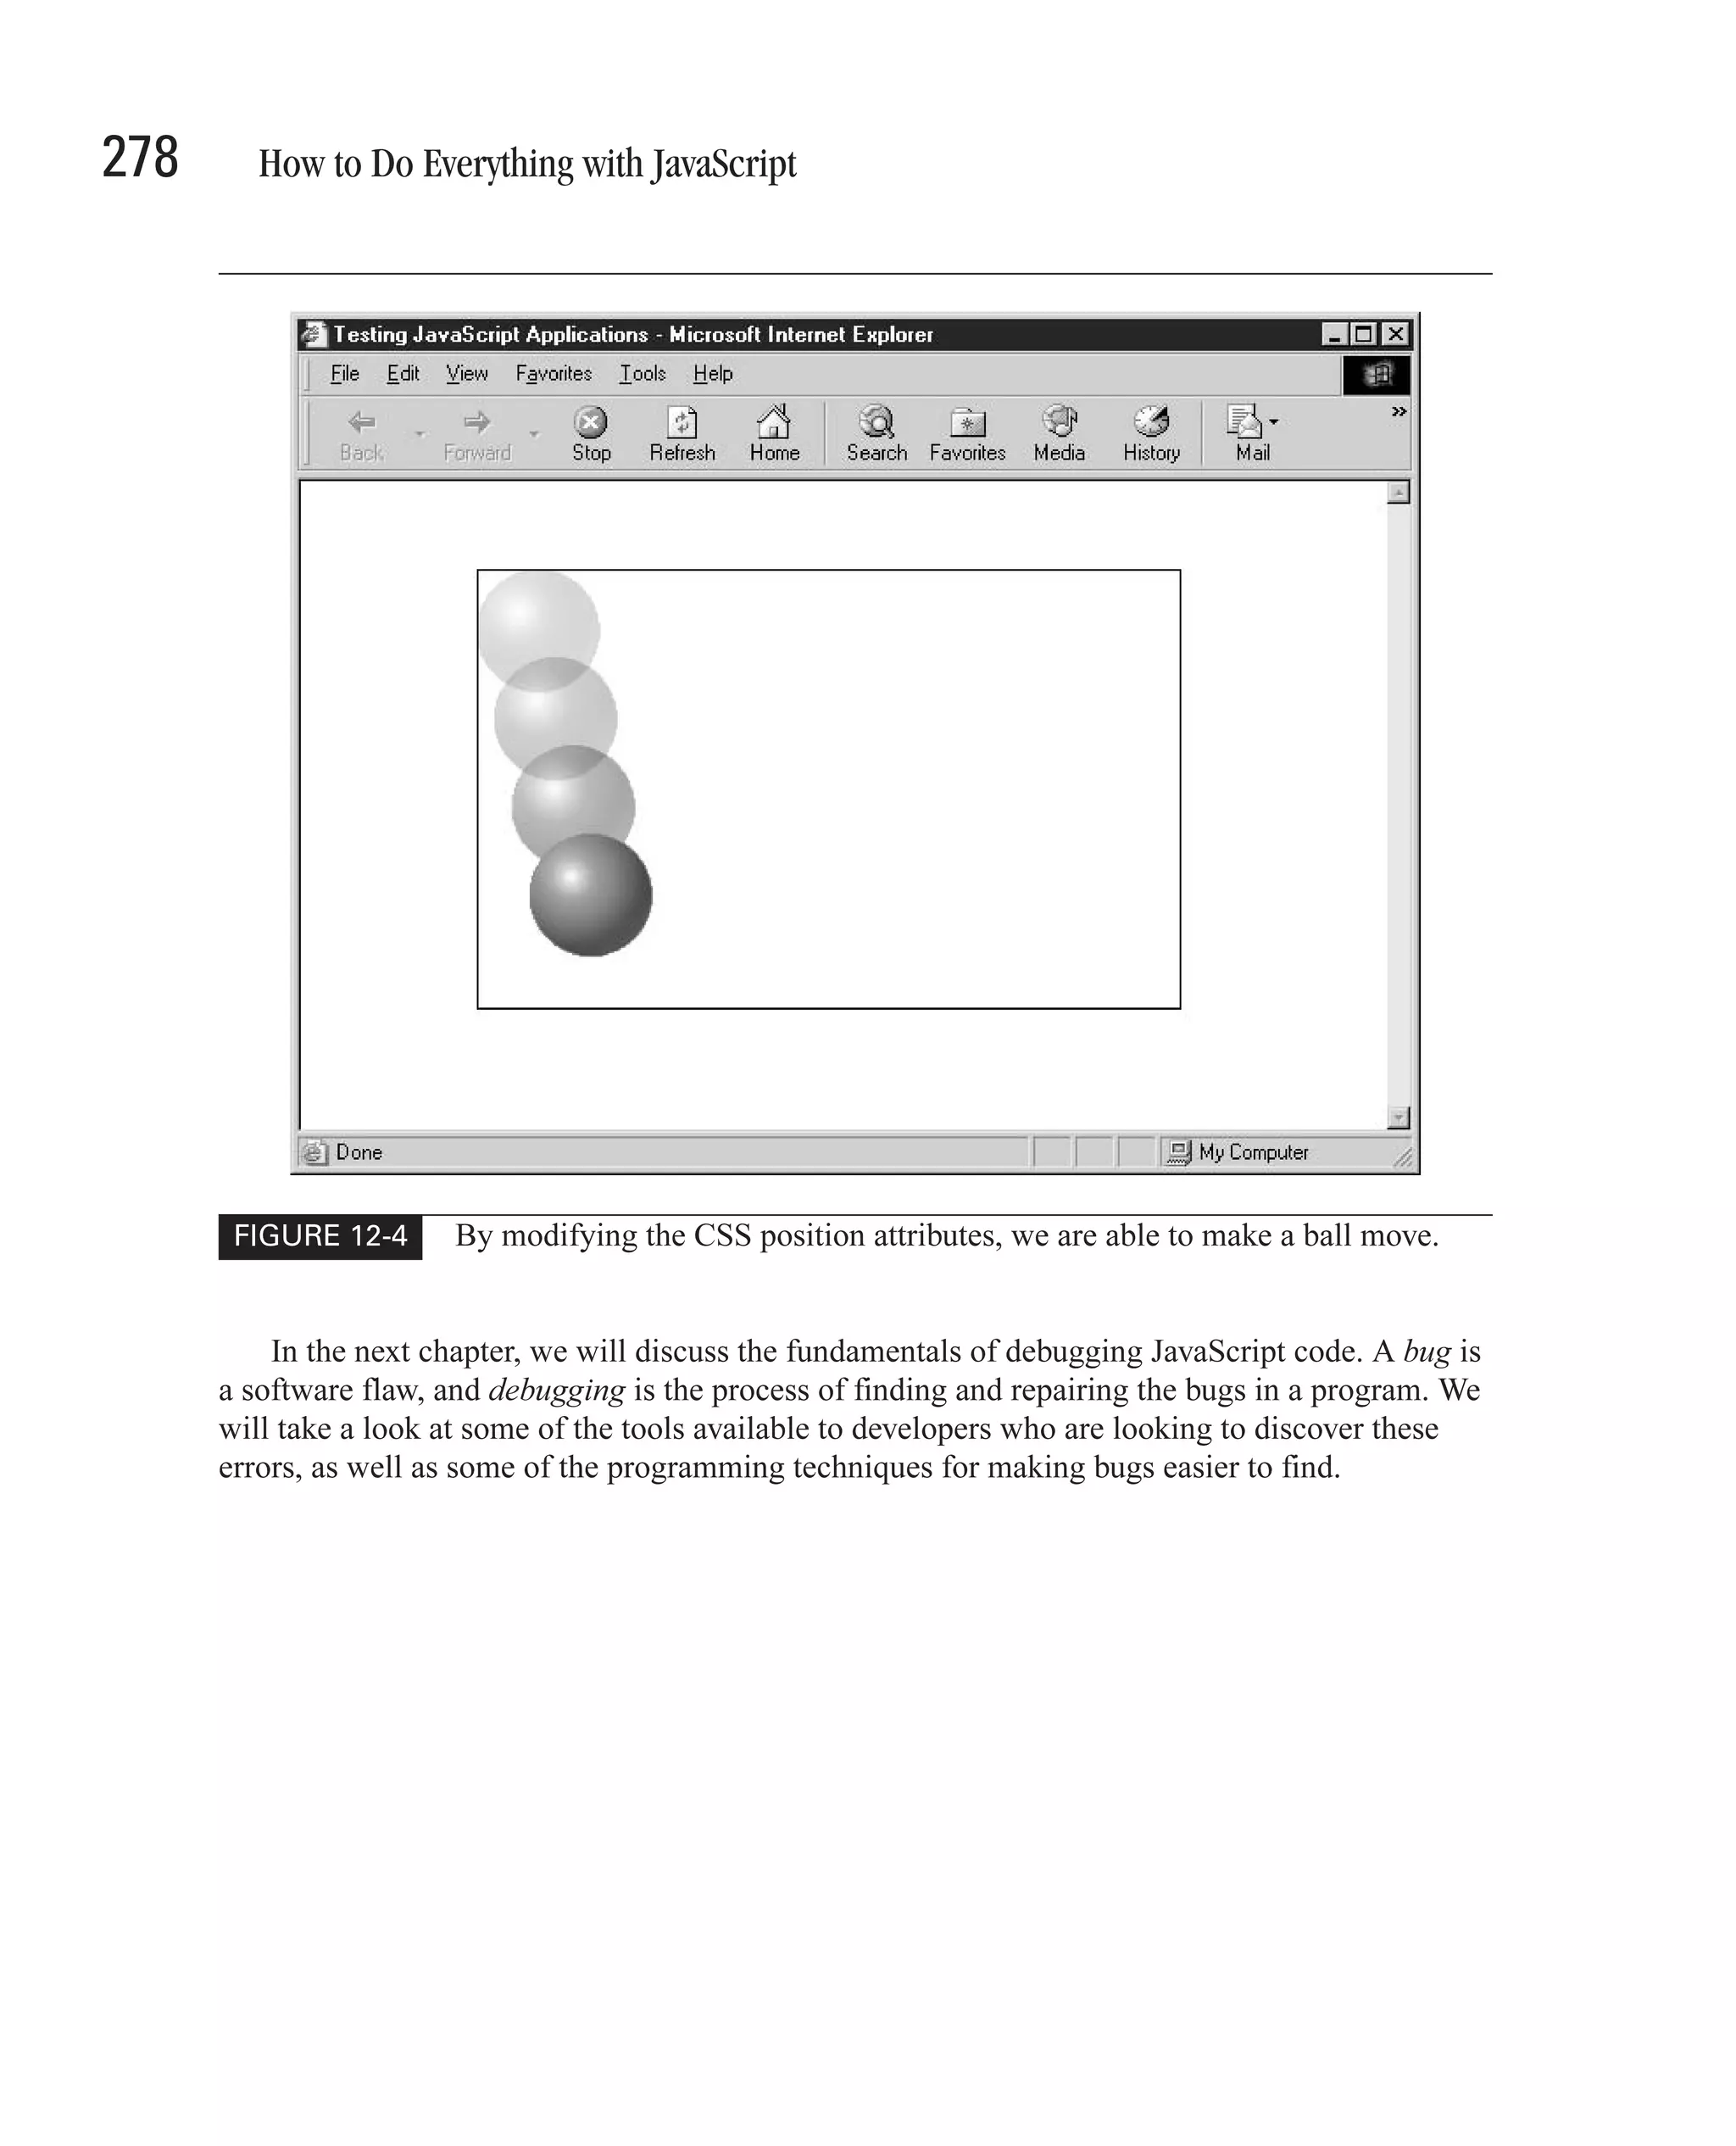


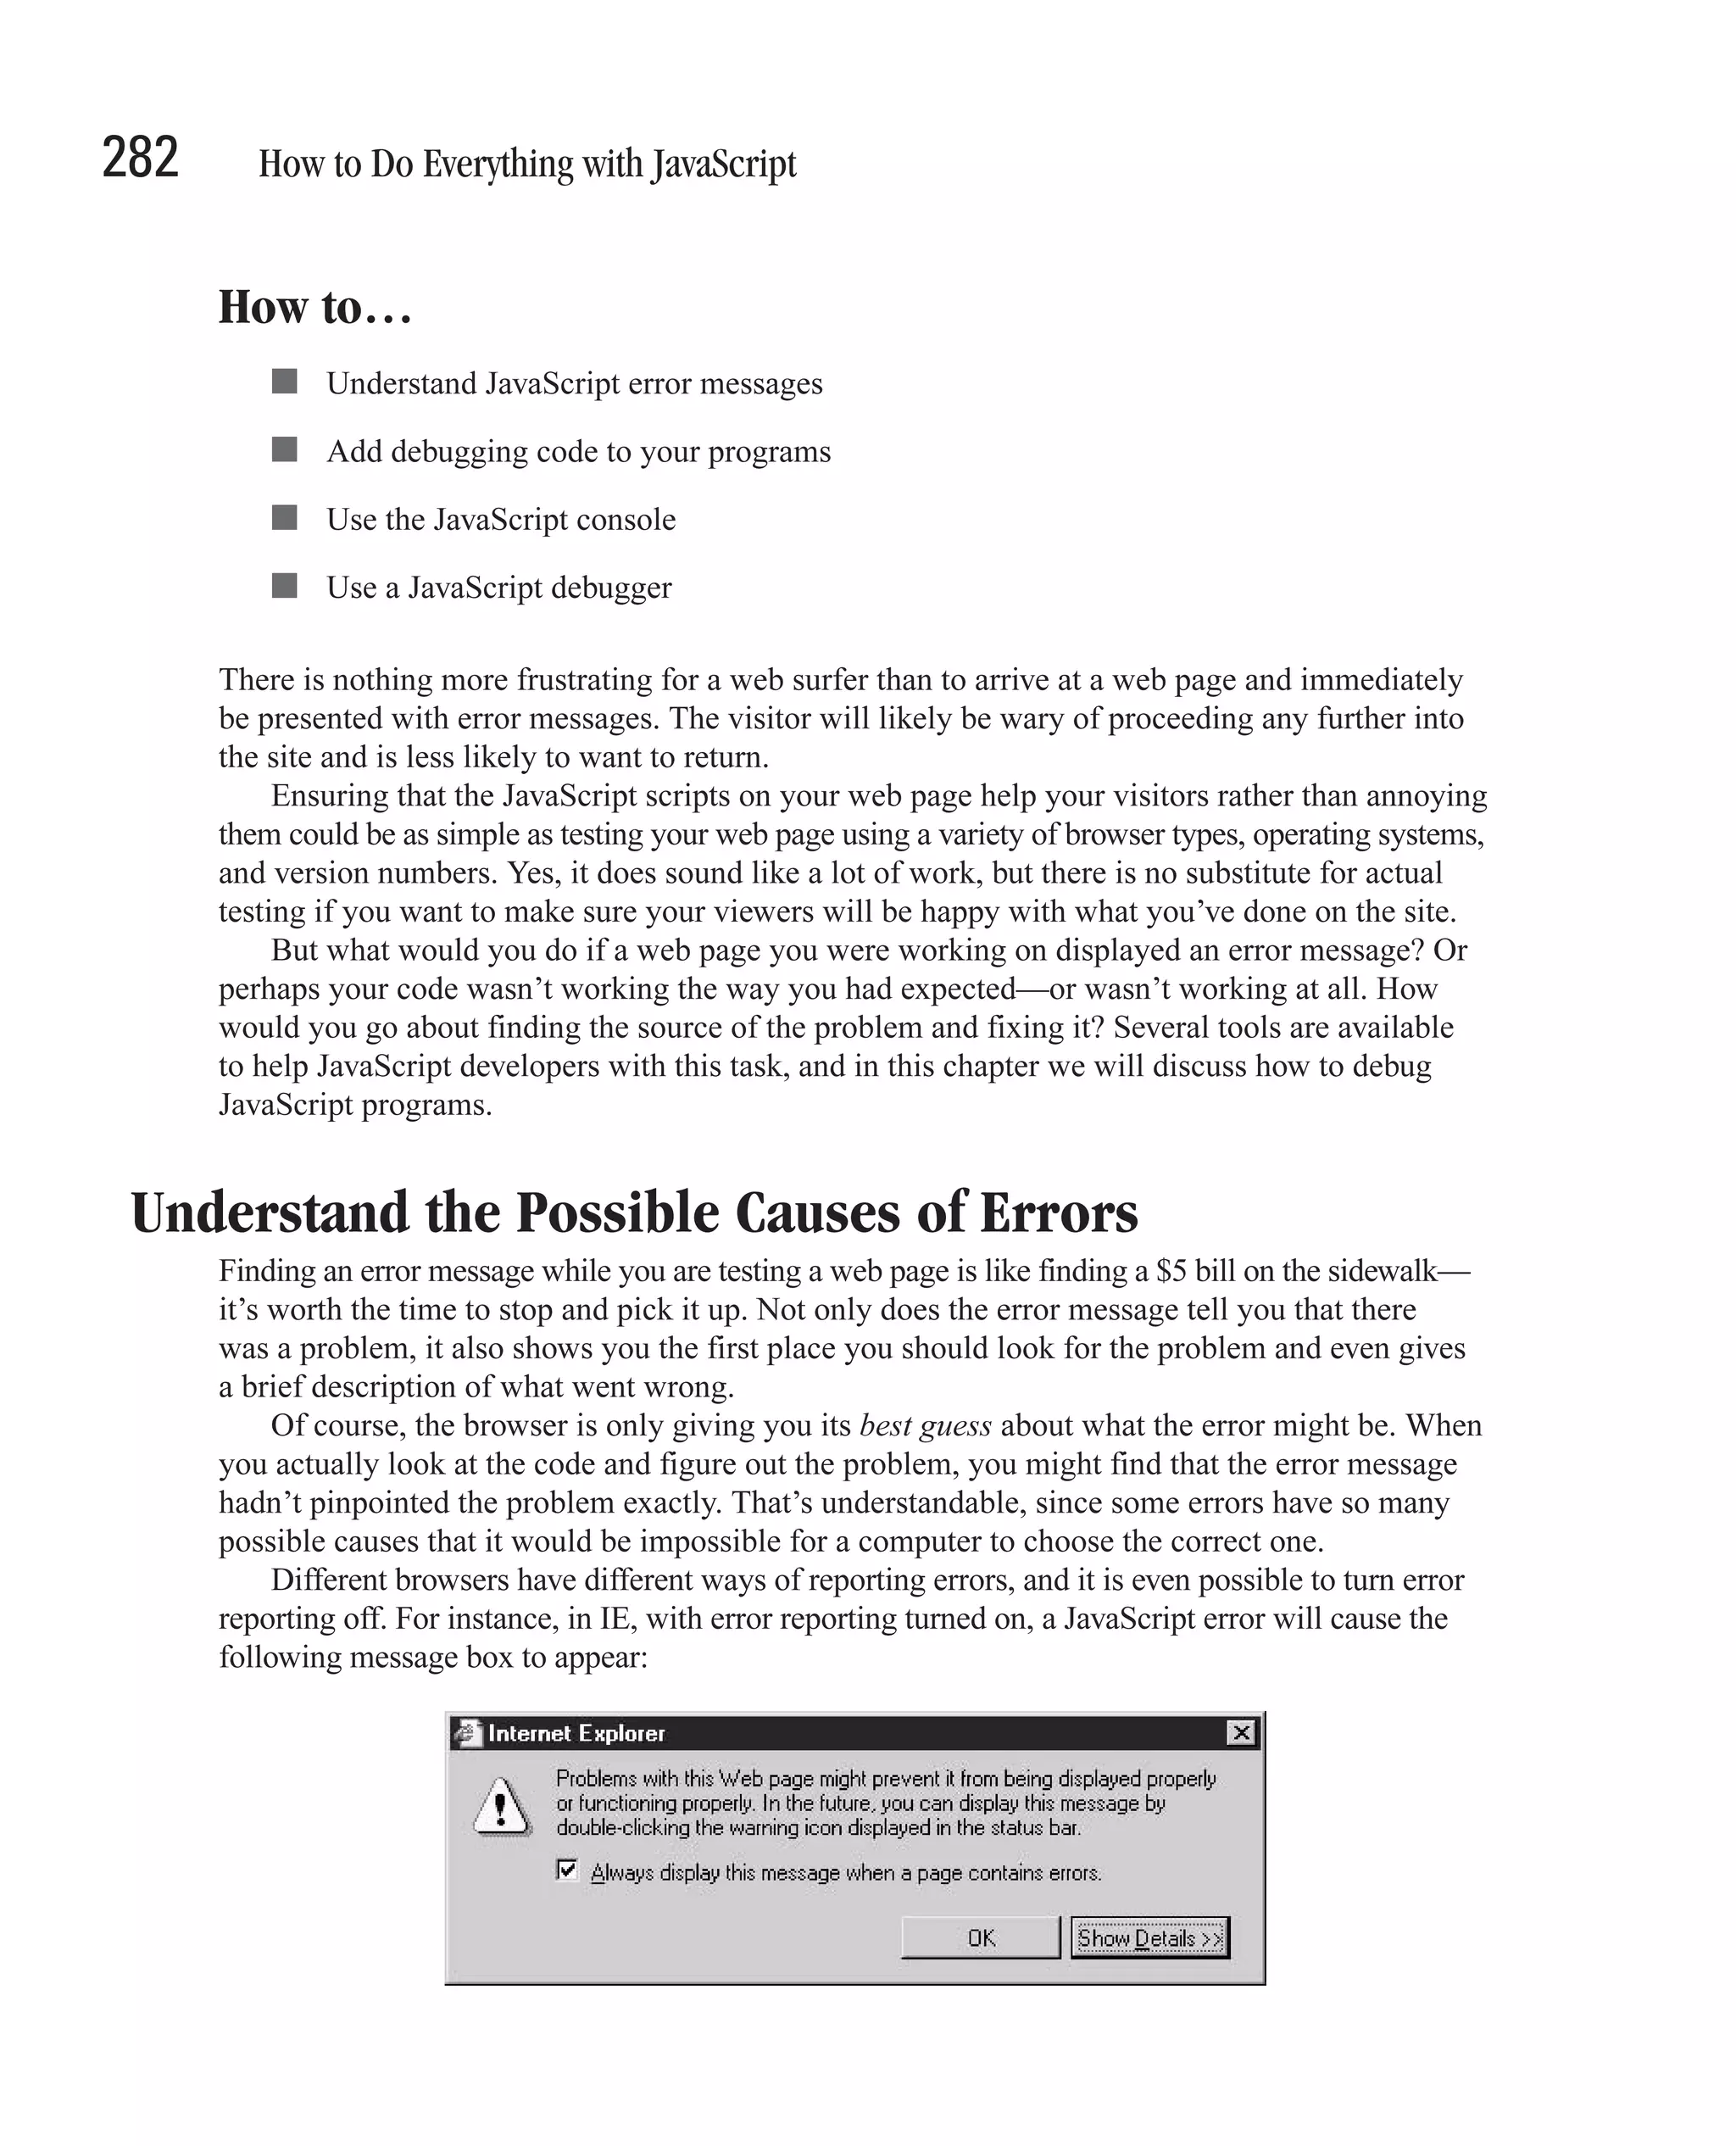
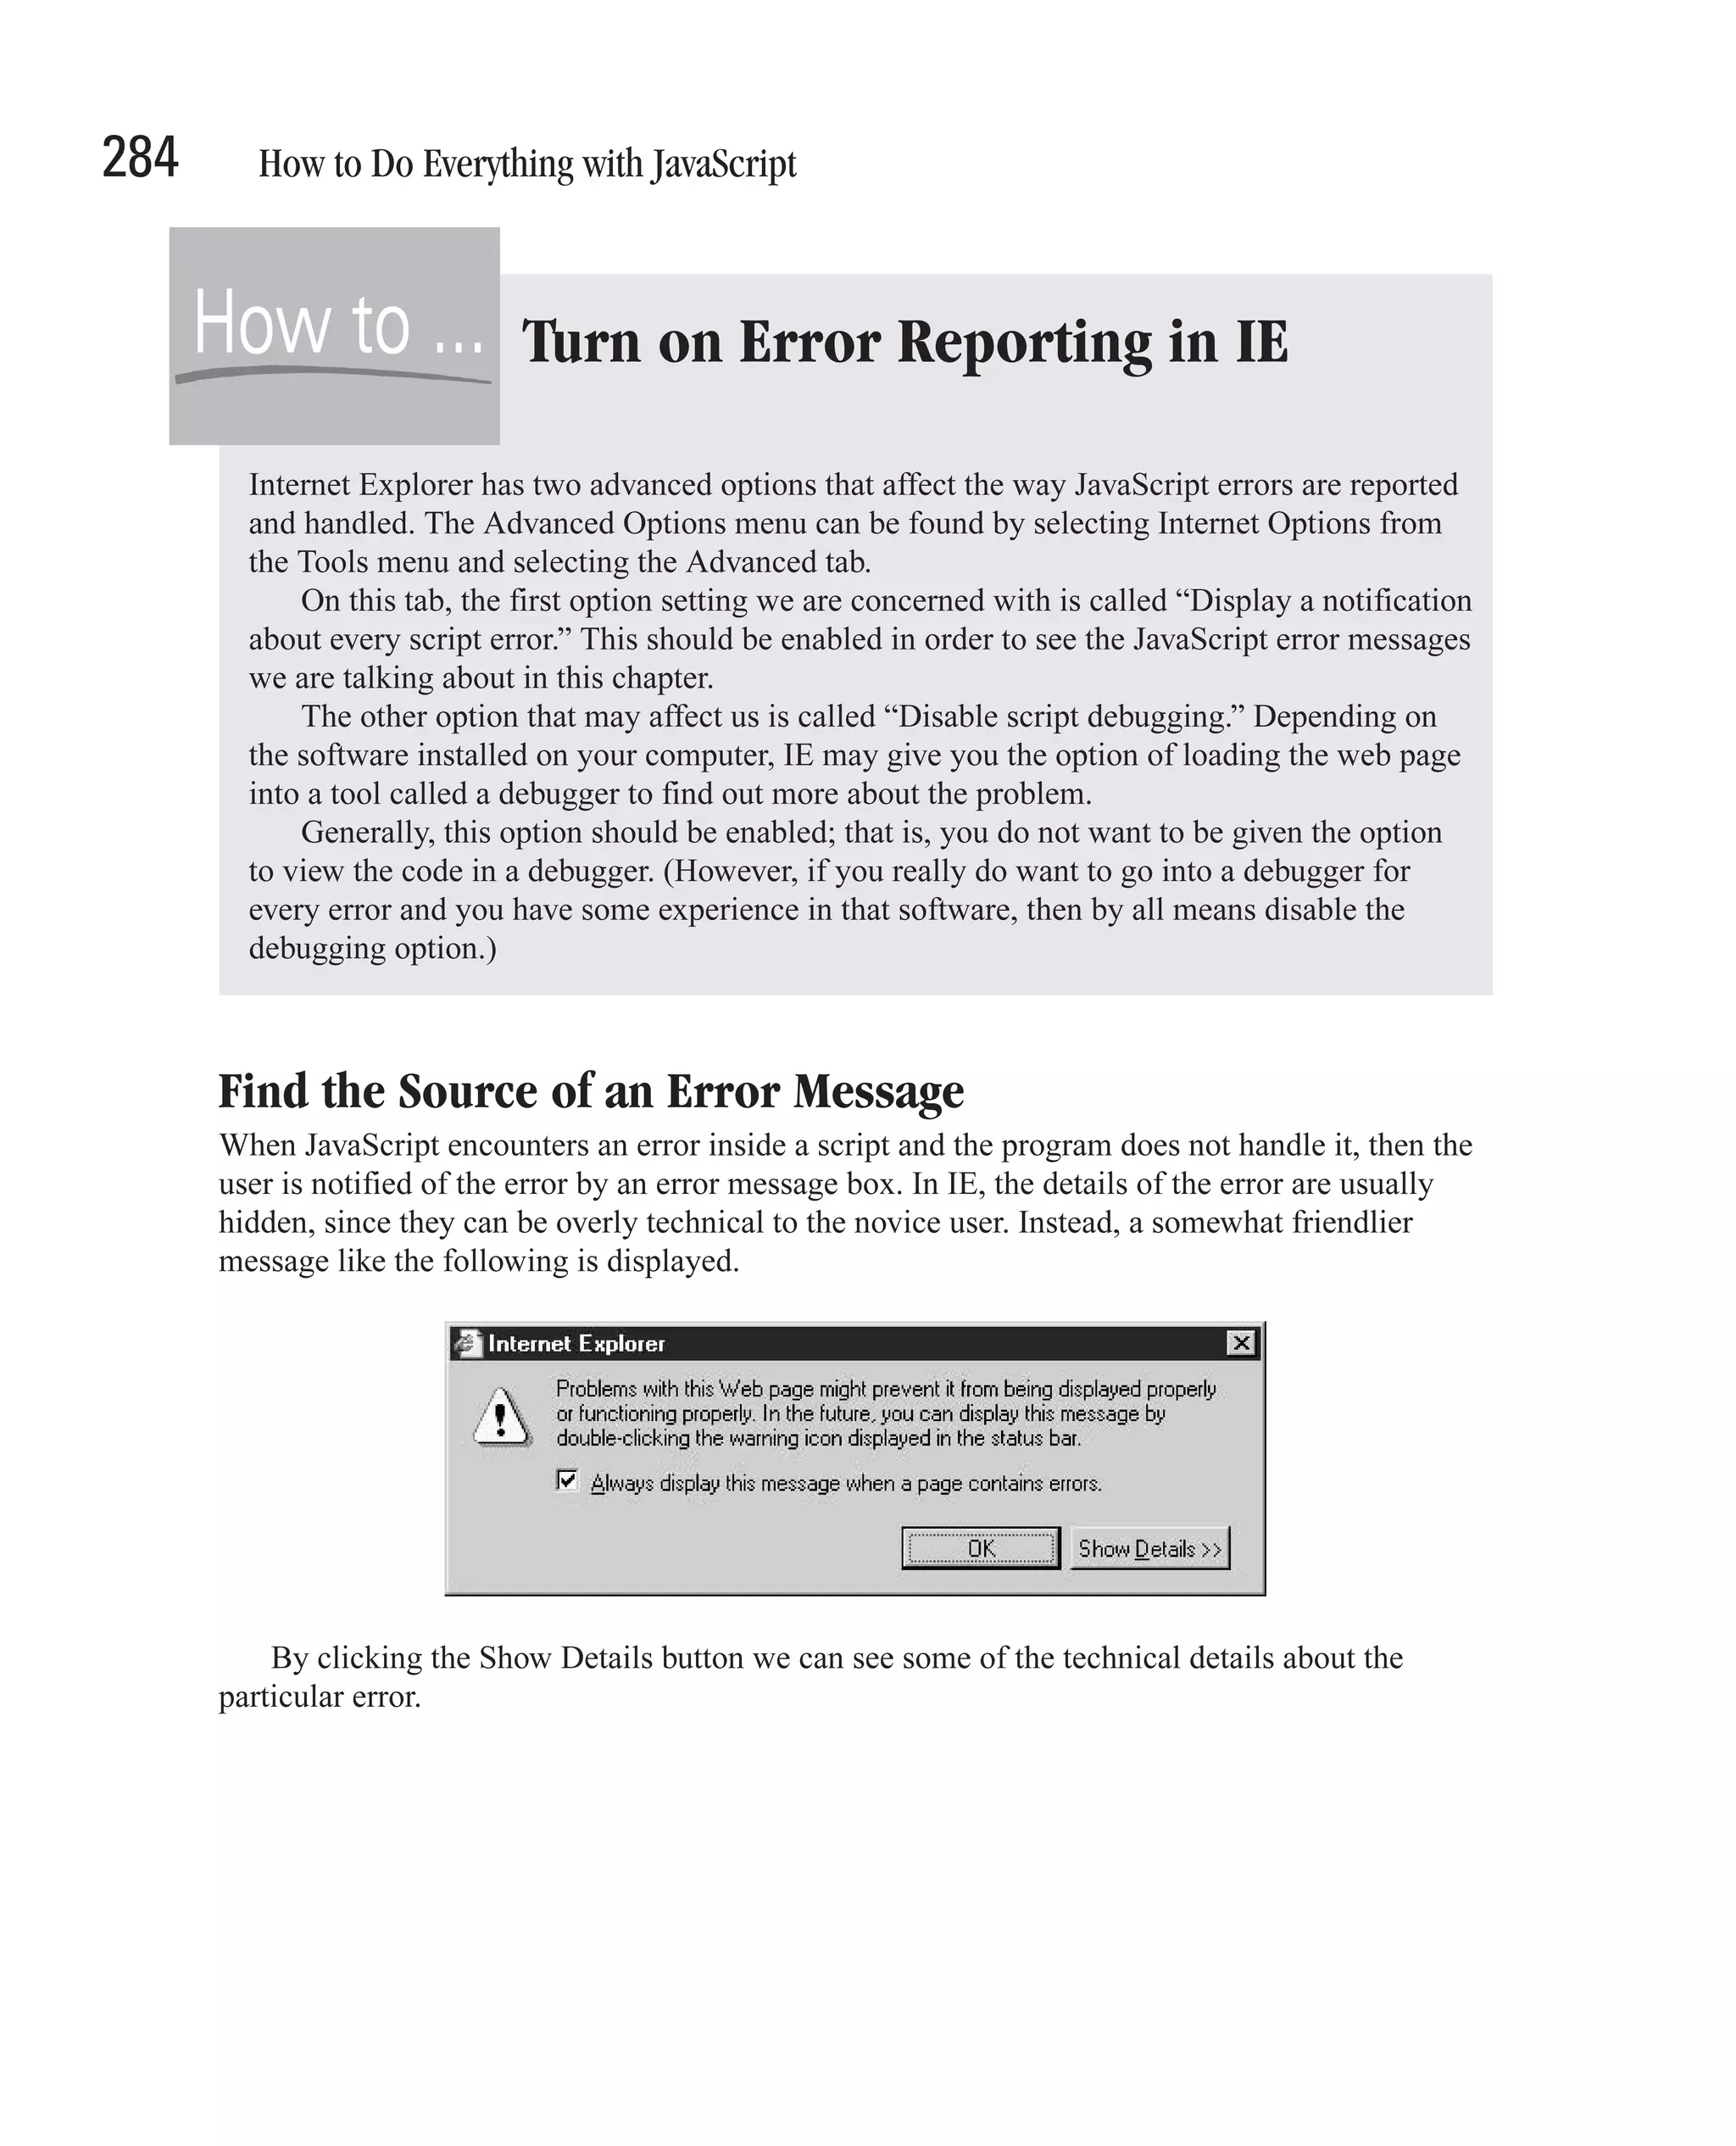
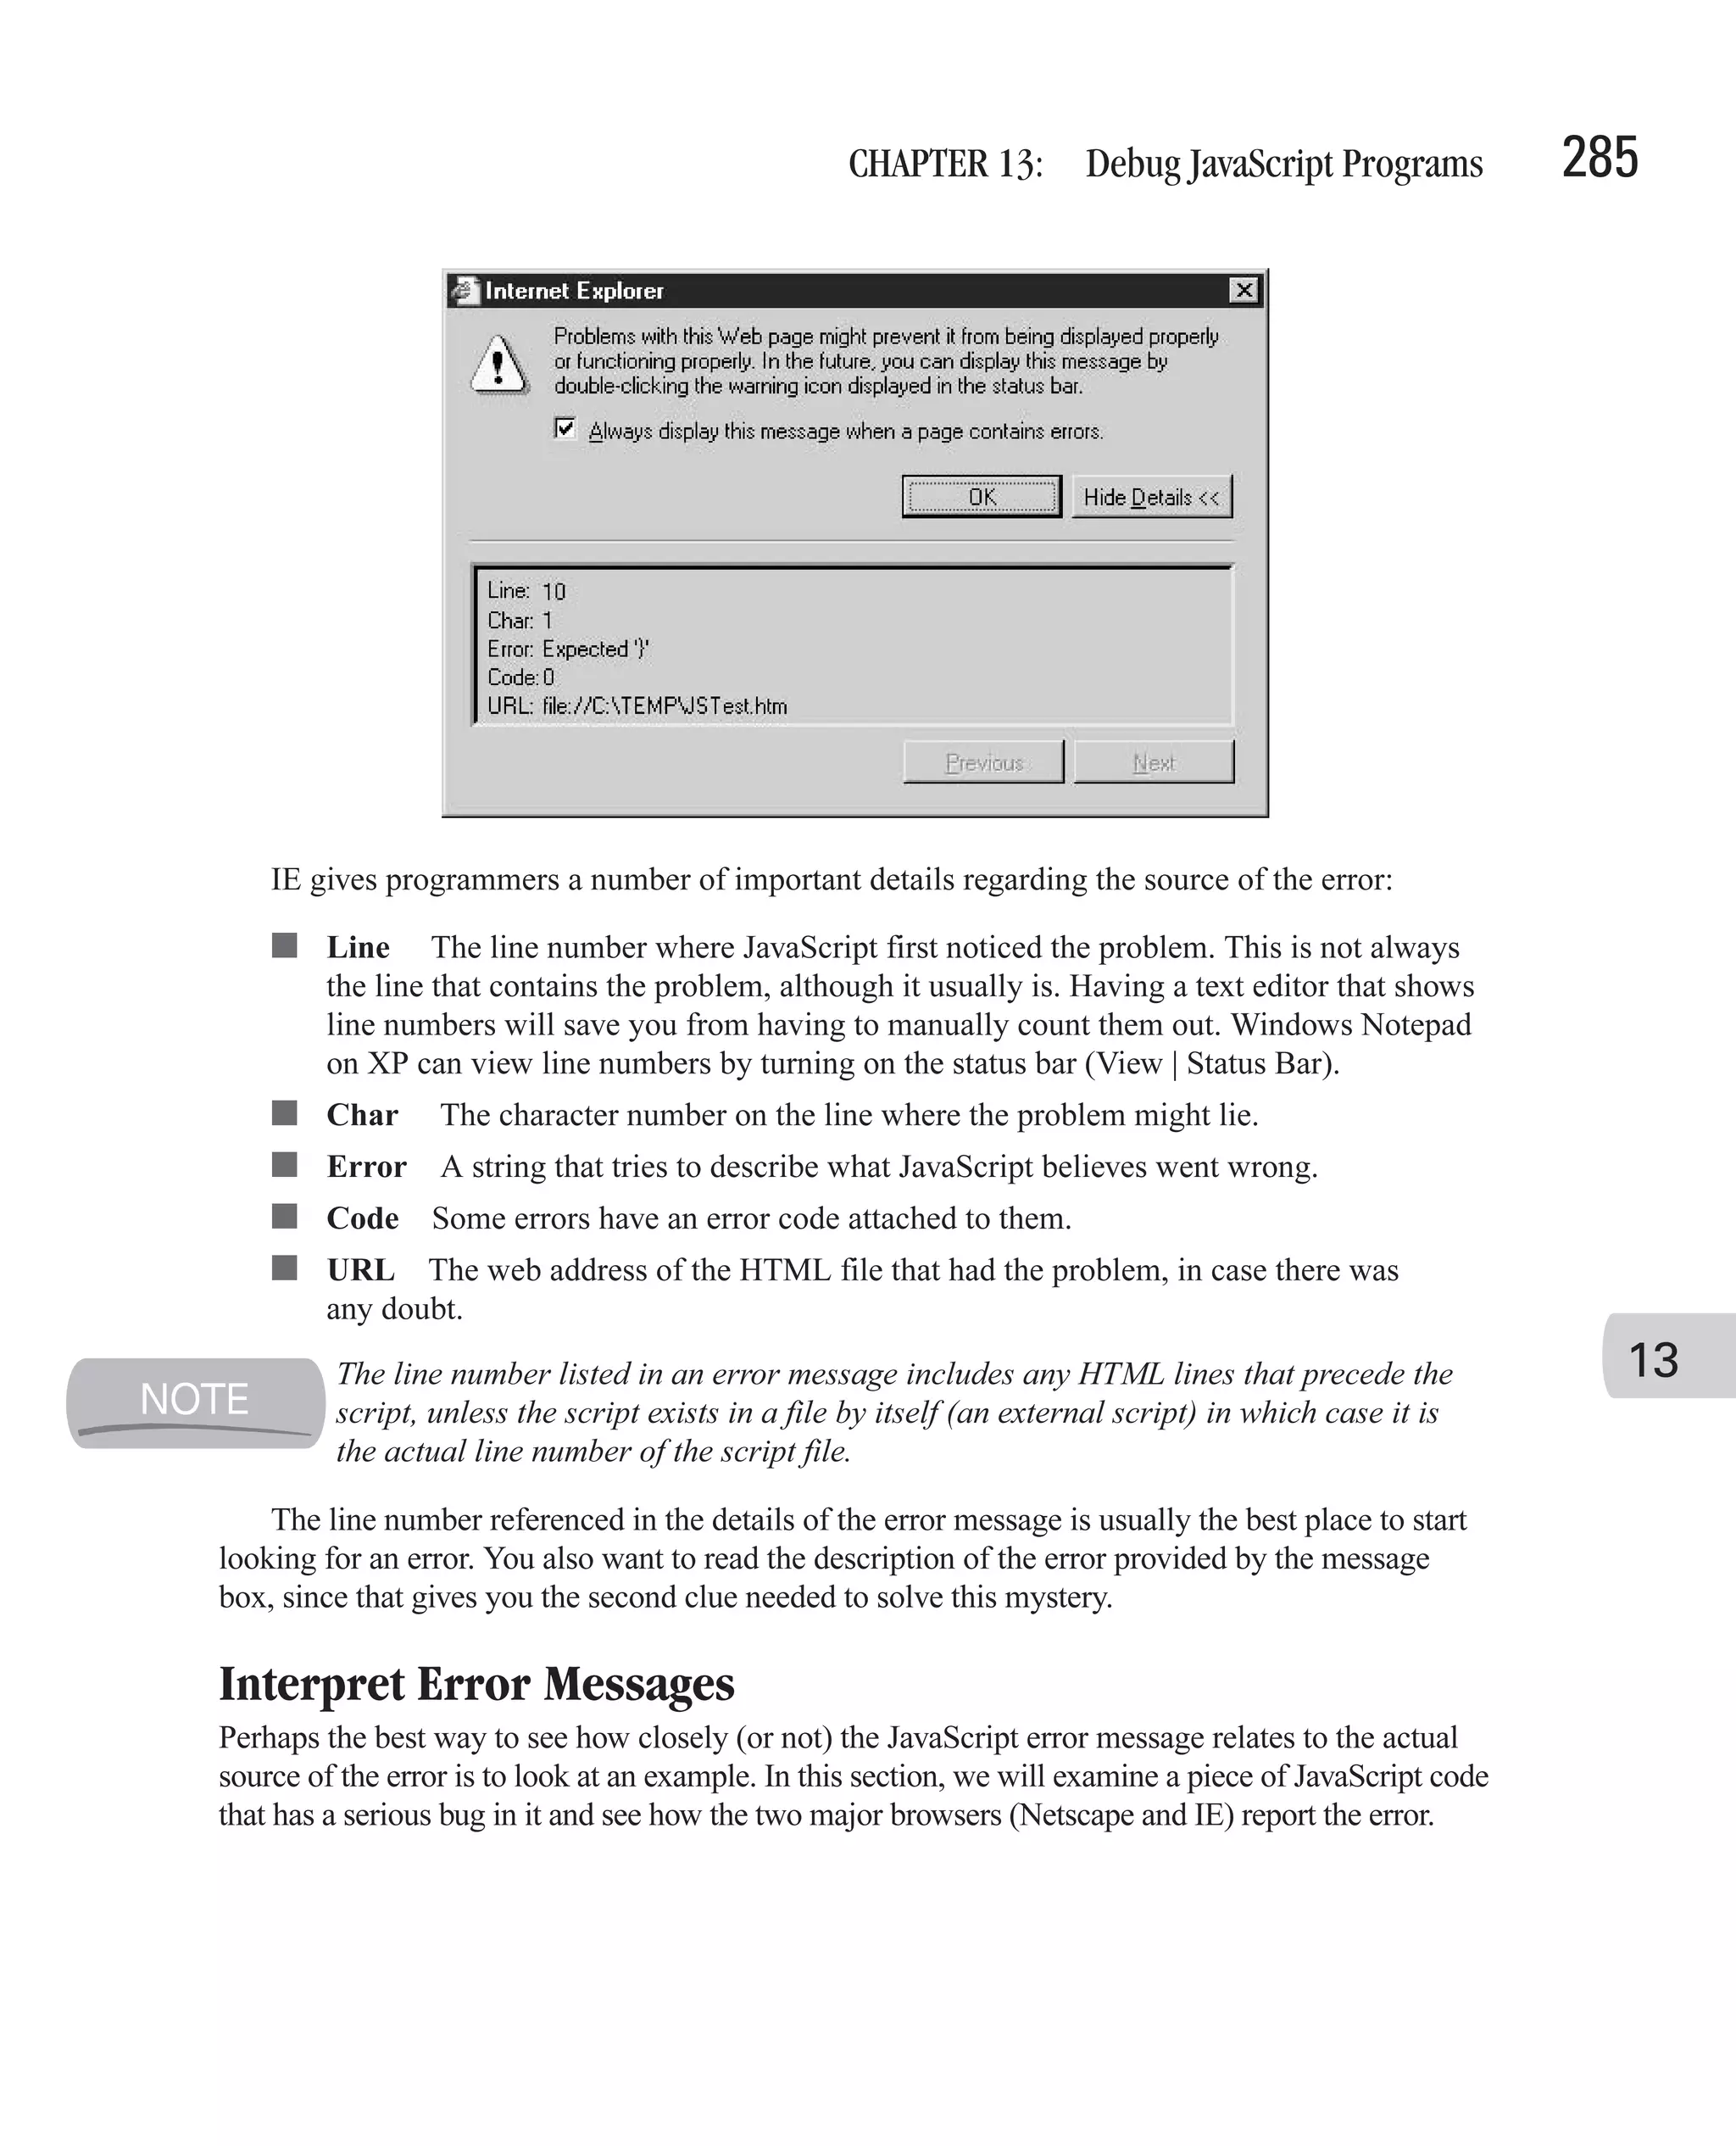
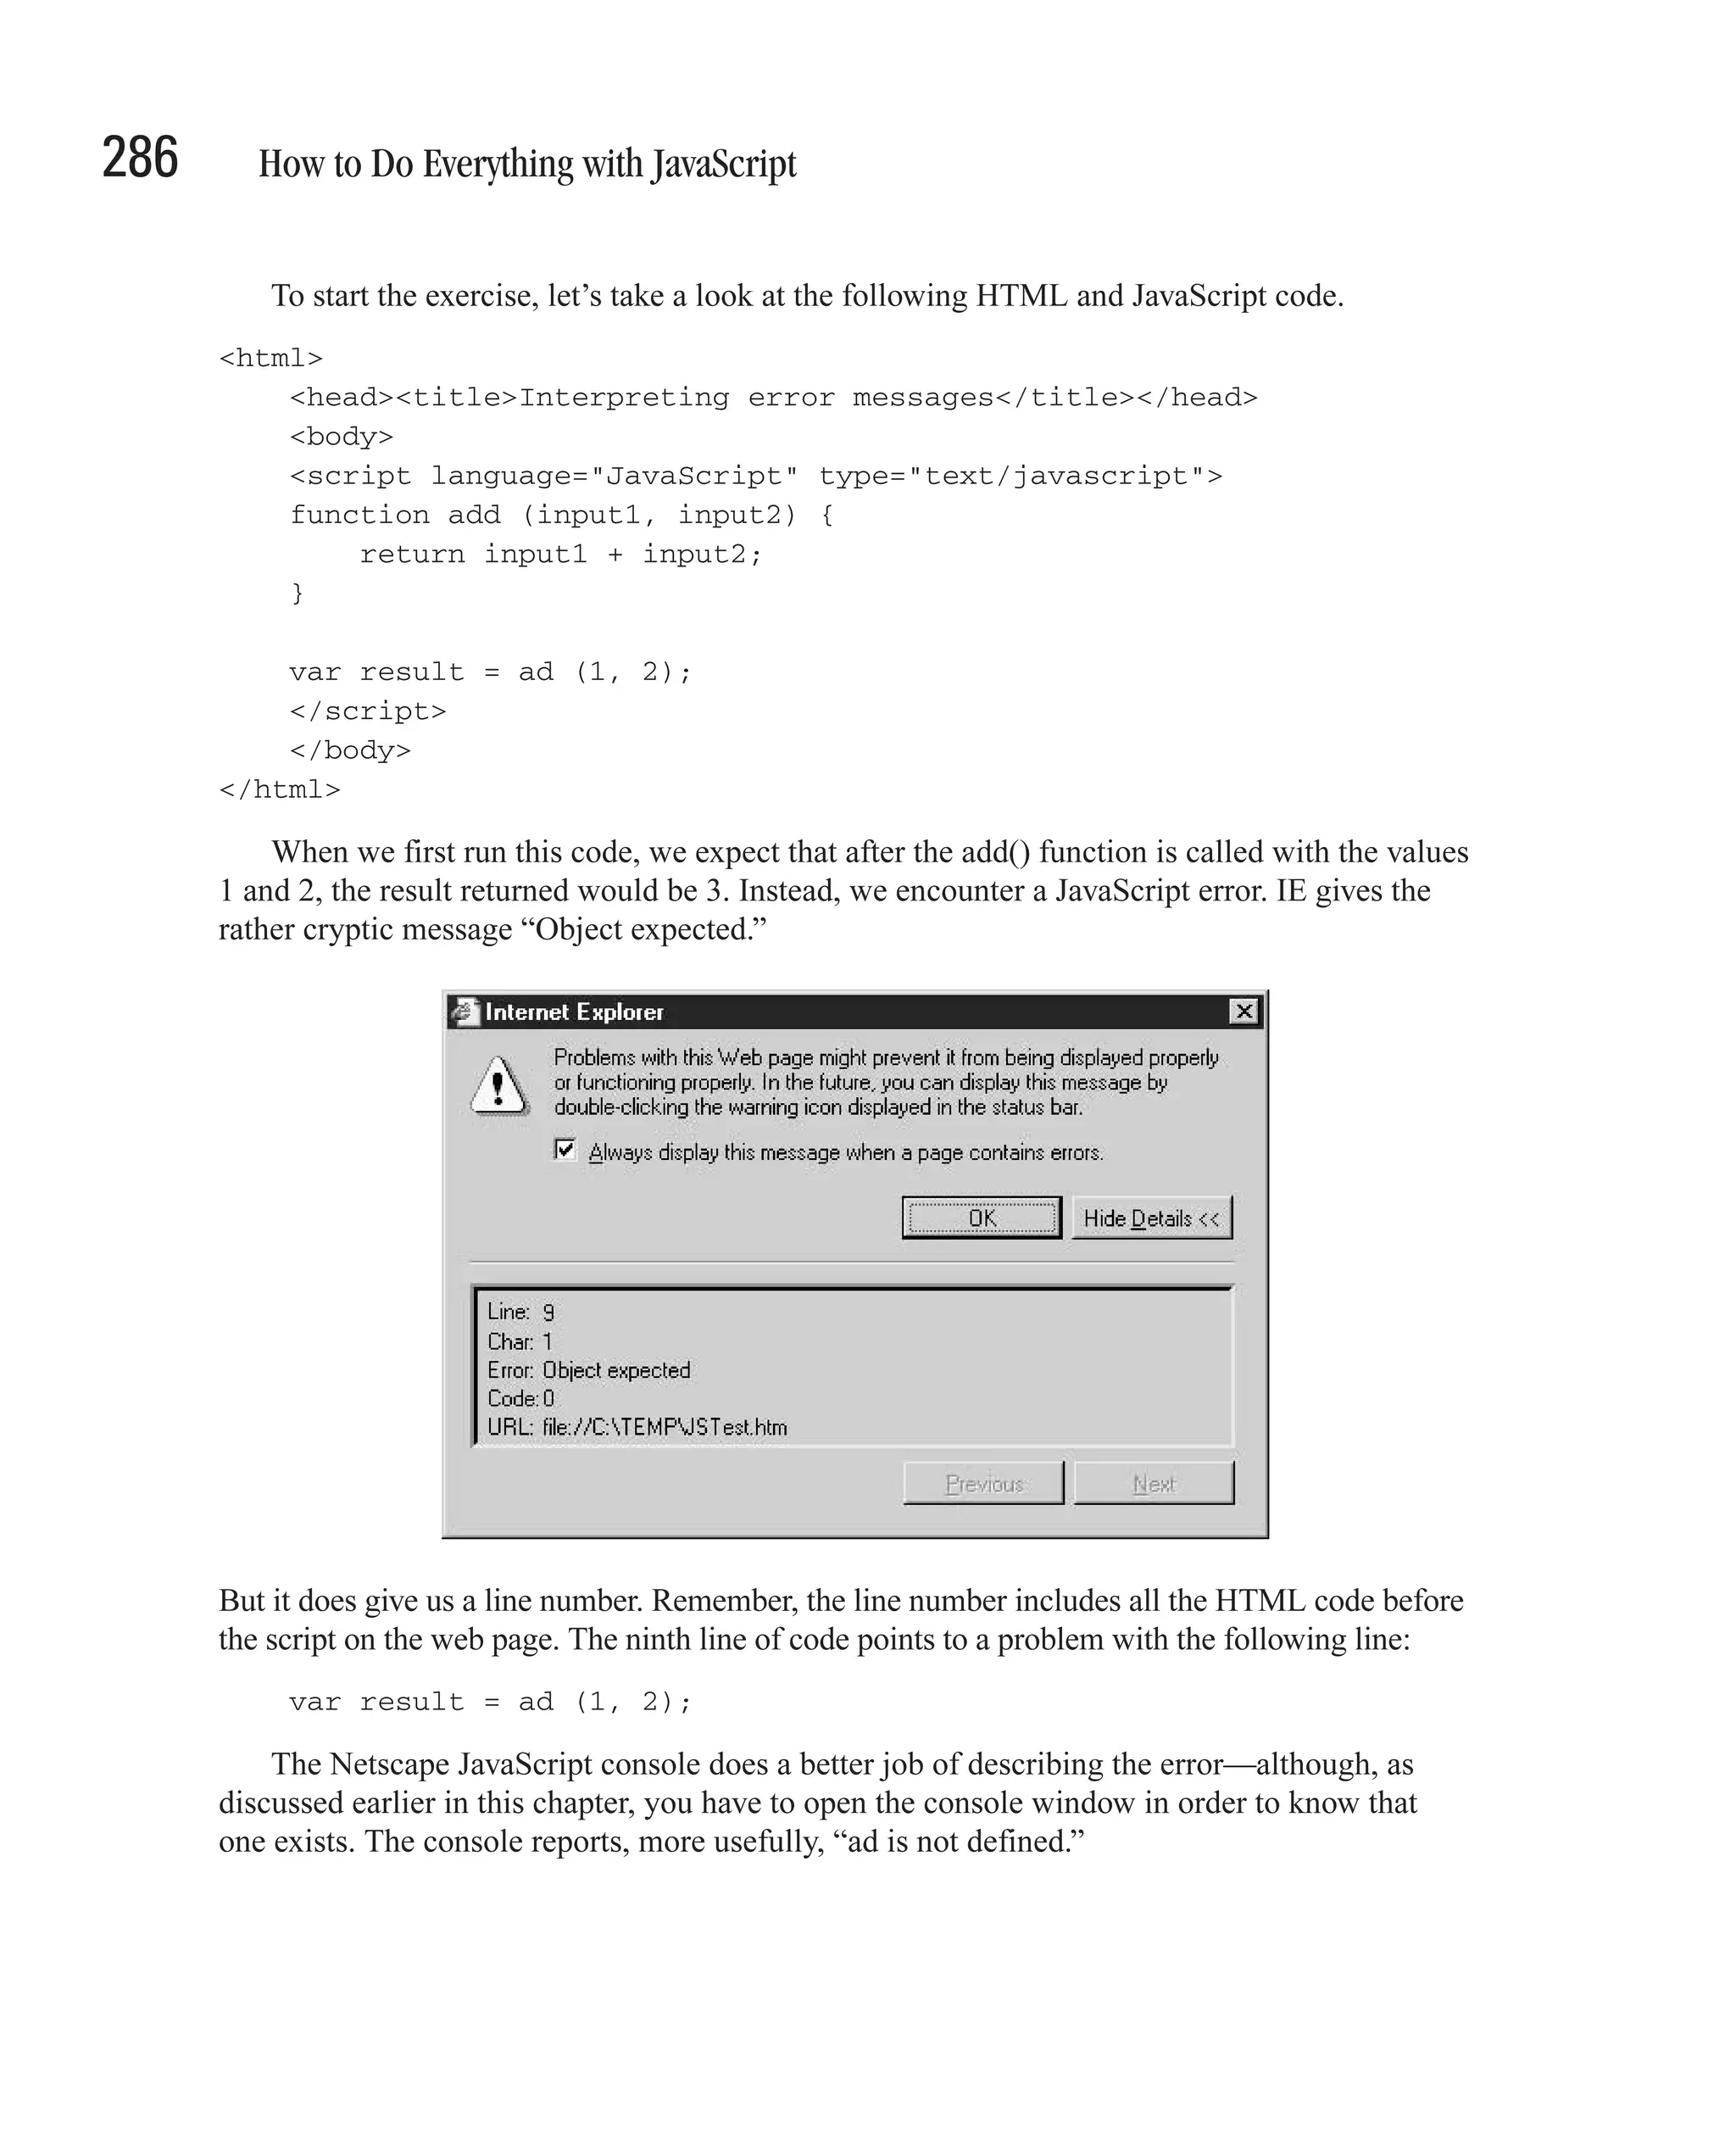
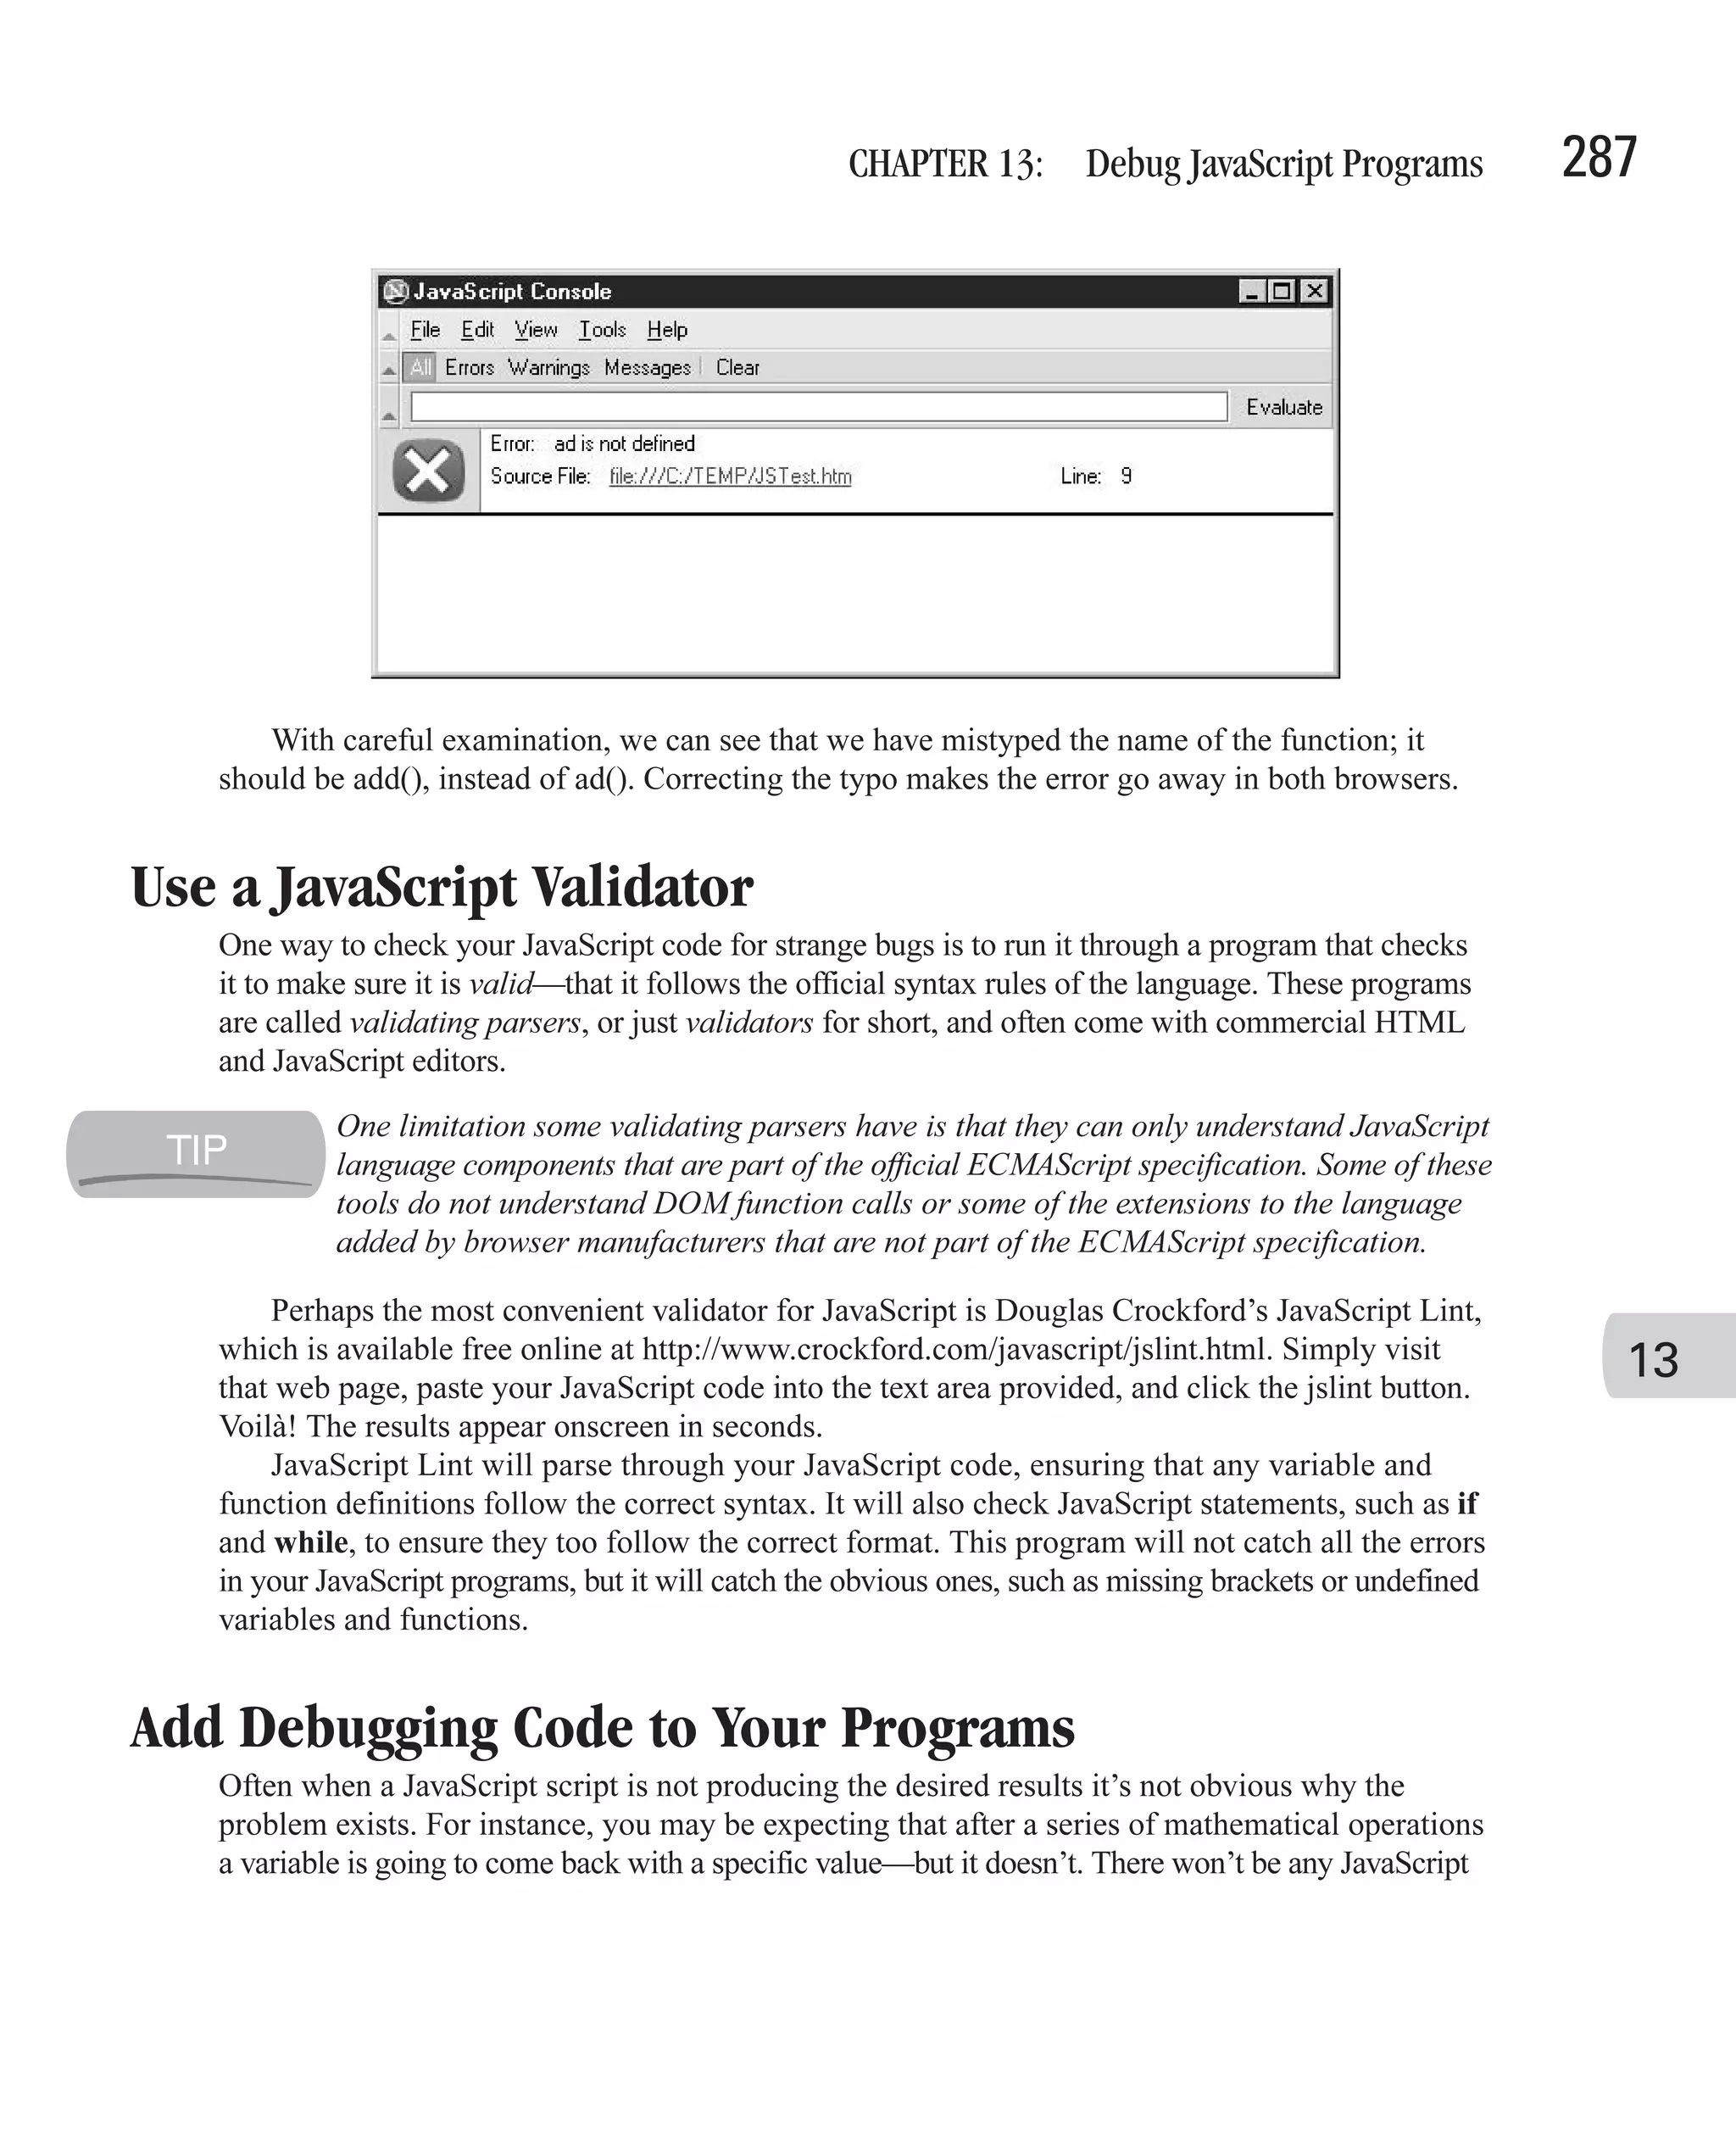
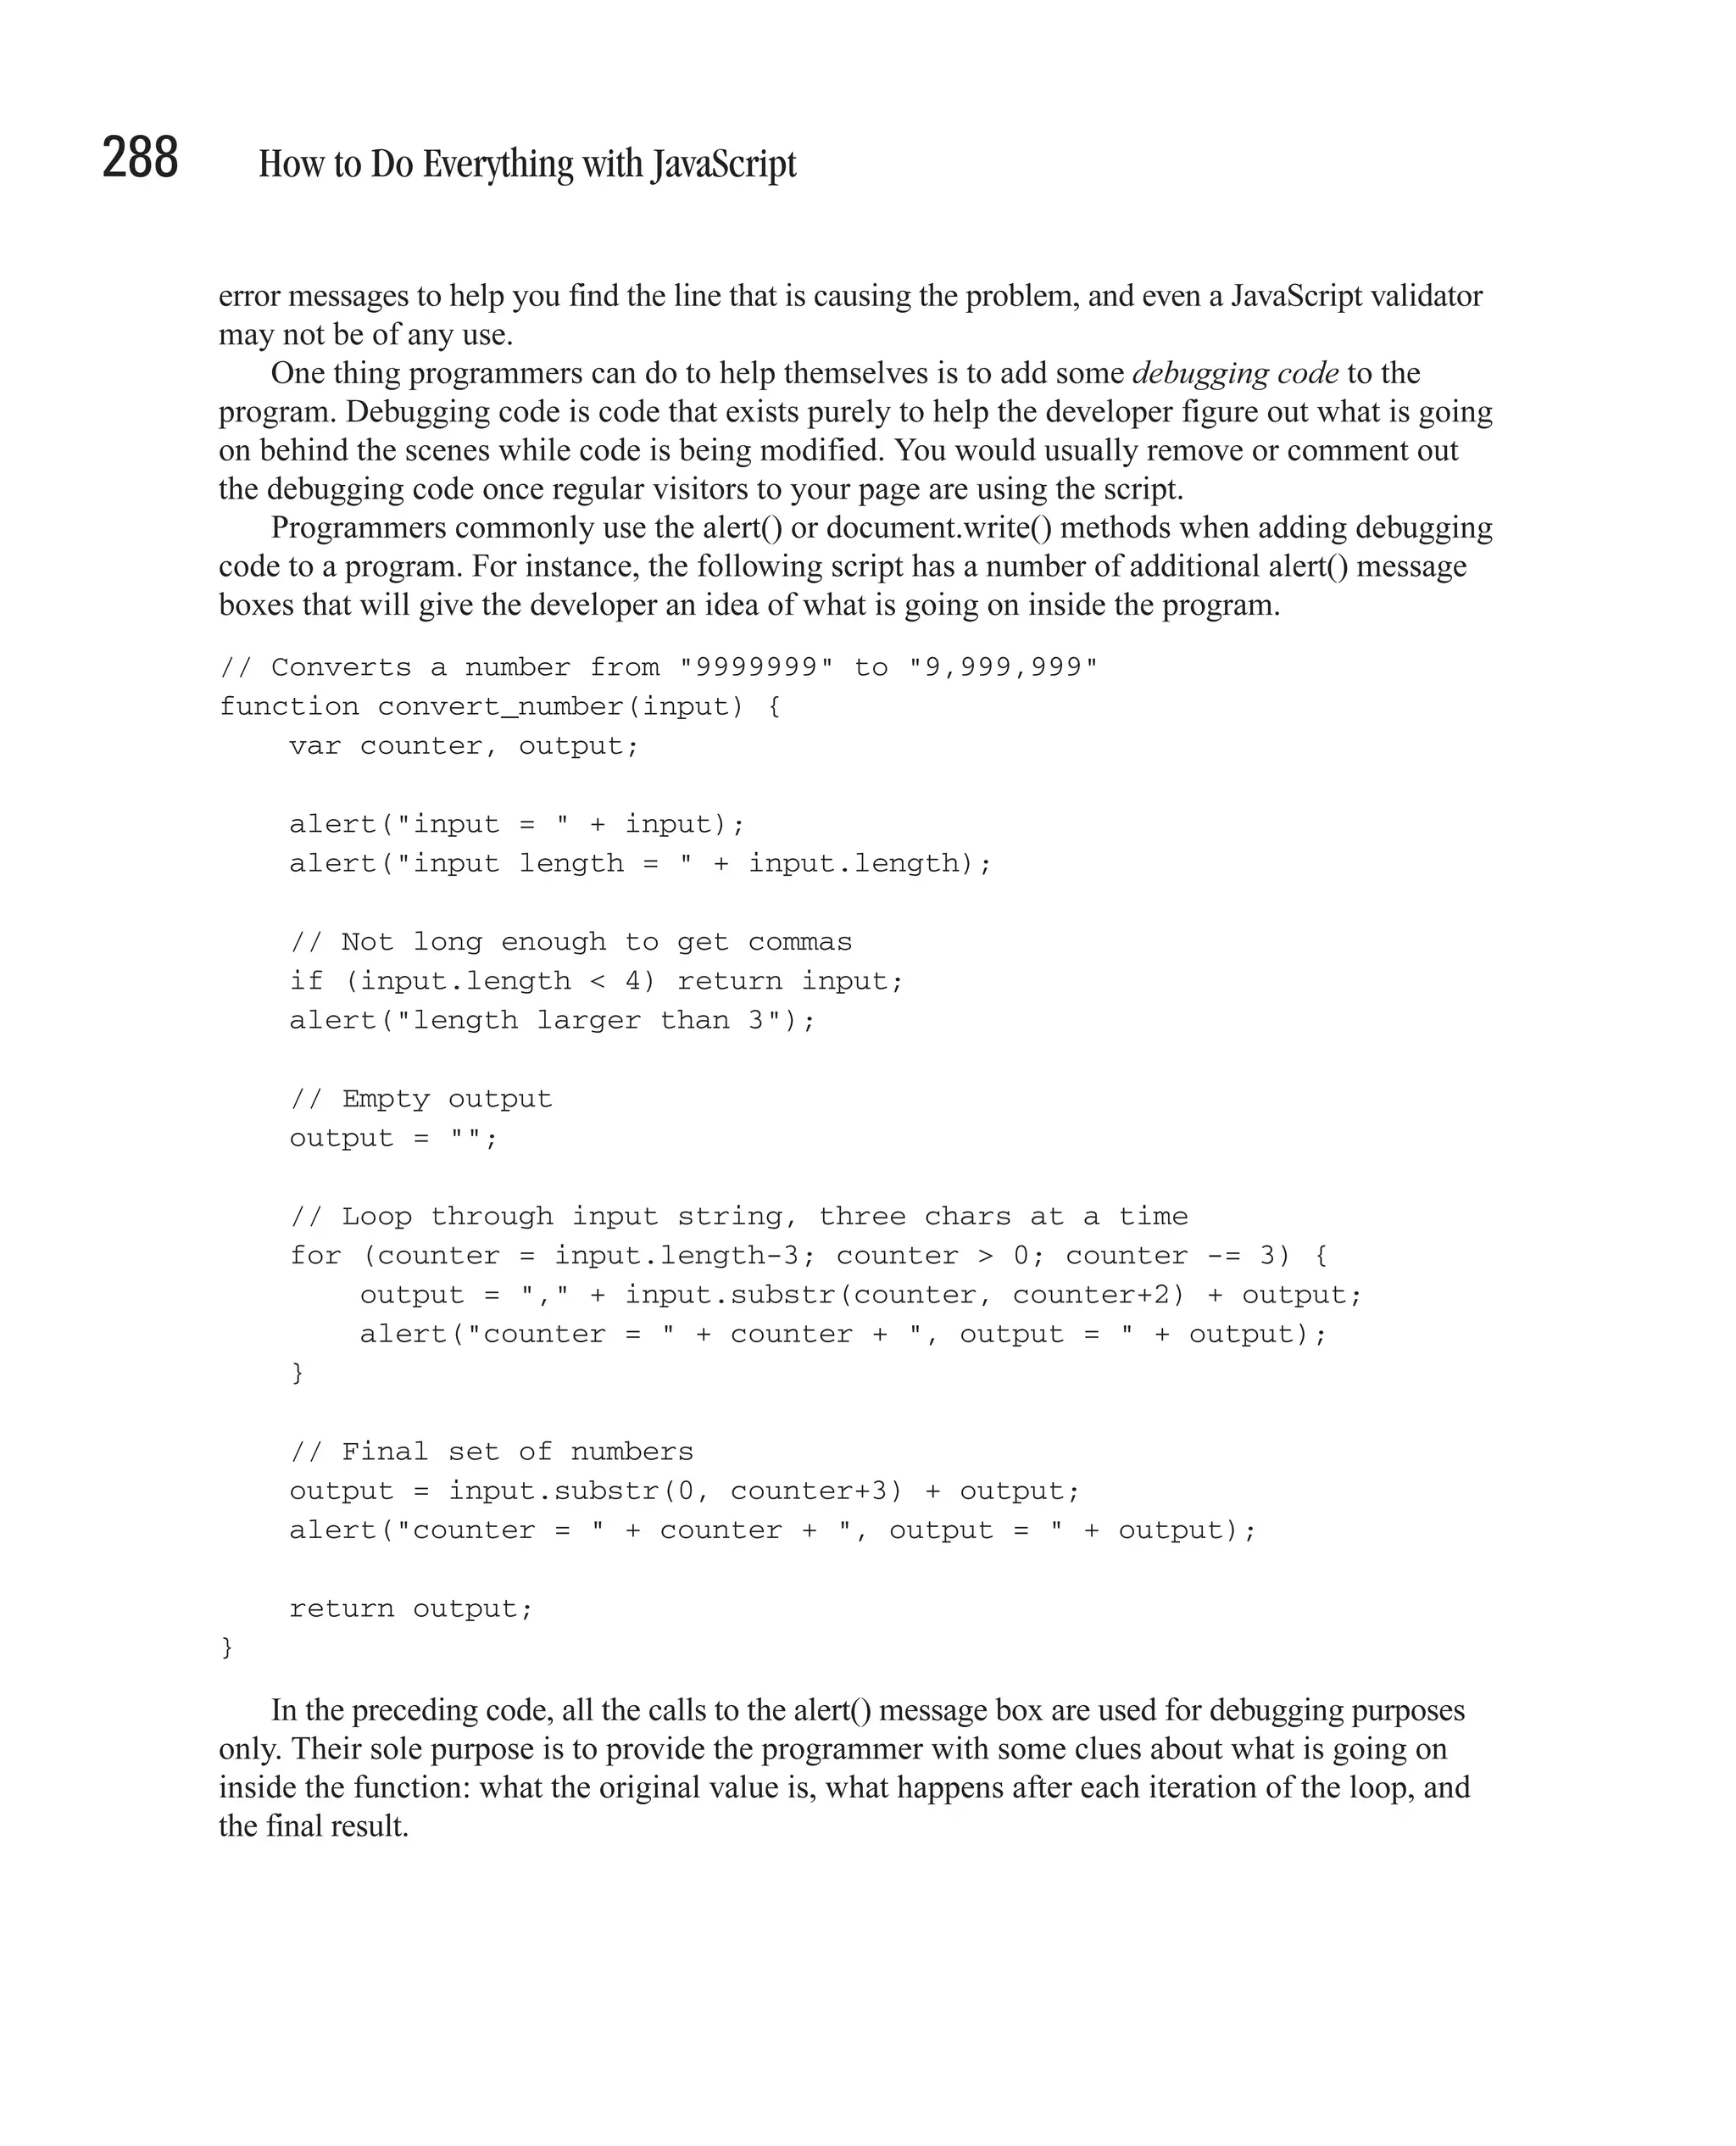

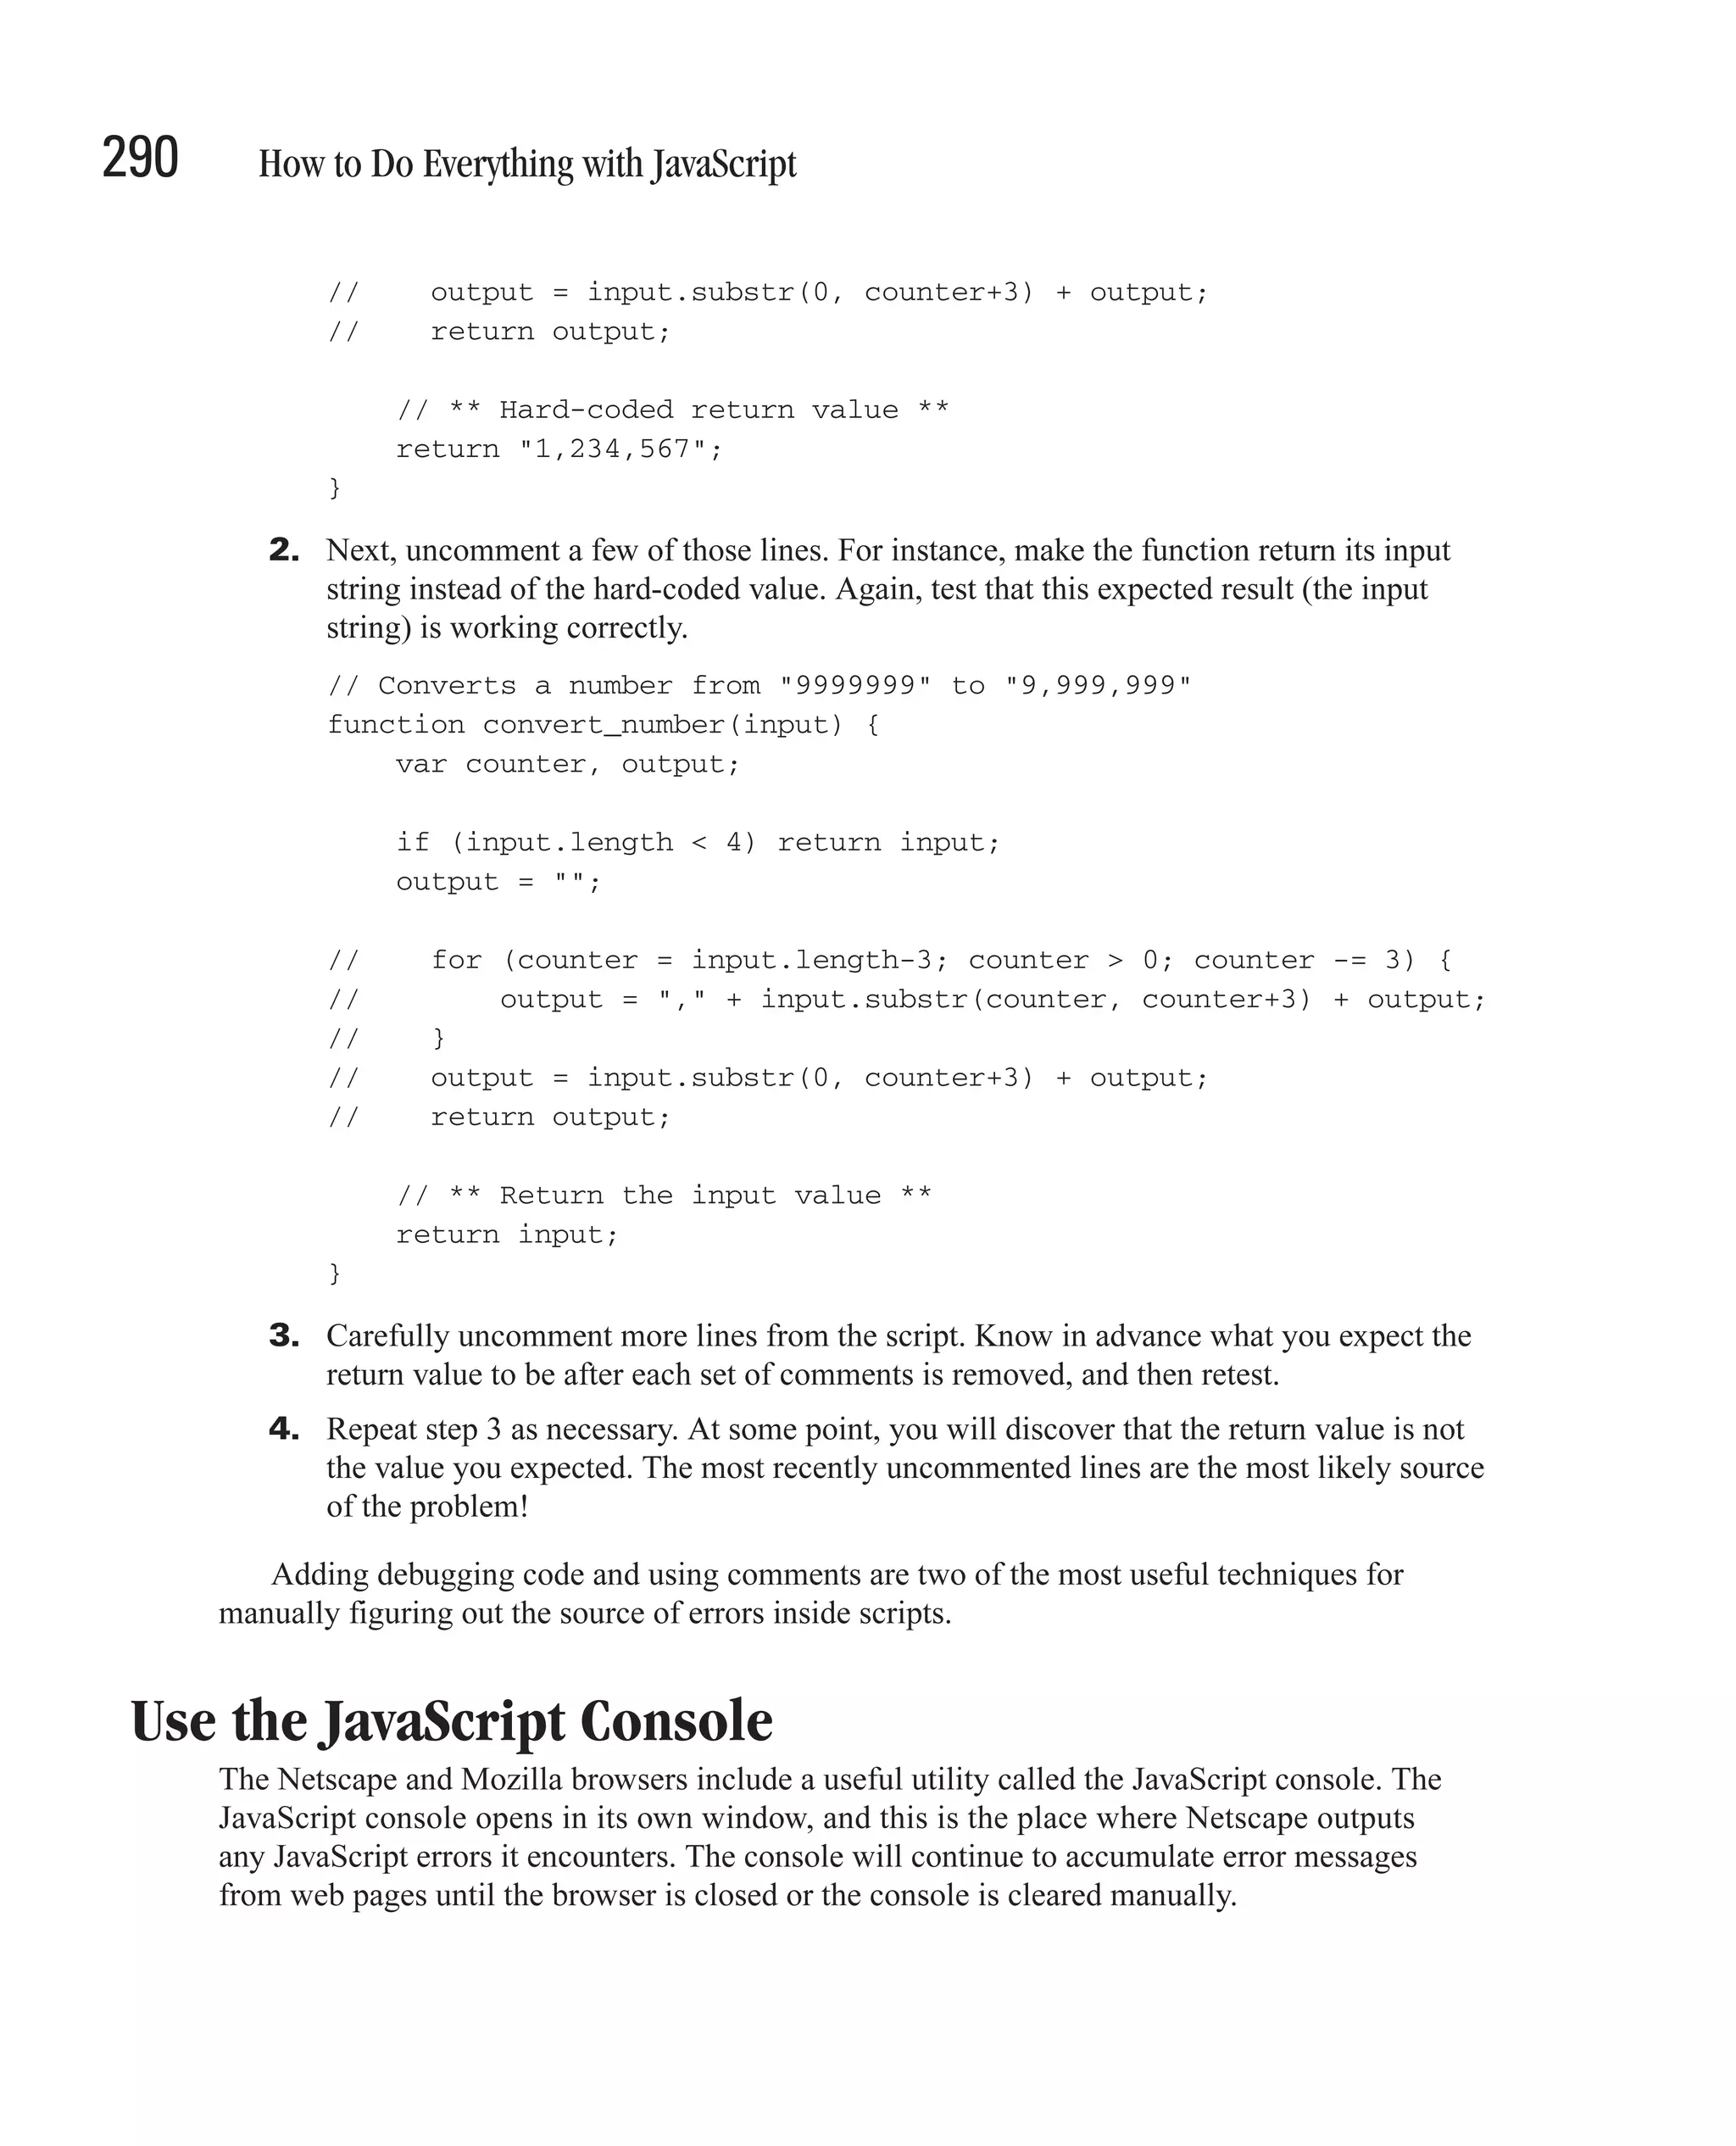
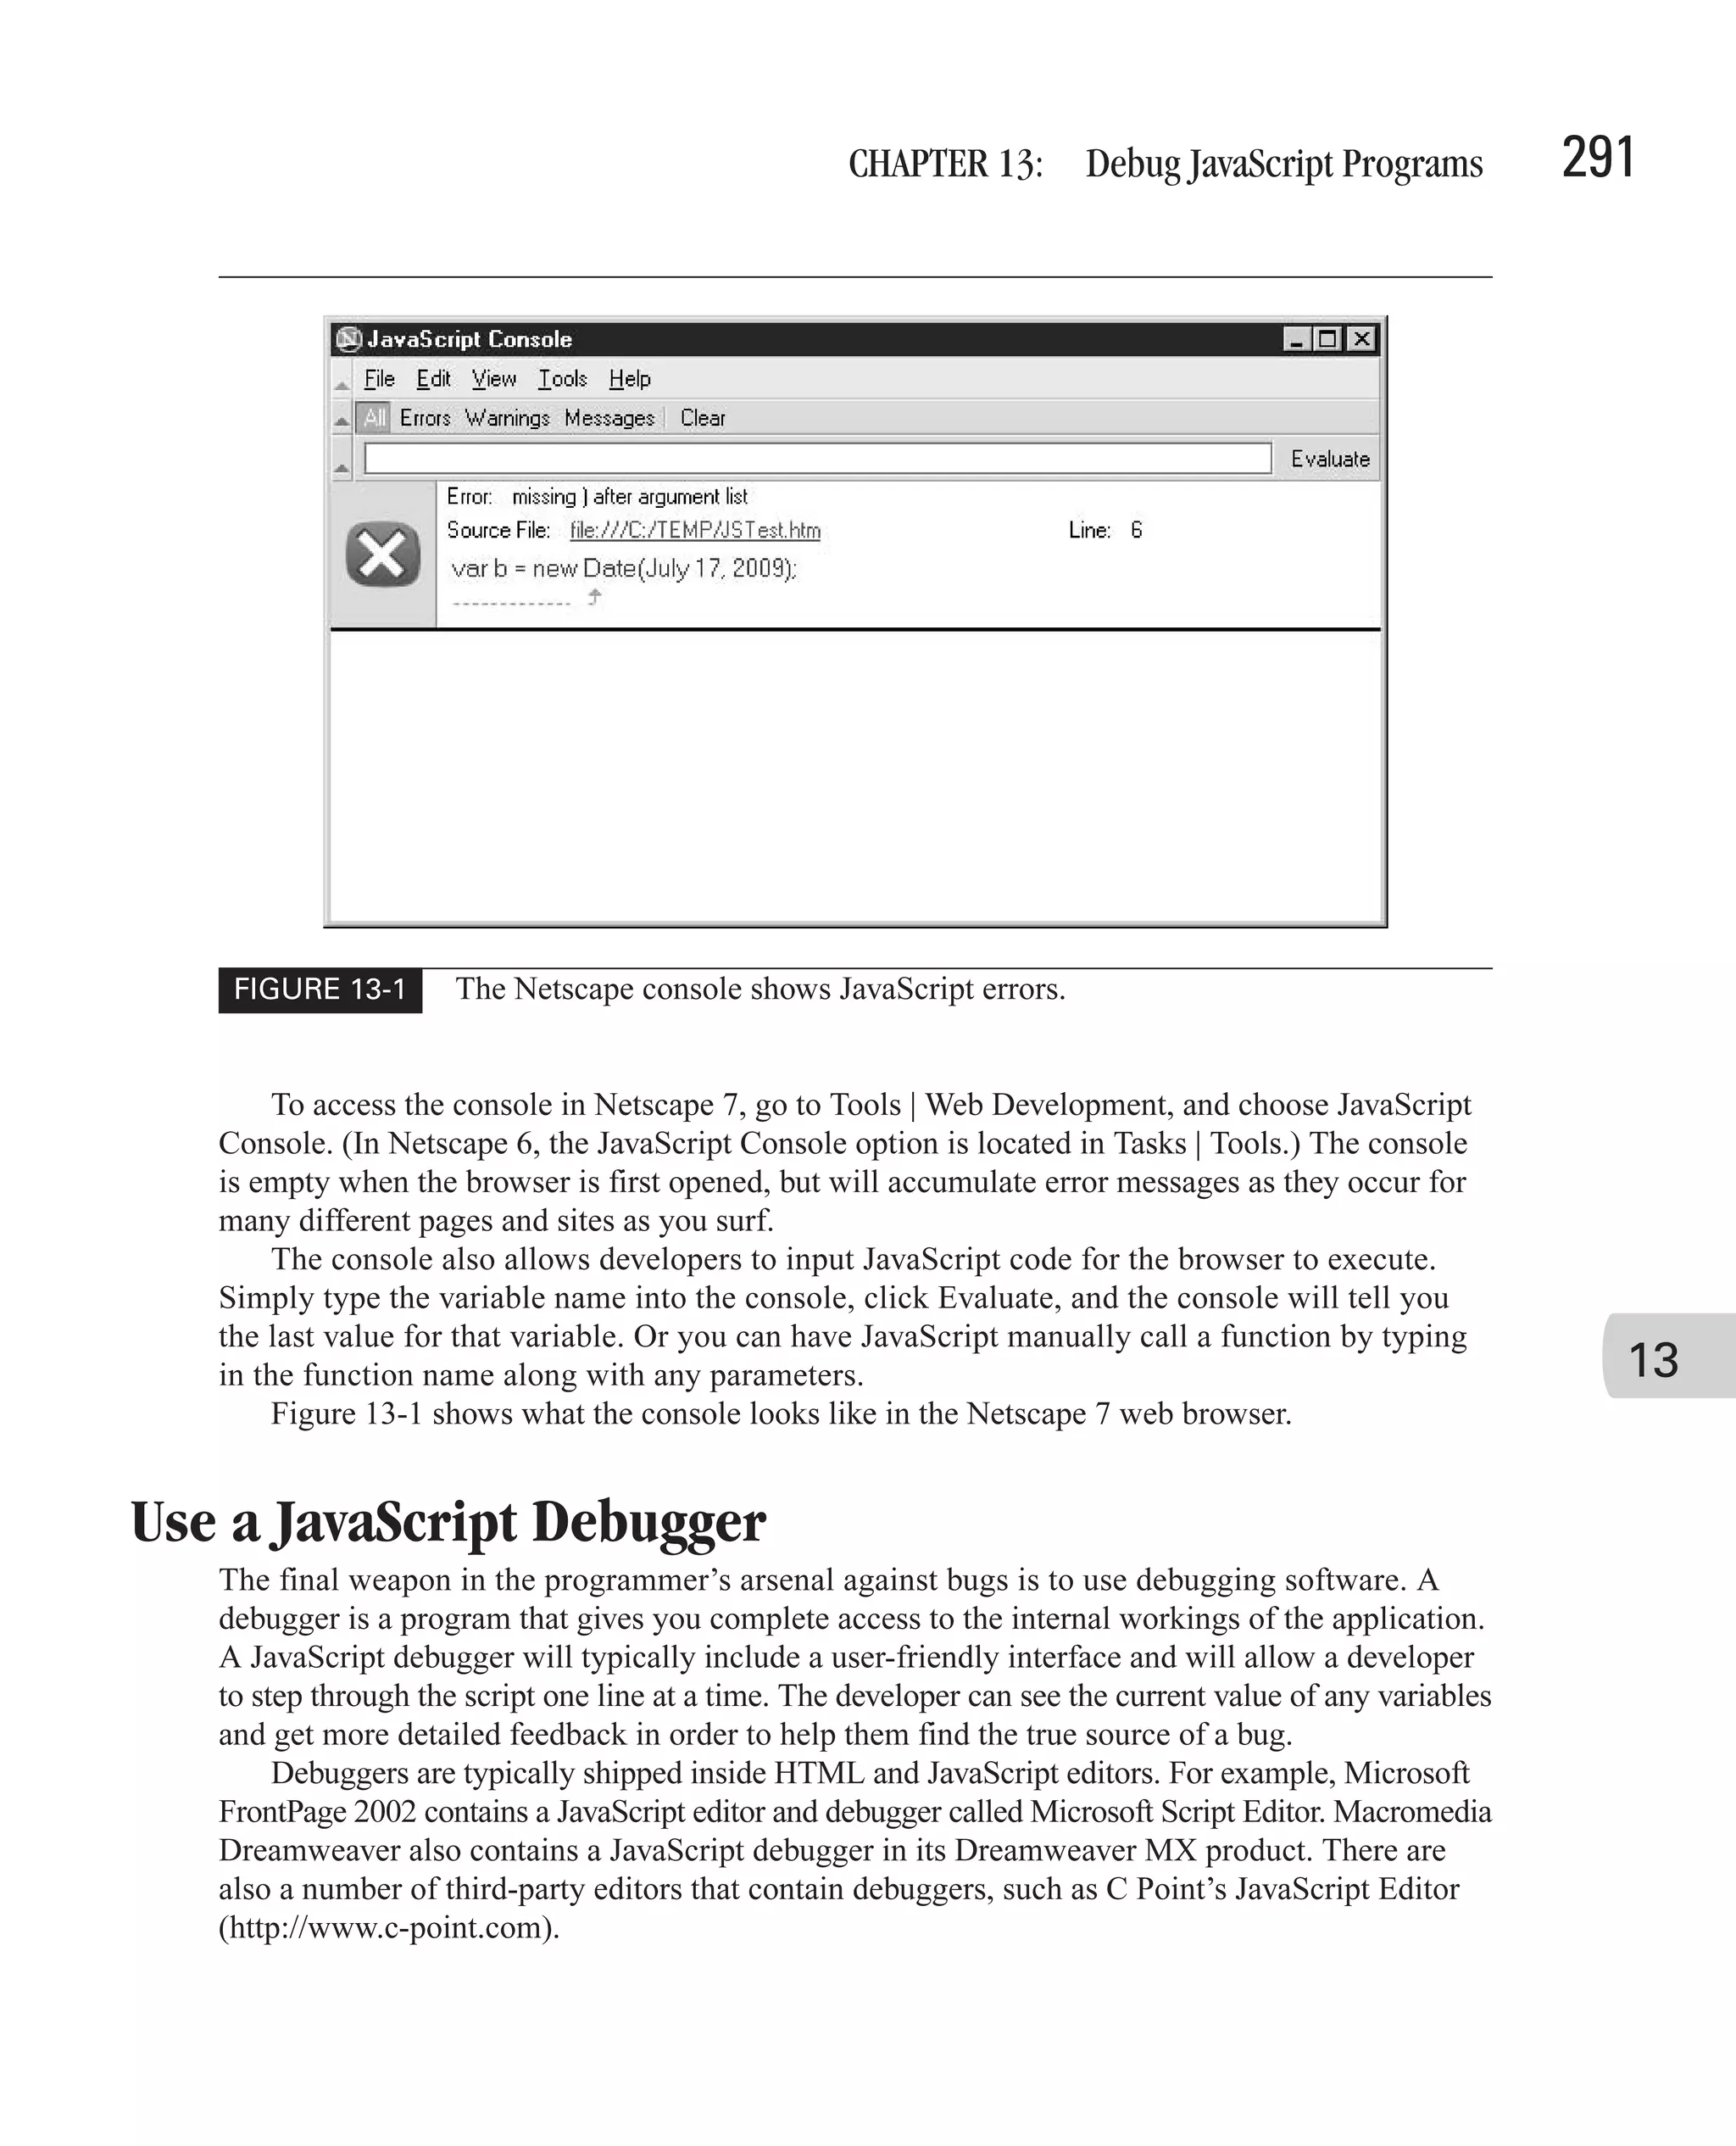
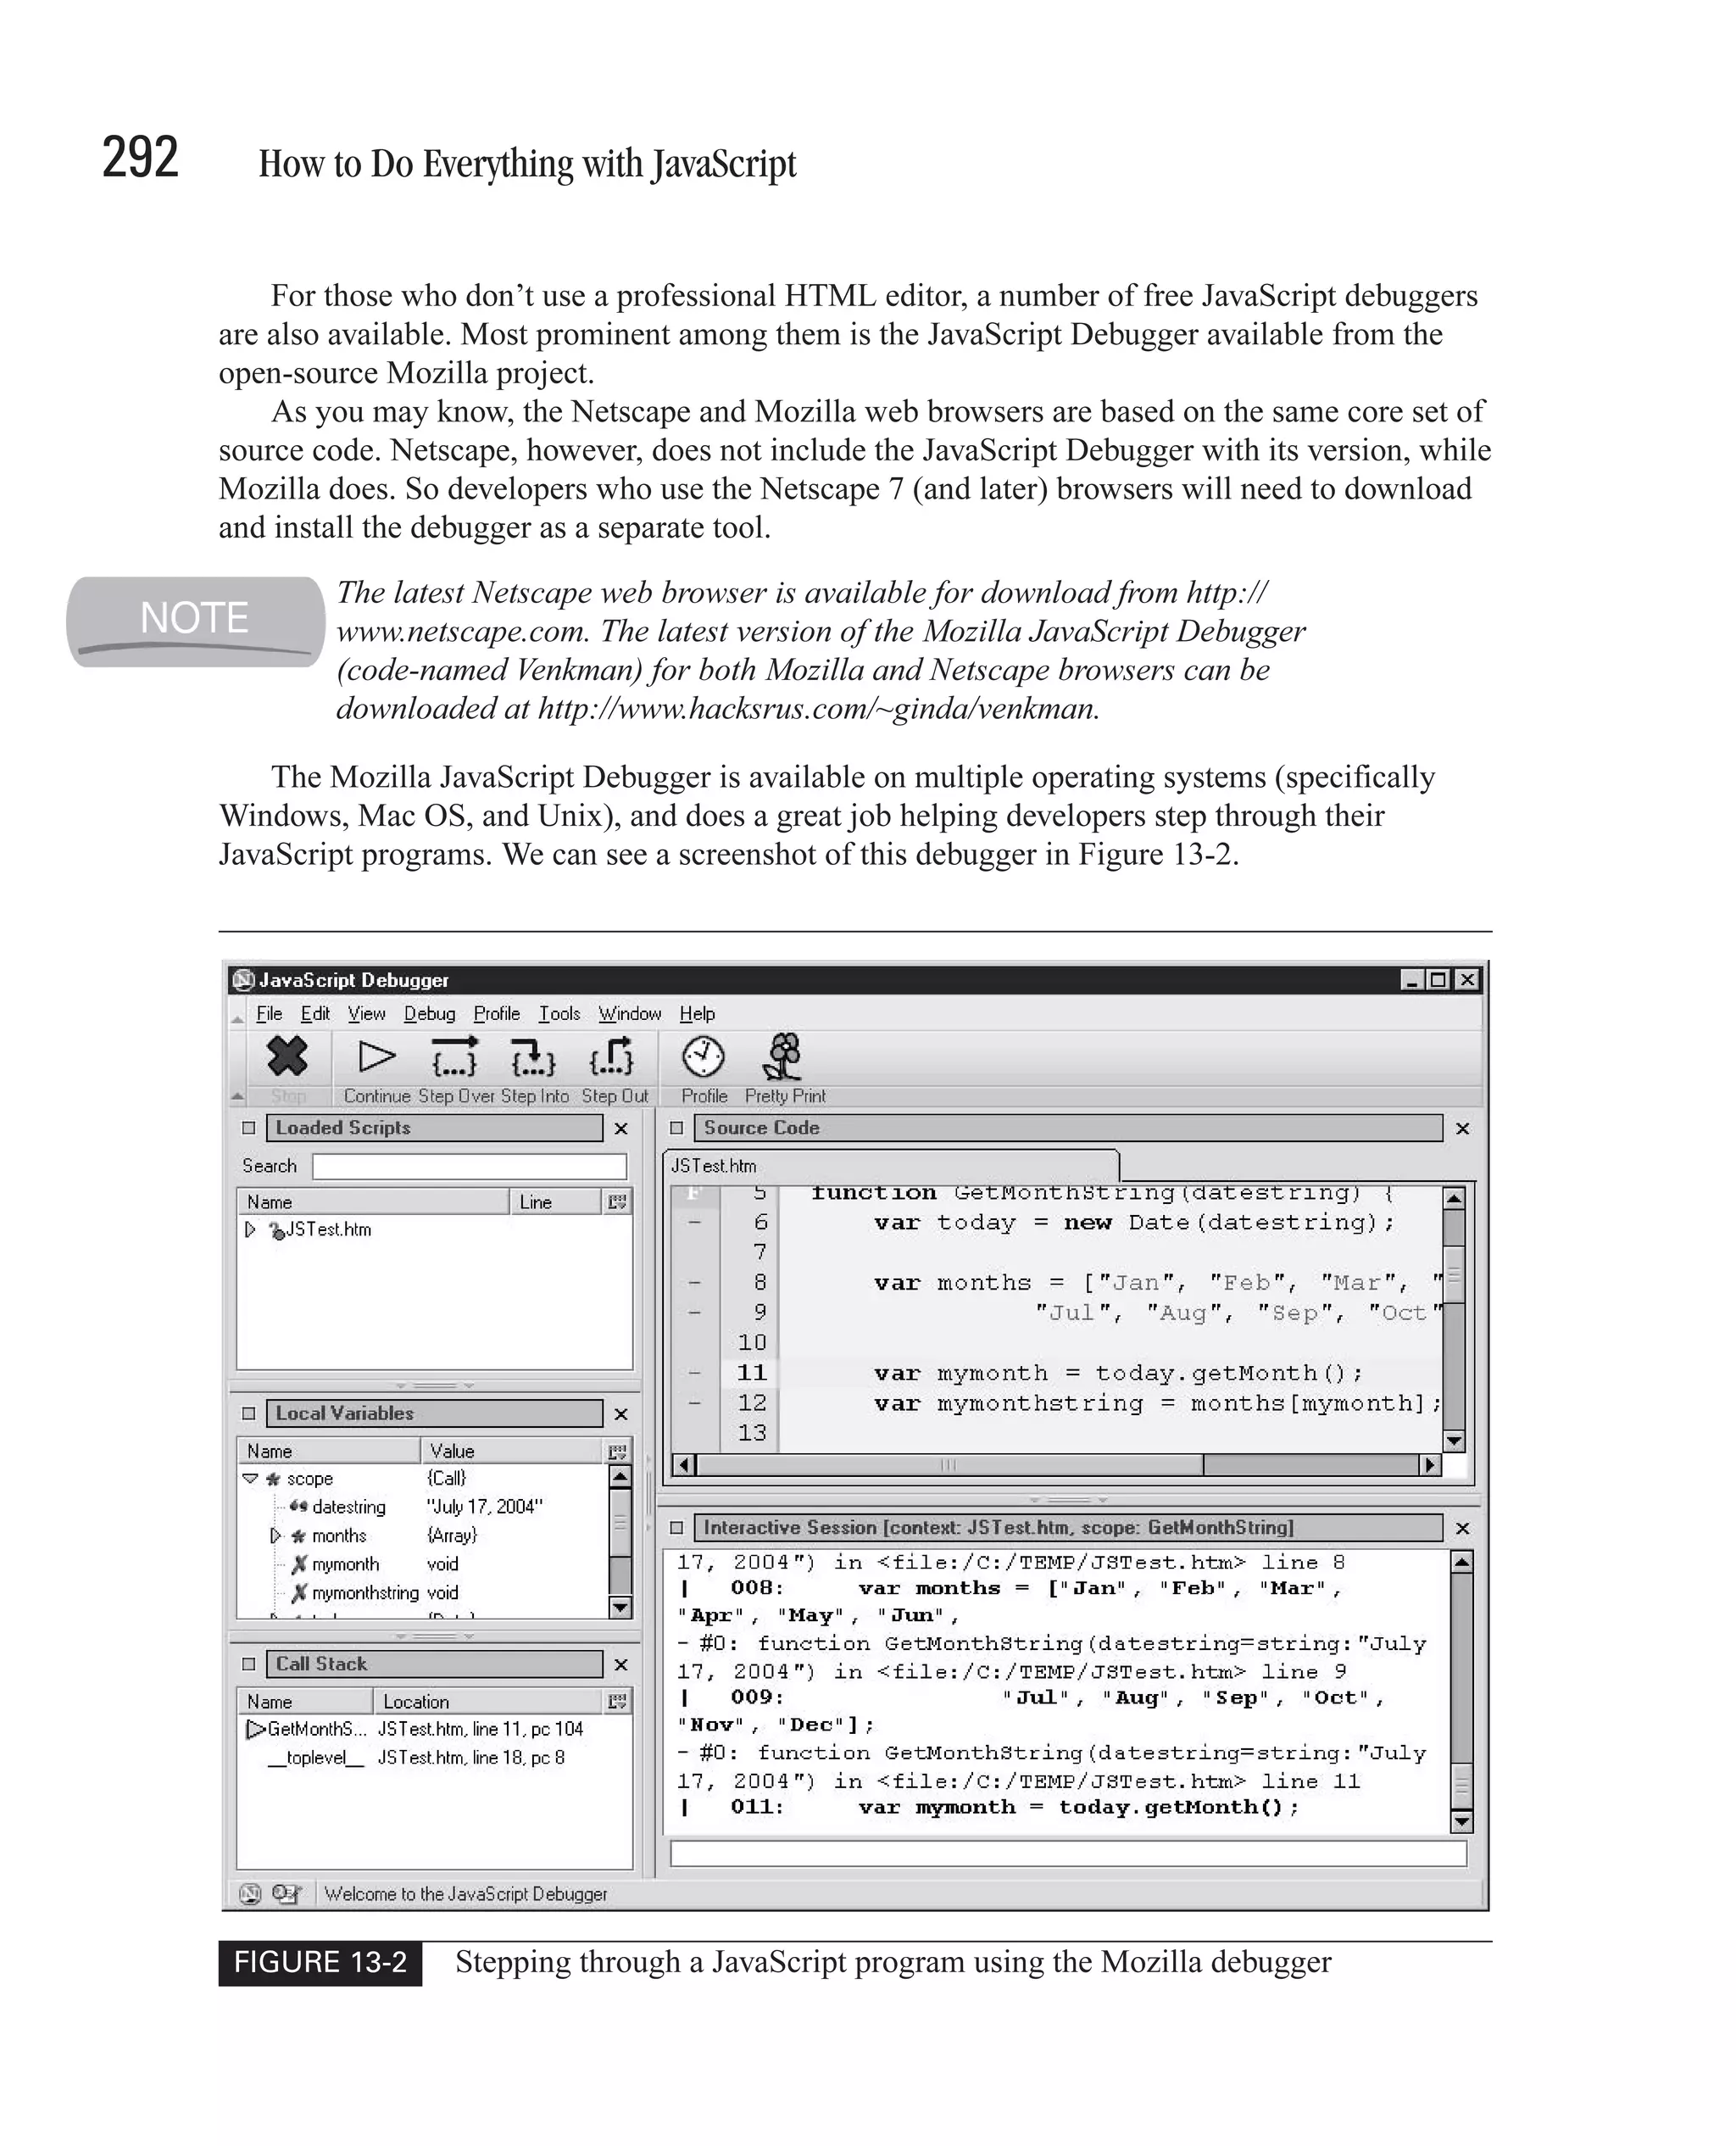


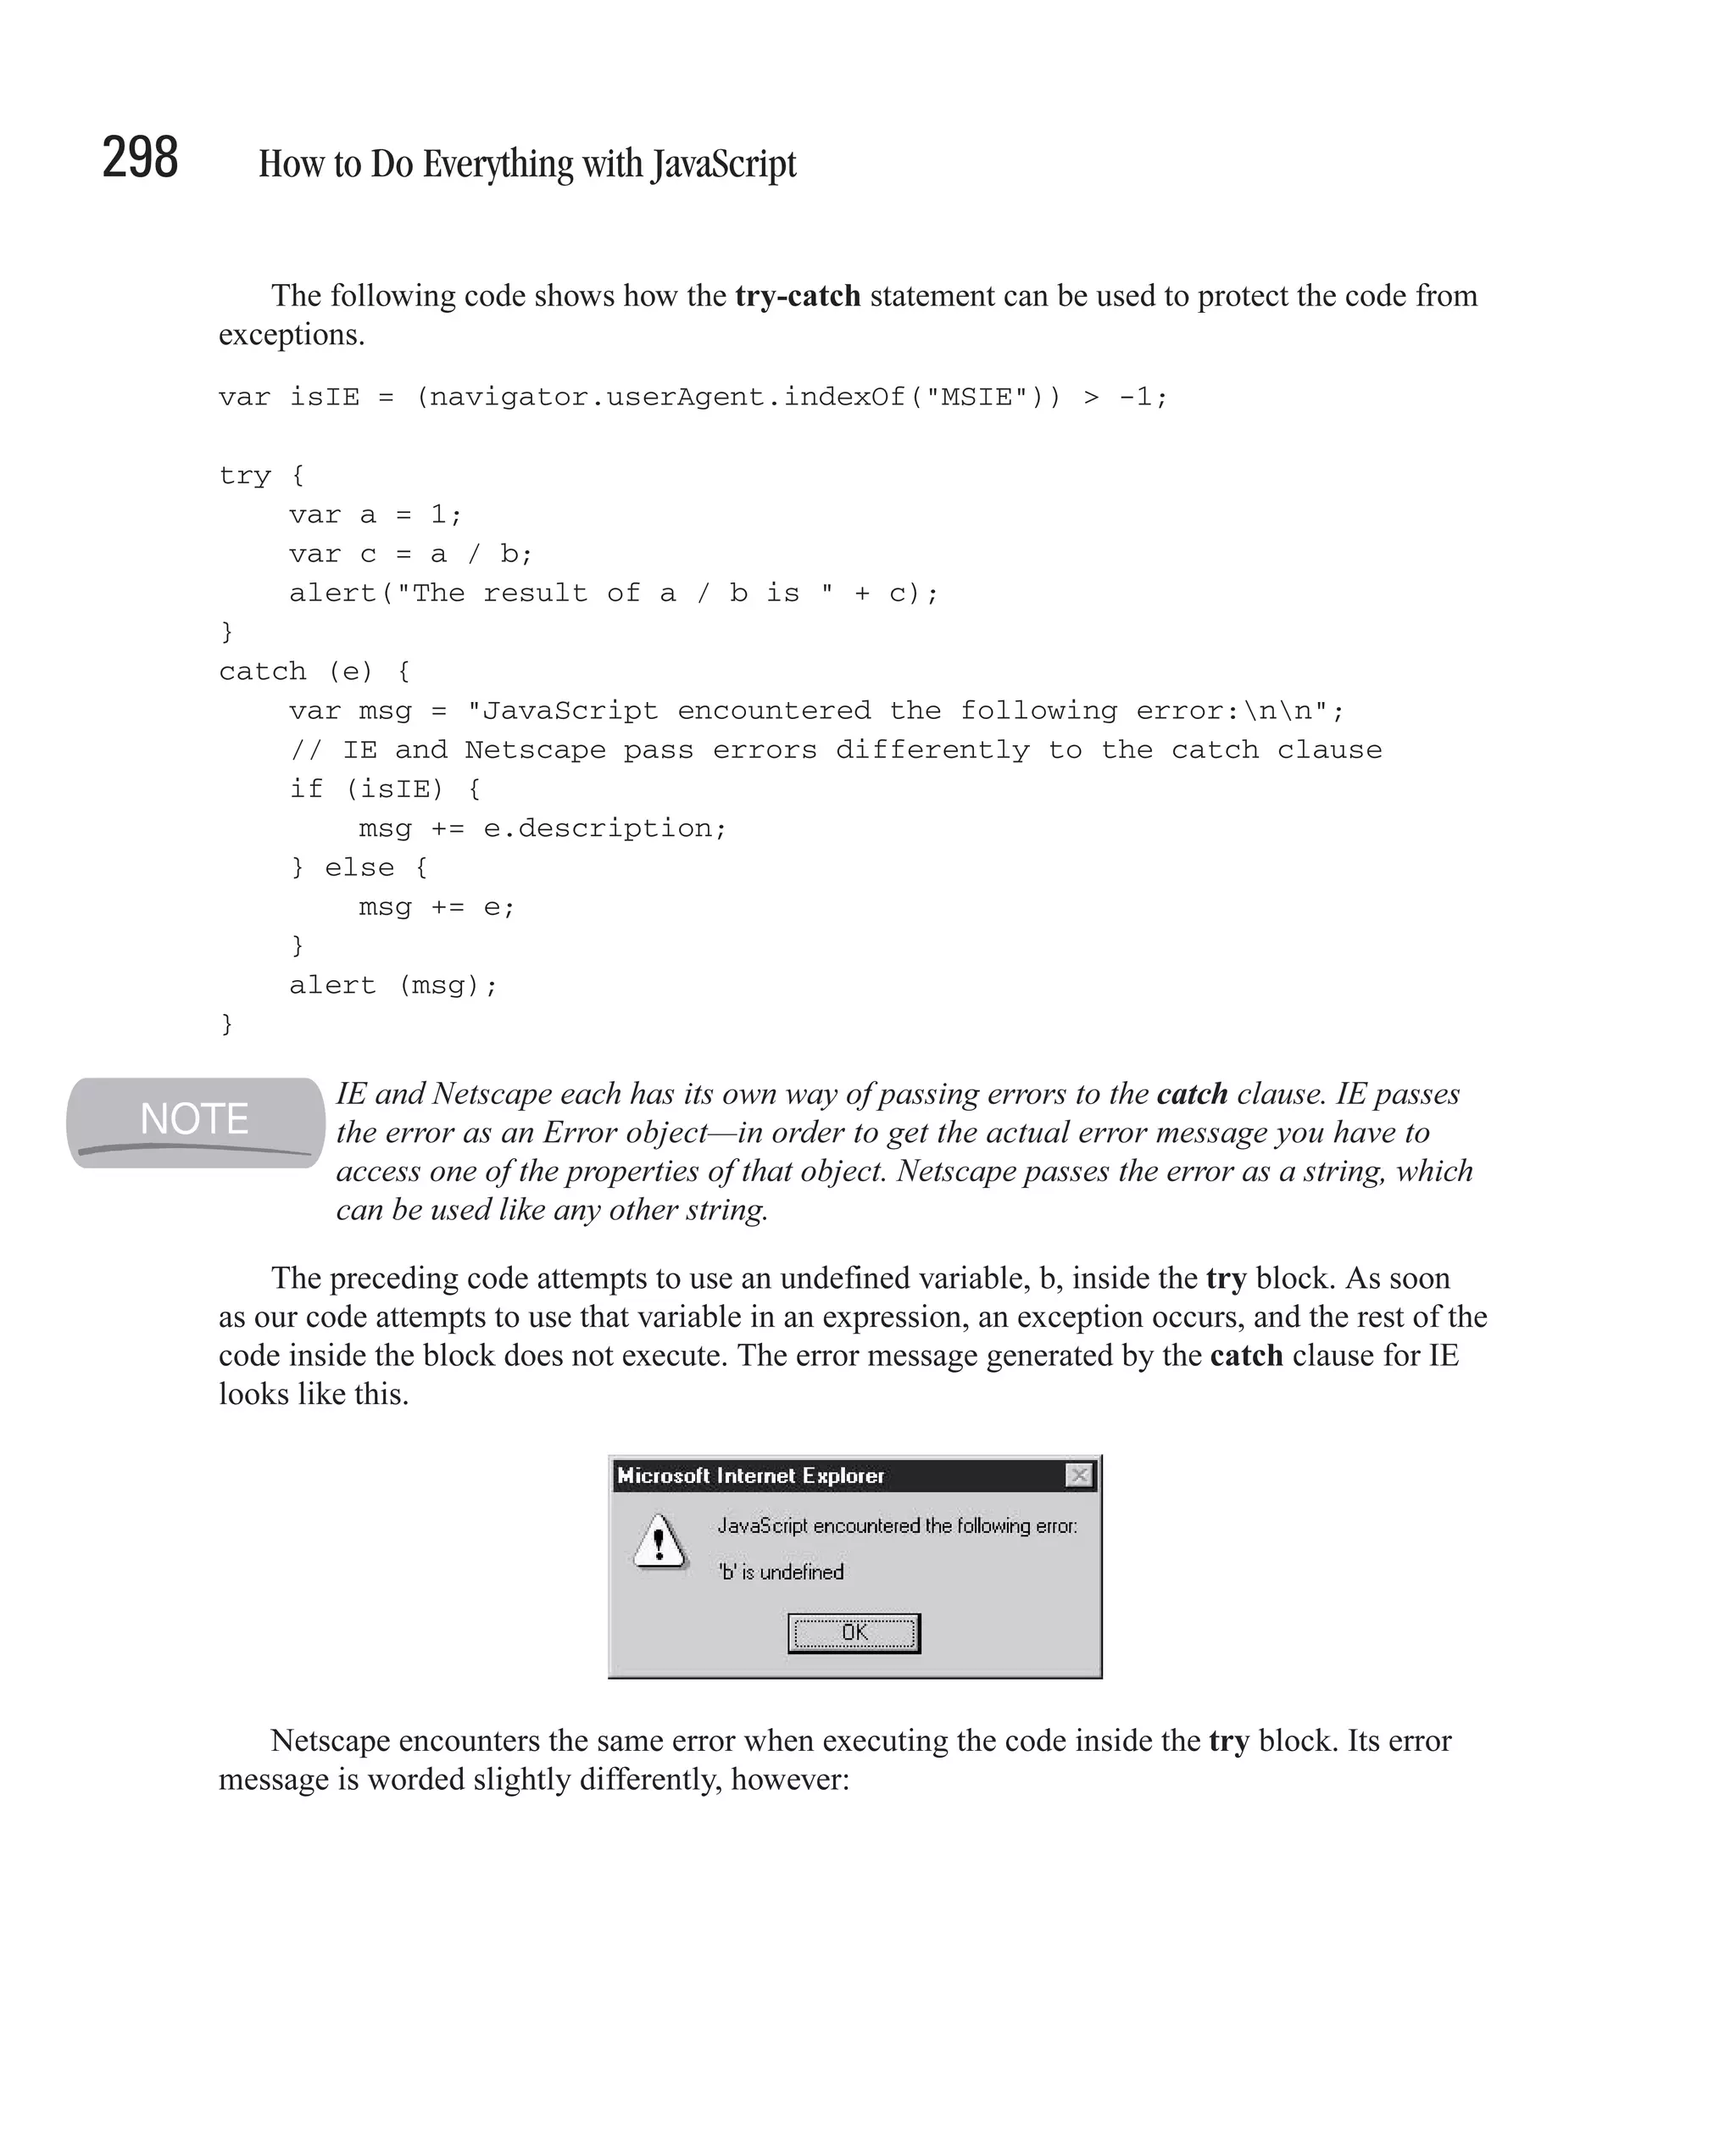
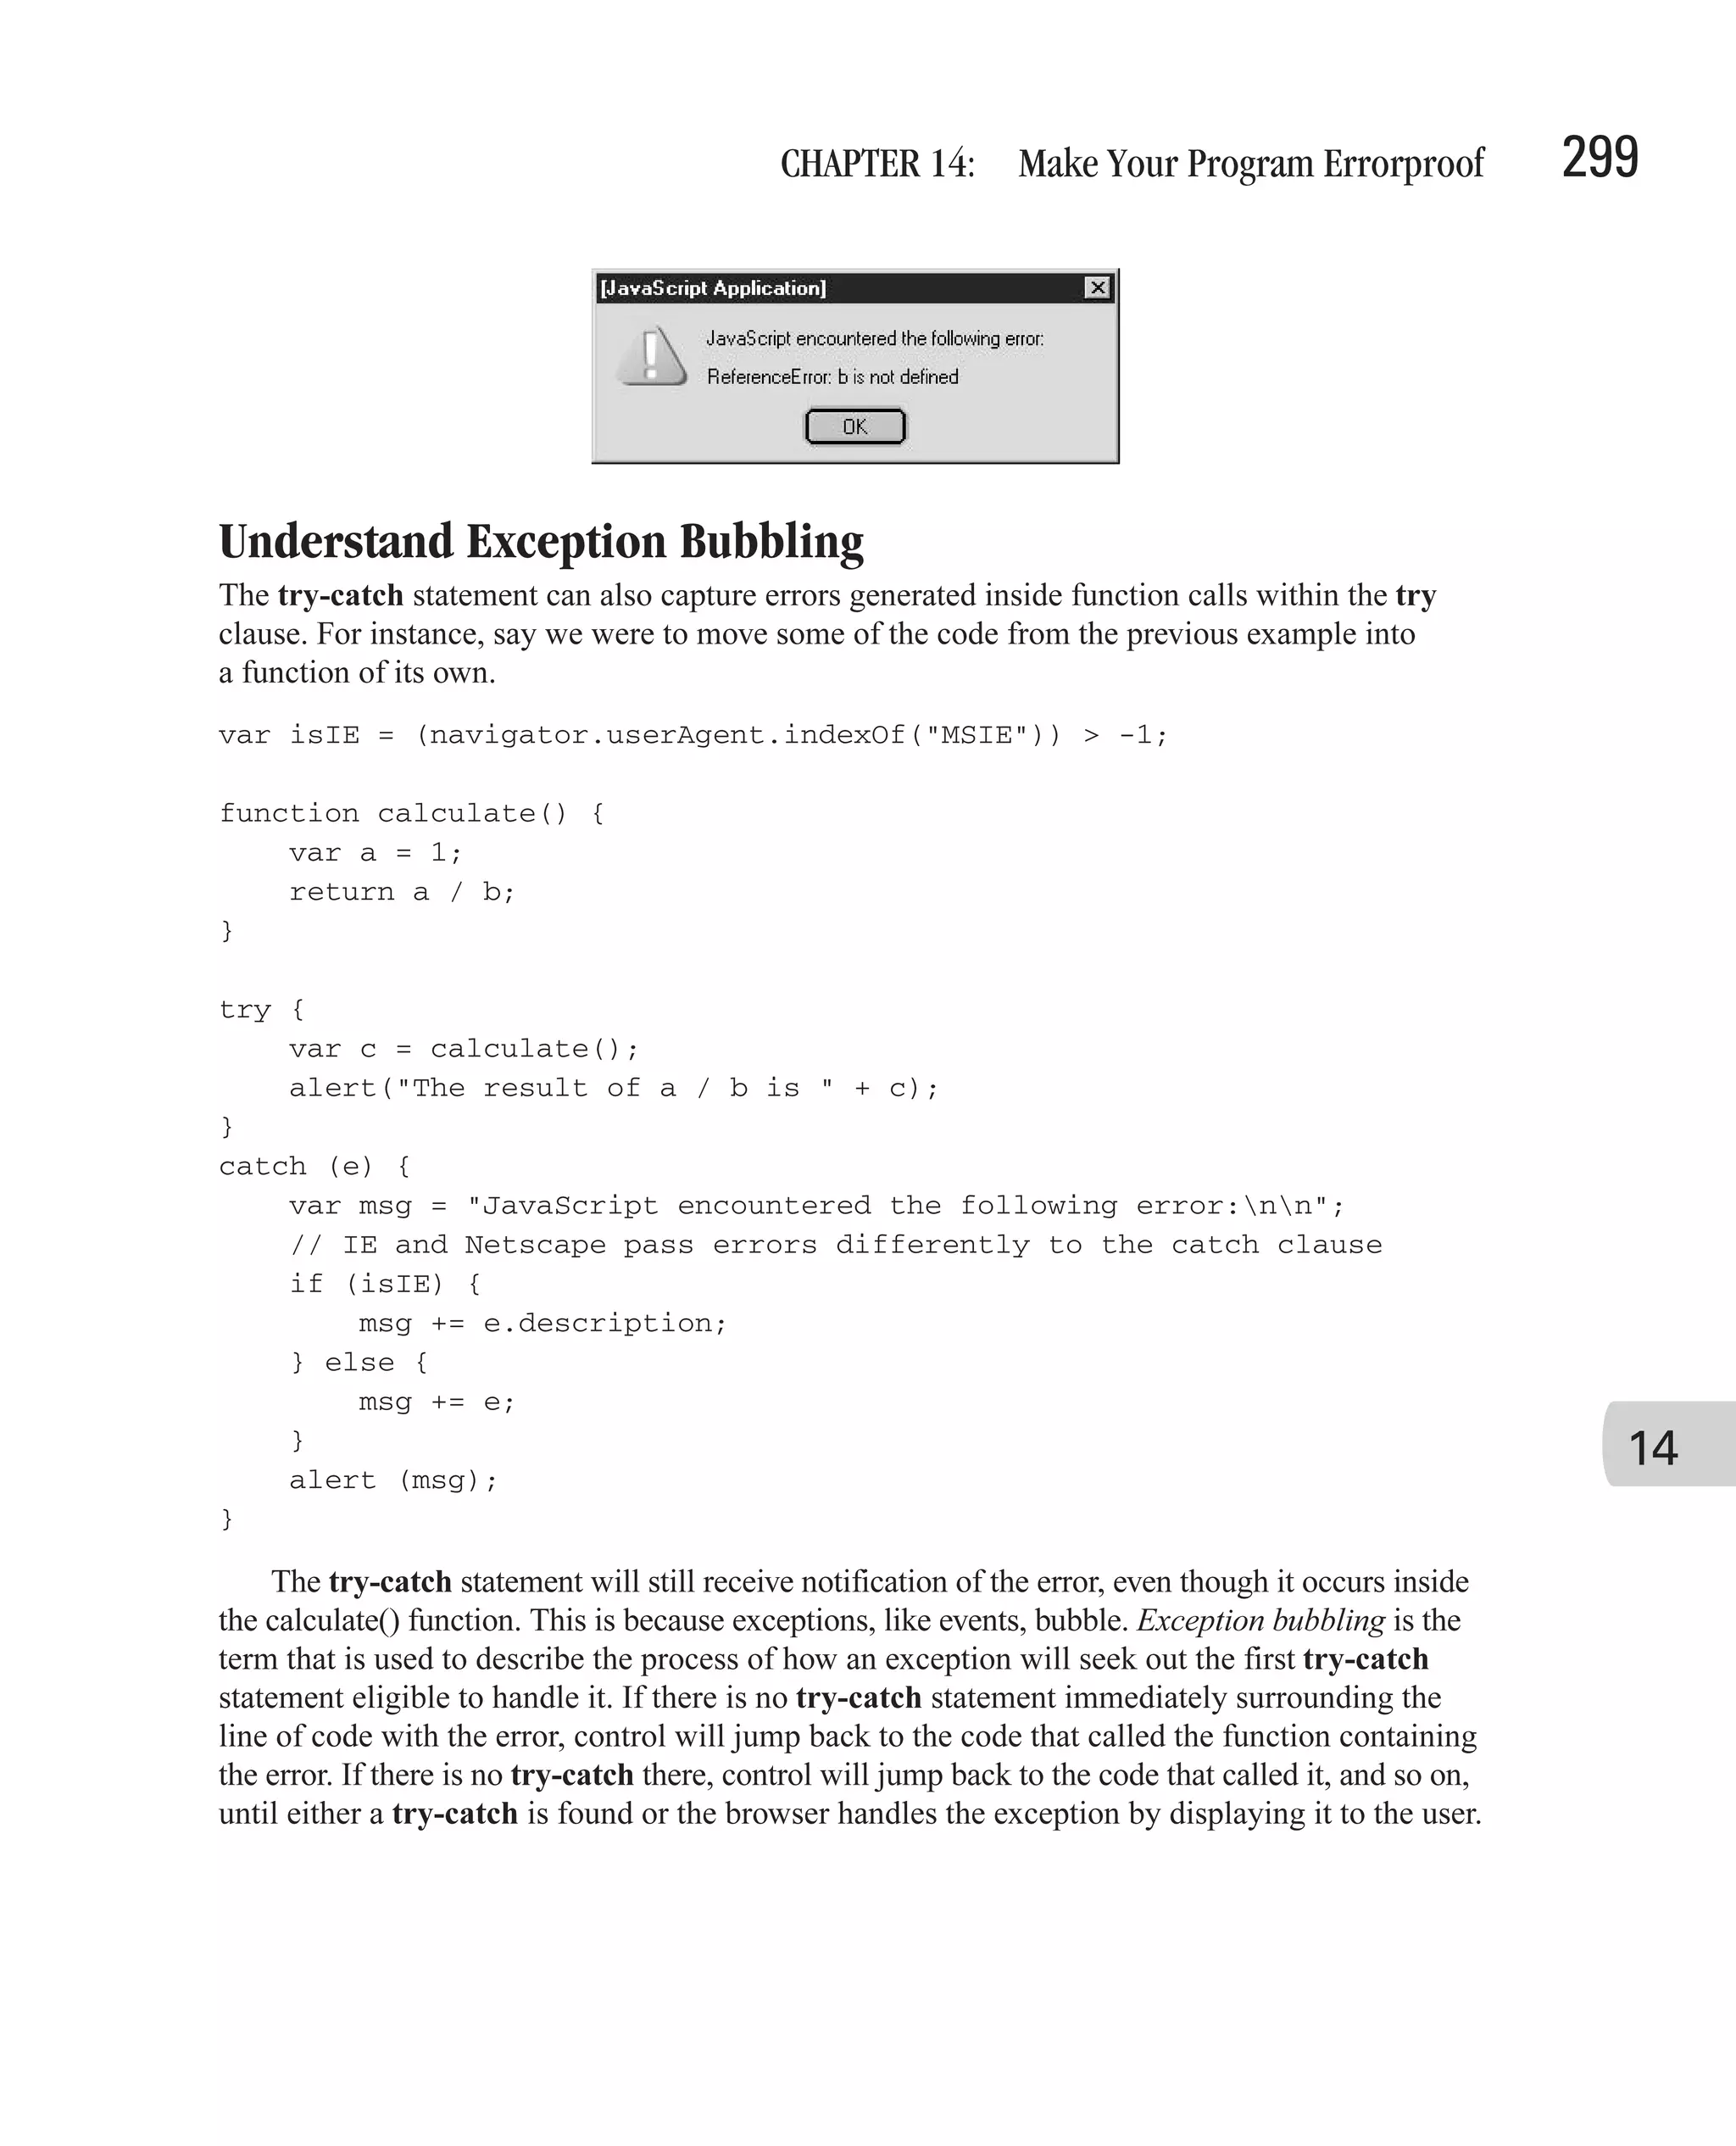
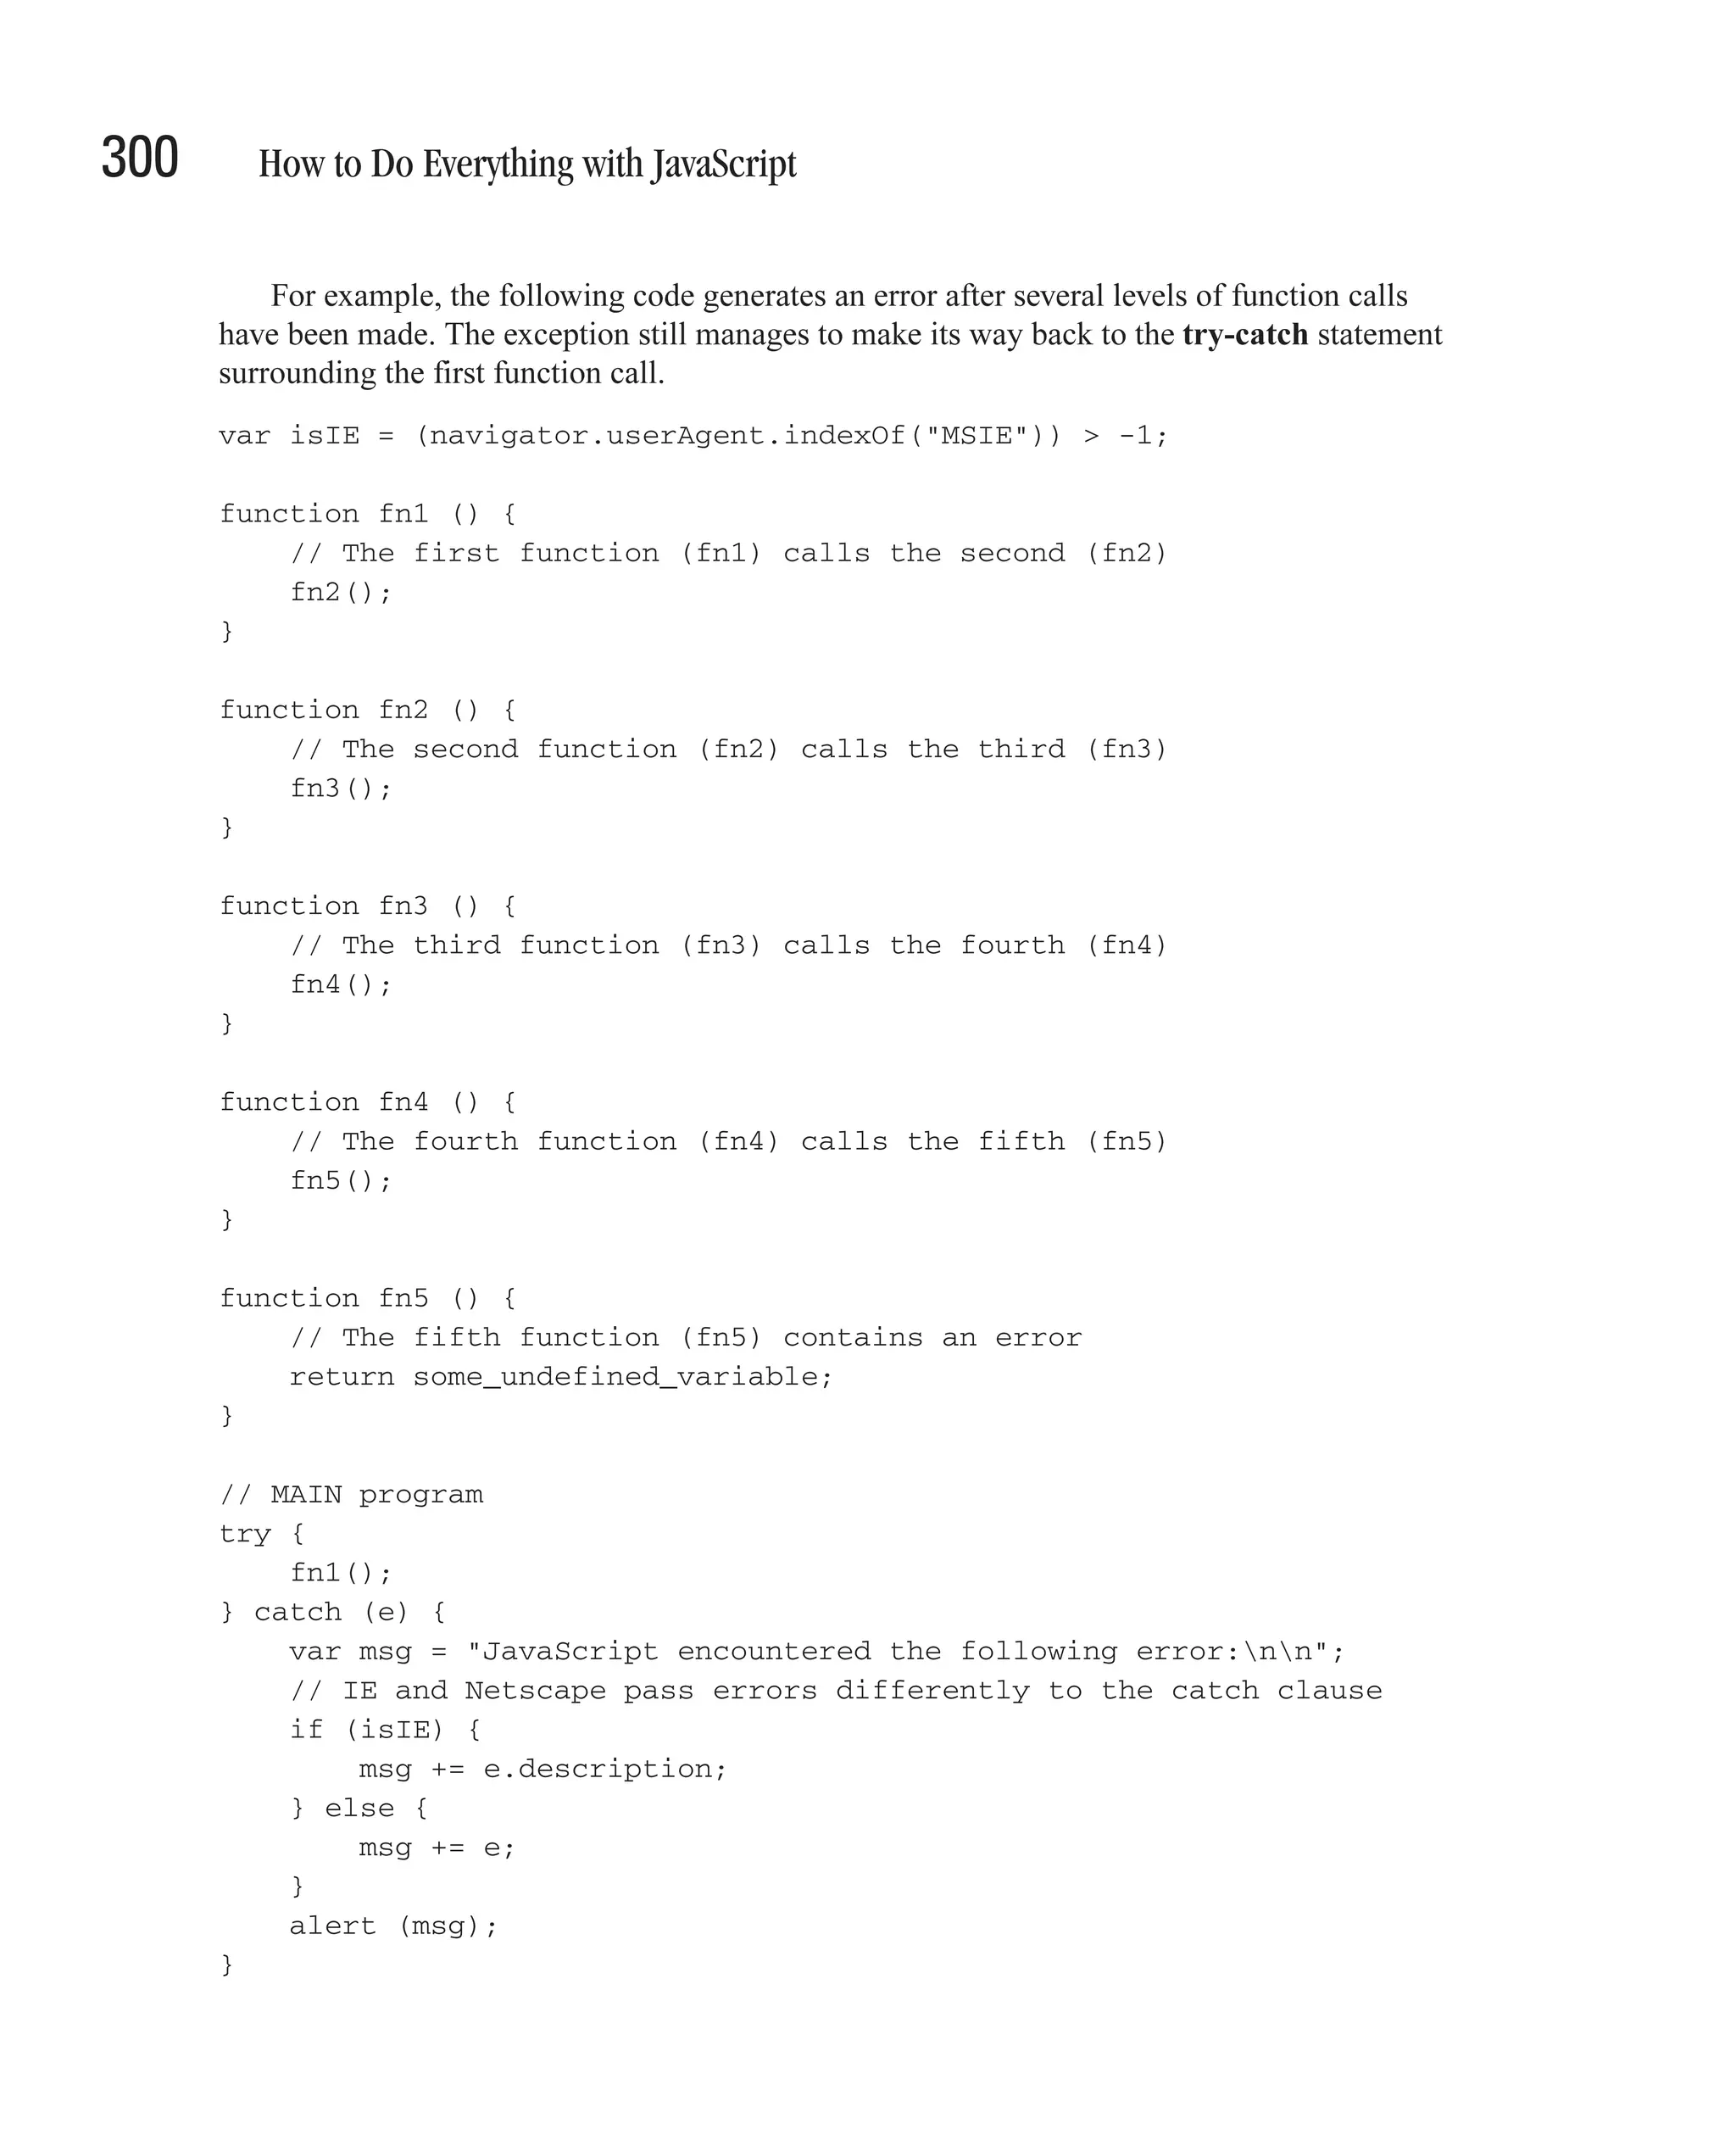
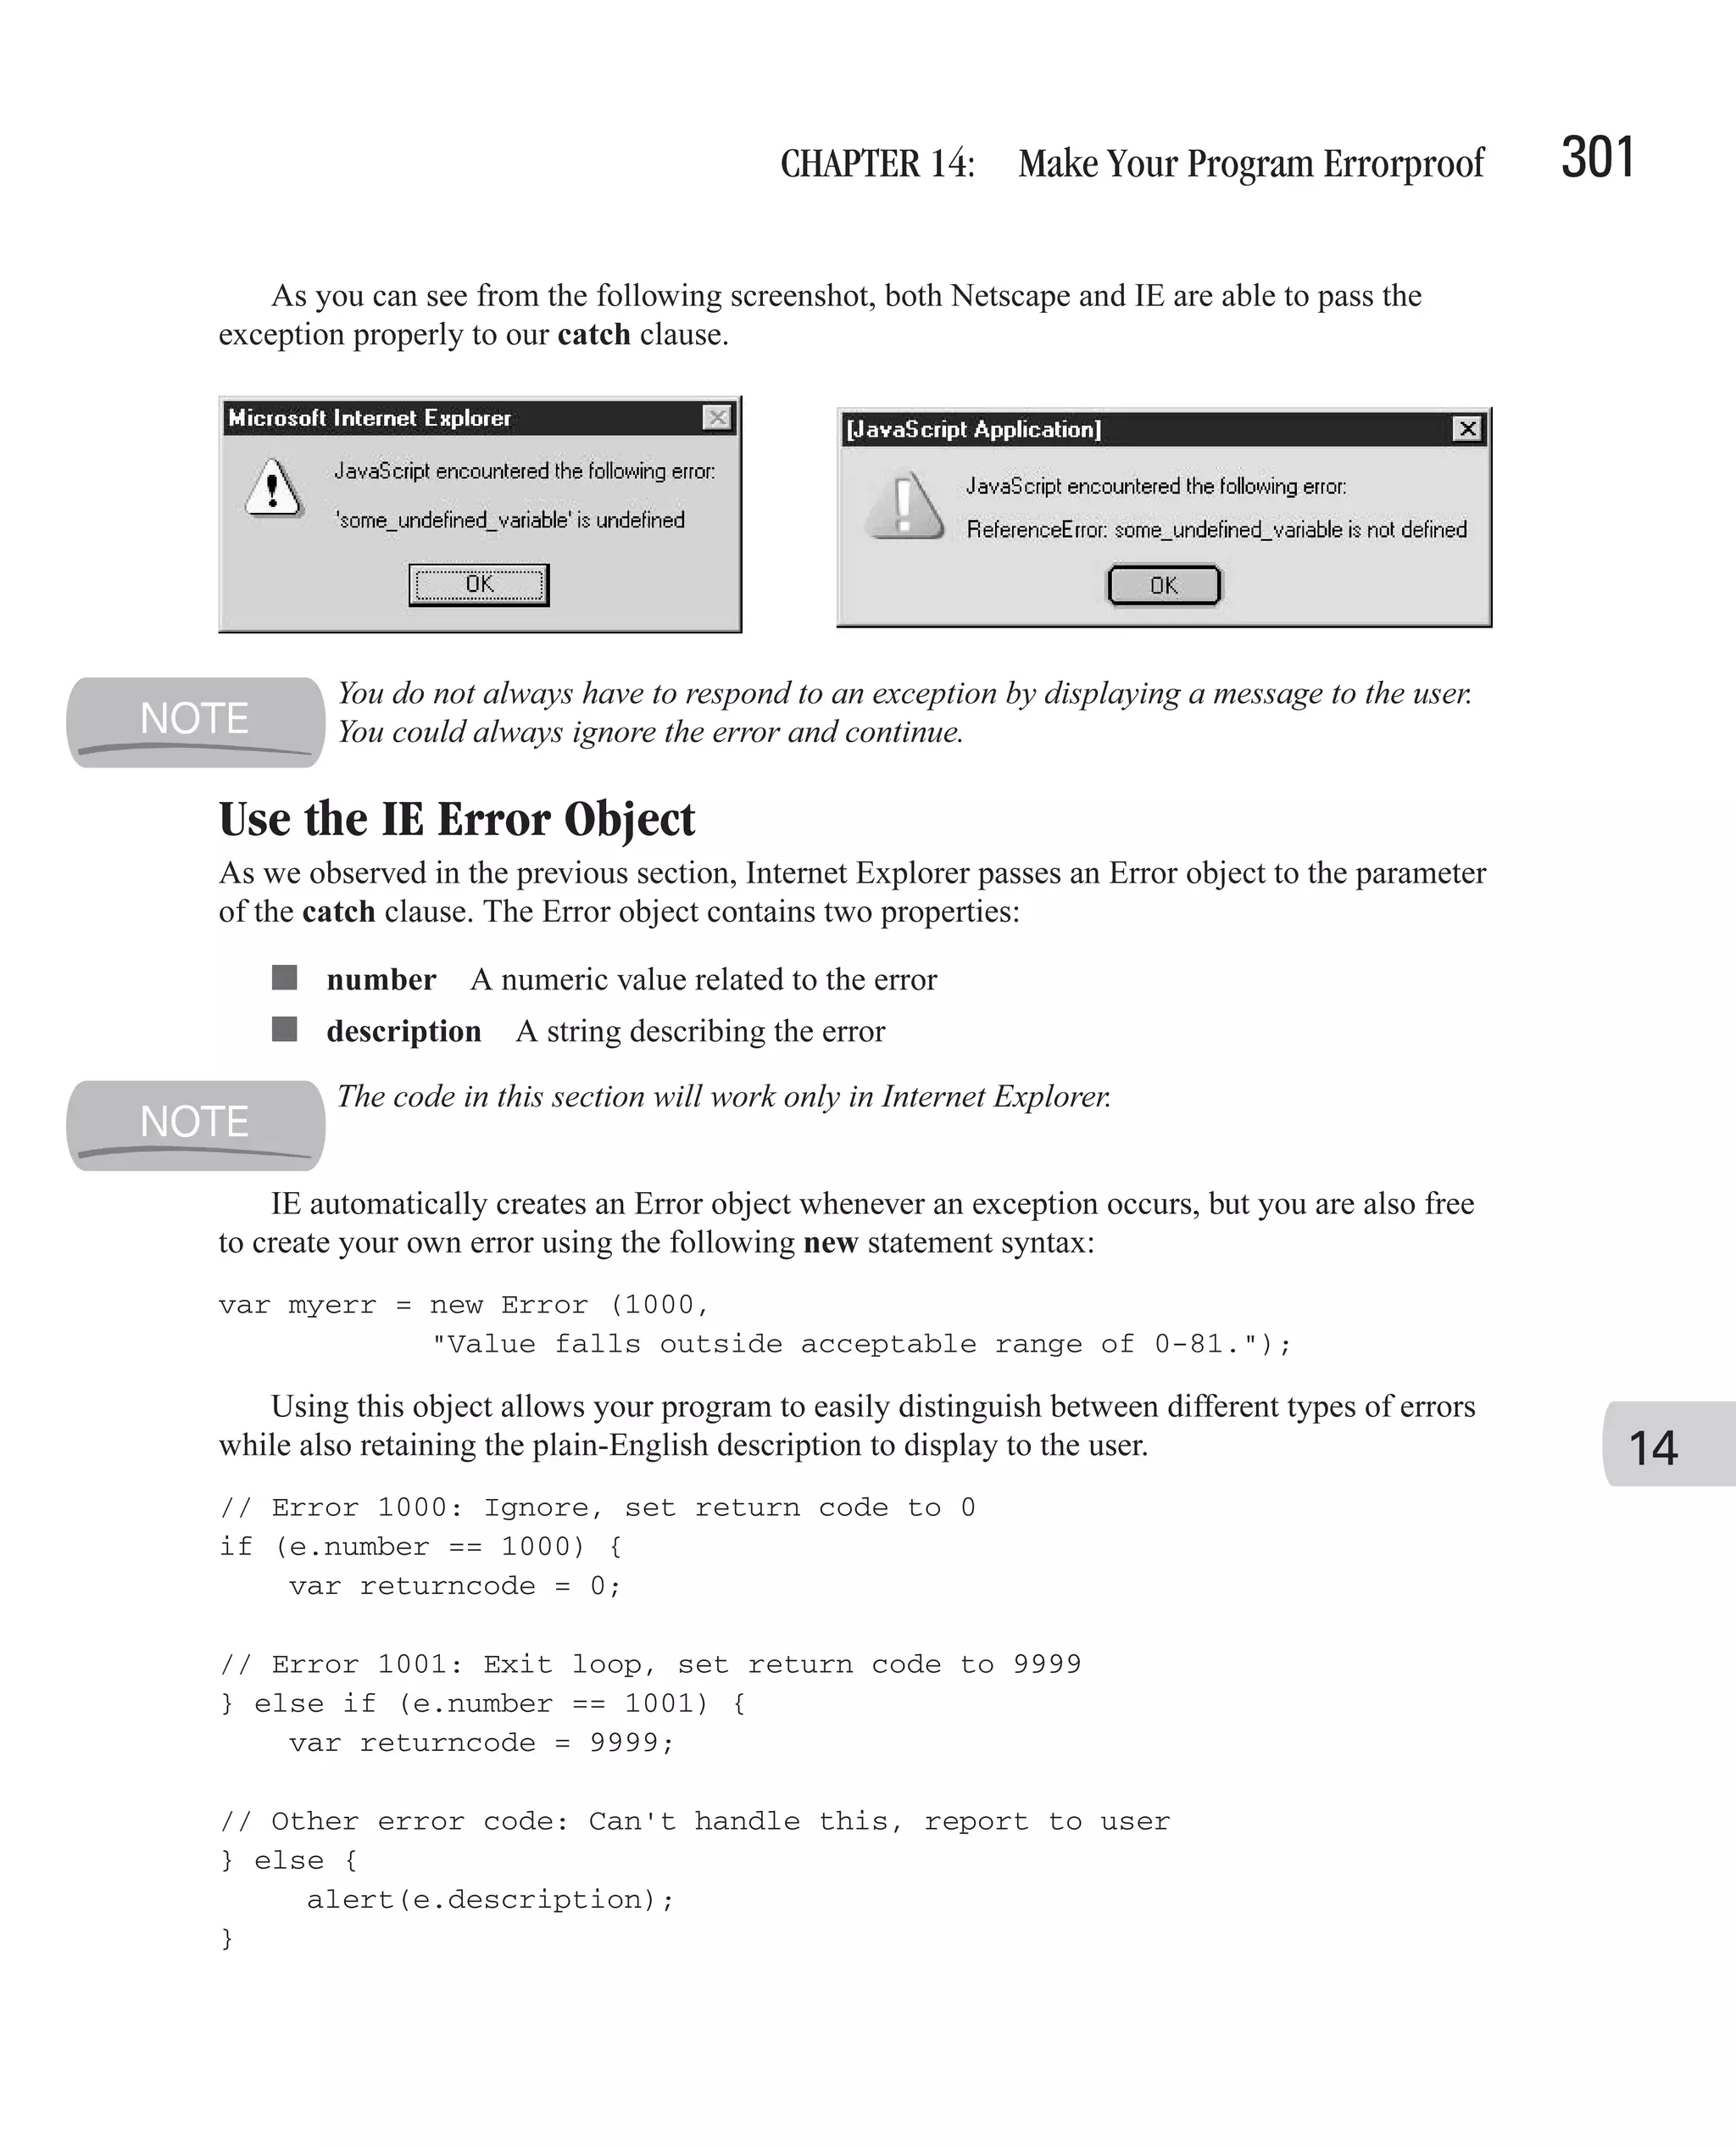
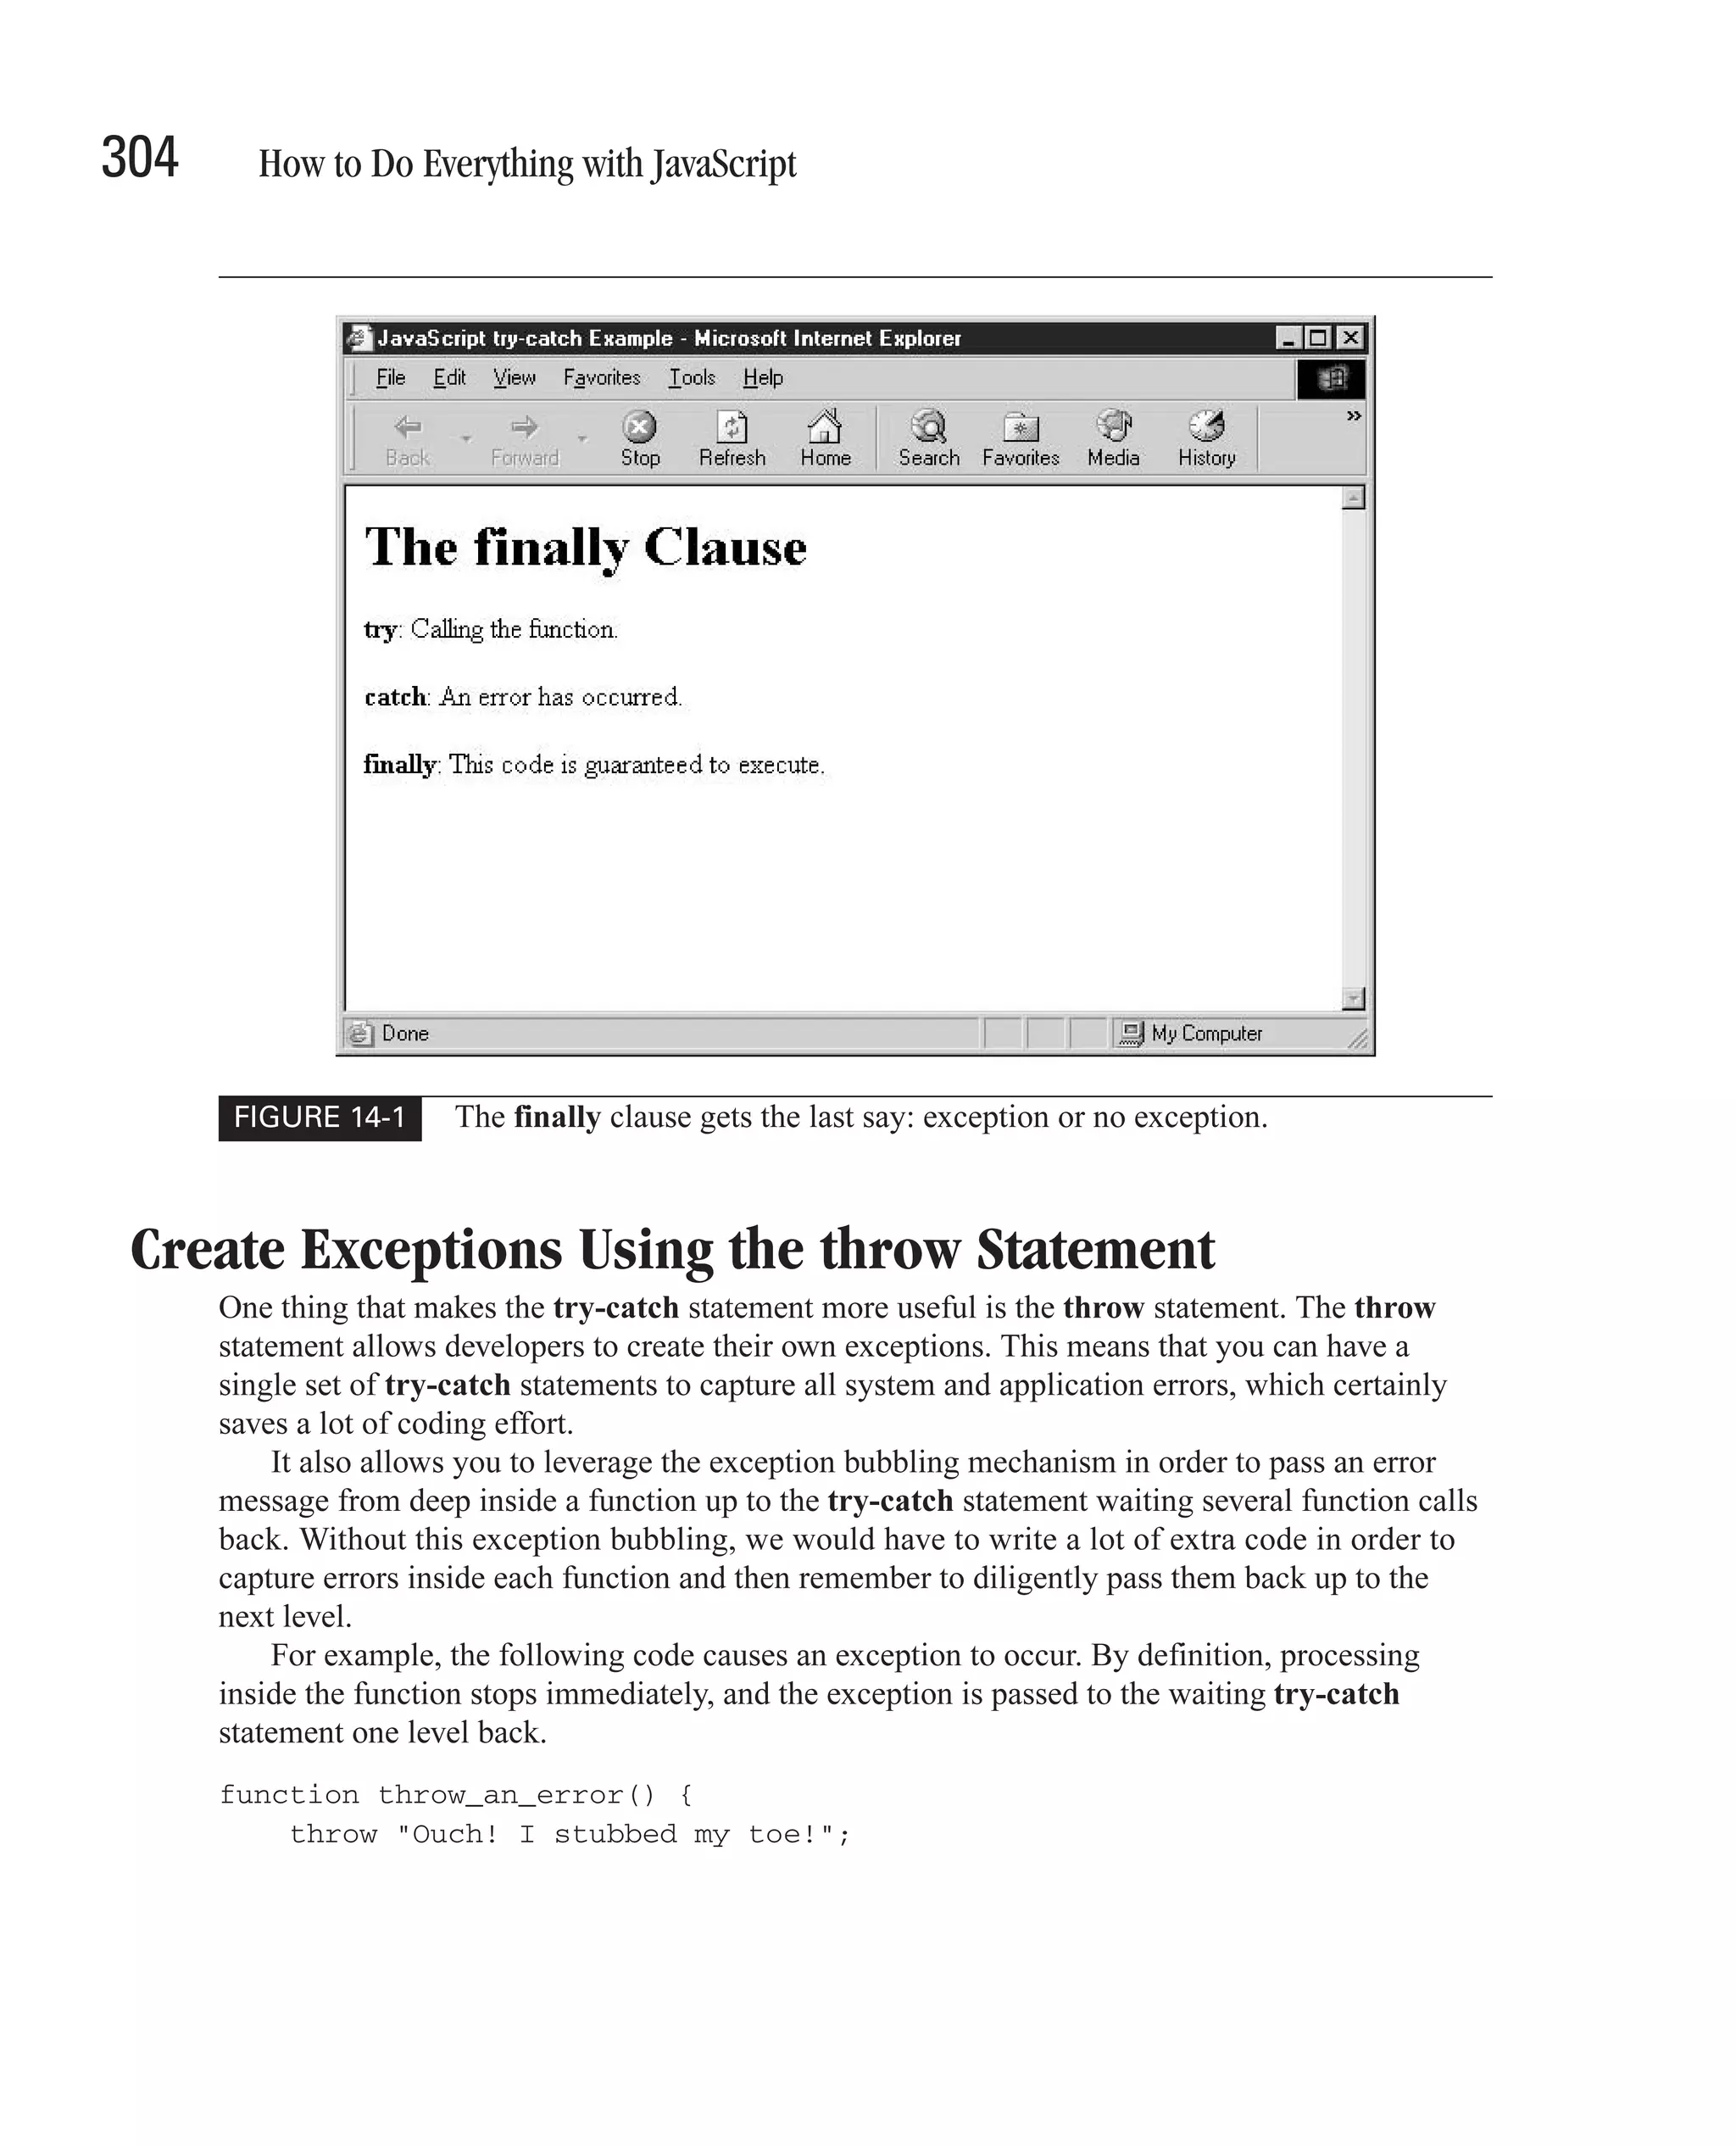

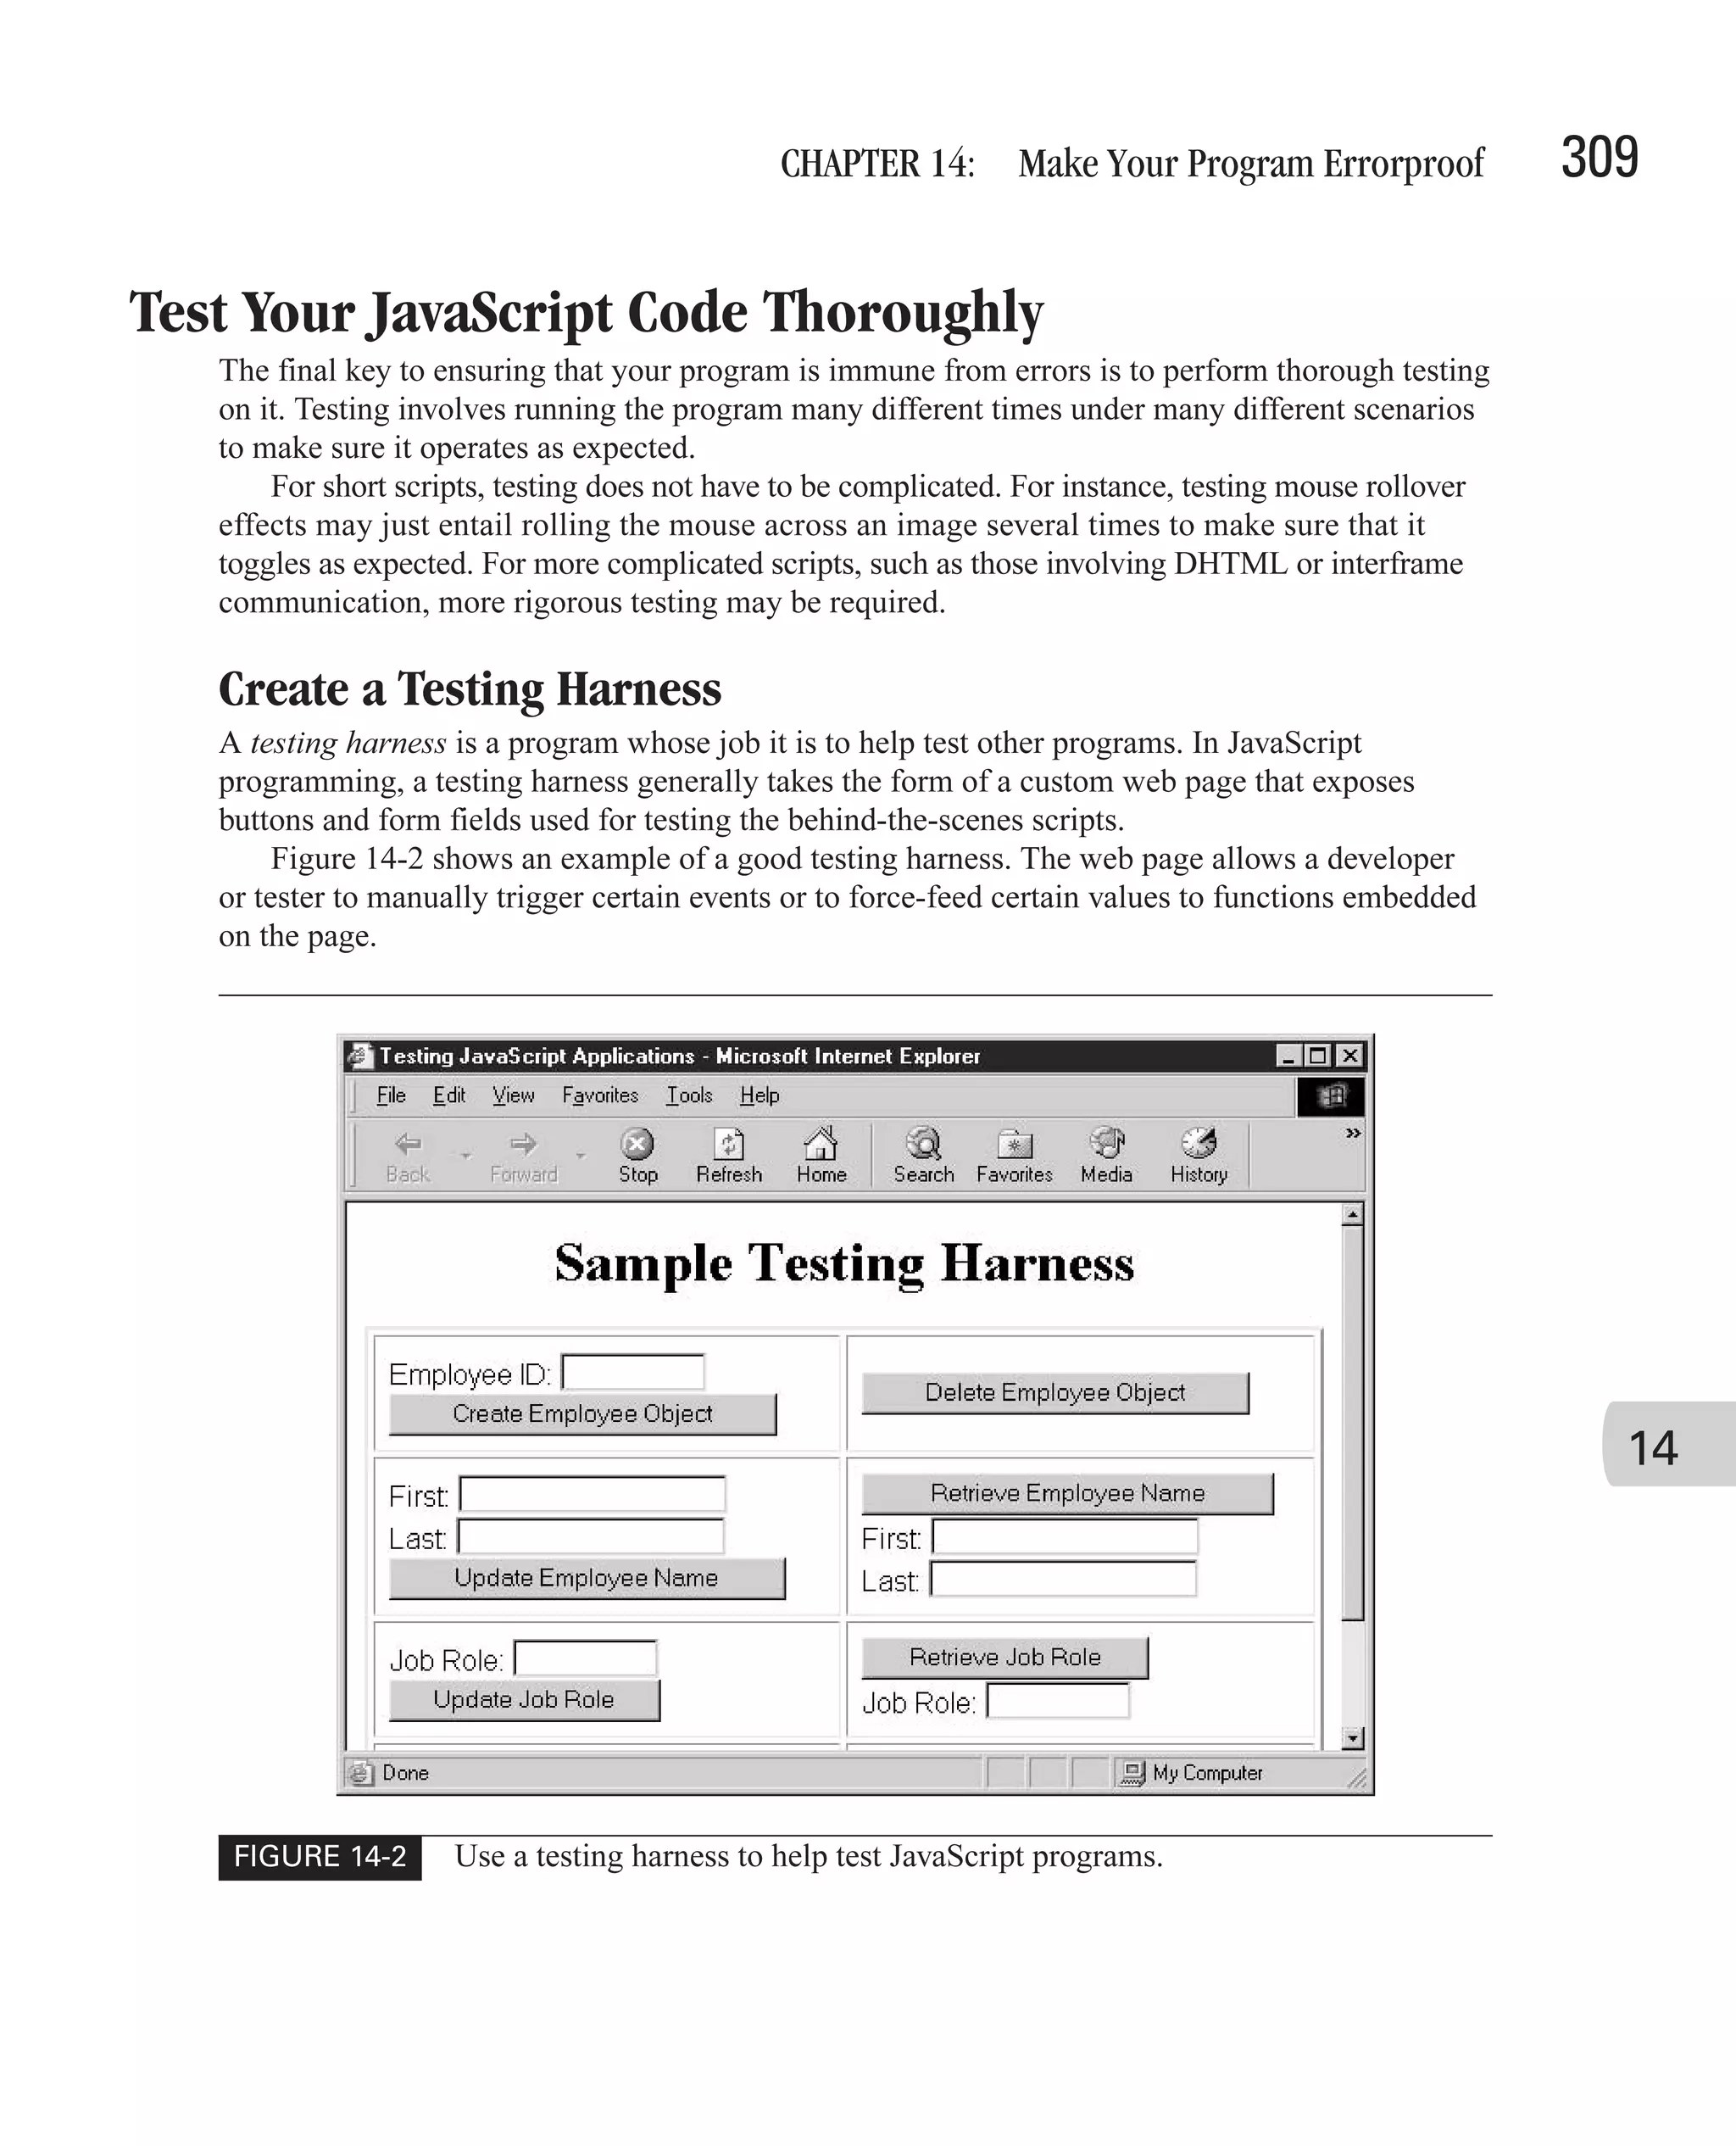
![310 How to Do Everything with JavaScript To see a testing harness in action, let’s start with a small JavaScript script that we wish to test. // This script will validate an e-mail address function validate_email (inputstr) { // The following complex regular expression pattern checks // for a valid e-mail address: user.name@domain-name.com var pattern = /^[a-zA-Z0-9_-.]+@([a-zA-Z0-9-]+.)+[a-zA-Z]{2,3}$/; if (inputstr.search(pattern) > -1) { return true; } else { return false; } } Now we could just choose to use this straight in our program, but it would be a good idea to verify that it is completely working before doing so. By creating the following HTML testing harness that includes our script, we can test dozens of different e-mail addresses in an easy and straightforward fashion. <html> <head> <title>HTML Testing Harness</title> <script language="JavaScript" type="text/javascript"> // This script will validate an e-mail address function validate_email (inputstr) { // The following complex regular expression pattern checks // for a valid e-mail address: user.name@domain-name.com var pattern = /^[a-zA-Z0-9_-.]+@([a-zA-Z0-9-]+.)+[a-zA-Z]{2,3}$/; if (inputstr.search(pattern) > -1) { return true; } else { return false; } } </script> </head> <body> <center> <h1>HTML Testing Harness</h1>](https://image.slidesharecdn.com/3592018/75/How-To-Do-Everything-With-JavaScript-330-2048.jpg)
![CHAPTER 14: Make Your Program Errorproof 311 <h2>for E-mail Checker</h2> </center> <form action="#" method="get"> E-mail address: <br> <input type="text" name="email"> <input type="button" value="Test" onclick="alert(validate_email(document.forms[0].email.value))"> </form> </body> </html> The preceding HTML code exists only to test the JavaScript function validate_email(). It consists of a simple HTML form that contains a text box and a push button. Using this form, testers and developers can type in dozens of different test e-mail addresses to verify that our script is working as expected. If this process is repeated with each complex function in a program, you will reduce the likelihood of users discovering strange behavior when using your web page. Force Errors to Test Error-Handling Code One thing that occurs when developers test their own programs is what I call “Sunny Day Syndrome.” We tend to use only valid dates when functions are expecting a date in a parameter field or use only numbers when functions expect numeric values. But it’s important to see what happens when you send an invalid date (such as “02/29/2005” or “12/33/2005”) to such a field—or even to try sending something that’s not a date (such as the string “Boo”). How does your function respond to invalid inputs? How is your error-handling code? You might even have to modify the code to force such errors. For example, in the following code, I have hard-coded an array to be empty in order to see how the code handles empty arrays. This is only to test the error-handling capabilities of the code that called this function. function print_listing() { 14 var itemarray = get_product_list(); // BEGIN TESTING:: Empty array added just for testing // Forcing an error itemarray = new Array(); // END TESTING for (var item in itemarray) { // Rest of code ... } }](https://image.slidesharecdn.com/3592018/75/How-To-Do-Everything-With-JavaScript-331-2048.jpg)
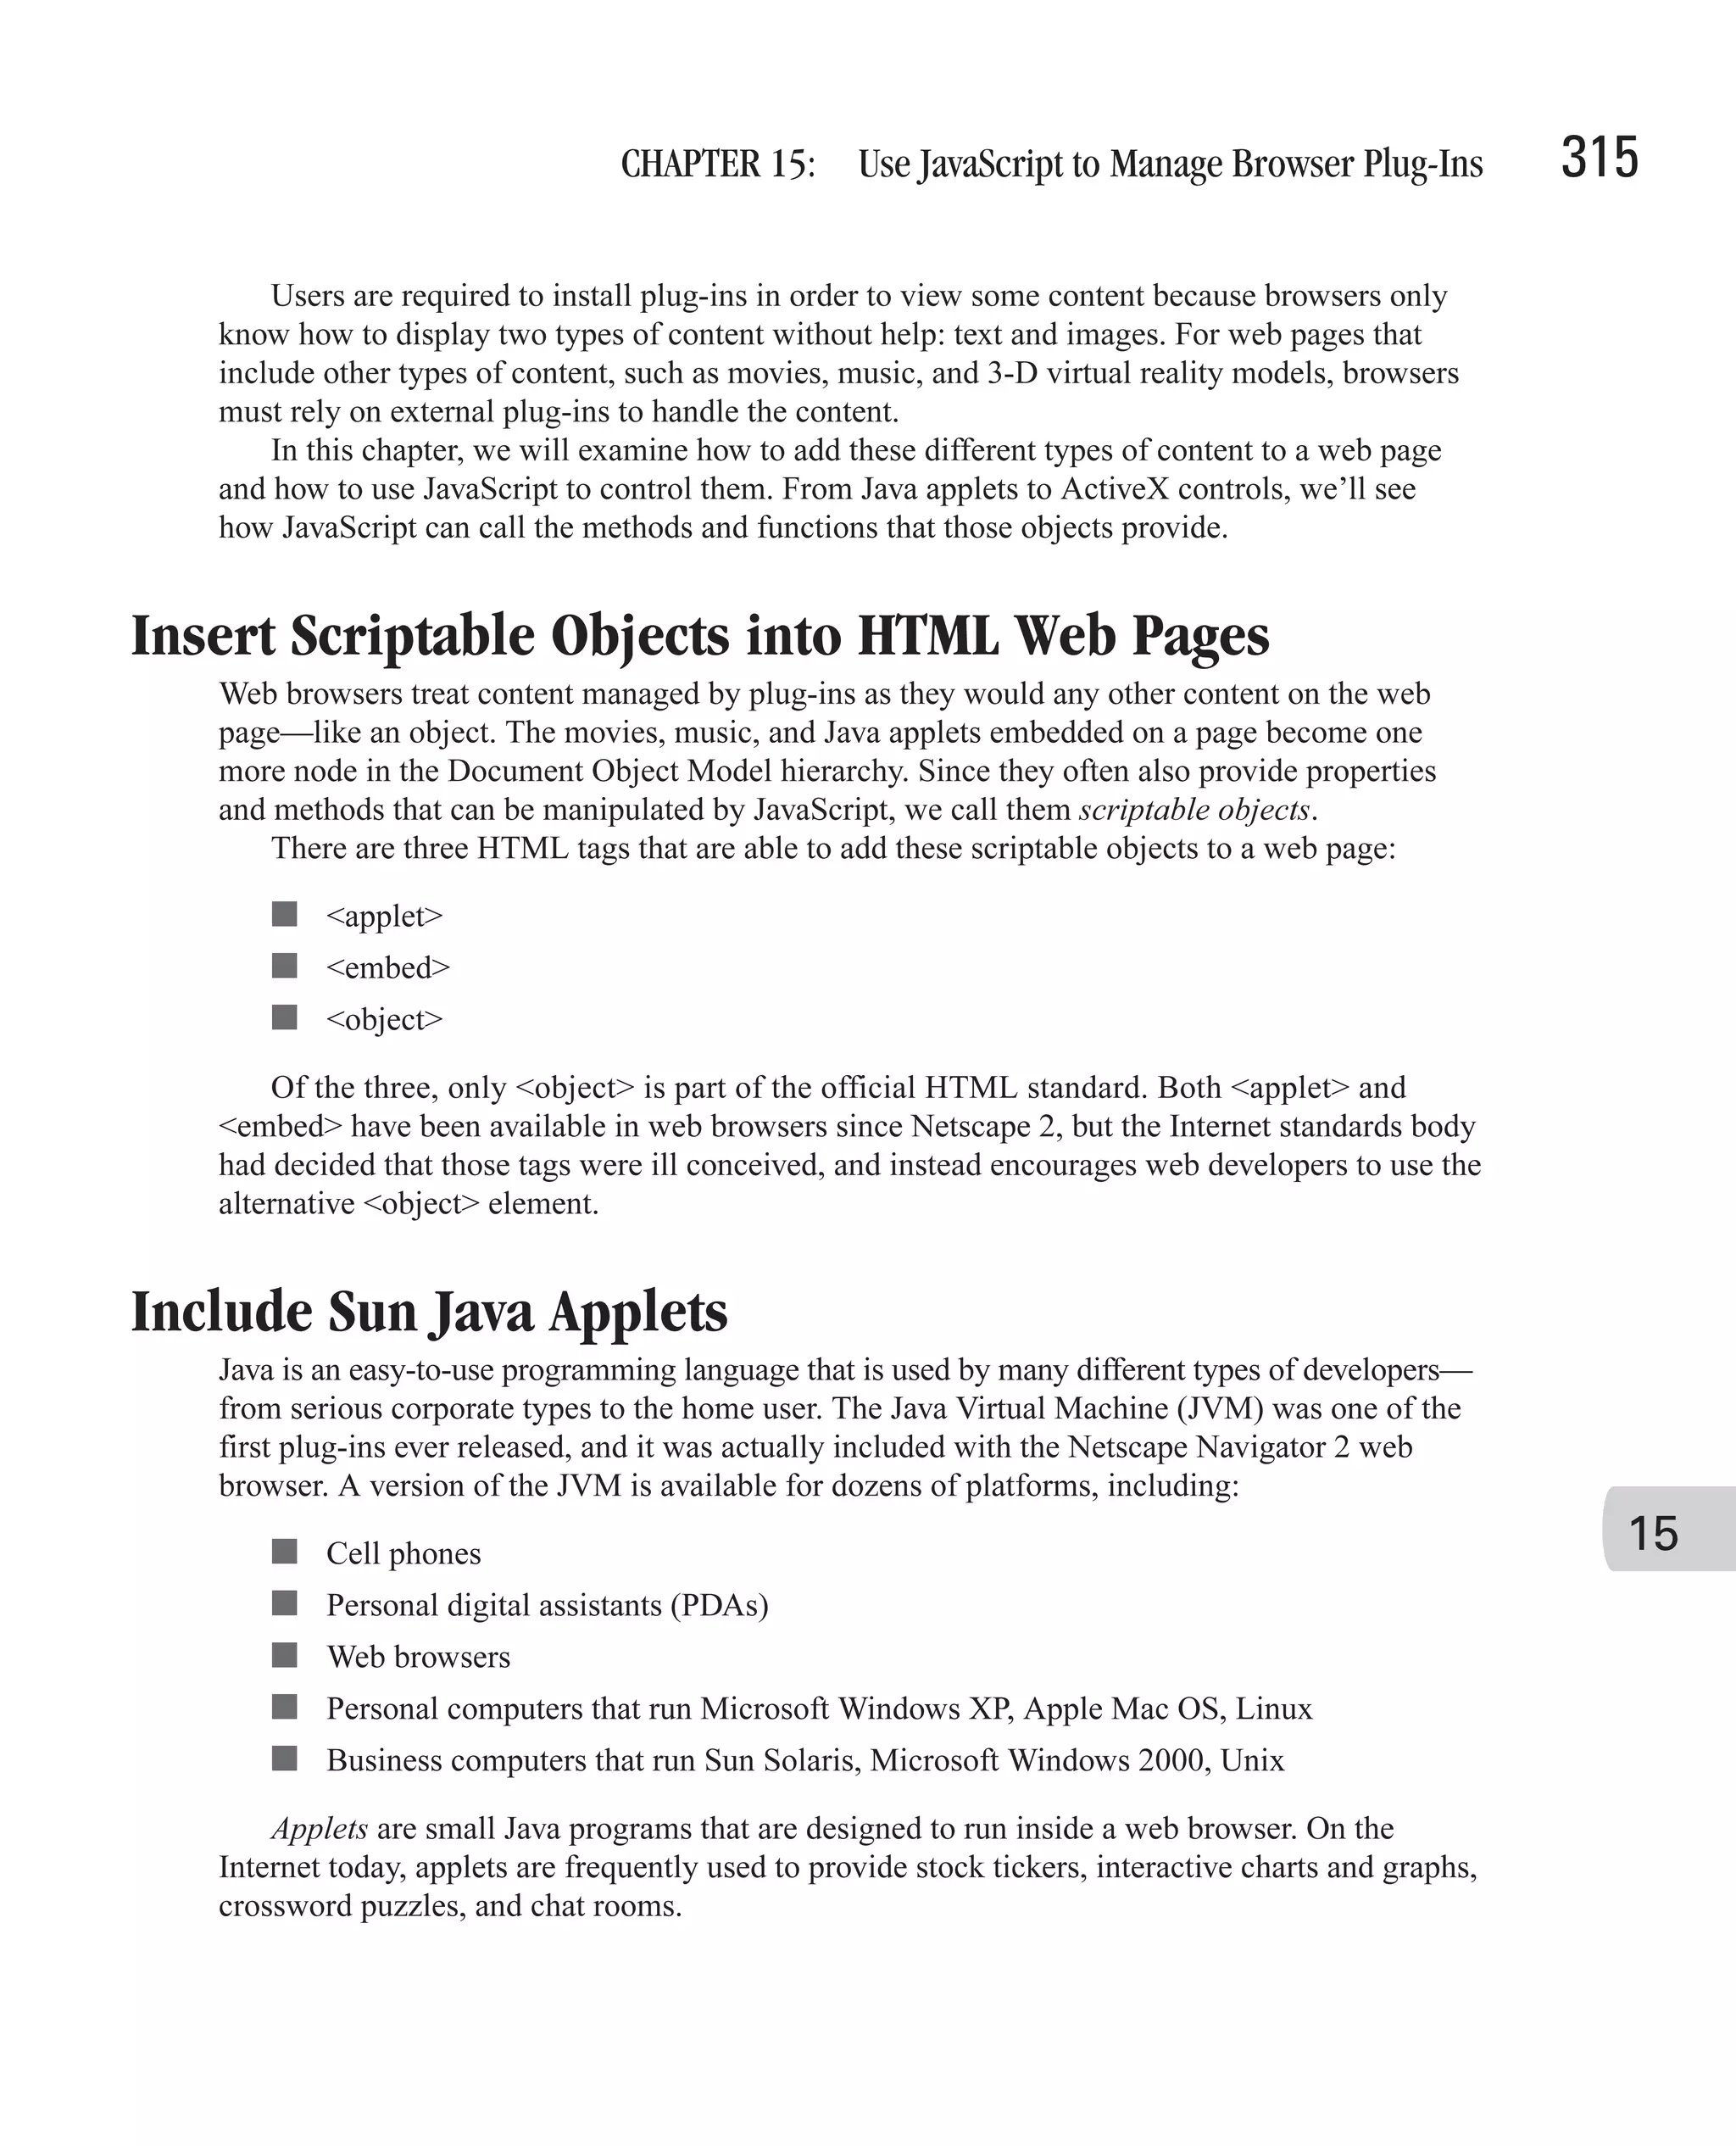
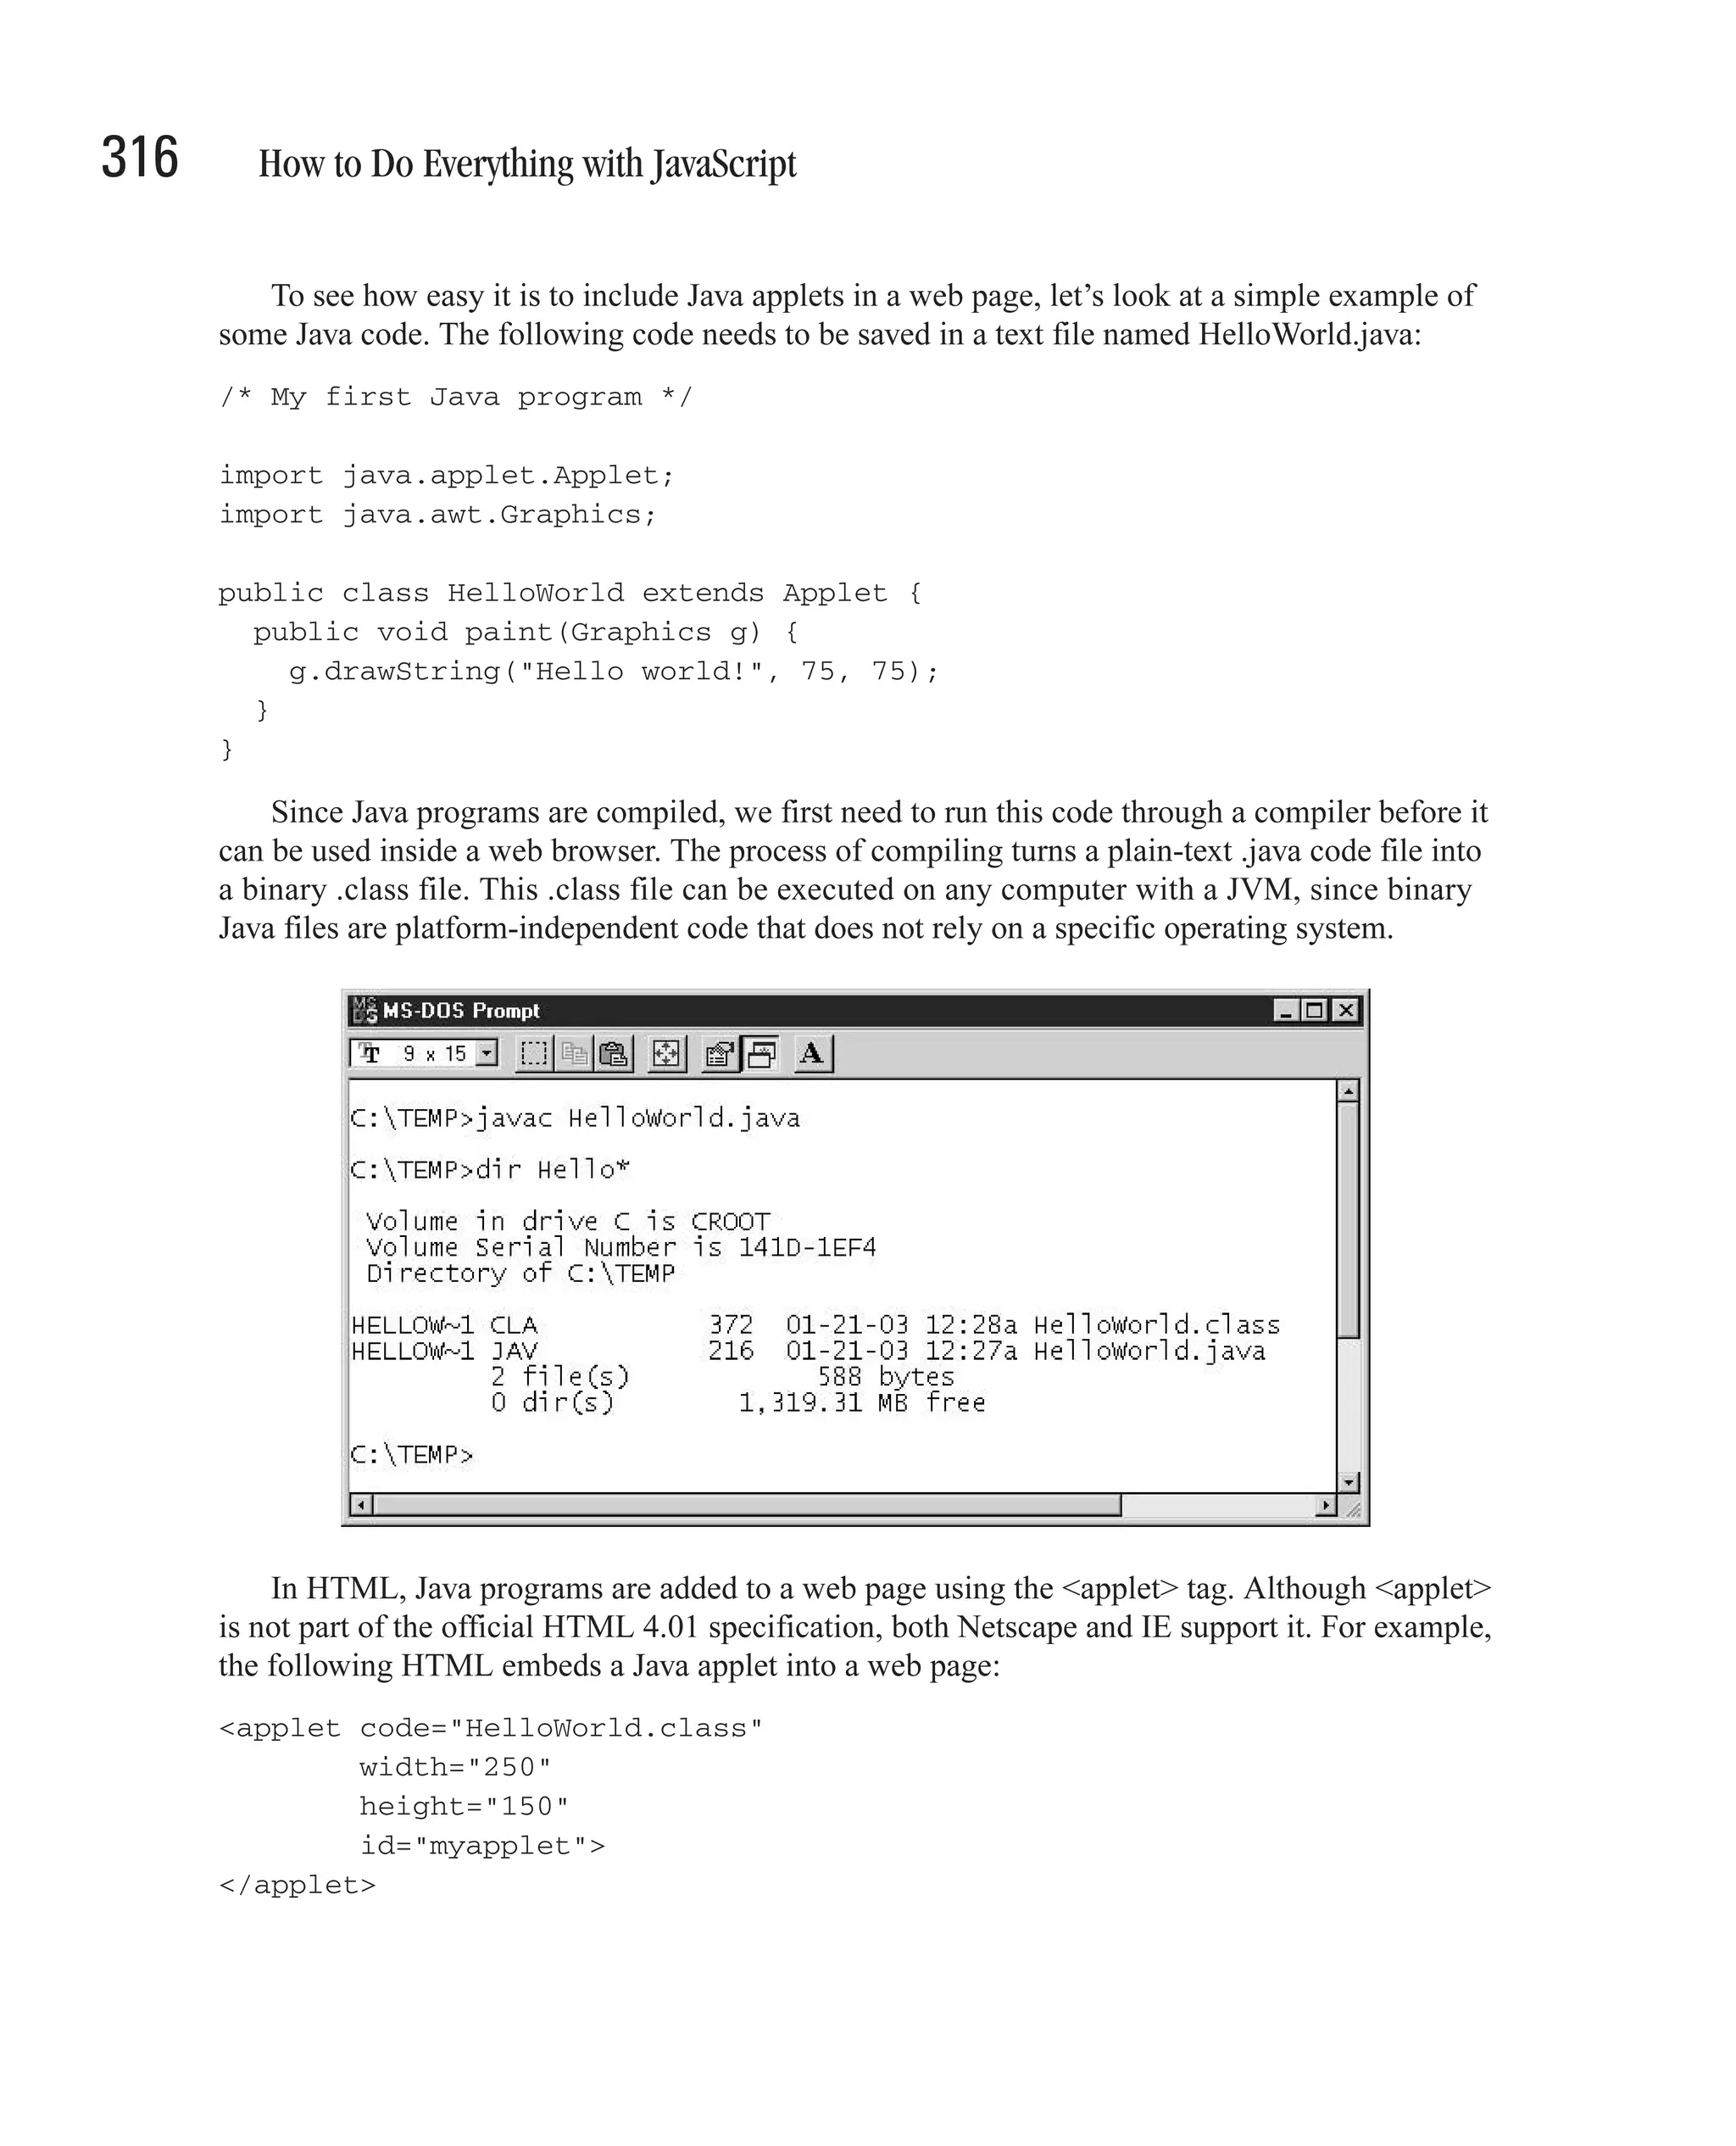
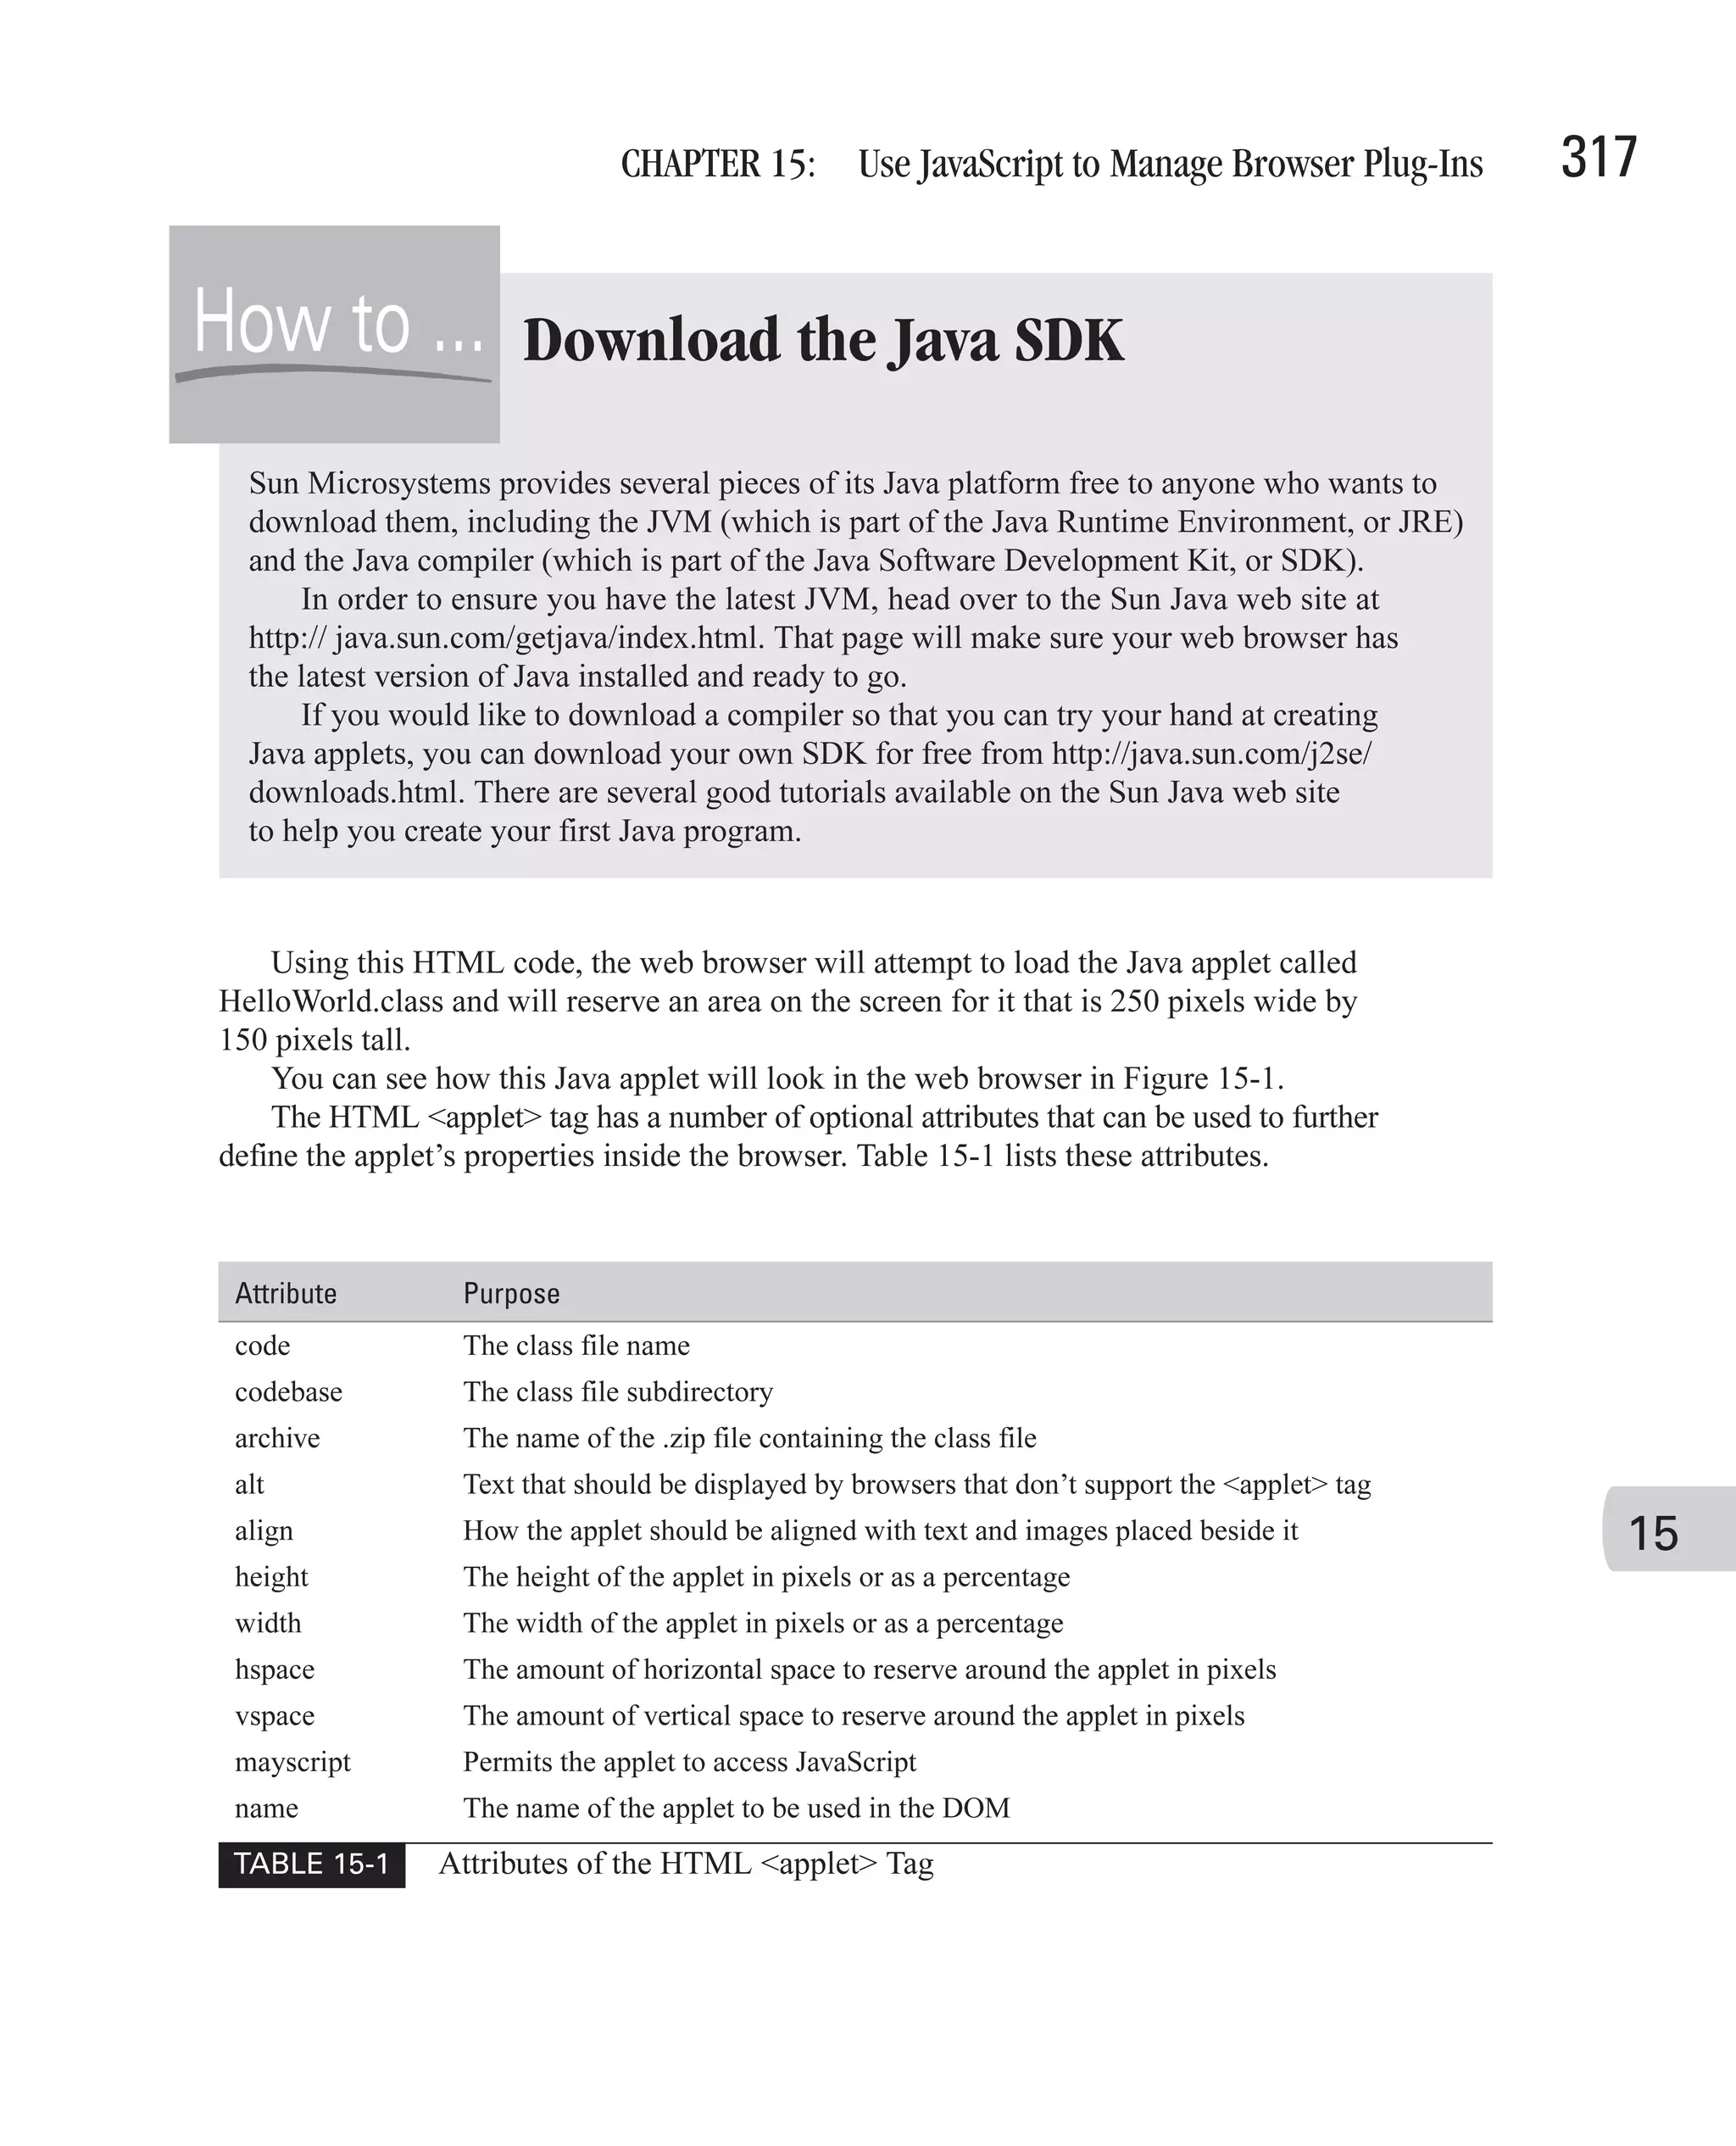
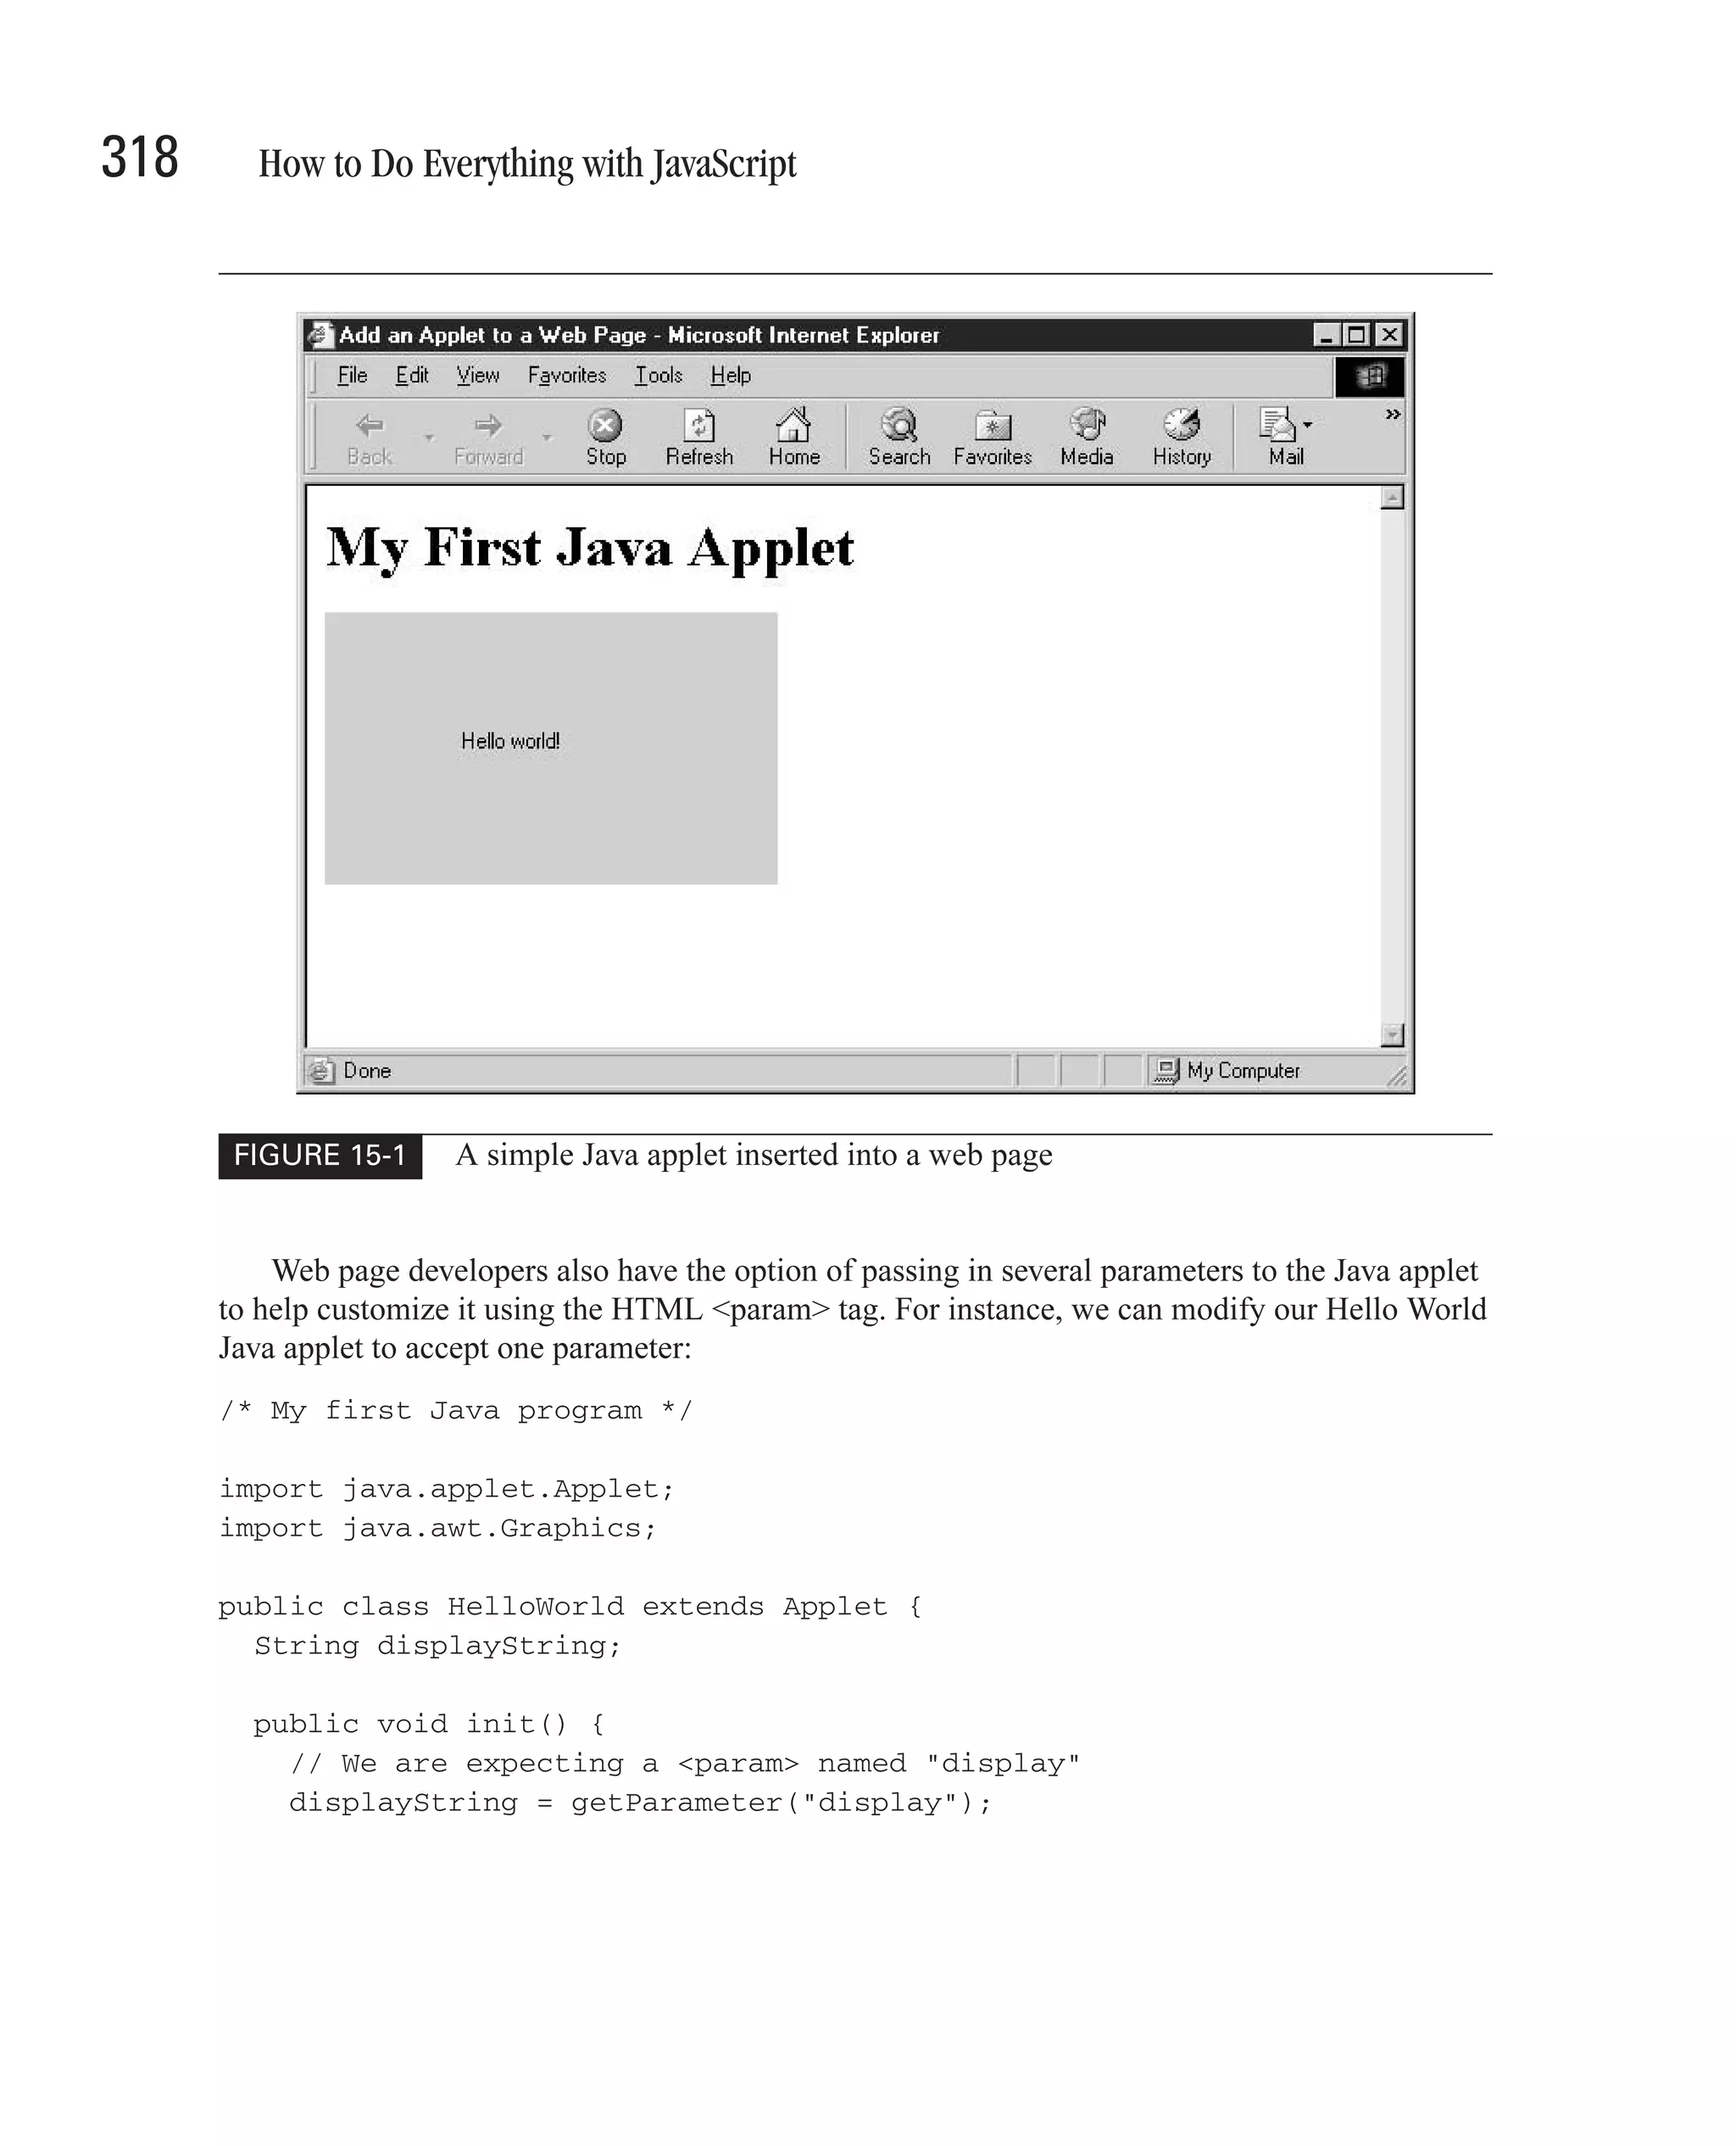
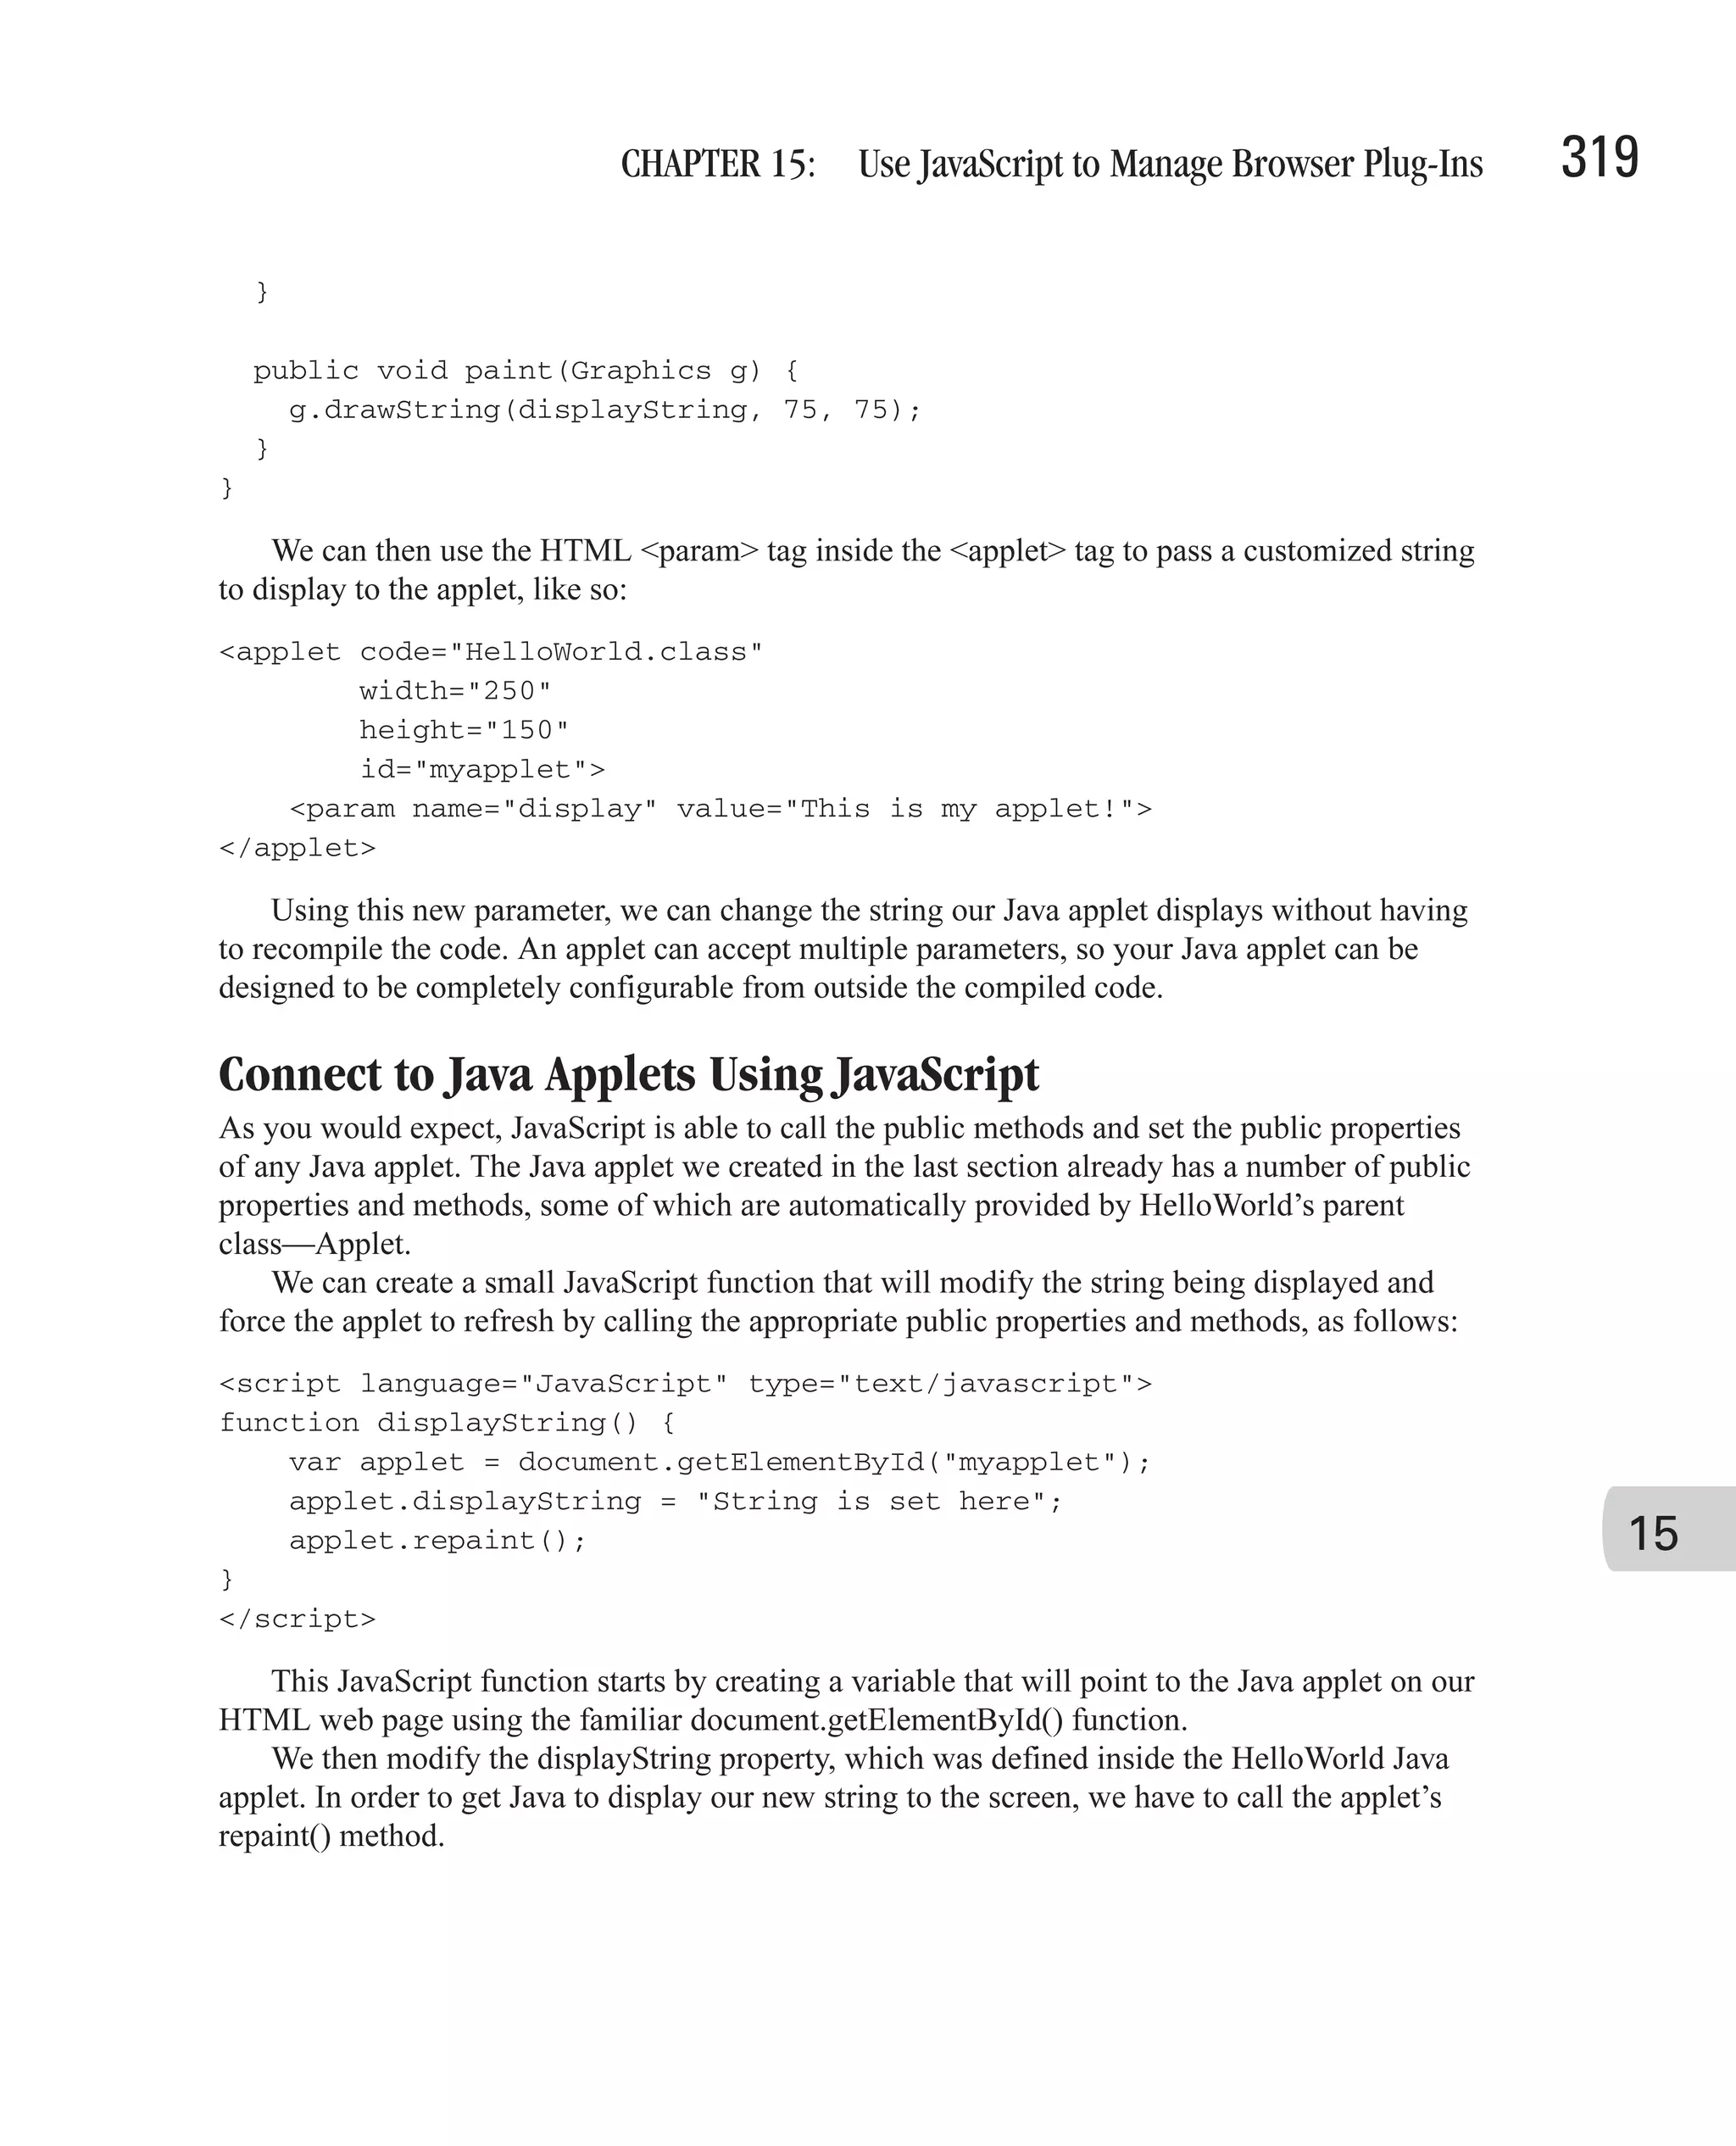
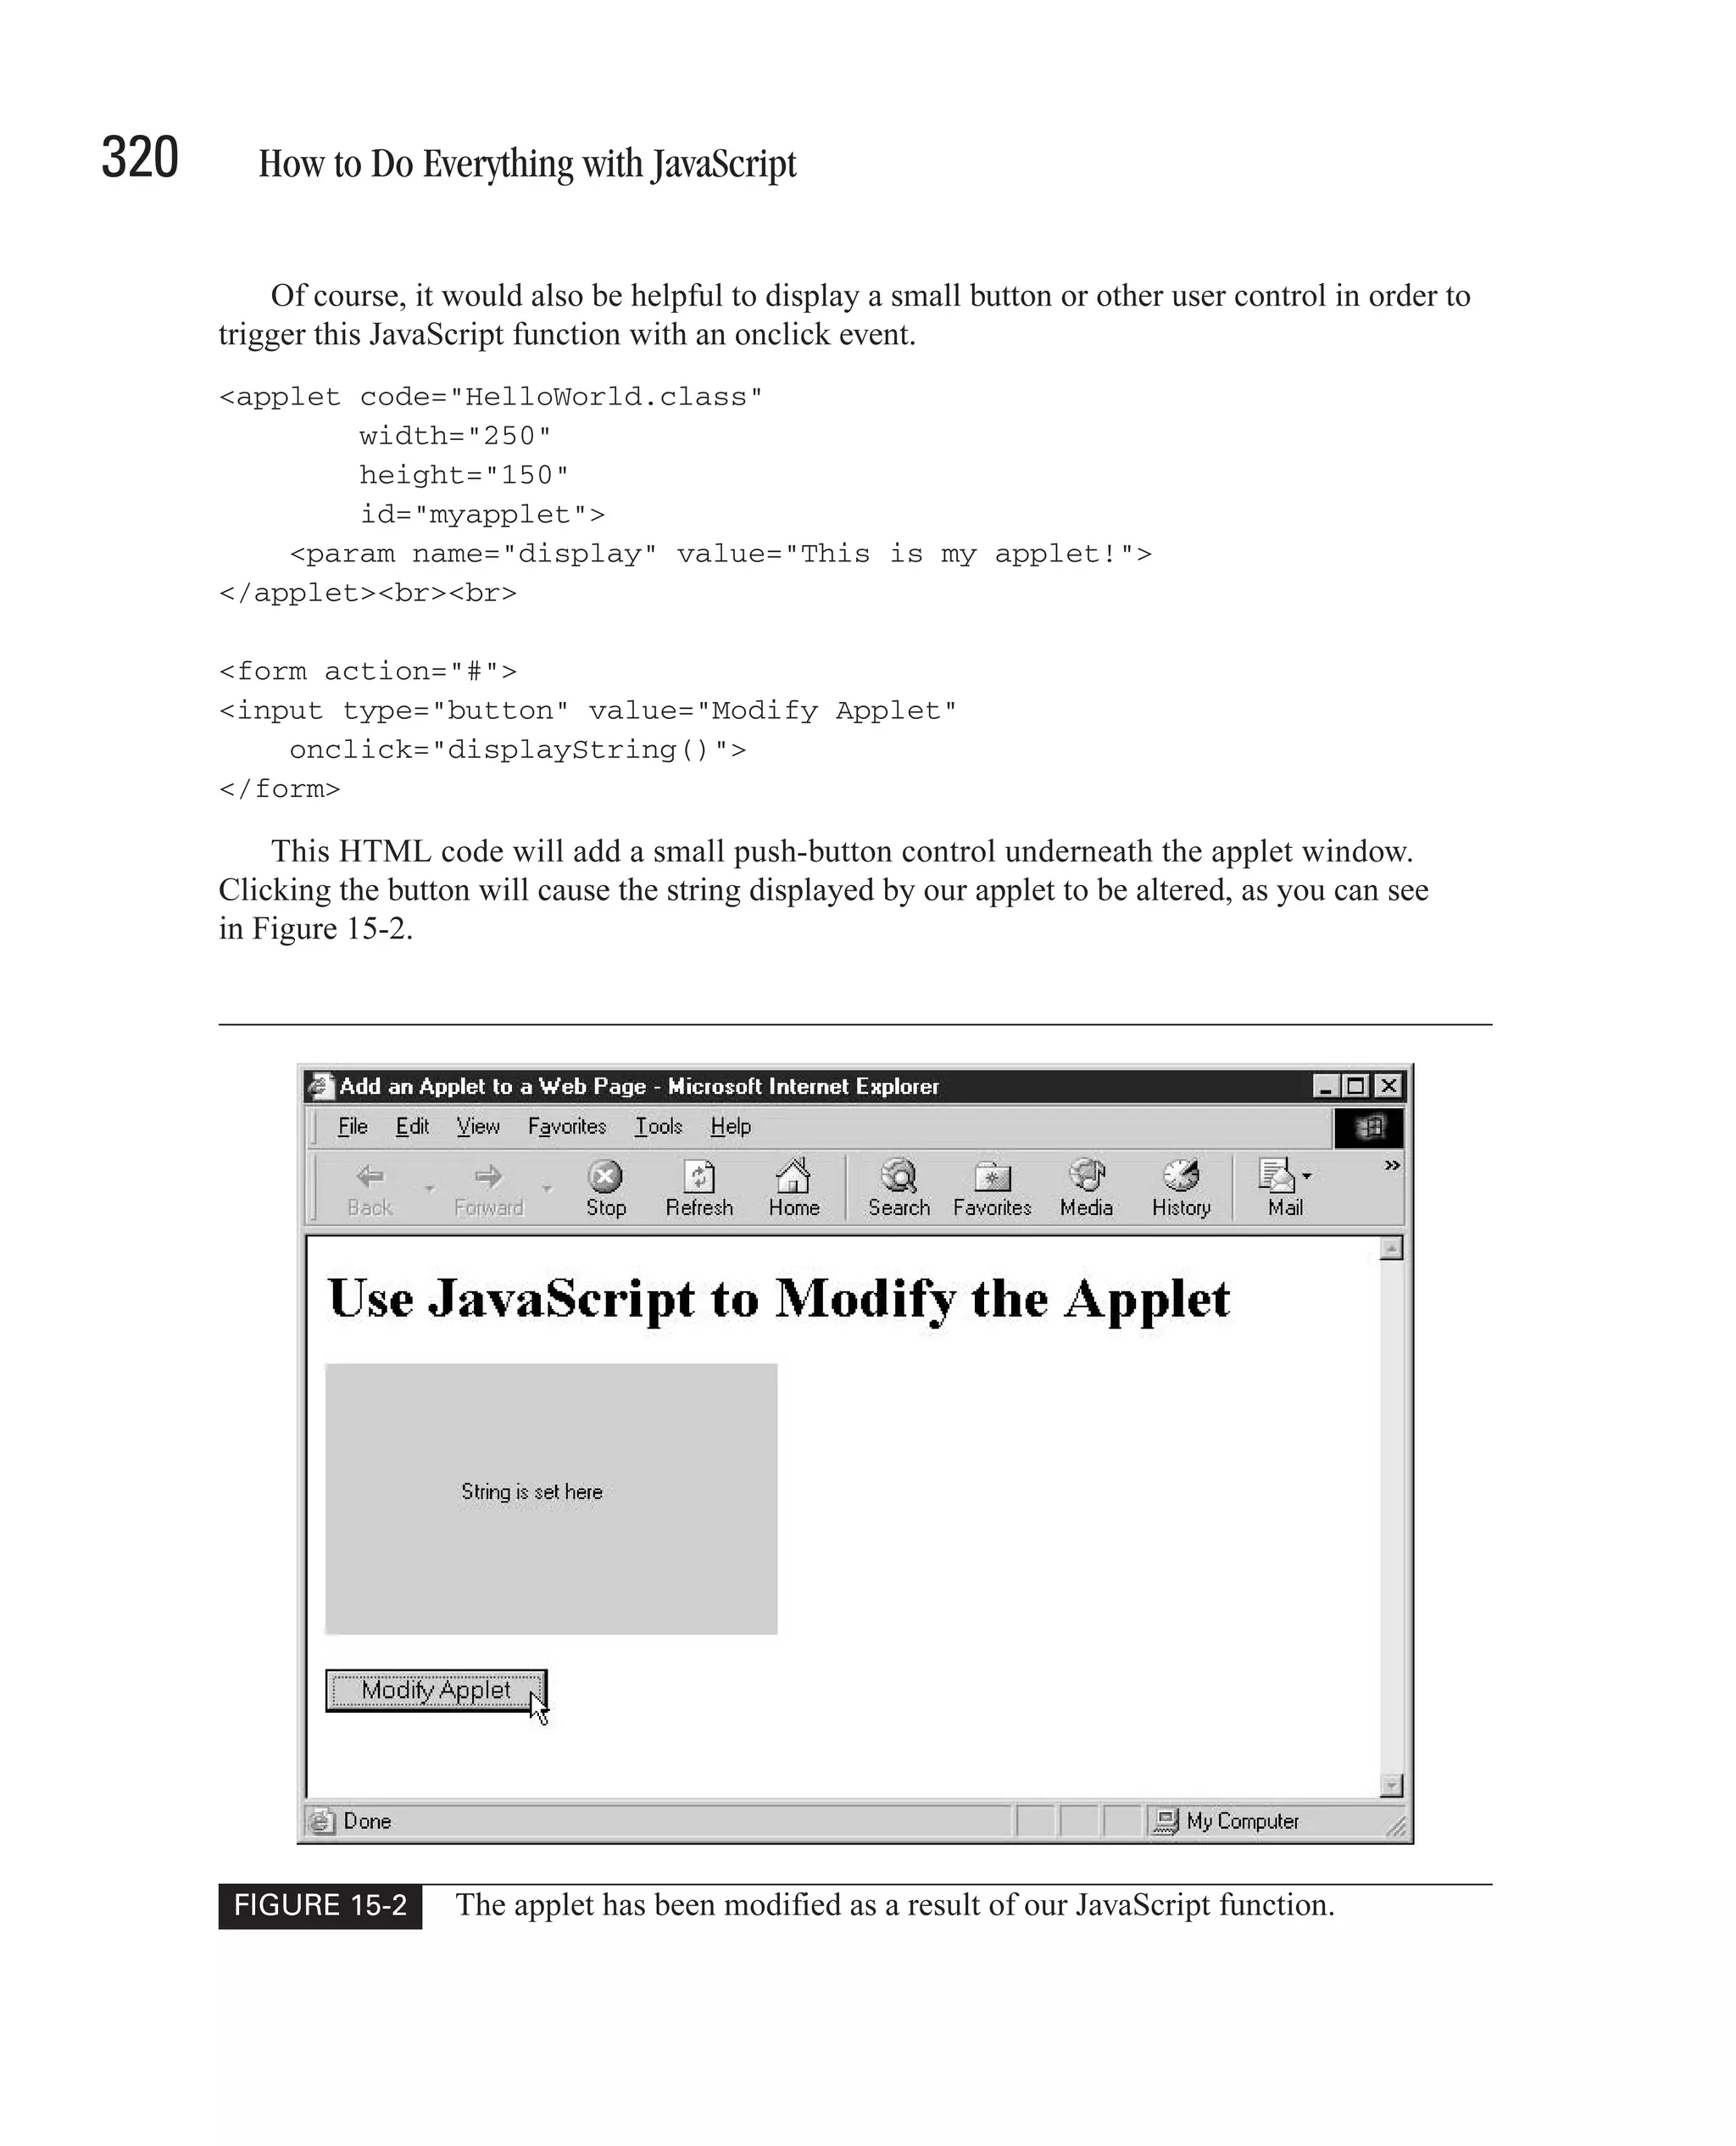
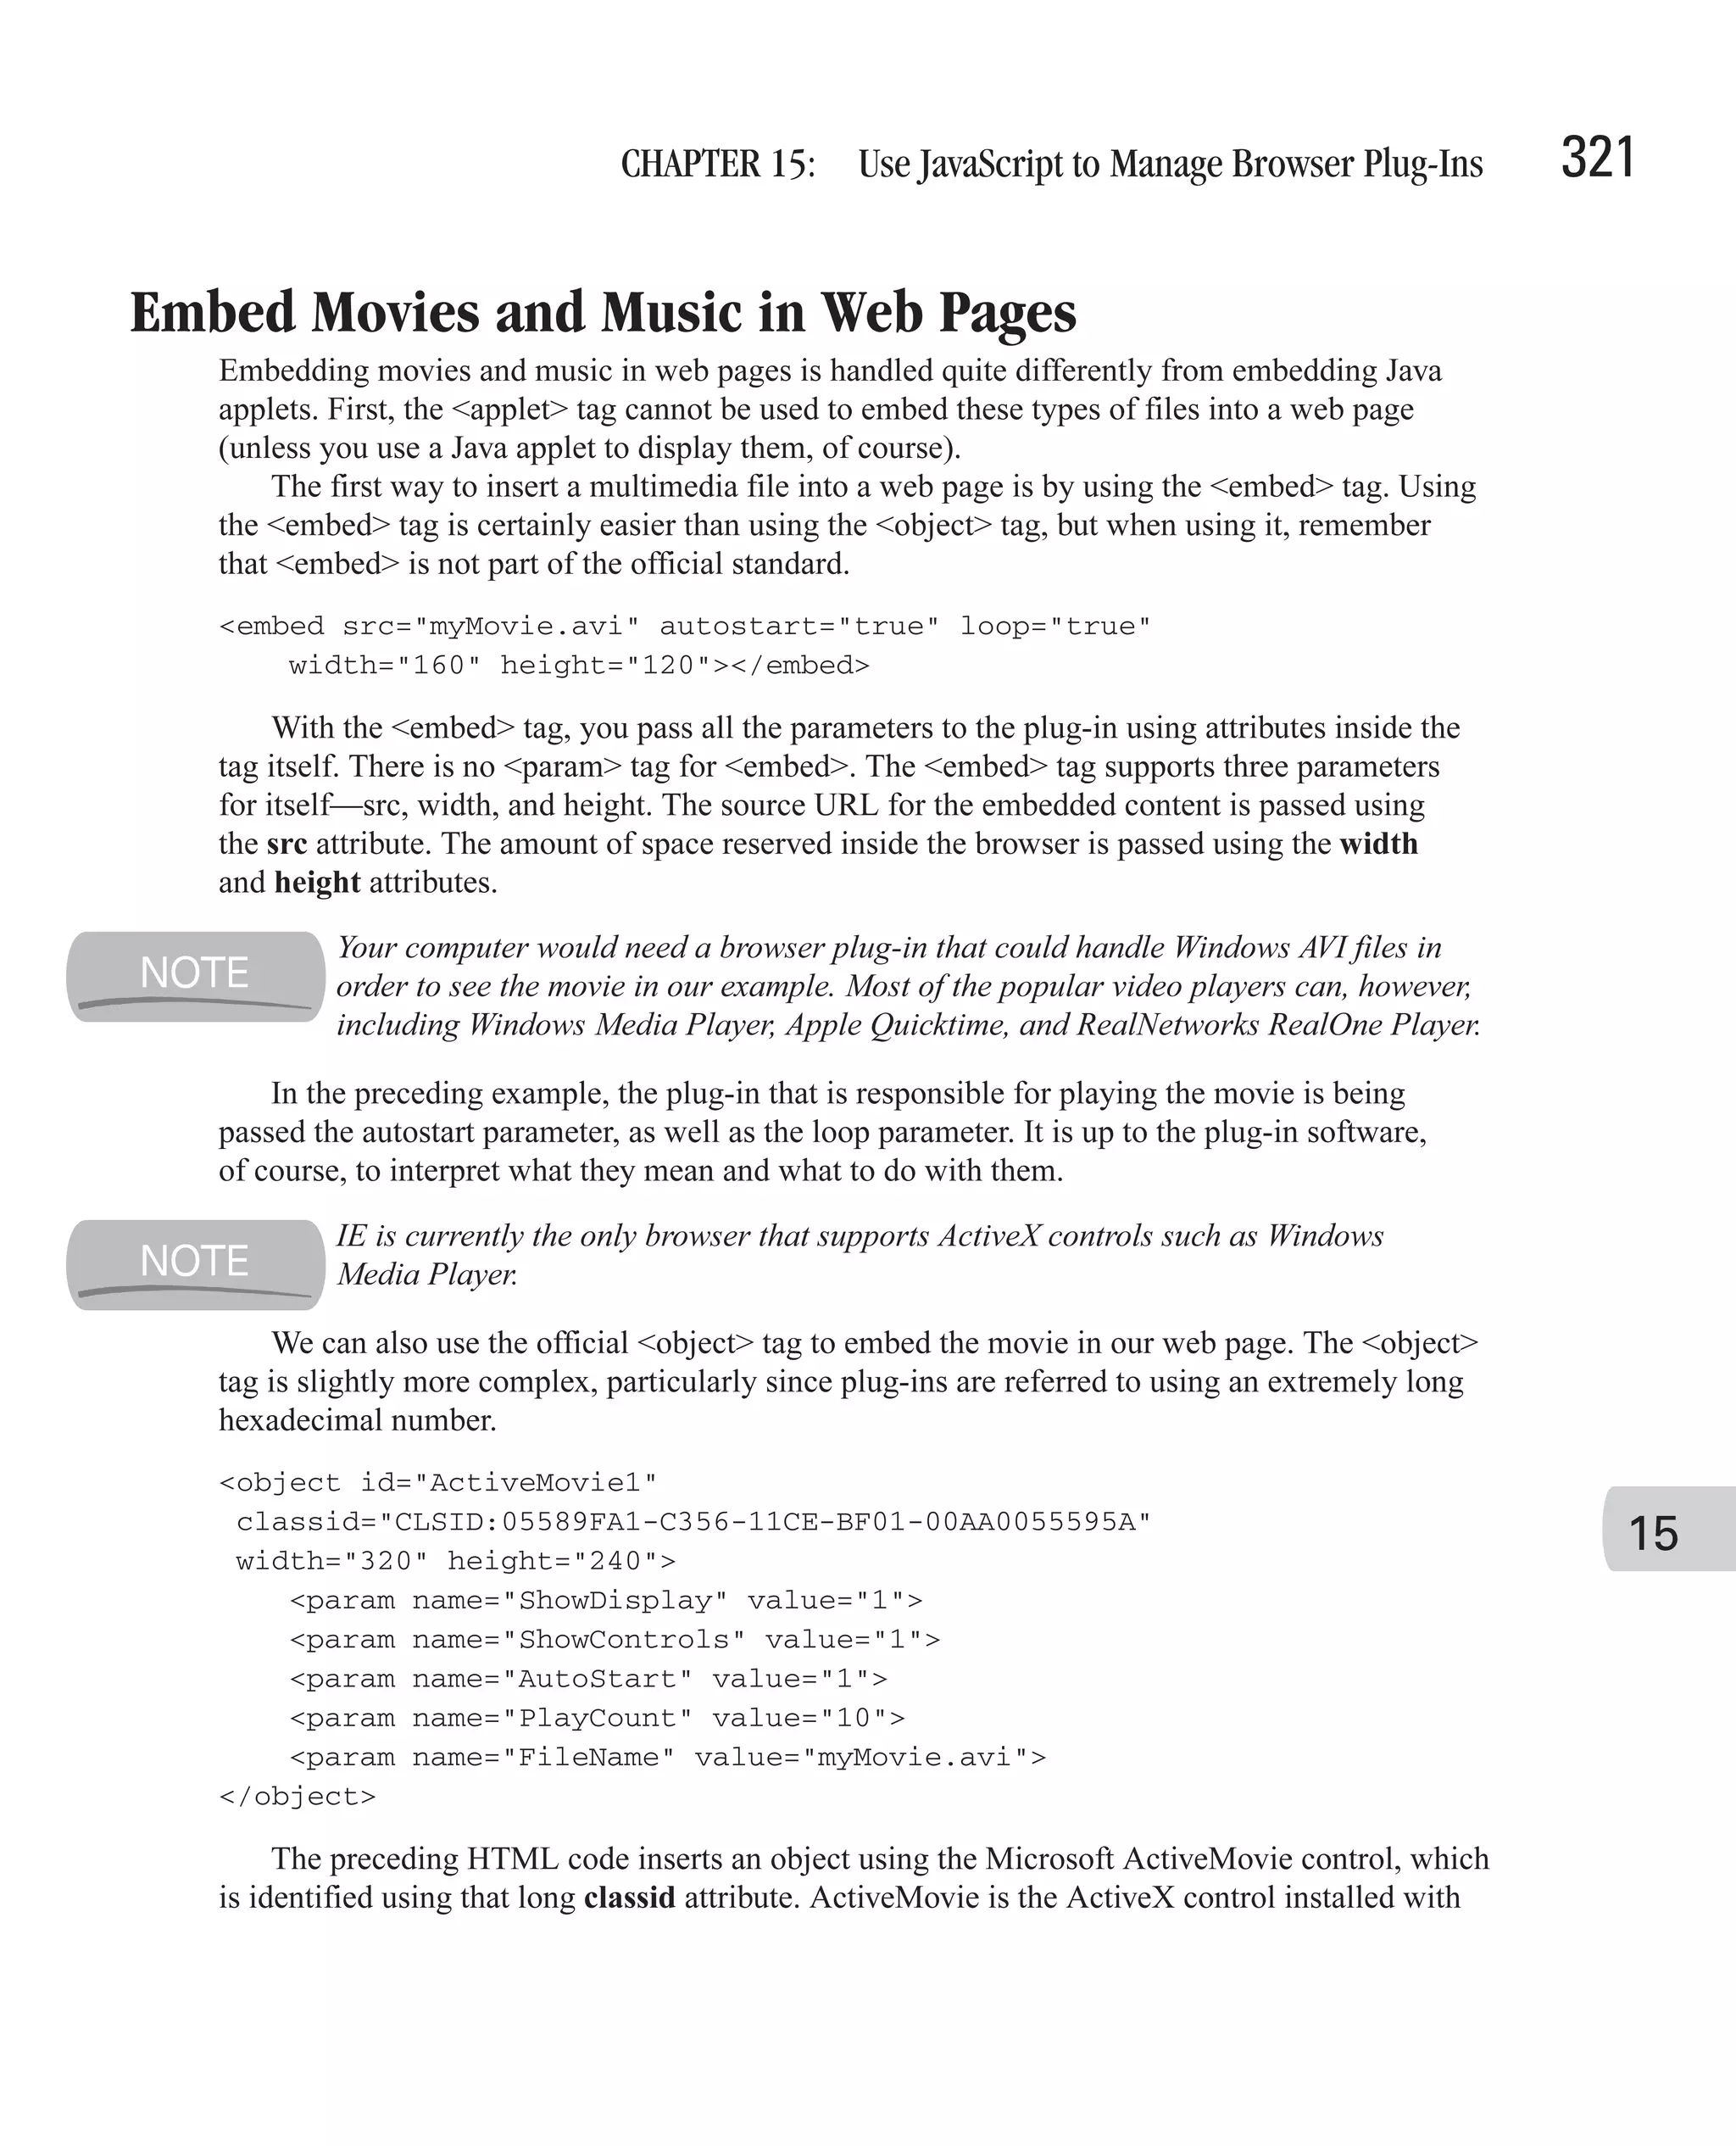

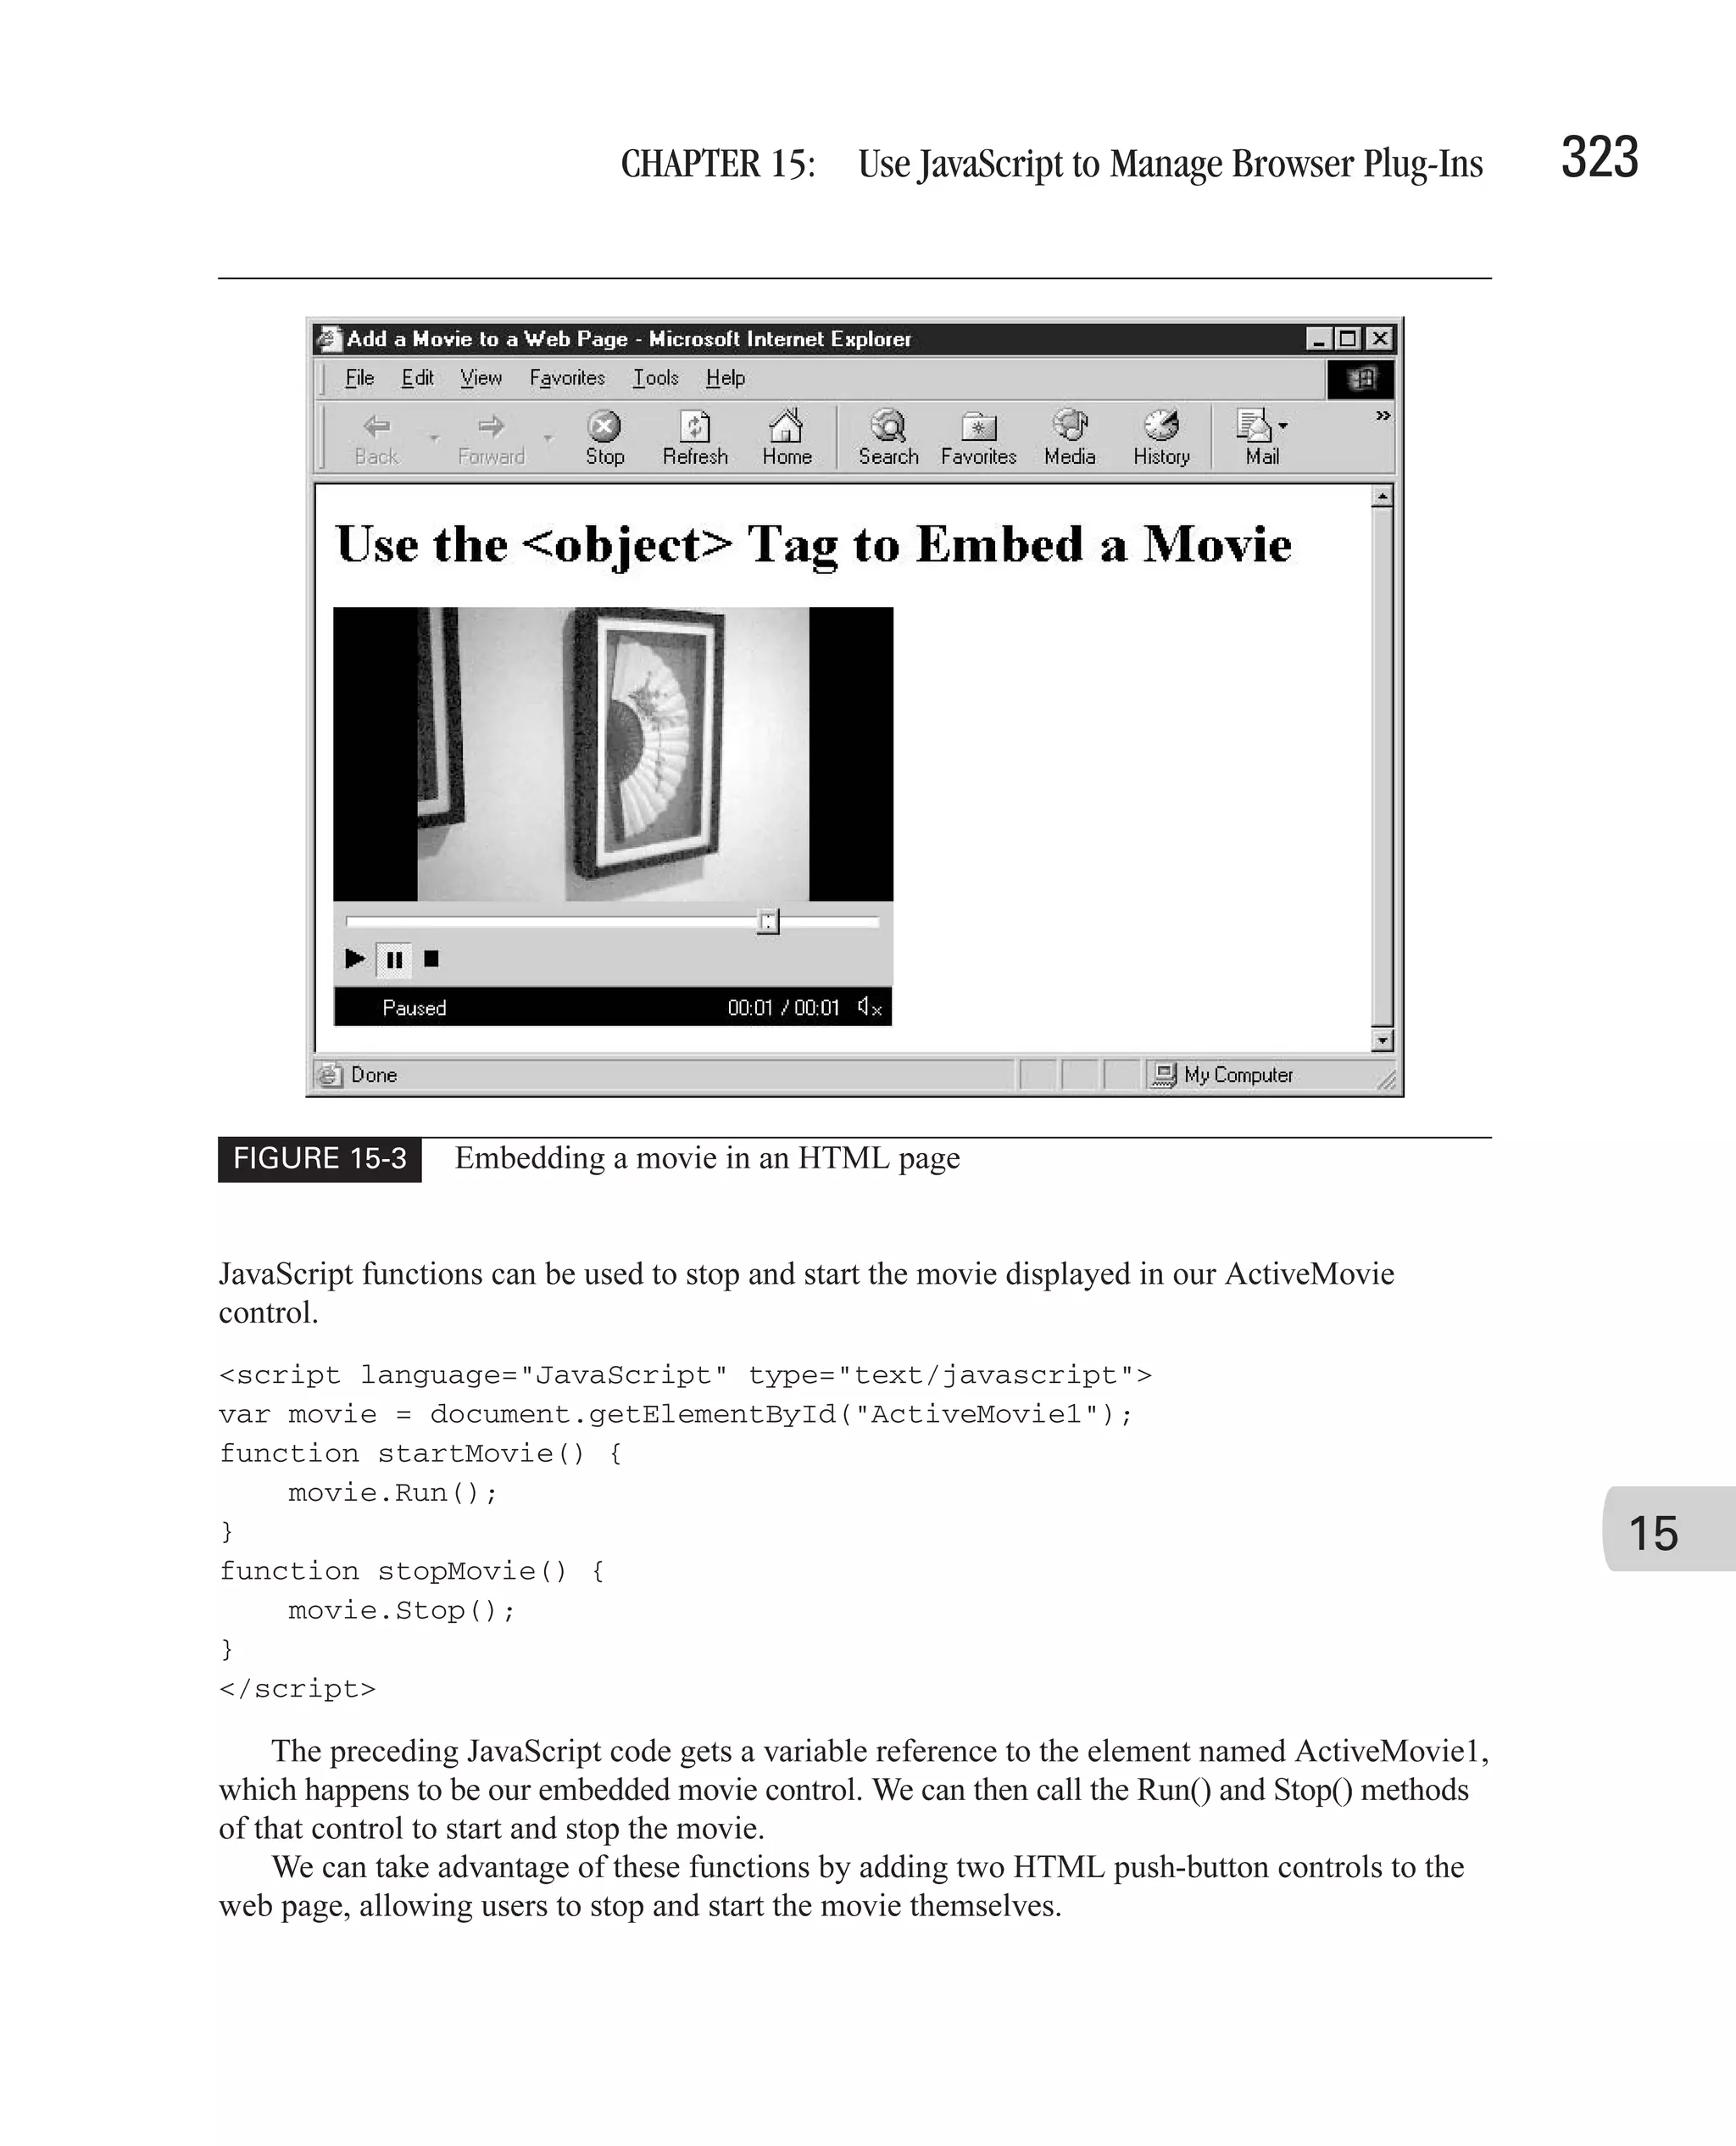
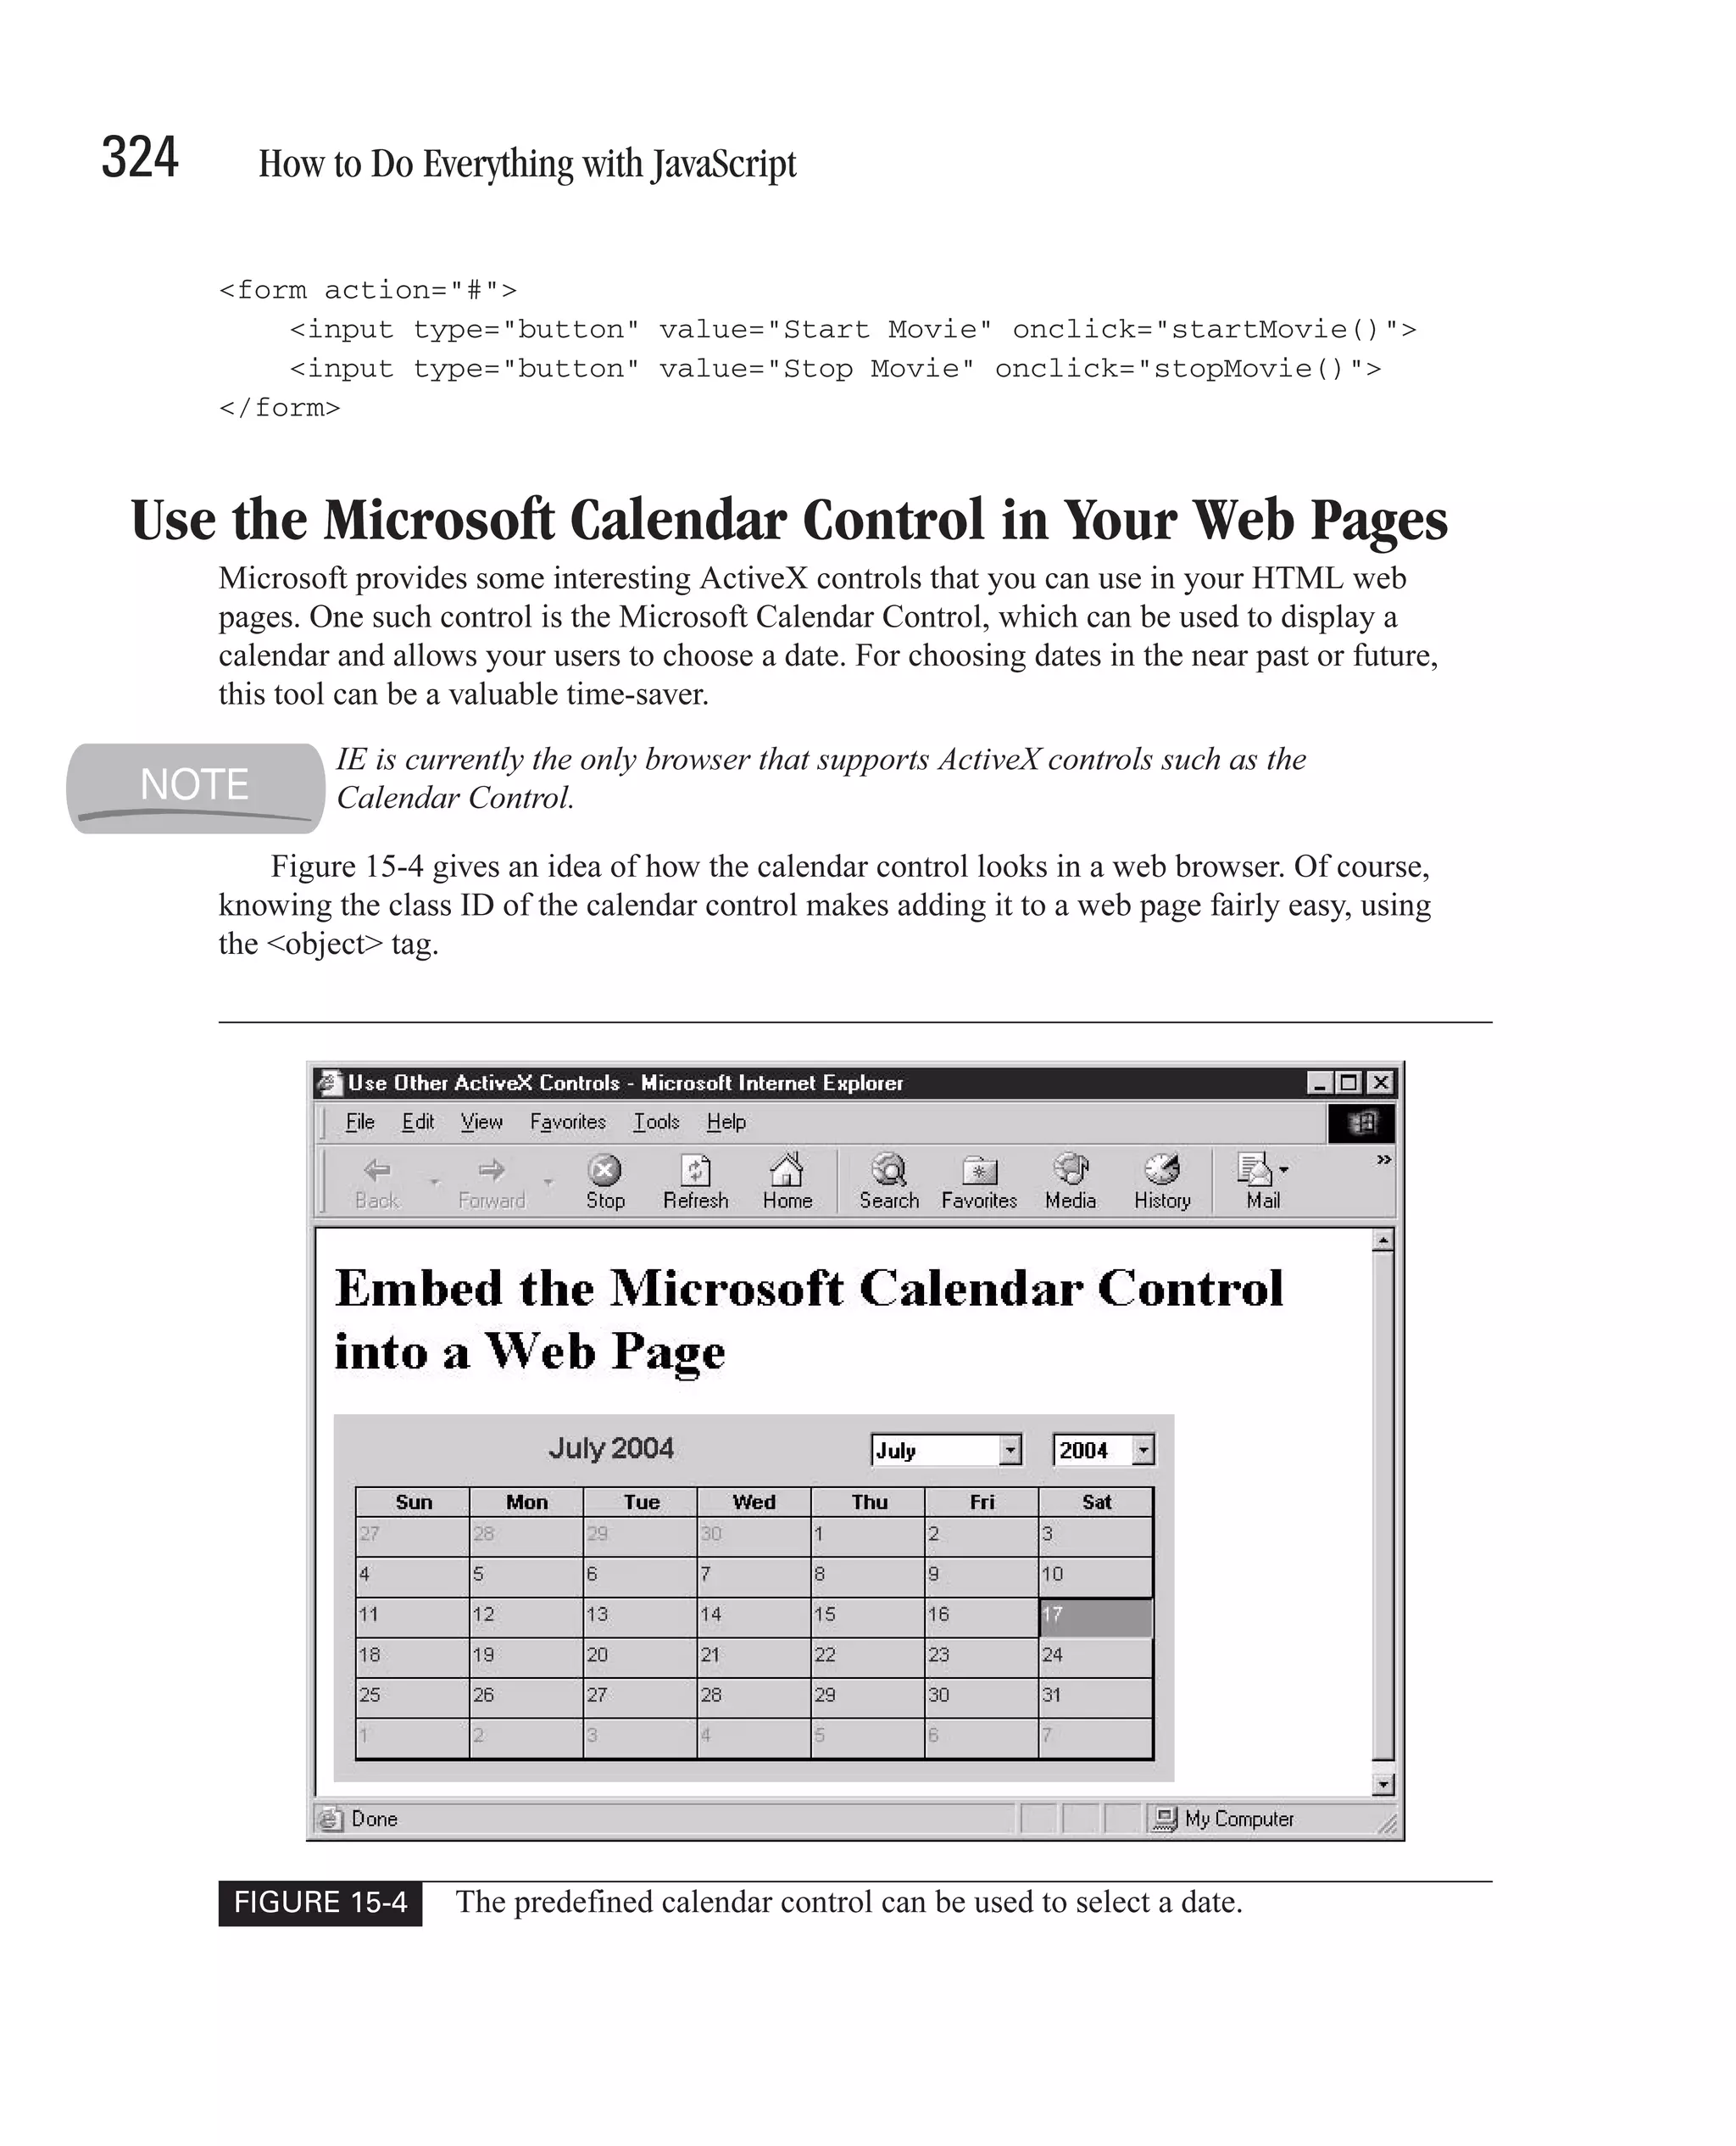
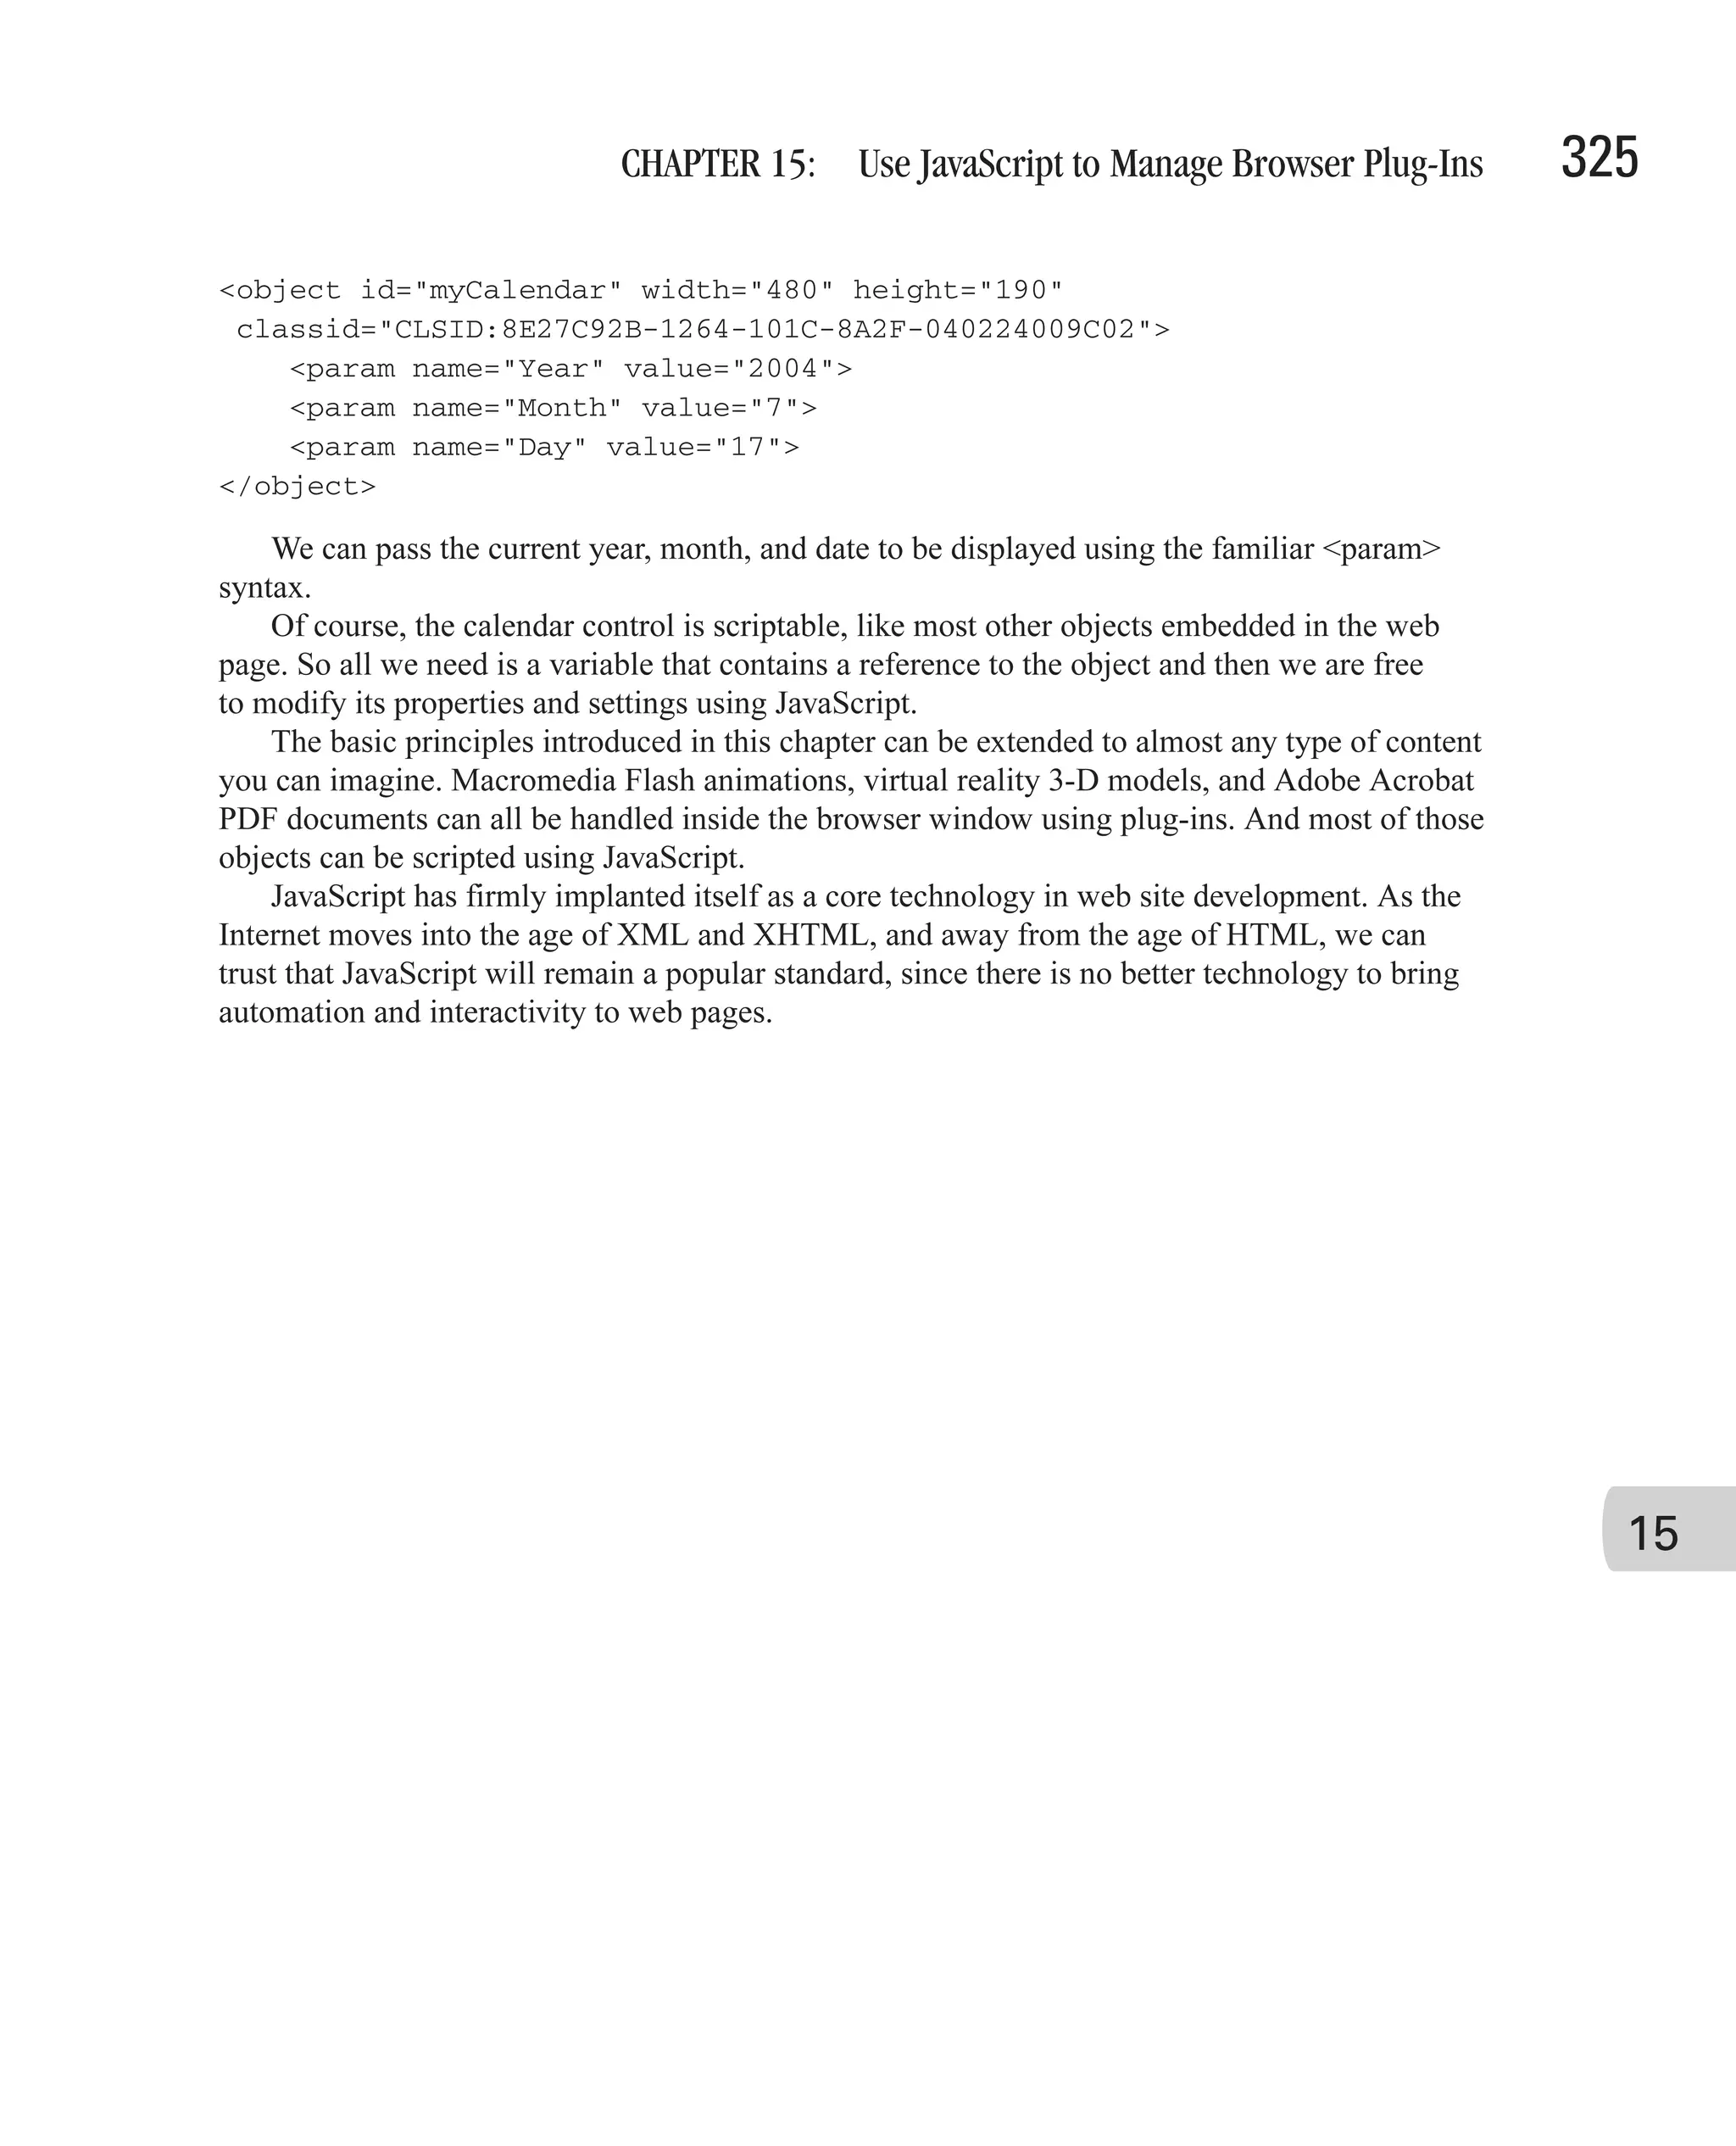


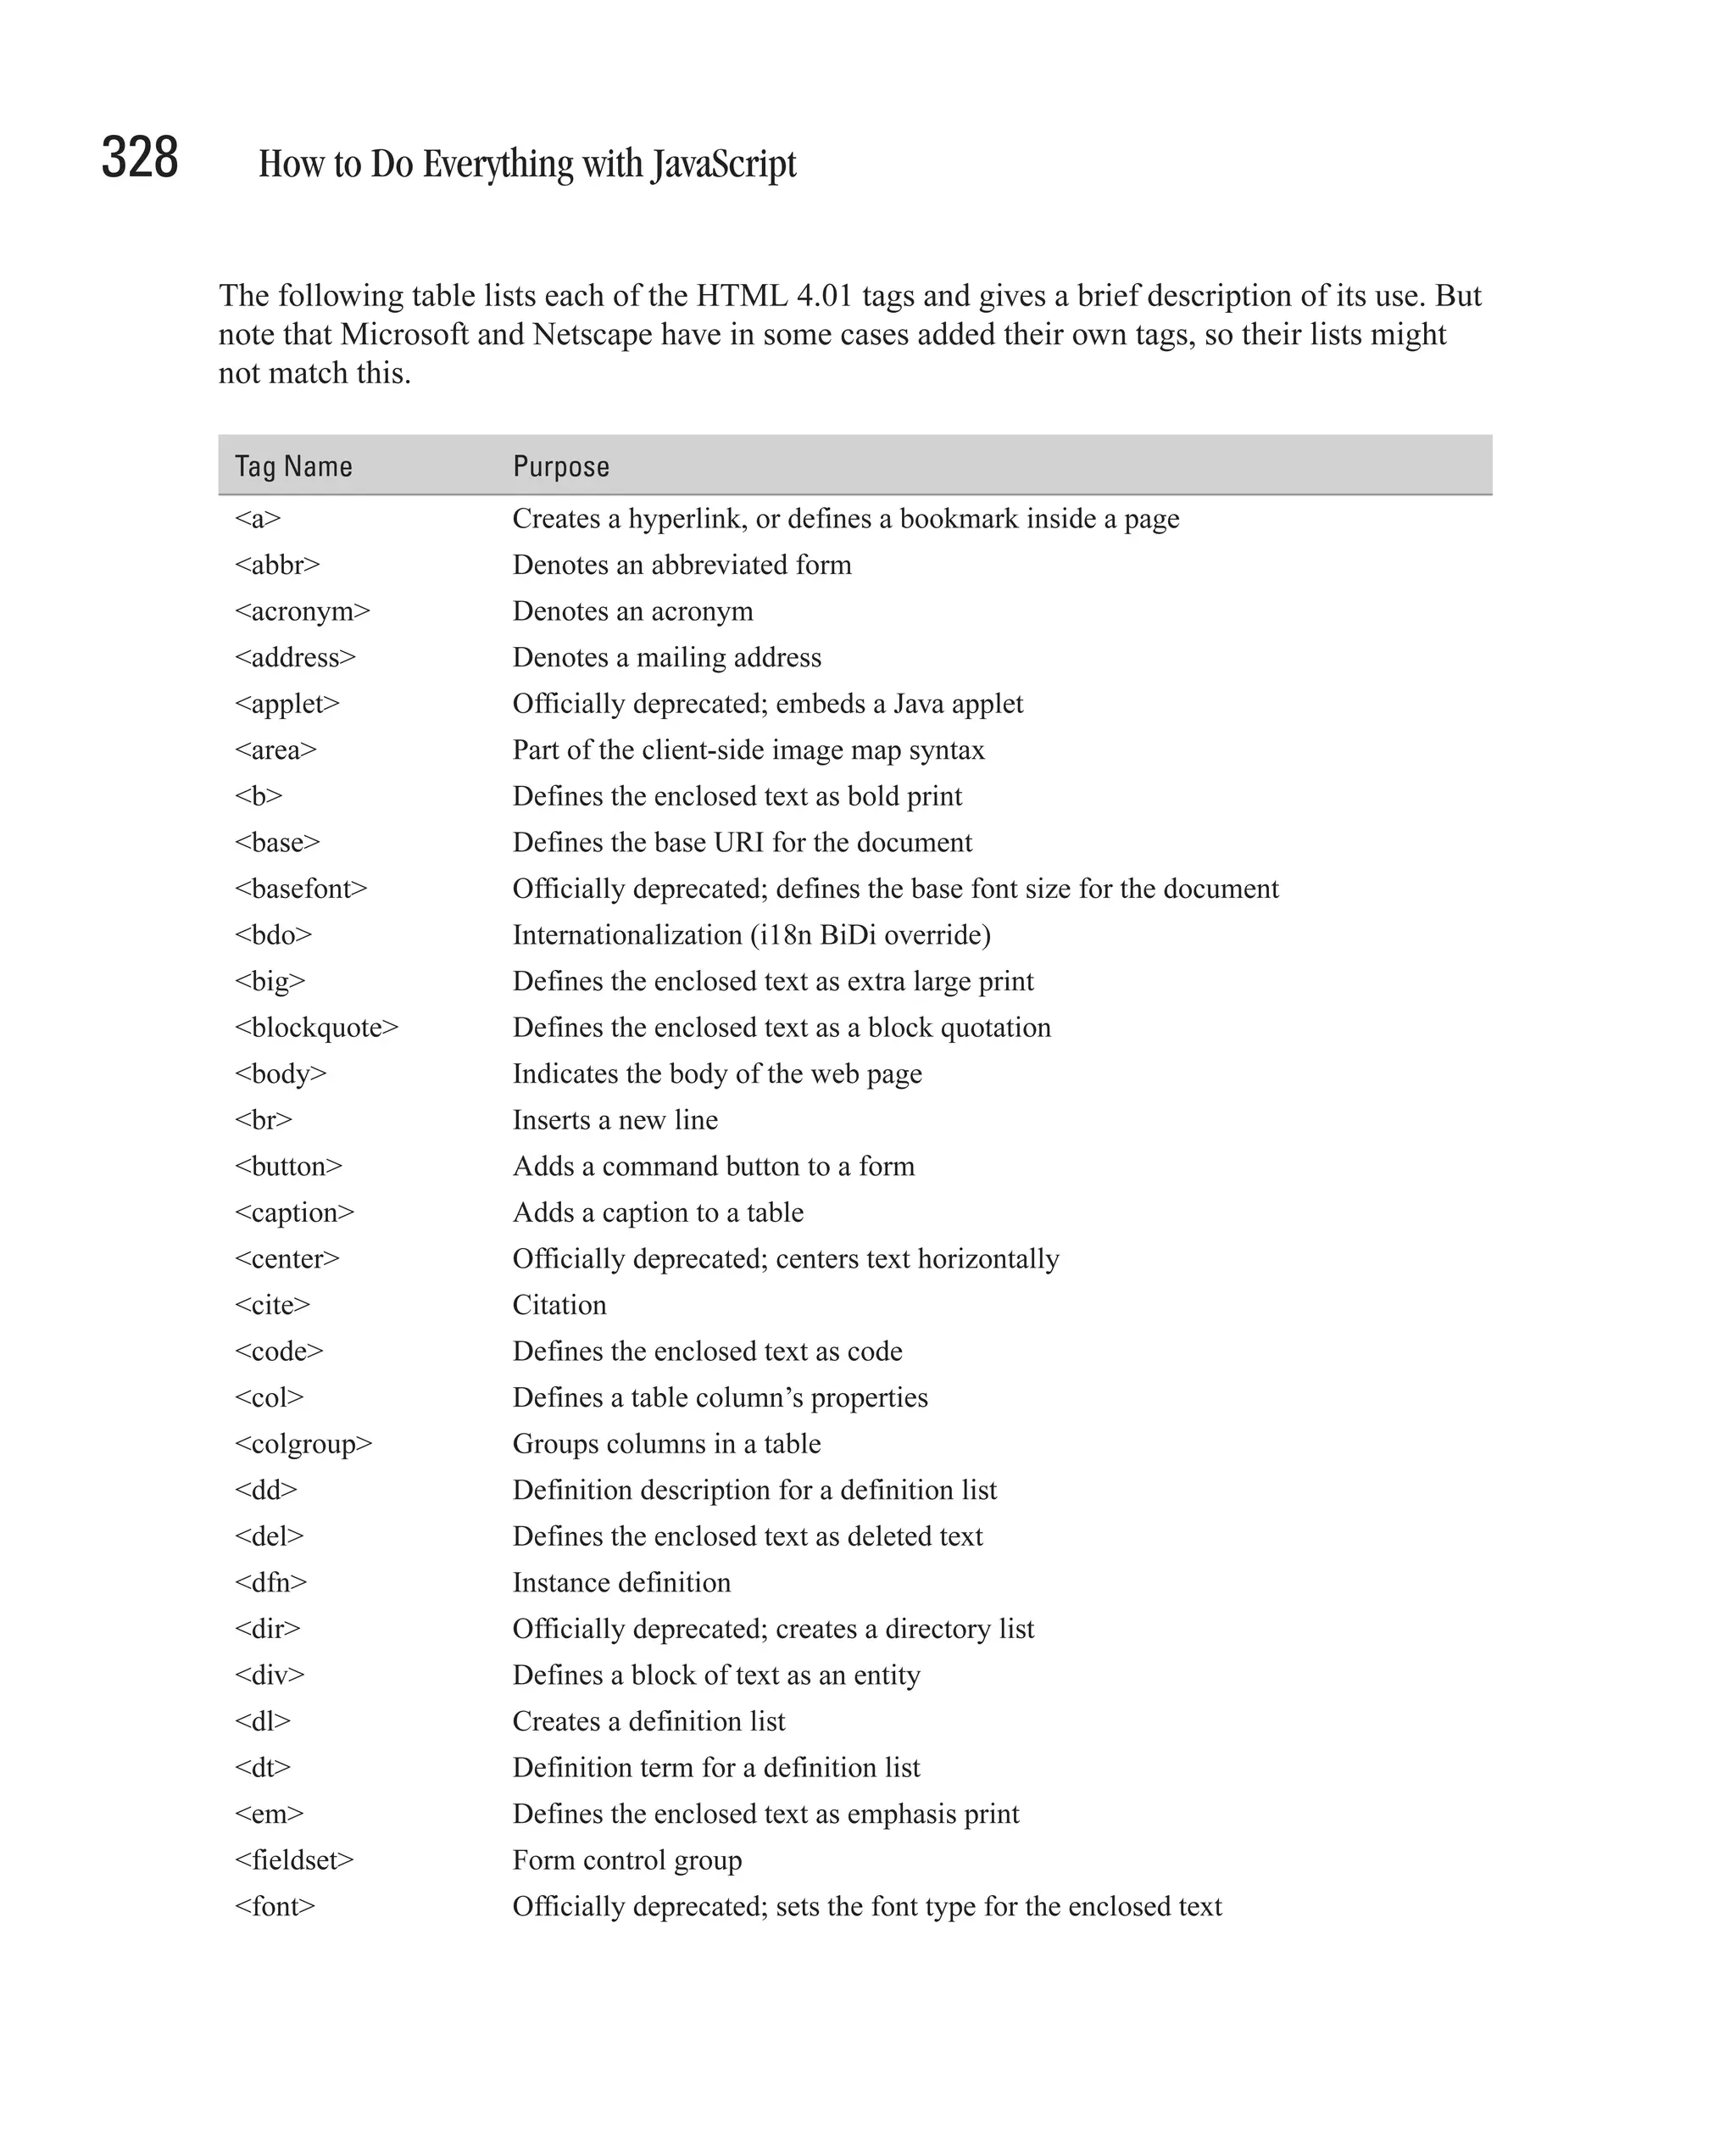
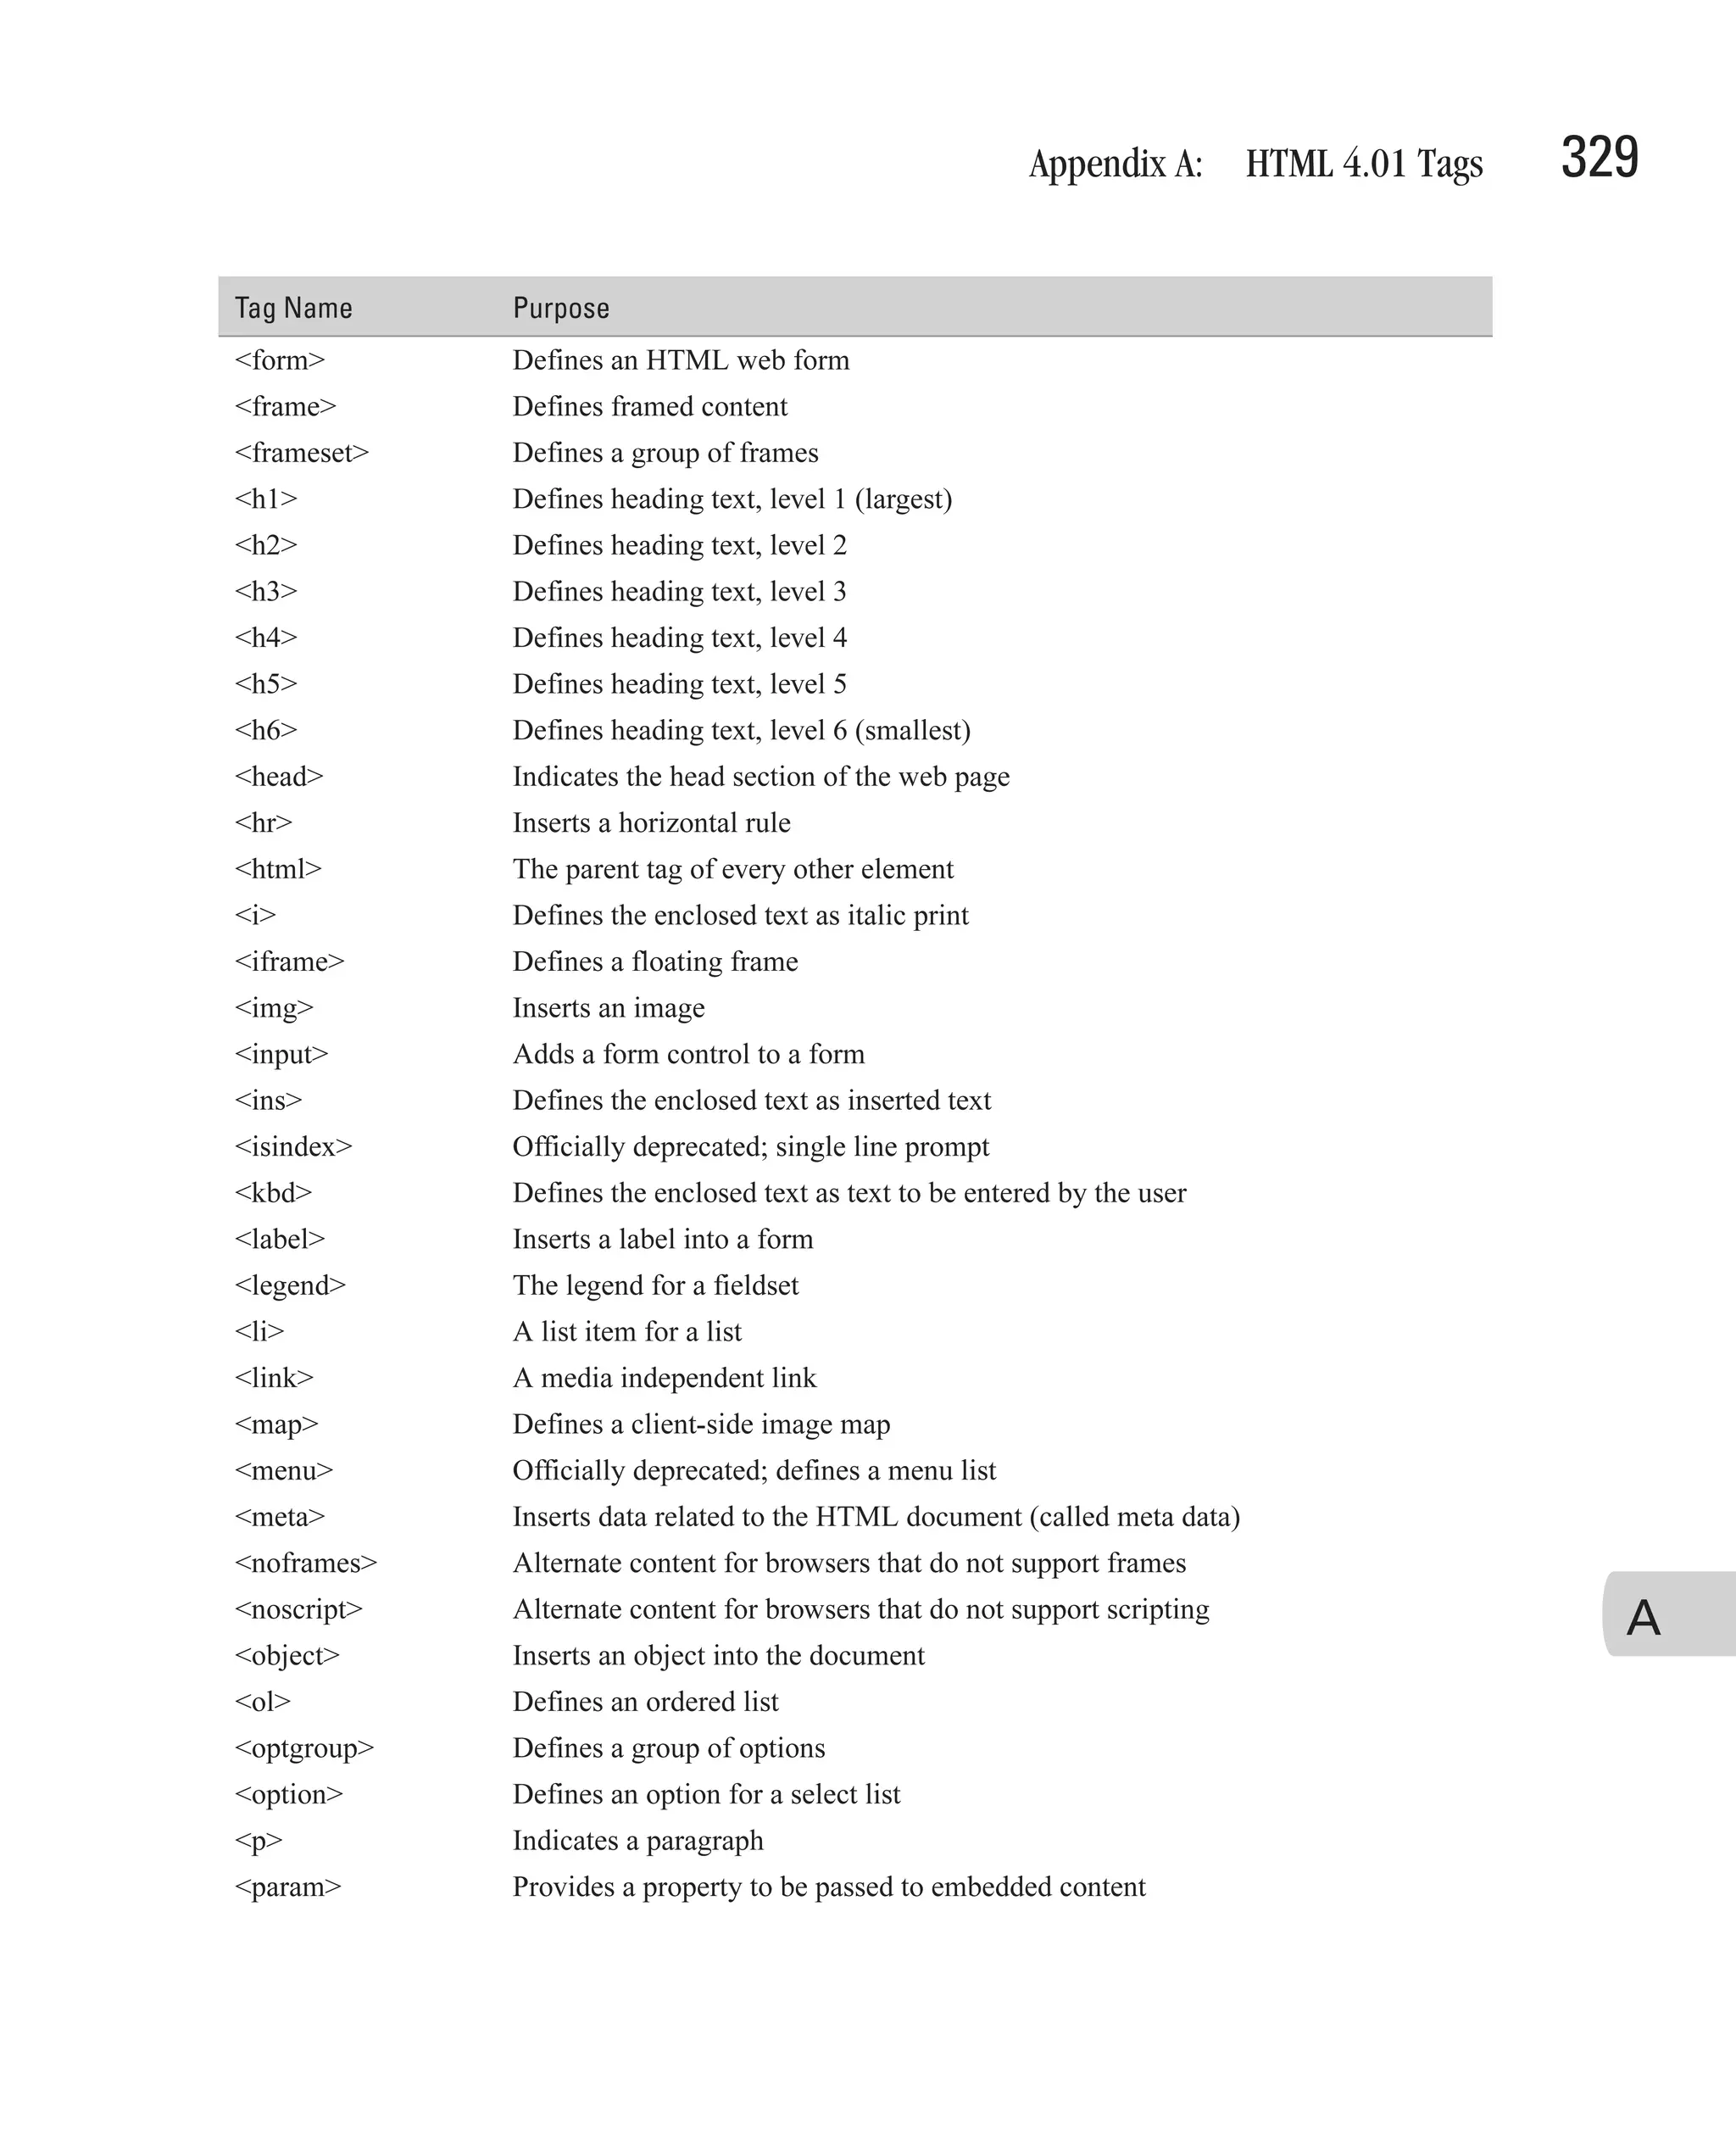
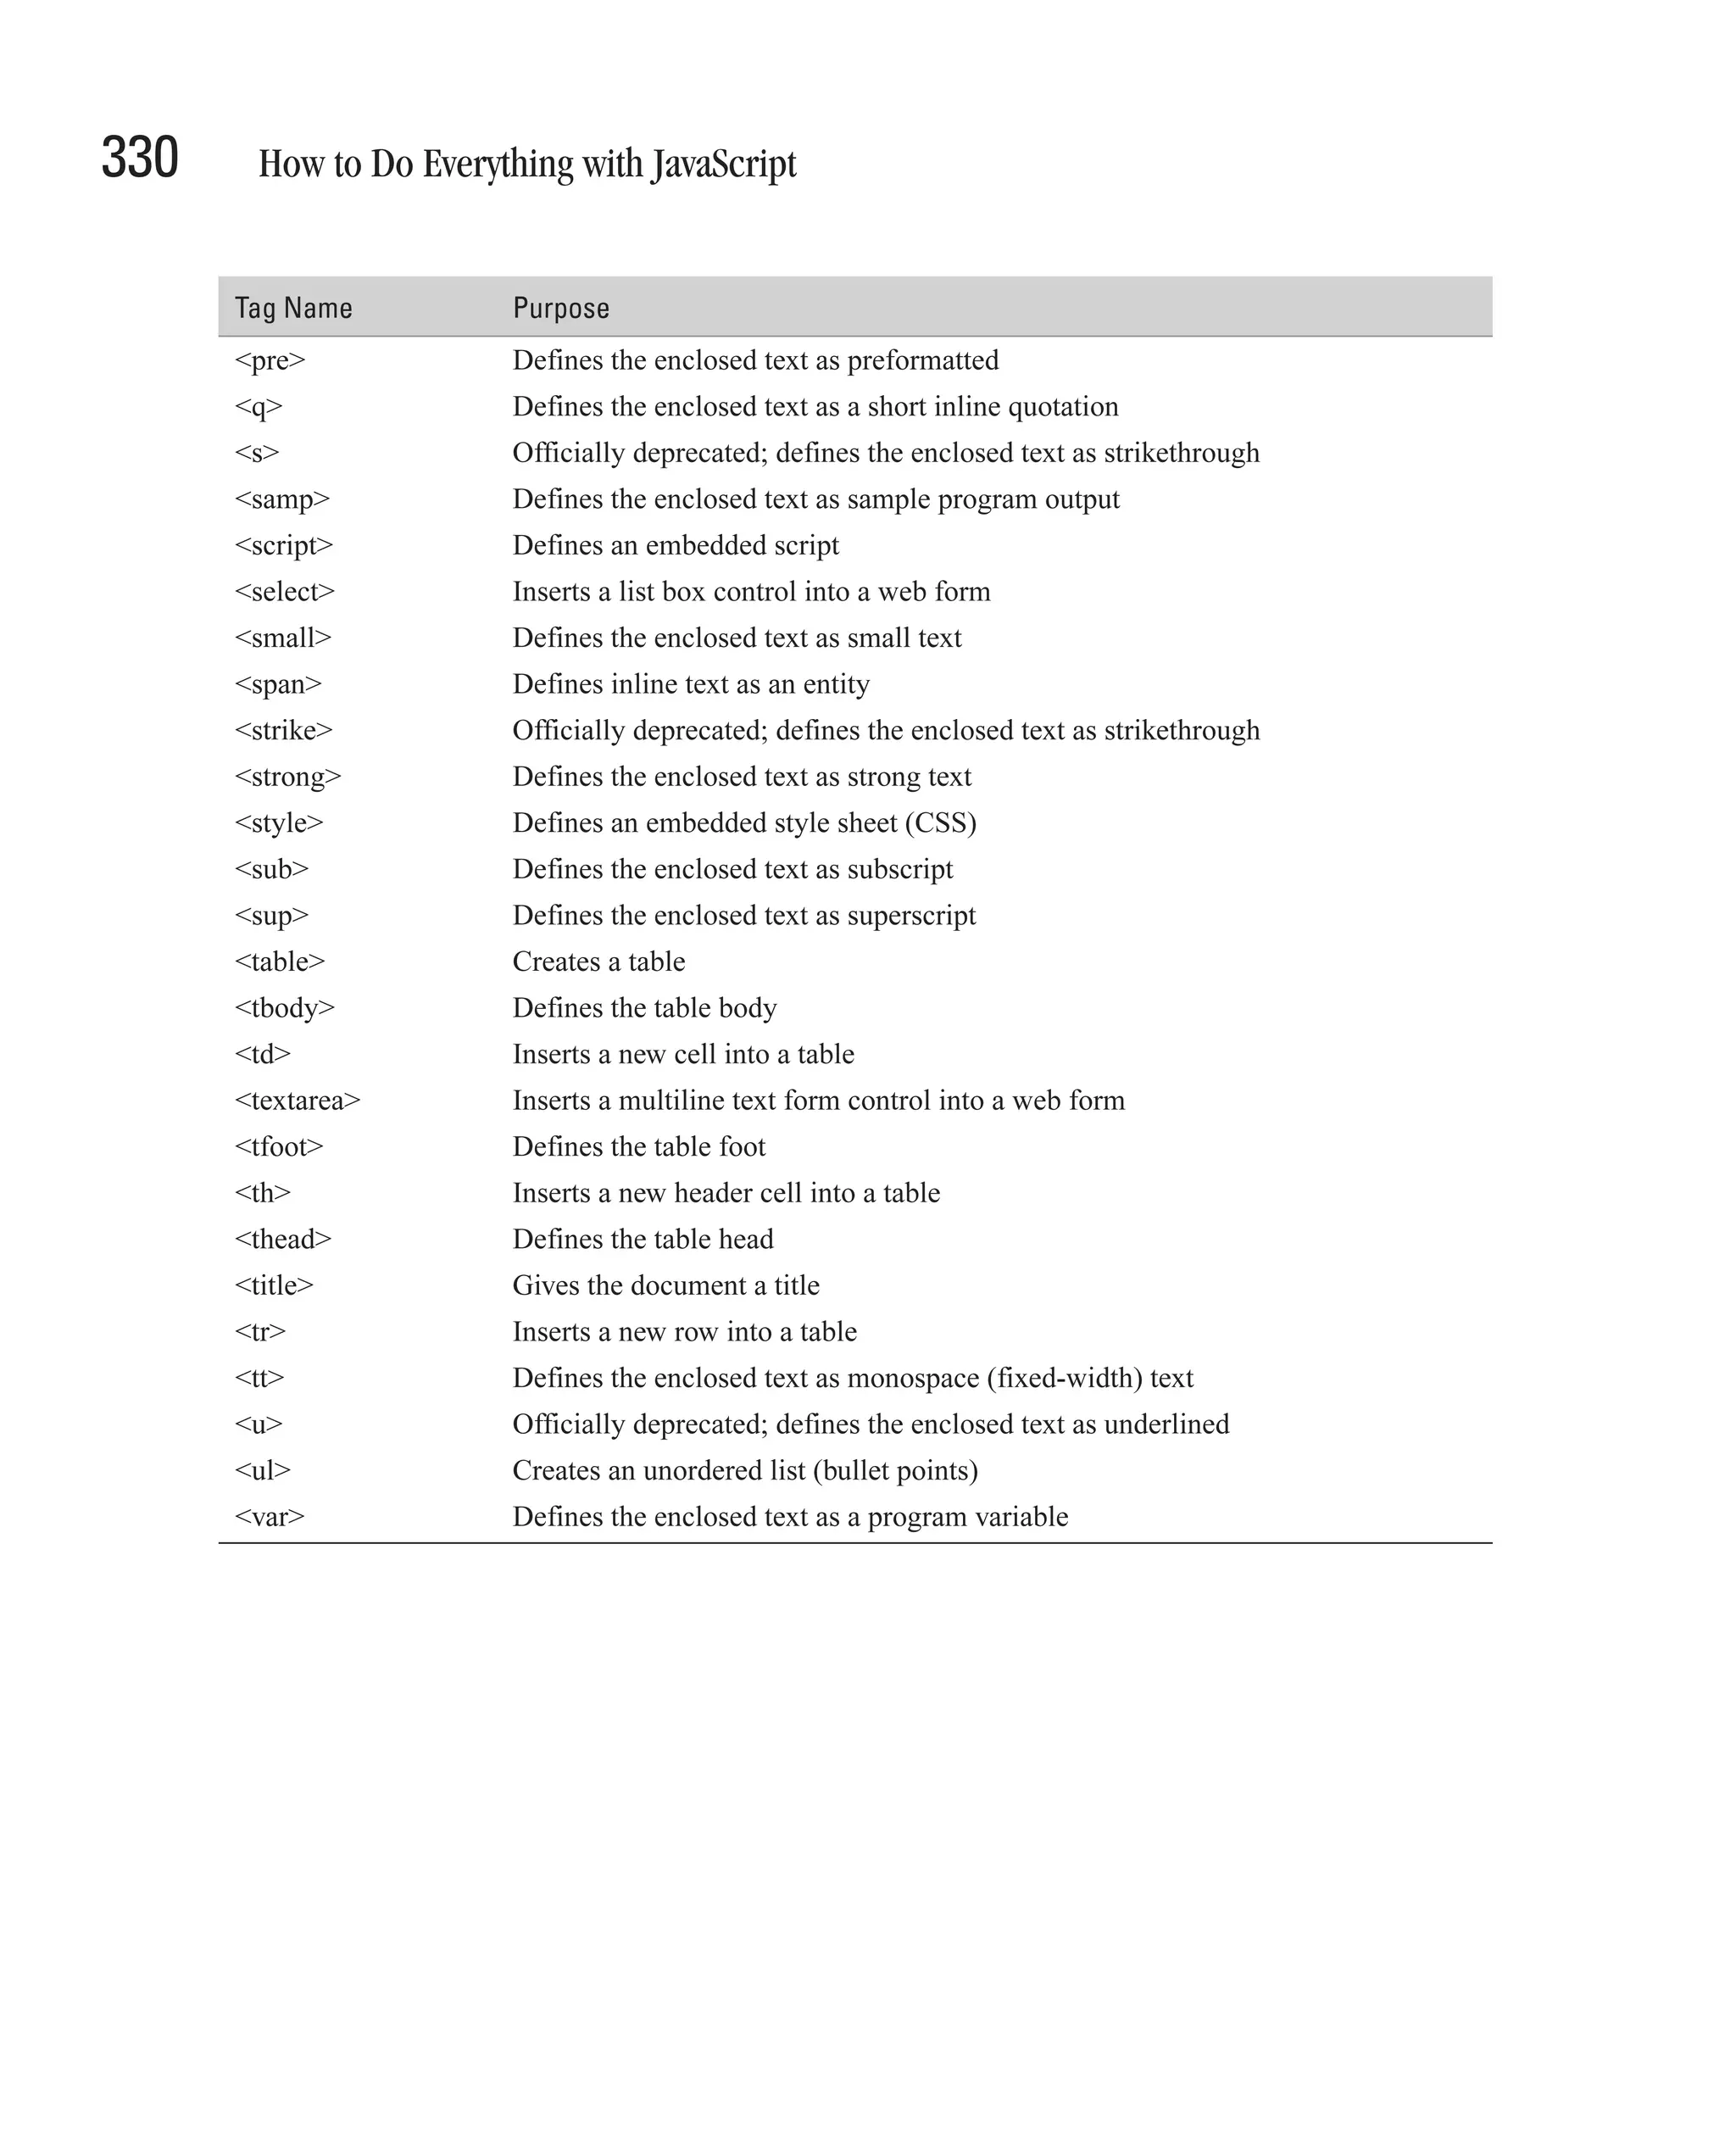

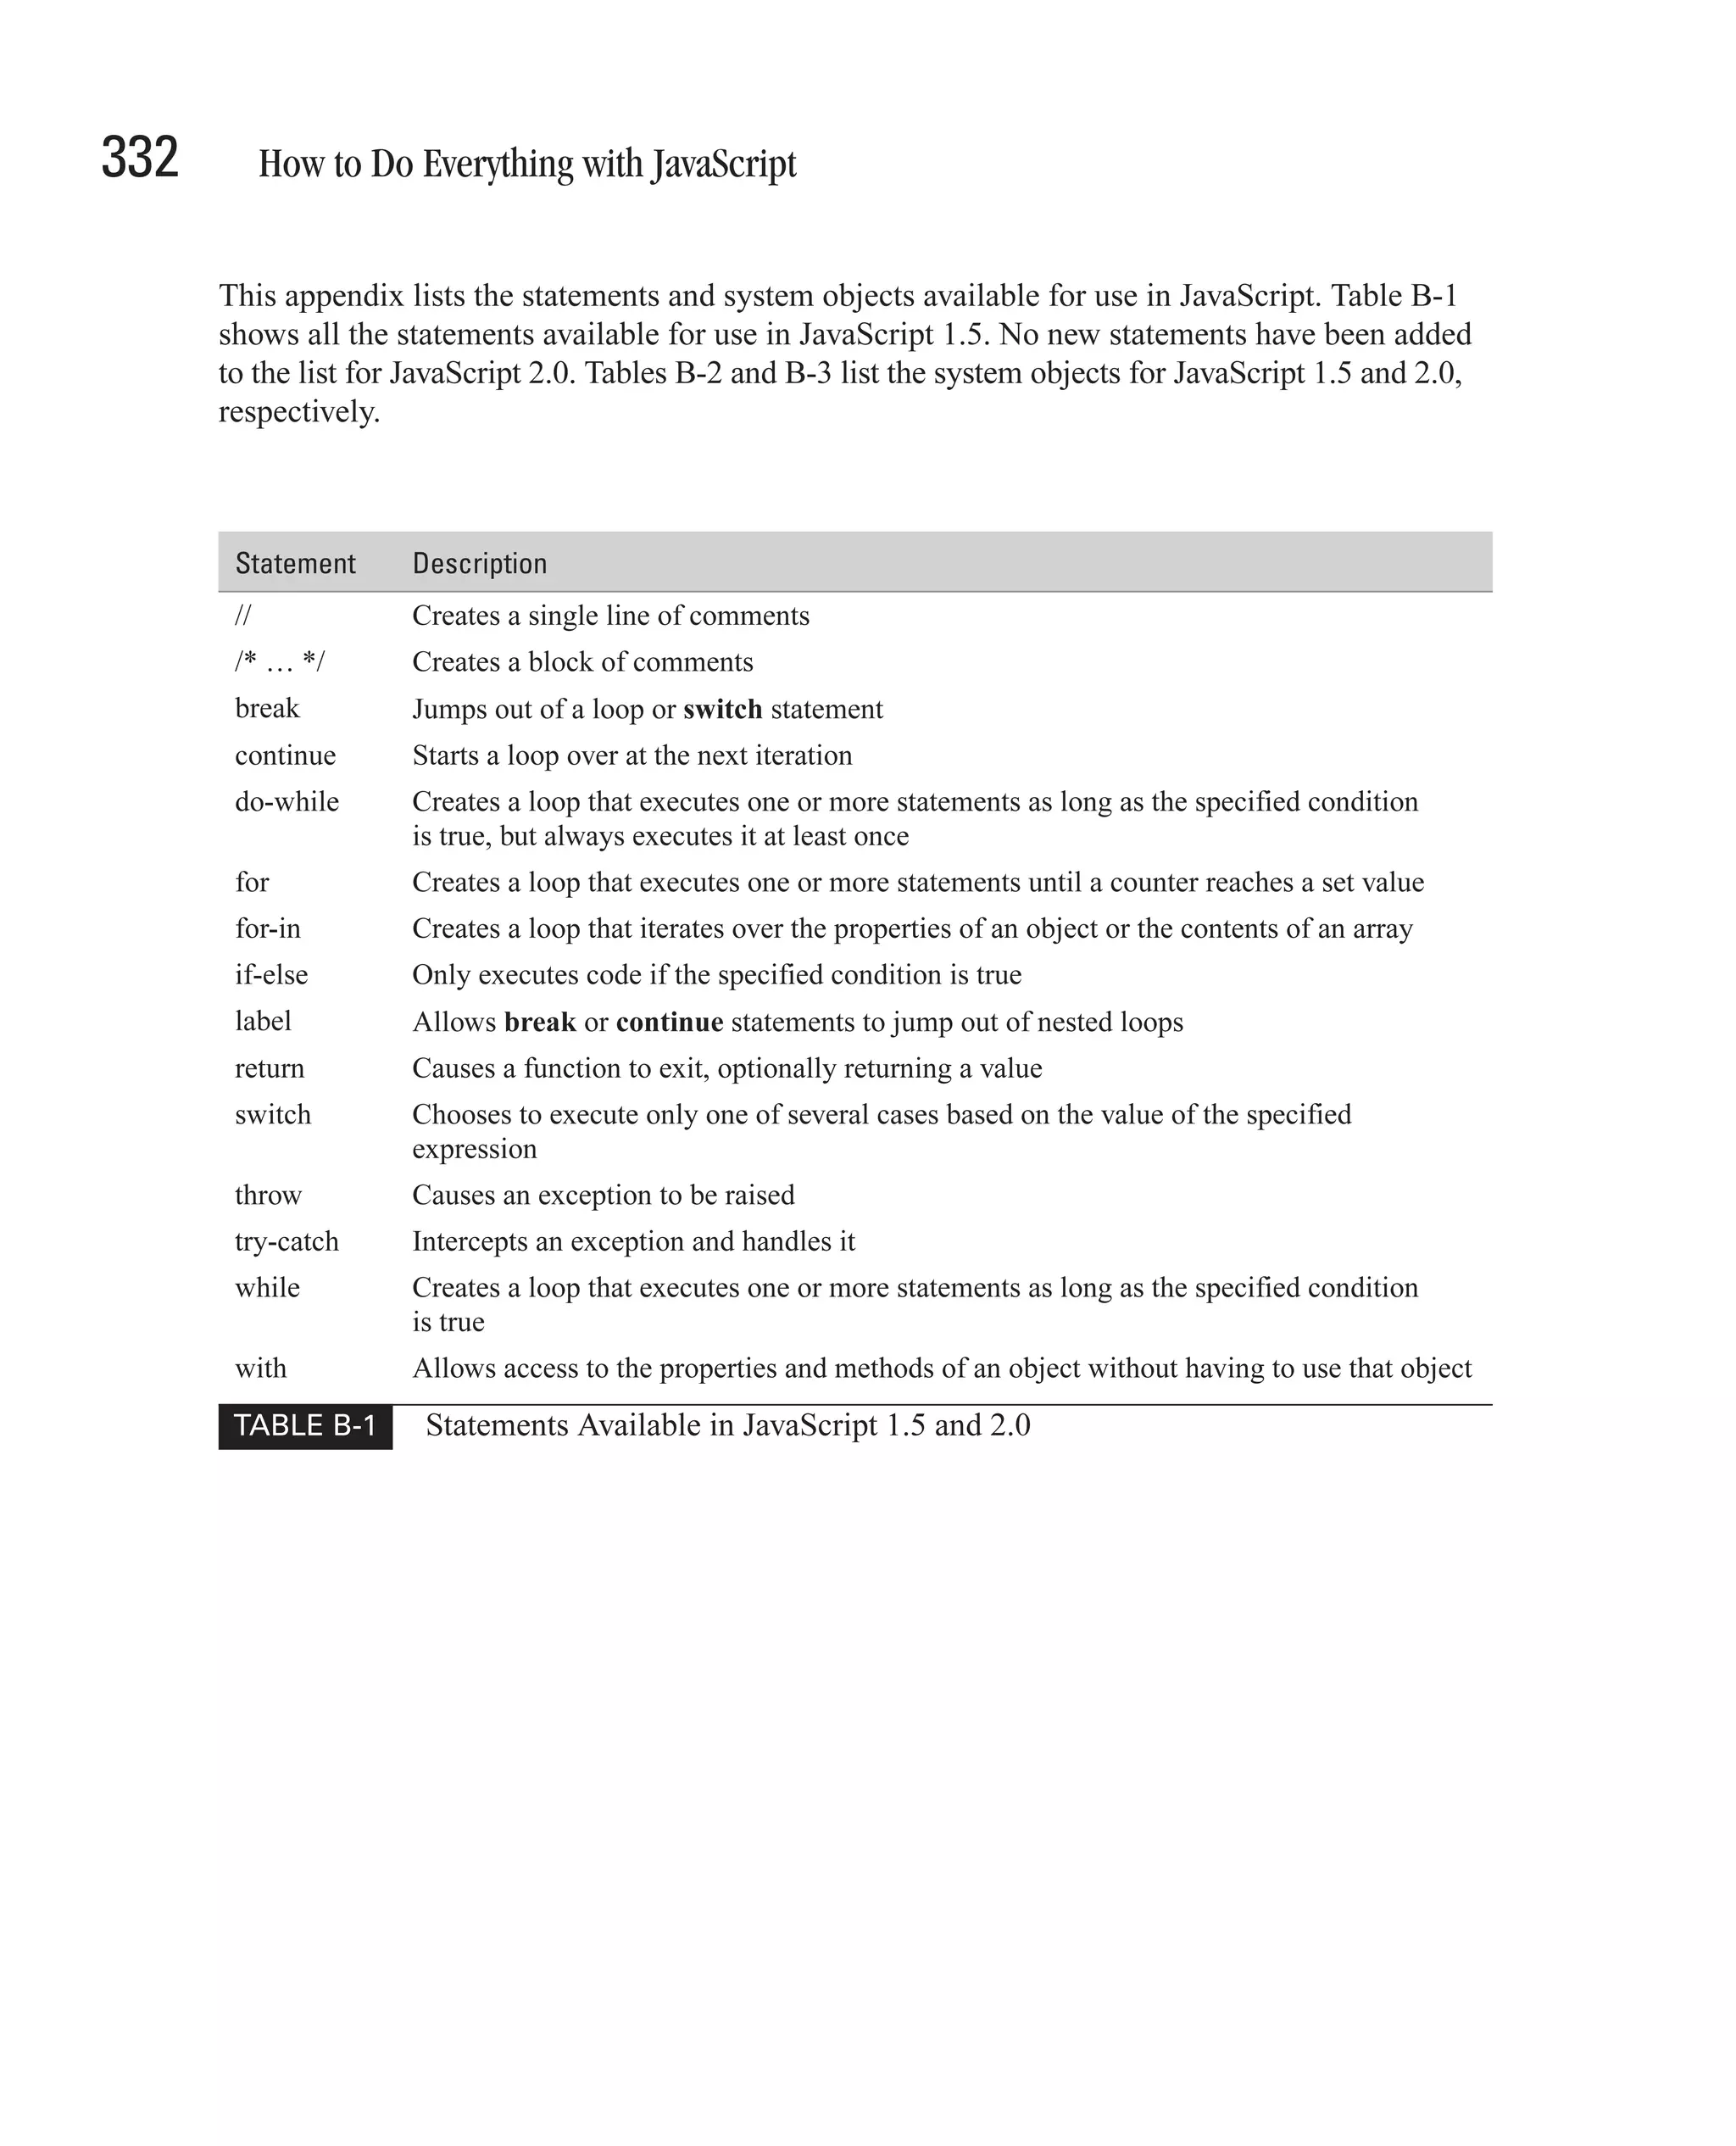
![Appendix B: JavaScript Quick Reference 333 Class Name Description Array Allows lists of data to be stored in a single variable Boolean A wrapper for Boolean values Date Lets you work with dates and times Function Allows you to define a function programmatically Math Contains convenient mathematical constants and functions Number A wrapper for primitive numeric values Object All objects derive from this data type RegExp Provides support for regular expressions in JavaScript String A wrapper for string values TABLE B-2 Built-in System Objects Available in JavaScript 1.5 Class Name Description Array Allows lists of data of type Object to be stored in a single variable; equivalent to the Array[Object] data type Array[type] Allows lists of data of type type to be stored in a single variable Boolean Supports variables that can store only the values true and false char Supports variables that can store only a single character ConstArray Allows lists of data of type Object to be stored in a single constant; is equivalent to the ConstArray[Object] data type ConstArray[type] Allows lists of data of type type to be stored in a single constant DynamicArray[type] Allows resizable lists of data of type type to be stored in a single variable Function The “data type” of functions Integer Supports variables that can only store integers Never Supports variables that cannot contain any value Null Supports variables that can only store the value null Number Supports variables that can only store numbers Object Supports variables that can contain any value B Prototype Supports variables that contain prototype-based objects (JavaScript 1.5’s way of handling objects) StaticArray[type] Allows writable lists of data of type type to be stored in a single variable String Supports variables that can only store strings Type The “data type” of data types Void Supports variables that can only store the value undefined TABLE B-3 Built-in System Objects Available in JavaScript 2.0](https://image.slidesharecdn.com/3592018/75/How-To-Do-Everything-With-JavaScript-353-2048.jpg)

![336 How to Do Everything with JavaScript <i> tag, 261 Access key, key combination to activate, 189 <img> tag/element, 211, 276 Accesskey parameter, 189 attributes, 218 Activate event, 209 id attribute, 275 ActiveMovie control (Microsoft), 321-323 src attribute, 211 ActiveScript, 142 <input> element, 187, 194, 271 ActiveX controls, 321, 324 default type, 186 ActiveX (Microsoft), 314 maxlength attribute, 189 Address bar (browser), 258 size attribute, 189 Adobe Acrobat PDF documents, 142 value attribute, 189, 194 Adobe GoLive, 12-13 <layer> tag, 172-175 Alert box, 20-21, 197 <link> element, 267, 269 Alert message, displaying, 20-21, 288-289 <meta> tag, 147-148 Alert (message) box, 288-289 <meta> tag attributes, 147 Alert() method, 288 <noframes> tag, 226-227 Allaire Corporation, 11 <noscript> tag, 154-156 Ancestor, class as, 130 <object> tag/element, 315, 321-322, 324 Angle brackets (< and >), in HTML, 142 <object> tag classid attribute, 321-322 Animate() function, creating, 275 <option> element, 189, 193 Animating text, 277 <option> element attributes, 193 Animation, 259-278 <param> tag, 318-319 explained, 260 <script> tag/element, 16, 153-154, 158, 198 using JavaScript for, 274-278 attributes, 19, 153-154 using timer events, 274 in an HTML page, 17-18 API (application programming interface), 244 language attribute, 153 Apple Quicktime Player, 322 src attribute, 157 Applets (Java), 5, 315-320 type attribute, 154 Application error, defined, 46 <select> element, 189 Array of arrays, 110, 112 attributes, 192 Array class, 102 for a list box, 217 Array class subclasses, 111 multiple attribute, 191 Array elements size attribute, 191-192 accessing, 104-106 <span> element, 265 restricting to type, 113 <span> element attributes, 265 Array index, 96, 104-105 <style> tag/element, 151, 264, 266-267 Array literals, 100-101 <textarea> element, 193, 198 Array object, 96 <textarea> element attributes, 193 creating, 97-104 <title> tag, 147 index property, 101 ? (question mark), in expression matching, 34 input property, 101 [] (square brackets operator), 73, 96, 104-106 length property, 99, 101 ^ (caret), in regular expressions, 87 methods, 102-104 { and }, for enclosing statements, 32 properties and methods, 101-104 {} (curly brackets), for object literals, 122 Array of zero length, 97 (backslash), in regular expressions, 88-89 Arrays, 95-115 double backslash (escaped backslash), 89 creating empty, 97-99 d tokens, in regular expressions, 87-88 creating and initializing in one code line, 100 , (comma) creating using the Array class, 102 separating parameters, 52 JavaScript 2.0 enhanced, 111-112 separating property-value pairs, 122 of long lists, 100 multidimensional, 107-115 with numerical indexes, 106 A parallel, 109-110 Abort event, 216 setting and retrieving values in, 104-106 Absolute positioning, 258 specifying an initial length for, 99](https://image.slidesharecdn.com/3592018/75/How-To-Do-Everything-With-JavaScript-356-2048.jpg)
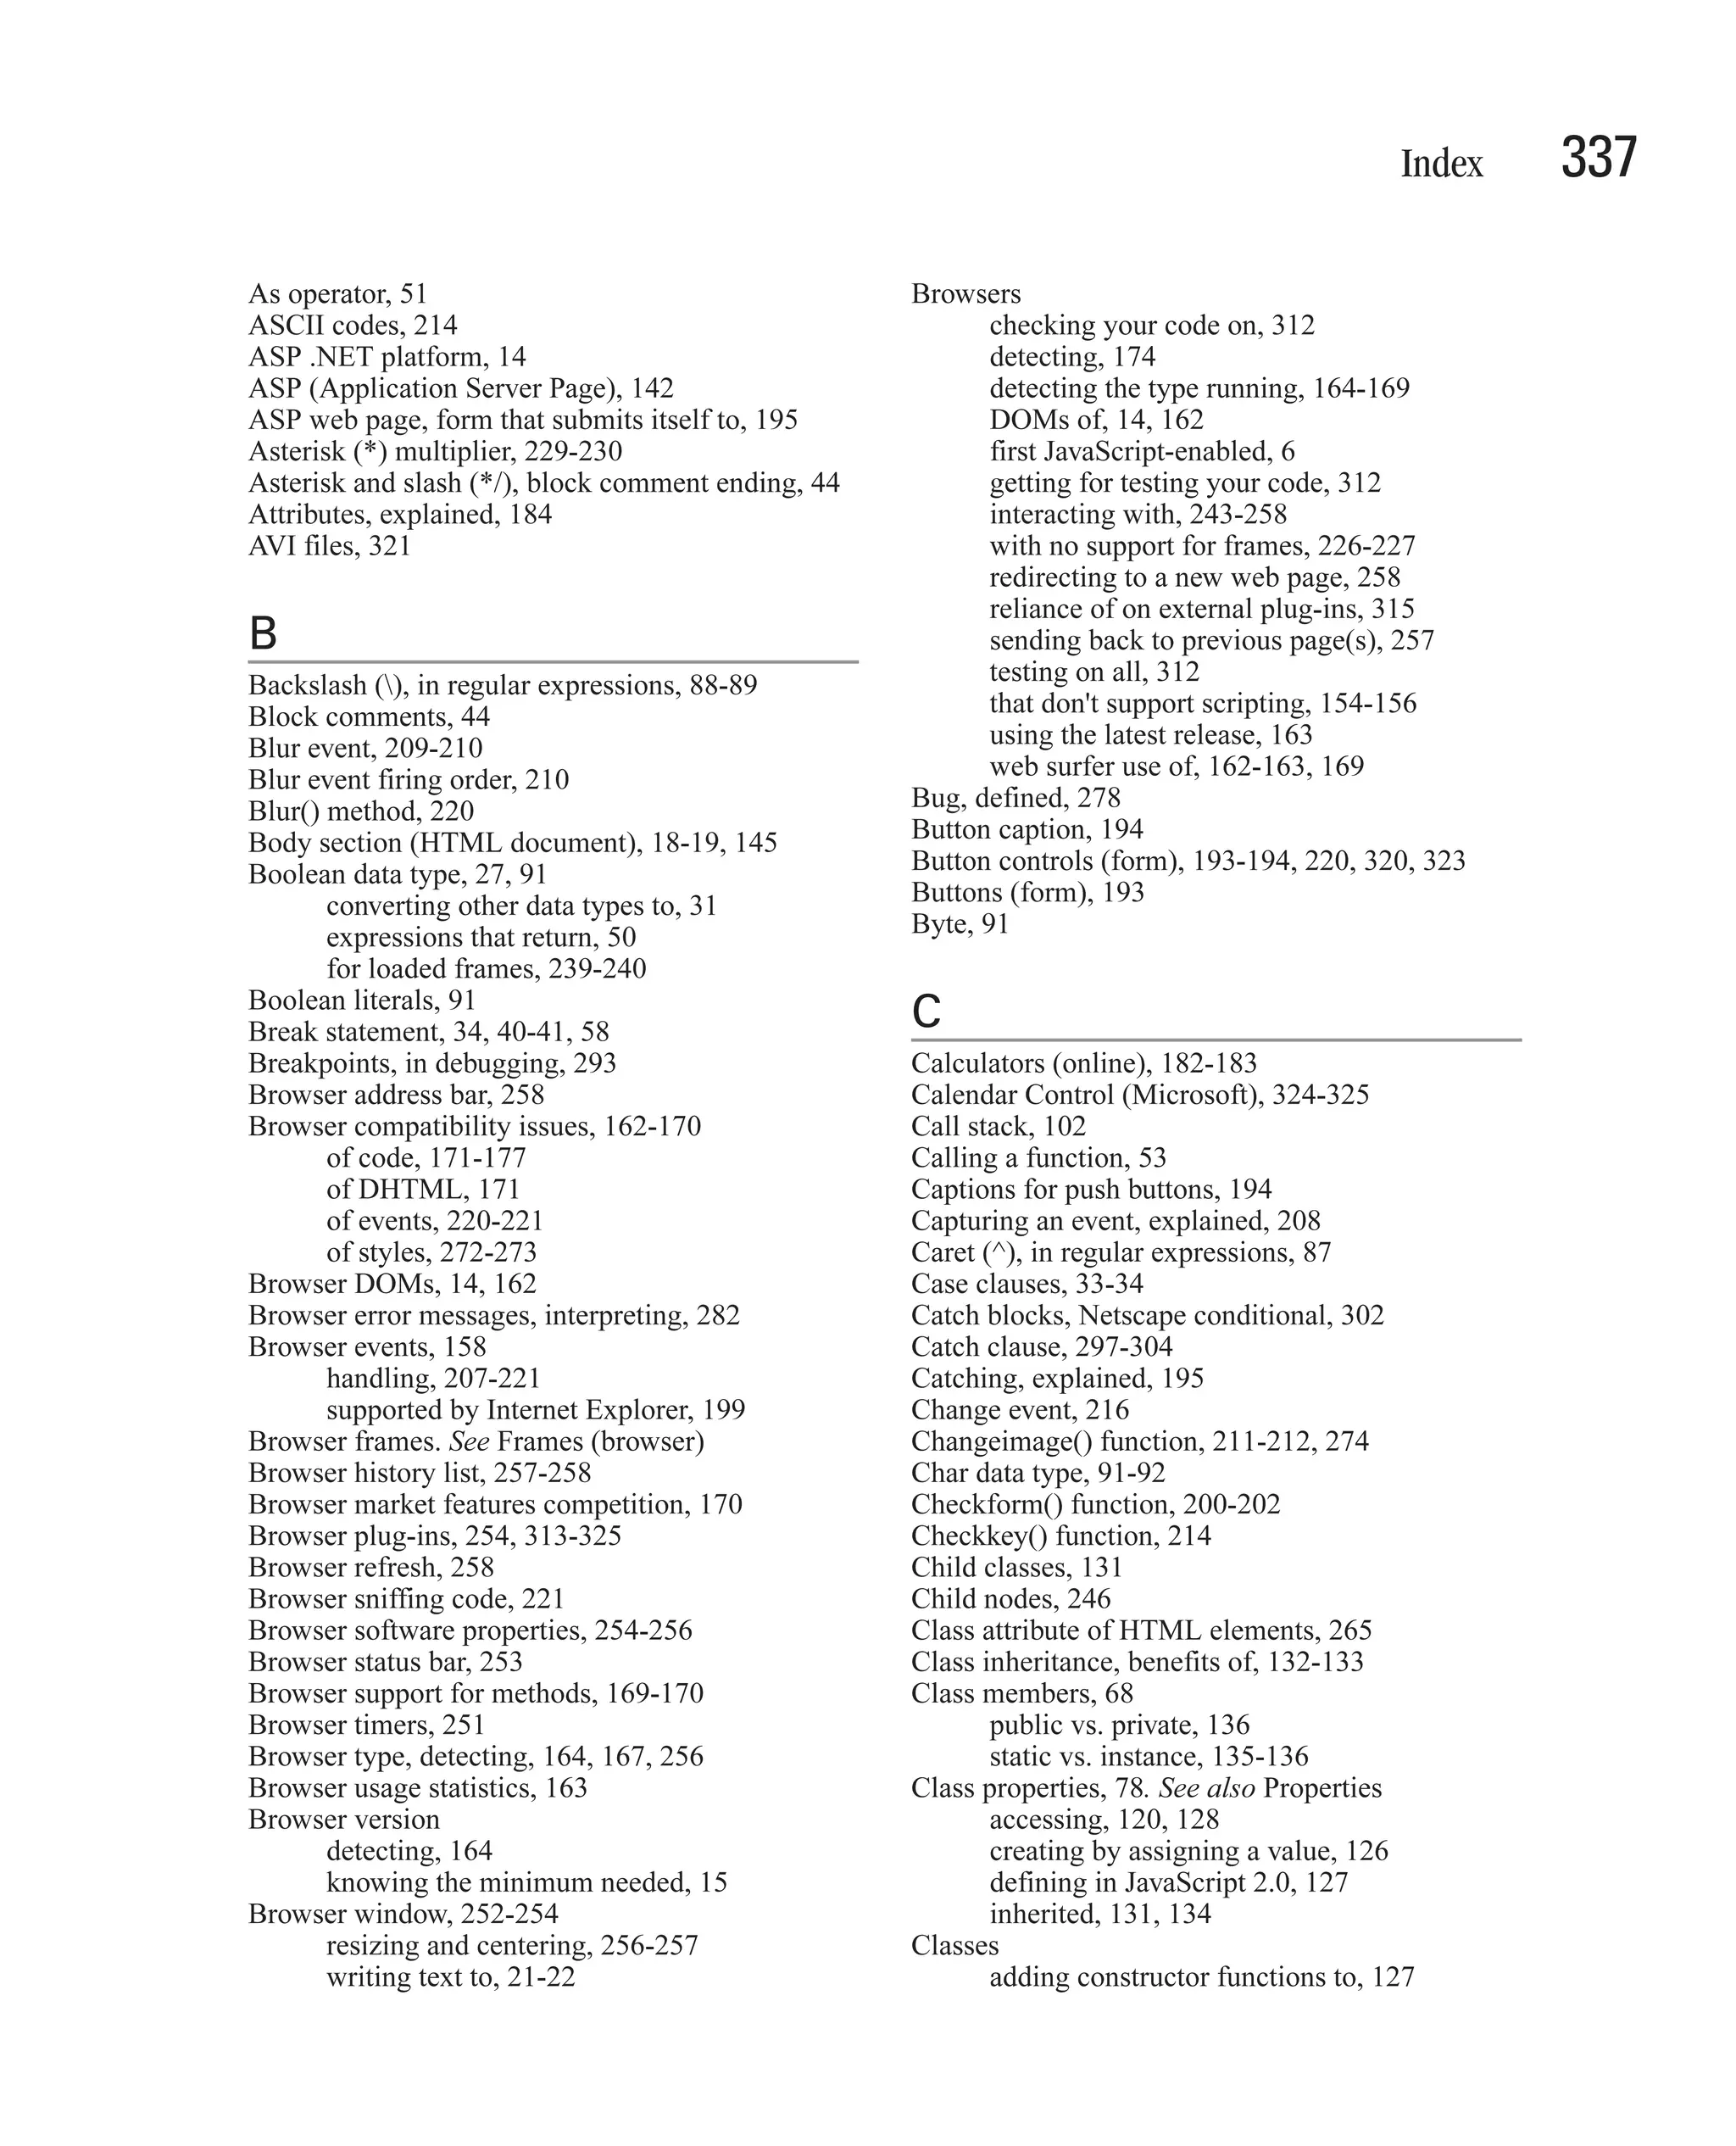
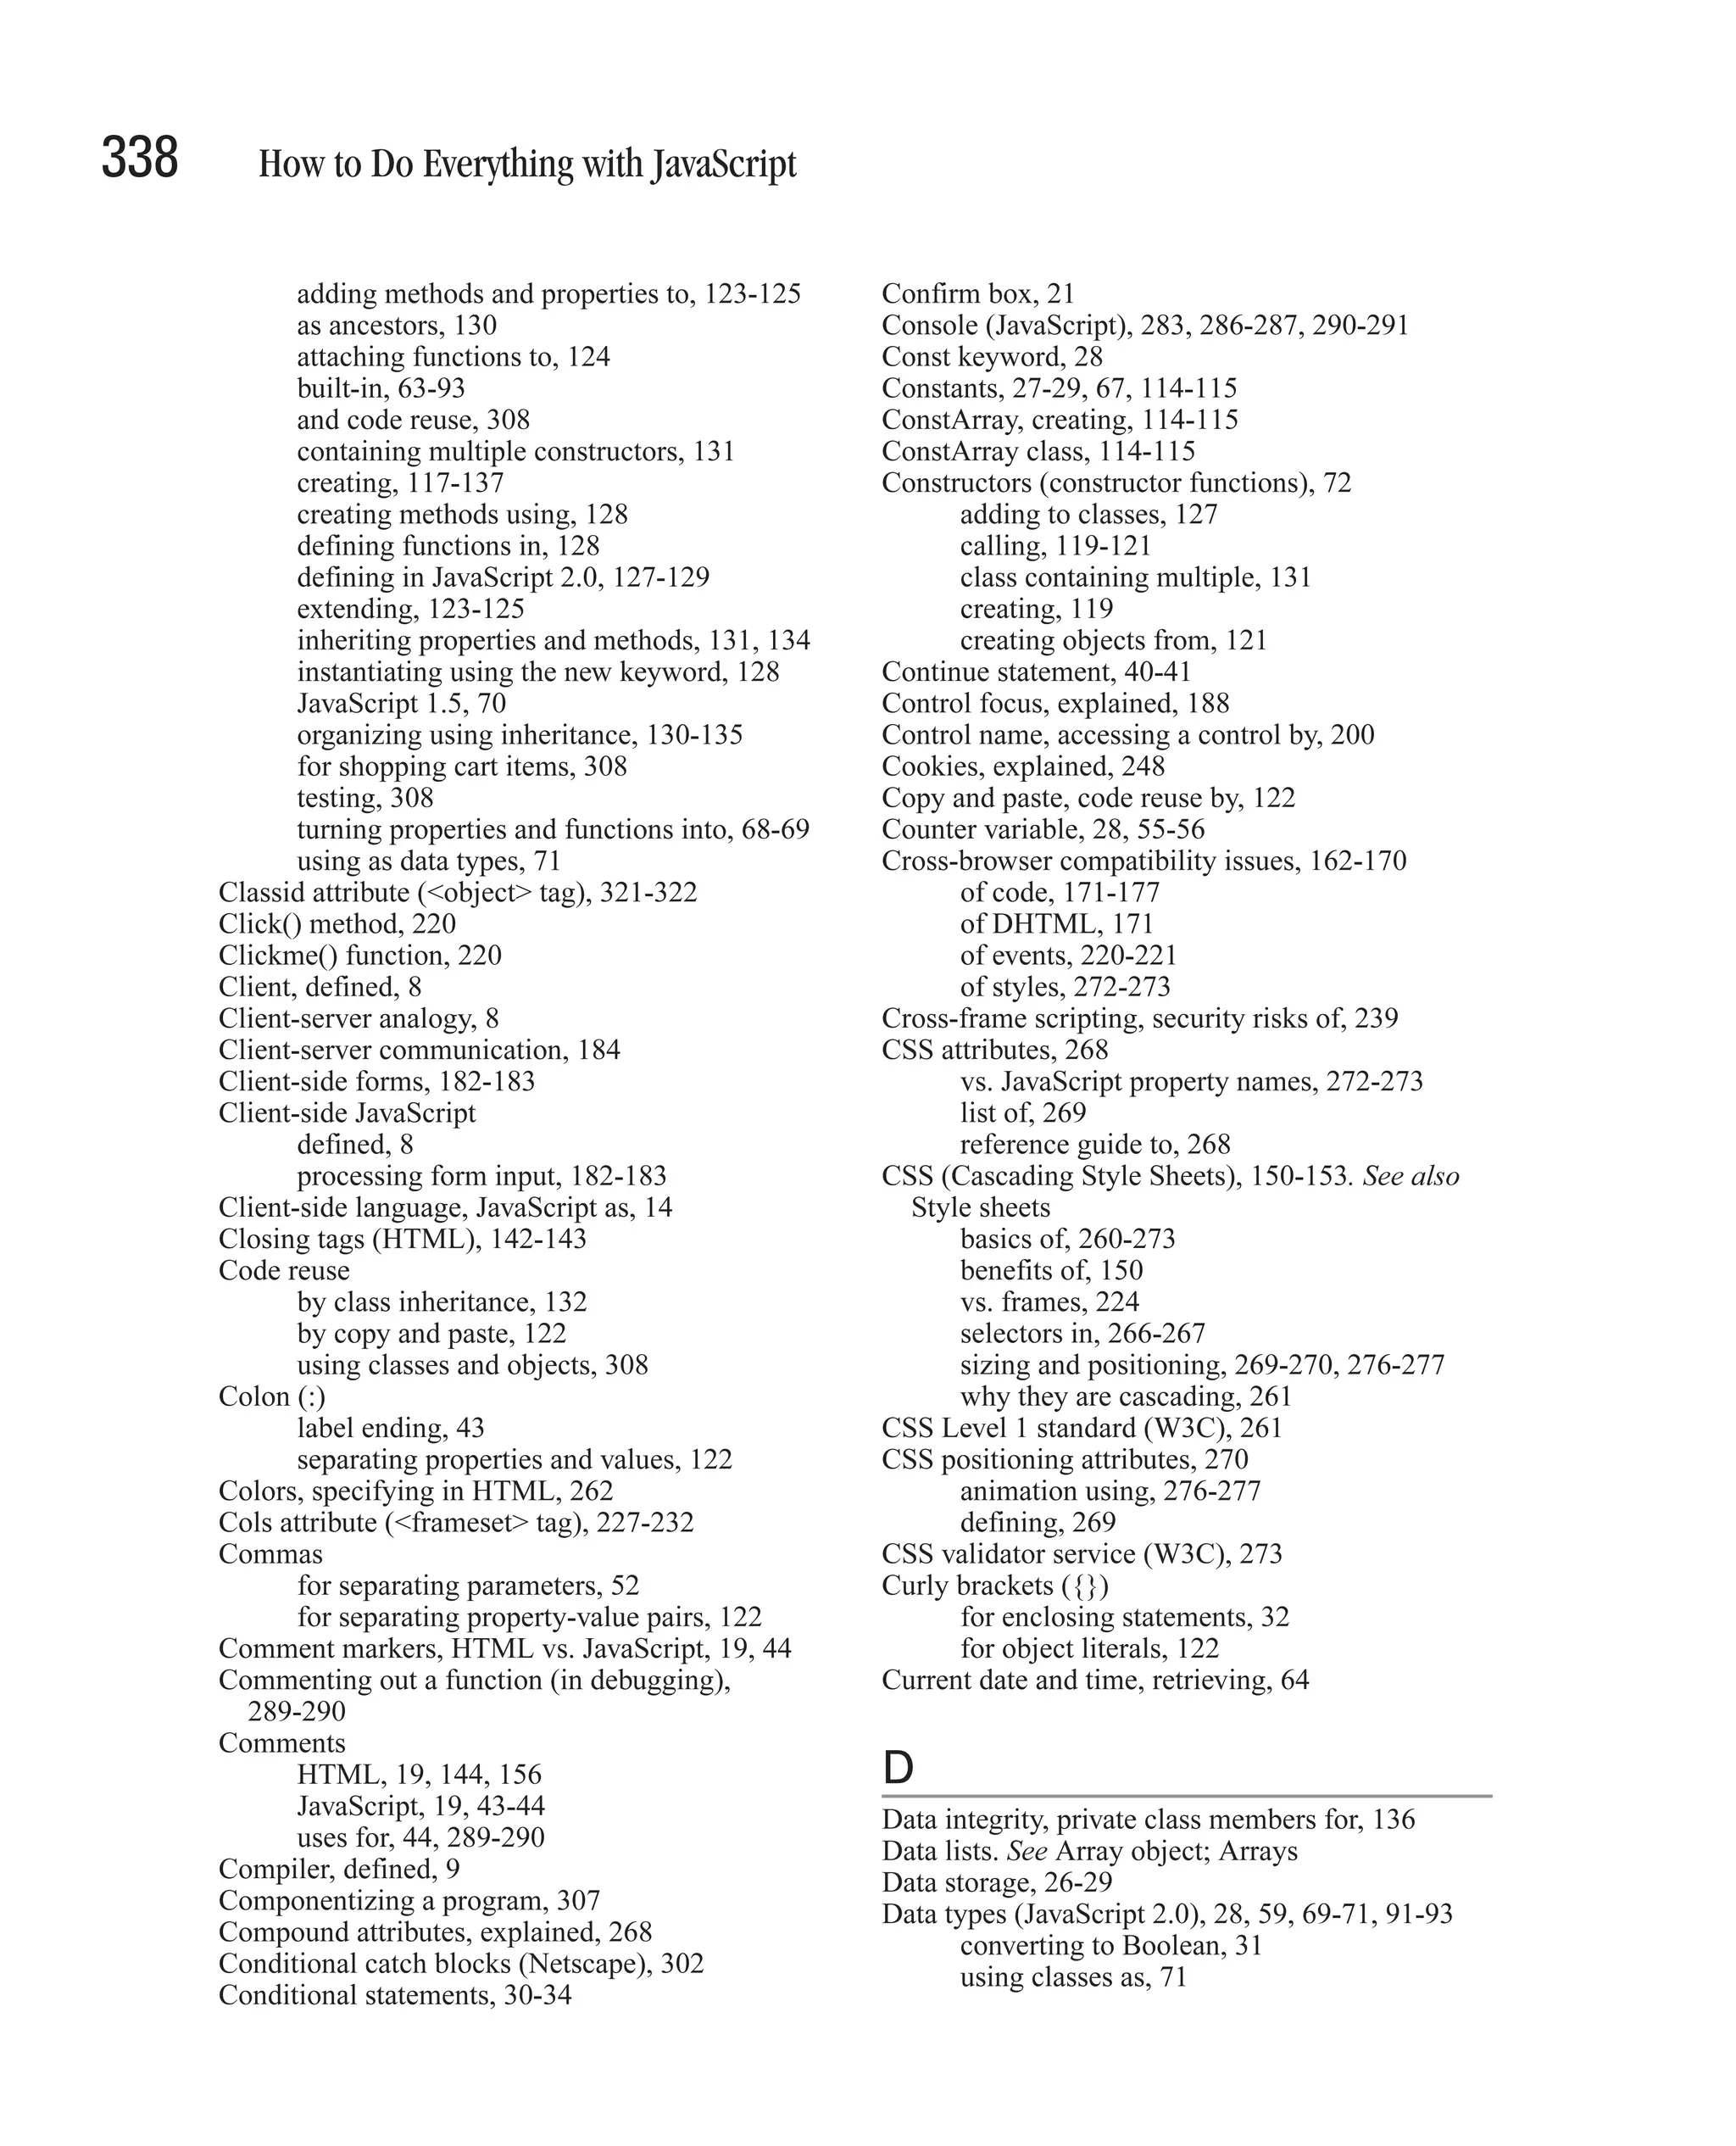
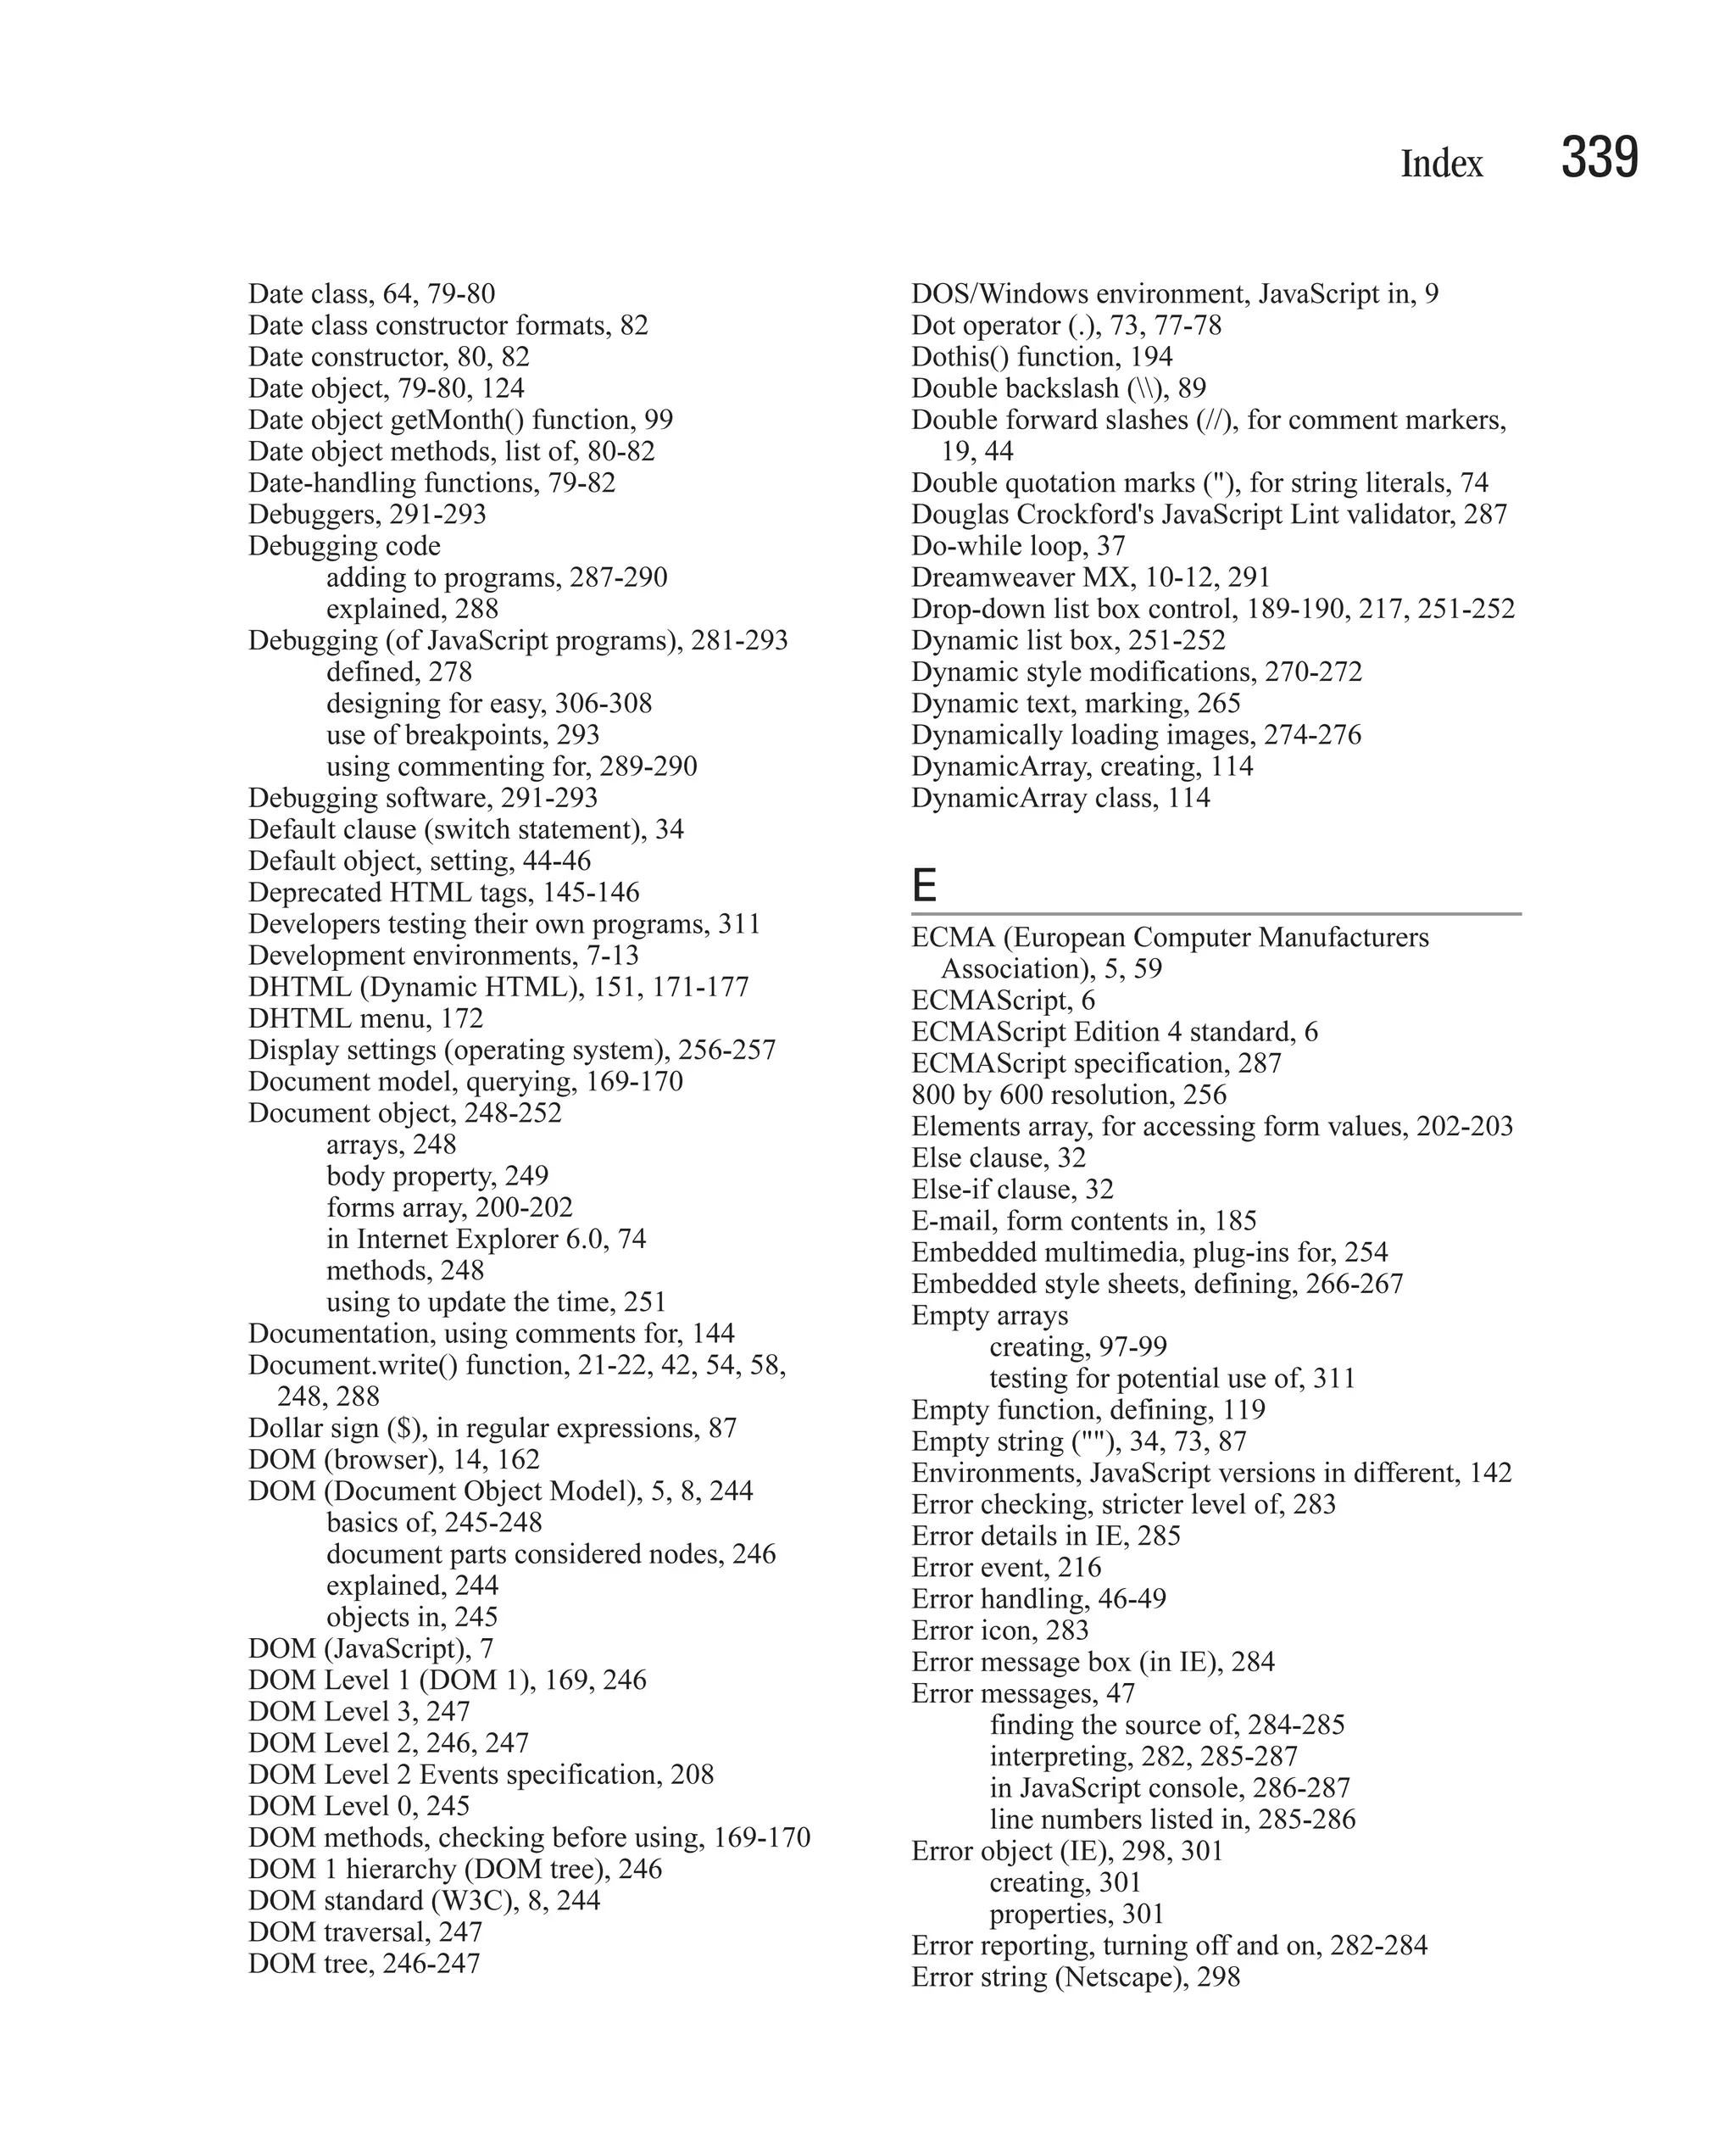


![Index 345 Navigator 4.0 (Communicator), 8 accessing with [] operator, 73 Navigator object, 164, 254-256 attaching functions to, 124-125 appName property, 165 attaching properties and methods to, 125-126 appVersion property, 166, 168-169 and code reuse, 308 properties, 164-169, 255-256 creating, 117-137 userAgent property, 166, 168, 175 creating as object literals, 122 Navigator 6, 8 creating in JavaScript 1.x, 118-126 Navigator 2.0 browser, 5-6 creating in JavaScript 2.0, 126-137 Nested framesets, creating, 233-234 creating from one constructor, 121 Nested loop, 42 creating using the new keyword, 129 NetObjects Fusion 7, 13 creating using an object literal, 123 Netscape Browser Central, 16 defined, 67 Netscape Communications, 5 extending, 125-126 Netscape Enterprise Server, 14 setting default, 44-46 Netscape 4 web browser testing, 308 layers in, 169, 172-174 Officially deprecated, explained, 145 style sheets in, 273 Onblur event (form), 188, 192 Netscape Navigator 4.0 (Communicator), 8 Onchange event (form), 188, 192 Netscape Navigator 6, 8 Onclick event (button), 220, 320 Netscape Navigator 2.0 browser, 5-6 One-dimensional arrays, 107 Netscape Plug-In API, 314 Onfocus event (form), 188, 192 Netscape 7.0, interpreting the <div> tag, 177 Onload event handler, 215-217, 226, 276-277 Netscape web browsers Onmouseout <img> tag attribute, 218 error string, 298 Onmouseover <img> tag attribute, 218 navigator.appName property, 165 Onmouseover event handler, 211 navigator.appVersion property, 166 Onpaste event handler, 221 original DOM, 245 Onpaste event (text box control), 221 syntax for catch clauses, 302 Onreset event (form), 186 Netscape/iPlanet web servers, 142 Onsubmit event (form), 186, 195-197 Never data type, 93 Onunload event handler, 226 New keyword/operator, 69, 72, 78, 97, Operands,defined, 27 128-129, 301 Operating systems Nodes (hierarchies of data), 246 display settings, 256-257 Nonbreaking spaces ( ), 263 testing on all, 312 Nonstandard coding practices, 170 Operators, 27, 50-51 Null data type, 93 JavaScript 2.0 new, 51 Number data type, 91 types of, 50 Number primitive, 91 Outer frameset, 233 Numbers, converting strings into, 82-84 Numeric literals, assigning to a variable, 71 Numeric to string conversion, 99 P Numerical indexes, arrays with, 106 Parallel arrays, 109-110 Parameter lists in parentheses, 52 Parameters (to functions), 52, 54-56 O expressions as, 50 Object arrays, 113 named, 60-61 Object data type, 92 passed by value, 56 Object instantiation with the new operator, 72 unlimited number of, 61 Object literal, 122-123 unnamed, 61 Object methods. See Methods Parent class, defining, 130 Object models, JavaScript environments and, 244 Parent object (window), 253 Object properties. See Properties Parent-child relationship, 130 Object-oriented programming, 66-69, 118 Parentheses (), for function parameter lists, 52, 54 Objects, 44, 64-69 ParseFloat() function, 82, 84](https://image.slidesharecdn.com/3592018/75/How-To-Do-Everything-With-JavaScript-365-2048.jpg)
![346 How to Do Everything with JavaScript ParseInt() function, 82-83 Password box with asterisks displayed, 190 Q Pattern matching (regular expressions), 86-87 Question mark (?), in expression matching, 34 PDF documents (Adobe Acrobat), 12, 142 Queue, 102 PDF (Portable Document Format), 12, 142 Perl language, 9 Phrase elements (HTML 4.01), 148-149 R Plug-ins Real estate, 256 defined, 314 RegExp object explained, 254 creating patterns with, 89-90 list of URLs for, 314 methods of, 89 managing with JavaScript, 313-325 Regular expression language, 87-88 Plugins array, 254 Regular expression literal, 89 Polymorphism, 92, 133 Regular expressions, 86-90 Pop-up dialog boxes, types of, 20 pattern matching, 86-87 Pop-up web advertisements, 254 special tokens, 88-89 Pop-up window, 254-255 syntax of, 88-89 Position attributes (CSS), animation using, 276-277 uses for, 87 Positioning elements on a Web page, 268-270 Reset event, 215 Pound sign (#) Resize event, 216 for <form> action attribute, 186 Rest parameter (...), 61 for RGB values, 262 Re-throwing an exception, 305 Practical Browser Sniffing Script, 168 Return statement, 53, 58-59 Primitives, 91 Return values (function), 58, 297 Privacy and the Internet, 190 RGB (red-green-blue) values, 262 Private class members, 136 Rows attribute (<frameset> tag), 227-232 Private keyword, 136 Rule selectors, 266-267 Private properties and methods, 73 Run-time errors, 283 Procedural programming, 65-66, 308 Procedures, 65 Program errors, catching, 48-49 Program flow, 29-30 S Programming methodologies, 65-68, 306 Screen object, 256 Programming terms, 27 Screen object properties, 256 Properties, 44, 67 Screen size, 256 accessing, 120, 128 Screen space, resizing components based on, 256 accessing with [] operator, 73 Script, defined, 4 adding to classes, 123-125 Script Debugger (Microsoft), 293 attaching to objects, 125-126 Script debugging, disabling in IE, 284 of a class, 68-69, 78 Script Editor (Microsoft), 291 creating by assigning a value, 126 Scriptable objects, inserting into web pages, 315 inherited, 131, 134 Scripting language, 14 private, 73, 136 Scroll bar (vertical), multiline text box with, 191 Property names (JavaScript) Scroll event, 216 case-sensitivity of, 122 Scrollable pop-up window of multiple choices, 190 vs. CSS attribute names, 272-273 Scrolled list box control, 189, 191 Proprietary events, 221 Search-and-replace, with regular expressions, Proprietary extensions, avoiding, 273 86-90 Proprietary markup tags, 170-171 Security, private class members for, 136 Prototype property, 123 Select event, 216 Prototyping, 123 Self object (window), 253 Public class members, 136 Semicolon (;) Public keyword, 136 for appending JavaScript commands, 159 Public methods, calling, 137 statement ending, 100 Push button control (form), 193-194, 220, 320, 323](https://image.slidesharecdn.com/3592018/75/How-To-Do-Everything-With-JavaScript-366-2048.jpg)
![Index 347 Server, defined, 8 Style sheet @import command, 267 Server-based web applications, creating, 8-9 Style sheet rules, 266 Server-side JavaScript (SSJS), 8, 14-15, 142 Style sheets, 150-153, 261 SetTimeout() function, 251 advantages of, 264 Show Details button (IE error message box), 284 creating, 276 Sibling nodes, 246 defining embedded, 266-267 Signed scripts, 8 vs. frames, 224 Single quotation mark ('), for string literal, 74 in Netscape 4 web browser, 273 Slash and asterisk (/*), for block comment, 44 Styles, 260 Special data types, 92-93 assigning using HTML elements, 261-263 Square brackets ([]) operator, 73, 96, 104-106 browser platform issues of, 272-273 Src attribute changing for all pages at once, 267 of <embed> tag, 321 importing external, 267 of <frame> tag, 234 modifying using JavaScript, 270-272 of <img> tag, 211 precedence of, 267 of <script> tag, 157 for text boxes, 271 SSL (Secure Sockets Layer), 190 using style sheets for, 264-267 Standards. See W3C Submit button, 193, 195-196 Starting tags (HTML), 142 disabling, 205 Statement block, 32 hyperlink to simulate, 219 Statements, 27, 30-49 Submit event, 215 categories of, 30 Submit() method (<form> object), 219-220 lists of JavaScript 1.5 and 2.0, 332 Sun Microsystems, 14, 317 Static (class) members, 68, 135 Sunny Day Syndrome, 311 defined, 78 Switch keyword, 33 vs. instance members, 78 Switch statement, 33-34 Static keyword, 135 Syntax errors, 283 StaticArray, creating, 112-113 System classes, 63-93. See also Classes StaticArray class, 112-113 System errors, 46, 48 Status bar (browser), 253 System objects (see also Objects) Storing data, 26-29 in JavaScript 1.5, 333 Storing lists, 96 in JavaScript 2.0, 333 Strict HTML, explained, 146 System testing, 312 Strict mode (error checking), 283 String class constructor, 76 String data type, 76, 91 T String literal, 74-75 Tags (HTML). See HTML tags defined, 74 Templates (JavaScript), 16-19 throw statement passing, 305-306 body section, 19 String object creating in Notepad, 16-17 creating, 73-78 Testing harness, creating, 309-311 creating using string data type, 76 Testing your code, 282, 309-312 creating using a string literal, 74-75 Text indexOf() method, 169 animating, 277 length property, 75 marking dynamic, 265 methods, 76-77 preparing for sending to web server, 84-85 Strings, 27 writing to the browser window, 21-22 converting into numbers, 82-84 Text area control, 193 converting numbers to, 99 Text block with invalid characters, 85 explained, 265 using as array indexes, 104 naming, 269 valid, 73 Text box control events, capturing, 197 ways to create, 74 Style attribute of HTML elements, 265-266, 268](https://image.slidesharecdn.com/3592018/75/How-To-Do-Everything-With-JavaScript-367-2048.jpg)


This document provides information about learning JavaScript programming, including: - It discusses the history and origins of JavaScript and how it has evolved over time. - It recommends choosing development environments for different types of JavaScript projects, such as for web pages or server-side applications. - It describes what JavaScript can and cannot do as a client-side and server-side language. - It provides guidance for deciding which version of JavaScript to use for a project. - It demonstrates how to test JavaScript programs using HTML templates.