Download as PDF, PPTX
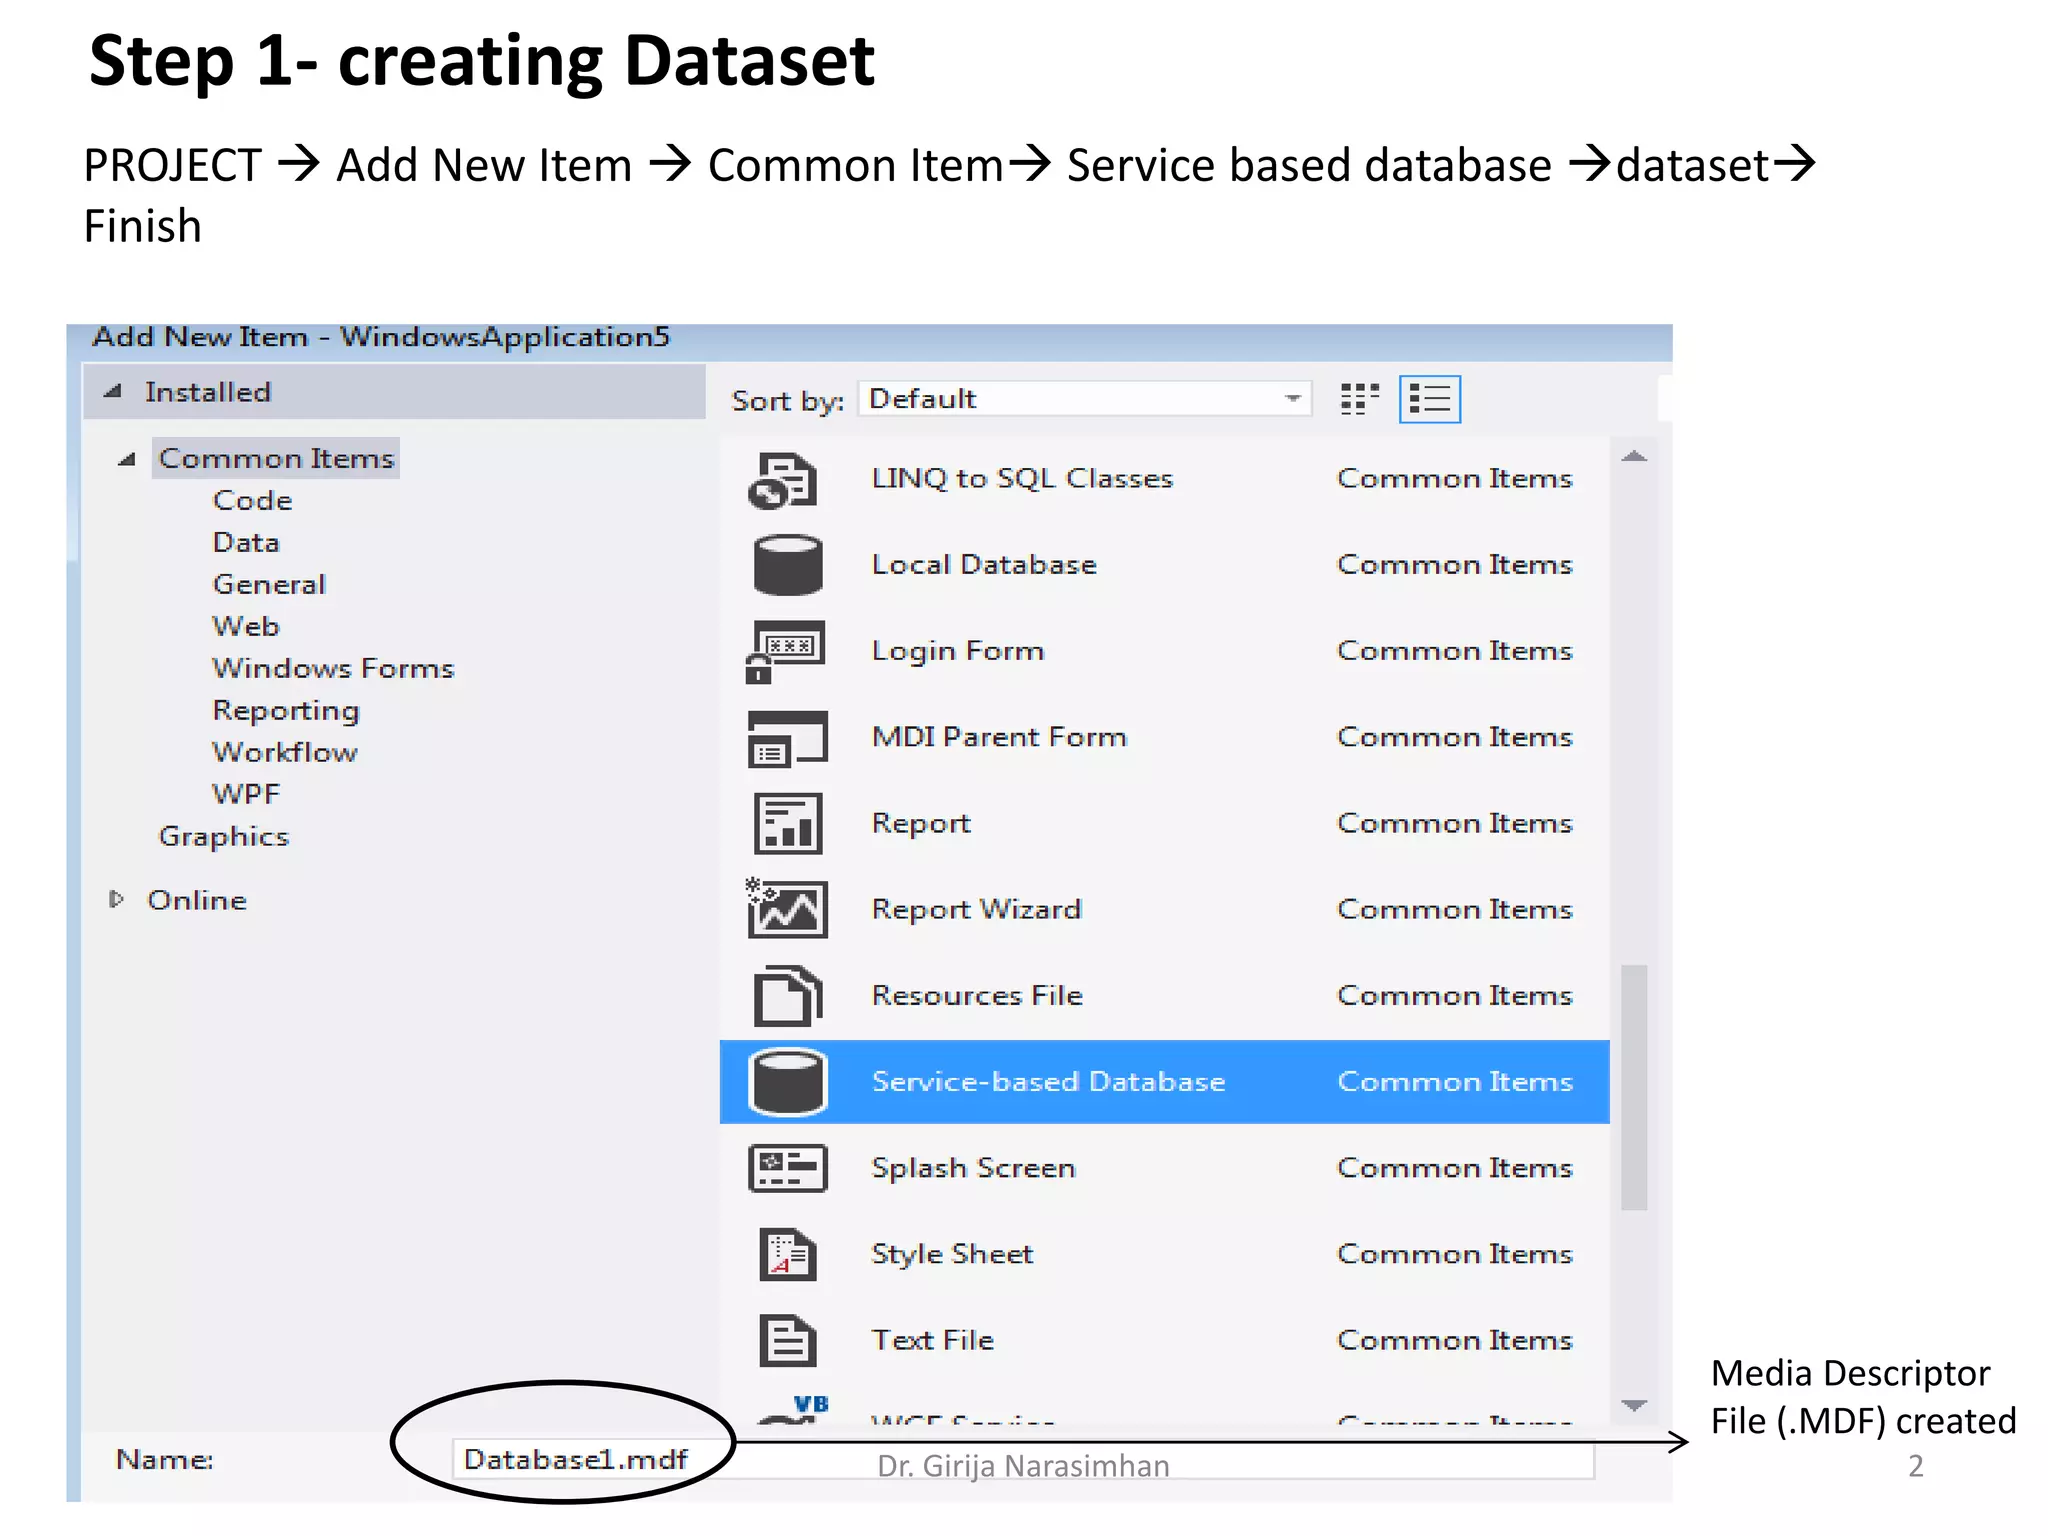
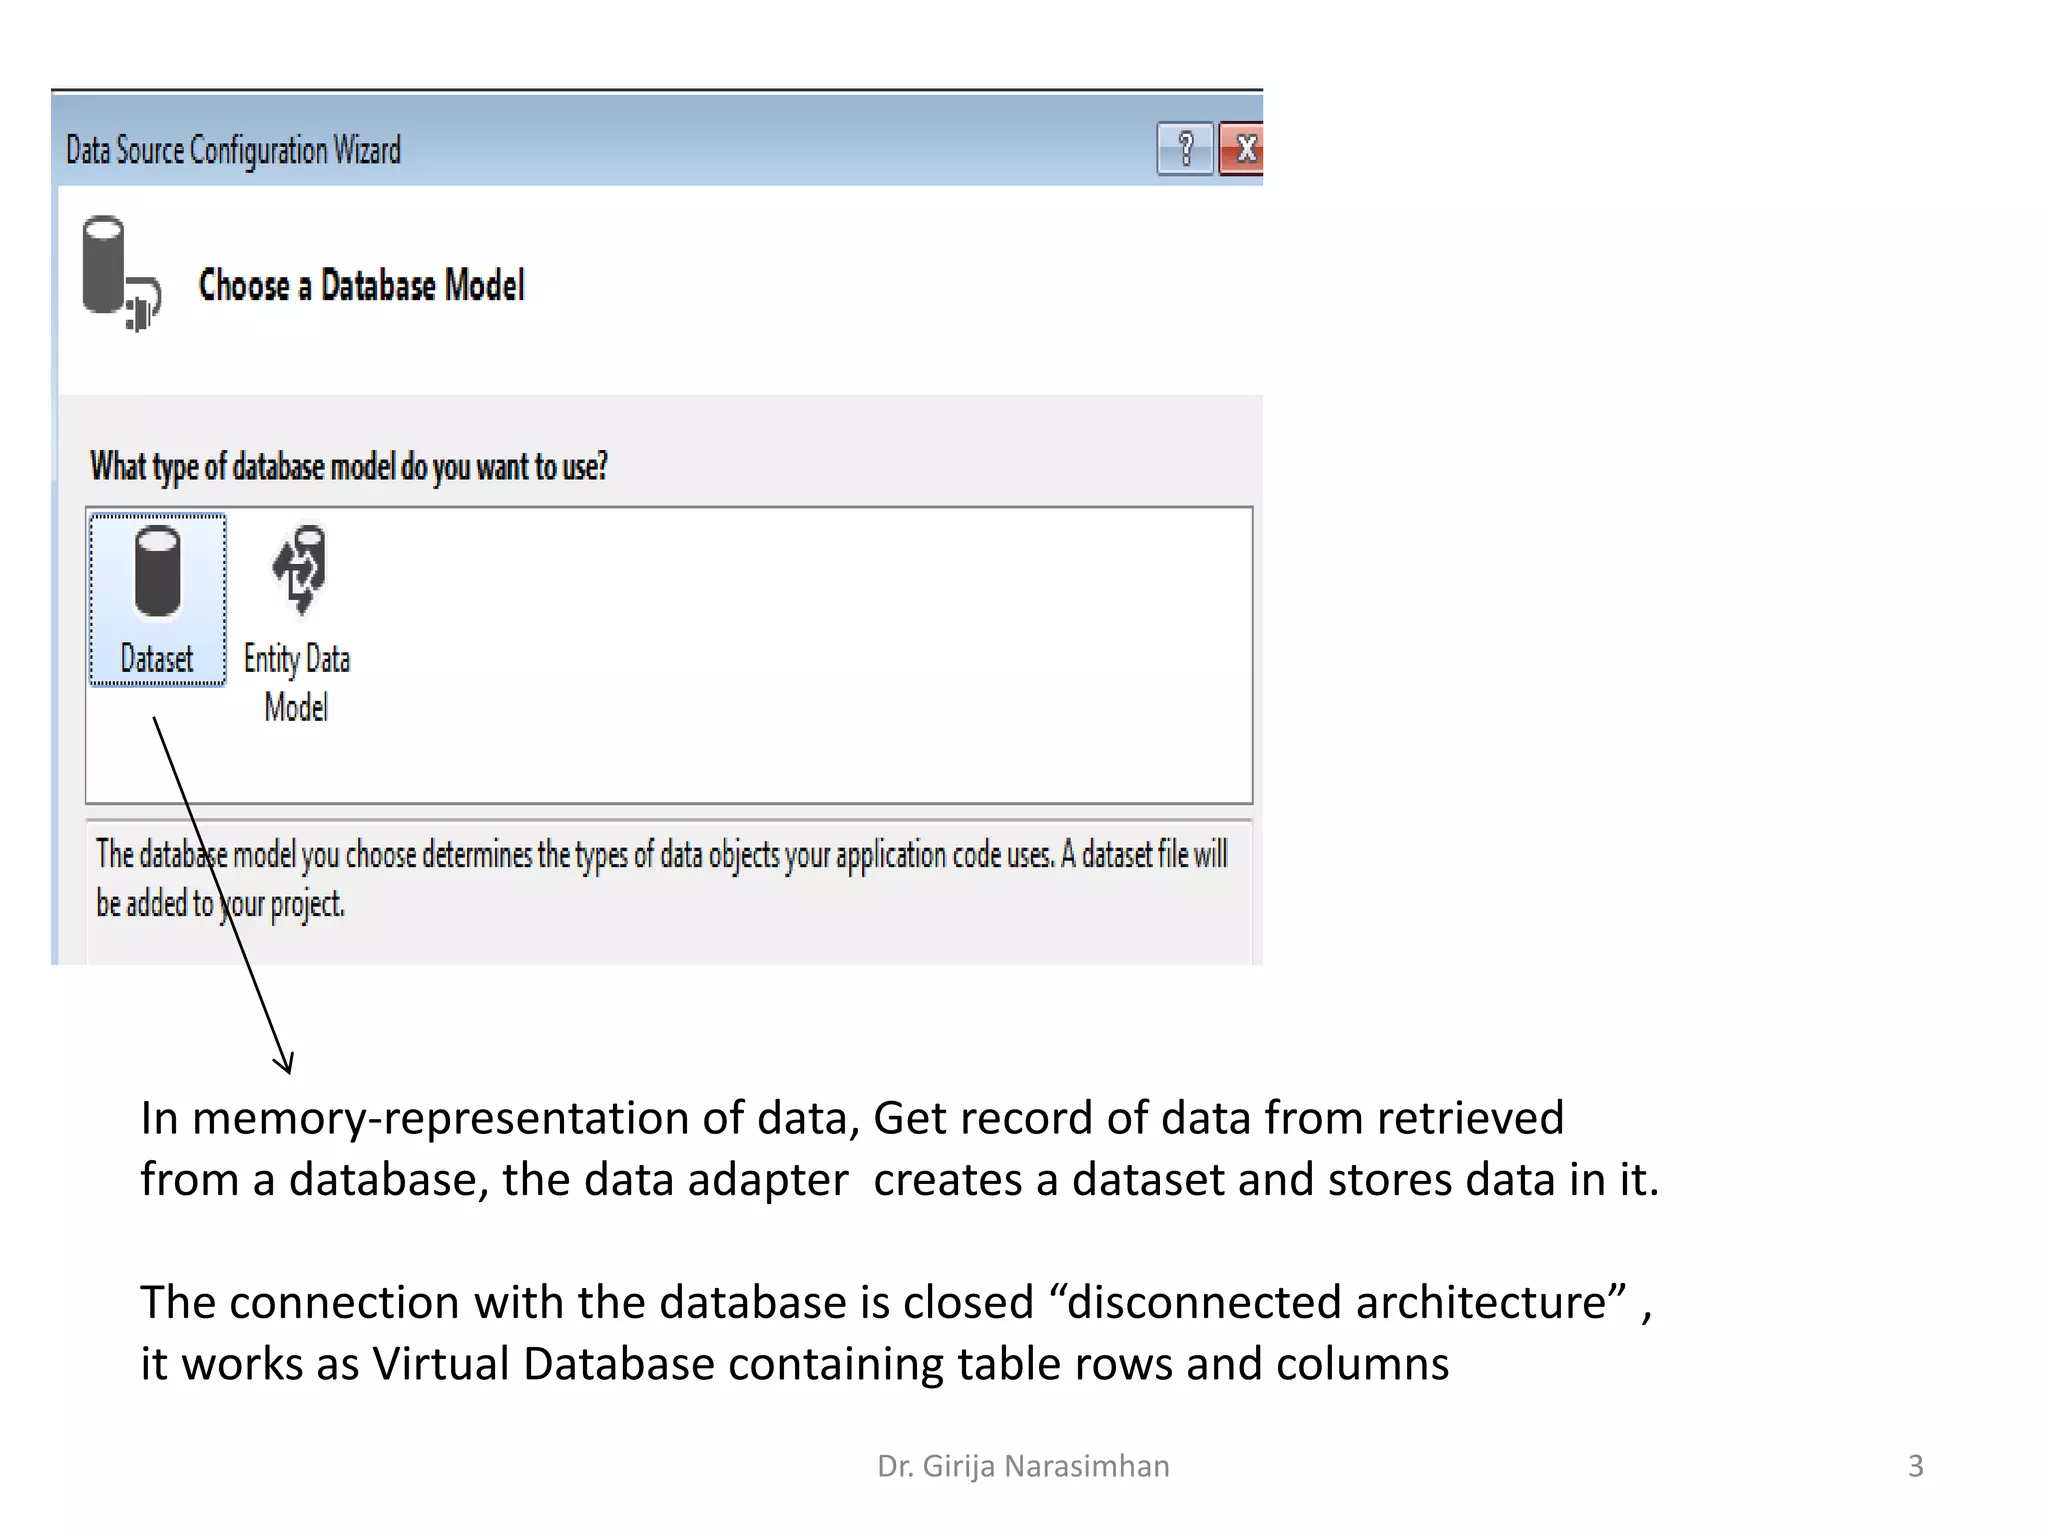
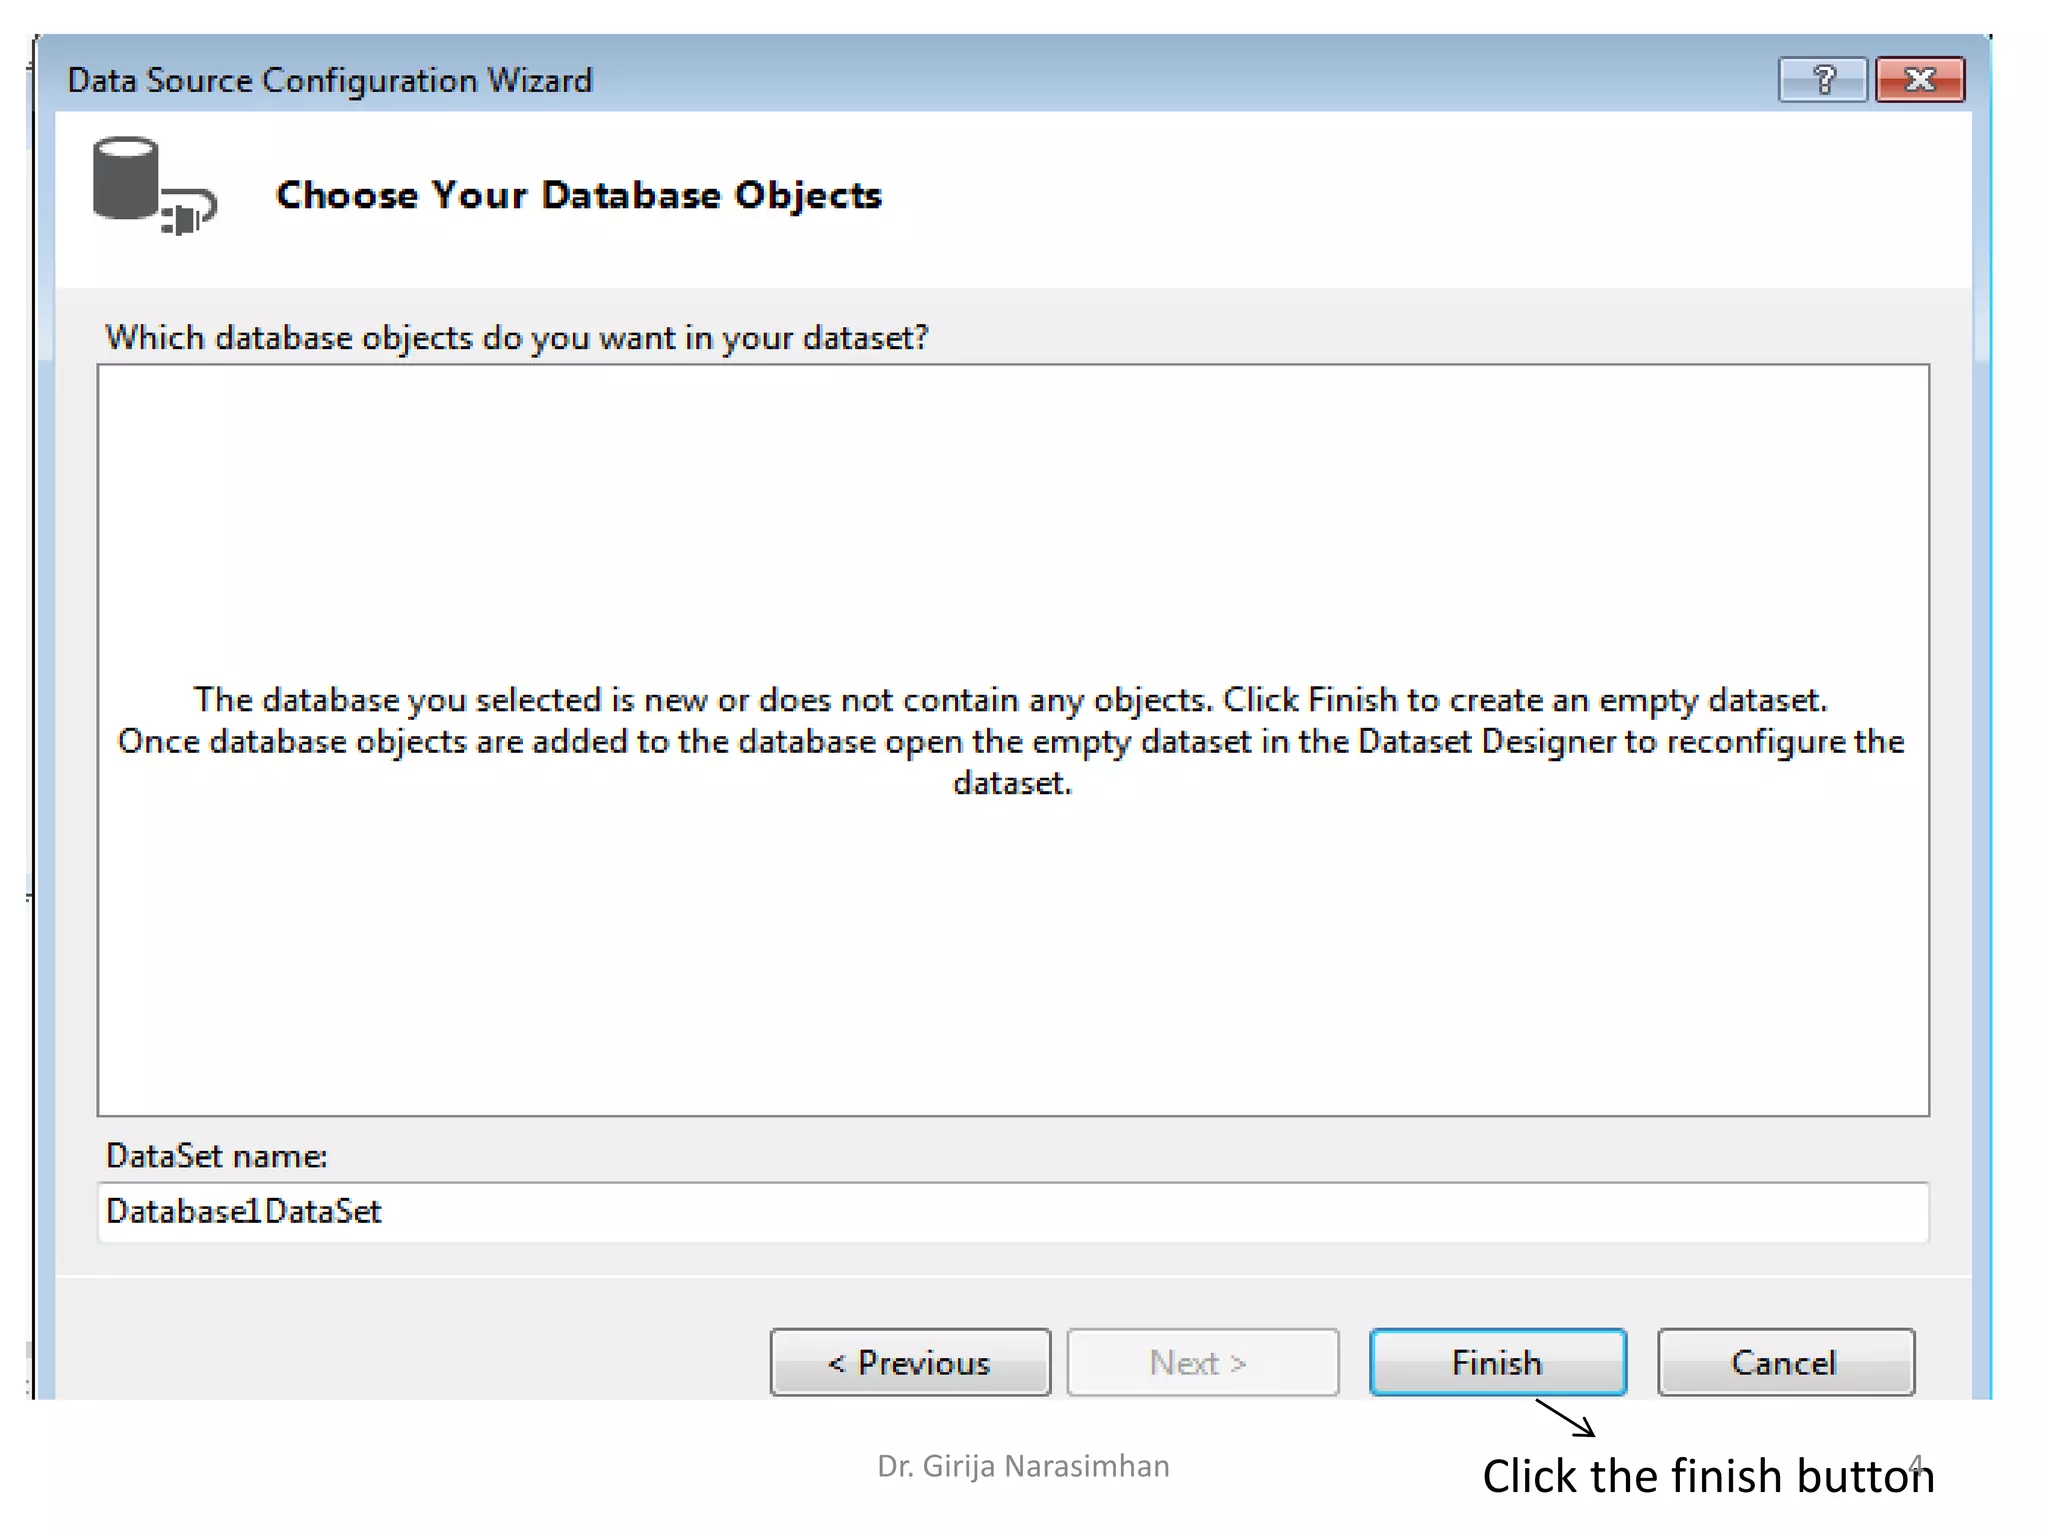
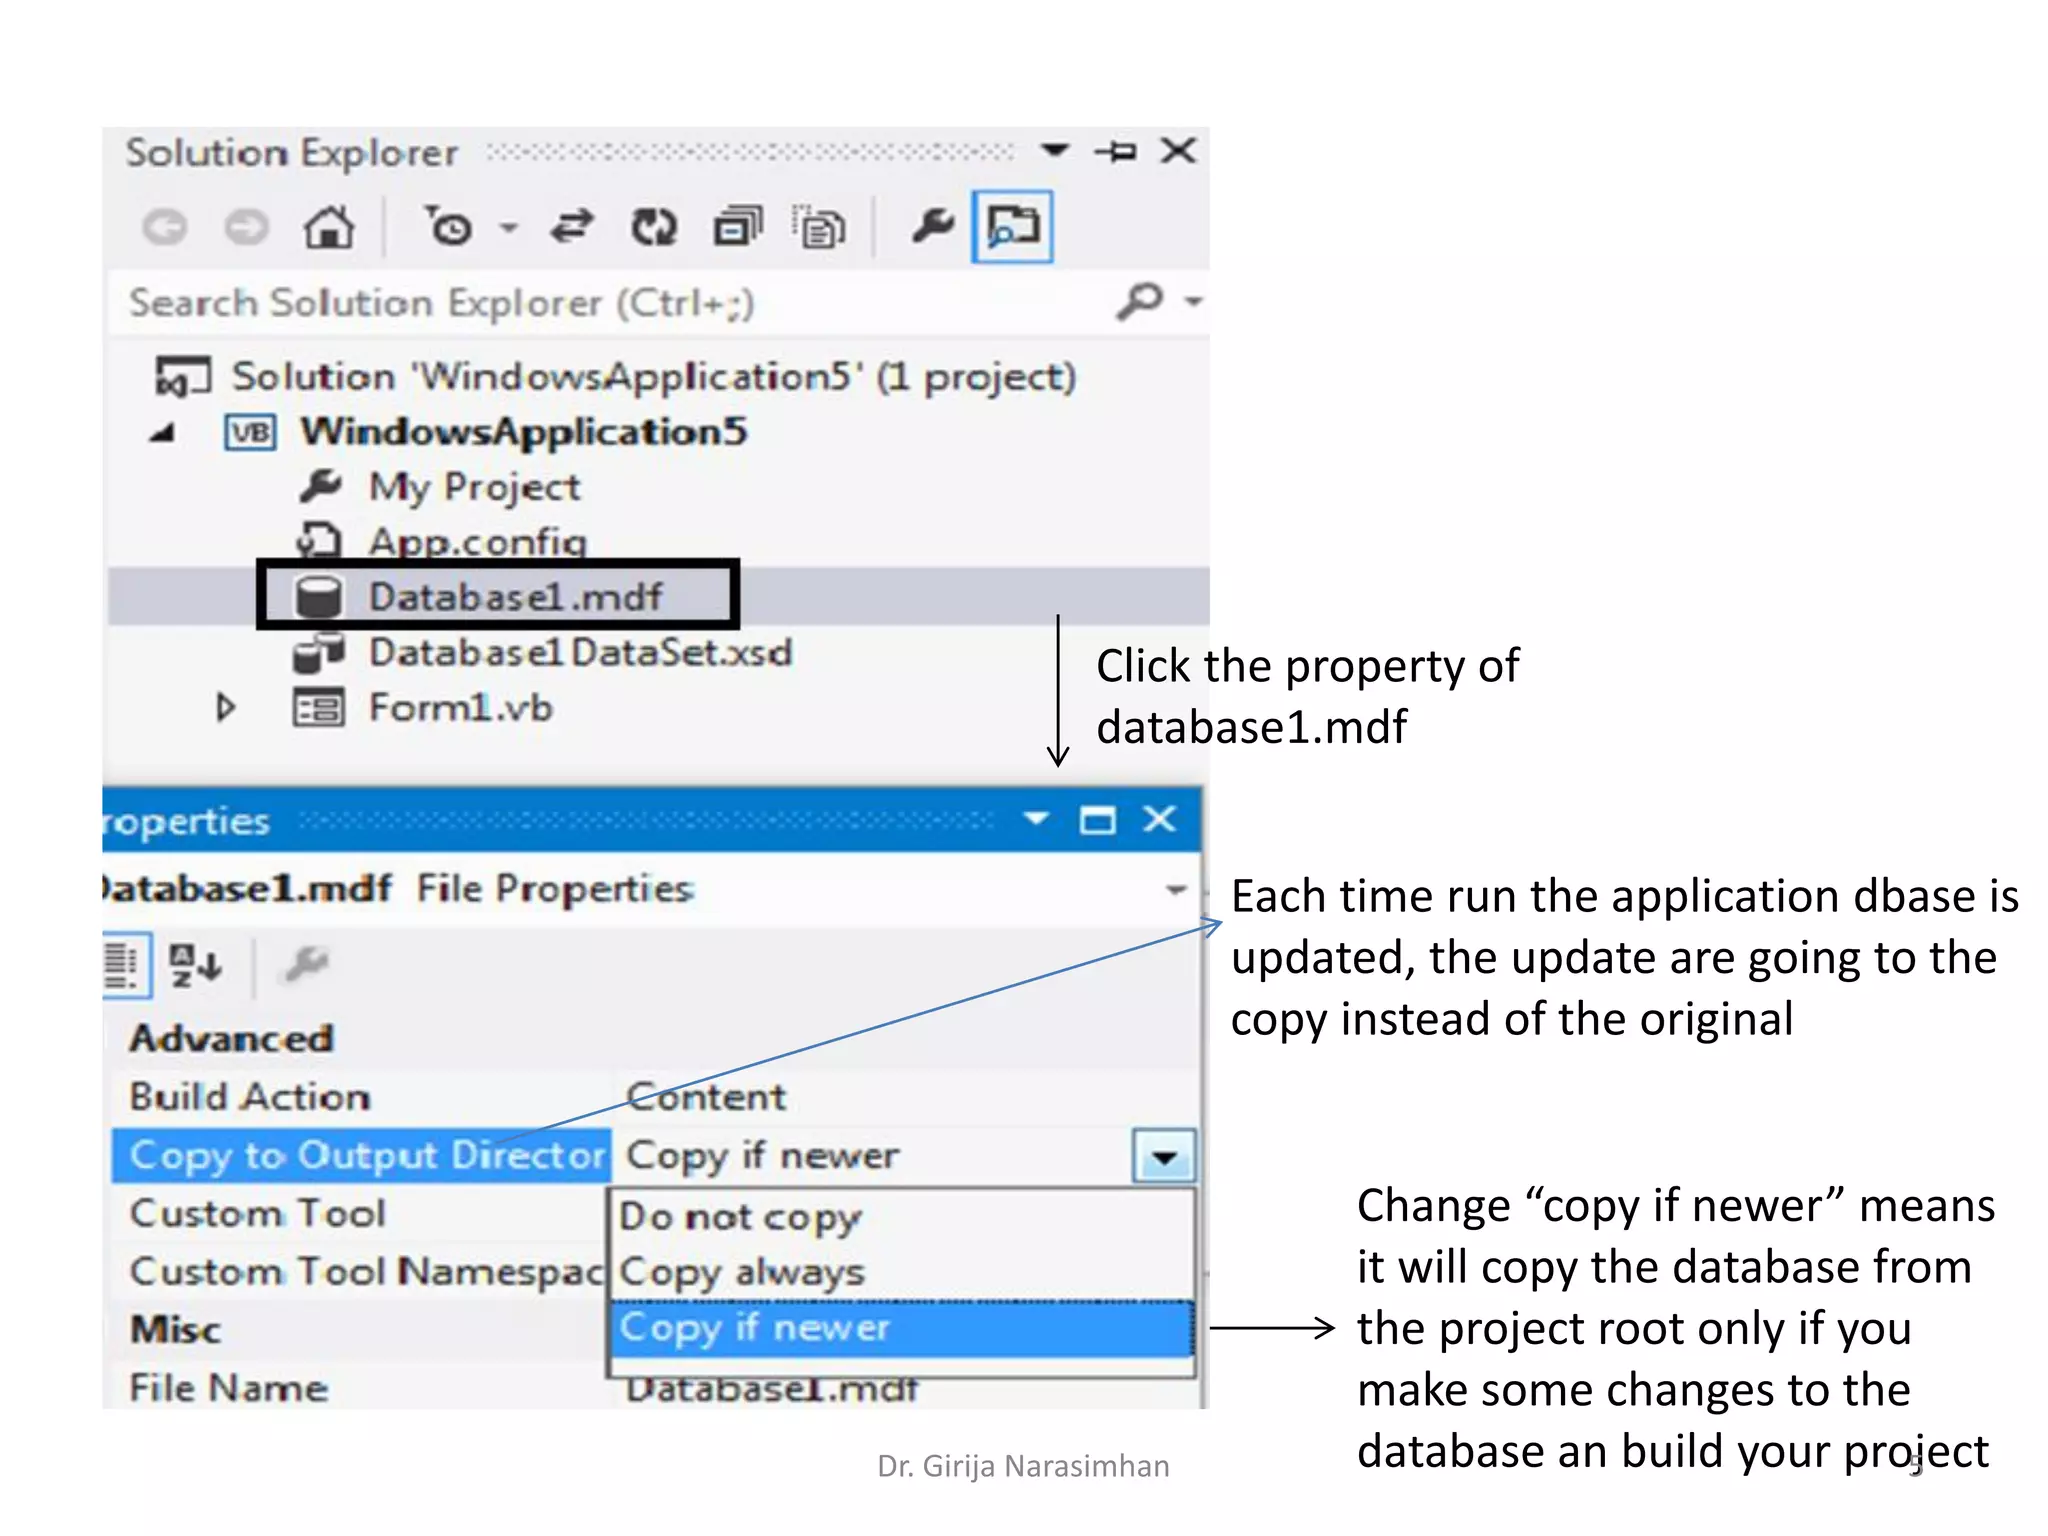
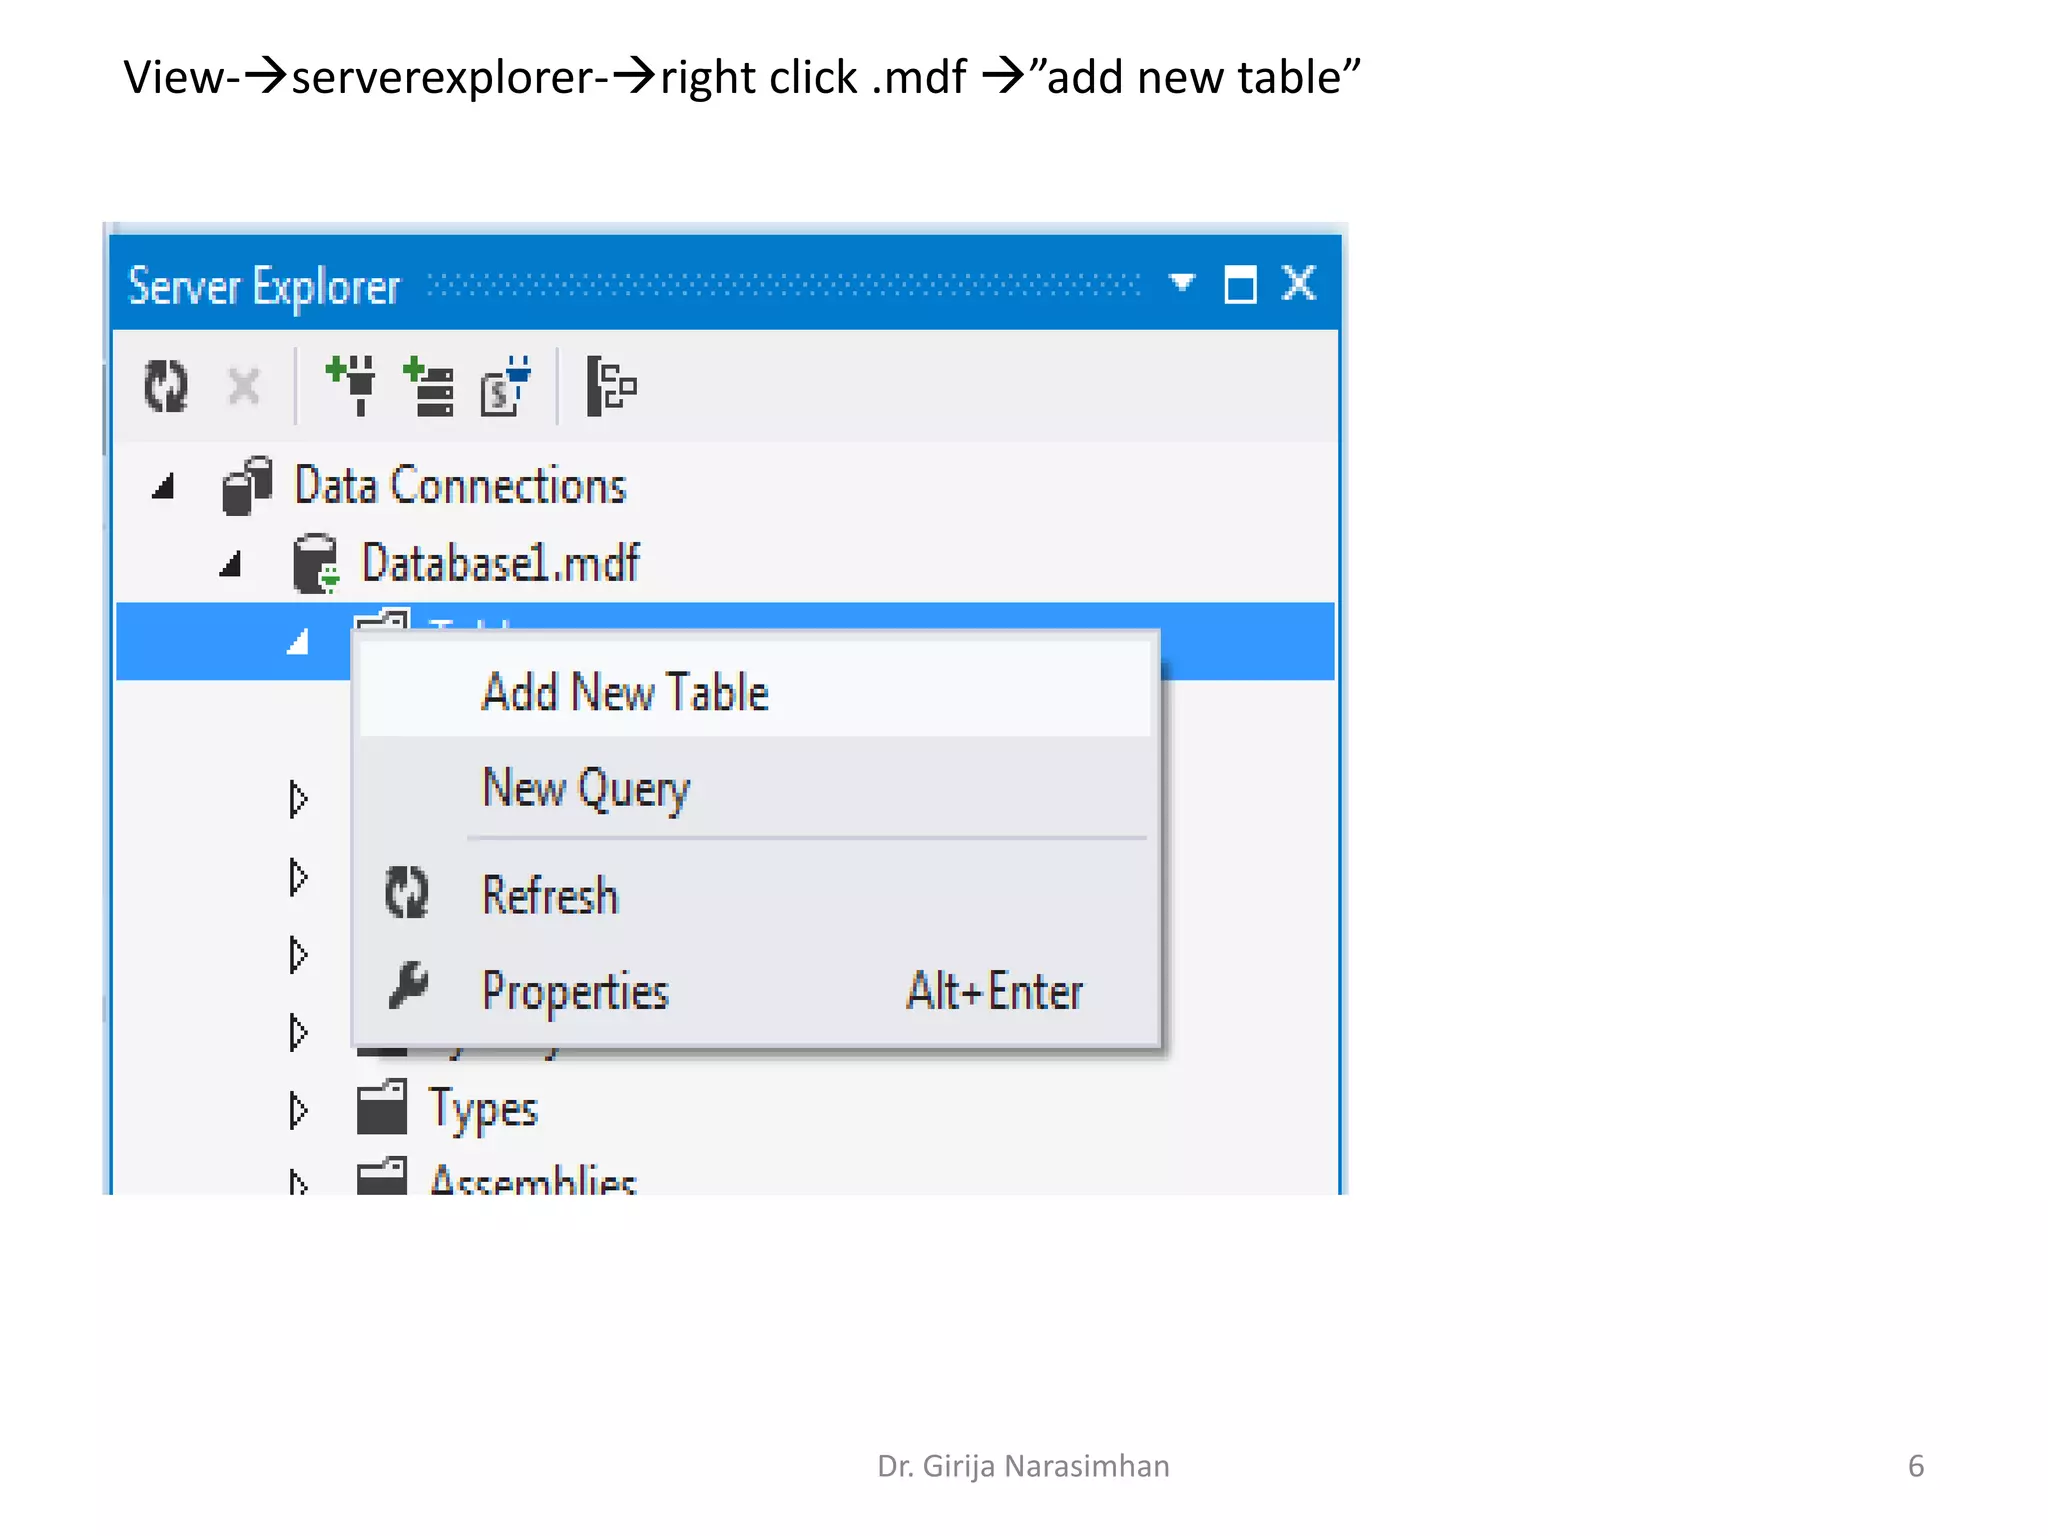
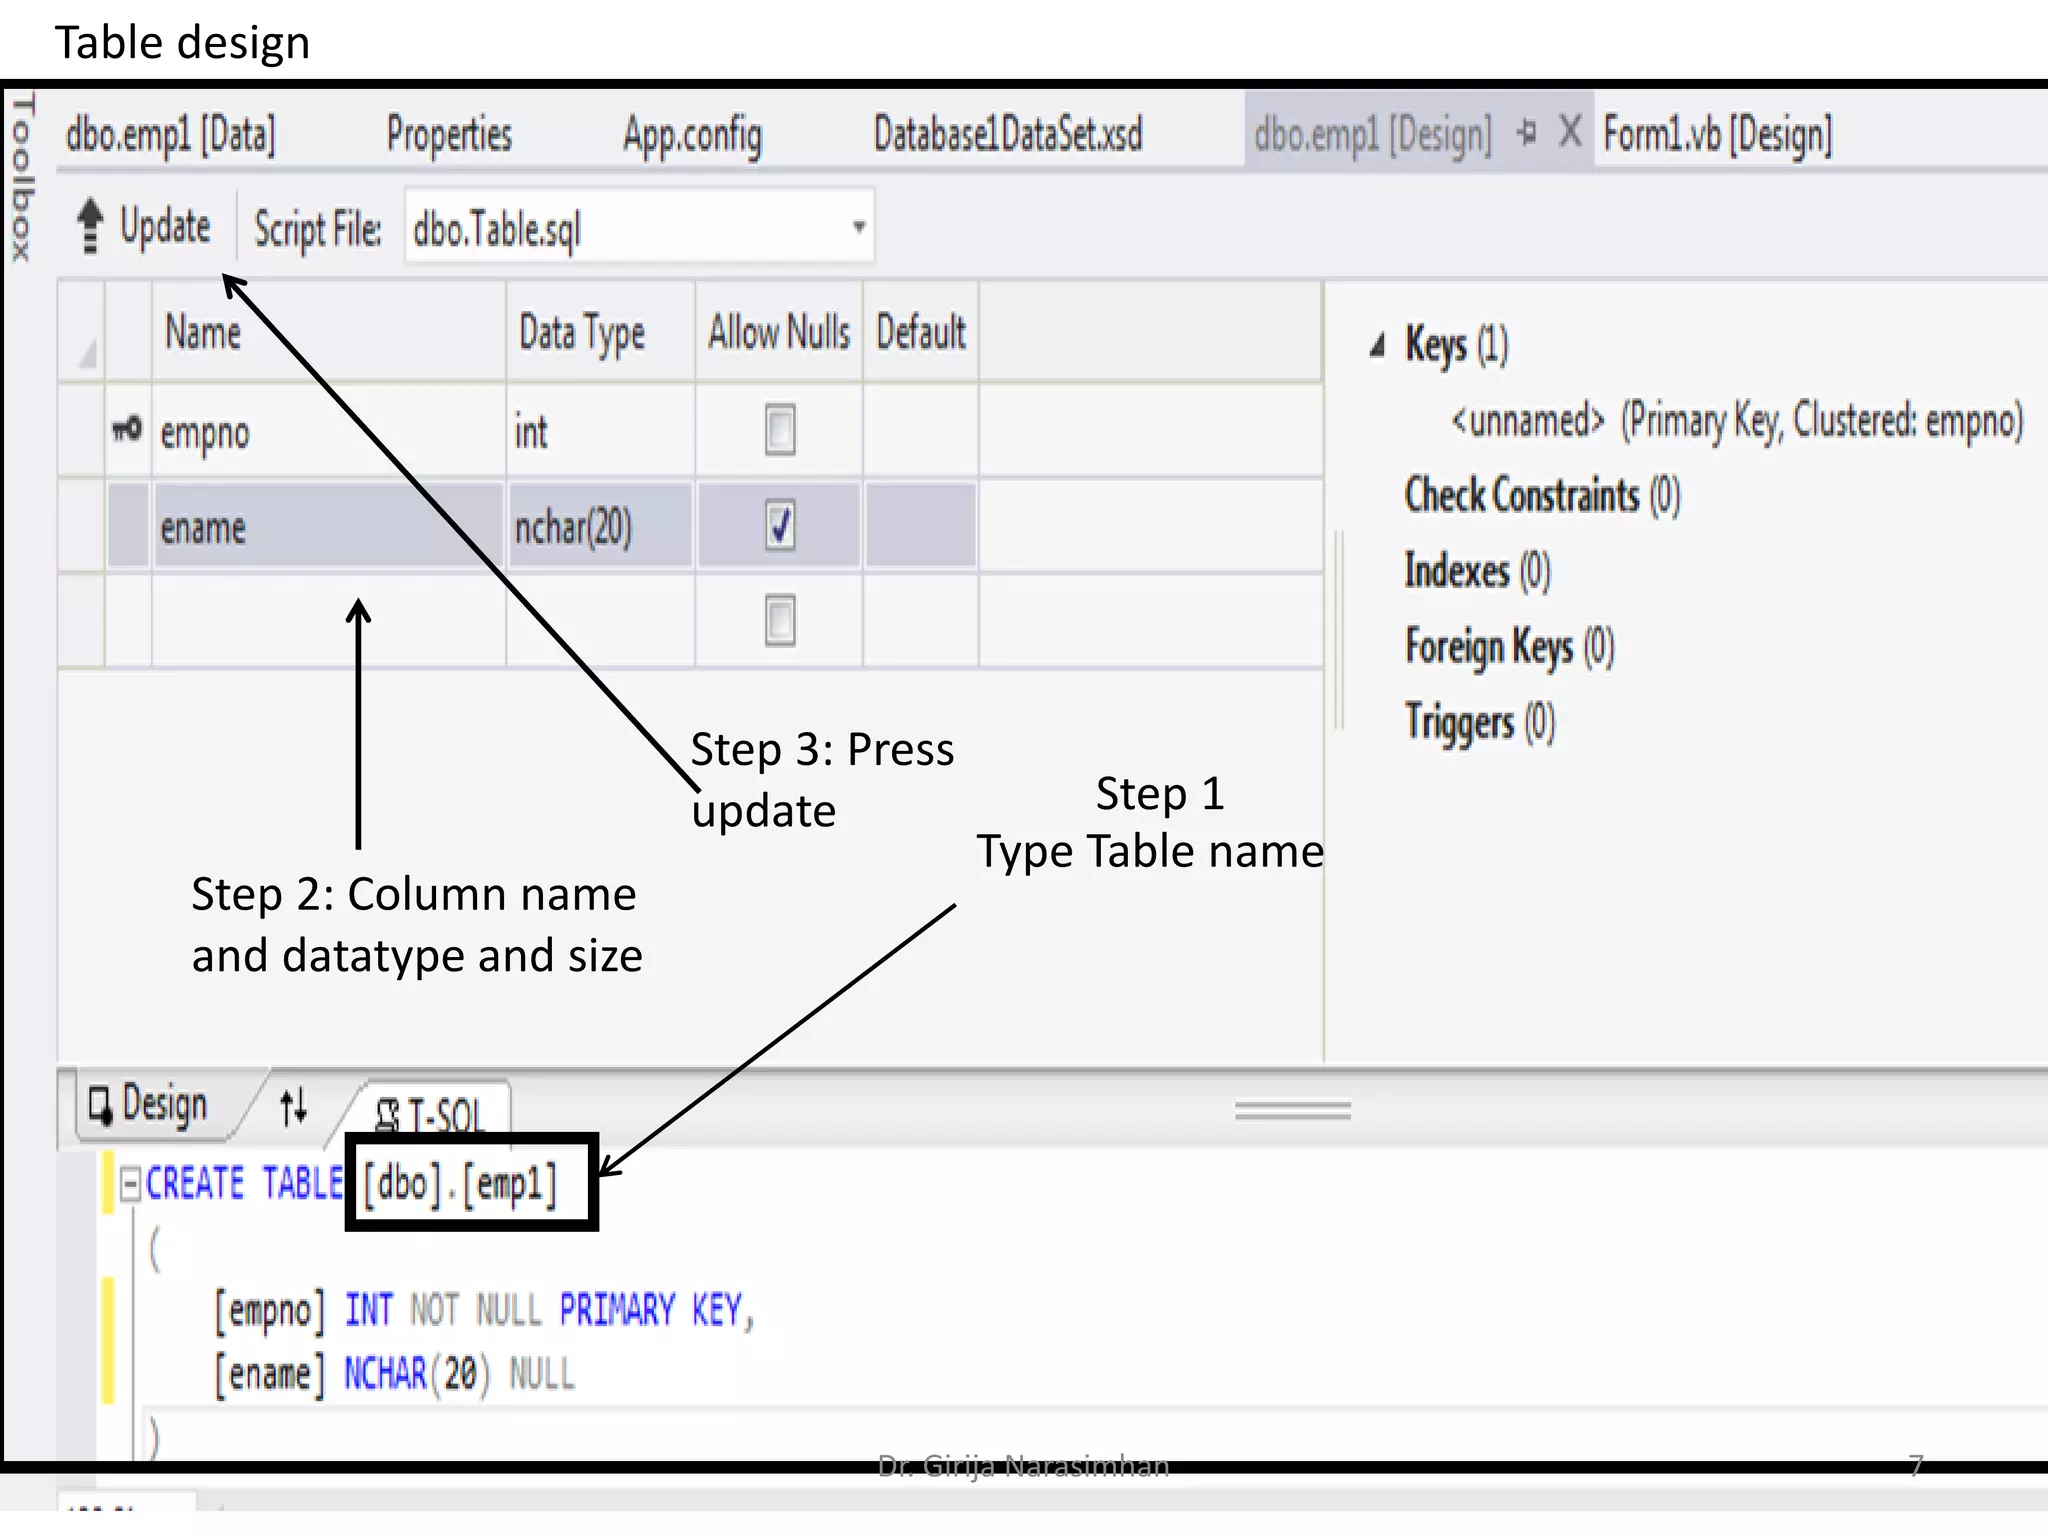
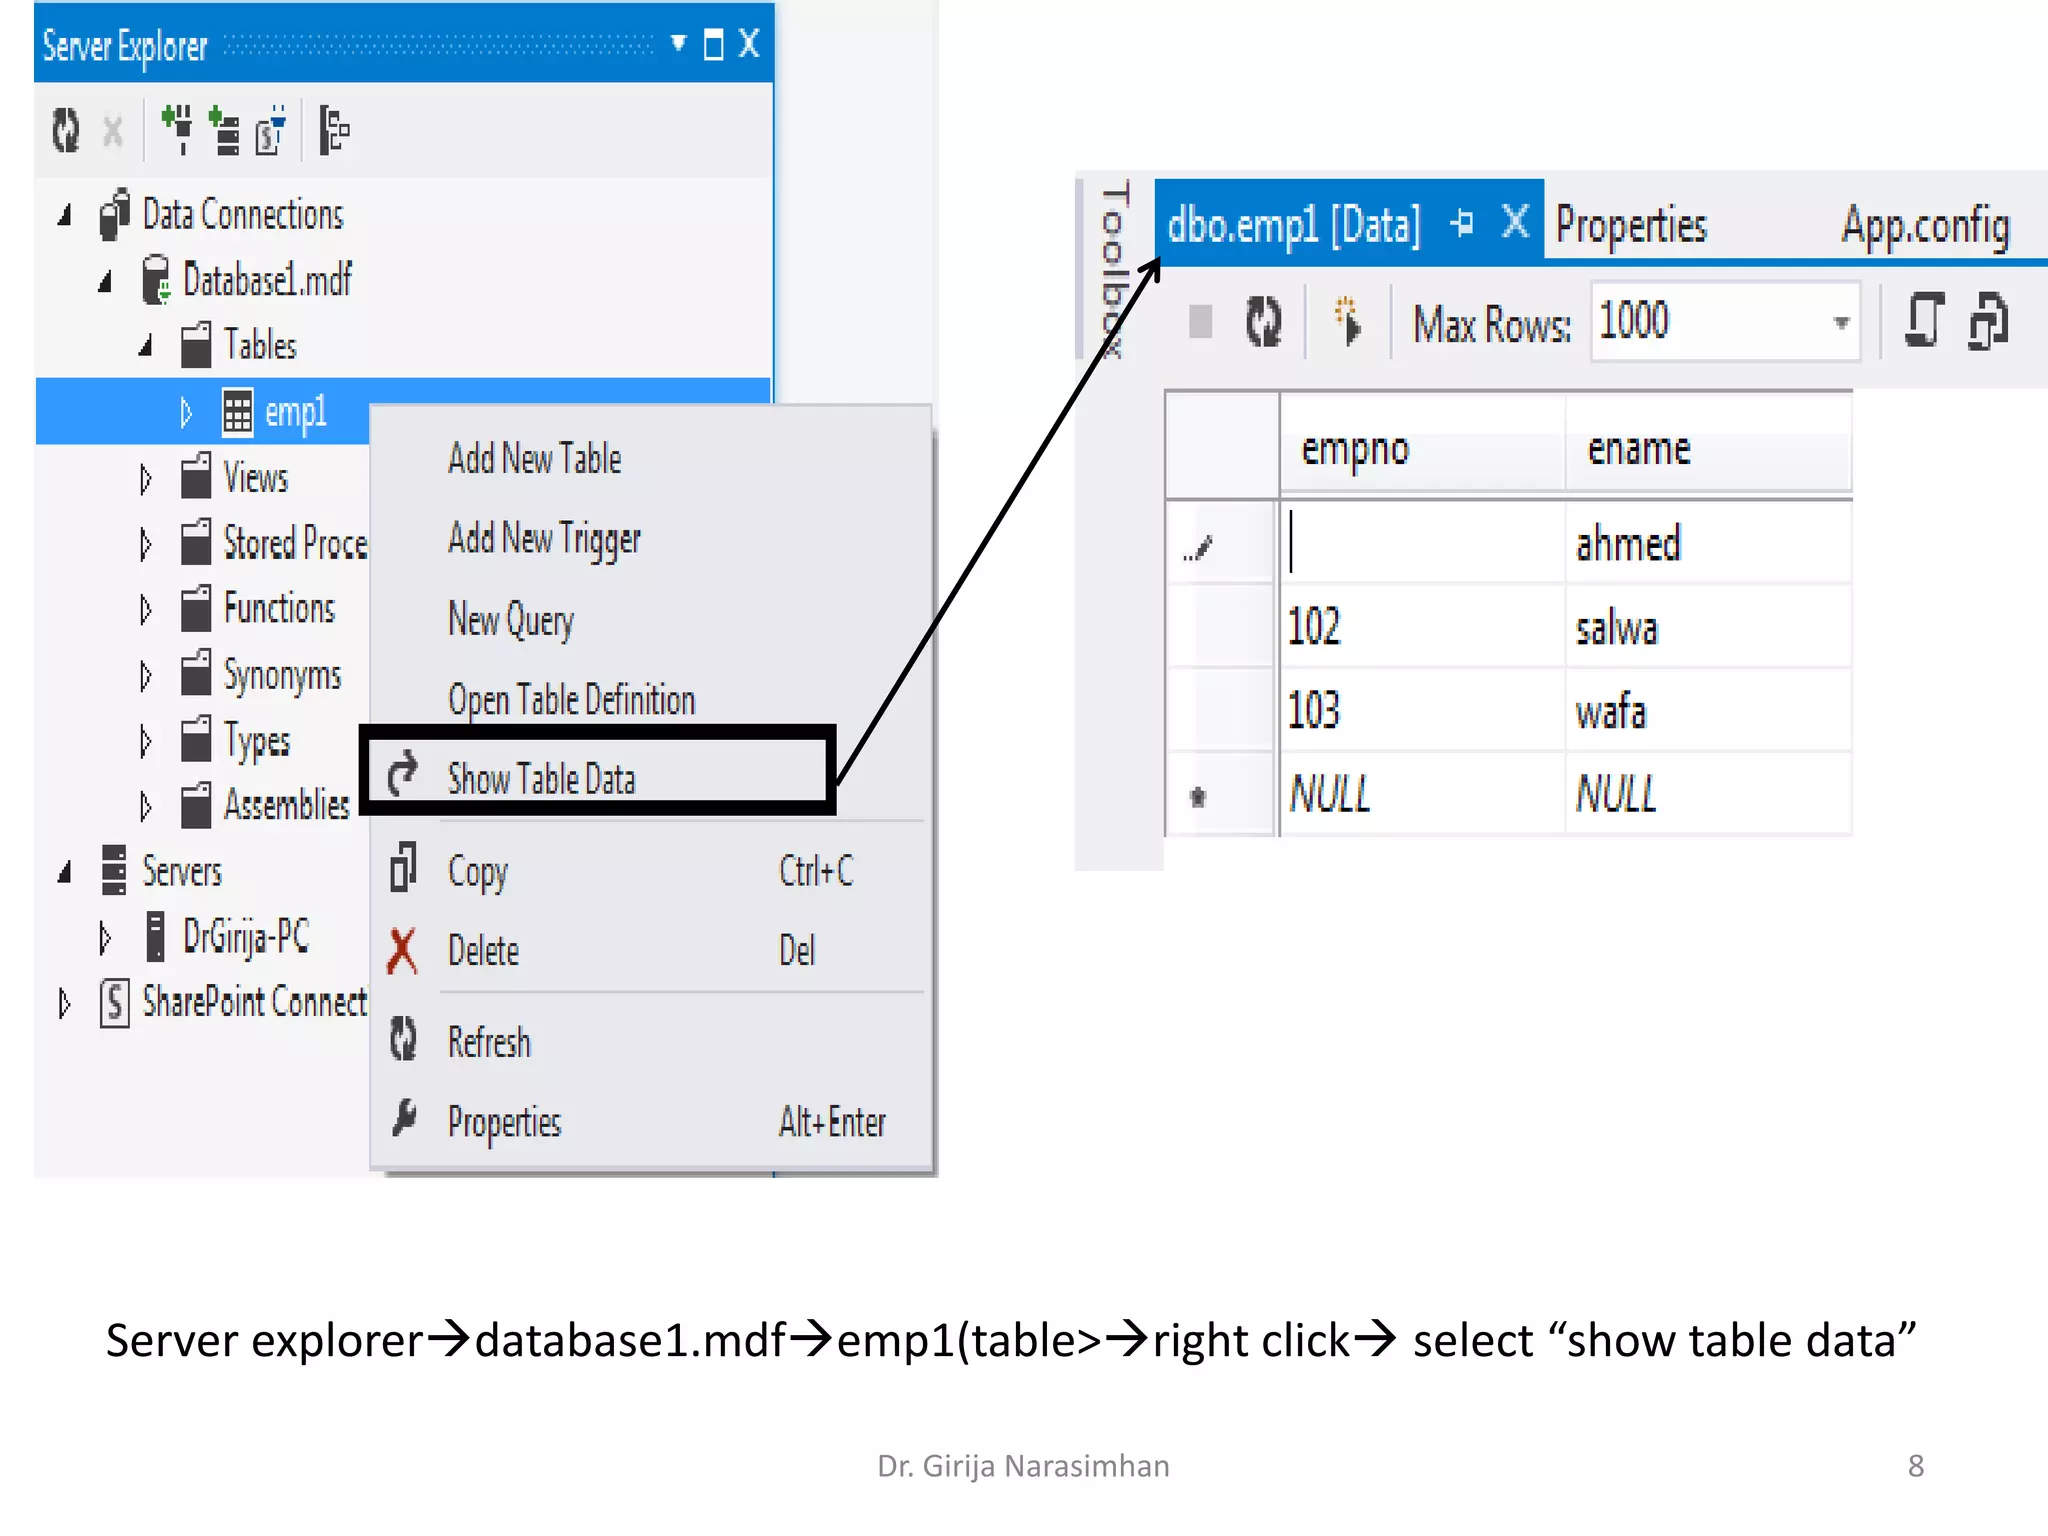
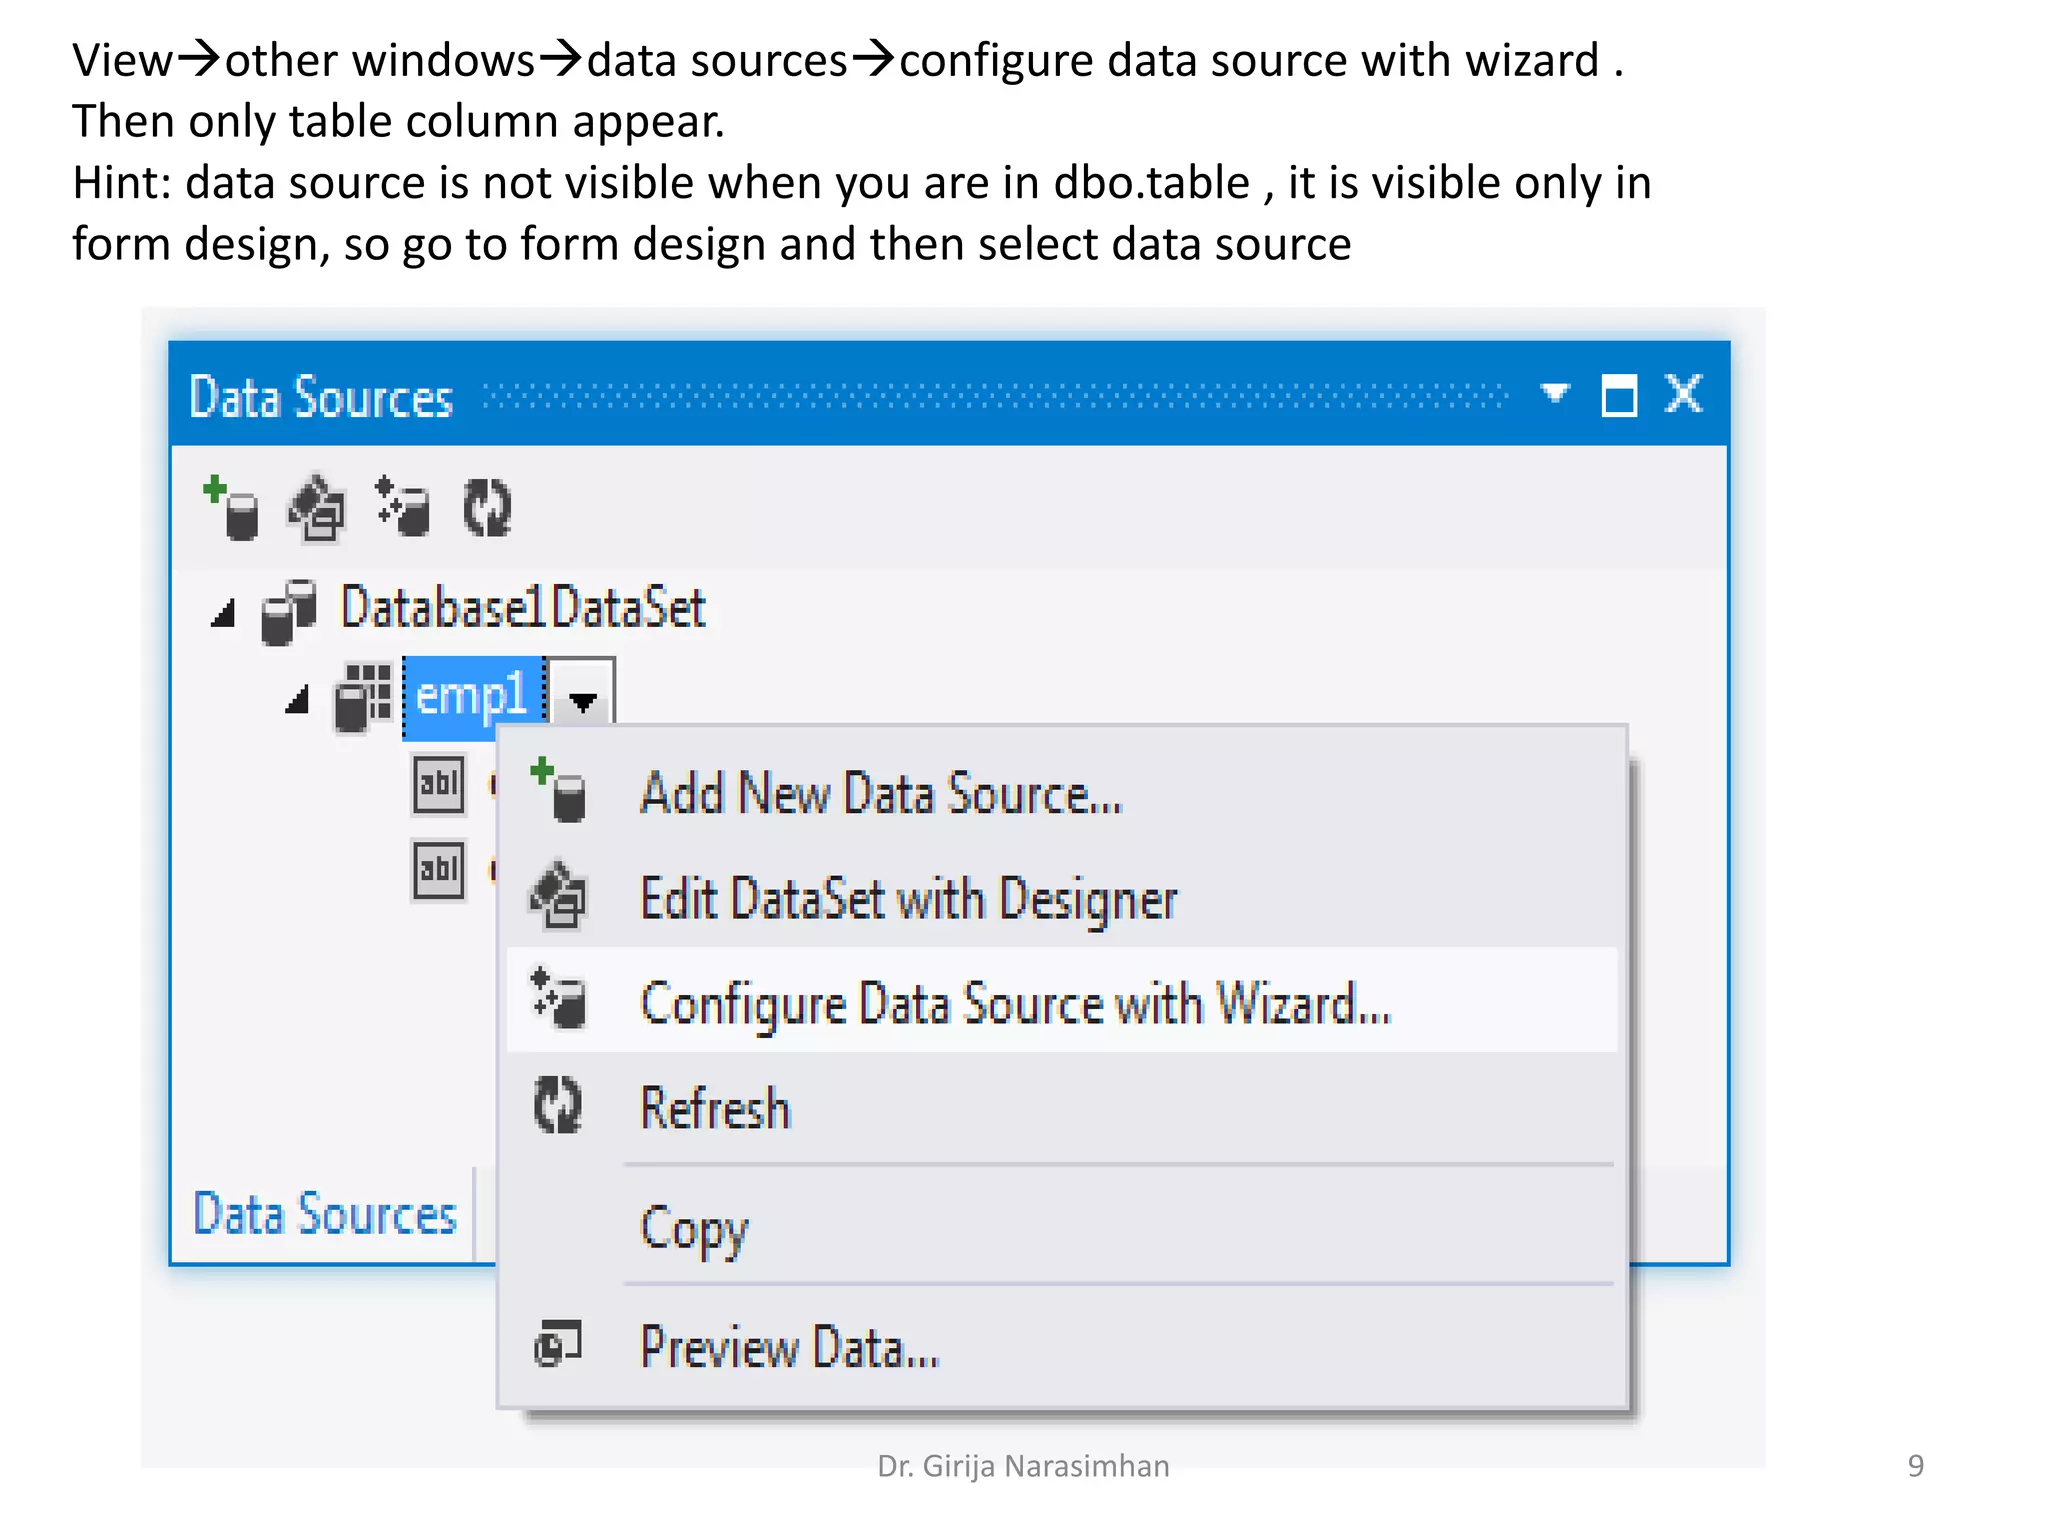
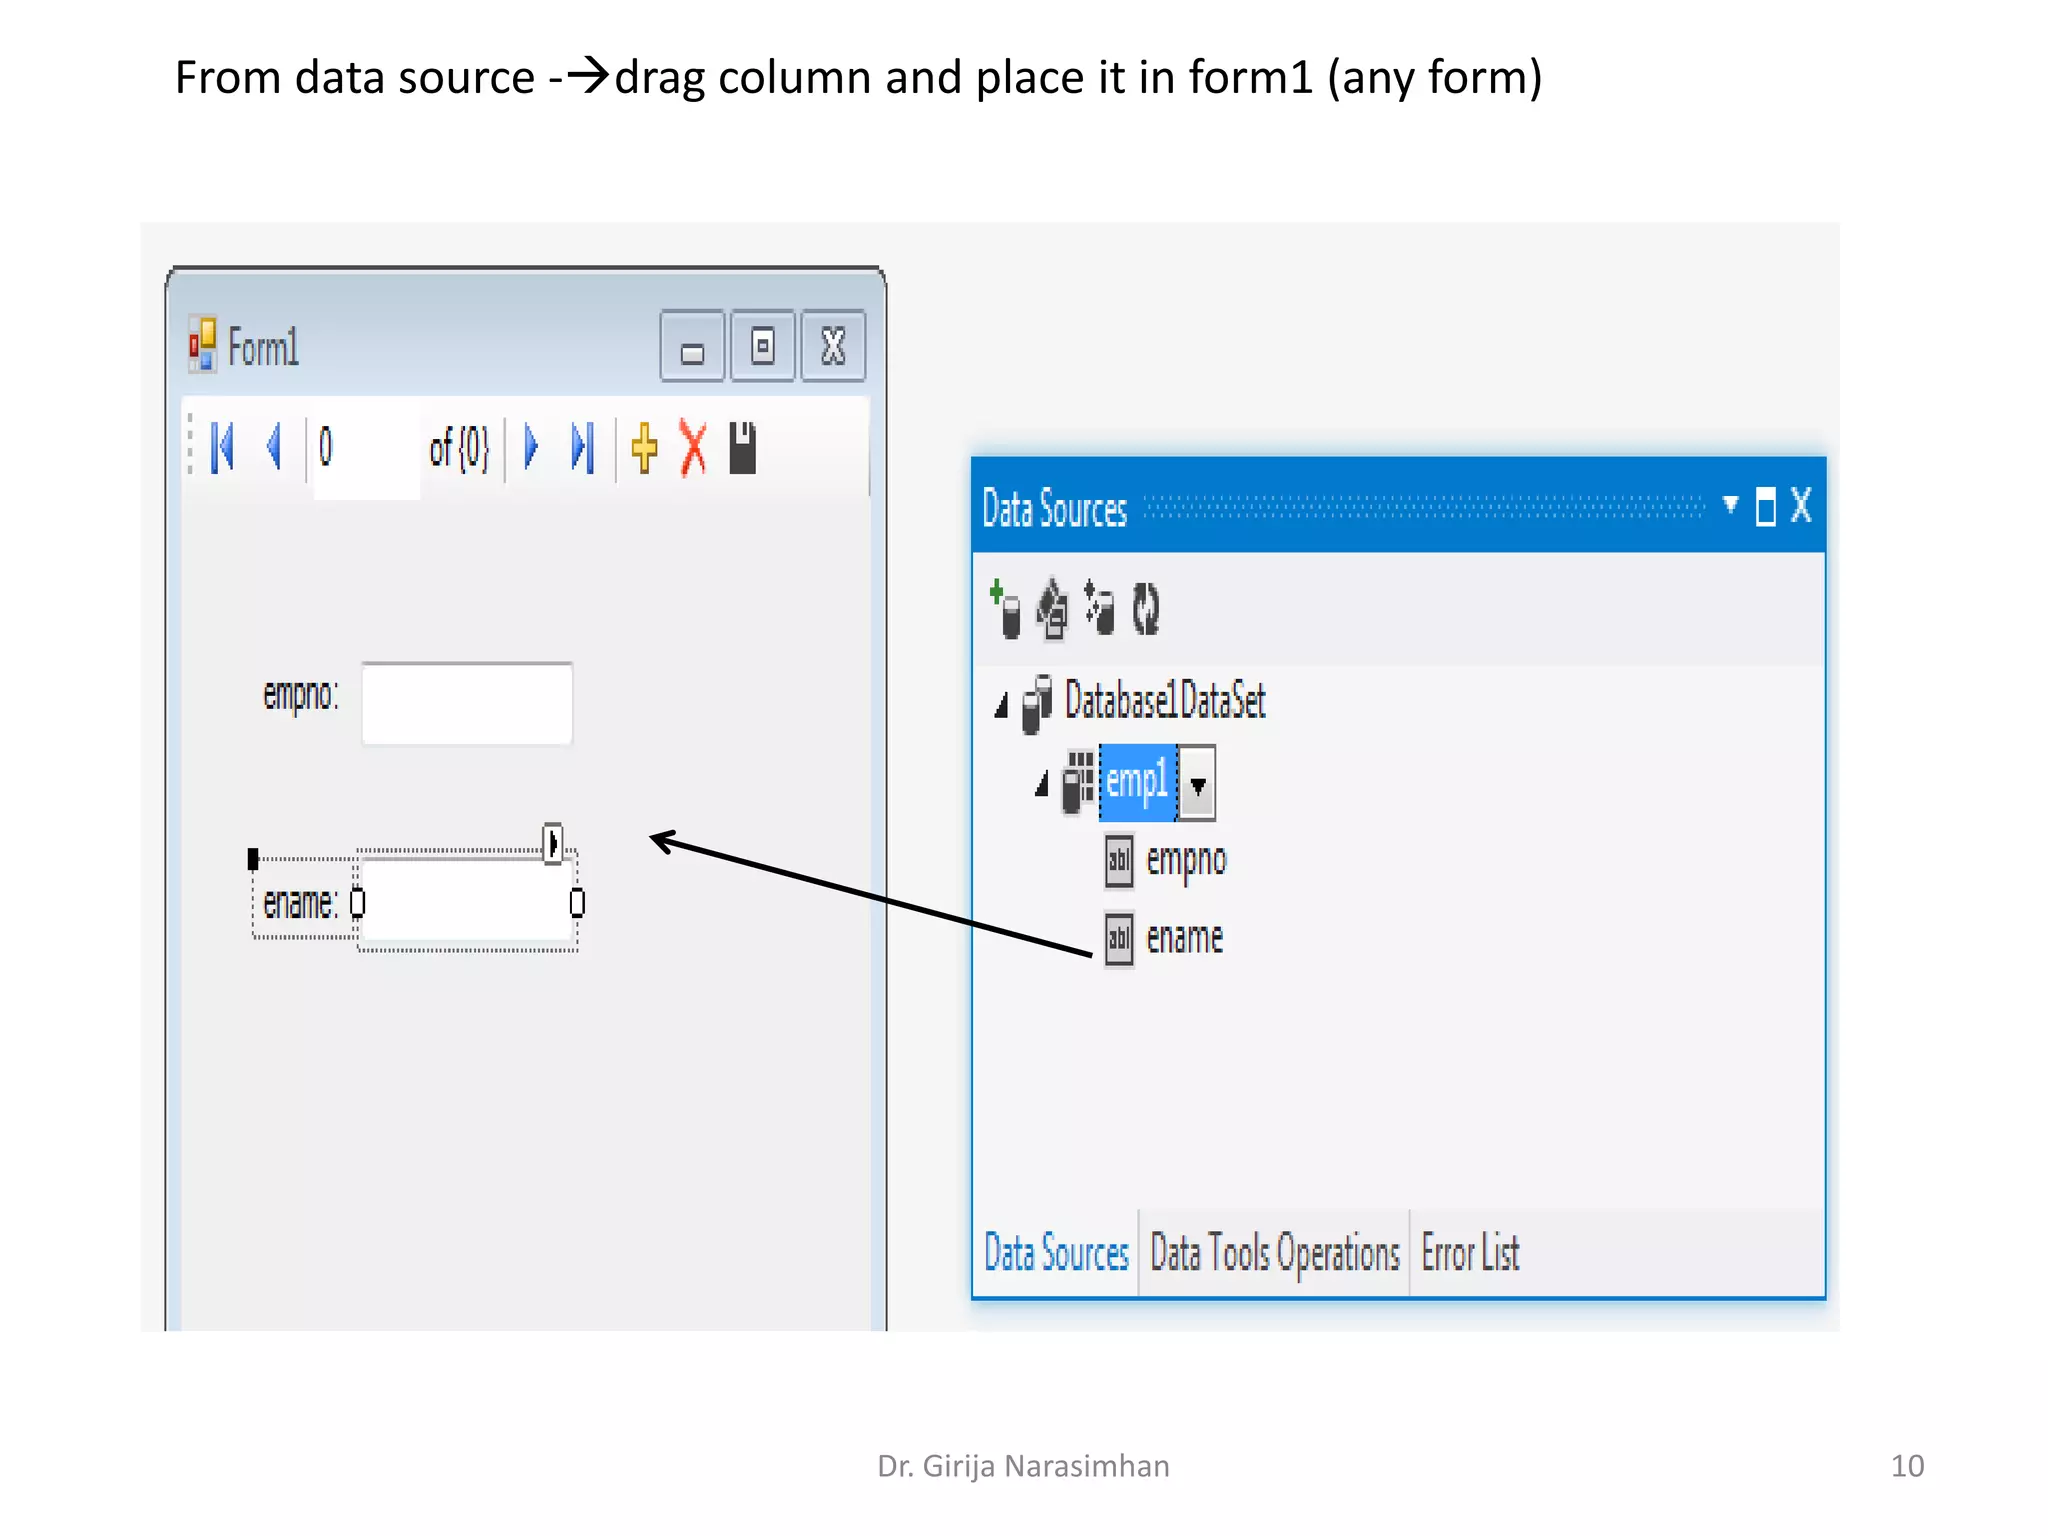
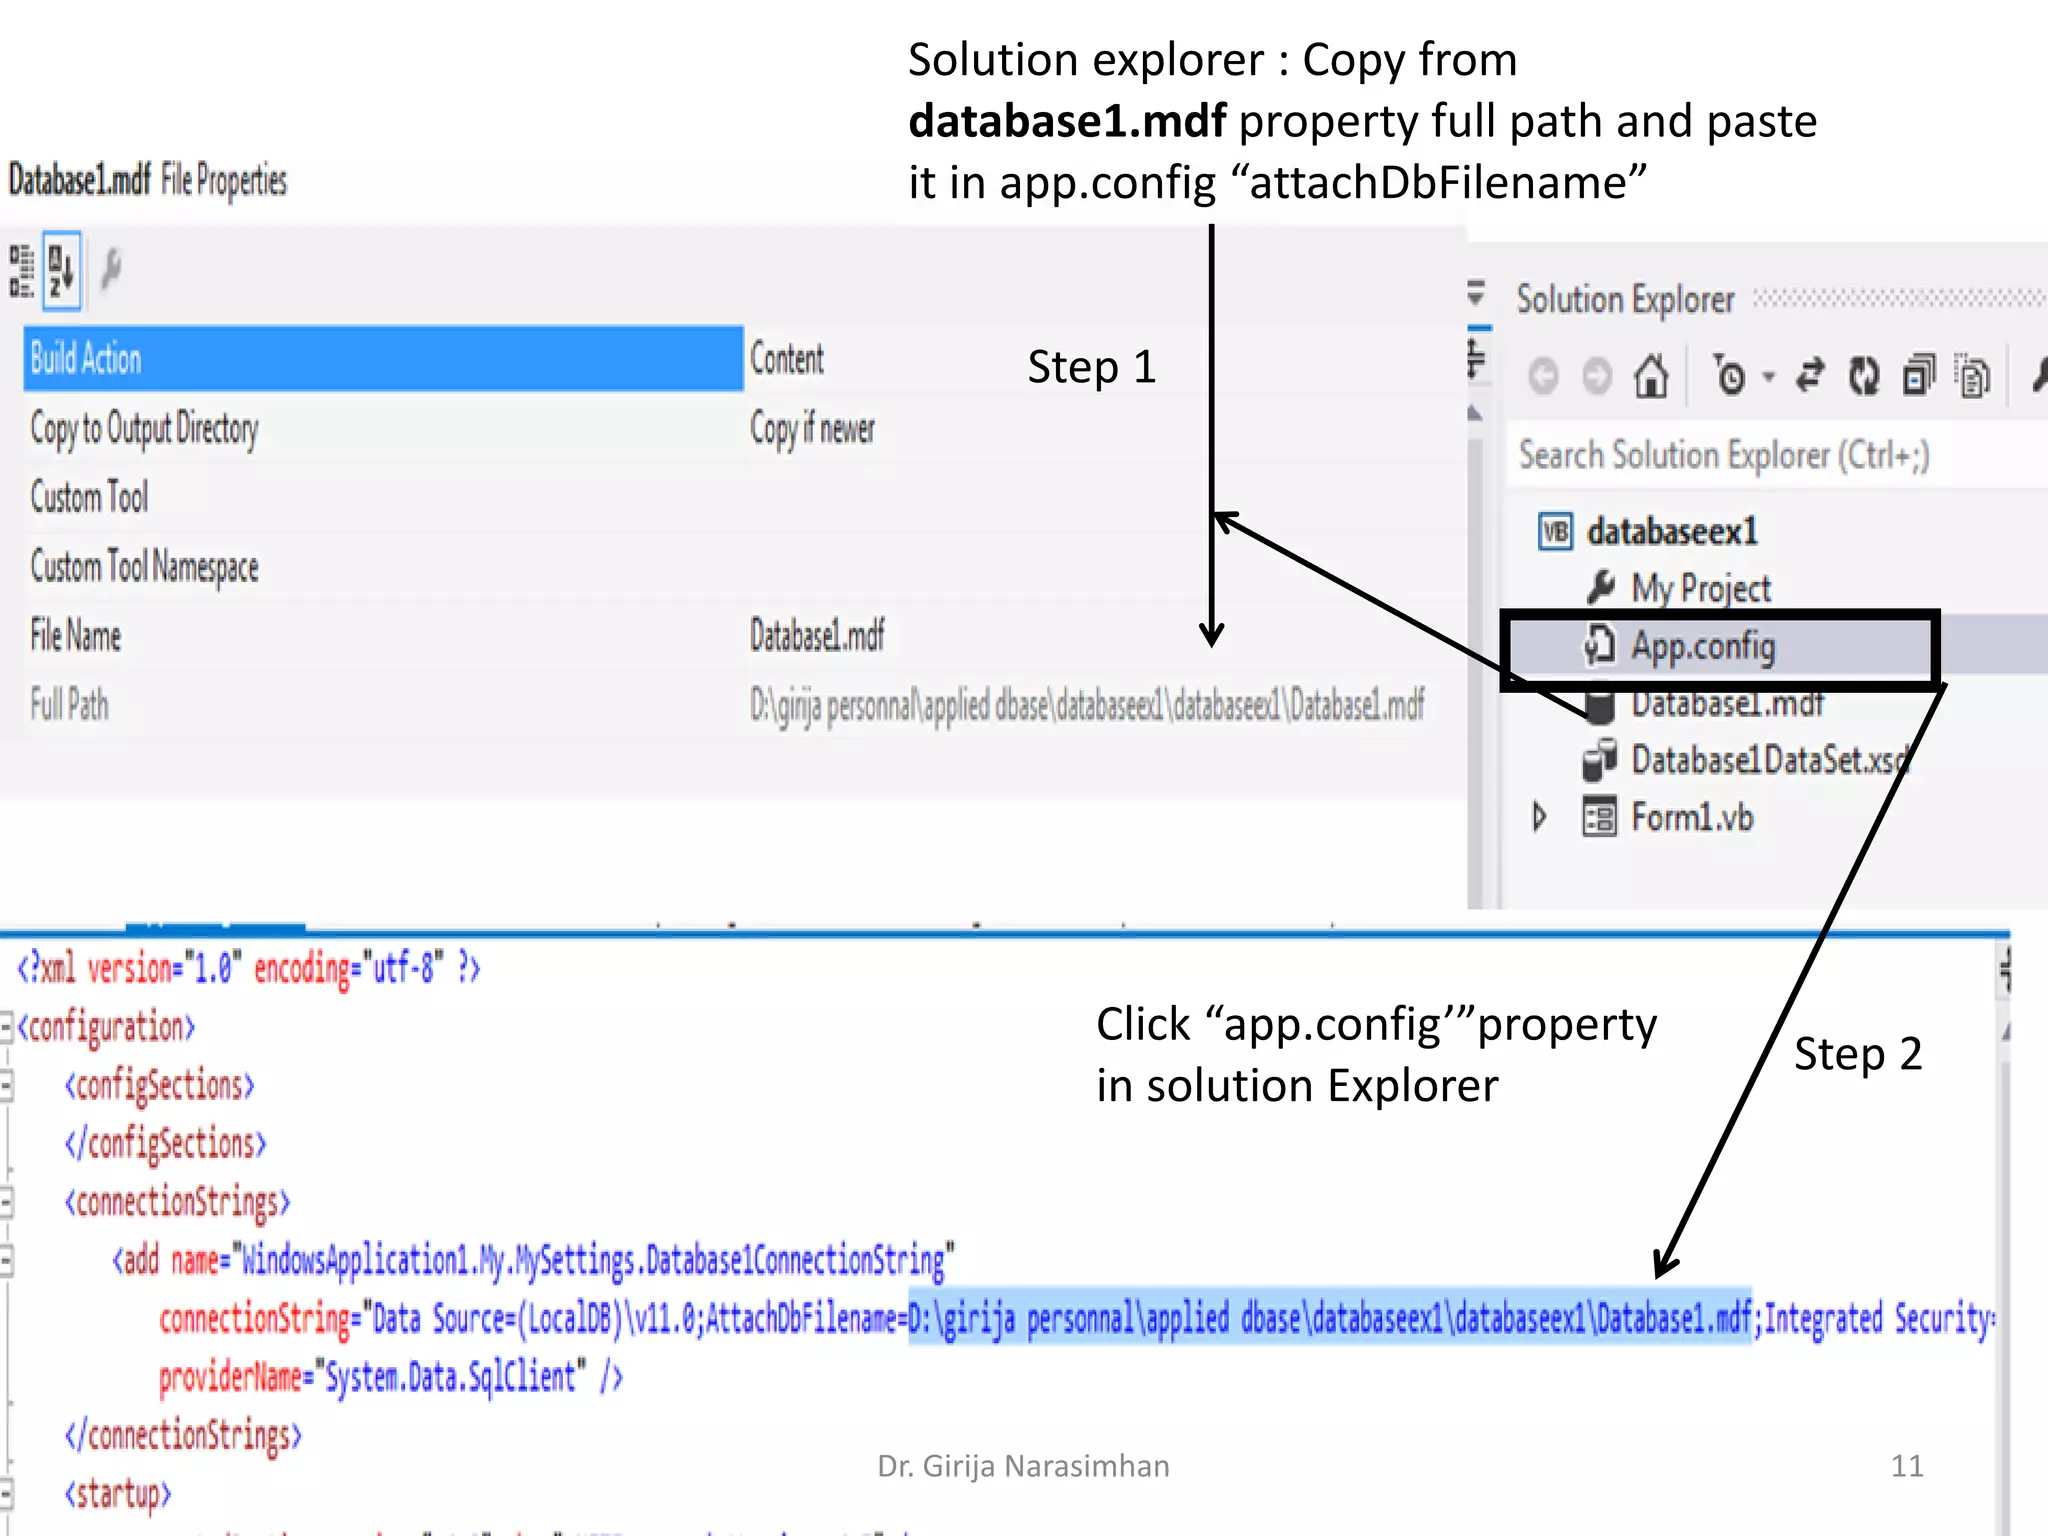
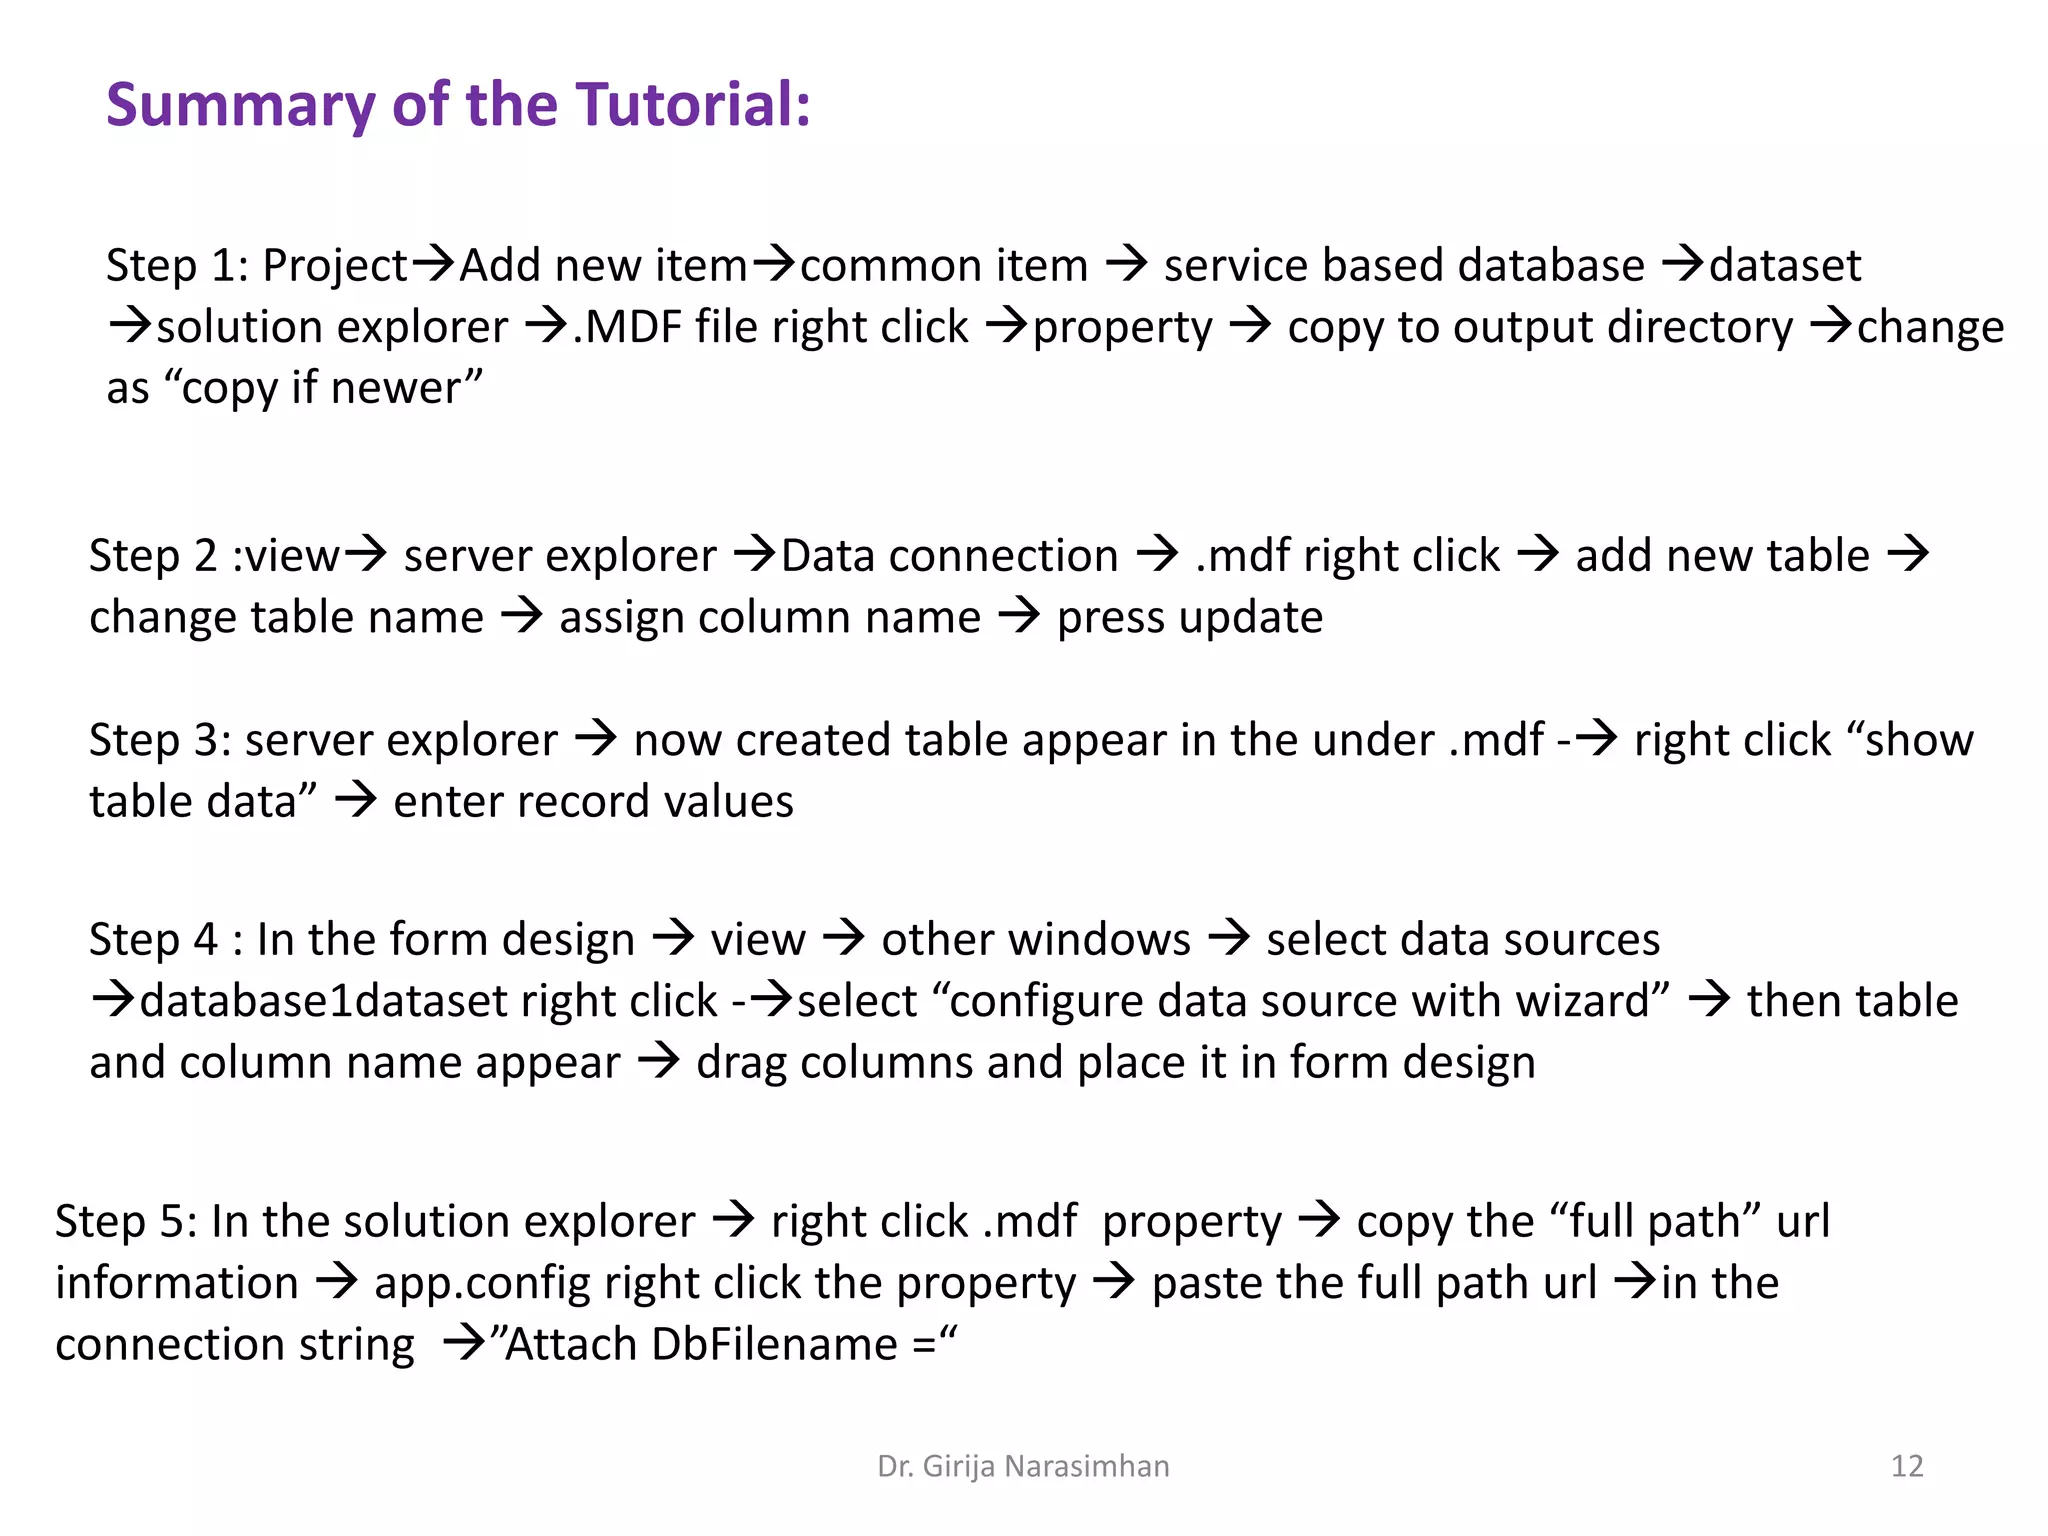

The document discusses creating a service-based database and dataset in VB.NET. It is a 5 step process: 1) Add a dataset to the project and set the .MDF file's copy property. 2) Add a table to the database using server explorer. 3) Enter record values by right clicking the table. 4) Configure the dataset as a data source and drag columns onto a form. 5) Copy the .MDF file path into the app.config connection string to connect the form to the database.