
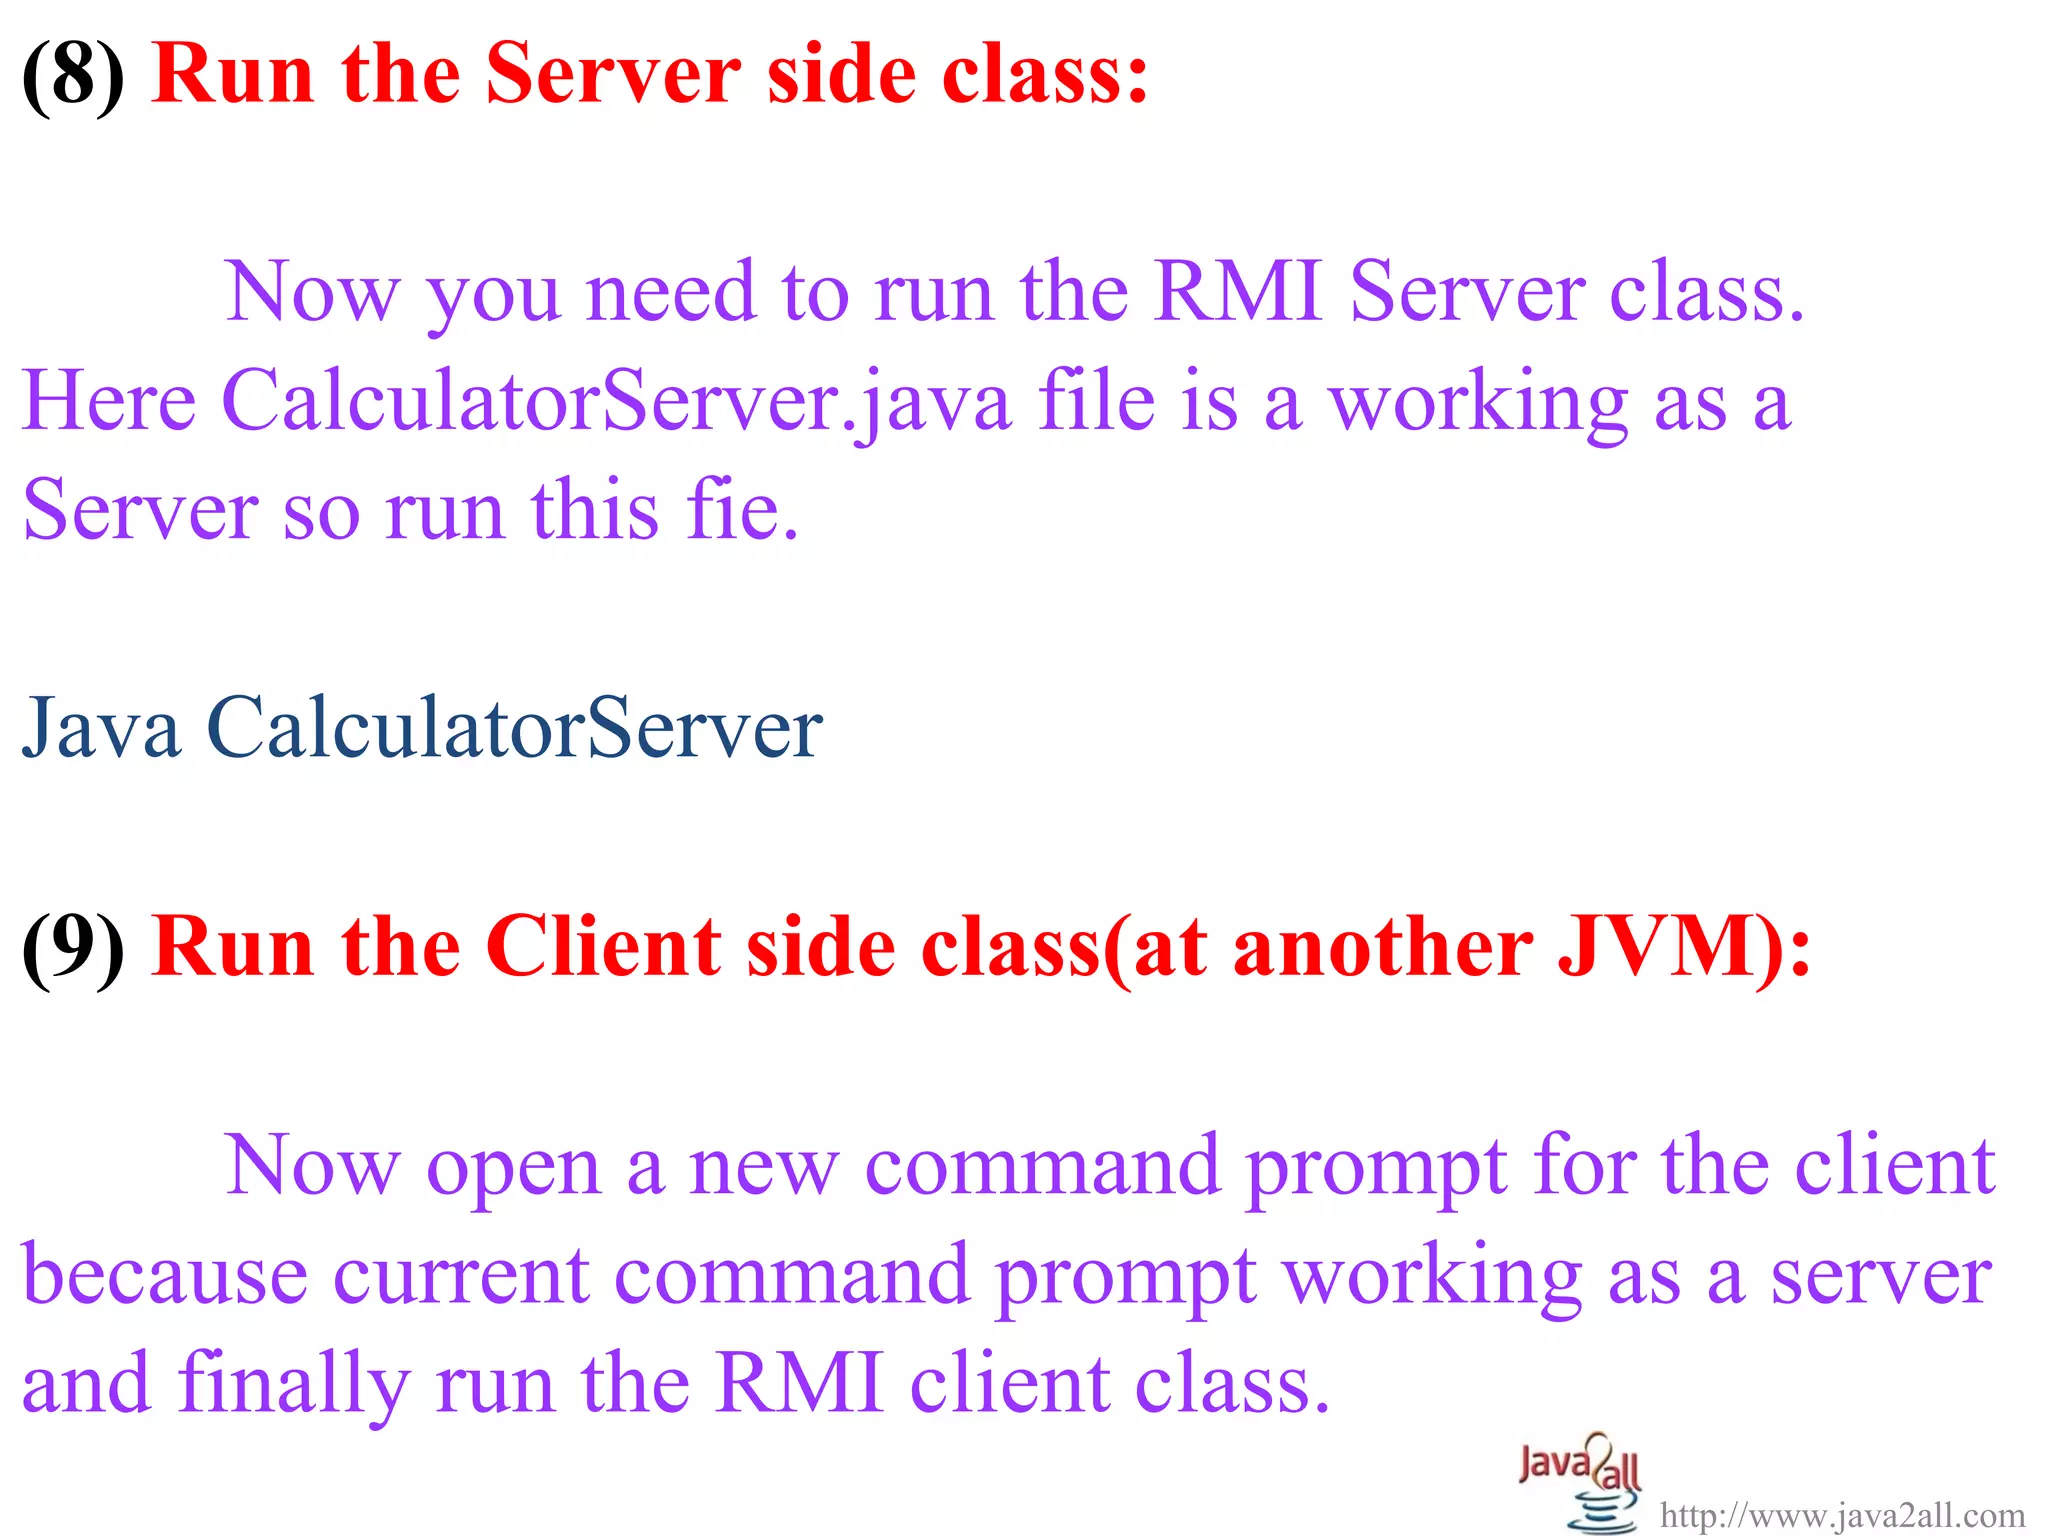
![CalculatorServer.java import java.rmi.Naming; public class CalculatorServer { CalculatorServer() { try { Calculator c = new CalculatorImpl(); Naming.rebind("rmi://127.0.0.1:1099/CalculatorService", c); } catch (Exception e) { e.printStackTrace(); } } public static void main(String[] args) { new CalculatorServer(); } } http://www.java2all.com](https://image.slidesharecdn.com/javarmiexampleprogramwithcode-130315110228-phpapp01/75/Java-rmi-example-program-with-code-7-2048.jpg)
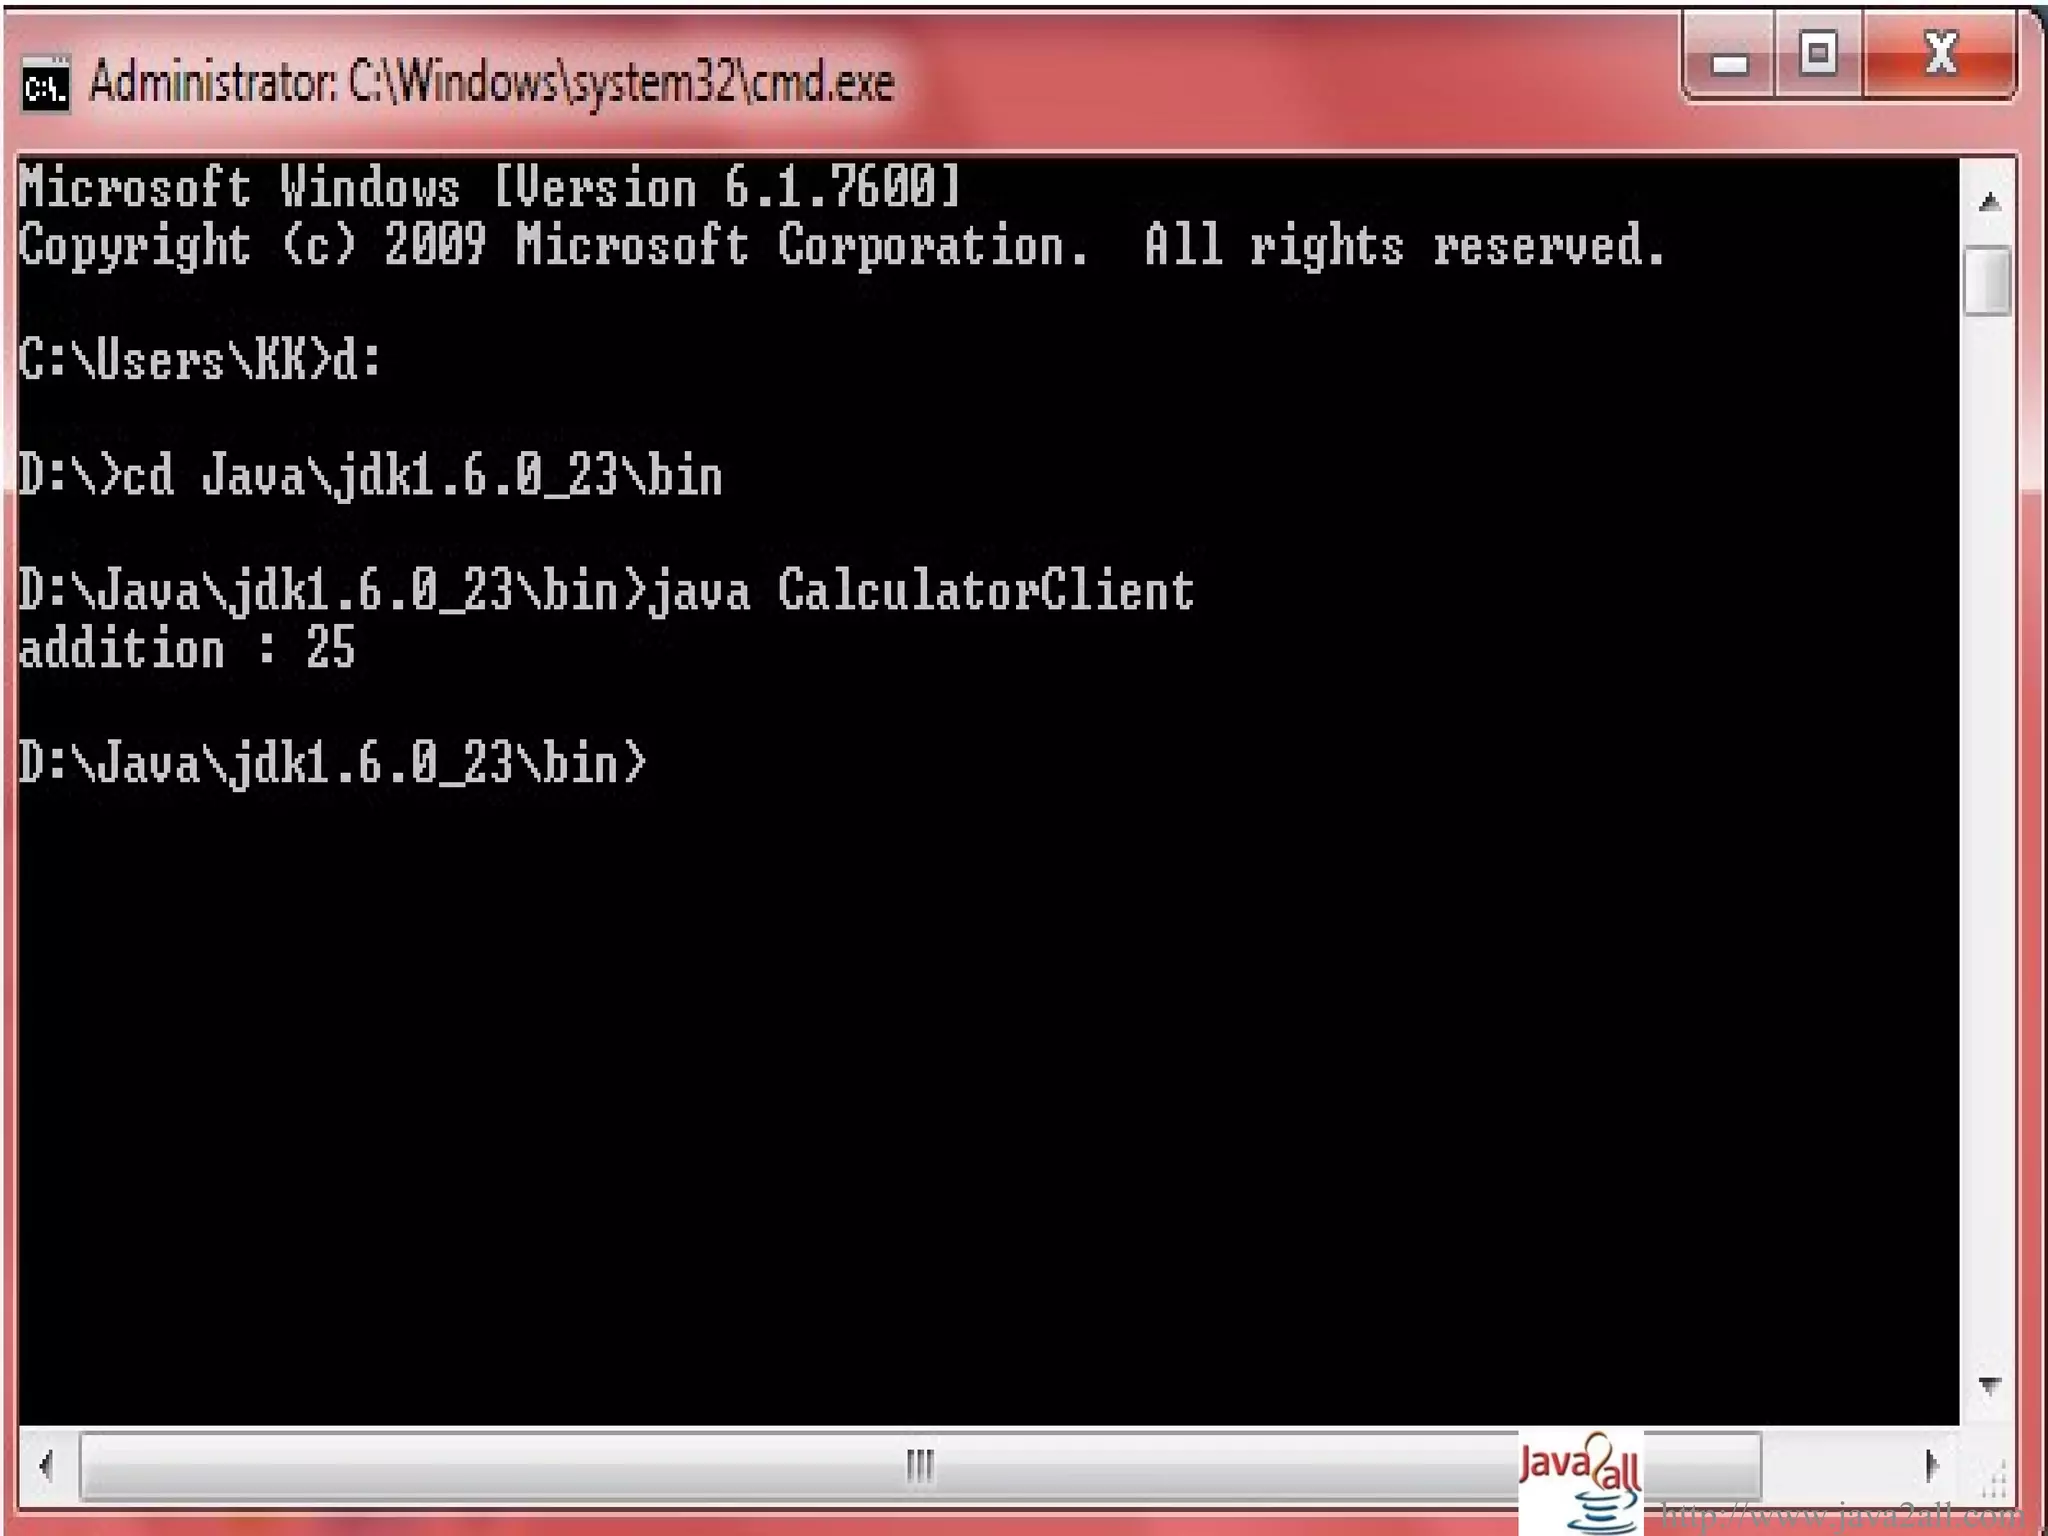
![CalculatorClient.java import java.rmi.Naming; public class CalculatorClient { public static void main(String[] args) { try { Calculator c = (Calculator) Naming.lookup("//127.0.0.1:1099/CalculatorService"); System.out.println("addition : "+c.add(10, 15)); } catch (Exception e) { System.out.println(e); } } } http://www.java2all.com](https://image.slidesharecdn.com/javarmiexampleprogramwithcode-130315110228-phpapp01/75/Java-rmi-example-program-with-code-8-2048.jpg)
![import java.rmi.Naming; public class CalculatorServer { CalculatorServer() { try { Calculator c = new CalculatorImpl(); Naming.rebind("rmi://localhost:1099/CalculatorService", c); } catch (Exception e) { System.out.println(“Exception is : ”+e); } } public static void main(String[] args) { new CalculatorServer(); } } http://www.java2all.com](https://image.slidesharecdn.com/javarmiexampleprogramwithcode-130315110228-phpapp01/75/Java-rmi-example-program-with-code-24-2048.jpg)

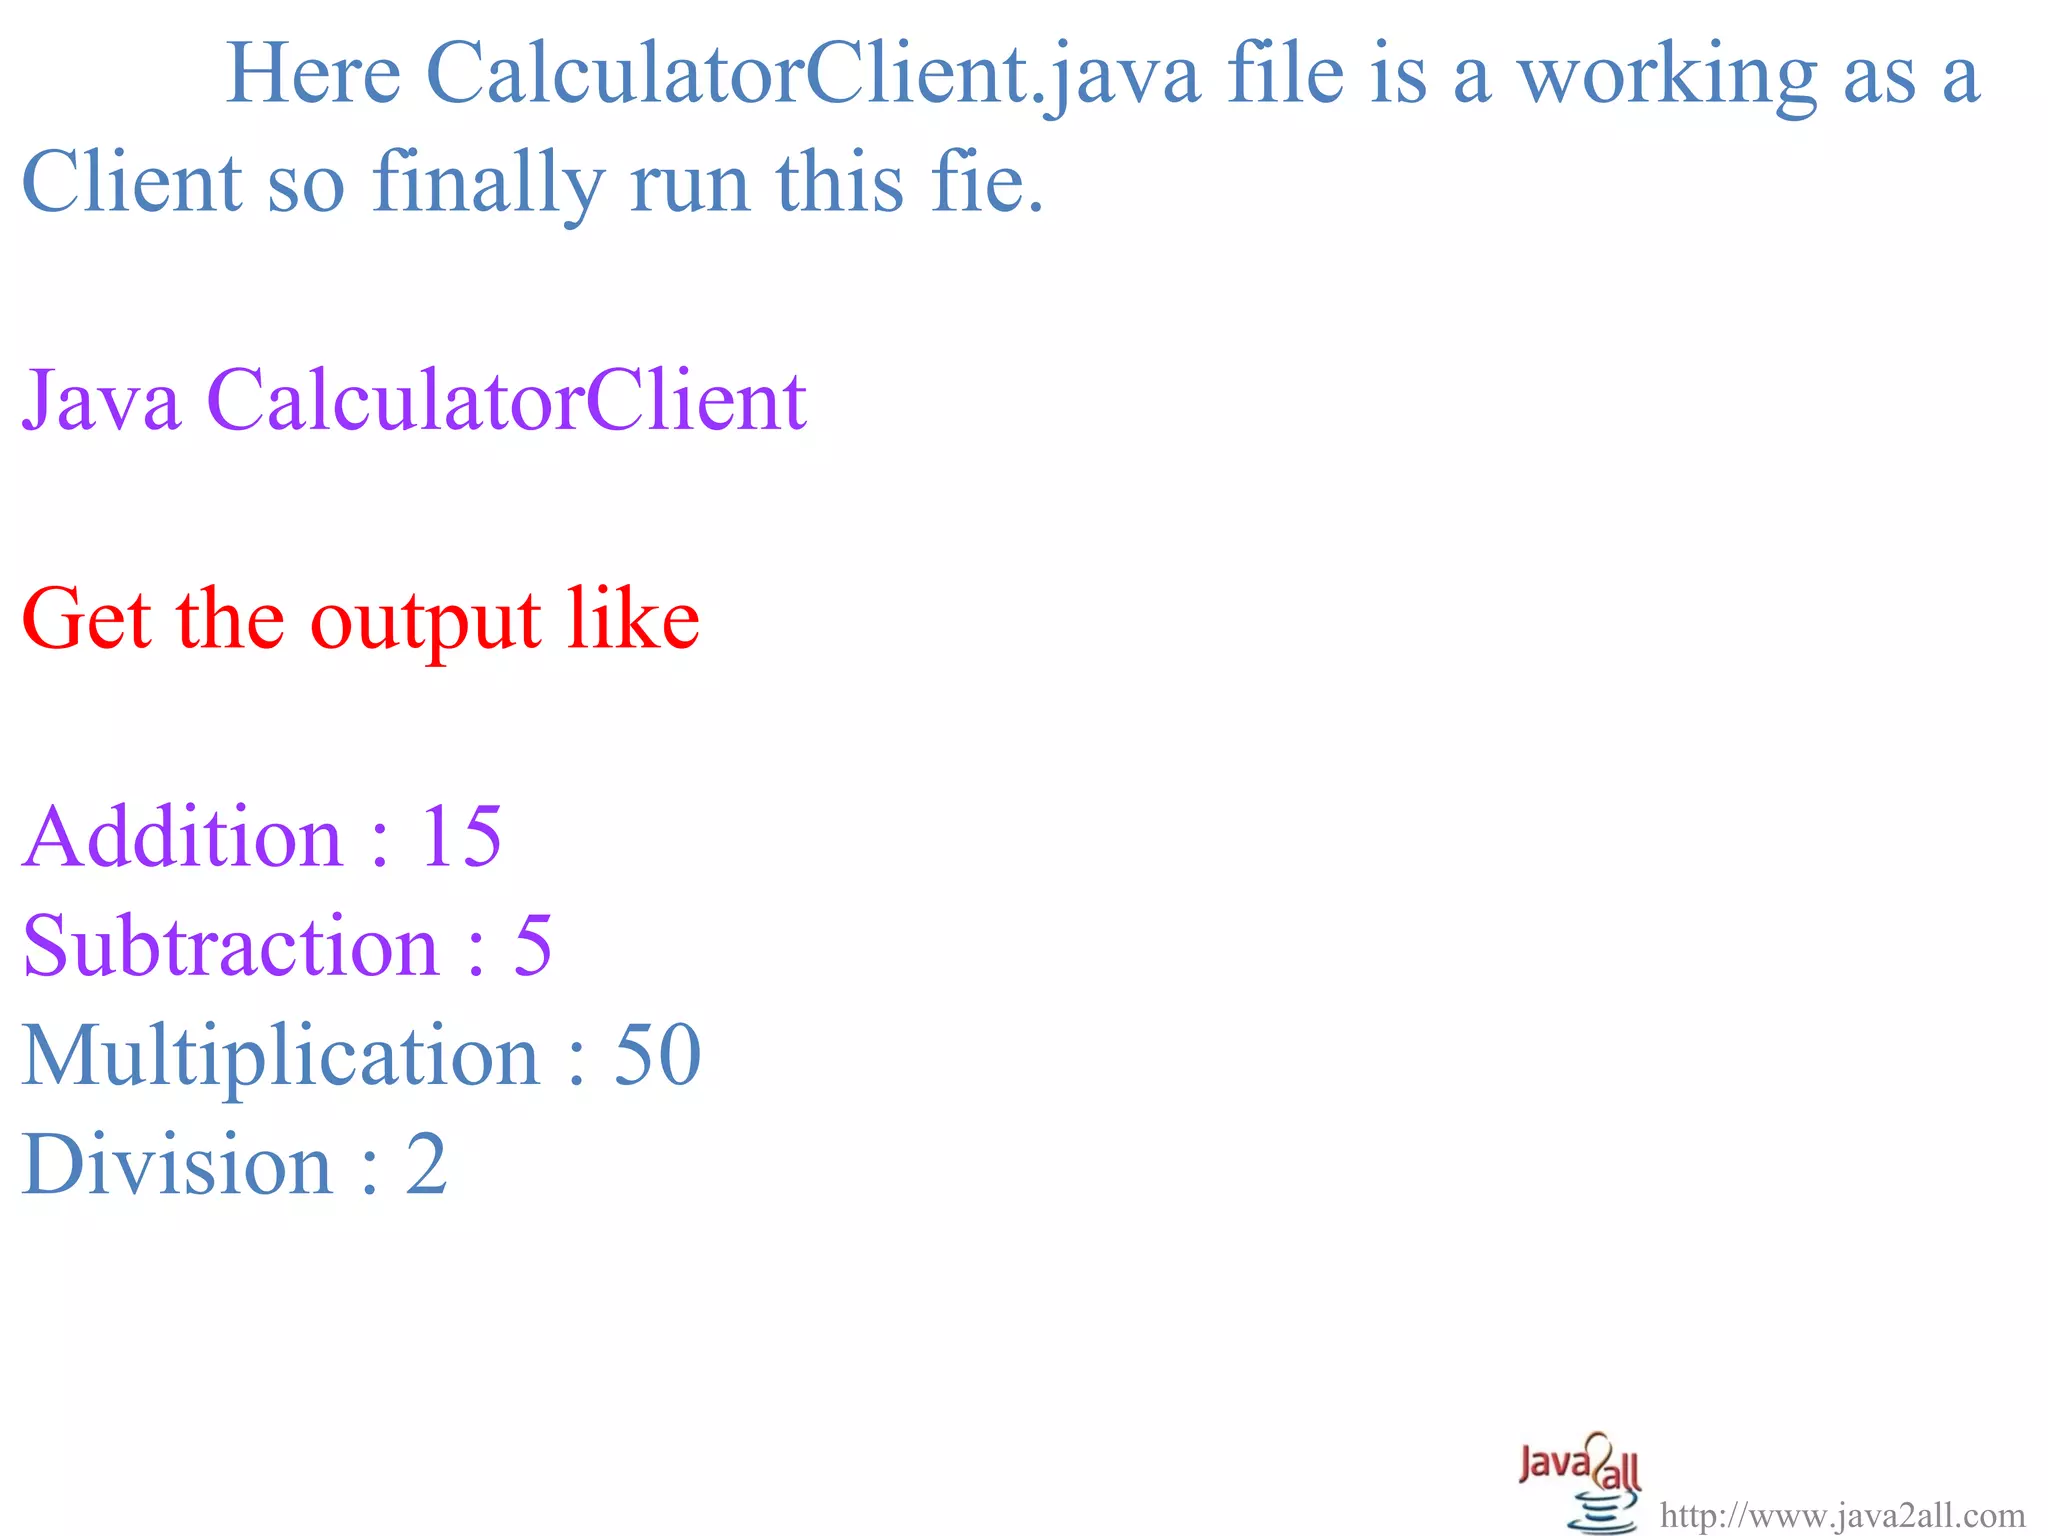
![CalculatorClient.java: import java.rmi.Naming; public class CalculatorClient { public static void main(String[] args) { try { Calculator c = (Calculator) Naming.lookup("//127.0.0.1:1099/CalculatorService"); System.out.println("Addition : "+c.addition(10,5)); System.out.println("Subtraction : "+c.subtraction(10,5)); System.out.println("Multiplication :"+c.multiplication(10,5)); System.out.println("Division : "+c. division(10,5)); } catch (Exception e) { System.out.println(“Exception is : ”+e); } } } http://www.java2all.com](https://image.slidesharecdn.com/javarmiexampleprogramwithcode-130315110228-phpapp01/75/Java-rmi-example-program-with-code-27-2048.jpg)

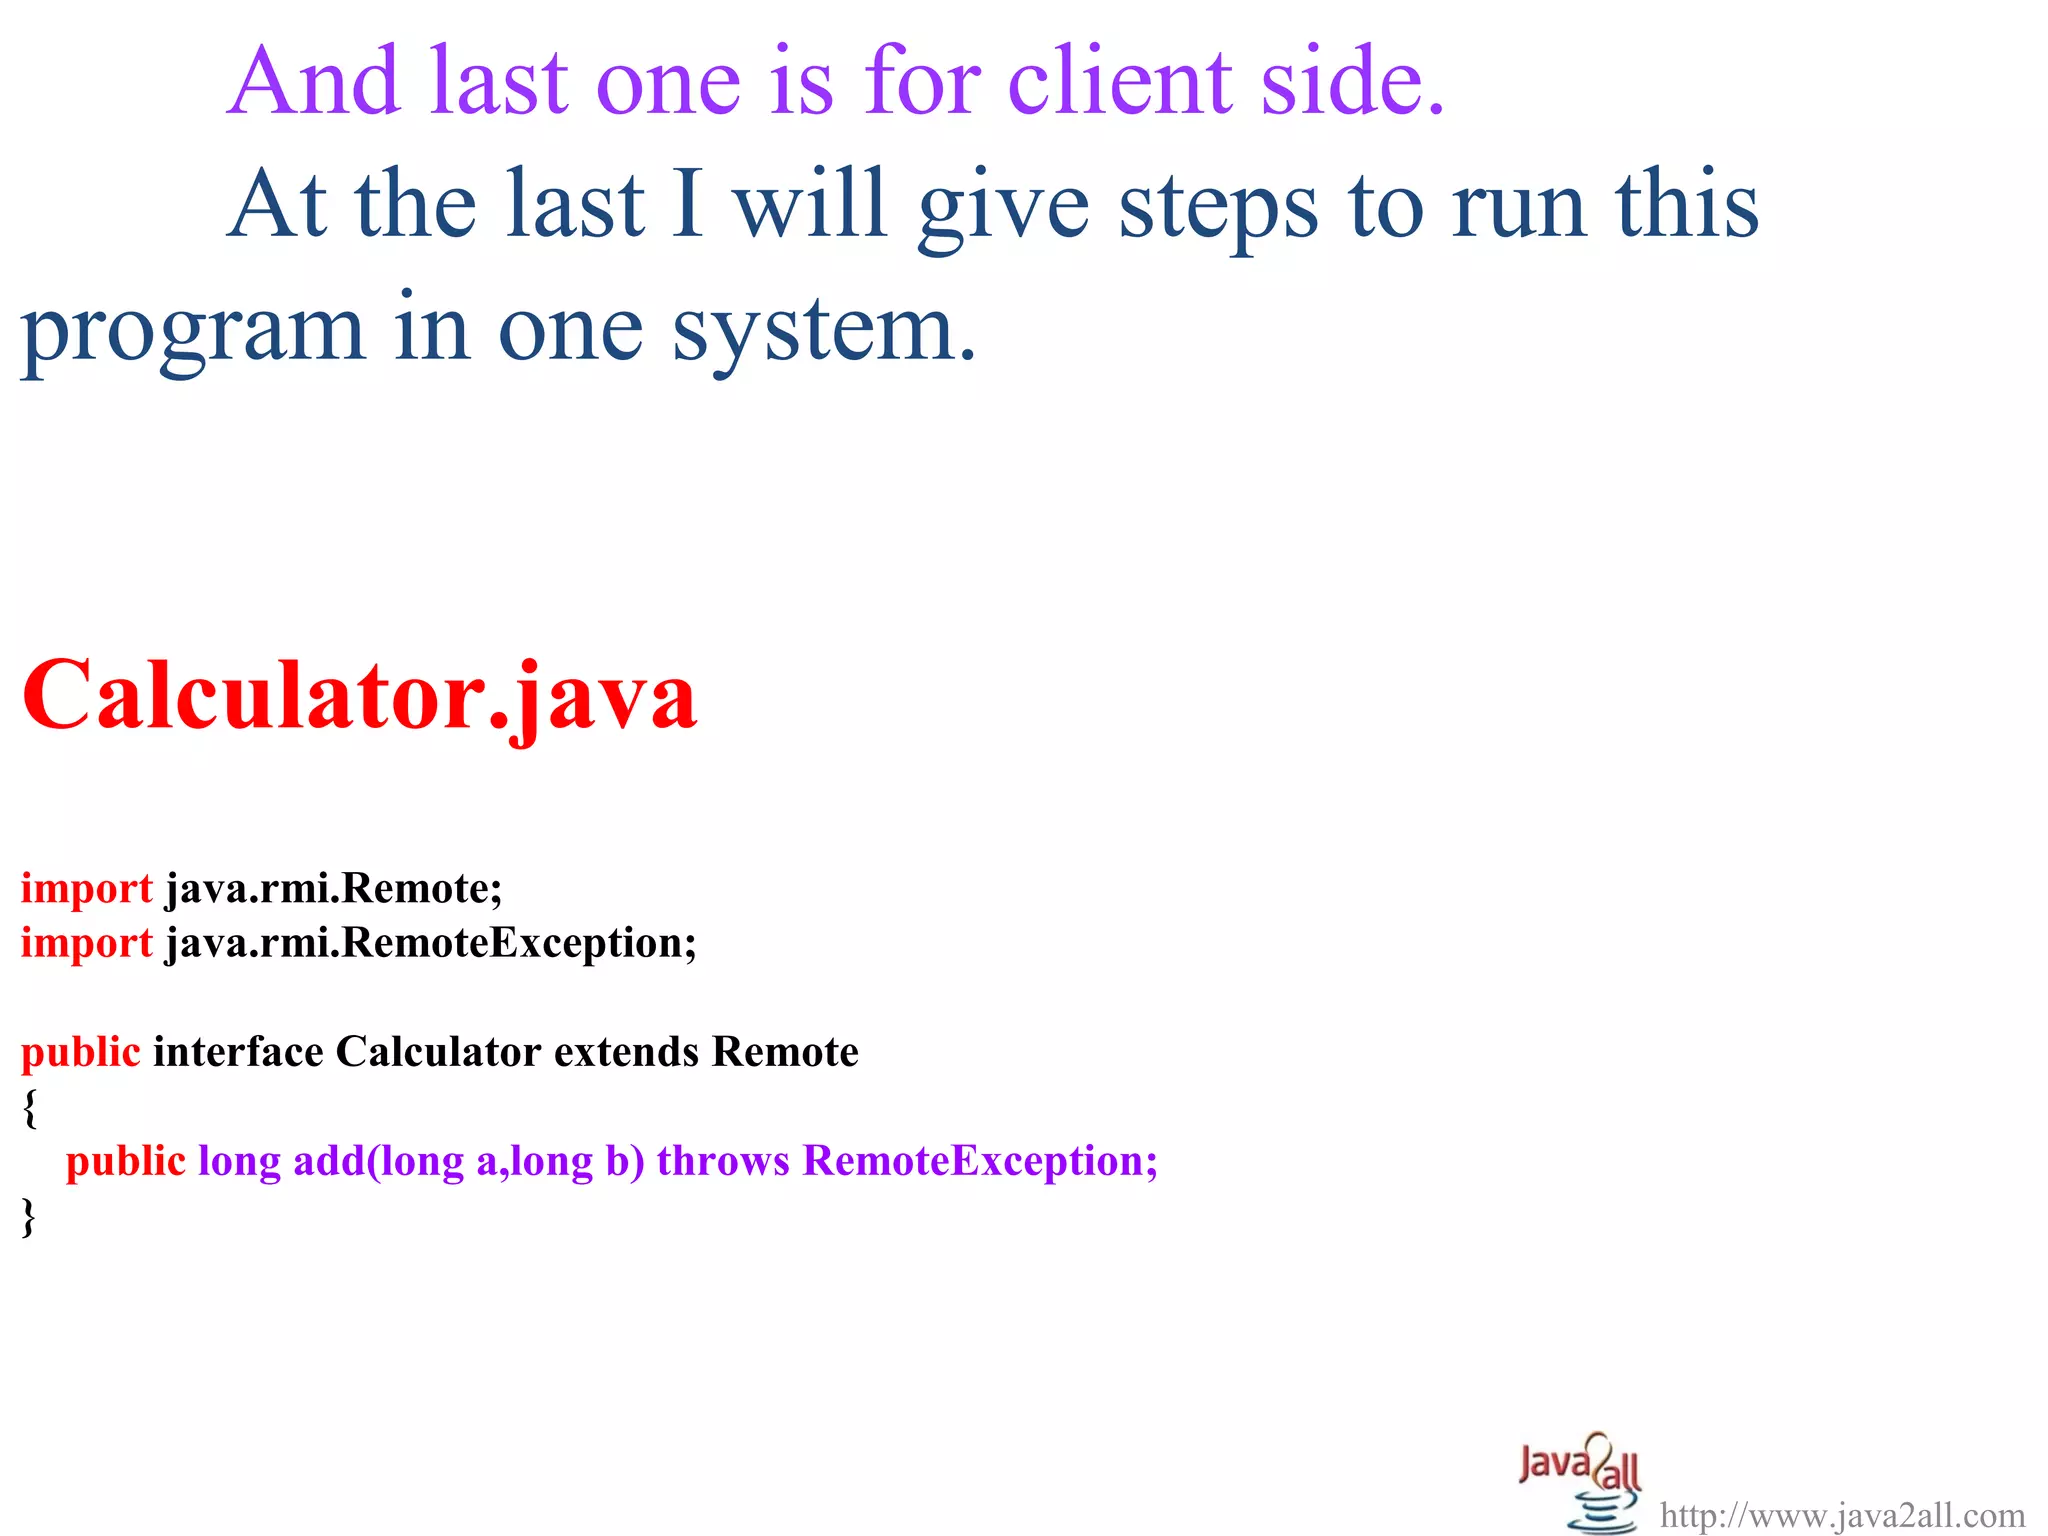
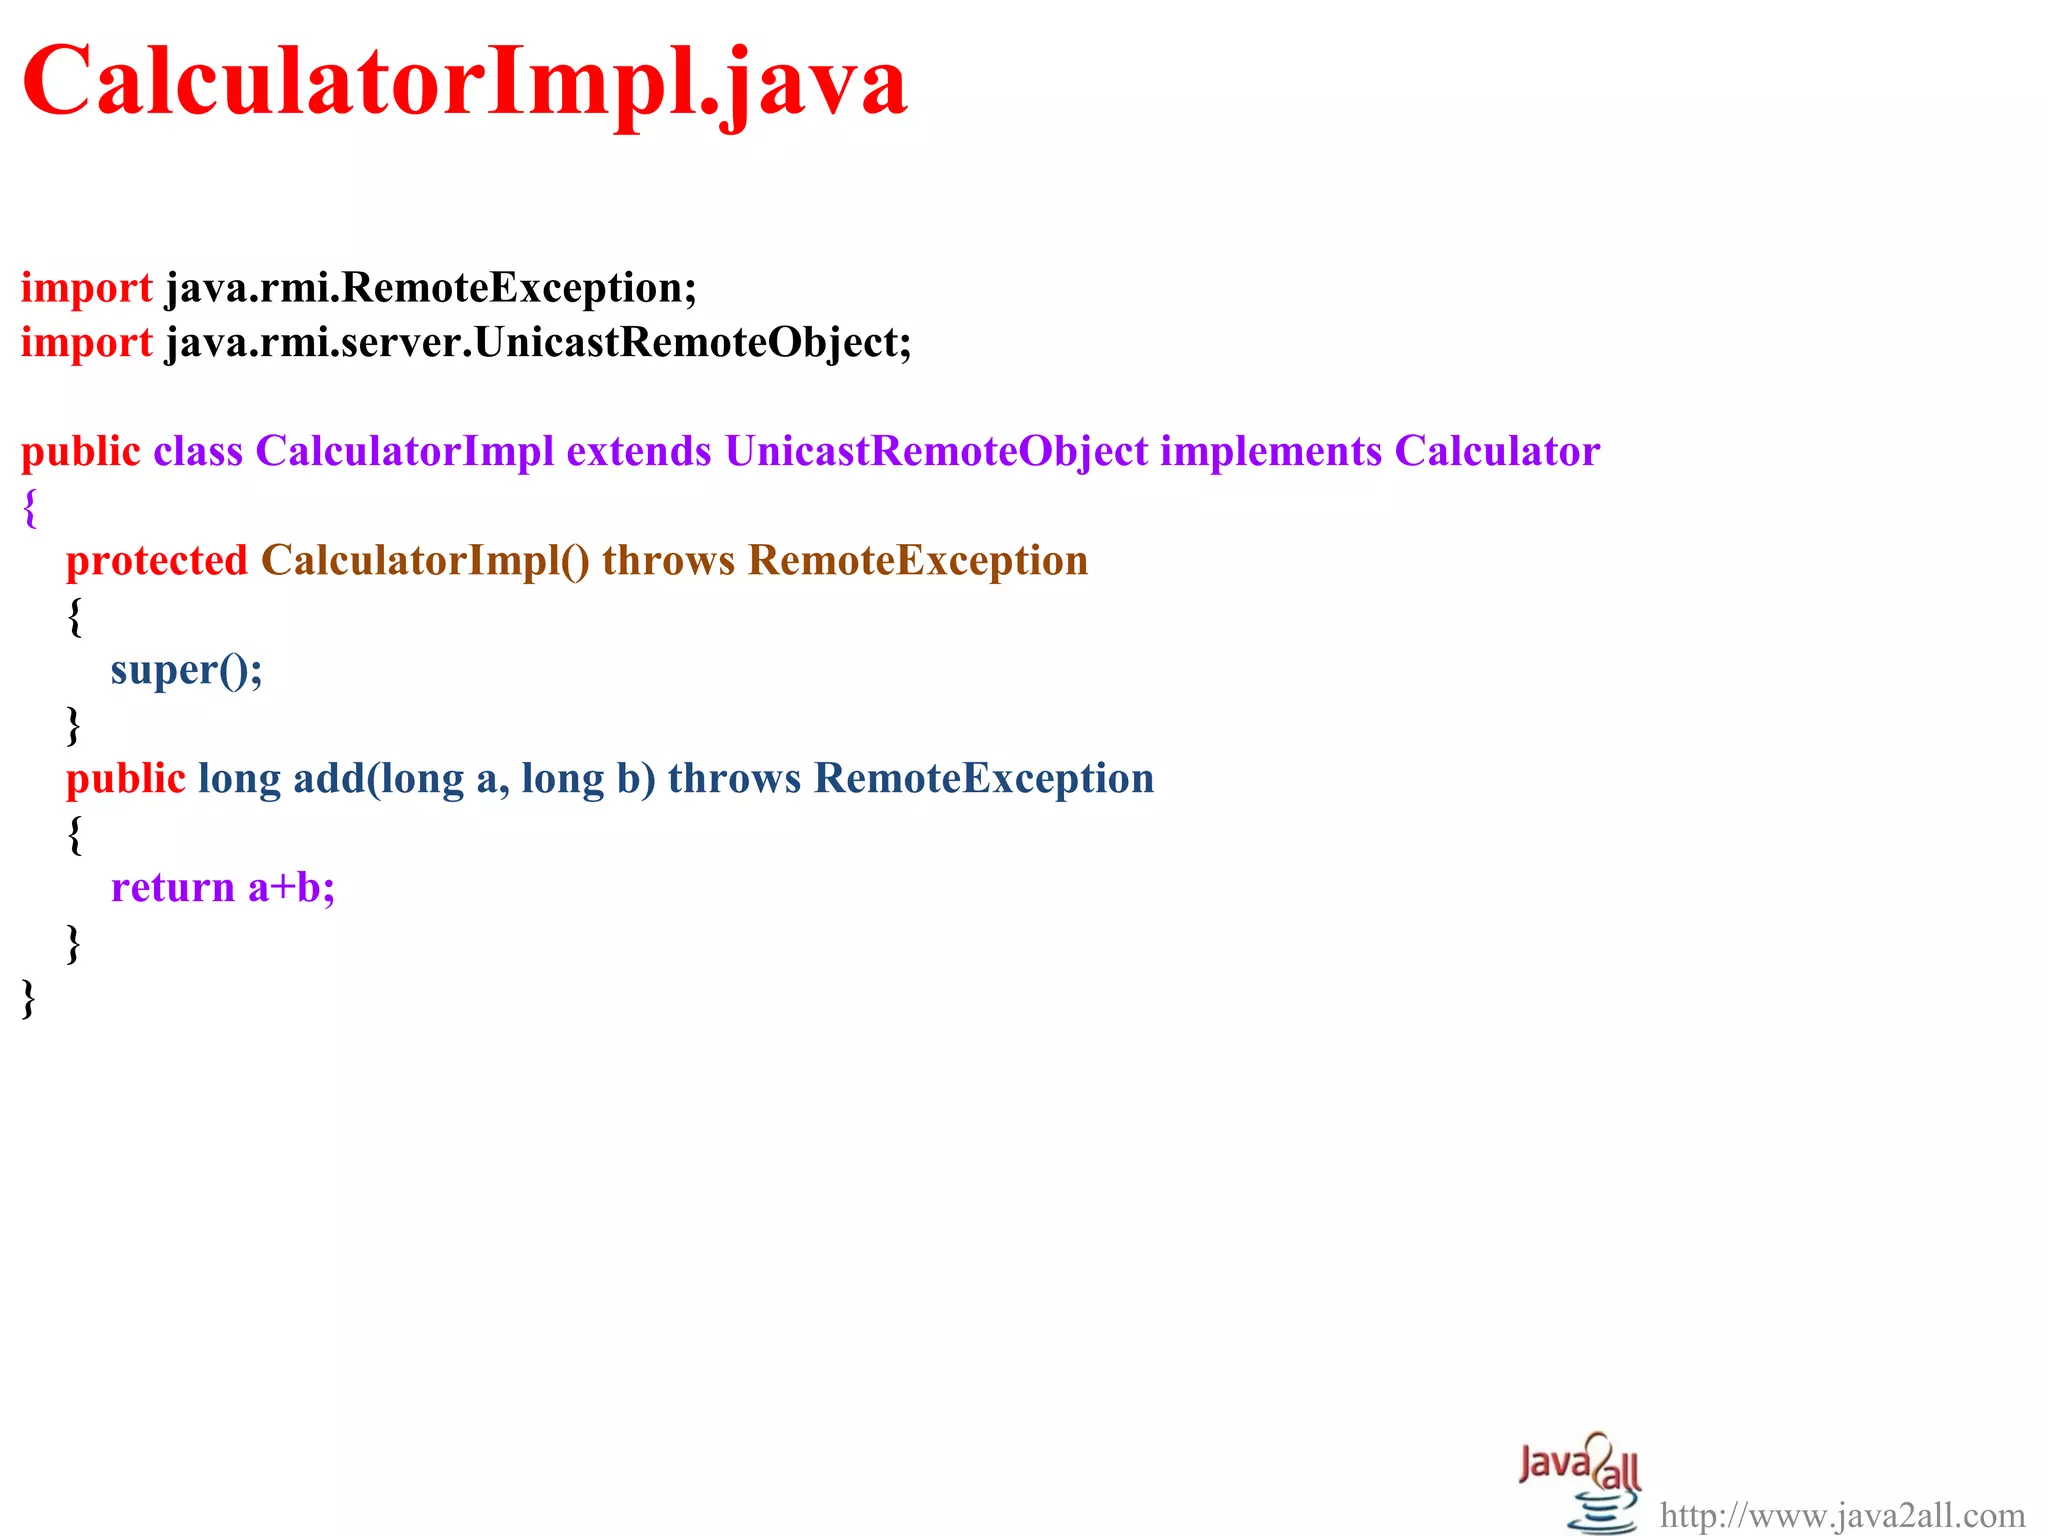
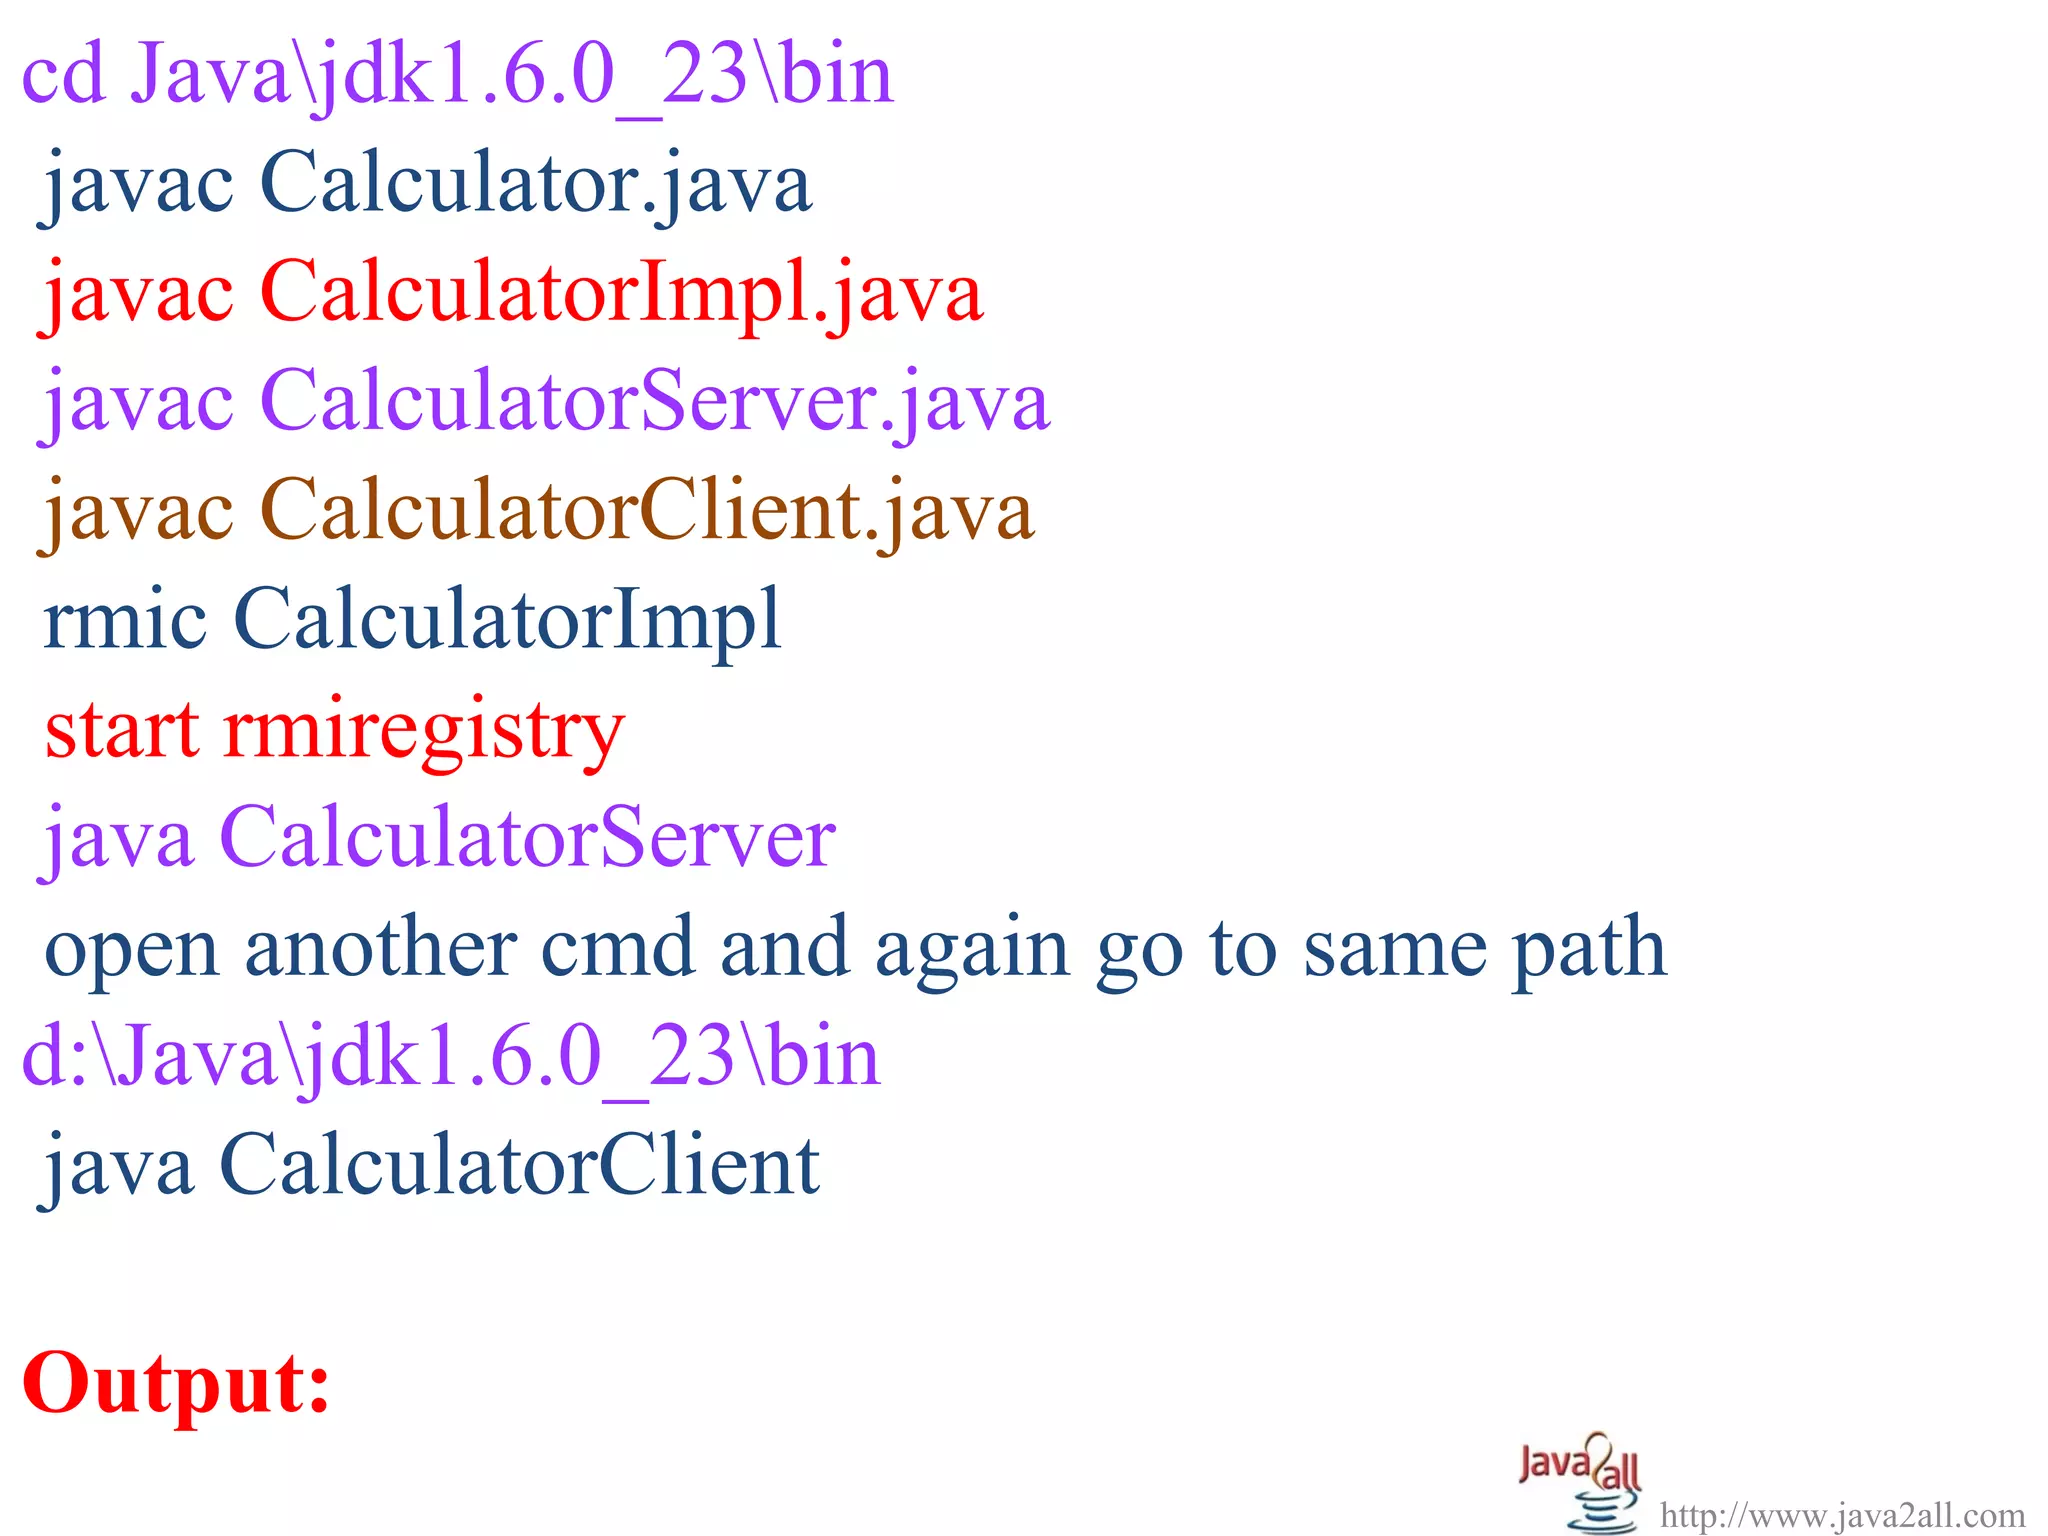
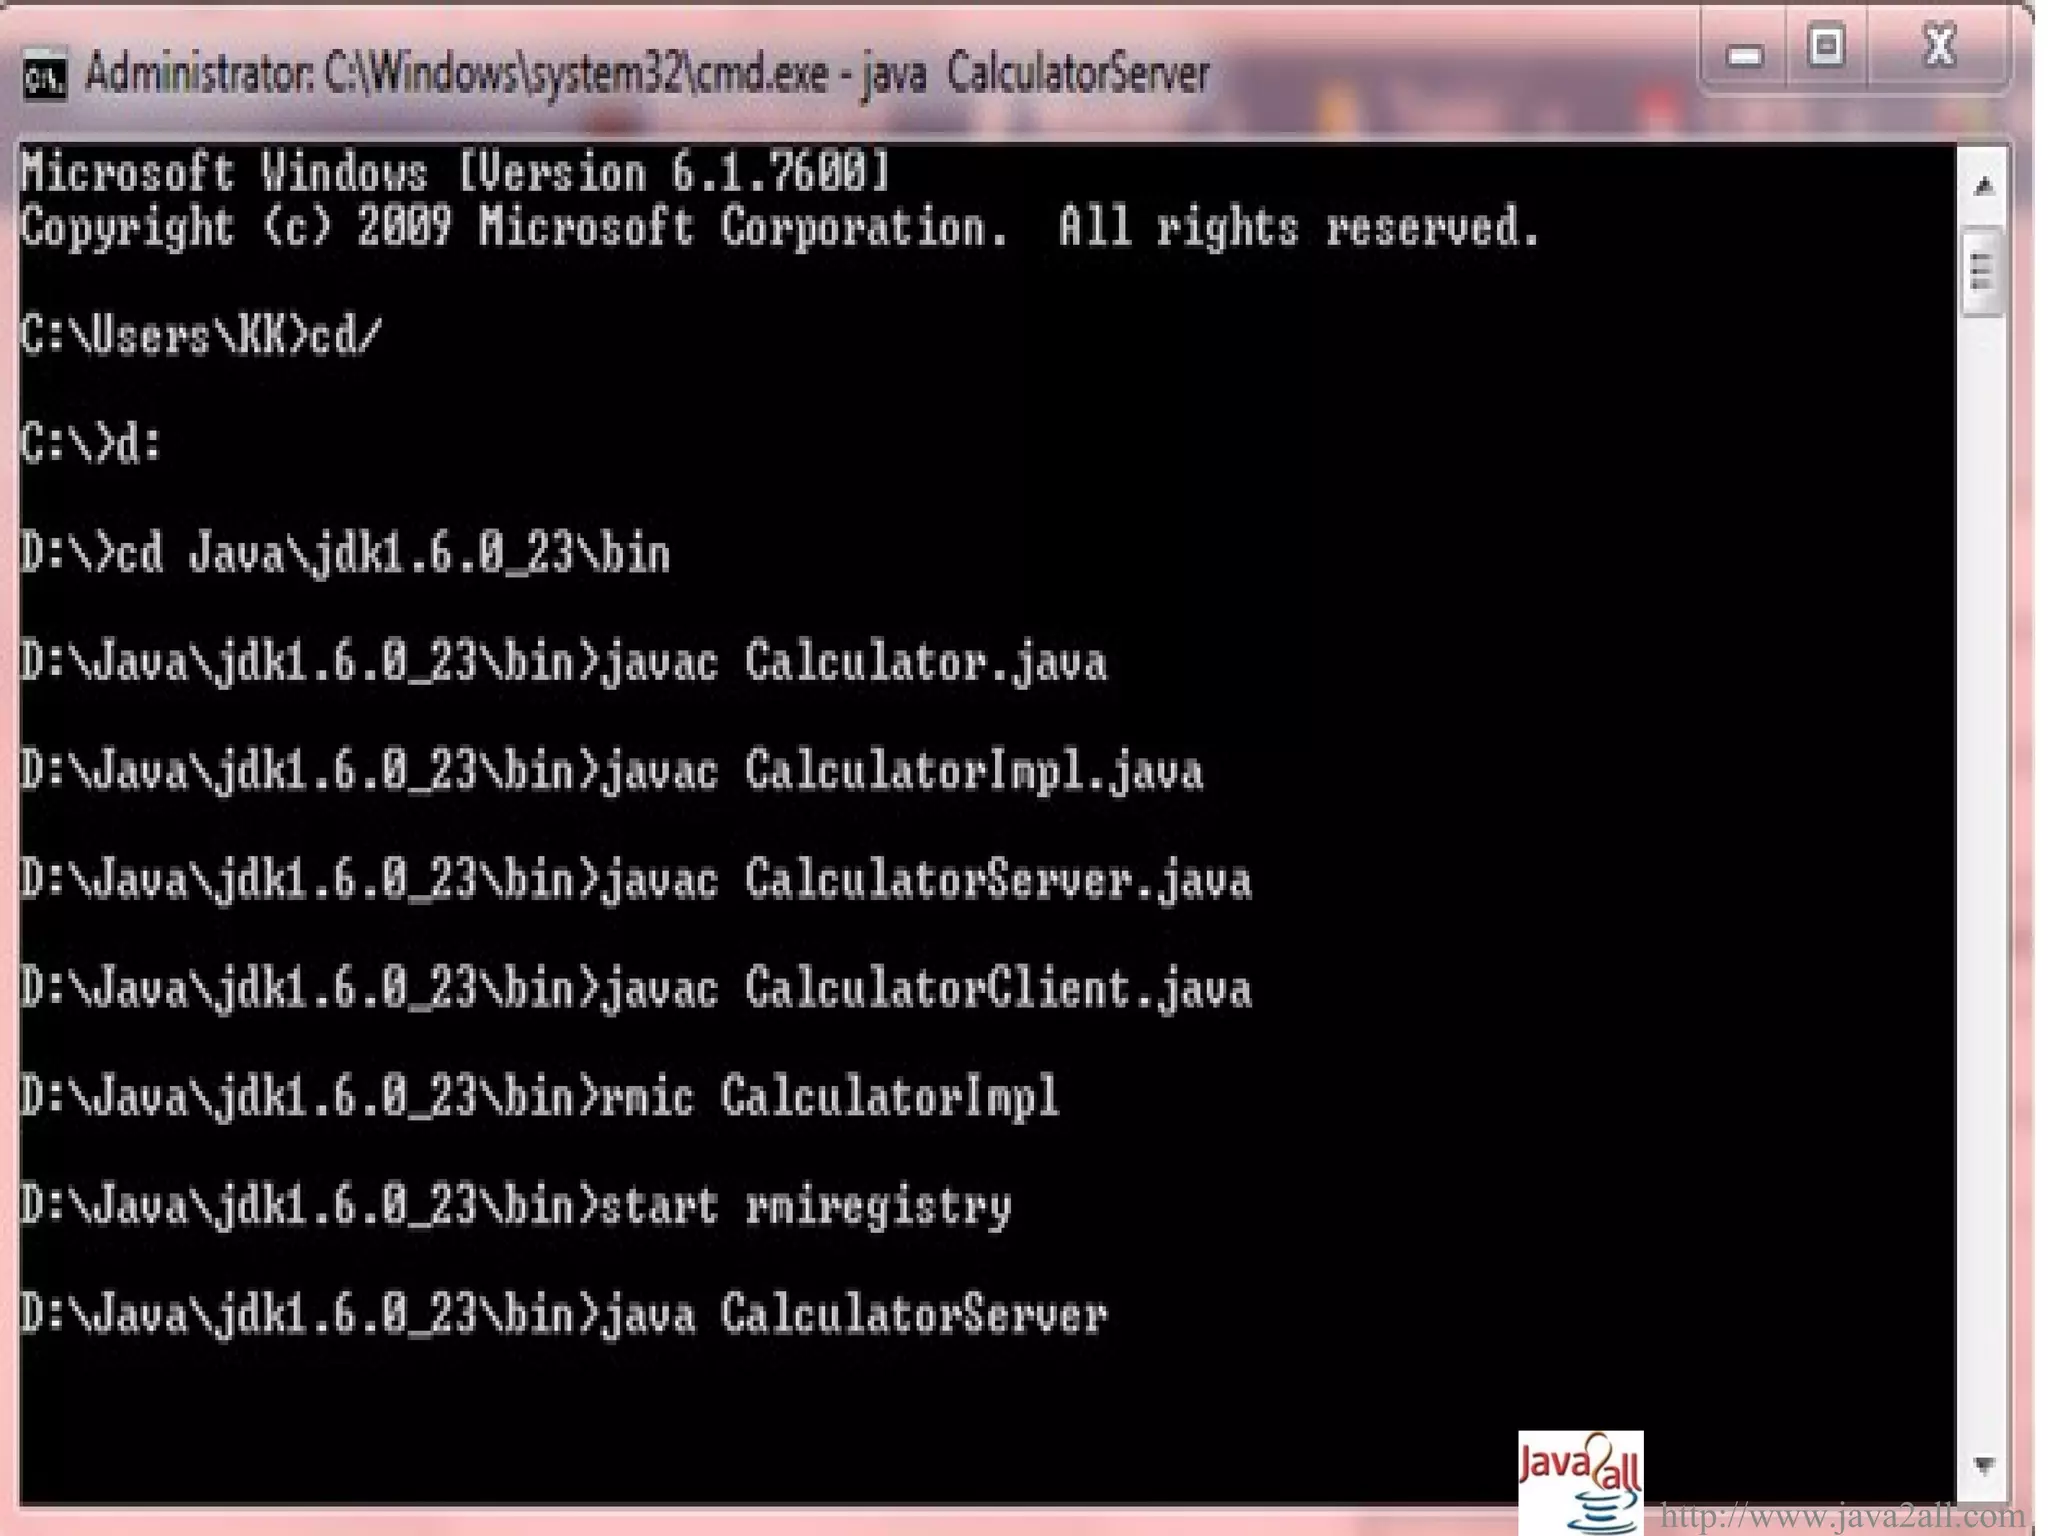
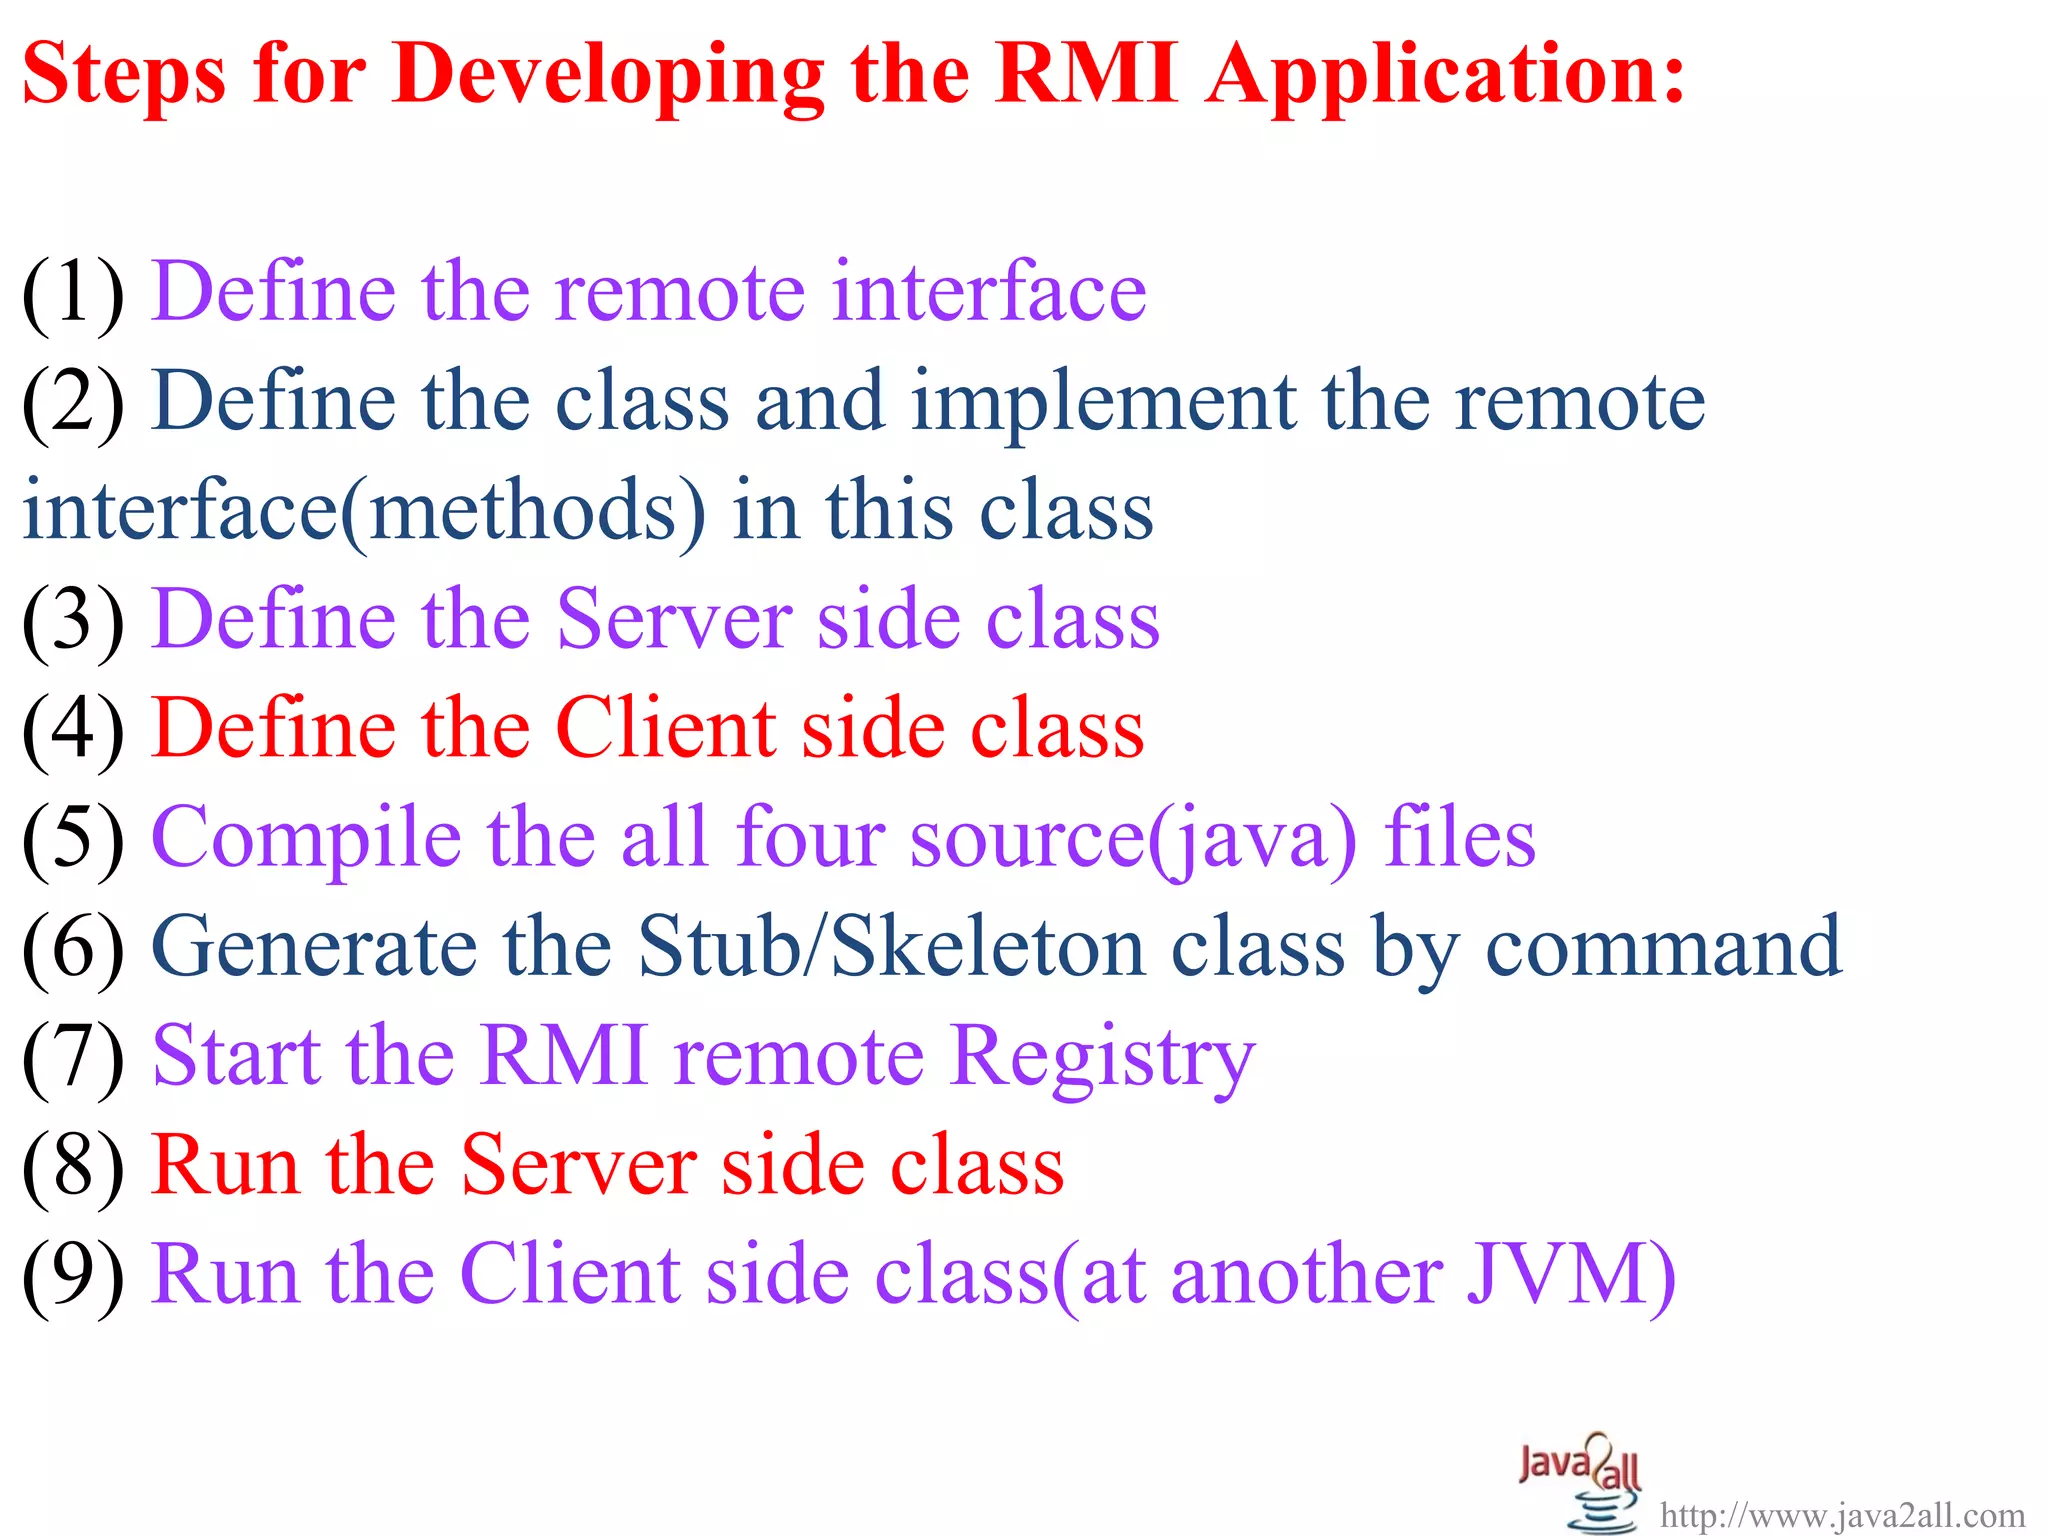
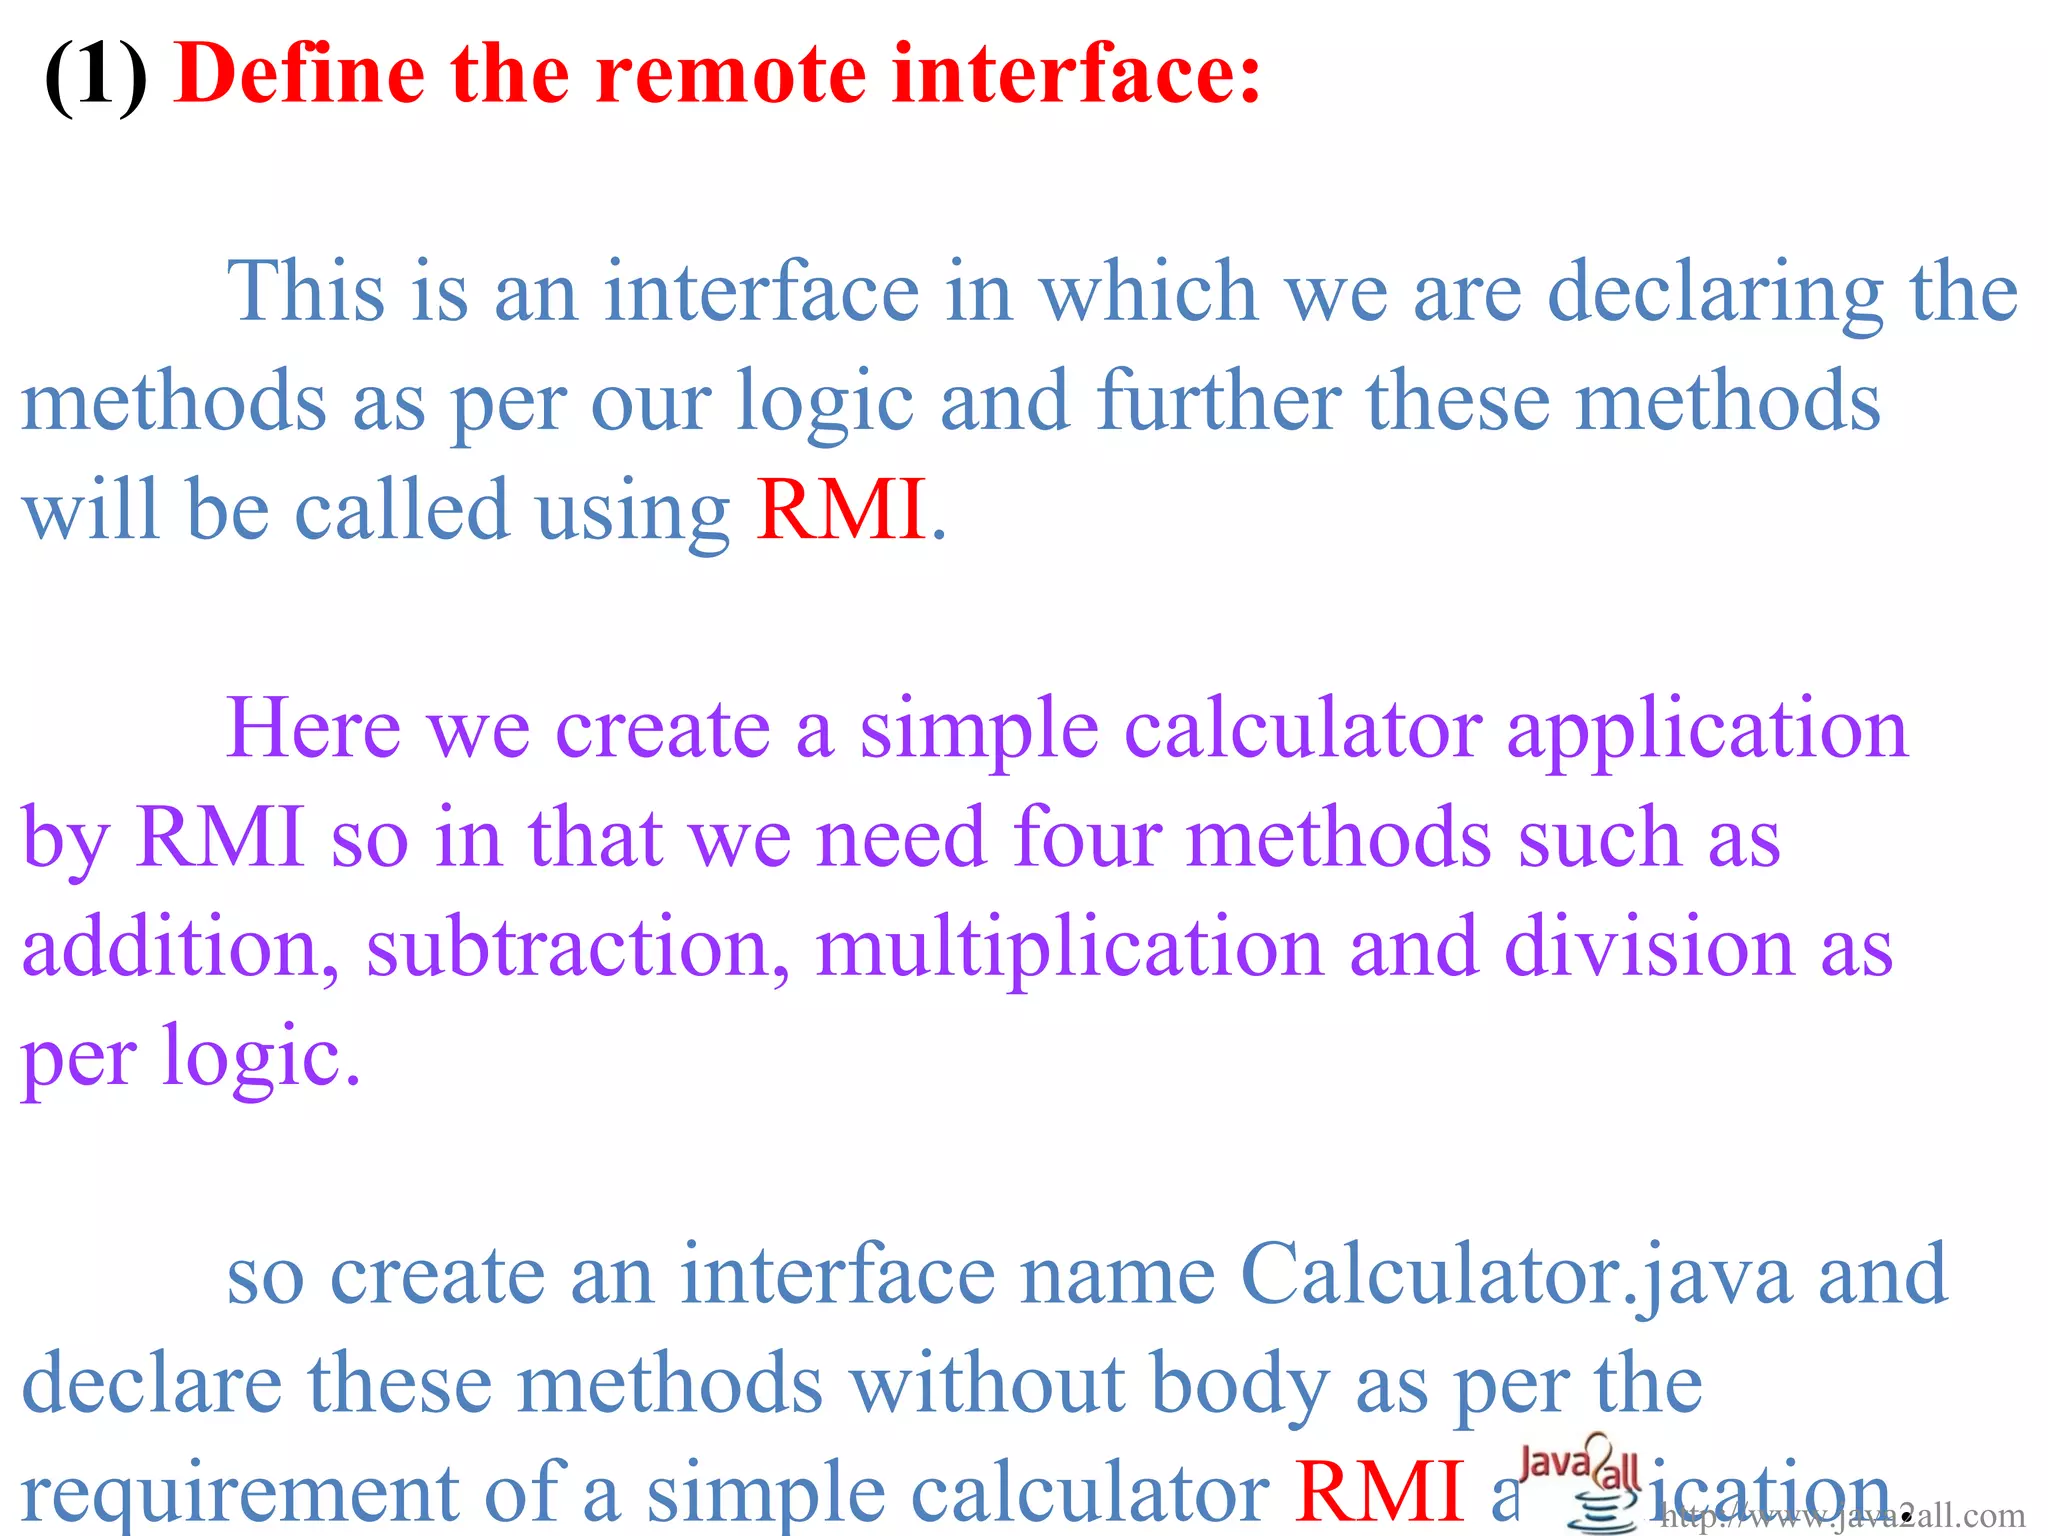
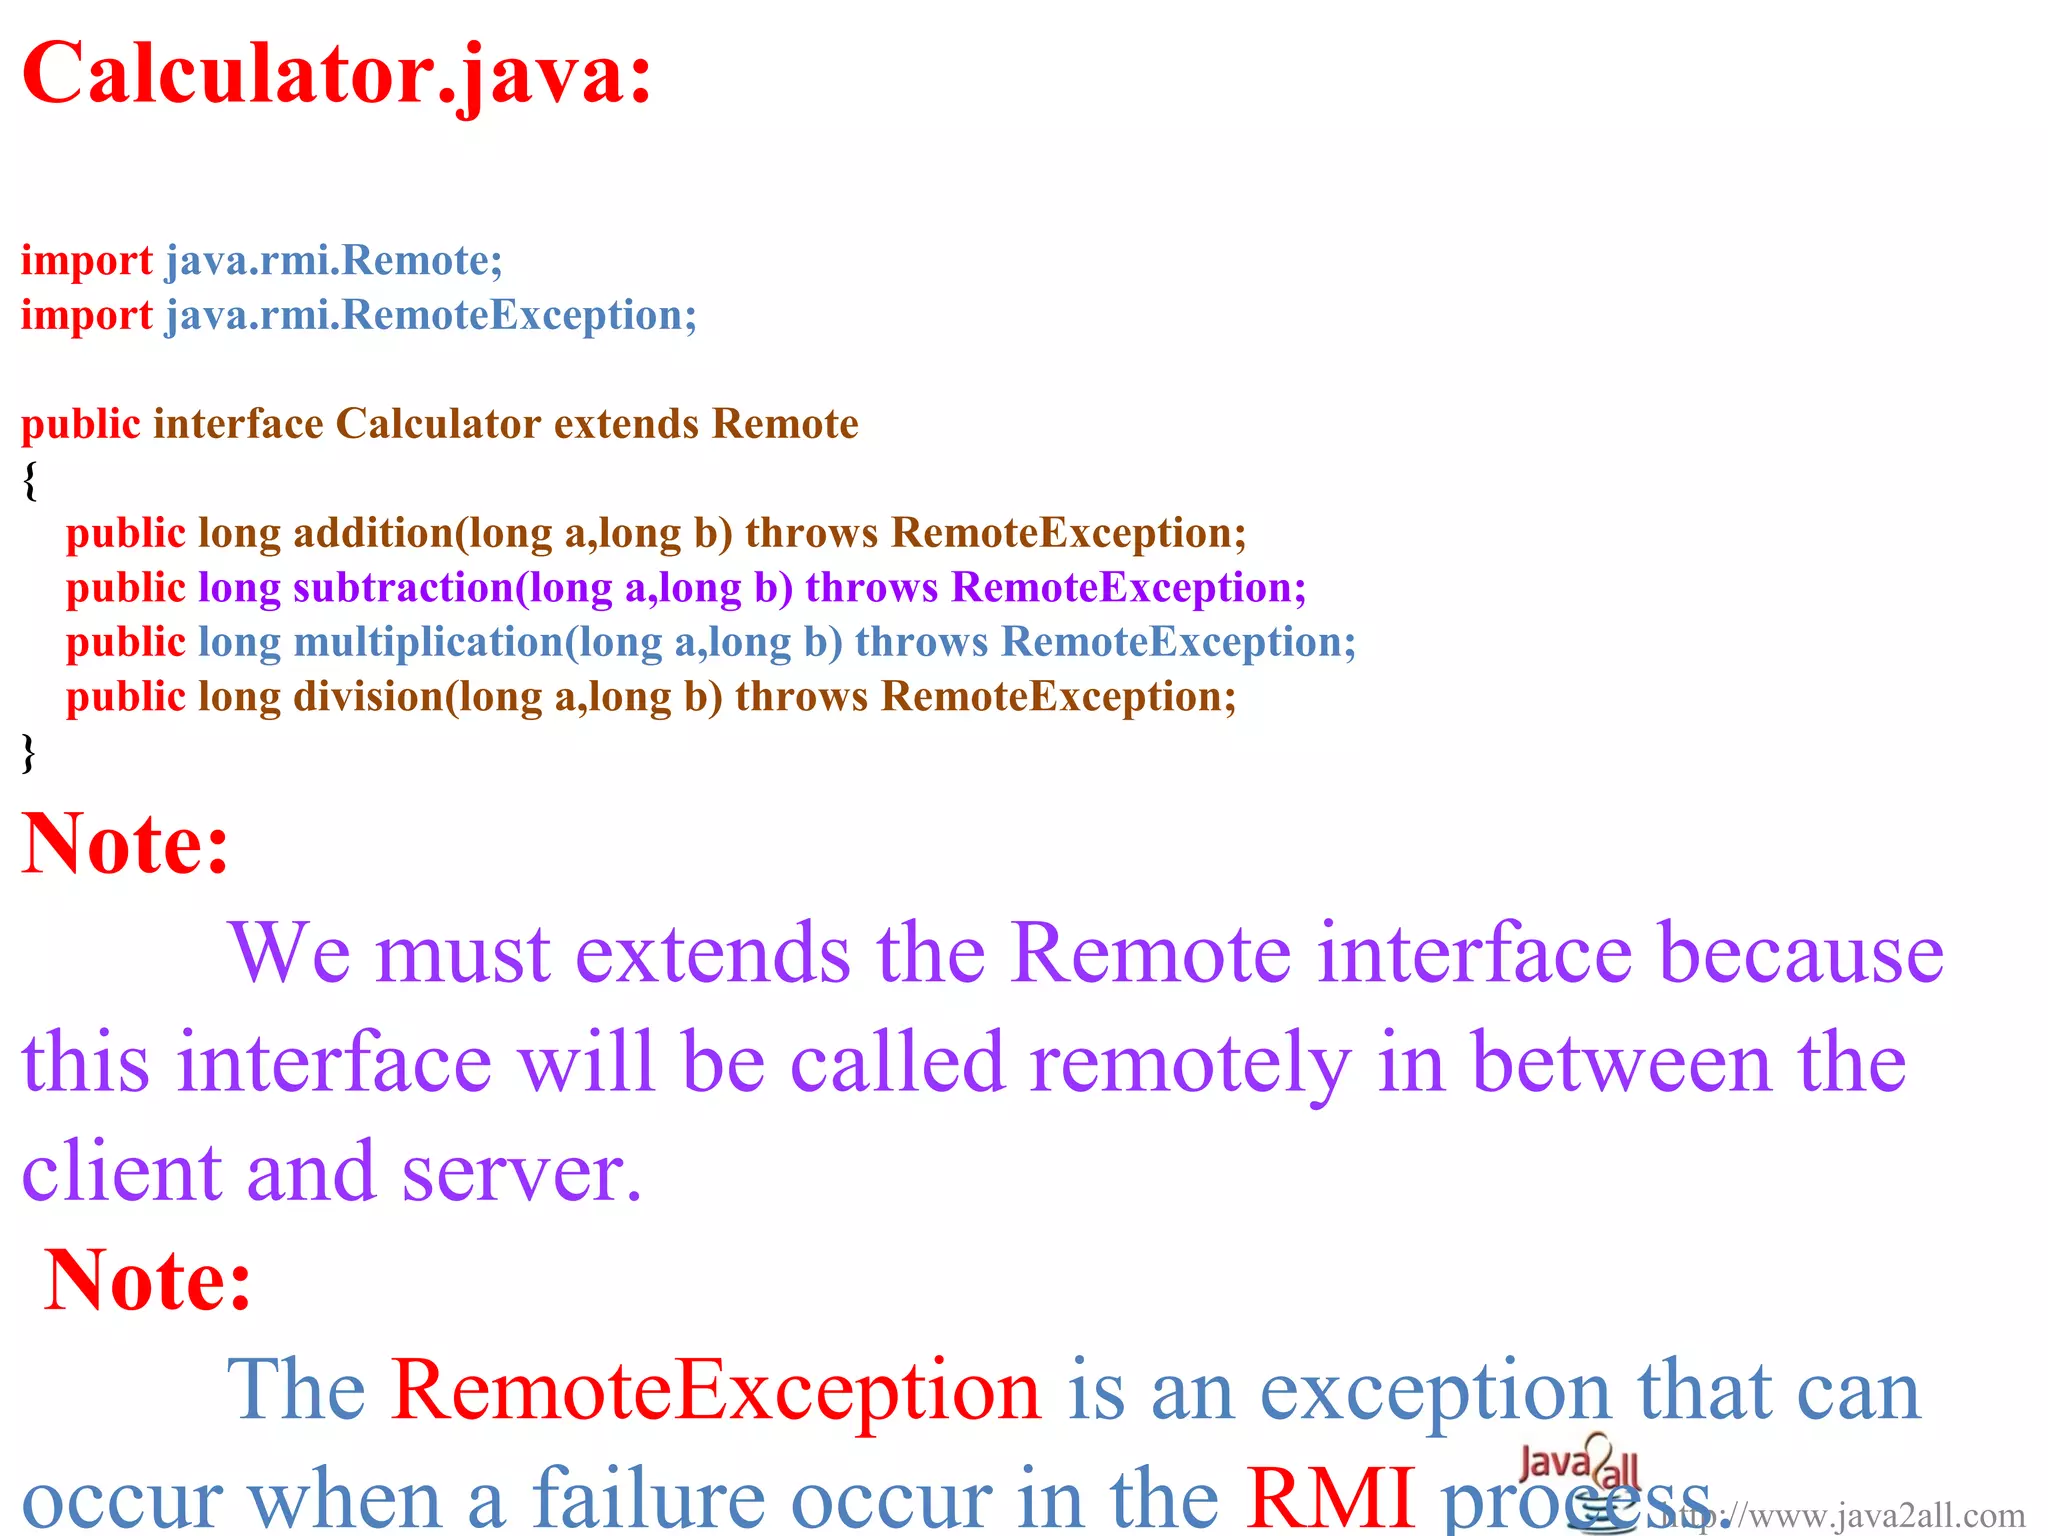
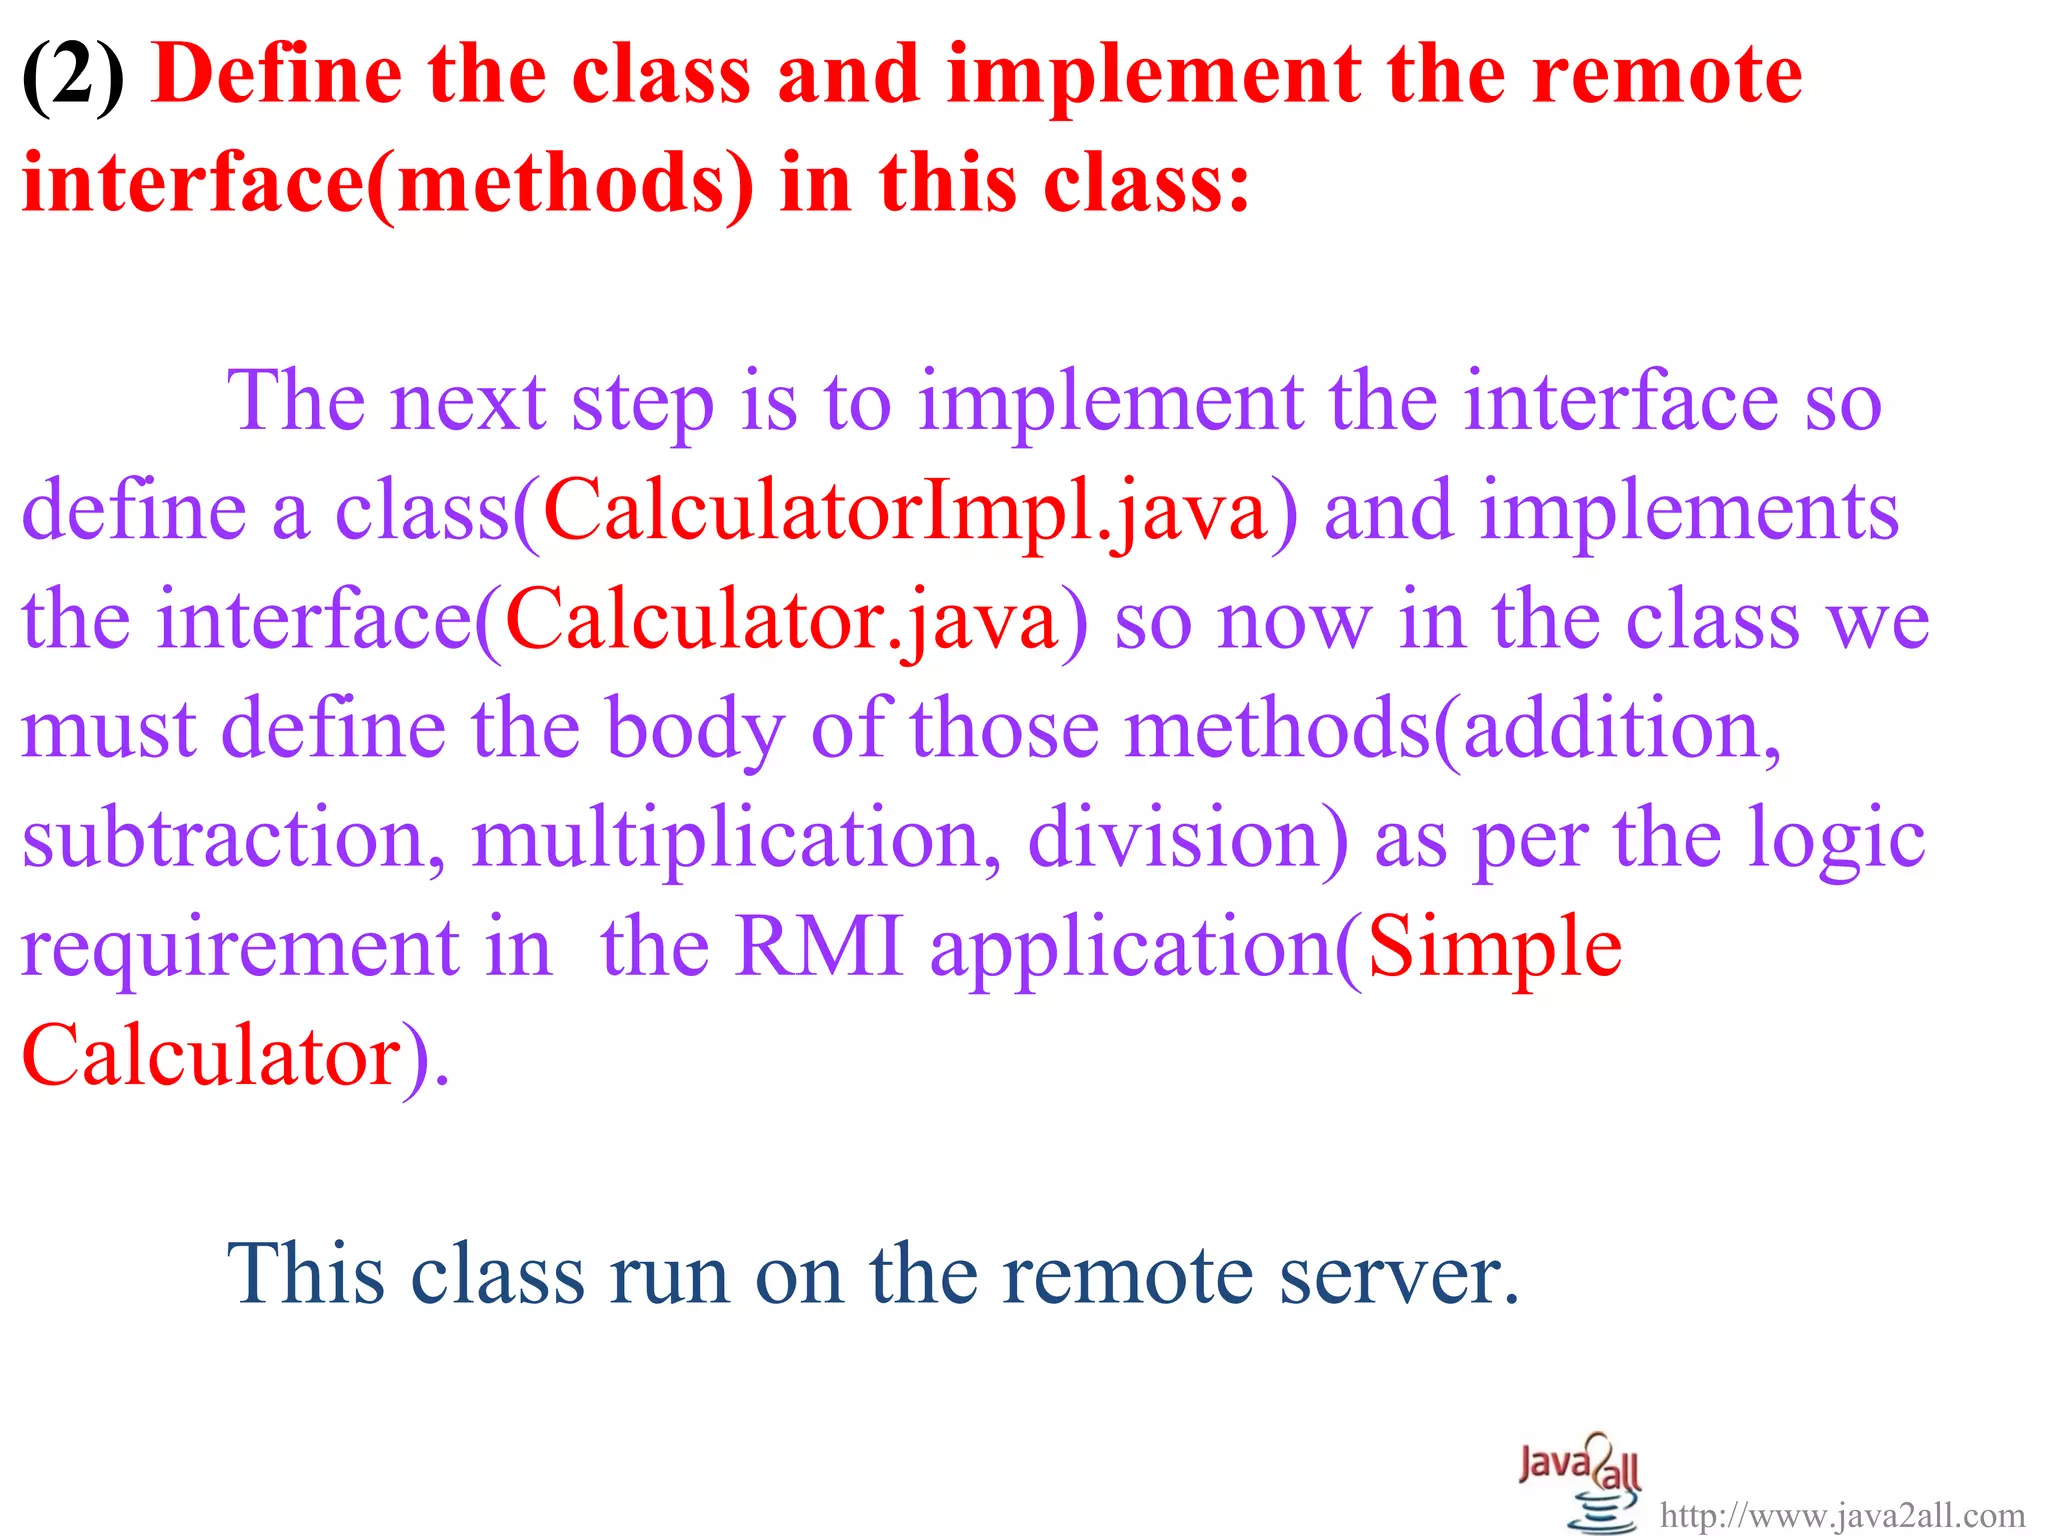
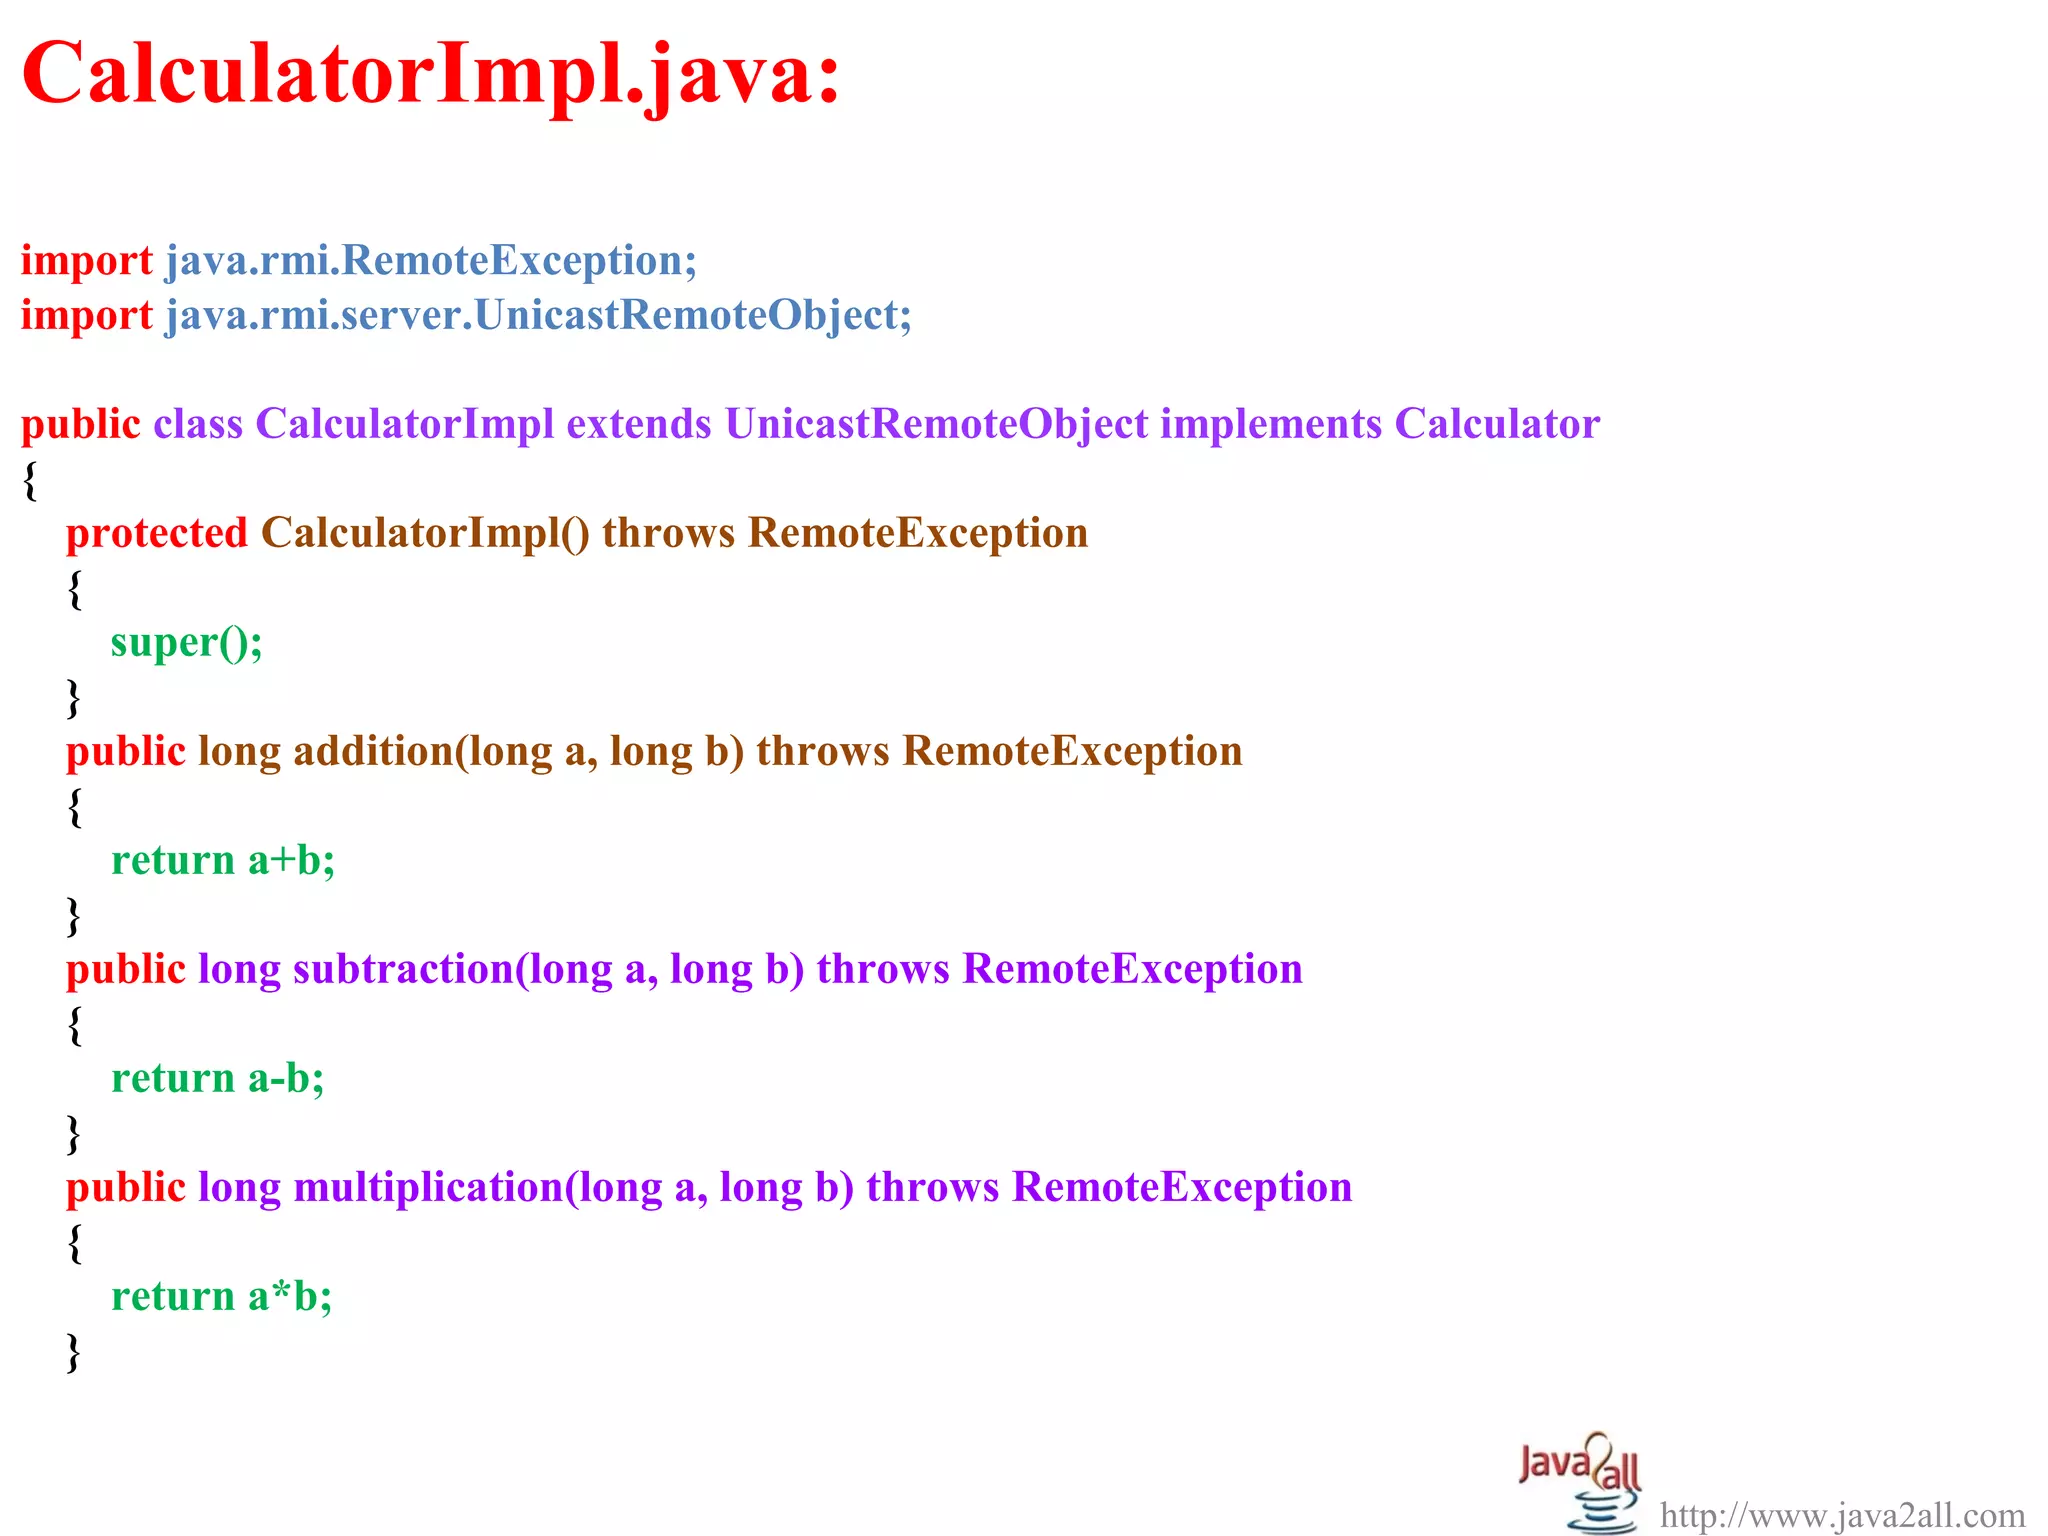
The document describes the steps to develop a simple remote method invocation (RMI) application in Java. It includes: 1. Defining a remote interface with methods like addition, subtraction etc. 2. Implementing the interface in a class that defines the method bodies. 3. Creating a server class that binds the remote object to the registry. 4. Making a client class that looks up the remote object and calls methods. 5. Compiling the classes, running the registry, then server and client separately to test the application.