Introduction to Excel Part 1: The Basics CS 101
In CS 101, we will use Excel to: 1. Store and organize data, 2. Analyze data, and 3. Represent data graphically (e.g., in bar graphs, histograms, and scatterplots)
 Microsoft Excel consists of Workbooks  Each Workbook is made up of an infinite number of worksheets  It is possible to name each worksheet to aid in organizing your data Excel Basics
Excel Basics This is a row. Rows are represented by numbers along the side of the sheet. This is a column. Columns are represented by letters across the top of the sheet. Excel spreadsheets organize information (text and numbers) by rows and columns:
Excel Basics A cell is the intersection between a column and a row. Each cell is named for the column letter and row number that intersect to make it.
Excel Basics  Excel allows for some basic actions which we have used before in other programs  Copy/Paste (Rows, Columns, Cells, etc.)  Insert (Rows and Columns)  Sort (Alphabetically, Numerically, Chronologically, etc.)
Inserting Rows and Columns • The Insert command offers several techniques to insert rows, columns, and cells
Deleting Rows and Columns • The Delete command offers several techniques to remove rows, columns, and cells
Formatting  Merging allows us to combine two or more adjacent cells physically (disregarding contents)  To merge cells simply highlight the cells to be merged and select the merge option from the home menu  Cells can also be formatted with options you are probably familiar with (bold, font size, borders, etc.)  These options can be found scattered on the home menu or under the format cells menu via the right-click list. Even whole rows and columns can be formatted. Let’s take a look!
Formatting  Excel also allows us to format cells by their data types. This is useful for a variety of reasons (sorting, manipulating, rounding, etc.)  To format the cell’s data type, in the numbers section of the home menu, select the number drop-down menu (defaults to General) and select the new type desired

Introduction_to_AdvanceExcel_FA12 - Copy.ppt

  • 1.
    Introduction to Excel Part1: The Basics CS 101
  • 2.
    In CS 101,we will use Excel to: 1. Store and organize data, 2. Analyze data, and 3. Represent data graphically (e.g., in bar graphs, histograms, and scatterplots)
  • 3.
     Microsoft Excelconsists of Workbooks  Each Workbook is made up of an infinite number of worksheets  It is possible to name each worksheet to aid in organizing your data Excel Basics
  • 4.
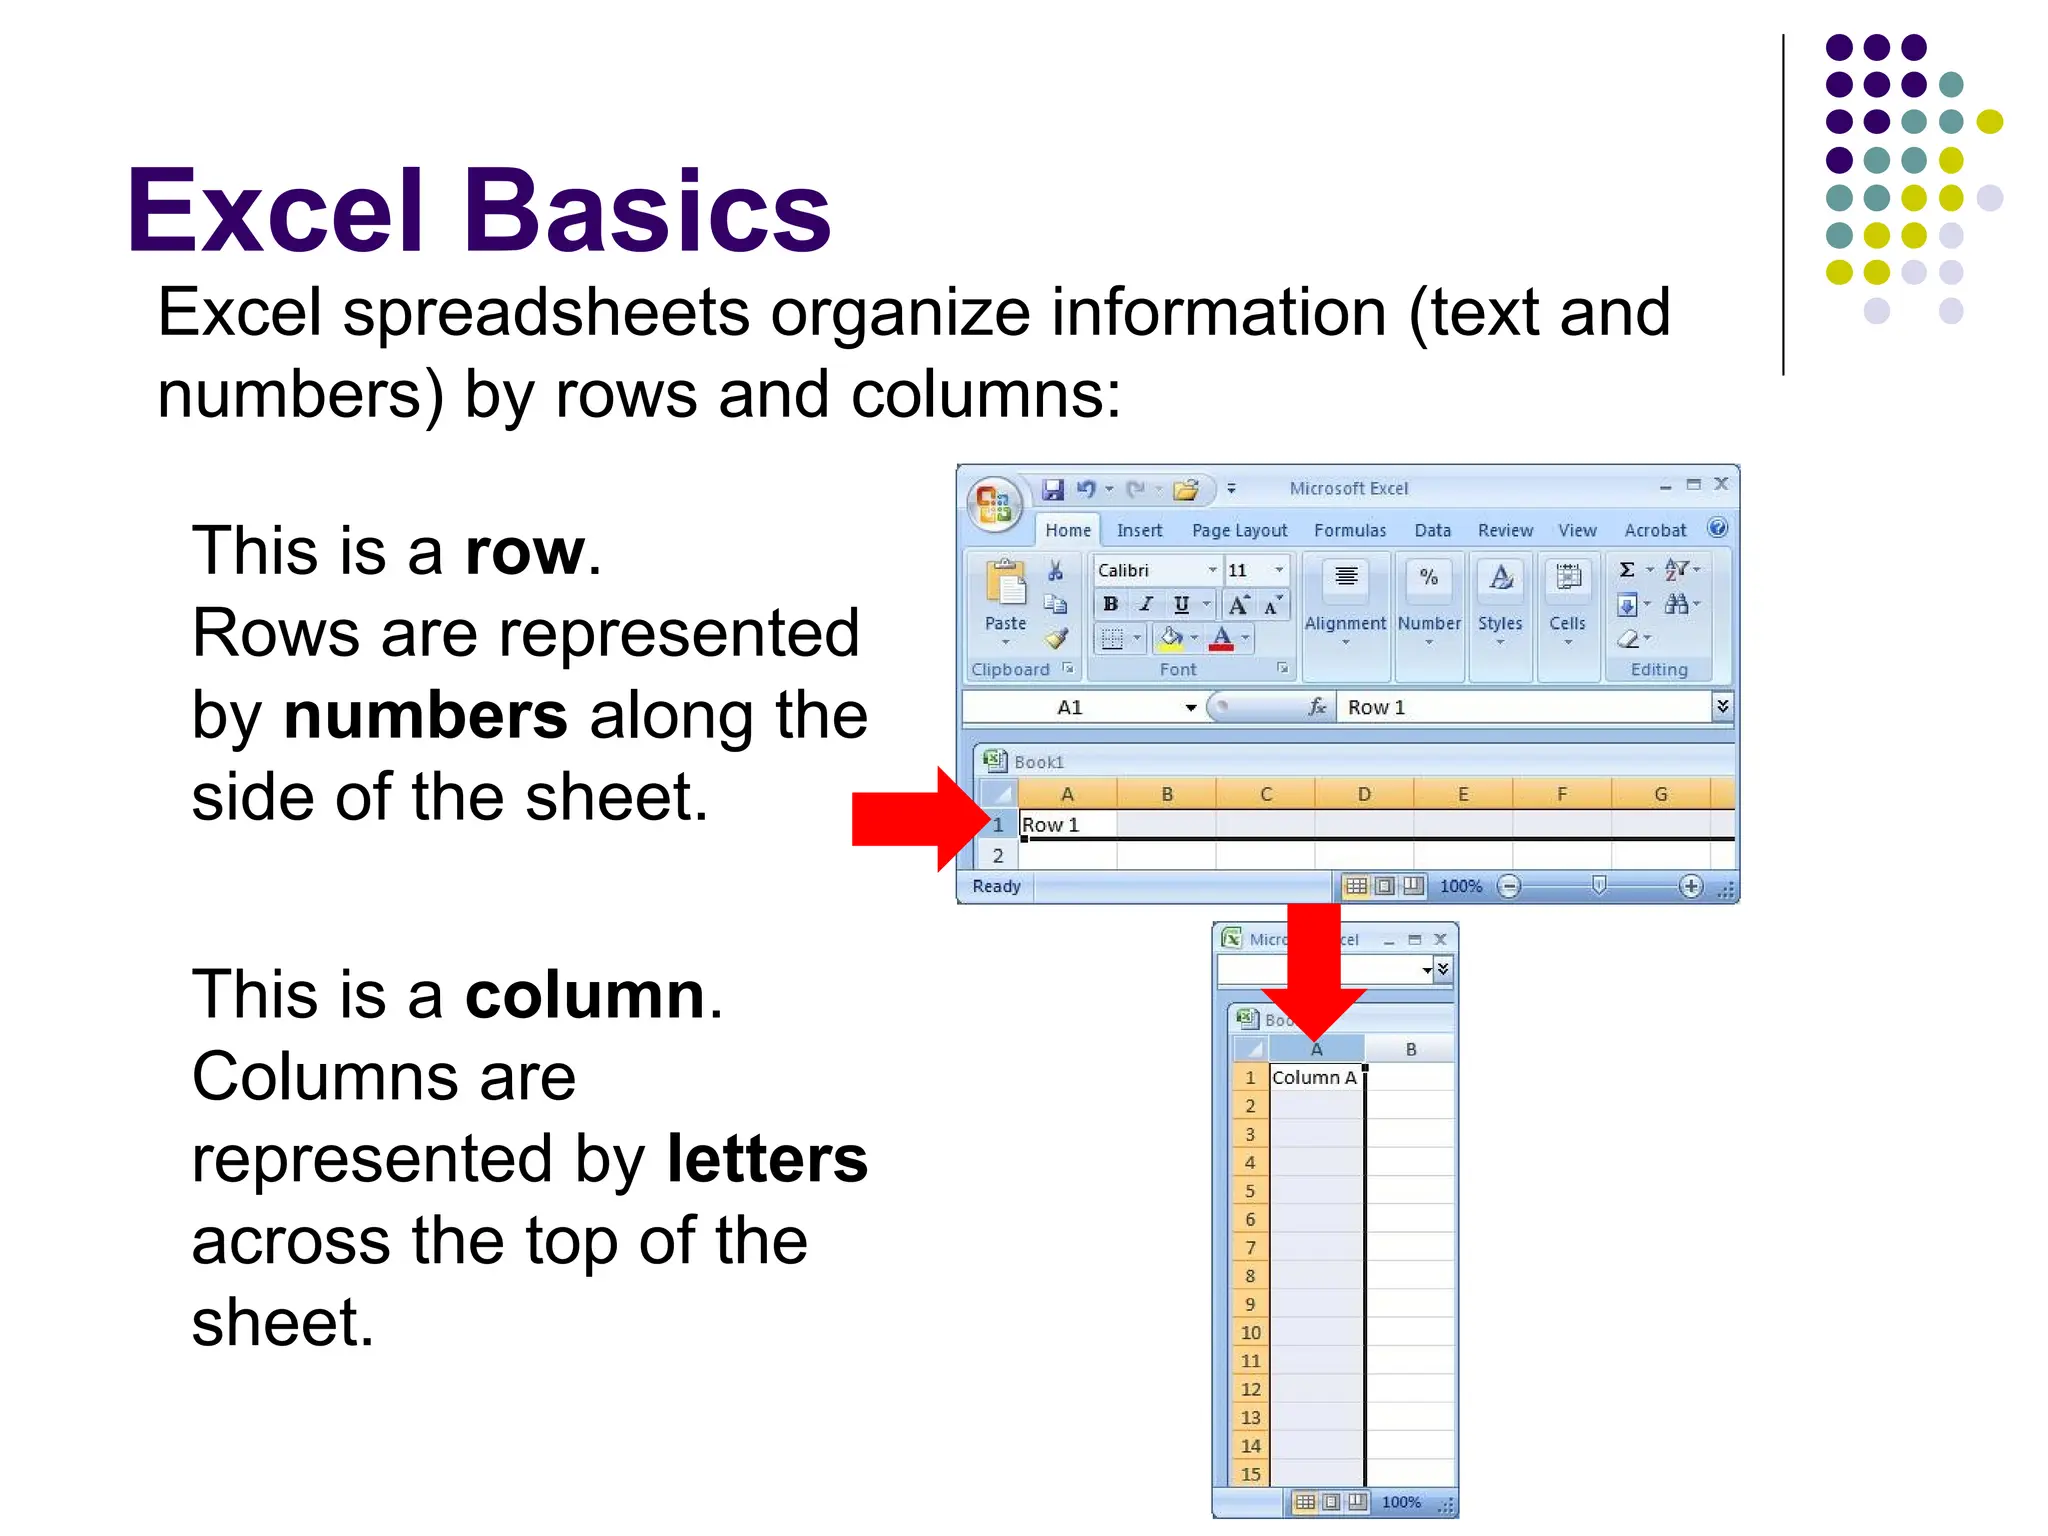
    Excel Basics This isa row. Rows are represented by numbers along the side of the sheet. This is a column. Columns are represented by letters across the top of the sheet. Excel spreadsheets organize information (text and numbers) by rows and columns:
  • 5.
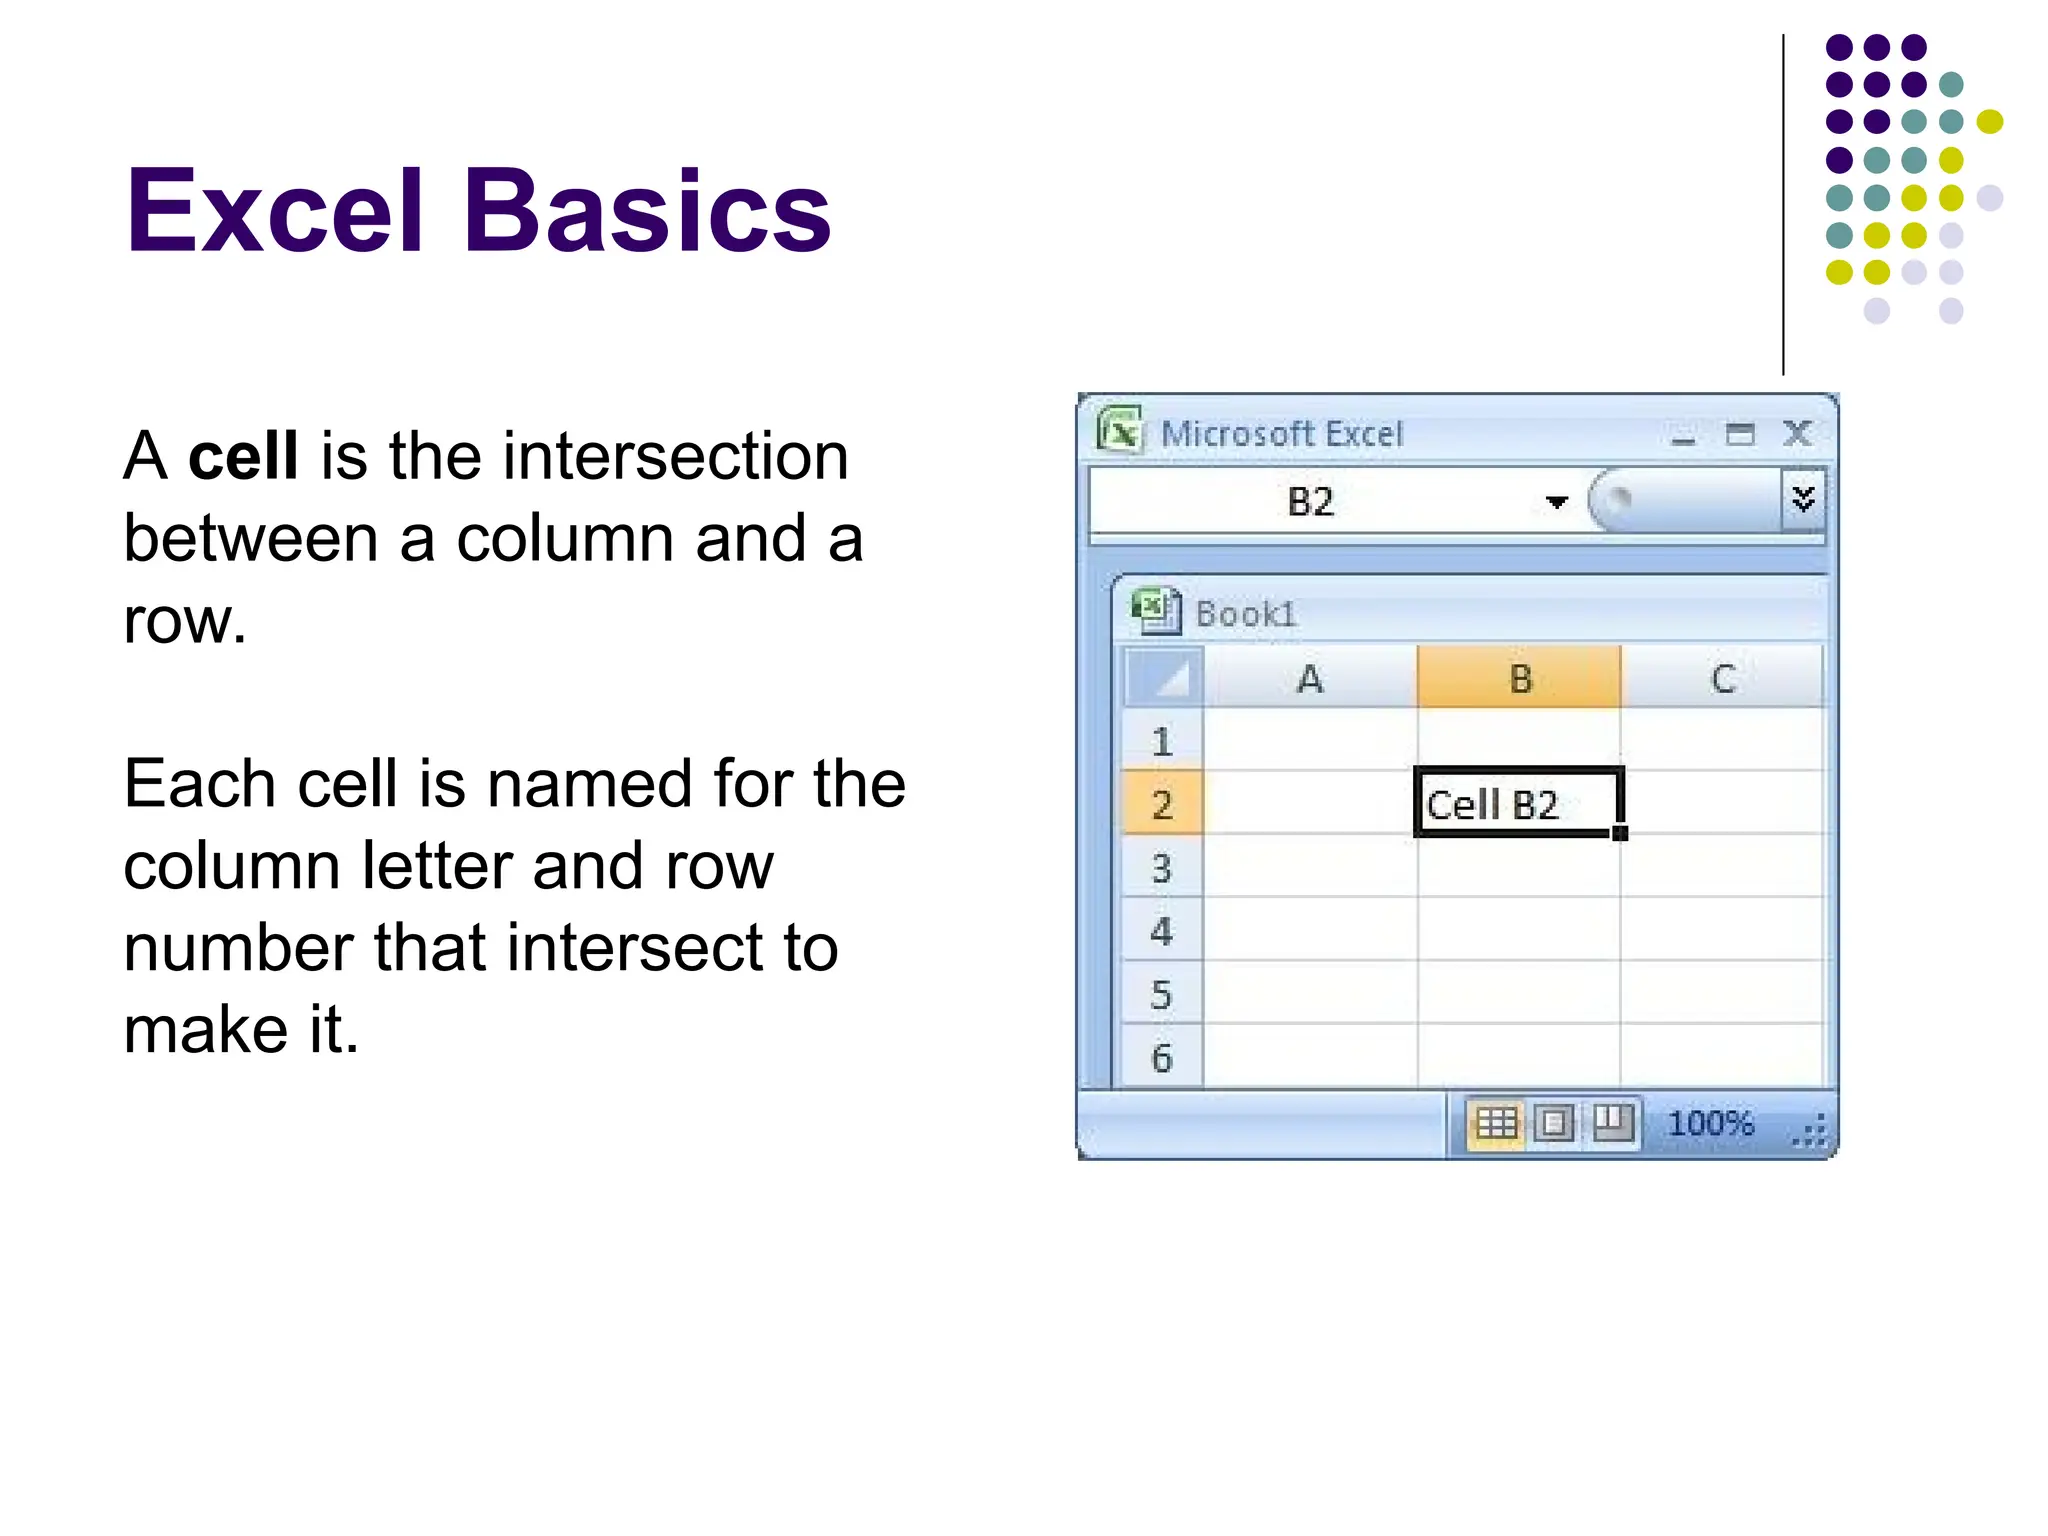
    Excel Basics A cellis the intersection between a column and a row. Each cell is named for the column letter and row number that intersect to make it.
  • 6.
    Excel Basics  Excelallows for some basic actions which we have used before in other programs  Copy/Paste (Rows, Columns, Cells, etc.)  Insert (Rows and Columns)  Sort (Alphabetically, Numerically, Chronologically, etc.)
  • 7.
    Inserting Rows andColumns • The Insert command offers several techniques to insert rows, columns, and cells
  • 8.
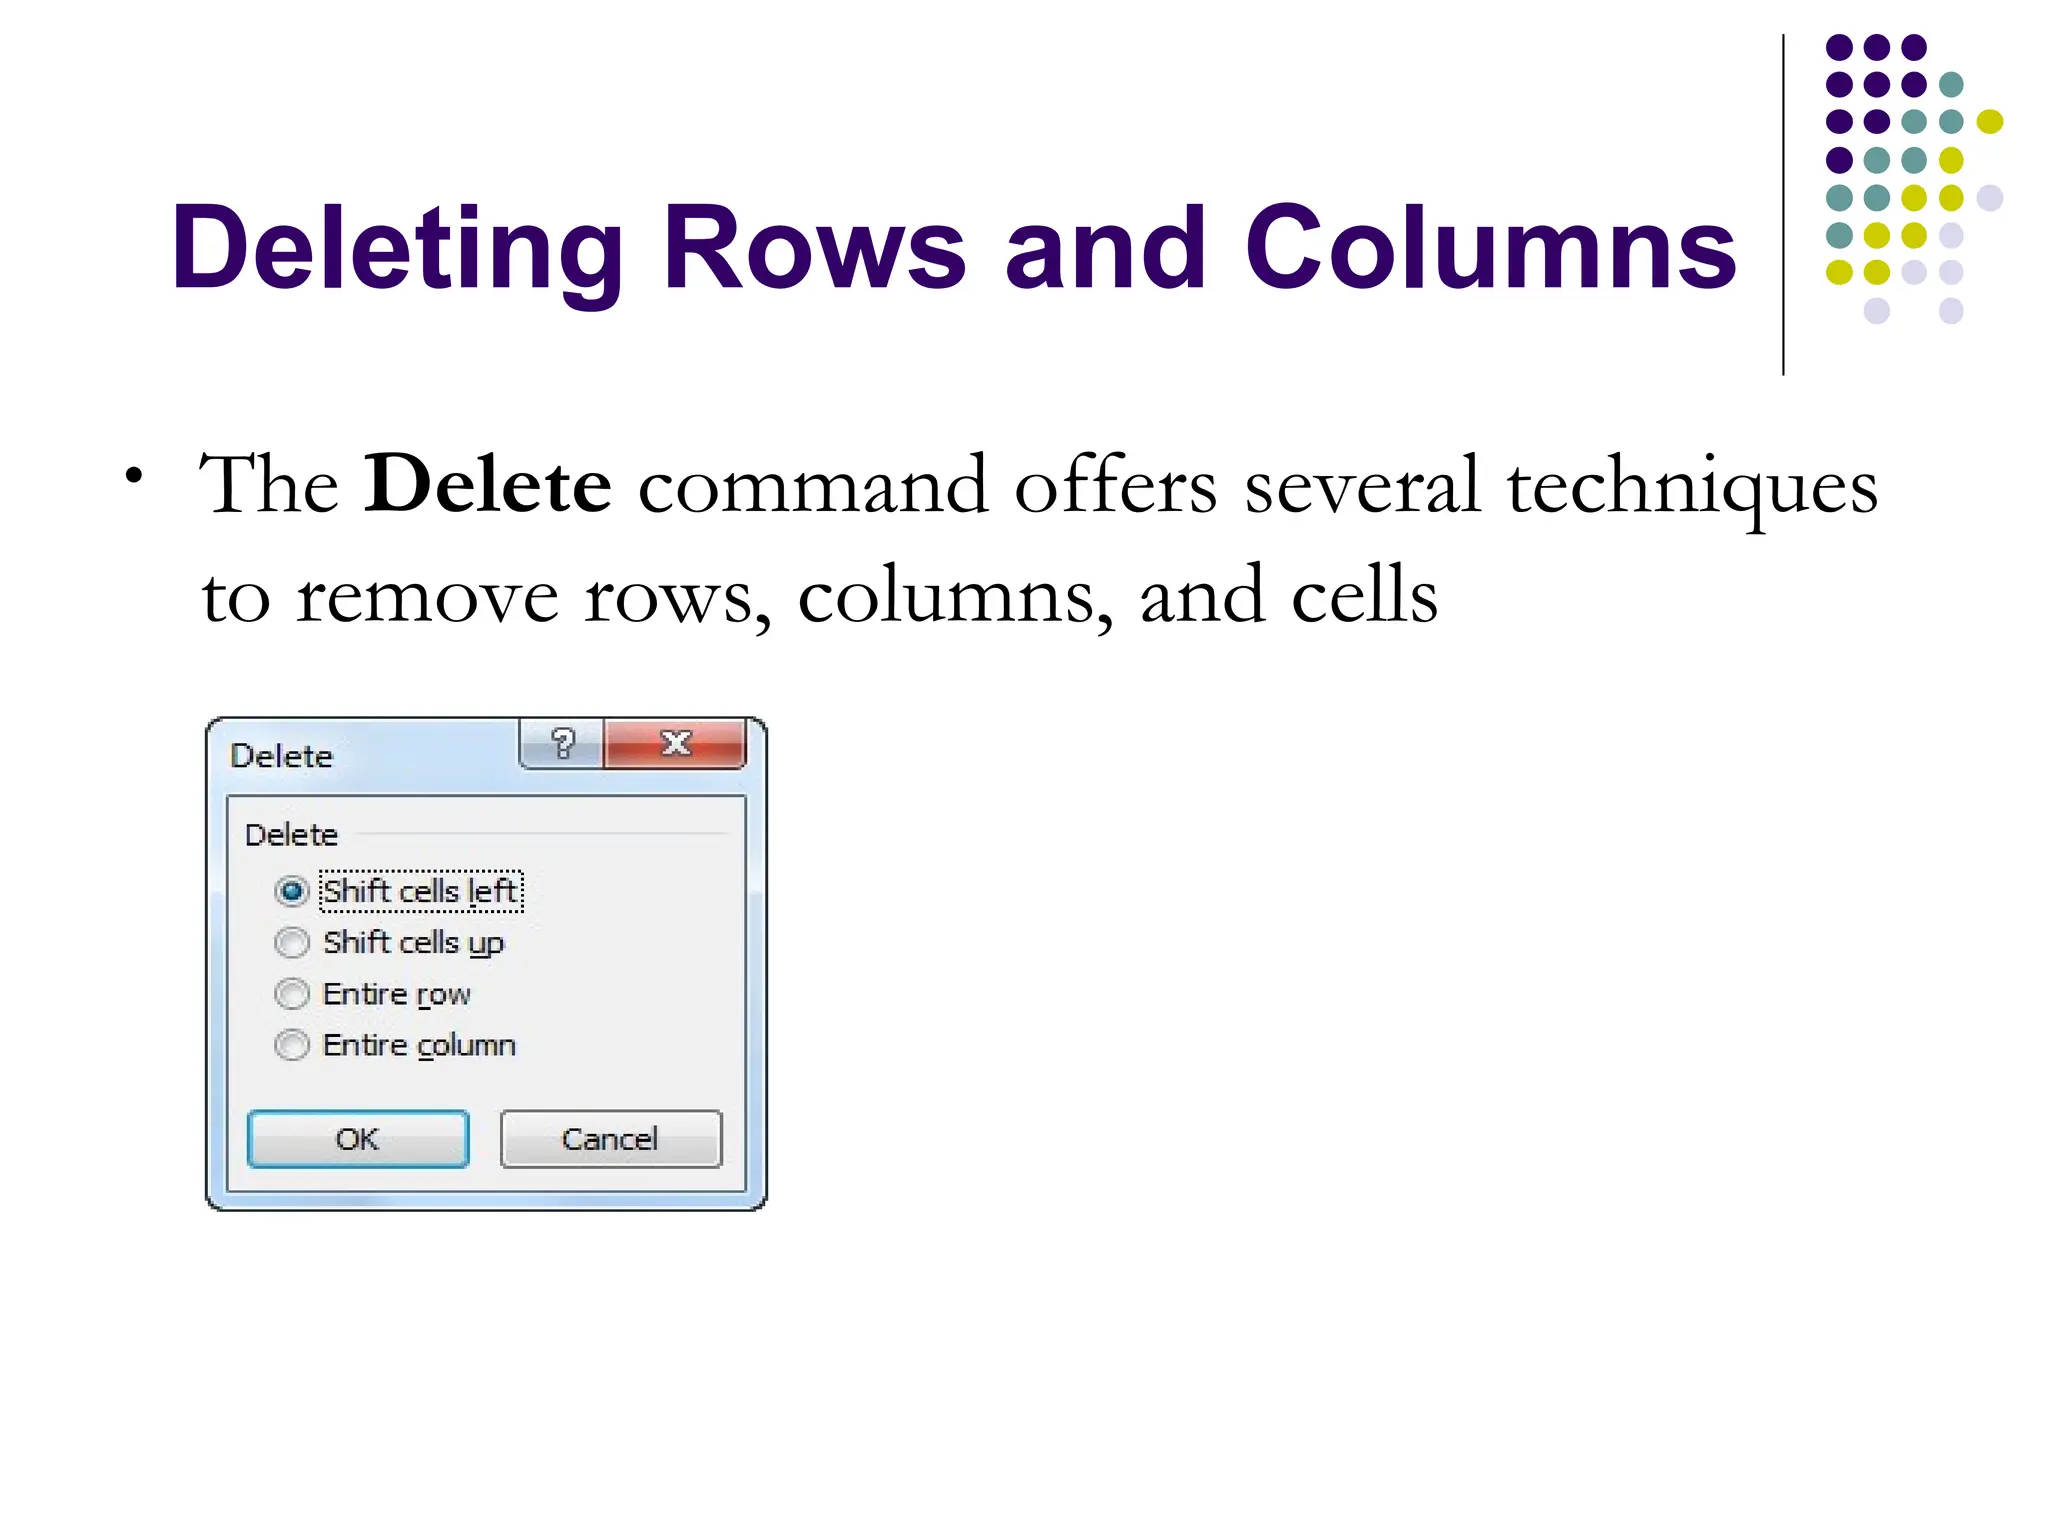
    Deleting Rows andColumns • The Delete command offers several techniques to remove rows, columns, and cells
  • 9.
    Formatting  Merging allowsus to combine two or more adjacent cells physically (disregarding contents)  To merge cells simply highlight the cells to be merged and select the merge option from the home menu  Cells can also be formatted with options you are probably familiar with (bold, font size, borders, etc.)  These options can be found scattered on the home menu or under the format cells menu via the right-click list. Even whole rows and columns can be formatted. Let’s take a look!
  • 10.
    Formatting  Excel alsoallows us to format cells by their data types. This is useful for a variety of reasons (sorting, manipulating, rounding, etc.)  To format the cell’s data type, in the numbers section of the home menu, select the number drop-down menu (defaults to General) and select the new type desired