Download as PDF, PPTX
![0. Getting started… Official installation guide: http://opencv.willowgarage.com/wiki/InstallGuide Prerequisites: [Mac OS X] Xcode 3.2 or later [Linux] GCC 4.3 or later 11/11/2011 Luigi De Russis - Computer Vision - OpenCV 2](https://image.slidesharecdn.com/opencvqtinstallationv3-120330091045-phpapp02/75/Installing-OpenCV-2-3-1-with-Qt-2-2048.jpg)
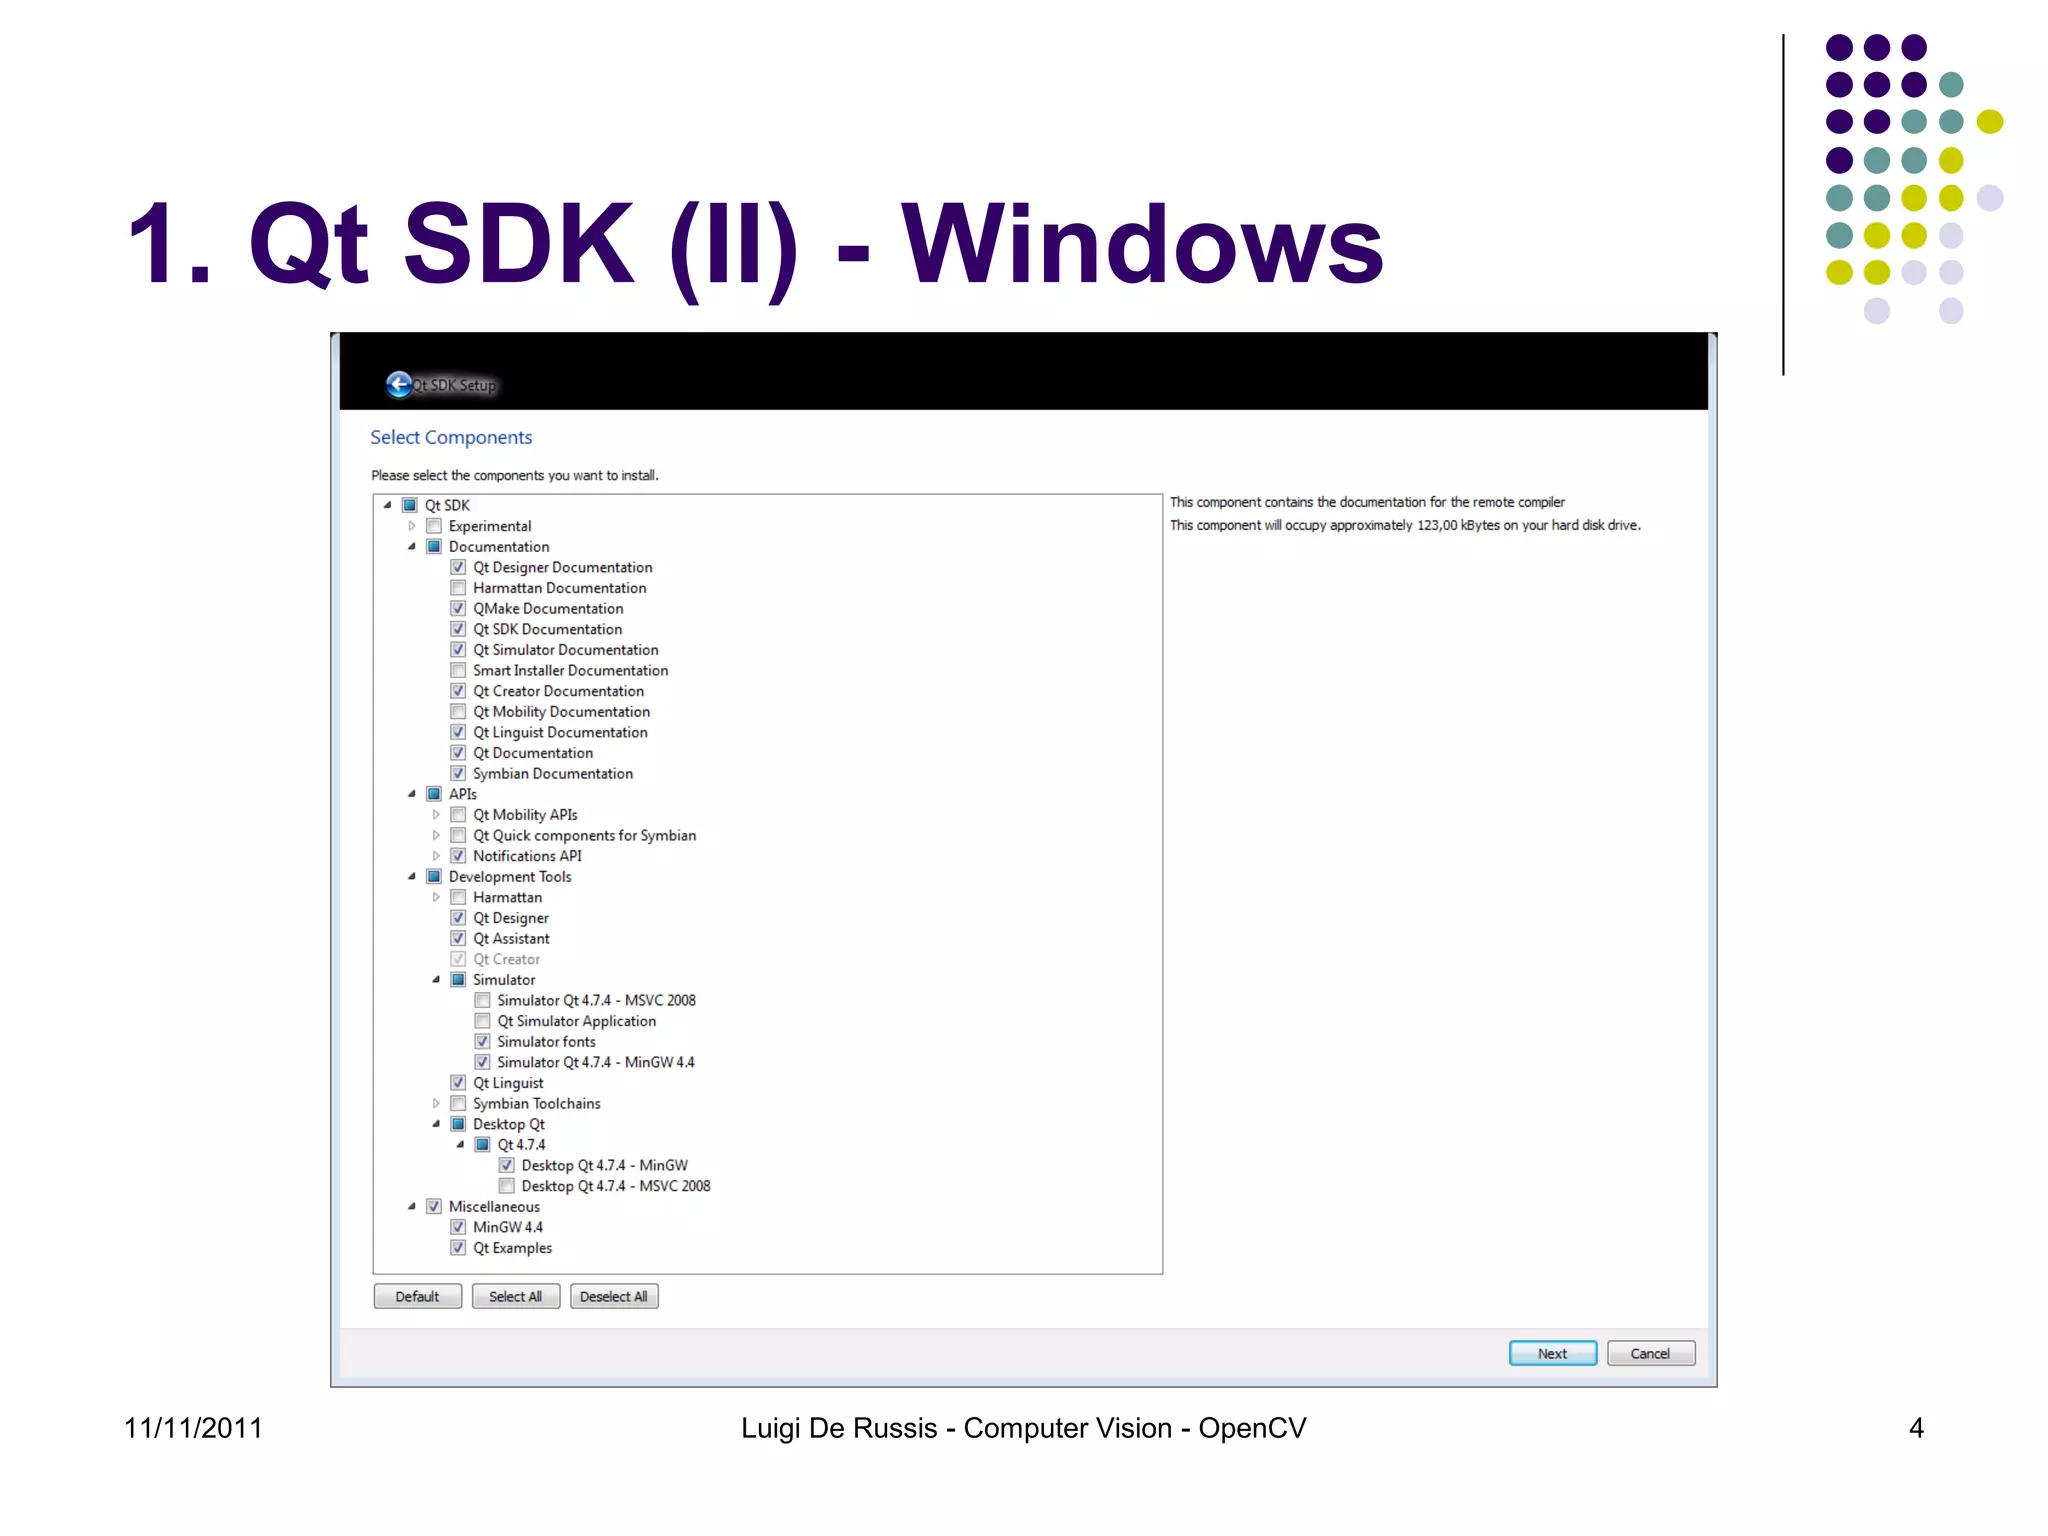
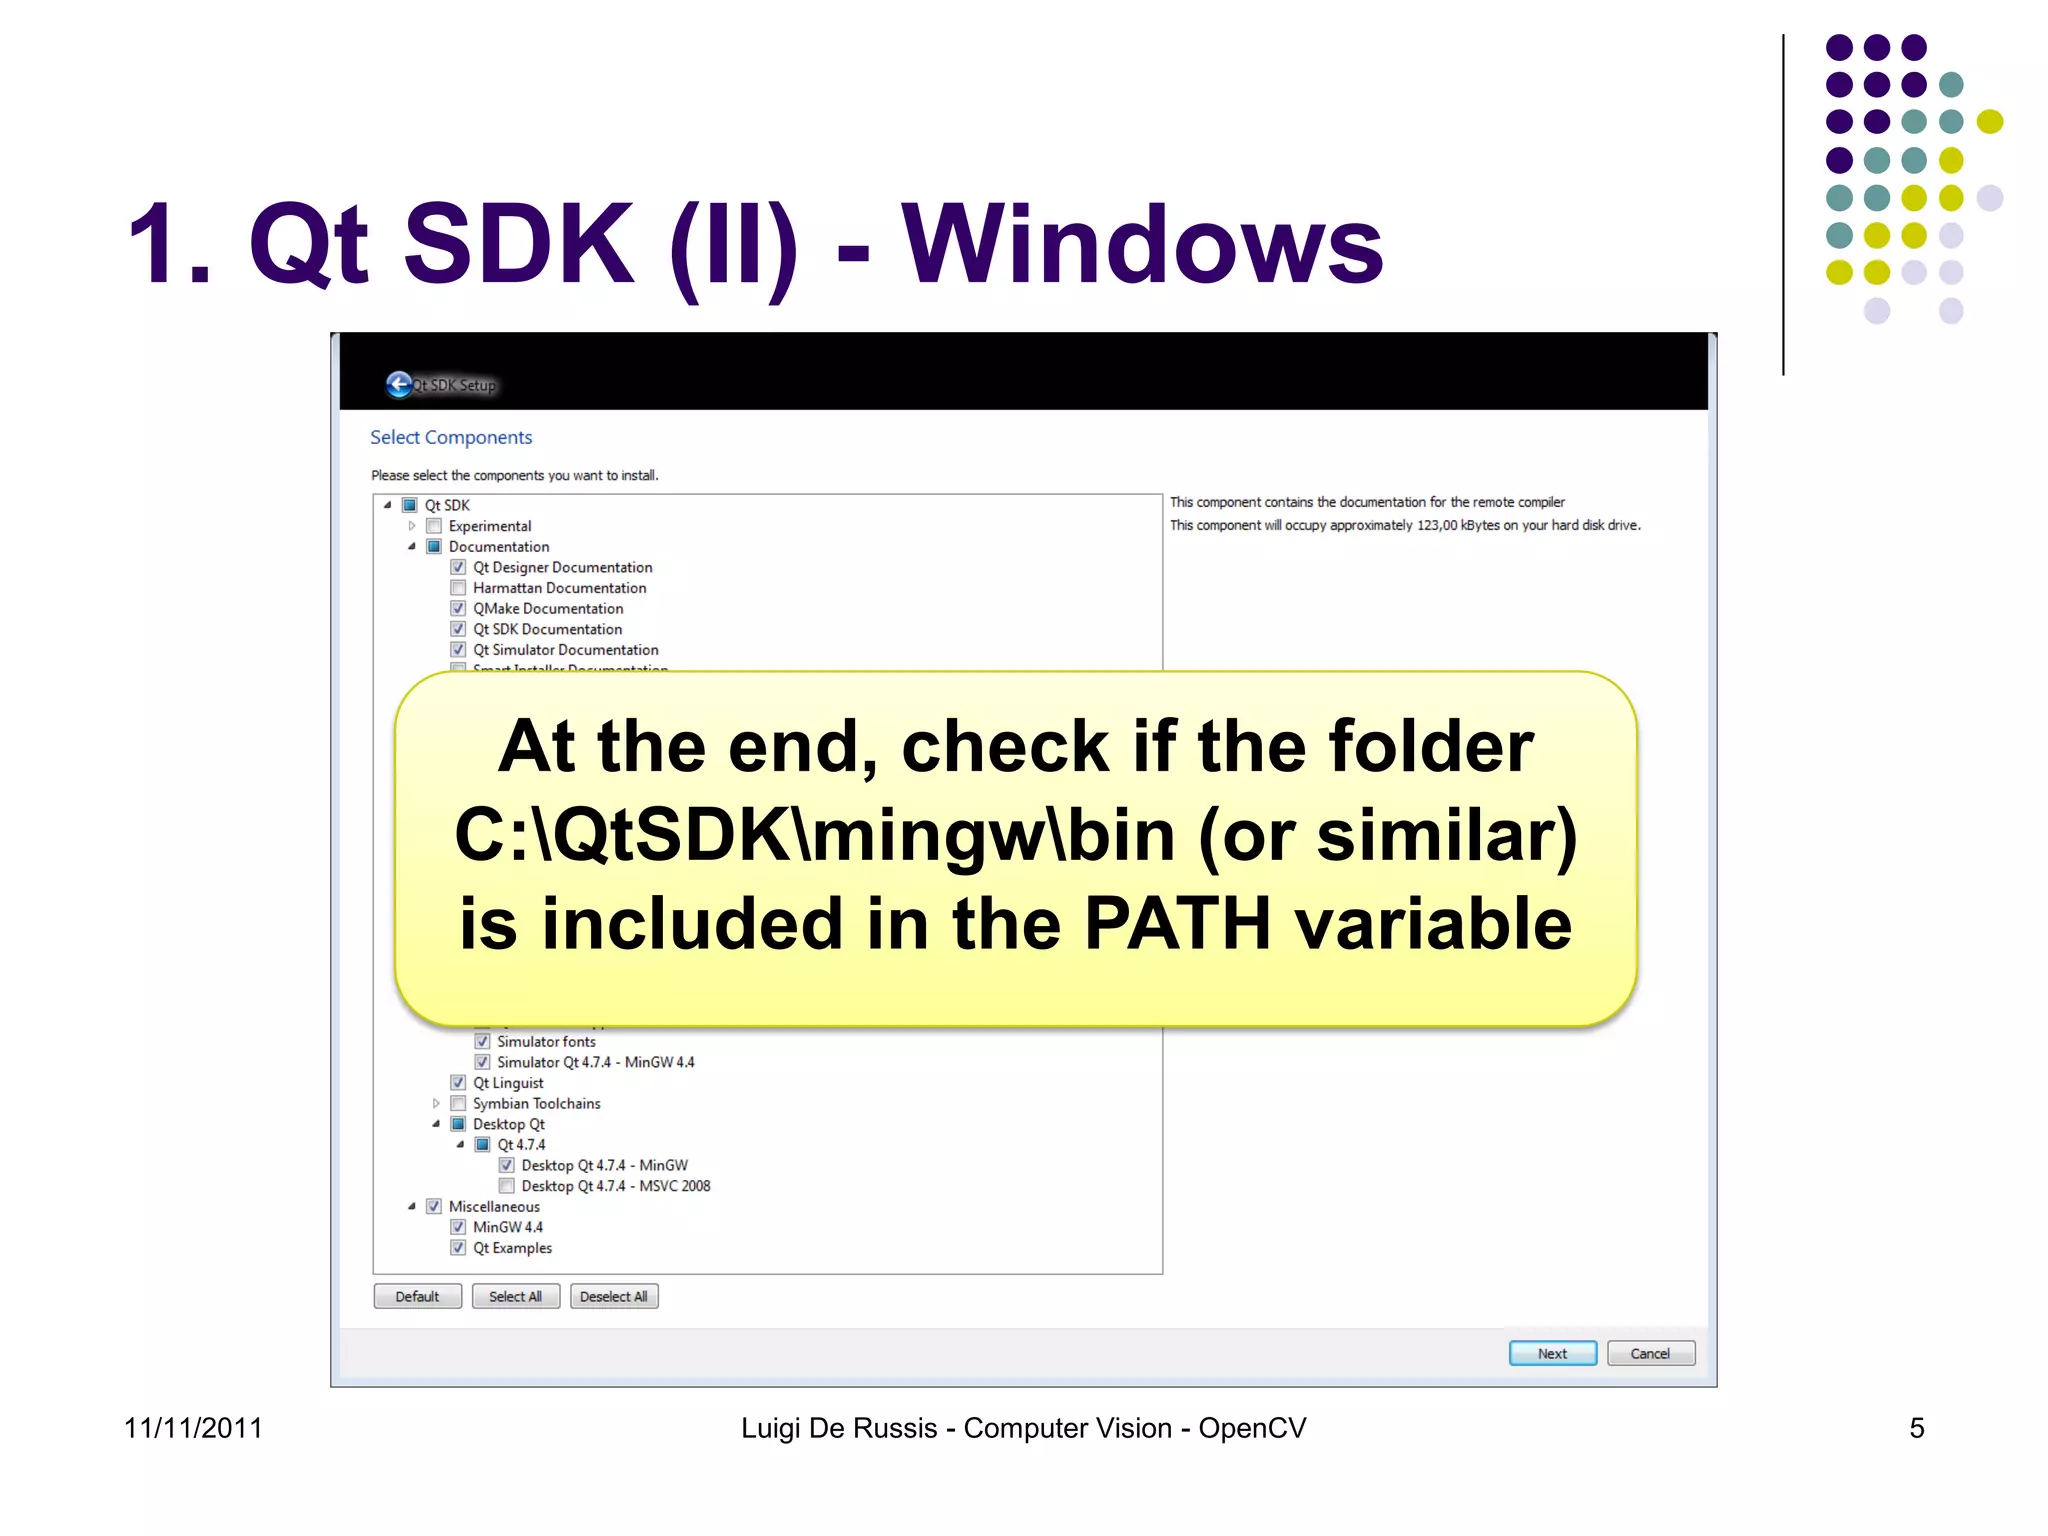
![1. Qt SDK (I) Download and install Qt SDK from http://qt.nokia.com/downloads, using the offline installer (current release 4.7.4) [Windows-only] Perform a custom installation, installing all the mingw32 stuff. Components about Meego, Symbian, etc. are not necessary for our purpose (see next slide) 11/11/2011 Luigi De Russis - Computer Vision - OpenCV 3](https://image.slidesharecdn.com/opencvqtinstallationv3-120330091045-phpapp02/75/Installing-OpenCV-2-3-1-with-Qt-3-2048.jpg)
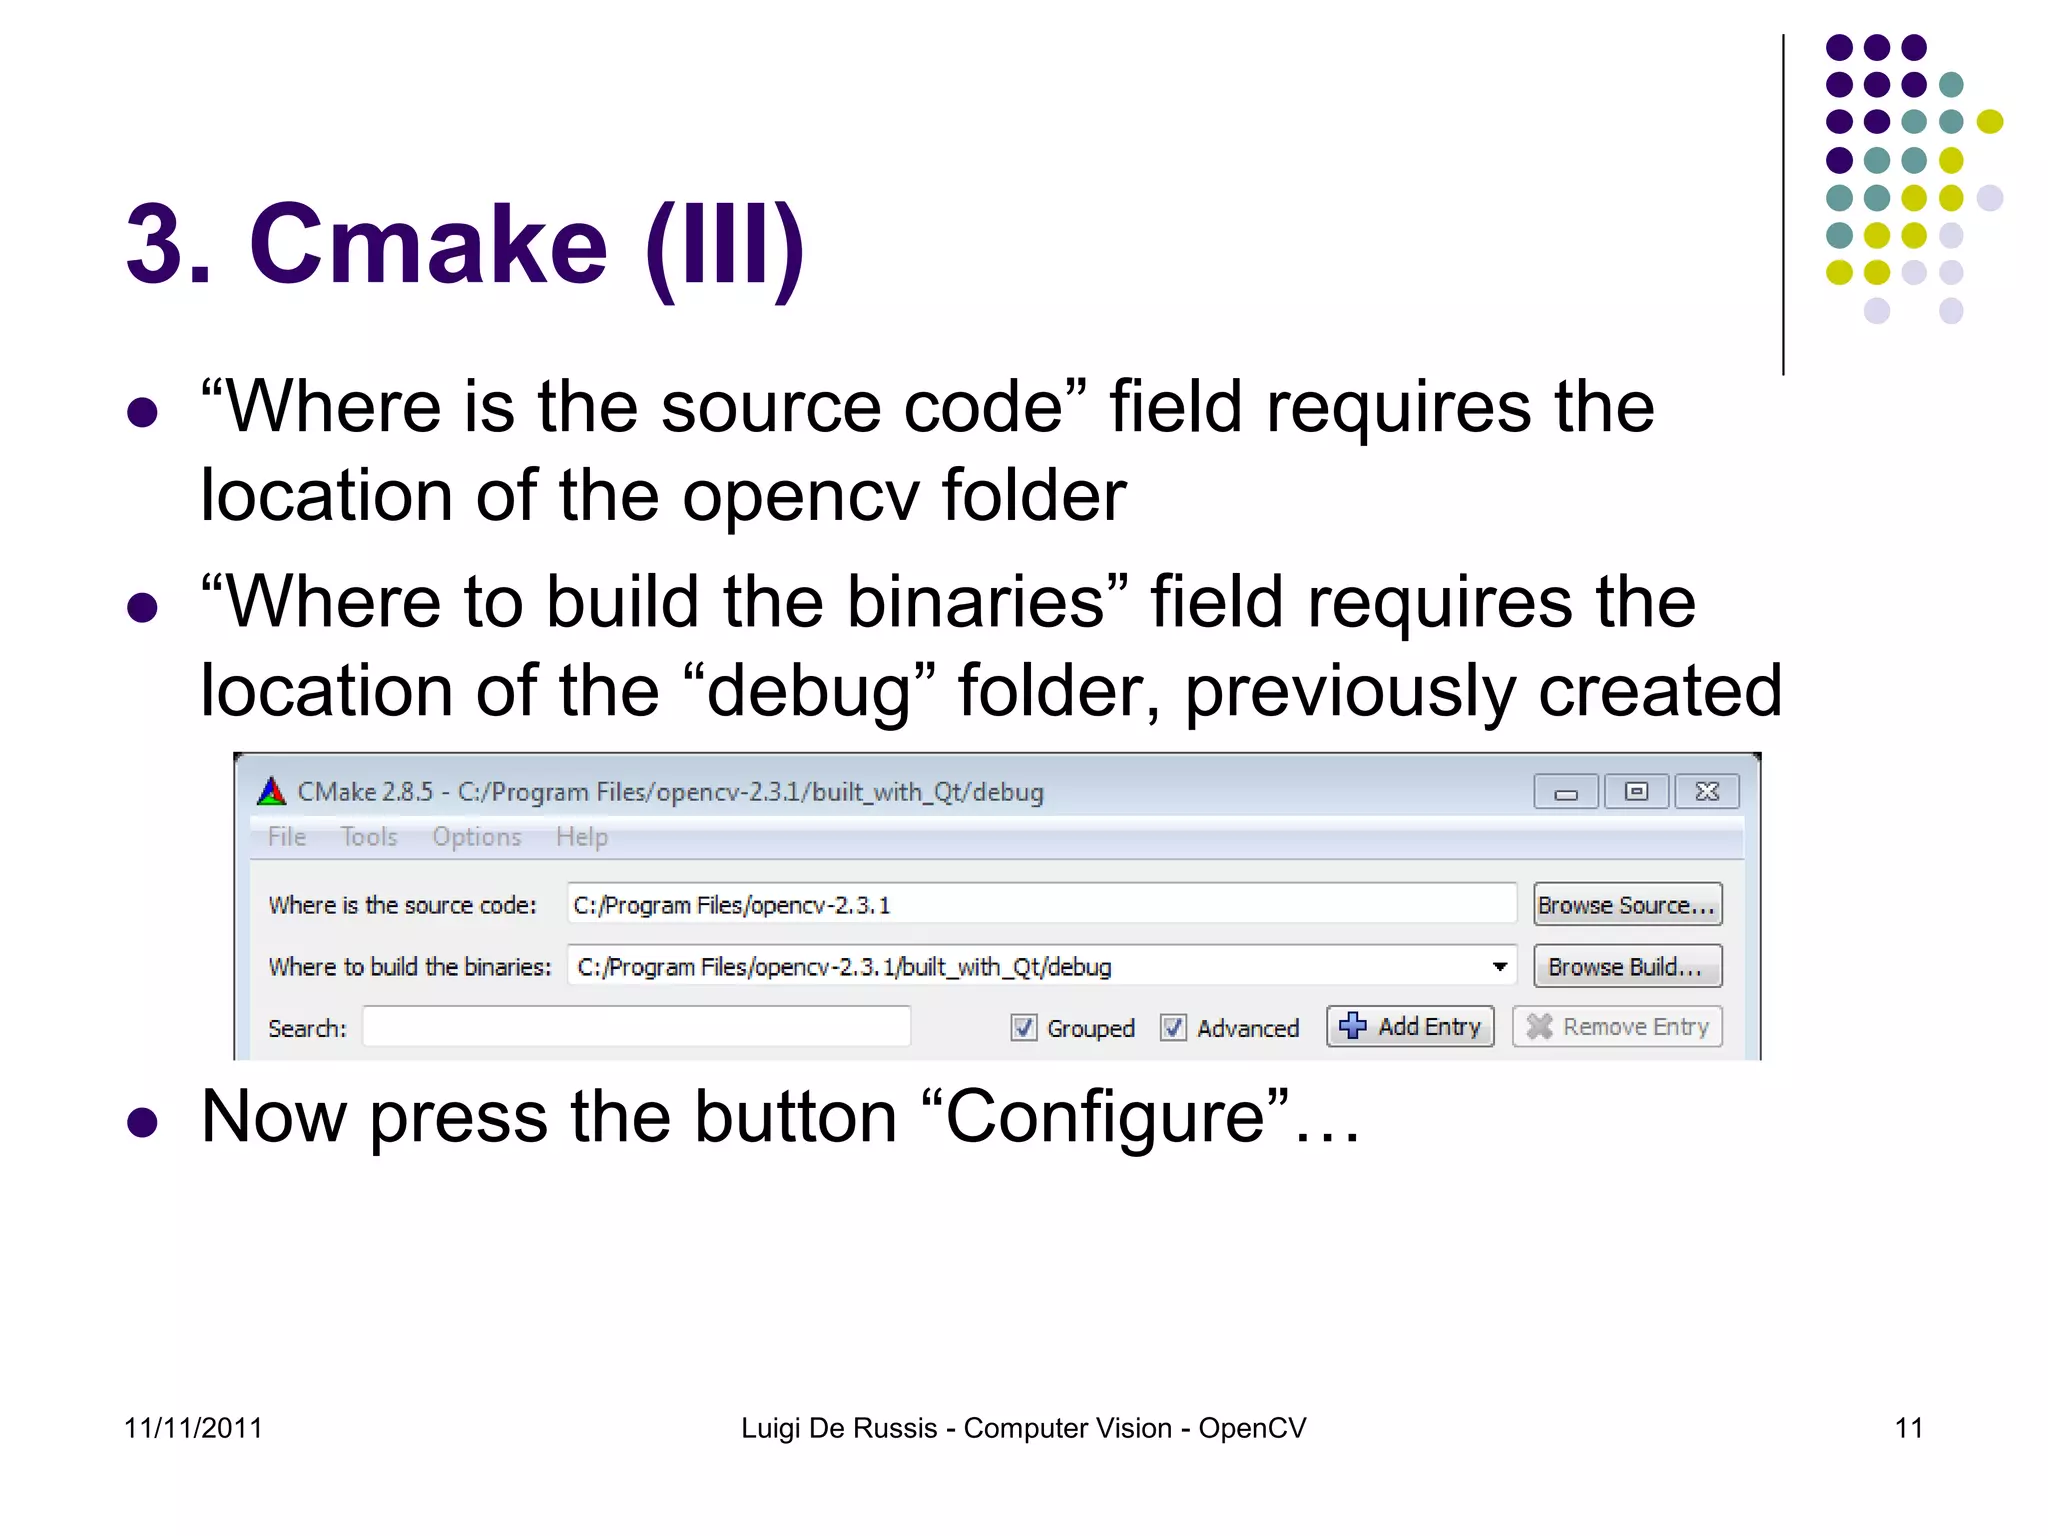
![3. Cmake (II) Create a folder named “builds_with_Qt” (or similar) wherever you want (suggested location: inside the opencv folder) Create two new folders named “debug” and “release” inside the “builds_with_Qt” folder [Mac-only] Warning: choose carefully where you put the “builds_with_Qt” folder. To move the folder, thus maintaining the compiled opencv library working, may require a little bit effort (by using “install_name_tool”). 11/11/2011 Luigi De Russis - Computer Vision - OpenCV 8](https://image.slidesharecdn.com/opencvqtinstallationv3-120330091045-phpapp02/75/Installing-OpenCV-2-3-1-with-Qt-8-2048.jpg)
![3. Cmake (II) Create a folder named “builds_with_Qt” (or similar) wherever you want (suggested location: inside the opencv folder) Create two new folders named “debug” and It is not strongly mandatory… “release” inside the “builds_with_Qt” folder only a “best practice”! [Mac-only] Warning: choose carefully where you put the “builds_with_Qt” folder. To move the folder, thus maintaining the compiled opencv library working, may require a little bit effort (by using “install_name_tool”). 11/11/2011 Luigi De Russis - Computer Vision - OpenCV 9](https://image.slidesharecdn.com/opencvqtinstallationv3-120330091045-phpapp02/75/Installing-OpenCV-2-3-1-with-Qt-9-2048.jpg)
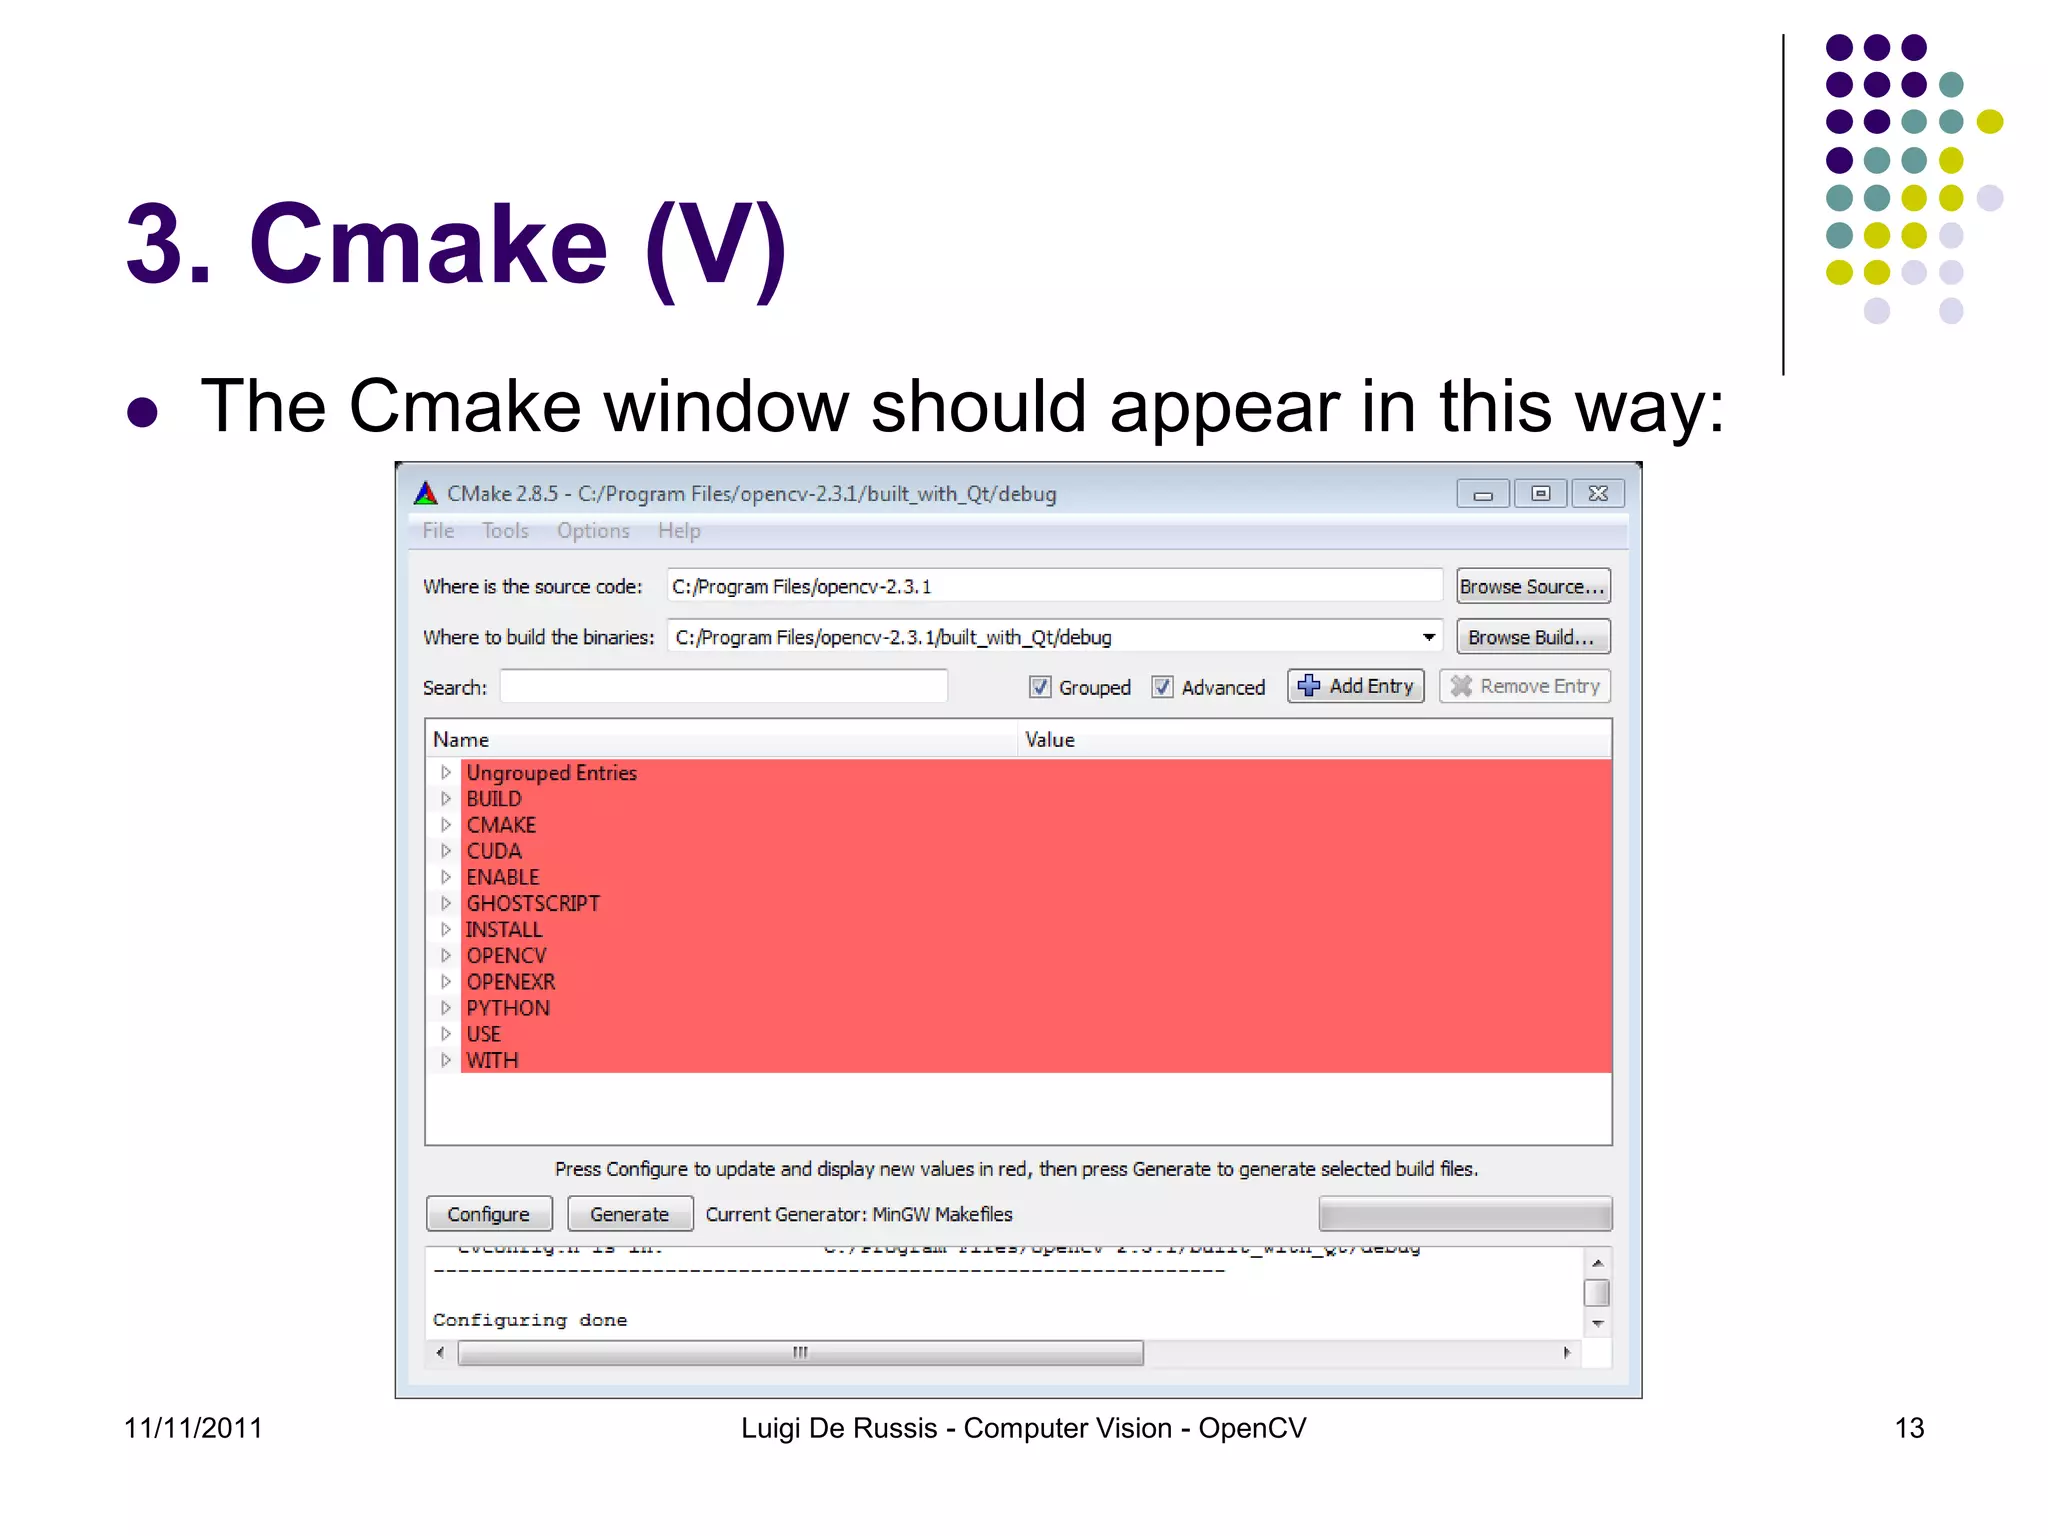
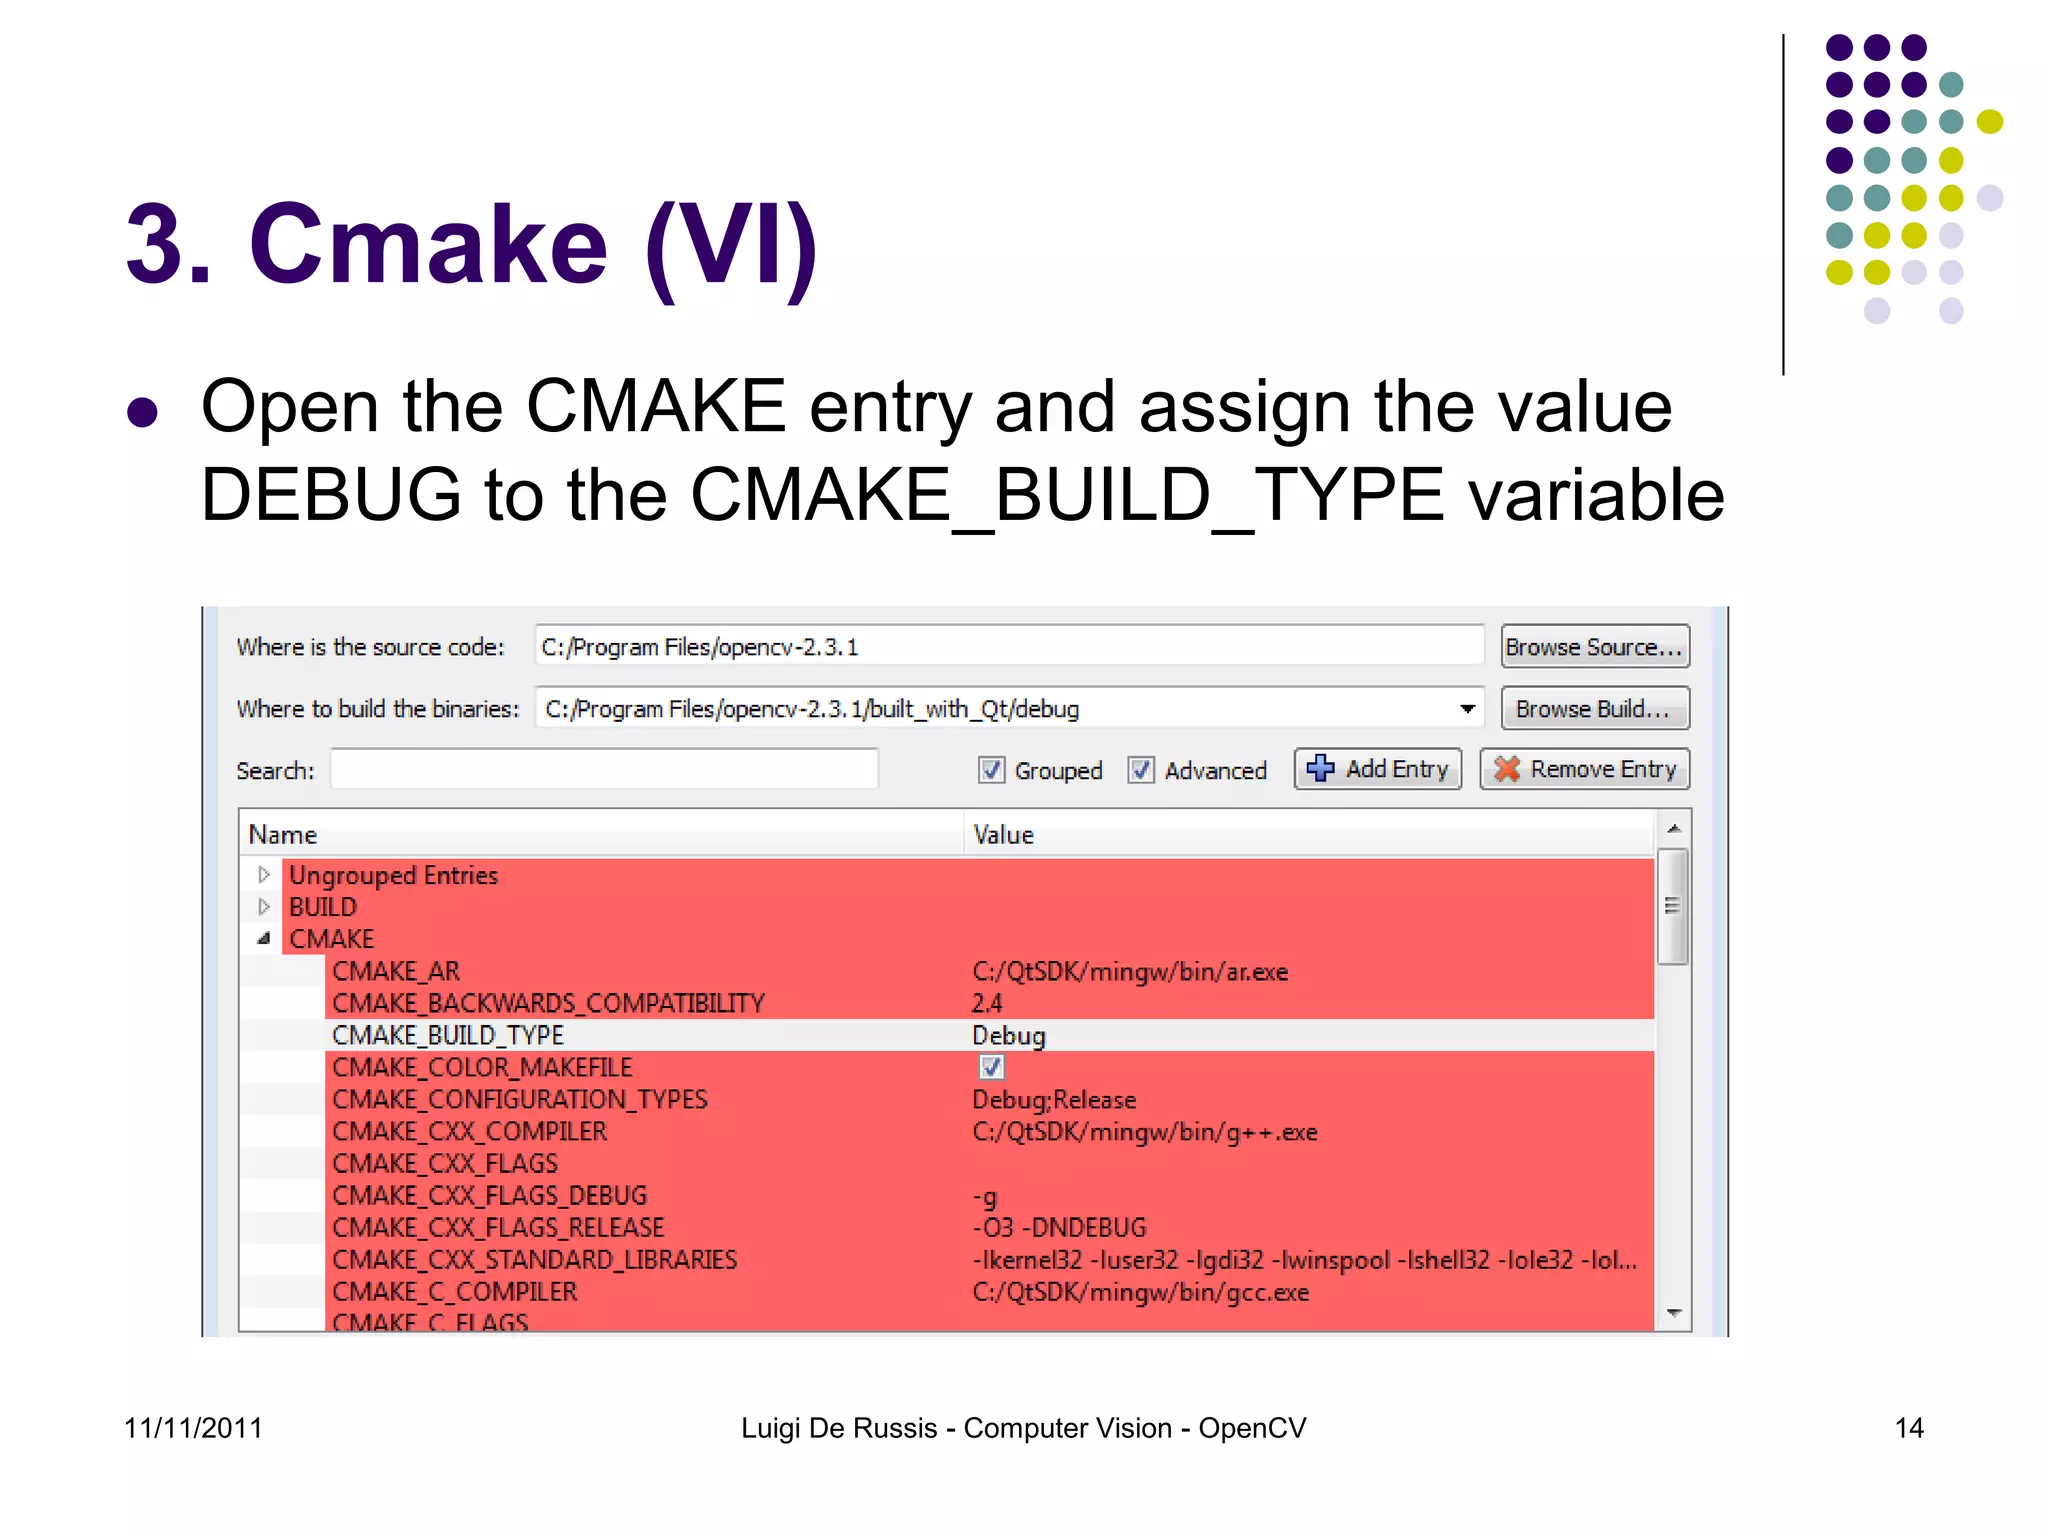
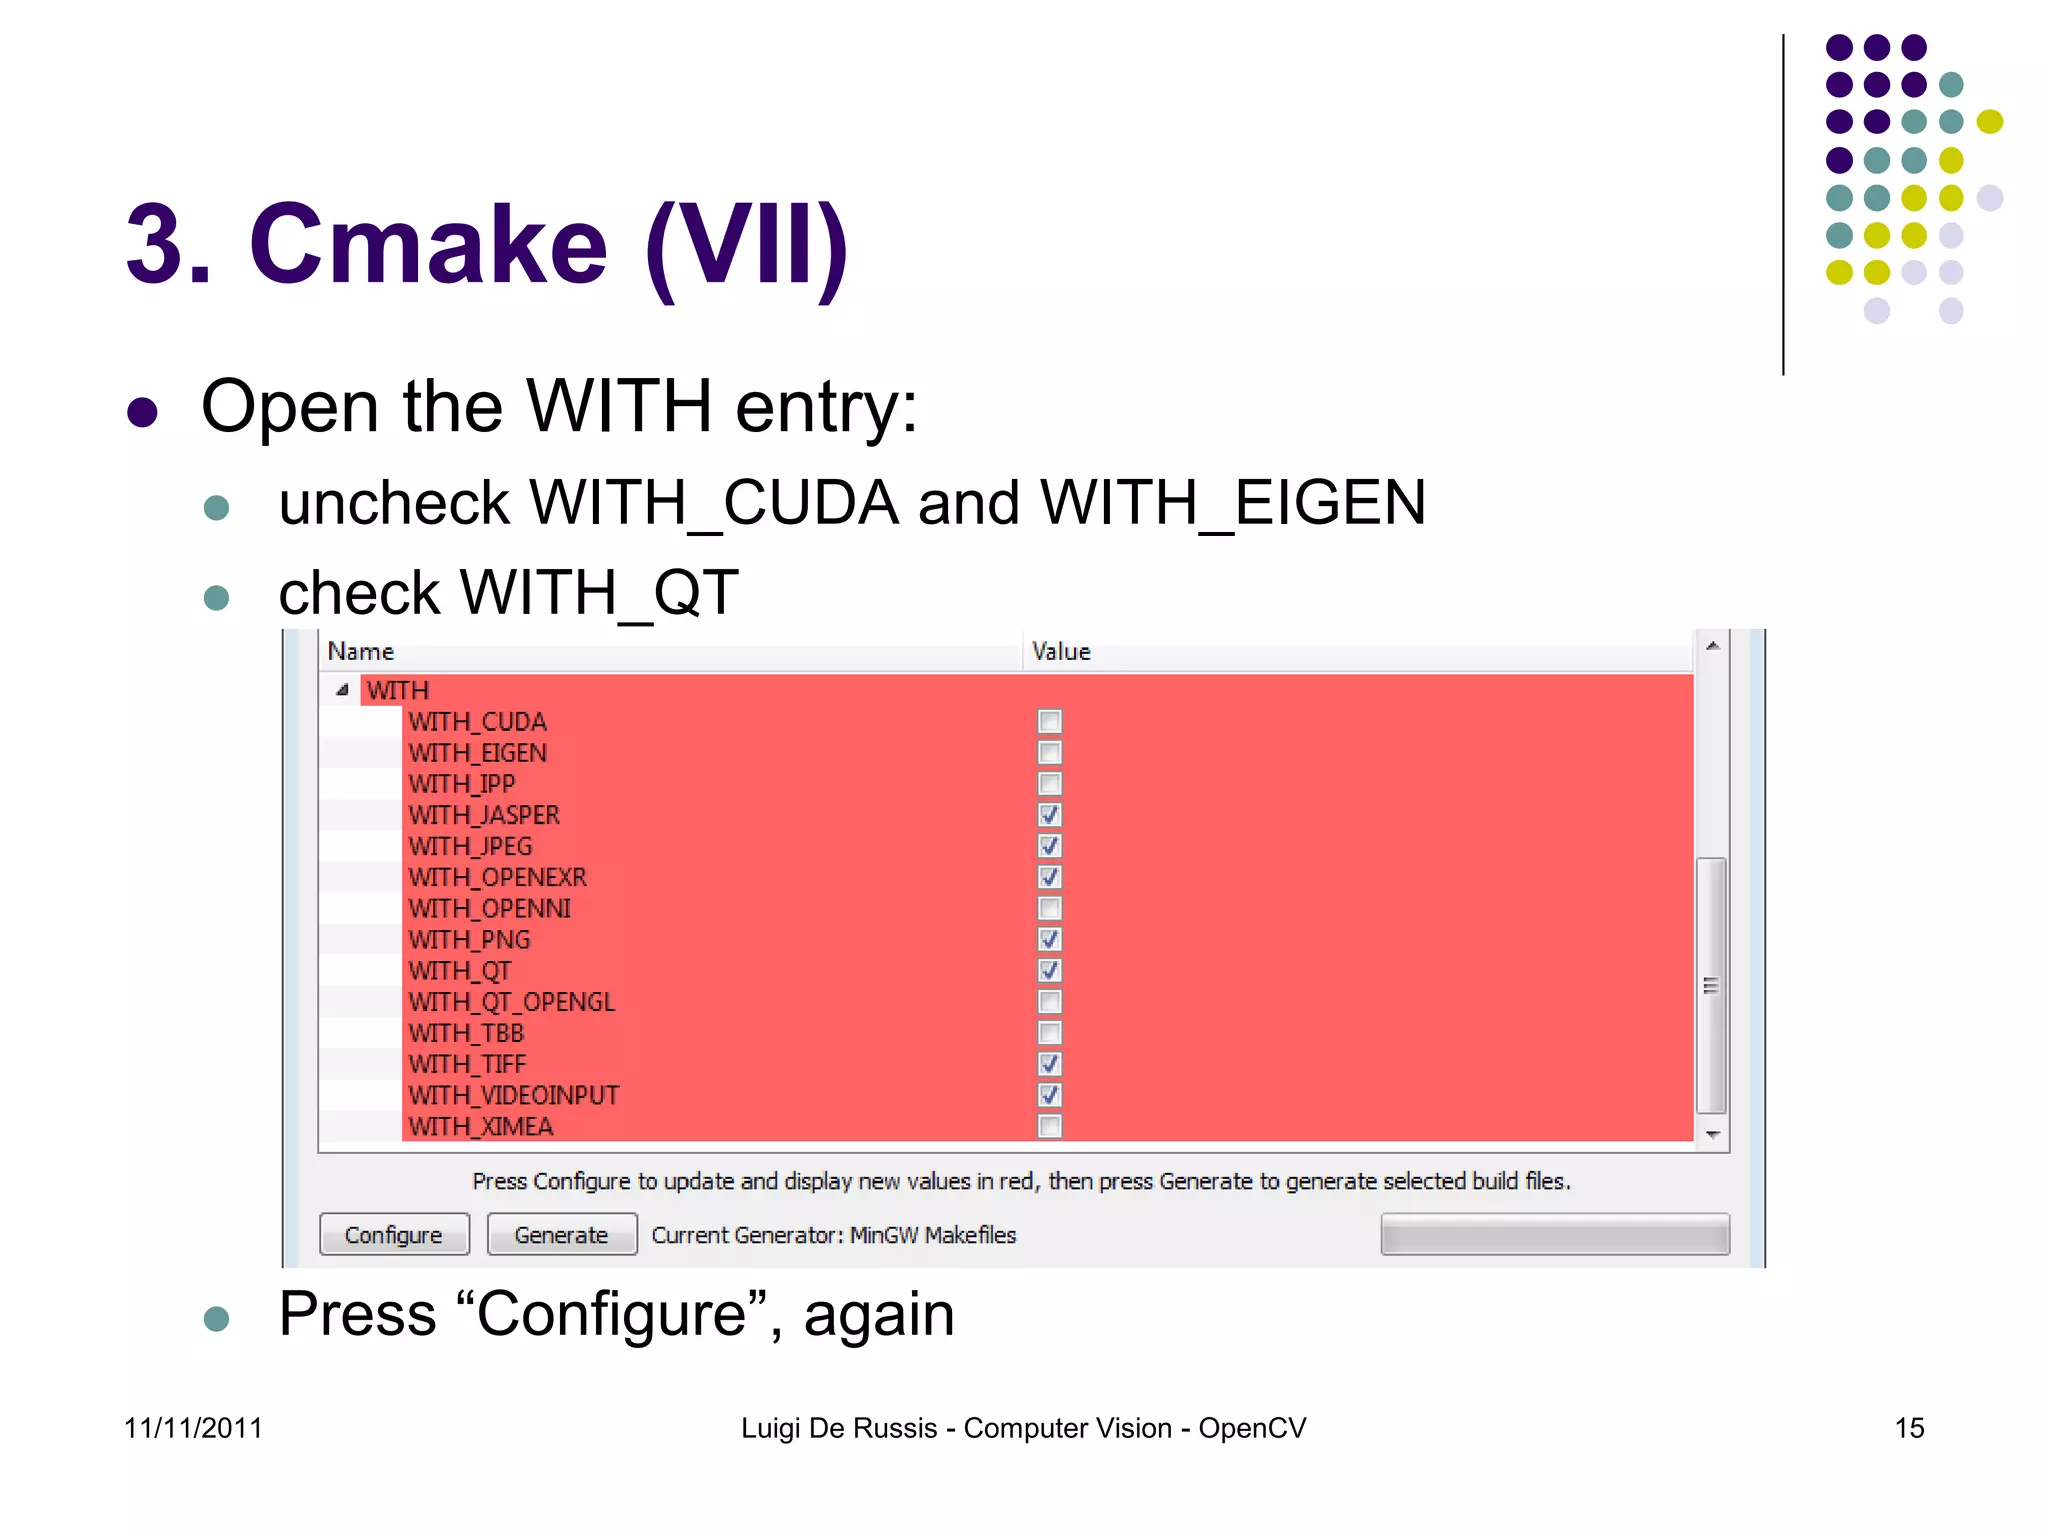
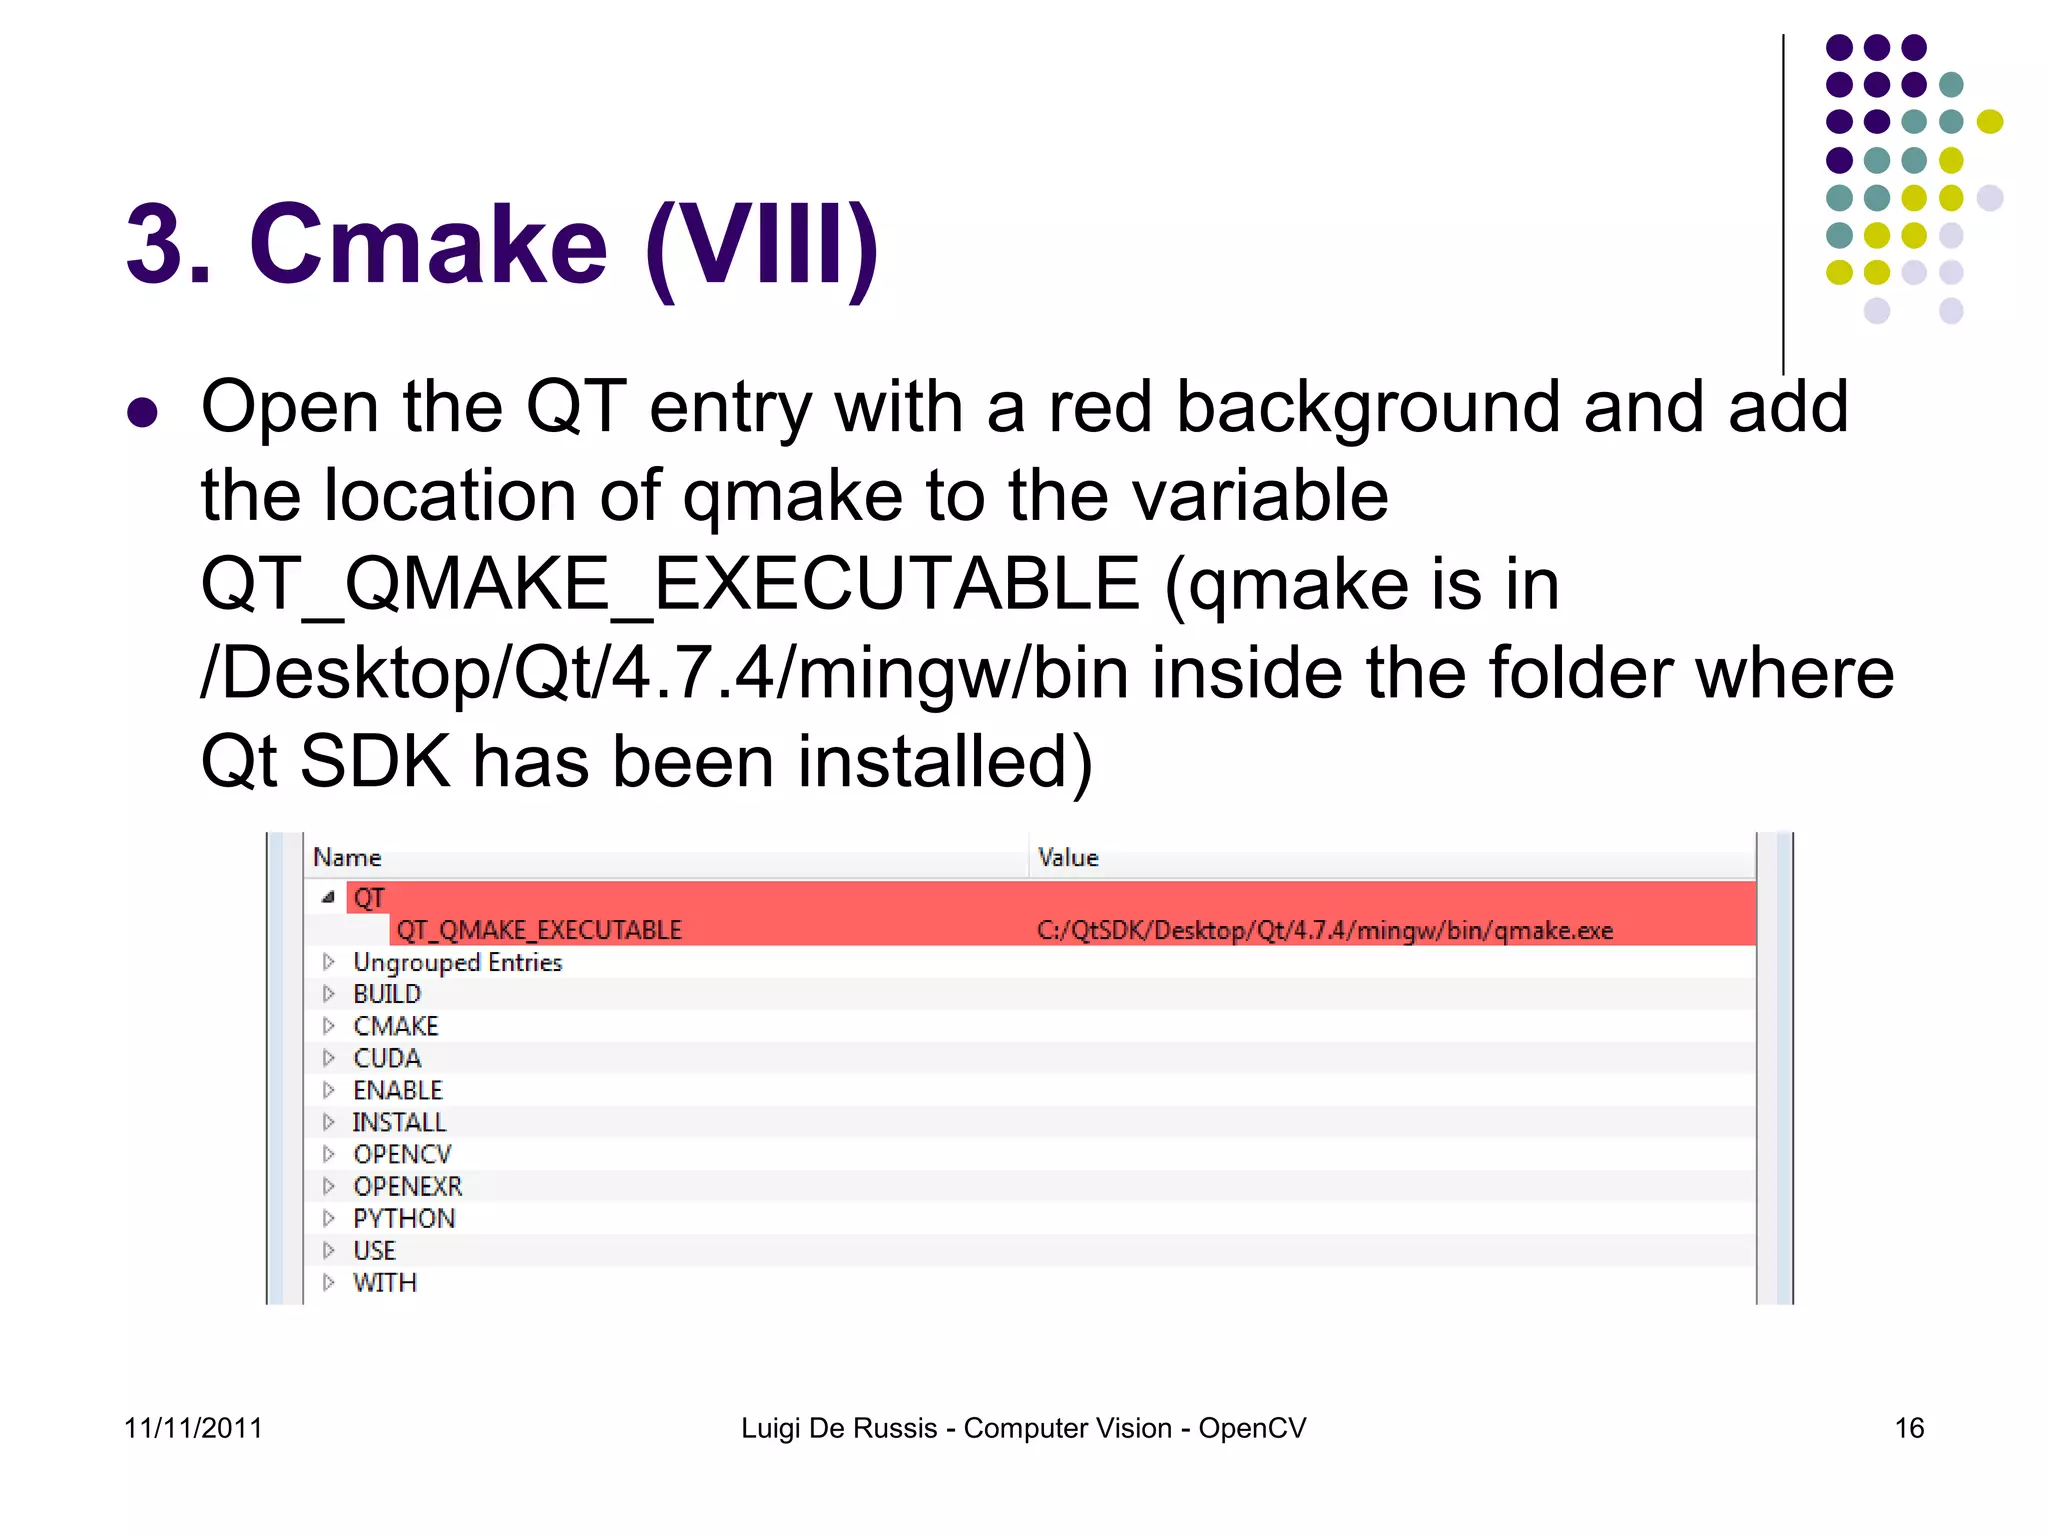

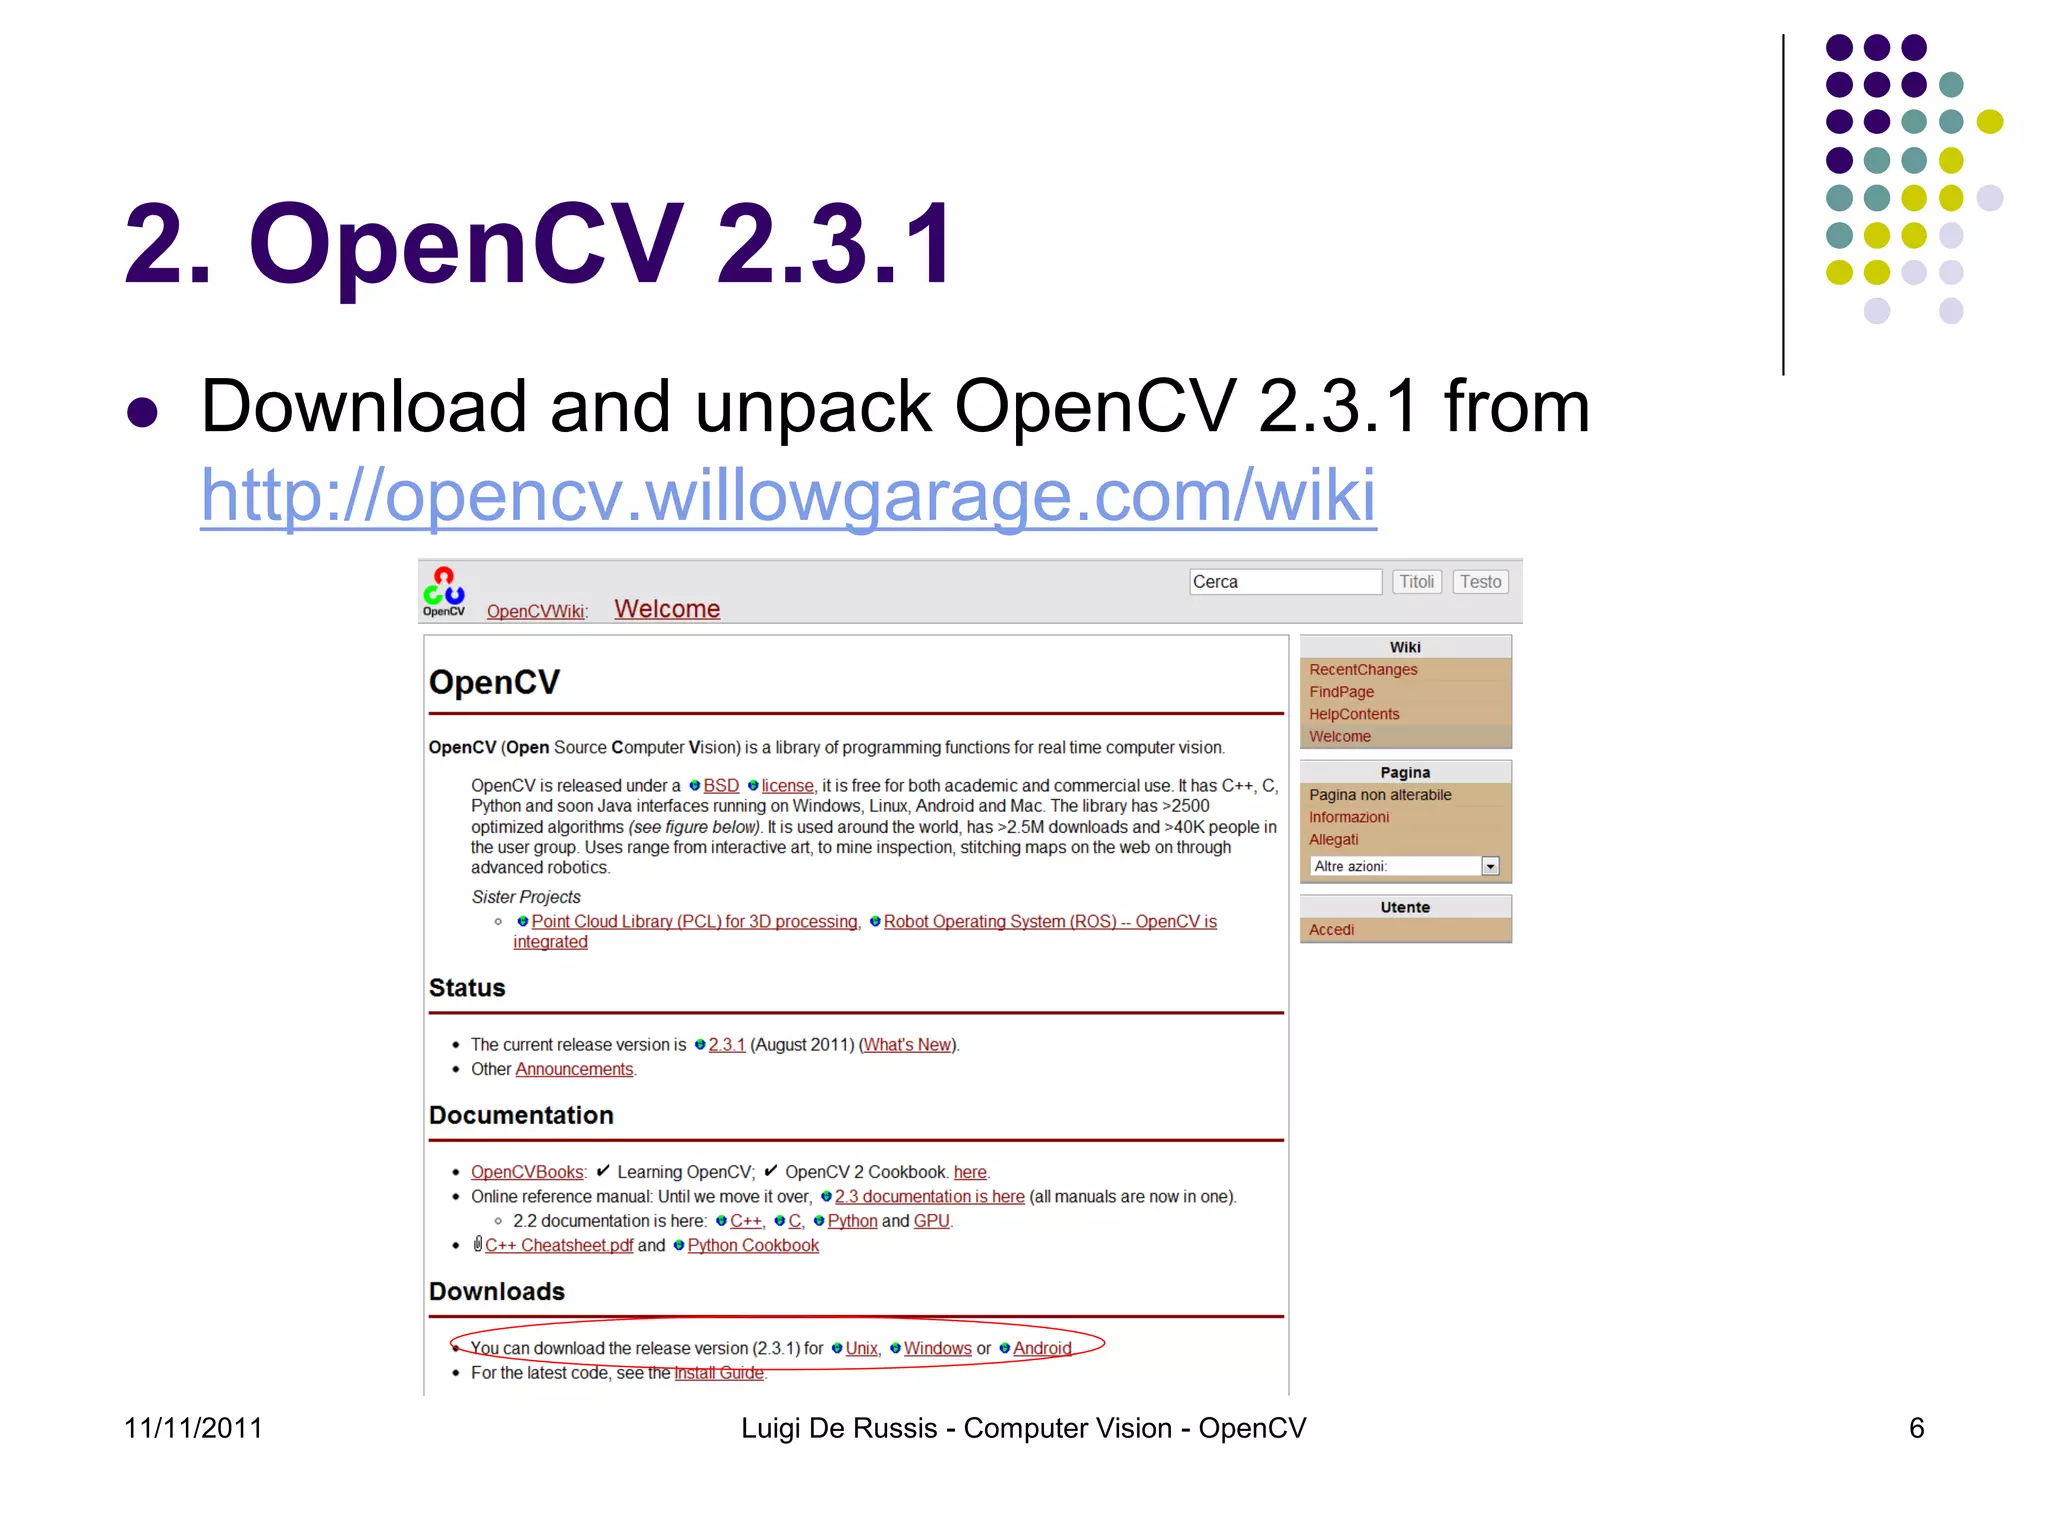
This document provides a step-by-step guide for installing OpenCV 2.3.1 with Qt, including prerequisites, installation of necessary components like Qt SDK and CMake, and detailed instructions for building the project on different operating systems. It outlines the setup process for both Linux and Windows, emphasizing configuration settings and final steps to prepare the environment for using OpenCV with Qt. The document includes links for downloads and important notes regarding folder placement and environment variables.