Download to read offline

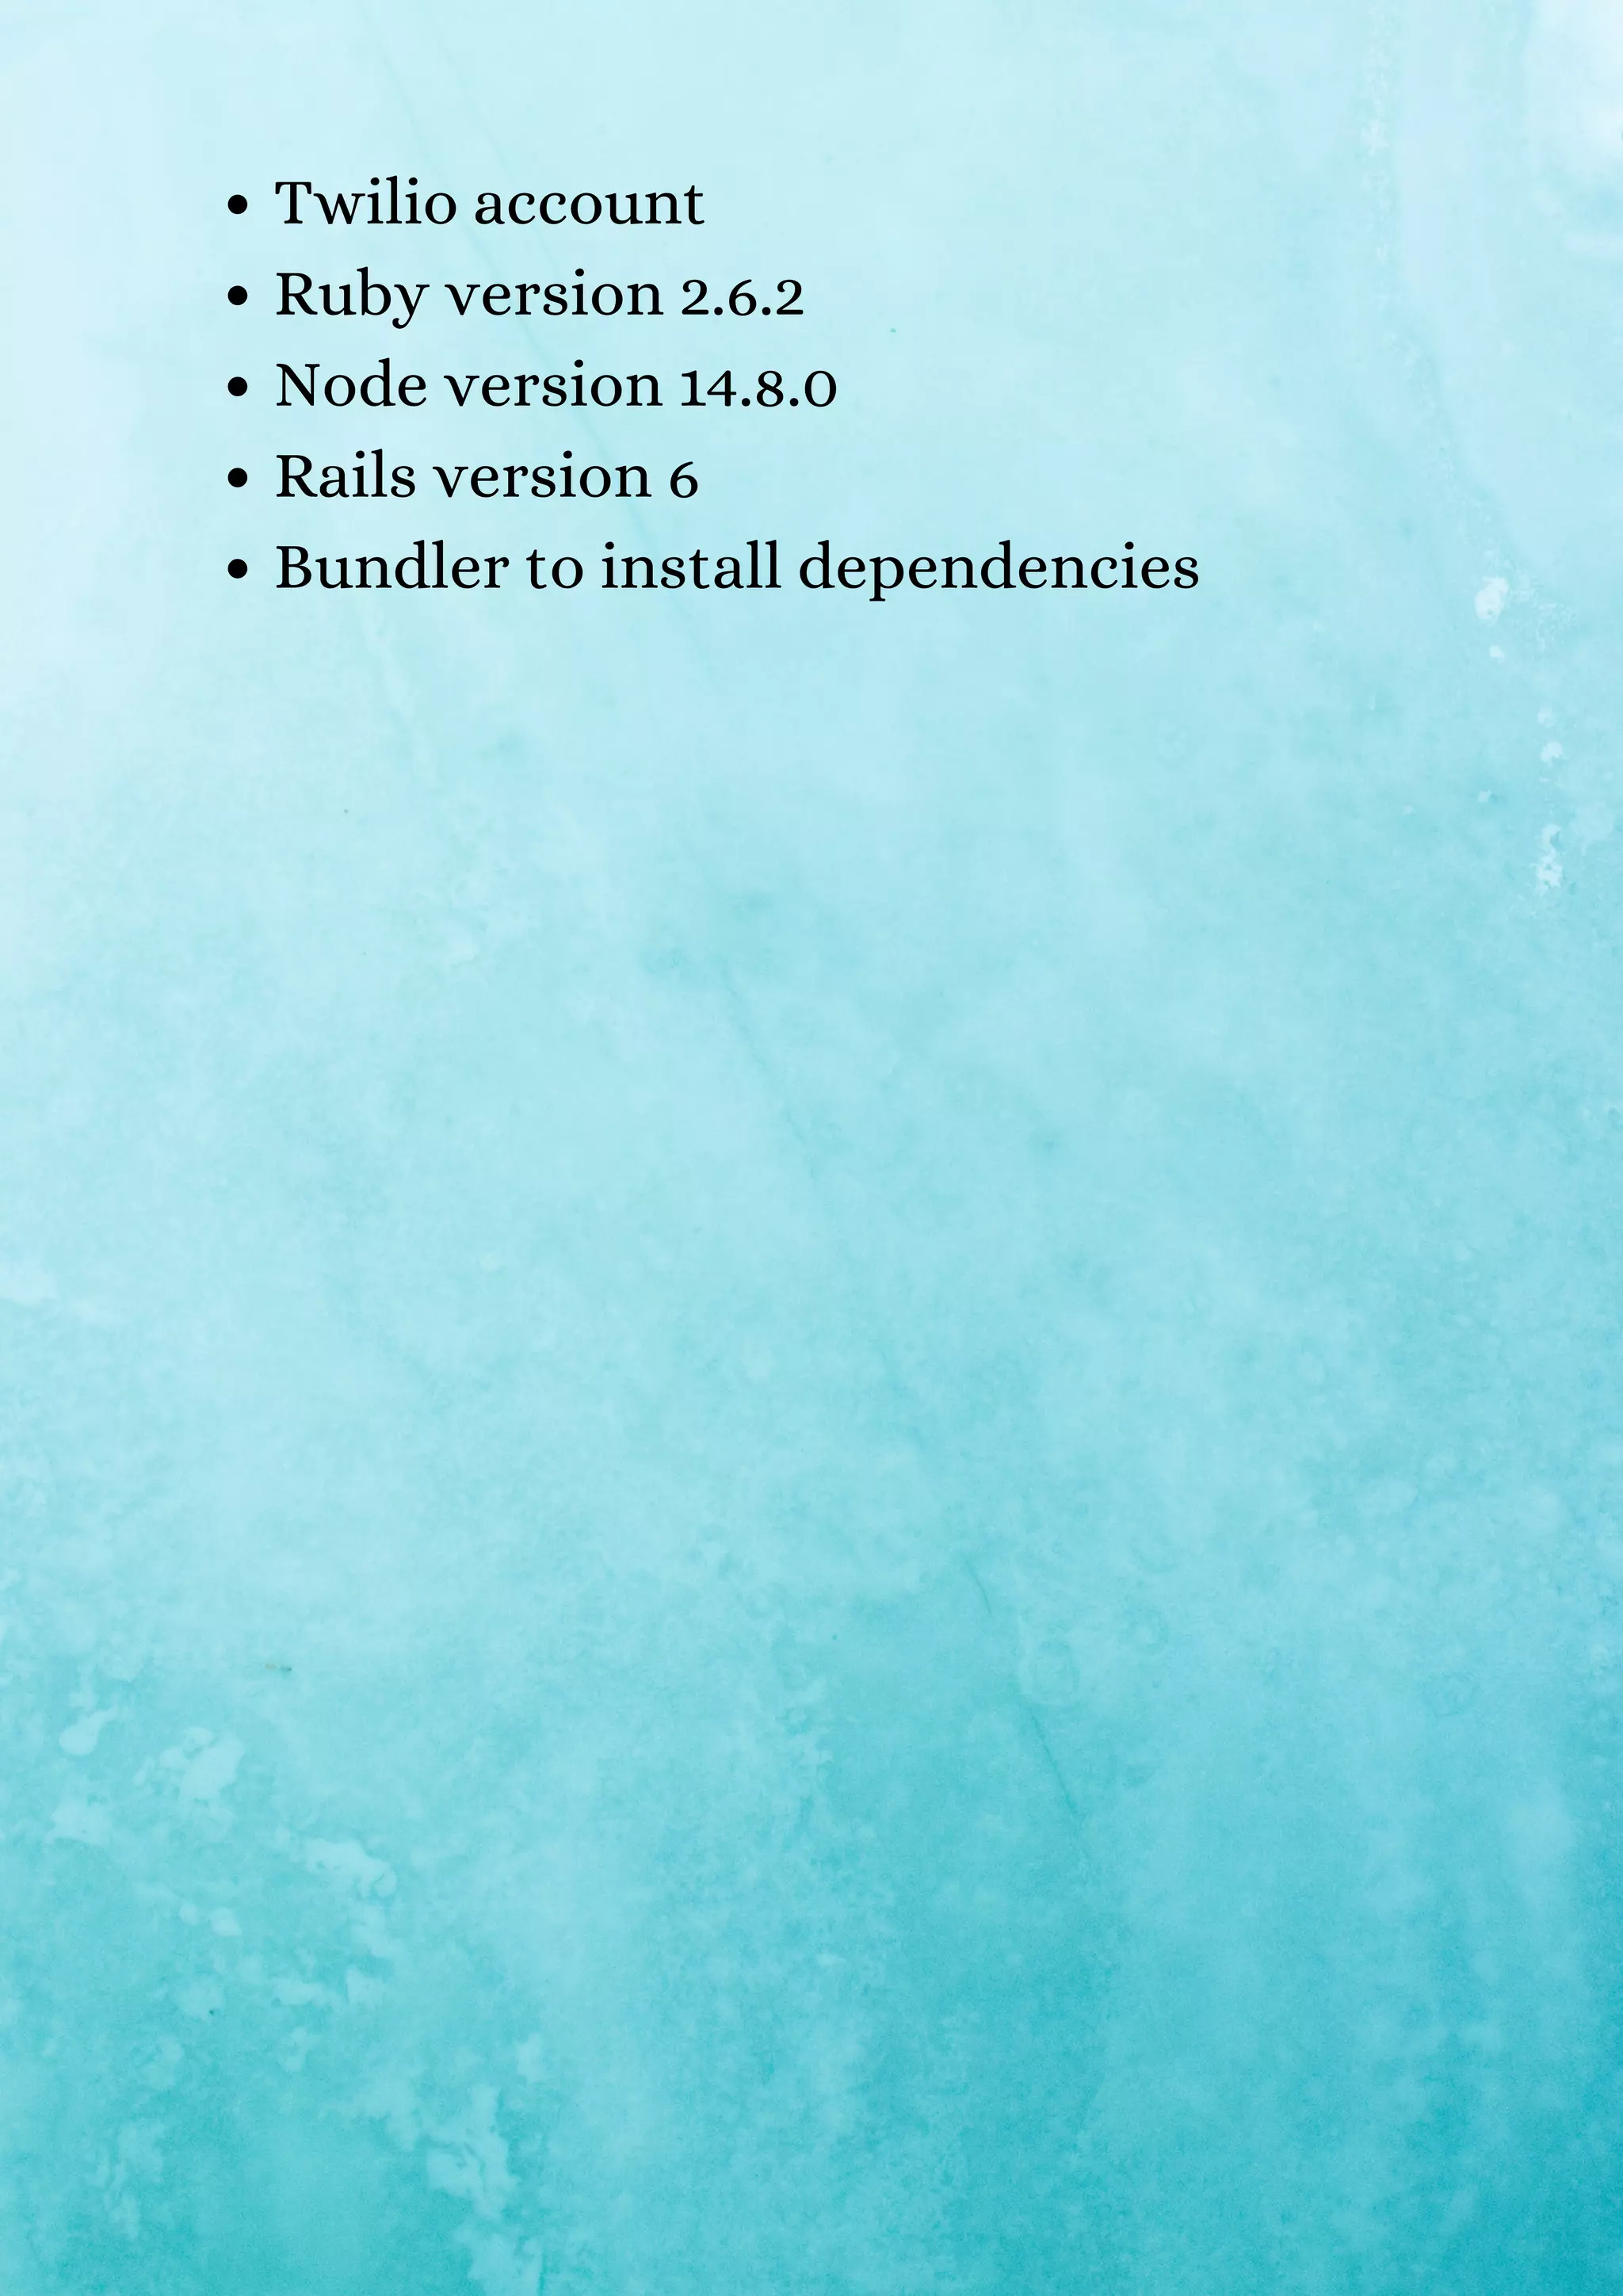
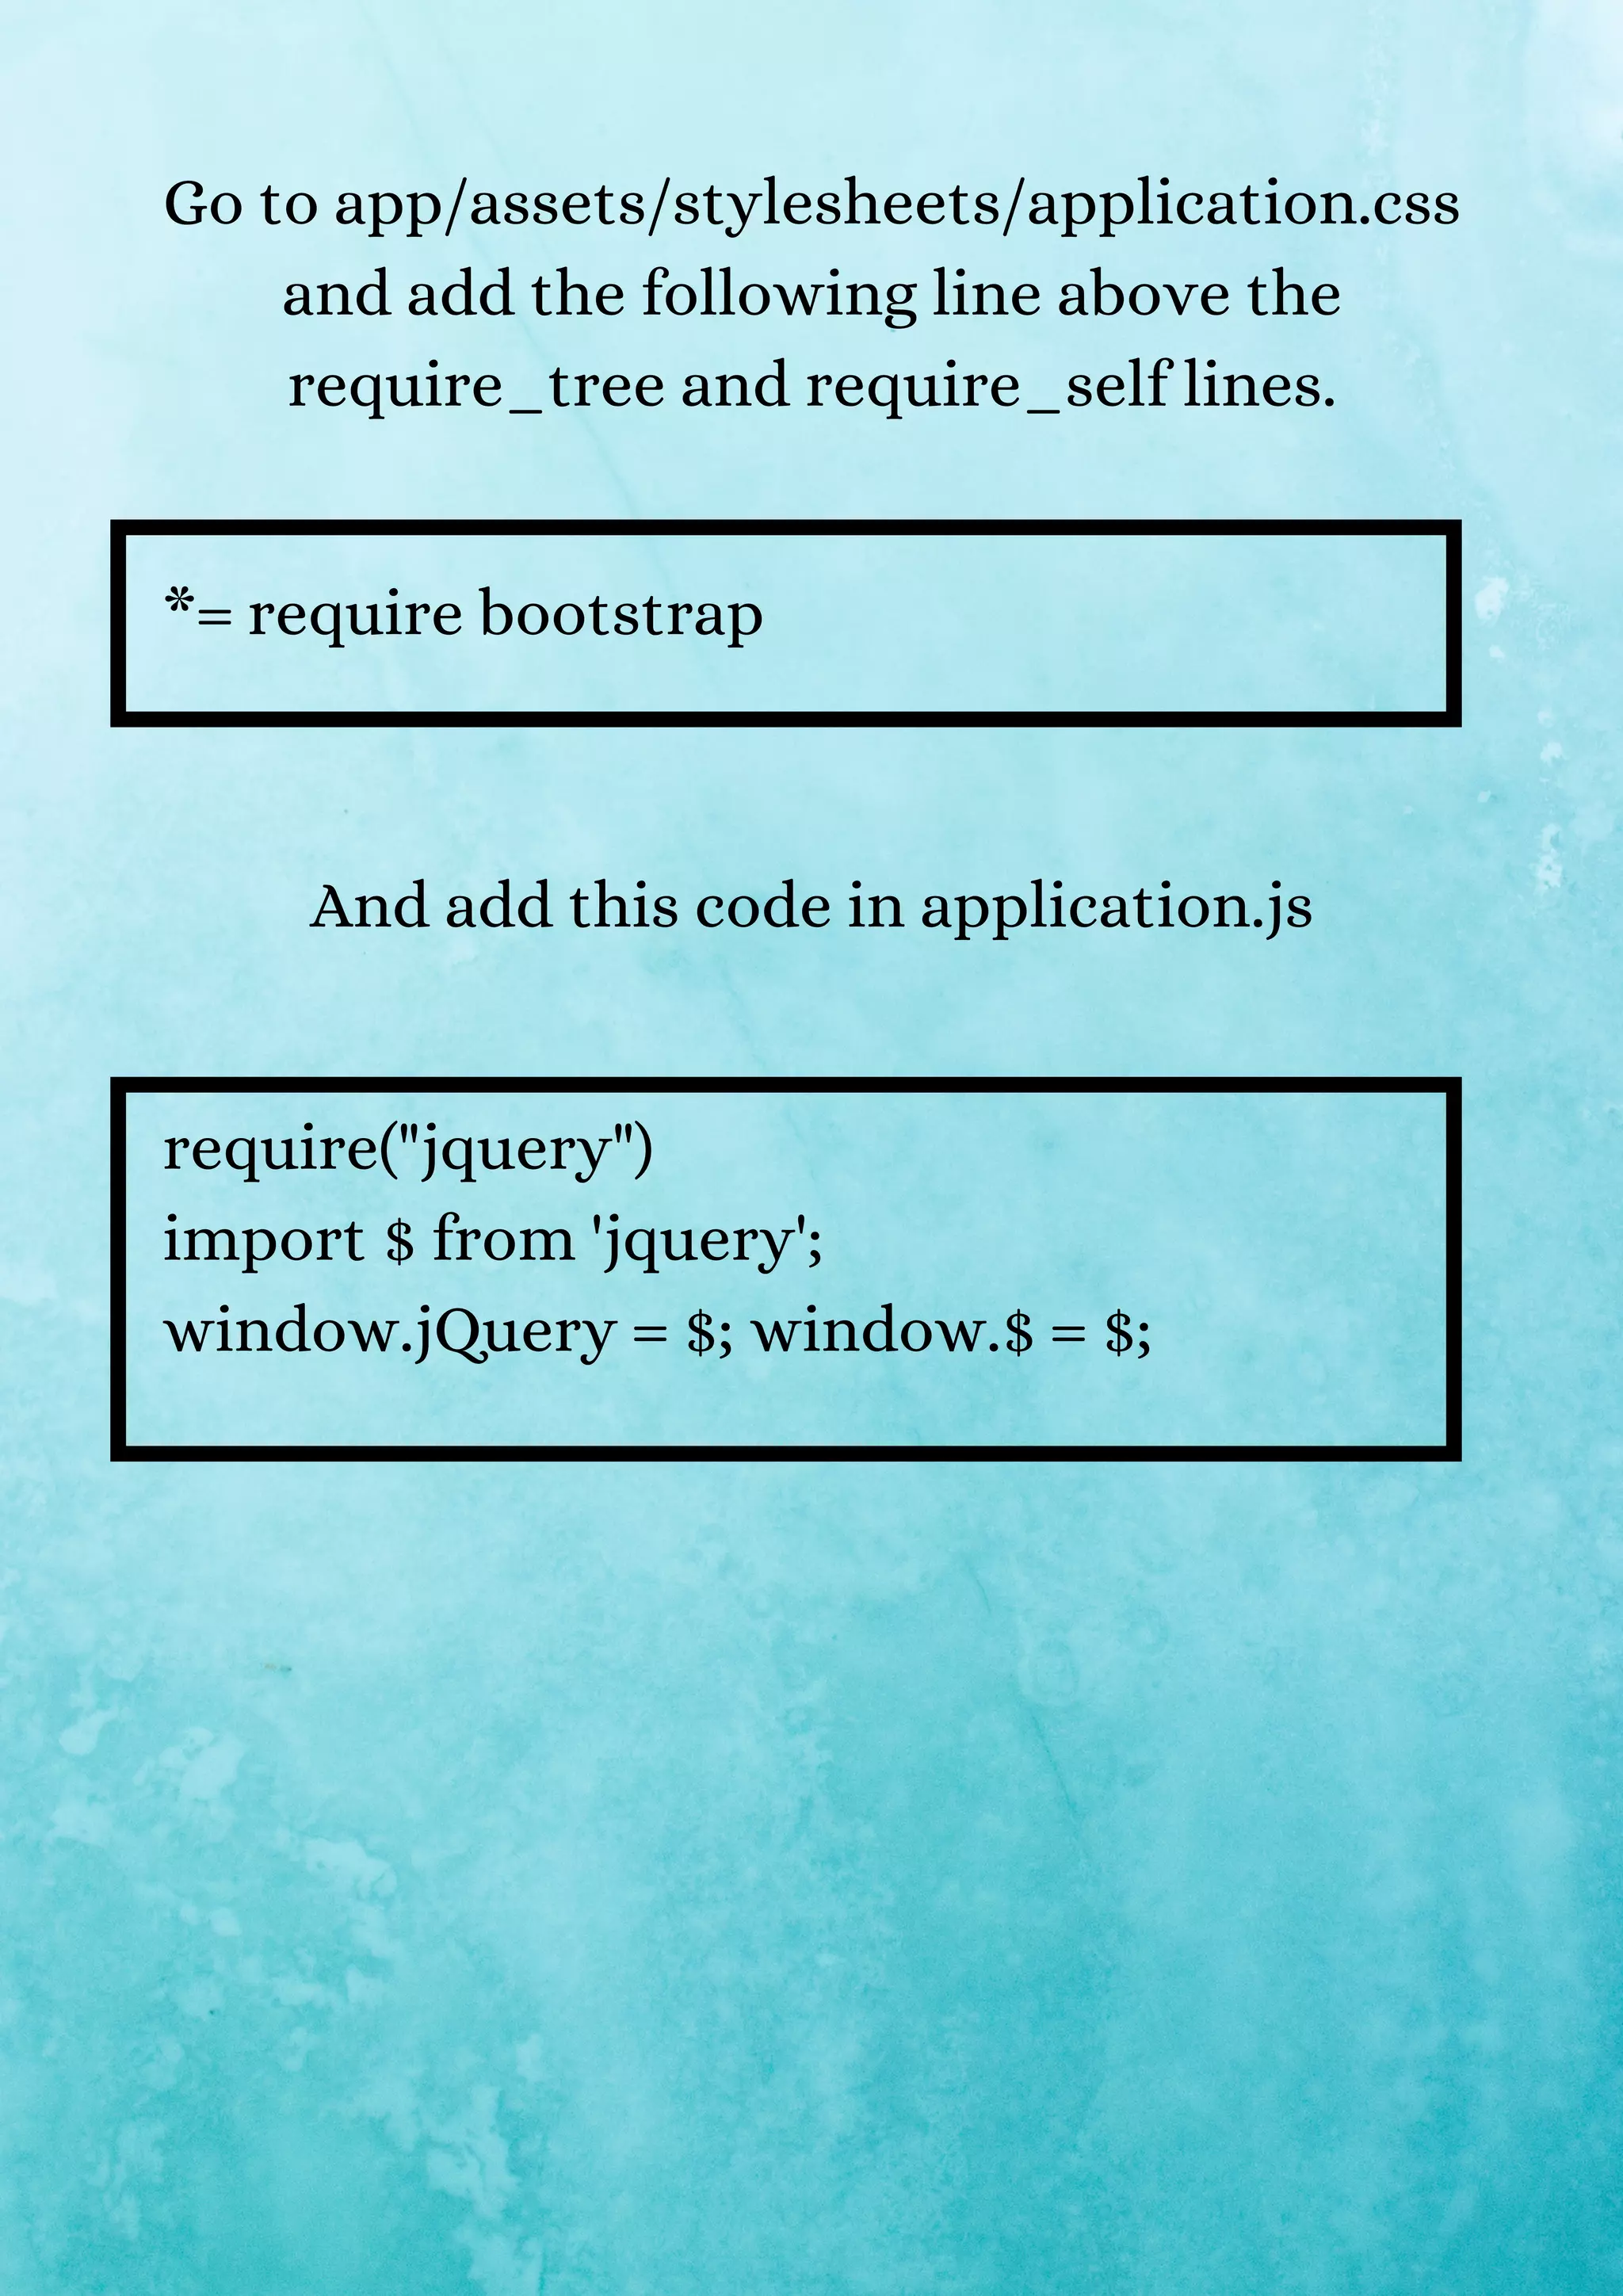
![After this, add the following code in the config/webpack/environment.js file. const { environment } = require('@rails/webpacker') const webpack = require("webpack") environment.plugins.append("Provide", new webpack.ProvidePlugin({ $: 'jquery', jQuery: 'jquery', Popper: ['popper.js', 'default'] })) module.exports = environment // config/webpack/environme nt.js file](https://image.slidesharecdn.com/buildavideochatapplicationwithtwiliorailsandjavascriptpart1-211005112841/75/Build-a-video-chat-application-with-twilio-rails-and-javascript-part-1-10-2048.jpg)

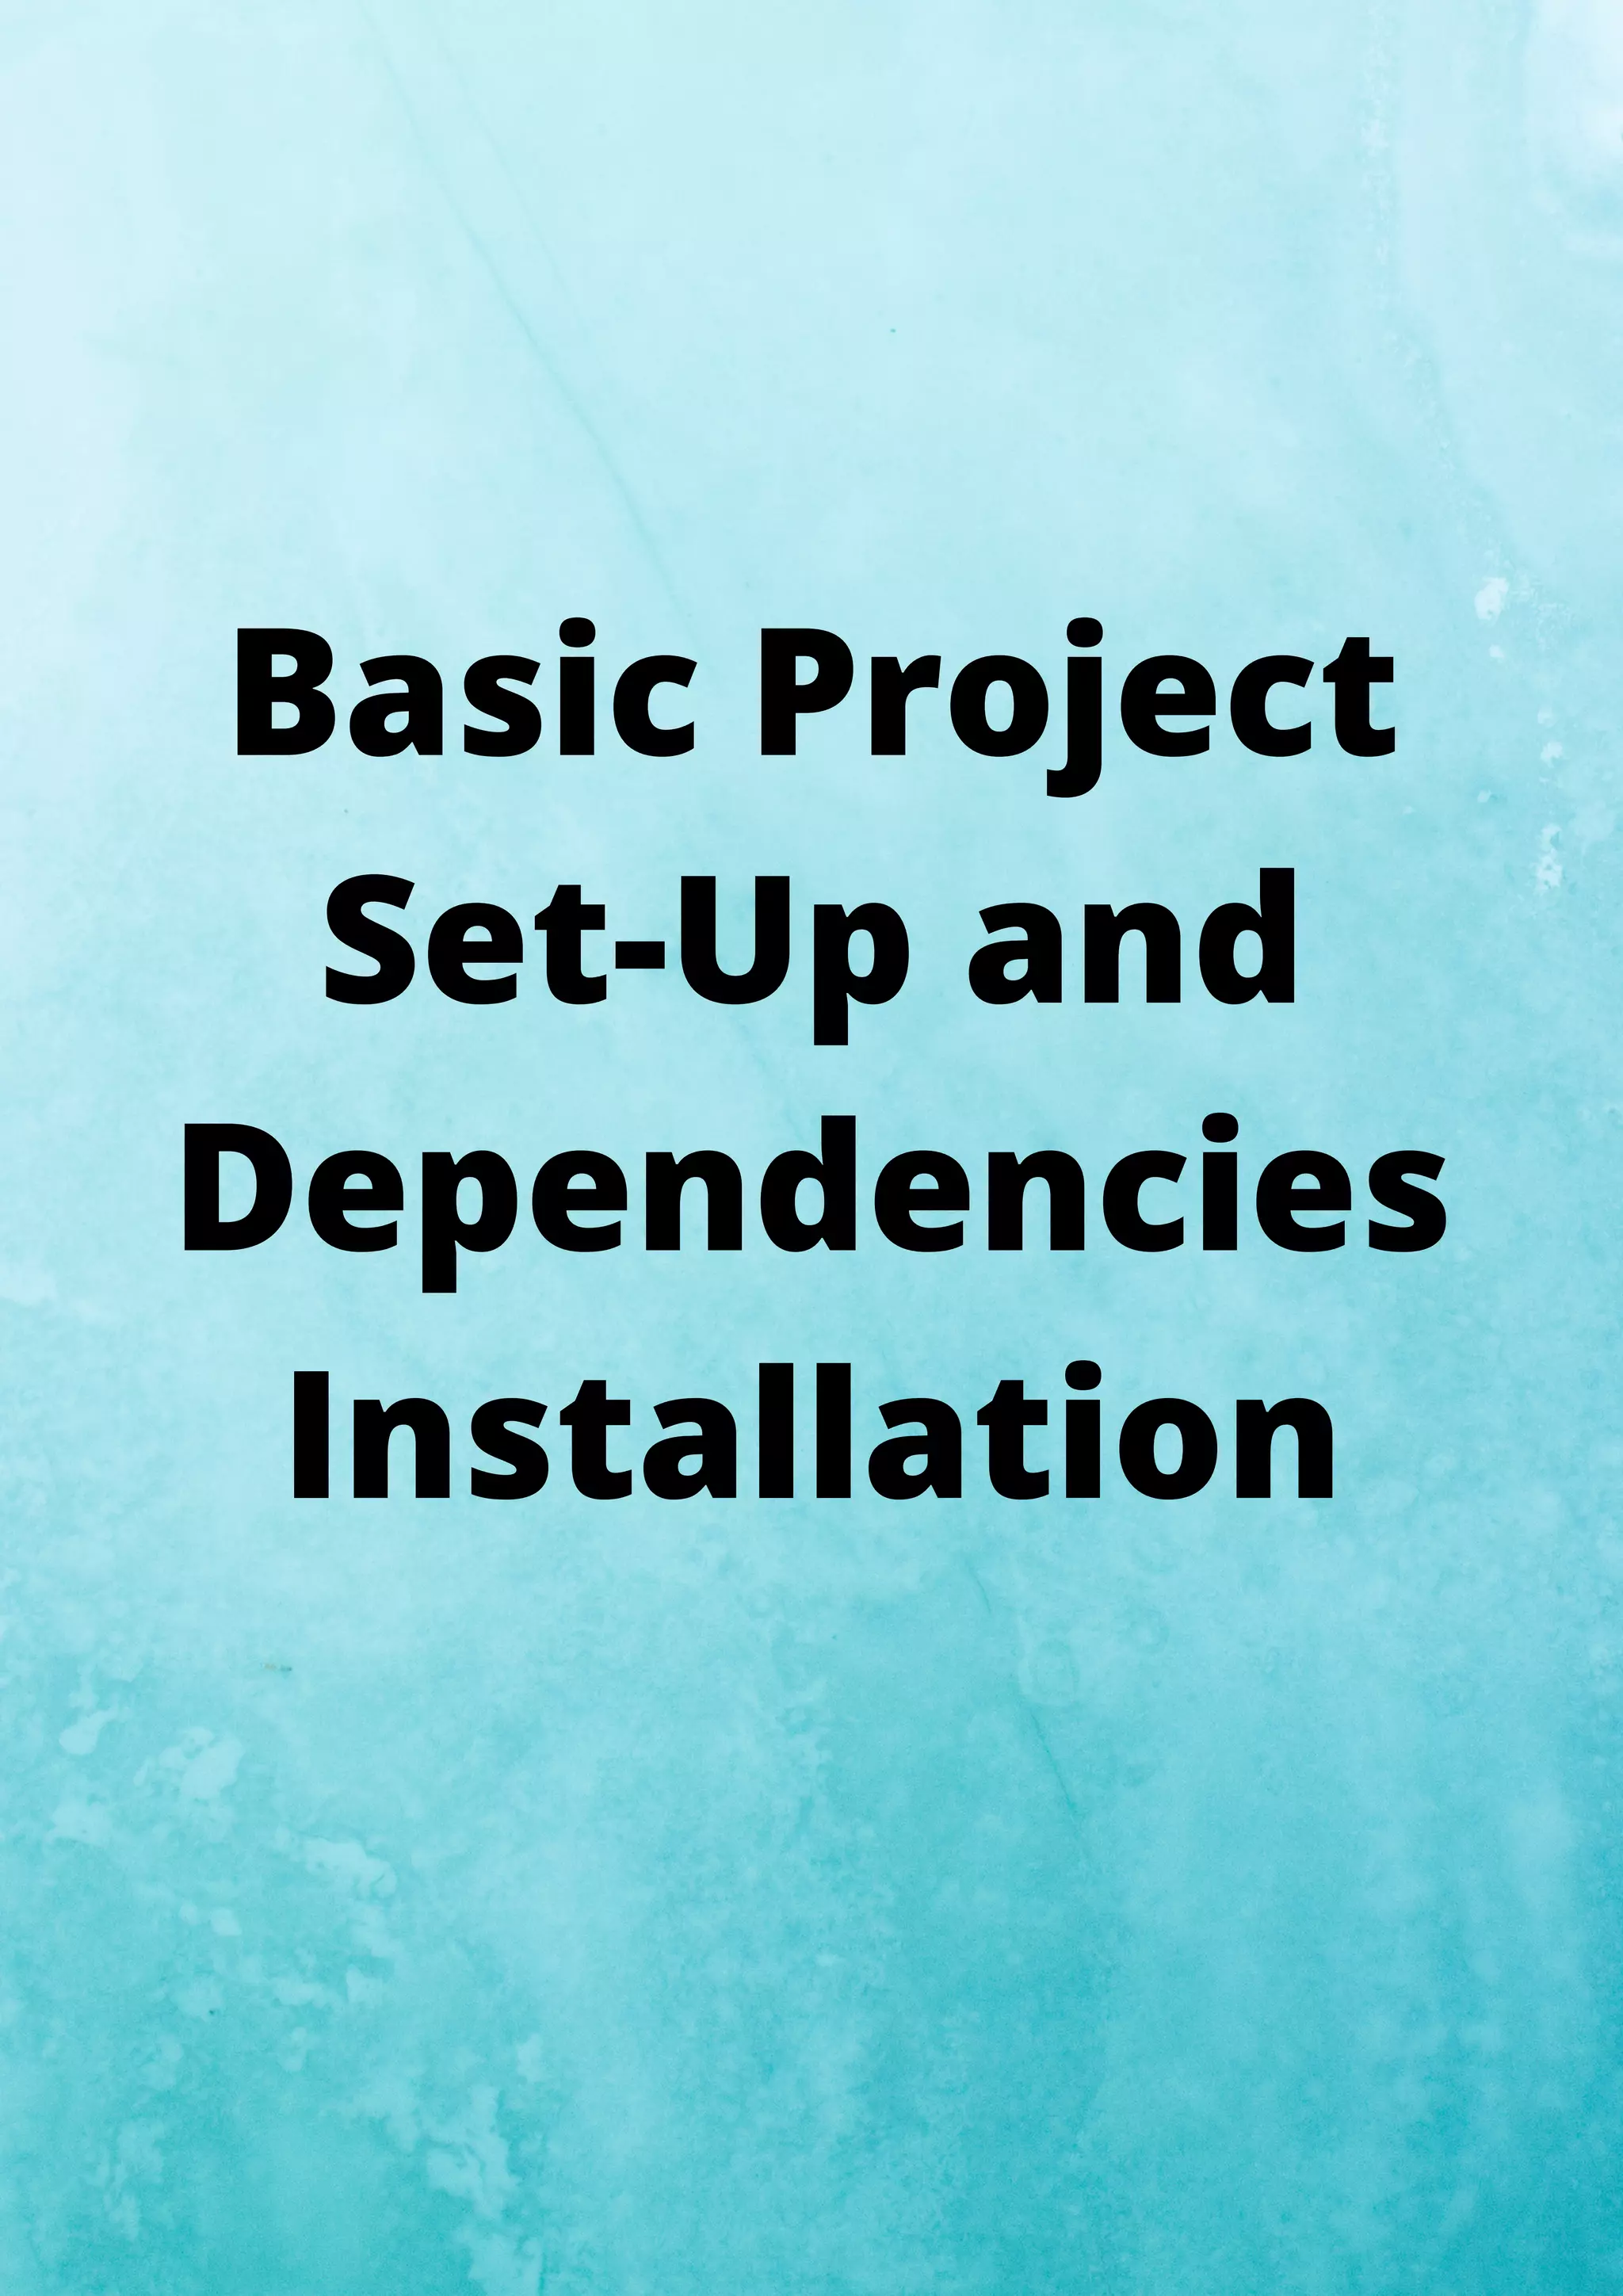
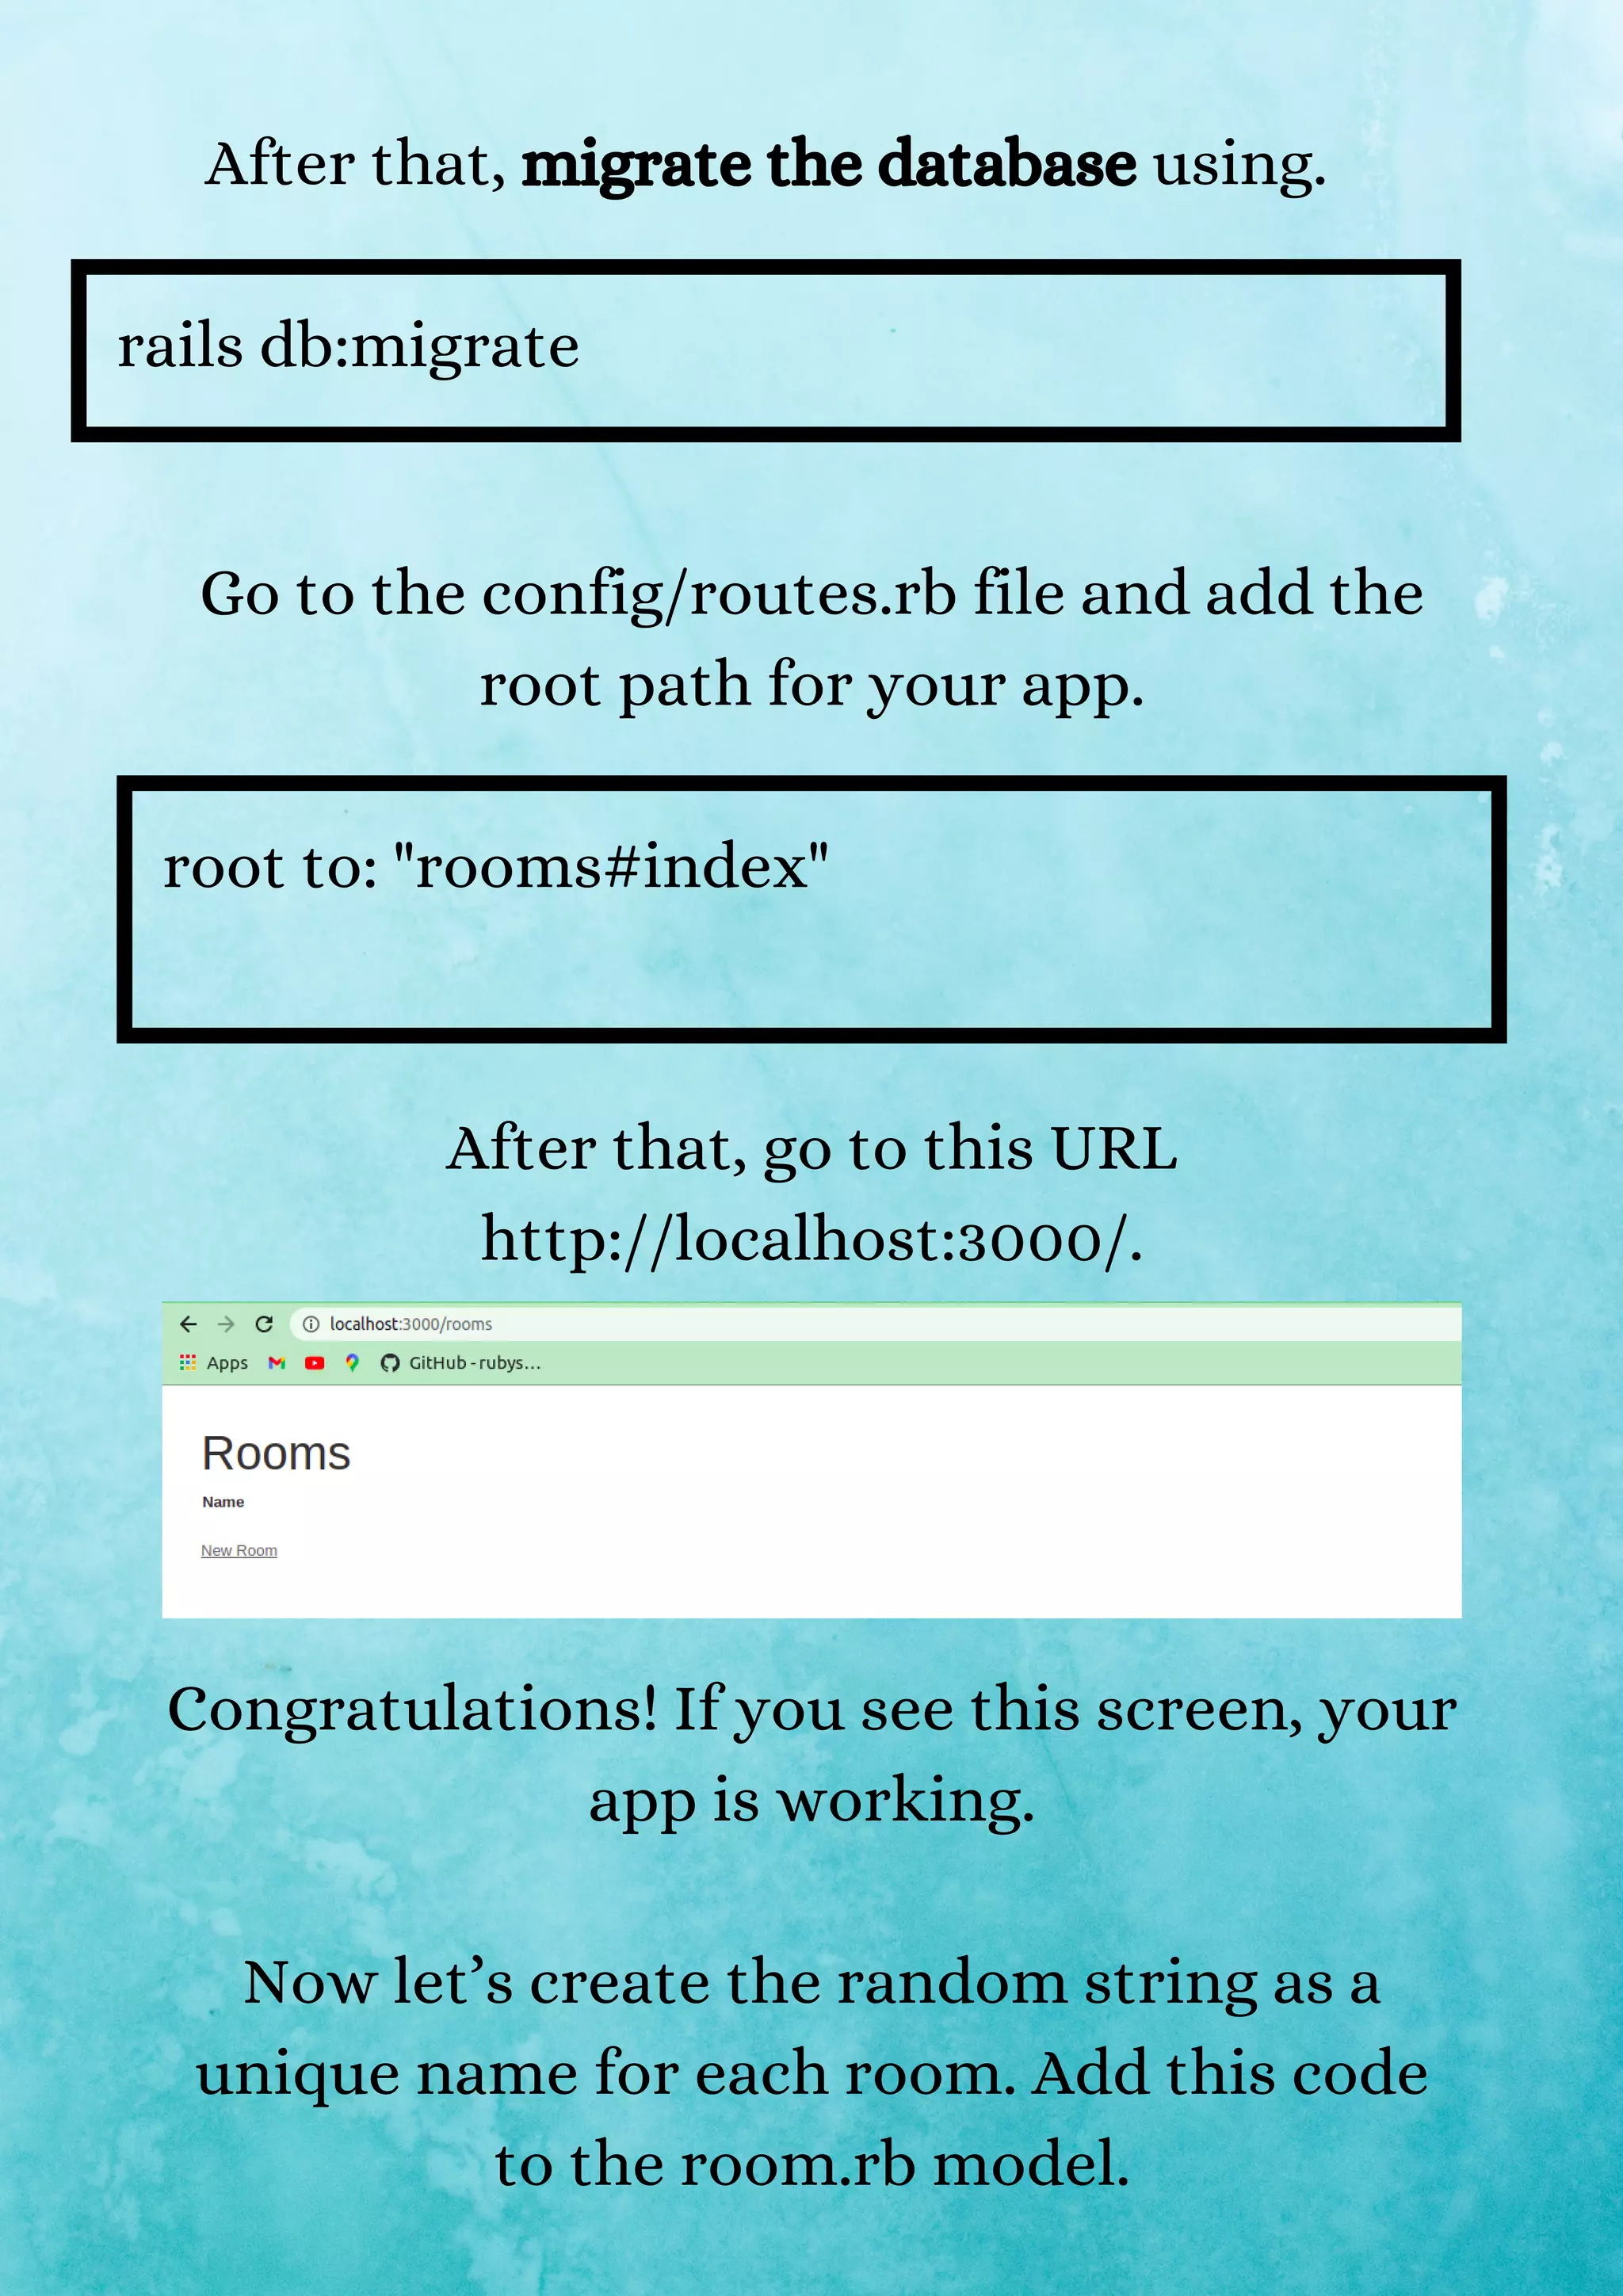
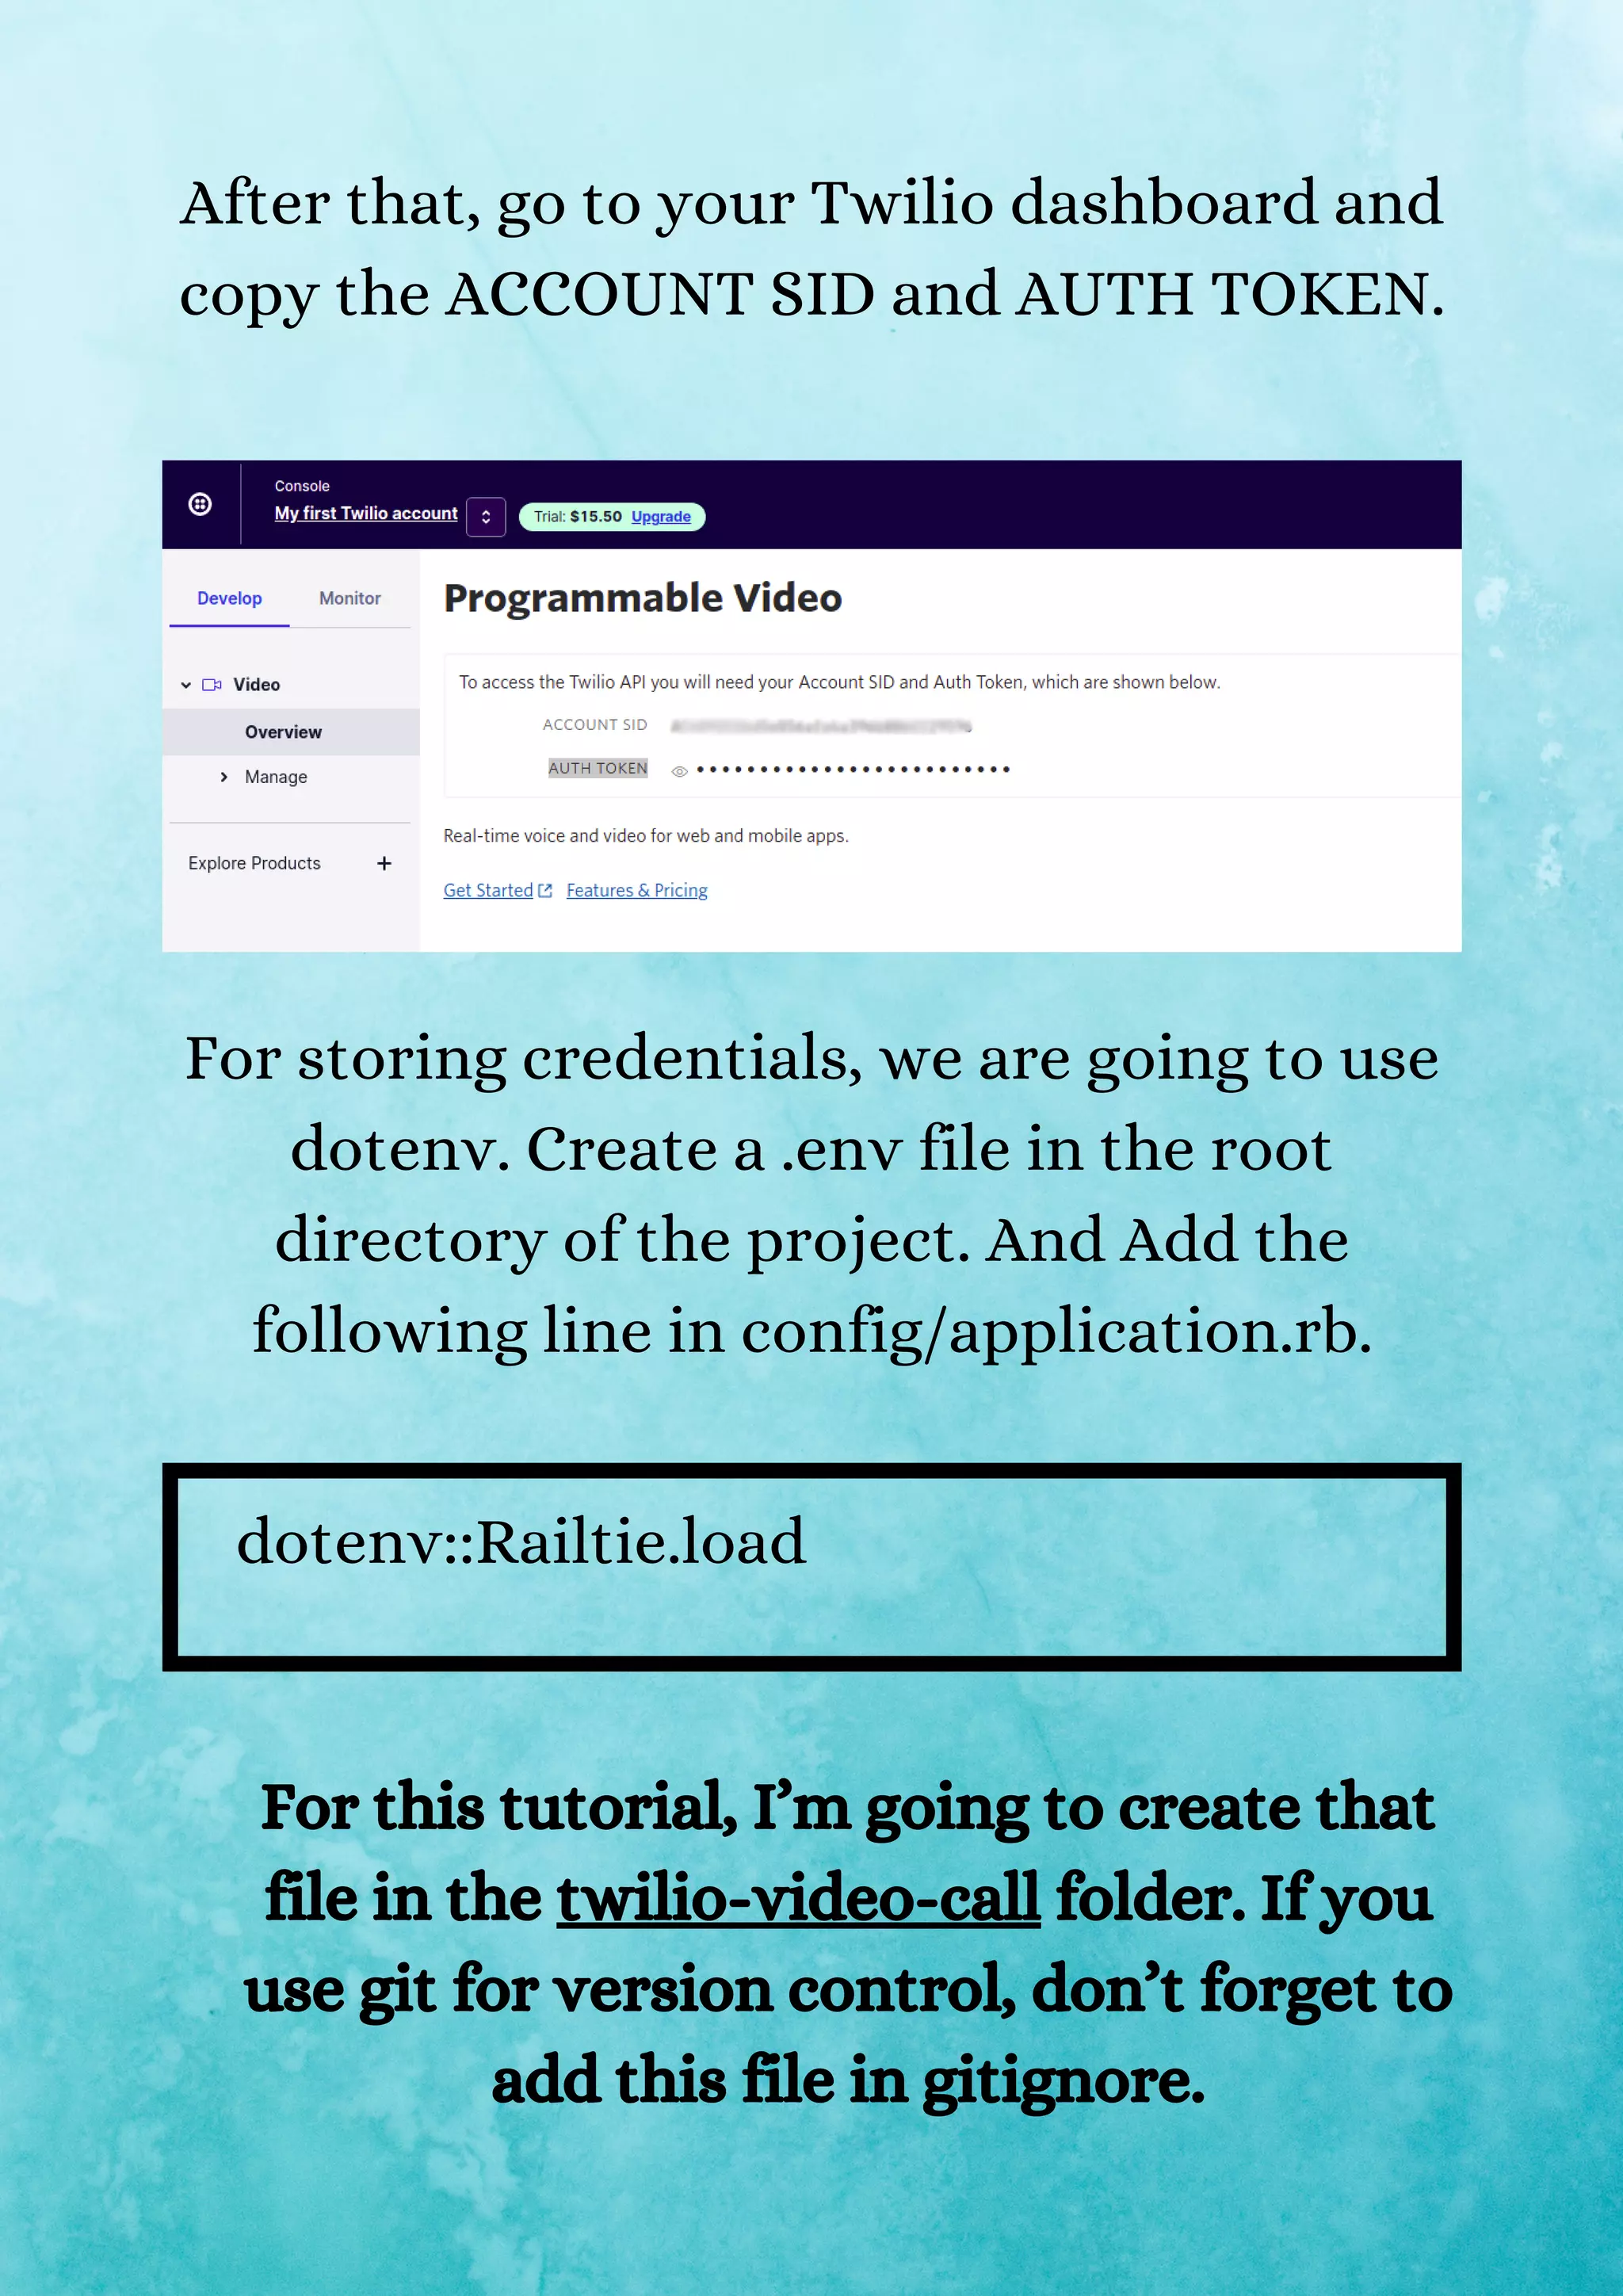
![Now, it’s time to create a Model, View, and Controller using Scaffold once we have a basic setup. Use the below command to do the same. rails g scaffold room name:string After that, go to the migration file and add the unique_name and room_sid field to the migration. We will use this in the future. Now your migration will look like this. class CreateRooms <ActiveRecord::Migration[6.0] def change create_table :rooms do |t| t.string :name t.string :unique_name t.string :room_sid t.timestamps end end end](https://image.slidesharecdn.com/buildavideochatapplicationwithtwiliorailsandjavascriptpart1-211005112841/75/Build-a-video-chat-application-with-twilio-rails-and-javascript-part-1-13-2048.jpg)
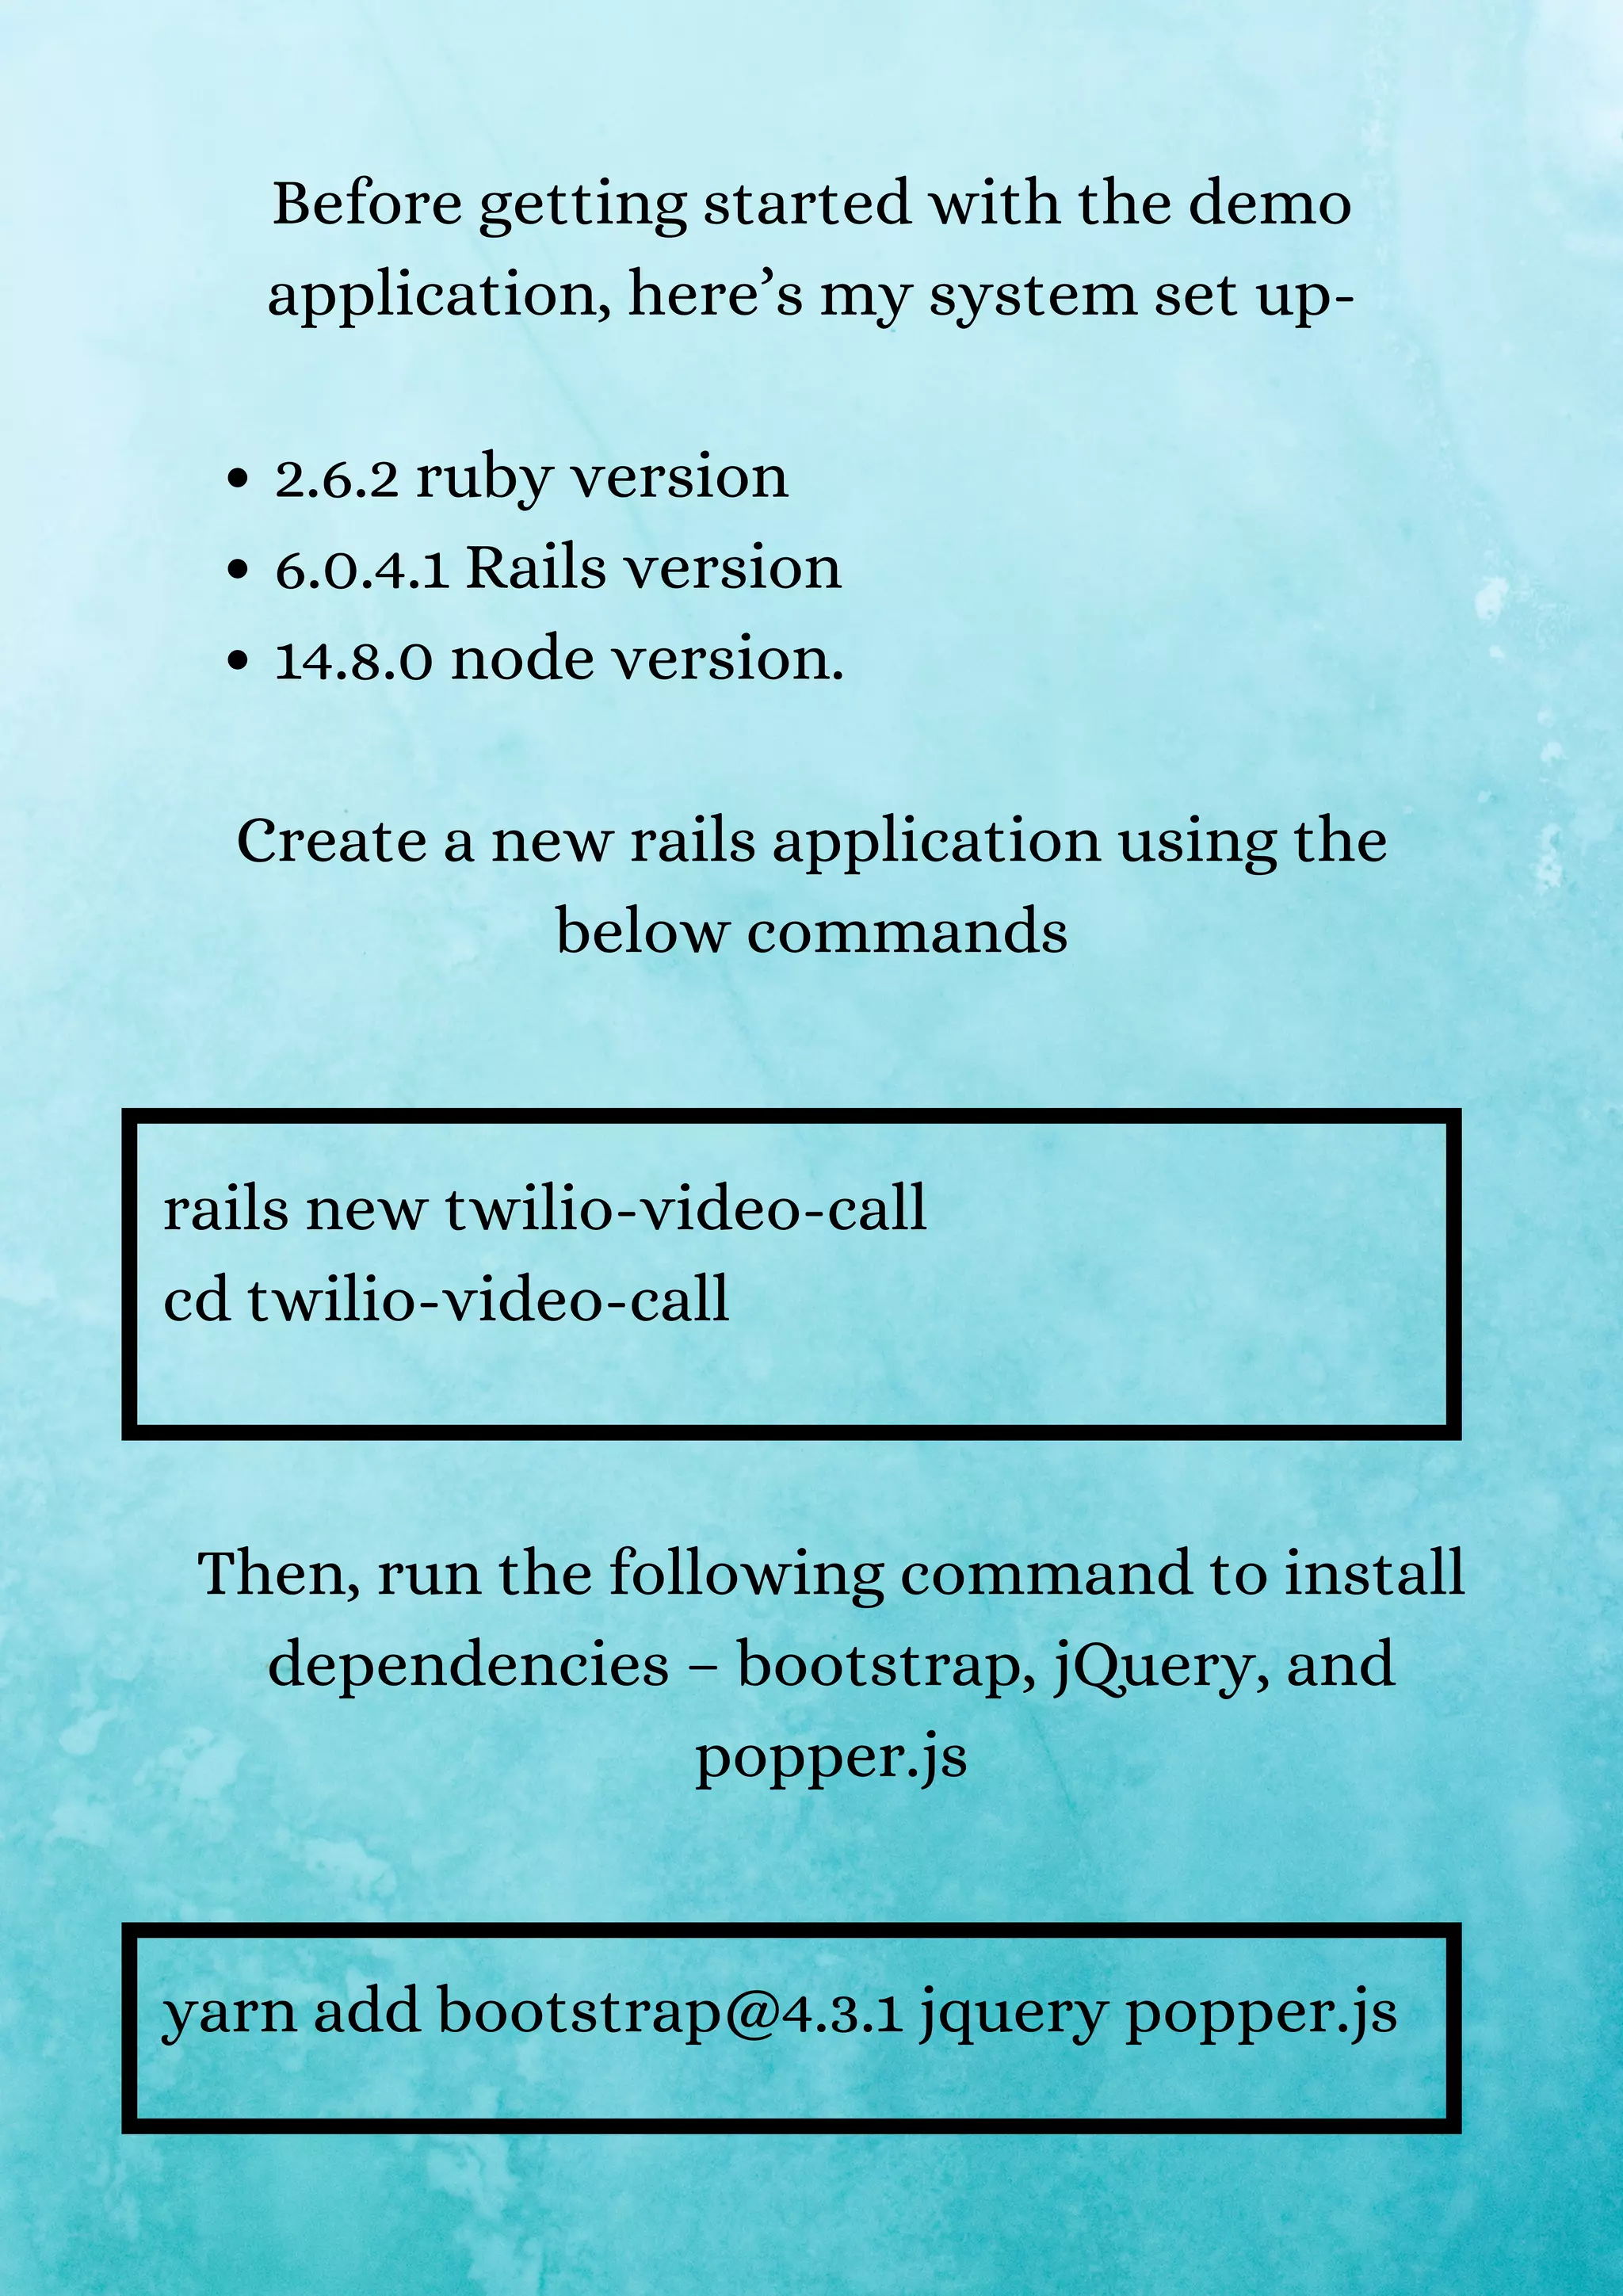
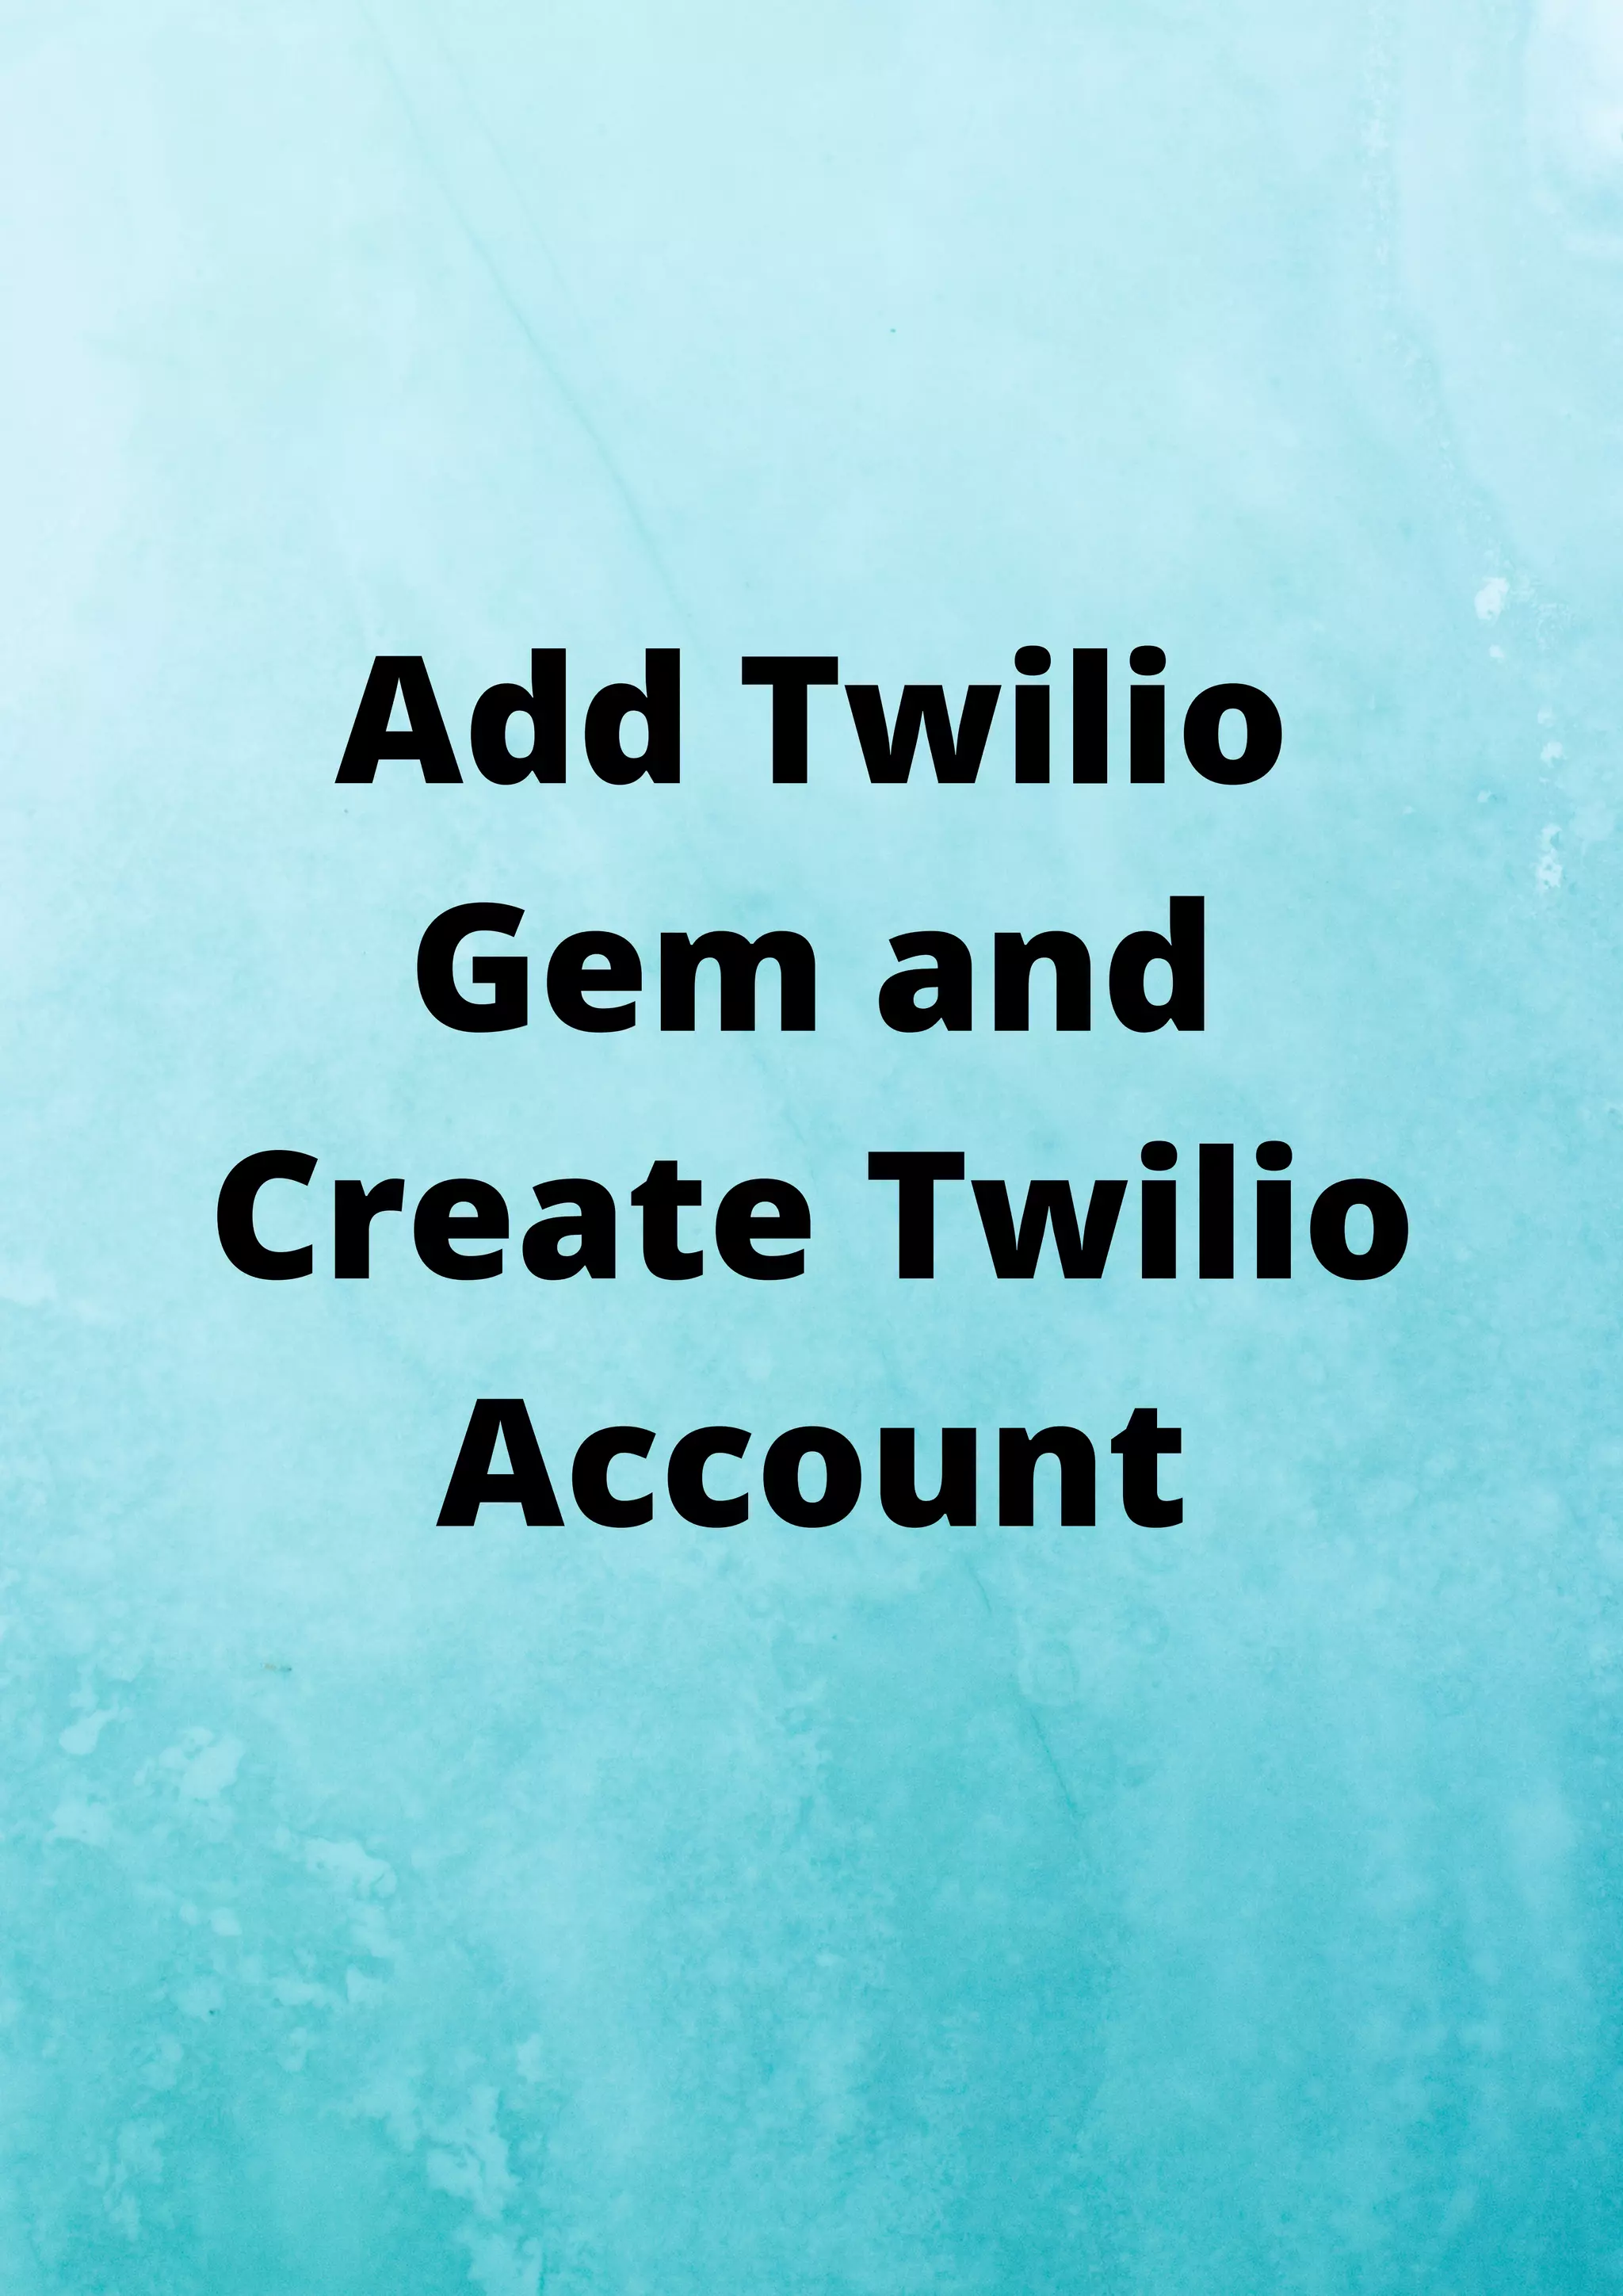
![before_create :add_uniqe_name def add_uniqe_name unless self.unique_name.present? self.unique_name = (0...15).map { ('a'..'z').to_a[rand(26)] }.join end end // room.rb This will create a unique random string for the unique_name field whenever a new room is generated. Moving on further with the tutorial to build a video chat application with Twilio, Rails, and JS. Here, we are done with creating a room. Now, let’s set up a Twilio account and store its credentials.](https://image.slidesharecdn.com/buildavideochatapplicationwithtwiliorailsandjavascriptpart1-211005112841/75/Build-a-video-chat-application-with-twilio-rails-and-javascript-part-1-15-2048.jpg)
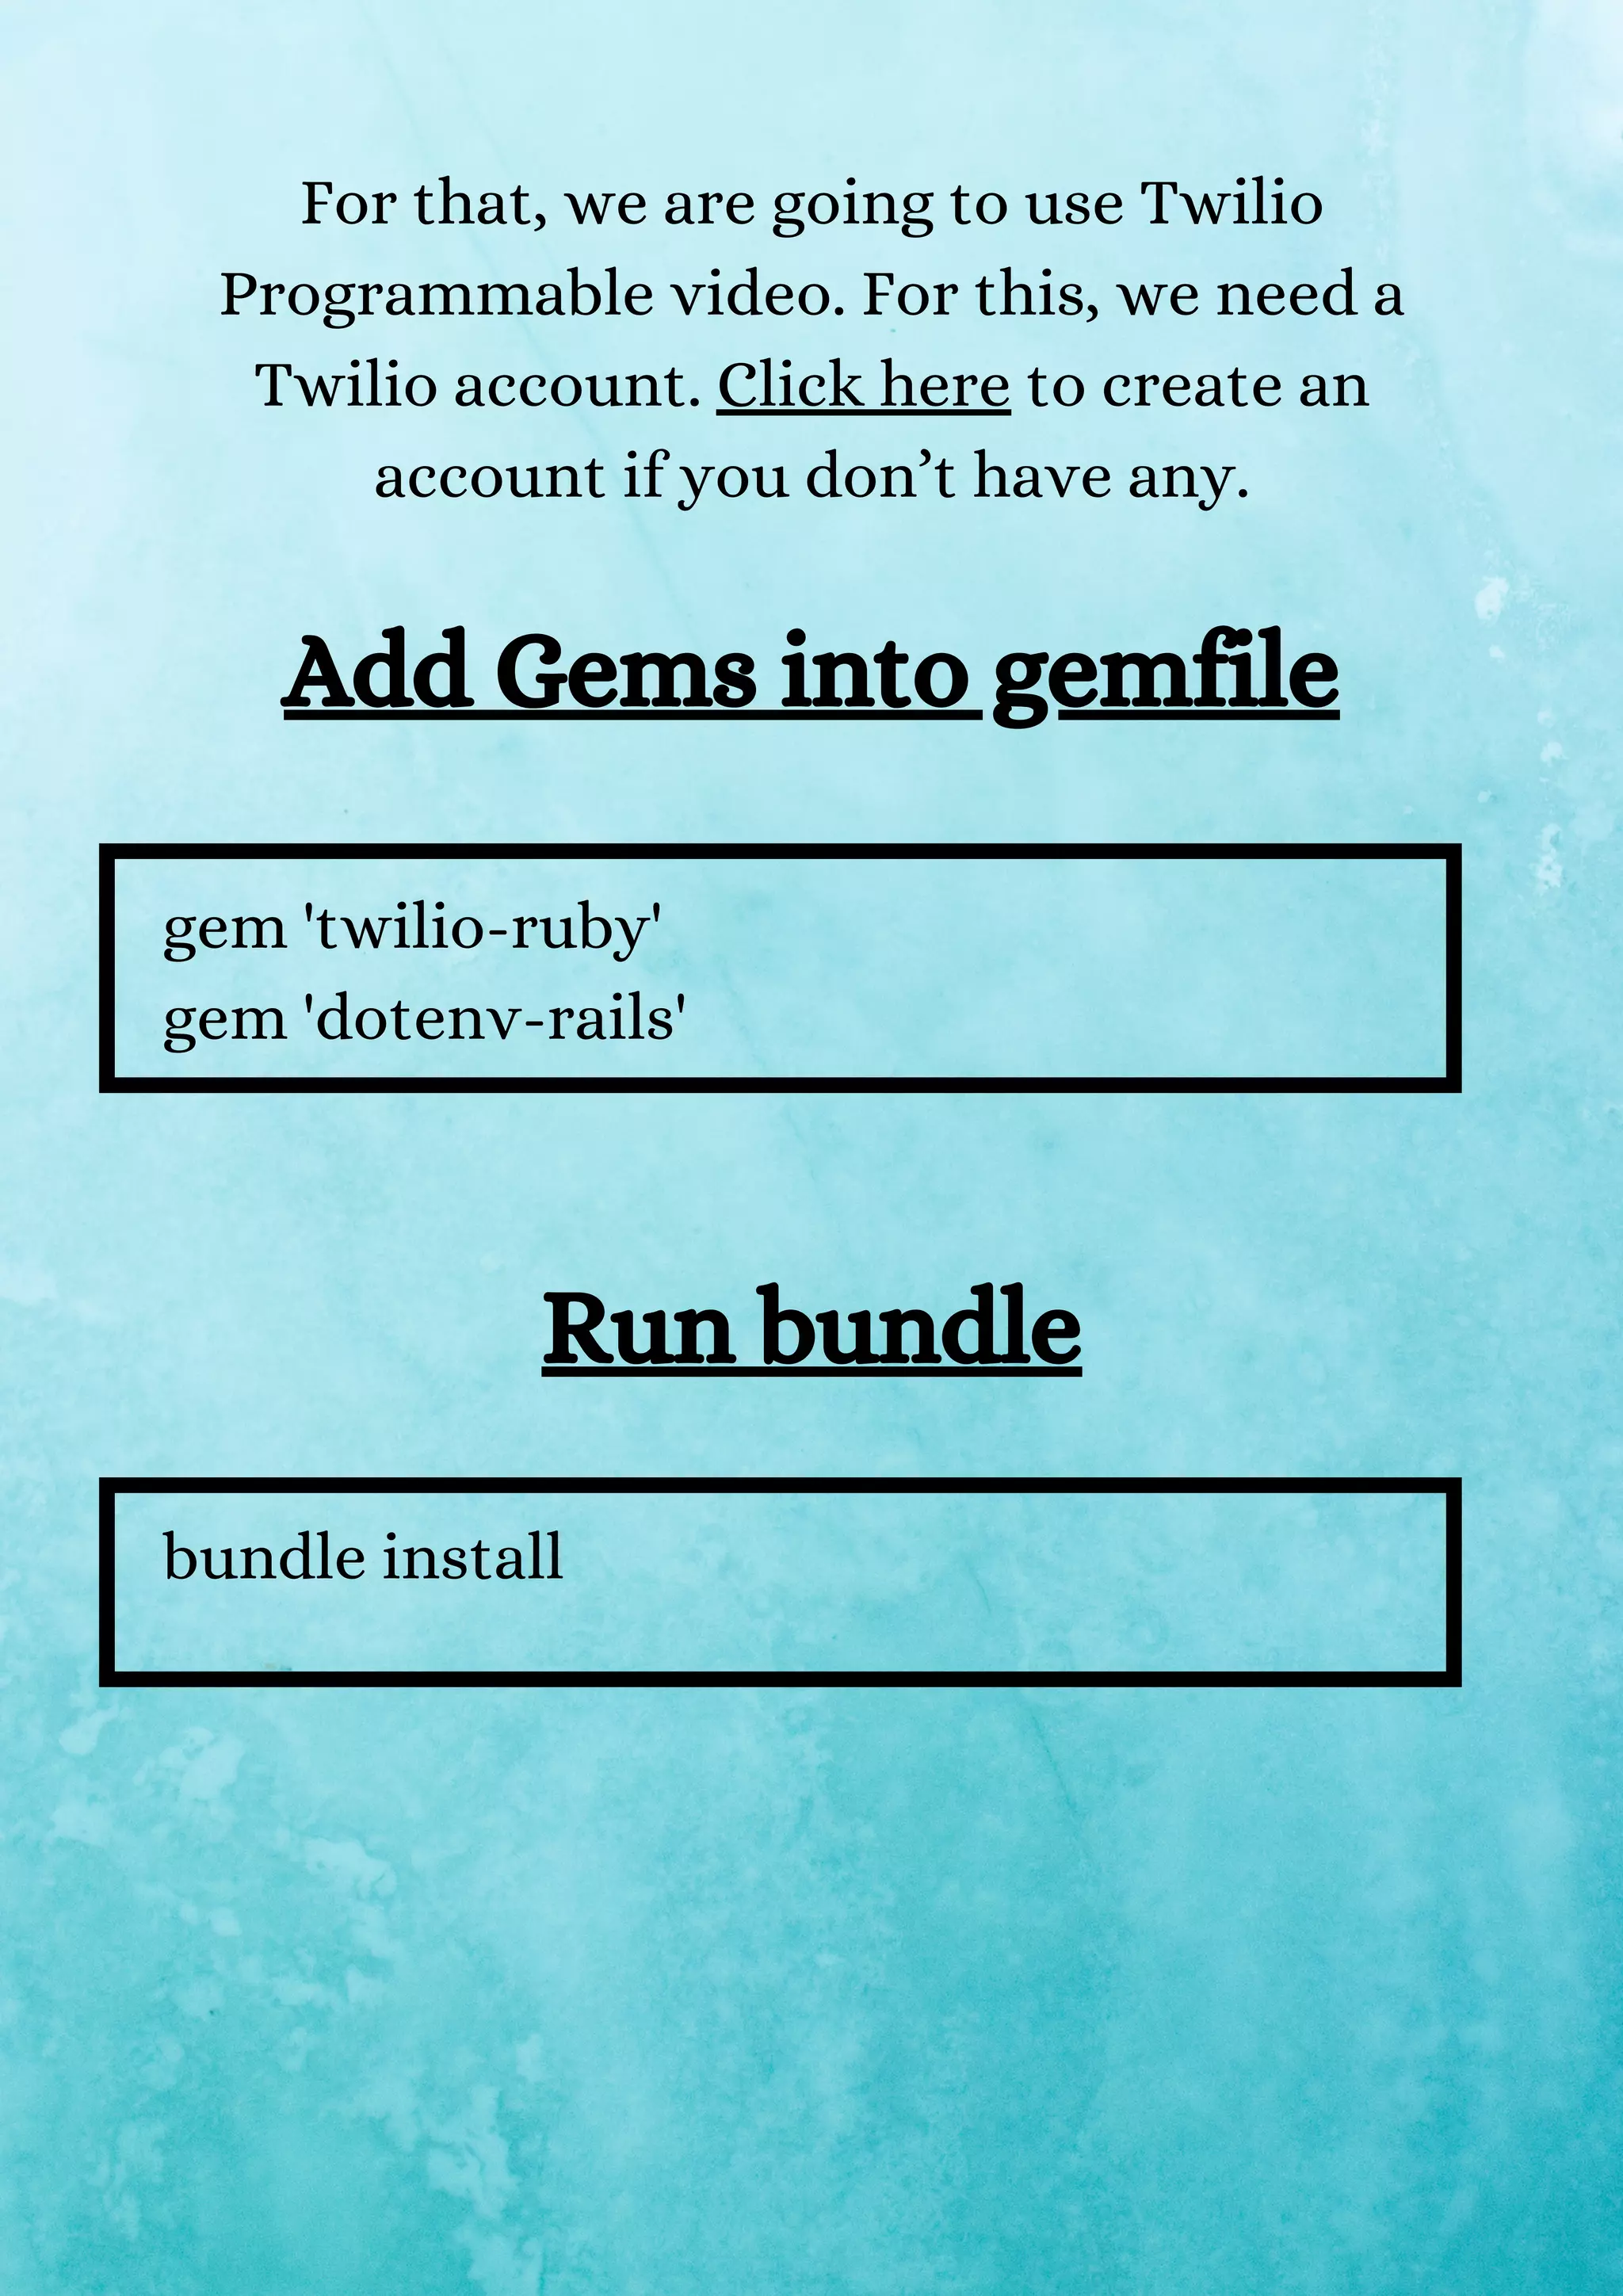

![// controllers/rooms_controller.rb def show @client = Twilio::REST::Client.new(ENV['ACCOUNT_S ID'], ENV['AUTH_TOKEN']) unless @room.room_sid.present? # create room in twilio twilio_room = @client.video.rooms.create(type: 'peer-to- peer',unique_name: @room.unique_name) @room.update(room_sid: twilio_room.sid) end identity = (0...5).map { ('a'..'z').to_a[rand(26)] }.join @room_name = @room.unique_name Create Twilio Room Change the Show action’s code with the following code.](https://image.slidesharecdn.com/buildavideochatapplicationwithtwiliorailsandjavascriptpart1-211005112841/75/Build-a-video-chat-application-with-twilio-rails-and-javascript-part-1-22-2048.jpg)
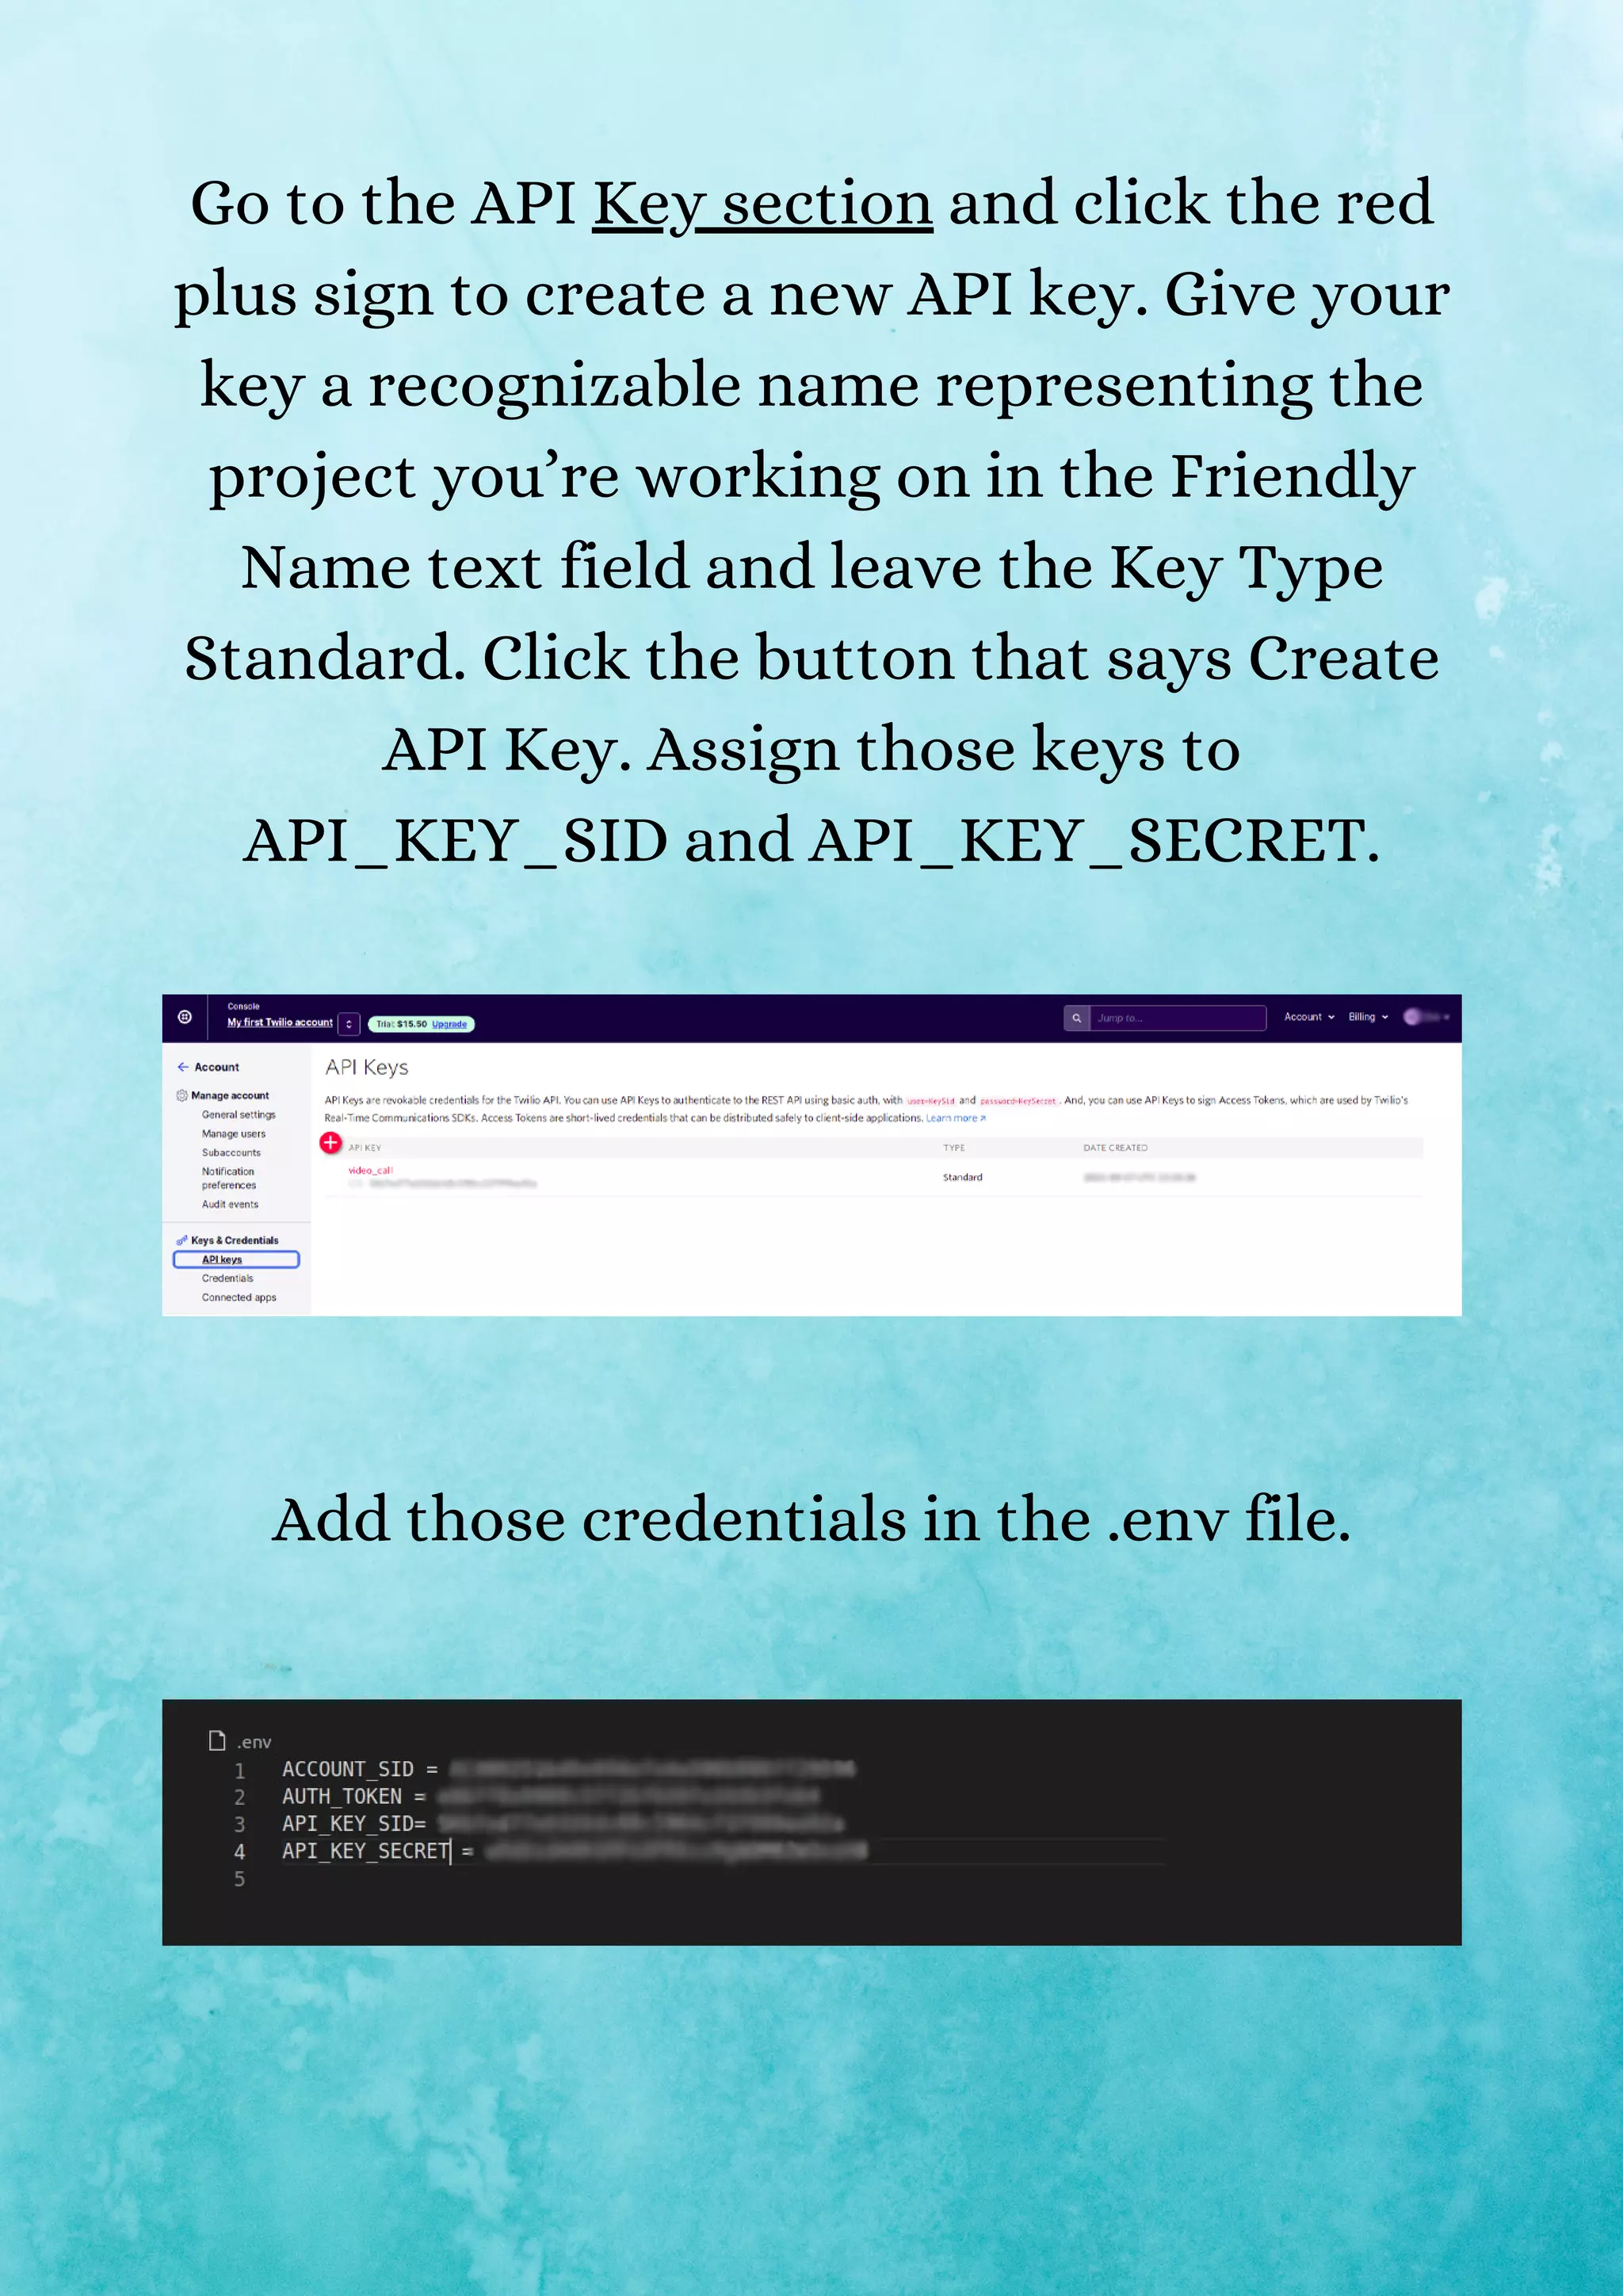
![#create token to access Twilio room @token = Twilio::JWT::AccessToken.new(ENV['ACCOU NT_SID'], ENV['API_KEY_SID'],ENV['API_KEY_SECR ET'], identity: identity) #create video grant for token grant = Twilio::JWT::AccessToken::VideoGrant.new grant.room = @room_name @token.add_grant grant @token = @token.to_jwt end This code will first check the presence of sid (unique id used for Twilio unique rooms) in the database. If it is not available, it will generate the room in Twilio and store the sid in the database.](https://image.slidesharecdn.com/buildavideochatapplicationwithtwiliorailsandjavascriptpart1-211005112841/75/Build-a-video-chat-application-with-twilio-rails-and-javascript-part-1-23-2048.jpg)

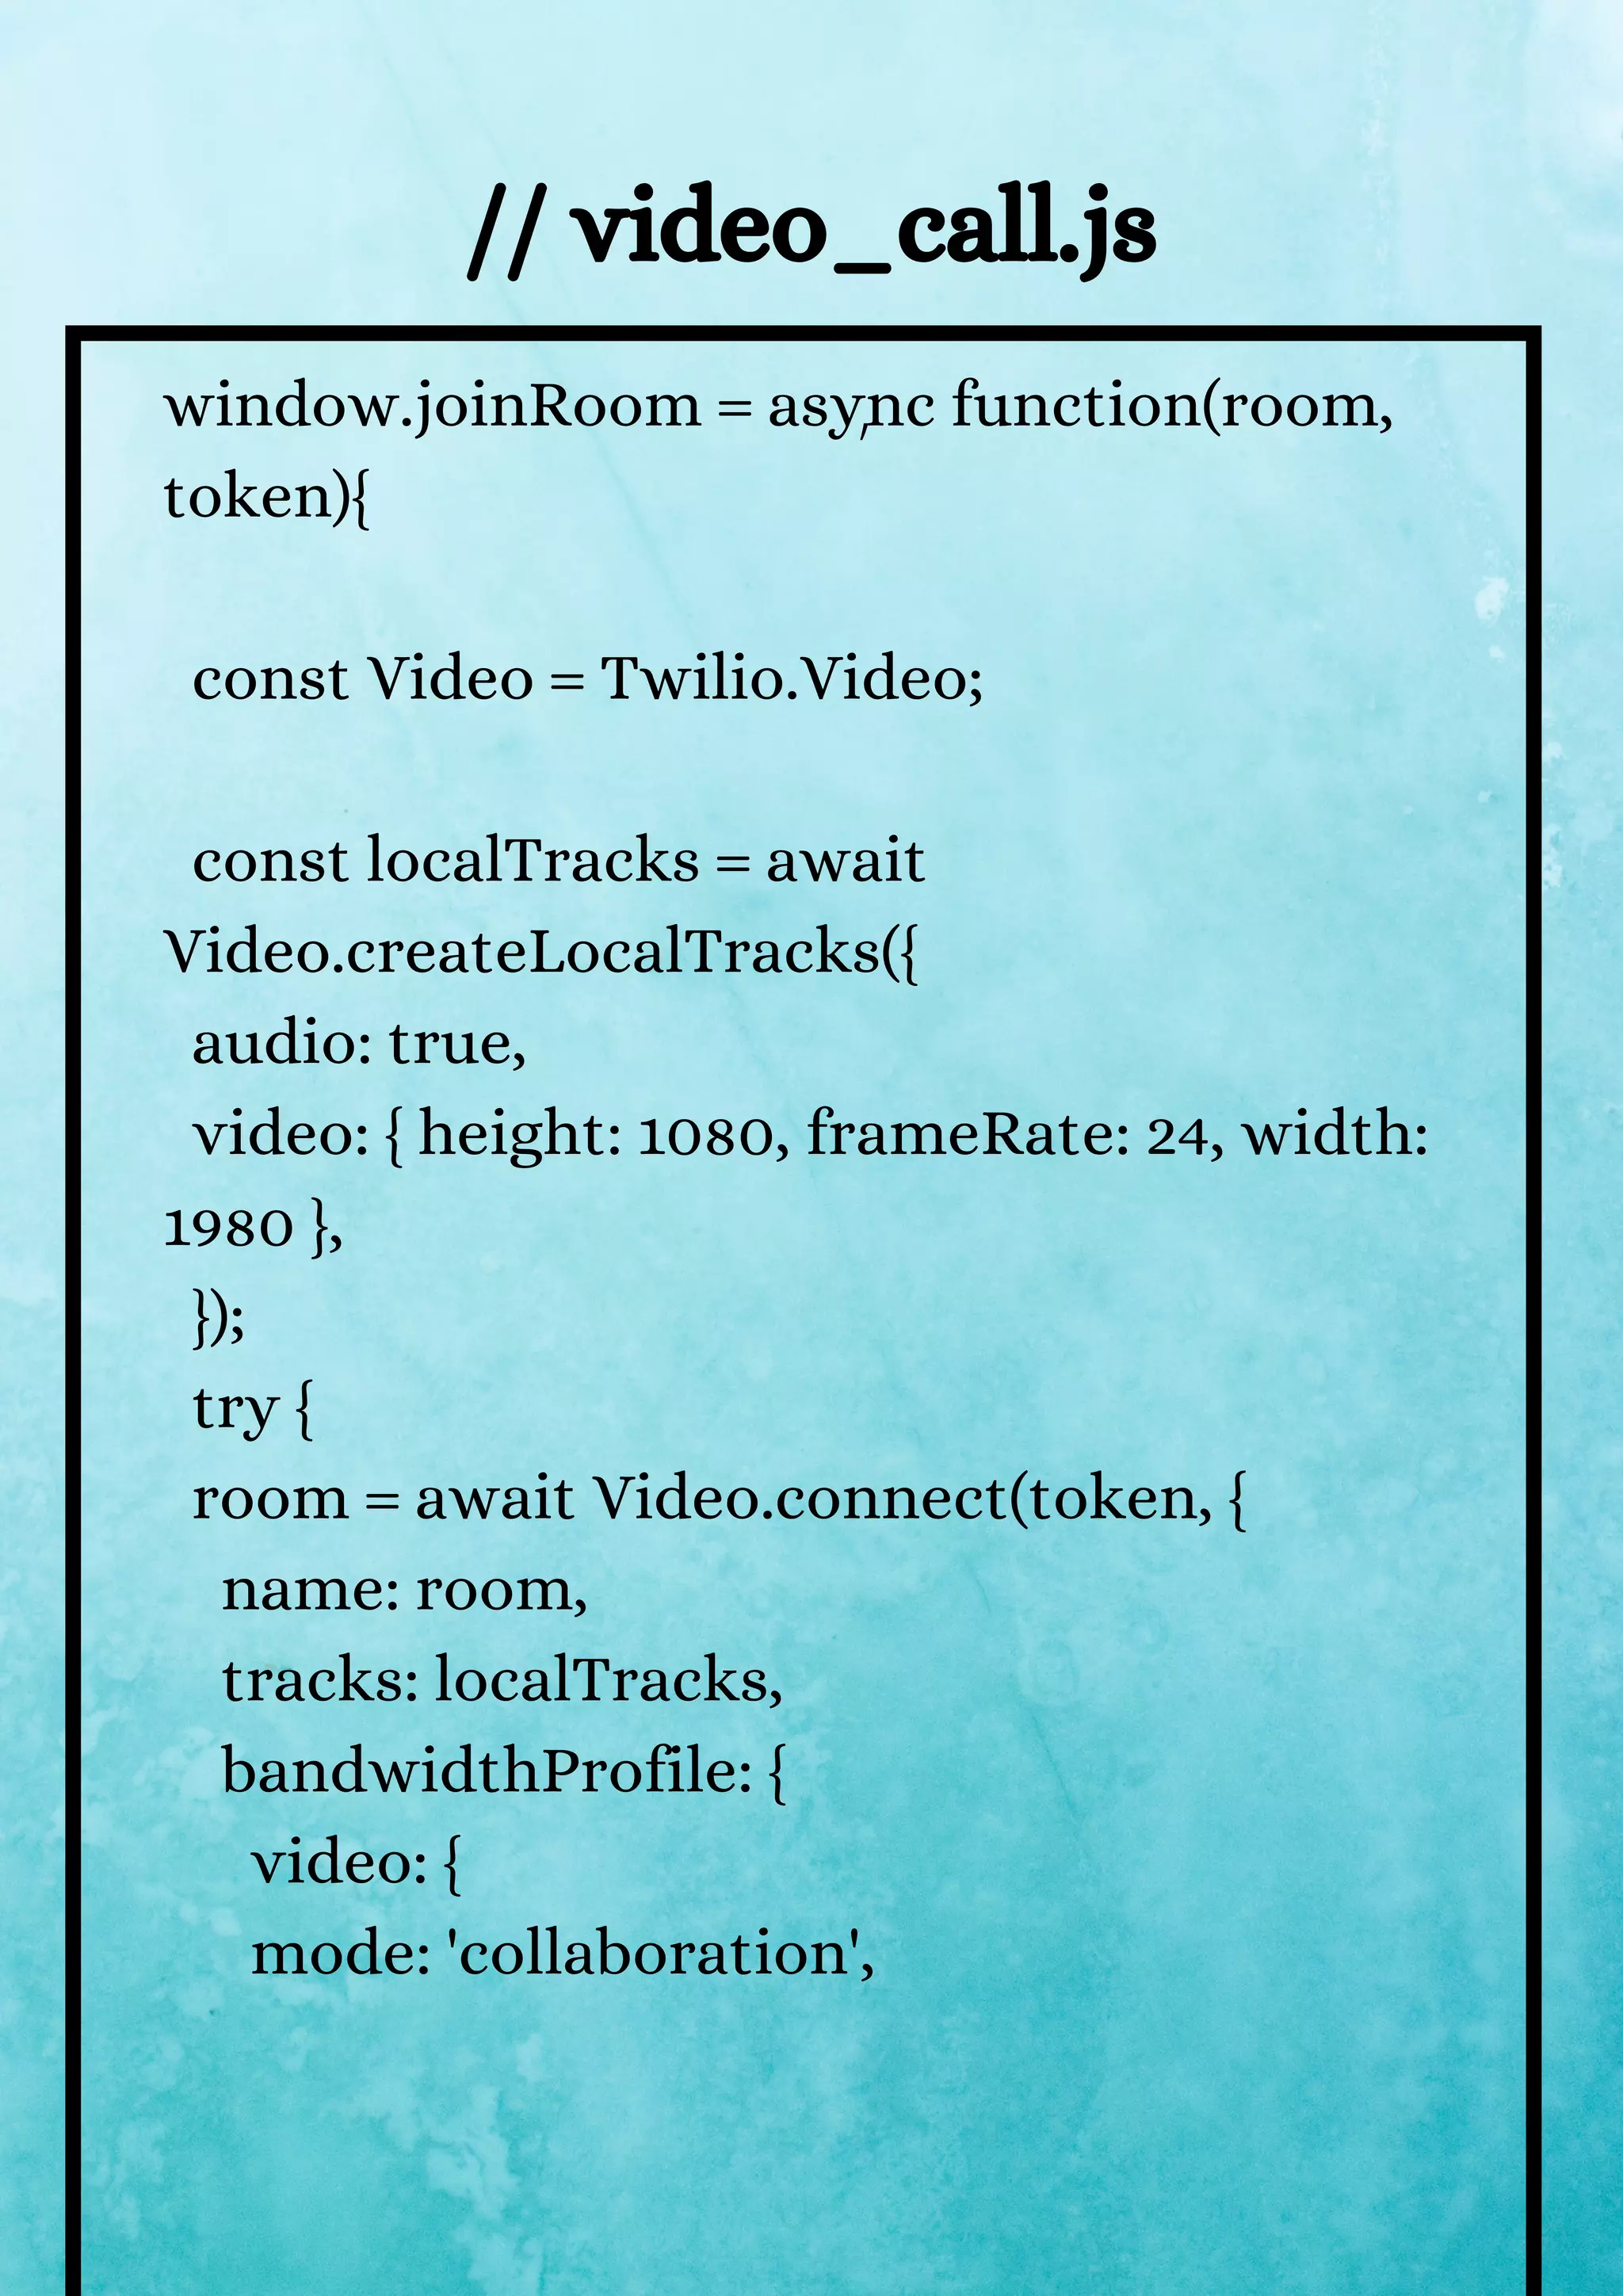
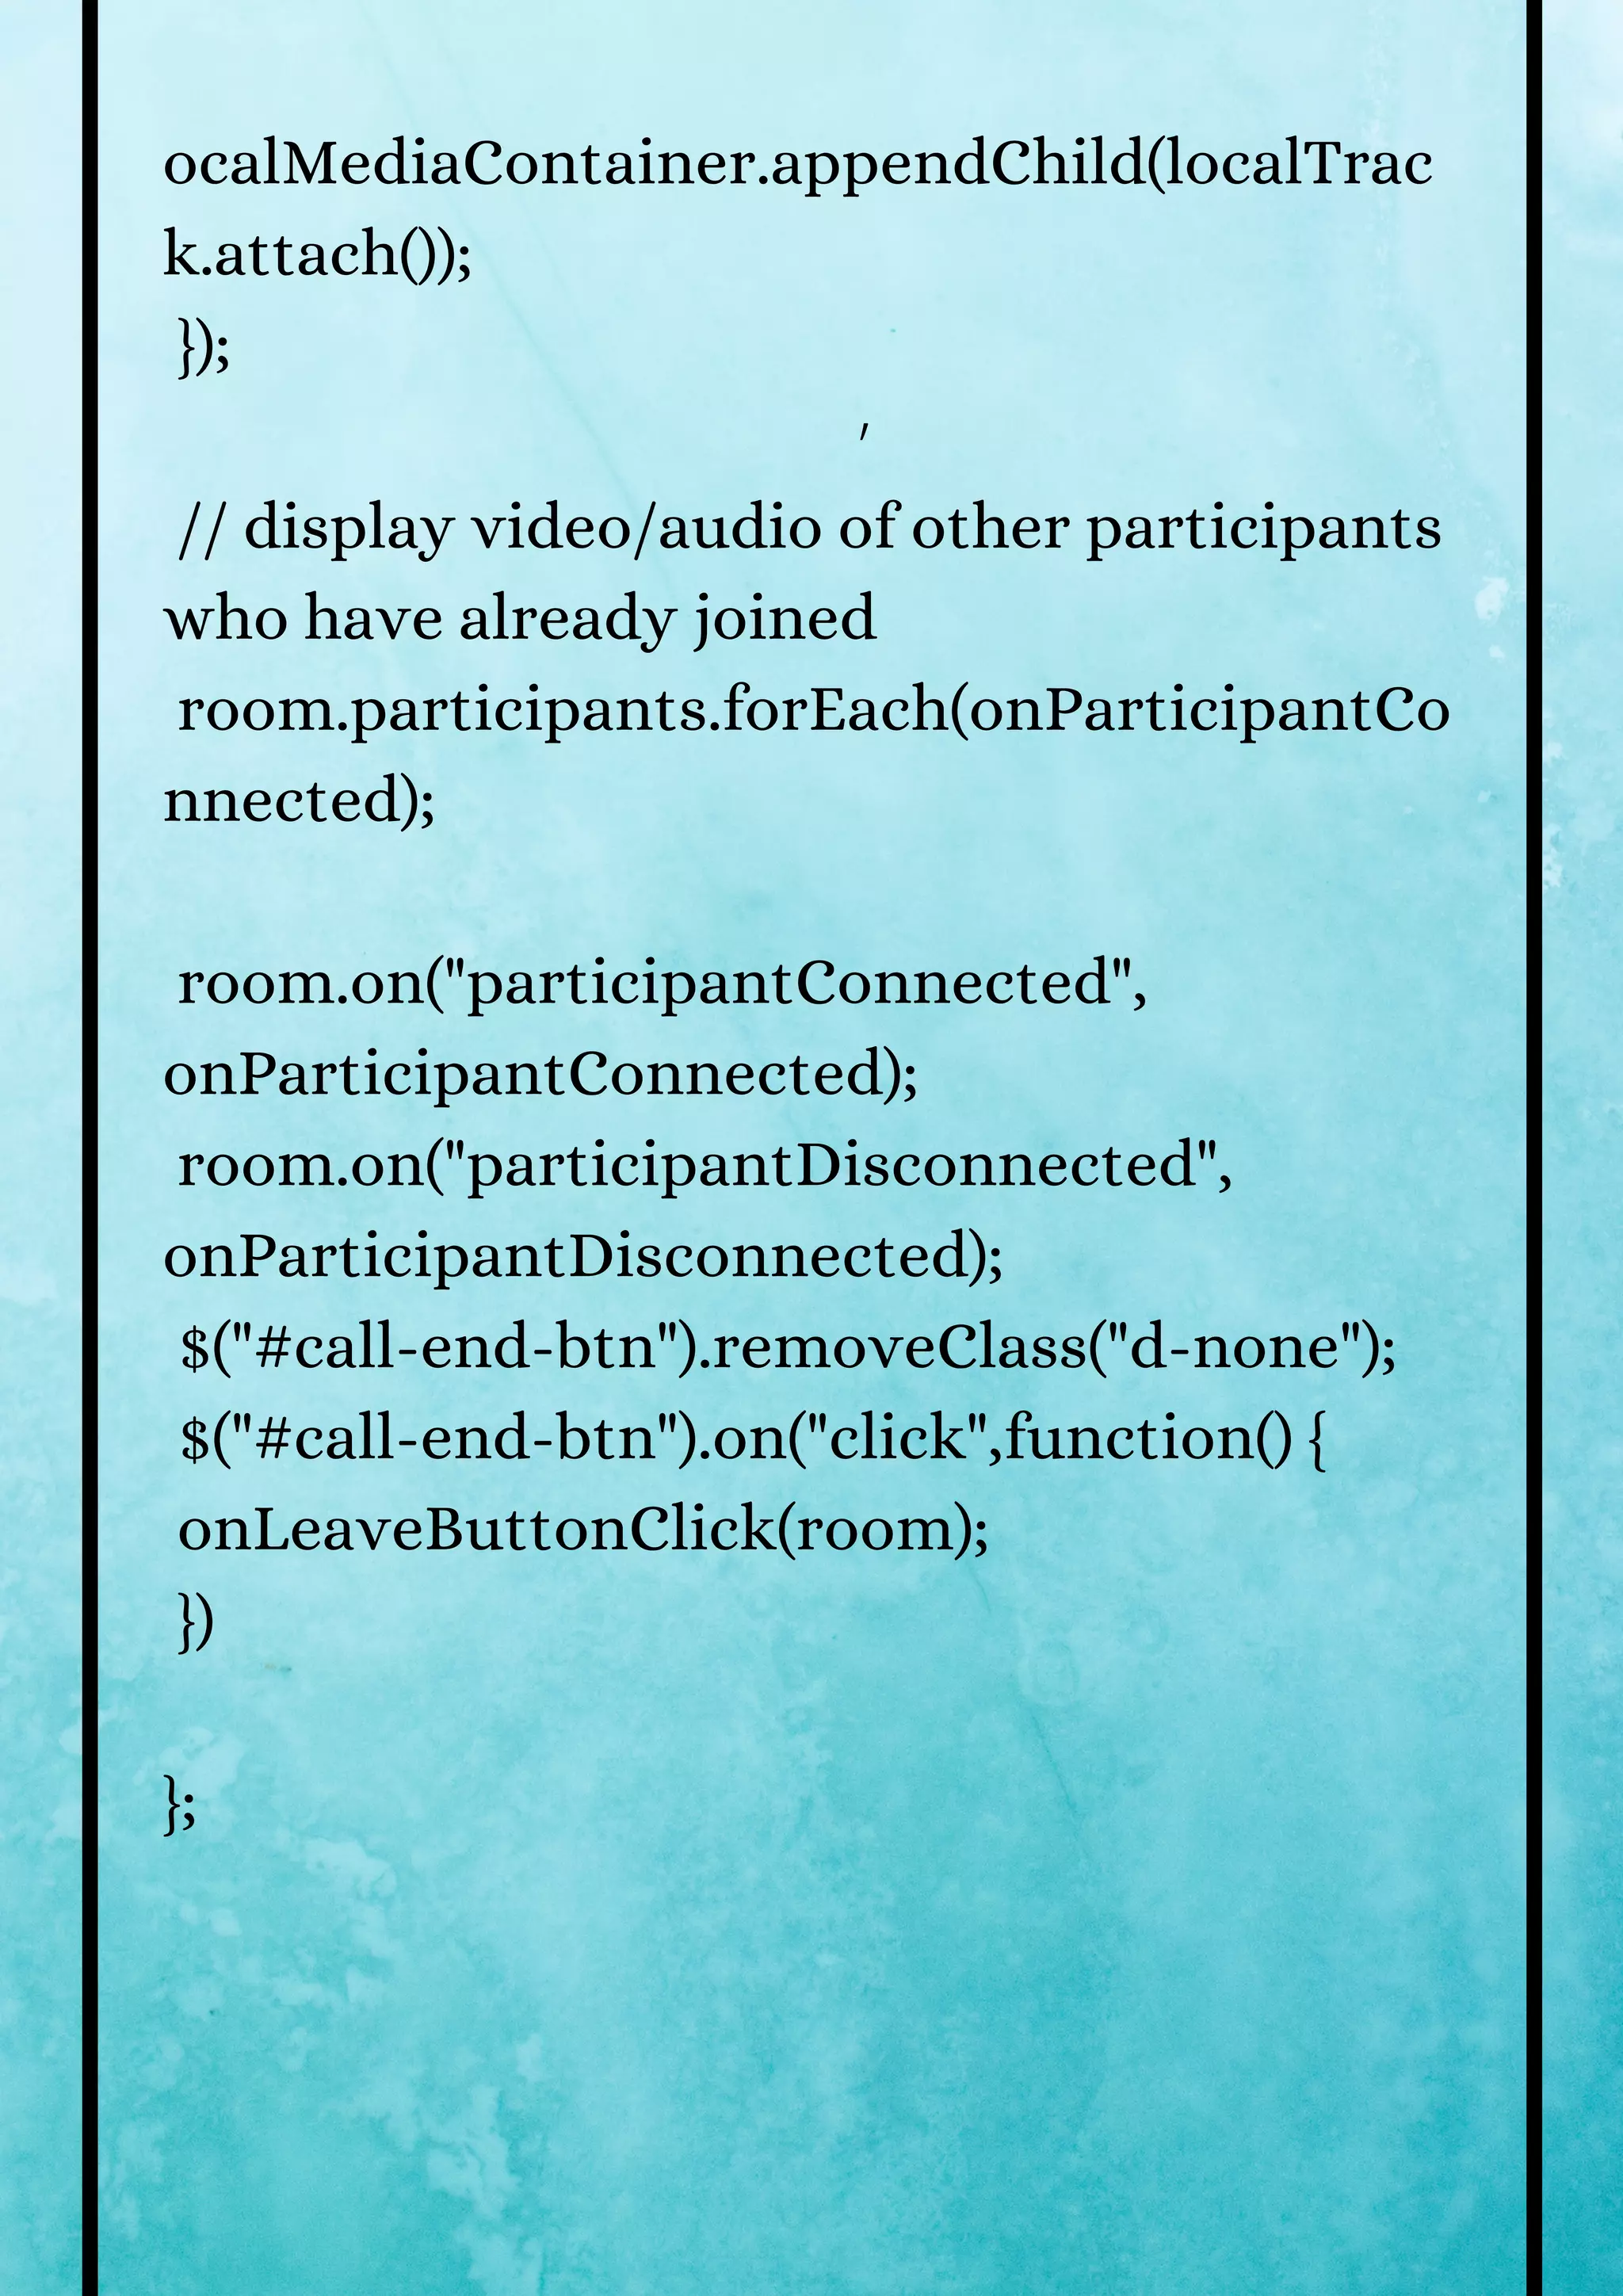
![, maxTracks: 10, dominantSpeakerPriority: 'high', renderDimensions: { high: {height:1080, width:1980}, standard: {height:720, width:1280}, low: {height:176, width:144} } } }, dominantSpeaker: true, maxAudioBitrate: 16000, preferredVideoCodecs: [{ codec: 'VP8', simulcast: true }], networkQuality: {local:1, remote: 4} }); } catch (error) { console.log(error); } const localMediaContainer = document.getElementById("local-video"); localTracks.forEach((localTrack) => { l](https://image.slidesharecdn.com/buildavideochatapplicationwithtwiliorailsandjavascriptpart1-211005112841/75/Build-a-video-chat-application-with-twilio-rails-and-javascript-part-1-33-2048.jpg)


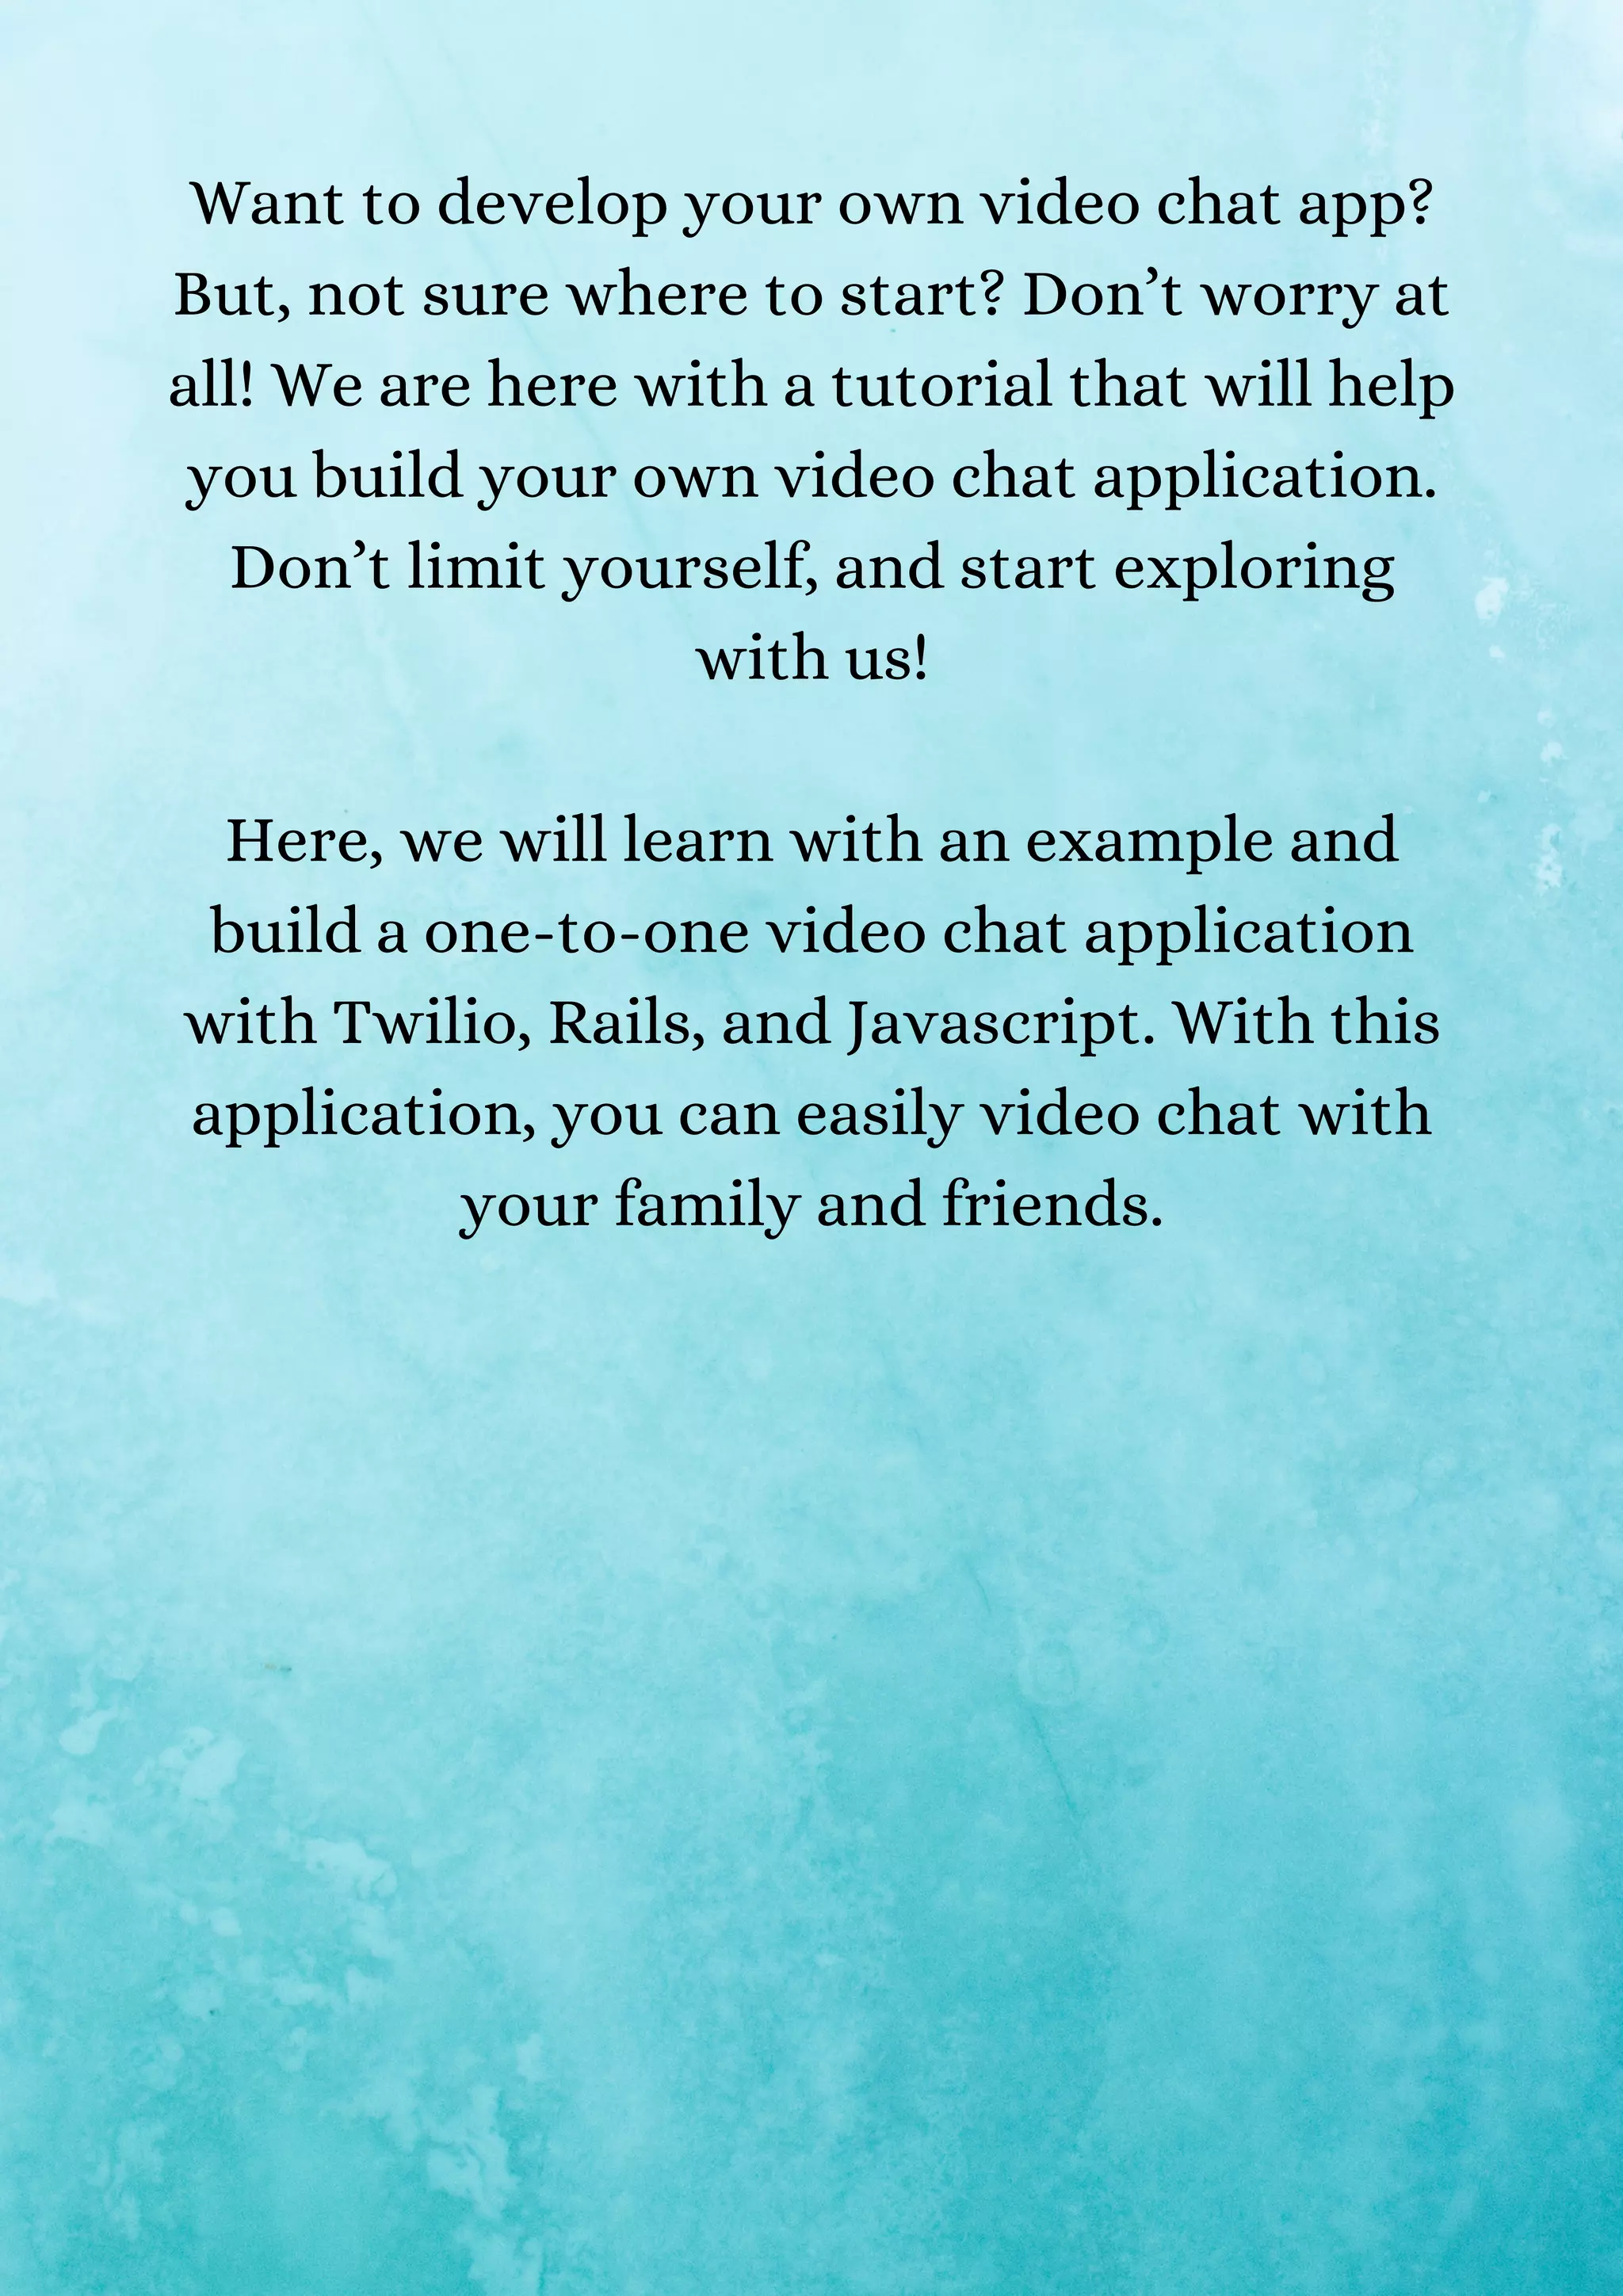
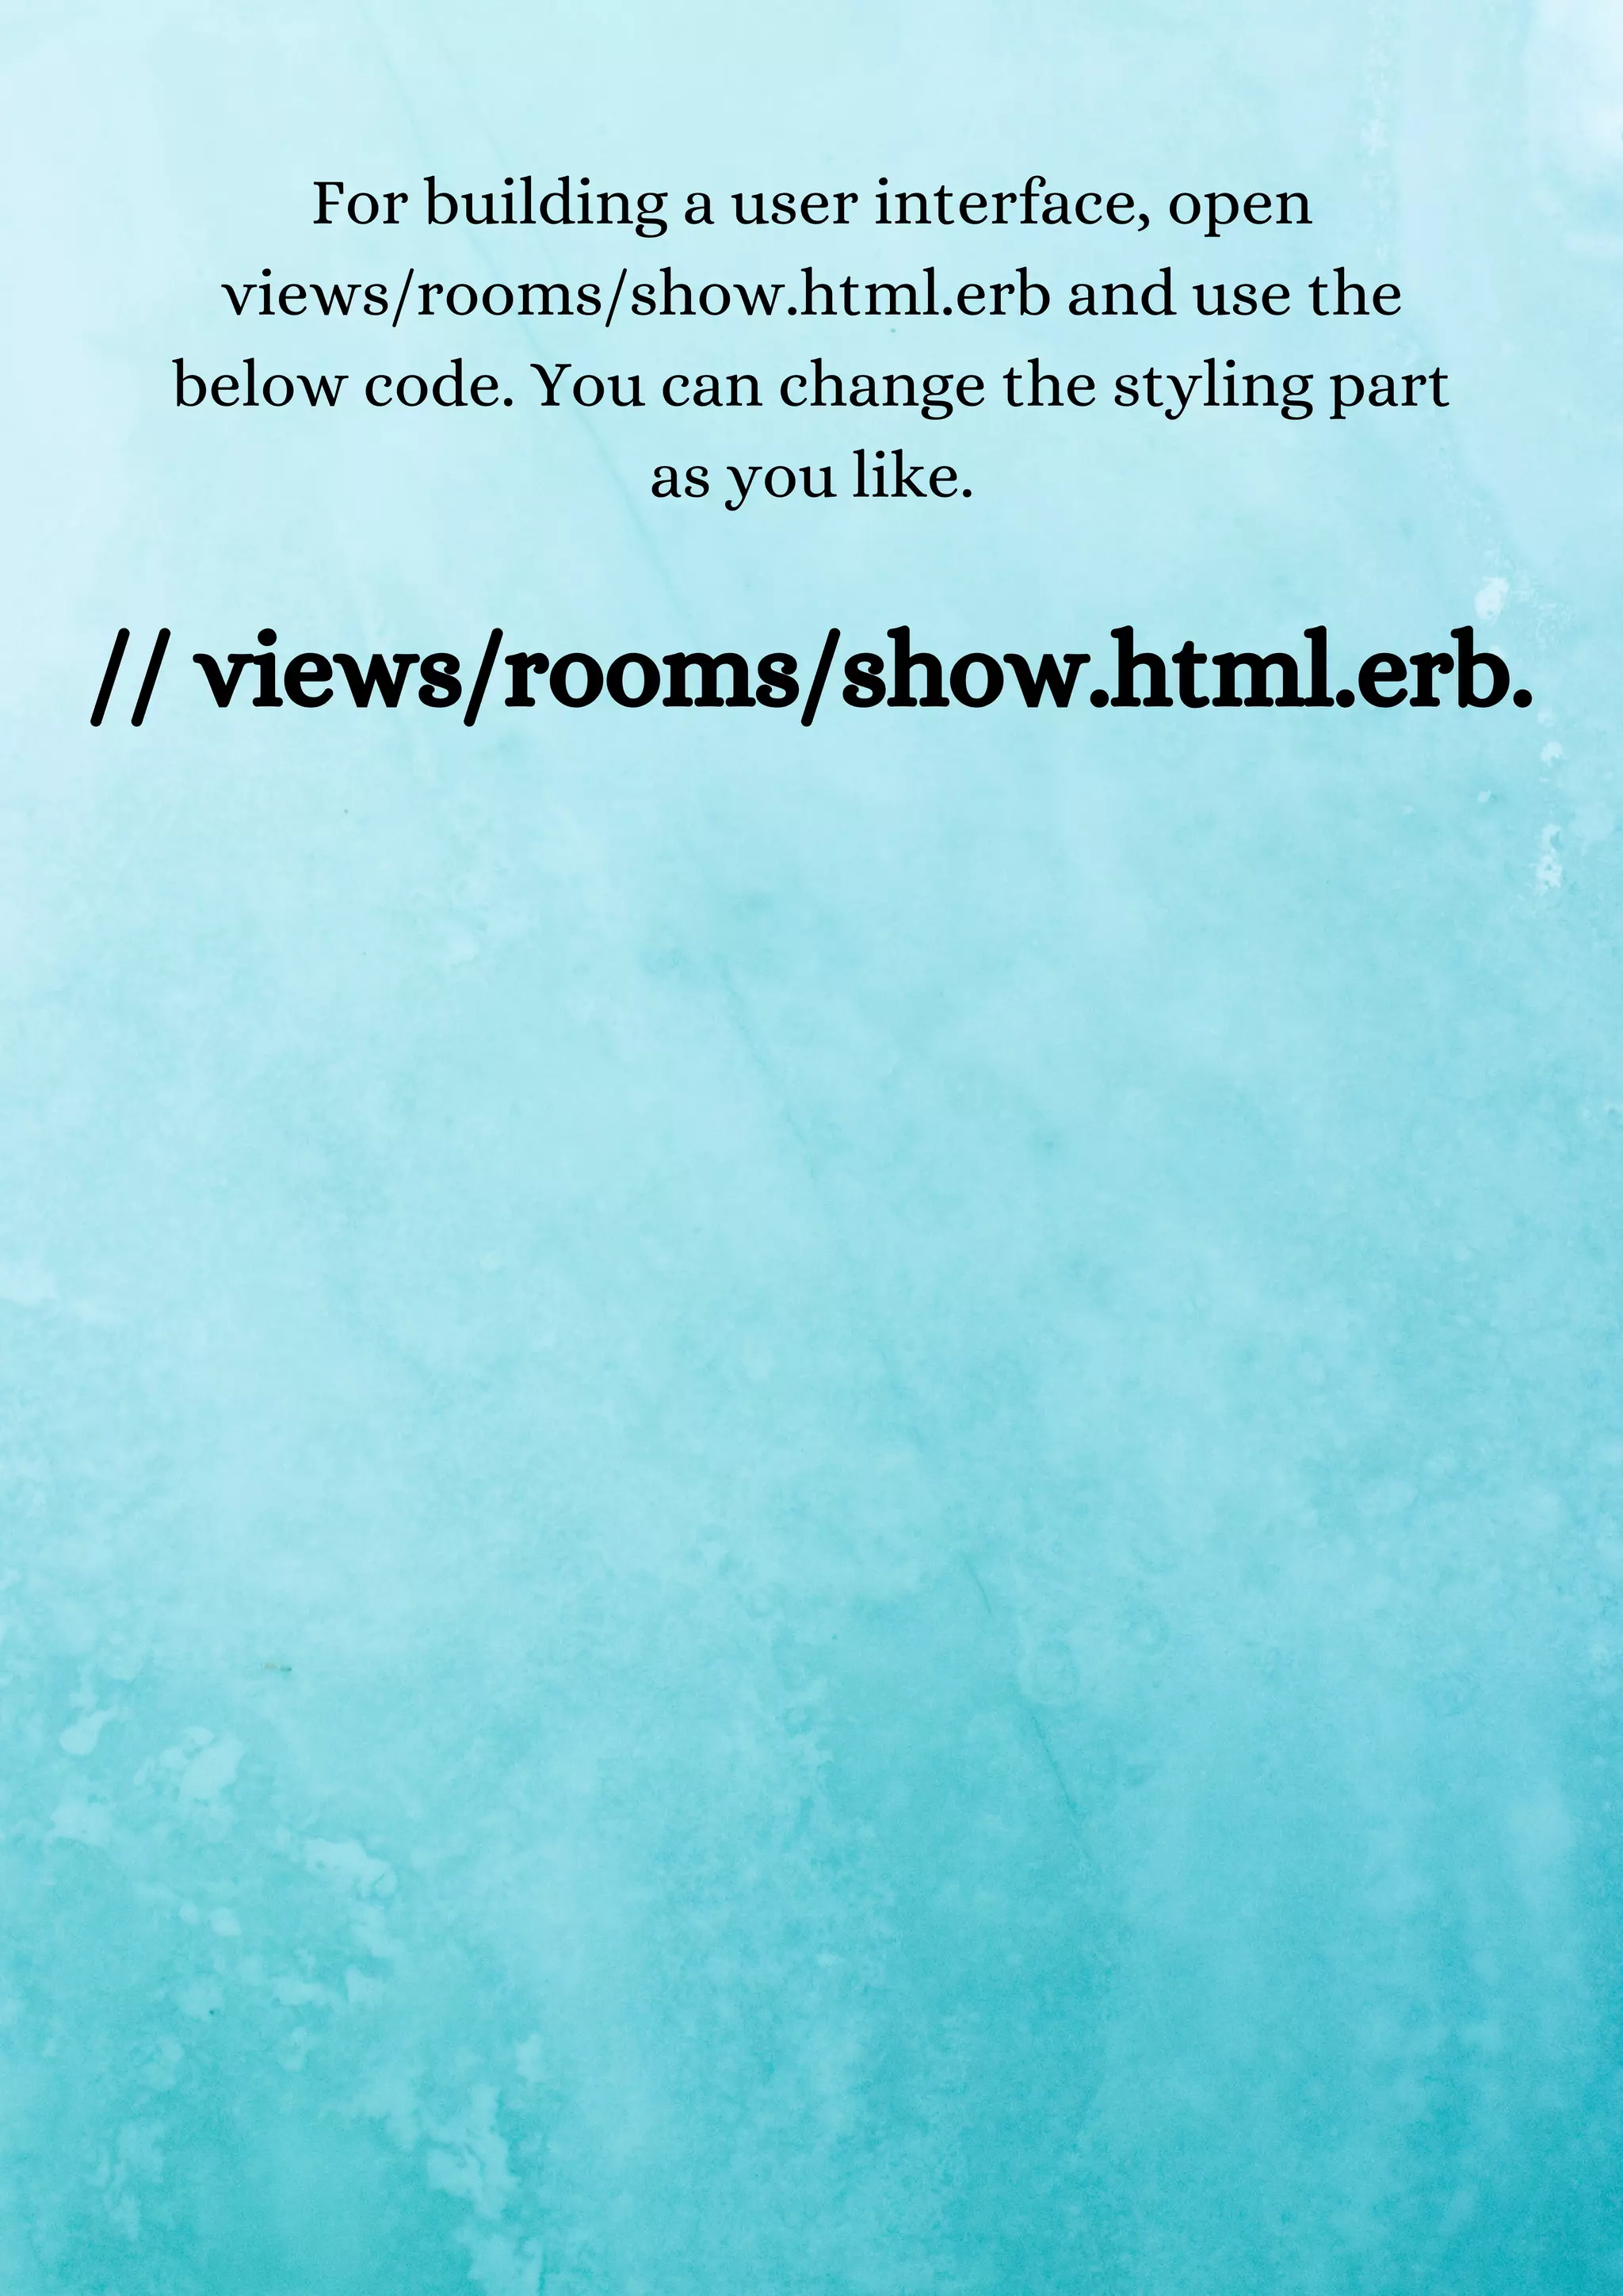
This document provides a comprehensive tutorial for building a one-to-one video chat application using Twilio, Rails, and JavaScript. It outlines the prerequisites, step-by-step setup of the Rails project, integration of Twilio services, and implementation of the front-end user interface. The tutorial concludes by encouraging readers to explore the provided code and consider professional development assistance if needed.