Download to read offline


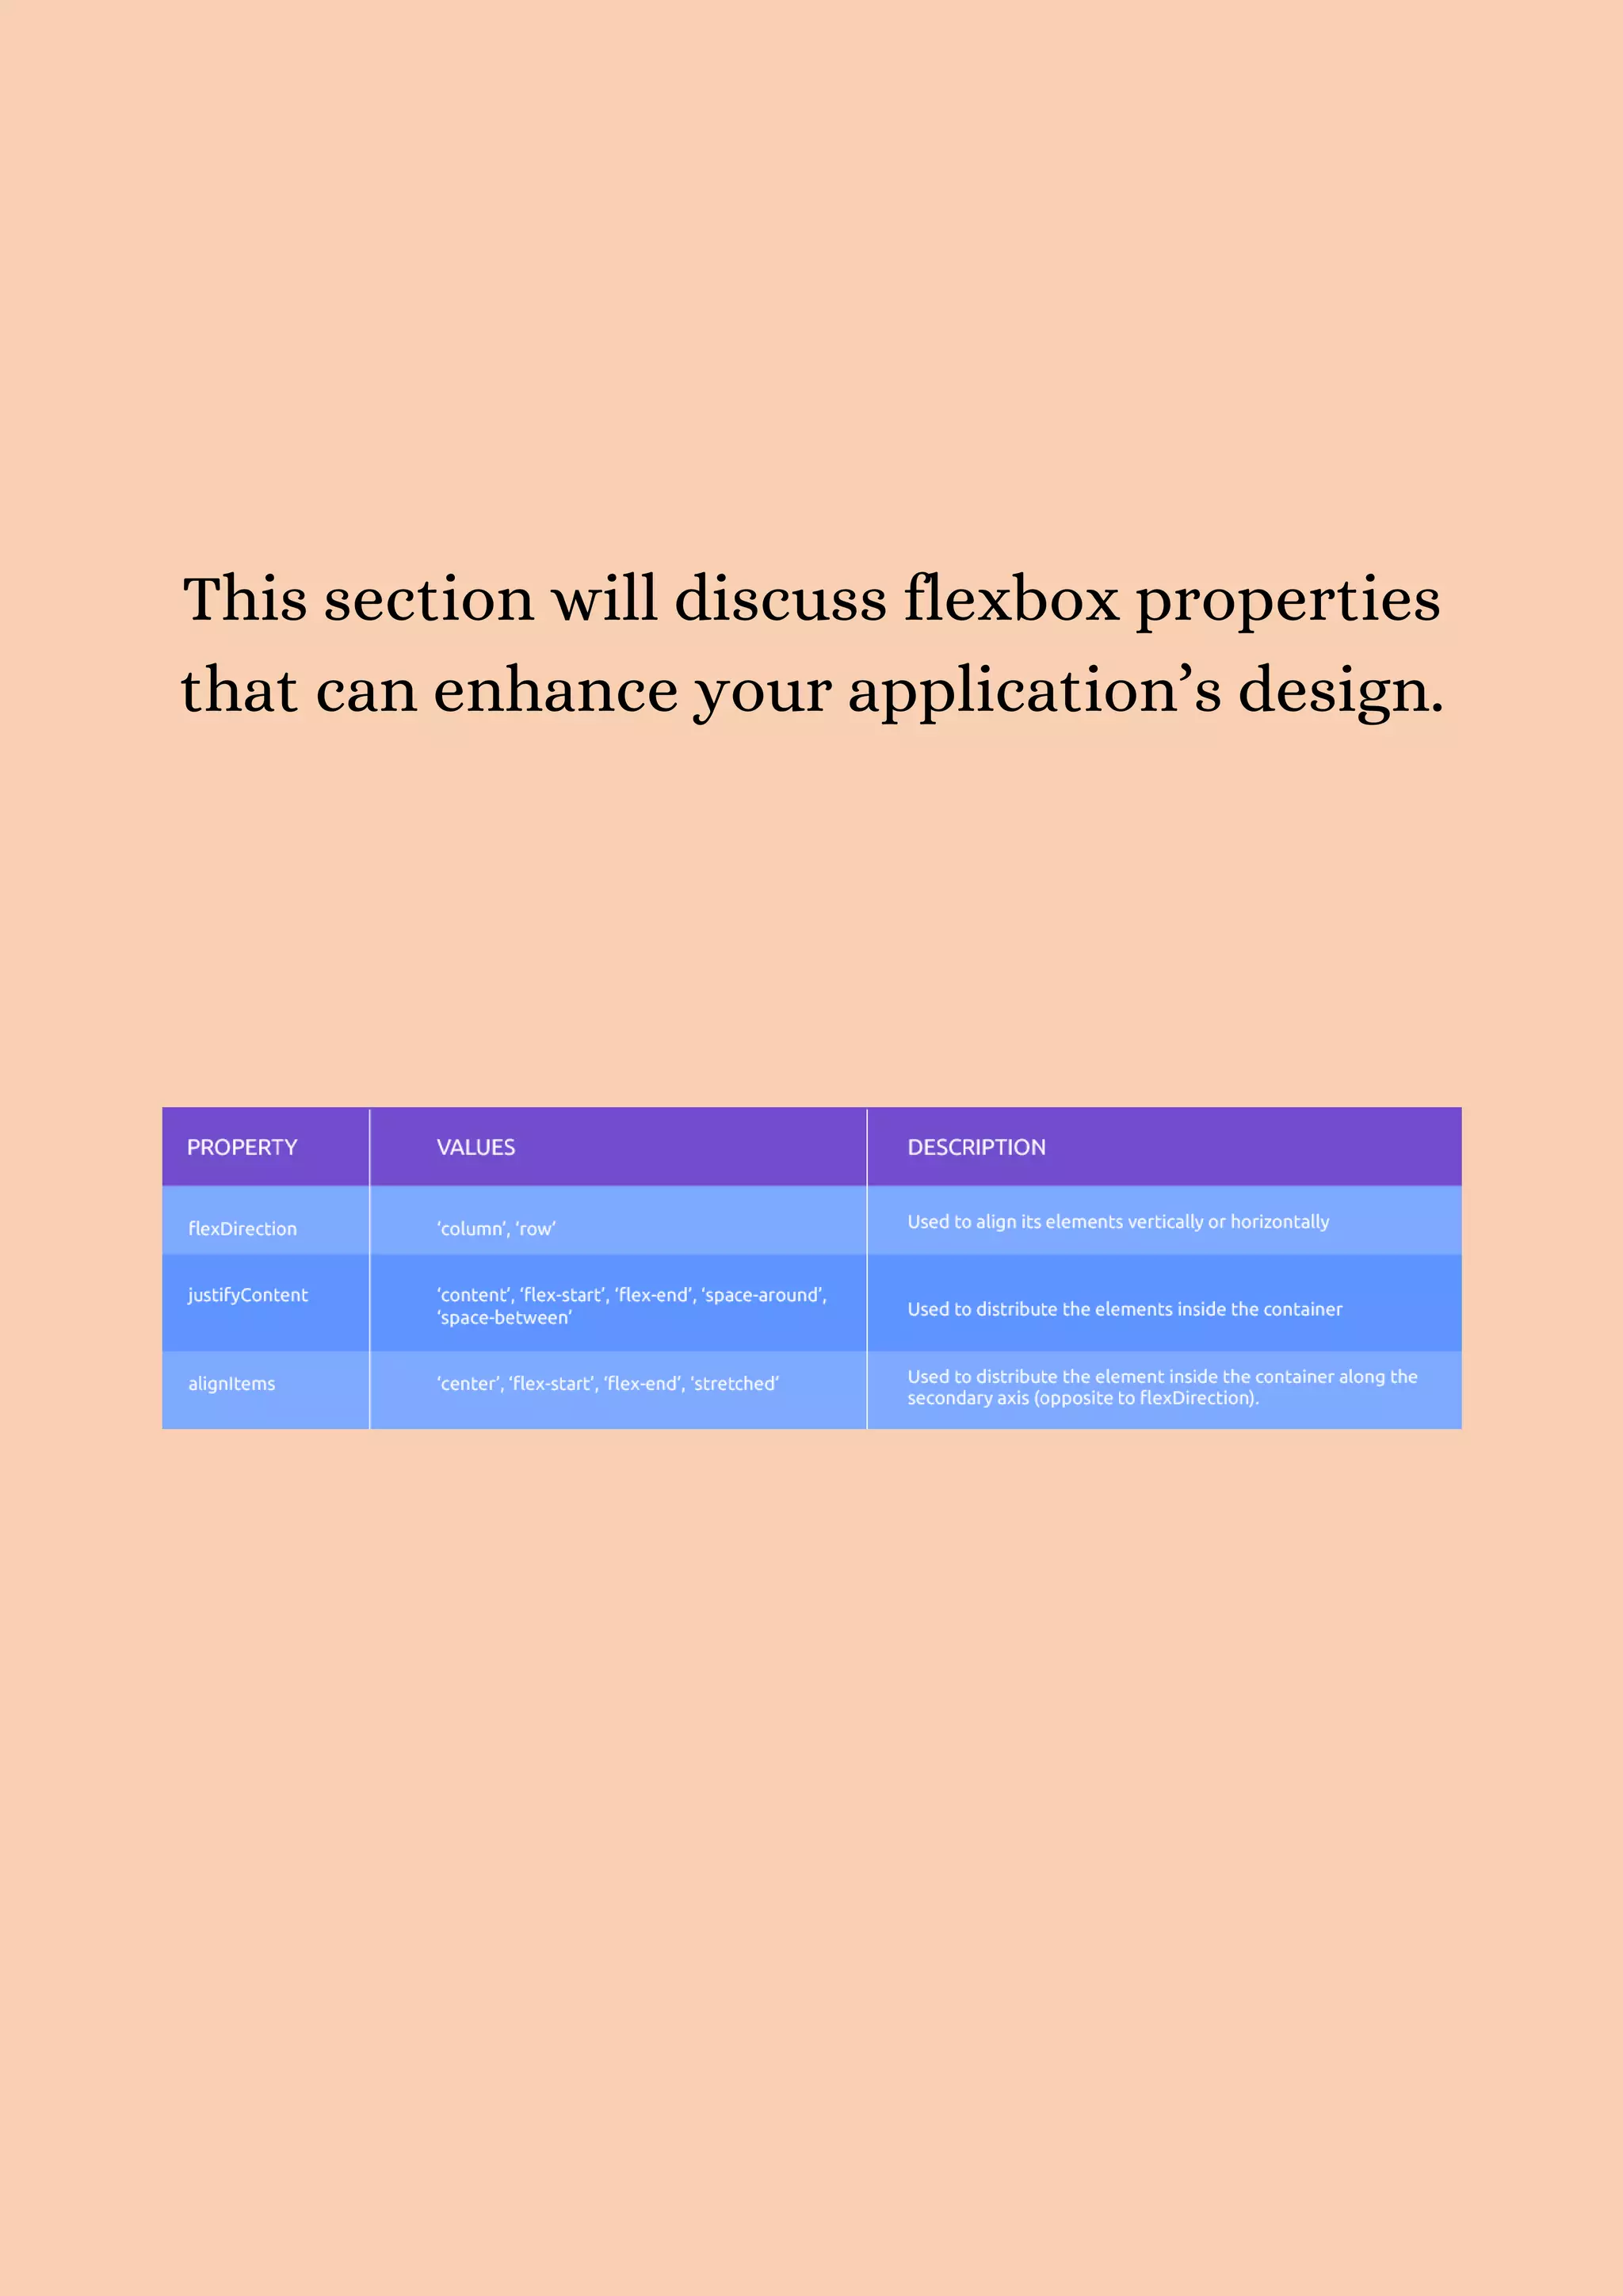
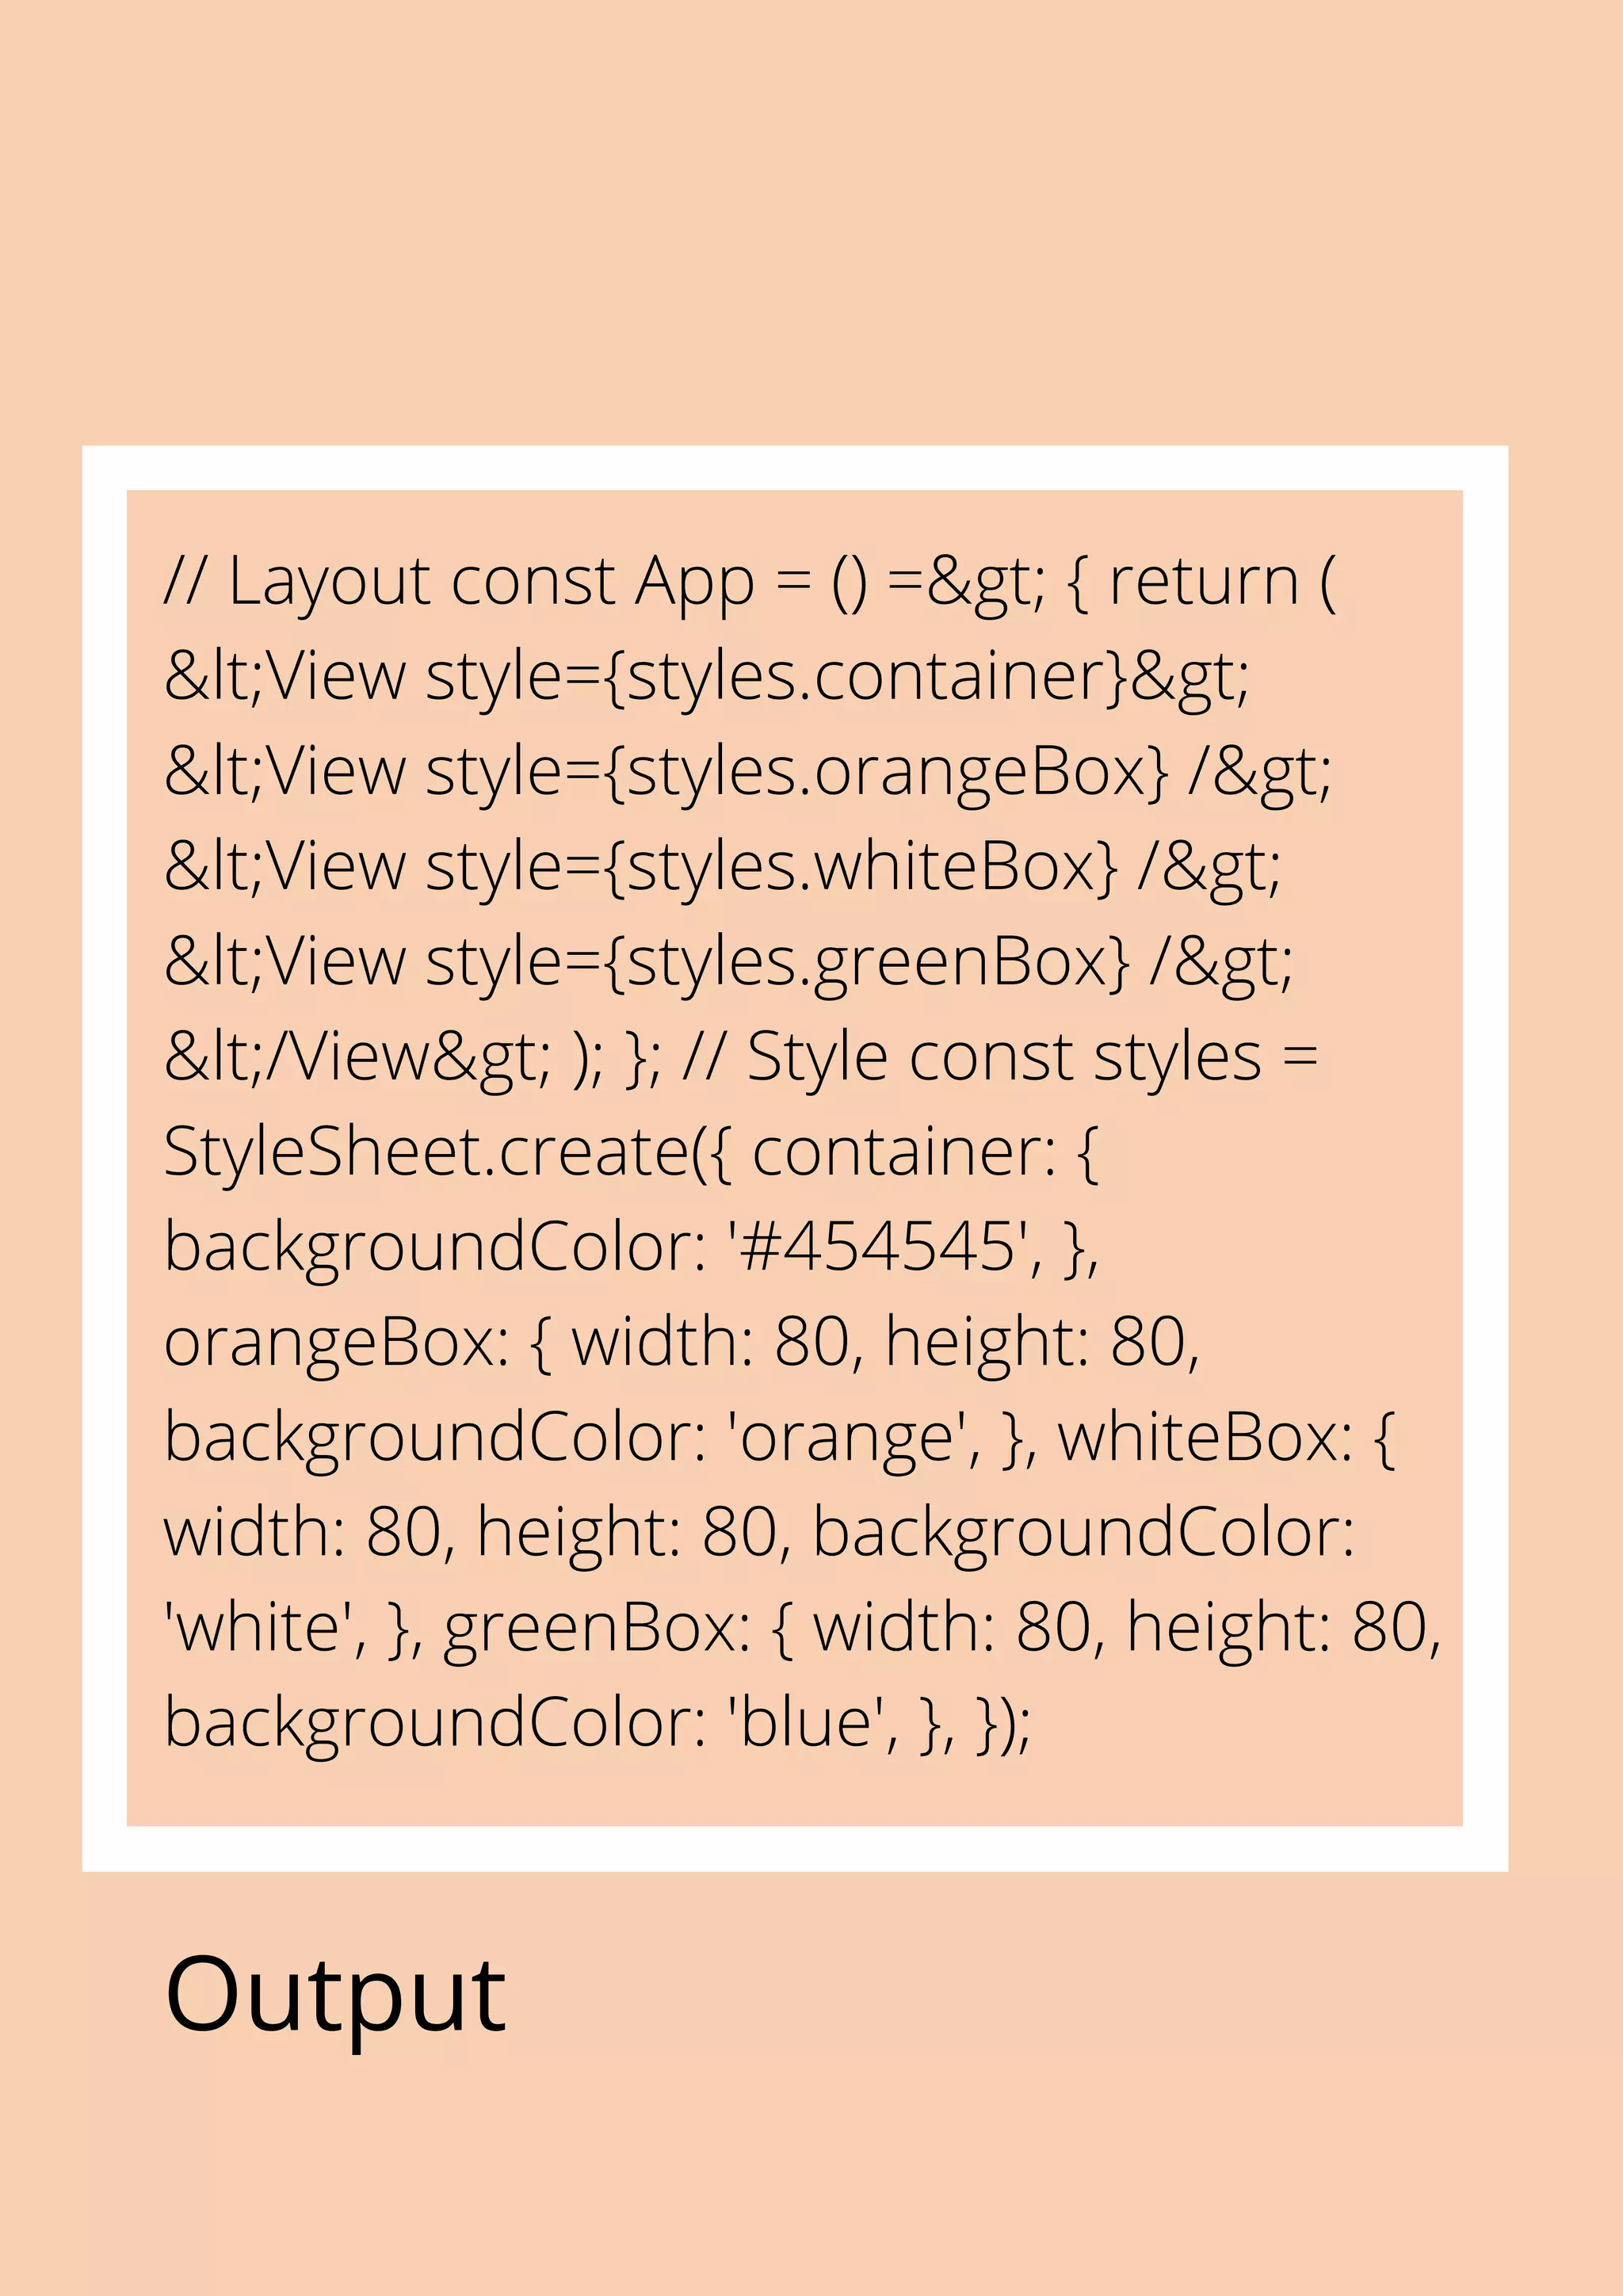
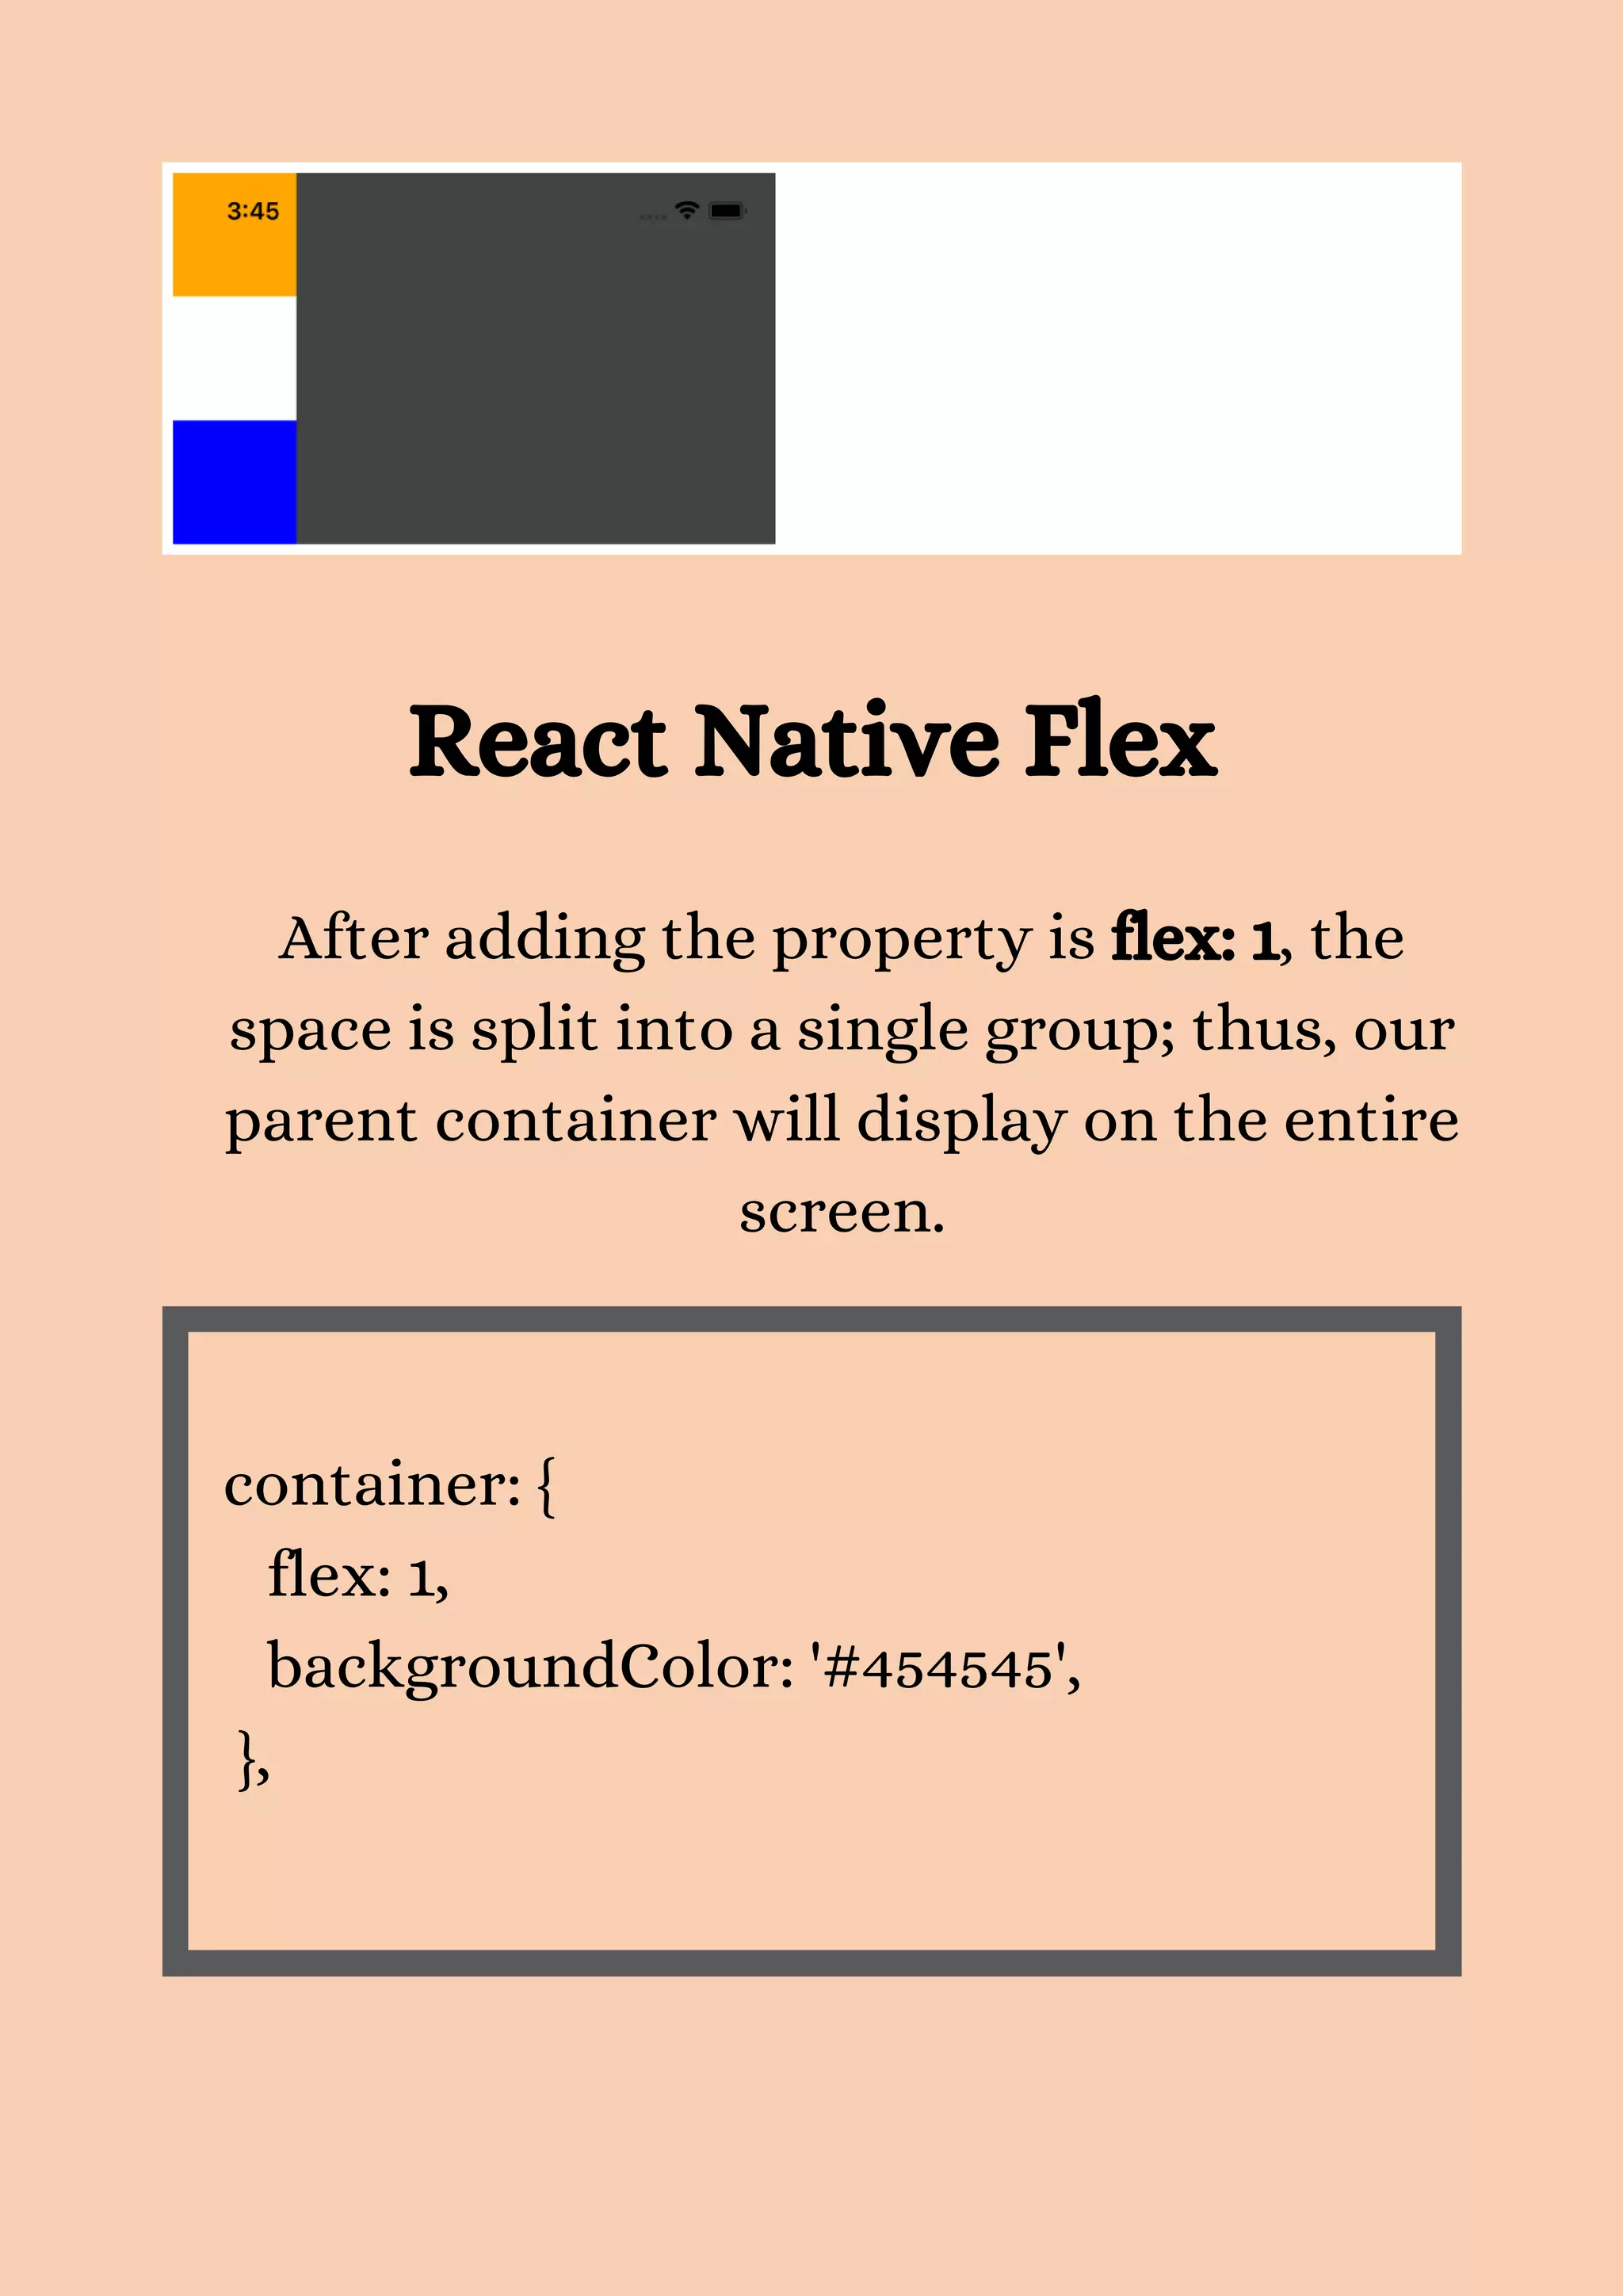
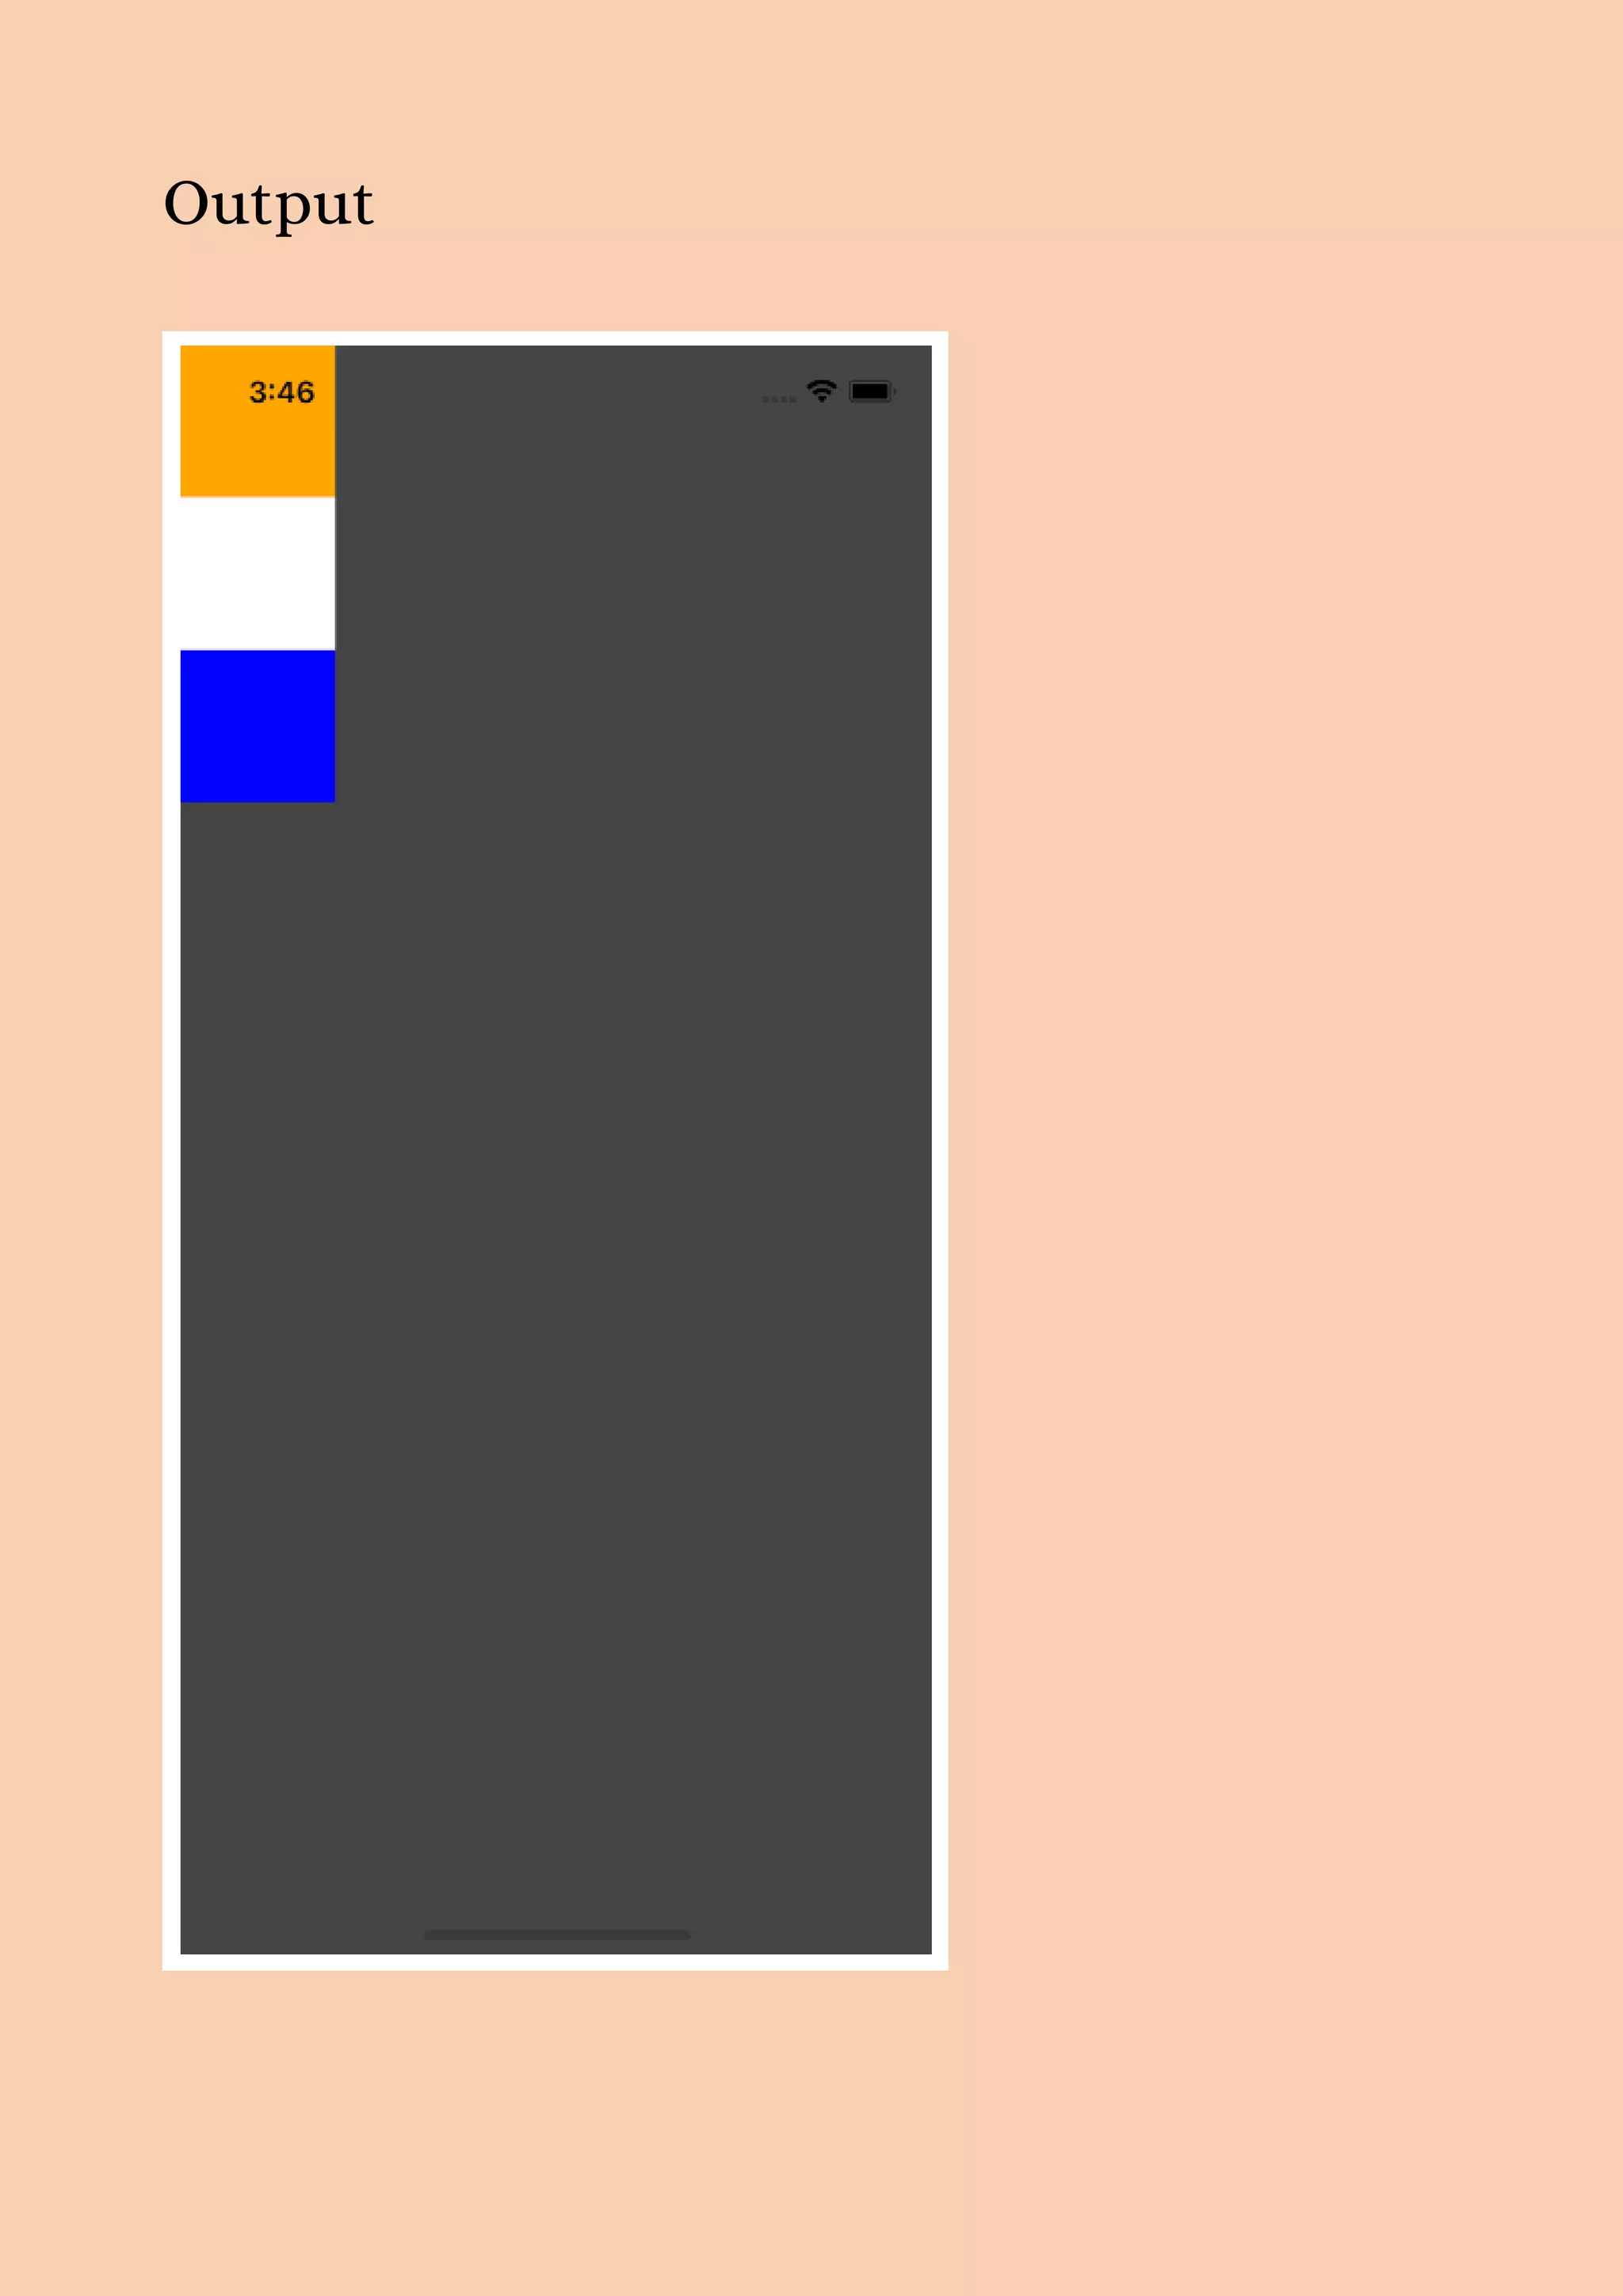
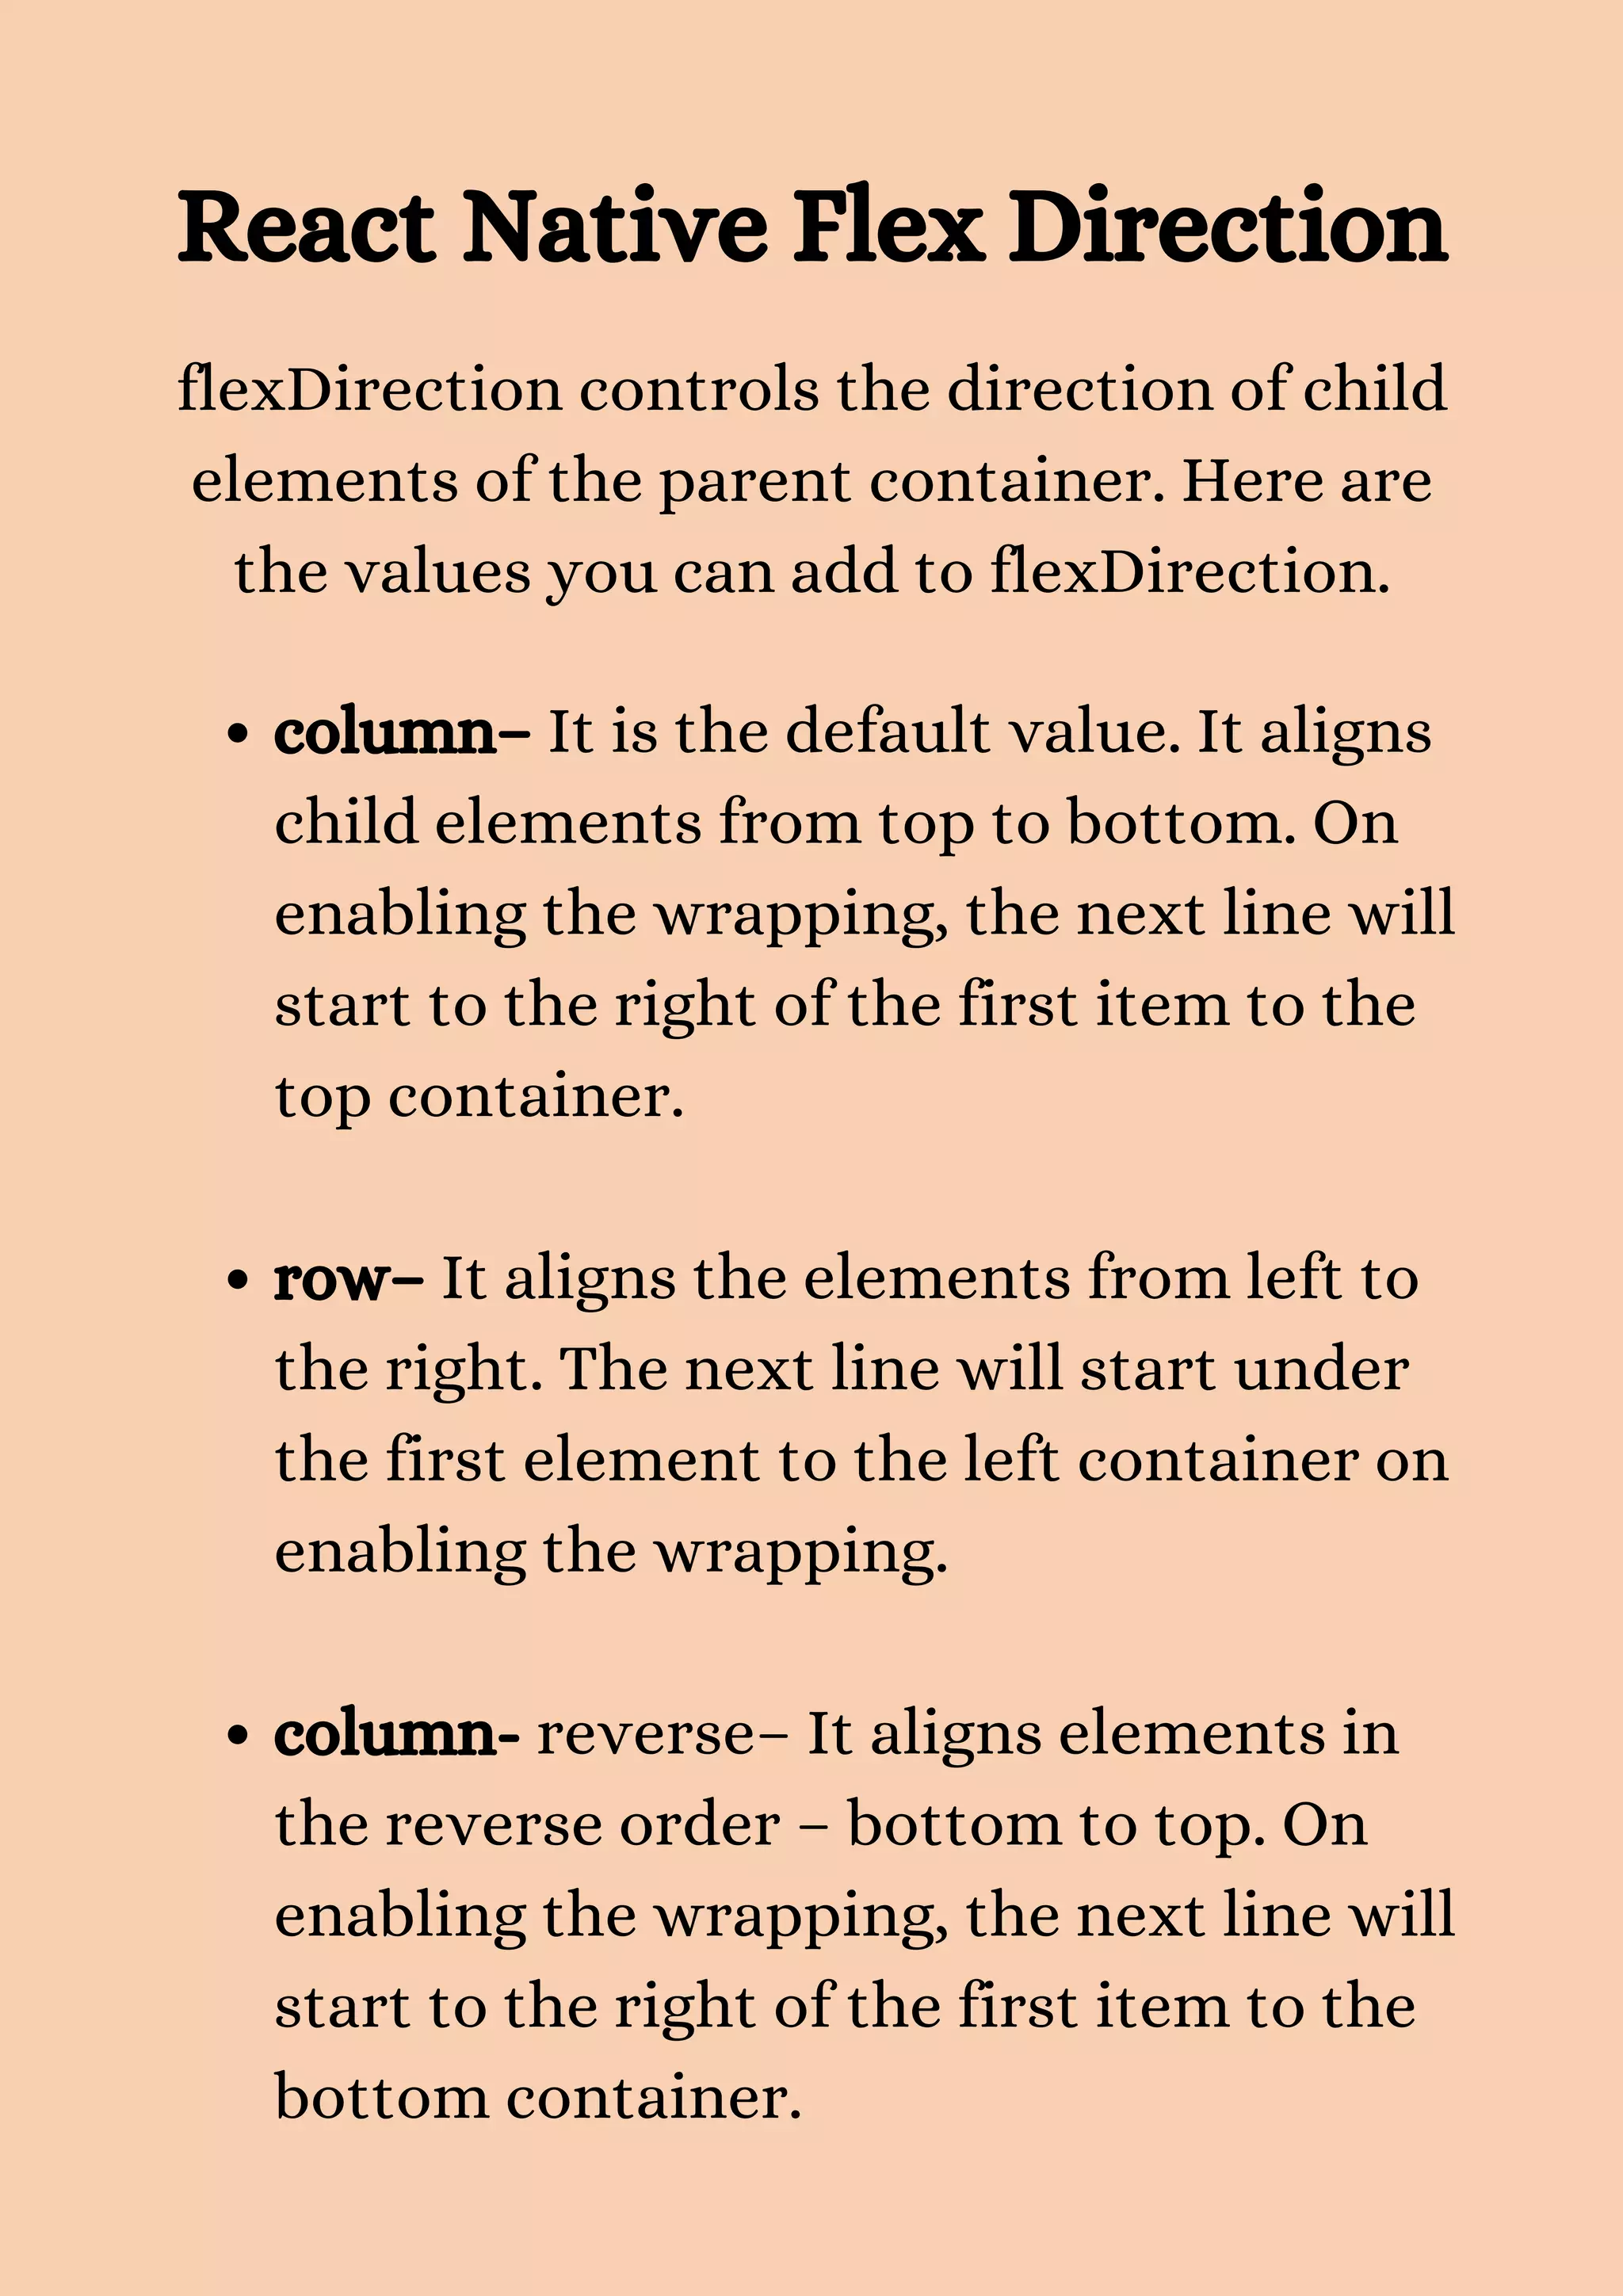
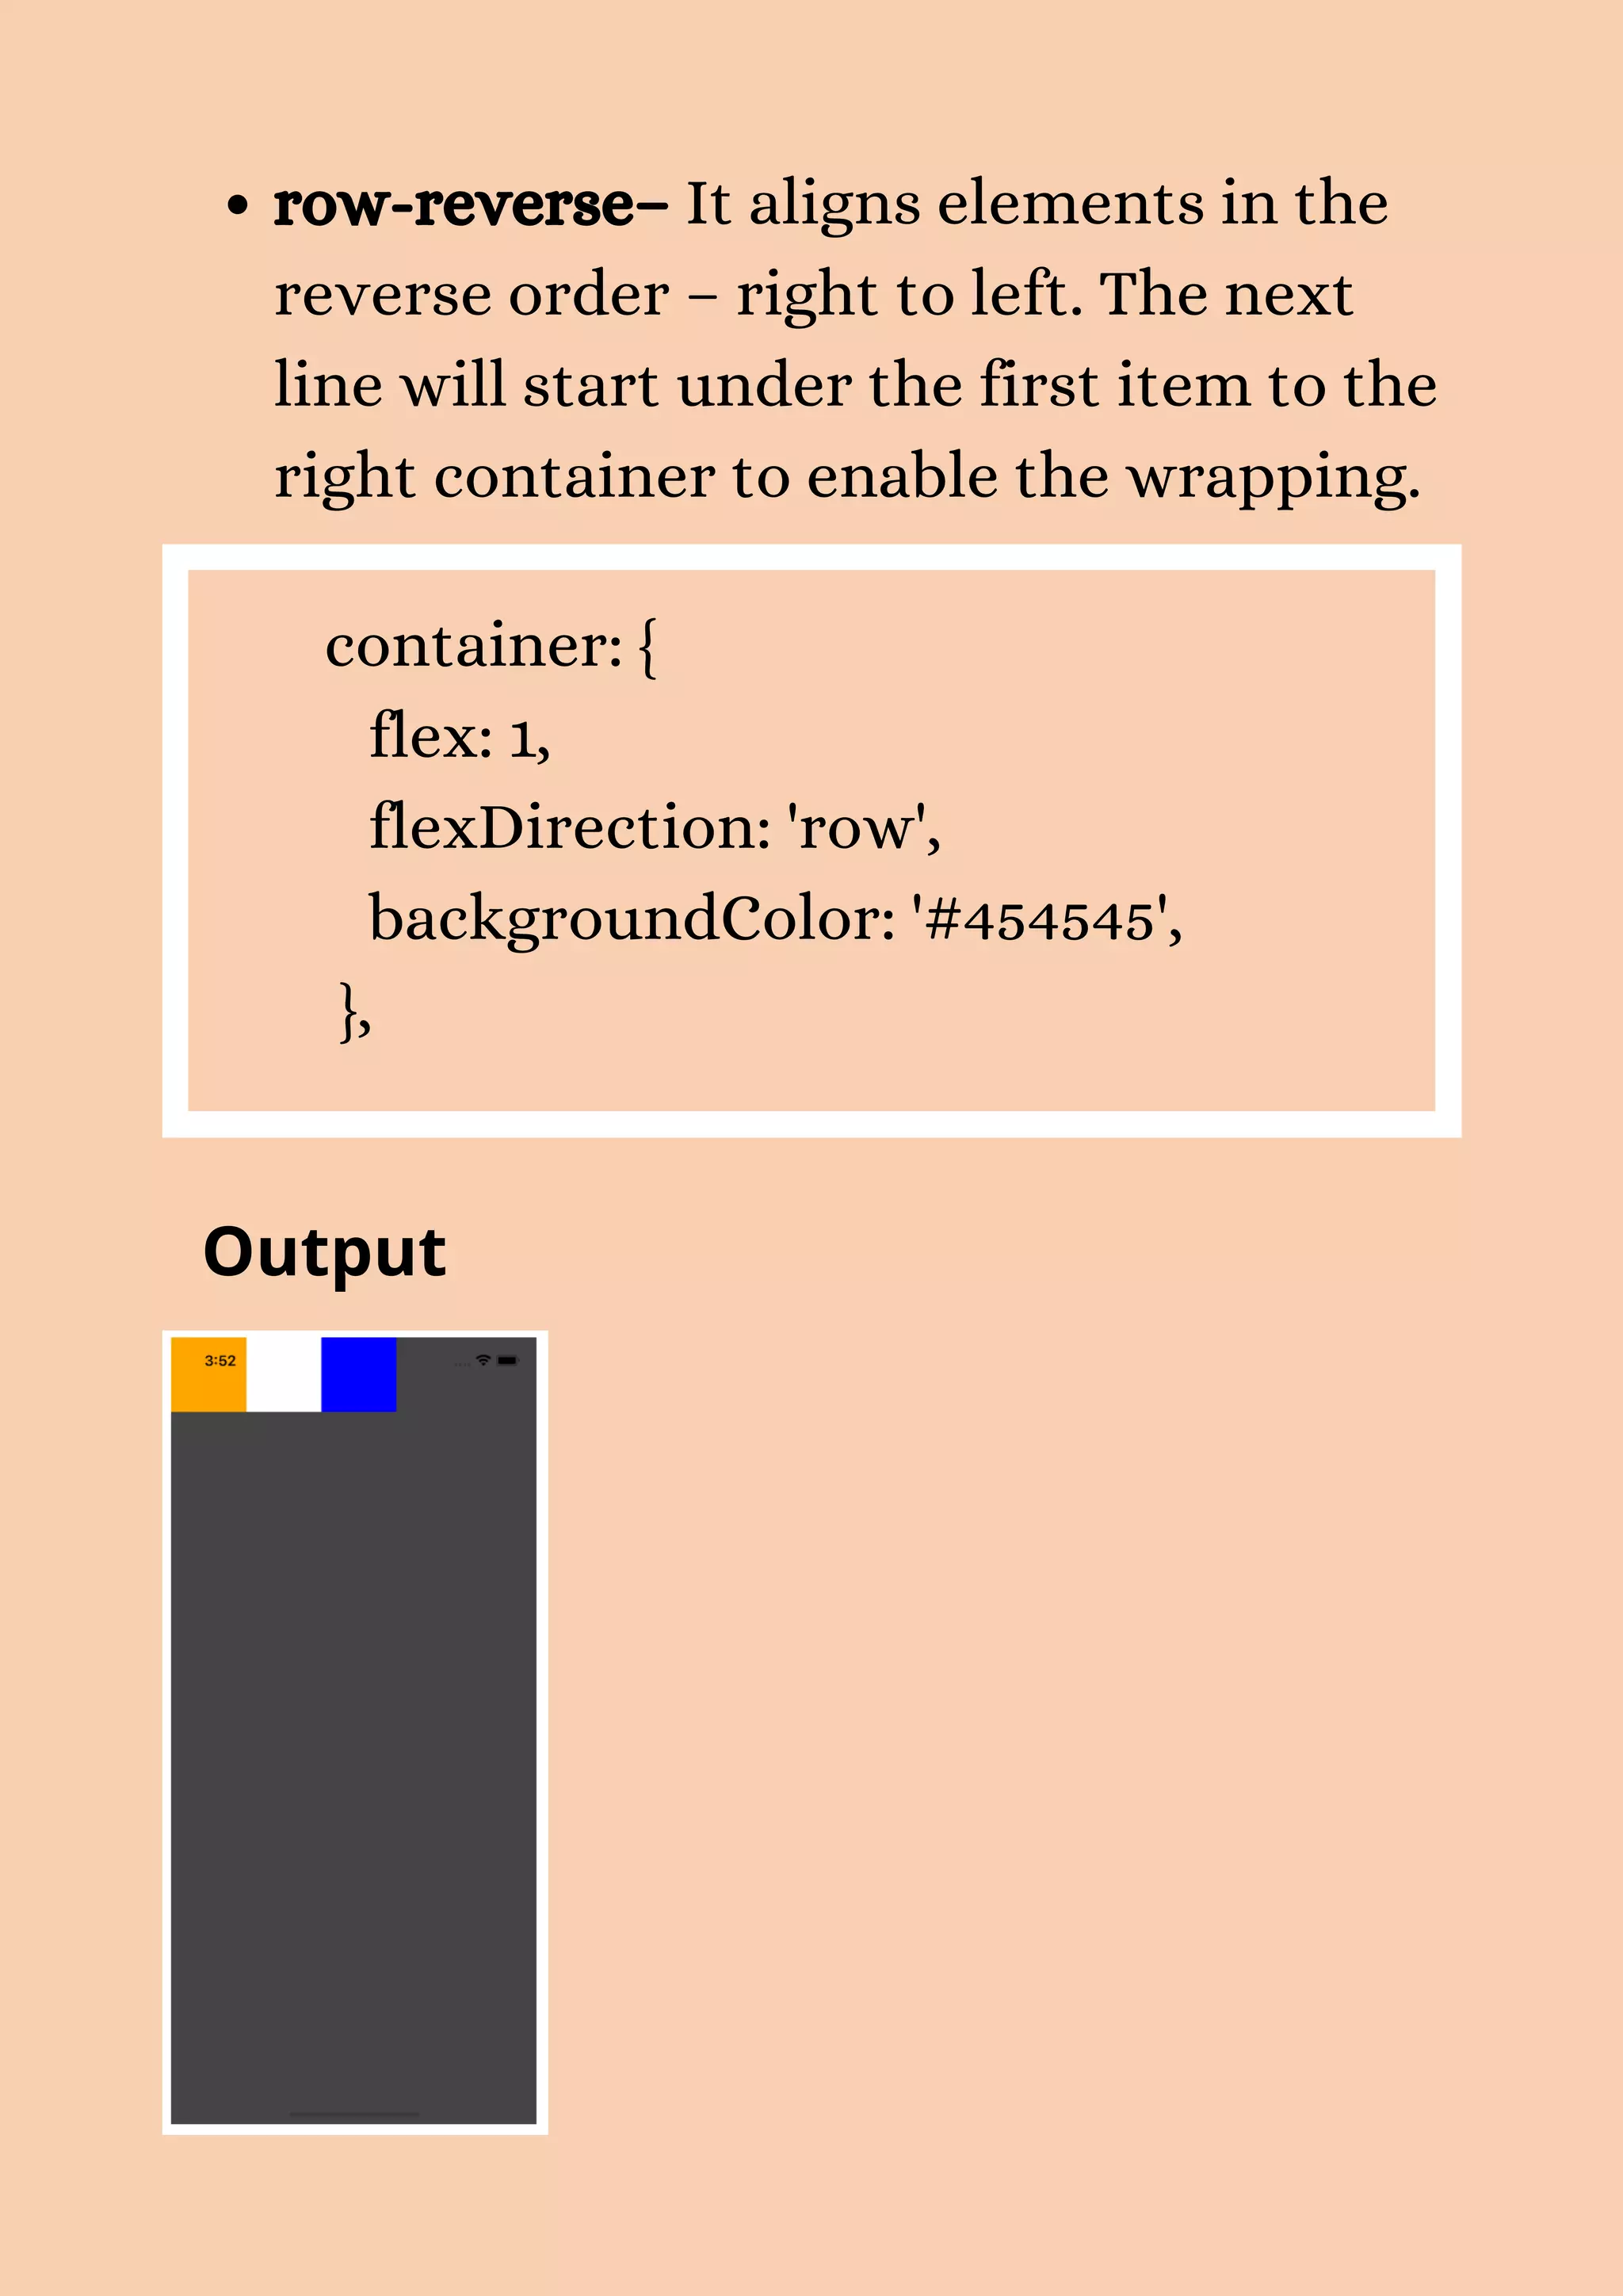
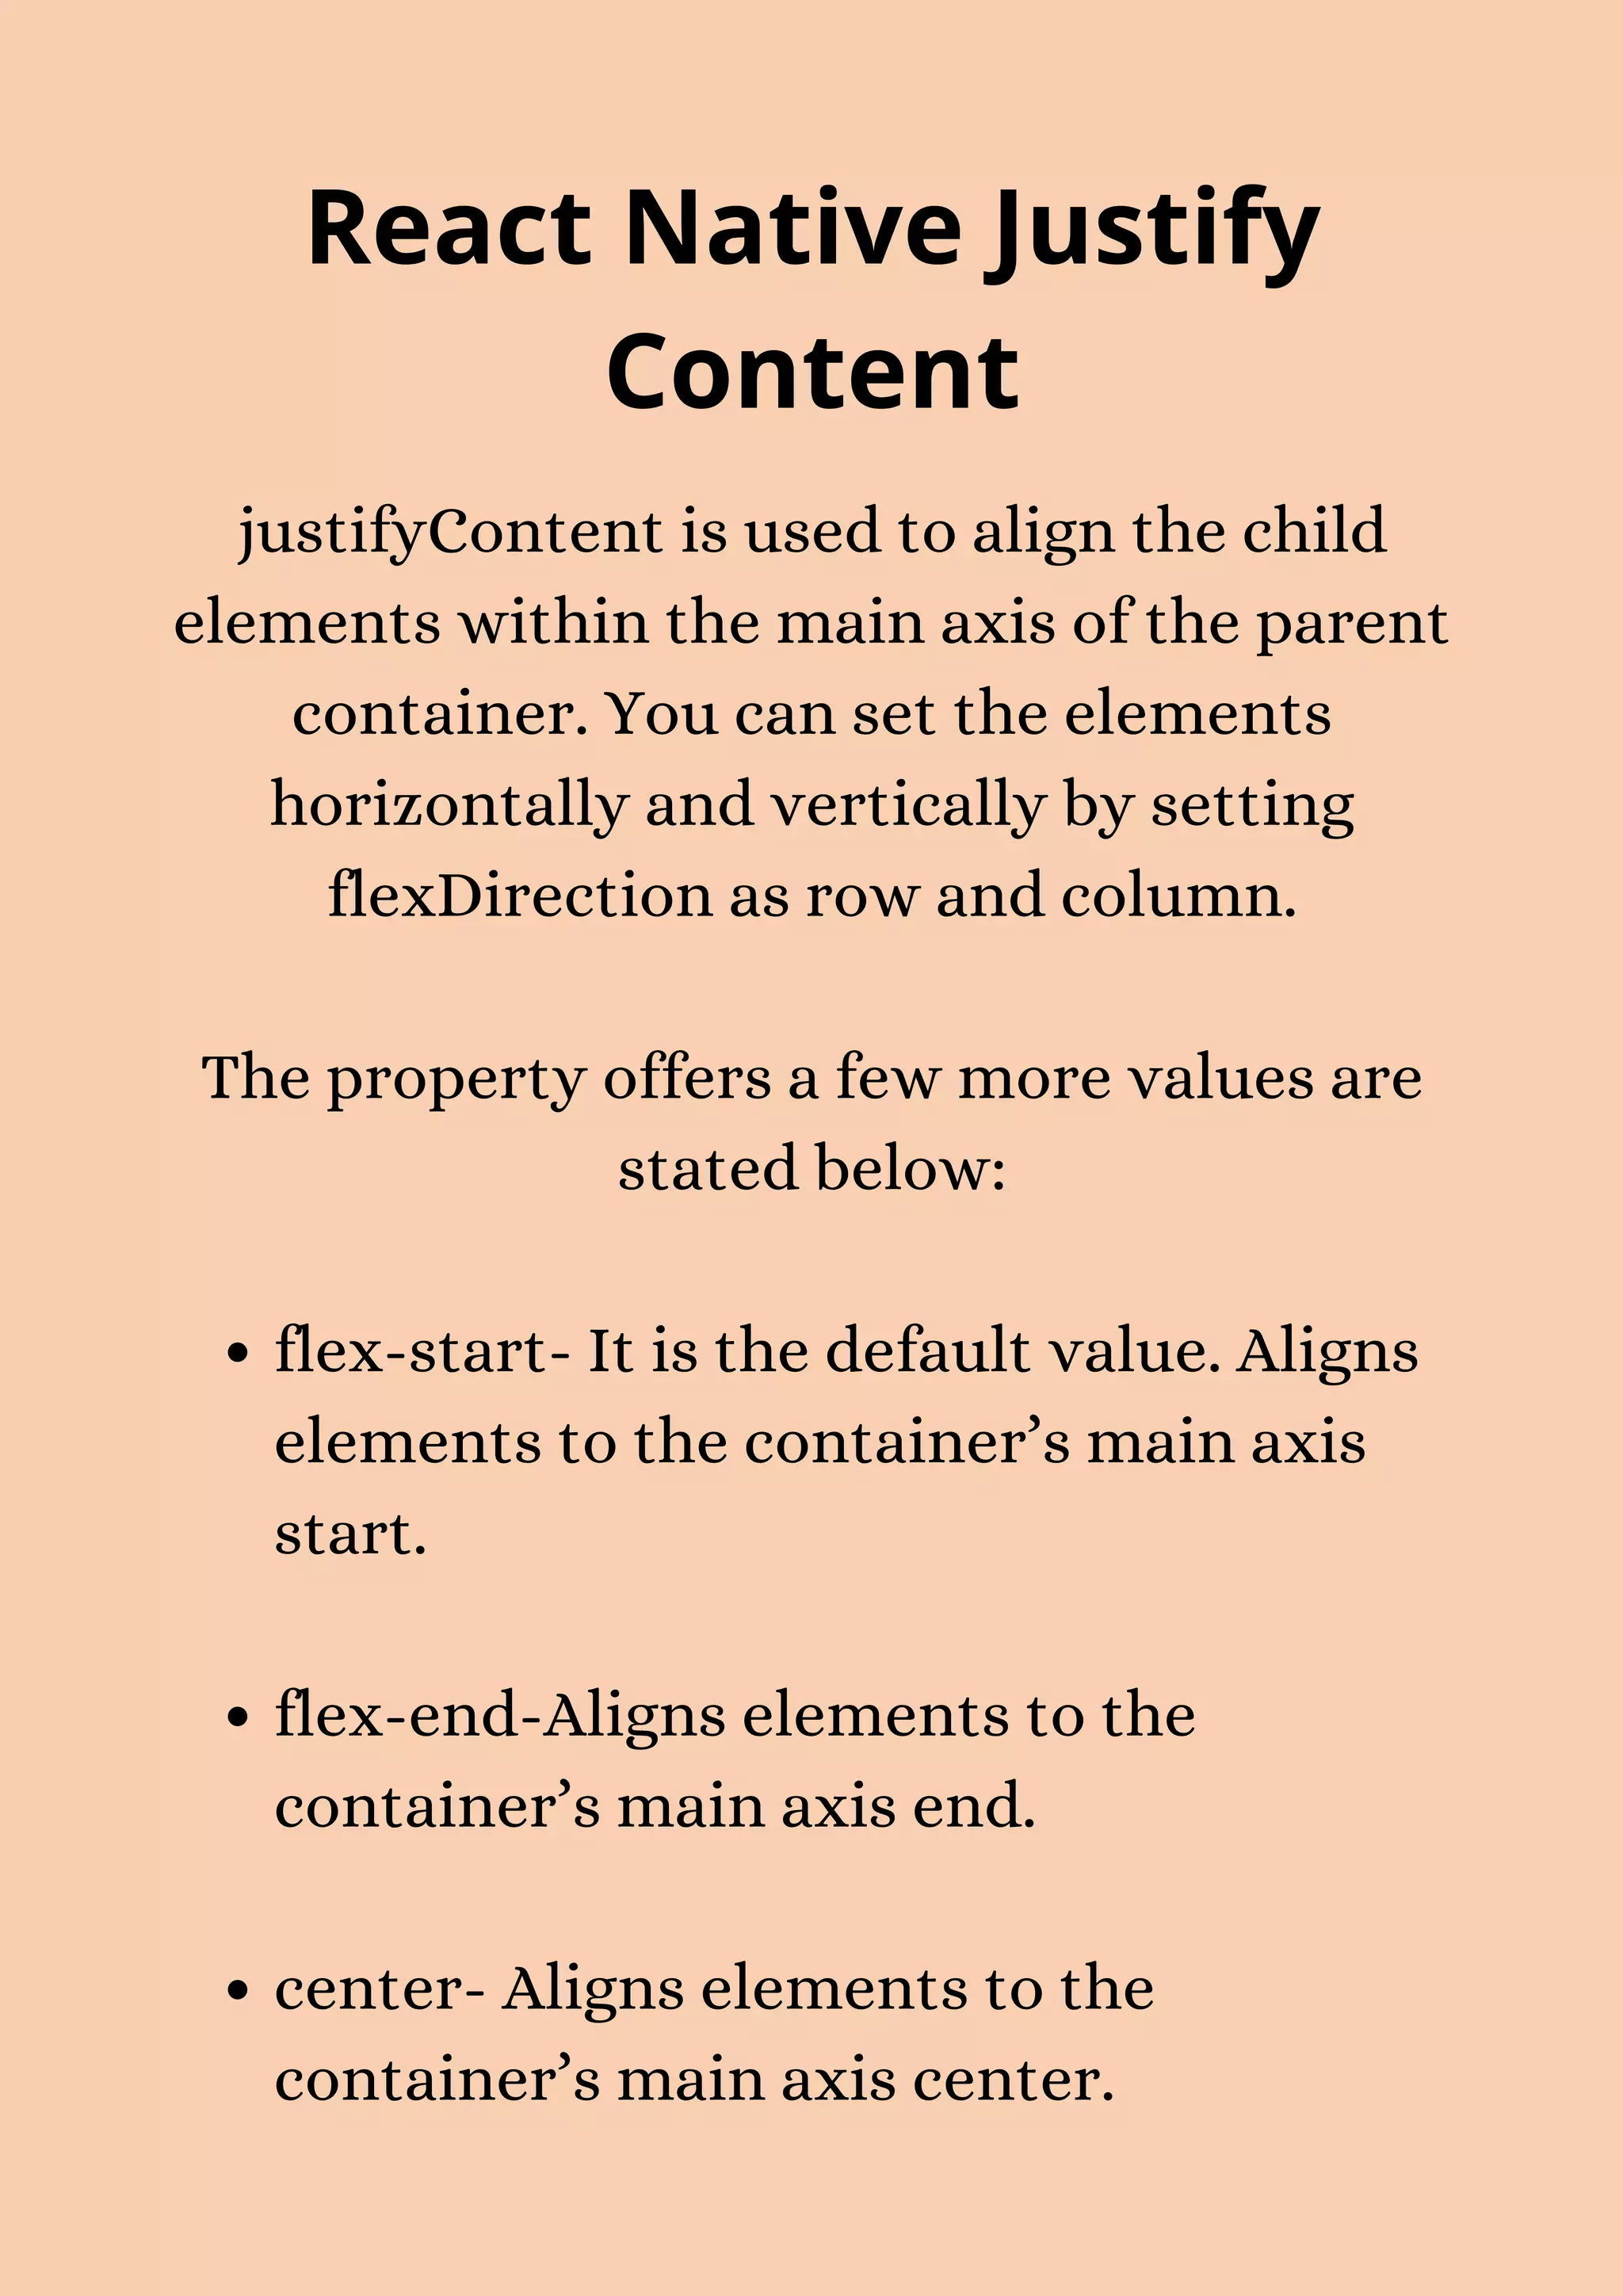
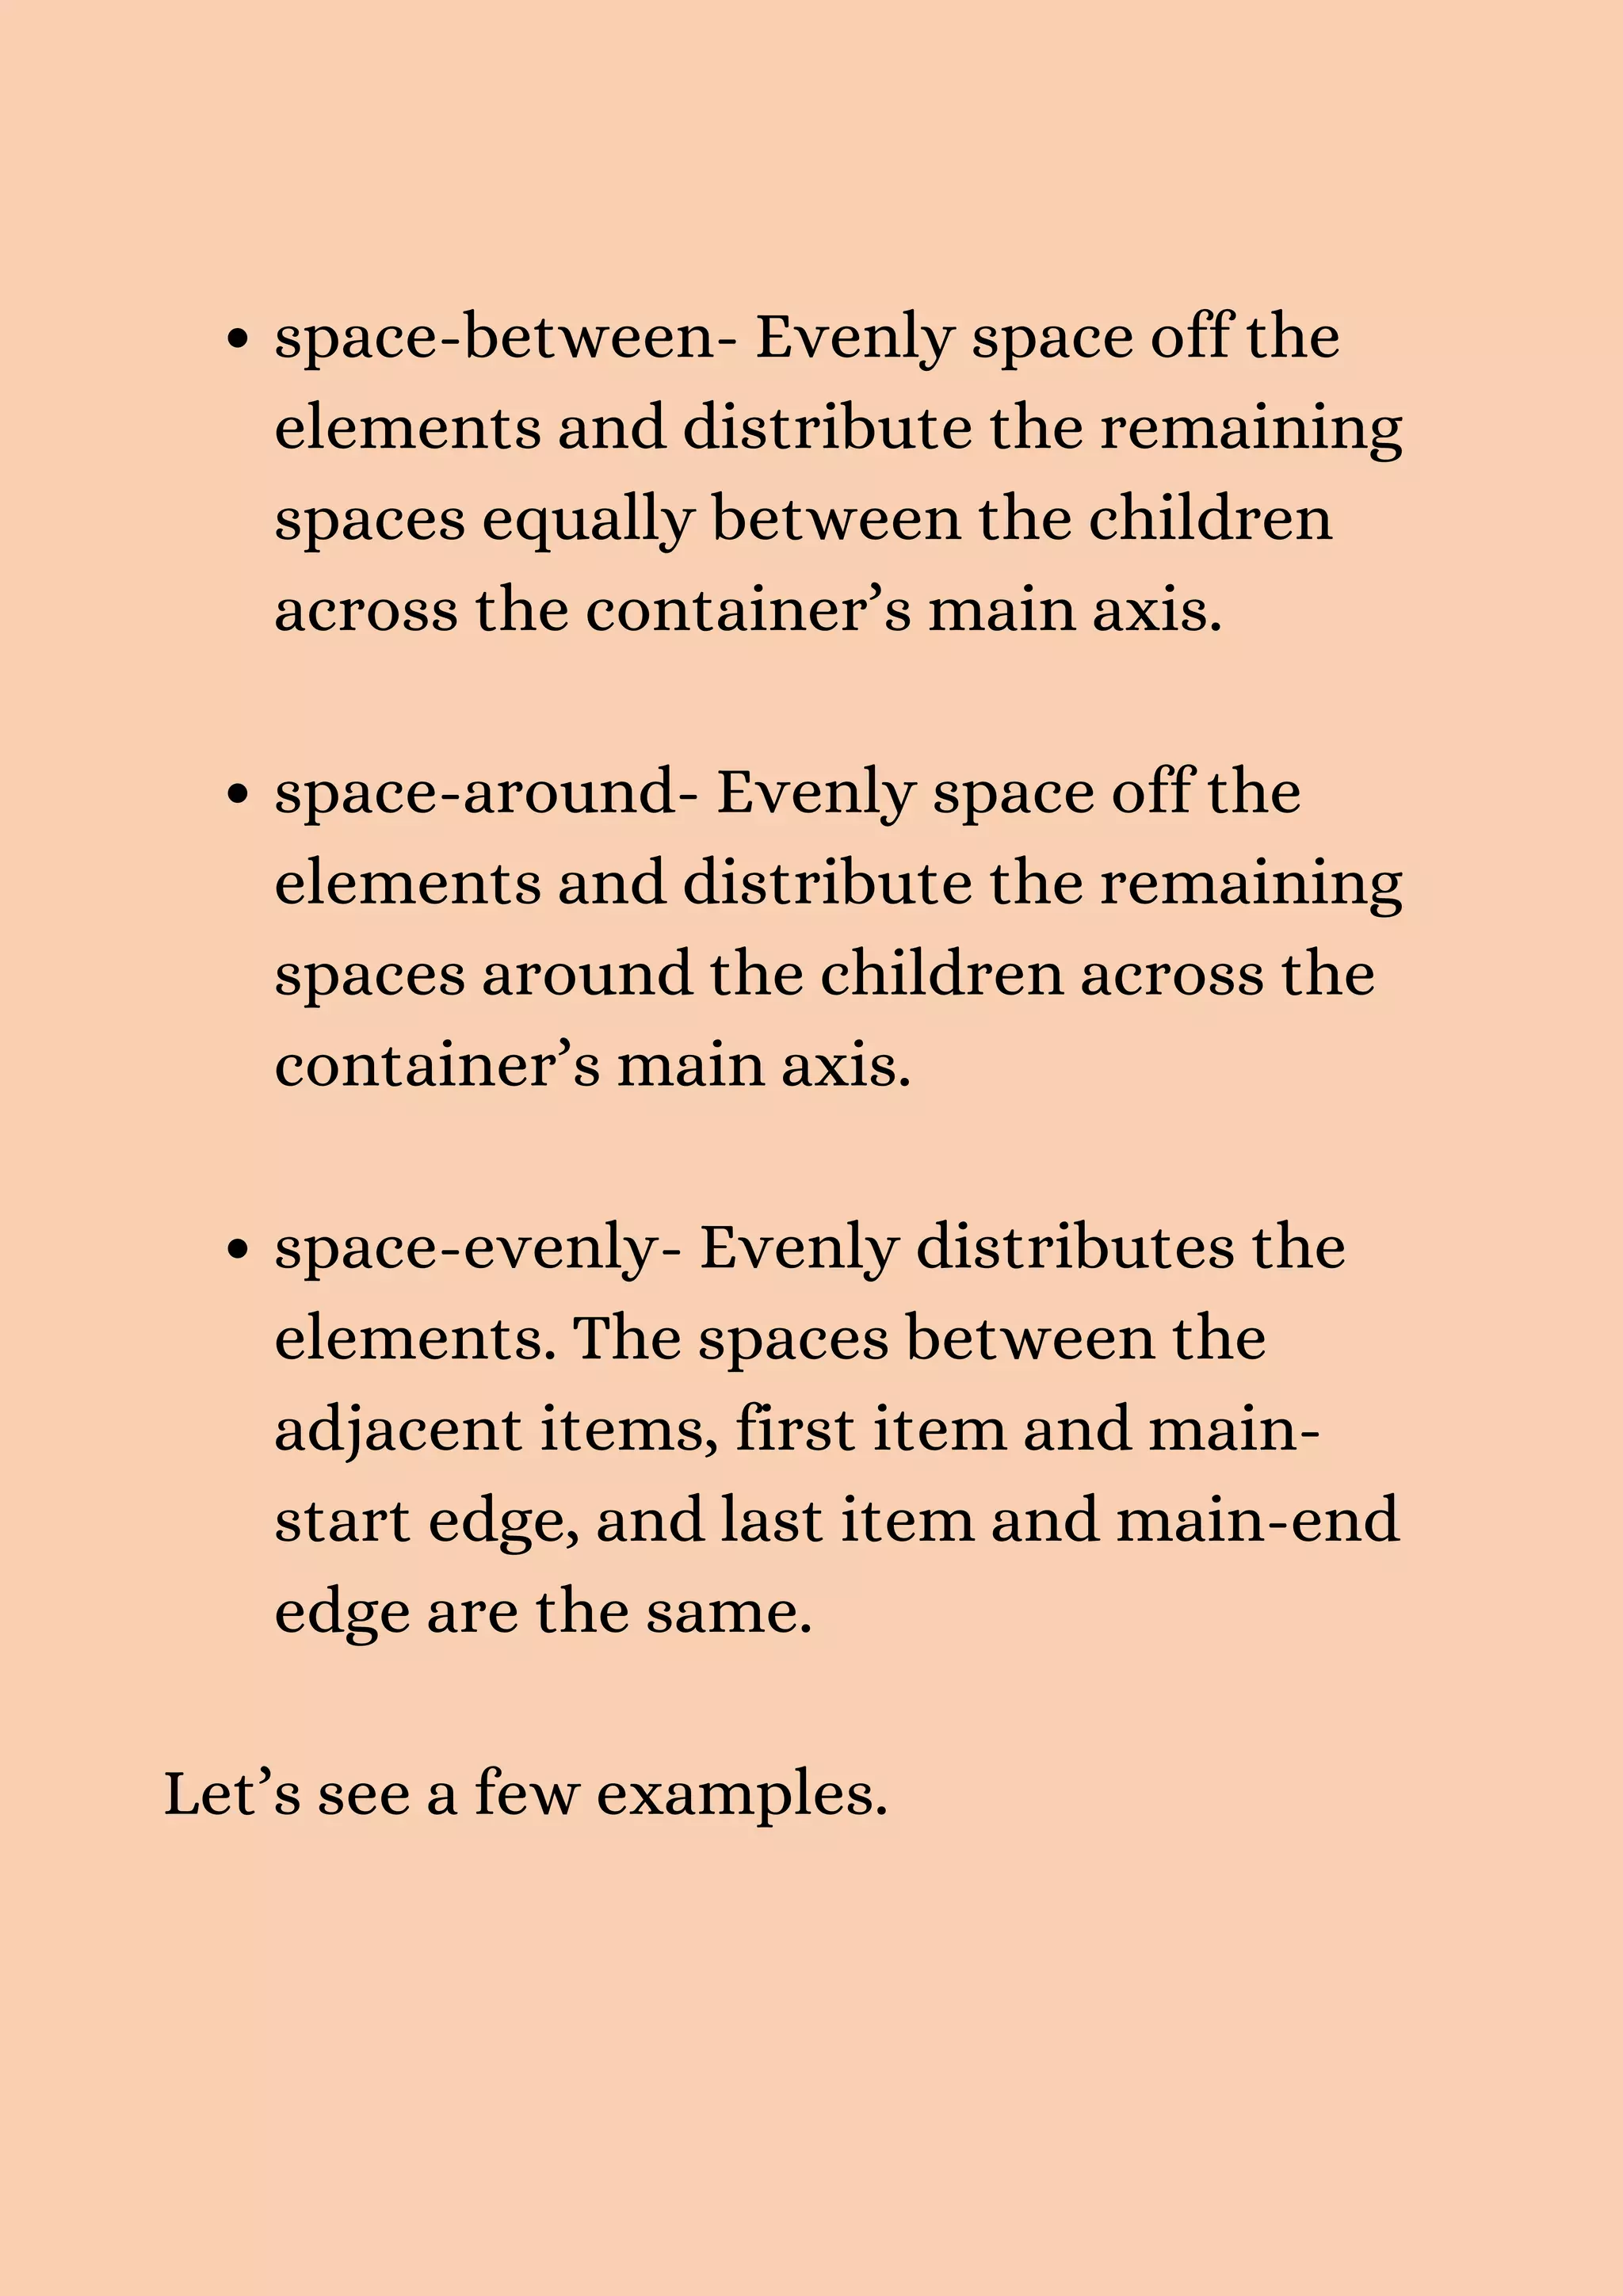
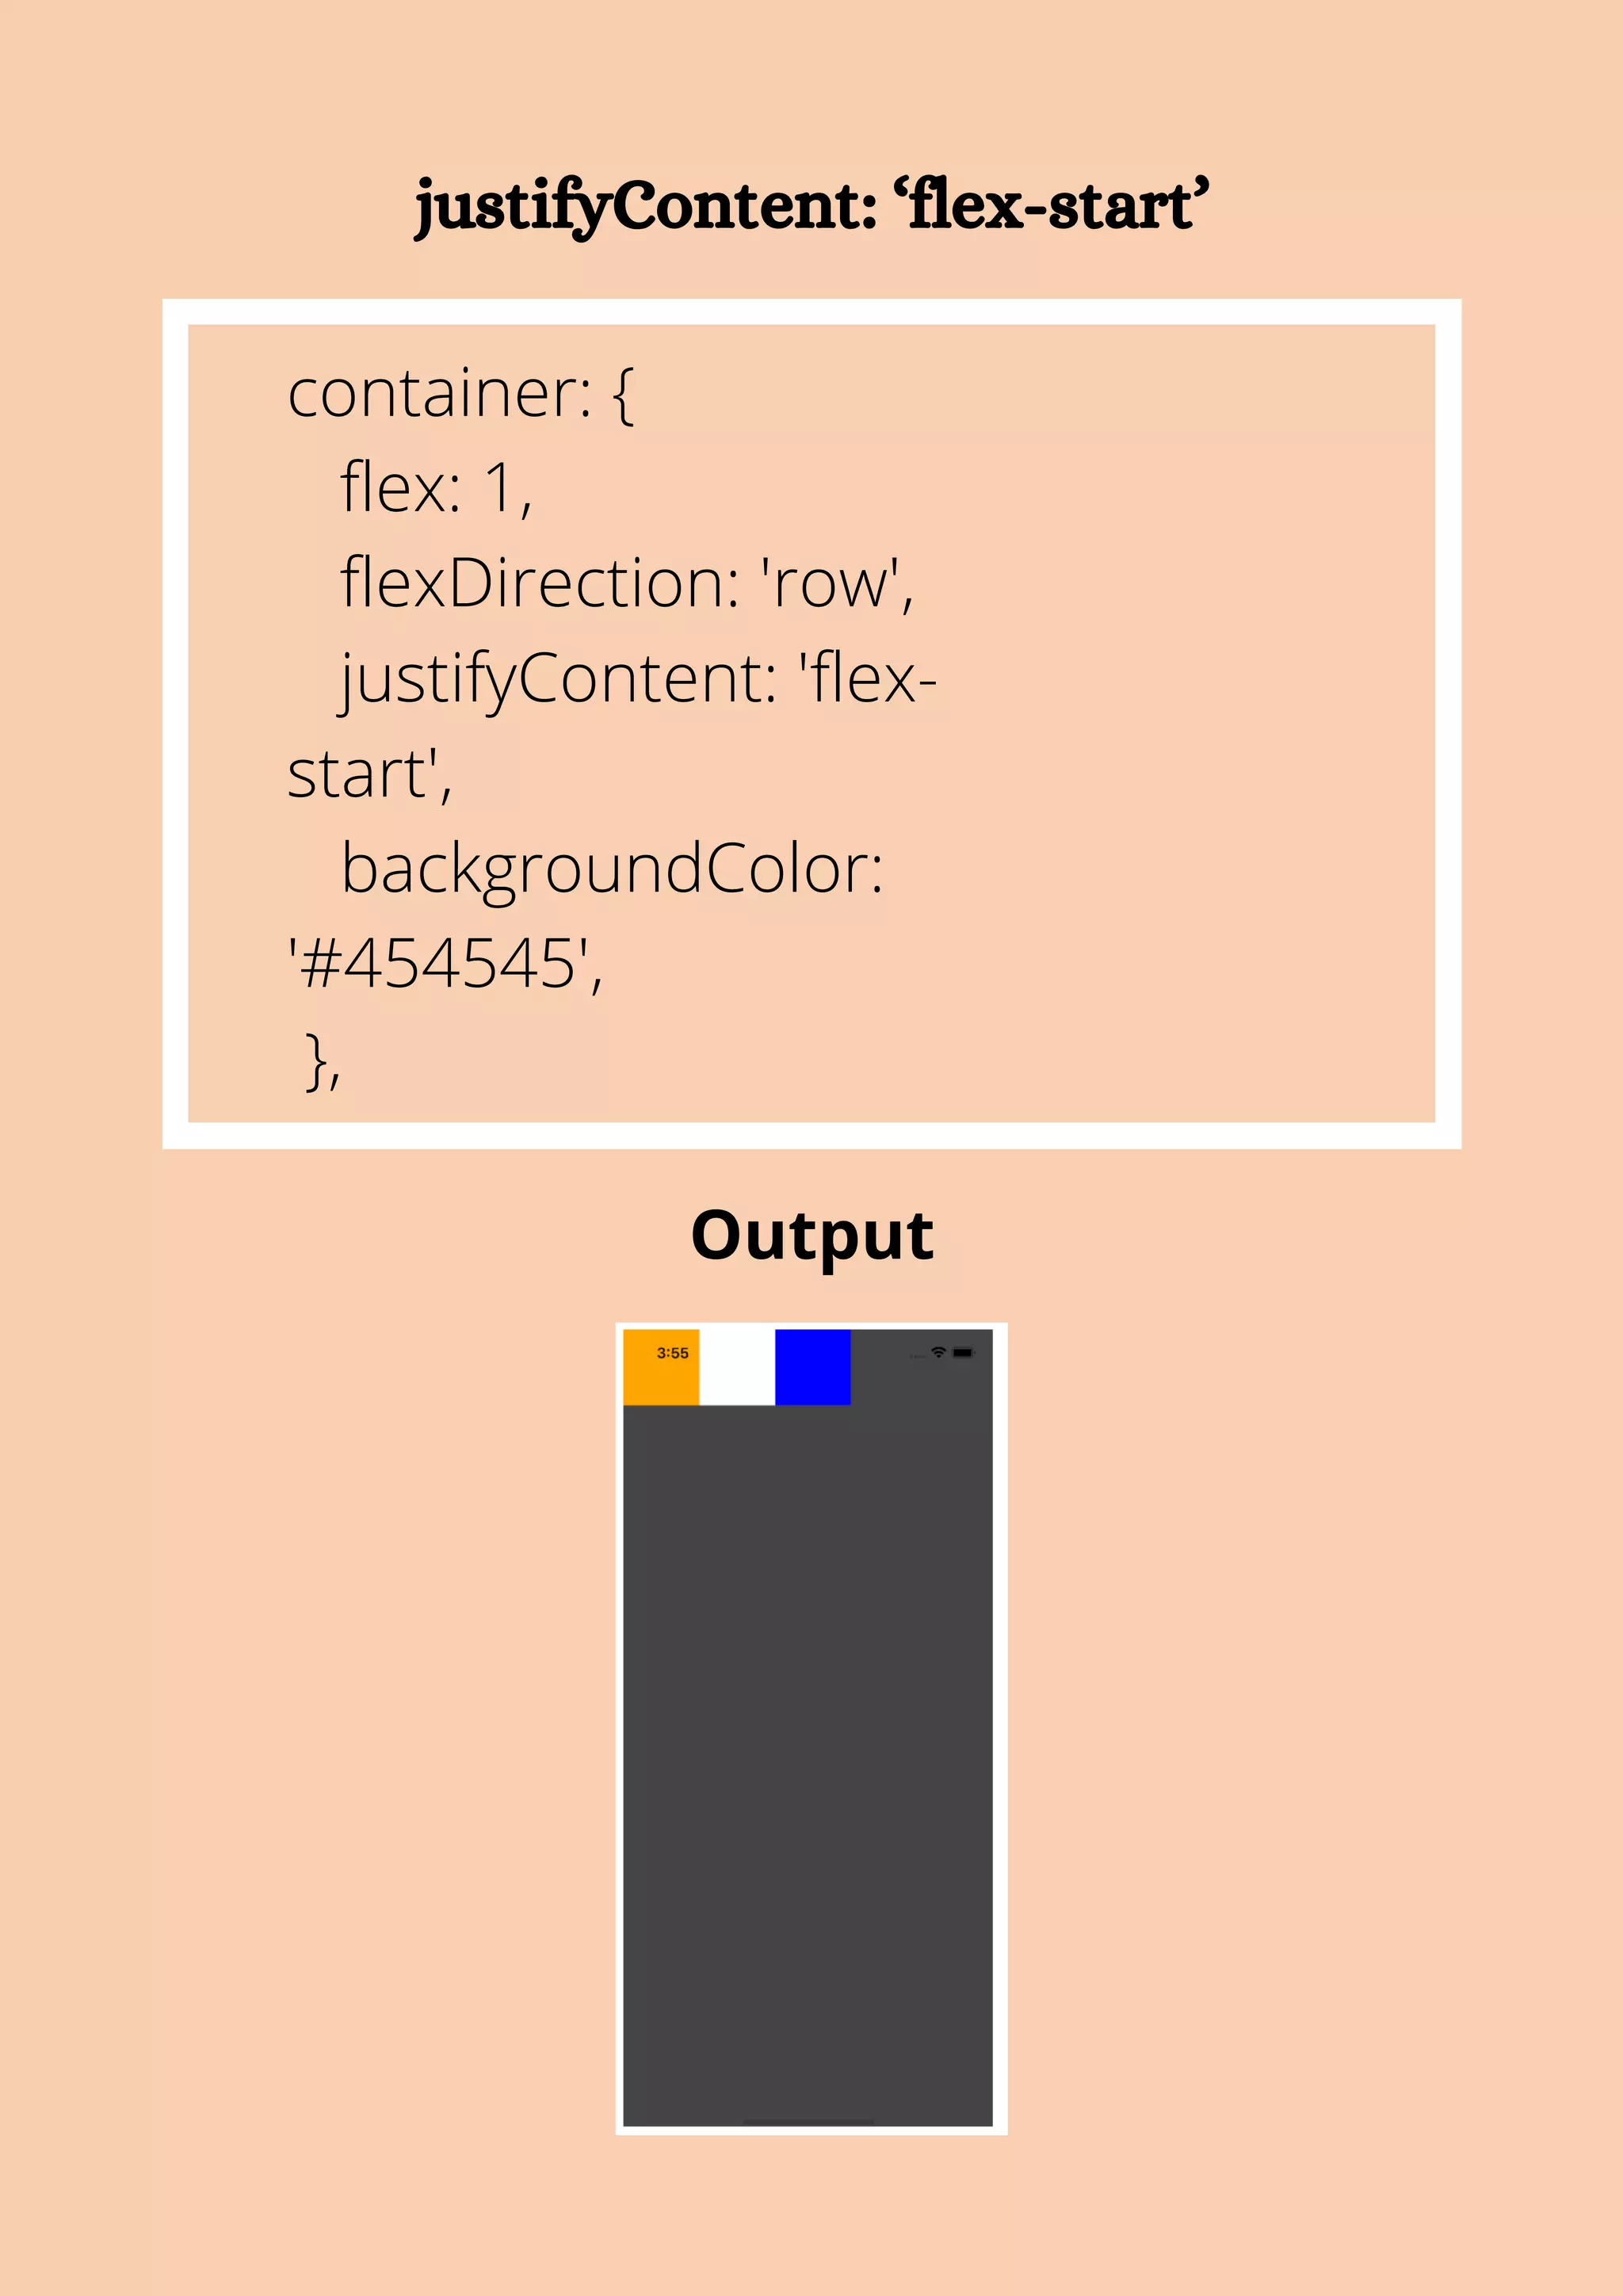
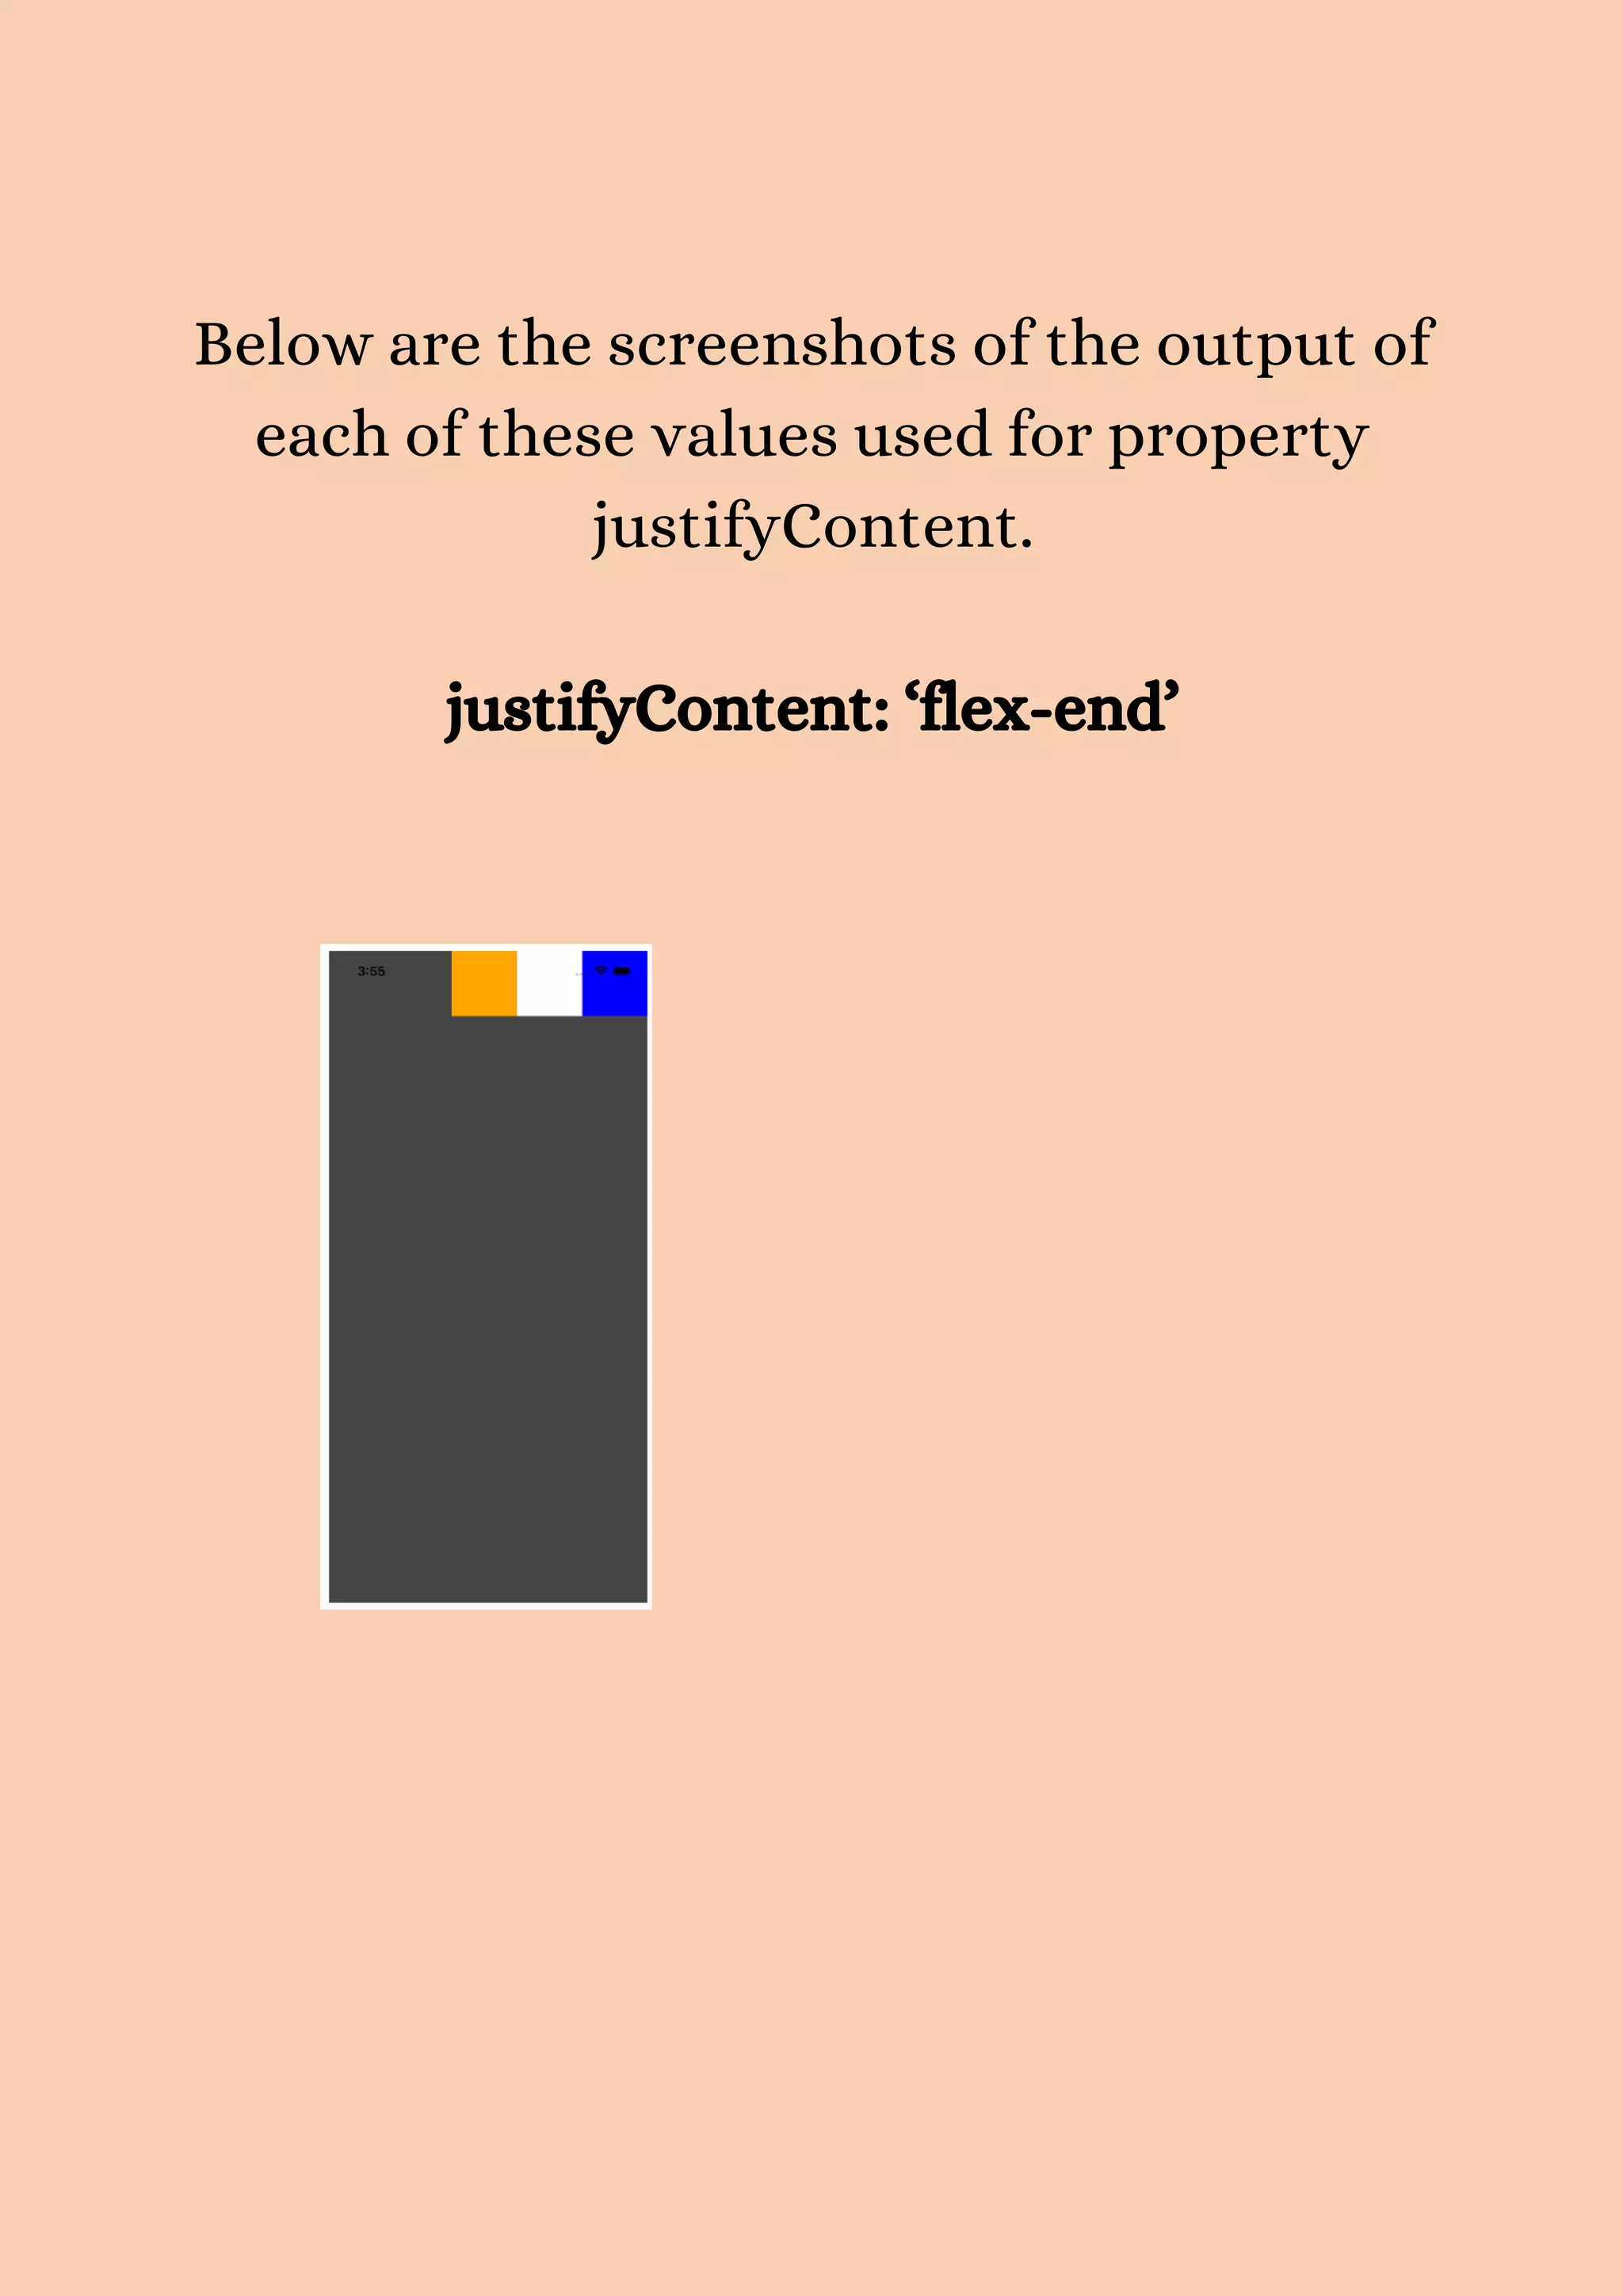
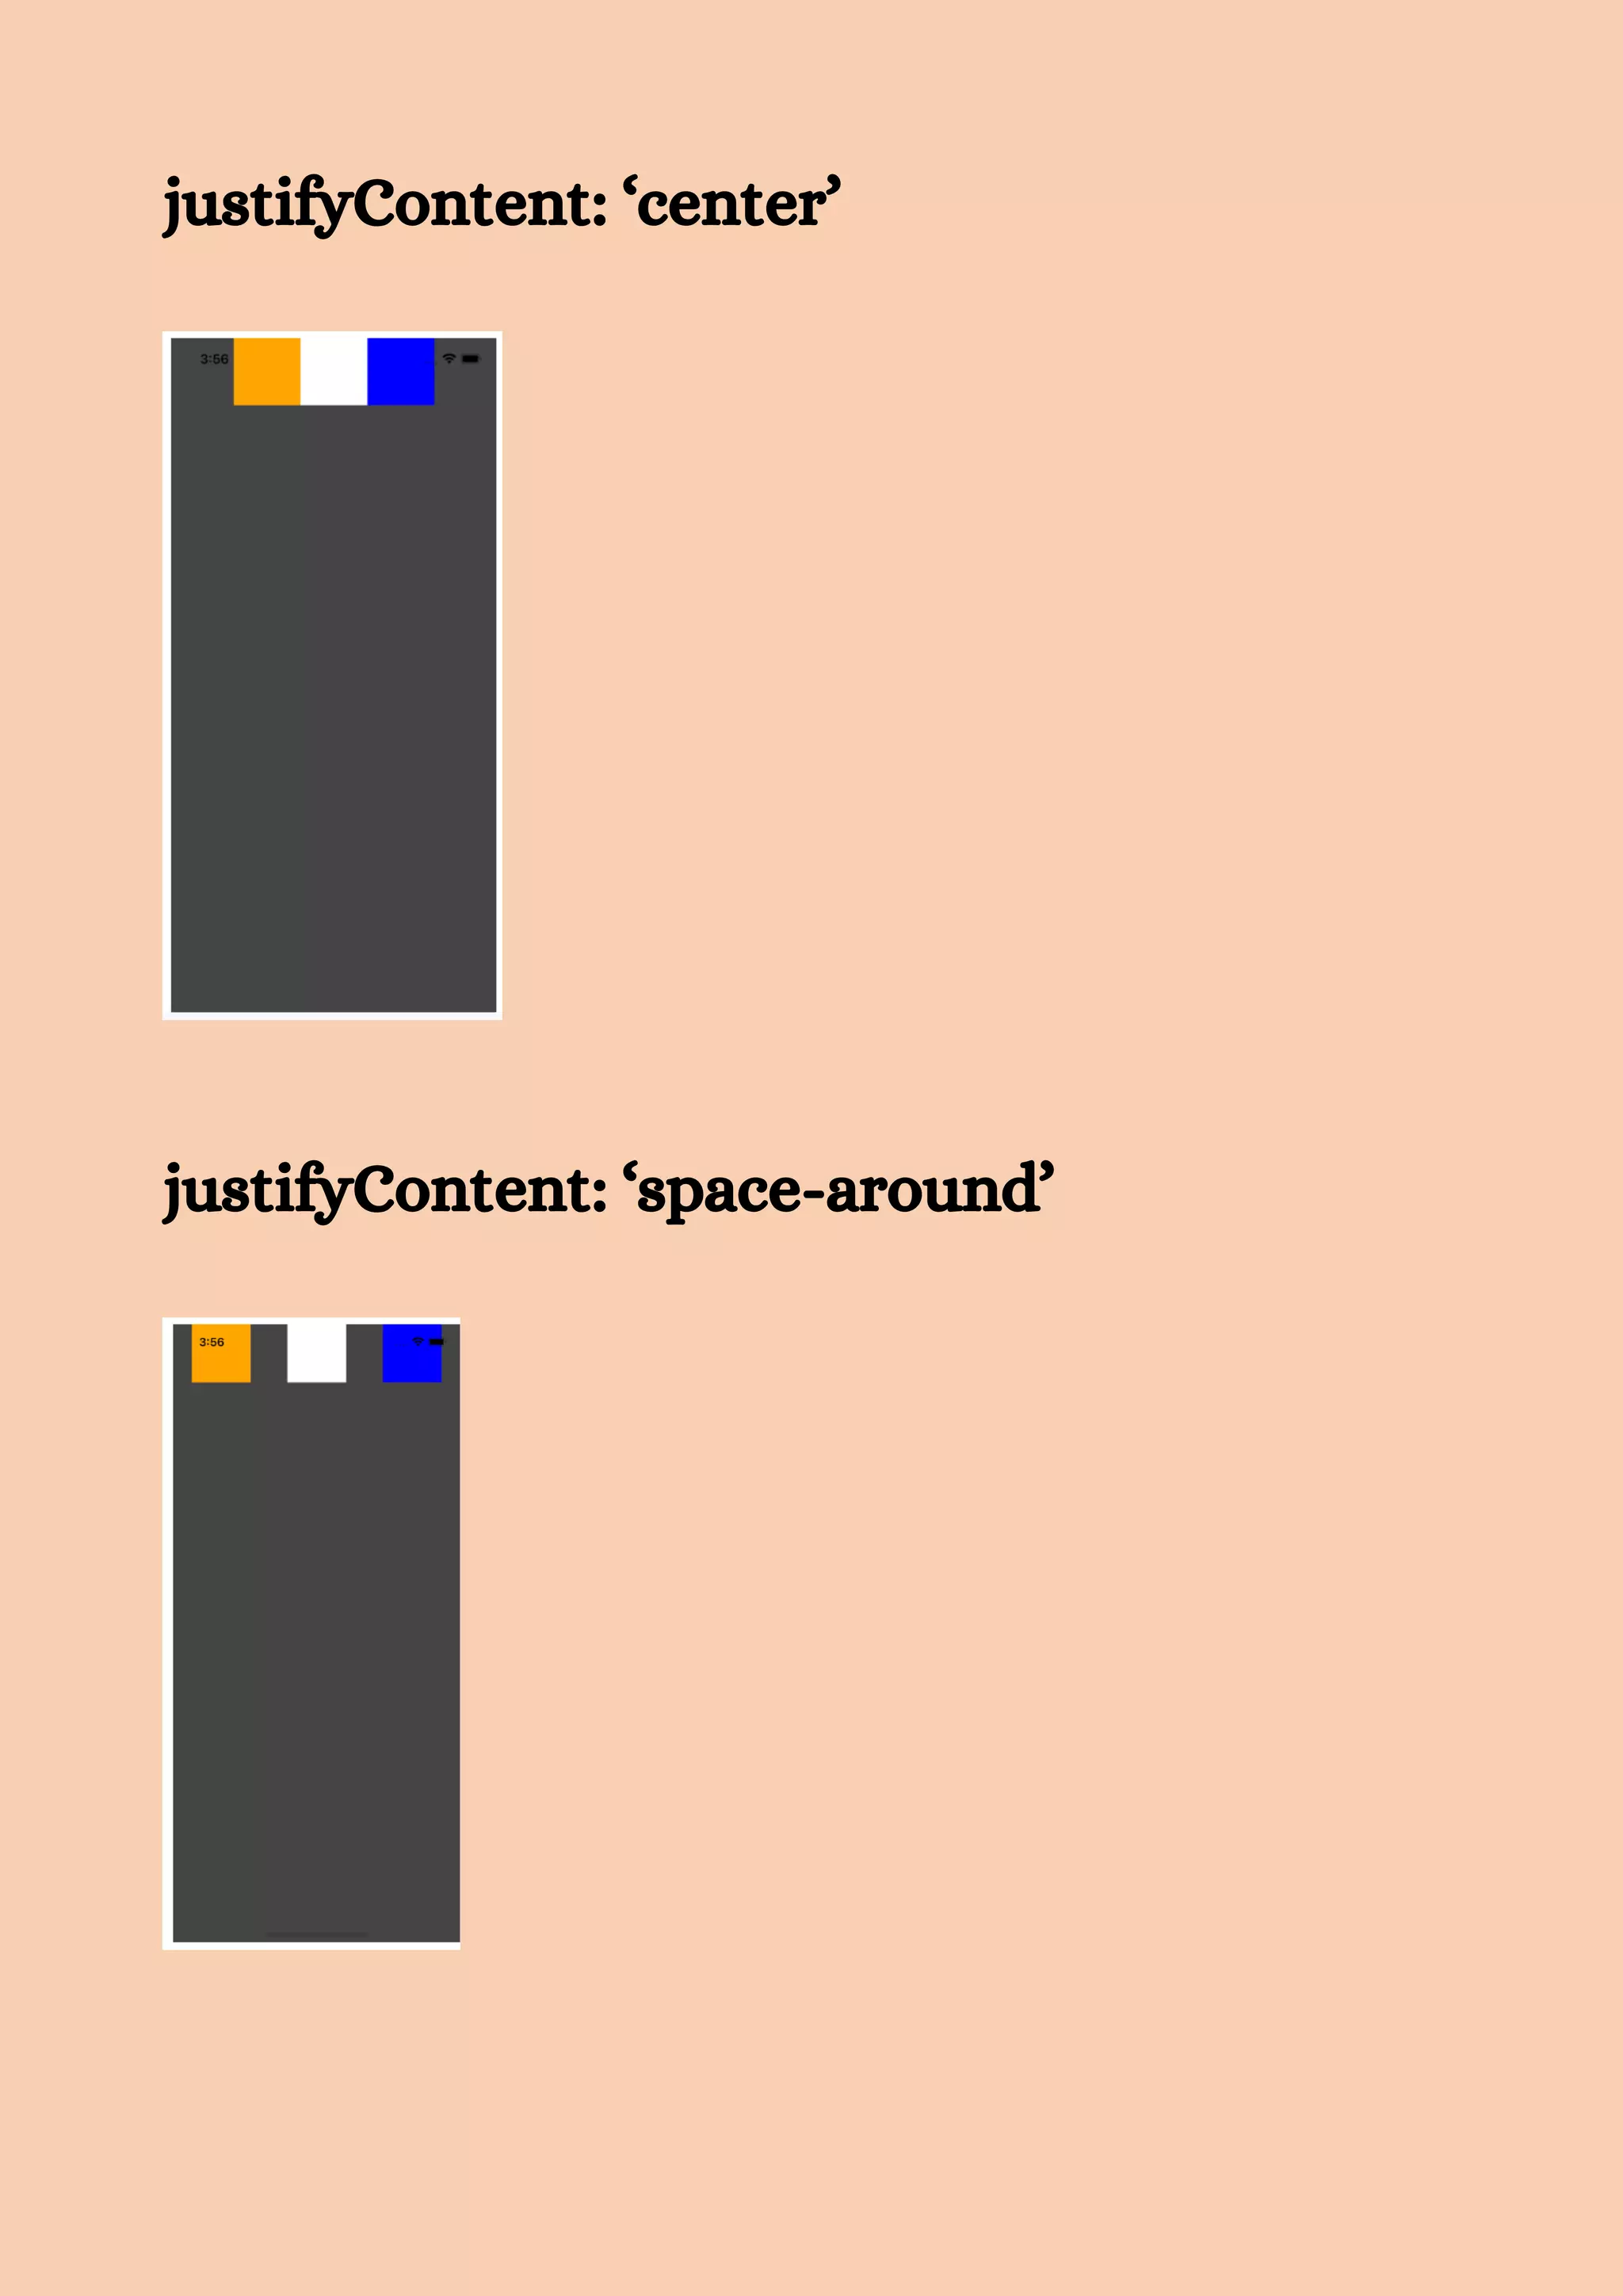

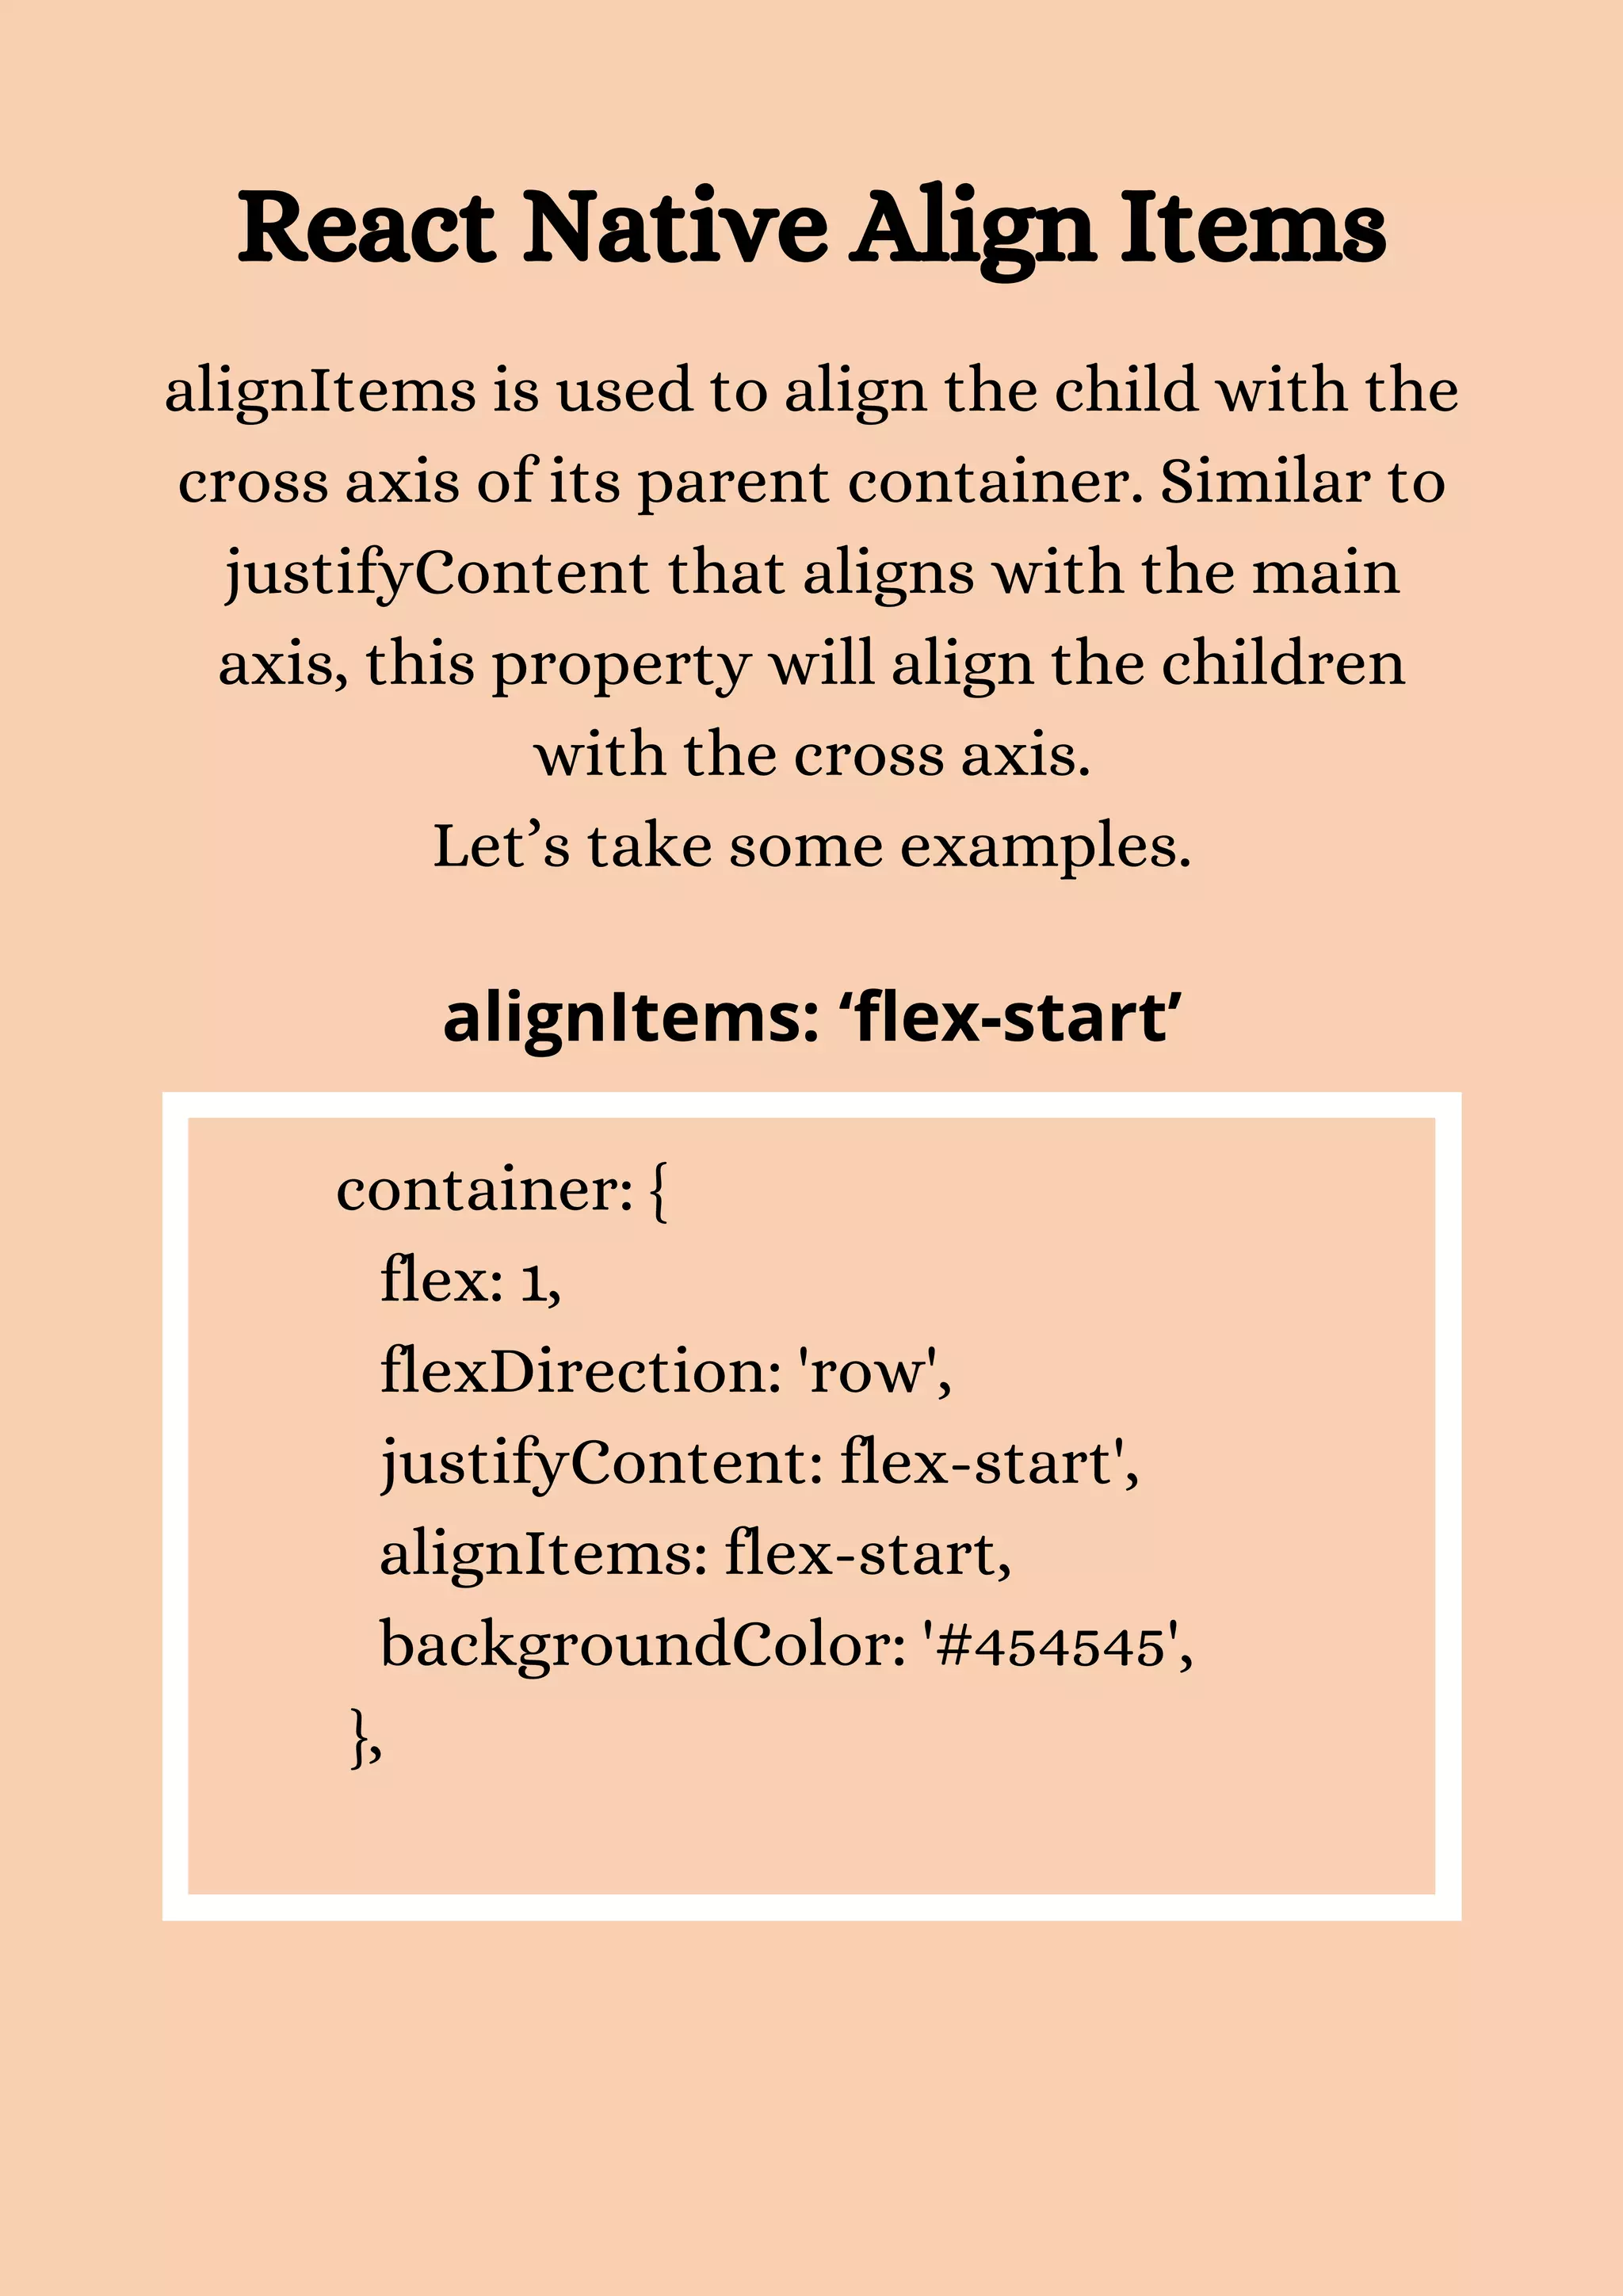
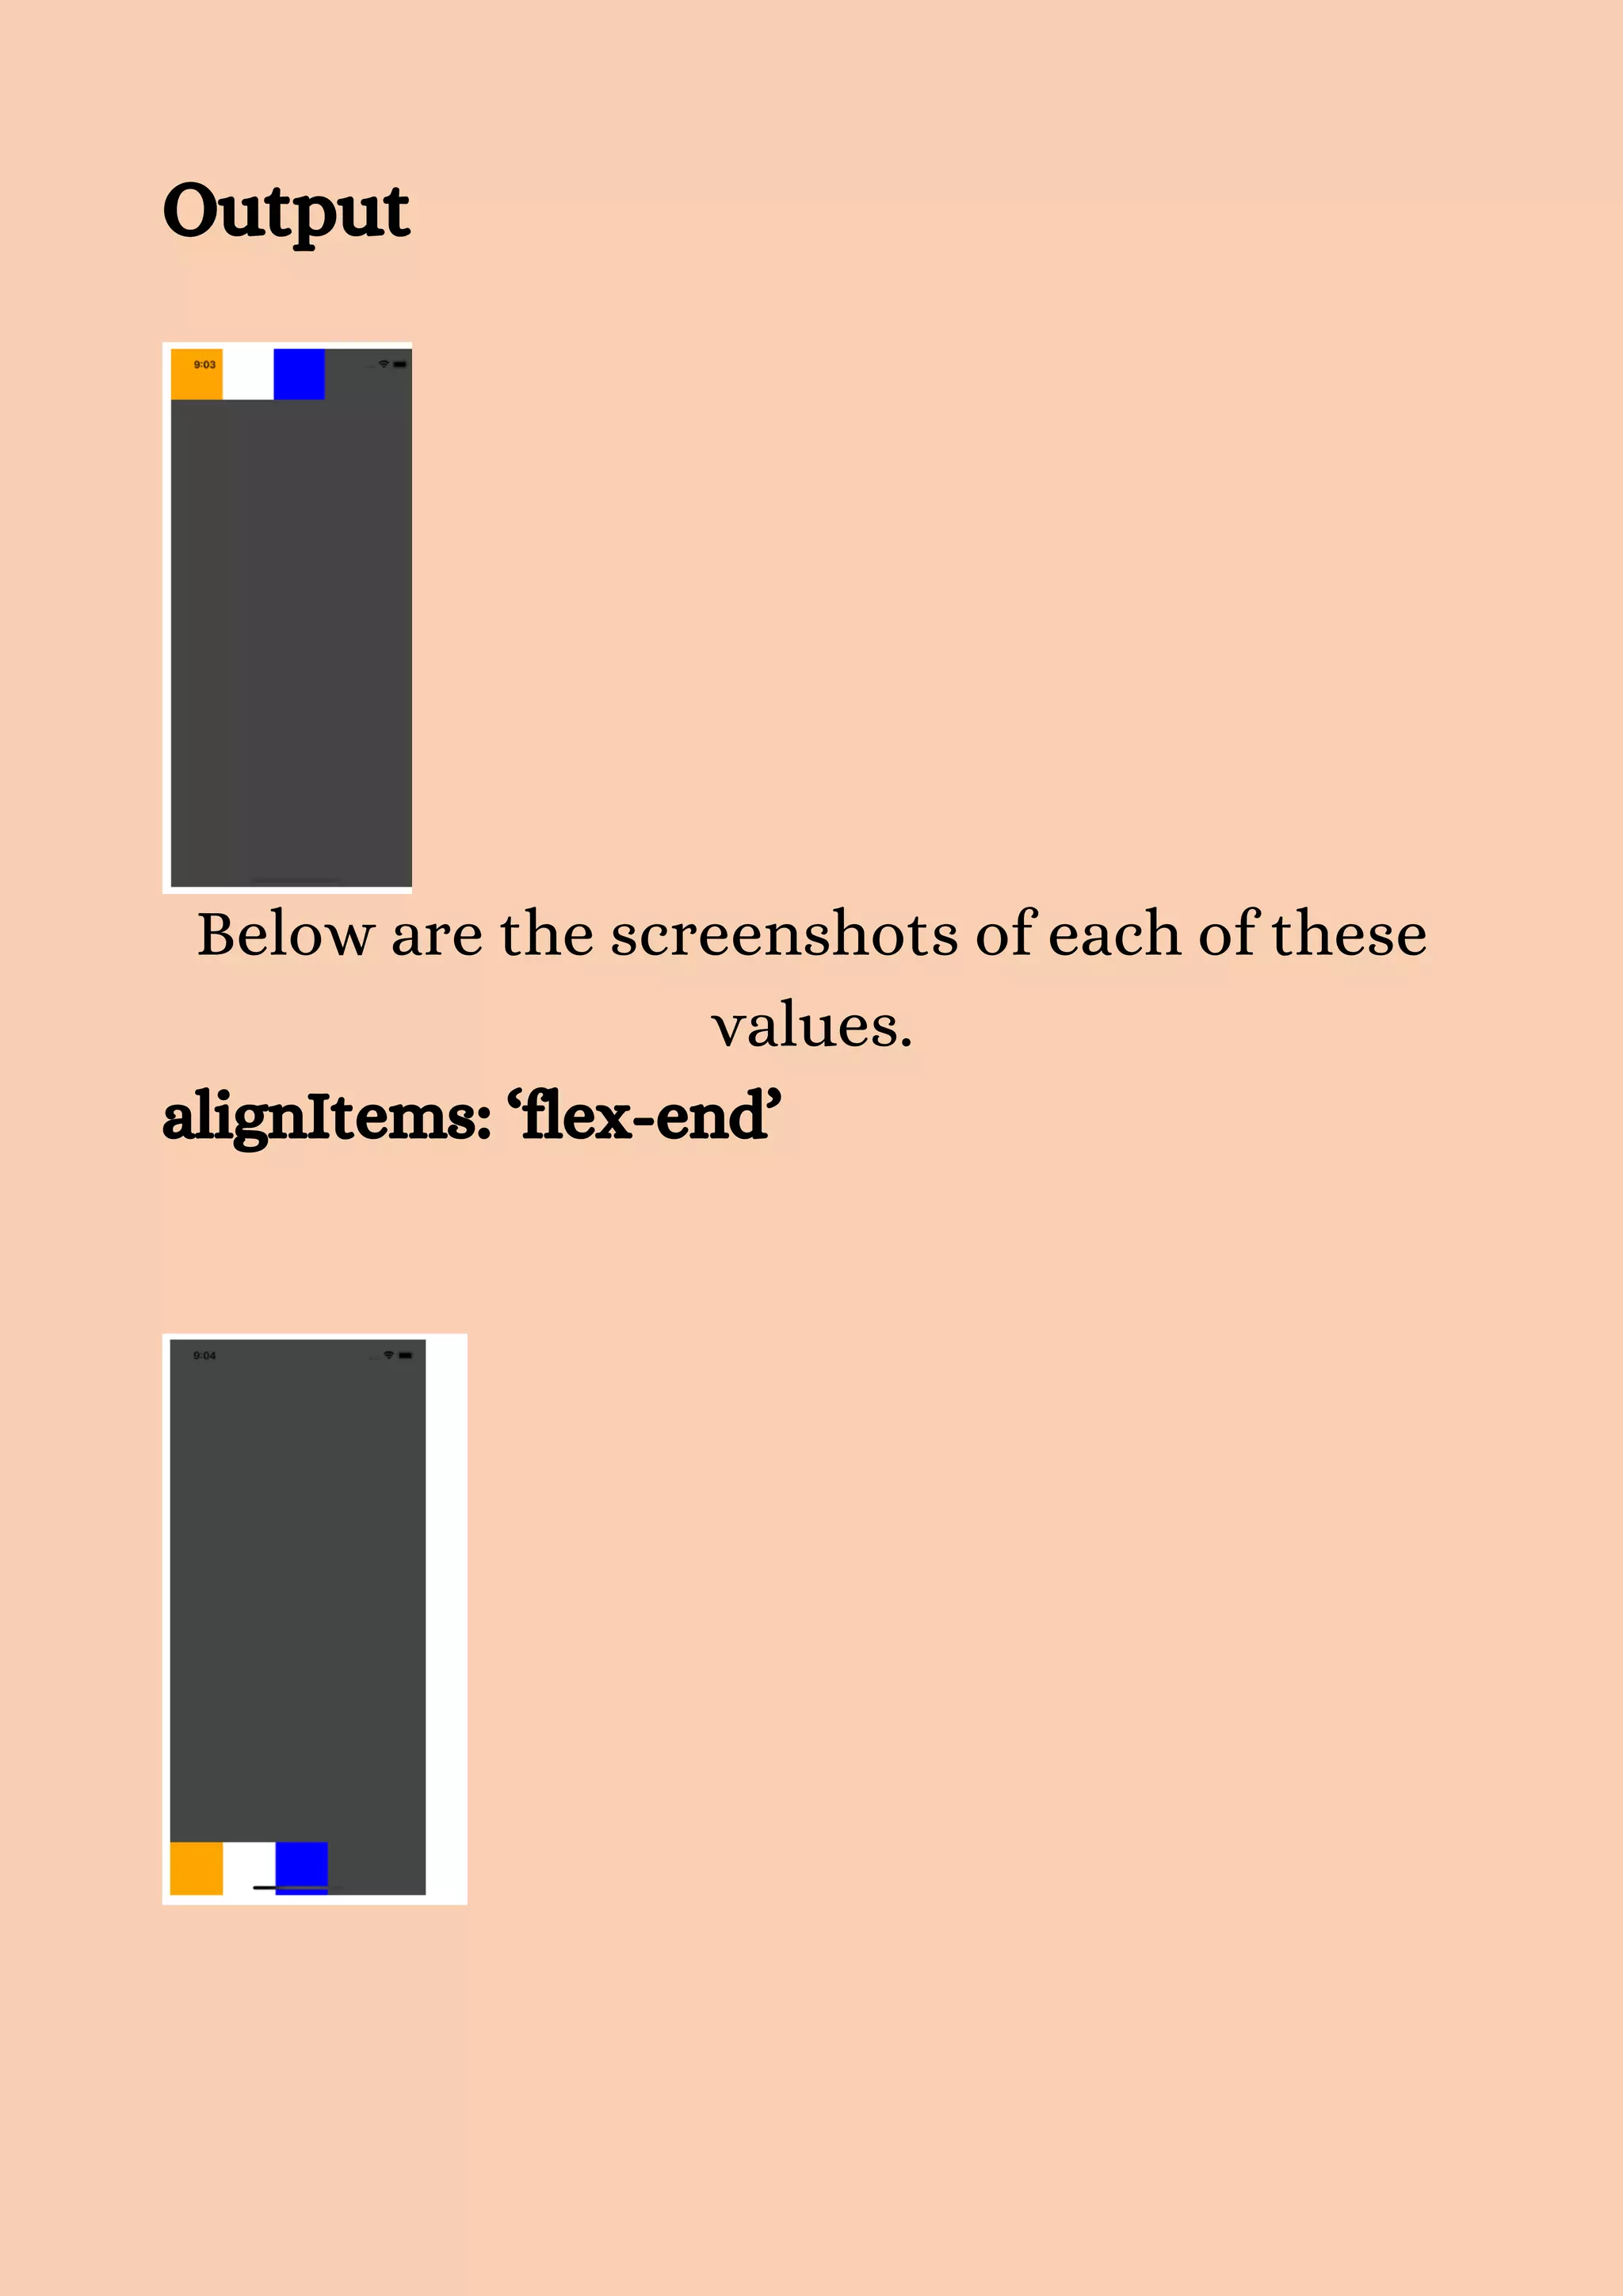
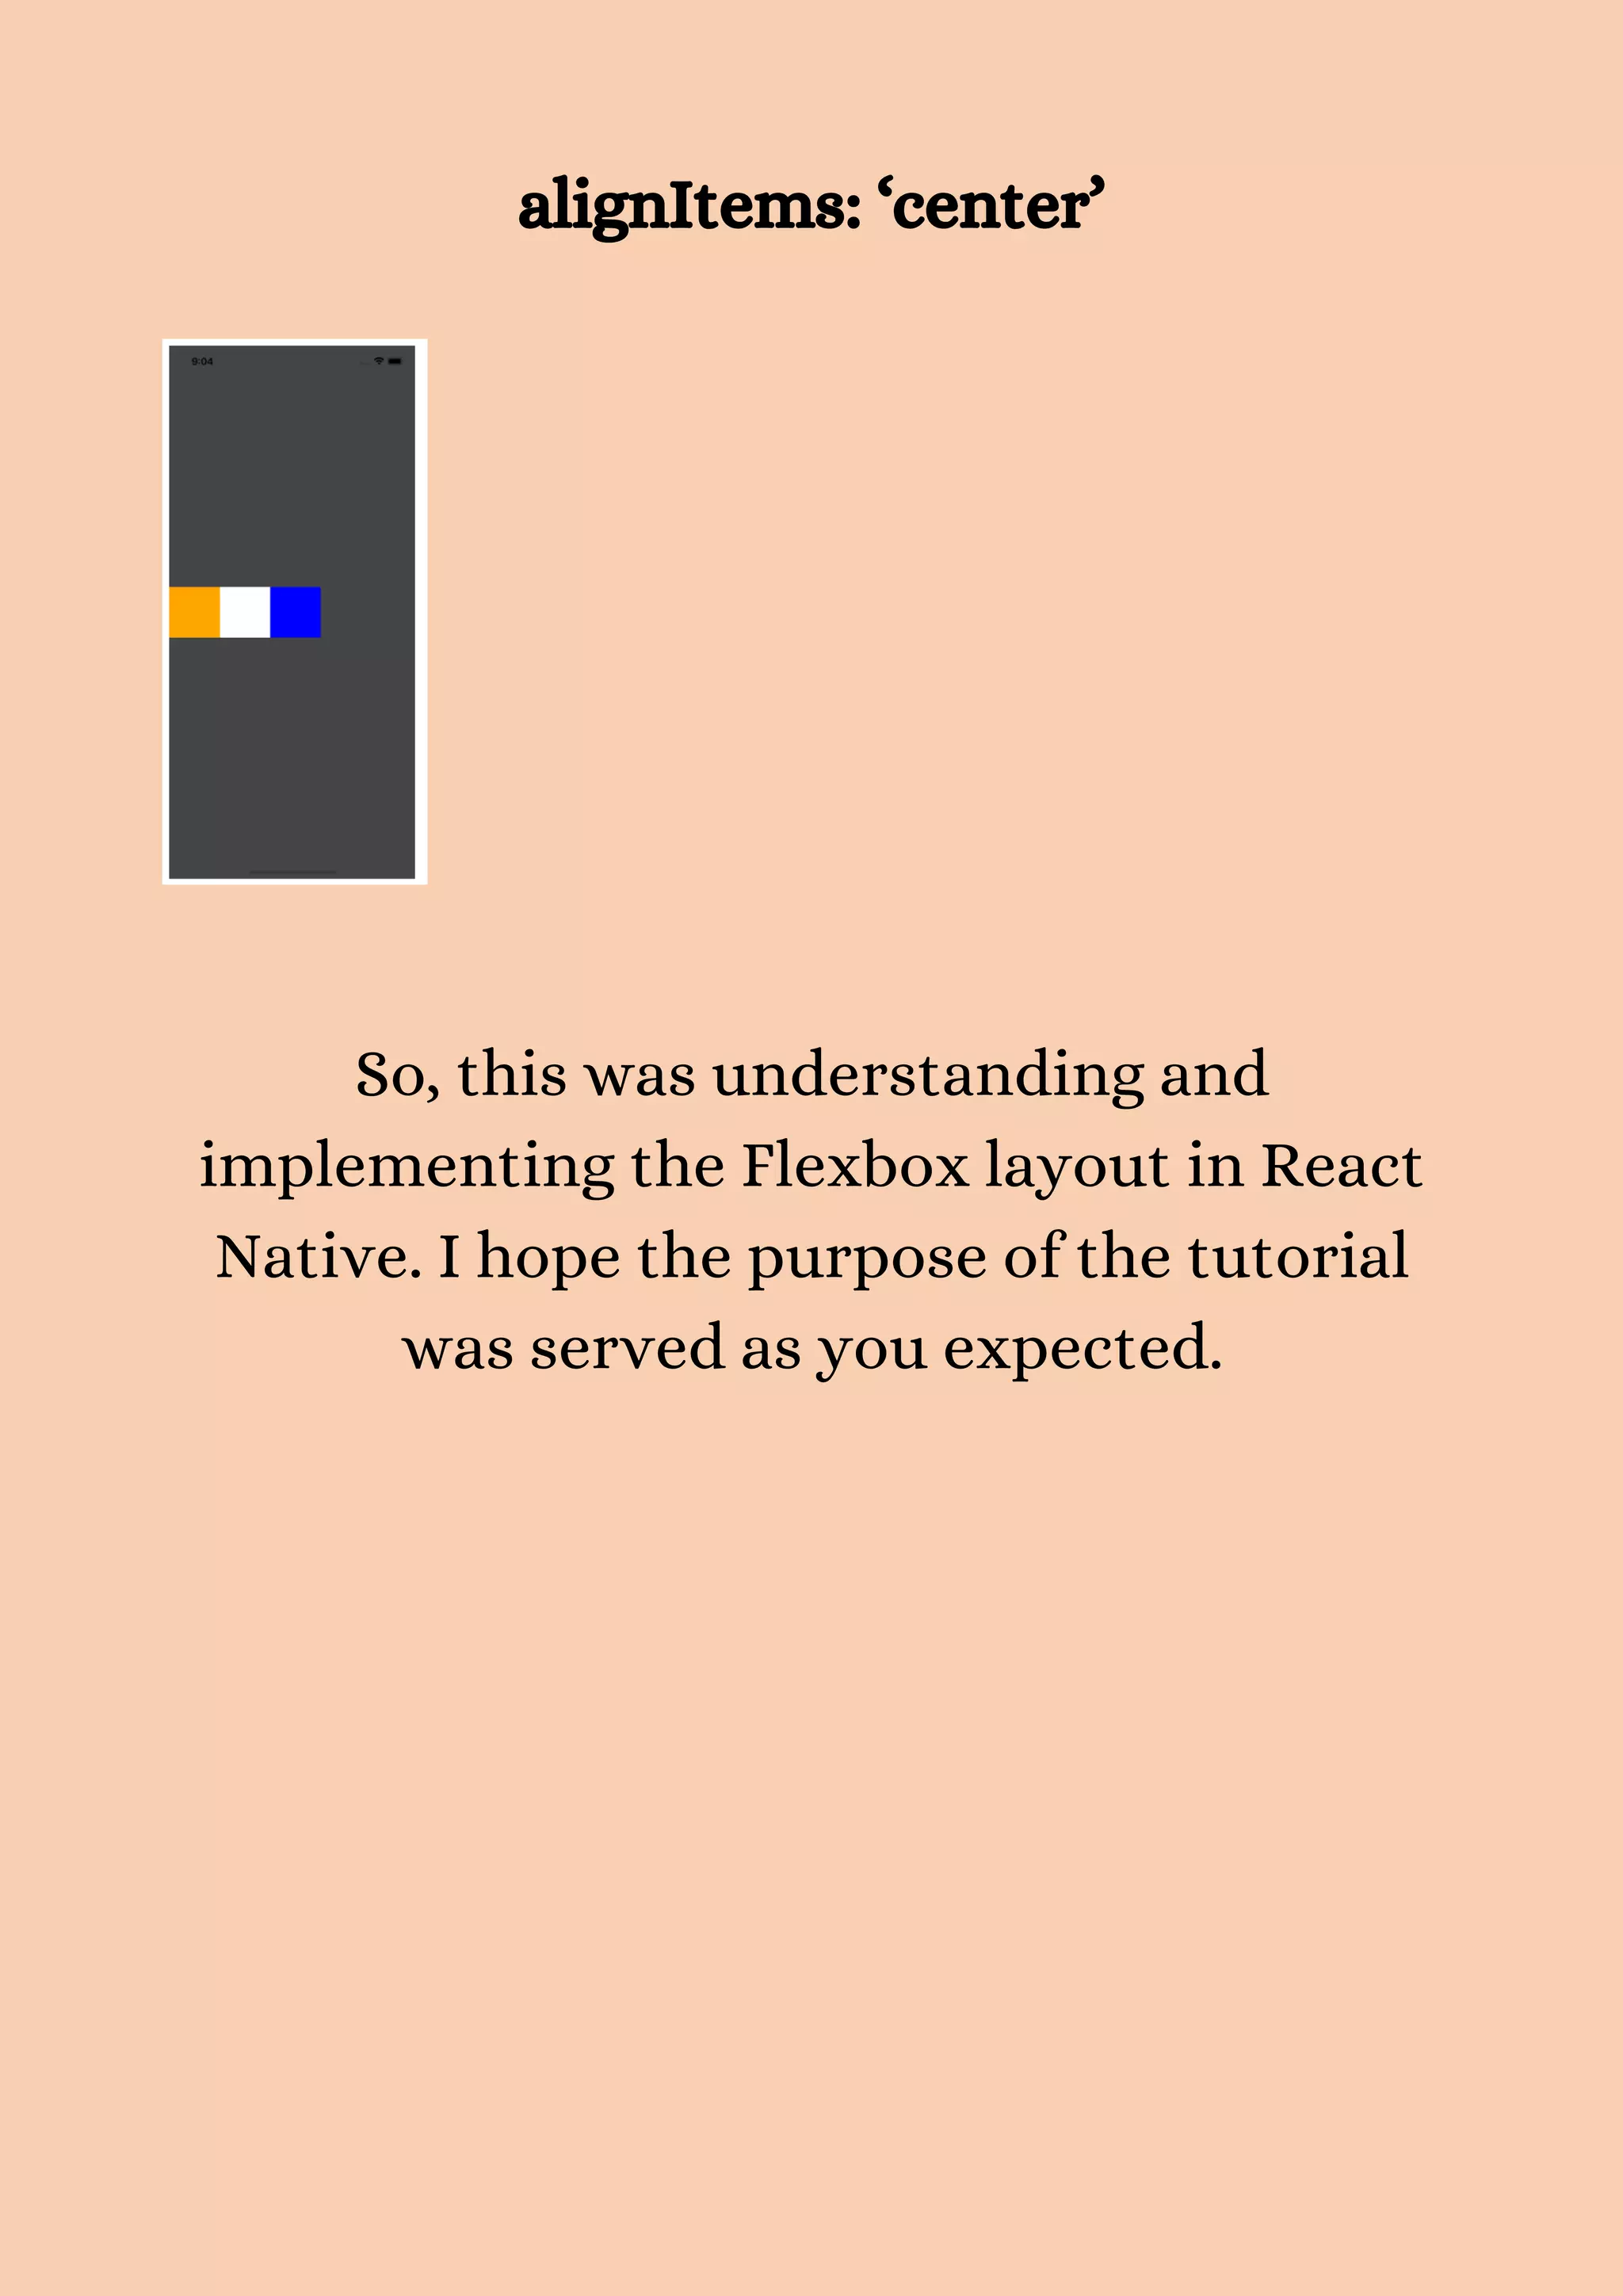


El tutorial explica el uso de Flexbox en React Native, destacando sus conceptos fundamentales y cómo implementar diseños de aplicación utilizando esta técnica. Se aborda la configuración de contenedores y elementos flex, así como las propiedades clave como `flex-direction`, `justify-content` y `align-items`. Además, se presentan ejemplos prácticos y un recurso de GitHub para acceder a un repositorio de ejemplos de Flexbox.