Introduction to Programming Using Visual Basic 6.0
Why VB? Rationale…  Easy for beginners to produce a workingEasy for beginners to produce a working programprogram  Capable of high end programsCapable of high end programs  GraphicalGraphical  OOP (for the most part)OOP (for the most part)  AffordableAffordable  Many free resources availableMany free resources available 2
The VB IDE Menu bar Tool box Tool bar Project Window View Code View Object Project Explorer Window Properties Window Immediate Window 3
As in all WindowsAs in all Windows applications, simplyapplications, simply choose View from thechoose View from the menu to view yourmenu to view your different toolboxes,different toolboxes, windows, etc. or towindows, etc. or to remove them from theremove them from the IDE.IDE. View Menu 4
Objects Every VB app has atEvery VB app has at least one object – theleast one object – the form.form. Other objects are added atOther objects are added at design timedesign time byby selecting the object from the toolbox andselecting the object from the toolbox and drawing it on the form. A second way is todrawing it on the form. A second way is to simply double-click the object and it willsimply double-click the object and it will appear on the form.appear on the form. 5
Object Properties All objects should be named. Each object has aAll objects should be named. Each object has a prefix that is standard in the VB coding world.prefix that is standard in the VB coding world. For example, the prefix for a form isFor example, the prefix for a form is frmfrm. See the. See the VB help for a complete list.VB help for a complete list. Objects have many properties that can be accessed atObjects have many properties that can be accessed at design time or at run time.design time or at run time. VB usesVB uses dot notationdot notation to access properties…forto access properties…for example:example: lblMessage.Caption = “Welcome!”lblMessage.Caption = “Welcome!” Object Property Property Value 6
Events AnAn event procedureevent procedure is a block of code thatis a block of code that executes in response to an event. Aexecutes in response to an event. A useruser eventevent is an action performed by the useris an action performed by the user such as asuch as a mouse clickmouse click.. 7
The Inevitable Hello World Program We will work toWe will work to create thecreate the program shownprogram shown at the side.at the side. 1.1. Open VB andOpen VB and choose a New,choose a New, Standard ExeStandard Exe program.program. 8
Hello World 2.2. Name the formName the form frmHelloWorldfrmHelloWorld 3. Type in the3. Type in the Caption asCaption as shown. Noteshown. Note it change init change in the title bar.the title bar. 9
Hello World 4.4. Save the project.Save the project. Create a new folderCreate a new folder and save your formand save your form in.in. 5. A second dialog box will5. A second dialog box will pop to ask for the Projectpop to ask for the Project name…change it toname…change it to HelloHello WorldWorld as shown to the rightas shown to the right 10
6.6. Add a labelAdd a label object andobject and resize itresize it accordingly.accordingly. 7.7. Change theChange the name toname to lblMessage.lblMessage. 8.8. Change theChange the Caption toCaption to Welcome!Welcome! Label Object 11
9. Choose the9. Choose the FontFont propertyproperty and makeand make your fontyour font larger andlarger and of aof a differentdifferent type.type. Font Property 12
10. Choose the10. Choose the AlignmentAlignment propertyproperty and Centerand Center the labelthe label Alignment Property 13
11.11. Add aAdd a commandcommand button bybutton by doubledouble clicking thatclicking that object in theobject in the toolbox.toolbox. Move it asMove it as shown.shown. 12.12. Name theName the buttonbutton cmdDisplaycmdDisplay and changeand change the caption tothe caption to Display.Display. Command Button 14
13.13. Add a buttonAdd a button calledcalled cmdDonecmdDone and change theand change the caption tocaption to Done.Done. Note: If you chooseNote: If you choose to Copy andto Copy and Paste a control,Paste a control, you will get ayou will get a message box re:message box re: Control Array.Control Array. Answer “NO” toAnswer “NO” to this.this. Done Button 15
We will begin codingWe will begin coding with thewith the cmdDone_ClickcmdDone_Click event procedure.event procedure. 14. Double click the14. Double click the Done button on theDone button on the object. This willobject. This will open up the codeopen up the code editor window aseditor window as shown. Type inshown. Type in Unload Me.Unload Me. Time to Code 16
Unload Me Adding the code Unload Me to theAdding the code Unload Me to the cmdDone_ClickcmdDone_Click event tells the computer thatevent tells the computer that when the control namedwhen the control named cmdDonecmdDone is clicked, theis clicked, the form (me)form (me) willwill unloadunload.. ToTo runrun your program, choose Run from the menu,your program, choose Run from the menu, press F5, or click the Run button on the toolbar.press F5, or click the Run button on the toolbar. Clicking the Done button should unload your form.Clicking the Done button should unload your form. 17
Display Button The code for the Display button will make theThe code for the Display button will make the Caption in the labelCaption in the label lblMessagelblMessage changechange to “Hello, World”.to “Hello, World”. 15. Double click the Display button and type15. Double click the Display button and type in the following code:in the following code: lblMessage.Caption=“Hello,lblMessage.Caption=“Hello, World”World” Run your program and click theRun your program and click the Done button.Done button. 18
Details – Default Buttons It would be good if the user could simply hitIt would be good if the user could simply hit the <Enter> key to have the message change.the <Enter> key to have the message change. 16. Choose the Display button, find the16. Choose the Display button, find the DefaultDefaultproperty and set it to True. Run the program. Note the dark outline around the button indicating that it is Default. 19
Details – Keyboard Access Keys Another standard Windows feature is to beAnother standard Windows feature is to be able to access a key using Alt-?. To createable to access a key using Alt-?. To create this ability in your program, change thethis ability in your program, change the Caption property to include anCaption property to include an &&.. Caption for Display - &Display Caption for Done – D&one. (You can’t have them both be a D for the hotkey. 20
Moving Your Program and Creating an exe. Your program at this point will consist of threeYour program at this point will consist of three files…files… *.frm*.frm *.vbw*.vbw *.vbp*.vbp You would need to transport all 3 of these to have itYou would need to transport all 3 of these to have it work properly at a different location.work properly at a different location. 17. Create an exe by choosing File, Make17. Create an exe by choosing File, Make Helloworld.exe. Choose your path. This one file,Helloworld.exe. Choose your path. This one file, of course, will allow others to run your program,of course, will allow others to run your program, but not to edit it.but not to edit it. 21
Colors We can alter the look of your formWe can alter the look of your form with colors and graphics.with colors and graphics. 18.18. Select lblMessage. ChooseSelect lblMessage. Choose the Backcolor property, thenthe Backcolor property, then Palette.Palette. Select a color of your own choice.Select a color of your own choice. 19.19. Do the same for the Forecolor.Do the same for the Forecolor. 22
Colors on Buttons You change the color of a button’sYou change the color of a button’s background, but first you must set it’sbackground, but first you must set it’s Style property to Graphical.Style property to Graphical. 20.20. Choose the Display button, then changeChoose the Display button, then change the Backcolor and the Style property.the Backcolor and the Style property. Note that there is no Forecolor…the fontNote that there is no Forecolor…the font stays blackstays black.. 23
Graphics We can also add graphics to some objects.We can also add graphics to some objects. 21. Select the Picture property of the Form, then choose an image. This one is at g:klimackimagesbonnell. Change the file type to All Files if nothing is showing up. 22. Change your Done button picture property remembering to change the Style to Graphical. 24
Message Boxes 23.23. In your code for the Done button, add thisIn your code for the Done button, add this line:line: MsgBox "Have a good day!", vbOKOnly, "ByeMsgBox "Have a good day!", vbOKOnly, "Bye Bye"Bye" 25
Comments Adding comments in VB is done by prefixing yourAdding comments in VB is done by prefixing your statement with an apostrophe. For example:statement with an apostrophe. For example: ‘‘this is a comment and will be ignored by the computerthis is a comment and will be ignored by the computer Comments turn green when typed correctly.Comments turn green when typed correctly. 24.24. At the top of your program, add comments with yourAt the top of your program, add comments with your name, date, and project info as such:name, date, and project info as such: ‘‘Cheryl KlimackCheryl Klimack ‘‘Hello World projectHello World project ‘‘Oct 24 2003Oct 24 2003 Run your program. We are done!Run your program. We are done! 26
Break Time! 27
Pizza Project We will create theWe will create the project shown toproject shown to the left withthe left with checkboxes,checkboxes, option buttons,option buttons, textboxes,textboxes, message boxes,message boxes, command buttonscommand buttons and labels.and labels. 28
1.1. Create a new project by firstCreate a new project by first removing the current project.removing the current project. Save as Pizza.Save as Pizza. 2.2. Add a label and format it asAdd a label and format it as you desire.you desire. 3.3. Add an image control andAdd an image control and name itname it imgPizza.imgPizza. TheThe image seen here is found atimage seen here is found at G:klimackimages.G:klimackimages. Note: to resize an image on yourNote: to resize an image on your form, you must set the Stretchform, you must set the Stretch property to True.property to True. 29
4.4. Add and nameAdd and name labels andlabels and textboxes totextboxes to correspond to thecorrespond to the figure at thefigure at the right. Don’tright. Don’t worry aboutworry about lining them uplining them up perfectly yet.perfectly yet. lblName lblPhone txtPhone txtName Choose the Text property and delete it’s contents to remove Text1 from the text boxes. 30
Aligning You can line up objects on your form evenlyYou can line up objects on your form evenly by selecting them (holding down the shiftby selecting them (holding down the shift key allows multiple selections) and thenkey allows multiple selections) and then choosing Format, Align, etc. Notice thechoosing Format, Align, etc. Notice the other options under the Format menu.other options under the Format menu. 5.5. Line up your labels and text boxes.Line up your labels and text boxes. 6.6. Choose both labels and text boxes at theChoose both labels and text boxes at the same time, then select Font and makesame time, then select Font and make them all 10 or 12 point.them all 10 or 12 point. 31
Frames Frames are used as containers for otherFrames are used as containers for other controls. Usually groups of option buttonscontrols. Usually groups of option buttons are placed in frames.are placed in frames. 7. Add a frame named fraSize. 8. Make the Caption Size. 32
Option Buttons in Frame These are used when only one button of a groupThese are used when only one button of a group should be selected. For example, a pizza sizeshould be selected. For example, a pizza size choice cannot be both large and medium atchoice cannot be both large and medium at the same time.the same time. 9. Select (but do not double click) the Option button control. Draw 3 buttons inside of the frame. Name them optSmall, optMedium, and optLarge. 10. Line them up and make the same size. Make their spacing equal as well. 33
Options on Form Options on a form but not in a frame function as aOptions on a form but not in a frame function as a group.group. 11. Add options for Pickup and Delivery as shown. Set the Value for Pickup to True Note: Run the program and experiment with the buttons. If you can select 2 in one group, one of them doesn’t belong. Delete it and recreate it. 34
Multiline Textboxes with Scroll Bars 12. Add a label12. Add a label (lblAddress) for(lblAddress) for EnterEnter AddressAddress and a textboxand a textbox (txtAddress) for the(txtAddress) for the contents of thecontents of the address. Make theaddress. Make the Multiline propertyMultiline property True, and setTrue, and set Scrollbars to Both.Scrollbars to Both. 35
Checkboxes Checkboxes allow the user to select (orCheckboxes allow the user to select (or deselect) an option. Any number ofdeselect) an option. Any number of checkboxes in a group may be selected. Ifcheckboxes in a group may be selected. If selected, it’s value is vbChecked, otherwiseselected, it’s value is vbChecked, otherwise it is vbUnchecked.it is vbUnchecked. 13. Add a frame for Toppings (fraToppings). 14. Add the checkboxes indicated (chkPepperoni, etc.) 36
Order and Cancel Buttons 15. Add an Order15. Add an Order and Canceland Cancel button as shownbutton as shown in the figure atin the figure at the right. Makethe right. Make the Order buttonthe Order button Default. AddDefault. Add hotkey access.hotkey access. 37
Time to Code! The specs for this program state that the orderThe specs for this program state that the order can be cancelled at any time. After ordercan be cancelled at any time. After order placement, a message box will appearplacement, a message box will appear asking the user to verify the order asasking the user to verify the order as indicated. If it is verified another messageindicated. If it is verified another message box will indicate this.box will indicate this. 38
Enabling and Disabling It is a good idea to not let the user makeIt is a good idea to not let the user make inappropriate choices if at all possible.inappropriate choices if at all possible. Disable any options that are not applicable at theDisable any options that are not applicable at the current time, and enable them whencurrent time, and enable them when appropriate.appropriate. 16. Select all the checkboxes at once and set the16. Select all the checkboxes at once and set the Enabled property to False. Run the program.Enabled property to False. Run the program. 39
Enabling Controls It would be appropriate for these checkboxes to beIt would be appropriate for these checkboxes to be enabled after choosing a pizza size.enabled after choosing a pizza size. 17.17. Double click optSmall, and add this code to theDouble click optSmall, and add this code to the procedure.procedure. chkPepperoni.enabled=truechkPepperoni.enabled=true Run the program. Click on Small and PepperoniRun the program. Click on Small and Pepperoni should become enabled.should become enabled. 18. Enable each of the checkboxes in the same18. Enable each of the checkboxes in the same manner.manner. 40
Copy and Pasting Code 19. The code for19. The code for Medium and LargeMedium and Large will be the same as itwill be the same as it is for Small, so youis for Small, so you can copy and paste itcan copy and paste it into thoseinto those procedures. Nowprocedures. Now choosing any of thechoosing any of the sizes will enable thesizes will enable the checkboxes.checkboxes. Choose the procedures here. 41
The Address Box We don’t need the addressWe don’t need the address box if the order is forbox if the order is for Pickup, so it should notPickup, so it should not be visible until thebe visible until the Delivery button isDelivery button is selected.selected. 20. Choose lblAddress and20. Choose lblAddress and txtAddress and maketxtAddress and make Visible = false in theVisible = false in the properties window.properties window. 42
Delivery Option Button If you choose the Delivery option, these two controlsIf you choose the Delivery option, these two controls ((lblAddresslblAddress andand txtAddress)txtAddress) should become visibleshould become visible and the cursor should move to the txtAddress box,and the cursor should move to the txtAddress box, waiting for input.waiting for input. 21. Add the following to the optDelivery_click21. Add the following to the optDelivery_click txtAddress.Visible = TruetxtAddress.Visible = True lblAddress.Visible = TruelblAddress.Visible = True txtAddress.SetFocustxtAddress.SetFocus 43
Pickup Option Button Just as Delivery should make the Address infoJust as Delivery should make the Address info visible, Pickup should make themvisible, Pickup should make them invisible.invisible. 22.22. Add the following to the optPickup_clickAdd the following to the optPickup_click procedure:procedure: txtAddress.Visible = falsetxtAddress.Visible = false lblAddress.Visible = FalselblAddress.Visible = False 44
Cancel Button If the user clicks theIf the user clicks the Cancel button, allCancel button, all the info currentlythe info currently entered shouldentered should disappear and thedisappear and the form reset to theform reset to the initial screen.initial screen. 23.23. Get to theGet to the cmdCancel_clickcmdCancel_click procedure and enterprocedure and enter the following linesthe following lines of code:of code: 'clear the text boxes txtName.Text = "" txtPhone.Text = "" txtAddress.Text = "" 45
Canceling, continued 'clear'clear the size optionsthe size options optSmall.Value = FalseoptSmall.Value = False optMedium.Value =optMedium.Value = FalseFalse optLarge.Value = FalseoptLarge.Value = False 'set the pickup option'set the pickup option optPickup.Value = TrueoptPickup.Value = True 'clear the checkboxes chkPepperoni.Value = vbUnchecked chkSausage.Value = vbUnchecked chkMushrooms.Value = vbUnchecked chkGreenPeppers.Value = vbUnchecked chkExtraCheese.Value = vbUnchecked chkOnions.Value = vbUnchecked 46
Canceling, continued Last of all, disable the checkboxes again and set theLast of all, disable the checkboxes again and set the focus to txtName.focus to txtName. 'disable the checkboxes chkPepperoni.Enabled = False chkSausage.Enabled = False chkMushrooms.Enabled = False chkGreenPeppers.Enabled = False chkExtraCheese.Enabled = False chkOnions.Enabled = False ‘set focus txtName.SetFocus 47
Break Time! 48
Global Variables We are going toWe are going to use someuse some GlobalGlobal variables forvariables for this program.this program. 24. Add the lines24. Add the lines shown to yourshown to your program.program. These variablesThese variables can be used bycan be used by all theall the procedures.procedures. 49
Constants Every time the user selects or de-selects a topping,Every time the user selects or de-selects a topping, the topping price must change. In this case,the topping price must change. In this case, toppings are 75 cents each.toppings are 75 cents each. 25. Constants should be declared before variables,25. Constants should be declared before variables, and these are global as well, so add themand these are global as well, so add them BEFORE the 2 global variables you just added.BEFORE the 2 global variables you just added. 50
Topping Price We need to ADD to the curToppings every time aWe need to ADD to the curToppings every time a new topping is selected, and SUBTRACT everynew topping is selected, and SUBTRACT every time one is de-selected.time one is de-selected. 26.26. InIn eacheach chk procedure, add code similar to thechk procedure, add code similar to the following, changing the Pepperoni to thefollowing, changing the Pepperoni to the appropriate topping.appropriate topping. If chkPepperoni.value=vbChecked thenIf chkPepperoni.value=vbChecked then curToppings=curToppings +curToppings=curToppings + curToppingPricecurToppingPrice ElseElse curToppings=curToppings –curToppings=curToppings – curToppingPricecurToppingPrice 51
The Immediate Window For testing purposes, you canFor testing purposes, you can ViewView the Immediatethe Immediate window and see the results of thewindow and see the results of the debug.printdebug.print itemitem statement that can be included in the code.statement that can be included in the code. Add this line to eachAdd this line to each chk procedurechk procedure.. Debug.print “Toppings =“Debug.print “Toppings =“ ;curToppings;curToppings When you run your program, select and de-selectWhen you run your program, select and de-select different checkboxes and watch the results in thedifferent checkboxes and watch the results in the immediate window.immediate window. 52
Debug.Print statements Results of Debug.print 53
Size Price The size price depends upon whicheverThe size price depends upon whichever option is selected. Each option procedureoption is selected. Each option procedure needs to have code similar to the following:needs to have code similar to the following: curSize = curSmallcurSize = curSmall ‘add to‘add to optSmalloptSmall curSize=curMediumcurSize=curMedium ‘ add to‘ add to optMediumoptMedium curSize=curLargecurSize=curLarge ‘add to‘add to optLargeoptLarge 54
Total Price We need to calculate the total due as anWe need to calculate the total due as an addition of curSize and curToppings.addition of curSize and curToppings. 27.27. Declare curTotal as a global variable ofDeclare curTotal as a global variable of type currency.type currency. Private curTotal as currencyPrivate curTotal as currency in the General section.in the General section. 55
Calculating the Total To calculate curTotal, we need to add a line to everyTo calculate curTotal, we need to add a line to every procedure that affects the price.procedure that affects the price. curTotal=curToppings + curSizecurTotal=curToppings + curSize 28.28. Add this line to all the options for size and theAdd this line to all the options for size and the checkboxes. (Thank goodness for copy and paste!)checkboxes. (Thank goodness for copy and paste!) If you change your Debug.Print statement as shown, youIf you change your Debug.Print statement as shown, you can watch the totals as you run your program. Usecan watch the totals as you run your program. Use Edit, Replace to do this.Also, copy and paste it toEdit, Replace to do this.Also, copy and paste it to your options after the lines that calculate theseyour options after the lines that calculate these totals.totals. 29.29. Debug.Print "Toppings =";Debug.Print "Toppings ="; curToppings; "Total is"; curTotalcurToppings; "Total is"; curTotal 56
Verifying the Order Now that we have the totals workingNow that we have the totals working properly, we need to manipulate someproperly, we need to manipulate some strings.strings. We want a message box similar to the figureWe want a message box similar to the figure to appear when the Order button isto appear when the Order button is clicked.clicked. 30.30. Declare a global variable to contain aDeclare a global variable to contain a string representing the size of the Pizza.string representing the size of the Pizza. Private strSize as stringPrivate strSize as string 57
strSize 31.31. In each of the procedures for the sizeIn each of the procedures for the size options, add a line to assign a string tooptions, add a line to assign a string to string size that corresponds with the size.string size that corresponds with the size. For example, in optSmall add:For example, in optSmall add: strSize=“Small”strSize=“Small” In optMedium, addIn optMedium, add strSize=“Medium”strSize=“Medium” && in optLarge addin optLarge add strSize=“Large”.strSize=“Large”. 58
Check for Required Input 32.Add the32.Add the followingfollowing code to verifycode to verify that nothat no requiredrequired options oroptions or textboxes aretextboxes are left blank.left blank. We do notWe do not have time tohave time to validate thevalidate the input today.input today. Dim blnValidData As Boolean 'error checking blnValidData = False If txtName.Text = "" Then MsgBox "Invalid name" txtName.SetFocus ElseIf txtPhone.Text = "" Then MsgBox "Invalid phone" txtPhone.SetFocus ‘to be continued 59
Run yourRun your project andproject and click the orderclick the order button withbutton with some textsome text boxes leftboxes left blank.blank. ElseIf strSize = "" Then MsgBox "Invalid size" optSmall.SetFocus ElseIf optDelivery.Value = True And txtAddress = "" Then MsgBox "Invalid address" txtAddress.SetFocus Else blnValidData=True End If 60
Create a Toppings List Once we have validated entry in each requiredOnce we have validated entry in each required control, we can create a toppings list. Note thecontrol, we can create a toppings list. Note the indenting.indenting. 33. 'list toppings in a string If blnValidData = True Then If chkPepperoni.Value = vbChecked Then strToppings = strToppings & vbCrLf & "Pepperoni" End If If chkSausage.Value = vbChecked Then strToppings = strToppings & vbCrLf & "Sausage" vbCrLf – carriage return, line feed & concatenate61
Toppings, continued Copy and paste the if …then statement forCopy and paste the if …then statement for Pepperoni 5 times to create appropriate ifPepperoni 5 times to create appropriate if statements for all of the toppings, as shownstatements for all of the toppings, as shown for Sausage.for Sausage. A message box can be a quick test to see ifA message box can be a quick test to see if this works:this works: MsgBox strToppings 'test toppingsMsgBox strToppings 'test toppings stringstring Delete this line once testing is completed.Delete this line once testing is completed. 62
Delivery Method The following code can be used to determine theThe following code can be used to determine the appropriate string for the method of delivery:appropriate string for the method of delivery: 34. Declare a variable strDeliveryMethod as string34. Declare a variable strDeliveryMethod as string in the Order procedure. Then add the following toin the Order procedure. Then add the following to the bottom of the procedure.the bottom of the procedure. 'check for delivery or pickup'check for delivery or pickup If optDelivery.Value = True ThenIf optDelivery.Value = True Then strDeliveryMethod = "Delivery"strDeliveryMethod = "Delivery" ElseElse strDeliveryMethod = "Pickup"strDeliveryMethod = "Pickup" End IfEnd If 63
Message Boxes Revisited There are different parameters youThere are different parameters you can use with Message Boxes.can use with Message Boxes. See the Help for a complete list.See the Help for a complete list. We are going to ask the user toWe are going to ask the user to click Yes or No to confirm theclick Yes or No to confirm the order. We want their response toorder. We want their response to be stored so we can act upon it.be stored so we can act upon it. If it is yes, the form should printIf it is yes, the form should print and clear. If no, the message boxand clear. If no, the message box should simply disappear andshould simply disappear and allow the user to make theallow the user to make the required changes.required changes. 64
Message Box String The following code will output a message box withThe following code will output a message box with the appropriate strings and the Yes/No buttons.the appropriate strings and the Yes/No buttons. 35. First, declare a variable in the declaration section35. First, declare a variable in the declaration section of the procedure.of the procedure. Dim intOrderCorrect as IntegerDim intOrderCorrect as Integer ‘holds‘holds yes/no response from useryes/no response from user 65
Msgbox() intOrderCorrect = MsgBox("Order for " & txtNameintOrderCorrect = MsgBox("Order for " & txtName & vbCrLf _& vbCrLf _ & strSize & "Pizza for " & strDeliveryMethod && strSize & "Pizza for " & strDeliveryMethod & " with" _ & vbCrLf & strToppings & vbCrLf &" with" _ & vbCrLf & strToppings & vbCrLf & vbCrLf & _vbCrLf & _ "Total = " & Format(curTotal, "currency") & _"Total = " & Format(curTotal, "currency") & _ vbCrLf & vbCrLf & _vbCrLf & vbCrLf & _ "Is this order correct?", vbYesNo, "Verify"Is this order correct?", vbYesNo, "Verify Order")Order") _ at the end of a line means that _ the code is continued _ on the next line even though _ the statement is not finished. 66
vbYes, vbNo If the order is correct, print the form and clearIf the order is correct, print the form and clear it (the same as Canceling).it (the same as Canceling). If intOrderCorrect = vbYesIf intOrderCorrect = vbYes ThenThen Me.PrintFormMe.PrintForm Call cmdCancel_ClickCall cmdCancel_Click End ifEnd if If the order is not correct, do nothing to theIf the order is not correct, do nothing to the program.program. 67
Program Complete! 68
Conclusion Thank you for attending this workshop.Thank you for attending this workshop. Available on-line in zipped format is:Available on-line in zipped format is:  This presentationThis presentation  Hello World program sourceHello World program source  Pizza sourcePizza source  Source for the simple programs included in yourSource for the simple programs included in your packagepackage 69

Introduction to programming using Visual Basic 6

  • 1.
  • 2.
    Why VB? Rationale… Easy for beginners to produce a workingEasy for beginners to produce a working programprogram  Capable of high end programsCapable of high end programs  GraphicalGraphical  OOP (for the most part)OOP (for the most part)  AffordableAffordable  Many free resources availableMany free resources available 2
  • 3.
    The VB IDE Menubar Tool box Tool bar Project Window View Code View Object Project Explorer Window Properties Window Immediate Window 3
  • 4.
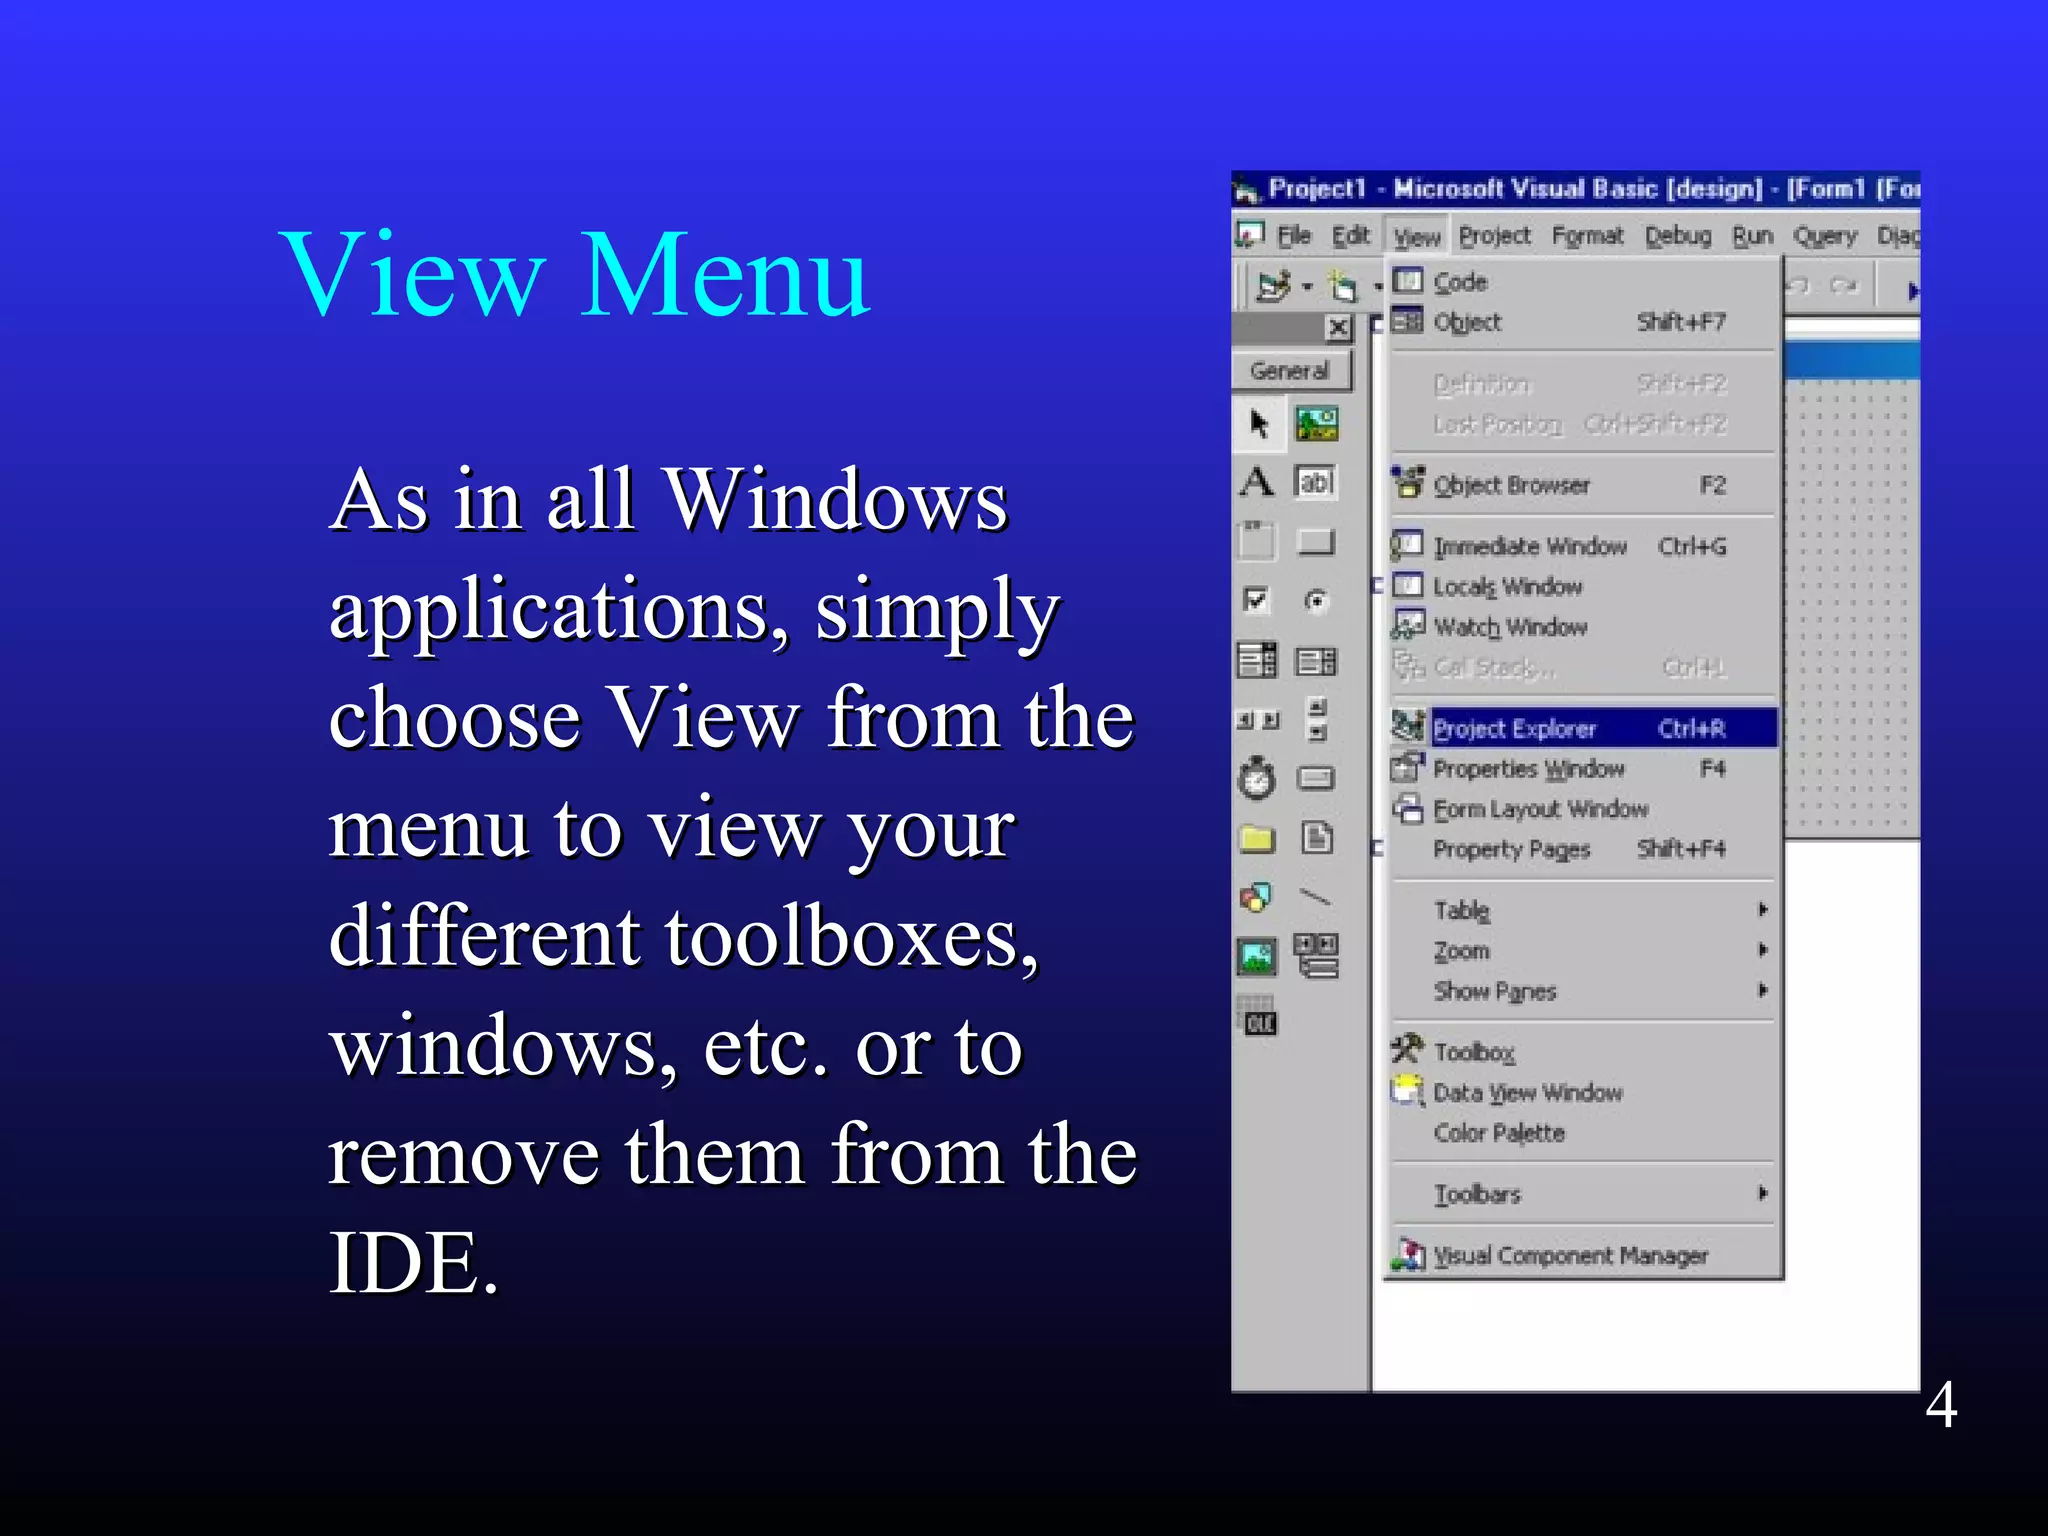
    As in allWindowsAs in all Windows applications, simplyapplications, simply choose View from thechoose View from the menu to view yourmenu to view your different toolboxes,different toolboxes, windows, etc. or towindows, etc. or to remove them from theremove them from the IDE.IDE. View Menu 4
  • 5.
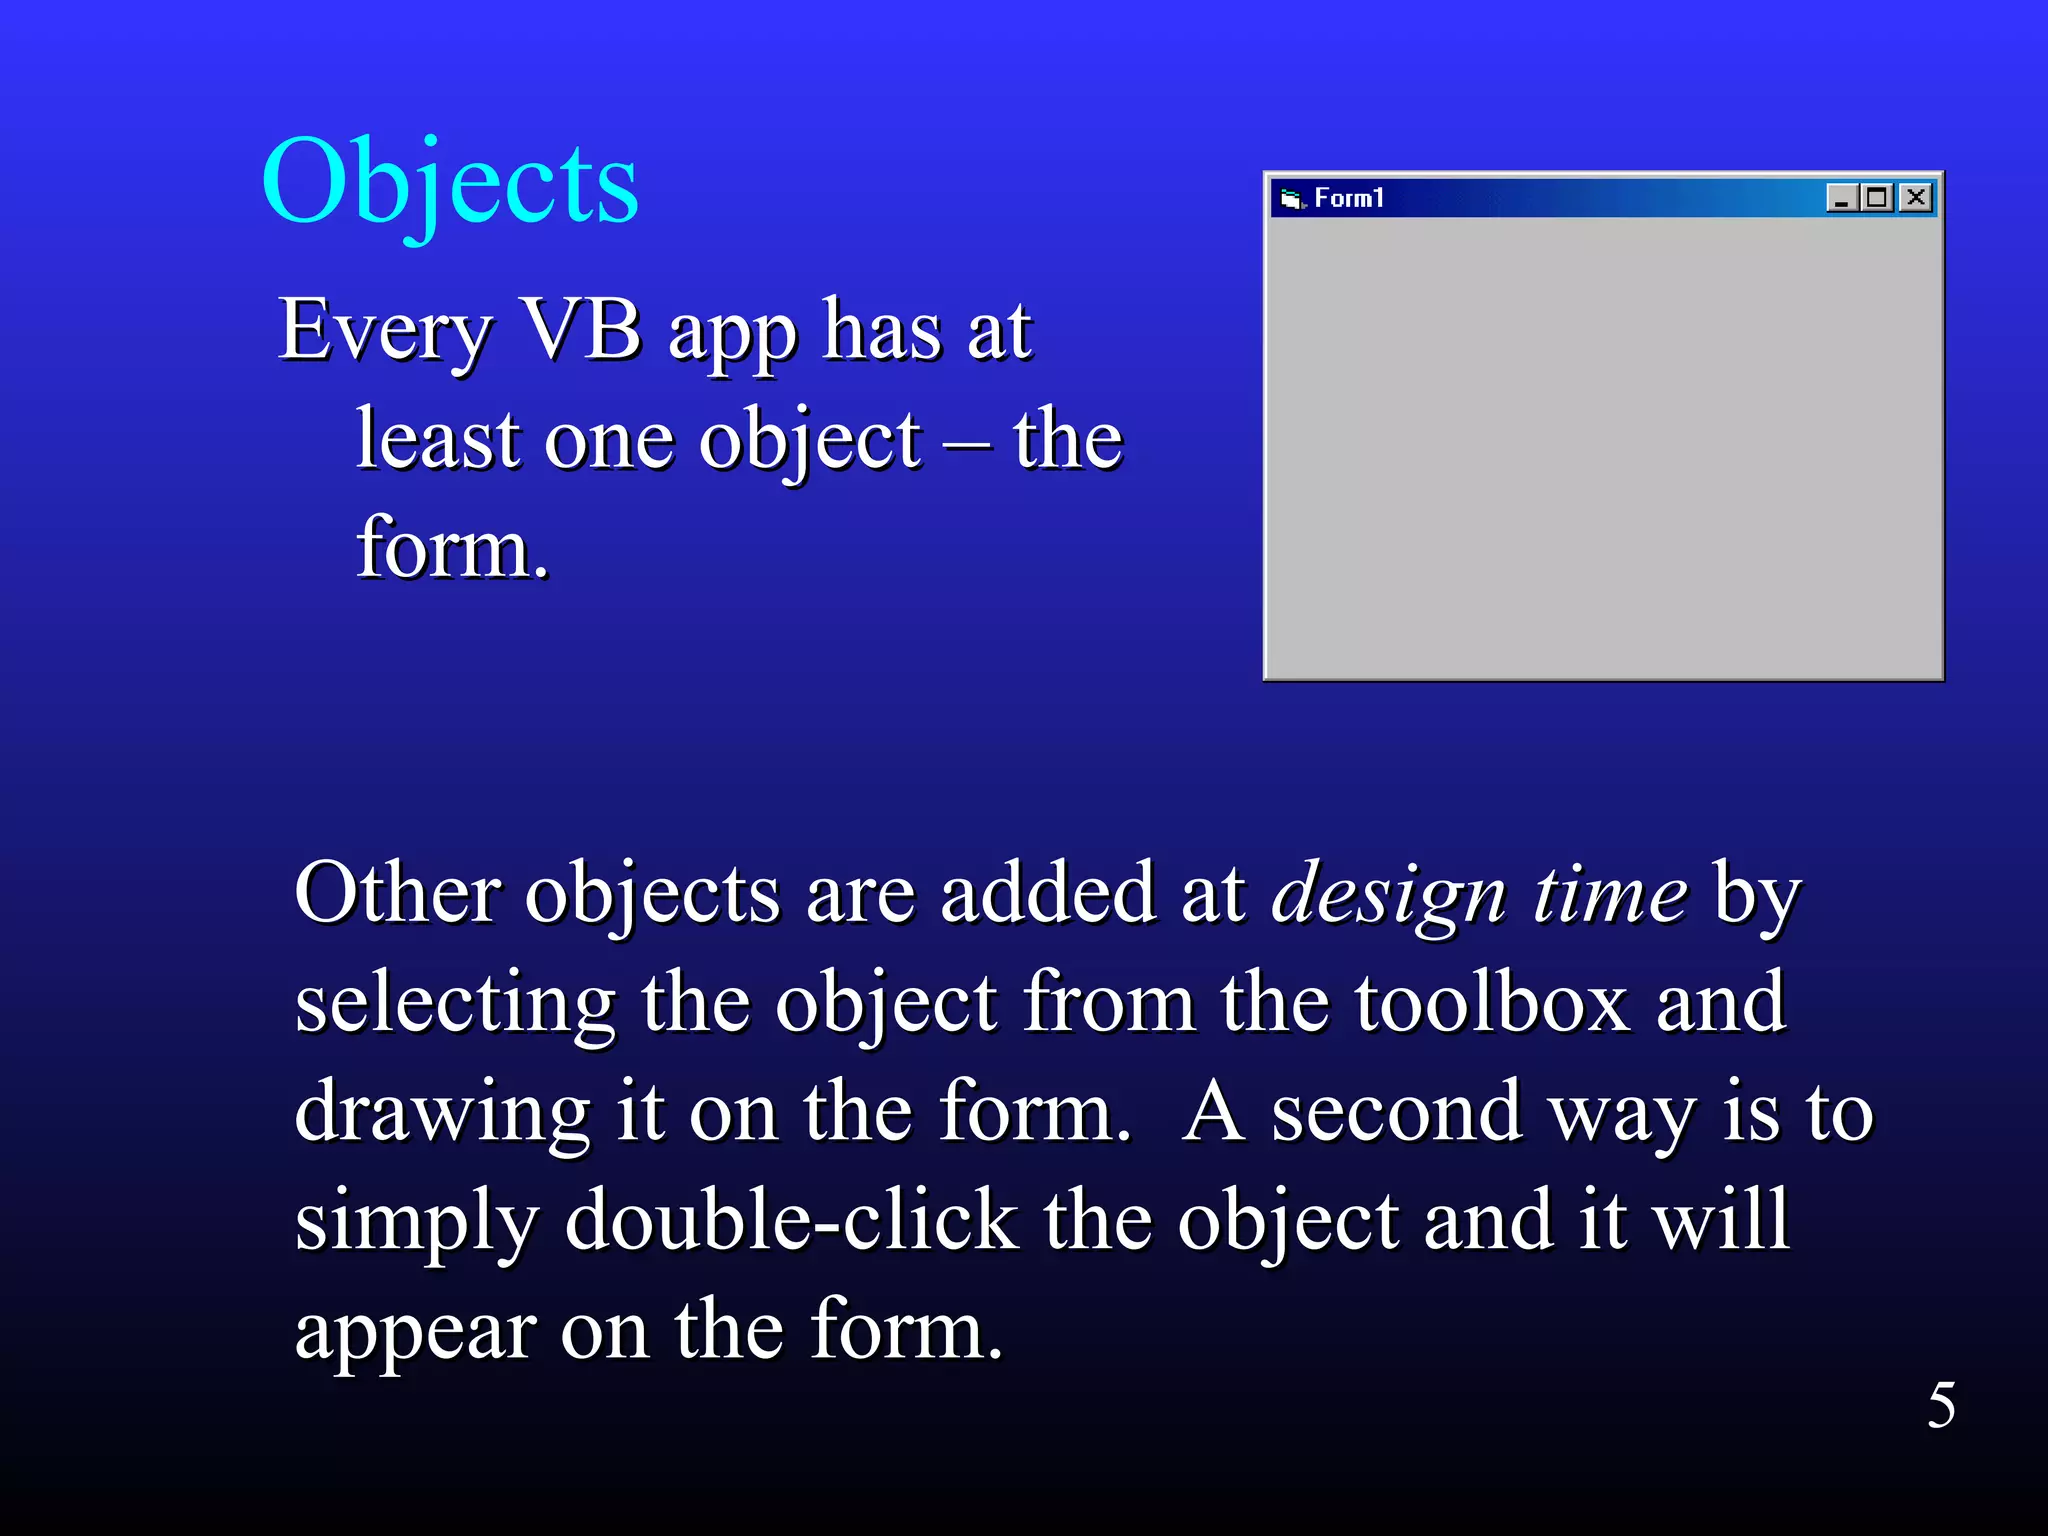
    Objects Every VB apphas atEvery VB app has at least one object – theleast one object – the form.form. Other objects are added atOther objects are added at design timedesign time byby selecting the object from the toolbox andselecting the object from the toolbox and drawing it on the form. A second way is todrawing it on the form. A second way is to simply double-click the object and it willsimply double-click the object and it will appear on the form.appear on the form. 5
  • 6.
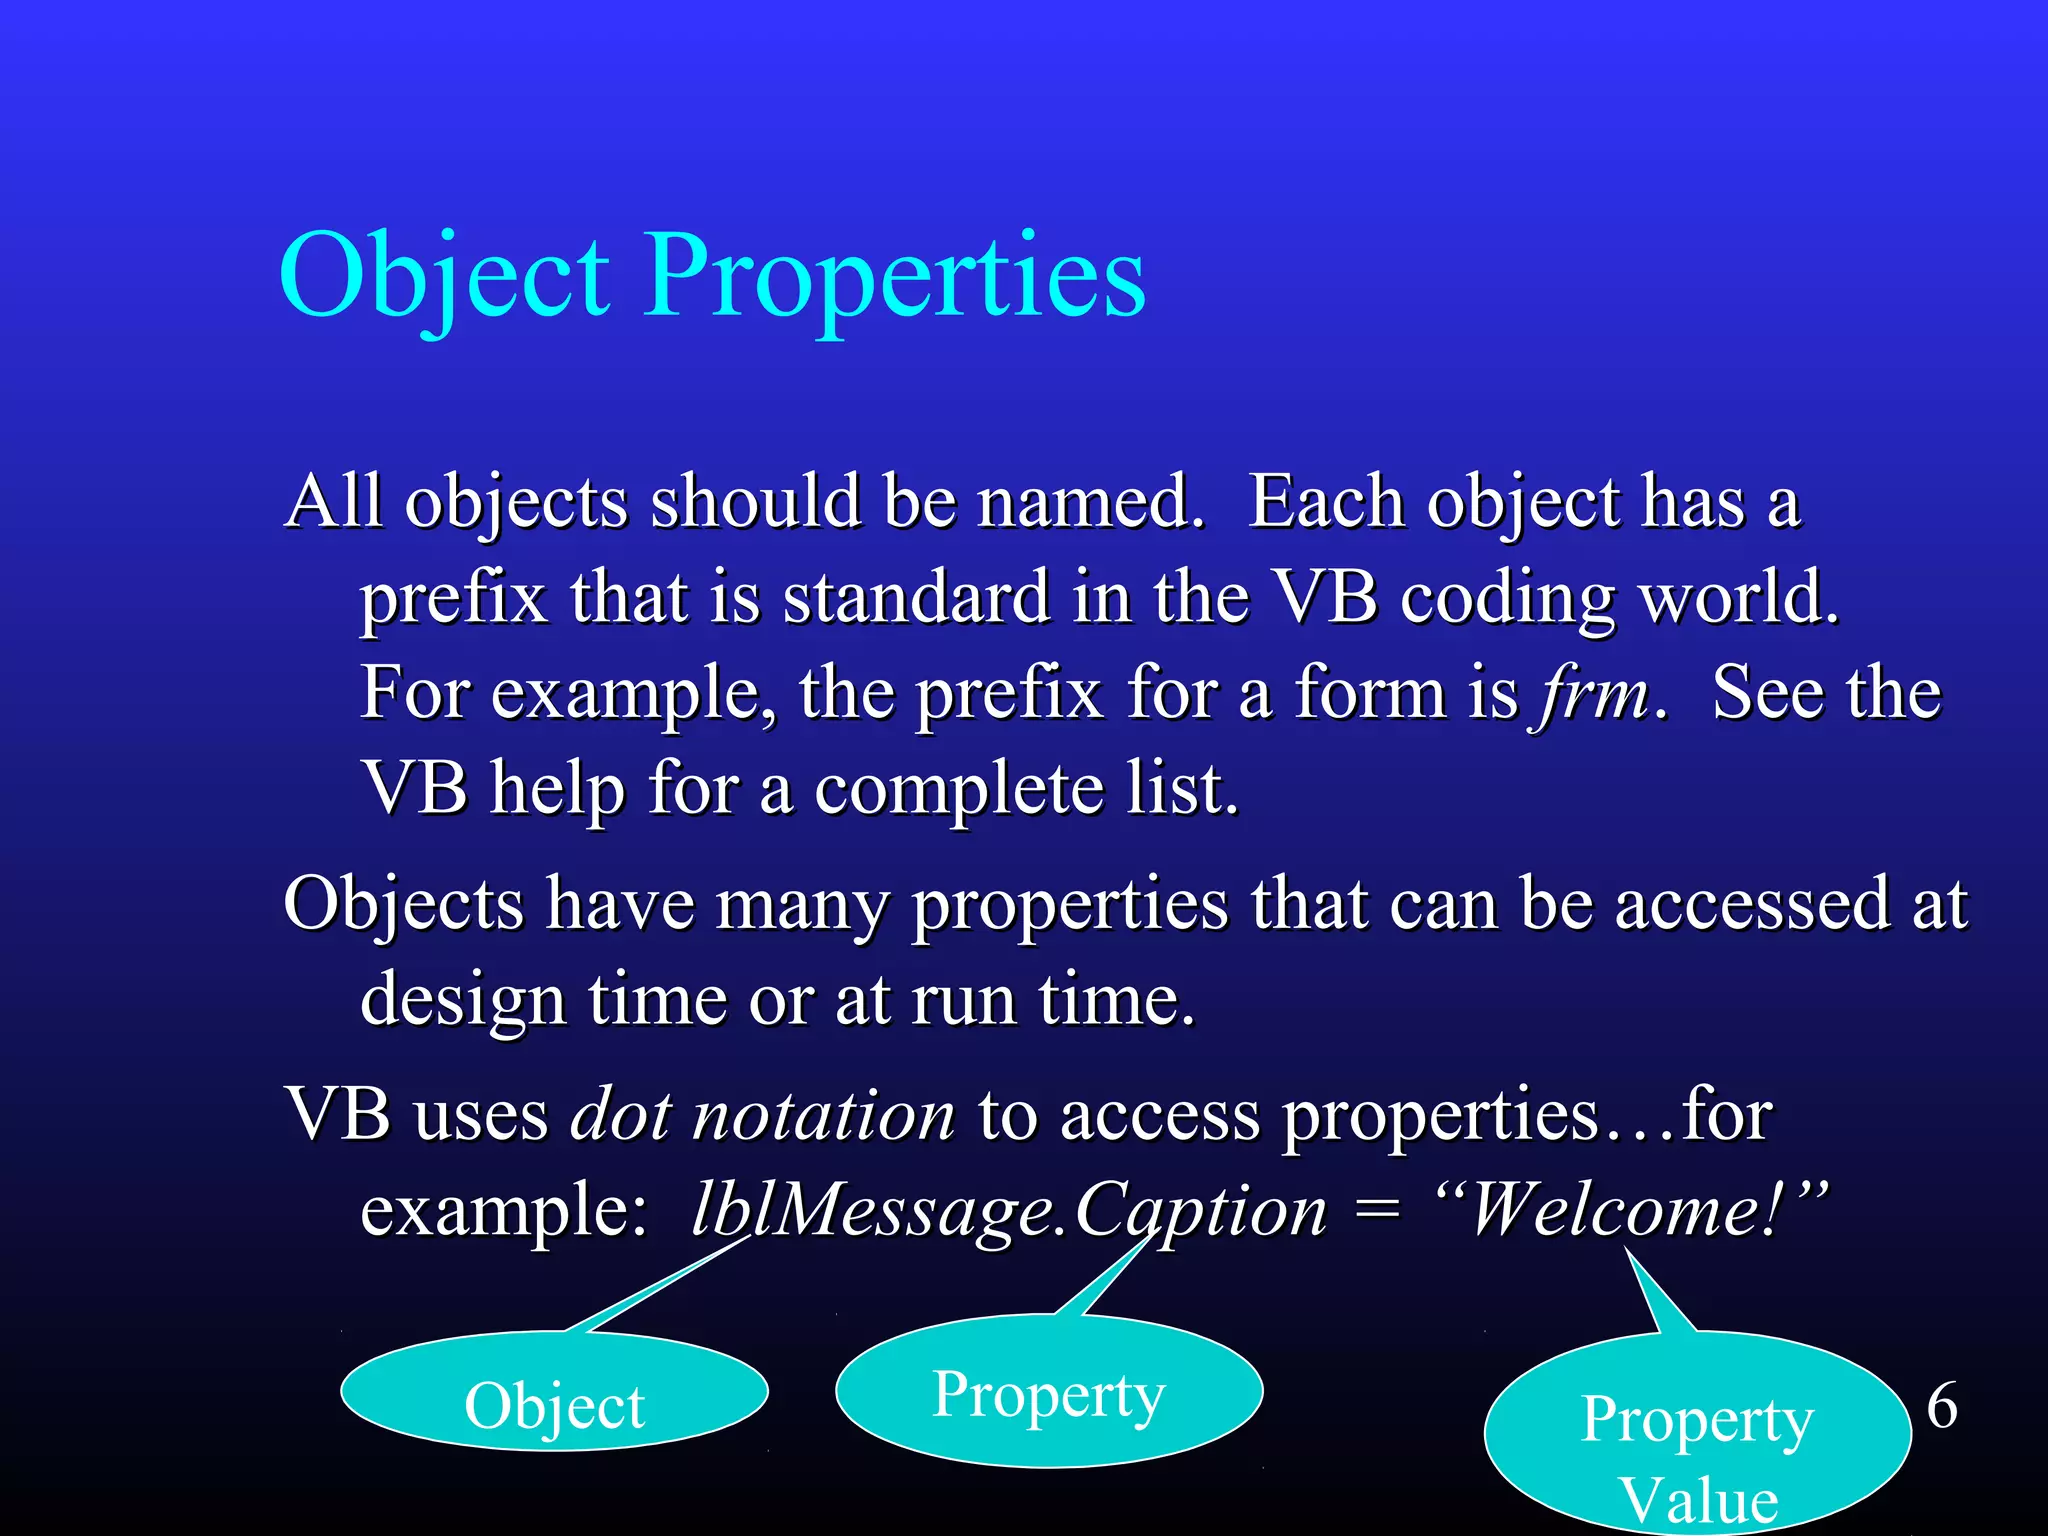
    Object Properties All objectsshould be named. Each object has aAll objects should be named. Each object has a prefix that is standard in the VB coding world.prefix that is standard in the VB coding world. For example, the prefix for a form isFor example, the prefix for a form is frmfrm. See the. See the VB help for a complete list.VB help for a complete list. Objects have many properties that can be accessed atObjects have many properties that can be accessed at design time or at run time.design time or at run time. VB usesVB uses dot notationdot notation to access properties…forto access properties…for example:example: lblMessage.Caption = “Welcome!”lblMessage.Caption = “Welcome!” Object Property Property Value 6
  • 7.
    Events AnAn event procedureeventprocedure is a block of code thatis a block of code that executes in response to an event. Aexecutes in response to an event. A useruser eventevent is an action performed by the useris an action performed by the user such as asuch as a mouse clickmouse click.. 7
  • 8.
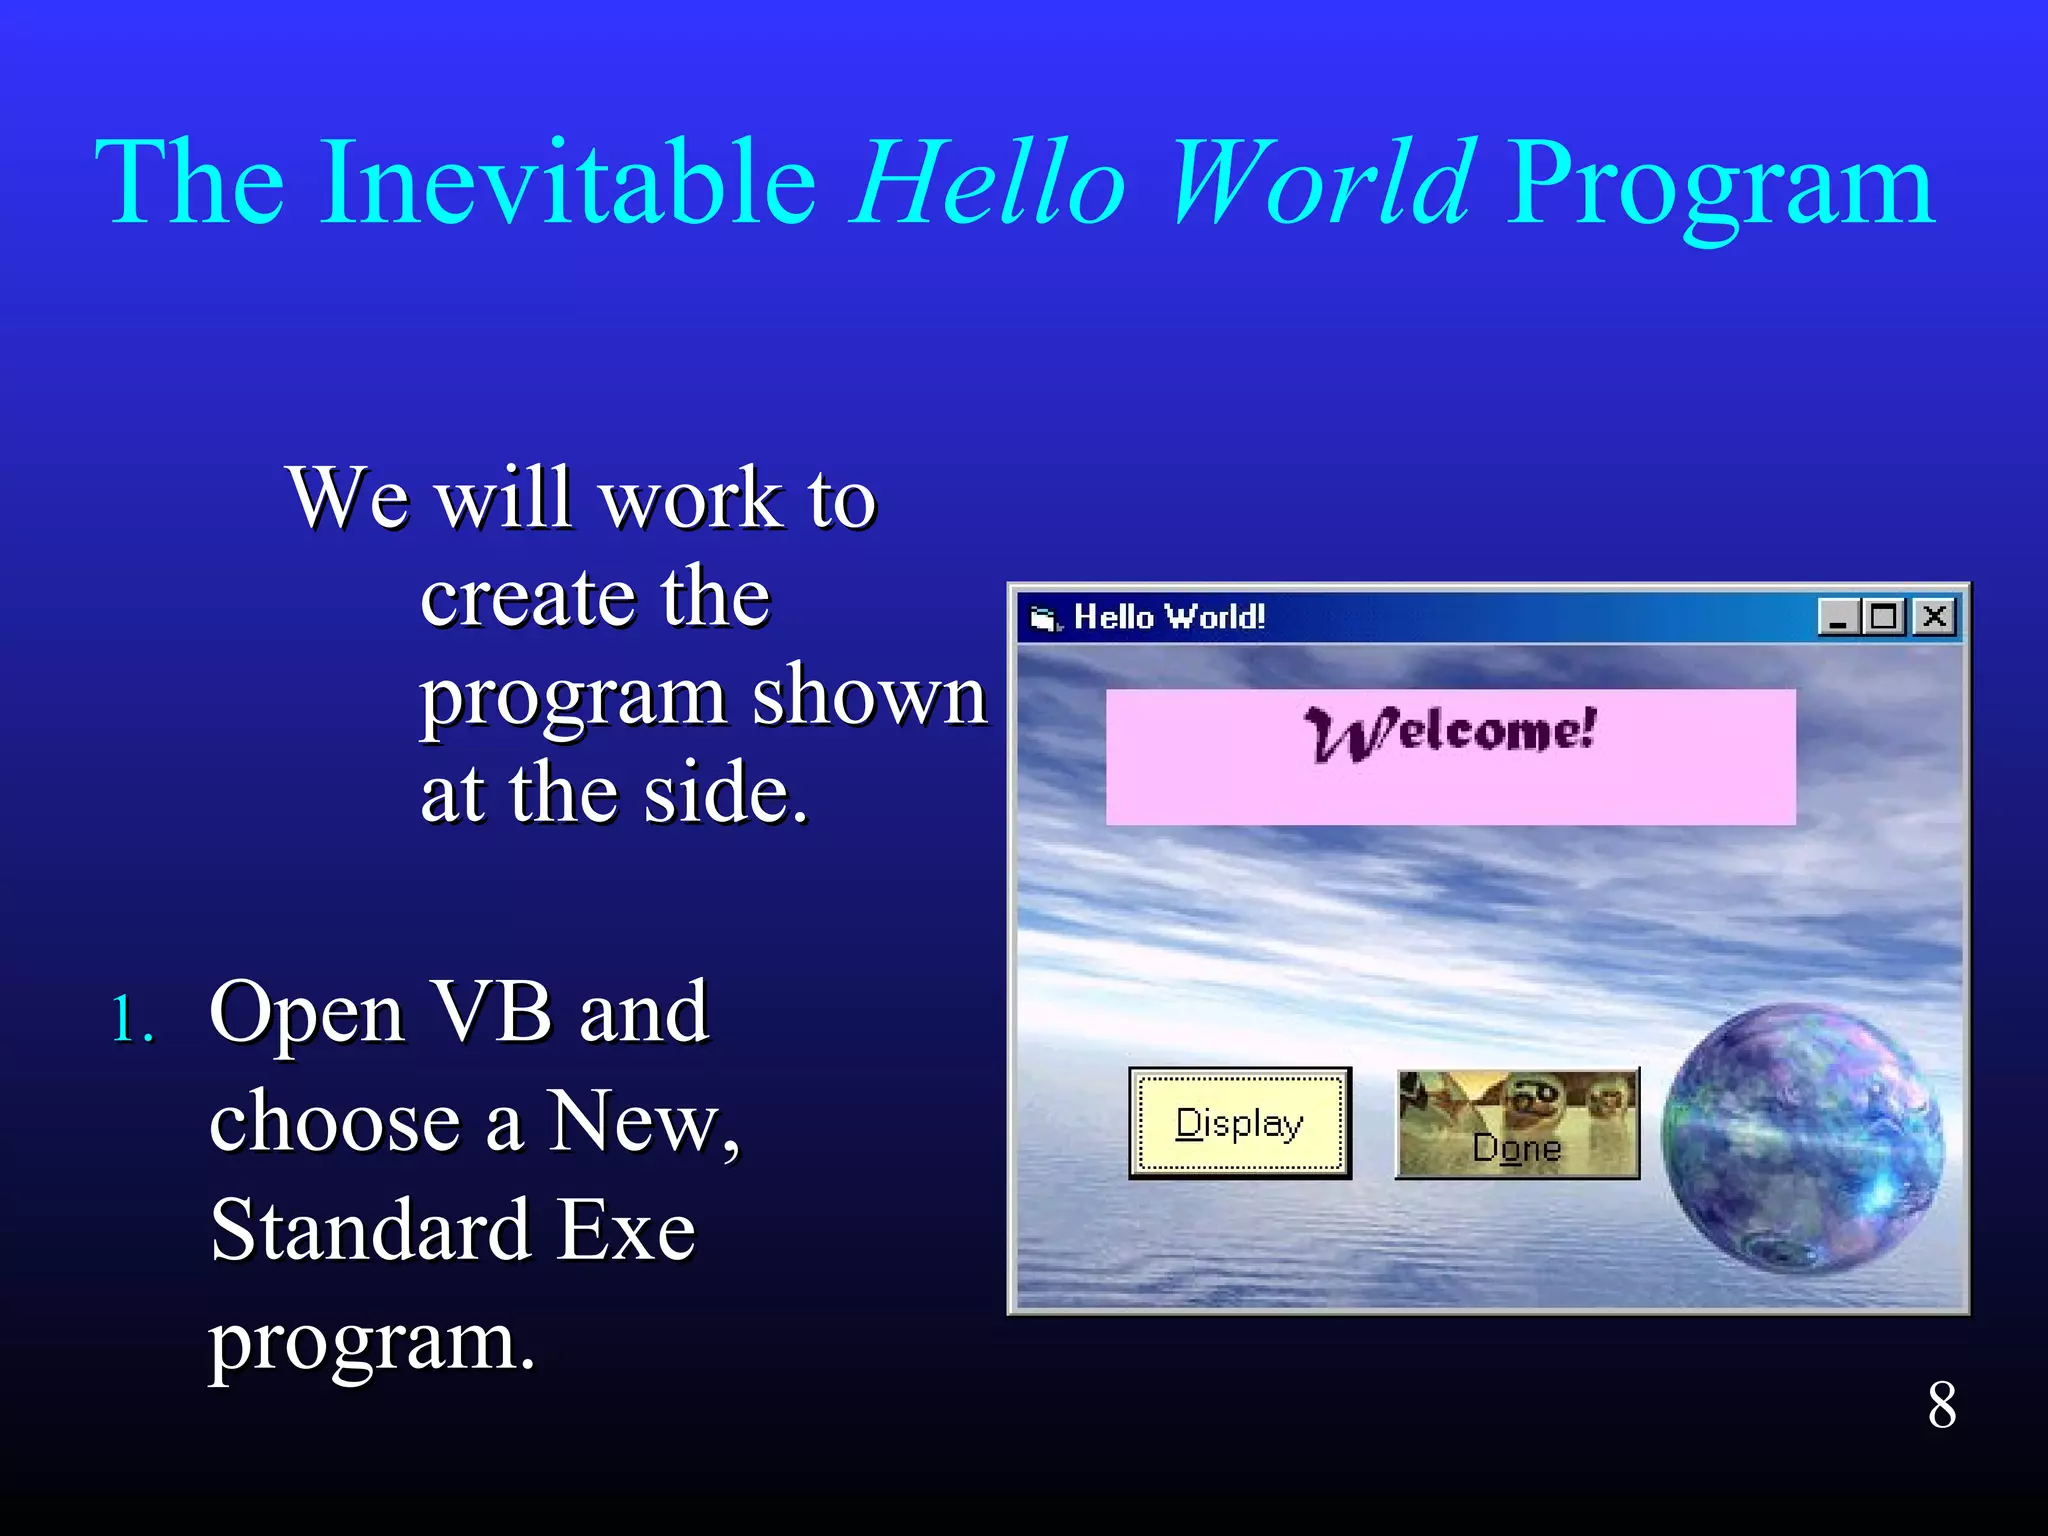
    The Inevitable HelloWorld Program We will work toWe will work to create thecreate the program shownprogram shown at the side.at the side. 1.1. Open VB andOpen VB and choose a New,choose a New, Standard ExeStandard Exe program.program. 8
  • 9.
    Hello World 2.2. Namethe formName the form frmHelloWorldfrmHelloWorld 3. Type in the3. Type in the Caption asCaption as shown. Noteshown. Note it change init change in the title bar.the title bar. 9
  • 10.
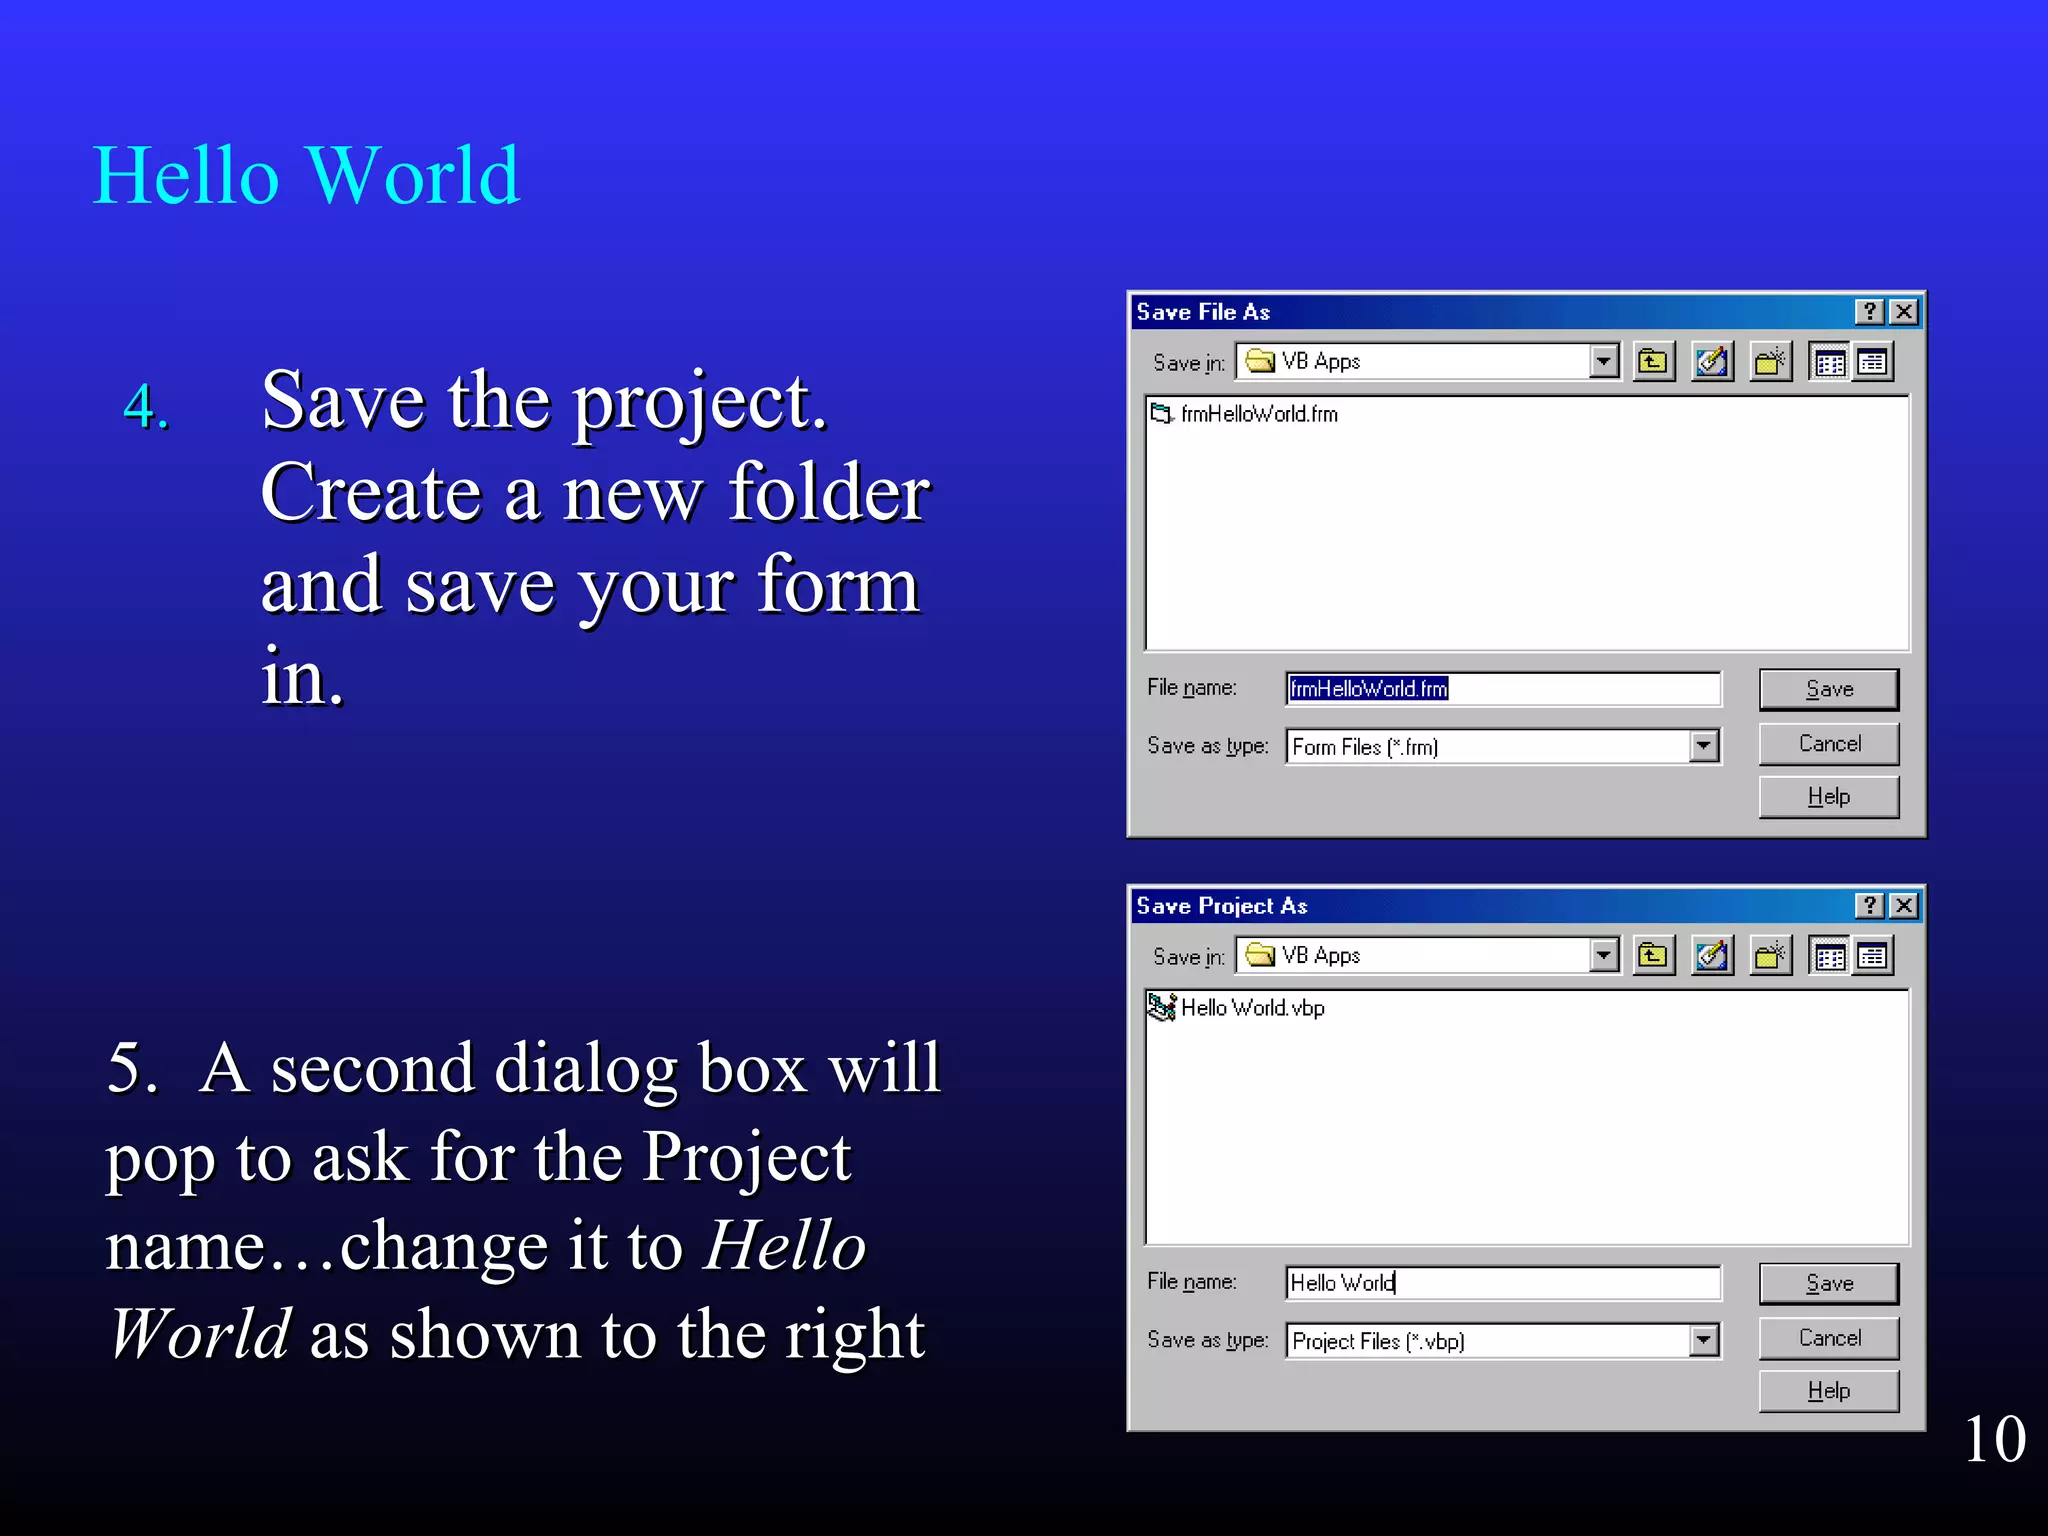
    Hello World 4.4. Savethe project.Save the project. Create a new folderCreate a new folder and save your formand save your form in.in. 5. A second dialog box will5. A second dialog box will pop to ask for the Projectpop to ask for the Project name…change it toname…change it to HelloHello WorldWorld as shown to the rightas shown to the right 10
  • 11.
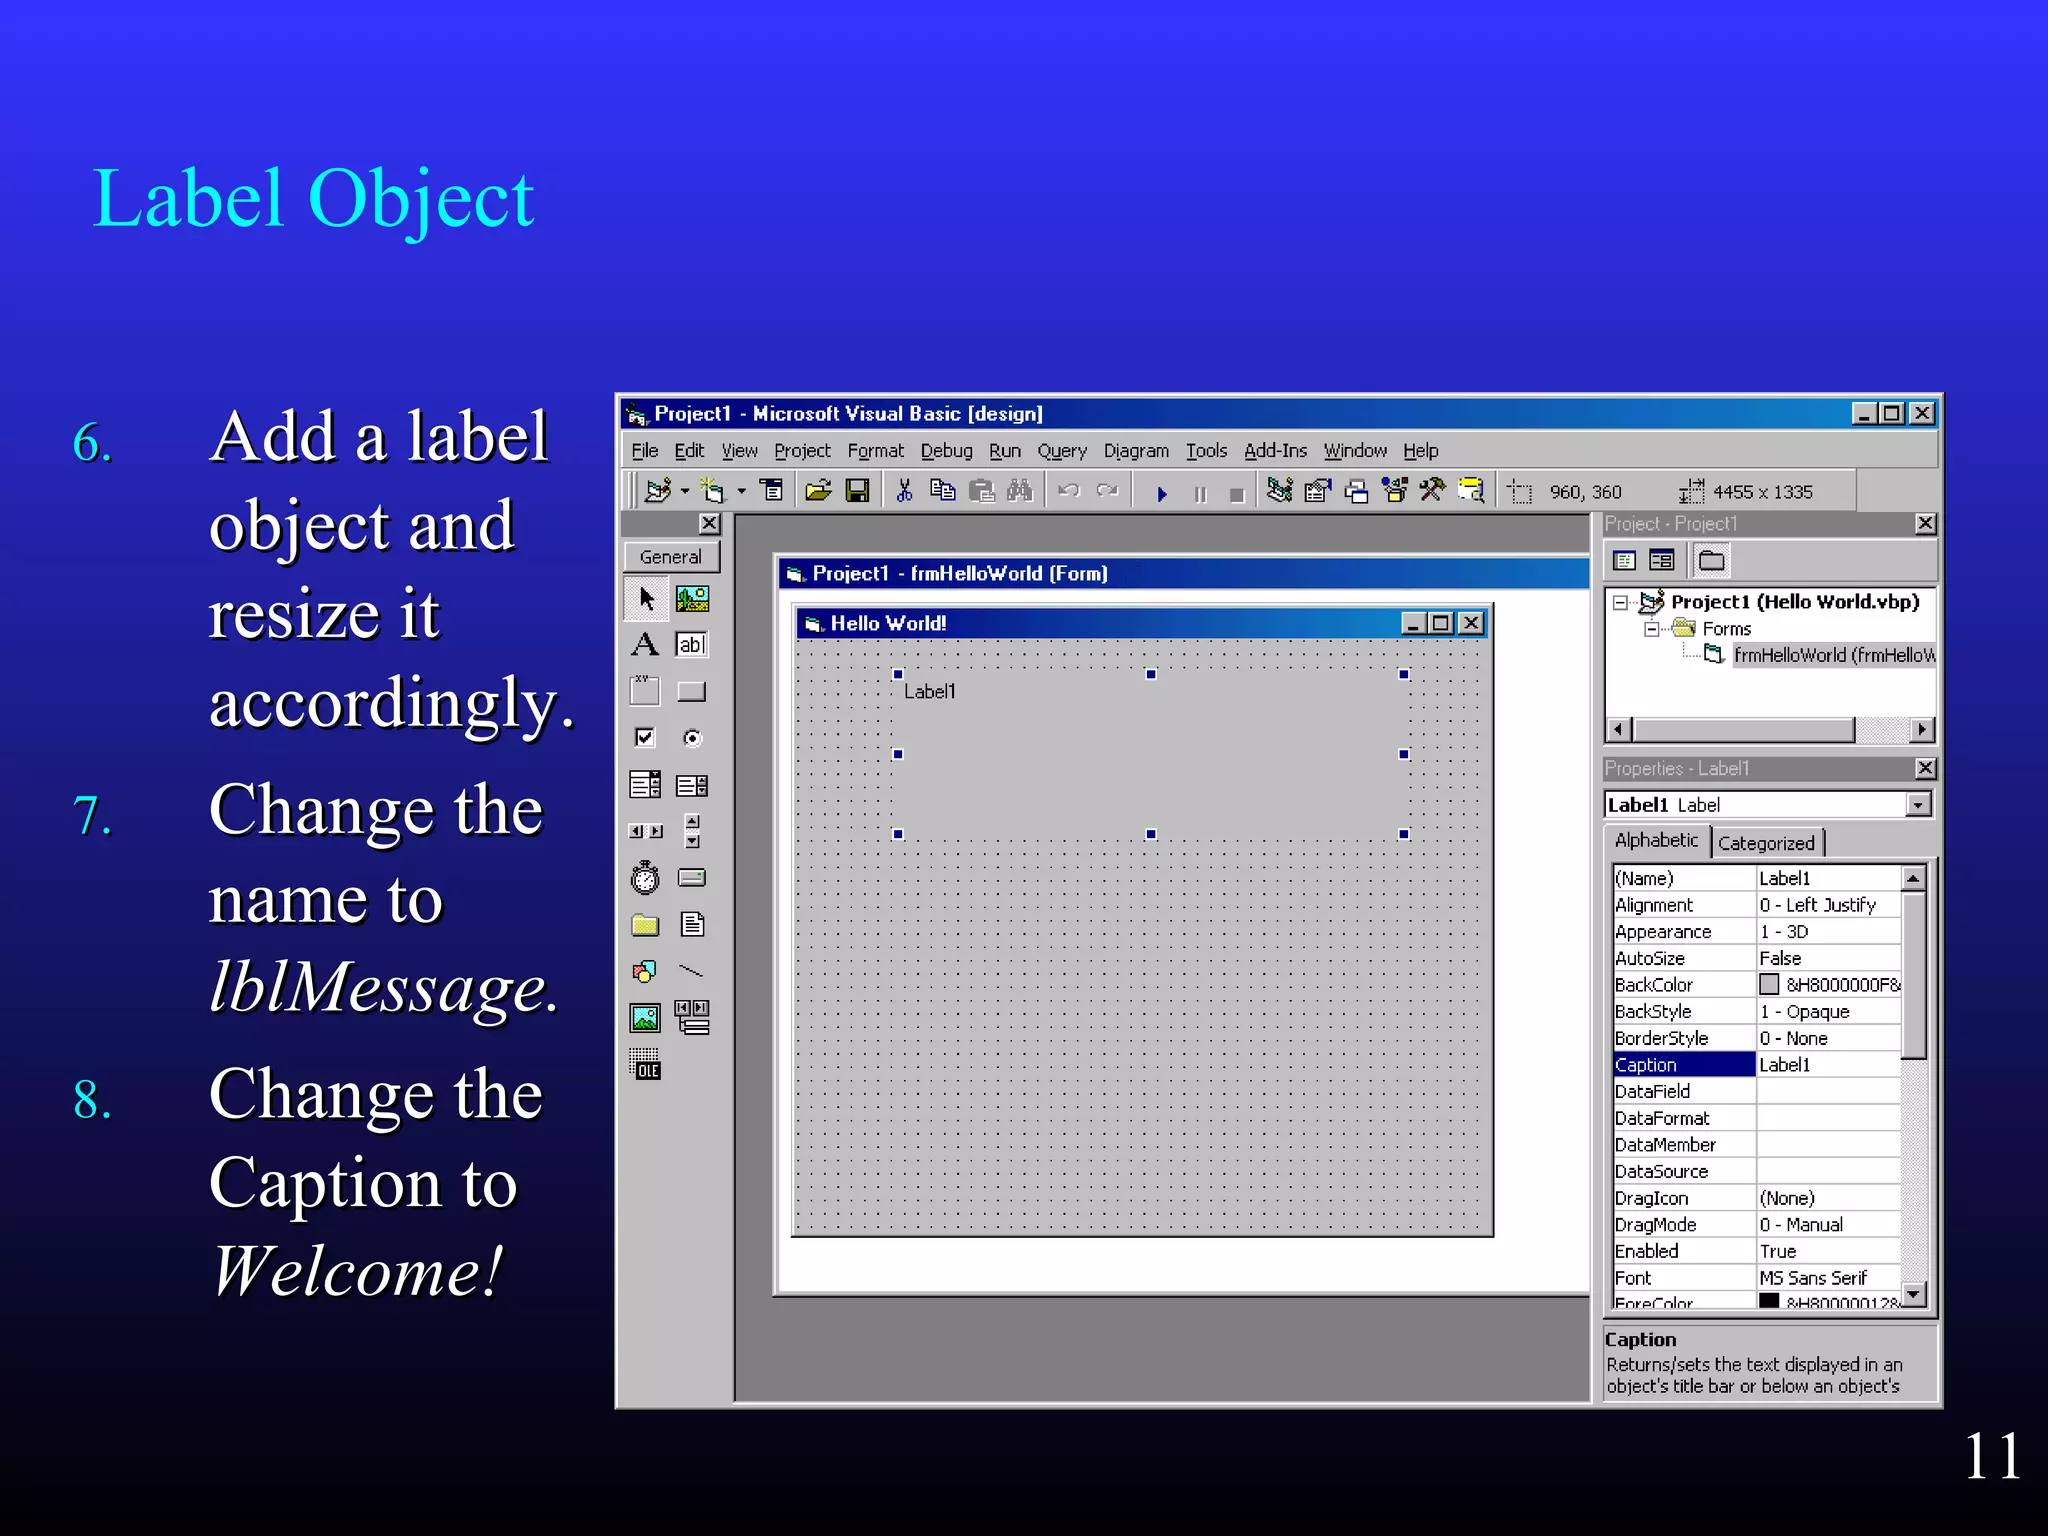
    6.6. Add alabelAdd a label object andobject and resize itresize it accordingly.accordingly. 7.7. Change theChange the name toname to lblMessage.lblMessage. 8.8. Change theChange the Caption toCaption to Welcome!Welcome! Label Object 11
  • 12.
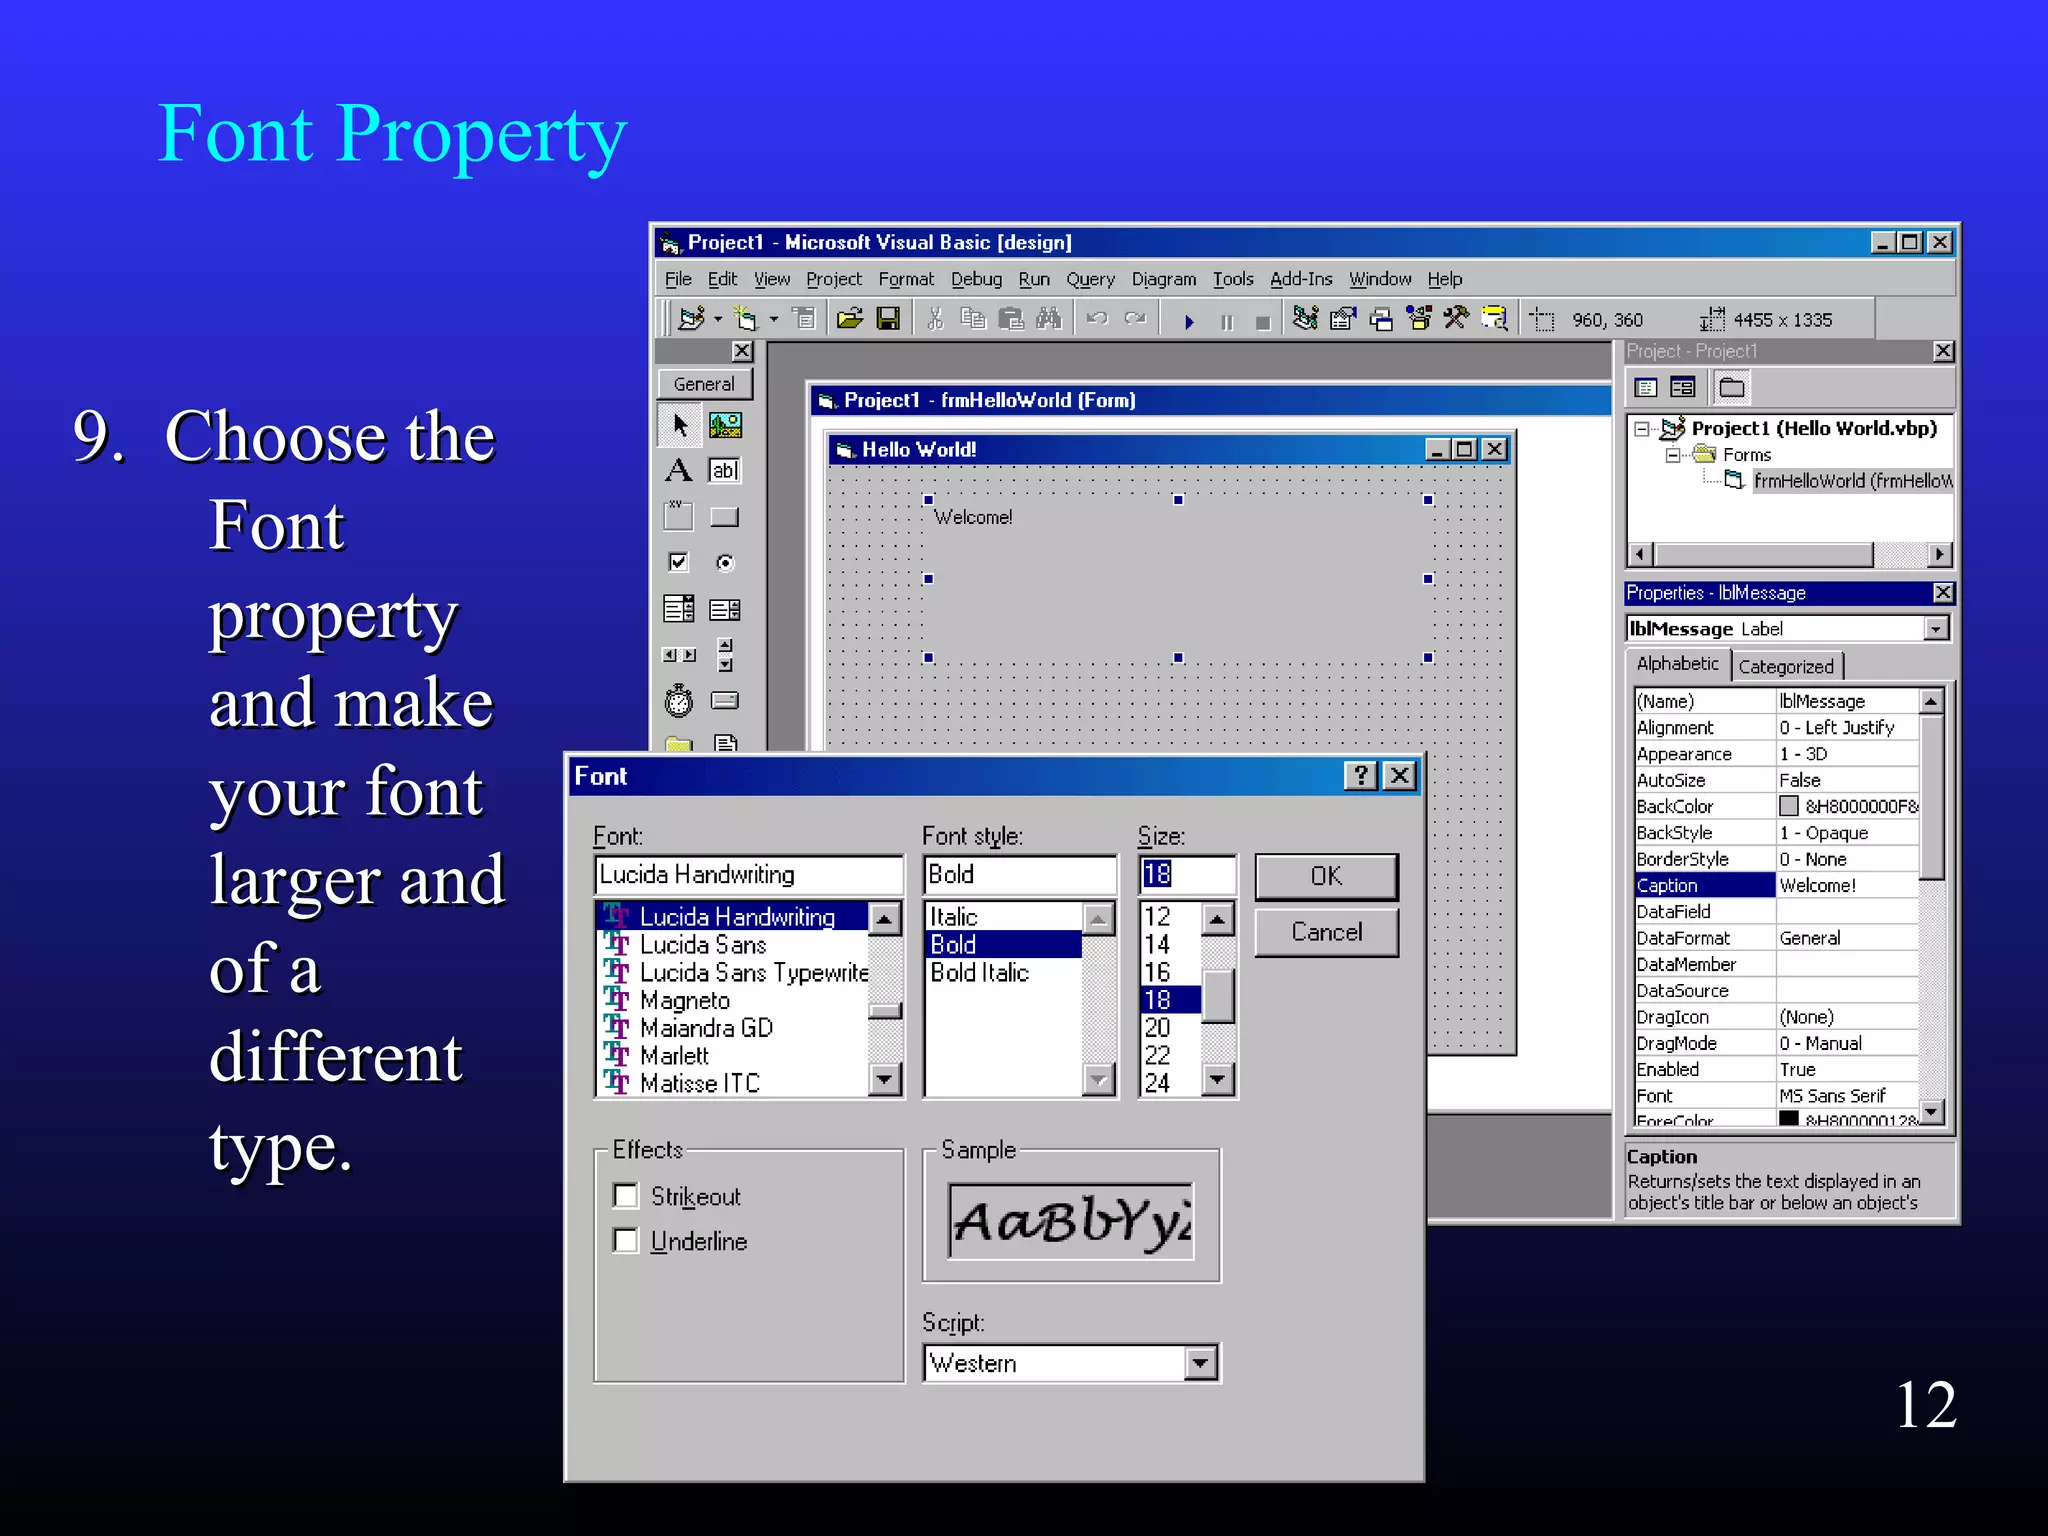
    9. Choose the9.Choose the FontFont propertyproperty and makeand make your fontyour font larger andlarger and of aof a differentdifferent type.type. Font Property 12
  • 13.
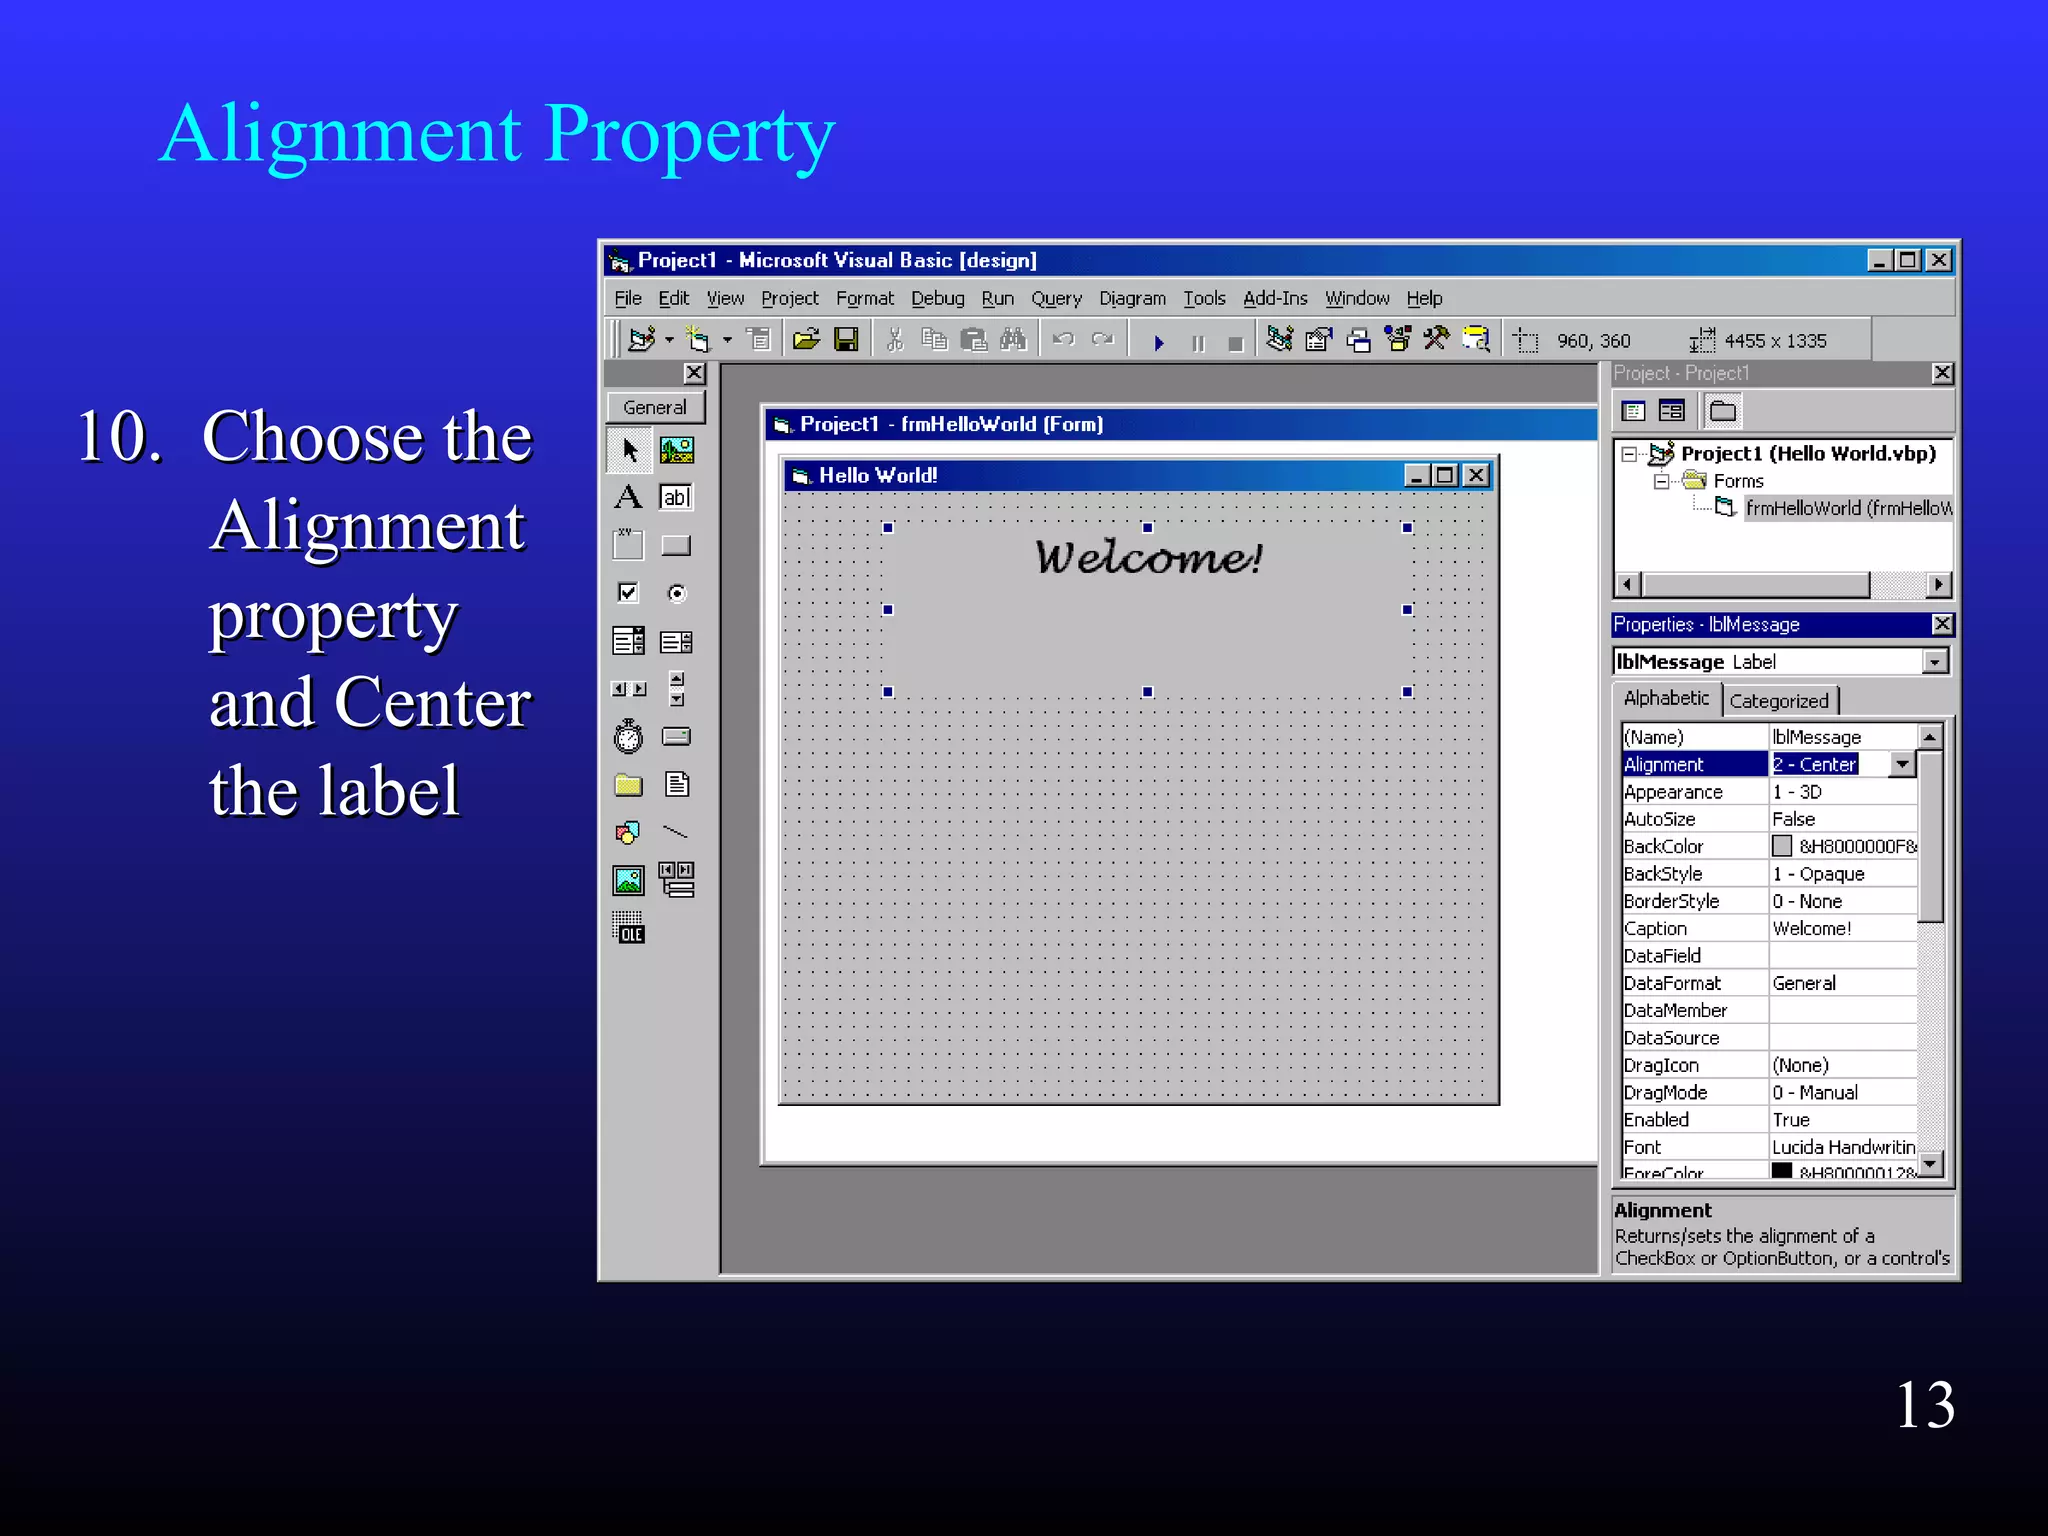
    10. Choose the10.Choose the AlignmentAlignment propertyproperty and Centerand Center the labelthe label Alignment Property 13
  • 14.
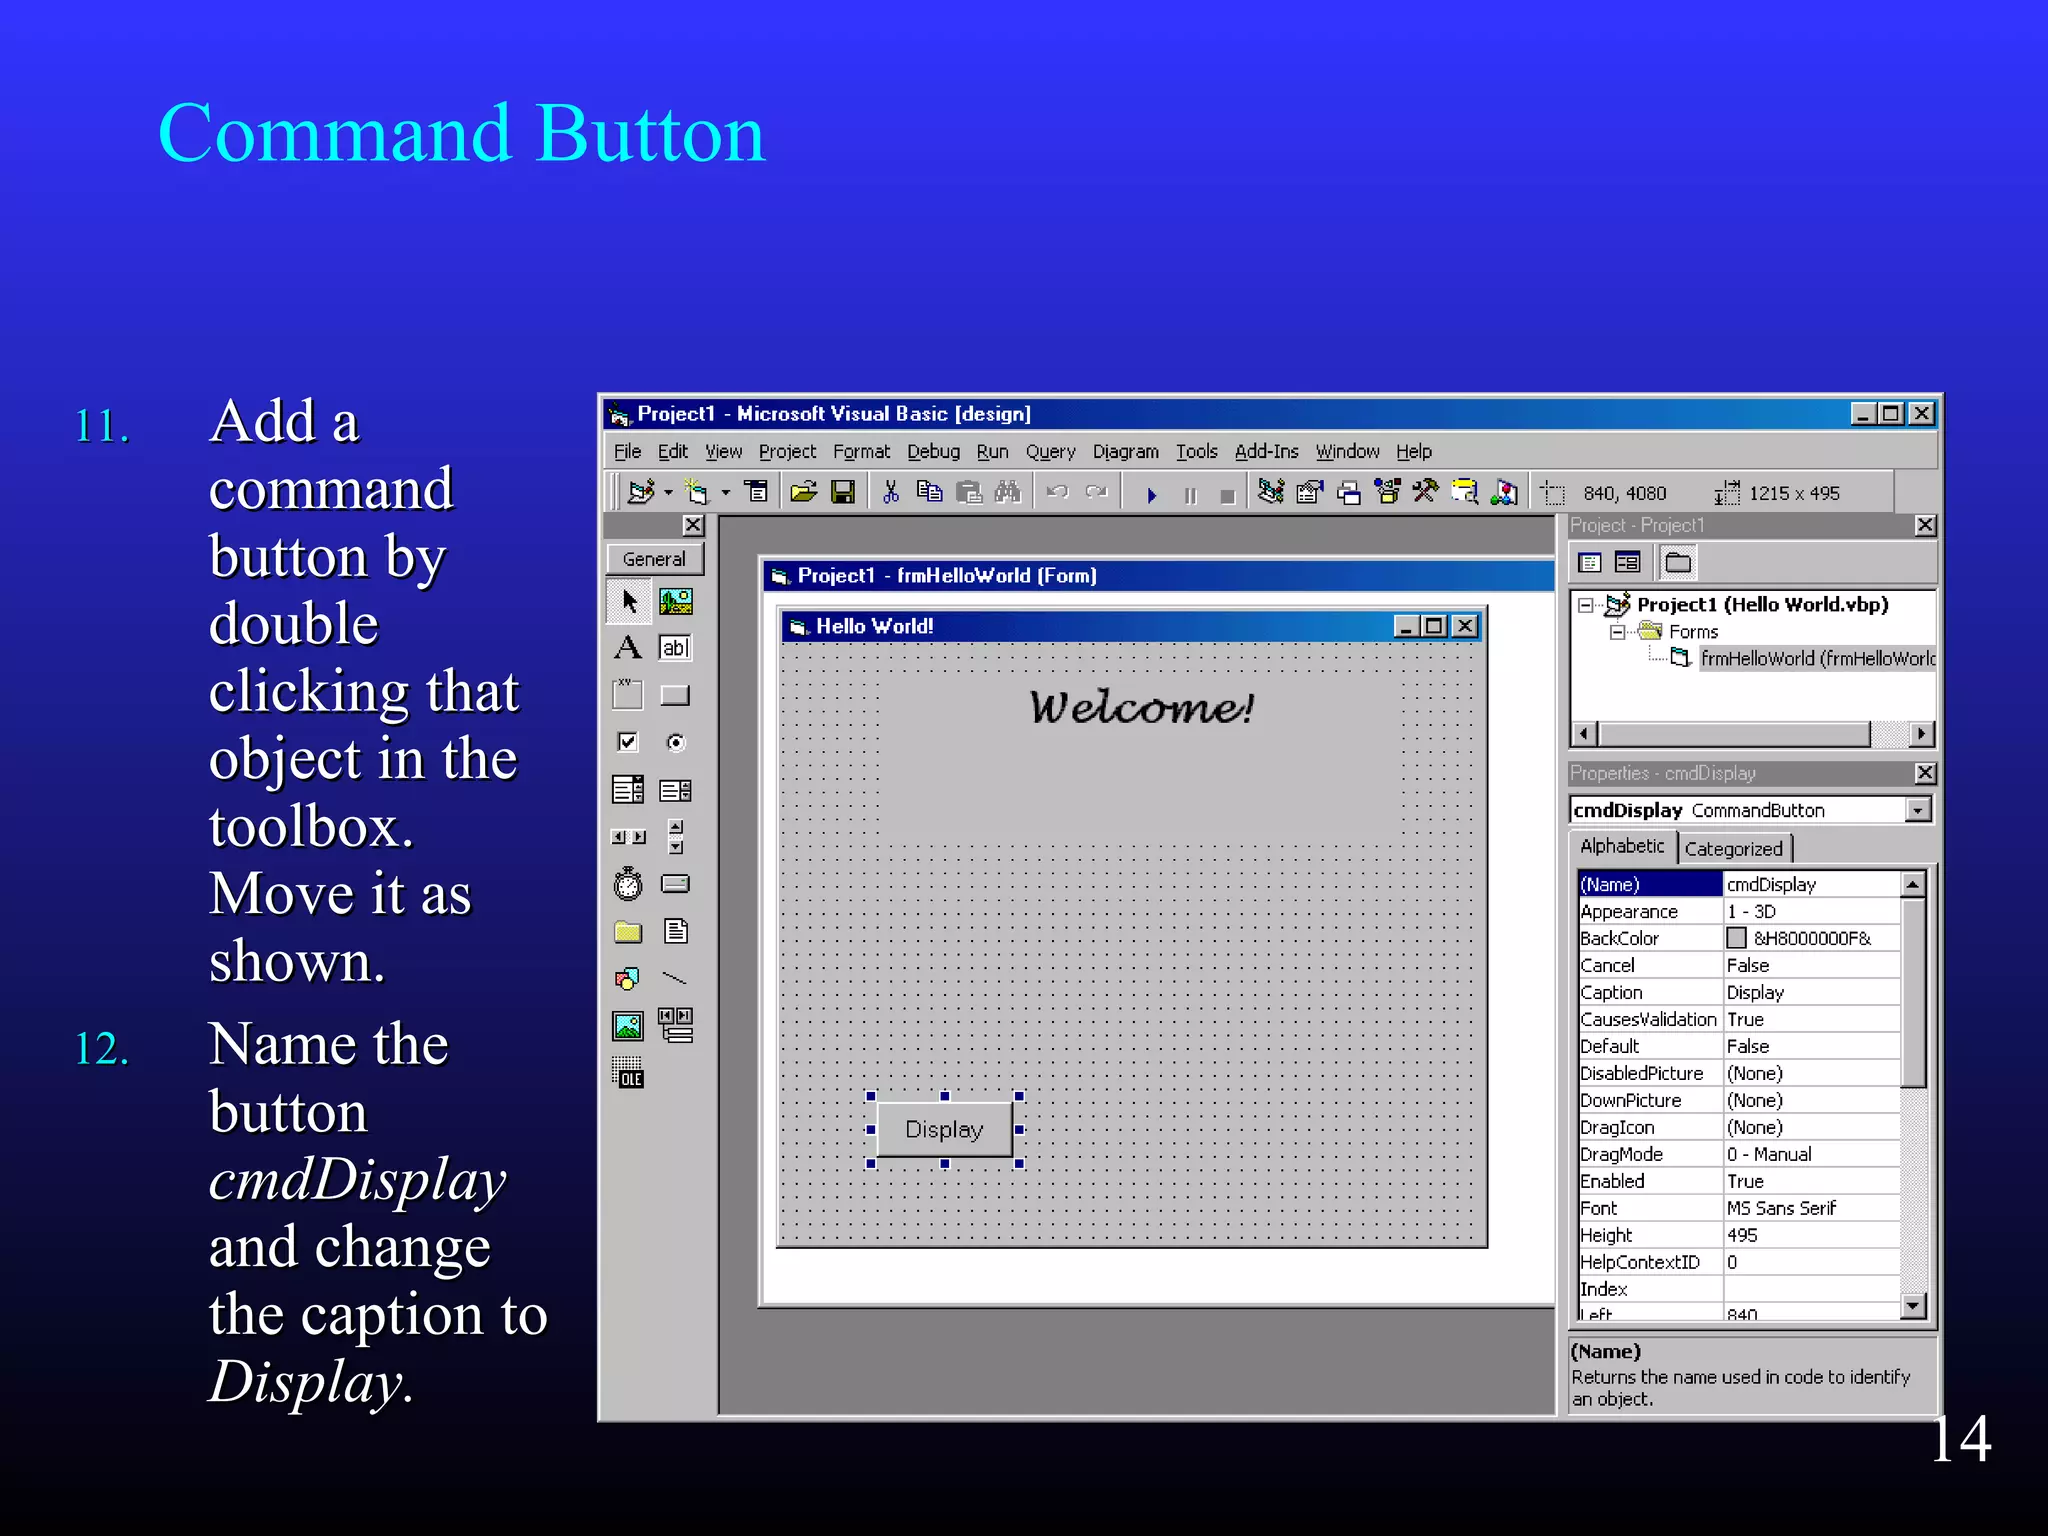
    11.11. Add aAdda commandcommand button bybutton by doubledouble clicking thatclicking that object in theobject in the toolbox.toolbox. Move it asMove it as shown.shown. 12.12. Name theName the buttonbutton cmdDisplaycmdDisplay and changeand change the caption tothe caption to Display.Display. Command Button 14
  • 15.
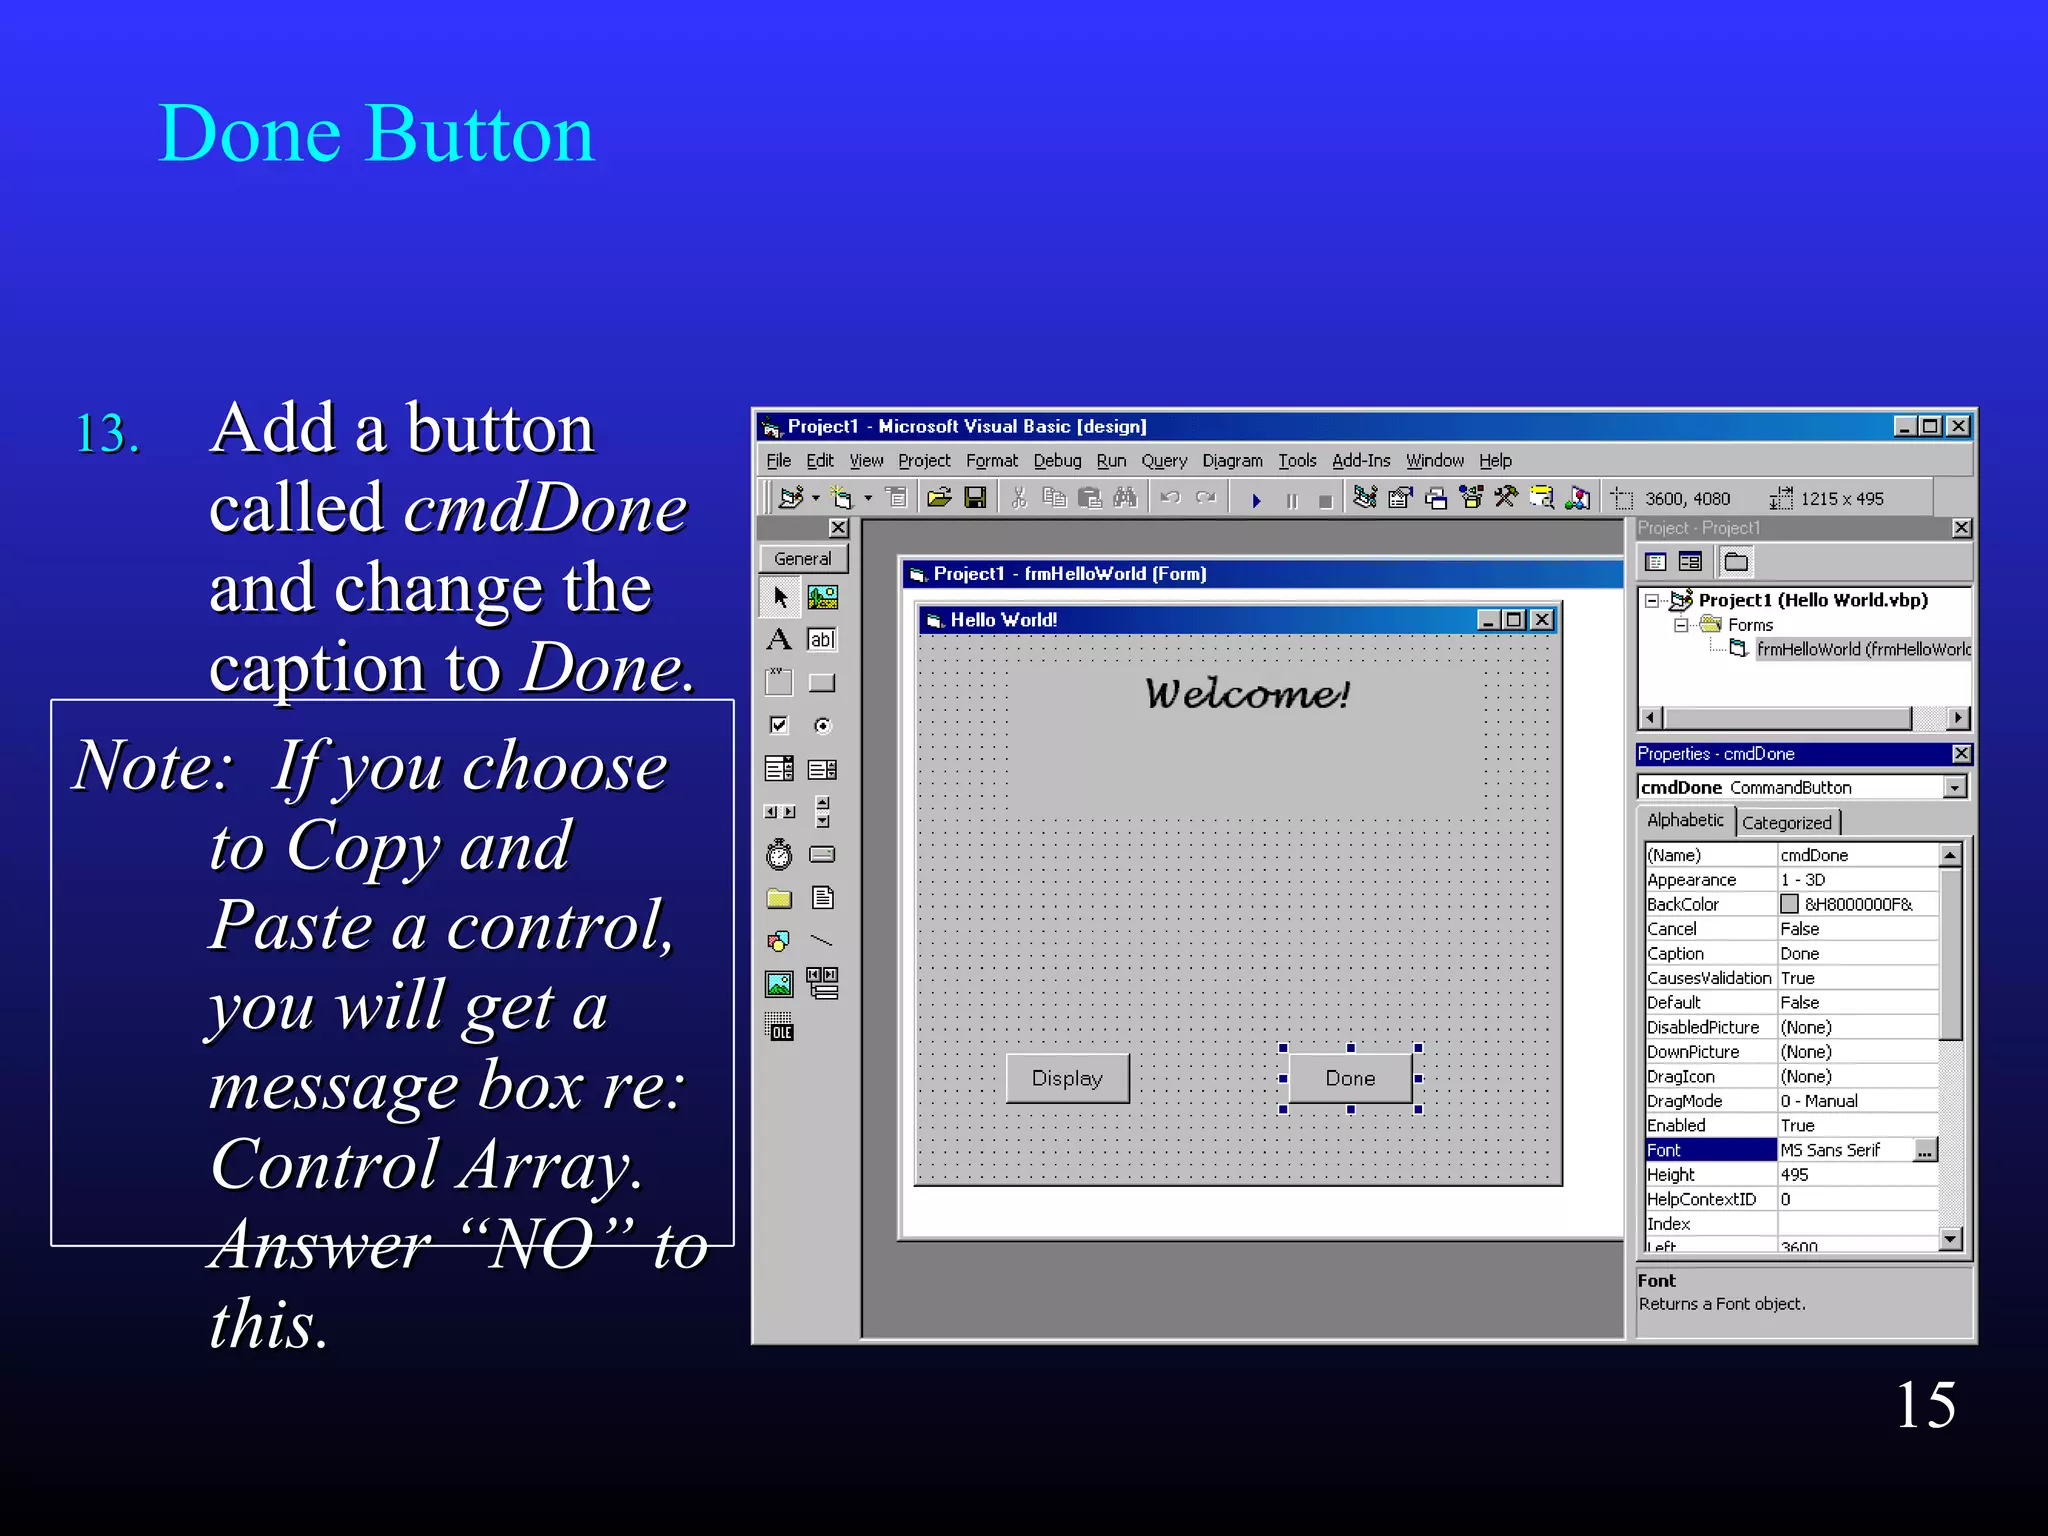
    13.13. Add abuttonAdd a button calledcalled cmdDonecmdDone and change theand change the caption tocaption to Done.Done. Note: If you chooseNote: If you choose to Copy andto Copy and Paste a control,Paste a control, you will get ayou will get a message box re:message box re: Control Array.Control Array. Answer “NO” toAnswer “NO” to this.this. Done Button 15
  • 16.
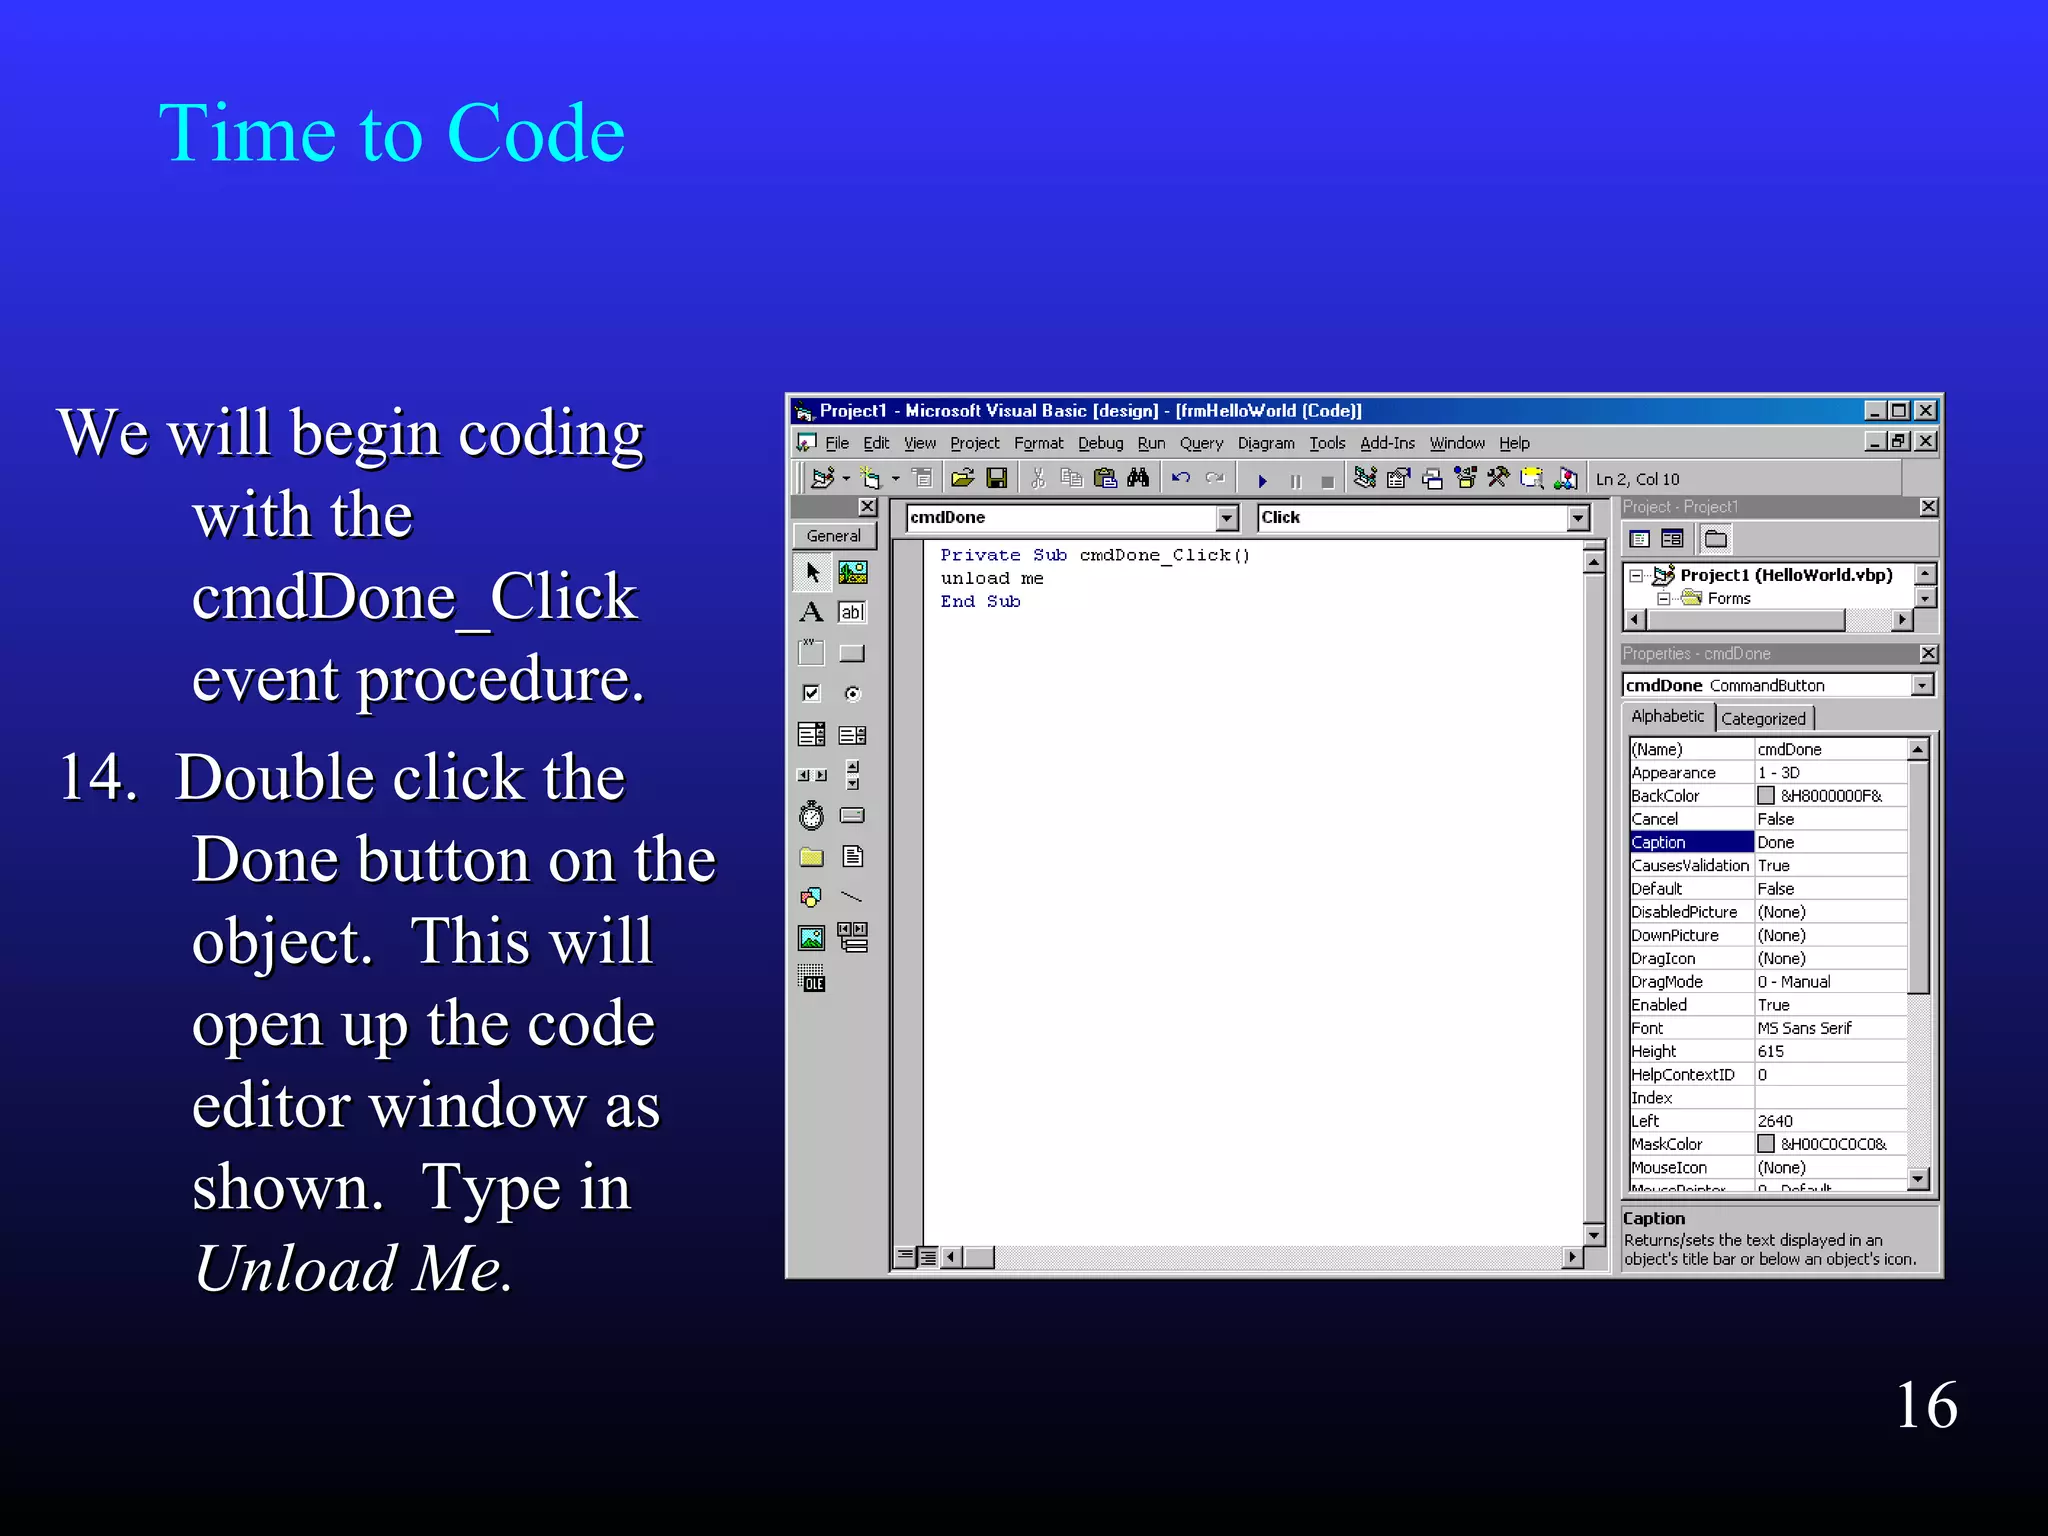
    We will begincodingWe will begin coding with thewith the cmdDone_ClickcmdDone_Click event procedure.event procedure. 14. Double click the14. Double click the Done button on theDone button on the object. This willobject. This will open up the codeopen up the code editor window aseditor window as shown. Type inshown. Type in Unload Me.Unload Me. Time to Code 16
  • 17.
    Unload Me Adding thecode Unload Me to theAdding the code Unload Me to the cmdDone_ClickcmdDone_Click event tells the computer thatevent tells the computer that when the control namedwhen the control named cmdDonecmdDone is clicked, theis clicked, the form (me)form (me) willwill unloadunload.. ToTo runrun your program, choose Run from the menu,your program, choose Run from the menu, press F5, or click the Run button on the toolbar.press F5, or click the Run button on the toolbar. Clicking the Done button should unload your form.Clicking the Done button should unload your form. 17
  • 18.
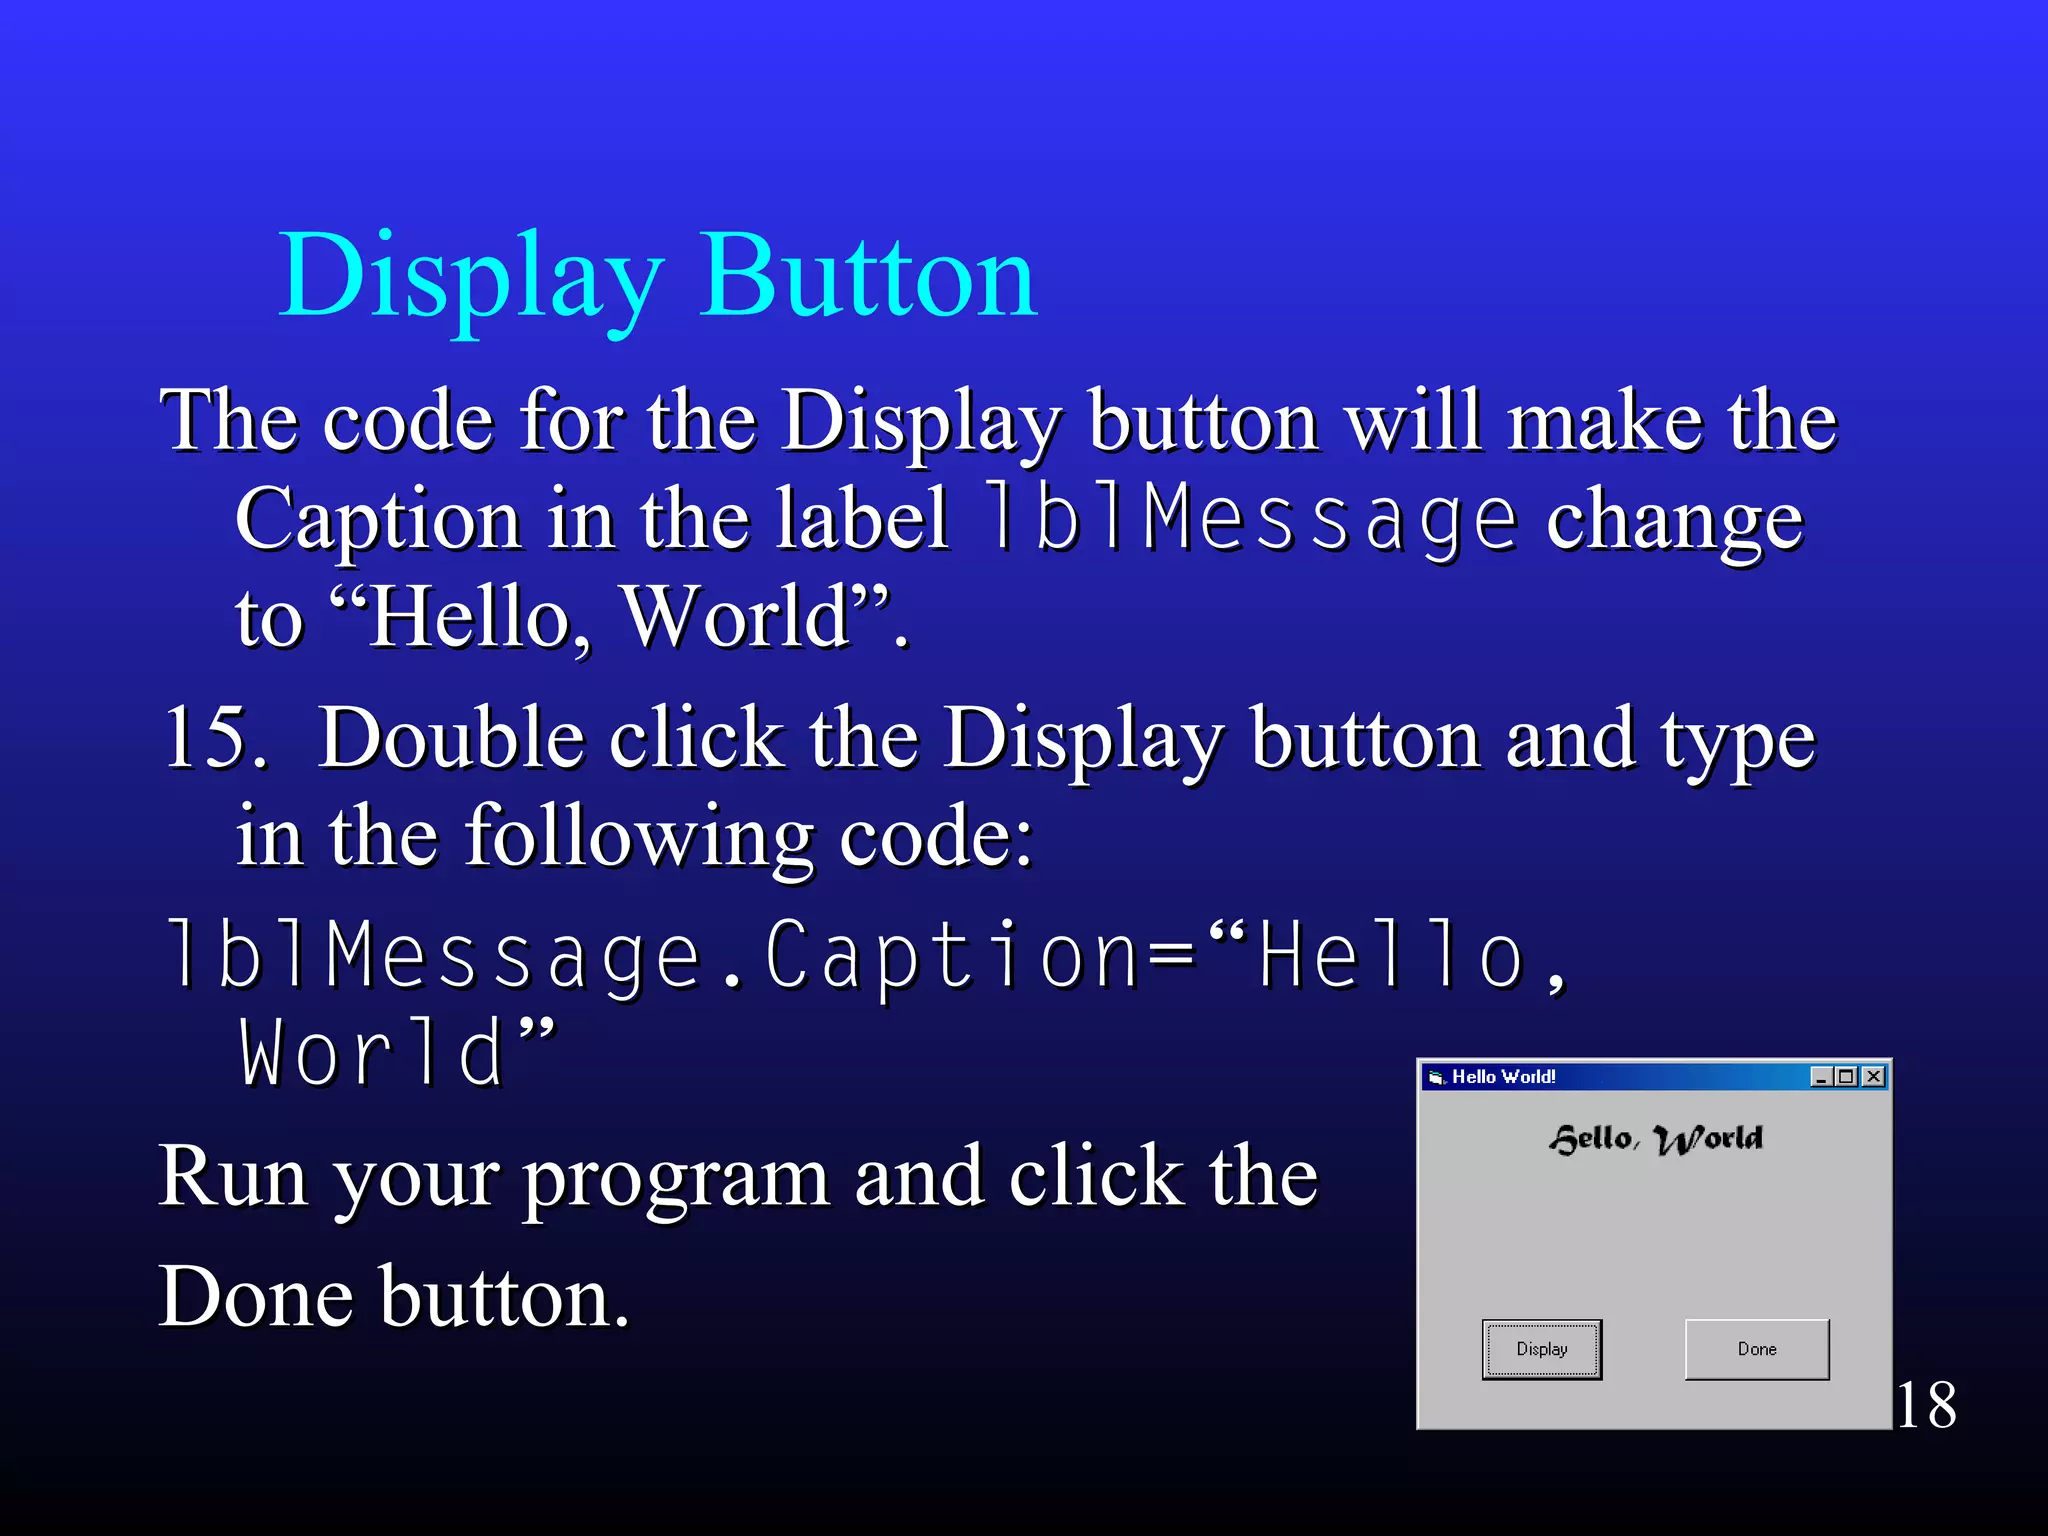
    Display Button The codefor the Display button will make theThe code for the Display button will make the Caption in the labelCaption in the label lblMessagelblMessage changechange to “Hello, World”.to “Hello, World”. 15. Double click the Display button and type15. Double click the Display button and type in the following code:in the following code: lblMessage.Caption=“Hello,lblMessage.Caption=“Hello, World”World” Run your program and click theRun your program and click the Done button.Done button. 18
  • 19.
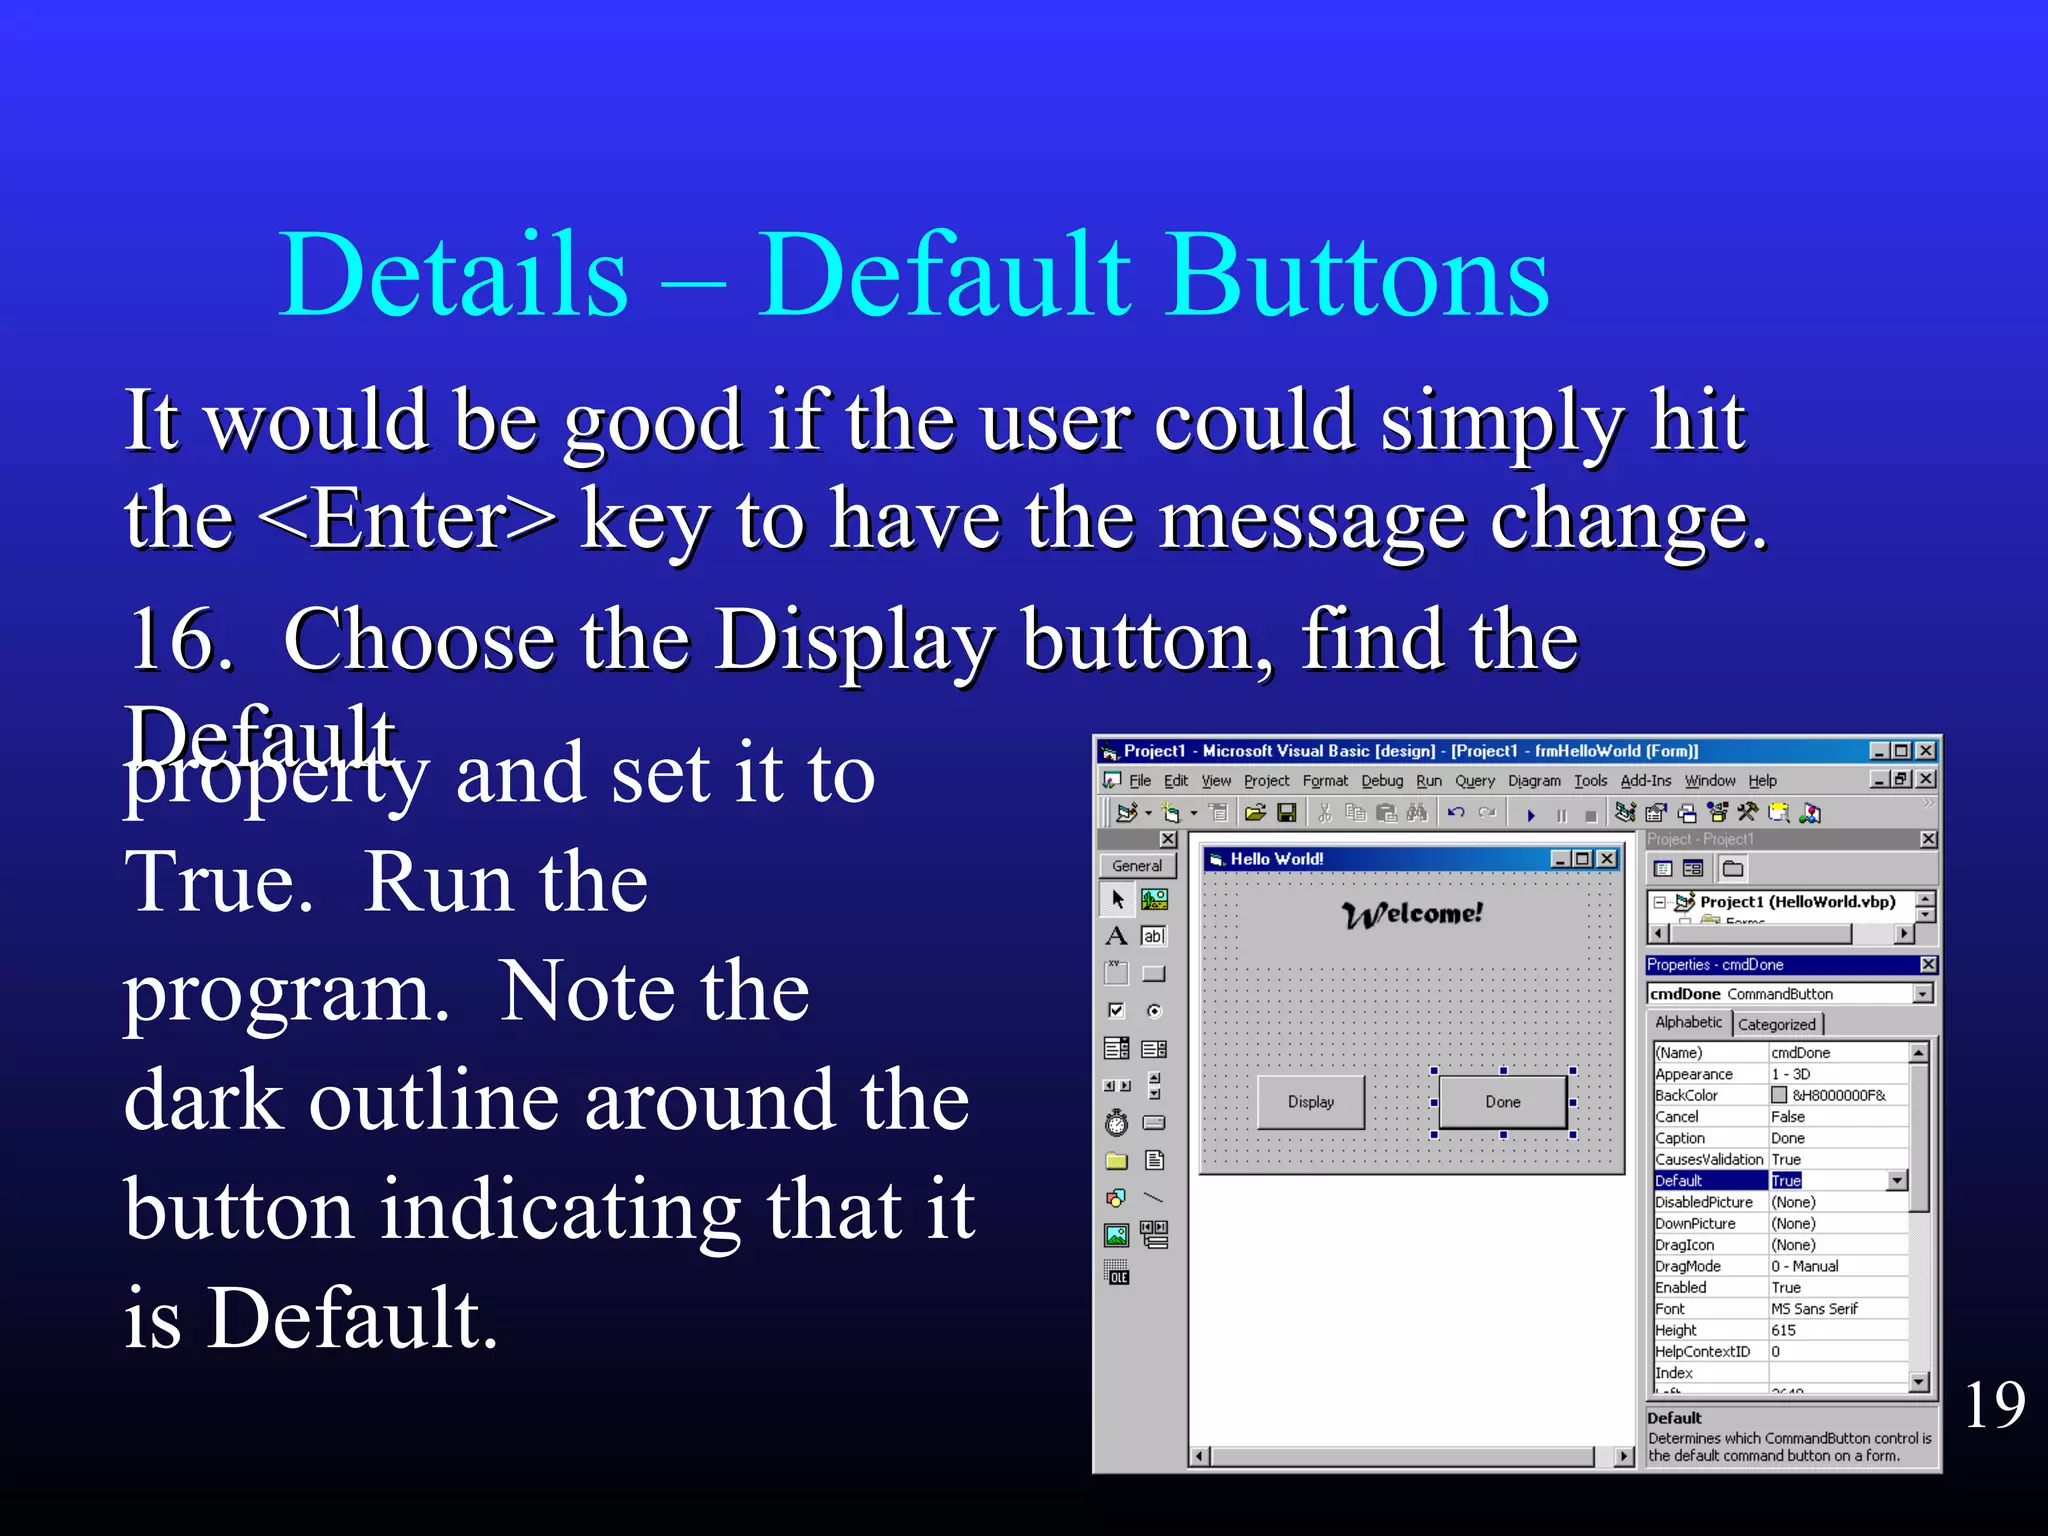
    Details – DefaultButtons It would be good if the user could simply hitIt would be good if the user could simply hit the <Enter> key to have the message change.the <Enter> key to have the message change. 16. Choose the Display button, find the16. Choose the Display button, find the DefaultDefaultproperty and set it to True. Run the program. Note the dark outline around the button indicating that it is Default. 19
  • 20.
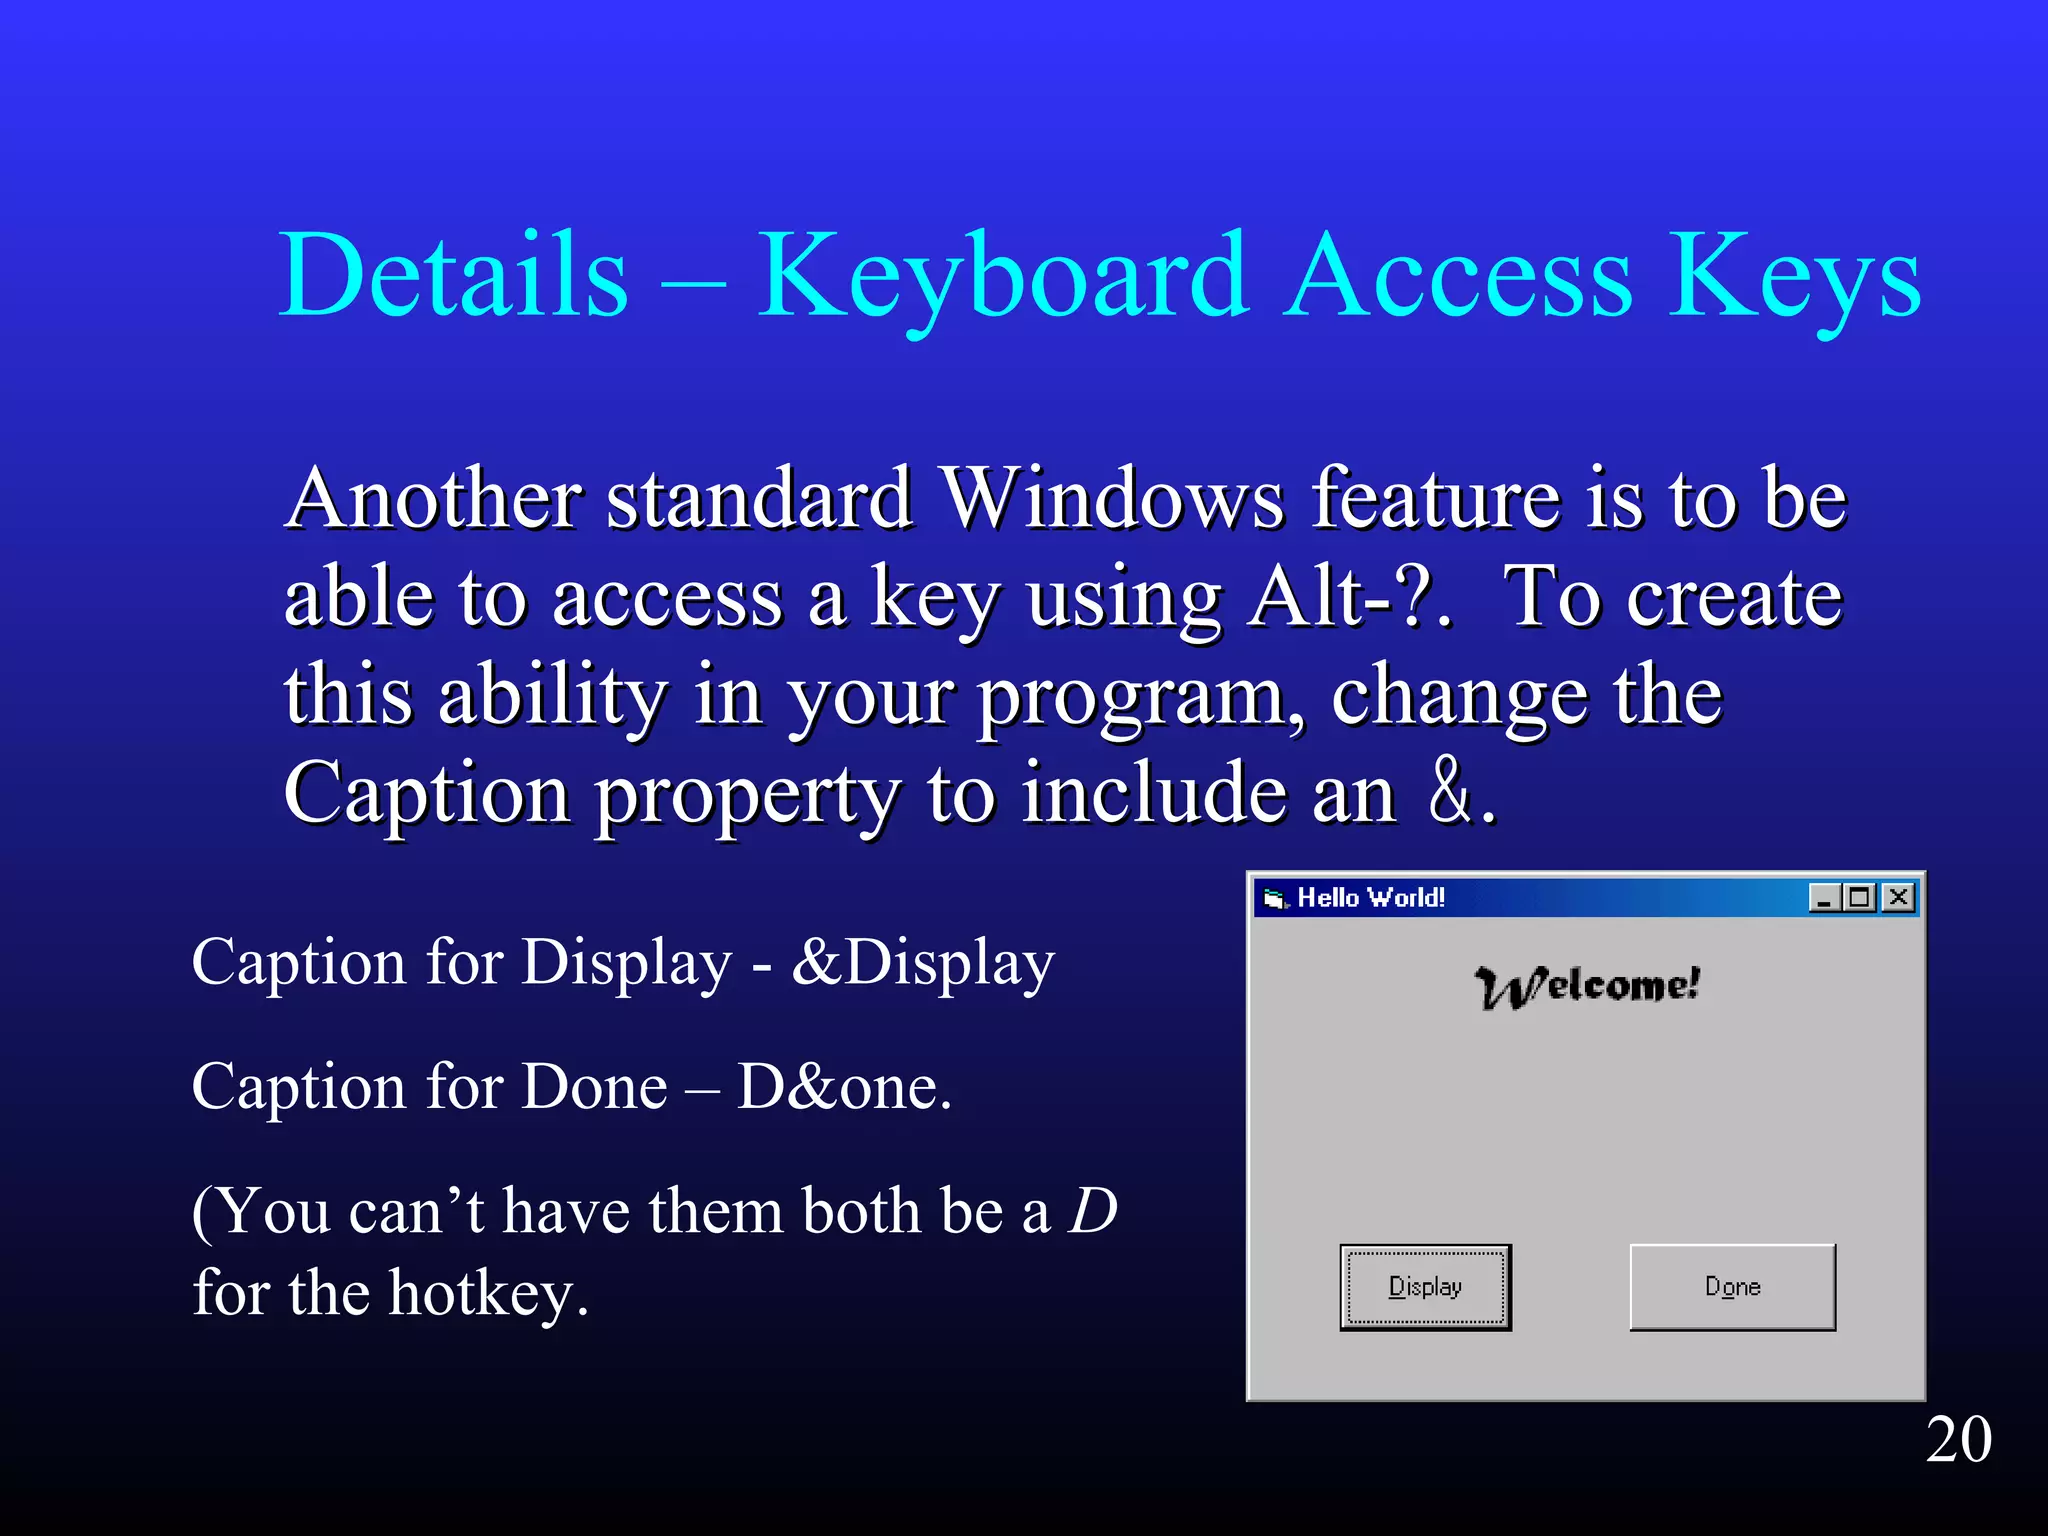
    Details – KeyboardAccess Keys Another standard Windows feature is to beAnother standard Windows feature is to be able to access a key using Alt-?. To createable to access a key using Alt-?. To create this ability in your program, change thethis ability in your program, change the Caption property to include anCaption property to include an &&.. Caption for Display - &Display Caption for Done – D&one. (You can’t have them both be a D for the hotkey. 20
  • 21.
    Moving Your Programand Creating an exe. Your program at this point will consist of threeYour program at this point will consist of three files…files… *.frm*.frm *.vbw*.vbw *.vbp*.vbp You would need to transport all 3 of these to have itYou would need to transport all 3 of these to have it work properly at a different location.work properly at a different location. 17. Create an exe by choosing File, Make17. Create an exe by choosing File, Make Helloworld.exe. Choose your path. This one file,Helloworld.exe. Choose your path. This one file, of course, will allow others to run your program,of course, will allow others to run your program, but not to edit it.but not to edit it. 21
  • 22.
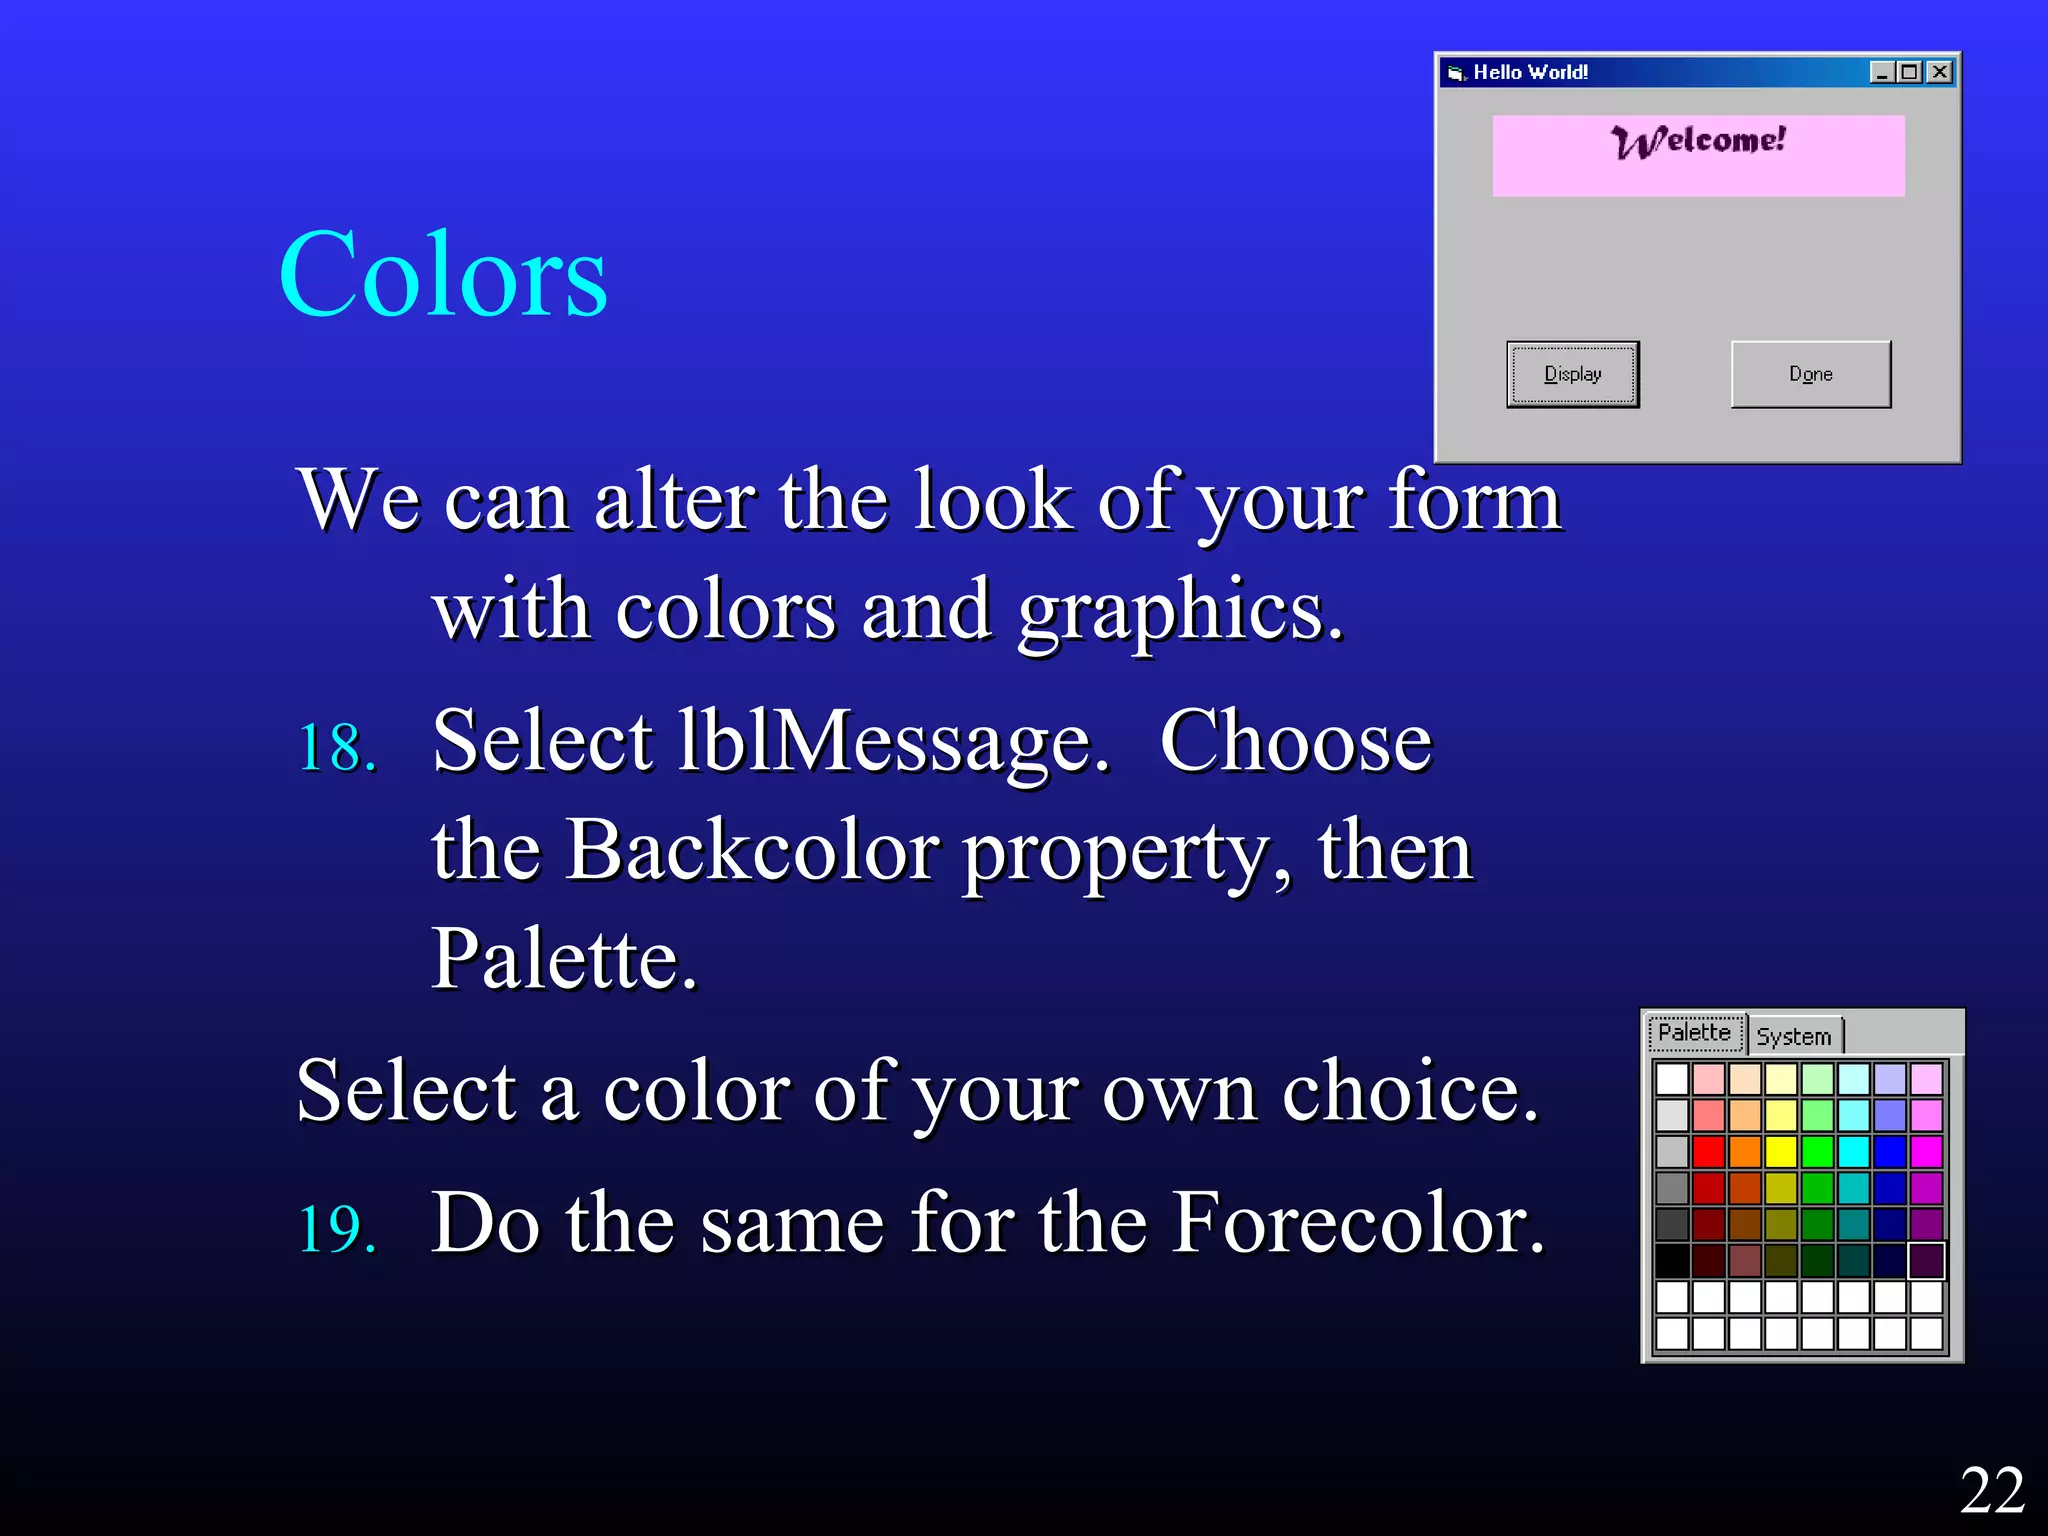
    Colors We can alterthe look of your formWe can alter the look of your form with colors and graphics.with colors and graphics. 18.18. Select lblMessage. ChooseSelect lblMessage. Choose the Backcolor property, thenthe Backcolor property, then Palette.Palette. Select a color of your own choice.Select a color of your own choice. 19.19. Do the same for the Forecolor.Do the same for the Forecolor. 22
  • 23.
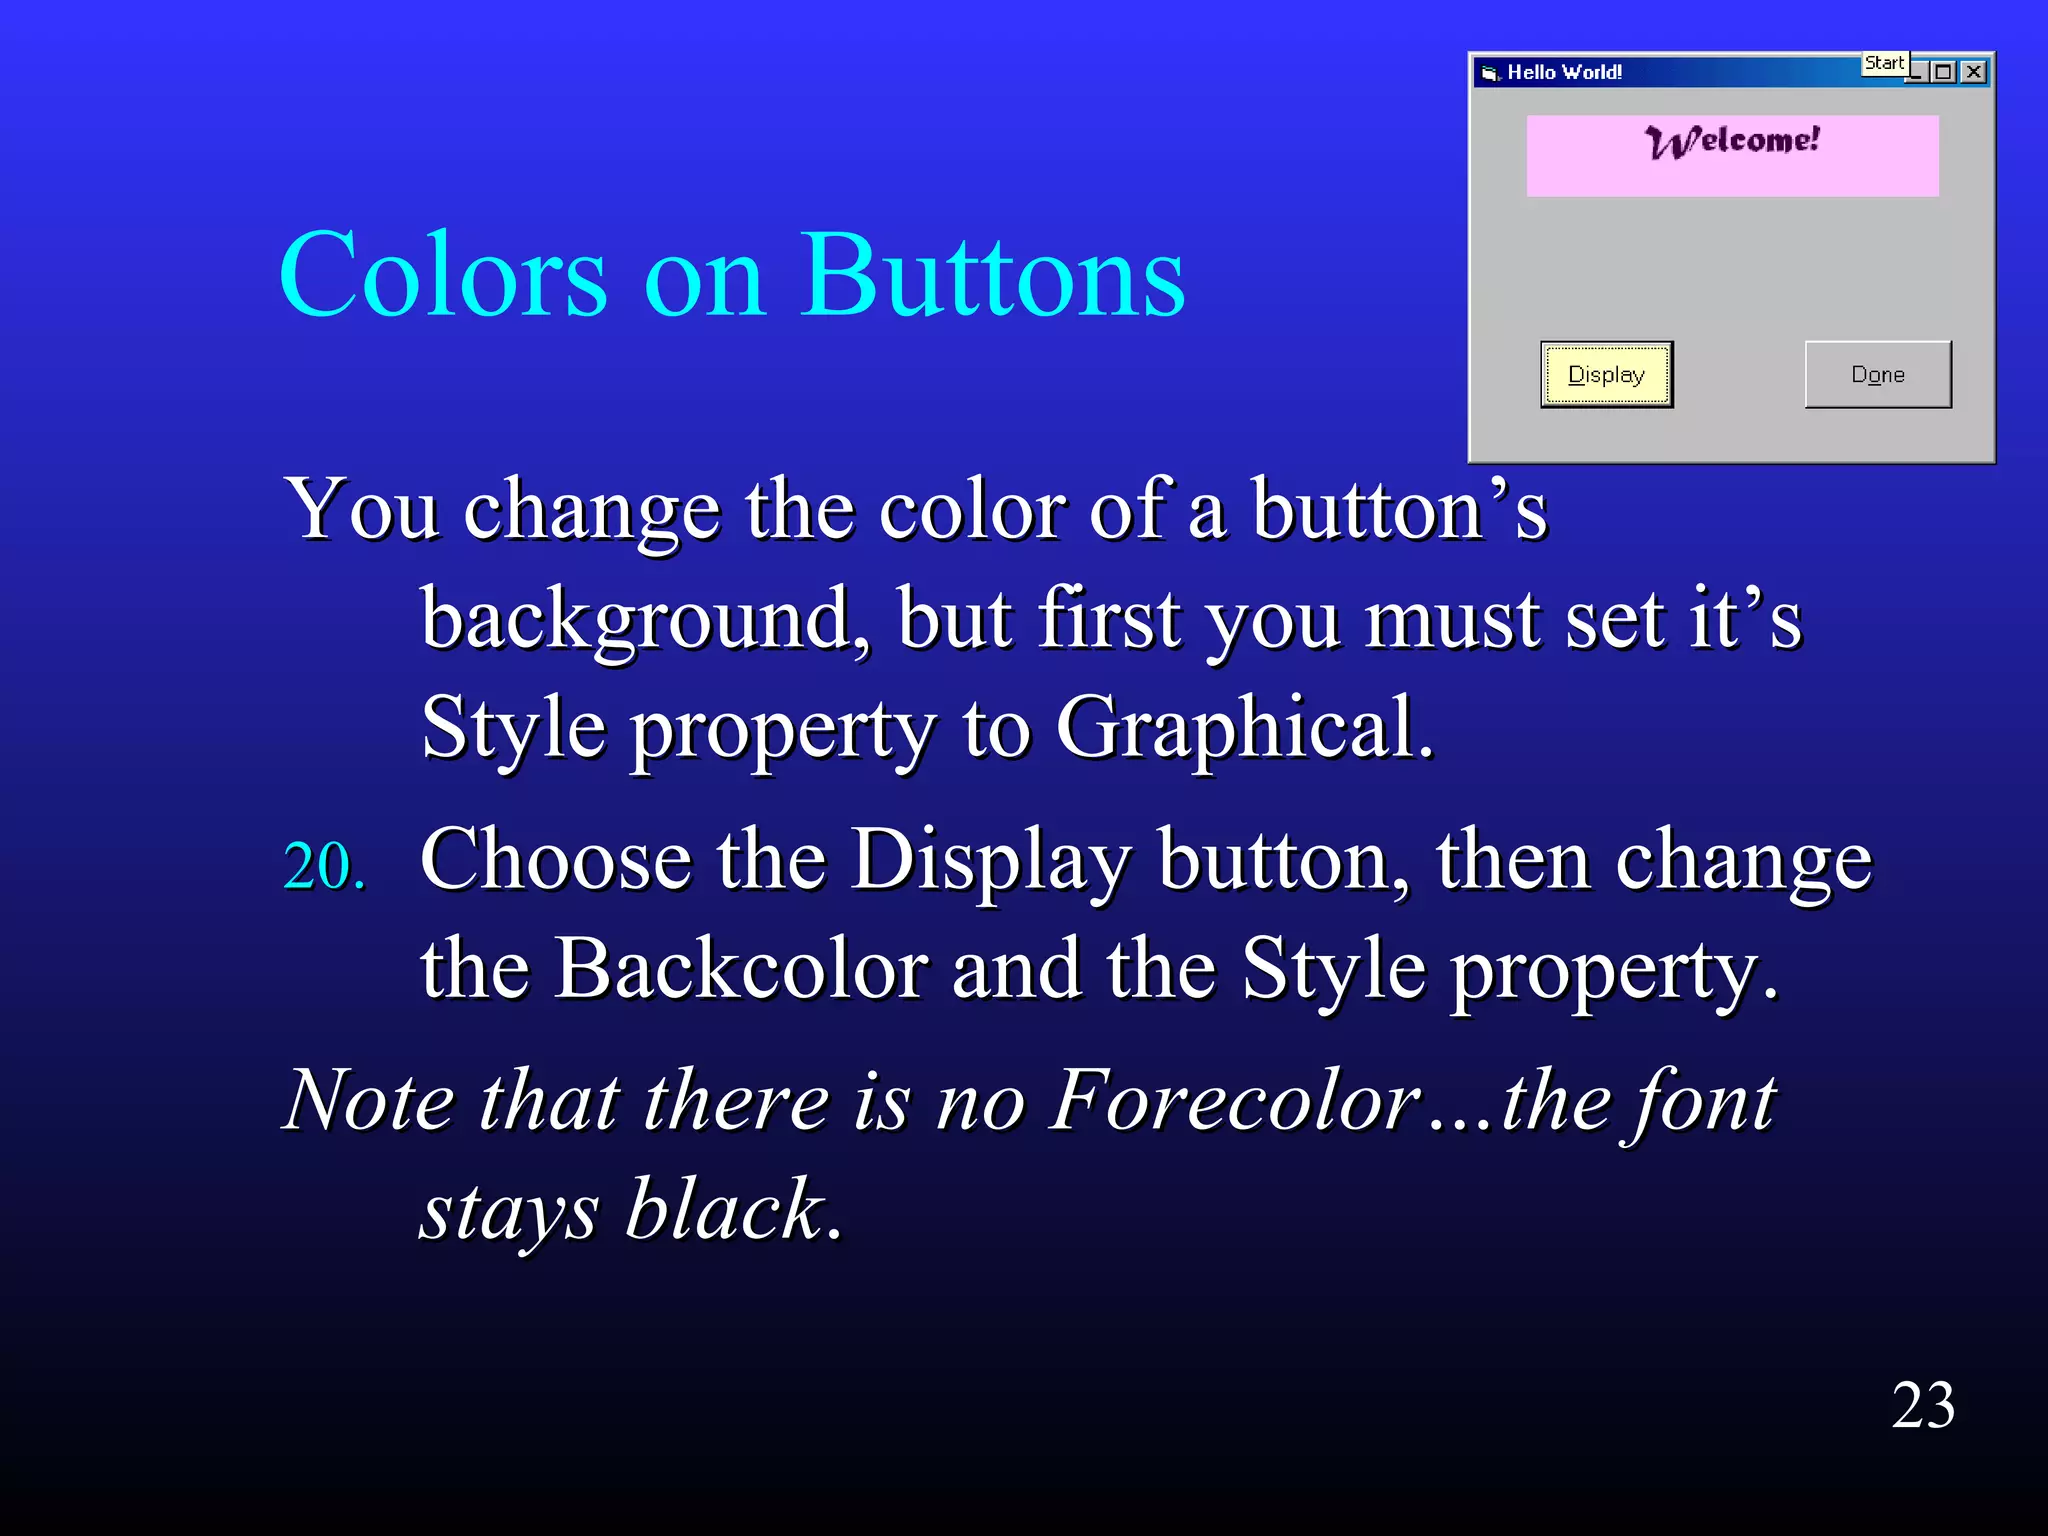
    Colors on Buttons Youchange the color of a button’sYou change the color of a button’s background, but first you must set it’sbackground, but first you must set it’s Style property to Graphical.Style property to Graphical. 20.20. Choose the Display button, then changeChoose the Display button, then change the Backcolor and the Style property.the Backcolor and the Style property. Note that there is no Forecolor…the fontNote that there is no Forecolor…the font stays blackstays black.. 23
  • 24.
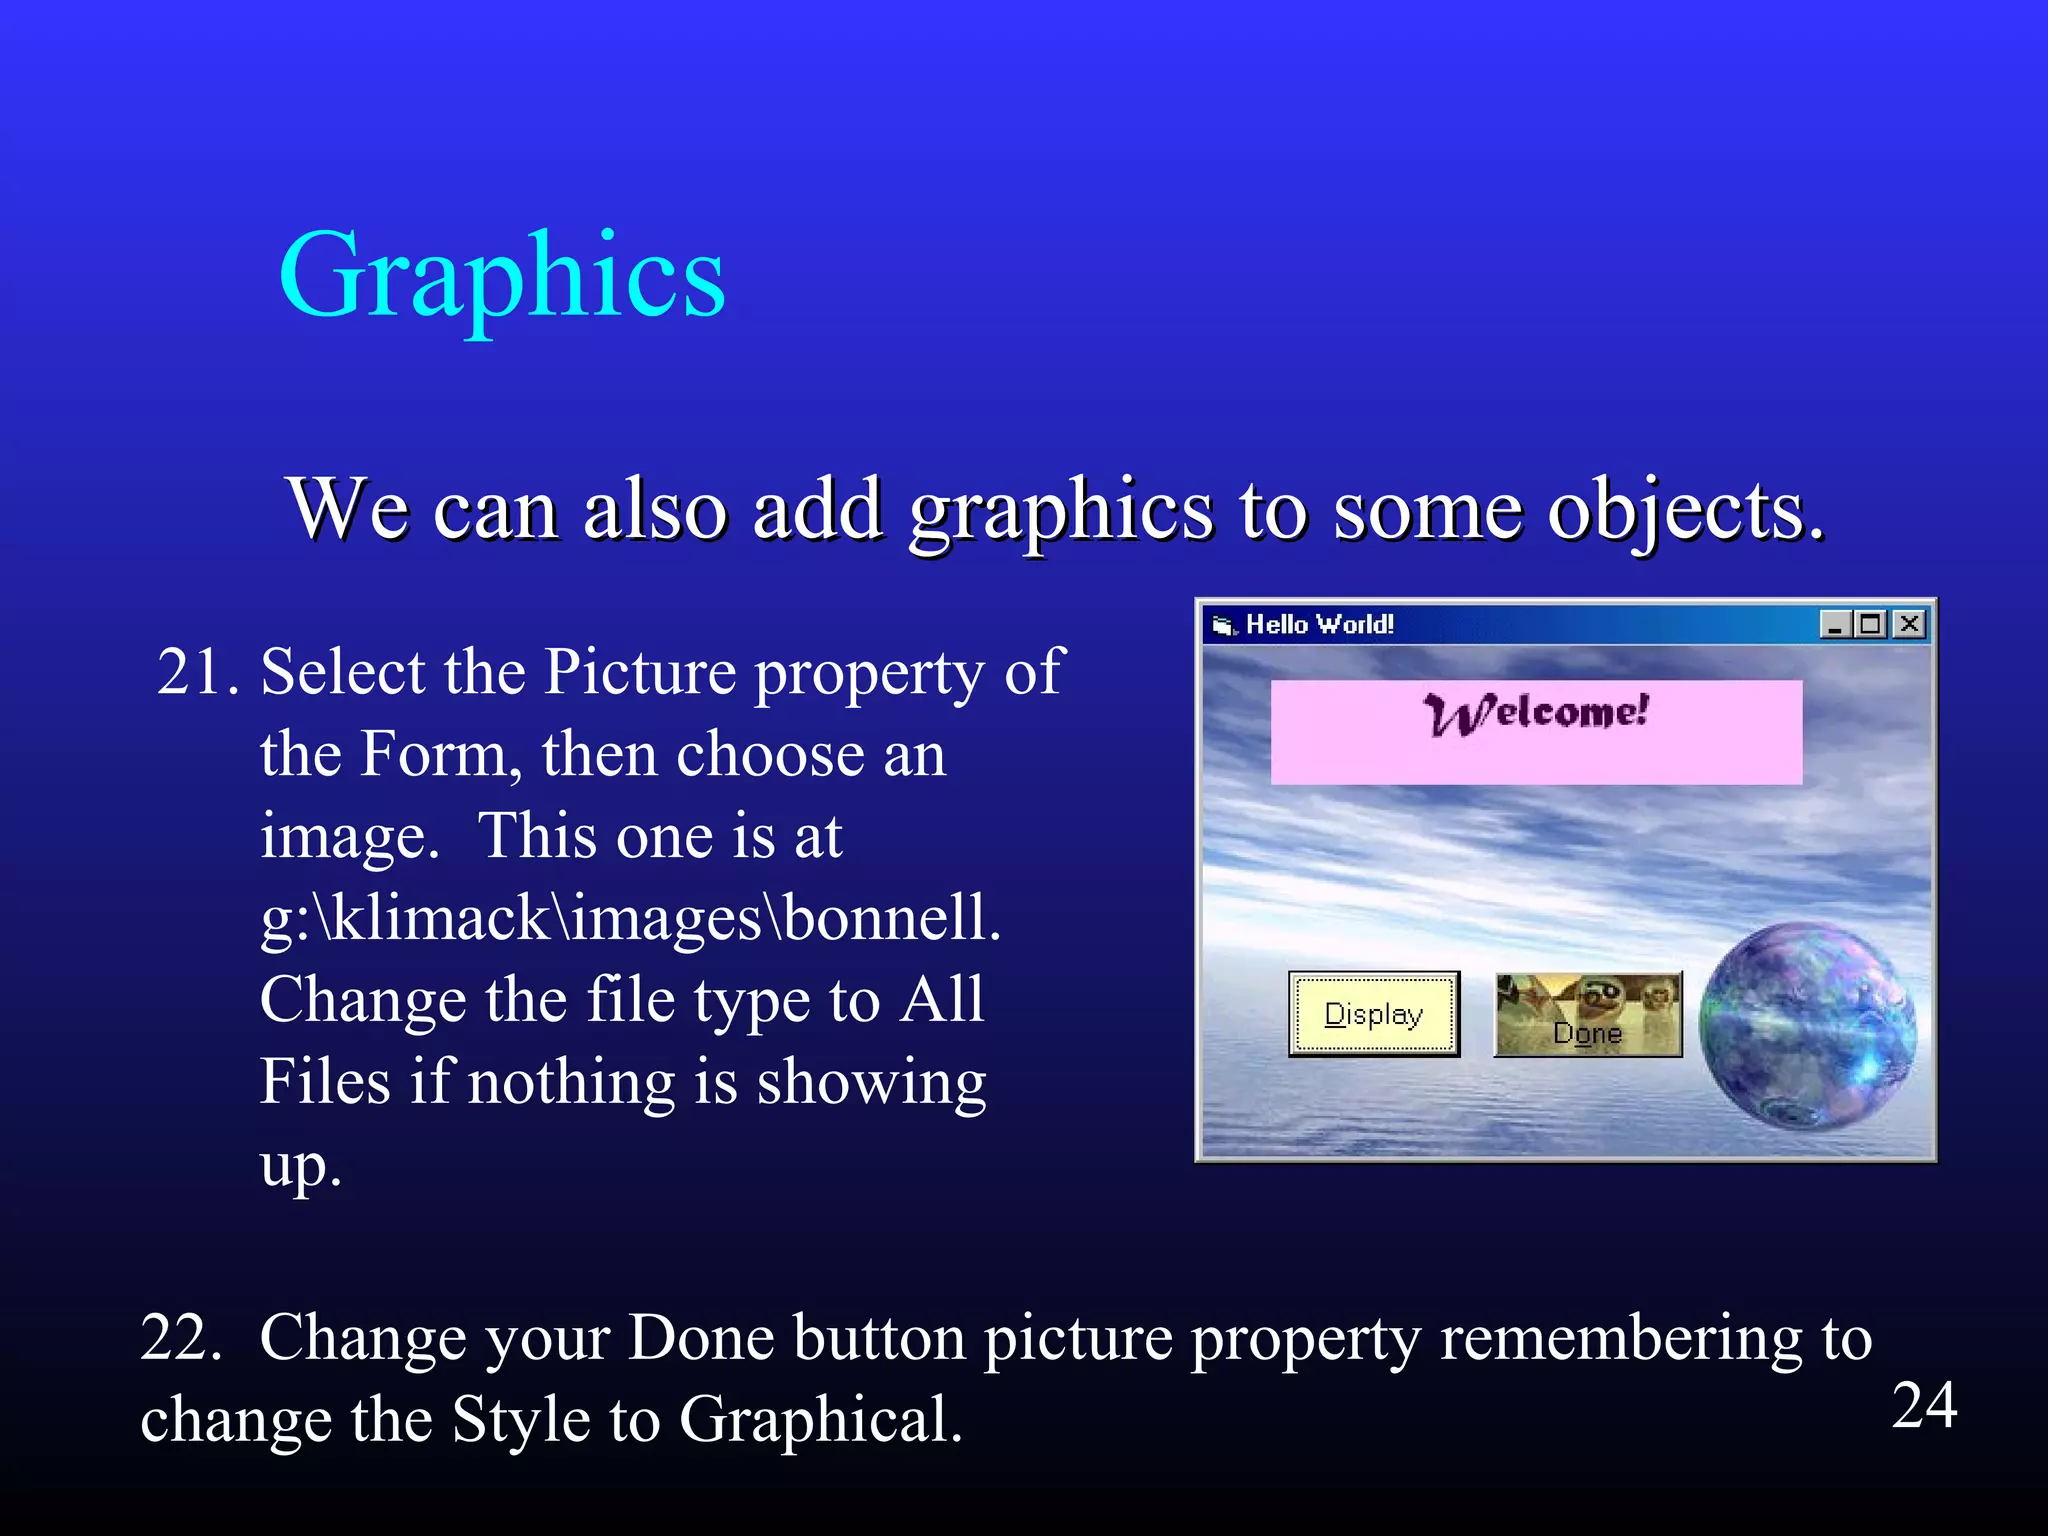
    Graphics We can alsoadd graphics to some objects.We can also add graphics to some objects. 21. Select the Picture property of the Form, then choose an image. This one is at g:klimackimagesbonnell. Change the file type to All Files if nothing is showing up. 22. Change your Done button picture property remembering to change the Style to Graphical. 24
  • 25.
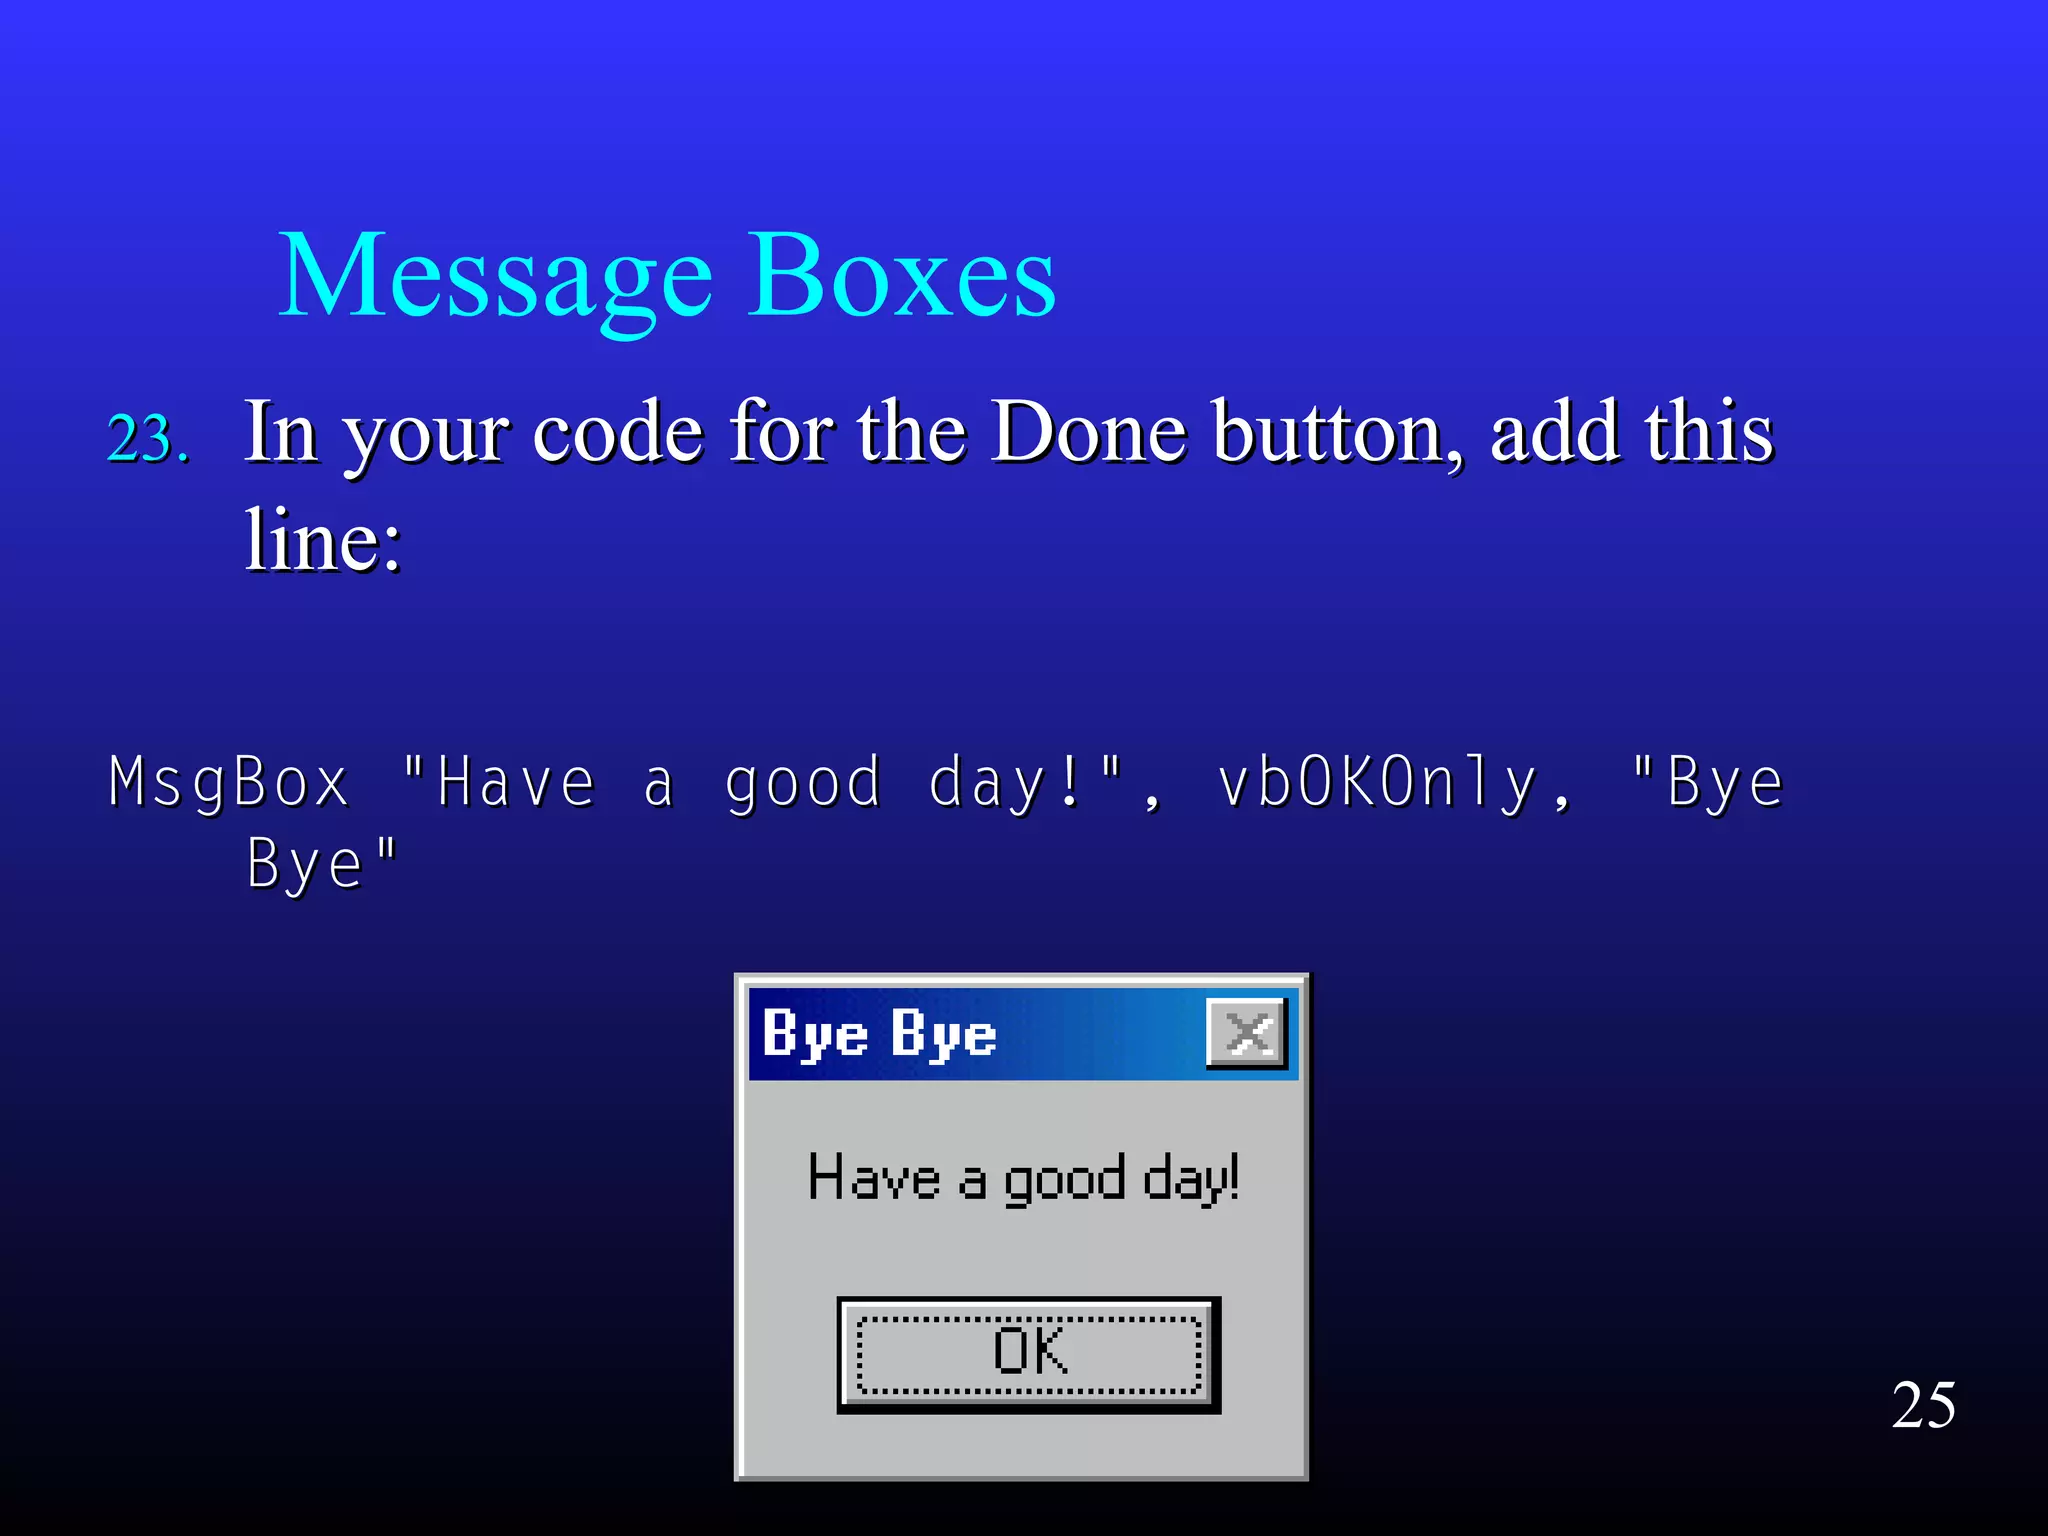
    Message Boxes 23.23. Inyour code for the Done button, add thisIn your code for the Done button, add this line:line: MsgBox "Have a good day!", vbOKOnly, "ByeMsgBox "Have a good day!", vbOKOnly, "Bye Bye"Bye" 25
  • 26.
    Comments Adding comments inVB is done by prefixing yourAdding comments in VB is done by prefixing your statement with an apostrophe. For example:statement with an apostrophe. For example: ‘‘this is a comment and will be ignored by the computerthis is a comment and will be ignored by the computer Comments turn green when typed correctly.Comments turn green when typed correctly. 24.24. At the top of your program, add comments with yourAt the top of your program, add comments with your name, date, and project info as such:name, date, and project info as such: ‘‘Cheryl KlimackCheryl Klimack ‘‘Hello World projectHello World project ‘‘Oct 24 2003Oct 24 2003 Run your program. We are done!Run your program. We are done! 26
  • 27.
  • 28.
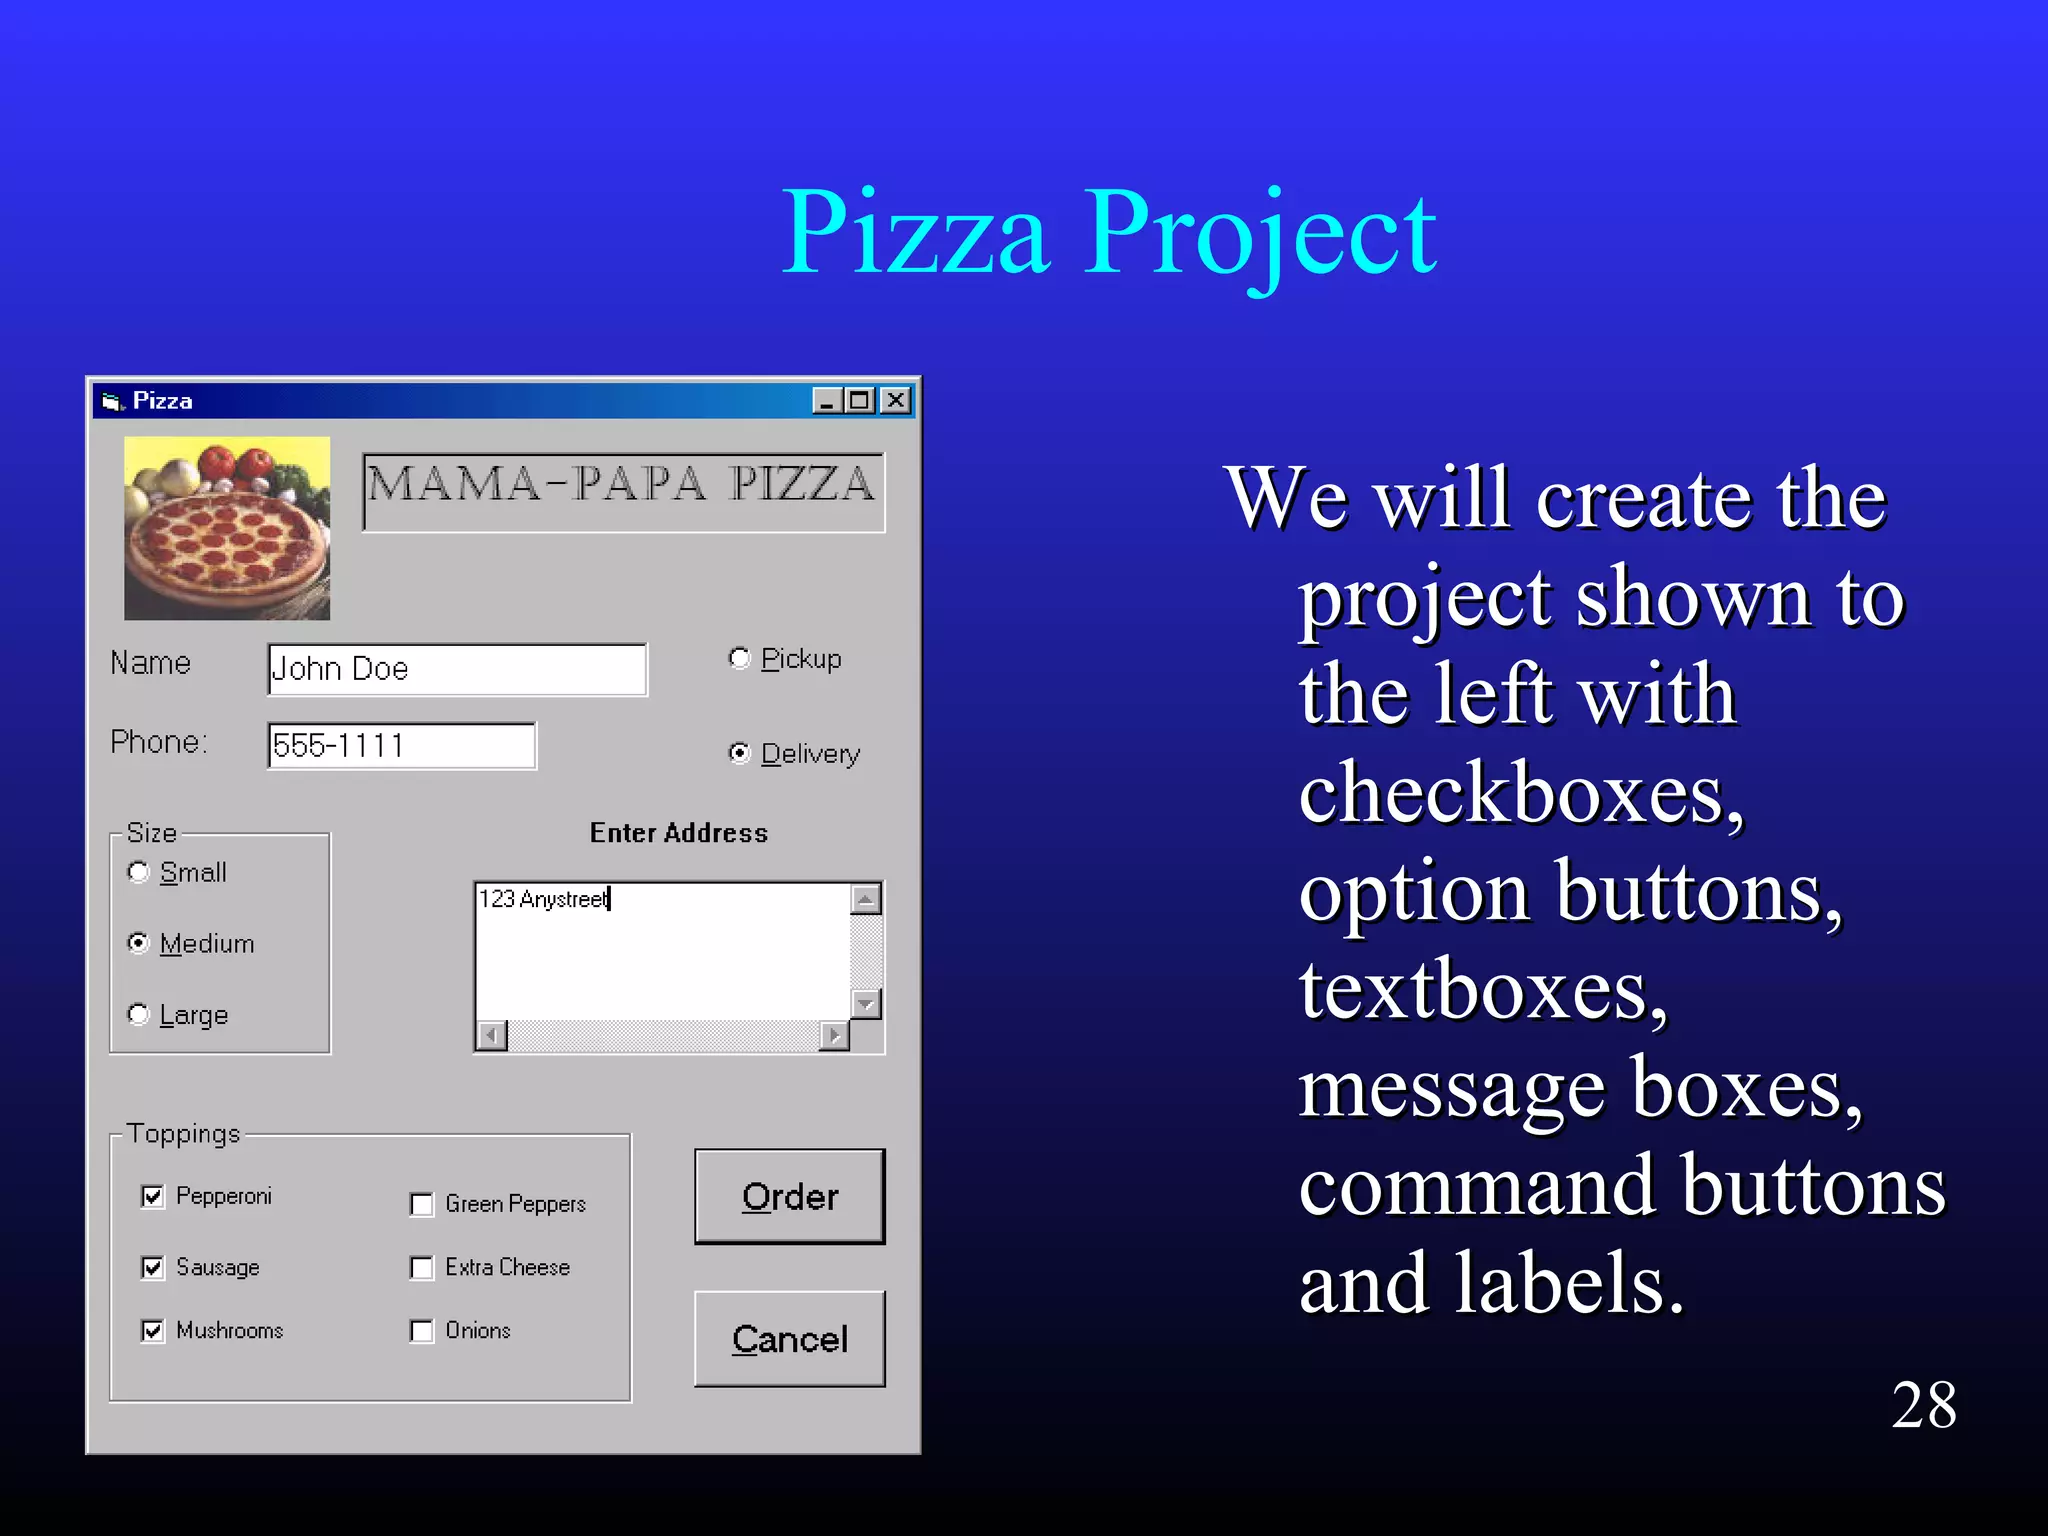
    Pizza Project We willcreate theWe will create the project shown toproject shown to the left withthe left with checkboxes,checkboxes, option buttons,option buttons, textboxes,textboxes, message boxes,message boxes, command buttonscommand buttons and labels.and labels. 28
  • 29.
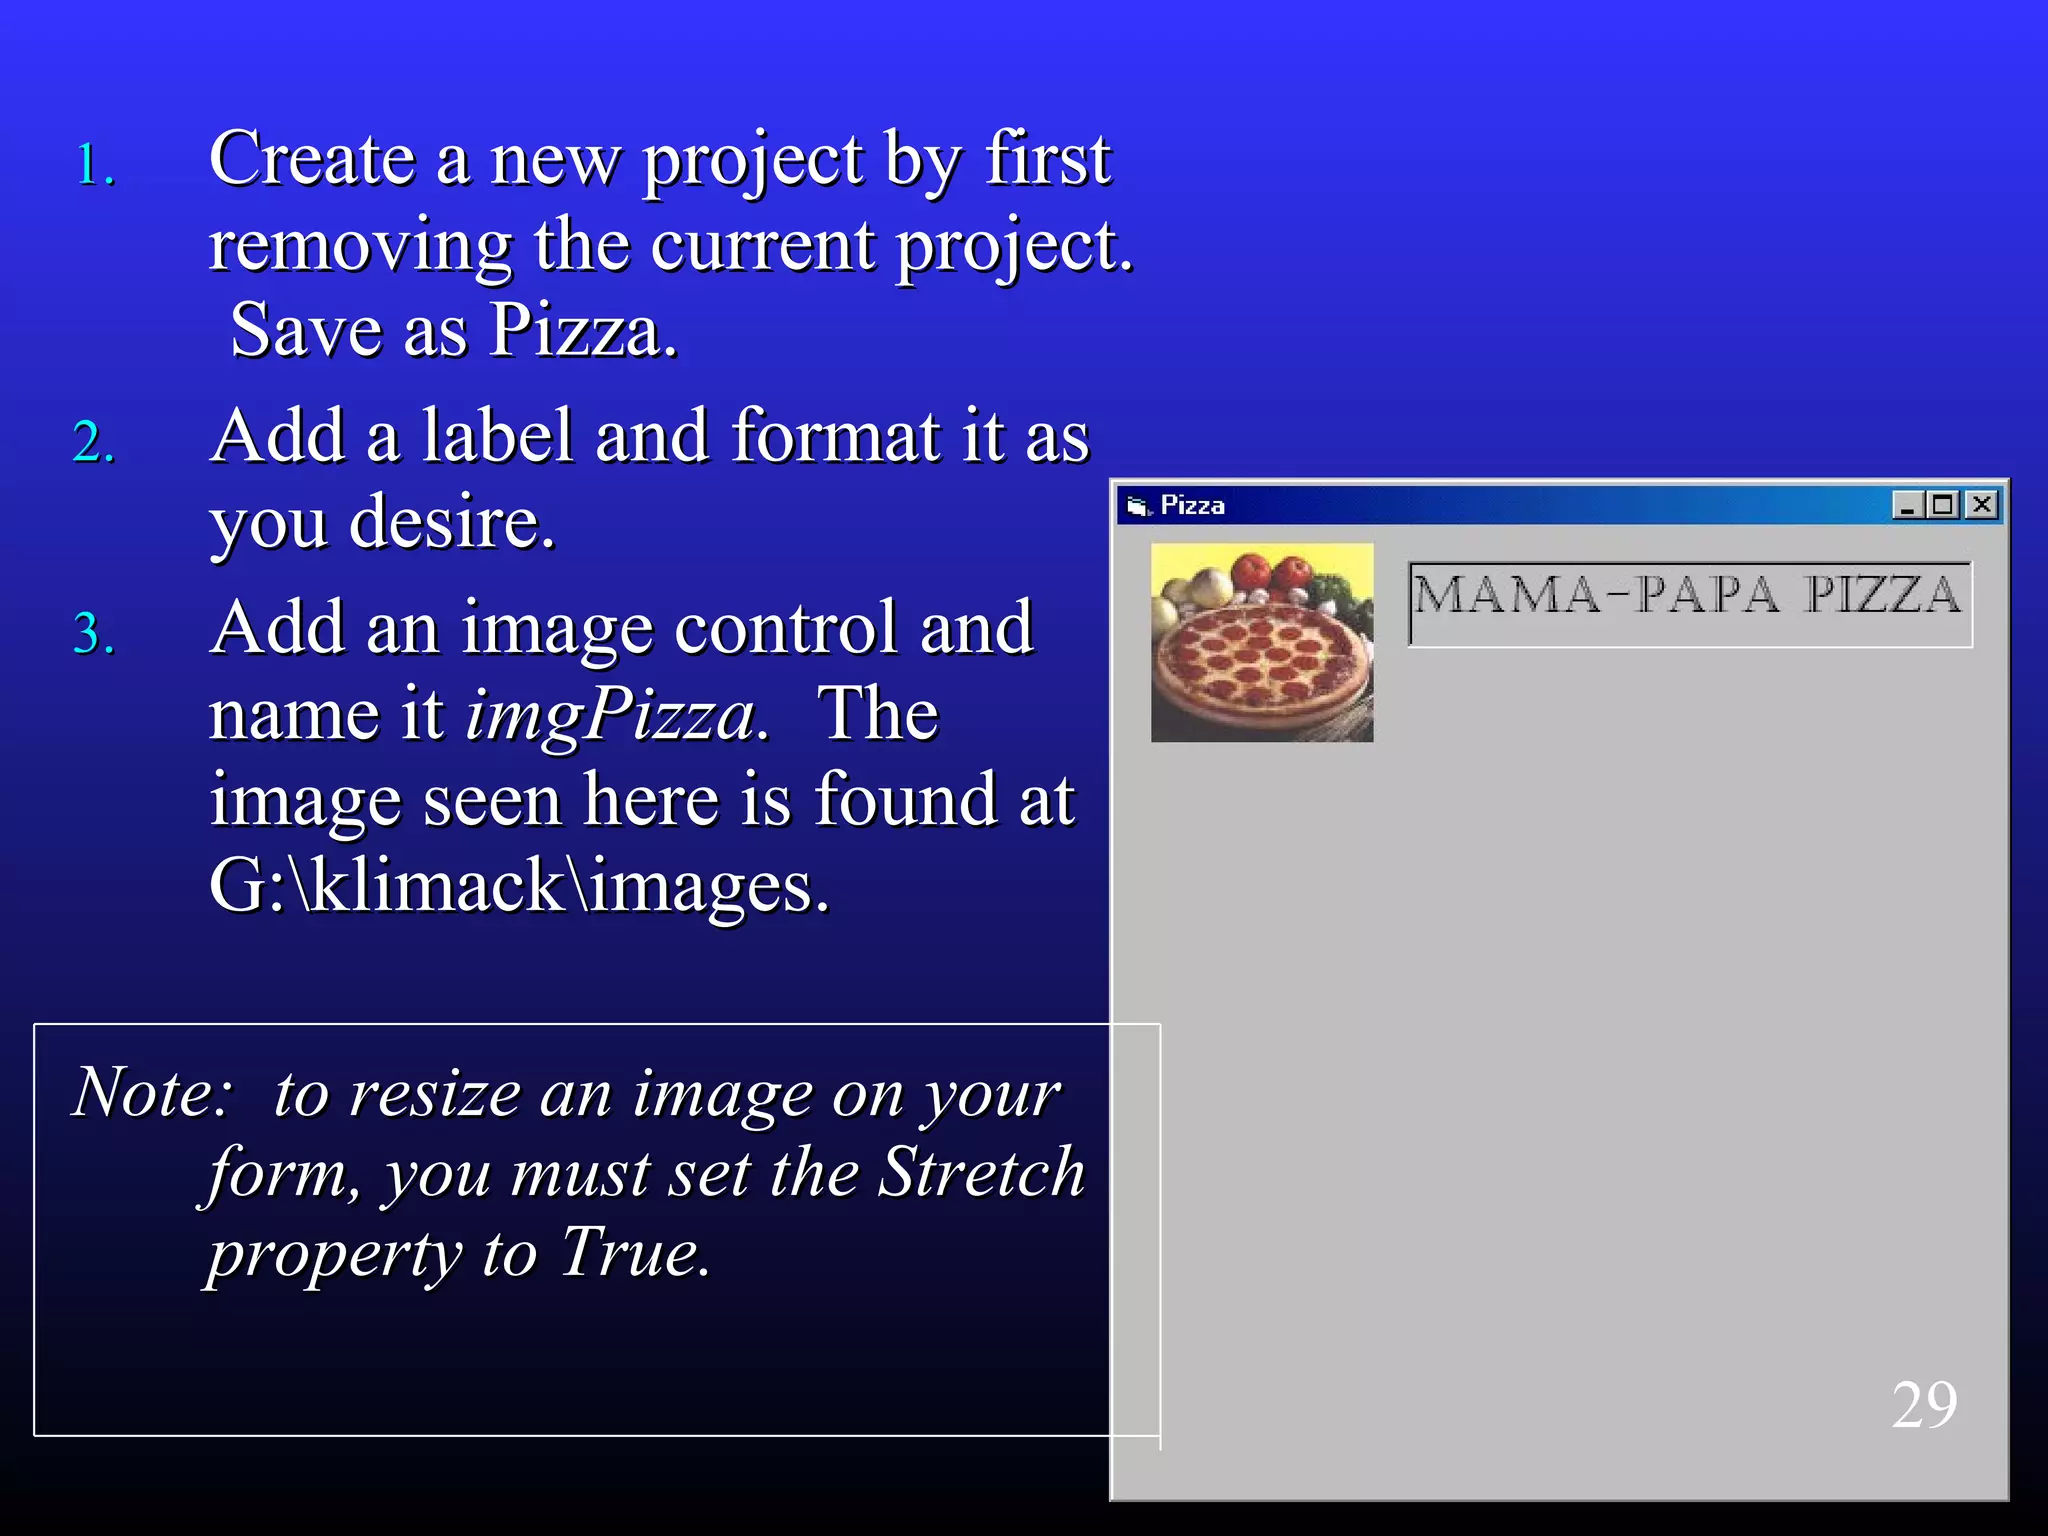
    1.1. Create anew project by firstCreate a new project by first removing the current project.removing the current project. Save as Pizza.Save as Pizza. 2.2. Add a label and format it asAdd a label and format it as you desire.you desire. 3.3. Add an image control andAdd an image control and name itname it imgPizza.imgPizza. TheThe image seen here is found atimage seen here is found at G:klimackimages.G:klimackimages. Note: to resize an image on yourNote: to resize an image on your form, you must set the Stretchform, you must set the Stretch property to True.property to True. 29
  • 30.
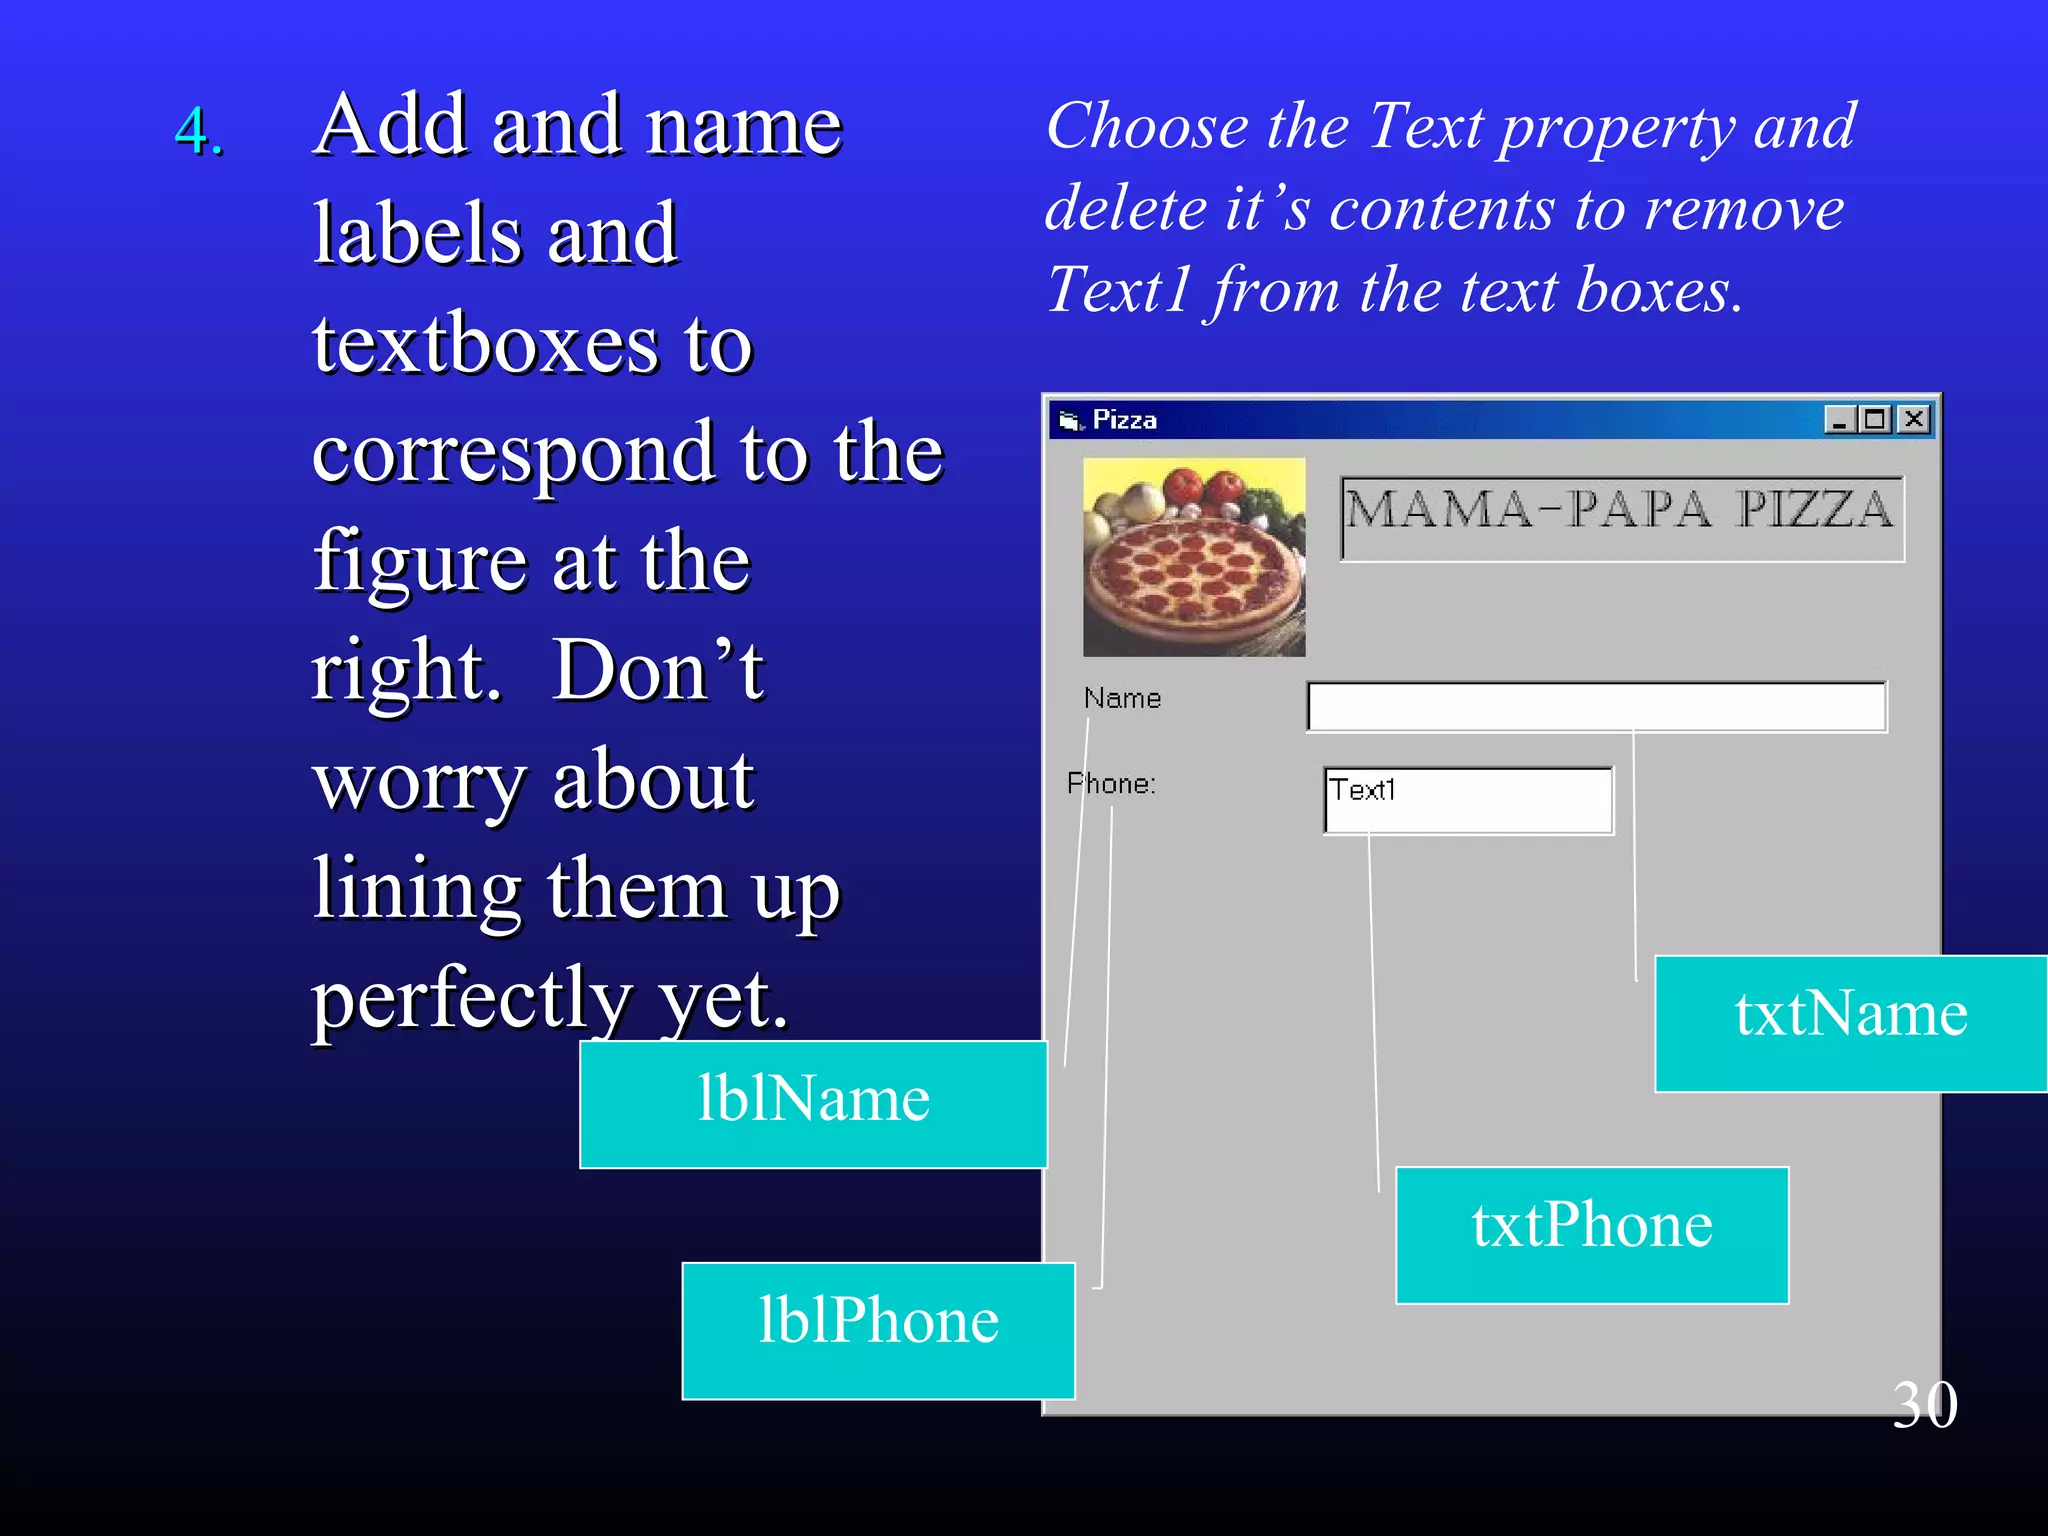
    4.4. Add andnameAdd and name labels andlabels and textboxes totextboxes to correspond to thecorrespond to the figure at thefigure at the right. Don’tright. Don’t worry aboutworry about lining them uplining them up perfectly yet.perfectly yet. lblName lblPhone txtPhone txtName Choose the Text property and delete it’s contents to remove Text1 from the text boxes. 30
  • 31.
    Aligning You can lineup objects on your form evenlyYou can line up objects on your form evenly by selecting them (holding down the shiftby selecting them (holding down the shift key allows multiple selections) and thenkey allows multiple selections) and then choosing Format, Align, etc. Notice thechoosing Format, Align, etc. Notice the other options under the Format menu.other options under the Format menu. 5.5. Line up your labels and text boxes.Line up your labels and text boxes. 6.6. Choose both labels and text boxes at theChoose both labels and text boxes at the same time, then select Font and makesame time, then select Font and make them all 10 or 12 point.them all 10 or 12 point. 31
  • 32.
    Frames Frames are usedas containers for otherFrames are used as containers for other controls. Usually groups of option buttonscontrols. Usually groups of option buttons are placed in frames.are placed in frames. 7. Add a frame named fraSize. 8. Make the Caption Size. 32
  • 33.
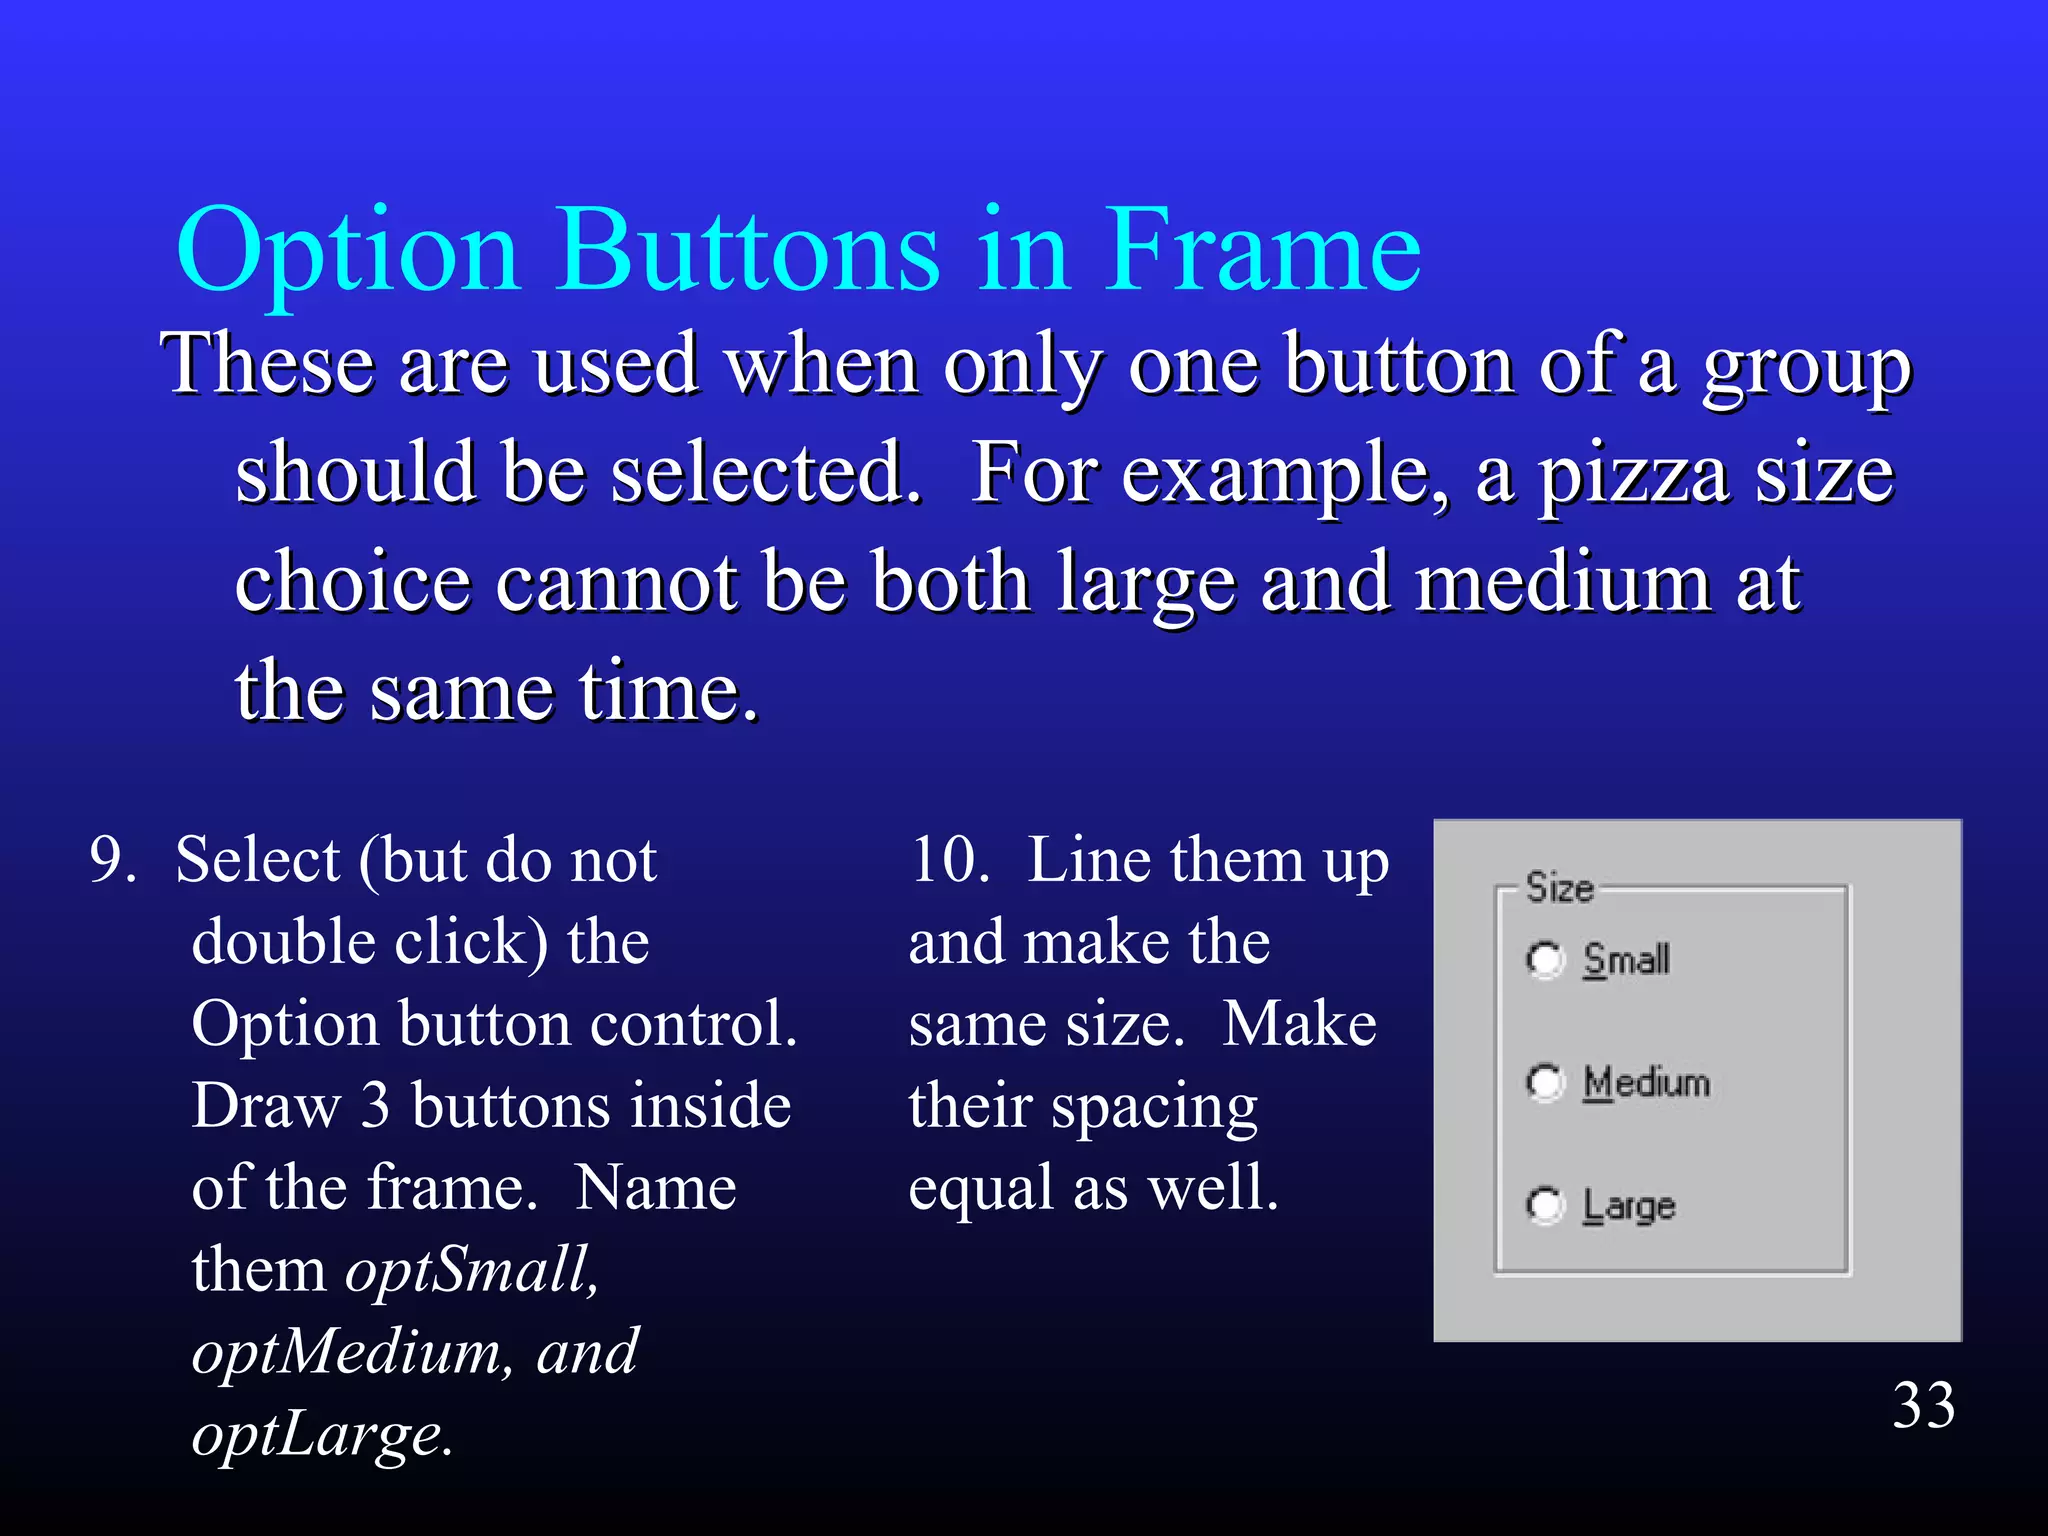
    Option Buttons inFrame These are used when only one button of a groupThese are used when only one button of a group should be selected. For example, a pizza sizeshould be selected. For example, a pizza size choice cannot be both large and medium atchoice cannot be both large and medium at the same time.the same time. 9. Select (but do not double click) the Option button control. Draw 3 buttons inside of the frame. Name them optSmall, optMedium, and optLarge. 10. Line them up and make the same size. Make their spacing equal as well. 33
  • 34.
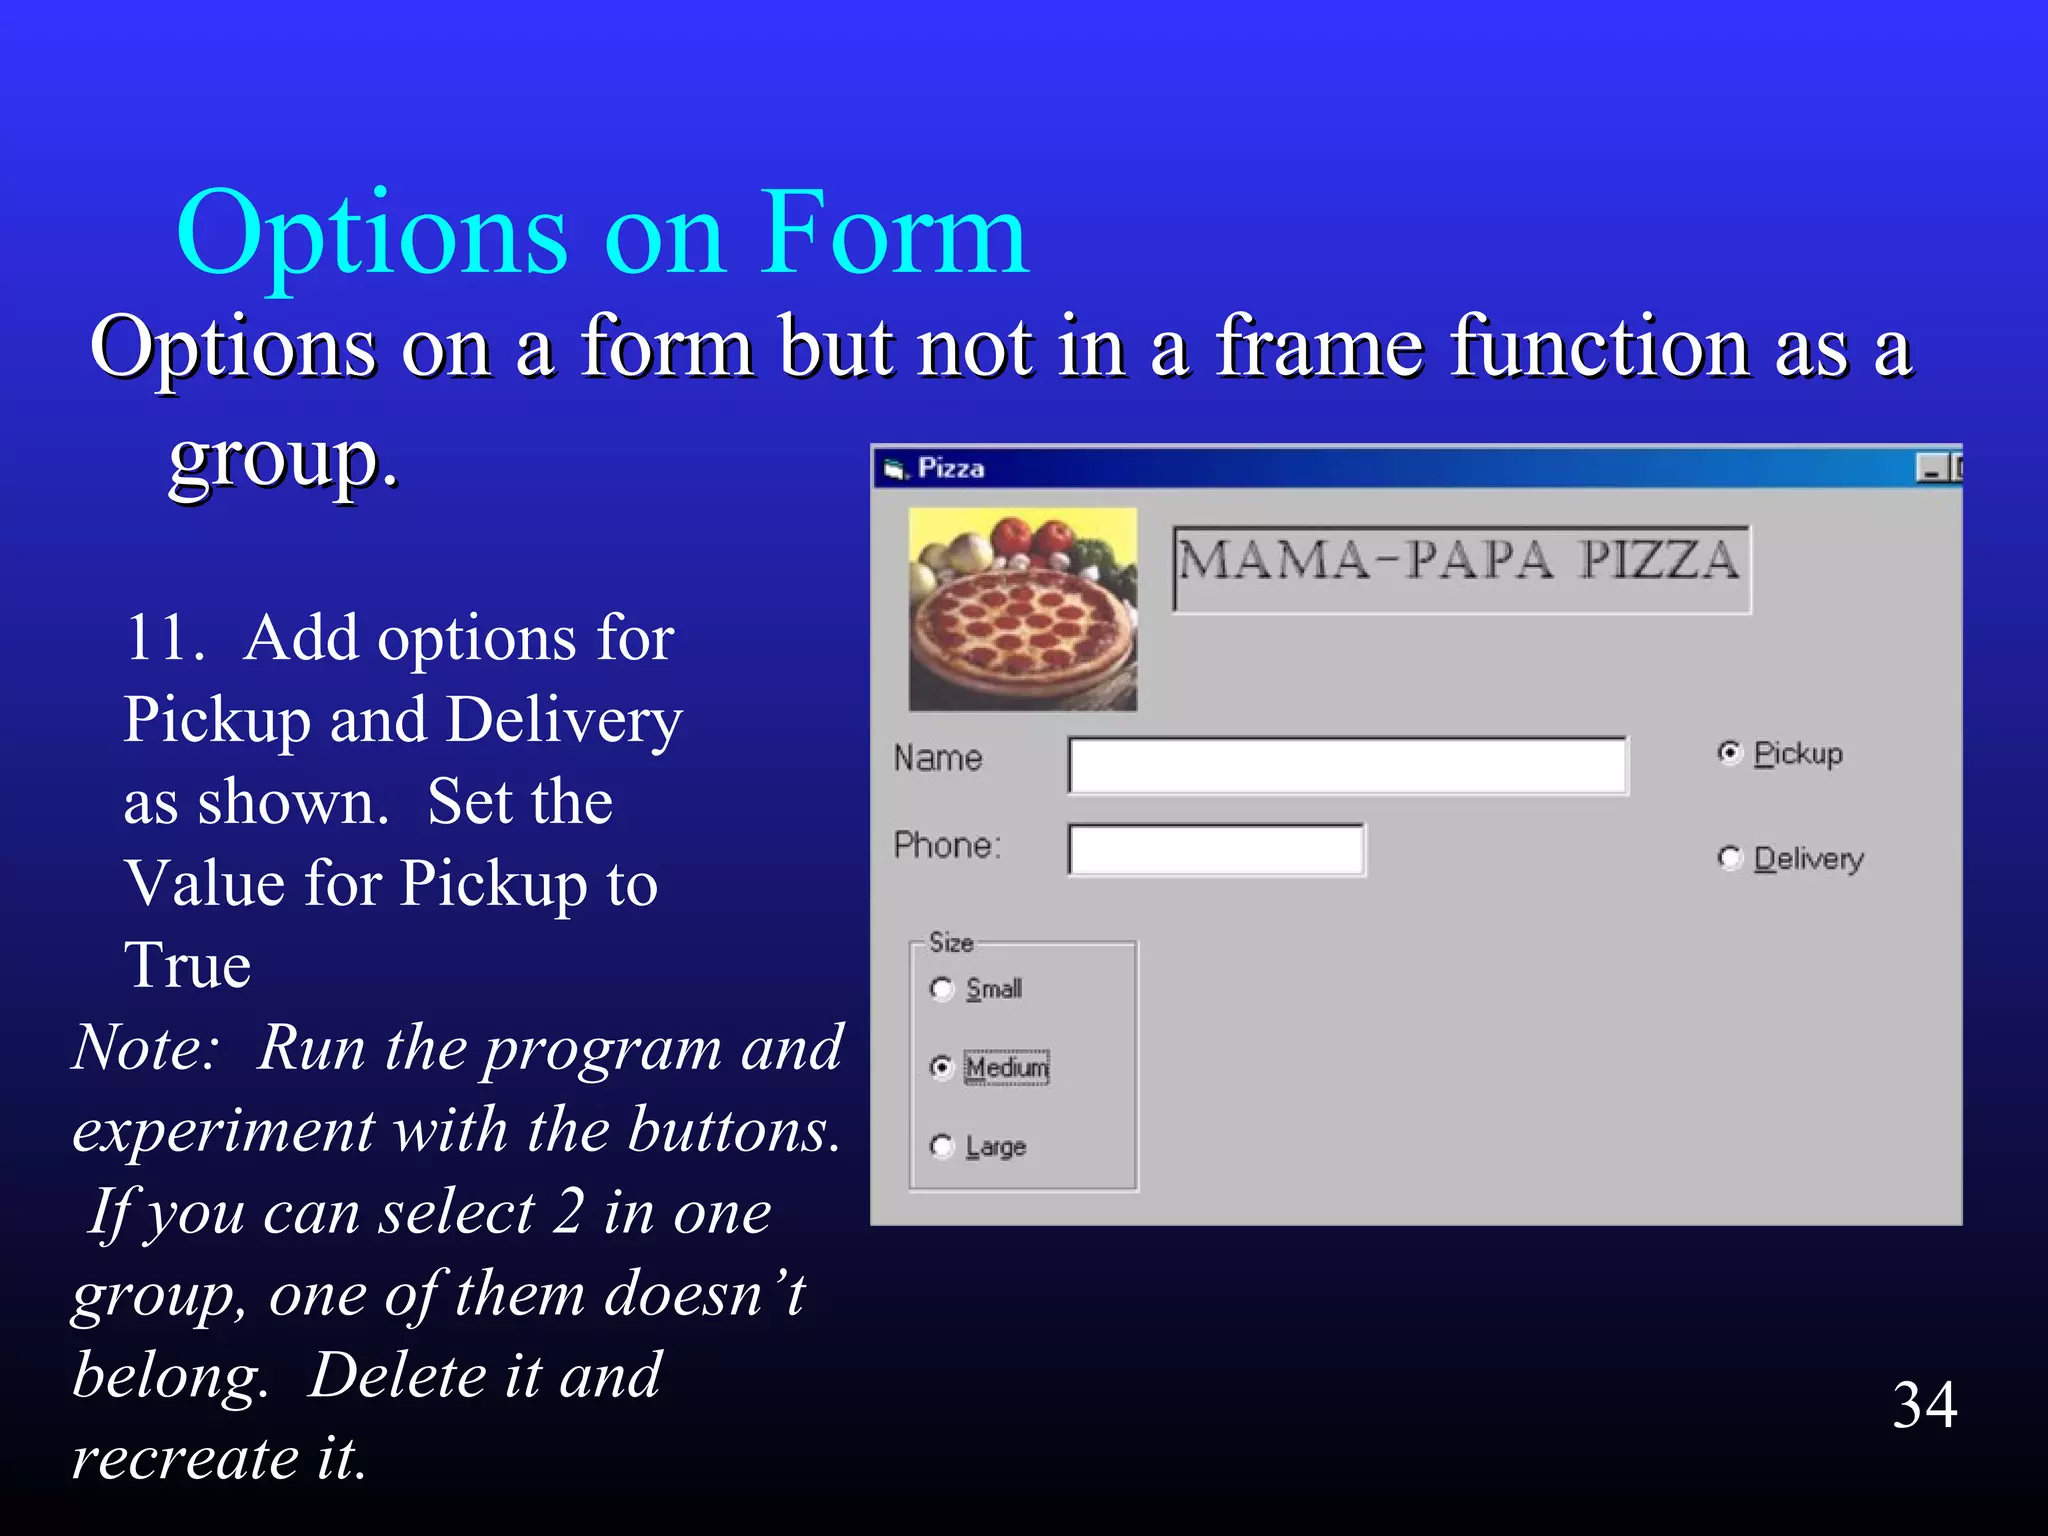
    Options on Form Optionson a form but not in a frame function as aOptions on a form but not in a frame function as a group.group. 11. Add options for Pickup and Delivery as shown. Set the Value for Pickup to True Note: Run the program and experiment with the buttons. If you can select 2 in one group, one of them doesn’t belong. Delete it and recreate it. 34
  • 35.
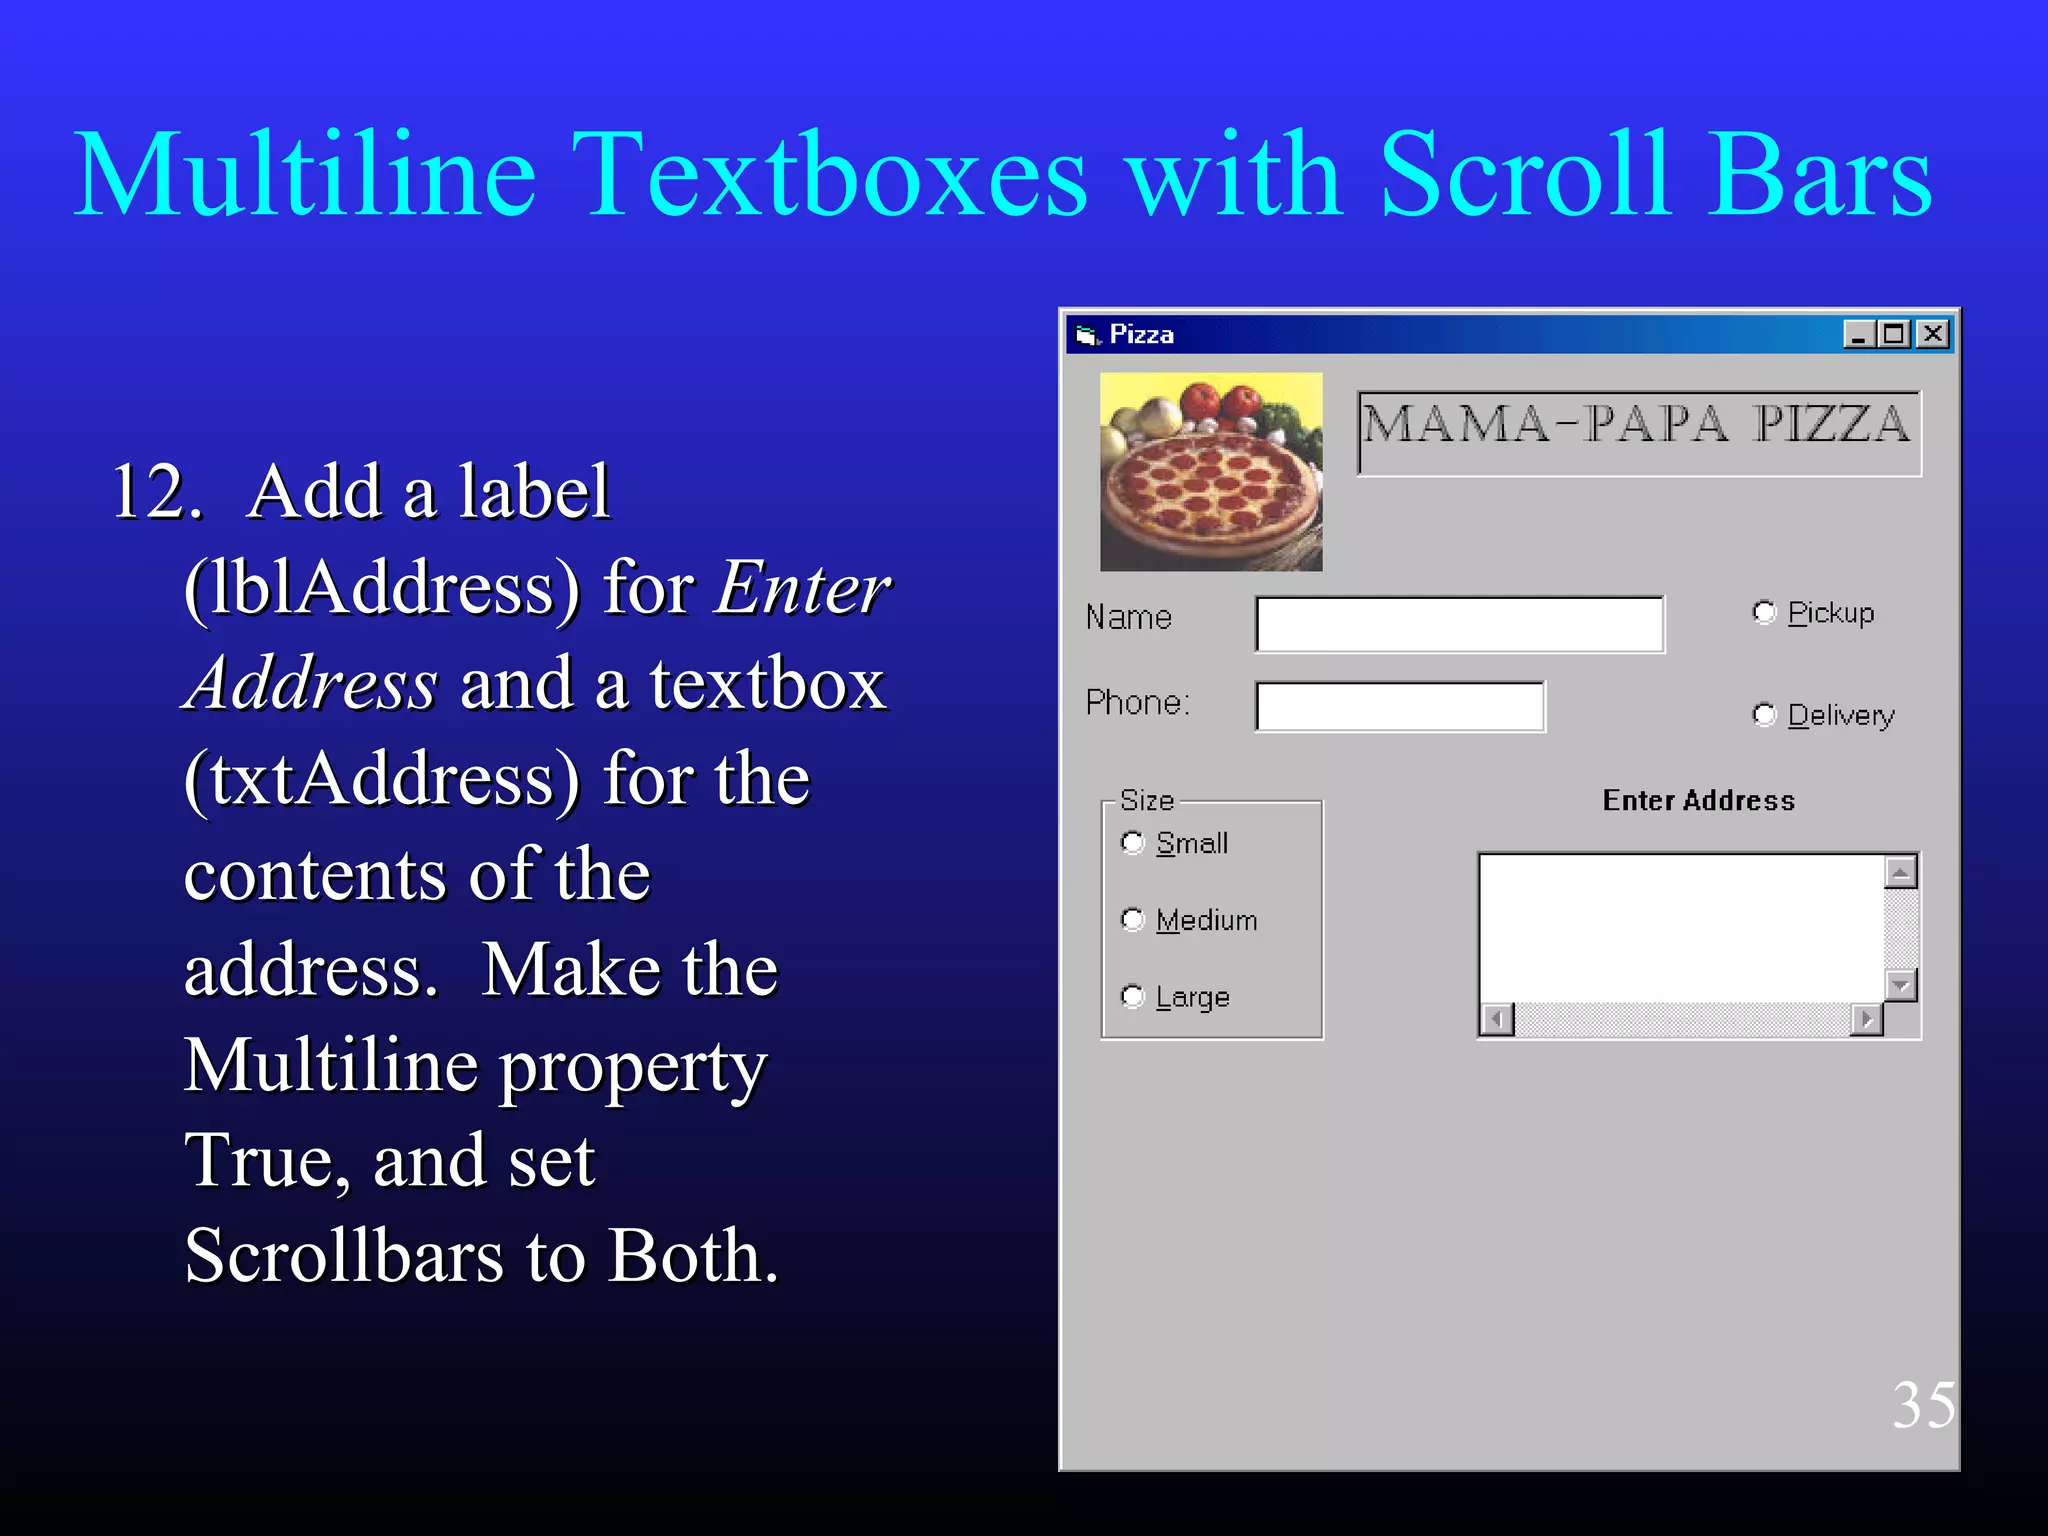
    Multiline Textboxes withScroll Bars 12. Add a label12. Add a label (lblAddress) for(lblAddress) for EnterEnter AddressAddress and a textboxand a textbox (txtAddress) for the(txtAddress) for the contents of thecontents of the address. Make theaddress. Make the Multiline propertyMultiline property True, and setTrue, and set Scrollbars to Both.Scrollbars to Both. 35
  • 36.
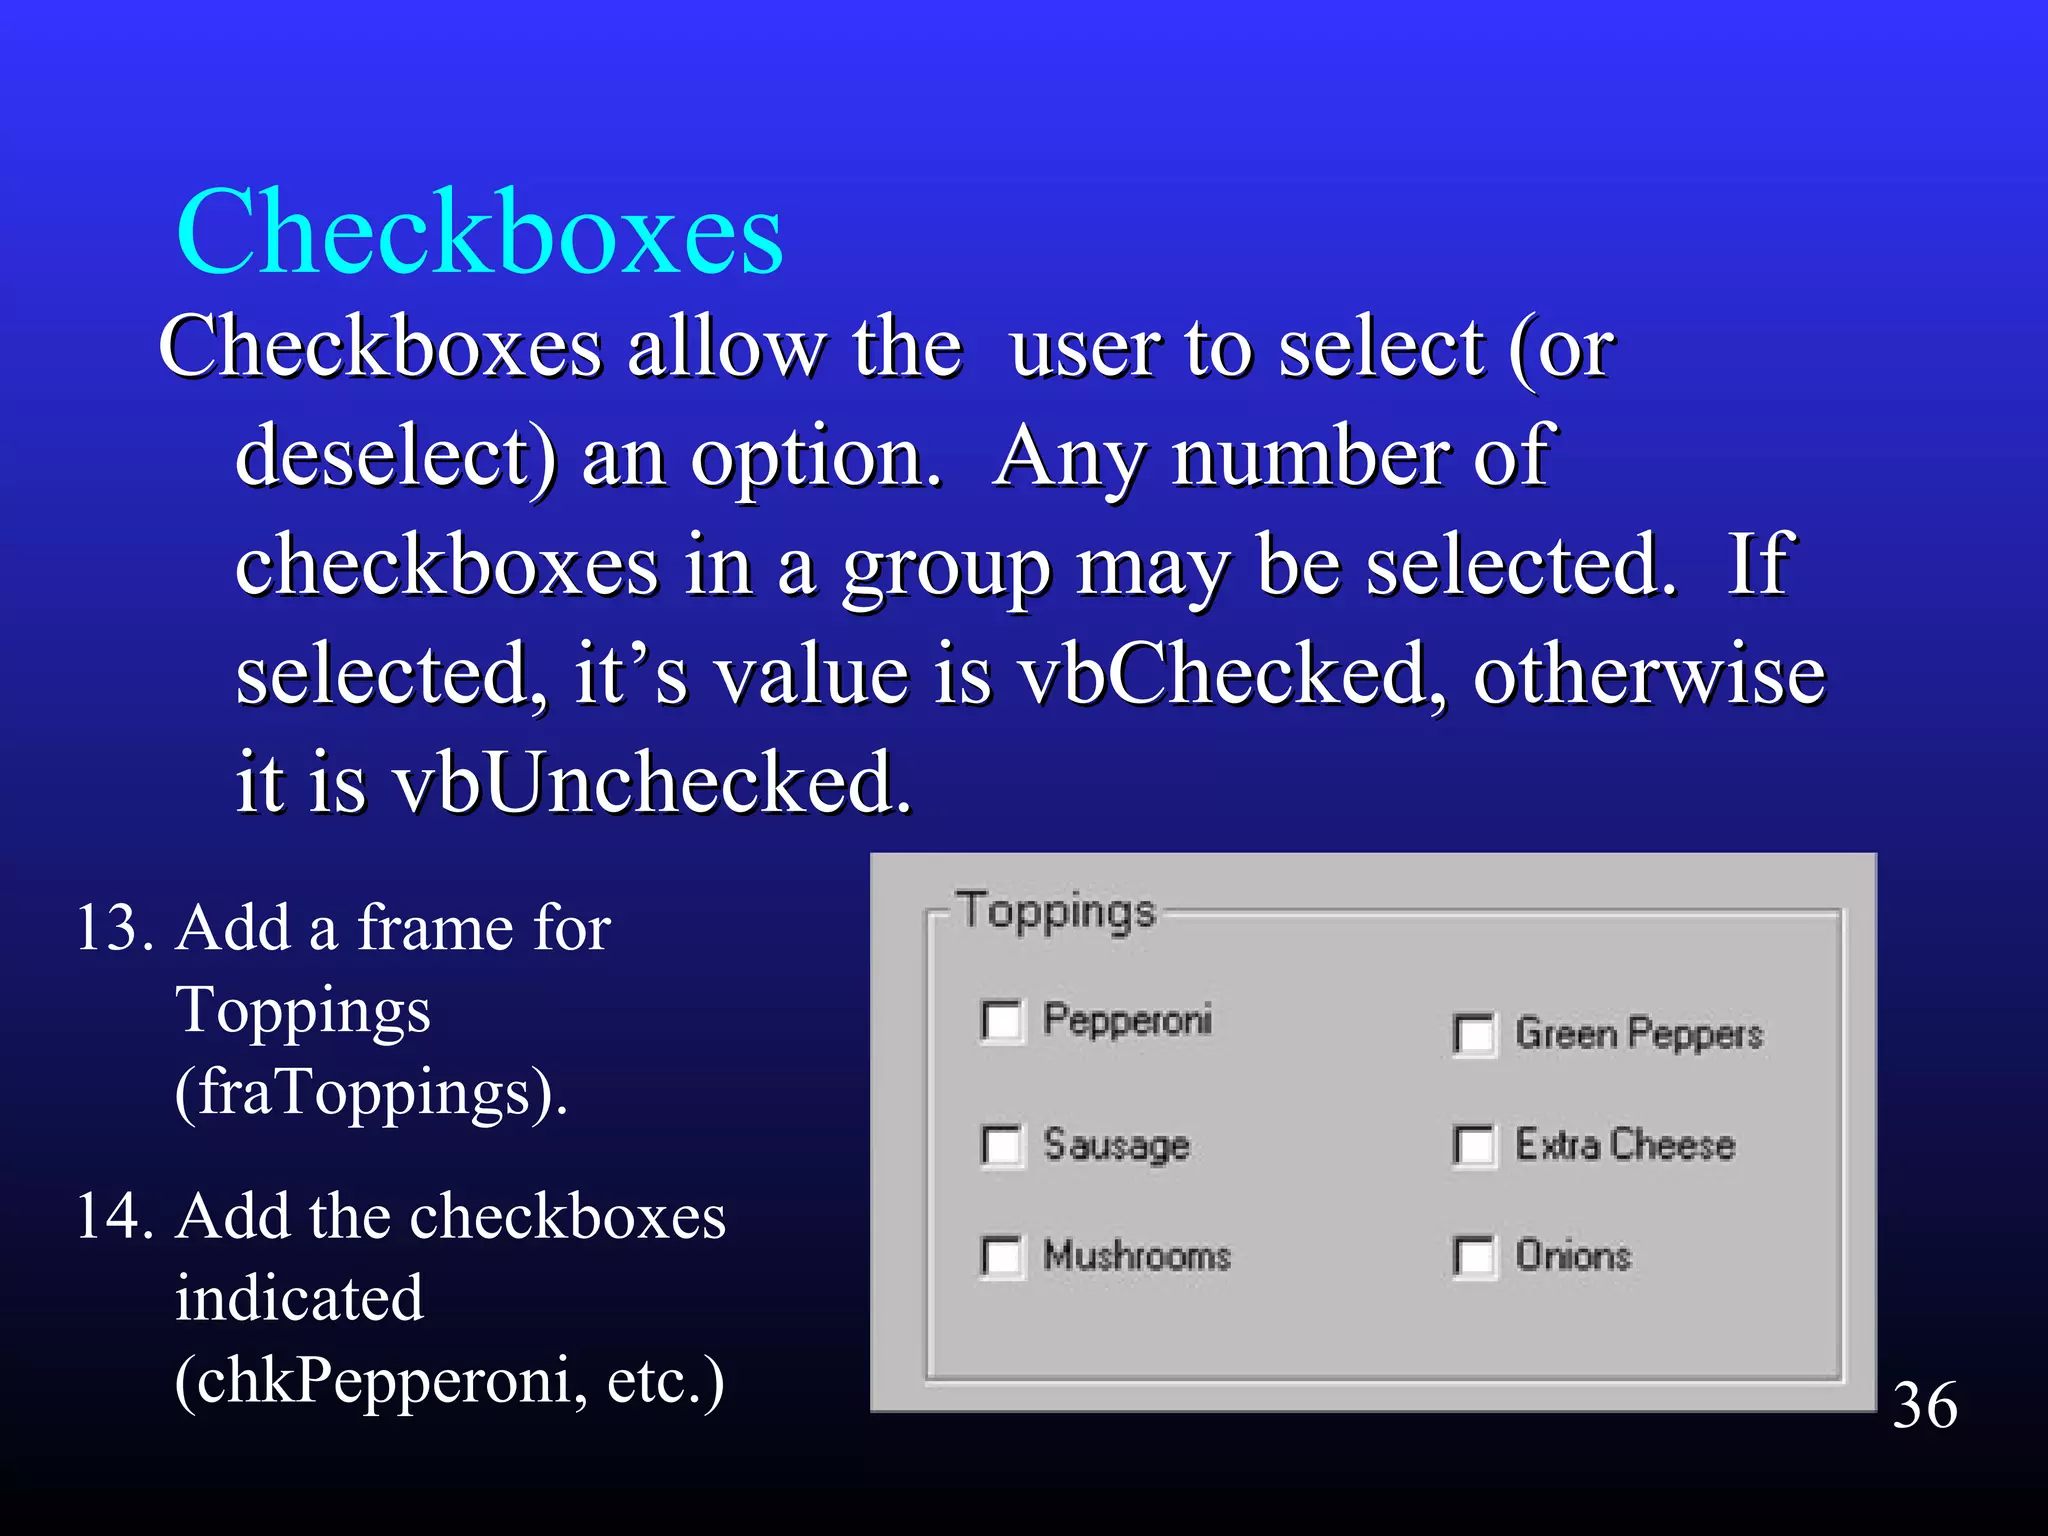
    Checkboxes Checkboxes allow theuser to select (orCheckboxes allow the user to select (or deselect) an option. Any number ofdeselect) an option. Any number of checkboxes in a group may be selected. Ifcheckboxes in a group may be selected. If selected, it’s value is vbChecked, otherwiseselected, it’s value is vbChecked, otherwise it is vbUnchecked.it is vbUnchecked. 13. Add a frame for Toppings (fraToppings). 14. Add the checkboxes indicated (chkPepperoni, etc.) 36
  • 37.
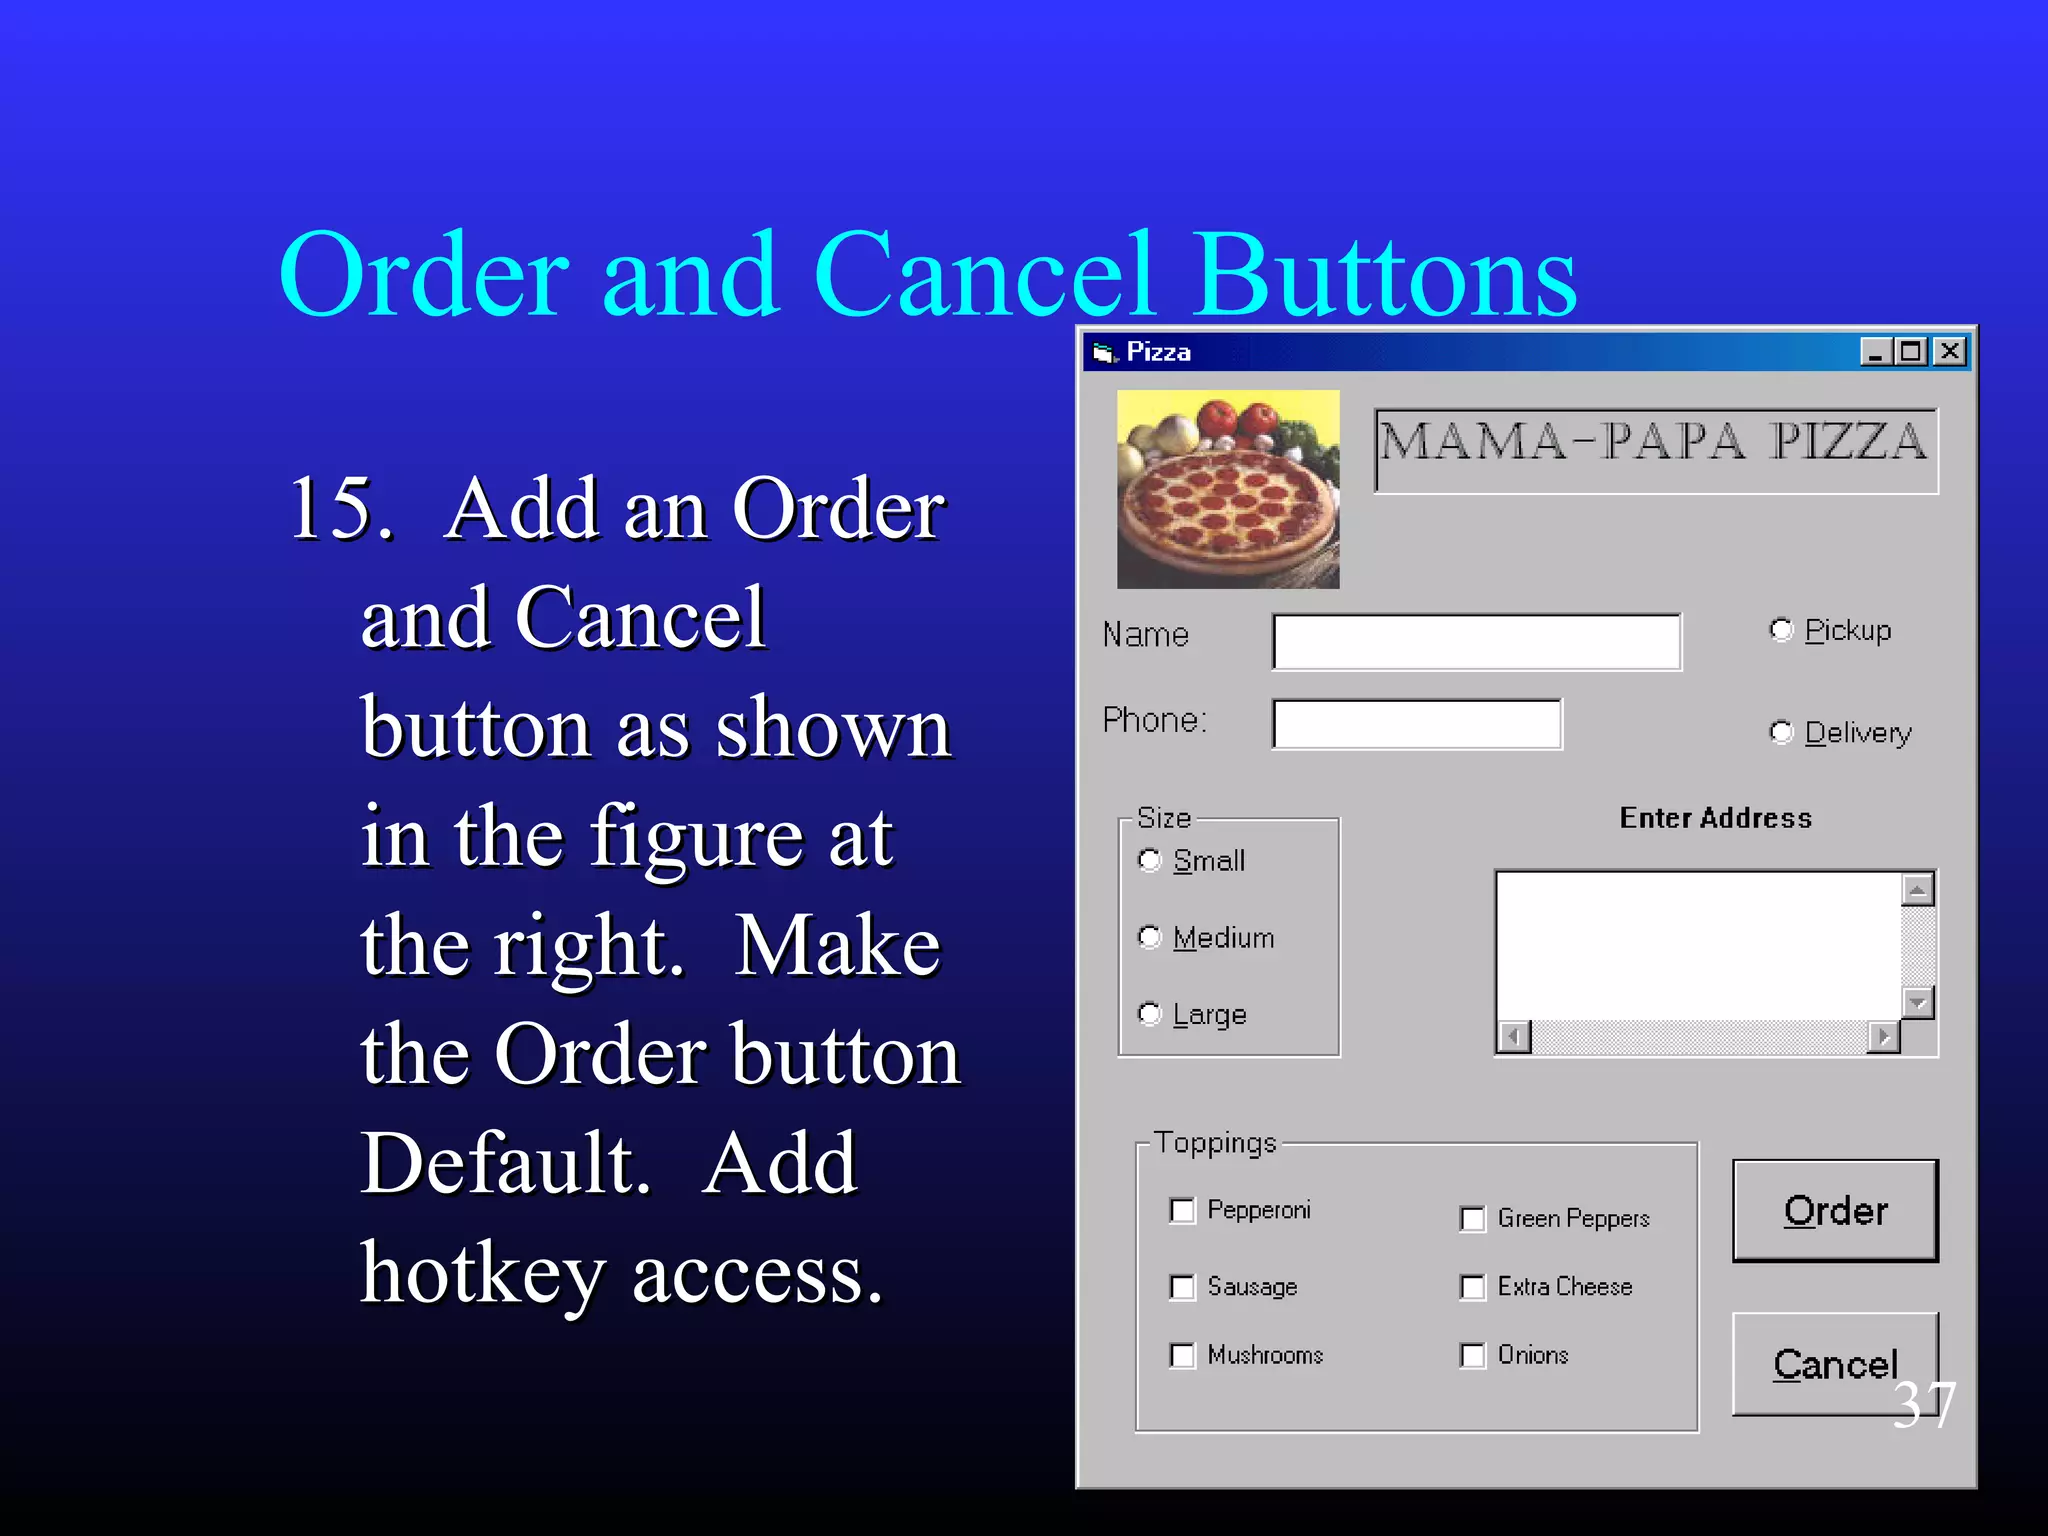
    Order and CancelButtons 15. Add an Order15. Add an Order and Canceland Cancel button as shownbutton as shown in the figure atin the figure at the right. Makethe right. Make the Order buttonthe Order button Default. AddDefault. Add hotkey access.hotkey access. 37
  • 38.
    Time to Code! Thespecs for this program state that the orderThe specs for this program state that the order can be cancelled at any time. After ordercan be cancelled at any time. After order placement, a message box will appearplacement, a message box will appear asking the user to verify the order asasking the user to verify the order as indicated. If it is verified another messageindicated. If it is verified another message box will indicate this.box will indicate this. 38
  • 39.
    Enabling and Disabling Itis a good idea to not let the user makeIt is a good idea to not let the user make inappropriate choices if at all possible.inappropriate choices if at all possible. Disable any options that are not applicable at theDisable any options that are not applicable at the current time, and enable them whencurrent time, and enable them when appropriate.appropriate. 16. Select all the checkboxes at once and set the16. Select all the checkboxes at once and set the Enabled property to False. Run the program.Enabled property to False. Run the program. 39
  • 40.
    Enabling Controls It wouldbe appropriate for these checkboxes to beIt would be appropriate for these checkboxes to be enabled after choosing a pizza size.enabled after choosing a pizza size. 17.17. Double click optSmall, and add this code to theDouble click optSmall, and add this code to the procedure.procedure. chkPepperoni.enabled=truechkPepperoni.enabled=true Run the program. Click on Small and PepperoniRun the program. Click on Small and Pepperoni should become enabled.should become enabled. 18. Enable each of the checkboxes in the same18. Enable each of the checkboxes in the same manner.manner. 40
  • 41.
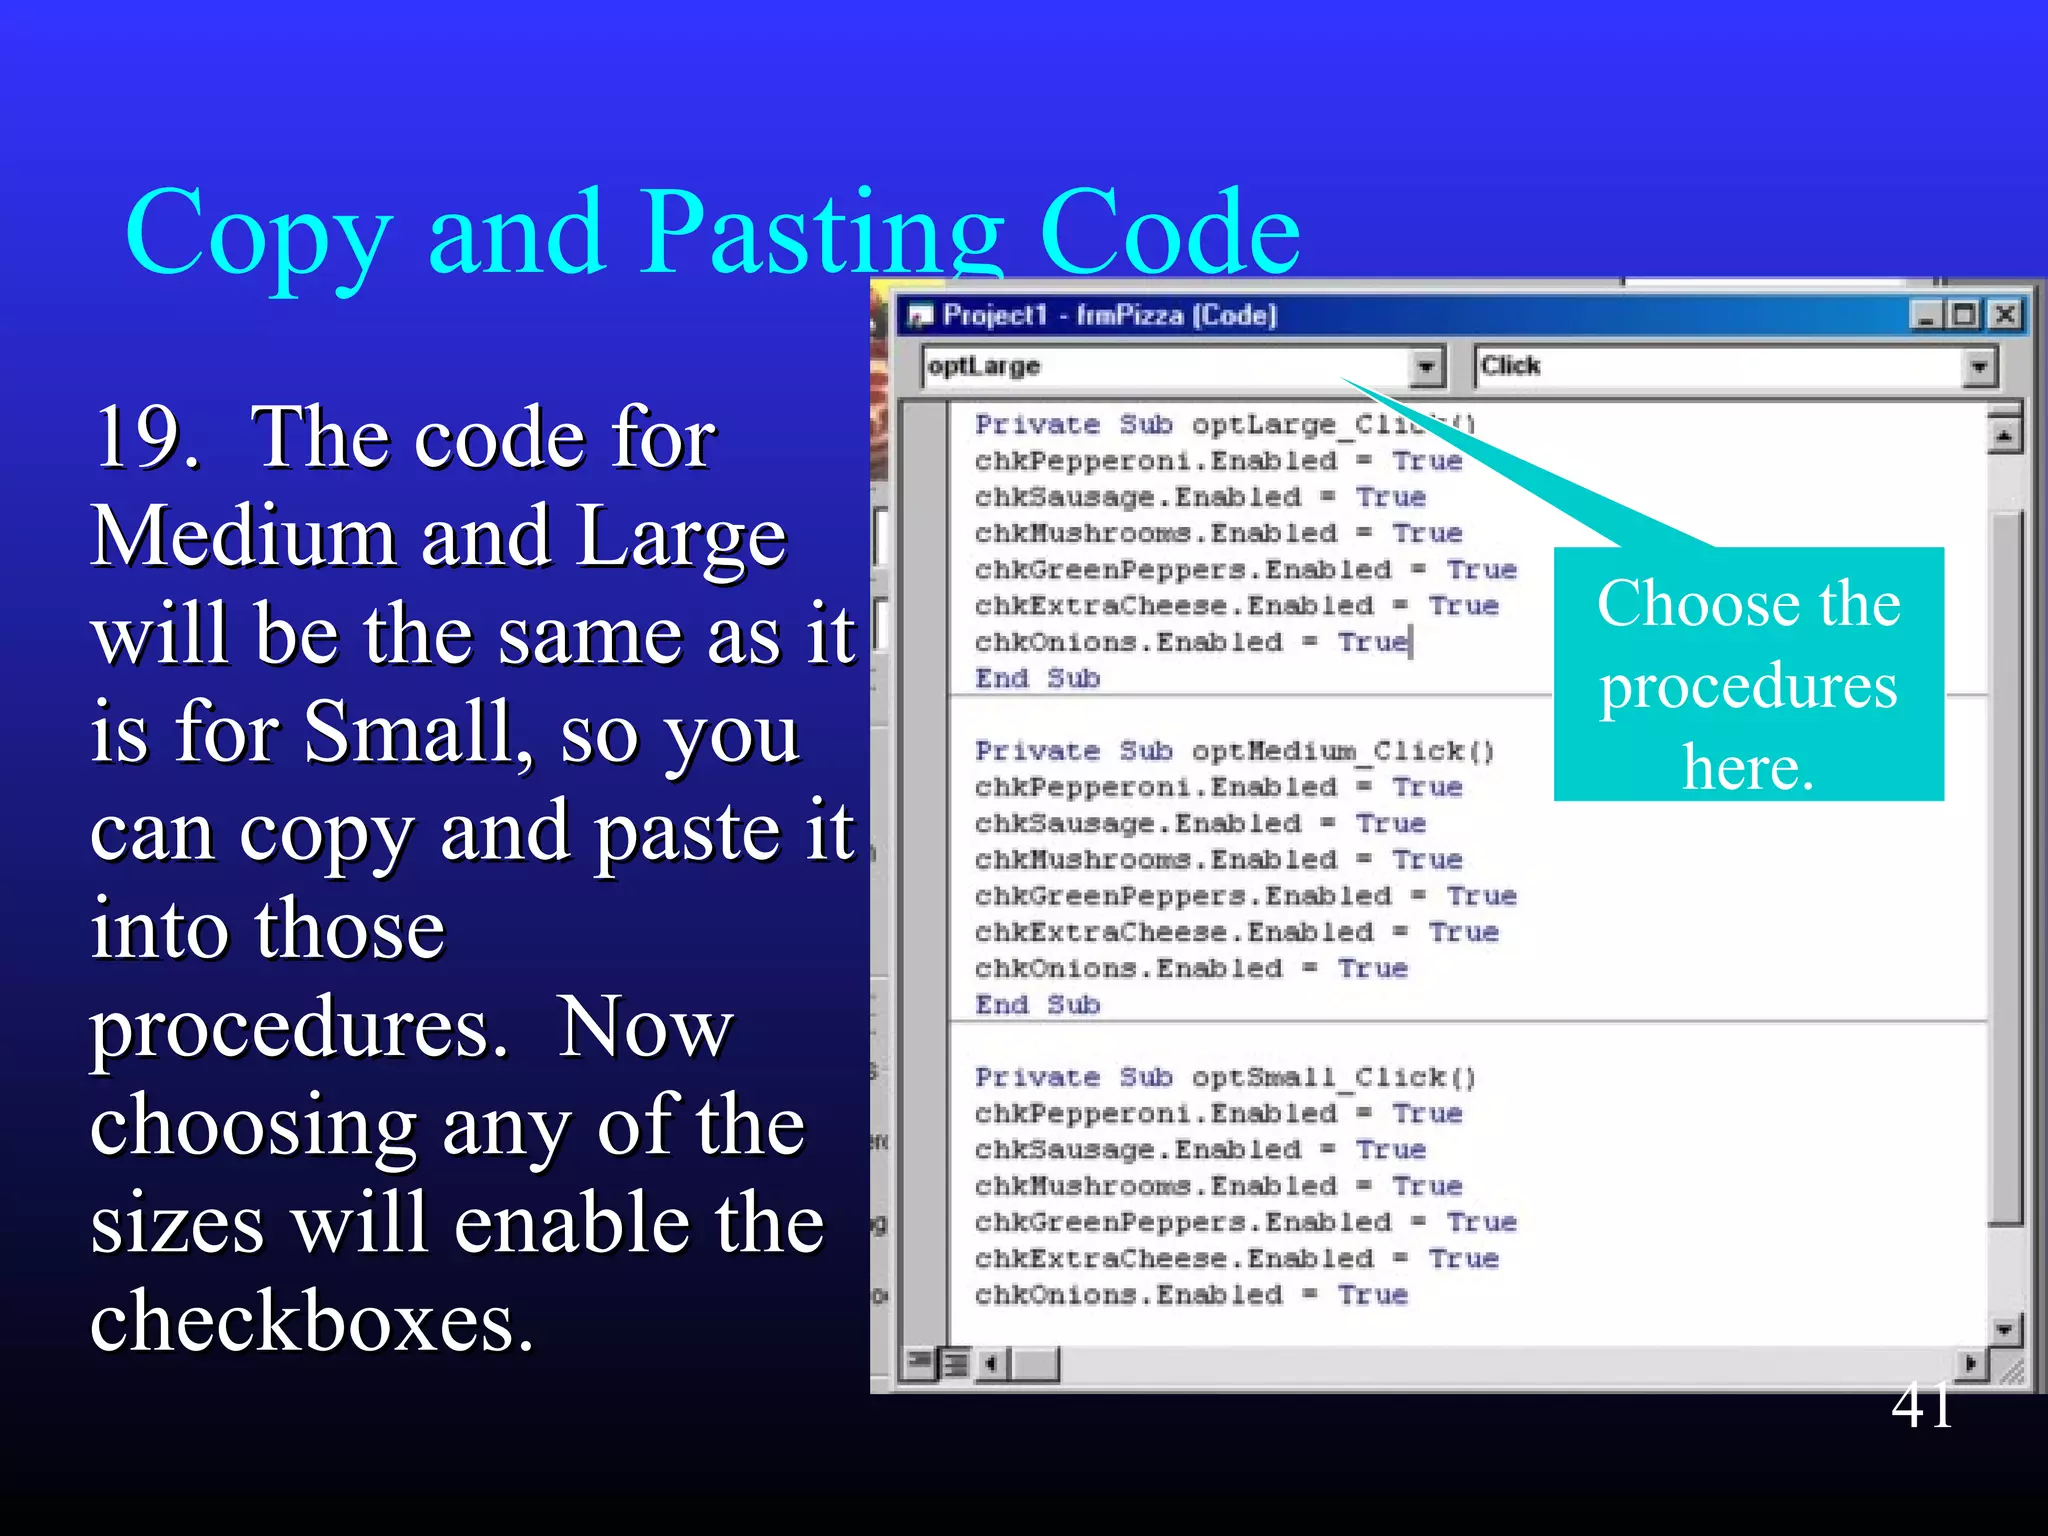
    Copy and PastingCode 19. The code for19. The code for Medium and LargeMedium and Large will be the same as itwill be the same as it is for Small, so youis for Small, so you can copy and paste itcan copy and paste it into thoseinto those procedures. Nowprocedures. Now choosing any of thechoosing any of the sizes will enable thesizes will enable the checkboxes.checkboxes. Choose the procedures here. 41
  • 42.
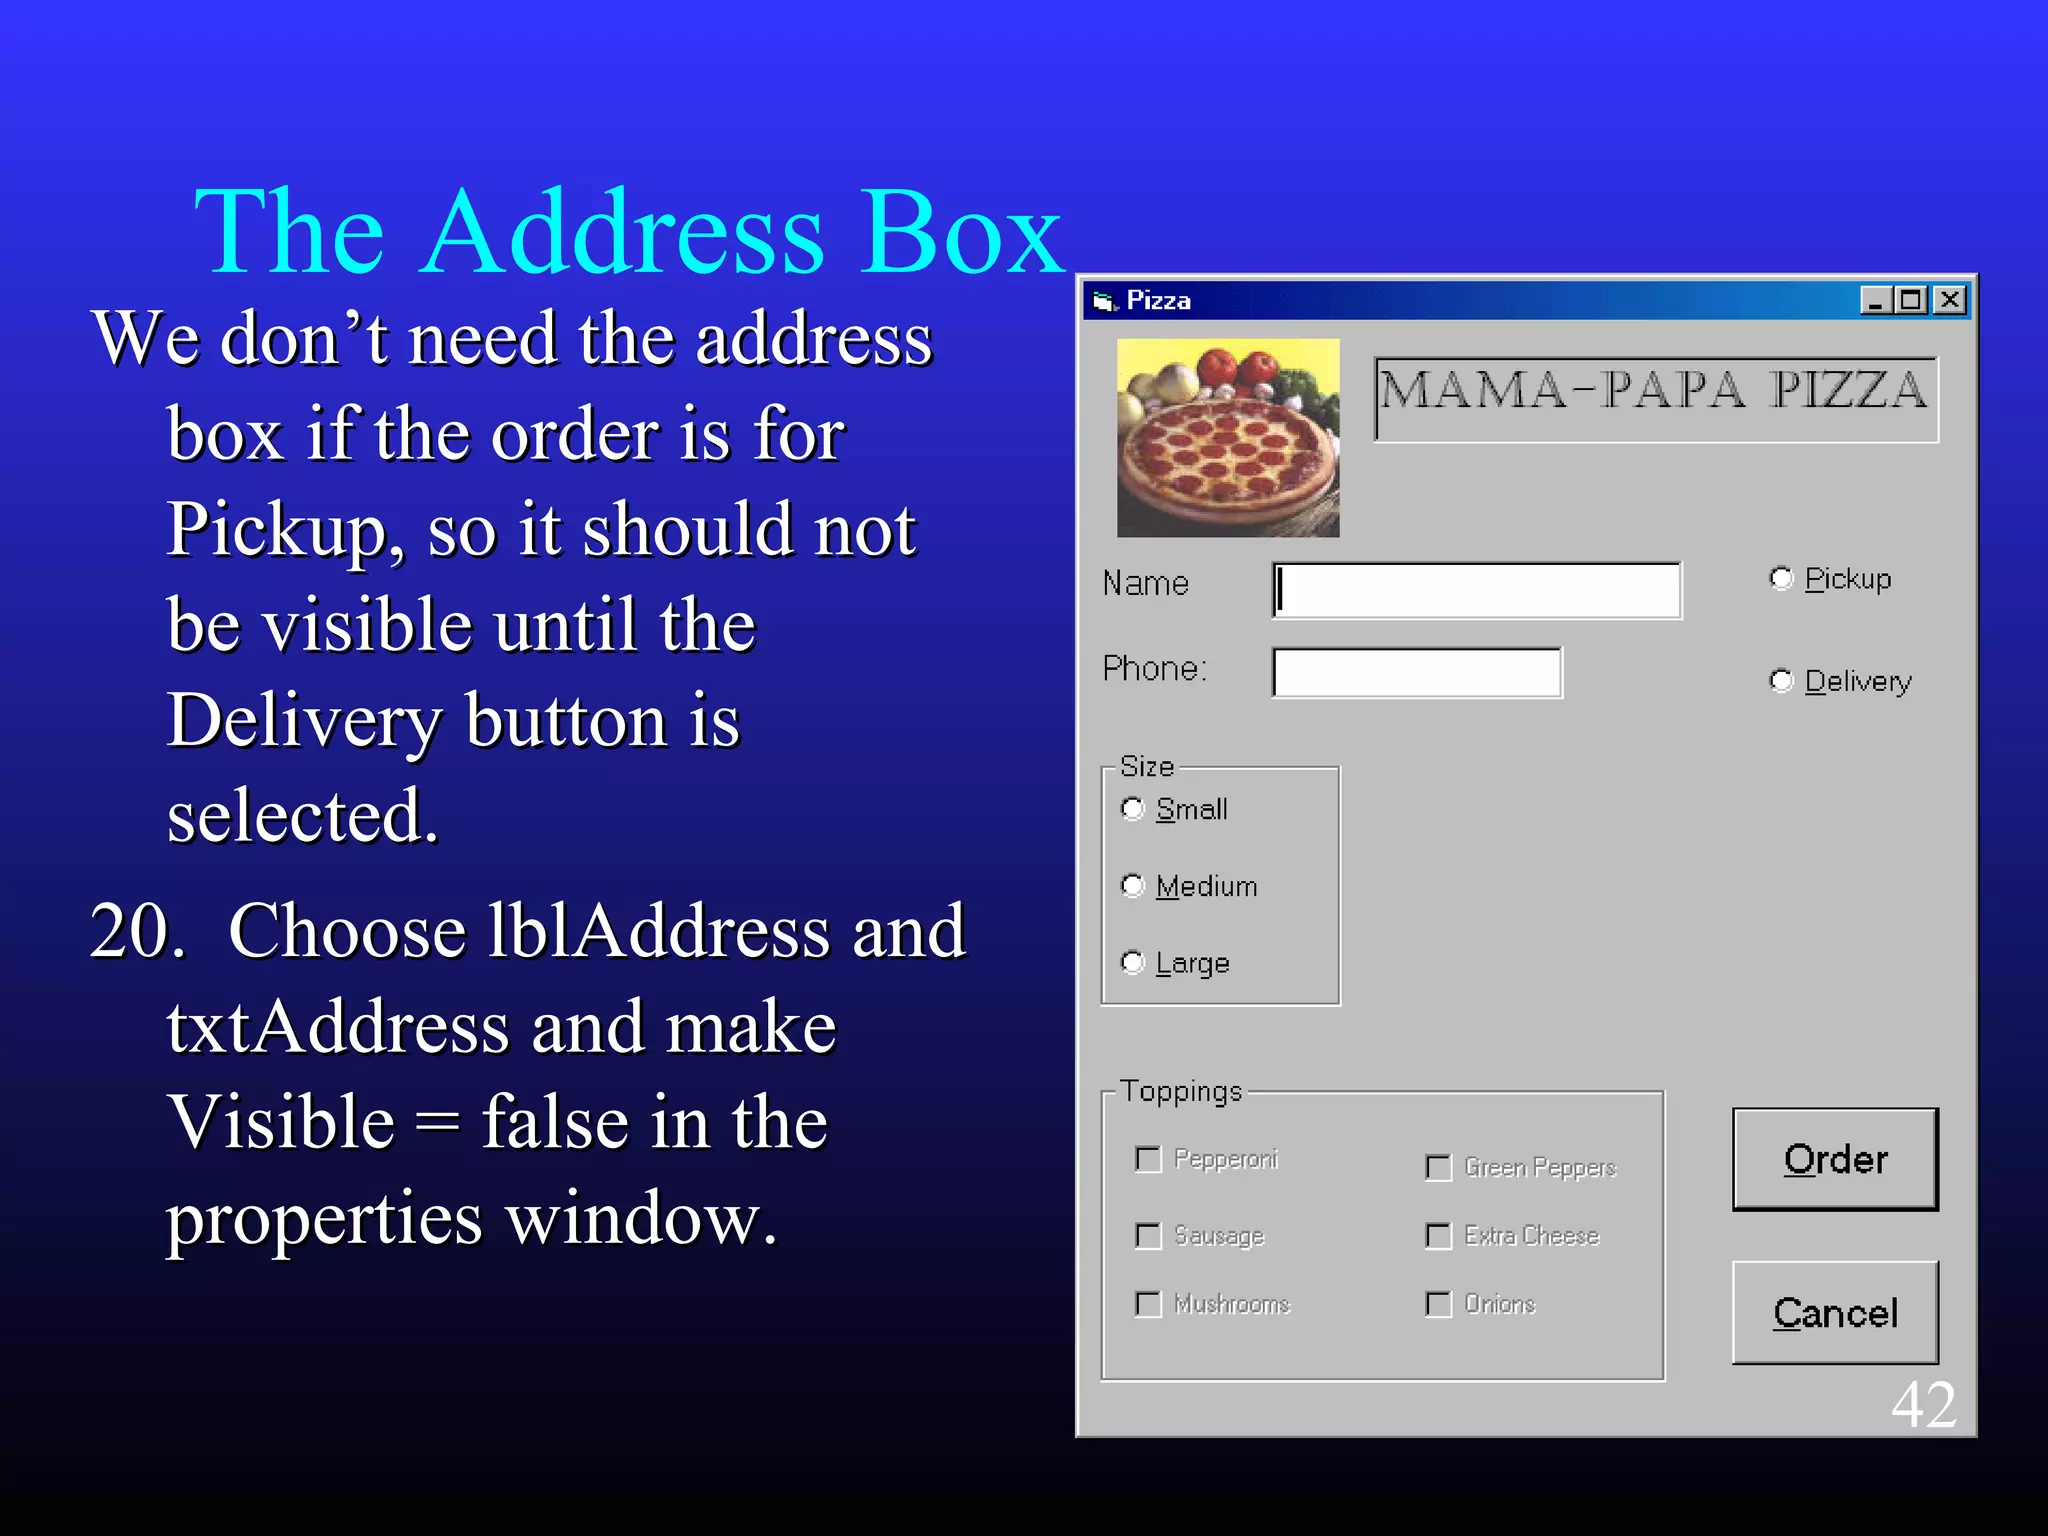
    The Address Box Wedon’t need the addressWe don’t need the address box if the order is forbox if the order is for Pickup, so it should notPickup, so it should not be visible until thebe visible until the Delivery button isDelivery button is selected.selected. 20. Choose lblAddress and20. Choose lblAddress and txtAddress and maketxtAddress and make Visible = false in theVisible = false in the properties window.properties window. 42
  • 43.
    Delivery Option Button Ifyou choose the Delivery option, these two controlsIf you choose the Delivery option, these two controls ((lblAddresslblAddress andand txtAddress)txtAddress) should become visibleshould become visible and the cursor should move to the txtAddress box,and the cursor should move to the txtAddress box, waiting for input.waiting for input. 21. Add the following to the optDelivery_click21. Add the following to the optDelivery_click txtAddress.Visible = TruetxtAddress.Visible = True lblAddress.Visible = TruelblAddress.Visible = True txtAddress.SetFocustxtAddress.SetFocus 43
  • 44.
    Pickup Option Button Justas Delivery should make the Address infoJust as Delivery should make the Address info visible, Pickup should make themvisible, Pickup should make them invisible.invisible. 22.22. Add the following to the optPickup_clickAdd the following to the optPickup_click procedure:procedure: txtAddress.Visible = falsetxtAddress.Visible = false lblAddress.Visible = FalselblAddress.Visible = False 44
  • 45.
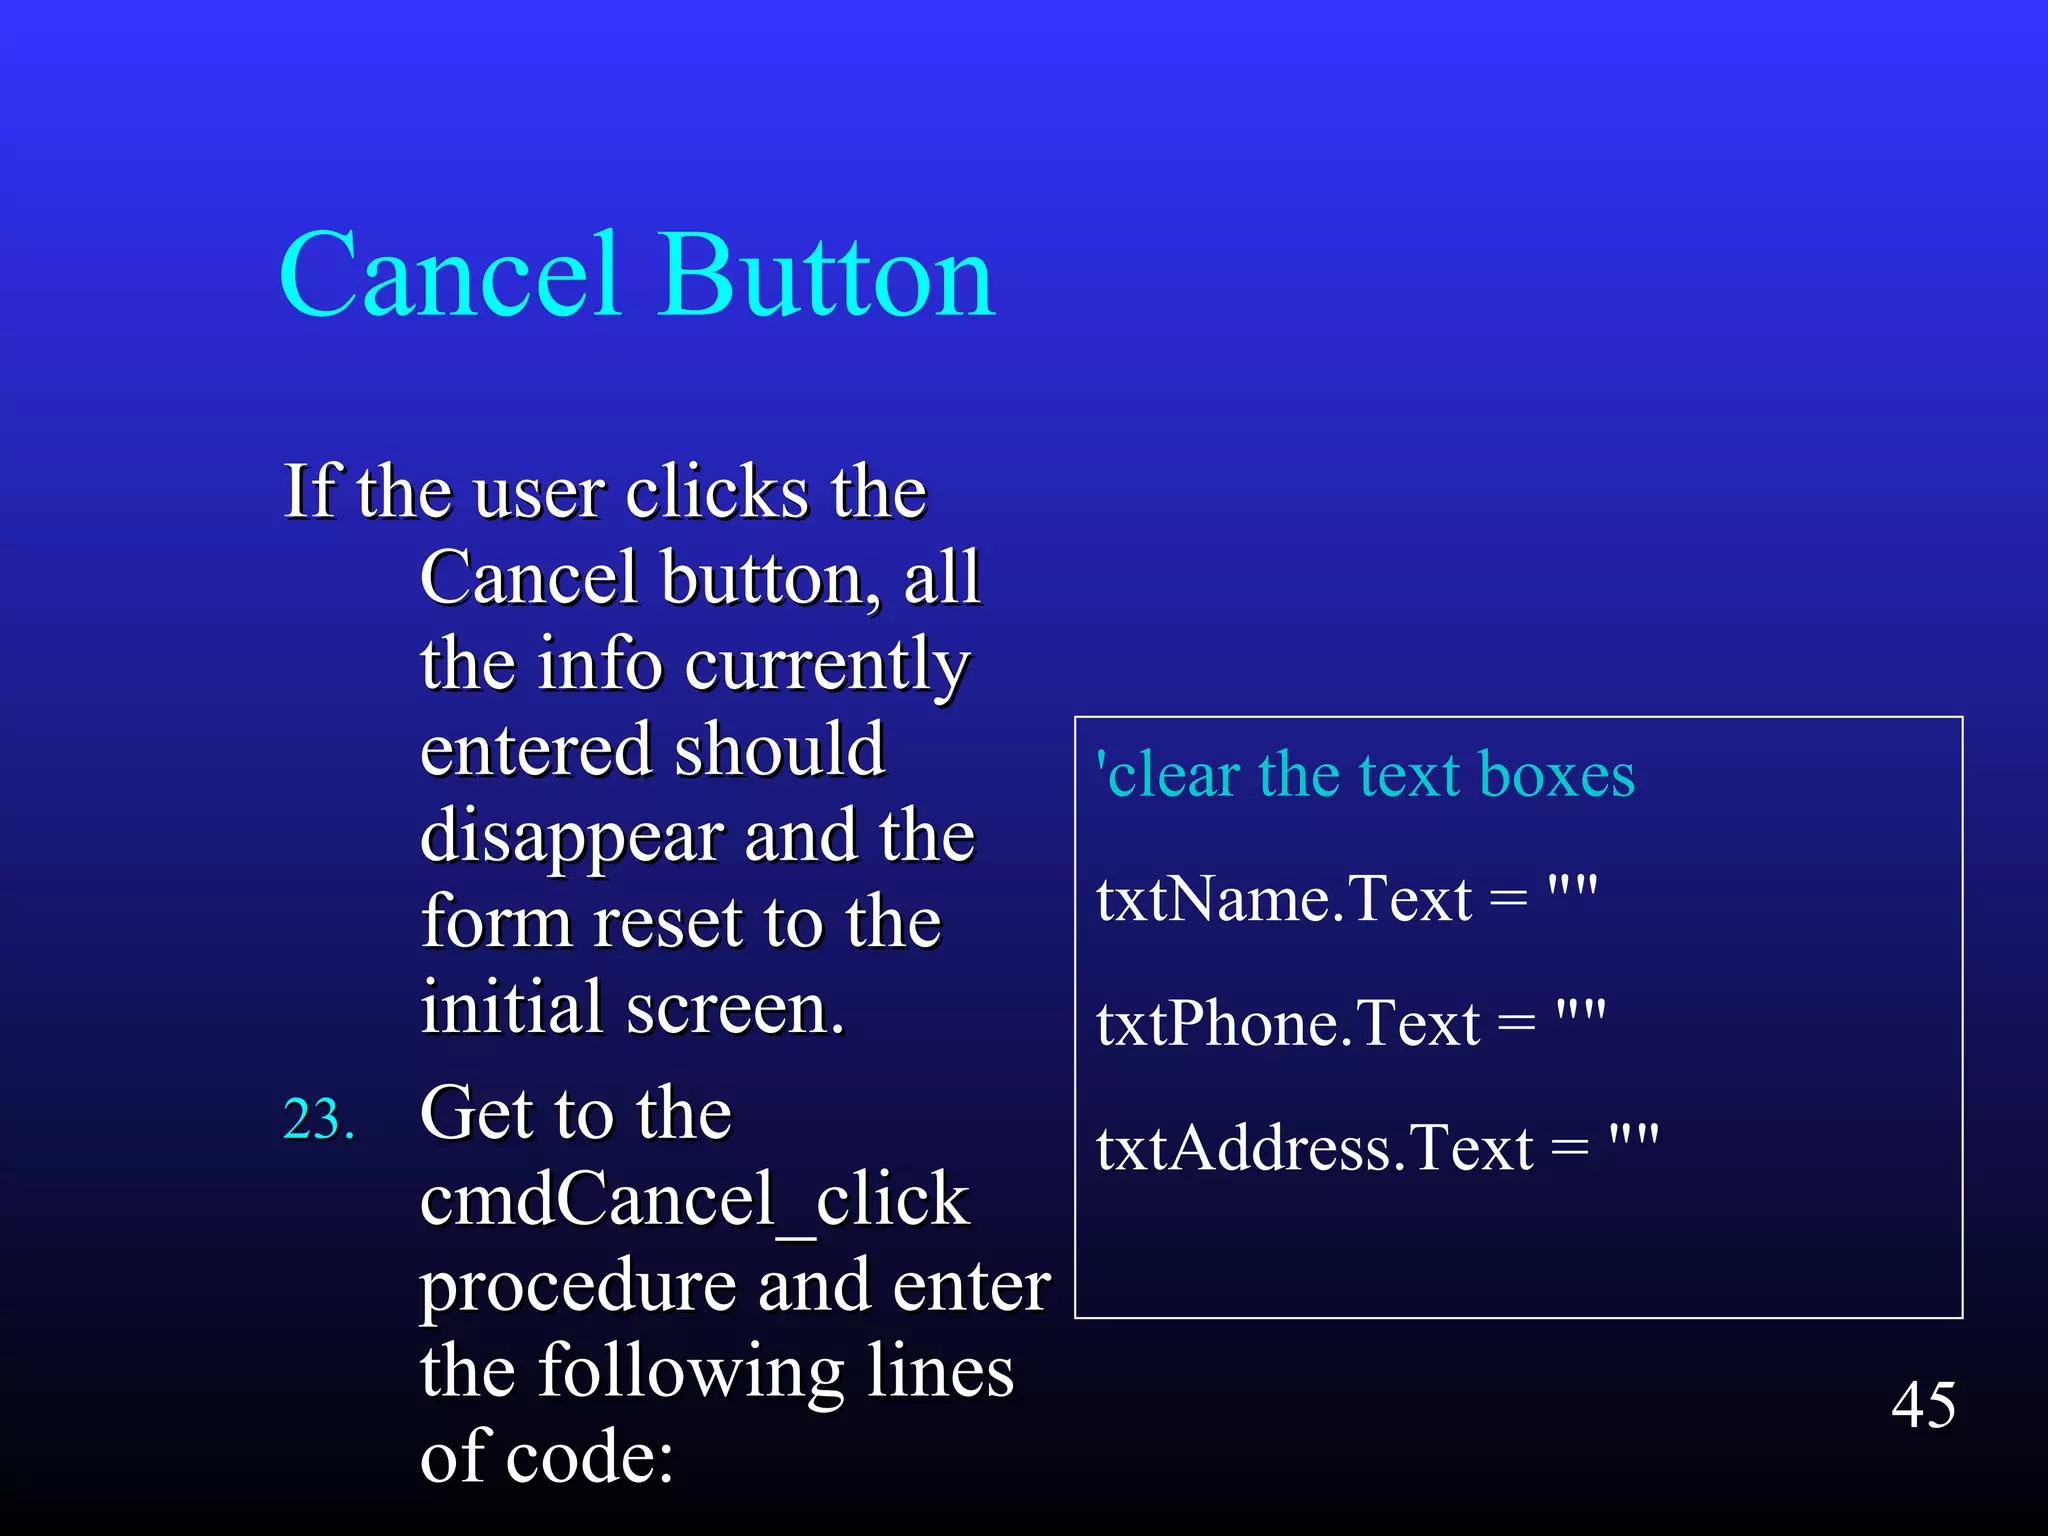
    Cancel Button If theuser clicks theIf the user clicks the Cancel button, allCancel button, all the info currentlythe info currently entered shouldentered should disappear and thedisappear and the form reset to theform reset to the initial screen.initial screen. 23.23. Get to theGet to the cmdCancel_clickcmdCancel_click procedure and enterprocedure and enter the following linesthe following lines of code:of code: 'clear the text boxes txtName.Text = "" txtPhone.Text = "" txtAddress.Text = "" 45
  • 46.
    Canceling, continued 'clear'clear thesize optionsthe size options optSmall.Value = FalseoptSmall.Value = False optMedium.Value =optMedium.Value = FalseFalse optLarge.Value = FalseoptLarge.Value = False 'set the pickup option'set the pickup option optPickup.Value = TrueoptPickup.Value = True 'clear the checkboxes chkPepperoni.Value = vbUnchecked chkSausage.Value = vbUnchecked chkMushrooms.Value = vbUnchecked chkGreenPeppers.Value = vbUnchecked chkExtraCheese.Value = vbUnchecked chkOnions.Value = vbUnchecked 46
  • 47.
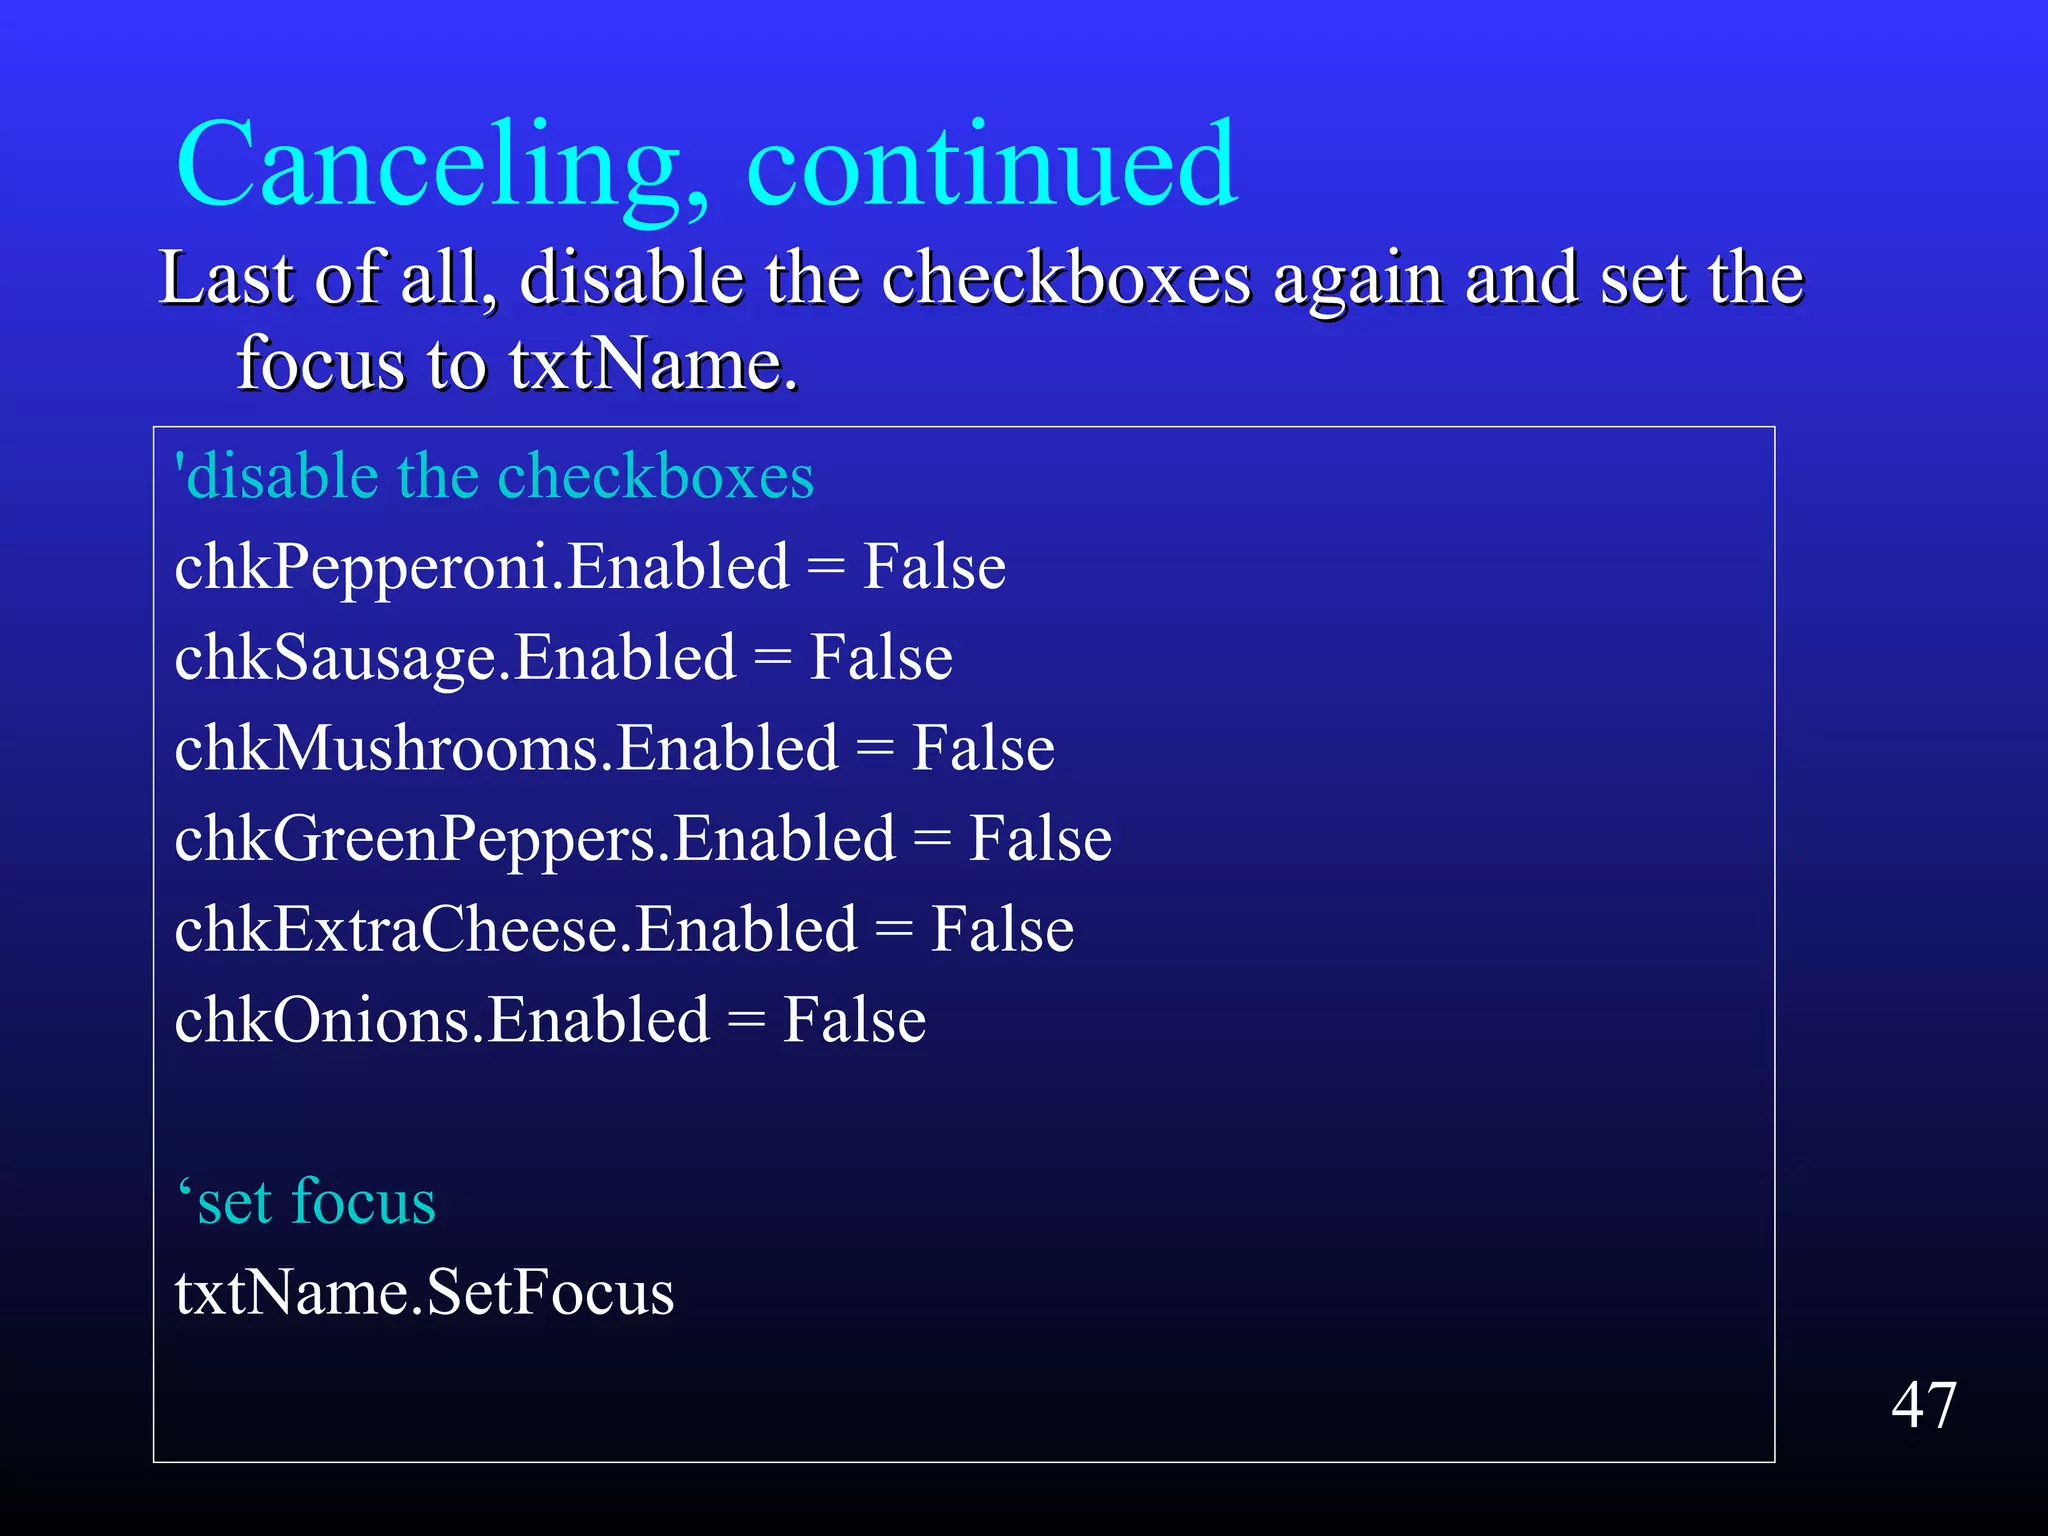
    Canceling, continued Last ofall, disable the checkboxes again and set theLast of all, disable the checkboxes again and set the focus to txtName.focus to txtName. 'disable the checkboxes chkPepperoni.Enabled = False chkSausage.Enabled = False chkMushrooms.Enabled = False chkGreenPeppers.Enabled = False chkExtraCheese.Enabled = False chkOnions.Enabled = False ‘set focus txtName.SetFocus 47
  • 48.
  • 49.
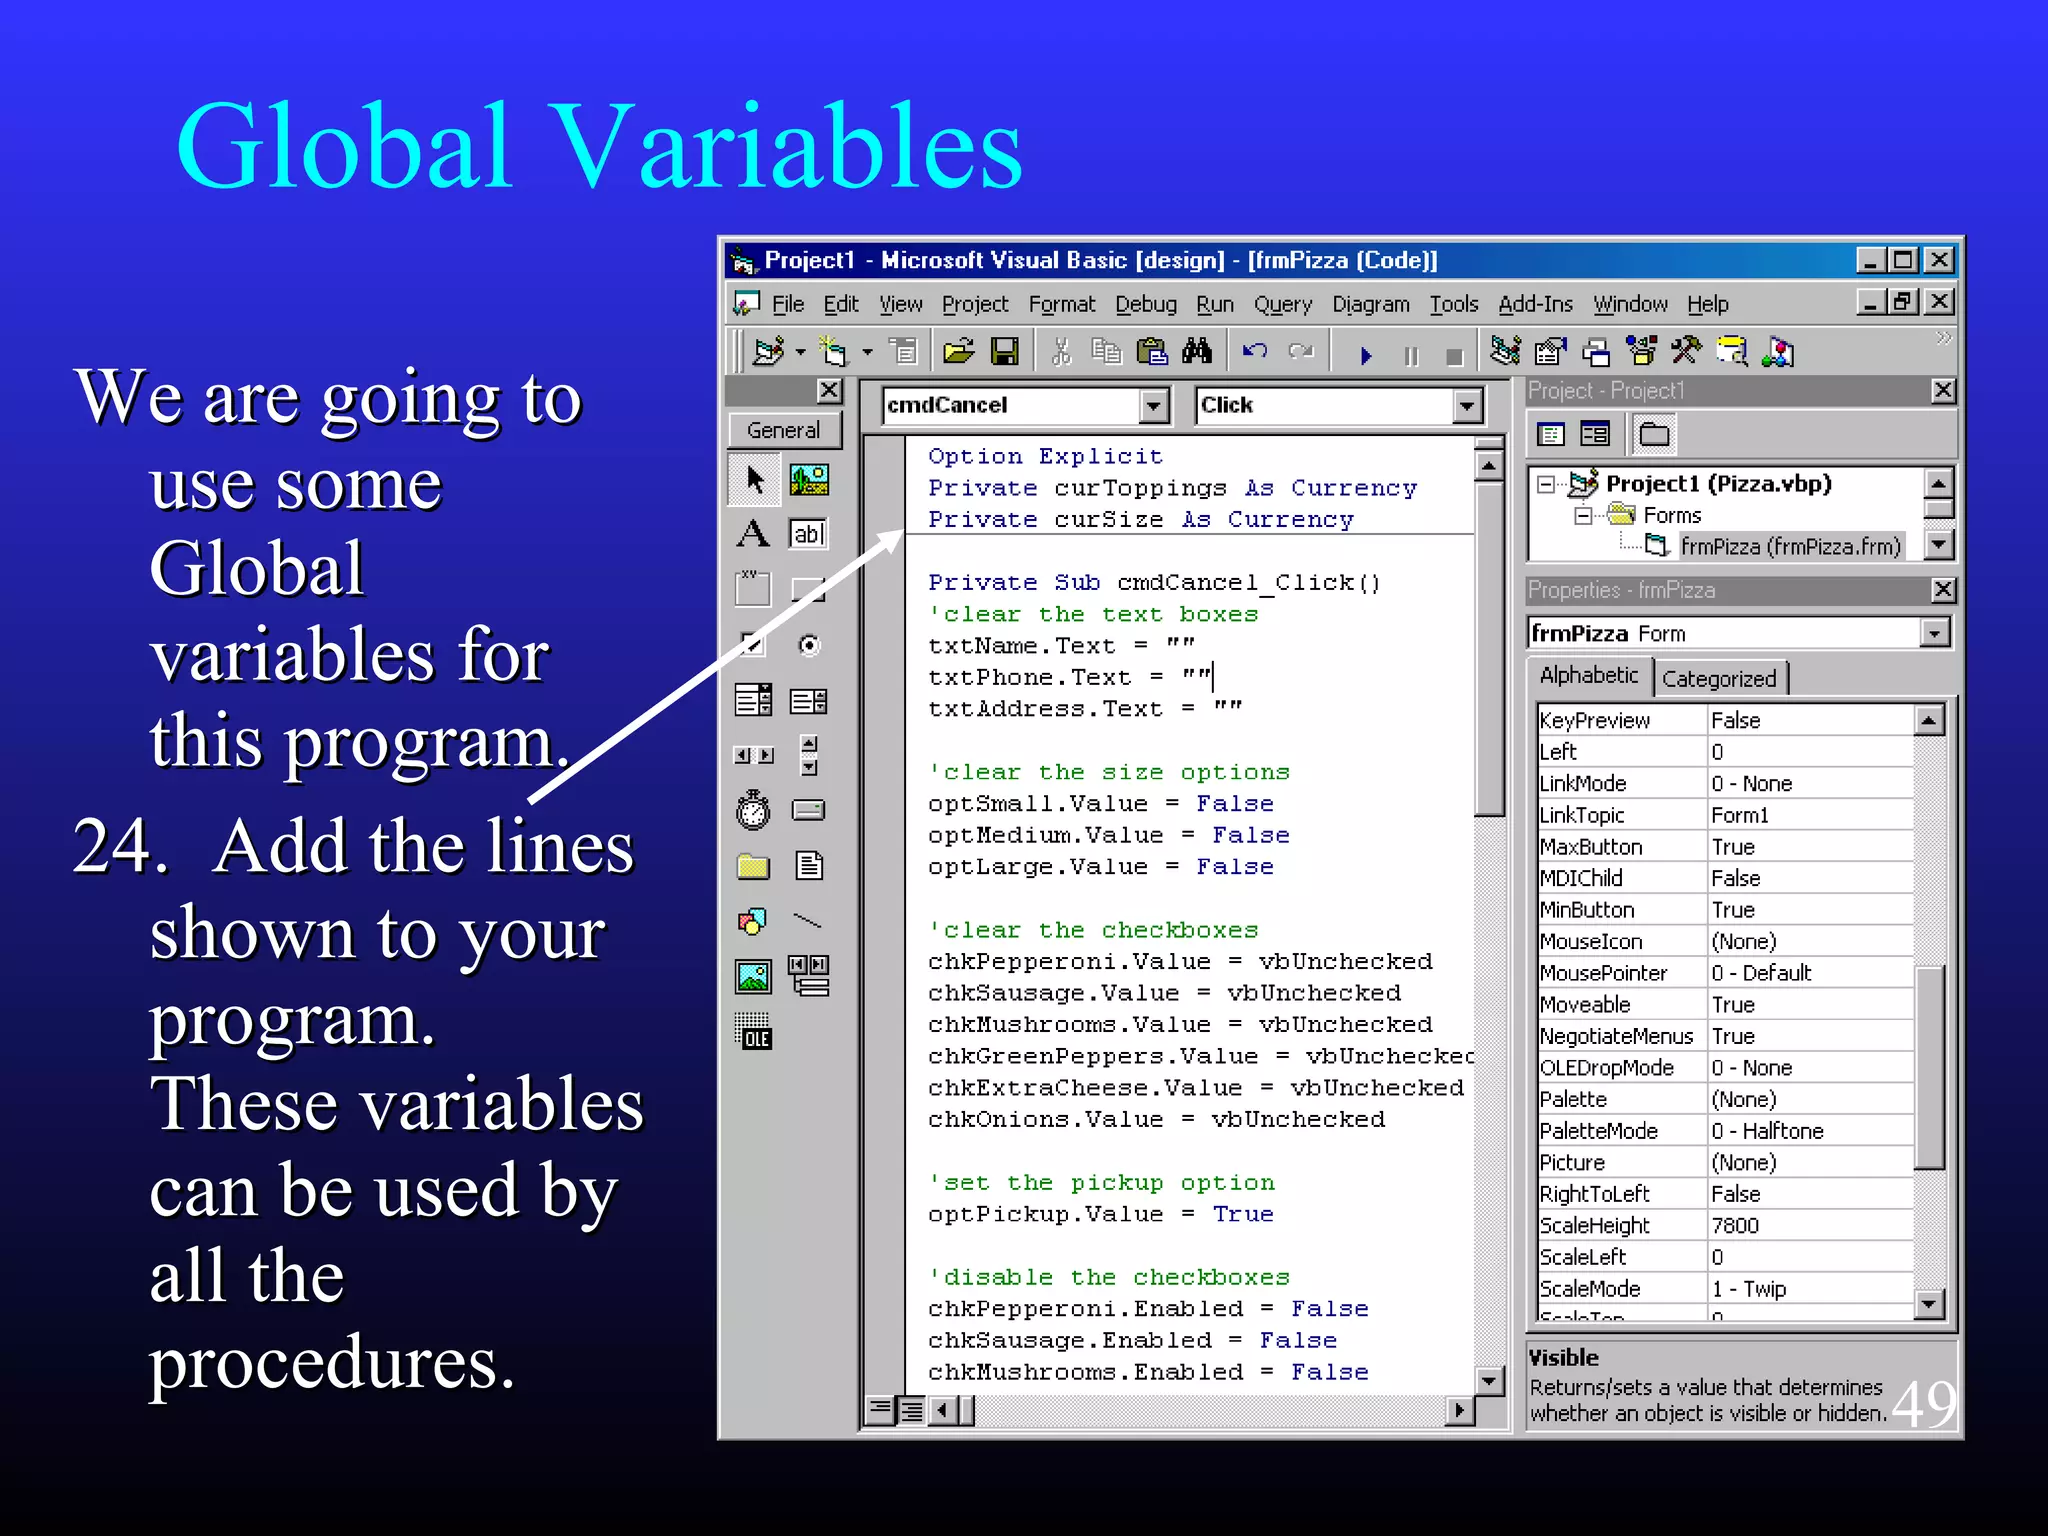
    Global Variables We aregoing toWe are going to use someuse some GlobalGlobal variables forvariables for this program.this program. 24. Add the lines24. Add the lines shown to yourshown to your program.program. These variablesThese variables can be used bycan be used by all theall the procedures.procedures. 49
  • 50.
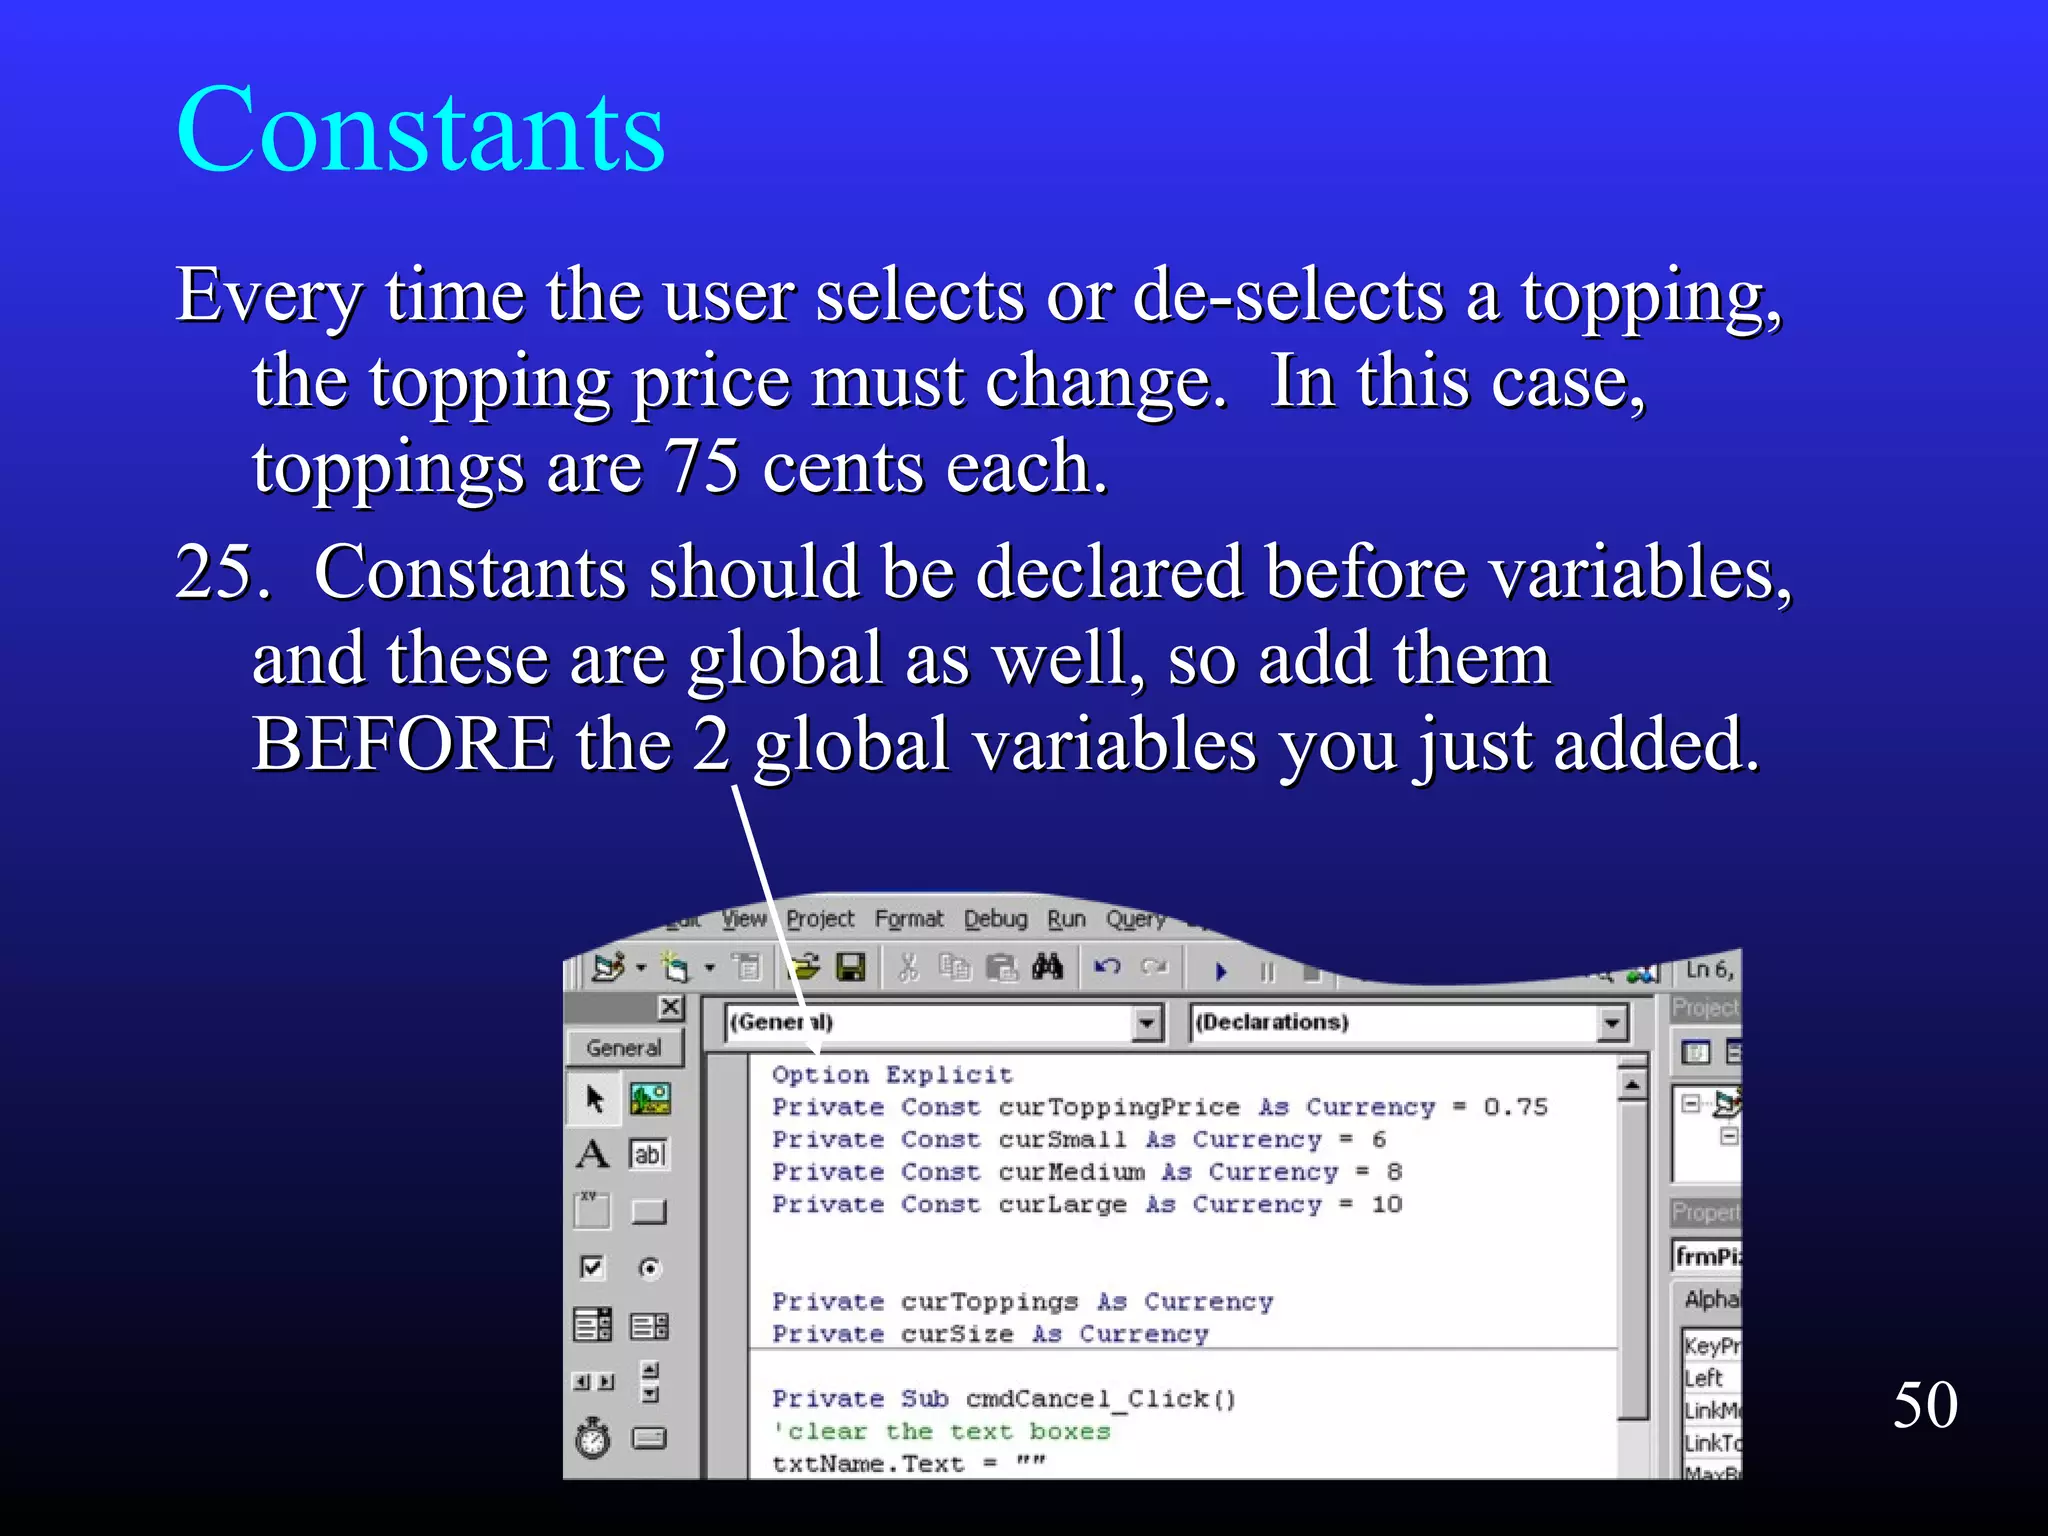
    Constants Every time theuser selects or de-selects a topping,Every time the user selects or de-selects a topping, the topping price must change. In this case,the topping price must change. In this case, toppings are 75 cents each.toppings are 75 cents each. 25. Constants should be declared before variables,25. Constants should be declared before variables, and these are global as well, so add themand these are global as well, so add them BEFORE the 2 global variables you just added.BEFORE the 2 global variables you just added. 50
  • 51.
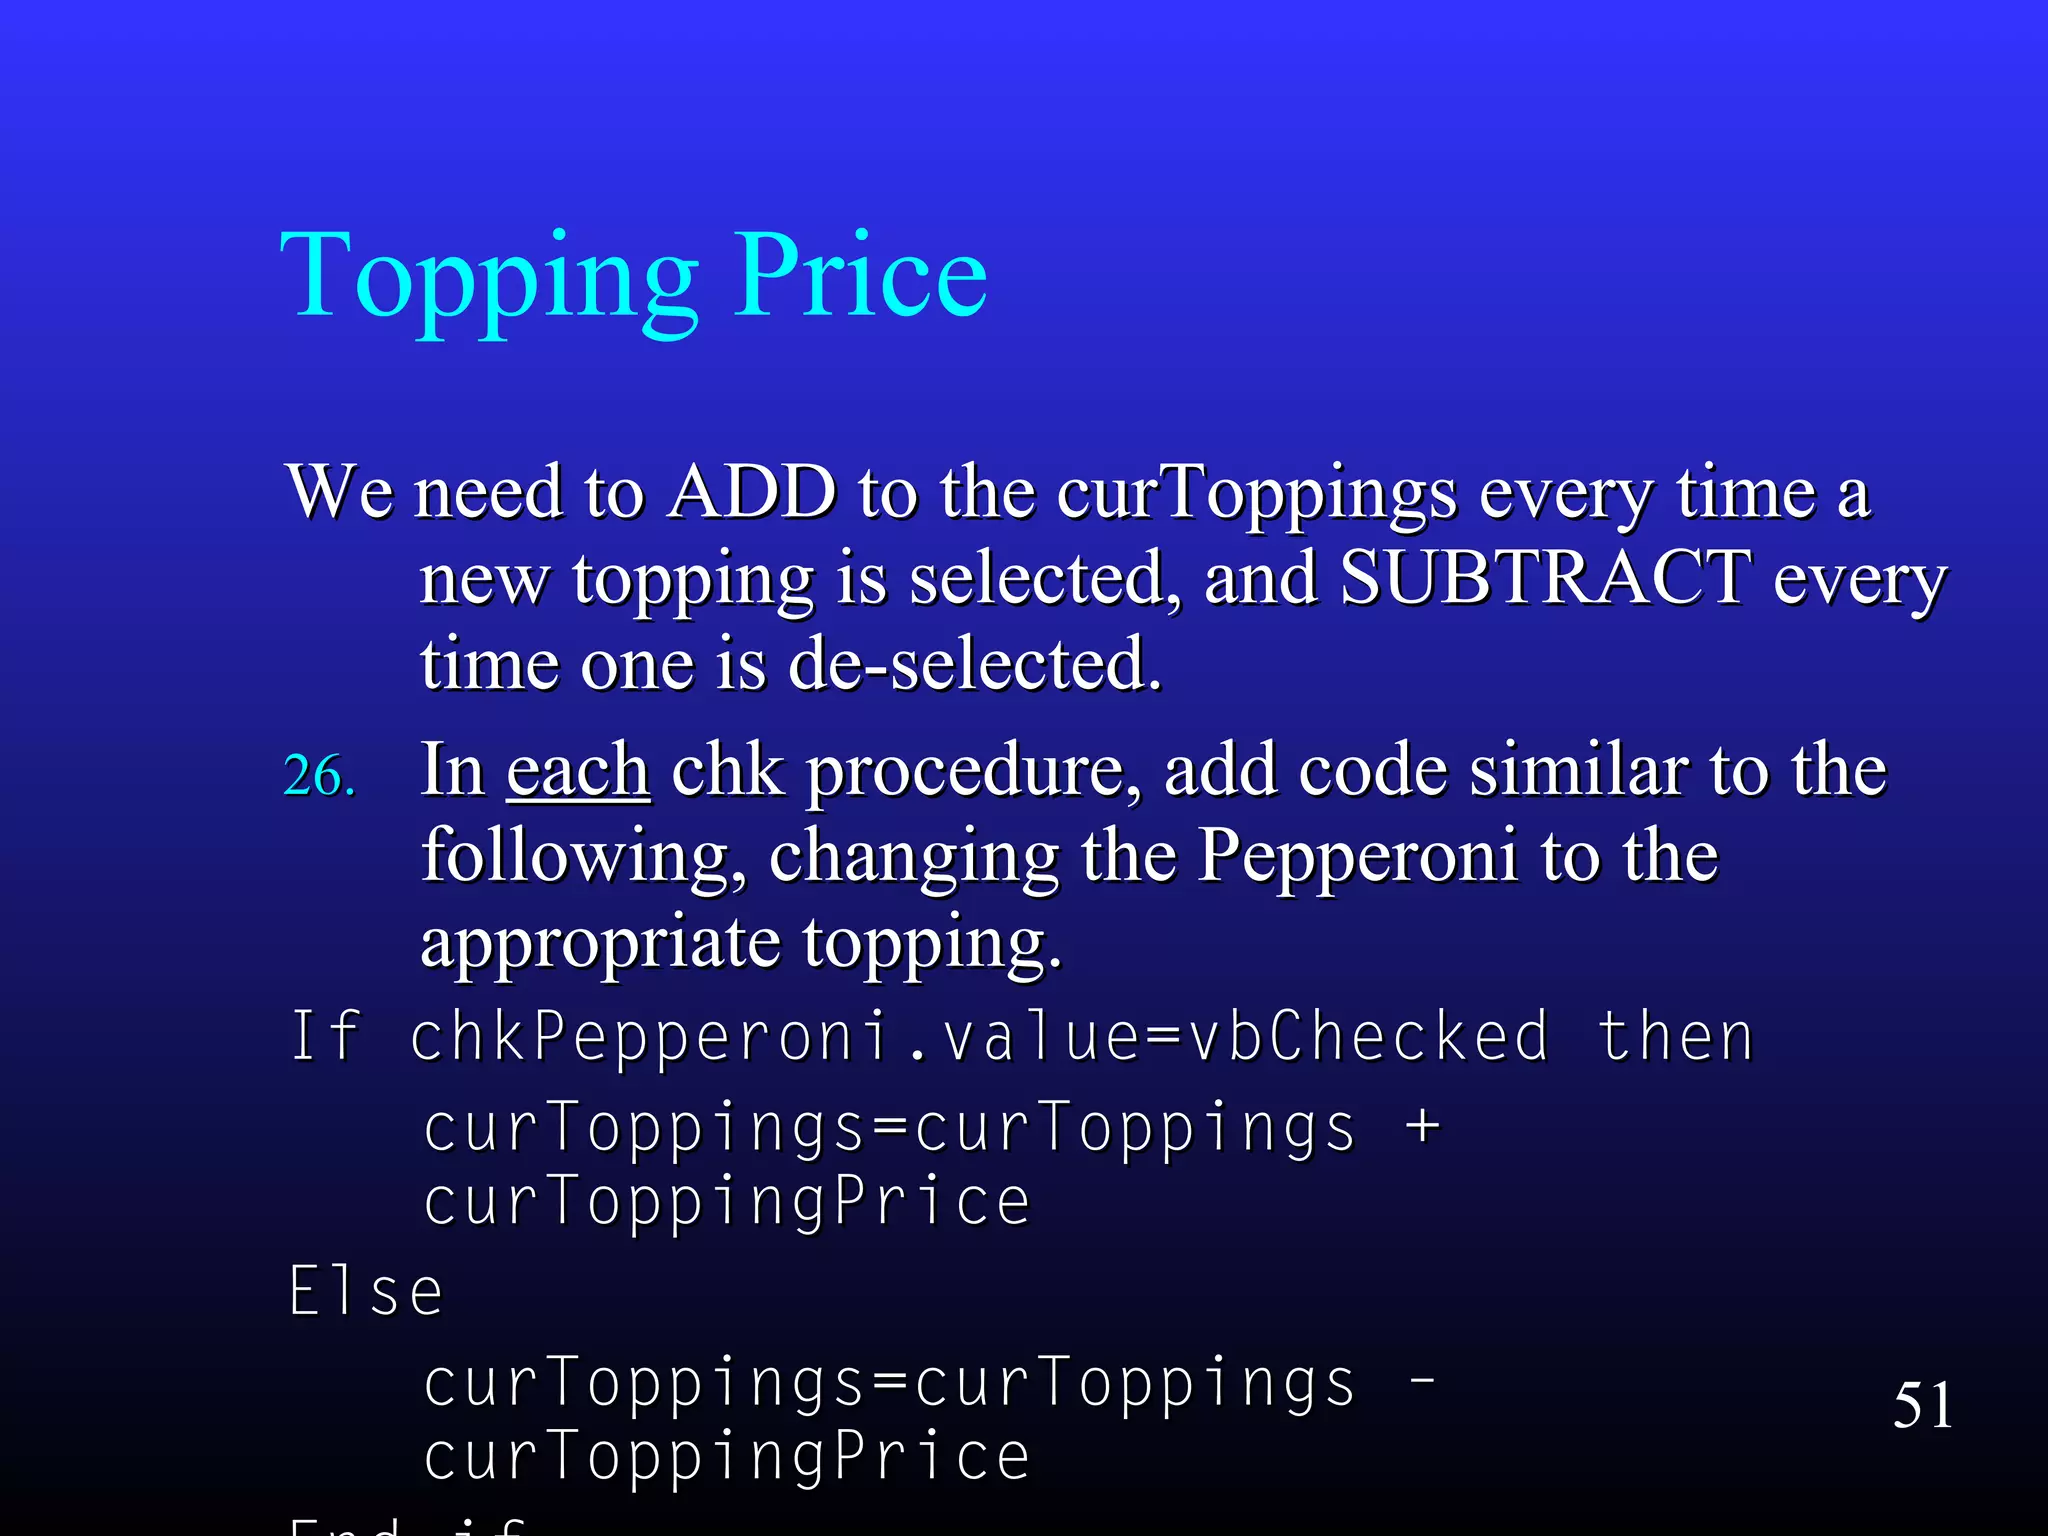
    Topping Price We needto ADD to the curToppings every time aWe need to ADD to the curToppings every time a new topping is selected, and SUBTRACT everynew topping is selected, and SUBTRACT every time one is de-selected.time one is de-selected. 26.26. InIn eacheach chk procedure, add code similar to thechk procedure, add code similar to the following, changing the Pepperoni to thefollowing, changing the Pepperoni to the appropriate topping.appropriate topping. If chkPepperoni.value=vbChecked thenIf chkPepperoni.value=vbChecked then curToppings=curToppings +curToppings=curToppings + curToppingPricecurToppingPrice ElseElse curToppings=curToppings –curToppings=curToppings – curToppingPricecurToppingPrice 51
  • 52.
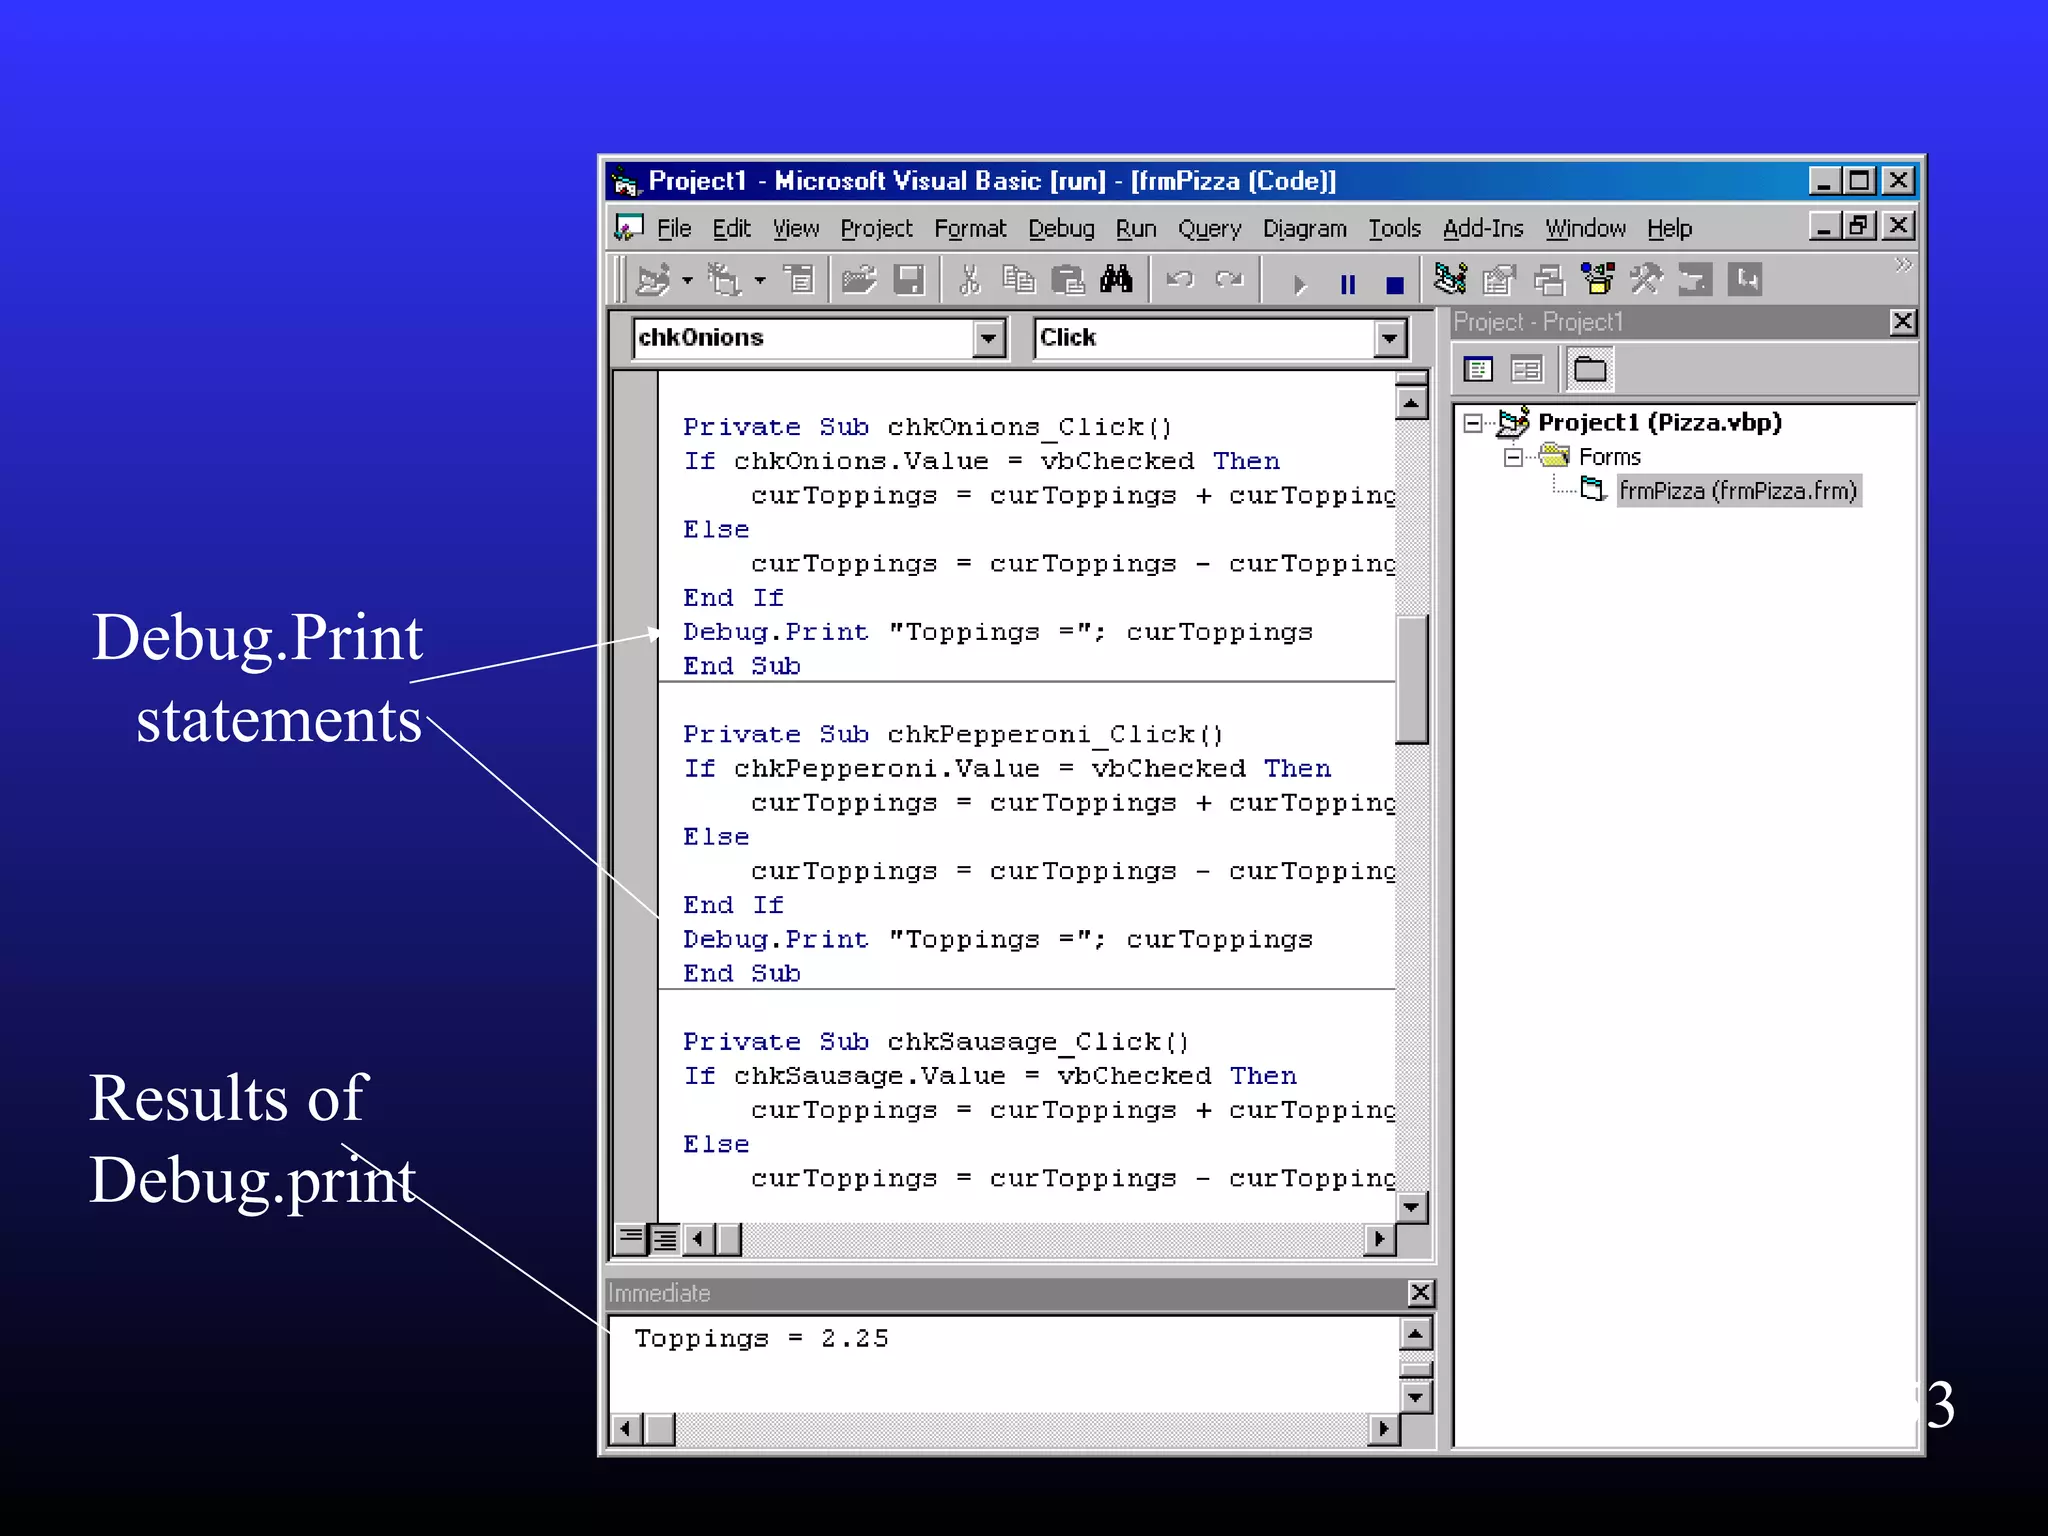
    The Immediate Window Fortesting purposes, you canFor testing purposes, you can ViewView the Immediatethe Immediate window and see the results of thewindow and see the results of the debug.printdebug.print itemitem statement that can be included in the code.statement that can be included in the code. Add this line to eachAdd this line to each chk procedurechk procedure.. Debug.print “Toppings =“Debug.print “Toppings =“ ;curToppings;curToppings When you run your program, select and de-selectWhen you run your program, select and de-select different checkboxes and watch the results in thedifferent checkboxes and watch the results in the immediate window.immediate window. 52
  • 53.
  • 54.
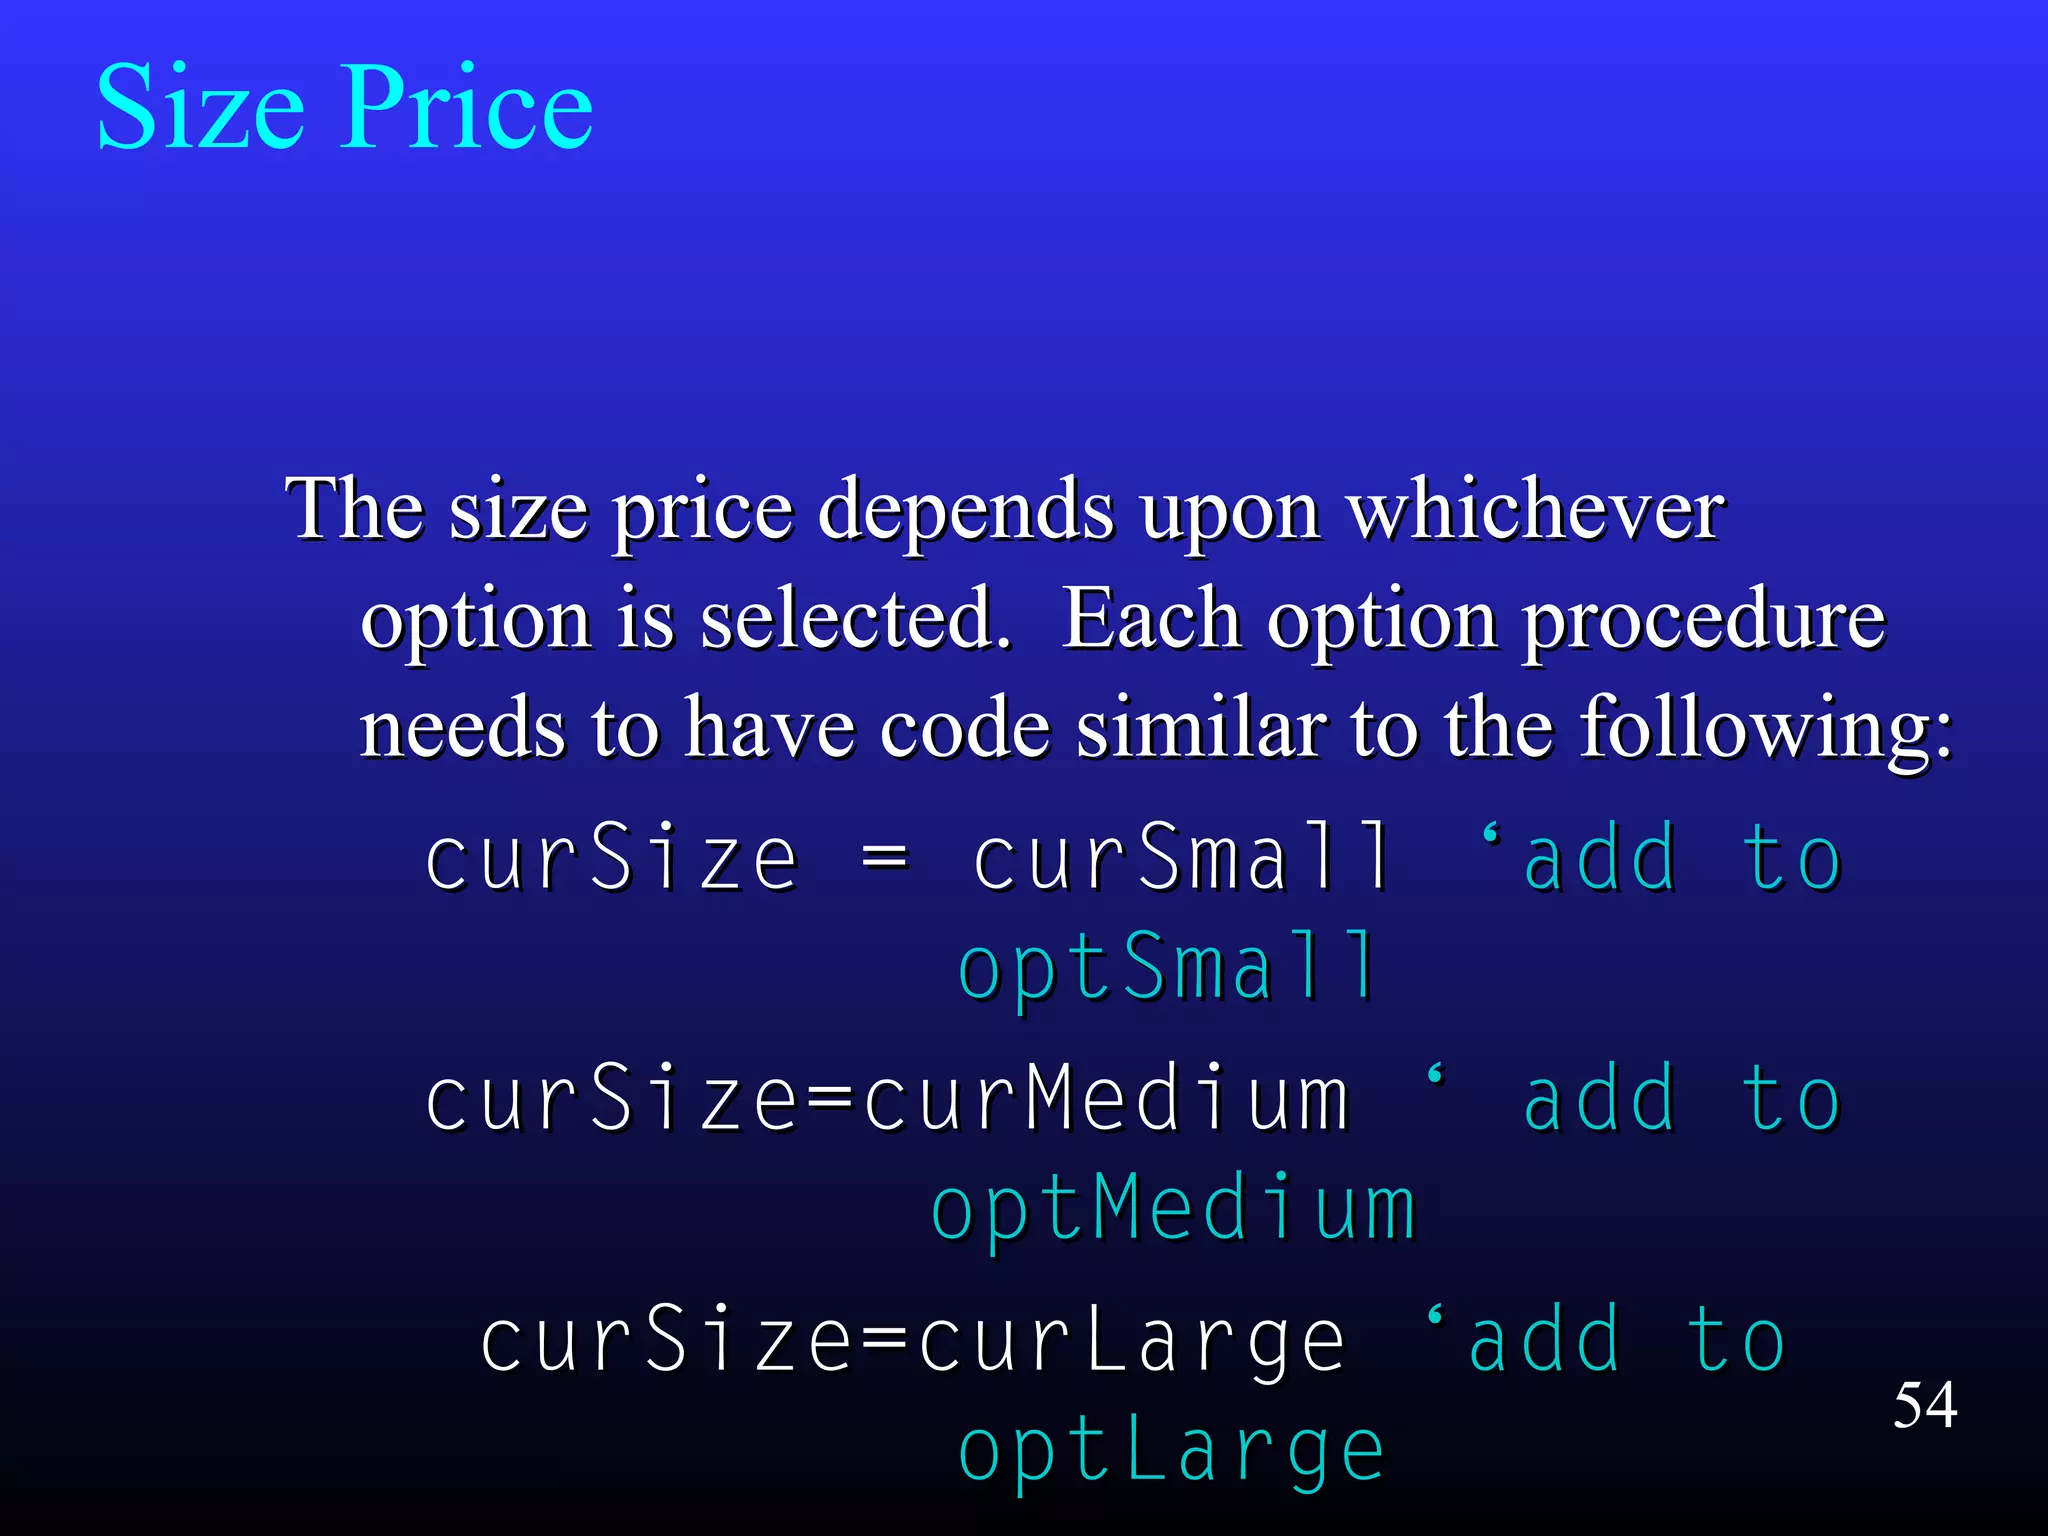
    Size Price The sizeprice depends upon whicheverThe size price depends upon whichever option is selected. Each option procedureoption is selected. Each option procedure needs to have code similar to the following:needs to have code similar to the following: curSize = curSmallcurSize = curSmall ‘add to‘add to optSmalloptSmall curSize=curMediumcurSize=curMedium ‘ add to‘ add to optMediumoptMedium curSize=curLargecurSize=curLarge ‘add to‘add to optLargeoptLarge 54
  • 55.
    Total Price We needto calculate the total due as anWe need to calculate the total due as an addition of curSize and curToppings.addition of curSize and curToppings. 27.27. Declare curTotal as a global variable ofDeclare curTotal as a global variable of type currency.type currency. Private curTotal as currencyPrivate curTotal as currency in the General section.in the General section. 55
  • 56.
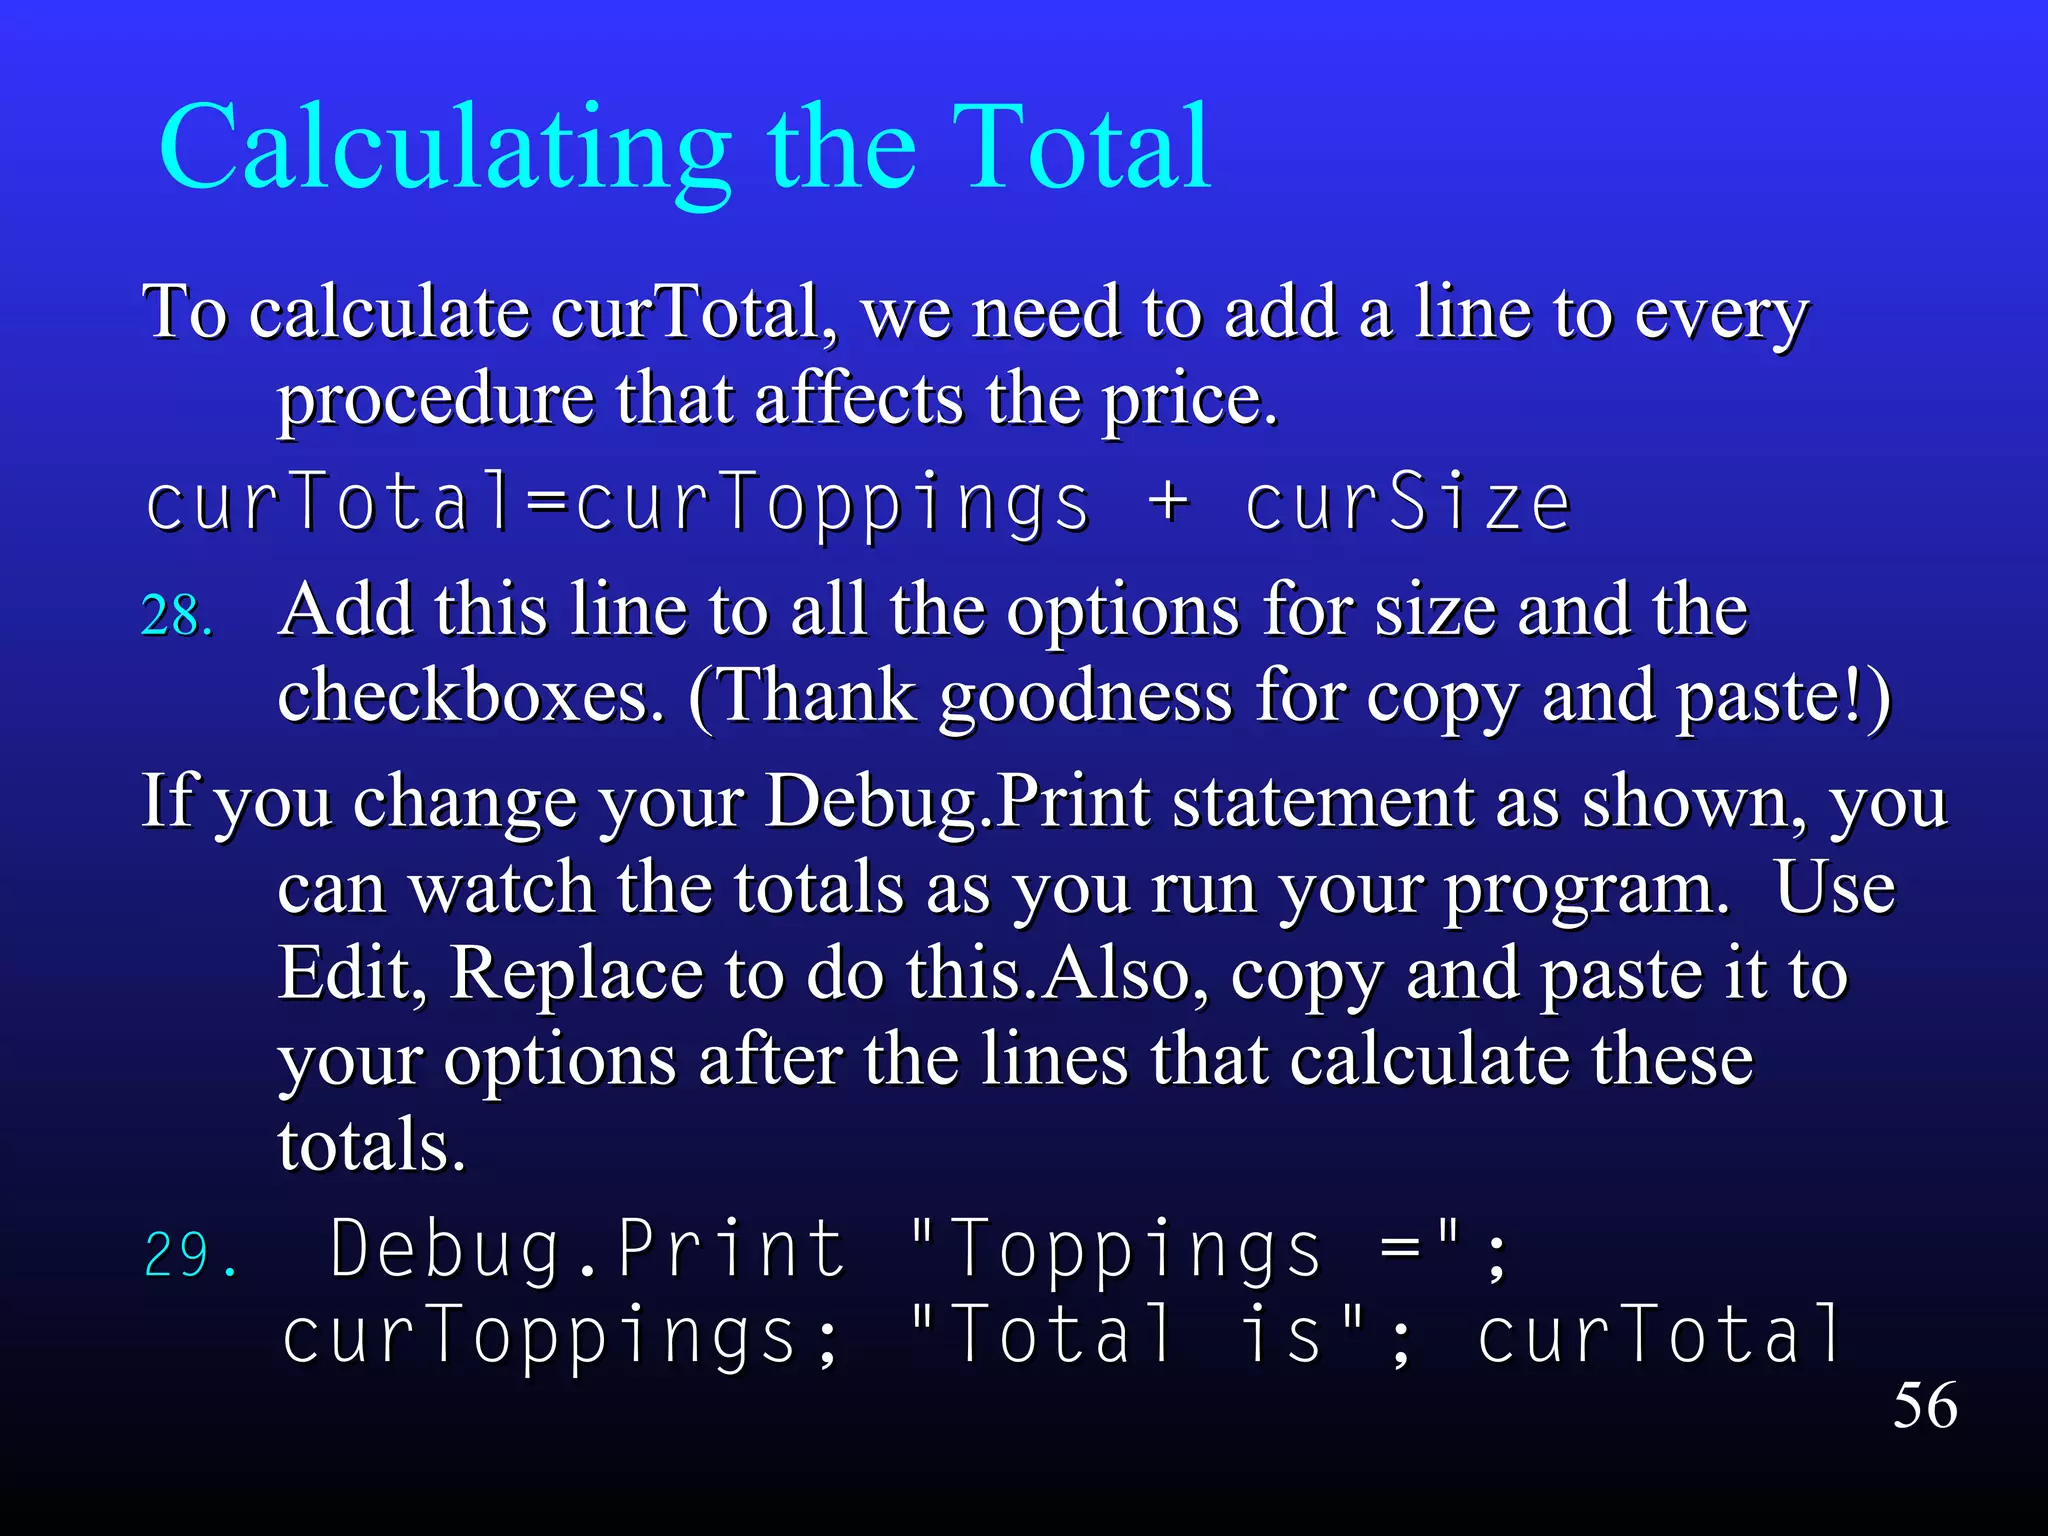
    Calculating the Total Tocalculate curTotal, we need to add a line to everyTo calculate curTotal, we need to add a line to every procedure that affects the price.procedure that affects the price. curTotal=curToppings + curSizecurTotal=curToppings + curSize 28.28. Add this line to all the options for size and theAdd this line to all the options for size and the checkboxes. (Thank goodness for copy and paste!)checkboxes. (Thank goodness for copy and paste!) If you change your Debug.Print statement as shown, youIf you change your Debug.Print statement as shown, you can watch the totals as you run your program. Usecan watch the totals as you run your program. Use Edit, Replace to do this.Also, copy and paste it toEdit, Replace to do this.Also, copy and paste it to your options after the lines that calculate theseyour options after the lines that calculate these totals.totals. 29.29. Debug.Print "Toppings =";Debug.Print "Toppings ="; curToppings; "Total is"; curTotalcurToppings; "Total is"; curTotal 56
  • 57.
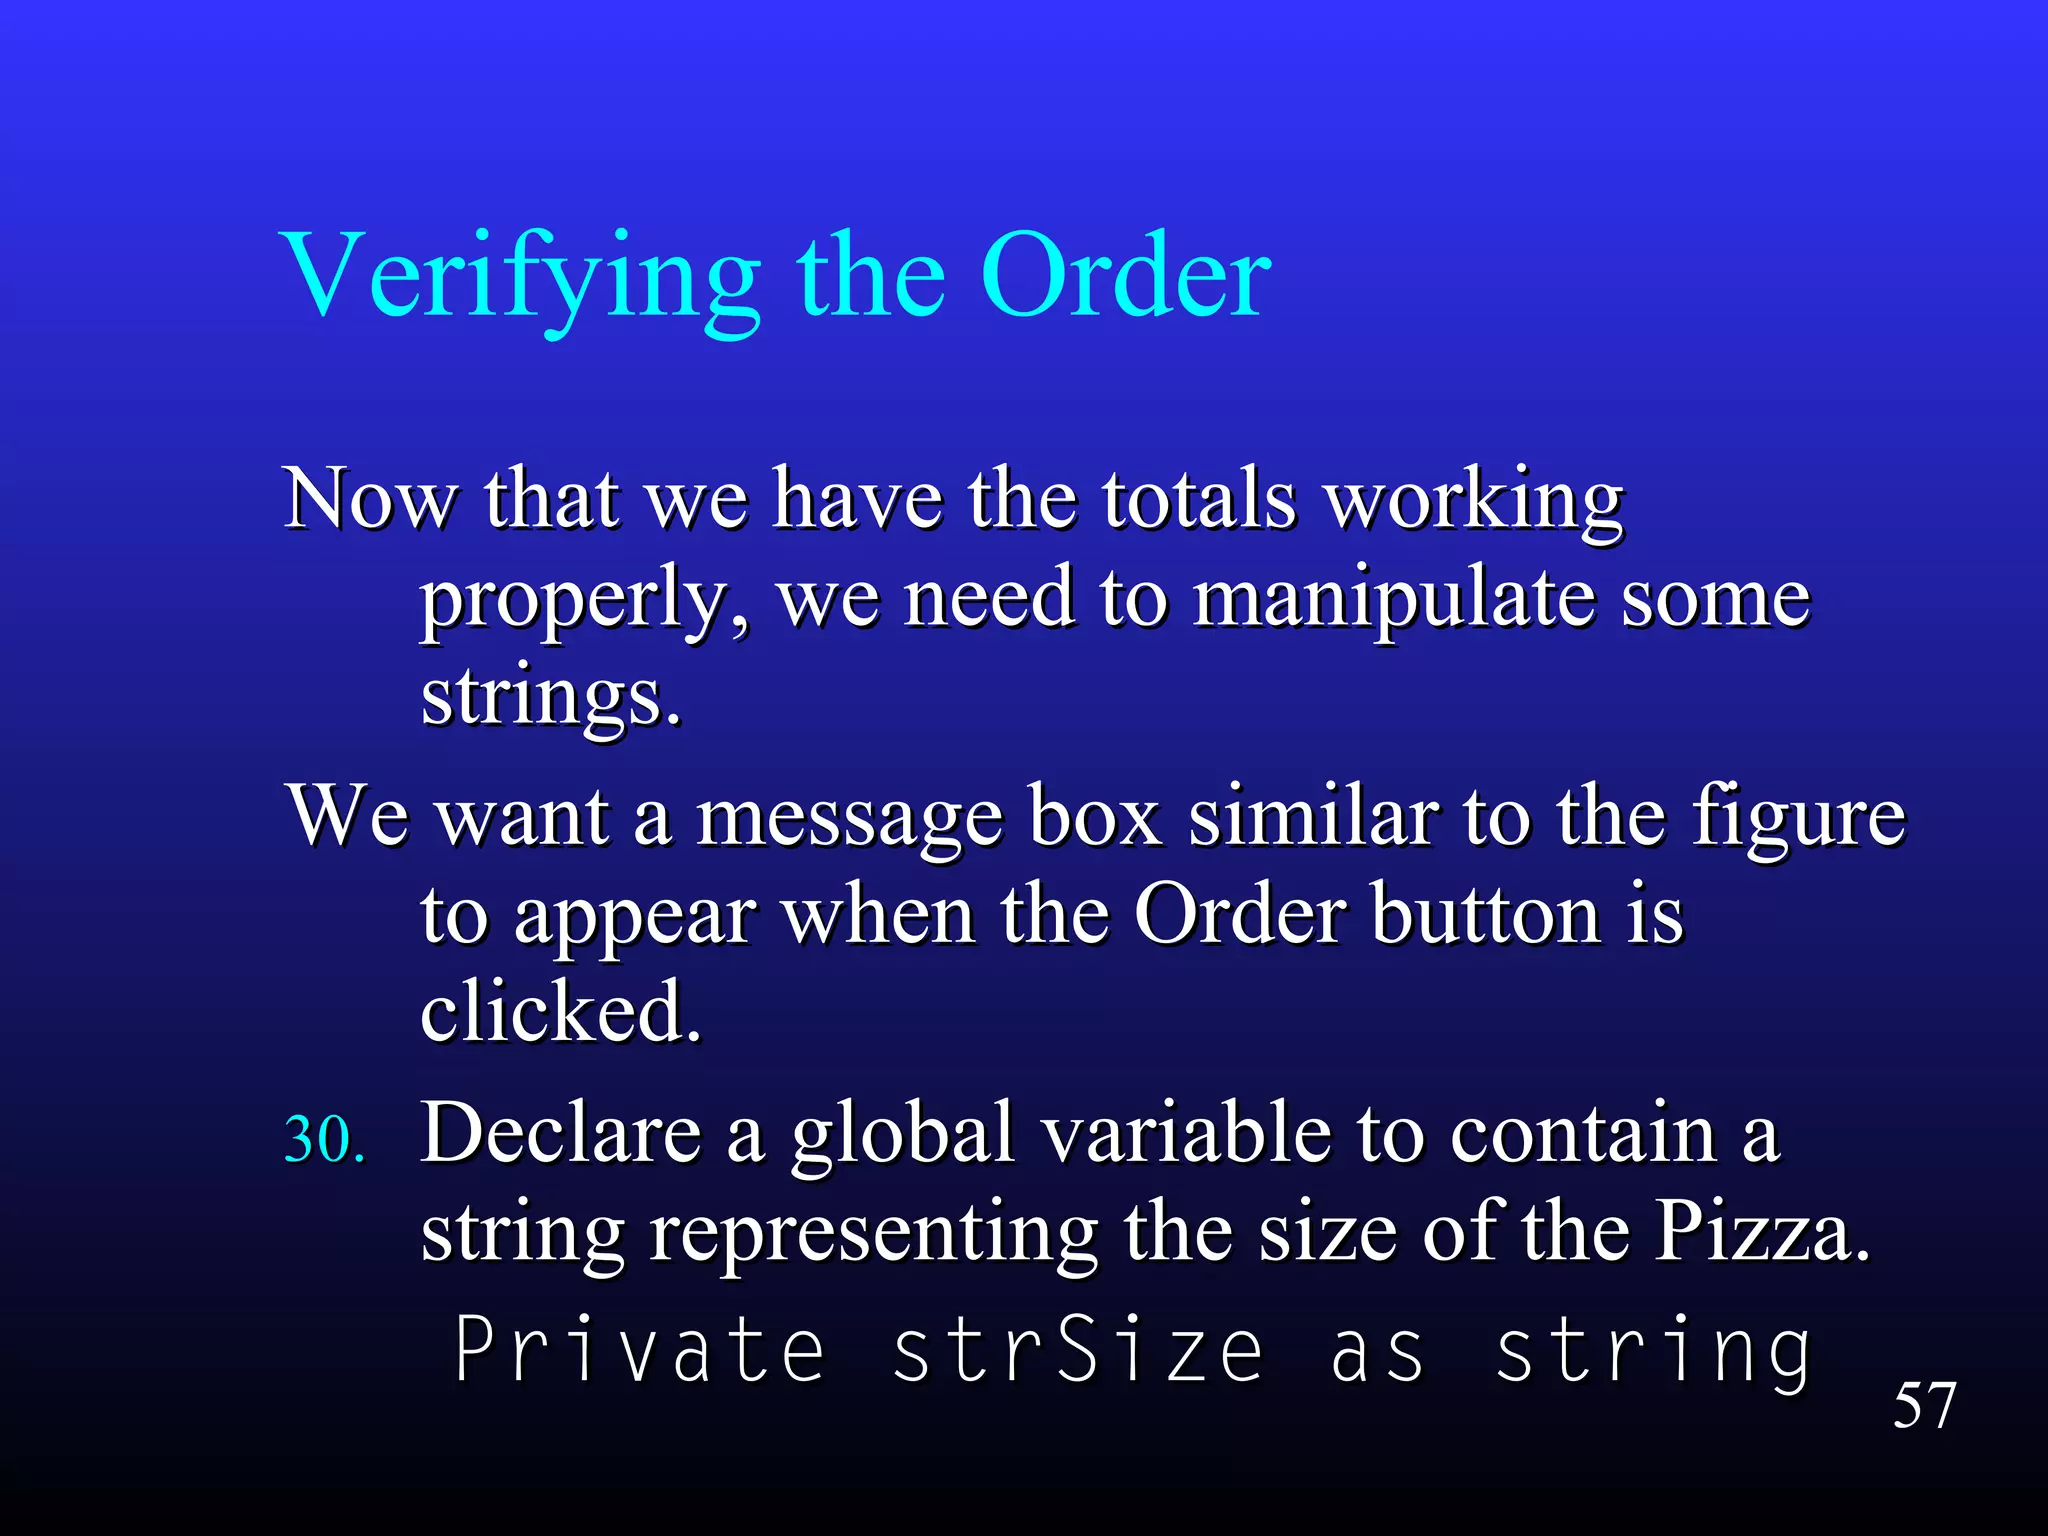
    Verifying the Order Nowthat we have the totals workingNow that we have the totals working properly, we need to manipulate someproperly, we need to manipulate some strings.strings. We want a message box similar to the figureWe want a message box similar to the figure to appear when the Order button isto appear when the Order button is clicked.clicked. 30.30. Declare a global variable to contain aDeclare a global variable to contain a string representing the size of the Pizza.string representing the size of the Pizza. Private strSize as stringPrivate strSize as string 57
  • 58.
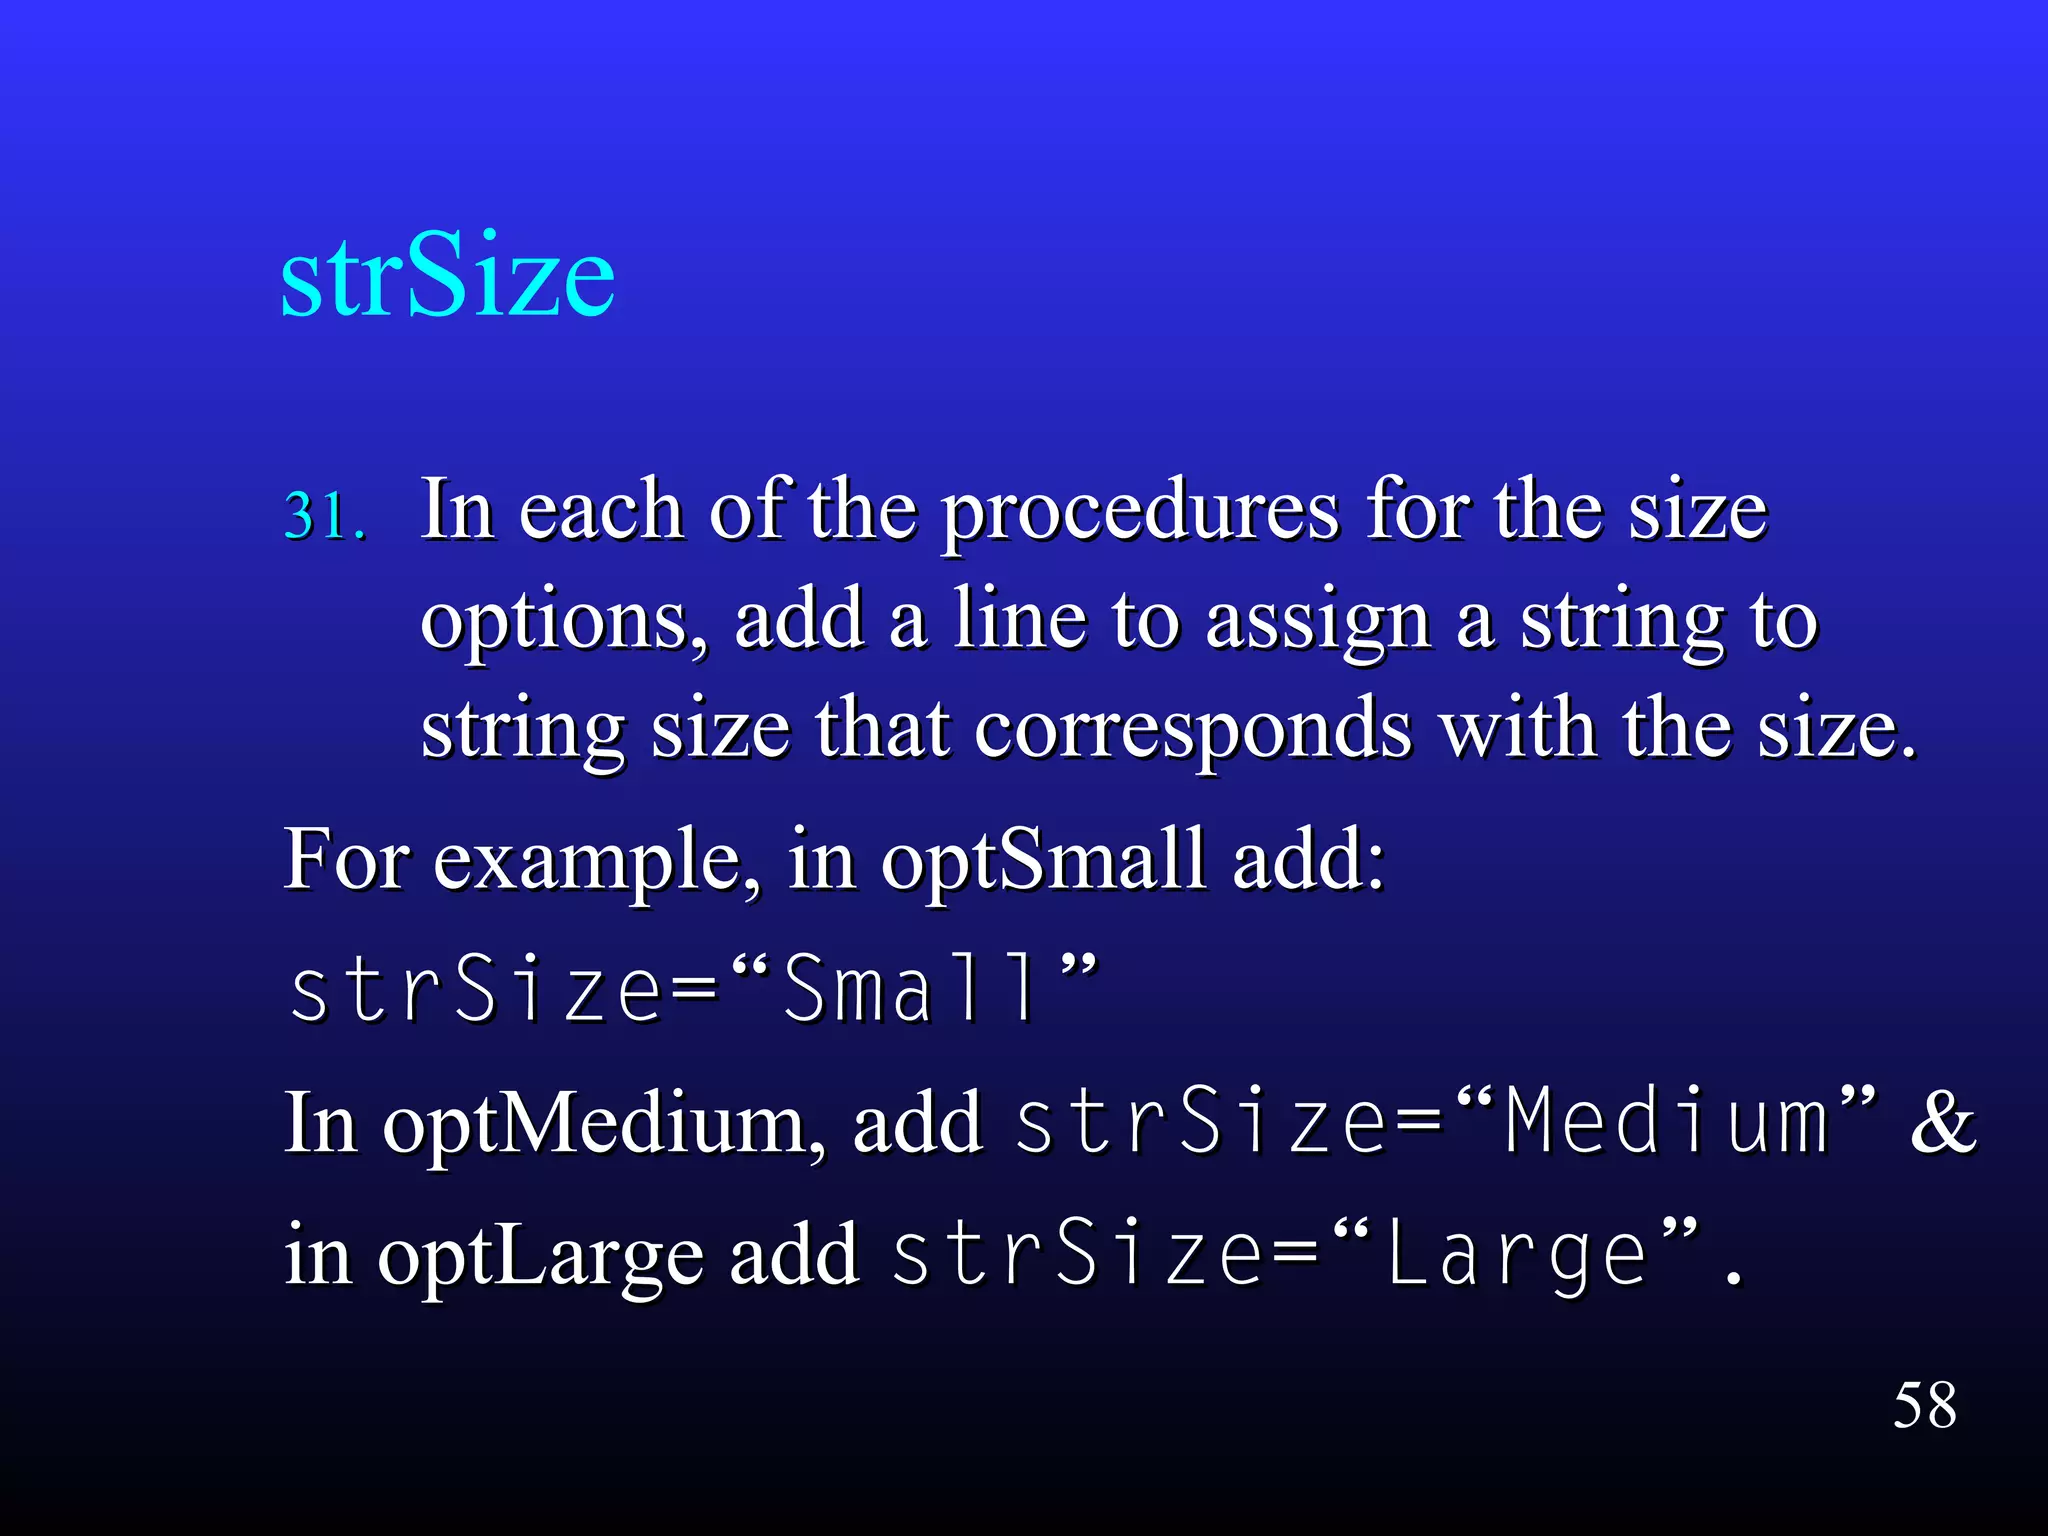
    strSize 31.31. In eachof the procedures for the sizeIn each of the procedures for the size options, add a line to assign a string tooptions, add a line to assign a string to string size that corresponds with the size.string size that corresponds with the size. For example, in optSmall add:For example, in optSmall add: strSize=“Small”strSize=“Small” In optMedium, addIn optMedium, add strSize=“Medium”strSize=“Medium” && in optLarge addin optLarge add strSize=“Large”.strSize=“Large”. 58
  • 59.
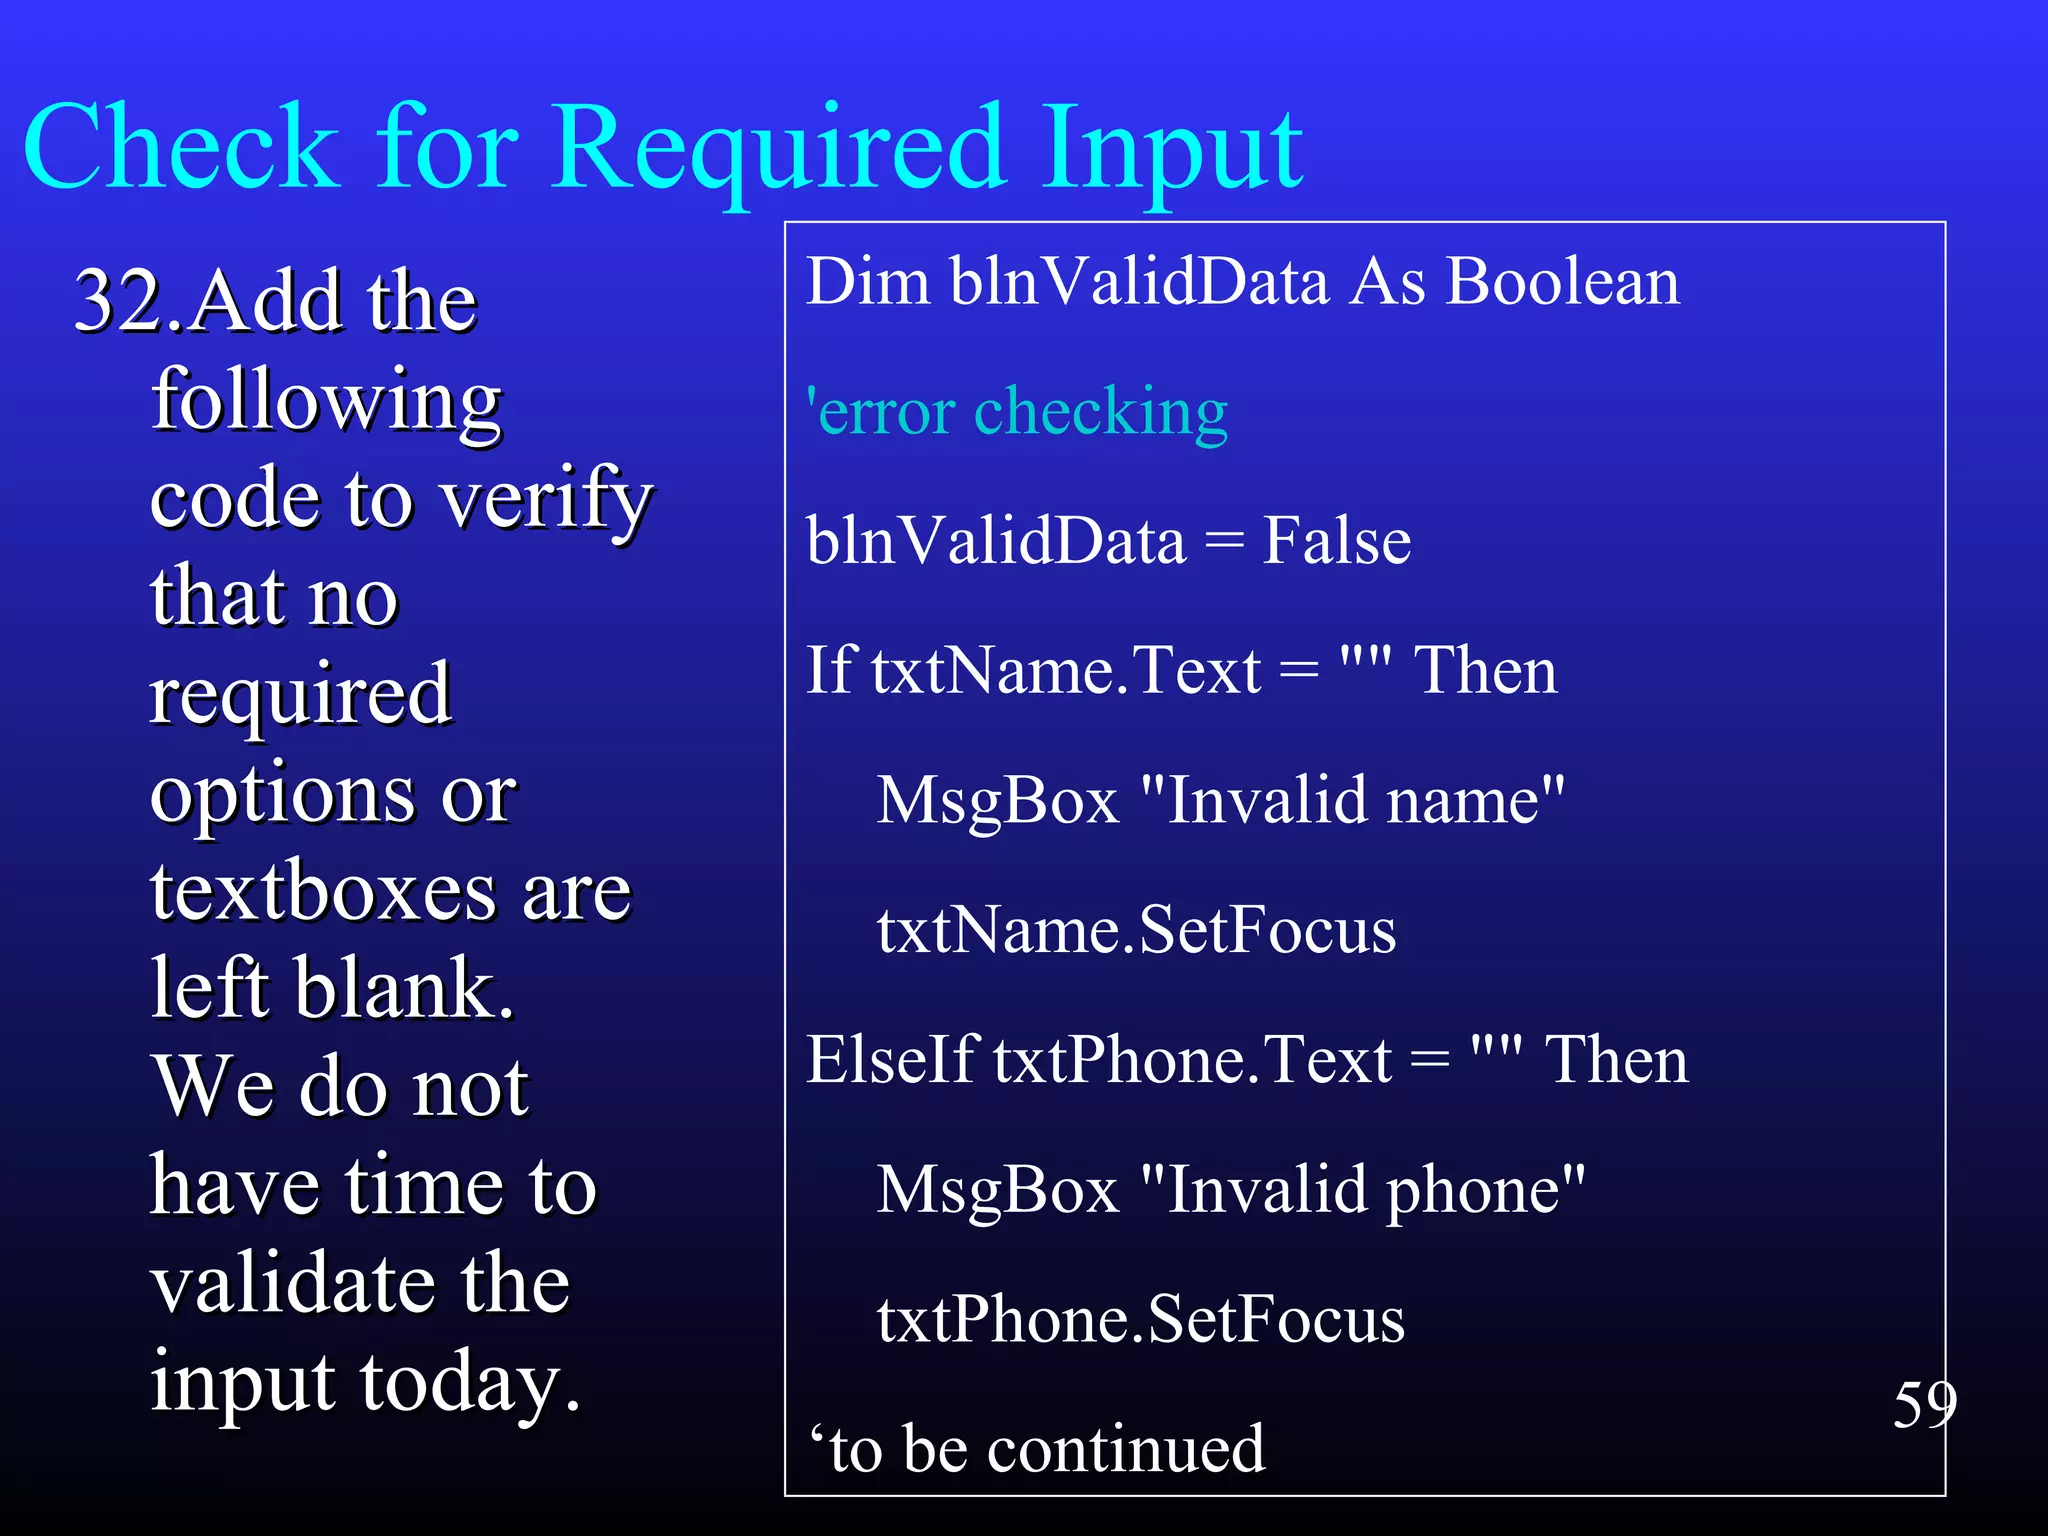
    Check for RequiredInput 32.Add the32.Add the followingfollowing code to verifycode to verify that nothat no requiredrequired options oroptions or textboxes aretextboxes are left blank.left blank. We do notWe do not have time tohave time to validate thevalidate the input today.input today. Dim blnValidData As Boolean 'error checking blnValidData = False If txtName.Text = "" Then MsgBox "Invalid name" txtName.SetFocus ElseIf txtPhone.Text = "" Then MsgBox "Invalid phone" txtPhone.SetFocus ‘to be continued 59
  • 60.
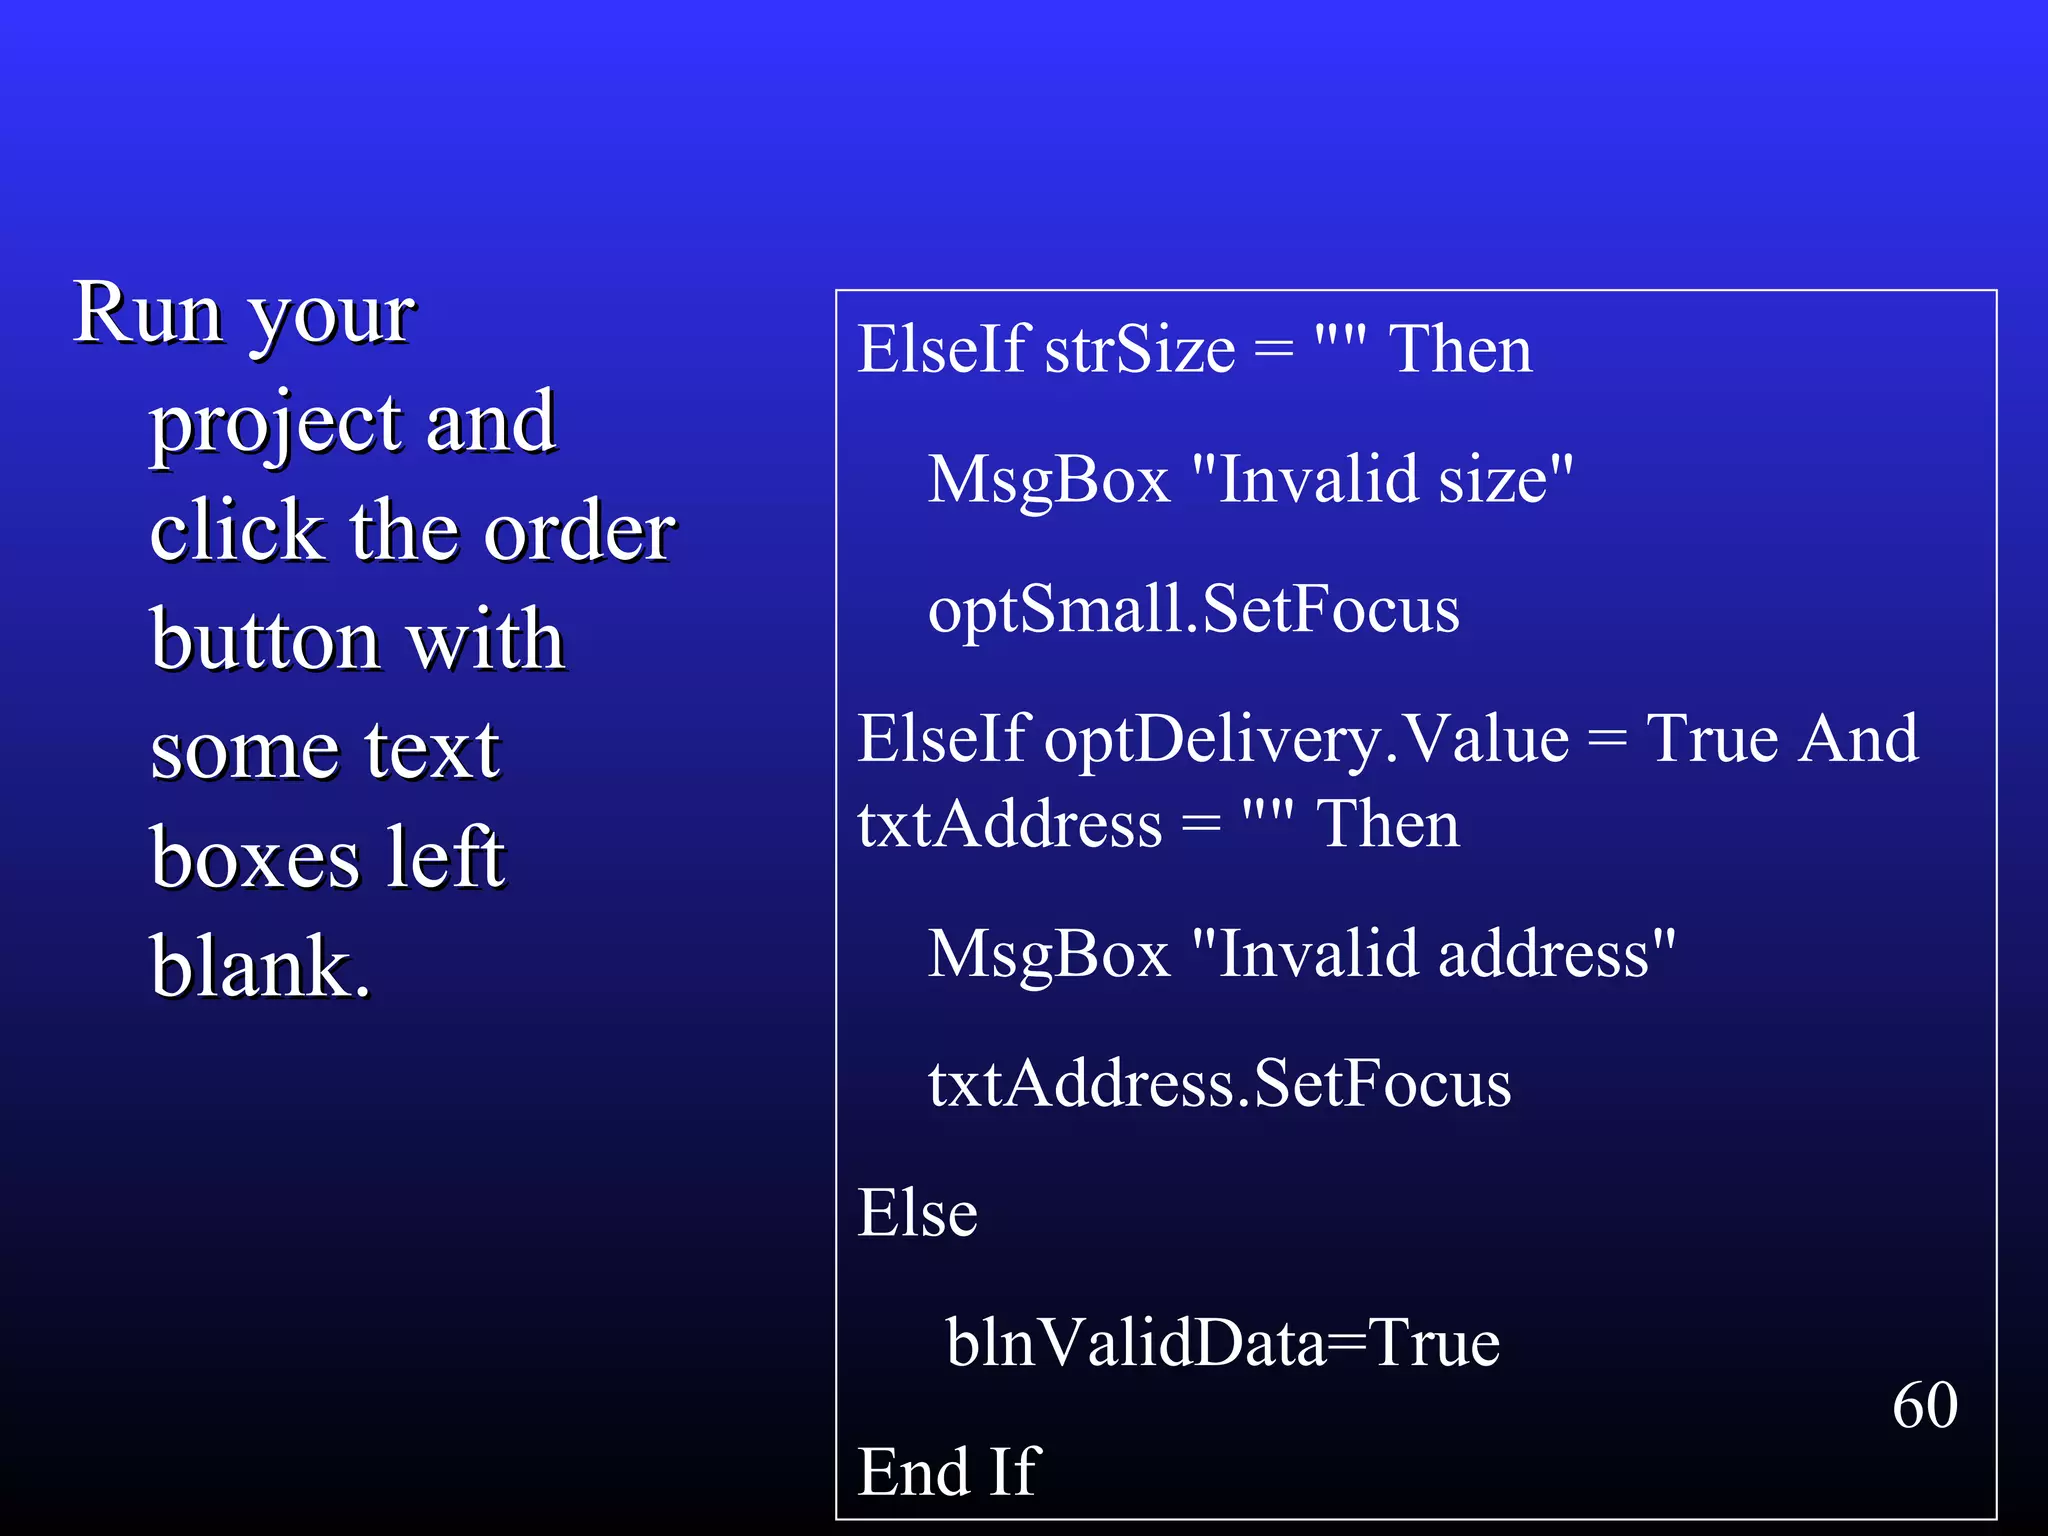
    Run yourRun your projectandproject and click the orderclick the order button withbutton with some textsome text boxes leftboxes left blank.blank. ElseIf strSize = "" Then MsgBox "Invalid size" optSmall.SetFocus ElseIf optDelivery.Value = True And txtAddress = "" Then MsgBox "Invalid address" txtAddress.SetFocus Else blnValidData=True End If 60
  • 61.
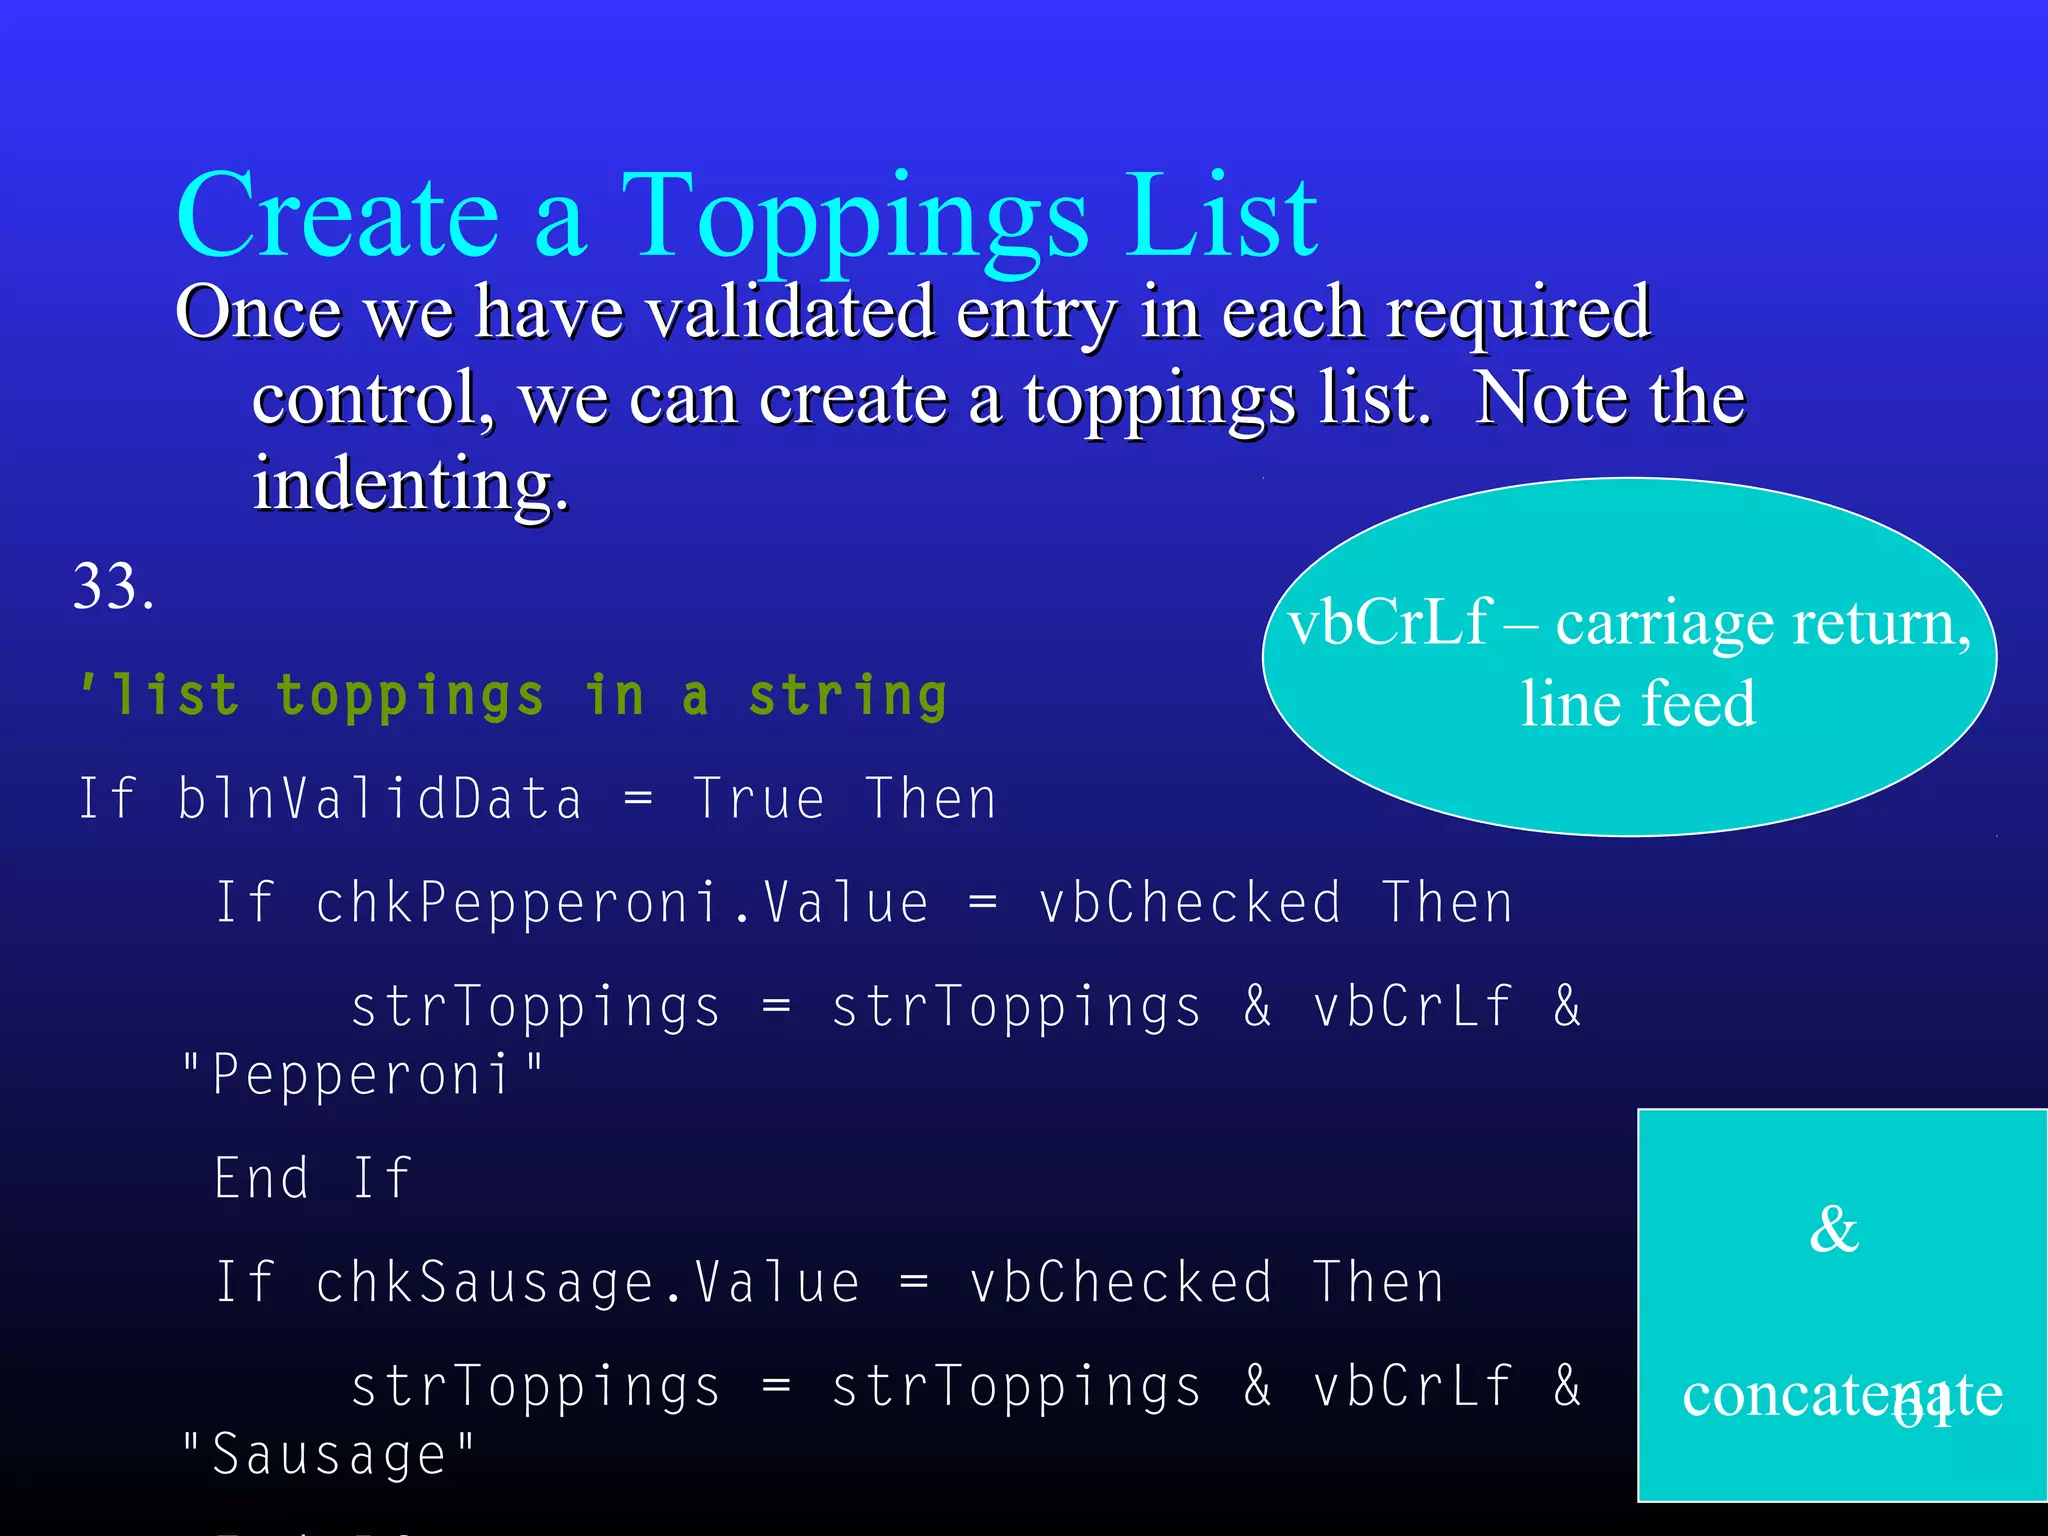
    Create a ToppingsList Once we have validated entry in each requiredOnce we have validated entry in each required control, we can create a toppings list. Note thecontrol, we can create a toppings list. Note the indenting.indenting. 33. 'list toppings in a string If blnValidData = True Then If chkPepperoni.Value = vbChecked Then strToppings = strToppings & vbCrLf & "Pepperoni" End If If chkSausage.Value = vbChecked Then strToppings = strToppings & vbCrLf & "Sausage" vbCrLf – carriage return, line feed & concatenate61
  • 62.
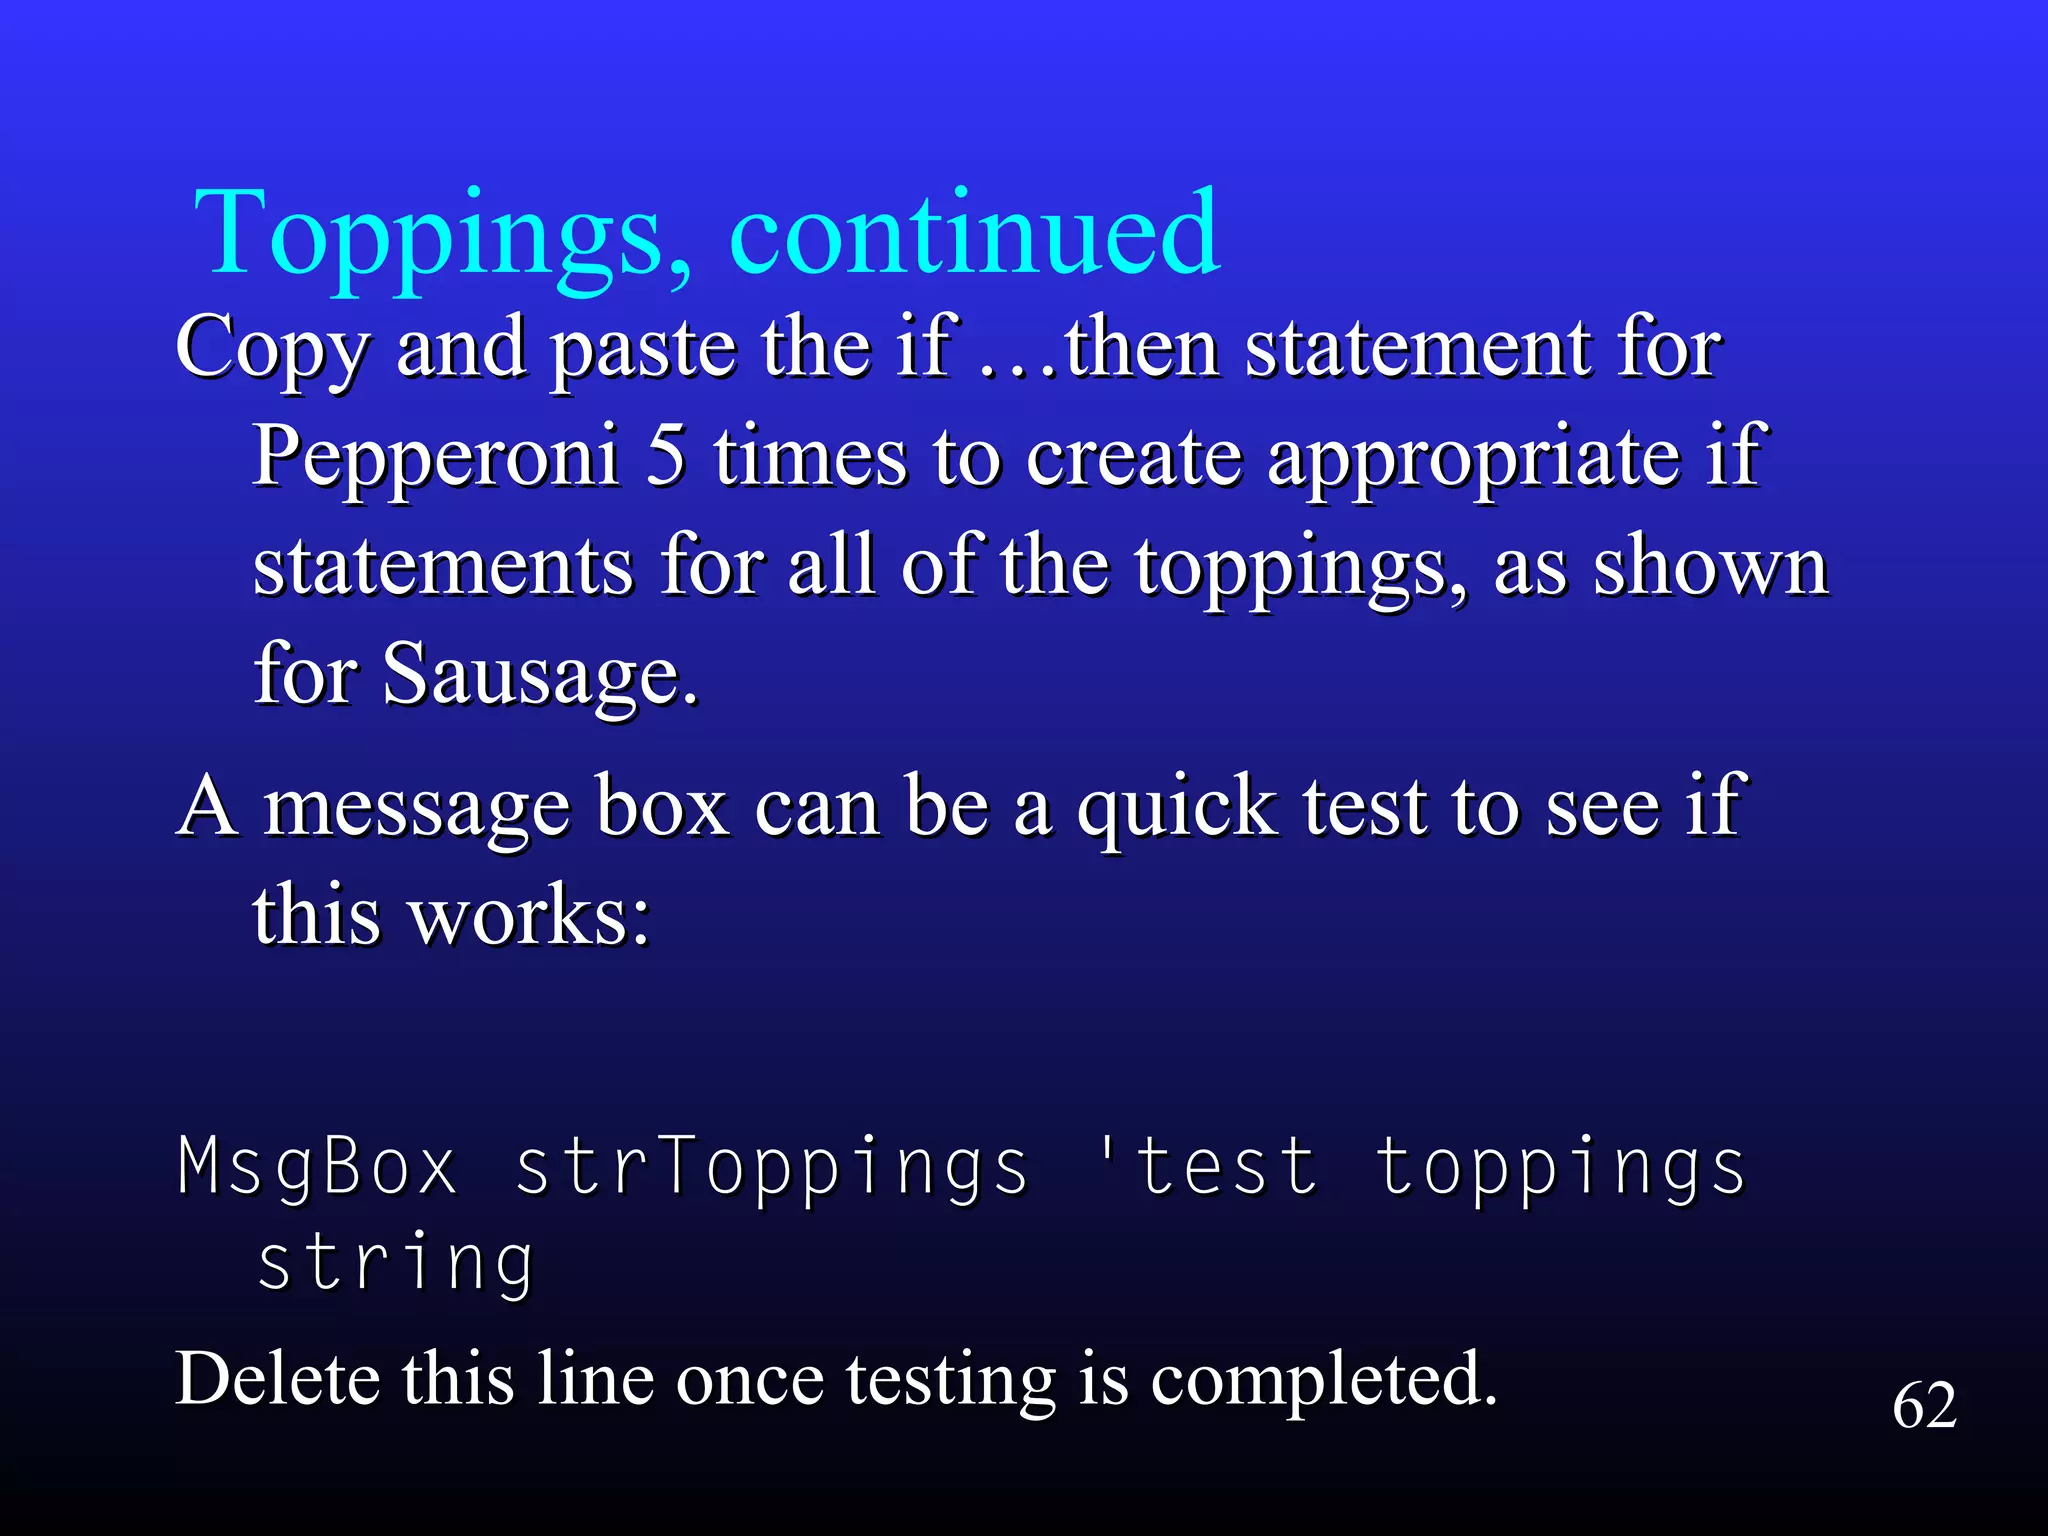
    Toppings, continued Copy andpaste the if …then statement forCopy and paste the if …then statement for Pepperoni 5 times to create appropriate ifPepperoni 5 times to create appropriate if statements for all of the toppings, as shownstatements for all of the toppings, as shown for Sausage.for Sausage. A message box can be a quick test to see ifA message box can be a quick test to see if this works:this works: MsgBox strToppings 'test toppingsMsgBox strToppings 'test toppings stringstring Delete this line once testing is completed.Delete this line once testing is completed. 62
  • 63.
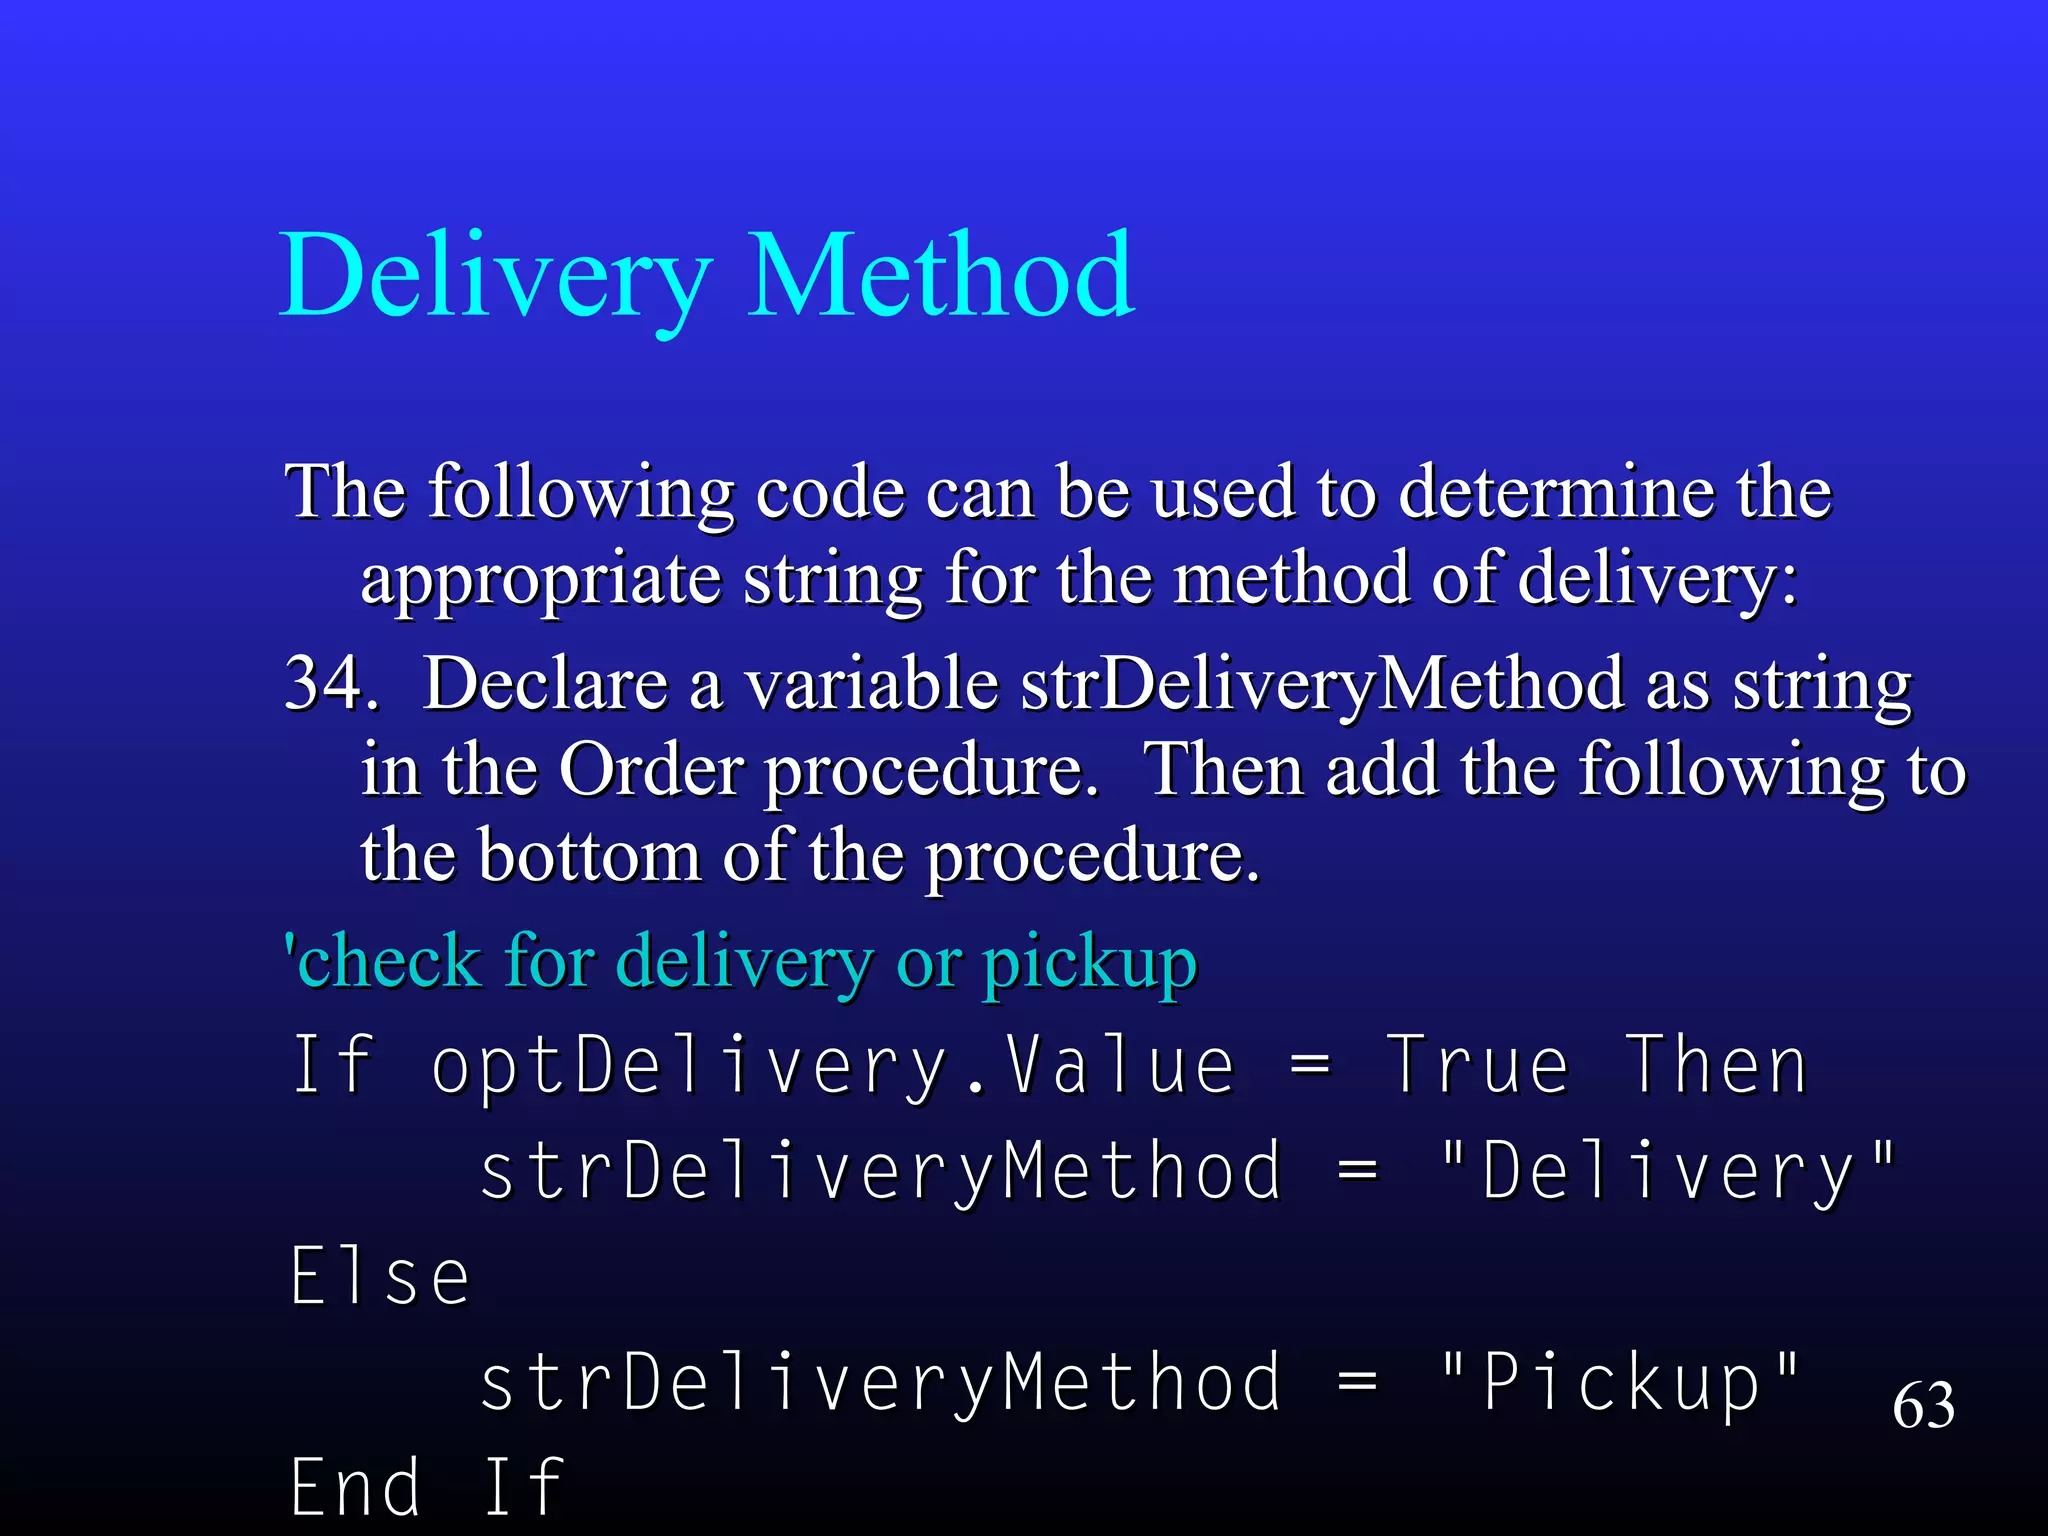
    Delivery Method The followingcode can be used to determine theThe following code can be used to determine the appropriate string for the method of delivery:appropriate string for the method of delivery: 34. Declare a variable strDeliveryMethod as string34. Declare a variable strDeliveryMethod as string in the Order procedure. Then add the following toin the Order procedure. Then add the following to the bottom of the procedure.the bottom of the procedure. 'check for delivery or pickup'check for delivery or pickup If optDelivery.Value = True ThenIf optDelivery.Value = True Then strDeliveryMethod = "Delivery"strDeliveryMethod = "Delivery" ElseElse strDeliveryMethod = "Pickup"strDeliveryMethod = "Pickup" End IfEnd If 63
  • 64.
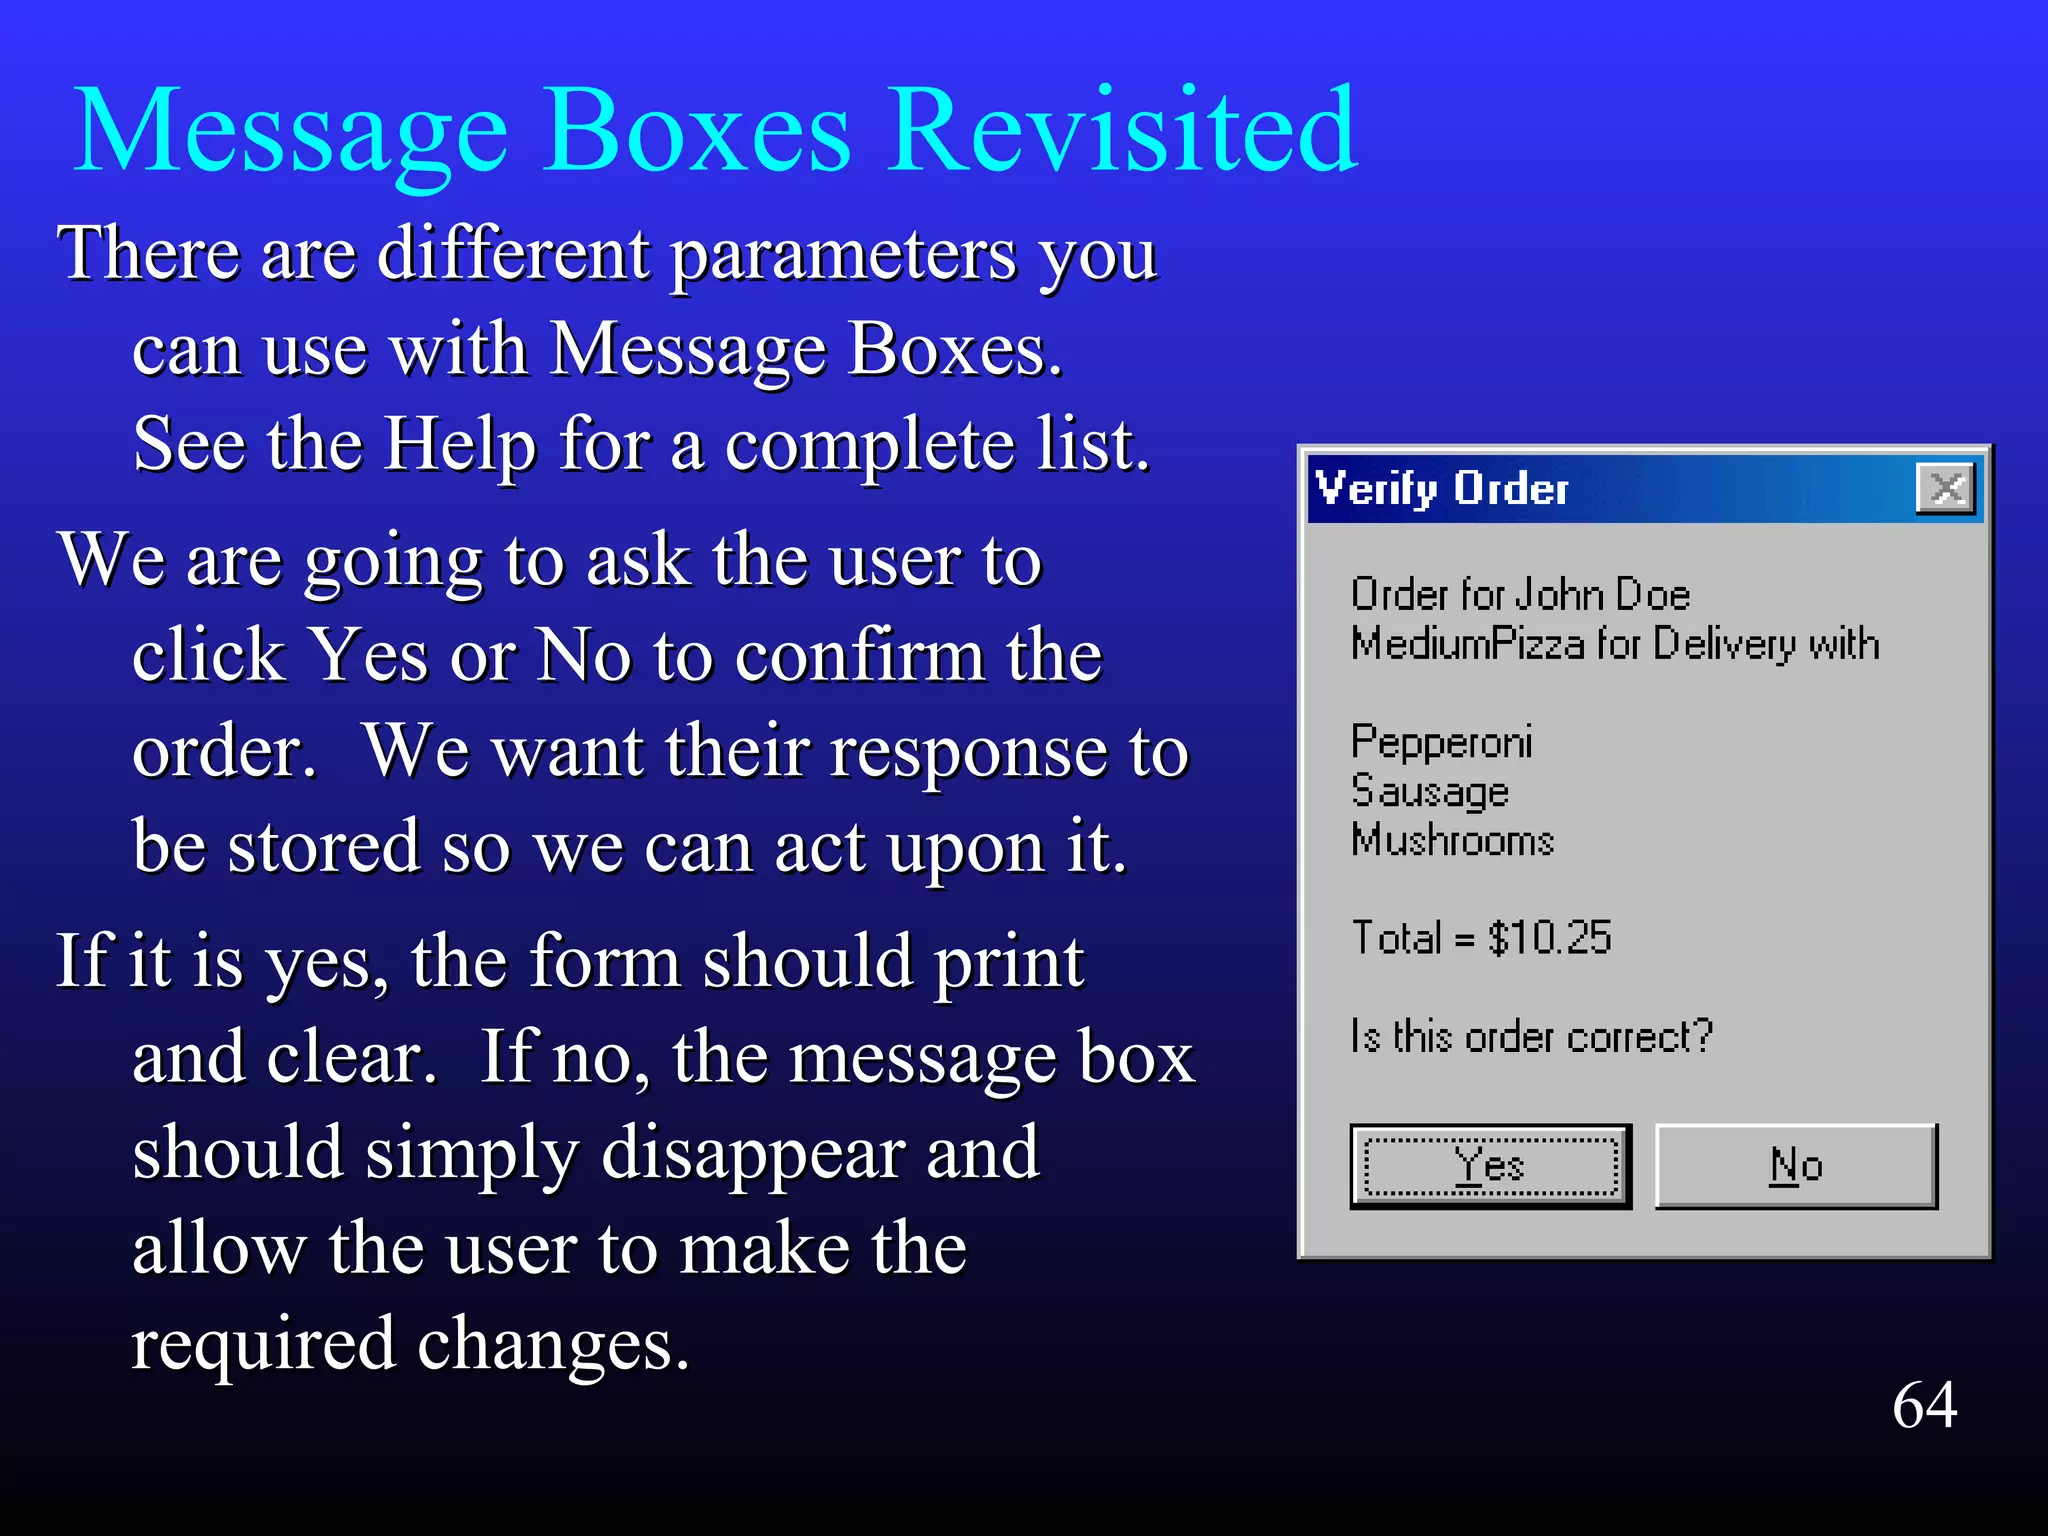
    Message Boxes Revisited Thereare different parameters youThere are different parameters you can use with Message Boxes.can use with Message Boxes. See the Help for a complete list.See the Help for a complete list. We are going to ask the user toWe are going to ask the user to click Yes or No to confirm theclick Yes or No to confirm the order. We want their response toorder. We want their response to be stored so we can act upon it.be stored so we can act upon it. If it is yes, the form should printIf it is yes, the form should print and clear. If no, the message boxand clear. If no, the message box should simply disappear andshould simply disappear and allow the user to make theallow the user to make the required changes.required changes. 64
  • 65.
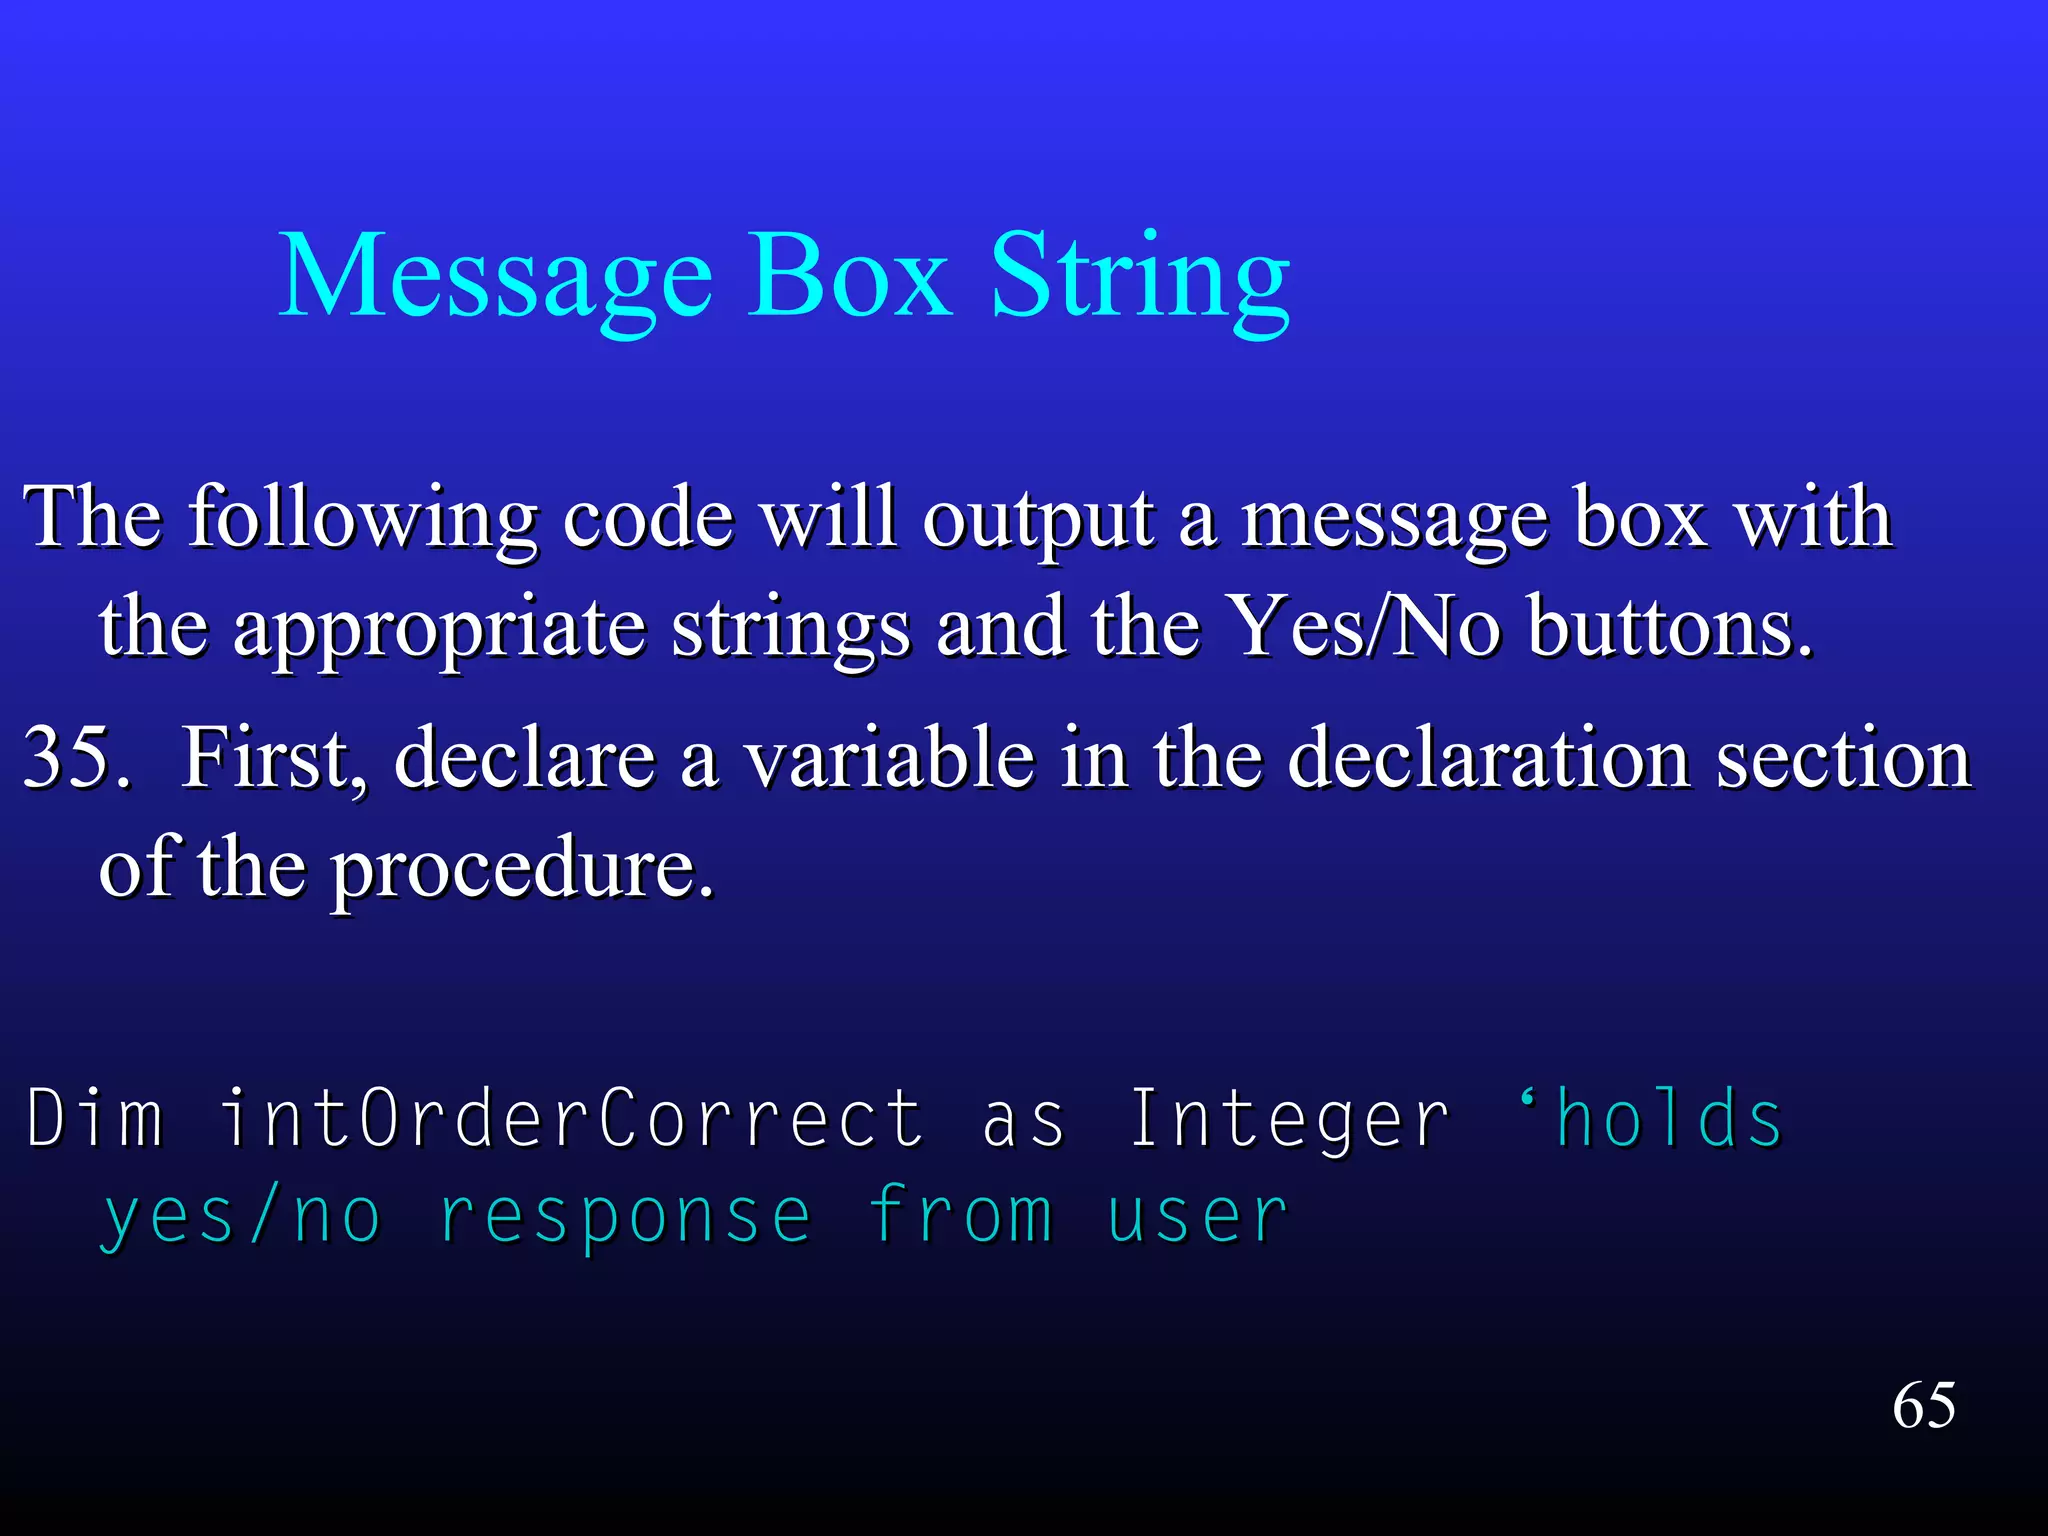
    Message Box String Thefollowing code will output a message box withThe following code will output a message box with the appropriate strings and the Yes/No buttons.the appropriate strings and the Yes/No buttons. 35. First, declare a variable in the declaration section35. First, declare a variable in the declaration section of the procedure.of the procedure. Dim intOrderCorrect as IntegerDim intOrderCorrect as Integer ‘holds‘holds yes/no response from useryes/no response from user 65
  • 66.
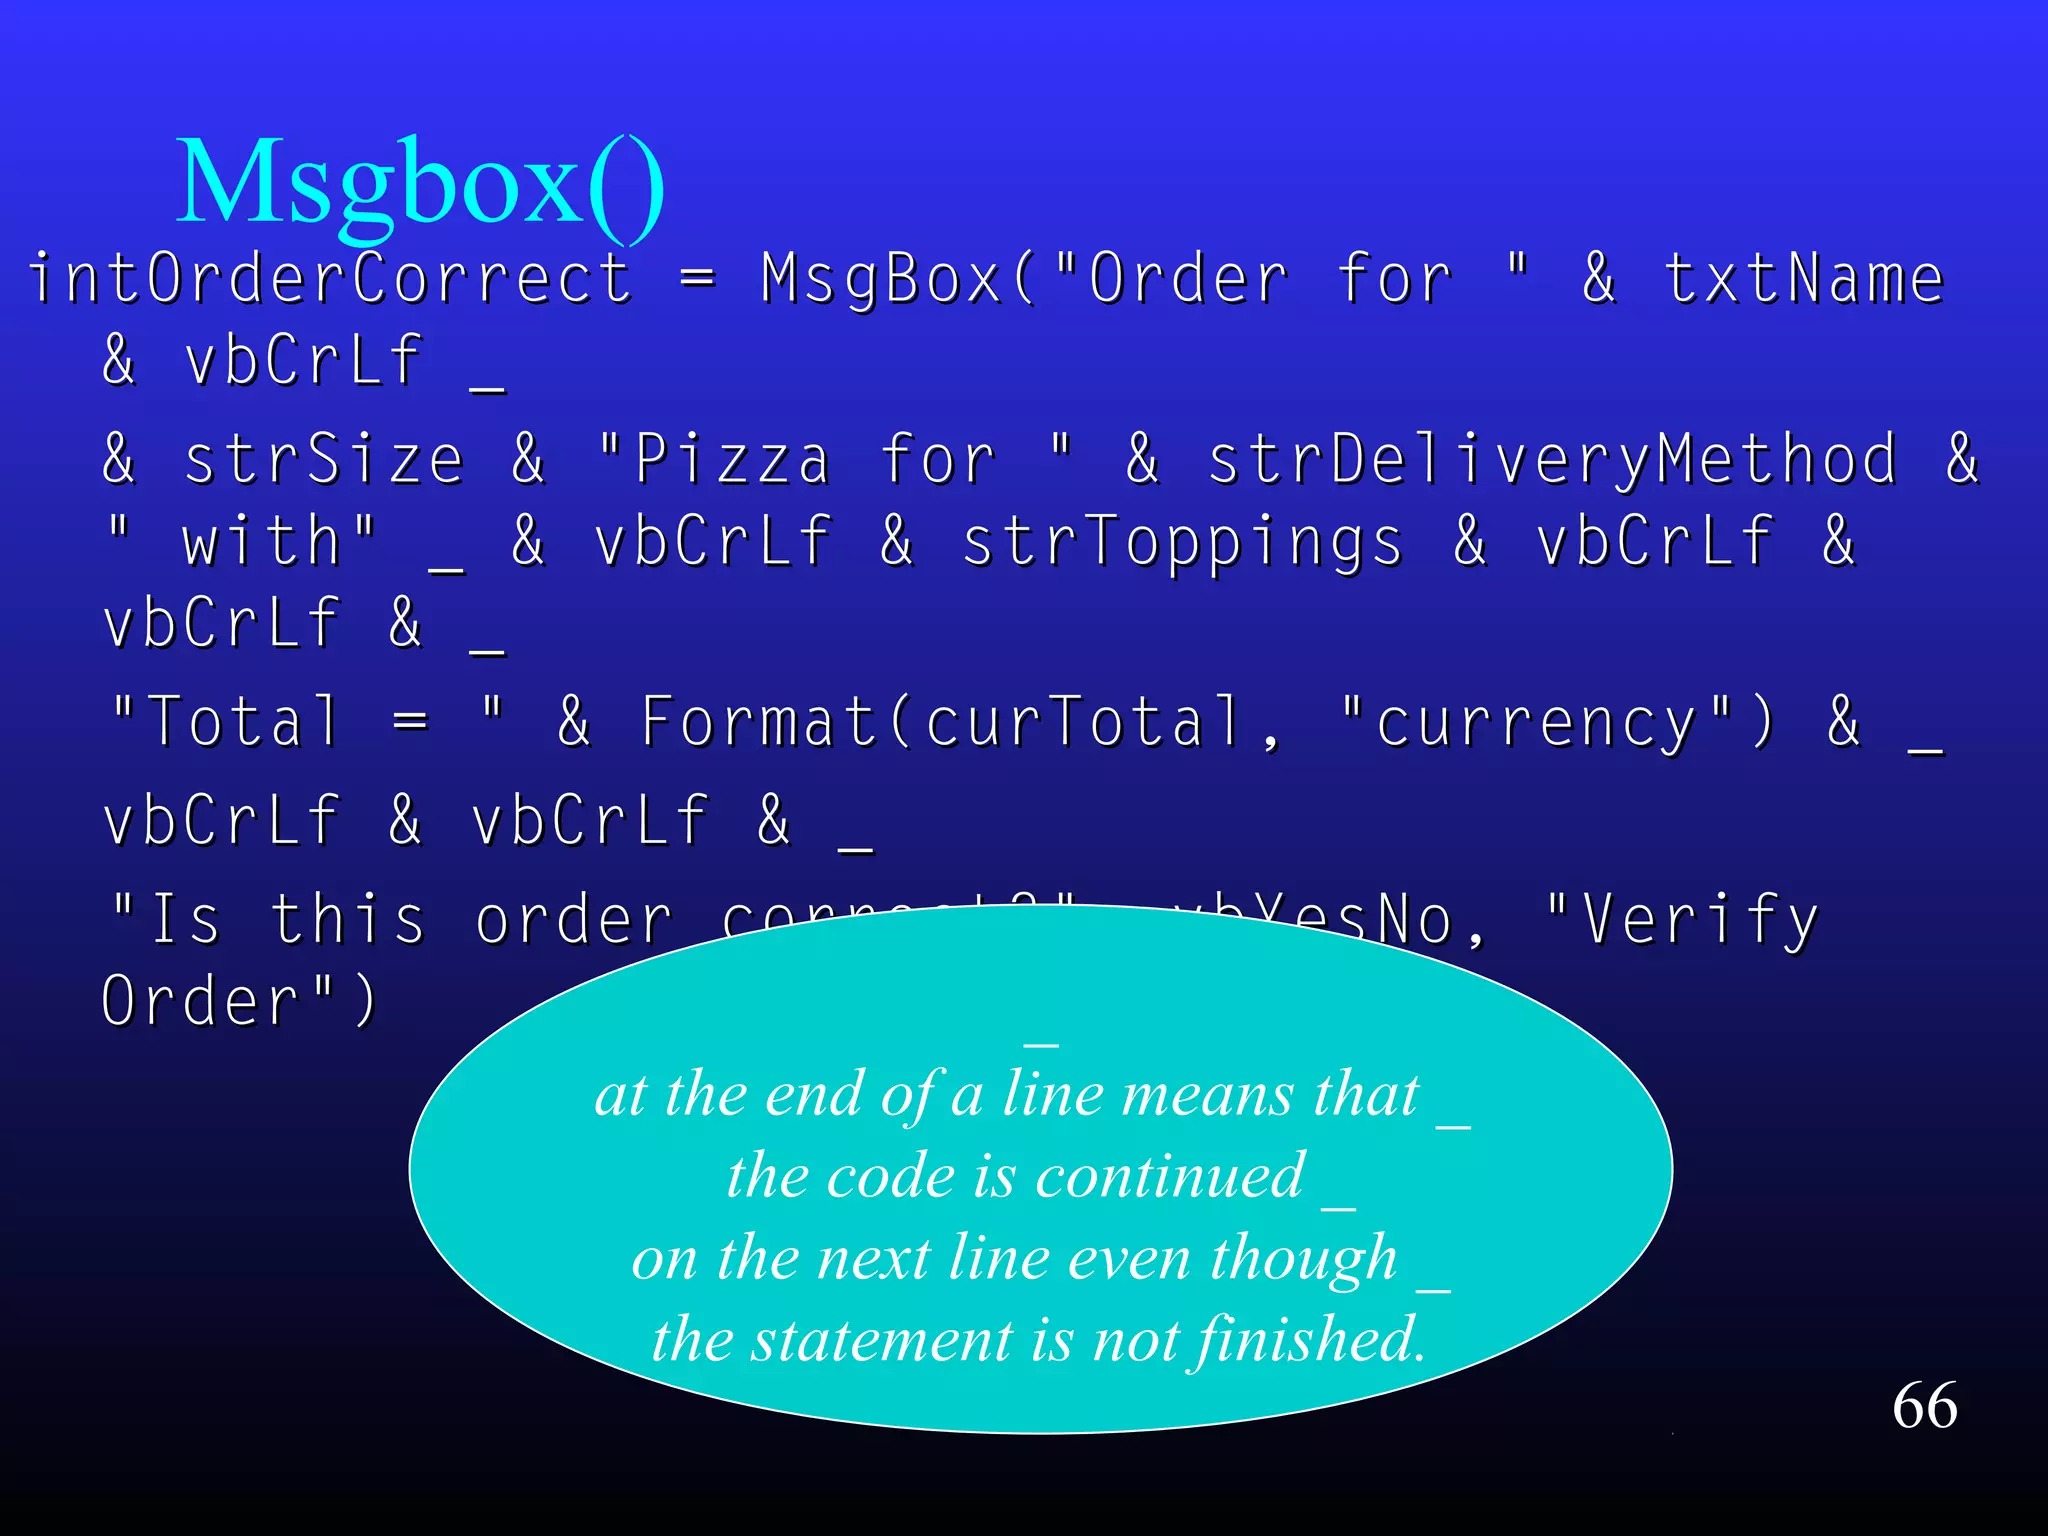
    Msgbox() intOrderCorrect = MsgBox("Orderfor " & txtNameintOrderCorrect = MsgBox("Order for " & txtName & vbCrLf _& vbCrLf _ & strSize & "Pizza for " & strDeliveryMethod && strSize & "Pizza for " & strDeliveryMethod & " with" _ & vbCrLf & strToppings & vbCrLf &" with" _ & vbCrLf & strToppings & vbCrLf & vbCrLf & _vbCrLf & _ "Total = " & Format(curTotal, "currency") & _"Total = " & Format(curTotal, "currency") & _ vbCrLf & vbCrLf & _vbCrLf & vbCrLf & _ "Is this order correct?", vbYesNo, "Verify"Is this order correct?", vbYesNo, "Verify Order")Order") _ at the end of a line means that _ the code is continued _ on the next line even though _ the statement is not finished. 66
  • 67.
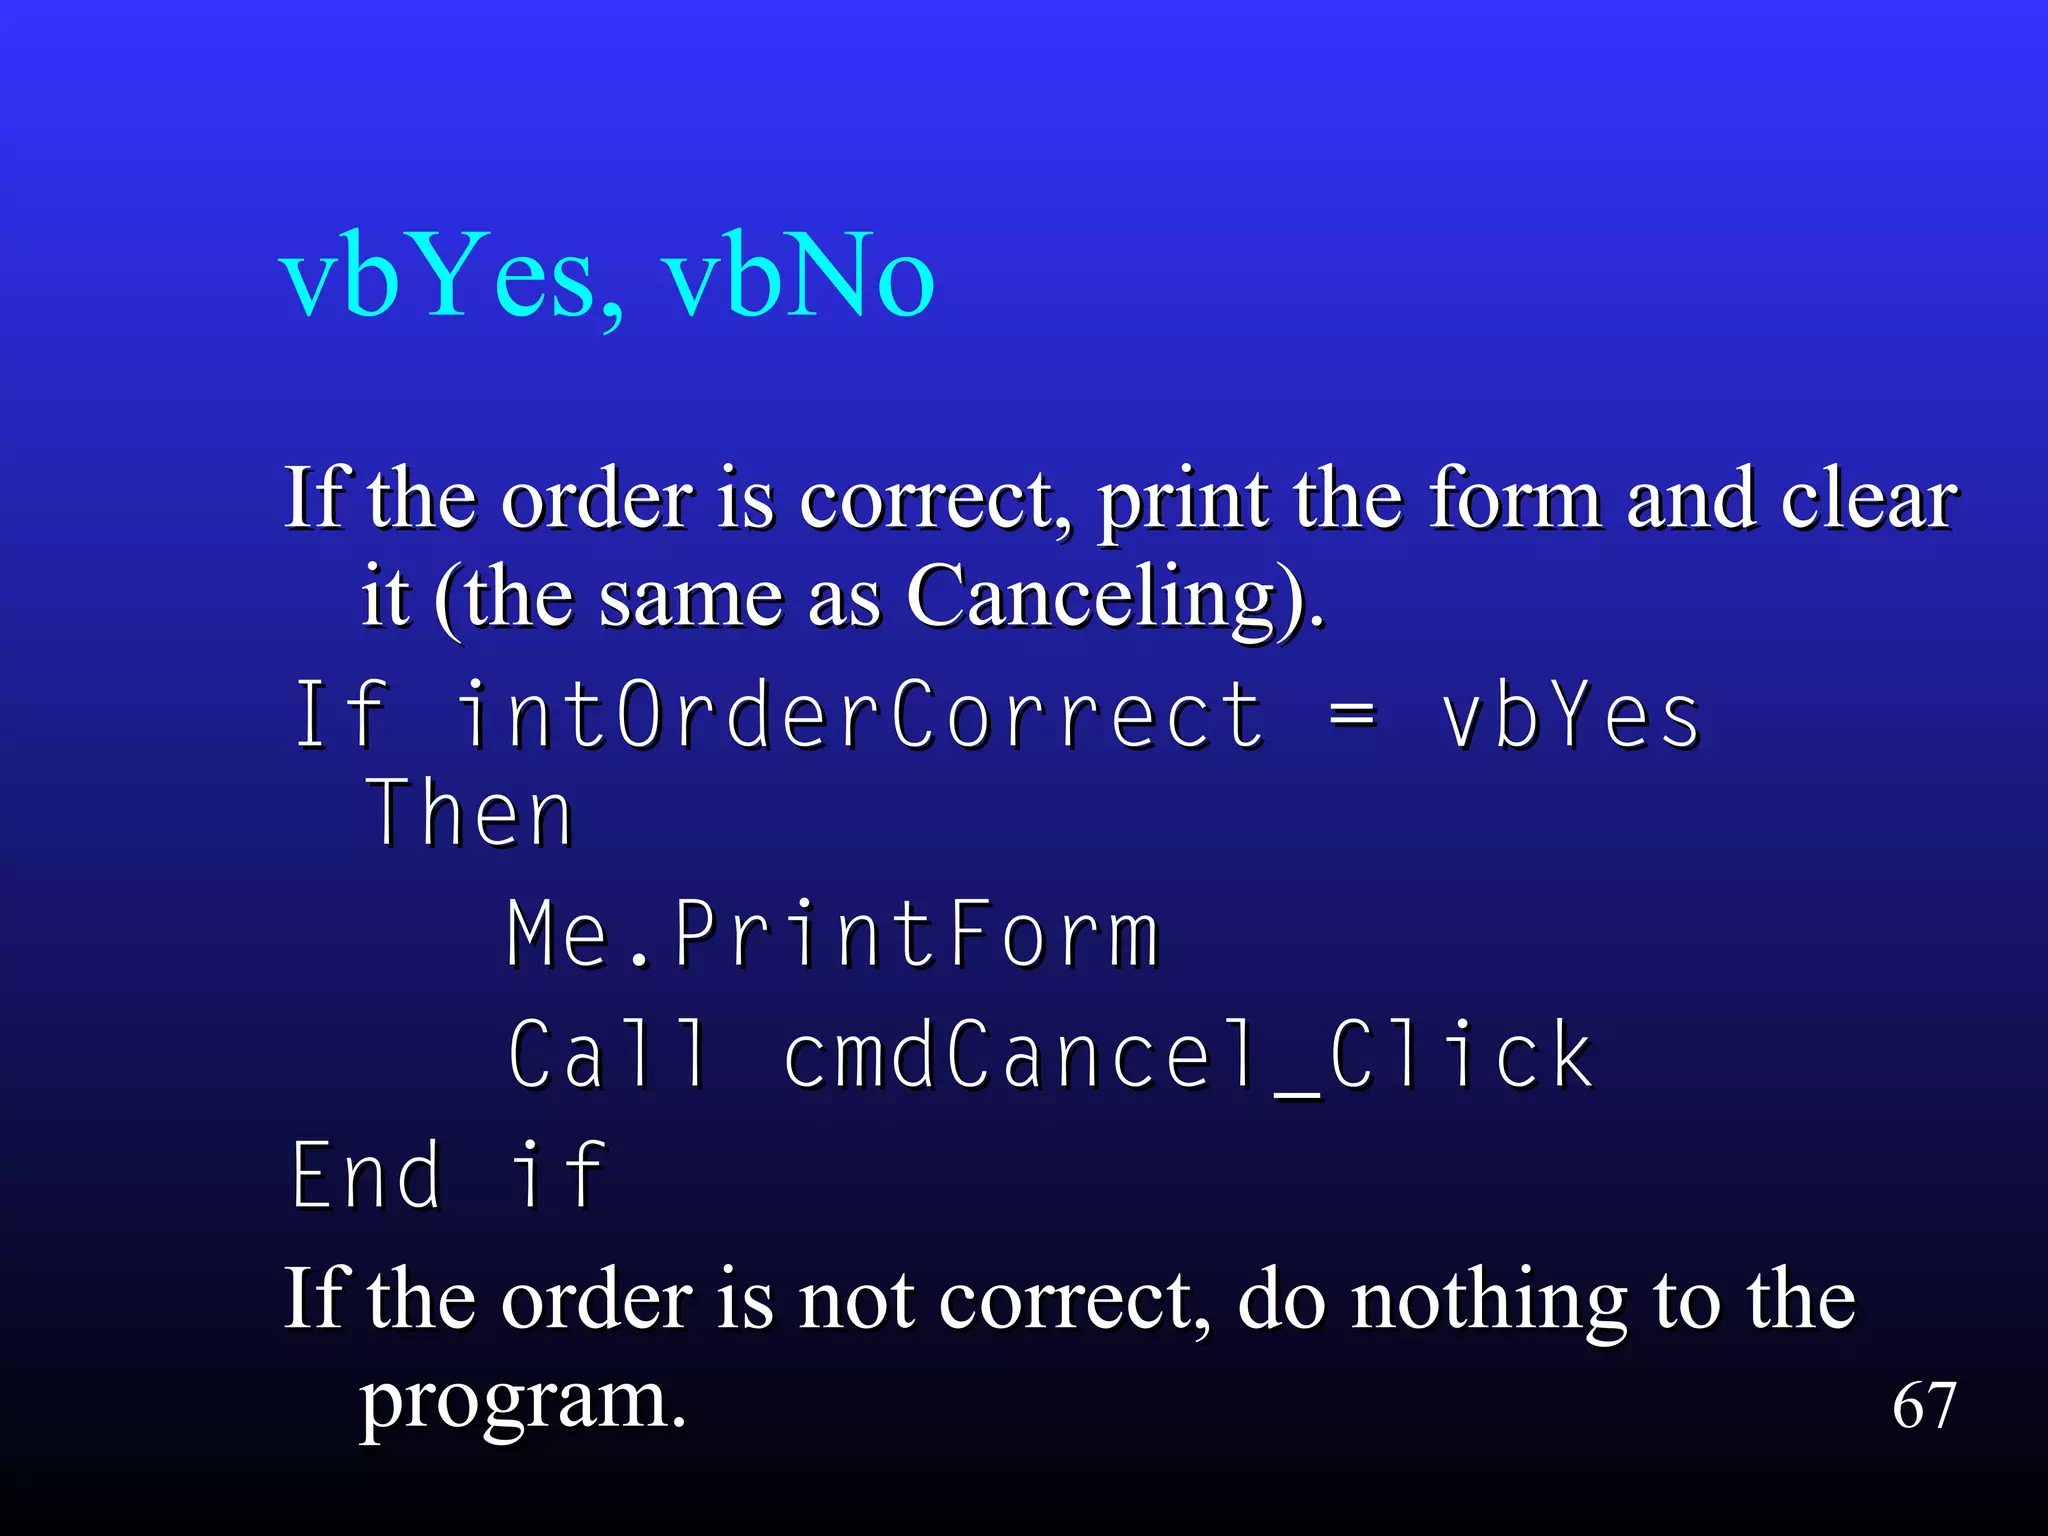
    vbYes, vbNo If theorder is correct, print the form and clearIf the order is correct, print the form and clear it (the same as Canceling).it (the same as Canceling). If intOrderCorrect = vbYesIf intOrderCorrect = vbYes ThenThen Me.PrintFormMe.PrintForm Call cmdCancel_ClickCall cmdCancel_Click End ifEnd if If the order is not correct, do nothing to theIf the order is not correct, do nothing to the program.program. 67
  • 68.
  • 69.
    Conclusion Thank you forattending this workshop.Thank you for attending this workshop. Available on-line in zipped format is:Available on-line in zipped format is:  This presentationThis presentation  Hello World program sourceHello World program source  Pizza sourcePizza source  Source for the simple programs included in yourSource for the simple programs included in your packagepackage 69

Editor's Notes