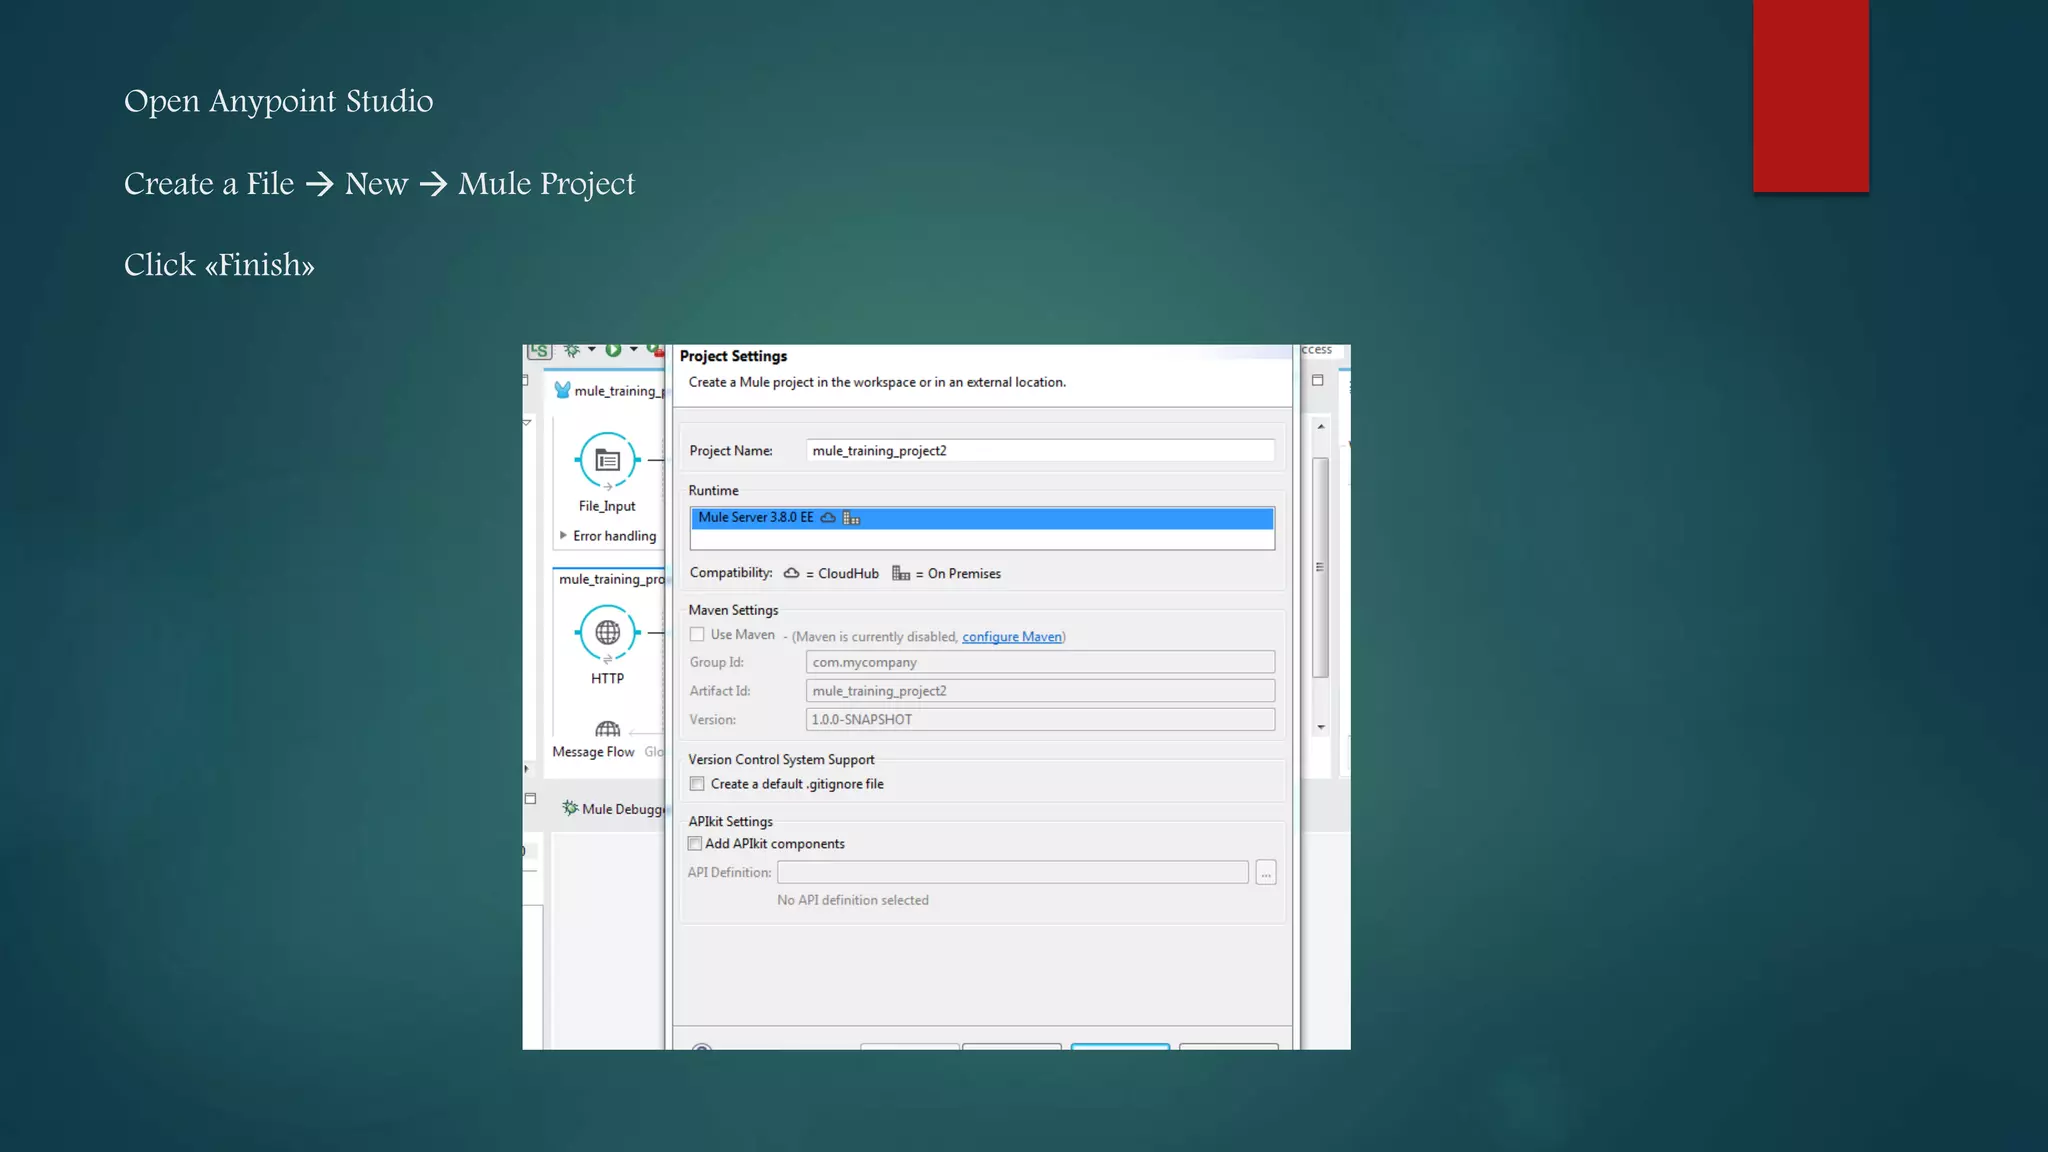
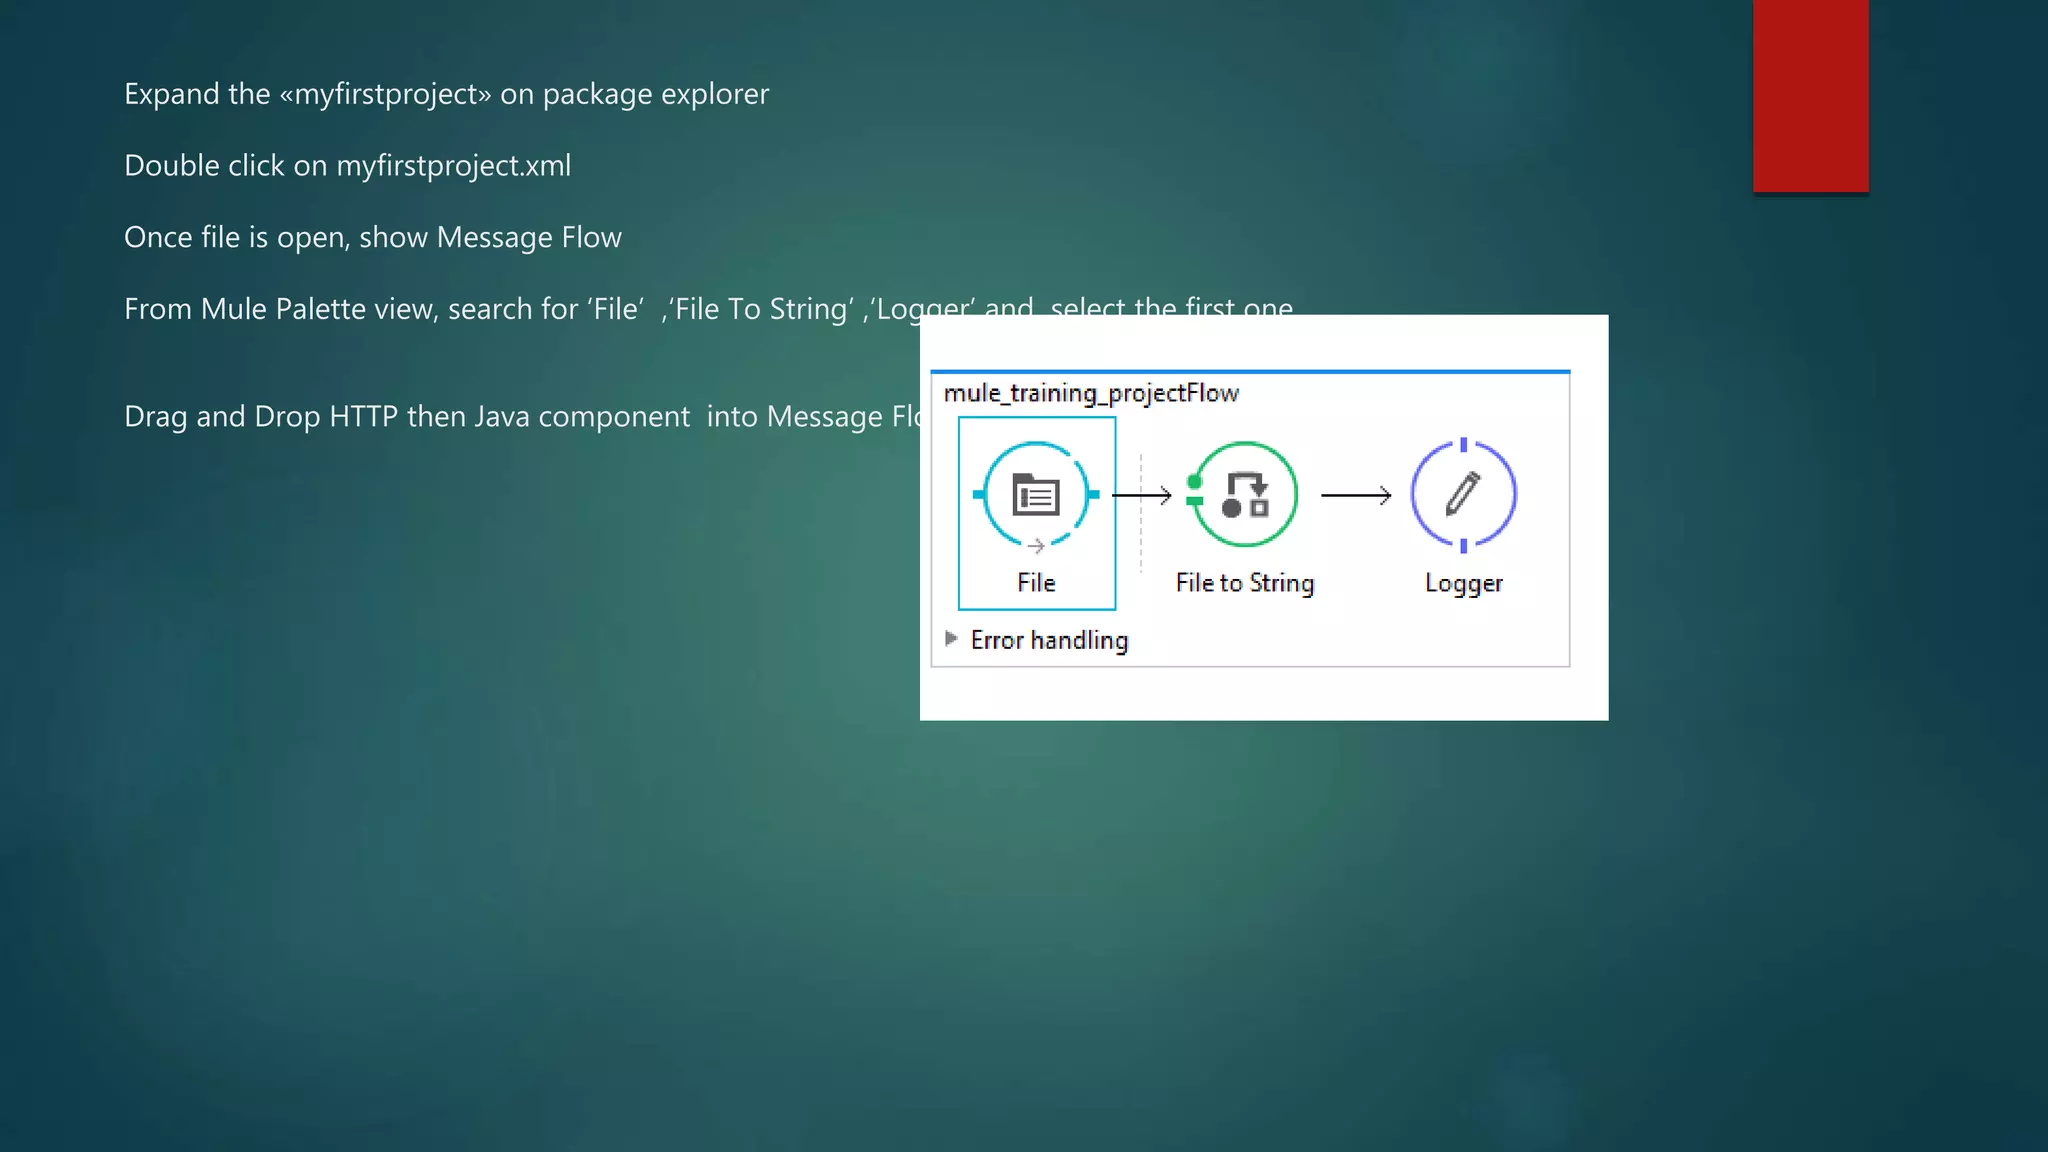
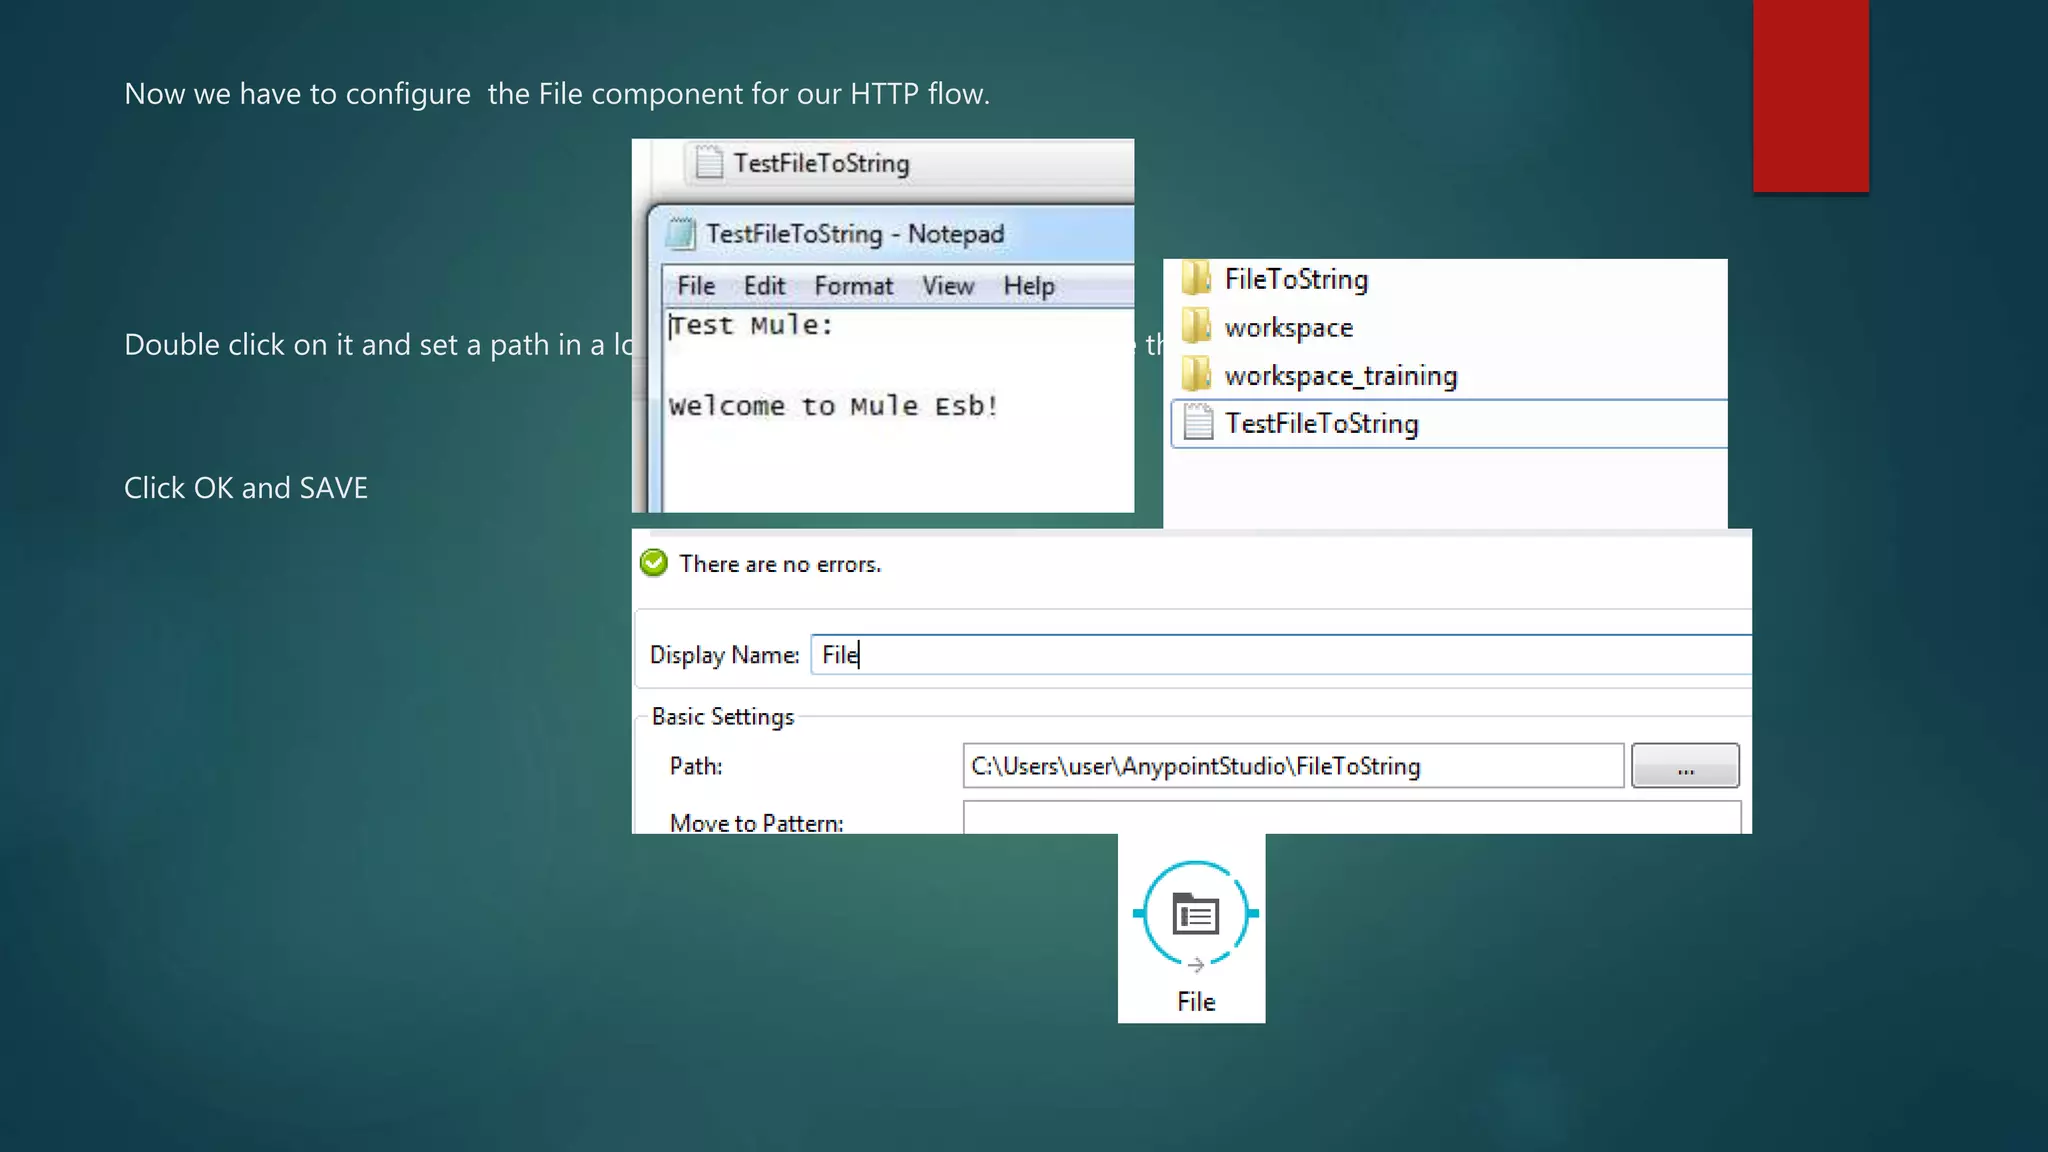
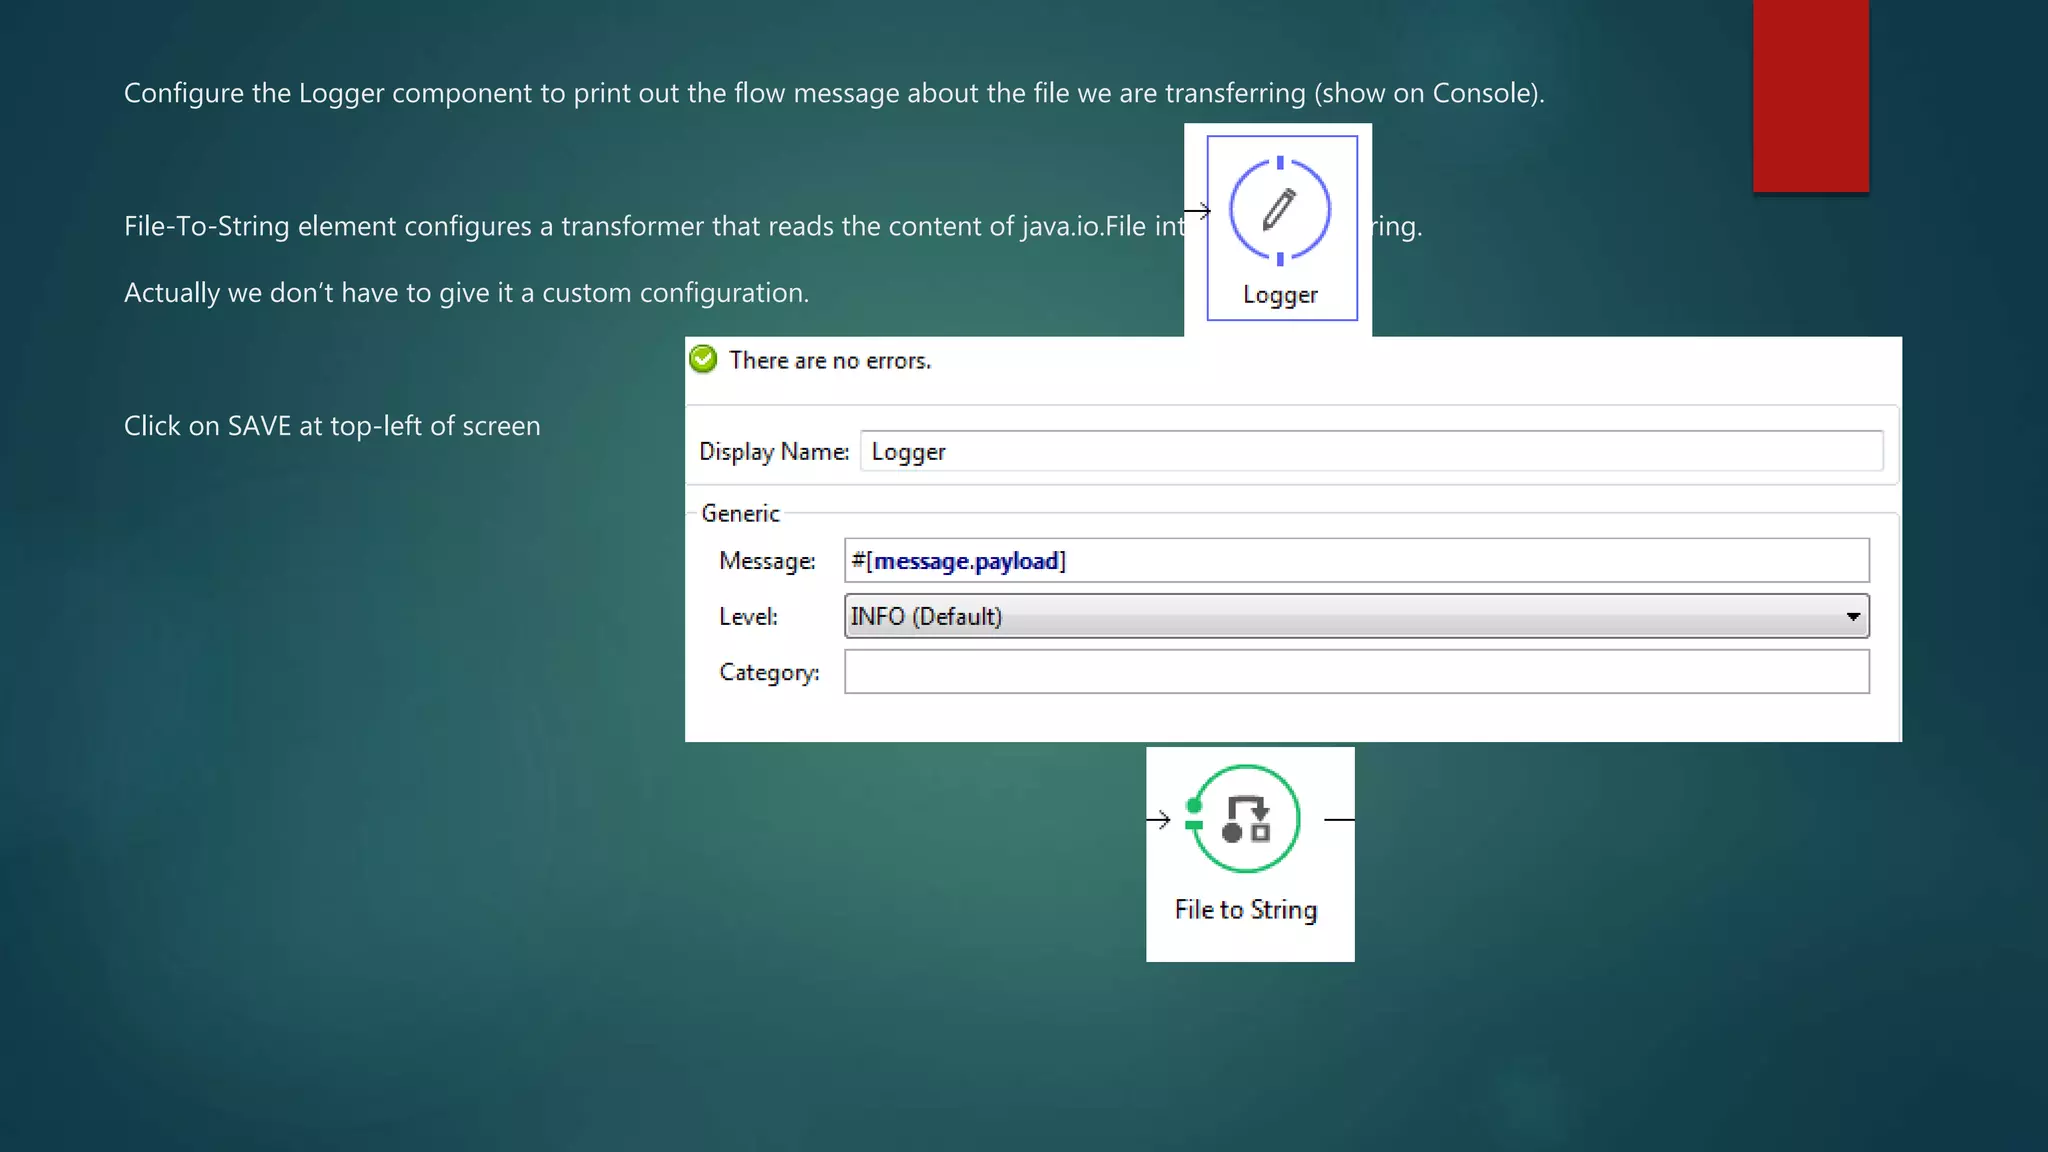
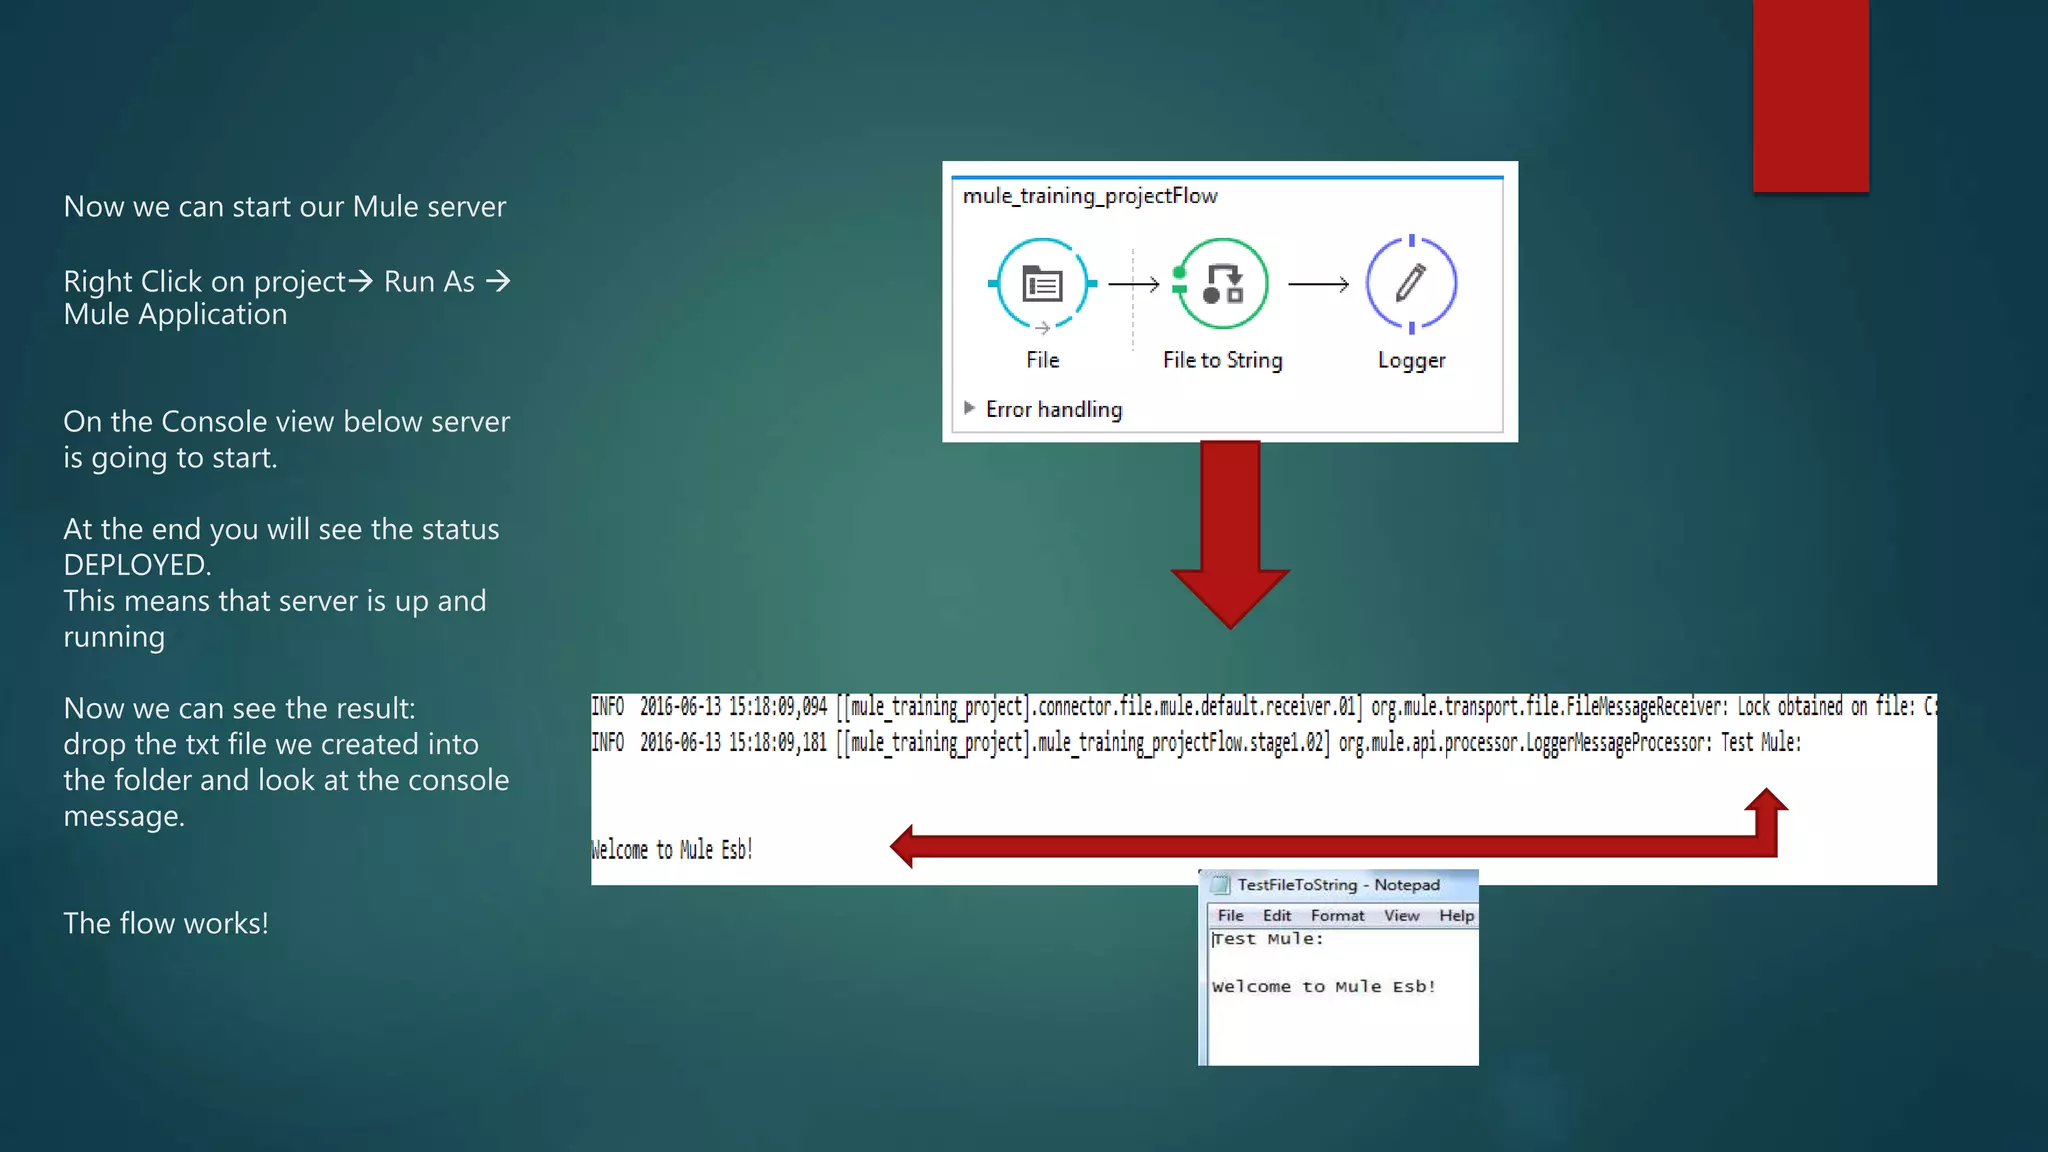
Using File to string and logger component
Open Anypoint Studio Create a File  New  Mule Project Click «Finish»
Expand the «myfirstproject» on package explorer Double click on myfirstproject.xml Once file is open, show Message Flow From Mule Palette view, search for ‘File’ ,‘File To String’ ,‘Logger’ and select the first one. Drag and Drop HTTP then Java component into Message Flow view.
Now we have to configure the File component for our HTTP flow. Double click on it and set a path in a local folder then create a txt file outside the folder. Click OK and SAVE
Configure the Logger component to print out the flow message about the file we are transferring (show on Console). File-To-String element configures a transformer that reads the content of java.io.File into a java.lang.String. Actually we don’t have to give it a custom configuration. Click on SAVE at top-left of screen
Now we can start our Mule server Right Click on project Run As  Mule Application On the Console view below server is going to start. At the end you will see the status DEPLOYED. This means that server is up and running Now we can see the result: drop the txt file we created into the folder and look at the console message. The flow works!

Input and output flow with logger component

  • 1.
    Using File tostring and logger component
  • 2.
    Open Anypoint Studio Createa File  New  Mule Project Click «Finish»
  • 3.
    Expand the «myfirstproject»on package explorer Double click on myfirstproject.xml Once file is open, show Message Flow From Mule Palette view, search for ‘File’ ,‘File To String’ ,‘Logger’ and select the first one. Drag and Drop HTTP then Java component into Message Flow view.
  • 4.
    Now we haveto configure the File component for our HTTP flow. Double click on it and set a path in a local folder then create a txt file outside the folder. Click OK and SAVE
  • 5.
    Configure the Loggercomponent to print out the flow message about the file we are transferring (show on Console). File-To-String element configures a transformer that reads the content of java.io.File into a java.lang.String. Actually we don’t have to give it a custom configuration. Click on SAVE at top-left of screen
  • 6.
    Now we canstart our Mule server Right Click on project Run As  Mule Application On the Console view below server is going to start. At the end you will see the status DEPLOYED. This means that server is up and running Now we can see the result: drop the txt file we created into the folder and look at the console message. The flow works!