Download to read offline
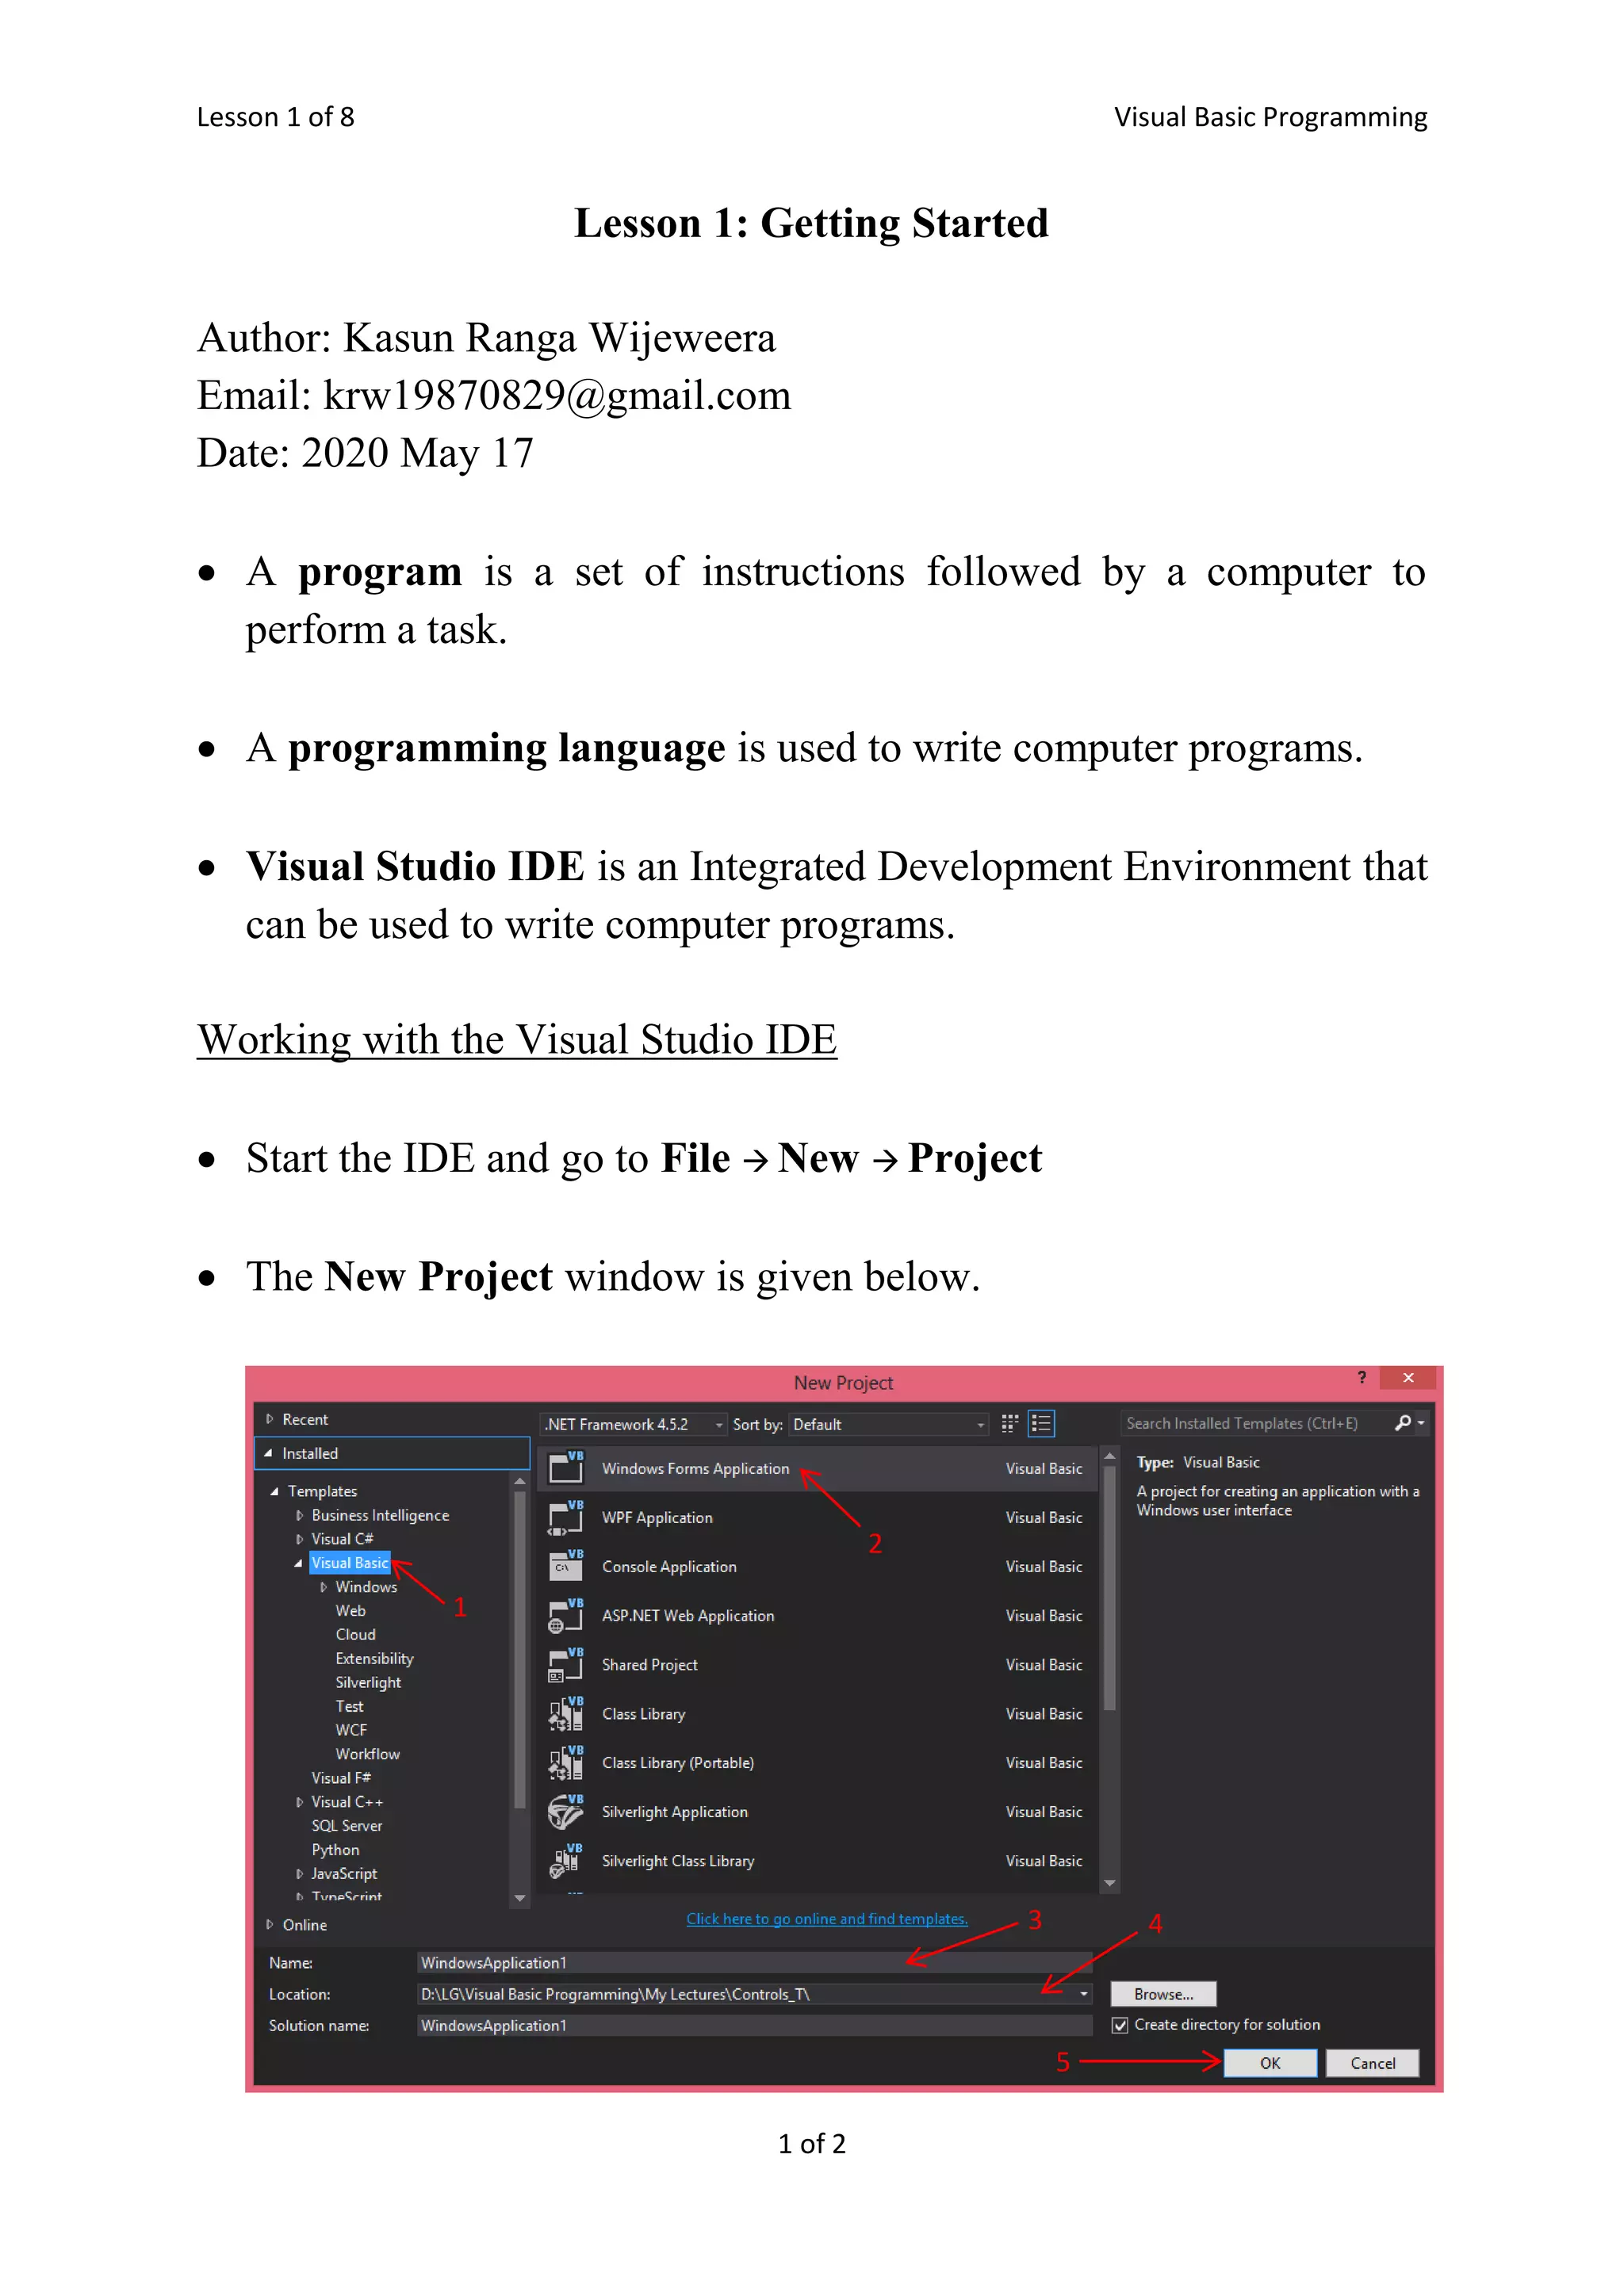
![Lesson 1 of 8 Visual Basic Programming 2 of 2 Visual Basic should be selected. [1] Windows Forms Application should be selected. [2] An appropriate name should be given for the project. [3] The location to store the project should be specified. [4] Then click the button OK. [5] An empty form can be seen. If not, go to View Designer. [6] The Toolbox window can be seen. If not, go to View Toolbox. [7] The Solution Explorer window can be seen. If not, go to View Solution Explorer. [8] The Properties window can be seen. If not, go to View Properties Window. [9] 6 7 8 9](https://image.slidesharecdn.com/gettingstarted-200517163309/75/Getting-Started-with-Visual-Basic-Programming-2-2048.jpg)

This document is the first lesson of a 8 part series on Visual Basic programming. It introduces some basic concepts like what a computer program and programming language are. It then provides instructions on how to get started with the Visual Studio Integrated Development Environment, including how to create a new Windows Forms Application project by selecting options, specifying a name and location, and viewing various windows.