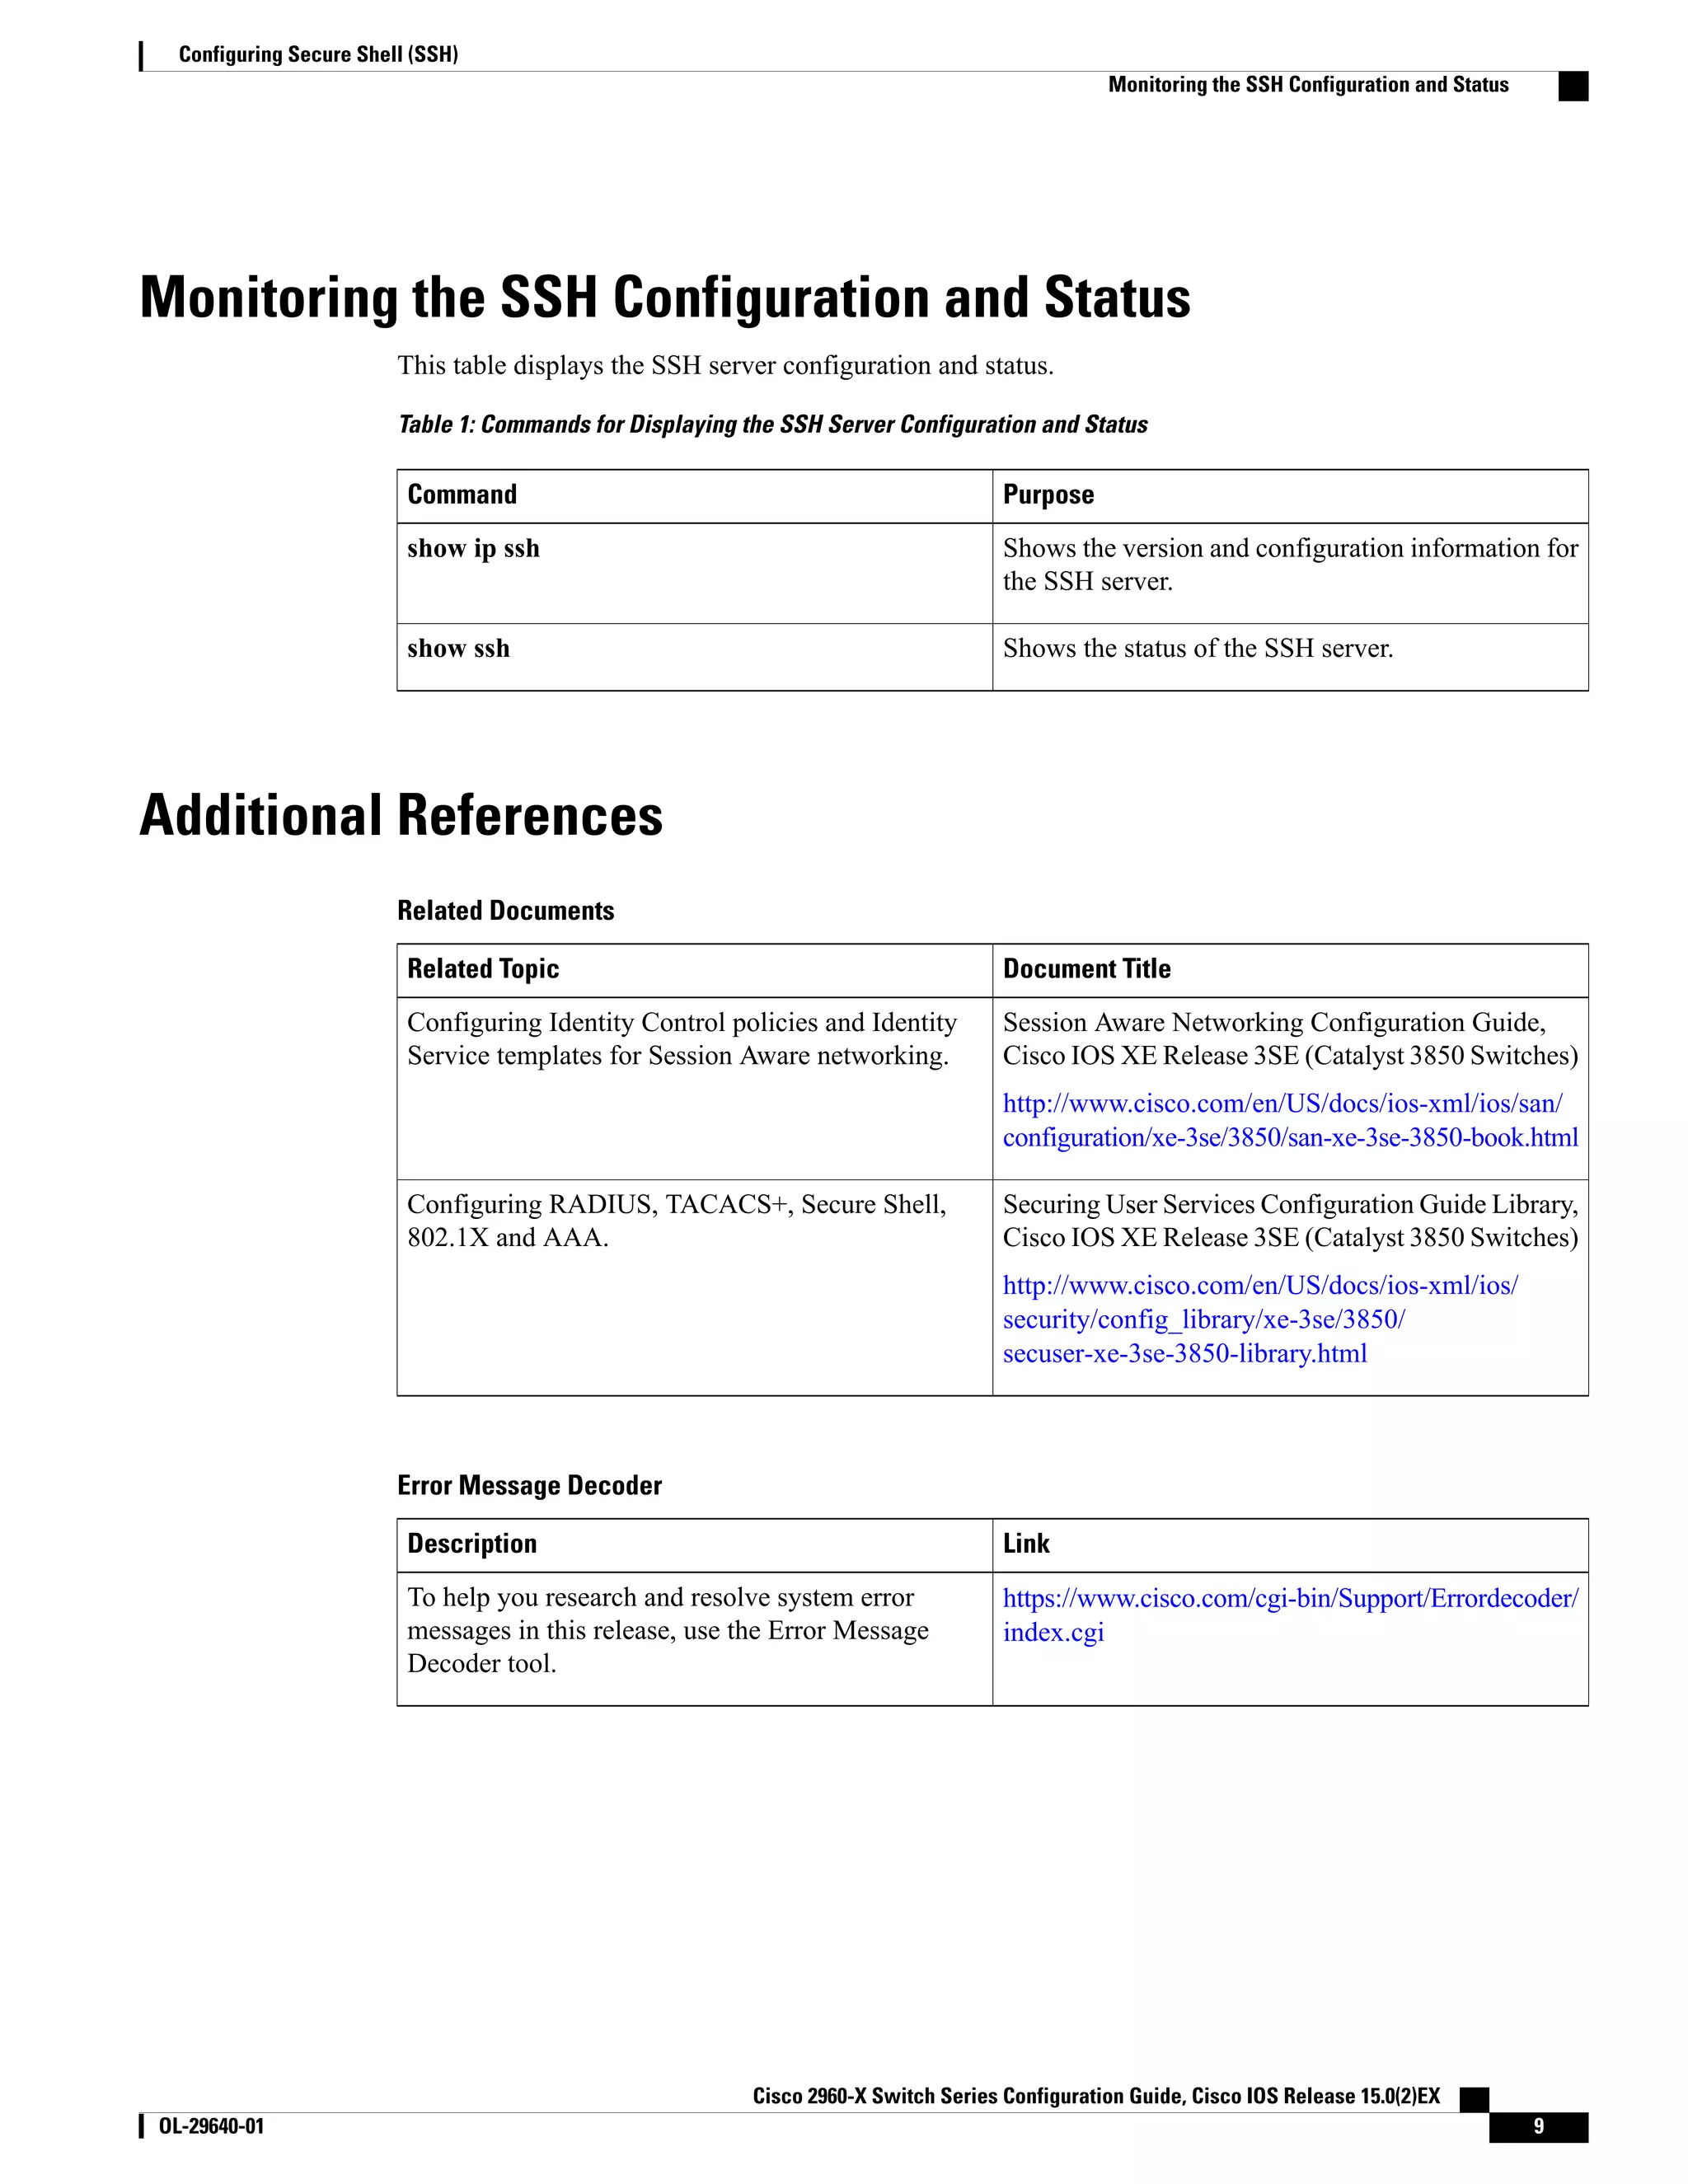
Secure Shell (SSH) is a protocol that provides secure remote access to devices. This document provides instructions for configuring SSH on Cisco switches including generating SSH keys, configuring the SSH server, and monitoring the SSH configuration. Key steps include generating an RSA key pair, configuring the SSH version, setting timeout values, and limiting network access to SSH-only connections.
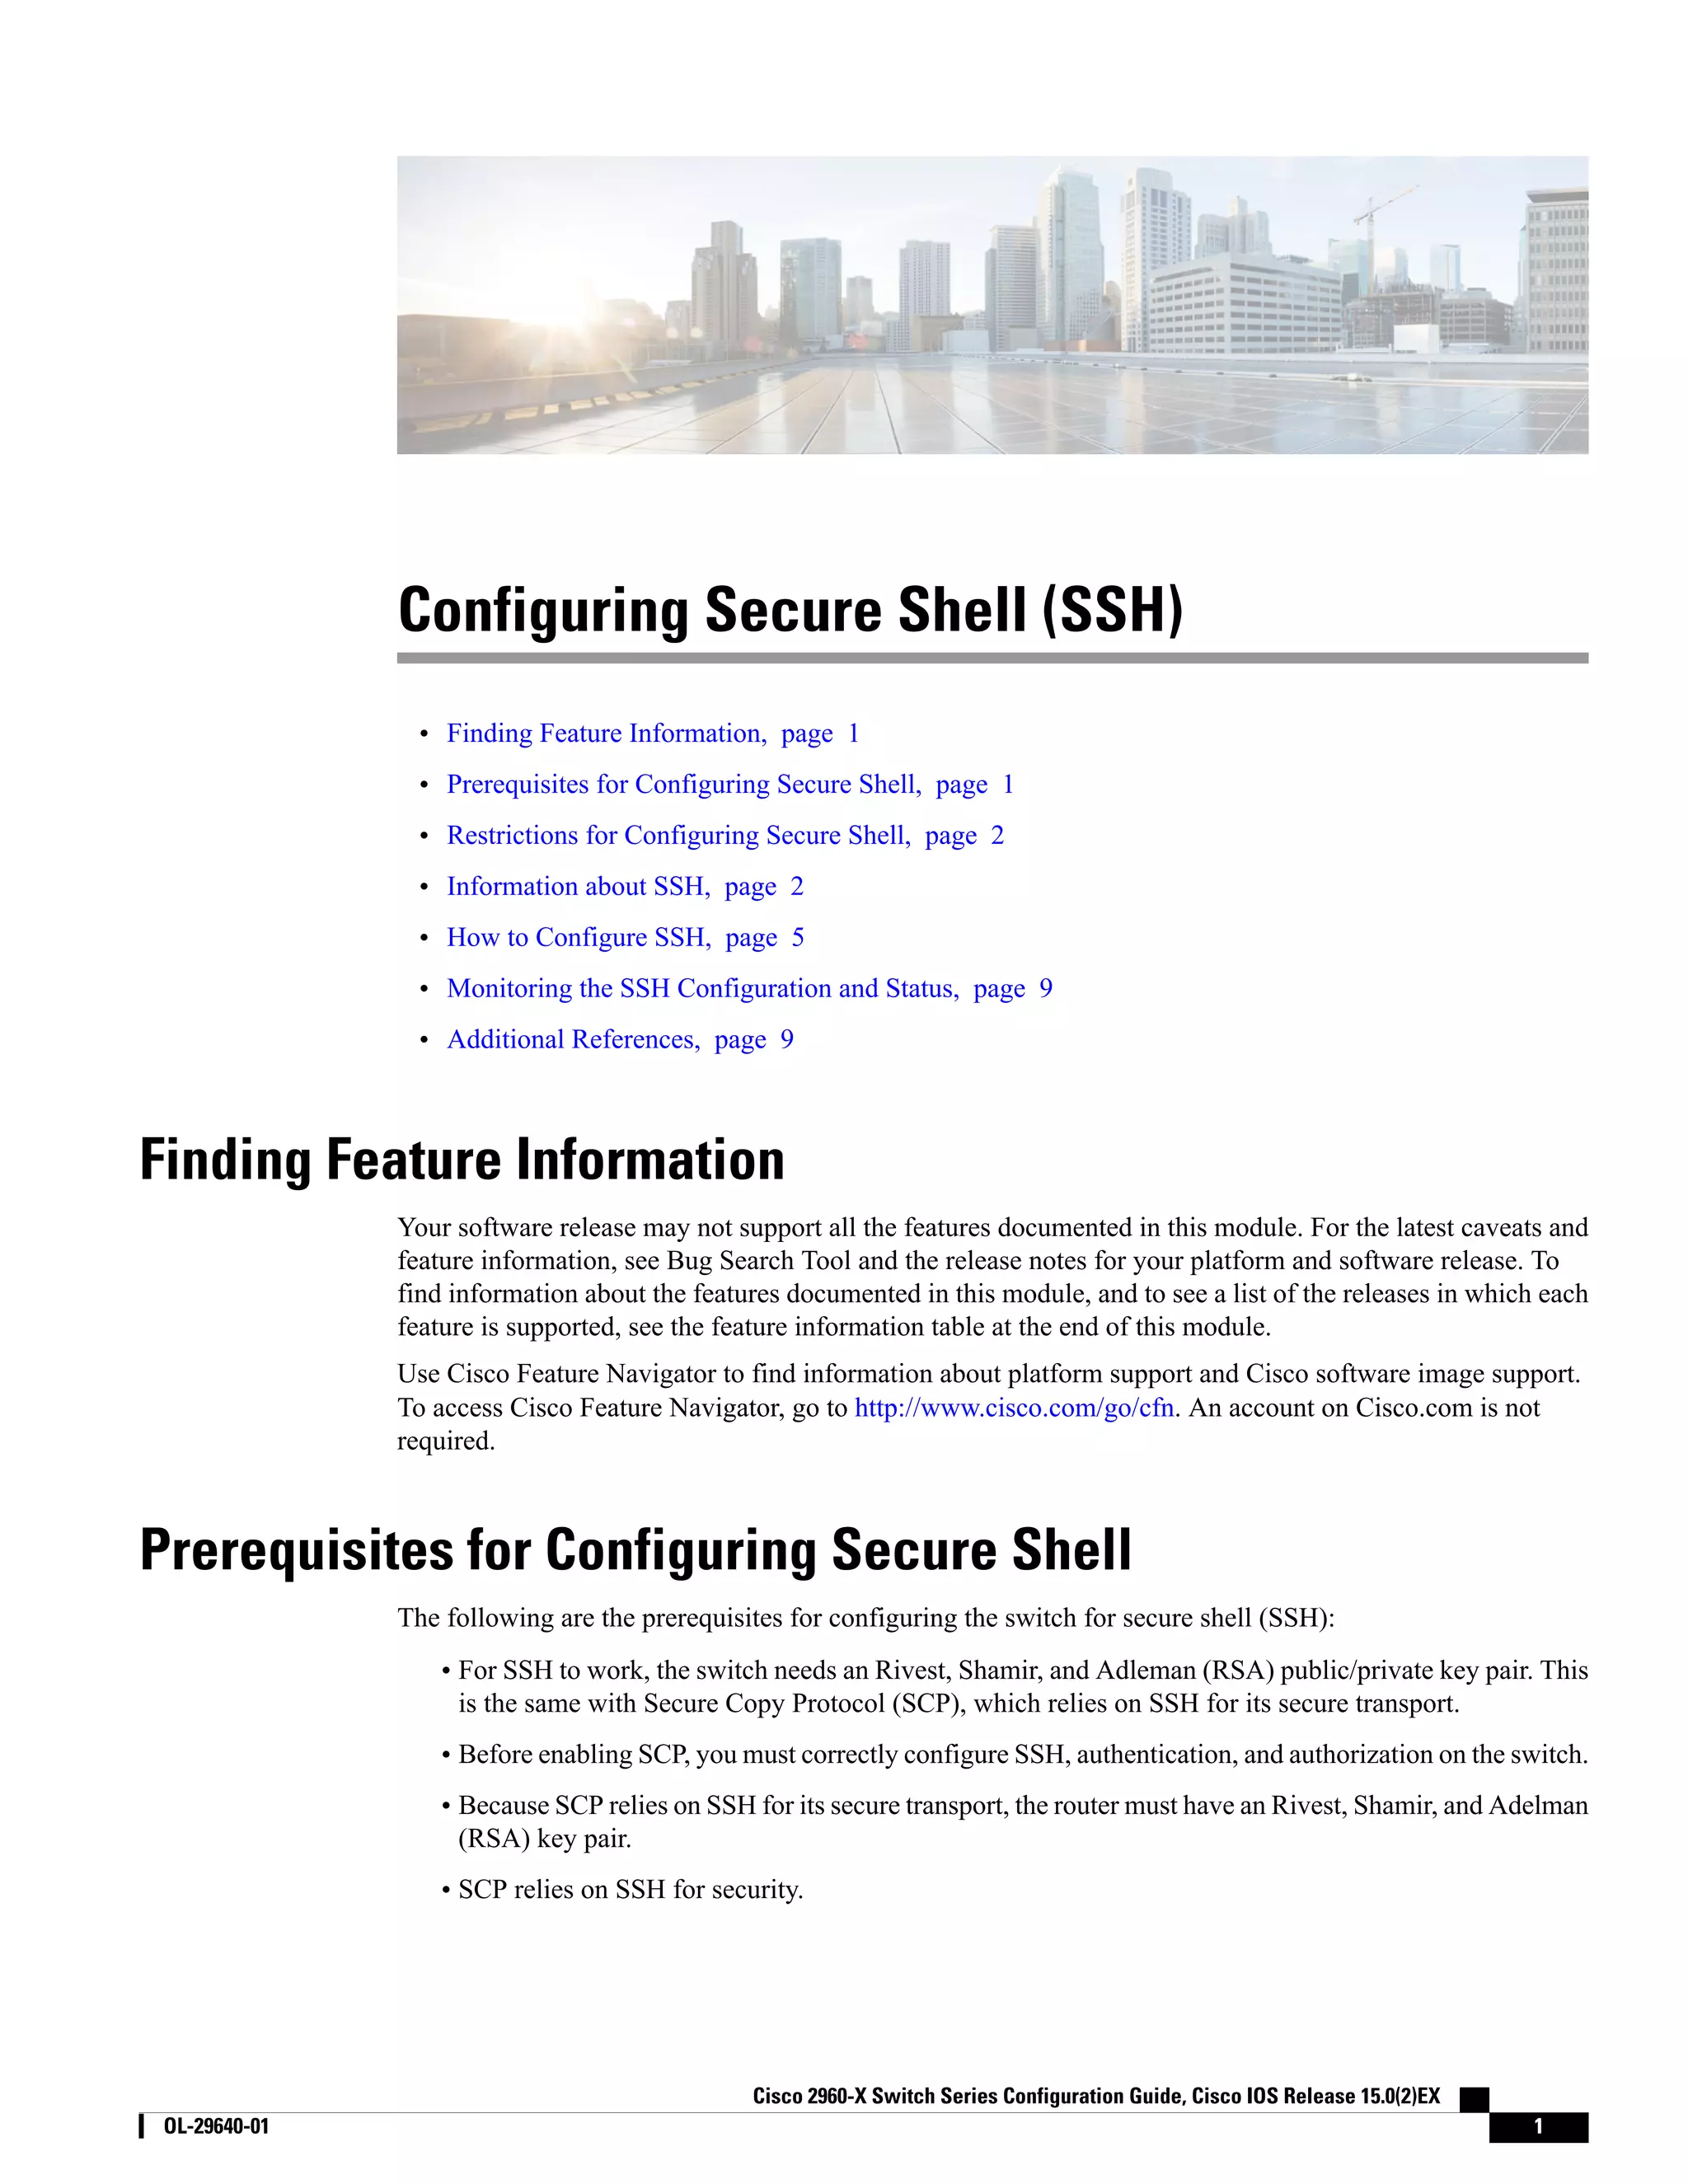
![• SCP requires that authentication, authorization, and accounting (AAA) authorization be configured so the router can determine whether the user has the correct privilege level. • A user must have appropriate authorization to use SCP. • A user who has appropriate authorization can use SCP to copy any file in the Cisco IOS File System (IFS) to and from a switch by using the copy command. An authorized administrator can also do this from a workstation. • The Secure Shell (SSH) server requires an IPsec (Data Encryption Standard [DES] or 3DES) encryption software image; the SSH client requires an IPsec (DES or 3DES) encryption software image.) • Configure a hostname and host domain for your device by using the hostname and ip domain-name commands in global configuration mode. Related Topics Secure Copy Protocol, on page 4 Restrictions for Configuring Secure Shell The following are restrictions for configuring the Switch for secure shell. • The switch supports Rivest, Shamir, and Adelman (RSA) authentication. • SSH supports only the execution-shell application. • The SSH server and the SSH client are supported only on Data Encryption Standard (DES) (56-bit) and 3DES (168-bit) data encryption software. In DES software images, DES is the only encryption algorithm available. In 3DES software images, both DES and 3DES encryption algorithms are available. • The Switch supports the Advanced Encryption Standard (AES) encryption algorithm with a 128-bit key, 192-bit key, or 256-bit key. However, symmetric cipher AES to encrypt the keys is not supported. • This software release does not support IP Security (IPSec). • When using SCP, you cannot enter the password into the copy command. You must enter the password when prompted. • The login banner is not supported in Secure Shell Version 1. It is supported in Secure Shell Version 2. • The -l keyword and userid :{number} {ip-address} delimiter and arguments are mandatory when configuring the alternative method of Reverse SSH for console access. Related Topics Secure Copy Protocol, on page 4 Information about SSH Secure Shell (SSH) is a protocol that provides a secure, remote connection to a device. SSH provides more security for remote connections than Telnet does by providing strong encryption when a device is authenticated. This software release supports SSH Version 1 (SSHv1) and SSH Version 2 (SSHv2). Cisco 2960-X Switch Series Configuration Guide, Cisco IOS Release 15.0(2)EX 2 OL-29640-01 Configuring Secure Shell (SSH) Restrictions for Configuring Secure Shell](https://image.slidesharecdn.com/configuresshcell-171015071302/75/Configure-ssh-cell-2-2048.jpg)
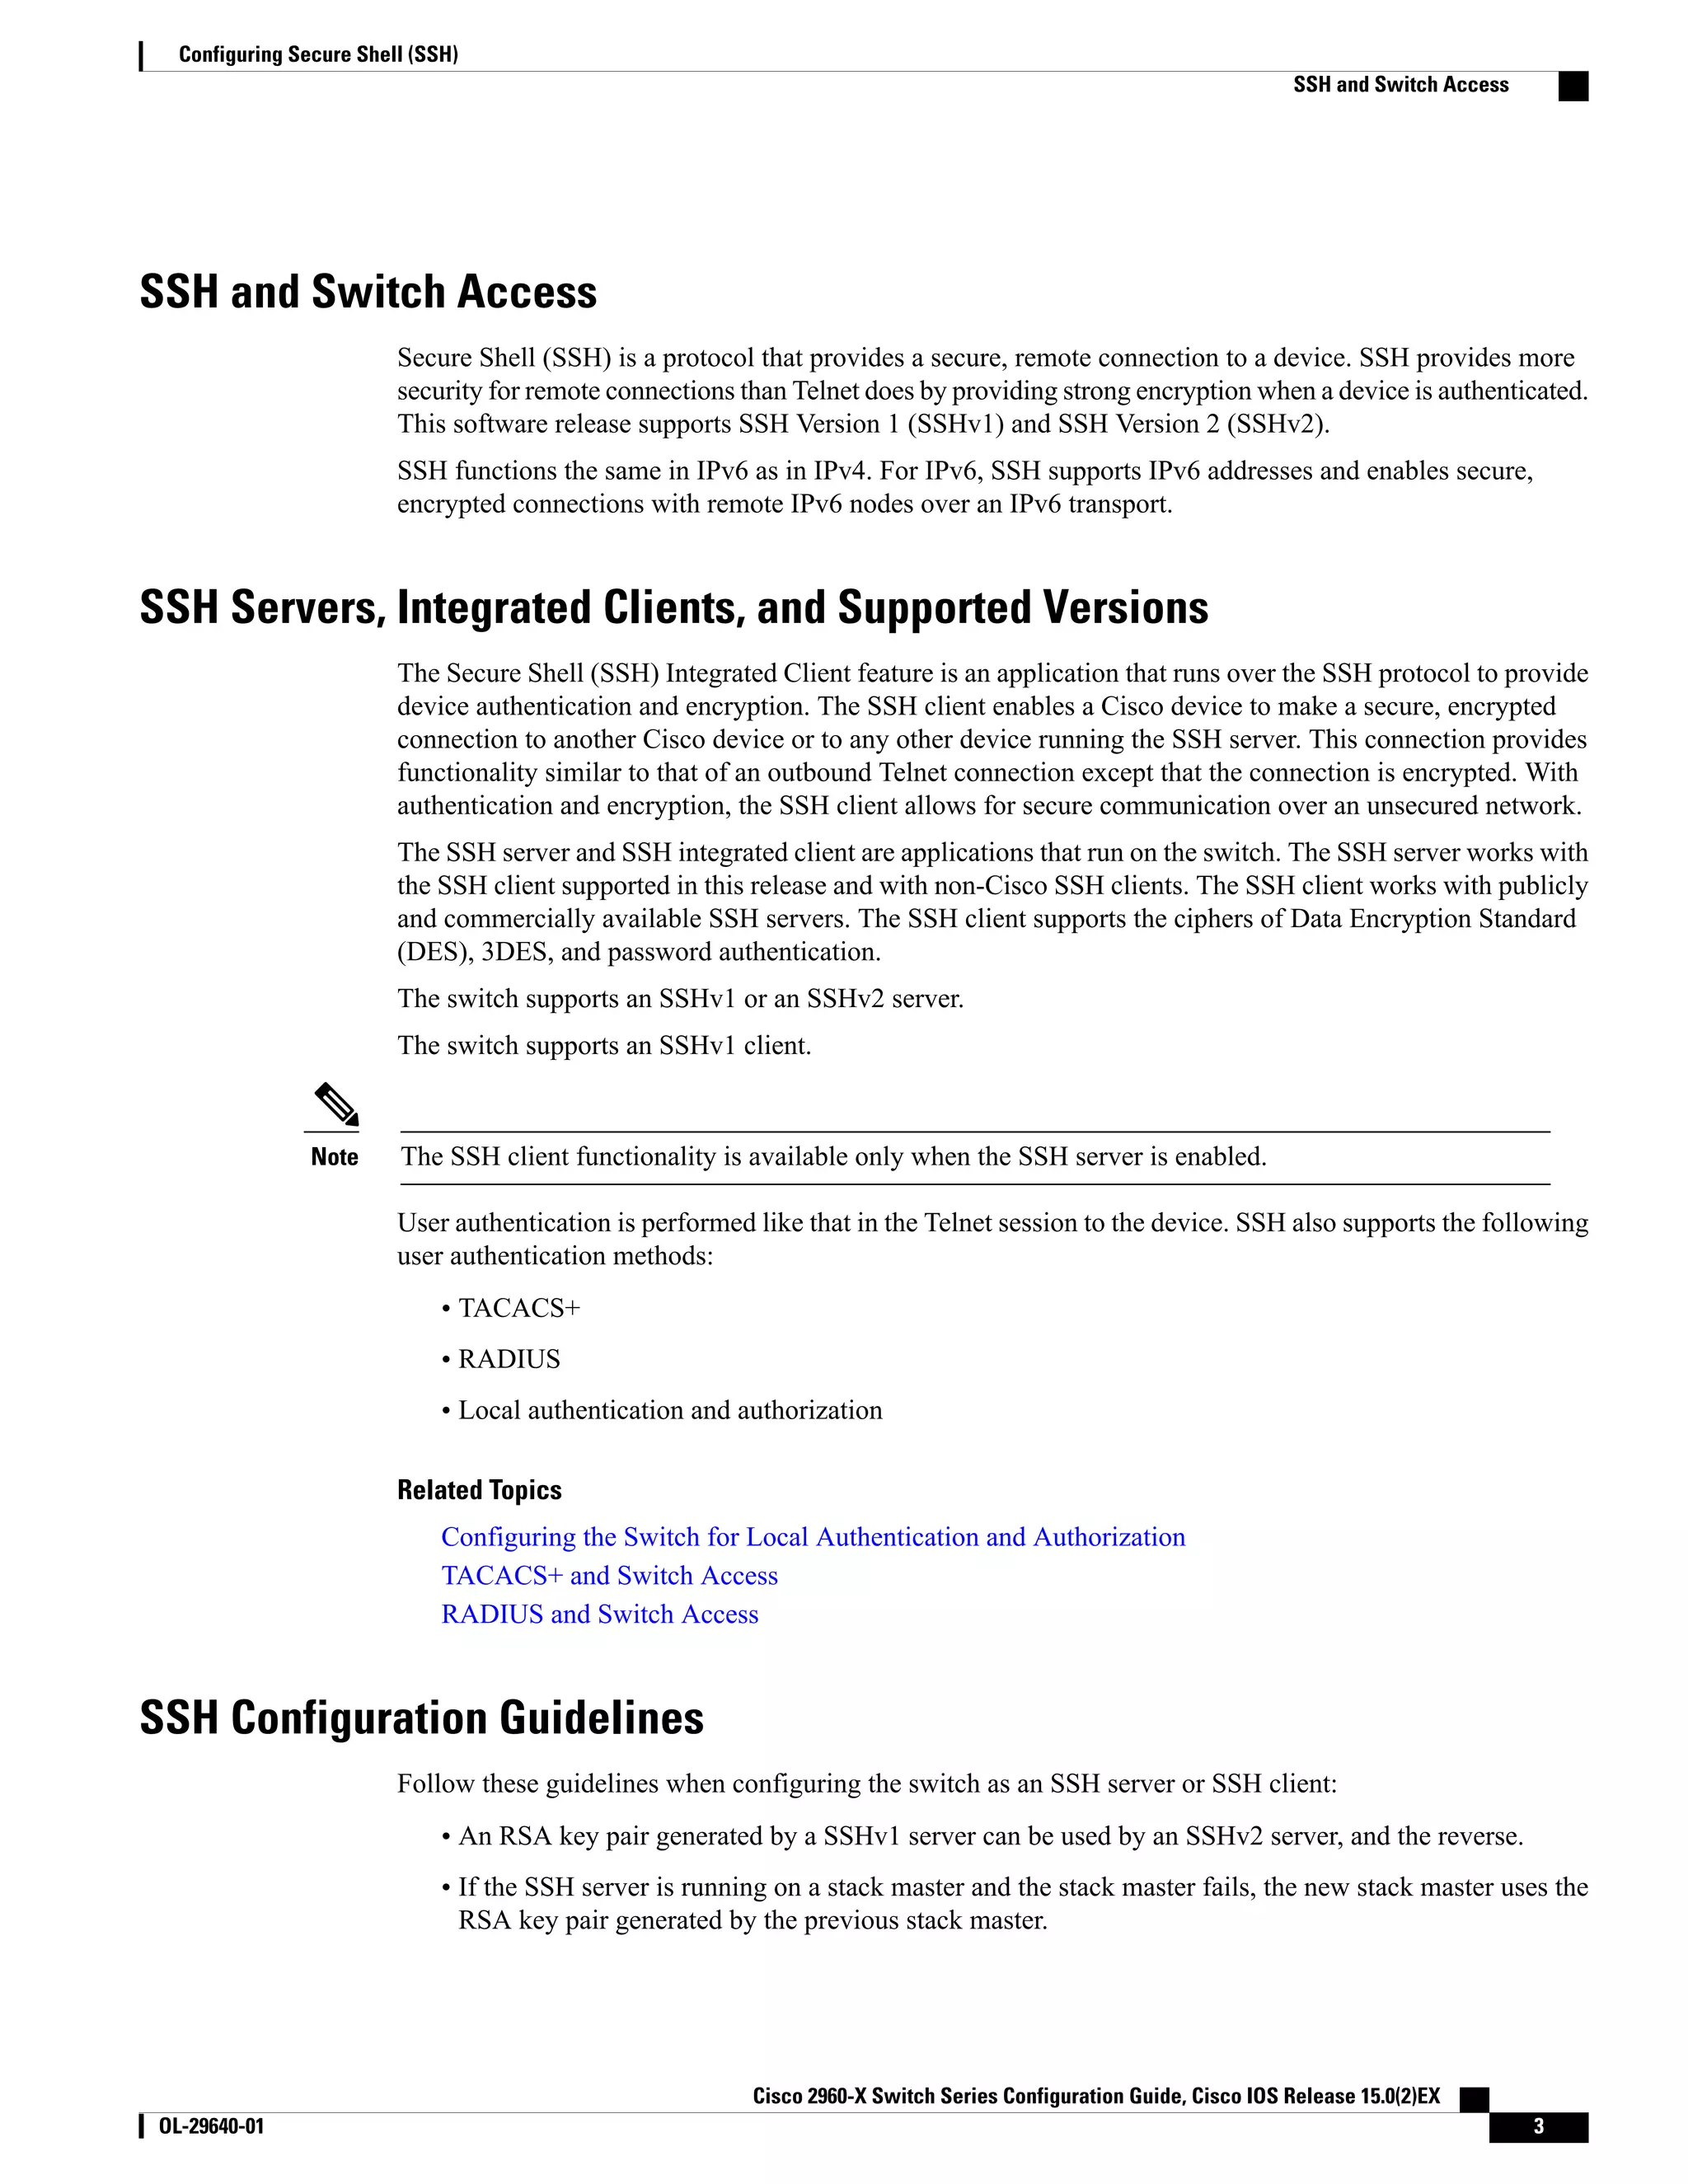
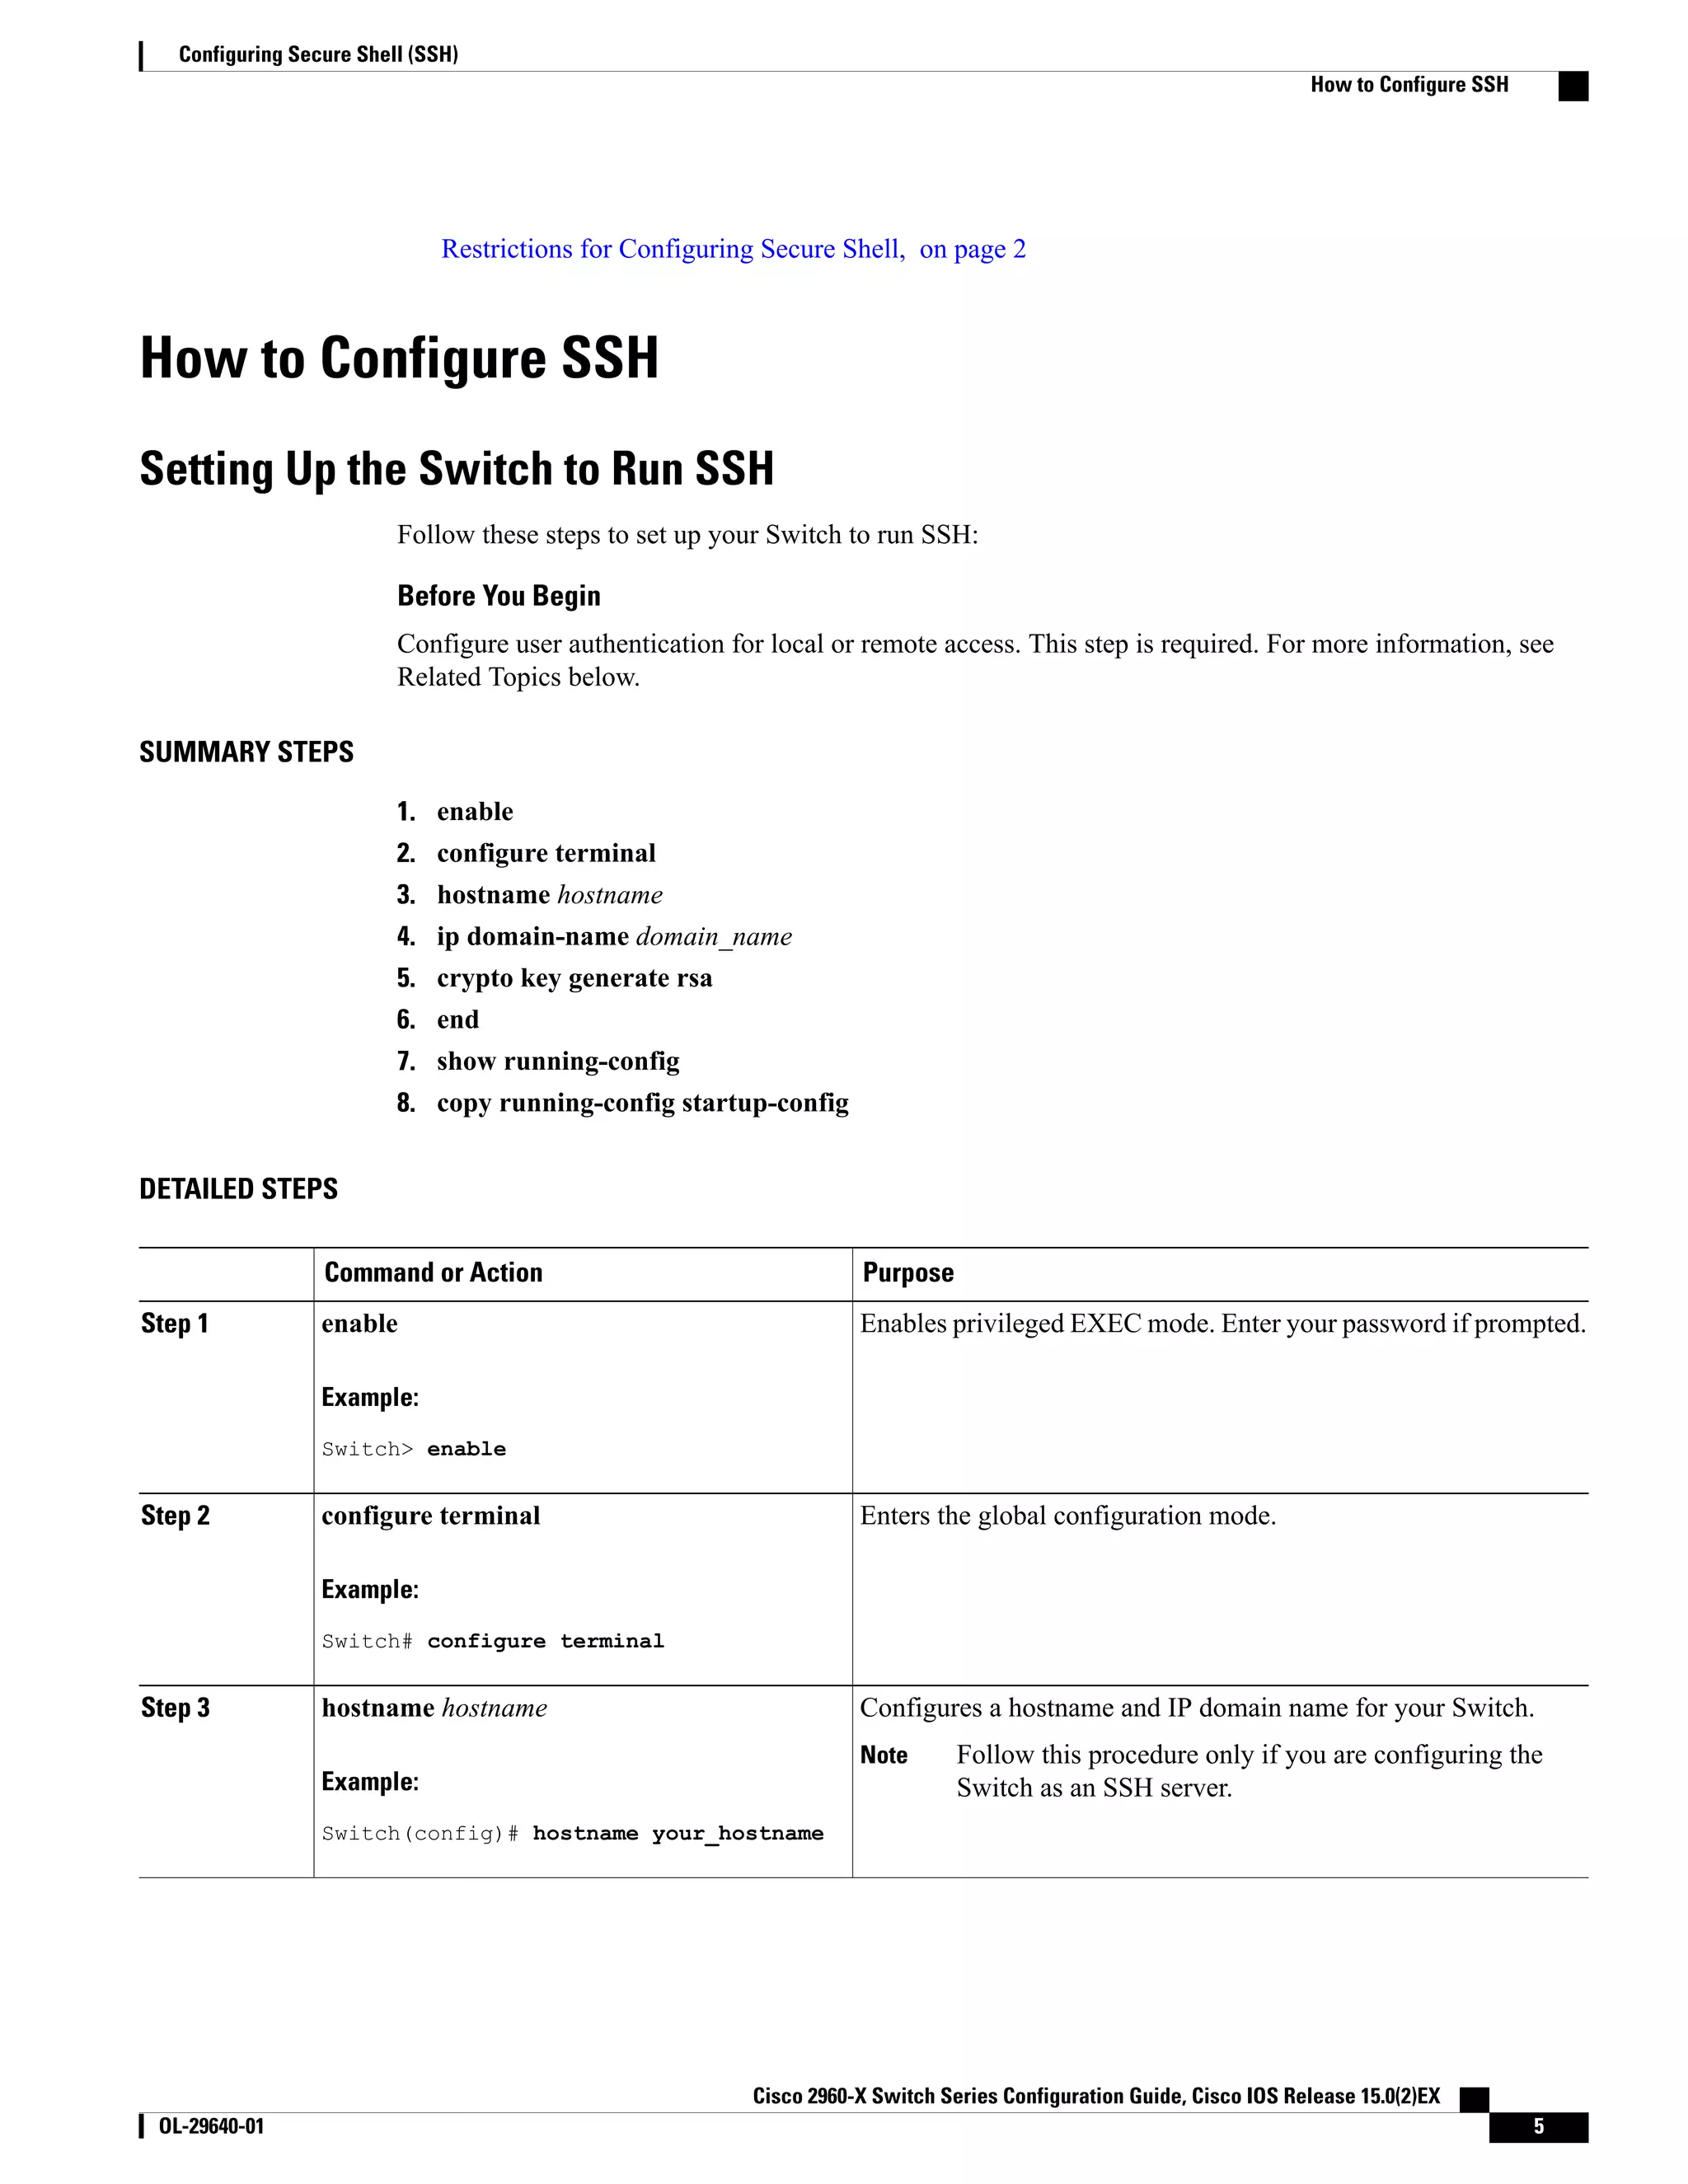
![This procedure is only required if you are configuring the Switch as an SSH server.Note SUMMARY STEPS 1. enable 2. configure terminal 3. ip ssh version [1 | 2] 4. ip ssh {timeout seconds | authentication-retries number} 5. Use one or both of the following: • line vtyline_number[ ending_line_number ] • transport input ssh 6. end 7. show running-config 8. copy running-config startup-config DETAILED STEPS PurposeCommand or Action Enables privileged EXEC mode. Enter your password if prompted.enableStep 1 Example: Switch> enable Enters the global configuration mode.configure terminal Example: Switch# configure terminal Step 2 (Optional) Configures the Switch to run SSH Version 1 or SSH Version 2. ip ssh version [1 | 2] Example: Switch(config)# ip ssh version 1 Step 3 • 1—Configure the Switch to run SSH Version 1. • 2—Configure the Switch to run SSH Version 2. If you do not enter this command or do not specify a keyword, the SSH server selects the latest SSH version supported by the SSH client. For example, if the SSH client supports SSHv1 and SSHv2, the SSH server selects SSHv2. Configures the SSH control parameters:ip ssh {timeout seconds | authentication-retries number} Step 4 Cisco 2960-X Switch Series Configuration Guide, Cisco IOS Release 15.0(2)EX OL-29640-01 7 Configuring Secure Shell (SSH) Configuring the SSH Server](https://image.slidesharecdn.com/configuresshcell-171015071302/75/Configure-ssh-cell-7-2048.jpg)
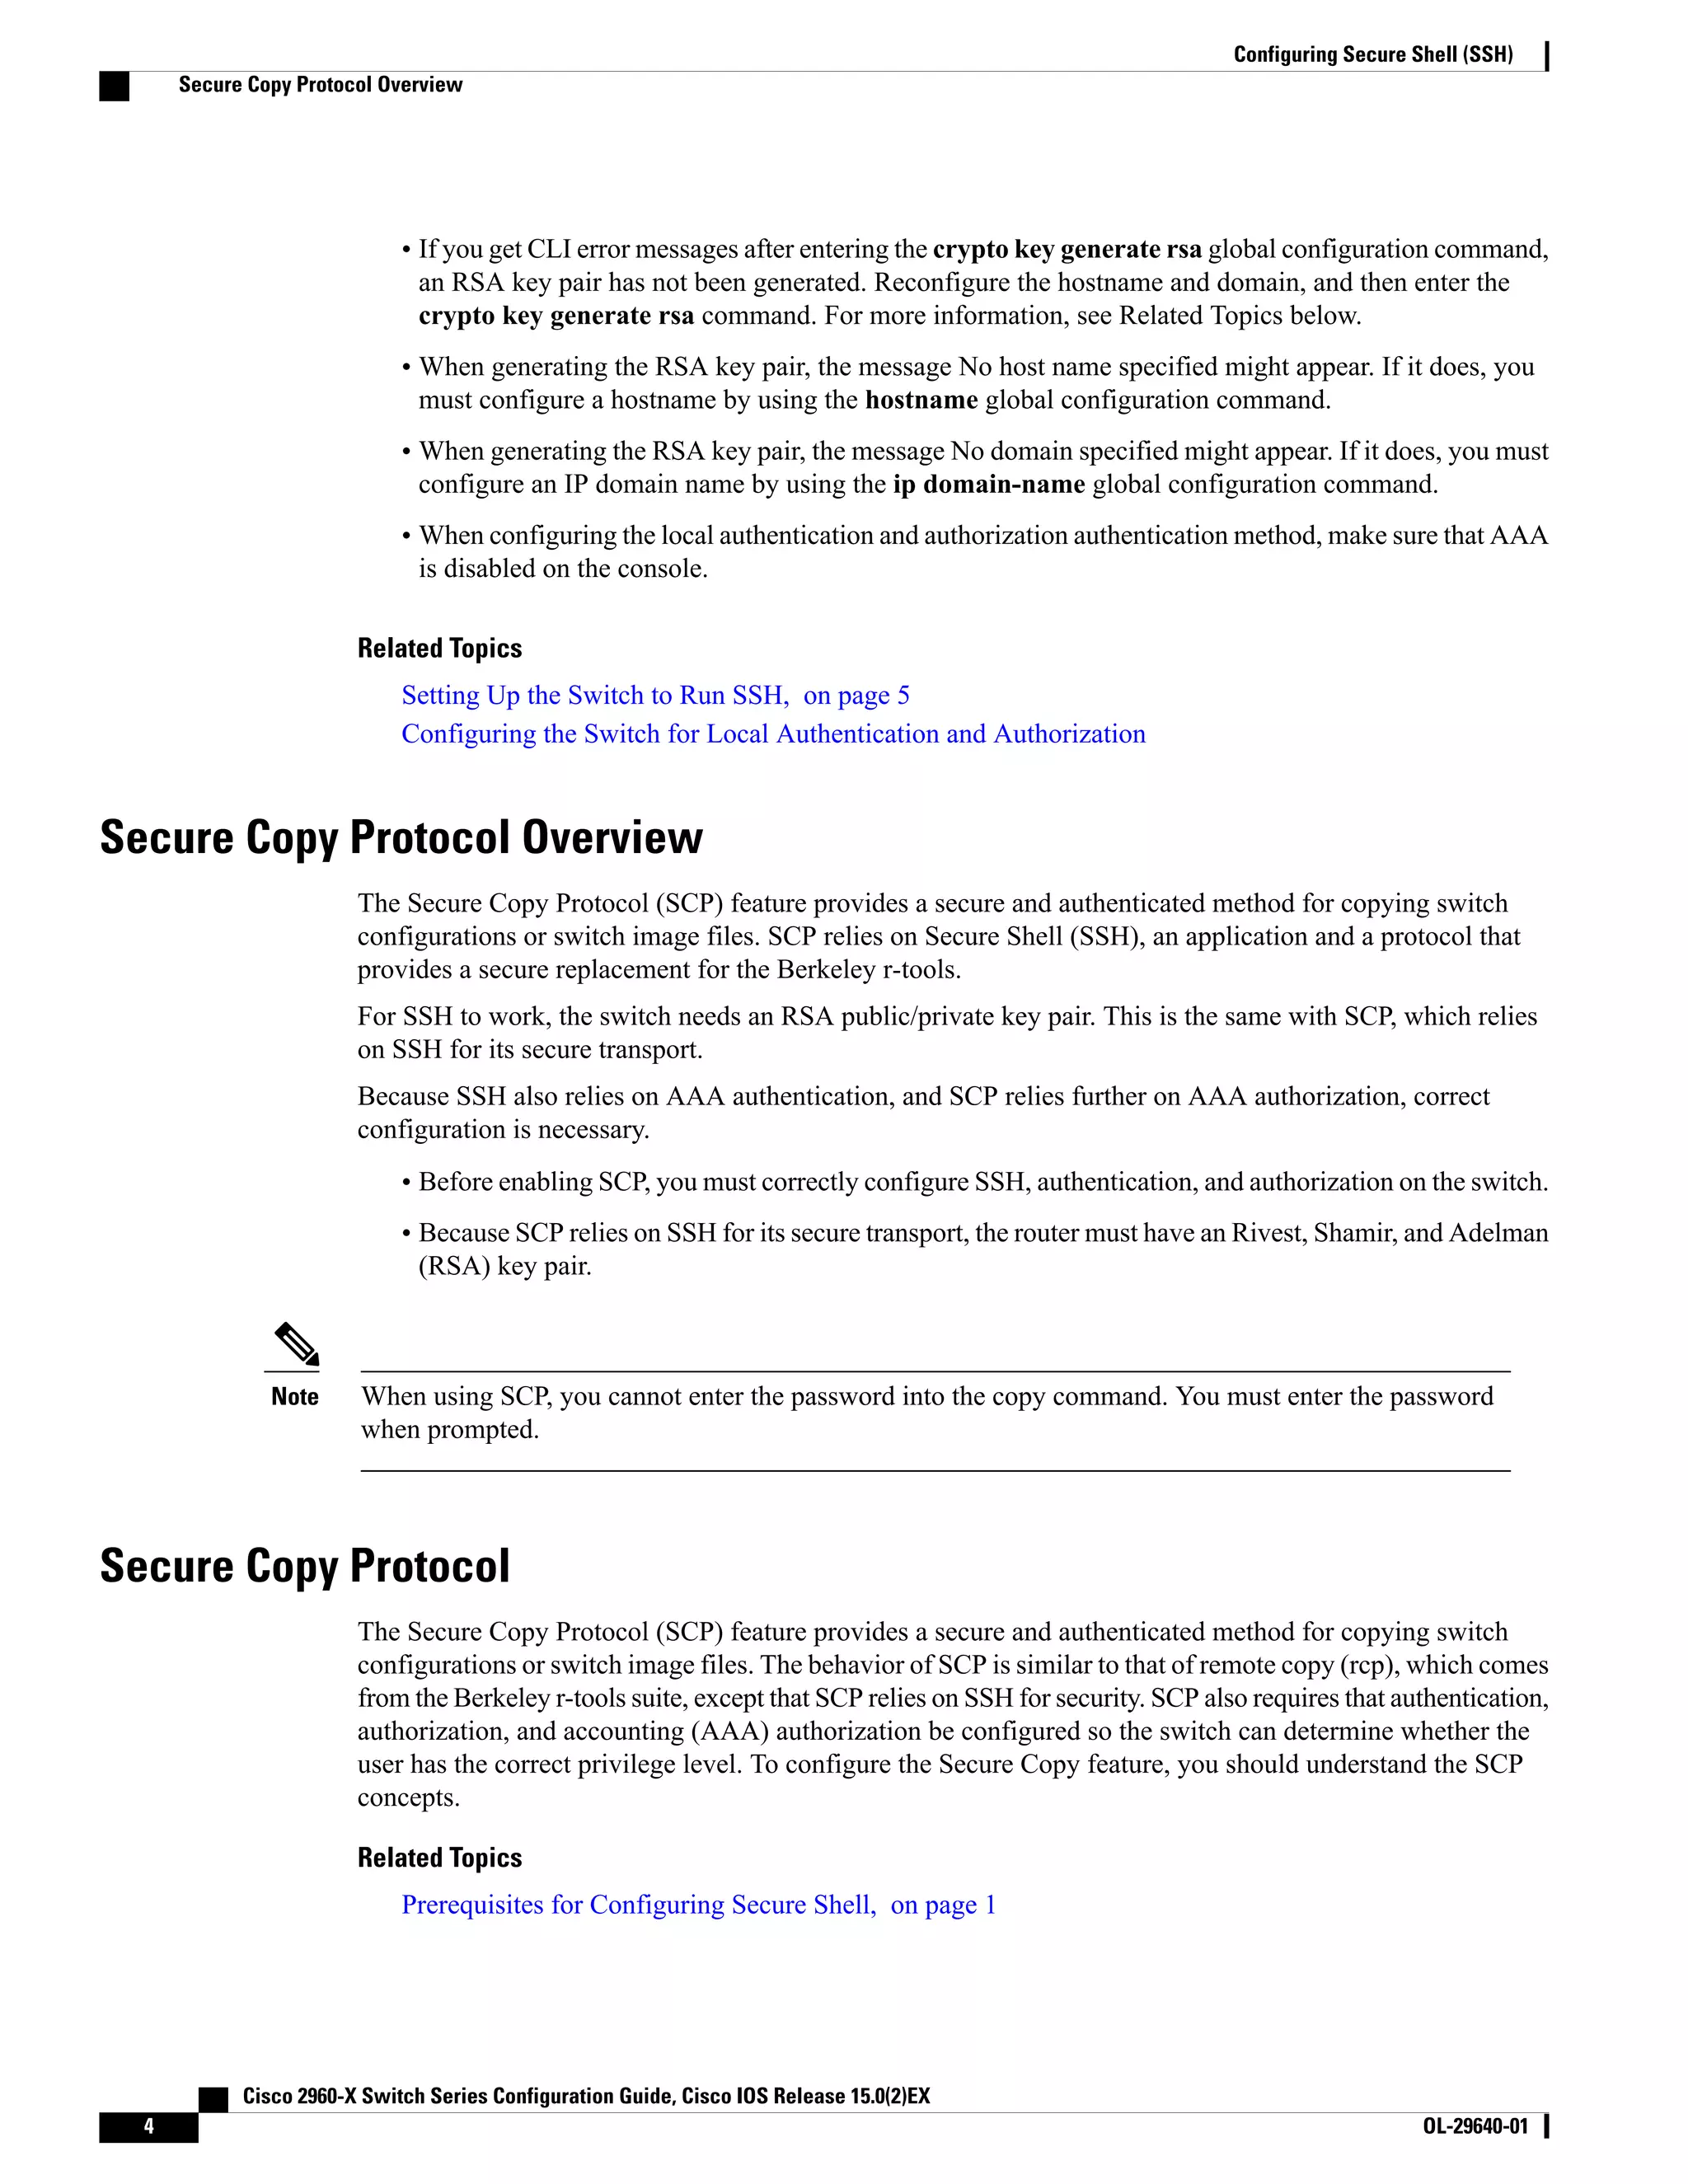
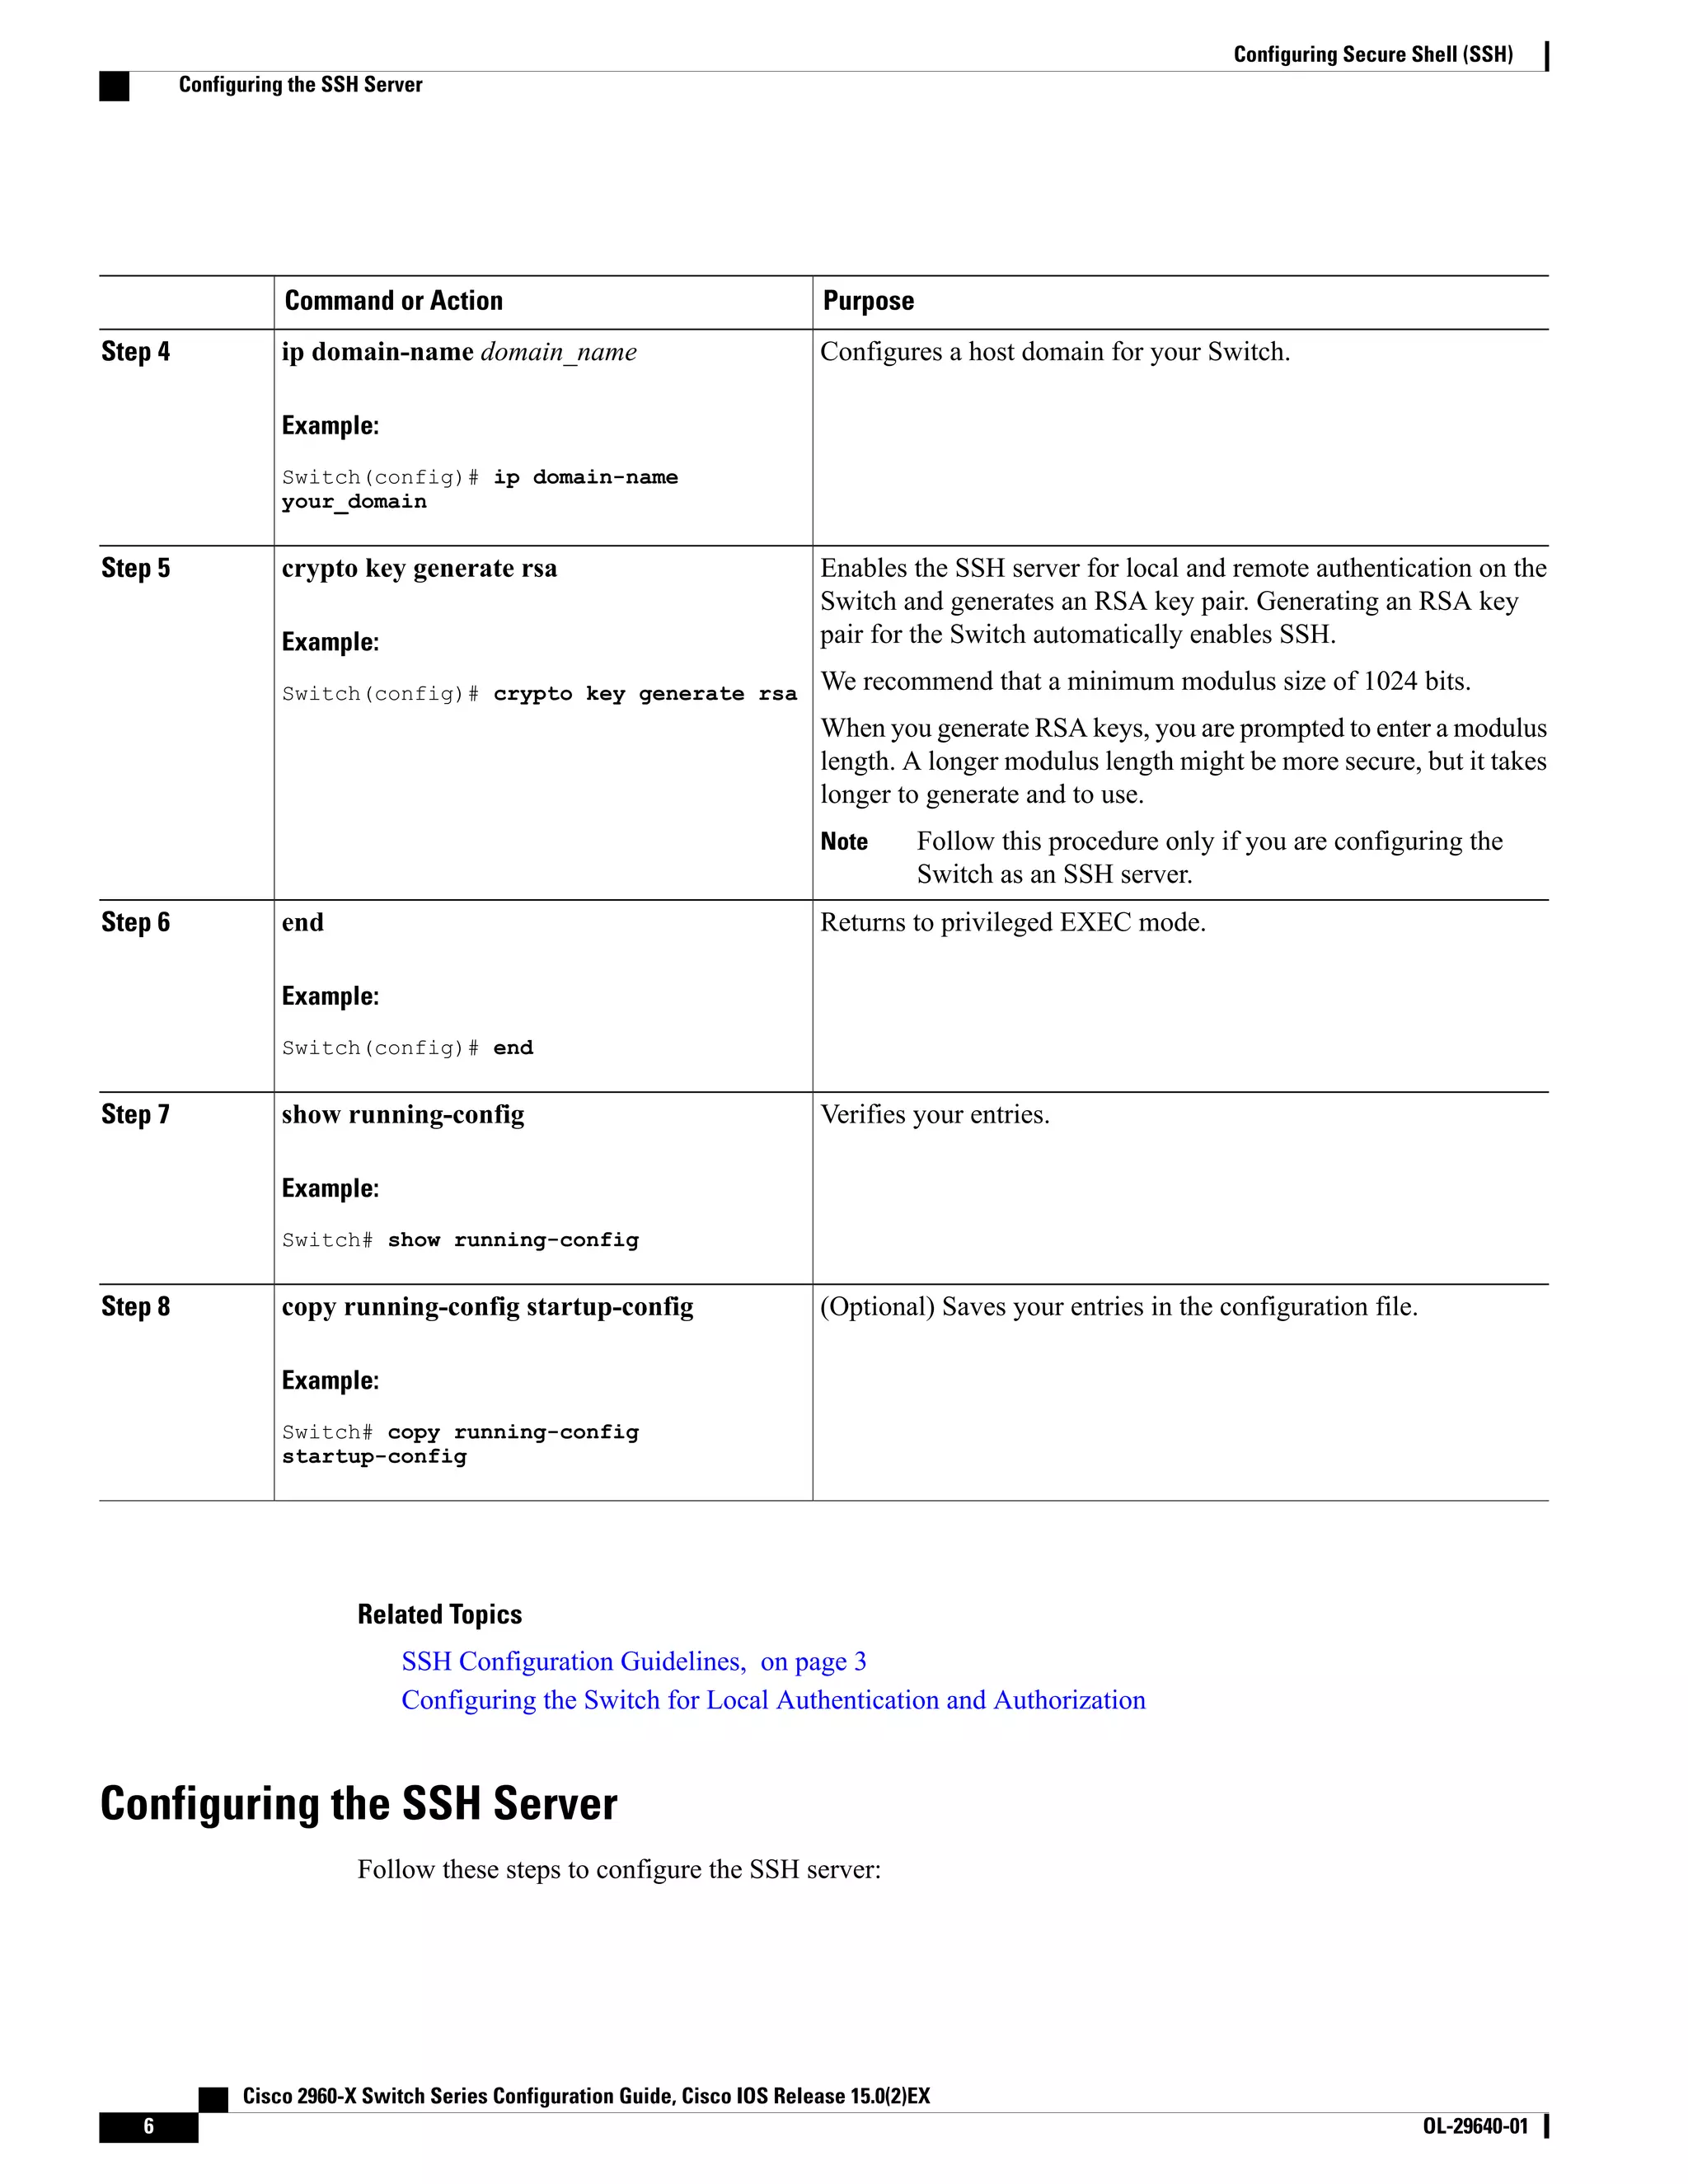
![PurposeCommand or Action • Specify the time-out value in seconds; the default is 120 seconds. The range is 0 to 120 seconds. This parameter applies to the SSHExample: Switch(config)# ip ssh timeout 90 negotiation phase. After the connection is established, the Switch uses the default time-out values of the CLI-based sessions. authentication-retries 2 By default, up to five simultaneous, encrypted SSH connections for multiple CLI-based sessions over the network are available (session 0 to session 4). After the execution shell starts, the CLI-based session time-out value returns to the default of 10 minutes. • Specify the number of times that a client can re-authenticate to the server. The default is 3; the range is 0 to 5. Repeat this step when configuring both parameters. (Optional) Configures the virtual terminal line settings.Use one or both of the following:Step 5 • line vtyline_number[ ending_line_number ] • Enters line configuration mode to configure the virtual terminal line settings. For line_number and ending_line_number, specify a pair of lines. The range is 0 to 15. • transport input ssh • Specifies that the Switch prevent non-SSH Telnet connections. This limits the router to only SSH connections. Example: Switch(config)# line vty 1 10 or Switch(config-line)# transport input ssh Returns to privileged EXEC mode.end Example: Switch(config-line)# end Step 6 Verifies your entries.show running-config Example: Switch# show running-config Step 7 (Optional) Saves your entries in the configuration file.copy running-config startup-config Example: Switch# copy running-config Step 8 startup-config Cisco 2960-X Switch Series Configuration Guide, Cisco IOS Release 15.0(2)EX 8 OL-29640-01 Configuring Secure Shell (SSH) Configuring the SSH Server](https://image.slidesharecdn.com/configuresshcell-171015071302/75/Configure-ssh-cell-8-2048.jpg)