Downloaded 45 times


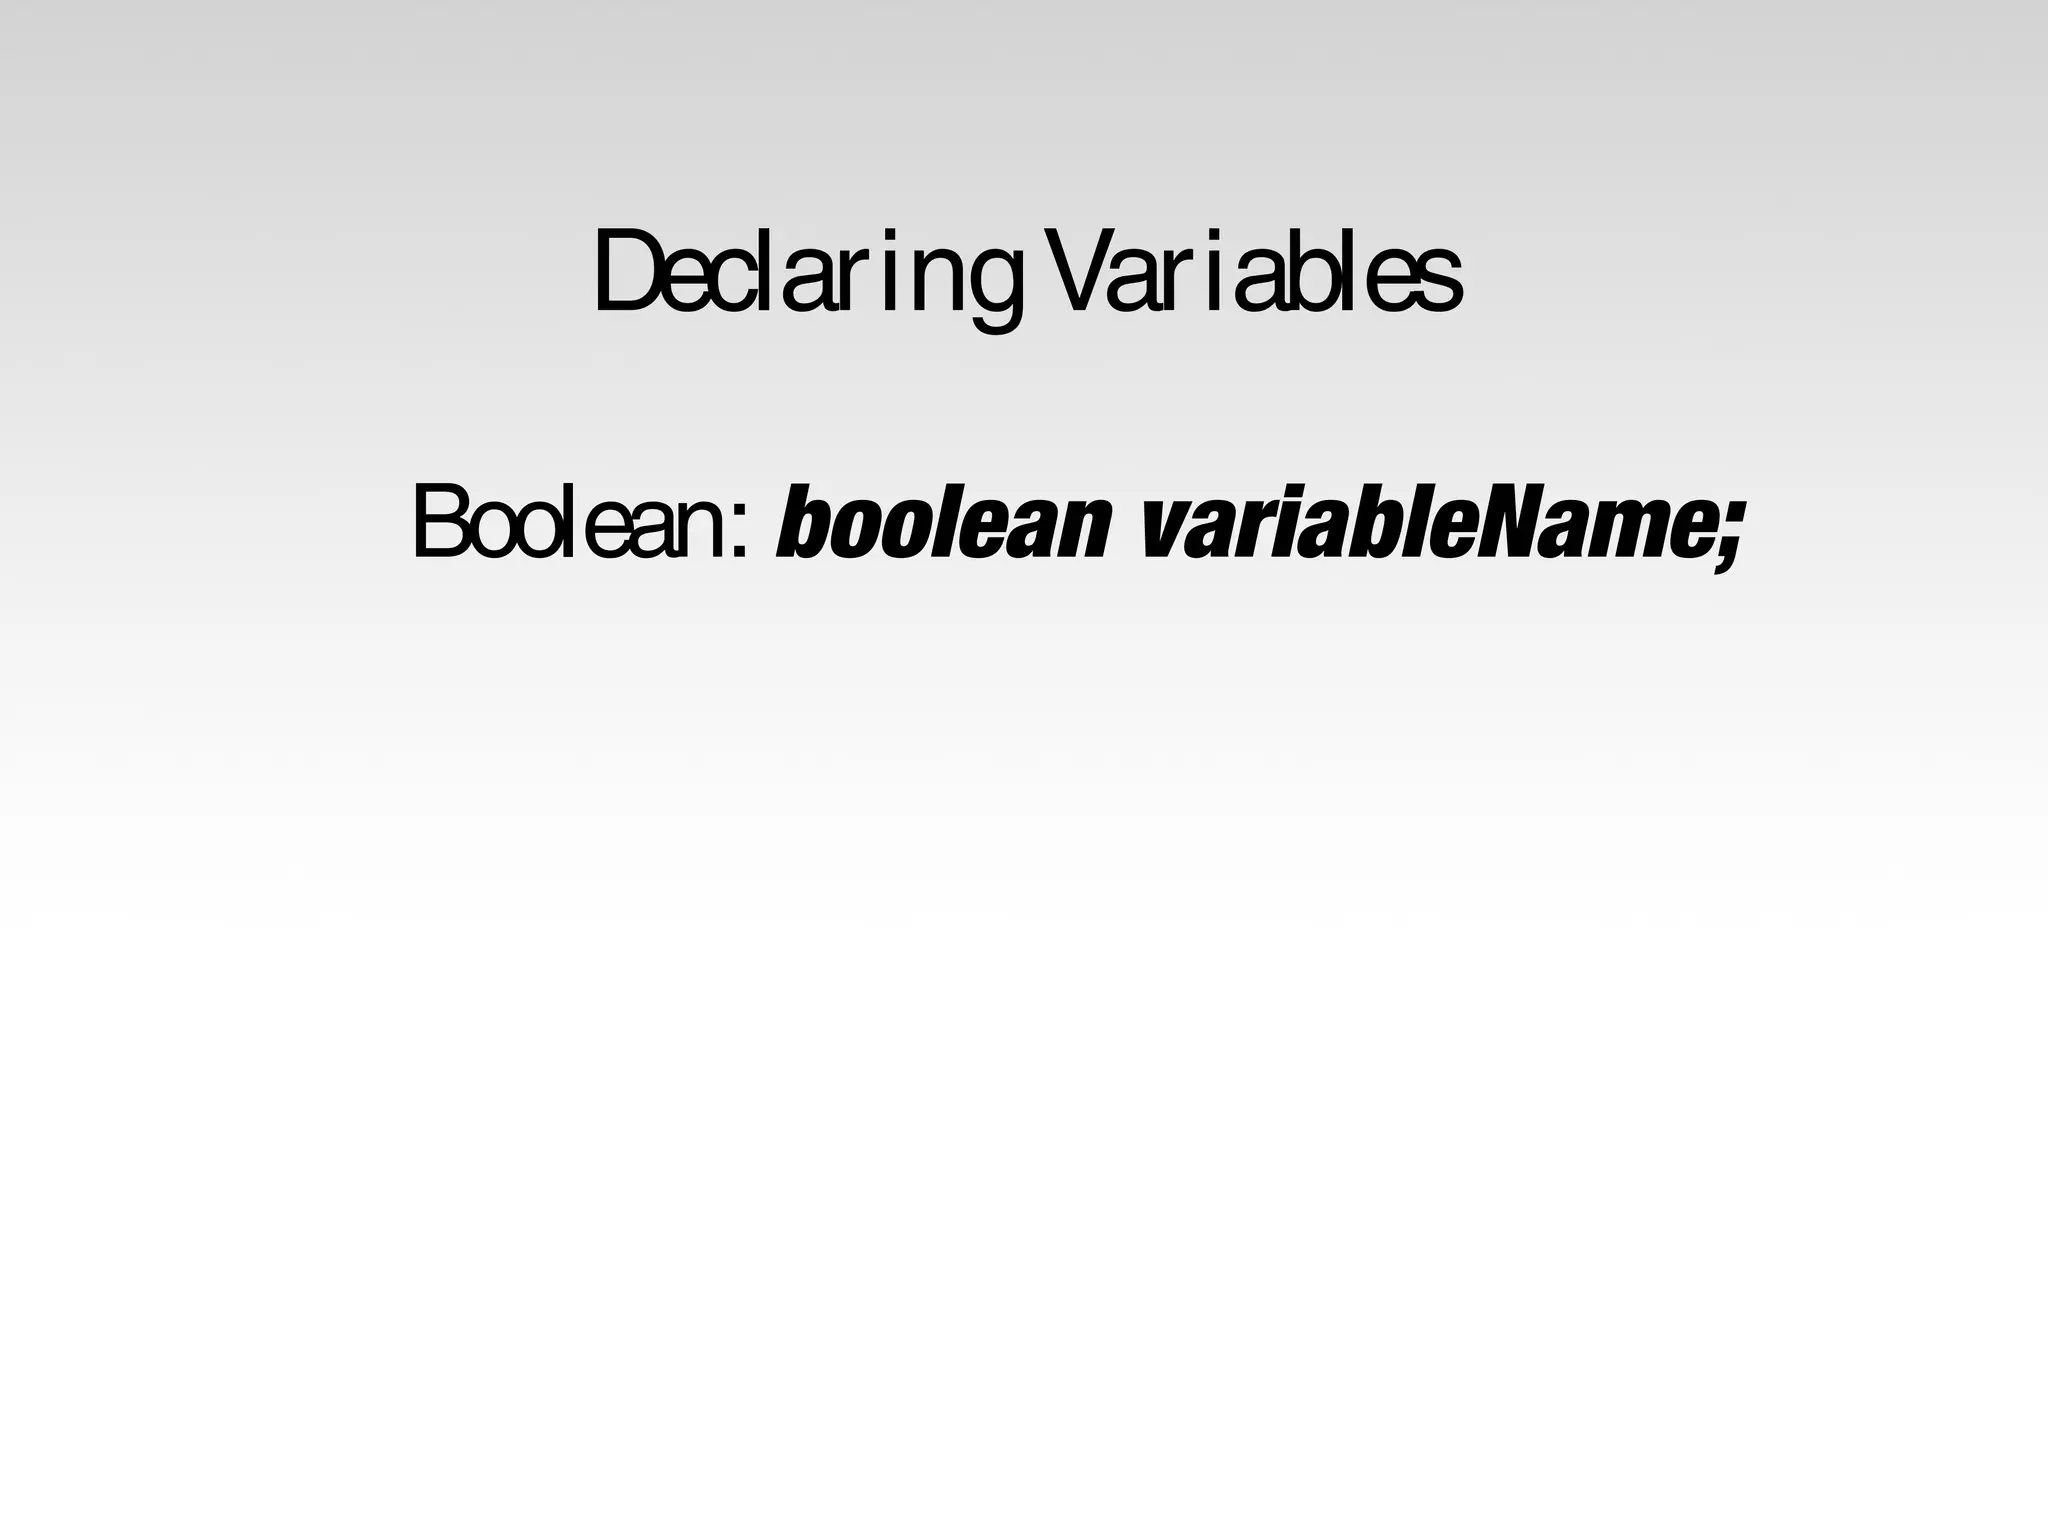

![Declaring Variables Boolean: boolean variableName; Integer: int variableName; Character: char variableName; String: stringName [ ];](https://image.slidesharecdn.com/arduinosectionprogramming-slides-141001041957-phpapp01/75/Arduino-section-programming-slides-17-2048.jpg)
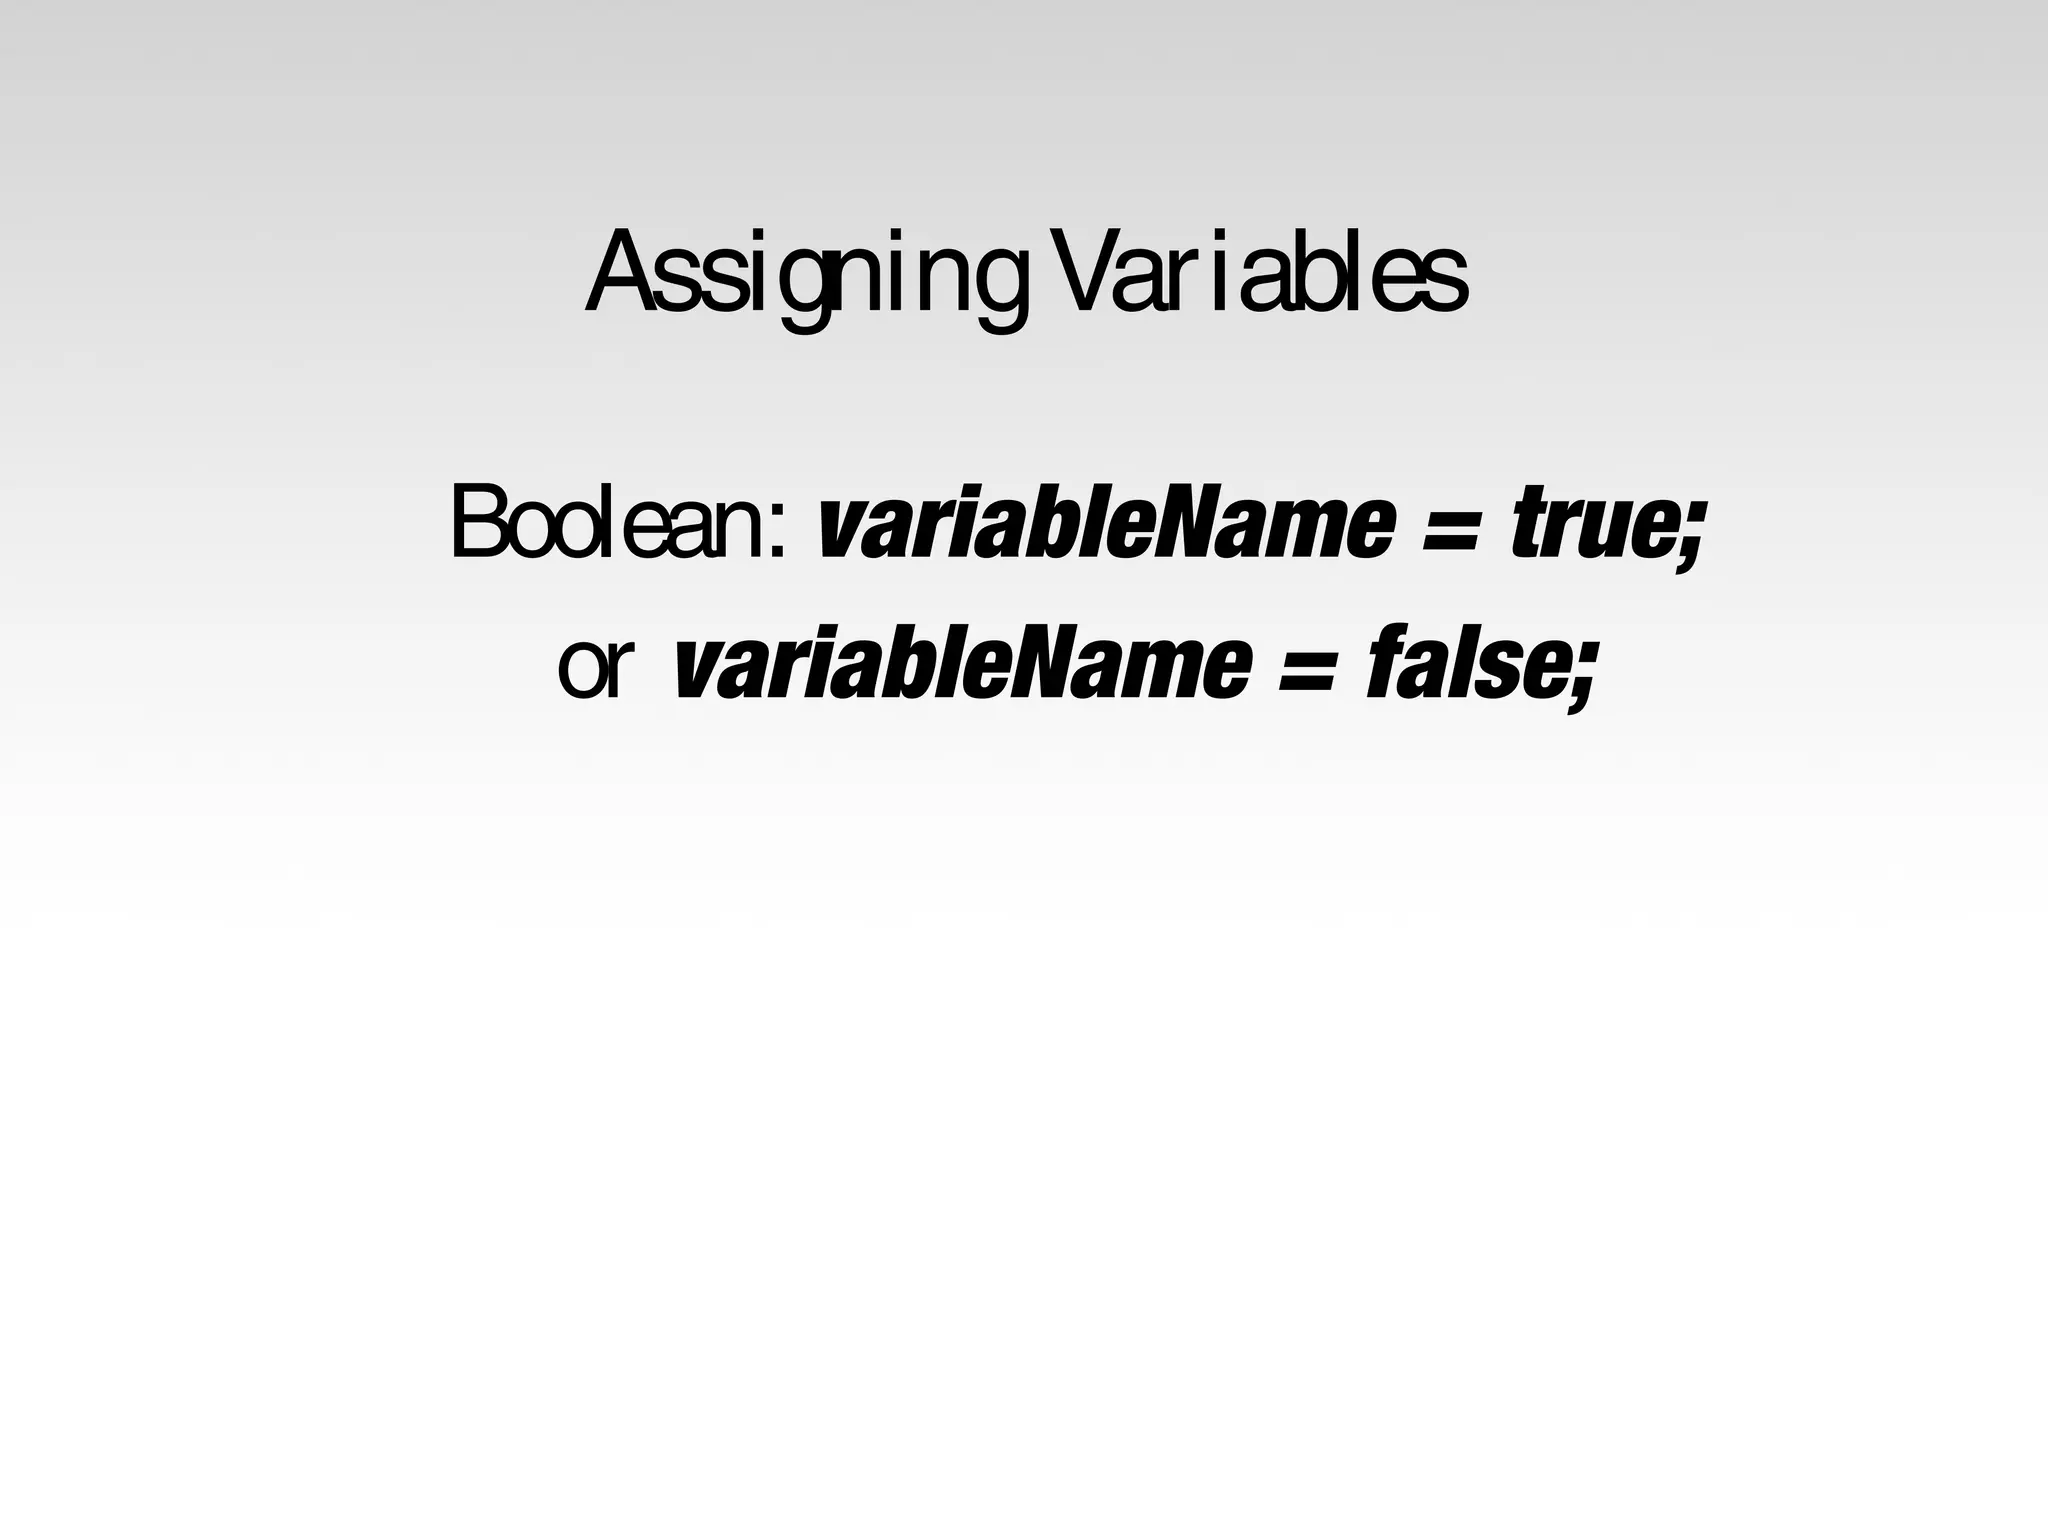
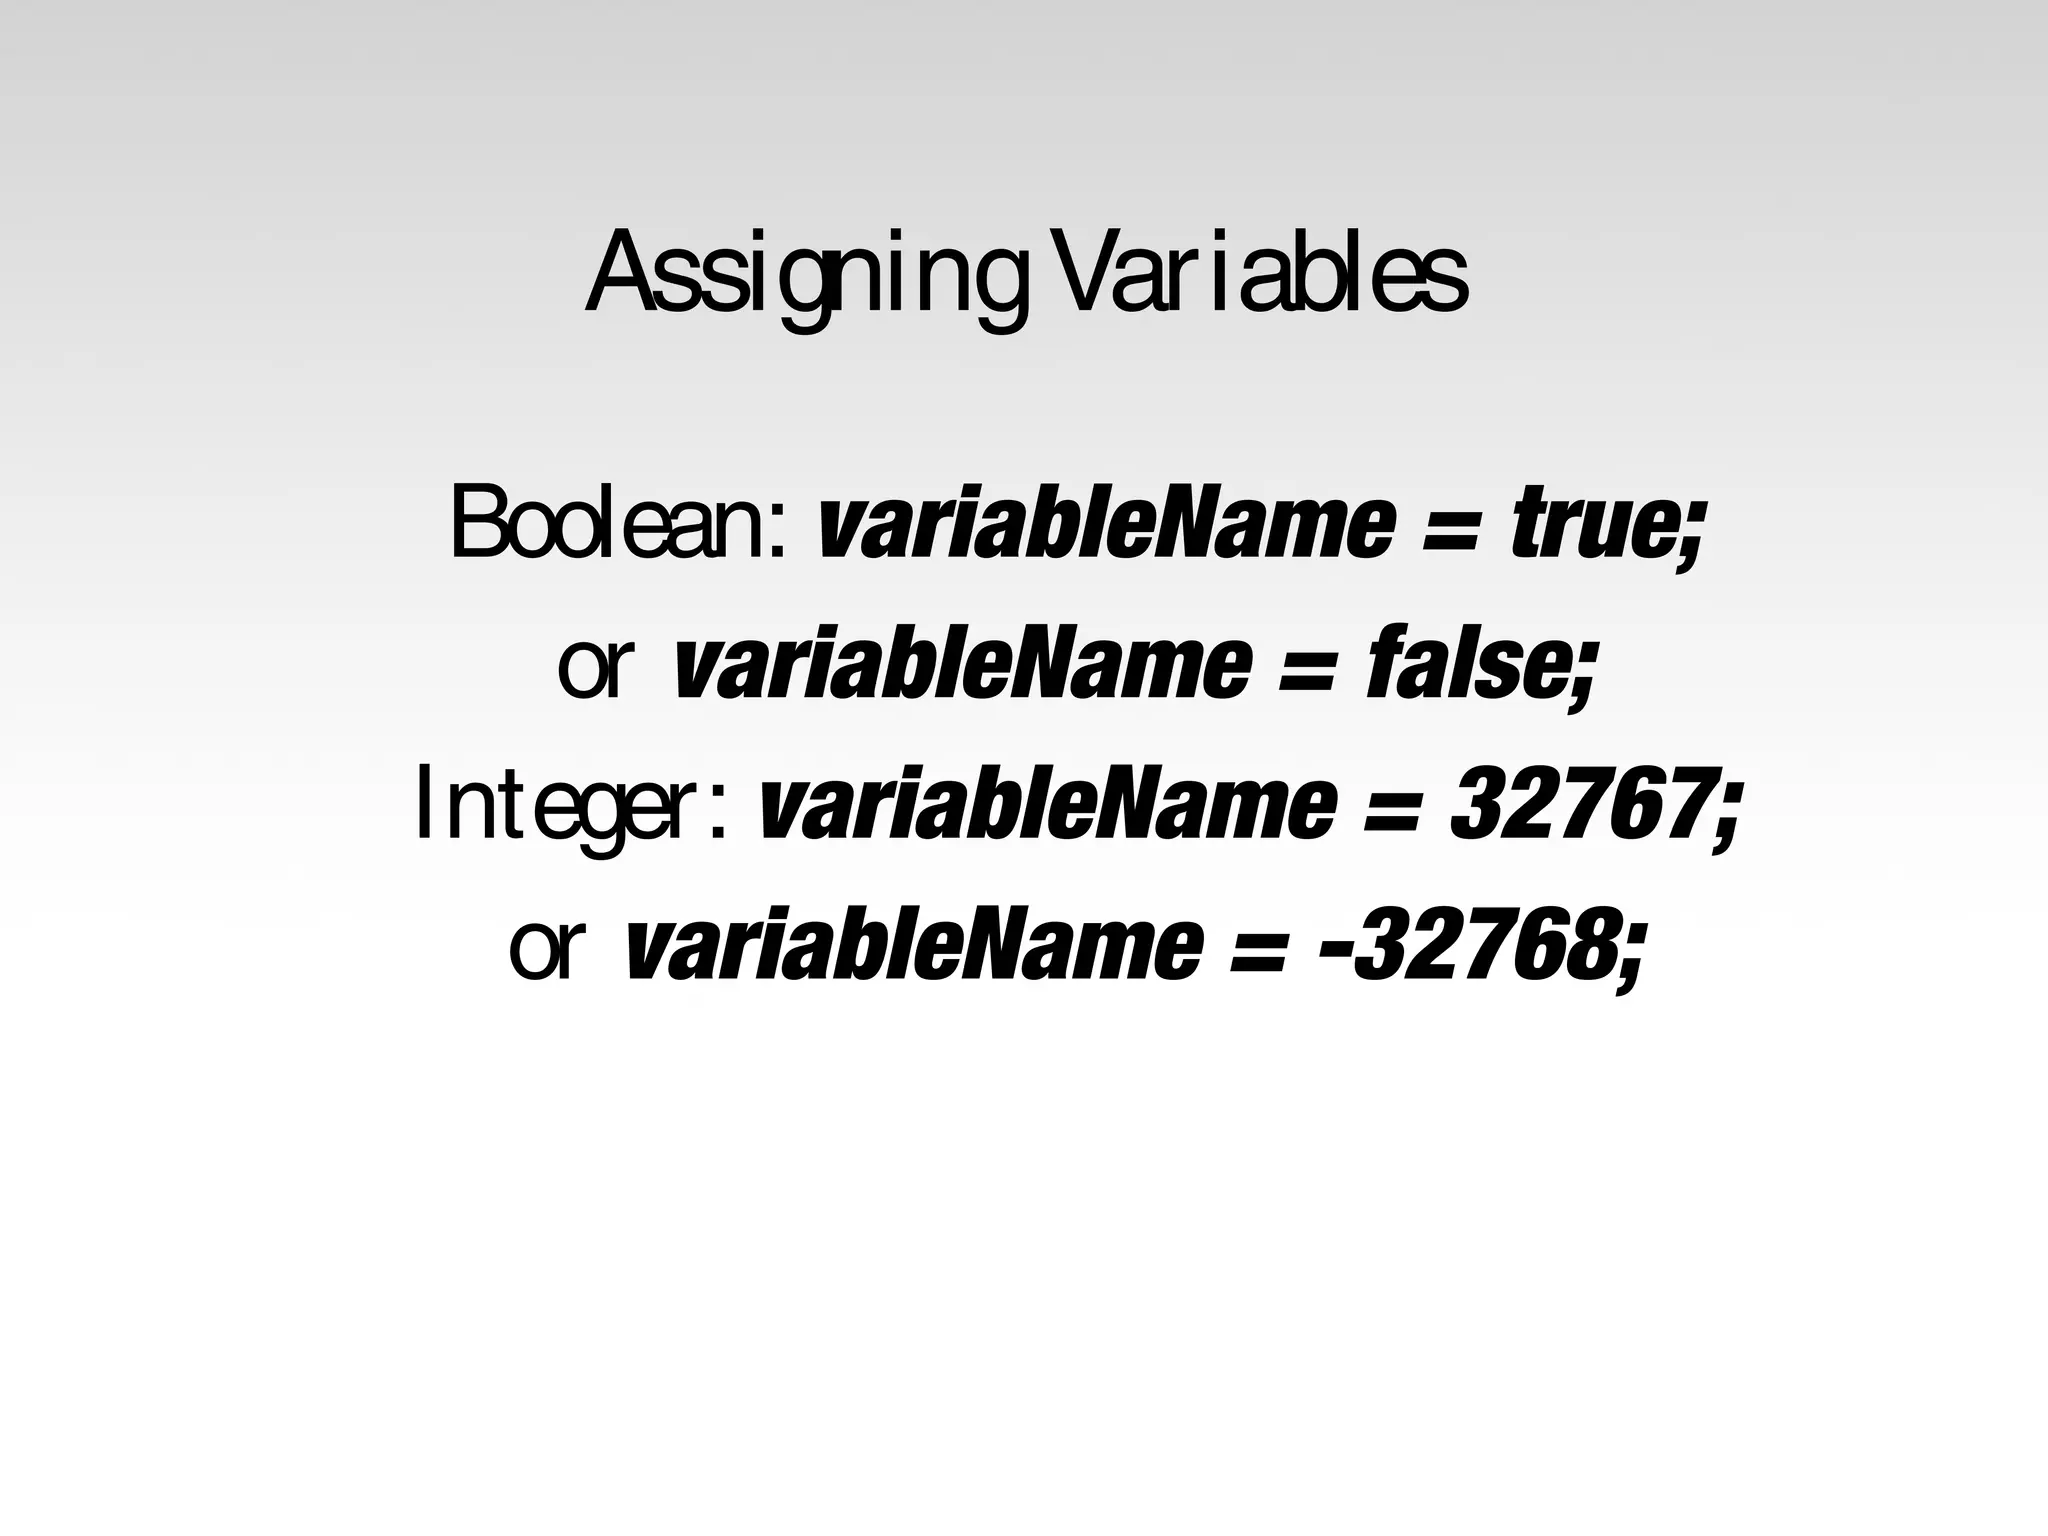

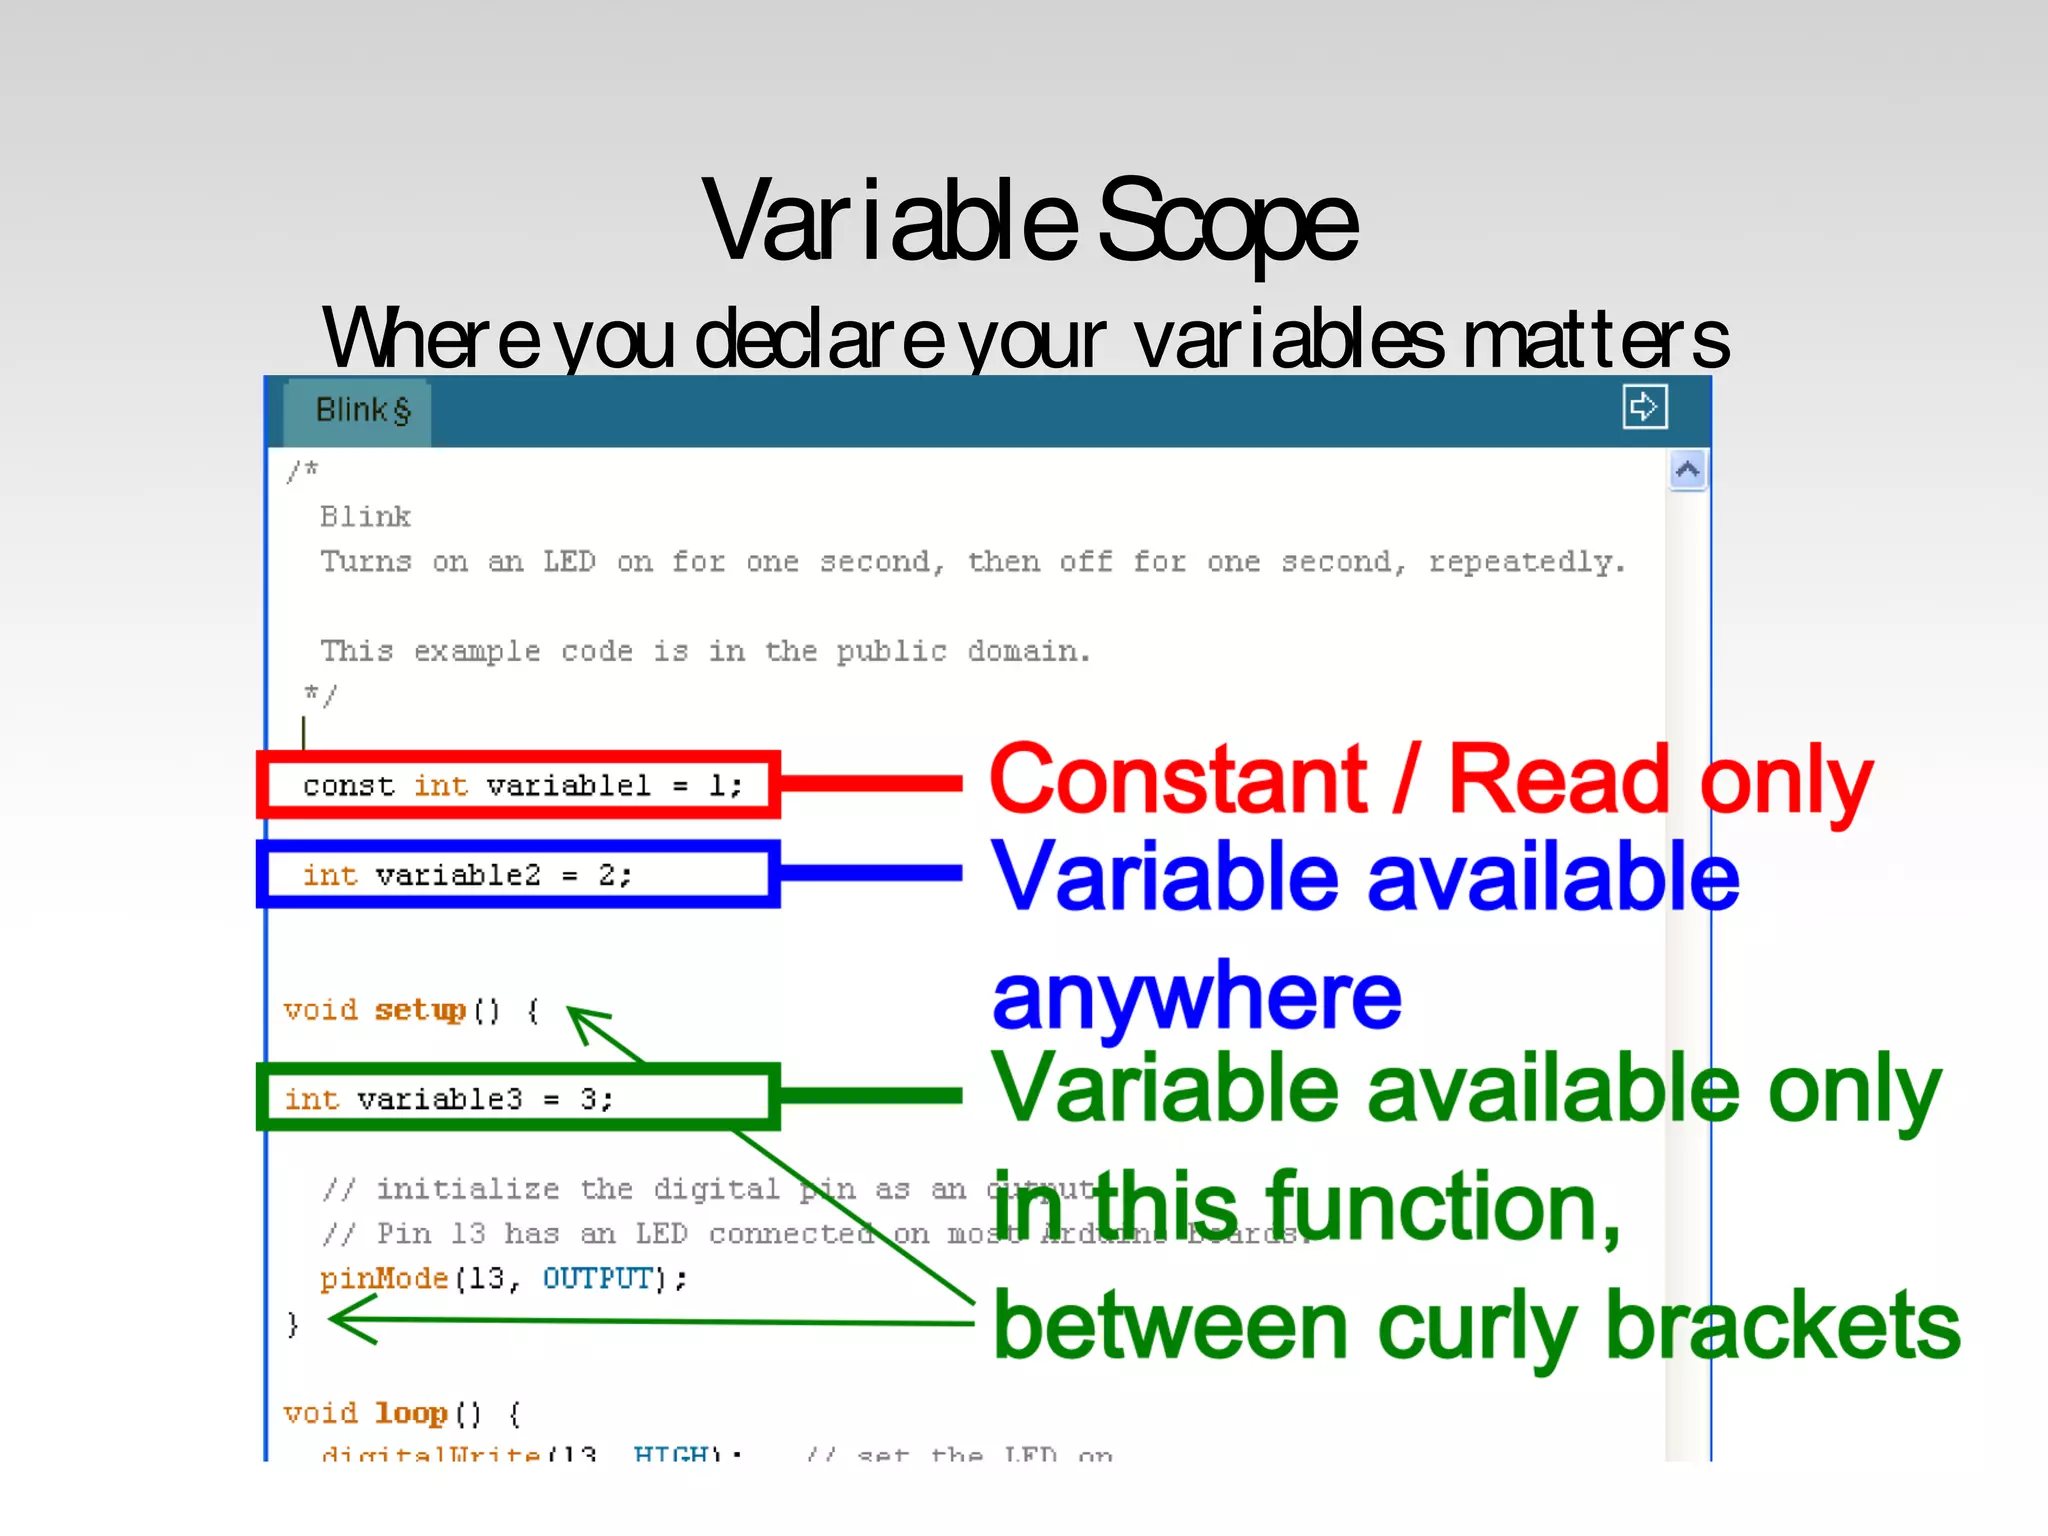
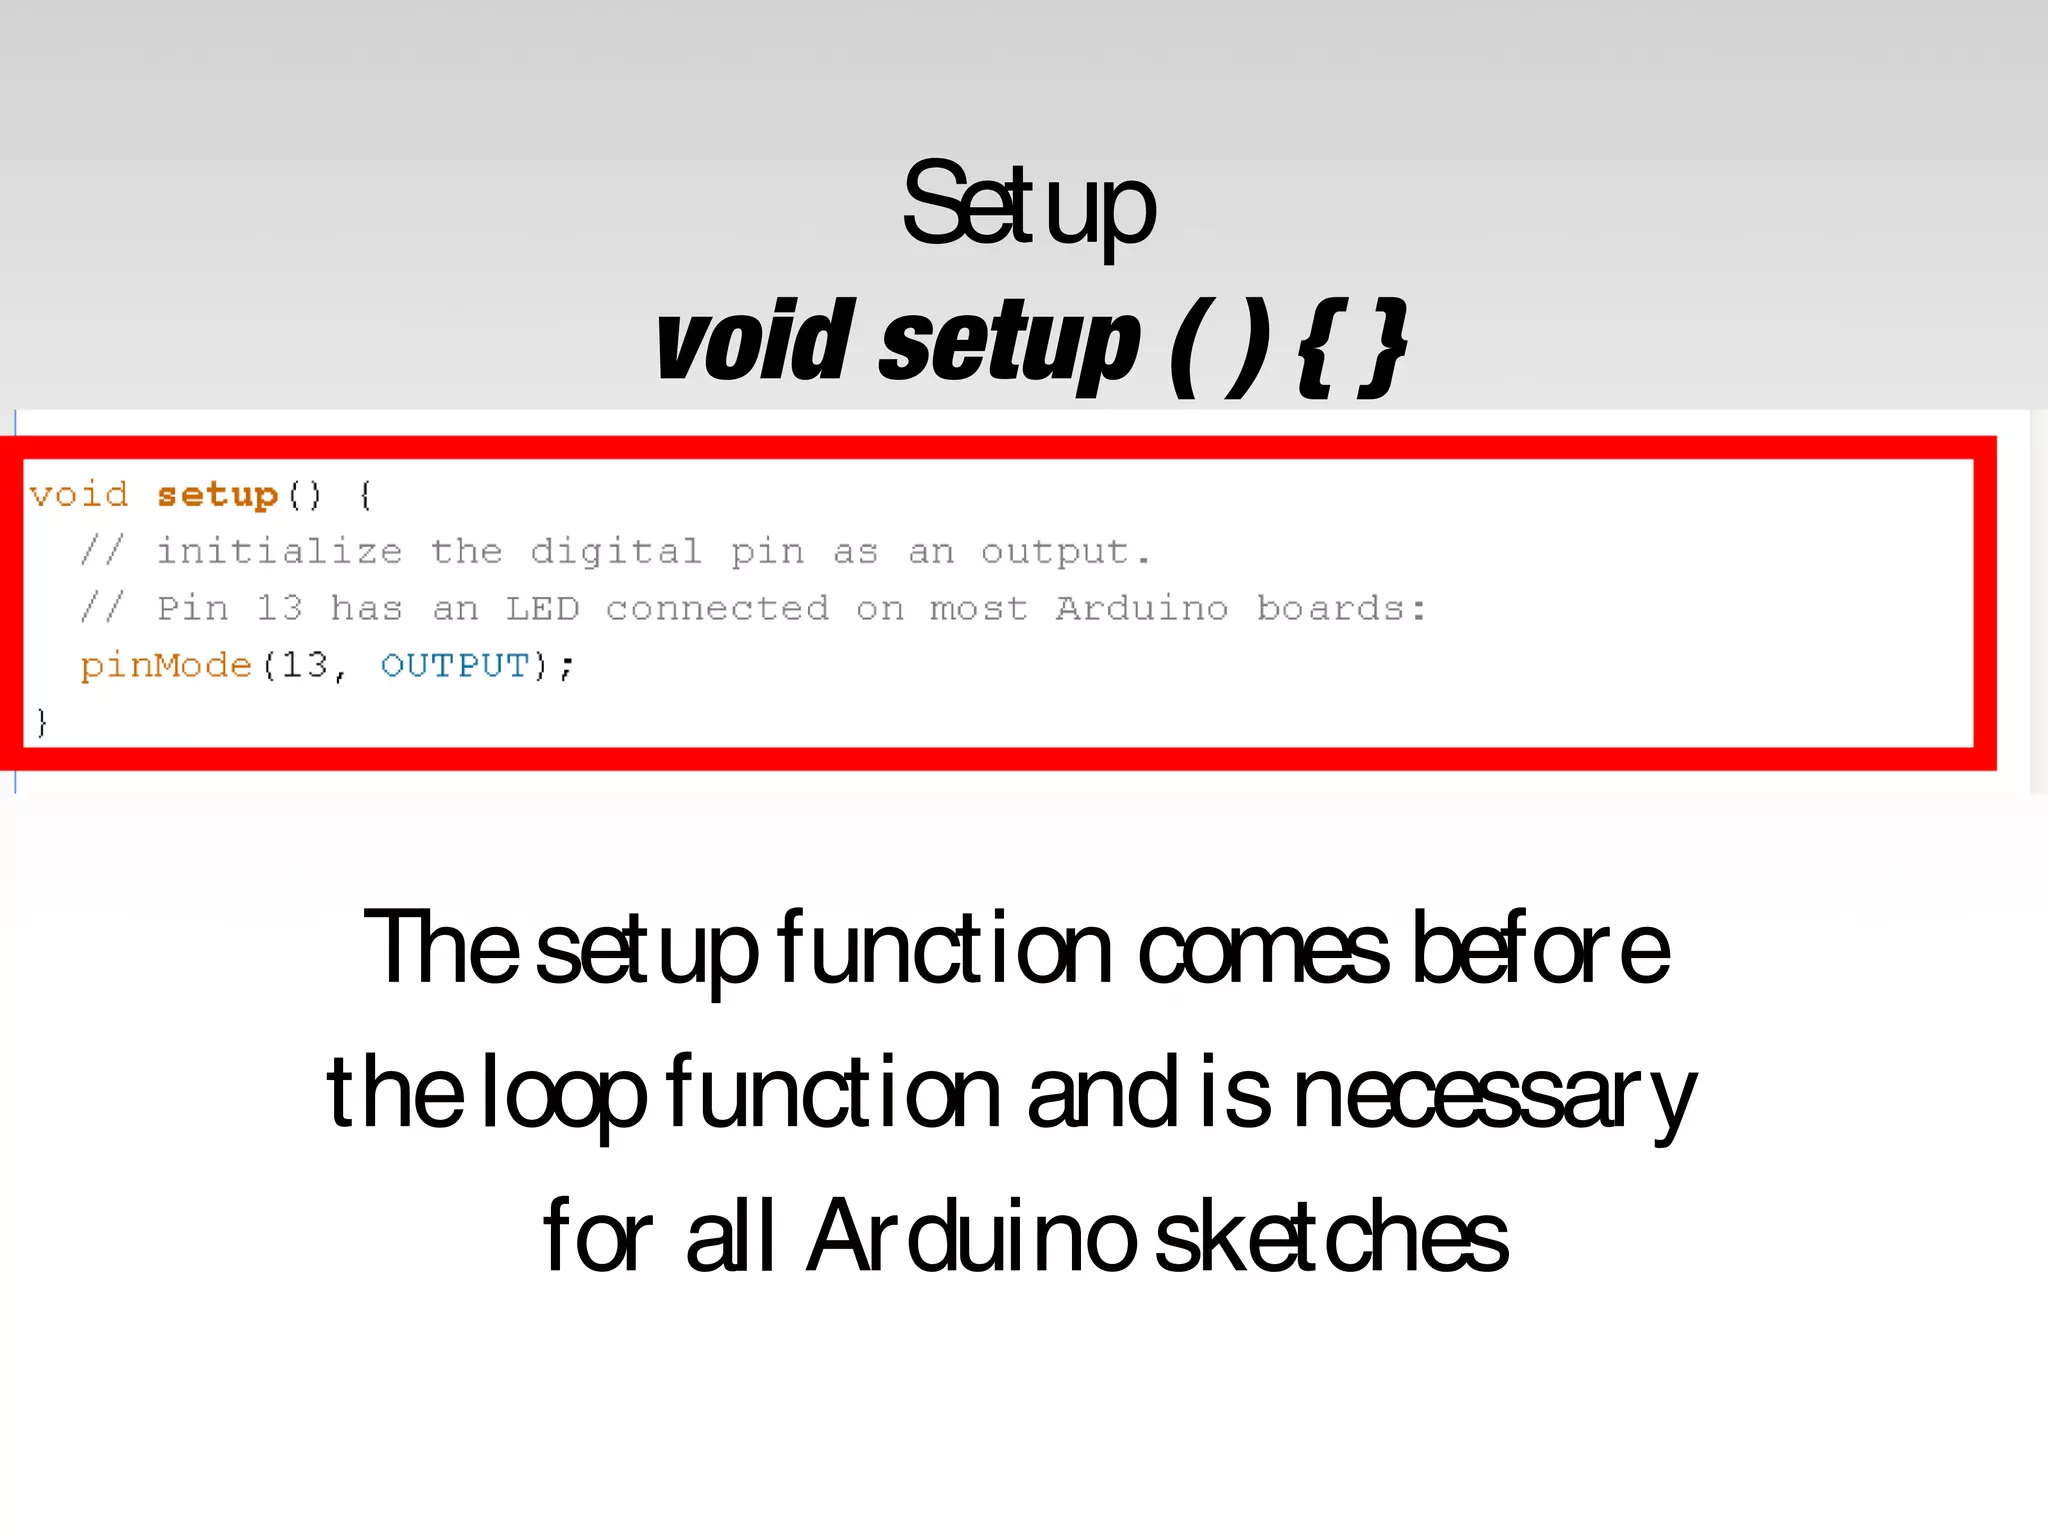
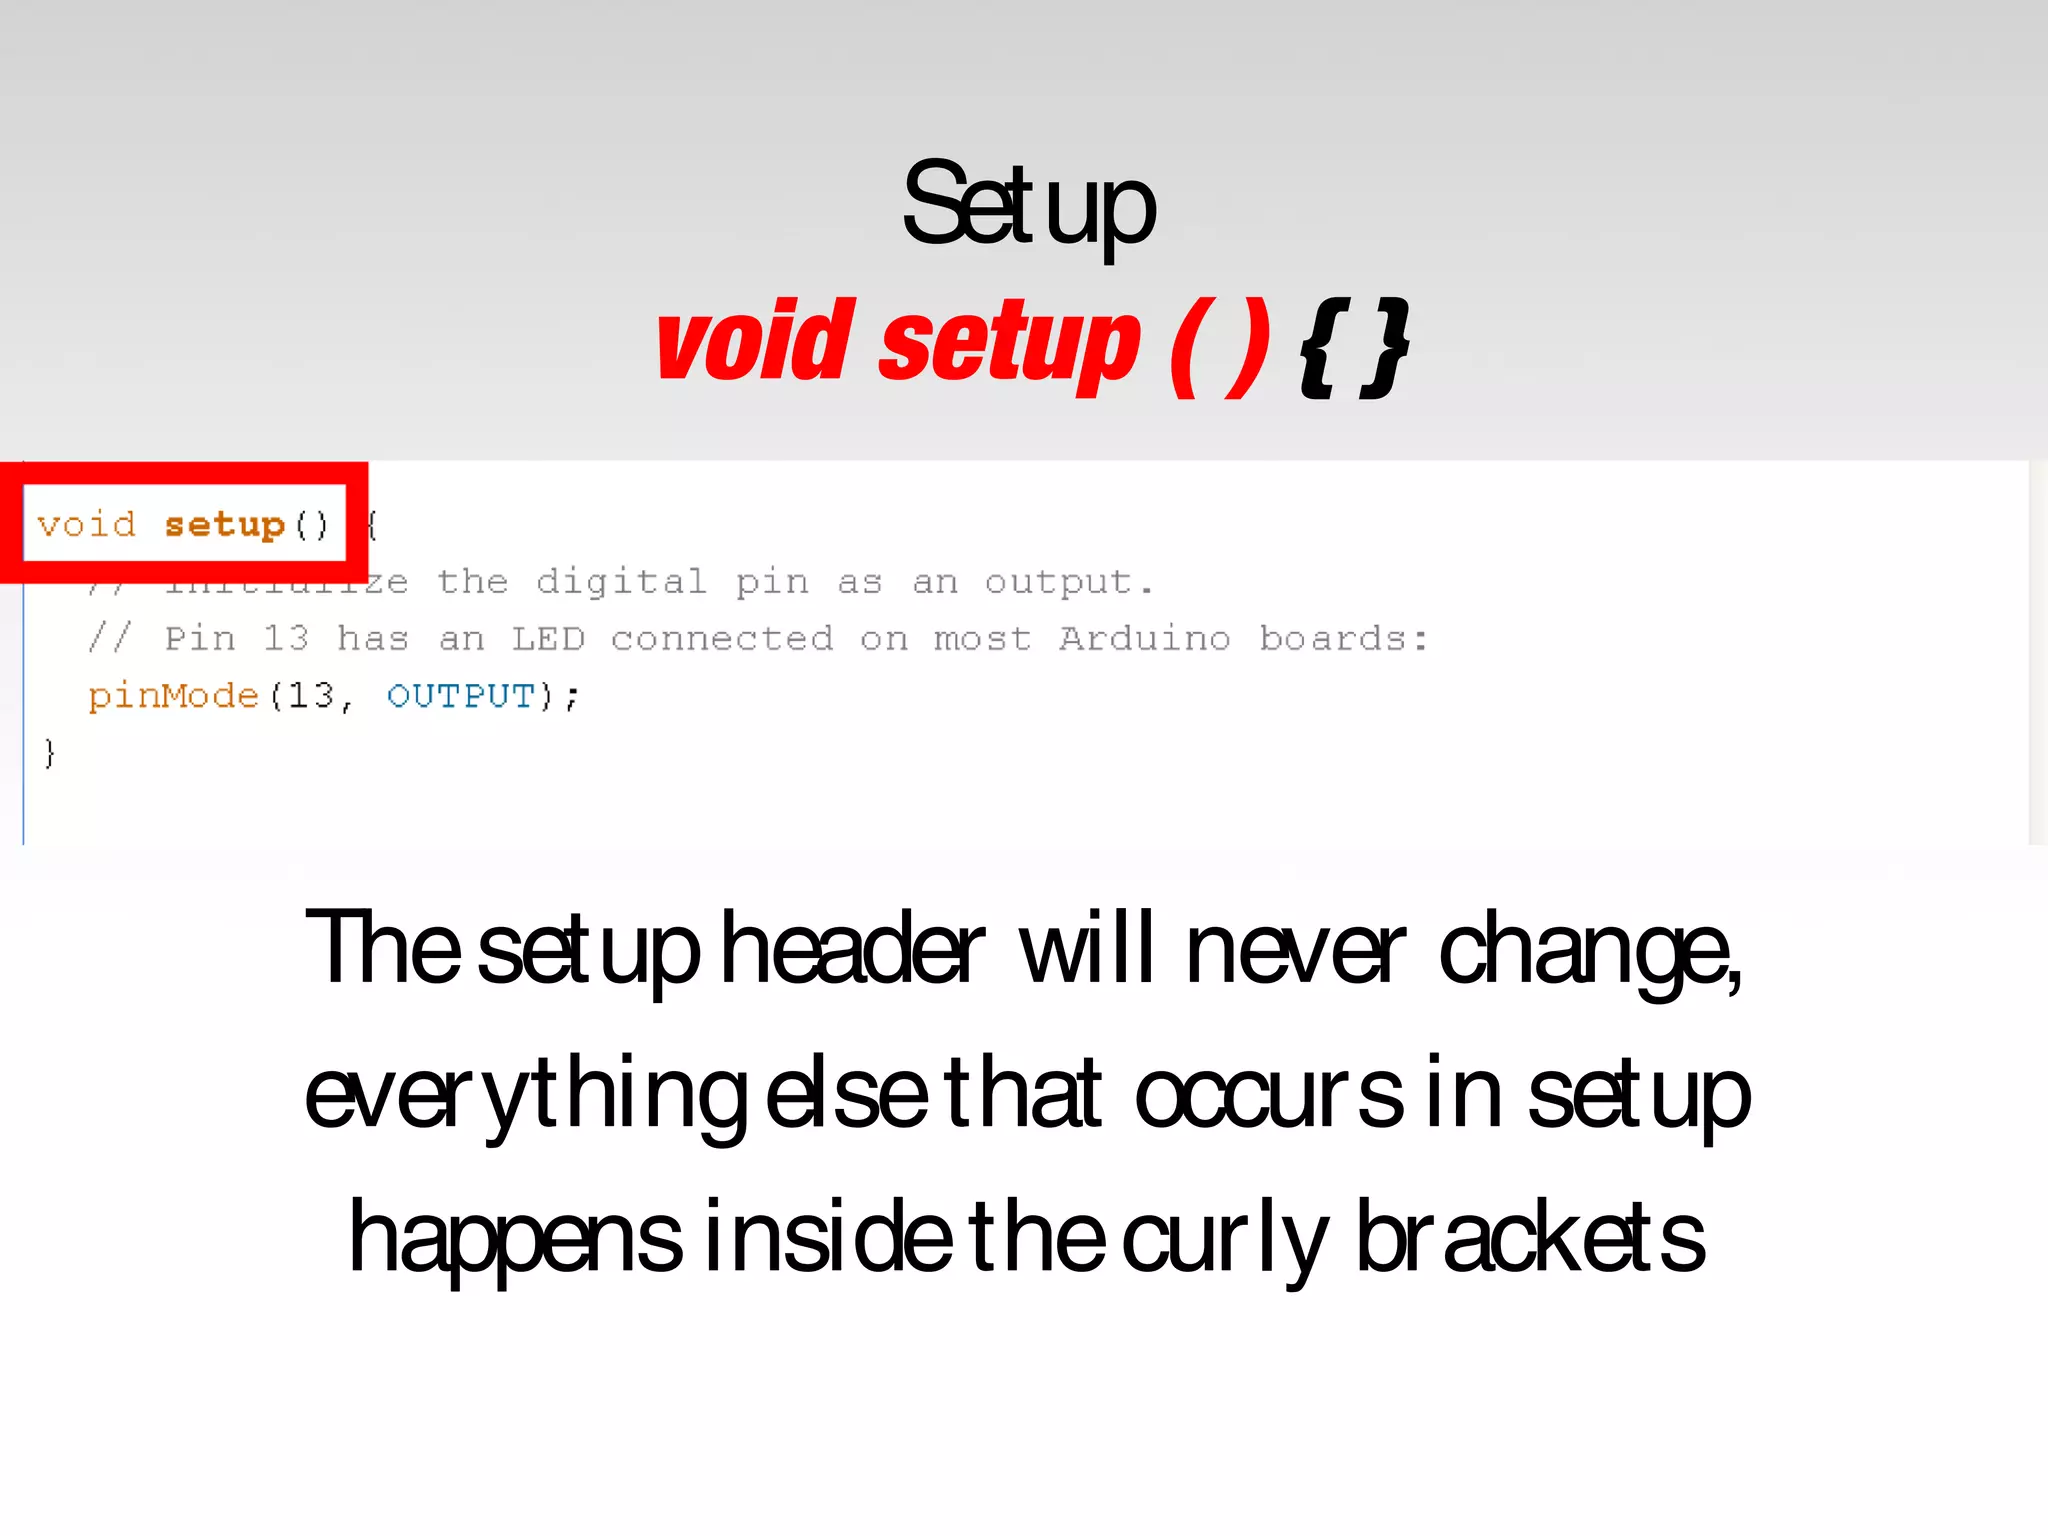
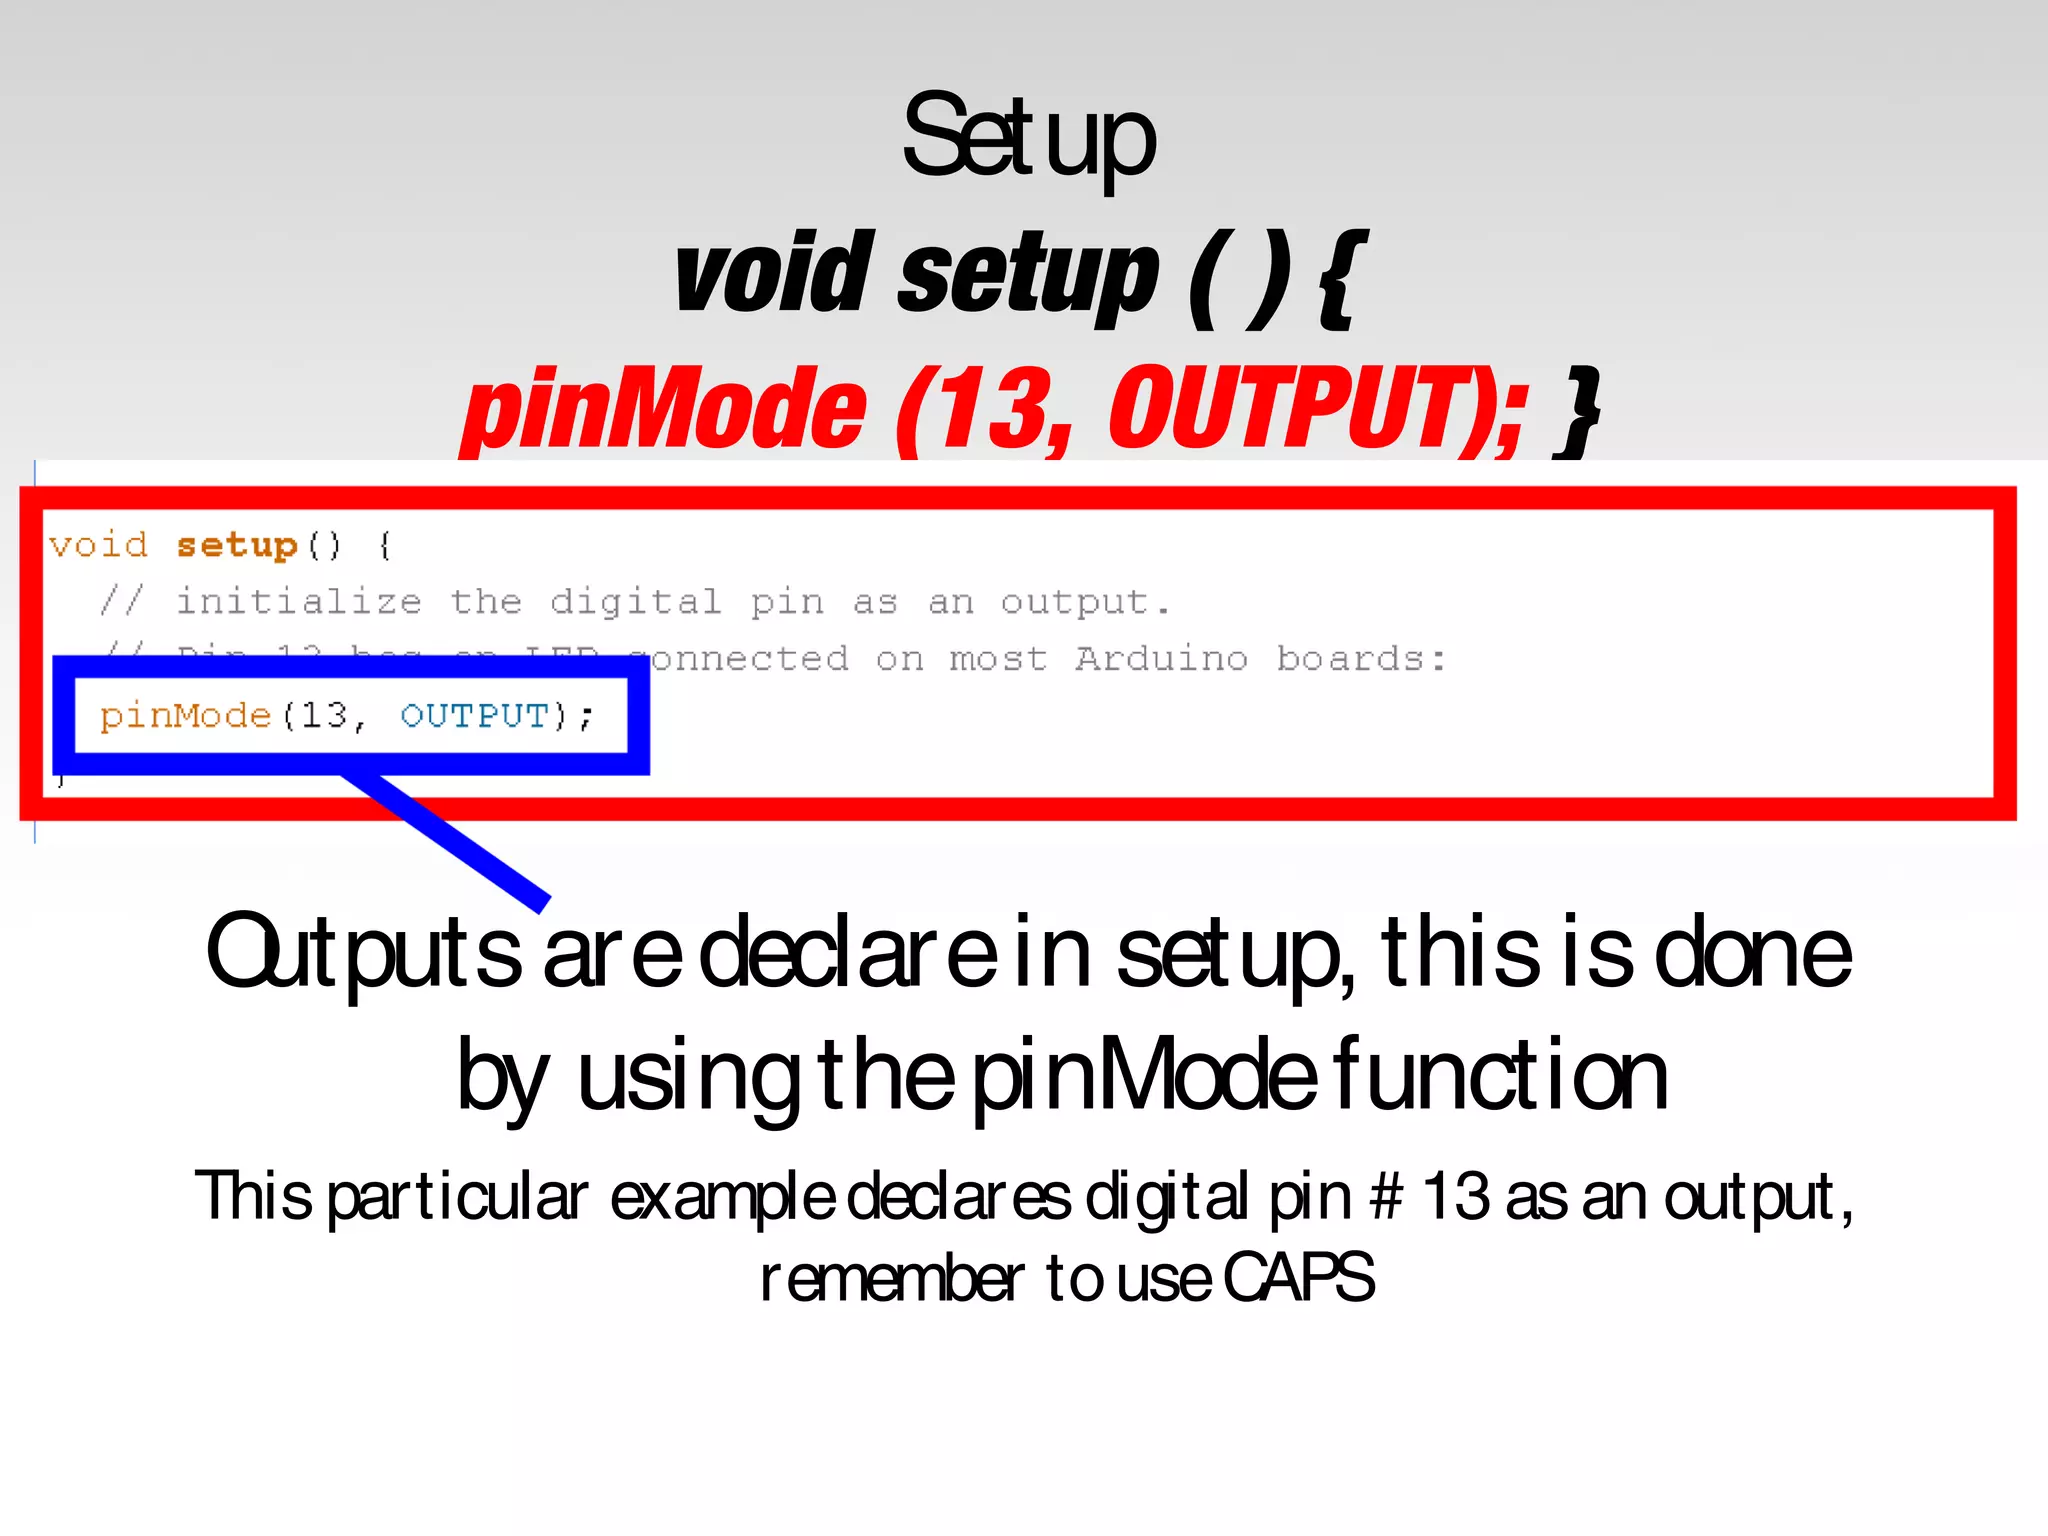
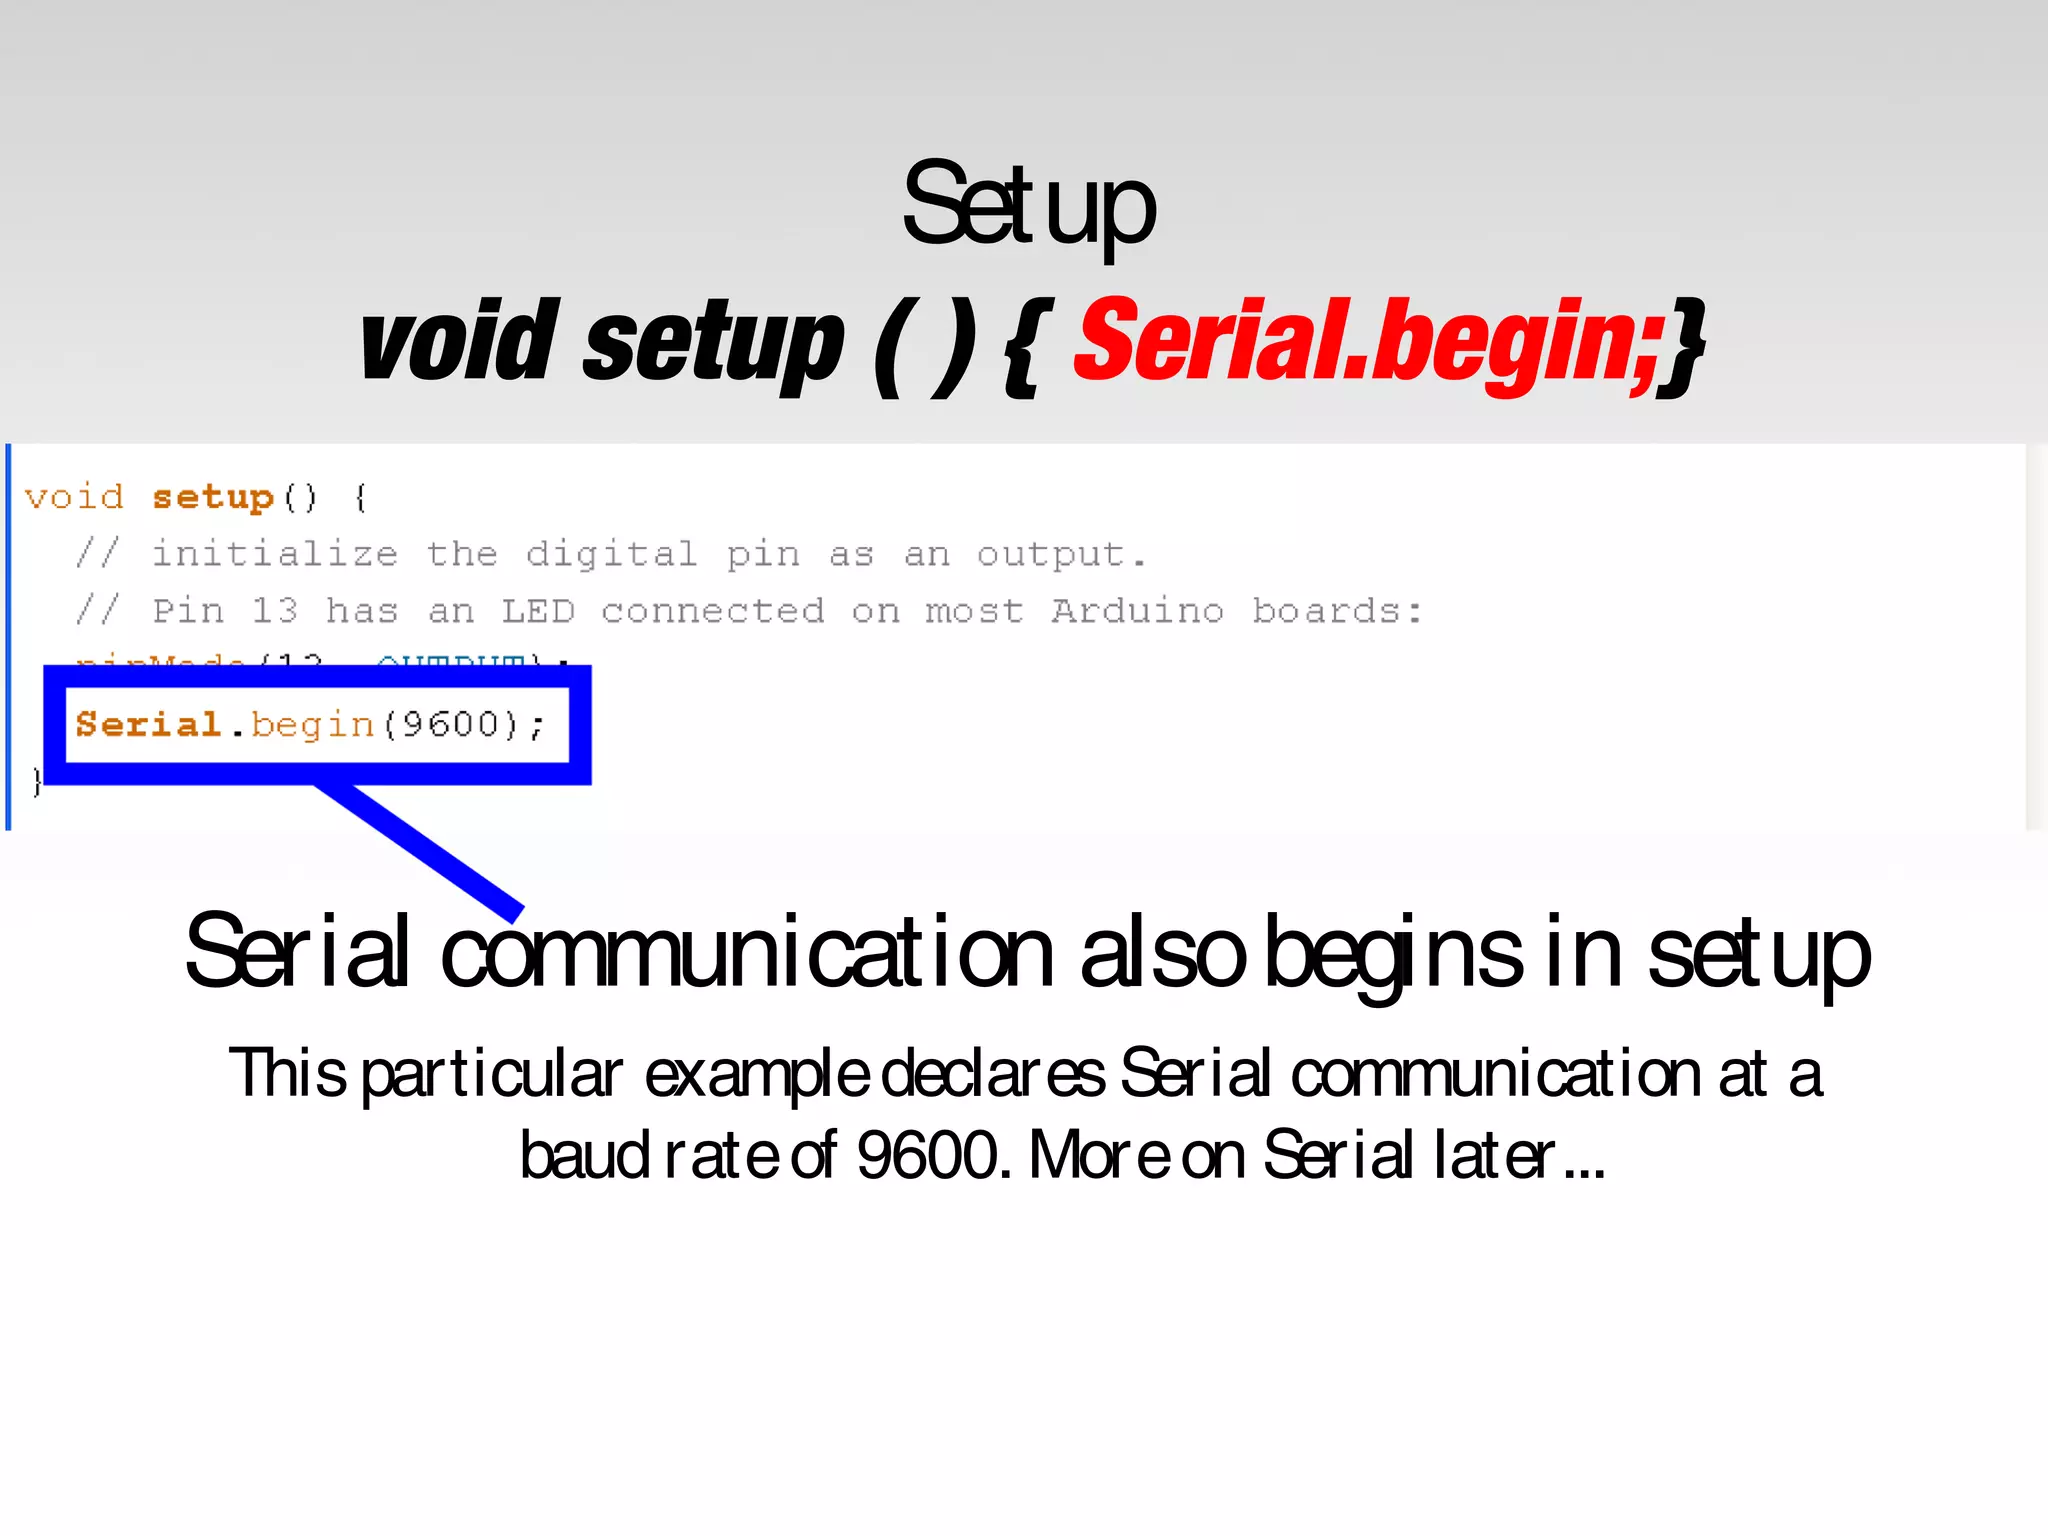

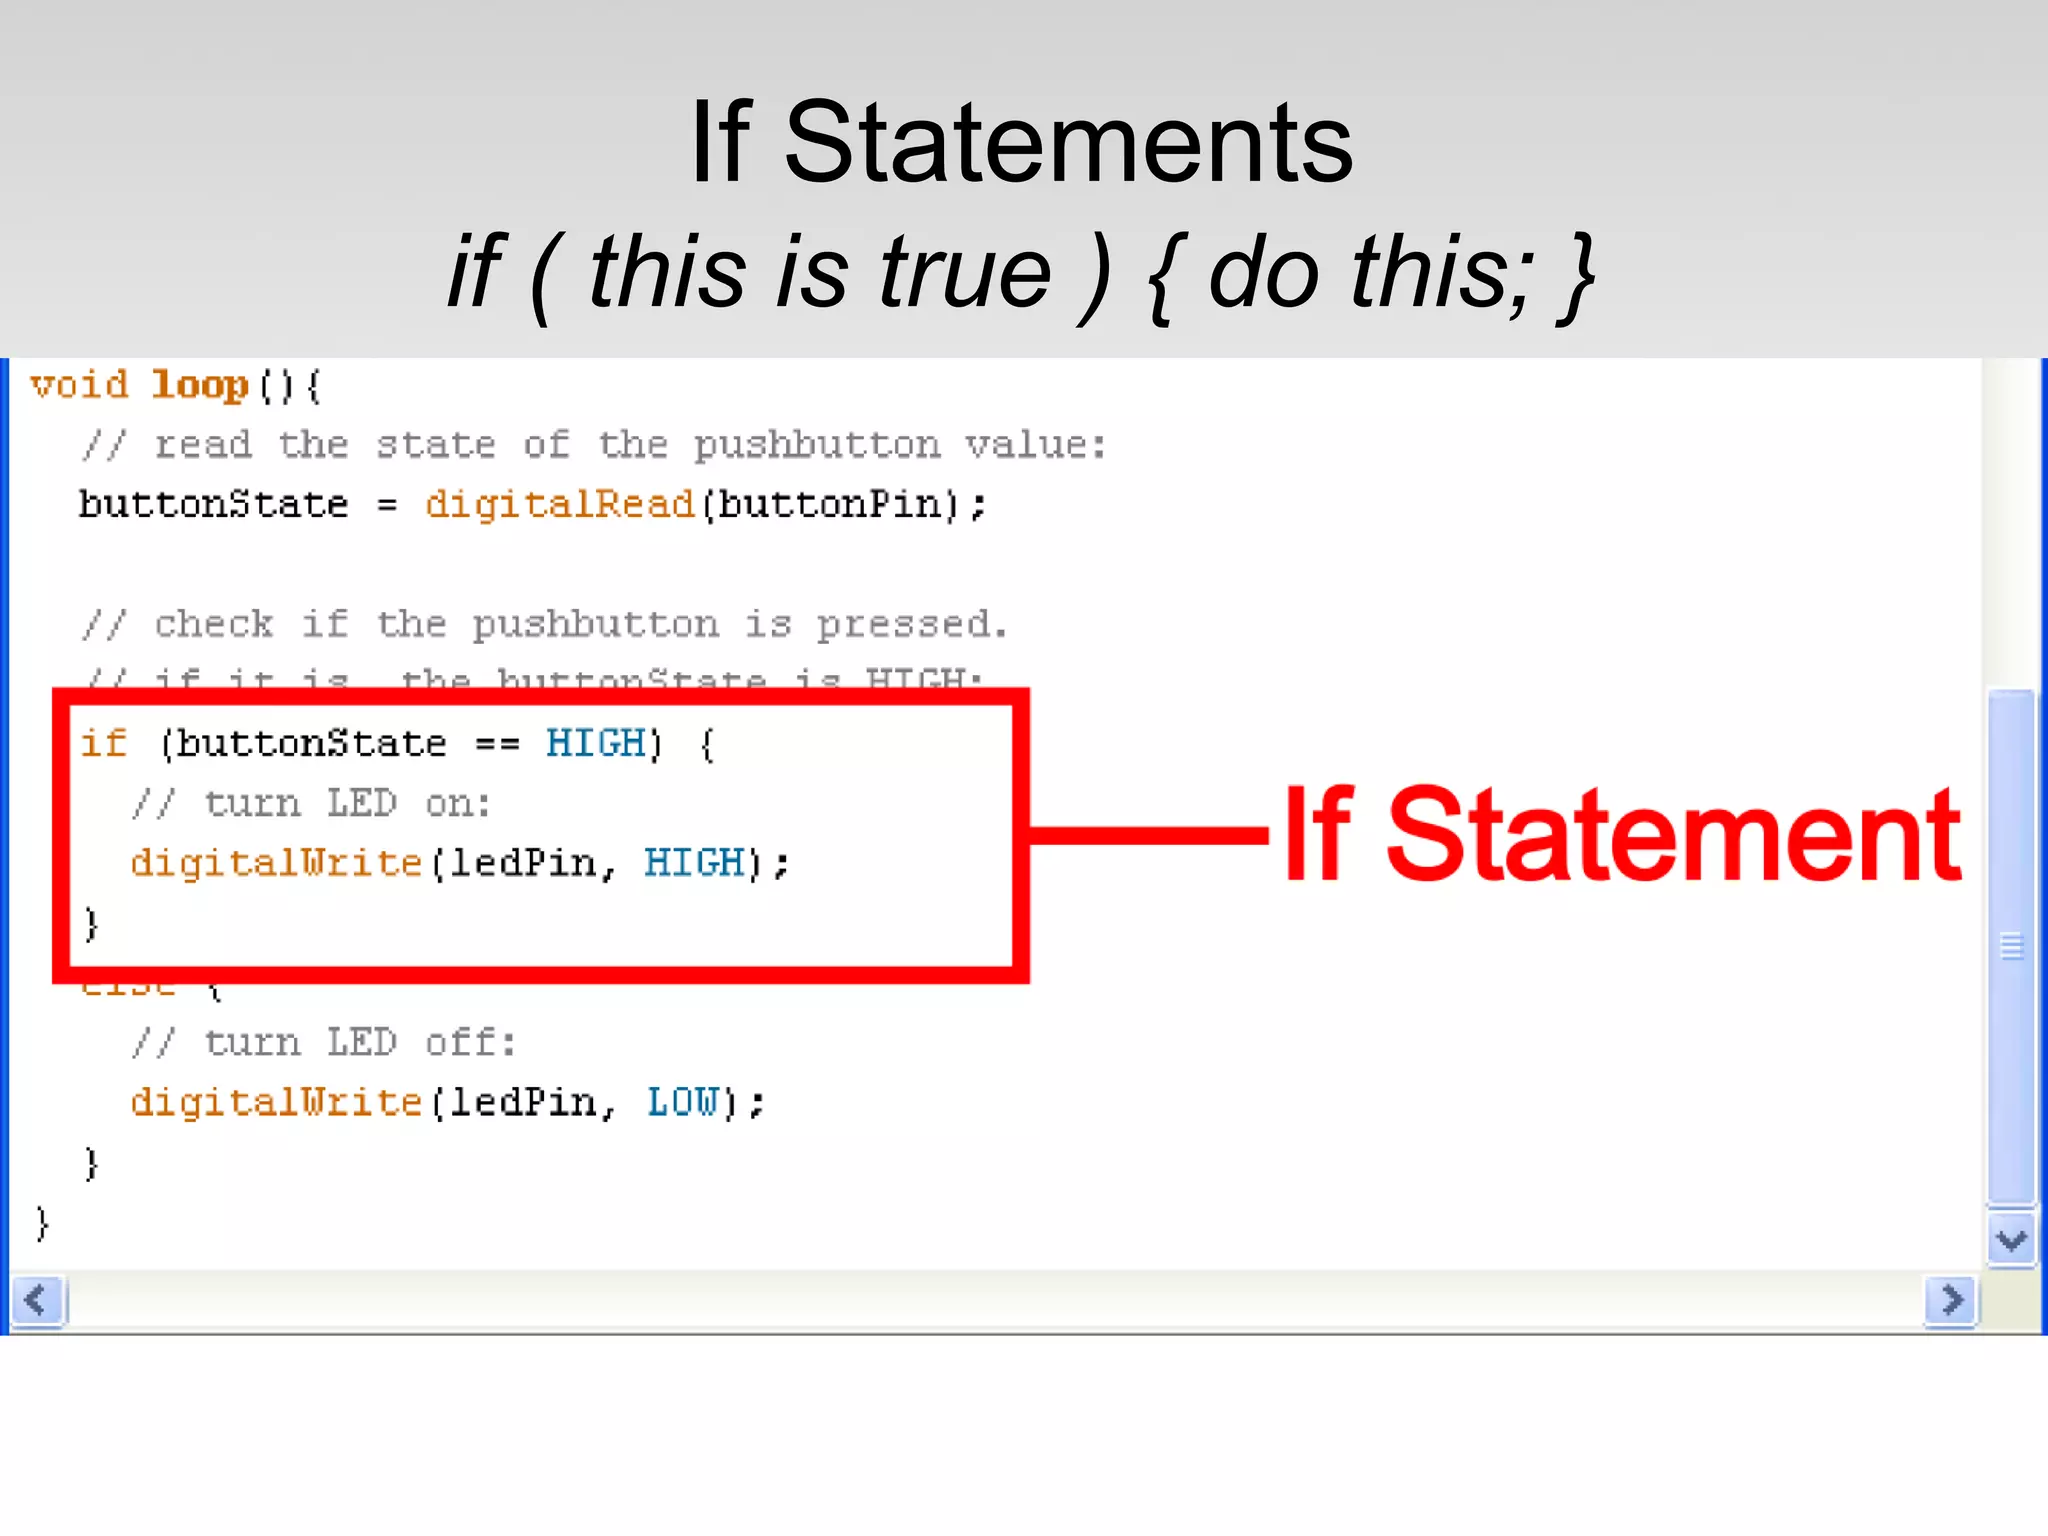
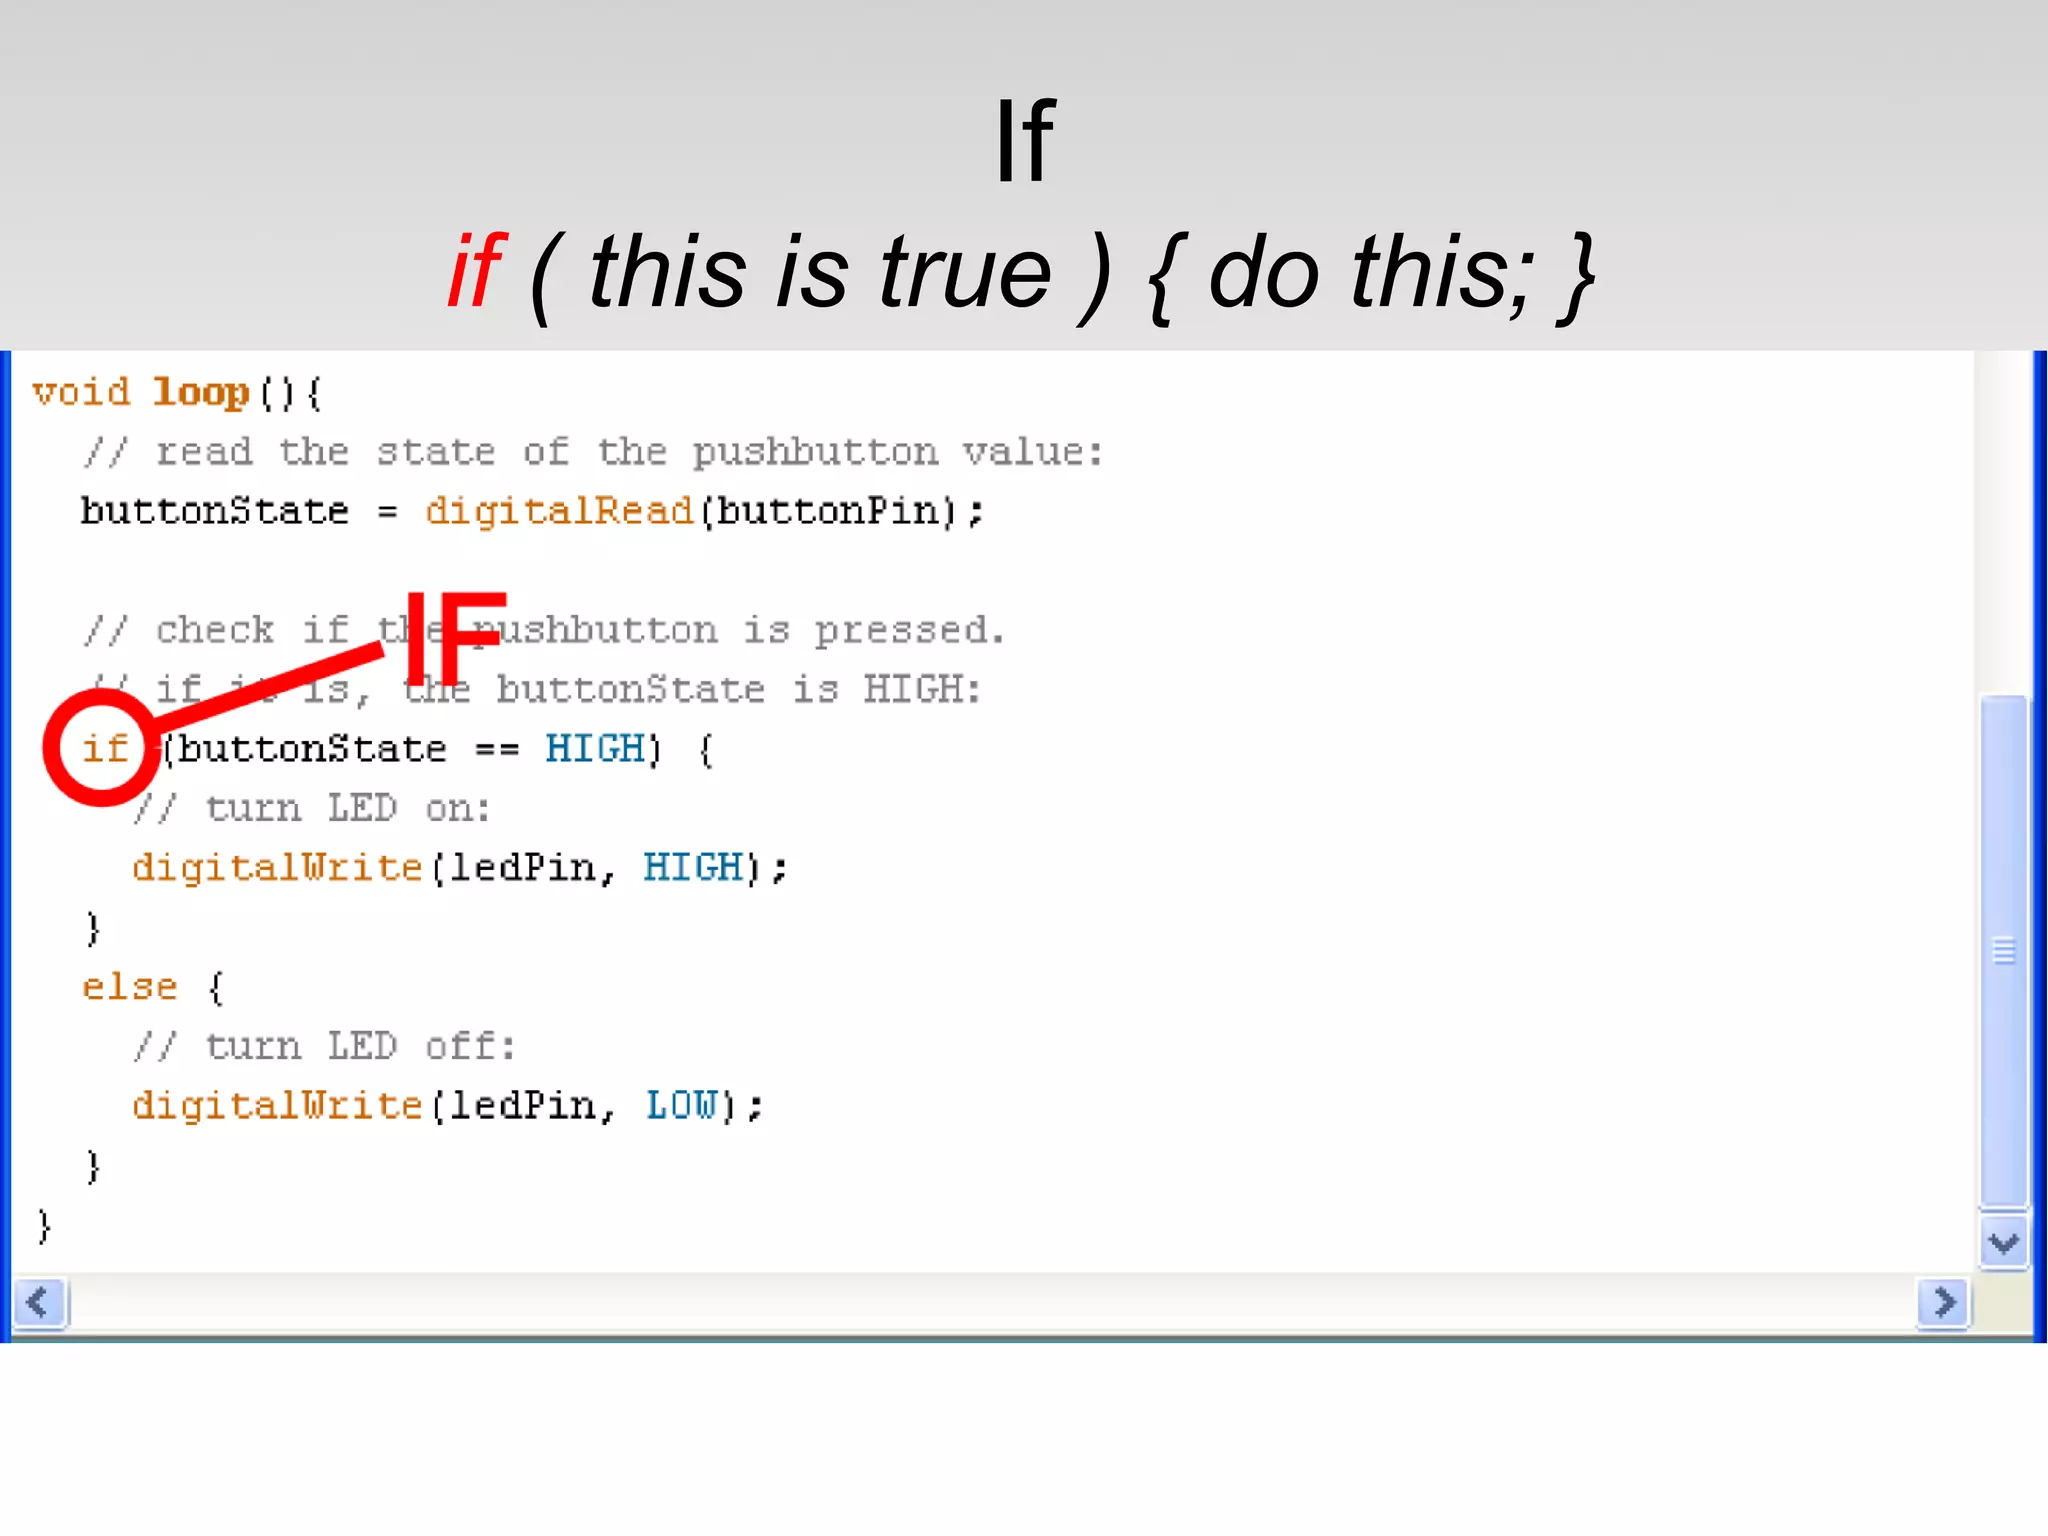
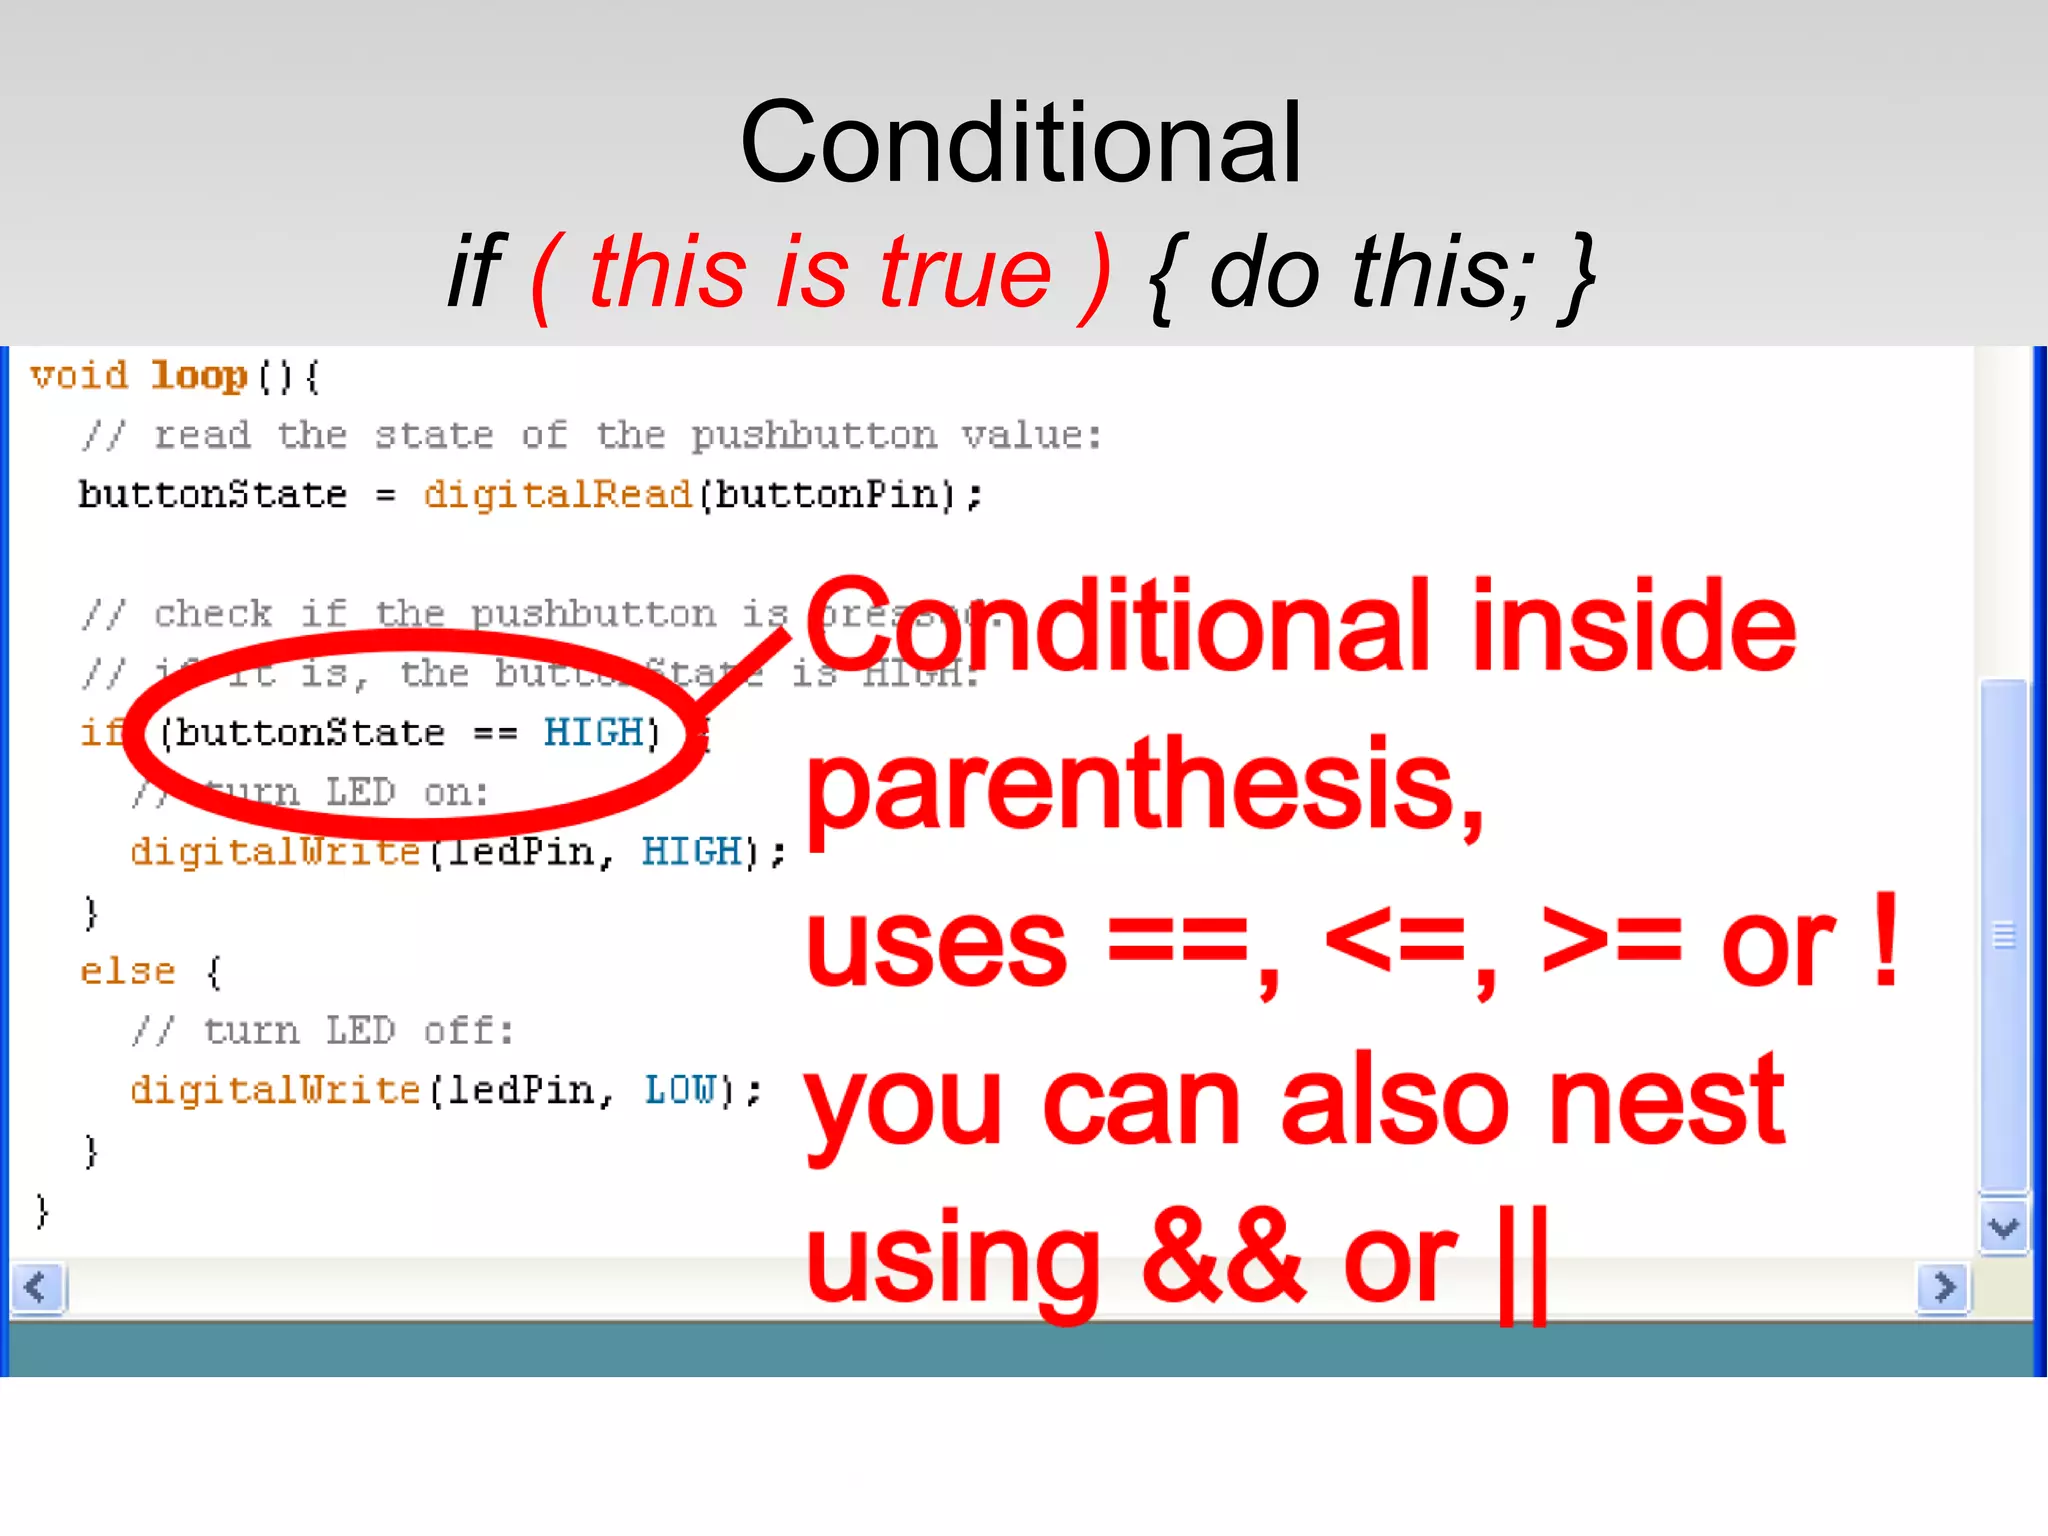
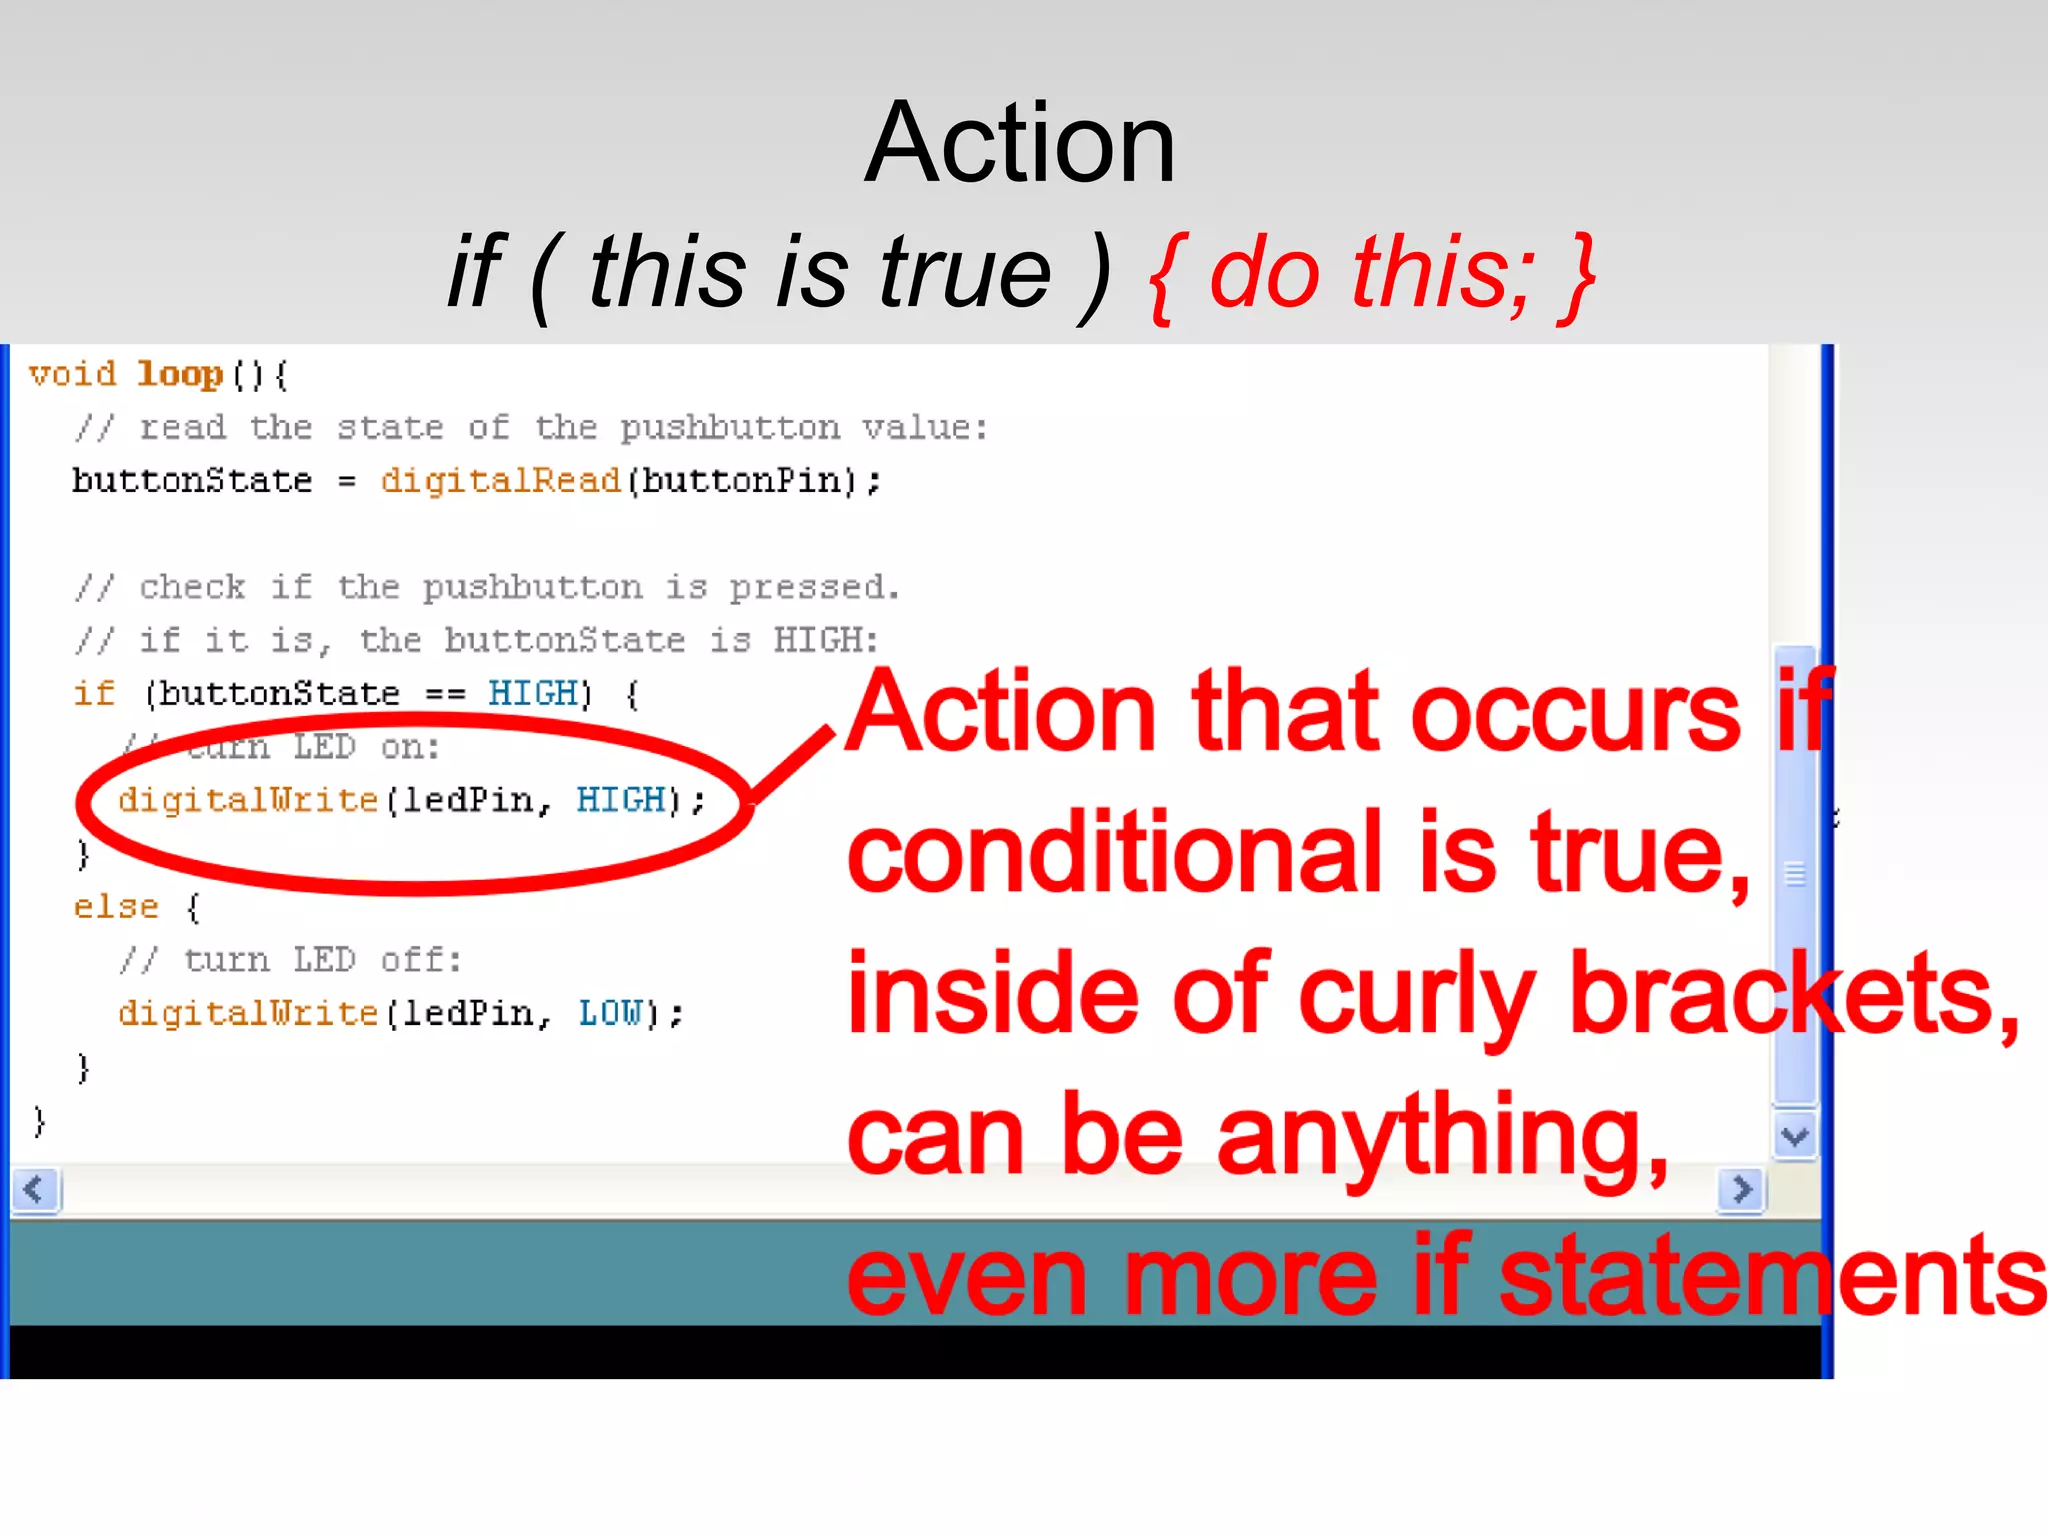


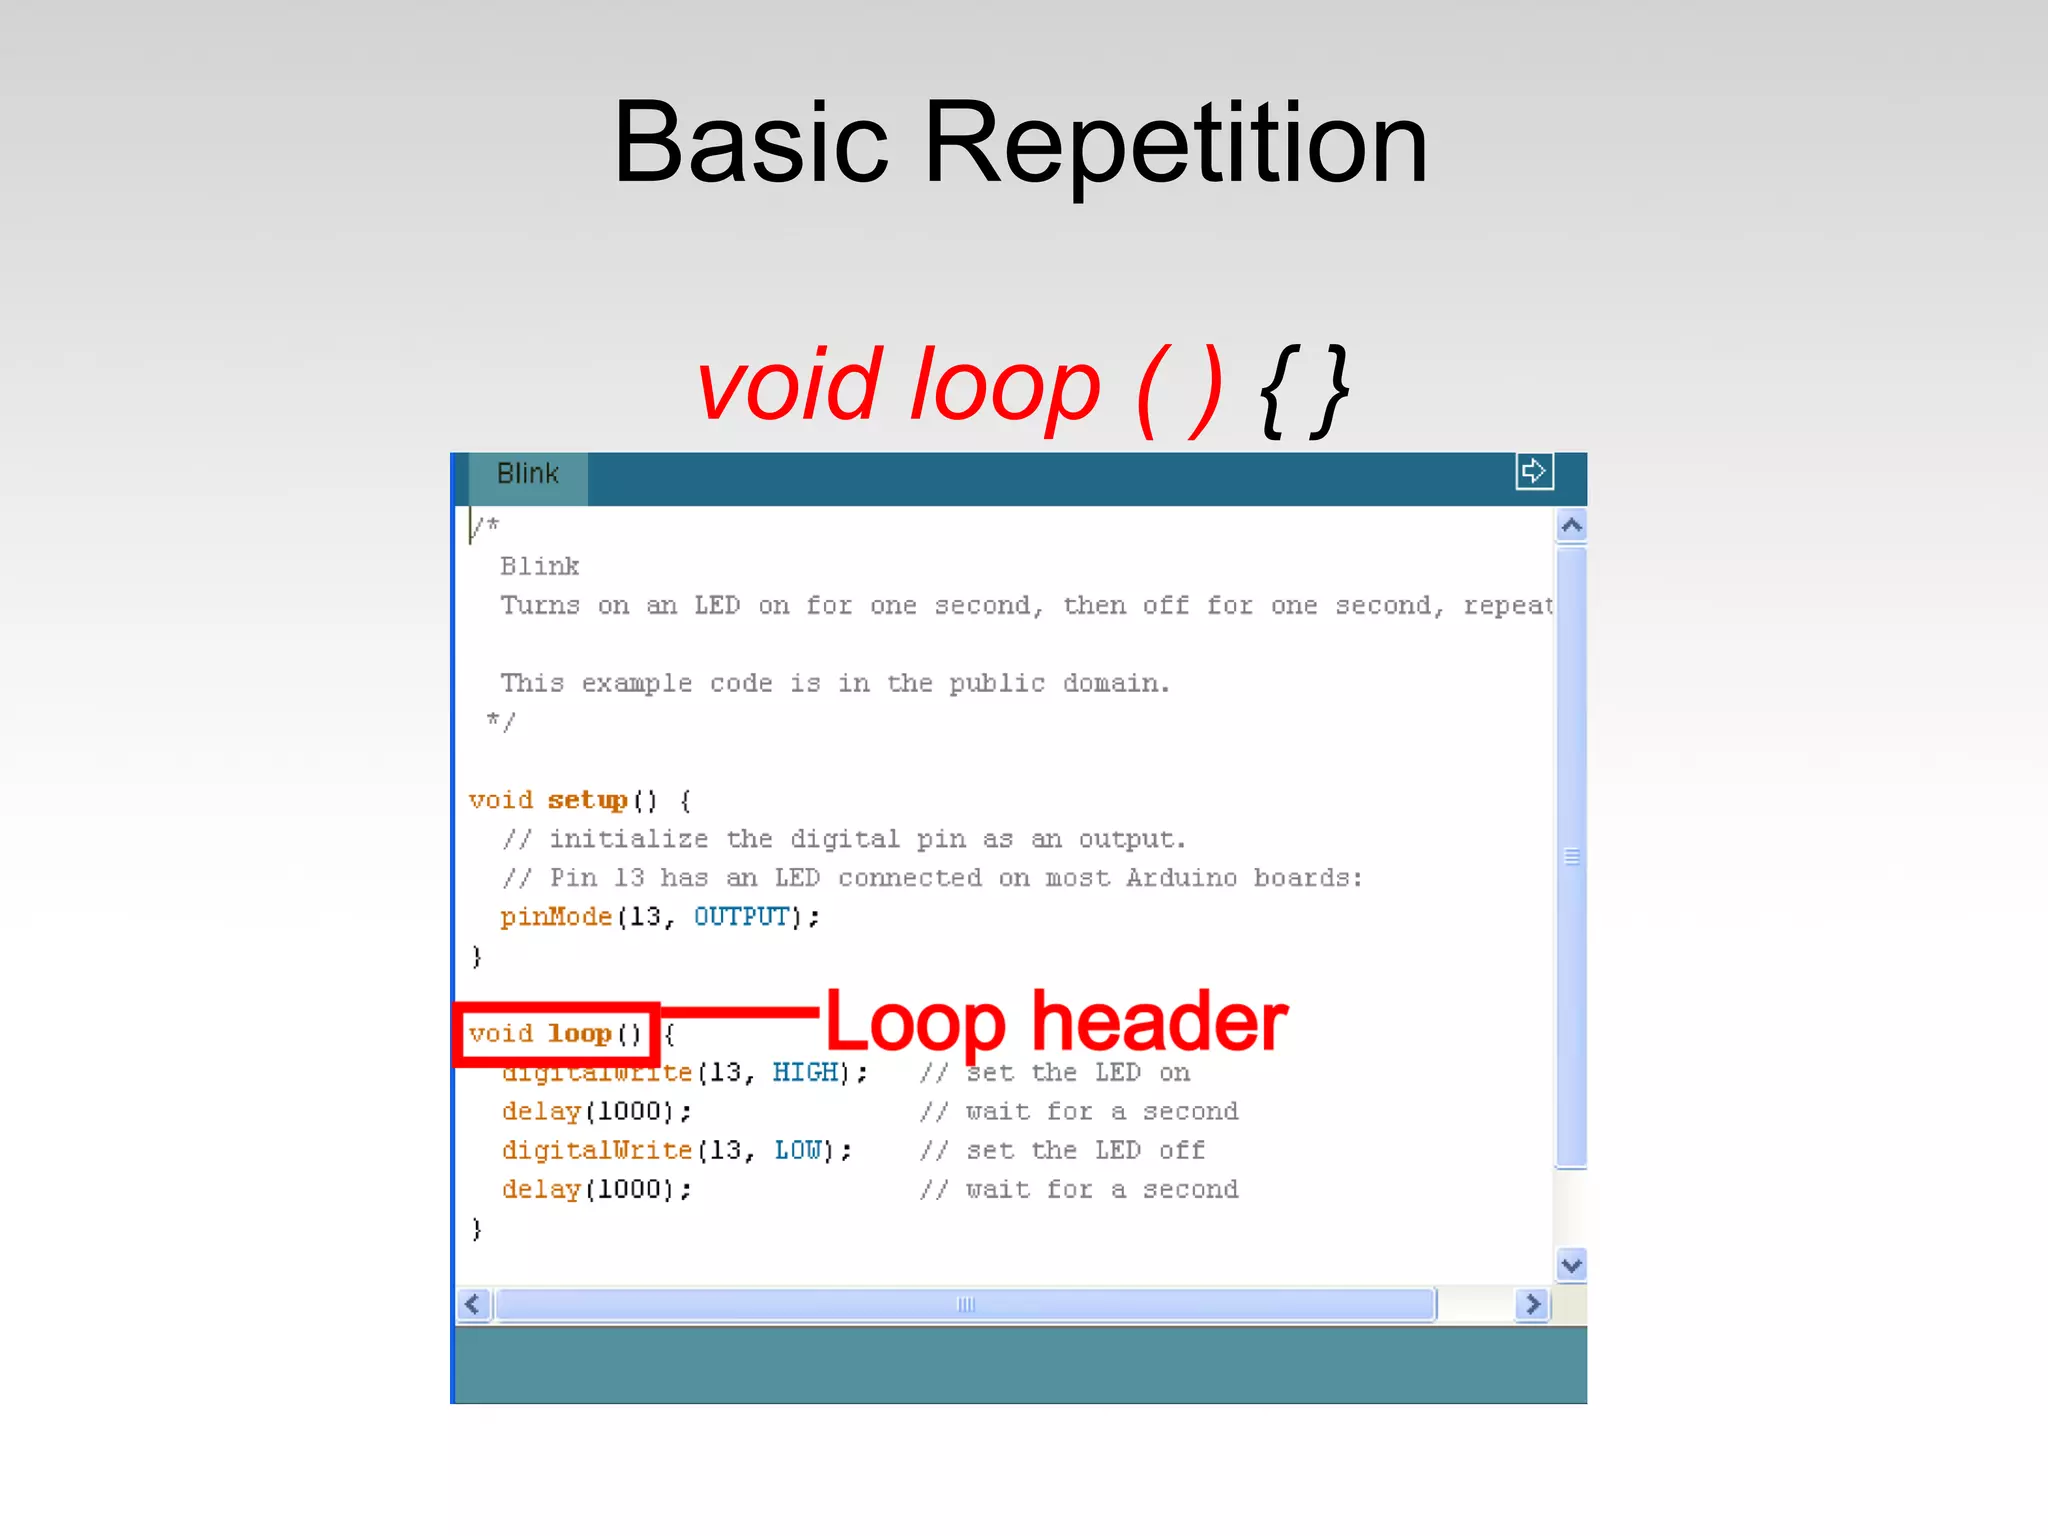
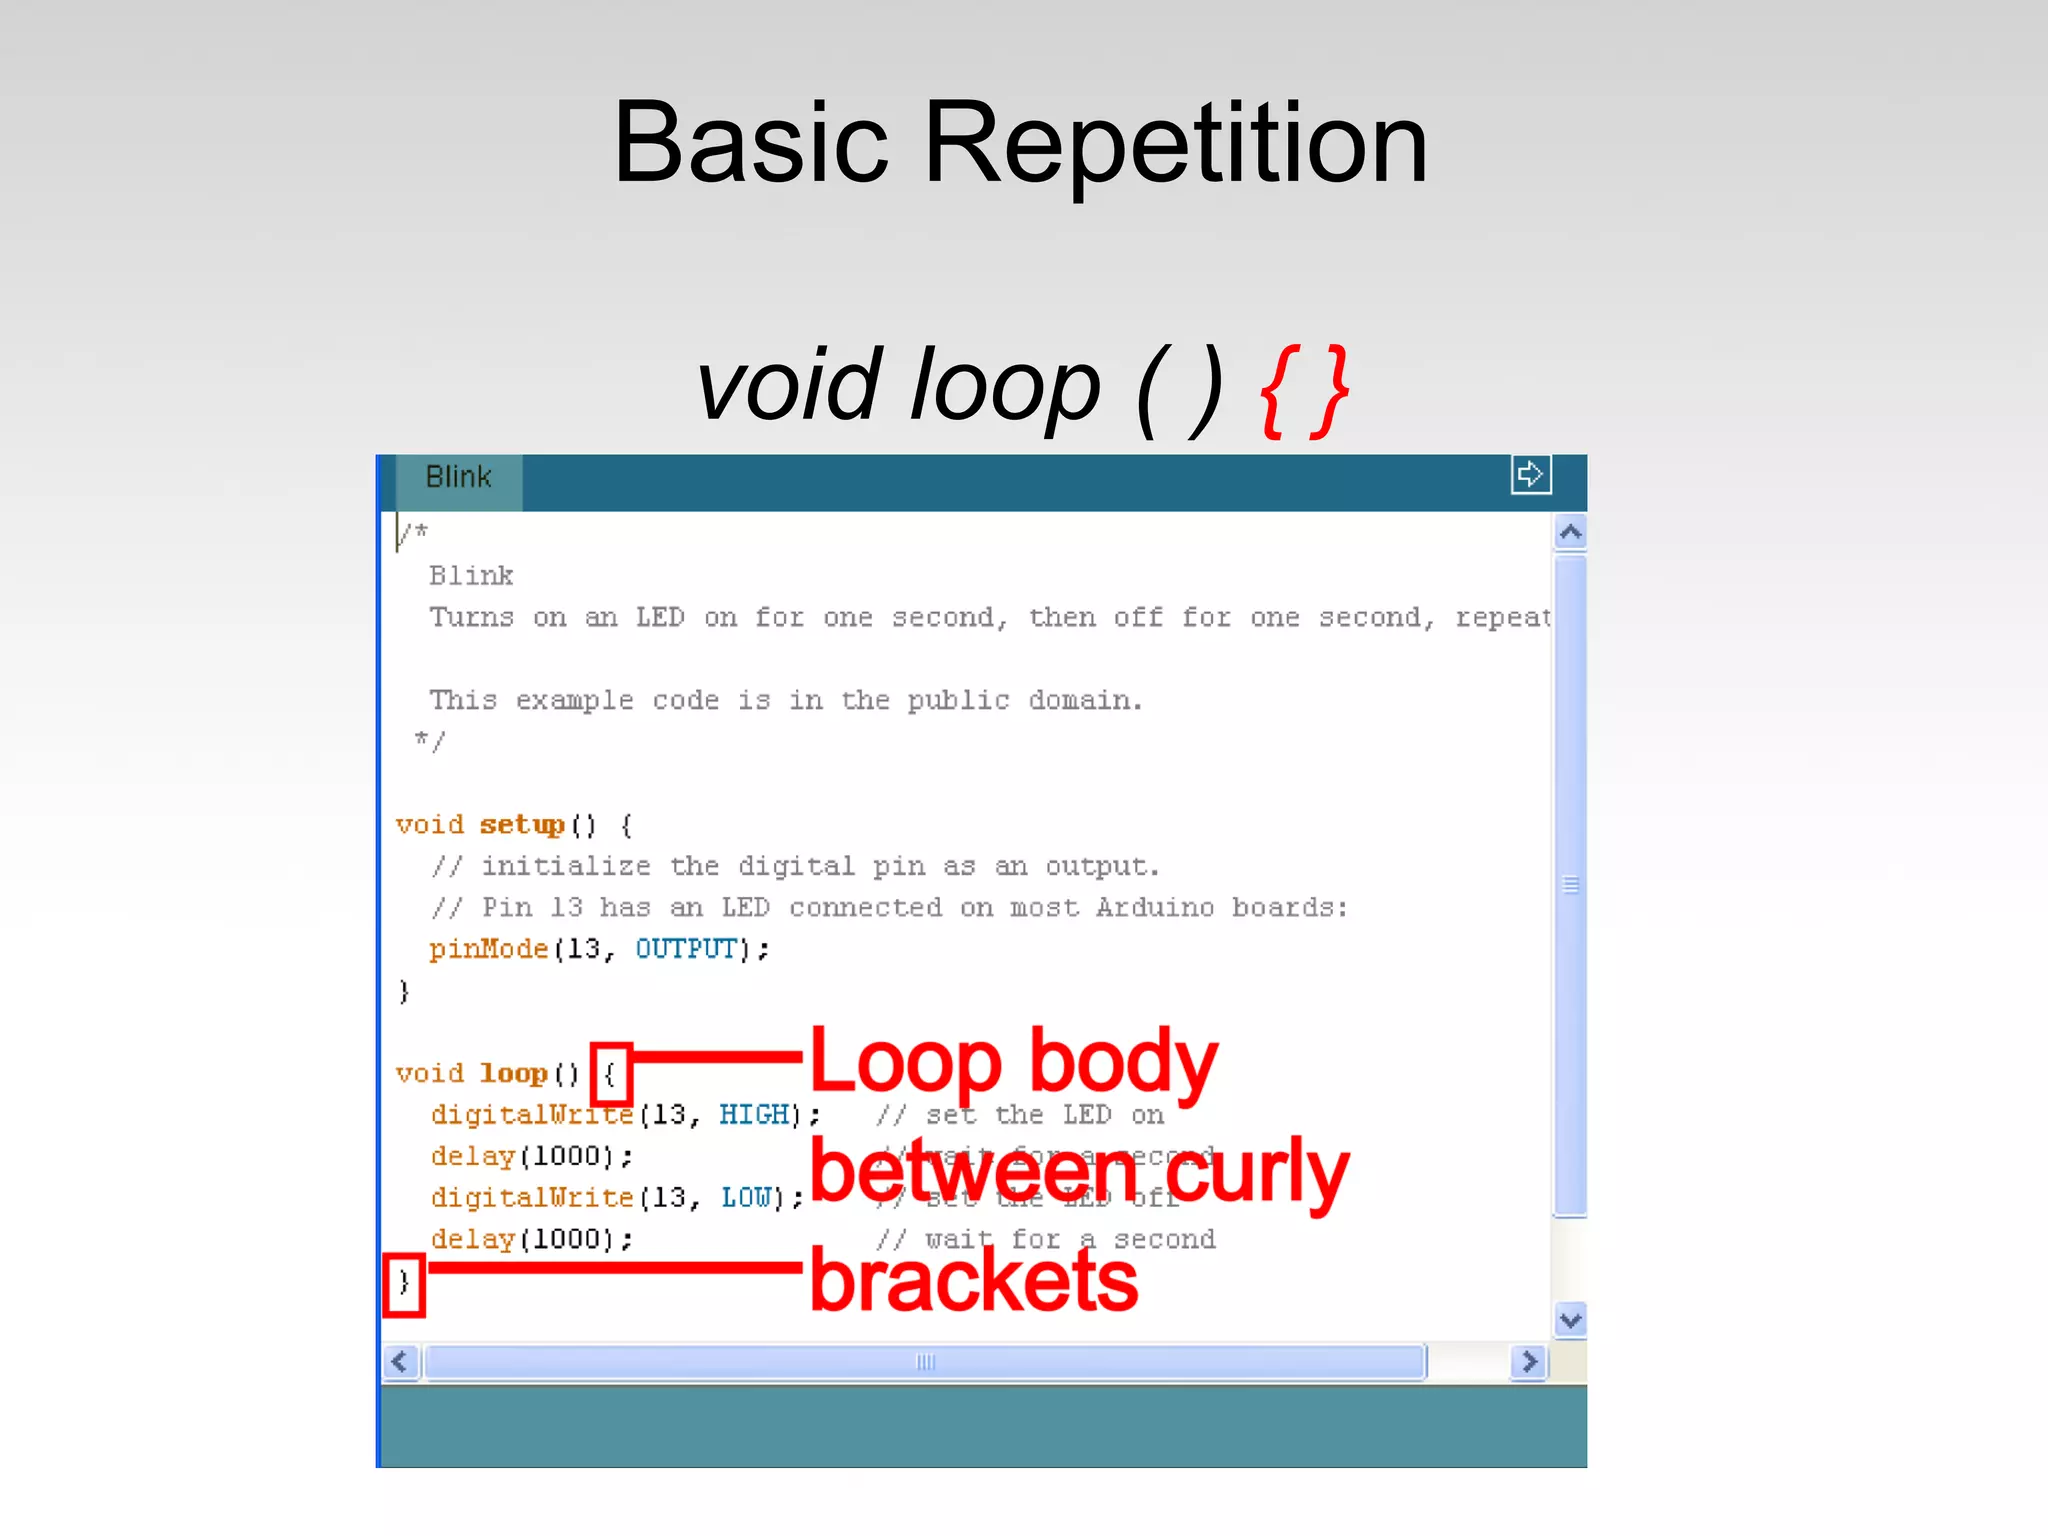
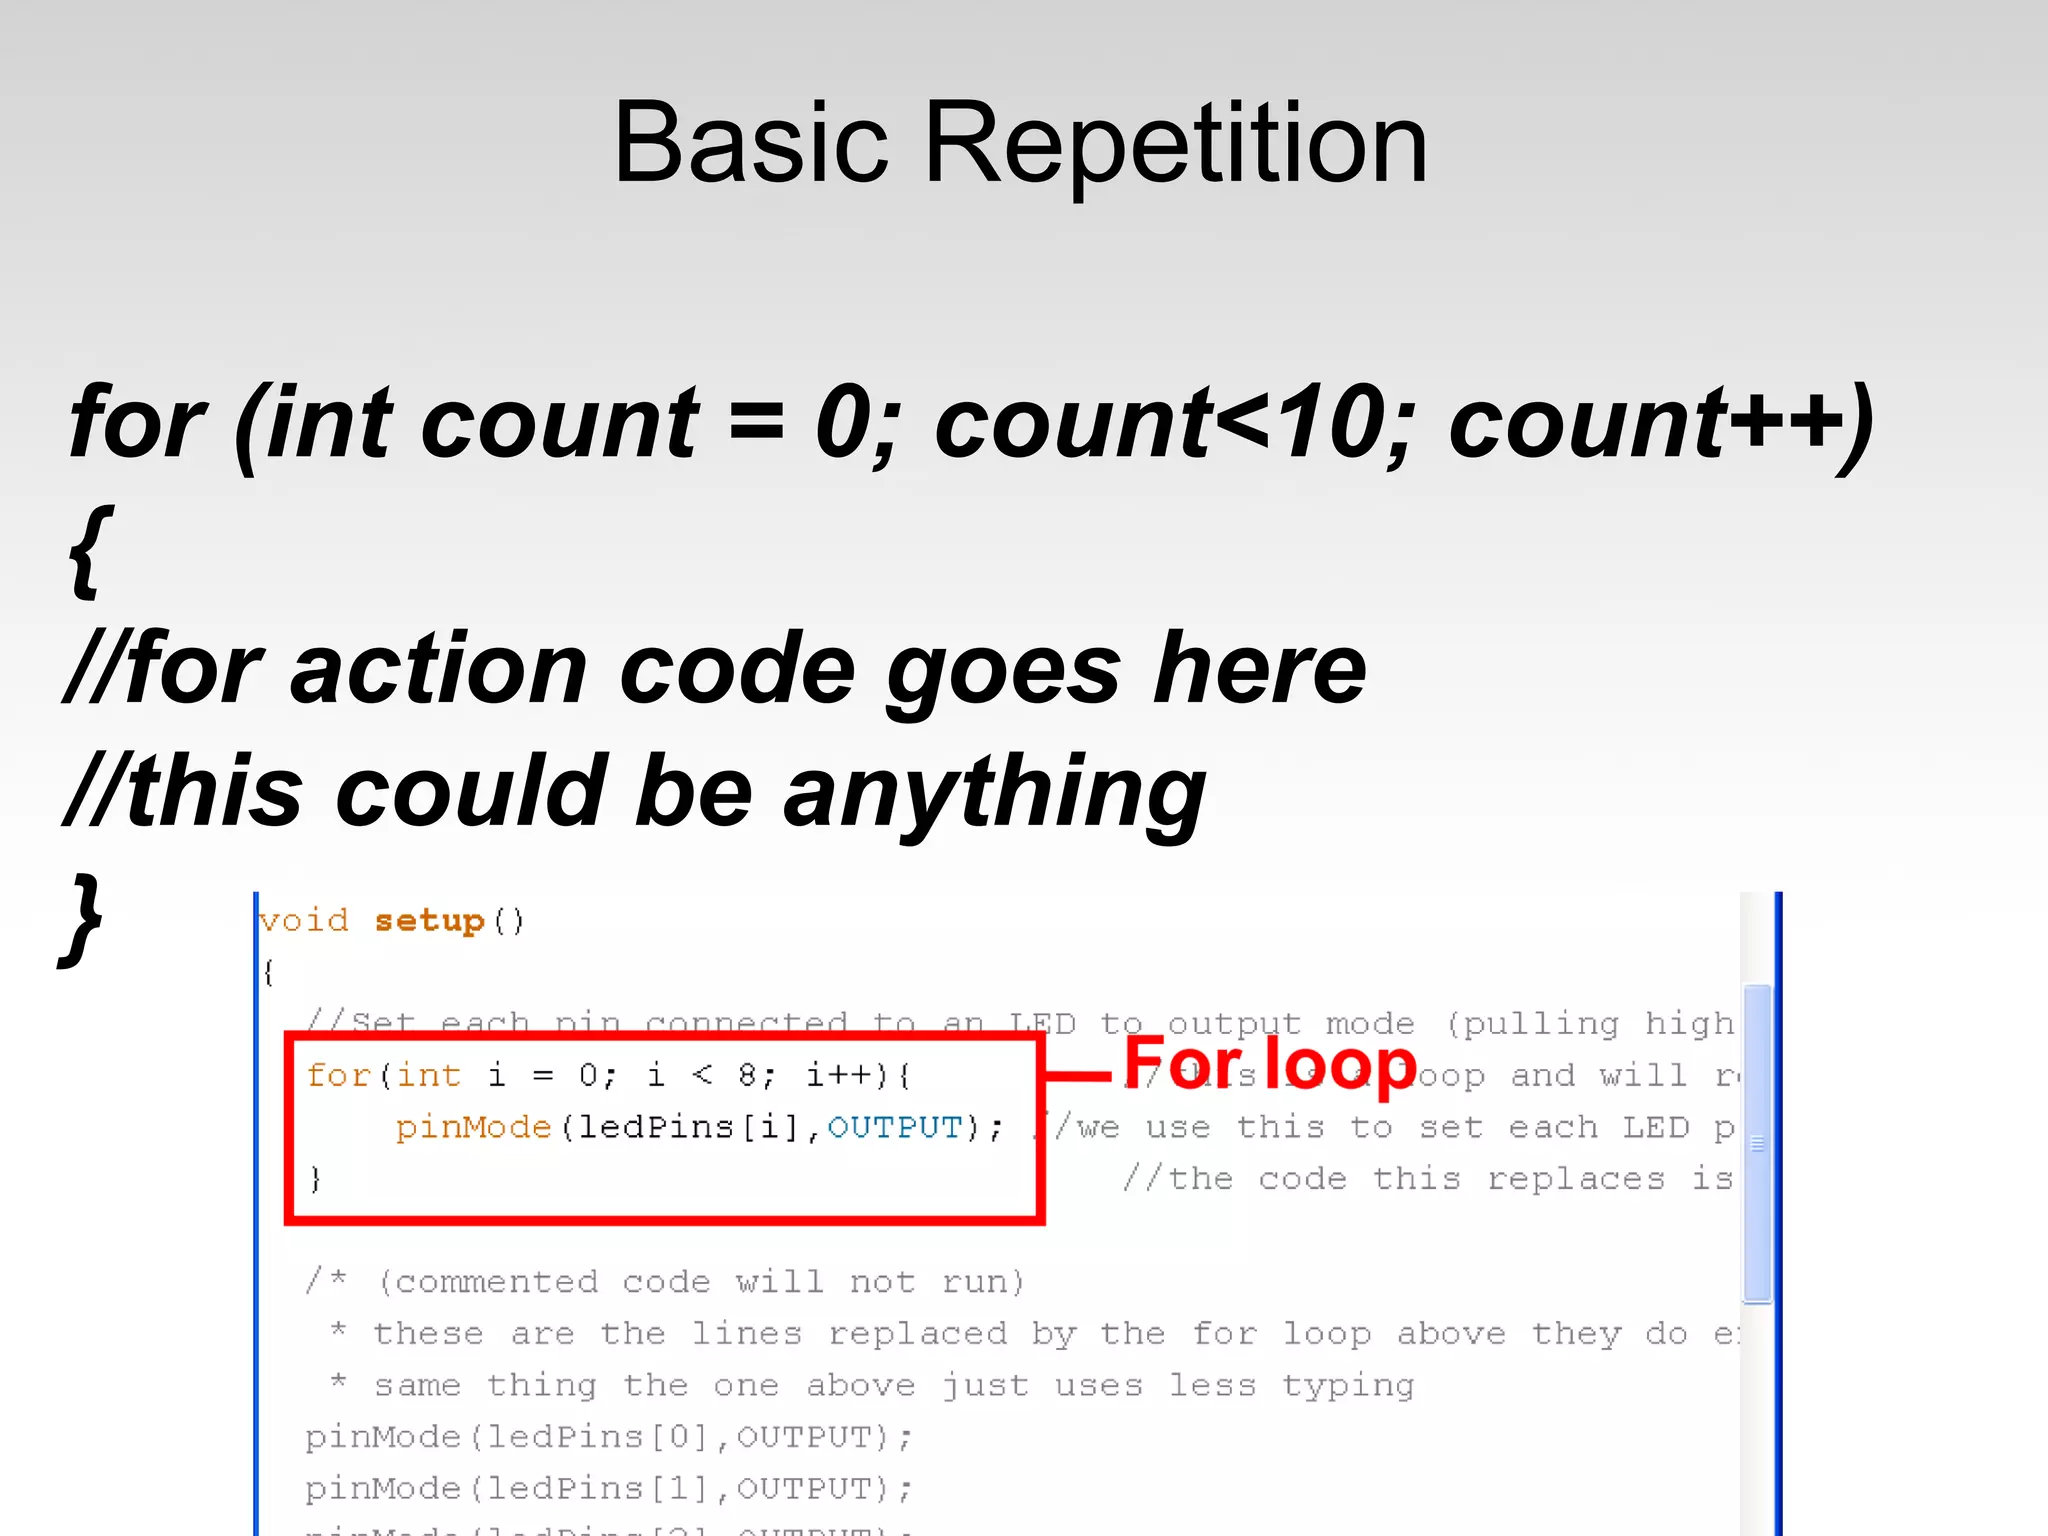

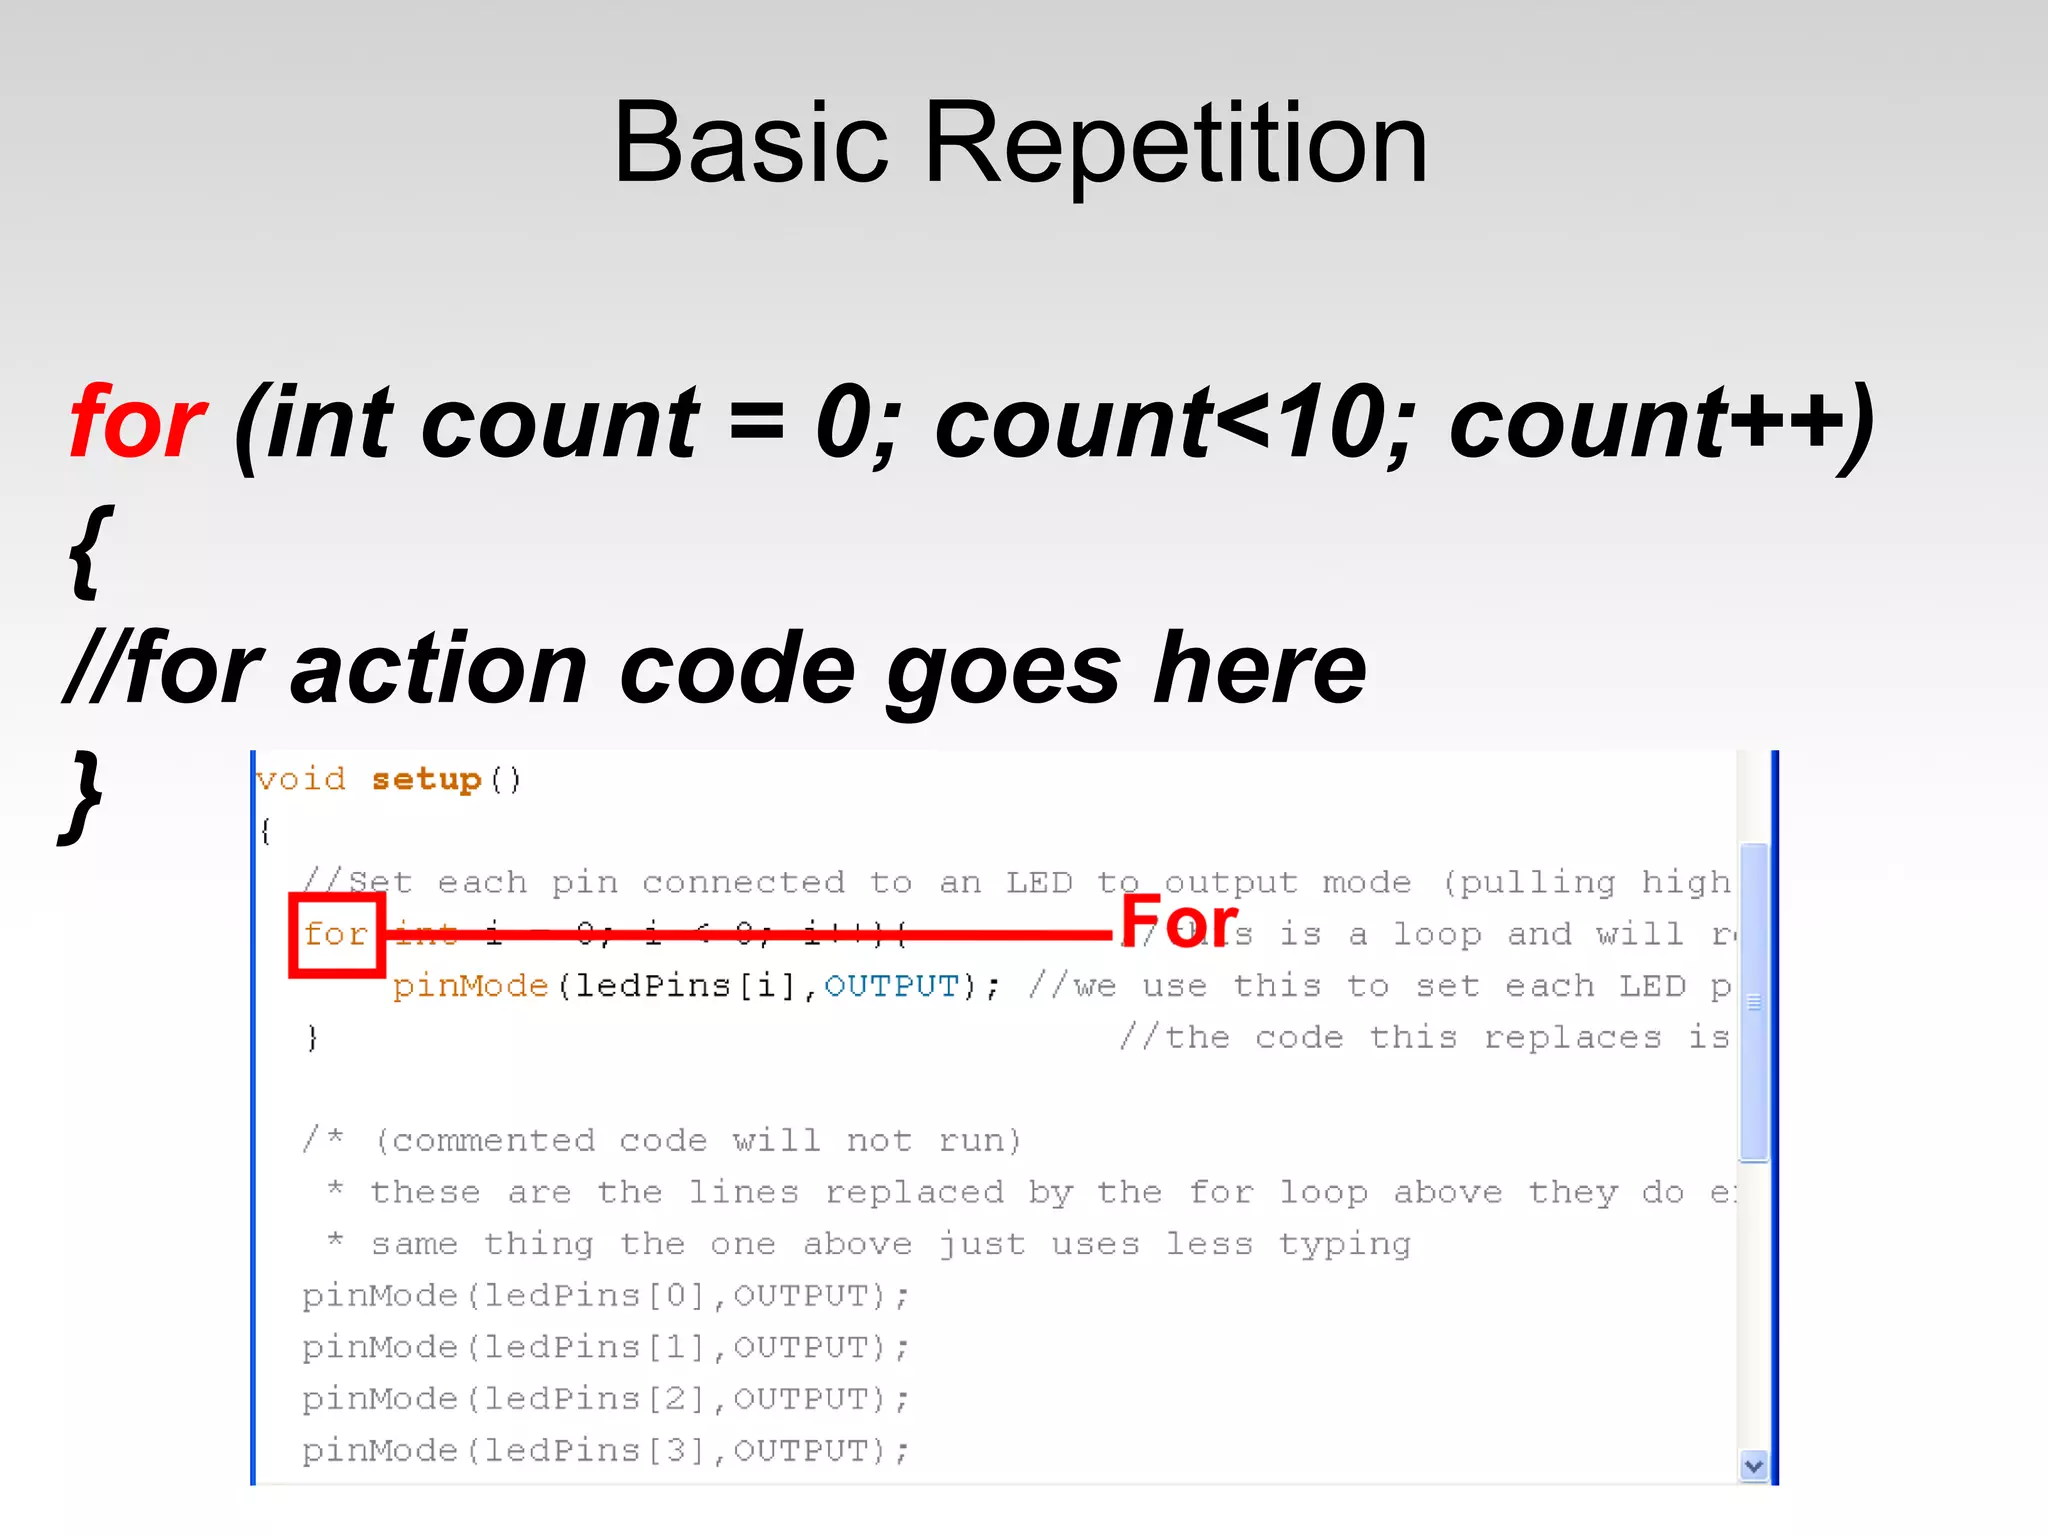
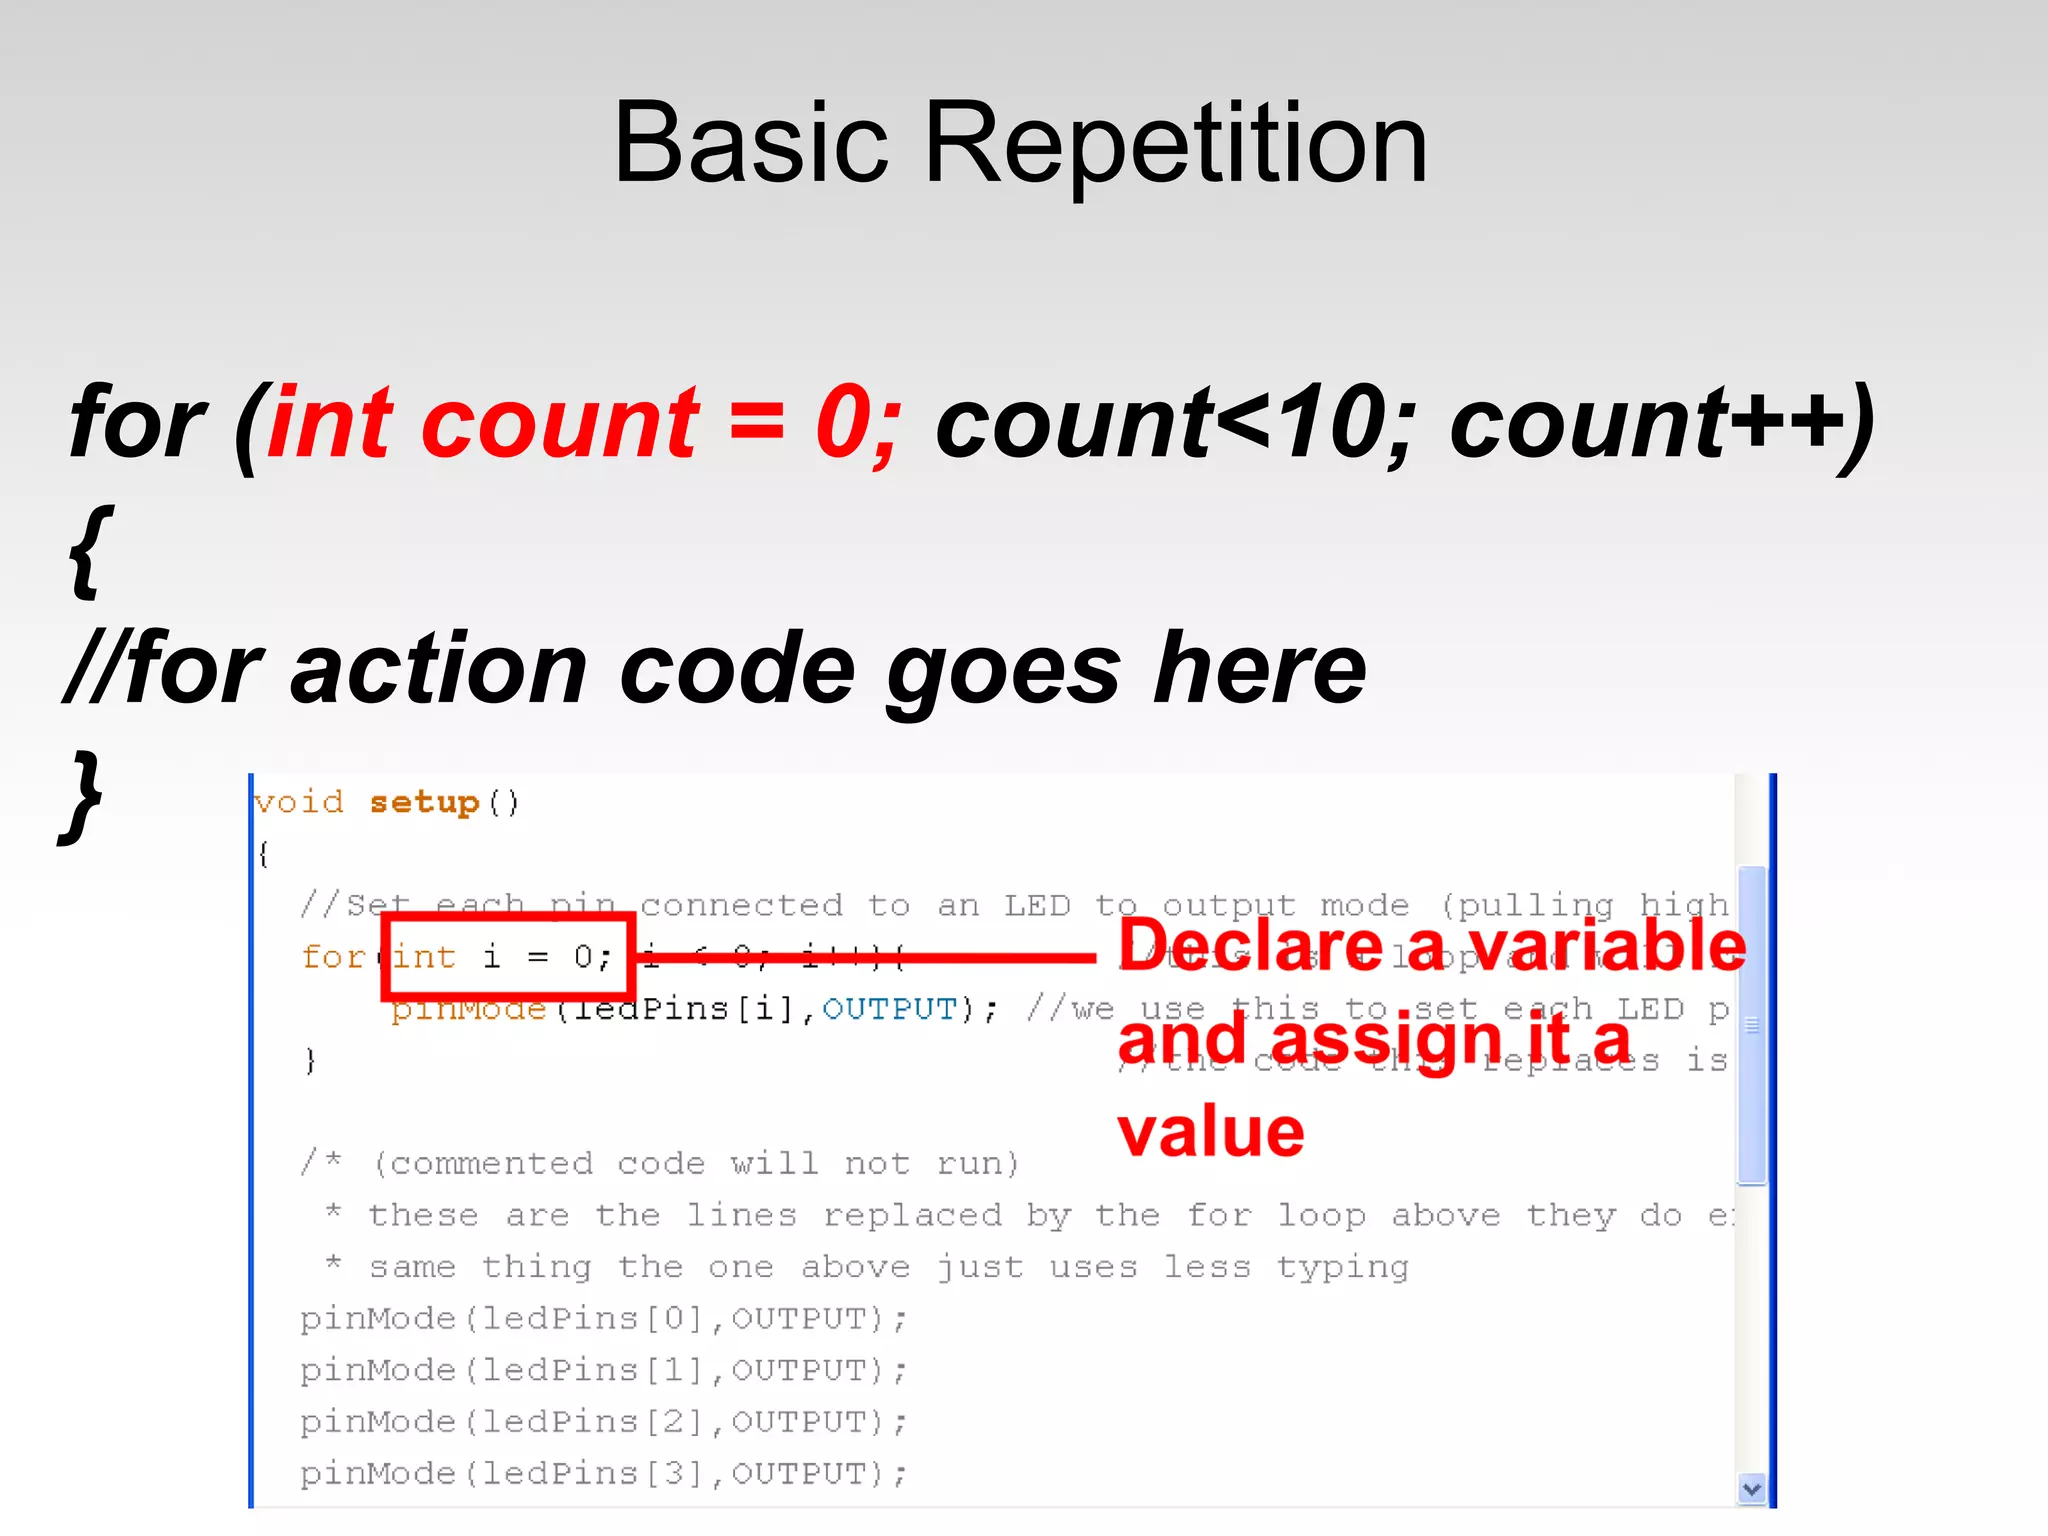
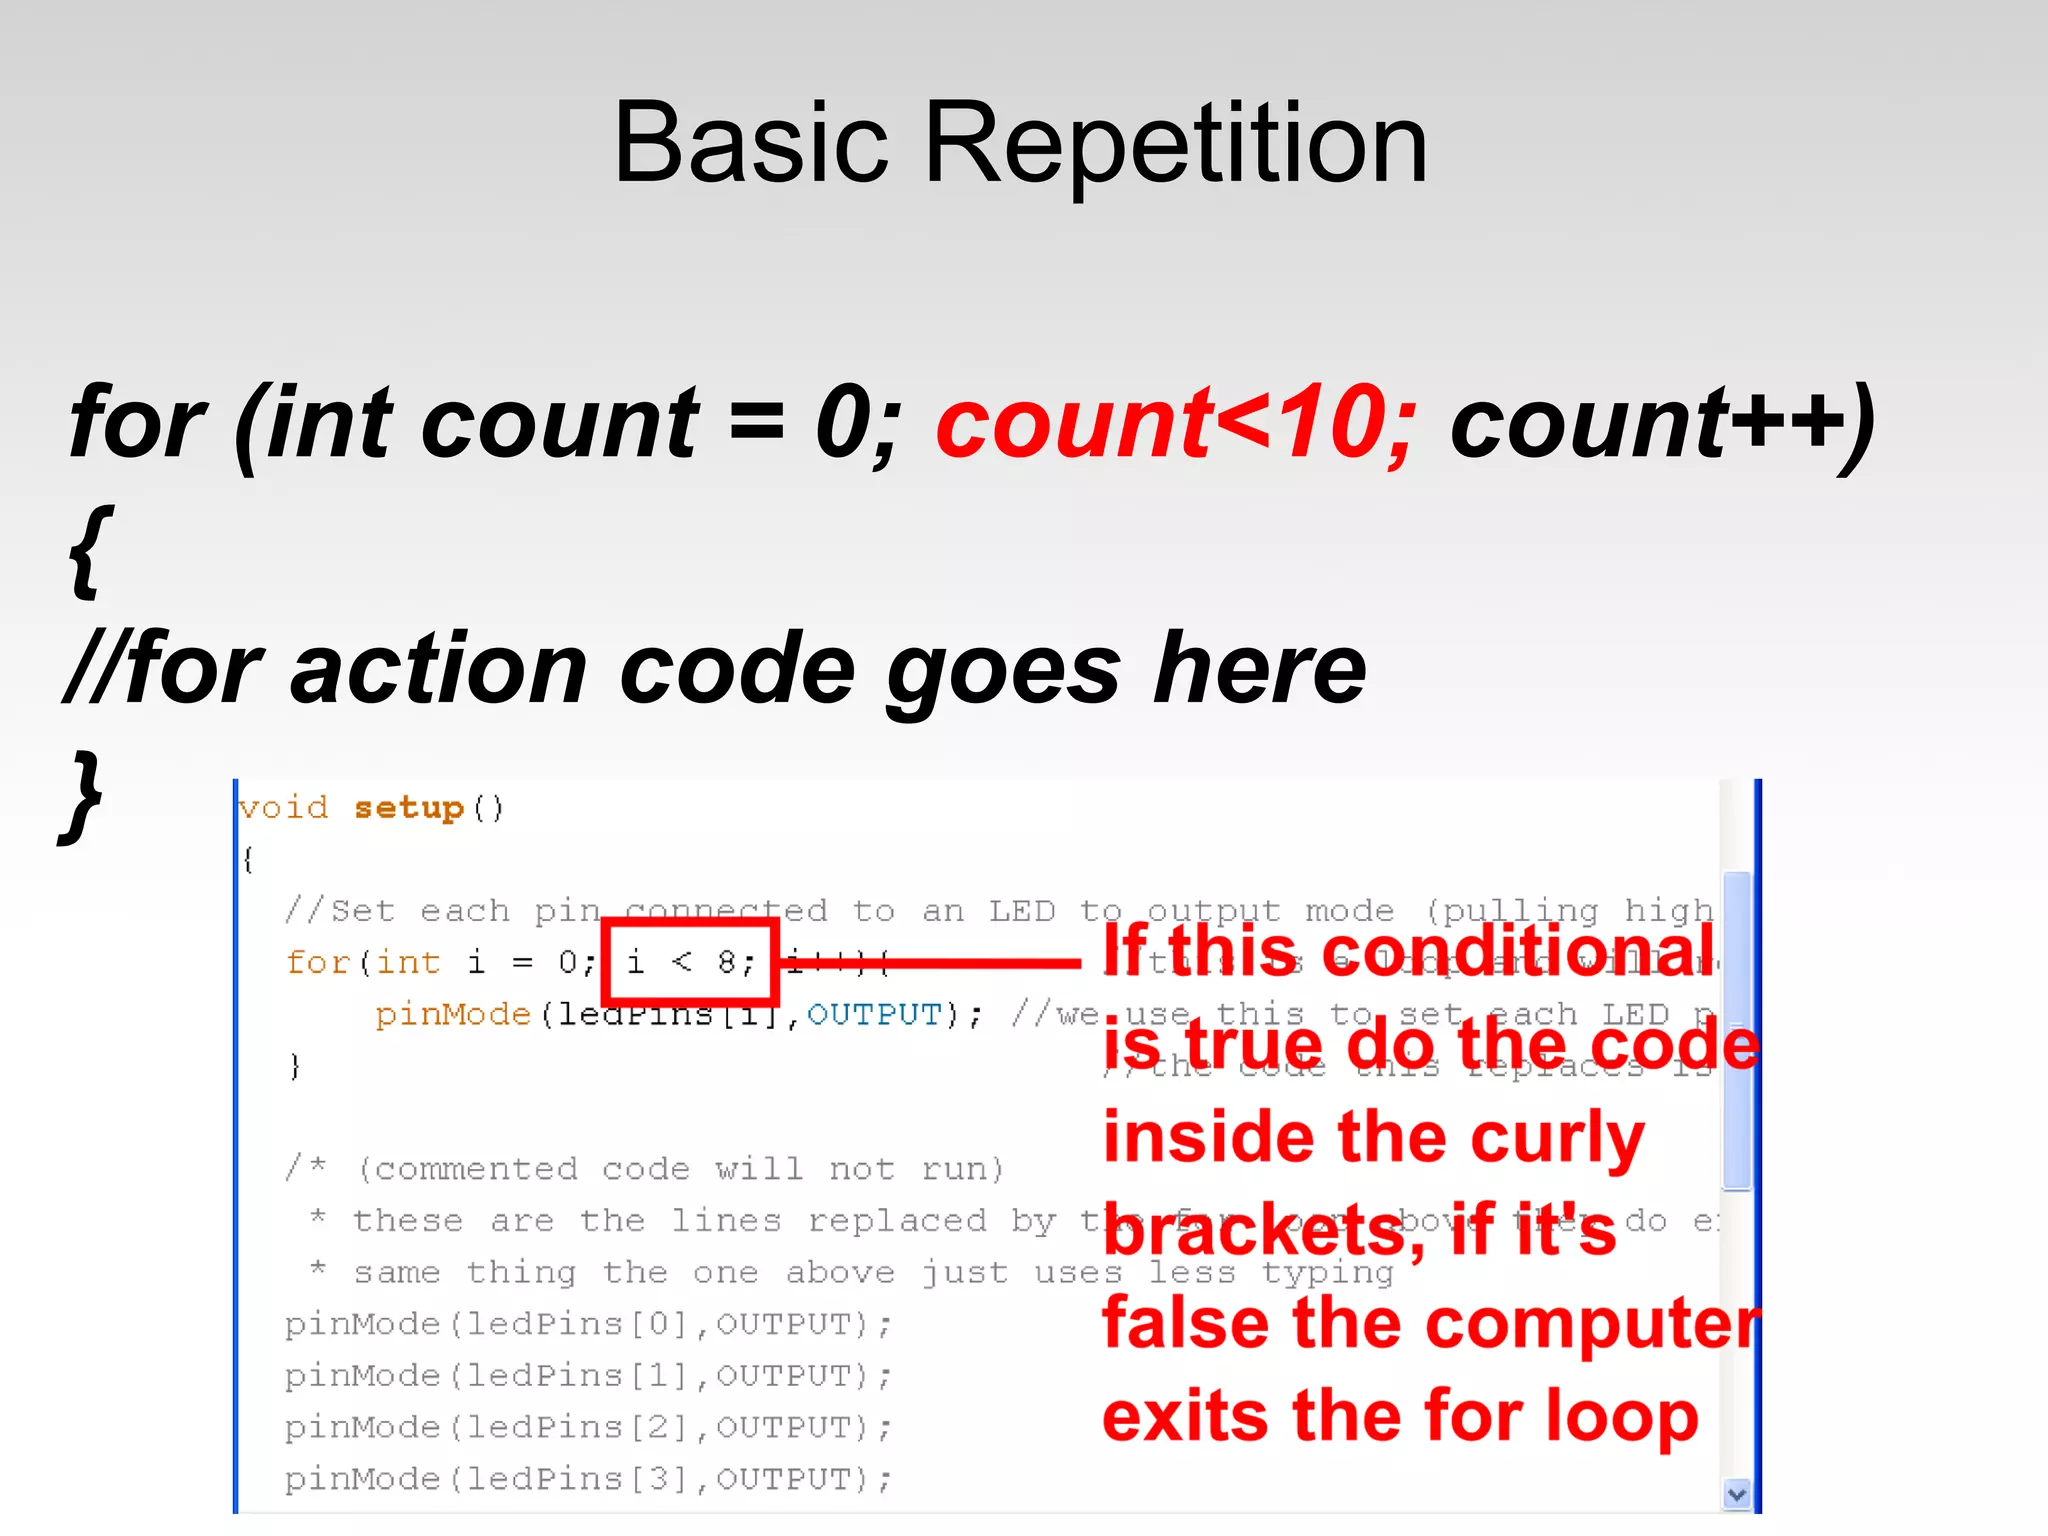
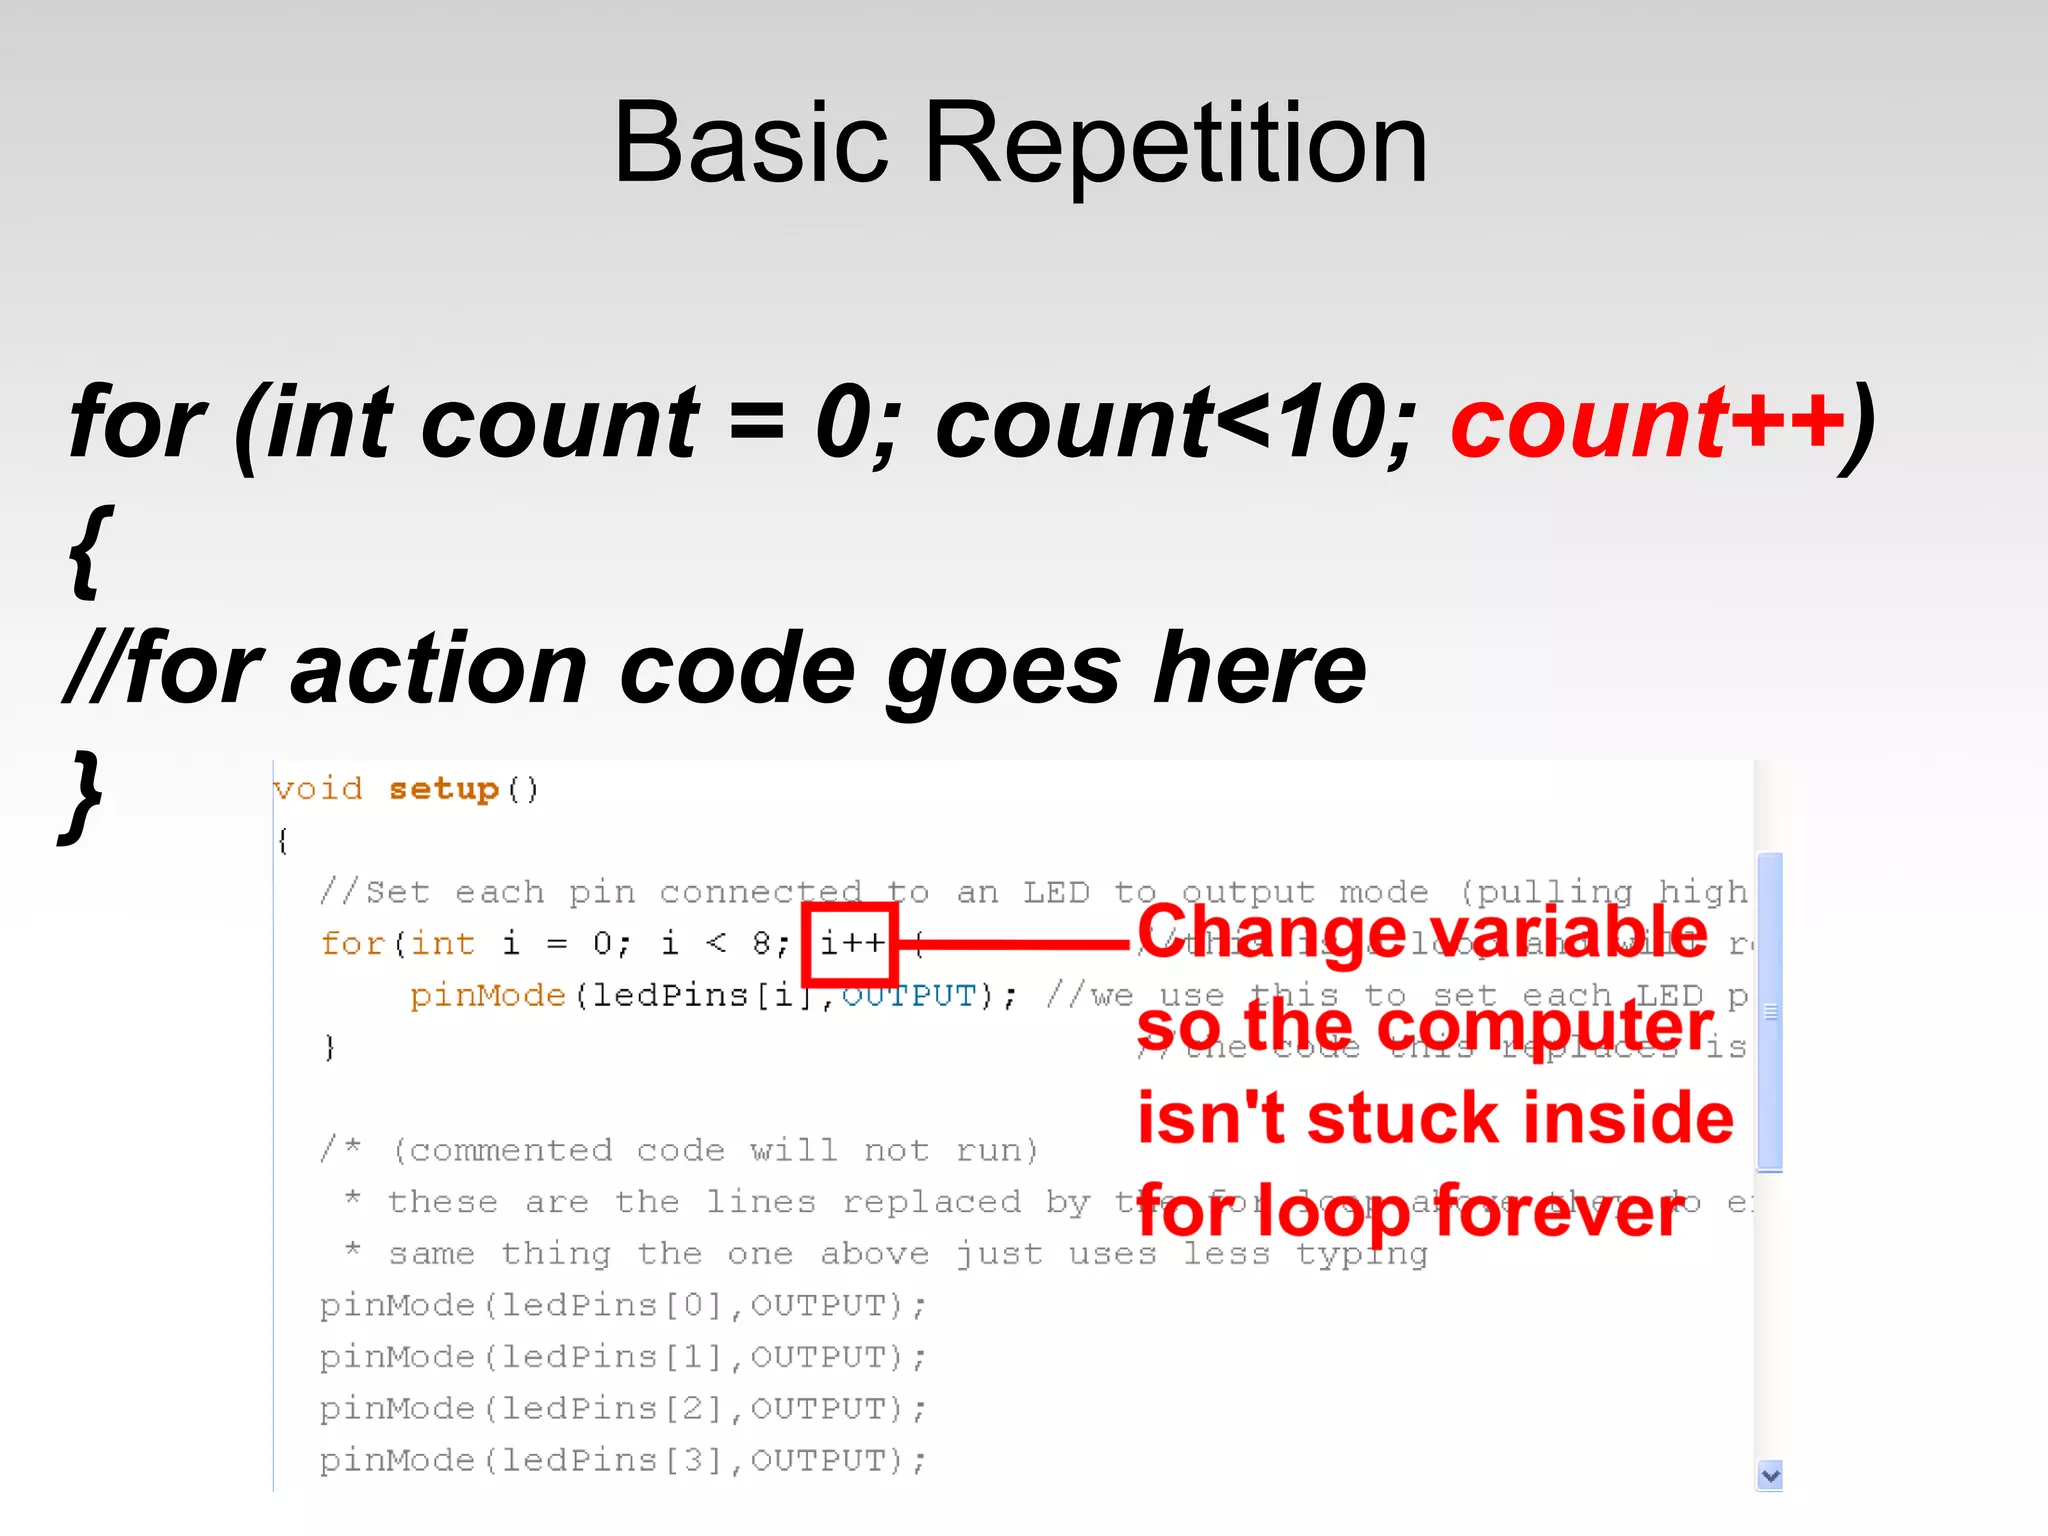
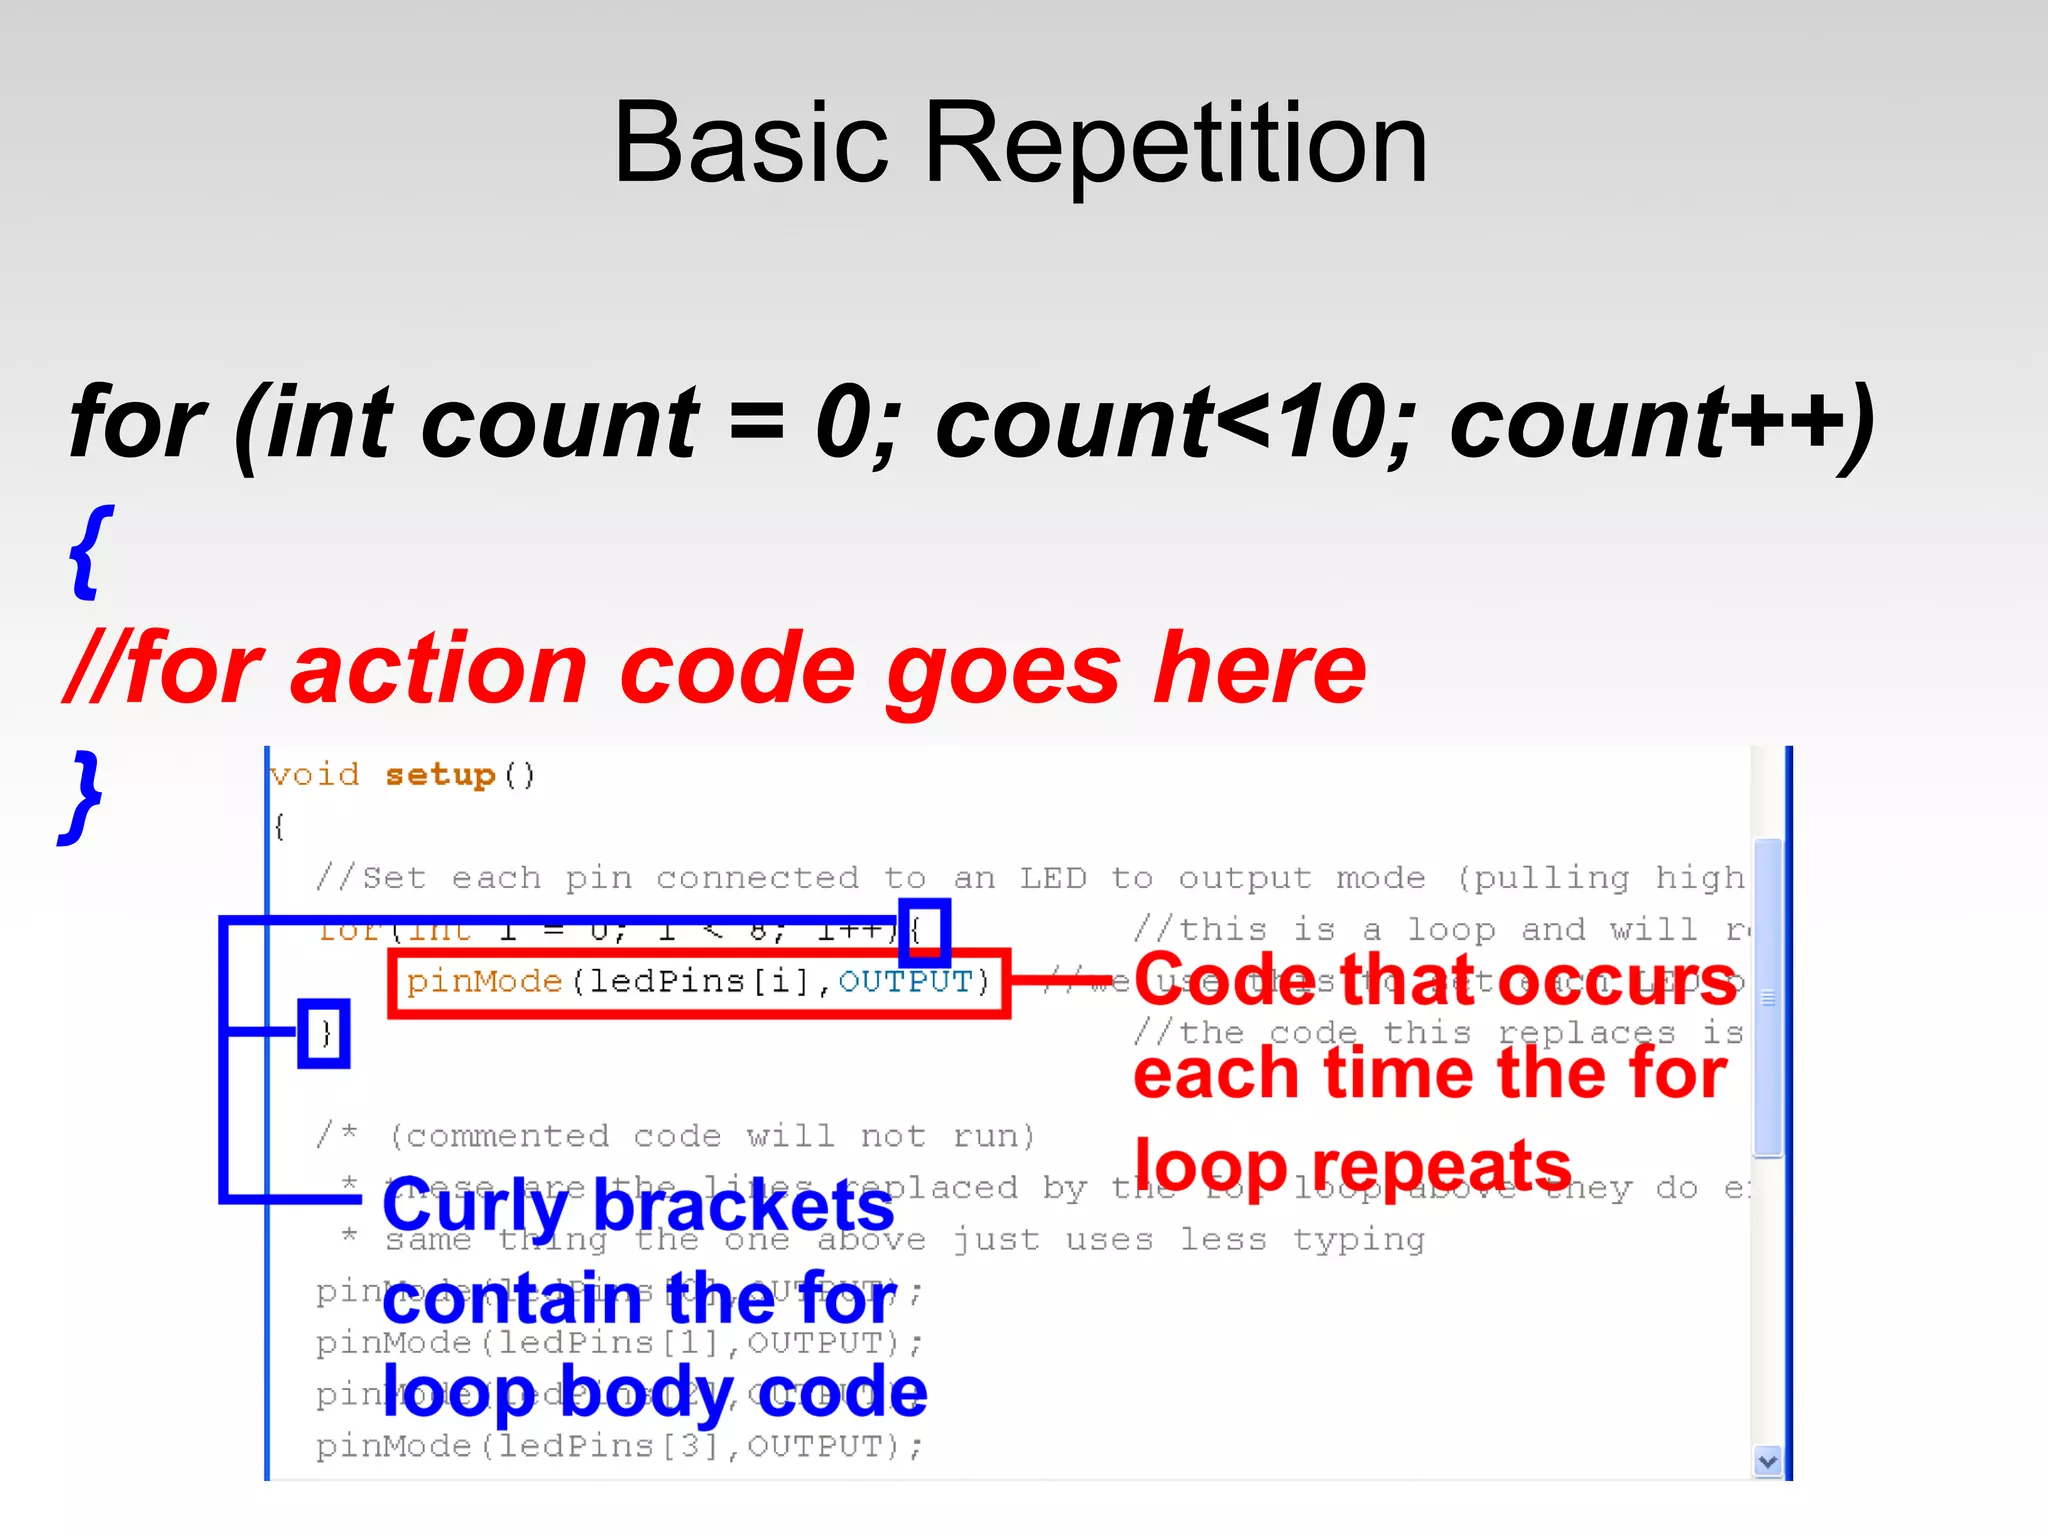
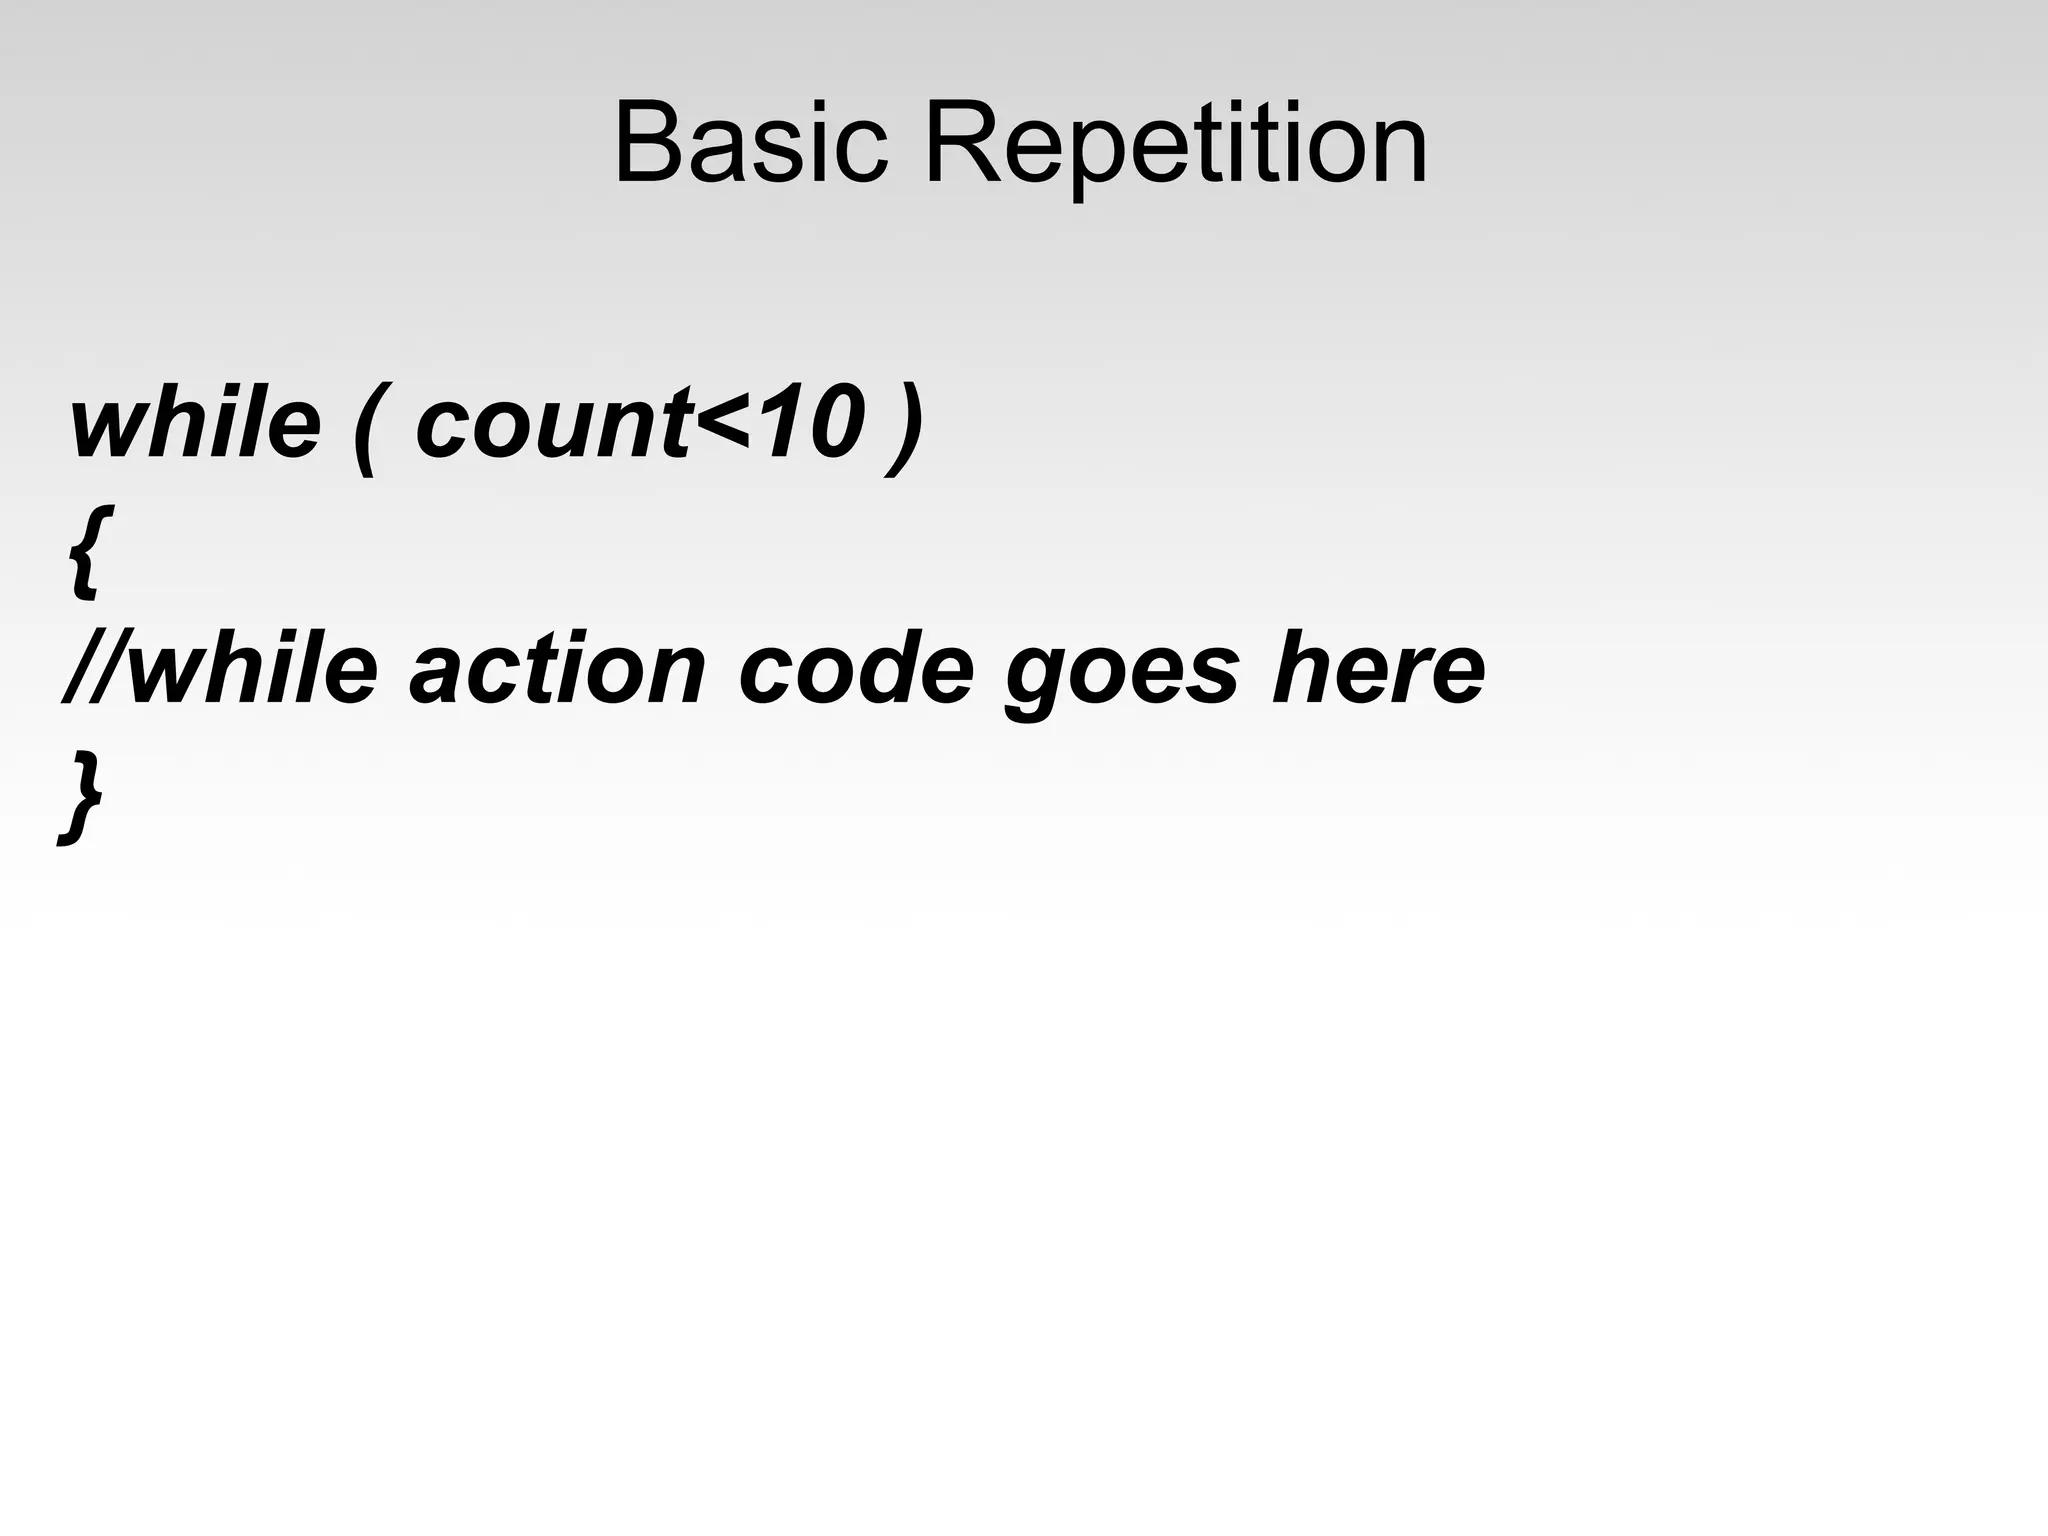
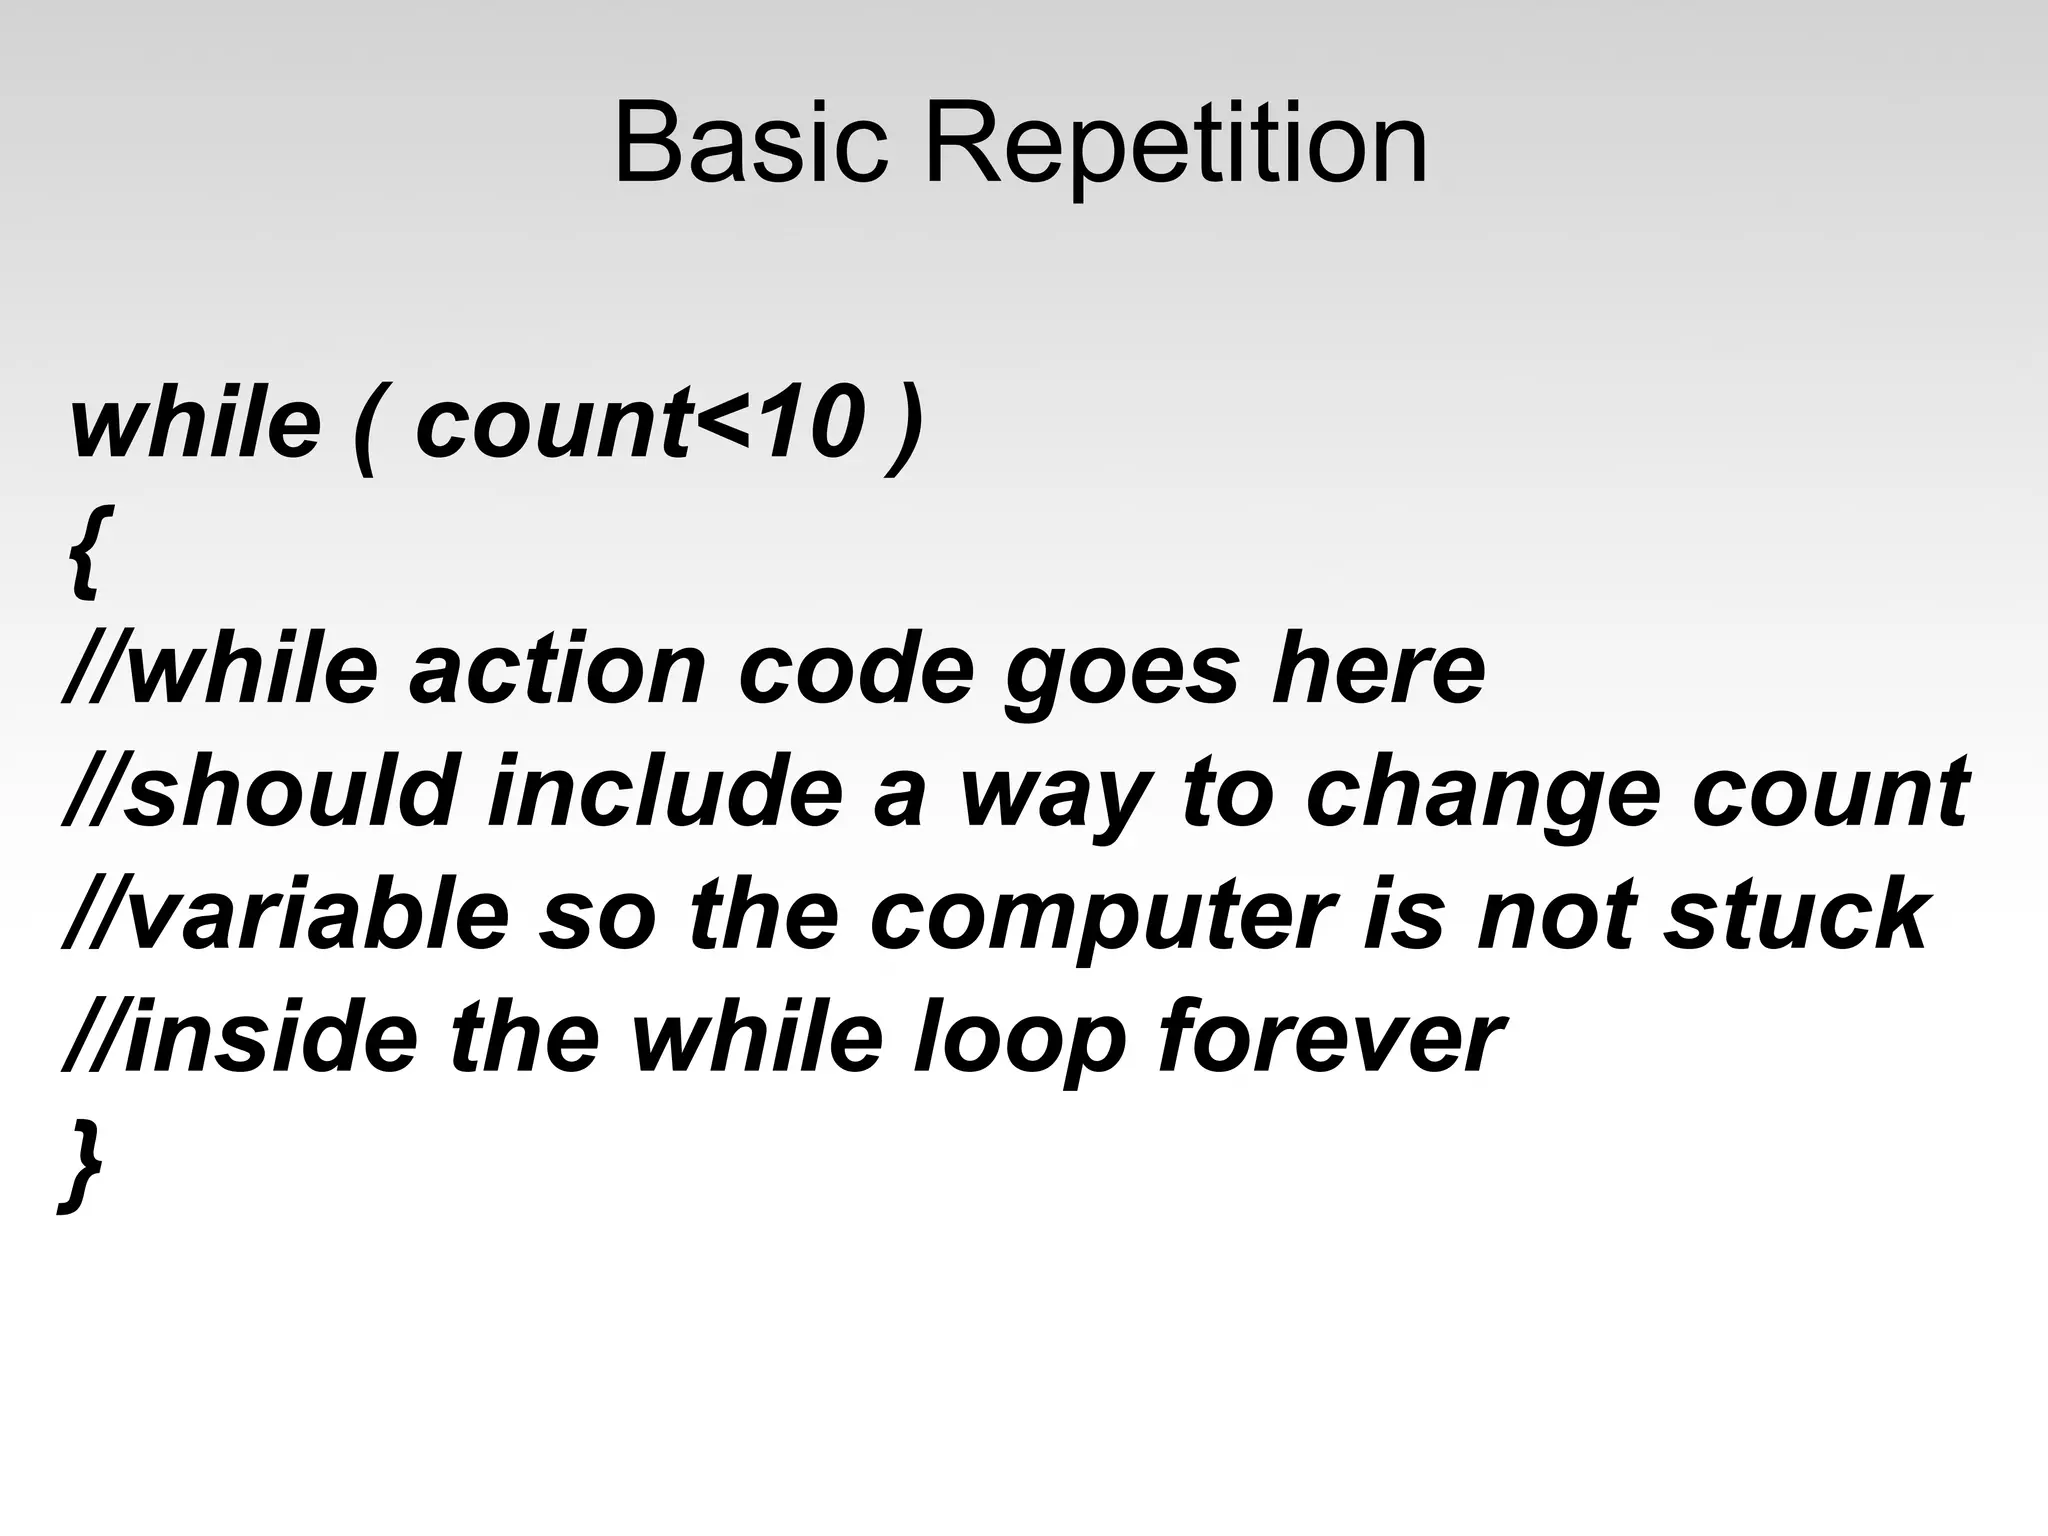
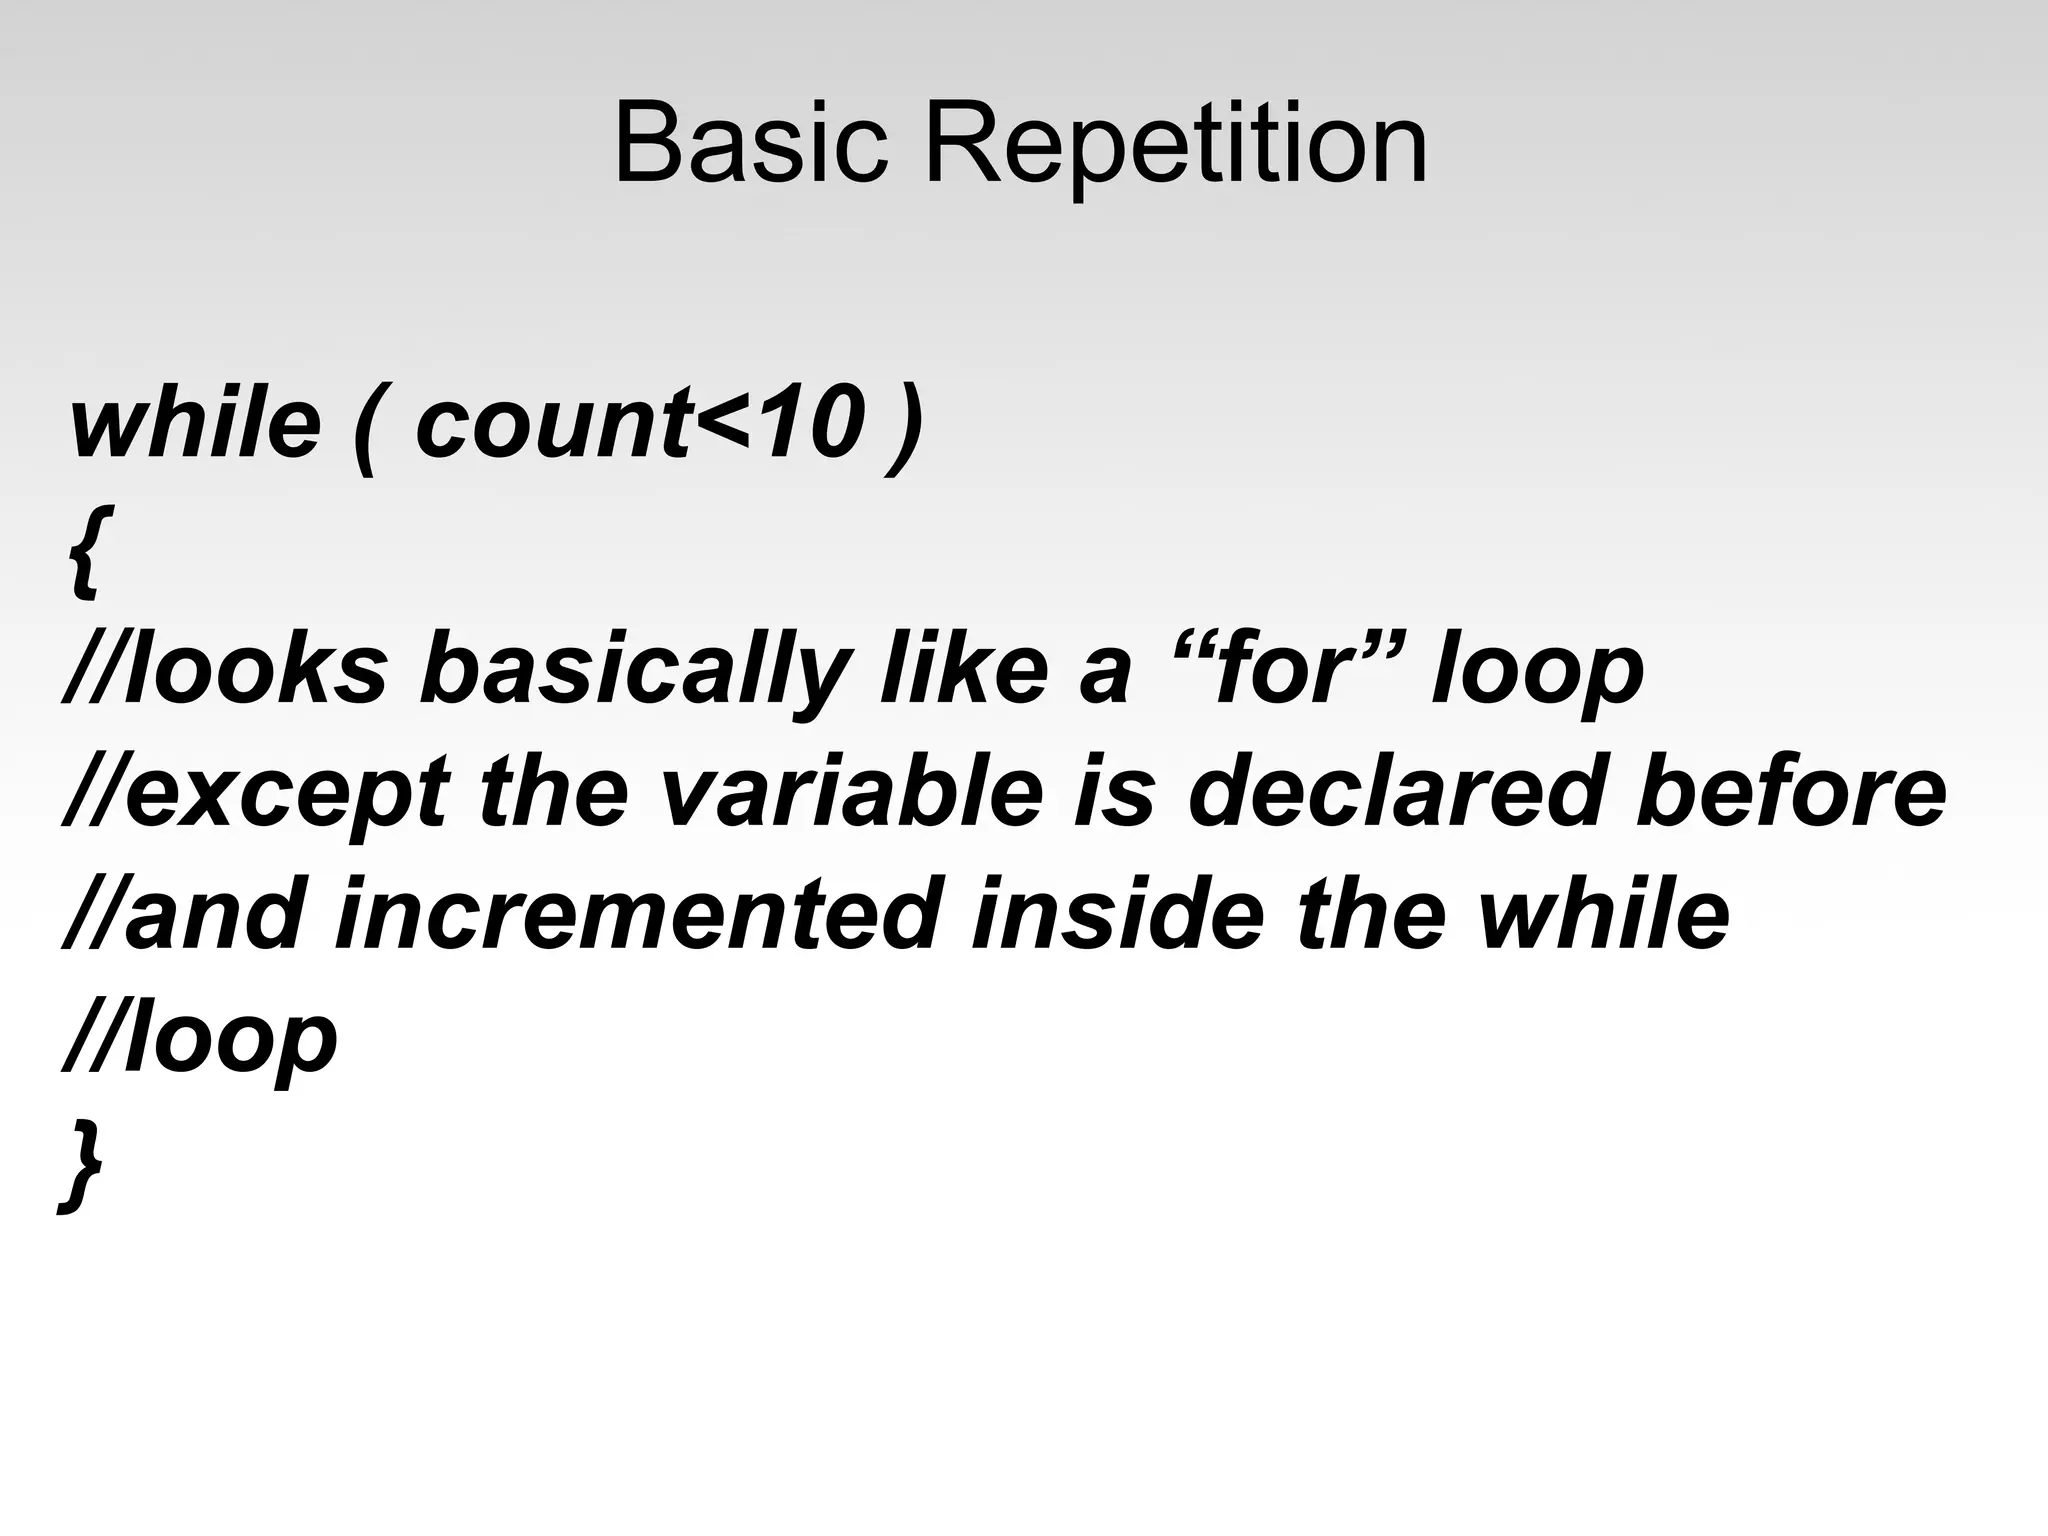
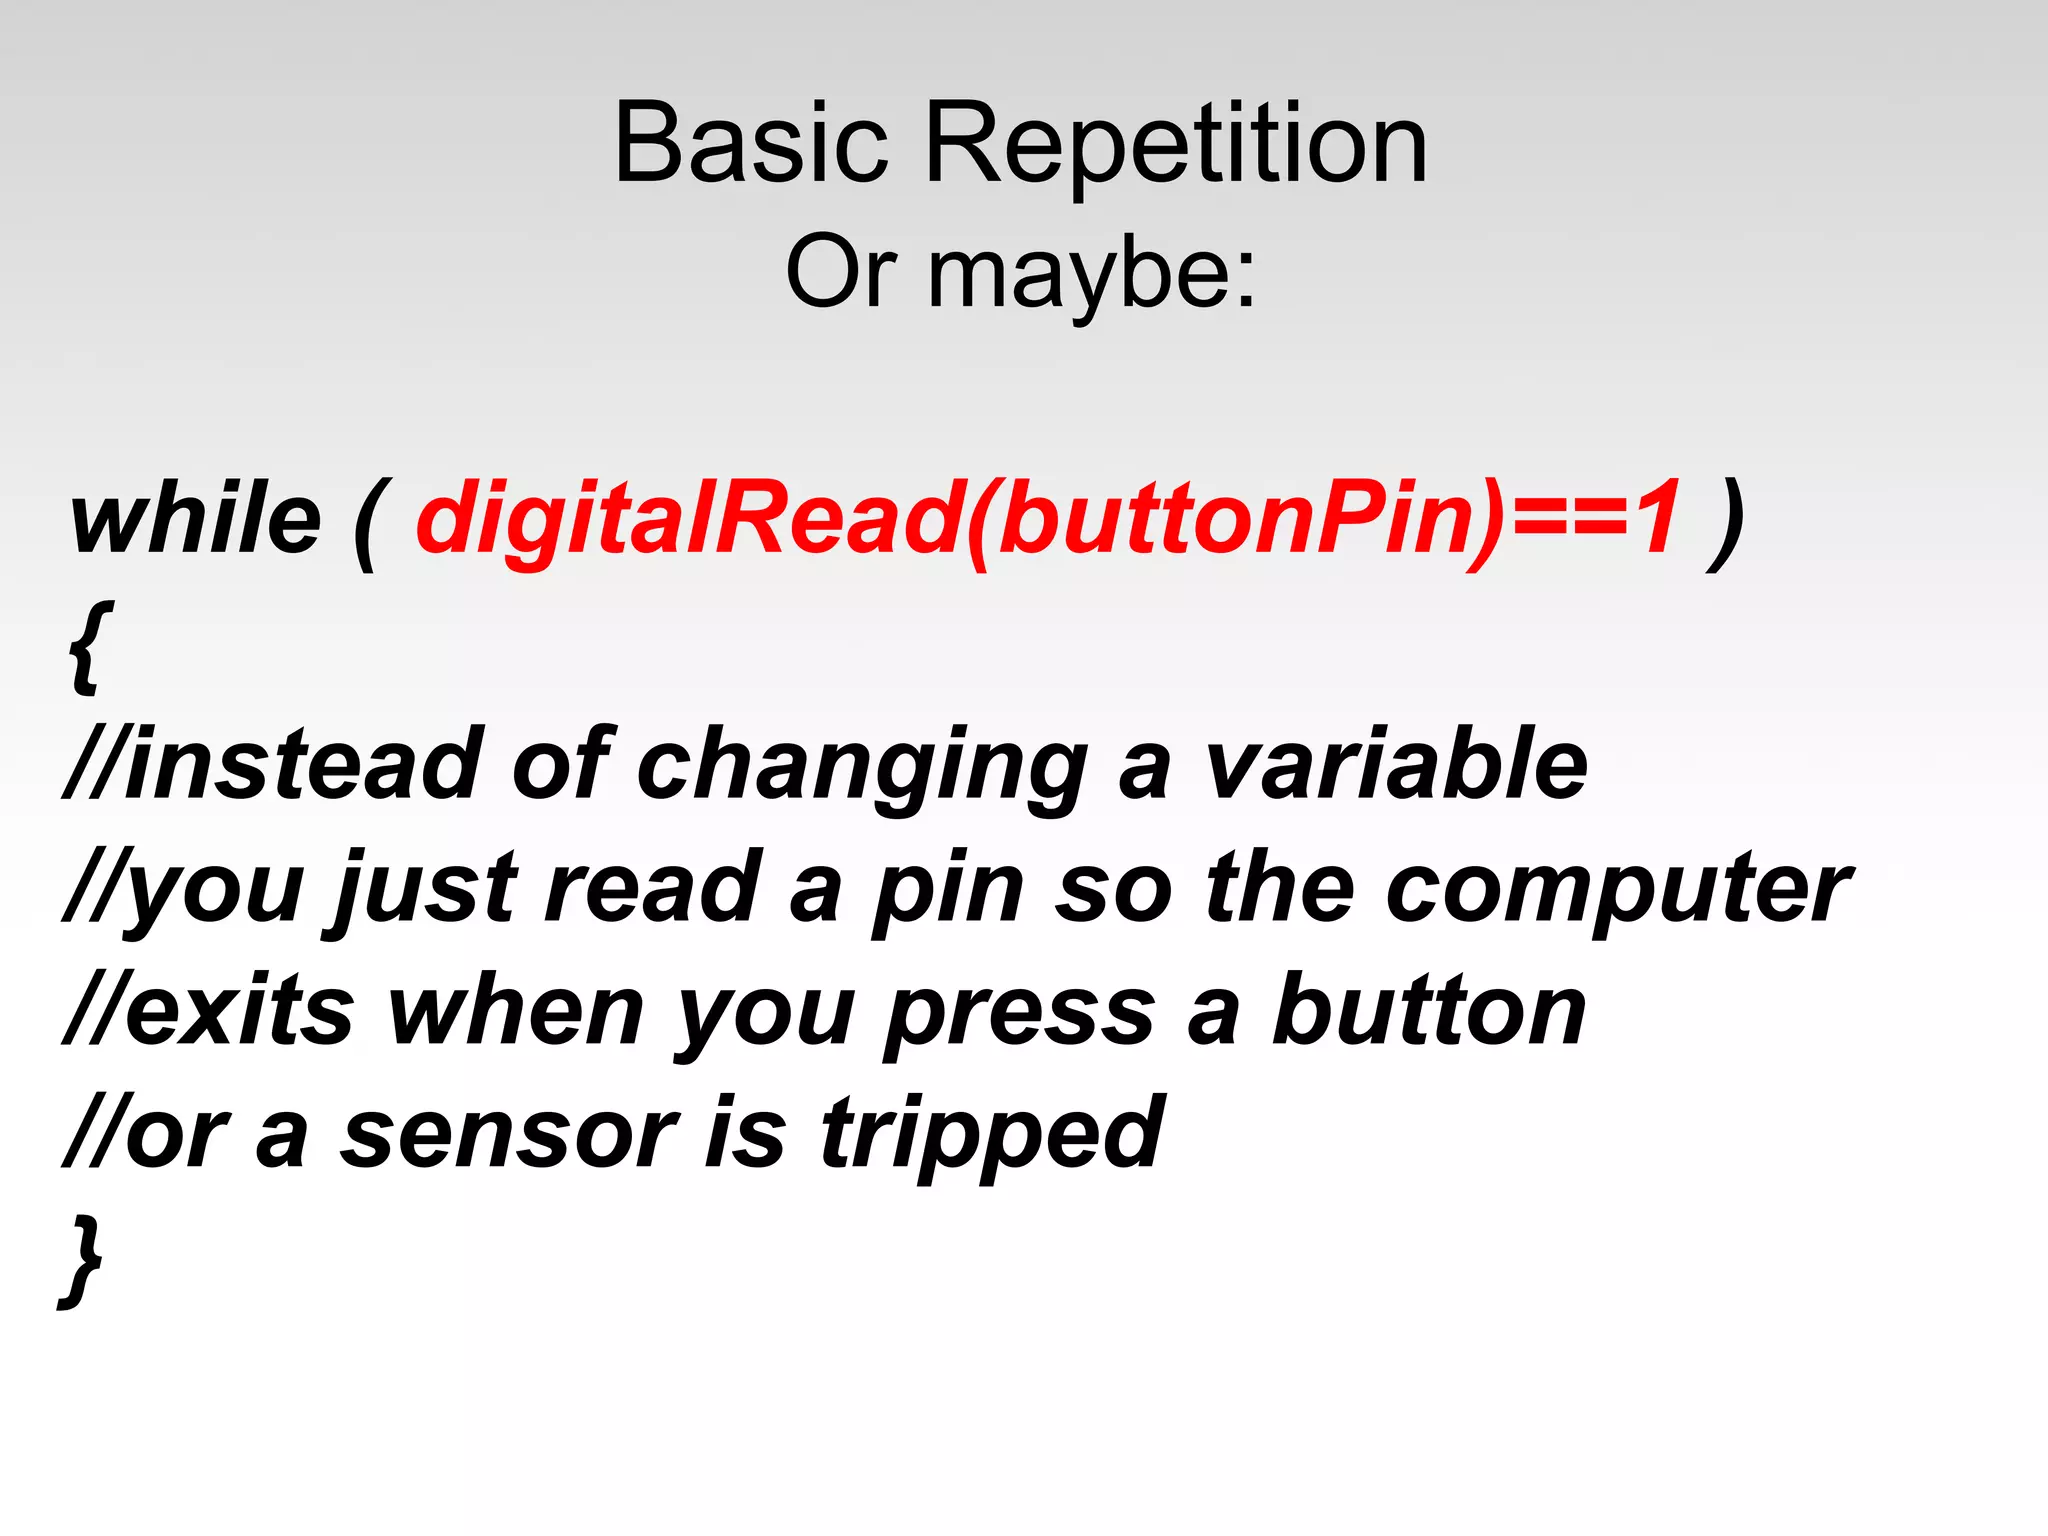


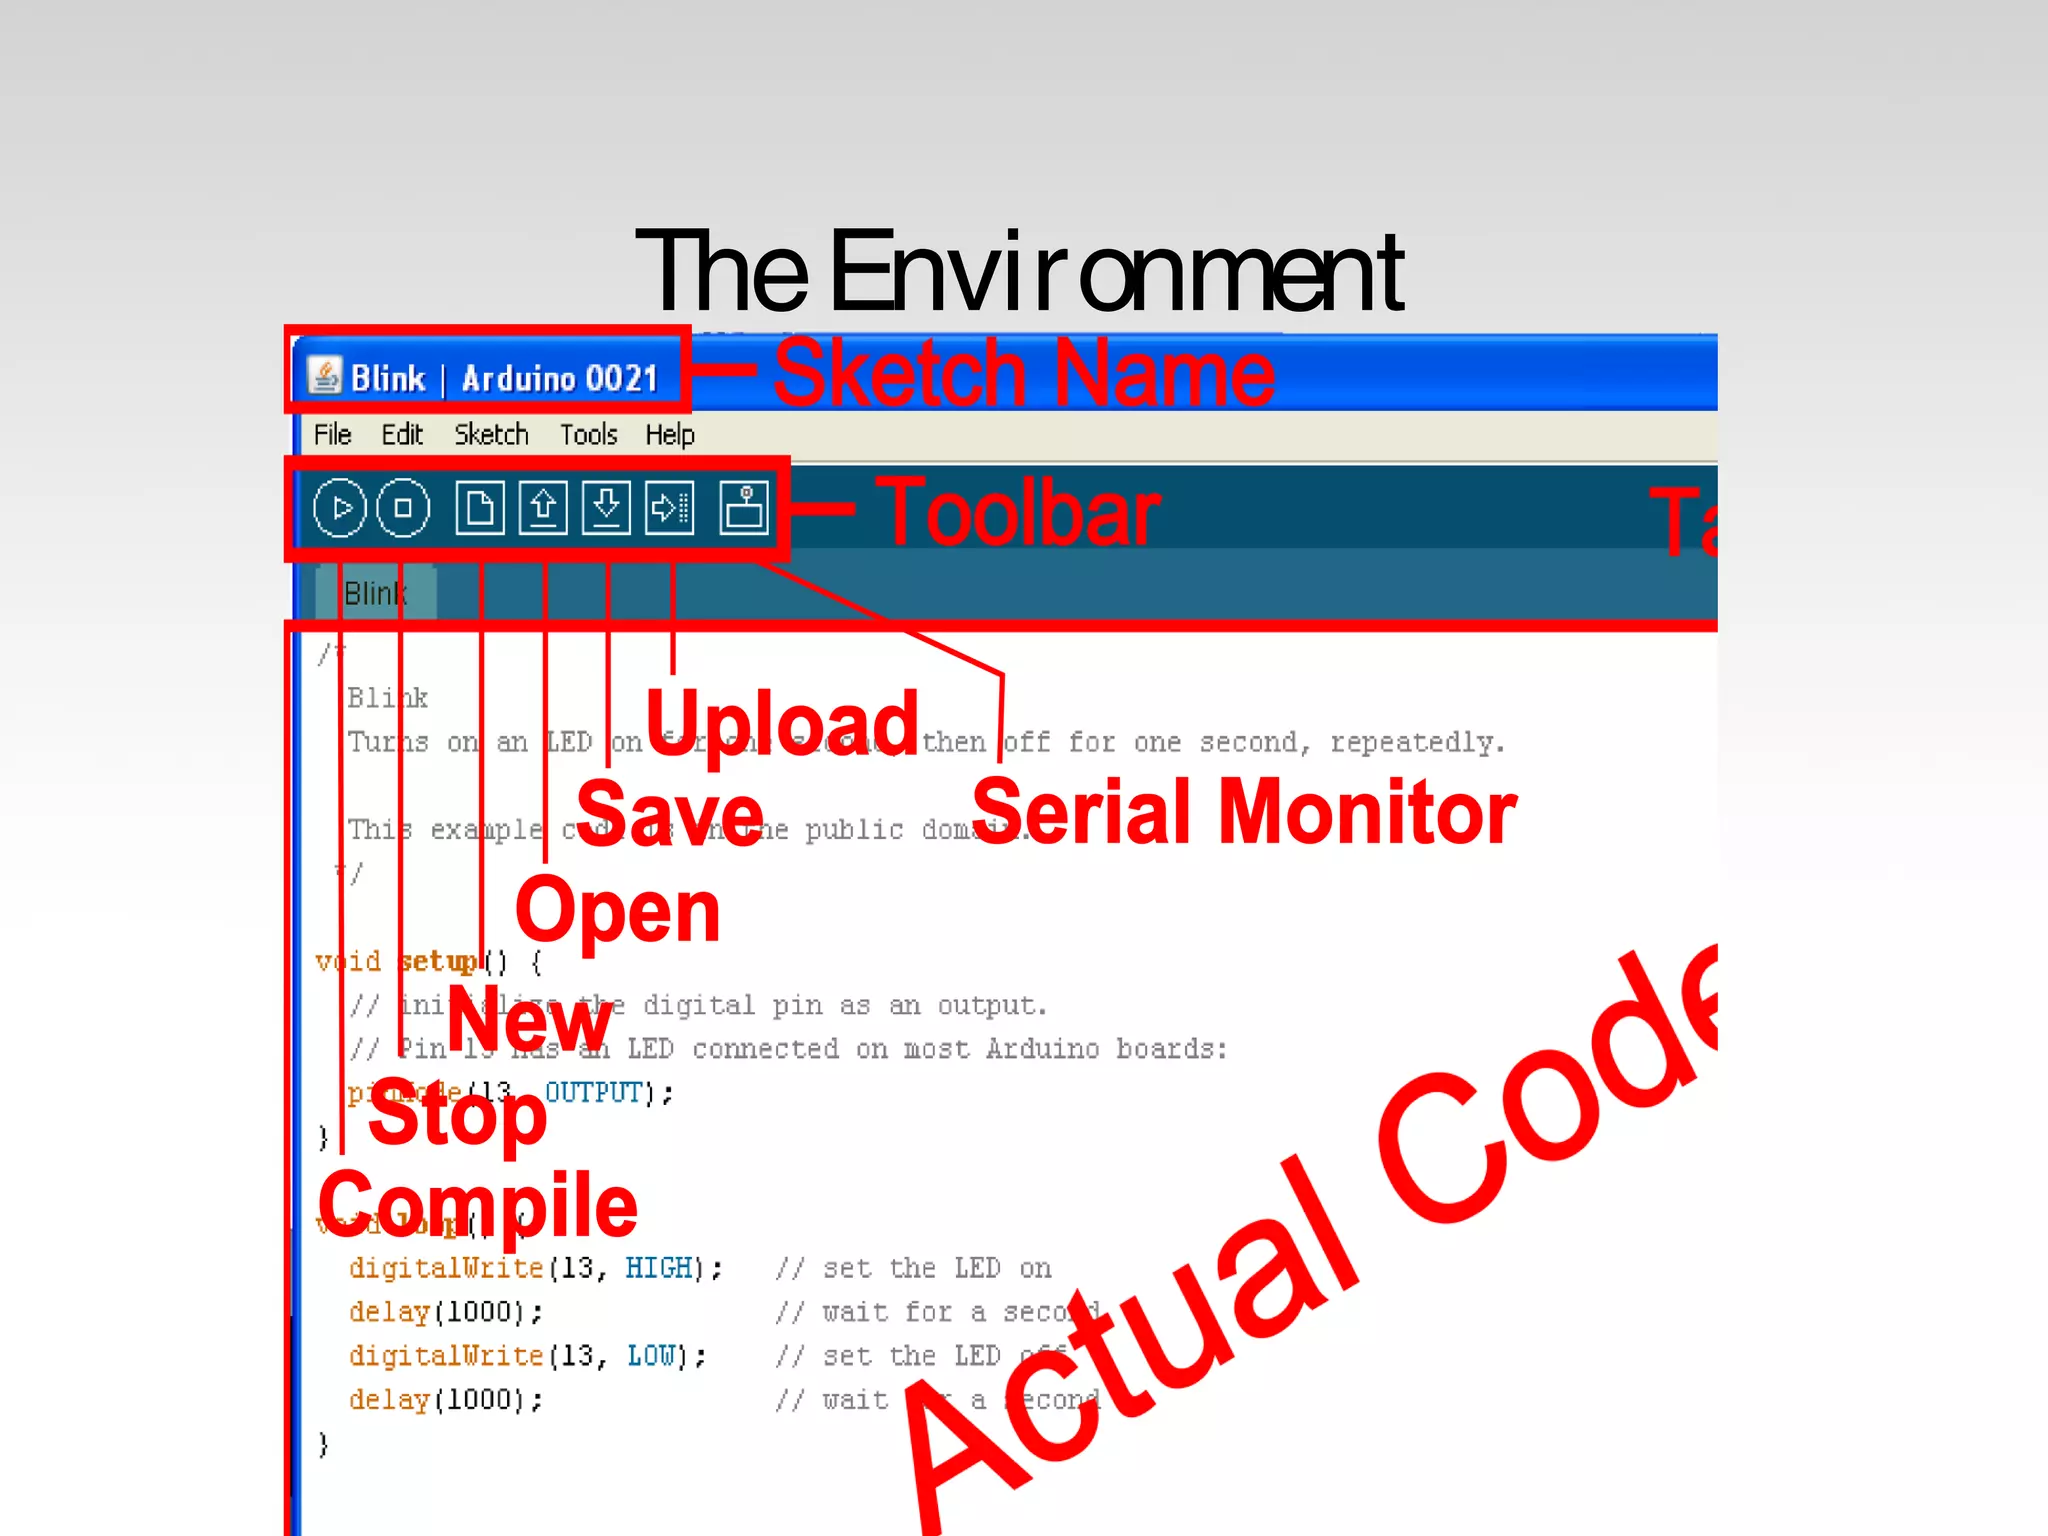
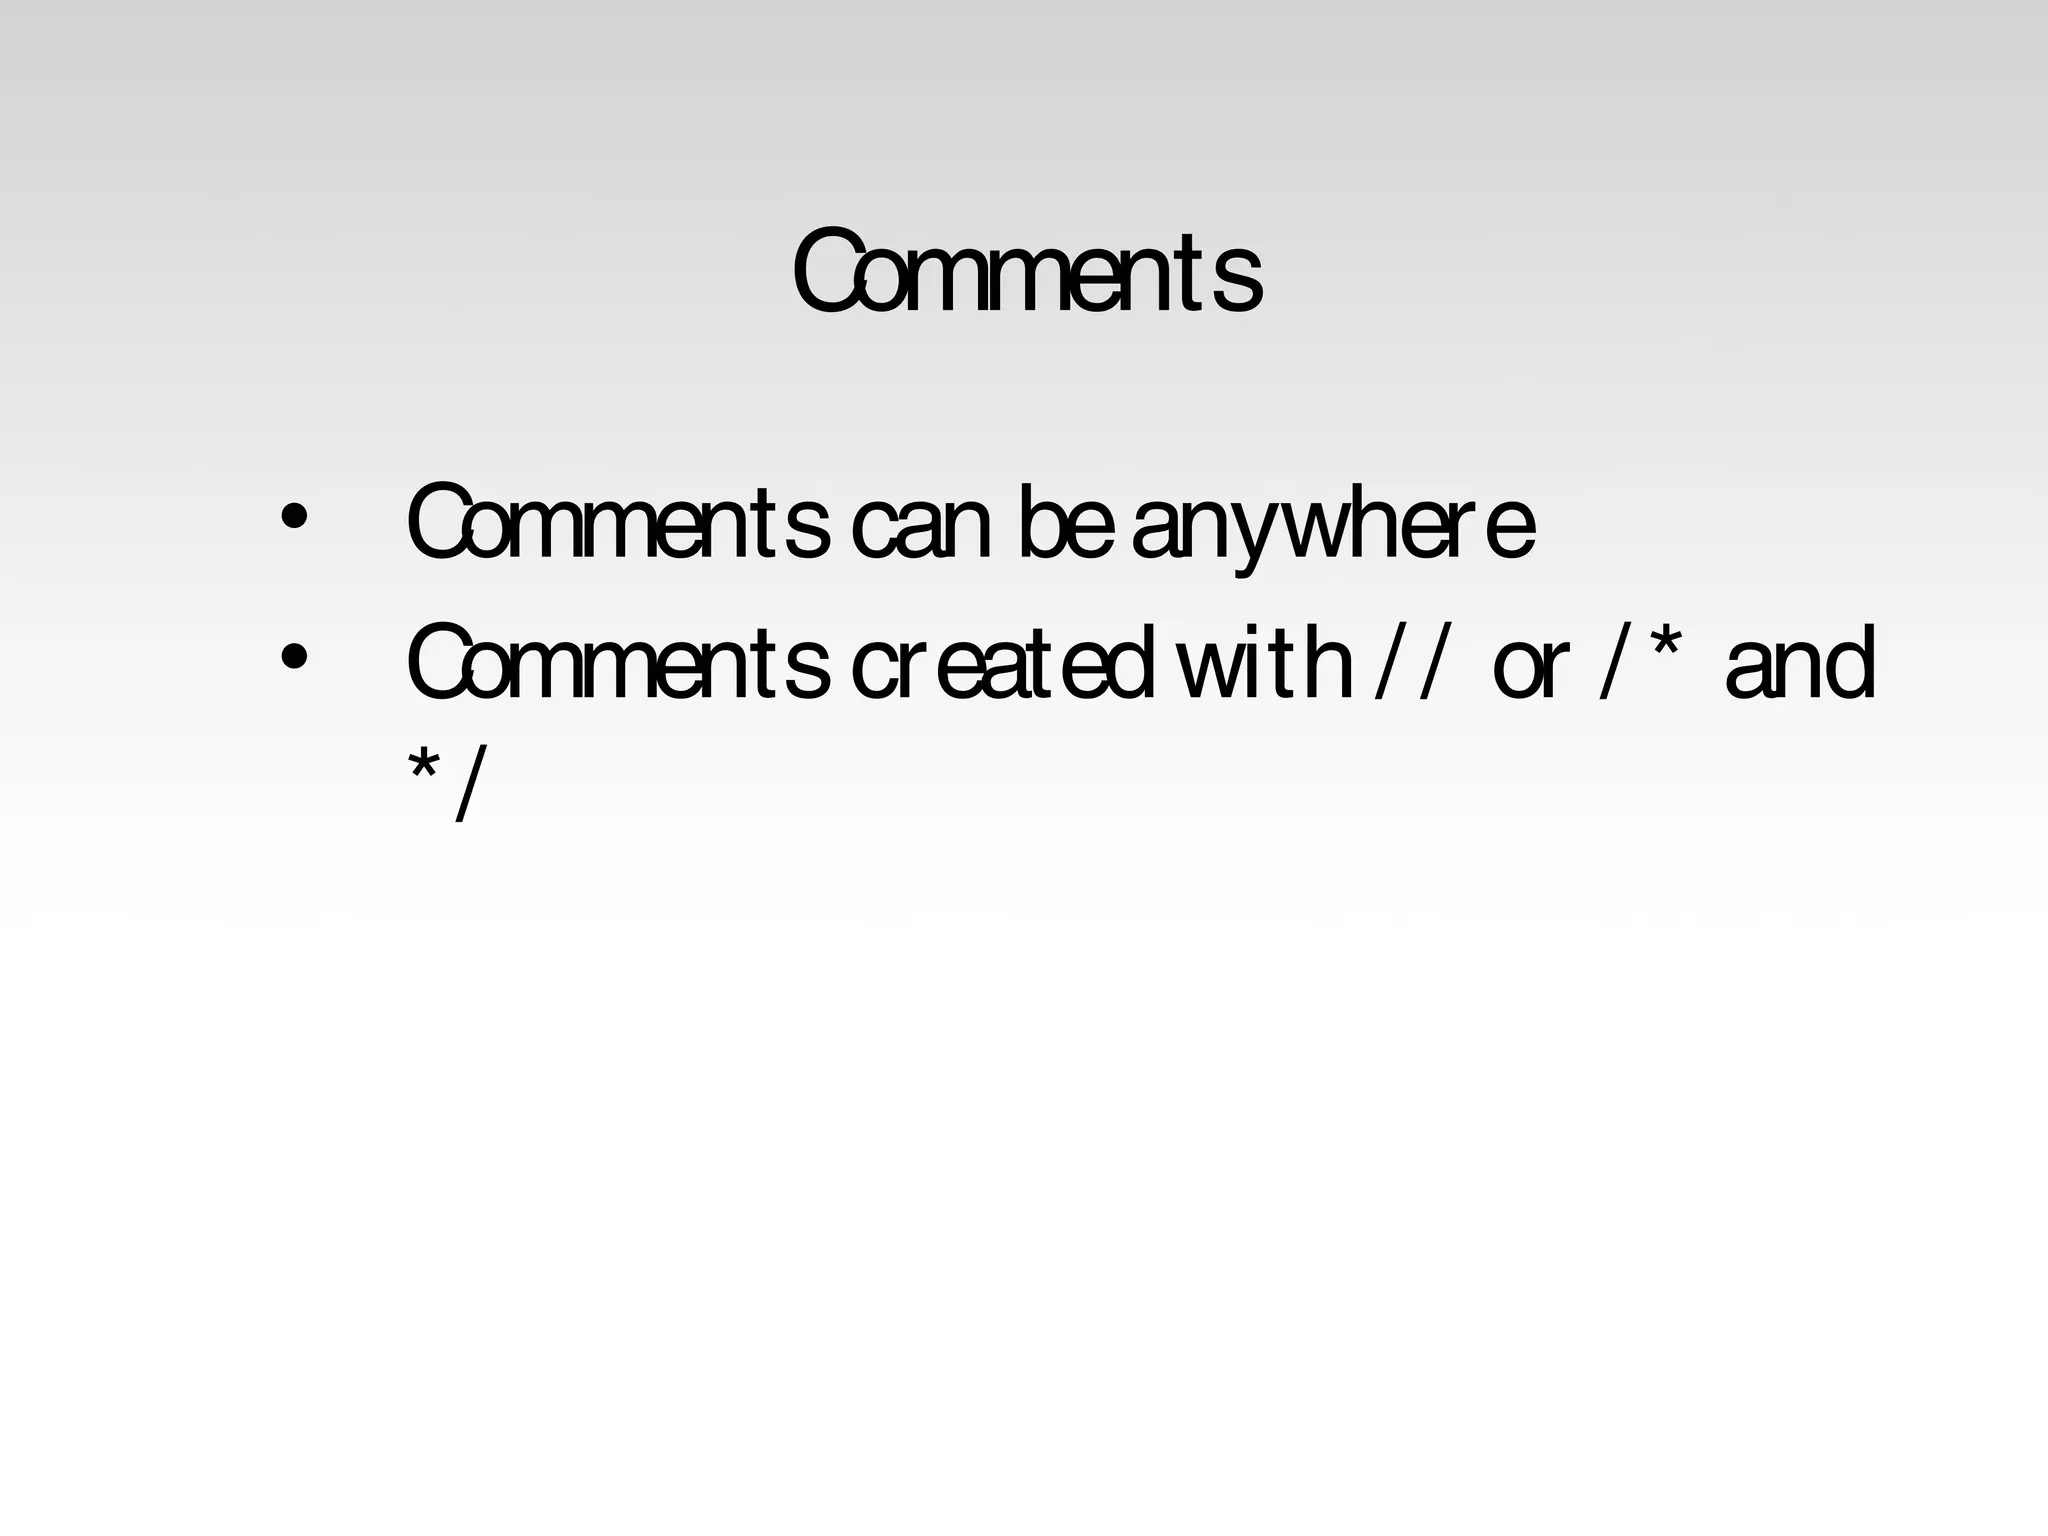
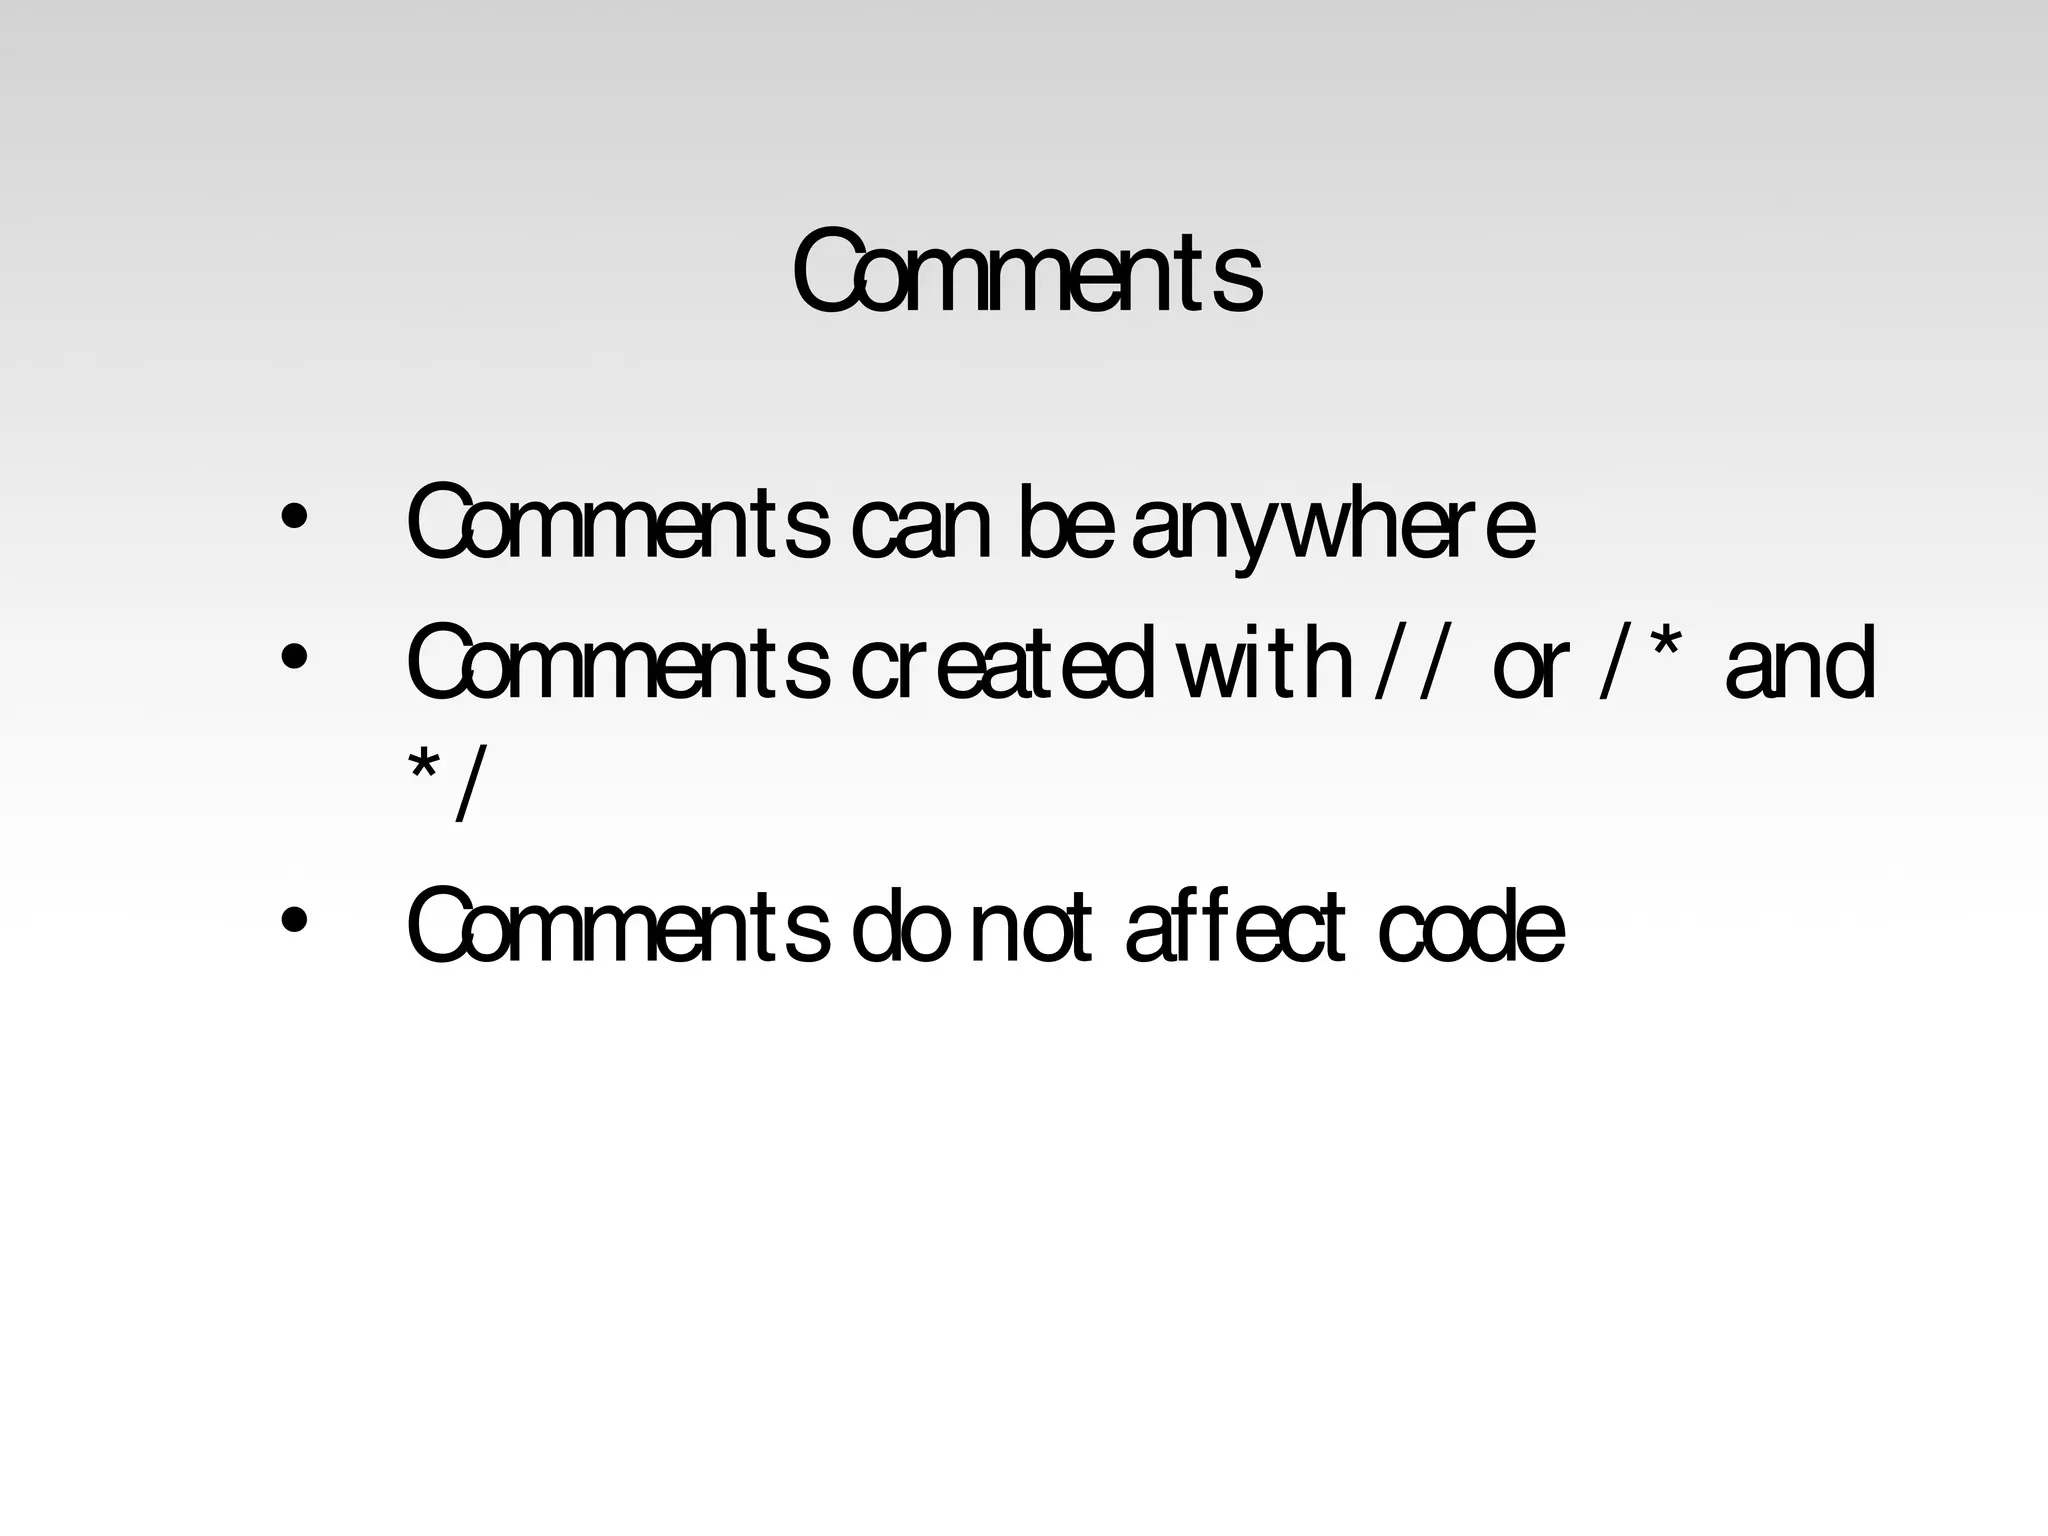
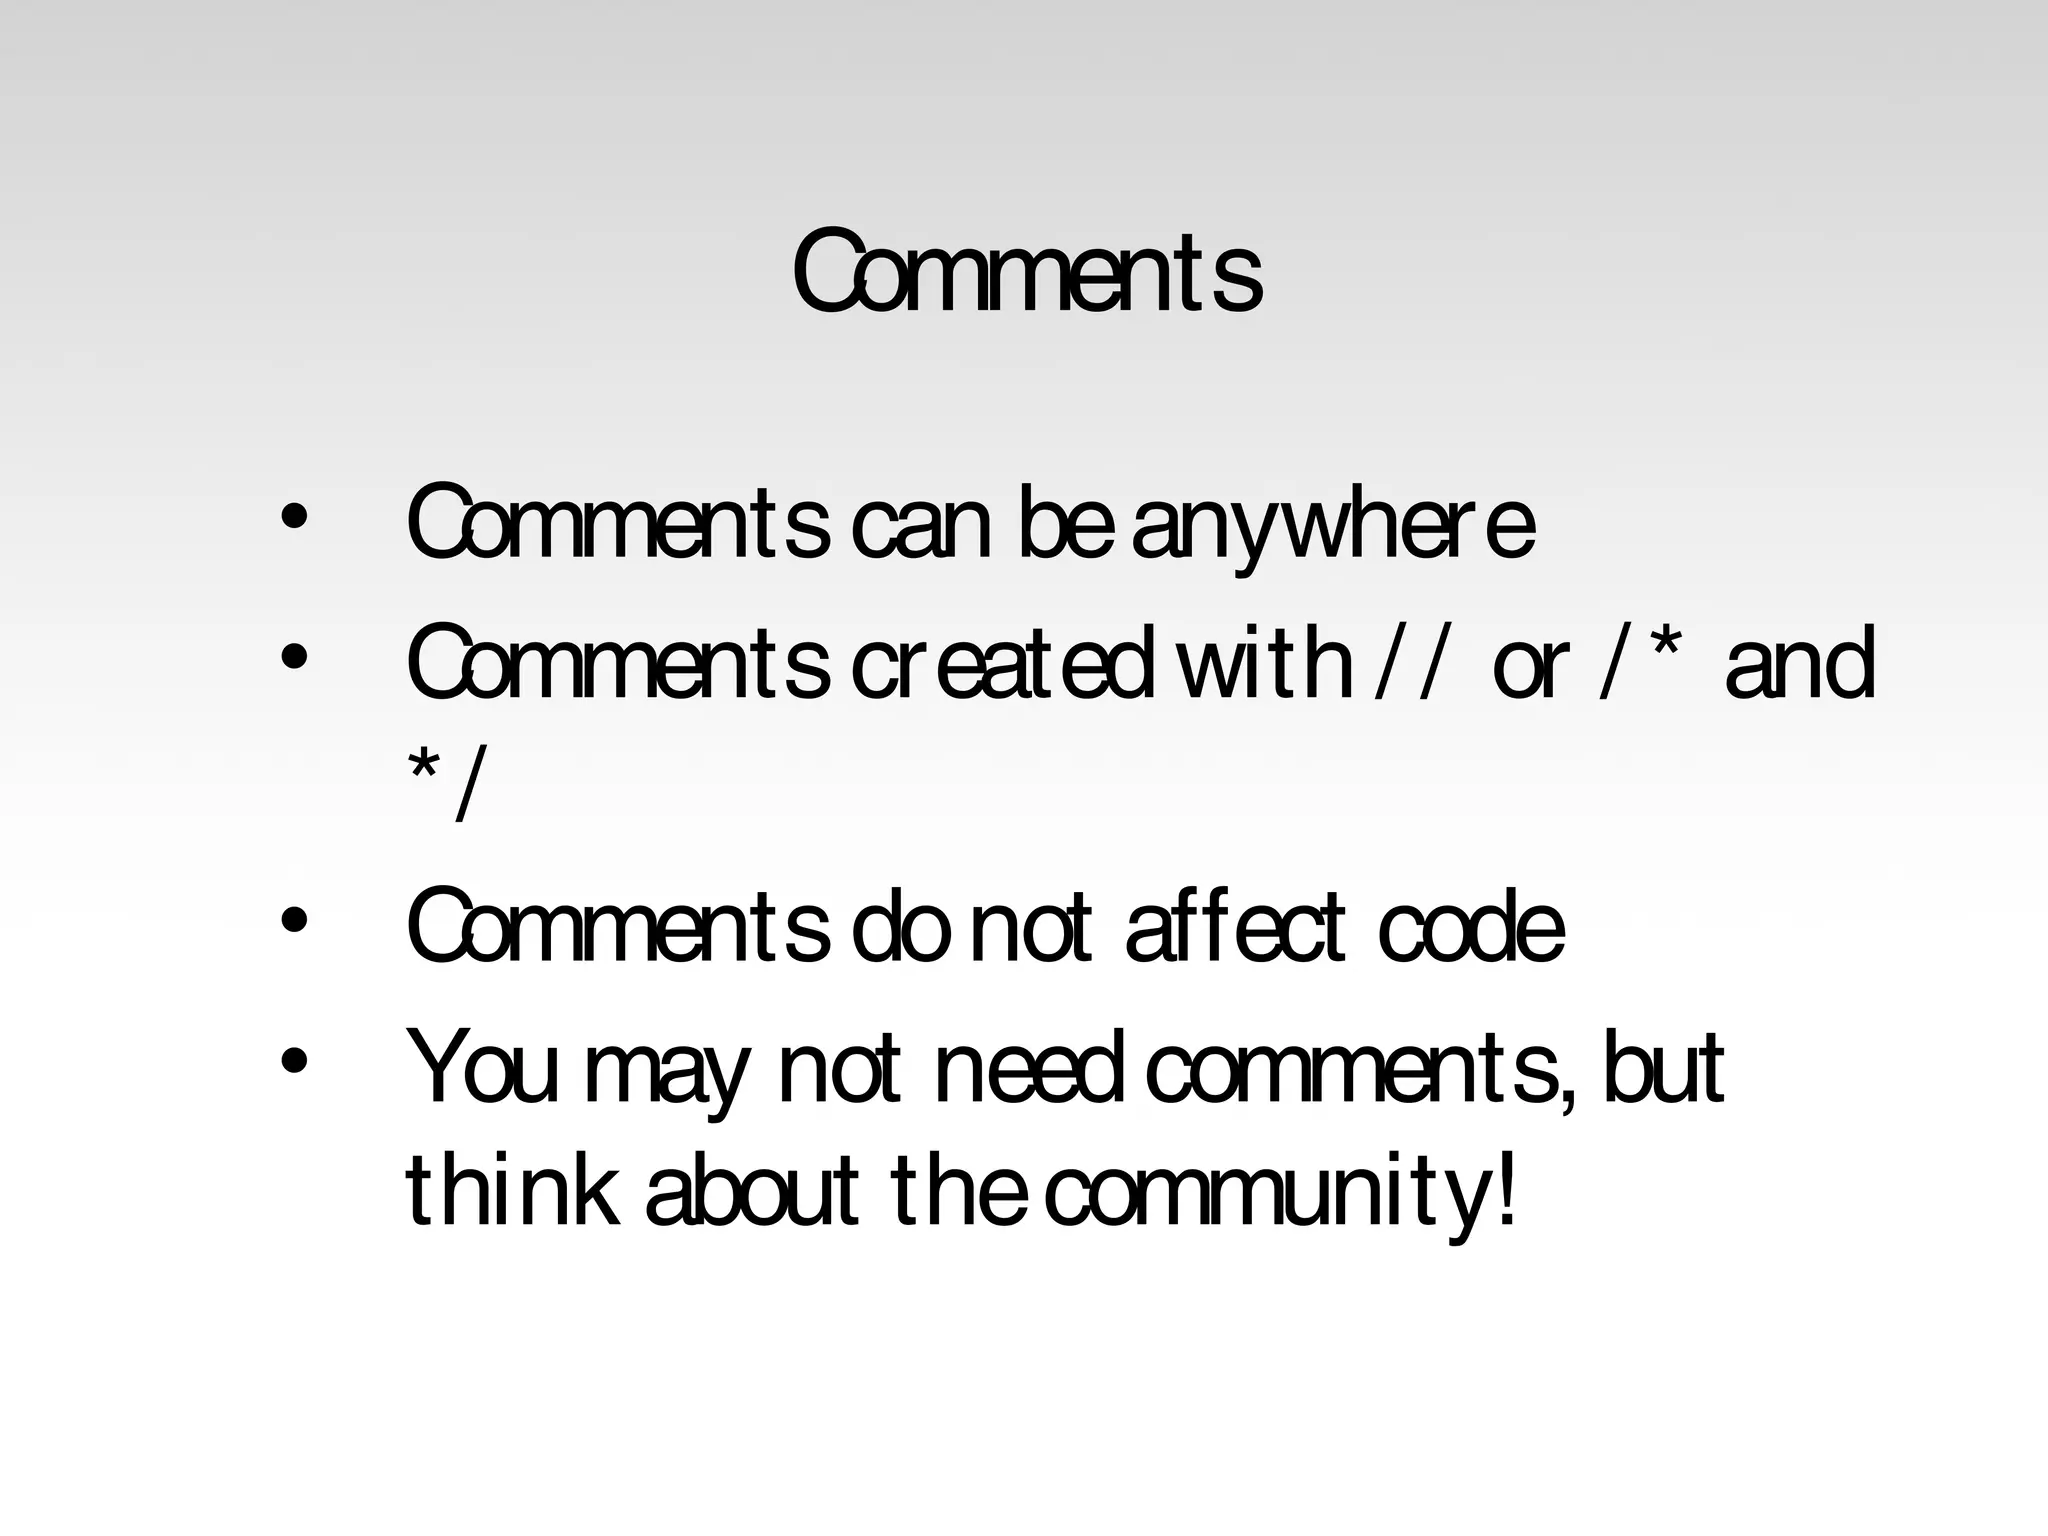
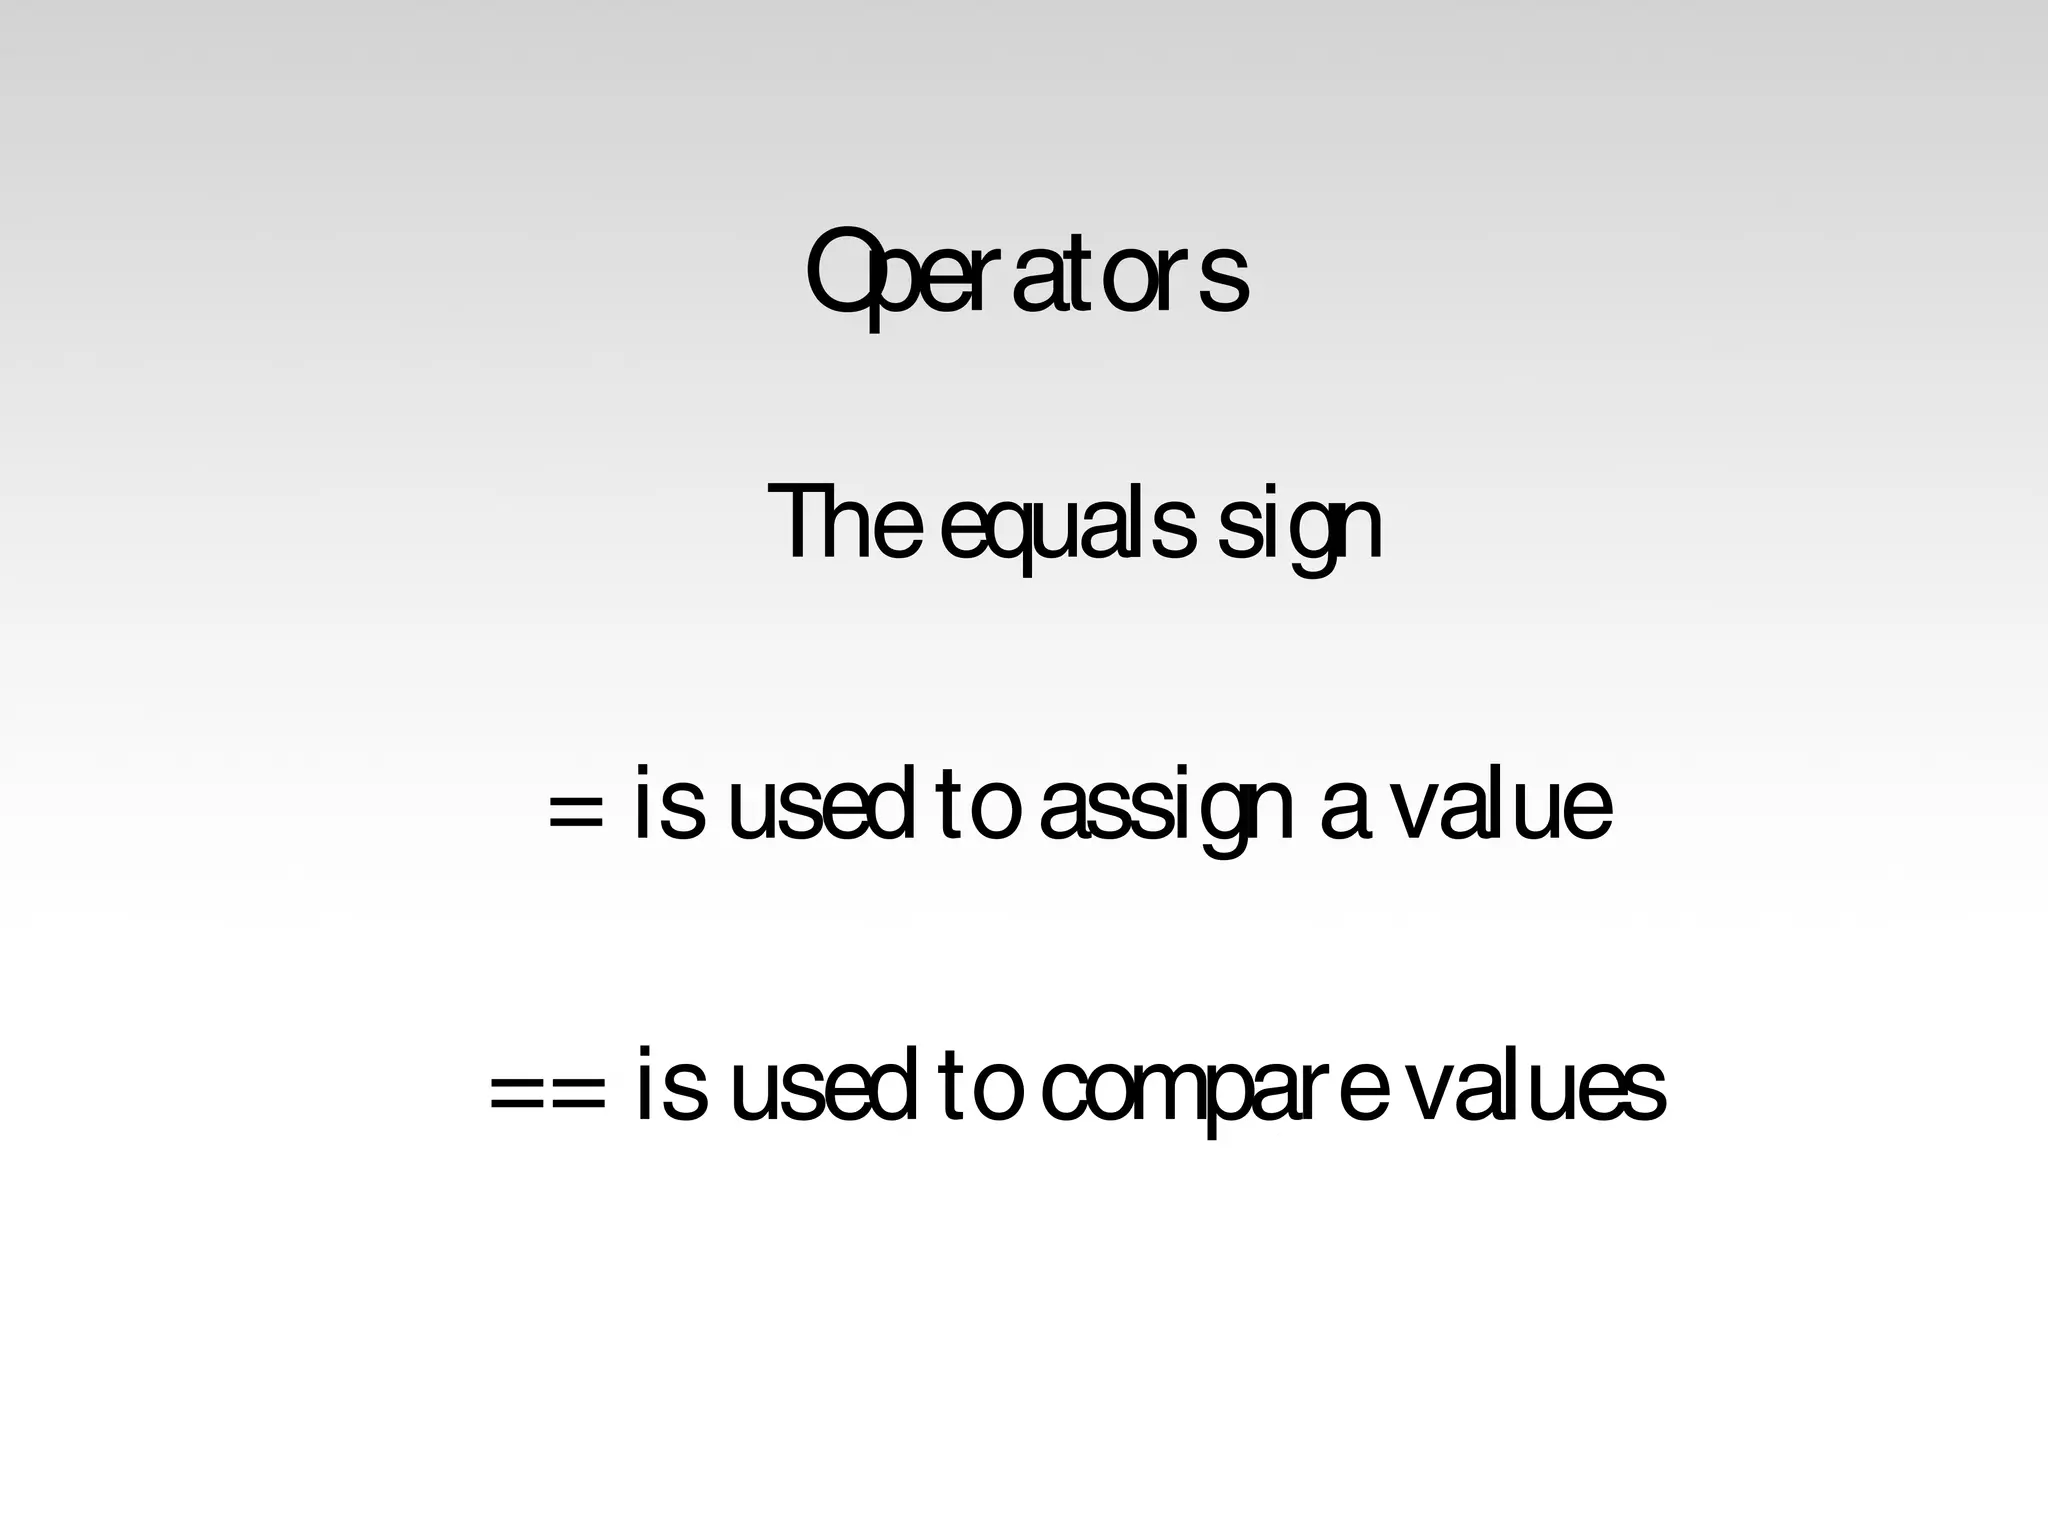
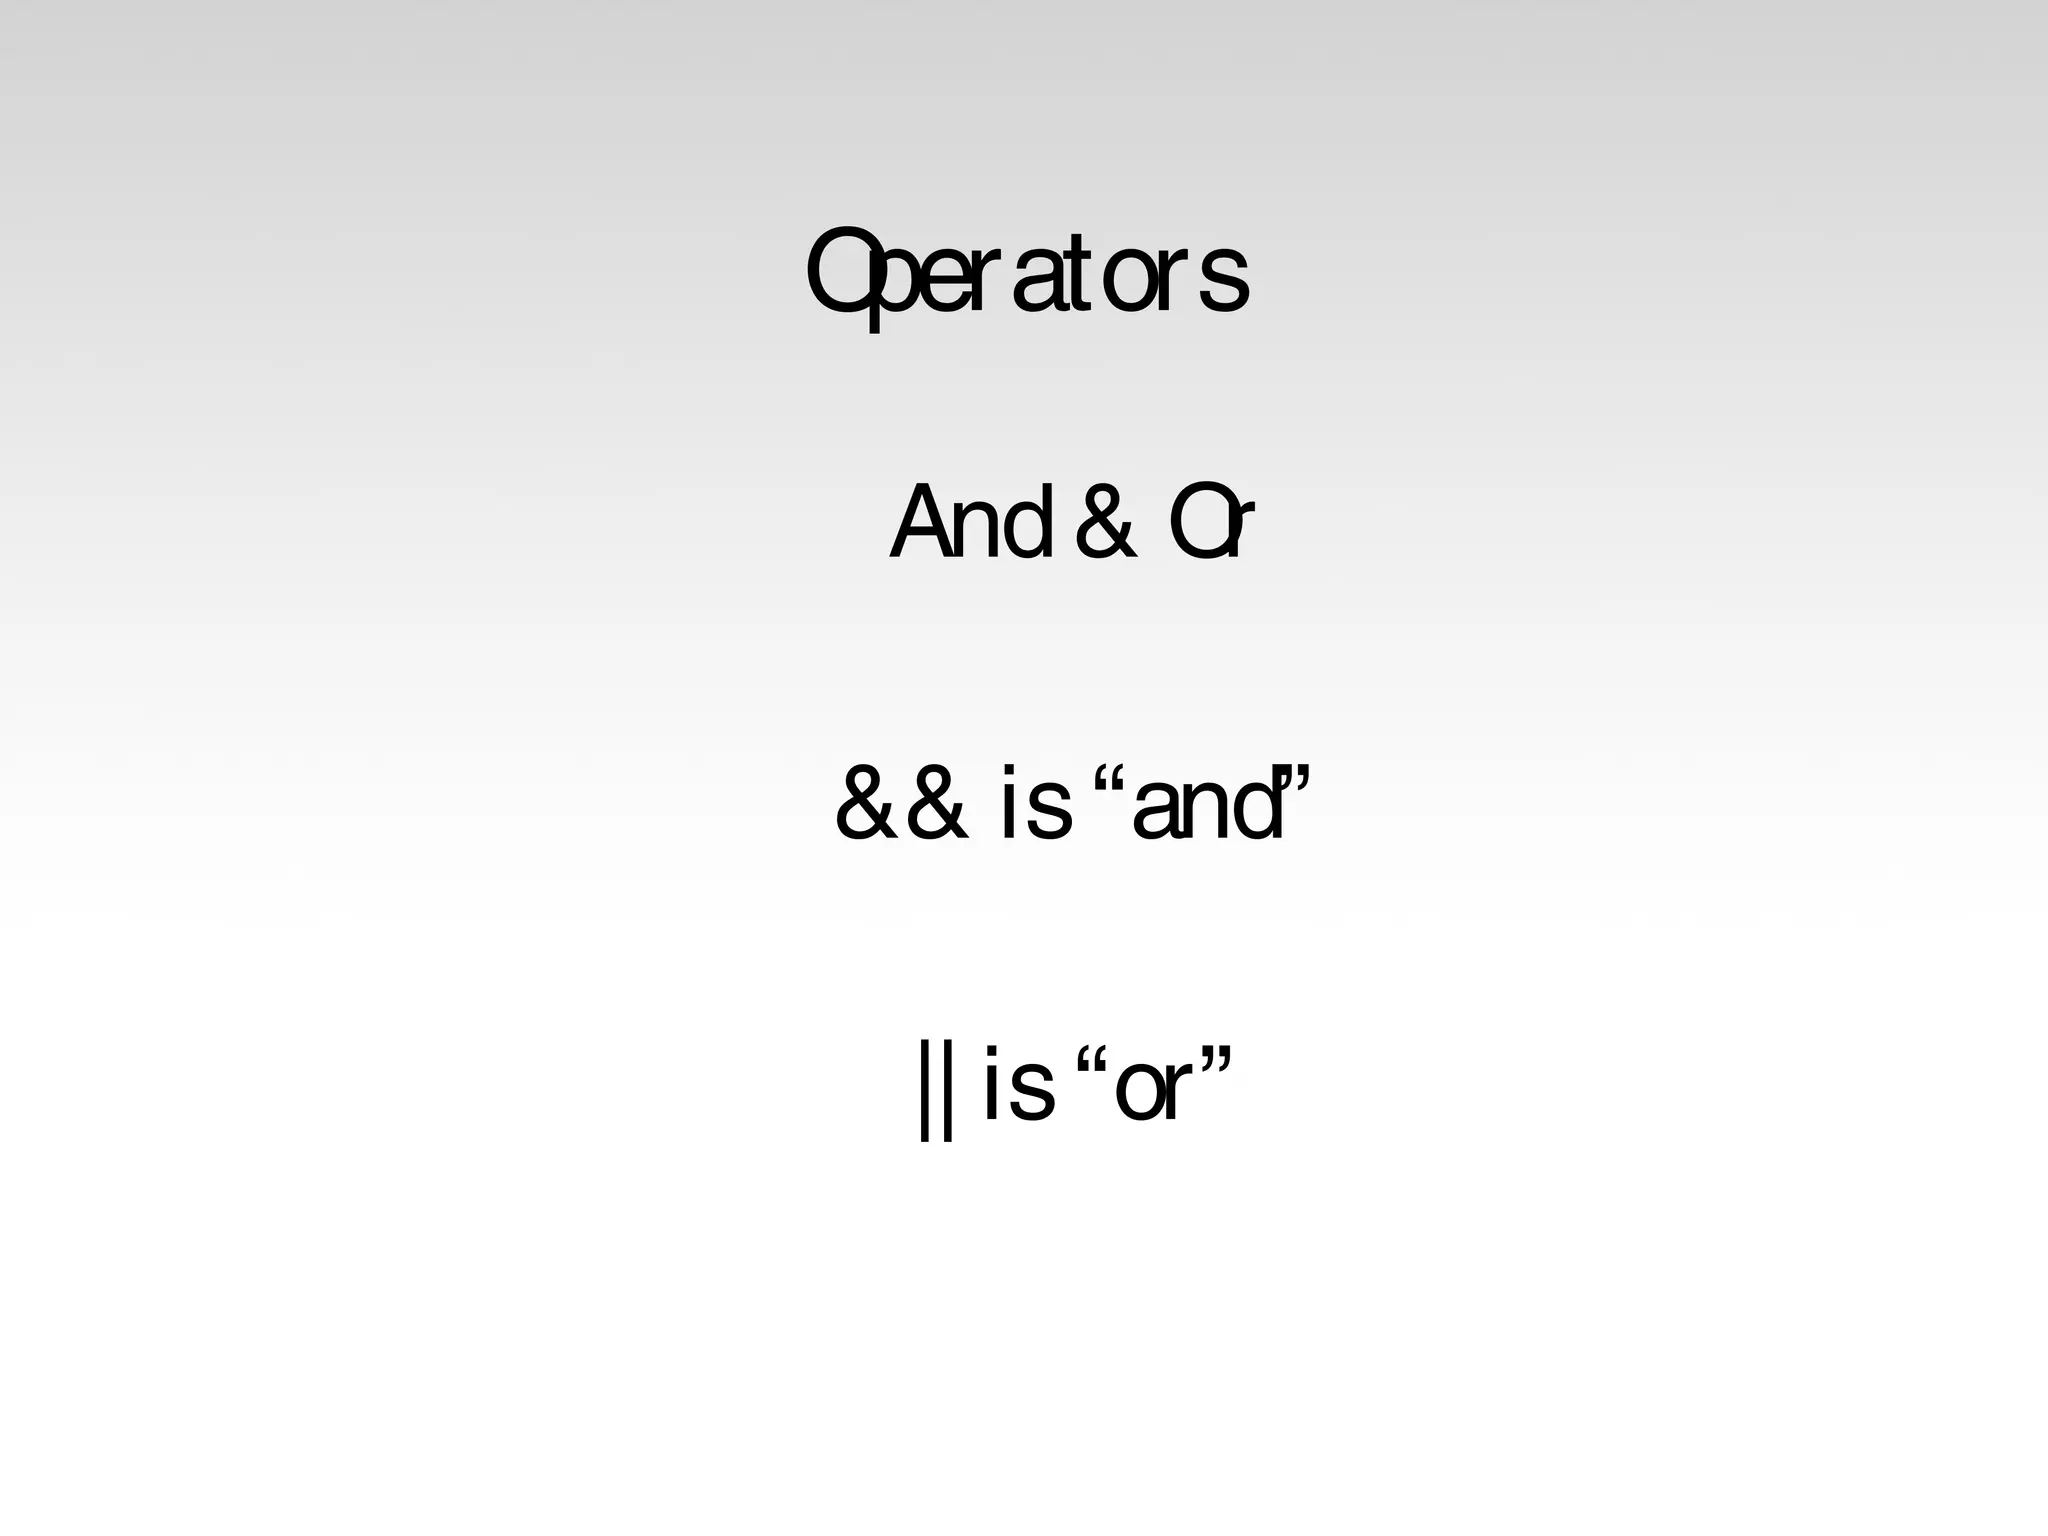
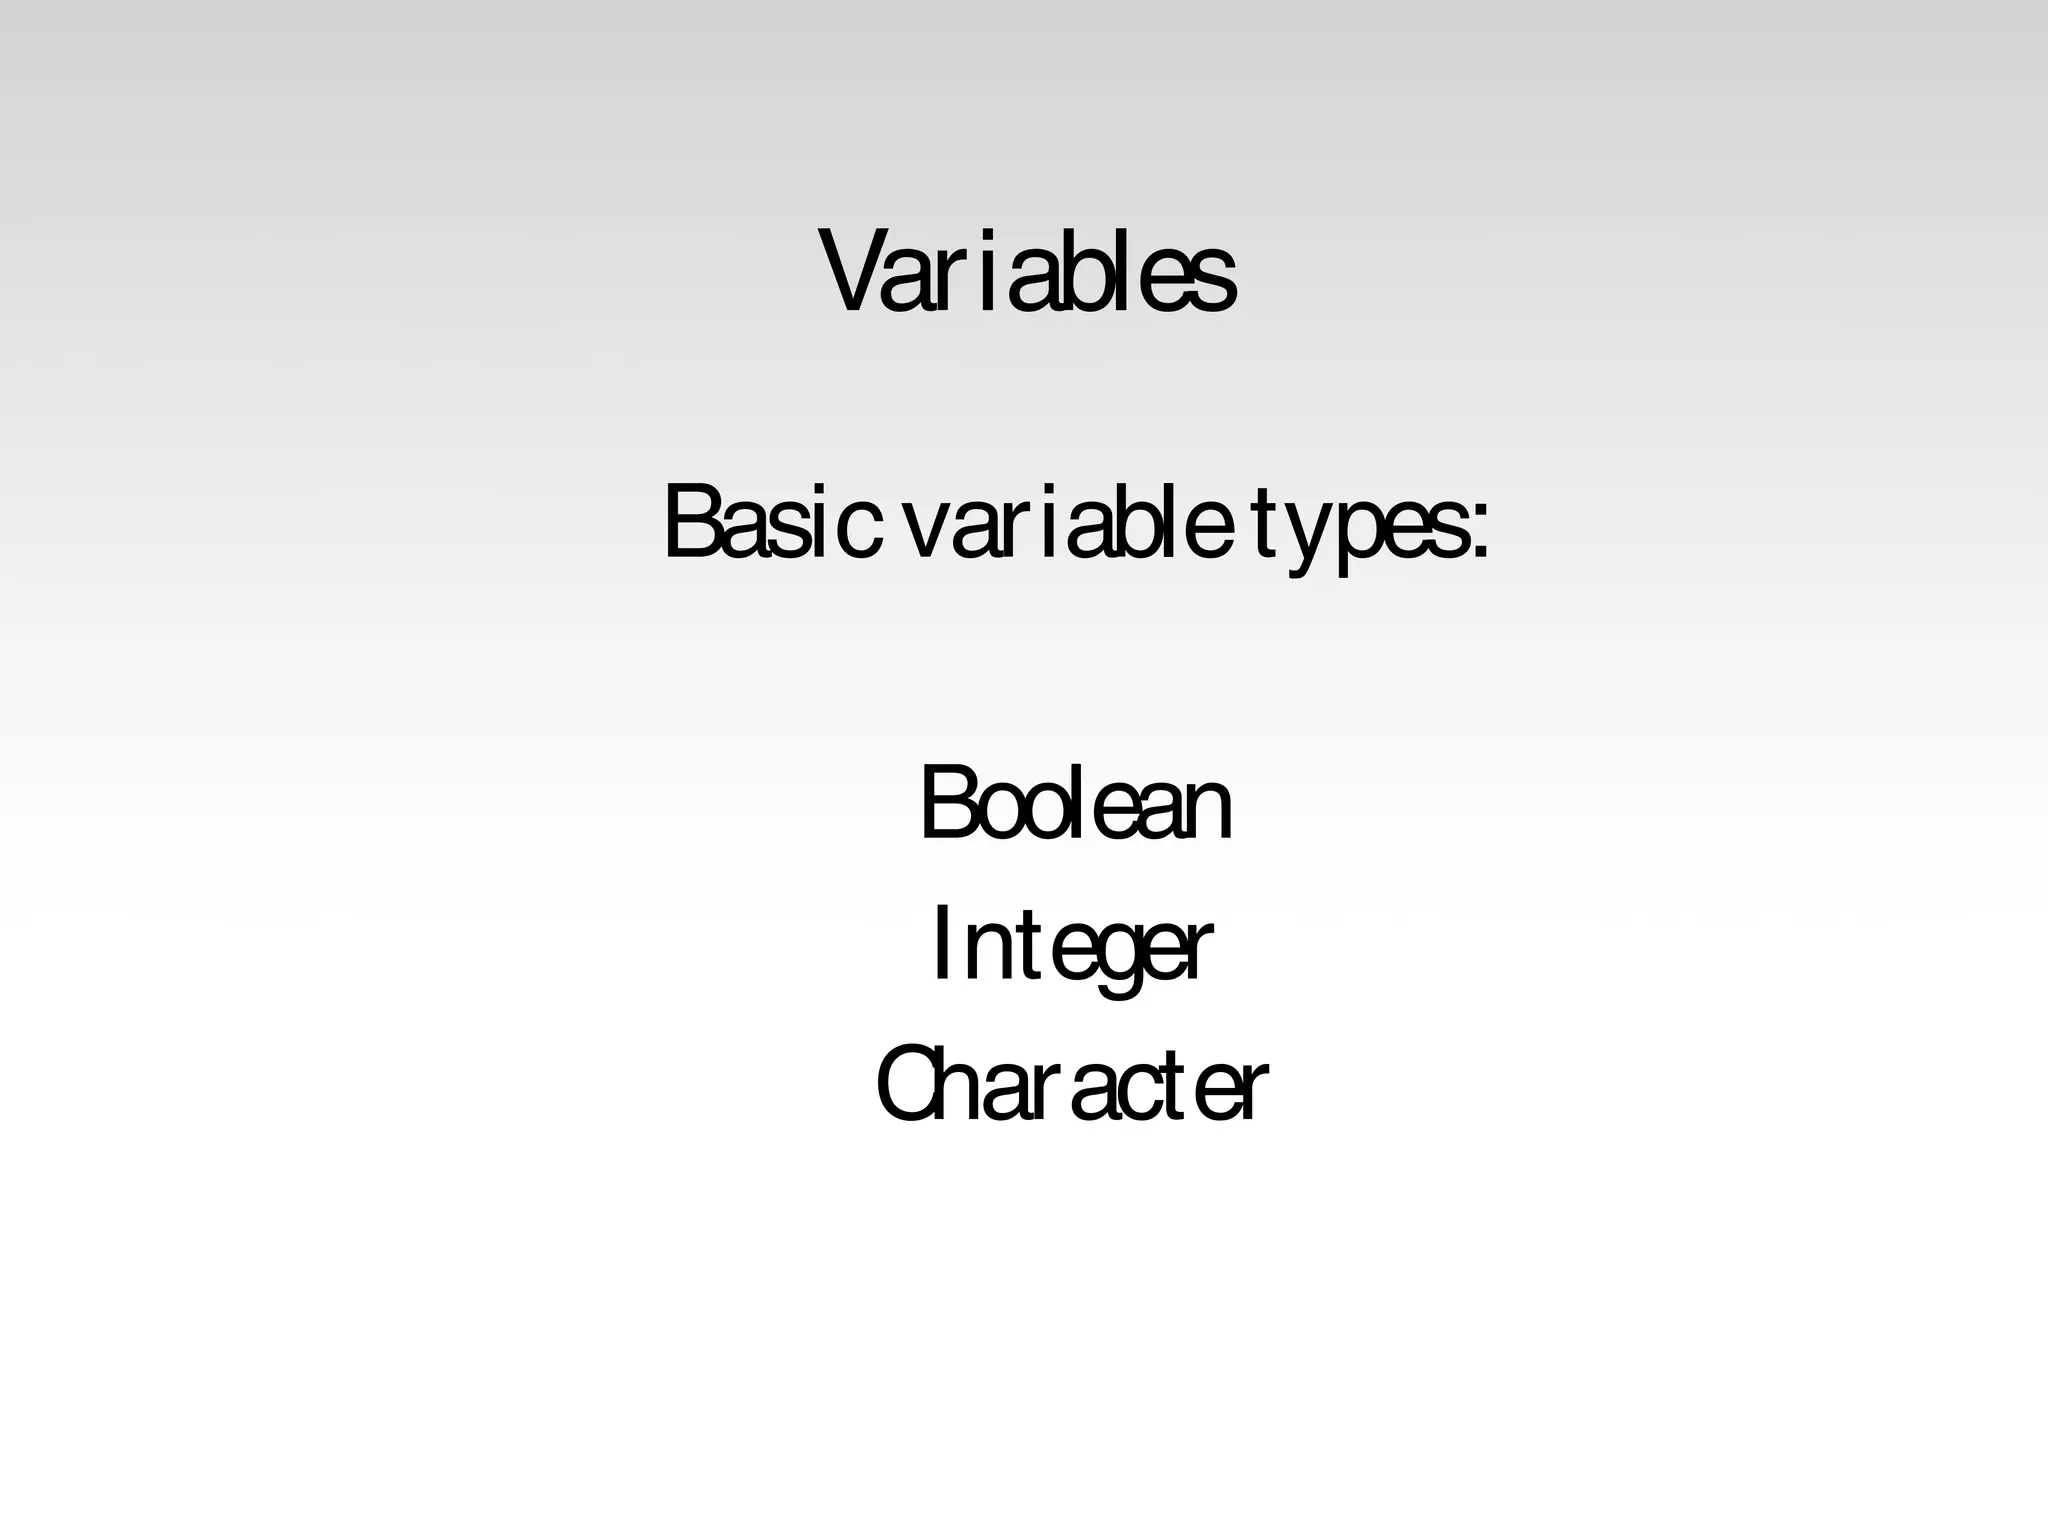
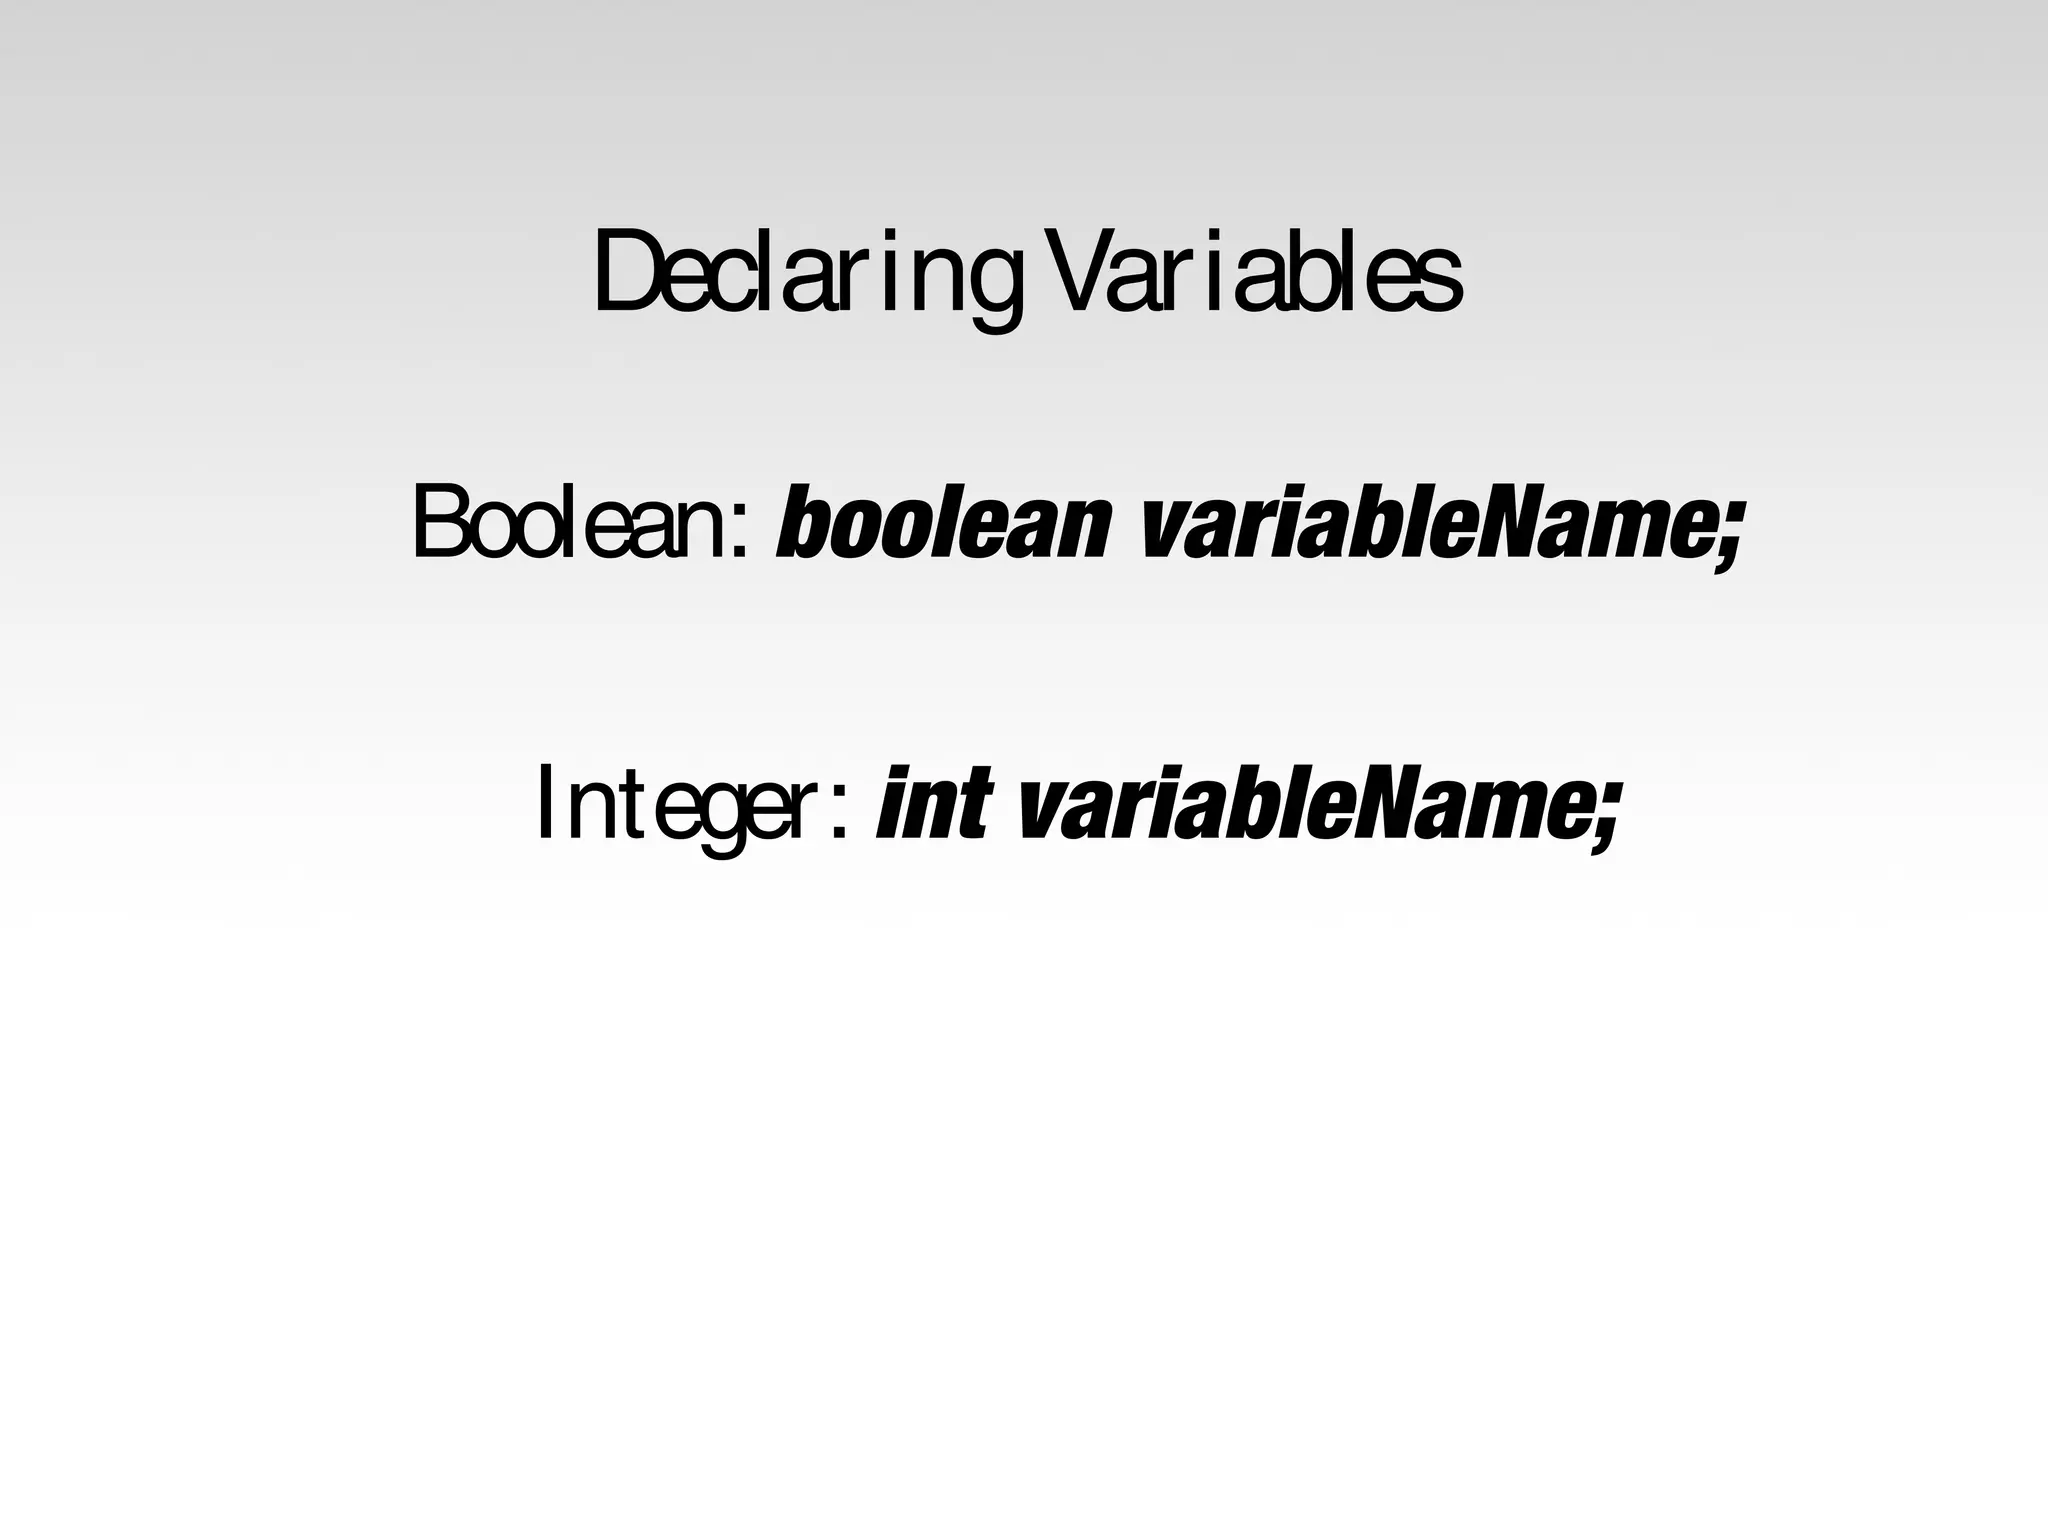
This document provides an overview of key concepts for programming Arduino boards including comments, variables, logic operators, and loops. It explains that comments are lines of text preceded by // or between /* and */. Variables can be boolean, integer, character, or strings, and are declared with keywords like boolean or int followed by the variable name. Common logic operators include = for assignment, == for comparison, && for AND, and || for OR. The Arduino setup function is used to initialize pins and serial communication. The loop function repeats code continuously. For, while, and basic repetition are covered with for loops iterating with a counter variable and while loops checking a condition.