Download to read offline


![const CLIENT_ID = environment.client_Id; @NgModule({ declarations: [AppComponent, LoginComponent], imports: [BrowserModule, FormsModule, SocialLoginModule], providers: [ { provide: "SocialAuthServiceConfig", useValue: { autoLogin: true, providers: [ { id: GoogleLoginProvider.PROVIDER_ID, provider: new GoogleLoginProvider( CLIENT_ID ) } ]](https://image.slidesharecdn.com/angular11googlesocialloginorsignintutorialusingangularx-social-login-210630034536/75/Angular-11-google-social-login-or-sign-in-tutorial-using-angularx-social-login-19-2048.jpg)
![} as SocialAuthServiceConfig } ], bootstrap: [AppComponent] }) export class AppModule { } Step 5 : Open login.component.html file and add the below code. <div class="jumbotron bg-transparent text- center"> <div *ngIf="!user" class="card text-center"> <h6 class="card-header"> Social Login Demo </h6> <div class="card-block"> <h4 class="card-title">Not signed in</h4>](https://image.slidesharecdn.com/angular11googlesocialloginorsignintutorialusingangularx-social-login-210630034536/75/Angular-11-google-social-login-or-sign-in-tutorial-using-angularx-social-login-20-2048.jpg)
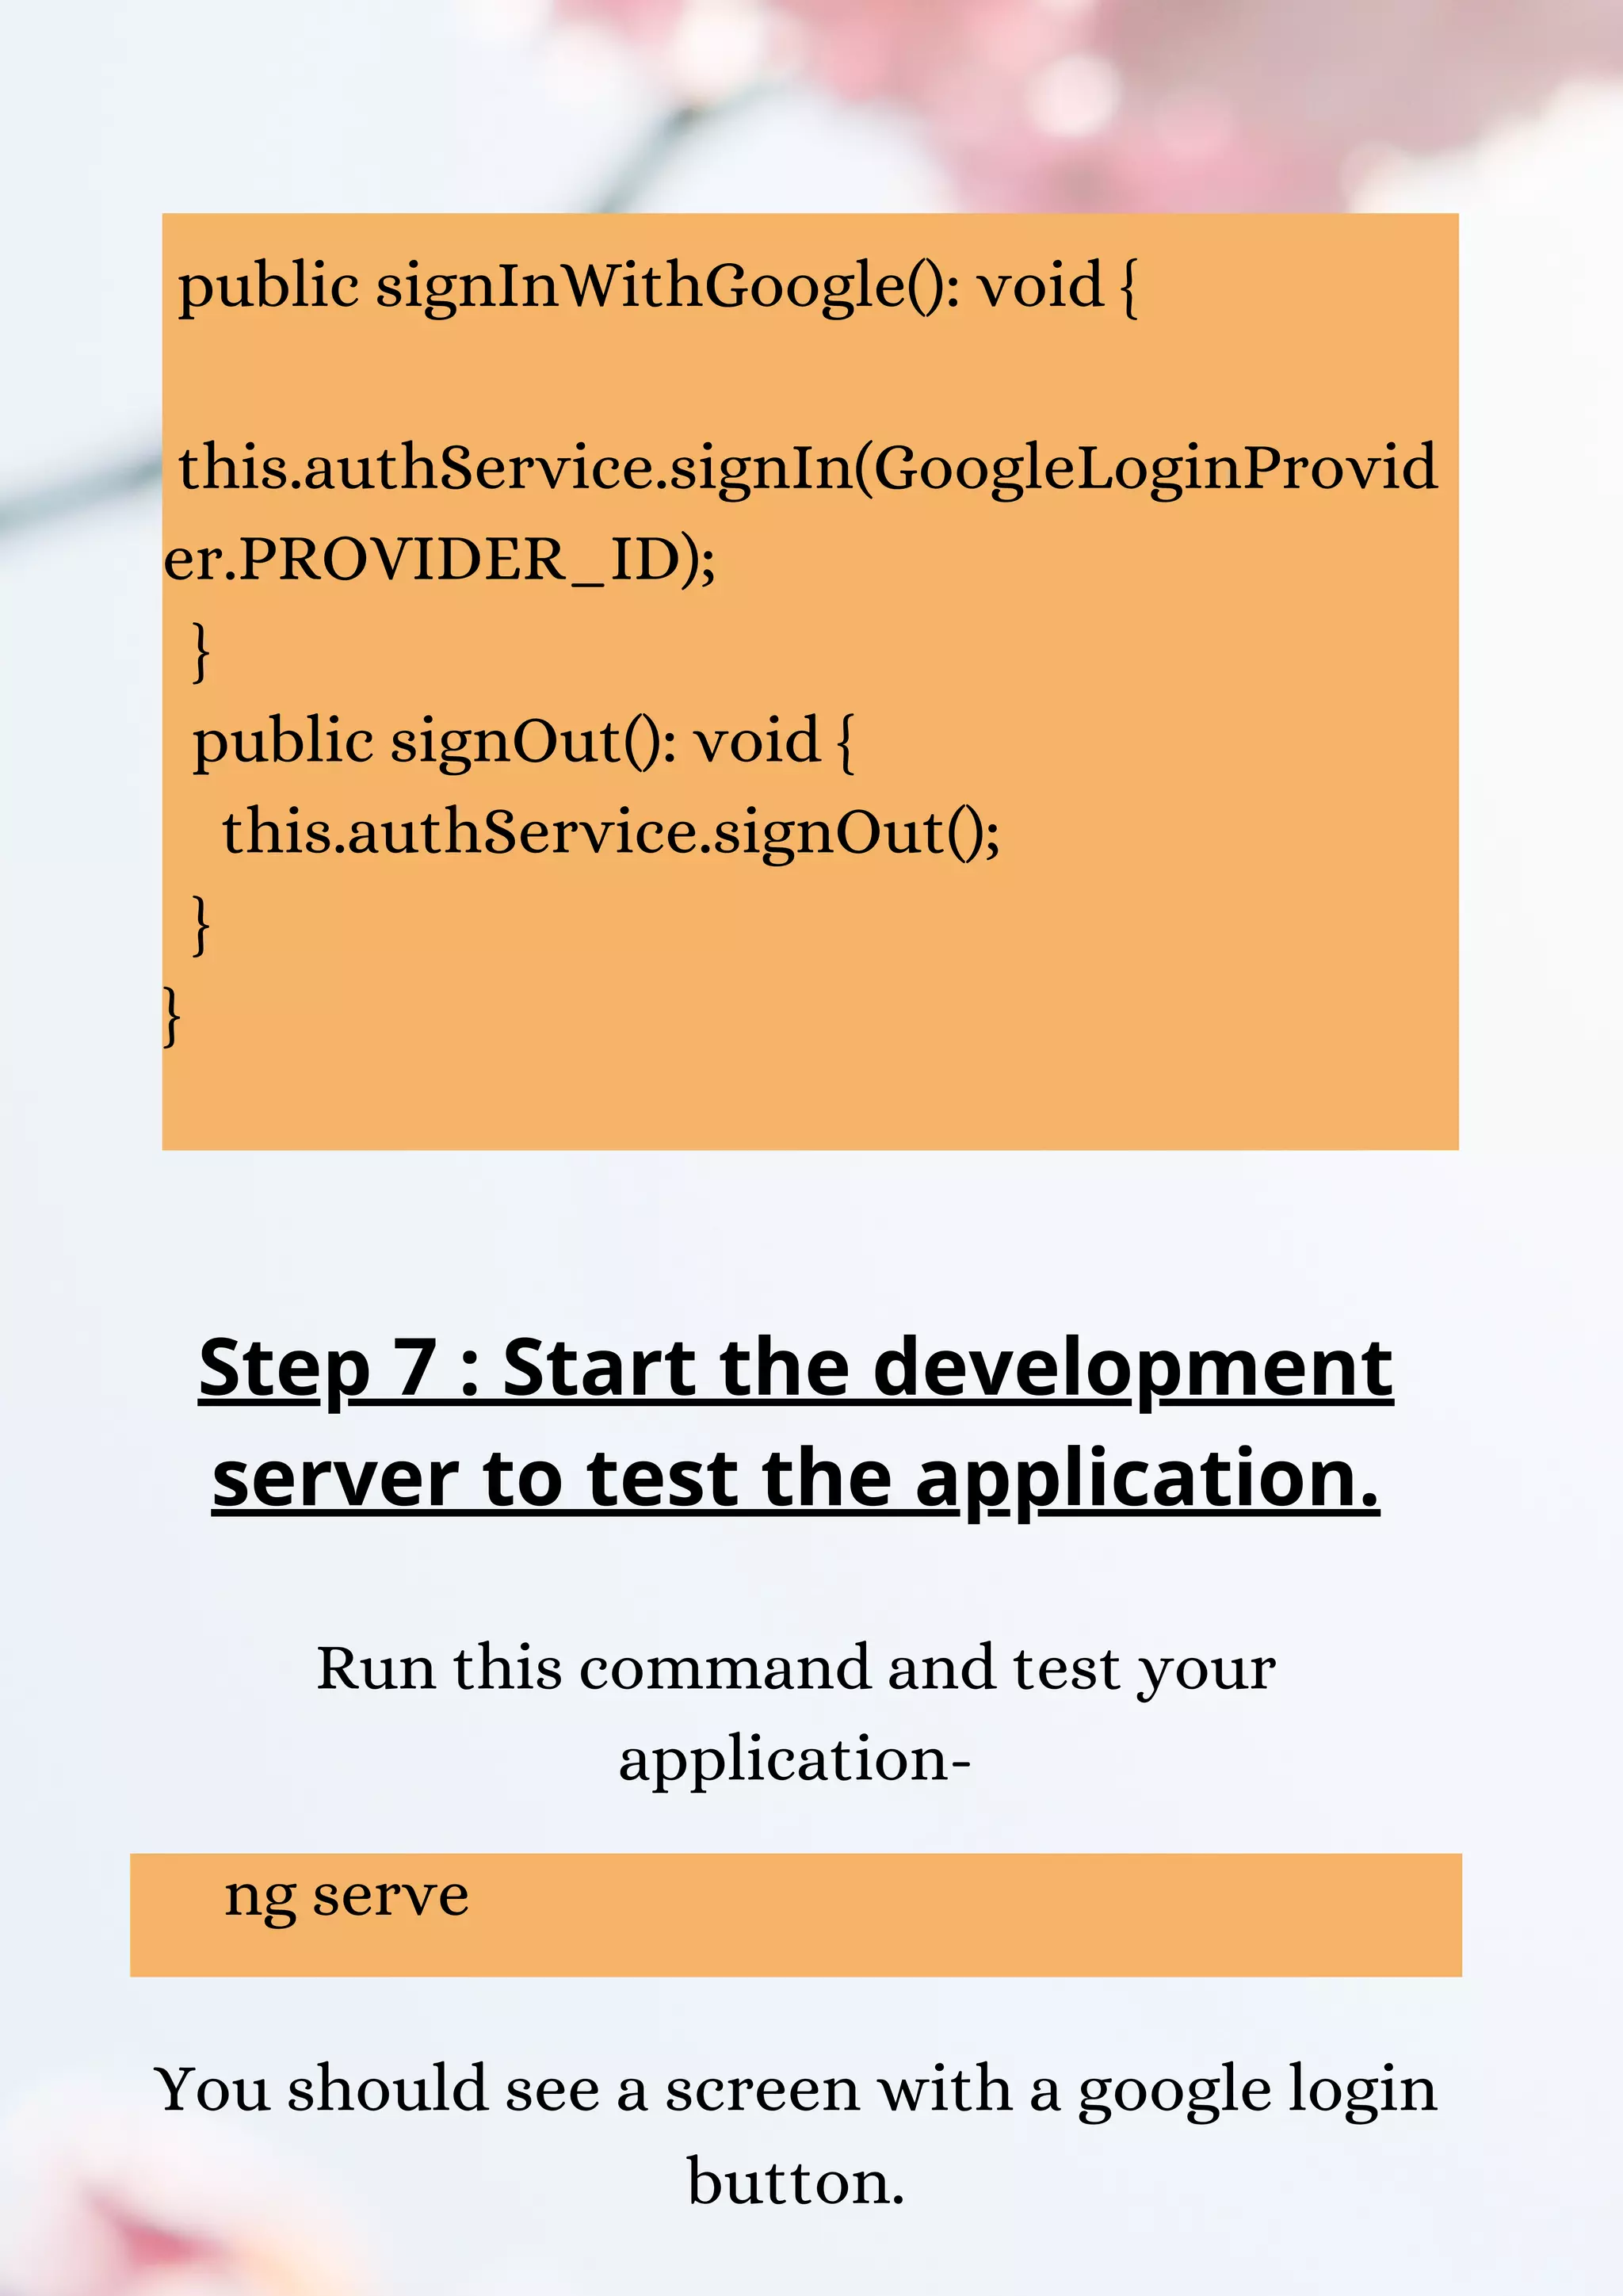
![templateUrl: './login.component.html', styleUrls: ['./login.component.css'] }) export class LoginComponent implements OnInit { public user: SocialUser = new SocialUser; constructor(private authService: SocialAuthService) {} ngOnInit() { this.authService.authState.subscribe(user => { this.user = user; console.log(user); }); }](https://image.slidesharecdn.com/angular11googlesocialloginorsignintutorialusingangularx-social-login-210630034536/75/Angular-11-google-social-login-or-sign-in-tutorial-using-angularx-social-login-23-2048.jpg)


This document is a tutorial on implementing Google social login in an Angular 11 application using the angularx-social-login library. It provides detailed steps for setting up Google developer credentials, creating a new Angular app, and integrating the necessary components and configuration for Google login. The tutorial concludes with an encouragement to learn more about Angular and hire developers for project needs.