


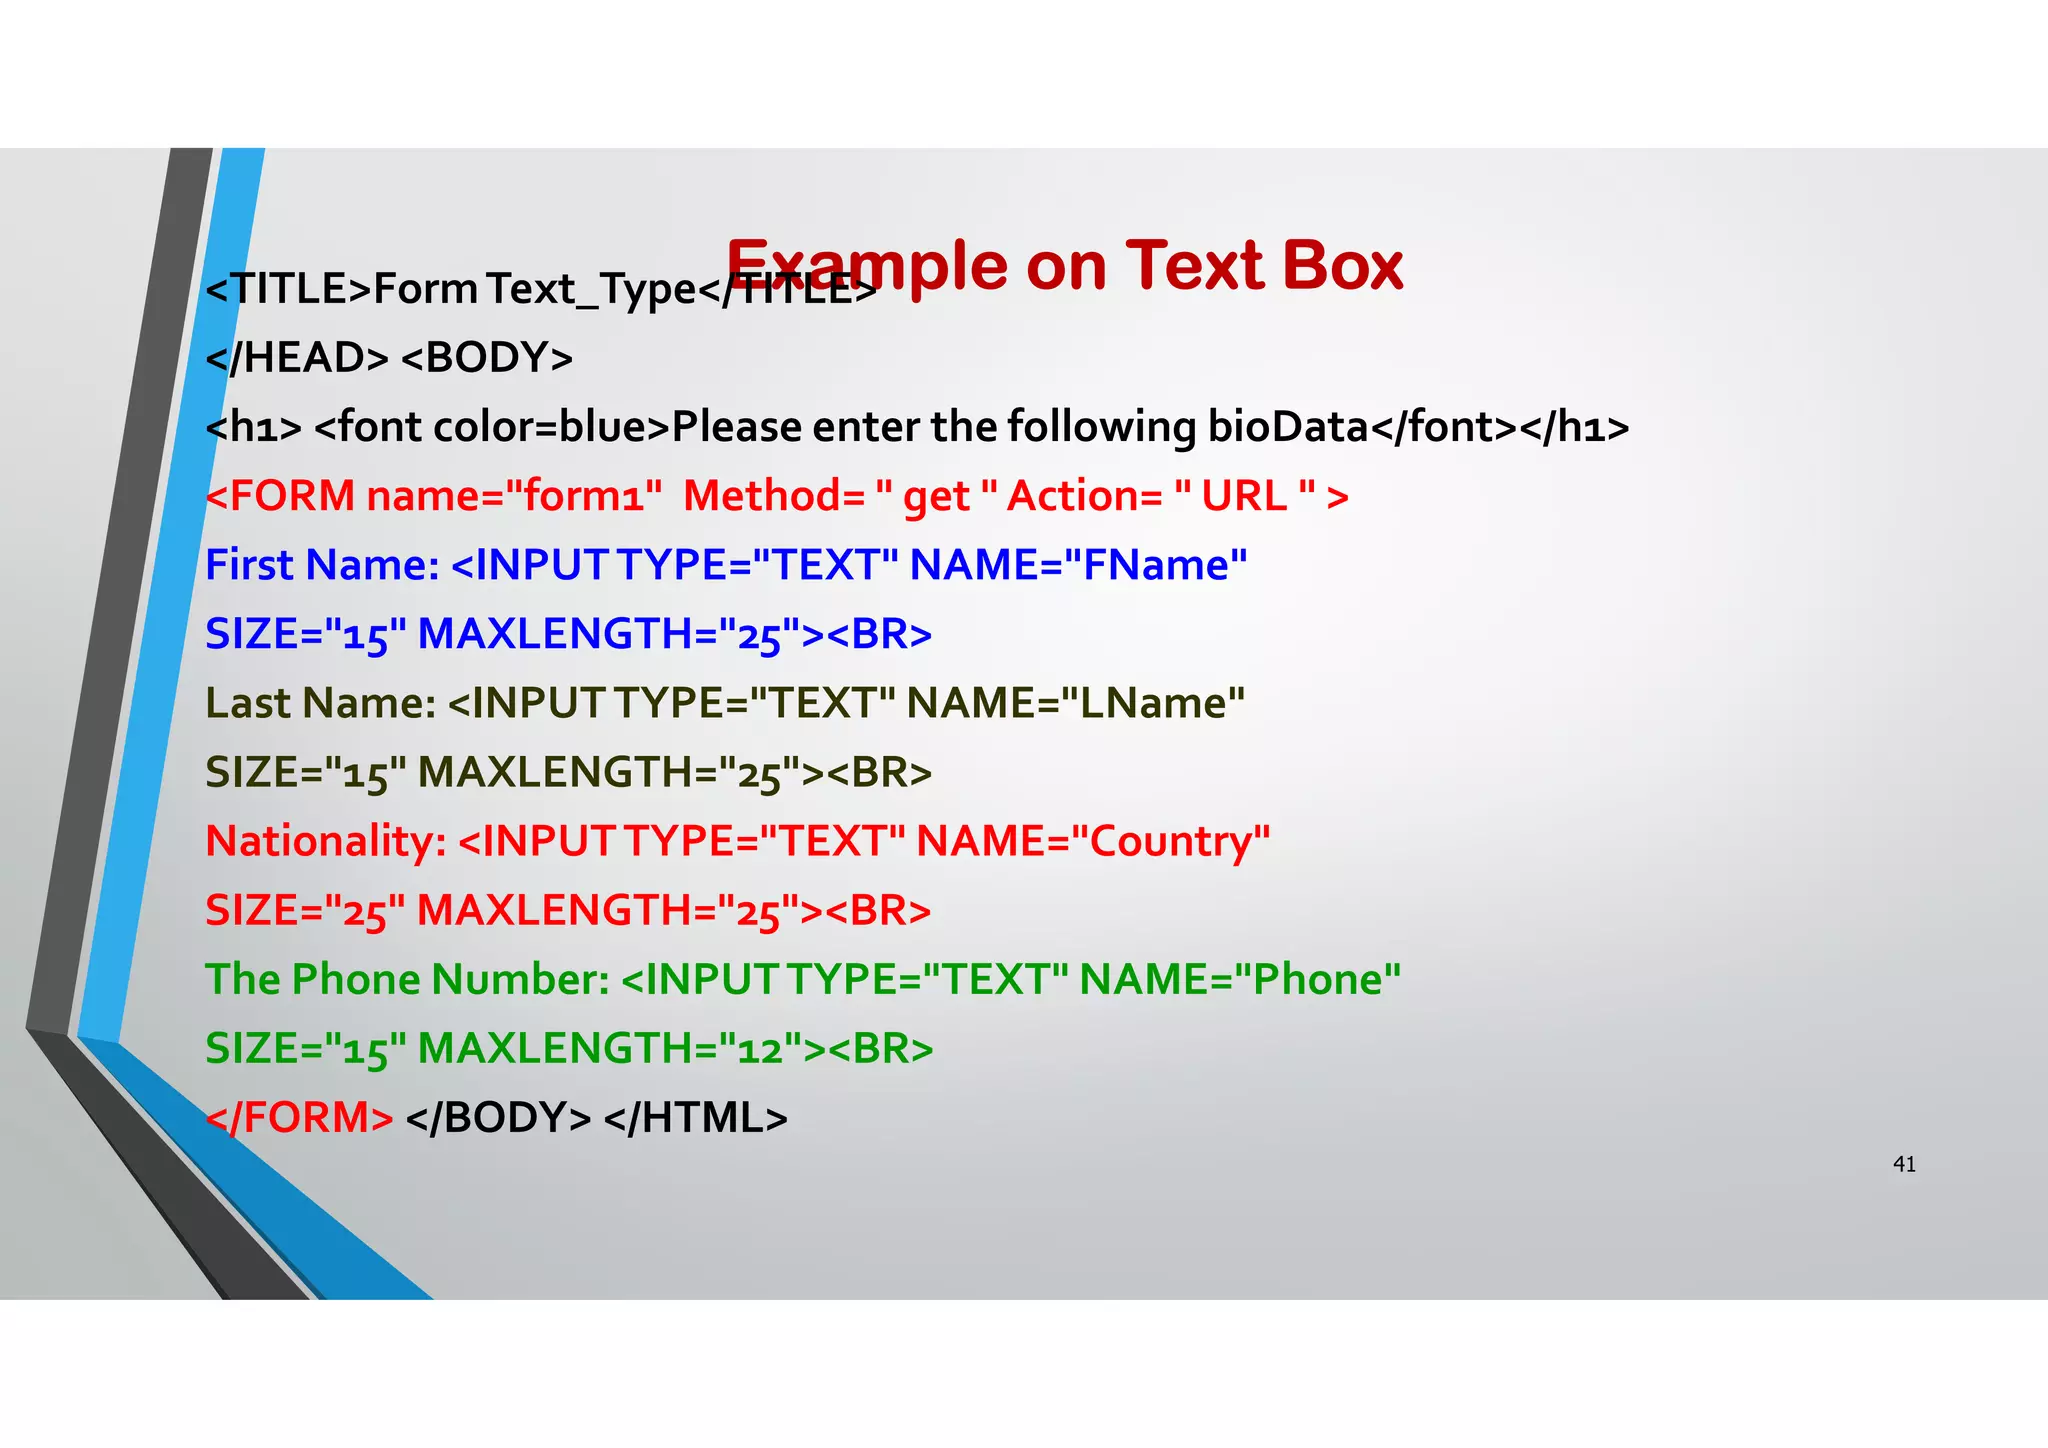
![32 TheTARGET attribute allows you to specify the frame into which a page is to be loaded into in a frames setting. <A HREF=“chap1.html”TARGET=“_self”> [Chapter 1]</A> <A HREF=“chap1.html”TARGET=“_parent”> [Chapter 2]</A> Parent window Learning HTML [Chapter 1][Chapter 2][Chapter 3] chap1.html chap2.html Targeting links to frames](https://image.slidesharecdn.com/2bwebtechnologyhtmlbasics-2-210505072748/75/2b-Web-Technology-HTML-Basics-2-32-2048.jpg)
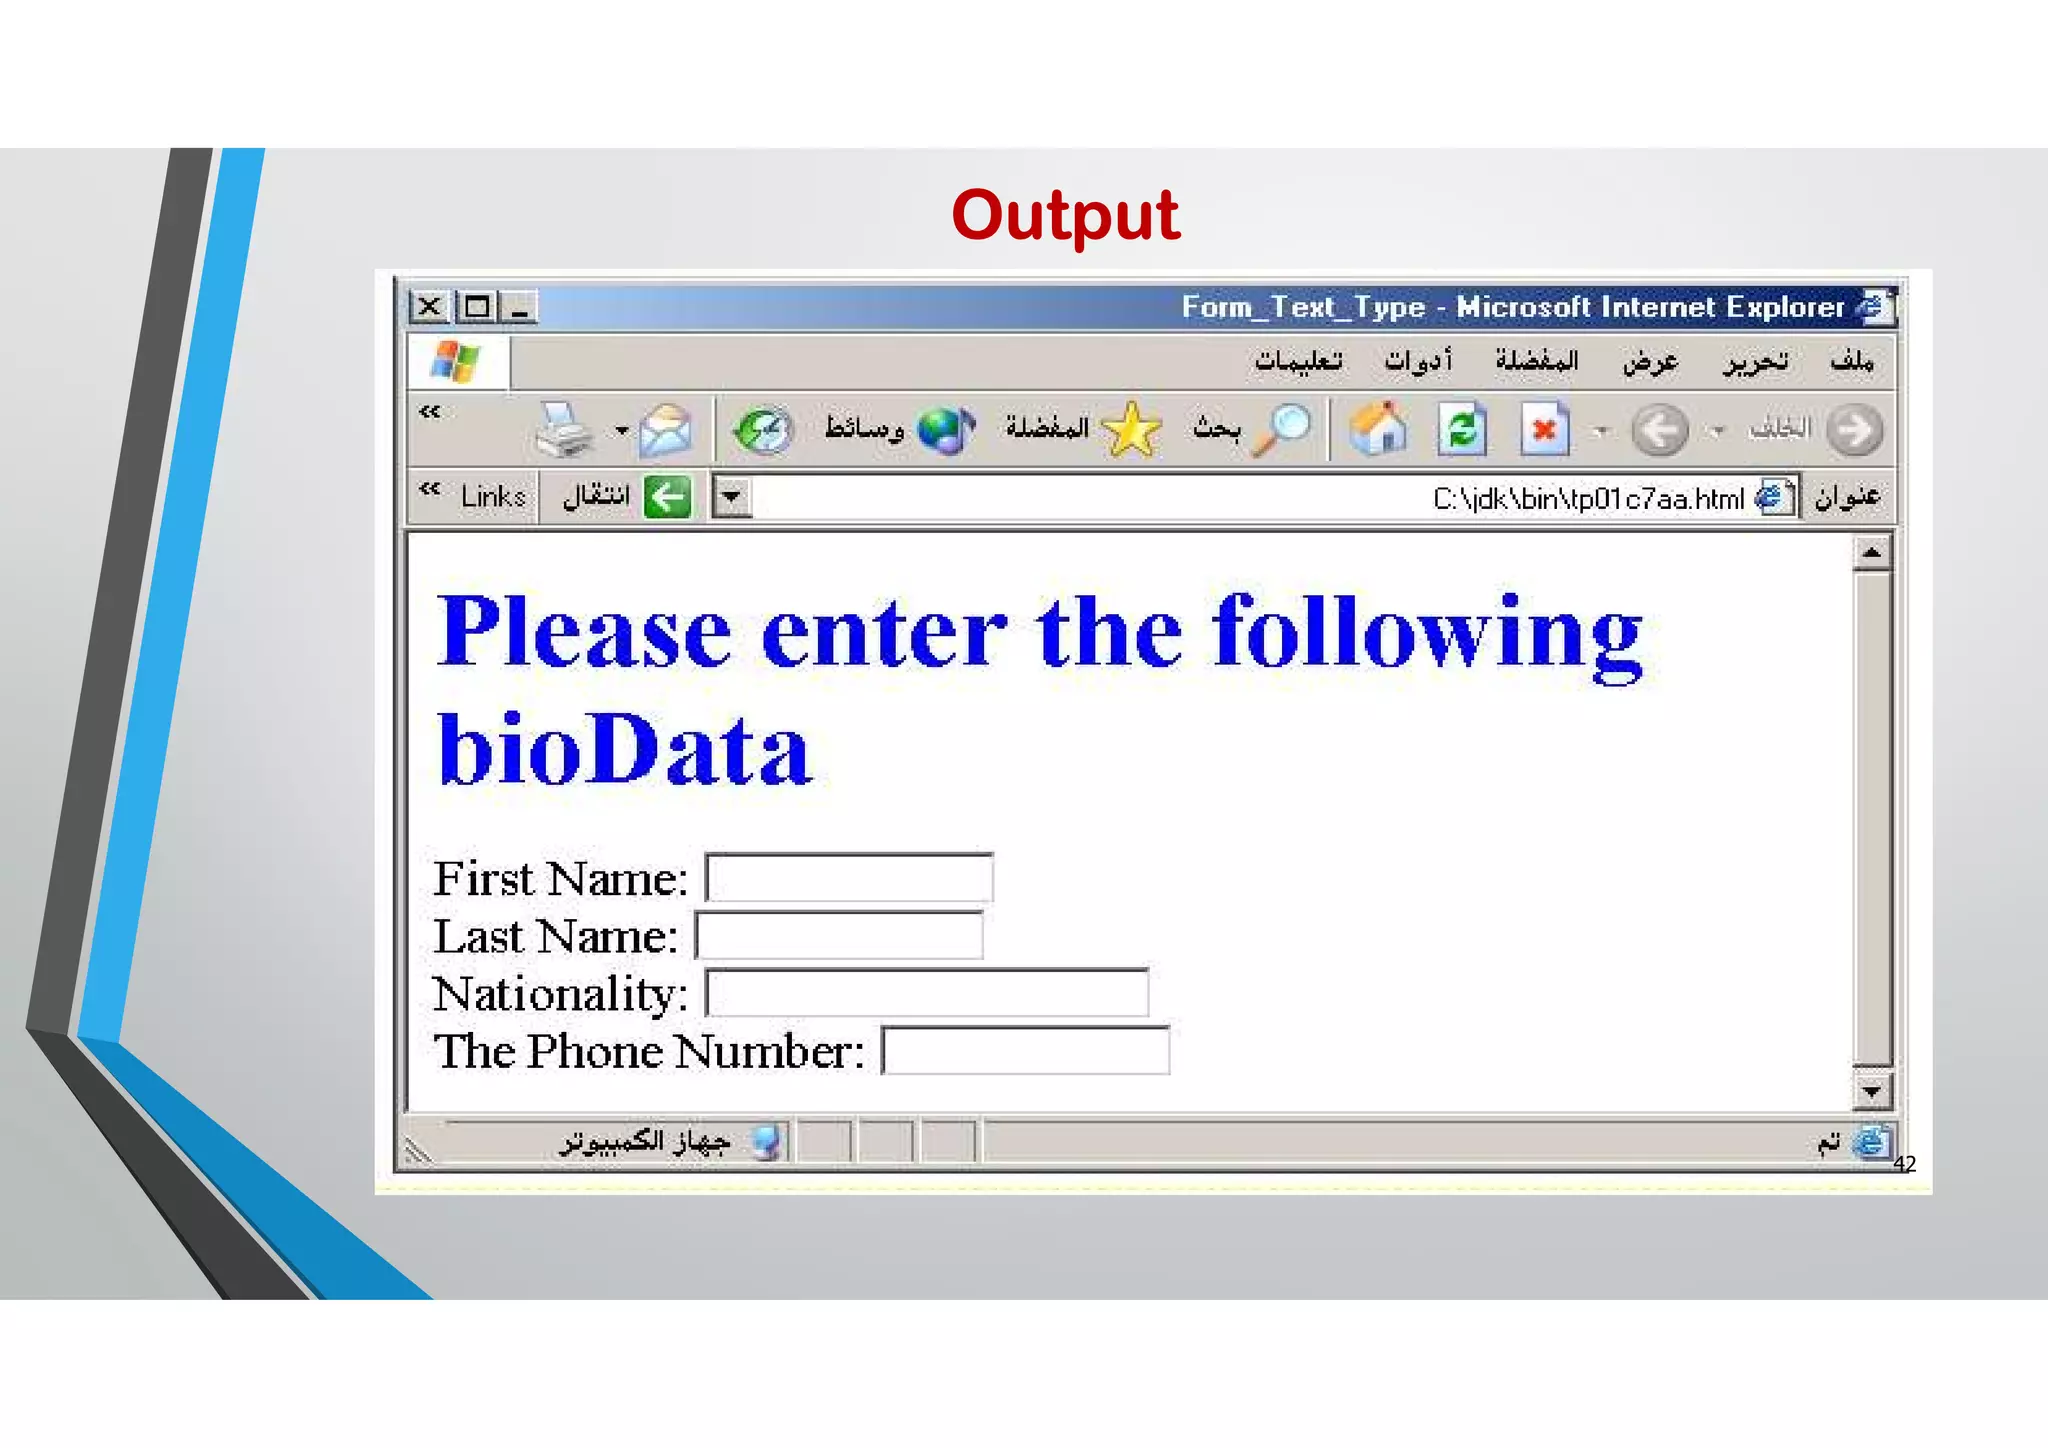
![33 TheTARGET attribute allows you to specify the frame into which a page is to be loaded into in a frames setting. <A HREF=“chap1.html”TARGET=“bottom”> [Chapter 1]</A> <A HREF=“chap2.html”TARGET=“bottom”> [Chapter 2]</A> <A HREF=“chap3.html”TARGET=“bottom”> [Chapter 3]</A> Learning HTML [Chapter 1][Chapter 2][Chapter 3] chap1.html chap2.html chap3.html Targeting links to frames](https://image.slidesharecdn.com/2bwebtechnologyhtmlbasics-2-210505072748/75/2b-Web-Technology-HTML-Basics-2-33-2048.jpg)


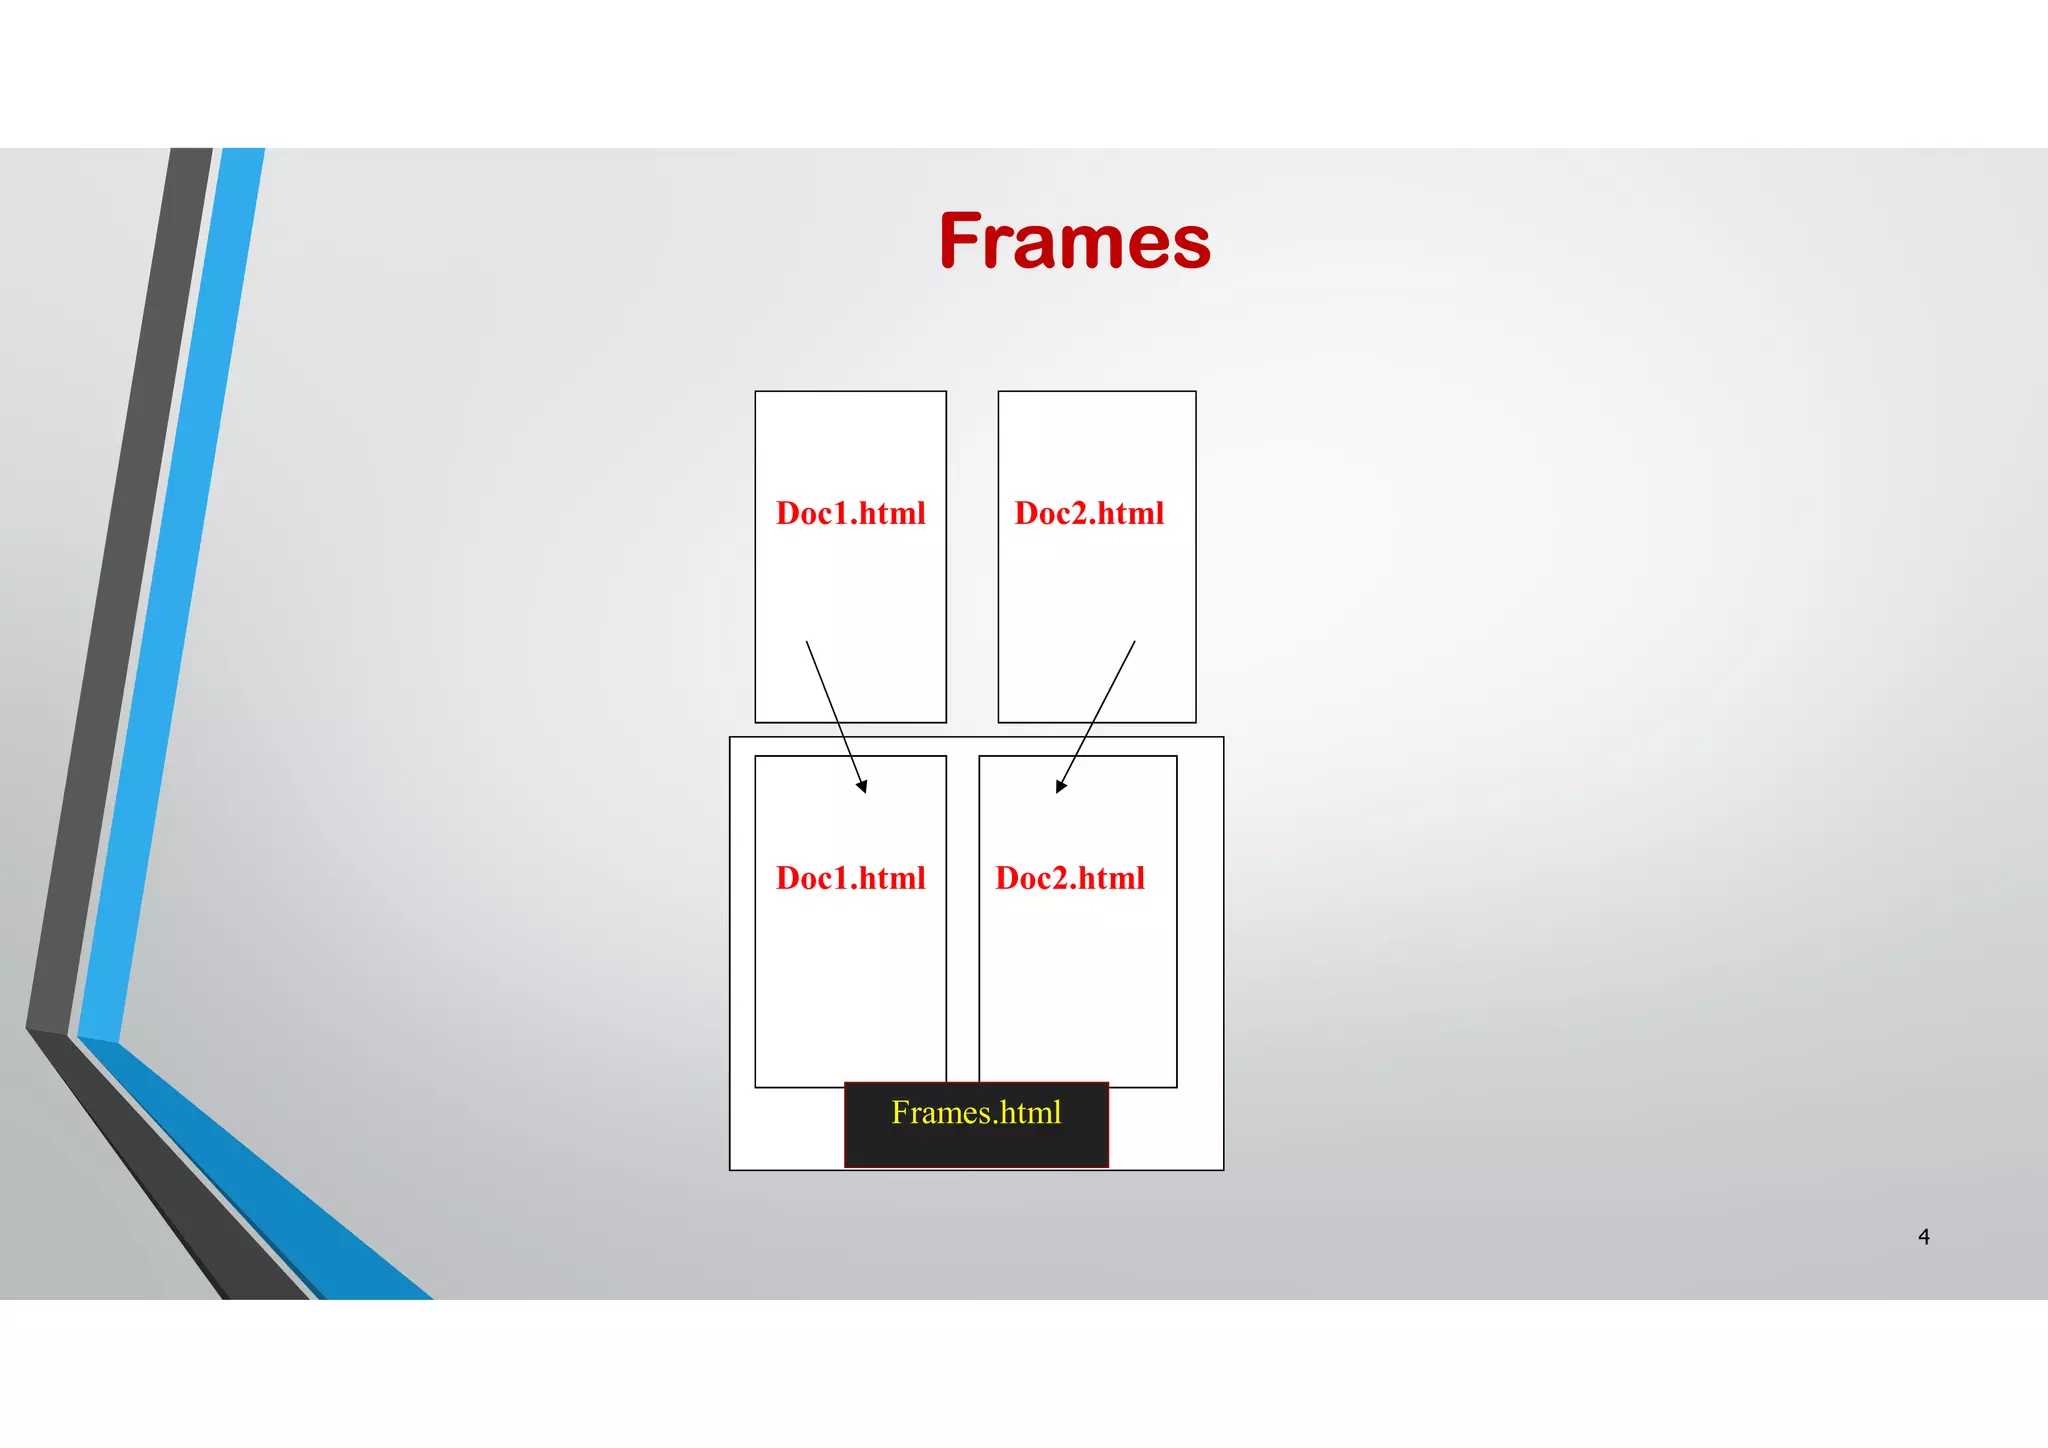
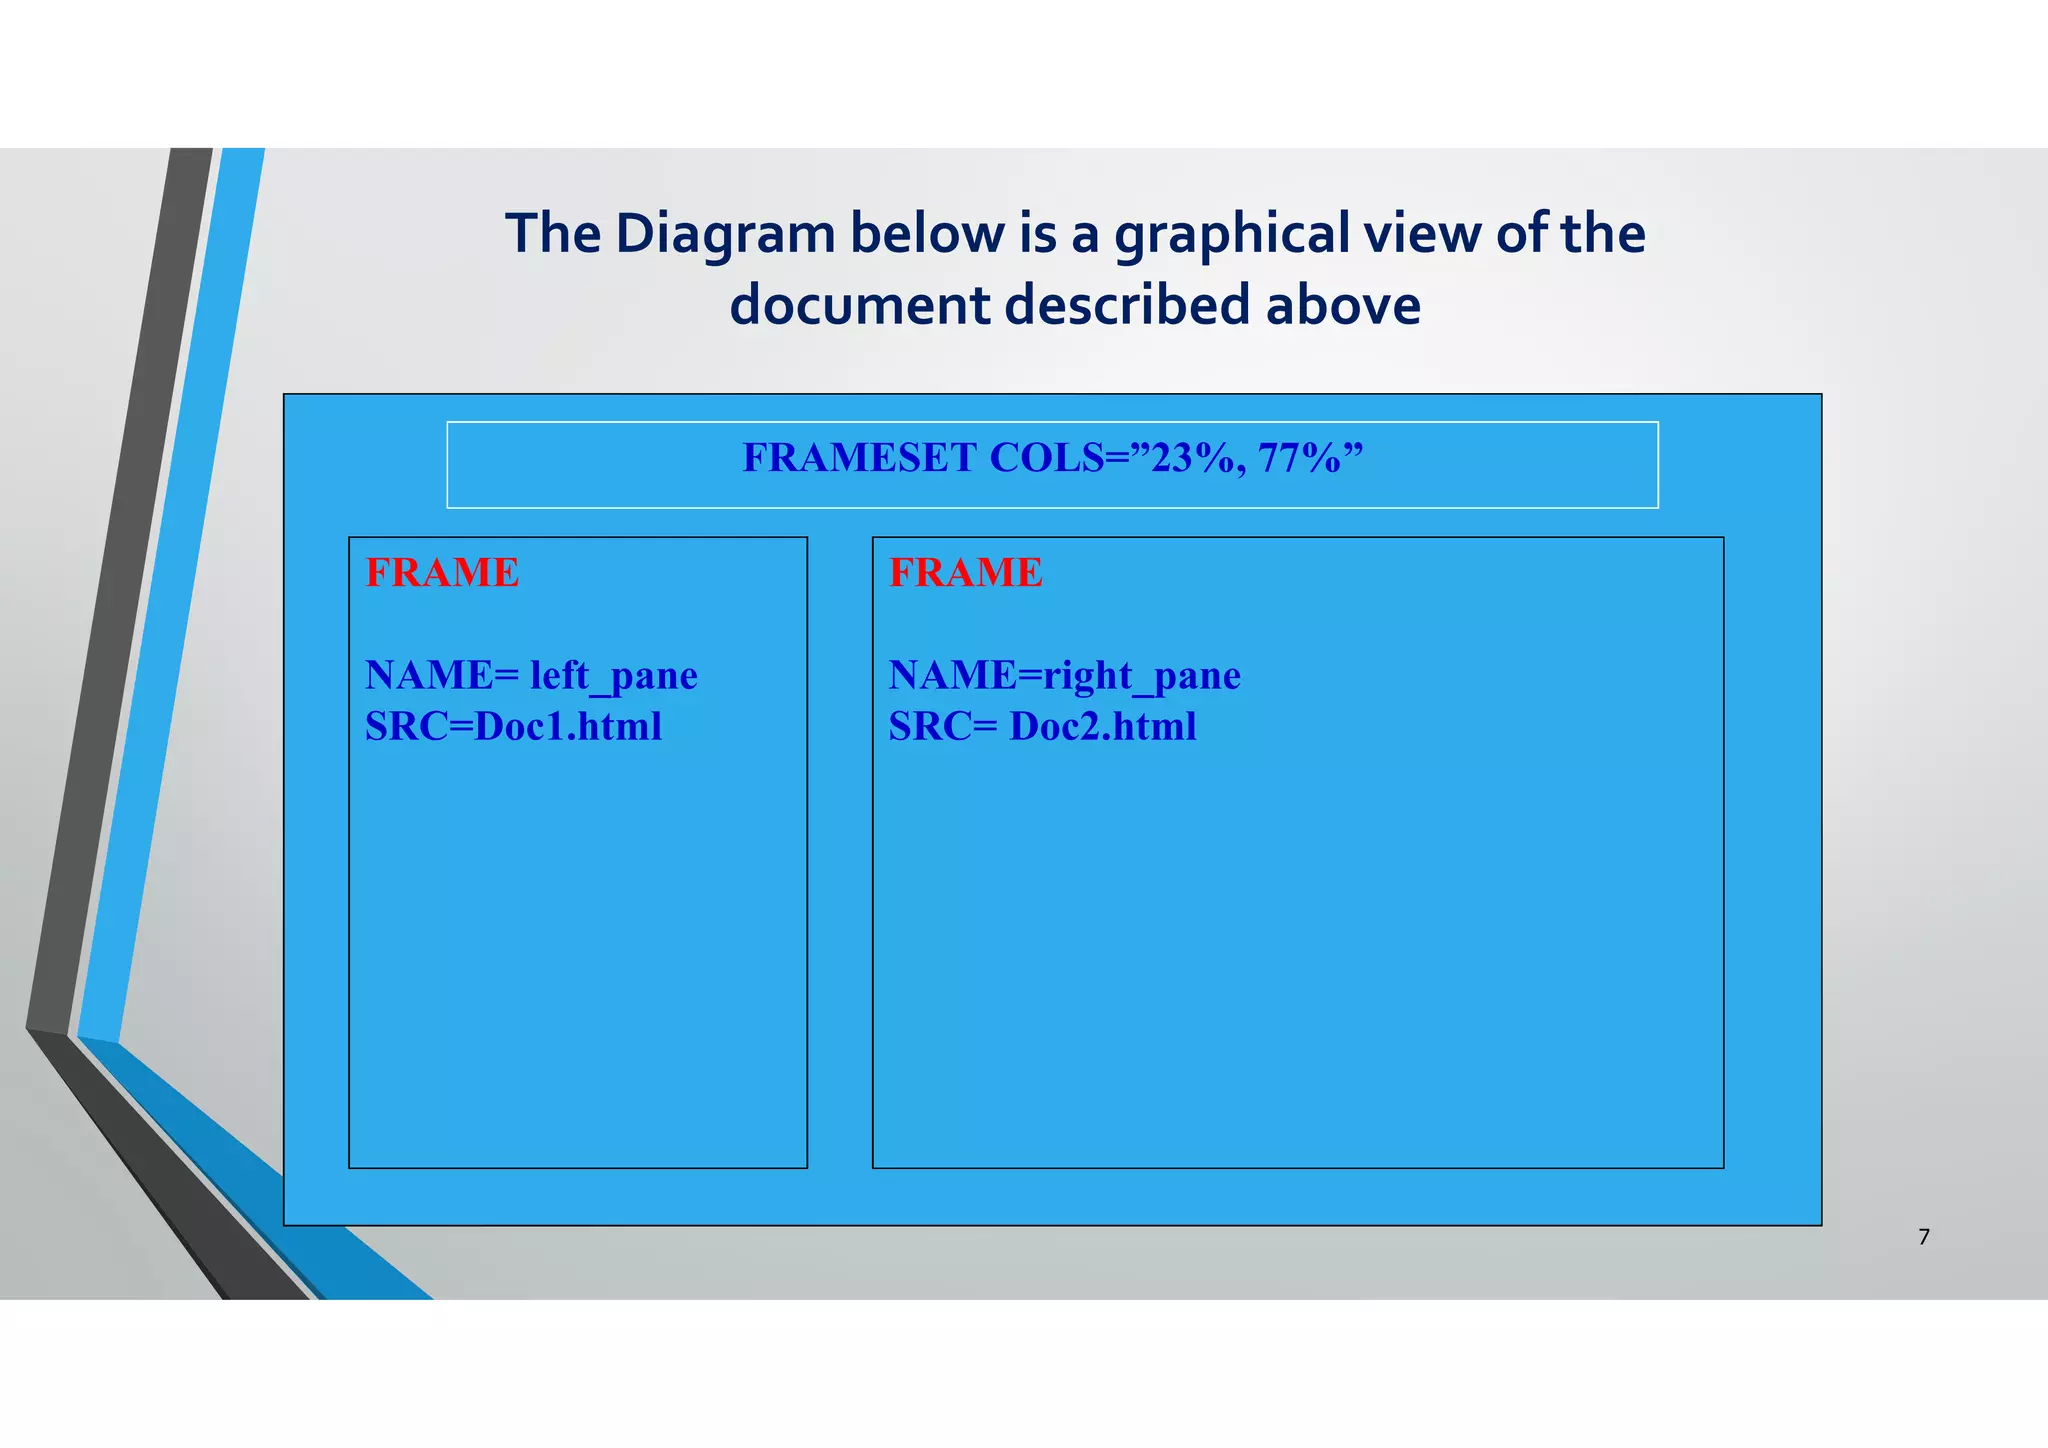
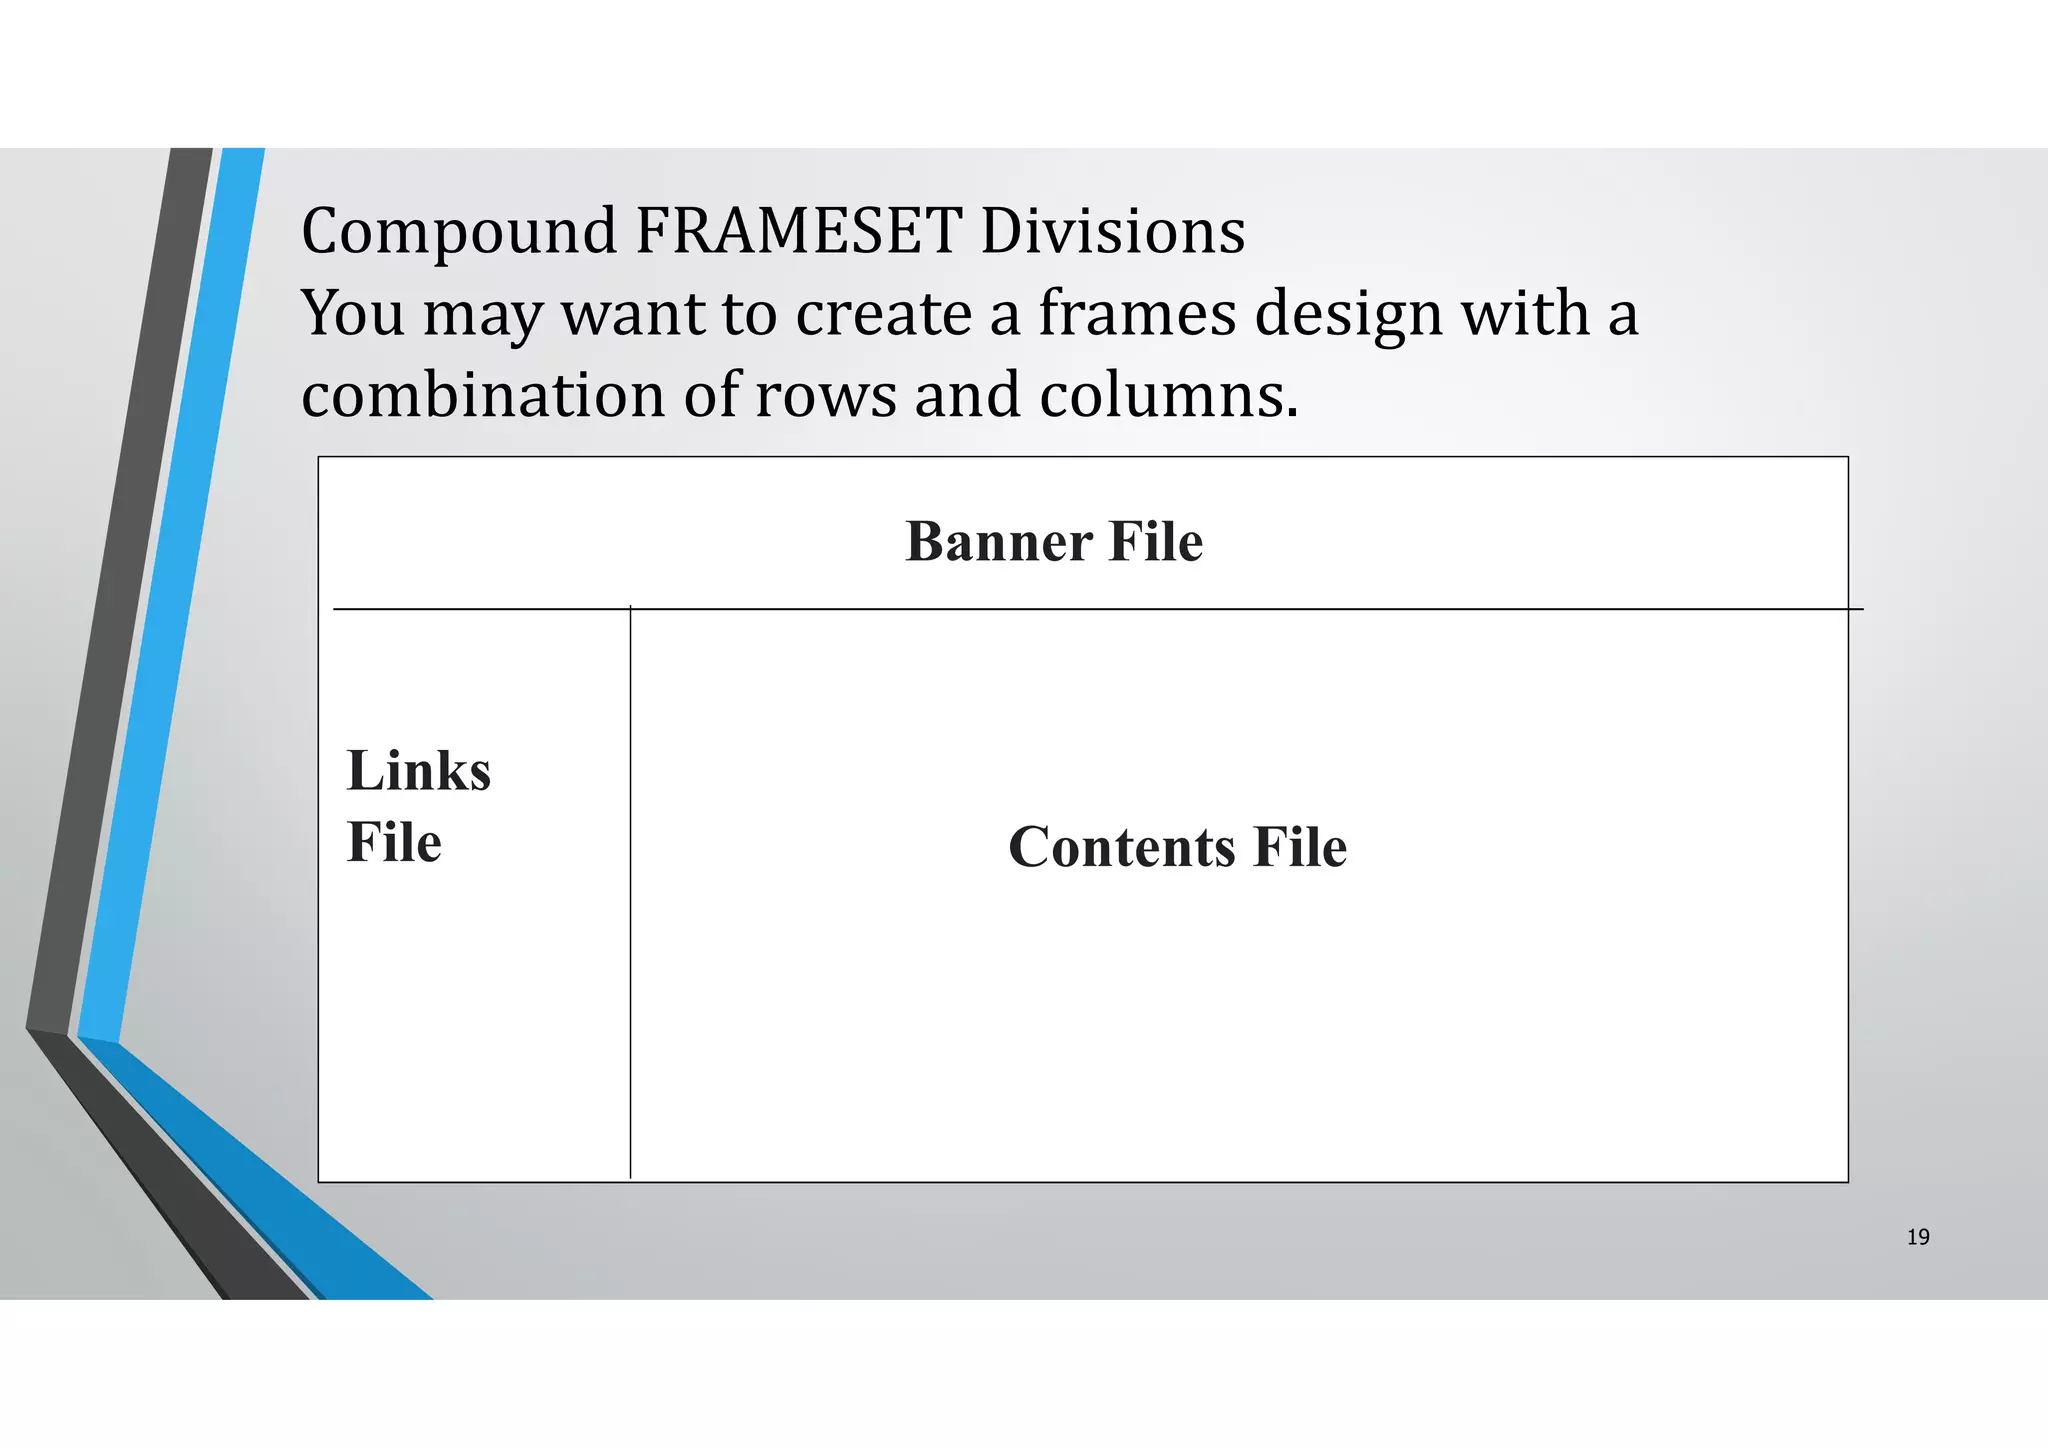
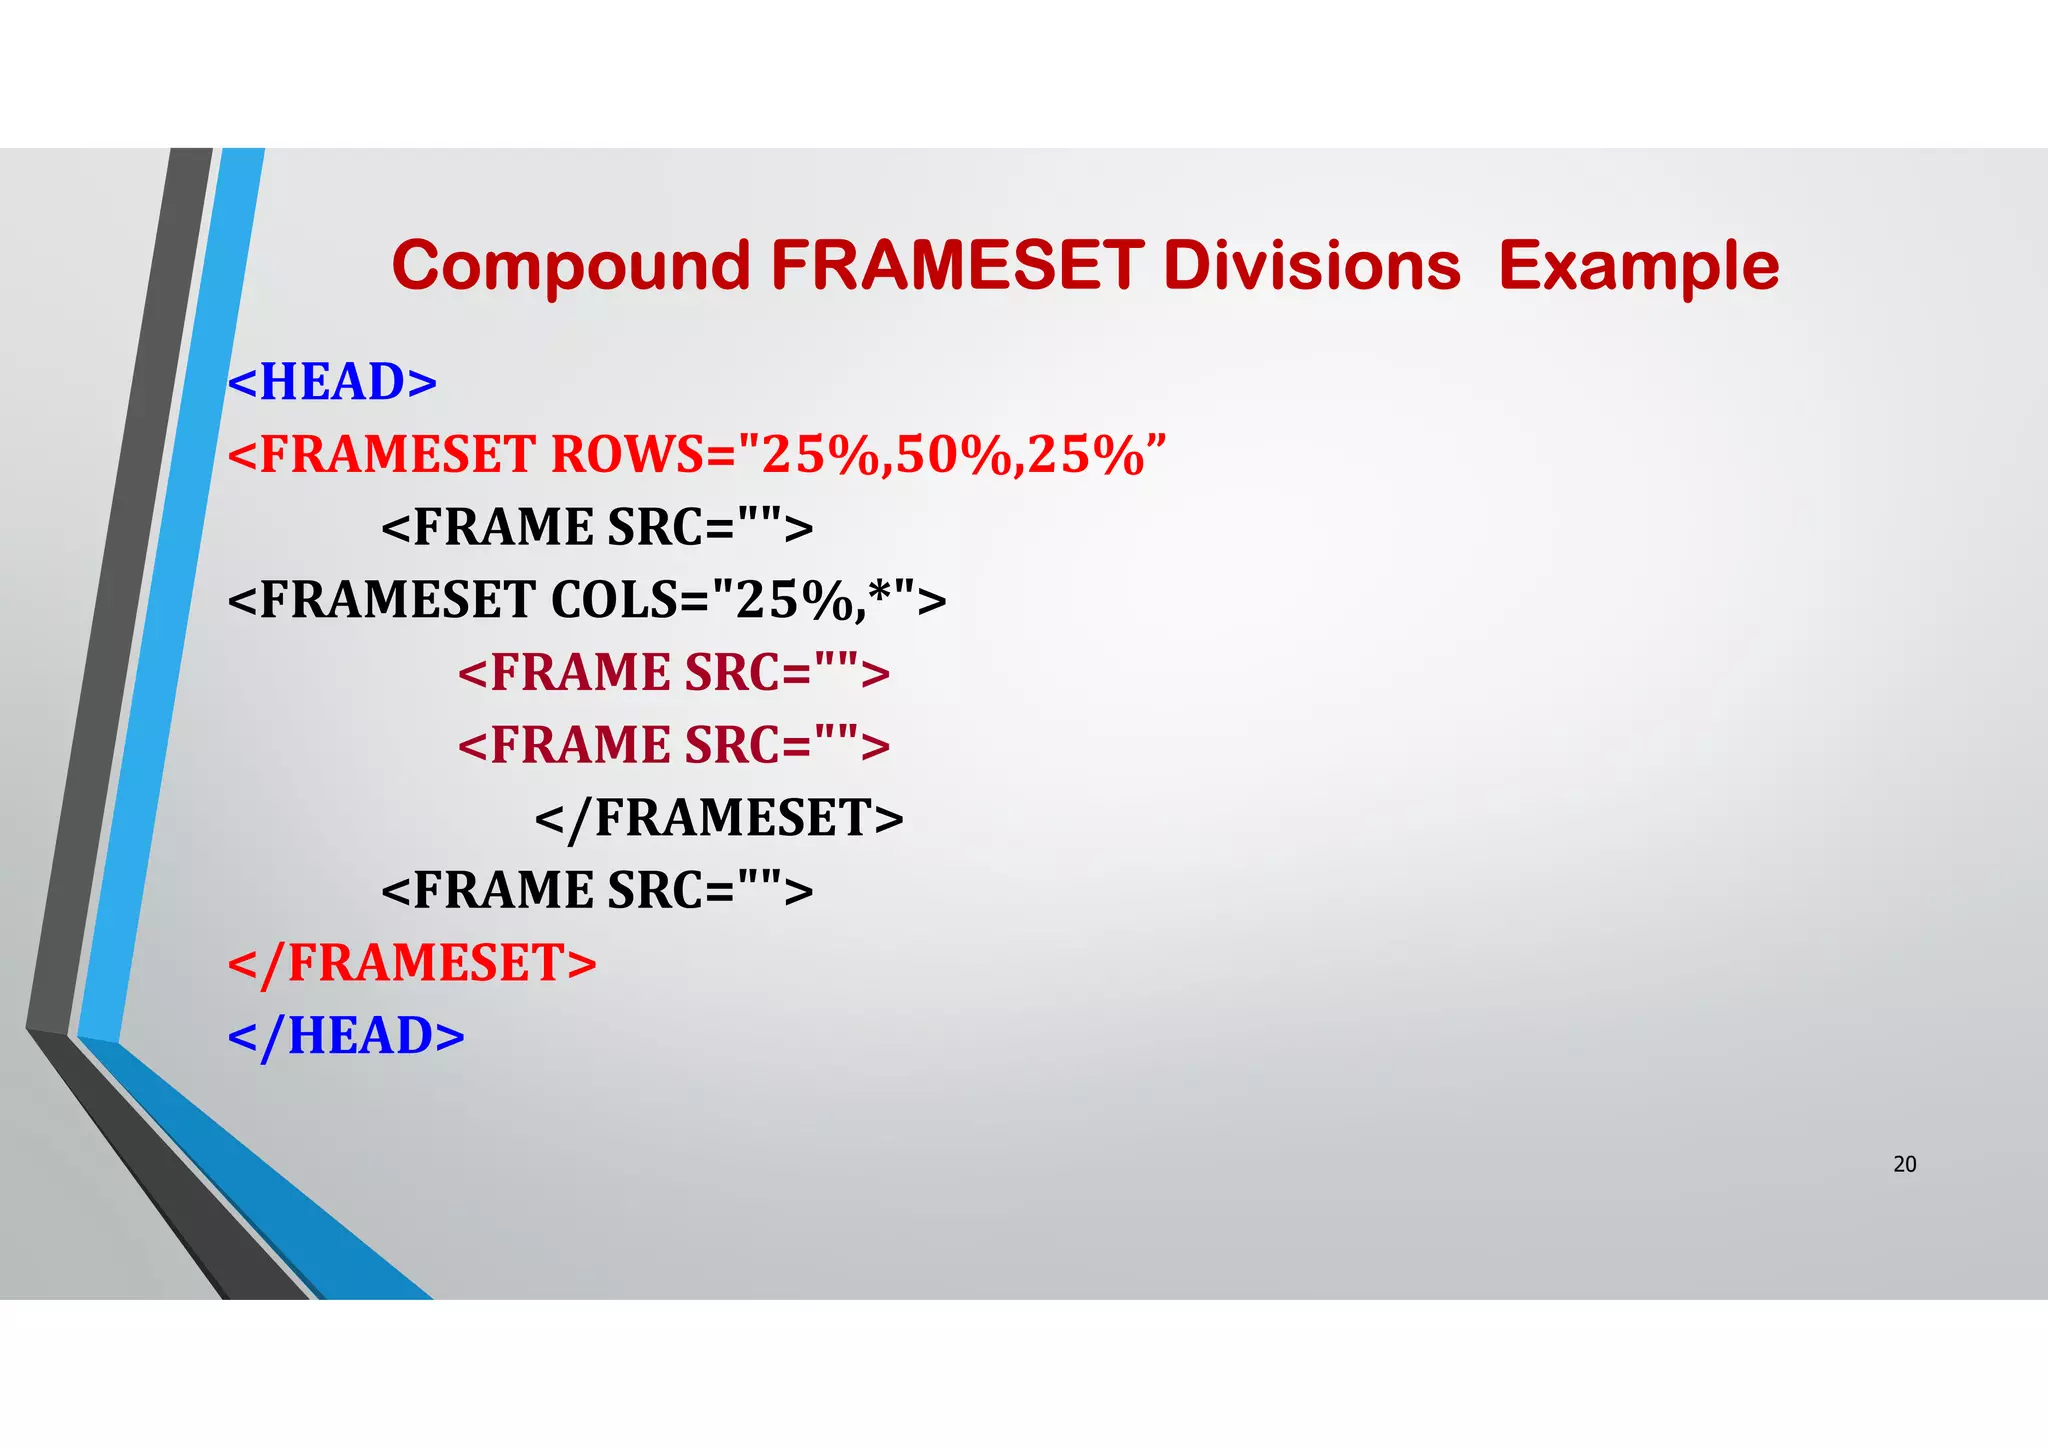
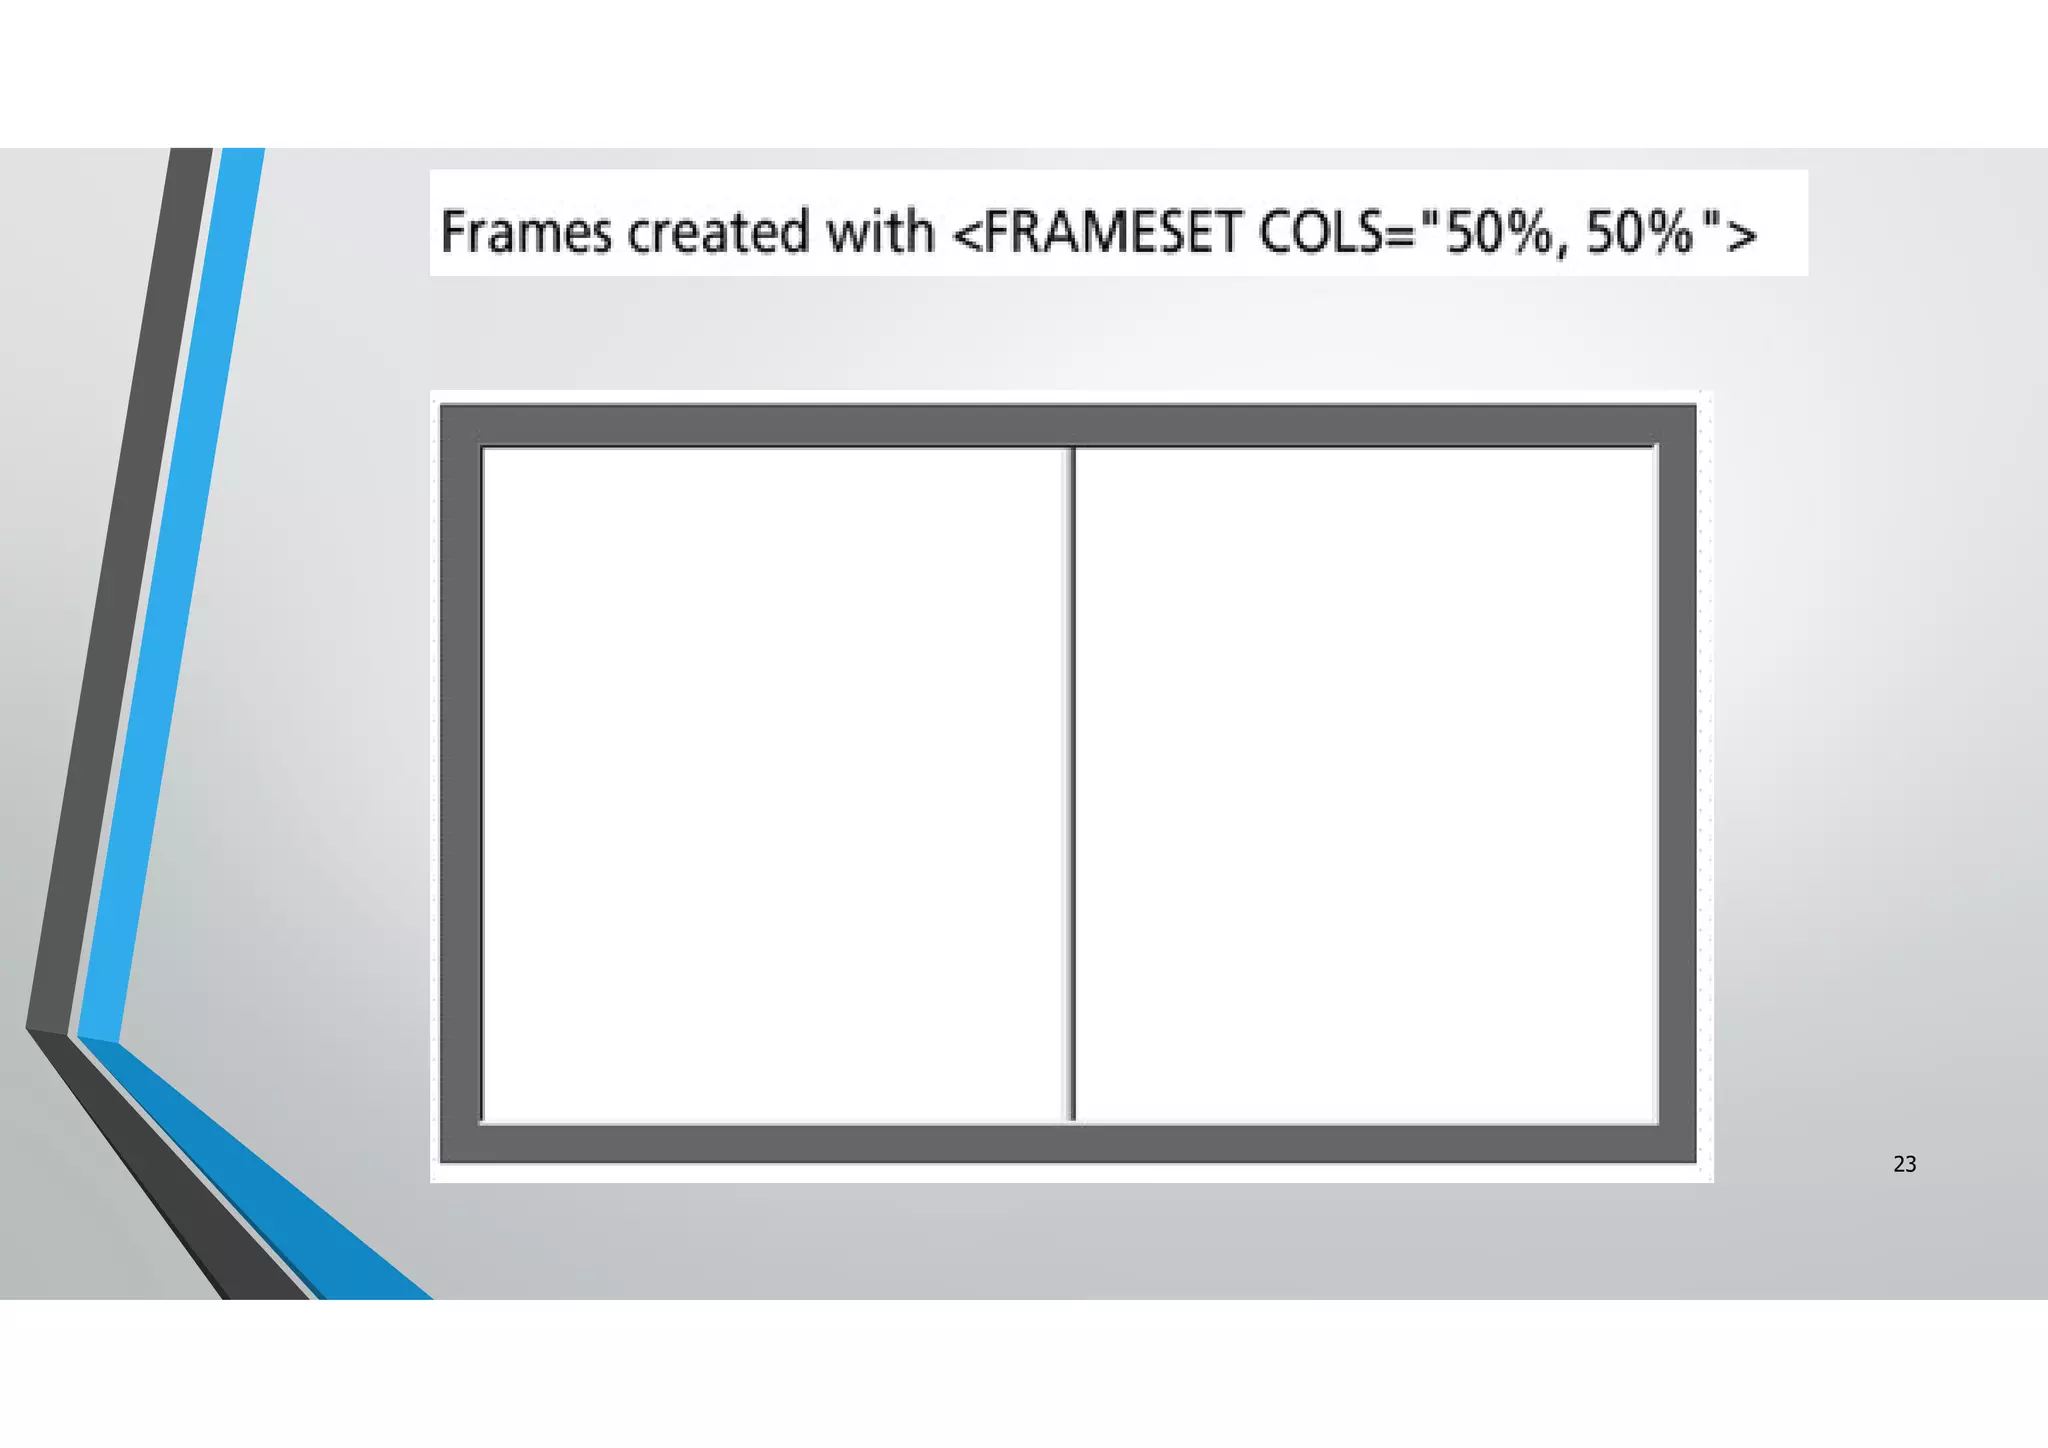
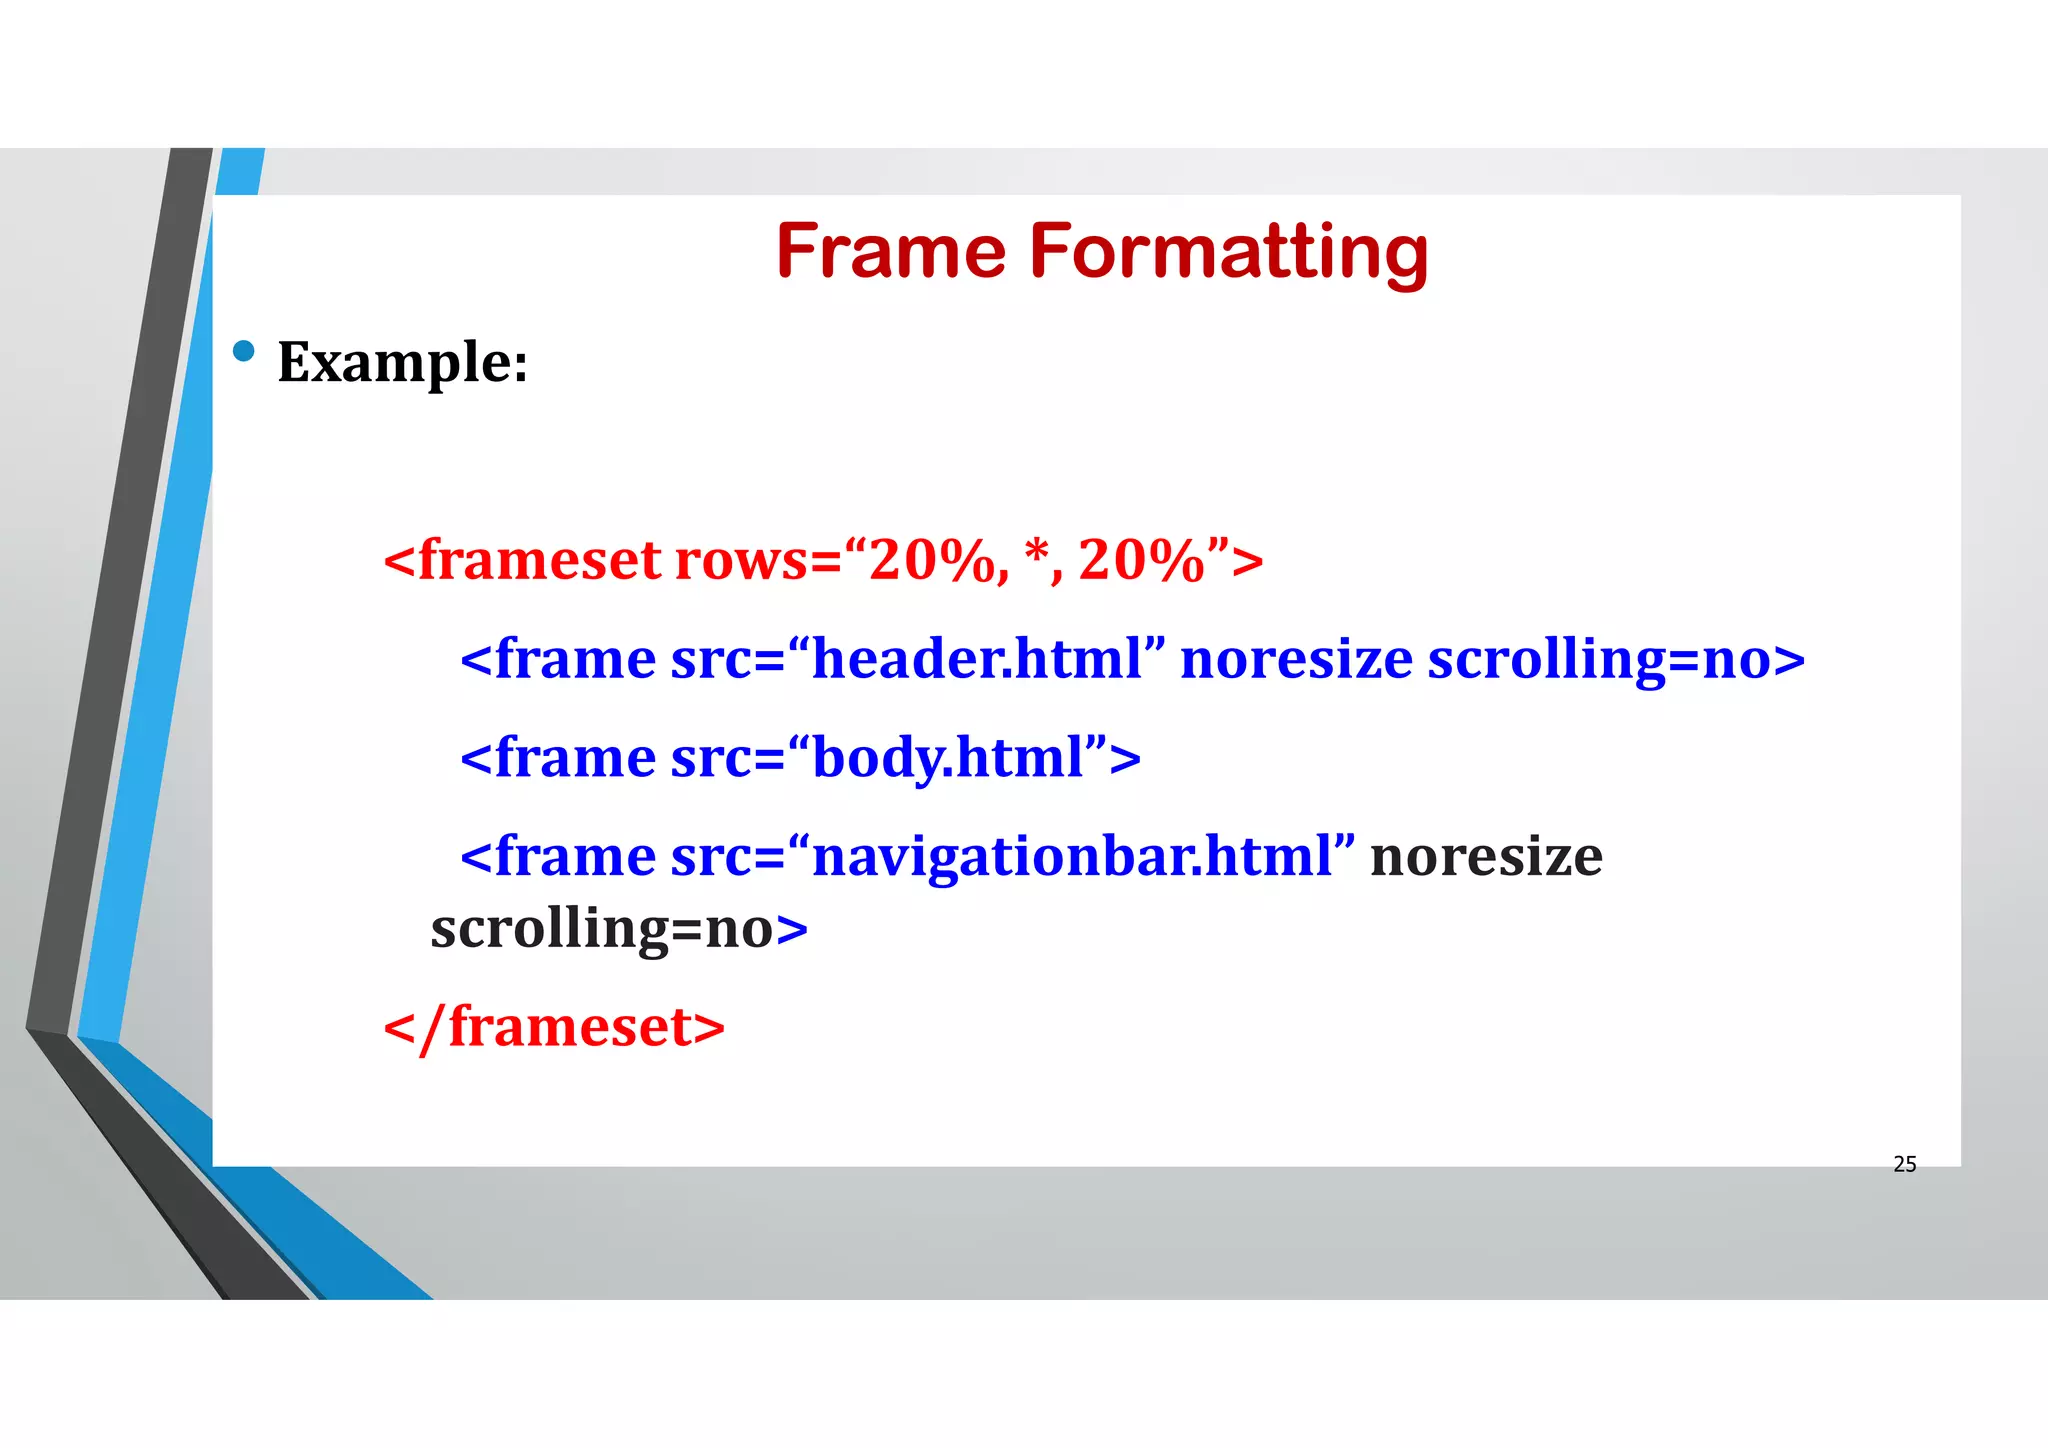
This document provides information about HTML frames including: - Frames allow dividing the browser window into multiple panes using <frameset> and <frame> tags. - <frameset> defines the layout as rows or columns and <frame> defines each individual pane. - Attributes like name, src, scrolling control frame behavior. - Targeting links to different frames uses the target attribute. - Nested <frameset> allow complex layouts with rows and columns. - <noframes> provides content for non-frame browsers.