Creating the Slack app
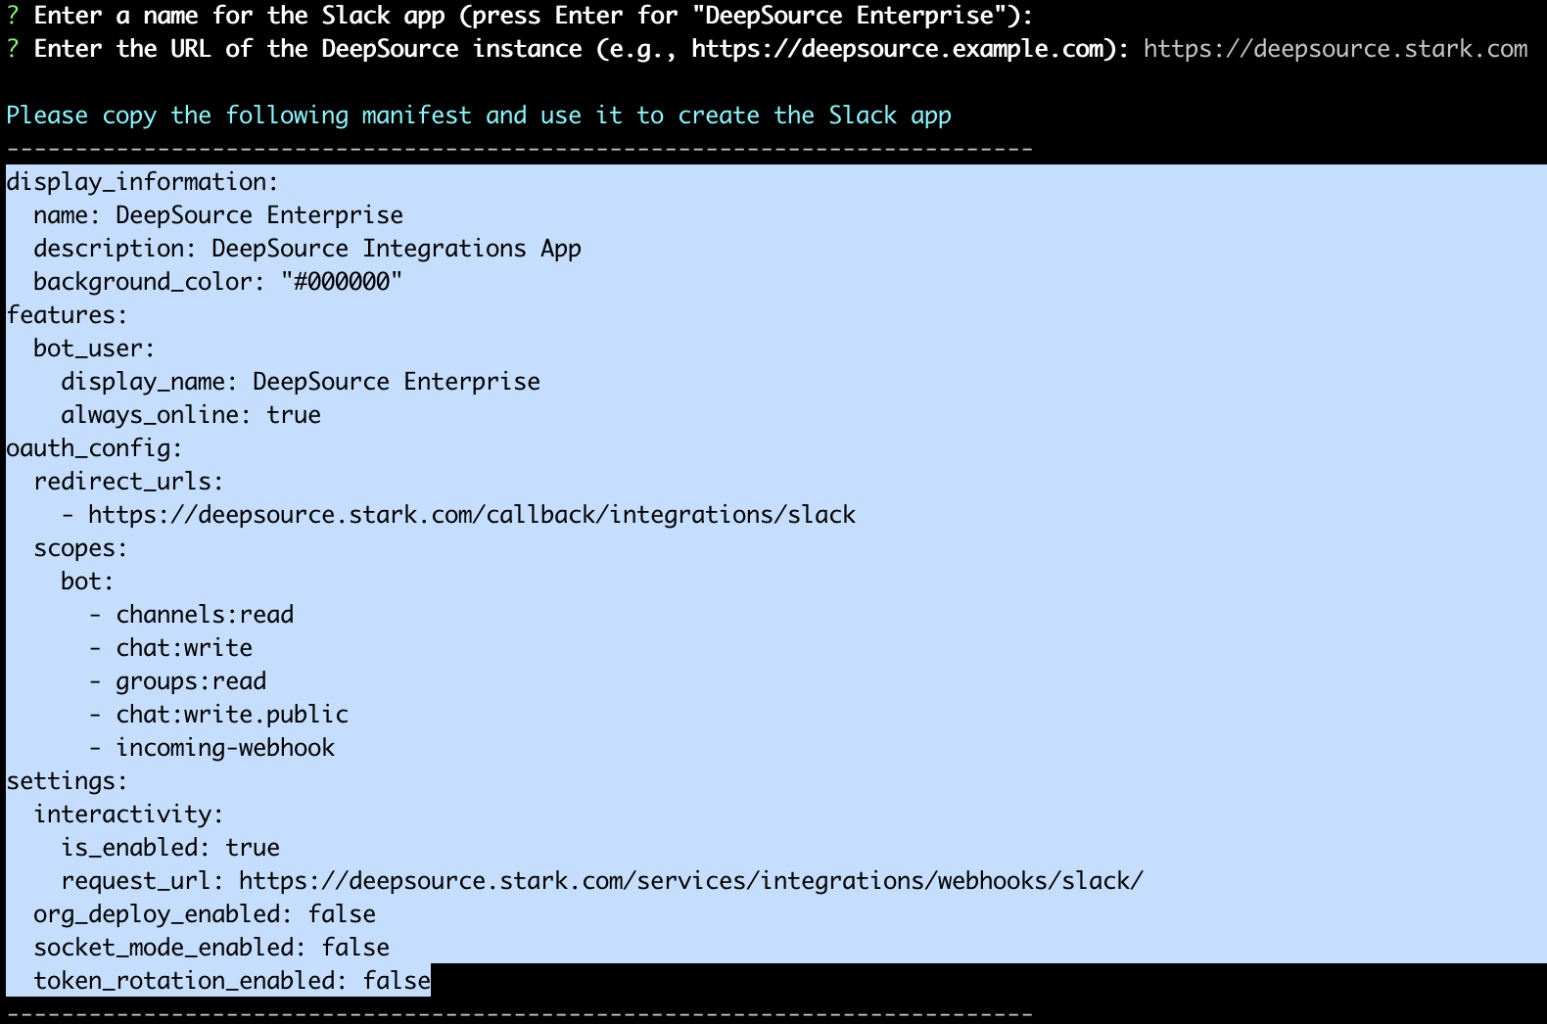
To create the app, you can run this quick setup script with a few additional steps. The script will create a Slack app manifest that can be used to easily create a Slack app.- When you run the command in the CLI, a few details will have to filled in:
- Name for the Slack app: The name of the Slack app being created. Defaults to
DeepSource Enterprise. - The URL of your DeepSource installation: The URL of your DeepSource instance. For e.g., if your DeepSource instance is running on
https://deepsource.stark.com, then enterhttps://deepsource.stark.comhere.
- Name for the Slack app: The name of the Slack app being created. Defaults to
- Copy the slack app manifest.
- Goto https://api.slack.com/apps and log into the Slack Developer Console if required.
- Click on Create New App.
- In the popup that opens select From an app manifest.
- Select the Slack workspace you’d like to create the app under and click on Next.
- Select the YAML tab and paste the app manifest. Once done, click on Next.
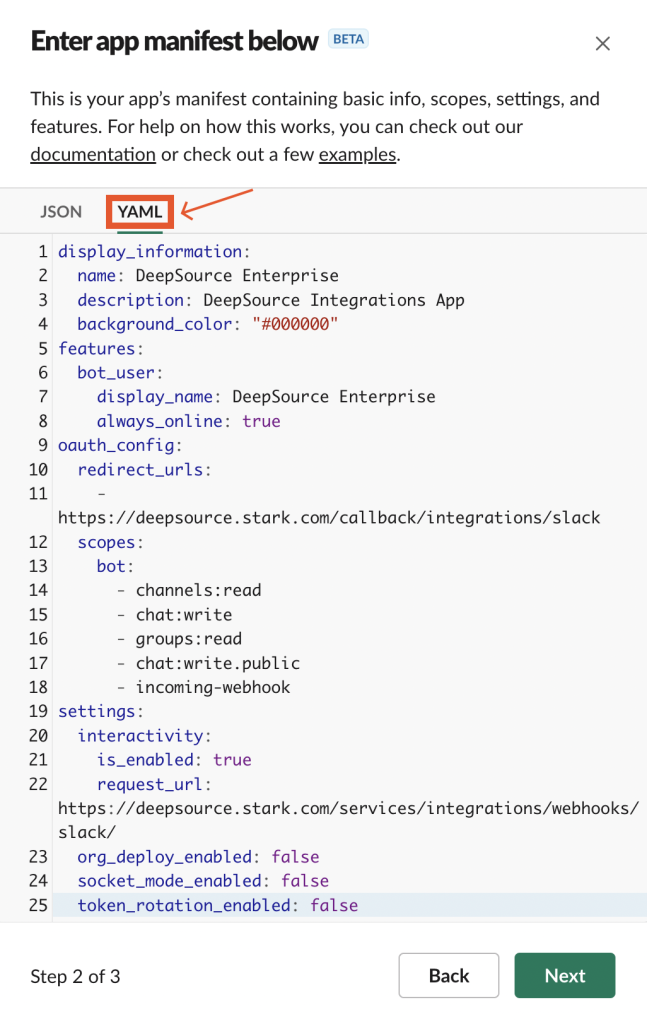
- Click on Create.
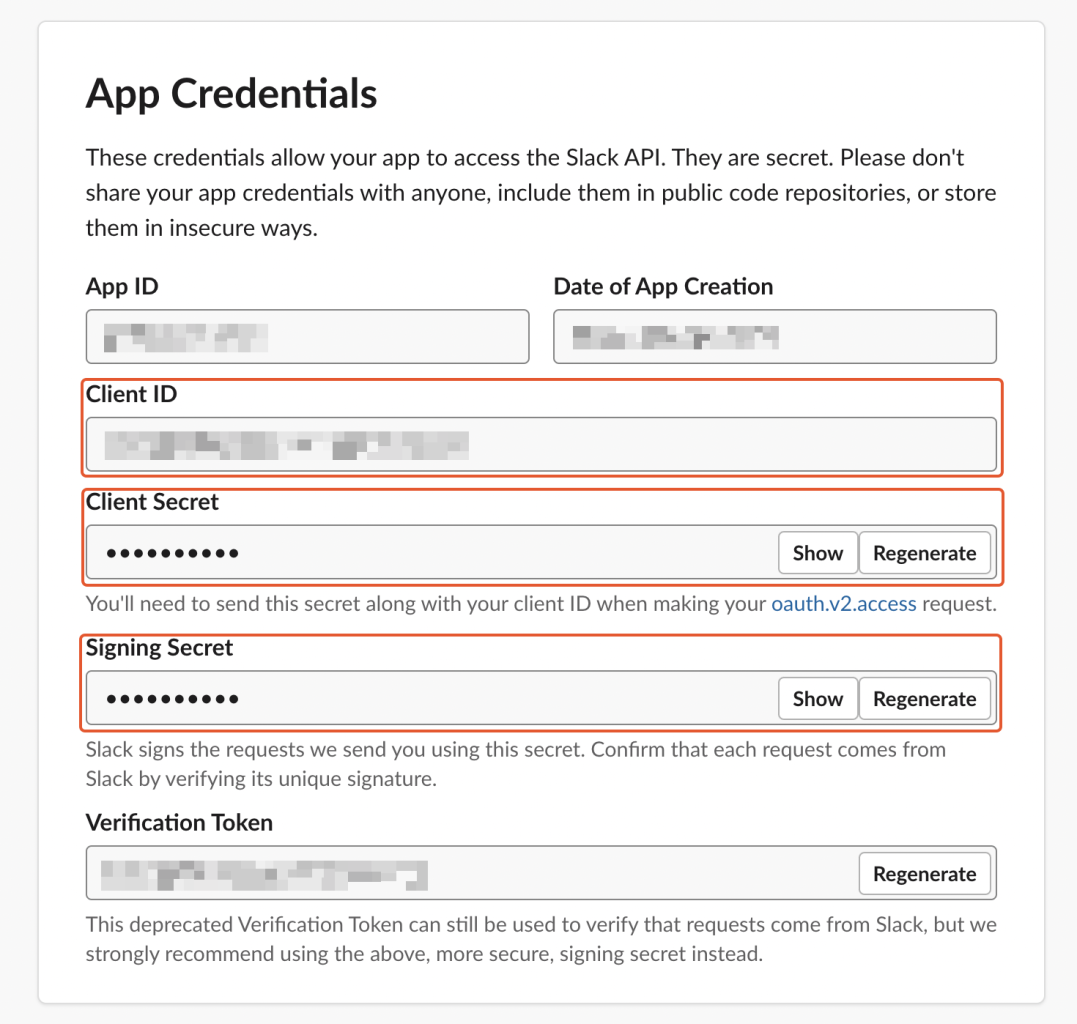
- Scroll down and navigate to the “App Credentials” section and note down the following values:
- Client ID
- Client Secret
- Signing Secret
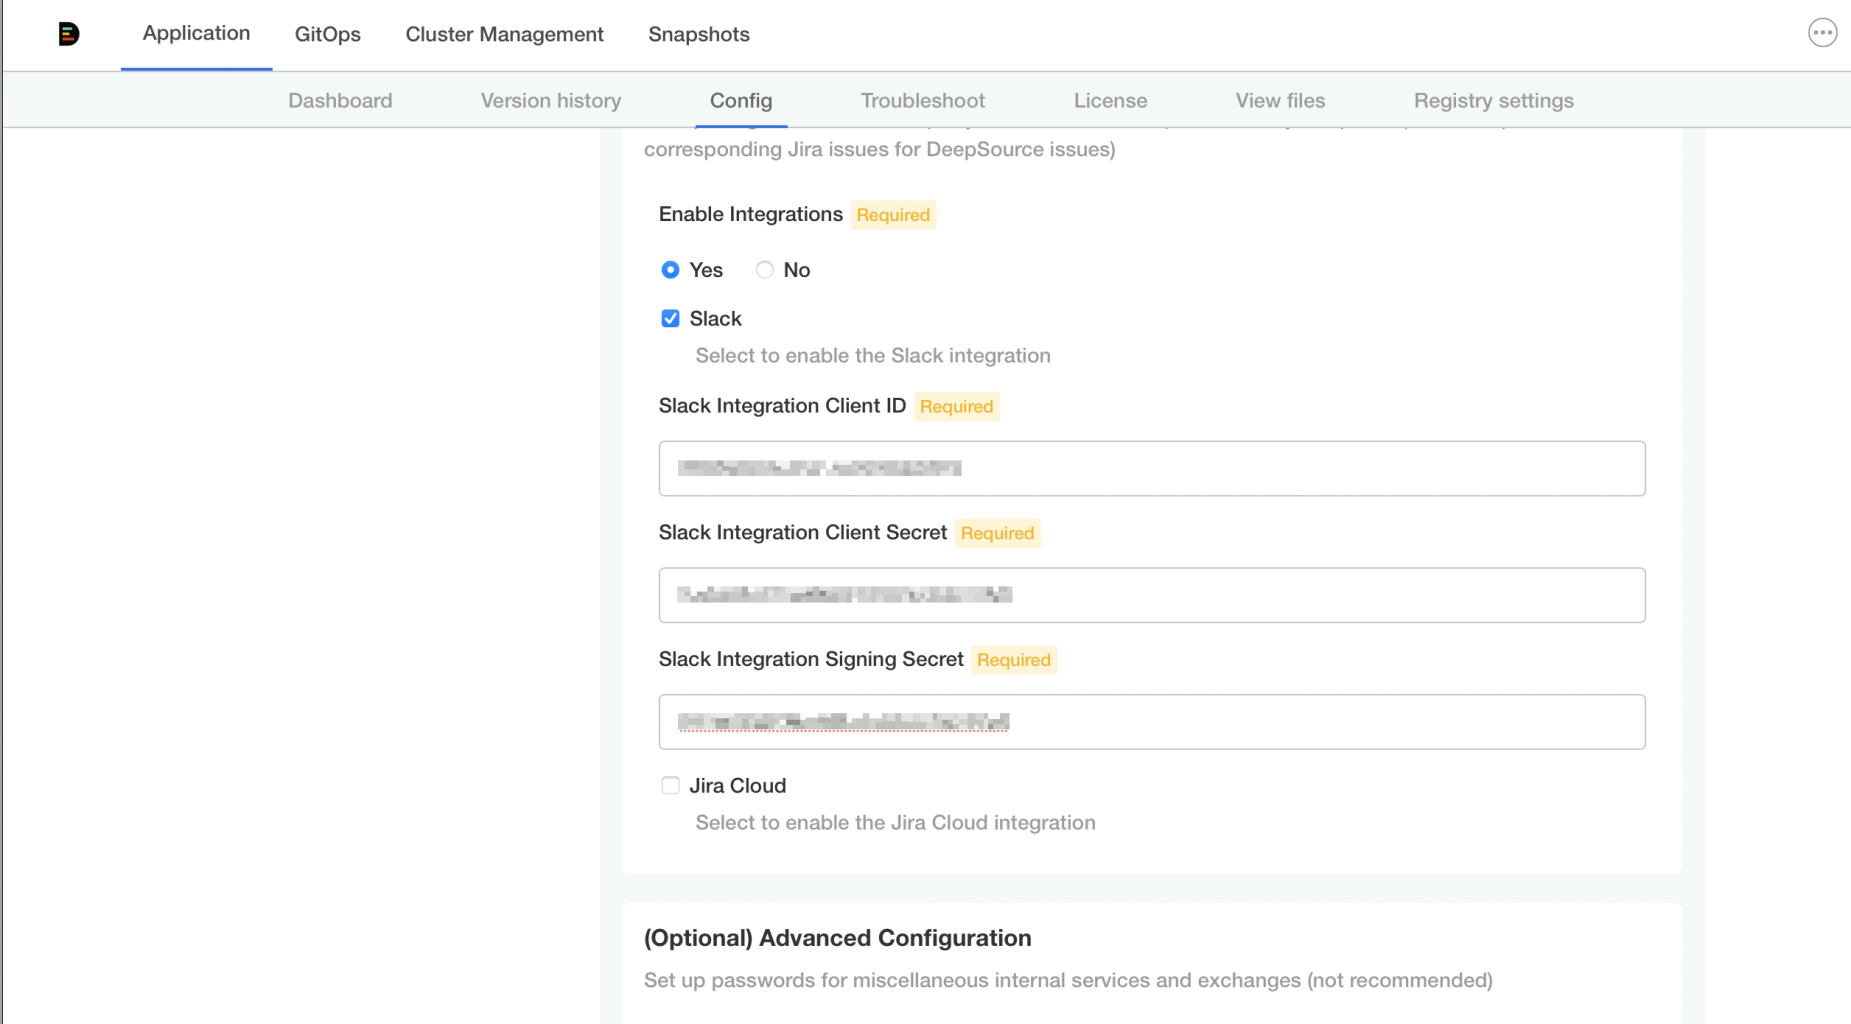
Configuring the Slack app in the Admin Console
After you create your Jira Cloud application, you need to configure Client ID & Secret in the Admin Console for the application to use it.- Visit the Admin Console
- Navigate to Application -> Config.
- In the Integrations section, set “Enable Integrations” to “Yes” and select the “Slack” checkbox.
- Fill up the values from the previous step for:
- Slack Integration Client ID
- Slack Integration Client Secret
- Slack Integration Signing Secret
- Save.