Skip to main contentCreating the Jira Cloud app
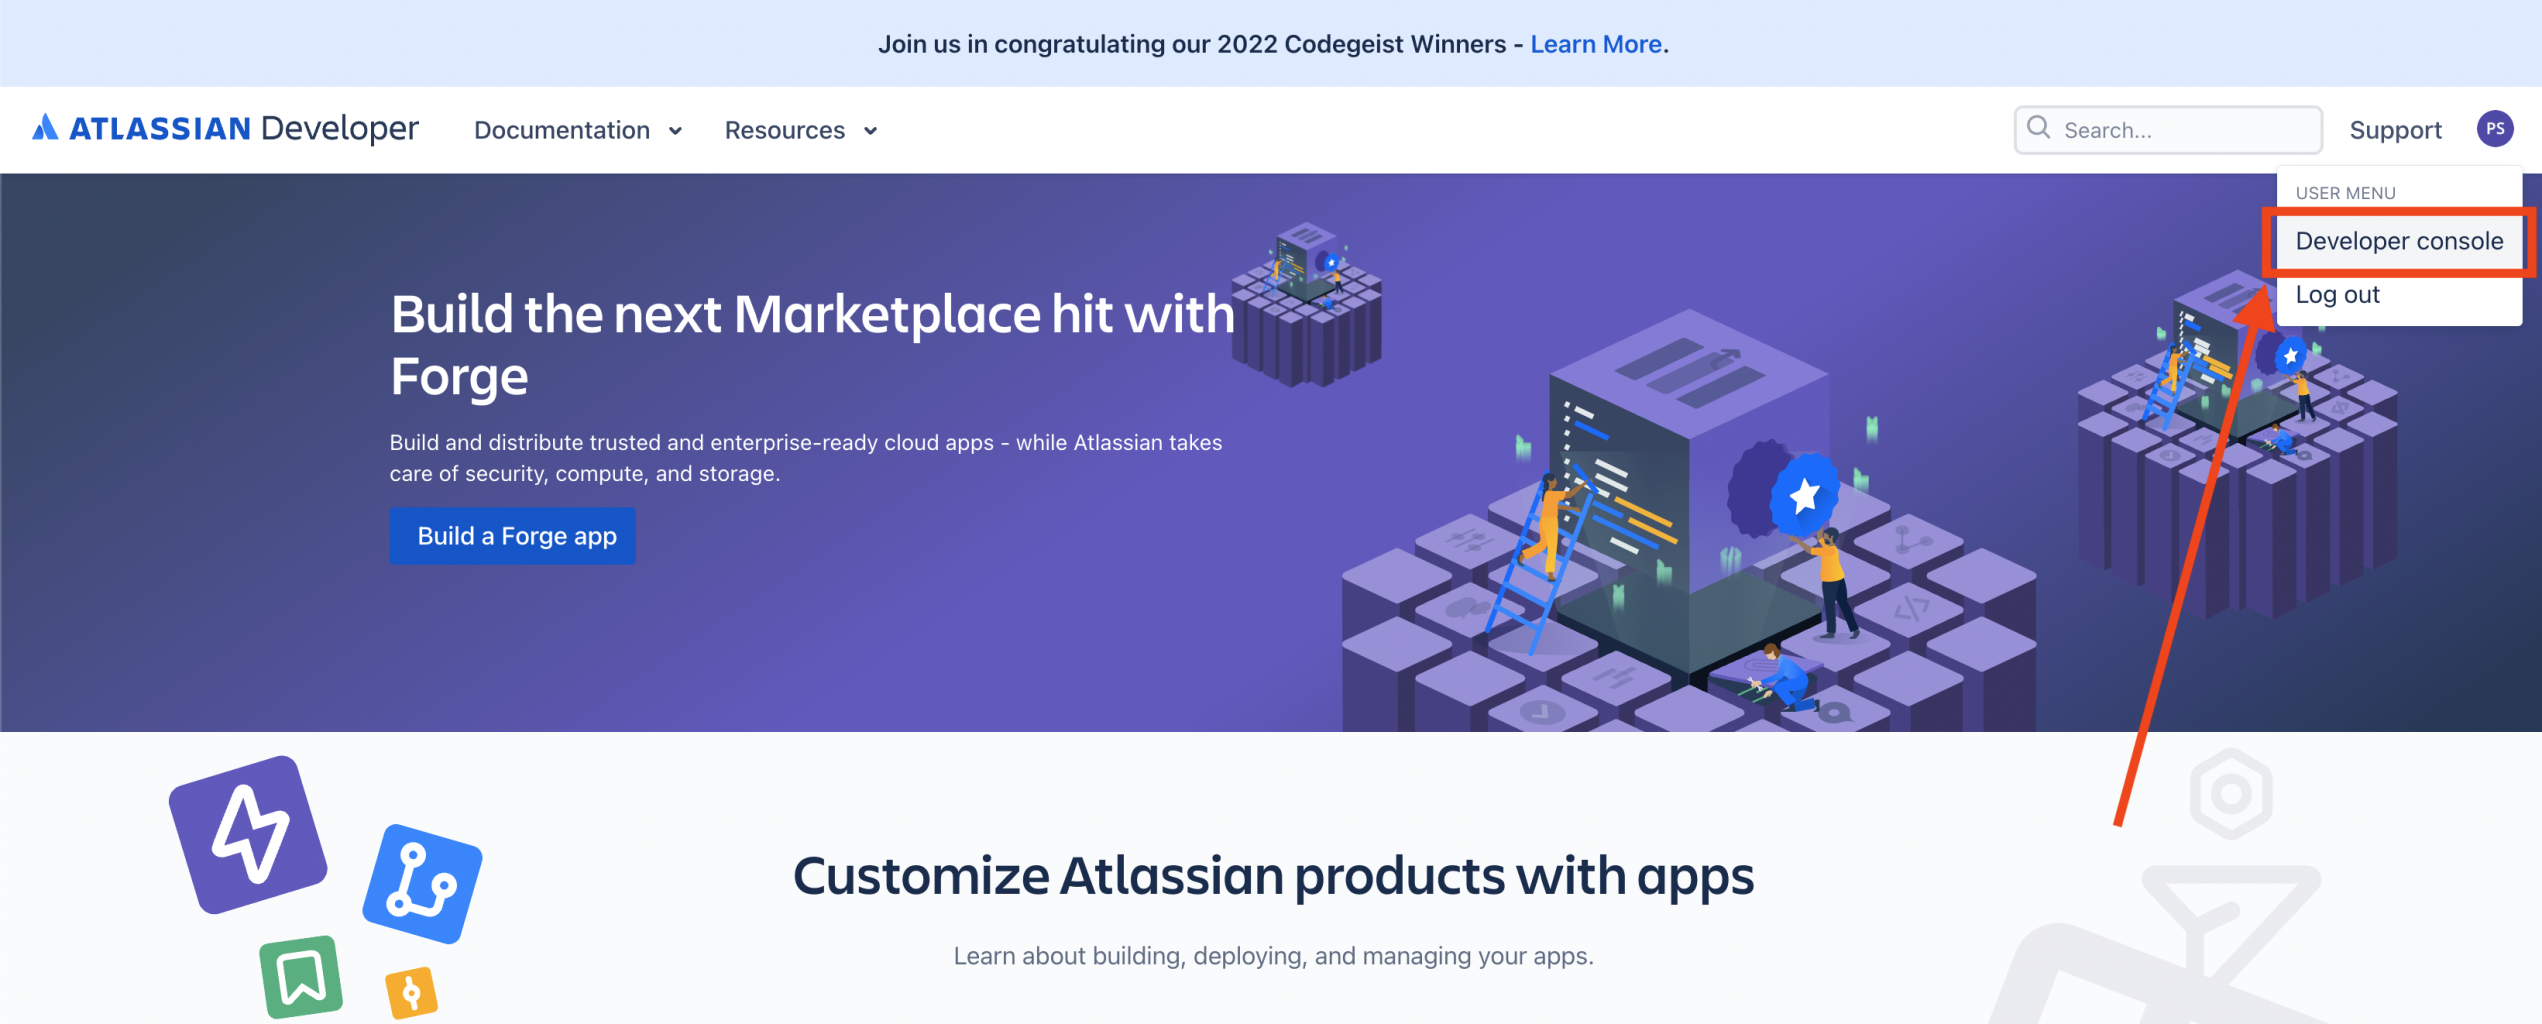
- Go to https://developer.atlassian.com and log into the Developer Console.
- Once logged in, click on you avatar on the top right and select Developer Console.
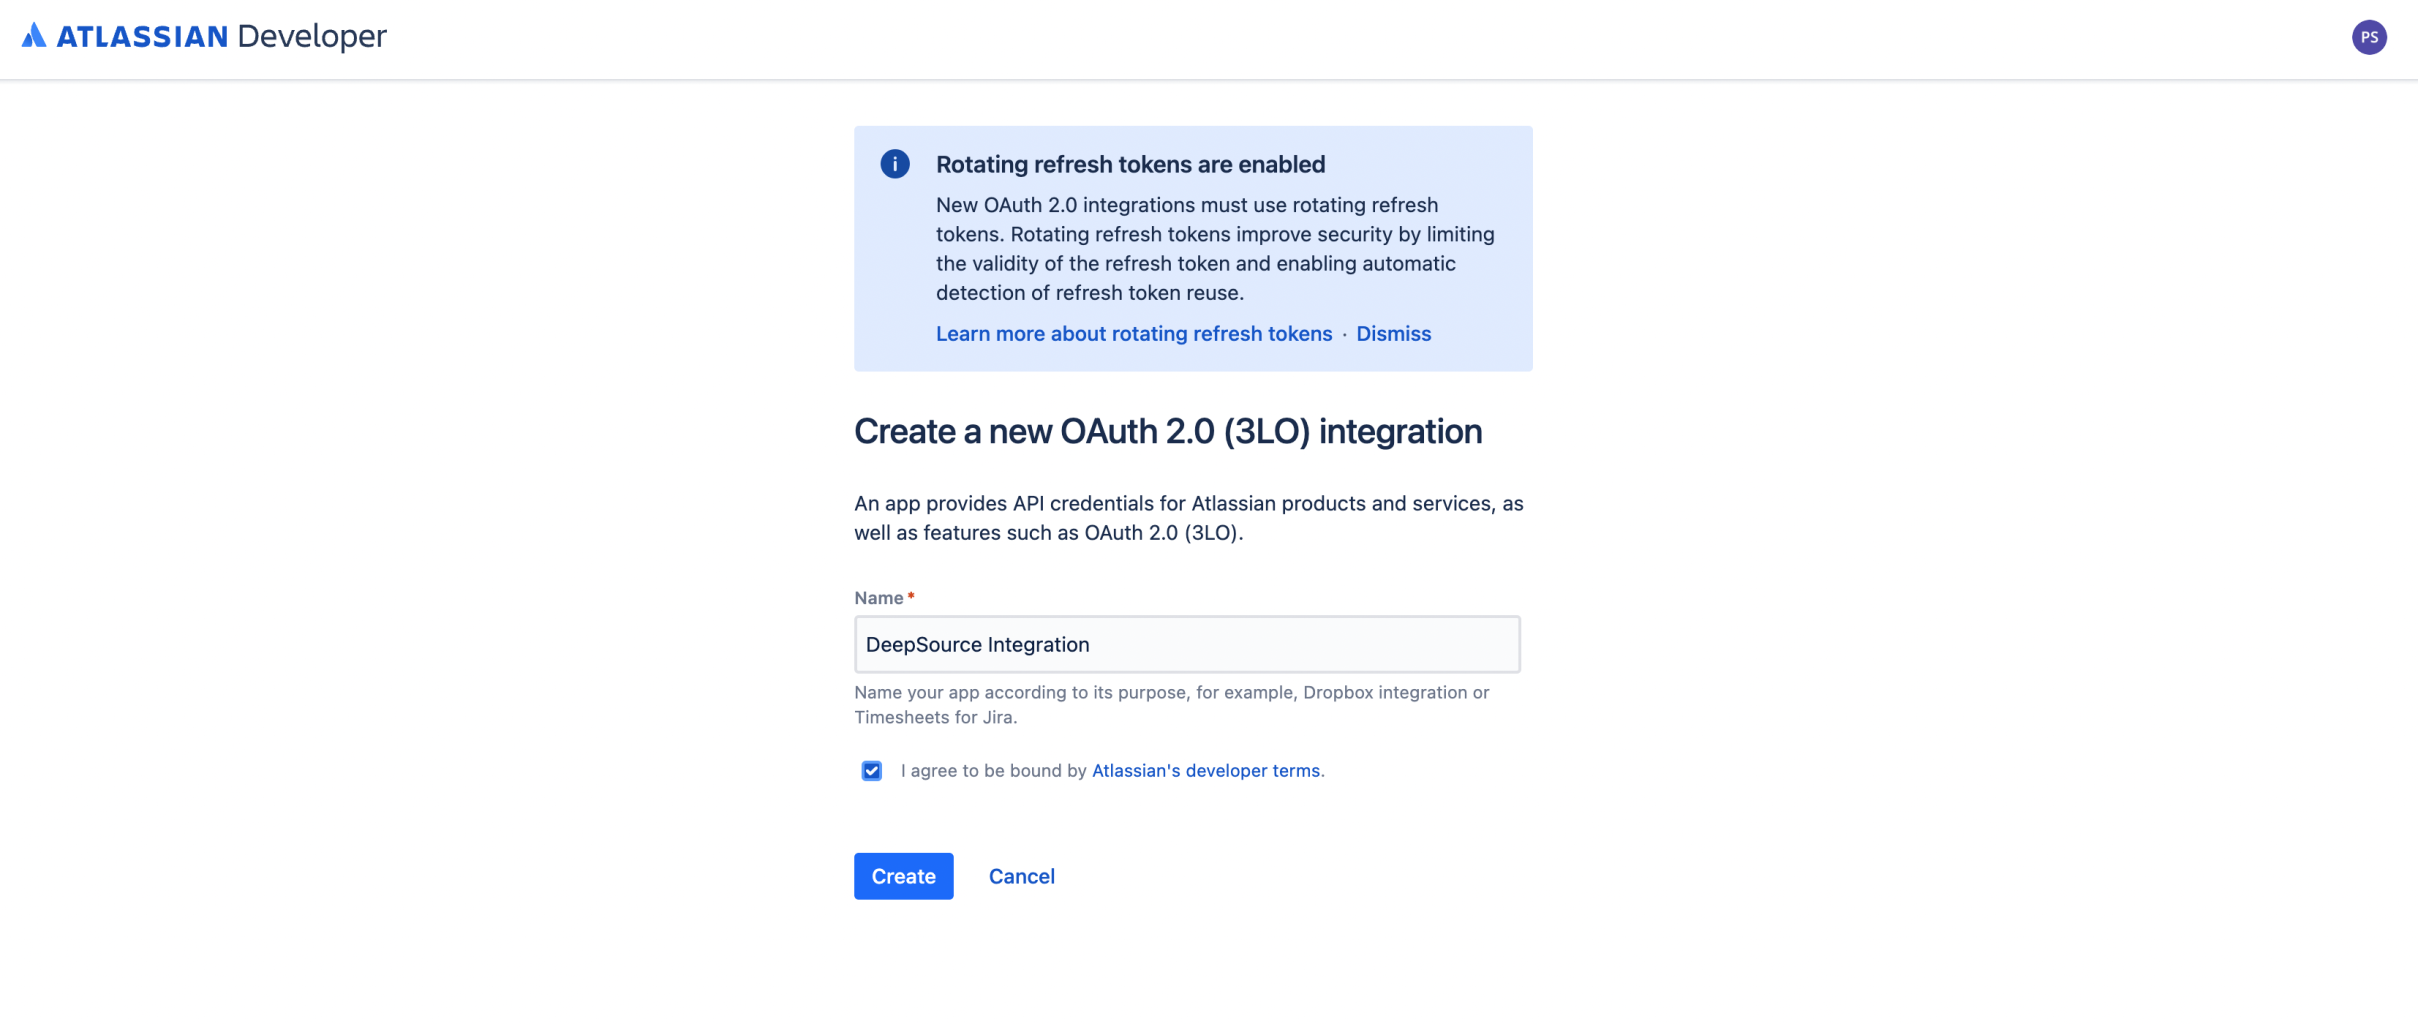
- Click on Create > OAuth 2.0 integration.
- Give a name to the app and click on Create.
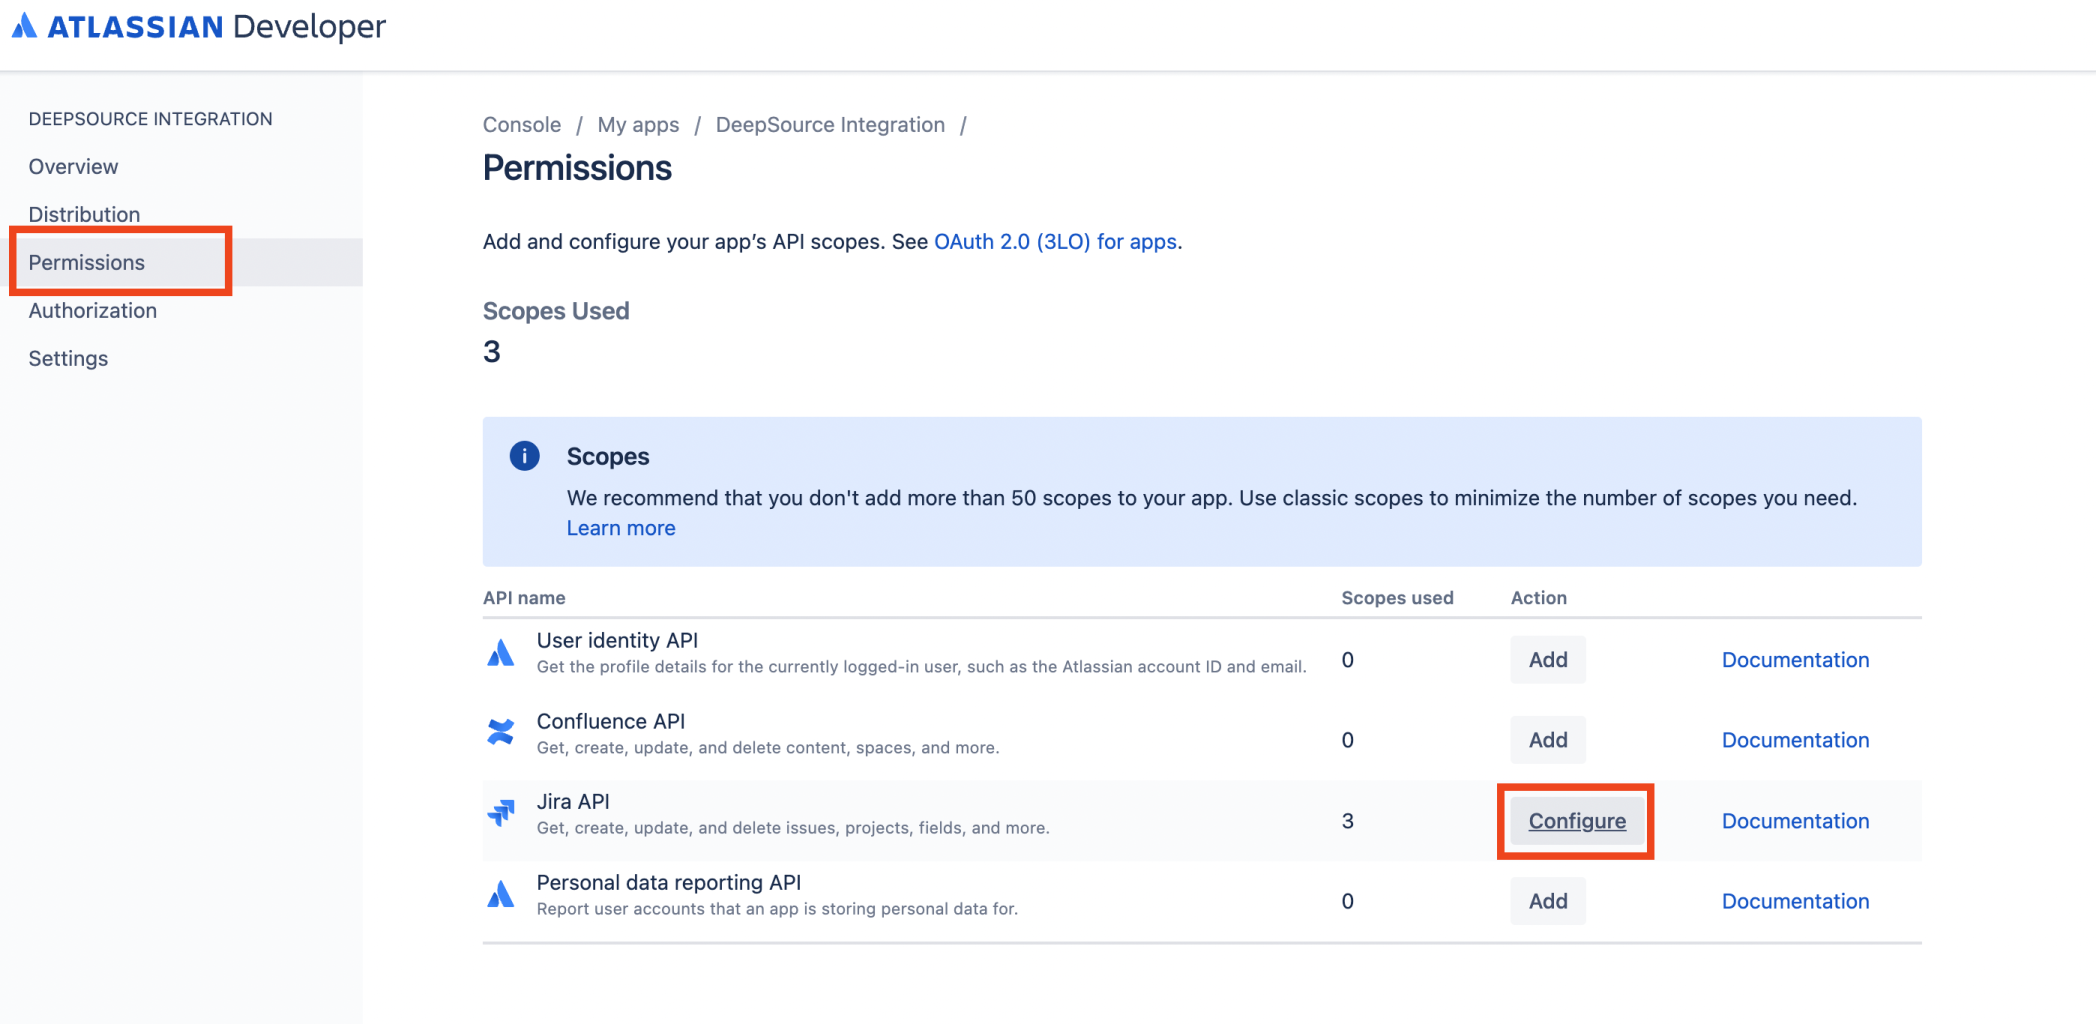
- Navigate to the Permissions tab. Against the Jira API click on Add and then click on Configure.
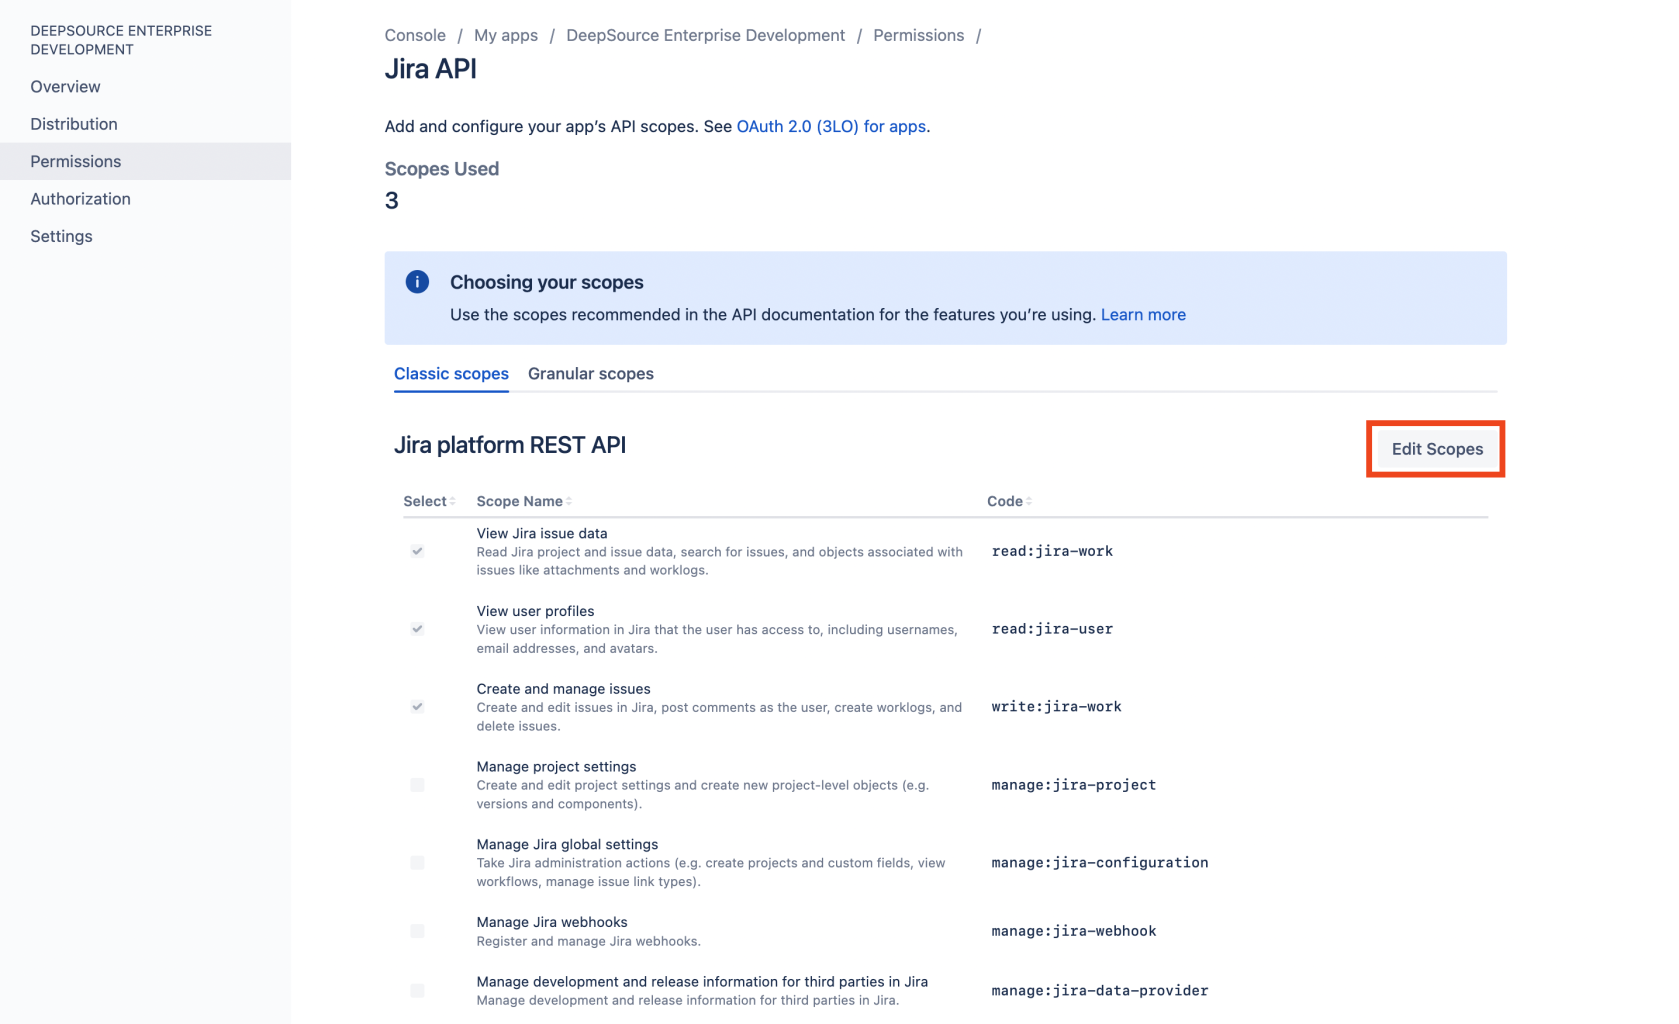
- In the Jira platform REST API section click on Edit Scopes and select the following scopes:
read:jira-workread:jira-userwrite:jira-work
- Navigate to the Authorization tab. Against OAuth 2.0 (3LO) click on Add and add the following callback URL:
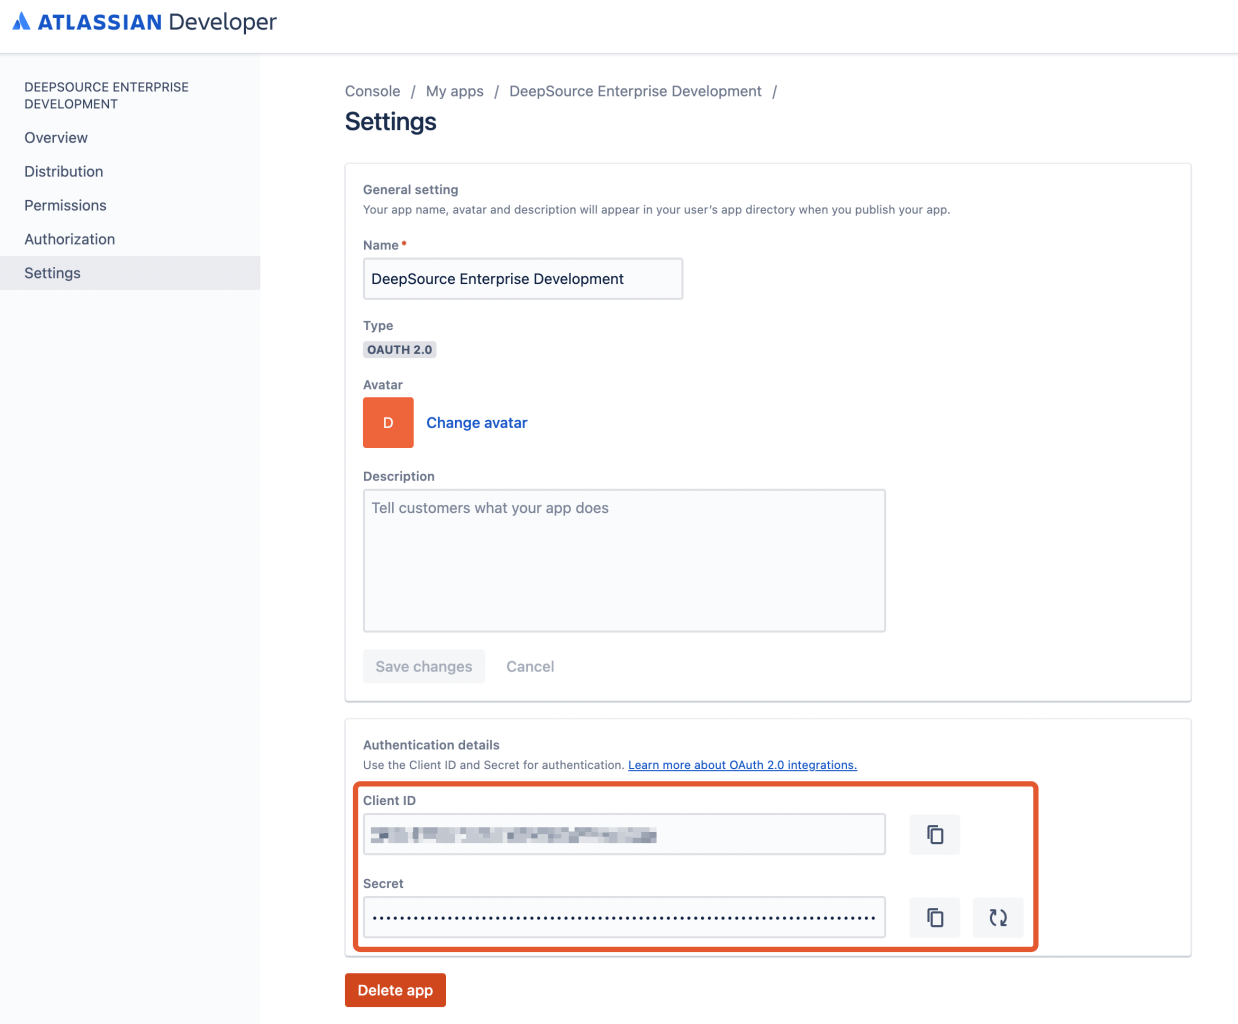
https://<HOSTNAME>/callback/integrations/jira. (Replace <HOSTNAME> with your DeepSource instance’s hostname, for e.g. if your <HOSTNAME> is deepsource.stark.com, then the callback URL will be https://deepsource.stark.com/callback/integrations/jira). - Navigate to the Settings tab and note down the following values:
Configuring the Jira Cloud app in the Admin Console
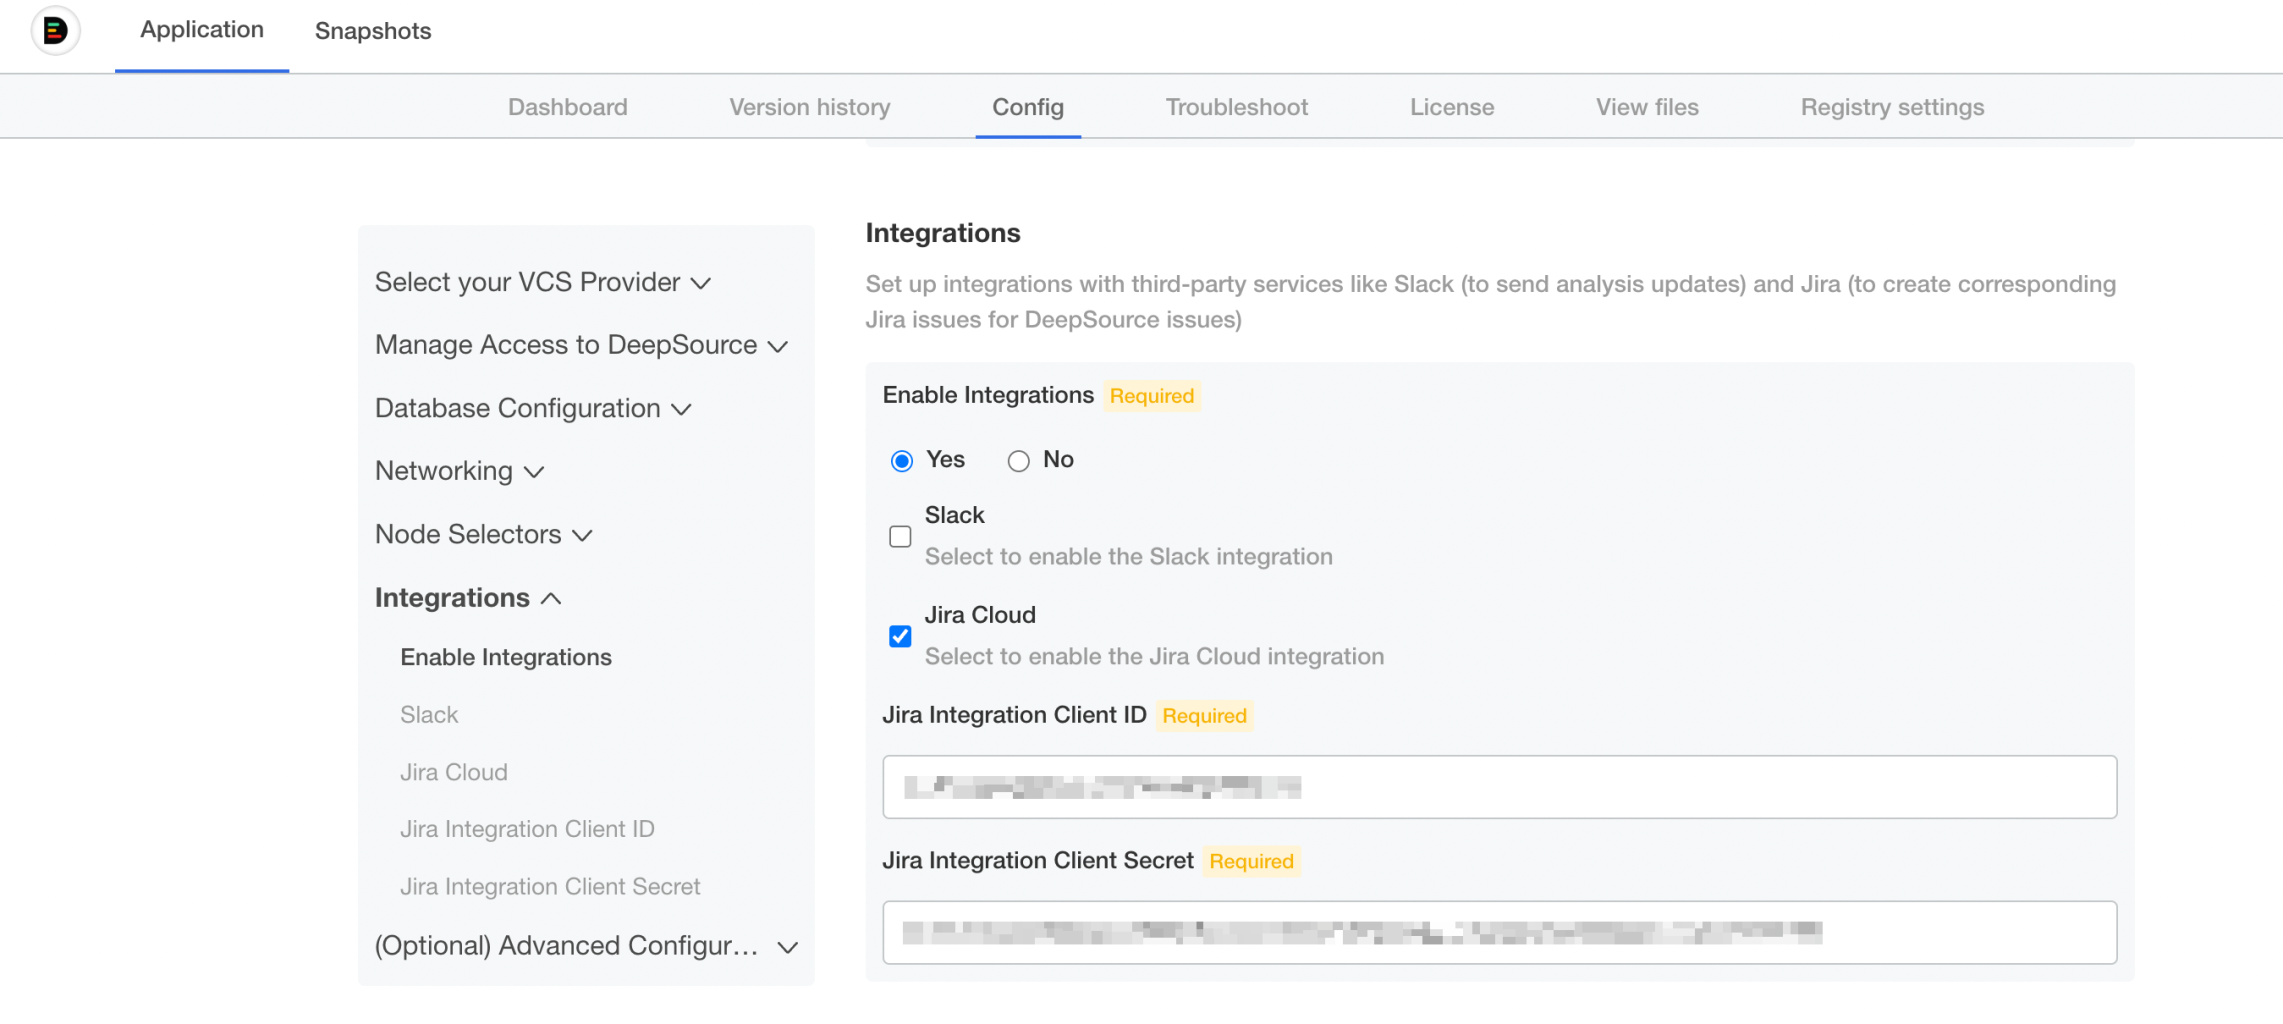
After you create your Jira Cloud application, you need to configure Client ID & Secret in the Admin Console for the application to use it. - Visit the Admin Console.
- Navigate to Application -> Config.
- In the Integrations section, set “Enable Integrations” to “Yes” and select the “Jira Cloud” checkbox.
- Fill up the values from the previous step for:
- Jira Integration Client ID
- Jira Integration Client Secret
- Save.