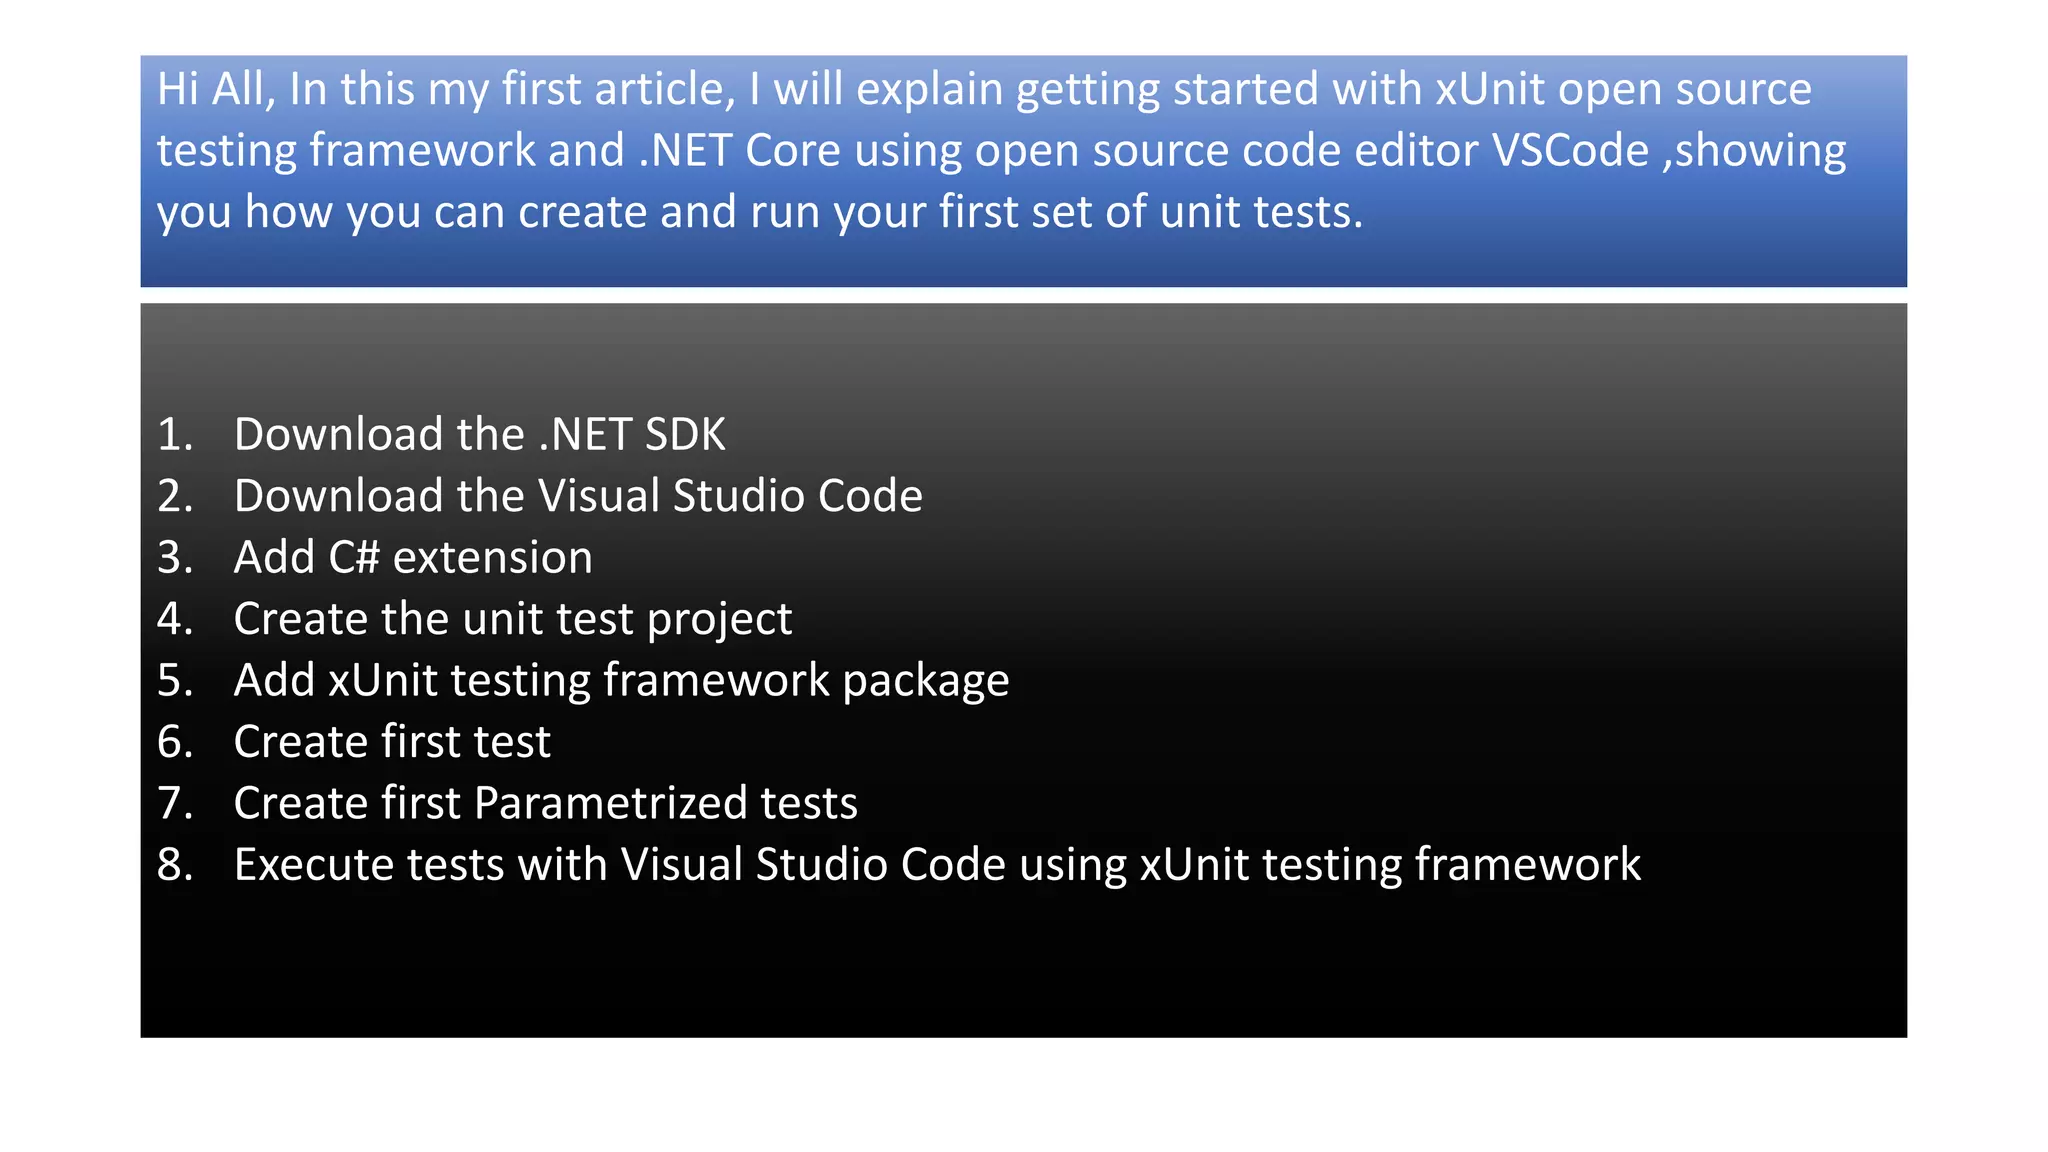
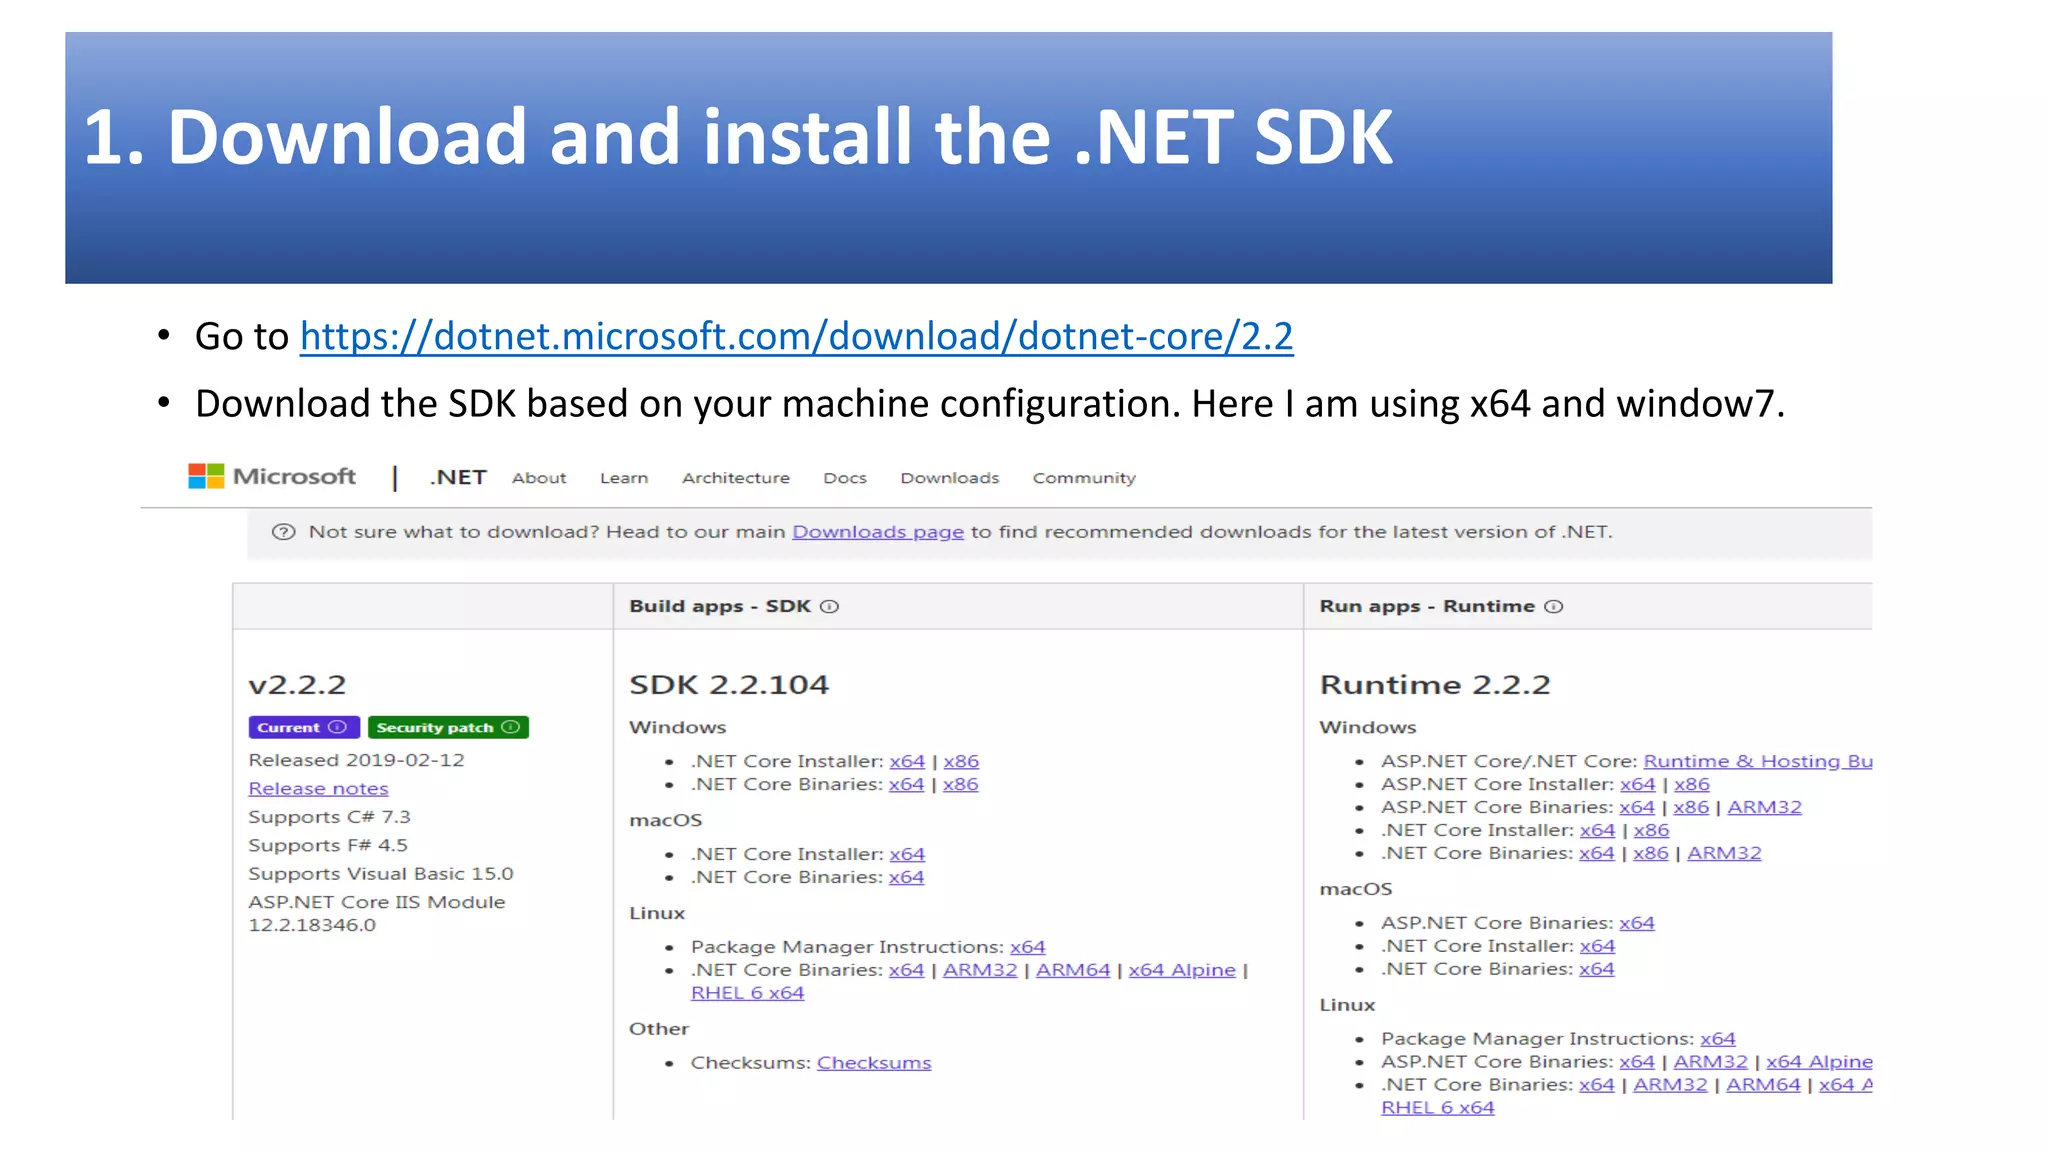
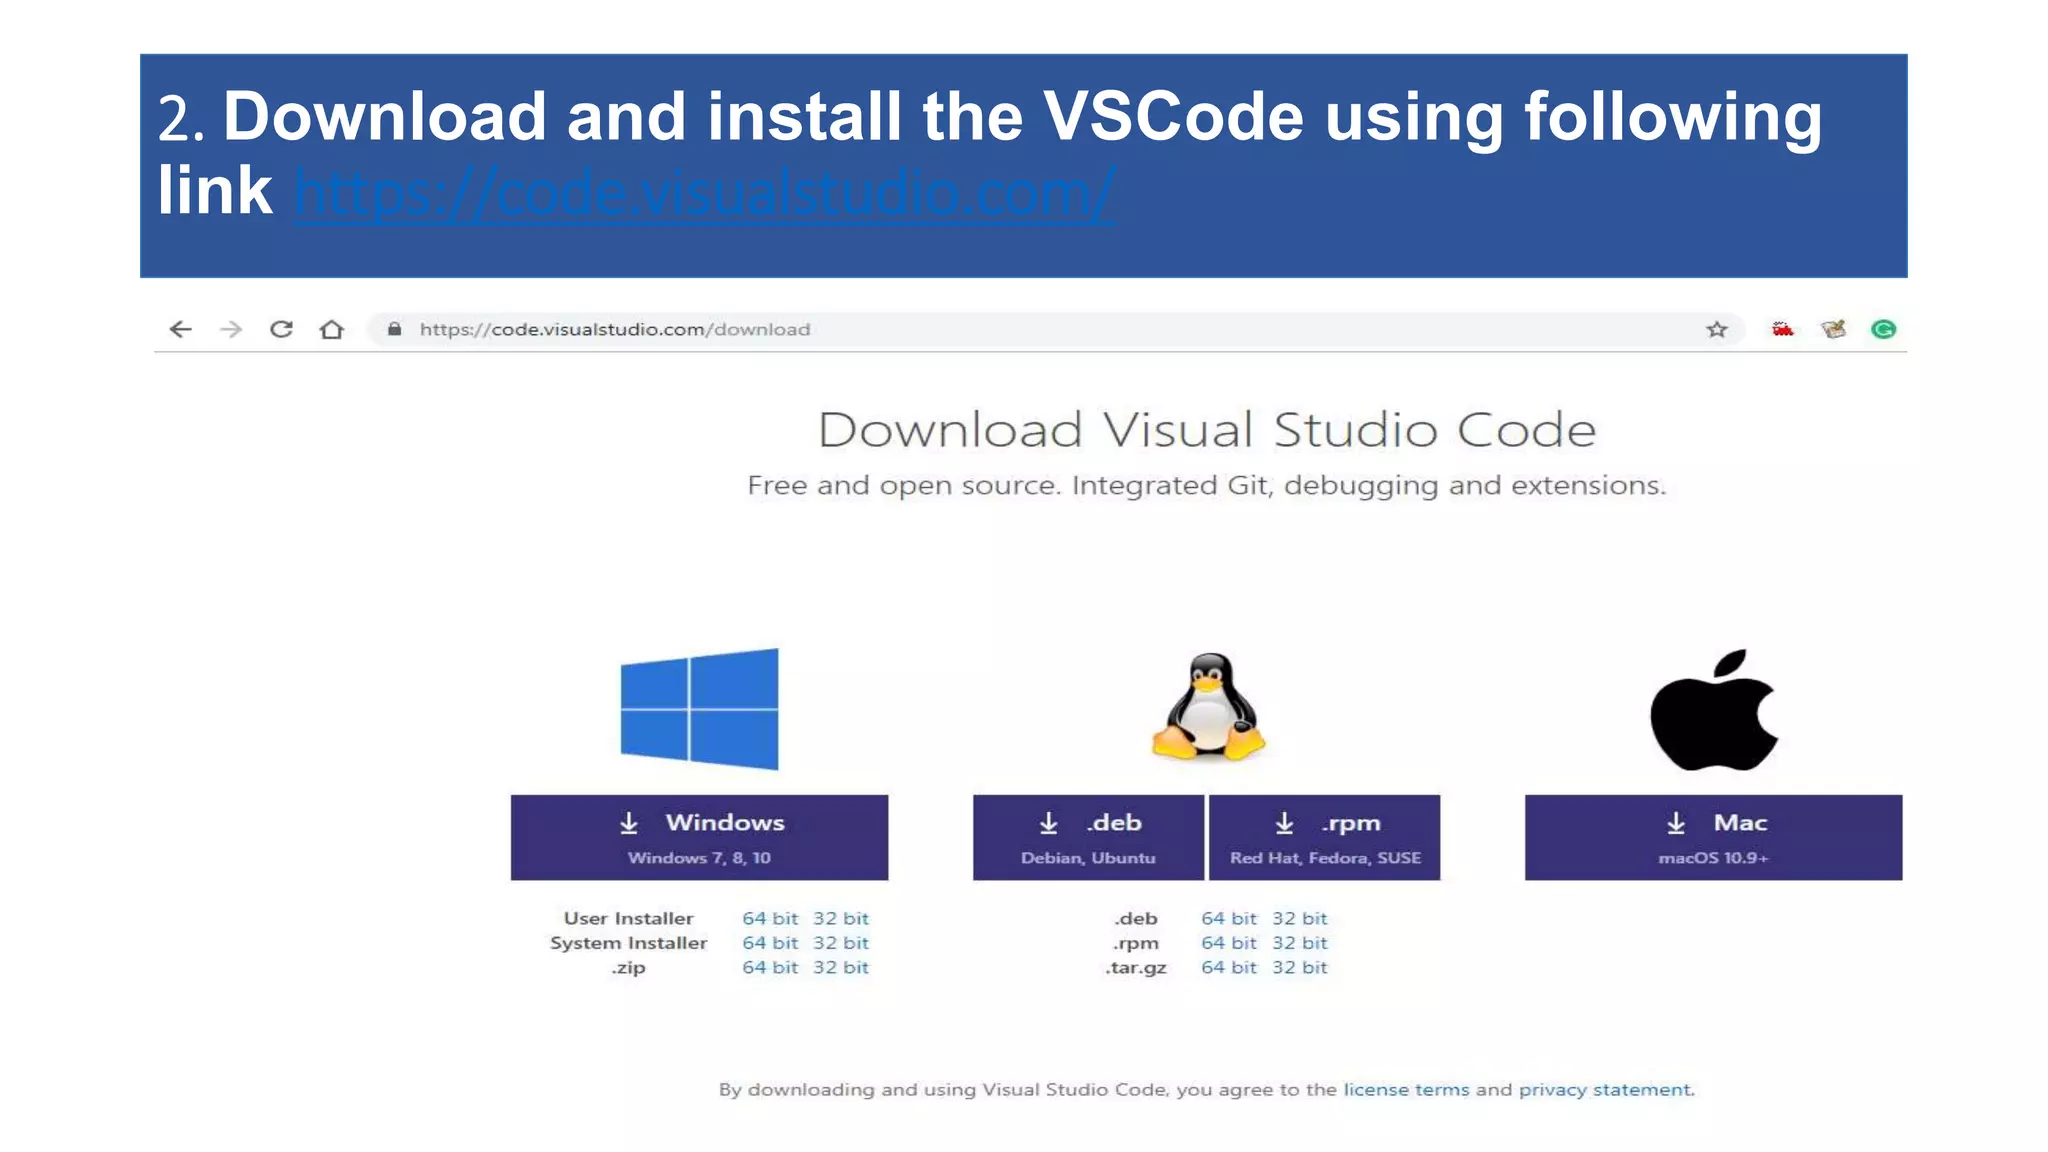
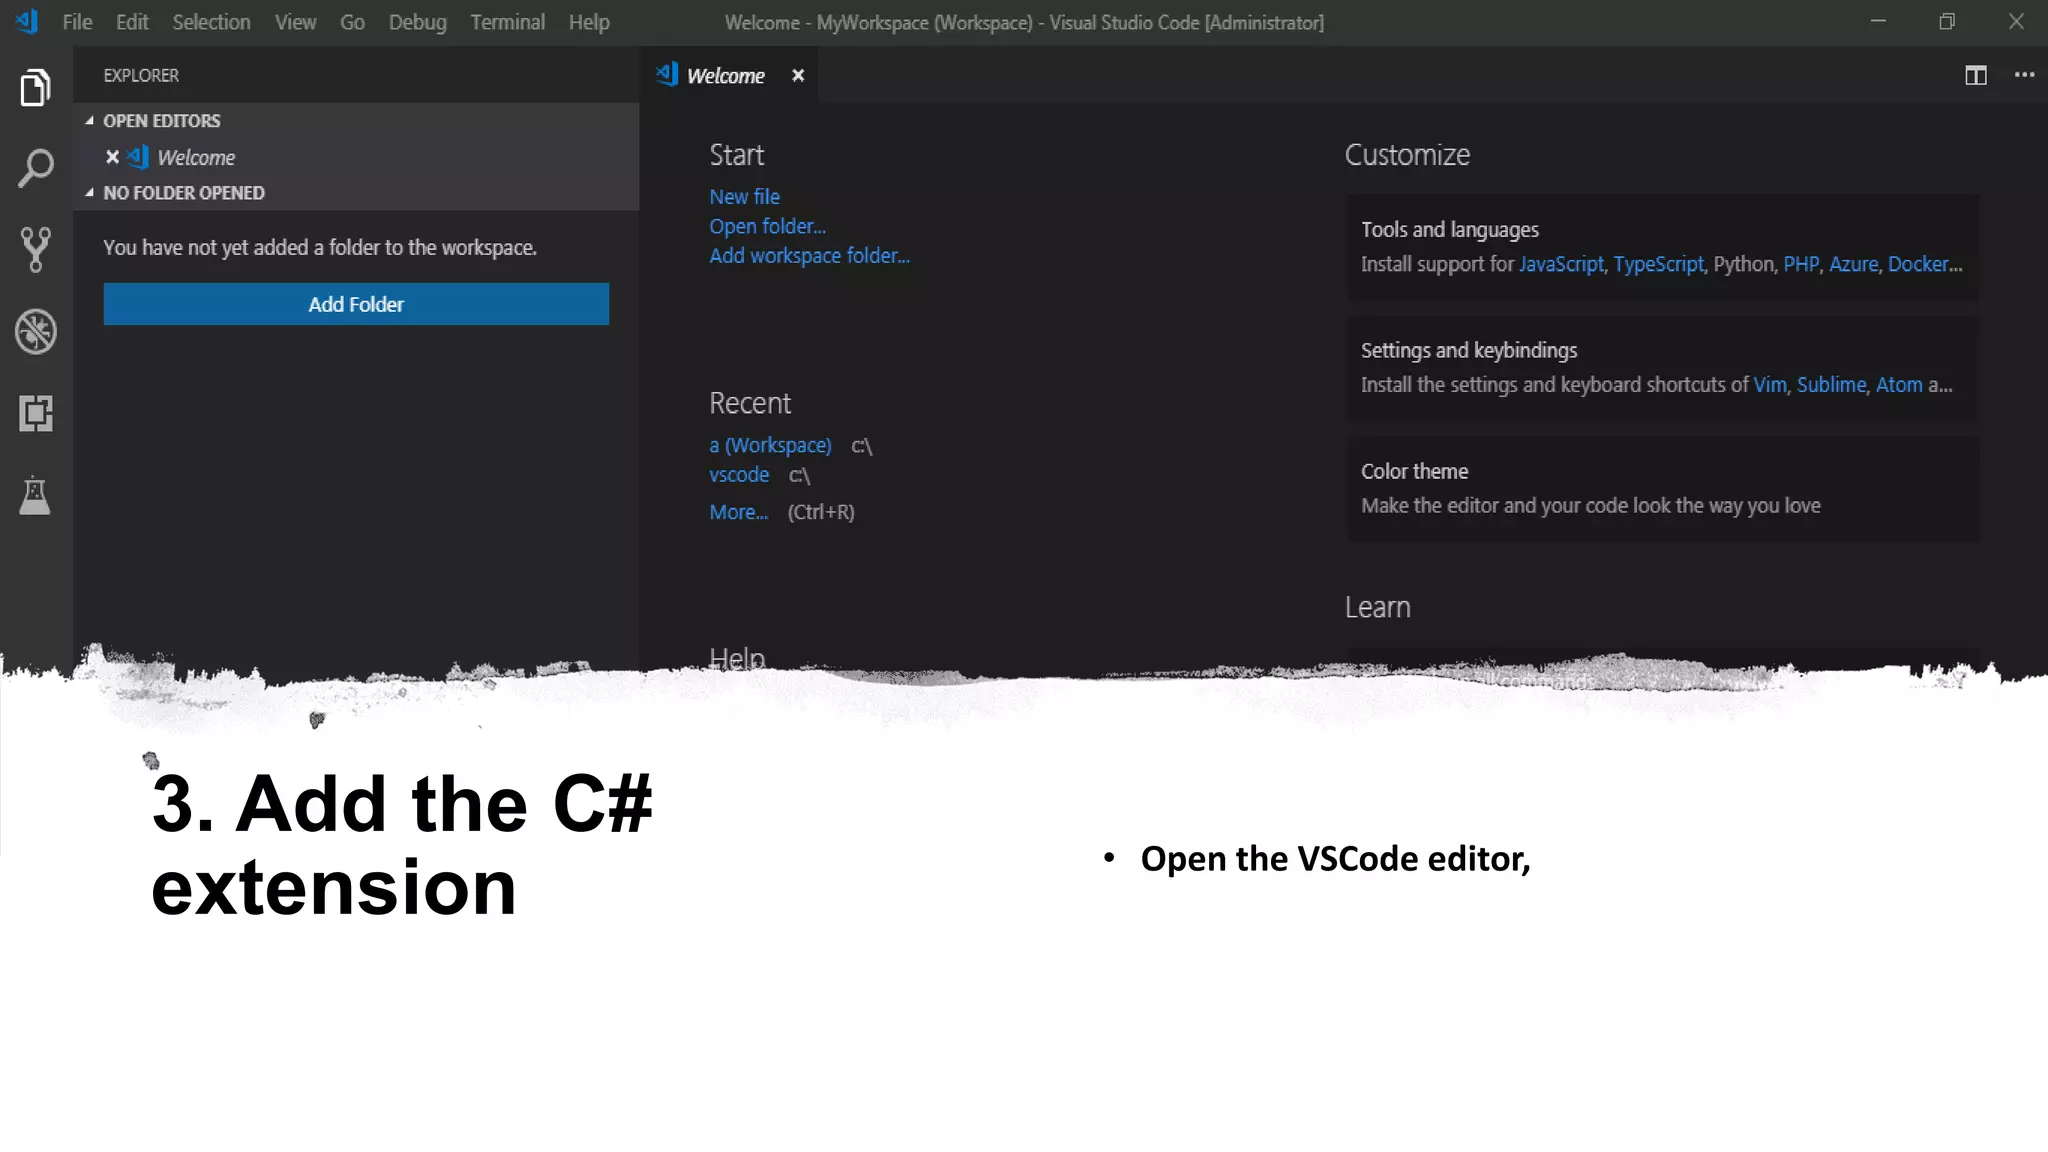
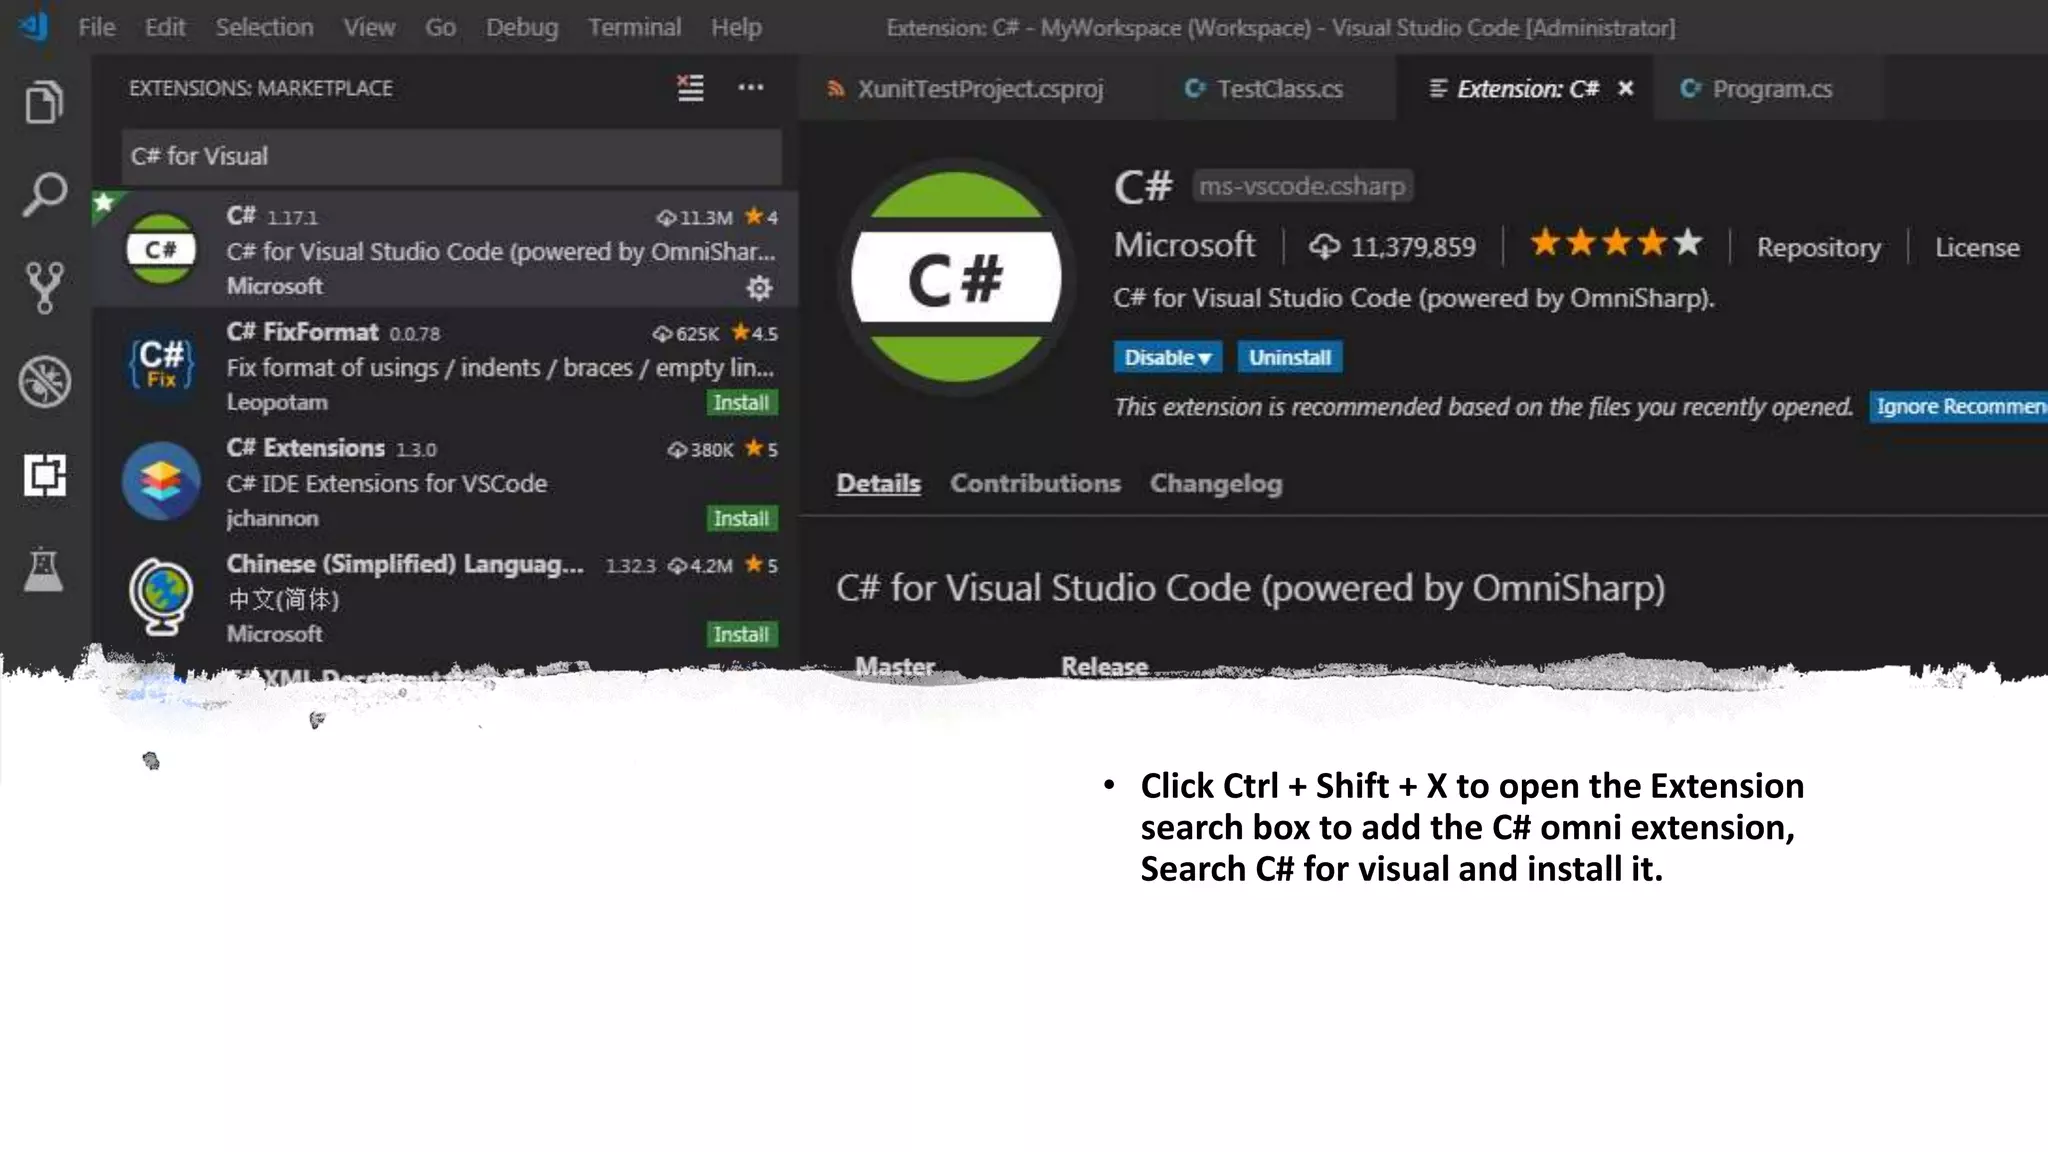
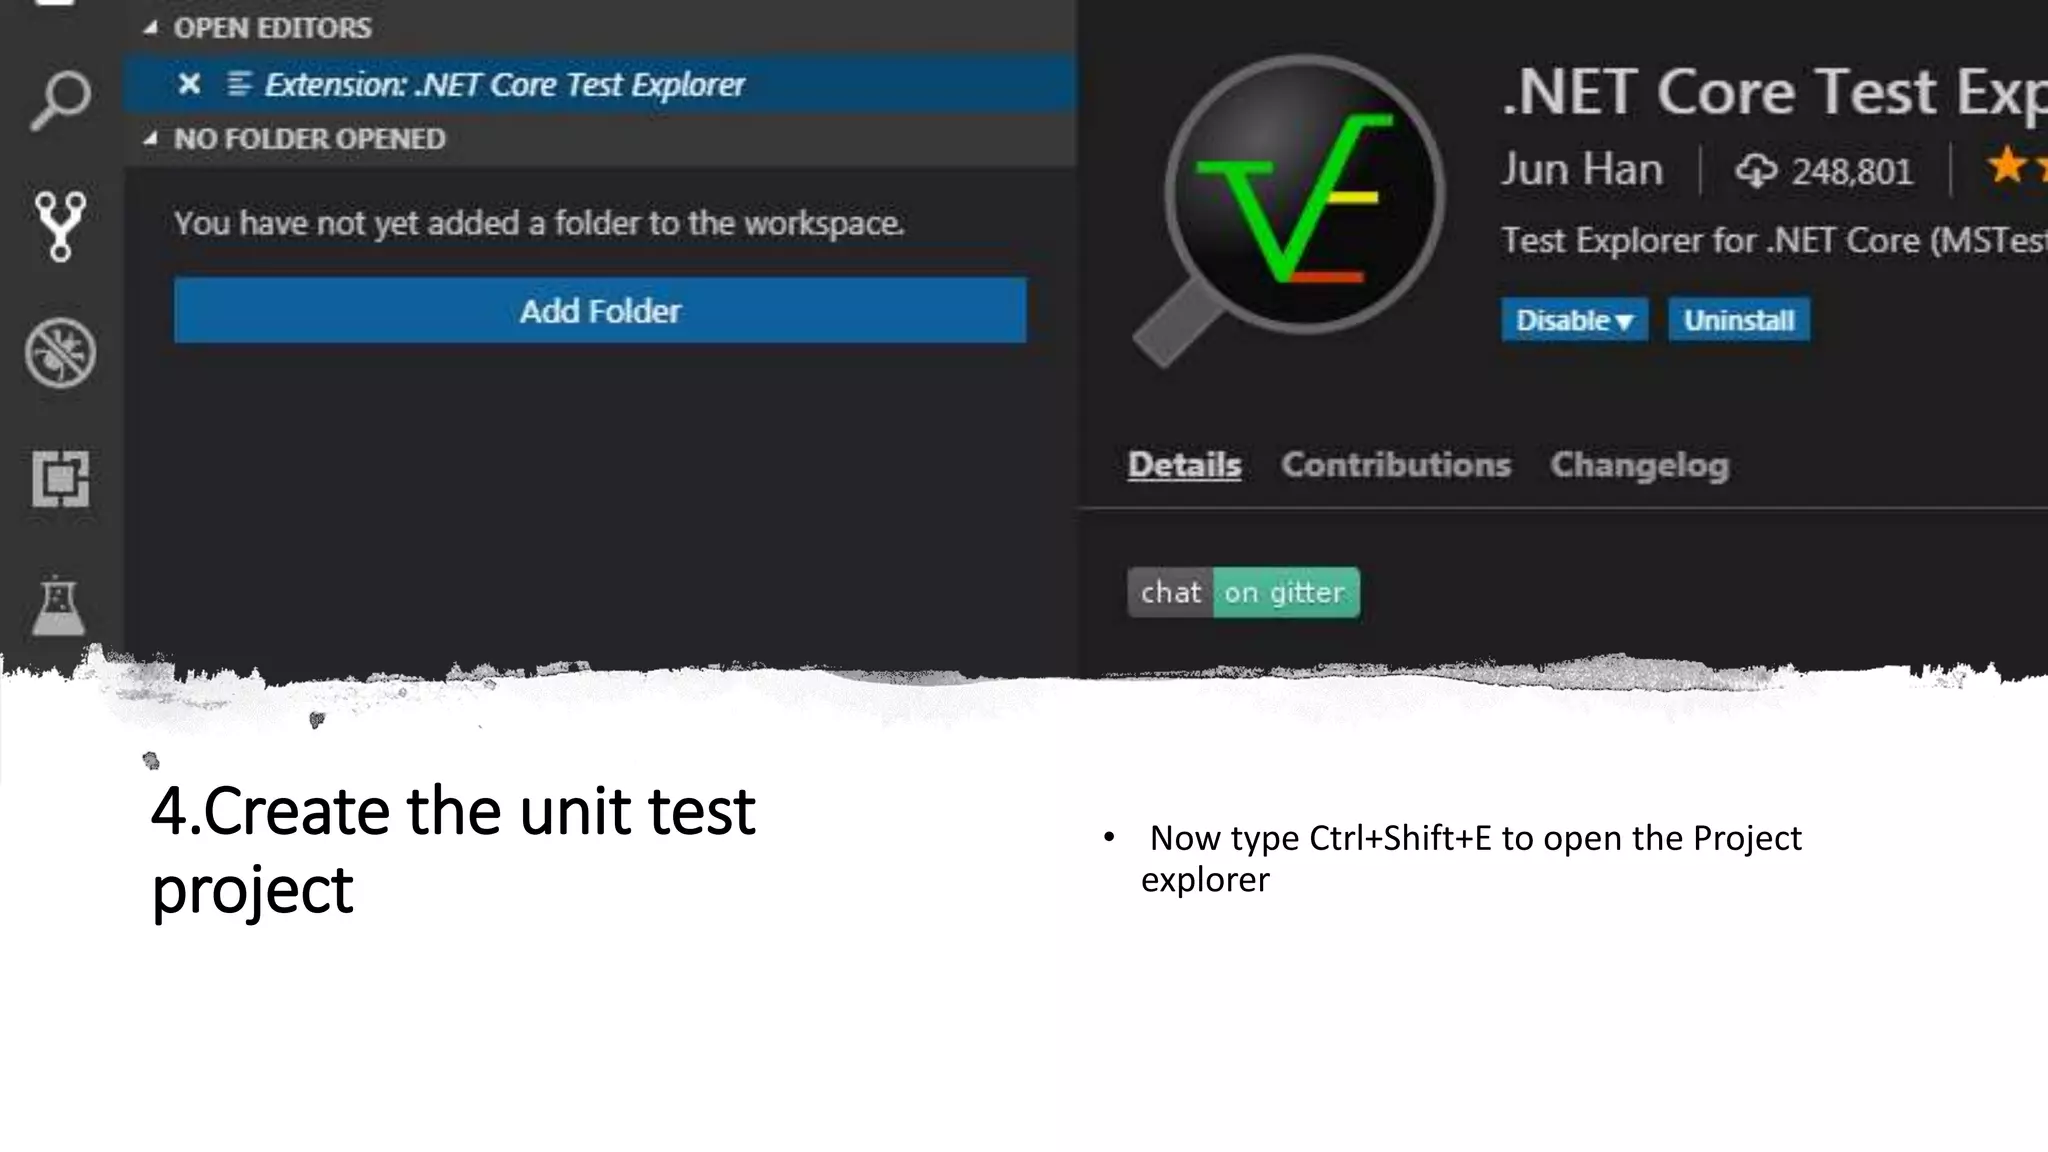
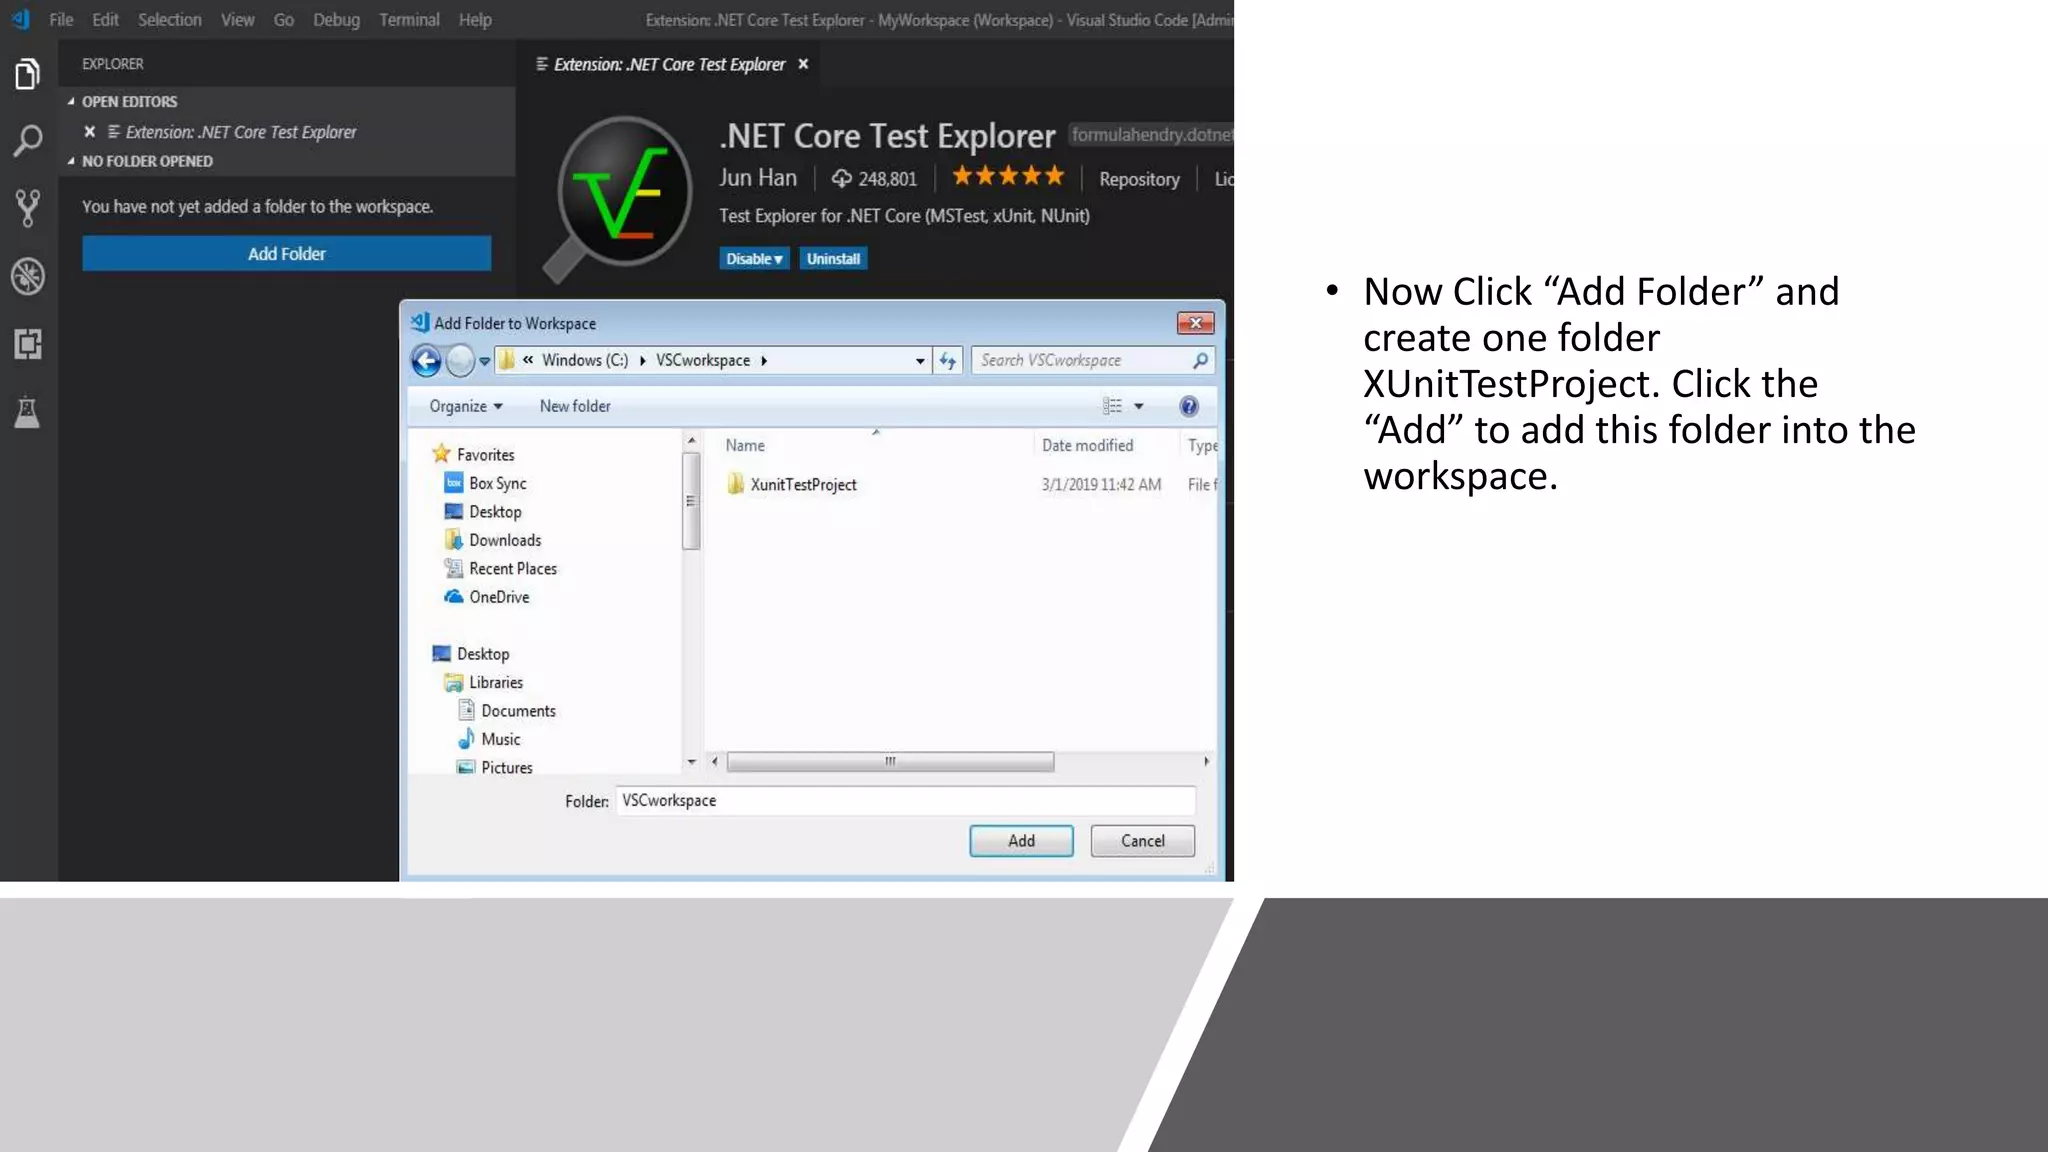
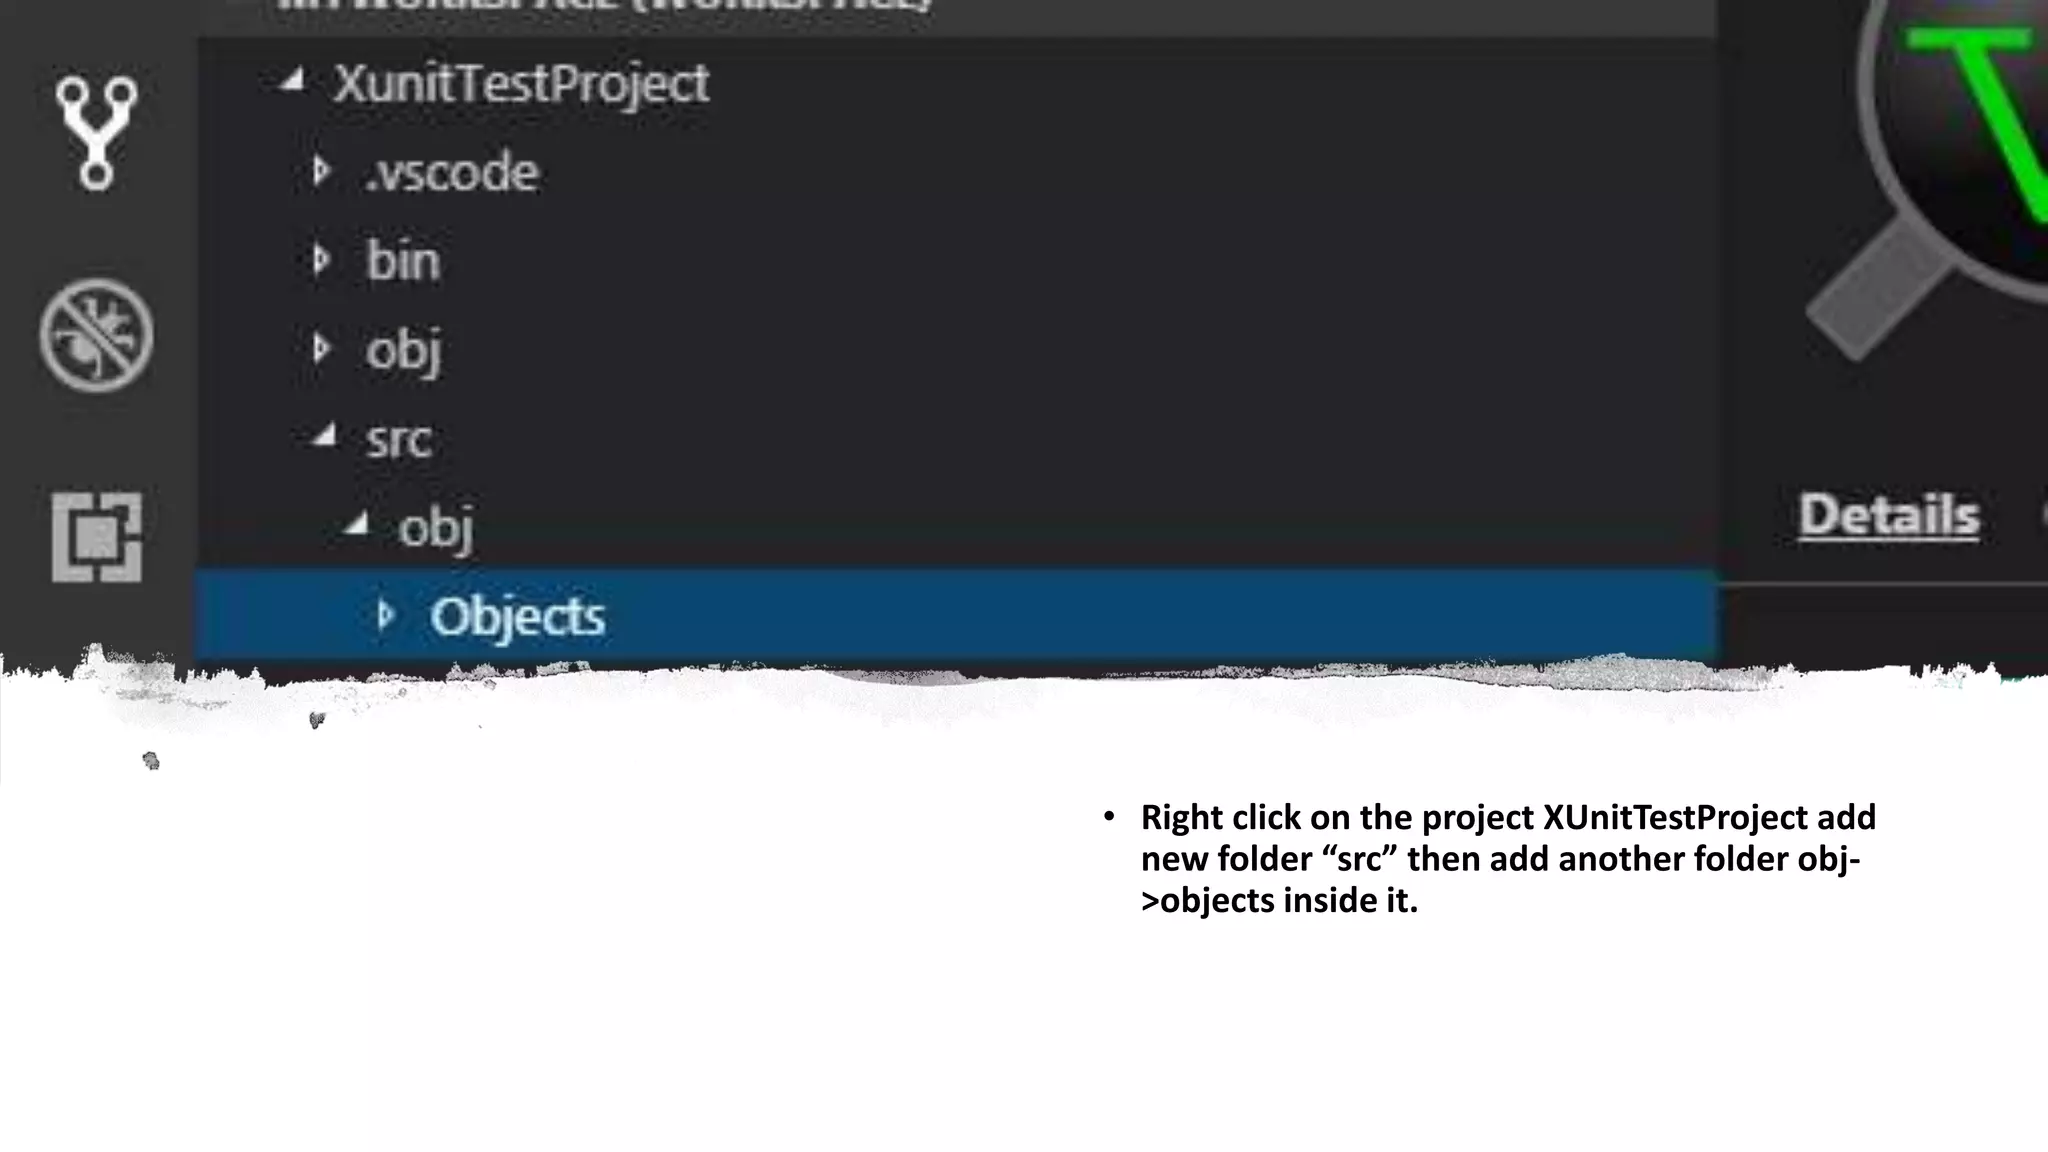
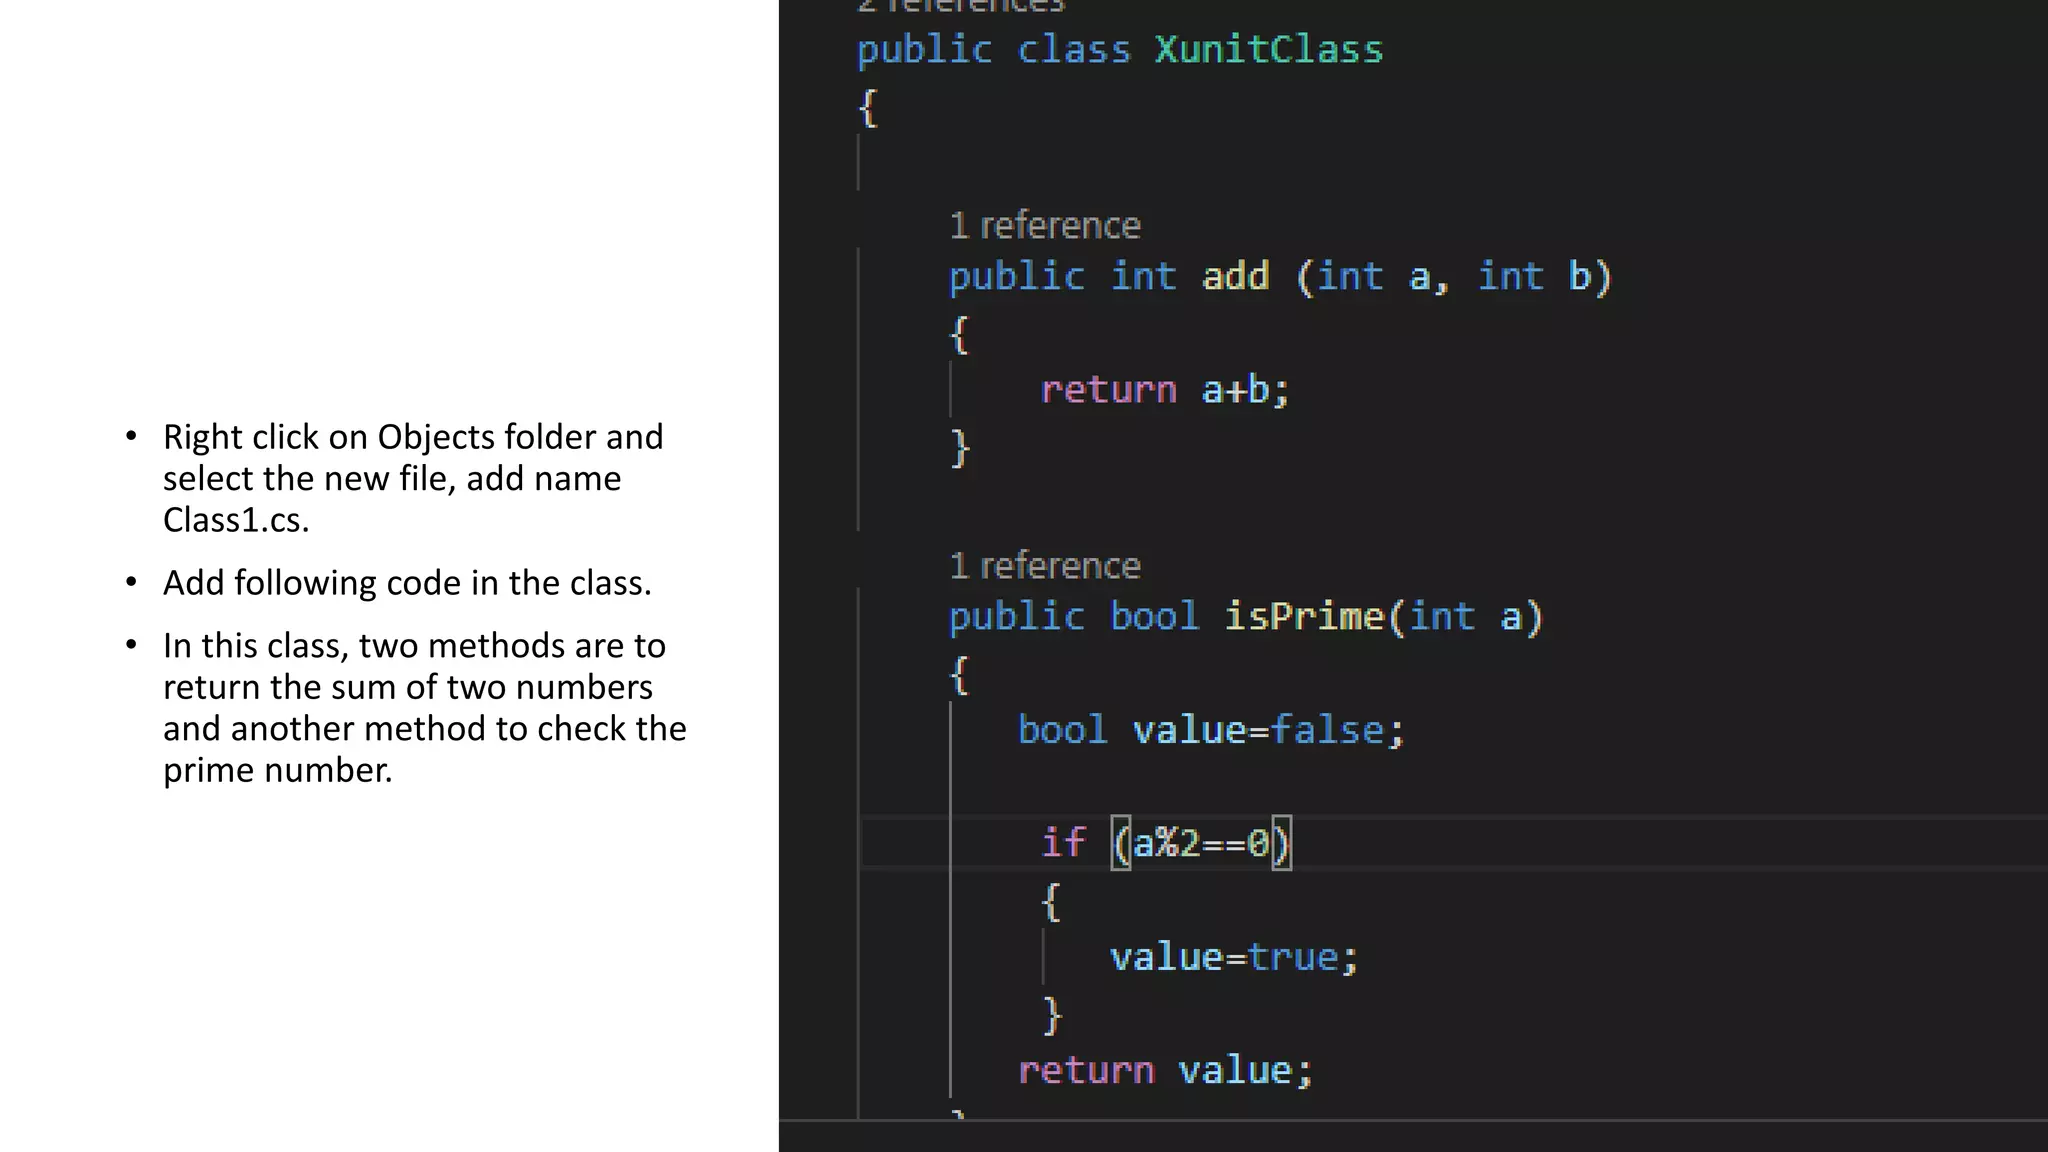
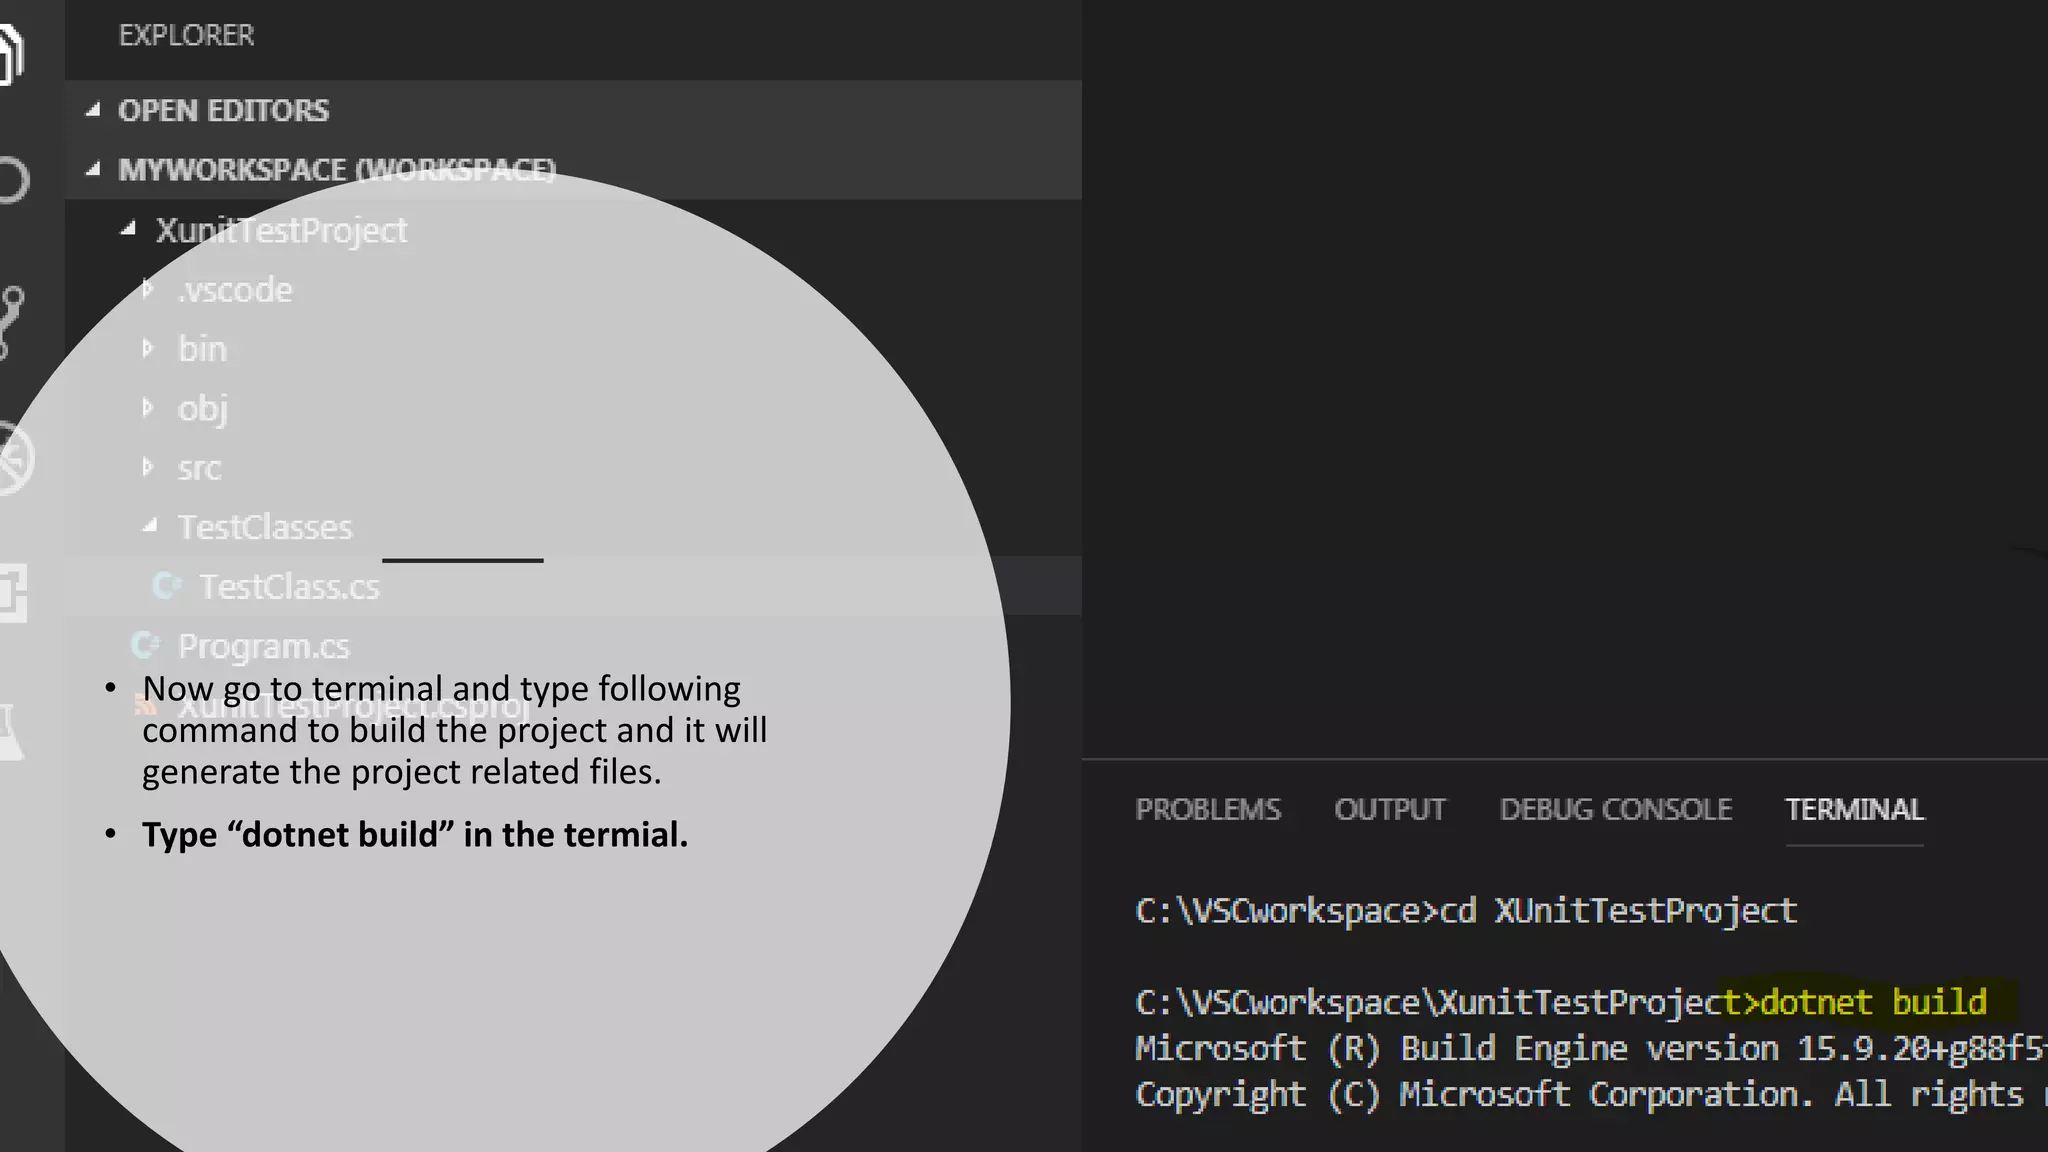
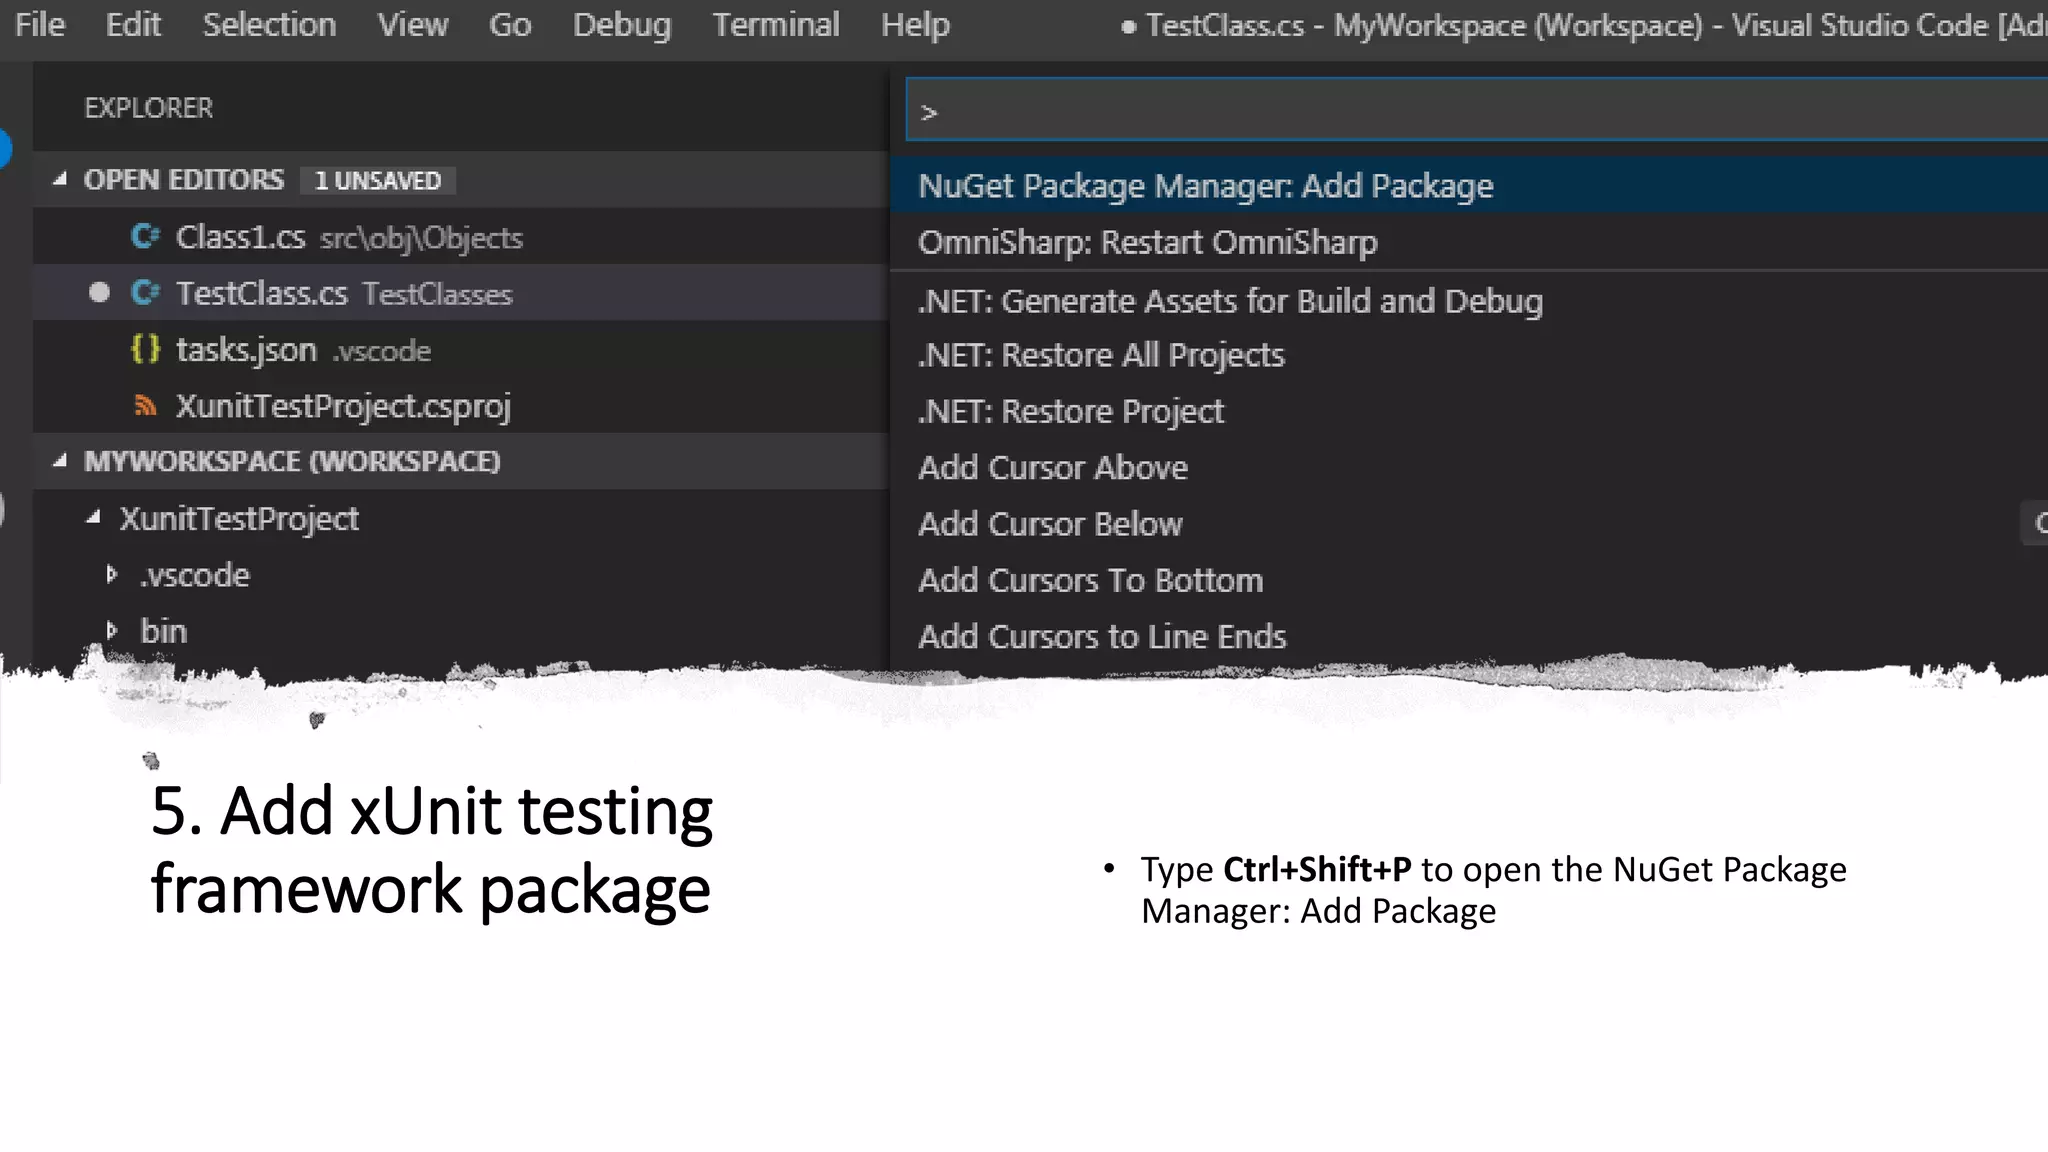
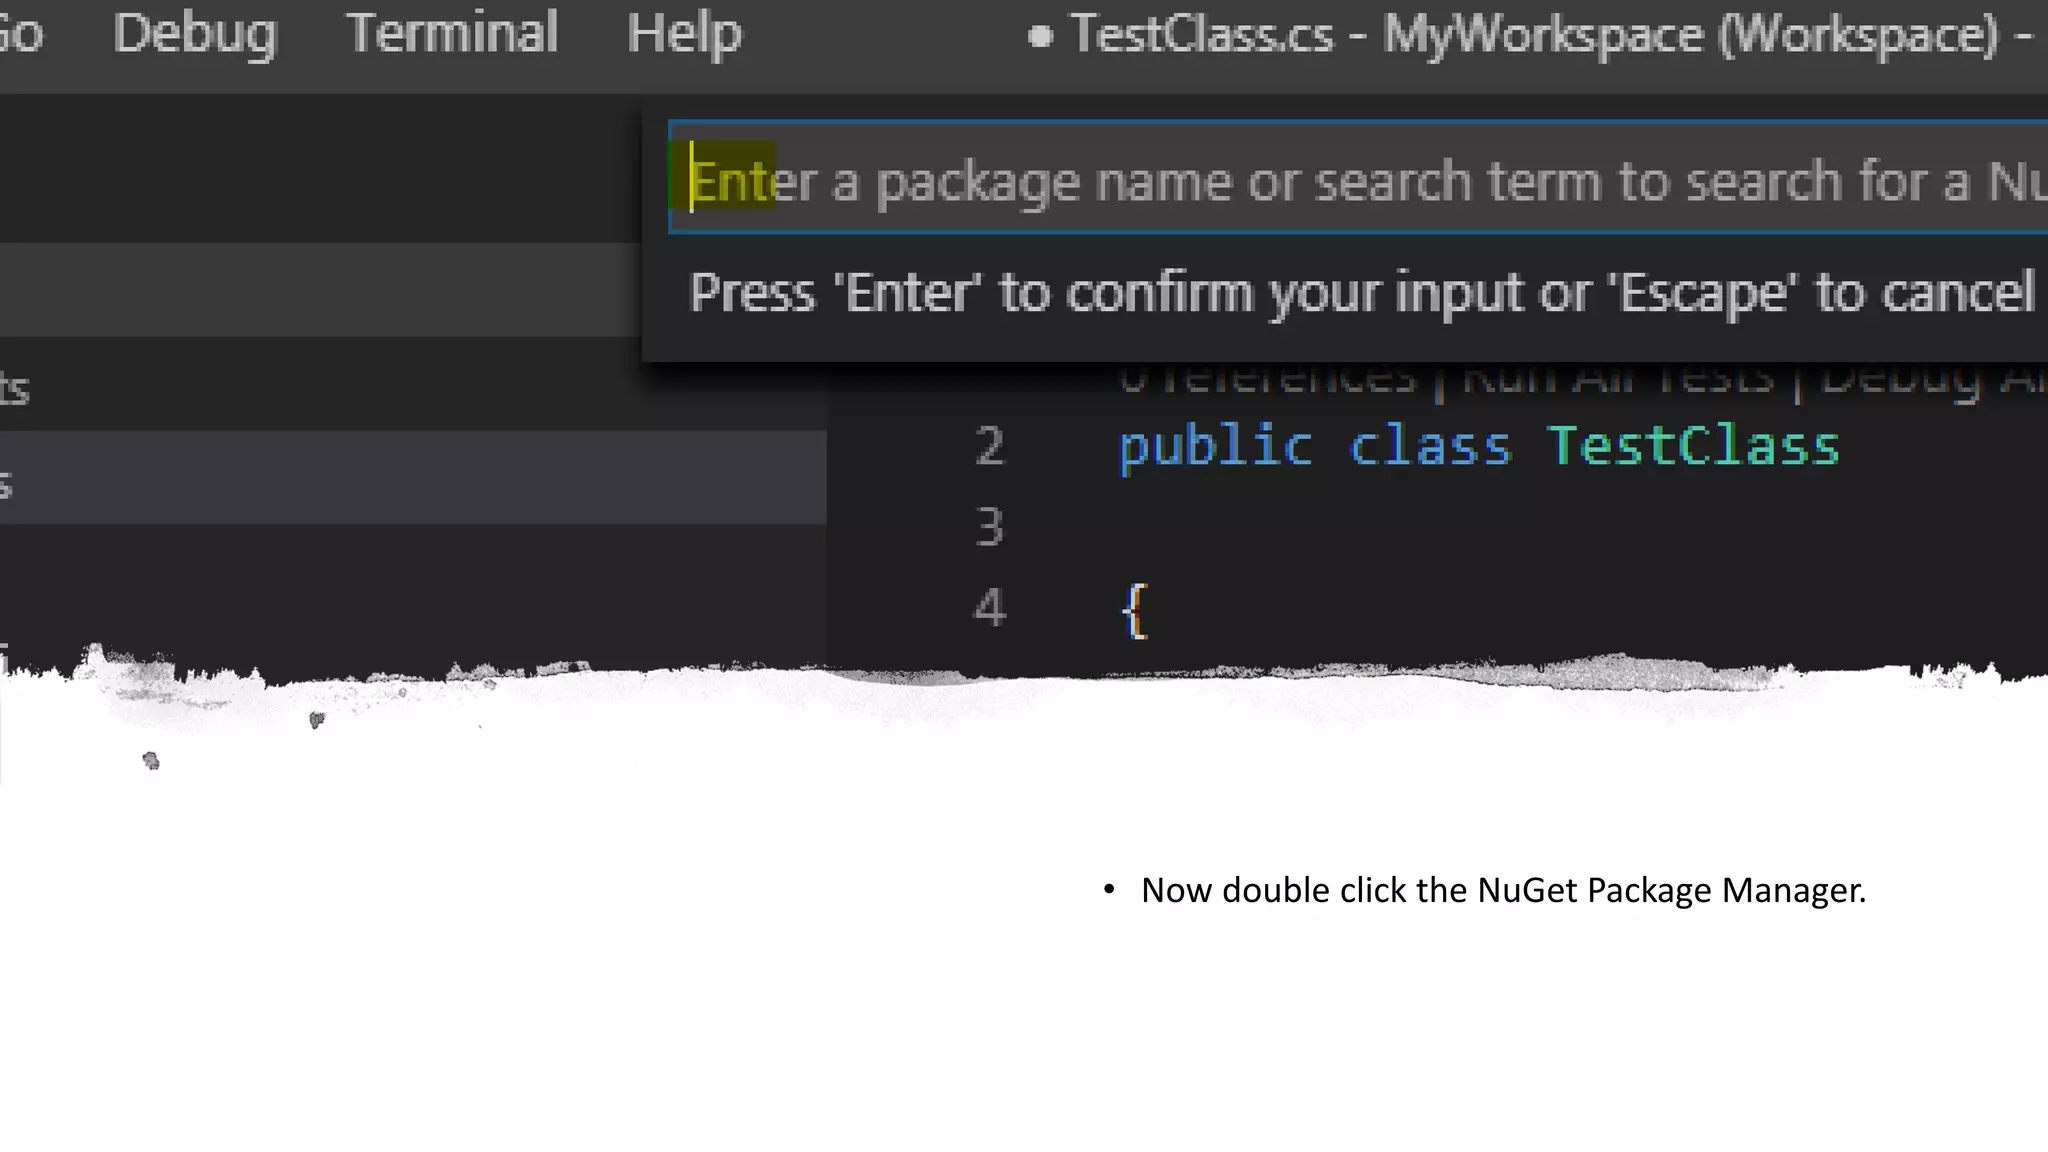
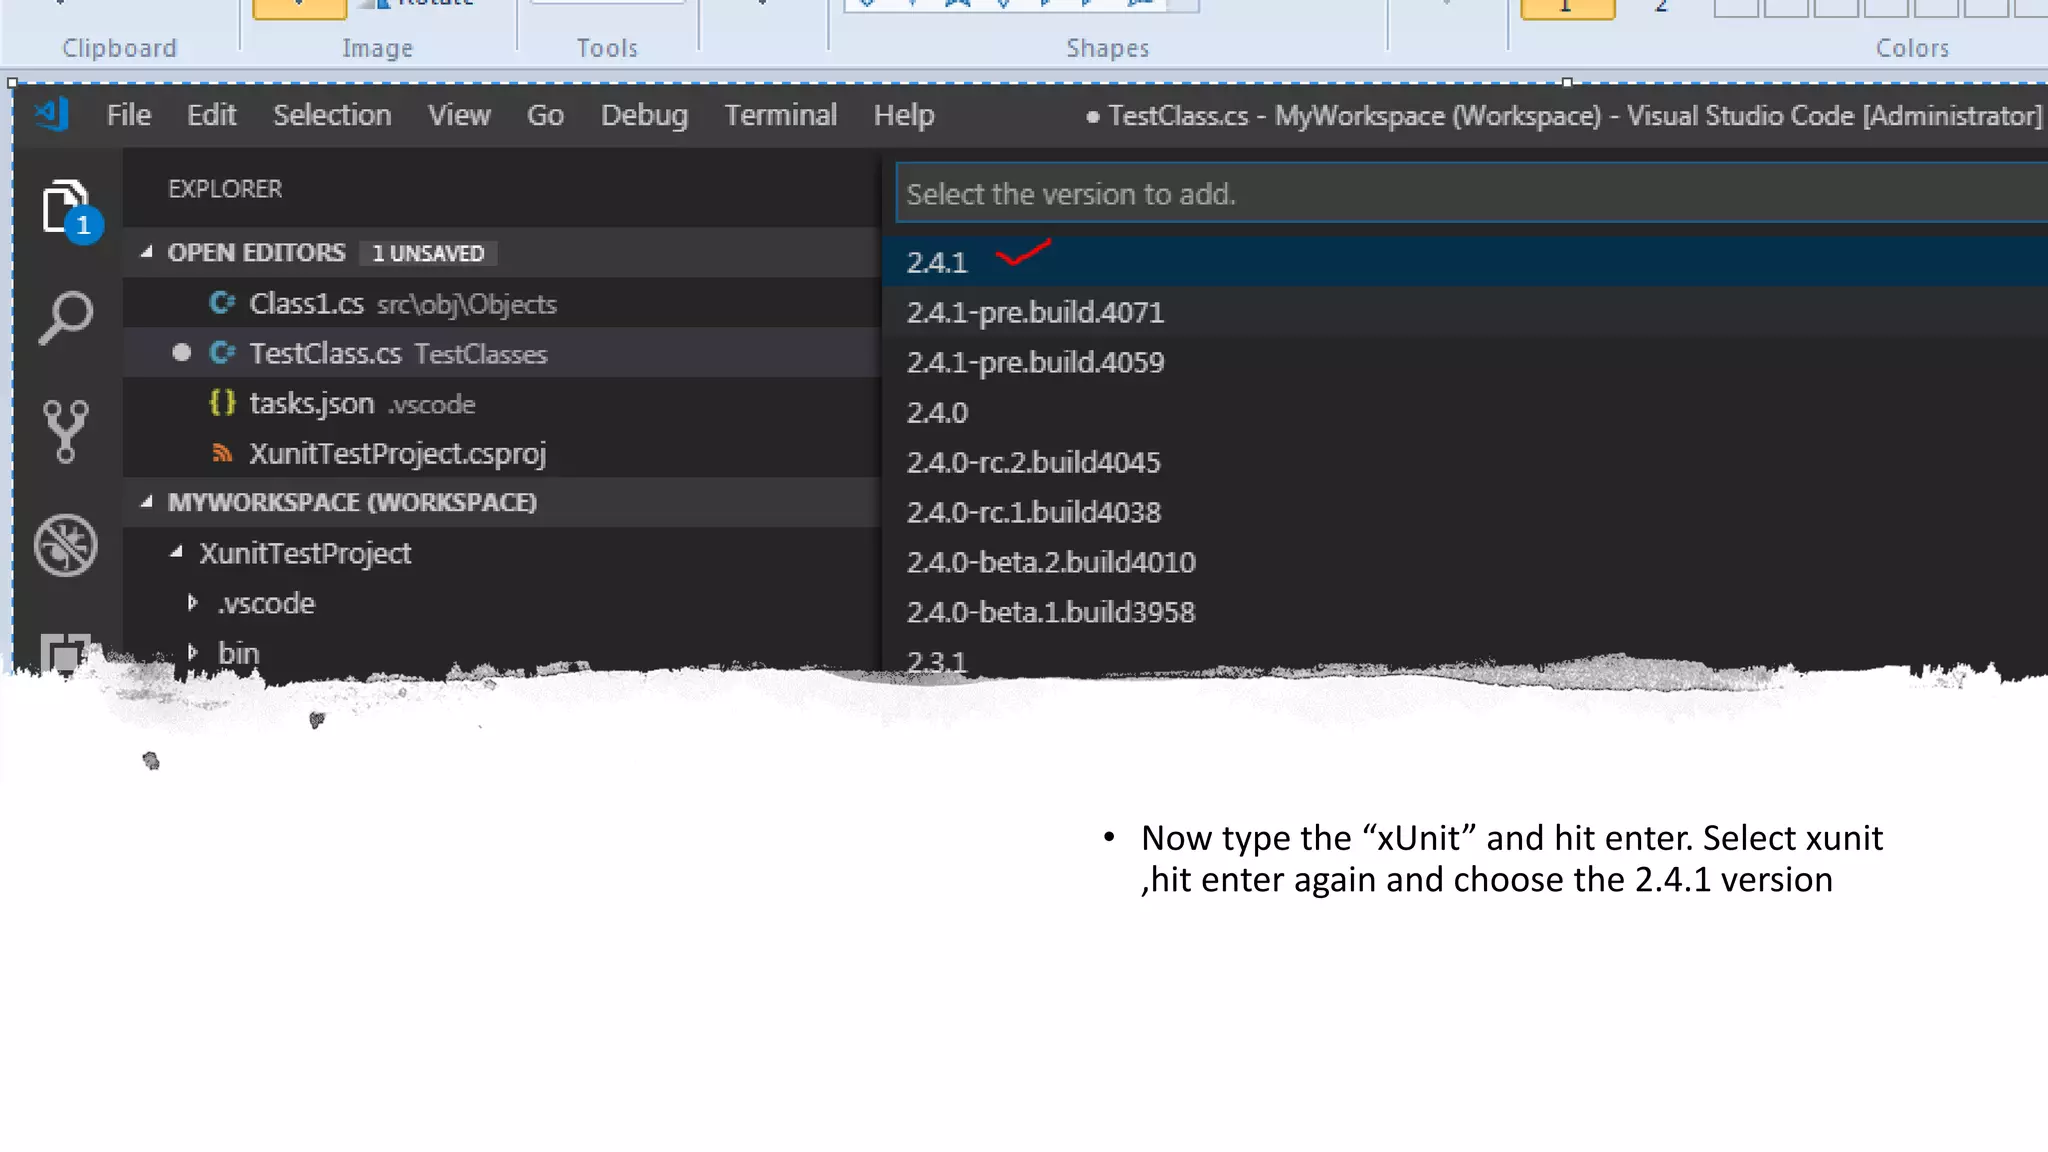
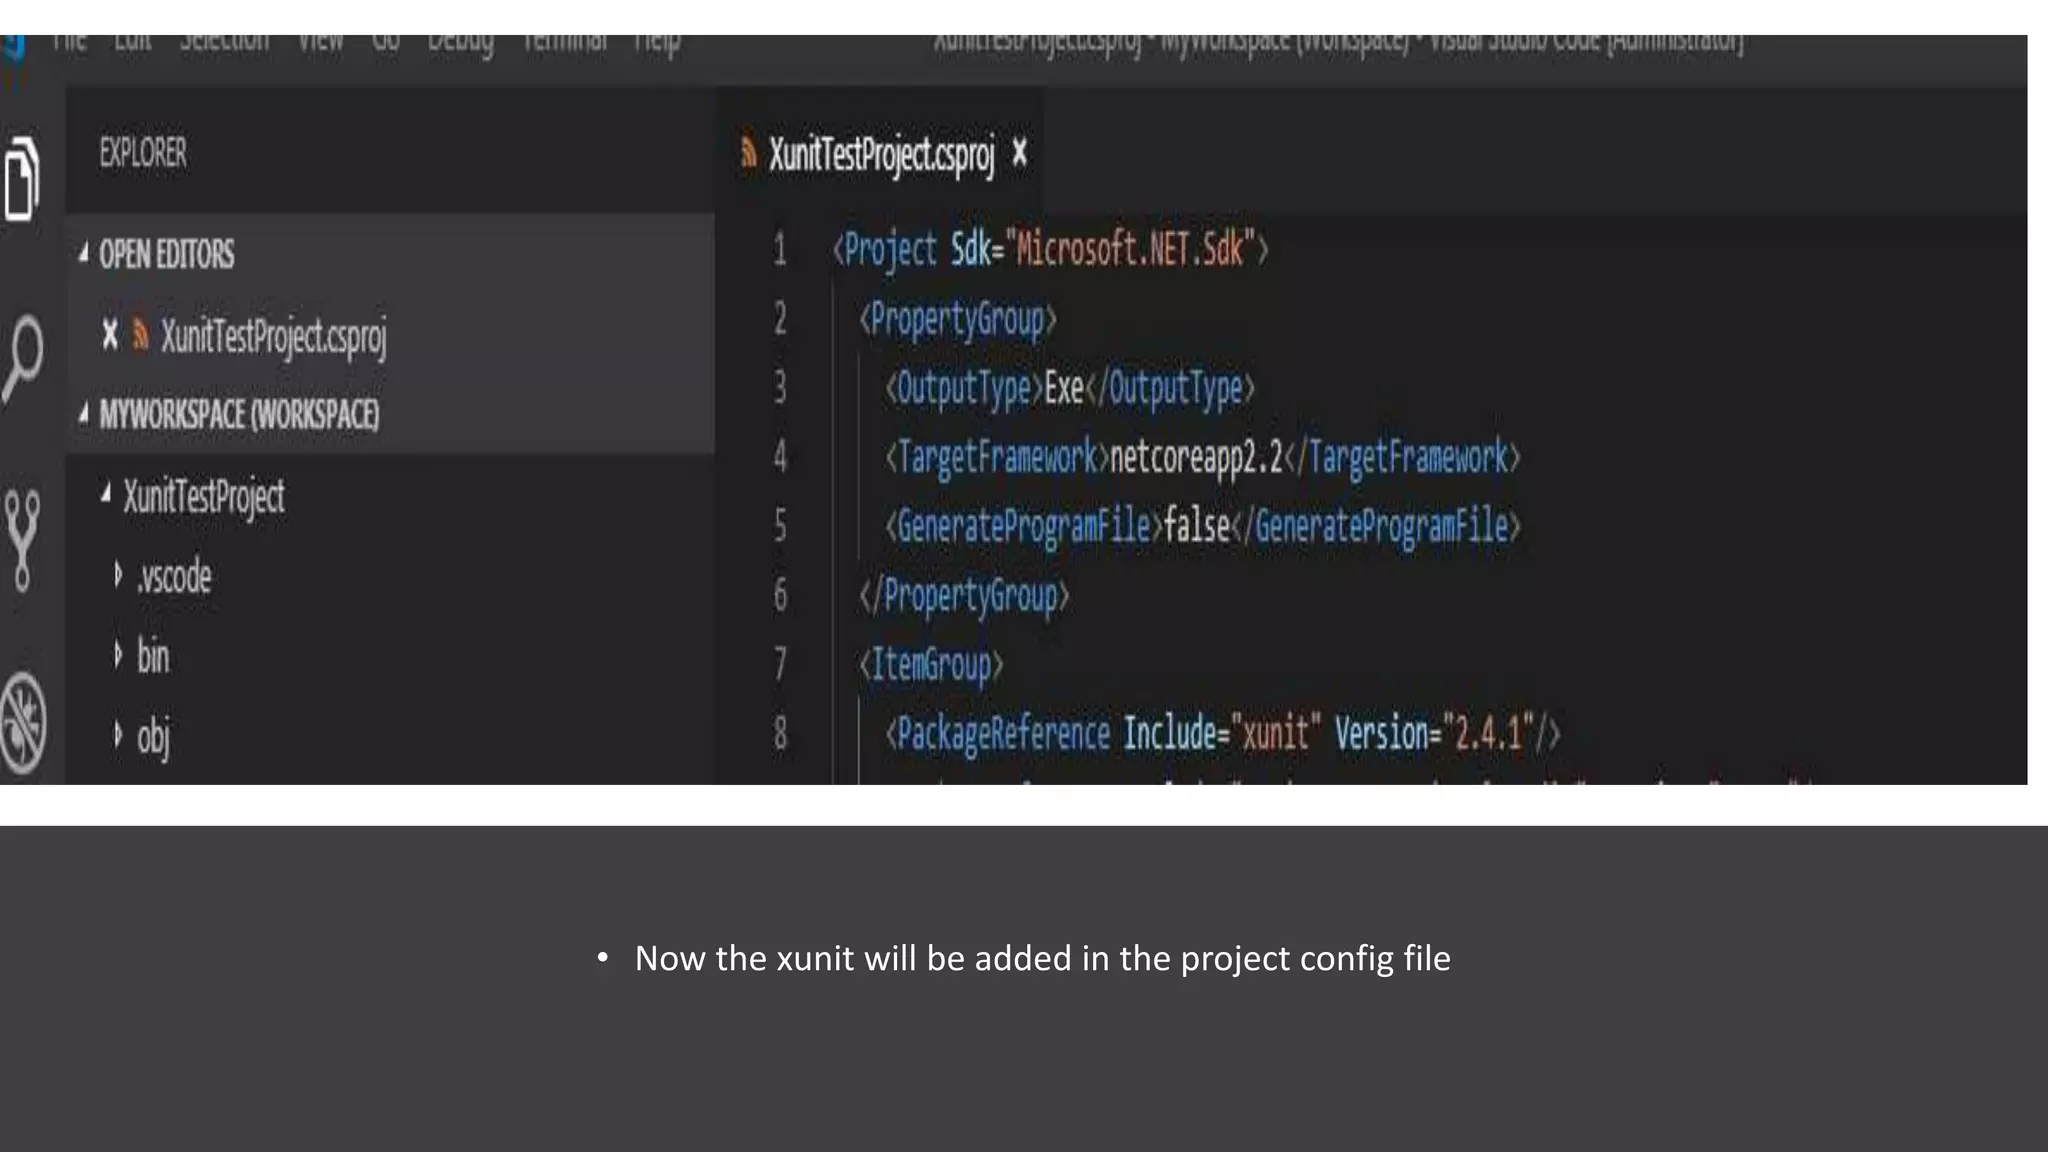
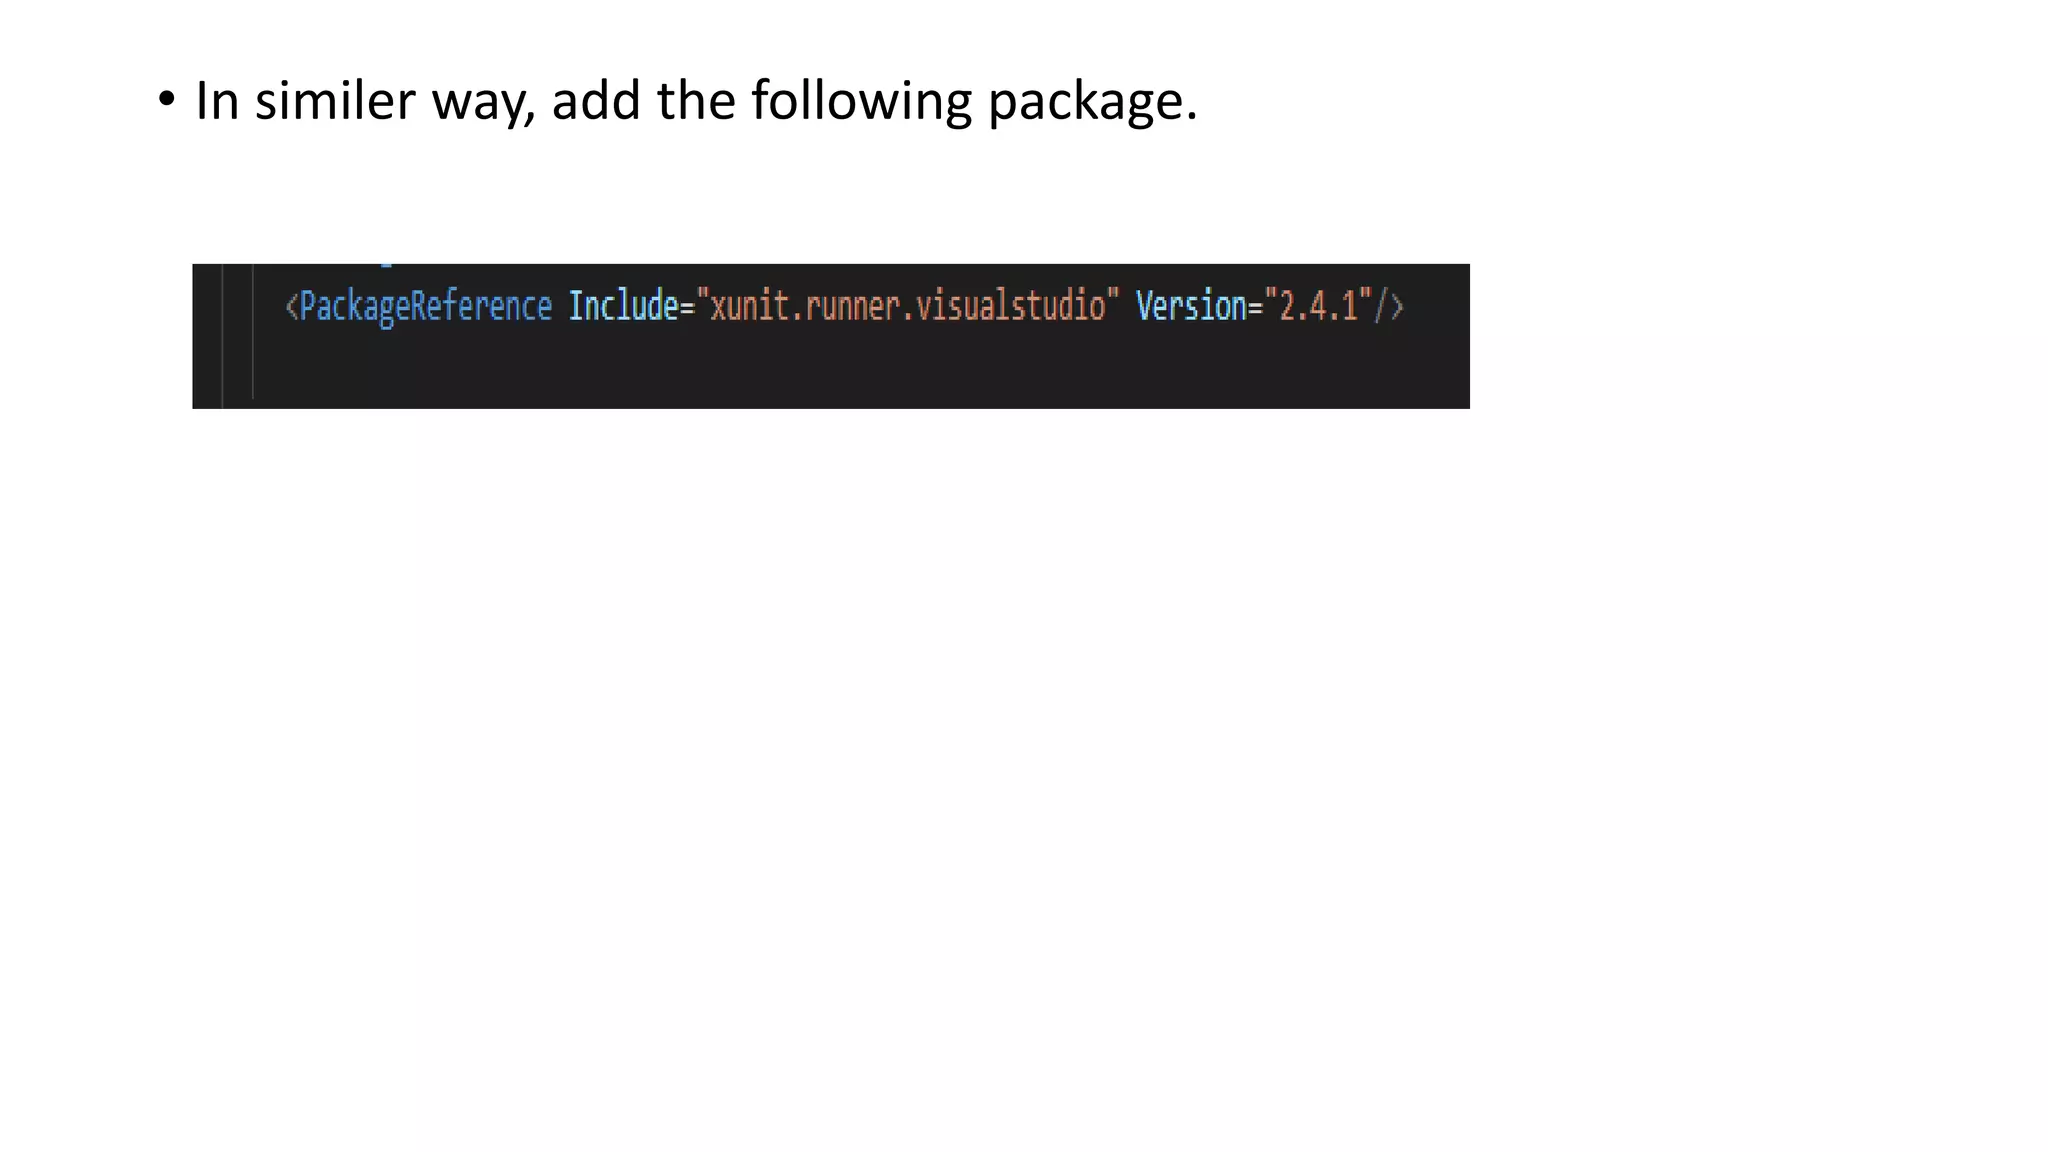
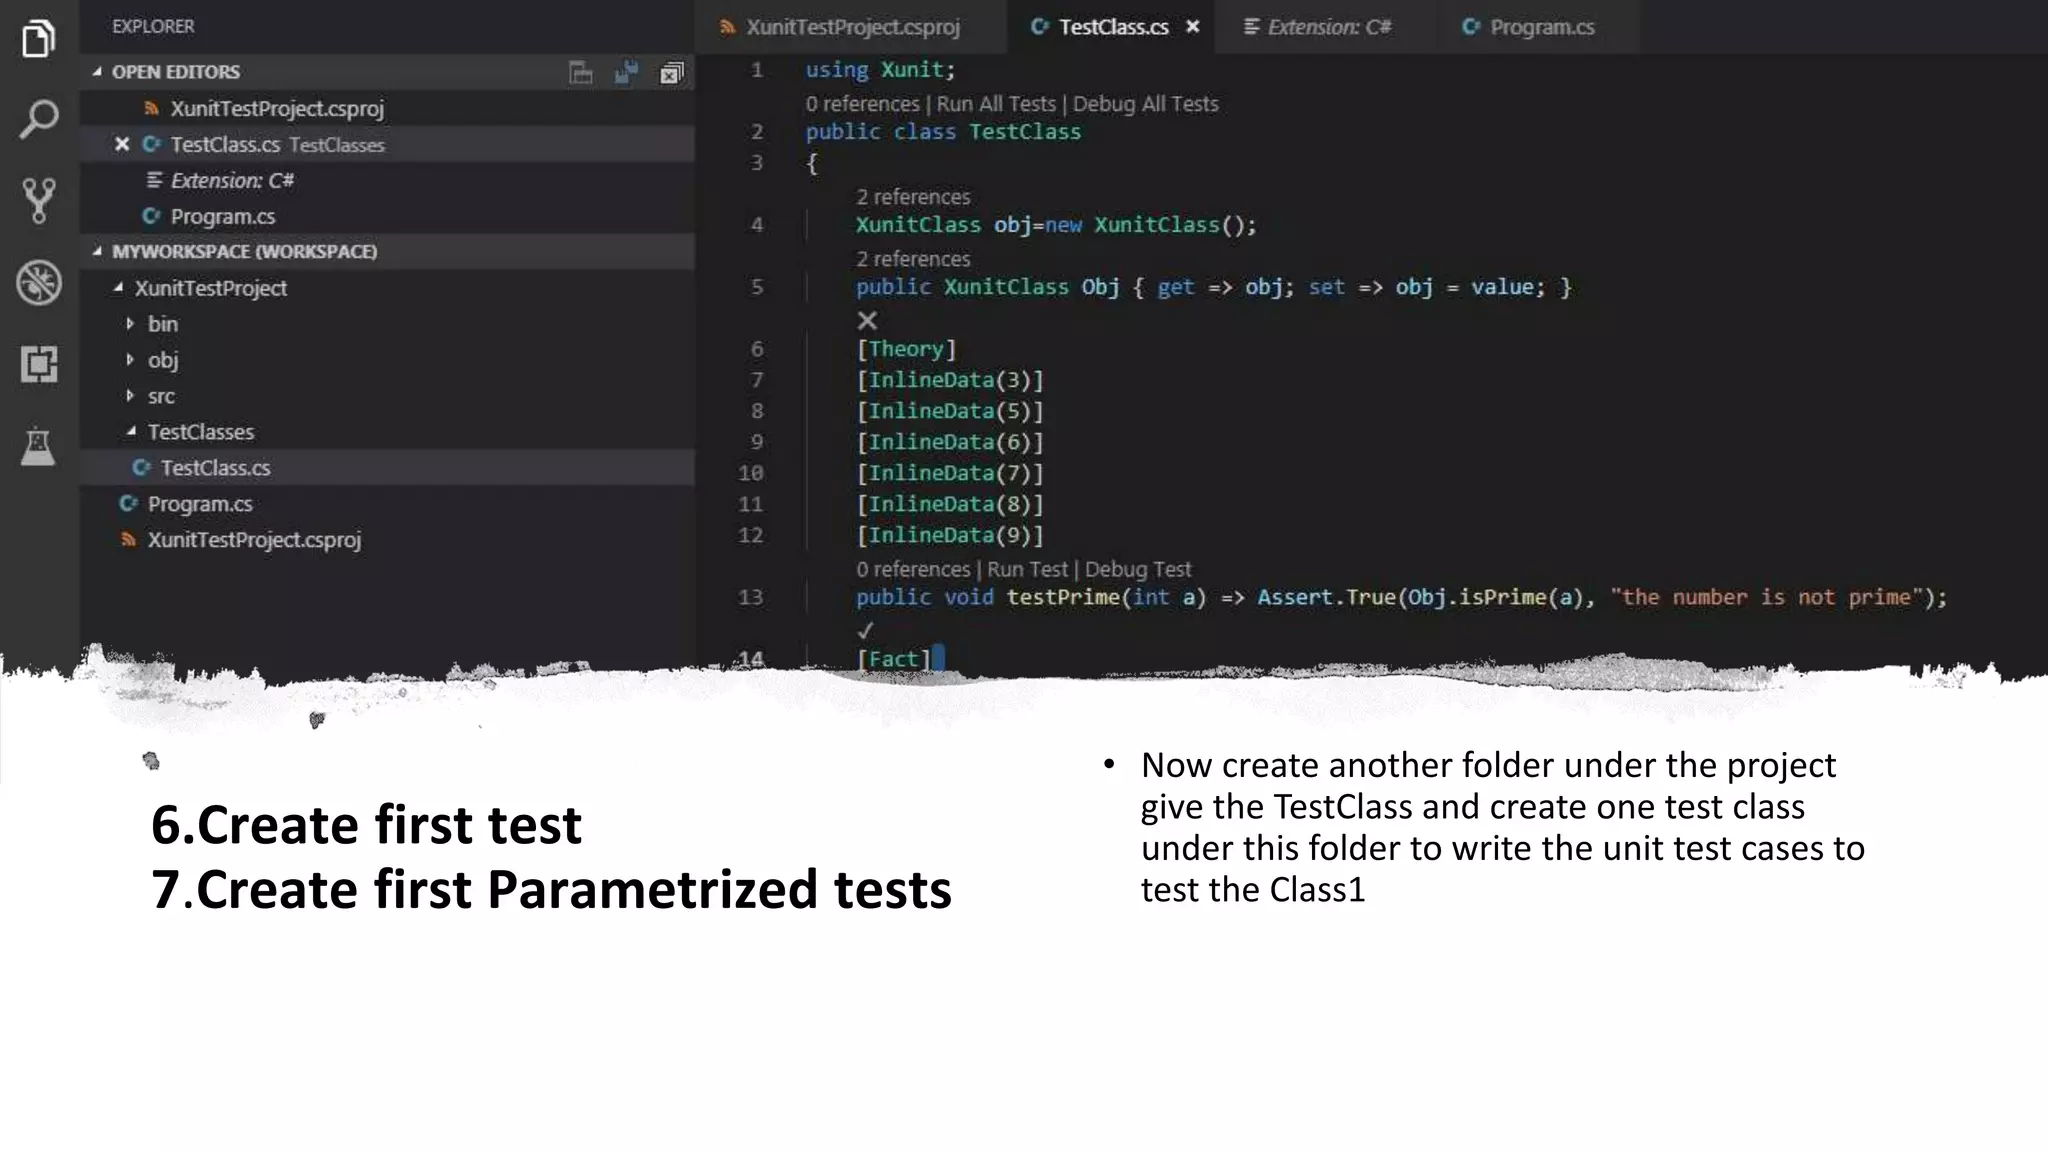
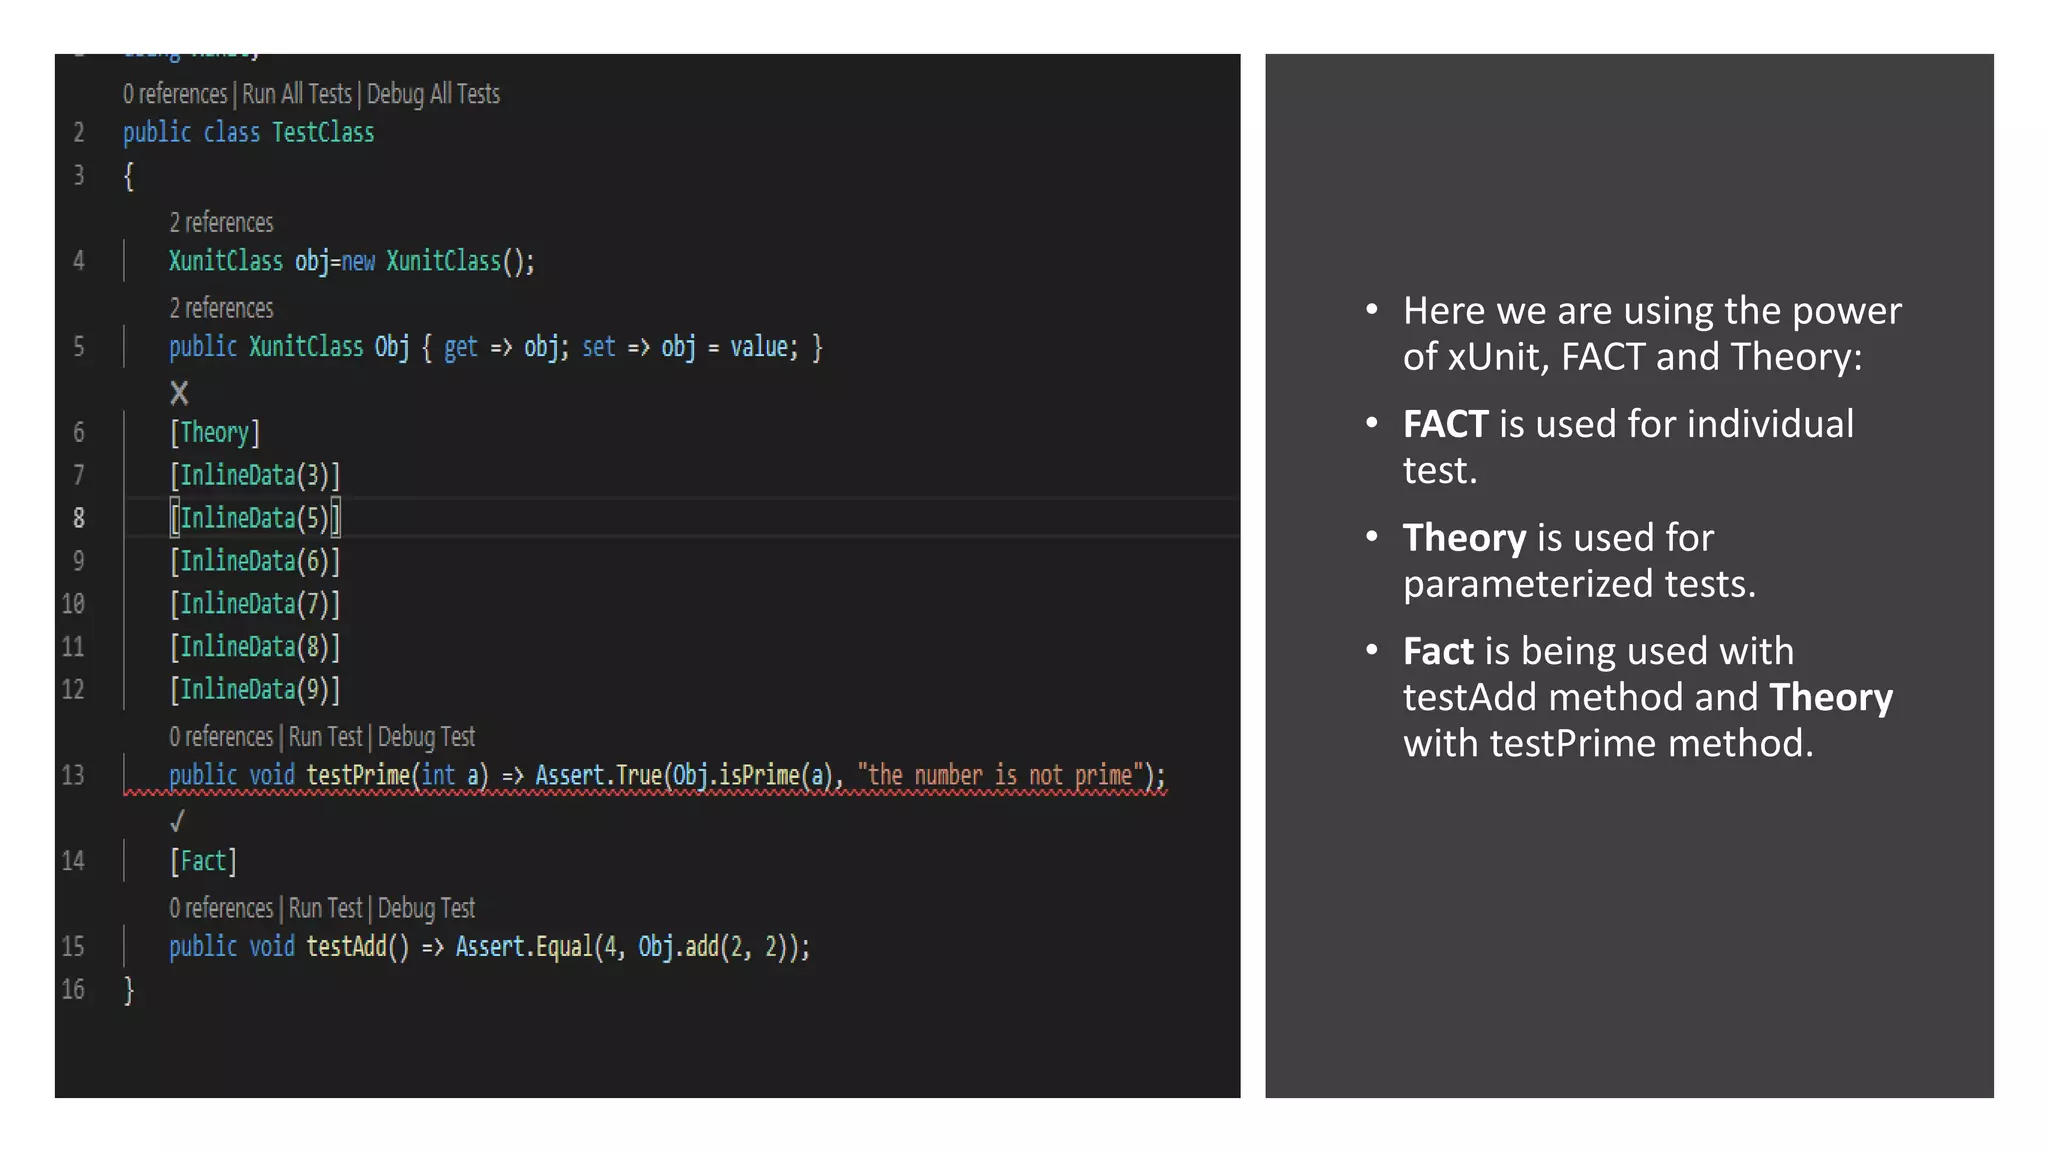
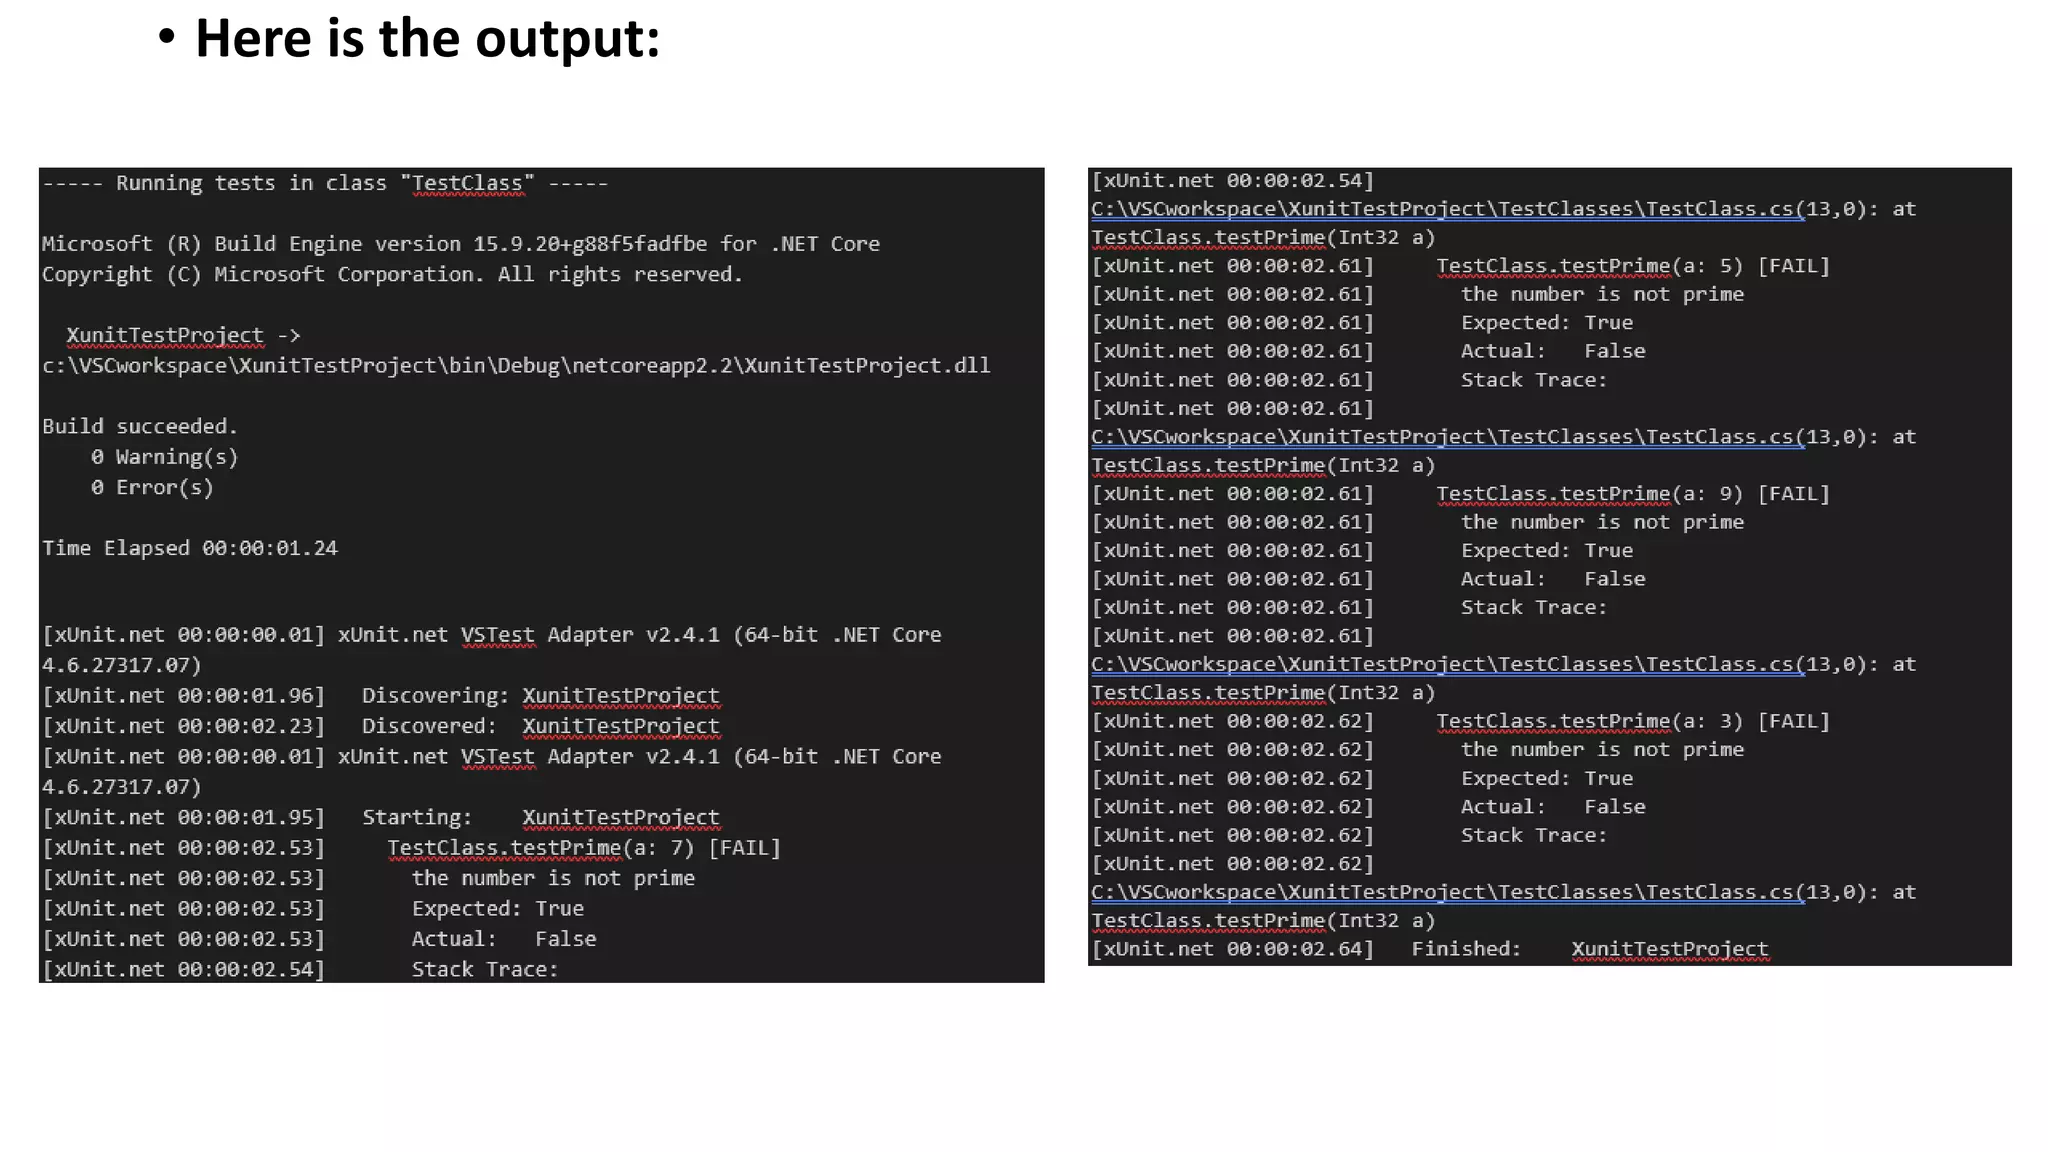
Unit testing with –xUnit+C# + VSCode
Hi All, In this my first article, I will explain getting started with xUnit open source testing framework and .NET Core using open source code editor VSCode ,showing you how you can create and run your first set of unit tests. Hi All, In this my first article, I will explain getting started with xUnit open source testing framework and .NET Core using open source code editor VSCode ,showing you how you can create and run your first set of unit tests. 1. Download the .NET SDK 2. Download the Visual Studio Code 3. Add C# extension 4. Create the unit test project 5. Add xUnit testing framework package 6. Create first test 7. Create first Parametrized tests 8. Execute tests with Visual Studio Code using xUnit testing framework
Download and install the .NET SDK • Go to https://dotnet.microsoft.com/download/dotnet-core/2.2 • Download the SDK based on your machine configuration. Here I am using x64 and window7. 1. Download and install the .NET SDK
2. Download and install the VSCode using following link https://code.visualstudio.com/
3. Add the C# extension • Open the VSCode editor,
• Click Ctrl + Shift + X to open the Extension search box to add the C# omni extension, Search C# for visual and install it.
4.Create the unit test project • Now type Ctrl+Shift+E to open the Project explorer
• Now Click “Add Folder” and create one folder XUnitTestProject. Click the “Add” to add this folder into the workspace.
• Now the project is added in our workspace.
• Right click on the project XUnitTestProject add new folder “src” then add another folder obj- >objects inside it.
• Right click on Objects folder and select the new file, add name Class1.cs. • Add following code in the class. • In this class, two methods are to return the sum of two numbers and another method to check the prime number.
• Now go to terminal and type following command to build the project and it will generate the project related files. • Type “dotnet build” in the termial.
5. Add xUnit testing framework package • Type Ctrl+Shift+P to open the NuGet Package Manager: Add Package
• Now double click the NuGet Package Manager.
• Now type the “xUnit” and hit enter. Select xunit ,hit enter again and choose the 2.4.1 version
• Now the xunit will be added in the project config file
• In similer way, add the following package.
6.Create first test 7.Create first Parametrized tests • Now create another folder under the project give the TestClass and create one test class under this folder to write the unit test cases to test the Class1
• Here we are using the power of xUnit, FACT and Theory: • FACT is used for individual test. • Theory is used for parameterized tests. • Fact is being used with testAdd method and Theory with testPrime method.
9.Execute tests with Visual Studio Code using xUnit testing framework • Now go to TestClass, click the Run All Tests.
• Here is the output:
Thank you

X unit testing framework with c# and vs code

  • 1.
    Unit testing with–xUnit+C# + VSCode
  • 2.
    Hi All, Inthis my first article, I will explain getting started with xUnit open source testing framework and .NET Core using open source code editor VSCode ,showing you how you can create and run your first set of unit tests. Hi All, In this my first article, I will explain getting started with xUnit open source testing framework and .NET Core using open source code editor VSCode ,showing you how you can create and run your first set of unit tests. 1. Download the .NET SDK 2. Download the Visual Studio Code 3. Add C# extension 4. Create the unit test project 5. Add xUnit testing framework package 6. Create first test 7. Create first Parametrized tests 8. Execute tests with Visual Studio Code using xUnit testing framework
  • 3.
    Download and installthe .NET SDK • Go to https://dotnet.microsoft.com/download/dotnet-core/2.2 • Download the SDK based on your machine configuration. Here I am using x64 and window7. 1. Download and install the .NET SDK
  • 4.
    2. Download andinstall the VSCode using following link https://code.visualstudio.com/
  • 5.
    3. Add theC# extension • Open the VSCode editor,
  • 6.
    • Click Ctrl+ Shift + X to open the Extension search box to add the C# omni extension, Search C# for visual and install it.
  • 7.
    4.Create the unittest project • Now type Ctrl+Shift+E to open the Project explorer
  • 8.
    • Now Click“Add Folder” and create one folder XUnitTestProject. Click the “Add” to add this folder into the workspace.
  • 9.
    • Now theproject is added in our workspace.
  • 10.
    • Right clickon the project XUnitTestProject add new folder “src” then add another folder obj- >objects inside it.
  • 11.
    • Right clickon Objects folder and select the new file, add name Class1.cs. • Add following code in the class. • In this class, two methods are to return the sum of two numbers and another method to check the prime number.
  • 12.
    • Now goto terminal and type following command to build the project and it will generate the project related files. • Type “dotnet build” in the termial.
  • 13.
    5. Add xUnittesting framework package • Type Ctrl+Shift+P to open the NuGet Package Manager: Add Package
  • 14.
    • Now doubleclick the NuGet Package Manager.
  • 15.
    • Now typethe “xUnit” and hit enter. Select xunit ,hit enter again and choose the 2.4.1 version
  • 16.
    • Now thexunit will be added in the project config file
  • 17.
    • In similerway, add the following package.
  • 18.
    6.Create first test 7.Createfirst Parametrized tests • Now create another folder under the project give the TestClass and create one test class under this folder to write the unit test cases to test the Class1
  • 19.
    • Here weare using the power of xUnit, FACT and Theory: • FACT is used for individual test. • Theory is used for parameterized tests. • Fact is being used with testAdd method and Theory with testPrime method.
  • 20.
    9.Execute tests withVisual Studio Code using xUnit testing framework • Now go to TestClass, click the Run All Tests.
  • 21.
    • Here isthe output:
  • 23.