Download to read offline


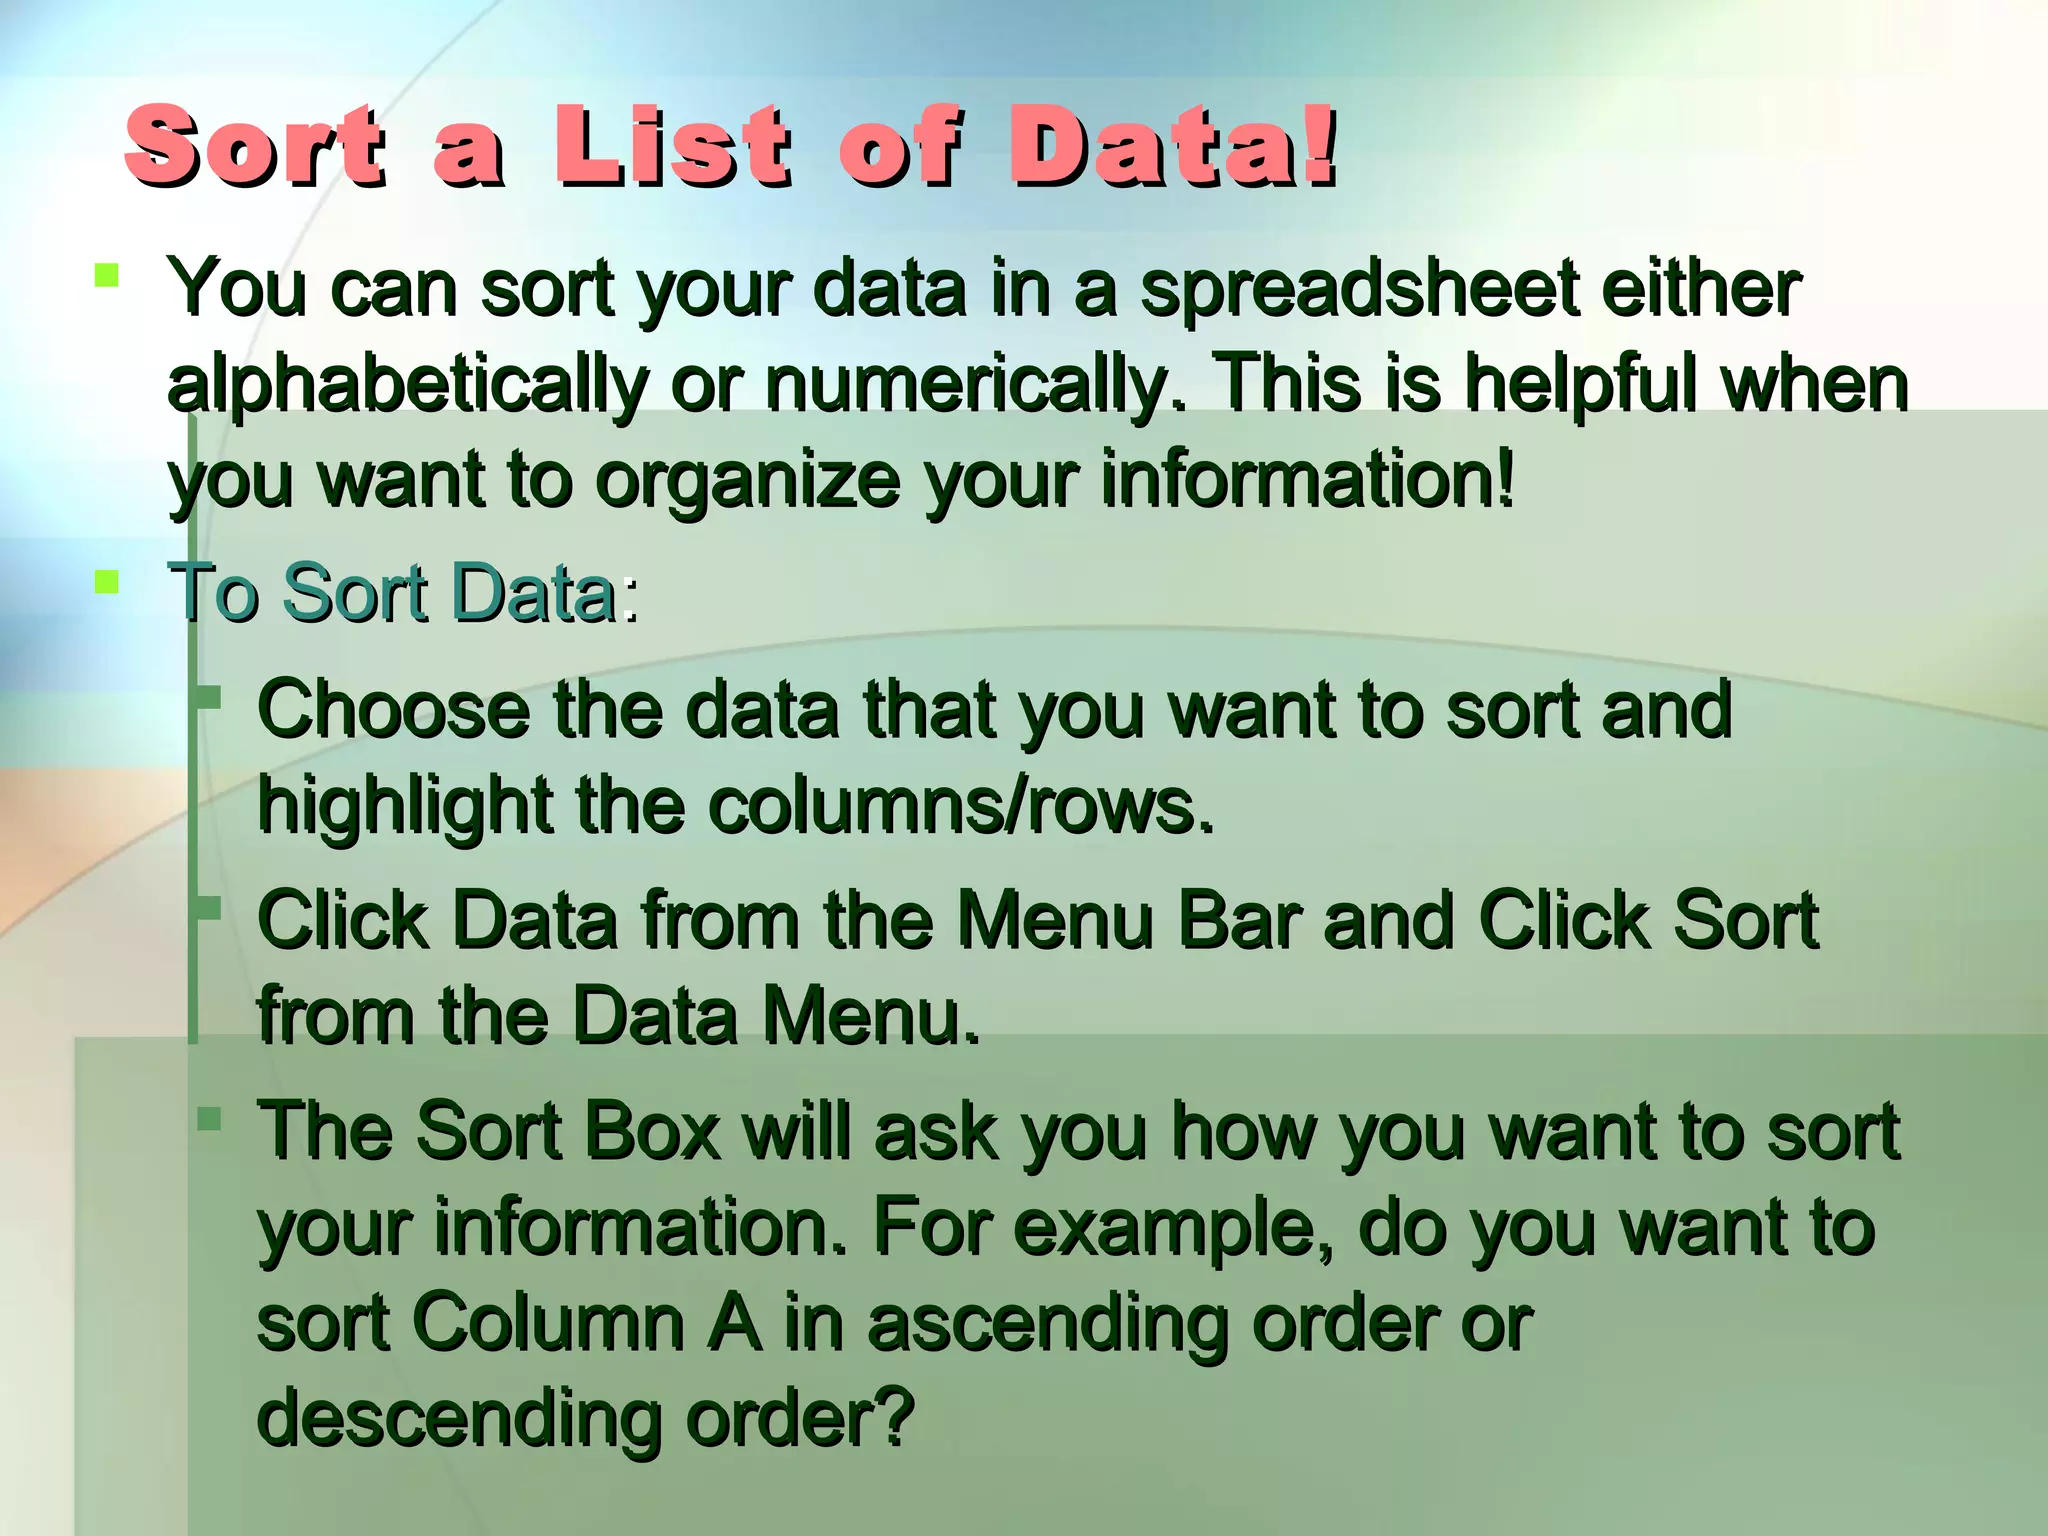


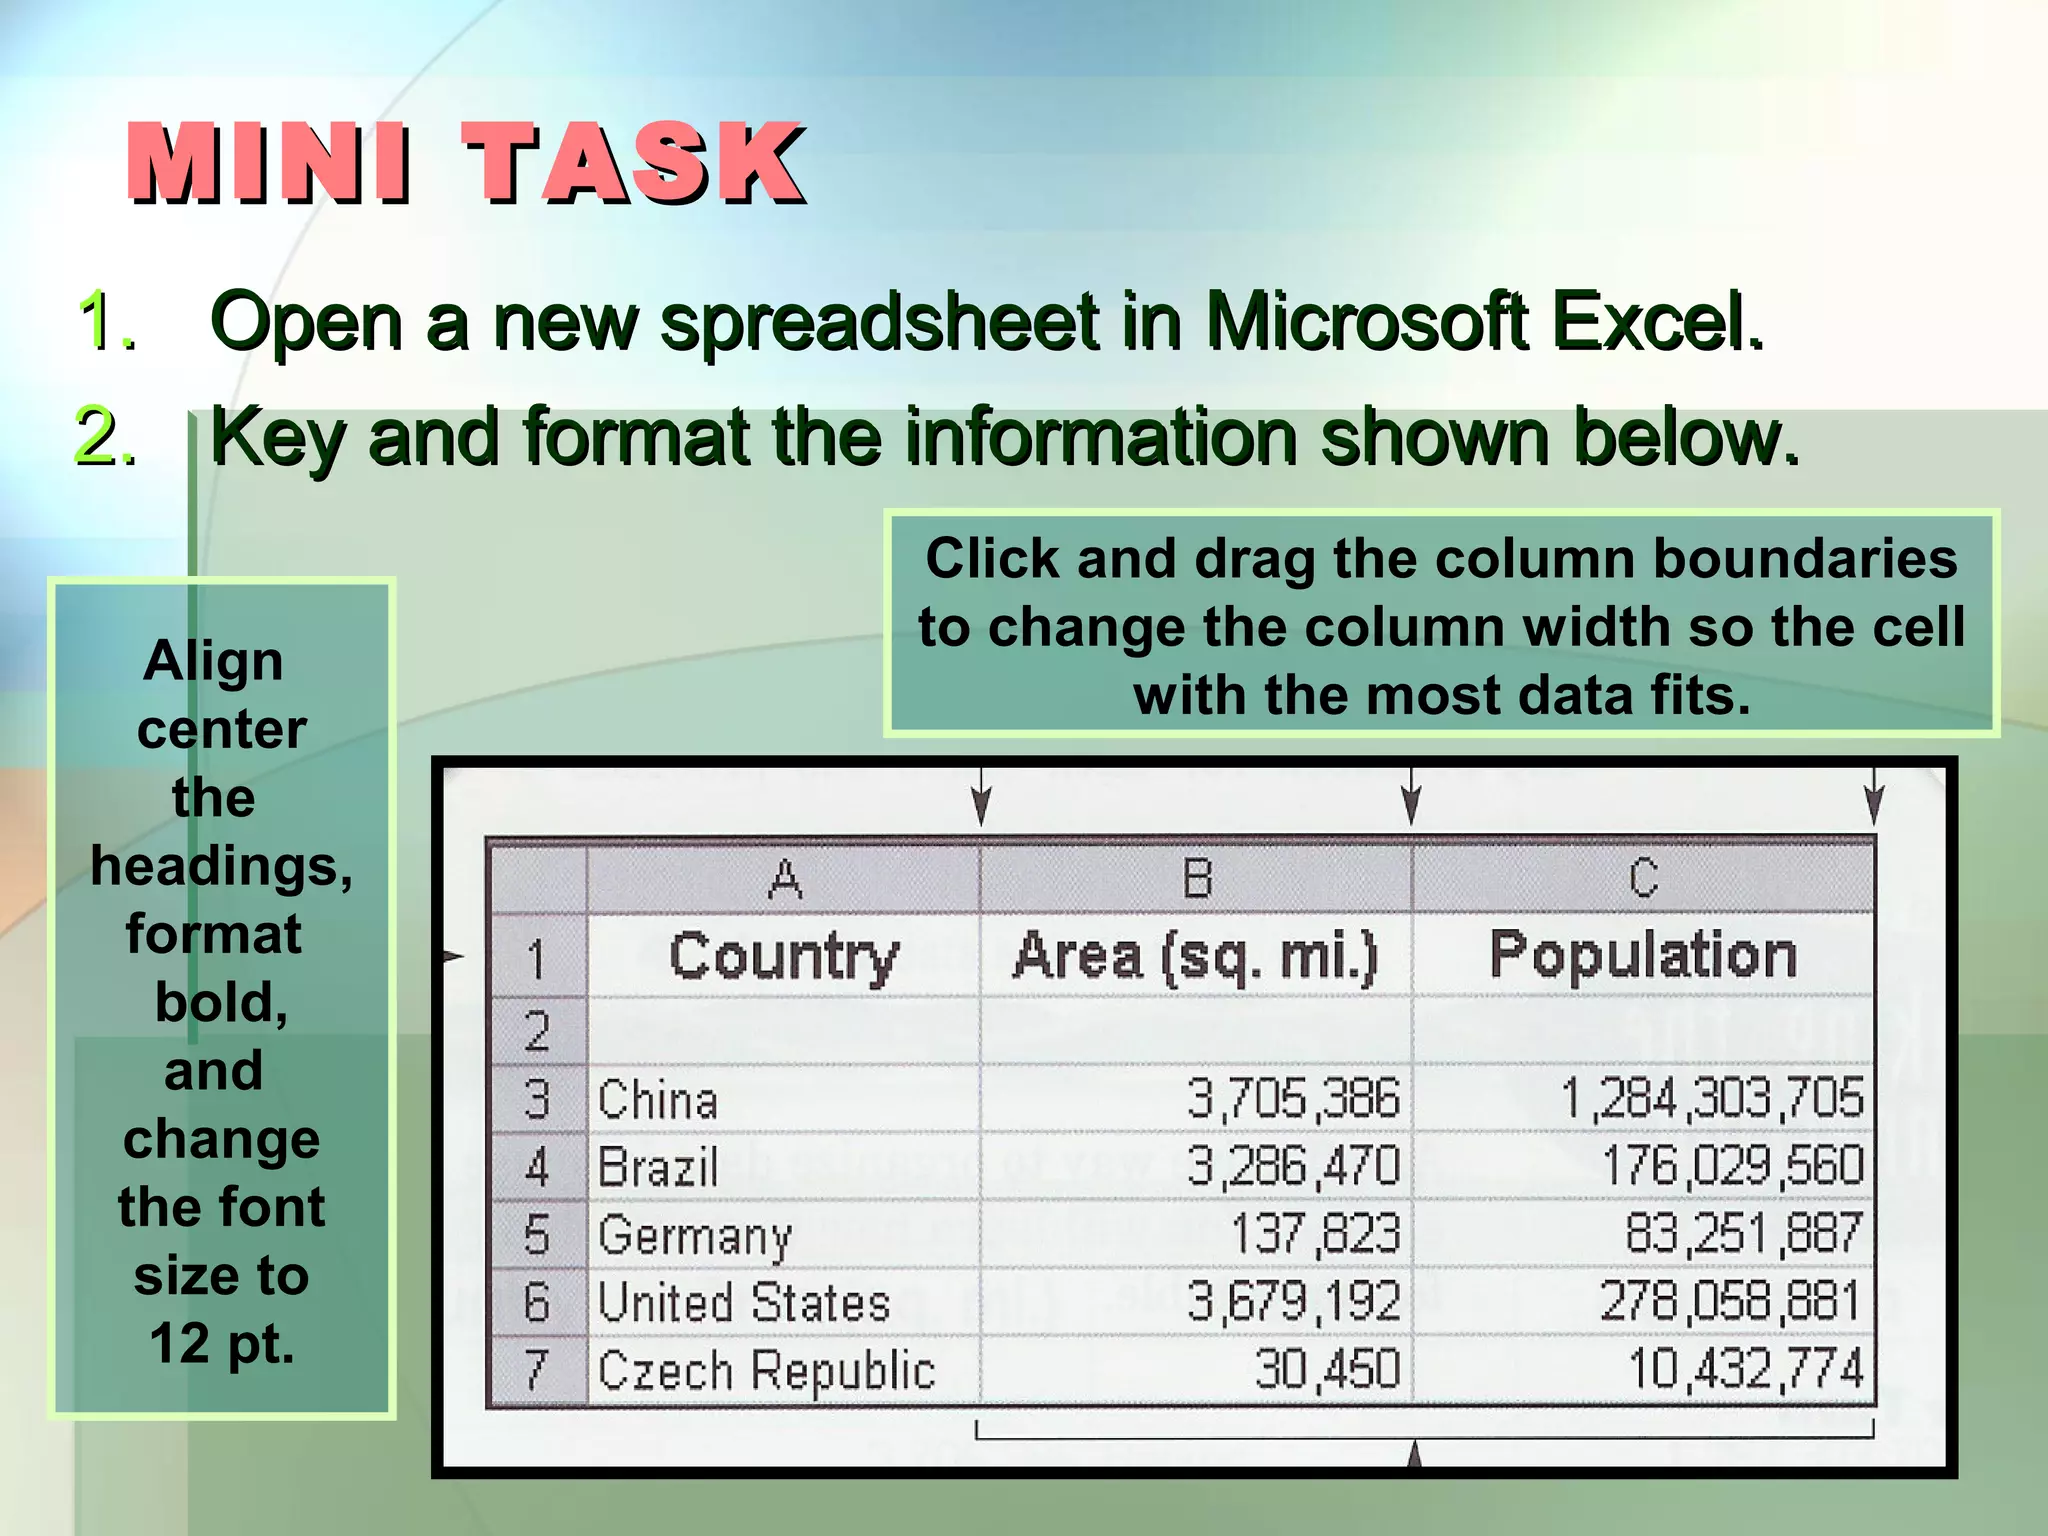
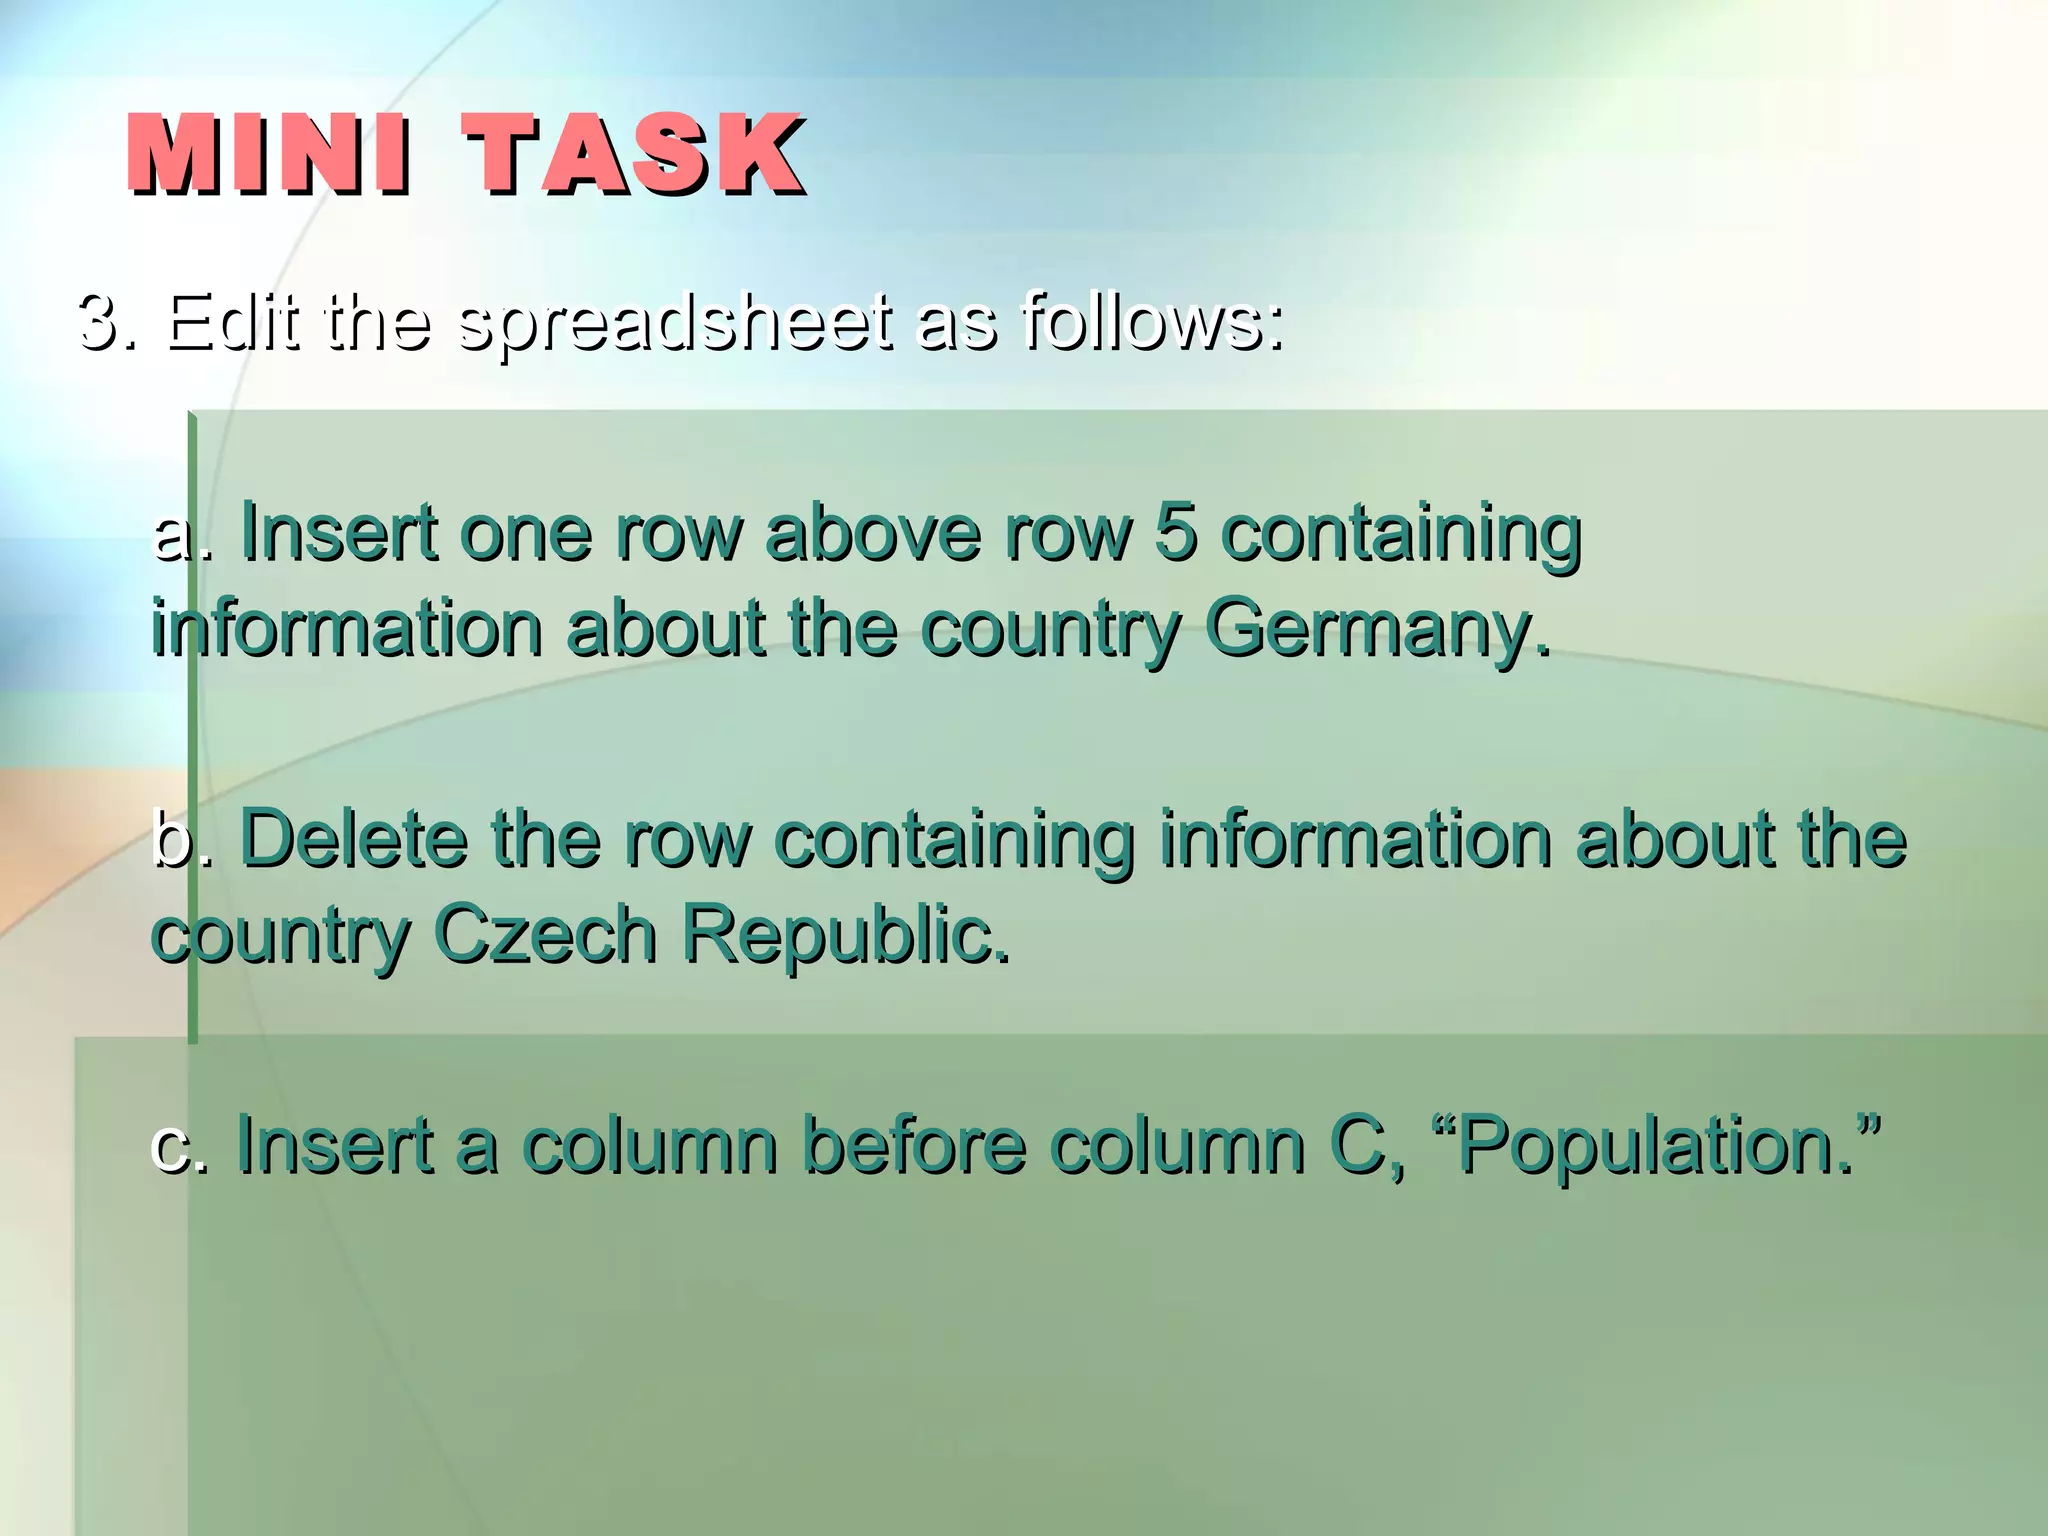
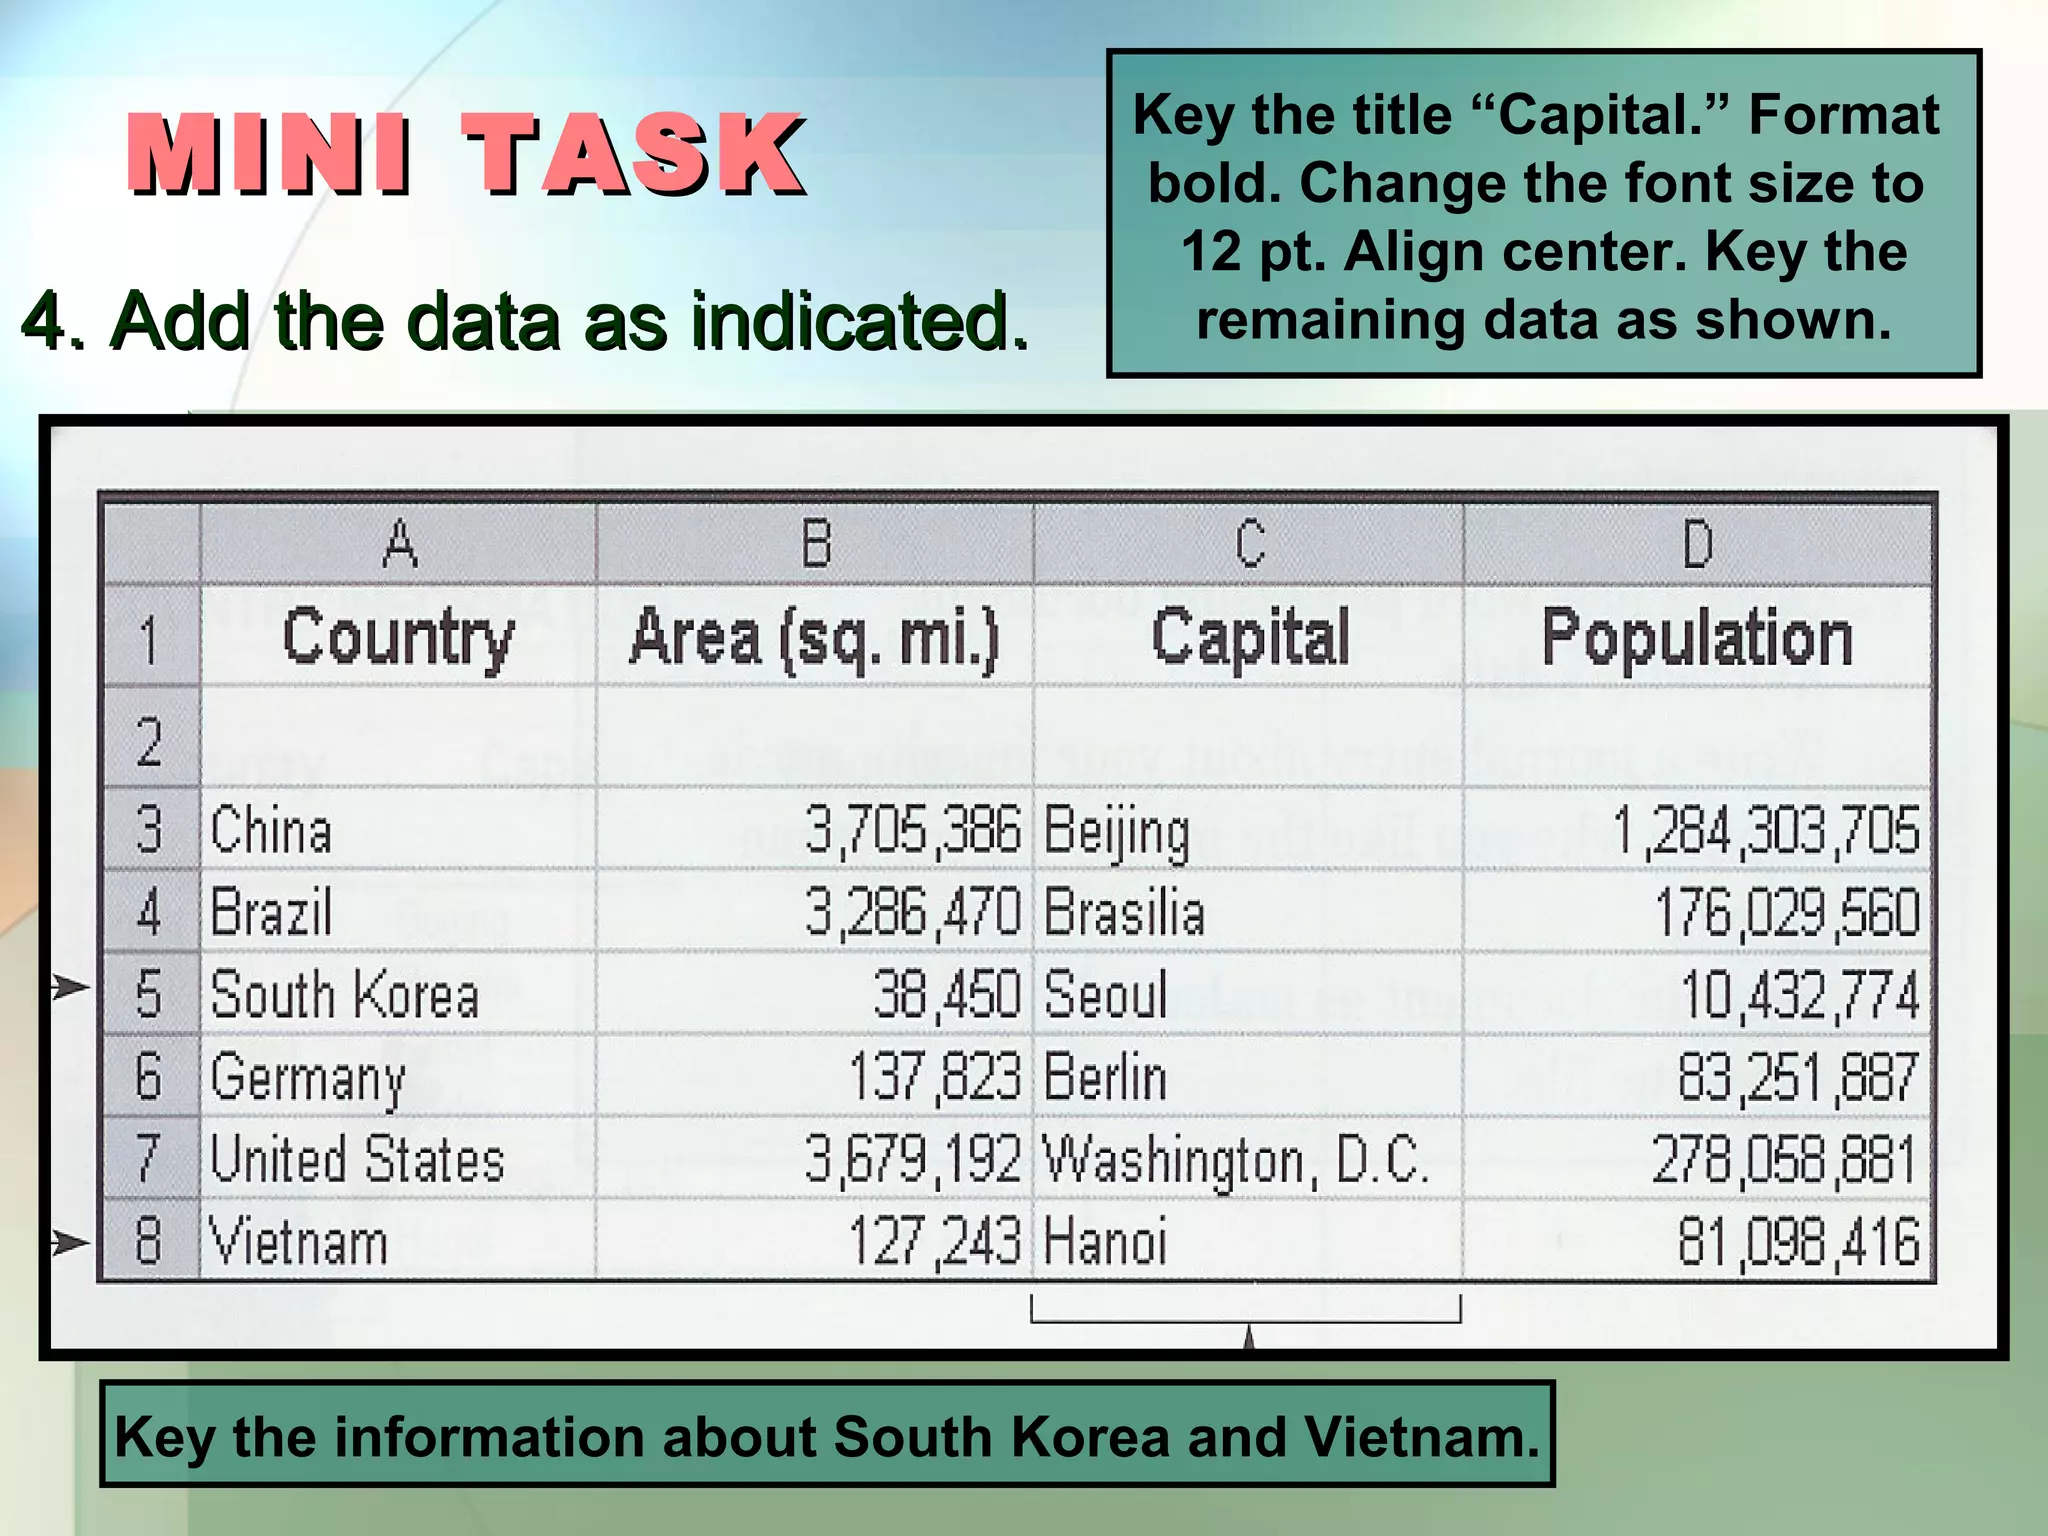
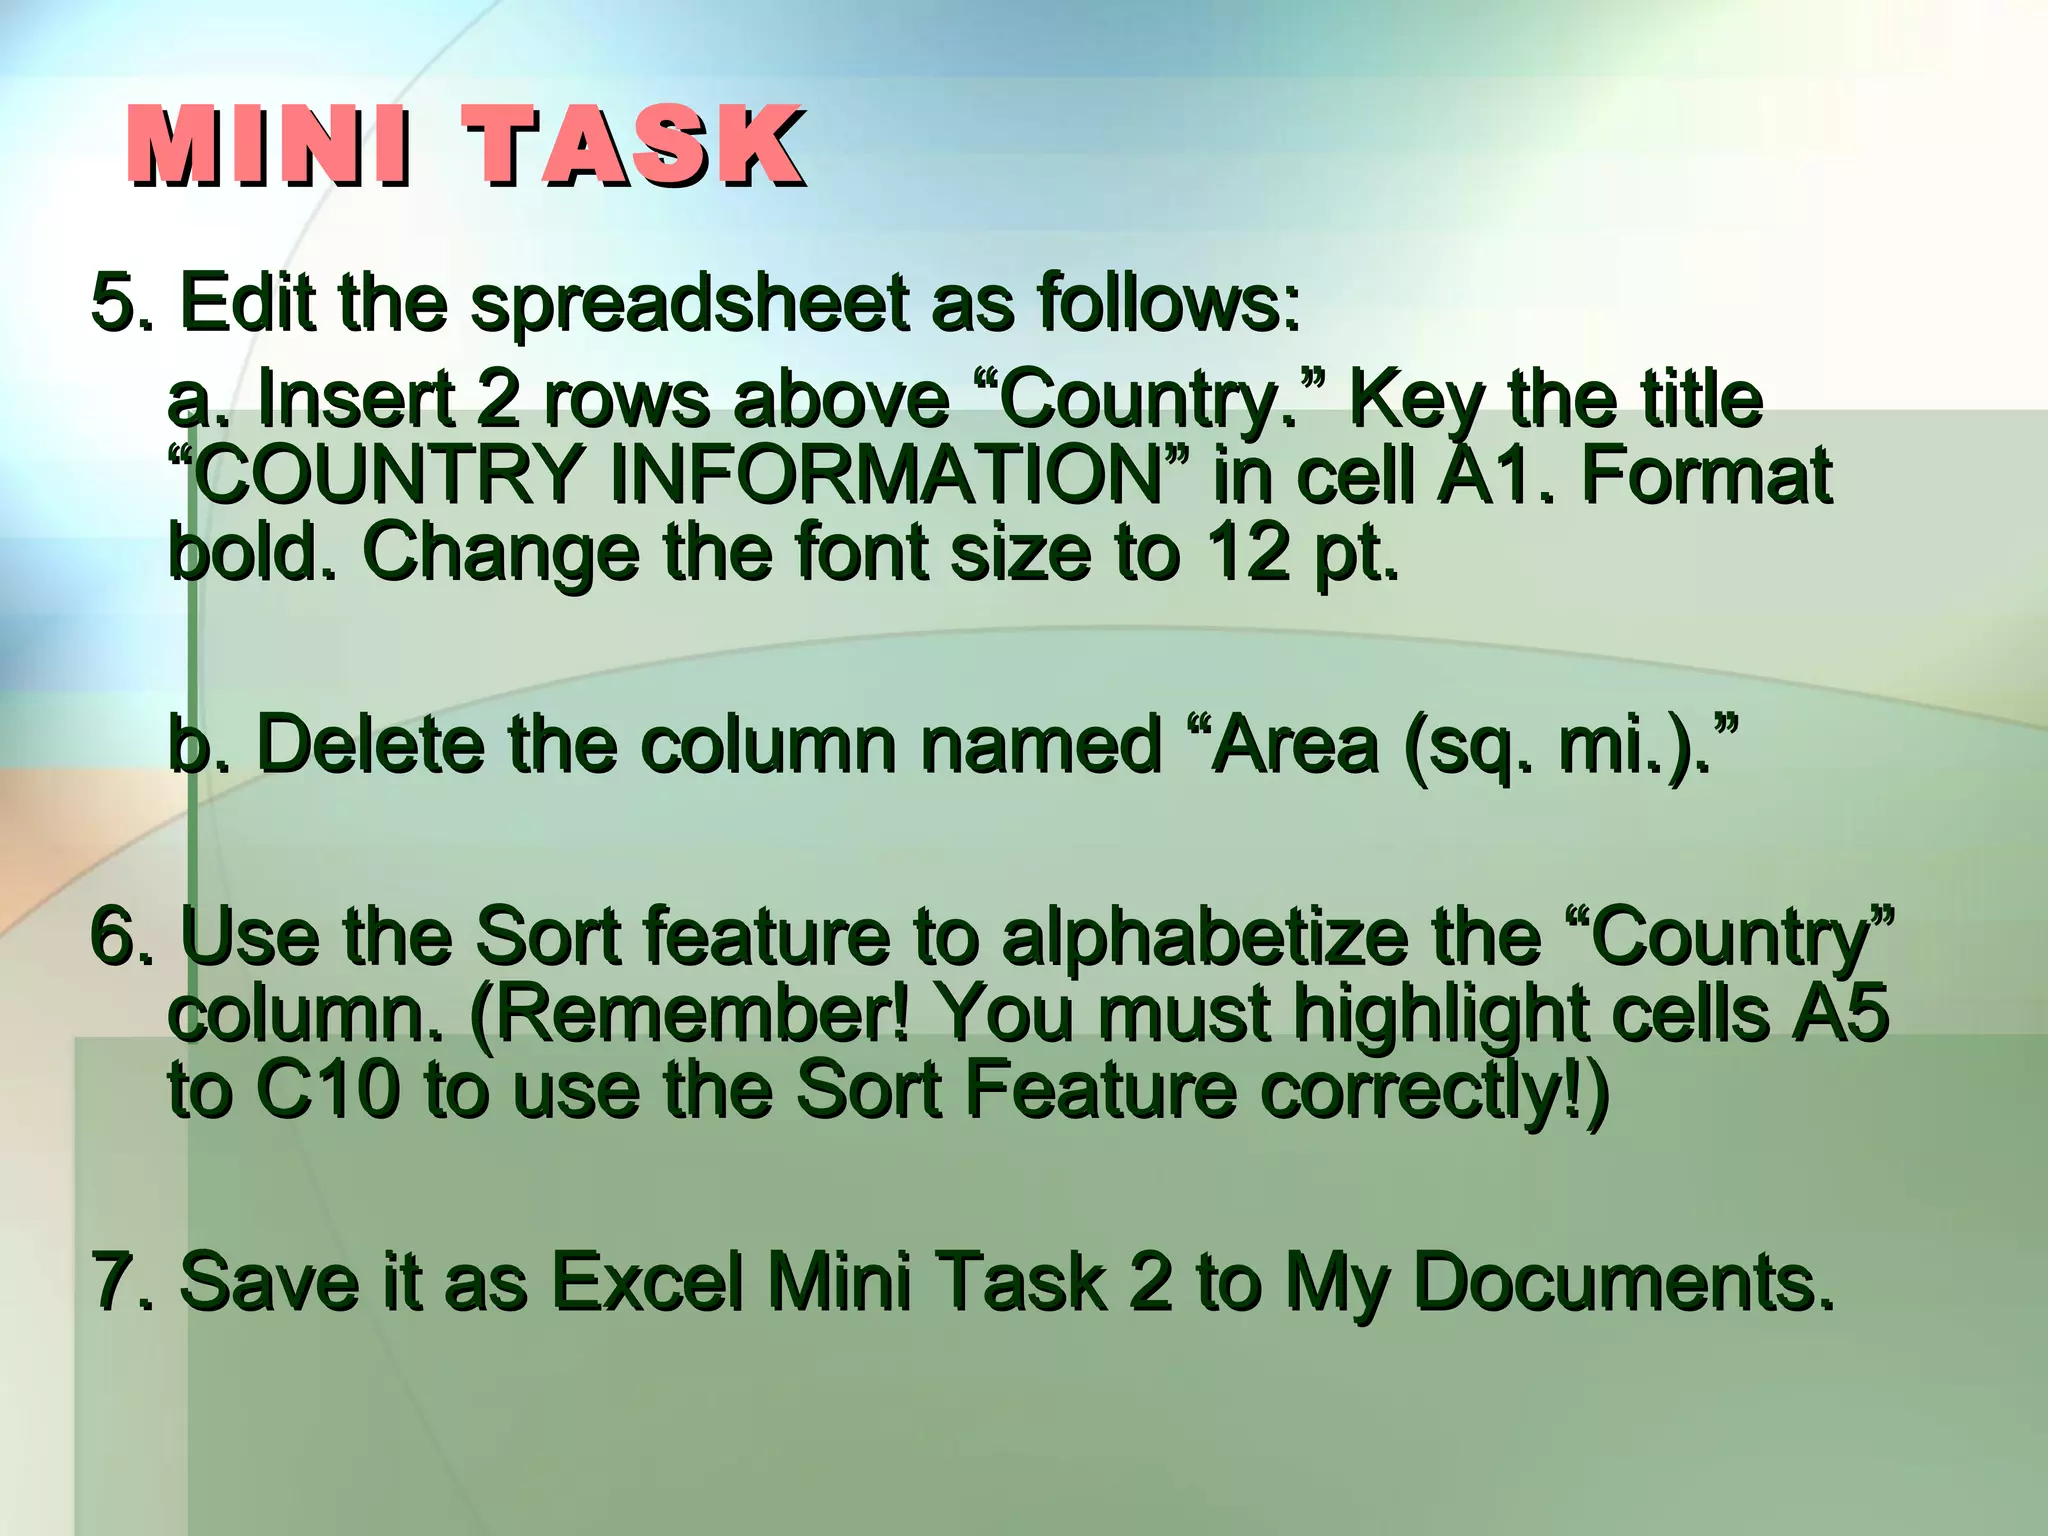

Here are the steps to complete the mini task: 1. Open a new spreadsheet in Excel. 2. Format and key the information as shown for the country headings and names. 3. Insert a row above row 5 and key information for Germany. 4. Delete the row containing information for Czech Republic. 5. Insert a column before column C titled "Population" and key the data. 6. Add a column titled "Capital" and key the data as shown, formatting appropriately. 7. Insert 2 rows above row 1, key "COUNTRY INFORMATION" in A1 and format. 8. Delete the column titled "Area (sq. mi.)." 9. Highlight cells A5