Professional Readiness for Innovation, Employability & Entrepreneurship Naan Mudhalvan - Project Based Experiential Learning IBM | career.education@ibm.com Technical Training Session - Internet of Things Powered by
Program Understanding Program aims to develop employability, innovation and entrepreneurship skills in the students through project-based experiential learning in collaborative learning environments under the guidance of industry mentoring. Program assists students in developing technical and professional competencies as they create innovative solutions to problem statements. Students are taught to think technically and with an open mind. Normally, companies provide such training after recruiting students, but under this project, skills are provided in colleges. Objectives: ❑ To empower the students with technical skills to require solving a real-world challenge ❑ To train the students on the approach to building solutions by applying critical thinking and problem-solving capabilities in a collaborative environment. ❑ To mentor the students to build innovative solutions by applying design thinking concepts. ❑ To introduce the standard project development methodologies followed in the industry to the students ❑ To develop the professional skills like teamwork, leadership qualities, communication in the students ❑ To enhance the employability of students in order to get them internships and job opportunities
Project Based Experiential Learning Project based learning helps students to understand the concepts by applying them on real-world usecases. Hands-on learning experiences help them build following professional and technical competencies required for job readiness and innovation PROFESSIONAL COMPETENCIES TECHNICAL COMPETENCIES Ideation & Innovation Solution architecture, Demos & presentation Critical Thinking & Problem Solving Teamwork & Inclusivity Communication Skills Research & Project planning Technology Stack (use APIs, tools, techniques) Coding & Solutioning Agile & Design Thinking practices
Greetings Everyone, Thanks for Joining, We shall start in 5 mins, just wait for all the guru’s to join.
IoT Course Objectives On completion of the 30 hours course the learner will be able to: ● Know the basis of Internet of Things ● Have knowledge of Building blocks of IoT ● Able to Design IoT Devices ● Able to communicate IoT Devices using various protocols ● Understand Cloud protocols ● Know about Computer Vision using Python
IoT Prerequisites Participants should ● Have a basic understanding of C programming and Python programming ● Have a computer with basic configuration and good internet connectivity ● Python 3.7 version should be installed (Python latest version is not recommended)
Content Introduction to Internet of Things (IoT) ● What is IoT & Industrial IoT ● Evolution of IoT ● Unblock Business Value with IoT ● Societal Impacts of IoT ● IoT Applications ● IoT Applications in various Sectors
Content Building Blocks of IoT ● IoT Architecture ● IoT Devices ● IoT Gateway ● IoT Communication Technologies ● IoT Communication Protocols ● IoT Platform ● IoT Security ● IoT Technology Stack
Content Design an IoT Device ● IoT Device Design Considerations ● Proof of Concept (PoC) Development ● Open IoT Hardware ● Sensors & Actuators ● Network Considerations ● Power Management
Content Getting Started with Arduino UNO & Tinkercad Platform ● Introduction to Arduino UNO ● Getting Started with TinkerCad Platform ● Blink an LED using Arduino UNO ● Integrating Push Button with Arduino UNO ● Integrating Analog Input with Arduino UNO ● Integrating Analog Output with Arduino UNO
Content Getting started with ESP32 and Wokwi platform ● Specifications of ESP32 Development Board ● Installation of Arduino IDE & ESP32 Packages Integrate TMP36 Sensor with Arduino UNO ● What is a DHT11 & TMP36 Sensor & How it works ● Integrate TMP36 sensor with ESP32
Content Integrate Ultrasonic Sensor with Arduino UNO ● What is an Ultrasonic Sensor & How it Works ● Integrate Ultrasonic sensor with Arduino UNO Integrate Servo Motor with Arduino UNO ● What is the Servo motor & How it works? ● Integrate Servo Motor with Arduino UNO
Content IoT Communication Technologies ● Wired vs. Wireless Technologies ● Short range vs. Long range communication ● Understand Bluetooth Low Energy (BLE) ● Understand Wi-Fi Communication ● Understand Zigbee Communication
Content Long Range Wireless Communication Technologies ● LoRa & LoRaWAN for IoT Communication ● Narrow Band-Internet of Things (NB-IoT) Communication ● Compare LoRAWAN & NB IoT Communication IoT protocols ● Understand HTTP Protocol ● Understand HTTPS Protocol ● Understand MQTT Protocol ● Understand CoAP Protocol
Content HTTP & MQTT Practical’s ● Get Weather Info from Open Weather API using HTTP ● Hands-on with MQTT - Hive MQ Publish Broker Introduction to Python ● Python Environment setup Python basics ● Python-Variable Types ● Python- Basic Operators ● Python- Strings
Content Python - Collection Data Types, Functions ● Lists, Tuples, Set, Dictionary ● Control Statements ● Functions Modules Files I/O Python In-Built libraries Overview of OOP Terminology Creating Classes
Content Getting started with Raspberry PI ● Introduction to Raspberry PI ● Compare different models of Raspberry PI ● Explore Raspberry PI GPIO pins ● OS installation Raspberry Pi as a Gateway ● Raspberry Pi as a gateway ● Configuring Raspberry Pi as a gateway
Content Introduction to Cloud ● What is Cloud Technology? ● Understand Different Service models (SaaS, PaaS, IaaS) Firebase Cloud & IoT Platform Architecture ● Introduction to Firebase Cloud Platform & its services ● Explore IoT Platform Architecture
Content Getting Started Node-RED Service ● Introduction to Node-RED Service ● Installation of local Node-Red ● Getting Started with Node-RED Web Application Development using Node-RED Service ● Develop a web UI to display the Sensor data ● Configure the buttons in UI to send the commands ● Publish and Subscribe data from Firebase IoT Platform using Python Code
Content Mobile Application Development using MIT App Inventor ● Develop the User Interface to display the sensor data ● Configure the API's using Node-RED service to get the sensor data ● Display the Data in the UI and Install the Mobile App ● Configure the API's using Node-RED service to receive commands from Mobile App ● Configure the mobile App to send commands to Firebase Cloud Case study 1 Case study 2
History
When? Where? Who? ● A Coke Machine at Carnegie Mellon University, in 1982 ● Mike Kazar, David Nichols, John Zsarnay, and Ivor Durham ● They could check from their desks if the machine was loaded with cold coke
When? Where? Who? ● The Internet Toaster by John Romkey in 1989 ● Connected to the internet with TCP/IP ● Controlled via SNMP MIB (Simple Networking Management Protocol Management Information Base) ● Control to turn on/off
Sending Data to Human On/Off by Human
Connected Devices
IoT Promises today is much beyond this
WHAT IS IoT?
BENEFITS OF IOT •Improved Performance •Reduced Cost •Improved Data Collection •Improved Customer Engagement •New revenue streams
APPLICATIONS OF IoT Electrical IOT
APPLICATIONS OF IoT AUTOMATION IOT
APPLICATIONS OF IoT Mechanical IOT
Smart Home APPLICATIONS IN DIFFERENT SECTORS Smart Cities Smart Retail Smart Health Smart Environment Smart Agriculture Smart Industry Smart Grid
▪ Smart Parking ▪ Smart Roads ▪ Emergency Response ▪ Weather Monitoring ▪ Forest Fire Detection ▪ Air Pollution ▪ Smart Grids ▪ Renewable Energy Systems ▪ Prognostics ▪ Smart Irrigation ▪ Green House ▪ Shipment Monitoring ▪ Remote vehicle Diagnostics ▪ Fleet Tracking HOME AUTOMATION ▪ Smart Lighting ▪ Smart Appliance ▪ Smart Security Systems INDUSTRIES Machine Diagnosis Indoor Air Quality Monitoring Internet of Things HEALTH & LIFESTYLE ▪ Wearable Electronics ▪ Health & Fitness Monitoring
IoT ARCHITECTURE
IoT TECHNOLOGY STACK
IoT Statistics
PROTOTYPING HARDWARE
PROTOTYPING SOFTWARE
Break for 5 mins
Arduino Introduction
WHAT IS ARDUINO? ● Arduino is an open-source platform used for building electronics projects . ● Easy tool for fast prototyping. ● consists of both a physical programmable circuit board and a piece of software.
WHY ARDUINO? ● Open source Platform. ● Inexpensive ● Does not need a separate piece of hardware ● Arduino IDE uses a simplified version of C++ ● Cross-platform ● Provides a standard form factor
WHAT CAN AN ARDUINO DO? ● Interacts with buttons, LEDs, motors, speakers, GPS units, cameras, the internet, and even your smart-phone or your TV ● designed for artists, designers, hobbyists, hackers, newbie's, and anyone interested in creating interactive objects or environments
TYPES OF ARDUINO (Entry level Boards)
TYPES OF ARDUINO (Wearable Boards)
TYPES OF ARDUINO (Enhanced Boards)
TYPES OF ARDUINO (IoT Board)
ARDUINO UNO ATmega328
ARDUINO UNO Specifications • Operating Voltages - 5V and 3.3V • Input Voltage (recommended) - 5-12V • Input Voltage (limits) - 6-20V • Digital I/O Pins - 14 (6 provide PWM output) • Analog Input Pins - 6 • DC Current per I/O Pin - 40 mA • DC Current for 3.3V Pin - 50 mA • Flash Memory - 32 KB (ATmega328) • SRAM - 2 KB (ATmega328) • EEPROM - 1 KB (ATmega328) • Clock Speed - 16 MHz • Microcontroller - ATmega328
ARDUINO UNO Software ● Check out: http://arduino.cc/en/Guide/HomePage ● Download & install the Arduino environment (IDE) ● Connect the board to your computer via the USB cable ● If needed, install the drivers (not needed in lab) ● Launch the Arduino IDE ● Select your board ● Select your serial port ● Open the example ● Upload the program
ARDUINO IDE
Tinkercad
Process Open Tinkercad and Sign in https://www.tinkercad.com/
● Click on Create New circuit ● Explore the Tinkercad Platform ● Drag and drop Arduino Uno to the workspace ● Go to Code and change from Blocks to Text
Hello world Code: void setup() { Serial.begin(9600); // Baud Rate: No. of bits transmitted per second } void loop() { Serial.println(“Hello World!”); }
Basic codes ● Print Integers ● different baud rates and speed ● loop and setup difference ● Print Binary: (10, BIN)
Digital Output Code (LED): void setup() { pinMode(13, OUTPUT); } void loop() { digitalWrite(13, HIGH); } Add 100 ohm resistor to avoid any error.
Lunch break 12:30 pm to 1:15 pm
Try to Blink LED with any frequency Hint: to play with time use the function: delay(1000);
LED Blink Code: void setup() { pinMode(LED_BUILTIN, OUTPUT); } void loop() { digitalWrite(LED_BUILTIN, HIGH); delay(1000); digitalWrite(LED_BUILTIN, LOW); delay(1000); }
Try to Blink 3 LEDs with a sequence Traffic Lights
Button code digital input
Digital Input Code (Button): const int buttonPin = 2; // the number of the pushbutton pin int buttonState = 0; // variable for reading the pushbutton status void setup() { pinMode(buttonPin, INPUT); Serial.begin(9600); } void loop() { buttonState = digitalRead(buttonPin); Serial.println(buttonState); }
Try to Glow LED when the Button is pressed and off LED when button is released
(Button with LED): const int buttonPin = 2; // the number of the pushbutton pin const int ledPin = 13; // the number of the LED pin int buttonState = 0; // variable for reading the pushbutton status void setup() { pinMode(ledPin, OUTPUT); pinMode(buttonPin, INPUT); } void loop() { buttonState = digitalRead(buttonPin); if (buttonState == LOW) { digitalWrite(ledPin, HIGH); } else { digitalWrite(ledPin, LOW); } }
Analog Read with Potentiometer
Analog Read with Potentiometer void setup() { Serial.begin(9600); } void loop() { int a = analogRead(A0); Serial.print("Analog value: "); Serial.println(a); }
Potentiometer above 500 glow LED If not Off the LED
(Potentiometer with LED): const int potPin = A0; // the number of the pushbutton pin const int ledPin = 13; // the number of the LED pin int potState = 0; // variable for reading the pushbutton status void setup() { pinMode(ledPin, OUTPUT); pinMode(potPin, INPUT); } void loop() { int potState = analogRead( potPin ); Serial.print("Analog value: "); Serial.println(potState); if (potState >= 500 ) { digitalWrite(ledPin, HIGH); } else { digitalWrite(ledPin, LOW); } }
Analog write with led
Analog write with led void setup() { Serial.begin(9600); pinMode(11,OUTPUT); } void loop() { analogWrite(11, 255); delay(1000); analogWrite(11, 200); delay(1000); analogWrite(11, 100); delay(1000); analogWrite(11, 50); delay(1000); analogWrite(11, 0); delay(1000); }
increase/decrease LED intensity with potentiometer
Increase/Decrease LED intensity with potentiometer void setup() { Serial.begin(9600); pinMode(11,OUTPUT); } void loop() { int p = analogRead(A0); Serial.print("Analog value: "); Serial.println(p); int m= map(p,0,1023,0,255); analogWrite(11,m); Serial.print("Map value: "); Serial.println(m); delay(1000); }
Produce different colors with RGB LED with potentiometers
Ultrasonic Sensor Intro Ultrasonic Sensor (HC-SR04) can measure distance. It emits an ultrasound at 40 kHz which travels through the air and if there is an object or obstacle on its path It will bounce back to the module. Can detect between 2 cm to 450 cm range.
Ultrasonic Sensor working Considering the travel time and the speed of the sound you can calculate the distance. Distance = (Duration/2) * Velocity of sound (340 m/s)
Ultrasonic Sensor Specifications Operating Voltage : DC 5V Operating Current : 15mA Operating Frequency : 40KHz Max Range : 4m Min Range : 2cm Ranging Accuracy : 3mm Measuring Angle : 15 degree Trigger Input Signal : 10µS TTL pulse Dimension : 45 x 20 x 15mm
Ultrasonic sensor code int t = 2; int e = 3; void setup() { Serial.begin(9600); pinMode(t,OUTPUT); pinMode(e,INPUT); } void loop() { digitalWrite(t, LOW); digitalWrite(t,HIGH); delayMicroseconds(10); digitalWrite(t,LOW); float dur = pulseIn(e,HIGH); float dis = (dur * 0.0343)/2; Serial.print("Distance in cm:"); Serial.println(dis); }
try to write logic for car reverse functionality, led should glow with max intensity if there is an object near, and glow less when there is object at some distance and should not glow when it is far
Temperature Sensor Intro The DHT11 is a basic, ultra low-cost digital temperature and humidity sensor. It uses a resistive type humidity sensor and a thermistor to measure the surrounding air, and spits out a digital signal on the data pin (no analog input pins needed.
Temperature Sensor working Humidity sensing component ● Two electrodes ● Substrate As humidity changes substrate conductivity changes and the change is measured by ic Thermistor ● Variable resistor As the temperature changes the resistance value is changes and the result is measured
Temperature Sensor Specifications ● 3 to 5V power and I/O ● 2.5mA max current use during conversion (while requesting data) ● Good for 20-80% humidity readings with 5% accuracy ● Good for 0-50°C temperature readings ±2°C accuracy ● No more than 1 Hz sampling rate (once every second) ● Body size 15.5mm x 12mm x 5.5mm ● 4 pins with 0.1" spacing
Temperature Sensor Code void setup() { Serial.begin(9600); } void loop() { double a = analogRead(A0); Serial.print("Analog value: "); Serial.println(a); double ca = a/1024; Serial.print("converted Analog value: "); Serial.println(ca); double v = ca*5; Serial.print("voltage value: "); Serial.println(v); double o = v-0.5; Serial.print("offset value: "); Serial.println(o); double c = o*100; Serial.print("celsius value: "); Serial.println(c); delay(1000); }
Optimized Temperature Sensor Code void setup() { Serial.begin(9600); } void loop() { double a = analogRead(A0); a =(( (a/1024)*5)-0.5)*100; Serial.print("celsius value: "); Serial.println(a); delay(1000); }
Glow LED when Temp sensor detects more than 30 degree C
PIR Sensor Intro PIR sensors allow you to sense motion, almost always used to detect whether a human has moved in or out of the sensors range. They are small, inexpensive, low-power, easy to use and don't wear out. For that reason they are commonly found in appliances and gadgets used in homes or businesses. They are often referred to as PIR, "Passive Infrared", "Pyroelectric", or "IR motion" sensors.
PIR Sensor Working The Pyro-electric Infra-Red (PIR) sensor is an extremely useful device for detecting the presence of a moving body. PIR is simply sensitive to the infrared energy emitted by every living thing. When an intruder walks into the detector’s field of vision, the detector “sees” a sharp increase in infrared energy.
PIR Sensor Specifications Size: Rectangular Output: Digital pulse high (3V) when triggered (motion detected) digital low when idle (no motion detected). Sensitivity range: up to 20 feet (6 meters) 110° x 70° detection range Power supply: 3V-9V input voltage, but 5V is ideal.
PIR Sensor Code void setup() { pinMode(4, INPUT); Serial.begin(9600); } void loop() { int p = digitalRead(4); Serial.println(4); }
Glow LED when Motion is detected by PIR sensor
Servo Motor #include<Servo.h> Servo s; void setup() { s.attach(3); } void loop() { s.write(0); delay(1000); s.write(30); delay(1000); s.write(70); delay(1000); s.write(130); delay(1000); s.write(180); delay(1000); }
Servo Motor #include<Servo.h> Servo s; void setup() { s.attach(3); } void loop() { for(int i=0;i<=180;i++){ s.write(i); delay(100); } delay(2000); for(int j=180;j>=0;j–){ s.write(j); delay(100); } delay(2000); }
Buzzer void setup() { pinMode(12,OUTPUT); } void loop() { for(int i=0; i<30000;i=i+10){ tone(12,i); //(pin number, frequency,delay) delay(1000); noTone(12); delay(1000); } }
7 segment Display void setup() { pinMode(2, OUTPUT); pinMode(3, OUTPUT); pinMode(4, OUTPUT); pinMode(5, OUTPUT); pinMode(6, OUTPUT); pinMode(7, OUTPUT); pinMode(8, OUTPUT); } void loop() { digitalWrite(2, 0); digitalWrite(3, 0); digitalWrite(4, 0); digitalWrite(5, 0); digitalWrite(6, 0); digitalWrite(7, 0); digitalWrite(8, 1);
Design an IoT Device
DESIGN CONSIDERATIONS ● Cost ● Network ● Features ● User interface ● Power ● Size ● Antenna ● Cloud ● Interoperability ● Security ● Applicability ● Software Updates ● Support ● Data Collection ● Data Management ● Analytics ● Market Trends
Proof Of Concept (POC) DEFINE DEVELOP EXECUTE EVALUATE The purpose is to design and test an IoT solution in your own environment
What is prototyping? Prototyping is a limited representation of a design that allows users to interact with it and explore more possibilities. It also allows stakeholders to interact with the envisioned product and get some user experience.
Goals of Prototyping ● Exploring requirements ● Choosing among alternatives ● Empirical usability testing ● Evolutionary development Why should you go for a prototype?
● Evaluation and feedback ● Team members can communicate effectively ● You can test your ideas ● It encourages reflection Why should you go for a prototype?
● Mockup ● Storyboard ● Sketches ● Scenarios ● Screenshots ● Function interface How to represent a prototype?
A device whose task is to detect events or changes in its immediate environment and convert these physical phenomena (like temperature, light, air humidity, movement, presence of chemical substances and many others) into electrical impulses SENSOR
Electrical impulses sent from the control system and converting them into mechanical motion, it actually introduces changes to its physical surroundings by means of a variety of simple actions, including but not limited to opening and closing valves, changing other devices’ position or angle ACTUATOR
ACTUATOR
Open Architecture with Powerful Integration Tools Built-in Security Intuitive, Customizable Management Portal/ UI Cross-Vendor Device Compatibility Modular, Platform- Independent Design NETWORK CONSIDERATIONS
The IoT device you develop must be able to perform its full functionality as long as possible, Relying on high capacity battery, super/ultra-capacitors or energy harvesting technology POWER MANAGEMENT
● Energy consumption ● Battery capacity ● Power generation Power Management Key Principles
Getting started with ESP32
ESP8266 ESP32
ESP32 in Arduino IDE https://raw.githubuserconte nt.com/espressif/arduino-es p32/gh-pages/package_esp32_ index.json
ESP32 in Arduino IDE
1St Feedback

Microinstruction encoding Microinstruction encoding

  • 1.
    Professional Readiness forInnovation, Employability & Entrepreneurship Naan Mudhalvan - Project Based Experiential Learning IBM | career.education@ibm.com Technical Training Session - Internet of Things Powered by
  • 2.
    Program Understanding Program aimsto develop employability, innovation and entrepreneurship skills in the students through project-based experiential learning in collaborative learning environments under the guidance of industry mentoring. Program assists students in developing technical and professional competencies as they create innovative solutions to problem statements. Students are taught to think technically and with an open mind. Normally, companies provide such training after recruiting students, but under this project, skills are provided in colleges. Objectives: ❑ To empower the students with technical skills to require solving a real-world challenge ❑ To train the students on the approach to building solutions by applying critical thinking and problem-solving capabilities in a collaborative environment. ❑ To mentor the students to build innovative solutions by applying design thinking concepts. ❑ To introduce the standard project development methodologies followed in the industry to the students ❑ To develop the professional skills like teamwork, leadership qualities, communication in the students ❑ To enhance the employability of students in order to get them internships and job opportunities
  • 3.
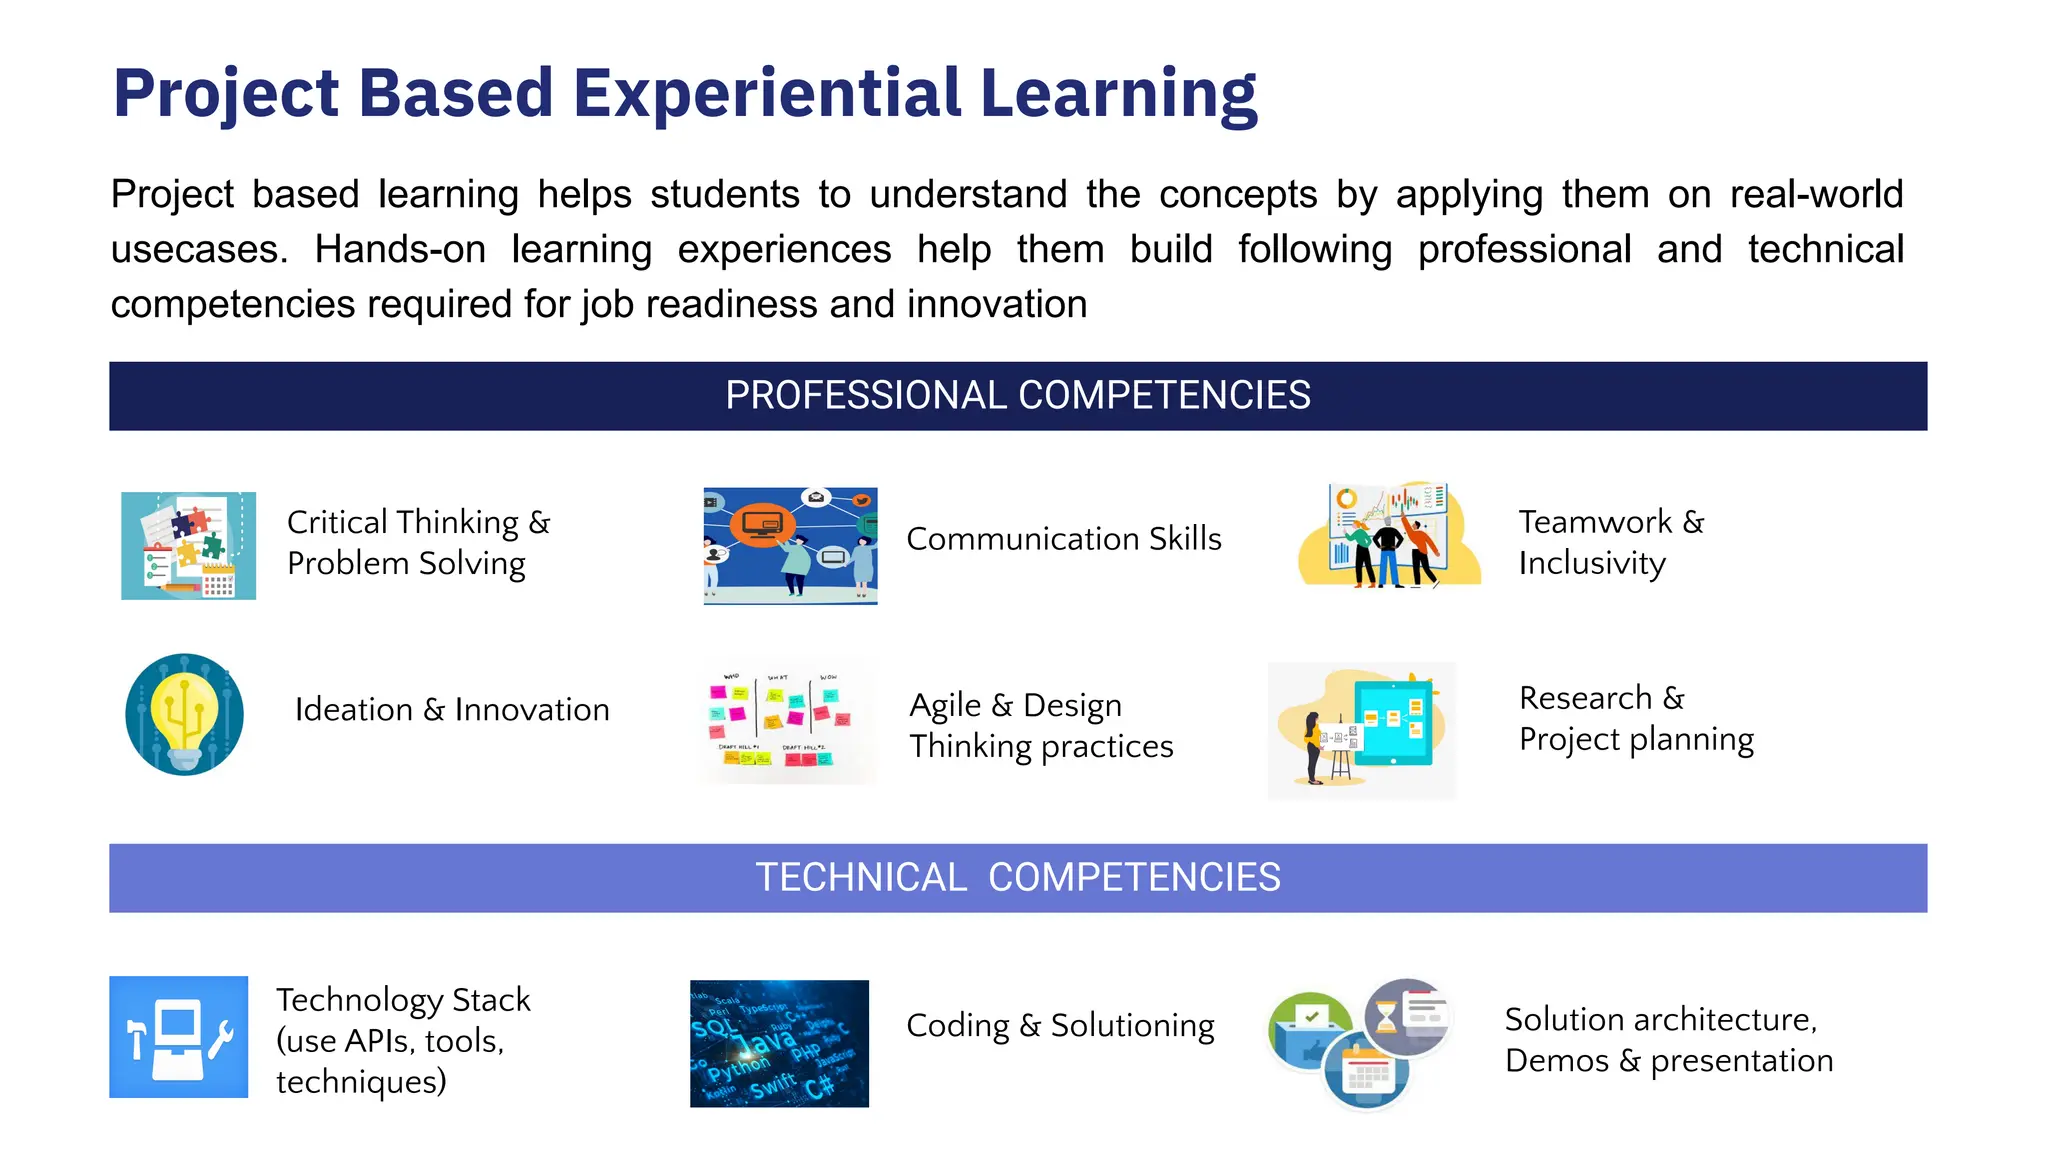
    Project Based ExperientialLearning Project based learning helps students to understand the concepts by applying them on real-world usecases. Hands-on learning experiences help them build following professional and technical competencies required for job readiness and innovation PROFESSIONAL COMPETENCIES TECHNICAL COMPETENCIES Ideation & Innovation Solution architecture, Demos & presentation Critical Thinking & Problem Solving Teamwork & Inclusivity Communication Skills Research & Project planning Technology Stack (use APIs, tools, techniques) Coding & Solutioning Agile & Design Thinking practices
  • 4.
    Greetings Everyone, Thanks forJoining, We shall start in 5 mins, just wait for all the guru’s to join.
  • 5.
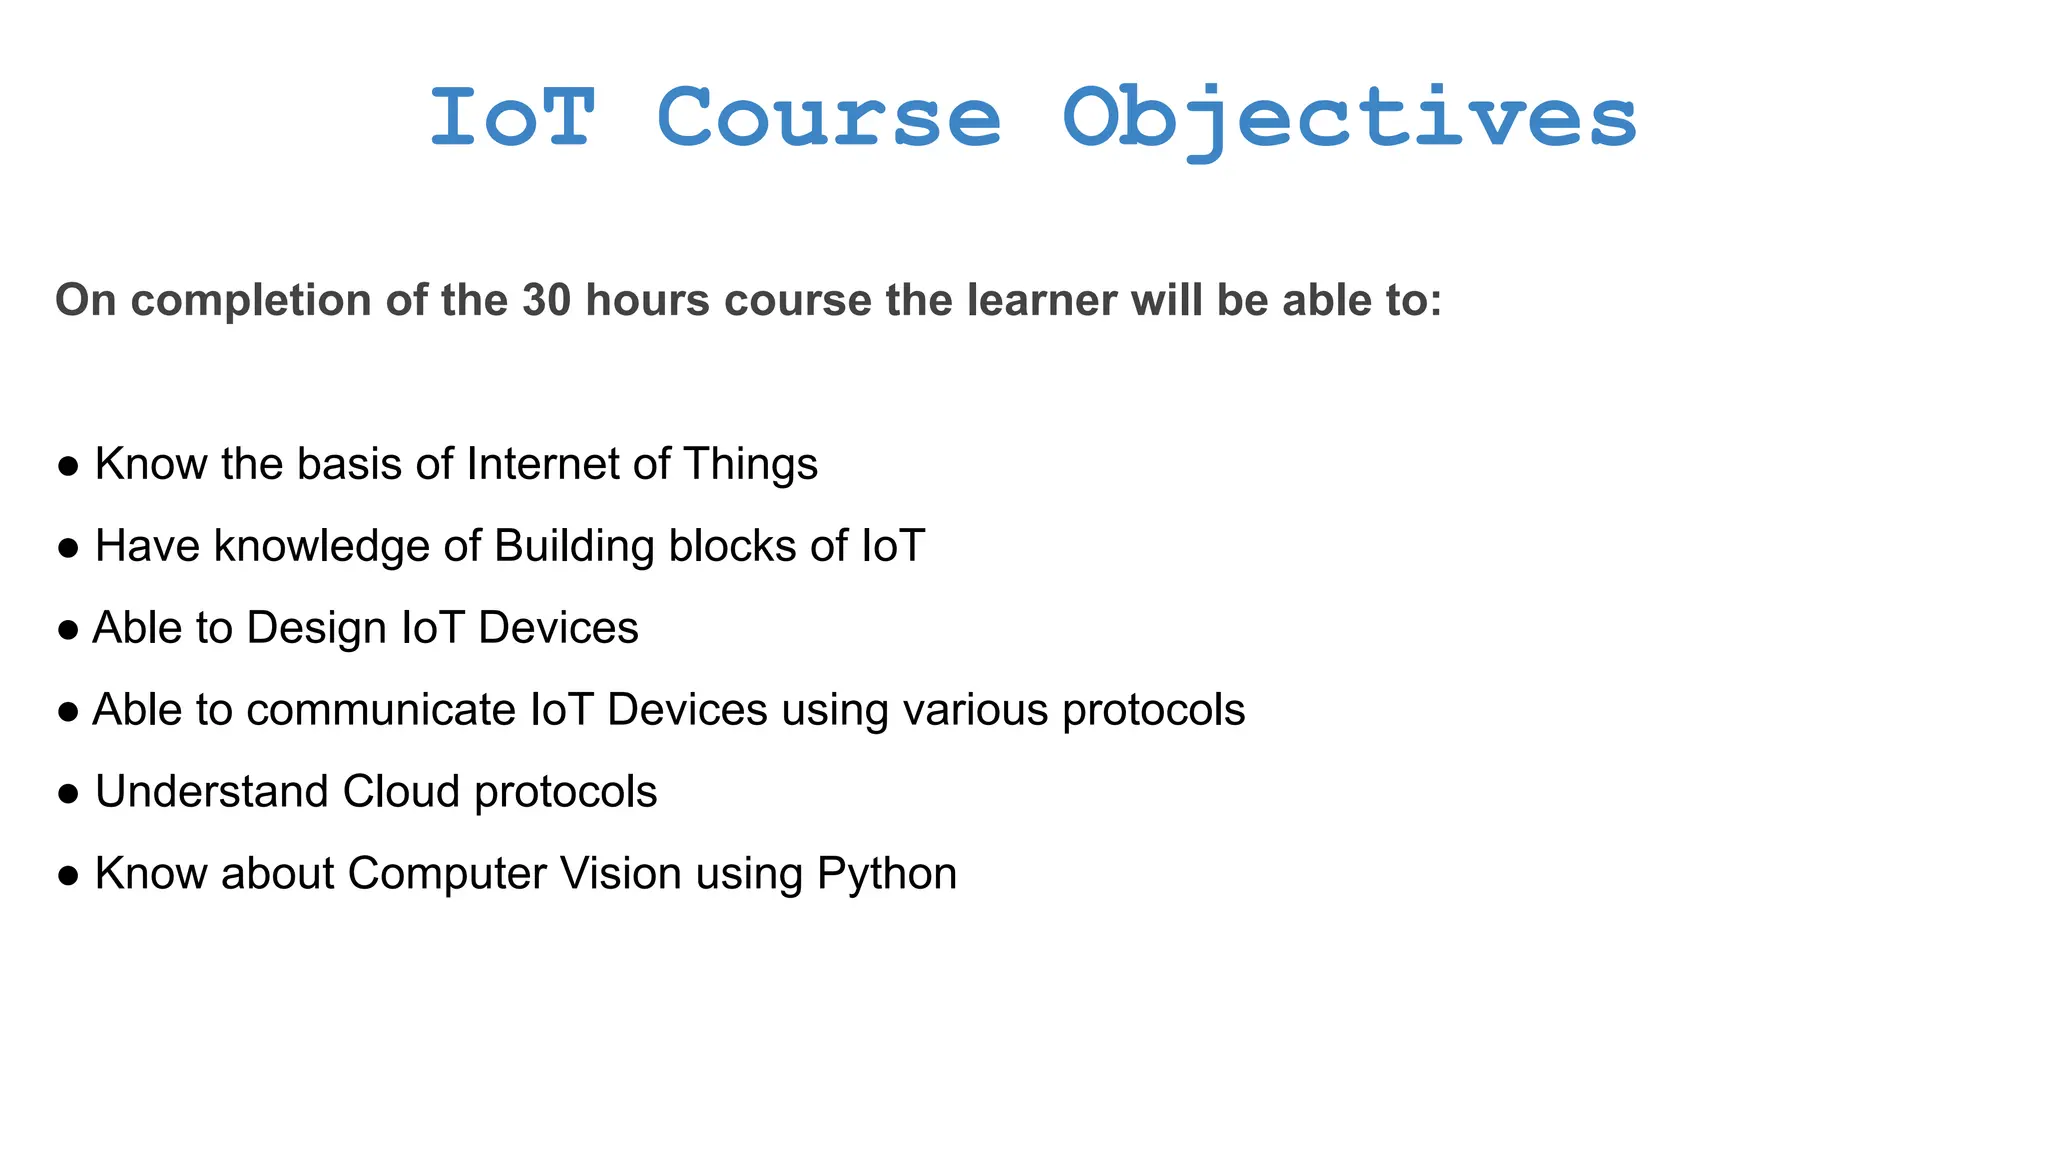
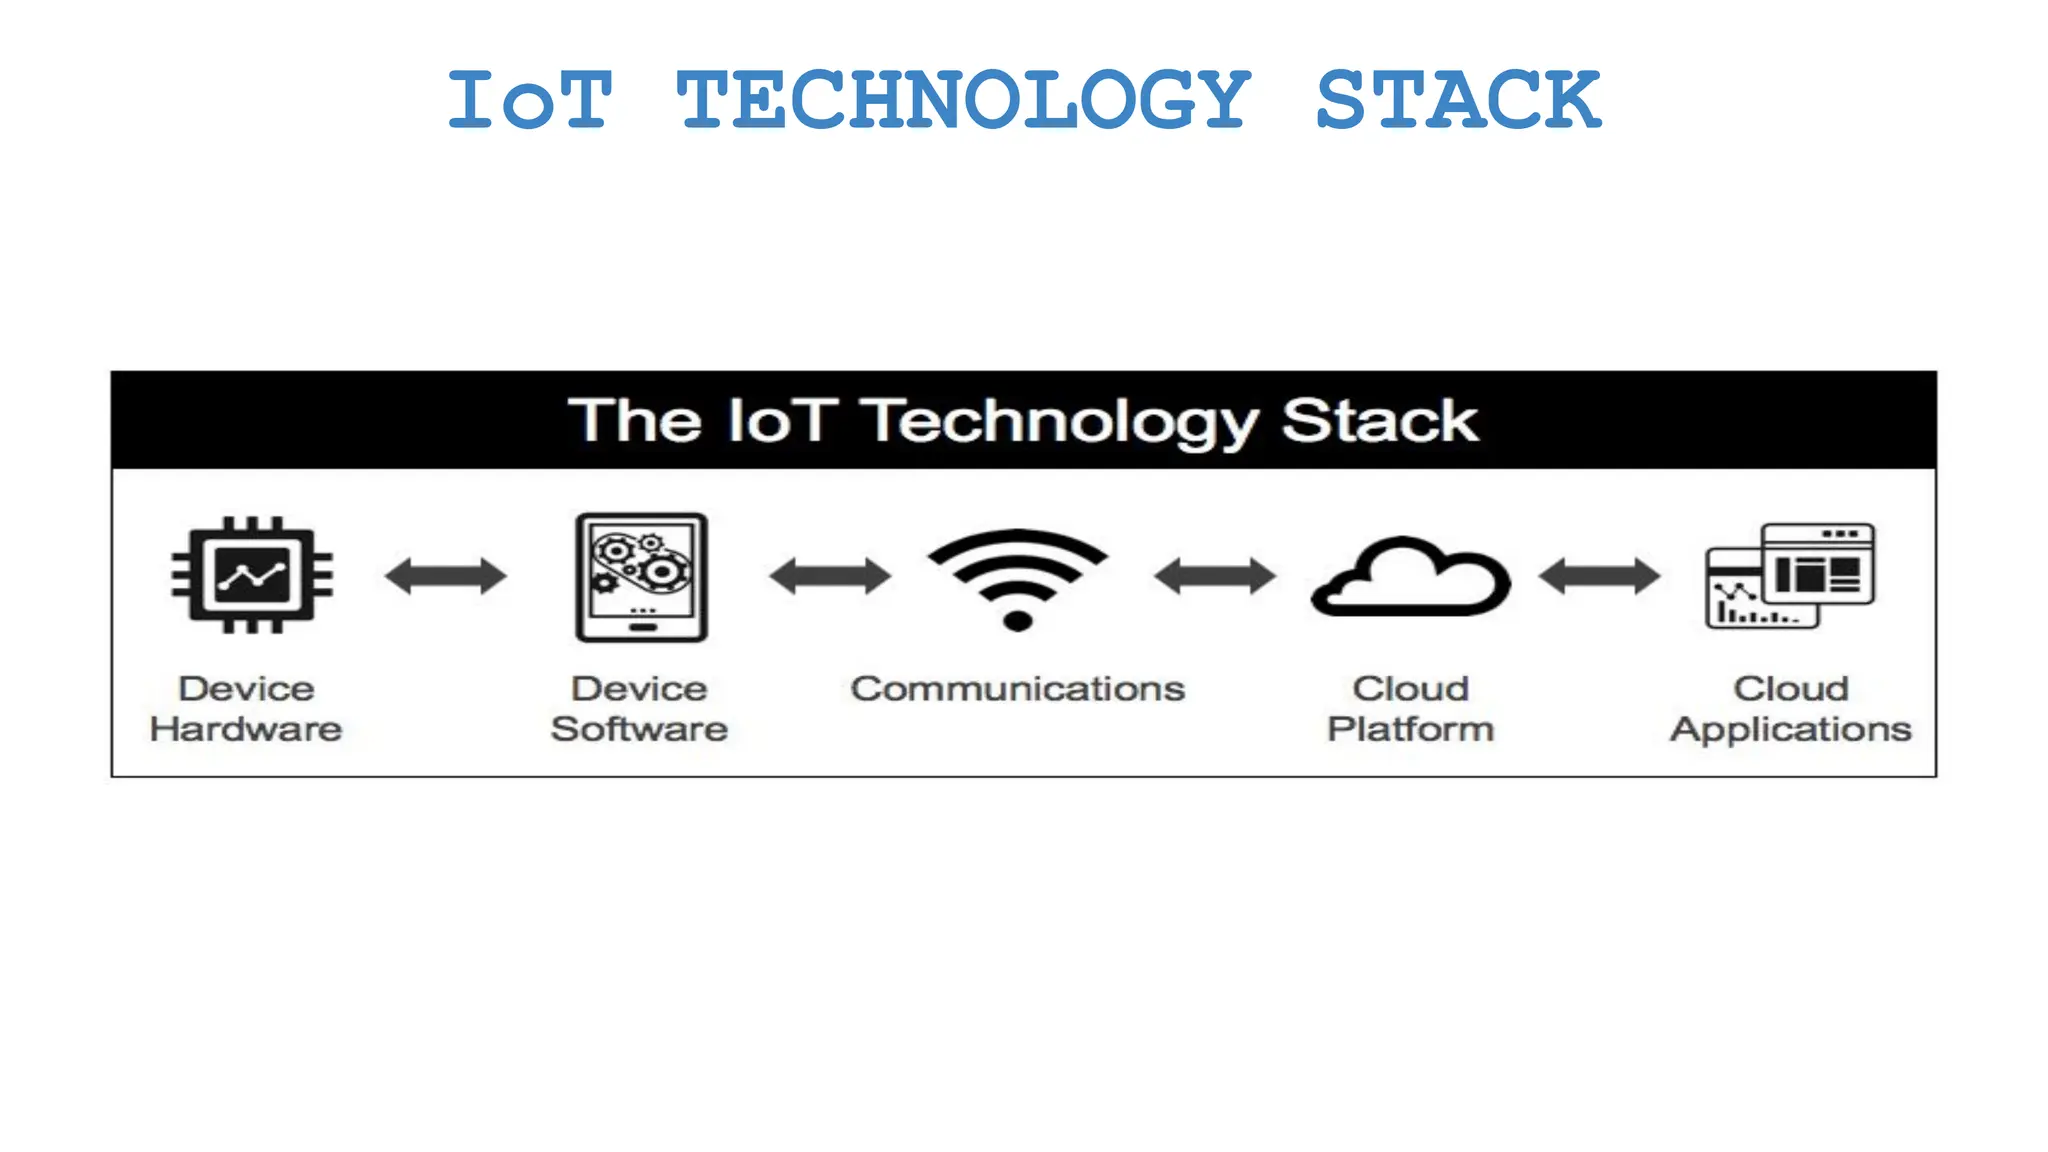
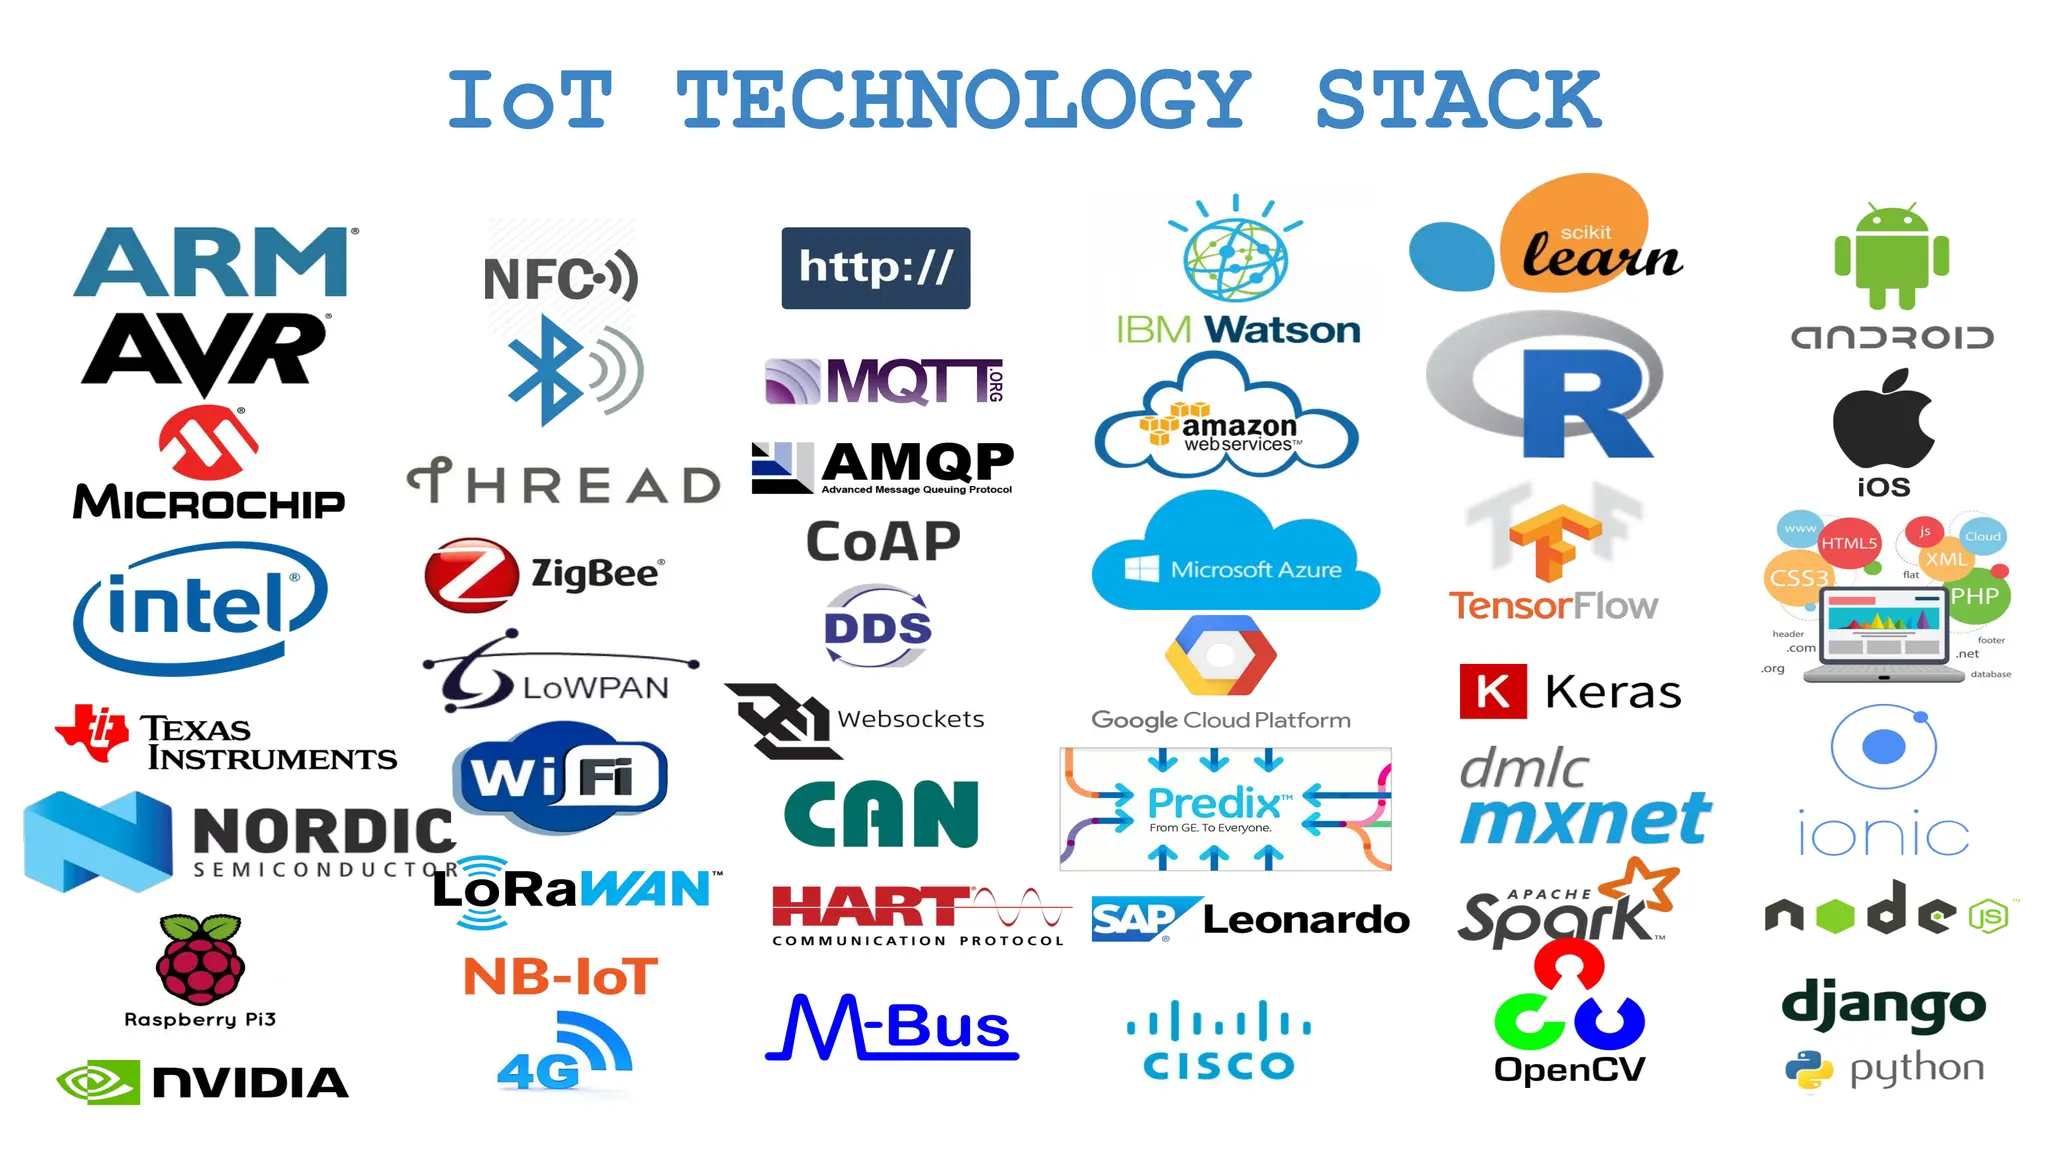
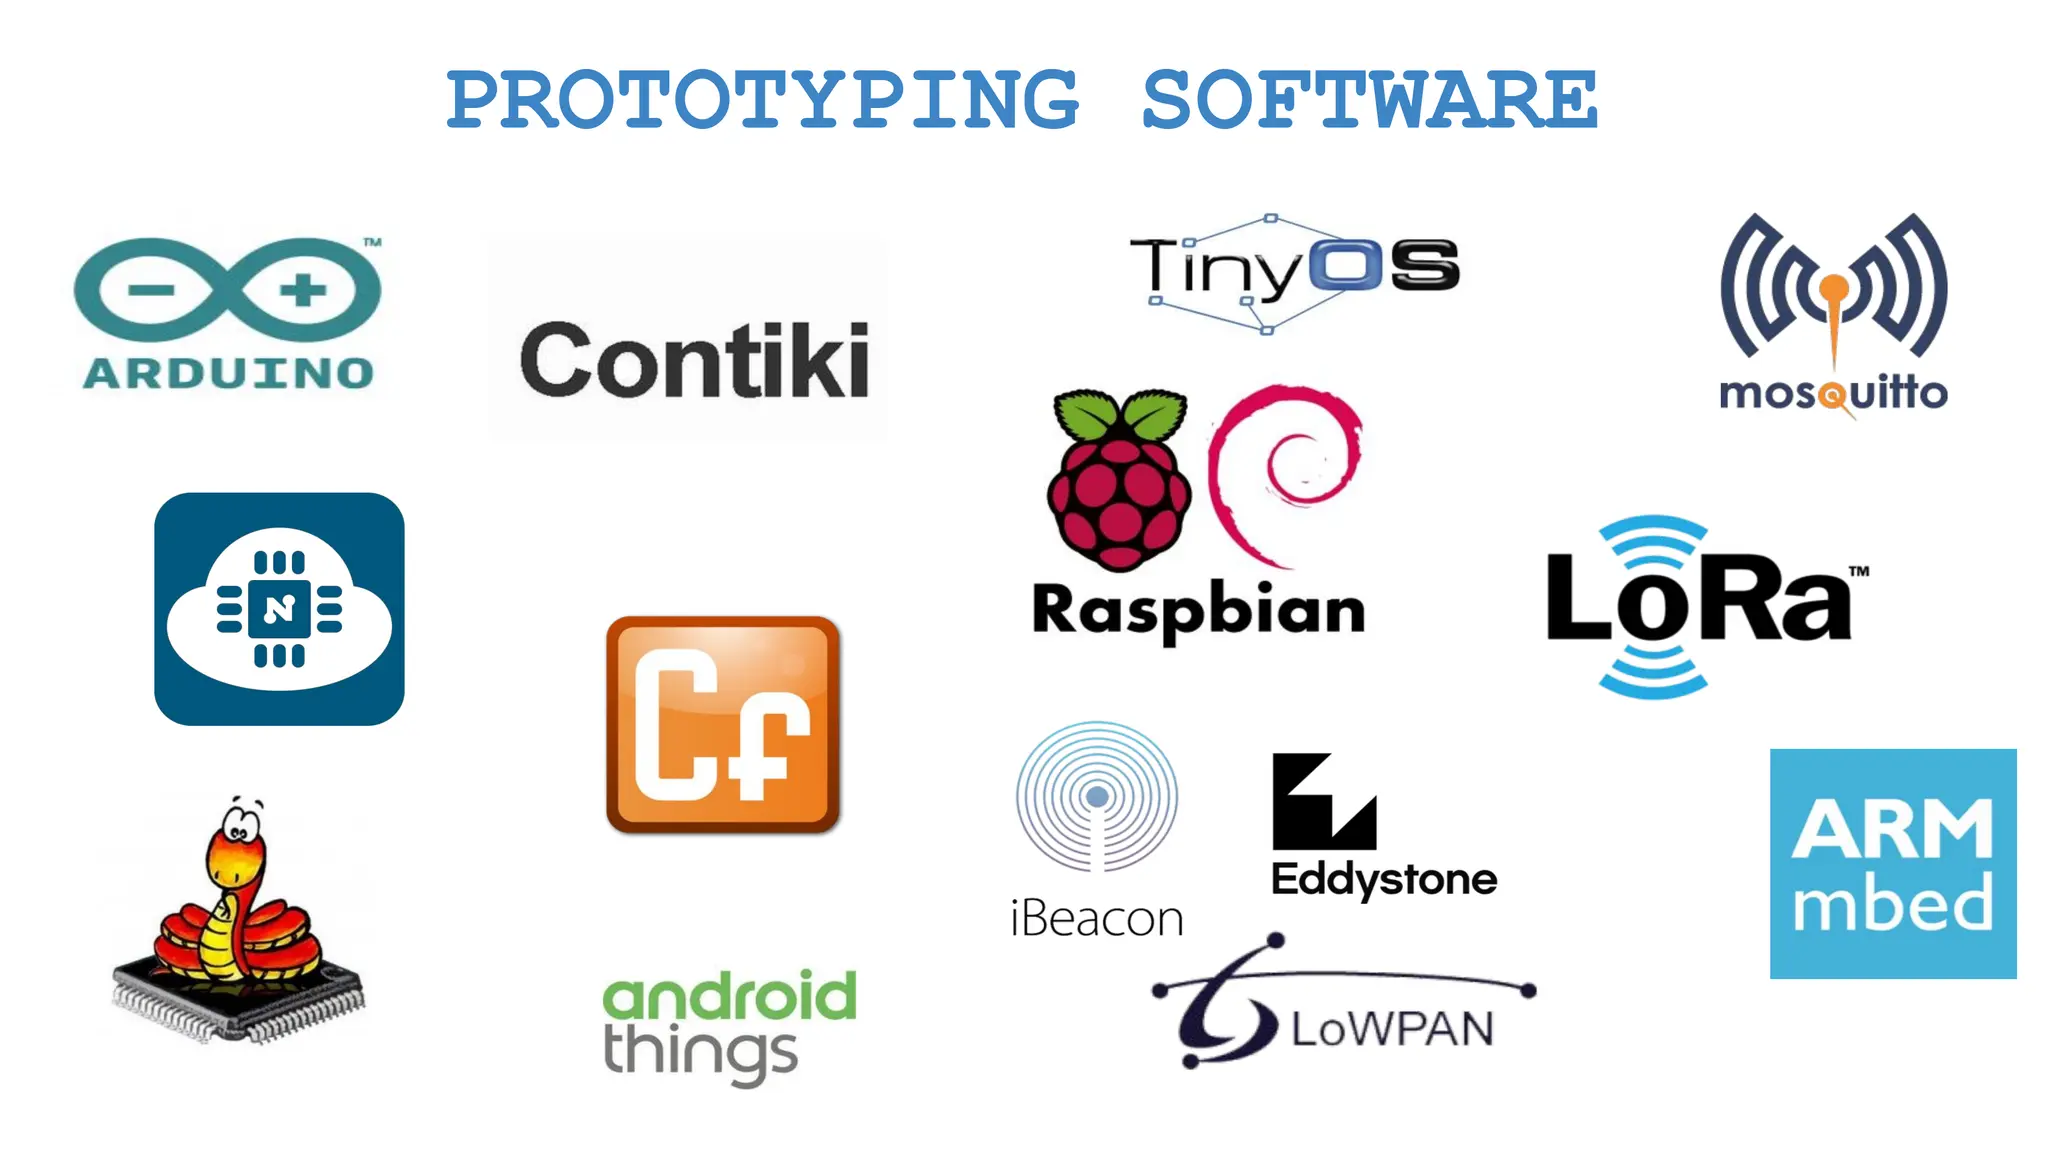
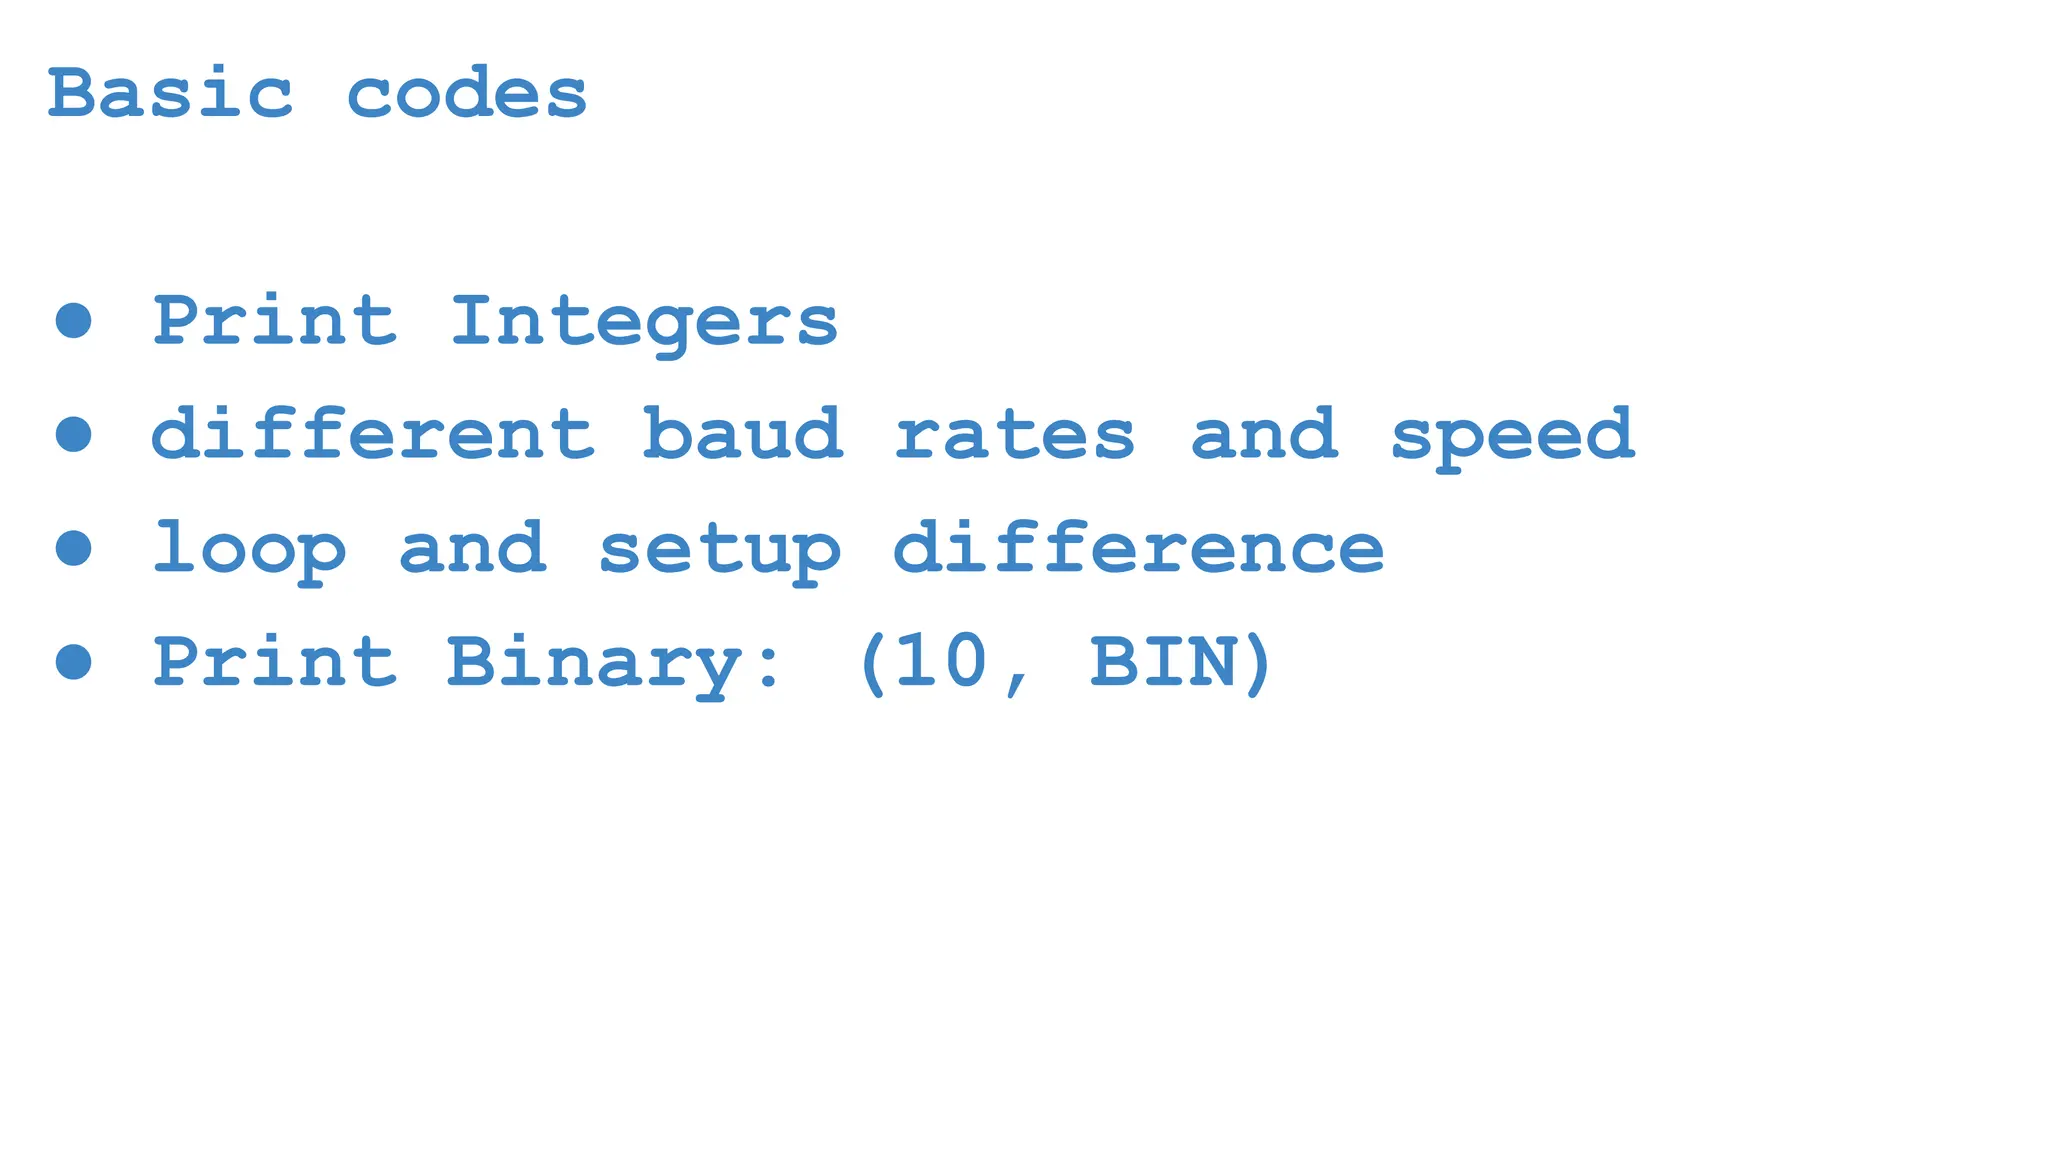
    IoT Course Objectives Oncompletion of the 30 hours course the learner will be able to: ● Know the basis of Internet of Things ● Have knowledge of Building blocks of IoT ● Able to Design IoT Devices ● Able to communicate IoT Devices using various protocols ● Understand Cloud protocols ● Know about Computer Vision using Python
  • 6.
    IoT Prerequisites Participants should ●Have a basic understanding of C programming and Python programming ● Have a computer with basic configuration and good internet connectivity ● Python 3.7 version should be installed (Python latest version is not recommended)
  • 7.
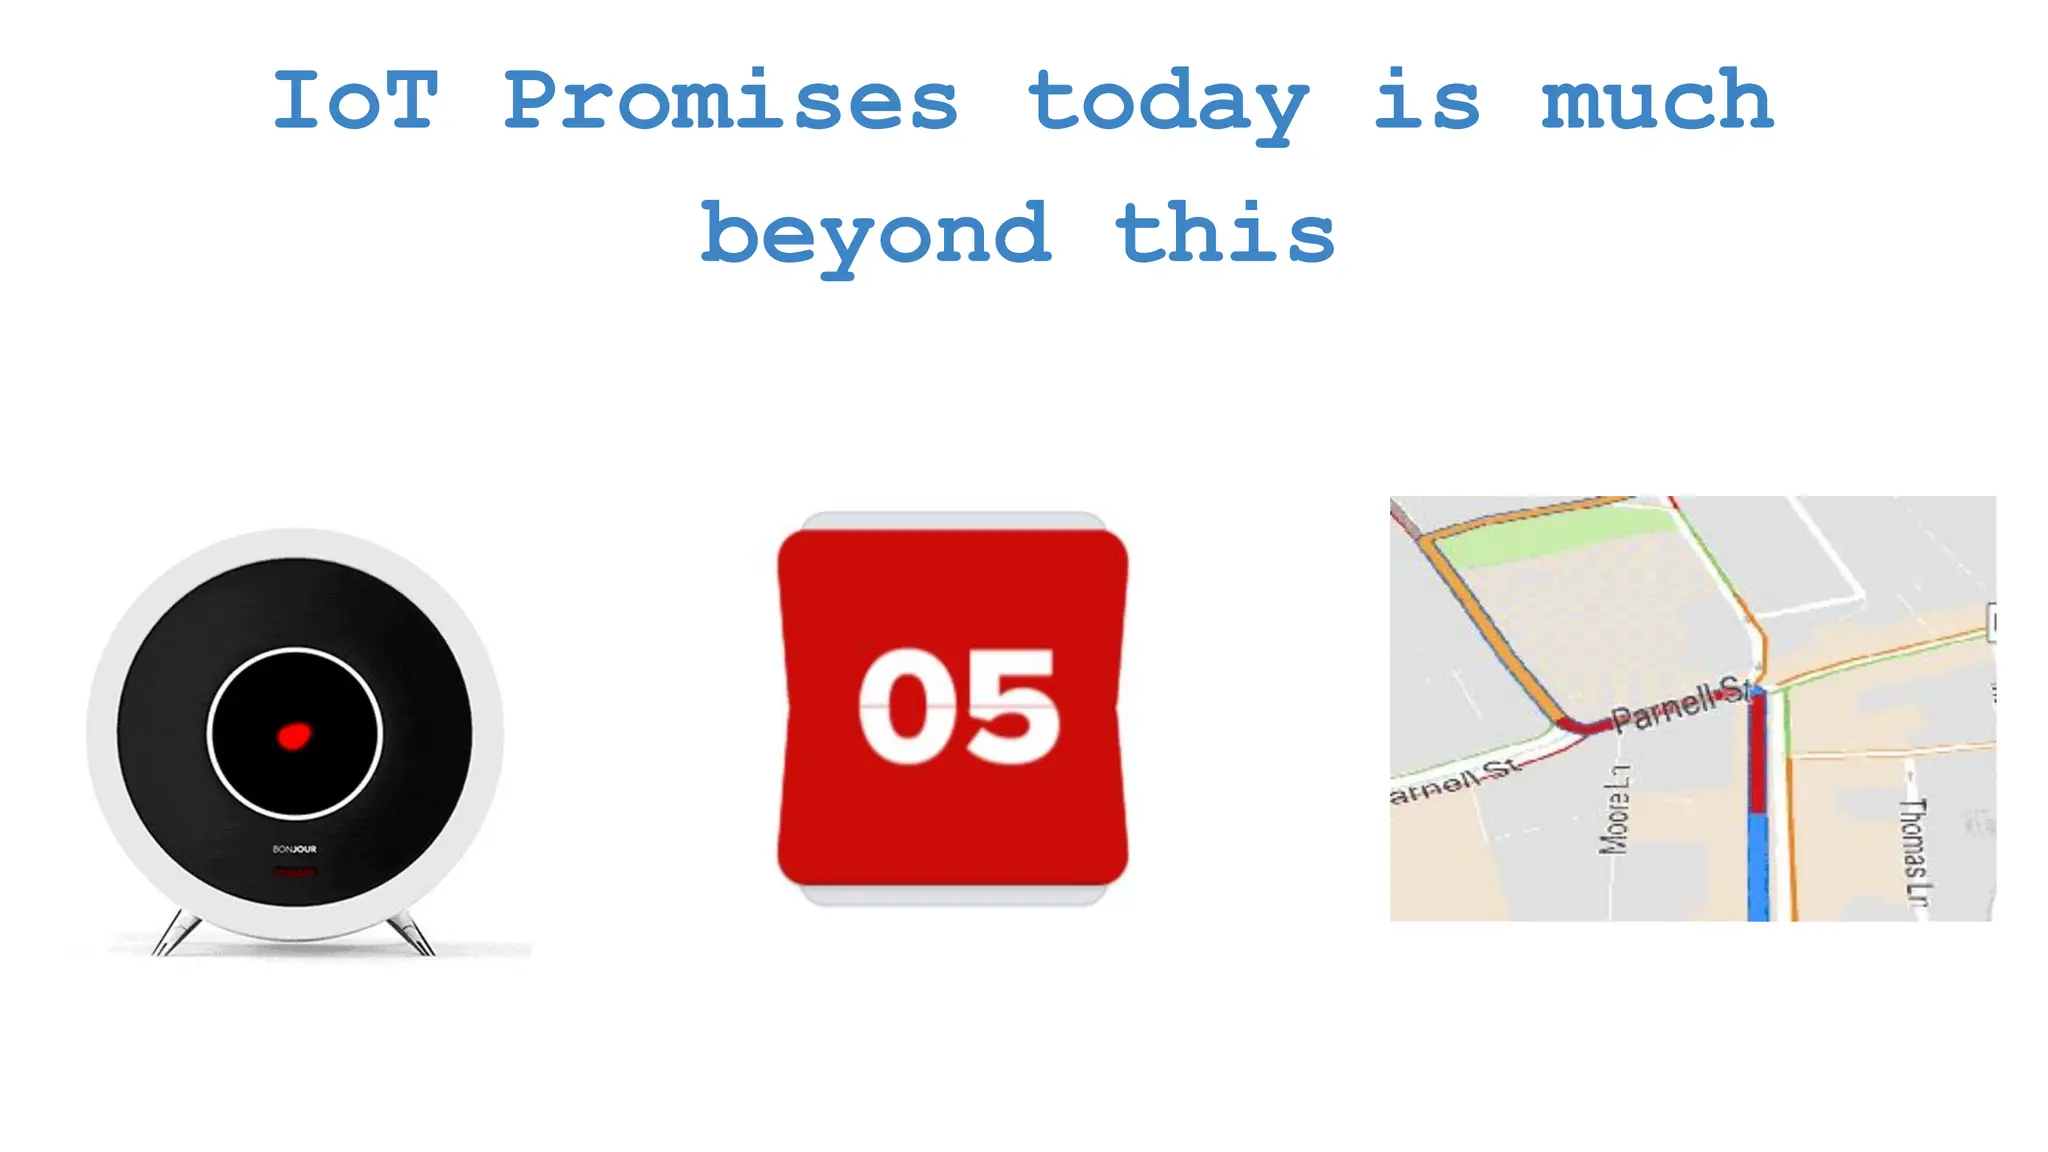
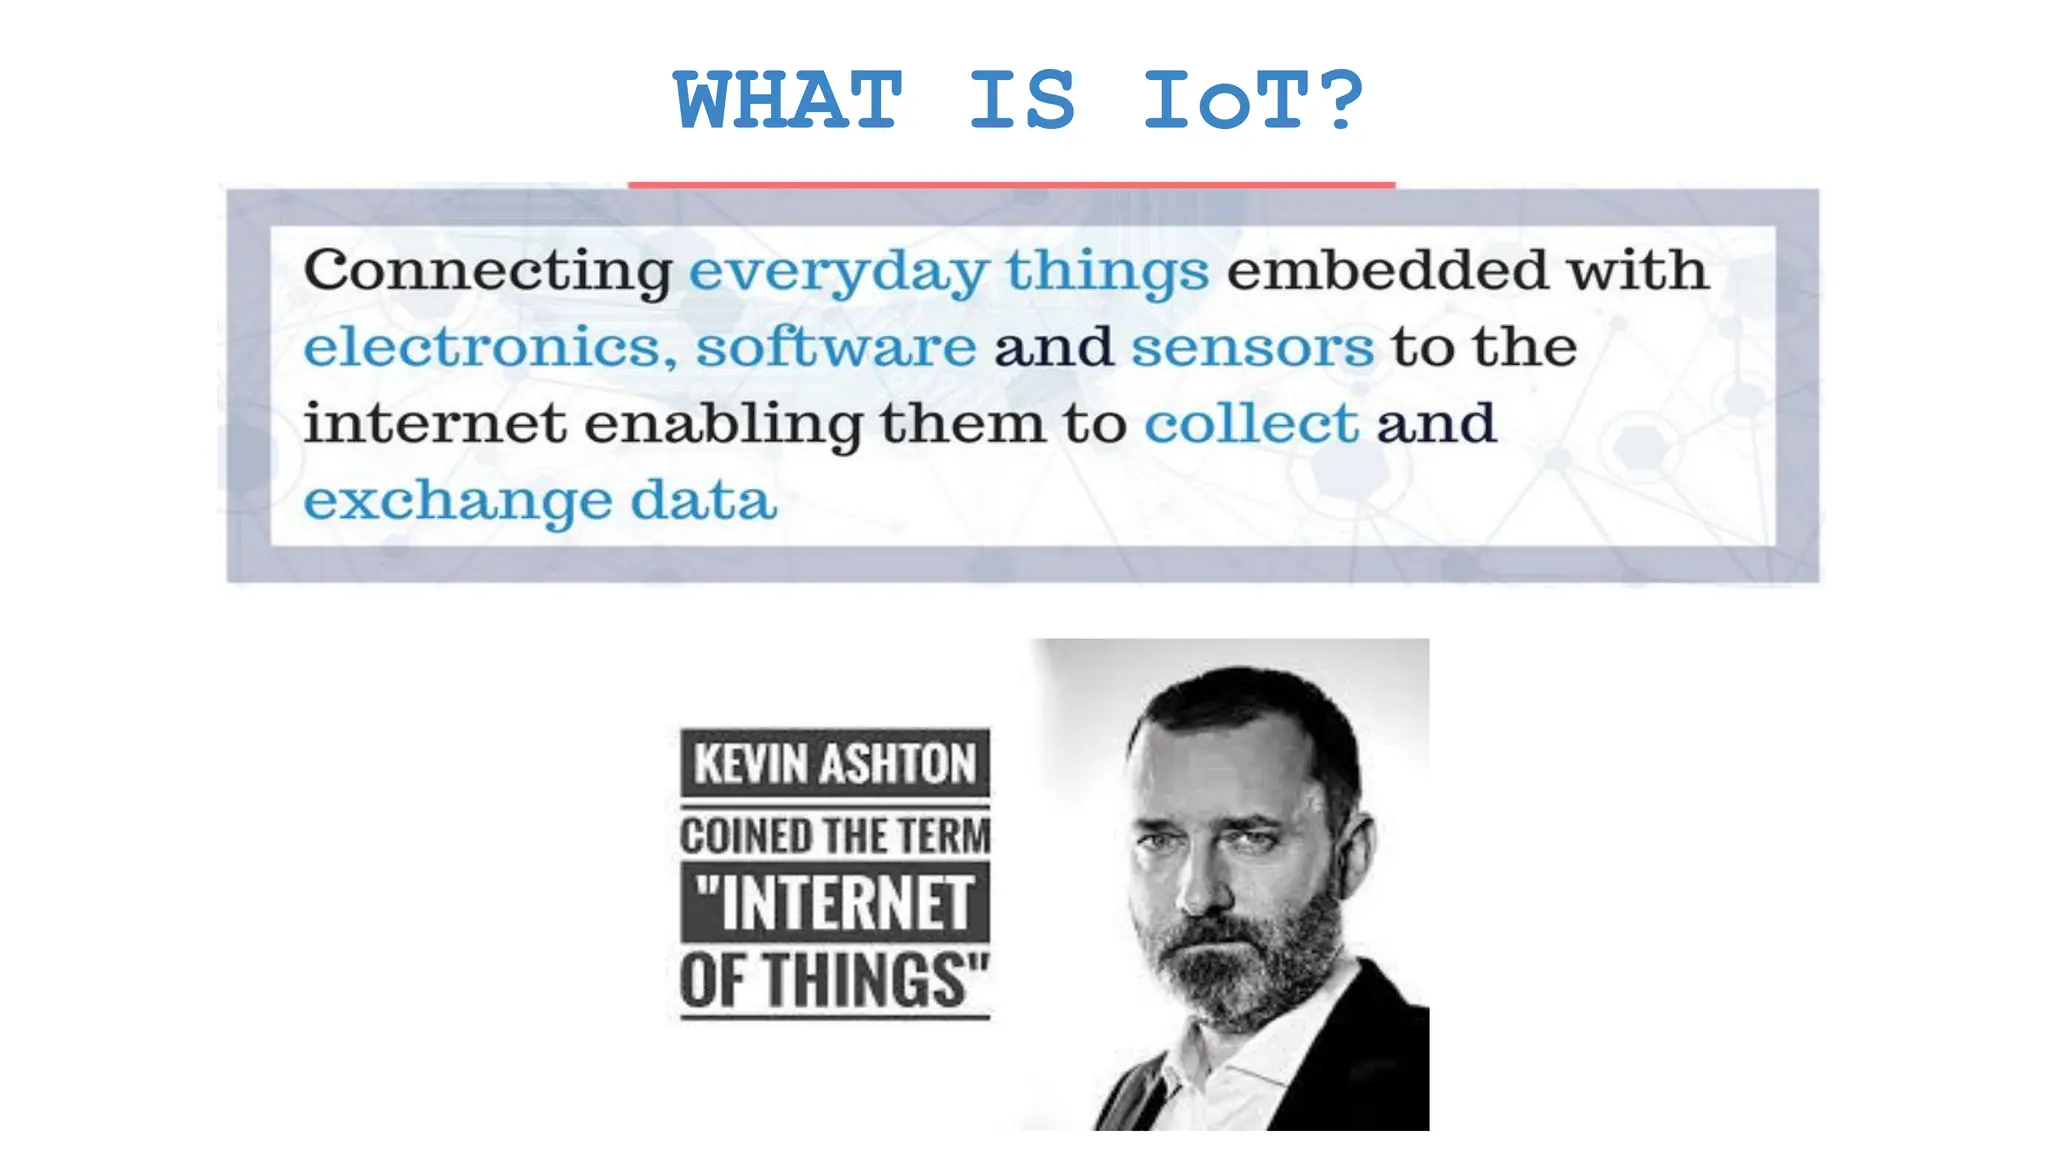
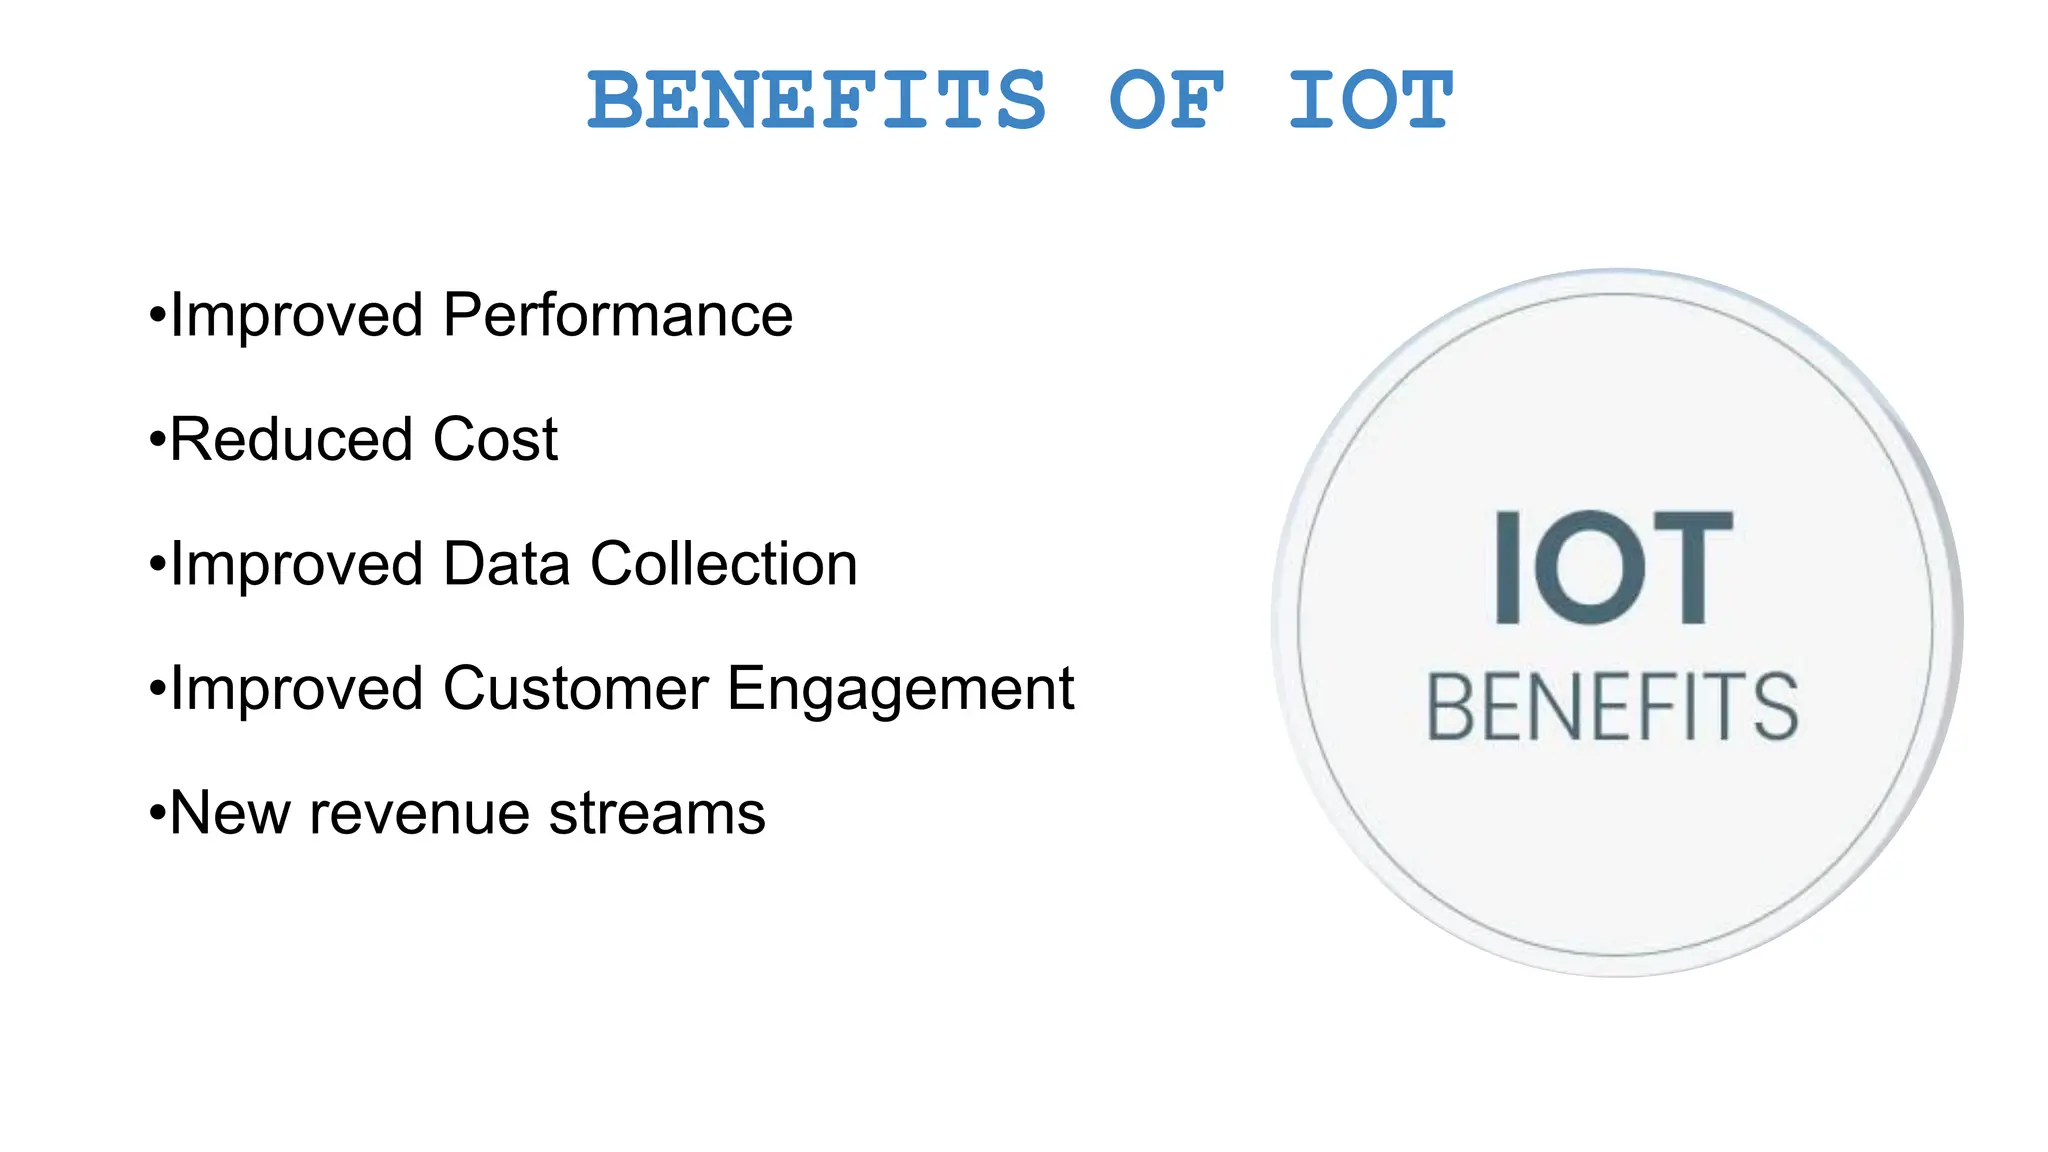
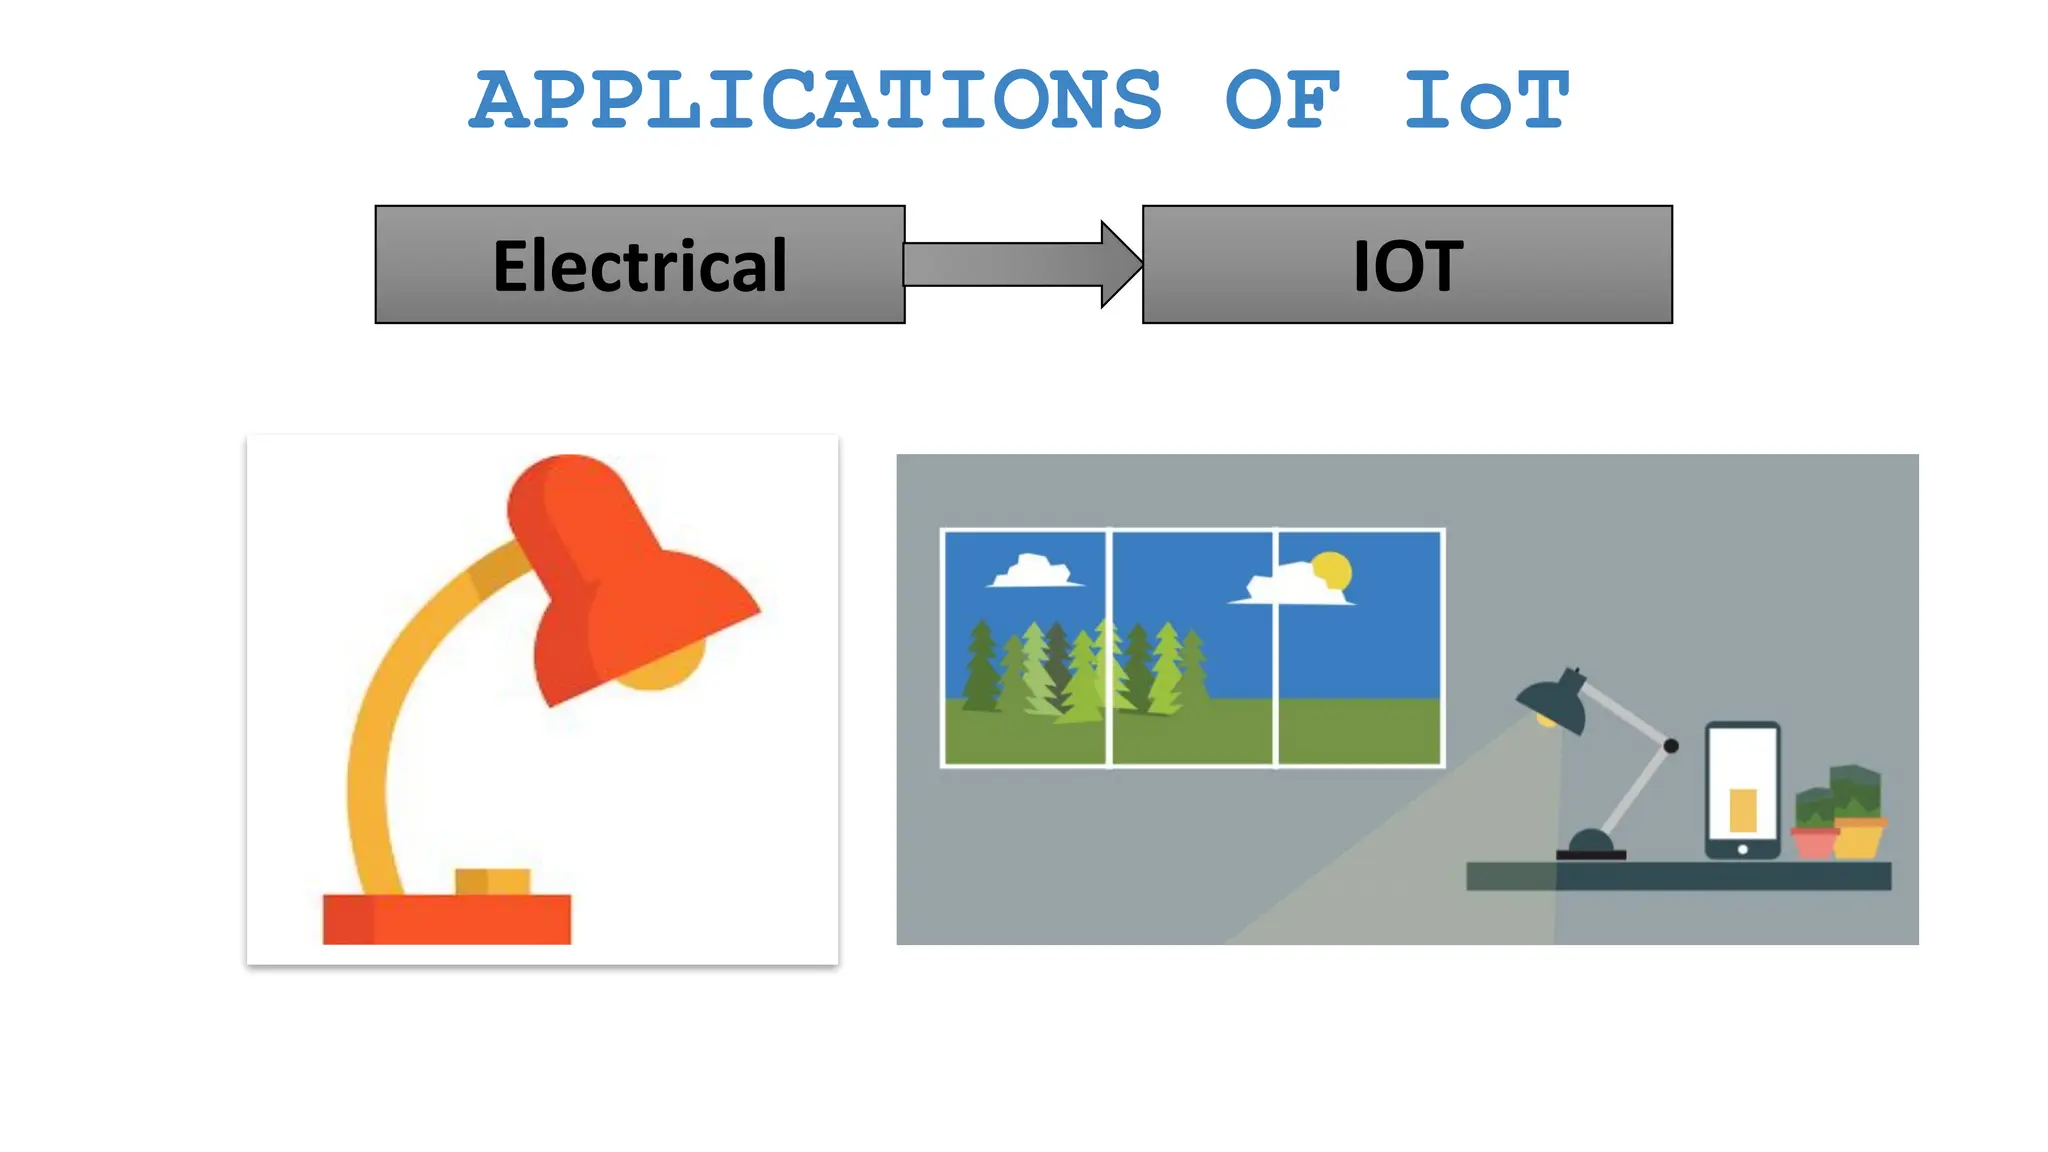
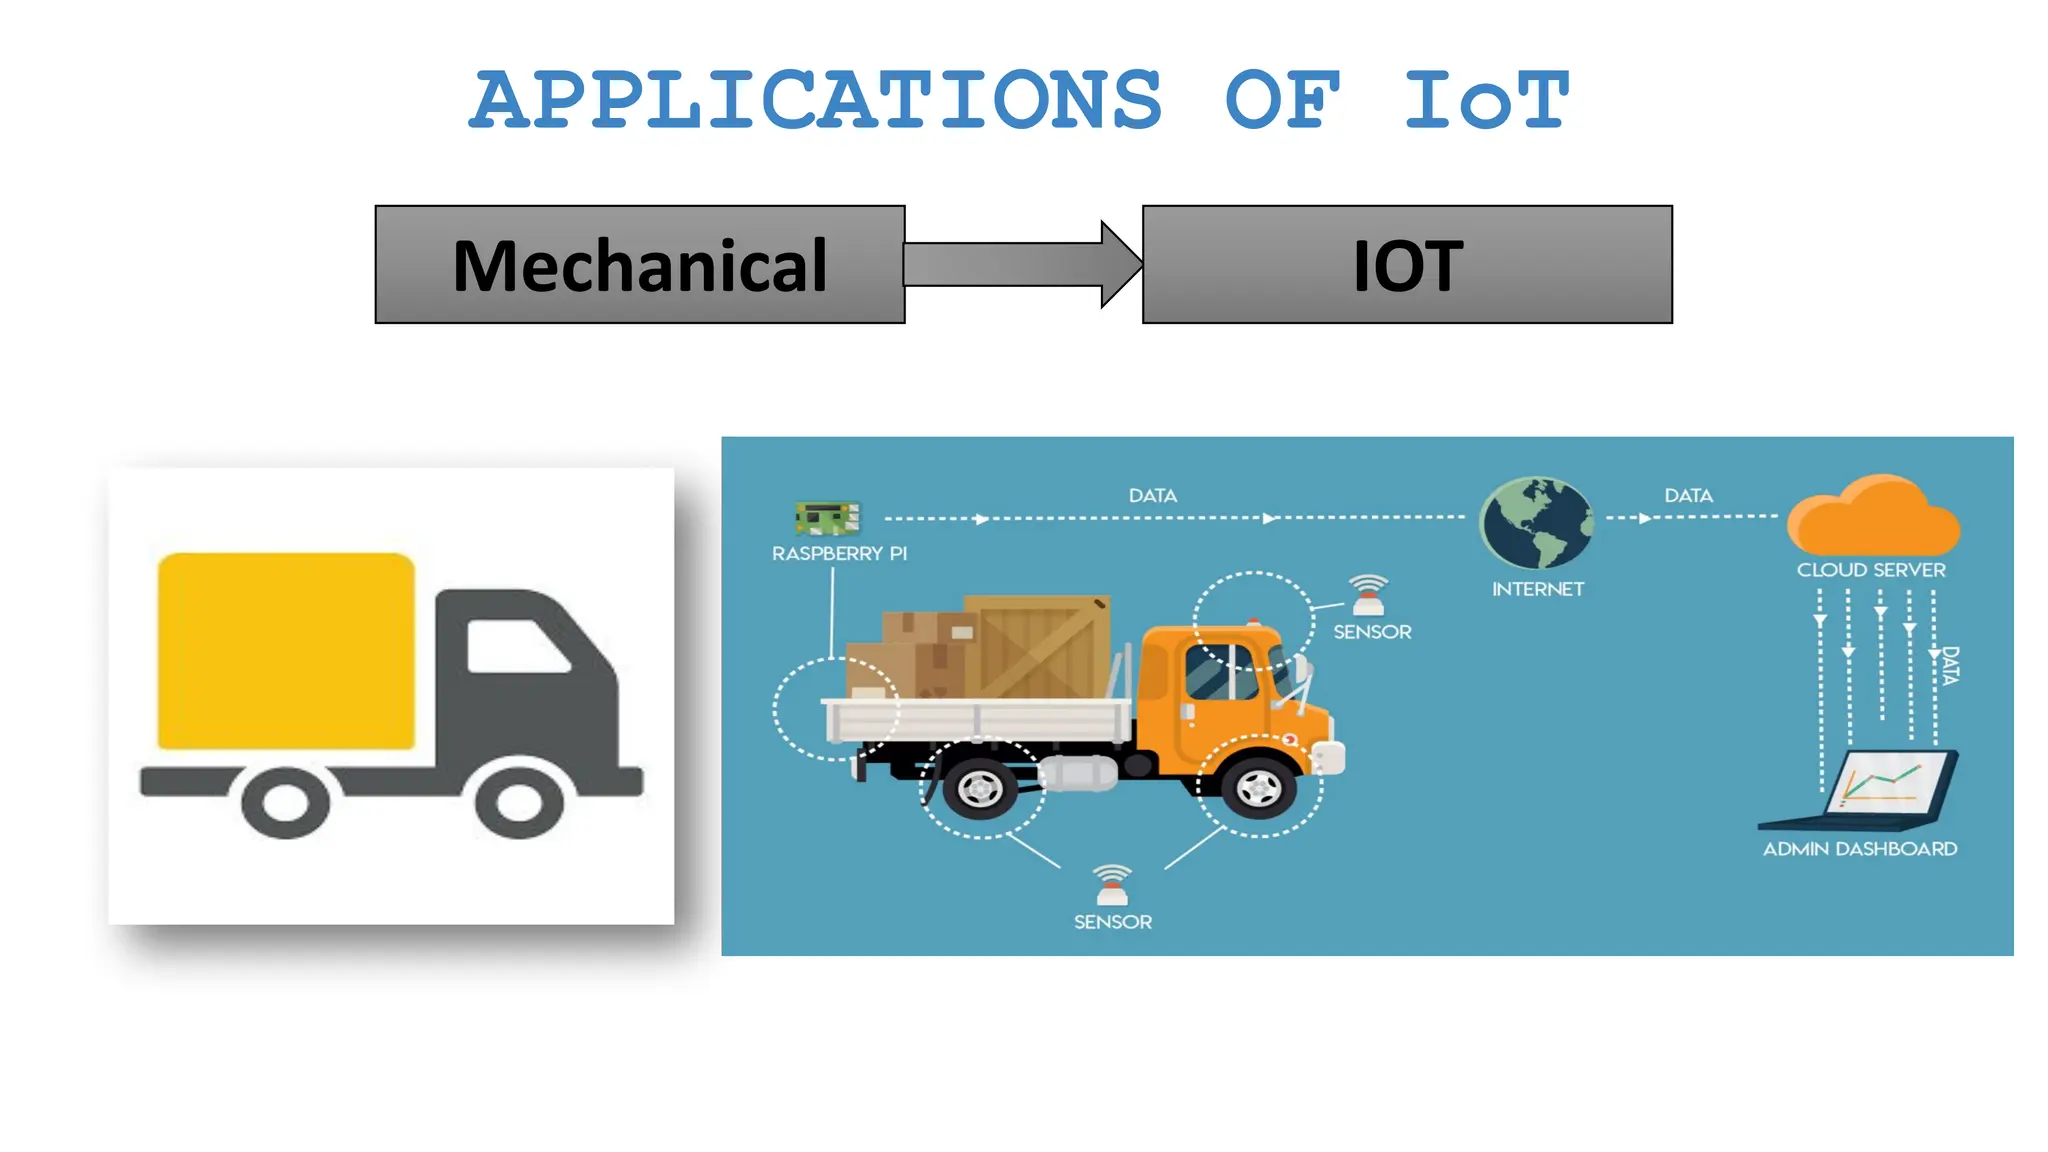
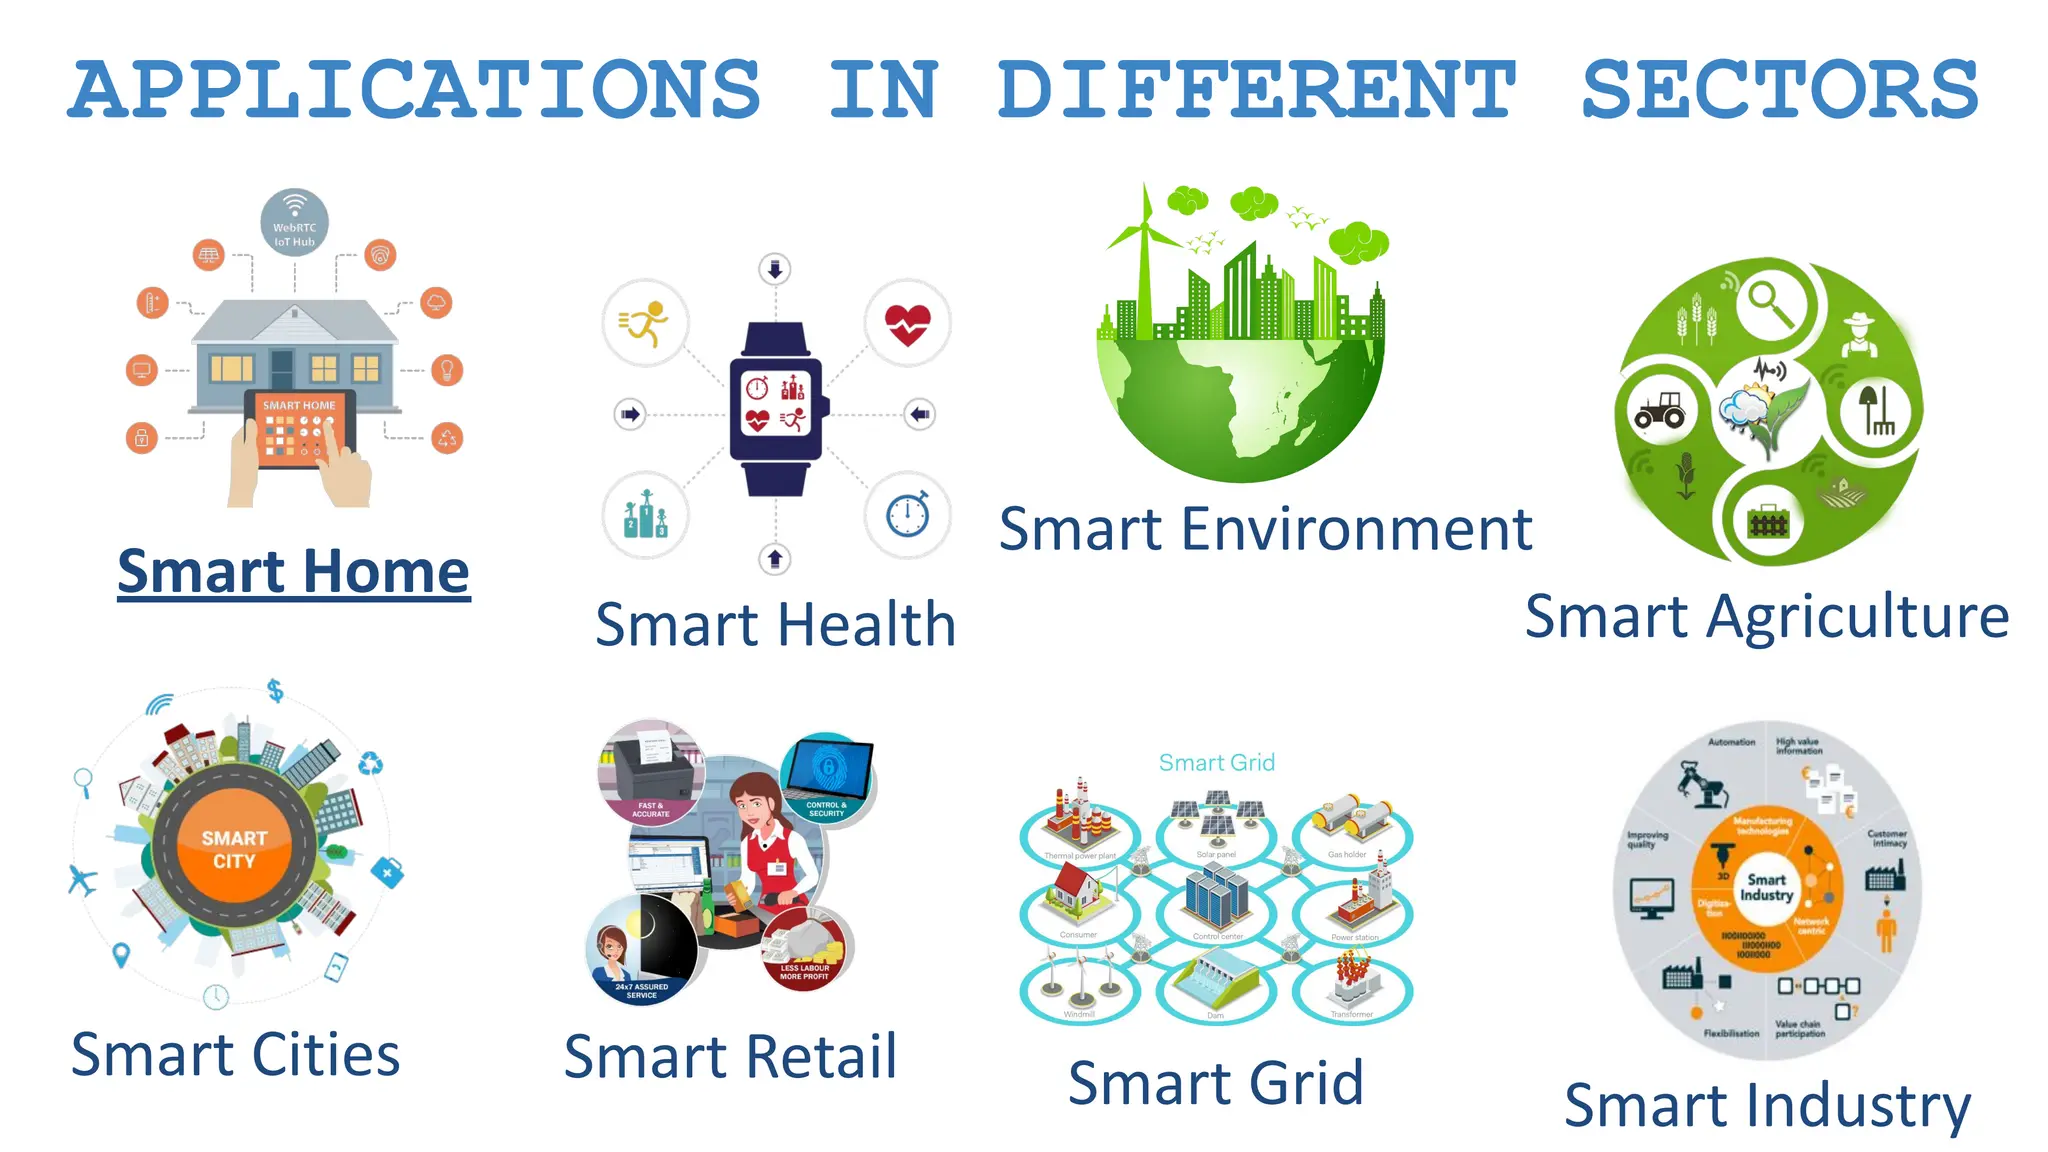
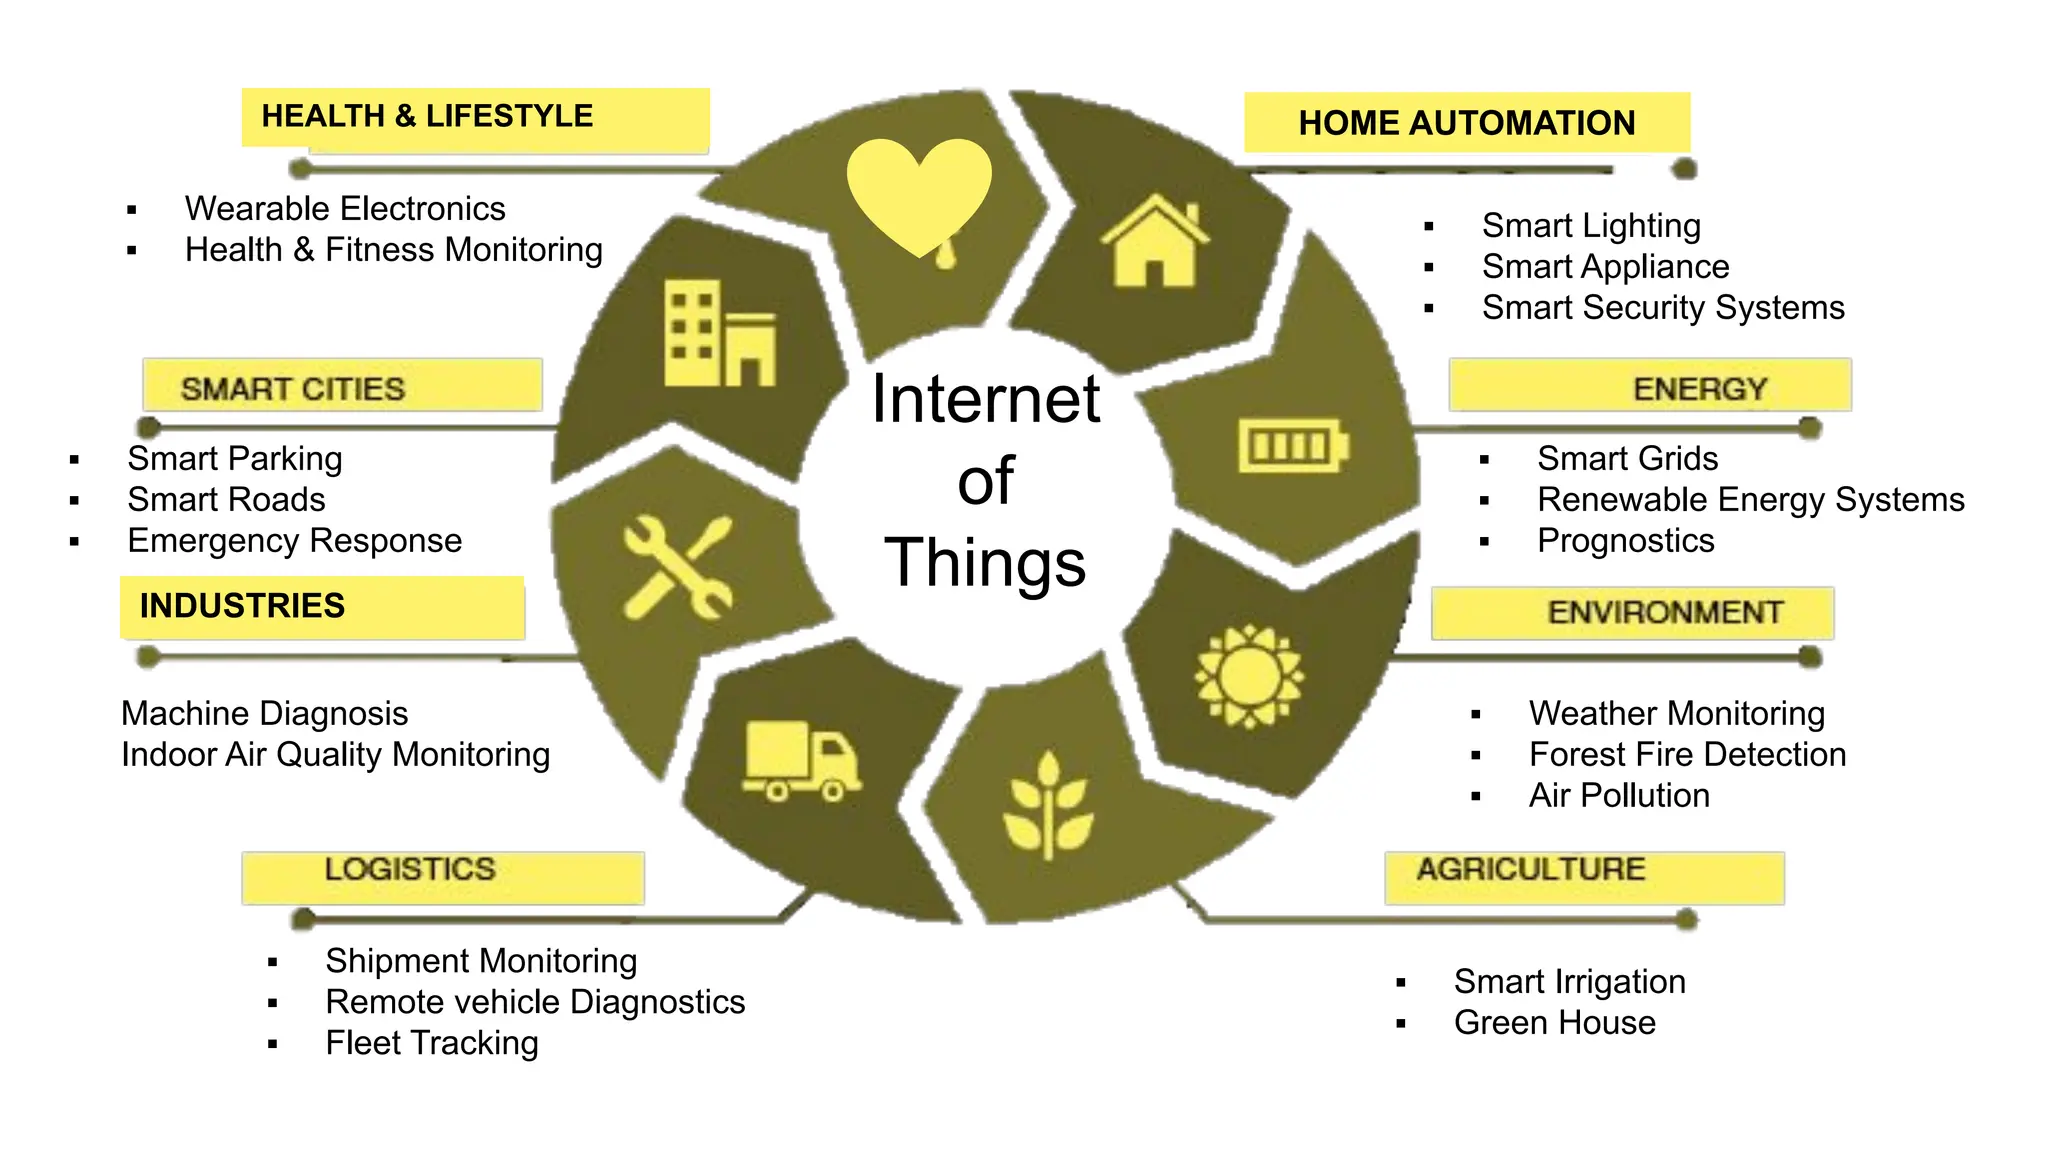
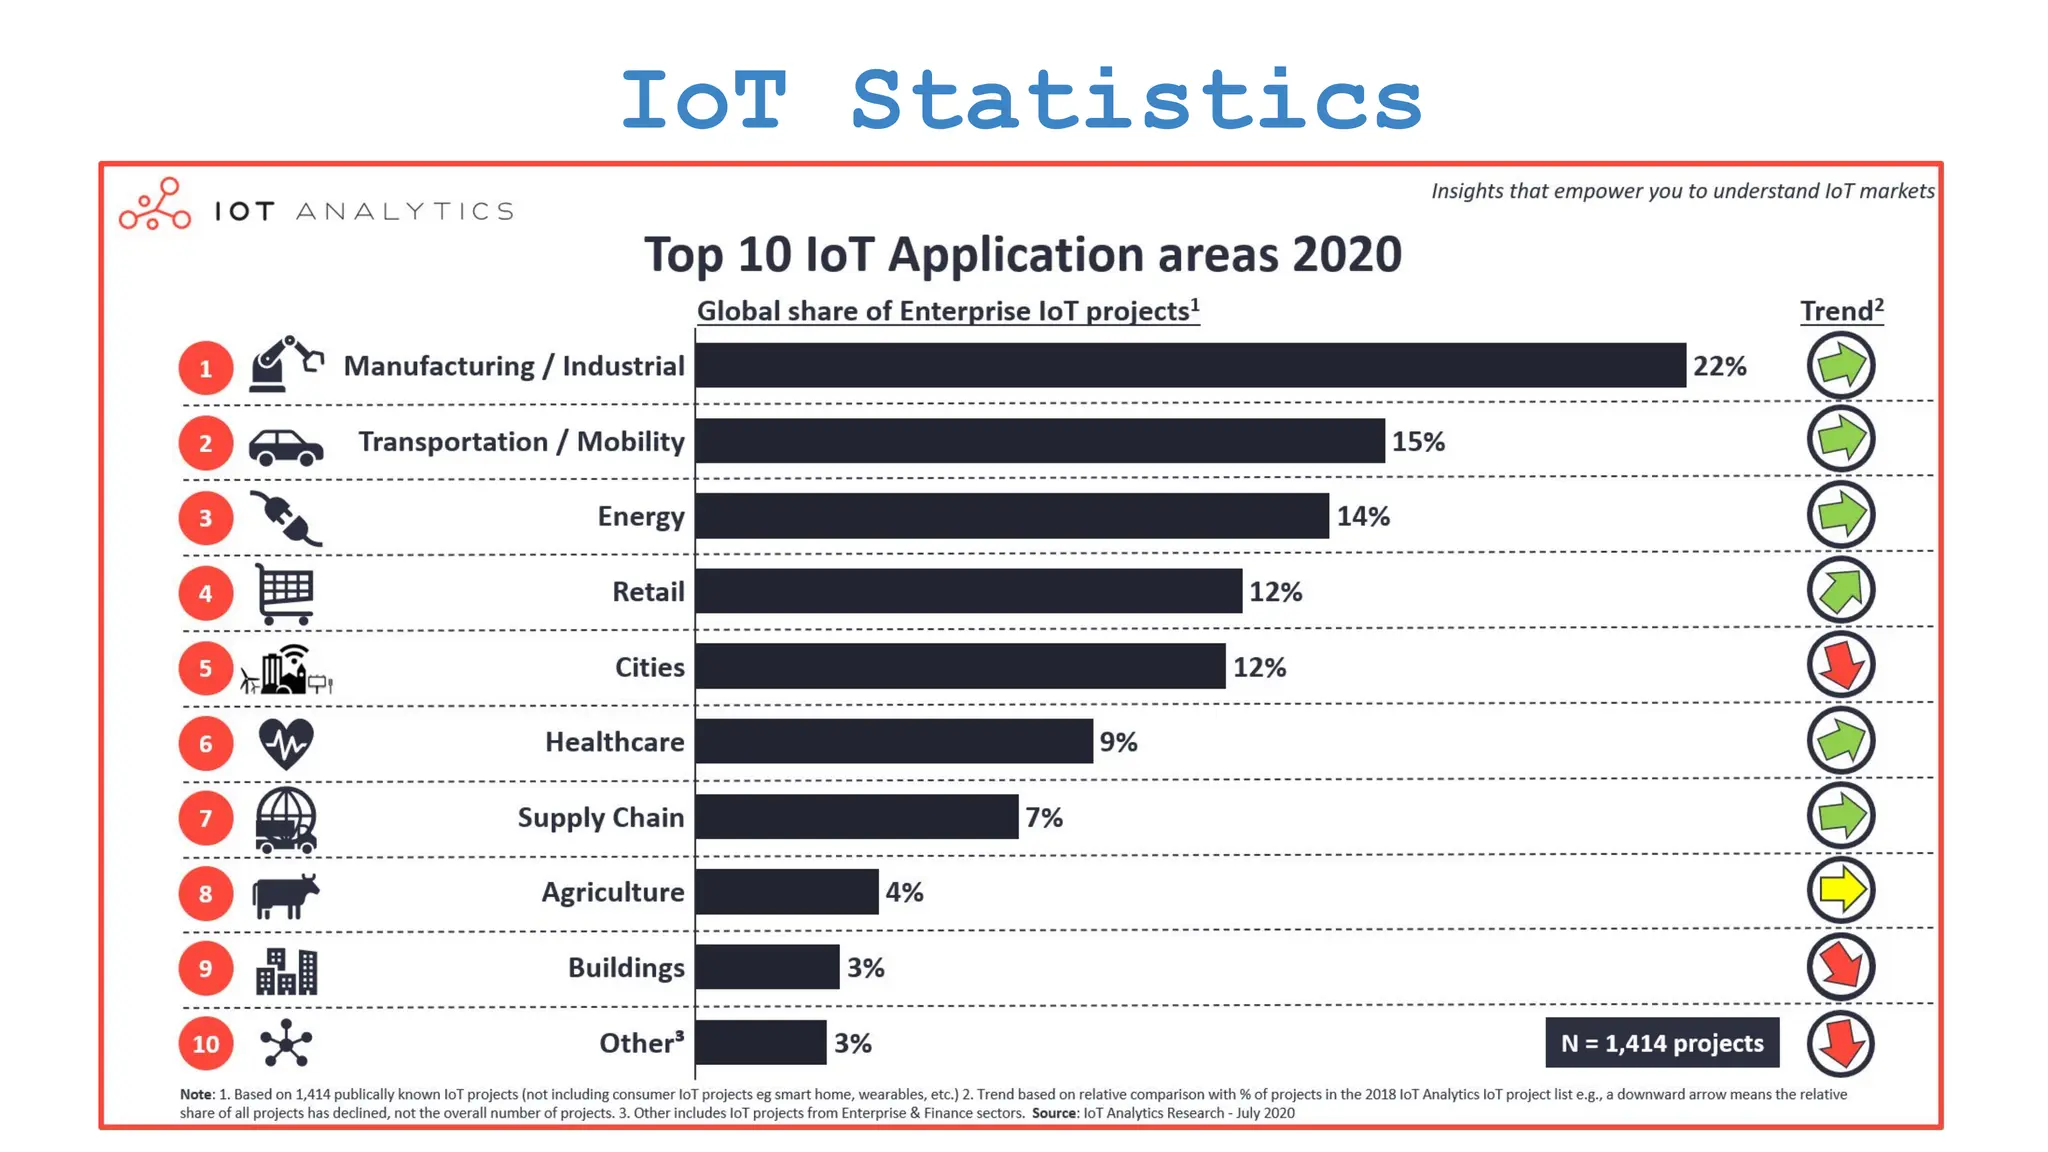
    Content Introduction to Internetof Things (IoT) ● What is IoT & Industrial IoT ● Evolution of IoT ● Unblock Business Value with IoT ● Societal Impacts of IoT ● IoT Applications ● IoT Applications in various Sectors
  • 8.
    Content Building Blocks ofIoT ● IoT Architecture ● IoT Devices ● IoT Gateway ● IoT Communication Technologies ● IoT Communication Protocols ● IoT Platform ● IoT Security ● IoT Technology Stack
  • 9.
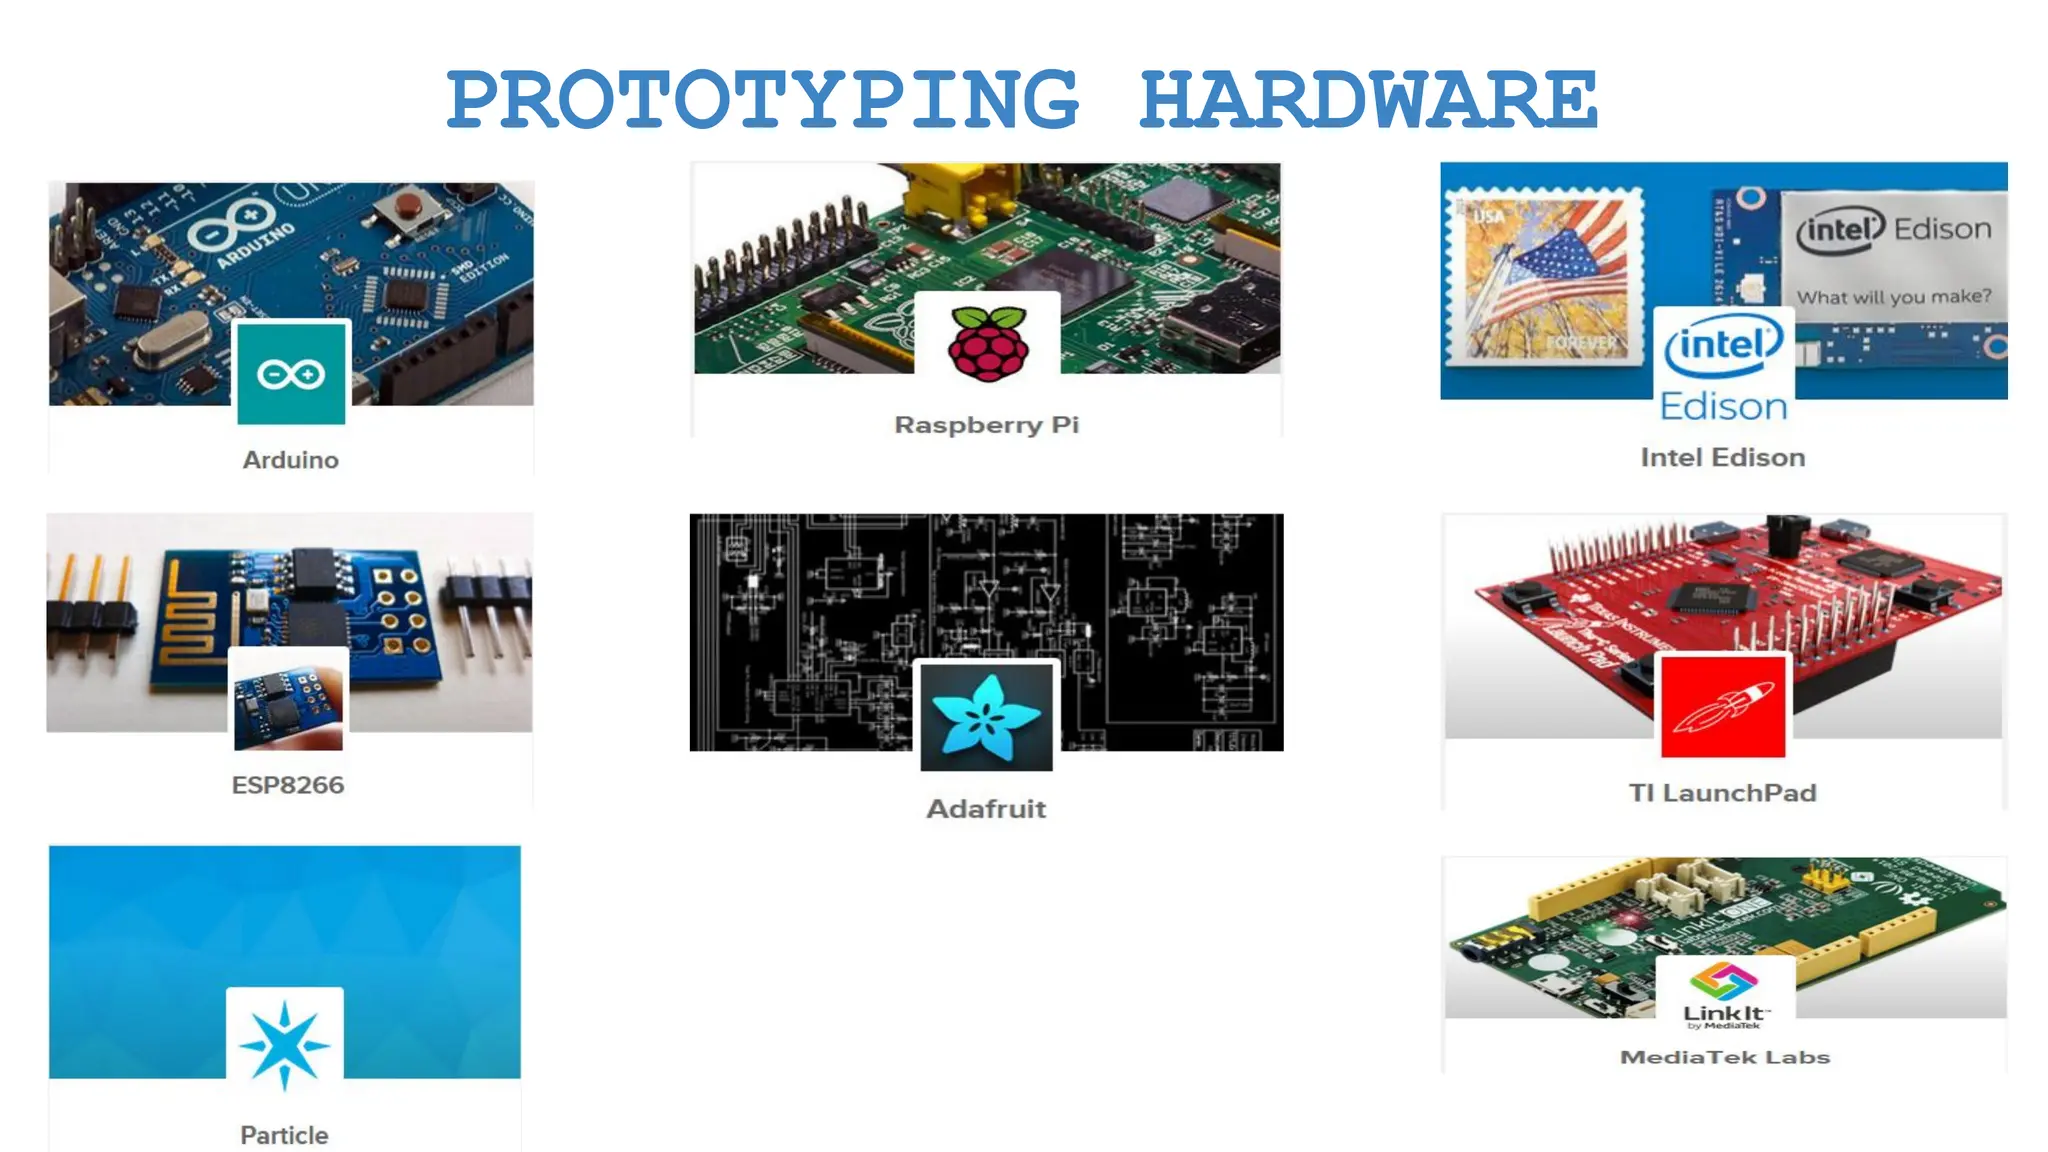
    Content Design an IoTDevice ● IoT Device Design Considerations ● Proof of Concept (PoC) Development ● Open IoT Hardware ● Sensors & Actuators ● Network Considerations ● Power Management
  • 10.
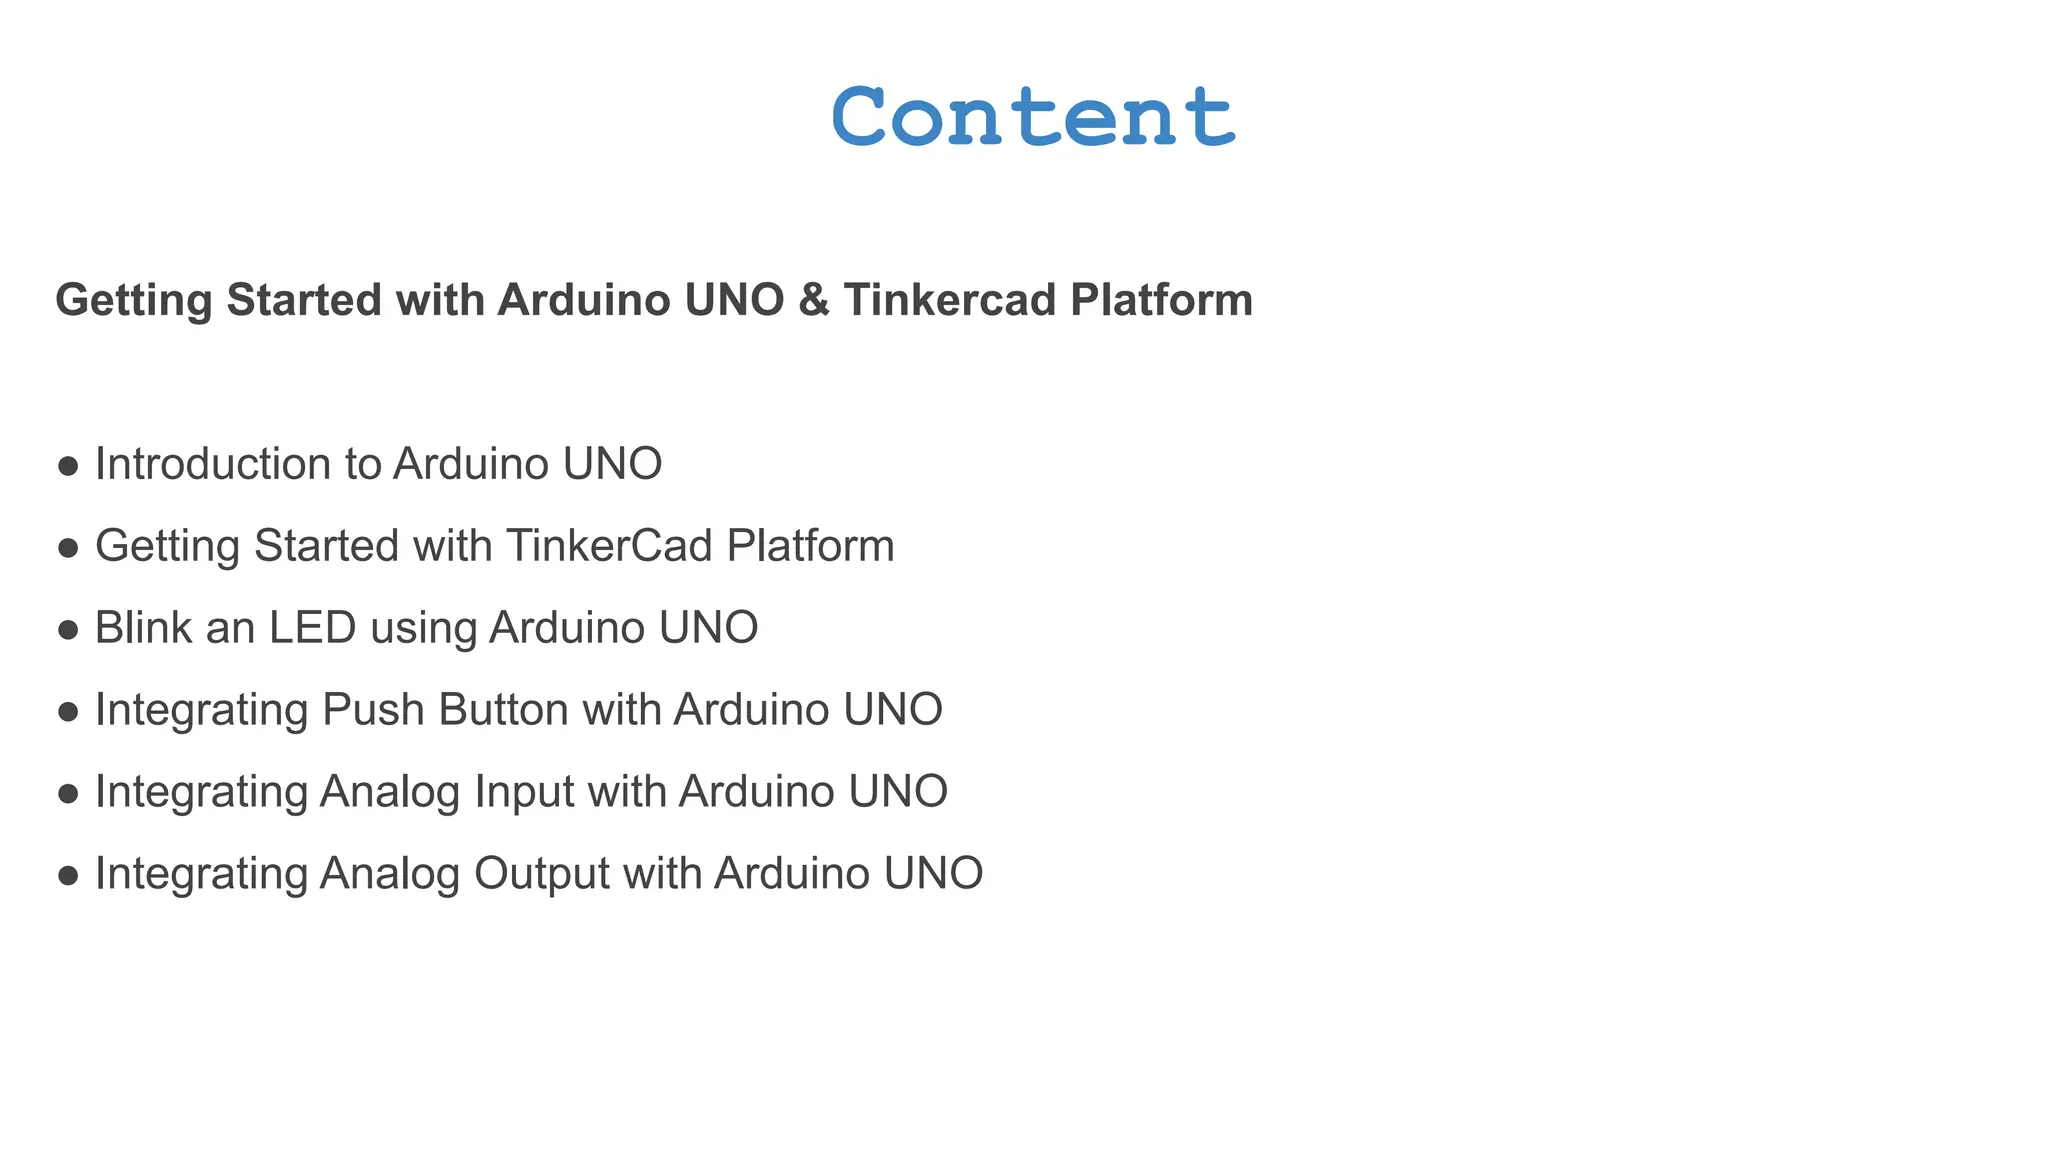
    Content Getting Started withArduino UNO & Tinkercad Platform ● Introduction to Arduino UNO ● Getting Started with TinkerCad Platform ● Blink an LED using Arduino UNO ● Integrating Push Button with Arduino UNO ● Integrating Analog Input with Arduino UNO ● Integrating Analog Output with Arduino UNO
  • 11.
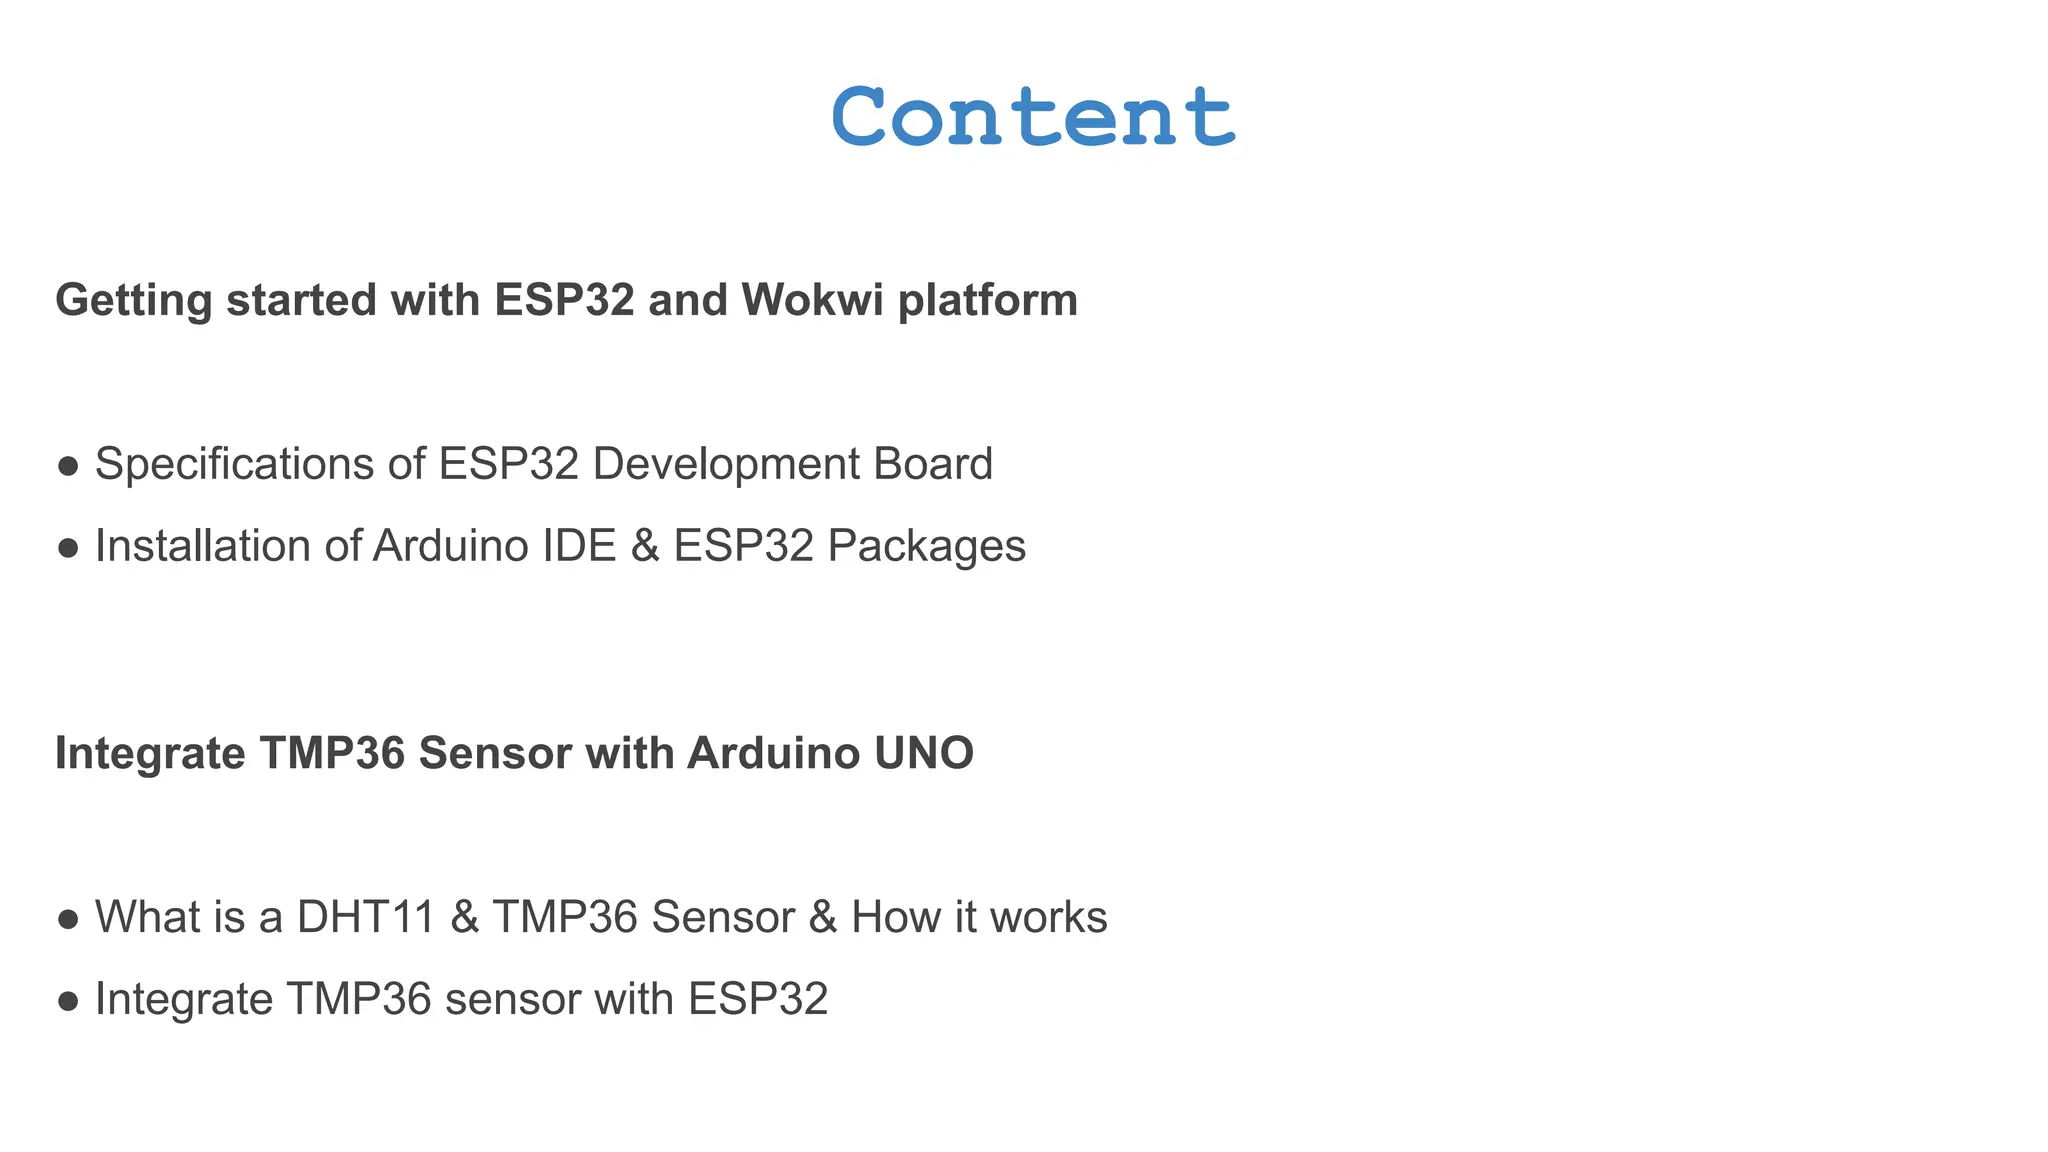
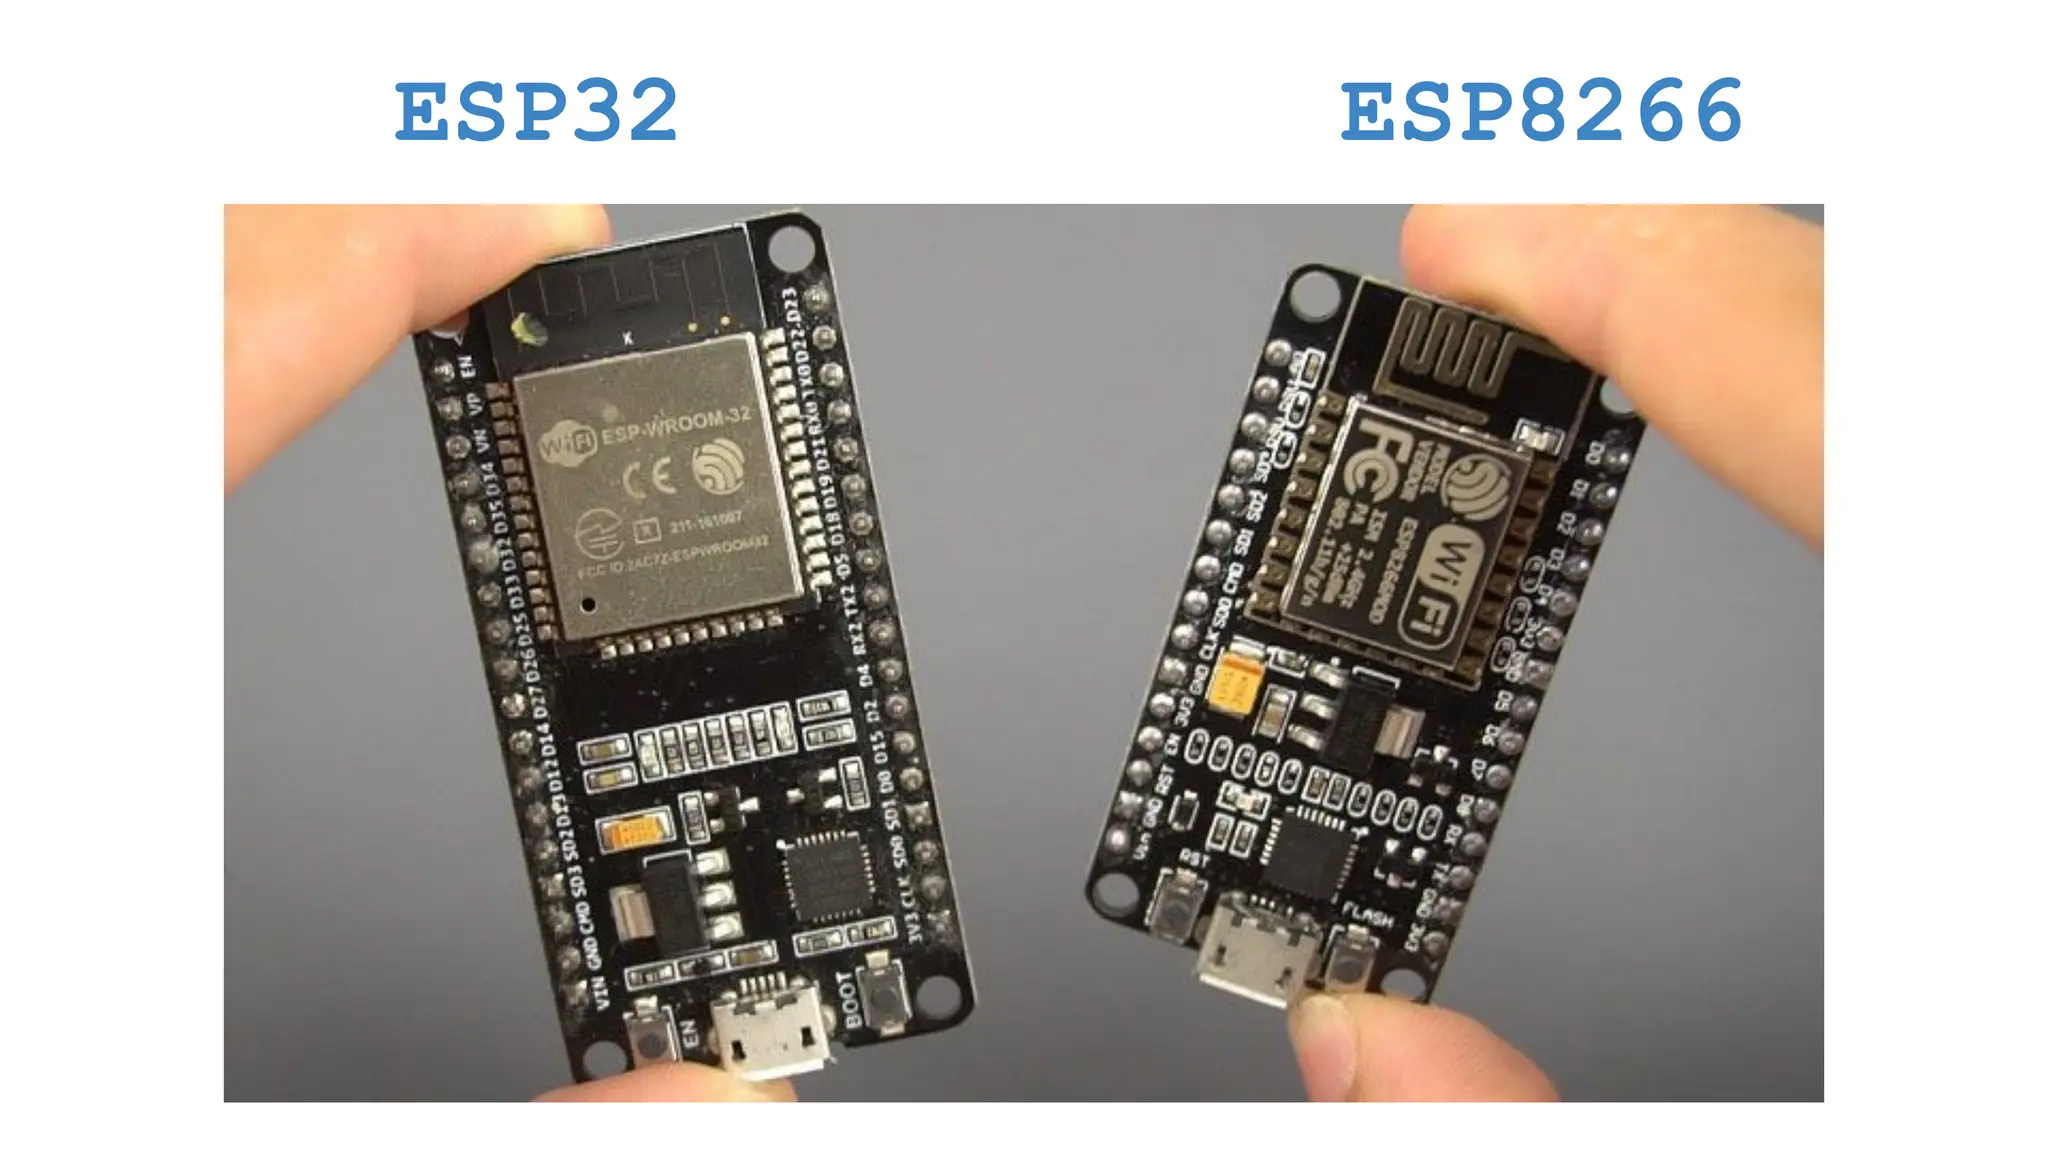
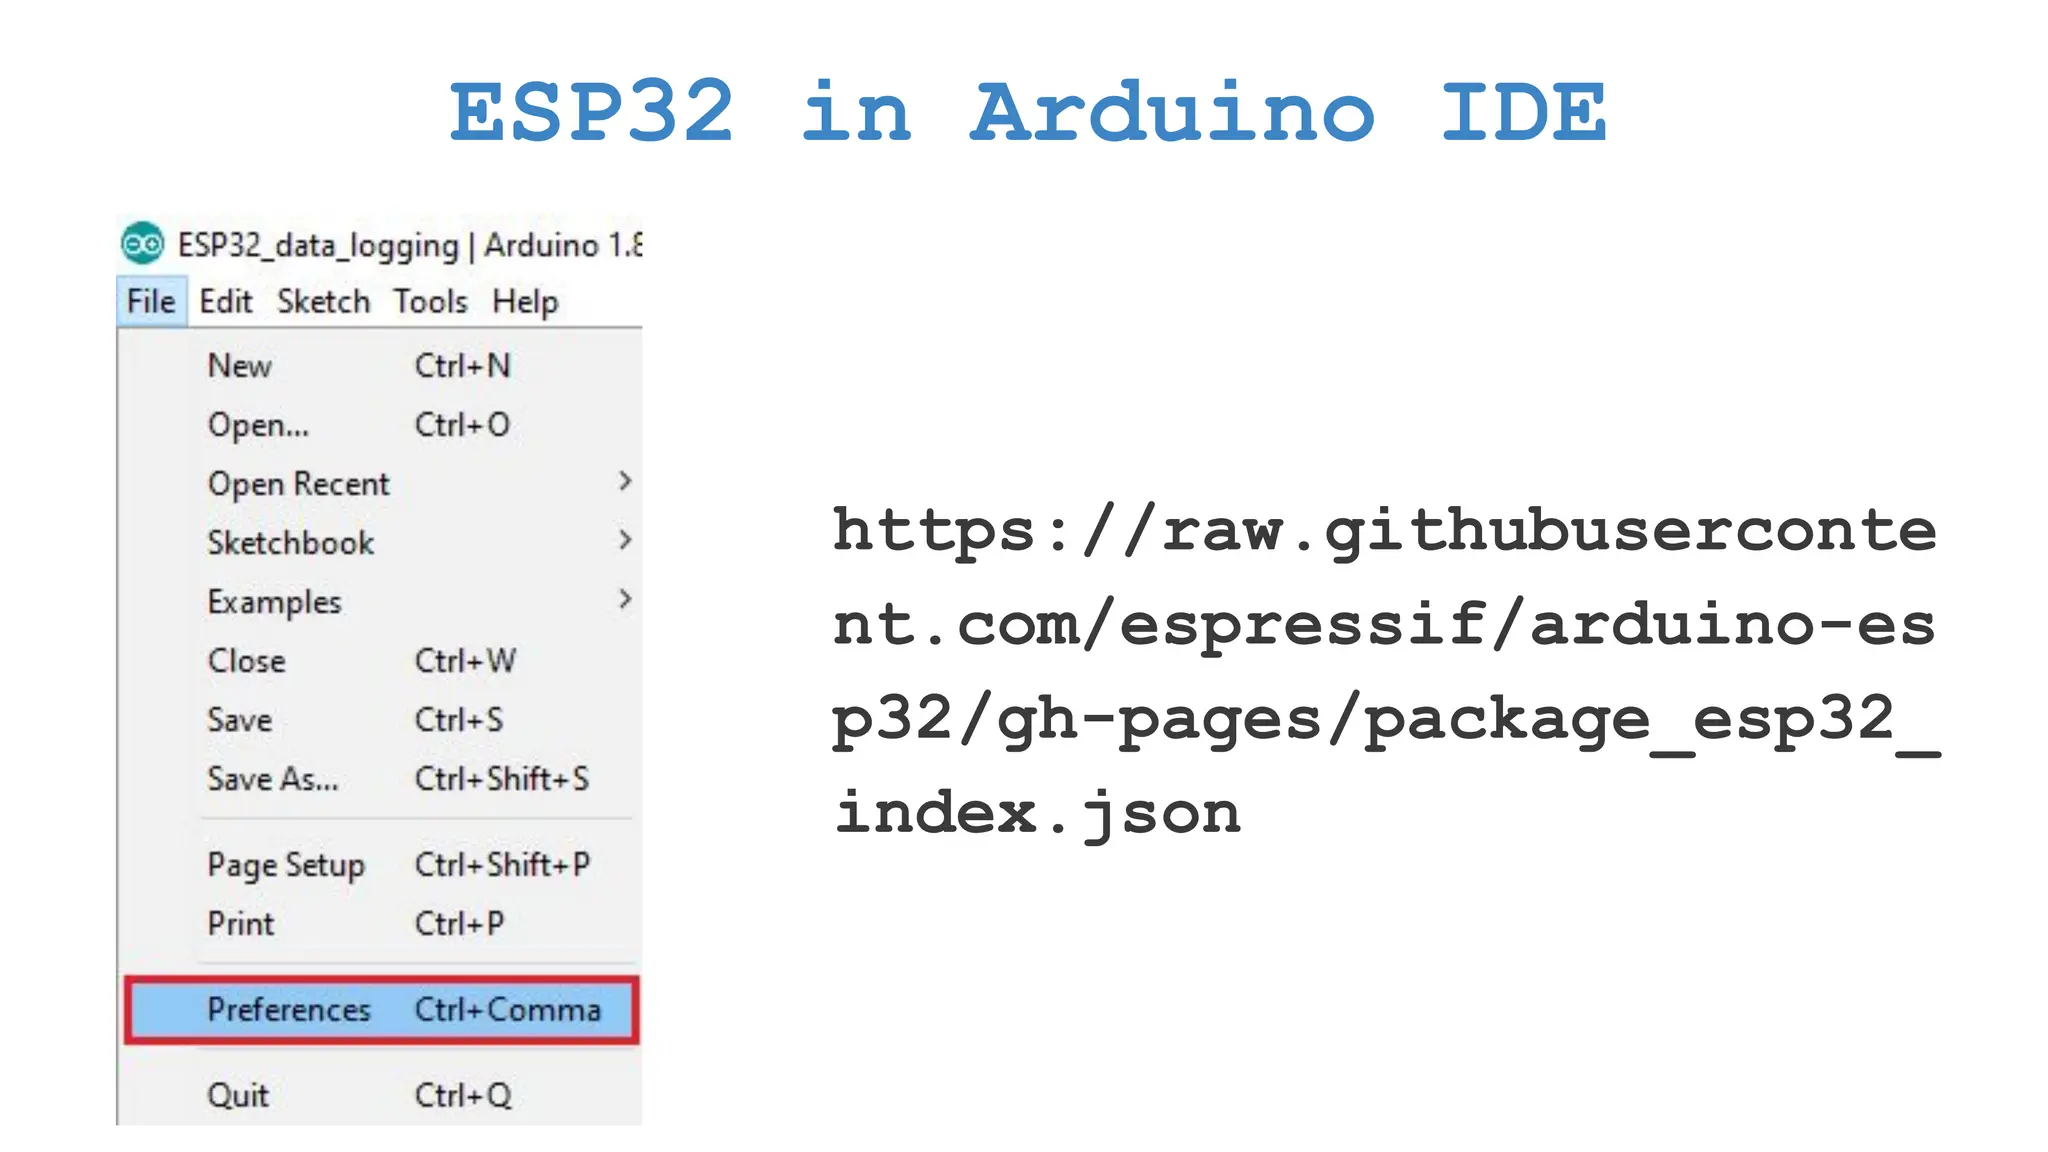
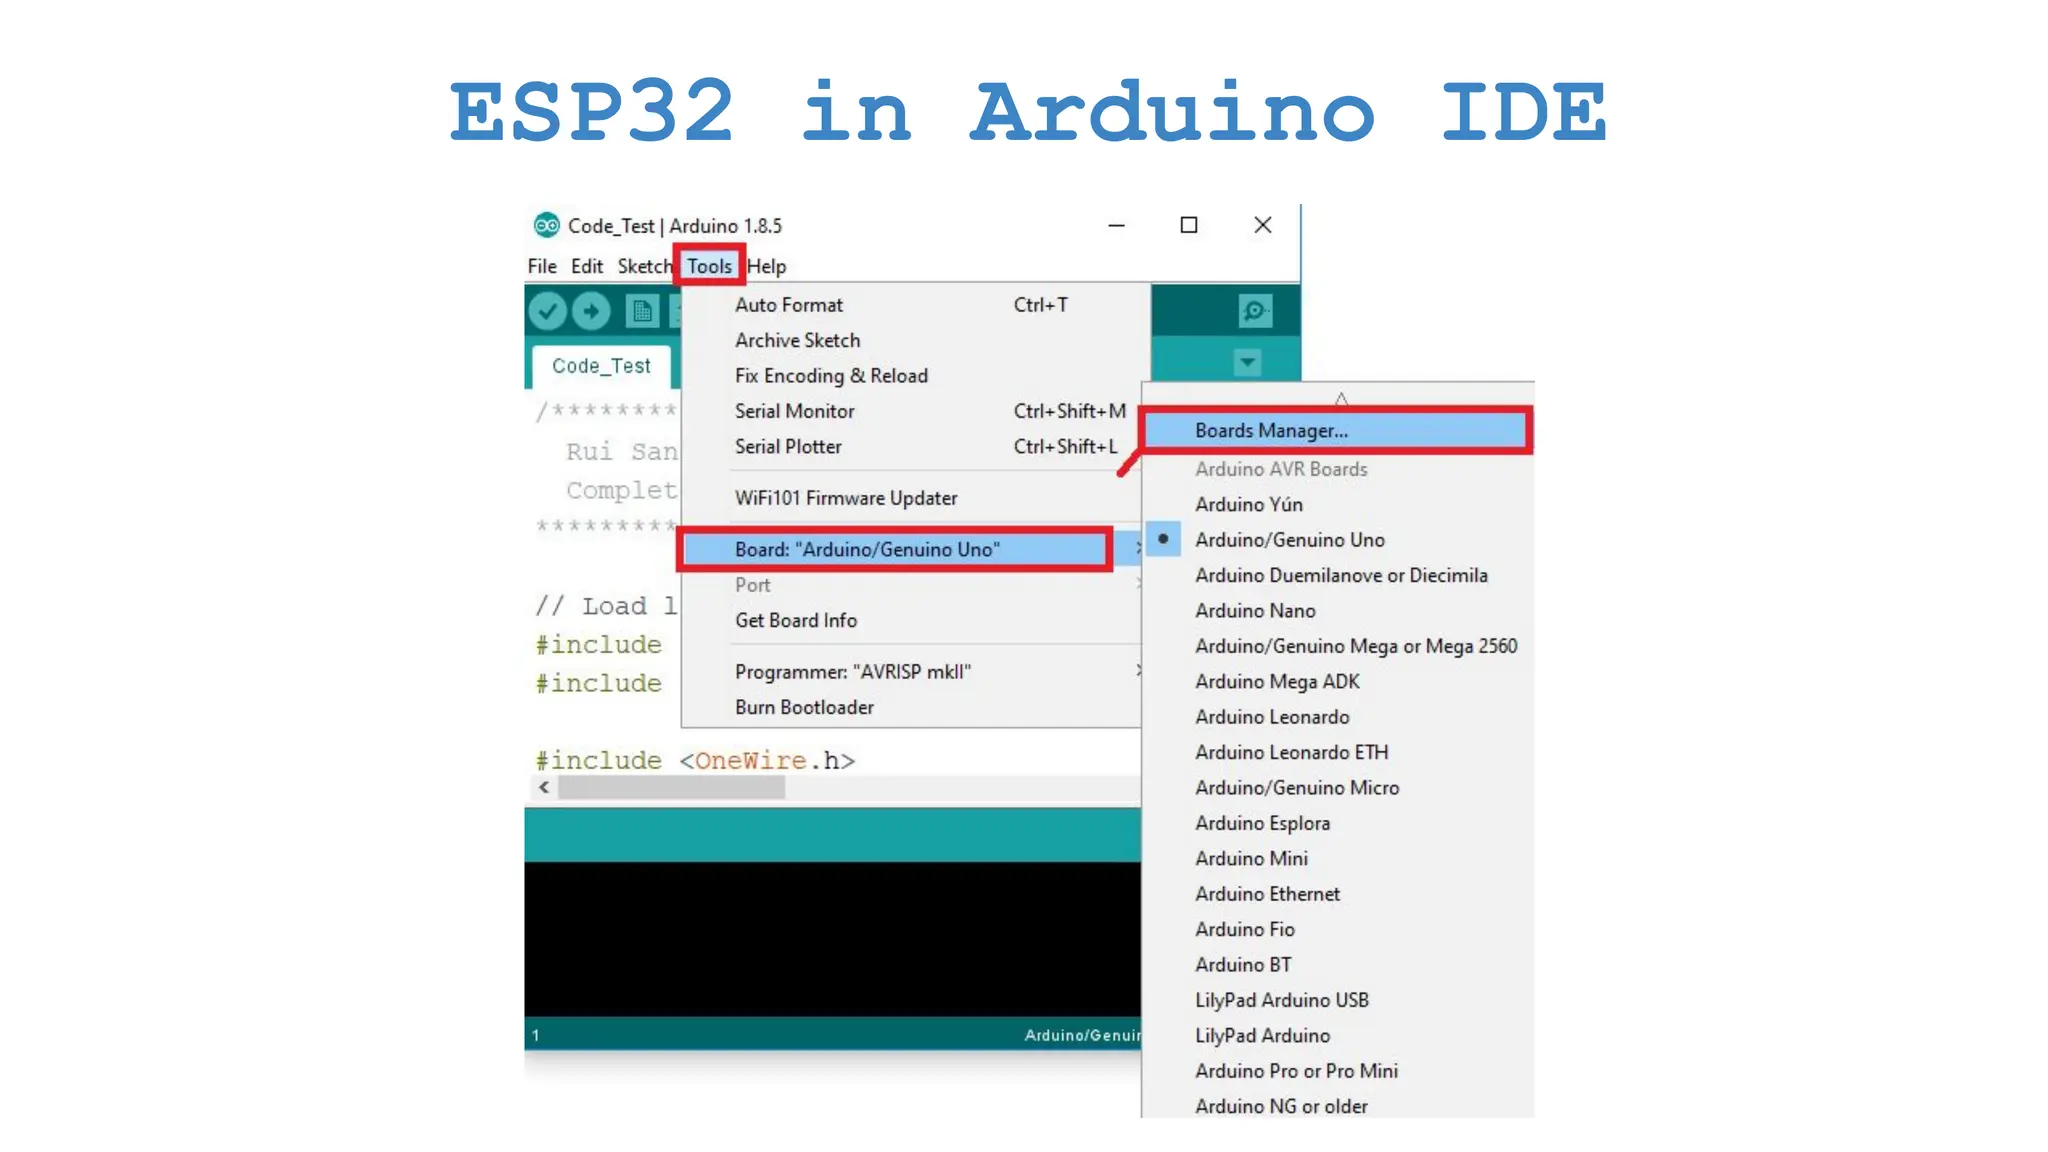
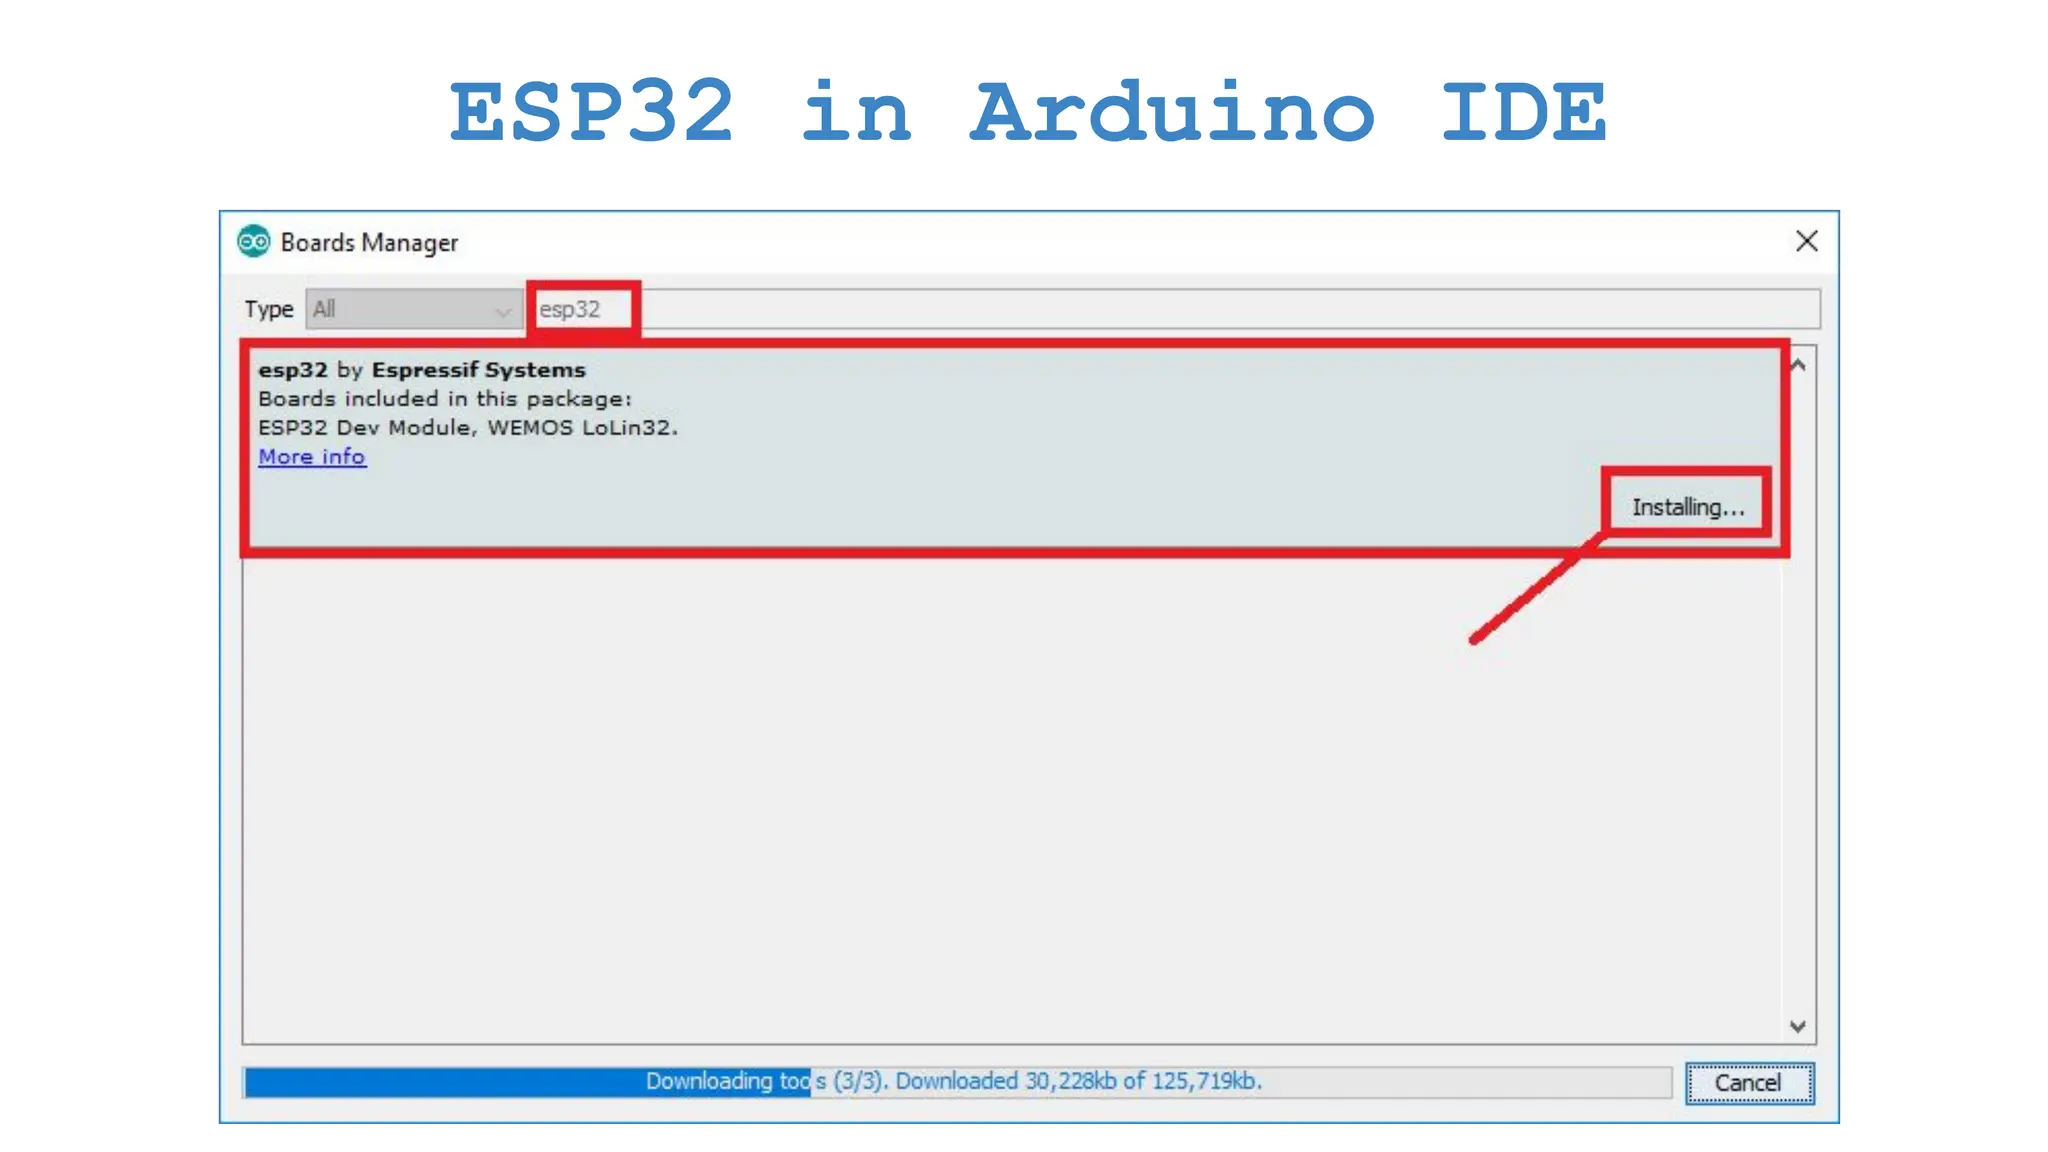
    Content Getting started withESP32 and Wokwi platform ● Specifications of ESP32 Development Board ● Installation of Arduino IDE & ESP32 Packages Integrate TMP36 Sensor with Arduino UNO ● What is a DHT11 & TMP36 Sensor & How it works ● Integrate TMP36 sensor with ESP32
  • 12.
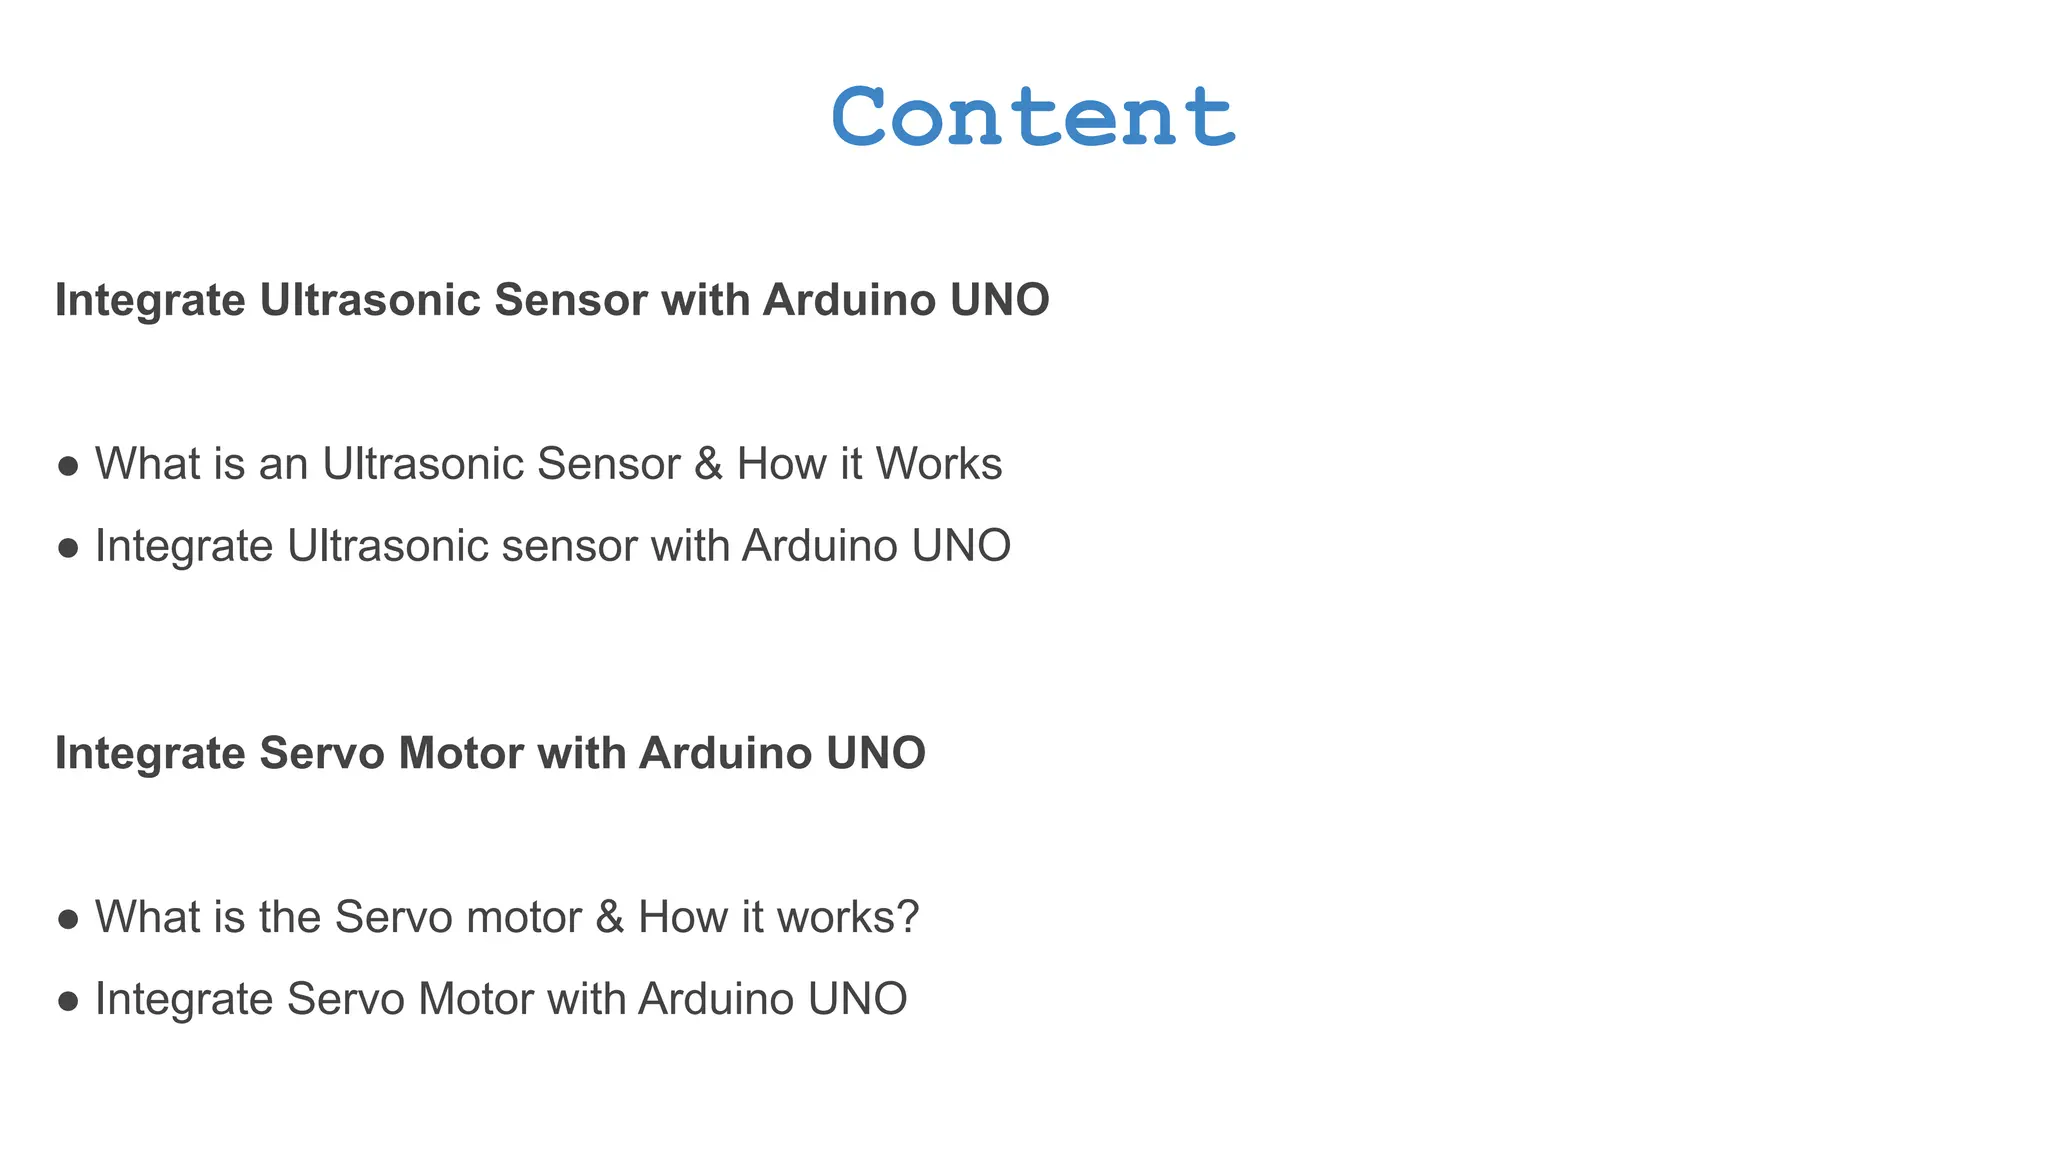
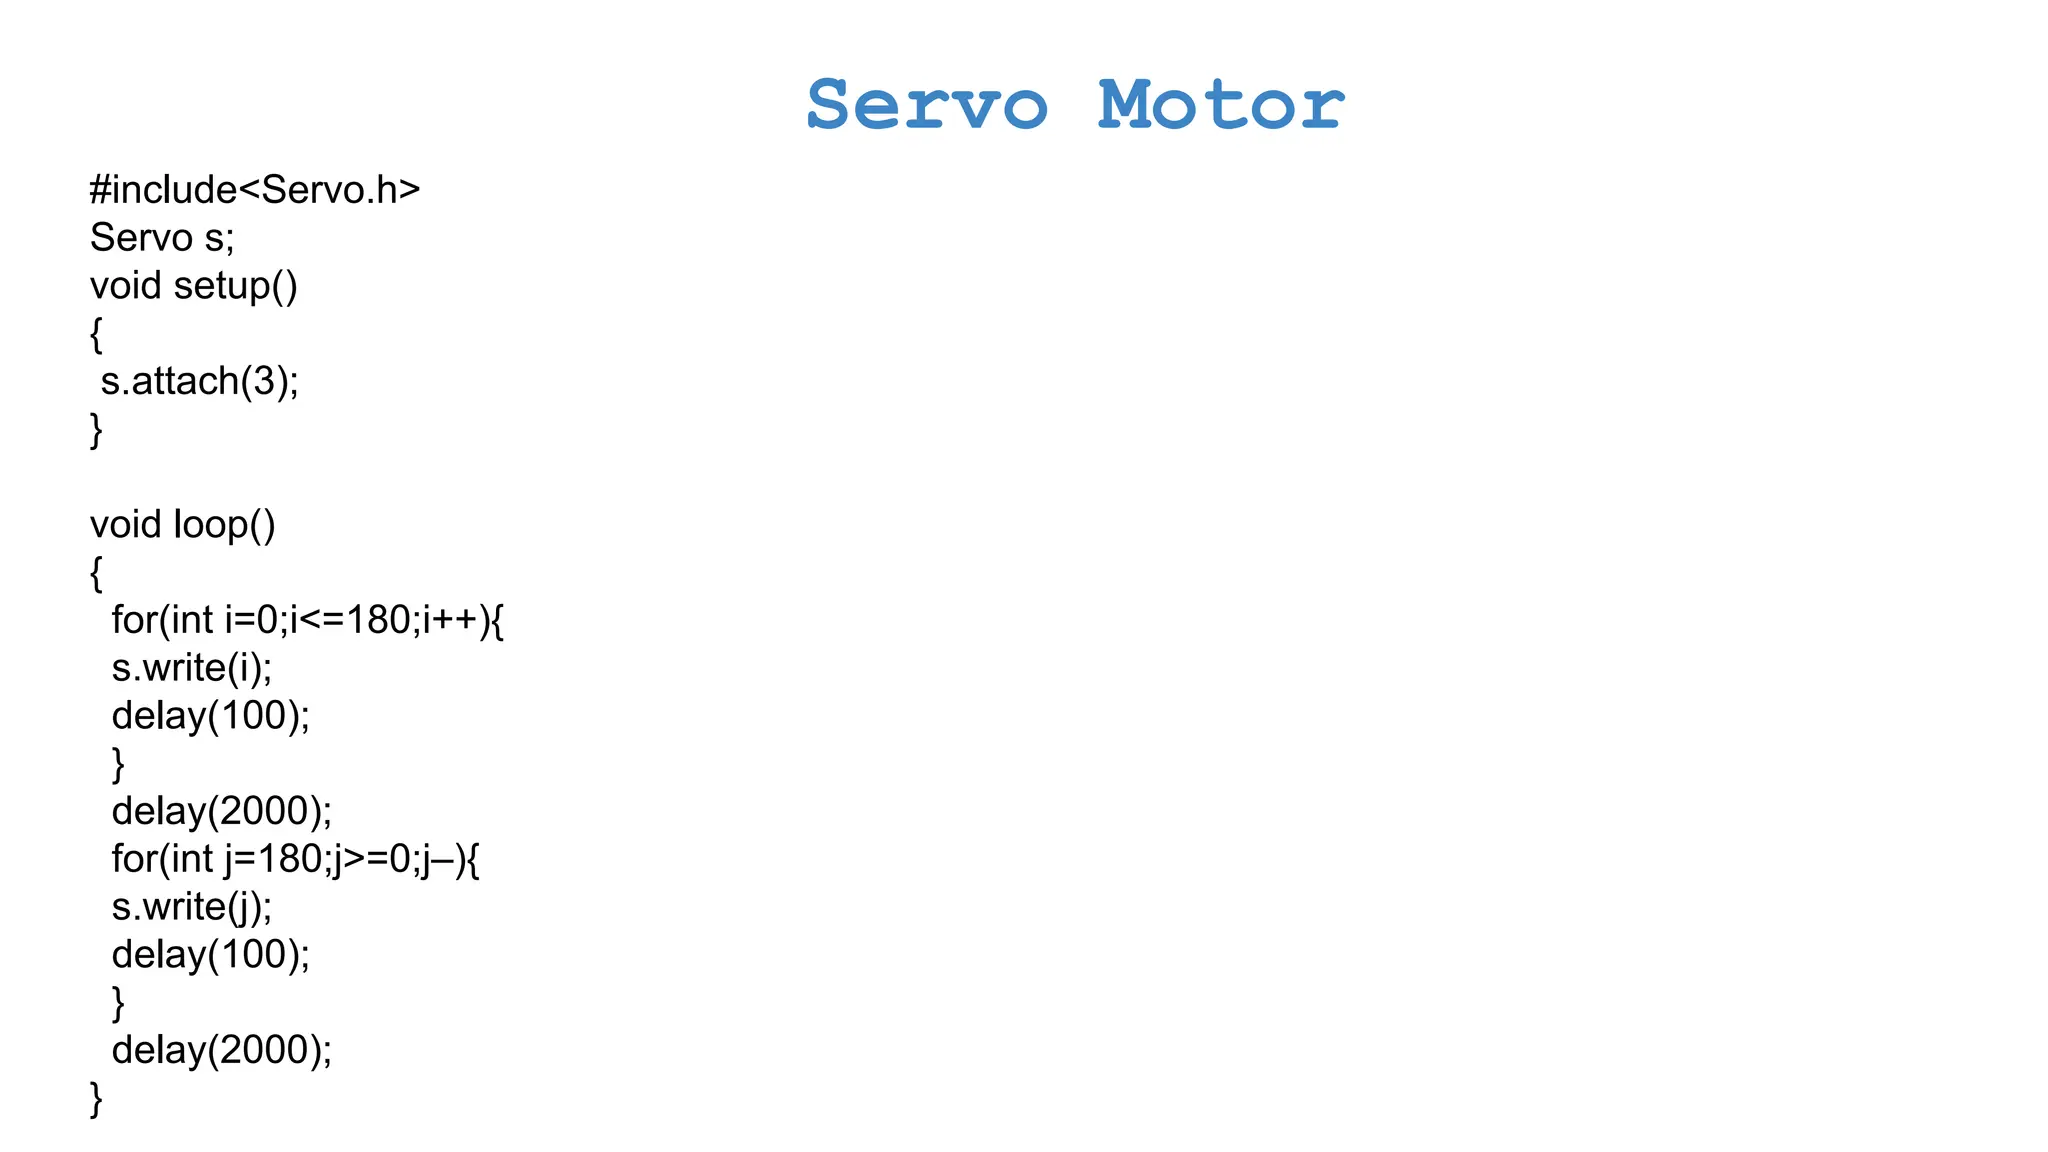
    Content Integrate Ultrasonic Sensorwith Arduino UNO ● What is an Ultrasonic Sensor & How it Works ● Integrate Ultrasonic sensor with Arduino UNO Integrate Servo Motor with Arduino UNO ● What is the Servo motor & How it works? ● Integrate Servo Motor with Arduino UNO
  • 13.
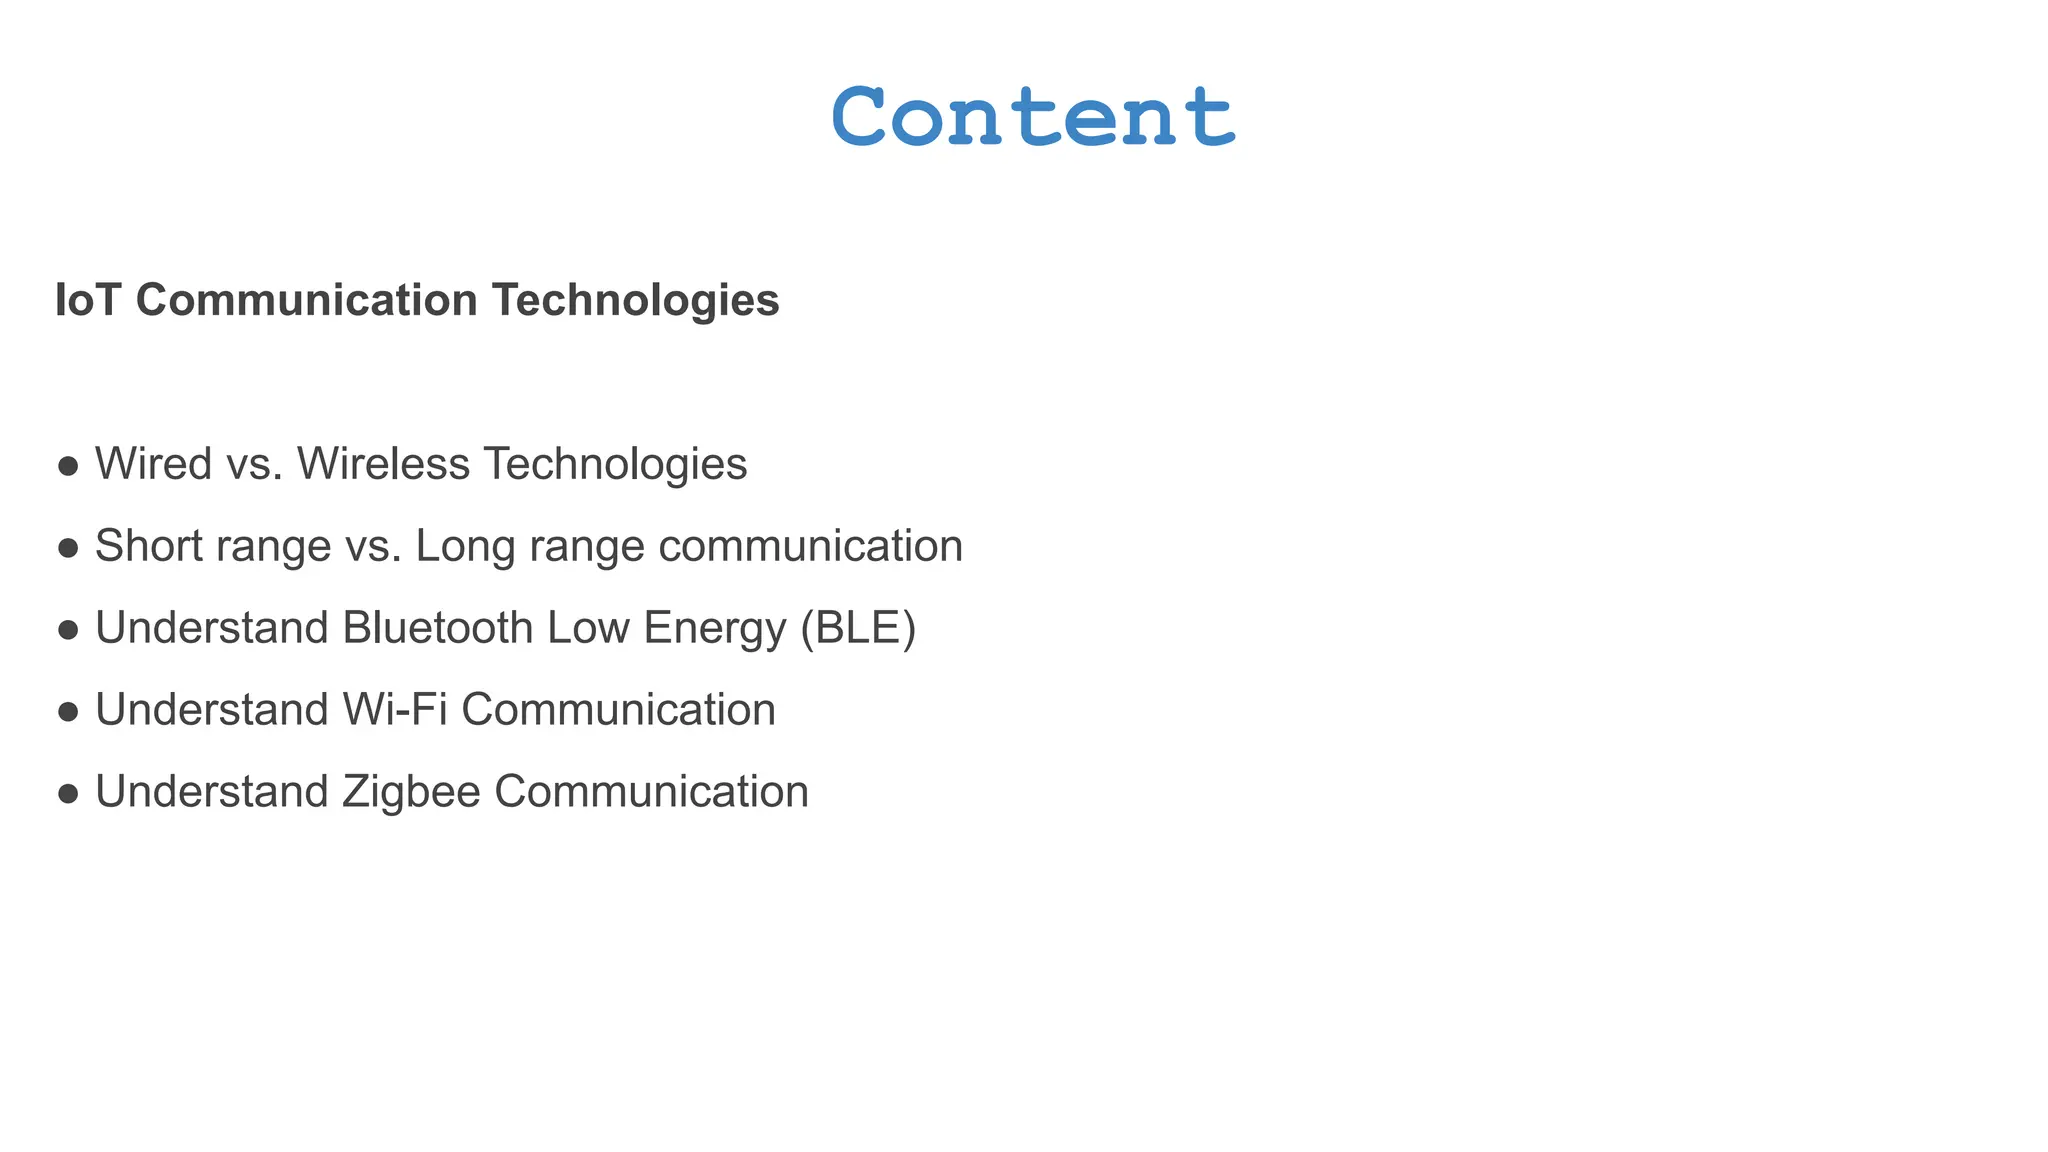
    Content IoT Communication Technologies ●Wired vs. Wireless Technologies ● Short range vs. Long range communication ● Understand Bluetooth Low Energy (BLE) ● Understand Wi-Fi Communication ● Understand Zigbee Communication
  • 14.
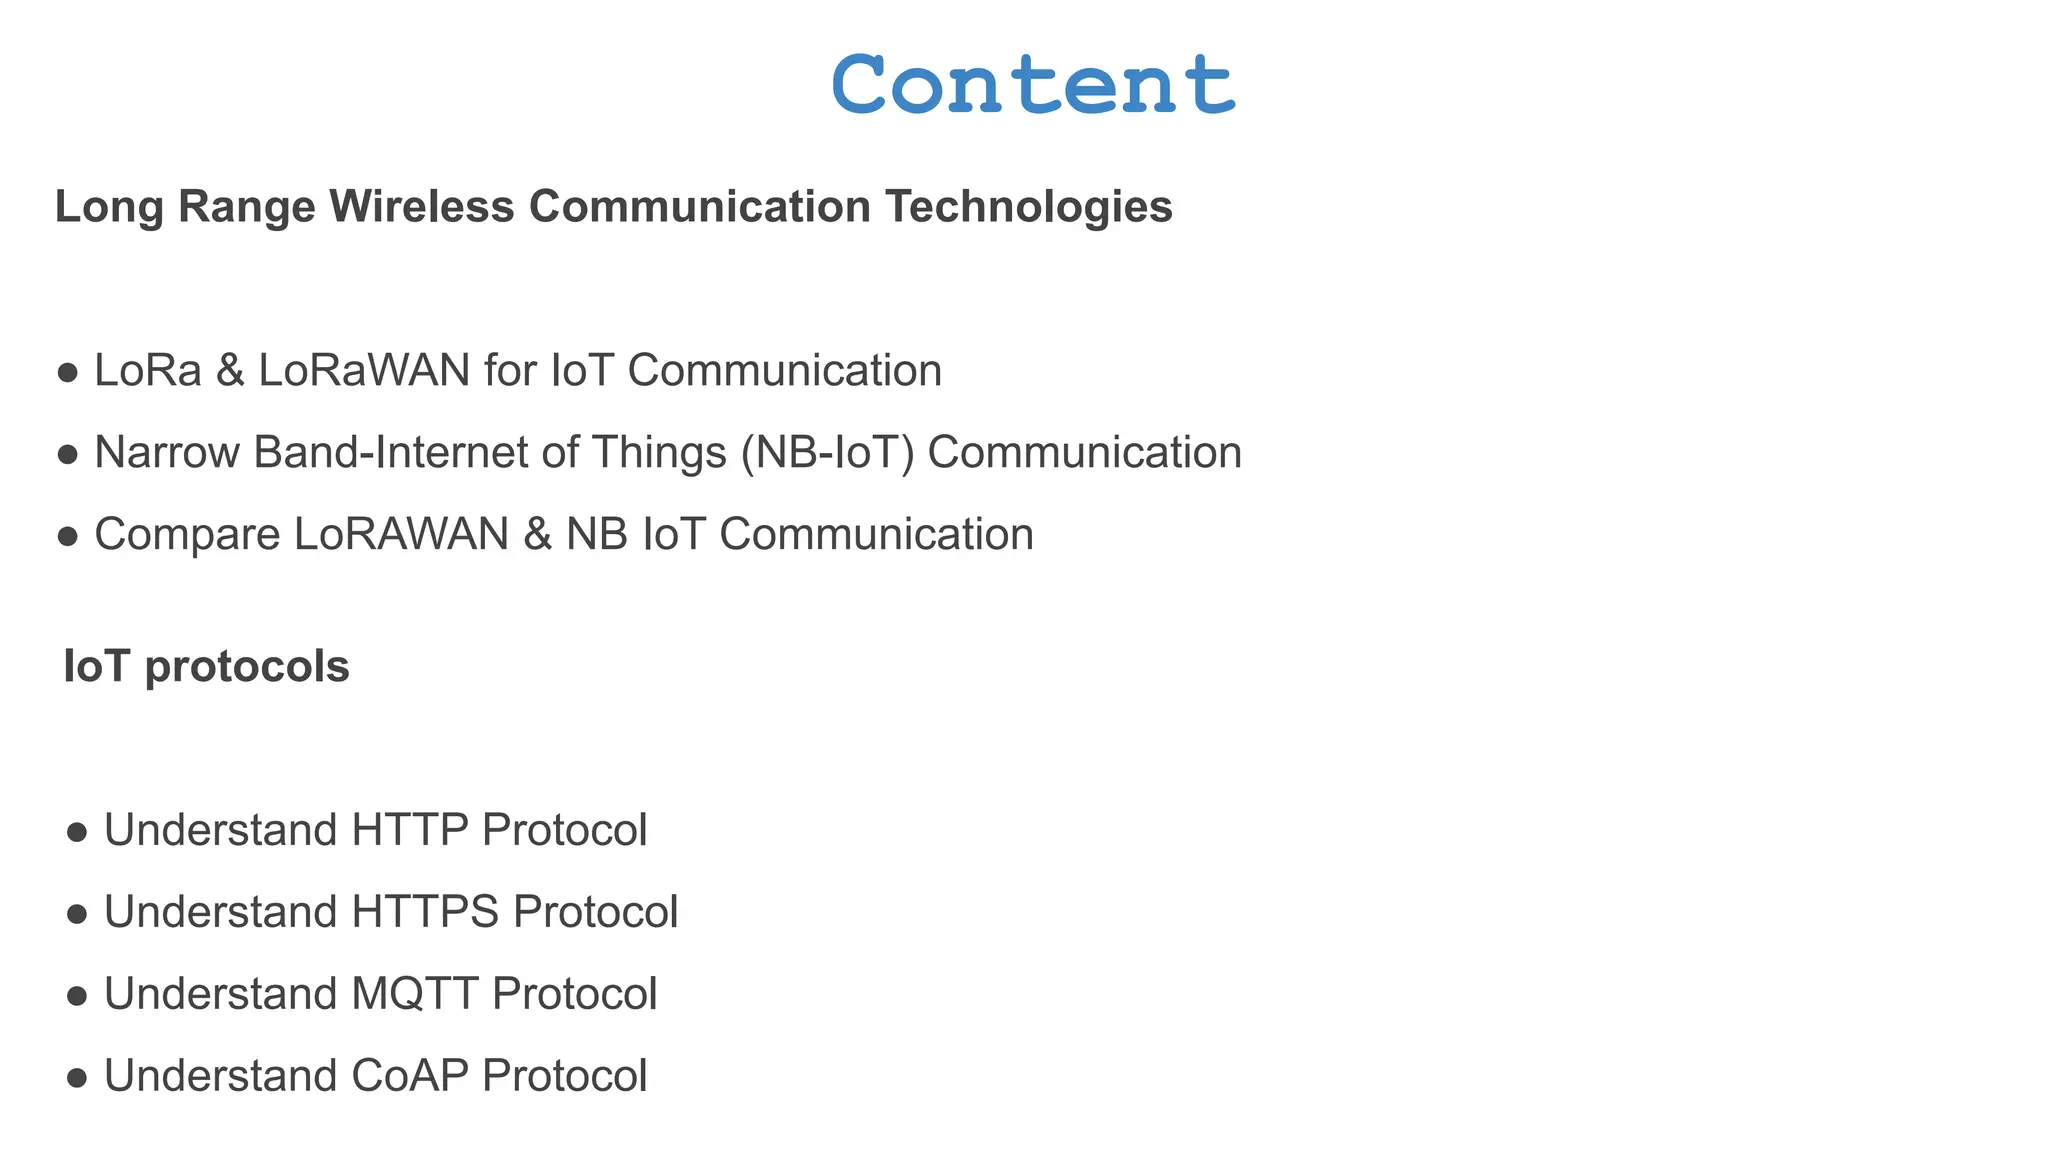
    Content Long Range WirelessCommunication Technologies ● LoRa & LoRaWAN for IoT Communication ● Narrow Band-Internet of Things (NB-IoT) Communication ● Compare LoRAWAN & NB IoT Communication IoT protocols ● Understand HTTP Protocol ● Understand HTTPS Protocol ● Understand MQTT Protocol ● Understand CoAP Protocol
  • 15.
    Content HTTP & MQTTPractical’s ● Get Weather Info from Open Weather API using HTTP ● Hands-on with MQTT - Hive MQ Publish Broker Introduction to Python ● Python Environment setup Python basics ● Python-Variable Types ● Python- Basic Operators ● Python- Strings
  • 16.
    Content Python - CollectionData Types, Functions ● Lists, Tuples, Set, Dictionary ● Control Statements ● Functions Modules Files I/O Python In-Built libraries Overview of OOP Terminology Creating Classes
  • 17.
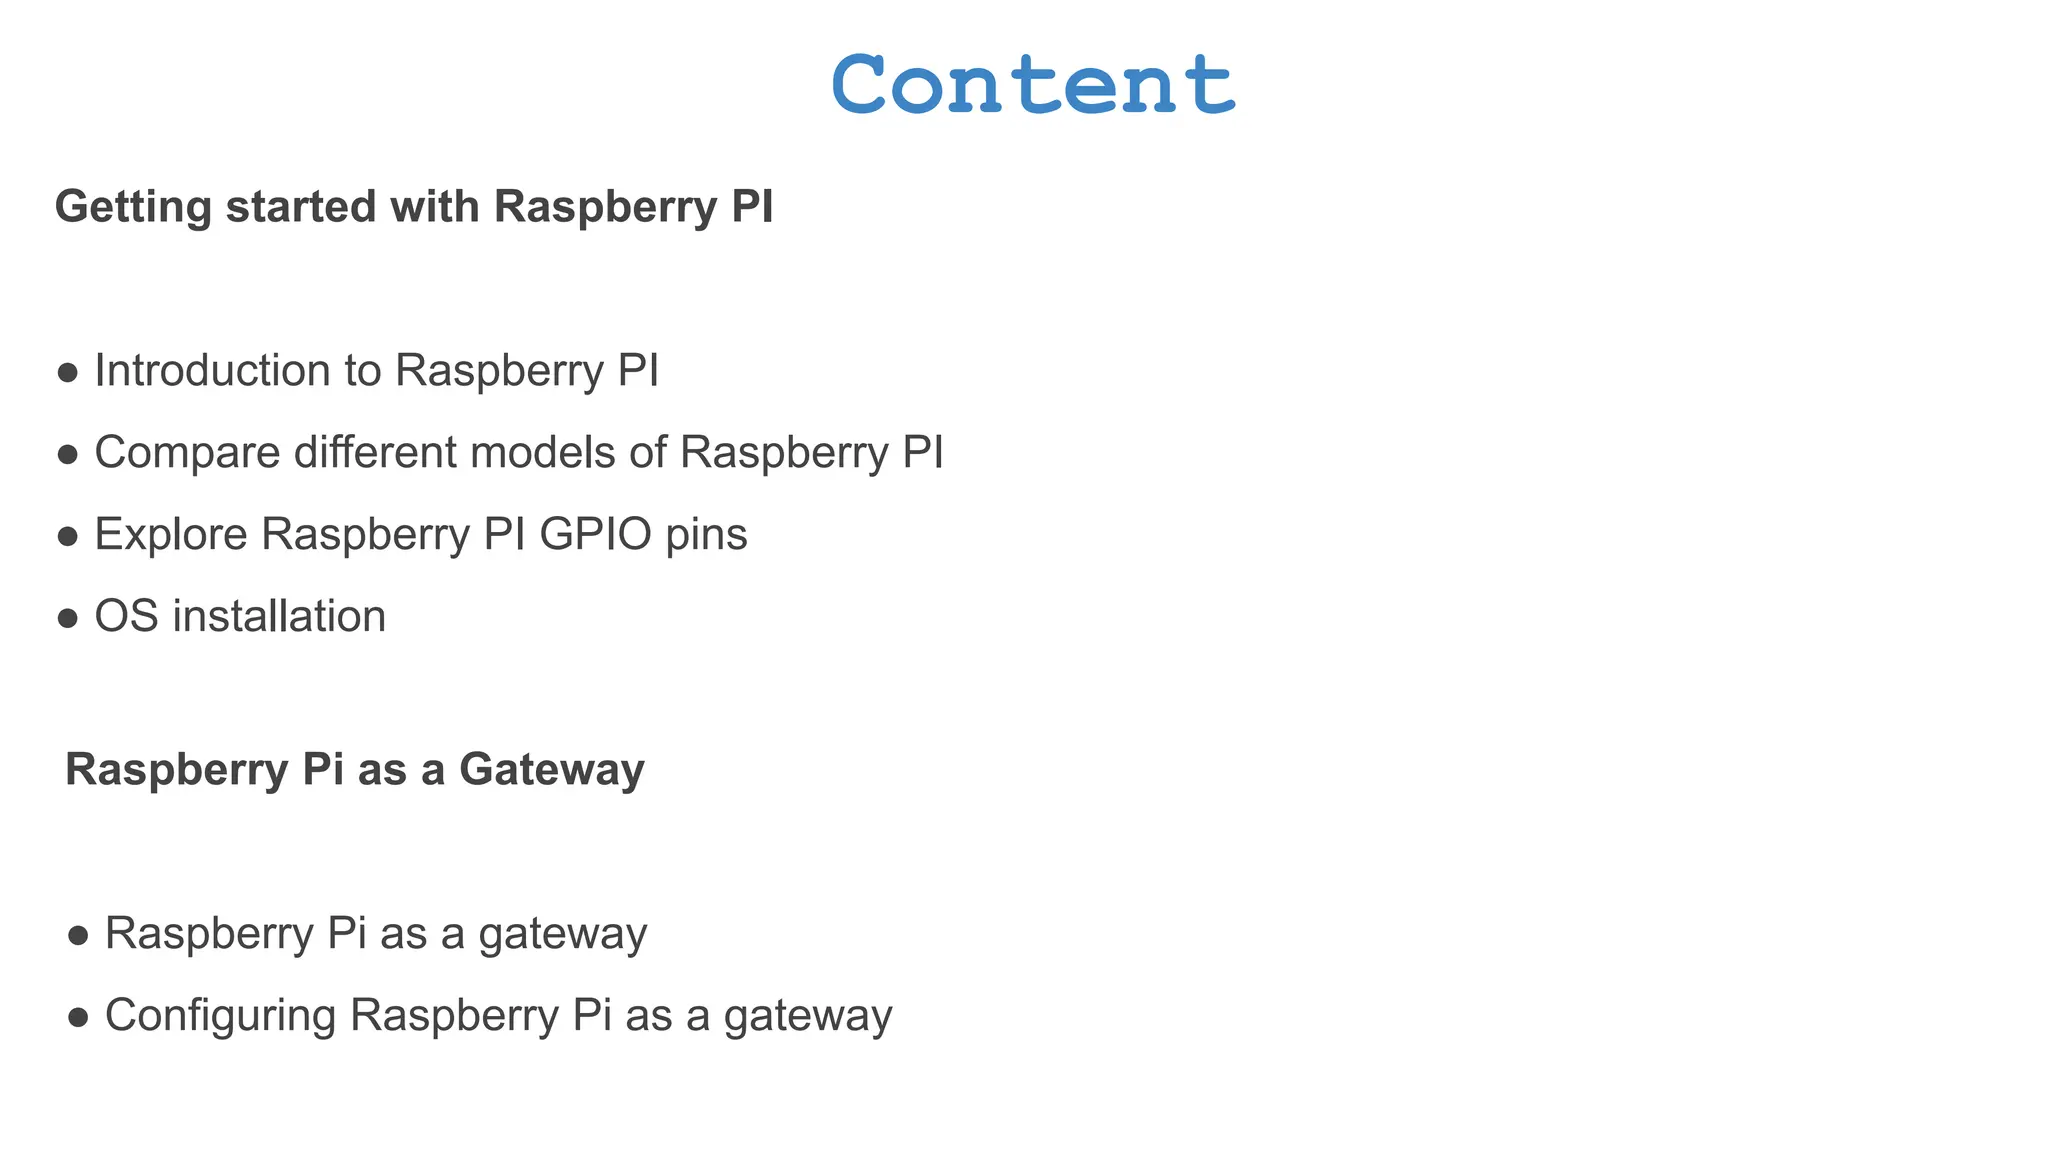
    Content Getting started withRaspberry PI ● Introduction to Raspberry PI ● Compare different models of Raspberry PI ● Explore Raspberry PI GPIO pins ● OS installation Raspberry Pi as a Gateway ● Raspberry Pi as a gateway ● Configuring Raspberry Pi as a gateway
  • 18.
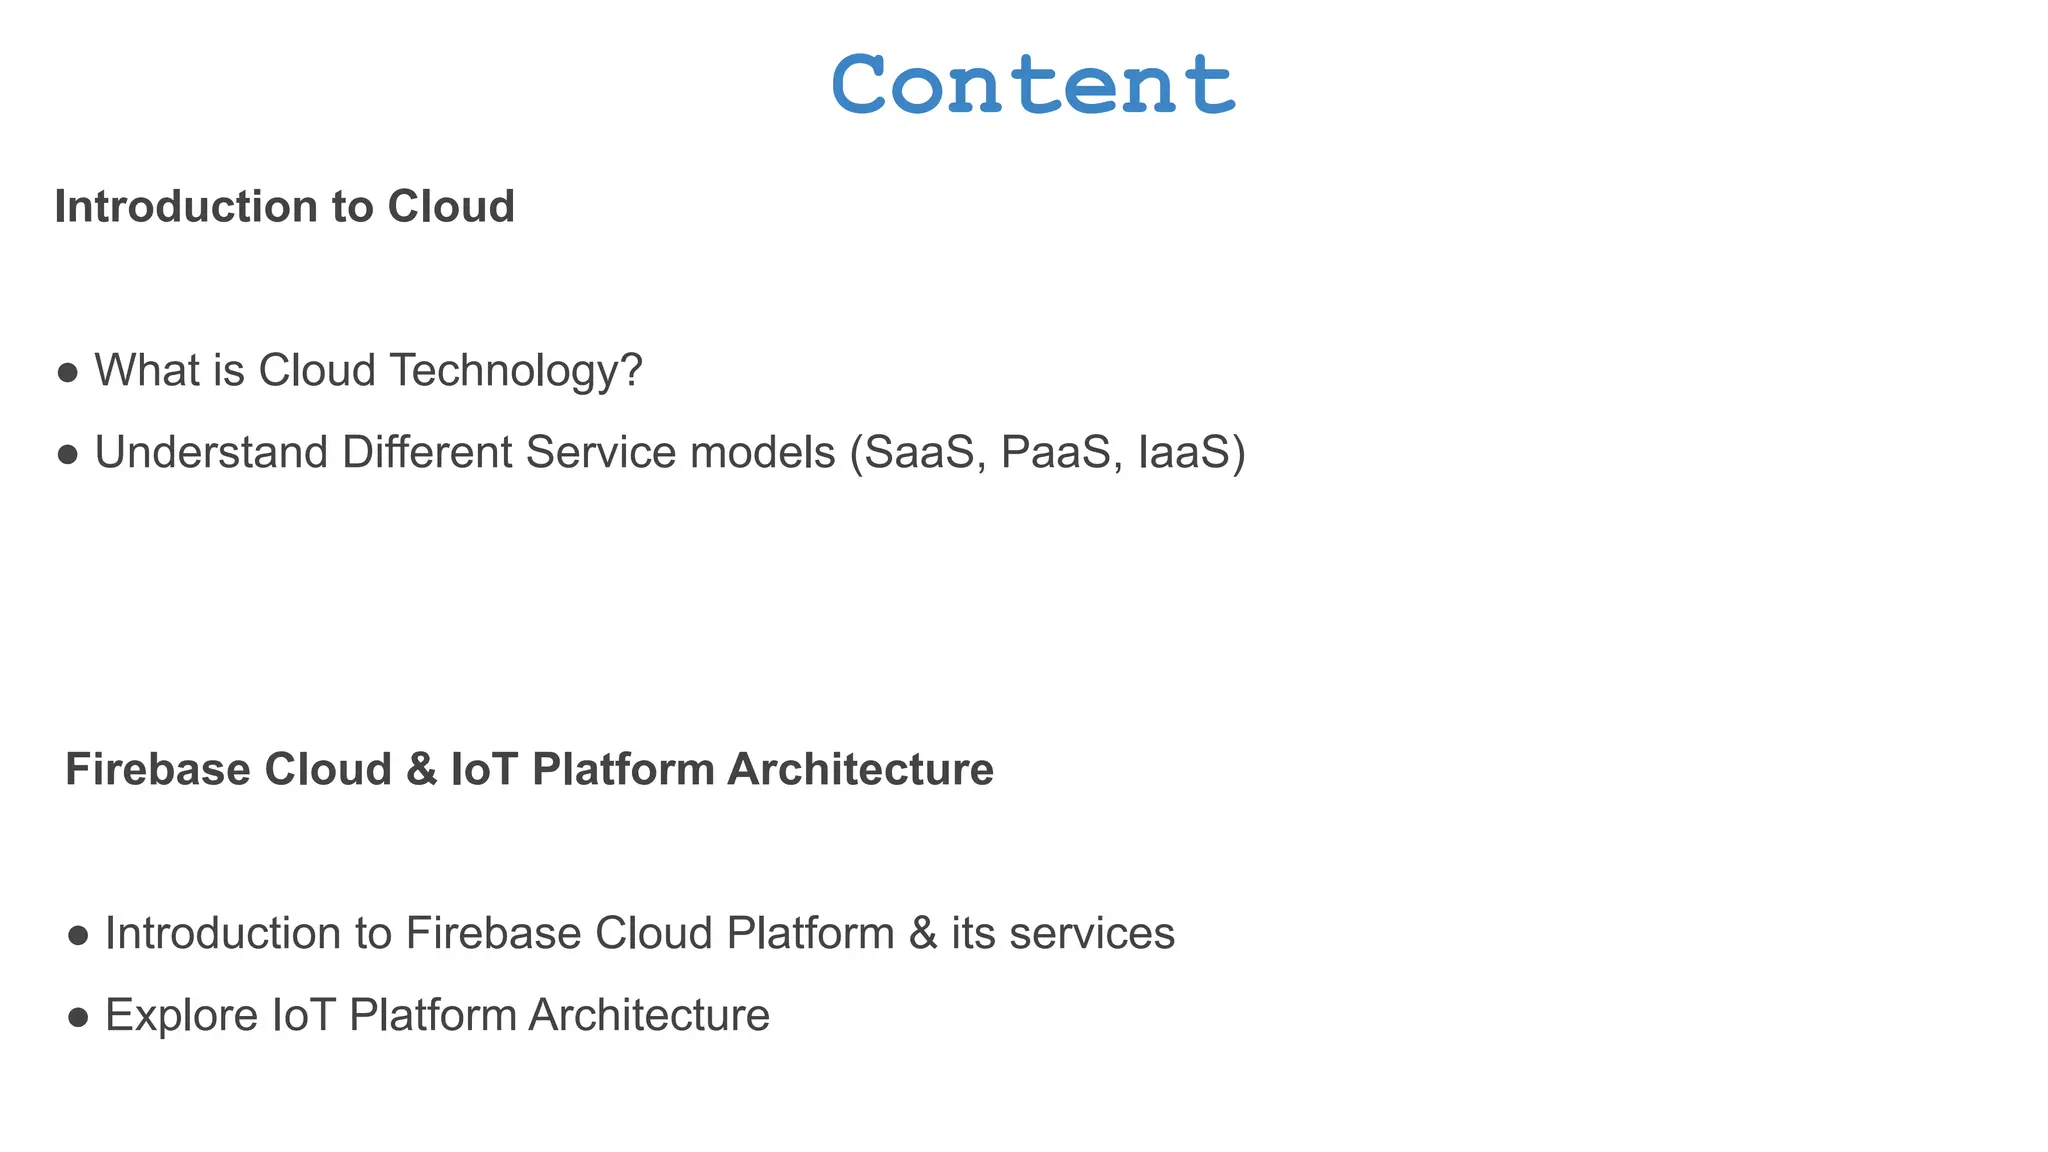
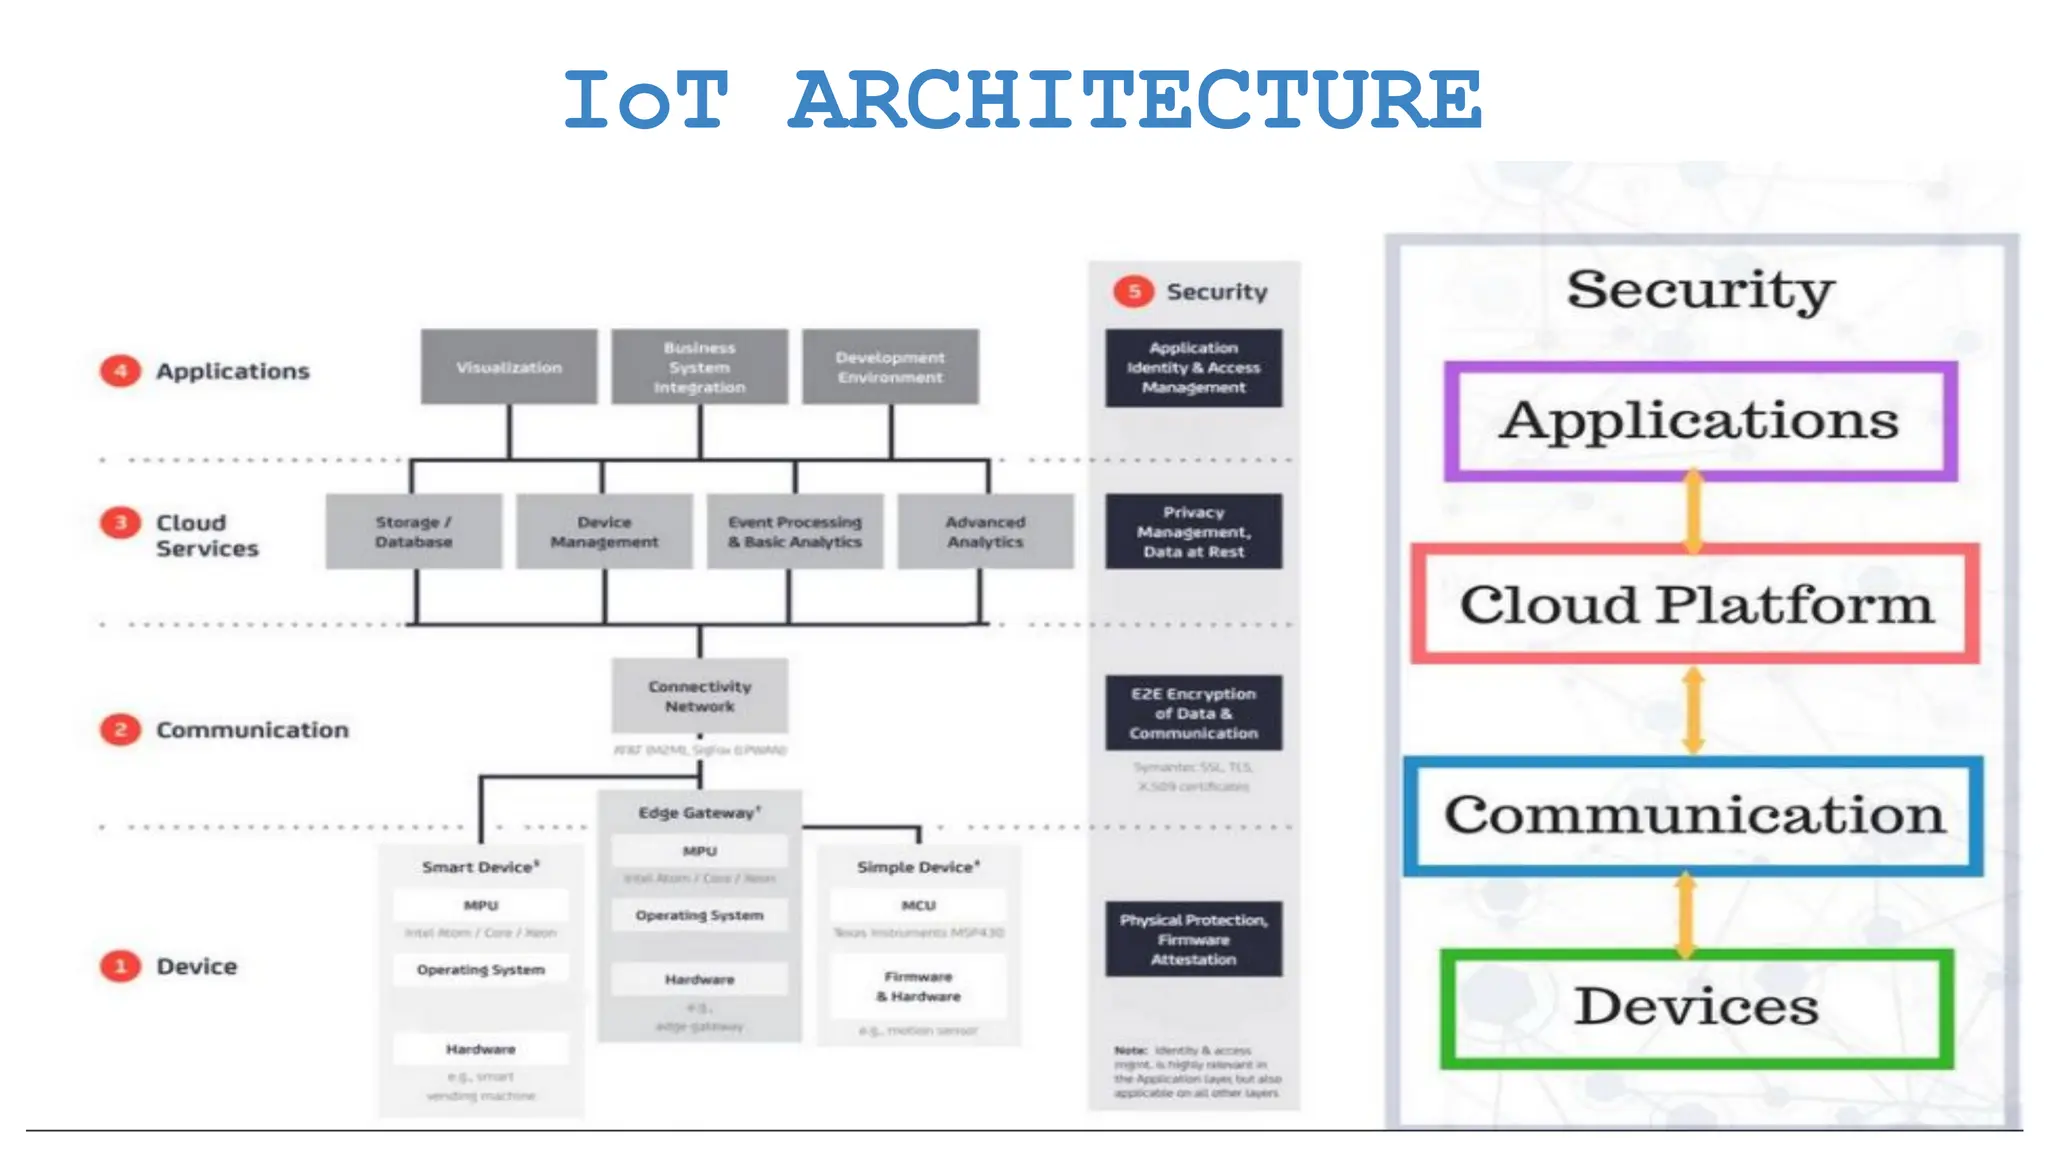
    Content Introduction to Cloud ●What is Cloud Technology? ● Understand Different Service models (SaaS, PaaS, IaaS) Firebase Cloud & IoT Platform Architecture ● Introduction to Firebase Cloud Platform & its services ● Explore IoT Platform Architecture
  • 19.
    Content Getting Started Node-REDService ● Introduction to Node-RED Service ● Installation of local Node-Red ● Getting Started with Node-RED Web Application Development using Node-RED Service ● Develop a web UI to display the Sensor data ● Configure the buttons in UI to send the commands ● Publish and Subscribe data from Firebase IoT Platform using Python Code
  • 20.
    Content Mobile Application Developmentusing MIT App Inventor ● Develop the User Interface to display the sensor data ● Configure the API's using Node-RED service to get the sensor data ● Display the Data in the UI and Install the Mobile App ● Configure the API's using Node-RED service to receive commands from Mobile App ● Configure the mobile App to send commands to Firebase Cloud Case study 1 Case study 2
  • 22.
  • 23.
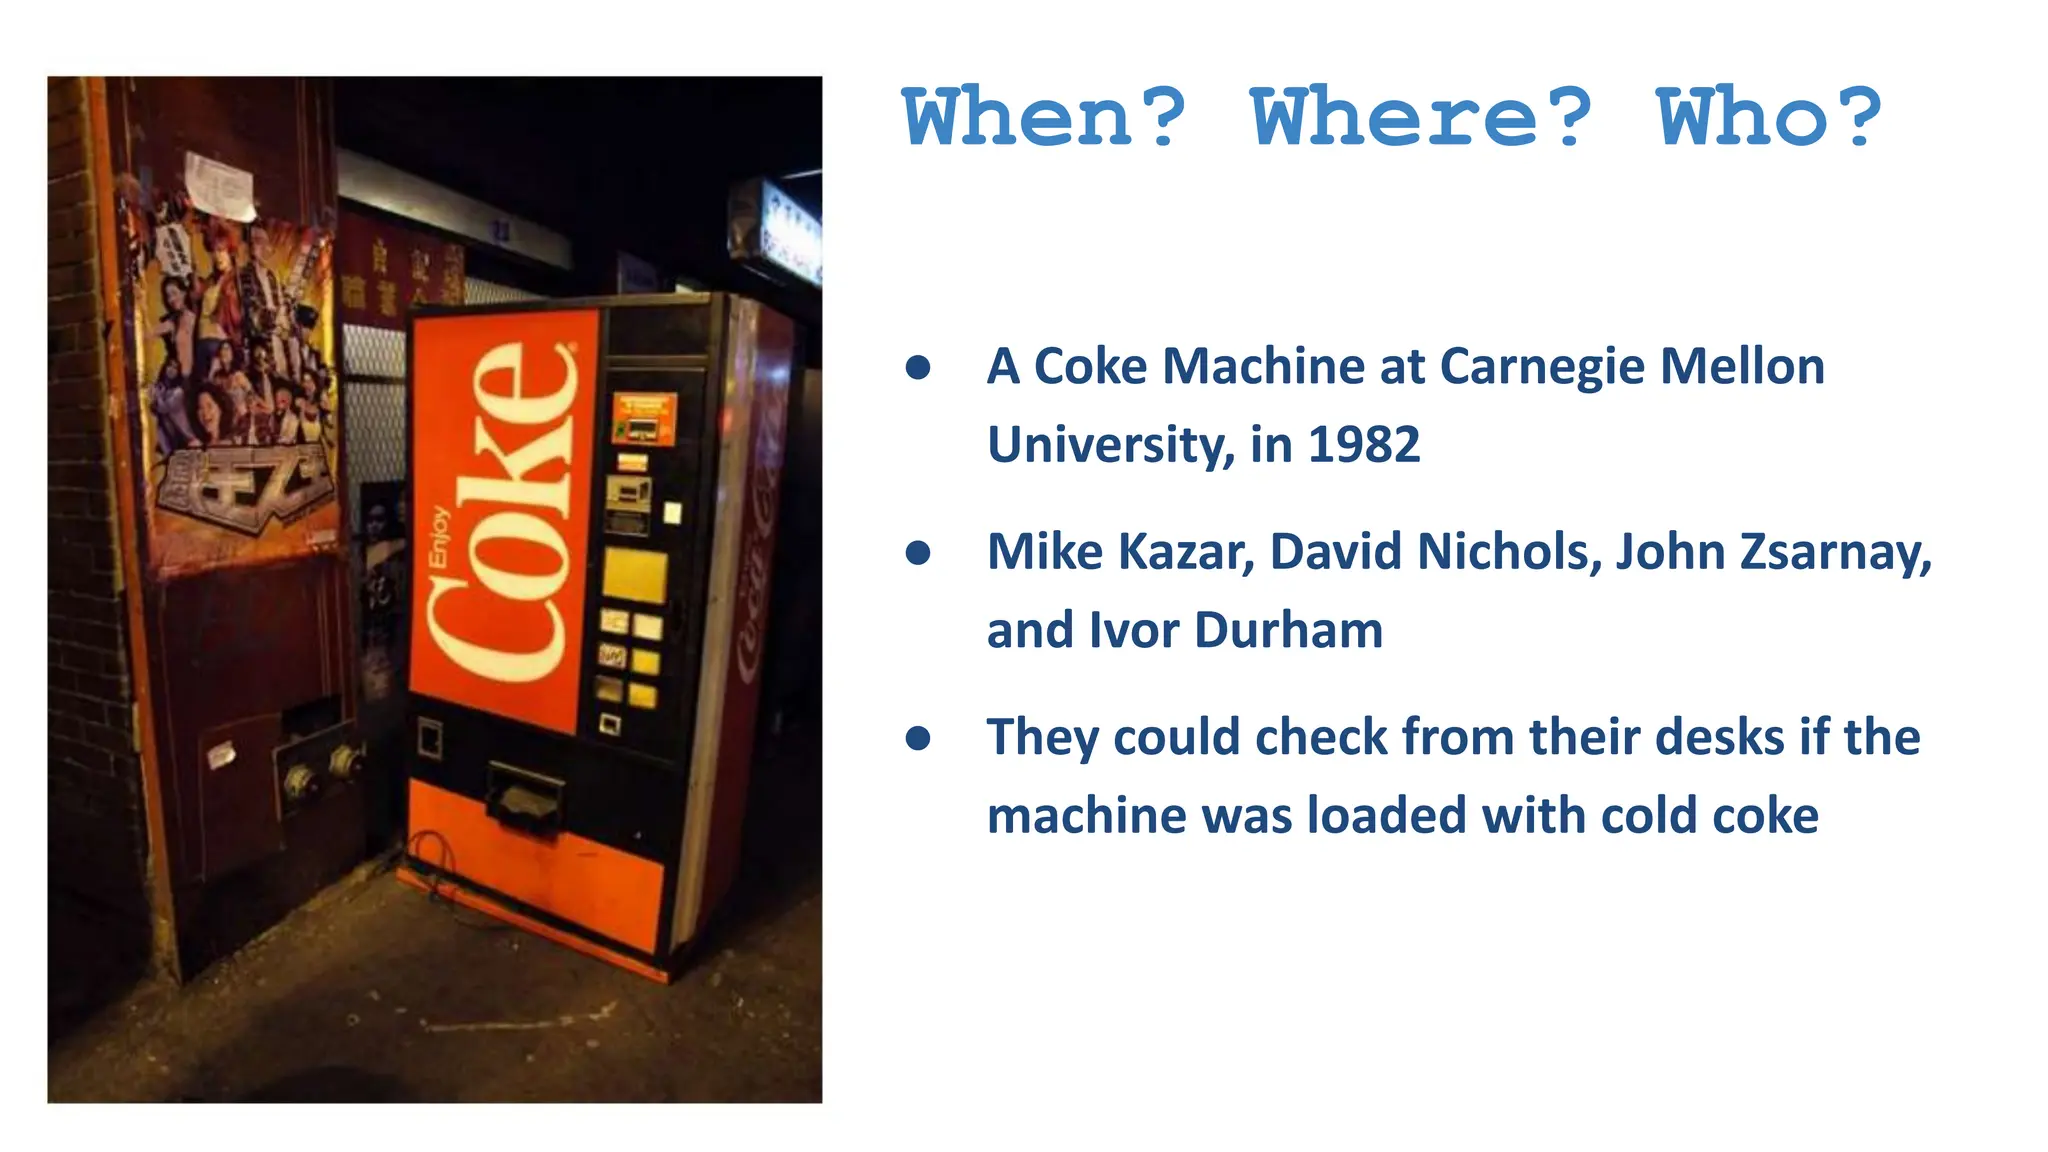
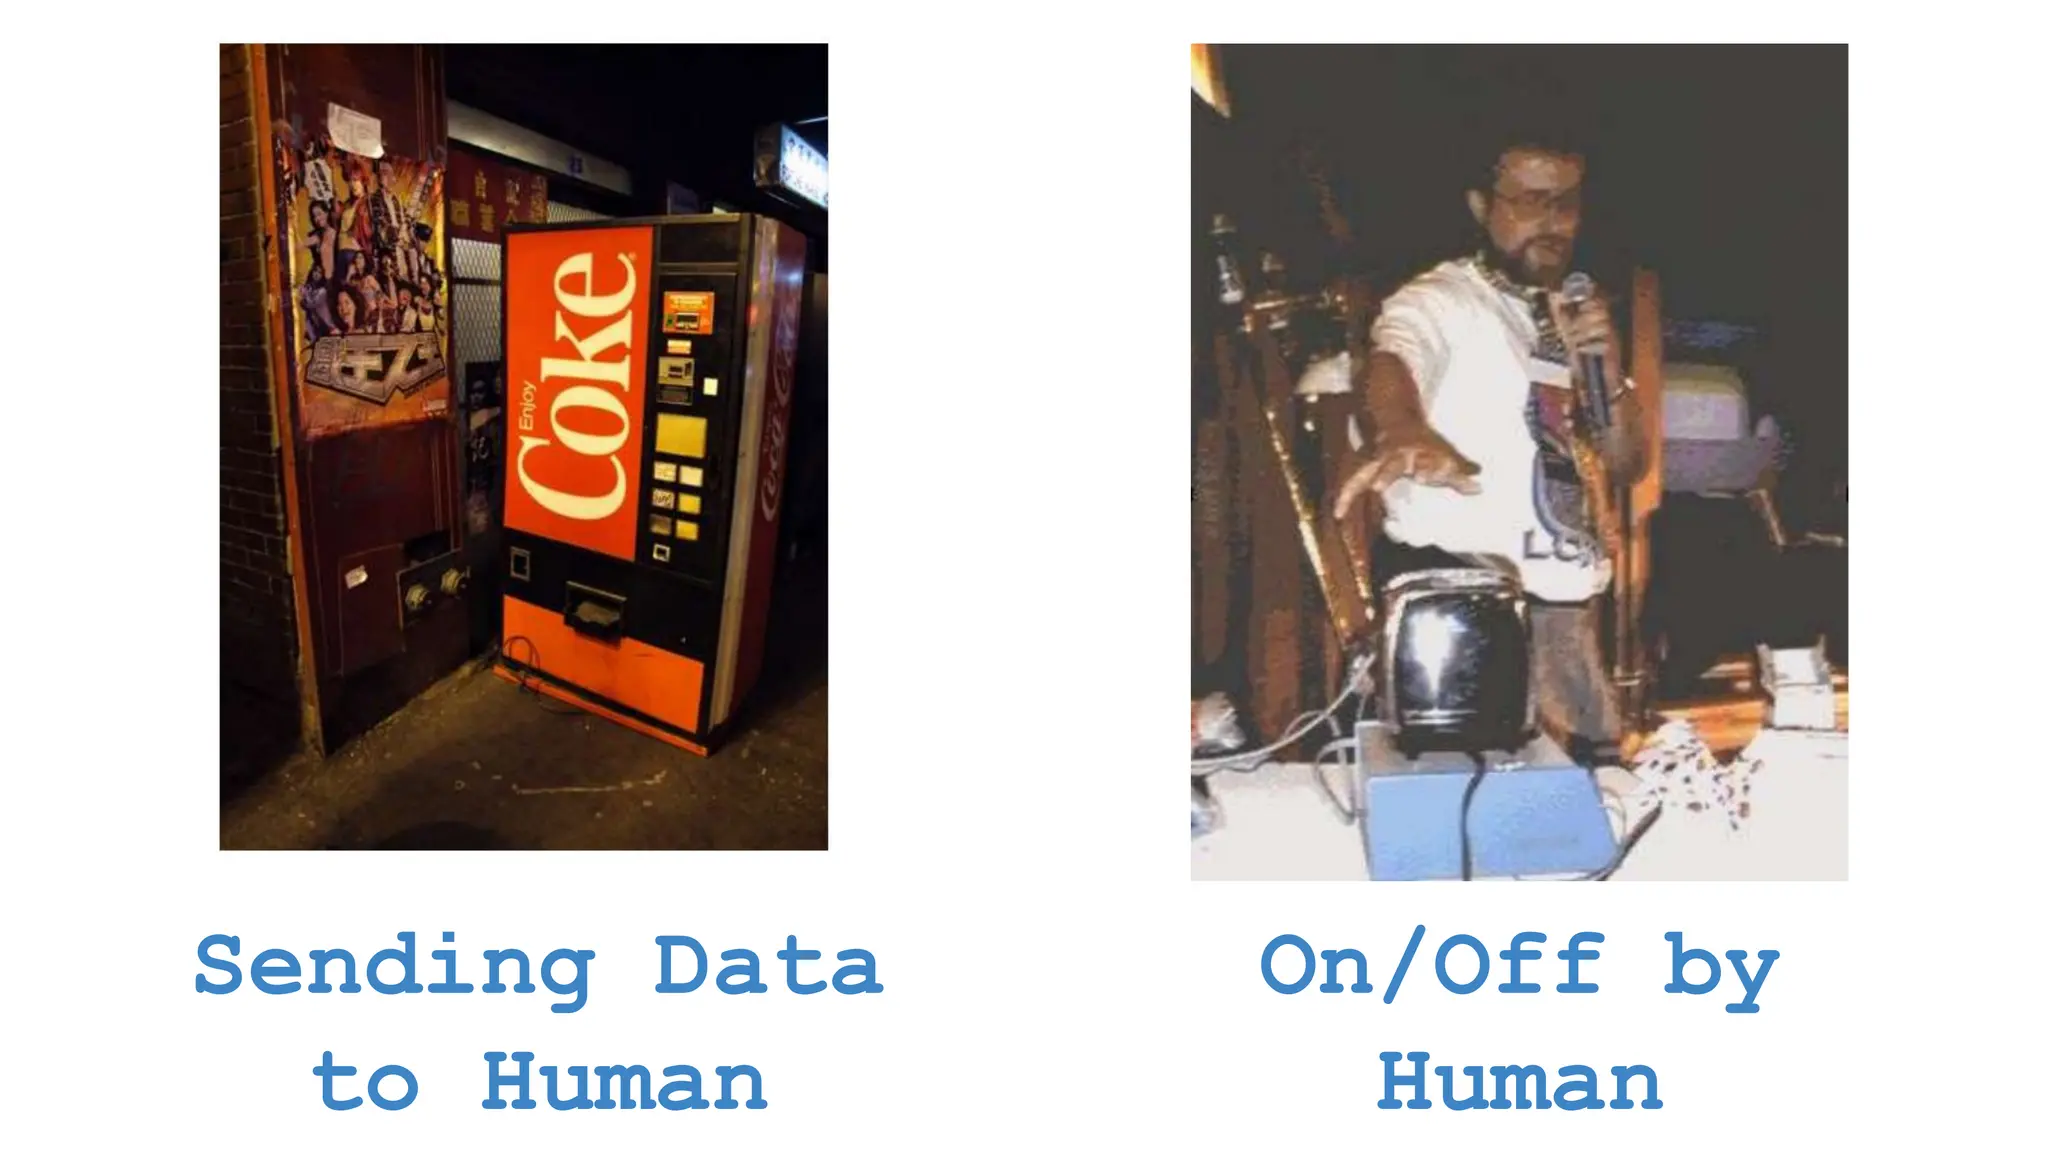
    When? Where? Who? ●A Coke Machine at Carnegie Mellon University, in 1982 ● Mike Kazar, David Nichols, John Zsarnay, and Ivor Durham ● They could check from their desks if the machine was loaded with cold coke
  • 24.
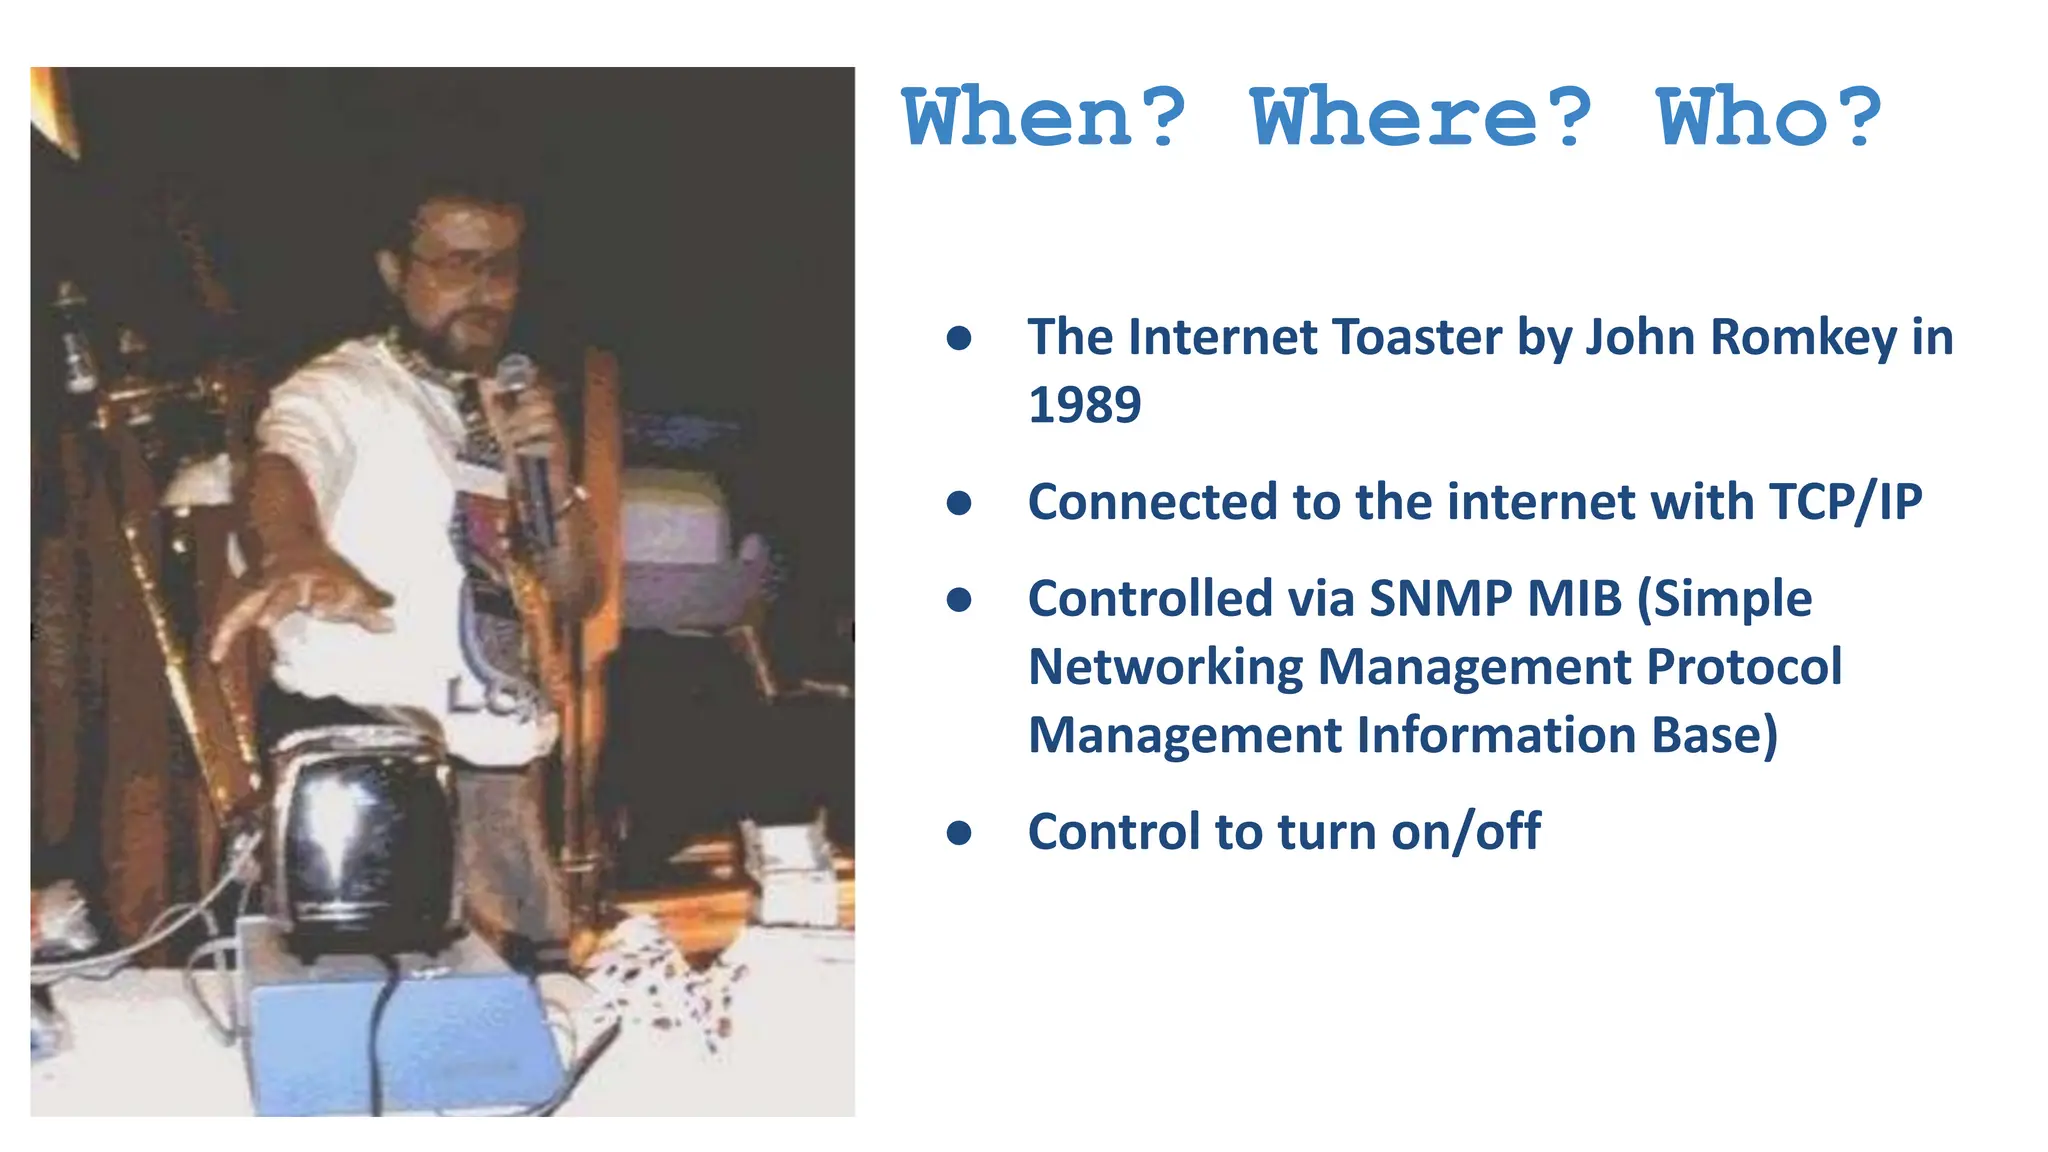
    When? Where? Who? ●The Internet Toaster by John Romkey in 1989 ● Connected to the internet with TCP/IP ● Controlled via SNMP MIB (Simple Networking Management Protocol Management Information Base) ● Control to turn on/off
  • 25.
  • 26.
  • 27.
    IoT Promises todayis much beyond this
  • 28.
  • 29.
    BENEFITS OF IOT •ImprovedPerformance •Reduced Cost •Improved Data Collection •Improved Customer Engagement •New revenue streams
  • 30.
  • 31.
  • 32.
  • 33.
    Smart Home APPLICATIONS INDIFFERENT SECTORS Smart Cities Smart Retail Smart Health Smart Environment Smart Agriculture Smart Industry Smart Grid
  • 34.
    ▪ Smart Parking ▪Smart Roads ▪ Emergency Response ▪ Weather Monitoring ▪ Forest Fire Detection ▪ Air Pollution ▪ Smart Grids ▪ Renewable Energy Systems ▪ Prognostics ▪ Smart Irrigation ▪ Green House ▪ Shipment Monitoring ▪ Remote vehicle Diagnostics ▪ Fleet Tracking HOME AUTOMATION ▪ Smart Lighting ▪ Smart Appliance ▪ Smart Security Systems INDUSTRIES Machine Diagnosis Indoor Air Quality Monitoring Internet of Things HEALTH & LIFESTYLE ▪ Wearable Electronics ▪ Health & Fitness Monitoring
  • 35.
  • 36.
  • 37.
  • 38.
  • 39.
  • 40.
  • 41.
  • 42.
  • 43.
  • 44.
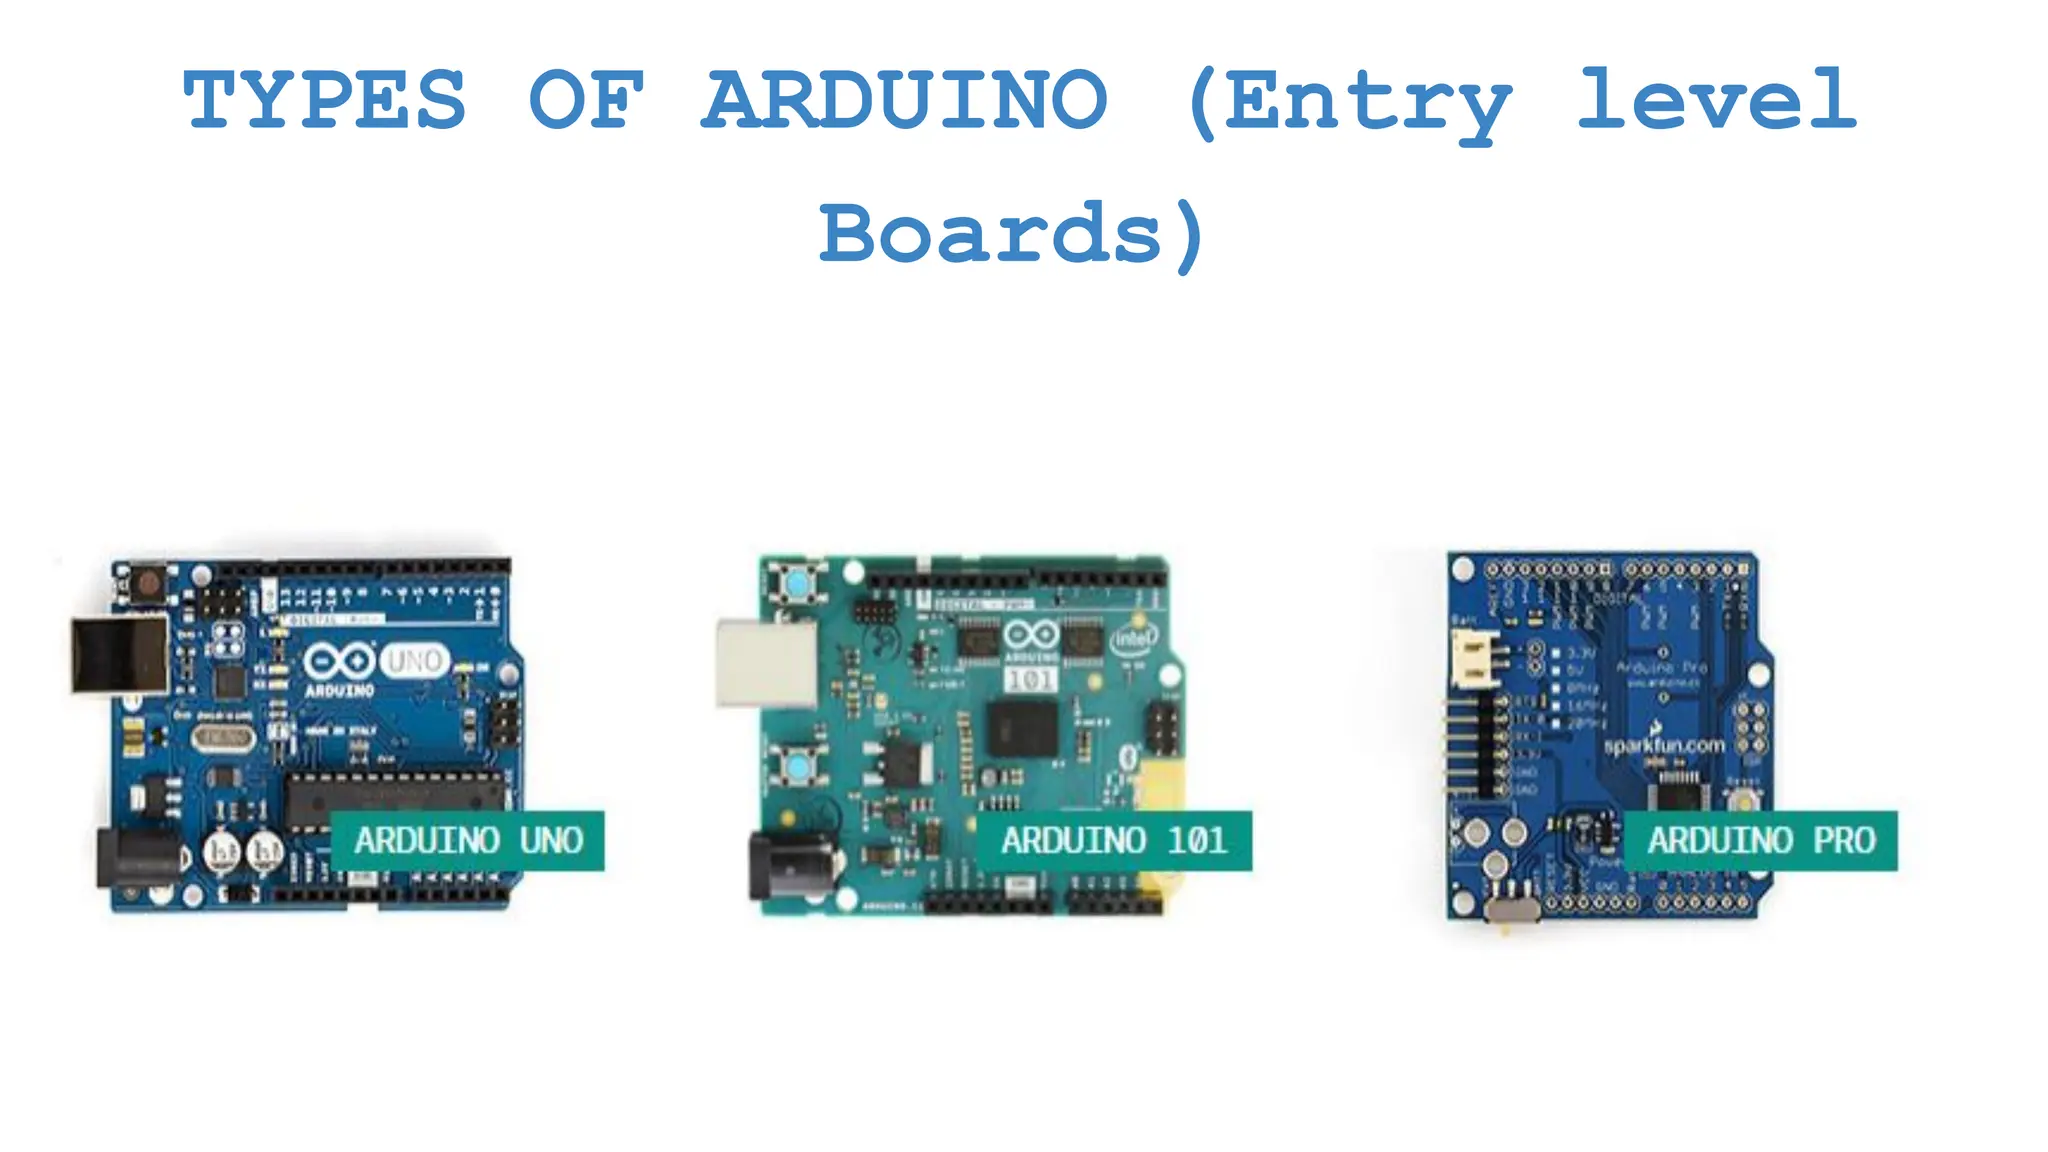
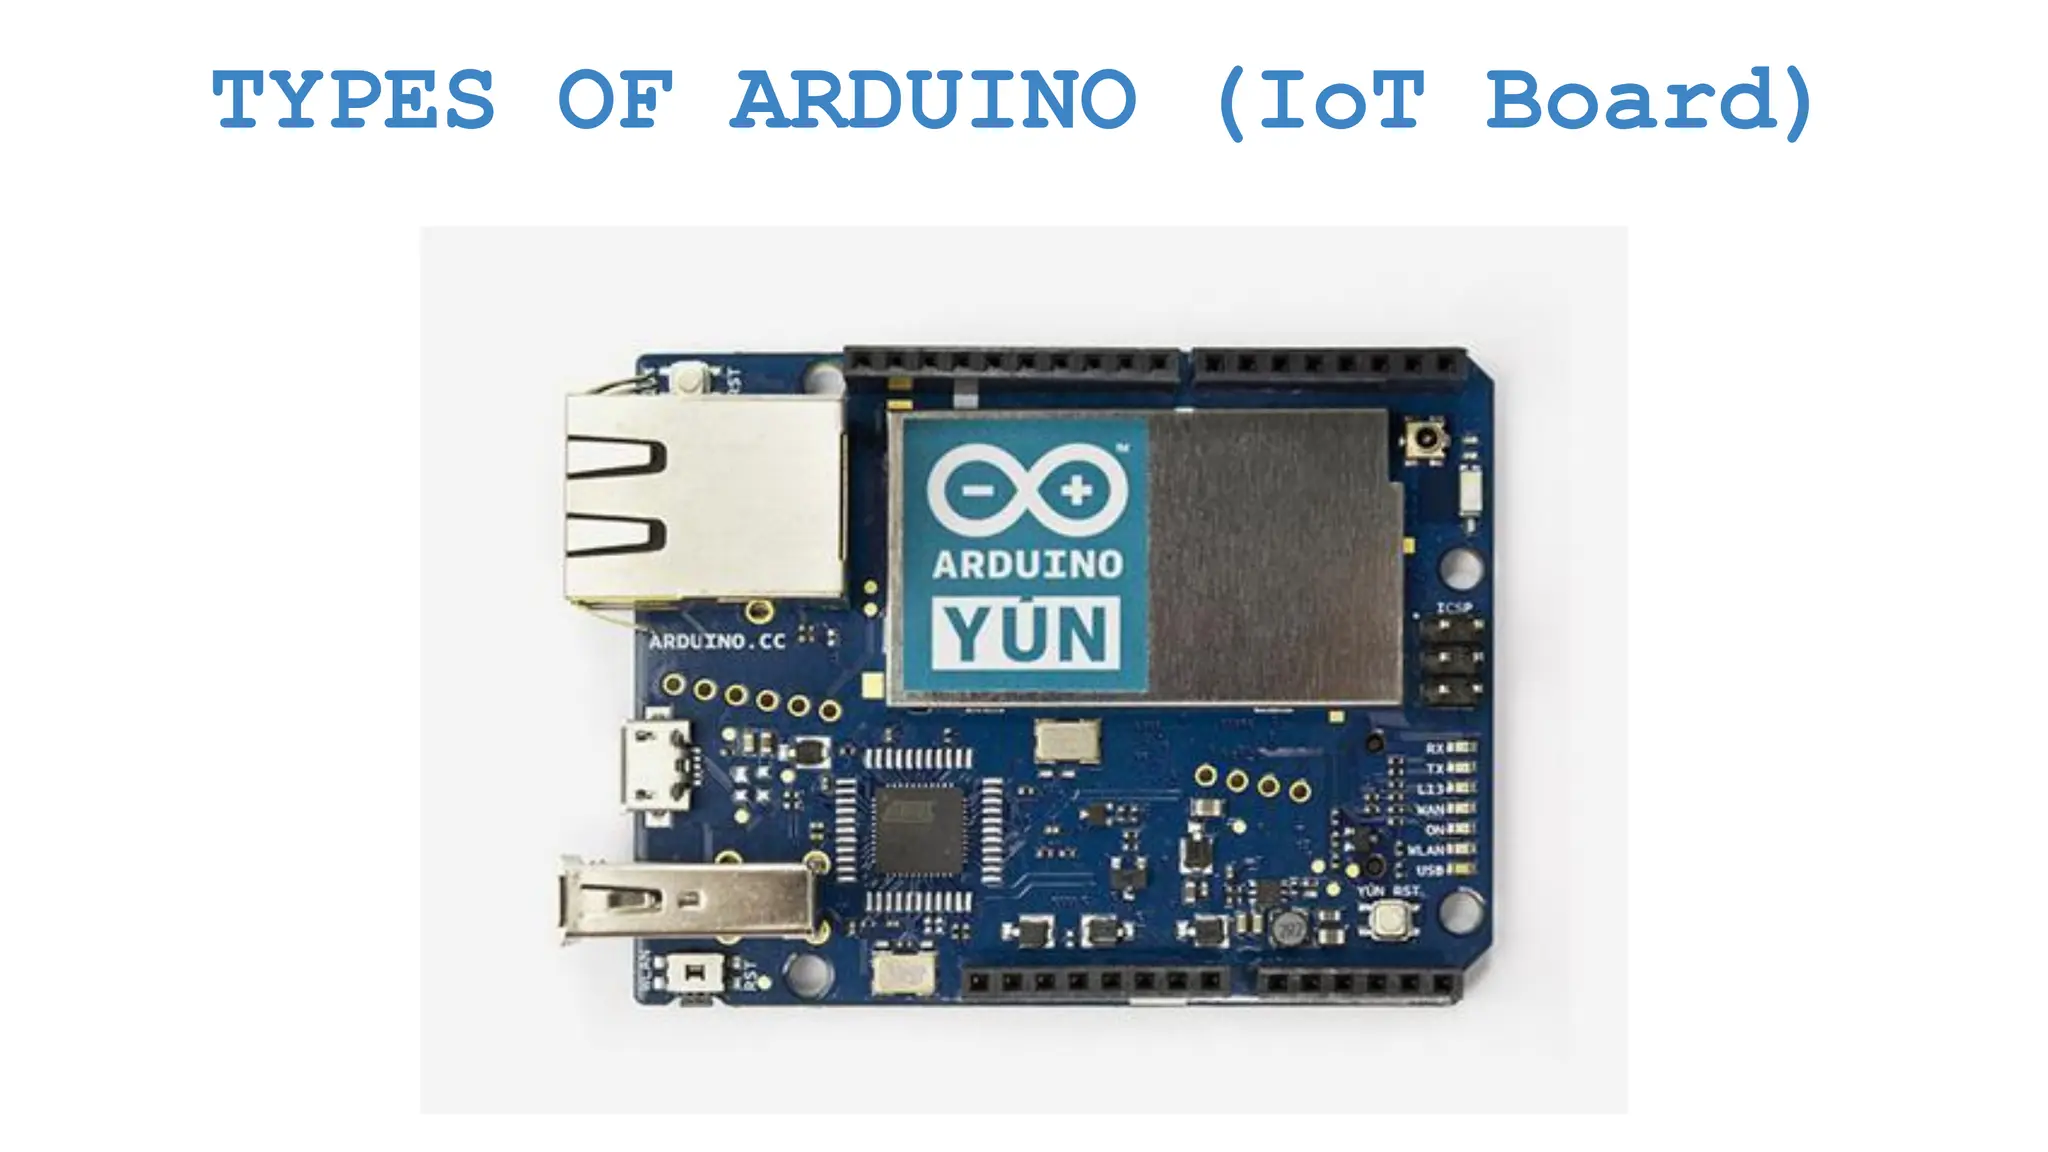
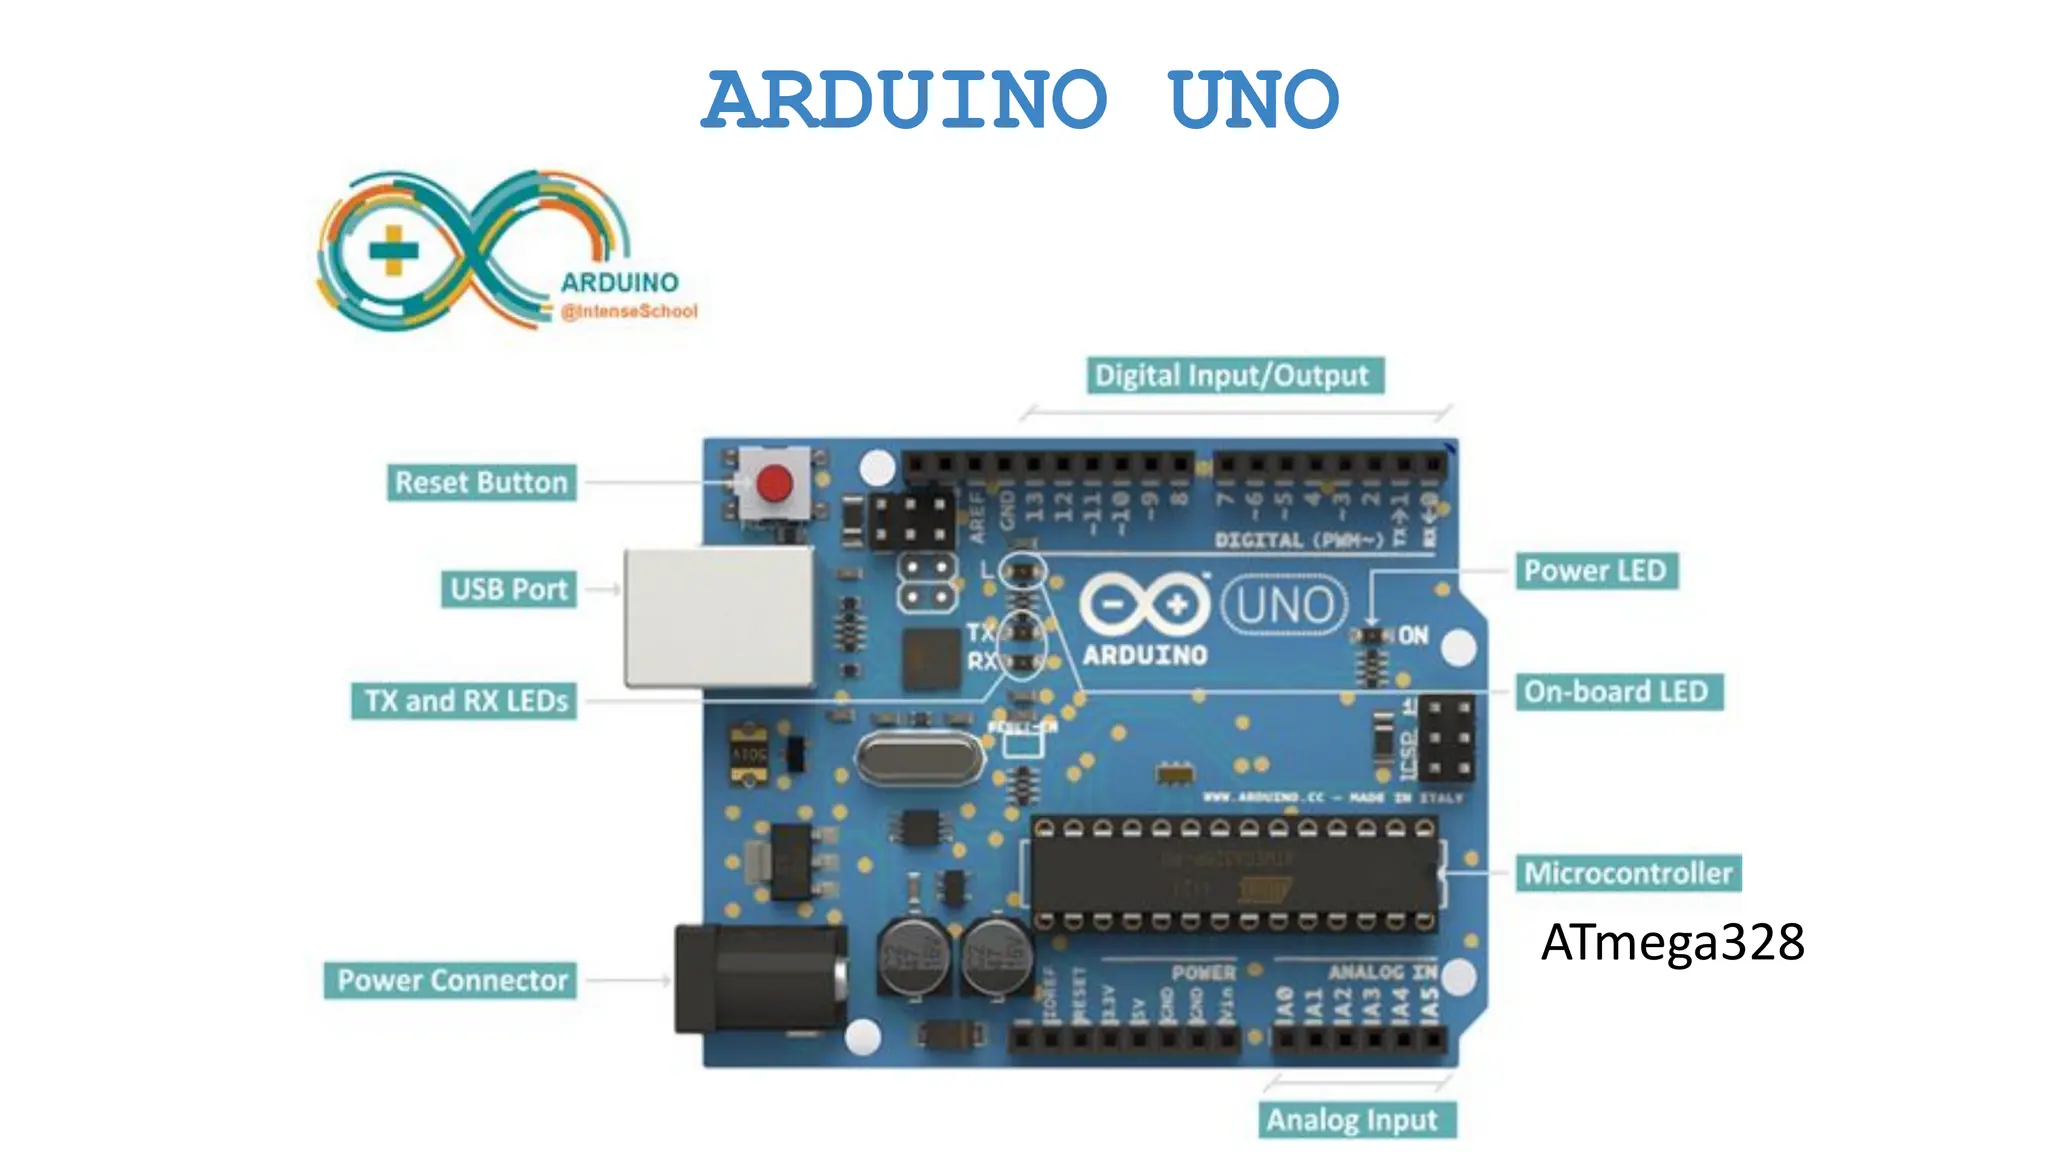
    WHAT IS ARDUINO? ●Arduino is an open-source platform used for building electronics projects . ● Easy tool for fast prototyping. ● consists of both a physical programmable circuit board and a piece of software.
  • 45.
    WHY ARDUINO? ● Opensource Platform. ● Inexpensive ● Does not need a separate piece of hardware ● Arduino IDE uses a simplified version of C++ ● Cross-platform ● Provides a standard form factor
  • 46.
    WHAT CAN ANARDUINO DO? ● Interacts with buttons, LEDs, motors, speakers, GPS units, cameras, the internet, and even your smart-phone or your TV ● designed for artists, designers, hobbyists, hackers, newbie's, and anyone interested in creating interactive objects or environments
  • 47.
    TYPES OF ARDUINO(Entry level Boards)
  • 48.
    TYPES OF ARDUINO(Wearable Boards)
  • 49.
    TYPES OF ARDUINO(Enhanced Boards)
  • 50.
    TYPES OF ARDUINO(IoT Board)
  • 51.
  • 52.
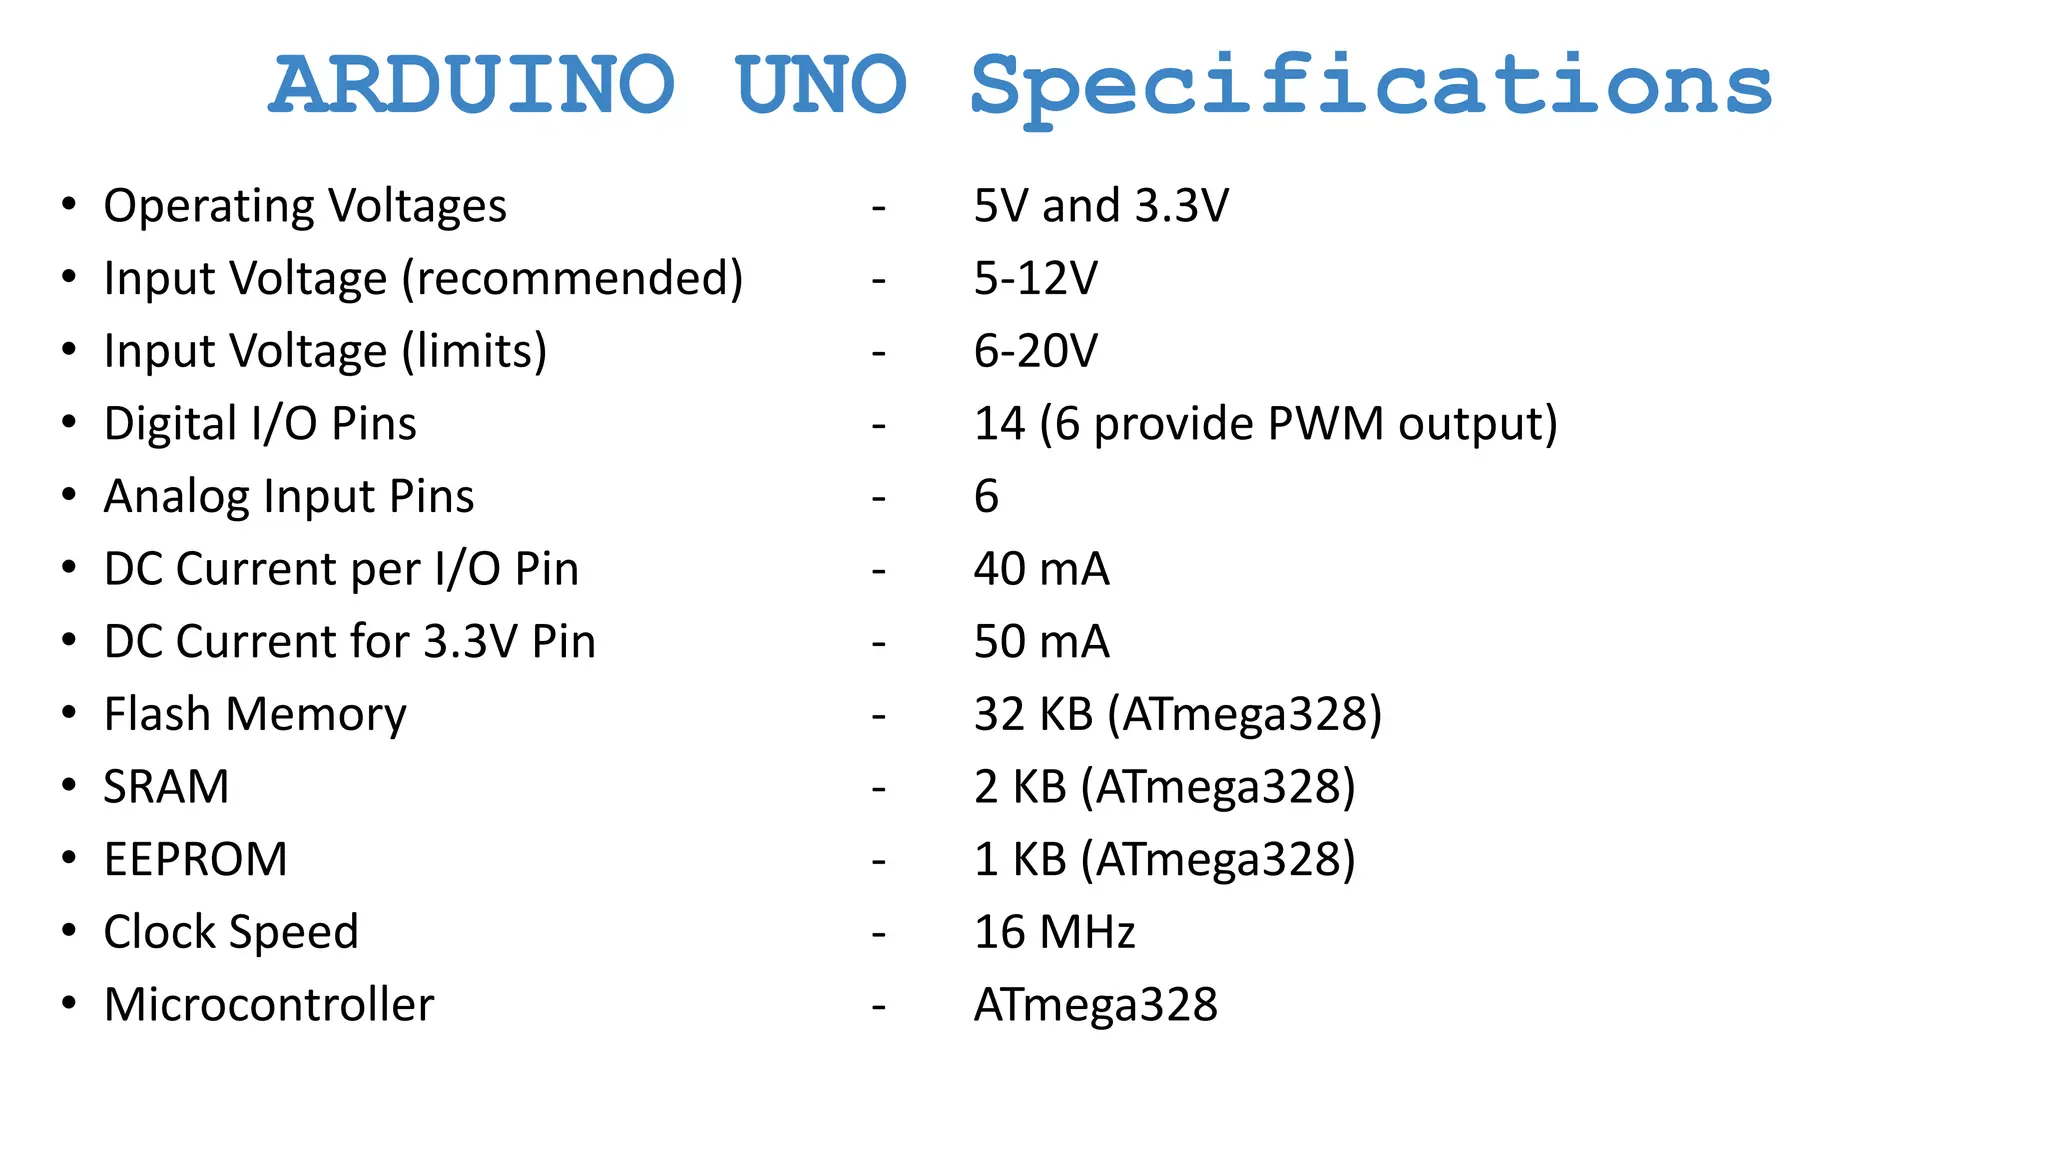
    ARDUINO UNO Specifications •Operating Voltages - 5V and 3.3V • Input Voltage (recommended) - 5-12V • Input Voltage (limits) - 6-20V • Digital I/O Pins - 14 (6 provide PWM output) • Analog Input Pins - 6 • DC Current per I/O Pin - 40 mA • DC Current for 3.3V Pin - 50 mA • Flash Memory - 32 KB (ATmega328) • SRAM - 2 KB (ATmega328) • EEPROM - 1 KB (ATmega328) • Clock Speed - 16 MHz • Microcontroller - ATmega328
  • 53.
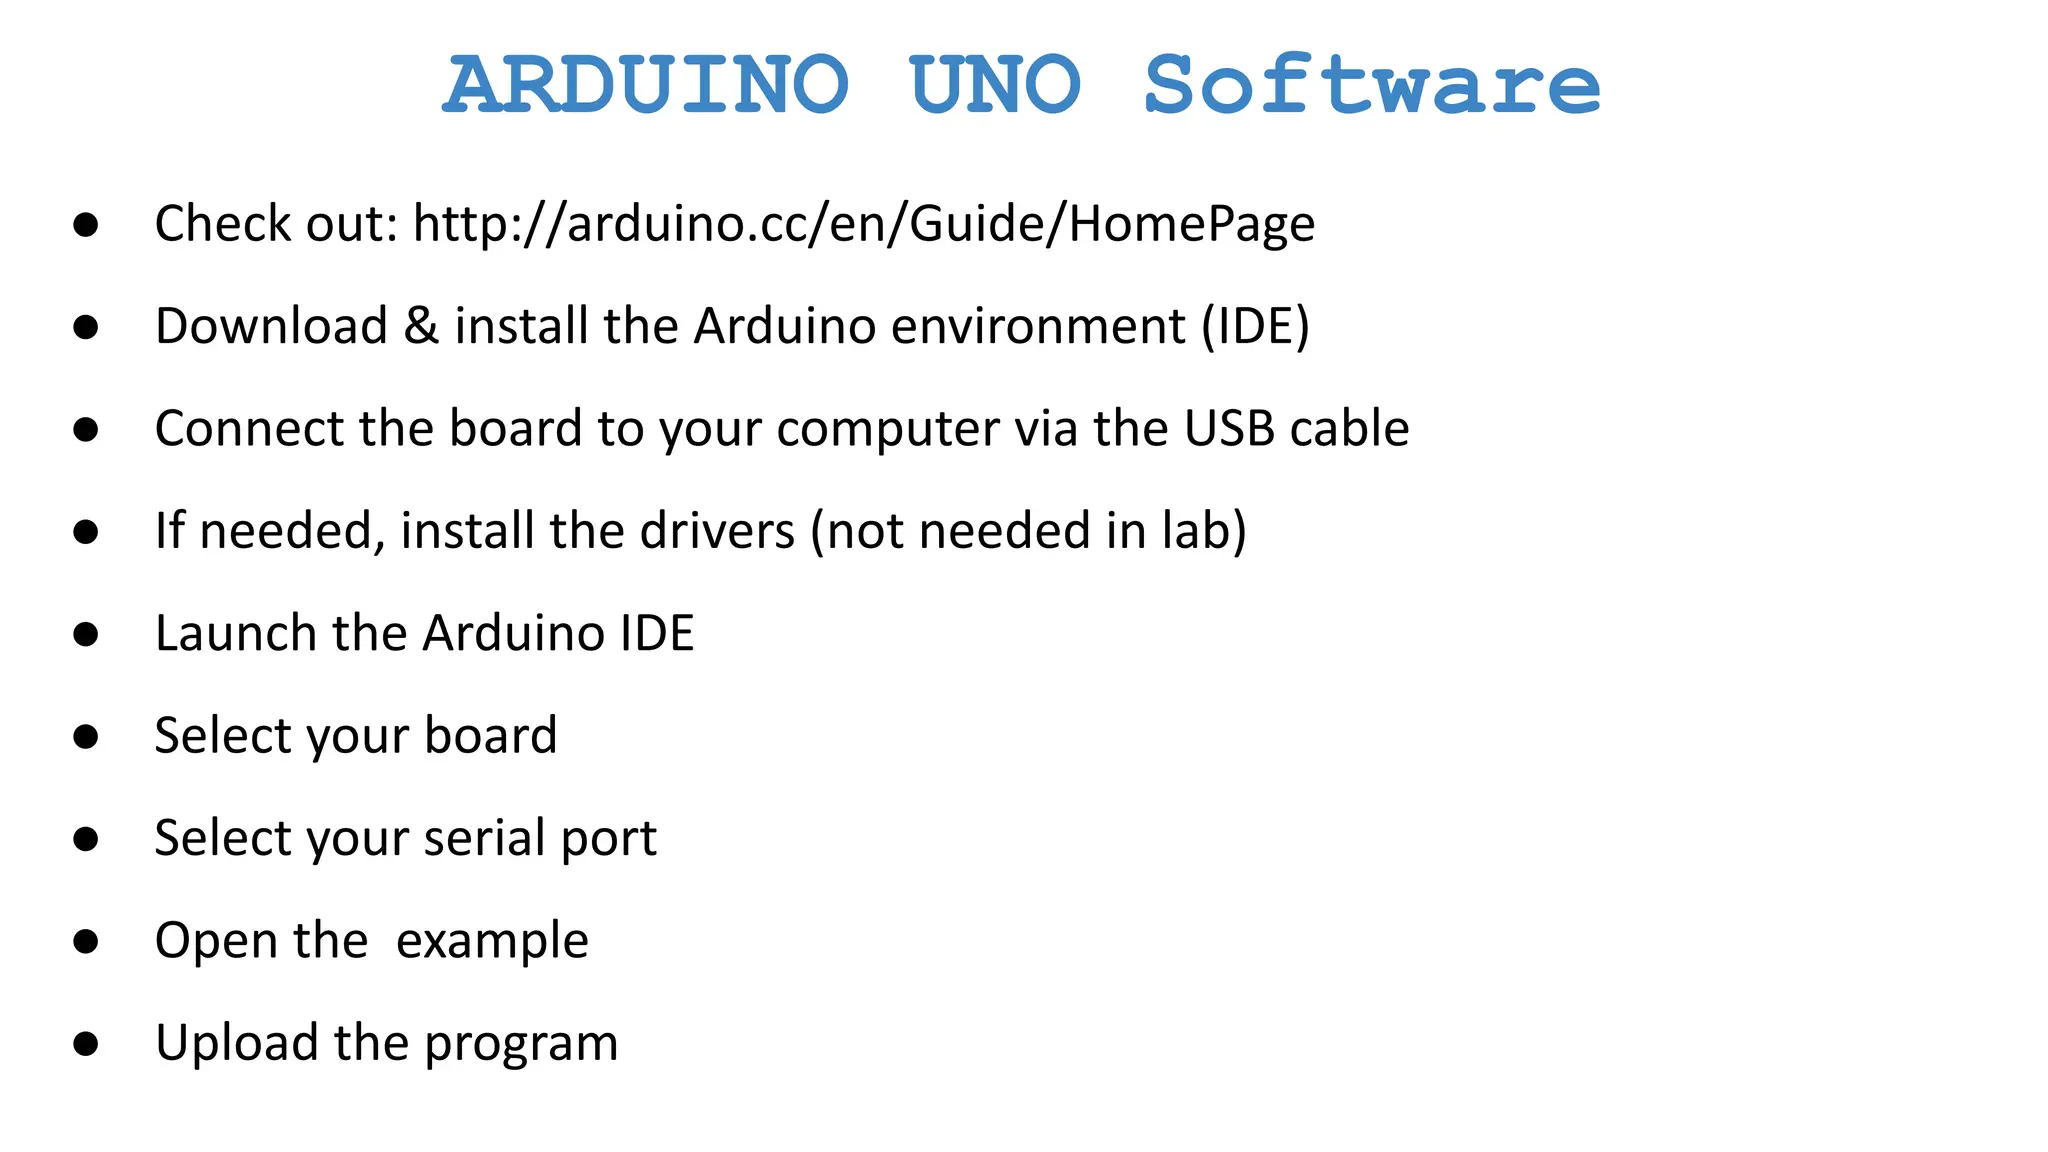
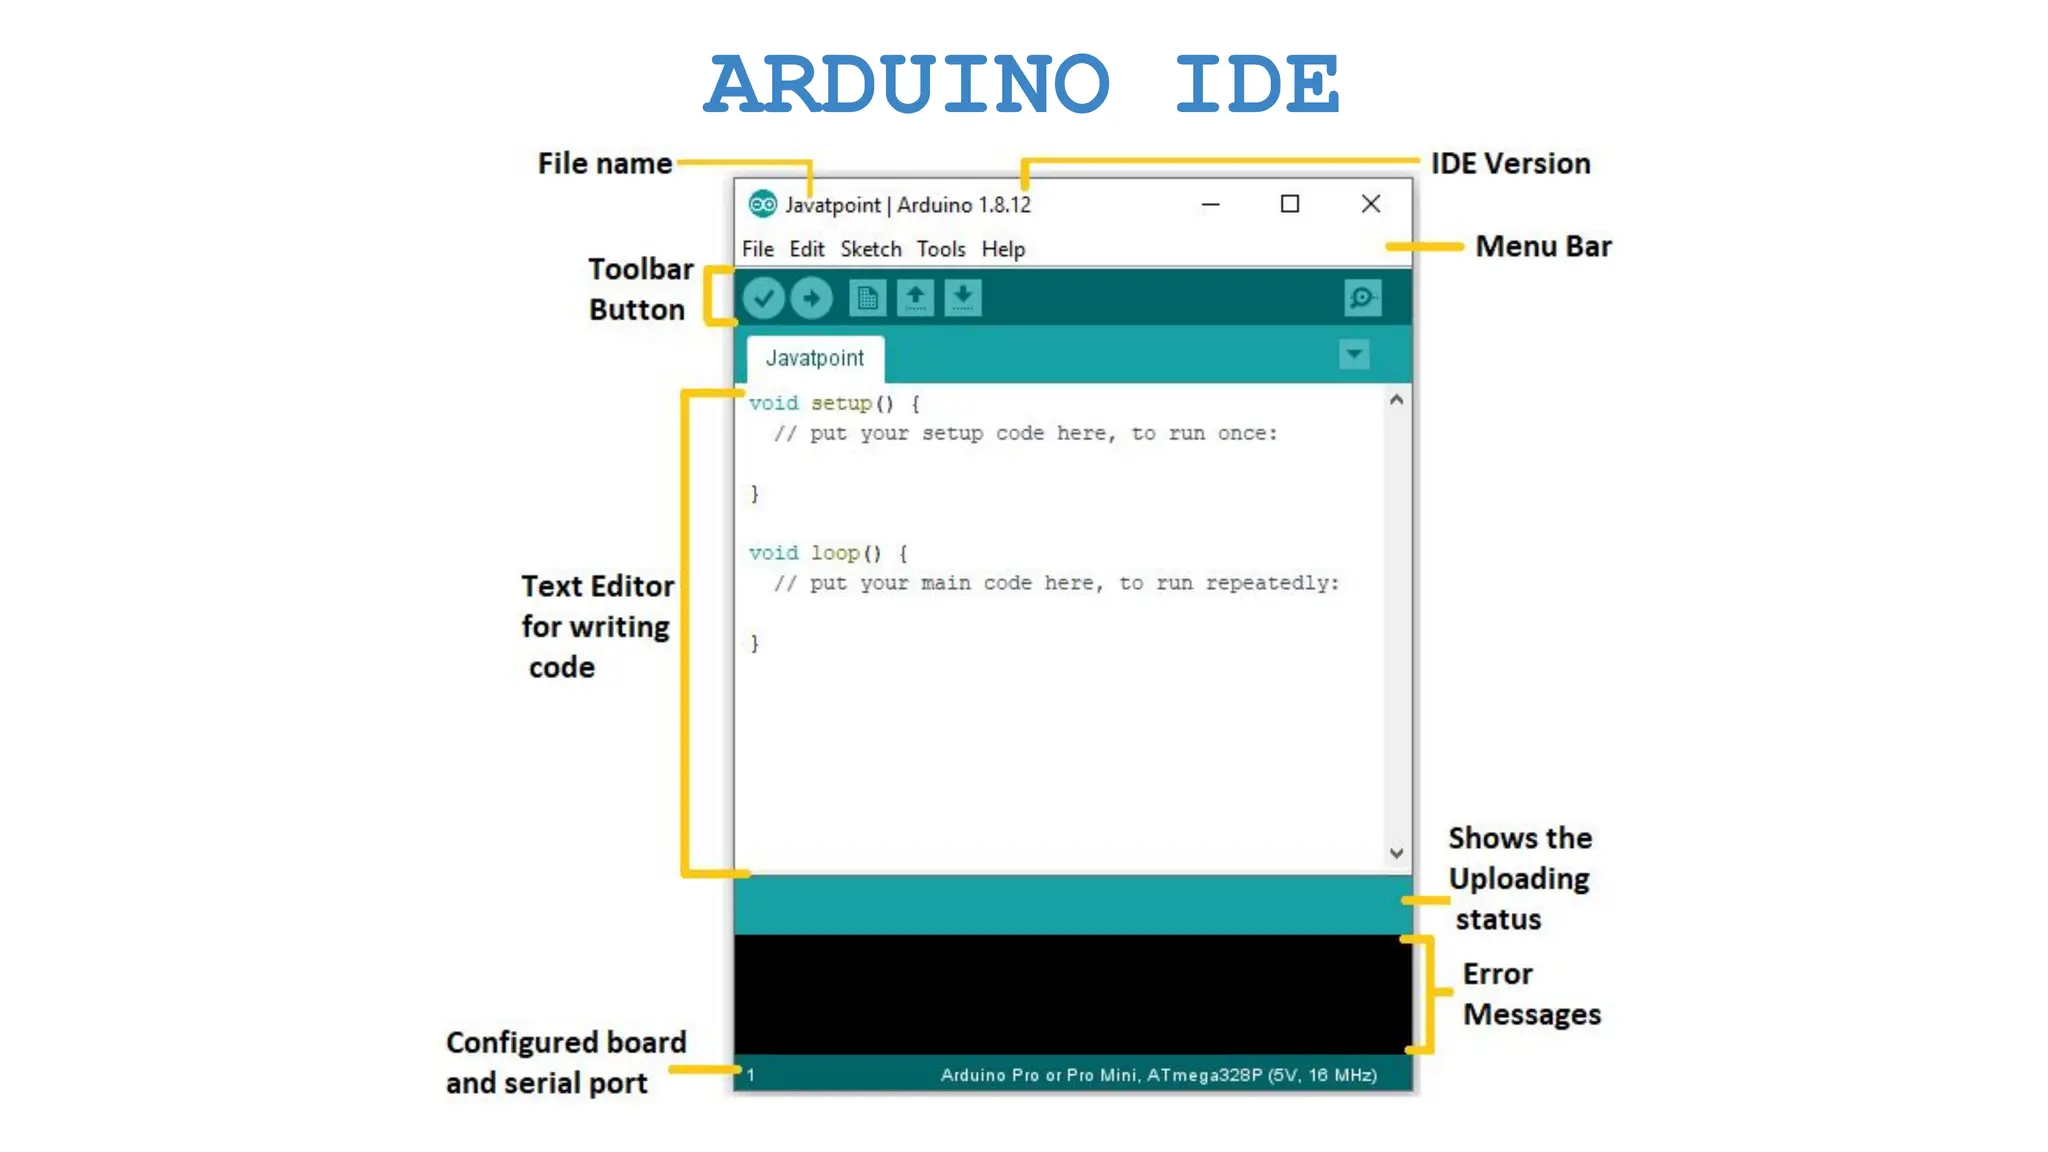
    ARDUINO UNO Software ●Check out: http://arduino.cc/en/Guide/HomePage ● Download & install the Arduino environment (IDE) ● Connect the board to your computer via the USB cable ● If needed, install the drivers (not needed in lab) ● Launch the Arduino IDE ● Select your board ● Select your serial port ● Open the example ● Upload the program
  • 54.
  • 55.
  • 56.
    Process Open Tinkercad andSign in https://www.tinkercad.com/
  • 57.
    ● Click onCreate New circuit ● Explore the Tinkercad Platform ● Drag and drop Arduino Uno to the workspace ● Go to Code and change from Blocks to Text
  • 58.
    Hello world Code: voidsetup() { Serial.begin(9600); // Baud Rate: No. of bits transmitted per second } void loop() { Serial.println(“Hello World!”); }
  • 59.
    Basic codes ● PrintIntegers ● different baud rates and speed ● loop and setup difference ● Print Binary: (10, BIN)
  • 60.
    Digital Output Code(LED): void setup() { pinMode(13, OUTPUT); } void loop() { digitalWrite(13, HIGH); } Add 100 ohm resistor to avoid any error.
  • 61.
  • 62.
    Try to BlinkLED with any frequency Hint: to play with time use the function: delay(1000);
  • 63.
    LED Blink Code: voidsetup() { pinMode(LED_BUILTIN, OUTPUT); } void loop() { digitalWrite(LED_BUILTIN, HIGH); delay(1000); digitalWrite(LED_BUILTIN, LOW); delay(1000); }
  • 64.
    Try to Blink3 LEDs with a sequence Traffic Lights
  • 65.
  • 66.
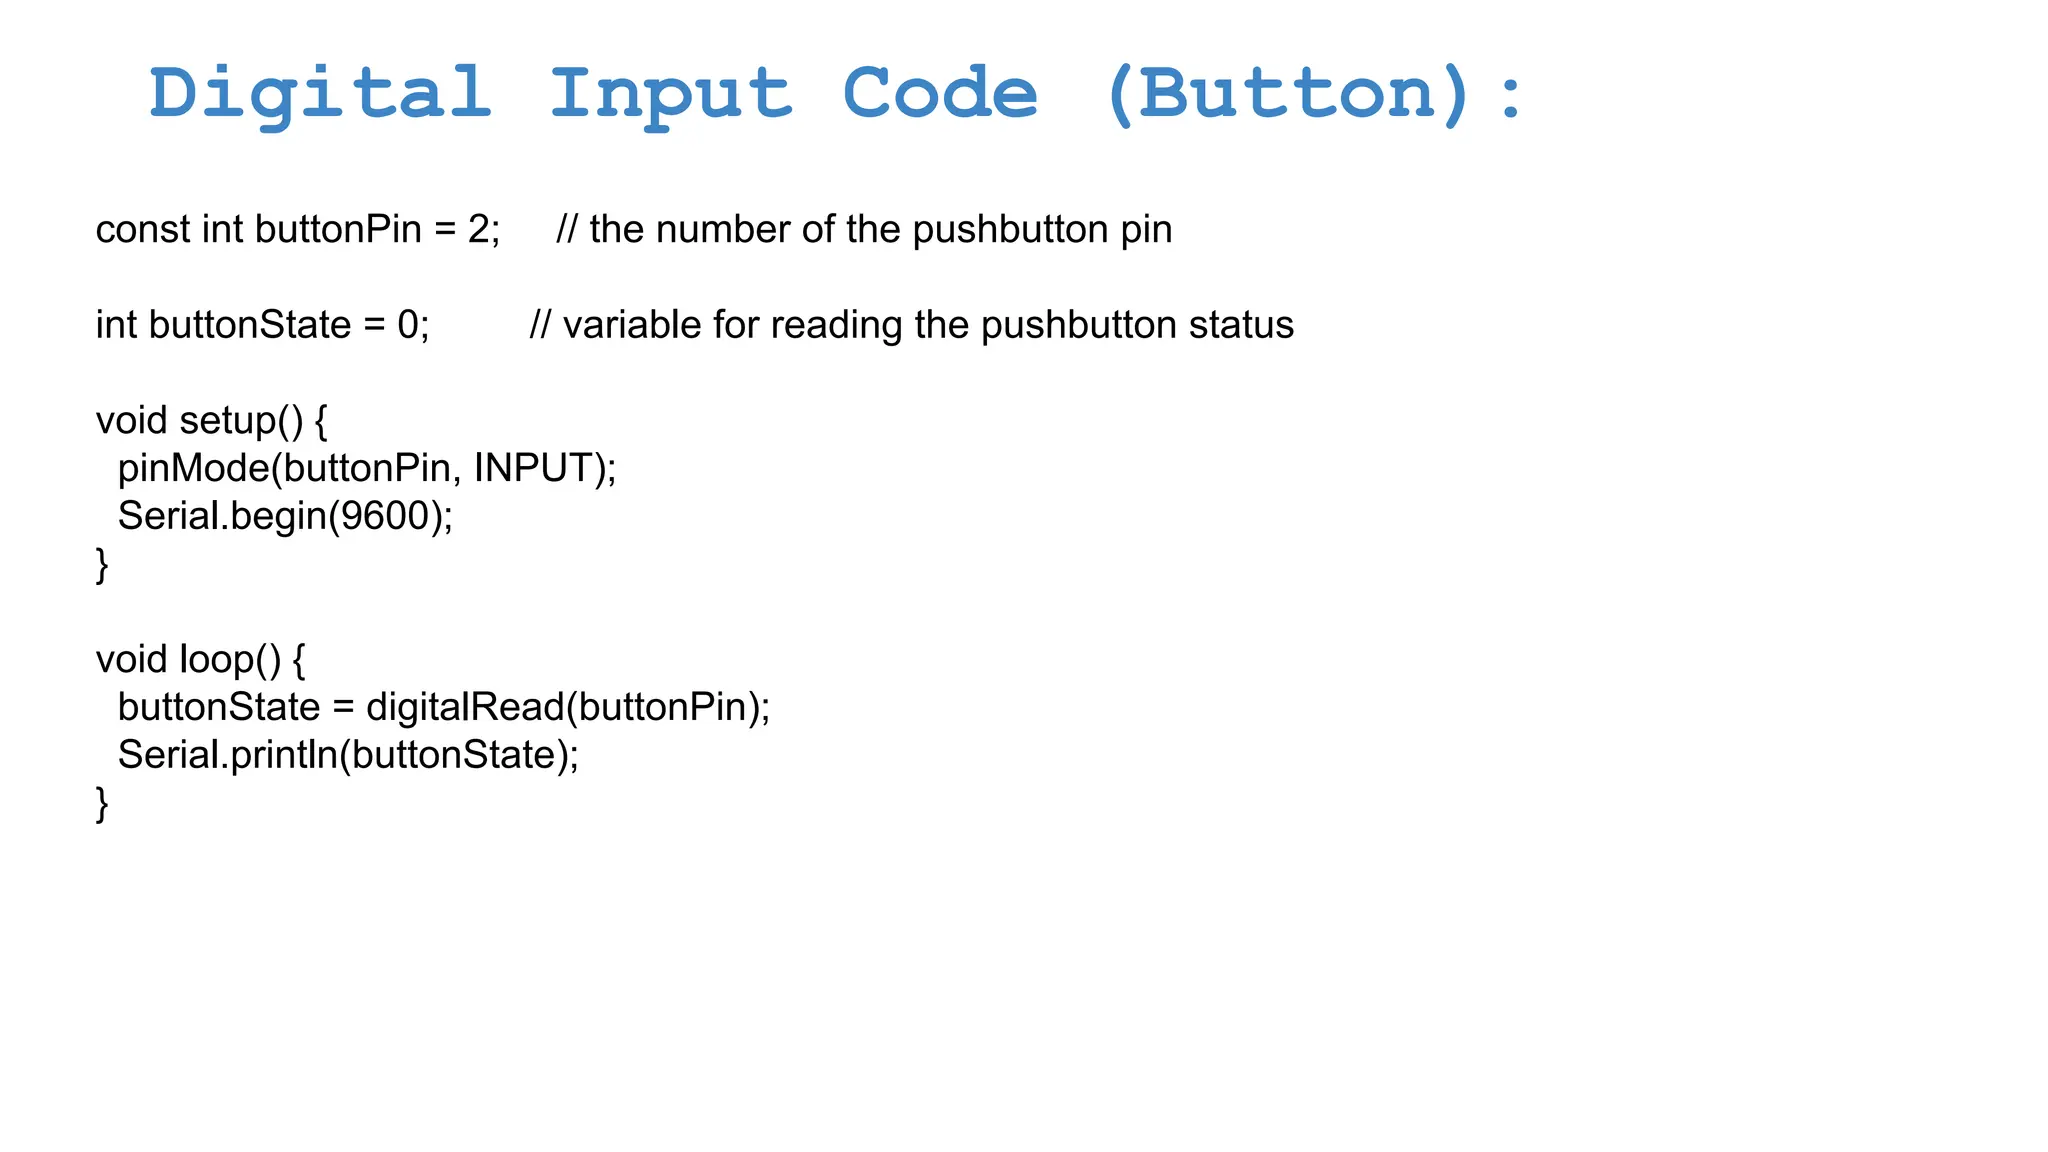
    Digital Input Code(Button): const int buttonPin = 2; // the number of the pushbutton pin int buttonState = 0; // variable for reading the pushbutton status void setup() { pinMode(buttonPin, INPUT); Serial.begin(9600); } void loop() { buttonState = digitalRead(buttonPin); Serial.println(buttonState); }
  • 67.
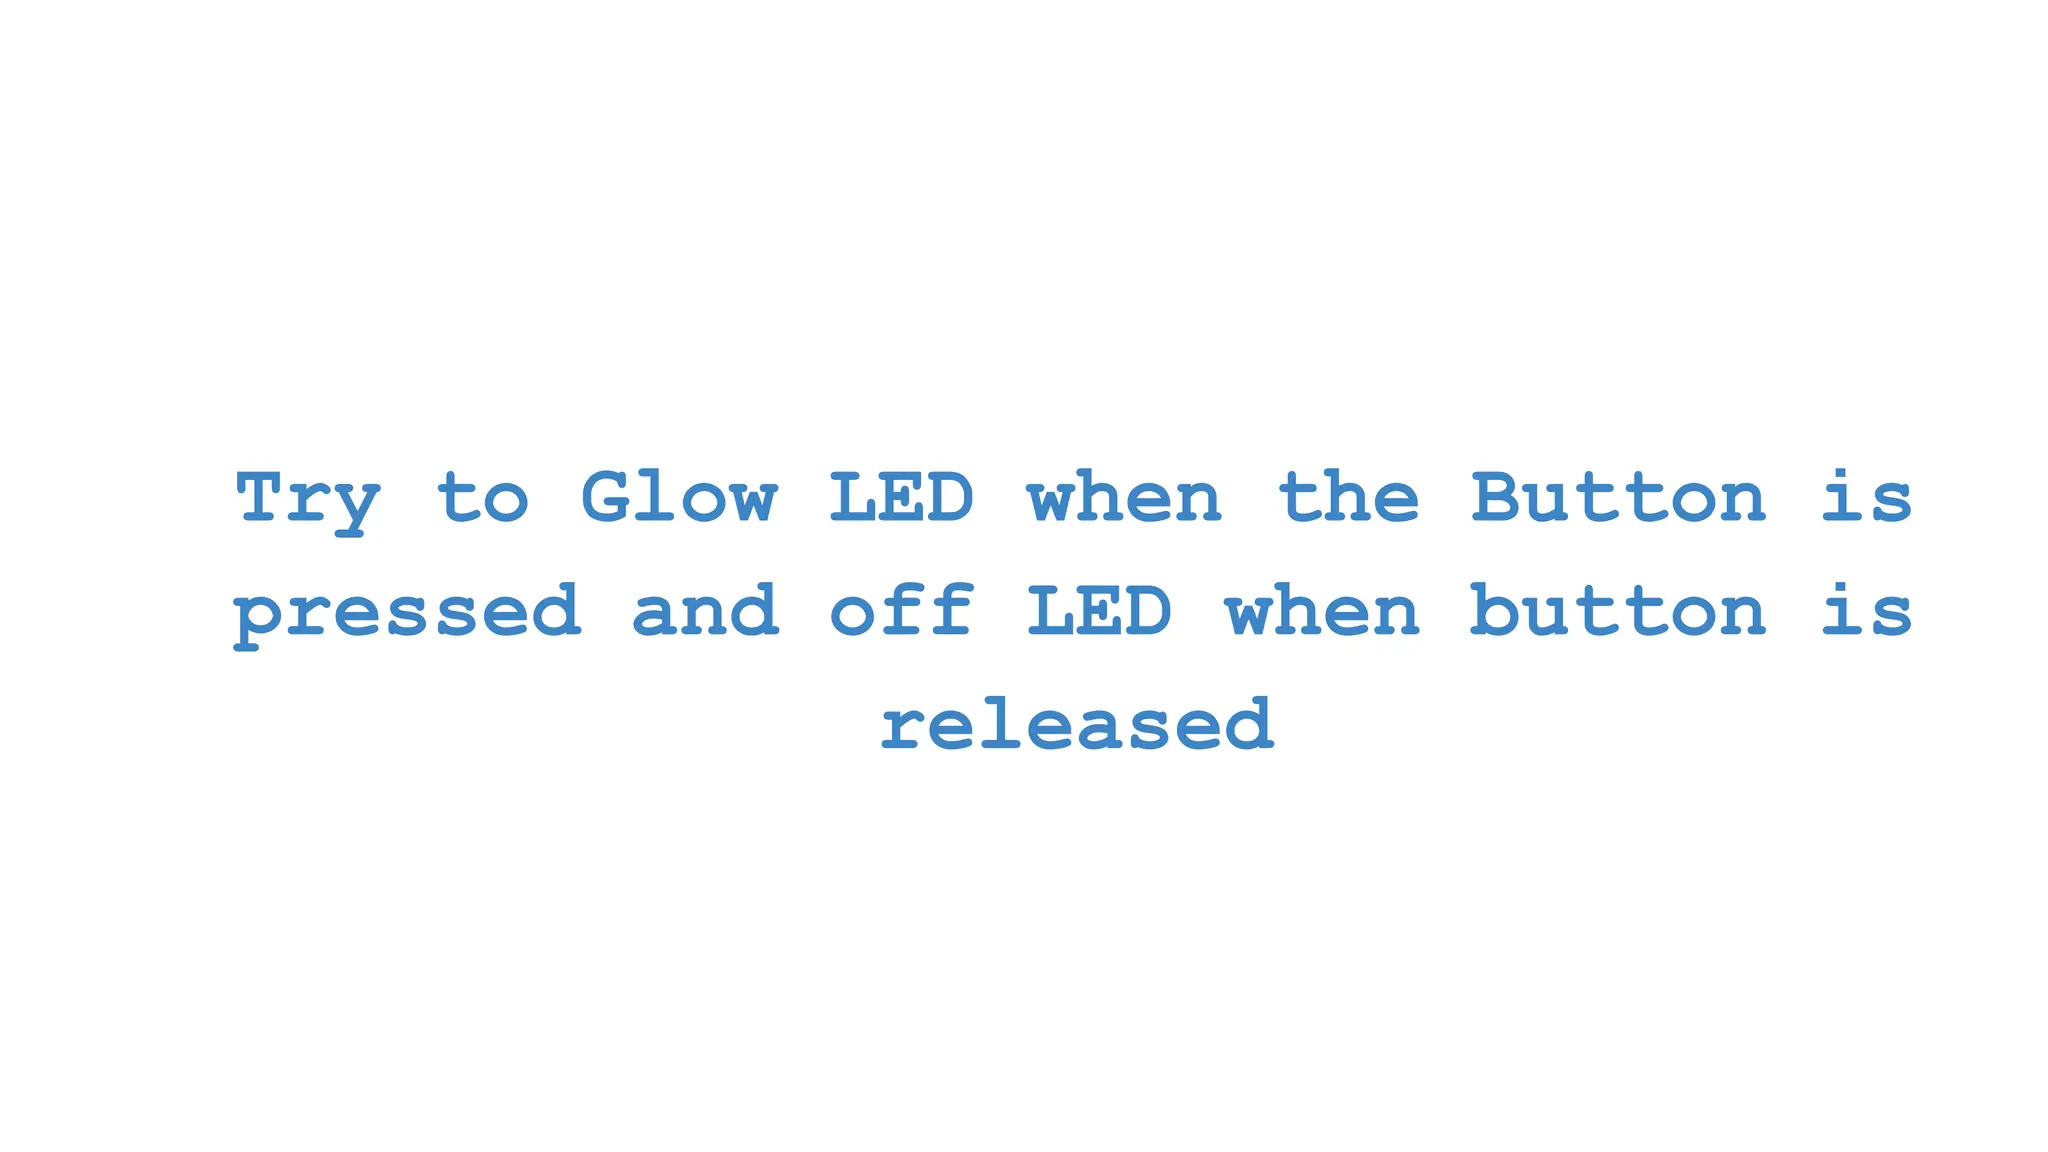
    Try to GlowLED when the Button is pressed and off LED when button is released
  • 68.
    (Button with LED): constint buttonPin = 2; // the number of the pushbutton pin const int ledPin = 13; // the number of the LED pin int buttonState = 0; // variable for reading the pushbutton status void setup() { pinMode(ledPin, OUTPUT); pinMode(buttonPin, INPUT); } void loop() { buttonState = digitalRead(buttonPin); if (buttonState == LOW) { digitalWrite(ledPin, HIGH); } else { digitalWrite(ledPin, LOW); } }
  • 69.
    Analog Read withPotentiometer
  • 70.
    Analog Read withPotentiometer void setup() { Serial.begin(9600); } void loop() { int a = analogRead(A0); Serial.print("Analog value: "); Serial.println(a); }
  • 71.
    Potentiometer above 500glow LED If not Off the LED
  • 72.
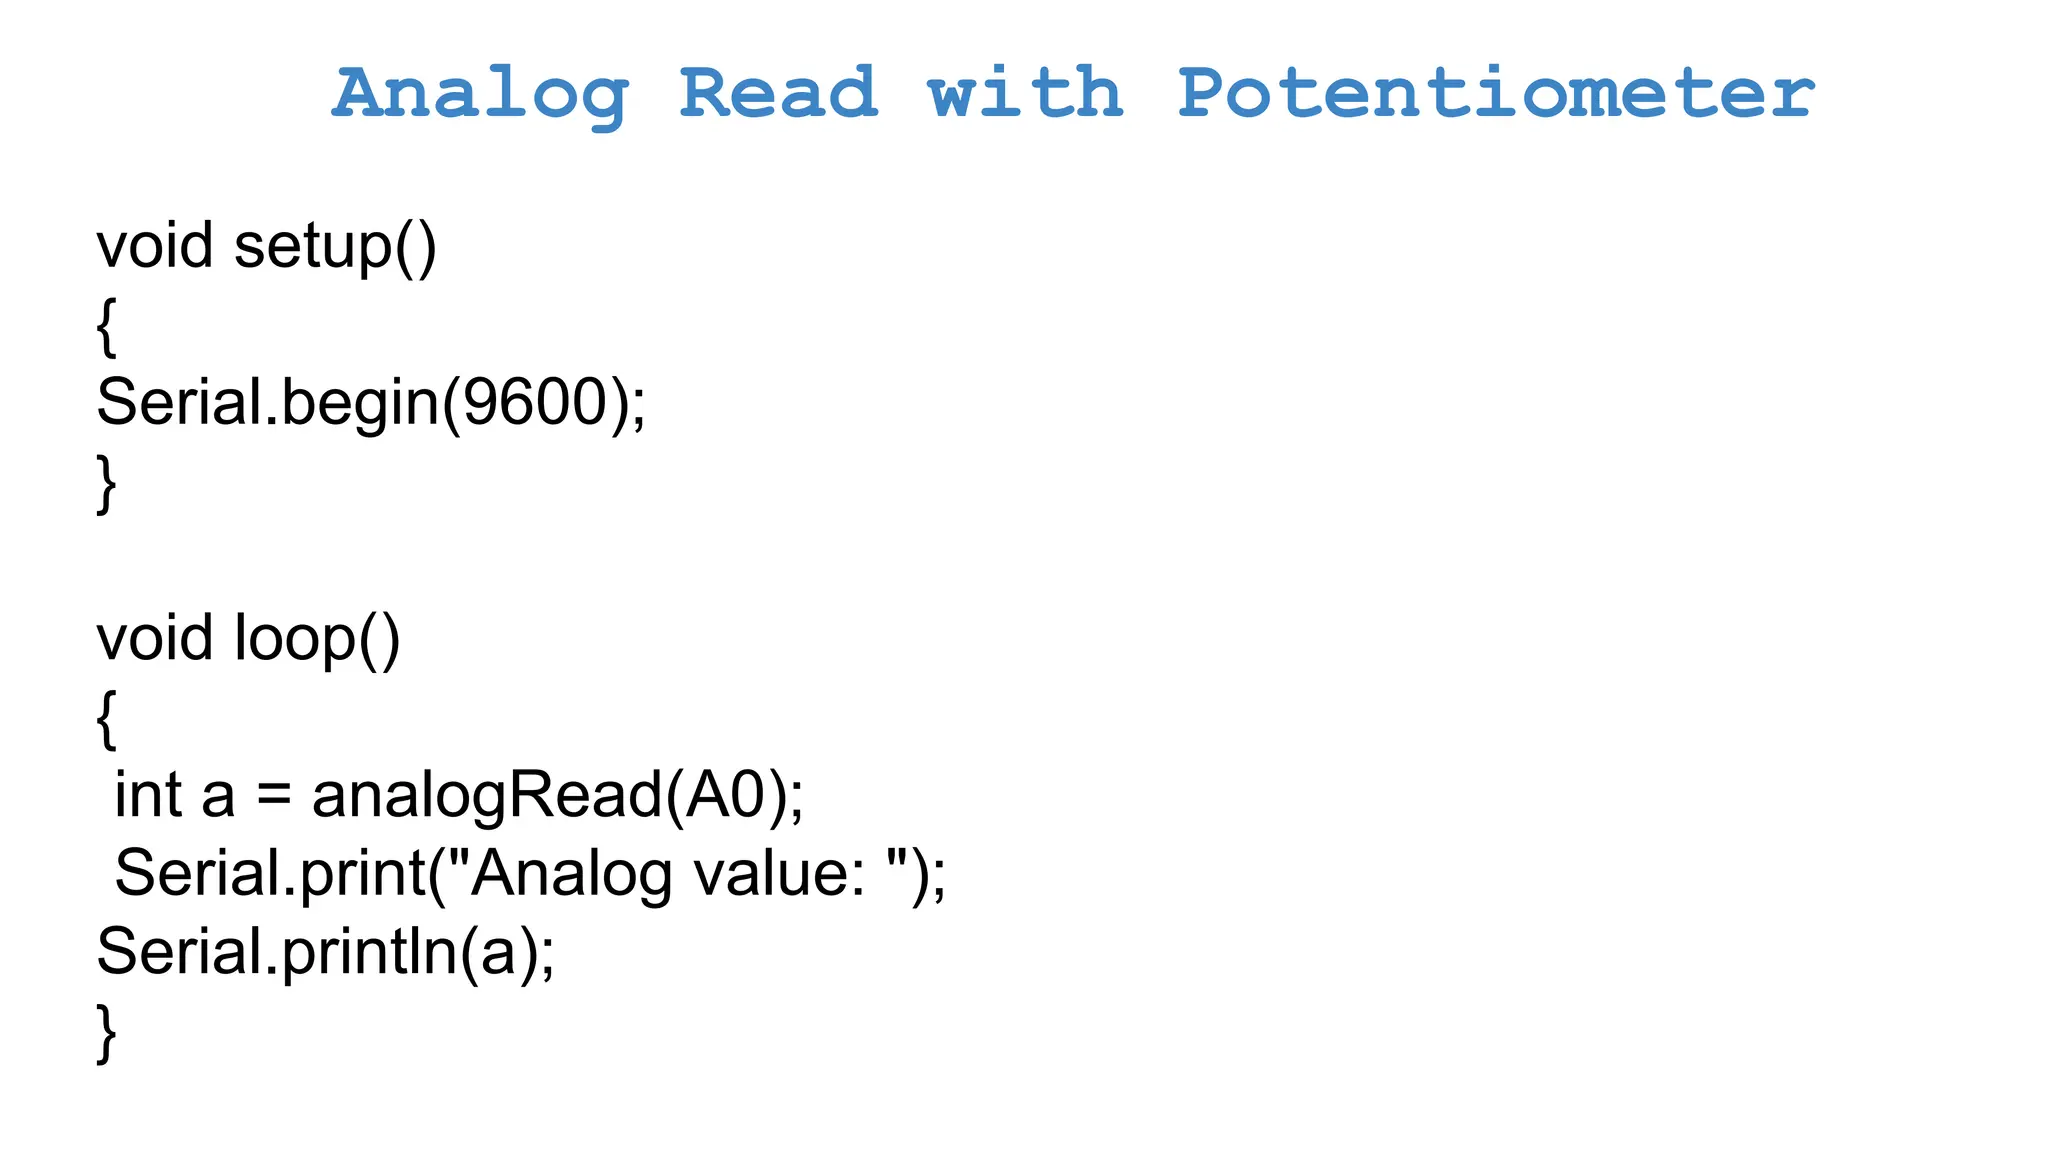
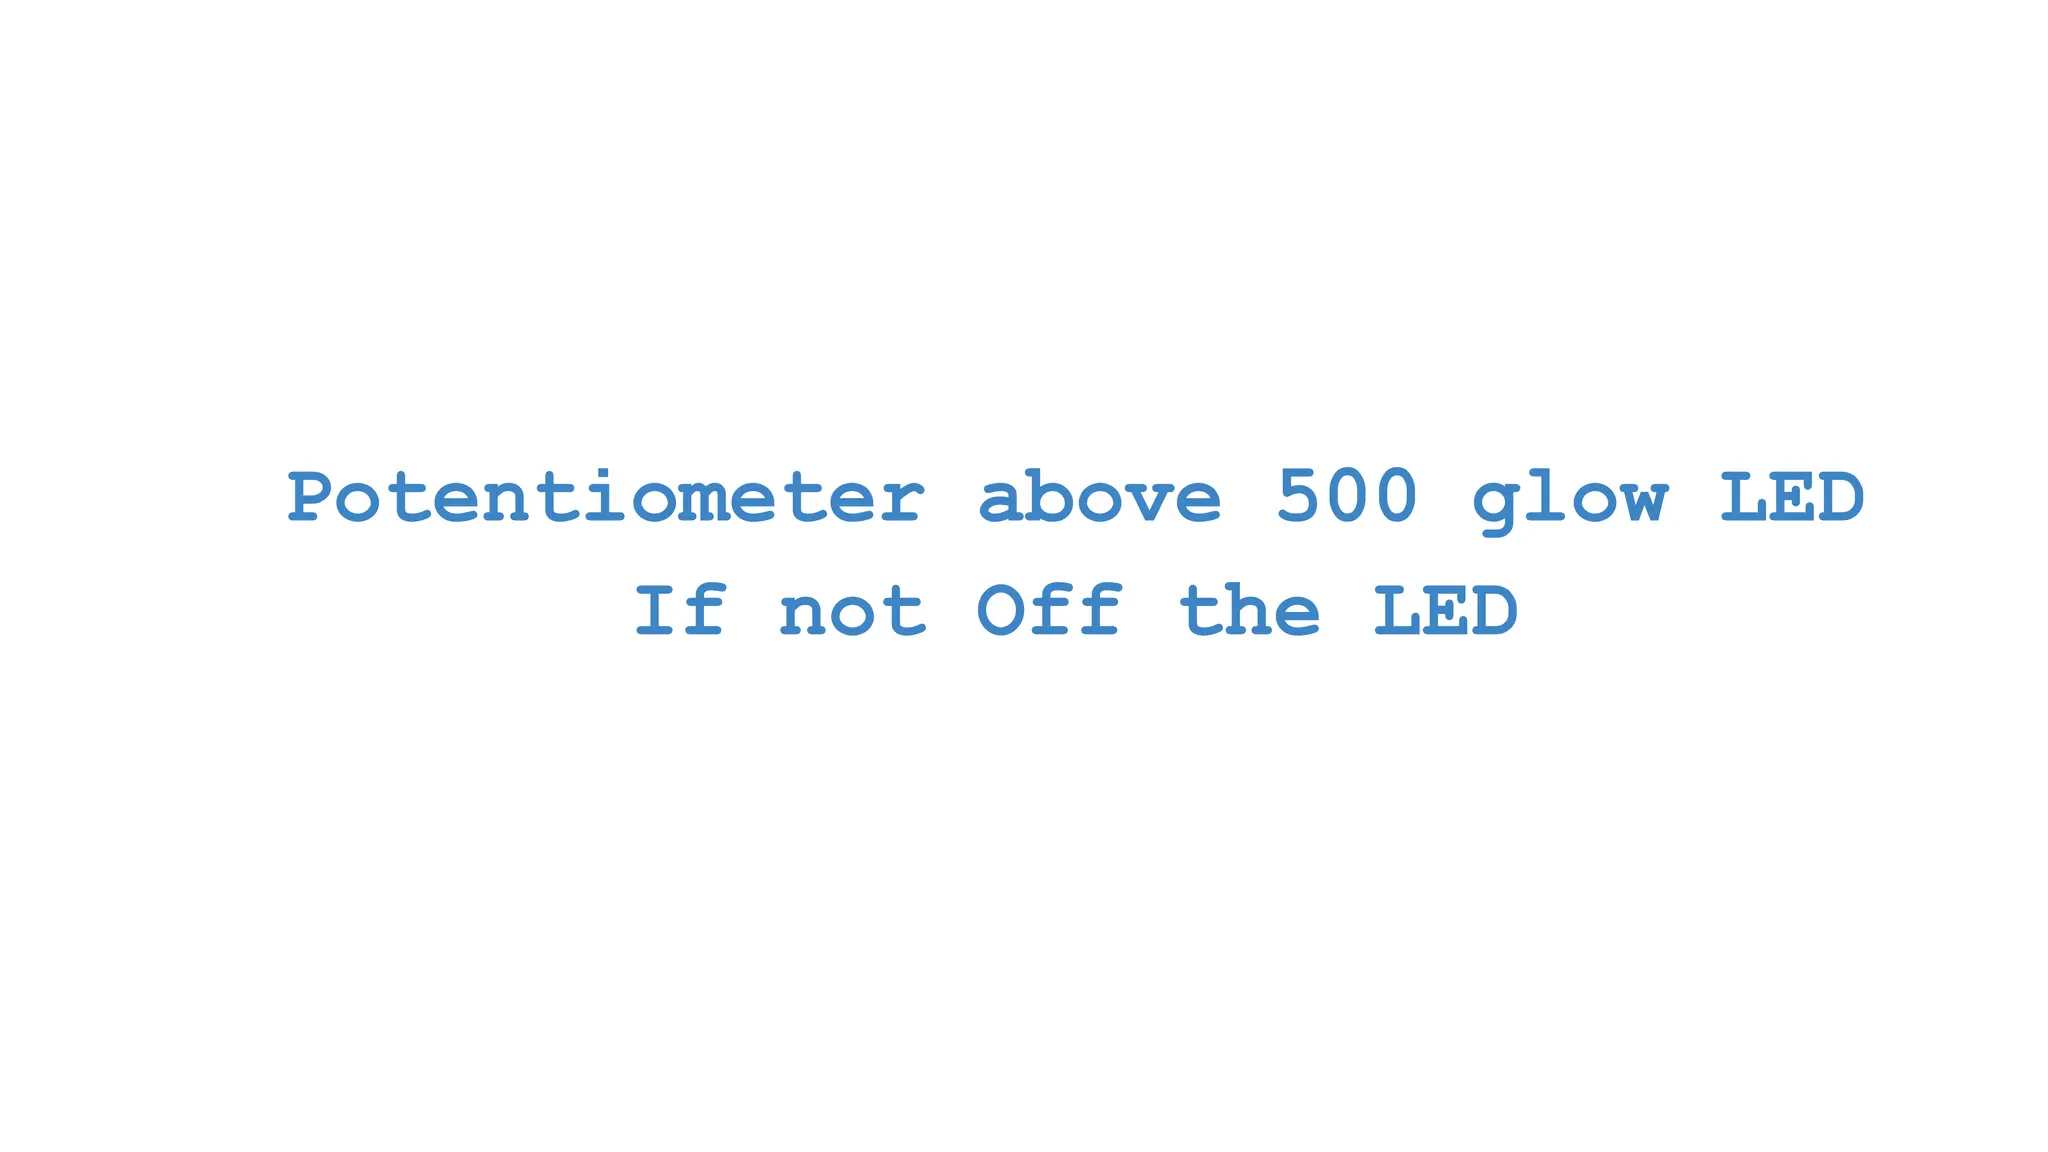
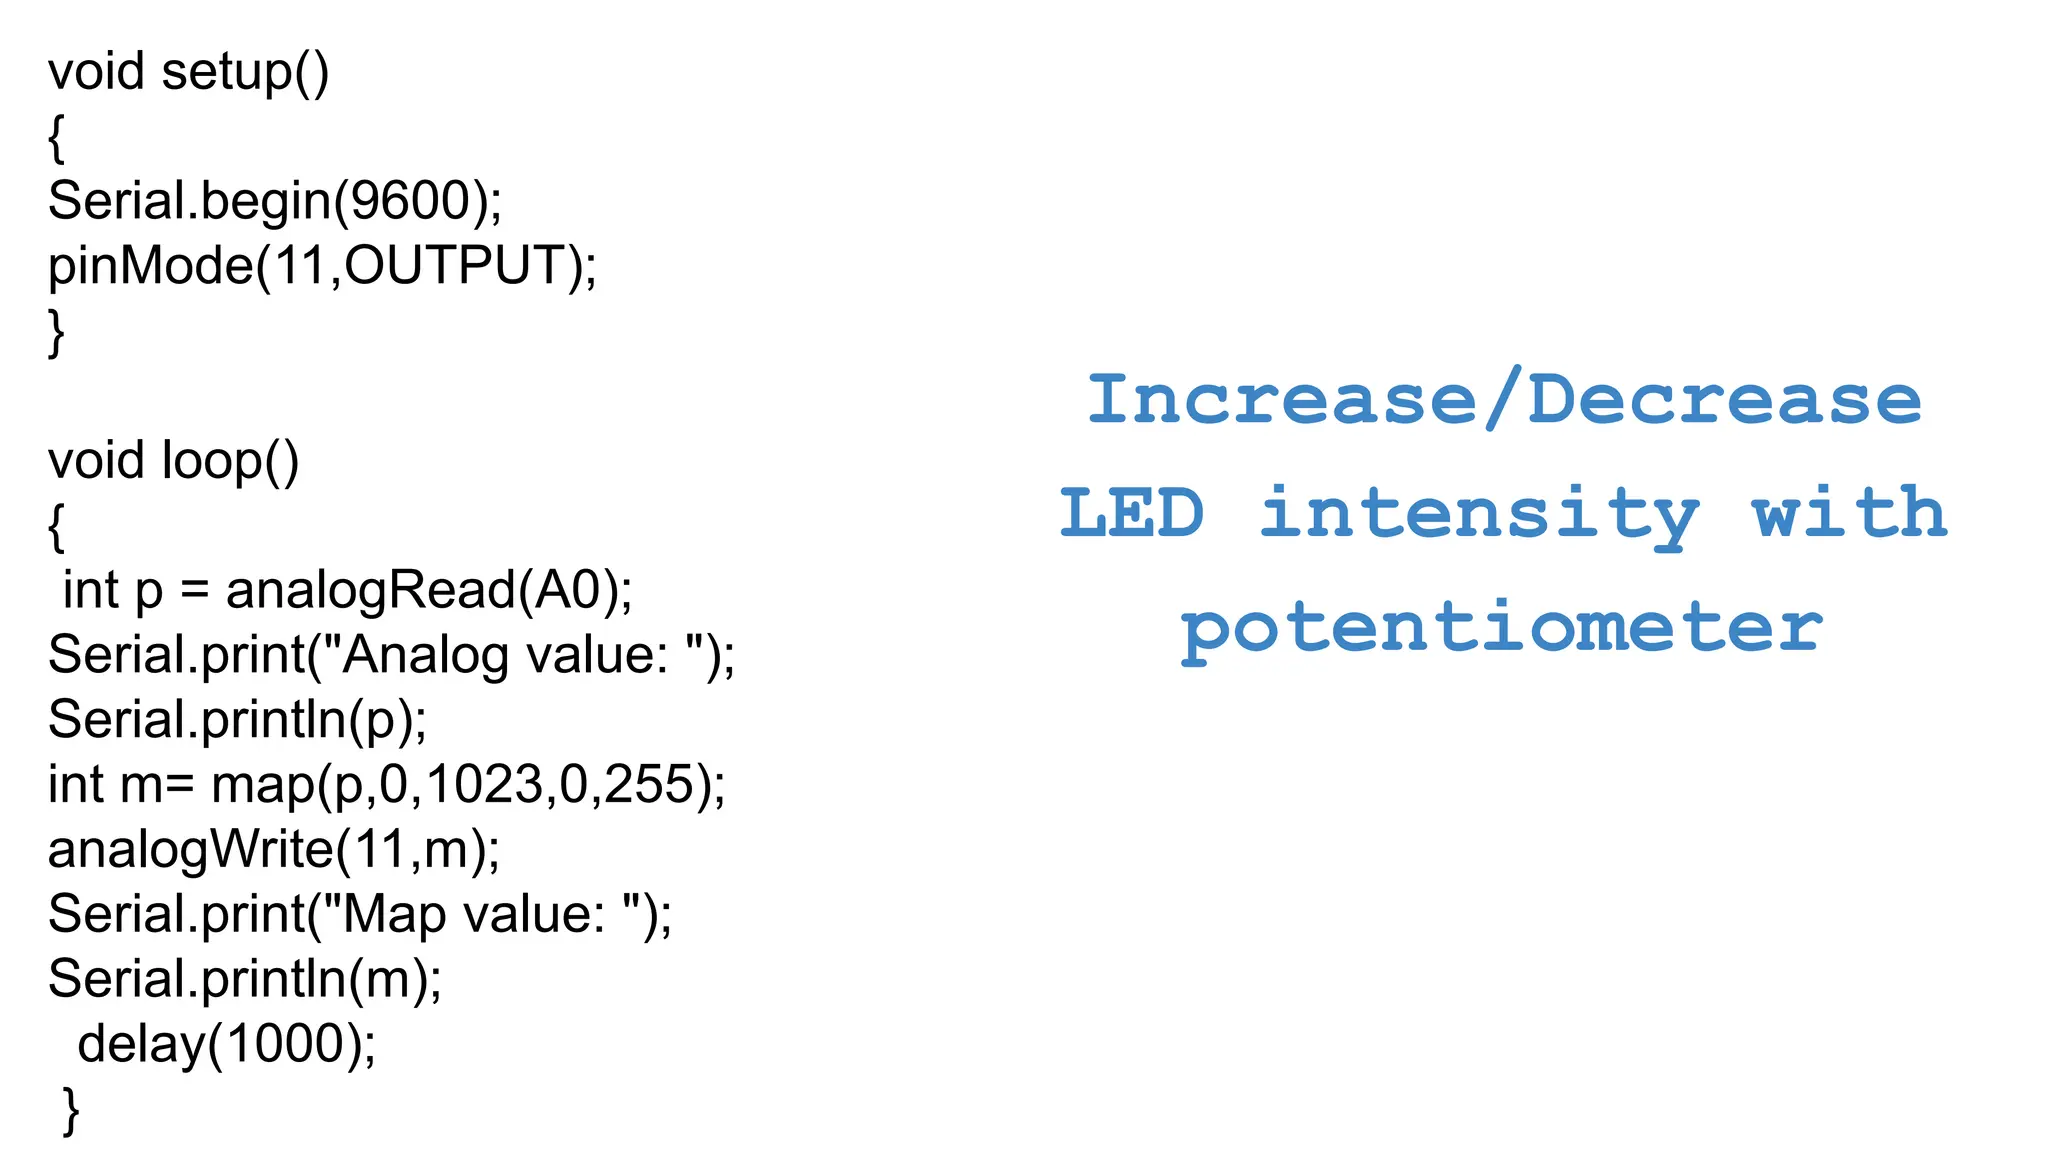
    (Potentiometer with LED): constint potPin = A0; // the number of the pushbutton pin const int ledPin = 13; // the number of the LED pin int potState = 0; // variable for reading the pushbutton status void setup() { pinMode(ledPin, OUTPUT); pinMode(potPin, INPUT); } void loop() { int potState = analogRead( potPin ); Serial.print("Analog value: "); Serial.println(potState); if (potState >= 500 ) { digitalWrite(ledPin, HIGH); } else { digitalWrite(ledPin, LOW); } }
  • 73.
  • 74.
    Analog write withled void setup() { Serial.begin(9600); pinMode(11,OUTPUT); } void loop() { analogWrite(11, 255); delay(1000); analogWrite(11, 200); delay(1000); analogWrite(11, 100); delay(1000); analogWrite(11, 50); delay(1000); analogWrite(11, 0); delay(1000); }
  • 75.
  • 76.
    Increase/Decrease LED intensity with potentiometer voidsetup() { Serial.begin(9600); pinMode(11,OUTPUT); } void loop() { int p = analogRead(A0); Serial.print("Analog value: "); Serial.println(p); int m= map(p,0,1023,0,255); analogWrite(11,m); Serial.print("Map value: "); Serial.println(m); delay(1000); }
  • 77.
    Produce different colorswith RGB LED with potentiometers
  • 78.
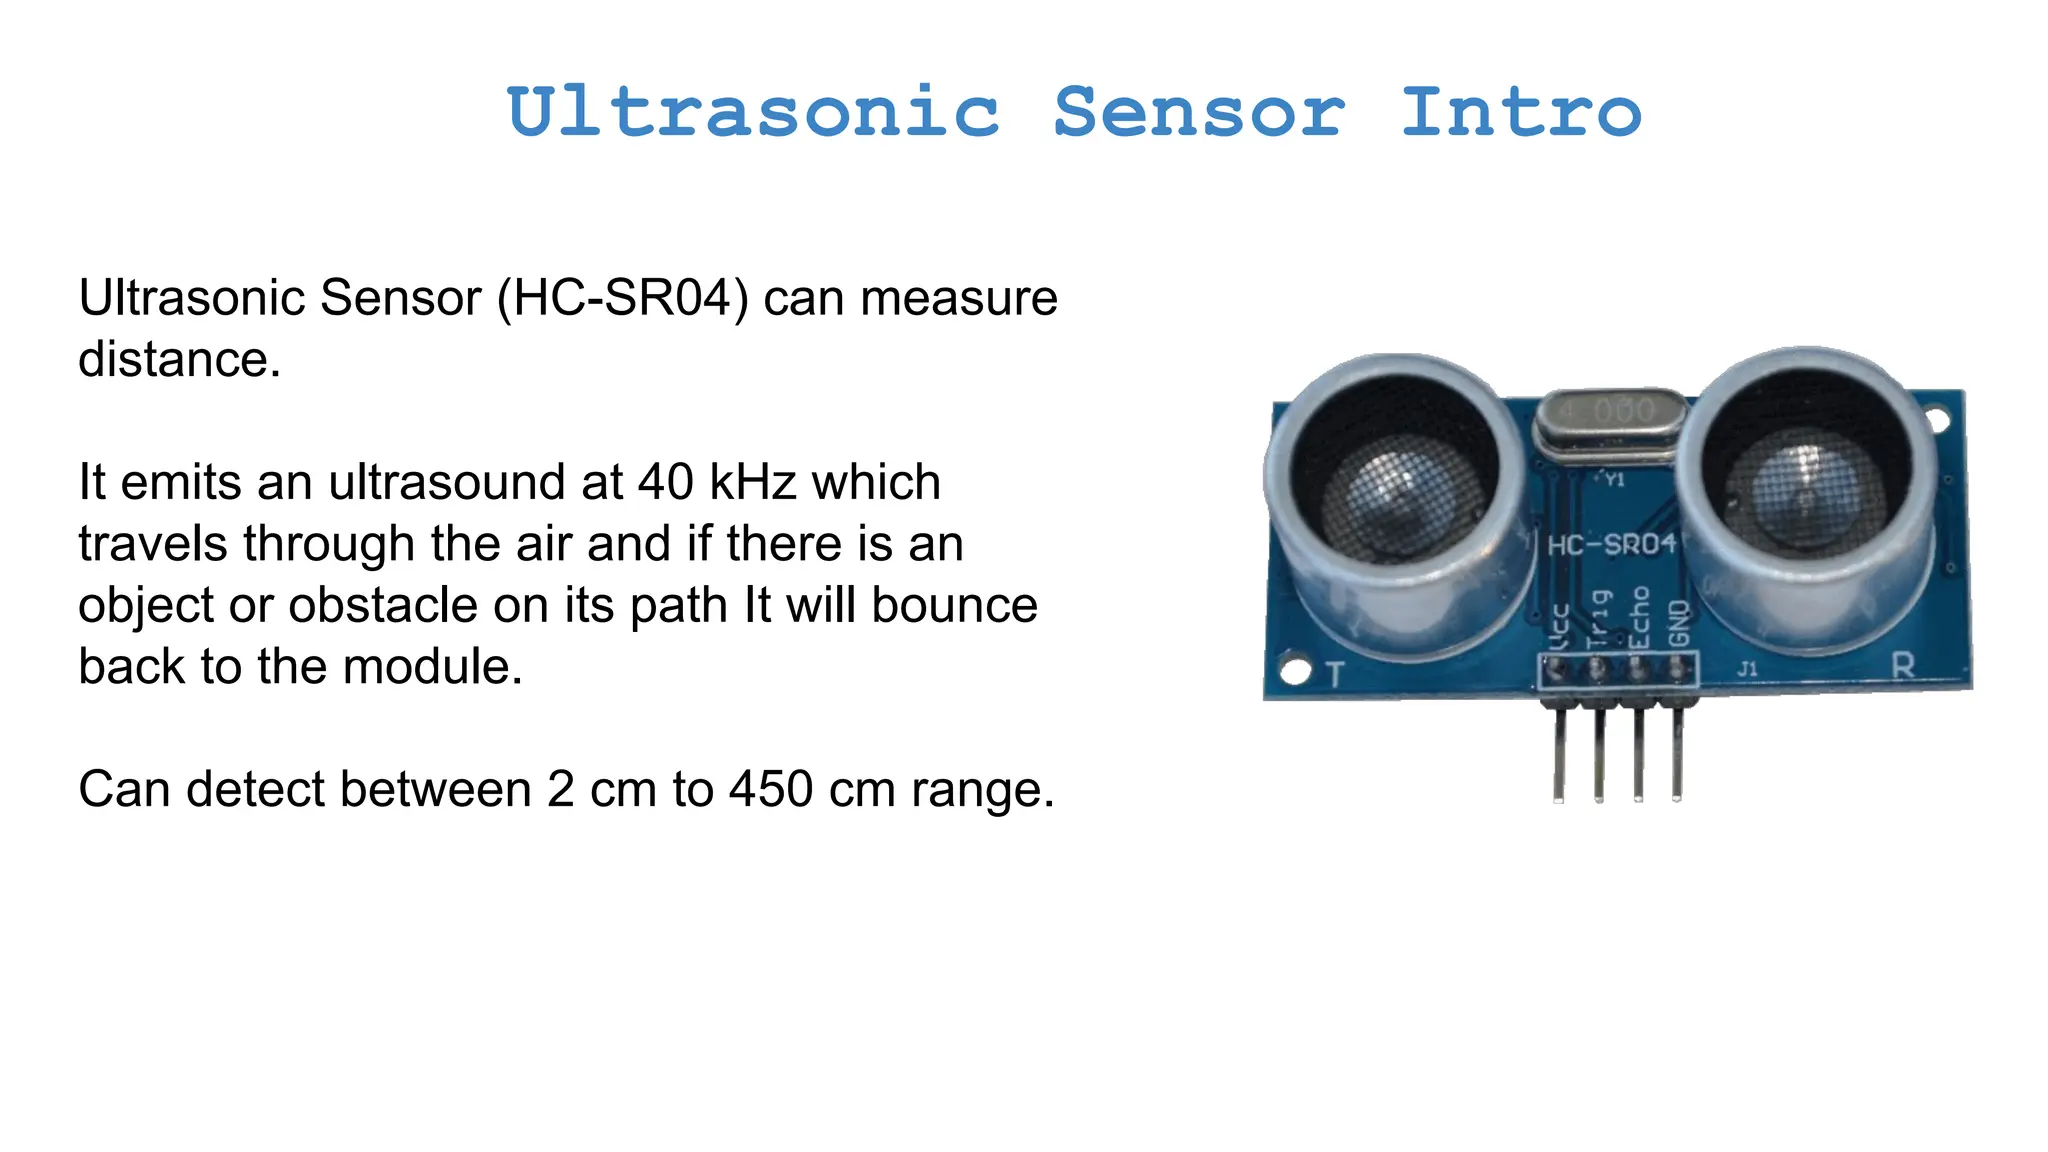
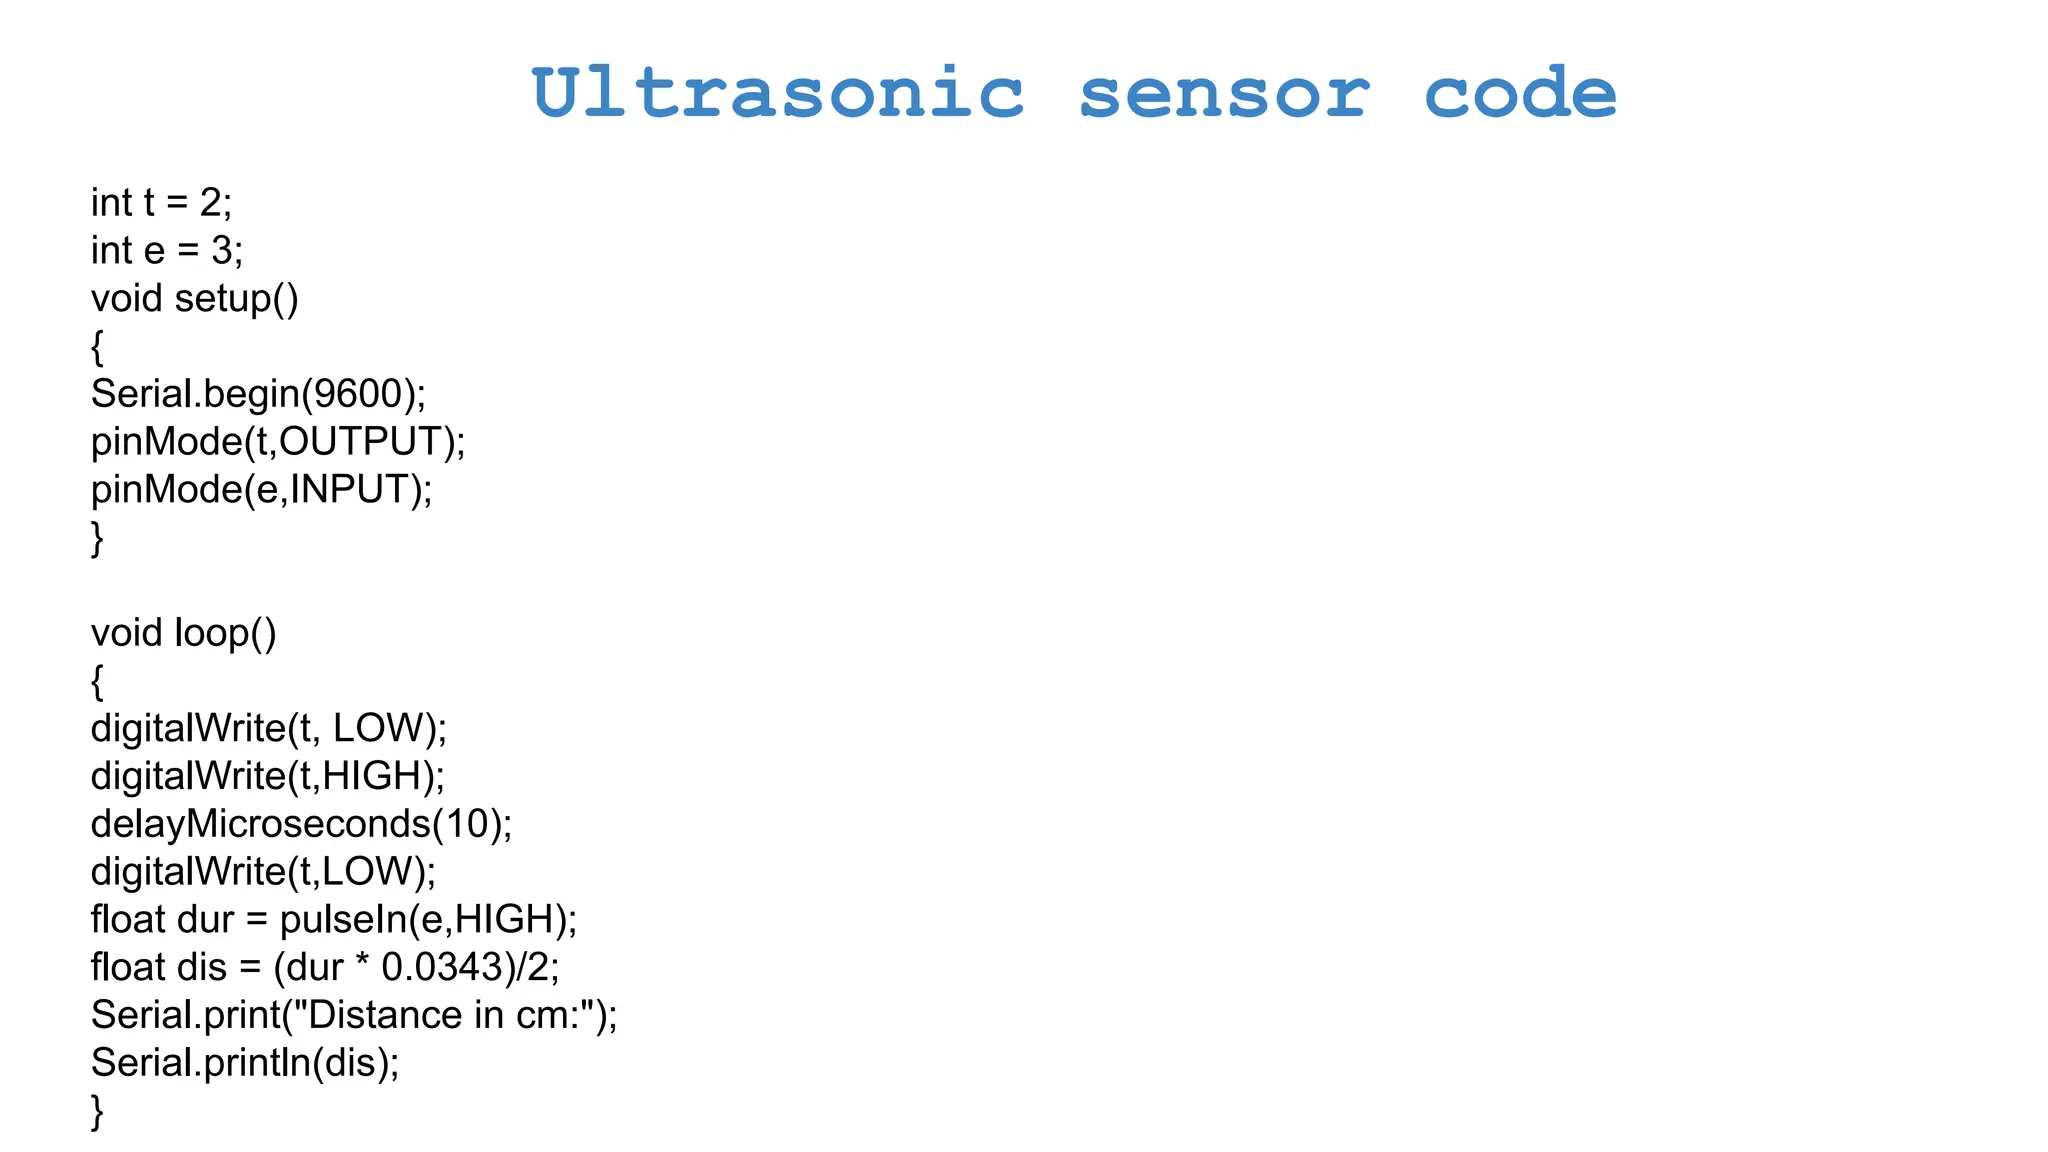
    Ultrasonic Sensor Intro UltrasonicSensor (HC-SR04) can measure distance. It emits an ultrasound at 40 kHz which travels through the air and if there is an object or obstacle on its path It will bounce back to the module. Can detect between 2 cm to 450 cm range.
  • 79.
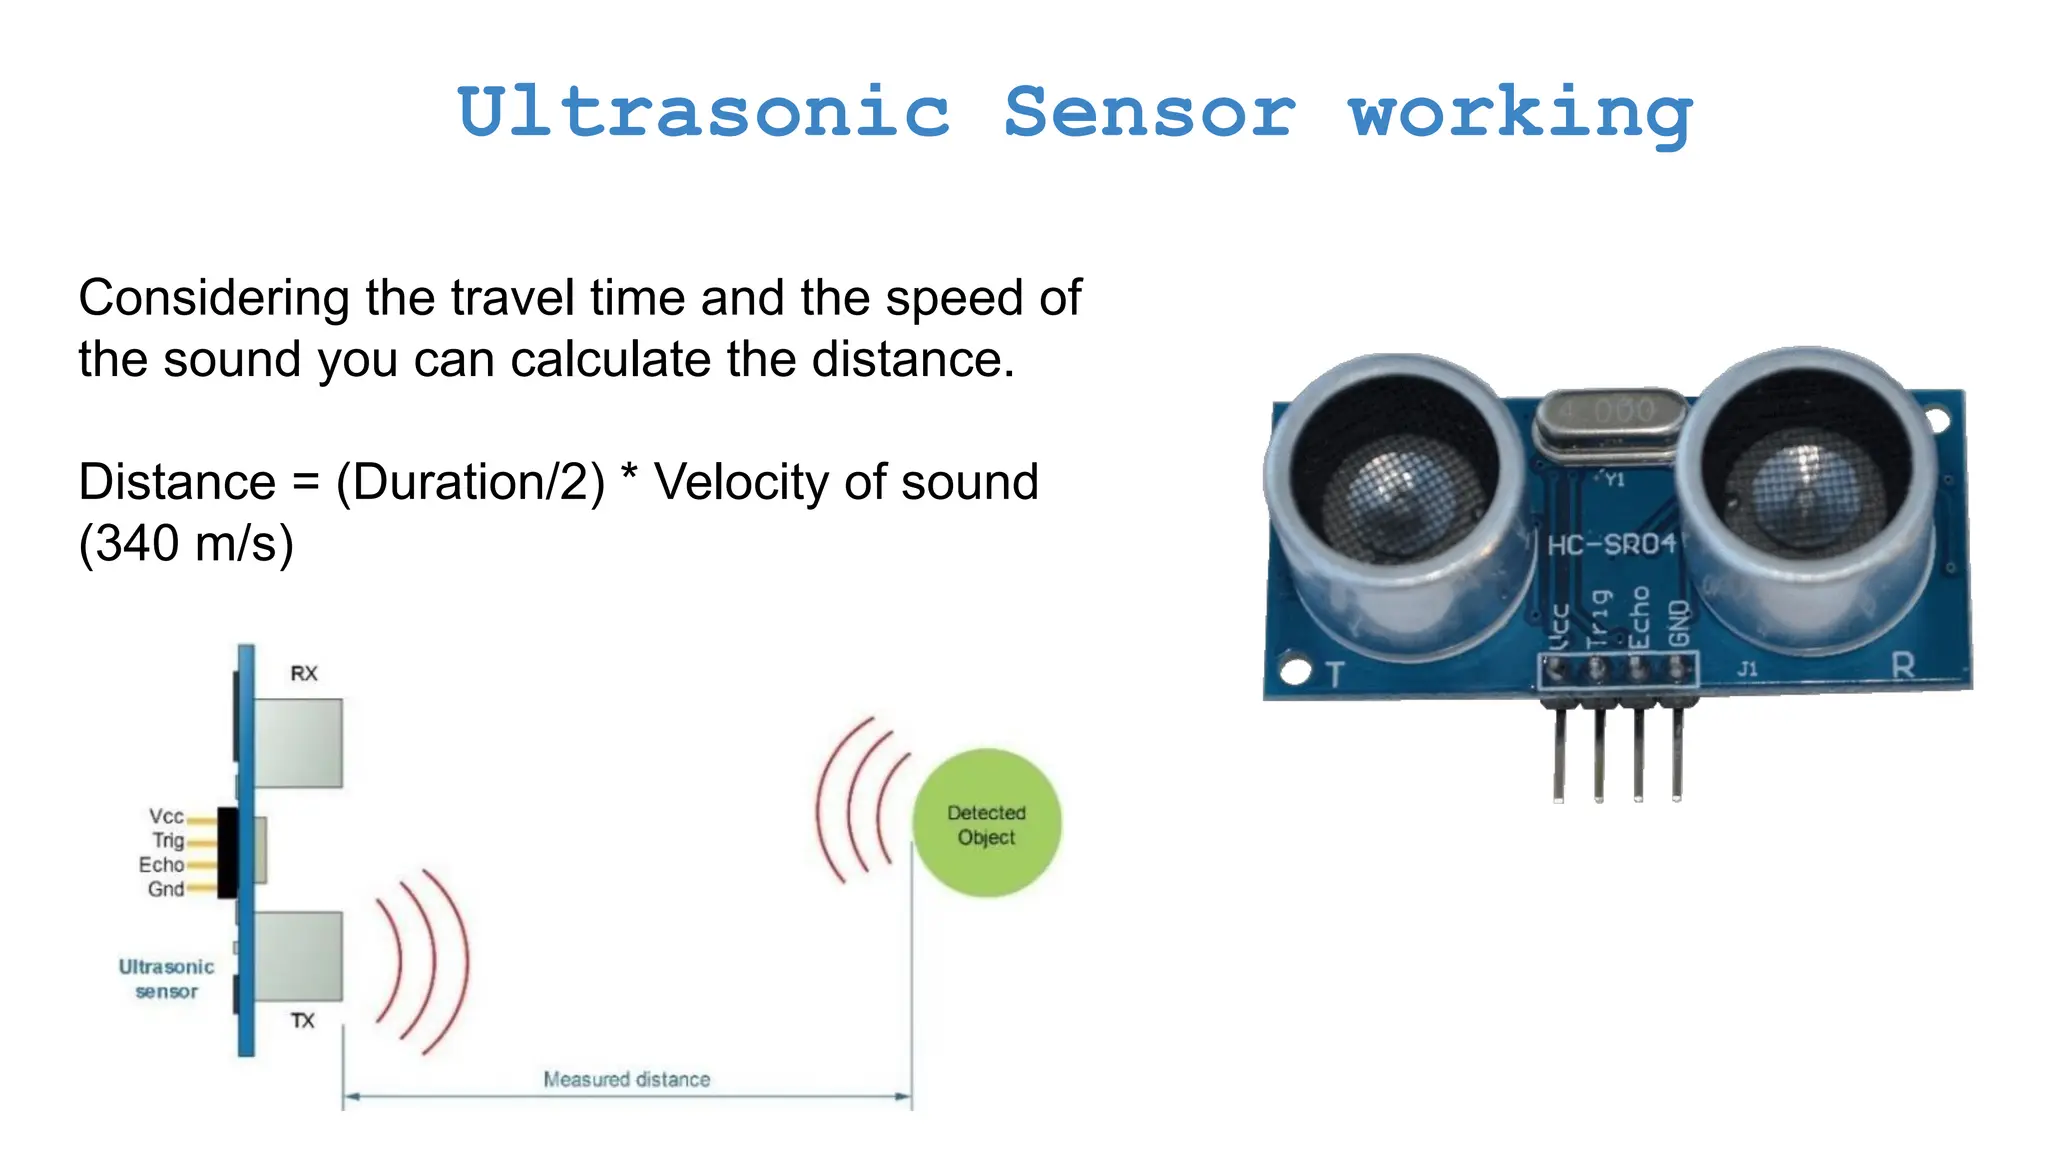
    Ultrasonic Sensor working Consideringthe travel time and the speed of the sound you can calculate the distance. Distance = (Duration/2) * Velocity of sound (340 m/s)
  • 80.
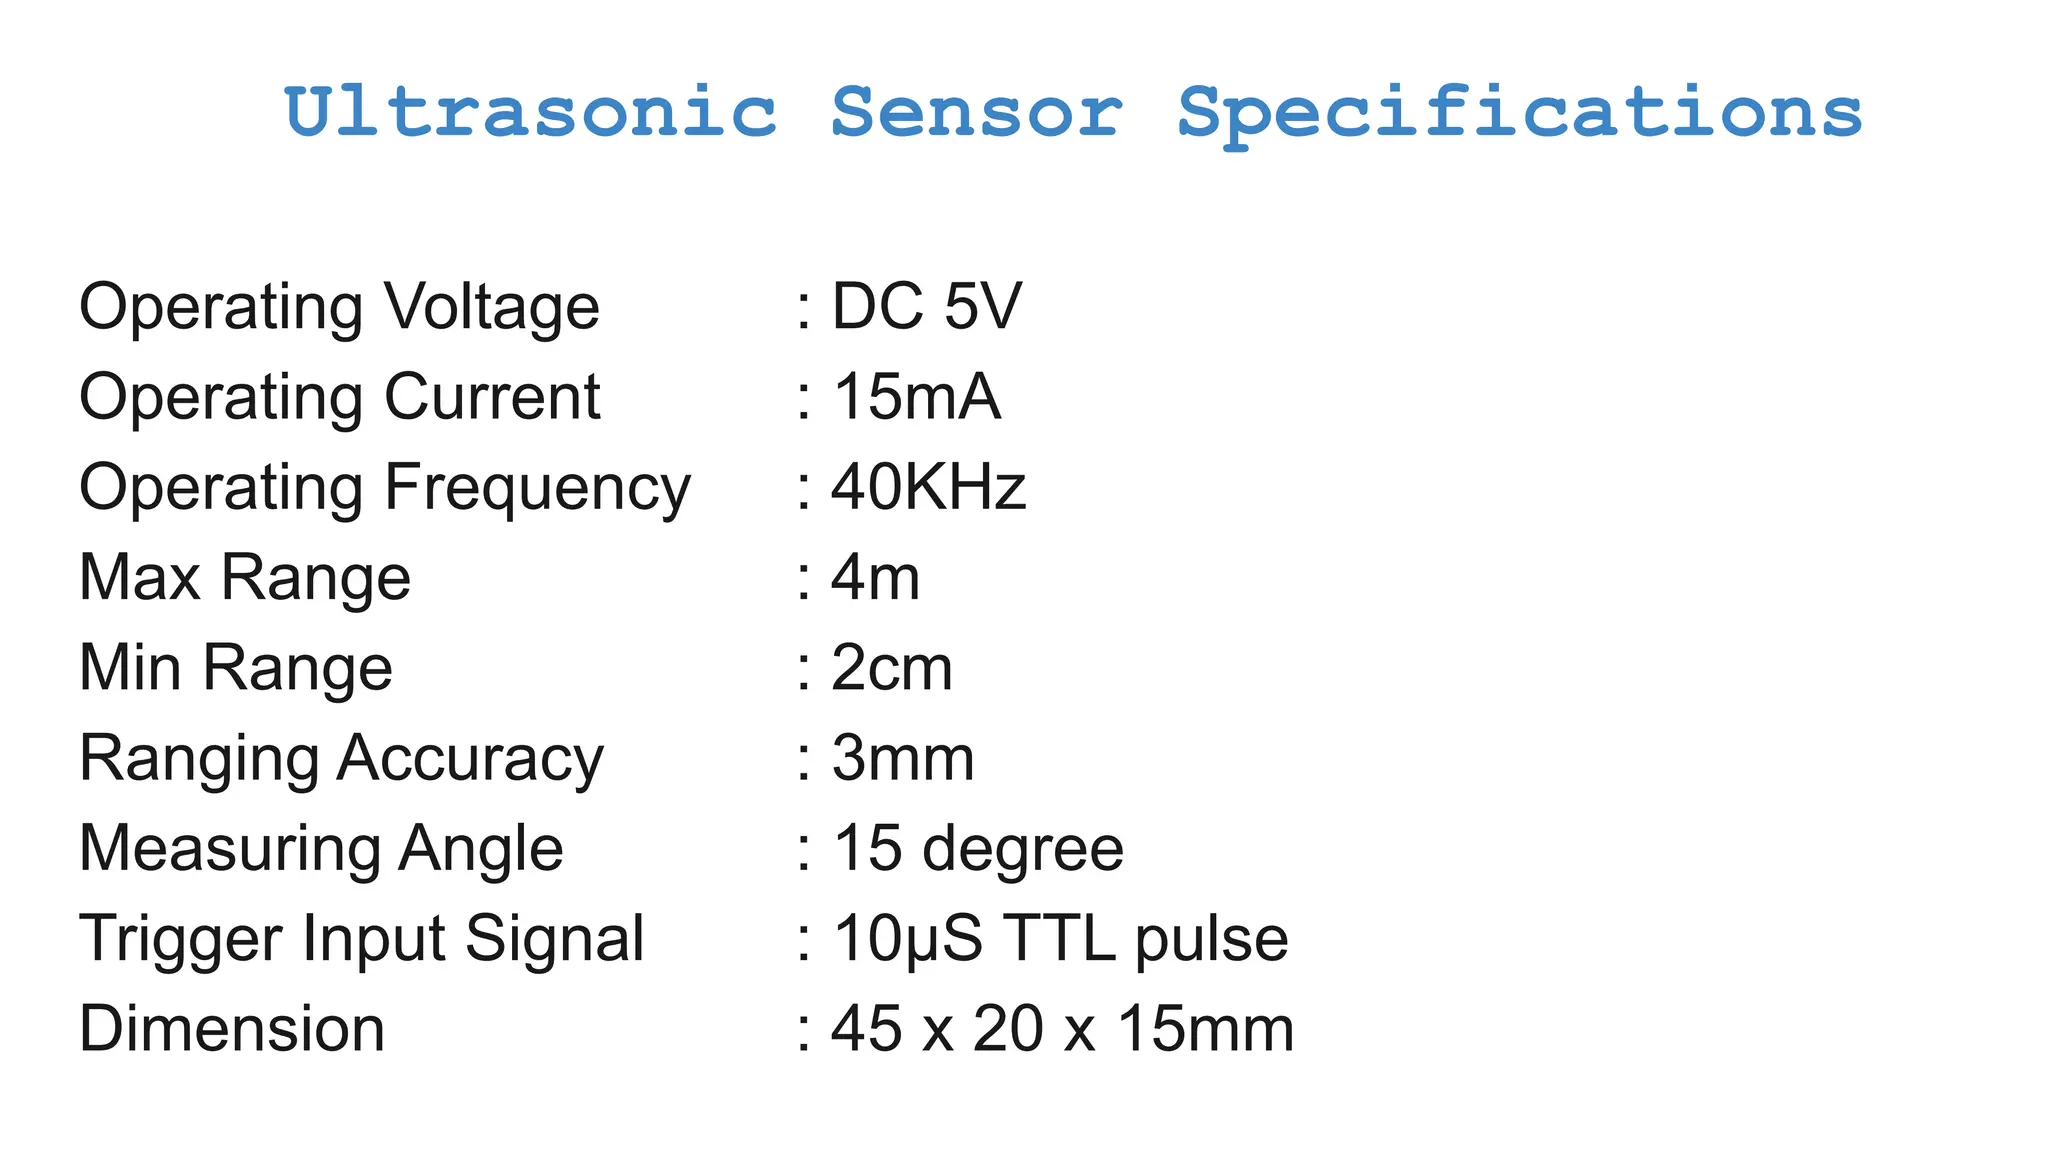
    Ultrasonic Sensor Specifications OperatingVoltage : DC 5V Operating Current : 15mA Operating Frequency : 40KHz Max Range : 4m Min Range : 2cm Ranging Accuracy : 3mm Measuring Angle : 15 degree Trigger Input Signal : 10µS TTL pulse Dimension : 45 x 20 x 15mm
  • 81.
    Ultrasonic sensor code intt = 2; int e = 3; void setup() { Serial.begin(9600); pinMode(t,OUTPUT); pinMode(e,INPUT); } void loop() { digitalWrite(t, LOW); digitalWrite(t,HIGH); delayMicroseconds(10); digitalWrite(t,LOW); float dur = pulseIn(e,HIGH); float dis = (dur * 0.0343)/2; Serial.print("Distance in cm:"); Serial.println(dis); }
  • 82.
    try to writelogic for car reverse functionality, led should glow with max intensity if there is an object near, and glow less when there is object at some distance and should not glow when it is far
  • 83.
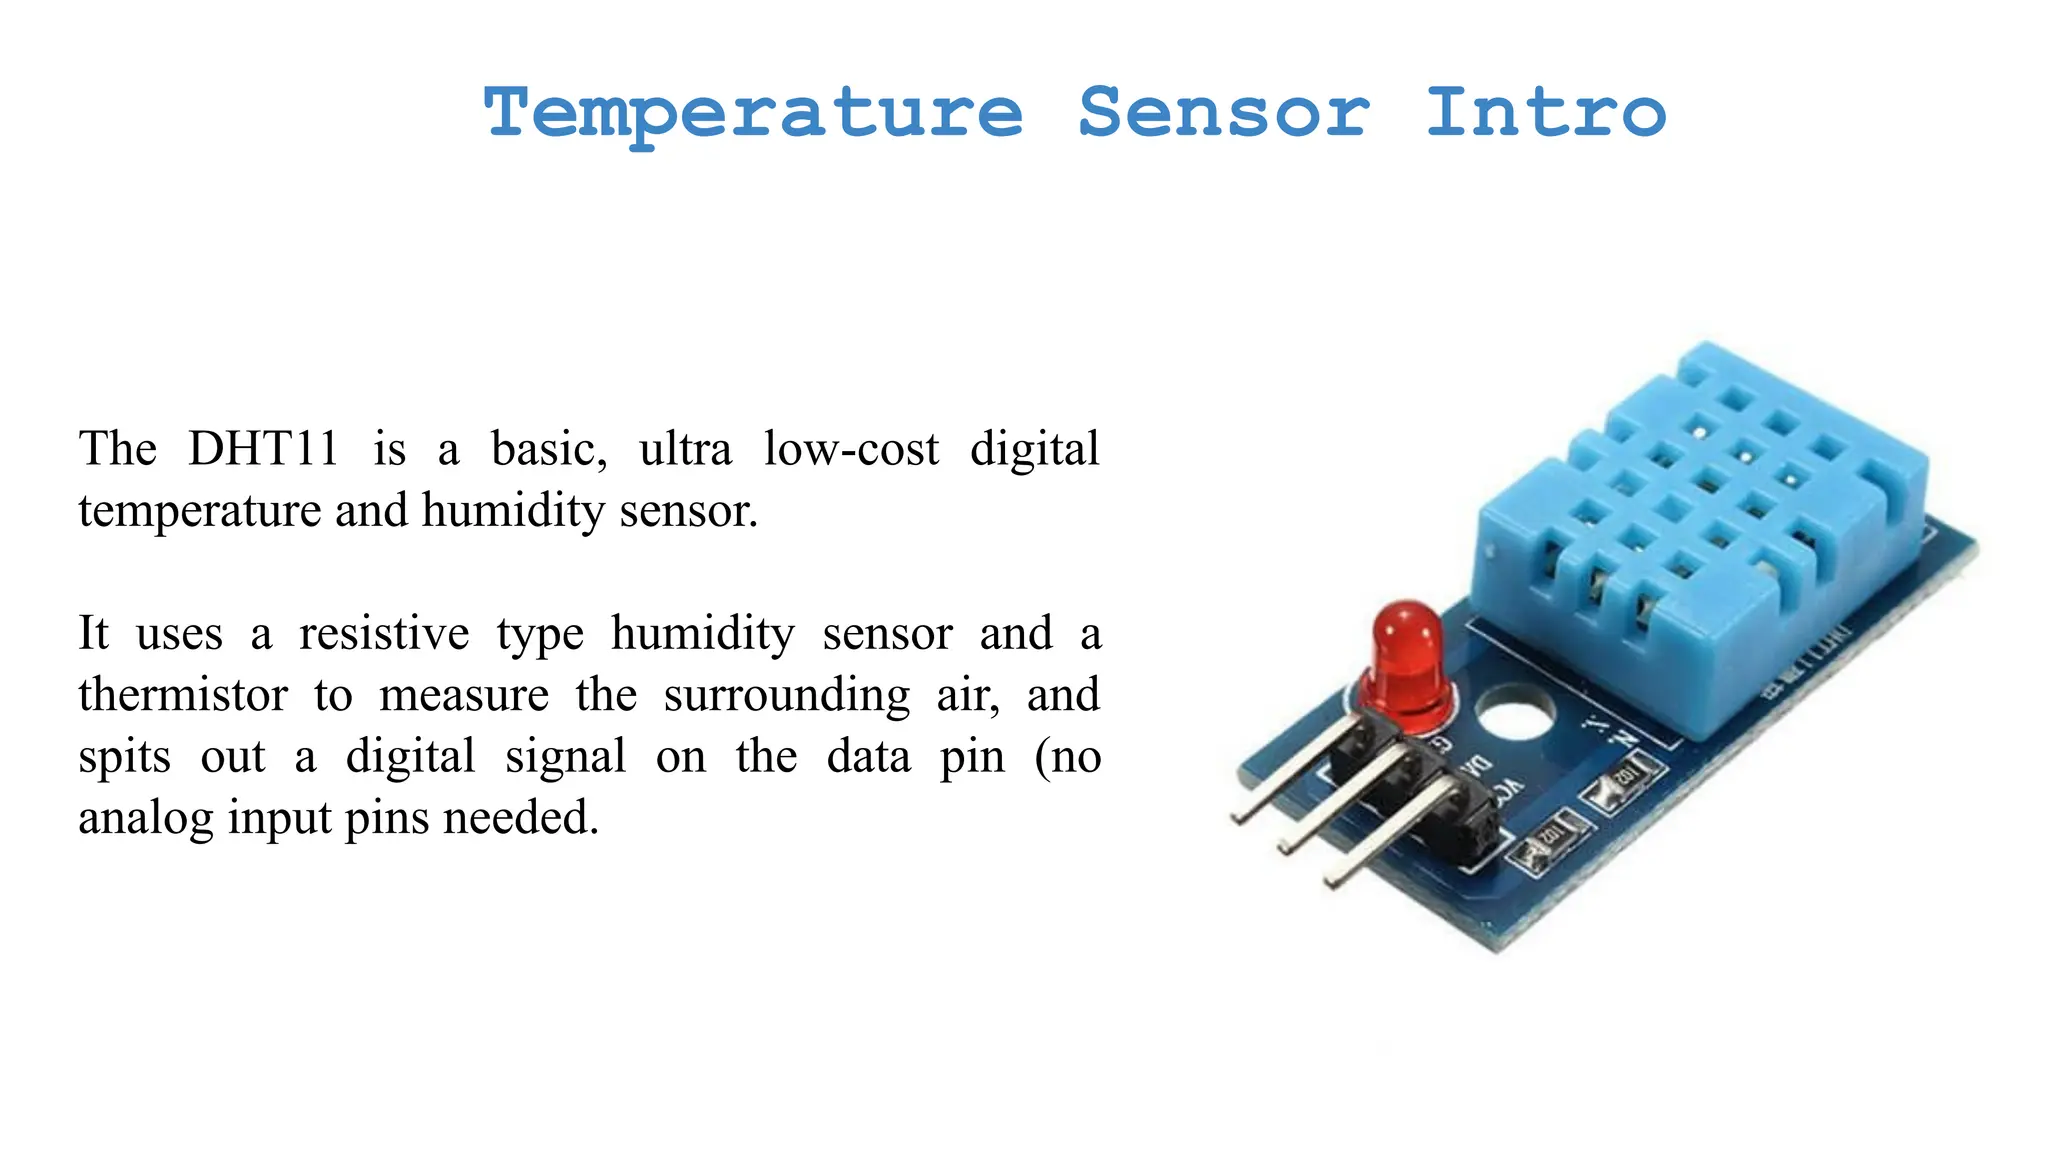
    Temperature Sensor Intro TheDHT11 is a basic, ultra low-cost digital temperature and humidity sensor. It uses a resistive type humidity sensor and a thermistor to measure the surrounding air, and spits out a digital signal on the data pin (no analog input pins needed.
  • 84.
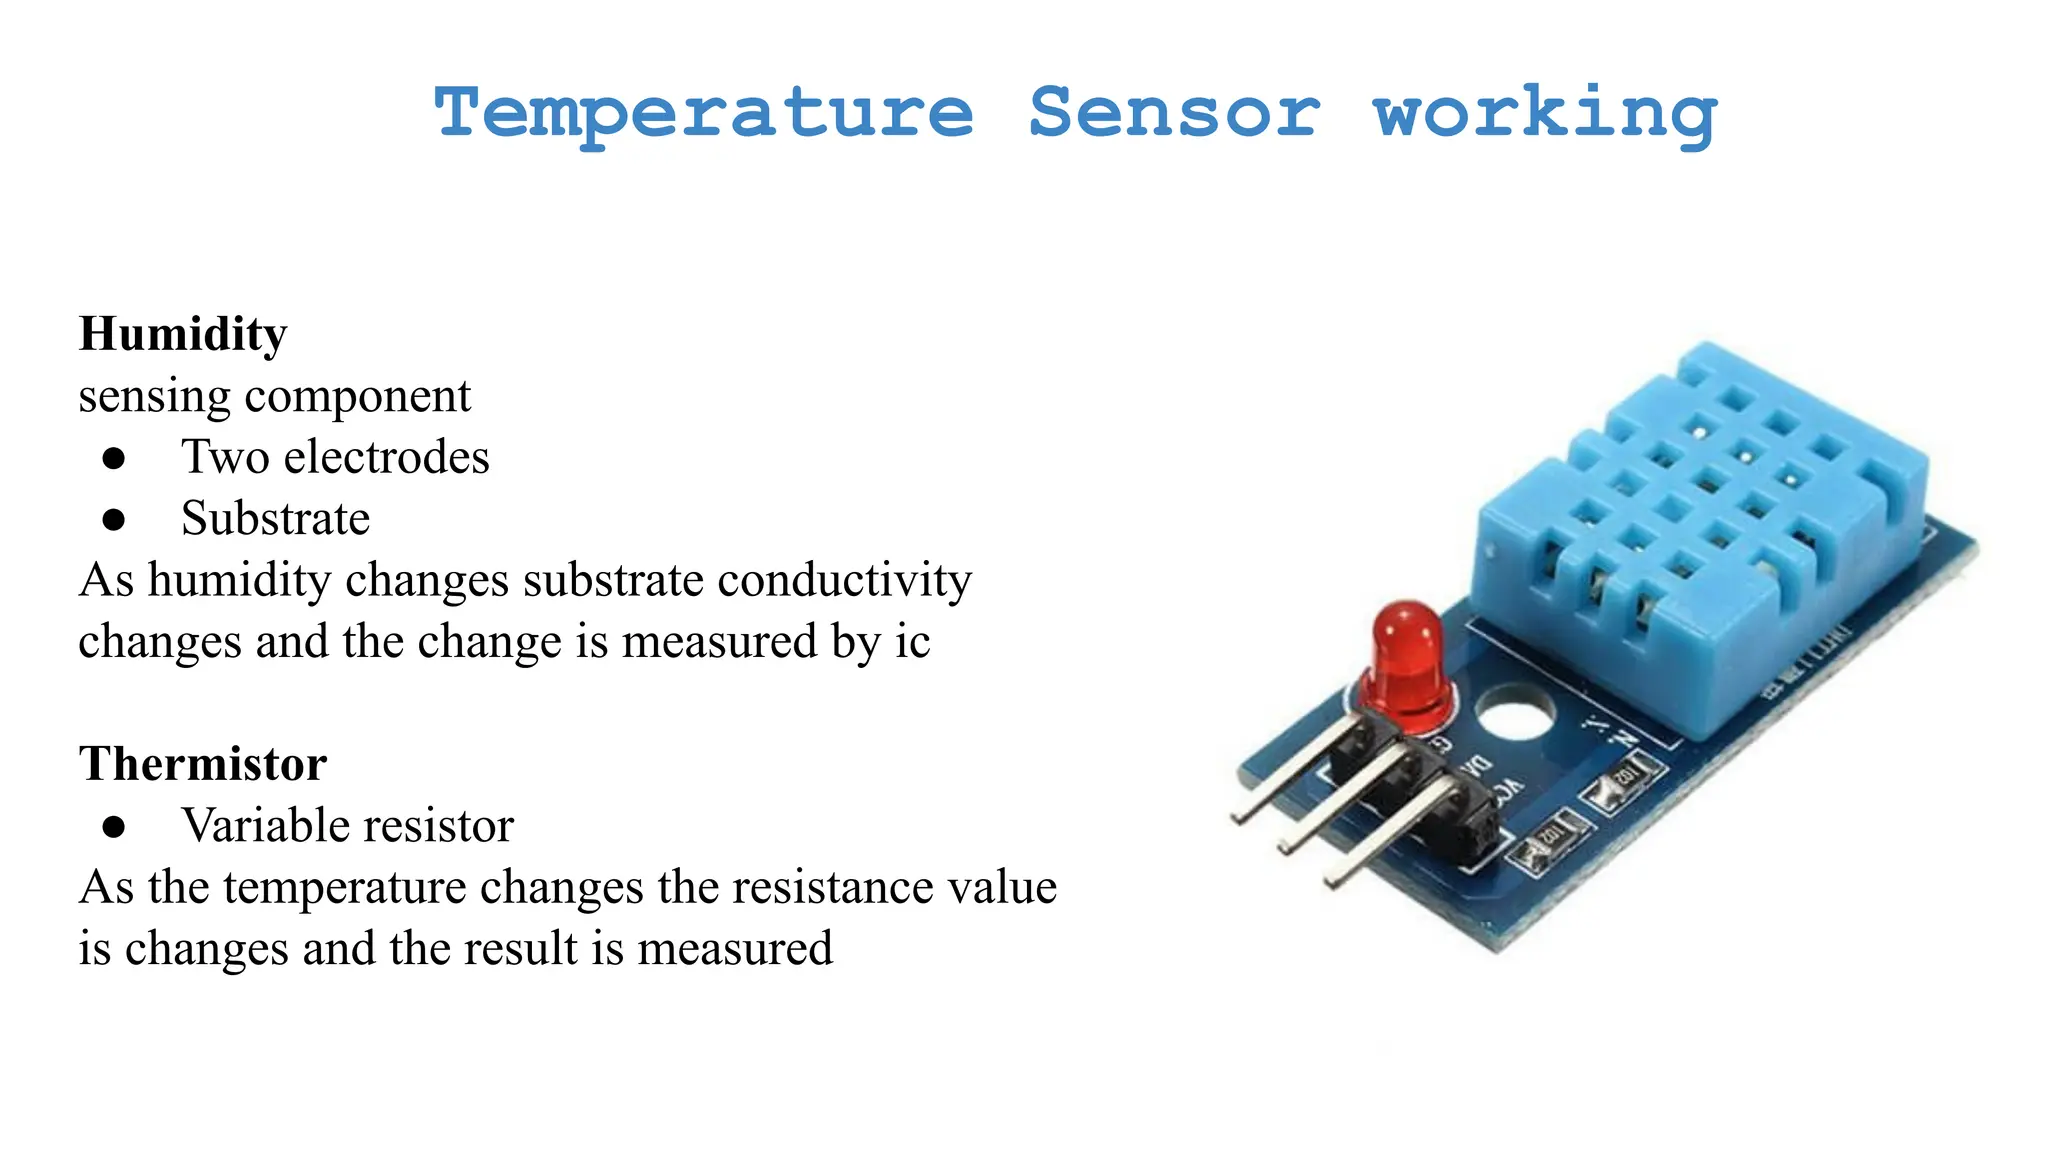
    Temperature Sensor working Humidity sensingcomponent ● Two electrodes ● Substrate As humidity changes substrate conductivity changes and the change is measured by ic Thermistor ● Variable resistor As the temperature changes the resistance value is changes and the result is measured
  • 85.
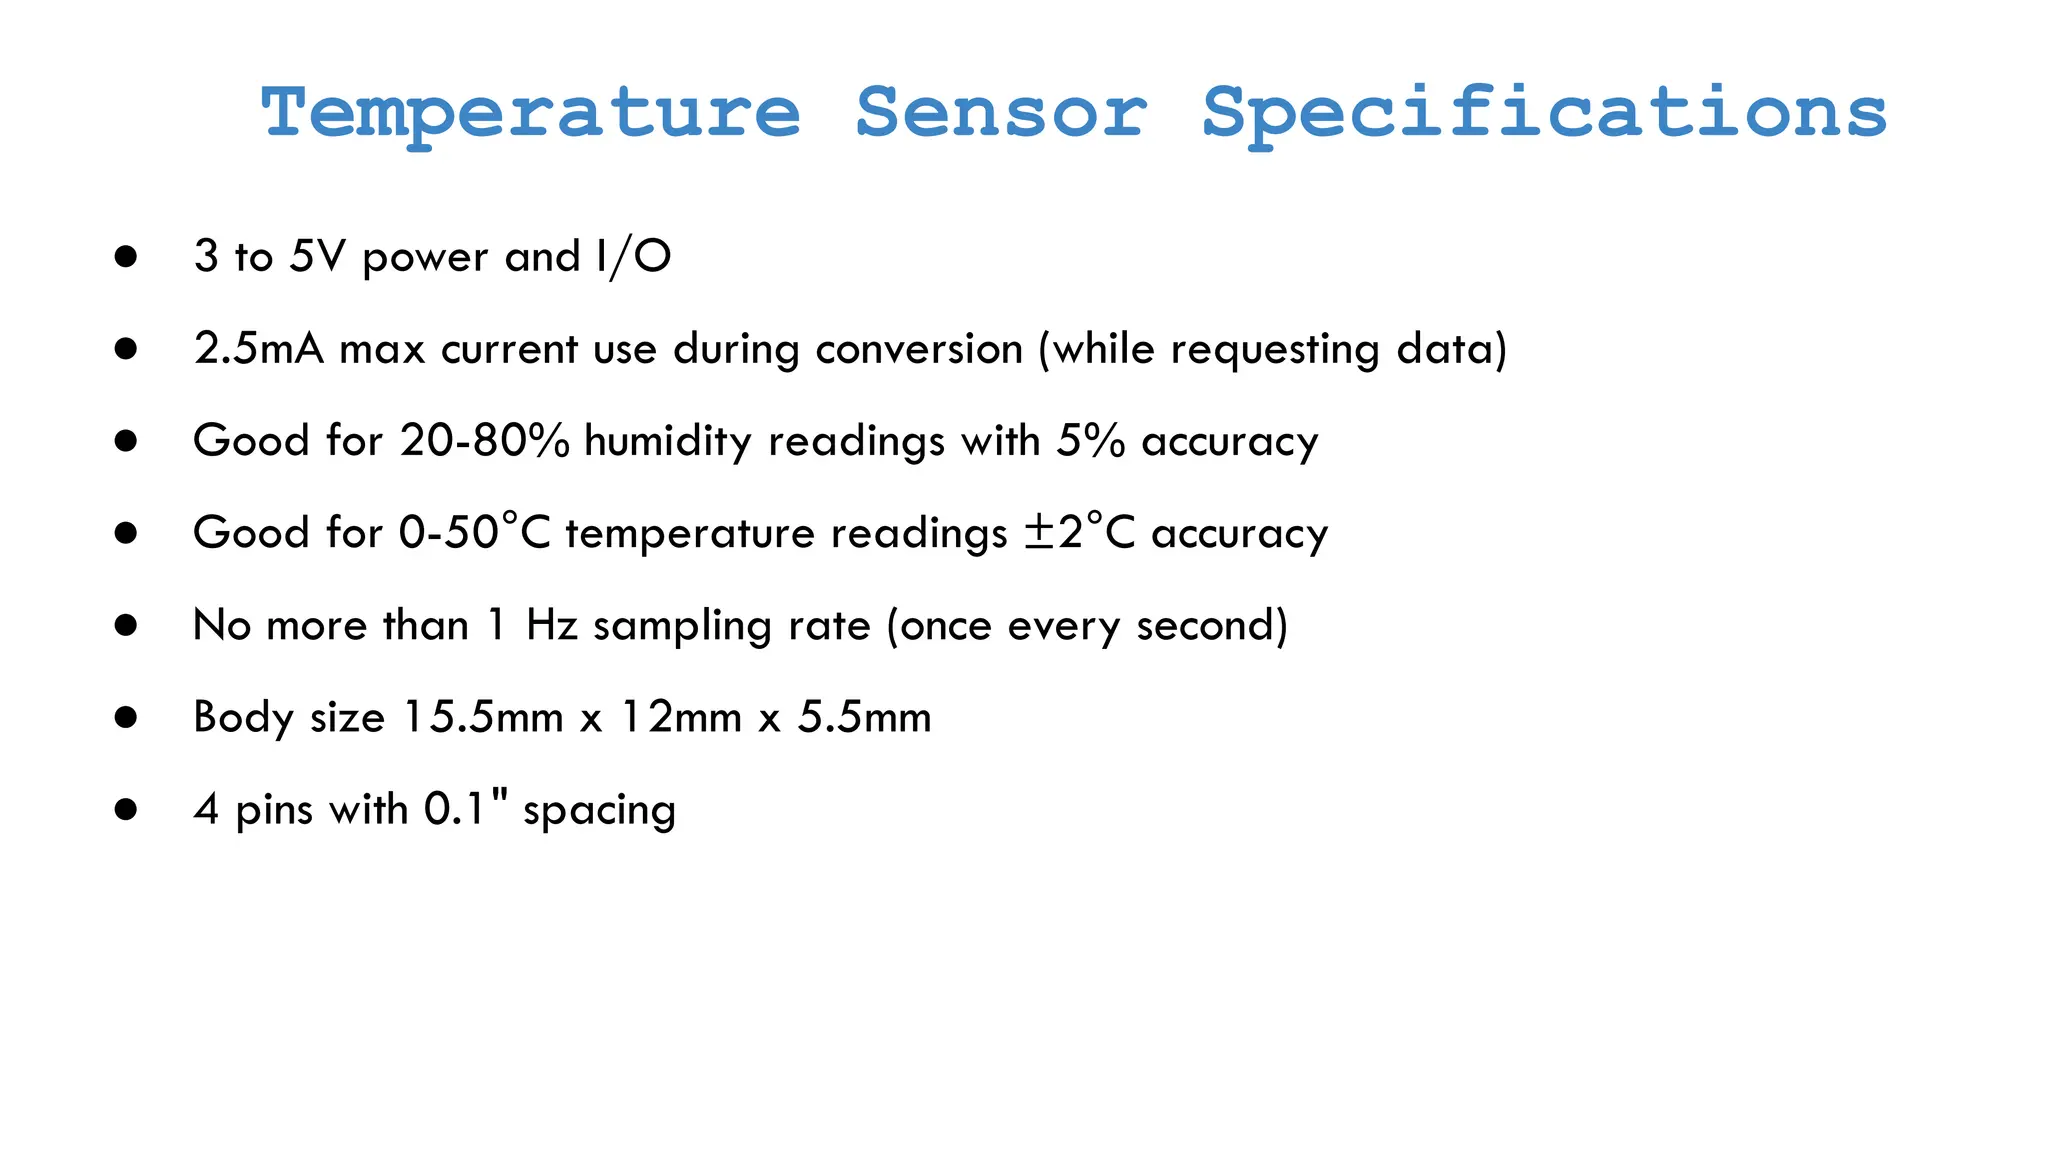
    Temperature Sensor Specifications ●3 to 5V power and I/O ● 2.5mA max current use during conversion (while requesting data) ● Good for 20-80% humidity readings with 5% accuracy ● Good for 0-50°C temperature readings ±2°C accuracy ● No more than 1 Hz sampling rate (once every second) ● Body size 15.5mm x 12mm x 5.5mm ● 4 pins with 0.1" spacing
  • 86.
    Temperature Sensor Code voidsetup() { Serial.begin(9600); } void loop() { double a = analogRead(A0); Serial.print("Analog value: "); Serial.println(a); double ca = a/1024; Serial.print("converted Analog value: "); Serial.println(ca); double v = ca*5; Serial.print("voltage value: "); Serial.println(v); double o = v-0.5; Serial.print("offset value: "); Serial.println(o); double c = o*100; Serial.print("celsius value: "); Serial.println(c); delay(1000); }
  • 87.
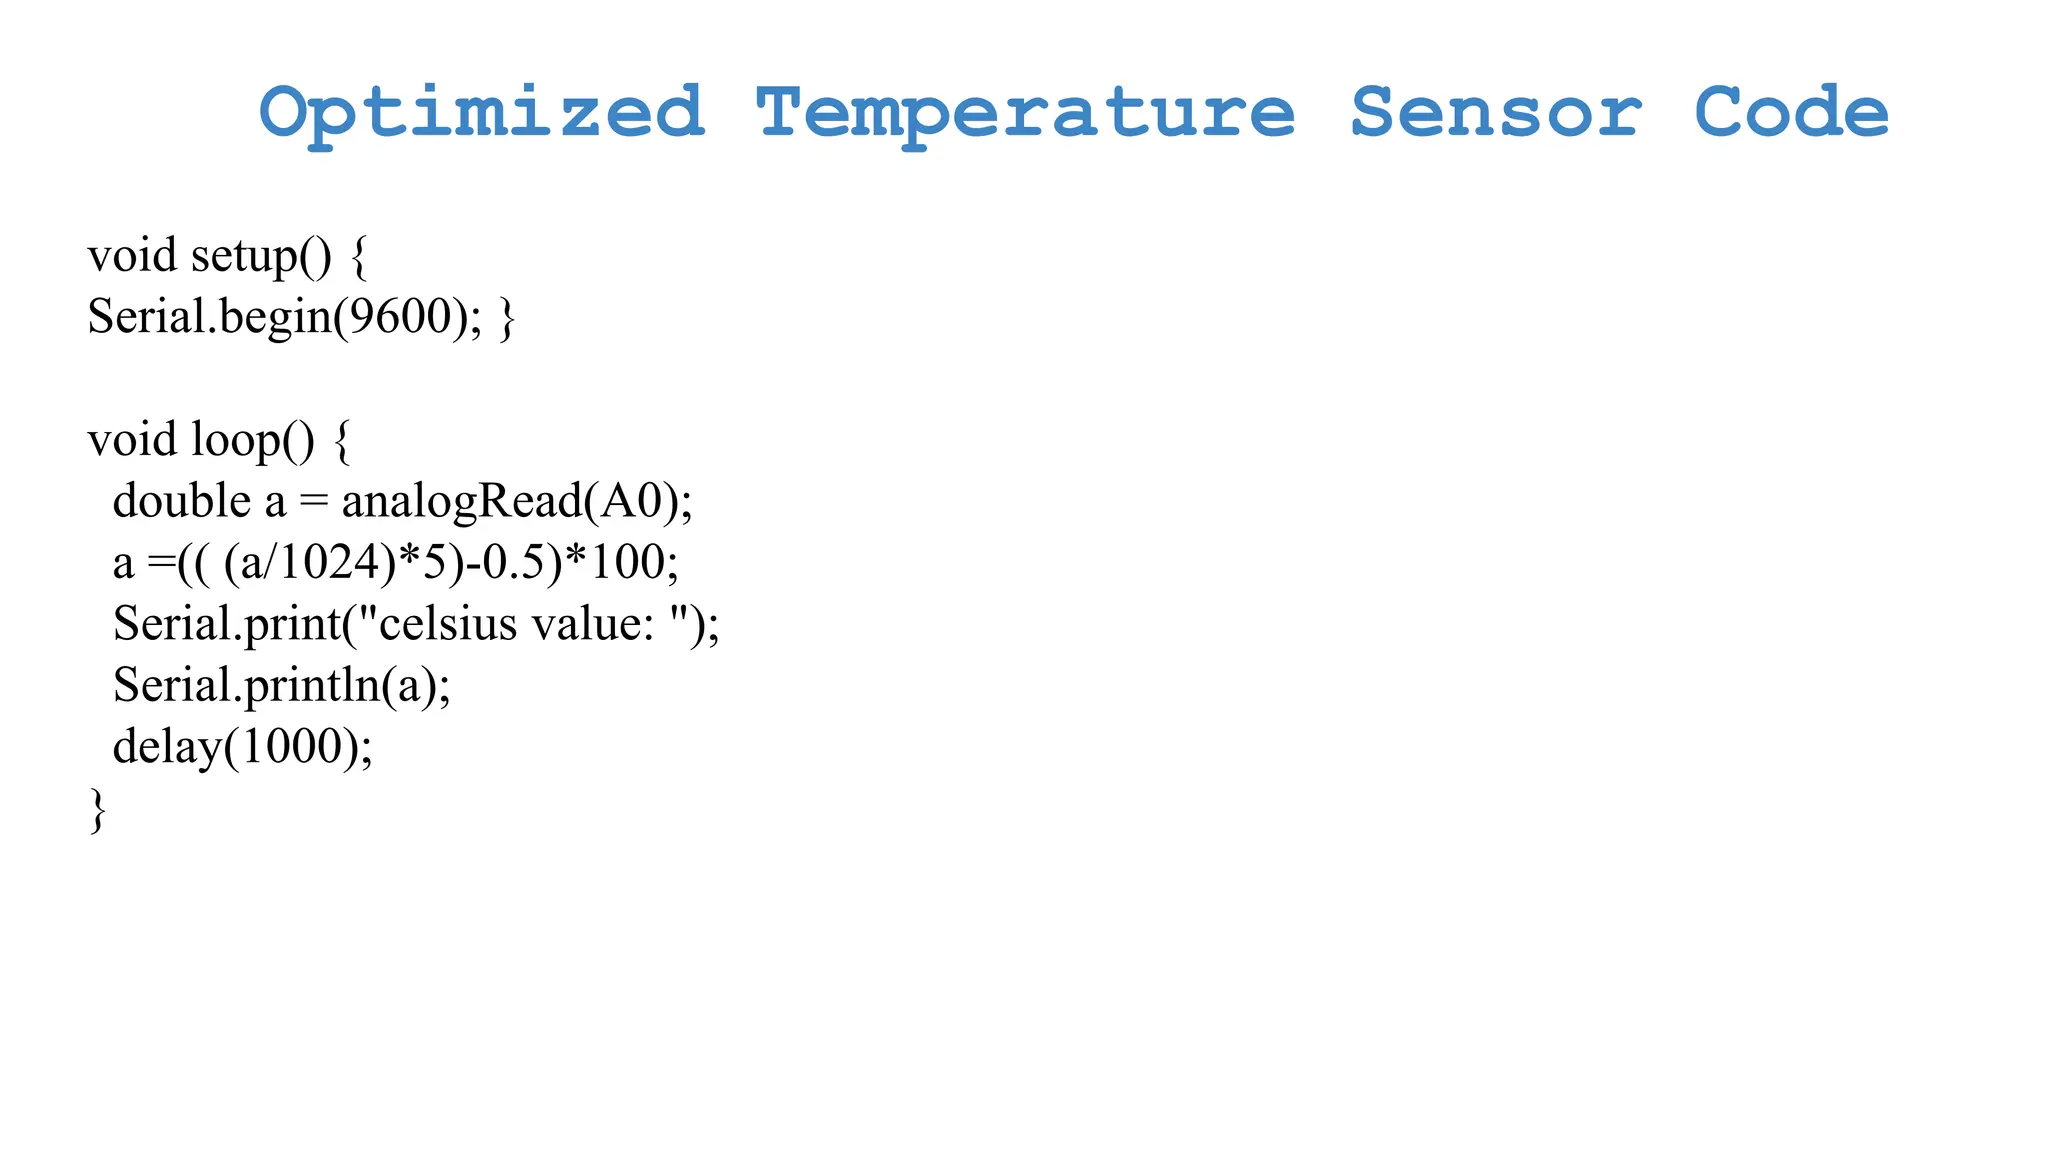
    Optimized Temperature SensorCode void setup() { Serial.begin(9600); } void loop() { double a = analogRead(A0); a =(( (a/1024)*5)-0.5)*100; Serial.print("celsius value: "); Serial.println(a); delay(1000); }
  • 88.
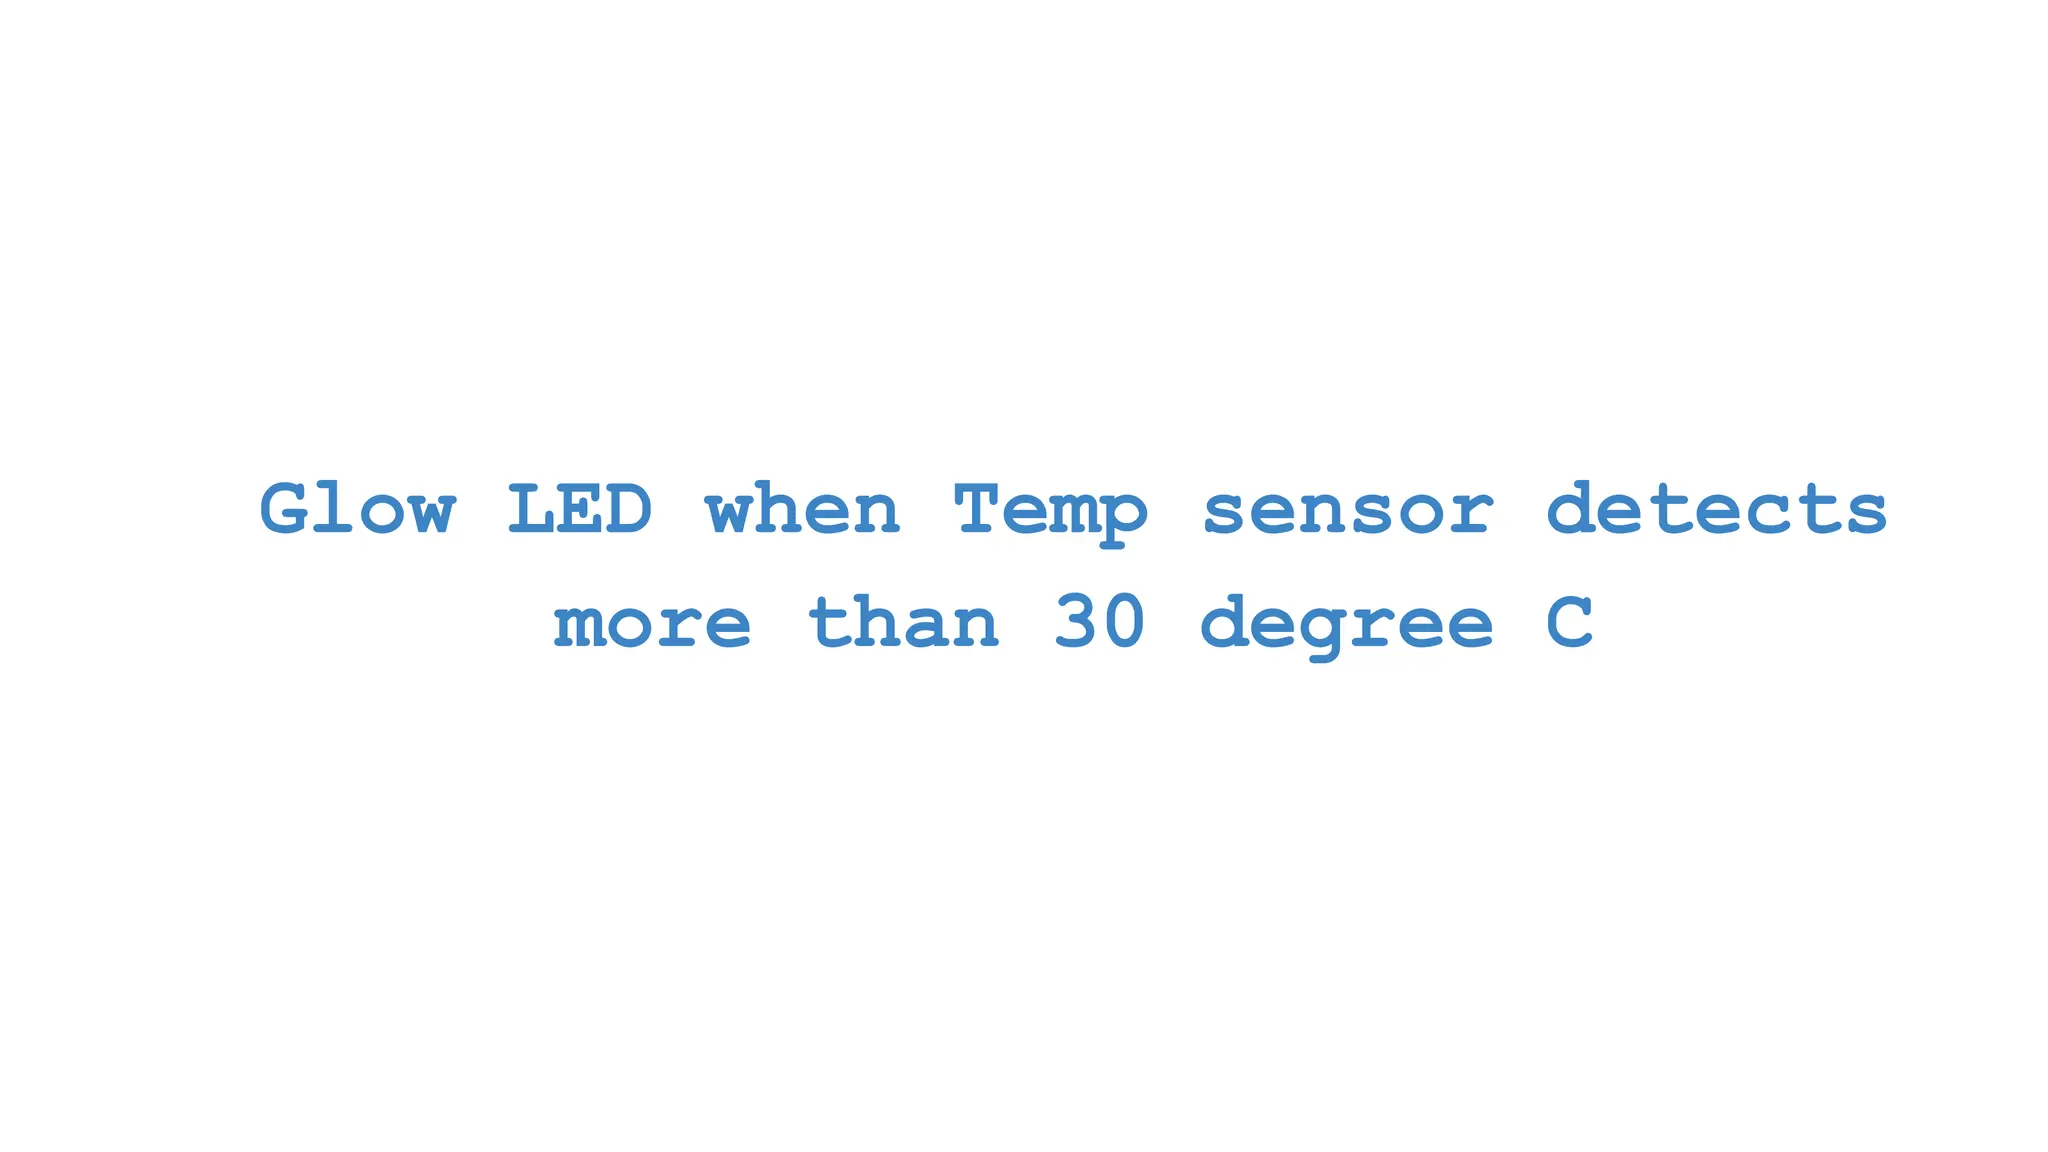
    Glow LED whenTemp sensor detects more than 30 degree C
  • 89.
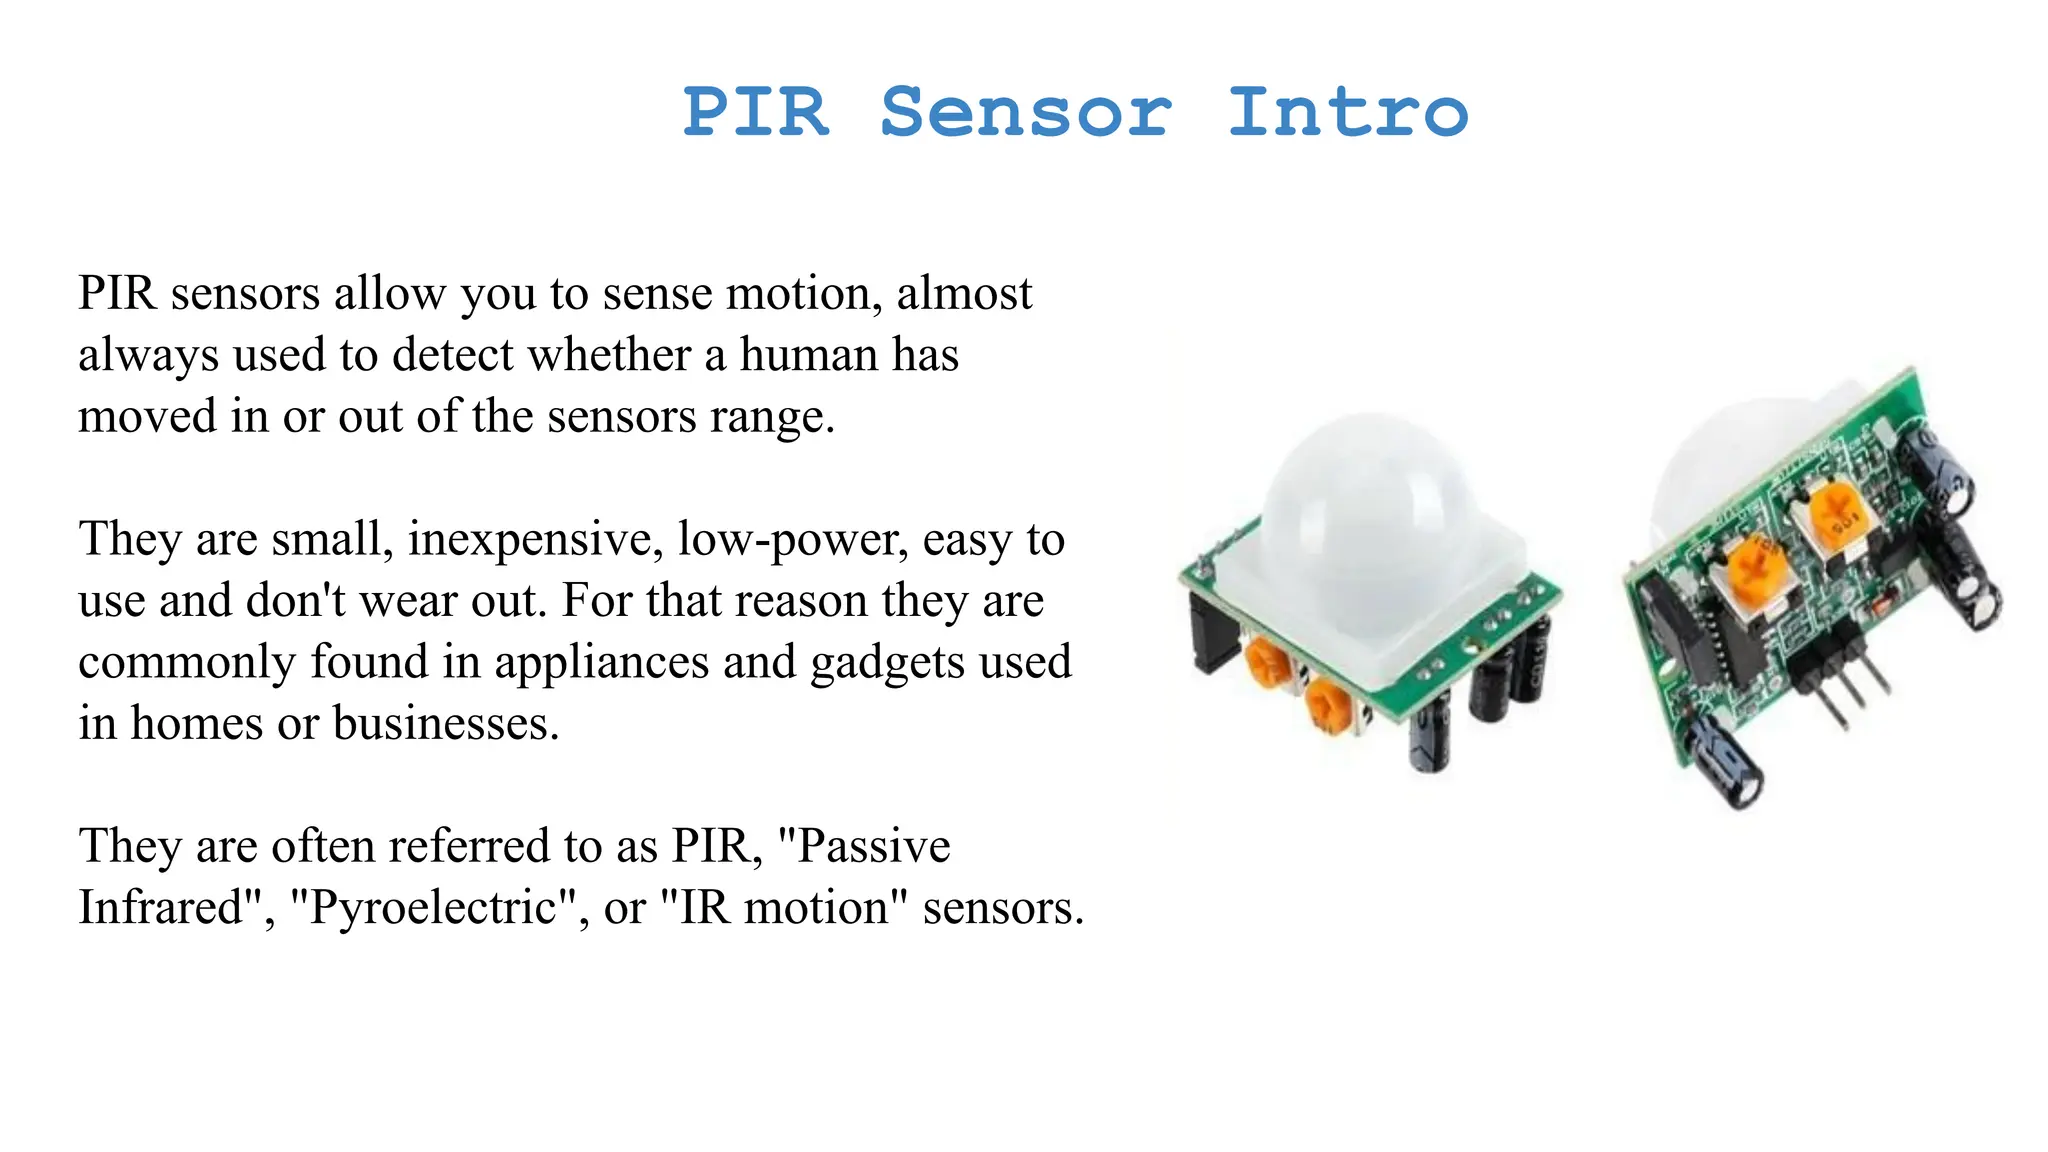
    PIR Sensor Intro PIRsensors allow you to sense motion, almost always used to detect whether a human has moved in or out of the sensors range. They are small, inexpensive, low-power, easy to use and don't wear out. For that reason they are commonly found in appliances and gadgets used in homes or businesses. They are often referred to as PIR, "Passive Infrared", "Pyroelectric", or "IR motion" sensors.
  • 90.
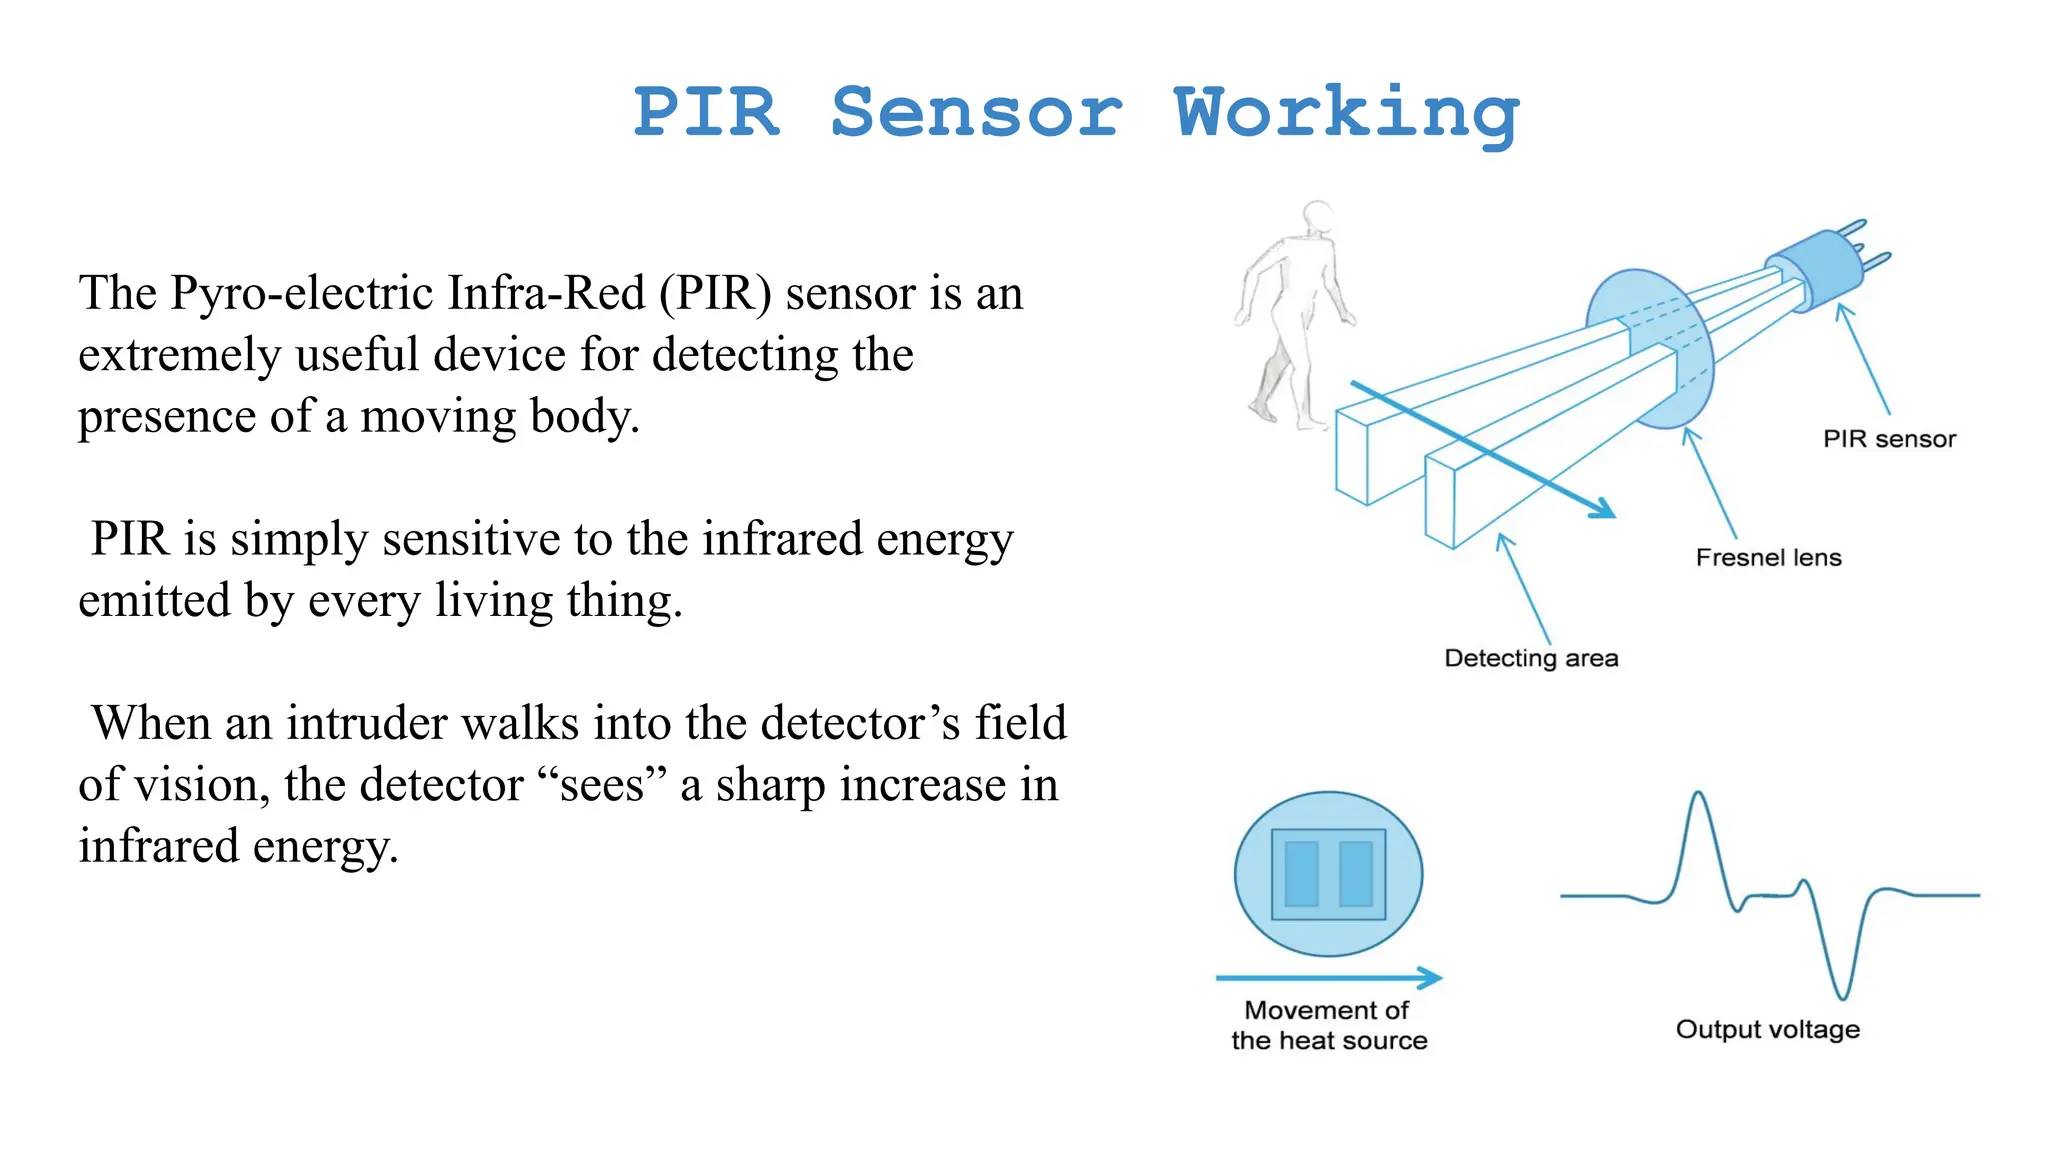
    PIR Sensor Working ThePyro-electric Infra-Red (PIR) sensor is an extremely useful device for detecting the presence of a moving body. PIR is simply sensitive to the infrared energy emitted by every living thing. When an intruder walks into the detector’s field of vision, the detector “sees” a sharp increase in infrared energy.
  • 91.
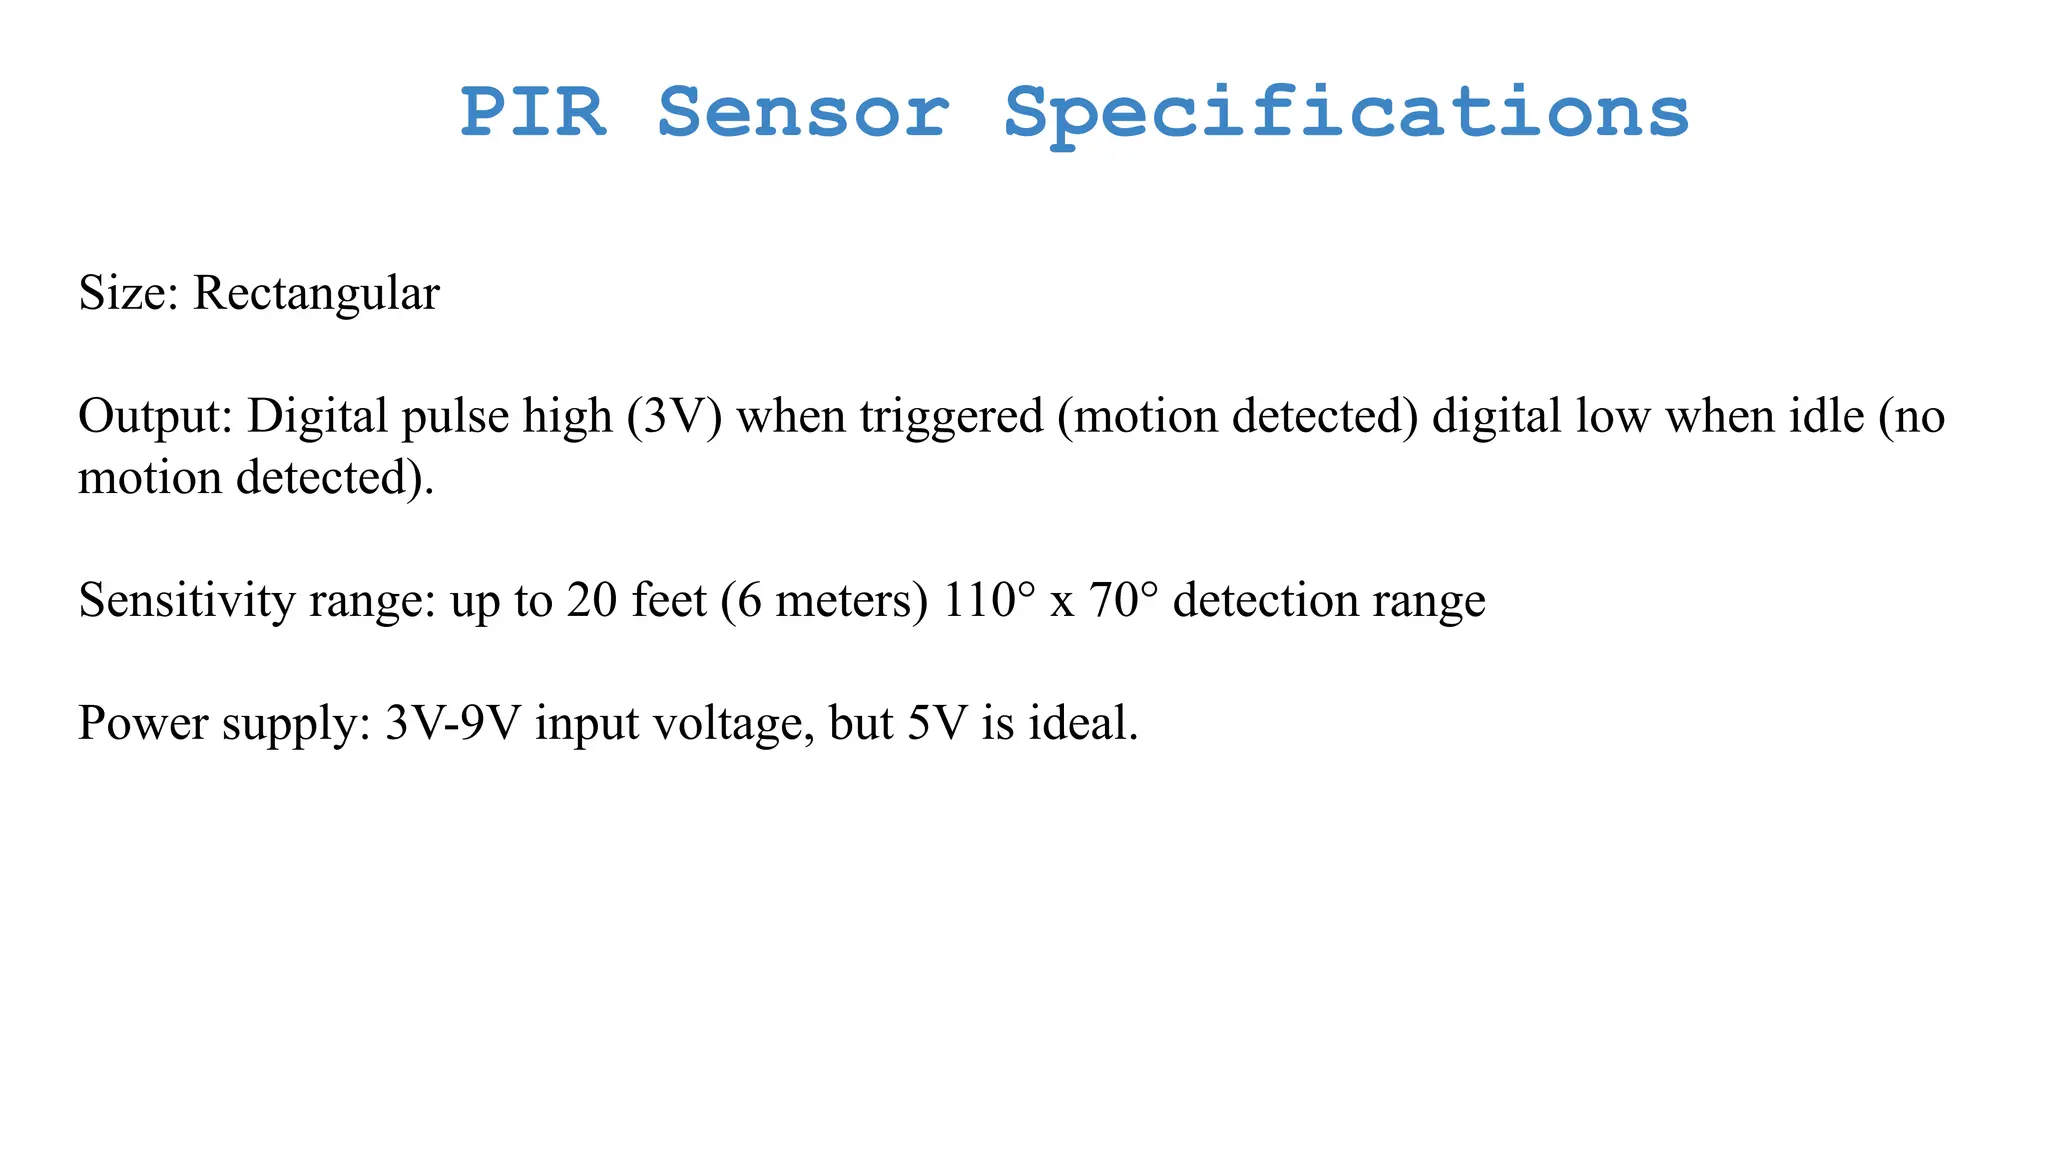
    PIR Sensor Specifications Size:Rectangular Output: Digital pulse high (3V) when triggered (motion detected) digital low when idle (no motion detected). Sensitivity range: up to 20 feet (6 meters) 110° x 70° detection range Power supply: 3V-9V input voltage, but 5V is ideal.
  • 92.
    PIR Sensor Code voidsetup() { pinMode(4, INPUT); Serial.begin(9600); } void loop() { int p = digitalRead(4); Serial.println(4); }
  • 93.
    Glow LED whenMotion is detected by PIR sensor
  • 94.
    Servo Motor #include<Servo.h> Servo s; voidsetup() { s.attach(3); } void loop() { s.write(0); delay(1000); s.write(30); delay(1000); s.write(70); delay(1000); s.write(130); delay(1000); s.write(180); delay(1000); }
  • 95.
    Servo Motor #include<Servo.h> Servo s; voidsetup() { s.attach(3); } void loop() { for(int i=0;i<=180;i++){ s.write(i); delay(100); } delay(2000); for(int j=180;j>=0;j–){ s.write(j); delay(100); } delay(2000); }
  • 96.
    Buzzer void setup() { pinMode(12,OUTPUT); } void loop() { for(inti=0; i<30000;i=i+10){ tone(12,i); //(pin number, frequency,delay) delay(1000); noTone(12); delay(1000); } }
  • 97.
    7 segment Display voidsetup() { pinMode(2, OUTPUT); pinMode(3, OUTPUT); pinMode(4, OUTPUT); pinMode(5, OUTPUT); pinMode(6, OUTPUT); pinMode(7, OUTPUT); pinMode(8, OUTPUT); } void loop() { digitalWrite(2, 0); digitalWrite(3, 0); digitalWrite(4, 0); digitalWrite(5, 0); digitalWrite(6, 0); digitalWrite(7, 0); digitalWrite(8, 1);
  • 98.
  • 99.
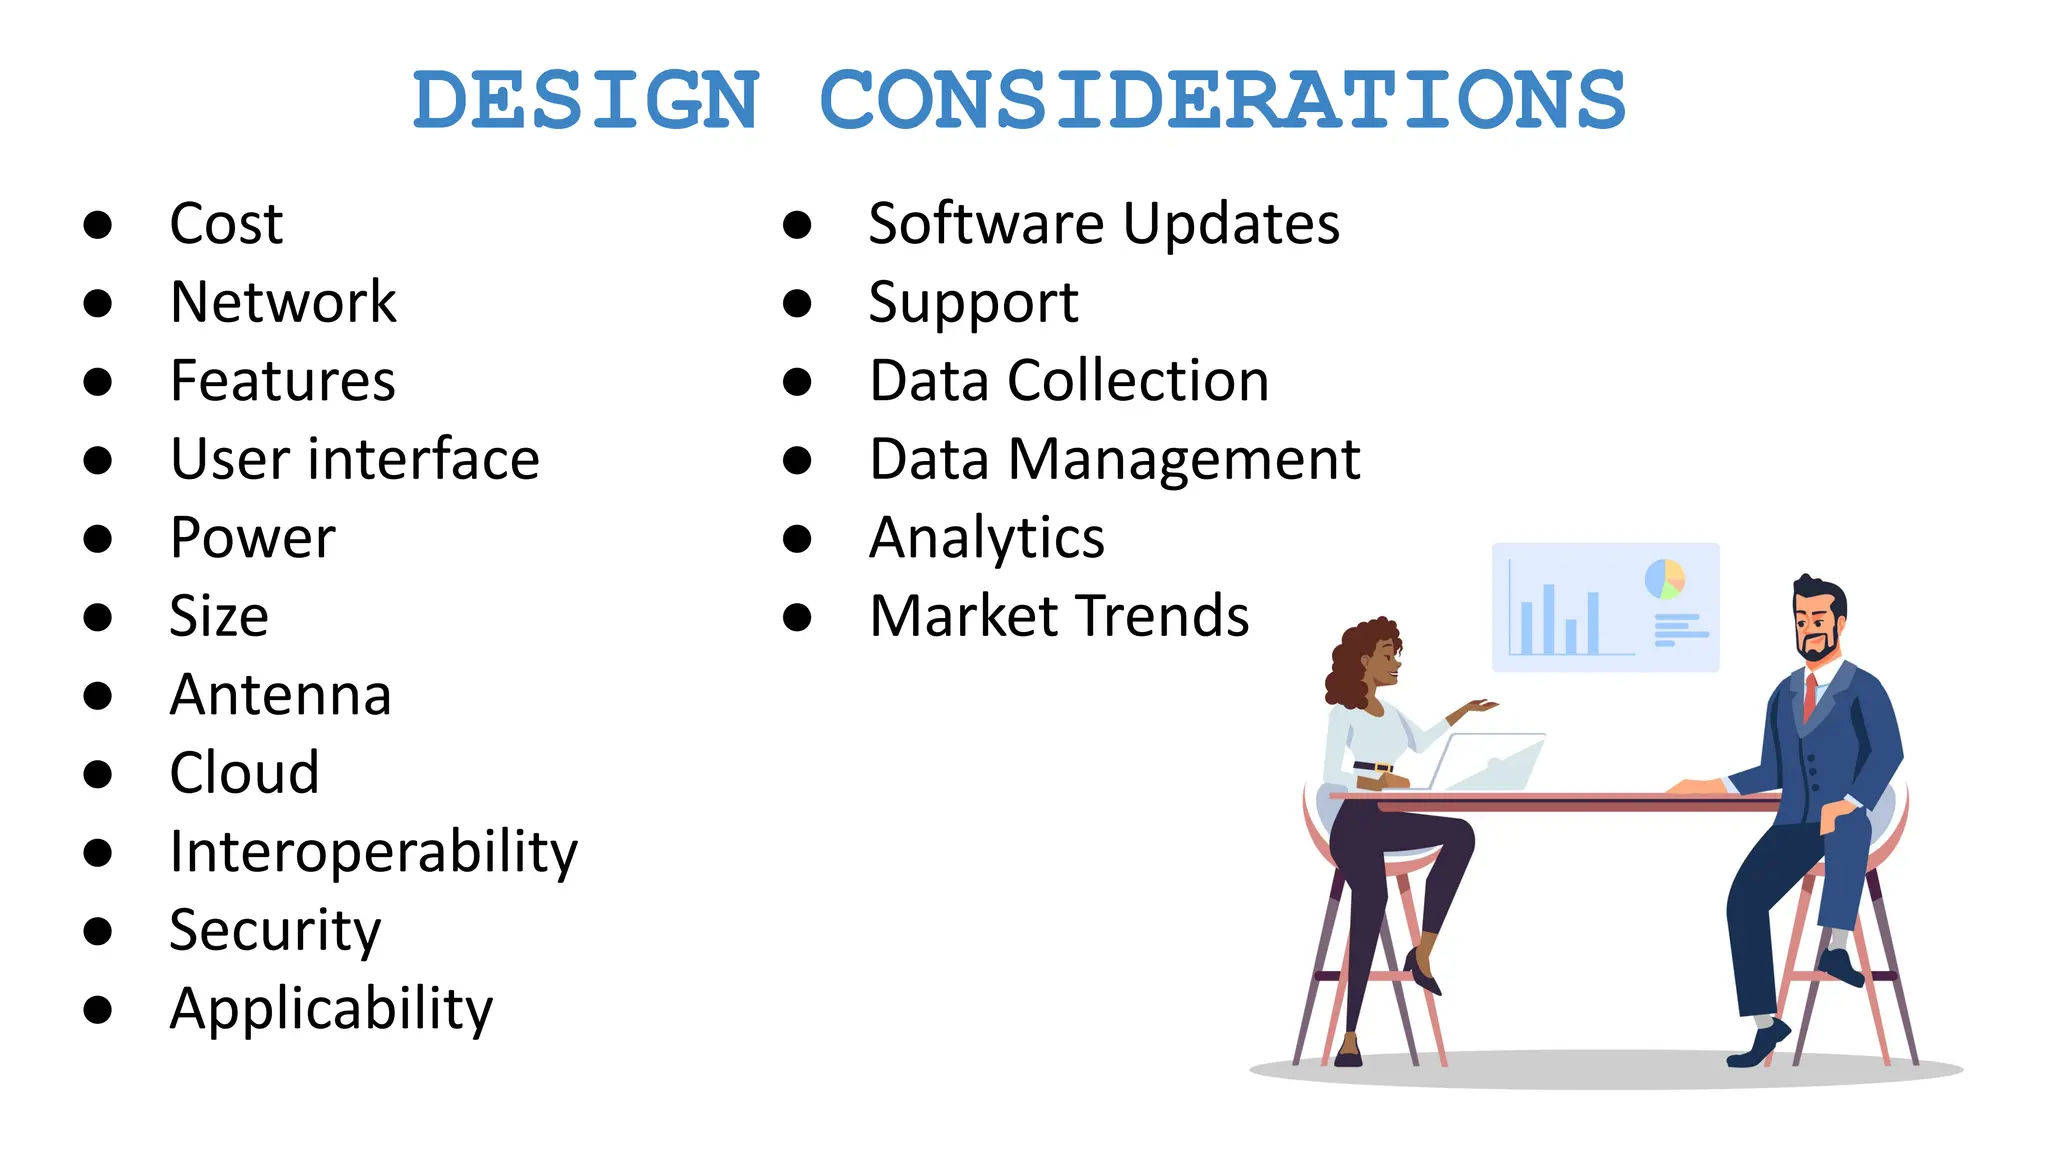
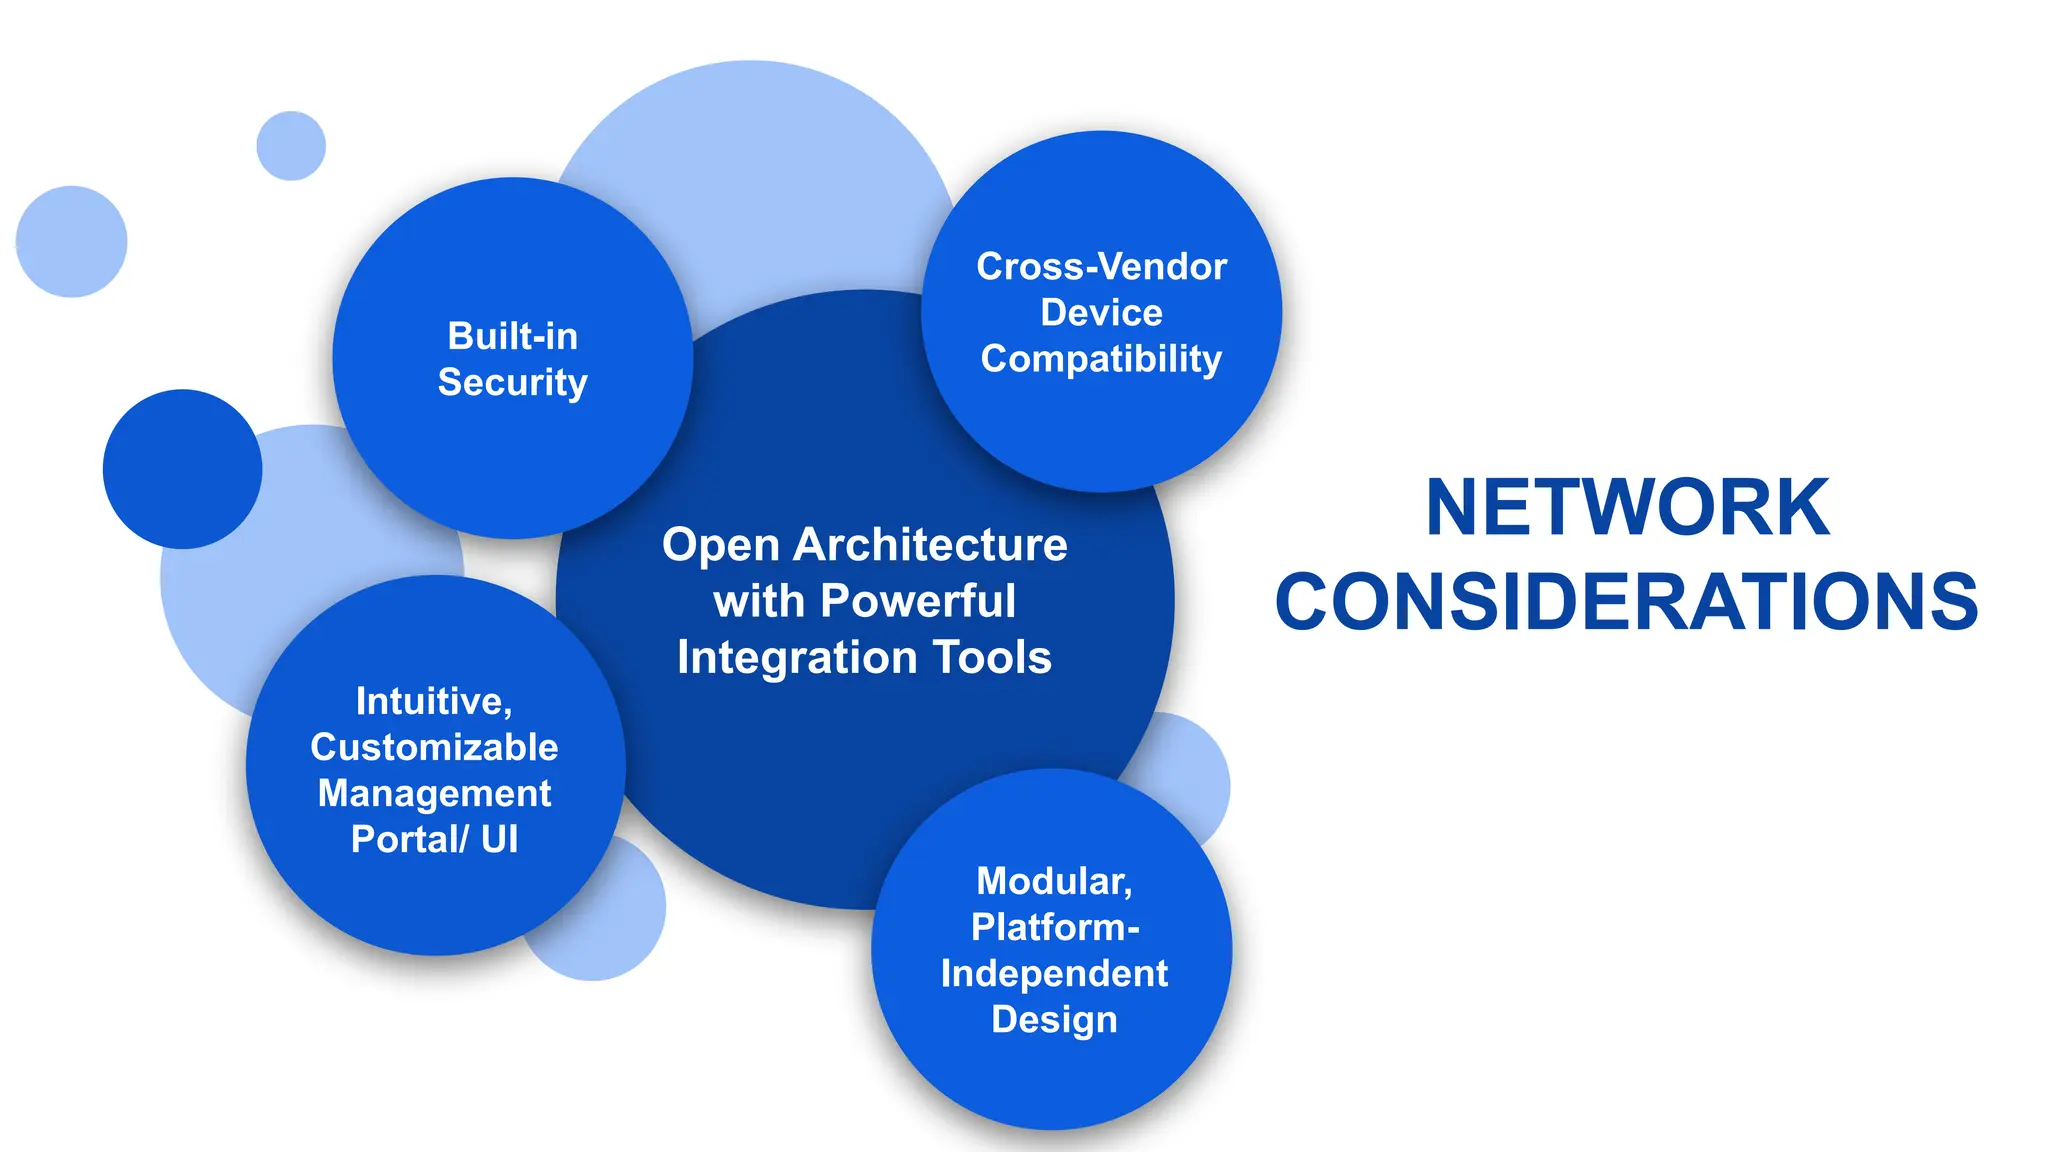
    DESIGN CONSIDERATIONS ● Cost ●Network ● Features ● User interface ● Power ● Size ● Antenna ● Cloud ● Interoperability ● Security ● Applicability ● Software Updates ● Support ● Data Collection ● Data Management ● Analytics ● Market Trends
  • 100.
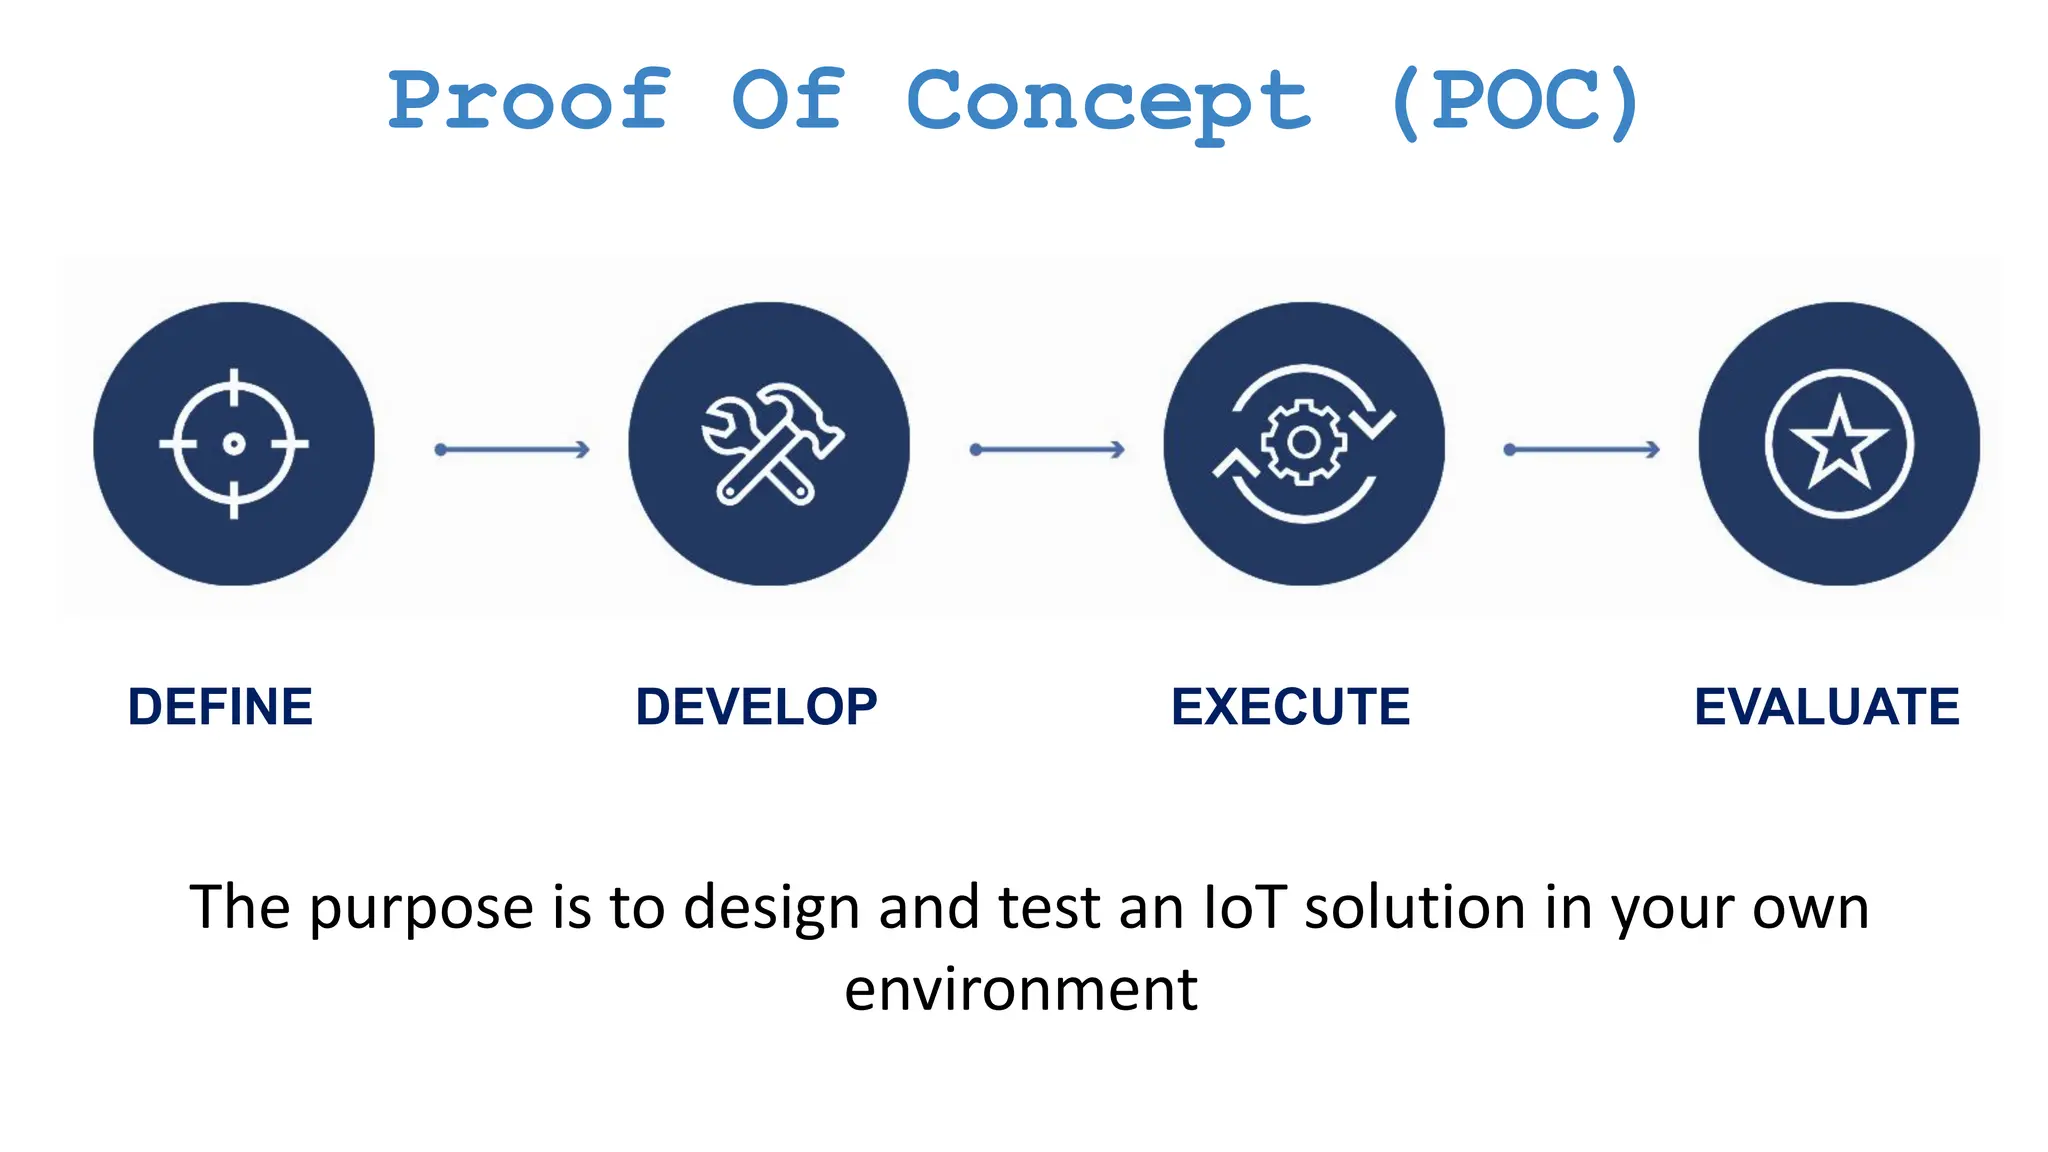
    Proof Of Concept(POC) DEFINE DEVELOP EXECUTE EVALUATE The purpose is to design and test an IoT solution in your own environment
  • 101.
    What is prototyping? Prototypingis a limited representation of a design that allows users to interact with it and explore more possibilities. It also allows stakeholders to interact with the envisioned product and get some user experience.
  • 102.
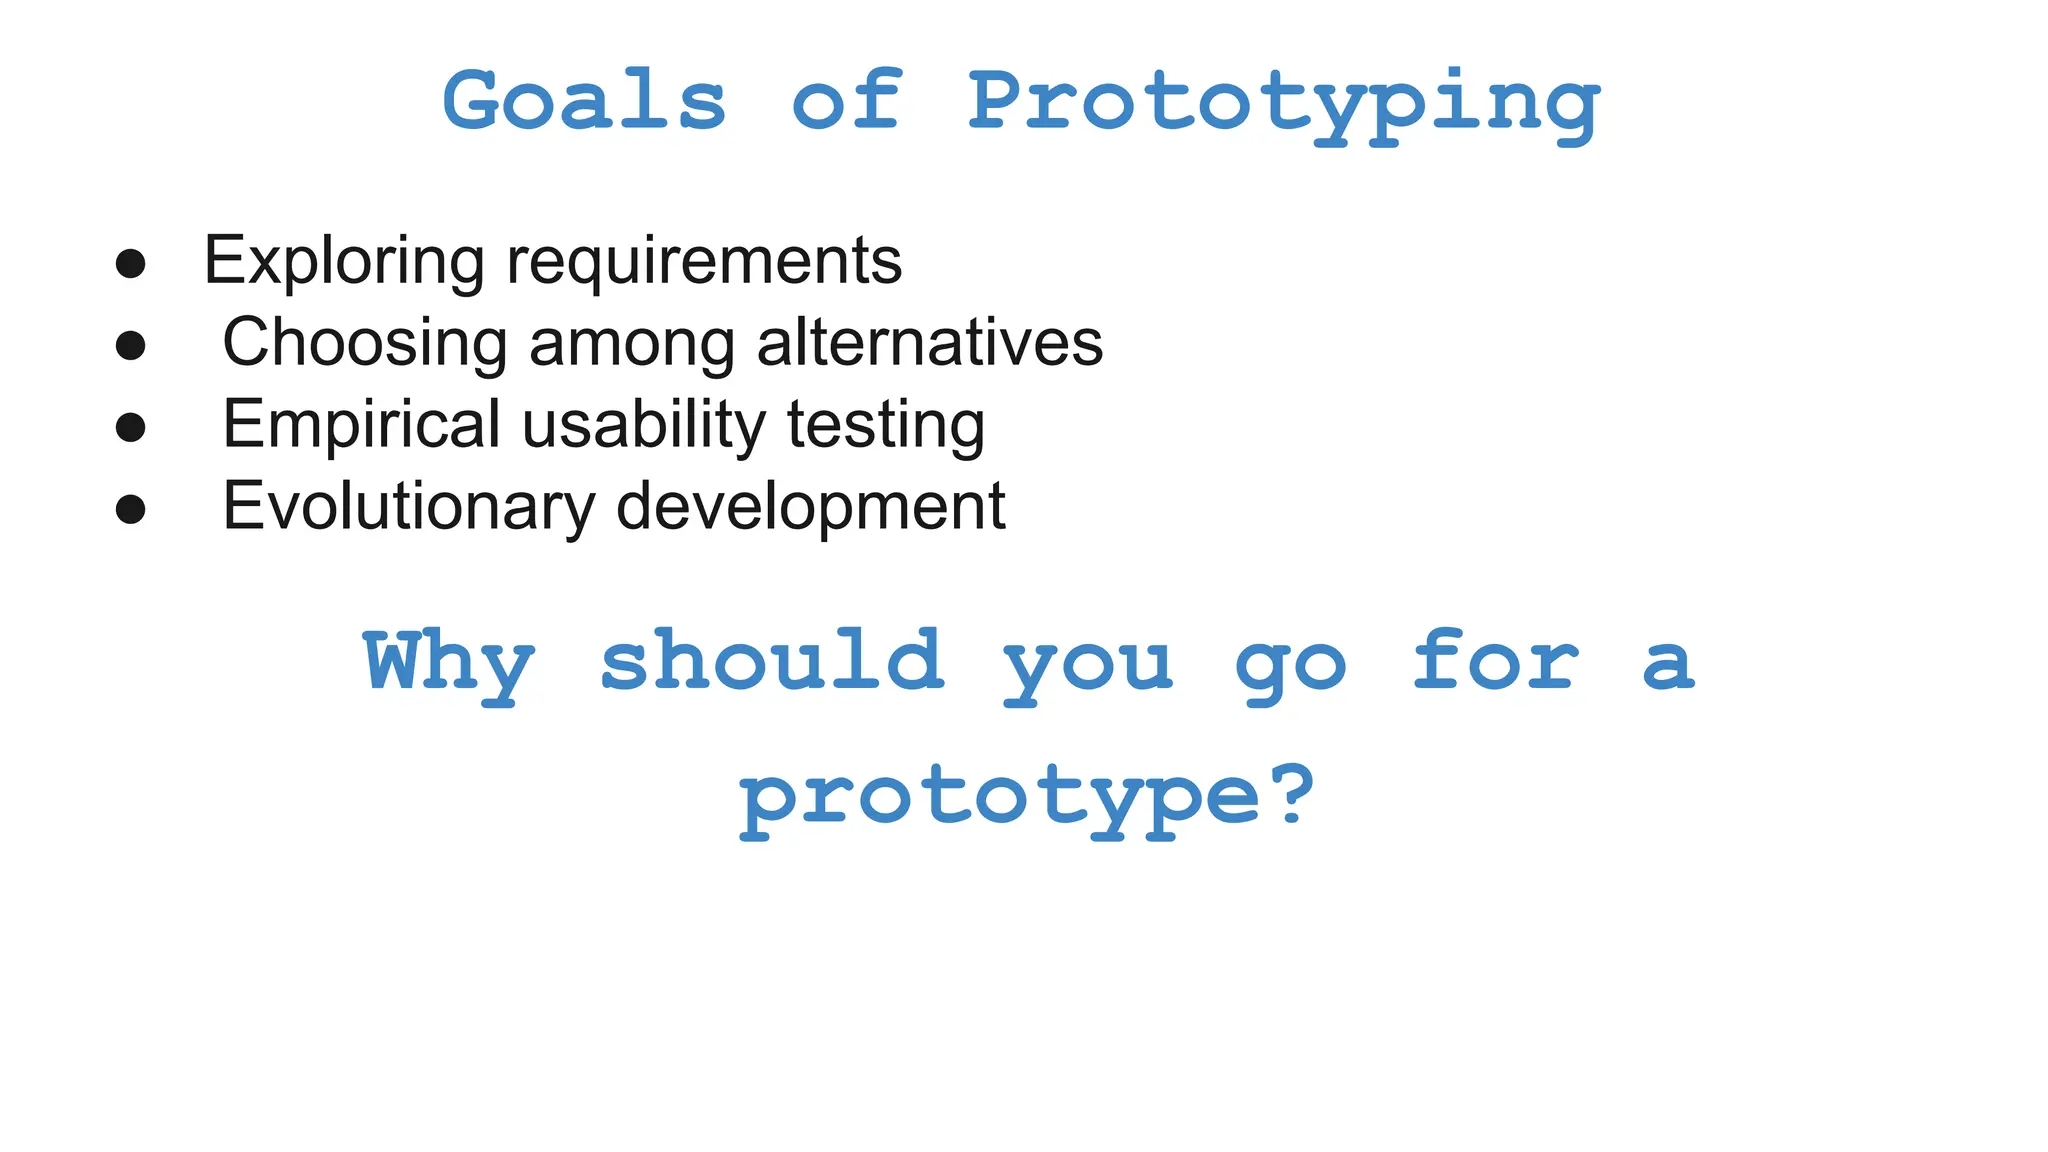
    Goals of Prototyping ●Exploring requirements ● Choosing among alternatives ● Empirical usability testing ● Evolutionary development Why should you go for a prototype?
  • 103.
    ● Evaluation andfeedback ● Team members can communicate effectively ● You can test your ideas ● It encourages reflection Why should you go for a prototype?
  • 104.
    ● Mockup ● Storyboard ●Sketches ● Scenarios ● Screenshots ● Function interface How to represent a prototype?
  • 105.
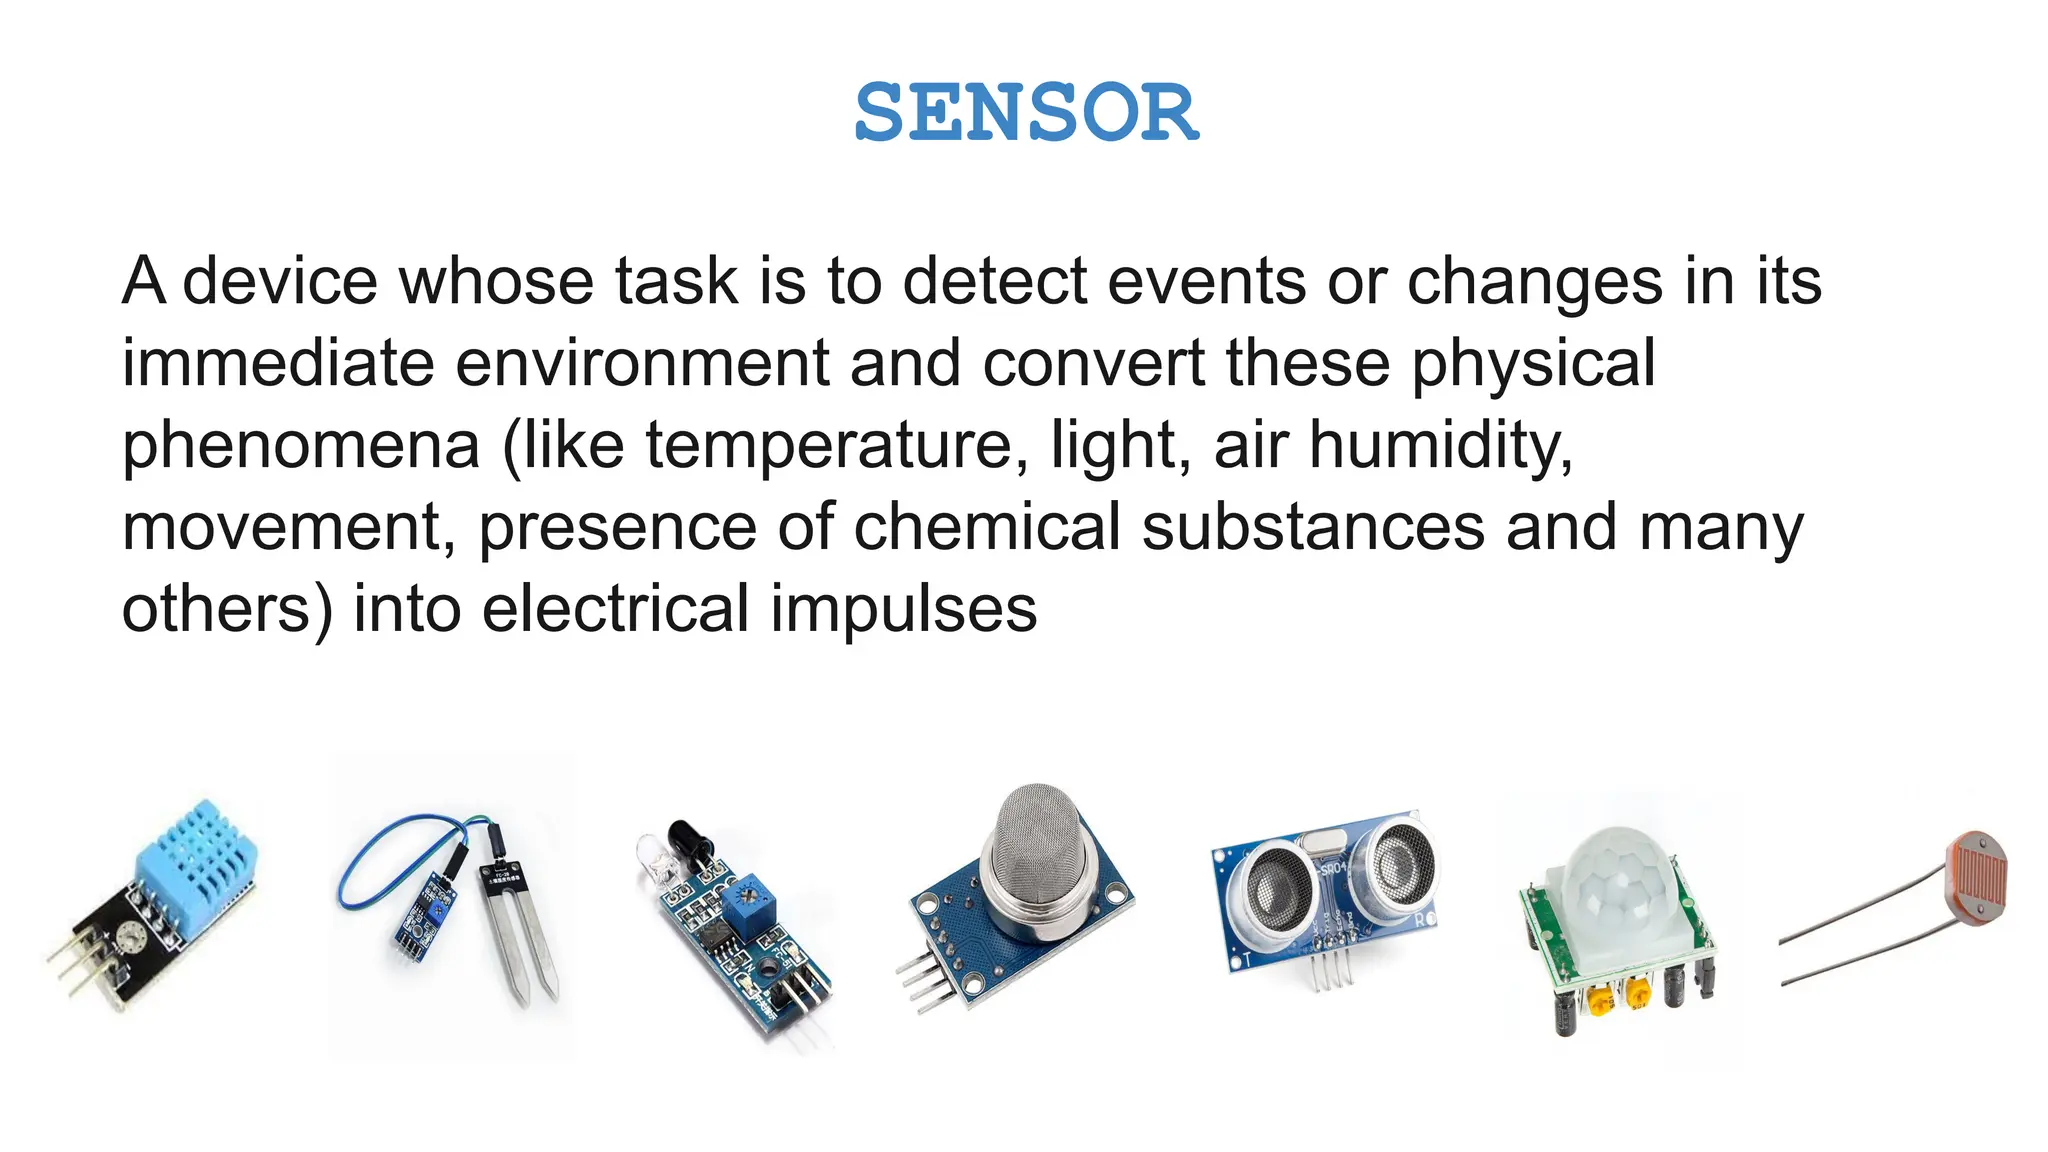
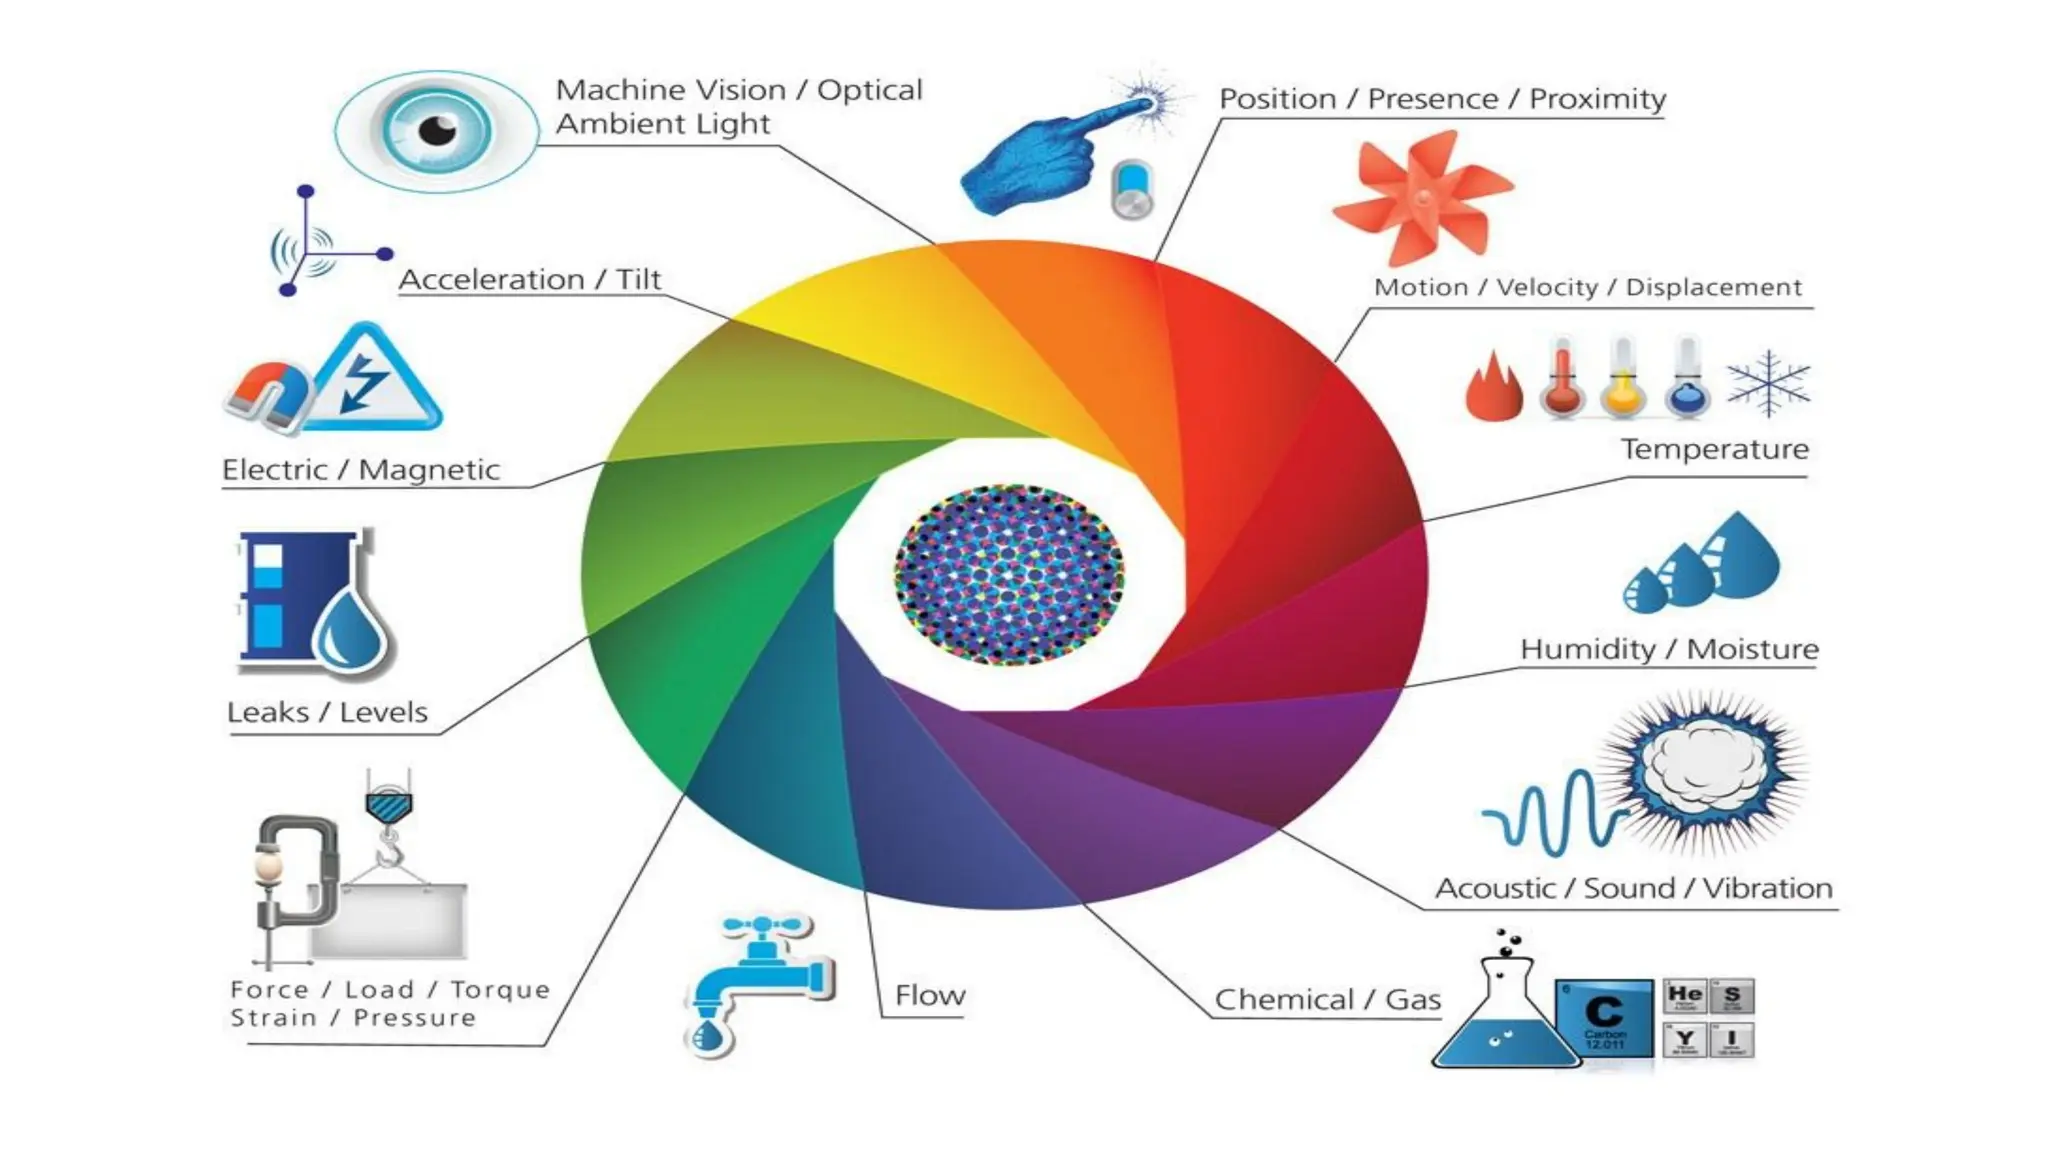
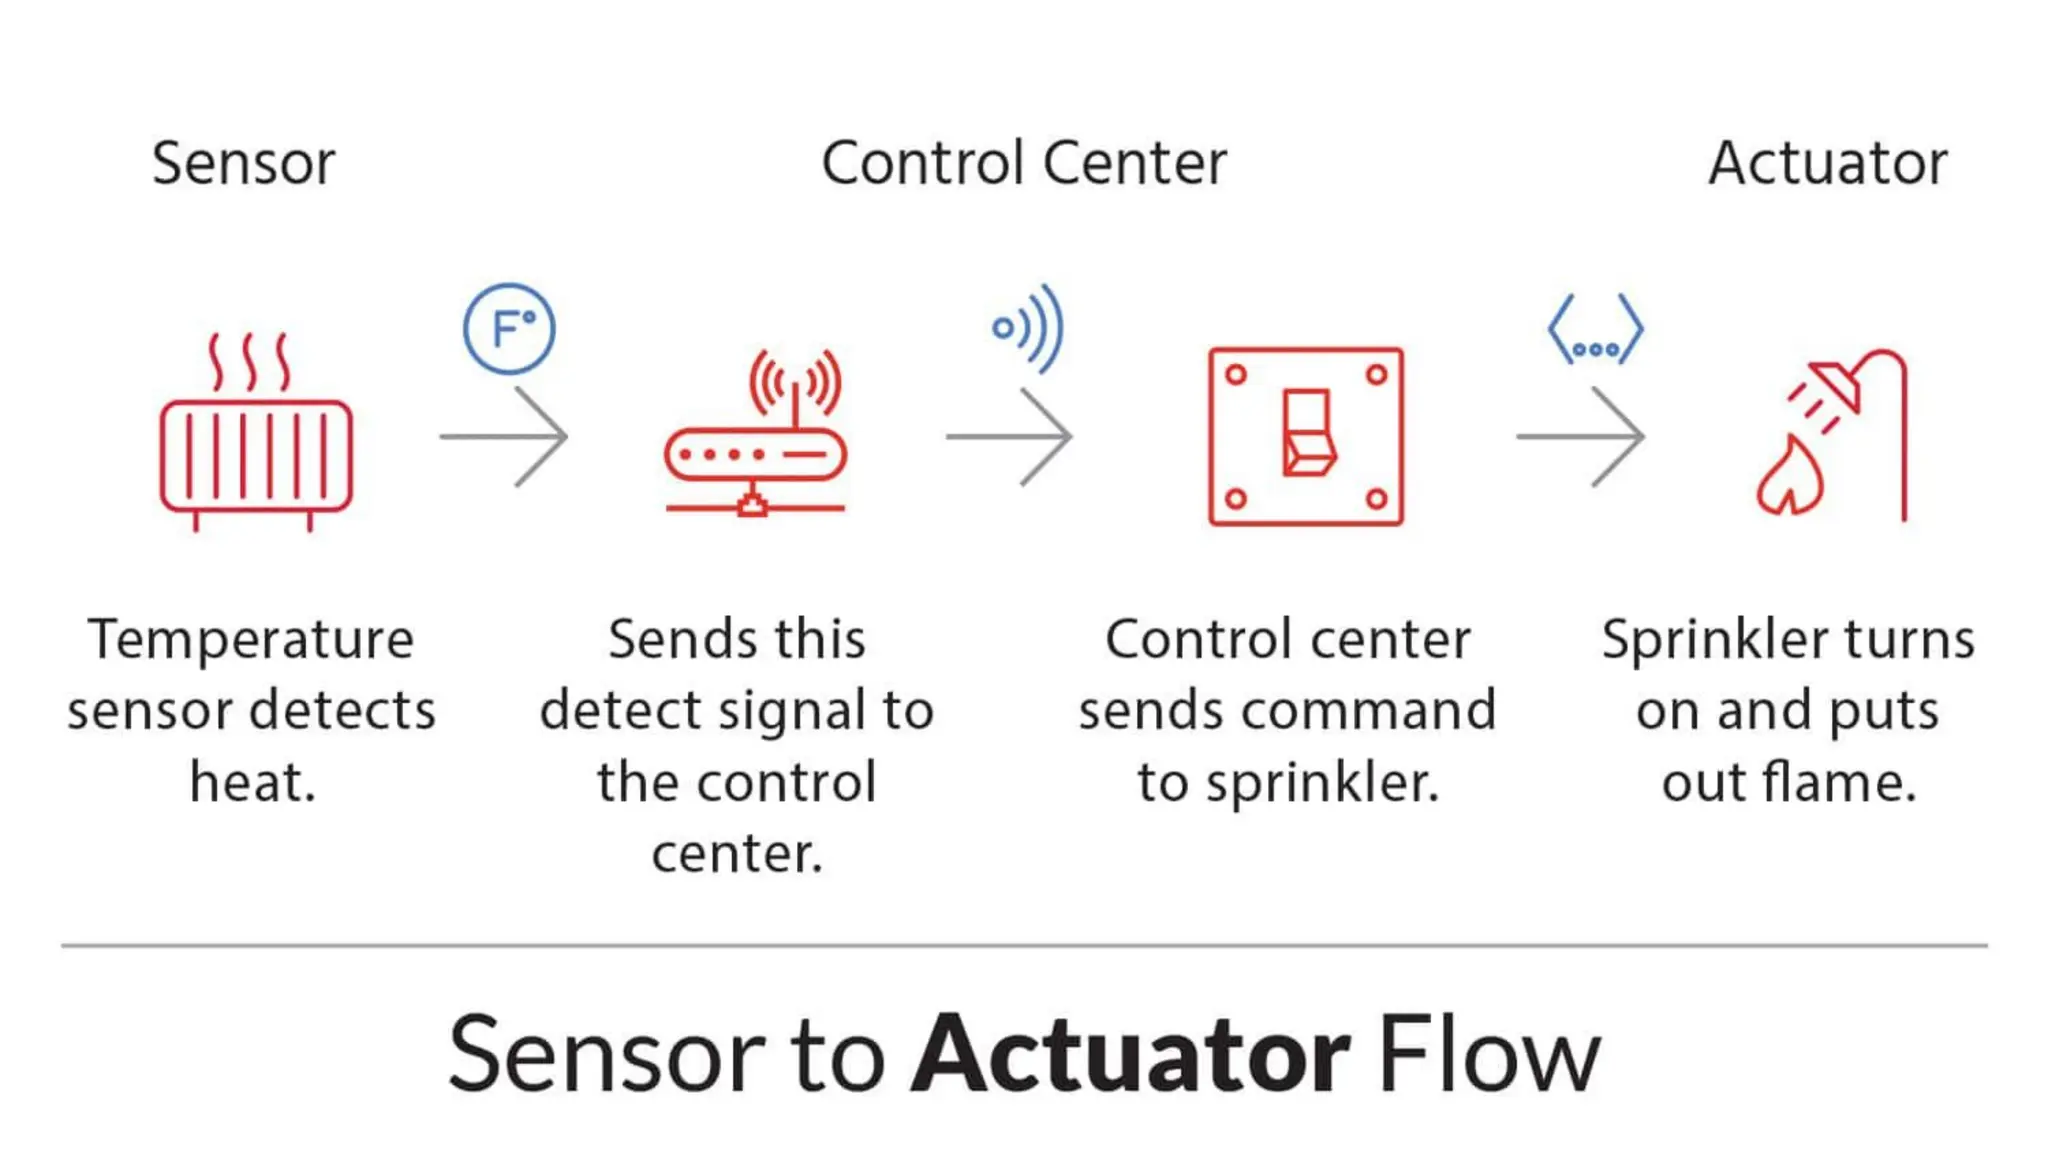
    A device whosetask is to detect events or changes in its immediate environment and convert these physical phenomena (like temperature, light, air humidity, movement, presence of chemical substances and many others) into electrical impulses SENSOR
  • 107.
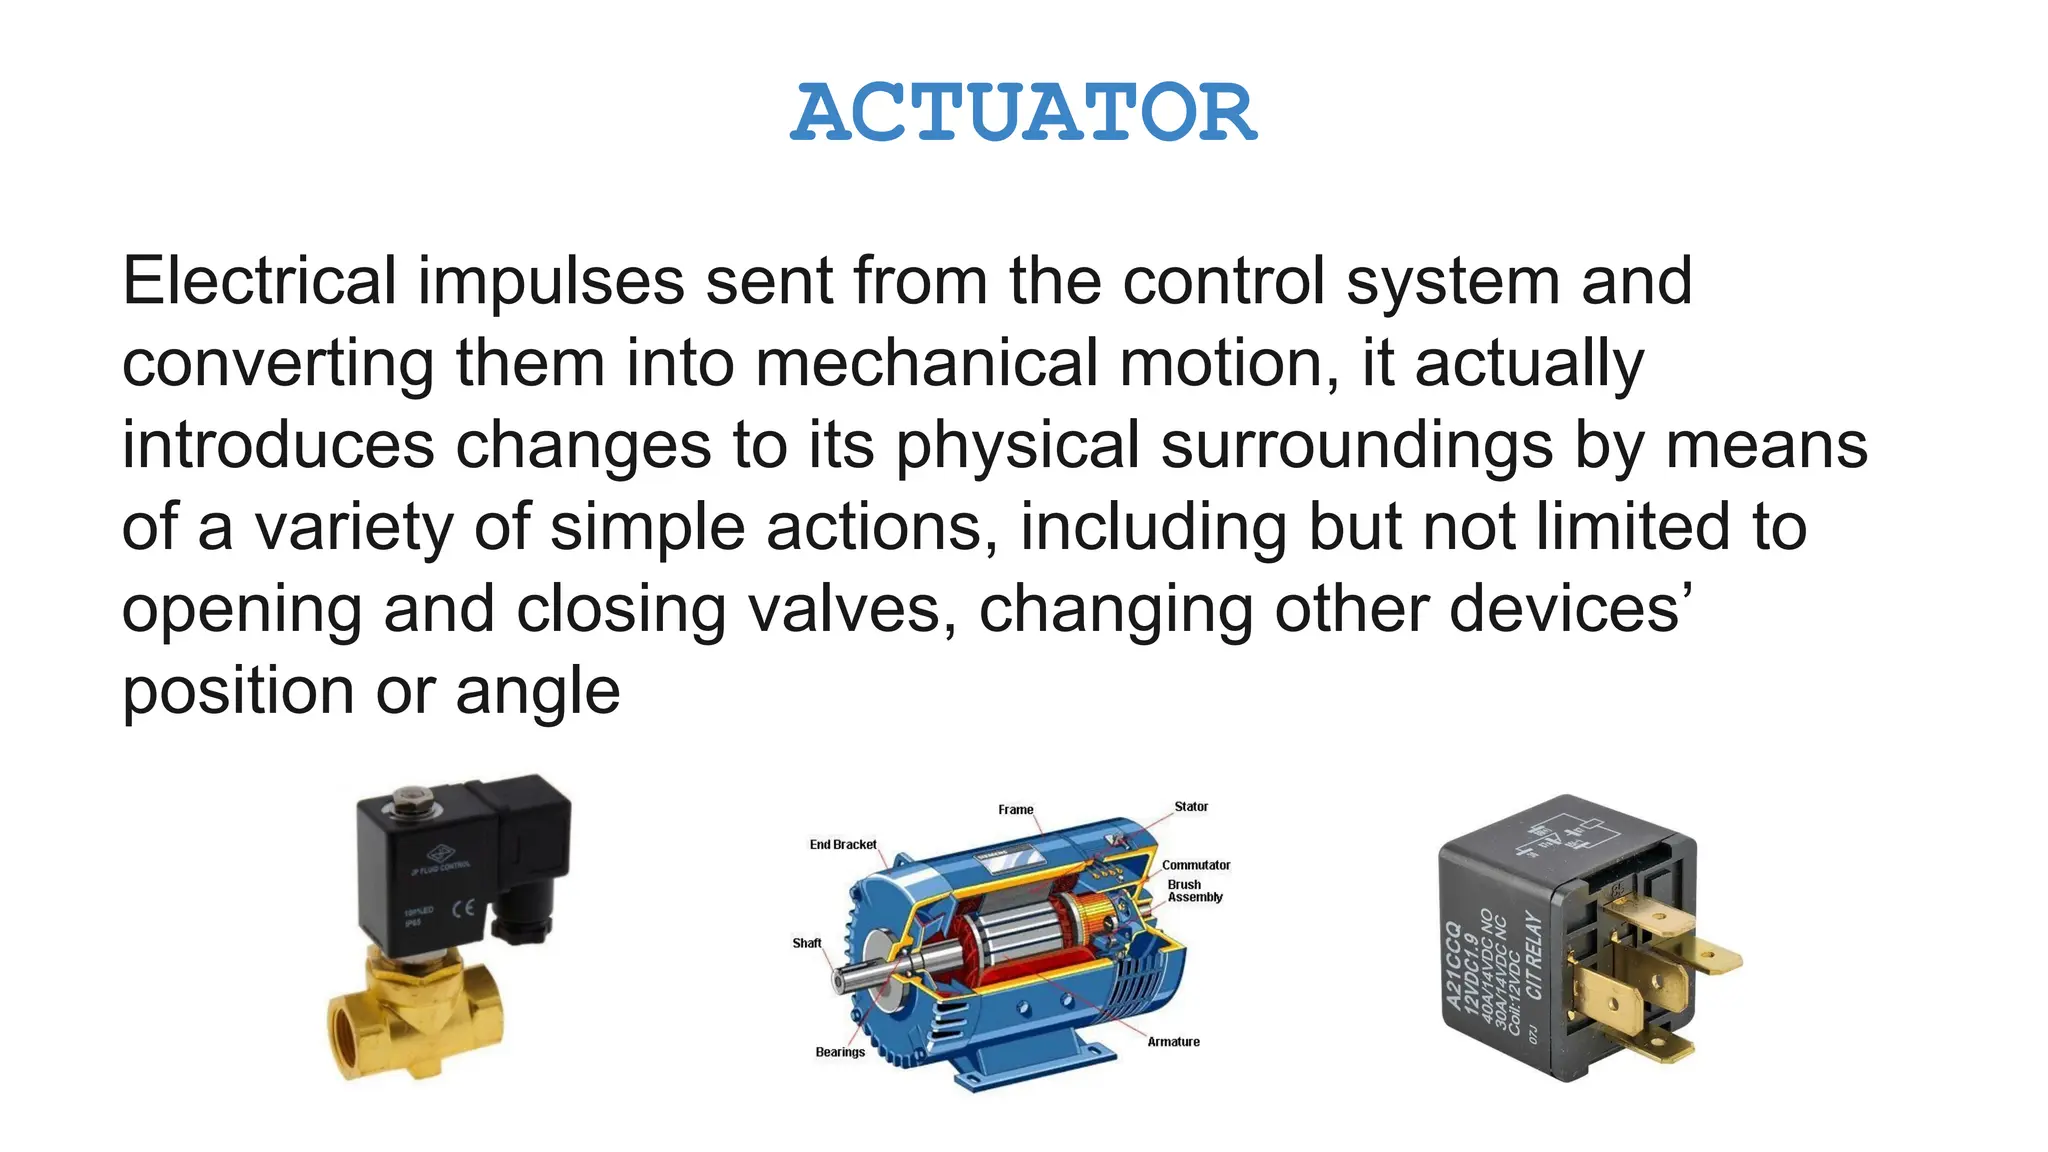
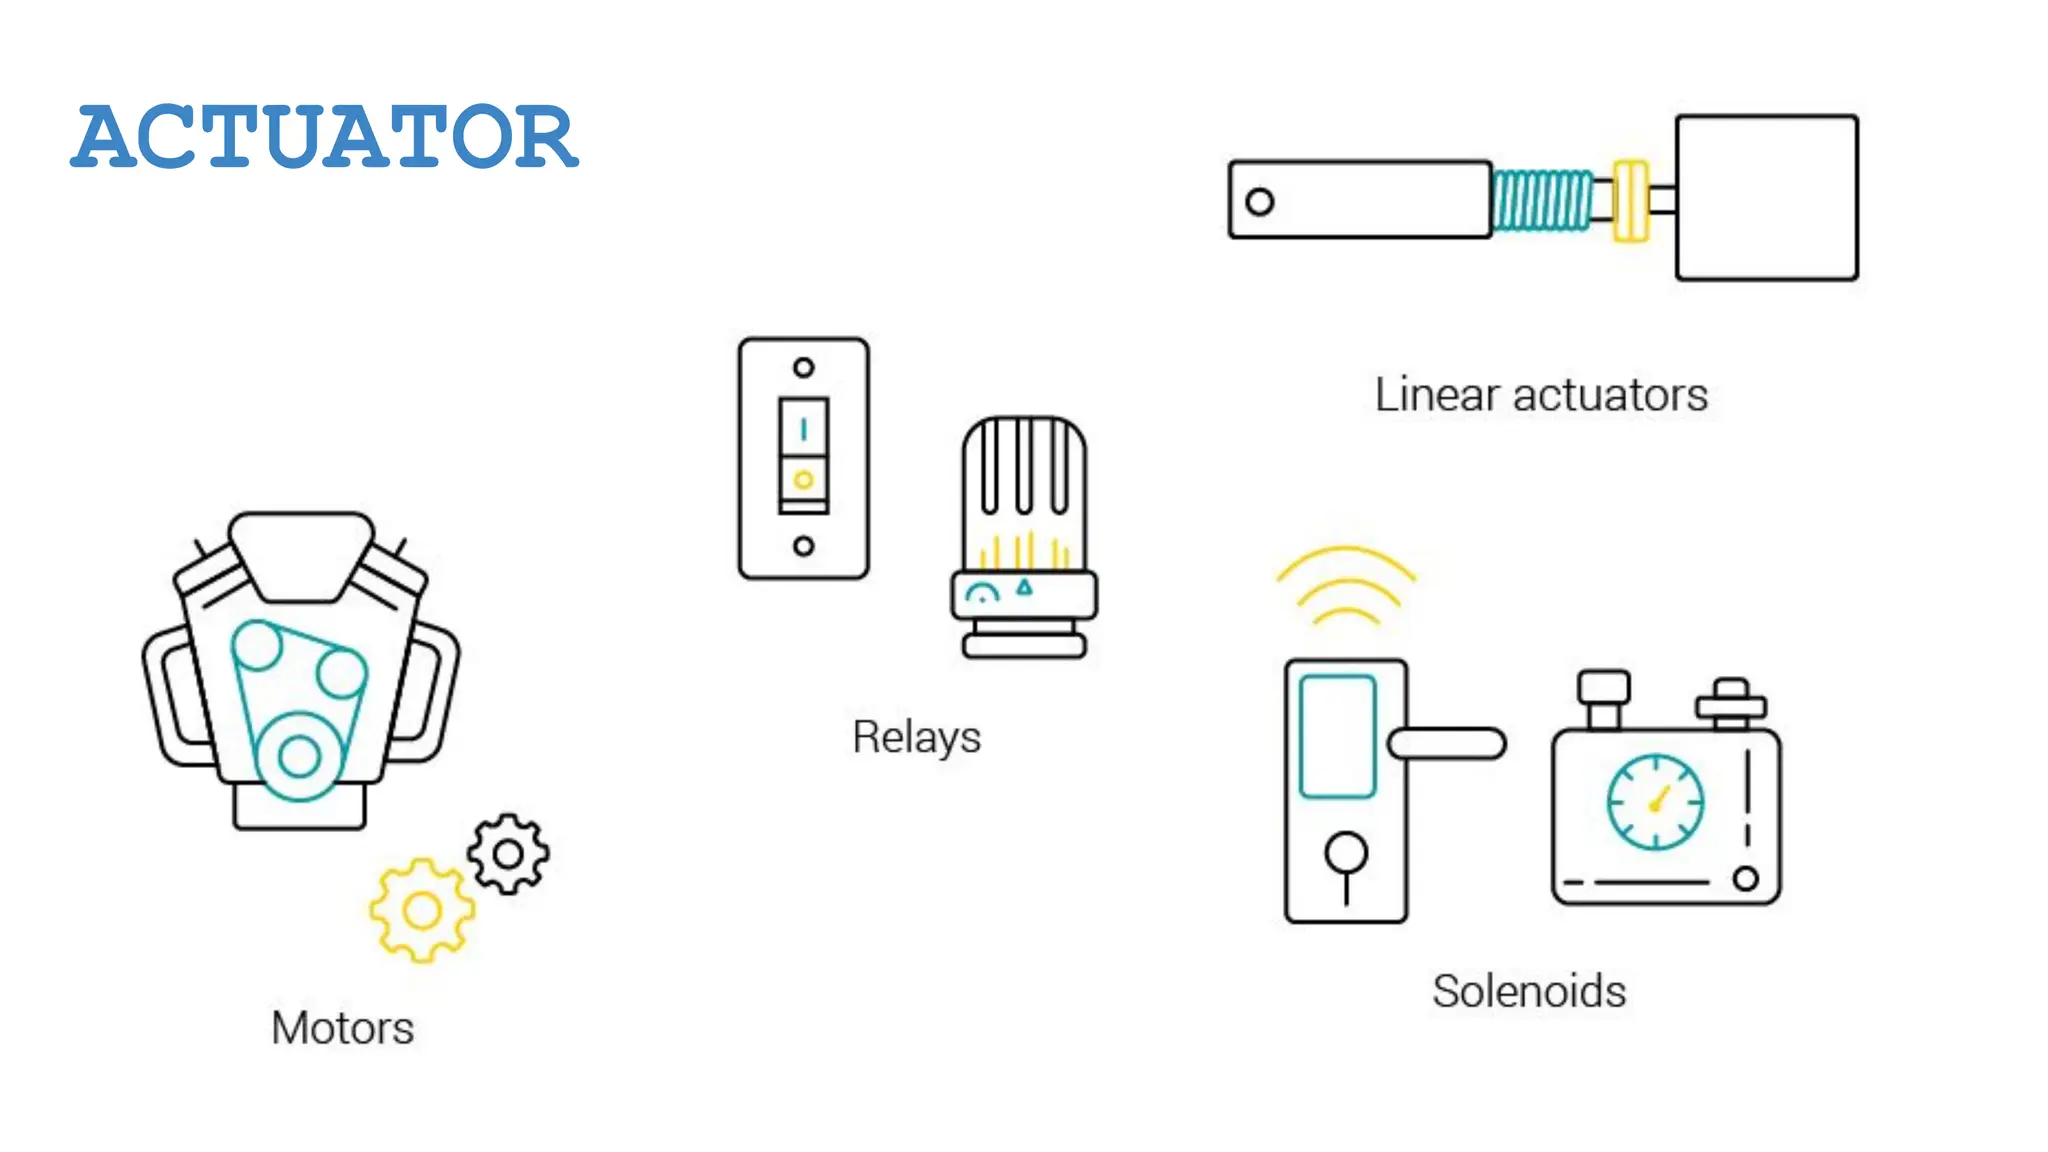
    Electrical impulses sentfrom the control system and converting them into mechanical motion, it actually introduces changes to its physical surroundings by means of a variety of simple actions, including but not limited to opening and closing valves, changing other devices’ position or angle ACTUATOR
  • 108.
  • 110.
    Open Architecture with Powerful IntegrationTools Built-in Security Intuitive, Customizable Management Portal/ UI Cross-Vendor Device Compatibility Modular, Platform- Independent Design NETWORK CONSIDERATIONS
  • 111.
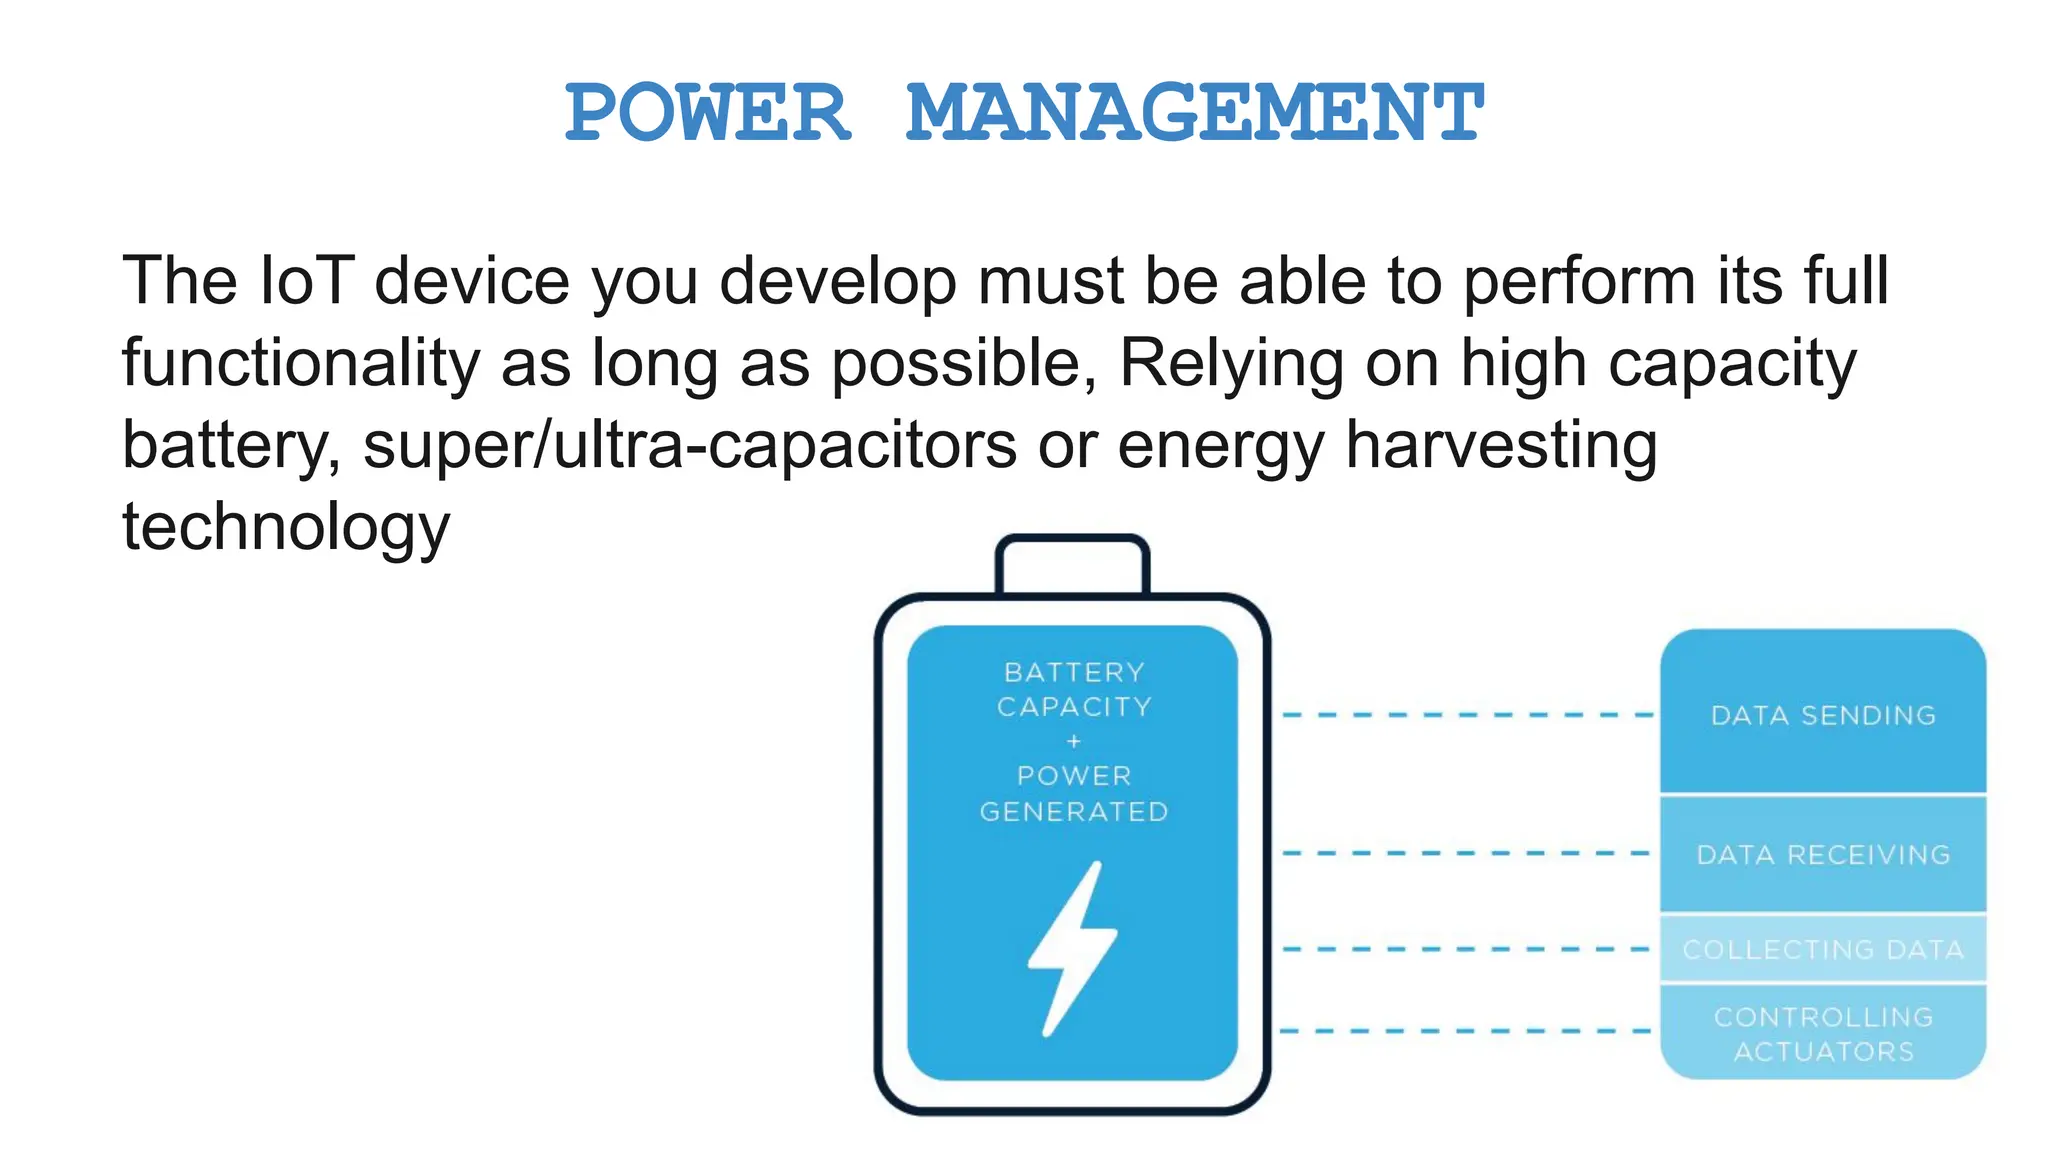
    The IoT deviceyou develop must be able to perform its full functionality as long as possible, Relying on high capacity battery, super/ultra-capacitors or energy harvesting technology POWER MANAGEMENT
  • 112.
    ● Energy consumption ●Battery capacity ● Power generation Power Management Key Principles
  • 113.
  • 114.
  • 115.
    ESP32 in ArduinoIDE https://raw.githubuserconte nt.com/espressif/arduino-es p32/gh-pages/package_esp32_ index.json
  • 116.
  • 117.
  • 118.
  • 120.