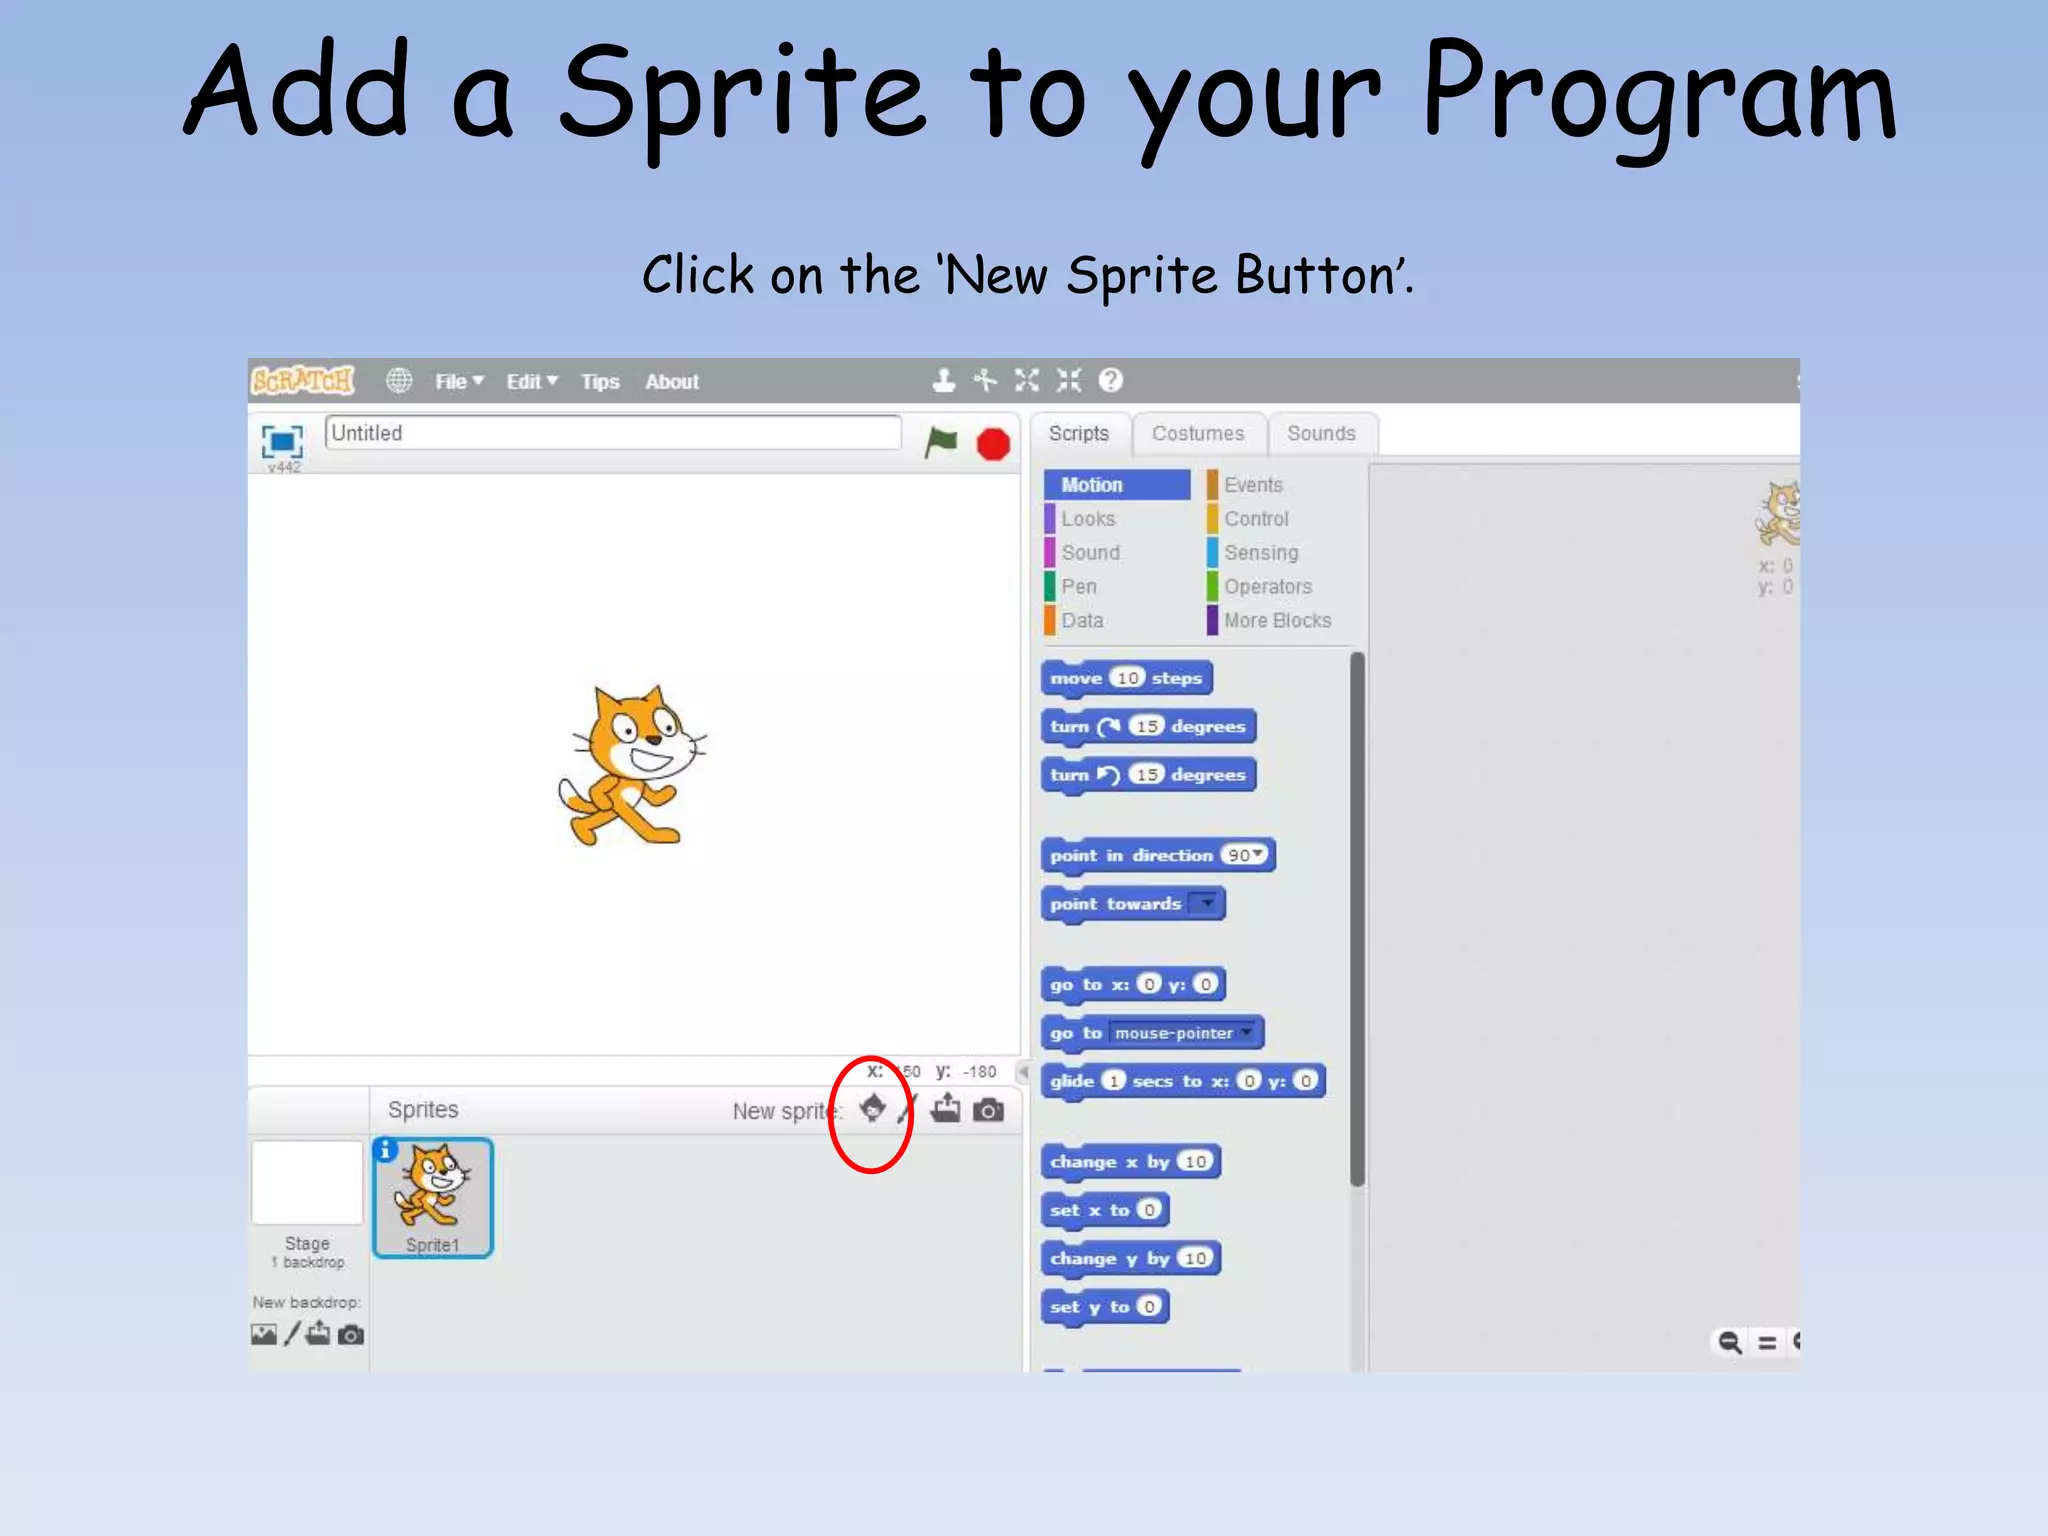
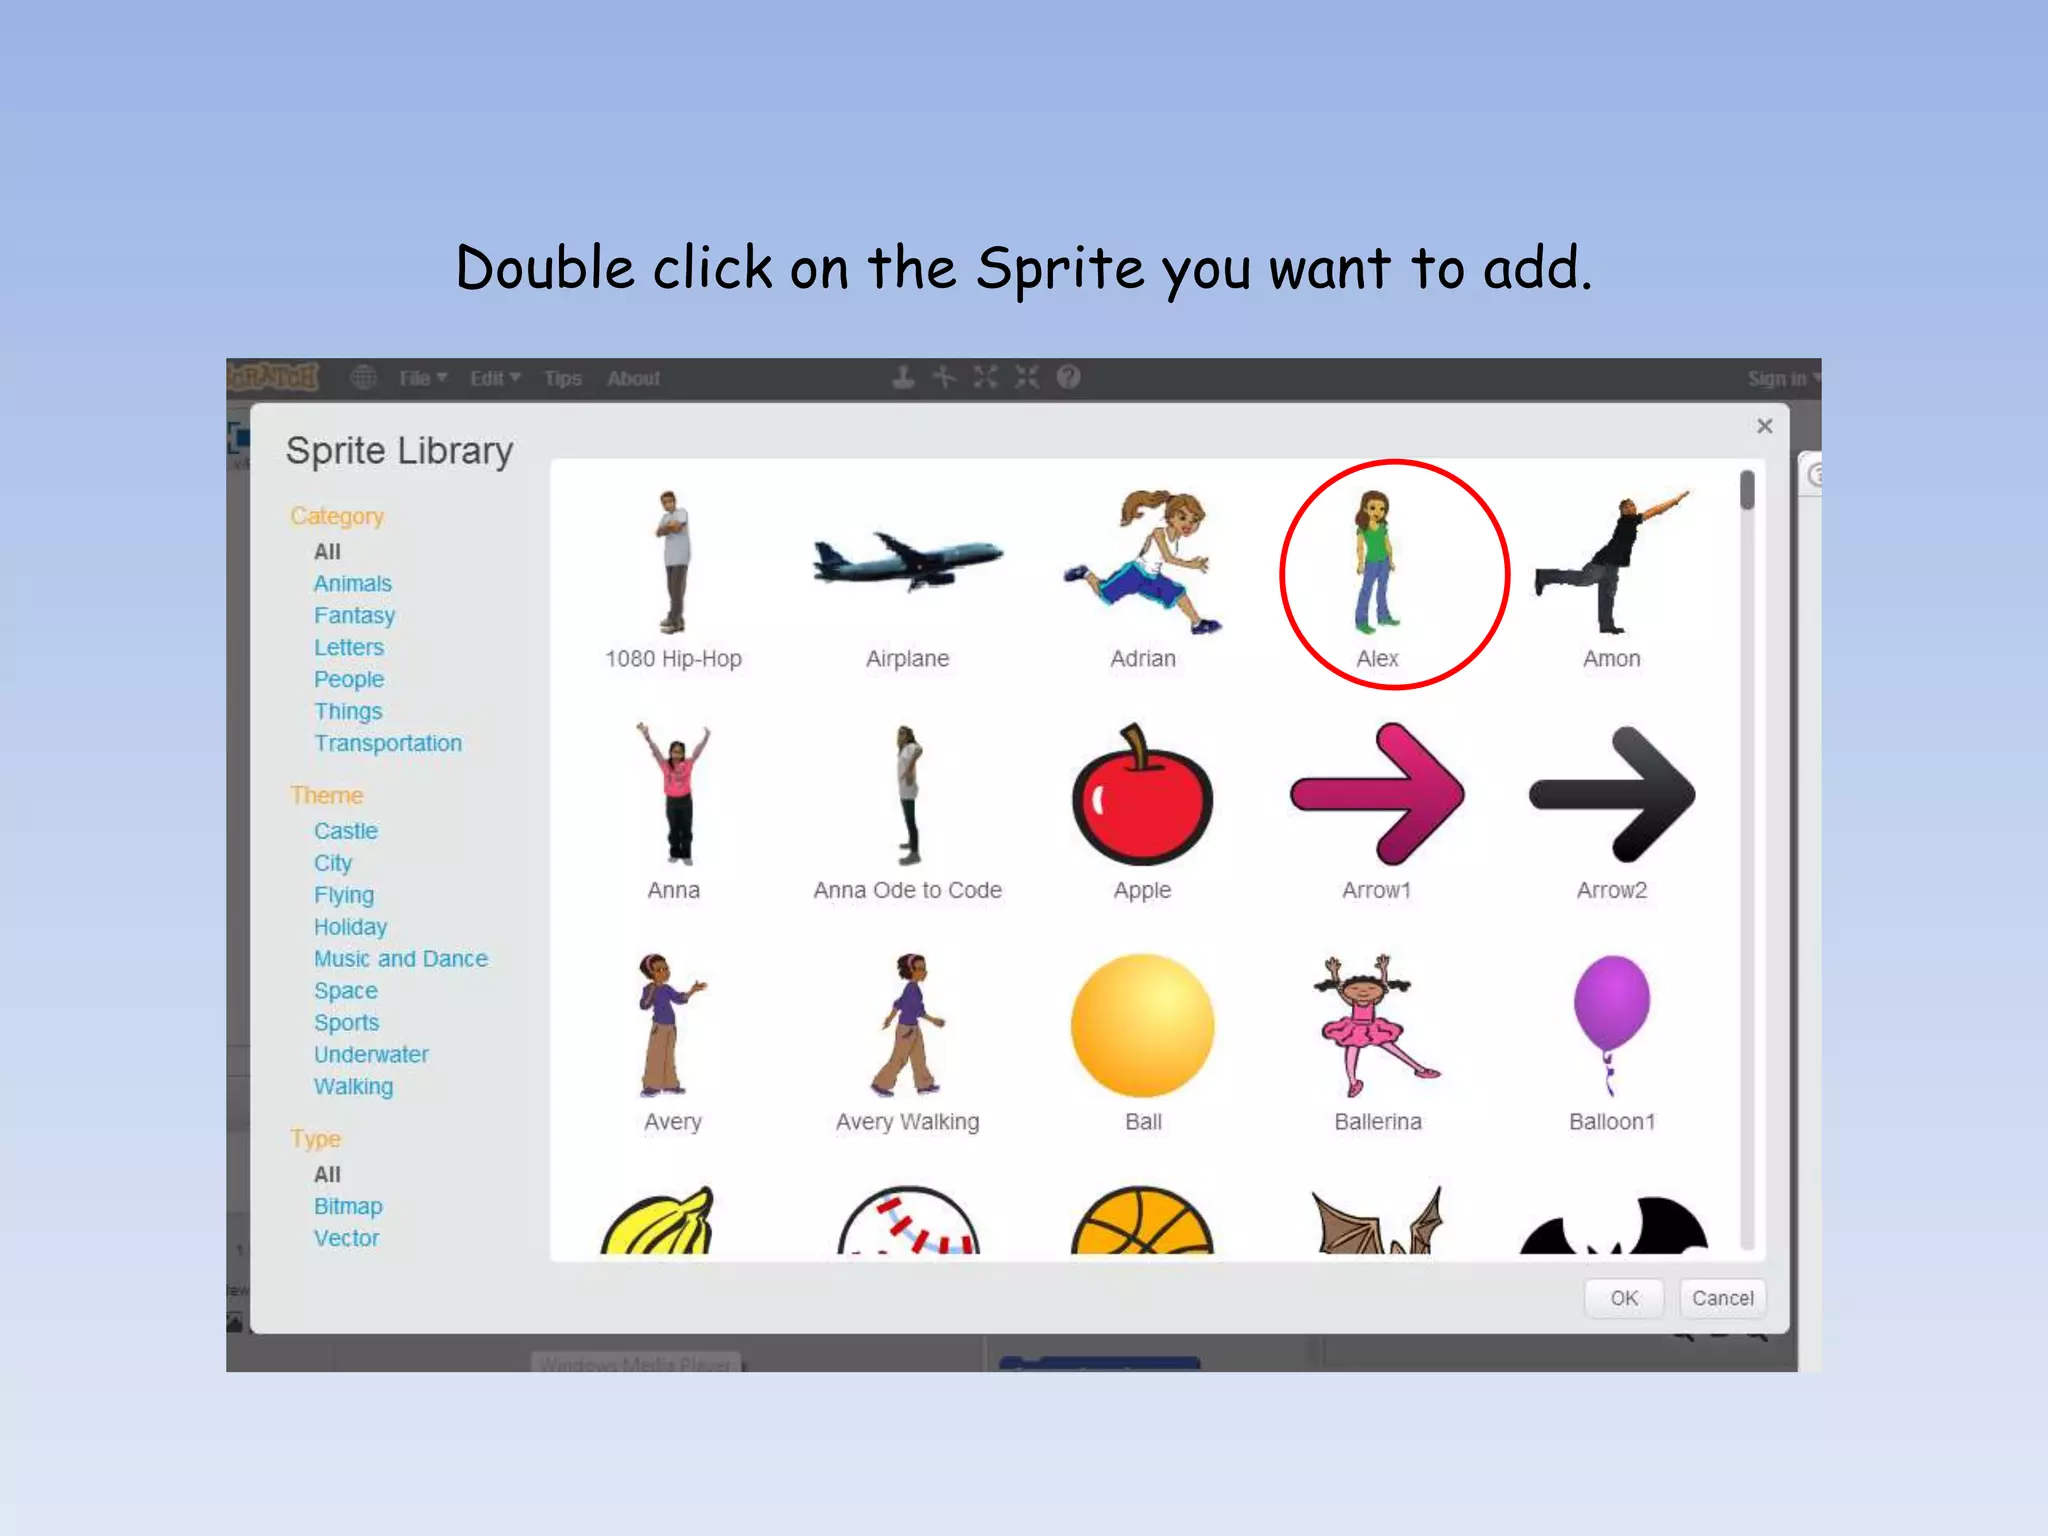
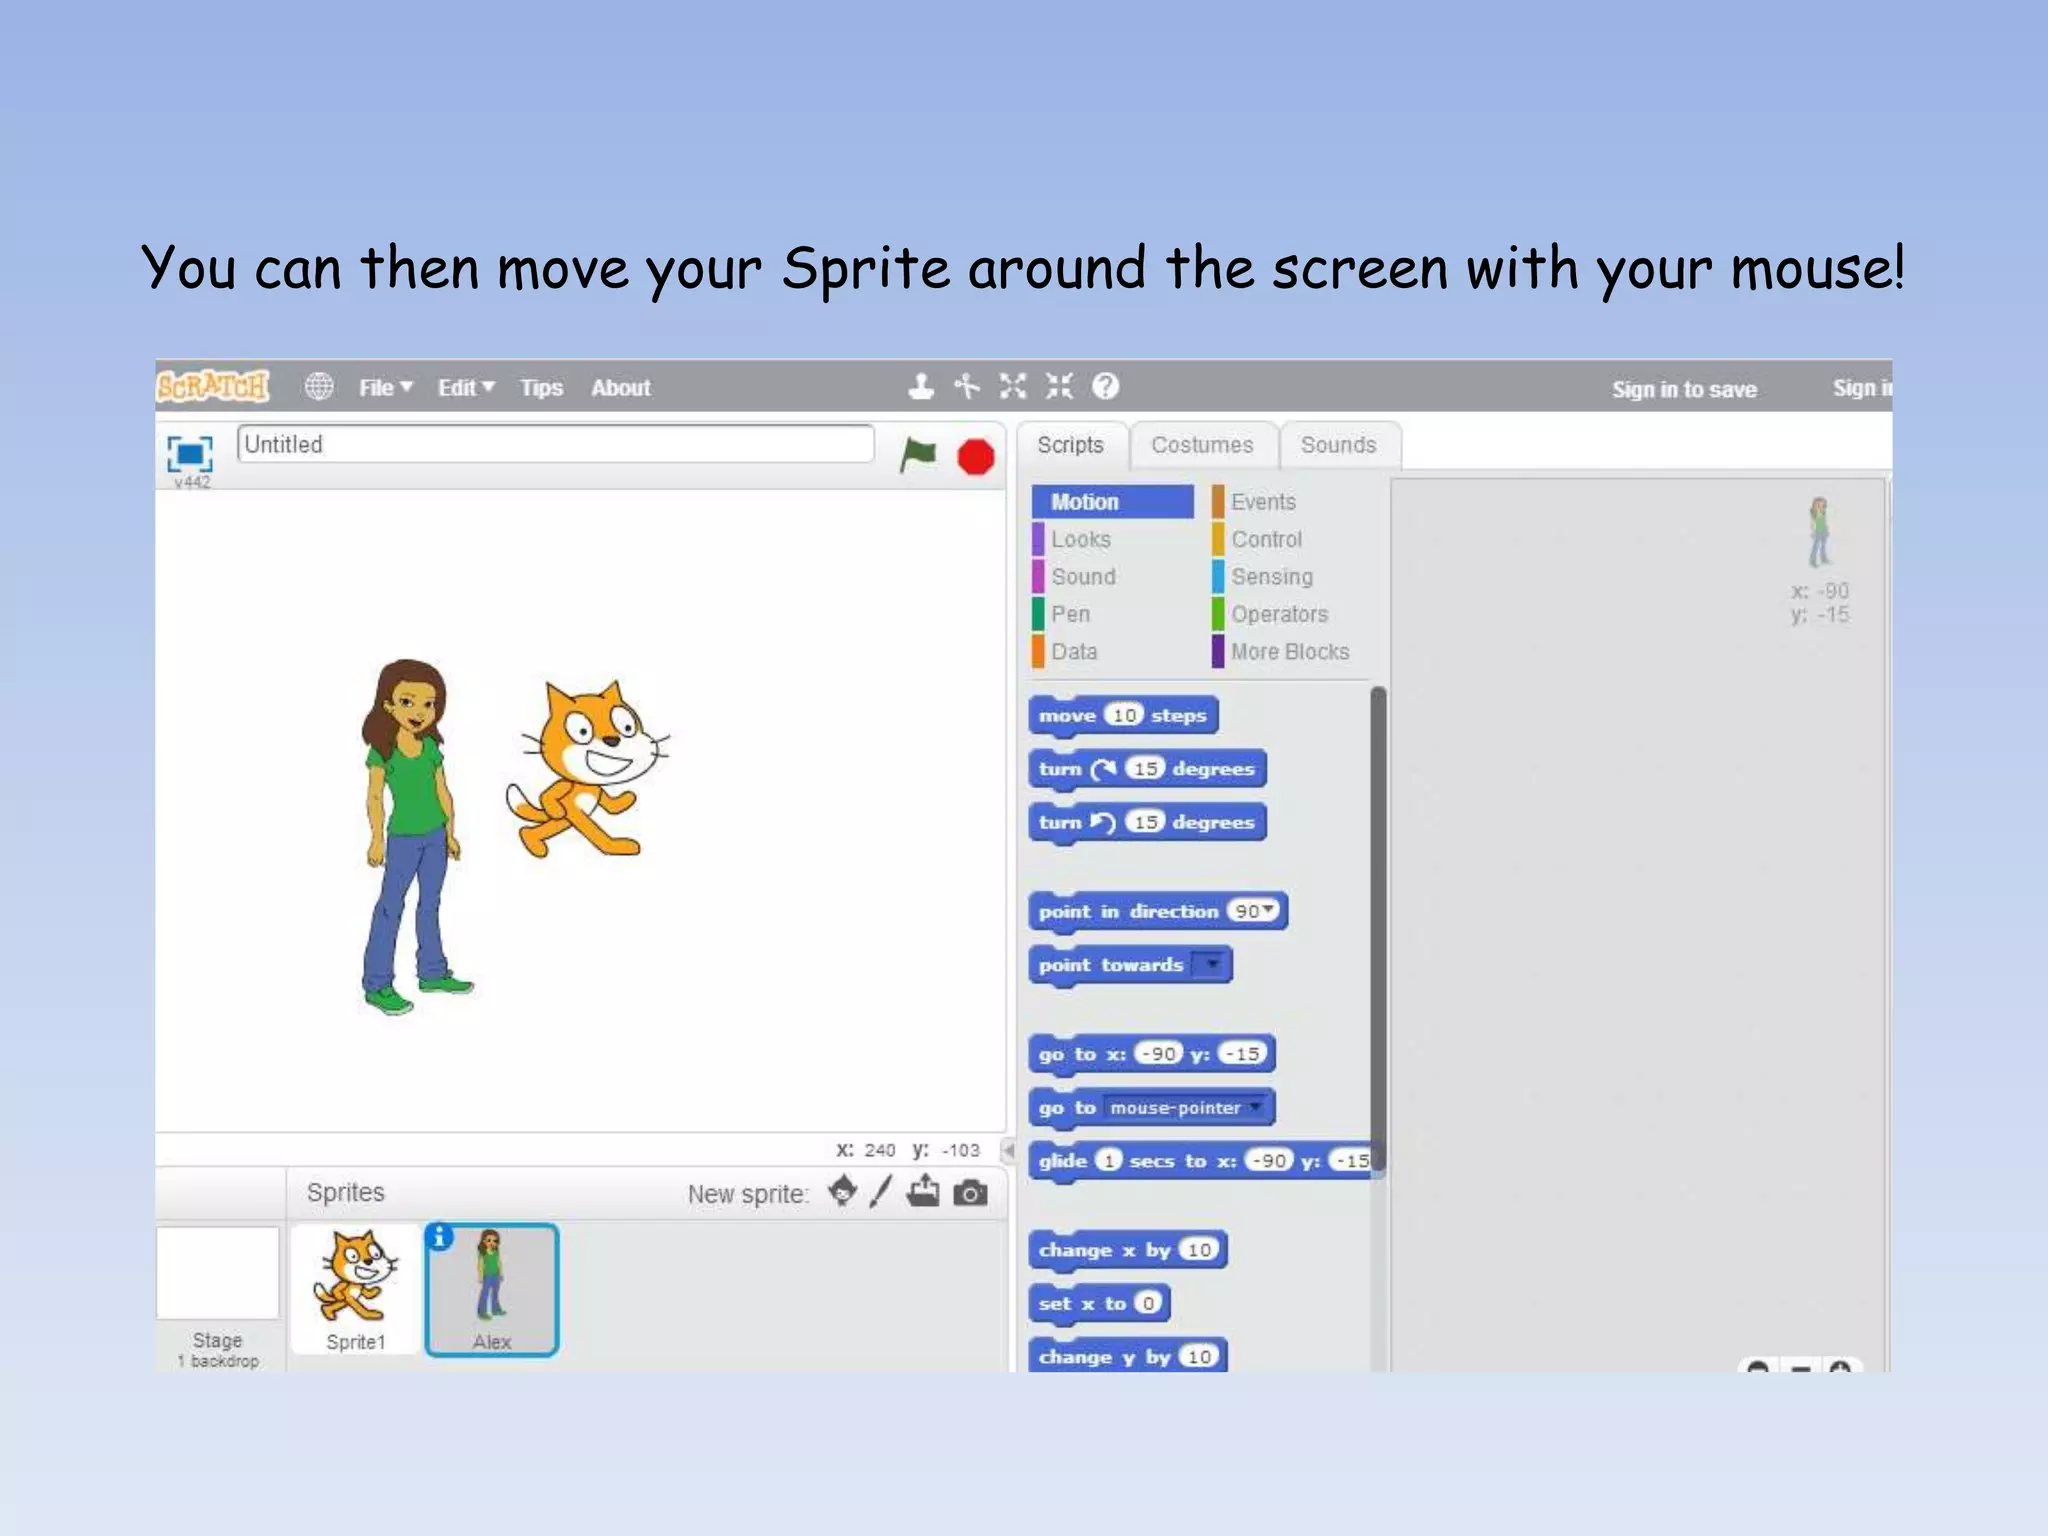
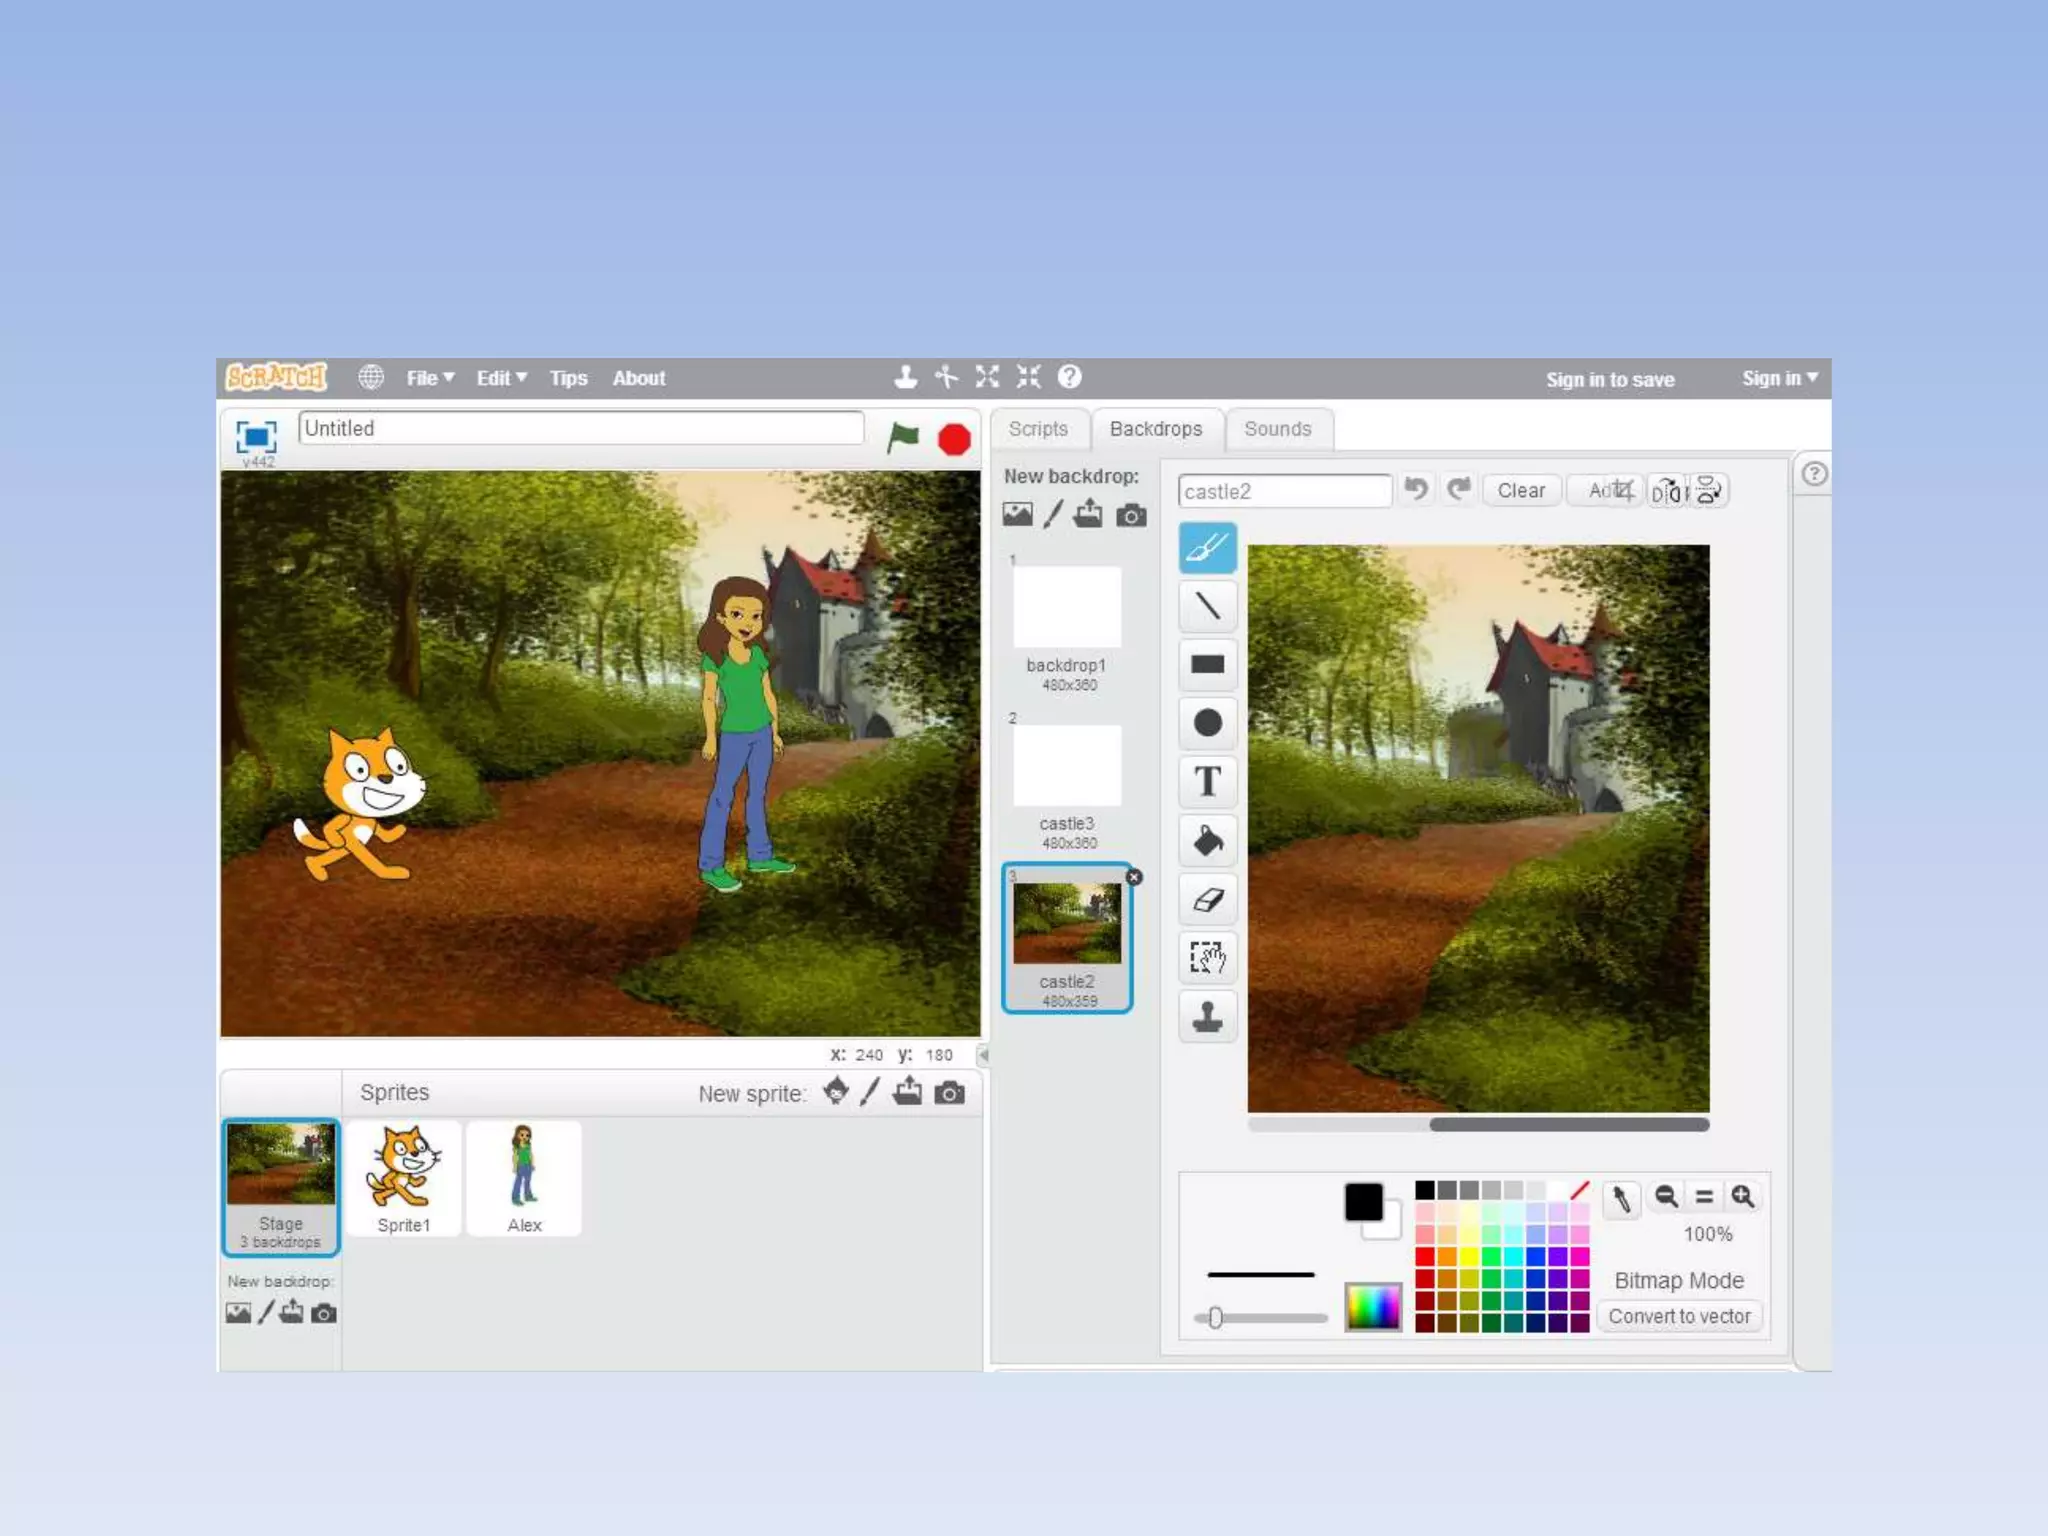
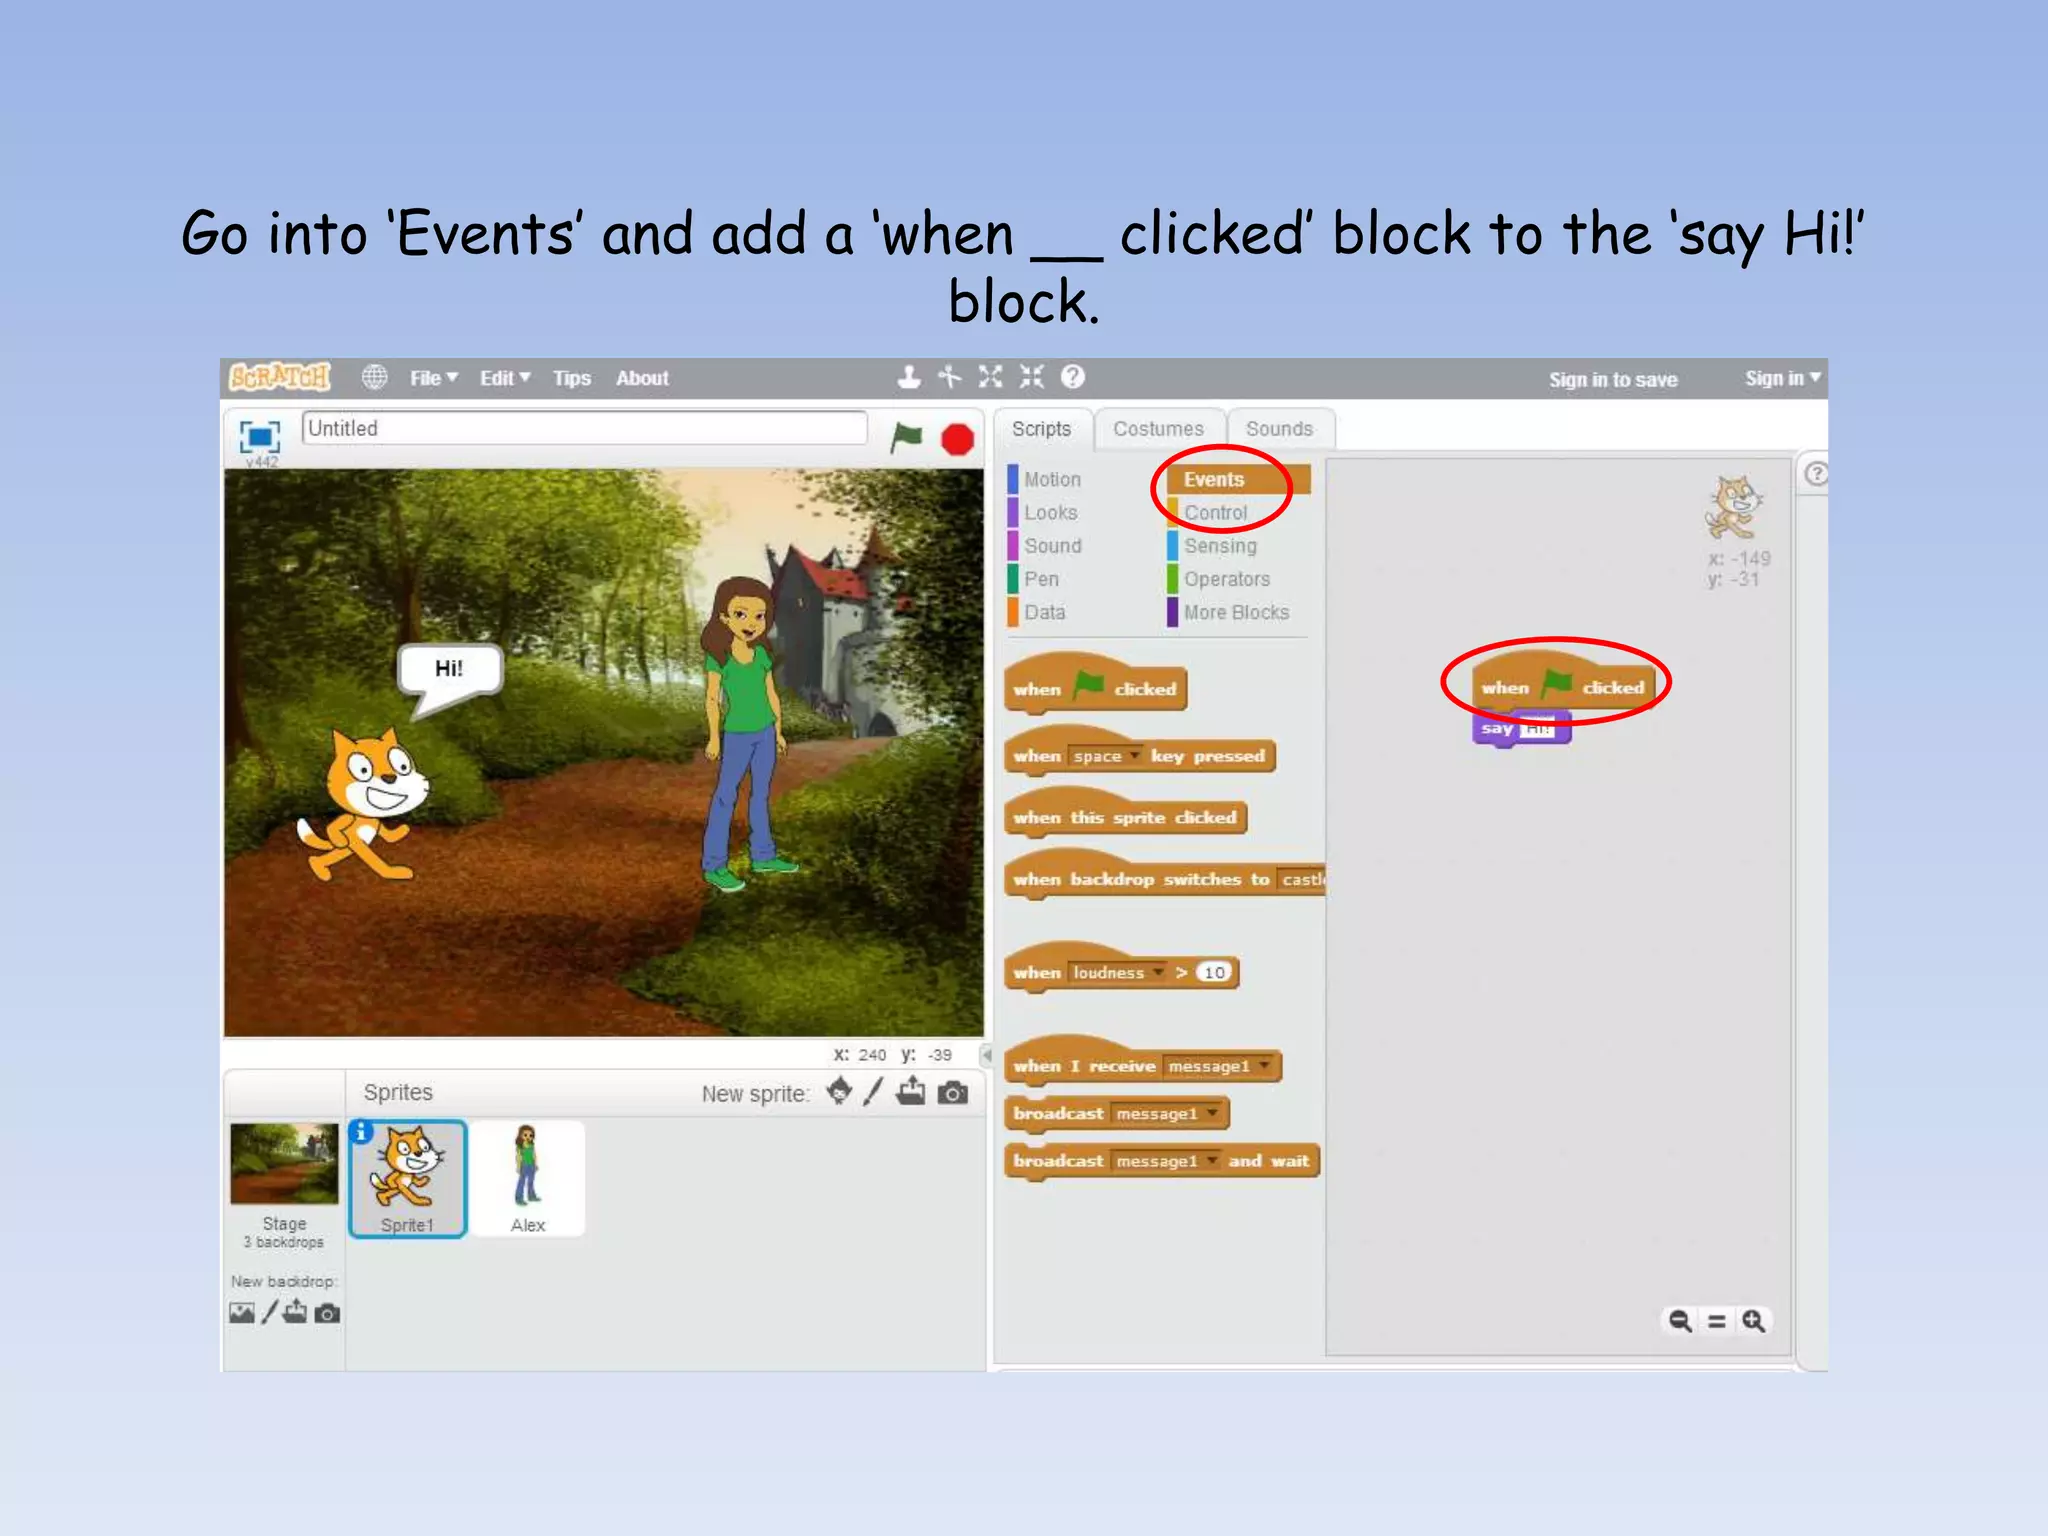
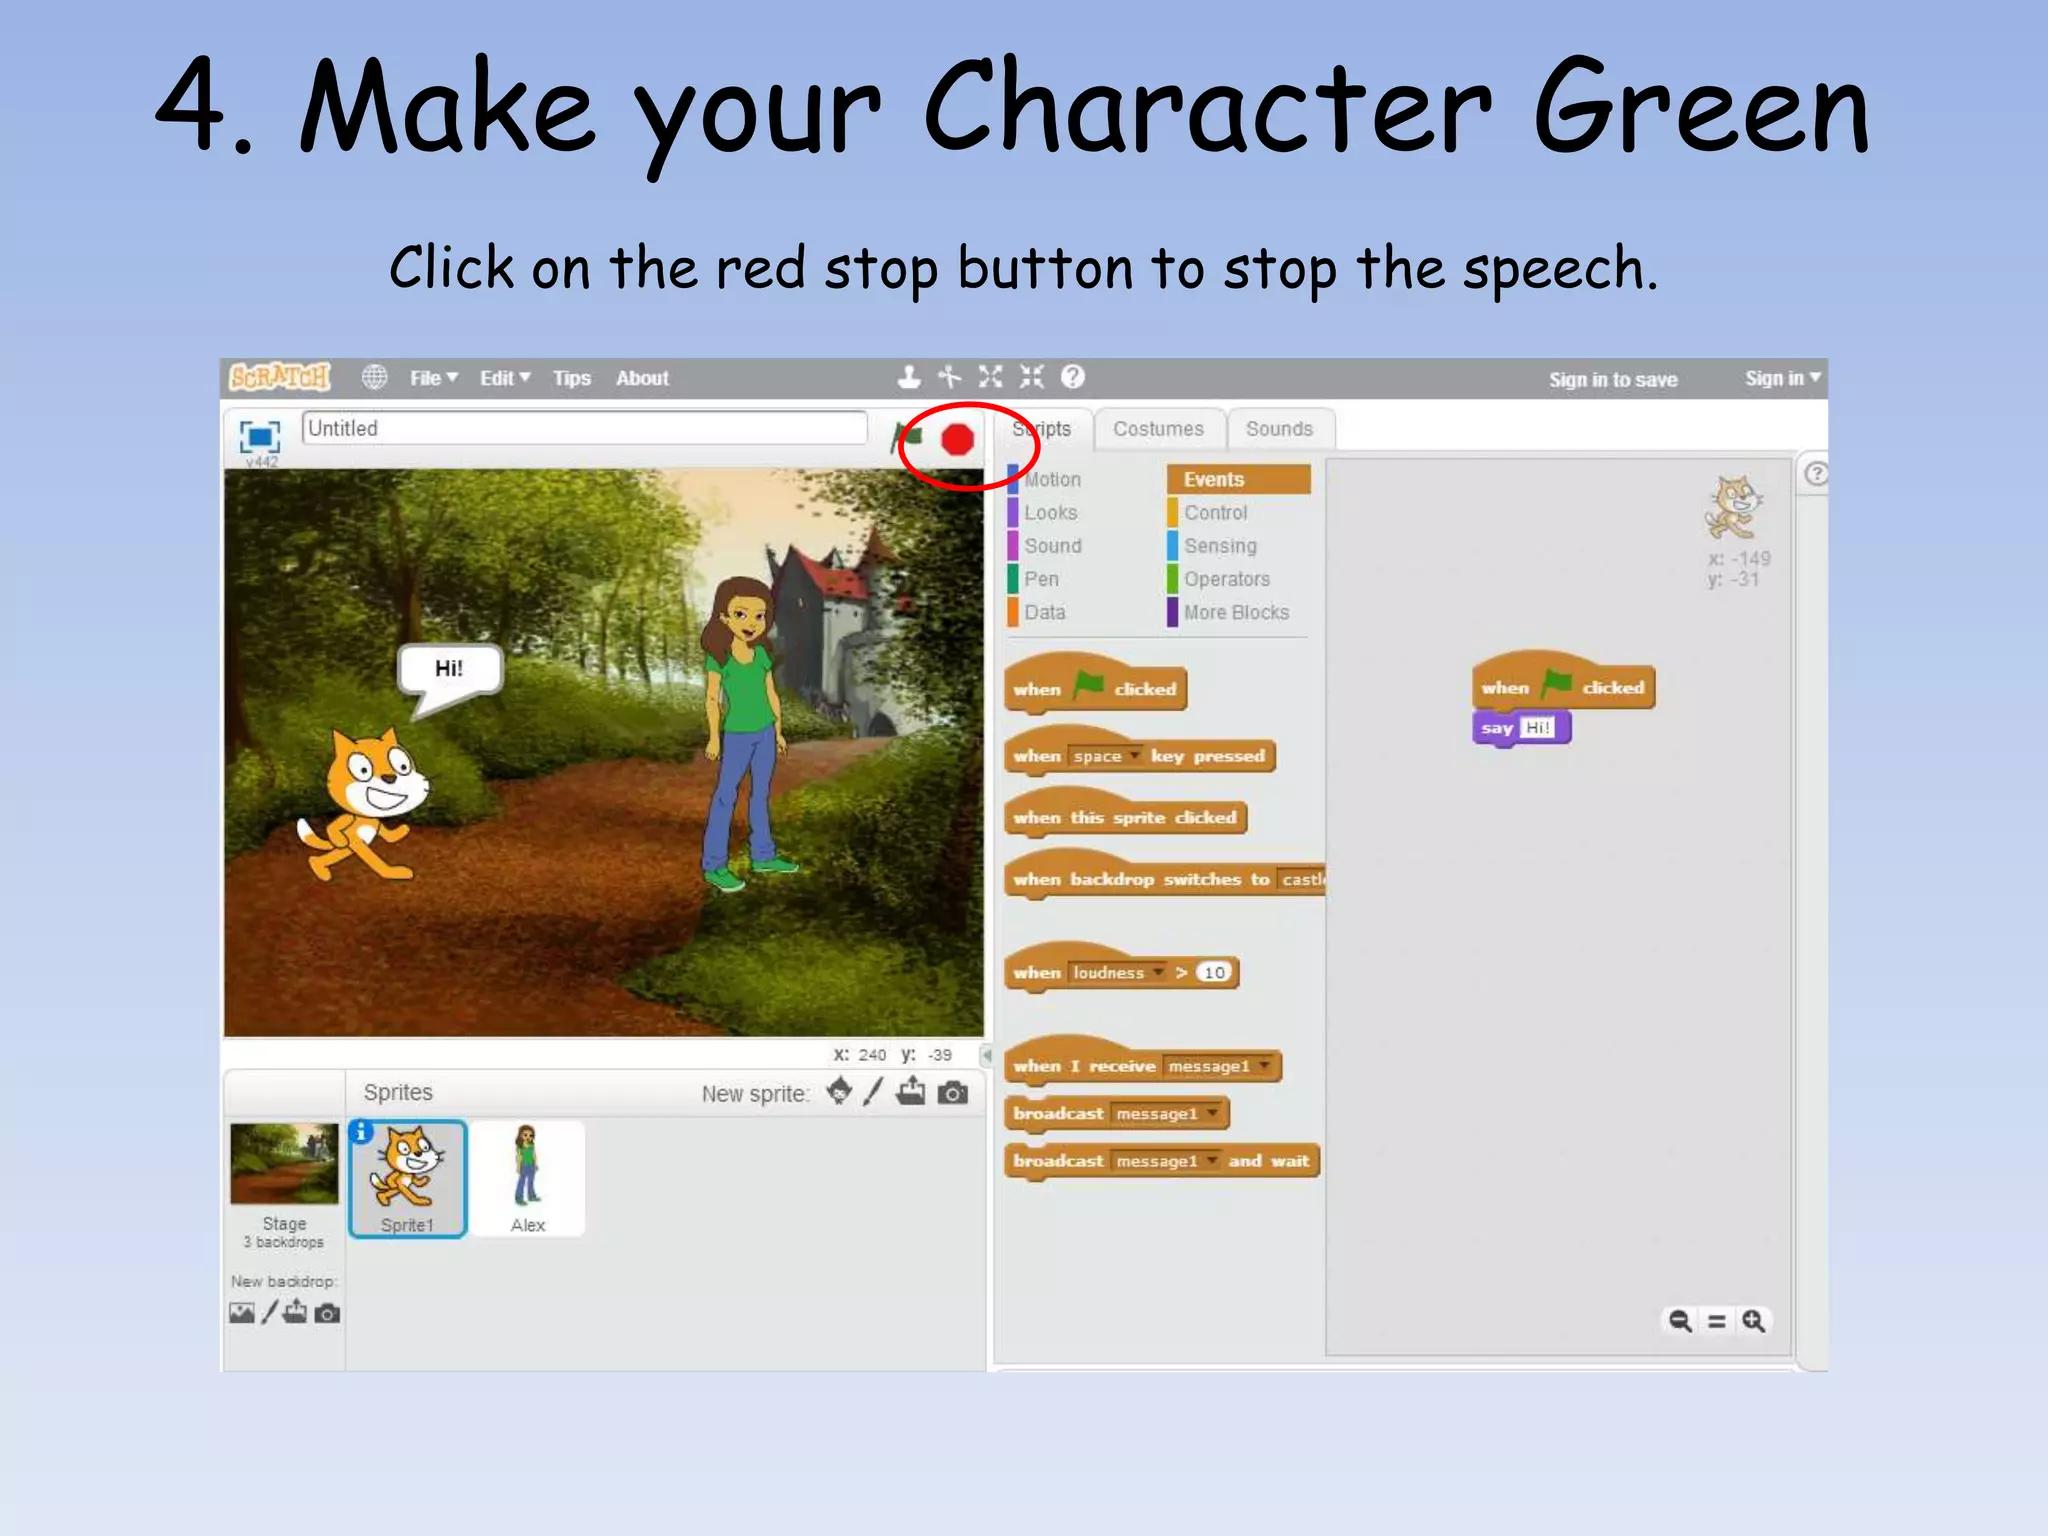
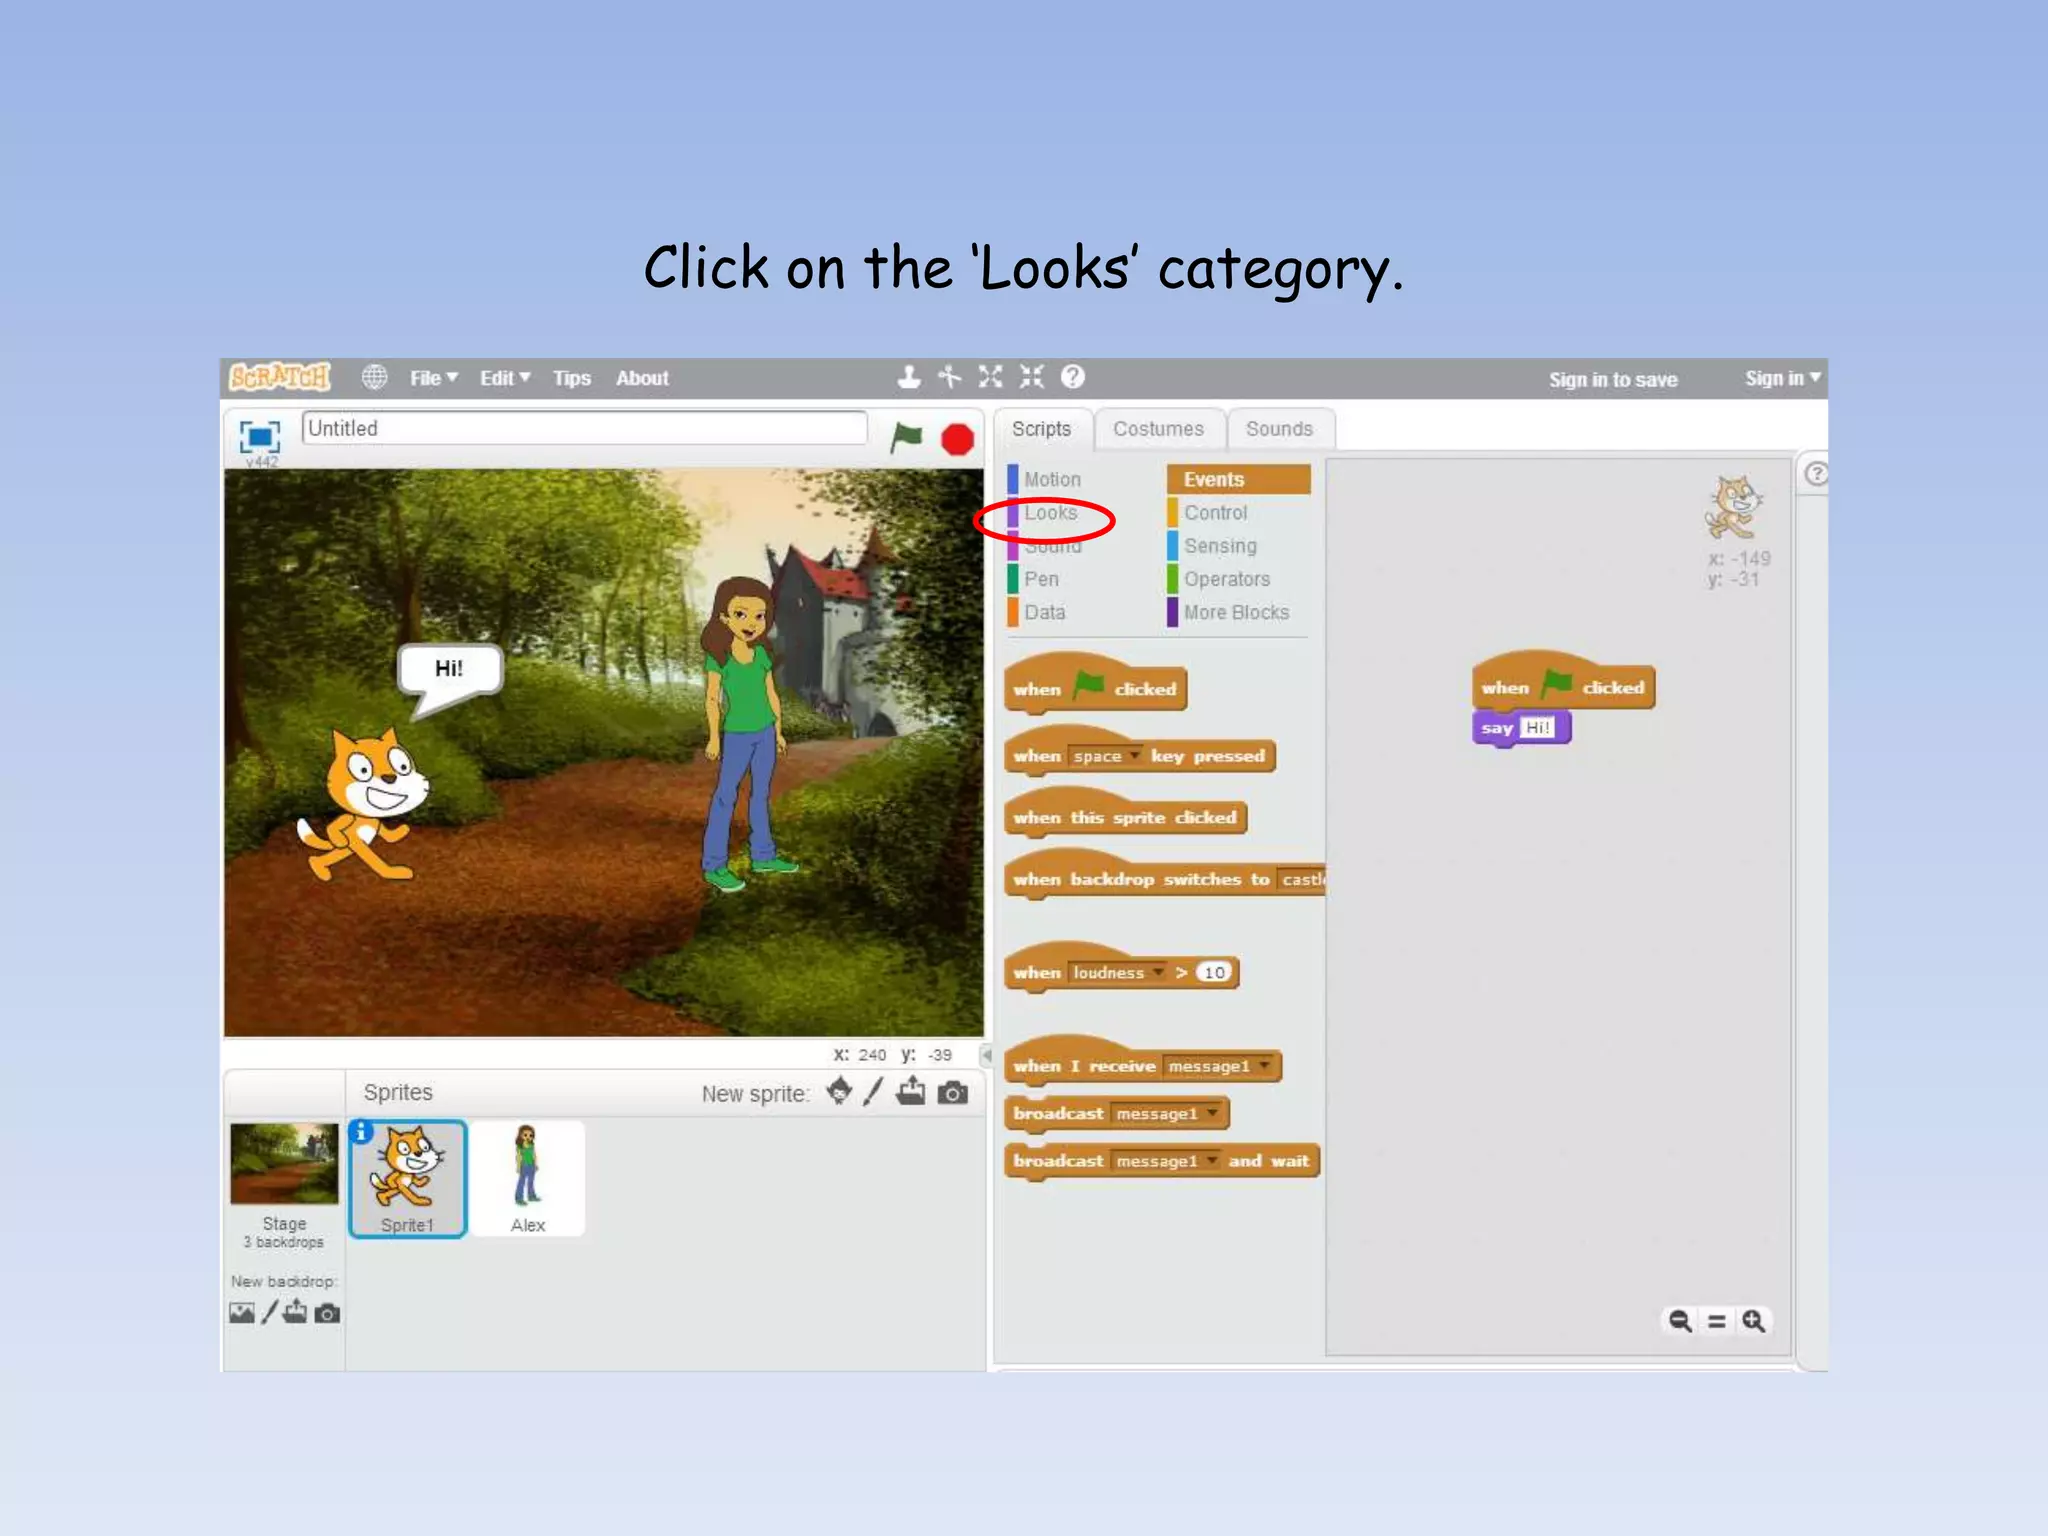
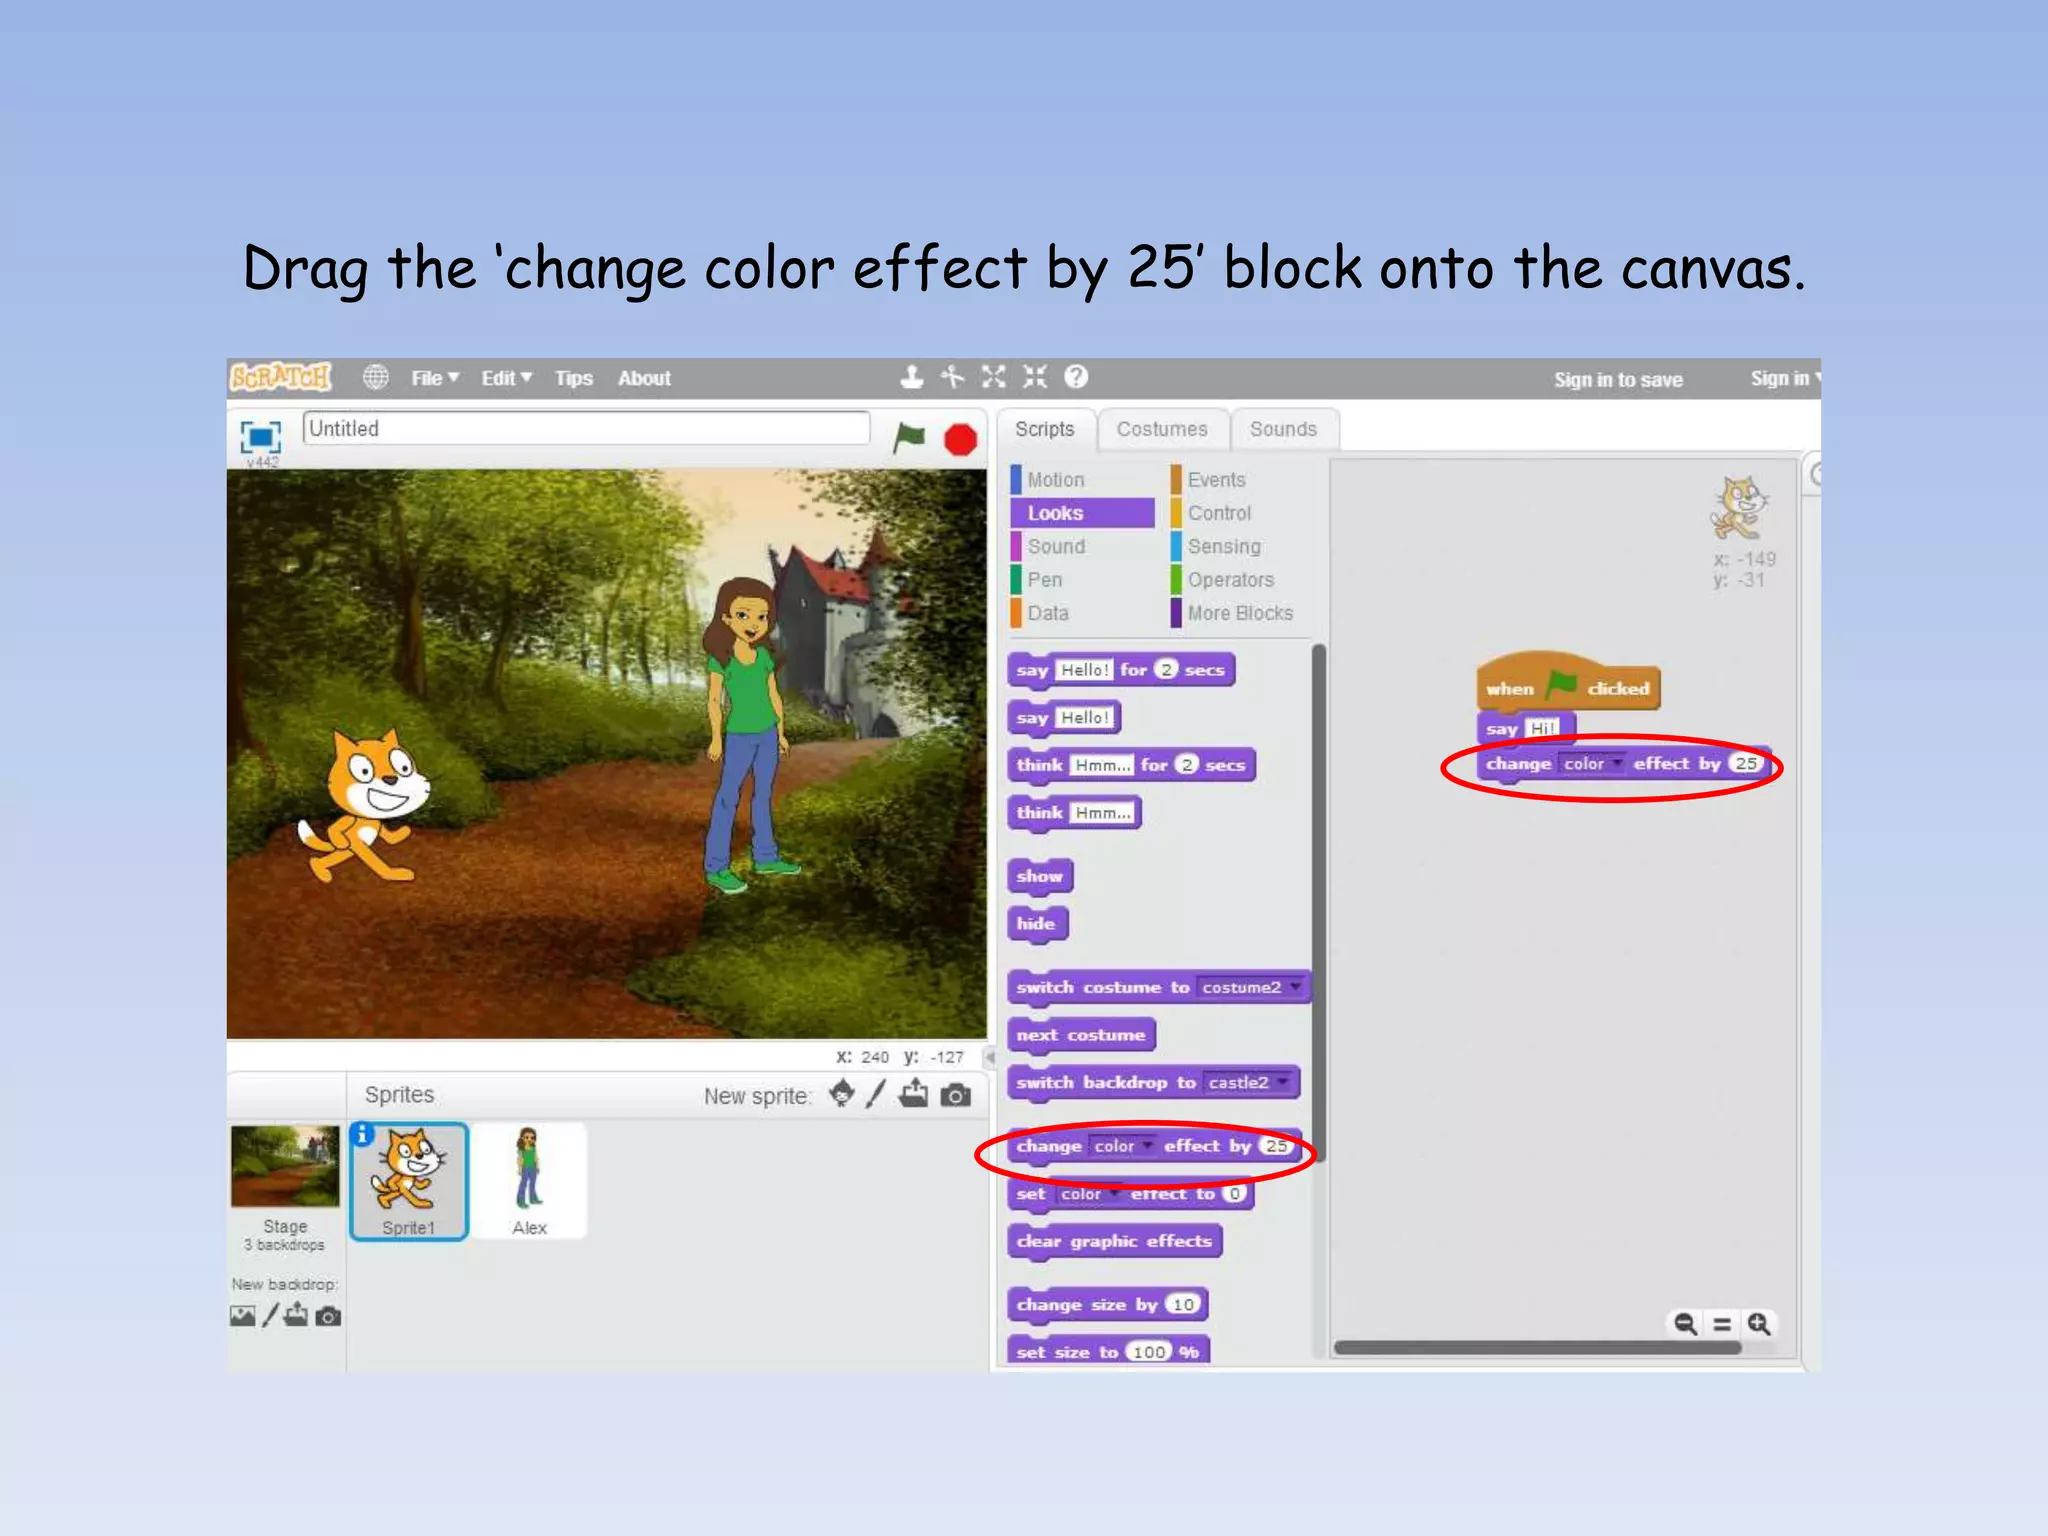
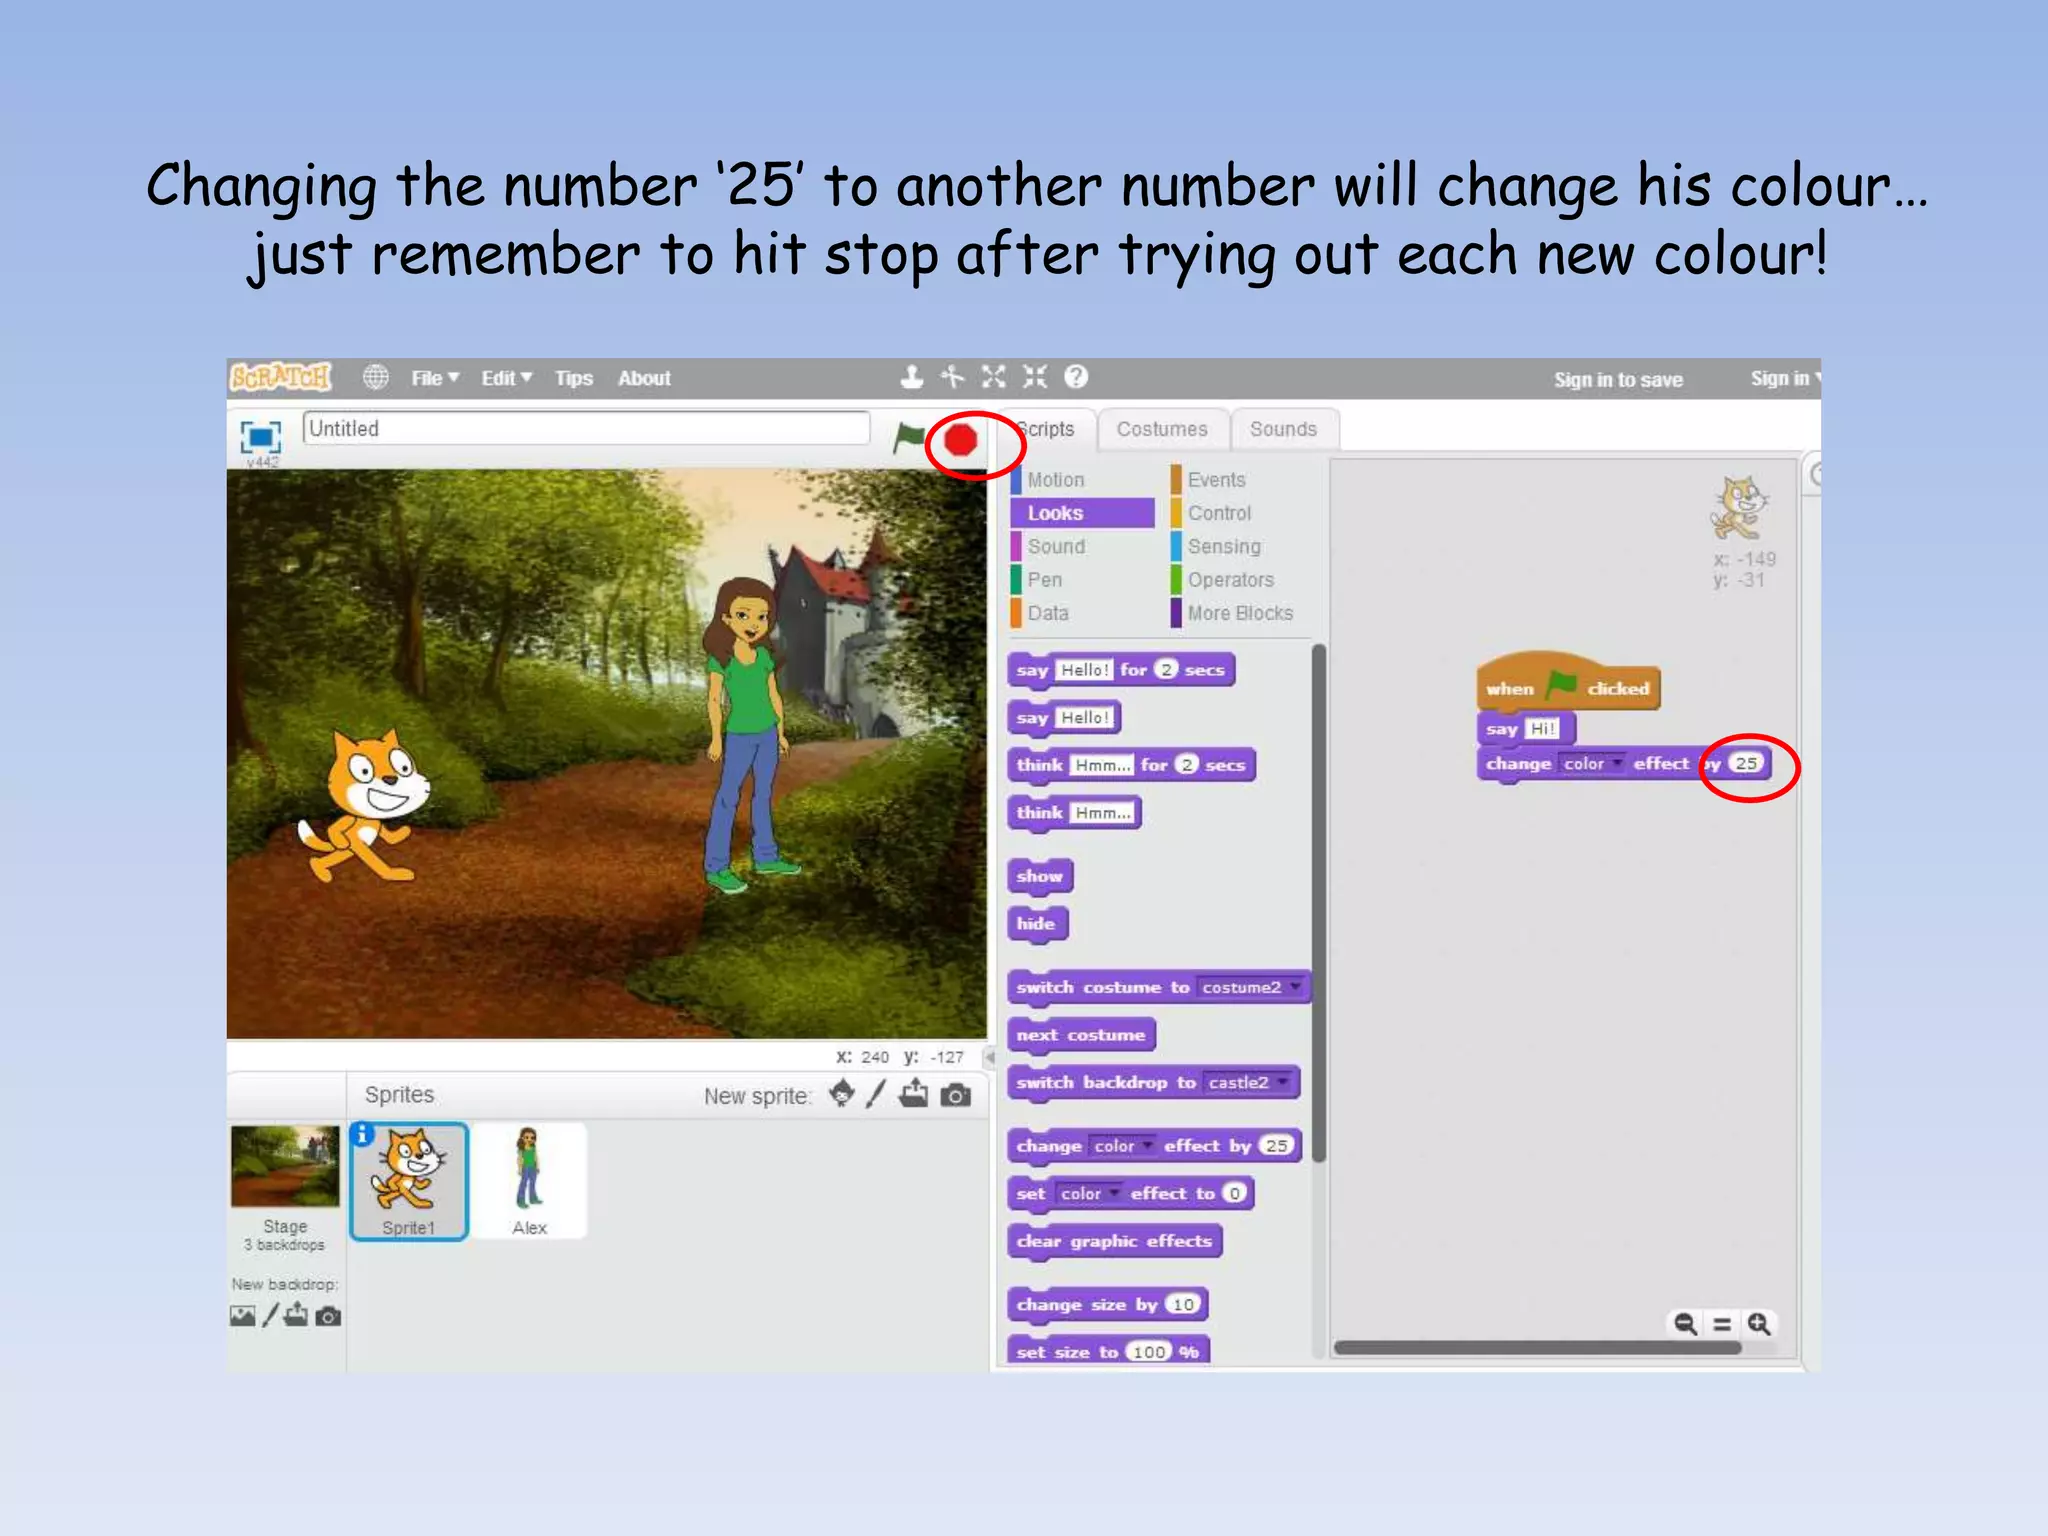
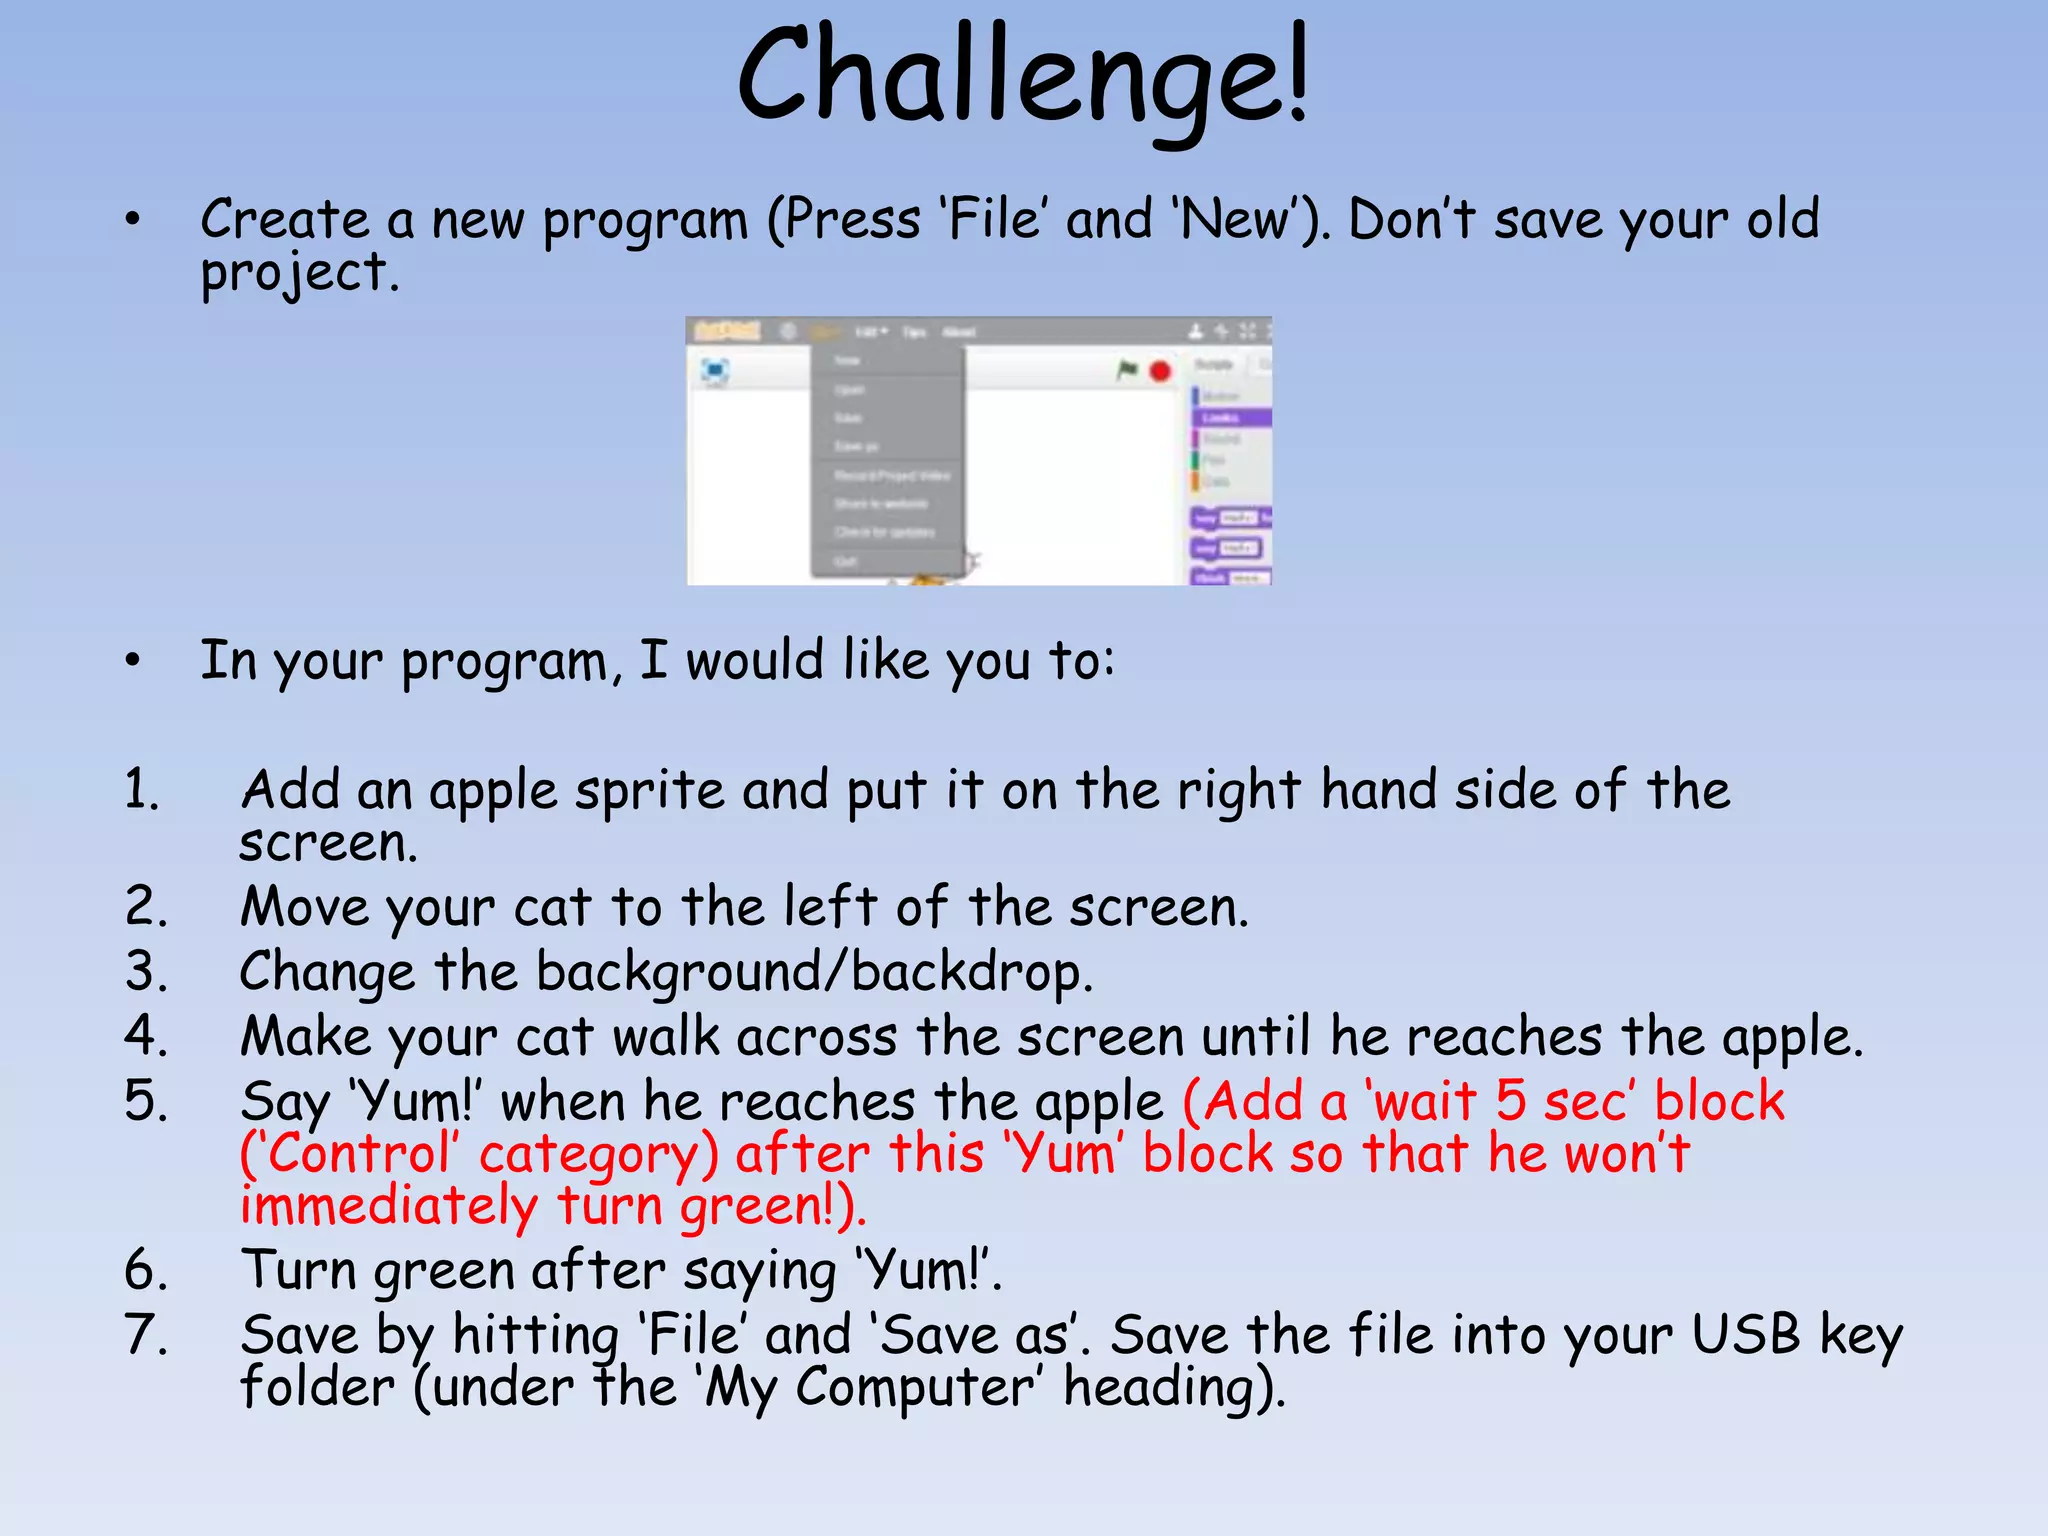
Lesson 2 • Add another Sprite to your program • Change the background of your program • Make your character speak • Make your character change colour
Talk to your partner about what you learned last week about computer coding. What is ‘coding’? What household objects need code to work? Did you discover anything new on Scratch?
Add a Sprite to your Program Click on the ‘New Sprite Button’.
Double click on the Sprite you want to add.
You can then move your Sprite around the screen with your mouse!
Click on the ‘New Backdrop’ button. 2. Add a Background to your Program
Double click on the backdrop of your choosing.
3. Make your Character Speak Double click on the Sprite you want to make speak. This will get rid of the background scripts.
Click on the ‘Scripts’ button to bring up your Sprite’s scripts.
Click on the ‘Looks’ category to bring up the speaking action.
Drag the ‘say Hello!’ block onto your canvas. Change the words to ‘Hi!’
Go into ‘Events’ and add a ‘when __ clicked’ block to the ‘say Hi!’ block.
Click on the red stop button to stop the speech. 4. Make your Character Green
Click on the ‘Looks’ category.
Drag the ‘change color effect by 25’ block onto the canvas.
Changing the number ‘25’ to another number will change his colour… just remember to hit stop after trying out each new colour!
Challenge! • Create a new program (Press ‘File’ and ‘New’). Don’t save your old project. • In your program, I would like you to: 1. Add an apple sprite and put it on the right hand side of the screen. 2. Move your cat to the left of the screen. 3. Change the background/backdrop. 4. Make your cat walk across the screen until he reaches the apple. 5. Say ‘Yum!’ when he reaches the apple (Add a ‘wait 5 sec’ block (‘Control’ category) after this ‘Yum’ block so that he won’t immediately turn green!). 6. Turn green after saying ‘Yum!’. 7. Save by hitting ‘File’ and ‘Save as’. Save the file into your USB key folder (under the ‘My Computer’ heading).
Finished Product!

Computer Coding with Scratch: Lesson 2_primaryschoollessons

  • 1.
    Lesson 2 • Addanother Sprite to your program • Change the background of your program • Make your character speak • Make your character change colour
  • 2.
    Talk to yourpartner about what you learned last week about computer coding. What is ‘coding’? What household objects need code to work? Did you discover anything new on Scratch?
  • 3.
    Add a Spriteto your Program Click on the ‘New Sprite Button’.
  • 4.
    Double click onthe Sprite you want to add.
  • 5.
    You can thenmove your Sprite around the screen with your mouse!
  • 7.
    Click on the‘New Backdrop’ button. 2. Add a Background to your Program
  • 8.
    Double click onthe backdrop of your choosing.
  • 10.
    3. Make yourCharacter Speak Double click on the Sprite you want to make speak. This will get rid of the background scripts.
  • 11.
    Click on the‘Scripts’ button to bring up your Sprite’s scripts.
  • 12.
    Click on the‘Looks’ category to bring up the speaking action.
  • 13.
    Drag the ‘sayHello!’ block onto your canvas. Change the words to ‘Hi!’
  • 14.
    Go into ‘Events’and add a ‘when __ clicked’ block to the ‘say Hi!’ block.
  • 15.
    Click on thered stop button to stop the speech. 4. Make your Character Green
  • 16.
    Click on the‘Looks’ category.
  • 17.
    Drag the ‘changecolor effect by 25’ block onto the canvas.
  • 18.
    Changing the number‘25’ to another number will change his colour… just remember to hit stop after trying out each new colour!
  • 19.
    Challenge! • Create anew program (Press ‘File’ and ‘New’). Don’t save your old project. • In your program, I would like you to: 1. Add an apple sprite and put it on the right hand side of the screen. 2. Move your cat to the left of the screen. 3. Change the background/backdrop. 4. Make your cat walk across the screen until he reaches the apple. 5. Say ‘Yum!’ when he reaches the apple (Add a ‘wait 5 sec’ block (‘Control’ category) after this ‘Yum’ block so that he won’t immediately turn green!). 6. Turn green after saying ‘Yum!’. 7. Save by hitting ‘File’ and ‘Save as’. Save the file into your USB key folder (under the ‘My Computer’ heading).
  • 20.