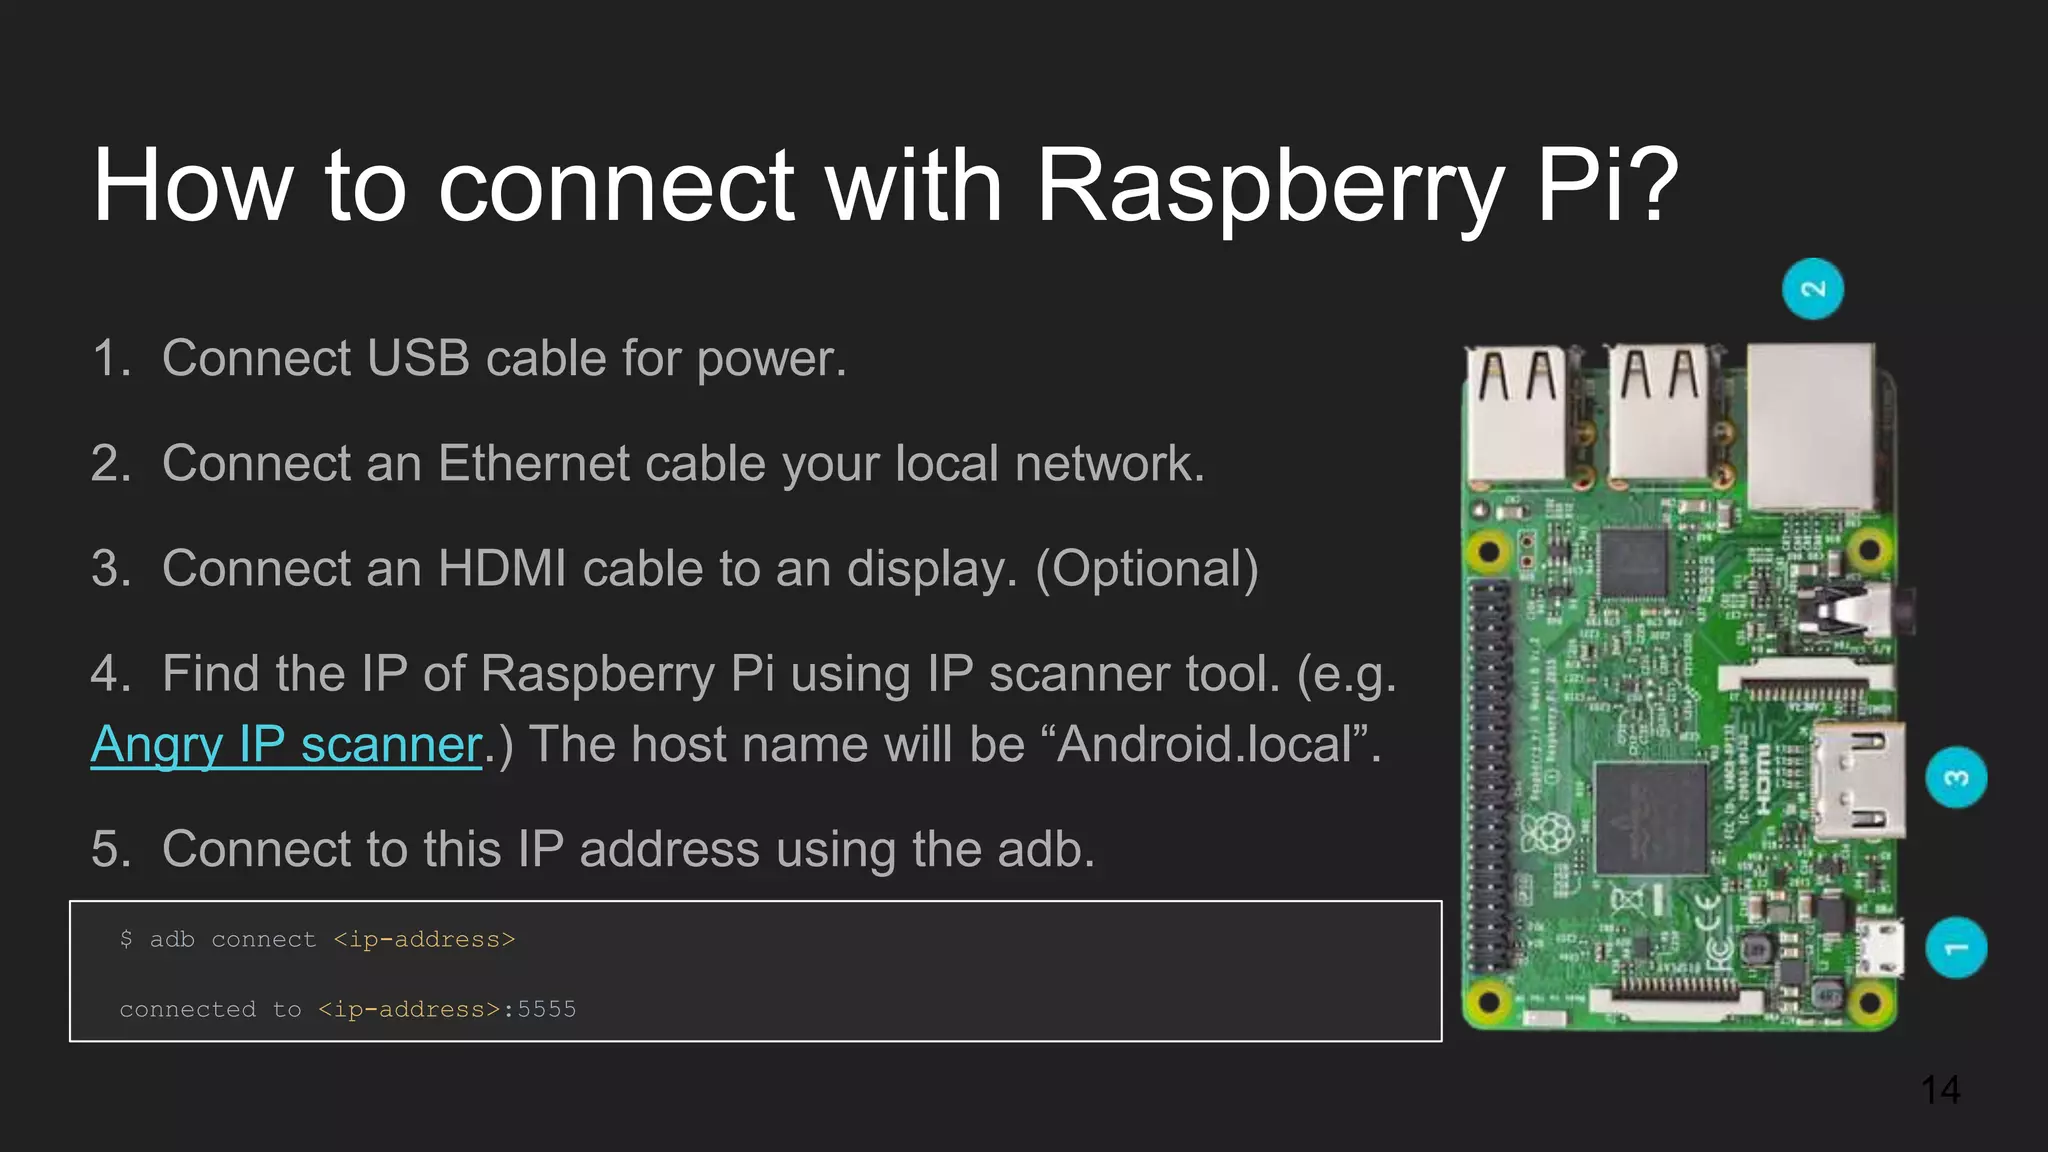
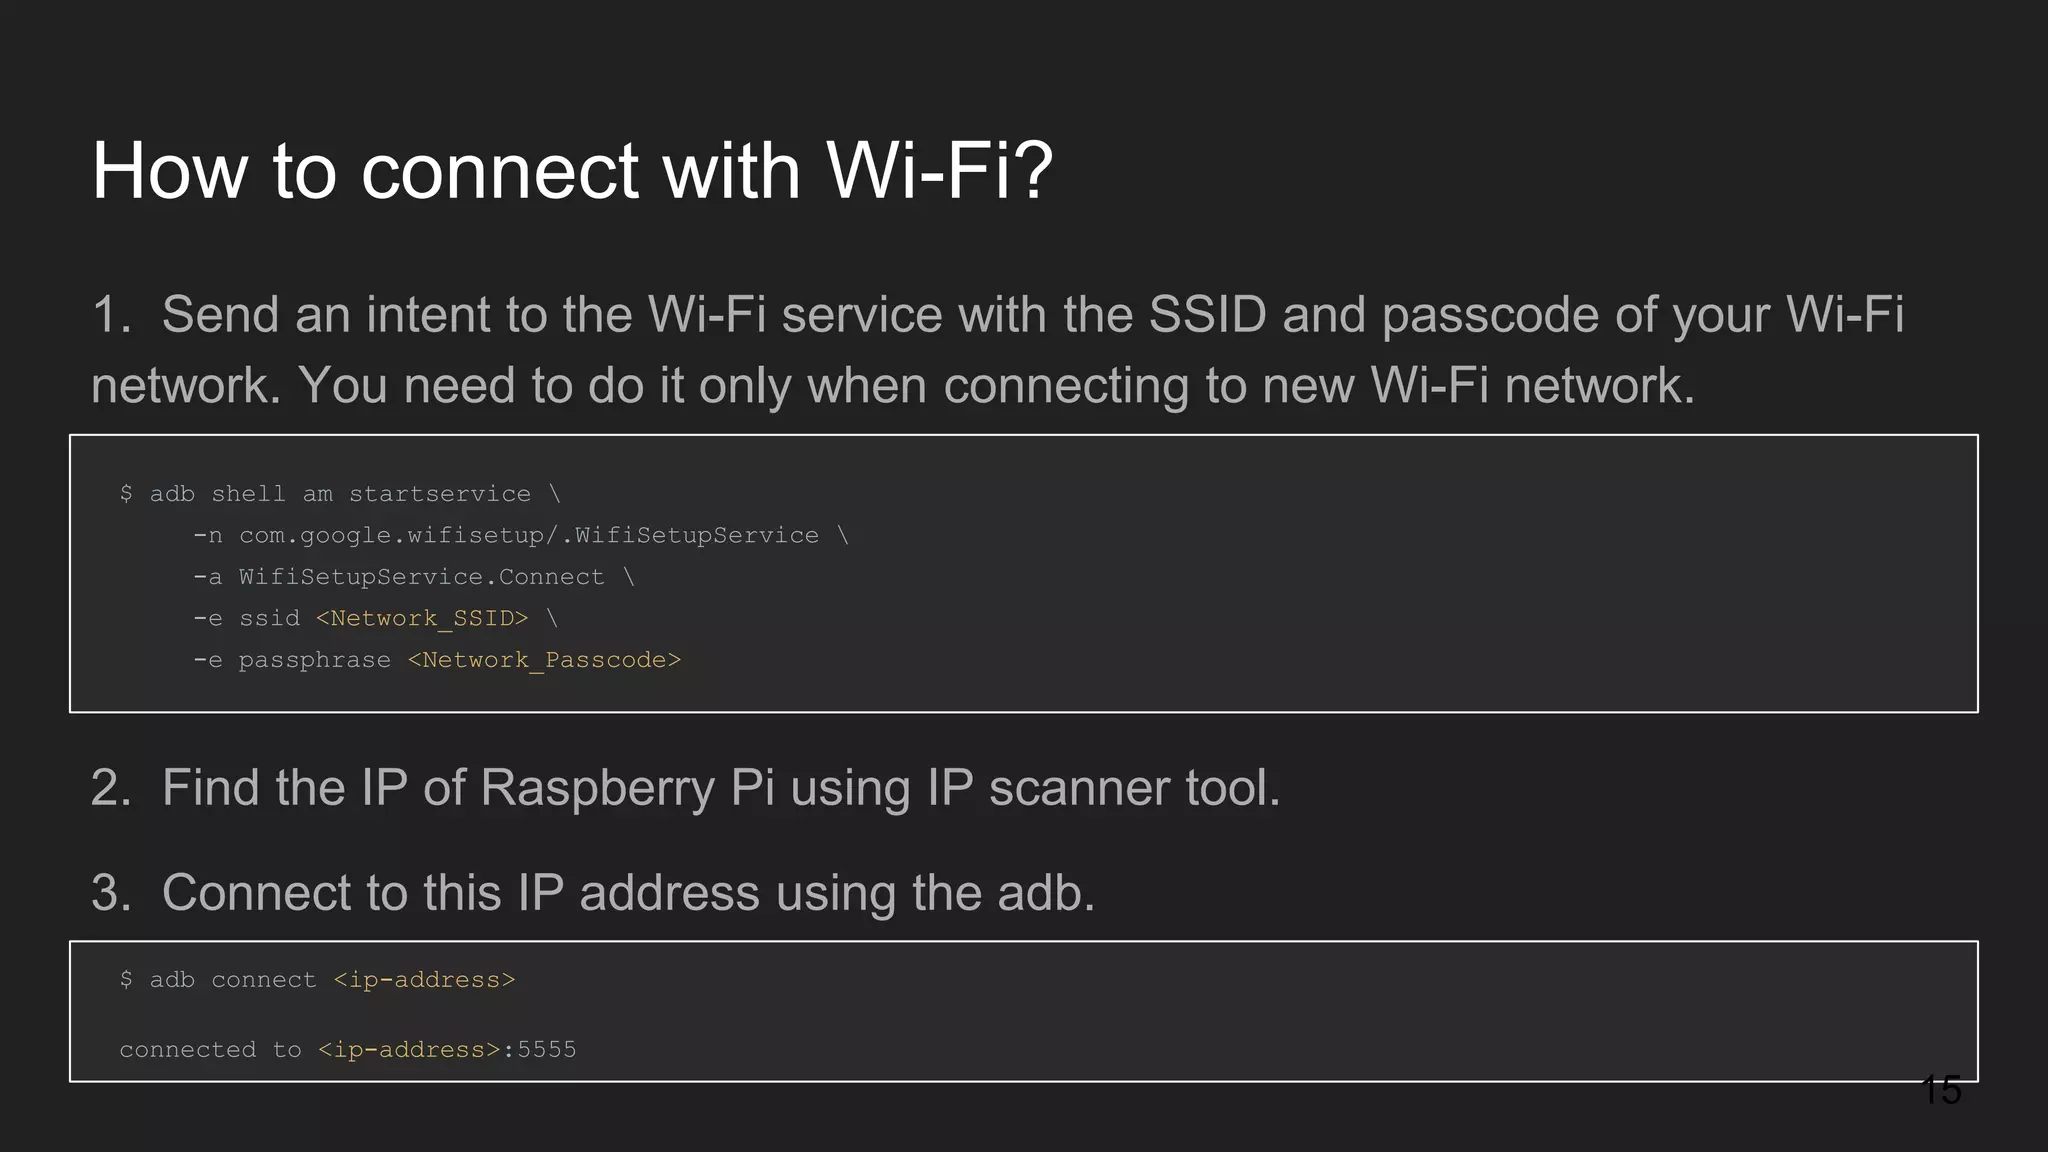
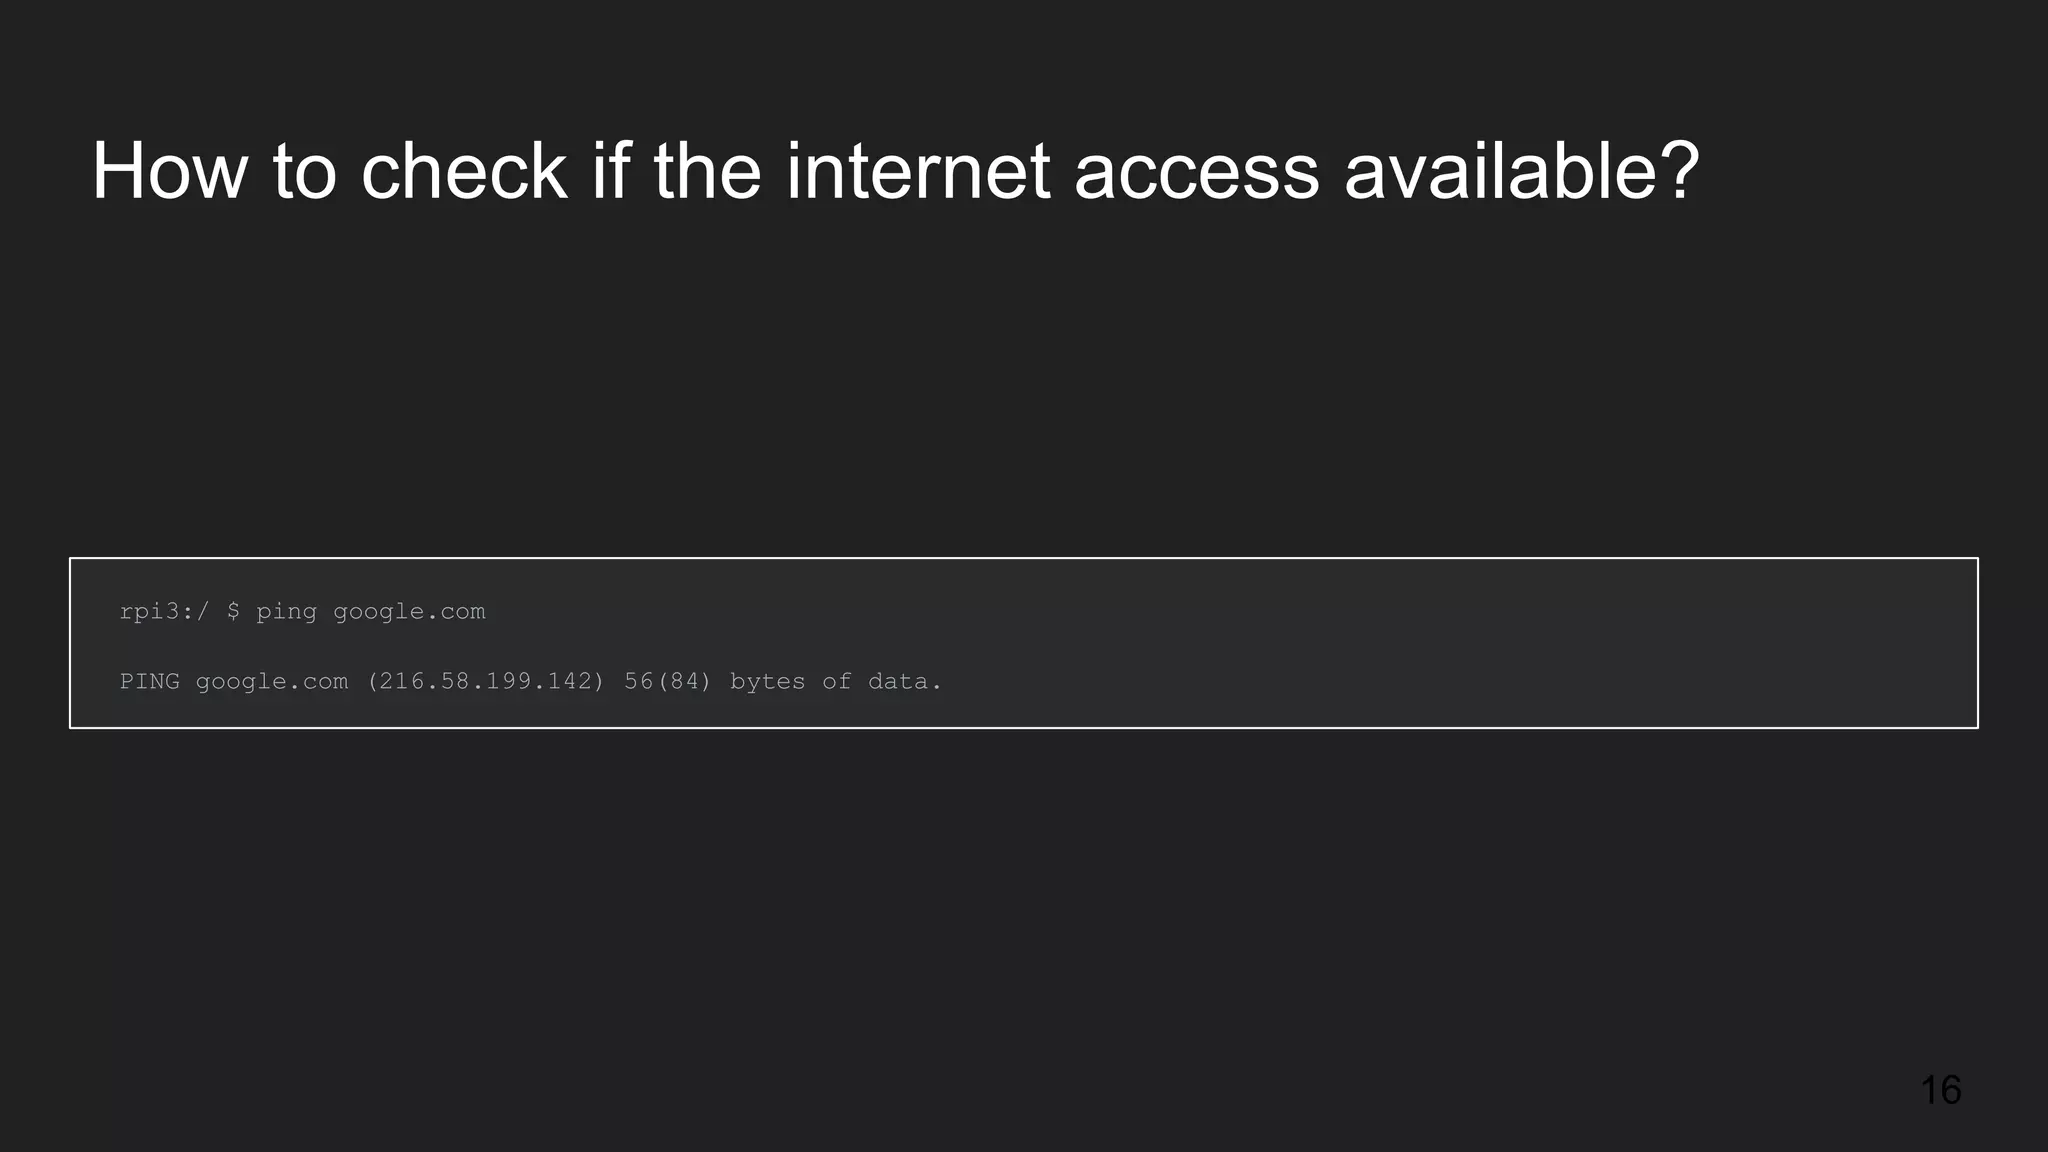
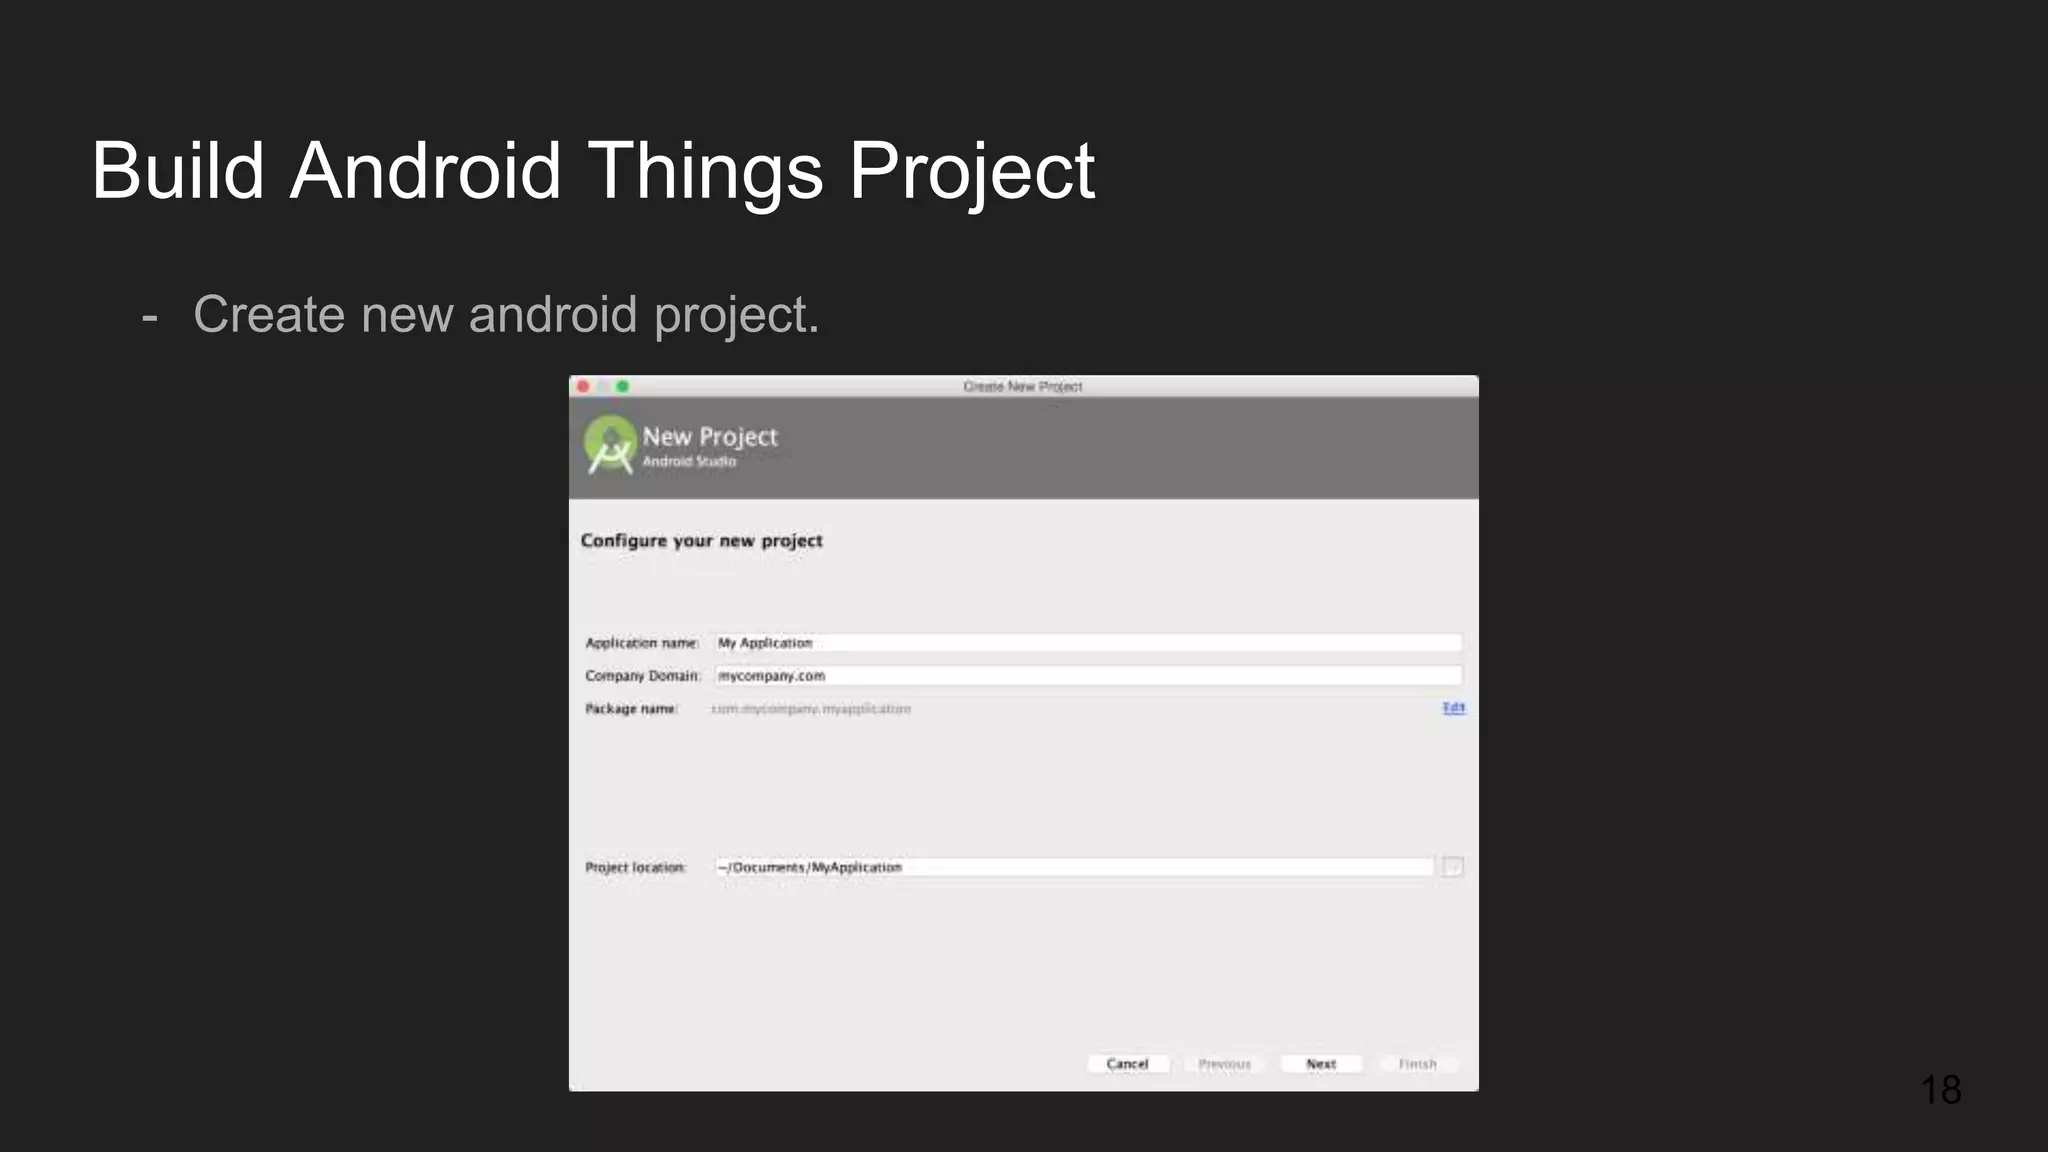
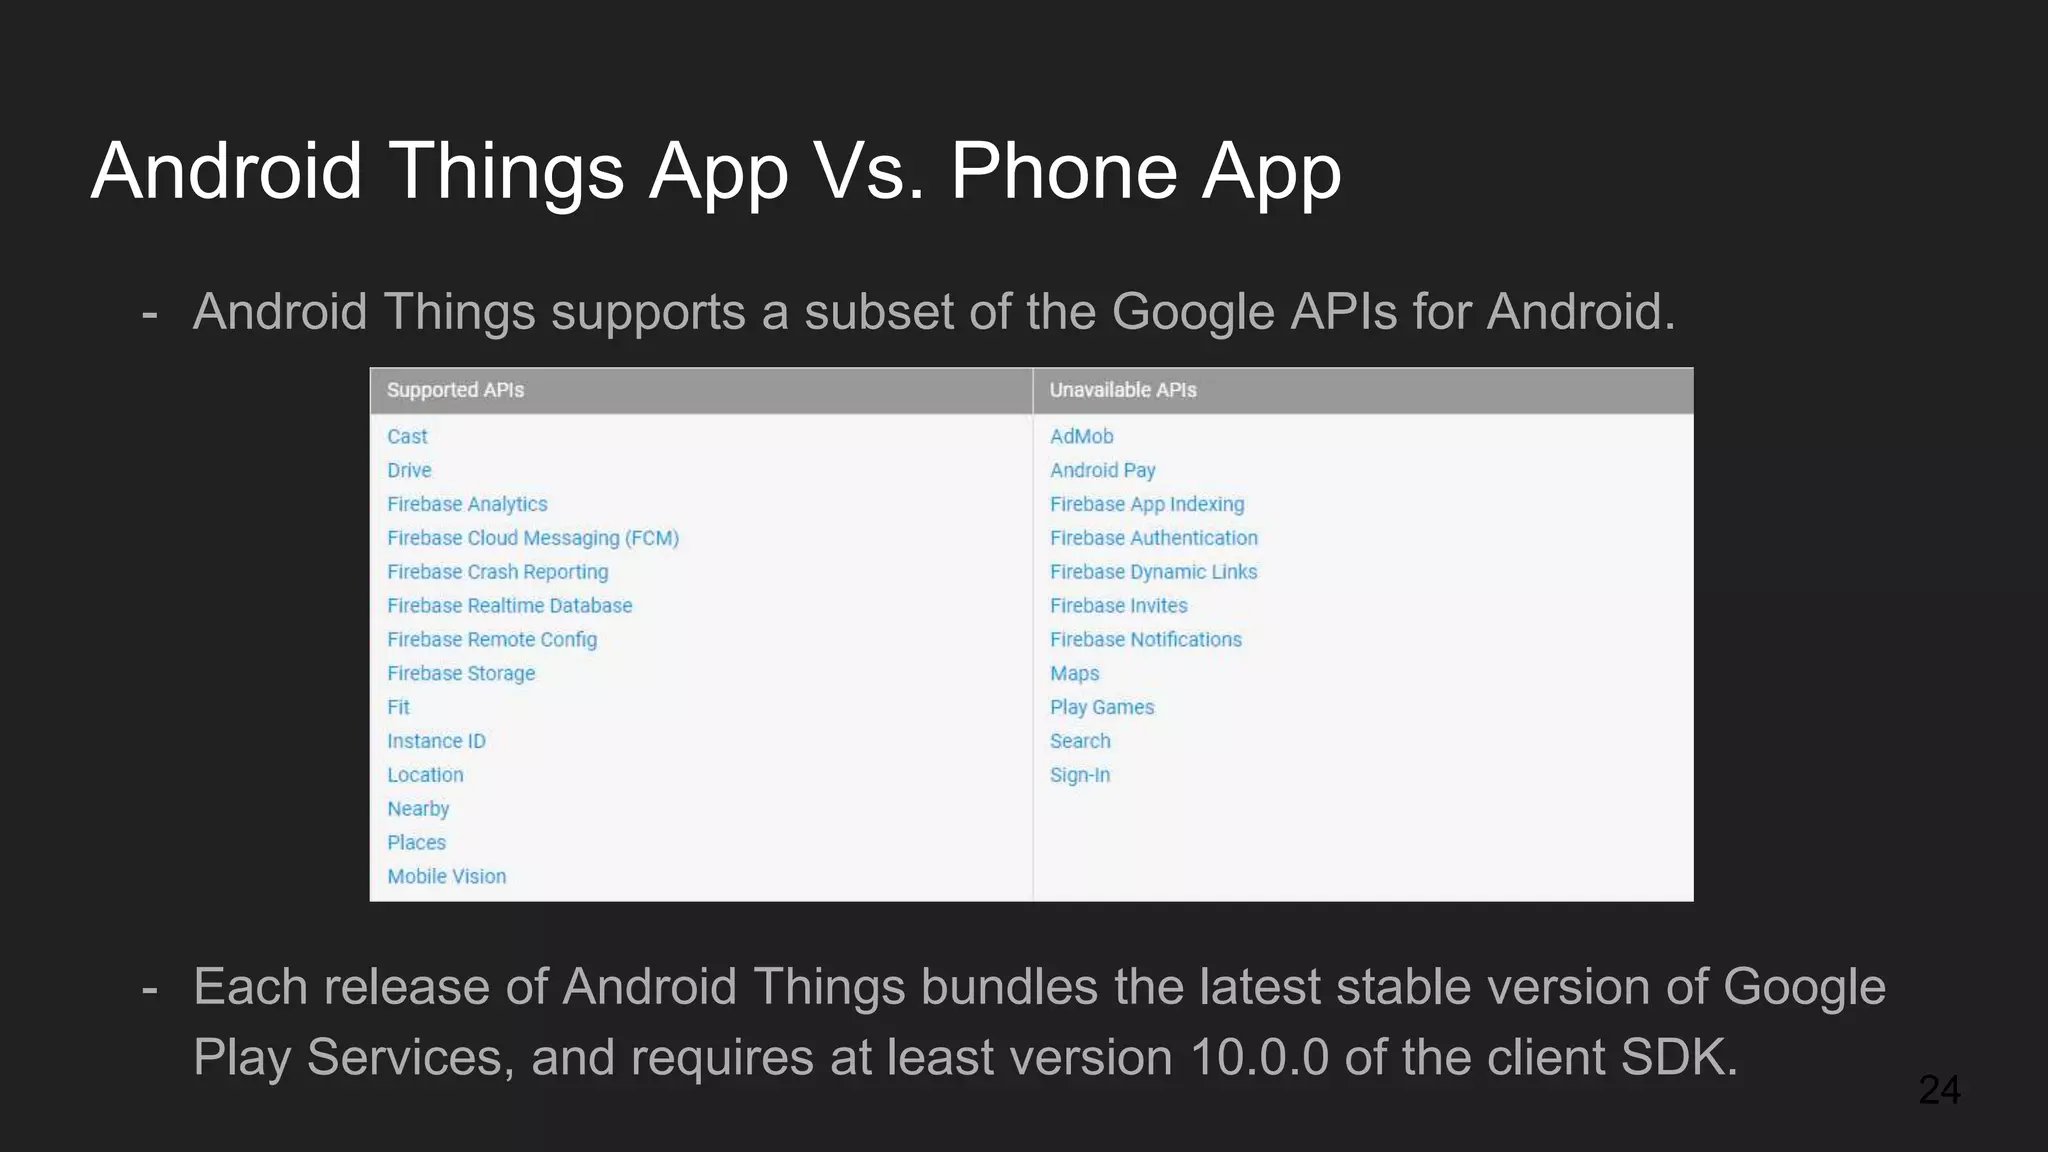
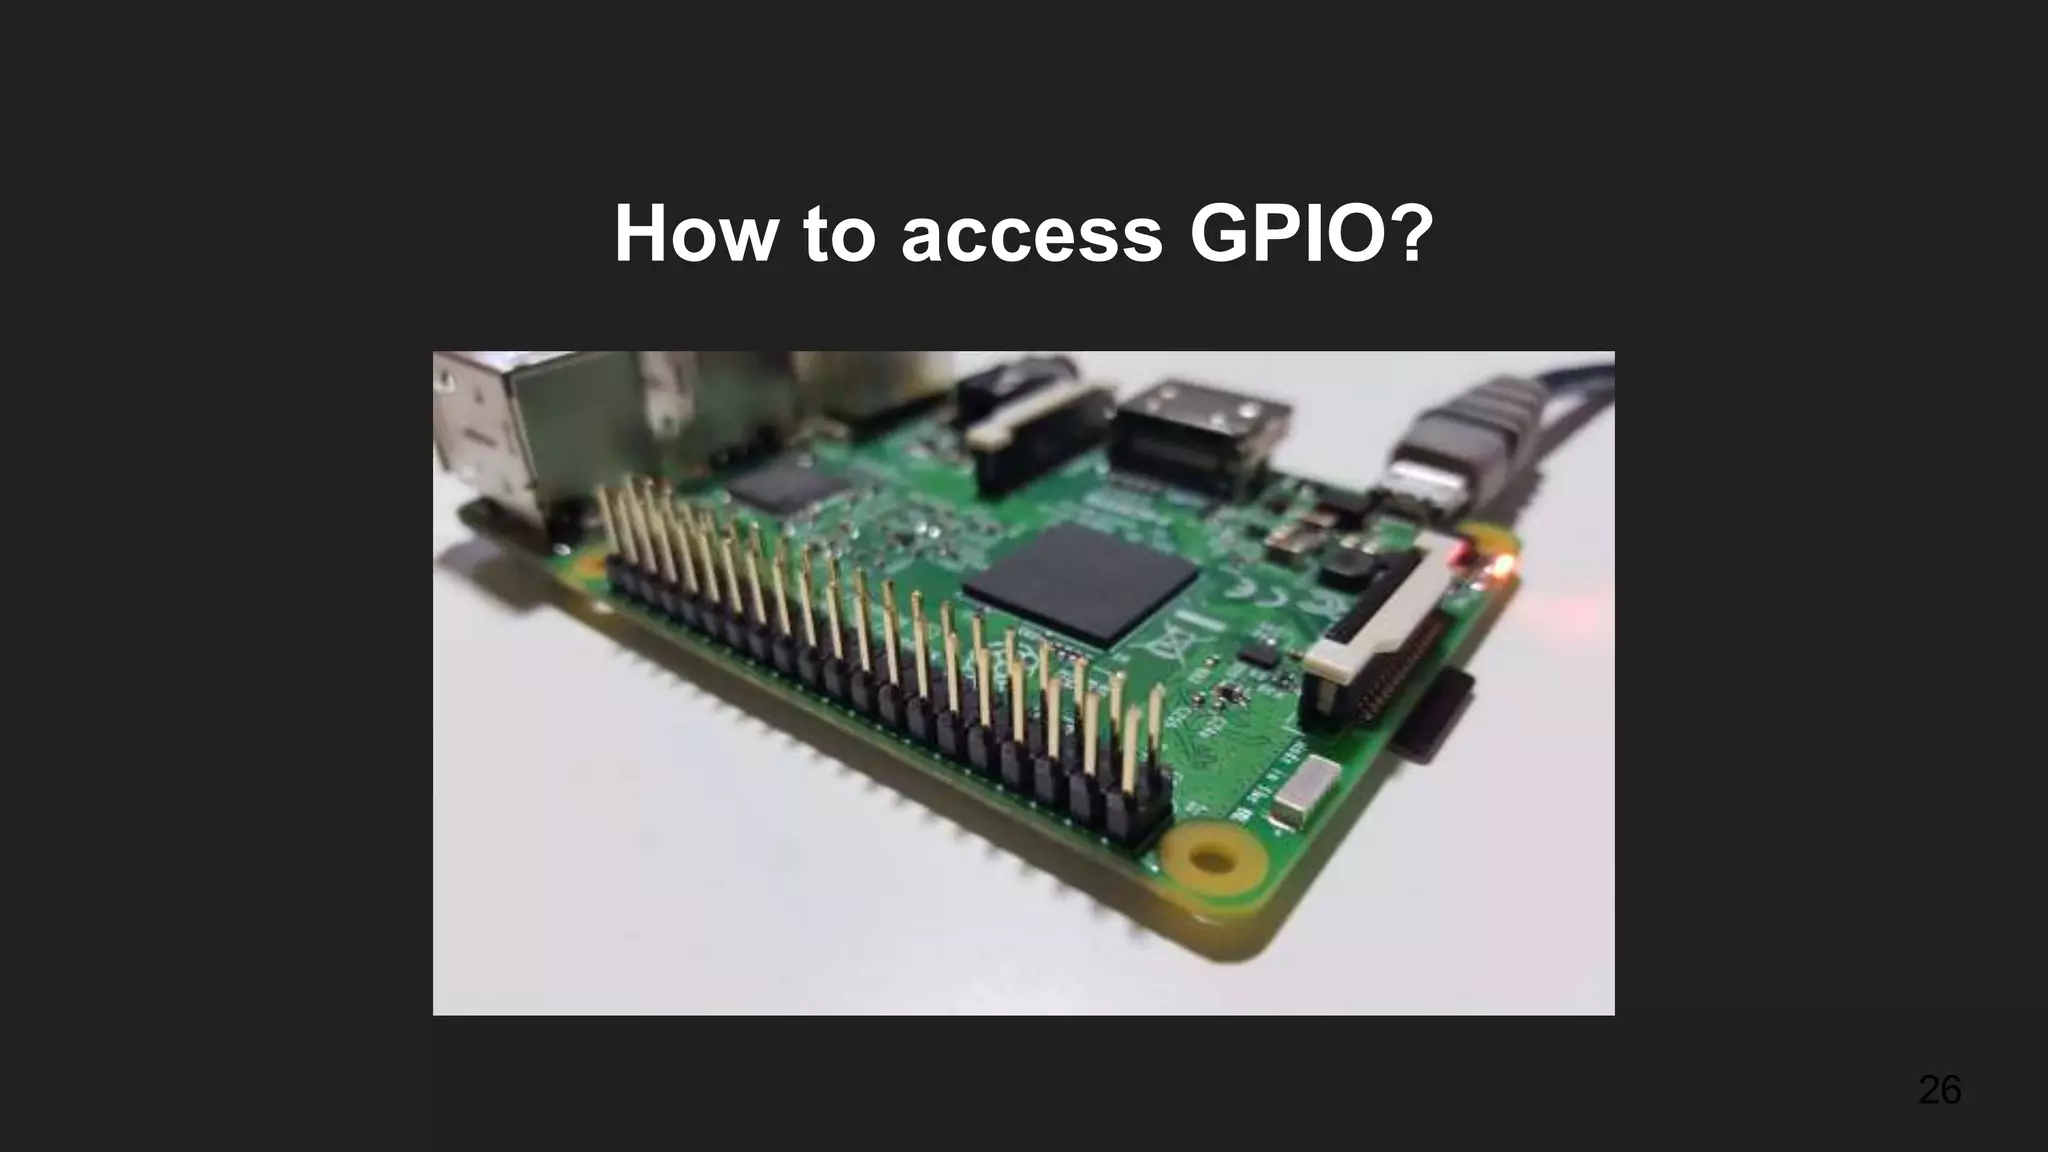
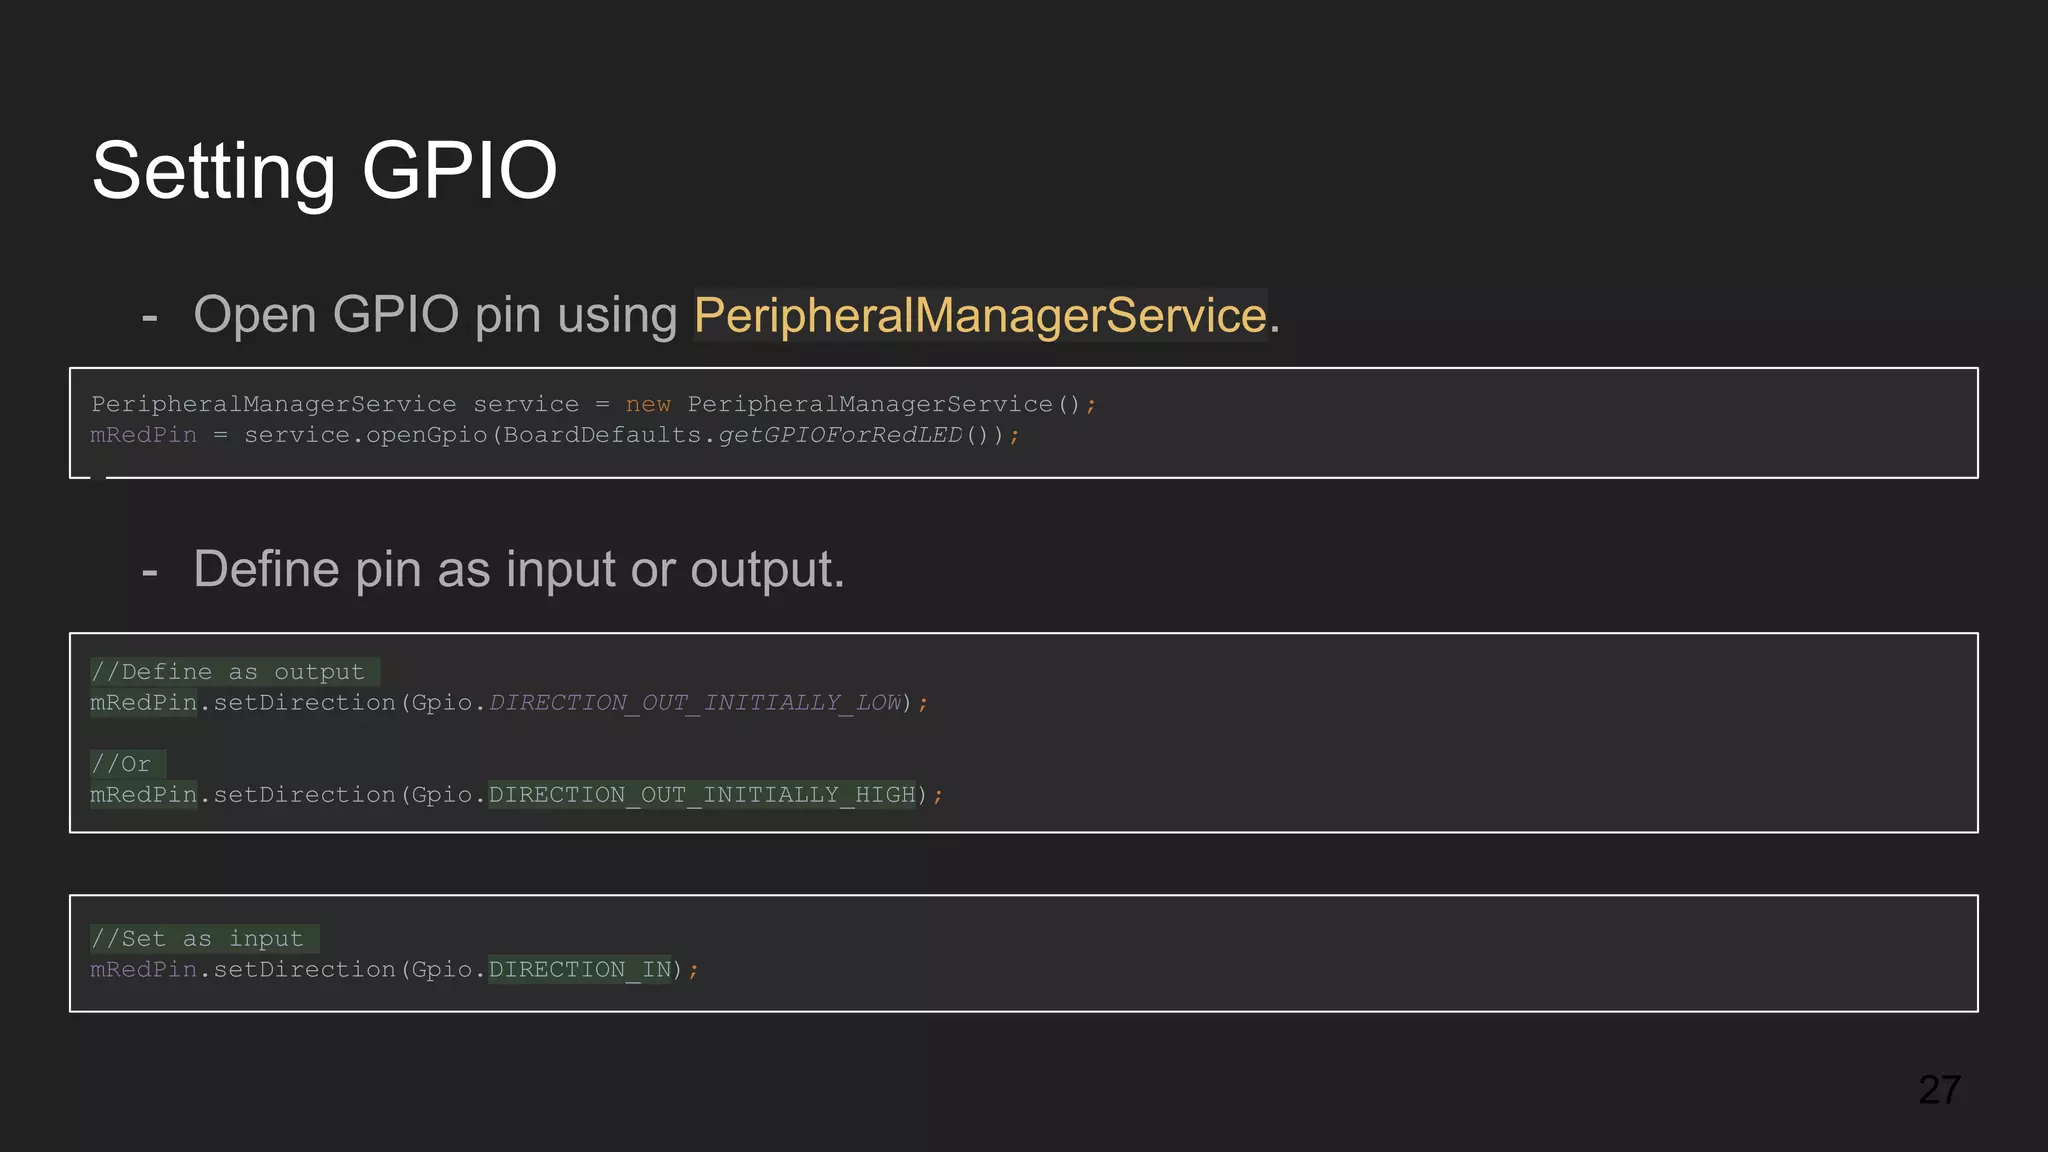
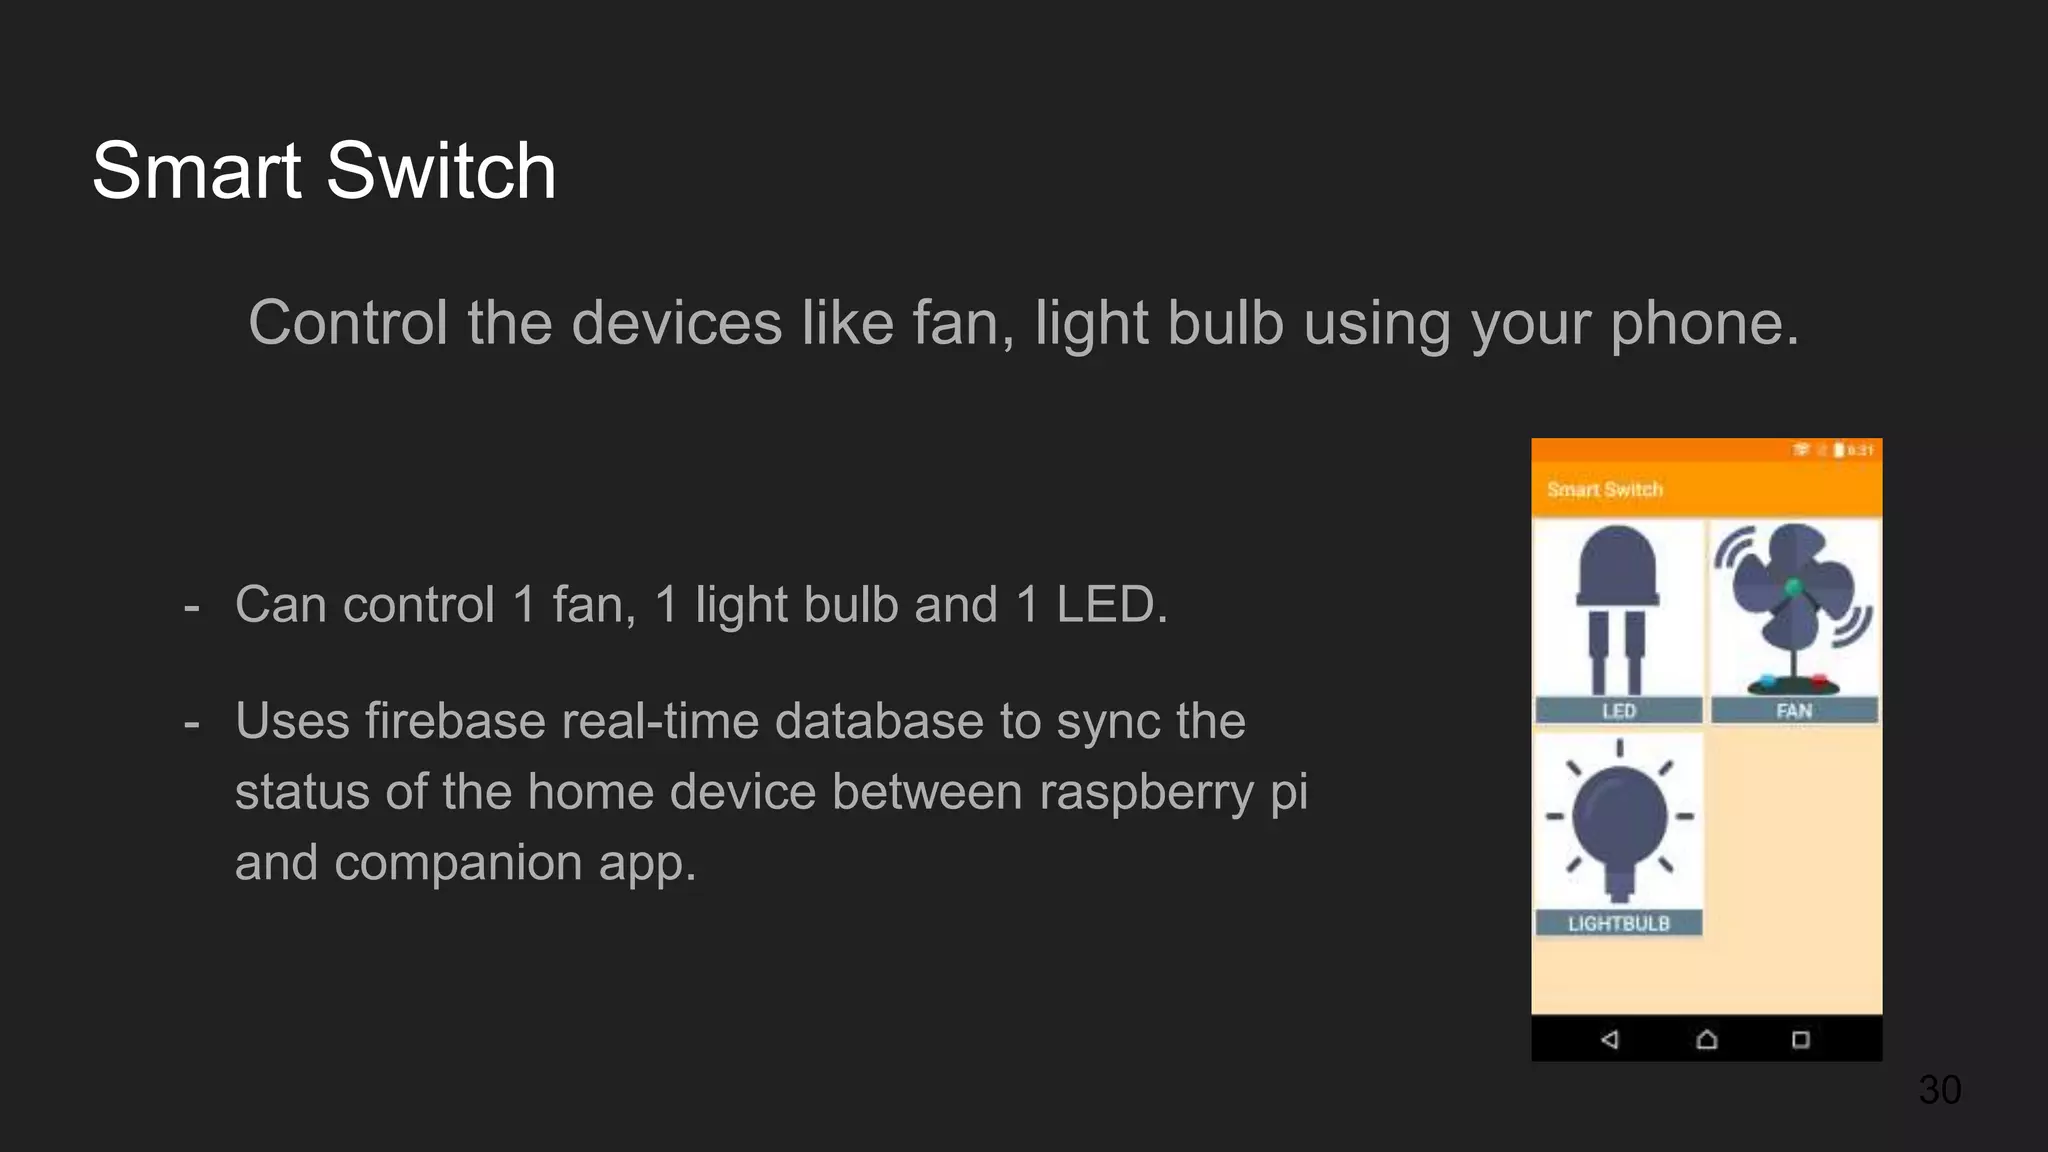
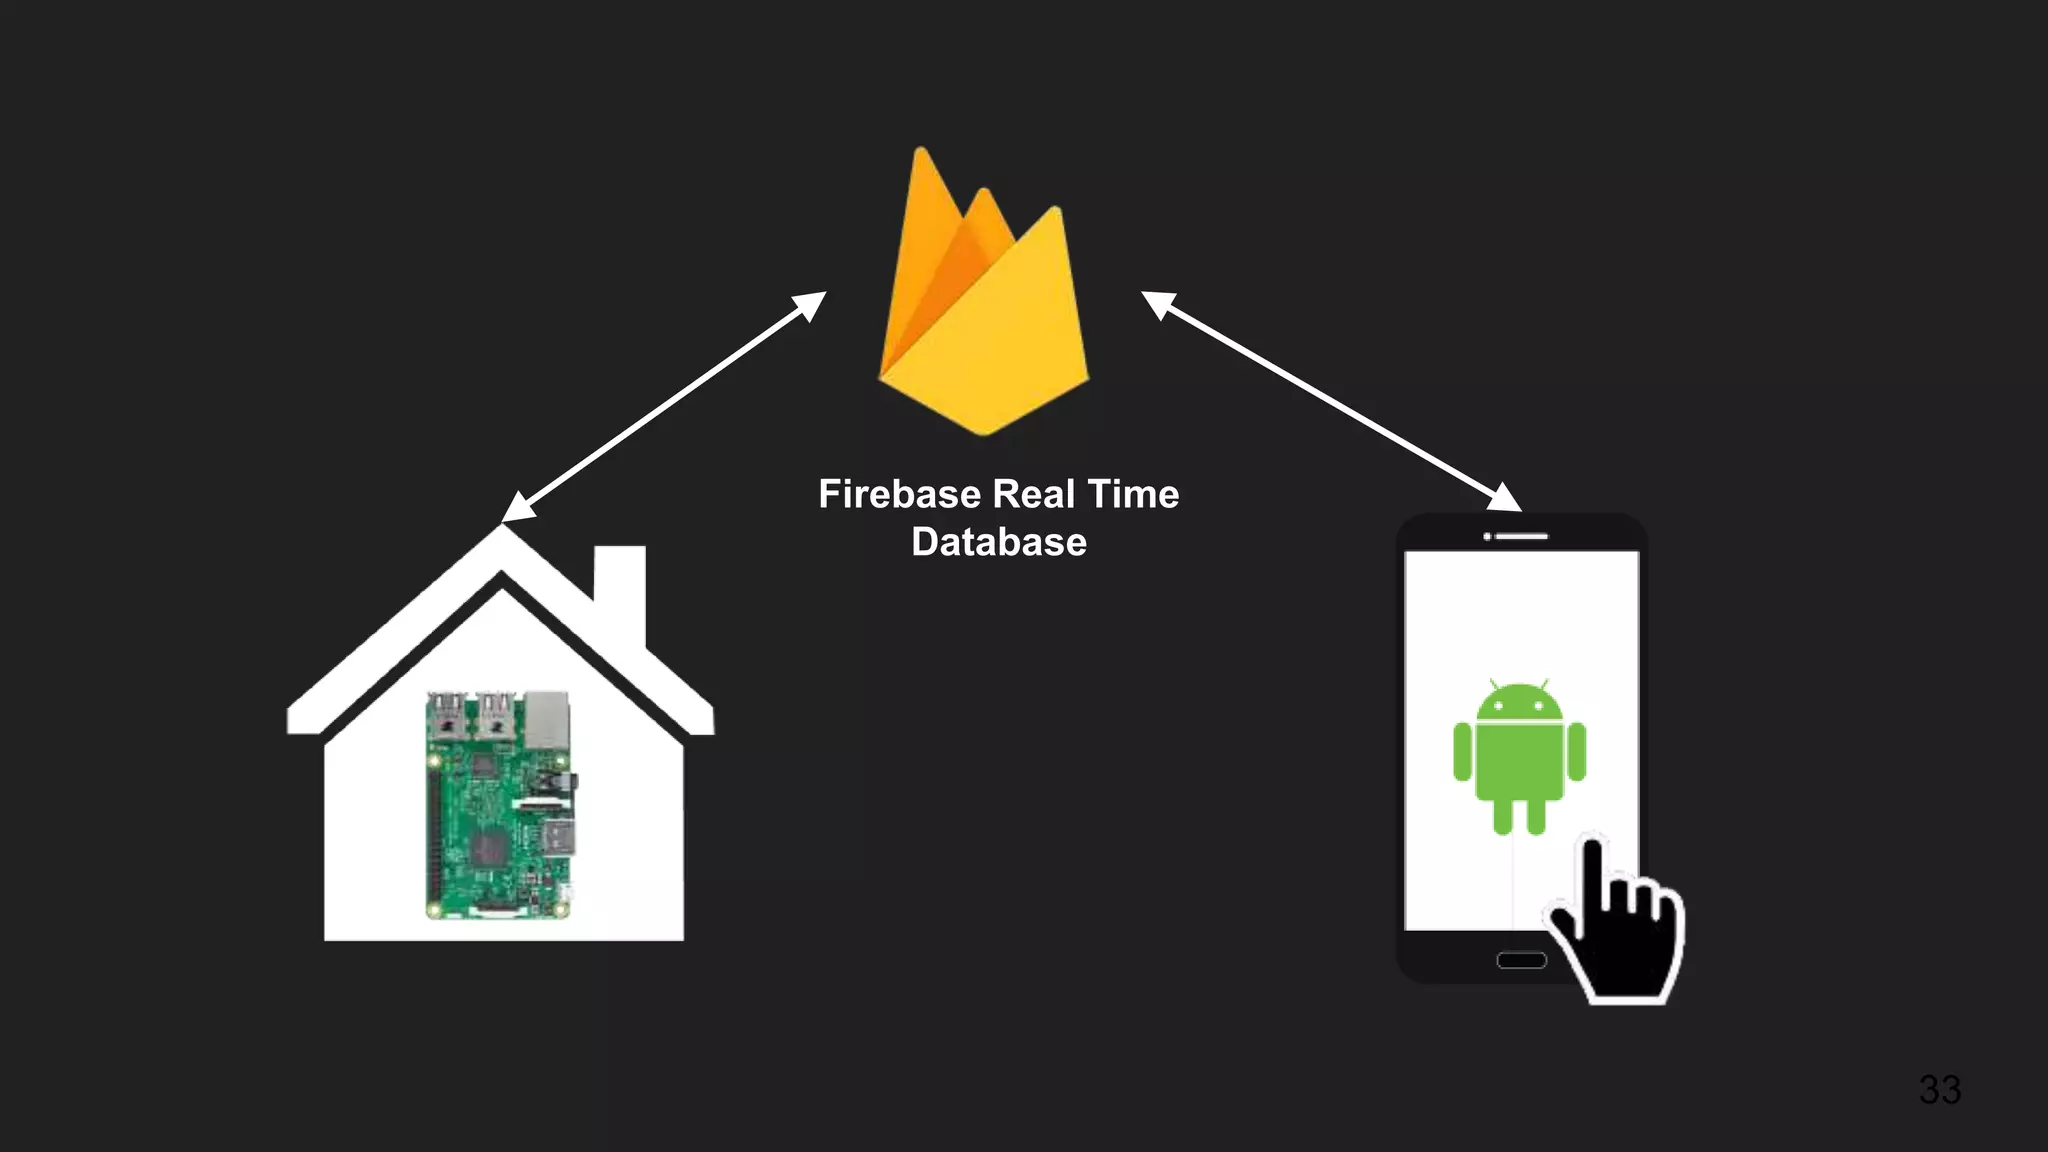
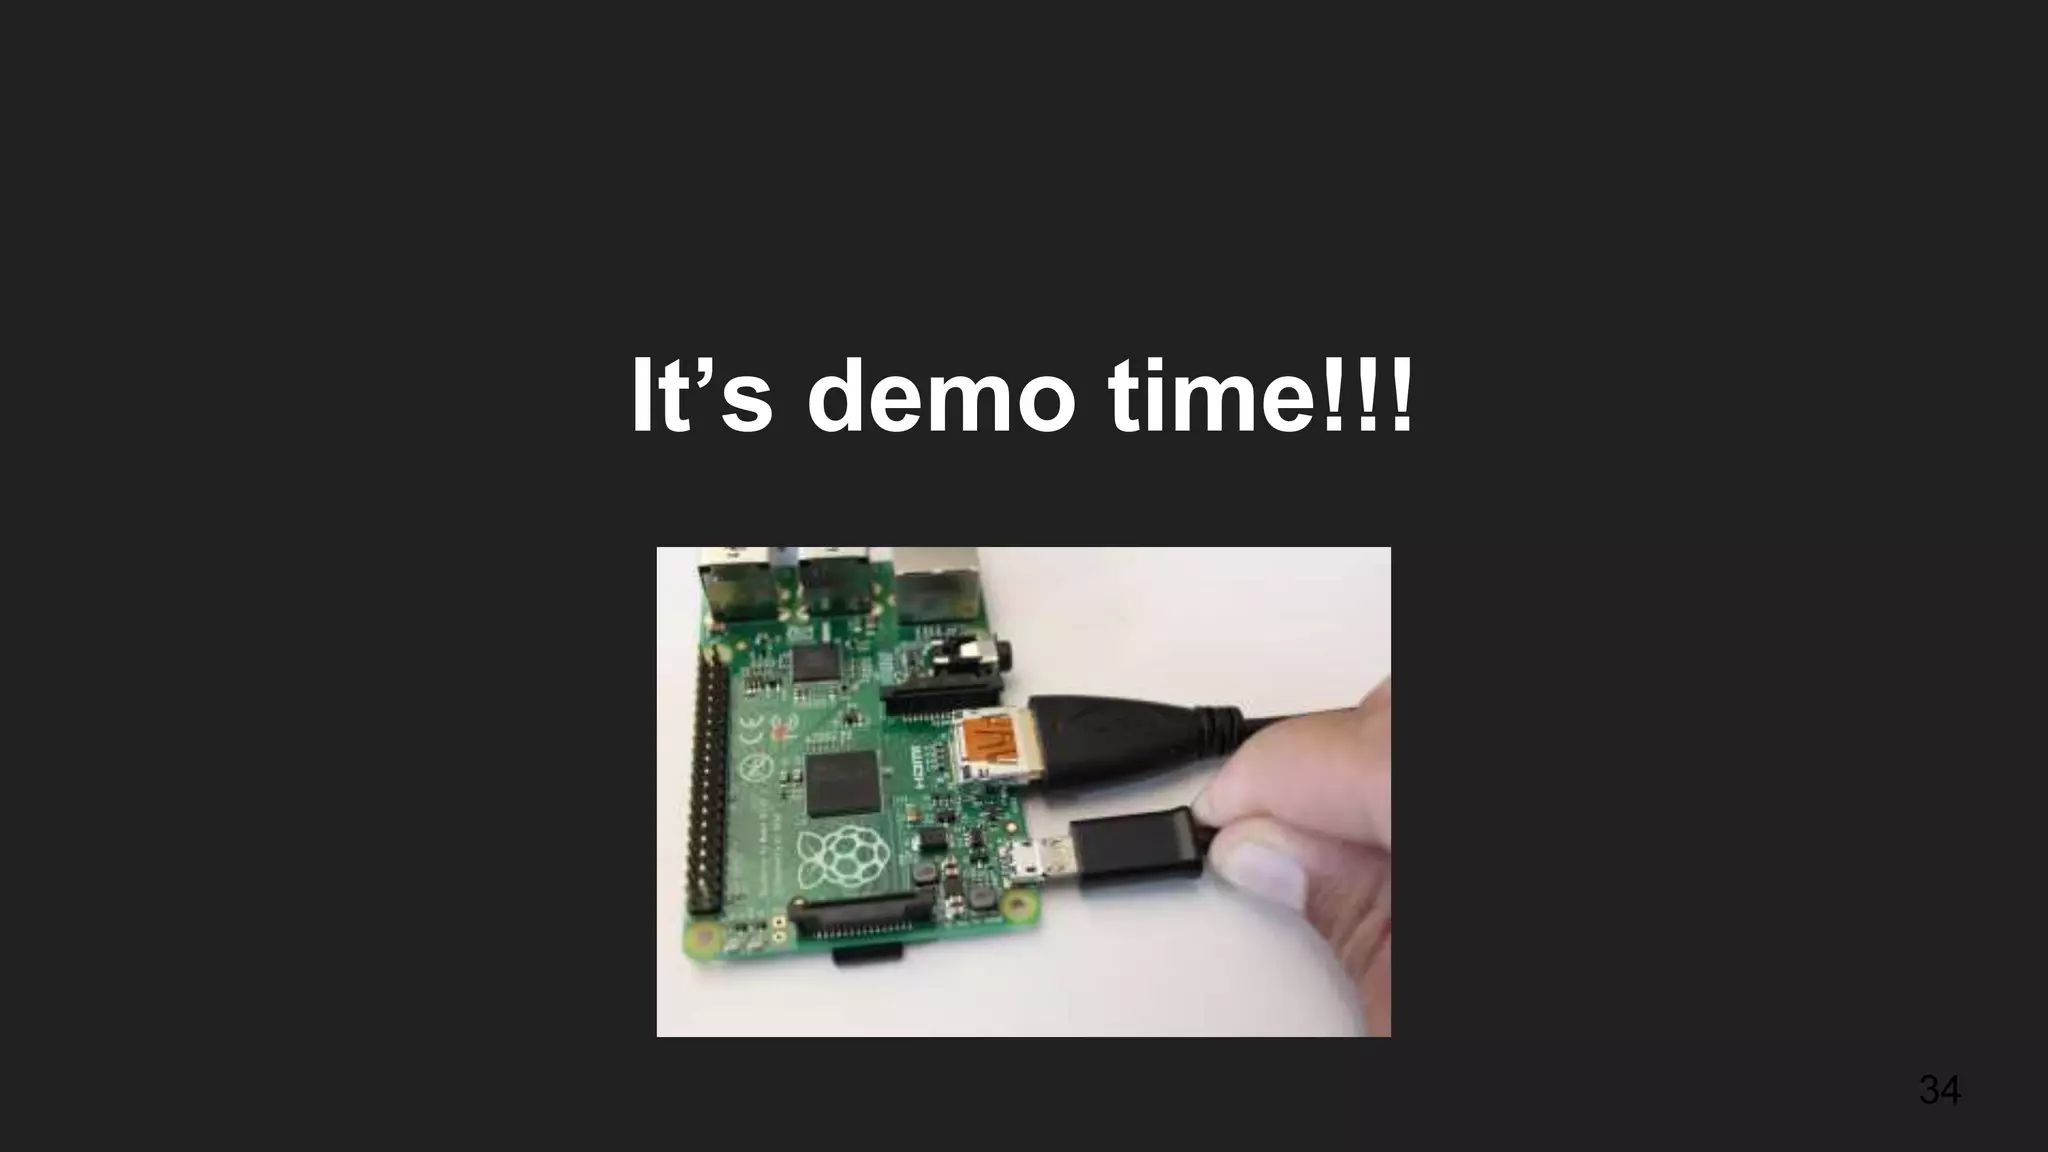
Build your first Android Things application Keval Patel Android Developer @ 1
Agenda - Introduction to Raspberry Pi. - Specifications & Schematics of Raspberry Pi. - How to connect Raspberry Pi to your computer?- Create a new project for Android Things. - What’s different than normal app development? - Accessing hardware components in Android app. - Introduction: Smart Switch App 2
What is Raspberry Pi? 3
What is Raspberry Pi? A computer. A small single-board computer that plugs into your TV and a keyboard, which can be used for many of the things that your average desktop does - spreadsheets, word-processing, games and it also plays high-definition video. 4
What is Raspberry Pi? Small - Size of the credit card. Affordable - Just $35!!! Single Board SoC. Consumes less than 5W power. Developed by Raspberry Pi foundation. Board for the hobbyist. 5
6
Which OS you can run? - Raspbian OS - Fedora OS - Debian OS - Windows 10 - And now Android... 7
Raspberry Pi 3 Model B - Released in Feb 2016. - Costs $35. - Supports Android Things. 8
Raspberry Pi 3 Model B Specification - Quad-core 64-bit ARM Cortex-A53, 1.2GHz - Broadcom VideoCore IV - 1GB LPDDR2 (900 MHz) - 10/100 Ethernet - 2.4GHz 802.11n wireless - Bluetooth 4.1 and Bluetooth Low Energy - 40-pin GPIO header - Ports: HDMI, 3.5mm analog audio-video jack, 4× USB 2.0, Ethernet, Camera Serial Interface (CSI), Display Serial Interface (DSI) 9
10
GPIO - GPIO = General Purpose Input Output. - You can configure that pin to act as input or output pin at runtime. - No predefined purpose, and go unused by default. - Raspberry Pi has 40 GPIO pins. - The pins allow us to interact with different components and receive and send information to them. 11
GPIO Pin Diagram 12
How to connect with Raspberry Pi? 13
How to connect with Raspberry Pi? 1. Connect USB cable for power. 2. Connect an Ethernet cable your local network. 3. Connect an HDMI cable to an display. (Optional) 4. Find the IP of Raspberry Pi using IP scanner tool. (e.g. Angry IP scanner.) The host name will be “Android.local”. 5. Connect to this IP address using the adb. $ adb connect <ip-address> connected to <ip-address>:5555 14
How to connect with Wi-Fi? 1. Send an intent to the Wi-Fi service with the SSID and passcode of your Wi-Fi network. You need to do it only when connecting to new Wi-Fi network. $ adb shell am startservice -n com.google.wifisetup/.WifiSetupService -a WifiSetupService.Connect -e ssid <Network_SSID> -e passphrase <Network_Passcode> $ adb connect <ip-address> connected to <ip-address>:5555 2. Find the IP of Raspberry Pi using IP scanner tool. 3. Connect to this IP address using the adb. 15
How to check if the internet access available? rpi3:/ $ ping google.com PING google.com (216.58.199.142) 56(84) bytes of data. 16
Creating Android Things Project In Android Studio 17
Build Android Things Project - Create new android project. 18
Build Android Things Project - Set the minSdkVersion for the project to 24. 19
Build Android Things Project - Add “com.google.android.things” library to “AndroidManifest.xml”. <application android:allowBackup="true" android:icon="@mipmap/ic_launcher" android:label="@string/app_name" android:theme="@style/AppTheme"> <uses-library android:name="com.google.android.things"/> <activity android:name=".MainActivity"> .... .... </activity> </application> 20
Add Home activity support - "Home activity" in its manifest as the main entry point for the system to automatically launch on boot. <activity android:name=".MainActivity"> <intent-filter> <action android:name="android.intent.action.MAIN"/> <category android:name="android.intent.category.LAUNCHER"/> </intent-filter> <!-- Launch activity automatically on boot --> <intent-filter> <action android:name="android.intent.action.MAIN"/> <category android:name="android.intent.category.IOT_LAUNCHER"/> <category android:name="android.intent.category.DEFAULT"/> </intent-filter> </activity> 21
Android Things Vs. Android Phone 22
Android Things App Vs. Phone App - In Android Things UI is optional. - Android Things launcher does not have an app drawer. You need to launch the application using ADB. - There is no system-wide status bar and window shade in Android Things. So, notifications are not supported. - No system-wide navigation bar. So, back button, home button, and app switcher are supported. 23
Android Things App Vs. Phone App - Android Things supports a subset of the Google APIs for Android. - Each release of Android Things bundles the latest stable version of Google Play Services, and requires at least version 10.0.0 of the client SDK. 24
- No runtime permission. Just declare permission in AndroidManifest. (Just like old days!!!) - No support for the Google Play. Android Things App Vs. Phone App - Doesn't include the all of the standard system apps and content providers. Like SMS application and SMS provider. Avoid using them. 25
How to access GPIO? 26
Setting GPIO - Open GPIO pin using PeripheralManagerService. PeripheralManagerService service = new PeripheralManagerService(); mRedPin = service.openGpio(BoardDefaults.getGPIOForRedLED()); - Define pin as input or output. //Define as output mRedPin.setDirection(Gpio.DIRECTION_OUT_INITIALLY_LOW); //Or mRedPin.setDirection(Gpio.DIRECTION_OUT_INITIALLY_HIGH); //Set as input mRedPin.setDirection(Gpio.DIRECTION_IN); 27
Peripheral Driver Library - There are many sensors we may need in our project. - All sensors have different specs and different types of input/output. - You don’t want to write code to integrate those sensors in your application. - Peripheral Driver Library contains pre-written user drivers for popular peripherals available for supported Android Things hardware. - It is open sourced. (https://github.com/androidthings/contrib-drivers) 28
Let’s build something REAL!!! 29
Smart Switch 30 Control the devices like fan, light bulb using your phone. - Can control 1 fan, 1 light bulb and 1 LED. - Uses firebase real-time database to sync the status of the home device between raspberry pi and companion app.
Components required - Raspberry Pi 31 - 2 x 5V Relay - 1 LED - 1K resistor - Breadboard - Wires/Connectors
32
33 Firebase Real Time Database
It’s demo time!!! 34
What’s next??? 35 - Go ahead and download from GitHub (https://goo.gl/1CHzrB). Play with your own devices. - Try out different samples from Android Things samples (https://goo.gl/aTRWTN) page. - Make your own project.
References 36 - Android Things - Android Developers (https://goo.gl/PefyPY) - Android Things - GitHub (https://goo.gl/AWA1Co) - Android Things – Hardware Basics for the Software Engineer (https://goo.gl/ini66V) - SmartSwitch - Github (https://goo.gl/1CHzrB)
What you are going to build now? @kevalpatel2106 @multidots 37

Build your first android things application

  • 1.
    Build your firstAndroid Things application Keval Patel Android Developer @ 1
  • 2.
    Agenda - Introduction toRaspberry Pi. - Specifications & Schematics of Raspberry Pi. - How to connect Raspberry Pi to your computer?- Create a new project for Android Things. - What’s different than normal app development? - Accessing hardware components in Android app. - Introduction: Smart Switch App 2
  • 3.
  • 4.
    What is RaspberryPi? A computer. A small single-board computer that plugs into your TV and a keyboard, which can be used for many of the things that your average desktop does - spreadsheets, word-processing, games and it also plays high-definition video. 4
  • 5.
    What is RaspberryPi? Small - Size of the credit card. Affordable - Just $35!!! Single Board SoC. Consumes less than 5W power. Developed by Raspberry Pi foundation. Board for the hobbyist. 5
  • 6.
  • 7.
    Which OS youcan run? - Raspbian OS - Fedora OS - Debian OS - Windows 10 - And now Android... 7
  • 8.
    Raspberry Pi 3Model B - Released in Feb 2016. - Costs $35. - Supports Android Things. 8
  • 9.
    Raspberry Pi 3Model B Specification - Quad-core 64-bit ARM Cortex-A53, 1.2GHz - Broadcom VideoCore IV - 1GB LPDDR2 (900 MHz) - 10/100 Ethernet - 2.4GHz 802.11n wireless - Bluetooth 4.1 and Bluetooth Low Energy - 40-pin GPIO header - Ports: HDMI, 3.5mm analog audio-video jack, 4× USB 2.0, Ethernet, Camera Serial Interface (CSI), Display Serial Interface (DSI) 9
  • 10.
  • 11.
    GPIO - GPIO =General Purpose Input Output. - You can configure that pin to act as input or output pin at runtime. - No predefined purpose, and go unused by default. - Raspberry Pi has 40 GPIO pins. - The pins allow us to interact with different components and receive and send information to them. 11
  • 12.
  • 13.
    How to connectwith Raspberry Pi? 13
  • 14.
    How to connectwith Raspberry Pi? 1. Connect USB cable for power. 2. Connect an Ethernet cable your local network. 3. Connect an HDMI cable to an display. (Optional) 4. Find the IP of Raspberry Pi using IP scanner tool. (e.g. Angry IP scanner.) The host name will be “Android.local”. 5. Connect to this IP address using the adb. $ adb connect <ip-address> connected to <ip-address>:5555 14
  • 15.
    How to connectwith Wi-Fi? 1. Send an intent to the Wi-Fi service with the SSID and passcode of your Wi-Fi network. You need to do it only when connecting to new Wi-Fi network. $ adb shell am startservice -n com.google.wifisetup/.WifiSetupService -a WifiSetupService.Connect -e ssid <Network_SSID> -e passphrase <Network_Passcode> $ adb connect <ip-address> connected to <ip-address>:5555 2. Find the IP of Raspberry Pi using IP scanner tool. 3. Connect to this IP address using the adb. 15
  • 16.
    How to checkif the internet access available? rpi3:/ $ ping google.com PING google.com (216.58.199.142) 56(84) bytes of data. 16
  • 17.
  • 18.
    Build Android ThingsProject - Create new android project. 18
  • 19.
    Build Android ThingsProject - Set the minSdkVersion for the project to 24. 19
  • 20.
    Build Android ThingsProject - Add “com.google.android.things” library to “AndroidManifest.xml”. <application android:allowBackup="true" android:icon="@mipmap/ic_launcher" android:label="@string/app_name" android:theme="@style/AppTheme"> <uses-library android:name="com.google.android.things"/> <activity android:name=".MainActivity"> .... .... </activity> </application> 20
  • 21.
    Add Home activitysupport - "Home activity" in its manifest as the main entry point for the system to automatically launch on boot. <activity android:name=".MainActivity"> <intent-filter> <action android:name="android.intent.action.MAIN"/> <category android:name="android.intent.category.LAUNCHER"/> </intent-filter> <!-- Launch activity automatically on boot --> <intent-filter> <action android:name="android.intent.action.MAIN"/> <category android:name="android.intent.category.IOT_LAUNCHER"/> <category android:name="android.intent.category.DEFAULT"/> </intent-filter> </activity> 21
  • 22.
  • 23.
    Android Things AppVs. Phone App - In Android Things UI is optional. - Android Things launcher does not have an app drawer. You need to launch the application using ADB. - There is no system-wide status bar and window shade in Android Things. So, notifications are not supported. - No system-wide navigation bar. So, back button, home button, and app switcher are supported. 23
  • 24.
    Android Things AppVs. Phone App - Android Things supports a subset of the Google APIs for Android. - Each release of Android Things bundles the latest stable version of Google Play Services, and requires at least version 10.0.0 of the client SDK. 24
  • 25.
    - No runtimepermission. Just declare permission in AndroidManifest. (Just like old days!!!) - No support for the Google Play. Android Things App Vs. Phone App - Doesn't include the all of the standard system apps and content providers. Like SMS application and SMS provider. Avoid using them. 25
  • 26.
    How to accessGPIO? 26
  • 27.
    Setting GPIO - OpenGPIO pin using PeripheralManagerService. PeripheralManagerService service = new PeripheralManagerService(); mRedPin = service.openGpio(BoardDefaults.getGPIOForRedLED()); - Define pin as input or output. //Define as output mRedPin.setDirection(Gpio.DIRECTION_OUT_INITIALLY_LOW); //Or mRedPin.setDirection(Gpio.DIRECTION_OUT_INITIALLY_HIGH); //Set as input mRedPin.setDirection(Gpio.DIRECTION_IN); 27
  • 28.
    Peripheral Driver Library -There are many sensors we may need in our project. - All sensors have different specs and different types of input/output. - You don’t want to write code to integrate those sensors in your application. - Peripheral Driver Library contains pre-written user drivers for popular peripherals available for supported Android Things hardware. - It is open sourced. (https://github.com/androidthings/contrib-drivers) 28
  • 29.
  • 30.
    Smart Switch 30 Control thedevices like fan, light bulb using your phone. - Can control 1 fan, 1 light bulb and 1 LED. - Uses firebase real-time database to sync the status of the home device between raspberry pi and companion app.
  • 31.
    Components required - RaspberryPi 31 - 2 x 5V Relay - 1 LED - 1K resistor - Breadboard - Wires/Connectors
  • 32.
  • 33.
  • 34.
  • 35.
    What’s next??? 35 - Goahead and download from GitHub (https://goo.gl/1CHzrB). Play with your own devices. - Try out different samples from Android Things samples (https://goo.gl/aTRWTN) page. - Make your own project.
  • 36.
    References 36 - Android Things- Android Developers (https://goo.gl/PefyPY) - Android Things - GitHub (https://goo.gl/AWA1Co) - Android Things – Hardware Basics for the Software Engineer (https://goo.gl/ini66V) - SmartSwitch - Github (https://goo.gl/1CHzrB)
  • 37.
    What you aregoing to build now? @kevalpatel2106 @multidots 37