
Once you’ve installed CockroachDB, it’s simple to start an insecure multi-node cluster locally.
Before You Begin
Make sure you have already installed CockroachDB.
Step 1. Start the first node
$ cockroach start --insecure \ --host=localhost CockroachDB node starting at build: CCL v2.0.7 @ 2018-12-10 00:00:00 admin: http://localhost:8080 sql: postgresql://root@localhost:26257?sslmode=disable logs: cockroach-data/logs store[0]: path=cockroach-data status: initialized new cluster clusterID: {dab8130a-d20b-4753-85ba-14d8956a294c} nodeID: 1 This command starts a node in insecure mode, accepting most cockroach start defaults.
- The
--insecureflag makes communication unencrypted. - Since this is a purely local cluster,
--host=localhosttells the node to listens only onlocalhost, with default ports used for internal and client traffic (26257) and for HTTP requests from the Admin UI (8080). - Node data is stored in the
cockroach-datadirectory. - The standard output gives you helpful details such as the CockroachDB version, the URL for the admin UI, and the SQL URL for clients.
Step 2. Add nodes to the cluster
At this point, your cluster is live and operational. With just one node, you can already connect a SQL client and start building out your database. In real deployments, however, you'll always want 3 or more nodes to take advantage of CockroachDB's automatic replication, rebalancing, and fault tolerance capabilities. This step helps you simulate a real deployment locally.
In a new terminal, add the second node:
$ cockroach start \ --insecure \ --store=node2 \ --host=localhost \ --port=26258 \ --http-port=8081 \ --join=localhost:26257 In a new terminal, add the third node:
$ cockroach start \ --insecure \ --store=node3 \ --host=localhost \ --port=26259 \ --http-port=8082 \ --join=localhost:26257 The main difference in these commands is that you use the --join flag to connect the new nodes to the cluster, specifying the address and port of the first node, in this case localhost:26257. Since you're running all nodes on the same machine, you also set the --store, --port, and --http-port flags to locations and ports not used by other nodes, but in a real deployment, with each node on a different machine, the defaults would suffice.
Step 3. Test the cluster
Now that you've scaled to 3 nodes, you can use any node as a SQL gateway to the cluster. To demonstrate this, open a new terminal and connect the built-in SQL client to node 1:
cockroach binary, so nothing extra is needed.$ cockroach sql --insecure Run some basic CockroachDB SQL statements:
> CREATE DATABASE bank; > CREATE TABLE bank.accounts (id INT PRIMARY KEY, balance DECIMAL); > INSERT INTO bank.accounts VALUES (1, 1000.50); > SELECT * FROM bank.accounts; +----+---------+ | id | balance | +----+---------+ | 1 | 1000.5 | +----+---------+ (1 row) Exit the SQL shell on node 1:
> \q Then connect the SQL shell to node 2, this time specifying the node's non-default port:
$ cockroach sql --insecure --port=26258 26257, and so you wouldn't need to set the --port flag.Now run the same SELECT query:
> SELECT * FROM bank.accounts; +----+---------+ | id | balance | +----+---------+ | 1 | 1000.5 | +----+---------+ (1 row) As you can see, node 1 and node 2 behaved identically as SQL gateways.
Exit the SQL shell on node 2:
> \q Step 4. Monitor the cluster
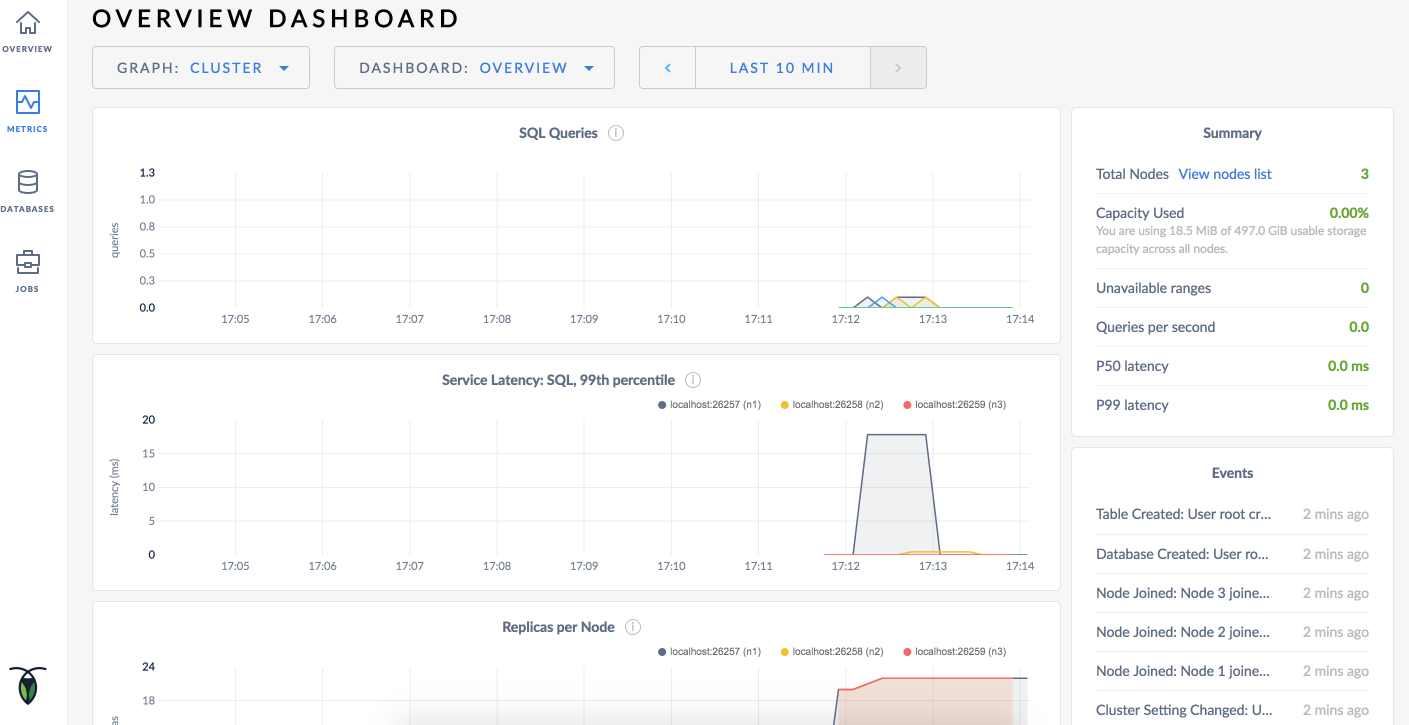
Access the Admin UI for your cluster by pointing a browser to http://localhost:8080, or to the address in the admin field in the standard output of any node on startup. Then click Metrics on the left-hand navigation bar.
As mentioned earlier, CockroachDB automatically replicates your data behind-the-scenes. To verify that data written in the previous step was replicated successfully, scroll down to the Replicas per Node graph and hover over the line:
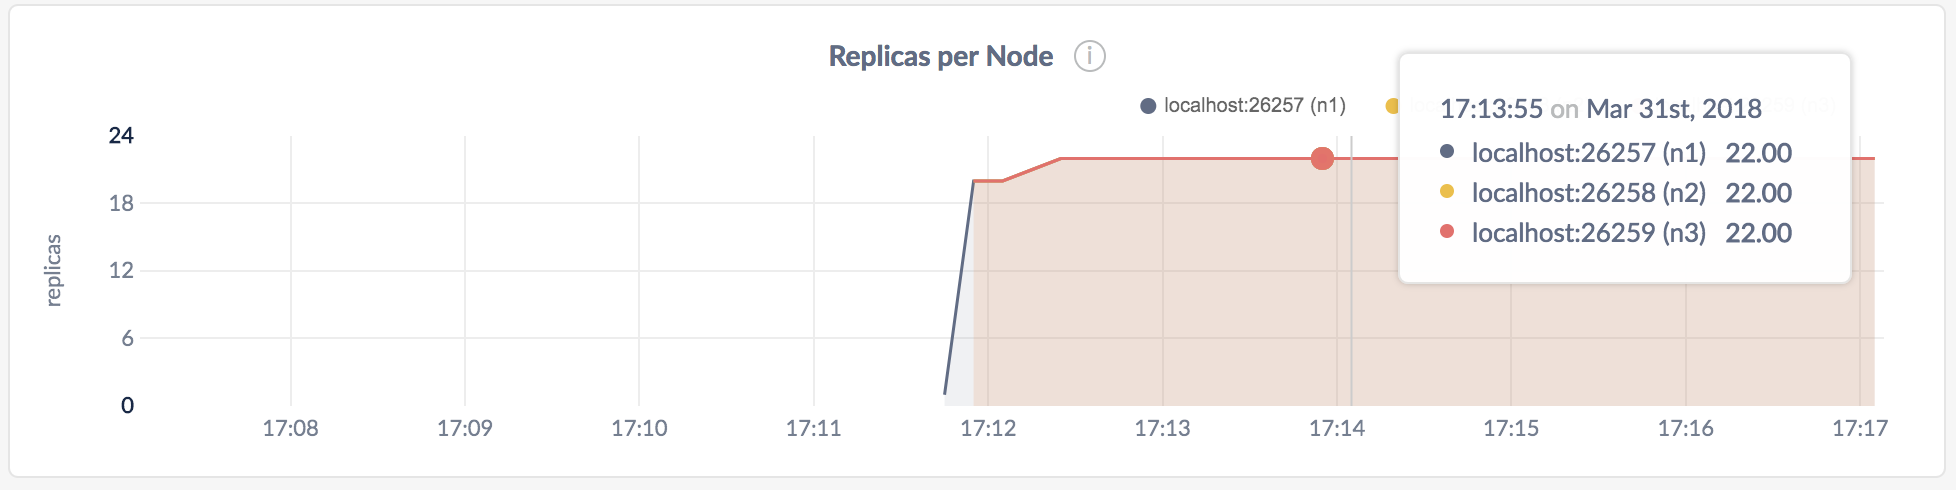
The replica count on each node is identical, indicating that all data in the cluster was replicated 3 times (the default).
Step 5. Stop the cluster
Once you're done with your test cluster, switch to the terminal running the first node and press CTRL-C to stop the node.
At this point, with 2 nodes still online, the cluster remains operational because a majority of replicas are available. To verify that the cluster has tolerated this "failure", connect the built-in SQL shell to nodes 2 or 3. You can do this in the same terminal or in a new terminal.
$ cockroach sql --insecure --port=26258 > SELECT * FROM bank.accounts; +----+---------+ | id | balance | +----+---------+ | 1 | 1000.5 | +----+---------+ (1 row) Exit the SQL shell:
> \q Now stop nodes 2 and 3 by switching to their terminals and pressing CTRL-C.
If you do not plan to restart the cluster, you may want to remove the nodes' data stores:
$ rm -rf cockroach-data node2 node3 Step 6. Restart the cluster
If you decide to use the cluster for further testing, you'll need to restart at least 2 of your 3 nodes from the directories containing the nodes' data stores.
Restart the first node from the parent directory of cockroach-data/:
$ cockroach start \ --insecure \ --host=localhost In a new terminal, restart the second node from the parent directory of node2/:
$ cockroach start \ --insecure \ --store=node2 \ --host=localhost \ --port=26258 \ --http-port=8081 \ --join=localhost:26257 In a new terminal, restart the third node from the parent directory of node3/:
$ cockroach start \ --insecure \ --store=node3 \ --host=localhost \ --port=26259 \ --http-port=8082 \ --join=localhost:26257 What's Next?
- Learn more about CockroachDB SQL and the built-in SQL client
- Install the client driver for your preferred language
- Build an app with CockroachDB
- Explore core CockroachDB features like automatic replication, rebalancing, fault tolerance, and cloud migration.