You can connect Quick BI to a MaxCompute project to analyze data in the MaxCompute project in real time. You can perform drag-and-drop operations and use various visualization methods to analyze MaxCompute data, explore data, and generate reports in the Quick BI console. This topic describes how to connect Quick BI to a MaxCompute project and analyze MaxCompute data in the Quick BI console in a visualized manner.
Background information
Quick BI is an easy-to-use, high-performance big data analytics platform that is developed for users in the cloud. Quick BI not only allows business personnel to visualize data, but also helps in the development of digital operations.
Prerequisites
Make sure that the following conditions are met:
The AccessKey ID and AccessKey secret that are used to access the MaxCompute project are obtained. You can obtain the AccessKey ID on the AccessKey Pair page.
The Quick BI service is activated. In this topic, Quick BI Basic is used.
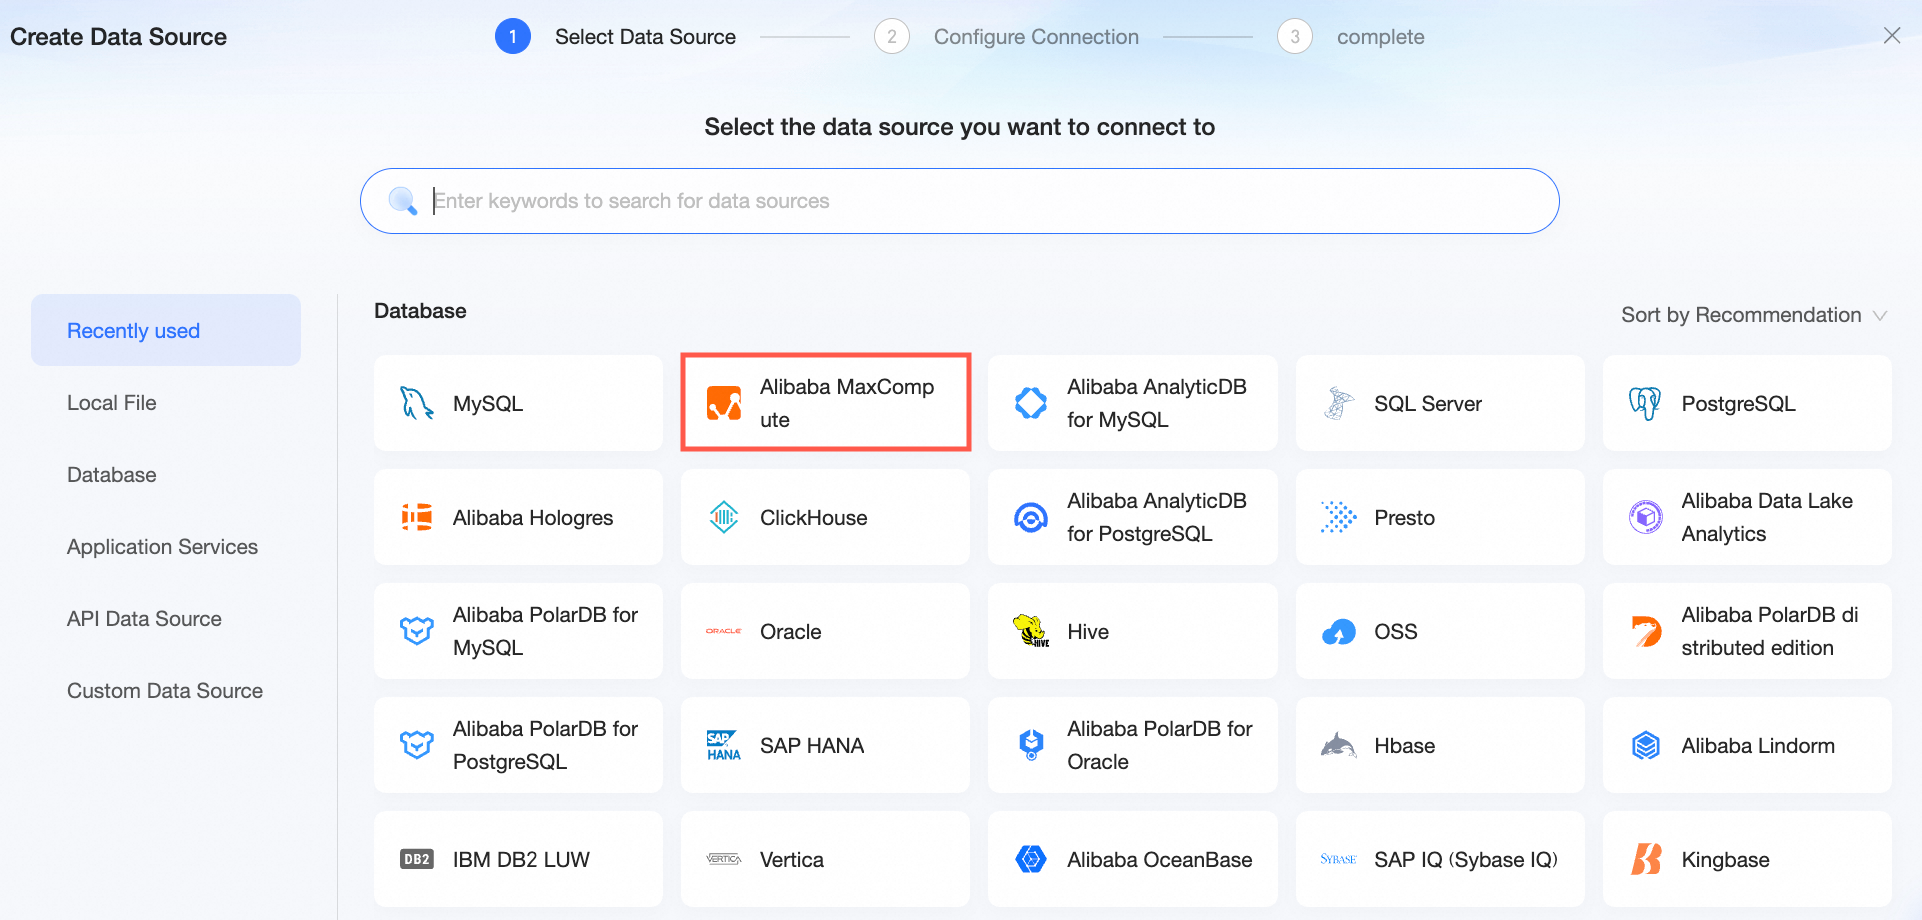
Step 1: Connect Quick BI to MaxCompute
Log on to the Quick BI console.
Add a data source.
Go to the Create Data Source page from the entry point for adding a data source.
Select Alibaba MaxCompute.
In the Configure Connection step, configure the parameters.
Parameter
Description
Name
The display name in the data source configuration list.
Enter a valid name. The name cannot contain special characters. No space is allowed before and after the name.
Database Address
The endpoint of MaxCompute. Quick BI can use the endpoint of the cloud product interconnection network to connect to the MaxCompute project.
Project Name
The name of the MaxCompute project.
This parameter specifies the name of your MaxCompute project instead of the DataWorks workspace to which the MaxCompute project corresponds. To view the name of a MaxCompute project, perform the following steps: Log on to the MaxCompute console. In the top navigation bar, select a region. In the left-side navigation pane, choose Workspace > Projects to view the name of the MaxCompute project.
AccessKey ID and AccessKey Secret
The AccessKey ID and AccessKey secret that are used to access the MaxCompute project.
Ensure that the account to which the AccessKey pair belongs has the Createlnstance and List permissions on the project and the Desc permission on tables. If file upload is required, the account must also have the CreateTable and Write permissions on the project.
You can obtain the AccessKey ID from the RAM console.
Quota Resource Group
If you need to use the MaxQA feature of MaxCompute for query acceleration, enter a MaxQA quota name.
If other computing resource quotas are available in the region, you can specify a quota based on your business requirements.
If you do not configure this parameter, the system will use the MaxCompute MCQA 1.0 feature for query acceleration.
This parameter is optional.
Enable File Upload
If you select this option, file upload is supported. This option is selected by default.
Initialize SQL
After turning on this switch, you can configure the SQL statements to be executed during the initialization of the data source connection.
The SQL statements executed during the initialization after each data source connection are restricted to
SETstatements only, and the statements must be separated by semicolons (;).Click Test Connection to test the data source connectivity.
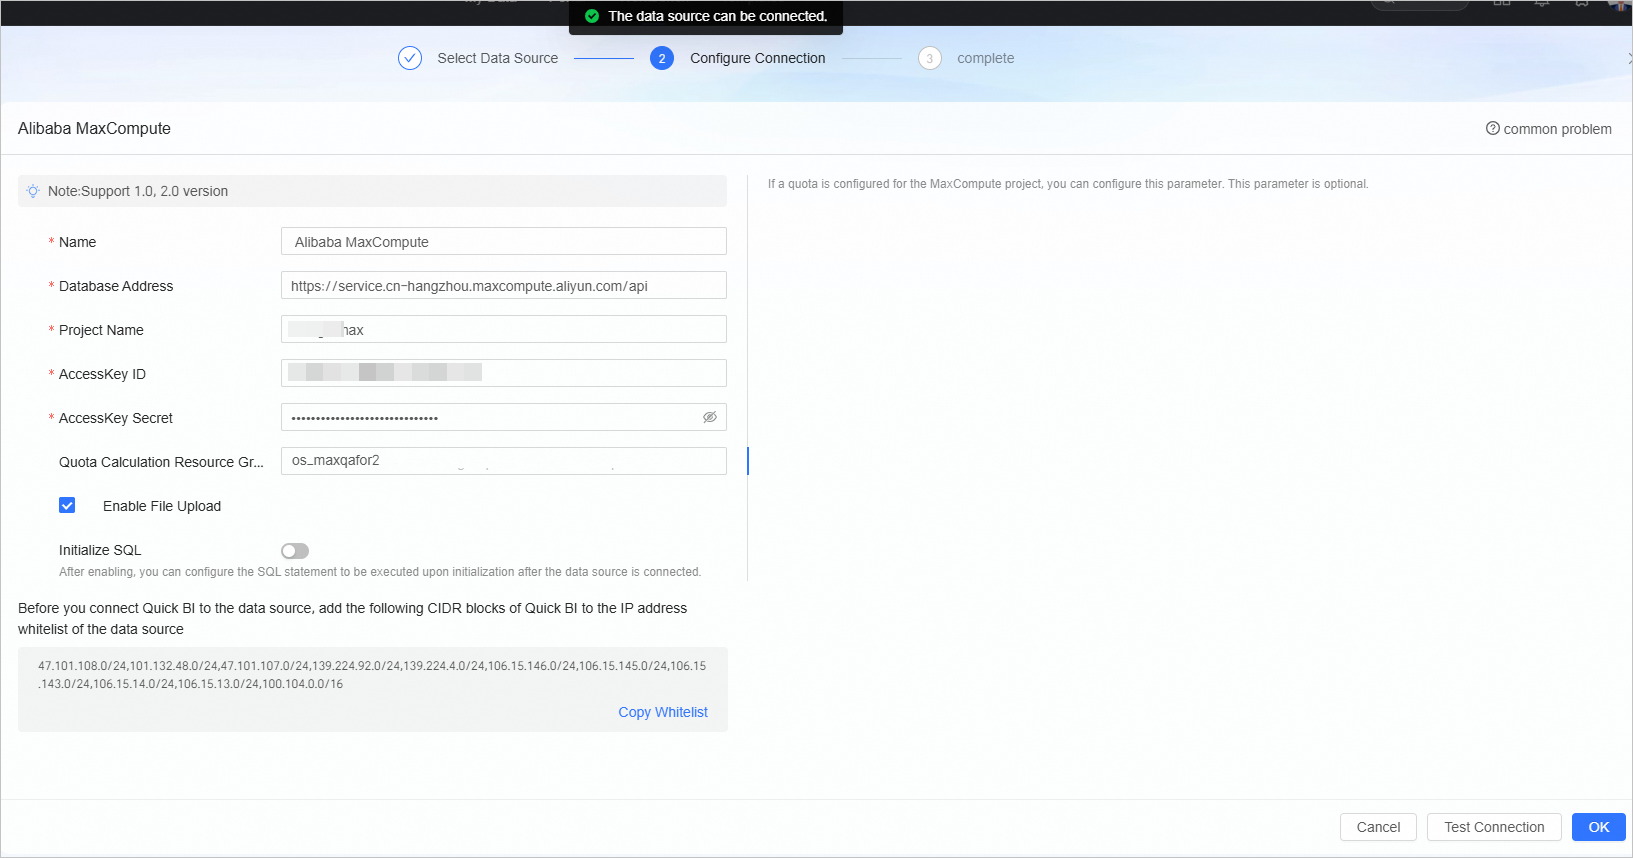
After the test is successful, click OK.
NoteWhen adding a MaxCompute data source in Quick BI, an asynchronous loading and updating strategy is adopted. If you add this data source for the first time, you need to wait 1 to 5 minutes for the data synchronization to complete.
Then, you can view the added data source in the data source list.
Step 2: Use Quick BI to query and analyze data
In the Quick BI console, you can query and analyze data in the MaxCompute project based on the added MaxCompute data source.
To add data tables from the MaxCompute data source or custom SQL statements to Quick BI, see Create and manage datasets.
To add visualization charts and analyze data, see Create a dashboard and Overview of visualization charts.
To drill down and perform in-depth data analysis, see Configure and display drill-down analysis.