This topic describes how to use the reindex API to migrate data from a self-managed Elasticsearch (ES) cluster that runs on Elastic Compute Service (ECS) instances to an Alibaba Cloud ES cluster.
Background information
You can use the reindex API to migrate data only to single-zone instances. If you have a multi-zone instance, use one of the following solutions to migrate data from your self-managed ES cluster to Alibaba Cloud:
If the self-managed Elasticsearch cluster stores a large volume of data, use snapshots stored in Object Storage Service (OSS). For more information, see Use OSS to migrate data from a self-managed Elasticsearch cluster to an Alibaba Cloud Elasticsearch cluster.
If you want to filter source data, use Logstash. For more information, see Use Alibaba Cloud Logstash to migrate data from a self-managed Elasticsearch cluster to an Alibaba Cloud Elasticsearch cluster.
Prerequisites
You have performed the following operations:
Create a single-zone Alibaba Cloud ES instance.
For more information, see Create an Alibaba Cloud Elasticsearch instance.
Prepare a self-managed ES cluster and the data to migrate.
We recommend that you use a self-managed Elasticsearch cluster deployed on Alibaba Cloud ECS instances. For more information about how to deploy a self-managed Elasticsearch cluster, see Installing and Running Elasticsearch. The self-managed Elasticsearch cluster must meet the following requirements:
The ECS instances that host the cluster must be in a virtual private cloud (VPC). The ECS instances cannot be connected through ClassicLink. The VPC must be the same one that the Alibaba Cloud ES instance uses.
The security group of the ECS instances must not restrict the IP addresses of the nodes in the Alibaba Cloud ES instance. You can view the IP addresses of the nodes in the Kibana console. Port 9200 must also be open.
The cluster must be able to connect to the Alibaba Cloud ES instance. You can run the
curl -XGET http://<host>:9200command on the machine where you run the script to verify the connection.NoteYou can run the scripts in this topic on any machine that can access both the self-managed ES cluster and the Alibaba Cloud ES cluster over port 9200.
Limits
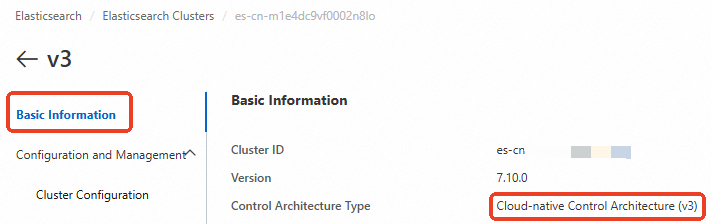
Alibaba Cloud ES provides two deployment modes: Basic Management (v2) architecture and Cloud-native New Management (v3) architecture. You can identify the deployment mode of your instance on the Basic Information page.
For clusters that use the Cloud-native New Management (v3) architecture, you must use PrivateLink to establish a private connection for cross-cluster reindexing. The following table describes the solutions for different business scenarios.
Scenario | ES cluster architecture | Solution |
Data migration between Alibaba Cloud ES clusters | Both ES clusters use the Basic Management (v2) architecture. | reindex API. For more information, see Use the reindex API to migrate data between Alibaba Cloud Elasticsearch clusters. |
One of the ES clusters uses the Cloud-native New Management (v3) architecture. Note The other ES cluster can use the Cloud-native New Management (v3) architecture or the Basic Management (v2) architecture. |
| |
Migrate data from a self-managed ES cluster on an ECS instance to an Alibaba Cloud ES cluster | The Alibaba Cloud ES cluster uses the Basic Management (v2) architecture. | reindex API. For more information, see Use the reindex API to migrate data from a self-managed Elasticsearch cluster to an Alibaba Cloud Elasticsearch cluster. |
The Alibaba Cloud ES cluster uses the Cloud-native New Management (v3) architecture. | reindex API. For more information, see Migrate data from a self-managed Elasticsearch cluster to an Alibaba Cloud Elasticsearch cluster deployed in the new network architecture. |
Precautions
The network architecture of Alibaba Cloud Elasticsearch was updated in October 2020. Instances created before this date use the original network architecture, while instances created in or after October 2020 use the new network architecture. You cannot perform cross-cluster operations, such as reindex, cross-cluster search, or cross-cluster replication, between an instance that uses the new network architecture and an instance that uses the original one. To perform these operations, ensure that the instances use the same network architecture. The time when the network architecture was updated in the China (Zhangjiakou) region and regions outside China is uncertain. Therefore, you must submit a ticket to contact Alibaba Cloud Elasticsearch technical support and verify network connectivity.
Alibaba Cloud ES instances with the Cloud-native New Management (v3) architecture are deployed in a service-owned VPC and cannot access resources in other network environments. Instances with the Basic Management (v2) architecture are deployed in your VPC and have no network access restrictions.
To ensure data consistency and prevent read errors, we recommend that you stop writing data to the self-managed Elasticsearch cluster during the migration. After the migration is complete, you can read data from and write data to the Alibaba Cloud Elasticsearch cluster. If you cannot stop write operations, we recommend that you use a script to set up a loop task to minimize write service downtime. For more information, see the Migrate a large volume of data (without deletions and with update timestamps) section in Step 4: Migrate data.
When you use a domain name to access a self-managed ES cluster or an Alibaba Cloud ES cluster, do not use a URL that contains a path, such as
http://host:port/path.
Procedure
Step 1: Obtain an endpoint domain name (Optional)
If your Alibaba Cloud Elasticsearch cluster uses the Cloud-native New Management (v3) architecture, you must use PrivateLink to connect the network of your self-managed ES cluster on ECS to the network of the Alibaba Cloud service account. This lets you obtain an endpoint domain name for the subsequent configuration. For more information, see Configure a private connection for an instance.
Step 2: Create a destination index
Create an index in the Alibaba Cloud ES cluster based on the configuration of the source index in the self-managed ES cluster. You can also enable automatic index creation for the Alibaba Cloud ES cluster, but this is not recommended.
The following example provides a Python 2 script to create multiple indexes from the self-managed ES cluster in the Alibaba Cloud ES cluster. By default, the number of replicas for the newly created indexes is 0.
#!/usr/bin/python # -*- coding: UTF-8 -*- # File name: indiceCreate.py import sys import base64 import time import httplib import json ## The host of the self-managed Elasticsearch cluster. oldClusterHost = "old-cluster.com" ## The username for the self-managed Elasticsearch cluster. This can be empty. oldClusterUserName = "old-username" ## The password for the self-managed Elasticsearch cluster. This can be empty. oldClusterPassword = "old-password" ## The host of the Alibaba Cloud Elasticsearch cluster. You can obtain this from the Basic Information page of the instance in the Alibaba Cloud Elasticsearch console. newClusterHost = "new-cluster.com" ## The username for the Alibaba Cloud Elasticsearch cluster. newClusterUser = "elastic" ## The password for the Alibaba Cloud Elasticsearch cluster. newClusterPassword = "new-password" DEFAULT_REPLICAS = 0 def httpRequest(method, host, endpoint, params="", username="", password=""): conn = httplib.HTTPConnection(host) headers = {} if (username != "") : 'Hello {name}, your age is {age} !'.format(name = 'Tom', age = '20') base64string = base64.encodestring('{username}:{password}'.format(username = username, password = password)).replace('\n', '') headers["Authorization"] = "Basic %s" % base64string; if "GET" == method: headers["Content-Type"] = "application/x-www-form-urlencoded" conn.request(method=method, url=endpoint, headers=headers) else : headers["Content-Type"] = "application/json" conn.request(method=method, url=endpoint, body=params, headers=headers) response = conn.getresponse() res = response.read() return res def httpGet(host, endpoint, username="", password=""): return httpRequest("GET", host, endpoint, "", username, password) def httpPost(host, endpoint, params, username="", password=""): return httpRequest("POST", host, endpoint, params, username, password) def httpPut(host, endpoint, params, username="", password=""): return httpRequest("PUT", host, endpoint, params, username, password) def getIndices(host, username="", password=""): endpoint = "/_cat/indices" indicesResult = httpGet(oldClusterHost, endpoint, oldClusterUserName, oldClusterPassword) indicesList = indicesResult.split("\n") indexList = [] for indices in indicesList: if (indices.find("open") > 0): indexList.append(indices.split()[2]) return indexList def getSettings(index, host, username="", password=""): endpoint = "/" + index + "/_settings" indexSettings = httpGet(host, endpoint, username, password) print index + " Original settings:\n" + indexSettings settingsDict = json.loads(indexSettings) ## By default, the number of shards is the same as that of the index in the self-managed Elasticsearch cluster. number_of_shards = settingsDict[index]["settings"]["index"]["number_of_shards"] ## The default number of replicas is 0. number_of_replicas = DEFAULT_REPLICAS newSetting = "\"settings\": {\"number_of_shards\": %s, \"number_of_replicas\": %s}" % (number_of_shards, number_of_replicas) return newSetting def getMapping(index, host, username="", password=""): endpoint = "/" + index + "/_mapping" indexMapping = httpGet(host, endpoint, username, password) print index + " Original mapping:\n" + indexMapping mappingDict = json.loads(indexMapping) mappings = json.dumps(mappingDict[index]["mappings"]) newMapping = "\"mappings\" : " + mappings return newMapping def createIndexStatement(oldIndexName): settingStr = getSettings(oldIndexName, oldClusterHost, oldClusterUserName, oldClusterPassword) mappingStr = getMapping(oldIndexName, oldClusterHost, oldClusterUserName, oldClusterPassword) createstatement = "{\n" + str(settingStr) + ",\n" + str(mappingStr) + "\n}" return createstatement def createIndex(oldIndexName, newIndexName=""): if (newIndexName == "") : newIndexName = oldIndexName createstatement = createIndexStatement(oldIndexName) print "The settings and mapping of the new index " + newIndexName + " are as follows:\n" + createstatement endpoint = "/" + newIndexName createResult = httpPut(newClusterHost, endpoint, createstatement, newClusterUser, newClusterPassword) print "Result of creating the new index " + newIndexName + ": " + createResult ## main indexList = getIndices(oldClusterHost, oldClusterUserName, oldClusterPassword) systemIndex = [] for index in indexList: if (index.startswith(".")): systemIndex.append(index) else : createIndex(index, index) if (len(systemIndex) > 0) : for index in systemIndex: print index + " might be a system index. It will not be recreated. Handle it separately if needed."Step 3: Configure a reindex whitelist
Log on to the Alibaba Cloud Elasticsearch console.
In the left-side navigation pane, click Elasticsearch Clusters.
Navigate to the desired cluster.
In the top navigation bar, select the resource group to which the cluster belongs and the region where the cluster resides.
On the Elasticsearch Clusters page, find the cluster and click its ID.
In the left navigation pane, choose .
In the YML File Configuration section, click Modify Configuration on the right.
In the YML File Configuration panel, modify Other Configure to configure the reindex whitelist.
The following code provides a configuration example.
reindex.remote.whitelist: ["10.0.xx.xx:9200","10.0.xx.xx:9200","10.0.xx.xx:9200","10.15.xx.xx:9200","10.15.xx.xx:9200","10.15.xx.xx:9200"]
When you configure the reindex whitelist, use the reindex.remote.whitelist parameter to specify the endpoint of the self-managed ES cluster. This adds the cluster to the remote access whitelist of the Alibaba Cloud ES cluster. The configuration rules vary based on the network architecture of the Alibaba Cloud ES cluster:
For instances that use the Basic Management (v2) architecture: Configure a combination of host and port. Use commas (,) to separate multiple host configurations. Example: otherhost:9200,another:9200,127.0.10.**:9200,localhost:**. The protocol information is not recognized.
For instances that use the Cloud-native New Management (v3) architecture: Configure a combination of the endpoint domain name and port of the instance. Example: ep-bp1hfkx7coy8lvu4****-cn-hangzhou-i.epsrv-bp1zczi0fgoc5qtv****.cn-hangzhou.privatelink.aliyuncs.com:9200.
NoteFor more information about other parameters, see Configure the YML file.
- Select This operation will restart the cluster. Continue? and click OK. Then, the system restarts the Elasticsearch cluster. You can view the restart progress in the Tasks dialog box. After the cluster is restarted, the configuration is complete.
Step 4: Migrate data
This section uses an instance with the Basic Management (v2) architecture as an example and provides three data migration methods. Select a method based on your data volume and business requirements.
Small data volume
Use the following script.
#!/bin/bash # file:reindex.sh indexName="your_index_name" newClusterUser="alibaba_cloud_es_cluster_username" newClusterPass="alibaba_cloud_es_cluster_password" newClusterHost="alibaba_cloud_es_cluster_host" oldClusterUser="self_managed_es_cluster_username" oldClusterPass="self_managed_es_cluster_password" # The host of the self-managed Elasticsearch cluster must be in the format of [scheme]://[host]:[port]. For example, http://10.37.*.*:9200. oldClusterHost="self_managed_es_cluster_host" curl -u ${newClusterUser}:${newClusterPass} -XPOST "http://${newClusterHost}/_reindex?pretty" -H "Content-Type: application/json" -d'{ "source": { "remote": { "host": "'${oldClusterHost}'", "username": "'${oldClusterUser}'", "password": "'${oldClusterPass}'" }, "index": "'${indexName}'", "query": { "match_all": {} } }, "dest": { "index": "'${indexName}'" } }'Large data volume, no delete operations, and with update timestamps
If you have a large volume of data and no delete operations, you can use a rolling migration to reduce the downtime of write services. A rolling migration requires a field, such as an update timestamp, to represent the write sequence of new data. After the data migration is complete, stop the business write operations. After reindex quickly performs an update using the most recent update time, switch the read and write operations to the Alibaba Cloud ES cluster.
#!/bin/bash # file: circleReindex.sh # CONTROLLING STARTUP: # This script remotely rebuilds an index using the reindex operation. Requirements: # 1. The index is already created in the Alibaba Cloud Elasticsearch cluster, or the cluster supports automatic index creation and dynamic mapping. # 2. An IP address whitelist must be configured in the YML file of the Alibaba Cloud Elasticsearch cluster. For example, reindex.remote.whitelist: 172.16.**.**:9200. # 3. The host must be in the format of [scheme]://[host]:[port]. USAGE="Usage: sh circleReindex.sh <count> count: The number of executions. A negative number indicates a loop for incremental execution. A positive number indicates a one-time execution. Example: sh circleReindex.sh 1 sh circleReindex.sh 5 sh circleReindex.sh -1" indexName="your_index_name" newClusterUser="alibaba_cloud_es_cluster_username" newClusterPass="alibaba_cloud_es_cluster_password" oldClusterUser="self_managed_es_cluster_username" oldClusterPass="self_managed_es_cluster_password" ## http://myescluster.com newClusterHost="alibaba_cloud_es_cluster_host" # The host of the self-managed Elasticsearch cluster must be in the format of [scheme]://[host]:[port]. For example, http://10.37.*.*:9200. oldClusterHost="self_managed_es_cluster_host" timeField="update_time_field" reindexTimes=0 lastTimestamp=0 curTimestamp=`date +%s` hasError=false function reIndexOP() { reindexTimes=$[${reindexTimes} + 1] curTimestamp=`date +%s` ret=`curl -u ${newClusterUser}:${newClusterPass} -XPOST "${newClusterHost}/_reindex?pretty" -H "Content-Type: application/json" -d '{ "source": { "remote": { "host": "'${oldClusterHost}'", "username": "'${oldClusterUser}'", "password": "'${oldClusterPass}'" }, "index": "'${indexName}'", "query": { "range" : { "'${timeField}'" : { "gte" : '${lastTimestamp}', "lt" : '${curTimestamp}' } } } }, "dest": { "index": "'${indexName}'" } }'` lastTimestamp=${curTimestamp} echo "Reindex attempt #${reindexTimes}. Update deadline for this attempt: ${lastTimestamp}. Result: ${ret}" if [[ ${ret} == *error* ]]; then hasError=true echo "An error occurred during this execution. Subsequent operations are interrupted. Please check." fi } function start() { ## A negative number indicates a continuous loop. if [[ $1 -lt 0 ]]; then while : do reIndexOP done elif [[ $1 -gt 0 ]]; then k=0 while [[ k -lt $1 ]] && [[ ${hasError} == false ]]; do reIndexOP let ++k done fi } ## main if [ $# -lt 1 ]; then echo "$USAGE" exit 1 fi echo "Starting the reindex operation for the index ${indexName}" start $1 echo "A total of ${reindexTimes} reindex operations were performed."Large data volume, no delete operations, and without update timestamps
If you have a large volume of data and the index mapping does not define an update timestamp field, you must modify the code of the upstream service to add the field. After you add the field, you can first migrate the historical data and then use the second method described in this topic.
#!/bin/bash # file:miss.sh indexName="your_index_name" newClusterUser="alibaba_cloud_es_cluster_username" newClusterPass="alibaba_cloud_es_cluster_password" newClusterHost="alibaba_cloud_es_cluster_host" oldClusterUser="self_managed_es_cluster_username" oldClusterPass="self_managed_es_cluster_password" # The host of the self-managed Elasticsearch cluster must be in the format of [scheme]://[host]:[port]. For example, http://10.37.*.*:9200 oldClusterHost="self_managed_es_cluster_host" timeField="updatetime" curl -u ${newClusterUser}:${newClusterPass} -XPOST "http://${newClusterHost}/_reindex?pretty" -H "Content-Type: application/json" -d '{ "source": { "remote": { "host": "'${oldClusterHost}'", "username": "'${oldClusterUser}'", "password": "'${oldClusterPass}'" }, "index": "'${indexName}'", "query": { "bool": { "must_not": { "exists": { "field": "'${timeField}'" } } } } }, "dest": { "index": "'${indexName}'" } }'FAQ
Problem: When I run the curl command, the message
{"error":"Content-Type header [application/x-www-form-urlencoded] is not supported","status":406}is returned.Solution: Add
-H "Content-Type: application/json"to the curl command and retry.// Obtain information about all indexes in the self-managed Elasticsearch cluster. If you do not have the required permissions, remove the "-u user:pass" parameter. Replace oldClusterHost with the host of your self-managed Elasticsearch cluster. curl -u user:pass -XGET http://oldClusterHost/_cat/indices | awk '{print $3}' // Based on the returned index list, obtain the settings and mapping of the user index that you want to migrate. Replace indexName with the name of the user index that you want to query. curl -u user:pass -XGET http://oldClusterHost/indexName/_settings,_mapping?pretty=true // Based on the obtained _settings and _mapping information of the index, create the corresponding index in the Alibaba Cloud Elasticsearch cluster. You can set the number of replicas to 0 to accelerate data synchronization. After the data migration is complete, reset the number of replicas to 1. // newClusterHost is the host of the Alibaba Cloud Elasticsearch cluster, testindex is the name of the created index, and testtype is the type of the index. curl -u user:pass -XPUT http://<newClusterHost>/<testindex> -d '{ "testindex" : { "settings" : { "number_of_shards" : "5", // Assume that the number of shards for the corresponding index in the self-managed Elasticsearch cluster is 5. "number_of_replicas" : "0" // Set the number of replicas to 0. } }, "mappings" : { // Assume that the mappings for the corresponding index in the self-managed Elasticsearch cluster are configured as follows. "testtype" : { "properties" : { "uid" : { "type" : "long" }, "name" : { "type" : "text" }, "create_time" : { "type" : "long" } } } } } }'Problem: What can I do if a single index has a large volume of data and data synchronization is slow?
Solution:
If you use the reindex API to migrate data, the data is migrated in scroll mode. To improve data migration efficiency, you can increase the scroll size or configure a sliced scroll. A sliced scroll can parallelize the reindex process. For more information, see the reindex API.
If the self-managed Elasticsearch cluster stores a large volume of data, we recommend that you use snapshots stored in OSS to migrate the data. For more information, see Use OSS to migrate data from a self-managed Elasticsearch cluster to an Alibaba Cloud Elasticsearch cluster.
If a single index has a large volume of data, you can set the number of replicas for the destination index to 0 and the refresh interval to -1 before migration to accelerate data synchronization. After the data migration is complete, restore the original settings.
// Before migrating index data, you can set the number of replicas to 0 and disable refresh to accelerate data migration. curl -u user:password -XPUT 'http://<host:port>/indexName/_settings' -d' { "number_of_replicas" : 0, "refresh_interval" : "-1" }' // After the index data is migrated, you can reset the number of replicas to 1 and the refresh interval to 1s (the default value). curl -u user:password -XPUT 'http://<host:port>/indexName/_settings' -d' { "number_of_replicas" : 1, "refresh_interval" : "1s" }'