If the built-in functions provided by MaxCompute cannot meet your business requirements, you can create user-defined functions (UDFs) to address your diverse business needs. This topic describes how to create a MaxCompute UDF in a visualized manner in DataWorks.
Background information
UDFs extend the existing function library to provide additional data processing capabilities. You can specify code logic and computing methods for tasks as needed for queries. For more information, see Overview. In addition to the visualized method for creating UDFs in DataWorks, you can also use MaxCompute Studio or the CLI in MaxCompute. For more information, see Use MaxCompute Studio to create a UDF and Use the CLI in MaxCompute to create a UDF.
Prerequisites
Before you can create a MaxCompute UDF, you must upload an existing resource or create a resource and add it to DataWorks in a visualized manner. For more information, see Create MaxCompute resources.
When creating MaxCompute resources, you can prepare MaxCompute resource files by referring to UDF development (Java) and UDF development (Python 3).
Limits
DataWorks lets you view and manage UDFs that are uploaded in a visualized manner only in the DataWorks console. If you add UDFs to a MaxCompute compute engine using other tools such as MaxCompute Studio, you must use the MaxCompute Function feature in DataWorks to manually load the UDFs to DataWorks. You can view and manage the UDFs in DataWorks after loading is complete. For more information, see Manage MaxCompute functions.
Register a function
Go to the DataStudio page.
Log on to the DataWorks console. In the top navigation bar, select the desired region. In the left-side navigation pane, choose . On the page that appears, select the desired workspace from the drop-down list and click Go to Data Development.
Create a workflow. For more information, see Create an auto triggered workflow.
Create a function.
Expand the desired workflow, right-click MaxCompute, and then select Create Function.
In the Create Function dialog box, enter a Name and a Path.
Click Create.
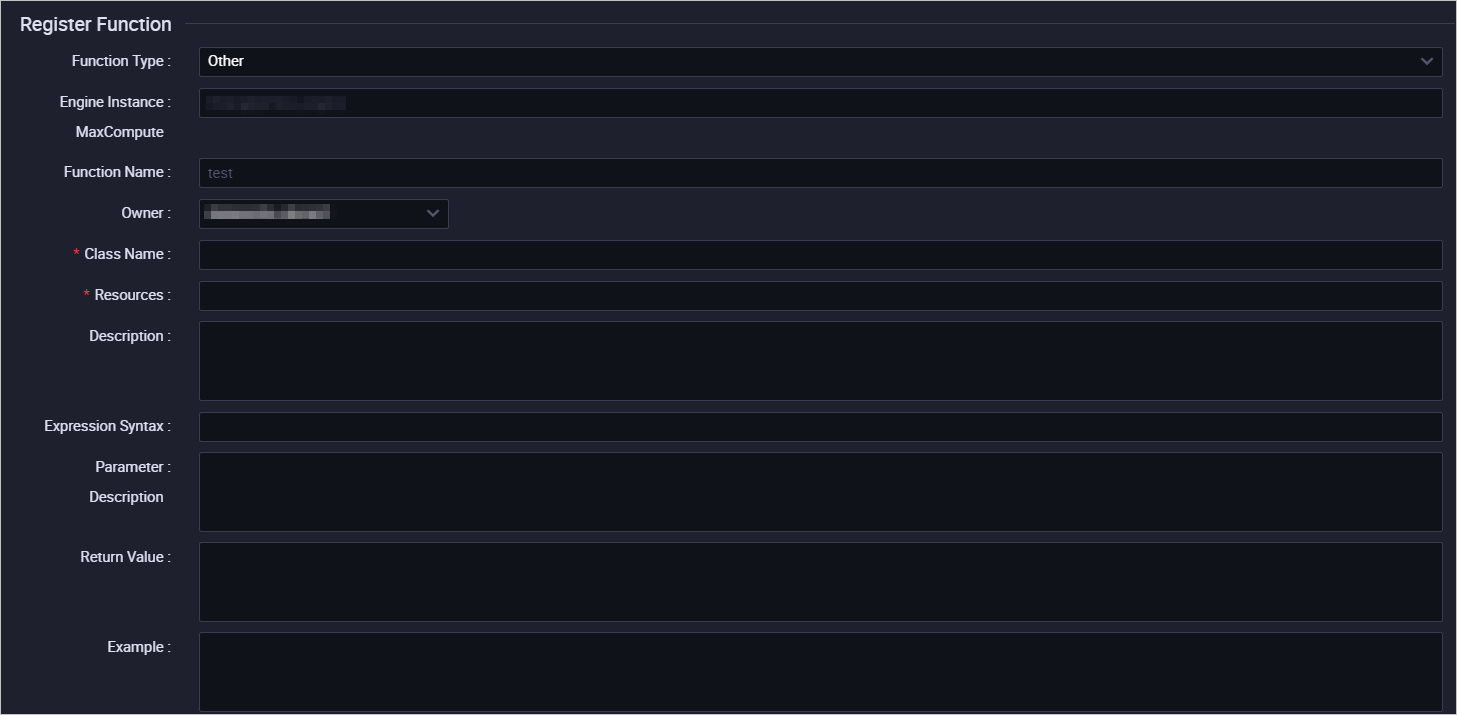
In the Register Function section of the configuration tab that appears, configure the parameters that are described in the following table.
Parameter
Description
Function Type
The type of the function. Valid values: Mathematical Operation Functions, Aggregate Functions, String Processing Functions, Date Functions, Window Functions, and Other Functions. For more information, see Use built-in functions.
MaxCompute Engine Instance
Cannot be modified by default.
Function Name
The name of the function. You can use the function name to reference the function in SQL statements. The function name must be globally unique and cannot be changed after the function is registered.
Owner
The current logon account is displayed by default, but you can also select a different account.
Class Name
The name of the class that implements the UDF. Configure this parameter in the
Resource name.Class nameformat. The resource name can be the name of a Java or Python package.When you register UDFs in the DataWorks console, you can reference MaxCompute resources including JAR packages and Python resources. The value format of this parameter varies based on the resource type:
If the resource type is JAR, configure the Class Name parameter in the
JAR package name.Actual class nameformat. You can query the class name by executing thecopy referencestatement in IntelliJ IDEA.For example, if
com.aliyun.odps.examples.udfis the Java package name andUDAFExampleis the class name, the value of the Class Name parameter iscom.aliyun.odps.examples.udf.UDAFExample.If the resource type is Python, configure the Class Name parameter in the
Python resource name.Actual class nameformat.For example, if
LcLognormDist_shis the Python resource name andLcLognormDist_shis the class name, the value of the Class Name parameter isLcLognormDist_sh.LcLognormDist_sh.NoteYou do not need to include the .jar or .py suffix in the resource name.
You can use a resource after the resource is committed and deployed. For more information, see Create and use MaxCompute resources.
Resources
Select the resources that you want to use to register the function.
Visual Mode: If you select this mode, you can select only the resources that have been uploaded or added to DataWorks.
Code Editor: If you select this mode, you can select all resources in the MaxCompute compute engine.
NoteYou do not need to specify the path of the added resources.
If multiple resources are referenced in the UDF, separate the resource names with commas (,).
Description
The description of the UDF.
Expression Syntax
The syntax of the UDF. Example:
test.Parameter Description
The description of the input and output parameters that are supported.
Return Value
Optional. The return value. Example: 1.
Example
Optional. The example of the function.
Click the
 icon in the top toolbar to save the UDF.
Commit the UDF.
Click the
 icon in the top toolbar.
In the Submit dialog box, enter your comments in the Change Description field.
Click Confirm.
For information about how to view the functions in a MaxCompute compute engine and the change history of the functions, and how to perform other operations, see Manage MaxCompute functions.
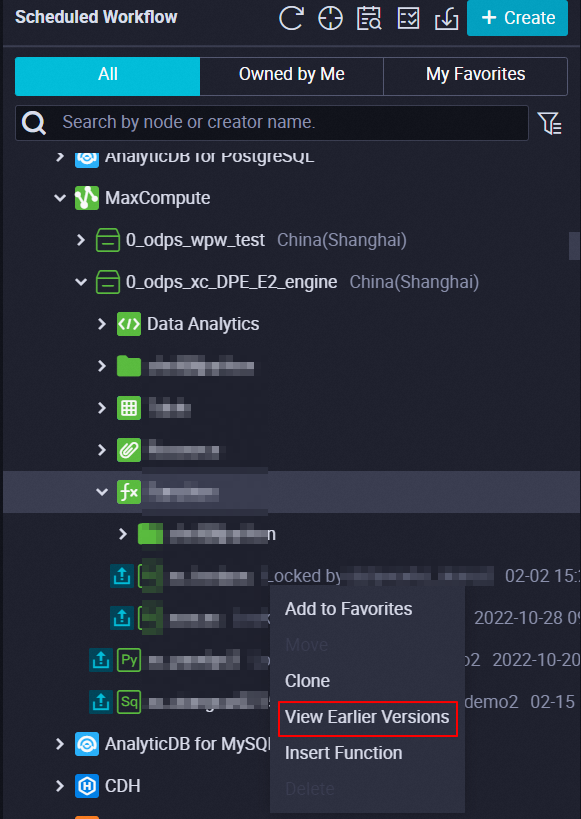
View the function version and roll back the function
In the MaxCompute folder in the Business Flow section in the Scheduled Workflow pane, you can right-click the name of a MaxCompute function and select View Earlier Versions to view the earlier versions of the function or roll back the function.
Use UDFs in nodes
To use a UDF in a node, you can directly reference the UDF name in the node code. You can find the UDF in the Scheduled Workflow pane, right-click the UDF name, and select Insert Function. This way, the UDF is displayed on the configuration tab of the node.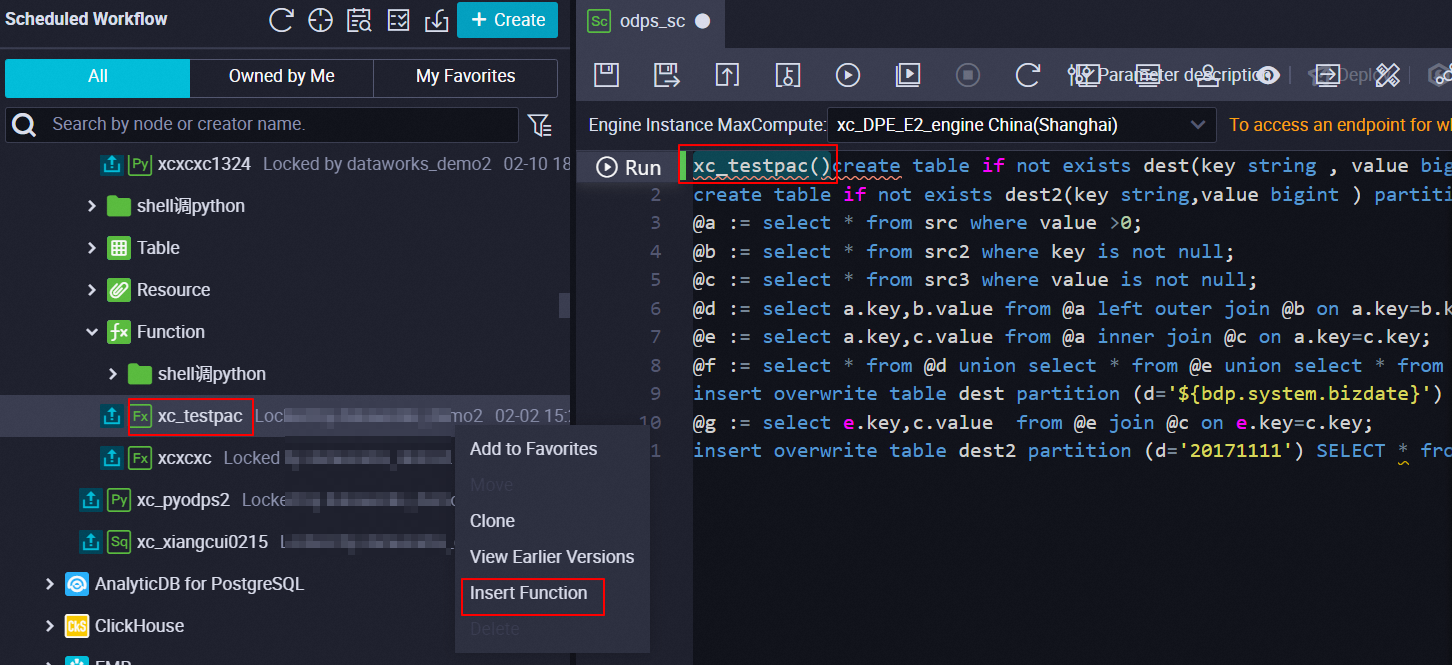
Appendix 1: View UDFs
You can run the
SHOW FUNCTIONScommand to view all registered UDFs in a MaxCompute project that is added to a DataWorks workspace as a data source.MaxCompute provides various types of built-in functions. For more information, see Overview of built-in functions.
// View functions in the current project. SHOW FUNCTIONS;Appendix 2: View the details of a UDF
You can run the
DESCRIBEor abbreviatedDESCcommand followed by a UDF name to view the details of a UDF.// Use the abbreviated DESC command to view the details of a UDF. DESC FUNCTION <function_name>;In DataWorks, if the processing logic required in your workflow cannot be implemented using existing functions, you can write a MaxCompute UDF and upload and associate a corresponding resource such as a JAR package or a Python file to manage and expand your data processing capabilities. For more information, see Manage MaxCompute resources.
Best practices
After creating a UDF, you can follow the instructions described in Grant access to a specific UDF to a specified user to implement access control on the UDF.
References
MaxCompute lets you package a Java program into a JAR file, upload the JAR file as a MaxCompute resource, and register a MaxCompute UDF with a few clicks. For more information, see Package a Java program, upload the package, and create a MaxCompute UDF.
For information about FAQ about MaxCompute UDFs that are written in Java, see FAQ about MaxCompute Java UDFs.
For information about FAQ about MaxCompute UDFs that are written in Python, see FAQ about MaxCompute Python UDFs.
FAQ
Q: After a UDF is registered based on specific resources uploaded in the DataWorks console, the UDF can be used by ODPS SQL nodes in DataStudio. Can the UDF be used in SQL Query of DataAnalysis?
A: Yes, the UDF can be used in SQL Query of DataAnalysis. UDFs registered in the DataWorks console are stored in MaxCompute projects. Therefore, the UDFs can be used not only in ODPS SQL nodes but also in SQL Query of DataAnalysis.