You can use a real-time sync task for a single table to capture data from DataHub. The task can be configured using a simple drag-and-drop operation. This topic describes how to configure the DataHub input component.
Function introduction
After a real-time sync task starts, it runs continuously. The task waits for data in the source DataHub, reads the data, and then writes the data to the destination. The DataHub input component provides the following features:
Reads data in real time.
Reads data in parallel based on the number of shards in DataHub.
Procedure
Go to the DataStudio page.
Log on to the DataWorks console. In the top navigation bar, select the desired region. In the left-side navigation pane, choose . On the page that appears, select the desired workspace from the drop-down list and click Go to Data Development.
In the Scheduled Workflow pane of the DataStudio page, move the pointer over the
 icon and choose .
 Alternatively, find the desired workflow in the Scheduled Workflow pane, right-click the workflow name, and then choose .
In the Create Node dialog box, set the Sync Method parameter to End-to-end ETL and configure the Name and Path parameters.
Click Confirm.
On the configuration tab of the real-time sync node, drag the component from the Input section to the canvas.
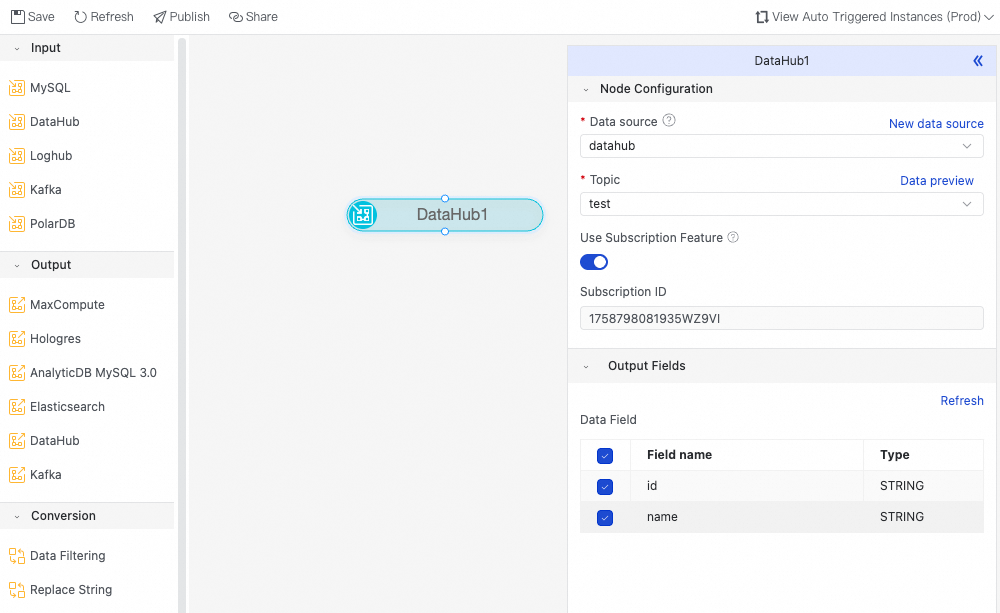
Click the DataHub node. In the Node Configuration panel that appears, configure the parameters.
Parameter
Description
Data Source
Select a configured DataHub data source. Only DataHub data sources are supported.
If no data source is available, click New Data Source on the right to go to the page and create one. For more information, see Configure a DataHub data source.
Topic
Select the topic that you want to sync from the current data source. You can click Data Preview on the right to confirm your selection.
Use Subscription Mode
If you enable subscription mode, a Subscription ID is automatically created. Data is subscribed from DataHub using this ID. This improves stability and performance. Do not delete a subscription ID that is in use from DataHub. Otherwise, the task fails.
Output Fields
Select the fields that you want to sync.
Click the
 icon in the toolbar to save the node.