How to Use the MeetVista on monday.com
This guide will walk you through the steps to access and use MeetVista to enhance your agile workflows and project management experience.
Prerequisite Information
Before using MeetVista, please ensure the following:
- Your device has an updated web browser that supports modern web applications.
- An active internet connection is required for syncing and real-time collaboration features
- You have an active monday account (if you don’t have one, you can sign up during the setup process).
- That you have created a board in your monday account.
- That you have installed the MeetVista app using the app store. These instructions apply to any type of MeetVista Plan, trial or not.
First-Time-Use Instructions
Adding a MeetVista Canvas board view
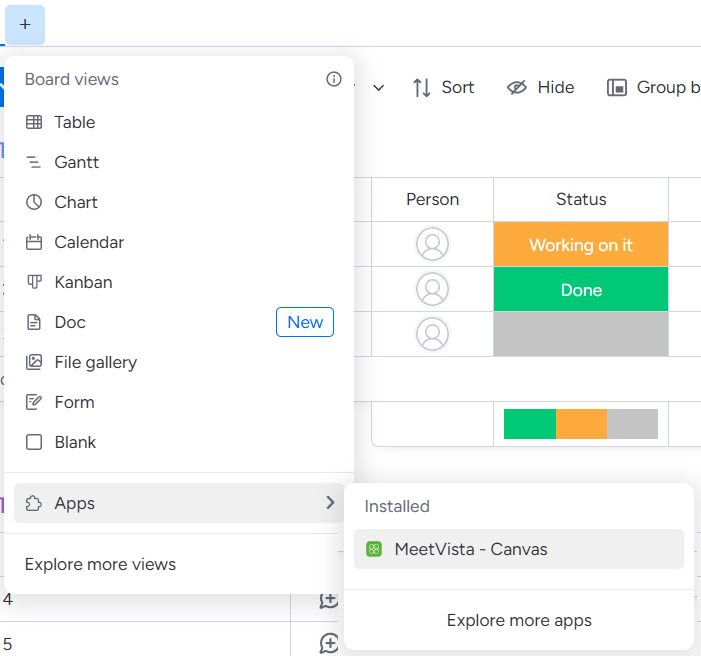
MeetVista is a board view application, to add a new view simply select the target board in the left panel and click on ‘+’ then select ‘apps’ and in the submenu select MeetVista – Canvas. This will add a board view that loads the MeetVista application.
Accessing Your MeetVista Account
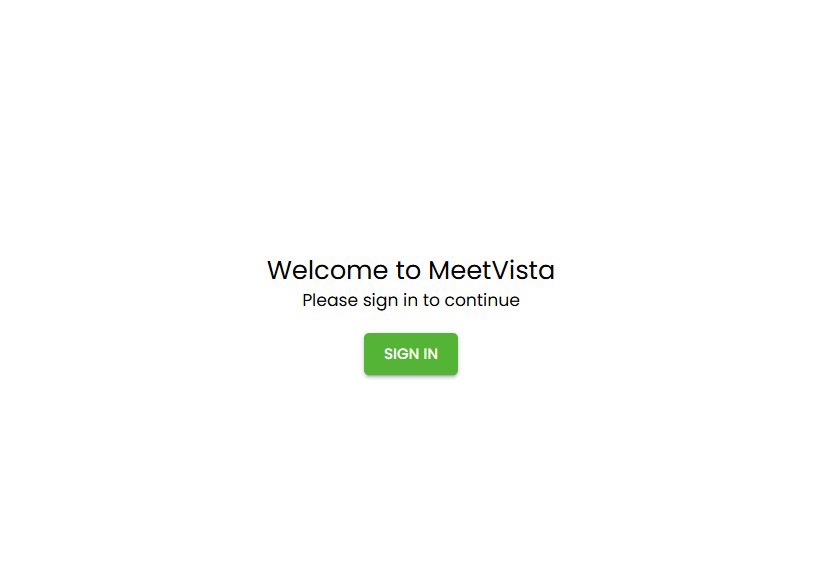
To use MeetVista, each user needs to sign up for a MeetVista account. This is a separate account from your monday account.
- Click on the “Sign in” button, this will open the sign in dialog in a separate window
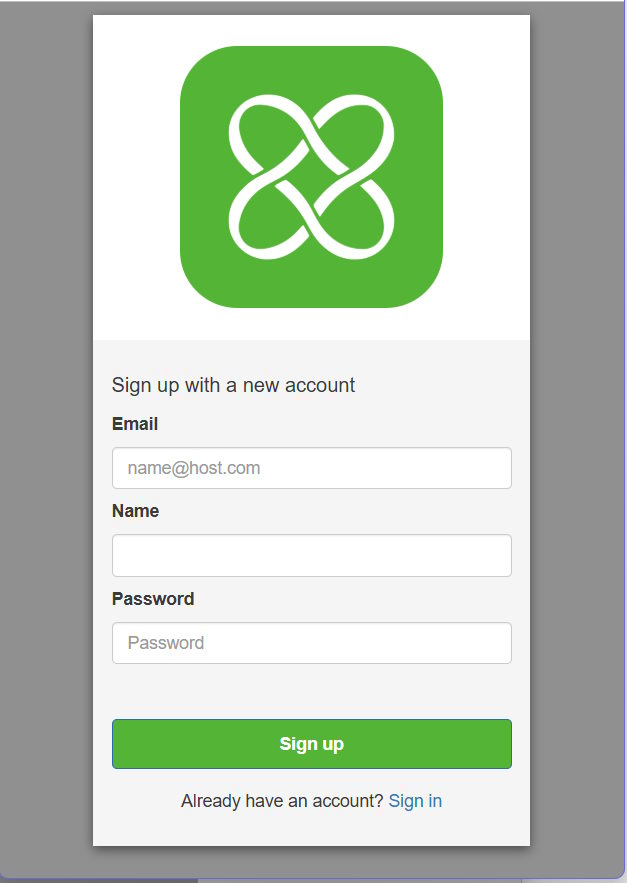
- Sign in with an existing MeetVista account or click “Sign Up” link to create your account.
- Fill out the sign-up form, a valid email address is required.
- Click on “Sign Up” button.
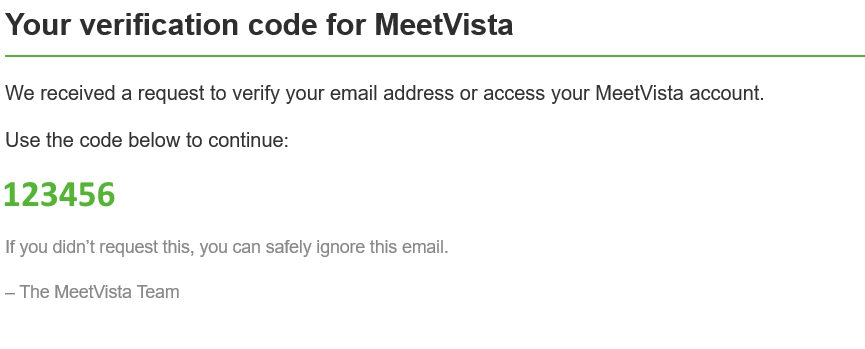
- You will receive an email with a validation code.
- Enter the code in the sign-up dialog and press “Confirm account”.

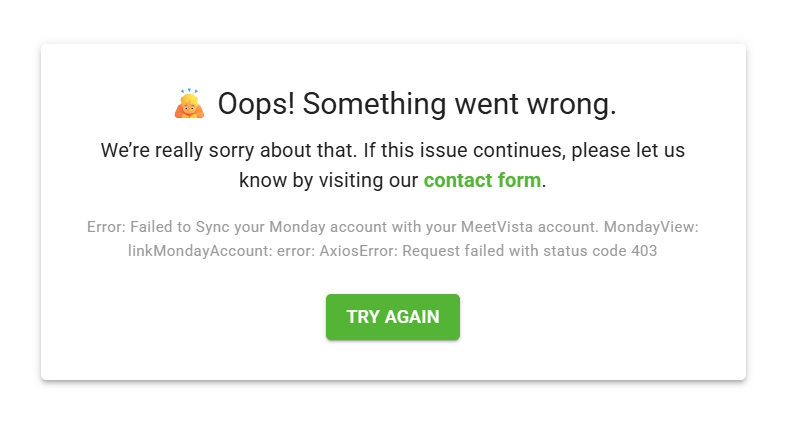
 If you receive error messages:
"1 validation error detected: Value '123456 ' at 'confirmation code' failed to satisfy constraint: Member must satisfy regular expression pattern: [\S]+".
This means that whitespaces have been entered into the dialog, make sure that you only copy/pasted the numbers specified.
Congratulations, you have now created your MeetVista user.
Since this is the first time you sign in/sign up to MeetVista within you monday account a new MeetVista account will automatically be created and associated with your monday account.
The first user who signed up to your MeetVista account will be the account manager for your MeetVista account. See ‘Using the dashboard’ to manage your team.
Creating your first MeetVista board
When you have created a new board view you are asked to associate it with a MeetVista board. This is a one-time step and the next time you open (or another user opens that board view) the app will load the MeetVista board you have selected. To open/create another MeetVista board simply create a new board view.
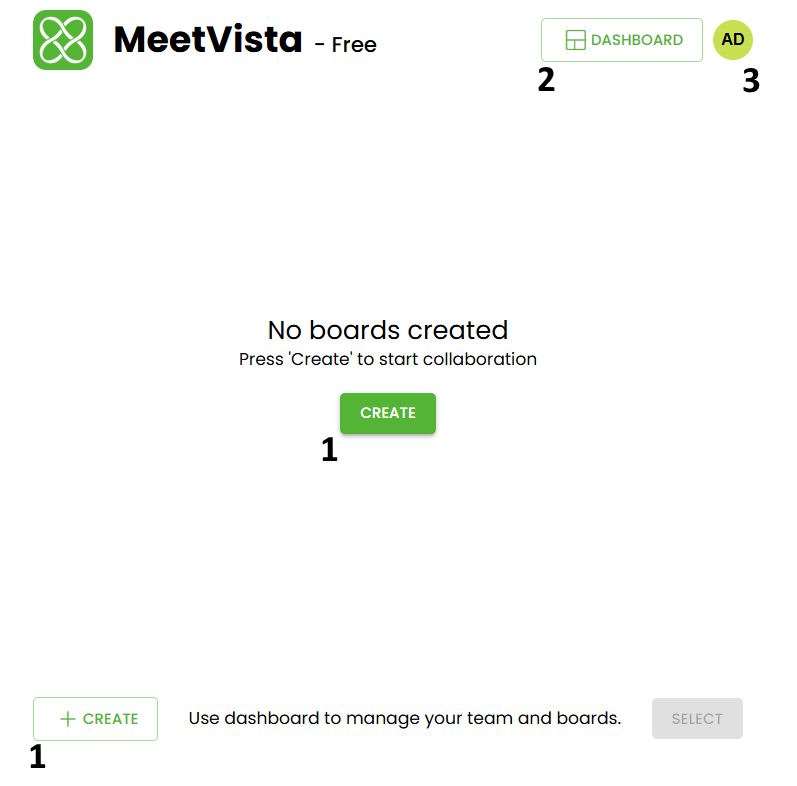
- Creates a new MeetVista board. This will automatically associate the board view with the newly created MeetVista board.
- Opens the MeetVista main dashboard in an external tab.
- Access your user, sign out and other options.
Your MeetVista board will now be loaded into the boardview.
If you already have a MeetVista board and would like to link it to the boardview

- Will associate the selected board with the board view.
- Create a new board to associate to the selected boardview.
Onboarding team members
Other team members from your monday account can onboard MeetVista by simply creating an account or sign in from an existing account within your monday account. This will automatically add a seat in the MeetVista account for that user.
If you receive the following error message while onboarding
 It means your MeetVista account no longer has any available seats. To solve this problem, you need to either:
- Upgrade your MeetVista account to unlock more seats. You can do this from the monday app store
- Use the MeetVista dashboard to remove a user from the MeetVista account to free up a seat.
Using Core Features
When your MeetVista canvas has loaded you should be able to access the main canvas view.
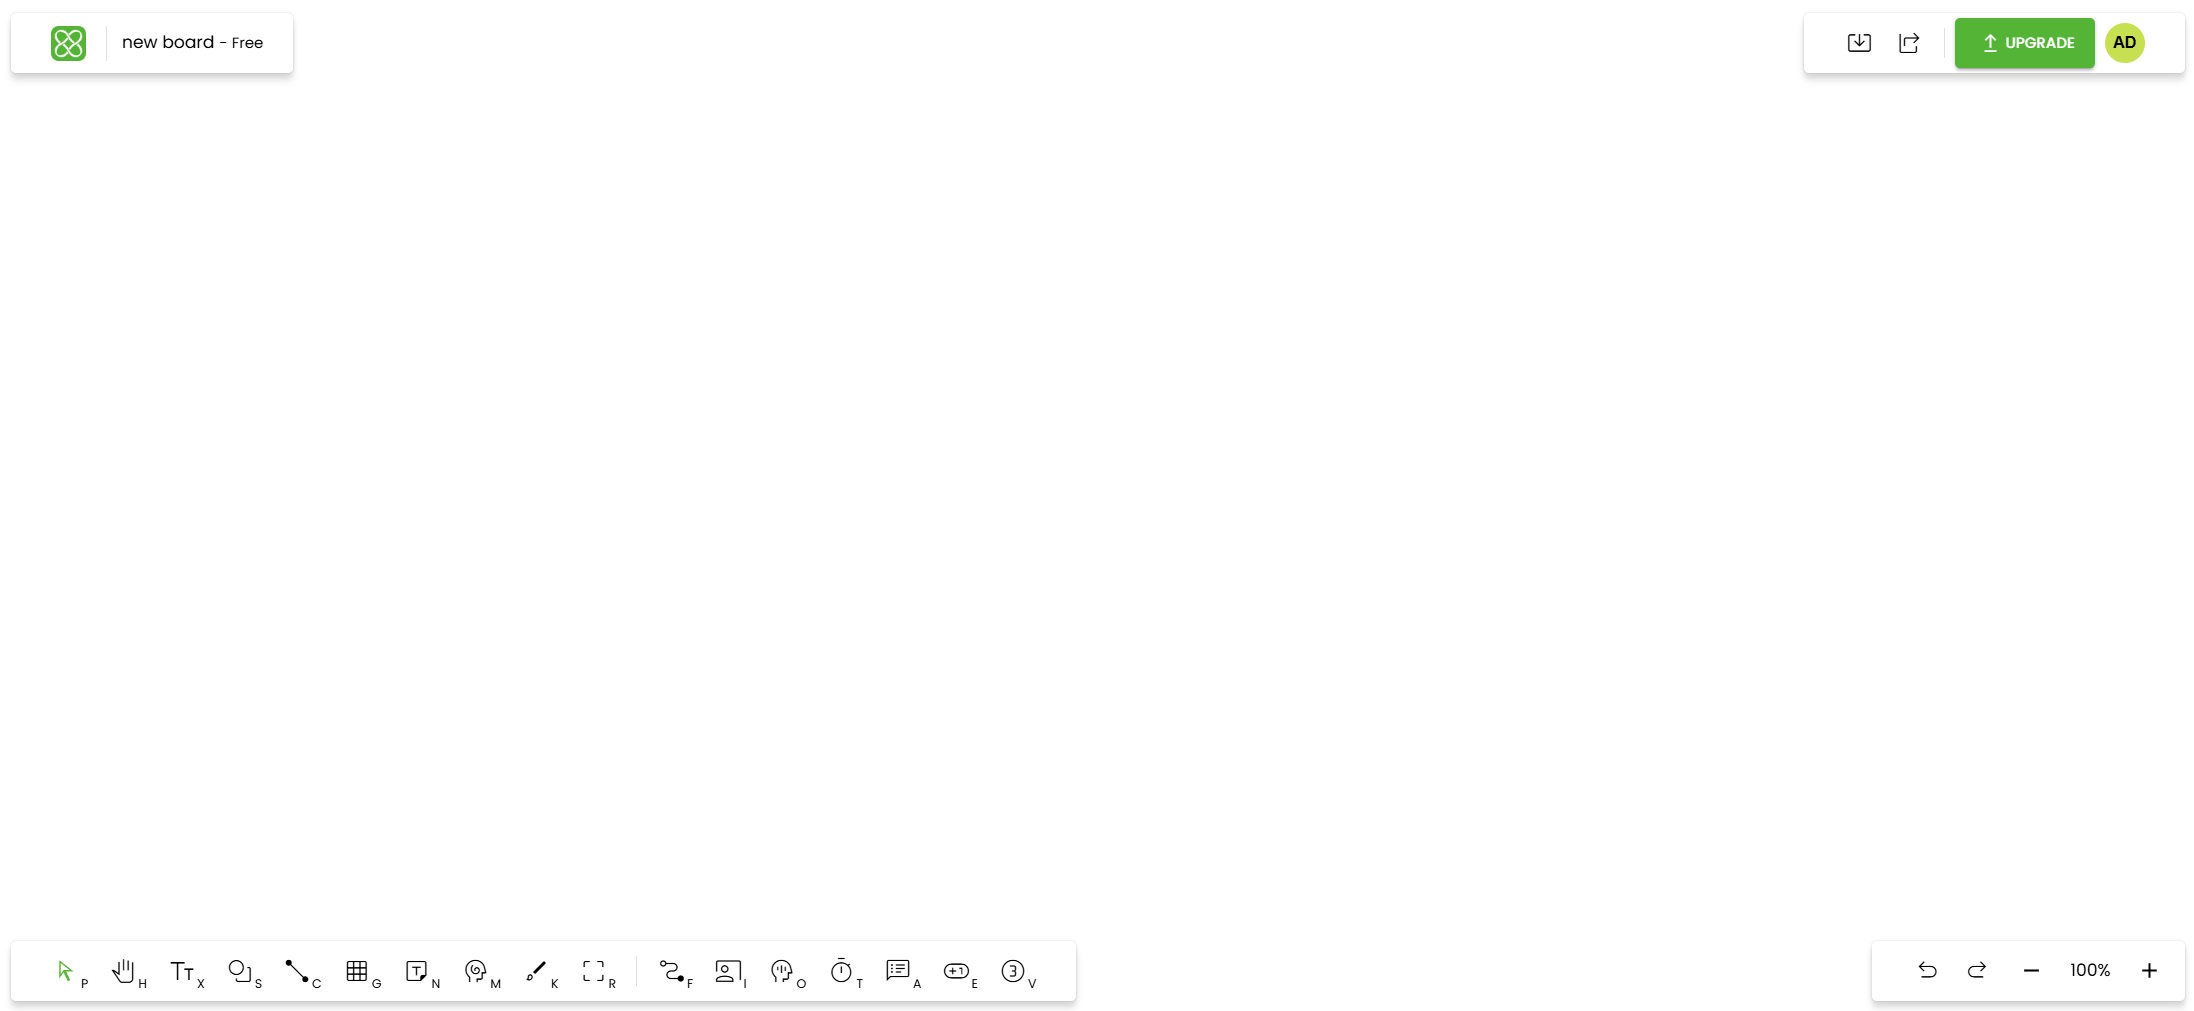
- Top right: Name of the board and the MeetVista logo. Click on the logo to access the dashboard.
- Bottom Right: The main toolbar.
- Bottom Left: Zoom bar.
- Top Right: Tools + Profile menu.
We recommend that for your first board you select a template to get started with an agile workflow.

- P – Pointer Tool
- H – Hand Tool
- X – Text Tool
- S – Shape Tool
- C – Connector Tool
- G – Grid Tool
- N – Sticky Note tools
- M – Mind Map Tool
- K – Marker Tool
- R – Frame Tool
The main toolbar also has the following session tools:
- F – Flow Session: Opens the flow panel, create / play flows
- I – Presentation Session: Opens the presentation panel, create / present directly on the board
- O – Focus Session: Create a focus session.
- T – Timers: Create timers to associate with your sessions.
- A – Agenda: Create Agendas
- E – Estimation Session: Create and manage estimations.
- V – Voting Session: Start a voting session.
Realtime collaboration is a core feature of the application, so no matter what you choose to create any other user watching the same board will see the updates in real time.
Using the Dashboard
The MeetVista Dashboard provides a central place to manage your boards, team, and account. You can create, delete and organize boards, as well as group them into folders. It also lets you manage team members by inviting users, assigning roles, and removing access when needed. Additionally, the dashboard gives you access to account settings, seat usage, and invitation links.
Members Section
The Members section in the MeetVista Dashboard provides a clear overview of user management for an account. Here's a breakdown of the key components:
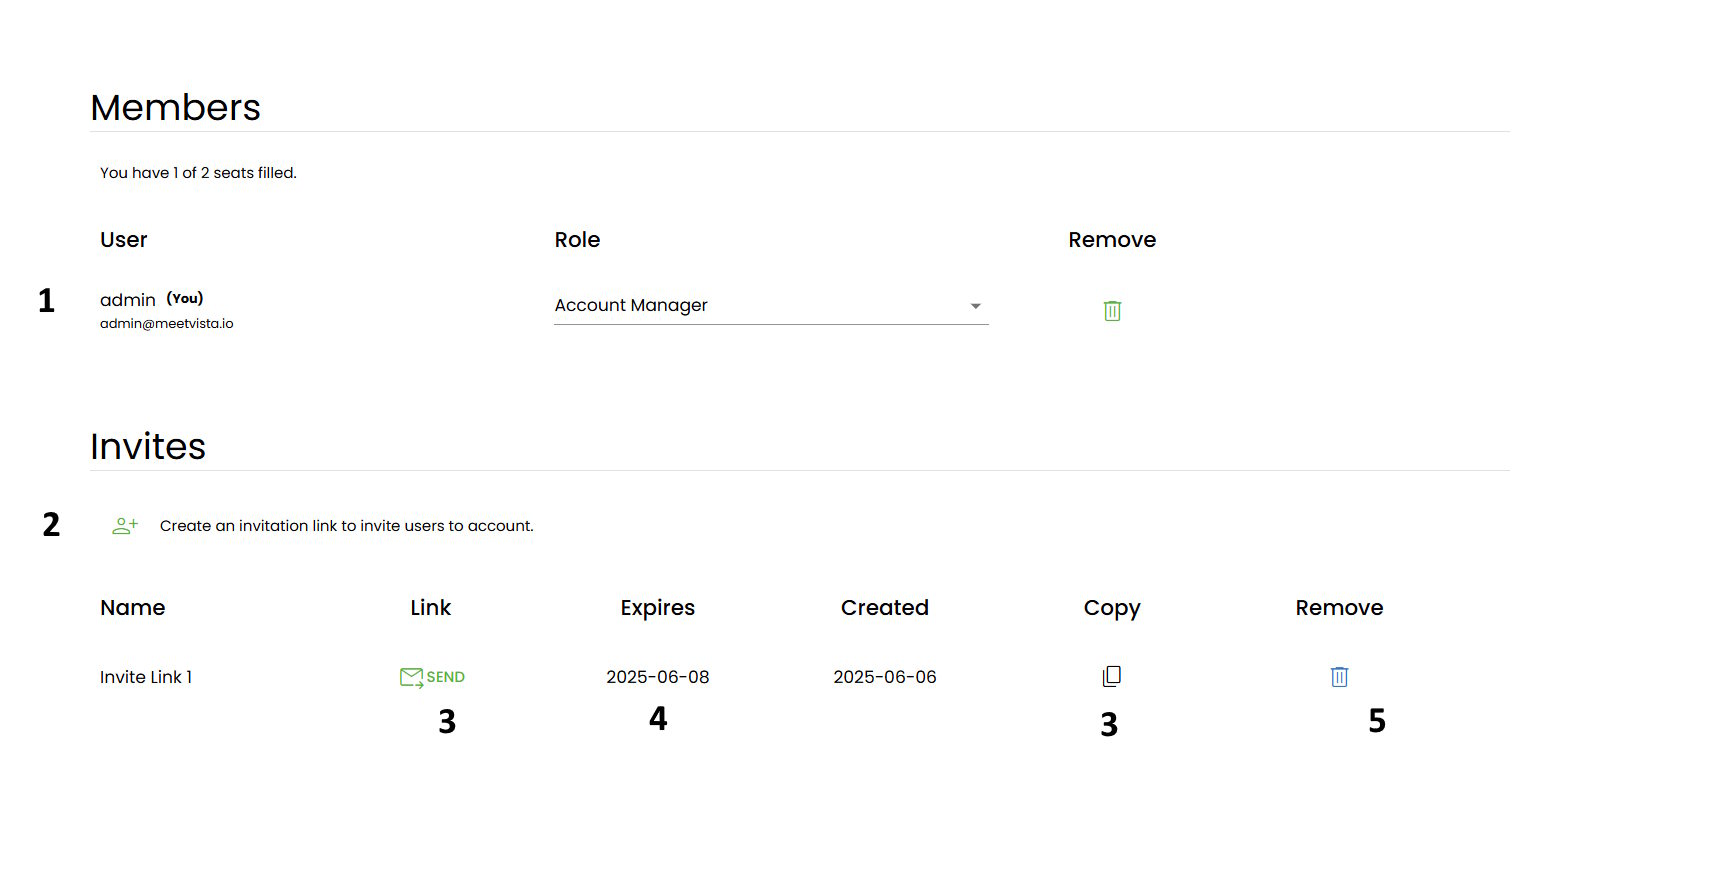
- Seat Info: Indicates how many seats are used out of the total available.
- Member List: Displays all users associated with the MeetVista account, including their names, email addresses, and roles.
- Role Management: Allows you to assign or change roles for each user, such as Accout Manager, Member.
- Seat Usage: Shows how many seats are currently in use and how many are available.
- Remove User: Allows you to remove a user from the account, freeing up a seat for another user.
- Invite Users: Provides an option to invite new users to the account by entering their email addresses.
Home Section
The home section displays all the boards created in this MeetVista account. From here you can:
- Manage boards
- Manage folders
- Arrange boards in folders
Manage your account
The dashboard also contains other sections for managing your account / your profile.
Uninstalling MeetVista
A Monday user with administrator access can uninstall the MeetVista app from the monday.com platform. Before doing so please note:
- This will irrevocably remove all data associated with your MeetVista account.
- This will disband your team.
- This will remove all boards you have created / shared.
You can still access the MeetVista service by reinstalling the MeetVista App using the app store; however, all your data has been erased during the previous uninstallation and cannot be recovered.
Need Help?
If you encounter any issues or have questions, MeetVista support is here to assist you!
- Visit the Help Center
- Contact support directly through the app’s “Contact Us” section.
- Email: support@meetvista.io
Thank you for choosing MeetVista! We’re excited to help you streamline your agile workflows and achieve more.