Django is a Python framework that makes it easier to create web sites using Python.
py -m venv .venv py -m pip install --upgrade pip py -m pip --version .venv\Scripts\activate dectivate py -m pip install Django django-admin startproject DjangowithTomar python manage.py runserver python manage.py runserver 80001 after virtual environment create a folder views.py and import HttpResponse from django.http
from django.http import HttpResponsefrom django.http import HttpResponse def home(request): return HttpResponse("Hi This is Home Page") def about(request): return HttpResponse("Hi This is about Page") def service(request): return HttpResponse("Hi This is service Page") def contact(request): return HttpResponse("Hi This is contact Page")from ./ import viewsfrom ./ import views urlpatterns = [ path('', views.home, name='home') path('/about', views.about, name='about') path('/service', views.service, name='service') path('/contact', views.contact, name='contact') ] python manage.py runserver under main project folder (root folder) you can create a folder to templates name for contain html files
under main project folder (root folder) you can create a folder to static name for contain css, javascript filesfrom django.http import HttpResponsefrom django.shortcut import render # Example 01 def home(request): return render (request, 'index.html') # if the html file name are index.html # Example 02 : if files contain in folder like website def about(request): return render (request, 'website/index.html') # in DIRS you put file name templates TEMPLATES = [ { 'BACKEND': 'django.template.backends.django.DjangoTemplates', 'DIRS': ['templates'], # its mandatory to render templates files 'APP_DIRS': True, 'OPTIONS': { 'context_processors': [ 'django.template.context_processors.debug', 'django.template.context_processors.request', 'django.contrib.auth.context_processors.auth', 'django.contrib.messages.context_processors.messages', ], }, }, ]{% load static %} <!--Load static engine --> <!DOCTYPE html> <html lang="en"> <head> <meta charset="UTF-8"> <meta name="viewport" content="width=device-width, initial-scale=1.0"> <title>Django</title> <!--CSS inject in html like that --> <link rel="stylesheet" href="{% static 'style.css' %}"> </head> <body> <h1>Django with Tomar</h1> </body> </html>import os # import os library for from pathlib import Path STATIC_URL = 'static/' # Set this type path STATICFILES_DIRS = [os.path.join(BASE_DIR, 'static')]first of all go to root folder where you can see manage.py file by terminal ls command after that run command
python manage.py startapp myApp Go to settings.py file where you see by default installed apps you join the new app name that you create like myApp
INSTALLED_APPS = [ 'django.contrib.admin', 'django.contrib.auth', 'django.contrib.contenttypes', 'django.contrib.sessions', 'django.contrib.messages', 'django.contrib.staticfiles', 'myApp', ]you can use templates folder which is already exist in root directory or you can create a folder under new app (like - myApp)
press (ctrl + ,) => go to Emmet include Language and set in item section django-html and in value section html
first you should know that tailwind install in Django without error with pip so please check your pip working or not if not working then install again with following two command but use any one command.
python -m pip install --upgrade pip python -m ensurepip --upgrade pip install django-tailwind pip install 'django-tailwind[reload]' Run that command under root folder where manage.py available
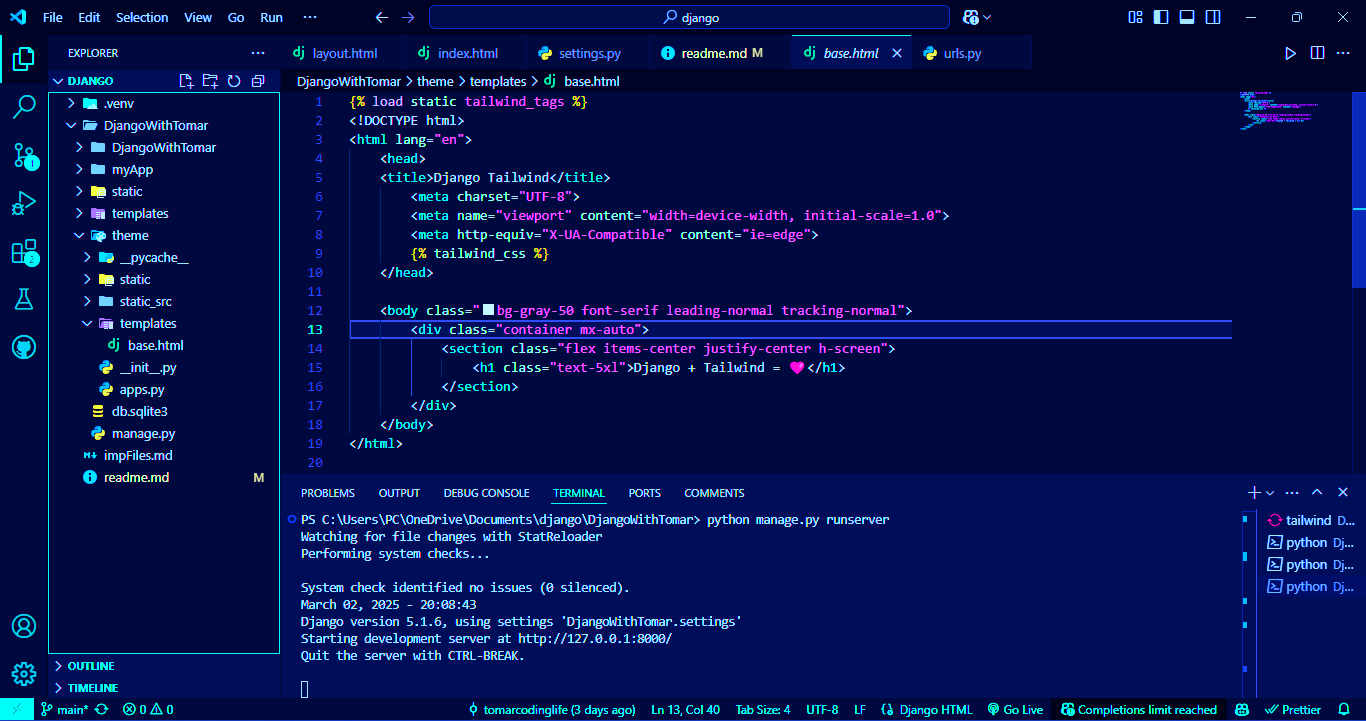
python manage.py tailwind init INSTALLED_APPS = [ 'django.contrib.admin', 'django.contrib.auth', 'django.contrib.contenttypes', 'django.contrib.sessions', 'django.contrib.messages', 'django.contrib.staticfiles', 'myApp', 'tailwind', # add it manualy in setting.py of root folder ] # add that ip because now you have two server after tailwind installpython manage.py tailwind install INSTALLED_APPS = [ 'django.contrib.admin', 'django.contrib.auth', 'django.contrib.contenttypes', 'django.contrib.sessions', 'django.contrib.messages', 'django.contrib.staticfiles', 'myApp', 'tailwind', # add it manualy in setting.py of root folder 'theme', # add it as per your theme name (default i lkie theme like that) ] TAILWIND_APP_NAME = 'theme' #add that after theme folder create if your theme folder name theme INTERNAL_IPS = ['127.0.0.1'] NPM_BIN_PATH = "C:/Program Files/nodejs/npm.cmd" # it add as per own system npm location # add that ip because now you have two server after tailwind installNow you want reload webpage or web browser automatically for both tailwind and django so In this case you will have to use a separate terminal for Tailwind css and a separate terminal for Django. As shown in the picture above
First Run this command in seprate terminal
python -m pip install django-browser-reload Ensure you have "django.contrib.staticfiles" in your INSTALLED_APPS
Add django-browser-reload to your INSTALLED_APPS
INSTALLED_APPS = [ ..., "django_browser_reload", ..., ]Include the app URLs in your root URLconf
from django.urls import include, path urlpatterns = [ ..., path("__reload__/", include("django_browser_reload.urls")), ]Add the middleware
MIDDLEWARE = [ # ... "django_browser_reload.middleware.BrowserReloadMiddleware", # ... ]After that run separate terminal (its tailwind updated automatically)
python manage.py runserver After that run separate terminal (its virtual environment reload automatically)
.venv/Scripts/activate python manage.py migrate python manage.py runserver After migrate and runserver you can see (server run ip/admin) page
python manage.py createsuperuser After that set username its mandatory and email is optional and set password with special character and character should be more than 8 character after that you can login admin page using credentials
python manage.py changepassword username After that set password with special character and character should be more than 8 character after that you can login admin page using credentials
Now you can write models (models.py) in own created apps as per your nee like bellow mention
from django.db import models from django.utils import timezone class Course(models.Model): # This is a model class Required_Language = [ # This is a list of tuples ('JS', 'Javascript'), ('PY', 'Python'), ('CPP', 'C++'), ('C#', 'C Sharp'), ('Java', 'Java'), ('DB', 'Database'), ] course_Name = models.CharField(max_length=30) # This is a char field thumbnails = models.ImageField(upload_to = 'media/') #This is an image field (pillo install for image handle) course_publish_date = models.DateTimeField(default=timezone.now) # This is a date time field Language_Required = models.CharField(max_length=4, choices=Required_Language) # This is a choice field Course_Description = models.TextField() # This is a text field # it is used to display the name of the course in the admin panel def __str__(self): return self.course_Name first step install pillo as per bellow command after that setup in seting.py files and finally set urls.py in root folder
python -m pip install Pillow in setting.py in same root file
MEDIA_URL = '/media/' MEDIA_ROOT = os.path.join(BASE_DIR, 'media')in urls.py in same root file
from django.conf import settings from django.conf.urls.static import static urlpatterns = [ ] + static(settings.MEDIA_URL, document_root=settings.MEDIA_ROOT)python manage.py makemigrations myApp python manage.py migrate after writing models if you want to show models in admin pannel than you can follow step as per bellow mention in admin.py
# Register your models here. from .models import Course admin.site.register(Course) # This is a model classafter writing models if you want to show models in frontend than you can follow step as per bellow mention in views.py
# Register your models here. def myApp(request) : courses = Course.objects.all() # all means its return array return render(request, 'myApp/django.html', {'courses': courses})after that you can import layout block and import models in app (like - myApp) templates html files
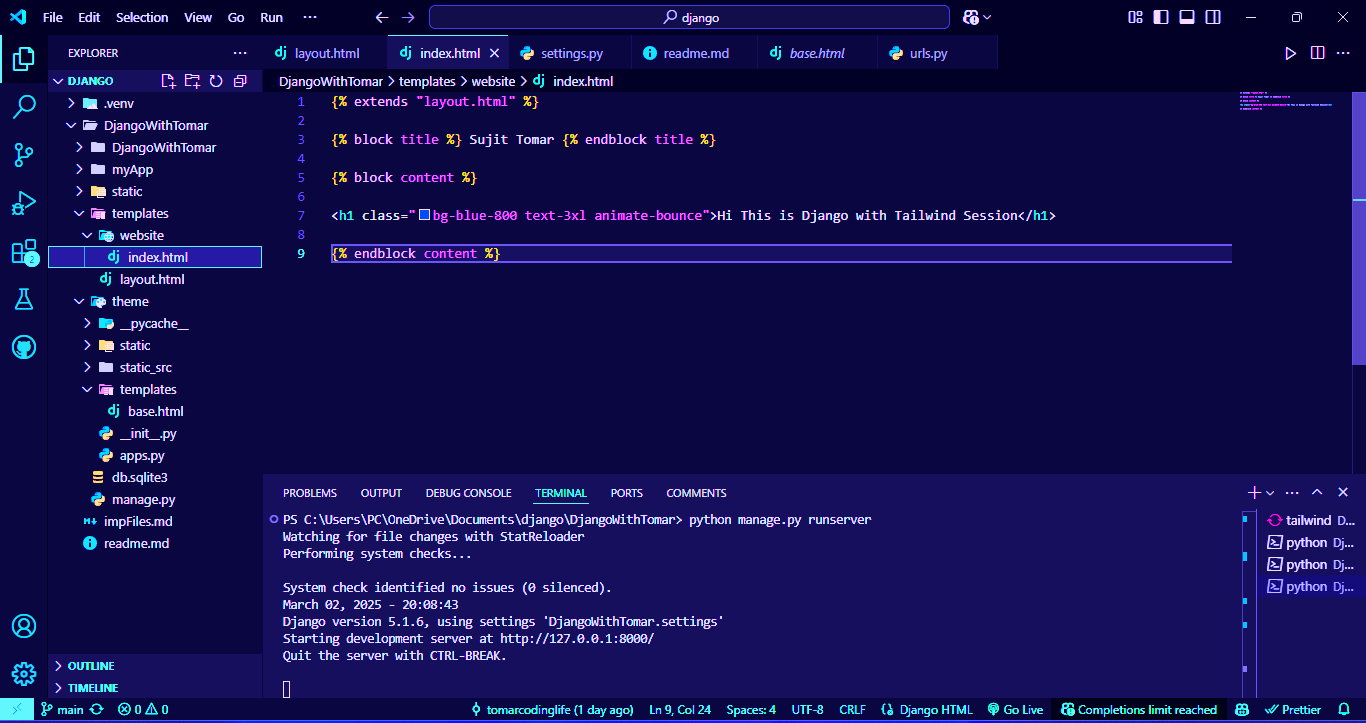
{% extends "layout.html" %} {% block title %} Sujit Tomar {% endblock title %} {% block content %} <h1 class="font-bold size-20 bg-orange-400 text-black h-full w-full p-2">Hi This is Django with My App Page</h1> {% for course in courses %} <div class="inline-flex flex flex-col items-center justify-center p-2 m-4 bg-gray-200 rounded-lg shadow-lg w-80"> <img class="h-40 w-96 " src="{{course.thumbnails.url}}" alt=""> # required Pillow for image handle <h3 class="text-gray-950 p-2 font-bold">{{course.course_Name}}</h3> <p class="text-black text-justify ">{{course.Course_Description}}</p> <button class="bg-orange-400 rounded-md p-1 w-50 text-black">Buy Now</button> </div> {% endfor %} {% endblock content %} set views in views.py
from django.shortcuts import render from .models import Course from django.shortcuts import get_object_or_404 # Create your views here. def myApp(request) : courses = Course.objects.all() return render(request, 'myApp/home.html', {'courses': courses}) def course_detail(request, course_id): course=get_object_or_404(Course, id=course_id) return render (request, 'myApp/course_detail.html', {'course': course}) # create course_details.html in myApp which is availabel in templates folderafter that you set url in urls.py
from django.urls import path from . import views urlpatterns = [ path('', views.myApp, name = 'myApp Home Page'), path('<int:course_id>/', views.course_detail, name = 'course_detail'), ]After that you can set variables and templates as per layout or independently
{% extends "layout.html" %} {% block title %} Course Details Page {% endblock title %} {% block content %} <h1 class="font-bold size-20 bg-orange-400 text-black h-full w-full p-2">Course Details Page</h1> <div class="items-center justify-center p-2 m-4 bg-gray-200 rounded-lg shadow-lg w-80"> <img class="h-40 w-96 " src="{{course.thumbnails.url}}" alt=""> <h3 class="text-gray-950 p-2 font-bold">{{course.course_Name}}</h3> {% comment %} <p class="text-black text-justify ">{{course.course_Description}}</p> {% endcomment %} <h3 class="text-black text-justify ">INR {{course.course_Price}}/-</h3> <p>{{course.course_Description}}</p> <a href="{% url "course_detail" course.id %}"> # url template <button class="bg-orange-400 rounded-md p-1 w-full text-black"> Add to Cart {% comment %} Buy Now {% endcomment %} </button> </a> </div> {% endblock content %} if you want to open new page when someone click on course button and show more details
Create a view (view.py)
from django.shortcuts import render from .models import Course from django.shortcuts import get_object_or_404 # Create your views here. def myApp(request) : courses = Course.objects.all() return render(request, 'myApp/home.html', {'courses': courses}) def course_detail(request, course_id): course=get_object_or_404(Course, id=course_id) return render (request, 'myApp/course_detail.html', {'course': course})Create a new html file for render under app (myApp) templates
Like course_detail.html
Manage url (urls.py)
from django.urls import path from . import views urlpatterns = [ path('', views.myApp, name = 'myApp Home Page'), path('<int:course_id>/', views.course_detail, name = 'course_detail'), ]Now you can design as per your requirement in render html page (course_detail.html)
{% extends "layout.html" %} {% block title %} Course Details Page {% endblock title %} {% block content %} <h1 class="font-bold size-20 bg-orange-400 text-black h-full w-full p-2">Course Details Page</h1> <div class="items-center justify-center p-2 m-4 bg-gray-200 rounded-lg shadow-lg w-80"> <img class="h-40 w-96 " src="{{course.thumbnails.url}}" alt=""> <h3 class="text-gray-950 p-2 font-bold">{{course.course_Name}}</h3> {% comment %} <p class="text-black text-justify ">{{course.course_Description}}</p> {% endcomment %} <h3 class="text-black text-justify ">INR {{course.course_Price}}/-</h3> <p>{{course.course_Description}}</p> <a href="{% url "course_detail" course.id %}"> <button class="bg-orange-400 rounded-md p-1 w-full text-black"> Add to Cart {% comment %} Buy Now {% endcomment %} </button> </a> </div> {% endblock content %} Now you can upload data and dispaly on render page 👍


