1
Open the Network Traffic Tab
Navigate to the Network Traffic tab located on the right sidebar.
2
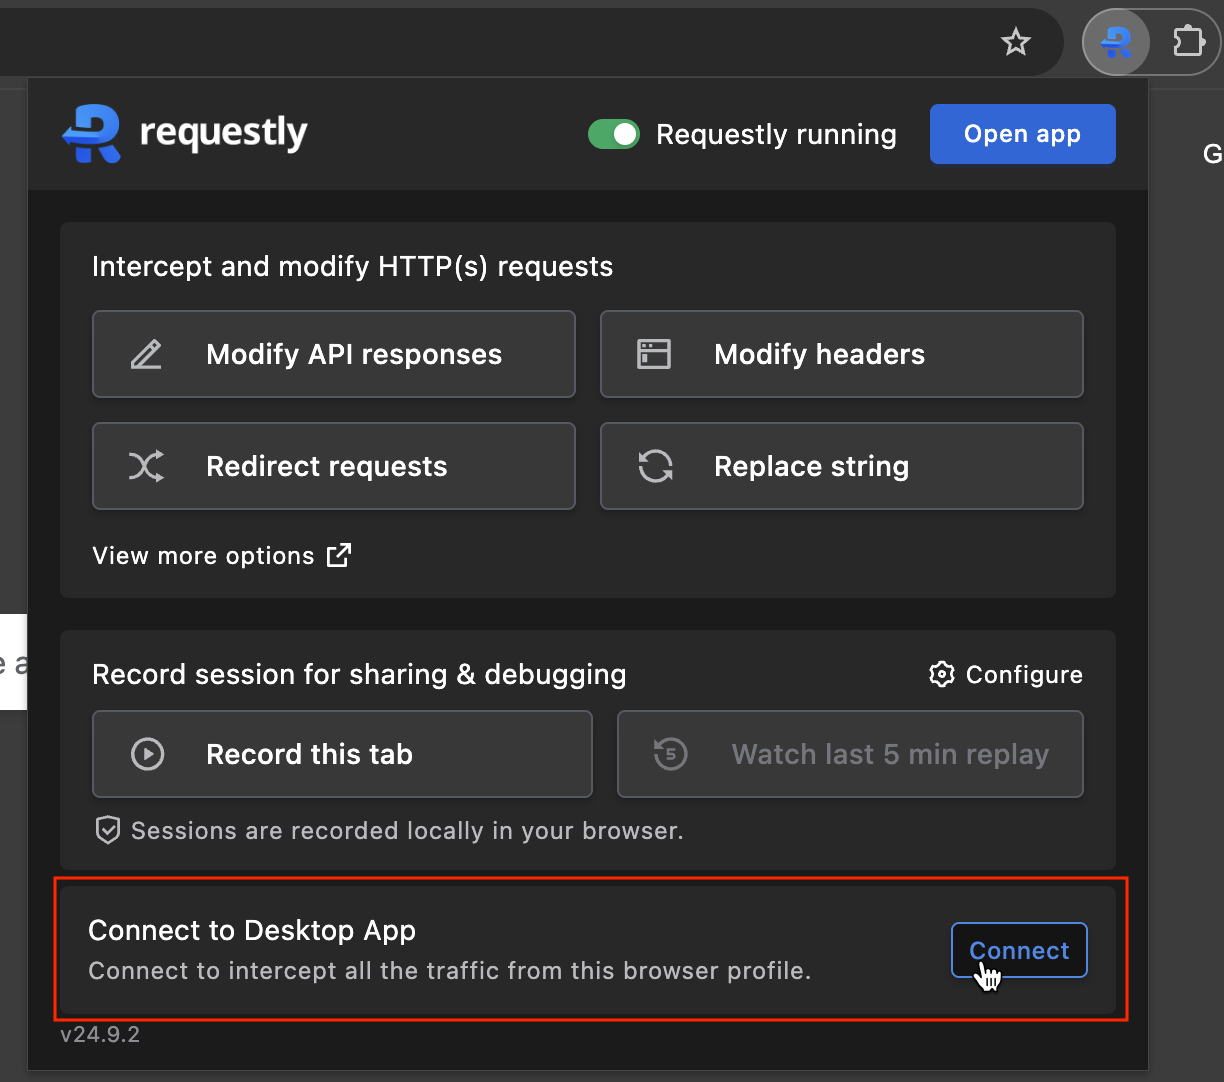
Click the Connect Apps Button
Click on any of the 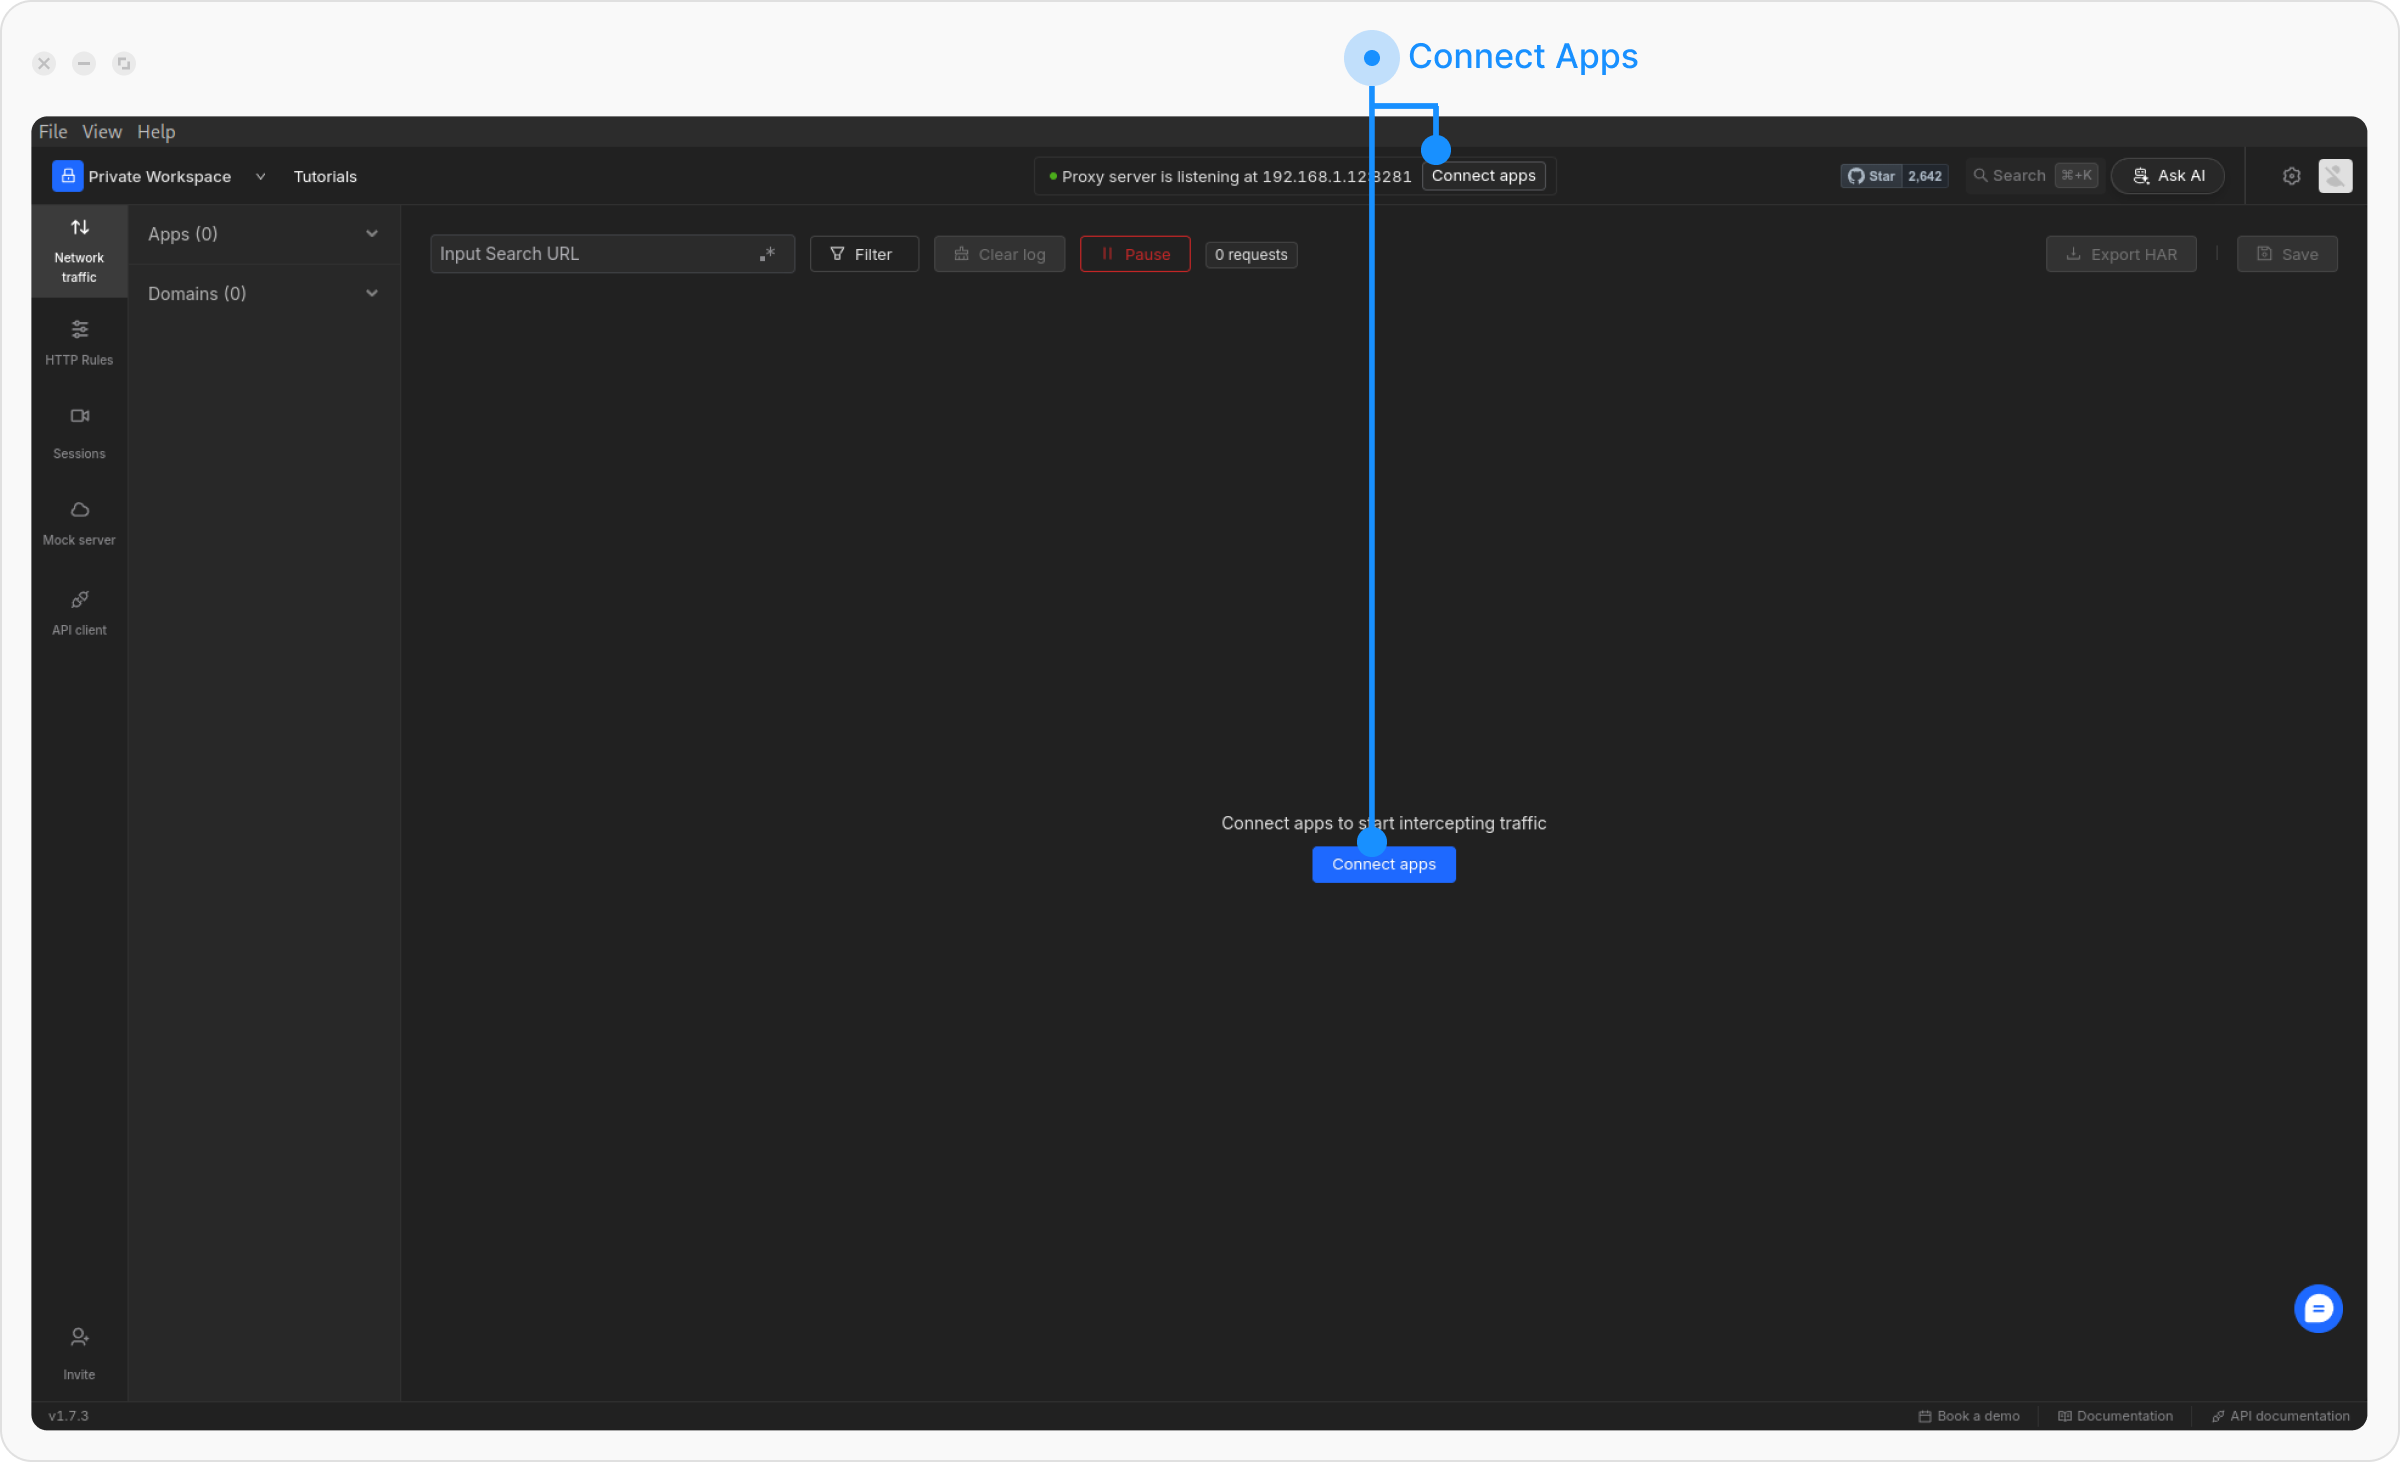
Connect Apps buttons, as shown below:3
Launch a Browser with Requestly Proxy
Select your preferred browser from the Connect Panel and click Launch/Open. This will start a new browser instance configured with the Requestly proxy.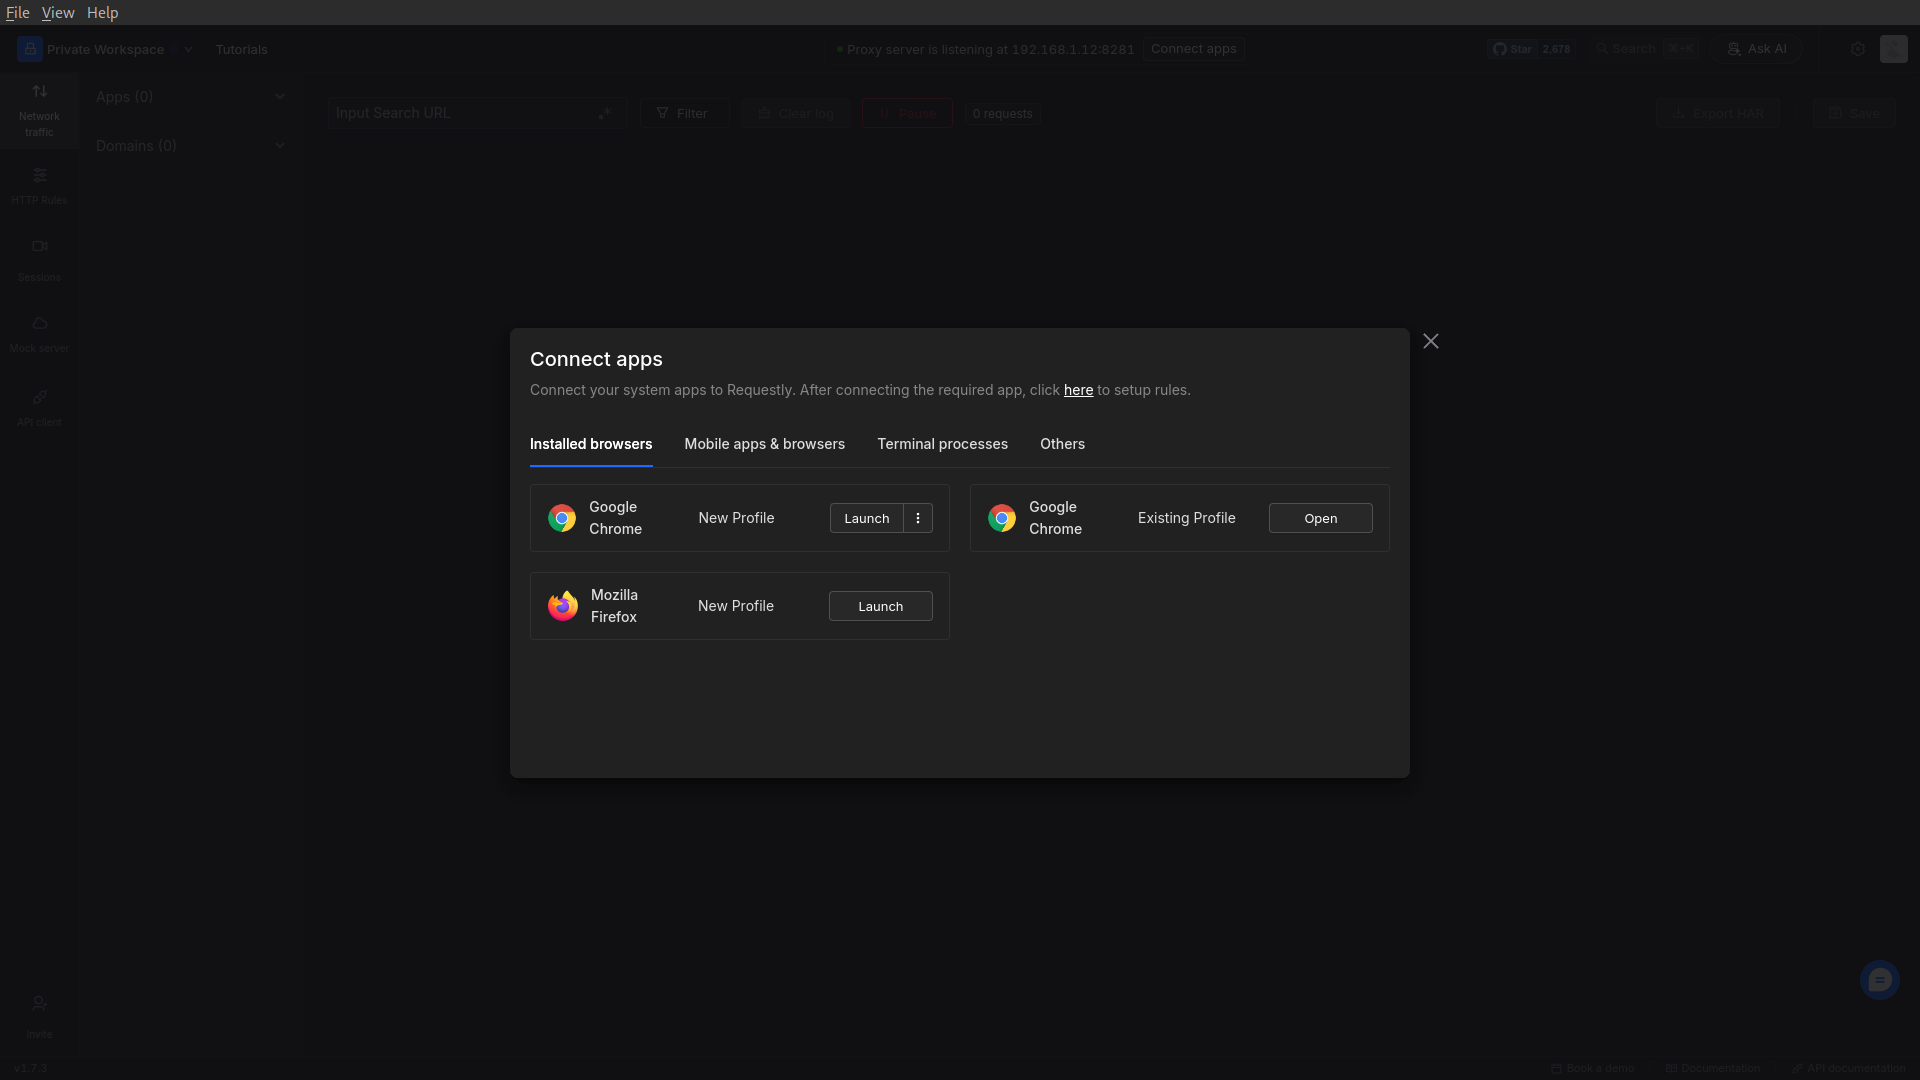
- For Chromium-based browsers, Requestly applies the
--proxy-serverflag, configuring the browser to route all network traffic through the Requestly proxy server - Then requestly automatically installs CA certificate to your system’s certificate store.
4
Verify Proxy Setup
The newly launched browser instance will automatically open amiusing.requestly.io. A success message on this page confirms that the browser is using Requestly’s proxy.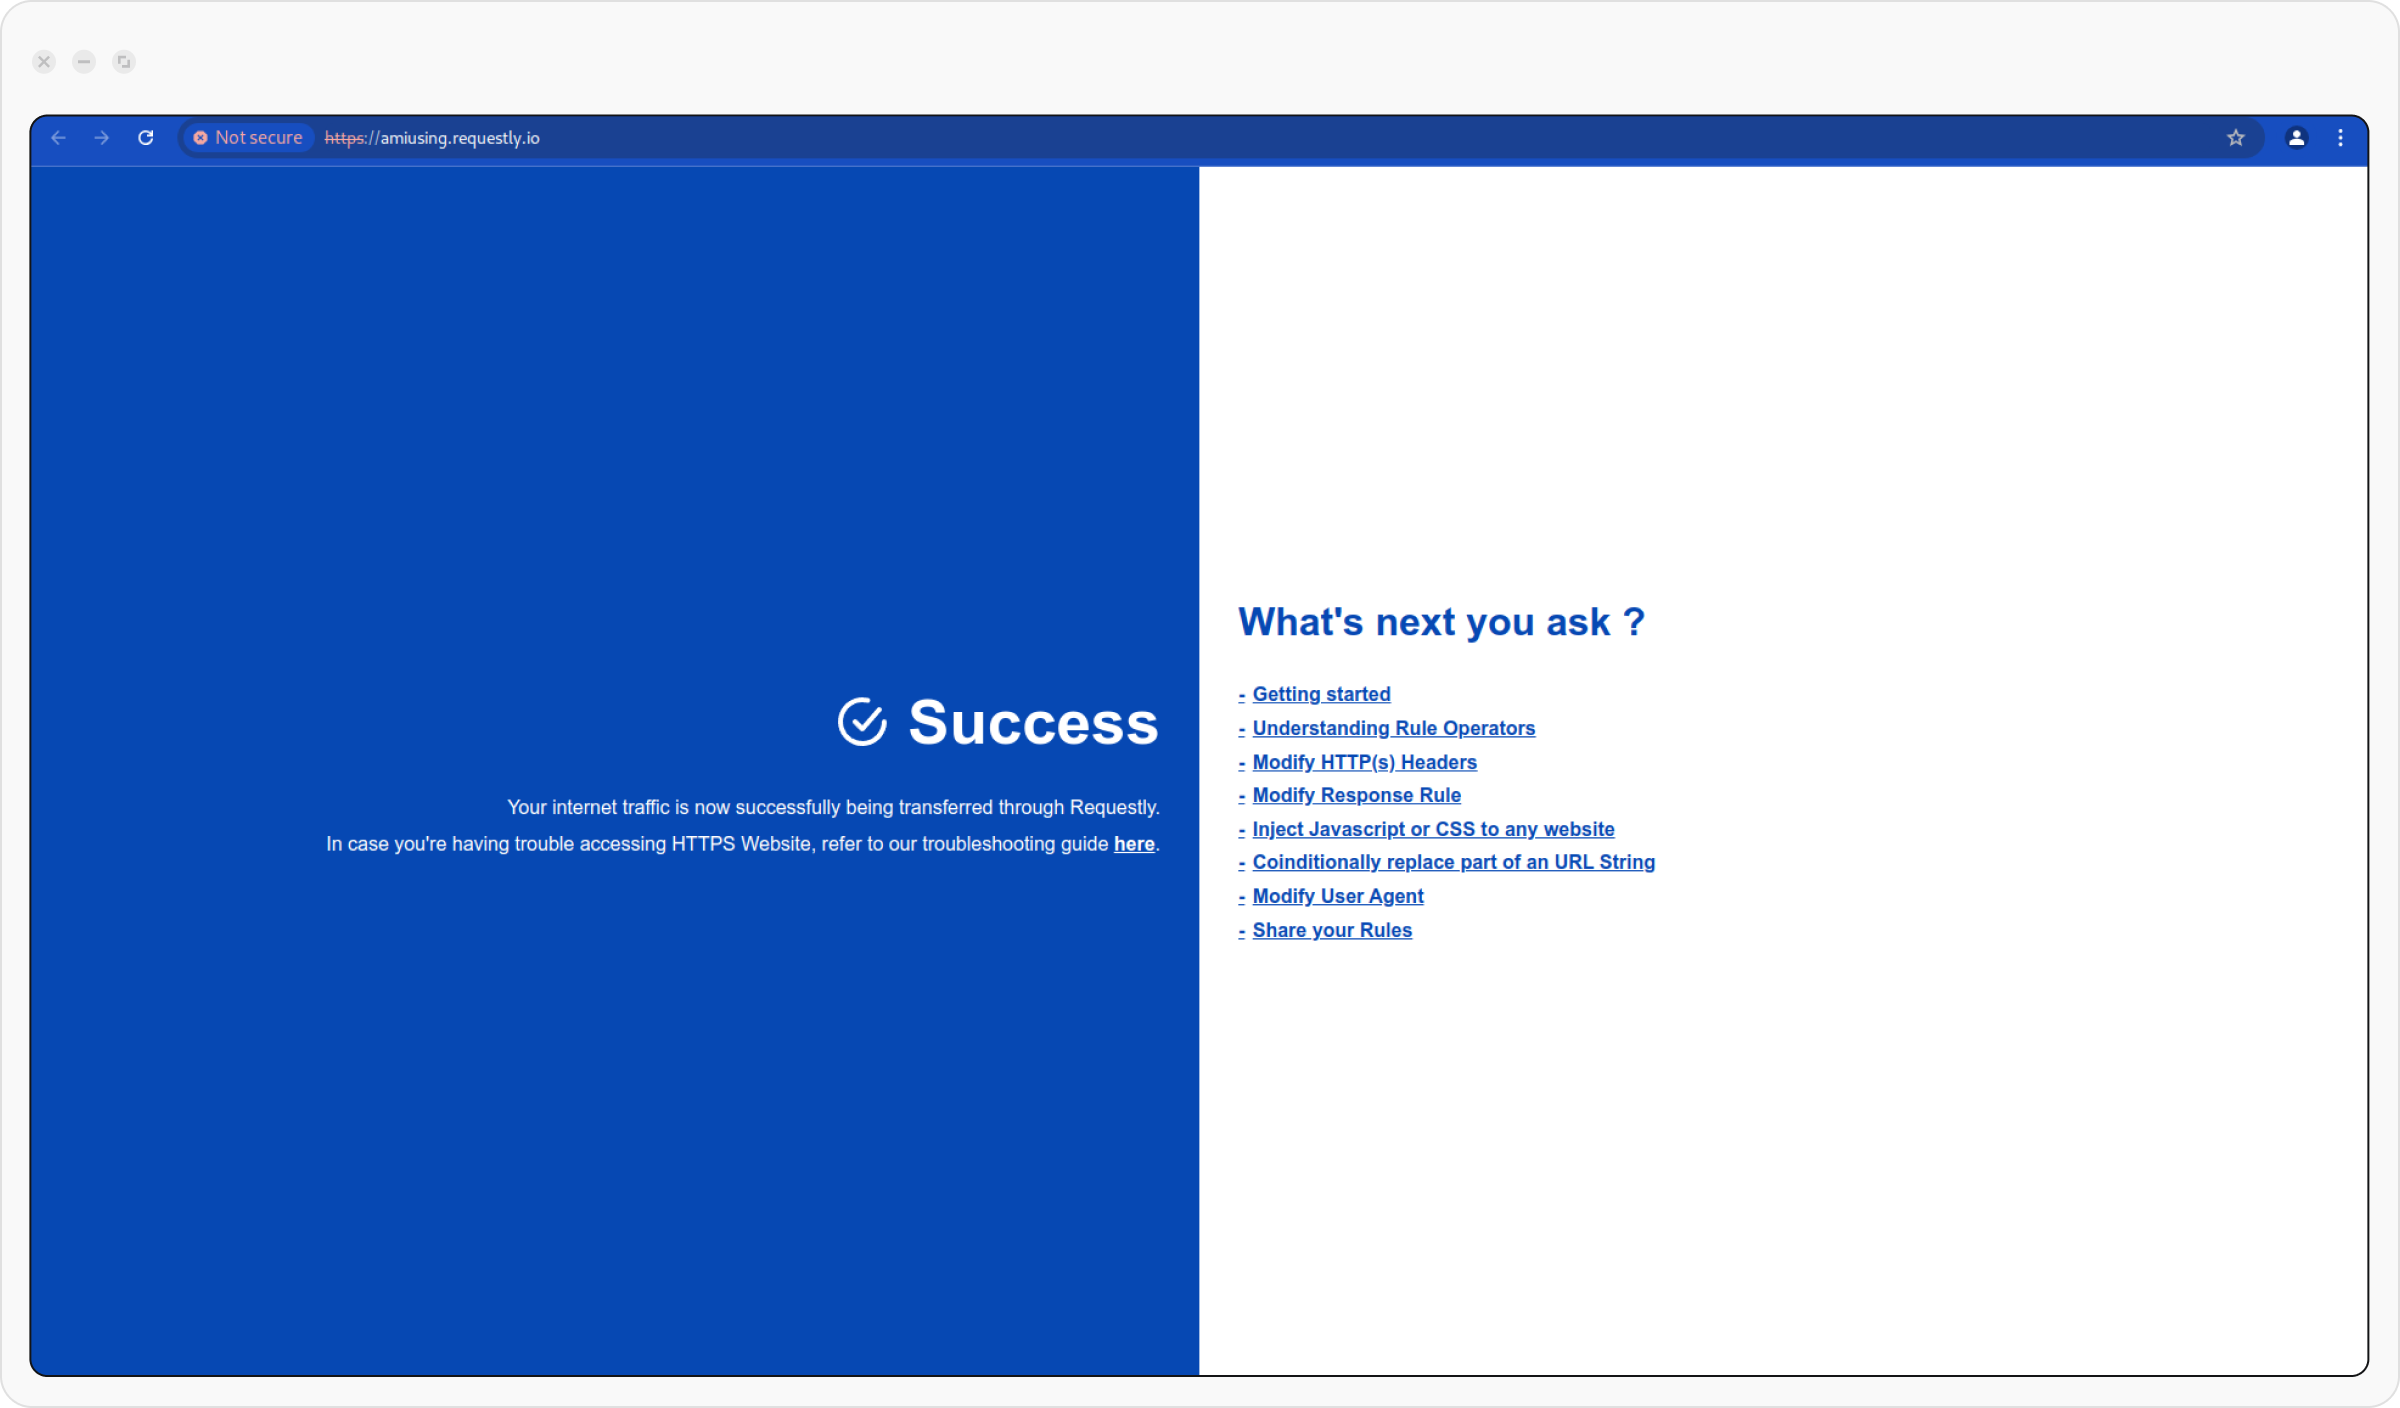
5
View Captured Traffic
Return to the Requestly dashboard to review all captured network traffic in the Network table.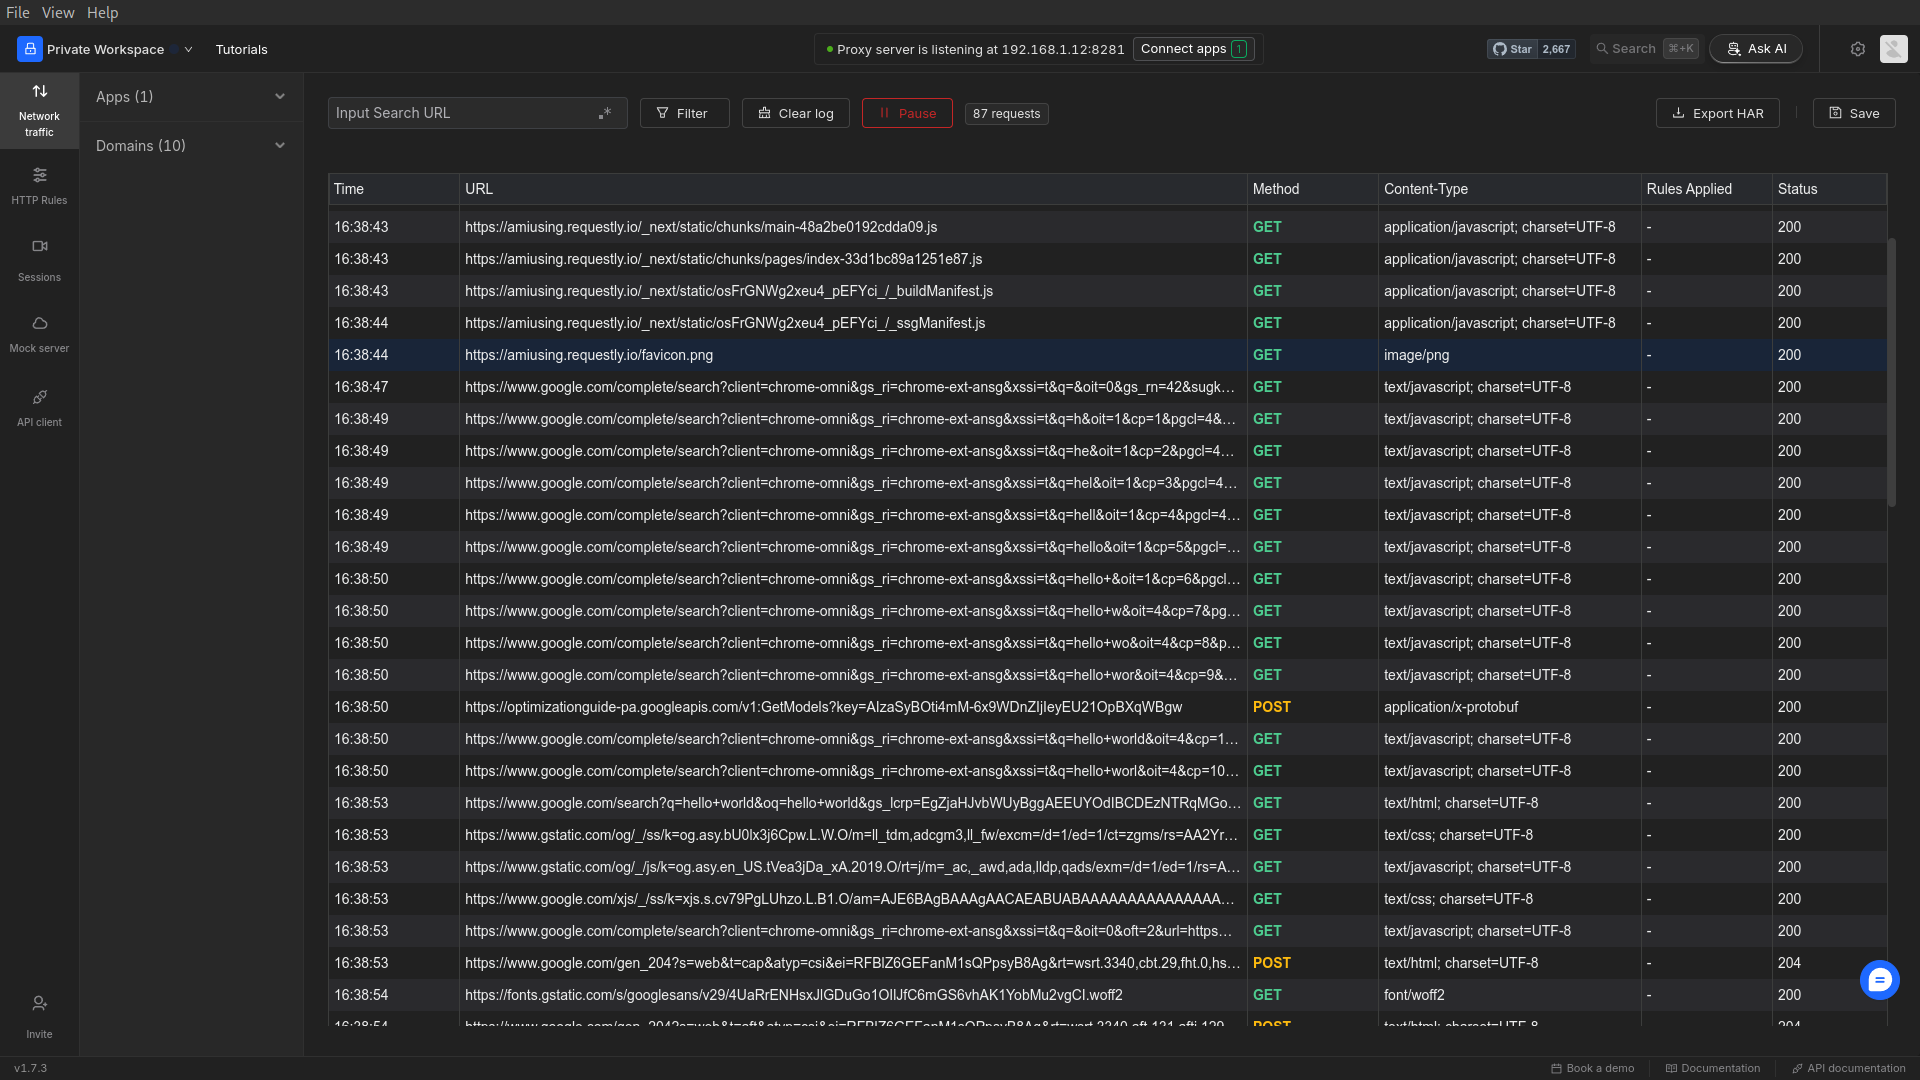
Supported Browsers & Profiles
The Connect Panel shows a list of browsers that Requestly supports. You can select from various profiles for browsers such as Google Chrome, Firefox, and Safari. Here are the details of each browser and its profile options:- Google Chrome (New Profile): Launch a new browser profile without any pre-configured settings, logins, or extensions. This is ideal for testing requests in a clean environment.
- Google Chrome (Existing Profile): Use an existing Chrome profile to connect, keeping all your extensions, settings, and history intact.
- Firefox: Connect to Firefox for testing your network requests on this browser. it will launch a new profile with a clean environment.
- Arc: Arc is another modern browser supported by Requestly. You can create a new profile or use an existing one.
- Safari: Connect to the Safari browser, clicking the connect button will open a new Safari window.
When you launch Safari from Requestly, it sets a system-wide proxy due to technical constraints. Make sure to turn it off after done debugging
Connect existing browser profile
You can connect your existing browser profile to the desktop app using the Requestly extension.Available on desktop app version >=1.7.4
Steps to connect using browser extension
- Launch the desktop app
- Open the Requestly extension popup in the browser profile you want to connect.
- You should see a connect button in the popup to connect with the desktop app.
- Click on the button and the desktop app starts intercepting the traffic.
Custom Browser Launch Options
Requestly offers custom browser launch options for certain browsers, specifically Chromium-based ones. These options allow you to tweak the behavior of the browser during interception. Use the buttons next to the browser selection to customize the launch options. Here’s a quick rundown of the preset configurations: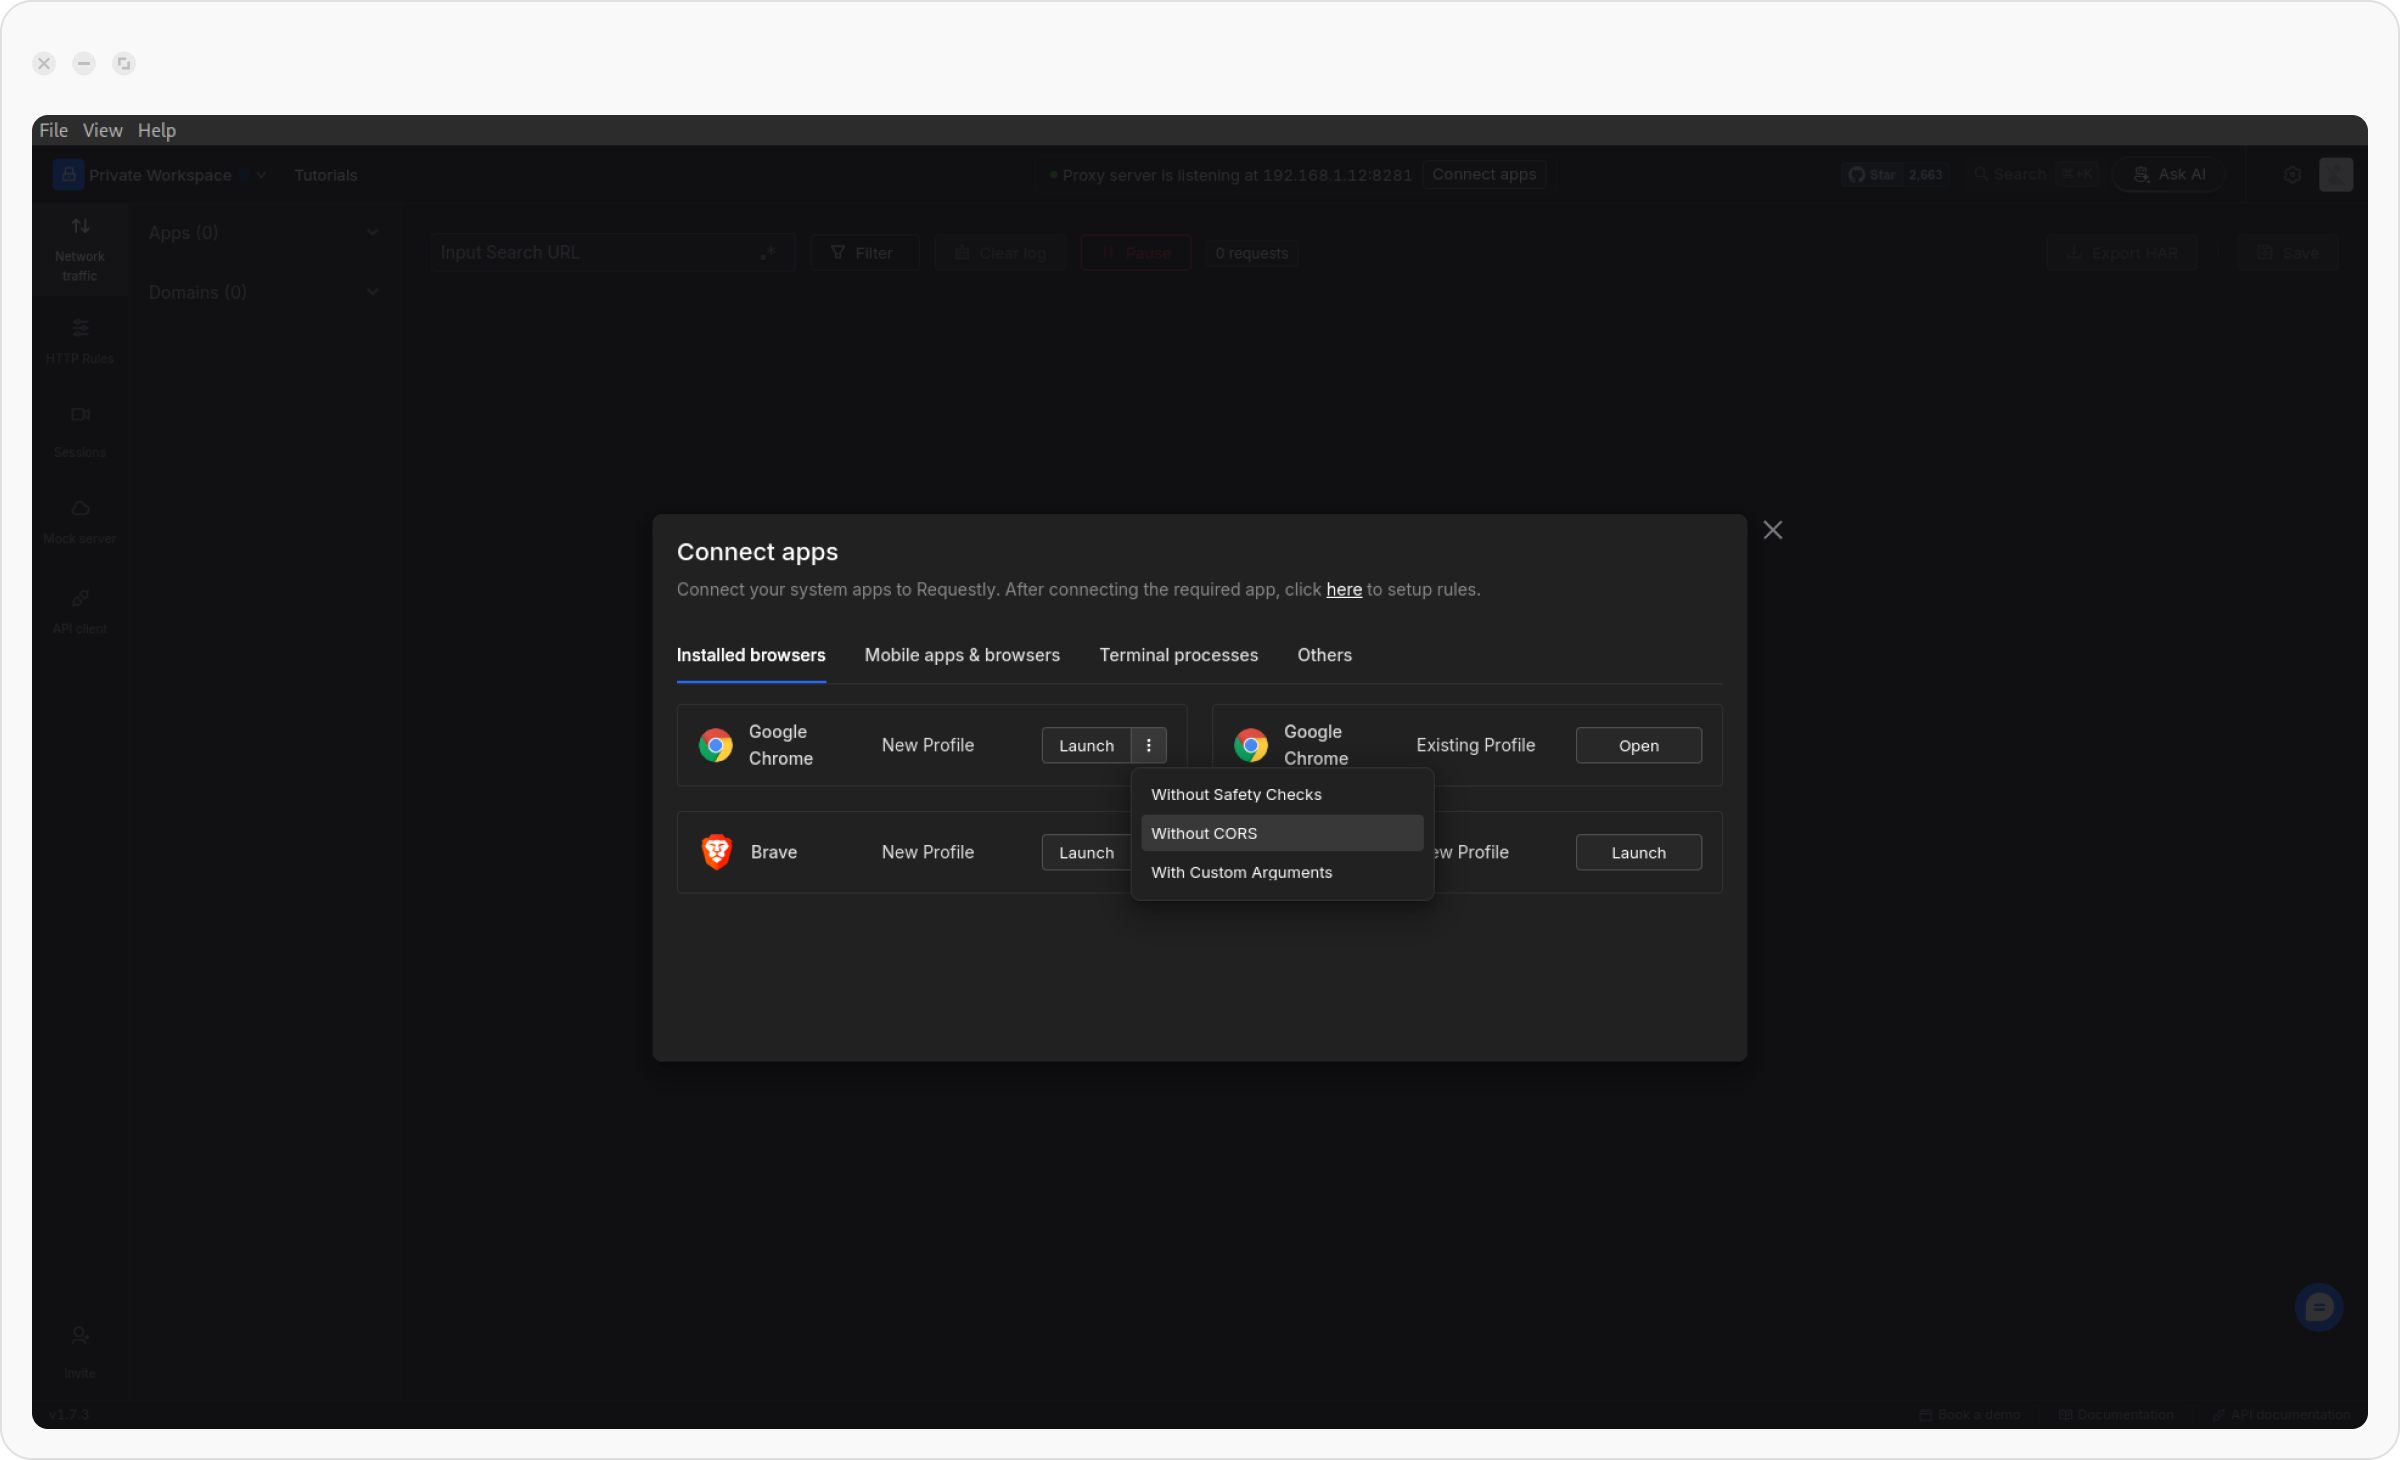
-
--allow-running-insecure-contentAllows the browser to load content from websites that are not served over HTTPS. -
--allow-insecure-localhostAllows insecure content to be loaded fromlocalhost -
--allow-third-party-modulesAllows third-party modules (which could include extensions or custom scripts) to run even if they are not from trusted sources
--disable-web-security flag disables CORS (Cross-Origin Resource Sharing) restrictions in the browser, allowing requests to be made across different domains without security checks, to learn more on cors check out our blogpost here. With Custom Arguments Launch the browser with custom flags (only supported for Chromium-based browsers). Here are some interesting flags for launching Chromium-based browsers with custom arguments: --incognito: Launches Chromium in Incognito mode by default. --window-size: Sets the initial window size. Provided as a string in the format “800,600”. --user-agent : A string used to override the default user agent with a custom one. A full list of available arguments can be found here.