Getting Started on Heroku with Ruby
Introduction
Complete this tutorial to deploy a sample Ruby app to Cedar, the legacy generation of the Heroku platform. To deploy the app to the Fir generation, only available to Heroku Private Spaces, follow this guide instead.
The tutorial assumes that you have:
- A verified Heroku Account
- Ruby 3.2.4 installed locally - see the installation guides for Ruby and Rails on OS X, Windows, and Linux
- Bundler installed locally - run
gem install bundler - Postgres installed locally
- An Eco dynos plan subscription (recommended)
If you’re running Windows, consider following Getting Started with Ruby on Heroku (Microsoft Windows) instead.
If you don’t follow the Windows guide, you can’t run bundle install as you must manually install OpenSSL and the Puma web server.
First, download OpenSSL. Next, extract the lzma download with 7Zip, and then extract the tar file to C:\openssl.
Verify the file is in the correct location:
$ dir c:\openssl bin include lib sslNow run:
$ gem install puma -- --with-opt-dir=c:\opensslAfter this command finishes, run:
$ bundle update pumaUsing dynos and databases to complete this tutorial counts towards your usage. We recommend using our low-cost plans to complete this tutorial. Eligible students can apply for platform credits through our new Heroku for GitHub Students program.
Set Up
Install the Heroku Command Line Interface (CLI). Use the CLI to manage and scale your app, provision add-ons, view your logs, and run your app locally.
The Heroku CLI requires Git, the popular version control system. If you don’t already have Git installed, complete the following before proceeding:
Download and run the installer for your platform:
Download the appropriate installer for your Windows installation:
You can find more installation options for the Heroku CLI here.
After installation, you can use the heroku command from your command shell.
On Windows, start the Command Prompt (cmd.exe) or Powershell to access the command shell.
To log in to the Heroku CLI, use the heroku login command:
$ heroku login heroku: Press any key to open up the browser to login or q to exit: Opening browser to https://cli-auth.heroku.com/auth/cli/browser/*** heroku: Waiting for login... Logging in... done Logged in as me@example.com This command opens your web browser to the Heroku login page. If your browser is already logged in to Heroku, click the Log In button on the page.
This authentication is required for the heroku and git commands to work correctly.
If you have any problems installing or using the Heroku CLI, see the main Heroku CLI article for advice and troubleshooting steps.
If you’re behind a firewall that uses a proxy to connect with external HTTP/HTTPS services, set the HTTP_PROXY or HTTPS_PROXY environment variables in your local development environment before running the heroku command.
Clone the Sample App
If you’re new to Heroku, it’s recommended that you complete this tutorial using the Heroku-provided sample application.
If you have an existing application you want to deploy, follow this article instead.
Clone the sample application so that you have a local version of the code. Execute these commands in your local command shell or terminal:
$ git clone https://github.com/heroku/ruby-getting-started.git $ cd ruby-getting-started You now have a functioning git repository that contains a simple application. It includes a Gemfile file, which Ruby’s dependency manager, bundler, uses to install dependencies.
Define a Procfile
Use a Procfile, a text file in the root directory of your application, to explicitly declare what command to execute to start your app.
The Procfile in the example app looks like this:
web: bundle exec puma -C config/puma.rb This Procfile declares a single process type, web, and the command needed to run it. The name web is important here. It declares that this process type is attached to Heroku’s HTTP routing stack and receives web traffic when deployed. The command used here runs Puma, the web server, and passes in a configuration file.
A Procfile can contain additional process types. For example, you can declare a background worker process that processes items off a queue.
Create Your App
Using a dyno and a database to complete this tutorial counts towards your usage. Delete your app, and database as soon as you’re done to control costs.
Apps use Eco dynos if you’re subscribed to Eco by default. Otherwise, it defaults to Basic dynos. The Eco dynos plan is shared across all Eco dynos in your account. It’s recommended if you plan on deploying many small apps to Heroku. Learn more here. Eligible students can apply for platform credits through our Heroku for GitHub Students program.
Create an app on Heroku to prepare the platform to receive your source code:
$ heroku create Creating app... done, ⬢ polar-inlet-4930 http://polar-inlet-4930.herokuapp.com/ | https://git.heroku.com/polar-inlet-4930.git When you create an app, a git remote called heroku is also created and associated with your local git repository. Git remotes are versions of your repository that live on other servers. You deploy your app by pushing its code to that special Heroku-hosted remote associated with your app.
Heroku generates a random name for your app, in this case, polar-inlet-4930. You can specify your own app name.
Provision a Database
The sample Rails app requires a database. Provision a Heroku Postgres database, one of the add-ons available through the Elements Marketplace. Add-ons are cloud services that provide out-of-the-box additional services for your application, such as logging, monitoring, databases, and more.
An essential-0 Postgres size costs $5 a month, prorated to the minute. At the end of this tutorial, we prompt you to delete your database to minimize costs.
$ heroku addons:create heroku-postgresql:essential-0 Creating heroku-postgresql:essential-0 on ⬢ polar-inlet-4930... ~$0.007/hour (max $5/month) Database should be available soon postgresql-encircled-75487 is being created in the background. The app will restart when complete... Use heroku addons:info postgresql-encircled-75487 to check creation progress Use heroku addons:docs heroku-postgresql to view documentation Your Heroku app can now access this Postgres database. The DATABASE_URL environment variable stores your credentials, which Rails connects to by convention. You can see all the add-ons provisioned with the addons command:
$ heroku addons Add-on Plan Price State ────────────────────────────────────────────── ─────────── ──────── ─────── heroku-postgresql (postgresql-encircled-75487) essential-0 $5/month created └─ as DATABASE The table above shows add-ons and the attachments to the current app (polar-inlet-4930) or other apps. Deploy the App
Using a dyno to complete this tutorial counts towards your usage. Delete your app as soon as you’re done to control costs.
Deploy your code. This command pushes the main branch of the sample repo to your heroku remote, which then deploys to Heroku:
$ git push heroku main Enumerating objects: 524, done. Counting objects: 100% (524/524), done. Delta compression using up to 16 threads Compressing objects: 100% (284/284), done. Writing objects: 100% (524/524), 127.49 KiB | 63.75 MiB/s, done. Total 524 (delta 210), reused 523 (delta 210), pack-reused 0 remote: Compressing source files... done. remote: Building source: remote: remote: -----> Building on the Heroku-22 stack remote: -----> Determining which buildpack to use for this app remote: ! Warning: Multiple default buildpacks reported the ability to handle this app. The first buildpack in the list below will be used. remote: Detected buildpacks: Ruby,Node.js remote: See https://devcenter.heroku.com/articles/buildpacks#buildpack-detect-order remote: -----> Ruby app detected remote: -----> Installing bundler 2.3.25 remote: -----> Removing BUNDLED WITH version in the Gemfile.lock remote: -----> Compiling Ruby/Rails remote: -----> Using Ruby version: ruby-3.2.4 remote: -----> Installing dependencies using bundler 2.5.6 remote: Running: BUNDLE_WITHOUT='development:test' BUNDLE_PATH=vendor/bundle BUNDLE_BIN=vendor/bundle/bin BUNDLE_DEPLOYMENT=1 bundle install -j4 ... remote: -----> Detecting rake tasks remote: -----> Preparing app for Rails asset pipeline remote: Running: rake assets:precompile ... remote: Asset precompilation completed (1.93s) remote: Cleaning assets remote: Running: rake assets:clean remote: -----> Detecting rails configuration remote: remote: remote: -----> Discovering process types remote: Procfile declares types -> web remote: Default types for buildpack -> console, rake remote: remote: -----> Compressing... remote: Done: 82.1M remote: -----> Launching... remote: Released v6 remote: https://polar-inlet-4930.herokuapp.com/ deployed to Heroku remote: remote: Verifying deploy... done. To https://git.heroku.com/polar-inlet-4930.git * [new branch] main -> main The application is now deployed.
Visit the app at the URL shown in the logs. As a handy shortcut, you can also open the website as follows:
$ heroku open View Logs
Heroku treats logs as streams of time-ordered events, aggregated from the output streams of all your app and Heroku components. Heroku provides a single stream for all events.
View information about your running app by using one of the logging commands, heroku logs --tail:
$ heroku logs --tail 2023-03-01T20:35:41.251666+00:00 heroku[web.1]: Starting process with command `bundle exec puma -C config/puma.rb` 2023-03-01T20:35:42.338830+00:00 app[web.1]: [2] Puma starting in cluster mode... 2023-03-01T20:35:42.338853+00:00 app[web.1]: [2] * Puma version: 6.4.2 (ruby 3.2.4-p170) ("The Eagle of Durango") 2023-03-01T20:35:42.338854+00:00 app[web.1]: [2] * Min threads: 5 2023-03-01T20:35:42.338877+00:00 app[web.1]: [2] * Max threads: 5 2023-03-01T20:35:42.338888+00:00 app[web.1]: [2] * Environment: production 2023-03-01T20:35:42.338908+00:00 app[web.1]: [2] * Master PID: 2 2023-03-01T20:35:42.338925+00:00 app[web.1]: [2] * Workers: 2 2023-03-01T20:35:42.338951+00:00 app[web.1]: [2] * Restarts: (✔) hot (✖) phased 2023-03-01T20:35:42.338968+00:00 app[web.1]: [2] * Preloading application 2023-03-01T20:35:45.603105+00:00 app[web.1]: [2] * Listening on http://0.0.0.0:41385 2023-03-01T20:35:45.603195+00:00 app[web.1]: [2] Use Ctrl-C to stop 2023-03-01T20:35:45.610050+00:00 app[web.1]: [2] - Worker 0 (PID: 6) booted in 0.0s, phase: 0 2023-03-01T20:35:45.610915+00:00 app[web.1]: [2] - Worker 1 (PID: 9) booted in 0.0s, phase: 0 2023-03-01T20:35:45.758375+00:00 heroku[web.1]: State changed from starting to up To see more log messages generate, visit your application in the browser first.
To stop streaming the logs, press Control+C.
Scale the App
After deploying the sample app, it automatically runs on a single web dyno. Think of a dyno as a lightweight container that runs the command specified in the Procfile.
You can check how many dynos are running by using the ps command:
$ heroku ps === web (Eco): `bundle exec puma -C config/puma.rb` web.1: up 2023/03/01 11:28:21 (~ 4m ago) Scaling an application on Heroku is equivalent to changing the number of running dynos. Scale the number of web dynos to zero:
$ heroku ps:scale web=0 Access the app again by hitting refresh in your browser, or heroku open to open it in a web tab. You get an error message because you no longer have web dynos available to serve requests.
Scale it up again:
$ heroku ps:scale web=1 By default, apps use Eco dynos if you’re subscribed to Eco. Otherwise, it defaults to Basic dynos. The Eco dynos plan is shared across all Eco dynos in your account and is recommended if you plan on deploying many small apps to Heroku. Eco dynos sleep if they don’t receive any traffic for half an hour. This sleep behavior causes a few seconds delay for the first request upon waking. Eco dynos consume from a monthly, account-level quota of eco dyno hours. As long as you haven’t exhausted the quota, your apps can continue to run.
To avoid dyno sleeping, upgrade to a Basic or higher dyno type as described in the Dyno Types article. Upgrading to at least Standard dynos allows you to scale up to multiple dynos per process type.
Declare App Dependencies
Heroku recognizes an app as a Ruby app by the existence of a Gemfile file in the root directory.
The demo app you deployed already has a Gemfile, and it looks something like this:
source 'https://rubygems.org' ruby '>= 3.1', '< 3.4' # Bundle edge Rails instead: gem 'rails', github: 'rails/rails' gem 'rails', '~> 7.0.4.2' # Use postgresql as the database for Active Record gem 'pg', '~> 1.3.5' # Use SCSS for stylesheets gem 'sass-rails' # Use Uglifier as compressor for JavaScript assets gem 'uglifier' ... The Gemfile file specifies the dependencies to install with your application. It also determines the version of Ruby used to run your application on Heroku.
When an app deploys, Heroku reads this file and installs the appropriate Ruby version and dependencies using the bundle install command.
To run the app locally, you must also install dependencies locally. This Gemfile dependency pg only resolves if you have Postgres installed locally. Install Postgres before you proceed.
If the command which psql returns some value on your command line, Postgres is installed locally:
$ which psql /usr/local/bin/psql Run bundle install in your local directory to install the dependencies, preparing your system for running the app locally:
$ bundle install Using rake 13.0.6 Using concurrent-ruby 1.2.2 Using i18n 1.12.0 .... Using turbolinks 5.2.1 Using uglifier 4.2.0 Your bundle is complete! After installing dependencies, you can run your app locally.
Run the App Locally
Running apps locally in your own dev environment requires some effort.
The sample app uses a database, so you must create the appropriate database and table locally using the rake task:
$ bundle exec rake db:create db:migrate == 20140707111715 CreateWidgets: migrating ==================================== -- create_table(:widgets) -> 0.0076s == 20140707111715 CreateWidgets: migrated (0.0077s) =========================== Now start your application locally using the heroku local command, which is part of the Heroku CLI:
$ heroku local web --port=5006 [OKAY] Loaded ENV .env File as KEY=VALUE Format 2:48:23 PM web.1 | [69541] Puma starting in cluster mode... 2:48:23 PM web.1 | [69541] * Puma version: 6.4.2 (ruby 3.2.4-p170) ("The Eagle of Durango") 2:48:23 PM web.1 | [69541] * Min threads: 5 2:48:23 PM web.1 | [69541] * Max threads: 5 2:48:23 PM web.1 | [69541] * Environment: development 2:48:23 PM web.1 | [69541] * Master PID: 69541 2:48:23 PM web.1 | [69541] * Workers: 2 2:48:23 PM web.1 | [69541] * Restarts: (✔) hot (✖) phased 2:48:23 PM web.1 | [69541] * Preloading application 2:48:24 PM web.1 | [69541] * Listening on http://0.0.0.0:5006 2:48:24 PM web.1 | [69541] Use Ctrl-C to stop 2:48:24 PM web.1 | [69541] - Worker 0 (PID: 69543) booted in 0.19s, phase: 0 2:48:24 PM web.1 | [69541] - Worker 1 (PID: 69545) booted in 0.19s, phase: 0 Just like Heroku, heroku local uses the Procfile to know what command to execute.
To see your app running locally, open http://localhost:5006 with your web browser.
To stop the app from running locally, in the CLI, press Control + C to exit.
Push Local Changes
In this step, you propagate a local change to the application to Heroku.
Modify Gemfile to include an additional dependency for the cowsay gem:
source 'https://rubygems.org' ruby '>= 3.1', '< 3.4' gem "cowsay" # Bundle edge Rails instead: gem 'rails', github: 'rails/rails' gem 'rails', '~> 7.0.4.2' ... Modify app/views/welcome/index.erb to use this gem. Change the file so that its first few lines are:
<pre><%= Cowsay.say("Hello", "tux") %></pre> ... Now test locally:
$ bundle install $ heroku local --port=5006 Visit your application at http://localhost:5006. If your changes worked, you see a cute ASCII picture displayed.
Now deploy this local change to Heroku.
Almost every deploy to Heroku follows this same pattern. First, add the modified files to the local git repository:
$ git add . Now commit the changes to the repository:
$ git commit -m "Added cowsay gem" Now deploy as before:
$ git push heroku main Finally, check that everything is working:
$ heroku open Provision a Logging Add-on
Beyond databases, add-ons provide many additional services for your application. In this step, you provision a free add-on to store your app’s logs.
By default, Heroku stores 1500 lines of logs from your application, but the full log stream is available as a service. Several add-on providers have logging services that provide things such as log persistence, search, and email and SMS alerts.
In this step, you provision one of these logging add-ons, Papertrail.
Provision the Papertrail logging add-on:
$ heroku addons:create papertrail Adding papertrail on polar-inlet-4930... done, v11 (free) Welcome to Papertrail. Questions and ideas are welcome (support@papertrailapp.com). Happy logging! Use `heroku addons:docs papertrail` to view documentation. The add-on is now deployed and configured for your application. You can list add-ons for your app with this command:
$ heroku addons To see this particular add-on in action, visit your application’s Heroku URL a few times. Each visit generates more log messages, which get routed to the Papertrail add-on. Visit the Papertrail console to see the log messages:
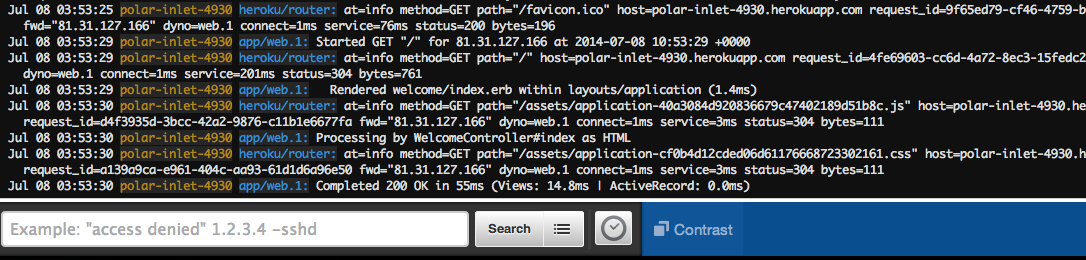
$ heroku addons:open papertrail Your browser opens up a Papertrail web console, showing the latest log events. The interface lets you search and set up alerts:
Start a Console
You can run a command, typically scripts and applications that are part of your app, in a one-off dyno using the heroku run command. You can also launch a REPL process attached to your local terminal for experimenting in your app’s environment:
$ heroku run rails console Running rails console on ⬢ polar-inlet-4930... up, run.1360 (Eco) Loading production environment (Rails 7.0.4.2) irb(main):001:0> If you receive an error, Error connecting to process, configure your firewall.
When the console starts, it loads your entire app. For example, you can type puts Cowsay.say("hi", "Cow") and an animal saying “hi” displays. Type exit to quit the console.
irb(main):001:0> puts Cowsay.say("hi", "tux") ____ | hi | ---- \ \ .--. |o_o | |:_/ | // \ \ (| | ) /'\_ _/`\ \___)=(___/ => nil irb(main):002:0> exit Let’s try another example. Create another one-off dyno and run the bash command to open up a shell on that dyno. You can then execute commands there. Each dyno has its own ephemeral filespace, populated with your app and its dependencies. After the command completes, in this case, bash, the dyno terminates:
$ heroku run bash Running bash on ⬢ polar-inlet-4930... up, run.6847 (Eco) ~ $ ls app app.json bin config config.ru db Gemfile Gemfile.lock lib log package.json Procfile public Rakefile README.md test tmp vendor ~ $ exit exit Don’t forget to type exit to exit the shell and terminate the dyno.
Define Config Vars
Heroku lets you externalize configuration by storing data such as encryption keys or external resource addresses in config vars.
At runtime, config vars are exposed as environment variables to the application. For example, modify app/views/welcome/index.erb so that the method repeats an action depending on the value of the TIMES environment variable. Change the file so that its first few lines read as follows:
<% for i in 0..(ENV['TIMES'] ? ENV['TIMES'].to_i : 2) do %> <p>Hello World #<%= i %>!</p> <% end %> heroku local automatically sets up the environment based on the contents of the .env file in your local directory. In the top-level directory of your sample project, there’s already a .env file that contains:
TIMES=10 If you run the app with heroku local --port=5006, you see “Hello World” ten times.
To set the config var on Heroku, execute the following:
$ heroku config:set TIMES=10 View the app’s config vars using heroku config:
$ heroku config == polar-inlet-4930 Config Vars PAPERTRAIL_API_TOKEN: erdKhPeeeehIcdfY7ne TIMES: 10 ... To see this change in action, deploy your changed application to Heroku.
Use a Database
Listing the config vars for your app displays the URL that your app uses to connect to the database, DATABASE_URL:
$ heroku config === polar-inlet-4930 Config Vars DATABASE_URL: postgres://xx:yyy@host:5432/d8slm9t7b5mjnd HEROKU_POSTGRESQL_BROWN_URL: postgres://xx:yyy@host:5432/d8slm9t7b5mjnd ... Heroku also provides a pg command that shows a lot more:
$ heroku pg === DATABASE_URL Plan: Essential 0 Status: Available Connections: 0/20 PG Version: 15.5 Created: 2024-05-01 13:22 UTC Data Size: 7.61 MB / 1 GB (0.74%) (In compliance) Tables: 3 Fork/Follow: Unsupported Rollback: Unsupported Continuous Protection: Off Add-on: postgresql-elliptical-30581 This info shows an essential-0 database running Postgres v15.5, with three tables.
The example app you deployed already has database functionality. It has a controller and database model for widgets, used by your app’s ‘/widgets’ page. You can visit the page by appending ‘/widgets’ to your app’s URL.
If you visit the URL, you see an error page appear. Check out the error message using heroku logs or in Papertrail to see something like this:
2014-07-08T14:52:37.884178+00:00 app[web.1]: Started GET "/widgets" for 94.174.204.242 at 2014-07-08 14:52:37 +0000 2014-07-08T14:52:38.162312+00:00 heroku[router]: at=info method=GET path="/widgets" host=fox828228.herokuapp.com request_id=3755bb46-4de2-4434-a13a-26ec73e53694 fwd="94.174.204.242" dyno=web.1 connect=0 service=294 status=500 bytes=955 2014-07-08T14:52:38.078295+00:00 app[web.1]: Processing by WidgetsController#index as HTML .... 2014-07-08T14:52:38.146062+00:00 app[web.1]: PG::UndefinedTable: ERROR: relation "widgets" does not exist This error indicates that while we could connect to the database, the widgets table wasn’t found. You can fix that error by running rake db:migrate. To execute this command on Heroku, run it in a one-off dyno like so:
$ heroku run rake db:migrate Running `rake db:migrate` attached to terminal... up, run.3559 Migrating to CreateWidgets (20140707111715) == 20140707111715 CreateWidgets: migrating ==================================== -- create_table(:widgets) -> 0.0244s == 20140707111715 CreateWidgets: migrated (0.0247s) =========================== Now if you visit the /widgets page of your app again, you can list and create widget records.
If you have Postgres installed locally, you can also interact directly with the database. For example, here’s how to connect to the database using psql and execute a query:
$ heroku pg:psql d8slm9t7b5mjnd=> select * from widgets; id | name | description | stock | created_at | updated_at ----+-----------+--------------+-------+----------------------------+---------------------------- 1 | My Widget | It's amazing | 100 | 2023-03-01 21:04:39.029311 | 2023-03-01 21:04:39.029311 (1 row) Read more about Heroku PostgreSQL.
Next Steps
You now know how to deploy an app, change its configuration, view logs, scale, and attach add-ons.
Here’s some recommended reading:
- Read How Heroku Works for a technical overview of the concepts you encounter while writing, configuring, deploying, and running applications.
- To learn more about developing and deploying Ruby applications, visit the Ruby support category.
- Read Getting Started with Rails 7.x on Heroku for a deep dive into deploying Rails apps.
Remember to delete your example app, and database as soon as you’re done with the tutorial, to control costs.
Delete Your App and Add-on
Remove the app and database from your account. You’re only charged for the resources you used.
This action removes your add-on and any data saved in the database.
$ heroku addons:destroy heroku-postgresql ▸ WARNING: Destructive Action ▸ This command will affect the app polar-inlet-4930 ▸ To proceed, type polar-inlet-4930 or re-run this command with ▸ --confirm polar-inlet-4930 > This action permanently deletes your application
$ heroku apps:destroy ▸ WARNING: This will delete ⬢ polar-inlet-4930 including all add-ons. ▸ To proceed, type polar-inlet-4930 or re-run this command with ▸ --confirm polar-inlet-4930 > You can confirm that your add-on and app are gone with these commands:
$ heroku addons --all $ heroku apps --all You’re now ready to deploy your app or read more about Getting Started with Rails 7.x on Heroku for a deeper dive into deploying Rails apps.