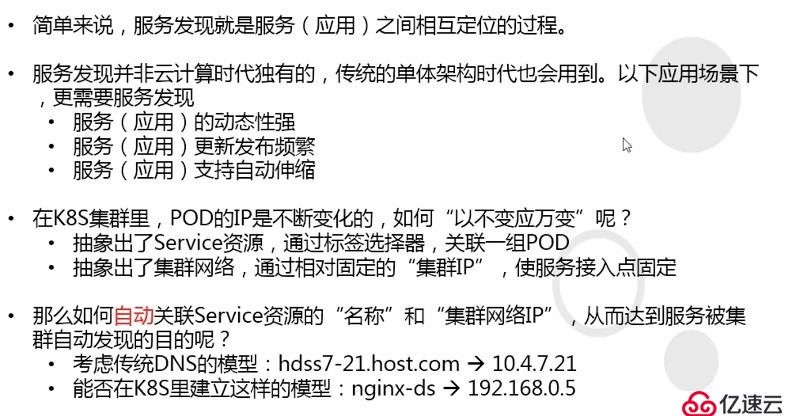
这篇文章给大家分享的是kubernetes中搭建和使用Coredns的方法,相信大部分人都还不知道怎么安装和使用,为了让大家学会,给大家总结了以下内容,话不多说,一起往下看吧。
~]# cd /etc/nginx/conf.d/ conf.d]# vi /etc/nginx/conf.d/k8s-yaml.od.com.conf server { listen 80; server_name k8s-yaml.od.com; location / { autoindex on; default_type text/plain; root /data/k8s-yaml; } } conf.d]# mkdir /data/k8s-yaml conf.d]# nginx -t conf.d]# nginx -s reload conf.d]# cd /data/k8s-yaml/ k8s-yaml]# mkdir coredns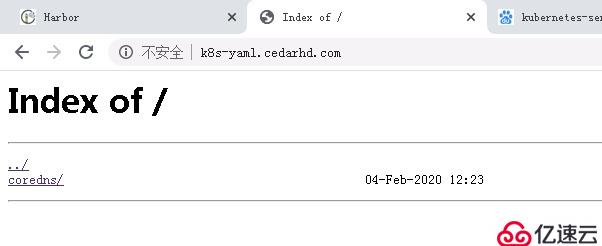
[root@test-operator coredns]# cat rbac.yaml apiVersion: v1 kind: ServiceAccount metadata: name: coredns namespace: kube-system labels: kubernetes.io/cluster-service: "true" addonmanager.kubernetes.io/mode: Reconcile --- apiVersion: rbac.authorization.k8s.io/v1 kind: ClusterRole metadata: labels: kubernetes.io/bootstrapping: rbac-defaults addonmanager.kubernetes.io/mode: Reconcile name: system:coredns rules: - apiGroups: - "" resources: - endpoints - services - pods - namespaces verbs: - list - watch --- apiVersion: rbac.authorization.k8s.io/v1 kind: ClusterRoleBinding metadata: annotations: rbac.authorization.kubernetes.io/autoupdate: "true" labels: kubernetes.io/bootstrapping: rbac-defaults addonmanager.kubernetes.io/mode: EnsureExists name: system:coredns roleRef: apiGroup: rbac.authorization.k8s.io kind: ClusterRole name: system:coredns subjects: - kind: ServiceAccount name: coredns namespace: kube-system ----------------------------------------------------------------------------------------------- [root@test-operator coredns]# cat cm.yaml apiVersion: v1 kind: ConfigMap metadata: name: coredns namespace: kube-system data: Corefile: | .:53 { errors log health ready kubernetes cluster.local 192.168.0.0/16 forward . 10.3.151.13 cache 30 loop reload loadbalance } ----------------------------------------------------------------------------------------------- [root@test-operator coredns]# cat dp.yaml apiVersion: apps/v1 kind: Deployment metadata: name: coredns namespace: kube-system labels: k8s-app: coredns kubernetes.io/name: "CoreDNS" spec: replicas: 1 selector: matchLabels: k8s-app: coredns template: metadata: labels: k8s-app: coredns spec: priorityClassName: system-cluster-critical serviceAccountName: coredns containers: - name: coredns image: test-harbor.cedarhd.com/public/coredns:v1.6.1 args: - -conf - /etc/coredns/Corefile volumeMounts: - name: config-volume mountPath: /etc/coredns ports: - containerPort: 53 name: dns protocol: UDP - containerPort: 53 name: dns-tcp protocol: TCP - containerPort: 9153 name: metrics protocol: TCP livenessProbe: httpGet: path: /health port: 8080 scheme: HTTP initialDelaySeconds: 60 timeoutSeconds: 5 successThreshold: 1 failureThreshold: 5 dnsPolicy: Default volumes: - name: config-volume configMap: name: coredns items: - key: Corefile path: Corefile ----------------------------------------------------------------------------------------------- [root@test-operator coredns]# cat svc.yaml apiVersion: v1 kind: Service metadata: name: coredns namespace: kube-system labels: k8s-app: coredns kubernetes.io/cluster-service: "true" kubernetes.io/name: "CoreDNS" spec: selector: k8s-app: coredns clusterIP: 192.168.0.2 ports: - name: dns port: 53 protocol: UDP - name: dns-tcp port: 53 - name: metrics port: 9153 protocol: TCP[root@test-nodes1 ~]# kubectl apply -f http://k8s-yaml.cedarhd.com/coredns/rbac.yaml serviceaccount/coredns created clusterrole.rbac.authorization.k8s.io/system:coredns created clusterrolebinding.rbac.authorization.k8s.io/system:coredns created [root@test-nodes1 ~]# kubectl apply -f http://k8s-yaml.cedarhd.com/coredns/cm.yaml configmap/coredns created [root@test-nodes1 ~]# kubectl apply -f http://k8s-yaml.cedarhd.com/coredns/dp.yaml deployment.apps/coredns created [root@test-nodes1 ~]# kubectl apply -f http://k8s-yaml.cedarhd.com/coredns/svc.yaml service/coredns created [root@test-nodes1 ~]# kubectl get all -n kube-system NAME READY STATUS RESTARTS AGE pod/coredns-6c69fbcc6c-6vqgr 1/1 Running 0 35s NAME TYPE CLUSTER-IP EXTERNAL-IP PORT(S) AGE service/coredns ClusterIP 192.168.0.2 <none> 53/UDP,53/TCP,9153/TCP 14s NAME READY UP-TO-DATE AVAILABLE AGE deployment.apps/coredns 1/1 1 1 36s NAME DESIRED CURRENT READY AGE replicaset.apps/coredns-6c69fbcc6c 1 1 1 36s
1、创建一个新的svc资源
[root@test-nodes1 ~]# kubectl create deployment nginx-test --image=test-harbor.cedarhd.com/public/nginx:v1.7.9deployment.apps/nginx-test created [root@test-nodes1 ~]# kubectl get all NAME READY STATUS RESTARTS AGE pod/nginx-test-5674474869-c4mzx 1/1 Running 0 5s NAME TYPE CLUSTER-IP EXTERNAL-IP PORT(S) AGE service/kubernetes ClusterIP 192.168.0.1 <none> 443/TCP 8h NAME READY UP-TO-DATE AVAILABLE AGE deployment.apps/nginx-test 1/1 1 1 5s NAME DESIRED CURRENT READY AGE replicaset.apps/nginx-test-5674474869 1 1 1 5s [root@test-nodes1 ~]# kubectl expose deployment nginx-test --port=80 service/nginx-test exposed [root@test-nodes1 ~]# kubectl get all NAME READY STATUS RESTARTS AGE pod/nginx-test-5674474869-c4mzx 1/1 Running 0 42s NAME TYPE CLUSTER-IP EXTERNAL-IP PORT(S) AGE service/kubernetes ClusterIP 192.168.0.1 <none> 443/TCP 8h service/nginx-test ClusterIP 192.168.109.13 <none> 80/TCP 8s #创建svc为nginx-test 对应的cluterip为192.168.109.13 NAME READY UP-TO-DATE AVAILABLE AGE deployment.apps/nginx-test 1/1 1 1 42s NAME DESIRED CURRENT READY AGE replicaset.apps/nginx-test-5674474869 1 1 1 42s 2、进入其中一个容器查看解释效果 [root@test-nodes2 ~]# kubectl get pods -n kube-public NAME READY STATUS RESTARTS AGE nginx-ds-dk9hf 1/1 Running 0 3h53m nginx-ds-m6v9q 1/1 Running 0 3h53m [root@test-nodes2 ~]# kubectl exec -ti nginx-ds-dk9hf /bin/bash -n kube-public PING nginx-test.default.svc.cluster.local (192.168.109.13) 56(84) bytes of data. 64 bytes from nginx-test.default.svc.cluster.local (192.168.109.13): icmp_seq=1 ttl=64 time=0.070 ms 64 bytes from nginx-test.default.svc.cluster.local (192.168.109.13): icmp_seq=2 ttl=64 time=0.077 ms #nginx-test.default defalut(容器所在的空间,必须加)
以上就是kubernetes中搭建和使用Coredns的方法介绍了,看完之后是否有所收获呢?如果想了解更多相关内容,欢迎关注亿速云行业资讯!
免责声明:本站发布的内容(图片、视频和文字)以原创、转载和分享为主,文章观点不代表本网站立场,如果涉及侵权请联系站长邮箱:is@yisu.com进行举报,并提供相关证据,一经查实,将立刻删除涉嫌侵权内容。


