这篇文章主要为大家展示了“WPF自定义路由事件的示例分析”,内容简而易懂,条理清晰,希望能够帮助大家解决疑惑,下面让小编带领大家一起研究并学习一下“WPF自定义路由事件的示例分析”这篇文章吧。
定义只读的静态变量字段RouteEvent类来声明一个变量,然后使用EventManager的RegisterRoutedEvent()方法向事件系统注册路由事件,该方法的签名如下:
public static RoutedEvent RegisterRoutedEvent(string name, RoutingStrategy routingStrategy, Type handlerType, Type ownerType);
该方法带有四个参数:
第一个参数name表示该路由事件在WPF事件系统中的名称。
第二个参数routingStrategy是RoutingStrategy类型的枚举值,标明了路由事件的路由策略,共三种策略:
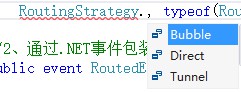
第一种Bubble是冒泡策略,这种模式是从触发点向根节点传递,直到最外层。
第二种是Direct就是传统的事件一样的。
第三种是隧道策略,这和冒泡策略相反,向下传递。
第三个参数handlerType用来标明事件处理函数的类型。
第四个个参数ownerType则用来标明拥有该路由事件的类型。
EventManager的RegisterRoutedEvent()方法返回一个RoutedEvent类型的实例。一般情况下,该实例将由一个public static readonly字段所保存。
事件包装器使用AddHandler方法来添加路由事件的调用程序,然后使用RemoveHandler来删除已经添加的调用程序。
演示创建自定义路由事件:
1、新建用户控件,添加一个Button按钮,添加按钮的Click事件,XAML代码如下:
<UserControl x:Class="CustomWpfRouteEvent.RouteEventControl" xmlns="http://schemas.microsoft.com/winfx/2006/xaml/presentation" xmlns:x="http://schemas.microsoft.com/winfx/2006/xaml" xmlns:mc="http://schemas.openxmlformats.org/markup-compatibility/2006" xmlns:d="http://schemas.microsoft.com/expression/blend/2008" mc:Ignorable="d" d:DesignHeight="300" d:DesignWidth="300"> <Grid> <Button Height="30" Width="100" Content="调用路由事件" Click="Button_Click"></Button> </Grid> </UserControl>
2、在用户控件的后台代码中创建自定义路由事件,C#代码如下:
using System; using System.Collections.Generic; using System.Linq; using System.Text; using System.Threading.Tasks; using System.Windows; using System.Windows.Controls; using System.Windows.Data; using System.Windows.Documents; using System.Windows.Input; using System.Windows.Media; using System.Windows.Media.Imaging; using System.Windows.Navigation; using System.Windows.Shapes; namespace CustomWpfRouteEvent { /// <summary> /// RouteEventControl.xaml 的交互逻辑 /// </summary> public partial class RouteEventControl : UserControl { public RouteEventControl() { InitializeComponent(); } //1、声明并注册路由事件,使用冒泡策略 public static readonly RoutedEvent MyClientEvent = EventManager.RegisterRoutedEvent("MyClick", RoutingStrategy.Bubble, typeof(RoutedEventHandler), typeof(RouteEventControl)); //2、通过.NET事件包装路由事件 public event RoutedEventHandler MyClick { add { AddHandler(MyClientEvent, value); } remove { RemoveHandler(MyClientEvent, value); } } /// <summary> /// 3、使用按钮的单击事件激发路由事件 /// </summary> /// <param name="sender"></param> /// <param name="e"></param> private void Button_Click(object sender, RoutedEventArgs e) { RoutedEventArgs arg = new RoutedEventArgs(); arg.RoutedEvent = MyClientEvent; RaiseEvent(arg); } } }3、在主界面中引入新创建的用户控件,使用自定义的路由事件MyClick,并为MyClick事件编写调用的方法,XAML代码如下:
<Window x:Class="CustomWpfRouteEvent.MainWindow" xmlns="http://schemas.microsoft.com/winfx/2006/xaml/presentation" xmlns:x="http://schemas.microsoft.com/winfx/2006/xaml" xmlns:u="clr-namespace:CustomWpfRouteEvent" Title="演示自定义路由事件" Height="350" Width="525" WindowStartupLocation="CenterScreen"> <Grid> <u:RouteEventControl MyClick="RouteEventControl_MyClick"></u:RouteEventControl> </Grid> </Window>
4、RouteEventControl_MyClick方法的后台代码如下:
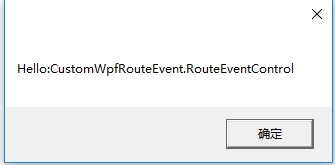
using System; using System.Collections.Generic; using System.Linq; using System.Text; using System.Threading.Tasks; using System.Windows; using System.Windows.Controls; using System.Windows.Data; using System.Windows.Documents; using System.Windows.Input; using System.Windows.Media; using System.Windows.Media.Imaging; using System.Windows.Navigation; using System.Windows.Shapes; namespace CustomWpfRouteEvent { /// <summary> /// MainWindow.xaml 的交互逻辑 /// </summary> public partial class MainWindow : Window { public MainWindow() { InitializeComponent(); } private void RouteEventControl_MyClick(object sender, RoutedEventArgs e) { MessageBox.Show("Hello:" + e.Source.ToString()); } } }5、运行程序,单击Button按钮,效果如下所示:
以上是“WPF自定义路由事件的示例分析”这篇文章的所有内容,感谢各位的阅读!相信大家都有了一定的了解,希望分享的内容对大家有所帮助,如果还想学习更多知识,欢迎关注亿速云行业资讯频道!
免责声明:本站发布的内容(图片、视频和文字)以原创、转载和分享为主,文章观点不代表本网站立场,如果涉及侵权请联系站长邮箱:is@yisu.com进行举报,并提供相关证据,一经查实,将立刻删除涉嫌侵权内容。


