这篇文章主要讲解了“CommandLineRunner和Application怎么使用”,文中的讲解内容简单清晰,易于学习与理解,下面请大家跟着小编的思路慢慢深入,一起来研究和学习“CommandLineRunner和Application怎么使用”吧!
在SpringBoot项目中创建组件类实现CommandLineRunner或ApplicationRunner接口可实现在应用启动之后及时进行一些初始化操作,如缓存预热、索引重建等等类似一些数据初始化操作。
两个接口功能相同,都有个run方法需要重写,只是实现方法的参数不同。
CommandLineRunner接收原始的命令行启动参数,ApplicationRunner则将启动参数对象化。
两个接口都是在SpringBoot应用初始化好上下文之后运行,所以在运行过程中,可以使用上下文中的所有信息,例如一些Bean等等。在框架SpringApplication类源码的run方法中,可查看Runner的调用时机callRunners,如下:
/** * Run the Spring application, creating and refreshing a new * {@link ApplicationContext}. * @param args the application arguments (usually passed from a Java main method) * @return a running {@link ApplicationContext} */ public ConfigurableApplicationContext run(String... args) { StopWatch stopWatch = new StopWatch(); stopWatch.start(); ConfigurableApplicationContext context = null; Collection<SpringBootExceptionReporter> exceptionReporters = new ArrayList<>(); configureHeadlessProperty(); SpringApplicationRunListeners listeners = getRunListeners(args); listeners.starting(); try { ApplicationArguments applicationArguments = new DefaultApplicationArguments(args); ConfigurableEnvironment environment = prepareEnvironment(listeners, applicationArguments); configureIgnoreBeanInfo(environment); Banner printedBanner = printBanner(environment); context = createApplicationContext(); exceptionReporters = getSpringFactoriesInstances(SpringBootExceptionReporter.class, new Class[] { ConfigurableApplicationContext.class }, context); prepareContext(context, environment, listeners, applicationArguments, printedBanner); refreshContext(context); afterRefresh(context, applicationArguments); stopWatch.stop(); if (this.logStartupInfo) { new StartupInfoLogger(this.mainApplicationClass).logStarted(getApplicationLog(), stopWatch); } listeners.started(context); //调用Runner,执行初始化操作 callRunners(context, applicationArguments); } catch (Throwable ex) { handleRunFailure(context, ex, exceptionReporters, listeners); throw new IllegalStateException(ex); } try { listeners.running(context); } catch (Throwable ex) { handleRunFailure(context, ex, exceptionReporters, null); throw new IllegalStateException(ex); } return context; }2.1 CommandLineRunner
简单实现如下,打印启动参数信息:
@Order(1) @Component public class CommandLineRunnerInit implements CommandLineRunner { private Logger logger = LoggerFactory.getLogger(this.getClass()); private final String LOG_PREFIX = ">>>>>>>>>>CommandLineRunner >>>>>>>>>> "; @Override public void run(String... args) throws Exception { try { this.logger.error("{} args:{}", LOG_PREFIX, StringUtils.join(args, ",")); } catch (Exception e) { logger.error("CommandLineRunnerInit run failed", e); } } }2.2 ApplicationRunner
简单实现如下,打印启动参数信息,并调用Bean的方法(查询用户数量):
@Order(2) @Component public class ApplicationRunnerInit implements ApplicationRunner { private Logger logger = LoggerFactory.getLogger(this.getClass()); private final String LOG_PREFIX = ">>>>>>>>>>ApplicationRunner >>>>>>>>>> "; private final UserRepository userRepository; public ApplicationRunnerInit(UserRepository userRepository) { this.userRepository = userRepository; } @Override public void run(ApplicationArguments args) throws Exception { try { this.logger.error("{} args:{}", LOG_PREFIX, JSONObject.toJSONString(args)); for (String optionName : args.getOptionNames()) { this.logger.error("{} argName:{} argValue:{}", LOG_PREFIX, optionName, args.getOptionValues(optionName)); } this.logger.error("{} user count:{}", LOG_PREFIX, this.userRepository.count()); } catch (Exception e) { logger.error("CommandLineRunnerInit run failed", e); } } }如果实现了多个Runner,默认会按照添加顺序先执行ApplicationRunner的实现再执行CommandLineRunner的实现,如果多个Runner之间的初始化逻辑有先后顺序,可在实现类添加@Order注解设置执行顺序,可在源码SpringApplication类的callRunners方法中查看,如下:
private void callRunners(ApplicationContext context, ApplicationArguments args) { List<Object> runners = new ArrayList<>(); //先添加的ApplicationRunner实现 runners.addAll(context.getBeansOfType(ApplicationRunner.class).values()); //再添加的CommandLineRunner实现 runners.addAll(context.getBeansOfType(CommandLineRunner.class).values()); //如果设置了顺序,则按设定顺序重新排序 AnnotationAwareOrderComparator.sort(runners); for (Object runner : new LinkedHashSet<>(runners)) { if (runner instanceof ApplicationRunner) { callRunner((ApplicationRunner) runner, args); } if (runner instanceof CommandLineRunner) { callRunner((CommandLineRunner) runner, args); } } }为了便于对比效果,在Idea中设置启动参数如下图(生产环境中会自动读取命令行启动参数):
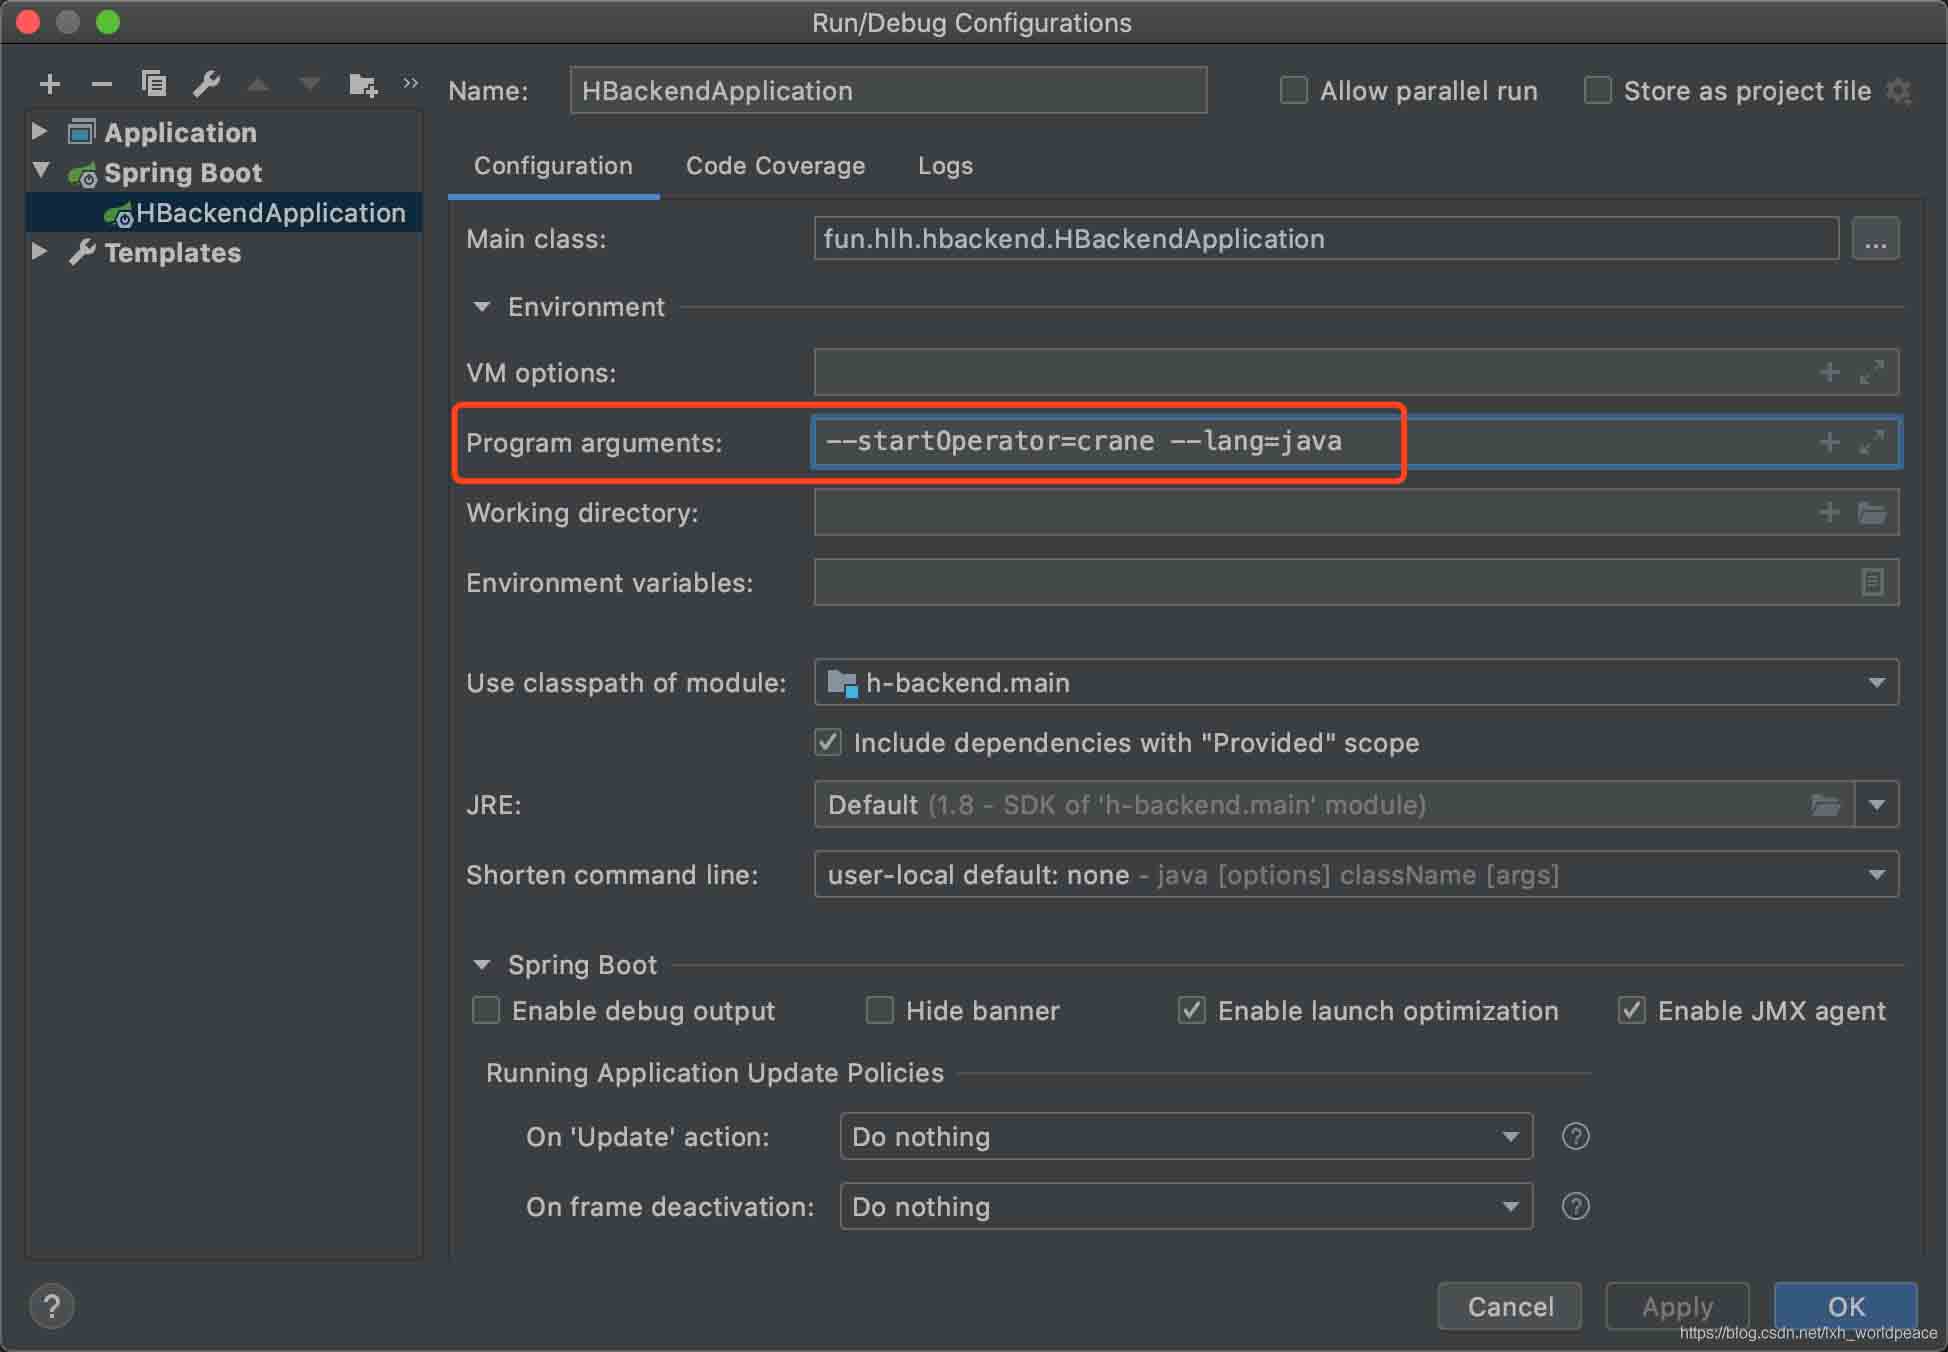
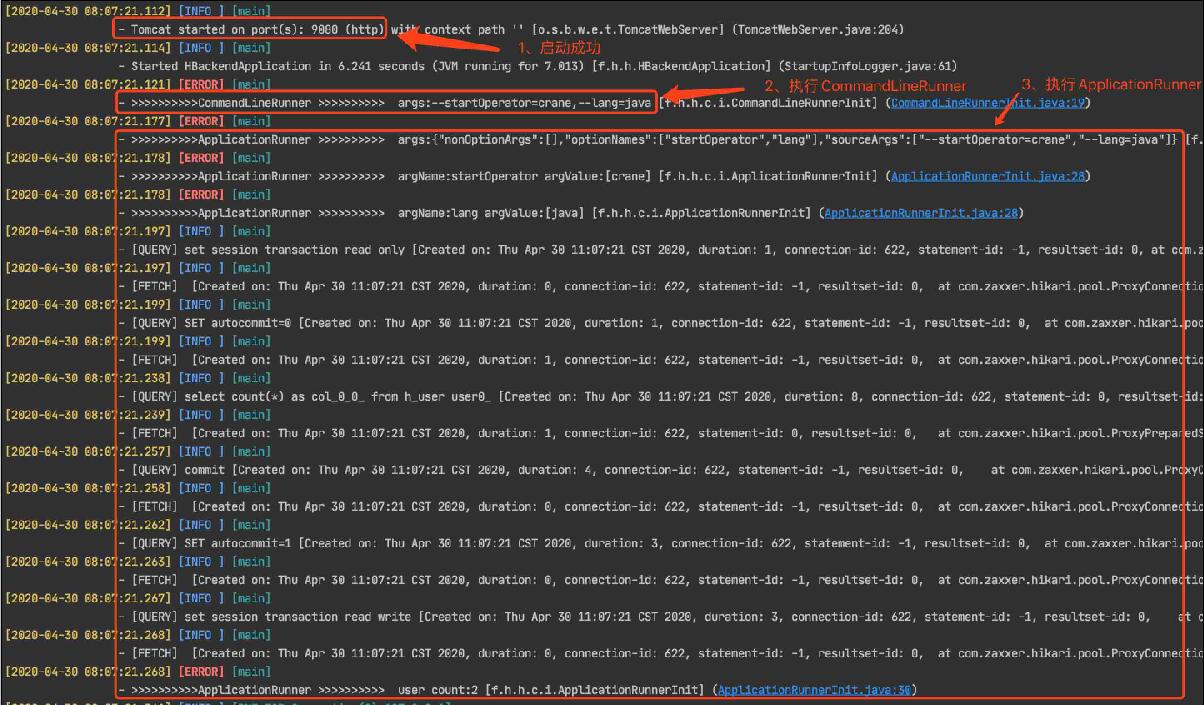
在上面的两个Runner中,设定了CommandLineRunnerInit是第一个,ApplicationRunnerInit是第二个。启动应用,运行效果如下图:
业务场景:
应用服务启动时,加载一些数据和执行一些应用的初始化动作。如:删除临时文件,清除缓存信息,读取配置文件信息,数据库连接等。
1、SpringBoot提供了CommandLineRunner和ApplicationRunner接口。当接口有多个实现类时,提供了@order注解实现自定义执行顺序,也可以实现Ordered接口来自定义顺序。
注意:数字越小,优先级越高,也就是@Order(1)注解的类会在@Order(2)注解的类之前执行。
两者的区别在于:
ApplicationRunner中run方法的参数为ApplicationArguments,而CommandLineRunner接口中run方法的参数为String数组。想要更详细地获取命令行参数,那就使用ApplicationRunner接口
@Component @Order(value = 10) public class AgentApplicationRun2 implements ApplicationRunner { @Override public void run(ApplicationArguments applicationArguments) throws Exception { } }@Component @Order(value = 11) public class AgentApplicationRun implements CommandLineRunner { @Override public void run(String... strings) throws Exception { } }感谢各位的阅读,以上就是“CommandLineRunner和Application怎么使用”的内容了,经过本文的学习后,相信大家对CommandLineRunner和Application怎么使用这一问题有了更深刻的体会,具体使用情况还需要大家实践验证。这里是亿速云,小编将为大家推送更多相关知识点的文章,欢迎关注!
免责声明:本站发布的内容(图片、视频和文字)以原创、转载和分享为主,文章观点不代表本网站立场,如果涉及侵权请联系站长邮箱:is@yisu.com进行举报,并提供相关证据,一经查实,将立刻删除涉嫌侵权内容。


