本篇内容主要讲解“如何分析Spring Boot应用通过Docker发布部署的流程”,感兴趣的朋友不妨来看看。本文介绍的方法操作简单快捷,实用性强。下面就让小编来带大家学习“如何分析Spring Boot应用通过Docker发布部署的流程”吧!
手动部署
1、idea创建spring boot项目
2、项目打成 Jar 包
3、构建 docker image
4、查看并运行镜像
插件部署
运行推送命令
将Spring Boot项目部署到docker中有两种方法,手动部署和插件部署
pom.xml文件
<?xml version="1.0" encoding="UTF-8"?> <project xmlns="http://maven.apache.org/POM/4.0.0" xmlns:xsi="http://www.w3.org/2001/XMLSchema-instance" xsi:schemaLocation="http://maven.apache.org/POM/4.0.0 http://maven.apache.org/xsd/maven-4.0.0.xsd"> <parent> <artifactId>spring-cloud-examples</artifactId> <groupId>org.example</groupId> <version>1.0-SNAPSHOT</version> </parent> <modelVersion>4.0.0</modelVersion> <artifactId>DockerDemo</artifactId> <dependencies> <dependency> <groupId>org.springframework.boot</groupId> <artifactId>spring-boot-starter-web</artifactId> </dependency> </dependencies> <build> <plugins> <plugin> <groupId>org.springframework.boot</groupId> <artifactId>spring-boot-maven-plugin</artifactId> </plugin> </plugins> </build> </project>
必须添加 spring-boot-maven-plugin 插件,该插件的作用是在打 Jar 包时引入依赖包,当运行“mvn package”进行打包时,会打包成一个可以直接运行的 JAR 文件,使用 “java -jar” 命令就可以直接运行。
启动类
package dockerdemo; import org.springframework.boot.SpringApplication; import org.springframework.boot.autoconfigure.SpringBootApplication; import org.springframework.web.bind.annotation.RequestMapping; import org.springframework.web.bind.annotation.RestController; @RestController @SpringBootApplication public class Application { public static void main(String[] args) { SpringApplication.run(Application.class, args); } @RequestMapping("/hello") public String hello(){ return "Hello Docker World!"; } }然后在项目pom.xml文件所在目录执行maven命令将项目打成 Jar 包
$ mvn package
从输出日志可知 Jar 在 target 目录下,直接运行 Jar 包
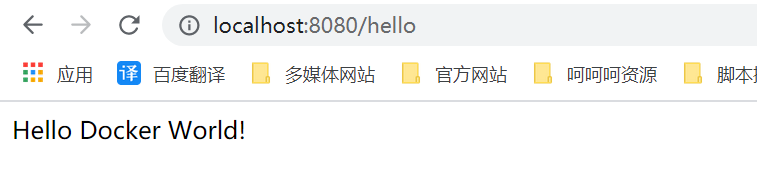
$ java -jar DockerDemo-1.0-SNAPSHOT.jar
然后在浏览器中输入 http://localhost:8080/hello 进行测试
创建Dockerfile文件
FROM java:8 VOLUME /tmp ADD DockerDemo-1.0-SNAPSHOT.jar DockerDemo.jar RUN bash -c "touch /DockerDemo.jar" ENTRYPOINT ["java","-Djava.security.egd=file:/dev/./urandom","-jar","/DockerDemo.jar"]
参数解释:
FROM:表示以JDK8为基础镜像制作docker镜像
VOLUME:表示创建一个挂载点,容器目录为 /tmp,主机目录自动生成。创建 /tmp 是因为Spring Boot内嵌的Tomcat容器默认使用 /tmp 作为工作目录
ADD:将容器外的 DockerDemo-1.0-SNAPSHOT.jar 拷贝到容器中,并重命名为 DockerDemo.jar
RUN:RUN 后面跟着bash命令,-c 表示将后面的字符串当命令执行,即执行 touch /DockerDemo.jar,该命令修改 DockerDemo.jar 文件的访问时间和修改时间为当前时间
ENTRYPOINT:容器启动时运行的命令,相当于我们在命令行中输入java -jar xxxx.jar,为了缩短Tomcat的启动时间,添加 java.security.egd 的系统属性指向 /dev/urandom 作为 ENTRYPOINT
创建好 Dockerfile 后,把打包好的 Spring Boot 项目 jar 包和 Dockerfile 文件放在任意一个目录下,使用 docker 命令构建镜像文件:
$ docker image build -t DockerDemo:1 .
参数解释:
build:表示制作镜像
-t:表示给镜像打个标签,相当于 docker tag 镜像ID 新镜像名:版本号
.:表示Dockerfile文件所在位置,. 表示在当前目录
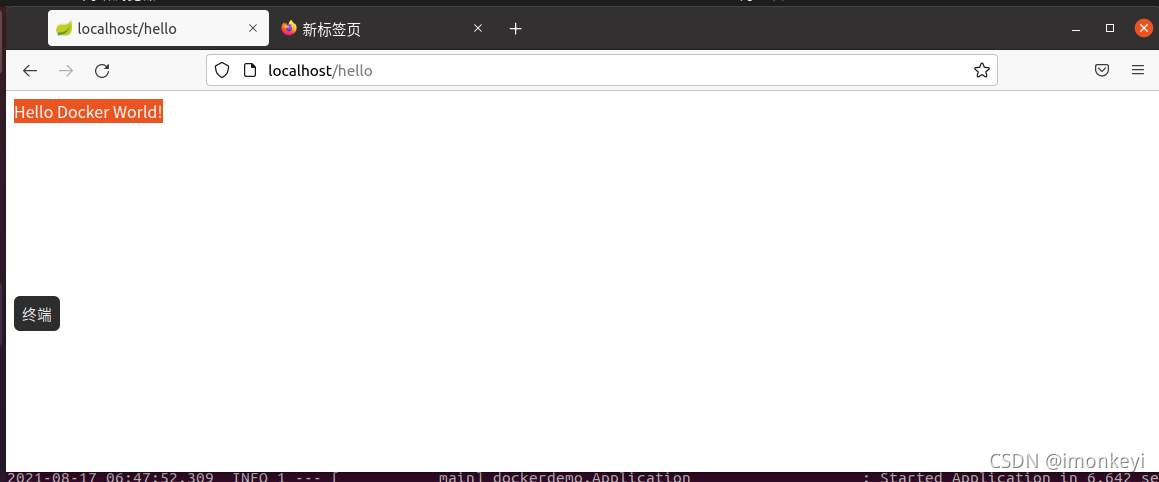
#查看镜像: $ docker images #运行镜像: $ docker container run --name DockerDemo -d -p 80:8080 DockerDemo:1
参数解释:
docker container run:表示运行容器
–name:给容器起个别名,操作容器的时候可以使用别名来代替容器ID,方便容器的管理
-d:表示容器开启后在后台运行
-p:端口映射。将容器内部的8080端口映射到宿主机的80端口
插件部署要在项目的 pom.xml 文件中添加 dockerfile-maven-plugin 插件
pom.xml
<?xml version="1.0" encoding="UTF-8"?> <project xmlns="http://maven.apache.org/POM/4.0.0" xmlns:xsi="http://www.w3.org/2001/XMLSchema-instance" xsi:schemaLocation="http://maven.apache.org/POM/4.0.0 http://maven.apache.org/xsd/maven-4.0.0.xsd"> <parent> <artifactId>spring-cloud-docker</artifactId> <groupId>org.example</groupId> <version>1.0-SNAPSHOT</version> </parent> <modelVersion>4.0.0</modelVersion> <artifactId>spring-cloud-eureka</artifactId> <properties> <maven.compiler.source>1.8</maven.compiler.source> <maven.compiler.target>1.8</maven.compiler.target> <project.build.sourceEncoding>UTF-8</project.build.sourceEncoding> <project.reporting.outputEncoding>UTF-8</project.reporting.outputEncoding> <!-- 镜像前缀,推送镜像到远程库时需要,这里配置了一个阿里云的私有库 --> <docker.image.prefix> registry.cn-huhehaote.aliyuncs.com/monkeybrain </docker.image.prefix> <!-- docker镜像的tag --> <docker.tag>latest</docker.tag> <!-- 激活的profile --> <!--<activatedProperties></activatedProperties>--> </properties> <dependencies> <dependency> <groupId>org.springframework.cloud</groupId> <artifactId>spring-cloud-starter-eureka-server</artifactId> </dependency> </dependencies> <profiles> <!-- docker环境 --> <!--<profile> <id>docker</id> <properties> <activatedProperties>docker</activatedProperties> <docker.tag>docker-demo-${project.version}</docker.tag> </properties> </profile>--> </profiles> <build> <!--默认maven命令--> <defaultGoal>install</defaultGoal> <finalName>${project.artifactId}</finalName> <resources> <resource> <directory>src/main/resources</directory> <filtering>true</filtering> </resource> </resources> <plugins> <!-- 配置spring boot maven插件,把项目打包成可运行的jar包 --> <plugin> <groupId>org.springframework.boot</groupId> <artifactId>spring-boot-maven-plugin</artifactId> <configuration> <executable>true</executable> </configuration> </plugin> <!-- 打包时跳过单元测试 --> <plugin> <groupId>org.apache.maven.plugins</groupId> <artifactId>maven-surefire-plugin</artifactId> <configuration> <skipTests>true</skipTests> </configuration> </plugin> <!-- 配置docker maven插件,绑定install生命周期,在运行maven install时生成docker镜像 --> <plugin> <groupId>com.spotify</groupId> <artifactId>docker-maven-plugin</artifactId> <version>0.4.13</version> <!--<executions> <execution> <phase>install</phase> <goals> <goal>build</goal> <goal>tag</goal> </goals> </execution> </executions>--> <configuration> <!-- 修改这里的docker节点ip,需要打开 docker节点的远程管理端口2375, 具体如何配置可以参照之前的 docker安装和配置的文章 --> <dockerHost>http://localhost:2375</dockerHost> <imageName>${docker.image.prefix}/${project.build.finalName}</imageName> <serverId>aliyun-docker-registry</serverId> <registryUrl>registry.cn-huhehaote.aliyuncs.com</registryUrl> <pushImage>true</pushImage> <!--镜像的标签--> <imageTags> <imageTag>latest</imageTag> </imageTags> <!--基础镜像--> <baseImage>java:8</baseImage> <!-- 这里的 entryPoint 定义了容器启动时的运行命令,容器启动时运行 java -jar 包名 --> <entryPoint> ["java","-jar","/${project.build.finalName}.jar"] </entryPoint> <resources> <resource> <targetPath>/</targetPath> <directory>${project.build.directory}</directory> <include>${project.build.finalName}.jar</include> </resource> </resources> <!--<image>${docker.image.prefix}/${project.build.finalName}</image> <newName>${docker.image.prefix}/${project.build.finalName}:${docker.tag}</newName> <forceTags>true</forceTags>--> <!-- 如果需要在生成镜像时推送到远程库,pushImage设为true --> <!--<pushImage>false</pushImage>--> </configuration> </plugin> </plugins> </build> </project>$ mvn clean package docker:build -DpushImage
到此,相信大家对“如何分析Spring Boot应用通过Docker发布部署的流程”有了更深的了解,不妨来实际操作一番吧!这里是亿速云网站,更多相关内容可以进入相关频道进行查询,关注我们,继续学习!
免责声明:本站发布的内容(图片、视频和文字)以原创、转载和分享为主,文章观点不代表本网站立场,如果涉及侵权请联系站长邮箱:is@yisu.com进行举报,并提供相关证据,一经查实,将立刻删除涉嫌侵权内容。


