今天就跟大家聊聊有关.NET Core 3.0中WPF怎么使用IOC,可能很多人都不太了解,为了让大家更加了解,小编给大家总结了以下内容,希望大家根据这篇文章可以有所收获。
步骤
1、通过命令行创建wpf项目,当然你也可以通过vs2019来进行创建。具体的步骤就不演示了,当然,如果你还不会用vs2019创建项目,那么请你右上角关闭网页,省的烦心。
❯ mkdir WpfIoc ❯ cd WpfIoc ❯ dotnet.exe --version 3.0.100-preview6-012264 ❯ dotnet new wpf The template "WPF Application" was created successfully. Processing post-creation actions... Running 'dotnet restore' on C:\Users\laure\projects\WpfIoc\WpfIoc.csproj... Restore completed in 90.03 ms for C:\Users\laure\projects\WpfIoc\WpfIoc.csproj. Restore succeeded. ❯ dotnet build Microsoft (R) Build Engine version 16.1.54-preview+gd004974104 for .NET Core Copyright (C) Microsoft Corporation. All rights reserved. Restore completed in 19.92 ms for C:\Users\laure\projects\WpfIoc\WpfIoc.csproj. C:\Program Files\dotnet\sdk\3.0.100-preview6-012264\Sdks\Microsoft.NET.Sdk\targets\Microsoft.NET.RuntimeIdentifierInference.targets(151,5): message NETSDK1057: You are using a preview version of .NET Core. See: https://aka.ms/dotnet-core-preview [C:\Users\laure\projects\WpfIoc\WpfIoc.csproj] WpfIoc -> C:\Users\laure\projects\WpfIoc\bin\Debug\netcoreapp3.0\WpfIoc.dll Build succeeded. 0 Warning(s) 0 Error(s) Time Elapsed 00:00:01.63
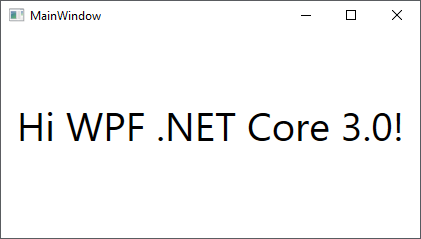
我们想要实现的是引导应用程序并在MainWindow的构造函数中注入一个服务,该服务将被调用以便在应用程序的主窗口上显示一些文本。
2、我们首选要安装下Microsoft Extensions DependencyInjectionnuget包,当然你也可以通过下面的方式进行添加,不过最好还是通过nuget的方式引入最新的预览版即可。
<Project Sdk="Microsoft.NET.Sdk.WindowsDesktop"> <PropertyGroup> <OutputType>WinExe</OutputType> <TargetFramework>netcoreapp3.0</TargetFramework> <UseWPF>true</UseWPF> </PropertyGroup> <ItemGroup> <PackageReference Include="Microsoft.Extensions.DependencyInjection" Version="3.0.0-preview6.19304.6" /> </ItemGroup> <ItemGroup> <ProjectReference Include="..\StoneGenerate.Core\StoneGenerate.Core.csproj" /> </ItemGroup> </Project>
3、创建一个ITextService接口服务,这个接口将由依赖注入容器注入到MainWindow类中进行使用。
public interface ITextService { string GetText(); }4、当然你还得创建一个TextService类来实现上面的接口。
class TextService : ITextService { private string _text; public TextService(string text) { _text = text; } public string GetText() { return _text; } }5、接下来在我们的入口App.xaml.cs文件中配置我们的IOC容器,并入住我们的服务,相信做过.NET Core项目的你,对下面的代码应该都非常的熟悉,这里就不过多的解释了,省的浪费大家的宝贵时间。
public App() { var serviceCollection = new ServiceCollection(); ConfigureServices(serviceCollection); _serviceProvider = serviceCollection.BuildServiceProvider(); } private void ConfigureServices(IServiceCollection services) { services.AddSingleton<ITextService>(provider => new TextService("Hi WPF .NET Core 3.0")); services.AddSingleton<MainWindow>(); }6、接下来我们重写一下App.xaml.cs的OnStartup方法,解析出MainWindow 并show出来
protected override void OnStartup(StartupEventArgs e) { base.OnStartup(e); var main = serviceProvider.GetRequiredService<MainWindow>(); main.Show(); }当然,这也就意味着你得移除App.xmal中的启动选项,代码如下:
<Application x:Class="wpfioc.App" xmlns="http://schemas.microsoft.com/winfx/2006/xaml/presentation" xmlns:x="http://schemas.microsoft.com/winfx/2006/xaml" xmlns:local="clr-namespace:wpfioc" Startup="App_OnStartup"> <Application.Resources> </Application.Resources> </Application>
1、接下来我们修改一下MainWindow的xaml代码以便来显示我们的文本信息:
<Window x:Class="WpfIoc.MainWindow" xmlns="http://schemas.microsoft.com/winfx/2006/xaml/presentation" xmlns:x="http://schemas.microsoft.com/winfx/2006/xaml" xmlns:d="http://schemas.microsoft.com/expression/blend/2008" xmlns:mc="http://schemas.openxmlformats.org/markup-compatibility/2006" xmlns:local="clr-namespace:WpfIoc" mc:Ignorable="d" Title="MainWindow" Height="450" Width="800"> <Grid> <Grid.RowDefinitions> <RowDefinition Height="9*" /> <RowDefinition Height="1*" /> </Grid.RowDefinitions> <Label Name="Label" Content="Hello .NET Core!" HorizontalAlignment="Center" VerticalAlignment="Center" FontSize="40" /> </Grid> </Window>
2、当然,MainWindow的cs代码也要进行下调整,以便能够接受IOC注入进来的方法。
public partial class MainWindow : Window { public MainWindow(ITextService textService) { InitializeComponent(); Label.Content = textService.GetText(); } }结果
相信上面的繁琐的步骤你也都看完了,那么接下来就是见证奇迹的时刻了,睁开你的双眼,奉上精美图片一张:
看完上述内容,你们对.NET Core 3.0中WPF怎么使用IOC有进一步的了解吗?如果还想了解更多知识或者相关内容,请关注亿速云行业资讯频道,感谢大家的支持。
免责声明:本站发布的内容(图片、视频和文字)以原创、转载和分享为主,文章观点不代表本网站立场,如果涉及侵权请联系站长邮箱:is@yisu.com进行举报,并提供相关证据,一经查实,将立刻删除涉嫌侵权内容。


