жё©йҰЁжҸҗзӨәГ—
жӮЁеҘҪпјҢзҷ»еҪ•еҗҺжүҚиғҪдёӢи®ўеҚ•е“ҰпјҒ
еҜҶз Ғзҷ»еҪ•Г—
зҷ»еҪ•жіЁеҶҢГ—
зӮ№еҮ» зҷ»еҪ•жіЁеҶҢ еҚіиЎЁзӨәеҗҢж„ҸгҖҠдәҝйҖҹдә‘з”ЁжҲ·жңҚеҠЎжқЎж¬ҫгҖӢ
з”ЁжҲ·зҷ»еҪ•Г—
жӮЁеҘҪпјҢзҷ»еҪ•еҗҺжүҚиғҪдёӢи®ўеҚ•е“ҰпјҒ
иҝҷжңҹеҶ…е®№еҪ“дёӯе°Ҹзј–е°Ҷдјҡз»ҷеӨ§е®¶еёҰжқҘжңүе…іжҖҺд№ҲеңЁAndroidдёӯеҲ©з”ЁActivityе®һзҺ°еҚ•е…ғжөӢиҜ•пјҢж–Үз« еҶ…е®№дё°еҜҢдё”д»Ҙдё“дёҡзҡ„и§’еәҰдёәеӨ§е®¶еҲҶжһҗе’ҢеҸҷиҝ°пјҢйҳ…иҜ»е®ҢиҝҷзҜҮж–Үз« еёҢжңӣеӨ§е®¶еҸҜд»ҘжңүжүҖ收иҺ·гҖӮ
еҜ№Acitivityзҡ„жөӢиҜ•
еҜ№дәҺActivityпјҢжҲ‘们еӨ§иҮҙжңүдёӨз§ҚжөӢиҜ•йңҖжұӮпјҡ
1гҖҒеңЁActivityжӯЈеёёеҗҜеҠЁеҗҺпјҢжҹҘзңӢз•ҢйқўеёғеұҖжҳҜеҗҰжӯЈзЎ®пјҢеҢ…жӢ¬Viewзҡ„зӮ№еҮ»дәӢ件зӯүжҳҜеҗҰжӯЈзЎ®гҖӮ
2гҖҒйңҖиҰҒеңЁActivityеҗҜеҠЁеүҚе®ҢжҲҗеҗ„з§Қж•°жҚ®зҡ„йғЁзҪІпјҢ然еҗҺжҹҘзңӢActivityзҡ„ж•ҲжһңгҖӮ
еҜ№дәҺиҝҷдёӨз§ҚйңҖжұӮпјҢ笔иҖ…еҲҶеҲ«еҒҡдәҶдёӨдёӘзӨәдҫӢи§ЈиҜҙпјҡ
1гҖҒжЈҖжөӢдёҖдёӘеёғеұҖдёӯзҡ„buttonе’ҢTextViewжҳҜеҗҰжӯЈзЎ®гҖӮ
2гҖҒд»ҺзҪ‘з»ңеҠЁжҖҒиҺ·еҸ–StringеҲ°Activityз•ҢйқўжҳҫзӨәпјҢ并且иҝҷдёӘеӣҫзүҮзҡ„URLжҳҜз”ұIntentдј йҖ’иҝҮжқҘзҡ„гҖӮ
зҺҜеўғйғЁзҪІ
йҰ–е…ҲиҰҒеҜје…Ҙexpresso-coreзҡ„еҢ…пјҢеҰӮдёӢпјҡ
dependencies { // Other dependencies ... androidTestCompile 'com.android.support.test.espresso:espresso-core:2.2.2' }еҪ“然еңЁзӣ®еүҚзҡ„йЎ№зӣ®жһ¶жһ„дёӯдёҖиҲ¬е·Із»ҸиҮӘеҠЁеҜје…ҘдәҶиҝҷдёӘеҢ…пјҢжүҖд»ҘдёҚйңҖиҰҒиҮӘе·ұеҜје…ҘпјҢ笔иҖ…йЎ№зӣ®дёӯиҮӘеҠЁеҜје…Ҙзҡ„еҢ…еҰӮдёӢеҰӮдёӢпјҡ
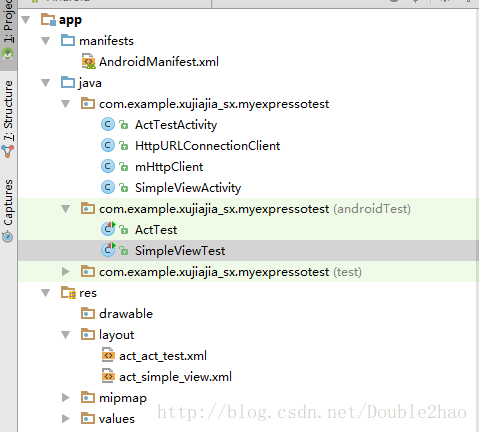
dependencies { compile fileTree(include: ['*.jar'], dir: 'libs') androidTestCompile('com.android.support.test.espresso:espresso-core:2.2.2', { exclude group: 'com.android.support', module: 'support-annotations' }) compile 'com.android.support:appcompat-v7:26.0.0-alpha1' compile 'com.android.support.constraint:constraint-layout:1.0.2' testCompile 'junit:junit:4.12' }йЎ№зӣ®з»“жһ„еҰӮдёӢпјҡ
еёғеұҖViewзҡ„жөӢиҜ•пјҡ
package com.example.xujiajia_sx.myexpressotest; import android.app.Activity; import android.os.Bundle; import android.support.annotation.Nullable; import android.view.View; import android.widget.Button; import android.widget.TextView; /** * Created by xujiajia_sx on 2017/8/14. */ public class SimpleViewActivity extends Activity{ private TextView tv; private Button btn; @Override protected void onCreate(@Nullable Bundle savedInstanceState) { super.onCreate(savedInstanceState); setContentView(R.layout.act_simple_view); initView(); } private void initView() { tv=findViewById(R.id.tv_simple_view); btn=findViewById(R.id.btn_simple_view); tv.setText("111"); btn.setText("222"); btn.setOnClickListener(new View.OnClickListener() { @Override public void onClick(View view) { tv.setText("777"); } }); } }<?xml version="1.0" encoding="utf-8"?> <LinearLayout xmlns:android="http://schemas.android.com/apk/res/android" android:layout_width="match_parent" android:layout_height="match_parent" android:orientation="vertical"> <TextView android:id="@+id/tv_simple_view" android:layout_width="wrap_content" android:layout_height="wrap_content" /> <Button android:id="@+id/btn_simple_view" android:layout_width="wrap_content" android:layout_height="wrap_content" /> </LinearLayout>
package com.example.xujiajia_sx.myexpressotest; import android.support.test.rule.ActivityTestRule; import org.junit.Rule; import org.junit.Test; import static android.support.test.espresso.Espresso.onView; import static android.support.test.espresso.action.ViewActions.click; import static android.support.test.espresso.assertion.ViewAssertions.matches; import static android.support.test.espresso.matcher.ViewMatchers.withId; import static android.support.test.espresso.matcher.ViewMatchers.withText; /** * Created by xujiajia_sx on 2017/8/14. */ public class SimpleViewTest { @Rule public ActivityTestRule<SimpleViewActivity> mActivityTestRule = new ActivityTestRule<SimpleViewActivity>(SimpleViewActivity.class); @Test public void textViewTest() throws Exception { onView(withId(R.id.tv_simple_view)) .check(matches(withText("111"))); } @Test public void buttonTest() throws Exception { onView(withId(R.id.btn_simple_view)) .check(matches(withText("222"))) .perform(click()); onView(withId(R.id.tv_simple_view)) .check(matches(withText("777"))); } }жөӢиҜ•дё»иҰҒйҖ»иҫ‘пјҡ
1гҖҒйҰ–е…ҲиҰҒдҪҝз”ЁActivityTestRuleеҲқе§ӢеҢ–дҪ иҰҒжөӢиҜ•зҡ„ActivityгҖӮ
2гҖҒзј–еҶҷжөӢиҜ•ж–№жі•пјҢжөӢиҜ•ViewжҳҜеҗҰжҳҜжҲ‘们预жңҹзҡ„ж ·еӯҗгҖӮ
дёӨдёӘжөӢиҜ•ж–№жі•йҖ»иҫ‘еҰӮдёӢпјҡ
textViewTest()пјҡ
еңЁActivityдёӯжҹҘжүҫidдёәtv_simple_viewзҡ„ViewпјҢжЈҖжҹҘе®ғзҡ„textжҳҜеҗҰдёәвҖң111вҖқгҖӮ
buttonTest()пјҡ
еңЁActivityдёӯжҹҘжүҫidдёәbtn_simple_viewзҡ„ViewпјҢжЈҖжҹҘе®ғзҡ„textжҳҜеҗҰдёәвҖң222вҖқгҖӮ然еҗҺжү§иЎҢзӮ№еҮ»дәӢ件пјҢзӮ№еҮ»дәӢ件зҡ„йҖ»иҫ‘жҳҜеңЁActivityзҡ„OnCreateдёӯи®ҫзҪ®зҡ„пјҢжҳҜжҠҠTextViewзҡ„textи®ҫзҪ®дёә777гҖӮеңЁжү§иЎҢе®ҢзӮ№еҮ»дәӢ件еҗҺпјҢжөӢиҜ•ж–№жі•дёӯ继з»ӯжөӢиҜ•TextViewзҡ„textжҳҜеҗҰдёәвҖң777вҖқгҖӮ
иҜ»иҖ…еҸҜиғҪйҳ…иҜ»еҲ°еҜ№Viewзҡ„жөӢиҜ•йқһеёёйҷҢз”ҹпјҢдёҚз”ЁжӢ…еҝғпјҢжӯӨеӨ„дё»иҰҒиҰҒзҗҶи§ЈжөӢиҜ•зҡ„йҖ»иҫ‘еҚіеҸҜпјҢ笔иҖ…дјҡеңЁдёӢзҜҮж–Үз« е…·дҪ“и®Іи§ЈViewзҡ„еҗ„з§ҚжөӢиҜ•ж–№жі•гҖӮ
зҪ‘з»ңиҺ·еҸ–Stringзҡ„ActivityжөӢиҜ•пјҡ
package com.example.xujiajia_sx.myexpressotest; import android.app.Activity; import android.os.Bundle; import android.support.annotation.Nullable; import android.widget.TextView; /** * Created by xujiajia_sx on 2017/8/14. */ public class ActTestActivity extends Activity{ private TextView tv; @Override protected void onCreate(@Nullable Bundle savedInstanceState) { super.onCreate(savedInstanceState); setContentView(R.layout.act_act_test); initView(); } private void initView() { tv= findViewById(R.id.tv_act_test); new Thread(new Runnable() { @Override public void run() { String url =getIntent().getStringExtra("url"); final String s=mHttpClient.getInstance().get(url); runOnUiThread(new Runnable() { @Override public void run() { tv.setText(s); } }); } }).start(); } }package com.example.xujiajia_sx.myexpressotest; /** * Created by xujiajia_sx on 2017/8/14. */ public class mHttpClient { private static HttpURLConnectionClient mClient = null; public static void setClient(HttpURLConnectionClient client) { mClient = client; } public static HttpURLConnectionClient getInstance() { return mClient; } }package com.example.xujiajia_sx.myexpressotest; import android.util.Log; import java.io.BufferedReader; import java.io.IOException; import java.io.InputStream; import java.io.InputStreamReader; import java.net.HttpURLConnection; import java.net.URL; import static android.content.ContentValues.TAG; /** * Created by xujiajia_sx on 2017/8/14. */ public class HttpURLConnectionClient { public String get(String url) { HttpURLConnection conn = null; try { URL mURL = new URL(url); conn = (HttpURLConnection) mURL.openConnection(); conn.setRequestMethod("GET"); conn.setConnectTimeout(2000); conn.connect(); InputStream is = conn.getInputStream(); StringBuilder sb = new StringBuilder(); BufferedReader reader = new BufferedReader(new InputStreamReader(is)); String line; while ((line = reader.readLine()) != null) { sb.append(line).append("\n"); } reader.close(); return sb.toString(); } catch (IOException e) { Log.e(TAG, "network error for mini program ", e); return ""; } finally { //жңҖеҗҺе°Ҷconnж–ӯејҖиҝһжҺҘ if (conn != null) { conn.disconnect(); } } } }<?xml version="1.0" encoding="utf-8"?> <LinearLayout xmlns:android="http://schemas.android.com/apk/res/android" android:layout_width="match_parent" android:layout_height="match_parent" android:orientation="vertical"> <TextView android:id="@+id/tv_act_test" android:layout_width="wrap_content" android:layout_height="wrap_content" /> </LinearLayout>
package com.example.xujiajia_sx.myexpressotest; import android.content.Intent; import android.support.test.rule.ActivityTestRule; import org.junit.Rule; import org.junit.Test; /** * Created by xujiajia_sx on 2017/8/14. */ public class ActTest { @Rule public ActivityTestRule<ActTestActivity> mActivityTestRule= new ActivityTestRule<ActTestActivity>(ActTestActivity.class){ @Override protected Intent getActivityIntent() { Intent intent=new Intent(); intent.putExtra("url","http://www.weather.com.cn/adat/sk/101310201.html"); return intent; } @Override protected void beforeActivityLaunched() { mHttpClient.setClient(new HttpURLConnectionClient()); } }; @Test public void mTest() throws Exception{ Thread.sleep(5000); } }зҪ‘з»ңиҺ·еҸ–дёҚиҰҒеҝҳи®°еңЁAndroidManifestдёӯеҠ зҪ‘з»ңжқғйҷҗе–”гҖӮ
иҝҷдёӘActivityзҡ„дё»иҰҒйҖ»иҫ‘е°ұжҳҜжҺҘ收IntentпјҢ然еҗҺиҺ·еҸ–еҲ°дј иҝҮжқҘзҡ„urlпјҢжҺҘзқҖйҖҡиҝҮзҪ‘з»ңиҺ·еҸ–еҲ°urlзҡ„StringпјҢжҳҫзӨәеҲ°TextViewдёҠгҖӮ
дё»иҰҒжөӢиҜ•йҖ»иҫ‘пјҡ
йҰ–е…ҲиҝҳжҳҜиҰҒе®ҡд№үActivityTestRuleпјҢзЎ®е®ҡдҪҝз”Ёе“ӘдёӘActivityгҖӮ
дёҺеүҚдёҖдёӘдҫӢеӯҗдёҚеҗҢзҡ„жҳҜпјҢиҝҷйҮҢиҰҒйҮҚеҶҷActivityTestRuleзҡ„дёӨдёӘж–№жі•пјҢgetActivityIntent() е’ҢbeforeActivityLaunched()гҖӮйЎҫеҗҚжҖқд№үпјҢдёҖдёӘжҳҜи®ҫзҪ®ActivityиҺ·еҸ–еҲ°зҡ„IntentпјҢеҸҰдёҖдёӘжҳҜи®ҫзҪ®ActivityеҗҜеҠЁи·ҹд№ӢеүҚзҡ„еҮҶеӨҮе·ҘдҪңгҖӮ
笔иҖ…жӯӨеӨ„еңЁgetActivityIntent() дёӯи®ҫзҪ®дәҶдј йҖ’зҡ„urlпјҢеңЁbeforeActivityLaunched()и®ҫзҪ®зҡ„зҪ‘з»ңиҺ·еҸ–зҡ„ж–№ејҸгҖӮ
жңүдәӣиҜ»иҖ…еҸҜиғҪдјҡеҘҪеҘҮдёәд»Җд№ҲзҪ‘з»ңиҺ·еҸ–зҡ„ж–№ејҸдёҚй»ҳи®Өе‘ўпјҢиҖҢиҰҒйҖҡиҝҮsetClient()жқҘи®ҫзҪ®пјҹ
еӣ дёәиҝҷж ·еҸҜд»Ҙжӣҙж–№дҫҝжҲ‘们жөӢиҜ•пјҢеңЁжӯЈејҸзҡ„йЎ№зӣ®дёӯпјҢжҲ‘们еҸҜиғҪдјҡйңҖиҰҒеңЁд»Јз ҒдёӯеҠ е…Ҙlogзӯүж“ҚдҪңпјҢдҪҶжҳҜжӯЈејҸзҡ„д»Јз ҒдёҖиҲ¬жҲ‘们жҳҜдёҚдјҡеҺ»дҝ®ж”№зҡ„пјҢдҪҶжҳҜжҲ‘们еҸҜд»Ҙ继жүҝе®ғпјҢйҮҚеҶҷжҹҗдәӣж–№жі•пјҢ然еҗҺжҠҠе®ғж”ҫеҲ°жөӢиҜ•йңҖиҰҒзҡ„ең°ж–№гҖӮ
еңЁиҝҷйҮҢжҲ‘们е°ұеҸҜд»Ҙ继жүҝHttpURLConnectionClient иҝҷдёӘзұ»пјҢ然еҗҺжҠҠ继жүҝзҡ„еӯҗзұ»дҪҝз”ЁsetClient()жқҘдҪңдёәзҪ‘з»ңиҺ·еҸ–зҡ„ж–№ејҸгҖӮ
дёҠиҝ°е°ұжҳҜе°Ҹзј–дёәеӨ§е®¶еҲҶдә«зҡ„жҖҺд№ҲеңЁAndroidдёӯеҲ©з”ЁActivityе®һзҺ°еҚ•е…ғжөӢиҜ•дәҶпјҢеҰӮжһңеҲҡеҘҪжңүзұ»дјјзҡ„з–‘жғ‘пјҢдёҚеҰЁеҸӮз…§дёҠиҝ°еҲҶжһҗиҝӣиЎҢзҗҶи§ЈгҖӮеҰӮжһңжғізҹҘйҒ“жӣҙеӨҡзӣёе…ізҹҘиҜҶпјҢж¬ўиҝҺе…іжіЁдәҝйҖҹдә‘иЎҢдёҡиө„и®Ҝйў‘йҒ“гҖӮ
е…ҚиҙЈеЈ°жҳҺпјҡжң¬з«ҷеҸ‘еёғзҡ„еҶ…е®№пјҲеӣҫзүҮгҖҒи§Ҷйў‘е’Ңж–Үеӯ—пјүд»ҘеҺҹеҲӣгҖҒиҪ¬иҪҪе’ҢеҲҶдә«дёәдё»пјҢж–Үз« и§ӮзӮ№дёҚд»ЈиЎЁжң¬зҪ‘з«ҷз«ӢеңәпјҢеҰӮжһңж¶үеҸҠдҫөжқғиҜ·иҒ”зі»з«ҷй•ҝйӮ®з®ұпјҡis@yisu.comиҝӣиЎҢдёҫжҠҘпјҢ并жҸҗдҫӣзӣёе…іиҜҒжҚ®пјҢдёҖз»ҸжҹҘе®һпјҢе°Ҷз«ӢеҲ»еҲ йҷӨж¶үе«ҢдҫөжқғеҶ…е®№гҖӮ

дәҝйҖҹдә‘е…¬дј—еҸ·

жүӢжңәзҪ‘з«ҷдәҢз»ҙз Ғ


