这篇文章给大家分享的是有关如何使用kotlin实现一个饼图的内容。小编觉得挺实用的,因此分享给大家做个参考,一起跟随小编过来看看吧。
先看看做的是什么
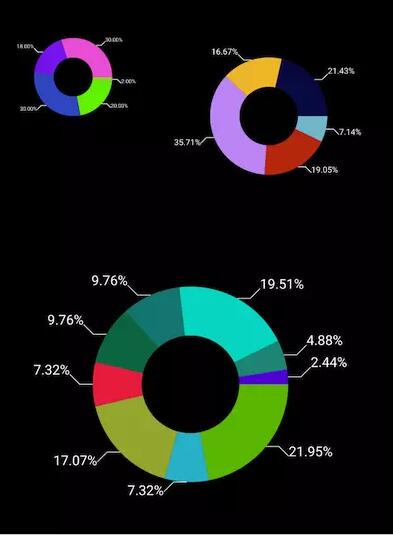
看完图,我们来整理下思路
饼图居中,每块区域都是一个扇形,需要canvas.drawArc根据角度来绘制
需要path.arcTo定位到扇形弧度的一半来绘制折线的起点
通过canvas.drawPath绘制折线,折线的长度根据饼图大小来设置比例
通过canvas.drawText绘制文字,文字的大小根据饼图的大小来设置比例,绘制文字的位置需要计算文字的宽度
思路清晰后就撸起袖子加油干
知识点
我们先来了解一个概念,我们在paint画扇形的时候,对应的度数是在哪个位置呢?
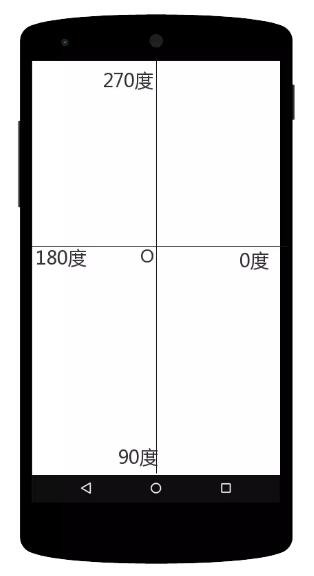
看到图后应该明白了吧
绘制饼图
我们先来看看他的参数,很明显,左、上、右、下参数形成一个面板,startAngle 为起始的角度,sweepAngle 为从起始角度开始绘制多少度,useCenter为是否连接到圆心,paint为画笔
public void drawArc(float left, float top, float right, float bottom, float startAngle, float sweepAngle, boolean useCenter, @NonNull Paint paint) { super.drawArc(left, top, right, bottom, startAngle, sweepAngle, useCenter, paint); }我们以当前控件的width、height为面板来画一个圆形的饼图
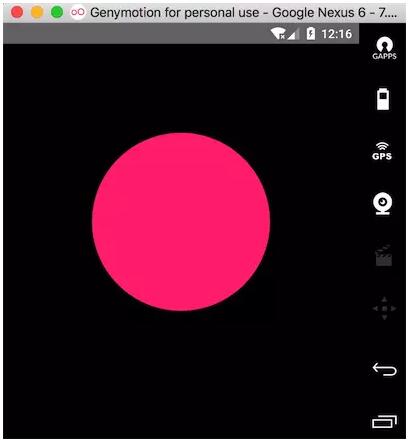
@RequiresApi(Build.VERSION_CODES.LOLLIPOP) override fun onDraw(canvas: Canvas) { super.onDraw(canvas) canvas.drawArc(0f, 0f, width, height, 0f, 360f, true, paintRed) }哇塞,好丑哦,结果显示的是一个椭圆,如果要绘制一个圆形的饼图,我们必须得保证left=top=right=bottom

设置饼图居中
/** * view的宽度 */ var width: Float = 0f /** * view的高度 */ var height: Float = 0f /** * drawArc距离左边的距离 */ var left: Float = 0f /** * drawArc距离上边的距离 */ var top: Float = 0f /** * drawArc距离右边的距离 */ var right: Float = 0f /** * drawArc距离下边的距离 */ var bottom: Float = 0f @RequiresApi(Build.VERSION_CODES.LOLLIPOP) override fun onDraw(canvas: Canvas) { super.onDraw(canvas) canvas.drawArc(left, top, right, bottom, 0f, 360f, true, paint) } override fun onSizeChanged(w: Int, h: Int, oldw: Int, oldh: Int) { super.onSizeChanged(w, h, oldw, oldh) setBackgroundColor(resources.getColor(R.color.black)) width = w.toFloat() height = h.toFloat() left = width / 4f top = width / 4f right = width - left bottom = width - top }完美居中
接下来,我们要把上面从0度到360度多分几个步骤来绘制
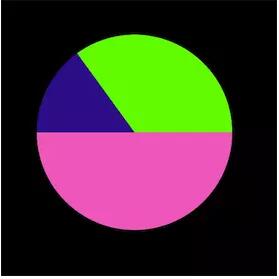
@RequiresApi(Build.VERSION_CODES.LOLLIPOP) override fun onDraw(canvas: Canvas) { super.onDraw(canvas) ... canvas.drawArc(left, top, right, bottom, 0f, 20f, true, paintPuple) canvas.drawArc(left, top, right, bottom, 20f, 10f, true, paintGray) canvas.drawArc(left, top, right, bottom, 30f, 40f, true, paintGreen) canvas.drawArc(left, top, right, bottom, 70f, 110f, true, paintBlue) canvas.drawArc(left, top, right, bottom, 180f, 110f, true, paintRed) canvas.drawArc(left, top, right, bottom, 290f, 70f, true, paintYellow) }还不错
上图的度数是写死的,现在我们来把他写活
提供一个设置个数的集合,比如农名伯伯卖水果,梨子卖了10个,香蕉卖了3个,苹果卖了7个,那么这个个数的集合为pieList=(10,3,7)。
因为饼图是根据角度来绘制的,我们必须将这个个数集合换算成角度集合,换算的过程中我们需要知道每一种水果所占总水果的比例,然后通过这个比例去乘上360度,就知道每一种水果所占的度数。
梨子的占比为10/(10+3+7)=1/2,可得梨子占饼图的度数为1/2*360=180度,按照这种方式计算,香蕉和苹果占饼图的度数分别为54度和126度,那么,饼图的分布也就出来了
现在,我们来定义一个个数集合,计算出比例的集合和度数的集合,下面是比例的集合,度数的集合我们在绘制的时候再去计算
/** * 个人分类集合 */ var pieList = arrayListOf(10f,3f,7f) /** * 饼图所占的比例 */ var scaleList = arrayListOf<Float>() /** * 个数分类的总量 */ var total: Float = 0f override fun onSizeChanged(w: Int, h: Int, oldw: Int, oldh: Int) { super.onSizeChanged(w, h, oldw, oldh) //计算个数的总和 total = pieList.sum() //存储比例值 for (a in pieList) { scaleList.add(a.div(total)) } }比例集合拿到了,接下来,我们去循环这个比例值,然后将比例值乘上360度,计算出角度值,供drawArc的sweepAngle使用,但是,我们还缺少一个startAngle起始角度,我们可以定义一个起始角度为0度,然后每次根据计算出的角度值sweepAngle去累加起始度数,用代码来实现下
/** * 记录当前画饼图的度数 */ var currentDegree: Float = 0f /** * 累加饼图的度数作为下一个绘制的起始度数 */ var srctorDegree: Float = 0f @RequiresApi(Build.VERSION_CODES.LOLLIPOP) override fun onDraw(canvas: Canvas) { super.onDraw(canvas) for (scale in scaleList) { val paint = Paint() paint.strokeWidth = dip(10.0f).toFloat() paint.isAntiAlias = true //定义一个随机生成的颜色数,来区分不同的扇形区域 val hex = "#" + Integer.toHexString((-16777216 * Math.random()).toInt()) paint.color = Color.parseColor(hex) //角度数 srctorDegree = scale * 360 canvas.drawArc(left, top, right, bottom, currentDegree, srctorDegree, true, paint) //累加角度 currentDegree += srctorDegree } }ok,现在我们可以随机的去定义个数来生成占比的饼图了
绘制折线
接下来,我们来绘制折线,折线的起点是每个扇形弧上的一半,path的arcTo方法也可以绘制圆,且方法参数使用也是一样,我们可以让arcTo跟着canvas.drawArc一块画,arcTo的startAngle起始角度为canvas.drawArc起始角度加上sweepAngle度数的一半,这样,就定位到了弧边的一半,arcTo的sweepAngle为0就行了,我们只定位,不绘制
... canvas.drawArc(left, top, right, bottom, currentDegree, srctorDegree, true, paint) val path = Path() path.arcTo(left, top, right, bottom, currentDegree + srctorDegree / 2, 0f, false) ...
现在,path的位置定位到弧边的一半了,接下来,我们要知道当前path的坐标然后根据坐标去绘制折线,
val bounds = RectF() //将path当前的坐标赋值给bounds path.computeBounds(bounds, true)
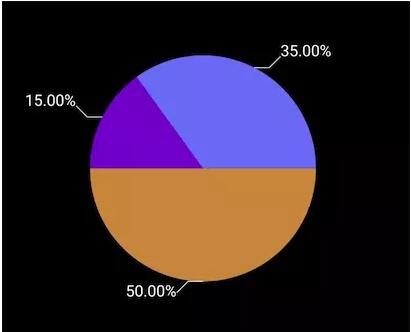
现在拿到坐标了,我们再来看看效果图,折线和文字呈四个方向,我们不如把饼图分成四个区域,以圆心为坐标轴原点,切分四个象限:
第一象限:折线为右上,文字在折线右边
第二象限:折线为左上,文字在折线左边
第三象限:折线为左下,文字在折线左边
第四象限:折线为右下,文字在折线右边
那么,接下来就是如何判断当前起始点在哪个象限了,先以第一象限为例,如果当前的坐标大于饼图横轴方向一半,并且小于饼图纵轴方向的一半,那么就是第一象限,其他依次类推
/** * 横线的长度 */ var lineae: Int = 30 /** * 斜线的长度 */ var slantLine: Int = 30 override fun onSizeChanged(w: Int, h: Int, oldw: Int, oldh: Int) { super.onSizeChanged(w, h, oldw, oldh) //计算横线的比例 lineae = (width / 30f).toInt() //计算斜线的比例 slantLine = (width / 40f).toInt() } @RequiresApi(Build.VERSION_CODES.LOLLIPOP) override fun onDraw(canvas: Canvas) { super.onDraw(canvas) for (scale in scaleList) { ... val path = Path() path.arcTo(left, top, right, bottom, currentDegree + srctorDegree / 2, 0f, false) val bounds = RectF() path.computeBounds(bounds, true) //第一象限 if (bounds.left >= width / 2 && bounds.top <= width / 2) { path.lineTo(bounds.left + lineae, bounds.top) path.lineTo(bounds.left + lineae + slantLine, bounds.top - slantLine) canvas.drawPath(path, paintLine) //第二象限 } else if (bounds.left <= width / 2 && bounds.top <= width / 2) { path.lineTo(bounds.left - lineae, bounds.top) path.lineTo(bounds.left - lineae - slantLine, bounds.top - slantLine) canvas.drawPath(path, paintLine) //第三象限 } else if (bounds.left <= width / 2 && bounds.top >= width / 2) { path.lineTo(bounds.left - lineae, bounds.top) path.lineTo(bounds.left - lineae - slantLine, bounds.top + slantLine) canvas.drawPath(path, paintLine) //第四象限 } else { path.lineTo(bounds.left + lineae, bounds.top) path.lineTo(bounds.left + lineae + slantLine, bounds.top + slantLine) canvas.drawPath(path, paintLine) } } ... }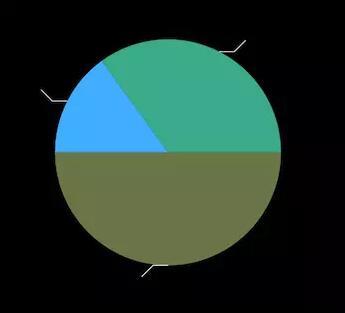
哎呀,出来了
绘制文字
接下来就是绘制文字了,第一、四象限还好,文字可以在折线后面跟着画,但是二、三象限的文字就不允许了,我们必须往前移动文字宽度的距离才能完美衔接到折线上,所以,我们来定义一个计算文字的方法
/** * 获取文字的宽度 */ private fun getStringWidth(str: String): Float = paintLine.measureText(str)
文字是会随着饼图的大小进行改变的,所以设置文字大小的比例
paintLine.textSize = dip(width / 100).toFloat()
接下来就开始绘制文字吧
@RequiresApi(Build.VERSION_CODES.LOLLIPOP) override fun onDraw(canvas: Canvas) { super.onDraw(canvas) ... //获取当前的百分比文字 val textStr = String.format("%.2f%%", scale * 100) //获取文字的宽度 val textWidth = getStringWidth(textStr) //第一象限 if (bounds.left >= width / 2 && bounds.top <= width / 2) { ... canvas.drawText(textStr, bounds.left + lineae + slantLine, bounds.top - slantLine, paintText) ... //第二象限 } else if (bounds.left <= width / 2 && bounds.top <= width / 2) { ... canvas.drawText(textStr, bounds.left - lineae - slantLine - textWidth, bounds.top - slantLine, paintText) ... //第三象限 } else if (bounds.left <= width / 2 && bounds.top >= width / 2) { ... canvas.drawText(textStr, bounds.left - lineae - slantLine - textWidth, bounds.top + lineae, paintText) ... //第四象限 } else { ... canvas.drawText(textStr, bounds.left + lineae + slantLine, bounds.top + slantLine, paintText) ... } }嗯,还不错,
然后我们再看看效果图,饼图中间还有一块与背景色一样的黑圆,这不跟简单了嘛
//定义中间黑圆的画笔 paintCicle.color = resources.getColor(R.color.black) paintCicle.isAntiAlias = true paintCicle.style = Paint.Style.FILL @RequiresApi(Build.VERSION_CODES.LOLLIPOP) override fun onDraw(canvas: Canvas) { super.onDraw(canvas) ... //在循环结束饼图的时候,以饼图的原点为中心画圆 canvas.drawCircle(width / 2, width / 2, width / 8, paintCicle) }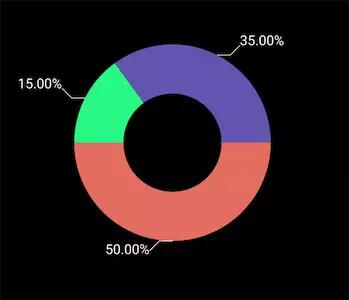
然后我们暴露一个方法,提供给Activity去调用
/** * 设置扇形参数 */ fun setPieData(a: ArrayList<Float>) { pieList.clear() pieList.addAll(a) invalidate() }那么,Activity就可以这么去调用了
override fun onCreate(savedInstanceState: Bundle?) { super.onCreate(savedInstanceState) setContentView(R.layout.activity_second) pie1.setPieData(arrayListOf(1f,10f,15f,9f,15f)) pie2.setPieData(arrayListOf(3f,8f,15f,7f,9f)) pie3.setPieData(arrayListOf(9f,3f,7f,3f,4f,2f,1f)) }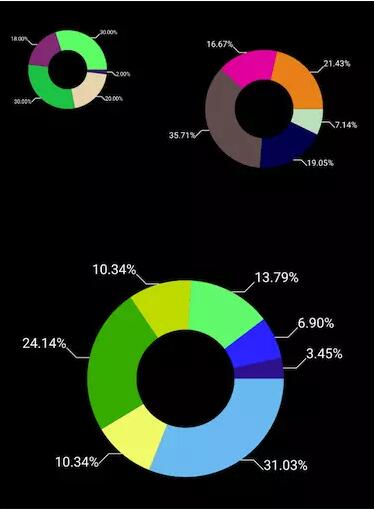
感谢各位的阅读!关于“如何使用kotlin实现一个饼图”这篇文章就分享到这里了,希望以上内容可以对大家有一定的帮助,让大家可以学到更多知识,如果觉得文章不错,可以把它分享出去让更多的人看到吧!
免责声明:本站发布的内容(图片、视频和文字)以原创、转载和分享为主,文章观点不代表本网站立场,如果涉及侵权请联系站长邮箱:is@yisu.com进行举报,并提供相关证据,一经查实,将立刻删除涉嫌侵权内容。


