檩鶮жПРз§Ї√Ч
жВ®е•љпЉМзЩїељХеРОжЙНиГљдЄЛиЃҐеНХеУ¶пЉБ
еѓЖз†БзЩїељХ√Ч
зЩїељХж≥®еЖМ√Ч
зВєеЗї зЩїељХж≥®еЖМ еН≥и°®з§ЇеРМжДПгАКдЇњйАЯдЇСзФ®жИЈжЬНеК°жЭ°жђЊгАЛ
зФ®жИЈзЩїељХ√Ч
жВ®е•љпЉМзЩїељХеРОжЙНиГљдЄЛиЃҐеНХеУ¶пЉБ
ињЩзѓЗжЦЗзЂ†дЄїи¶БдїЛзїНдЇЖAndroidе¶ВдљХеЃЮзО∞иБК姩зХМйЭҐпЉМеЕЈжЬЙдЄАеЃЪеАЯйЙідїЈеАЉпЉМжДЯеЕіиґ£зЪДжЬЛеПЛеПѓдї•еПВиАГдЄЛпЉМеЄМжЬЫе§ІеЃґйШЕиѓїеЃМињЩзѓЗжЦЗзЂ†дєЛеРОе§ІжЬЙжФґиОЈпЉМдЄЛйЭҐиЃ©е∞ПзЉЦеЄ¶зЭАе§ІеЃґдЄАиµЈдЇЖиІ£дЄАдЄЛгАВ
еЕЈдљУеЖЕеЃєе¶ВдЄЛ
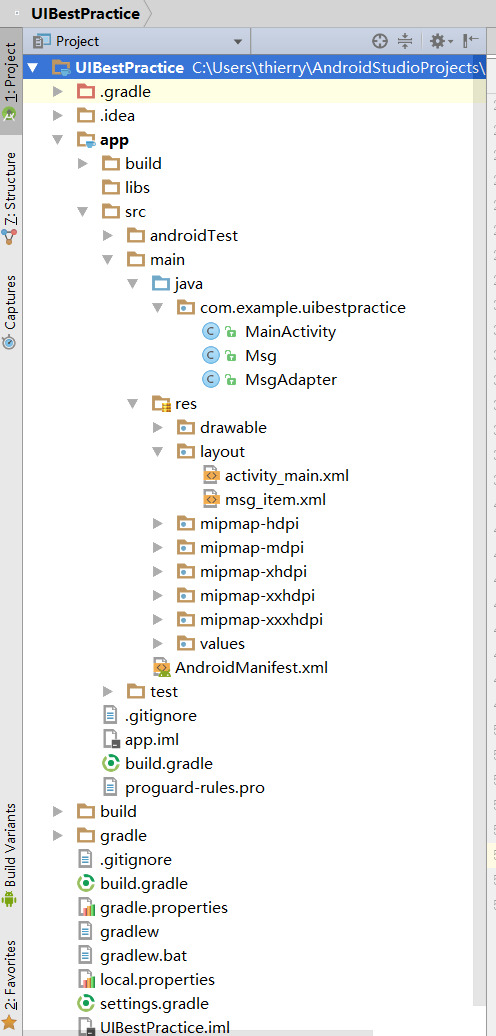
жЦЗдїґзЫЃељХ
еЬ®appдЄЛзЪДbuild.gradleдЄ≠жЈїеК†дЊЭиµЦеЇУпЉИRecyclerViewпЉЙ
apply plugin: 'com.android.application' android { compileSdkVersion 24 buildToolsVersion "26.0.1" defaultConfig { applicationId "com.example.uibestpractice" minSdkVersion 15 targetSdkVersion 24 versionCode 1 versionName "1.0" testInstrumentationRunner "android.support.test.runner.AndroidJUnitRunner" } buildTypes { release { minifyEnabled false proguardFiles getDefaultProguardFile('proguard-android.txt'), 'proguarrules.pro' } } } dependencies { compile fileTree(dir: 'libs', include: ['*.jar']) androidTestCompile('com.android.support.test.espresso:espresso-core:2.2.2', { exclude group: 'com.android.support', module: 'support-annotations' }) compile 'com.android.support:appcompat-v7:24.2.1' compile 'com.android.support.constraint:constraint-layout:1.0.2' compile 'com.android.support:recyclerview-v7:24.2.1'//жЈїеК†RecyclerViewдЊЭиµЦеЇУ testCompile 'junit:junit:4.12' }зЉЦеЖЩдЄїзХМйЭҐпЉИactivity_main.xml)
<?xml version="1.0" encoding="utf-8"?> <LinearLayout xmlns:android="http://schemas.android.com/apk/res/android" android:orientation="vertical" android:layout_width="match_parent" android:layout_height="match_parent" android:background="#d8e0d8"> <android.support.v7.widget.RecyclerView android:id="@+id/msg_recycler_view" android:layout_width="match_parent" android:layout_height="0dp" android:layout_weight="1"/> <LinearLayout android:layout_width="match_parent" android:layout_height="wrap_content"> <EditText android:id="@+id/input_text" android:layout_width="0dp" android:layout_height="wrap_content" android:layout_weight="1" android:hint="Type something here" android:maxLines="2"/> <Button android:id="@+id/send" android:layout_width="wrap_content" android:layout_height="wrap_content" android:text="Send"/> </LinearLayout> </LinearLayout>
еЬ®дЄїзХМйЭҐдЄ≠жФЊзљЃзЪДRecyclerViewзФ®дЇОжШЊз§ЇжґИжБѓ
EditTextзФ®дЇОзЉЦиЊСжґИжБѓ
ButtonзФ®дЇОеПСйАБжґИжБѓ
еЃЪдєЙжґИжБѓзЪДеЃЮдљУз±їMsg
package com.example.uibestpractice; public class Msg { public static final int TYPE_RECEIVED = 0; public static final int TYPE_SENT = 1; private String content; private int type; public Msg(String content,int type) { this.content = content; this.type = type; } public String getContent() { return content; } public int getType() { return type; } }зФ®дЄ§дЄ™еЄЄйЗПжЭ•и°®з§ЇжґИжБѓзЪДз±їеЮЛпЉИжО•жФґзЪДињШжШѓеПСйАБзЪДпЉЙ
зЉЦеЖЩRecyclerViewзЪДе≠РеЄГе±АпЉИmsg_item.xmlпЉЙ
<?xml version="1.0" encoding="utf-8"?> <LinearLayout xmlns:android="http://schemas.android.com/apk/res/android" android:orientation="vertical" android:layout_width="match_parent" android:layout_height="wrap_content" android:padding="10dp"> <LinearLayout android:id="@+id/left_layout" android:layout_width="wrap_content" android:layout_height="wrap_content" android:layout_gravity="left" android:background="@drawable/message_left"> <TextView android:id="@+id/left_msg" android:layout_width="wrap_content" android:layout_height="wrap_content" android:layout_gravity="center" android:layout_margin="10dp" android:textColor="#fff"/> </LinearLayout> <LinearLayout android:id="@+id/right_layout" android:layout_width="wrap_content" android:layout_height="wrap_content" android:layout_gravity="right" android:background="@drawable/message_right"> <TextView android:id="@+id/right_msg" android:layout_width="wrap_content" android:layout_height="wrap_content" android:layout_gravity="center" android:layout_margin="10dp"/> </LinearLayout> </LinearLayout>
е∞ЖжО•жФґзЪДжґИжБѓе±ЕеЈ¶еѓєйљРпЉМеПСйАБзЪДжґИжБѓе±ЕеП≥еѓєйљР
еИЫеїЇRecyclerViewйАВйЕНеЩ®з±ї
package com.example.uibestpractice; import android.support.v7.widget.RecyclerView; import android.view.LayoutInflater; import android.view.View; import android.view.ViewGroup; import android.widget.LinearLayout; import android.widget.TextView; import java.util.List; public class MsgAdapter extends RecyclerView.Adapter<MsgAdapter.ViewHolder>{ private List<Msg> mMsgList; static class ViewHolder extends RecyclerView.ViewHolder { LinearLayout leftLayout; LinearLayout rightLayout; TextView leftMsg; TextView rihgtMsg; public ViewHolder(View view) { super(view); leftLayout = (LinearLayout) view.findViewById(R.id.left_layout); rightLayout = (LinearLayout) view.findViewById(R.id.right_layout); leftMsg = (TextView) view.findViewById(R.id.left_msg); rihgtMsg = (TextView) view.findViewById(R.id.right_msg); } } public MsgAdapter(List<Msg> msgList) { mMsgList = msgList; } @Override public ViewHolder onCreateViewHolder(ViewGroup parent, int viewType) { View view = LayoutInflater.from(parent.getContext()).inflate(R.layout.msg_item,parent,false); return new ViewHolder(view); } @Override public void onBindViewHolder(ViewHolder holder, int position) { Msg msg = mMsgList.get(position); if (msg.getType() == Msg.TYPE_RECEIVED) { holder.leftLayout.setVisibility(View.VISIBLE); holder.rightLayout.setVisibility(View.GONE); holder.leftMsg.setText(msg.getContent()); } else if (msg.getType() == Msg.TYPE_SENT) { holder.rightLayout.setVisibility(View.VISIBLE); holder.leftLayout.setVisibility(View.GONE); holder.rihgtMsg.setText(msg.getContent()); } } @Override public int getItemCount() { return mMsgList.size(); } }еЃЪдєЙдЇЖдЄАдЄ™еЖЕйГ®з±їViewHolderпЉМзїІжЙњиЗ™RecyclerView.ViewHolderгАВViewHolderзЪДжЮДйА†еЗљжХ∞дЄ≠дЉ†еЕ•дЄАдЄ™ViewеПВжХ∞пЉМињЩдЄ™еПВжХ∞йАЪеЄЄжШѓRecyclerViewе≠Рй°єзЪДжЬАе§Це±ВеЄГе±АпЉМињЩж†ЈжИСдїђе∞±еПѓдї•йАЪињЗfindViewById()жЦєж≥ХжЭ•иОЈеПЦеЄГе±АдЄ≠зЪДжО•жФґеТМеПСйАБжґИжБѓеЄГе±АзЪДеЃЮдЊЛдЇЖгАВ
MsgAdapterдЄ≠дєЯжЬЙдЄАдЄ™жЮДйА†еЗљжХ∞пЉМе∞Жи¶Бе±Хз§ЇзЪДжХ∞жНЃжЇРдЉ†ињЫжЭ•е§НеИґзїЩmMsgListгАВ
MsgAdapterзїІжЙњиЗ™RecyclerView.AdapterпЉМењЕй°їйЗНеЖЩonCreateViewHolder()гАБonBindViewHolder()гАБgetItemCount()дЄЙдЄ™жЦєж≥ХгАВ
onCreateViewHolder()зФ®дЇОеИЫеїЇViewHolderеЃЮдЊЛпЉМеЬ®ињЩдЄ™жЦєж≥ХдЄ≠е∞Жmsg_itemеЄГе±АеК†иљљињЫжЭ•пЉМзДґеРОеИЫеїЇдЄАдЄ™ViewHolderеЃЮдЊЛпЉМеєґжККеК†иљљеЗЇжЭ•зЪДеЄГе±АдЉ†еИ∞жЮДйА†еЗљжХ∞дЄ≠пЉМињФеЫЮеЃЮдЊЛгАВ
onBindViewHolder()зФ®дЇОеѓєRecyclerViewе≠Рй°єзЪДжХ∞жНЃињЫи°МиµЛеАЉгАВ
getItemCount()иОЈеЊЧRecyclerViewжЬЙе§Ъе∞СдЄ™е≠Рй°є
дљњзФ®RecyclerViewпЉИдњЃжФєMainActivityпЉЙ
package com.example.uibestpractice; import android.support.v7.app.AppCompatActivity; import android.os.Bundle; import android.support.v7.widget.LinearLayoutManager; import android.support.v7.widget.RecyclerView; import android.view.View; import android.widget.Button; import android.widget.EditText; import java.util.ArrayList; import java.util.List; public class MainActivity extends AppCompatActivity { private List<Msg> msgList = new ArrayList<>(); private EditText inputText; private Button send; private RecyclerView msgRecyclerView; private MsgAdapter adapter; @Override protected void onCreate(Bundle savedInstanceState) { super.onCreate(savedInstanceState); setContentView(R.layout.activity_main); initMsgs(); inputText = (EditText) findViewById(R.id.input_text); send = (Button) findViewById(R.id.send); msgRecyclerView = (RecyclerView) findViewById(R.id.msg_recycler_view); LinearLayoutManager layoutManager = new LinearLayoutManager(this); msgRecyclerView.setLayoutManager(layoutManager); adapter = new MsgAdapter(msgList); msgRecyclerView.setAdapter(adapter); send.setOnClickListener(new View.OnClickListener() { @Override public void onClick(View v) { String content = inputText.getText().toString(); if (!"".equals(content)) { Msg msg = new Msg(content,Msg.TYPE_SENT); msgList.add(msg); adapter.notifyItemInserted(msgList.size()-1); msgRecyclerView.scrollToPosition(msgList.size()-1); inputText.setText(""); } } }); } private void initMsgs() { Msg msg1 = new Msg("Hello",Msg.TYPE_RECEIVED); msgList.add(msg1); Msg msg2 = new Msg("I'm John",Msg.TYPE_RECEIVED); msgList.add(msg2); Msg msg3 = new Msg("Hello",Msg.TYPE_SENT); msgList.add(msg3); } }onCreate()жЦєж≥ХдЄ≠еЕИиОЈеЊЧдЇЖRecyclerViewзЪДеЃЮдЊЛпЉМзДґеРОеИЫеїЇдЇЖLinearLayoutManagerеѓєи±°пЉМеєґжККеЃГиЃЊзљЃеИ∞RecyclerViewзЪДеЃЮдЊЛдЄ≠еОїгАВLayoutManagerзФ®дЇОжМЗеЃЪRecyclerViewзЪДеЄГе±АжЦєеЉПпЉМињЩйЗМдљњзФ®жШѓзЇњжАІеЄГе±АзЪДжДПжАЭпЉМеПѓдї•еЃЮзО∞ListViewзЫЄеРМзЪДжХИжЮЬгАВ
иЃЊзљЃдЇЖsendжМЙйТЃзЪДеУНеЇФдЇЛдїґпЉМе¶ВжЮЬеЖЕеЃєдЄНдЄЇз©ЇеИЩеИЫеїЇеЗЇдЄАдЄ™жЦ∞зЪДMsgеѓєи±°пЉМеєґжЈїеК†еИ∞msgListдЄ≠еОїпЉМдєЛеРОи∞ГзФ®дЇЖйАВйЕНеЩ®зЪДжЦєж≥ХnotifyItemInserted()жЭ•йАЪзЯ•еИЧи°®жЬЙжЦ∞жХ∞жНЃжПТеЕ•пЉМињЩж†ЈжЦ∞еҐЮзЪДжґИжБѓжЙНиГљеЬ®RecyclerViewдЄ≠жШЊз§ЇгАВжО•зЭАи∞ГзФ®RecyclerViewзЪДscrollToPosition()жЦєж≥ХпЉМе∞ЖжШЊз§ЇзЪДжХ∞жНЃеЃЪдљНеИ∞жЬАеРОдЄАи°МпЉМжЬАеРОжЄЕз©ЇиЊУеЕ•ж†ПгАВ
жХИжЮЬеЫЊпЉЪ

жДЯи∞Ґдљ†иГље§ЯиЃ§зЬЯйШЕиѓїеЃМињЩзѓЗжЦЗзЂ†пЉМеЄМжЬЫе∞ПзЉЦеИЖдЇЂзЪДвАЬAndroidе¶ВдљХеЃЮзО∞иБК姩зХМйЭҐвАЭињЩзѓЗжЦЗзЂ†еѓєе§ІеЃґжЬЙеЄЃеК©пЉМеРМжЧґдєЯеЄМжЬЫе§ІеЃґе§Ъе§ЪжФѓжМБдЇњйАЯдЇСпЉМеЕ≥ж≥®дЇњйАЯдЇСи°МдЄЪиµДиЃѓйҐСйБУпЉМжЫіе§ЪзЫЄеЕ≥зЯ•иѓЖз≠ЙзЭАдљ†жЭ•е≠¶дє†!
еЕНиі£е£∞жШОпЉЪжЬђзЂЩеПСеЄГзЪДеЖЕеЃєпЉИеЫЊзЙЗгАБиІЖйҐСеТМжЦЗе≠ЧпЉЙдї•еОЯеИЫгАБиљђиљљеТМеИЖдЇЂдЄЇдЄїпЉМжЦЗзЂ†иІВзВєдЄНдї£и°®жЬђзљСзЂЩзЂЛеЬЇпЉМе¶ВжЮЬжґЙеПКдЊµжЭГиѓЈиБФз≥їзЂЩйХњйВЃзЃ±пЉЪis@yisu.comињЫи°МдЄЊжК•пЉМеєґжПРдЊЫзЫЄеЕ≥иѓБжНЃпЉМдЄАзїПжЯ•еЃЮпЉМе∞ЖзЂЛеИїеИ†йЩ§жґЙеЂМдЊµжЭГеЖЕеЃєгАВ

дЇњйАЯдЇСеЕђдЉЧеПЈ

жЙЛжЬЇзљСзЂЩдЇМзїіз†Б


