怎么在Android中利用Javamail发送Email?针对这个问题,这篇文章详细介绍了相对应的分析和解答,希望可以帮助更多想解决这个问题的小伙伴找到更简单易行的方法。
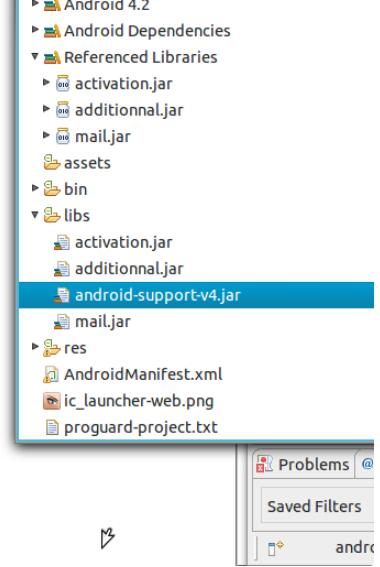
将activation.jar,additionnal.jar,mail.jar放到项目的libs 文件夹。然后在项目中选中这三个包,右击->Build Path->Add to buildPath.
添加成功后项目就像这样.
项目中添加Mail类
package com.example.mailtest; import java.util.Date; import java.util.Properties; import javax.activation.CommandMap; import javax.activation.DataHandler; import javax.activation.DataSource; import javax.activation.FileDataSource; import javax.activation.MailcapCommandMap; import javax.mail.BodyPart; import javax.mail.Multipart; import javax.mail.PasswordAuthentication; import javax.mail.Session; import javax.mail.Transport; import javax.mail.internet.InternetAddress; import javax.mail.internet.MimeBodyPart; import javax.mail.internet.MimeMessage; import javax.mail.internet.MimeMultipart; public class Mail extends javax.mail.Authenticator { private String _user; private String _pass; private String[] _to; private String _from; private String _port; private String _sport; private String _host; private String _subject; private String _body; private boolean _auth; private boolean _debuggable; private Multipart _multipart; public Mail() { _host = "smtp.gmail.com"; // default smtp server _port = "465"; // default smtp port _sport = "465"; // default socketfactory port _user = ""; // username _pass = ""; // password _from = ""; // email sent from _subject = ""; // email subject _body = ""; // email body _debuggable = false; // debug mode on or off - default off _auth = true; // smtp authentication - default on _multipart = new MimeMultipart(); // There is something wrong with MailCap, javamail can not find a handler for the multipart/mixed part, so this bit needs to be added. MailcapCommandMap mc = (MailcapCommandMap) CommandMap.getDefaultCommandMap(); mc.addMailcap("text/html;; x-java-content-handler=com.sun.mail.handlers.text_html"); mc.addMailcap("text/xml;; x-java-content-handler=com.sun.mail.handlers.text_xml"); mc.addMailcap("text/plain;; x-java-content-handler=com.sun.mail.handlers.text_plain"); mc.addMailcap("multipart/*;; x-java-content-handler=com.sun.mail.handlers.multipart_mixed"); mc.addMailcap("message/rfc822;; x-java-content-handler=com.sun.mail.handlers.message_rfc822"); CommandMap.setDefaultCommandMap(mc); } public Mail(String user, String pass) { this(); _user = user; _pass = pass; } public void setTo(String[] toArr) { this._to = toArr; } public void setFrom(String string) { this._from = string; } public void setSubject(String string) { this._subject = string; } public boolean send() throws Exception { Properties props = _setProperties(); if(!_user.equals("") && !_pass.equals("") && _to.length > 0 && !_from.equals("") && !_subject.equals("") && !_body.equals("")) { Session session = Session.getInstance(props, this); MimeMessage msg = new MimeMessage(session); msg.setFrom(new InternetAddress(_from)); InternetAddress[] addressTo = new InternetAddress[_to.length]; for (int i = 0; i < _to.length; i++) { addressTo[i] = new InternetAddress(_to[i]); } msg.setRecipients(MimeMessage.RecipientType.TO, addressTo); msg.setSubject(_subject); msg.setSentDate(new Date()); // setup message body BodyPart messageBodyPart = new MimeBodyPart(); messageBodyPart.setText(_body); _multipart.addBodyPart(messageBodyPart); // Put parts in message msg.setContent(_multipart); // send email Transport.send(msg); return true; } else { return false; } } public void addAttachment(String filename) throws Exception { BodyPart messageBodyPart = new MimeBodyPart(); DataSource source = new FileDataSource(filename); messageBodyPart.setDataHandler(new DataHandler(source)); messageBodyPart.setFileName(filename); _multipart.addBodyPart(messageBodyPart); } @Override public PasswordAuthentication getPasswordAuthentication() { return new PasswordAuthentication(_user, _pass); } private Properties _setProperties() { Properties props = new Properties(); props.put("mail.smtp.host", _host); if(_debuggable) { props.put("mail.debug", "true"); } if(_auth) { props.put("mail.smtp.auth", "true"); } props.put("mail.smtp.port", _port); props.put("mail.smtp.socketFactory.port", _sport); props.put("mail.smtp.socketFactory.class", "javax.net.ssl.SSLSocketFactory"); props.put("mail.smtp.socketFactory.fallback", "false"); return props; } // the getters and setters public String getBody() { return _body; } public void setBody(String _body) { this._body = _body; } // more of the getters and setters ….. }MailActivity调用
package com.example.mailtest; import java.util.Properties; import javax.mail.Address; import javax.mail.Message; import javax.mail.Session; import javax.mail.Transport; import javax.mail.internet.InternetAddress; import javax.mail.internet.MimeMessage; import android.os.AsyncTask; import android.os.Bundle; import android.os.Handler; import android.app.Activity; import android.app.ProgressDialog; import android.util.Log; import android.view.Menu; import android.view.View; import android.widget.Button; import android.widget.Toast; public class MailActivity extends Activity { private Button sendBtn; private String username; private String password; private Handler sendHandler; private ProgressDialog progressDialog; @Override protected void onCreate(Bundle savedInstanceState) { super.onCreate(savedInstanceState); setContentView(R.layout.activity_mail); sendBtn=(Button)findViewById(R.id.btnSend); sendHandler = new Handler(); sendBtn.setOnClickListener(new View.OnClickListener() { public void onClick(View v) { SendTask sTask = new SendTask(); sTask.execute(); } }); } @Override public boolean onCreateOptionsMenu(Menu menu) { // Inflate the menu; this adds items to the action bar if it is present. getMenuInflater().inflate(R.menu.activity_mail, menu); return true; } class SendTask extends AsyncTask<Integer, Integer, String>{ //后面尖括号内分别是参数(例子里是线程休息时间),进度(publishProgress用到),返回值 类型 @Override protected void onPreExecute() { //第一个执行方法 Toast.makeText(getApplicationContext(), "Begin Send!", Toast.LENGTH_SHORT).show(); super.onPreExecute(); } @Override protected String doInBackground(Integer... params) { //第二个执行方法,onPreExecute()执行完后执行 // TODO Auto-generated method stub Mail m = new Mail("empty.shen@gmail.com", "*****"); String[] toArr = {"silangquan@gmail.com","k283228391@126.com"}; m.setTo(toArr); m.setFrom("wooo@wooo.com"); m.setSubject("JavamailTest"); m.setBody("Email body."); try { //If you want add attachment use function addAttachment. //m.addAttachment("/sdcard/filelocation"); if(m.send()) { System.out.println("Email was sent successfully."); } else { System.out.println("Email was not sent."); } } catch(Exception e) { //Toast.makeText(MailApp.this, "There was a problem sending the email.", Toast.LENGTH_LONG).show(); Log.e("MailApp", "Could not send email", e); } return ""; } @Override protected void onProgressUpdate(Integer... progress) { //这个函数在doInBackground调用publishProgress时触发,虽然调用时只有一个参数 //但是这里取到的是一个数组,所以要用progesss[0]来取值 //第n个参数就用progress[n]来取值 super.onProgressUpdate(progress); } @Override protected void onPostExecute(String r) { //doInBackground返回时触发,换句话说,就是doInBackground执行完后触发 //这里的result就是上面doInBackground执行后的返回值,所以这里是"执行完毕" //setTitle(result); super.onPostExecute(r); } } }这里用到了AsyncTask,应为直接在UI线程中连接互联网的话,或爆 android.os.NetworkOnMainThreadException异常。
布局文件
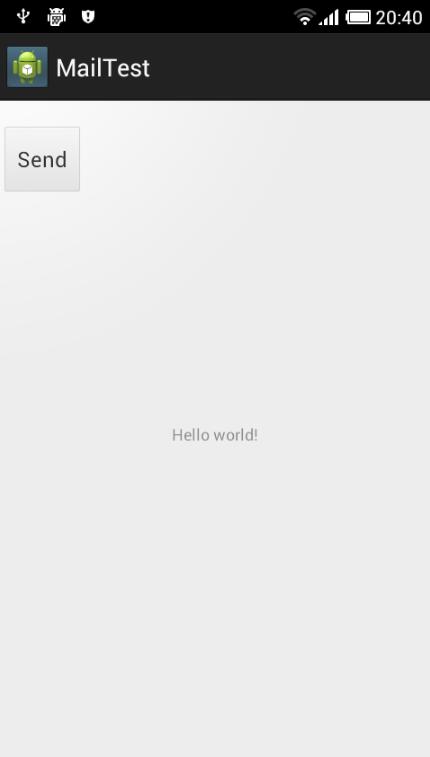
主界面的布局文件,非常简单。
<RelativeLayout xmlns:android="http://schemas.android.com/apk/res/android" xmlns:tools="http://schemas.android.com/tools" android:layout_width="match_parent" android:layout_height="match_parent" tools:context=".MailActivity" > <TextView android:layout_width="wrap_content" android:layout_height="wrap_content" android:layout_centerHorizontal="true" android:layout_centerVertical="true" android:text="@string/hello_world" /> <Button android:id="@+id/btnSend" android:layout_width="wrap_content" android:layout_height="wrap_content" android:layout_alignParentLeft="true" android:layout_alignParentTop="true" android:layout_marginTop="19dp" android:text="Send" /> </RelativeLayout>
运行效果图:
点击发送后

关于怎么在Android中利用Javamail发送Email问题的解答就分享到这里了,希望以上内容可以对大家有一定的帮助,如果你还有很多疑惑没有解开,可以关注亿速云行业资讯频道了解更多相关知识。
免责声明:本站发布的内容(图片、视频和文字)以原创、转载和分享为主,文章观点不代表本网站立场,如果涉及侵权请联系站长邮箱:is@yisu.com进行举报,并提供相关证据,一经查实,将立刻删除涉嫌侵权内容。


