这篇文章主要介绍使用vue实现图片上传预览功能,文中介绍的非常详细,具有一定的参考价值,感兴趣的小伙伴们一定要看完!
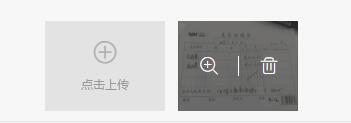
效果图
html结构
<ul class="gallery-window-map" > <!--点击上传按钮--> <li class="house-pic-item" v-if="!(!item.isNew&&editBtnType[index])" @click="houseUpload(index)"> <div class="pic-box"> <span class="iconfont icon-zengjia"></span> <h6 class="btn-tit">点击上传</h6> </div> </li> <!--展示区域--> <viewer :images="item.imgUrl"> <li class="house-pic-item" v-for="(picItem, picIndex) in item.imgUrl" :key="picIndex"> <img :src="picItem" alt="" :key="picItem" width="120" height="90" :ref="'showImg_'+index"> <div class="mask"> <div class="ico-box"> <span class="font-btn" @click="clickWatchImg('showImg_'+index,picIndex)"> <i class="iconfont icon-fangda"></i> </span> <span class="font-btn" v-if="!(!item.isNew&&editBtnType[index])" @click="delHouseImage(index,picIndex)"> <i class="iconfont icon-shanchu"></i> <i class="line"></i> </span> </div> </div> </li> </viewer> </ul>css样式
.gallery-window-map{ display: -webkit-box; display: -ms-flexbox; display: flex; margin-top: 10px; } .house-pic-item { position: relative; display: inline-block; margin-right: 13px; width: 120px; height: 90px; background-color: #e3e3e3; } .pic-box { width: 100%; text-align: center; } .icon-zengjia { position: relative; top: 12px; font-size: 26px; color: #b2b2b2; } .btn-tit { height: 38px; line-height: 38px; font-size: 12px; color: #999; } .mask { display: none; position: absolute; top: 0; left: 0; right: 0; bottom: 0; background: rgba(34, 34, 34, 0.6); } .font-btn { display: inline-block; height: 40px; width: 50%; padding: 0 20px; -webkit-box-sizing: border-box; box-sizing: border-box; } .font-btn:last-child { position: relative; } .icon-fangda, .icon-shanchu { font-size: 22px; color: #fff; } .line { content: ''; display: inline-block; position: absolute; left: 0; top: 10px; width: 1px; height: 20px; background: #fff; }/** * 模拟点击上传图片按钮 * @index 当前操作的户型box的索引 */ houseUpload(index) { this.$refs.houseTypeLoad[index].click() }, /** * 上传图片到服务器 * @index 当前操作的户型box的索引 */ upLoadHouse(e, index) { let _that = this const file = e.target.files[0] if (!file) { return } new ImageCompressor(file, { quality: 0.9, maxWidth: 2000, maxHeight: 2000, success(result) { // debugger const formData = new FormData() formData.append('file', result, result.name) formData.append('watermark', false) // Send the compressed image file to server with XMLHttpRequest. if (result.size > 1 * 1024 * 1024 || result.size < 3 * 1024) { _that.$message('图片大小要在3K~1M之间') return } else { _that.$ajax.post('/img/upload', formData).then(res => { res = res.data if (res.images && res.images.length > 0) { if (res.images[0].src !== 'file size is too small') { let item = res.images[0].src console.log(item) _that.houseTypeForm[index].imgUrl.unshift(item) } } }) } }, error(e) { console.log(e.message) } }) }, /** * 打开图片查看器 */ clickWatchImg(str, picIndex) { console.log('=================') console.log(picIndex) console.log(this.$refs[str][picIndex]) this.$refs[str][picIndex].click() }, /** * 删除指定图片,操作表单数据 * @index 当前操作的户型box的索引 * @picIndex 当前操作的图片索引 */ delHouseImage(index, picIndex) { this.houseTypeForm[index].imgUrl.splice(picIndex, 1) },以上是“使用vue实现图片上传预览功能”这篇文章的所有内容,感谢各位的阅读!希望分享的内容对大家有帮助,更多相关知识,欢迎关注亿速云行业资讯频道!
免责声明:本站发布的内容(图片、视频和文字)以原创、转载和分享为主,文章观点不代表本网站立场,如果涉及侵权请联系站长邮箱:is@yisu.com进行举报,并提供相关证据,一经查实,将立刻删除涉嫌侵权内容。


