 Data Structure
 Networking
 RDBMS
RDBMS Operating System
 Java
Java MS Excel
 iOS
iOS HTML
HTML CSS
CSS Android
 Python
 C Programming
 C++
C++ C#
C# MongoDB
 MySQL
MySQL Javascript
 PHP
PHP
- Selected Reading
- UPSC IAS Exams Notes
- Developer's Best Practices
- Questions and Answers
- Effective Resume Writing
- HR Interview Questions
- Computer Glossary
- Who is Who
How to update ui from Intent Service in android?
Before getting into example, we should know what Intent service is in android. Intent Service is going to do back ground operation asynchronously. When user call startService() from activity , it doesn’t create instance for each request. It going to stop service after done some action in service class or else we need to stop service using stopSelf().
This example demonstrate about How to update ui from Intent Service.
Step 1 − Create a new project in Android Studio, go to File ⇒ New Project and fill all required details to create a new project.
Step 2 − Add the following code to res/layout/activity_main.xml.
<?xml version = "1.0" encoding = "utf-8"?> <android.support.constraint.ConstraintLayout xmlns:android = "http://schemas.android.com/apk/res/android" xmlns:app = "http://schemas.android.com/apk/res-auto" xmlns:tools = "http://schemas.android.com/tools" android:layout_width = "match_parent" android:layout_height = "match_parent" tools:context = ".MainActivity"> <TextView android:id = "@+id/text" android:layout_width = "wrap_content" android:layout_height = "wrap_content" android:text = "Start Service" android:textSize = "25sp" app:layout_constraintBottom_toBottomOf = "parent" app:layout_constraintLeft_toLeftOf = "parent" app:layout_constraintRight_toRightOf = "parent" app:layout_constraintTop_toTopOf = "parent" /> </android.support.constraint.ConstraintLayout>
In the above code, we have taken text view, when user gets the data from intent service it will update.
Step 3 − Add the following code to src/MainActivity.java
package com.example.andy.myapplication; import android.content.BroadcastReceiver; import android.content.Context; import android.content.Intent; import android.content.IntentFilter; import android.os.Bundle; import android.support.v7.app.AppCompatActivity; import android.view.View; import android.widget.TextView; public class MainActivity extends AppCompatActivity { TextView text; BroadcastReceiver broadcastReceiver = new BroadcastReceiver() { @Override public void onReceive(Context context, Intent intent) { String s1 = intent.getStringExtra("DATAPASSED"); text.setText(s1); } }; @Override protected void onStart() { super.onStart(); IntentFilter intentFilter = new IntentFilter(); intentFilter.addAction("com.example.andy.myapplication"); registerReceiver(broadcastReceiver, intentFilter); } @Override protected void onCreate(Bundle savedInstanceState) { super.onCreate(savedInstanceState); setContentView(R.layout.activity_main); text = findViewById(R.id.text); text.setOnClickListener(new View.OnClickListener() { @Override public void onClick(View v) { startService(new Intent(MainActivity.this, service.class)); } }); } @Override protected void onStop() { super.onStop(); unregisterReceiver(broadcastReceiver); } } In the above code, we have create a service class and dynamic broad cast receiver as shown below –
@Override protected void onStart() { super.onStart(); IntentFilter intentFilter = new IntentFilter(); intentFilter.addAction("com.example.andy.myapplication"); registerReceiver(broadcastReceiver, intentFilter); } ………………………………………….. BroadcastReceiver broadcastReceiver = new BroadcastReceiver() { @Override public void onReceive(Context context, Intent intent) { String s1 = intent.getStringExtra("DATAPASSED"); text.setText(s1); } }; ………………………………………………………………………….. @Override protected void onStop() { super.onStop(); unregisterReceiver(broadcastReceiver); } Create a class called service.class file and add the following code –
package com.example.andy.myapplication; import android.app.IntentService; import android.content.Intent; import android.os.IBinder; public class service extends IntentService { public service() { super(service.class.getSimpleName()); } @Override public IBinder onBind(Intent intent) { return null; } @Override protected void onHandleIntent(Intent intent) { Intent intent1 = new Intent(); intent1.setAction("com.example.andy.myapplication"); intent1.putExtra("DATAPASSED", "Tutorialspoint.com"); sendBroadcast(intent1); } } Step 4 − Add the following code to manifest.xml
<?xml version = "1.0" encoding = "utf-8"?> <manifest xmlns:android = "http://schemas.android.com/apk/res/android" package = "com.example.andy.myapplication"> <uses-permission android:name = "android.permission.WAKE_LOCK"/> <application android:allowBackup = "true" android:icon = "@mipmap/ic_launcher" android:label = "@string/app_name" android:roundIcon = "@mipmap/ic_launcher_round" android:supportsRtl = "true" android:theme = "@style/AppTheme"> <activity android:name = ".MainActivity"> <intent-filter> <action android:name = "android.intent.action.MAIN" /> <category android:name = "android.intent.category.LAUNCHER" /> </intent-filter> </activity> <service android:name = ".service"/> </application> </manifest>
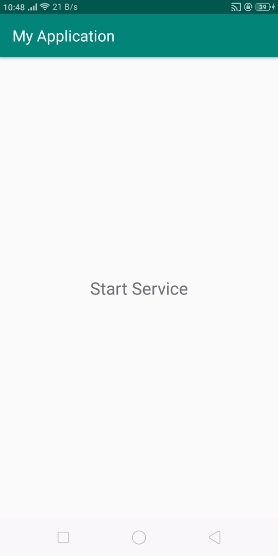
Let's try to run your application. I assume you have connected your actual Android Mobile device with your computer. To run the app from android studio, open one of your project's activity files and click Run ![]() icon from the toolbar. Select your mobile device as an option and then check your mobile device which will display your default screen –
icon from the toolbar. Select your mobile device as an option and then check your mobile device which will display your default screen –

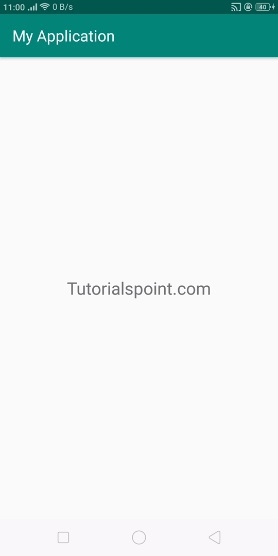
In the above result, it shown default screen of application. When user click on “start Service” it will start service and update the textview as shown below-

Click here to download the project code

